.png.e575b8f8bcb3ffa54248034c99593823.png)

tonybonneyba
-
Posts
464 -
Joined
-
Last visited
Content Type
Profiles
Forums
Resource Library
Events
Gallery
Blogs
Store
Community Map
Posts posted by tonybonneyba
-
-
6 minutes ago, Galteemore said:
Now that’s great imaginative work. Can really see this design style working with an 071 ….
Thank you!!

A GM (141/071) maybe on the list of future baby trains todo.... imagine a baby 071 with a rake of mini mk2 coaches....

Already got the MK2 done & Dave from Dave's Railway Bits (link in previous post) has done mini MK3s too....
-
 1
1
-
-
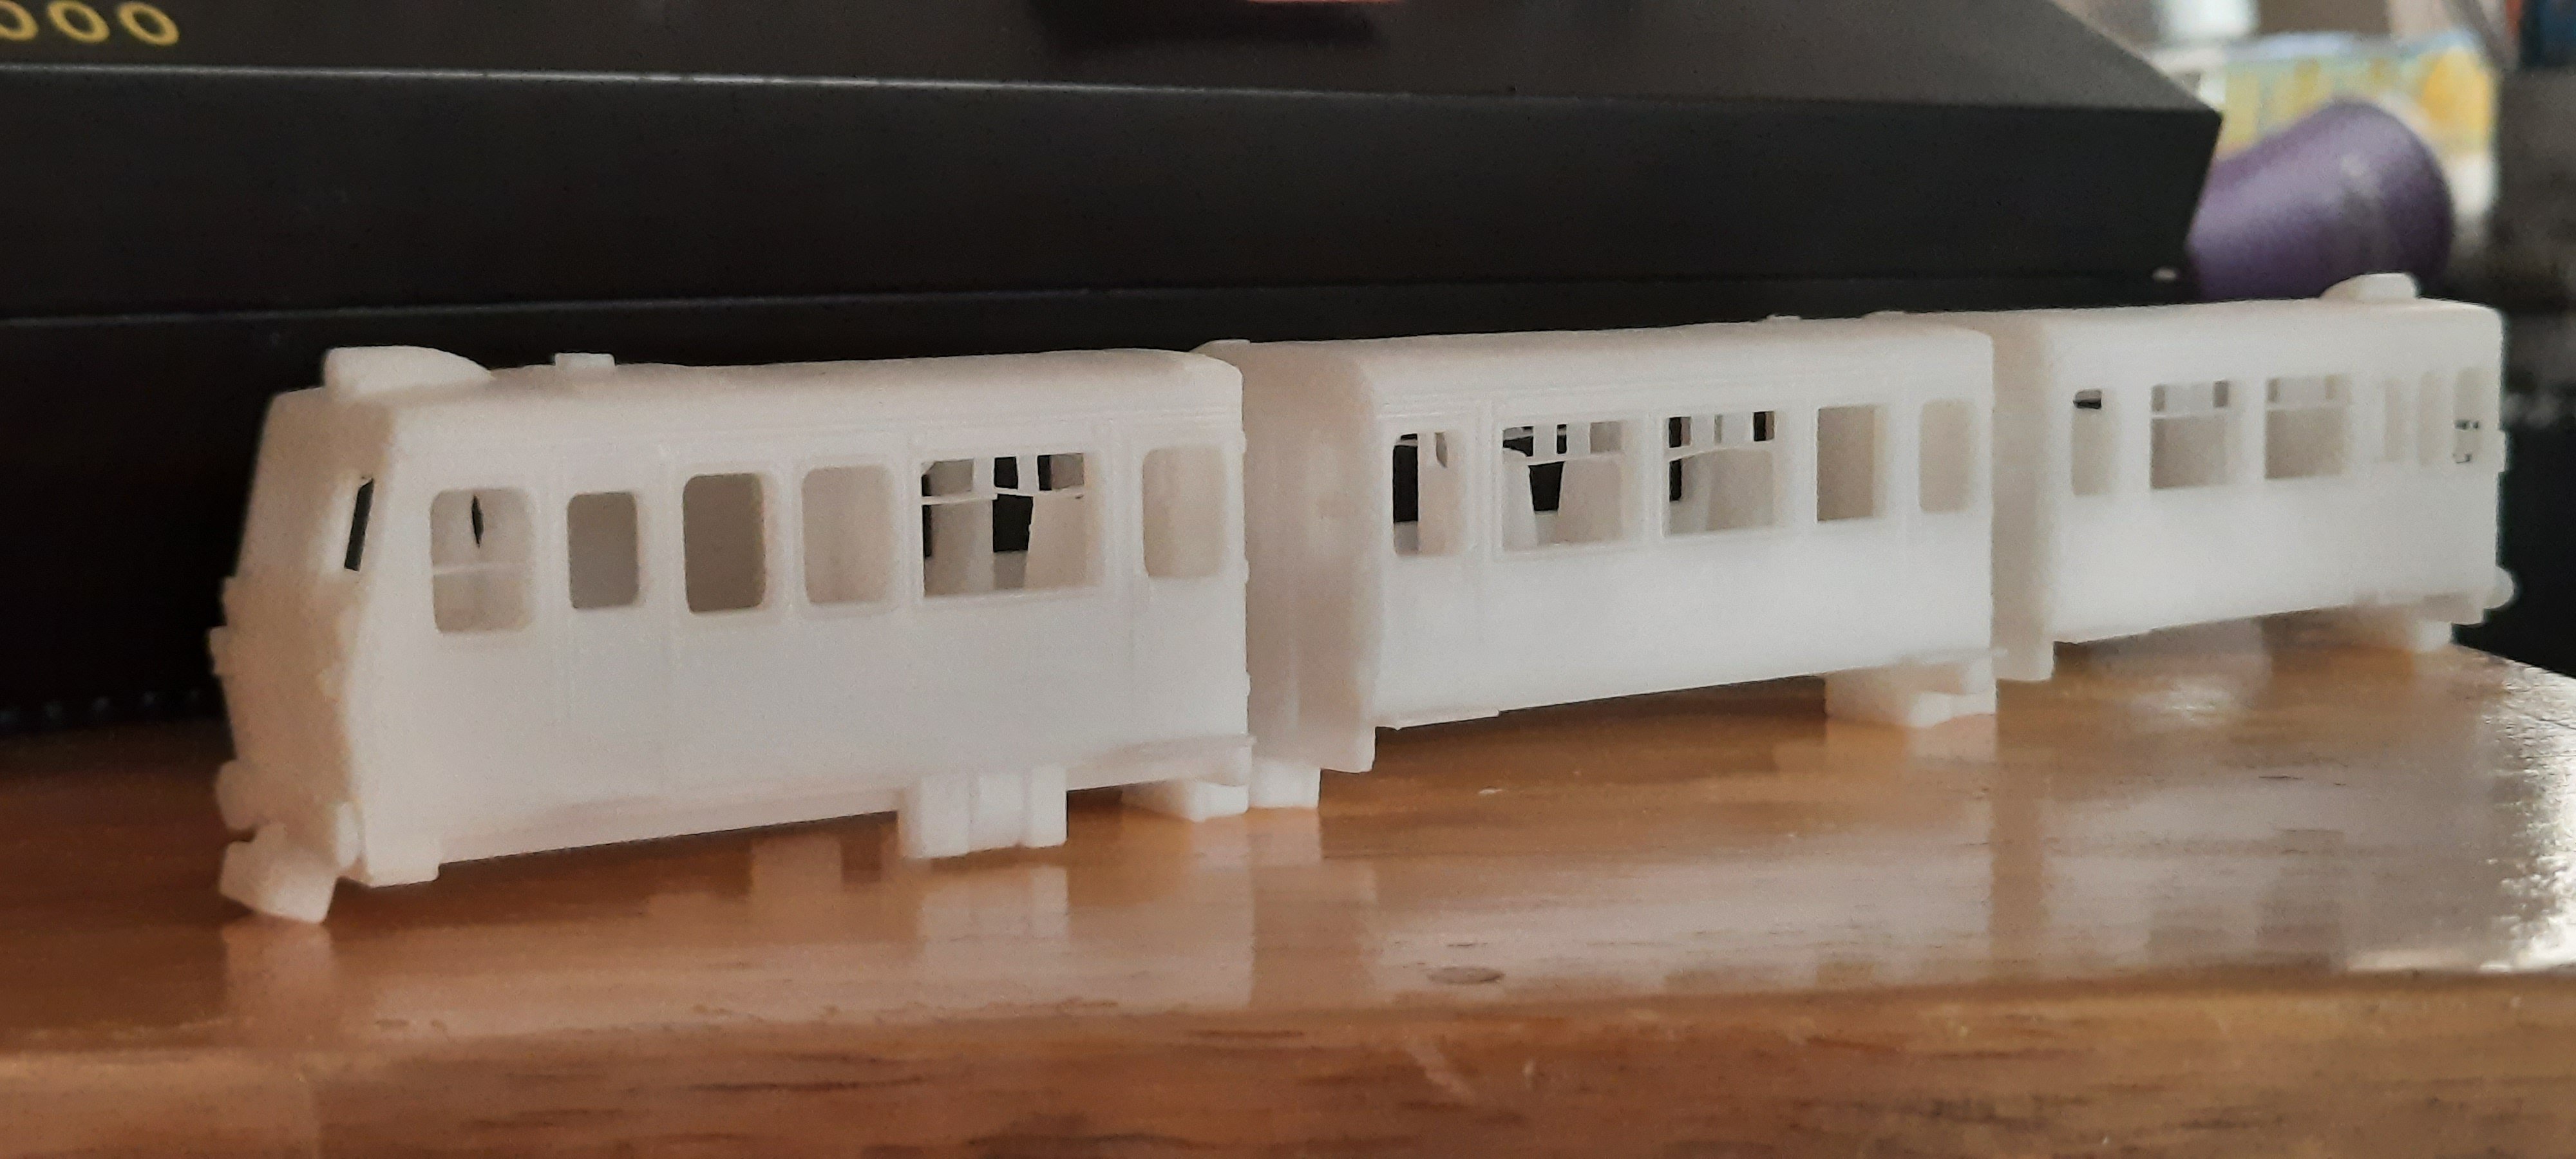
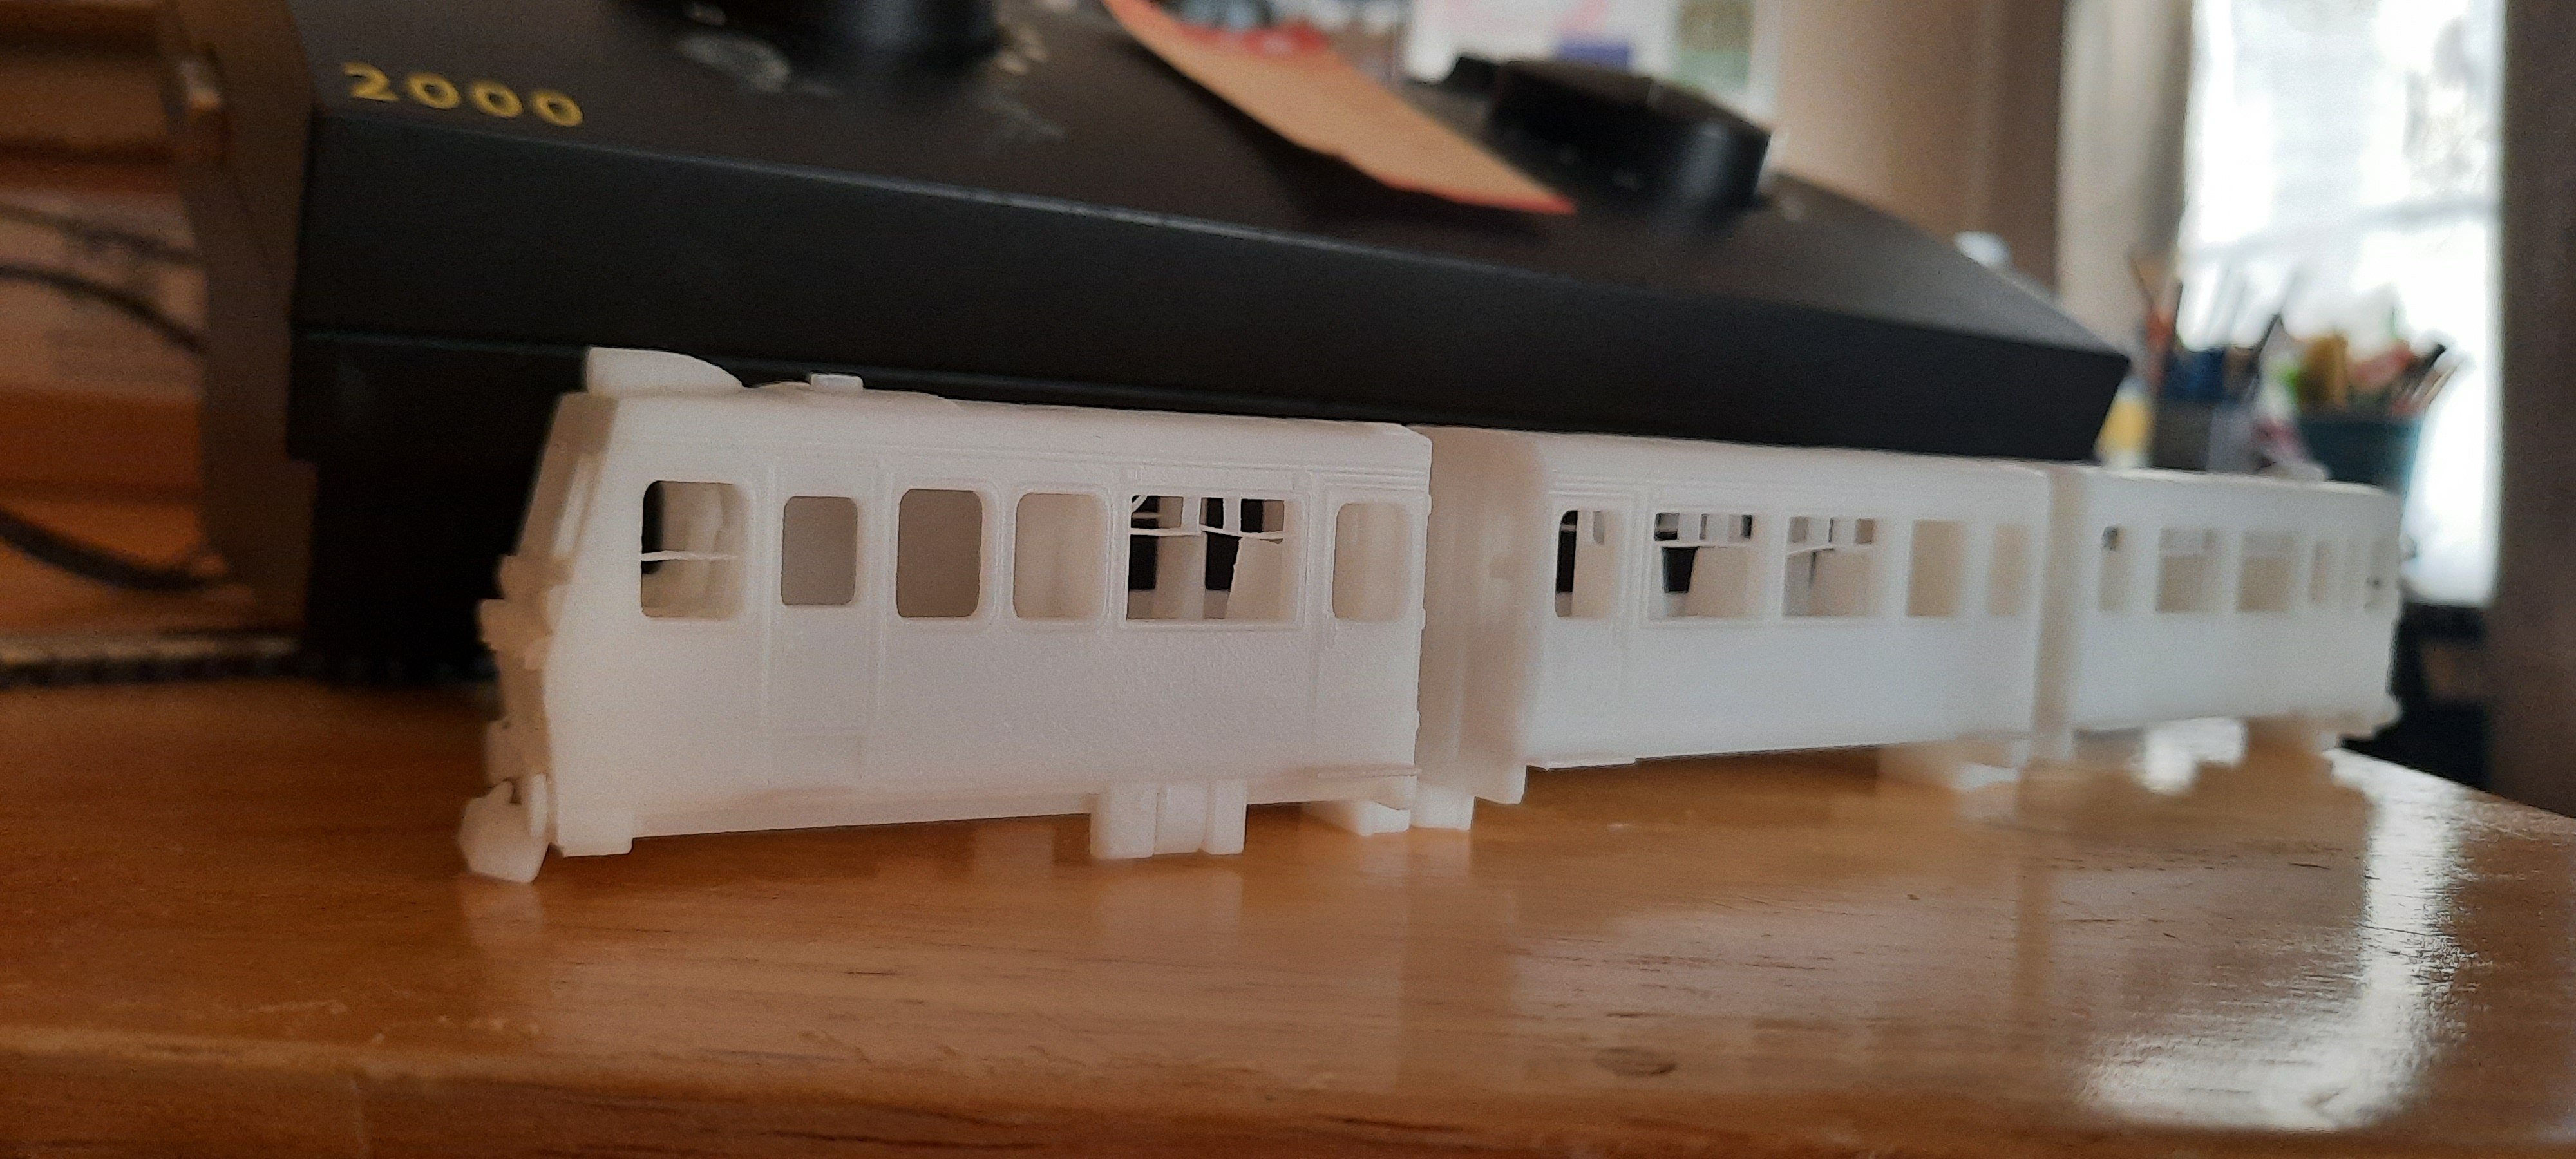
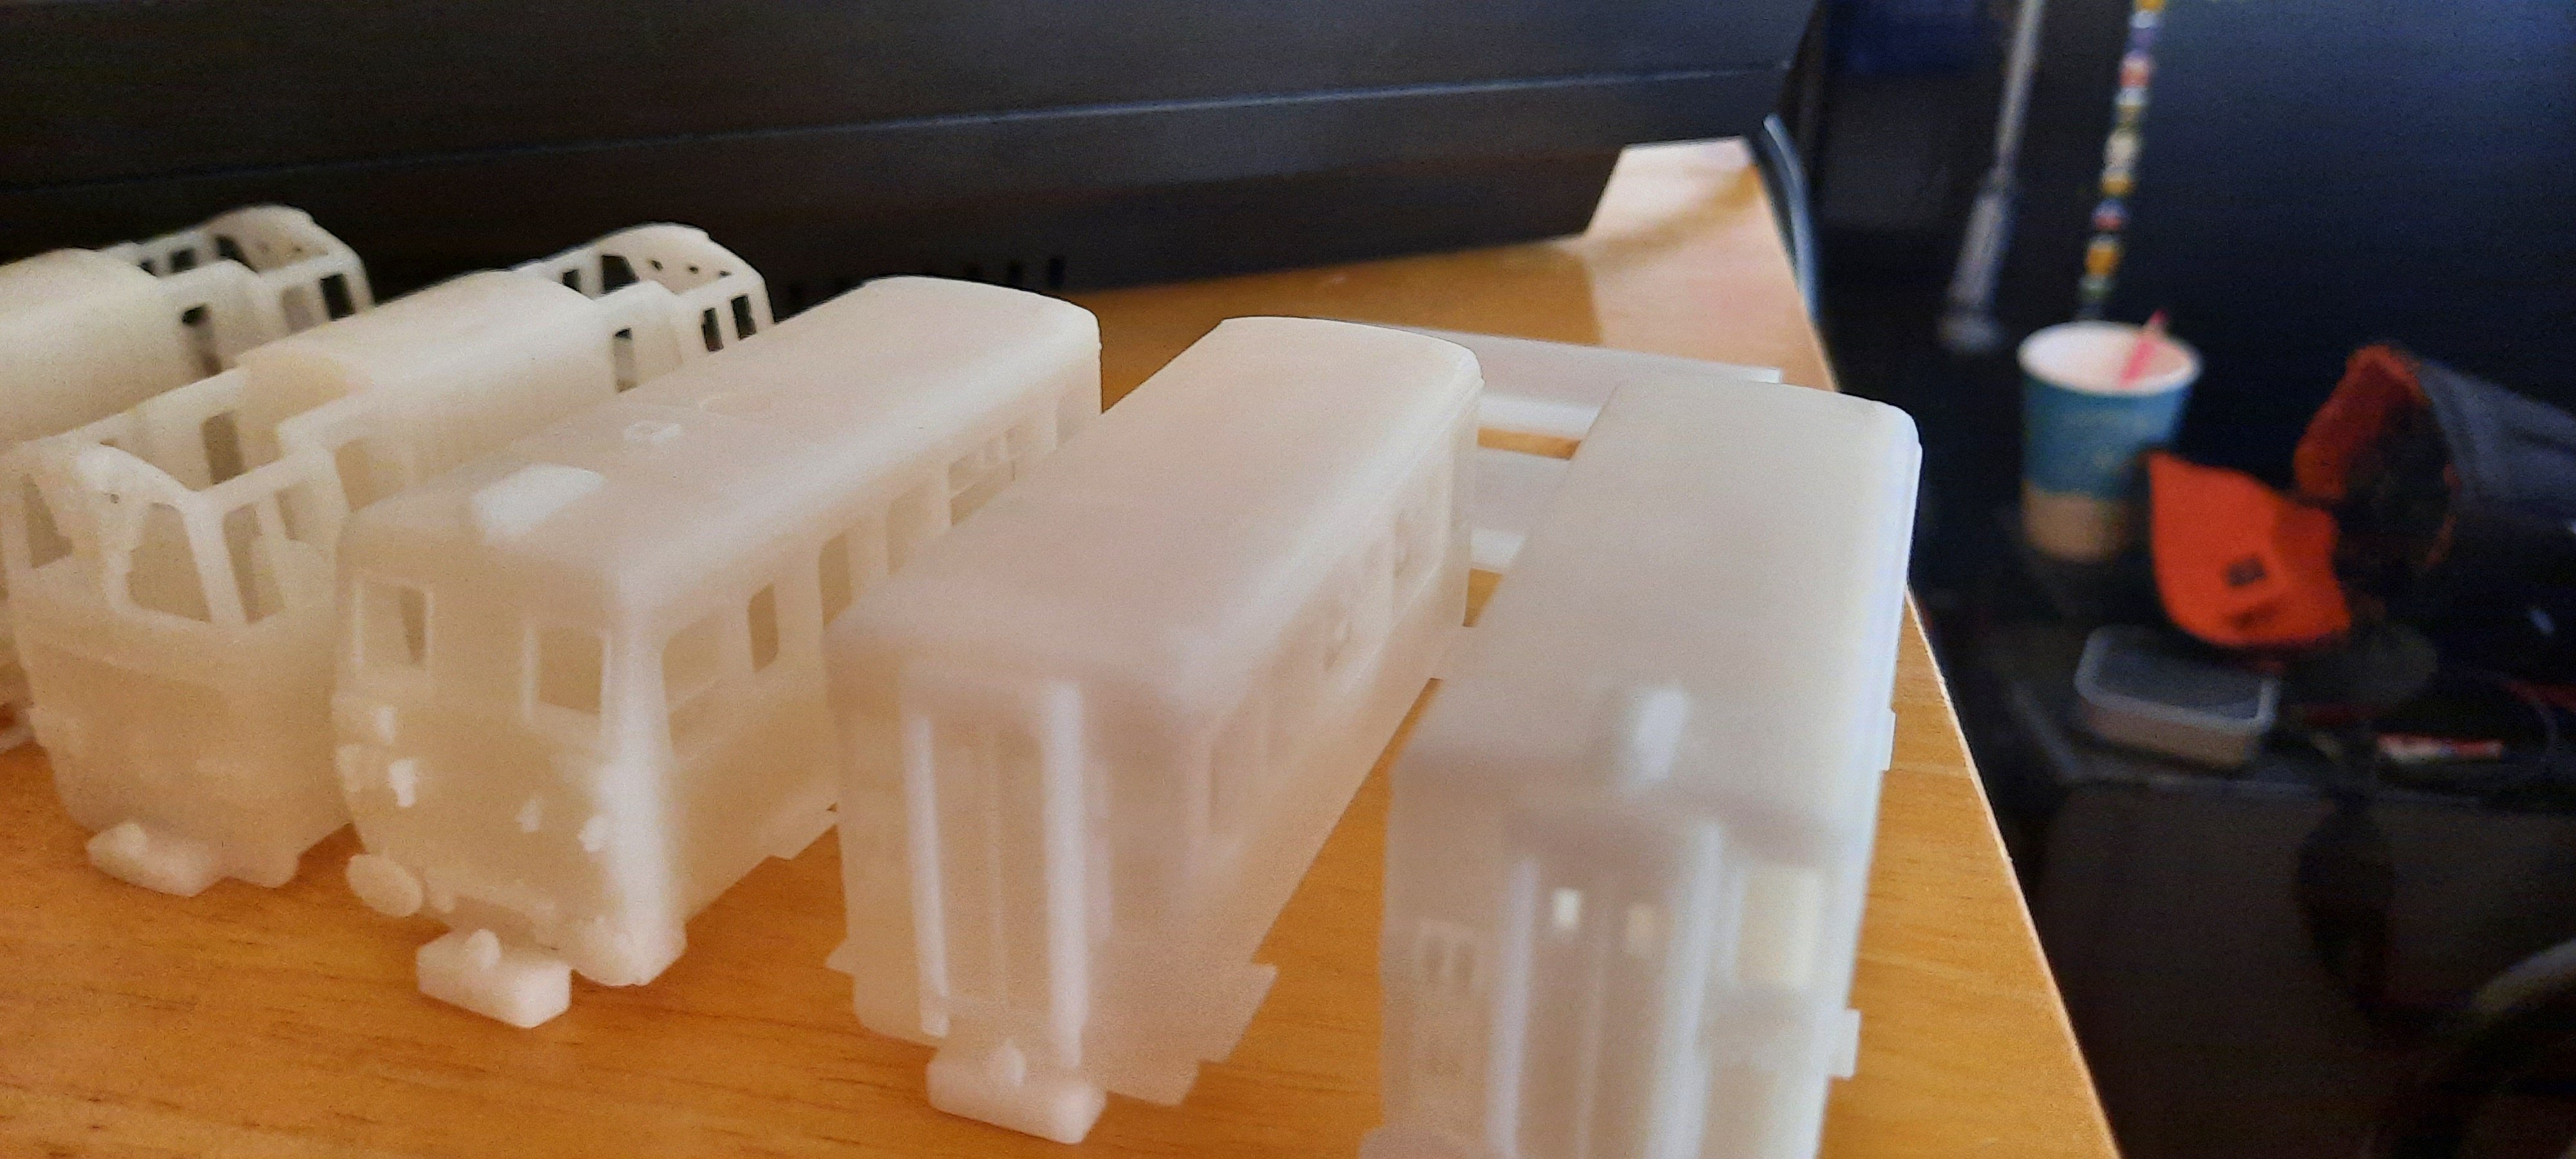
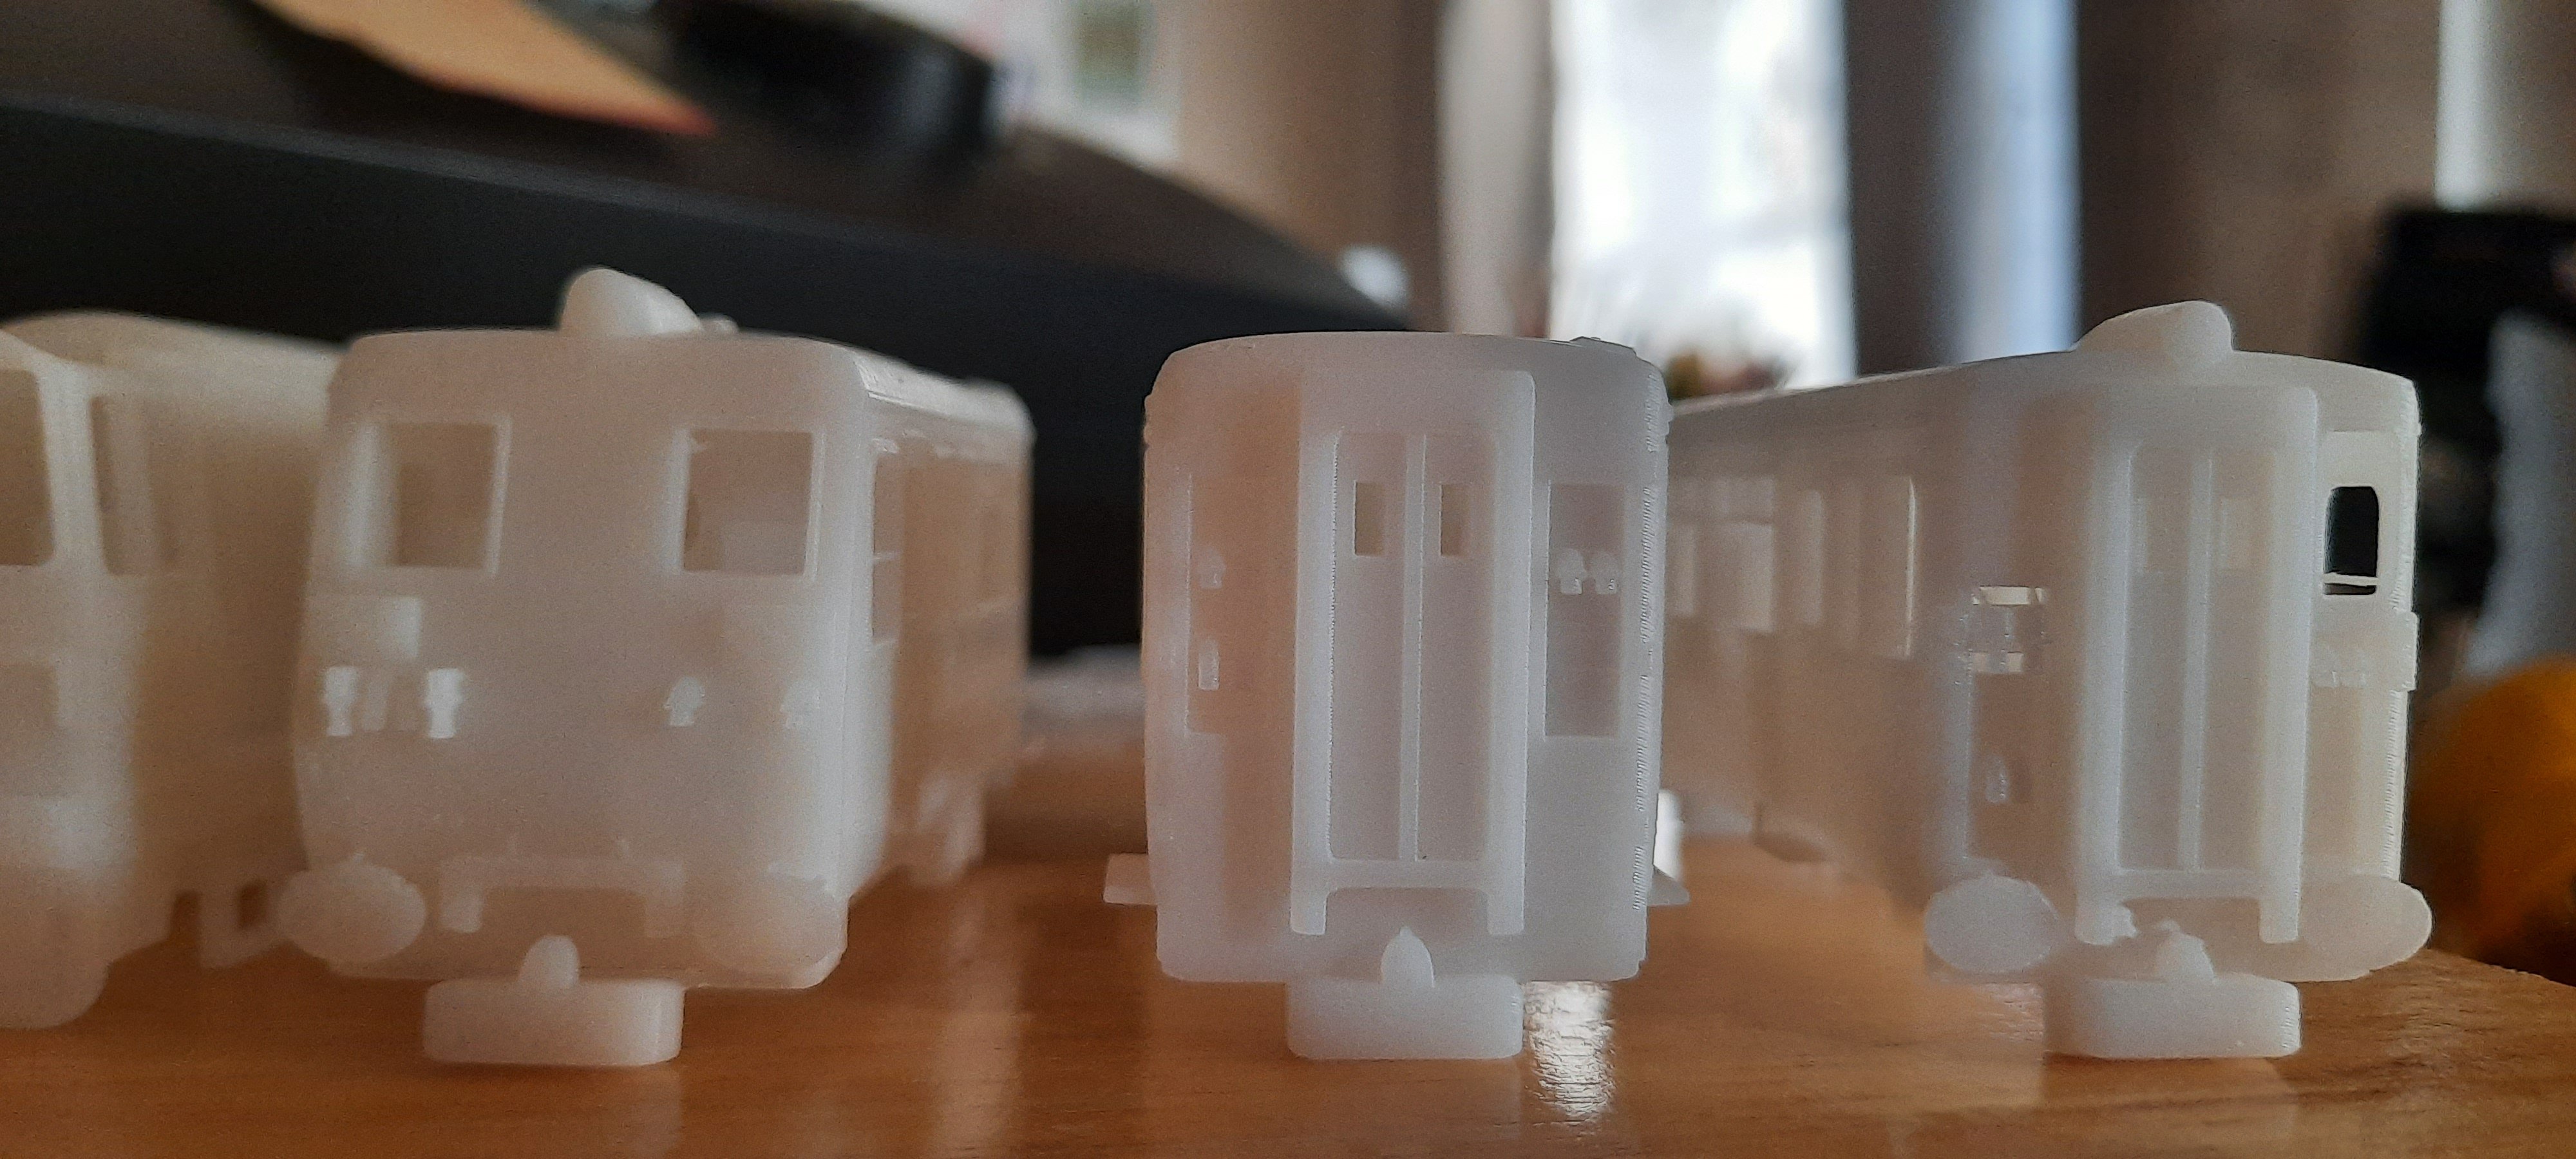
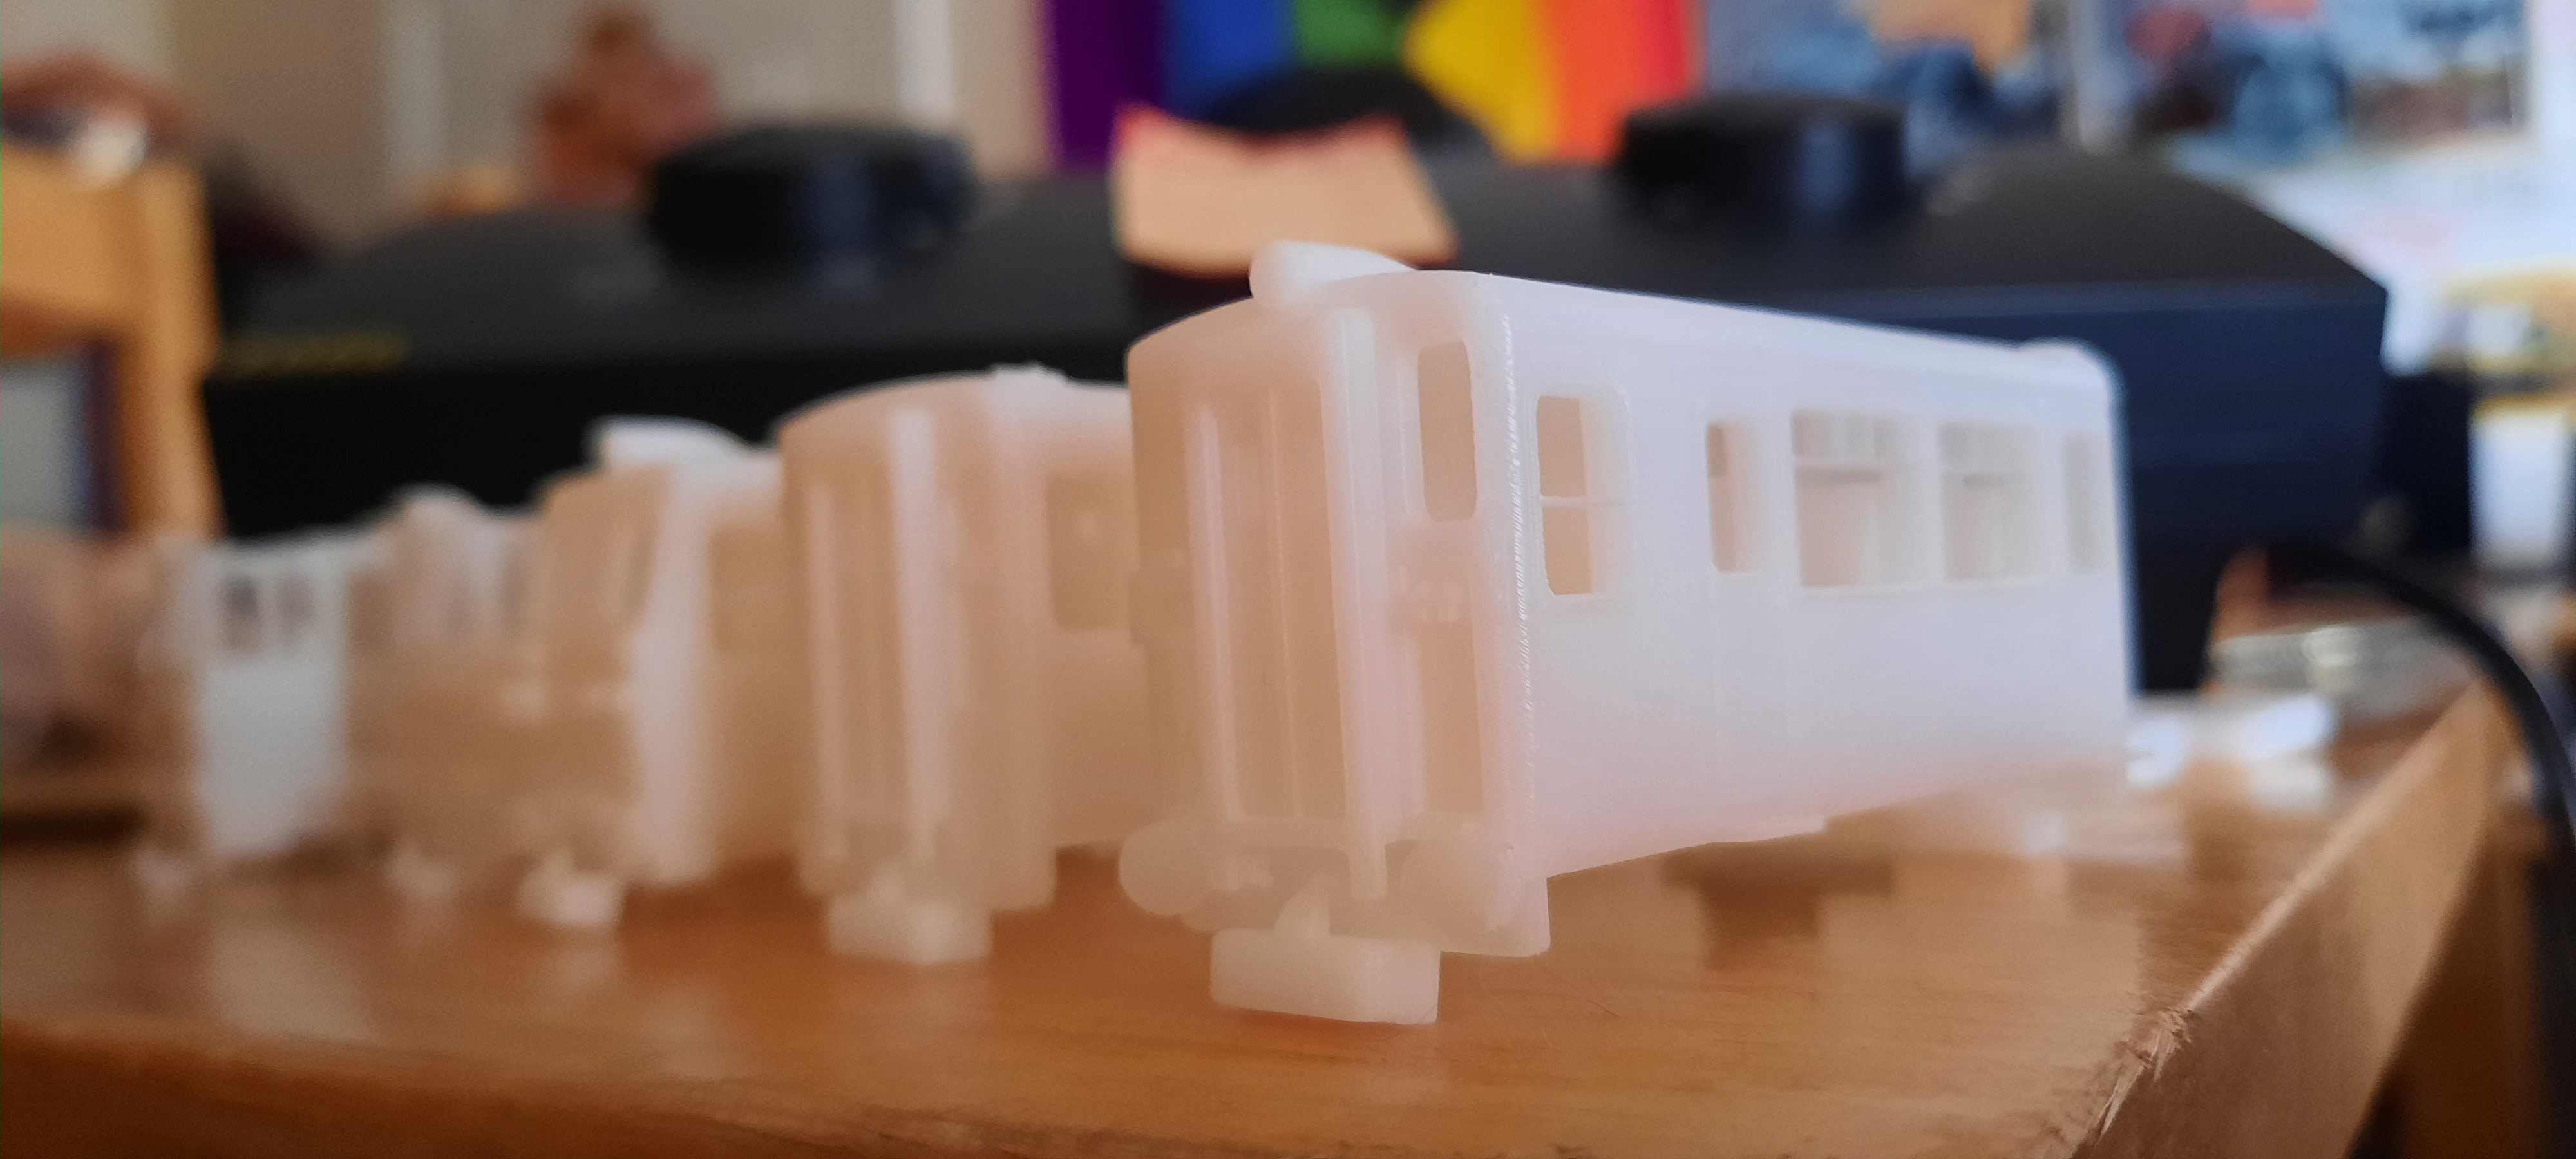
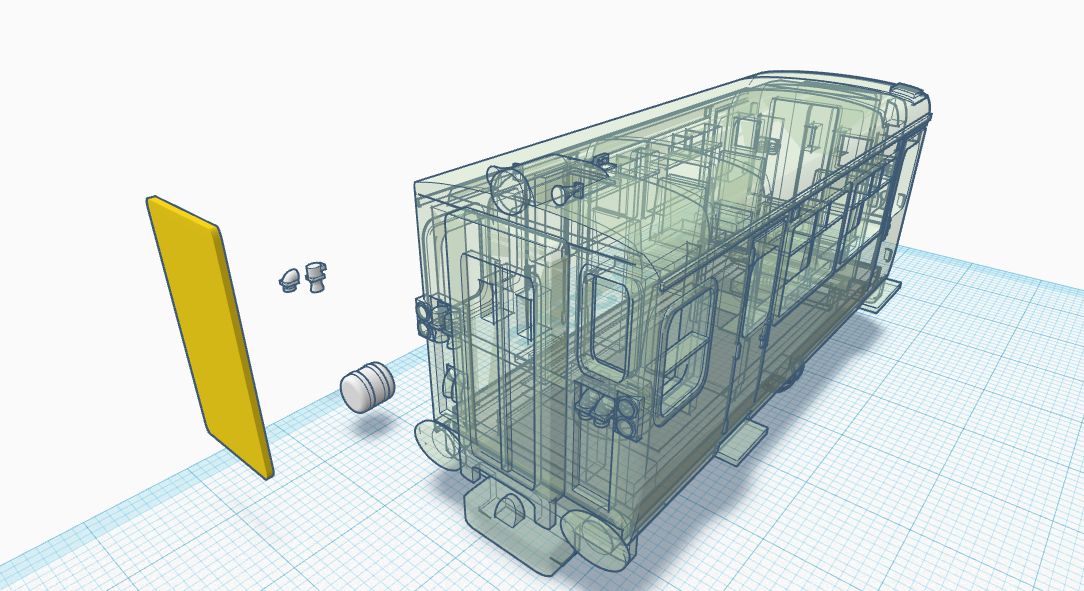
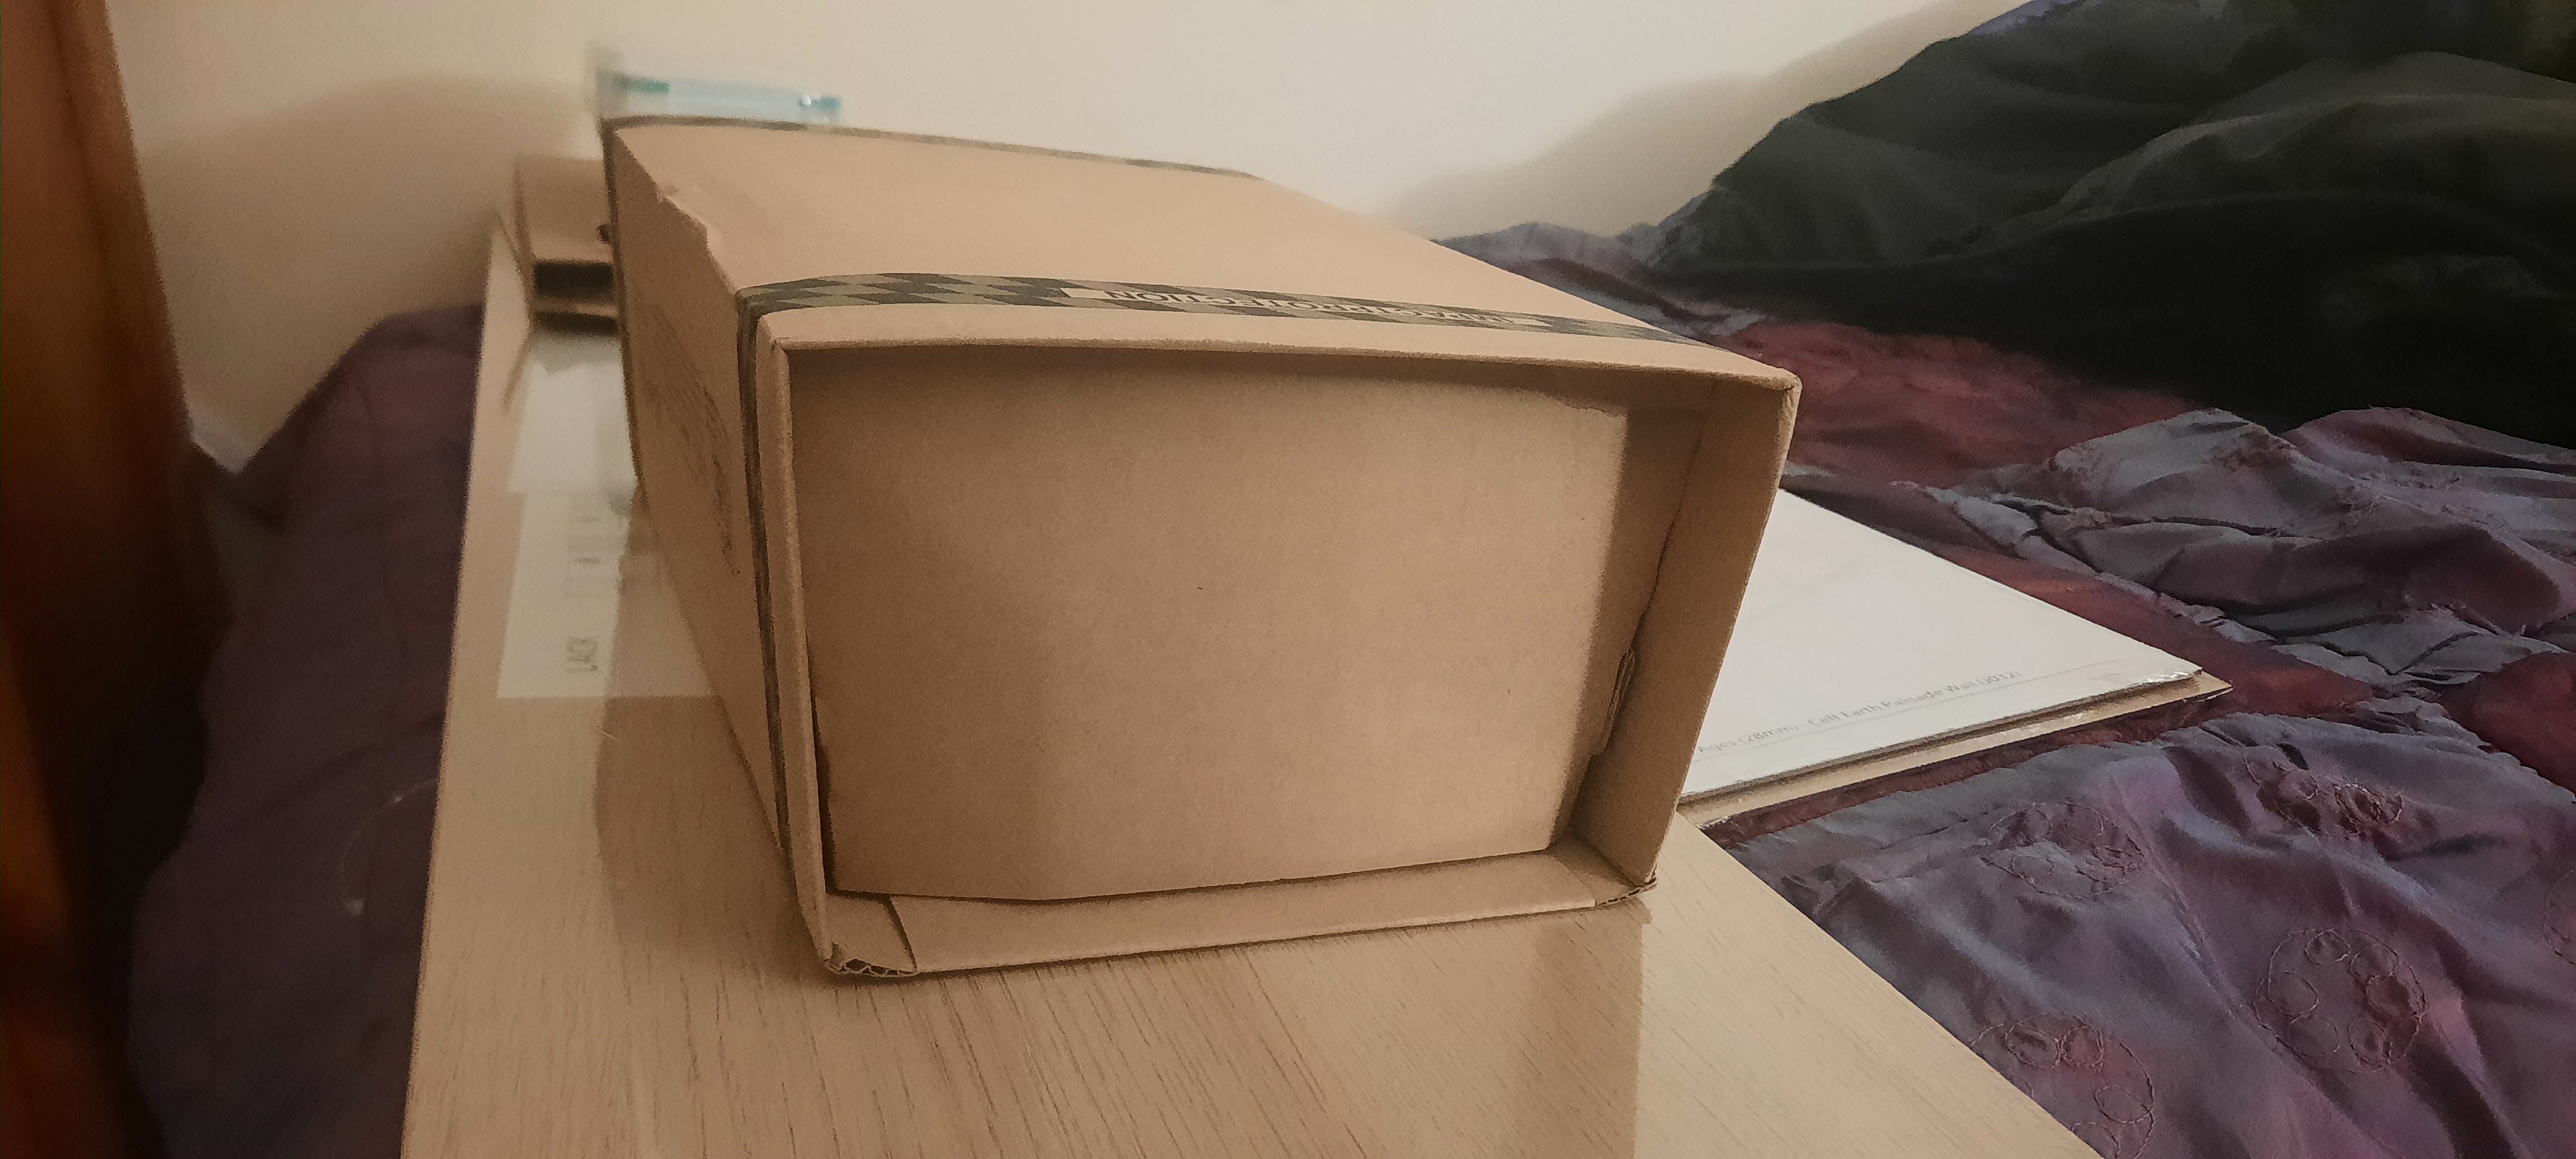
Baby 80 update: 2-12-2023
The baby 80 has arrived from Hong Kong!

This morning, the package from JLCPCB arrived amoungst other packages.
After having a look at the models, i can see somethings which needs improving before the next print, however, thats good, as that was the point of this prototype print, to see what needs fixing.
The things that need improving are:
- Front wall on DTSO needs to be more thick
- Front coupler on PC needs strengthening
- Chassis for DTSO & TSO needs triming of ½mm - 1mm
- Window divides need extra thickness
I think thats it really, all easy & quick fixes to the files.
Overall, im very impressed as how it's turned out & the speedyness of the print / delivery, along with the friendly support from JLCPCB.
Yay!!

-
6
-
 1
1
-
-
A Baby update for a Baby 80: 1-12-2023
Earlier this week, the print for the Baby 80 prototype was completed & has been shipped from Hong Kong
, it is currently in transit between England & Northern Ireland. Also early this week, peco 009 coach bogies were ordered from a well known auction site & due to arrive soon, these are for the DTSO & TSO carriages, whilst the PC uses the Kato 11-105/6 chassis.
Packing to prototype a potential Baby 80 kit (more on than later) has also started to arrive, the packaging is mostly card / biodegradable & recyclable materials.
From what started off as a blank cube a few weeks ago on Tinkercad, the project surely is slowly, but surely progressing!
Maybe we'll look into other baby irish rolling stock too! - I've already got a few ideas


-
3
-
-
30 minutes ago, Broithe said:
Does it need to be sound-fitted?
Would we be able to understand it, if it was?
No.....& no?

-
2
-
-
Hello!
I'm currently looking for a HO / 00 scale Yorkshire terror dog, if anyone has one spare or knows where i could get one, that would be very much appreciated!
Thank you in advance

-
Update:
21-11-2023
Gooood morning!
After various small, but fiddly corrects to the TSO, DTSO & PC, the first Baby 80 set has been ordered for resin printing.... yay!
It should arrive within the next ten days or so.
Whilst awaiting for the 80 to arrive, i'll get cracking on the layouts & the next few baby railcars....

-
2
-
-
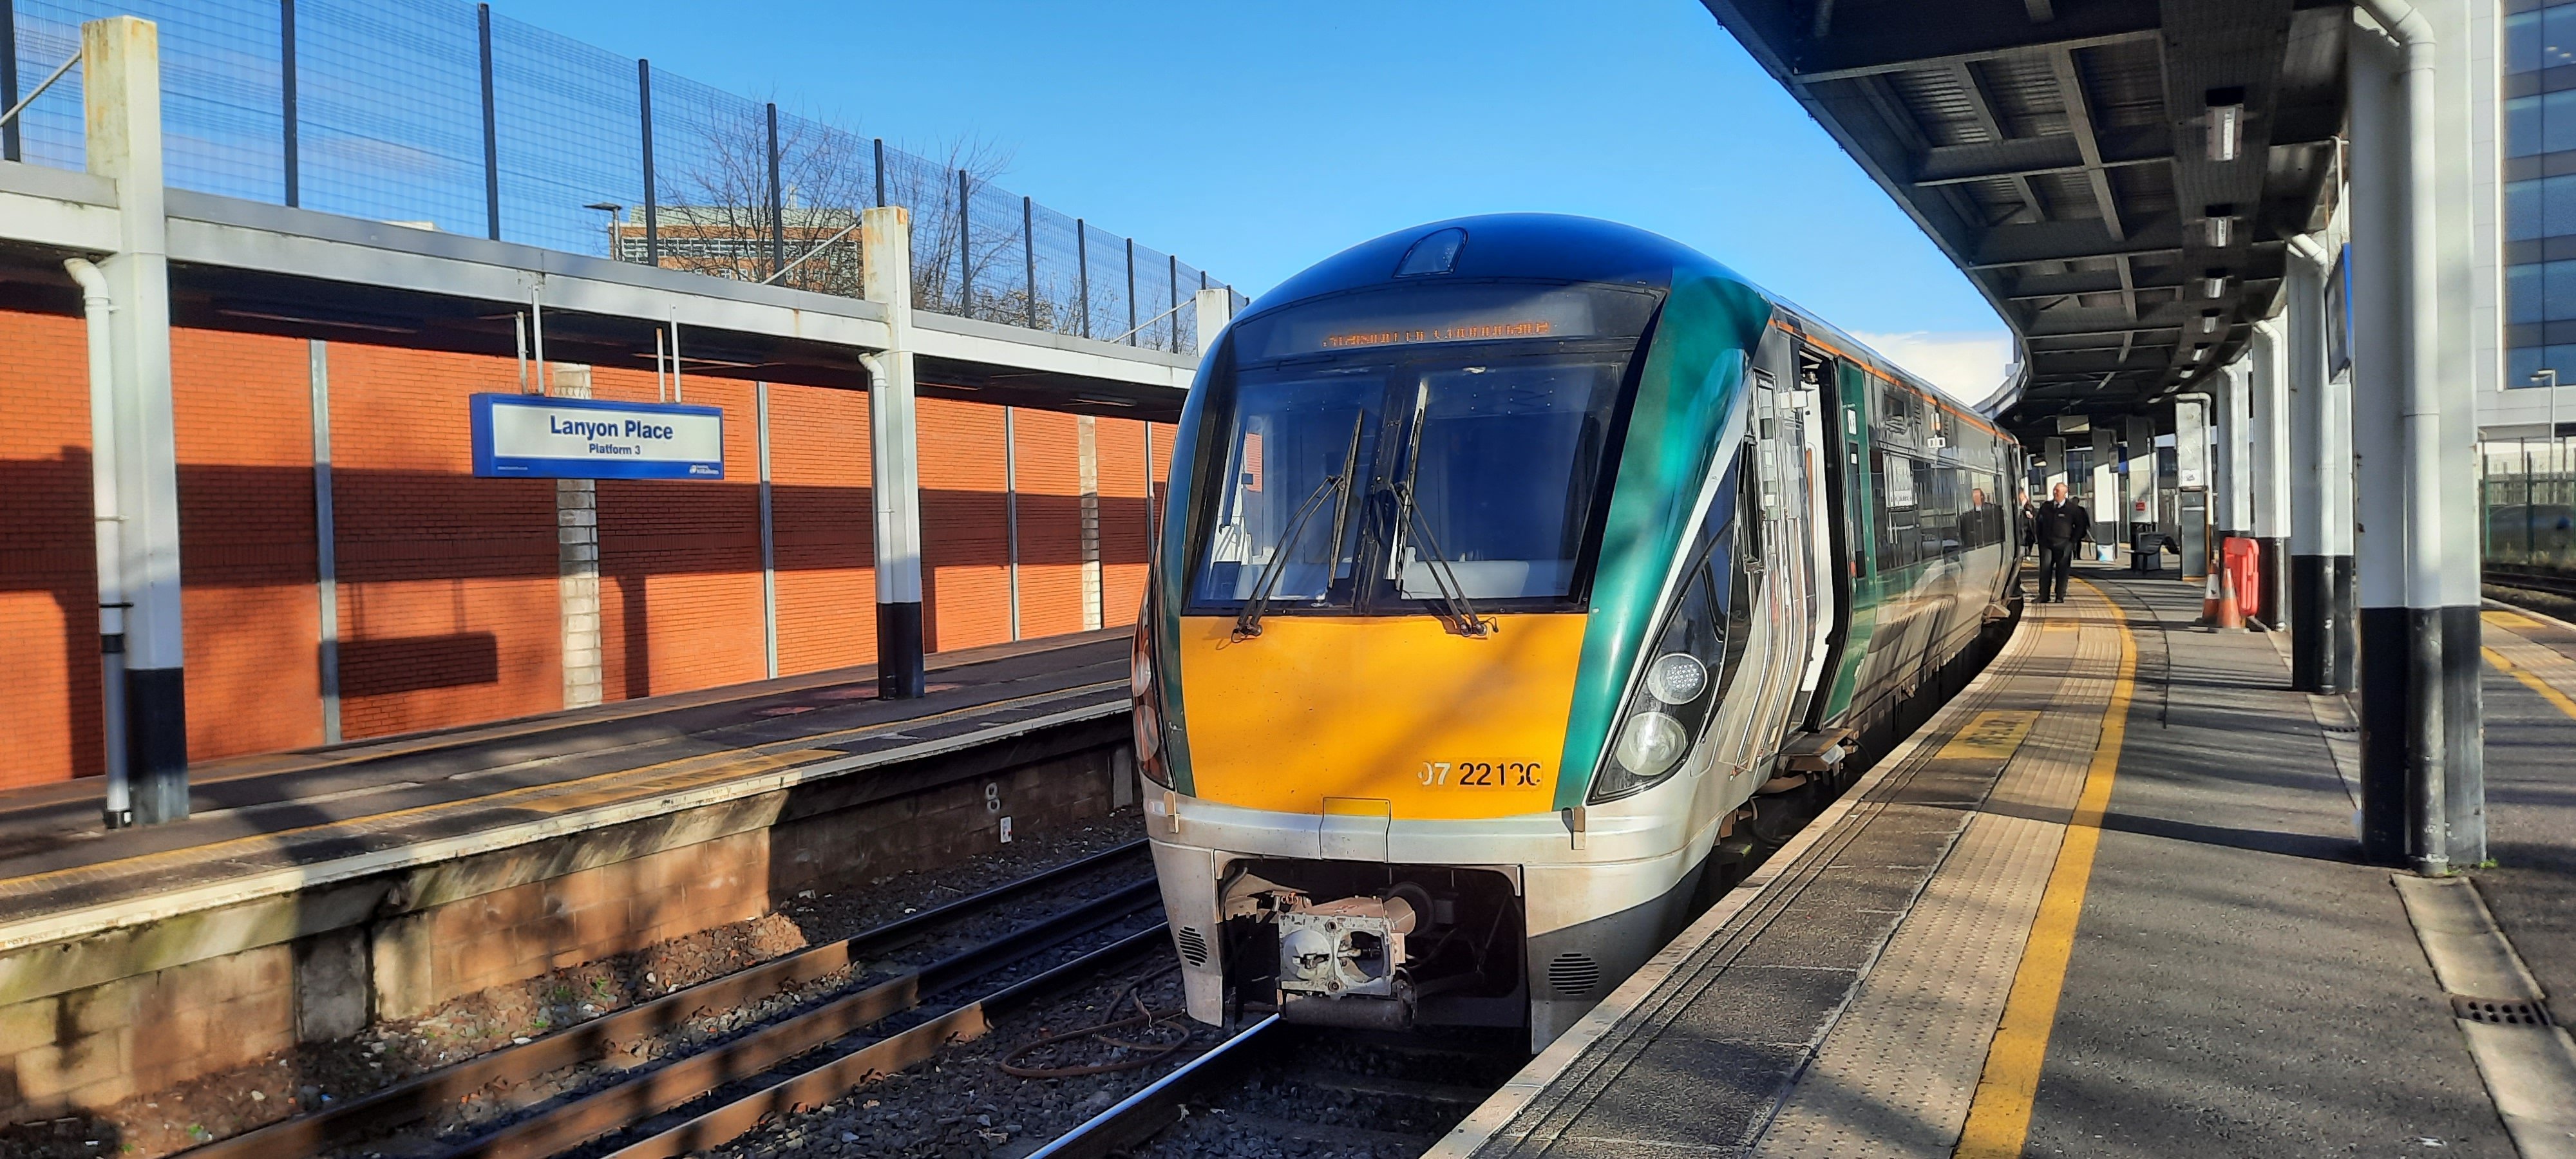
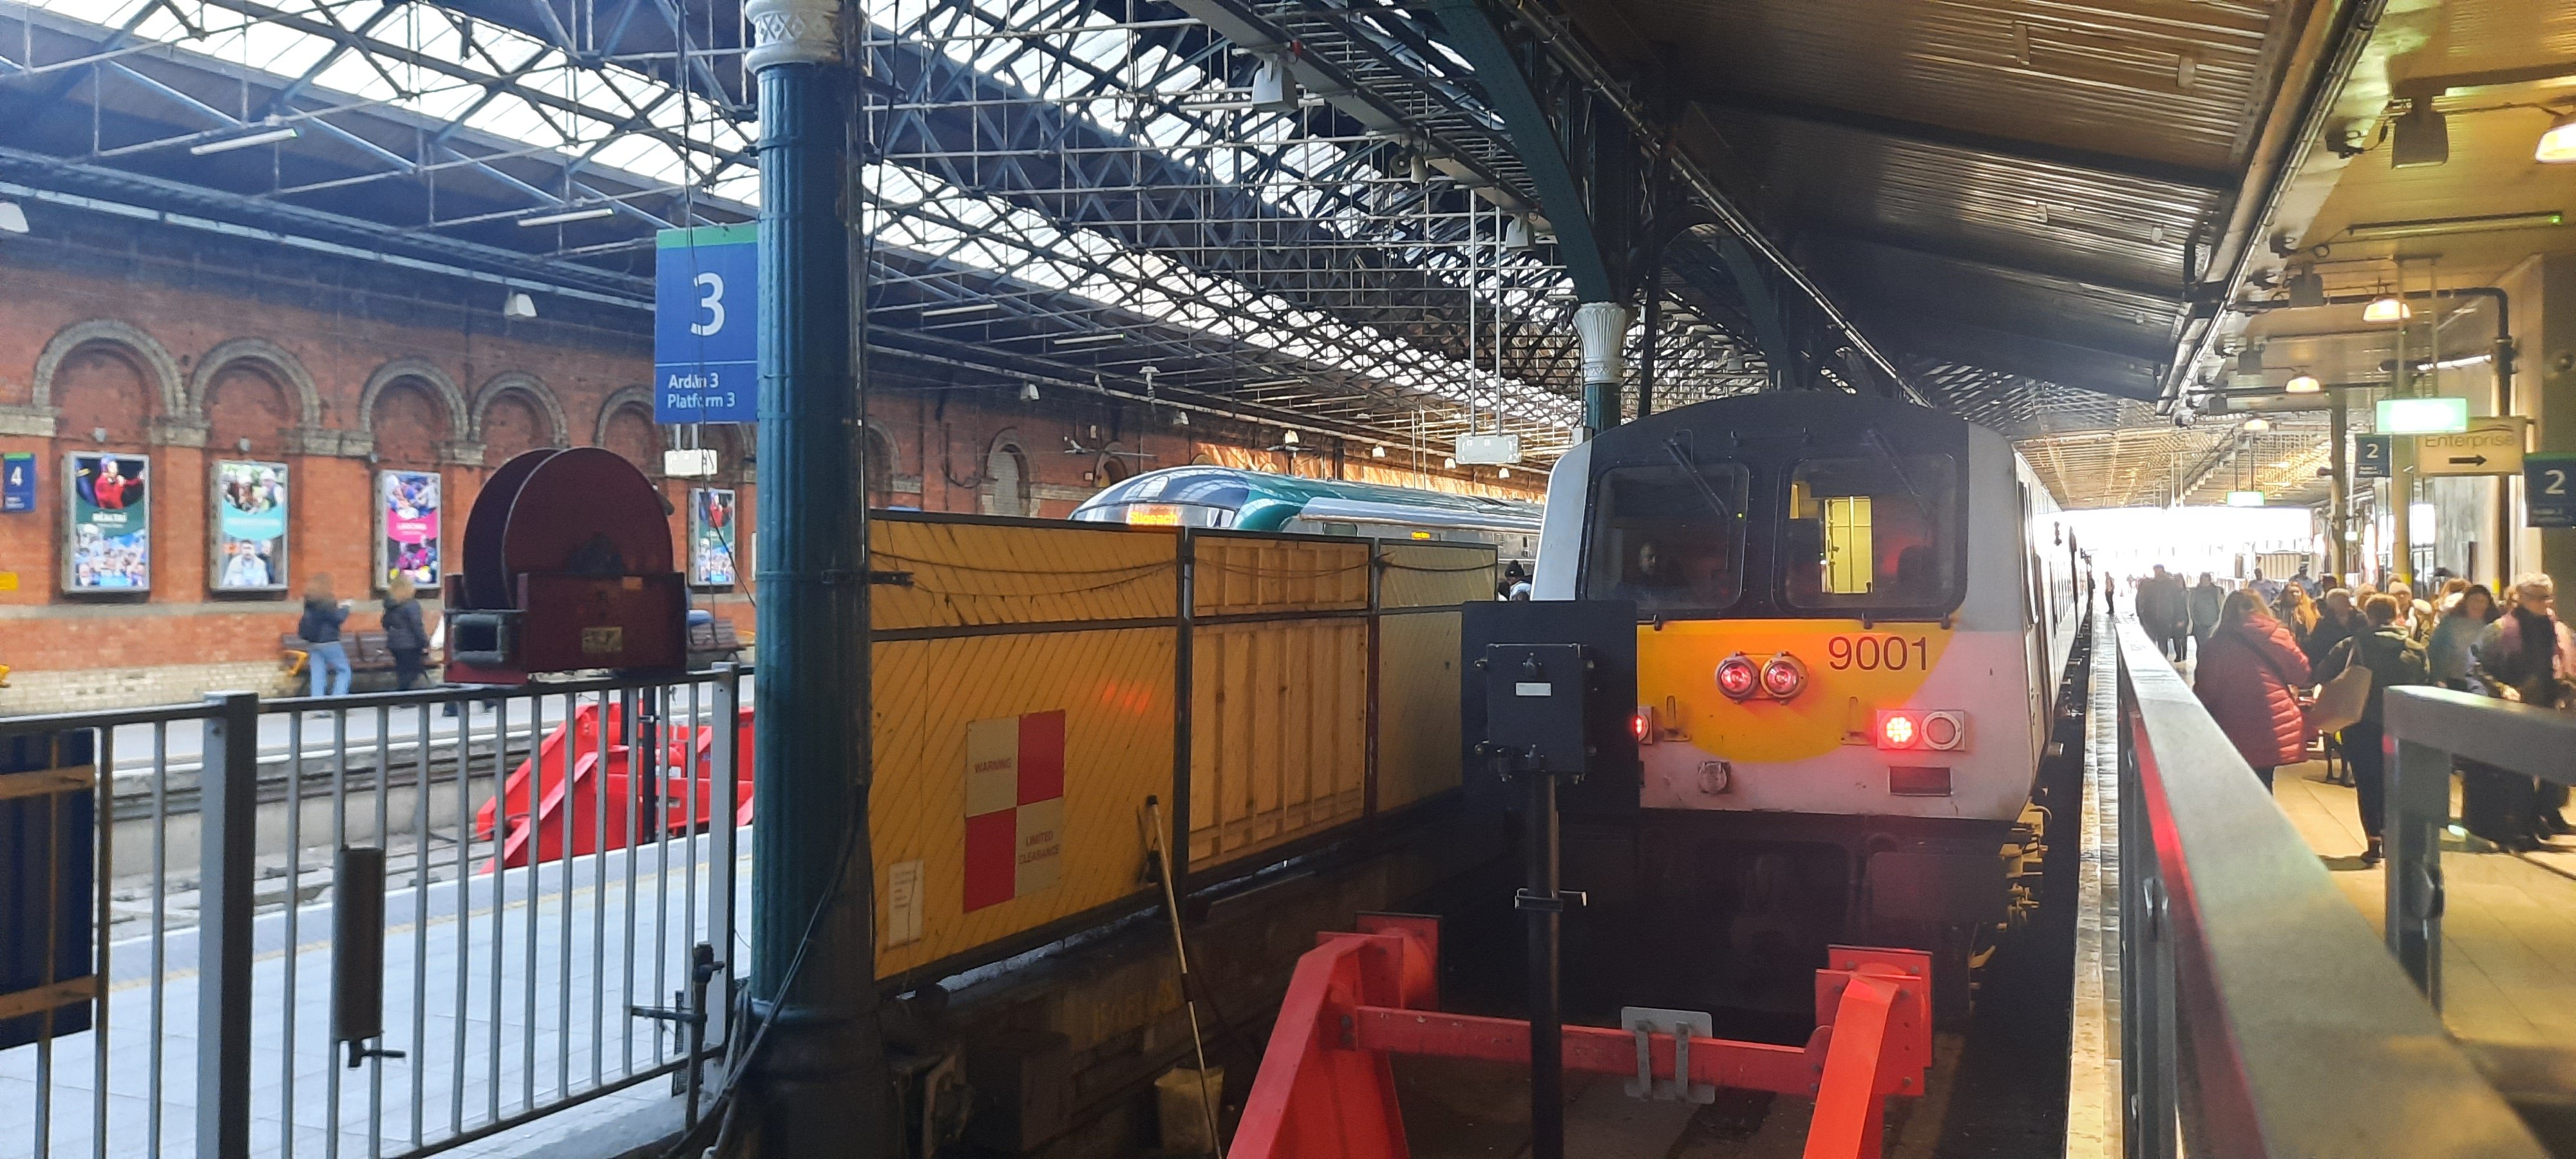
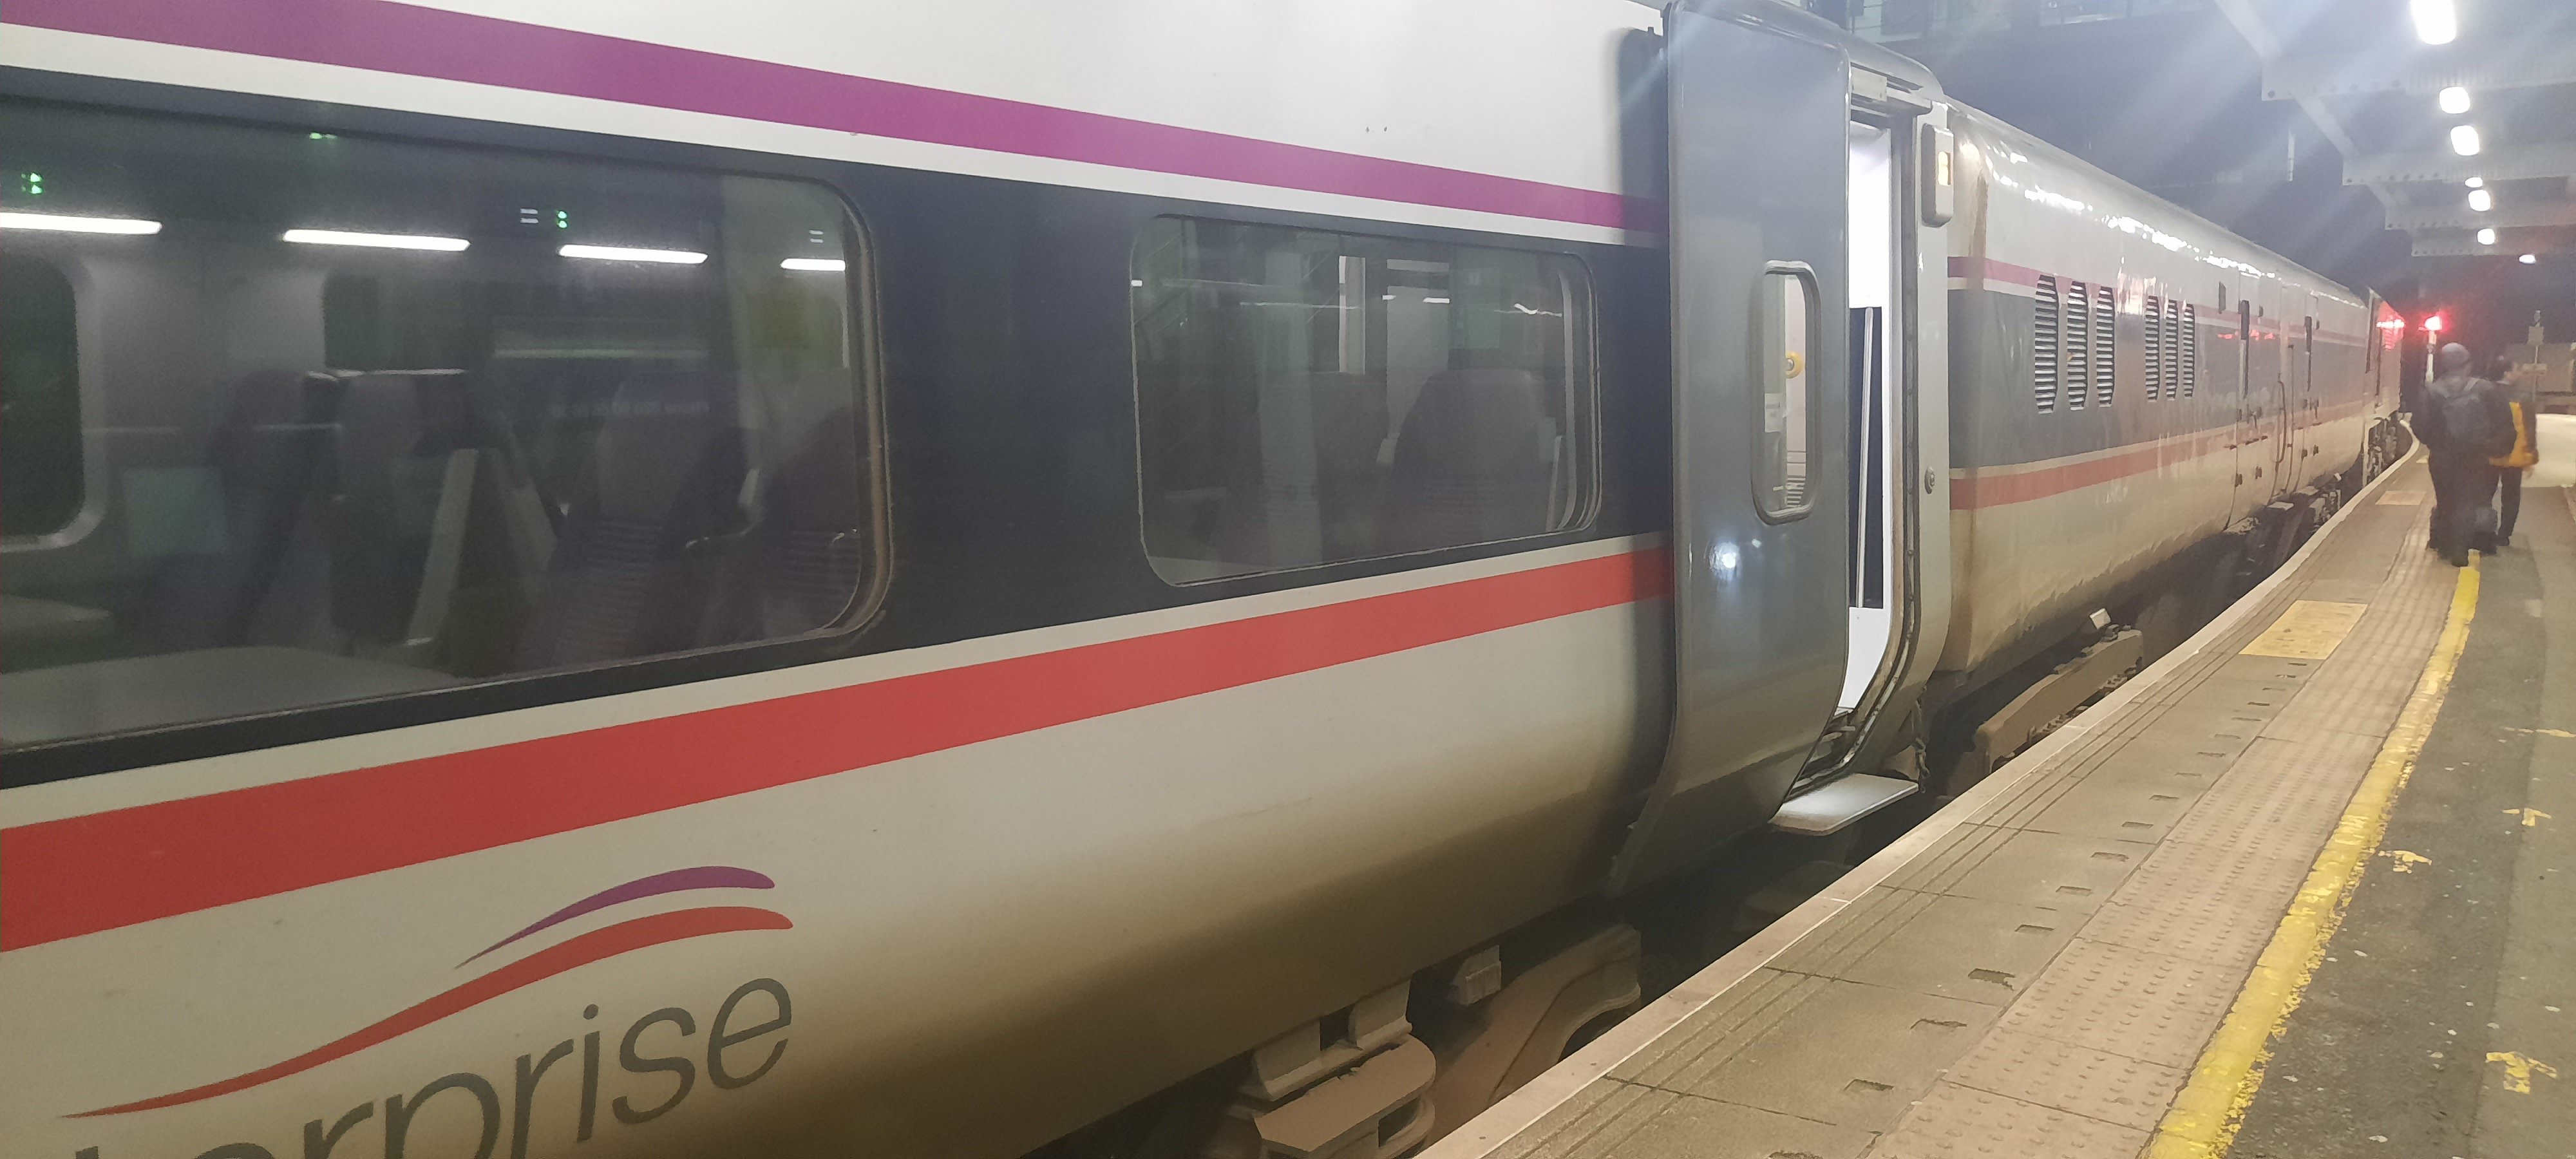
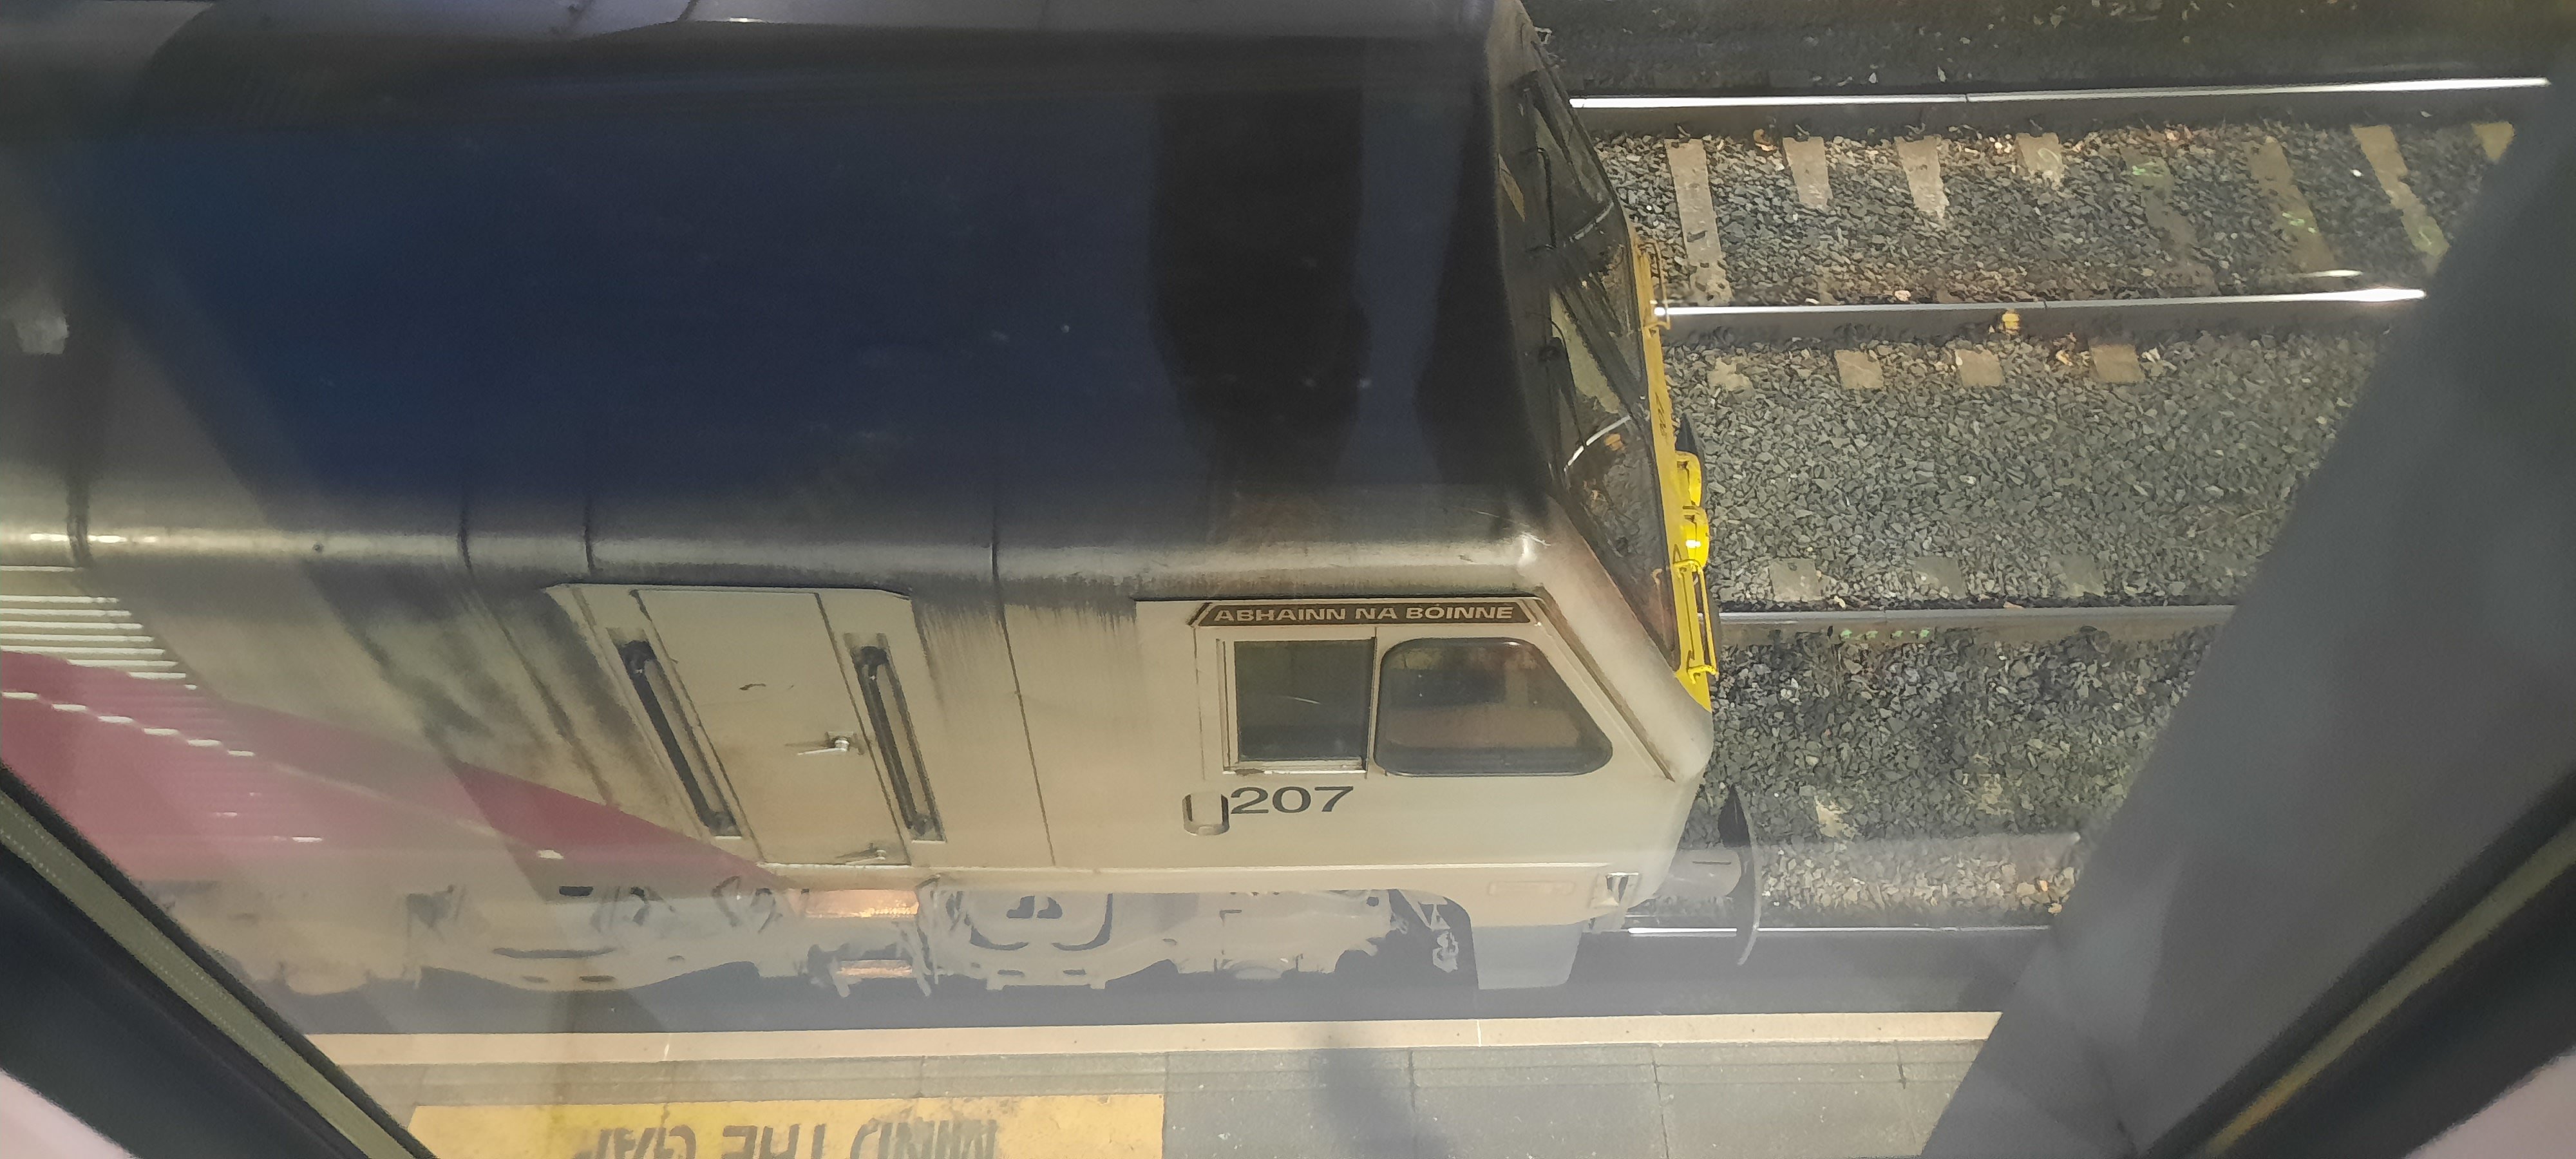
These were some of the ones on Wednesday [Nov 15], services were extremely busy, especially between Newry & Dublin....
Think 9002 passed us a few times too.
-
1
-
 1
1
-
-
Update:
I've put an order request through JLCPCB, which it's going through the order process for the train set.
I've also been playing around in Krita & Blender, to which i've came up with this design for the box cover design if i were ever to do this as a kit. Mind, needs a few tweaks & the 80 needs textures!
-
4
-
-
What do you do when you can't get sleep?
You colour in trains!
-
4
-
-
Update:
I'll be ordering a print of the Baby 80 from JLCPCB on Wednesday, which is around £7 - £10 for the entire train set & P&P, which isn't too bad. Looking to order from more local afterwards, but just awaiting from them for a quote.
I'm also going to see if i can create a baby 80 poster in blender from the stl 3D model to put in the train
- that'll be fun to learn!
----
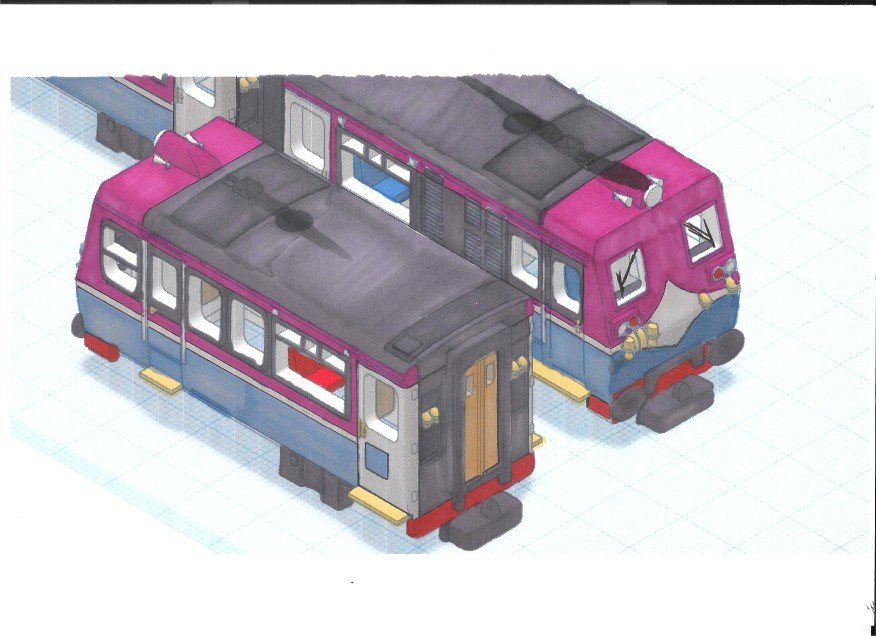
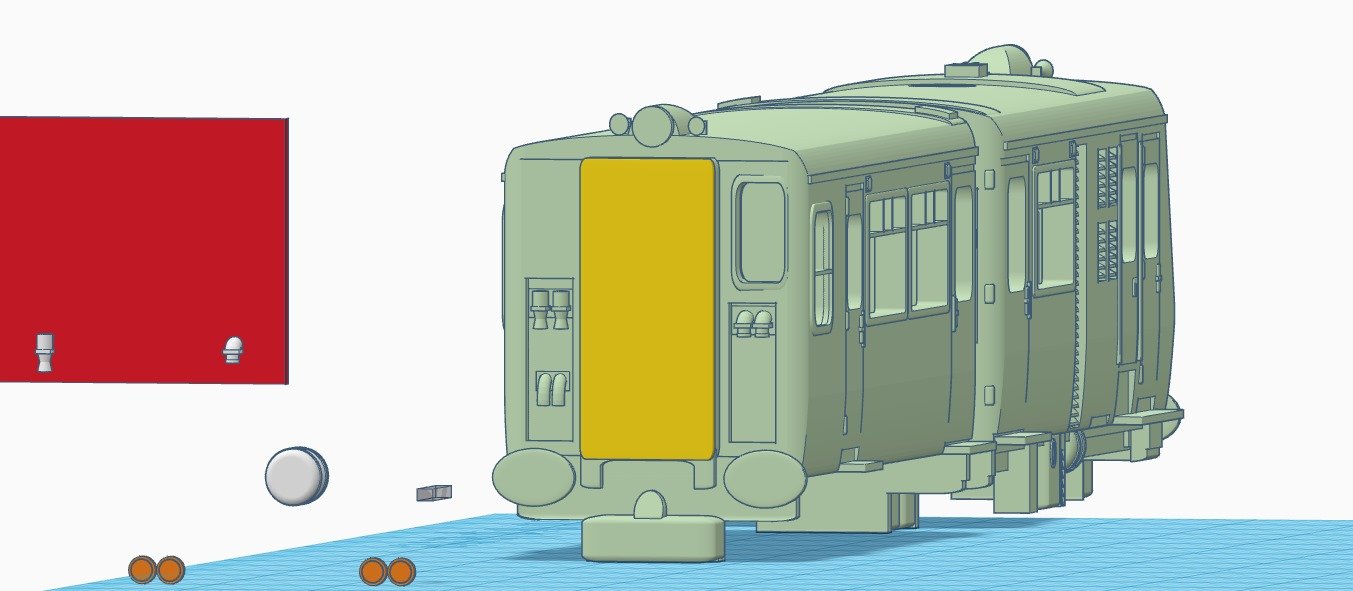
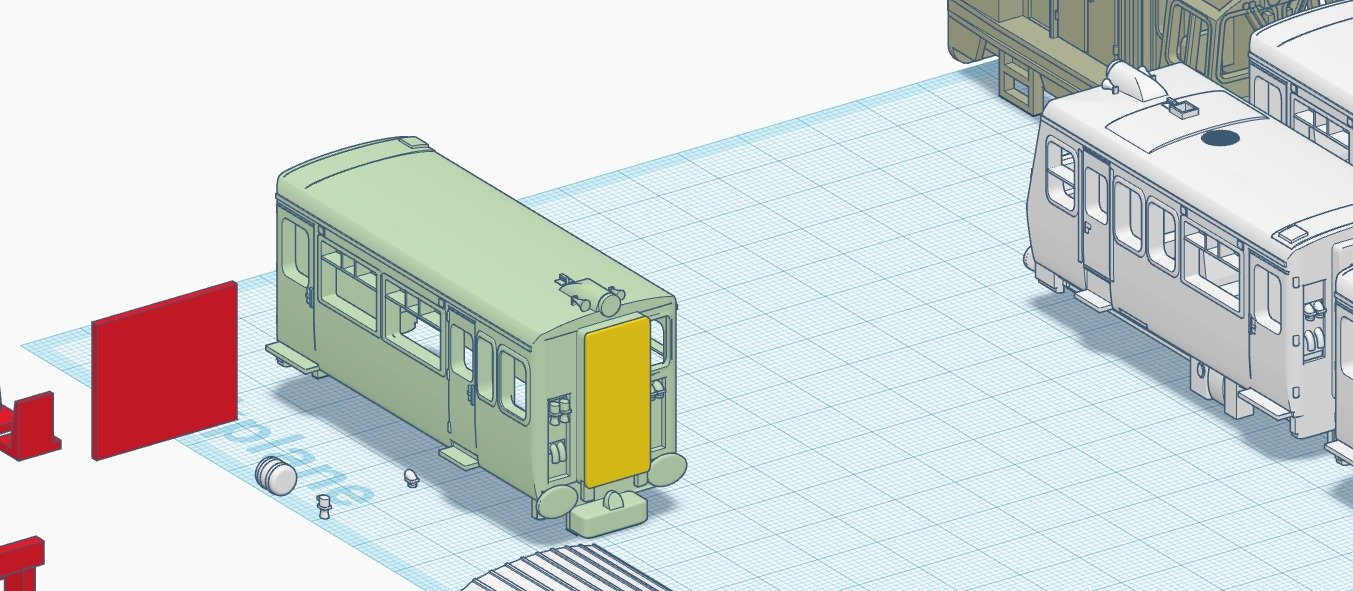
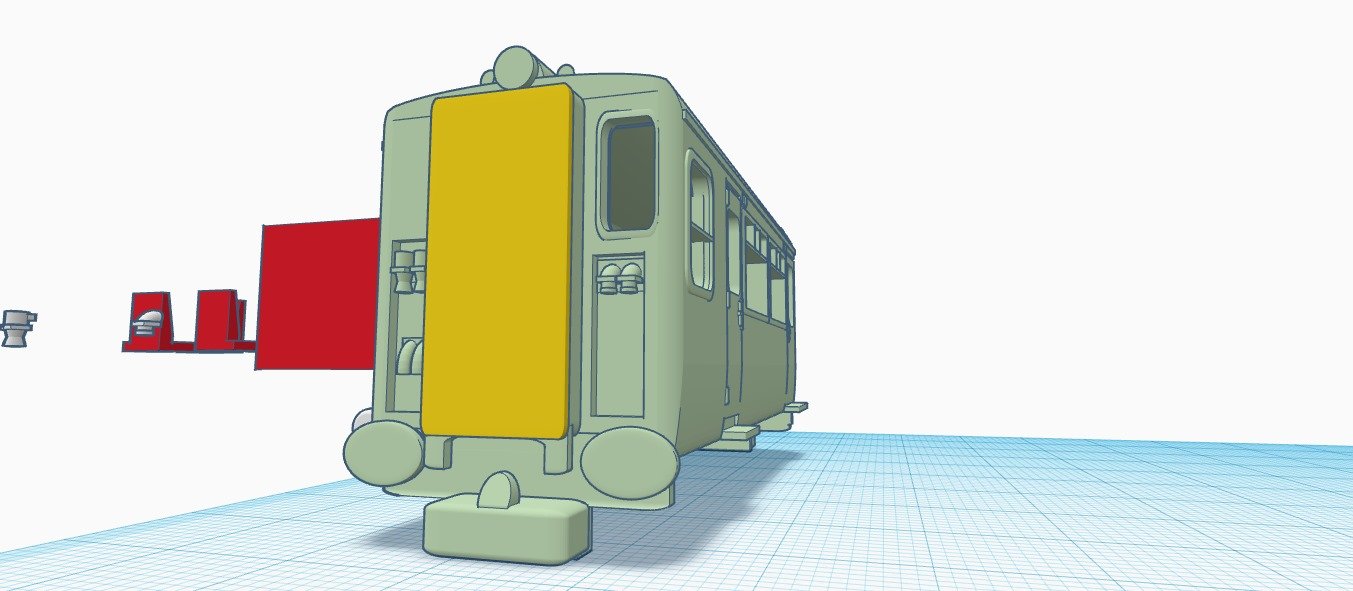
Had a go at designing the livery for the Baby 80 using a printout of the 3D model & promarker pens....
It's essentially the original NIR maroon & blue livery with a modern twist of alt coloured doors & black window surround.
I may be bit biased, but i think it didn't turn out too bad.
Now, if i could learn to texture in blender or another 3D texture tool....
#Baby80
-
-
8 hours ago, Flying Snail said:
Lots of detail there Tony - really has the Shorty Train vibe!
Thank you!
Hoping the next one also has this vibe too
3 hours ago, IrishTrainScenes said:@tonybonneyba Very good details! If you don’t mind me asking what software did you use to make these?
Much appreciated
I use Tinkercad, but others prefer Blender & Solid Edge (both, i'm occasionally trying to learn).
Hope this helps!
-
1
-
-
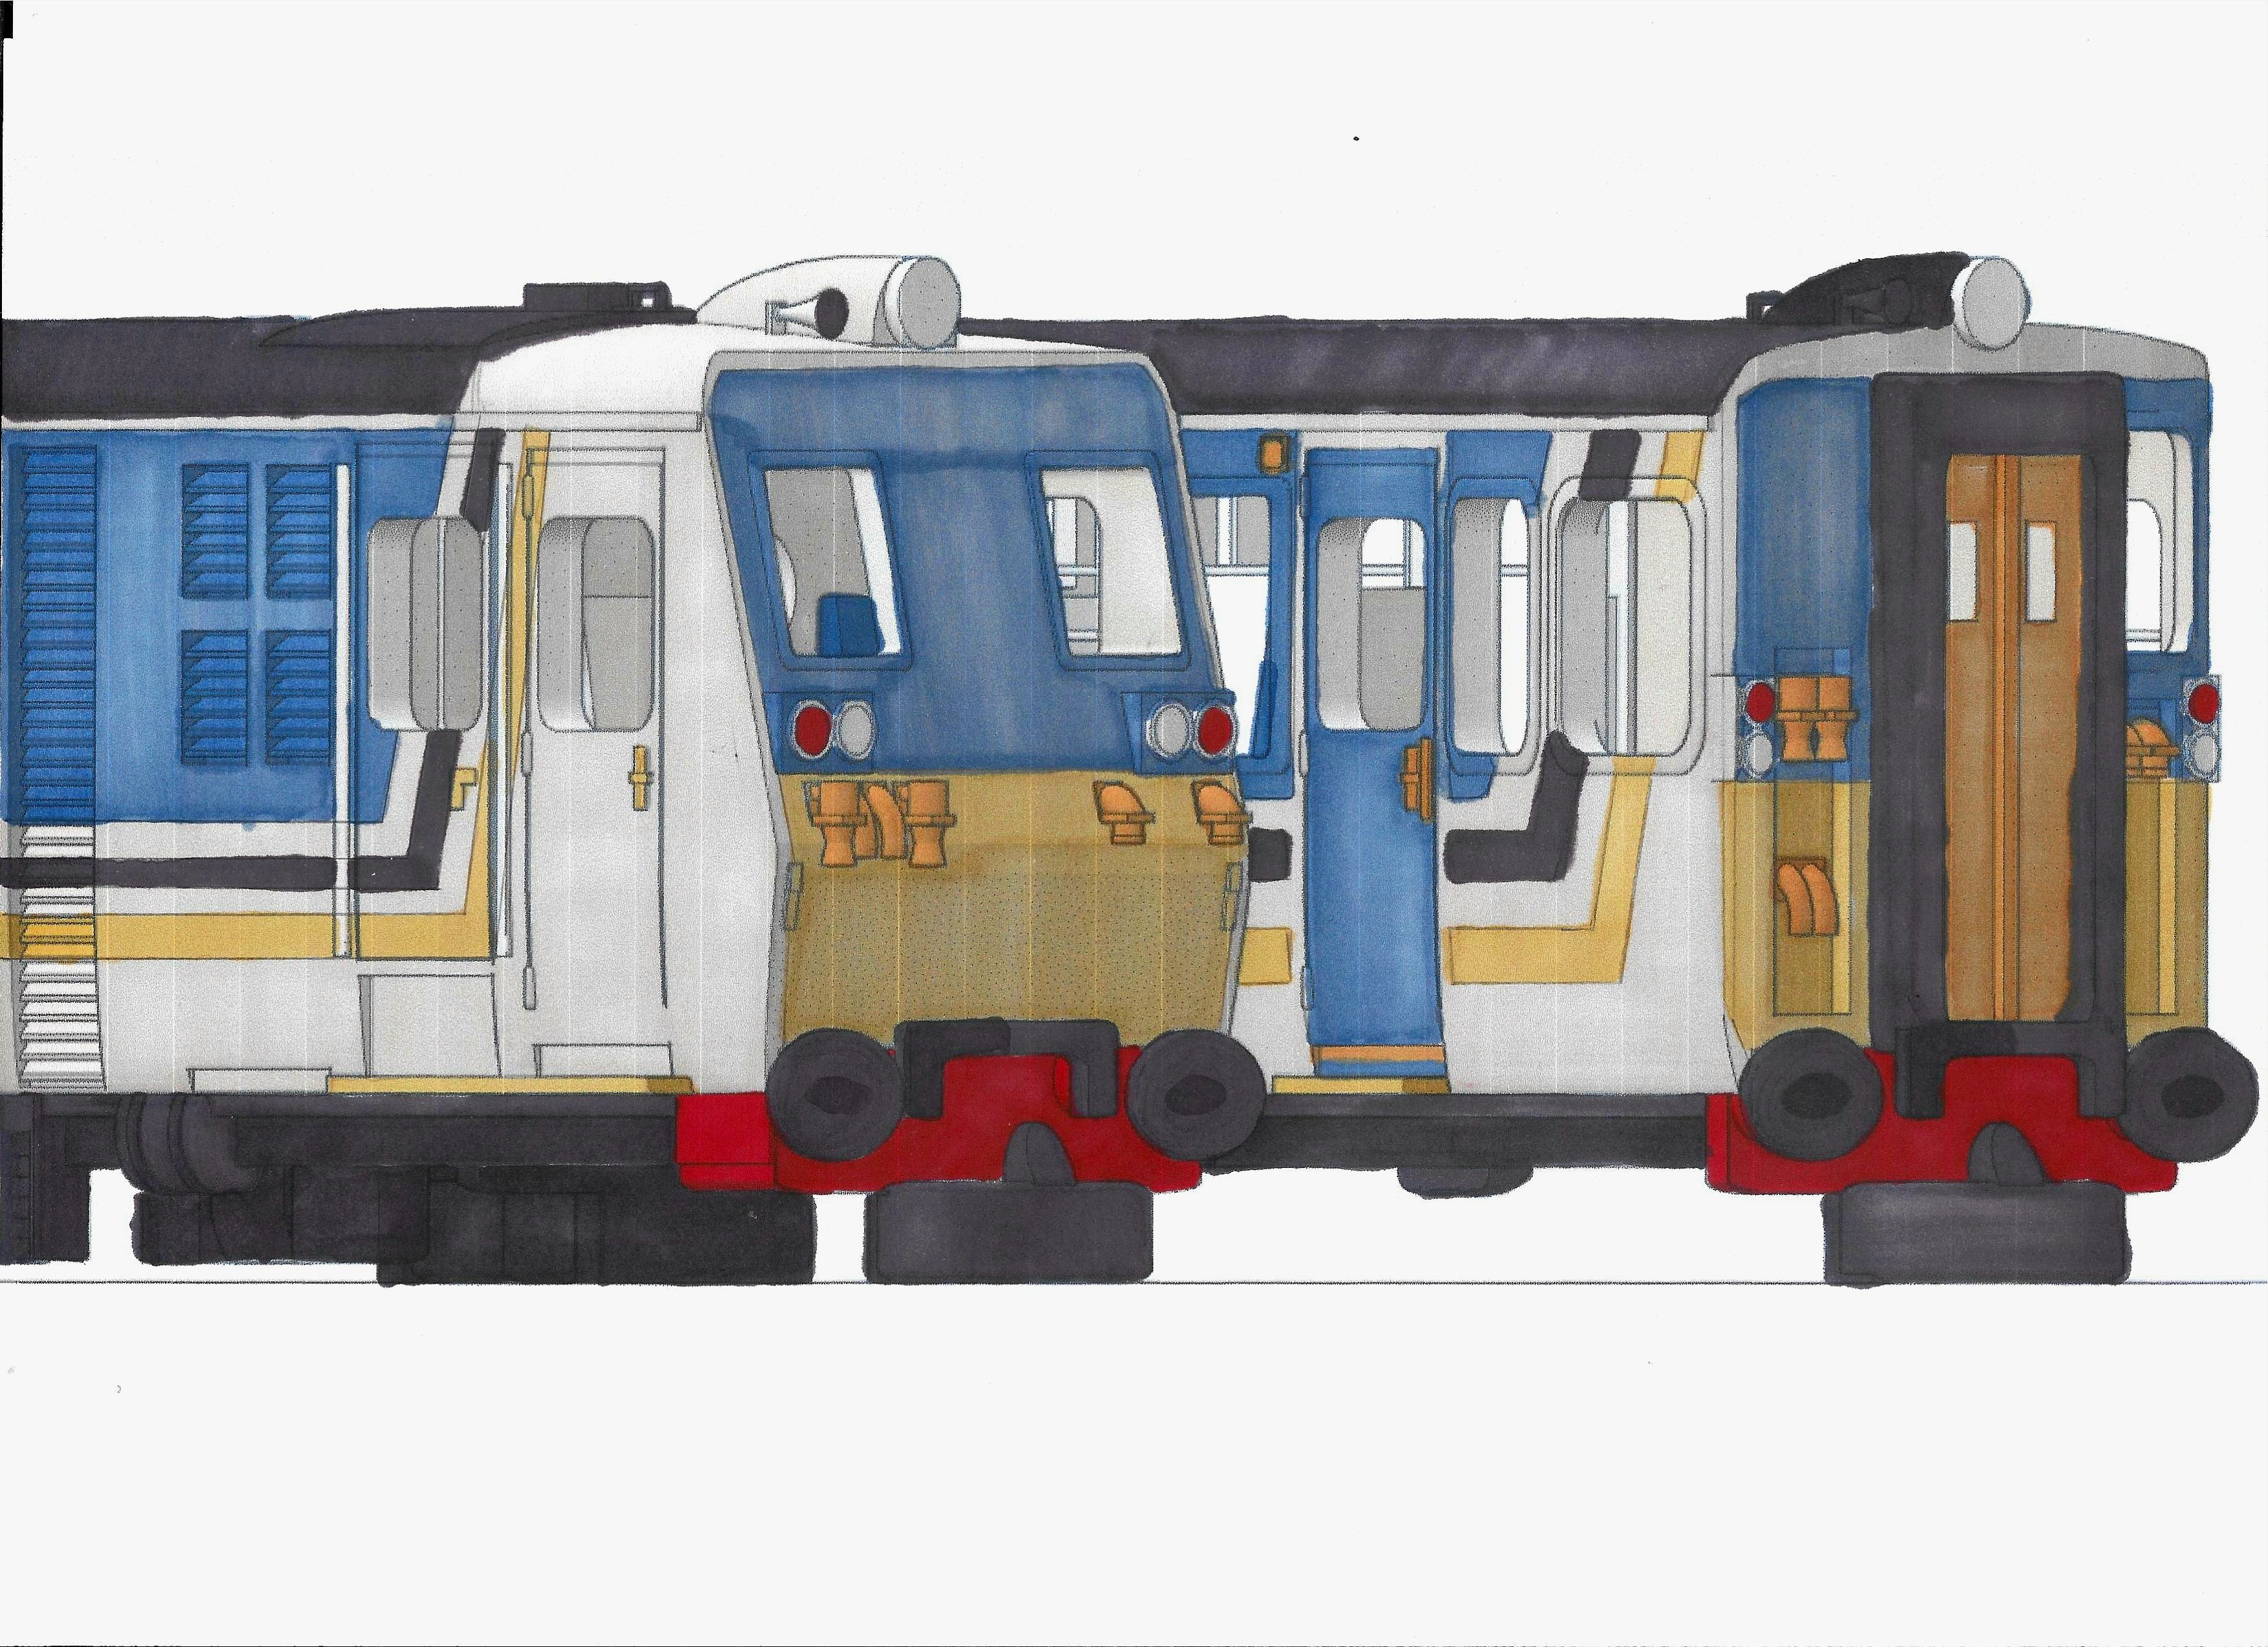
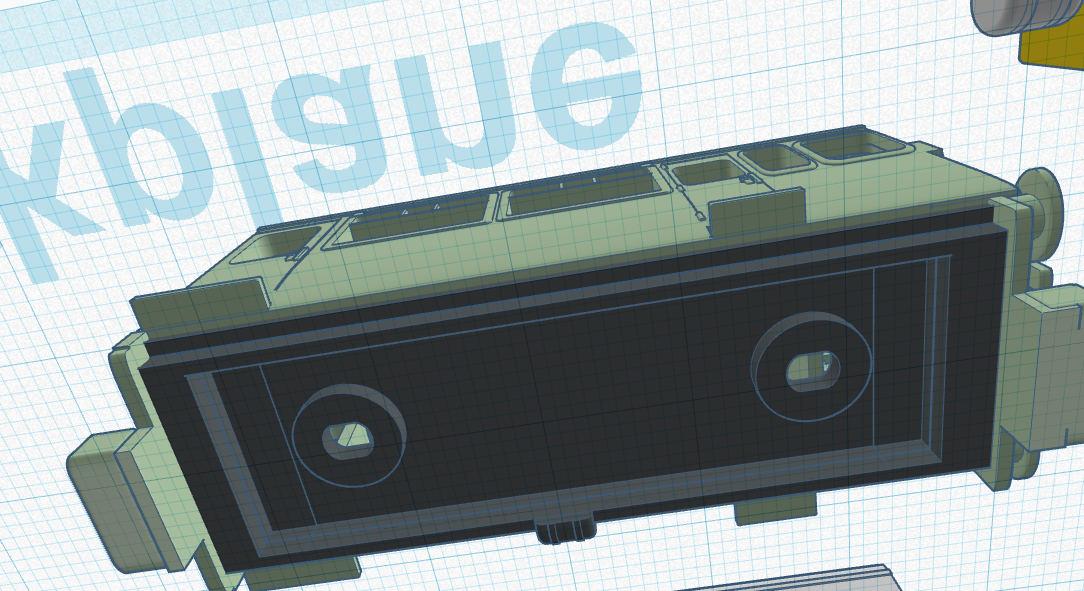
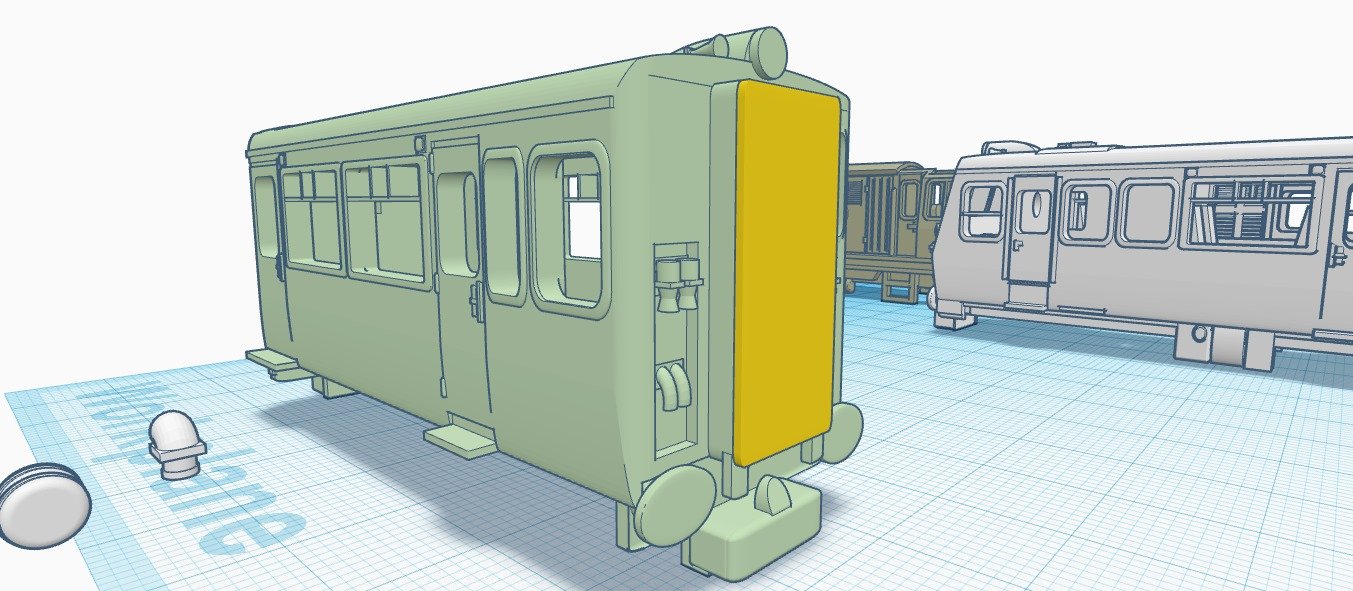
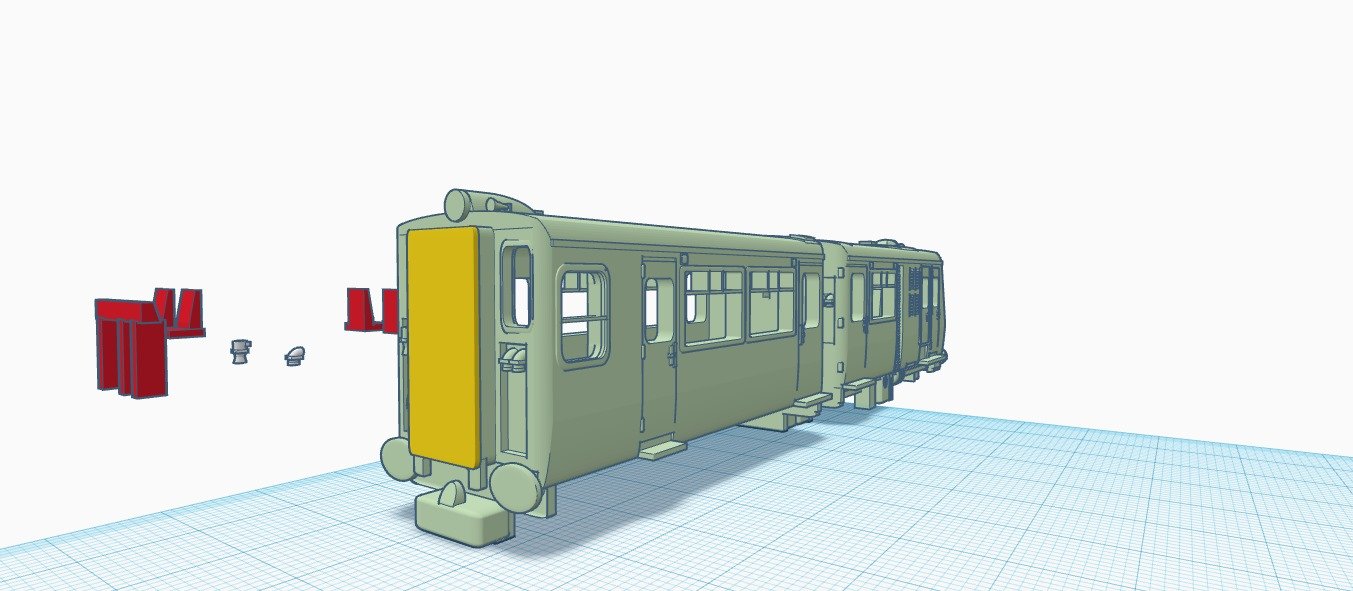
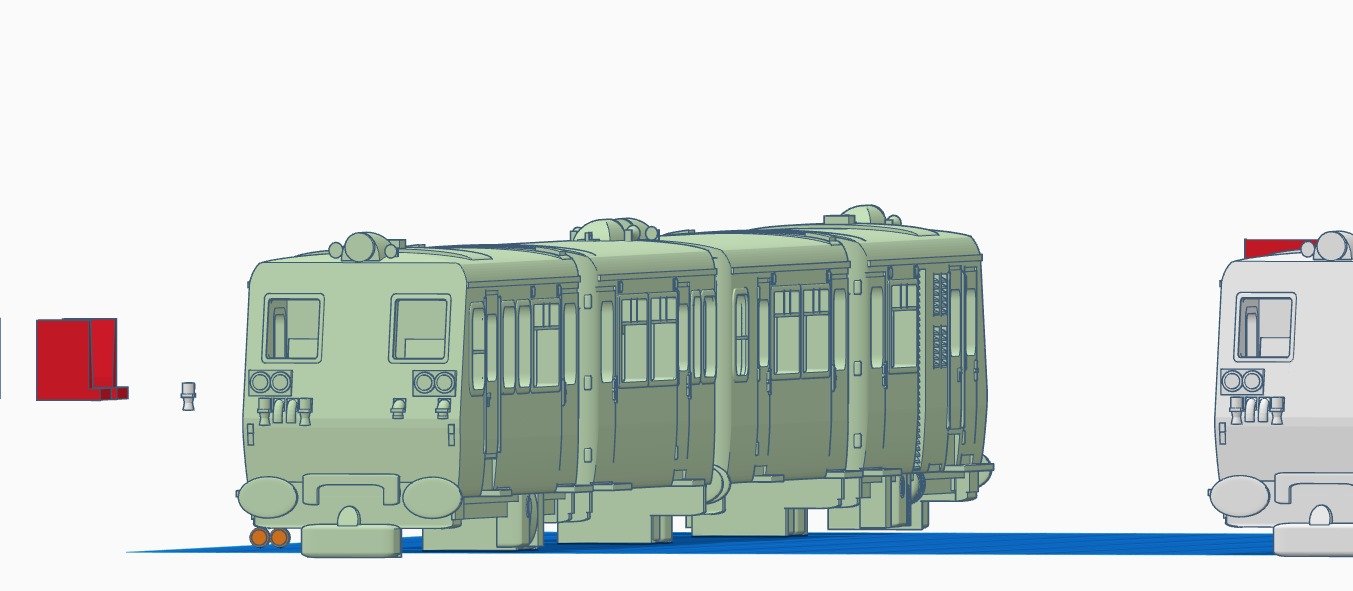
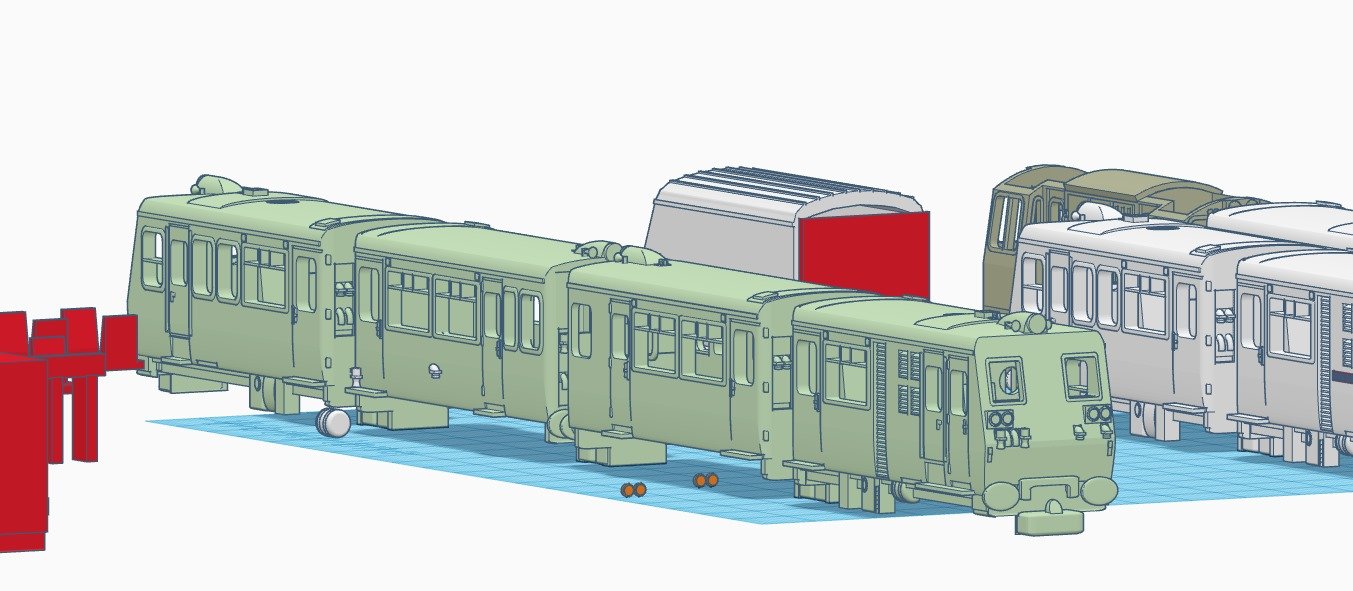
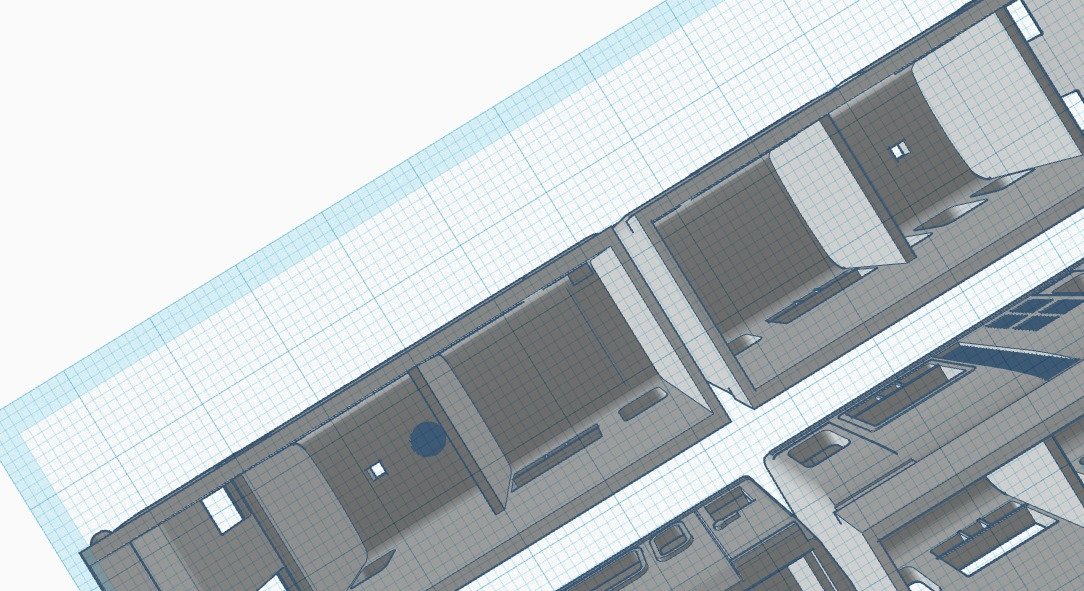
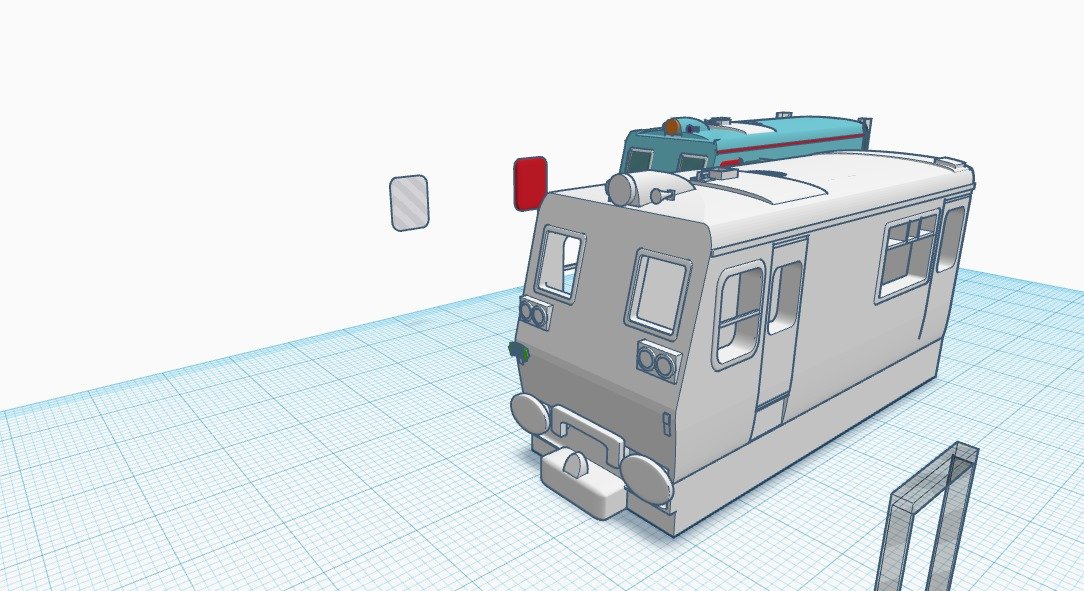
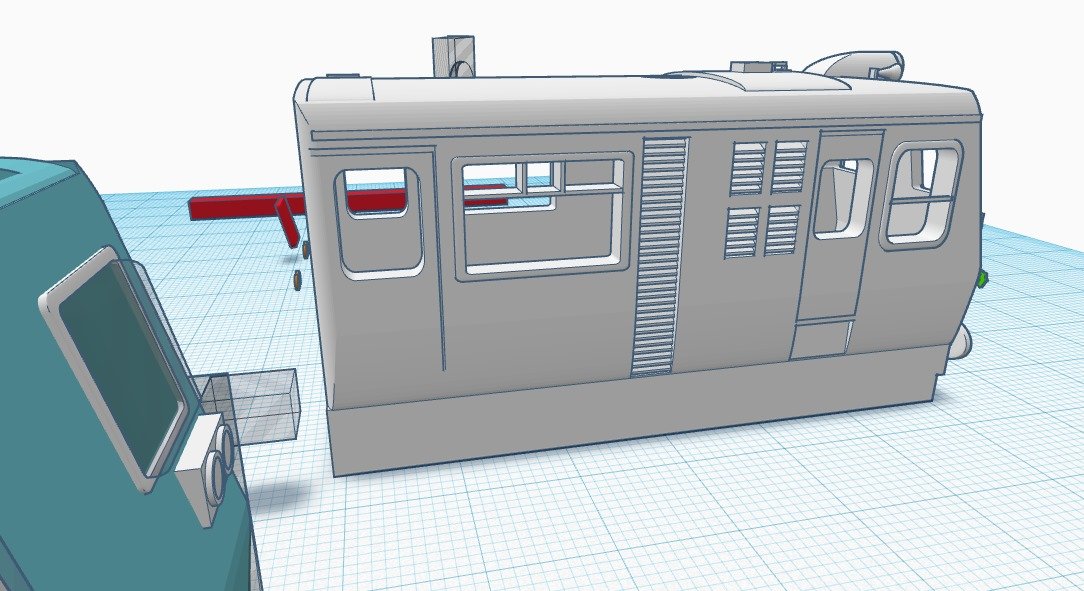
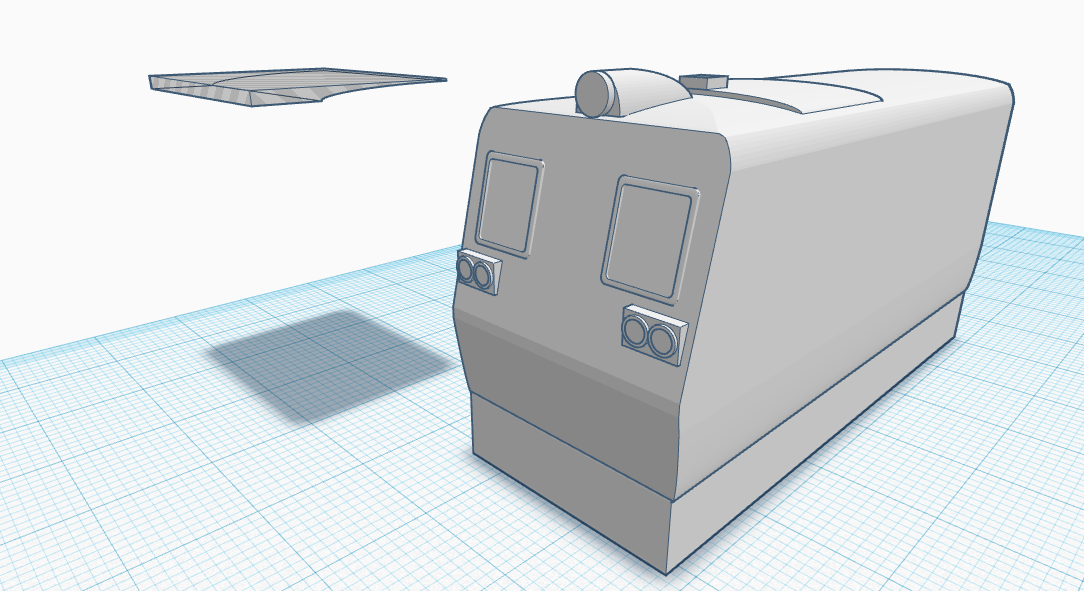
Baby 80 Update:
11/11/2023 - 12/11/2023Evening / Morning!
Have been doing a few bits on the 3D modelling of the Baby 80 this evening, this has included work on the DTSO & TSO....
DTSO
The work on the DTSO has finally finished! - Until i realise I've messed up somewhere!
This work included:- Adjusting the existing chassis from the PC to suit the DTSO, including holes for the GR-104 OO-9 L & B Coach Bogies
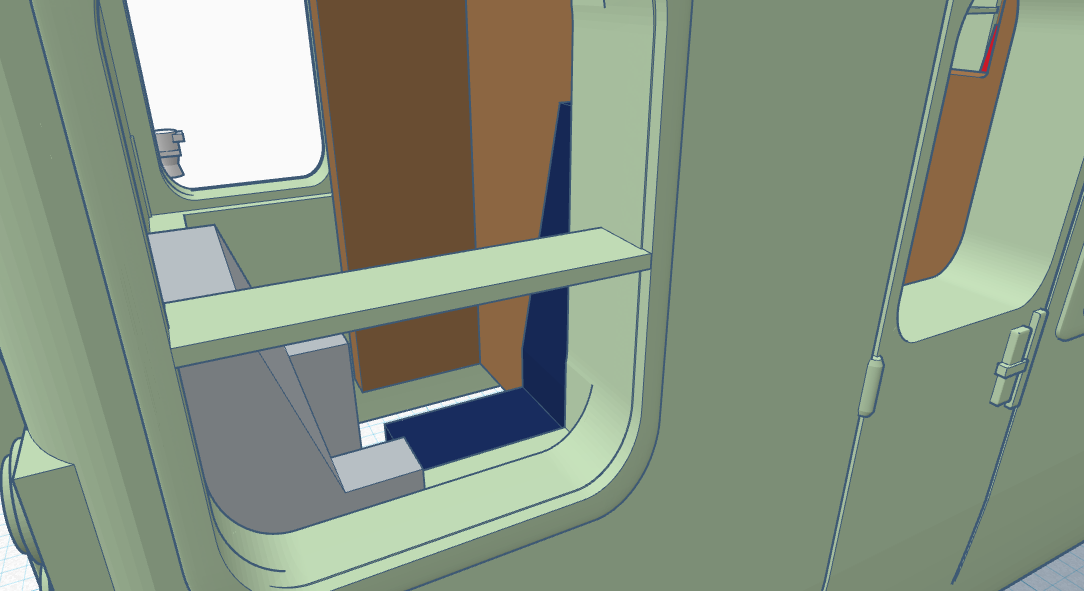
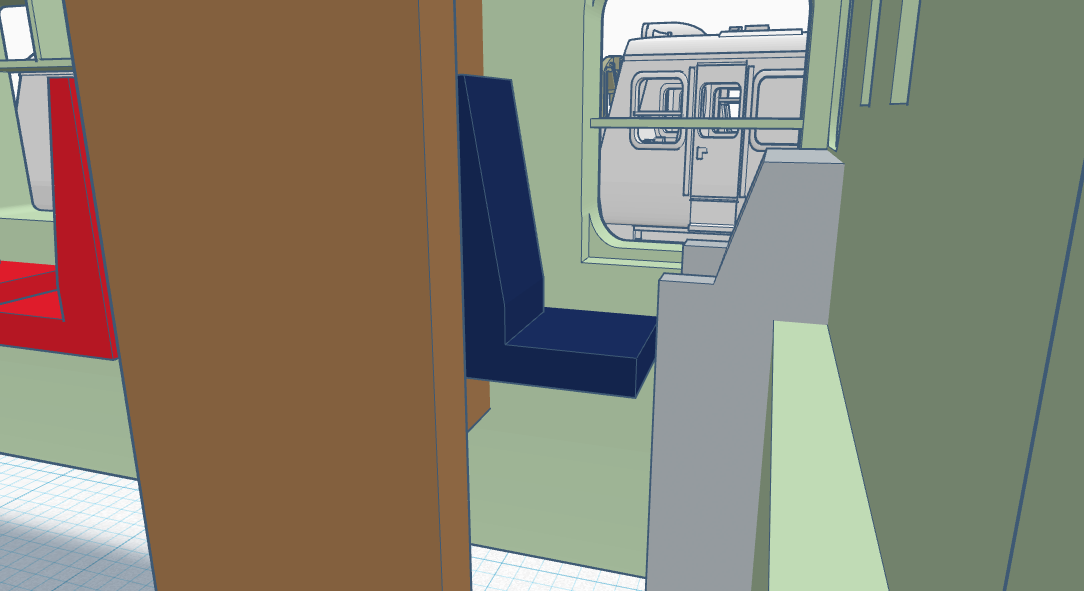
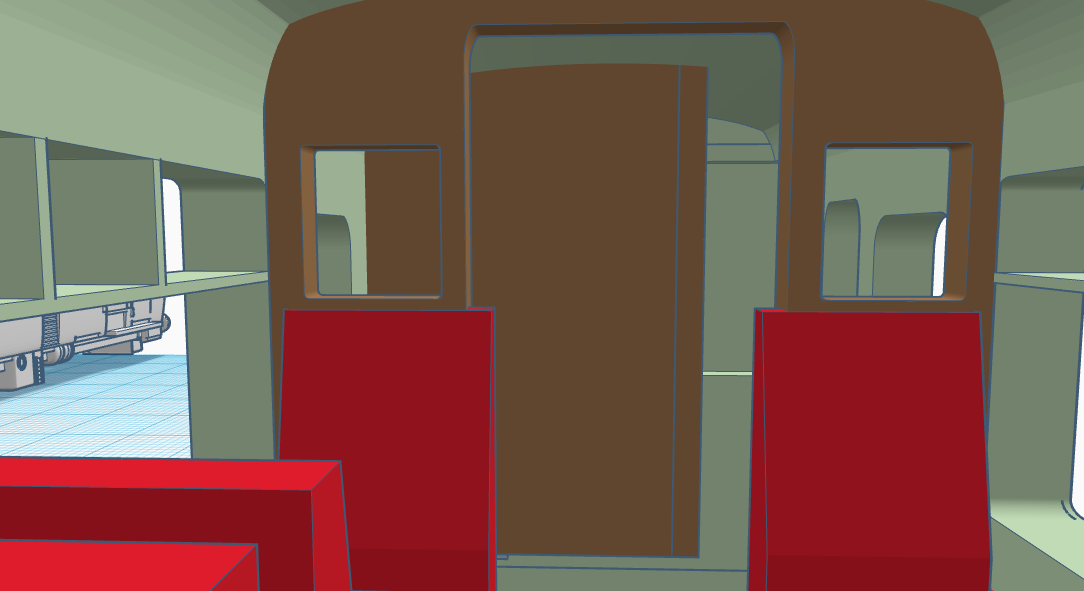
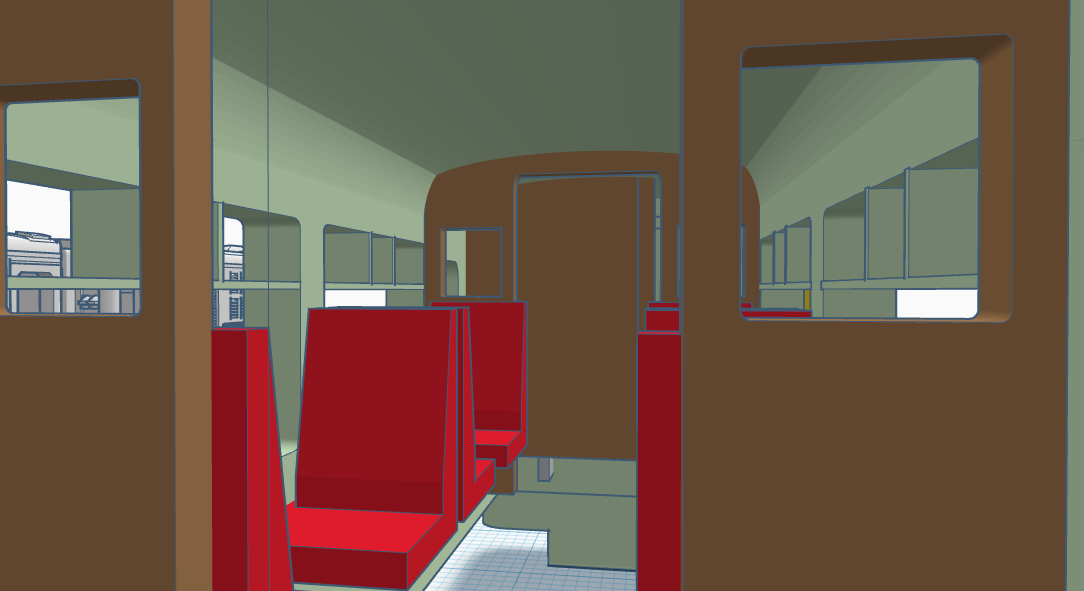
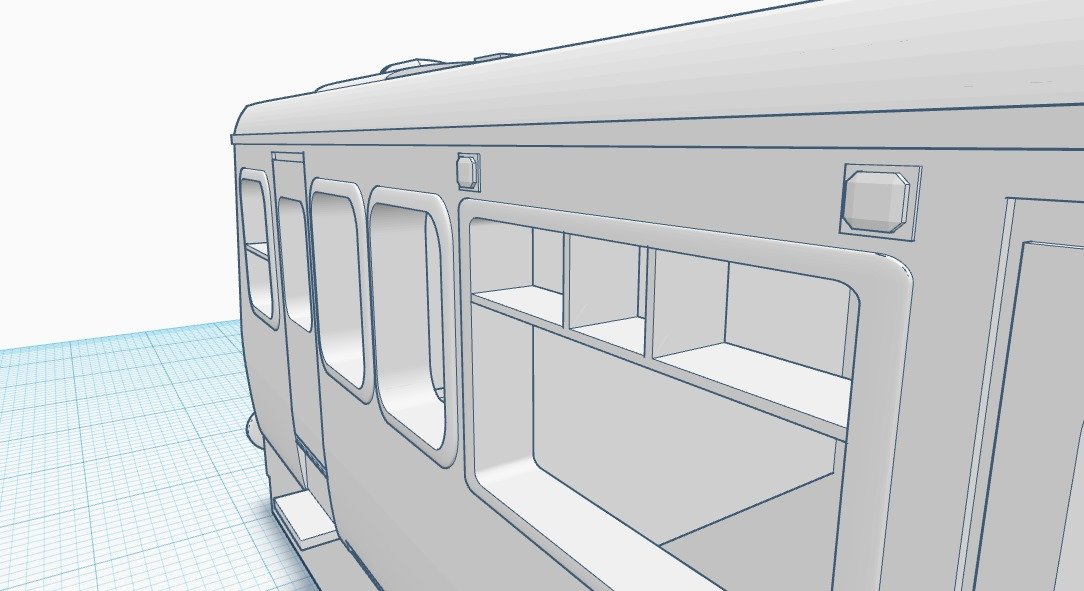
- Adding & adjusting the basic interior details, including passenger saloon area & cab area
TSO
After completing the DTSO, I made a duplicate of it & alike the DTSO, stripped it back down & built it up as the TSO.
The work on the TSO is complete!Finished!
The 3D modelling, for now at least for the Baby 80 is now complete, which means I can now send the stl files to the local printers to get a resin print of the Baby 80. Yay!
Once it's printed, I can get painted & do some testing. In future, I'd love to add lights & DCC sound using the HM7000, but we'll just have to await & see....Here's a few screengrabs, enjoy
")
-
3
-
2
-
I occasionally dab into G scale, but my main focus is 00 mainline & 009 'what if' narrow gauge.
-
 1
1
-
-
-
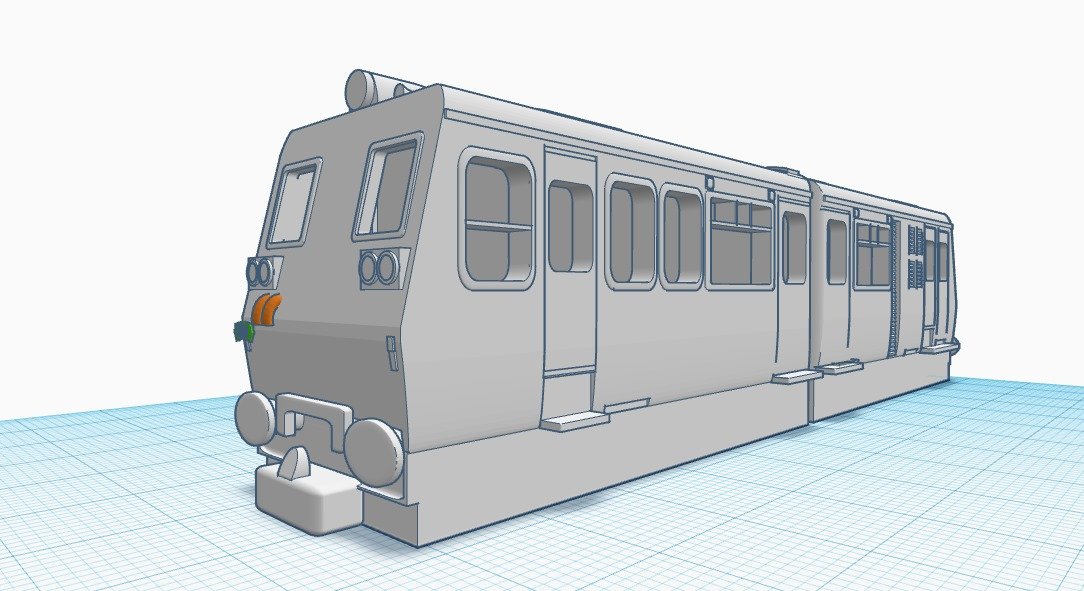
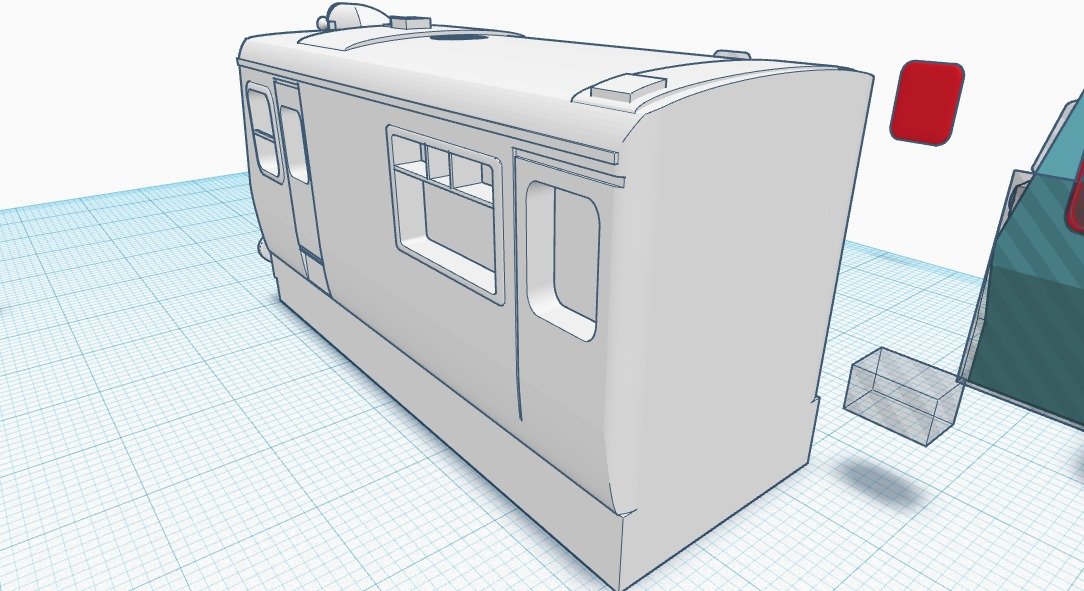
Baby 80 Update:
11/11/2023
The (dreaded) DTSO....
And so it begins! This evening / morning, work on modelling the DTSO began.
This was done by taking a copy of the PC & stripping it back to only the elements that is required & then building onto that, saving having to redo alot of the work, but as of anything in Tinkercad, this takes time.
After a few hours of work, we've got ourselves a baby 80 DTSO bodyshell.
I've had to make two of the windows smaller than I would have liked, but this was required to fit them in.... would be really bad if there wasn't a drivers window! It was also to keep the main saloon windows the same as the ones on the PC.
Now that the bodyshell is practically done, it'll be onwards to the chassis, underframe details & basics of interior details.
TSO??
As the DTSO would require some, but little, modifications, if time is given between now & Monday, i might consider a baby TSO too.... but we'll see!
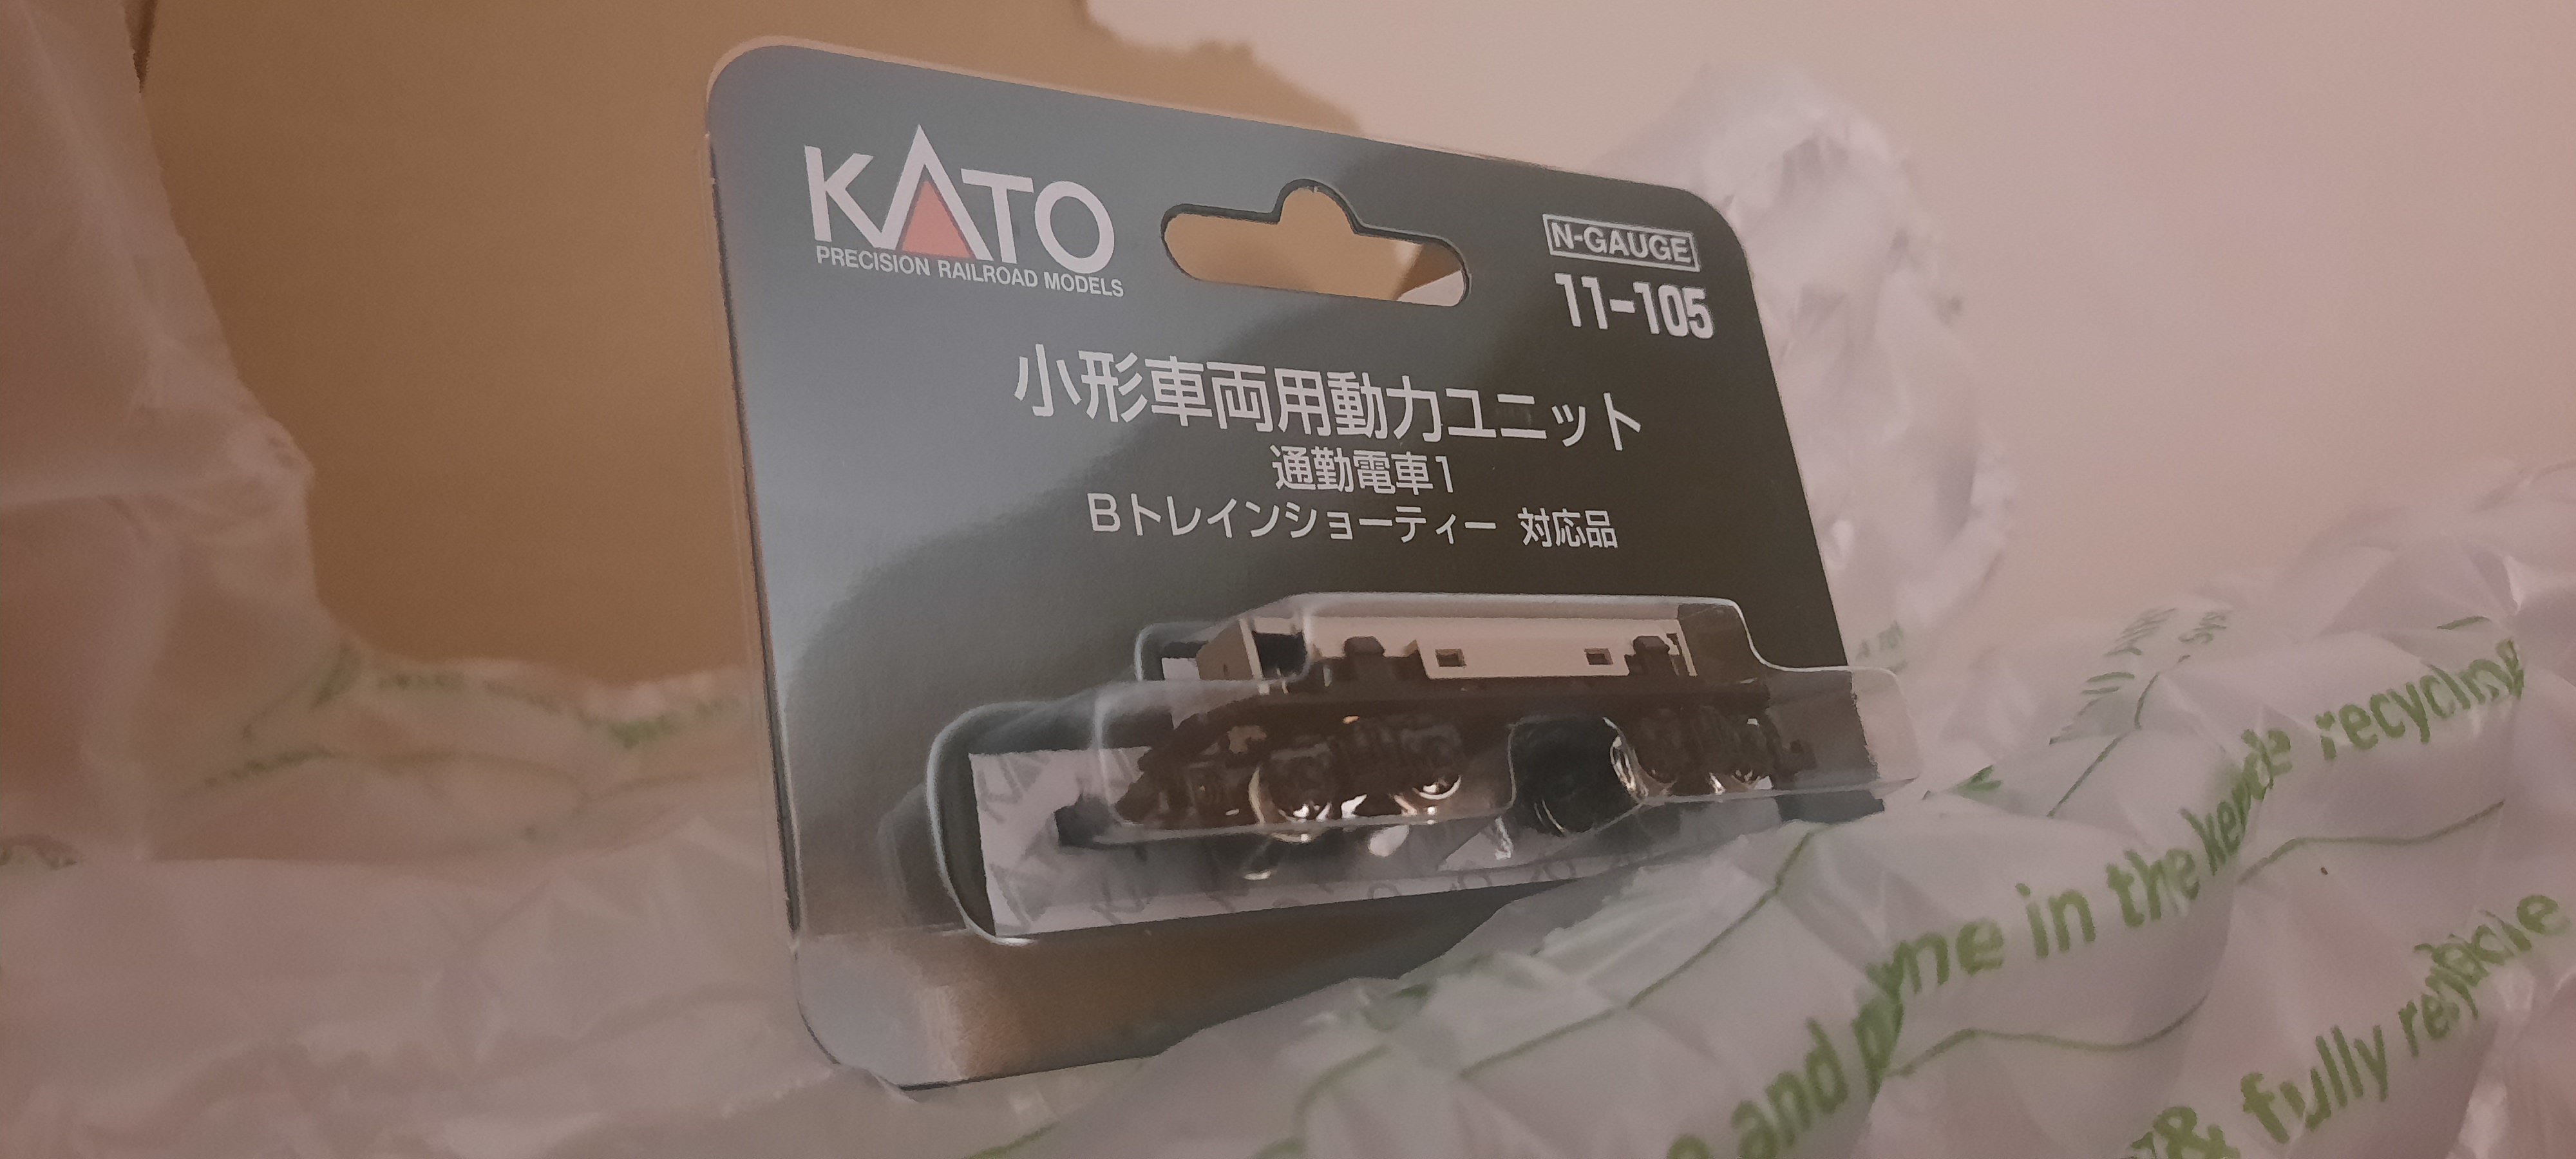
A wee delivery!
Received this err, small, hmmm.... package from hattons with the first of a few Kato 11-105 chassis. Only ordered one for now to test the print of the baby 80 when it eventually gets printed. Im also not made of money!


Anyways, enjoy!
-
2
-
-
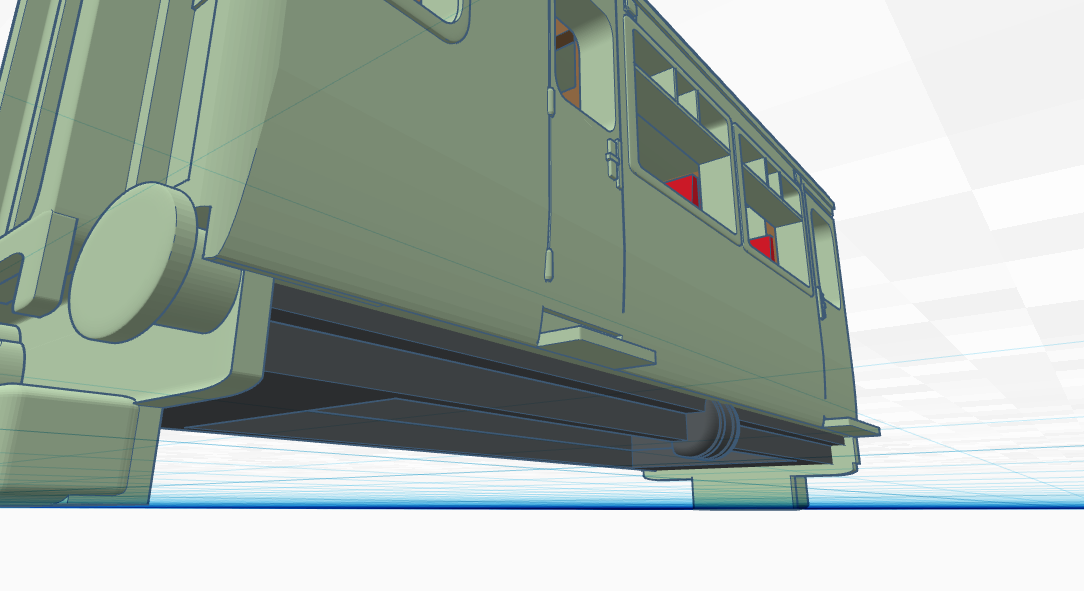
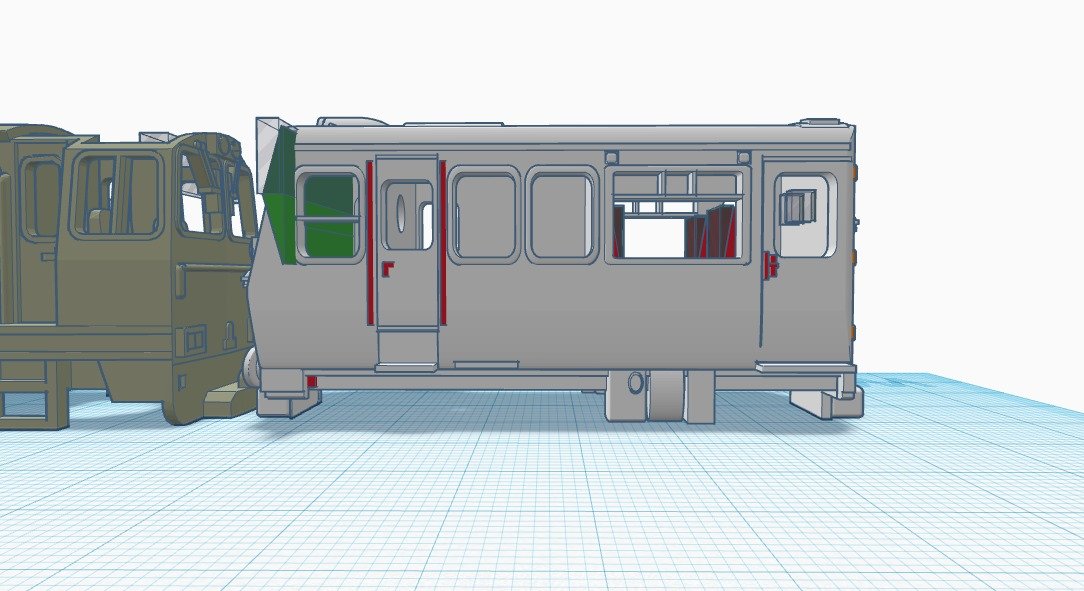
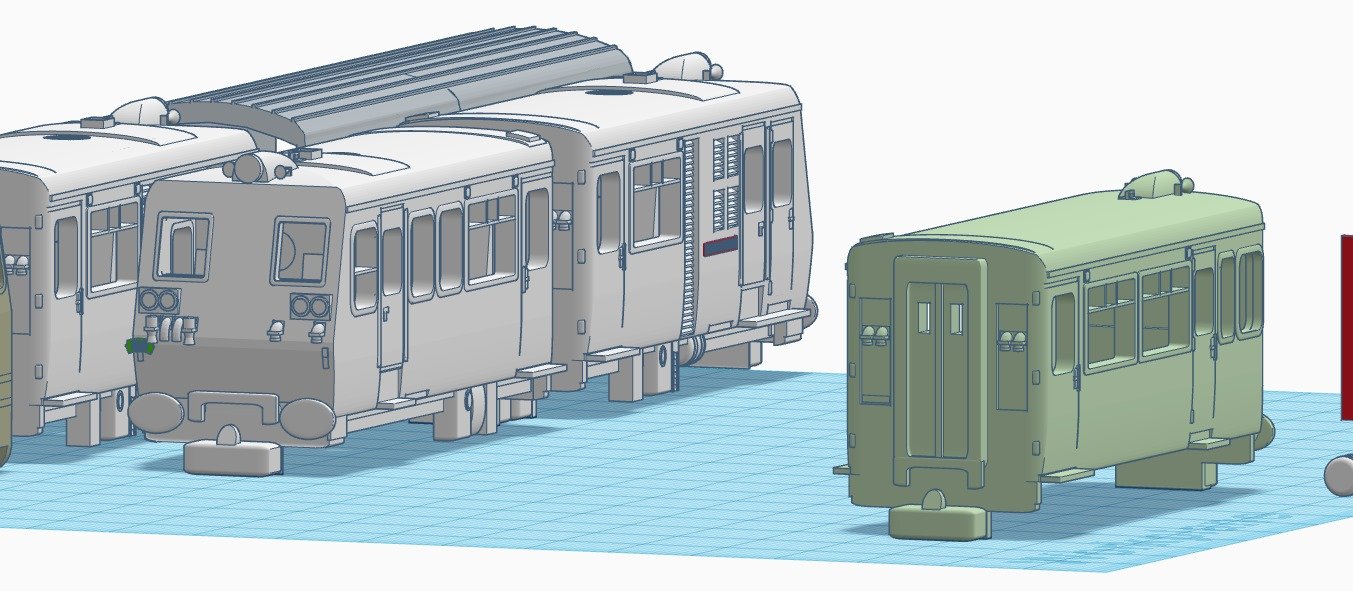
Baby 80 Update:
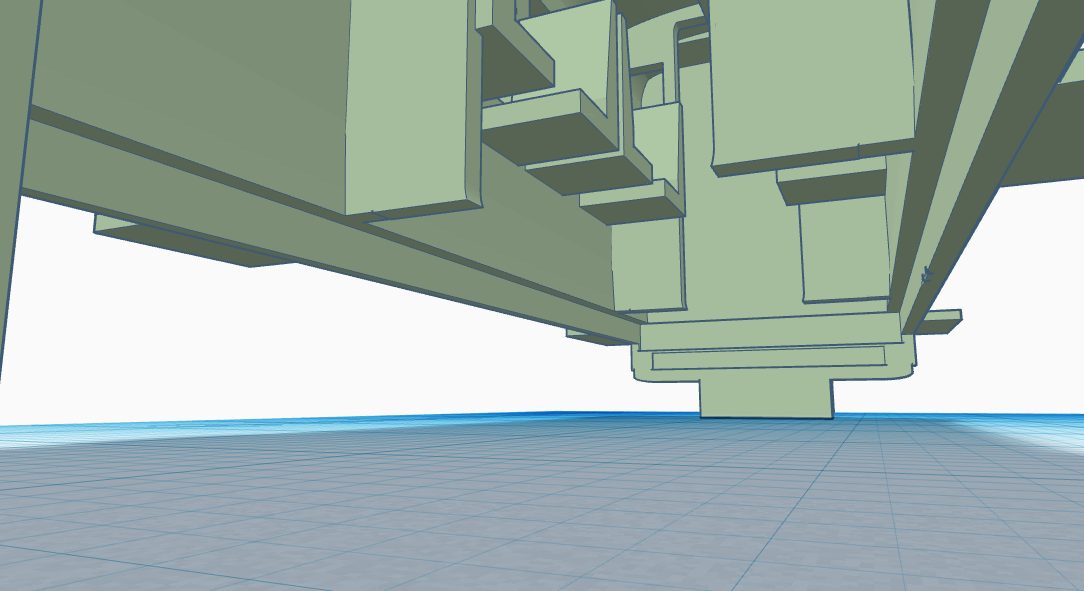
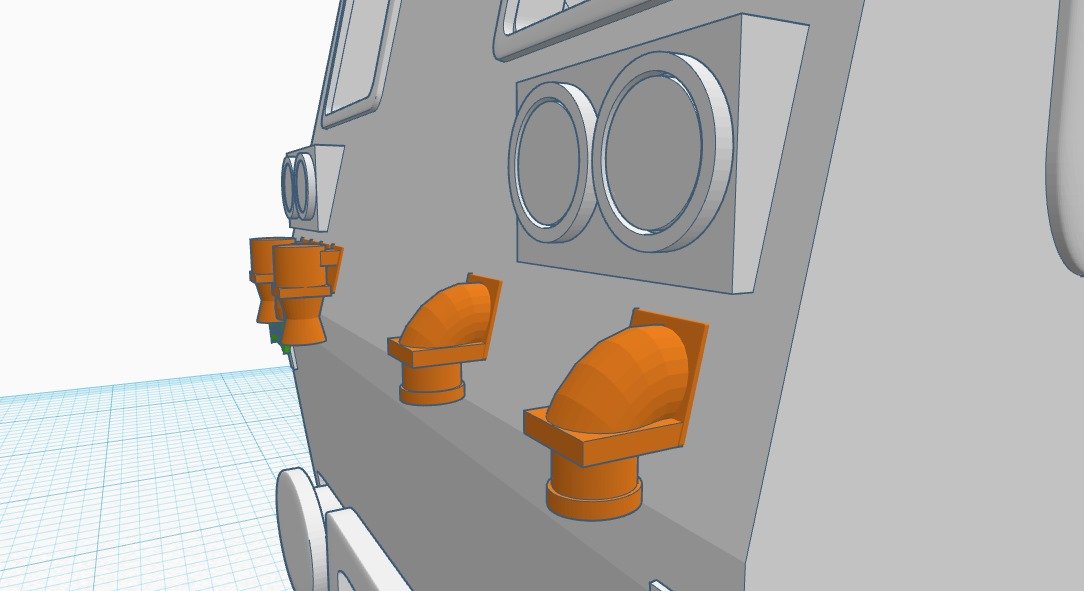
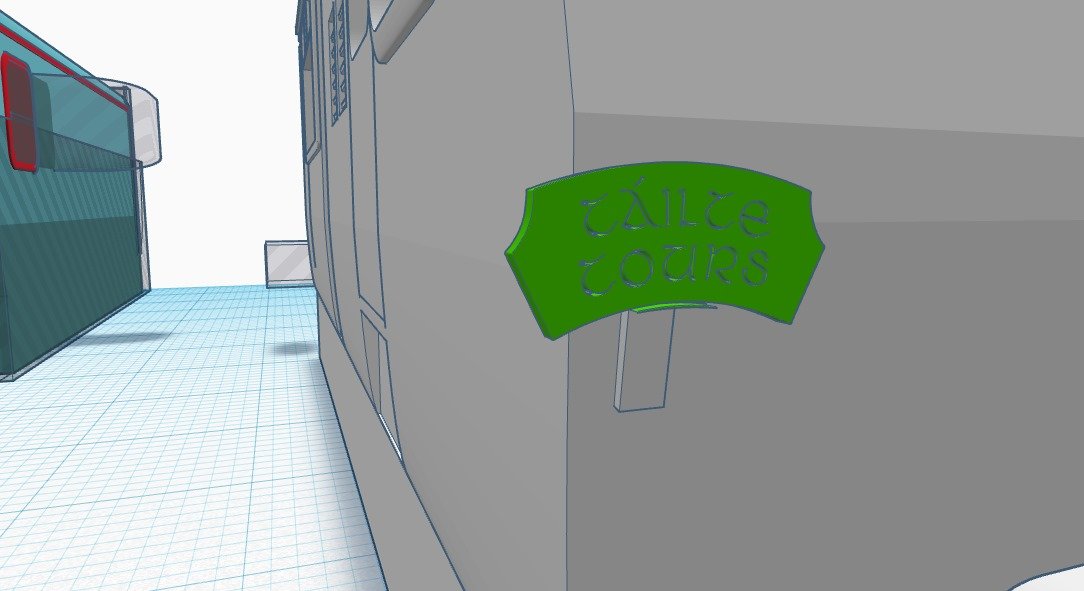
08/11/2023 - 09/11/2023After a days break from the project (& life in general), I spent a few hours working on the 80 PC this evening / morning adding some more details, these details include the following:
- Underframe details; removing unnecessary materials that isn't there, adding fuel tanks, air tanks & that curved thingy, adding the rear coupler
- Rear details; door hinges, rear gangway, rear cut-outs, rear MU sockets
- Side details; handrails, door handles, door hinges
- Inside details; basic seating in saloon, basic seating in drivers cab, basic drivers desk & window cut out from drivers cab to engine room
Other items that was added was name plates to one of PCs (you'll see this after December) & an additional chassis to allow the body to sit on the Kato chassis - this chassis is the same one Dave has on their mini version of the Ffestiniog railway’s rebuilt Funkey ‘Vale of Ffestiniog’ which can be found here....
Apart from that, I've basically been giving it a tidy.
The powercar is done!
Yup. That was the easy bit! The power car is done, now onwards to the dreaded DTSO, which i'm hoping to start tomorrow (Thursday) & have it designed for next week so that the two can be sent to the printers & be printed in resin. Woow!
-
2
-
1
-
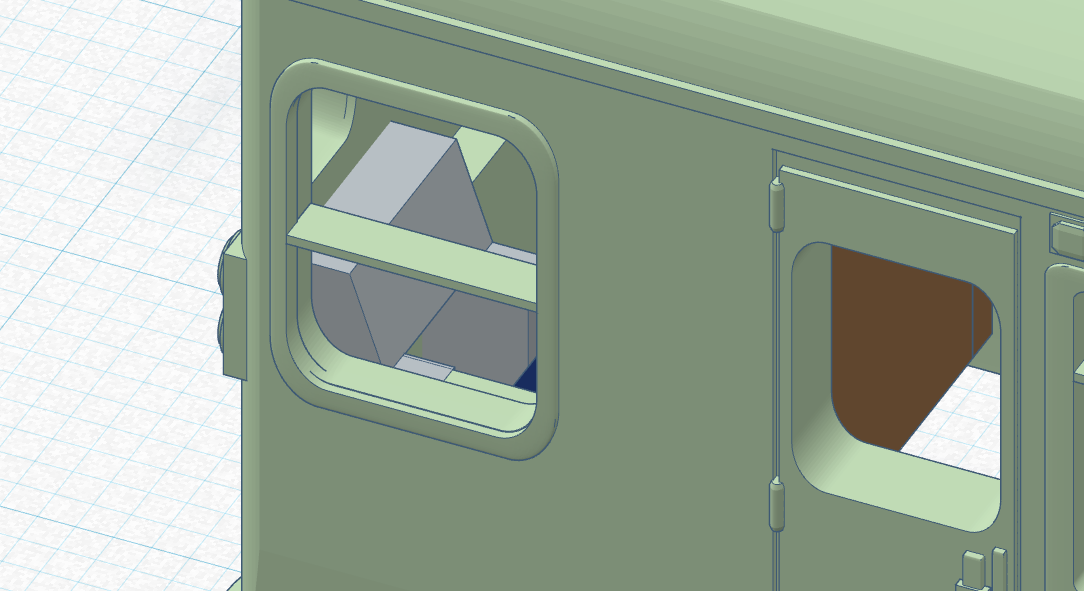
Baby 80 Update:
06/11/2023 - 07/11/2023
Did anyone else spot my mistake!?
After hours of looking through footage & photos of the 80 class, it only occurred to me when i saw DCDR's latest image of 8090 on Facebook that i had forgotten a door on the right side, instead, i had placed a large window.... after some time & struggling, got it fixed!
Started adding underframe details, such as running boards etc.
Finally got the MU sockets done with the way i like them, although without the cable, this will have to be added after the print.
CDIL lamps have been added, as has engine room divides in the railcar.
Engine room windows on left side has also been added.... need a fake mini engine now
Slowly but surely getting through it!
Have also ordered the Kato 11-105 chassis from Hattons in preparation for the print.
-
3
-
-
On 5/11/2023 at 8:06 AM, Galteemore said:
Very interesting. Reminds me of Bandai Shorty trains…..https://www.japanrailmodelers.org/pages/modelingjapan/btrainshorty-pt1.html - photo from website shows how short they are compared to a scale model. Allows long trains and tight - very tight - curves!

Ooh wow! Never seen these before....
Mines based on a 'What if' mainline narrow gauge, similar idea, but in 1/76.
Very tempted to purchase a few of those to run on the future layout, super cute!
-
1
-
-
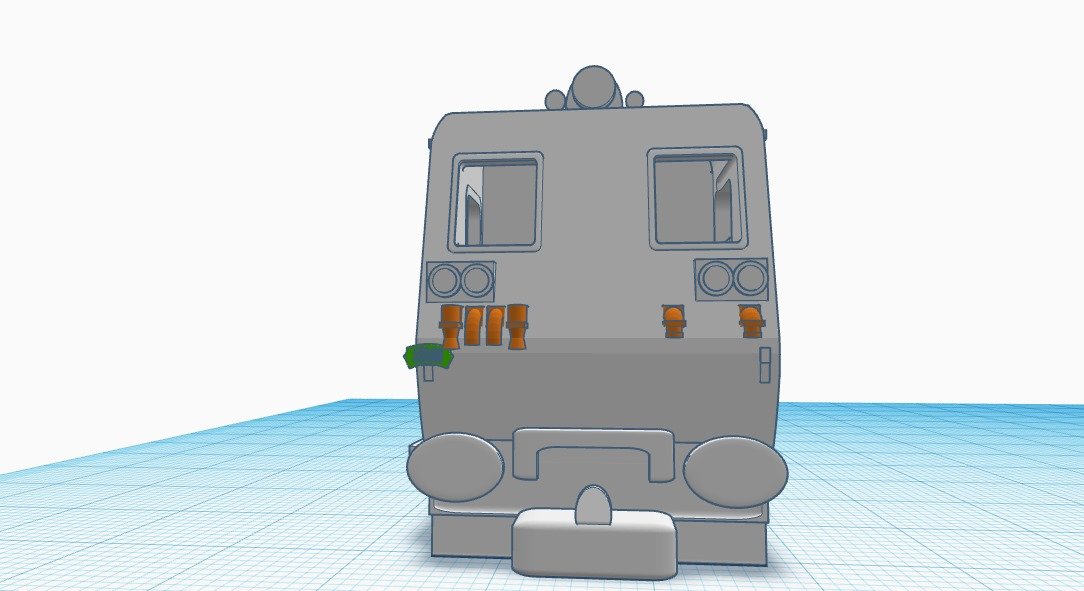
Baby 80 Update: 05/11/2023 - 06/11/2023
I've continued work on the baby 80 powercar & have got a few more details added, these include:
- Bufferbeam & buffers
- 009 coupler
- Right side engine room panels
- Drivers & passenger doors
- Drivers & passenger saloon windows
- Lamp Irons on front
- Roof detail including the adjustment of the engine room panel, filling the gap between the headlamp & body, adding fan grill behind engine room panel, adding panel & box thingy details above passenger doors.
- Adding curve at the rear of the PC on left & right sides
There's still a fair bit more to do on the PC before moving onto the dreaded DTSO, such as underframe details, MU sockets, rear details (gangway etc) & additional details like door handles, handrails, steps & CDIL lamps.
But it's alot of fun & i can't wait until the end result!
-
3
-
-
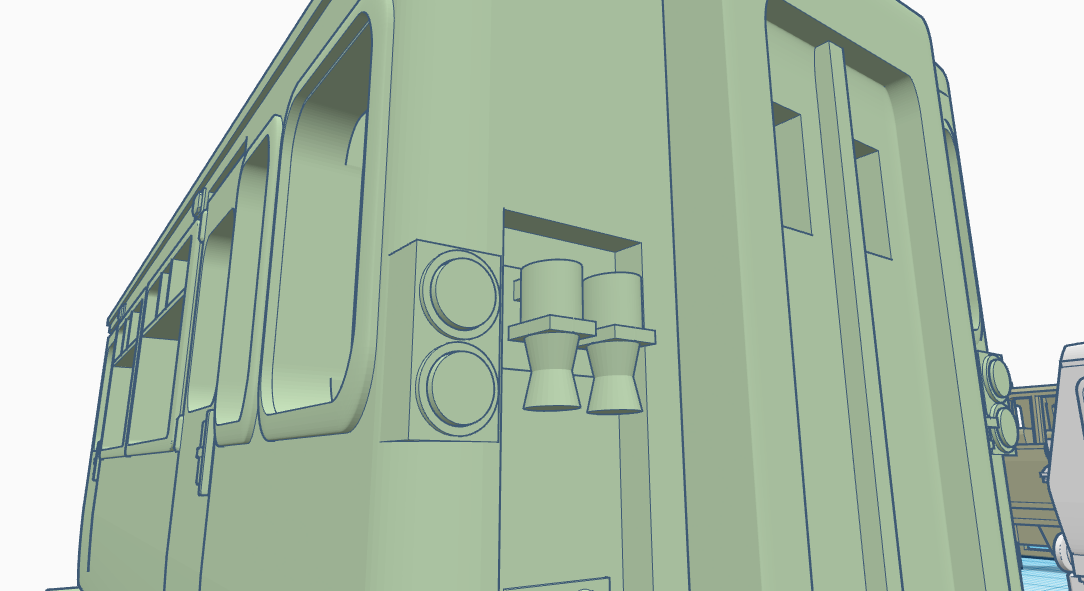
Baby 80 Update:
04/11/2023 - 05/11/2023
This evenings progress of the 80 concludes of the creating the 80 PC, the 80 PC getting front window frames, marker lights & headlamp, along with the radio thingy-doda, the engine room roof panel & exhaust & not least of all, the two air-horns!
Hoping to make some more progress on the 80 PC tomorrow. Quite happy how it's turning out so far, especially learning some new ways in tinkercad that i've never thought of using before.
Going to do the underframe last....
-
3
-
-
Welcome to the workbench for the 'Baby 80 Project'!
This thread will follow the progress of the baby 80, from start of design till finish.
The baby 80, alike the baby 59 project, is a mini narrow gauge 80 class railcar that runs on 009 for the future layout(s) & dioramas that I've planned.
These railcars will be designed to run on the Kato 11-106 chassis with DCC sound, a similar size & level of detail to the fantastic & marvellous models by Dave at Dave's Railway Bits.
The DCC sound will be an after project in its-self, as it'll be using Hornby's / Arnolds new HM 7000 for N gauge which yet hasn't been released - Although, I would like to try the one for TT:120 to see if it'll fit....
_____________
Tonight, we start off in Tinkercad & this is the progress that we've made so far!
Yes, it's only the basic bodyshell, but not bad for someone with quite the limited 3D modelling skillset, if i do say so myself.
As these are narrow gauge versions of the prototype, I will be using #Rule1 with a little bit of creative freedom & pulling out my creative license, so, please no moaning that it's missing that thingymabober or this whatsacallit etc!
Enjoy & do follow along!
I'm hoping to have the first print by December....
-
6
-
-
14 minutes ago, GSWR 90 said:
Important to remember that there is a ‘hump’ between Market Street and the railway – so even though the Street is dry the railway is still very wet, although the water levels have gone down by about 2 foot or so
Indeed!
Hopefully over the next few days it'll decrease even more
-
 1
1
-
-
8 hours ago, Horsetan said:
I see Joe Brolly doing his bit for international relations!
I thought it was talking of an umbrella! You can understand my confusion
17 hours ago, tonybonneyba said:Some good news, the DfI has started pumping the flood water out of Downpatrick....
https://m.facebook.com/story.php?story_fbid=718790620284869&id=100064618122842
Update from Downpatrick....
https://m.facebook.com/story.php?story_fbid=719250543572210&id=100064618122842&sfnsn=scwspmo
-
 2
2
-

.png.899b5ccb4263791badd76dac12857204.png)
.png.b661630fc5180627ca8f63e079917252.png)
.png.c56d40e98f9254f5adc1e40dc0f8524d.png)
.png.c53de9b859d9cd87bd648d339256ce4d.png)
.png.020ceeb344248815c6c5a7df63e5893c.png)
.png.7d3c3ff993239fcd381cf35bb69ba2cf.png)
.png.8e5dfe9f910692cc59d645bd0a587283.png)
.png.b6e79fa2a04f43b1d09b6334bc3157b5.png)
.png.56b81e75541d44acf4a600f5eb792b2f.png)
.png.f20d4289b6b5a0c869bdc612828f02dd.png)
.png.8ba9ac20d9d72671e8943de261f2c80e.png)
.png.bb506a6b7cc2ce2cedd57906e5601e46.png)
.png.6ffbc66bd62aefc146652e9069517448.png)
.png.9f3ef13dc007335d253814b7327bab0c.png)
.png.2703405daed2f04eb1d2d24665e38477.png)


.png.a5bf6c0ddcf66f82a920c8160ed1f6f8.png)
.png.9780c48cf0135d1ee7ebac3c84ff7cf6.png)
.png.bd222d72715b6556ef4d3c372c5ac93b.png)
.png.52b94f69181e0c9c1abb8e0e631b88d2.png)
.png.dbf2753dad8ddf8b99b8ccda99198571.png)
.png.7c2ebb7d1de45f0bae131fc9769806b9.png)
.png.ce4adc2989e37eea5c4cab99687170b3.png)
.png.89f741b4b6e815f4c4c765636aa46d27.png)
.png.a54ebf8e58d43e446e1367b4fbcc6471.png)
.png.d65dc460b6048adddf45141b96172005.png)
.png.73066727f7cead806bb3d5ab85a82e16.png)
.png.2918671a950686e10b97f9dea3e9a053.png)
.png.7b526bc099b99fa55871e85ae4db52eb.png)
.png.011e13f9697e48a743c0bcf3950a0448.png)
.png.fd9a1c7eade96811b2a33b6dafe048ee.png)
.png.c33fc802f3f636c71a31138b09e78c8c.png)
.png.111448a59293335abecd1def53ca6eae.png)
.png.8f6deca39325ff323ad1ac90f9cb43e3.png)
.png.fbb59281c6eabb7856d088198d1e424d.png)
.png.a9219f6e2adb9e70c7426dc4d30e9430.png)
.png.ce3811fdffd81d62acca9d58921f0358.png)
.png.31333a7b00edb3a0b7ef64ef173f1f13.png)
.png.87ceb06fd1fb7fc4f056acde7b8f33d0.png)
.png.88df4b417f7b30045cfe8524edea5095.png)
.png.25a931538d3cc2534ab55bacbac66fd9.png)
.png.99c984d6f902f1cdc91a651fb6a63ca4.png)
.png.c481b82abcd87a06ea0d2ed3f0ab7c20.png)
.png.05dfeae431a02d78352bca2ac4614da0.png)
.png.1925051a6f88cf01f8f7ba814da41c31.png)


.png.a9d47f5d721a74159bfd21d240945238.png)
.png.bf77923a6df13803a203299e0030ddc0.png)
.png.a51413ed7f1305971e767b20d384a987.png)
.png.ece7e1e03f72363a2003bef3fd0b2773.png)

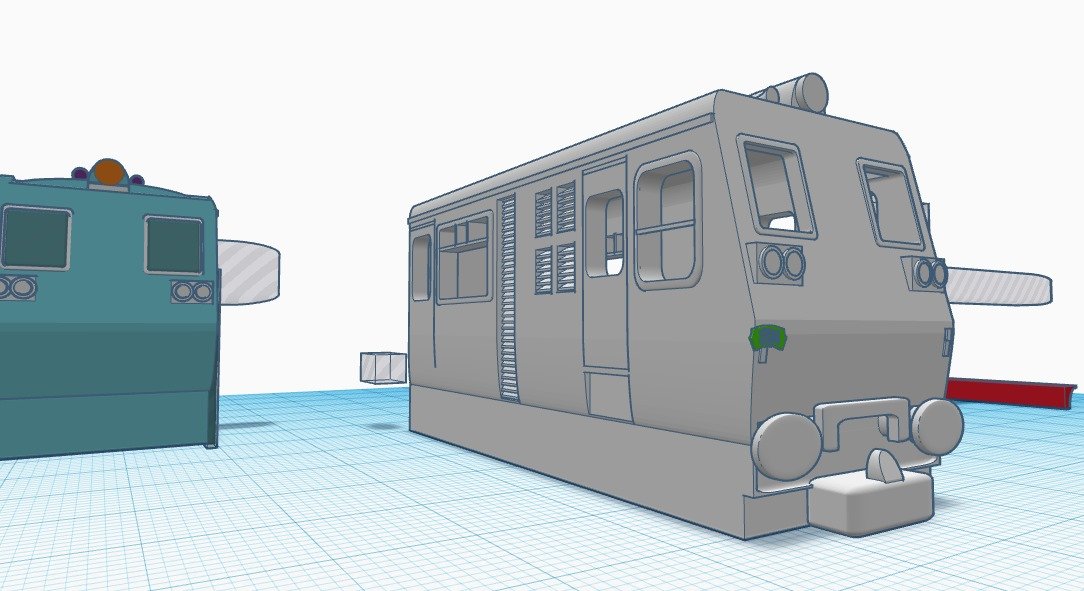
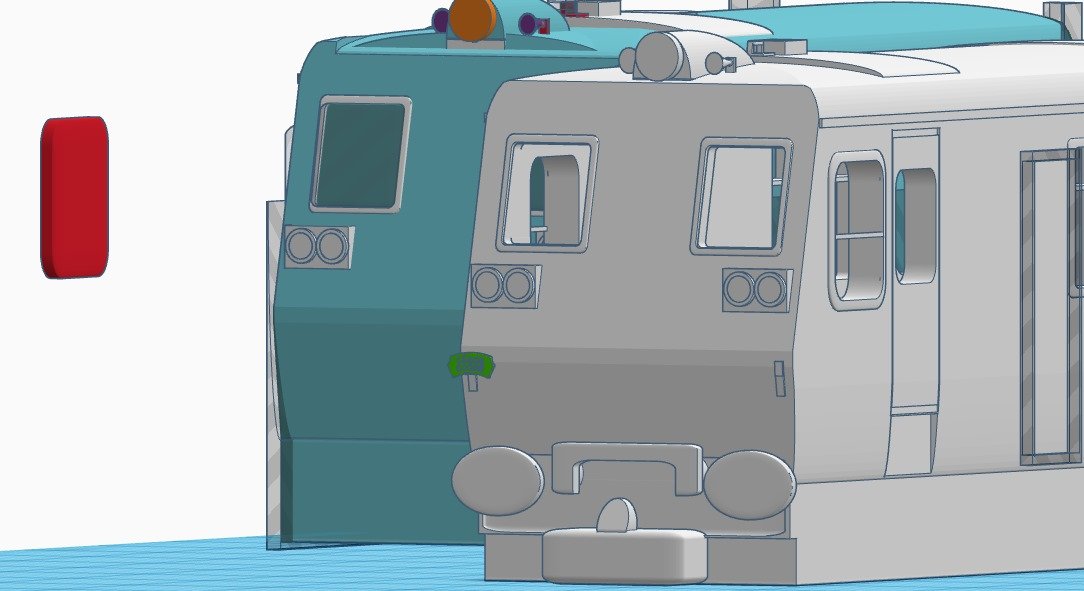
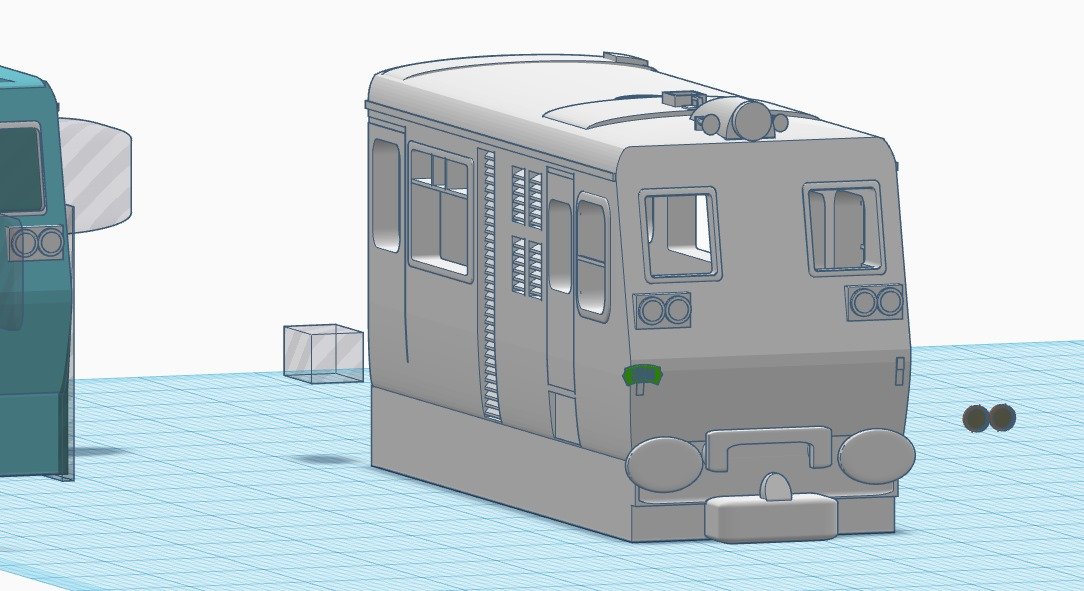
Baby 80
in Workbench
Posted
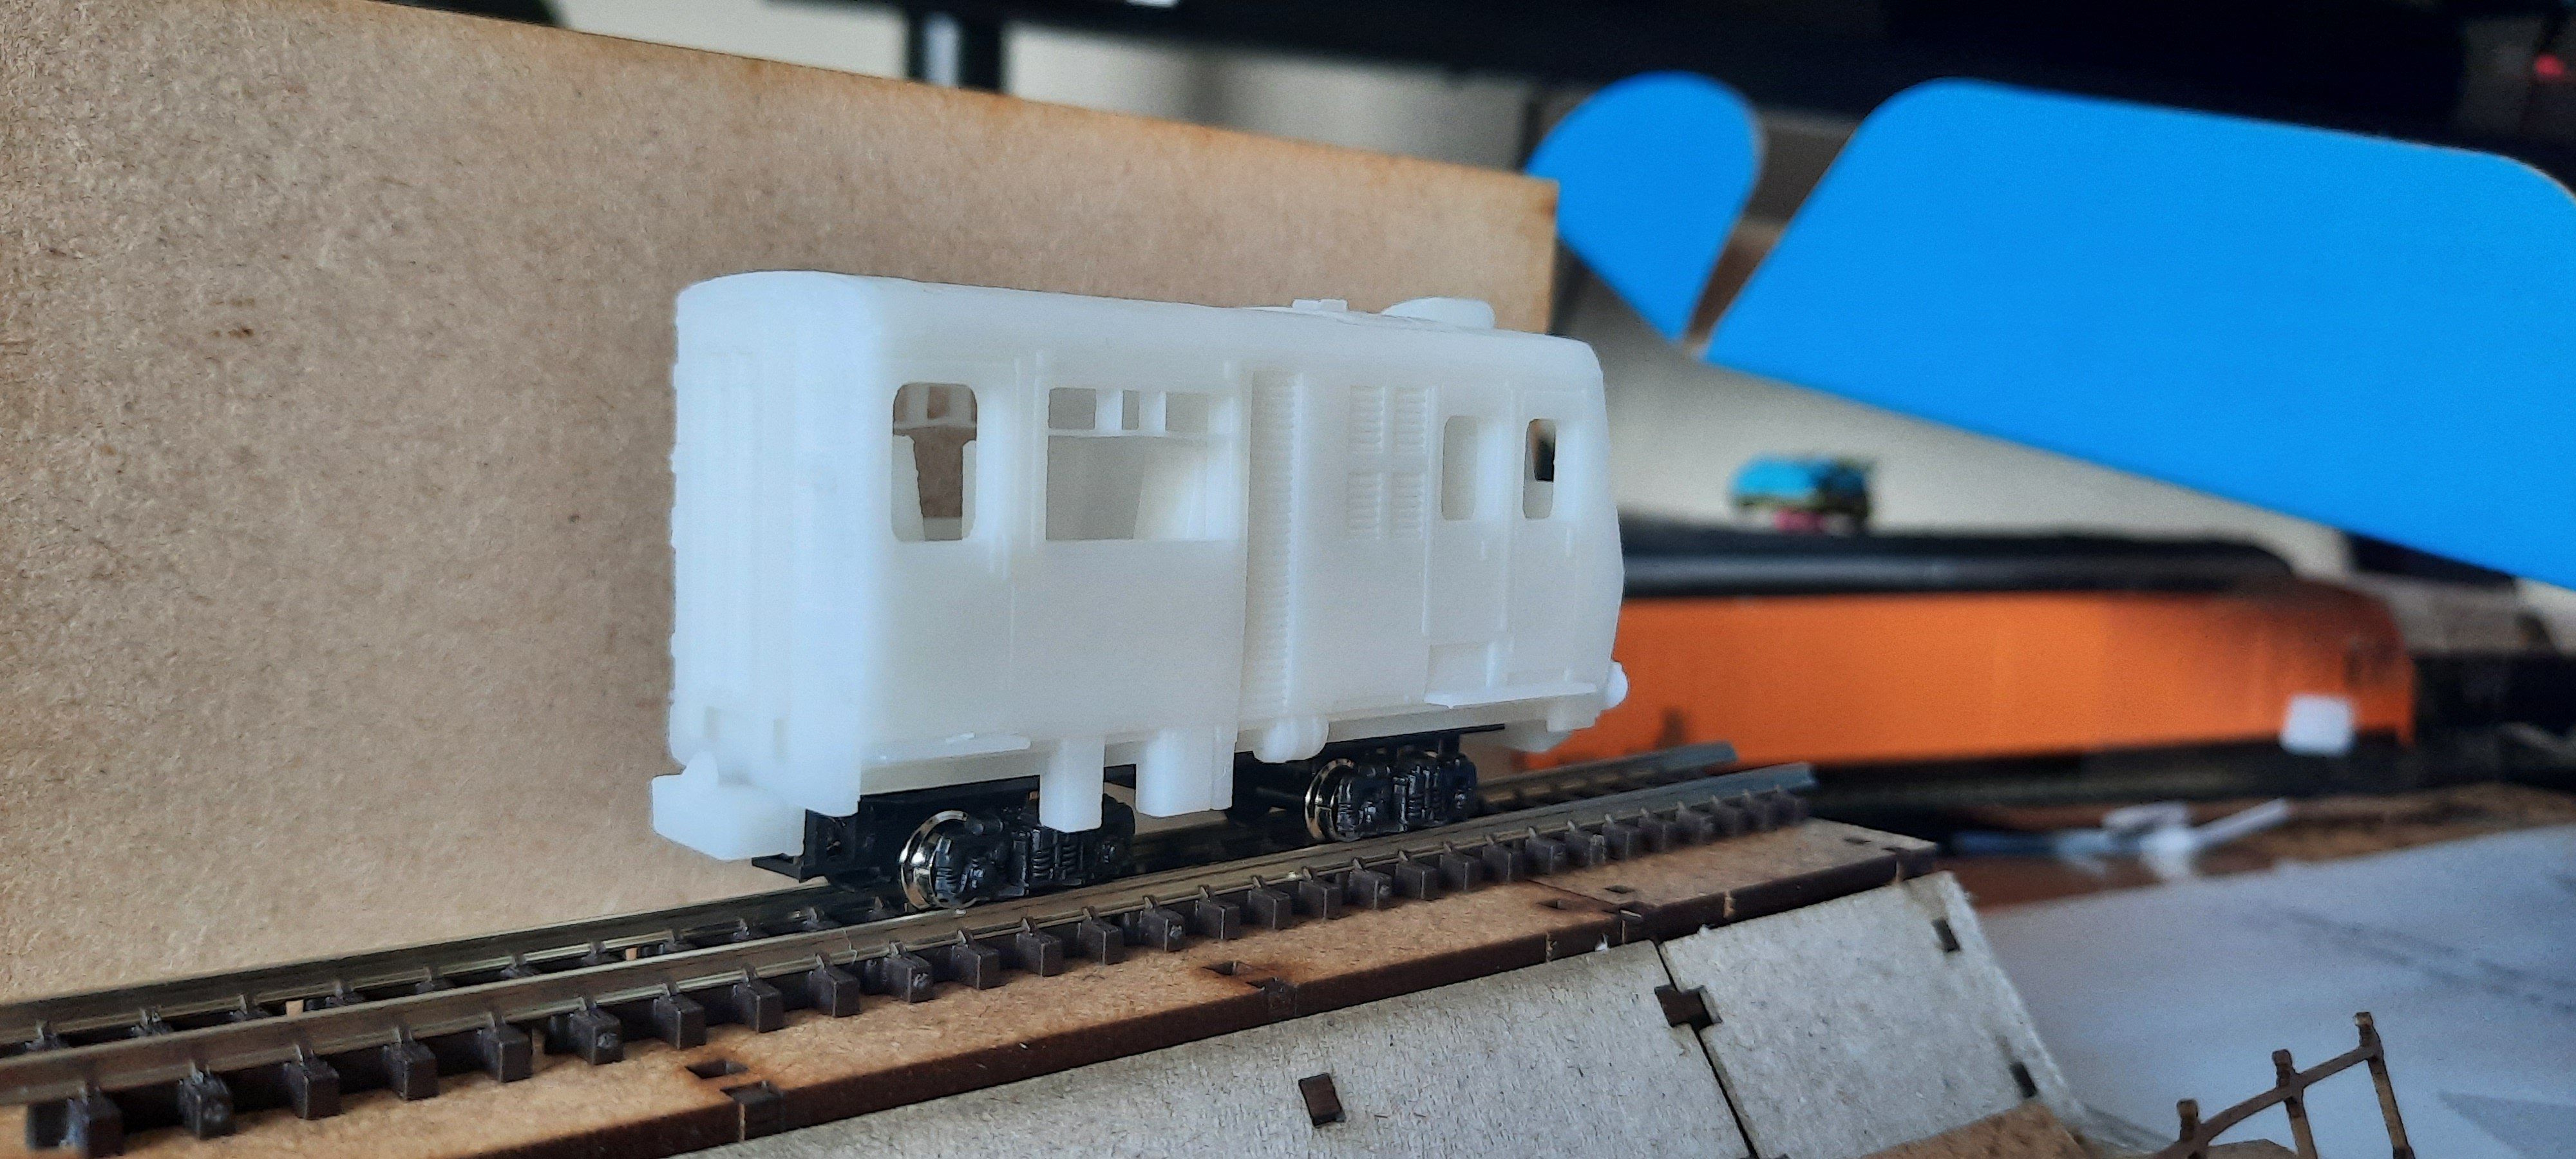
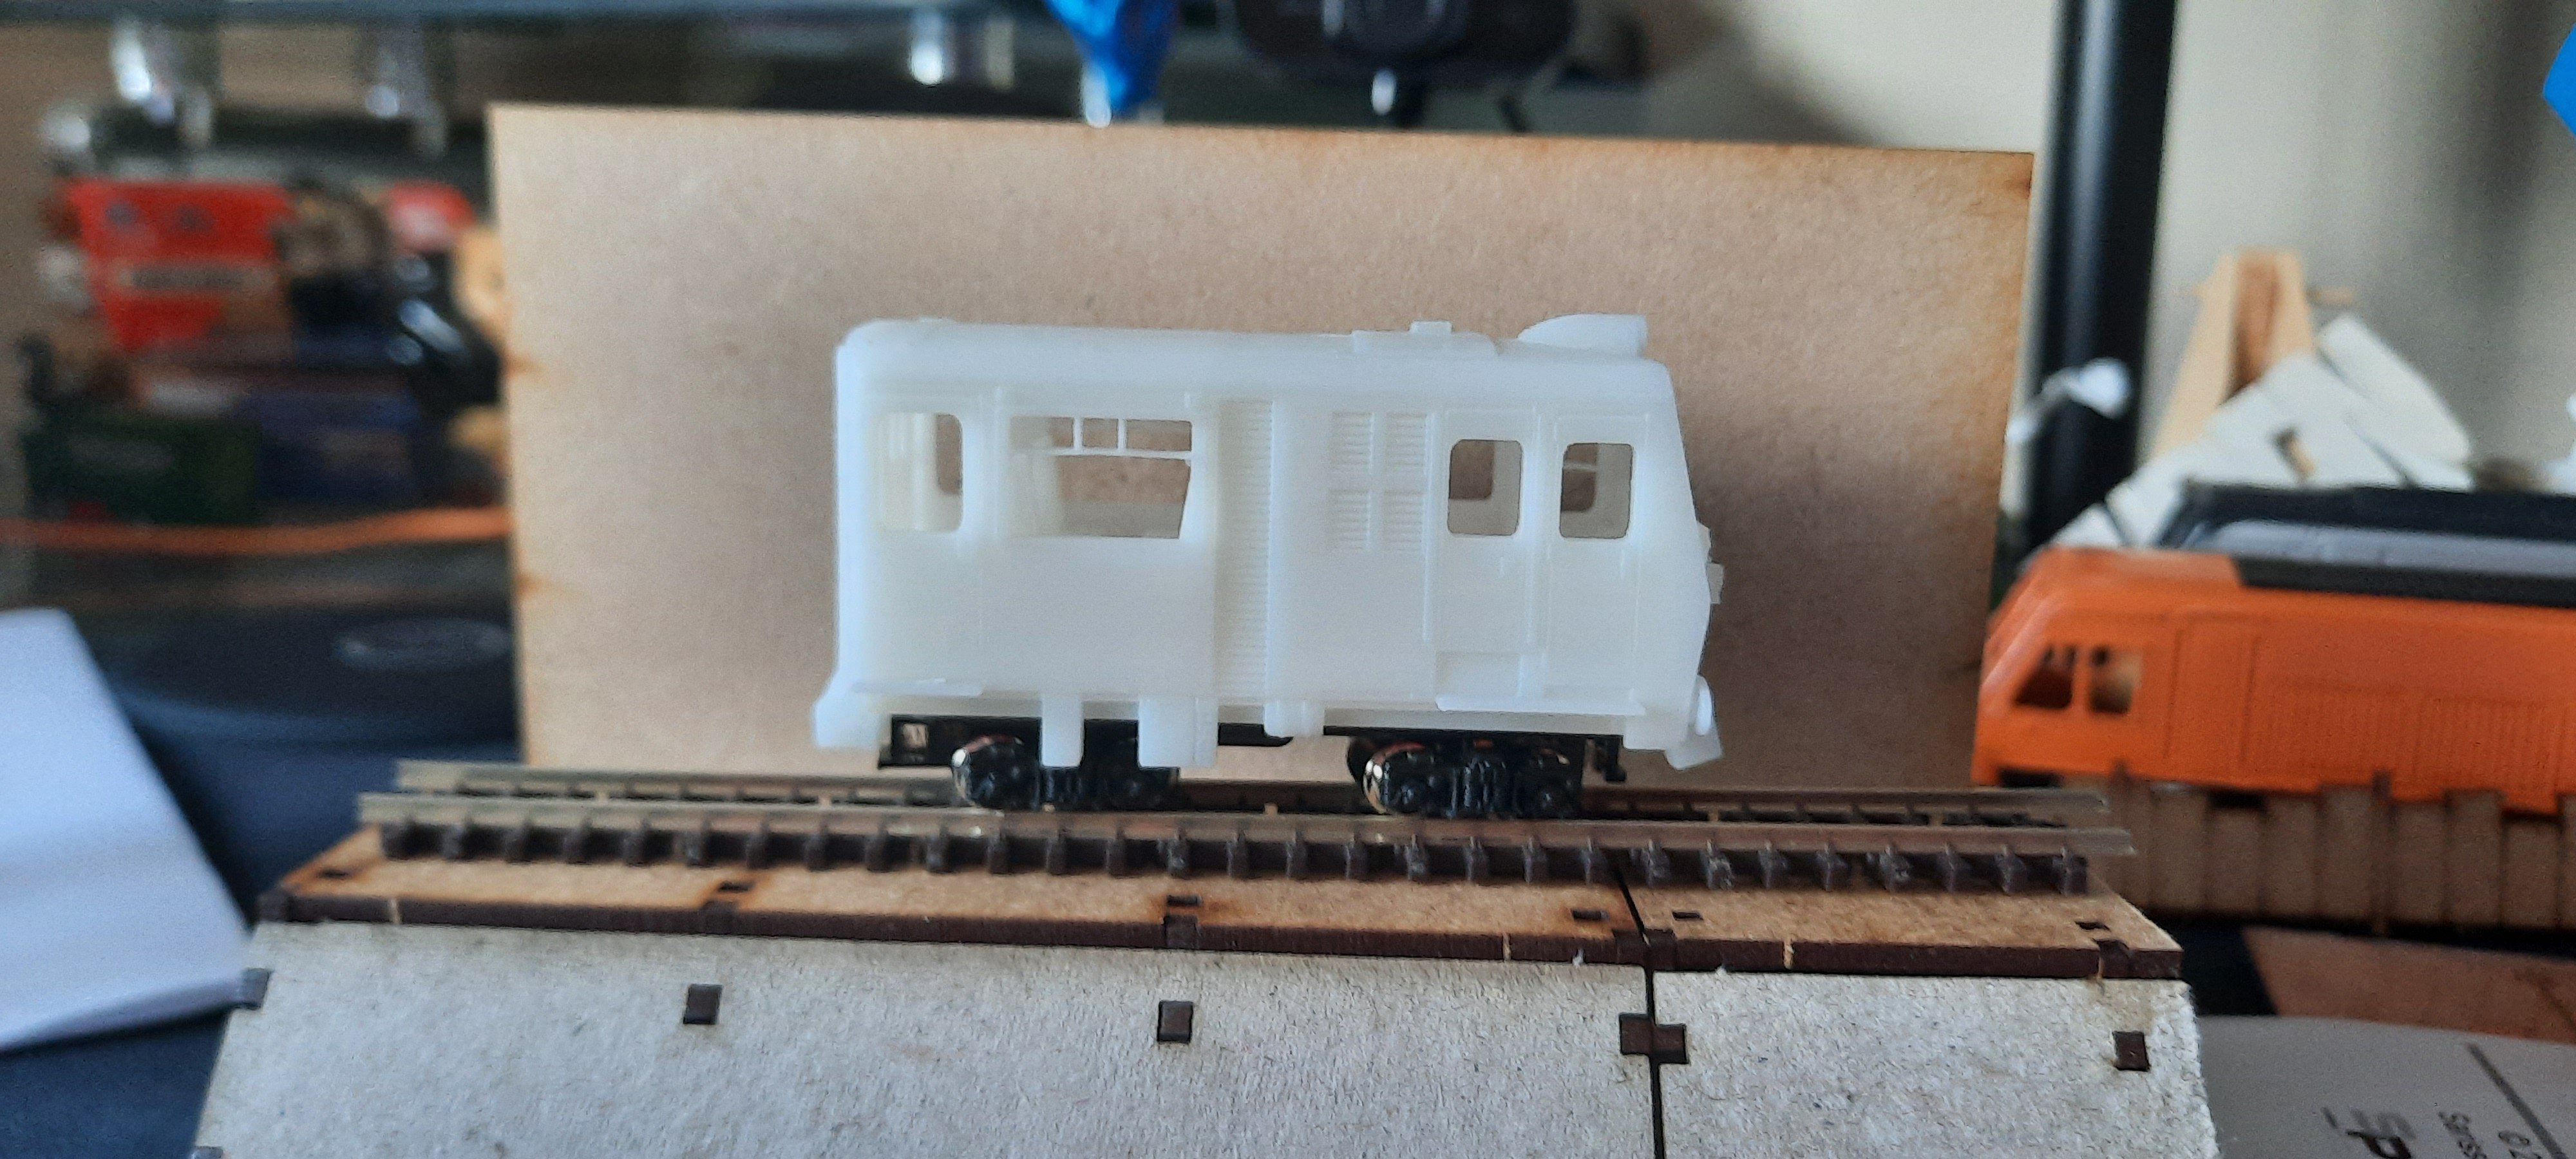
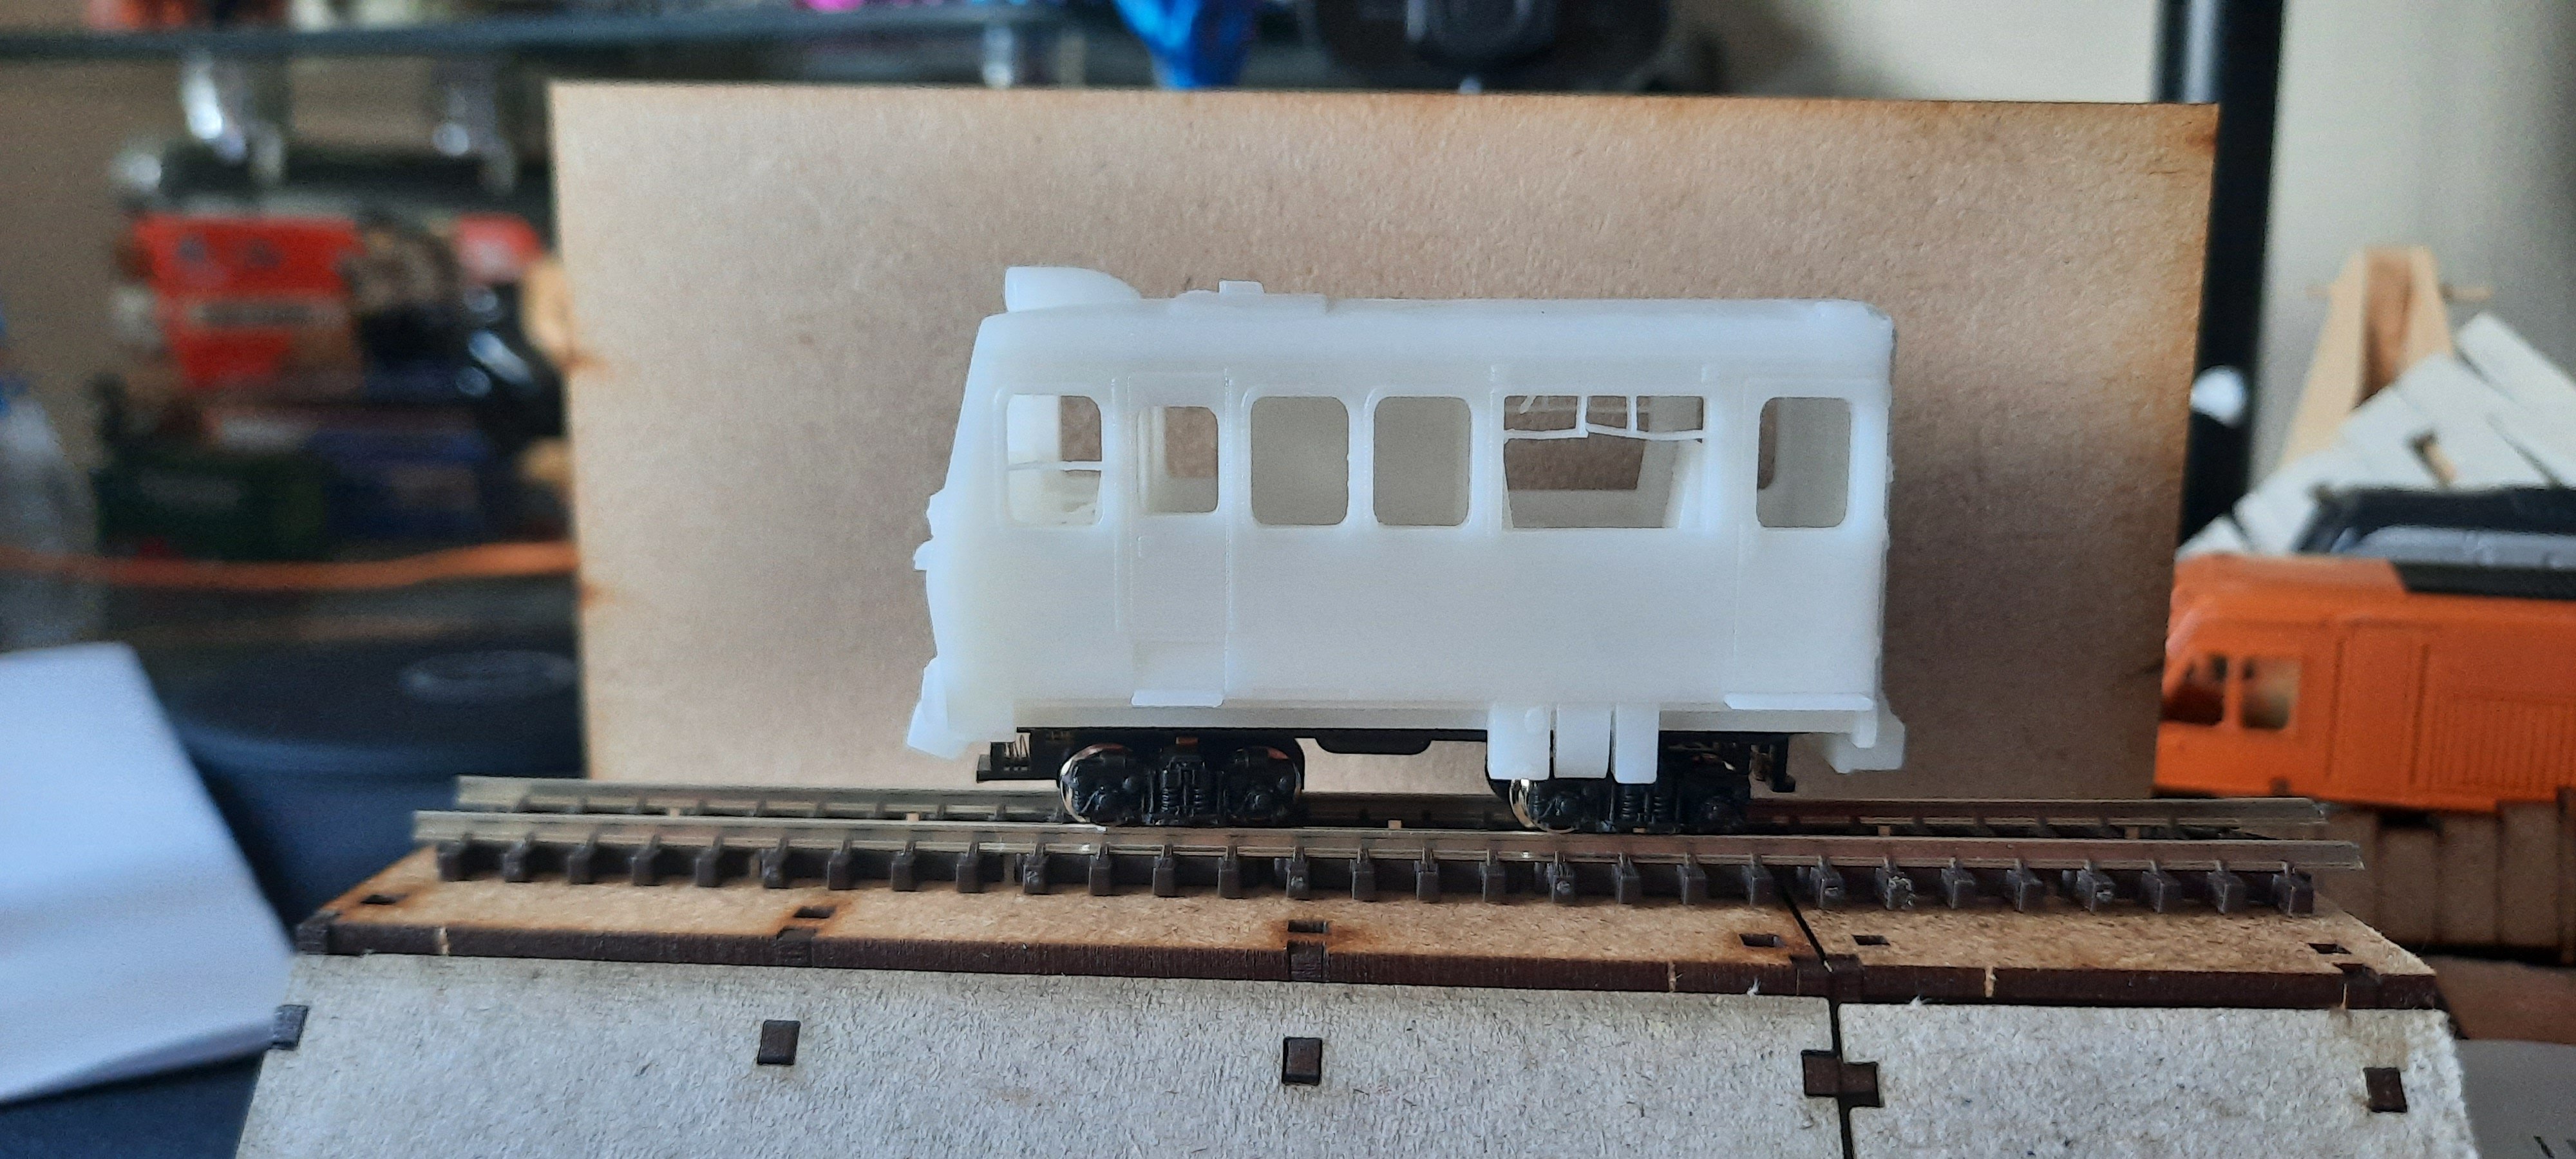
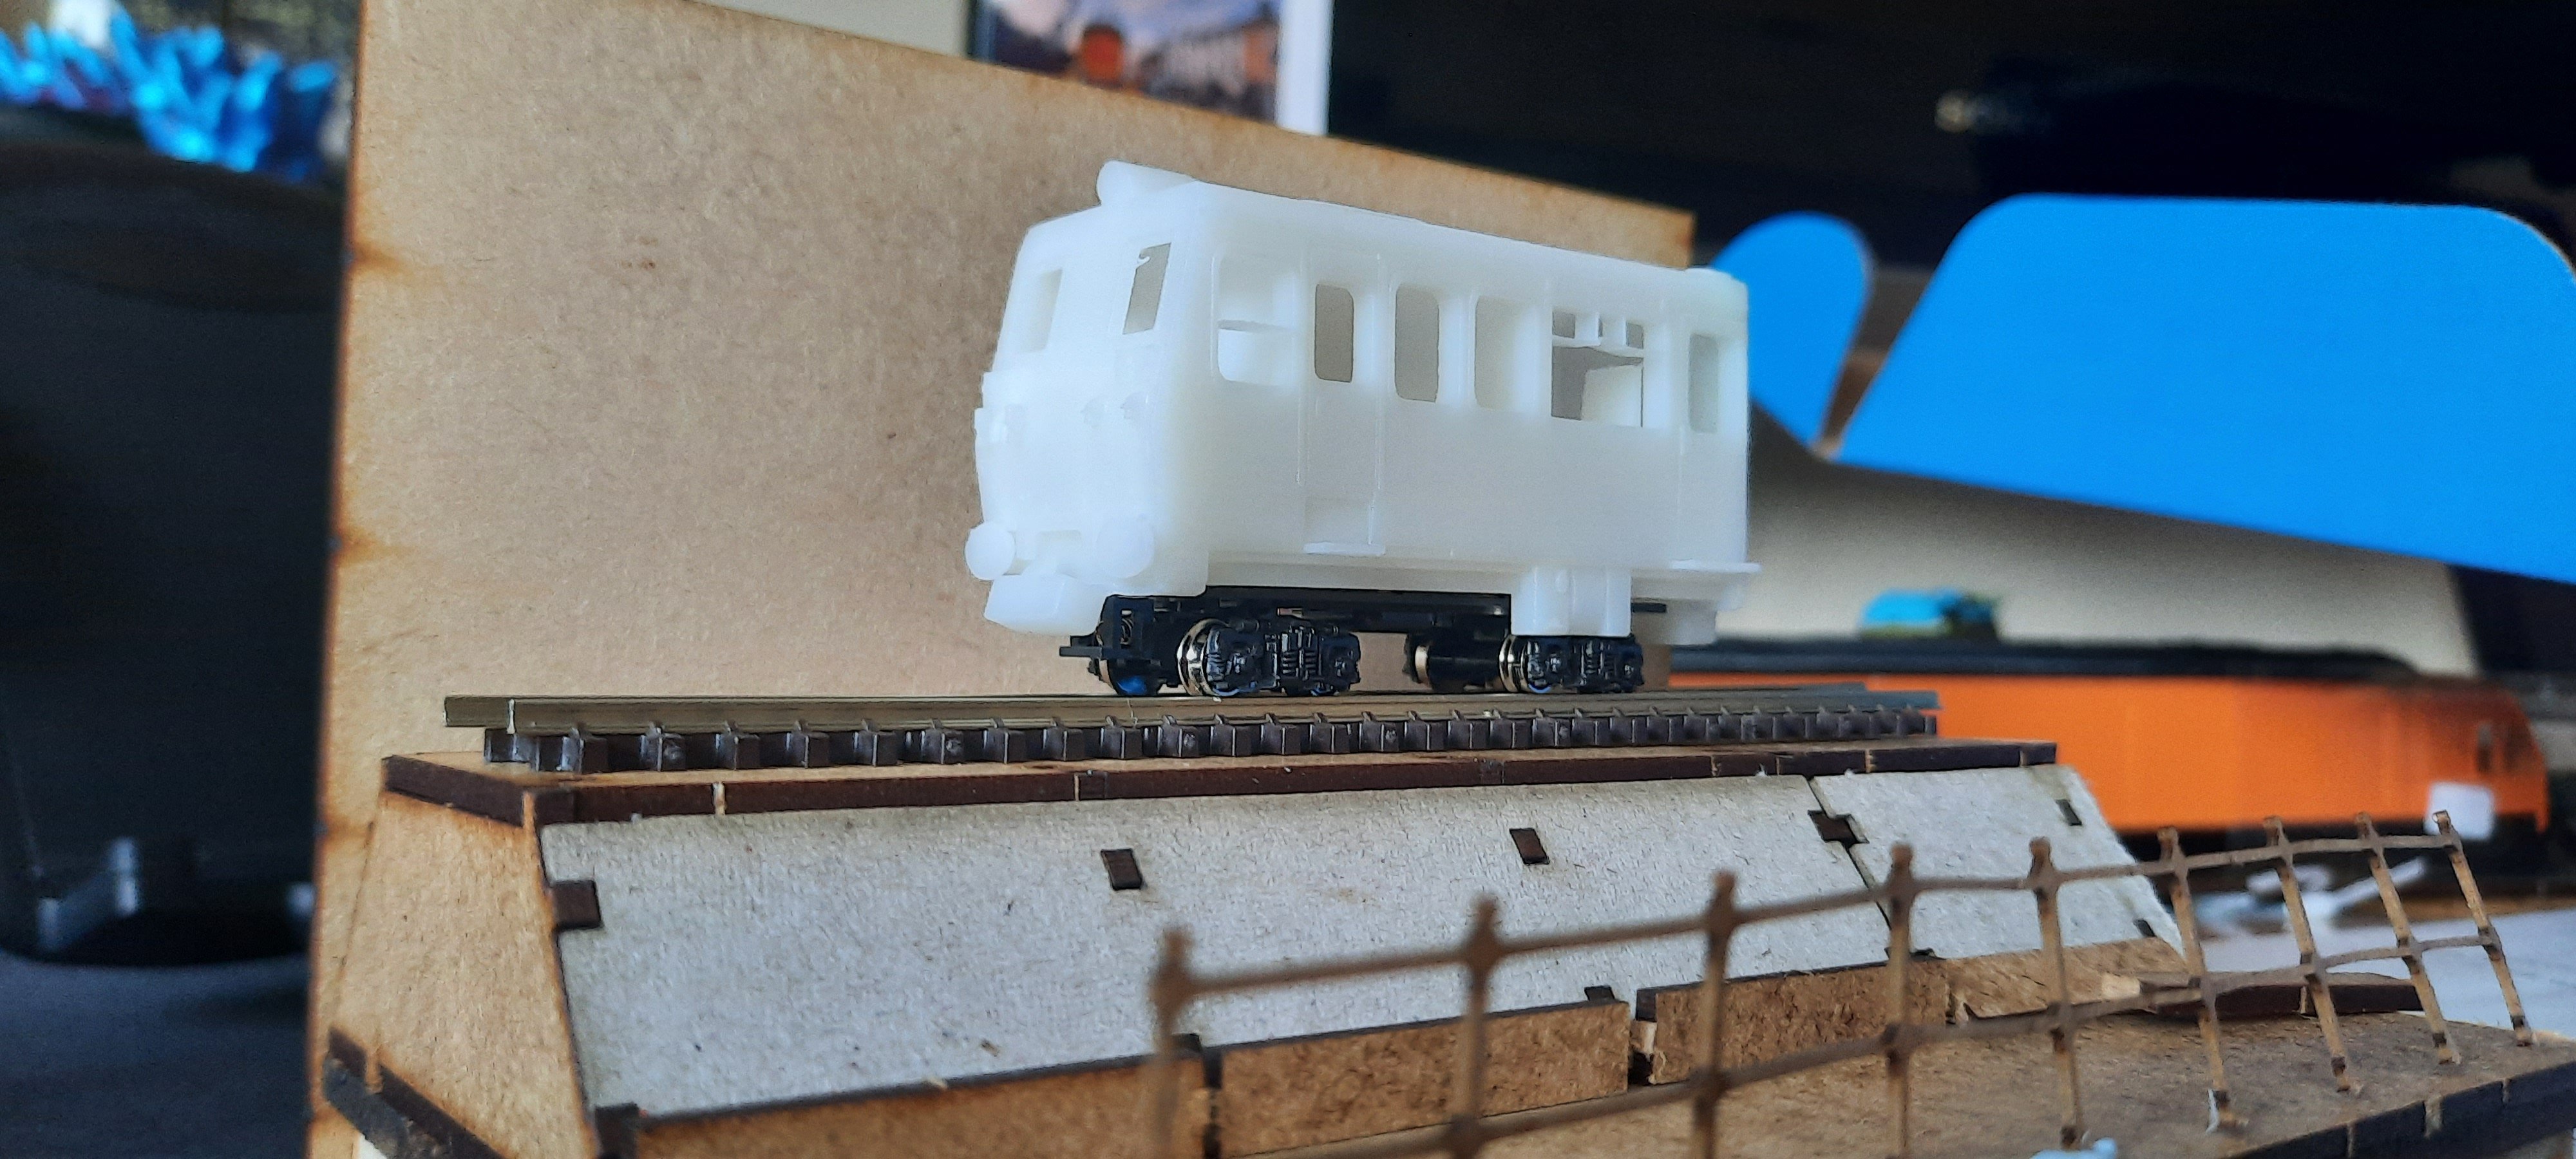
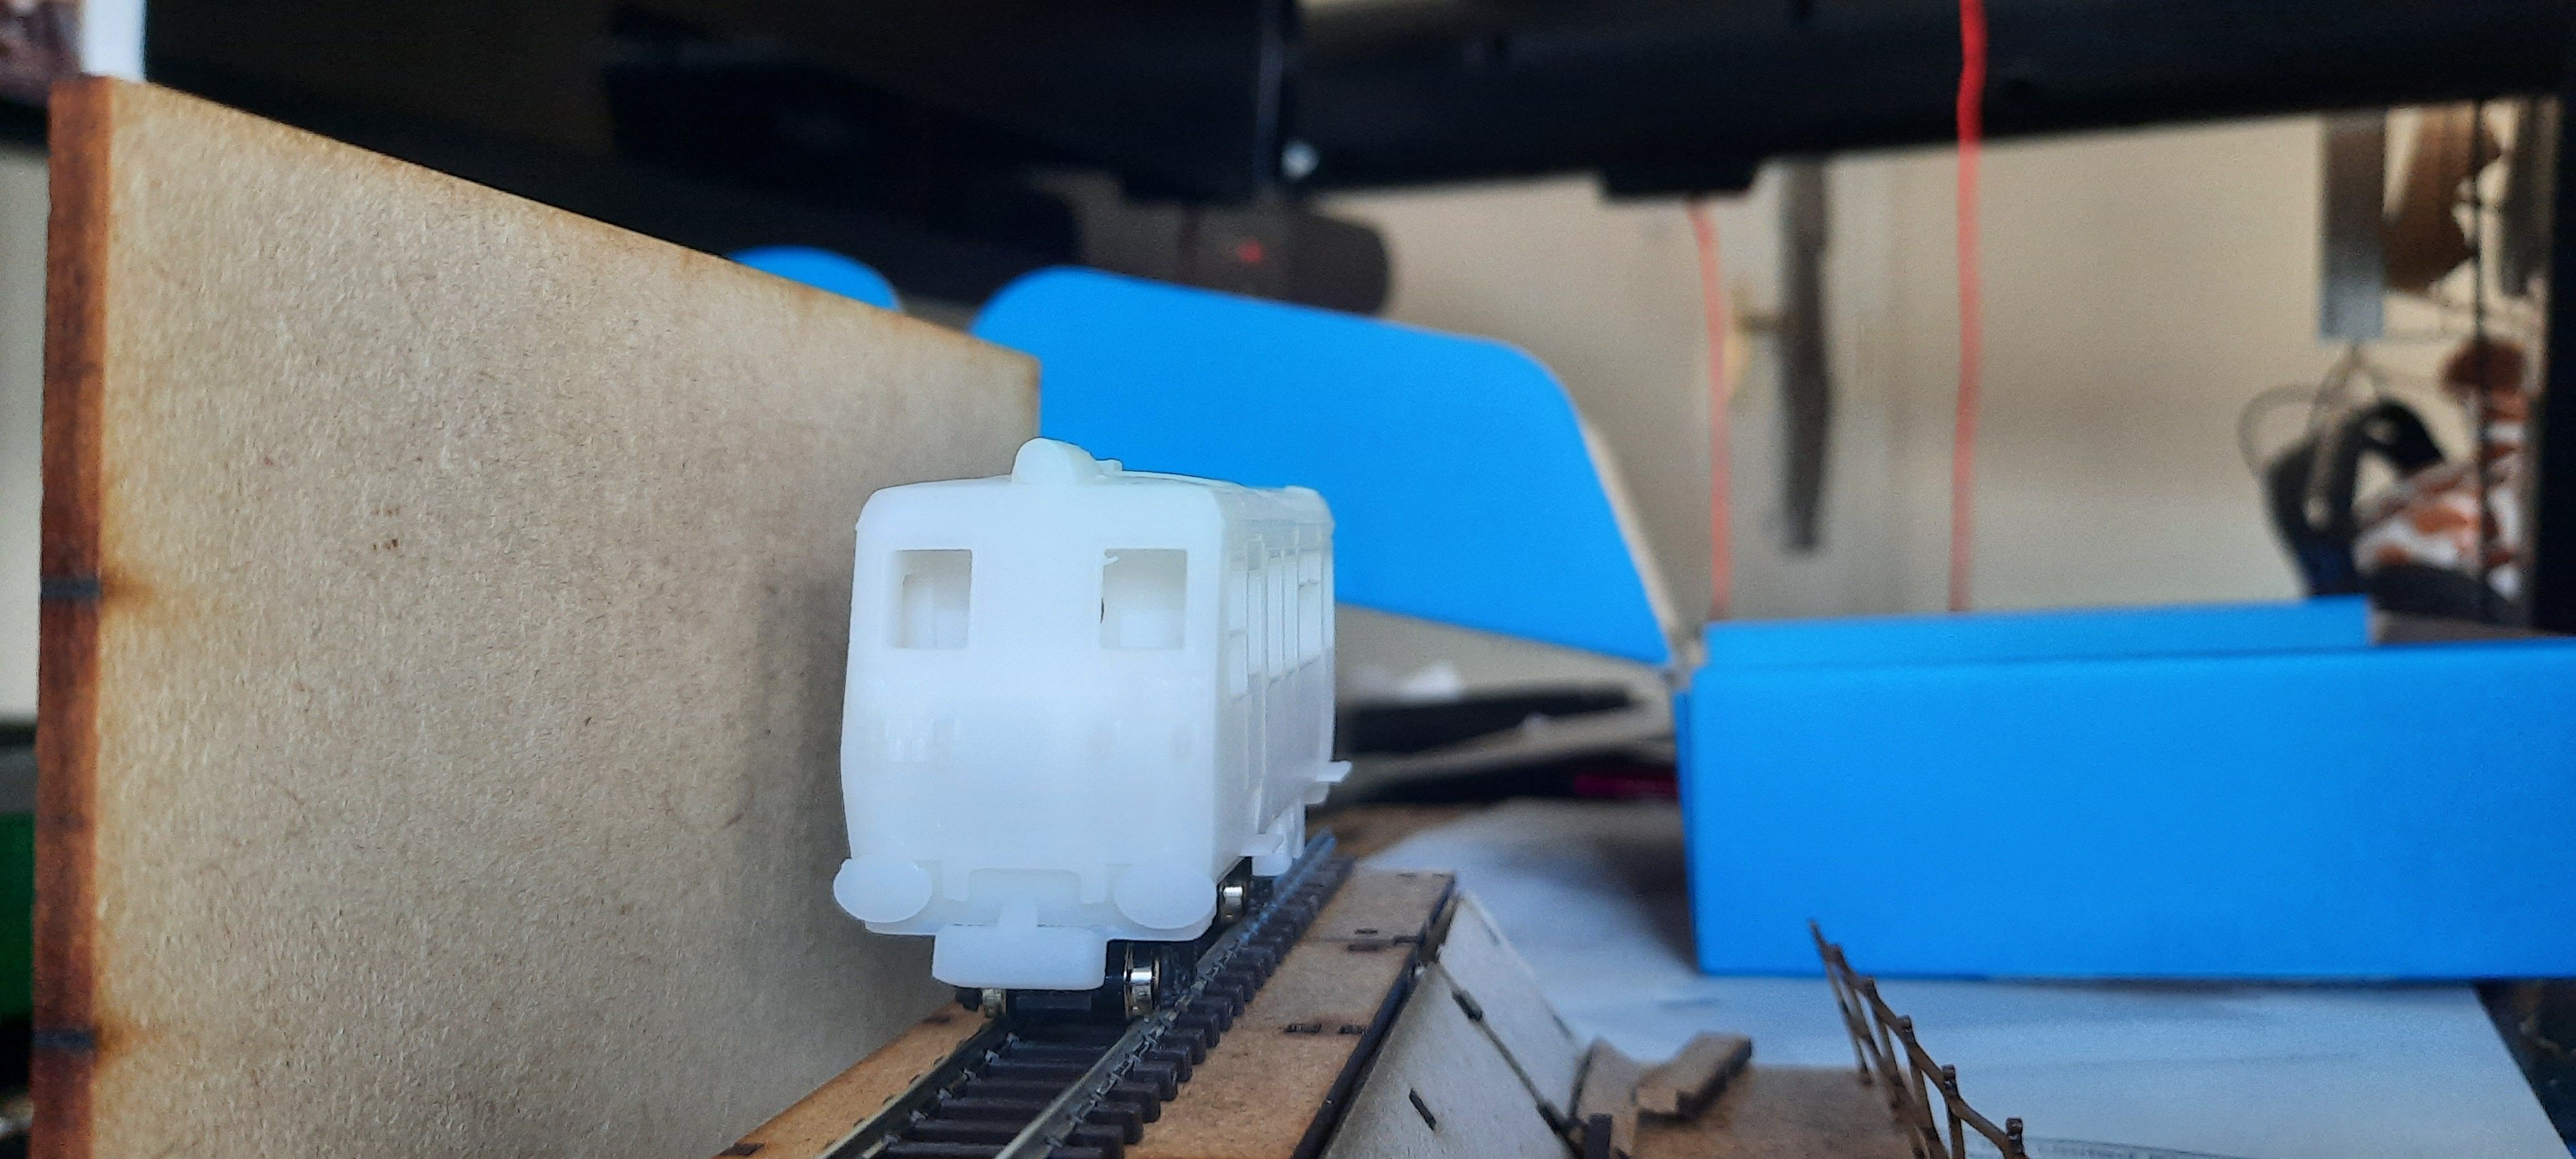
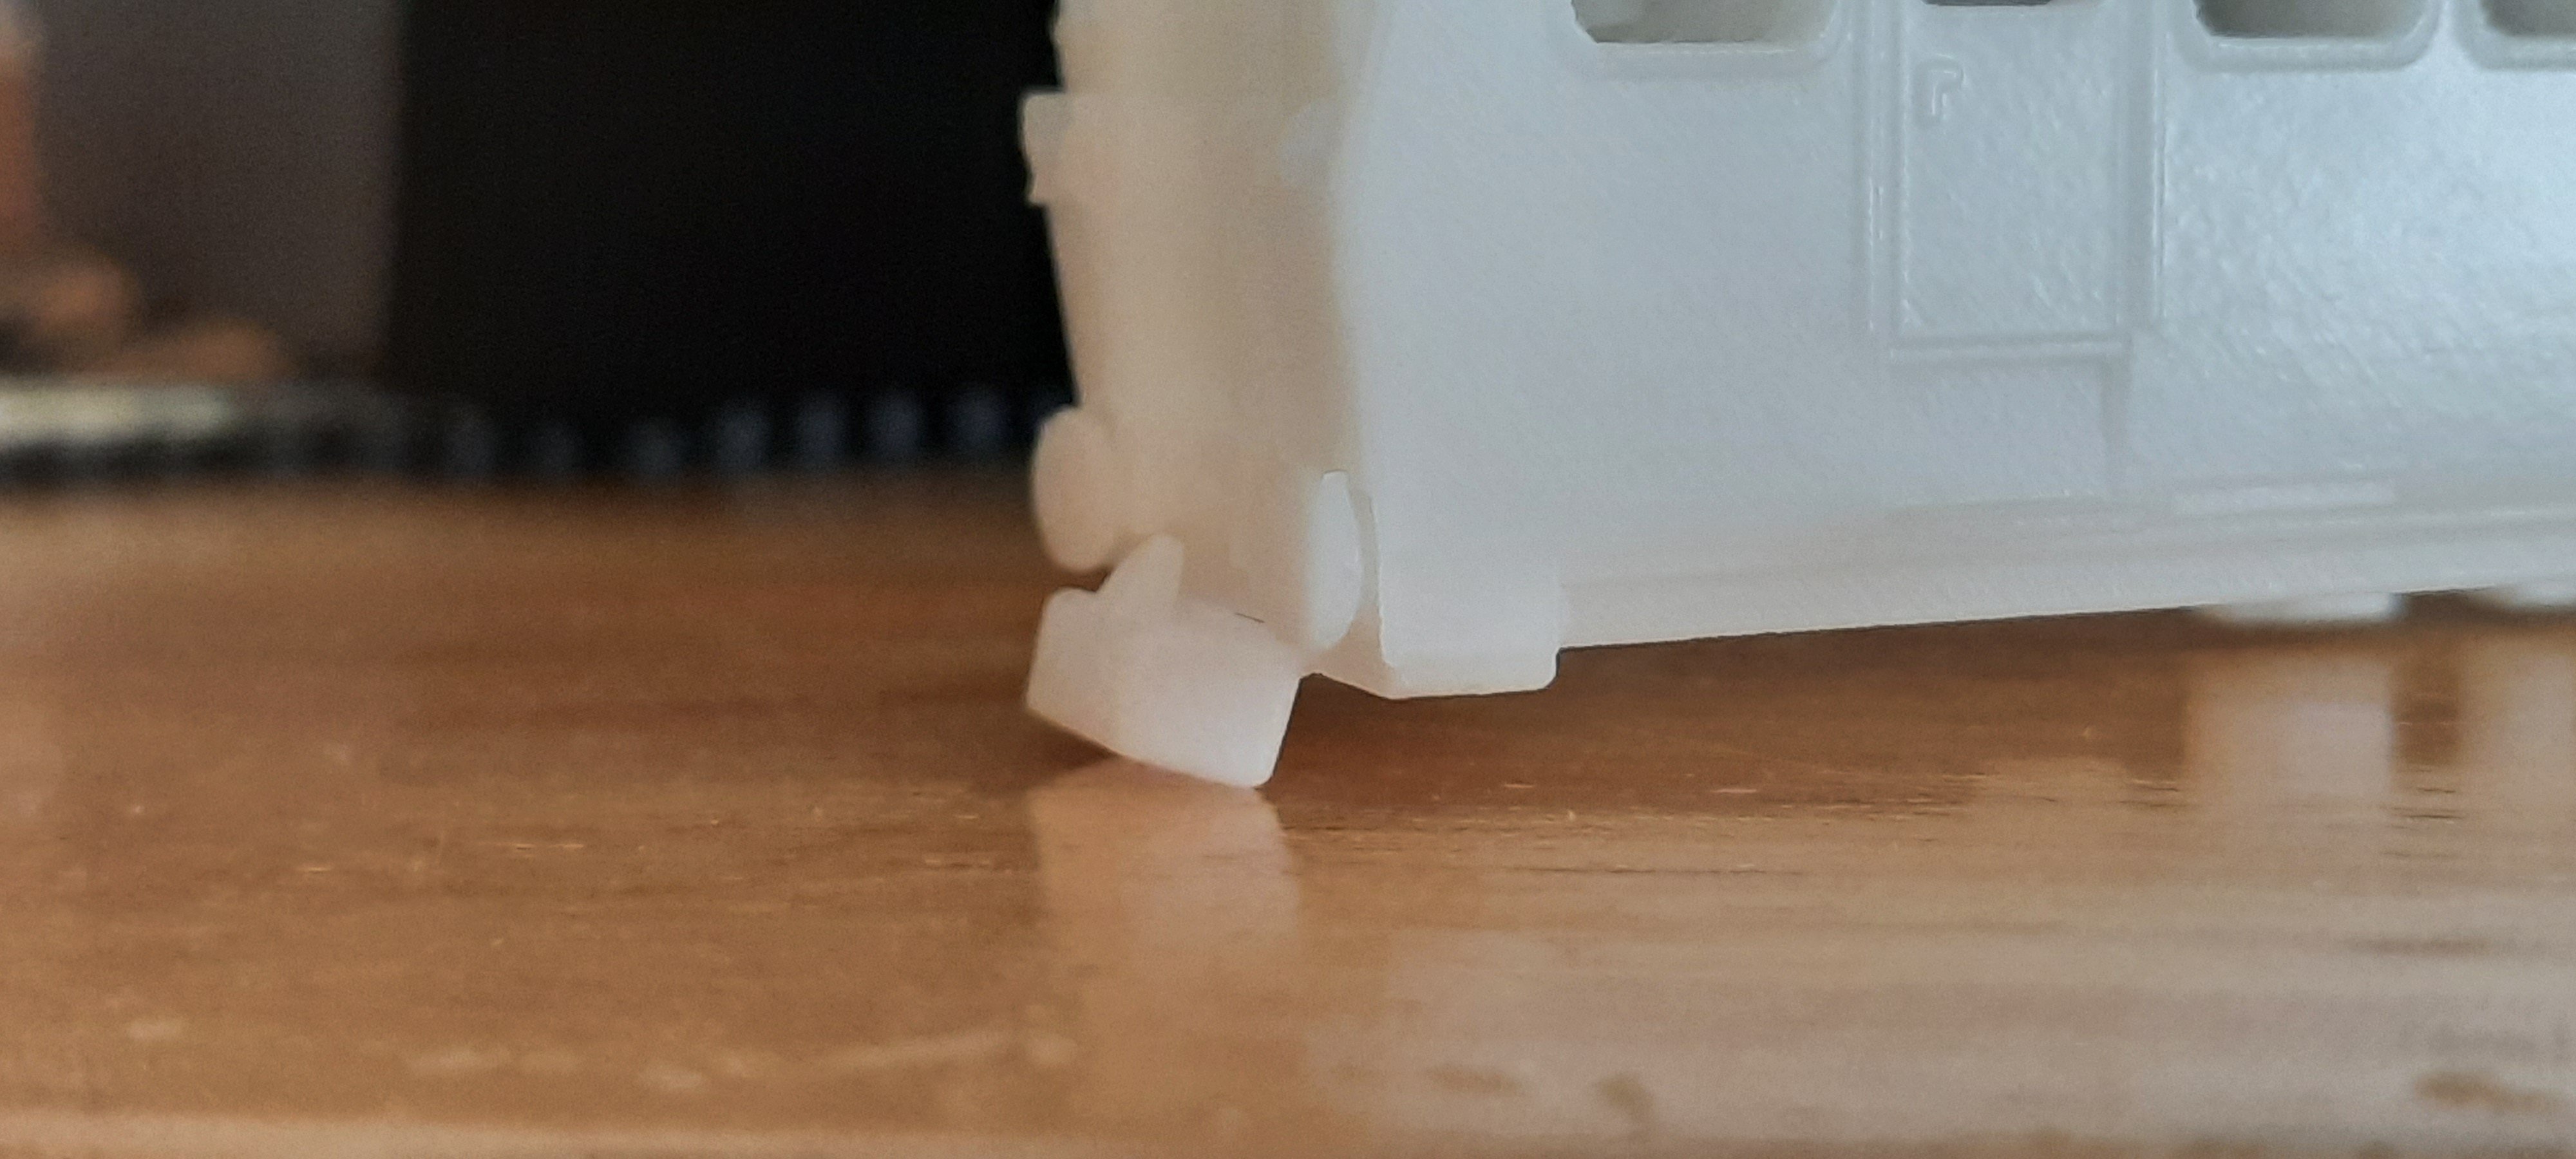
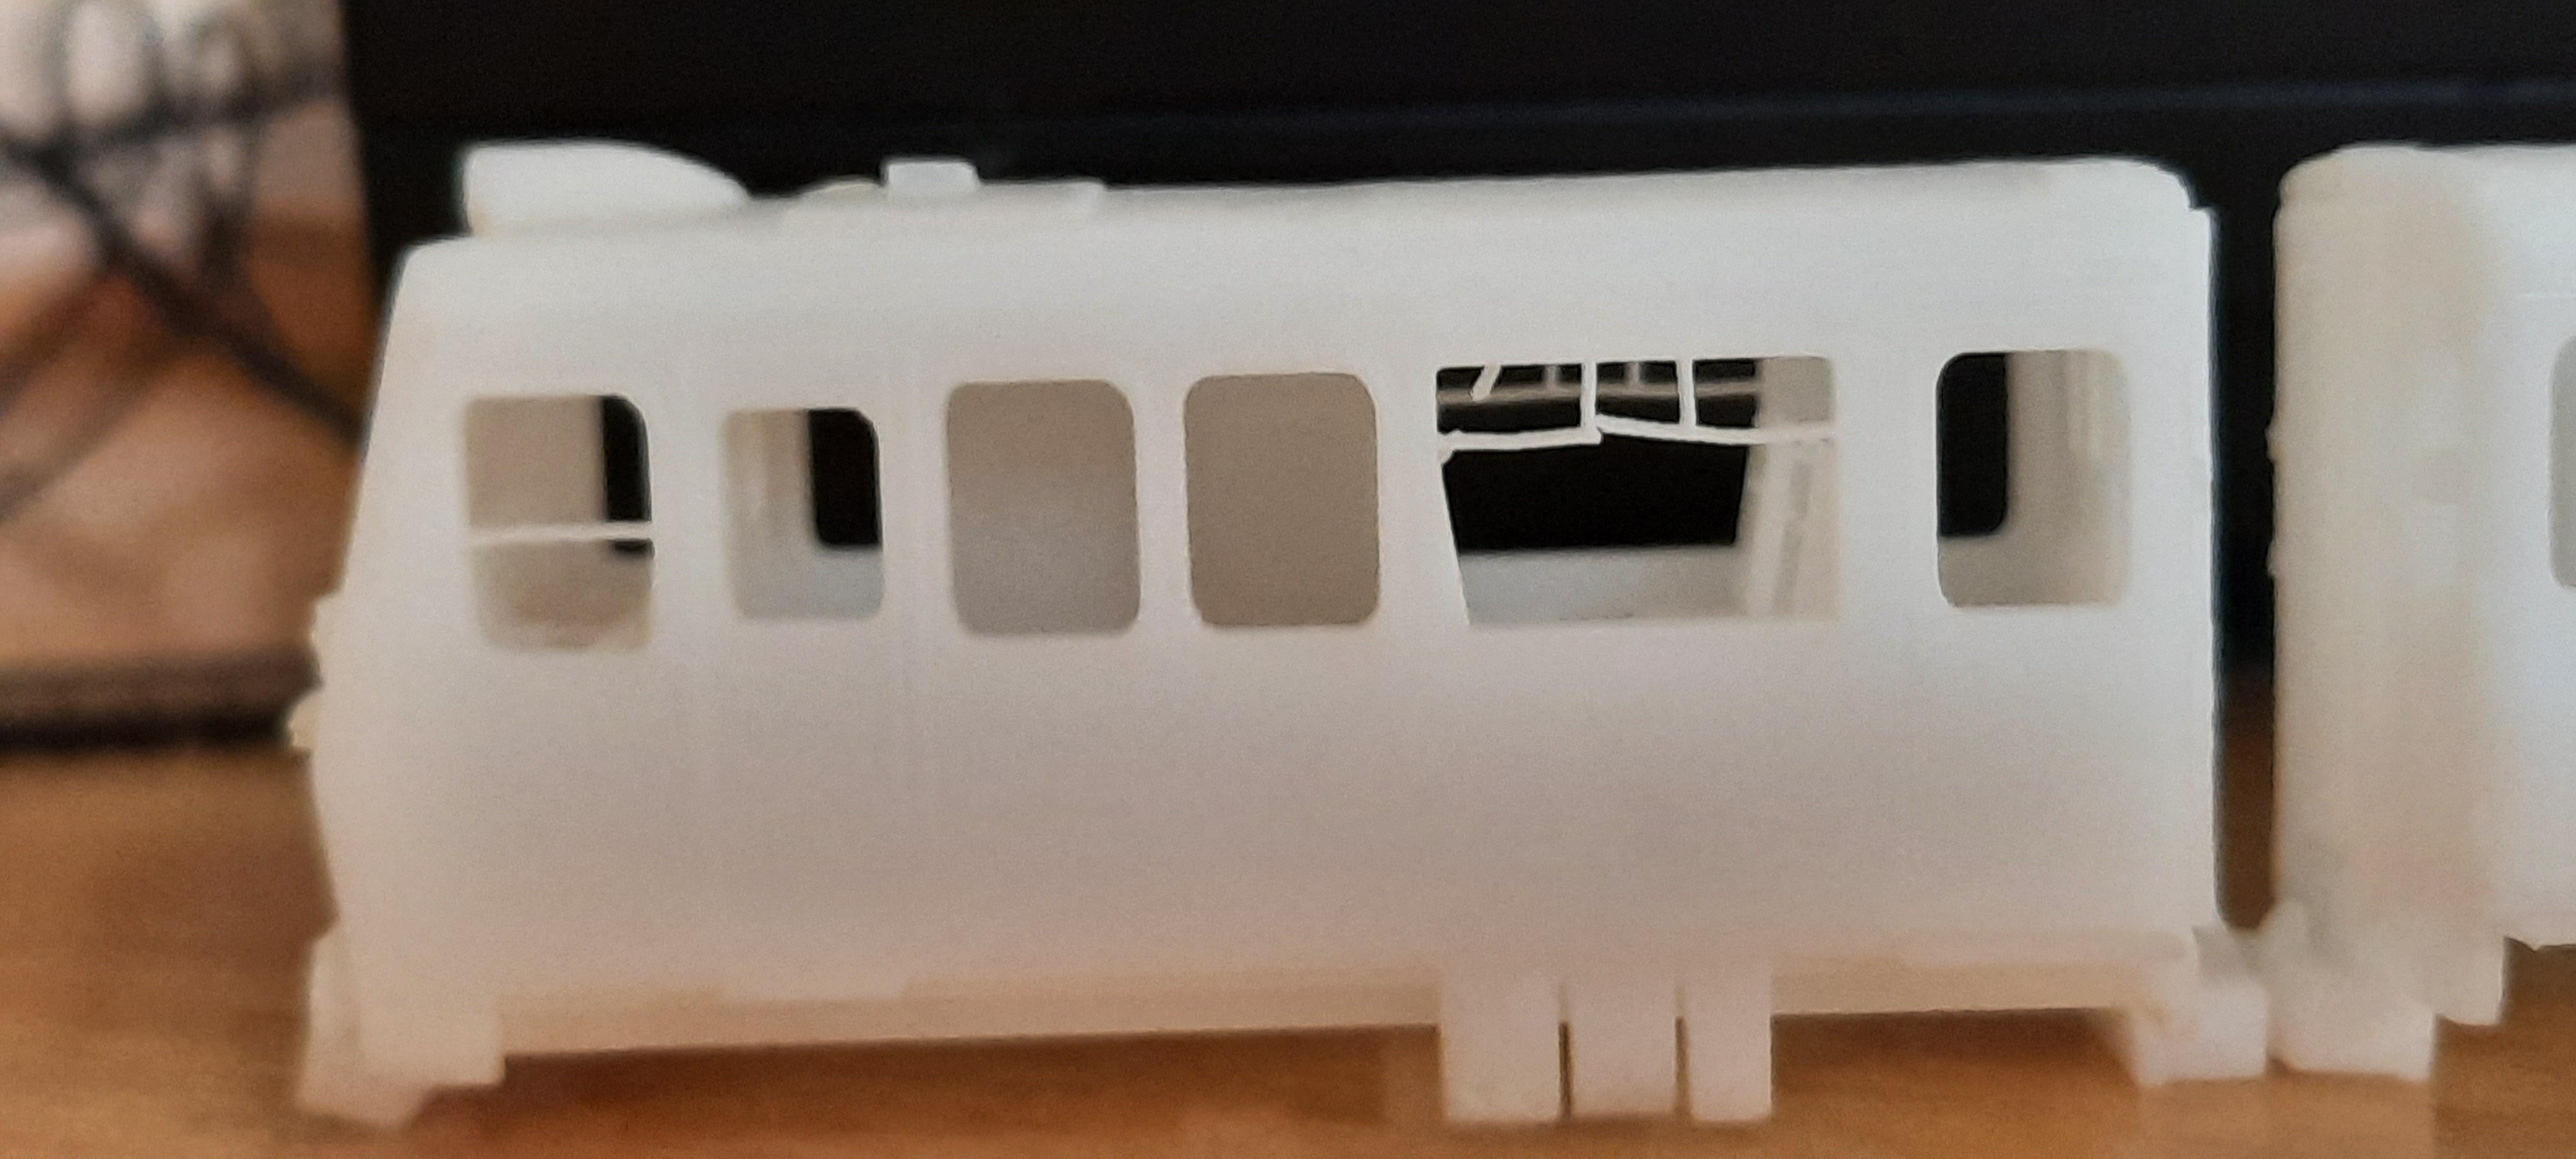
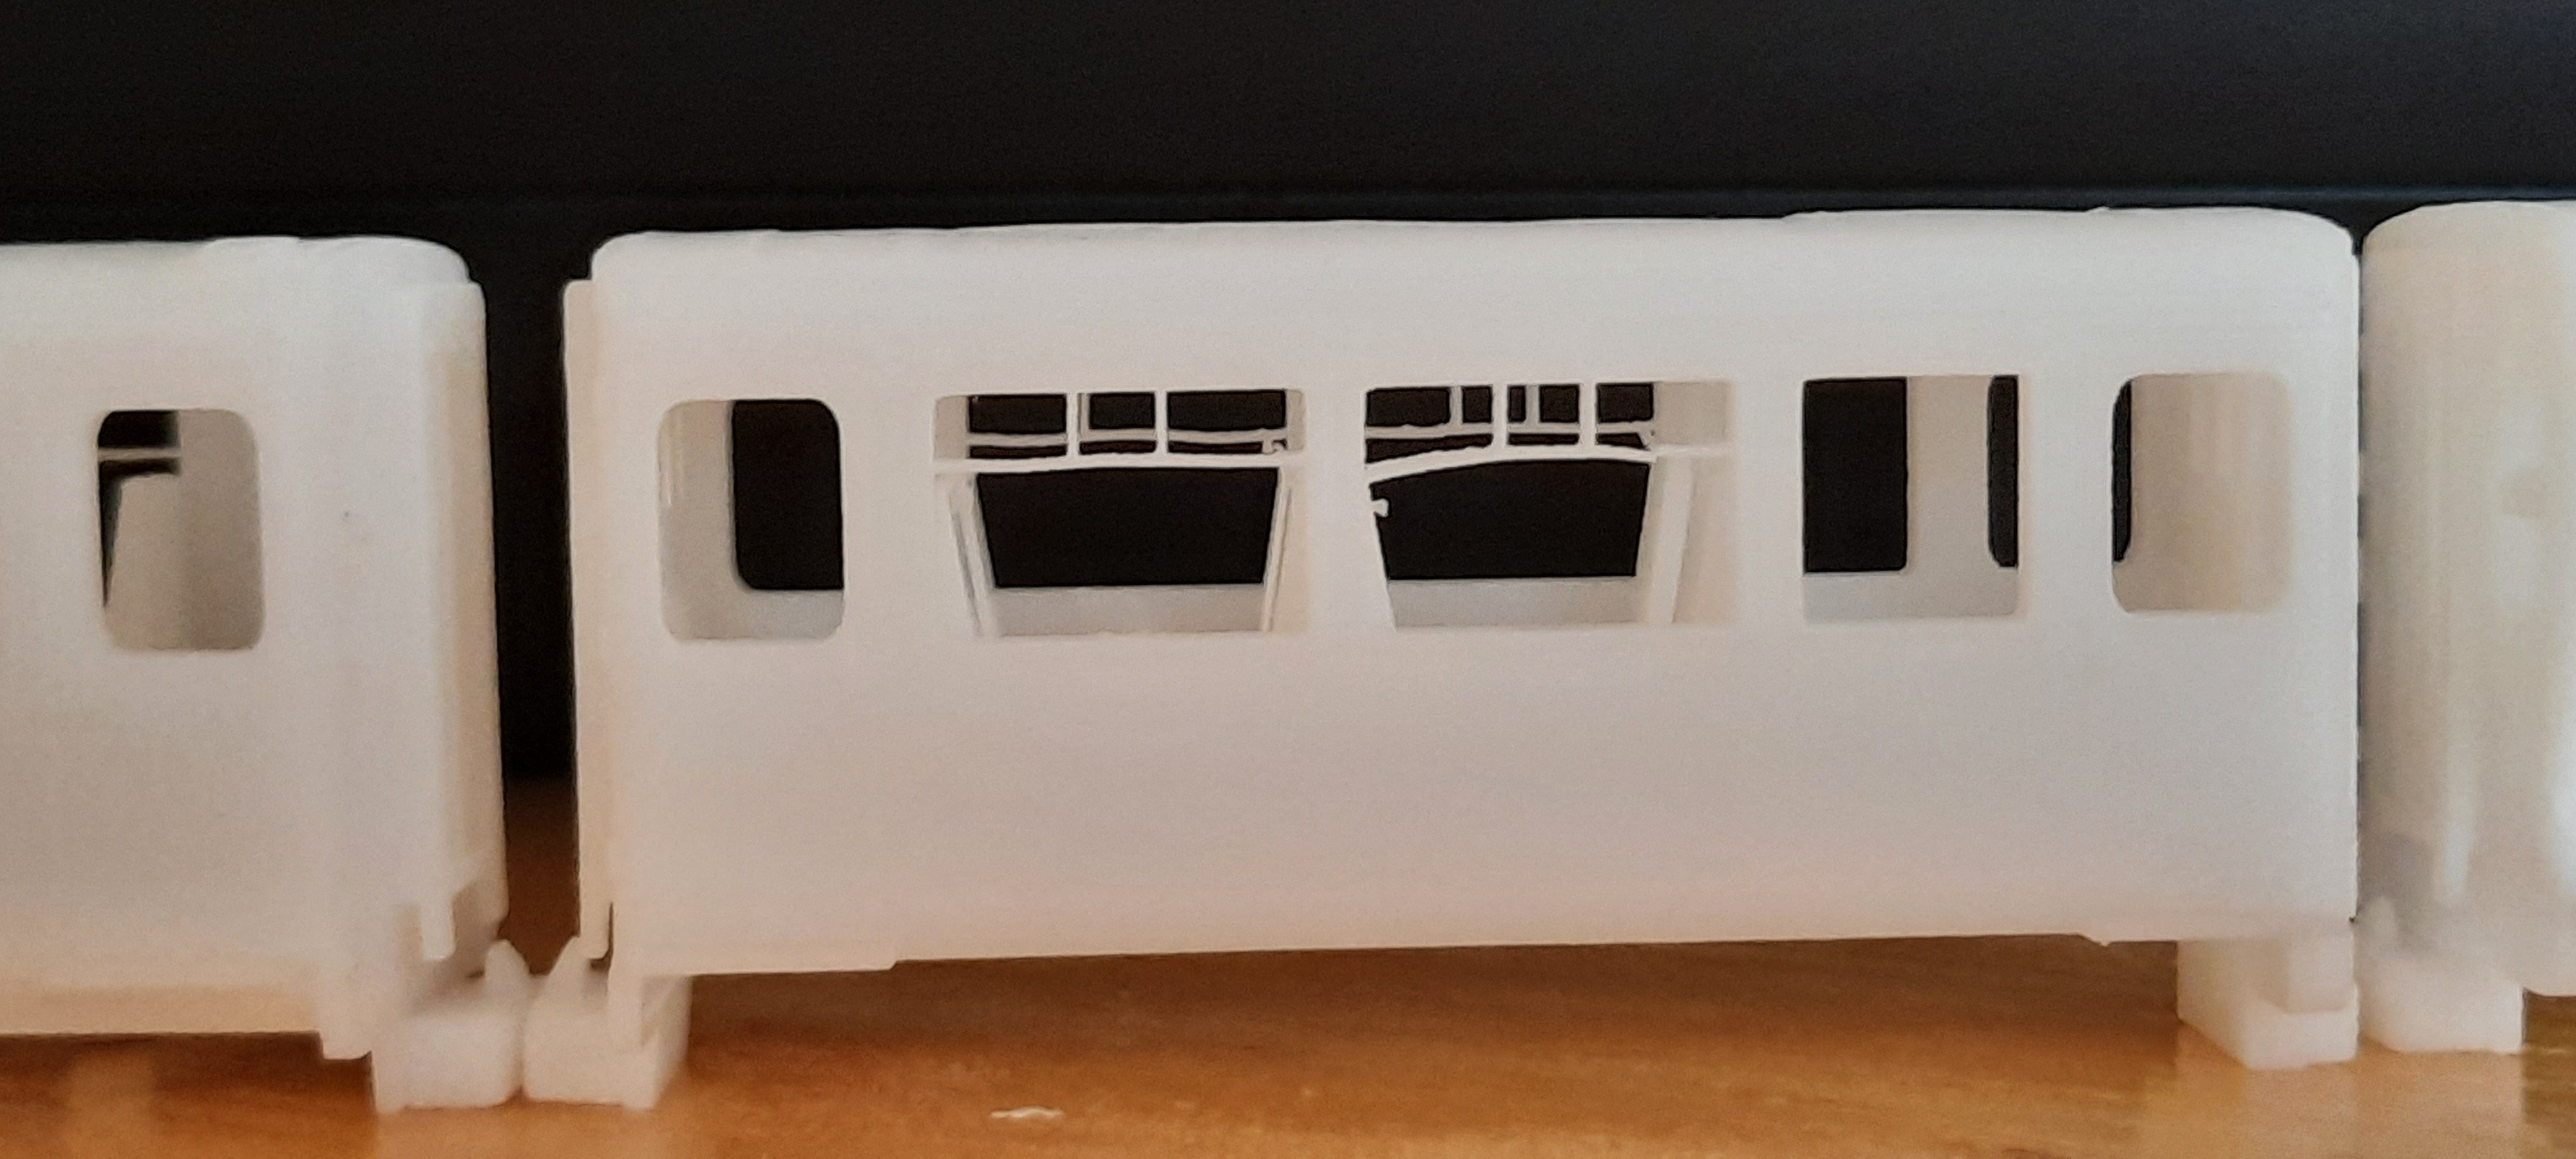
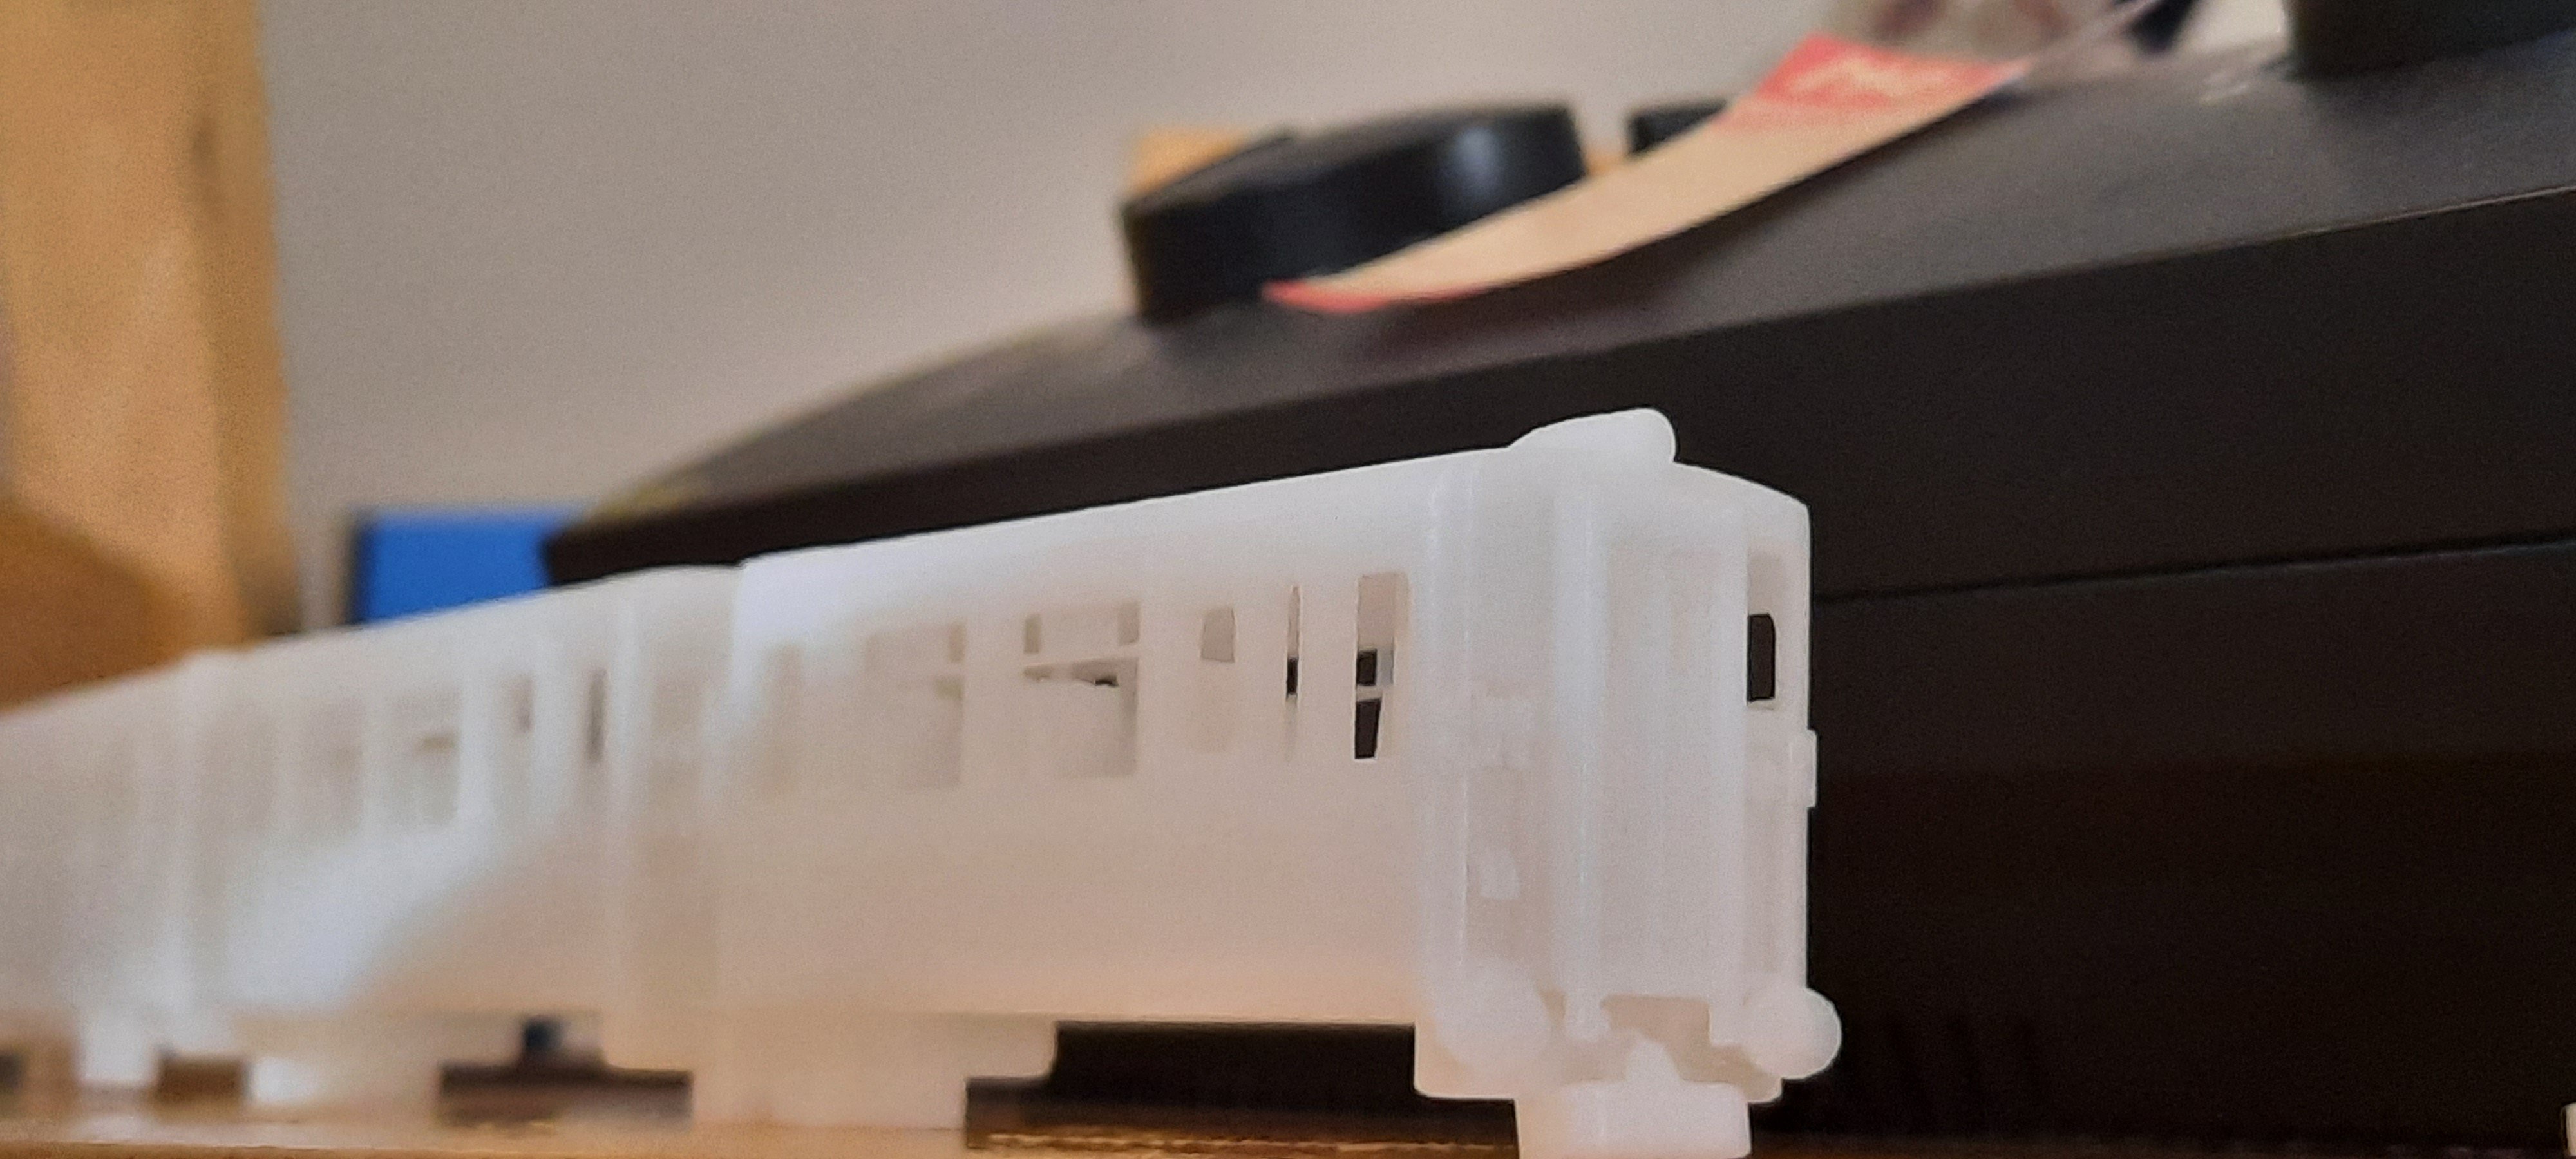
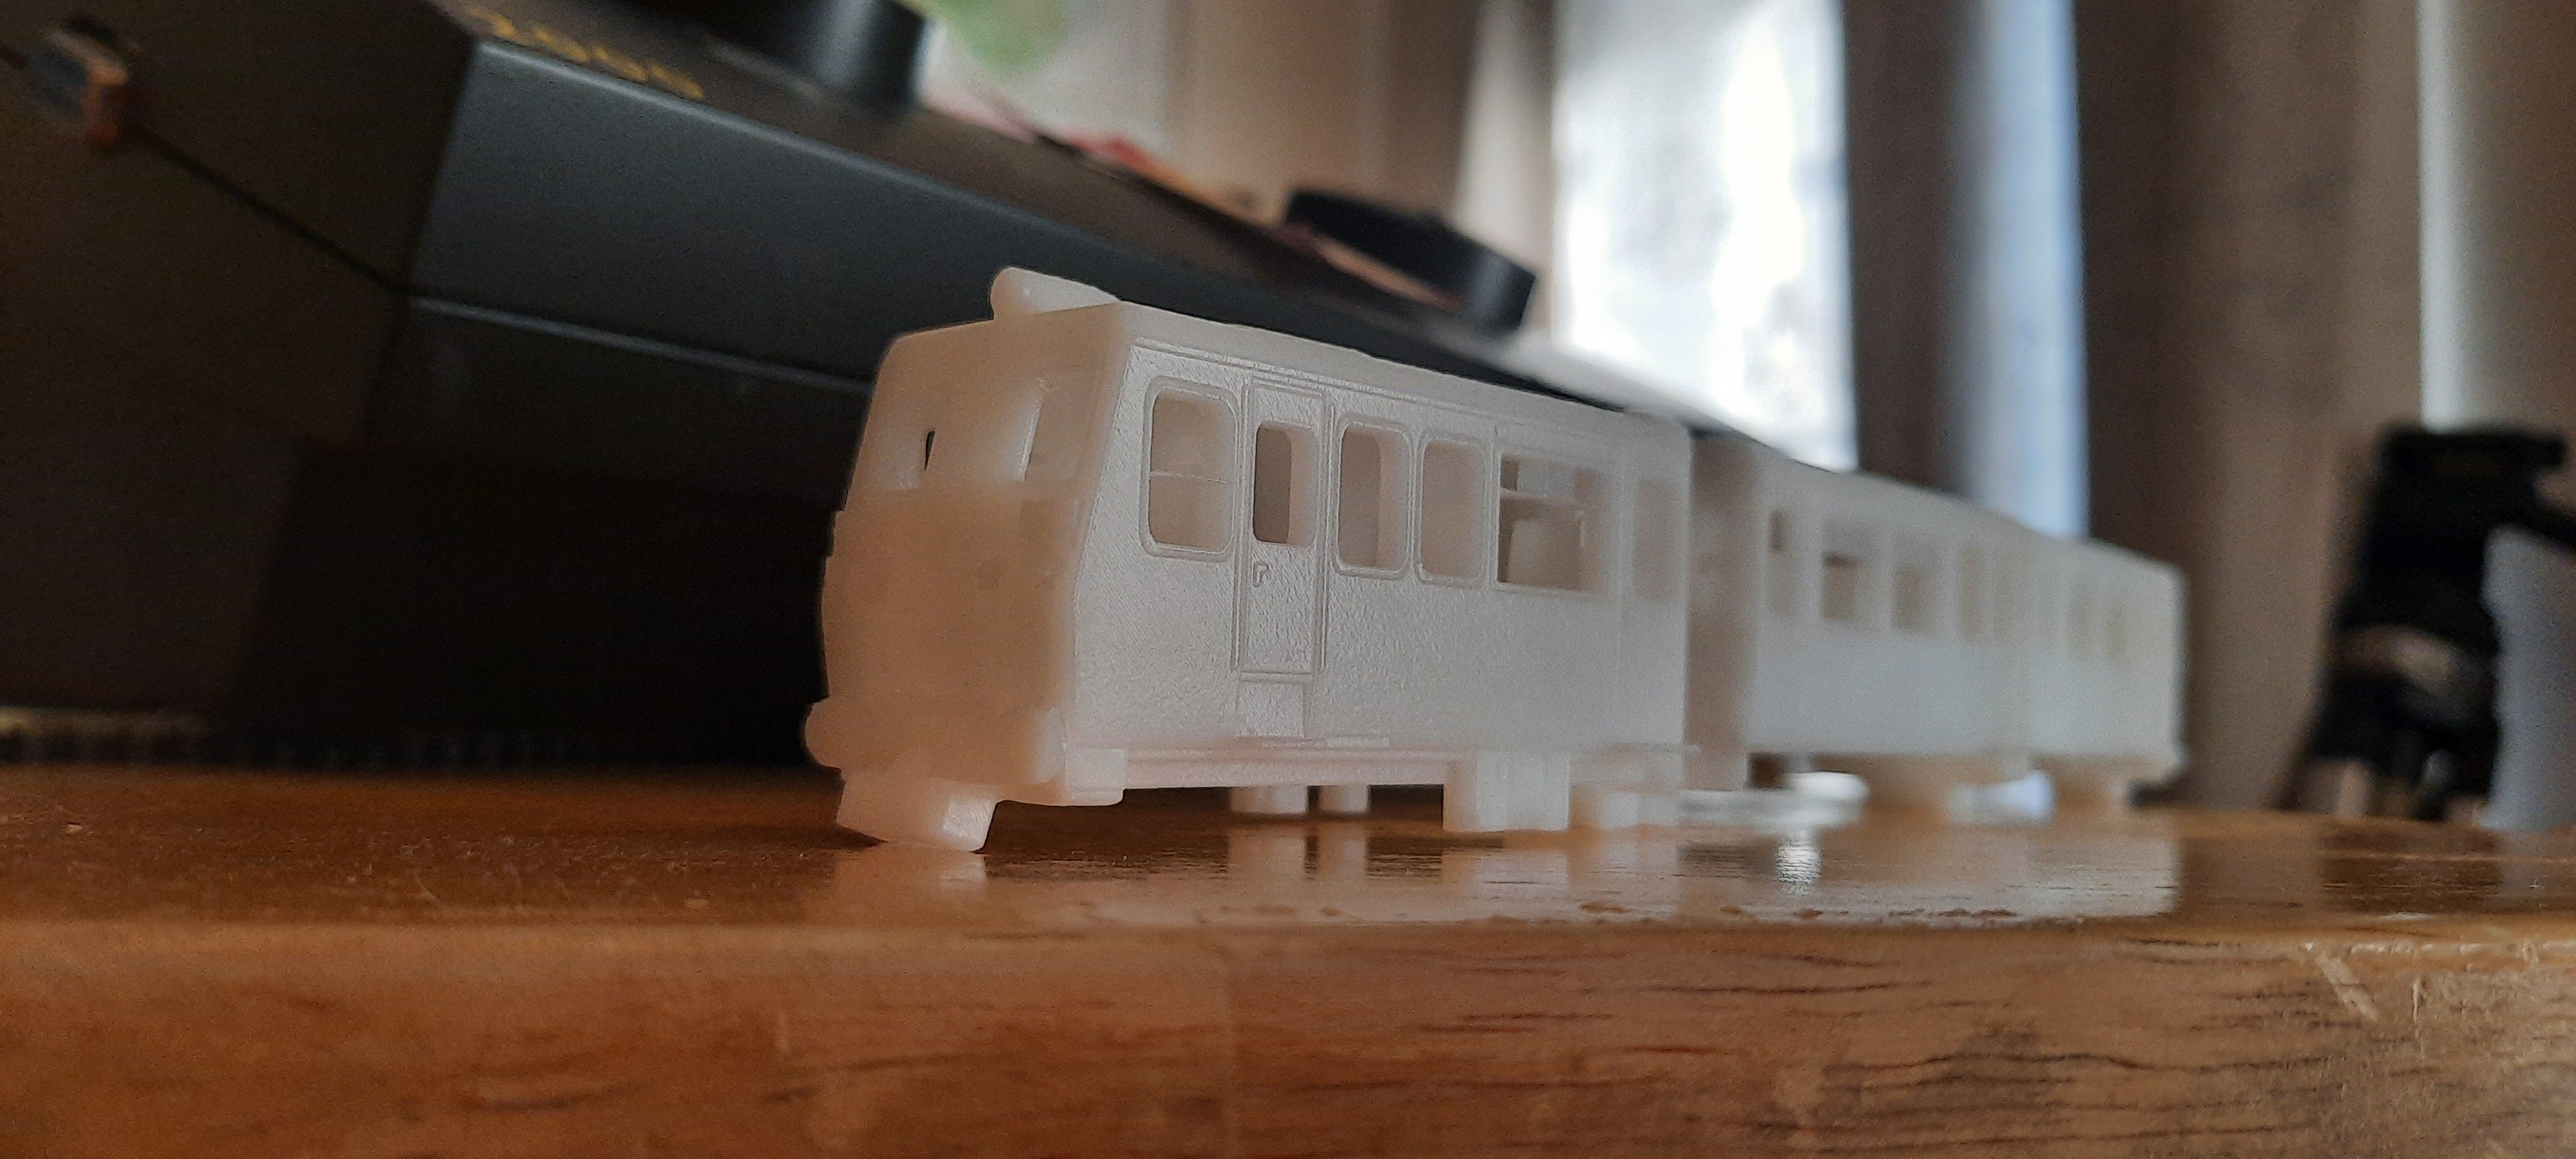
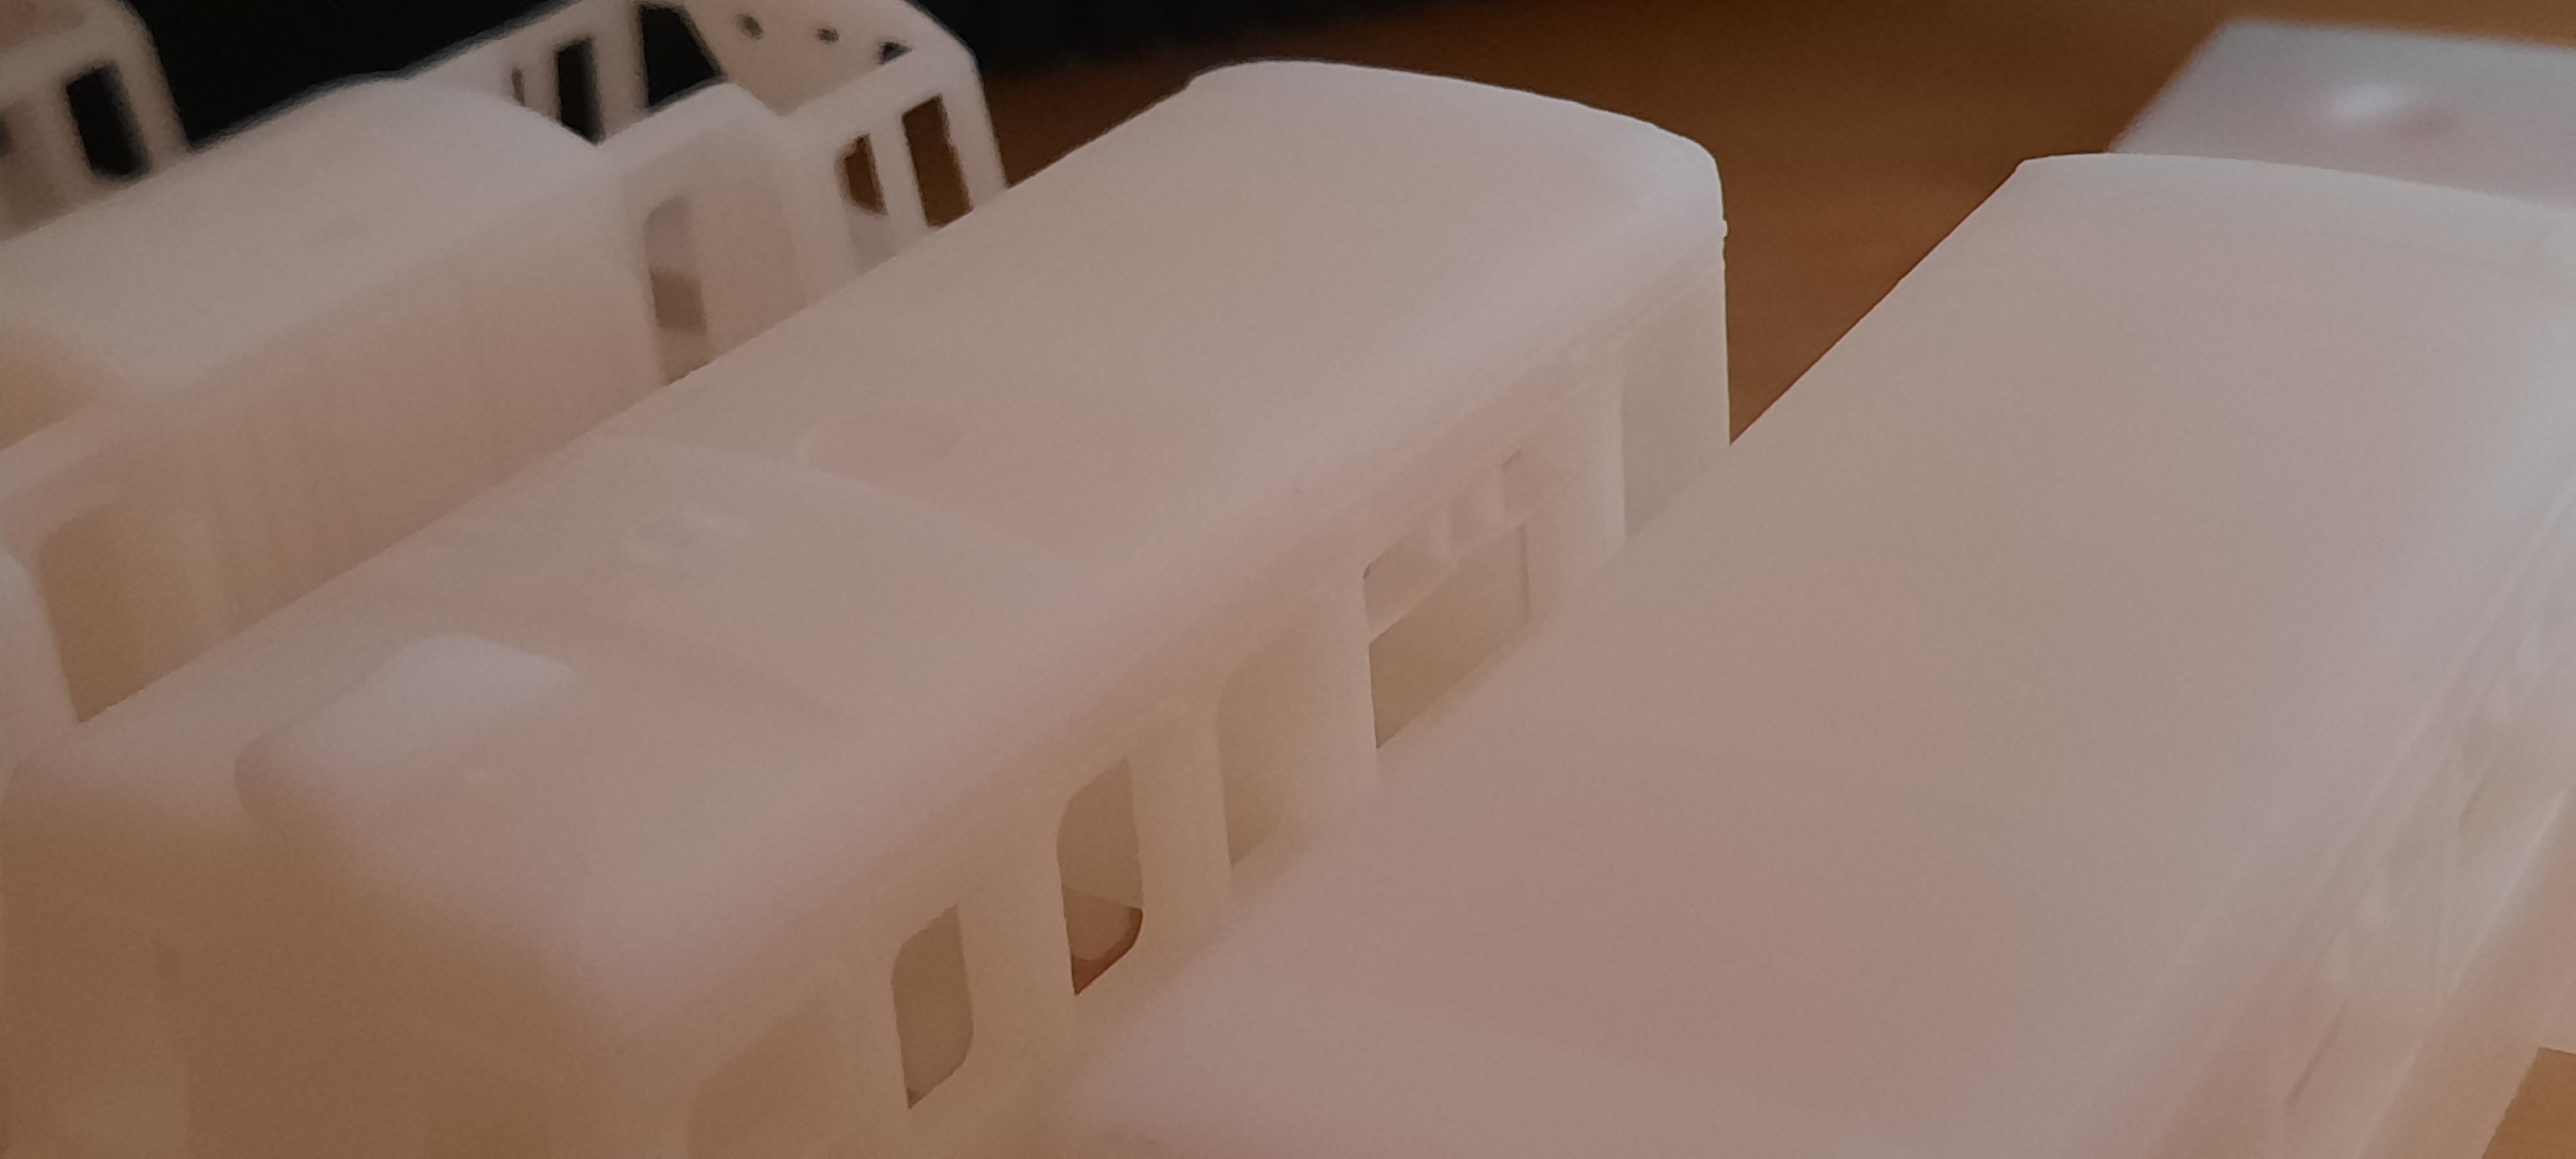
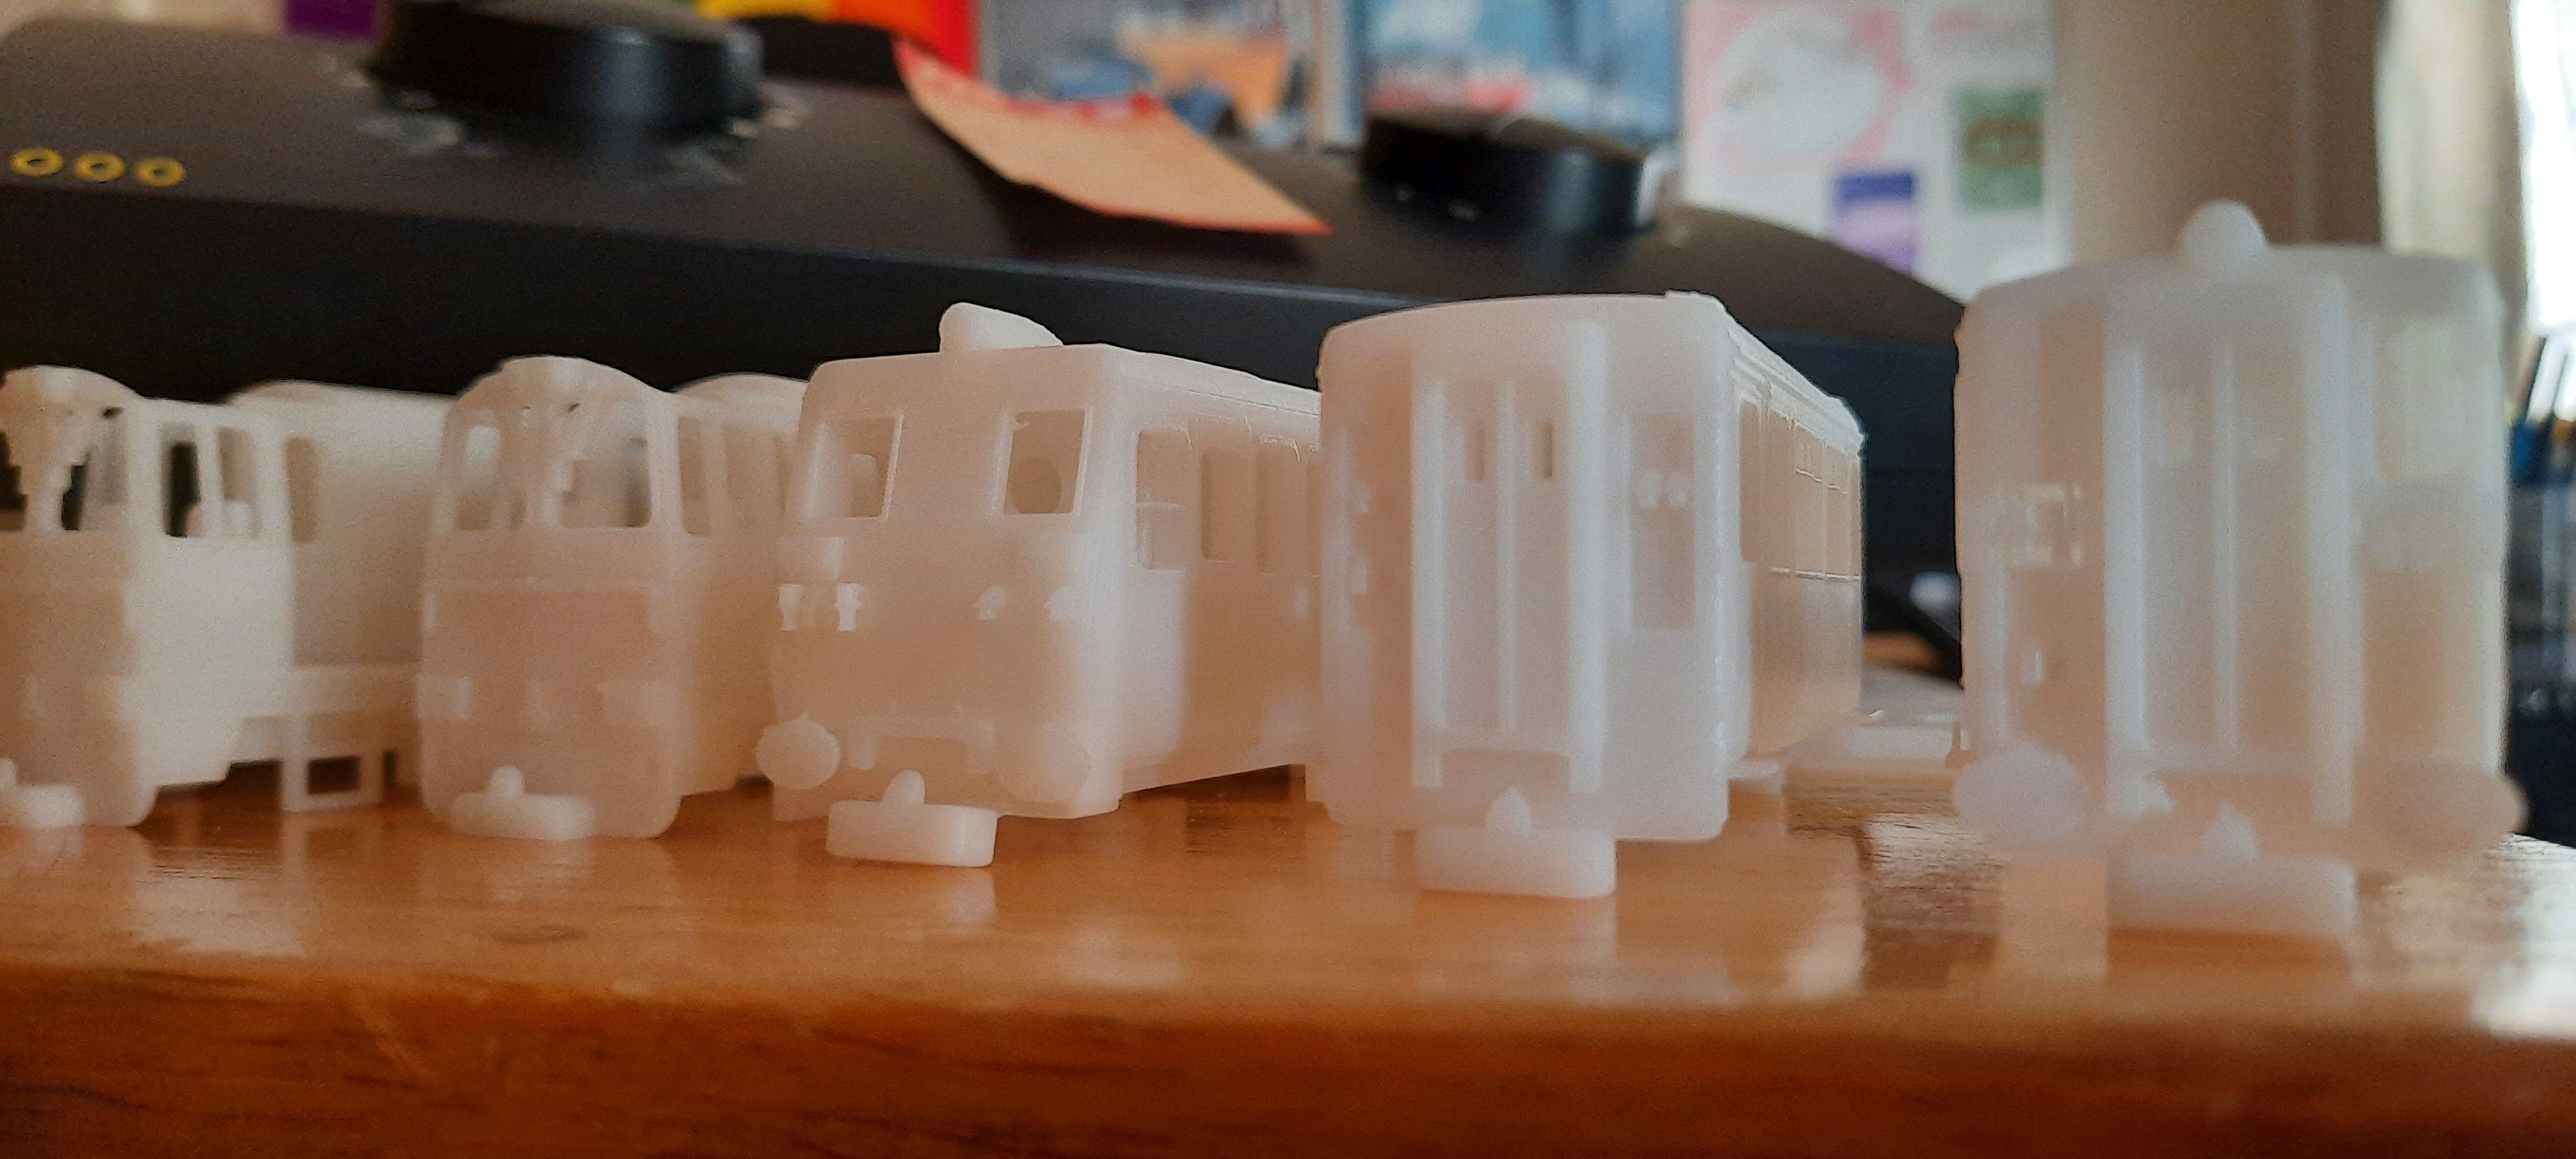
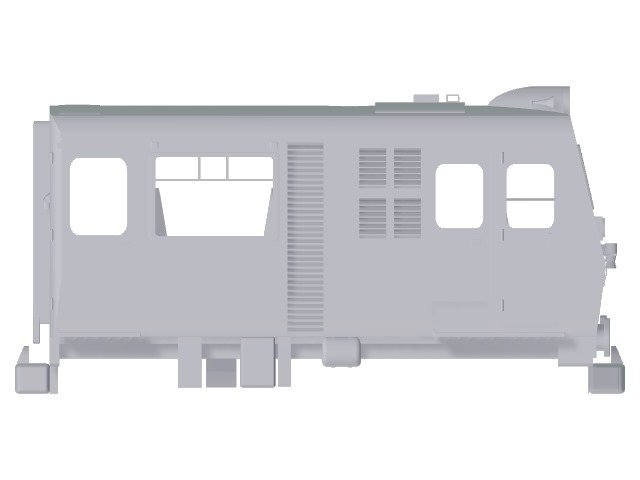
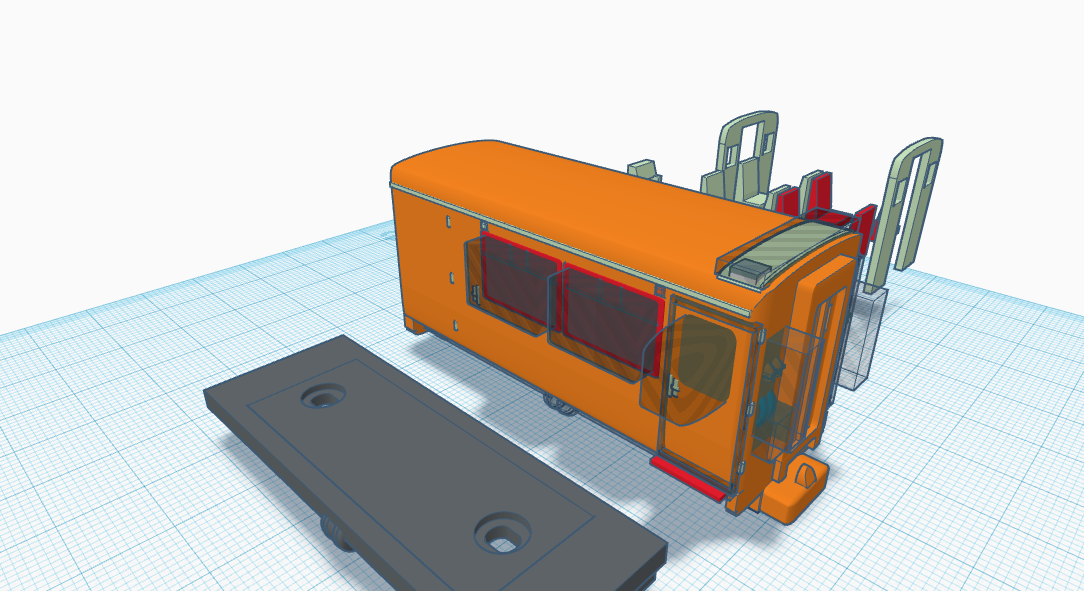
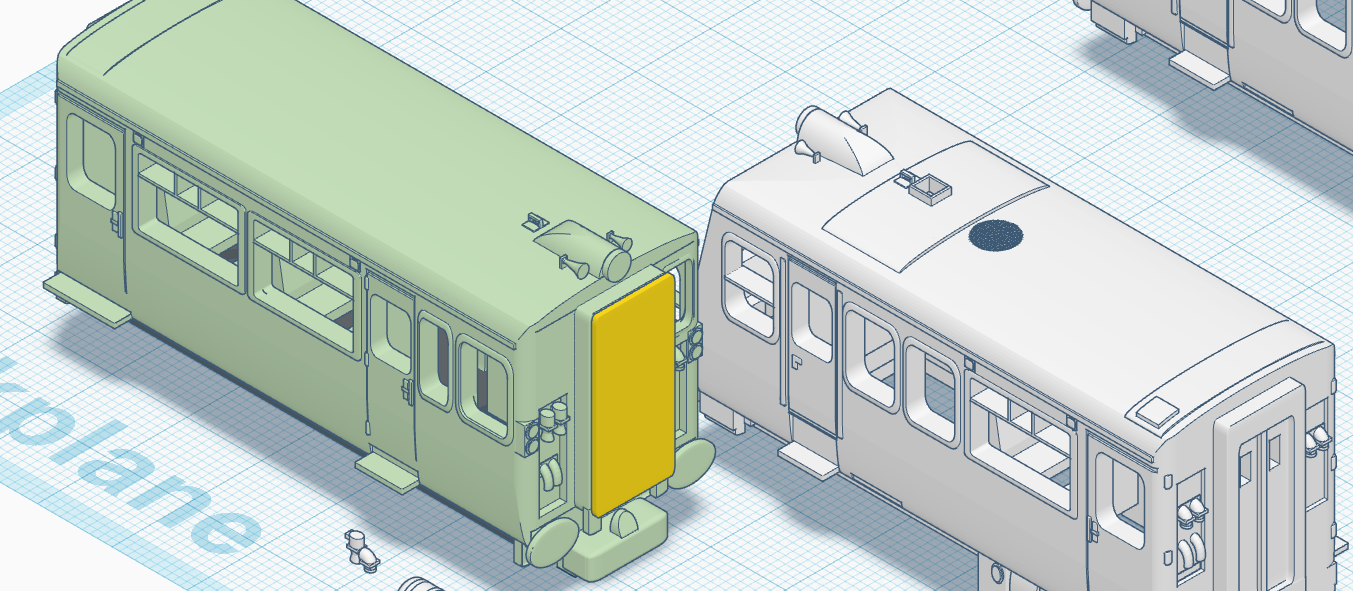
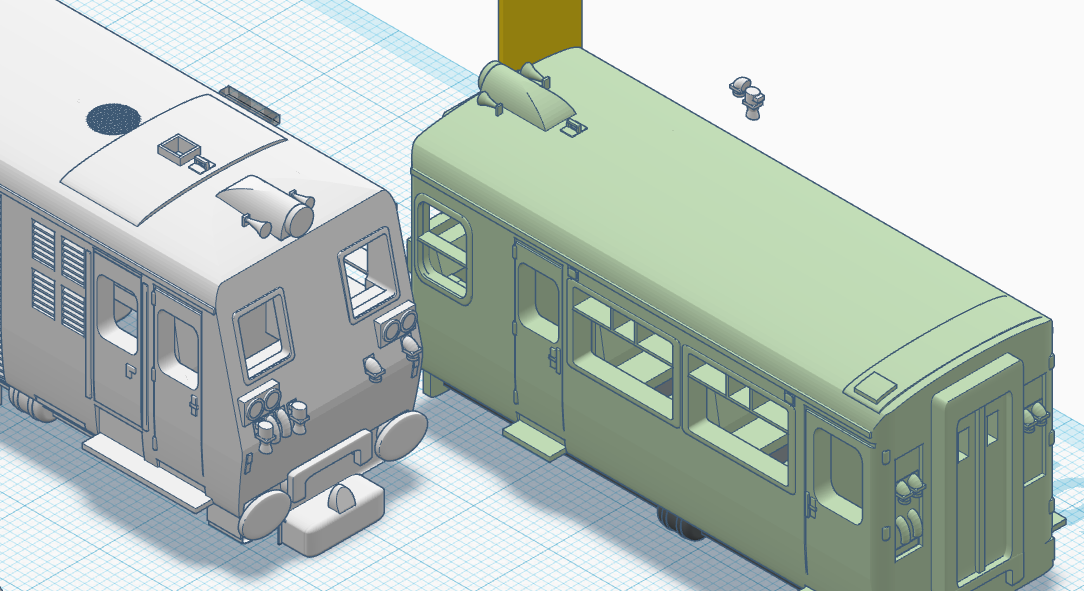
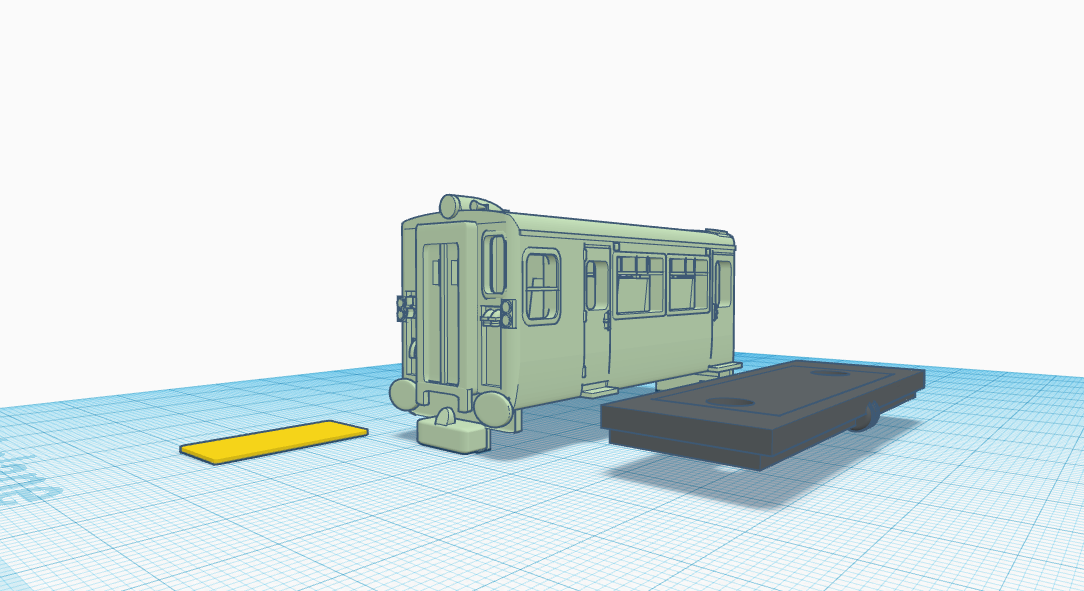
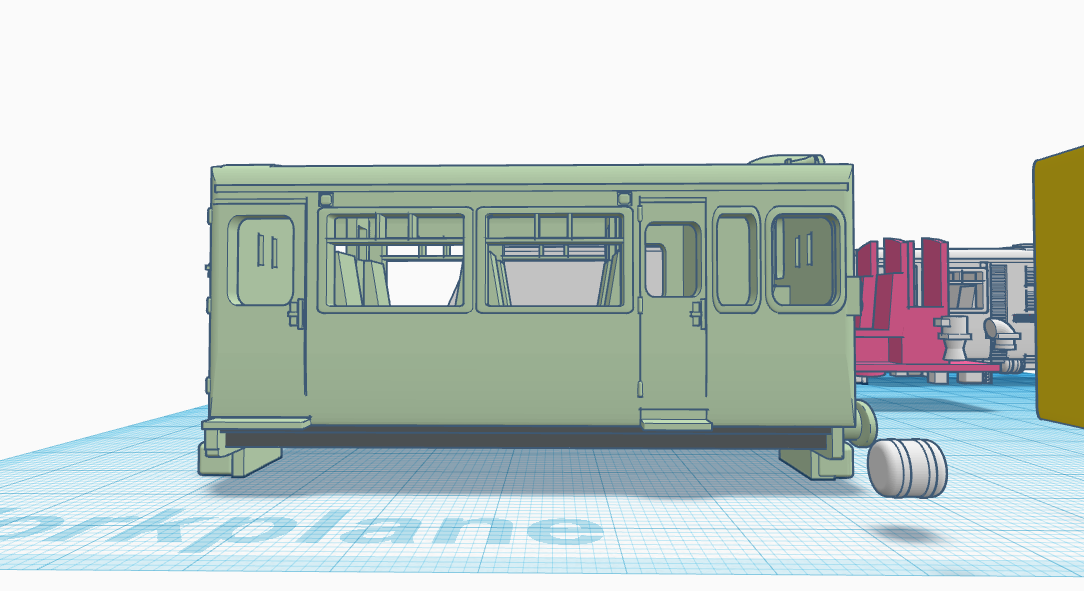
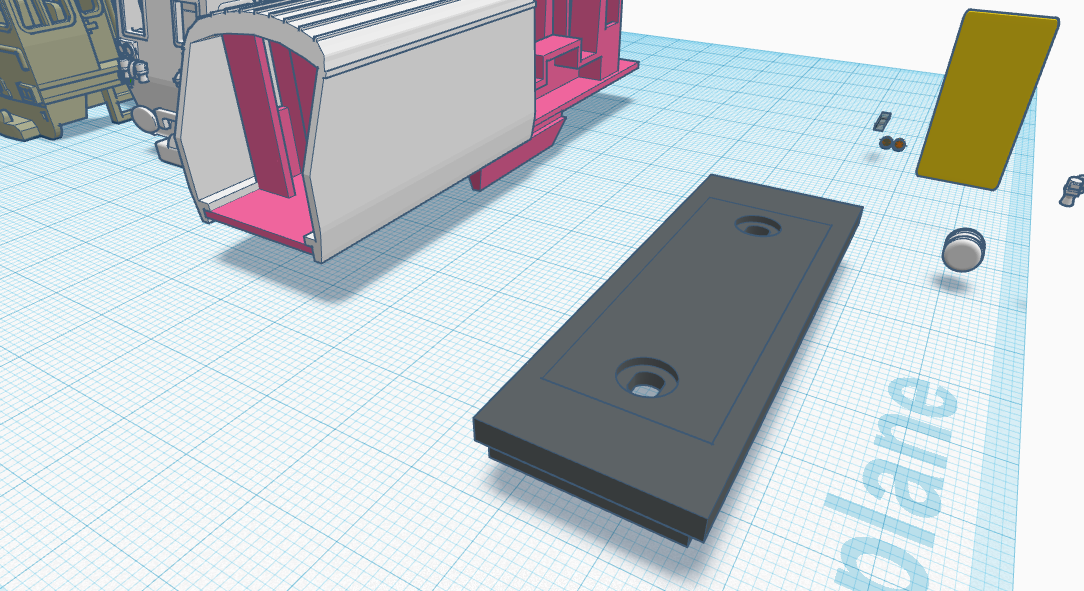
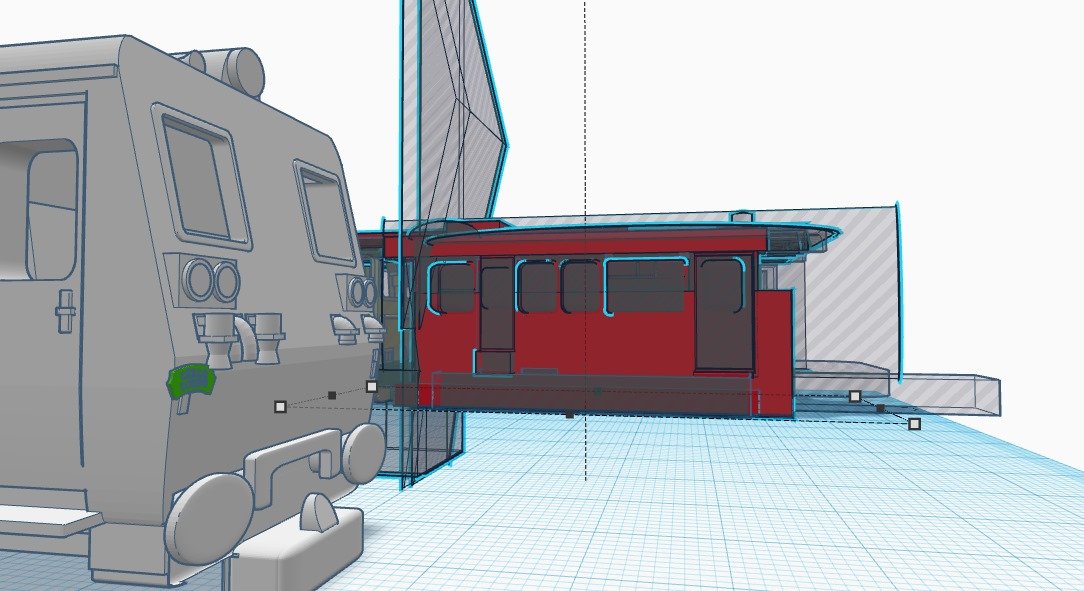
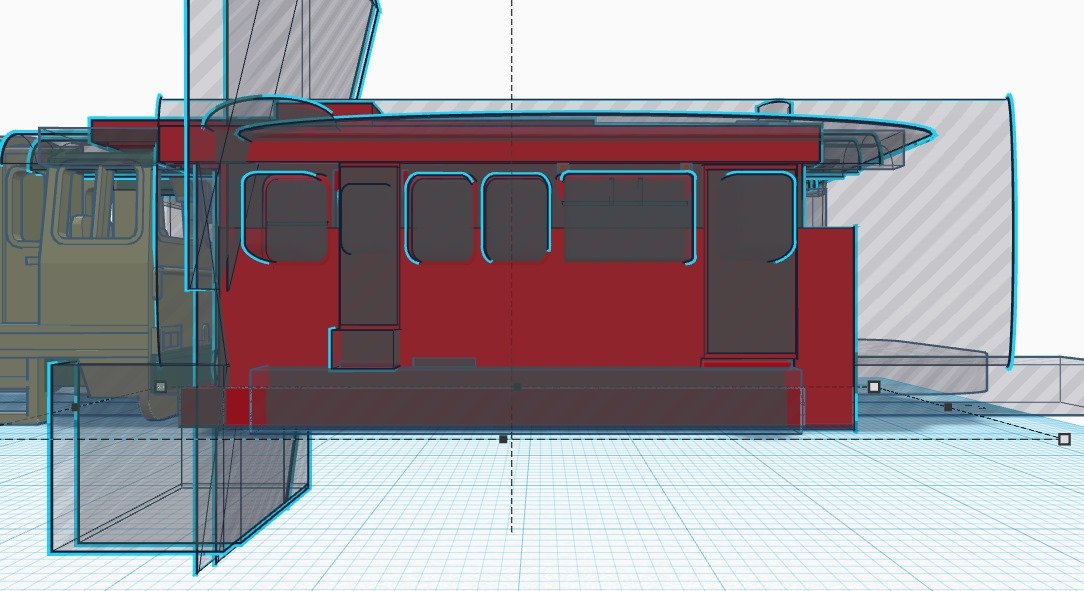
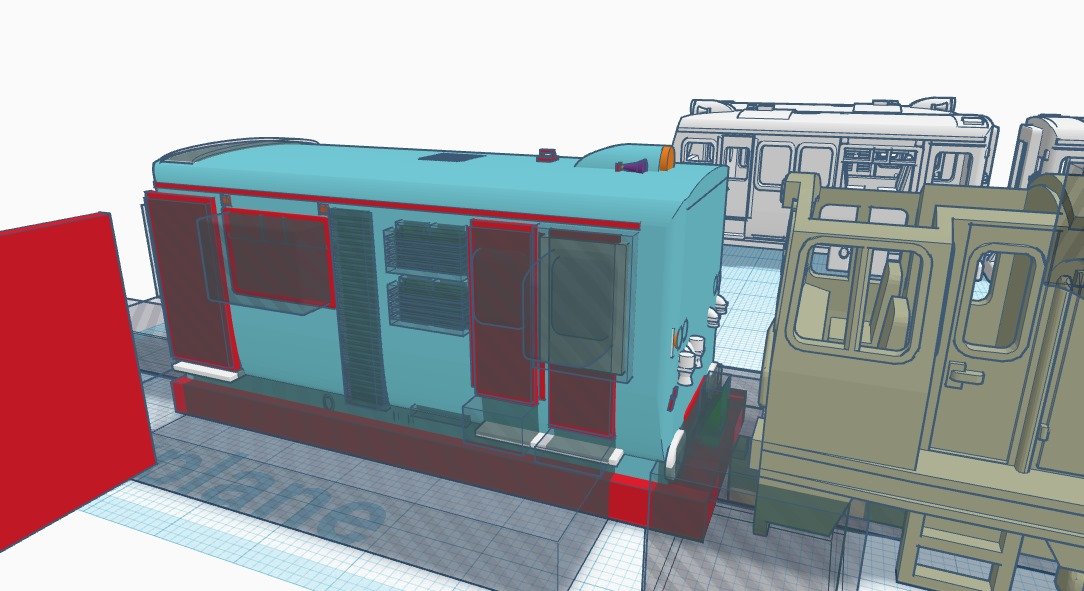
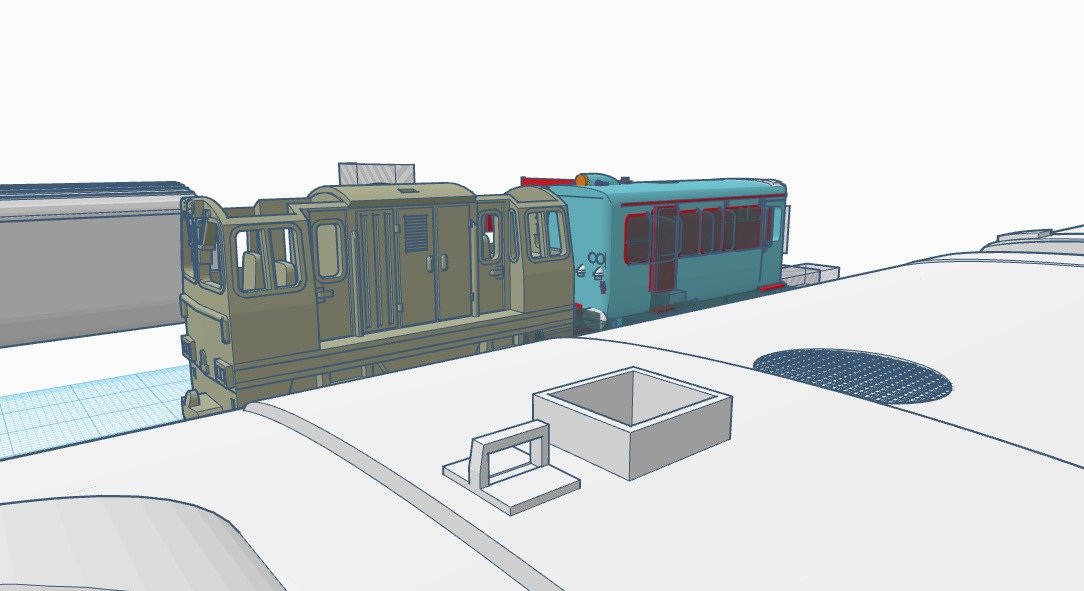
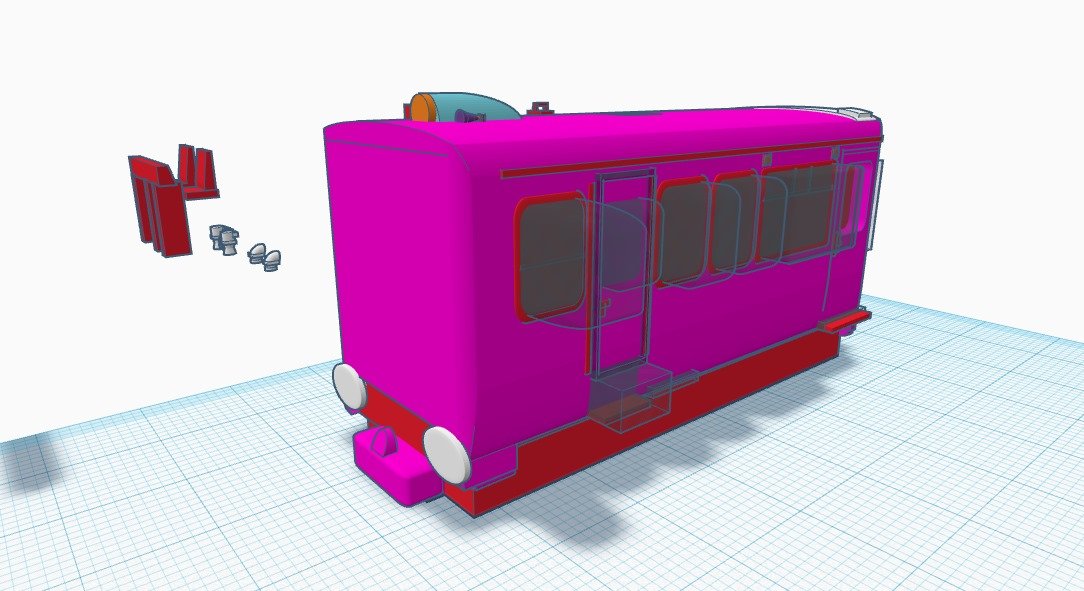
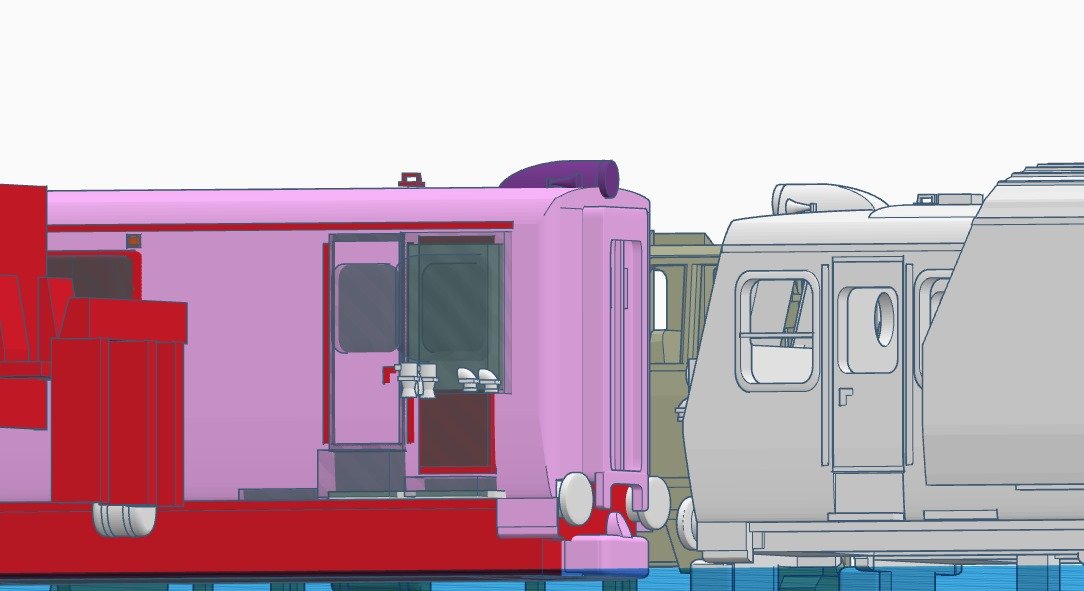
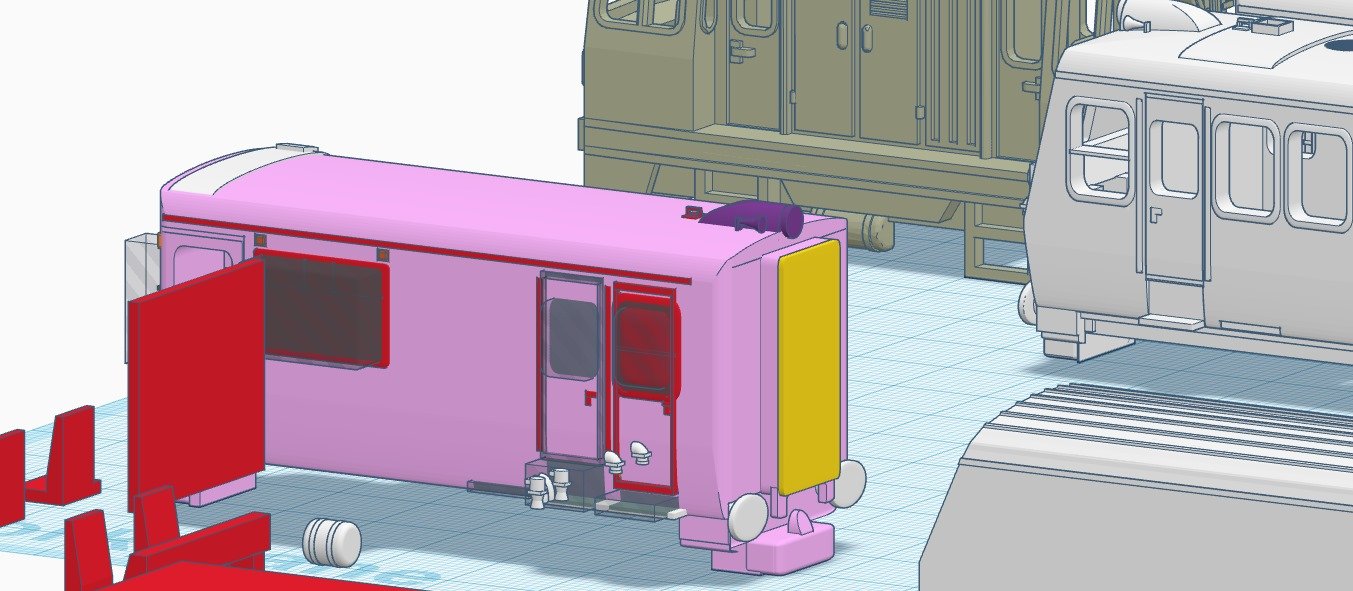
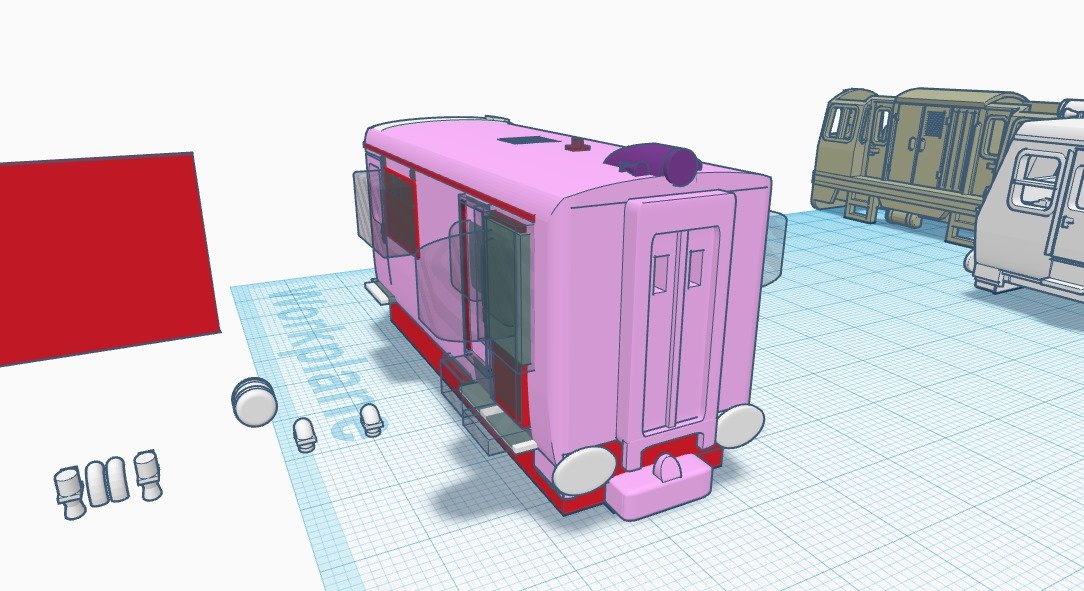
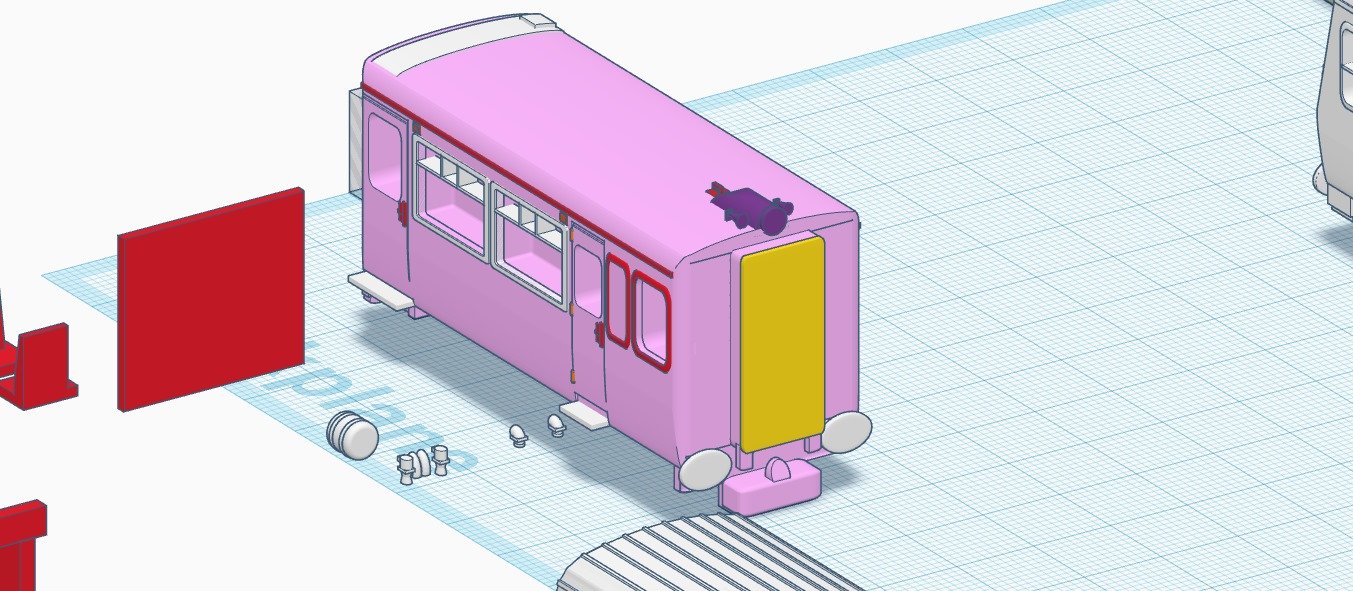
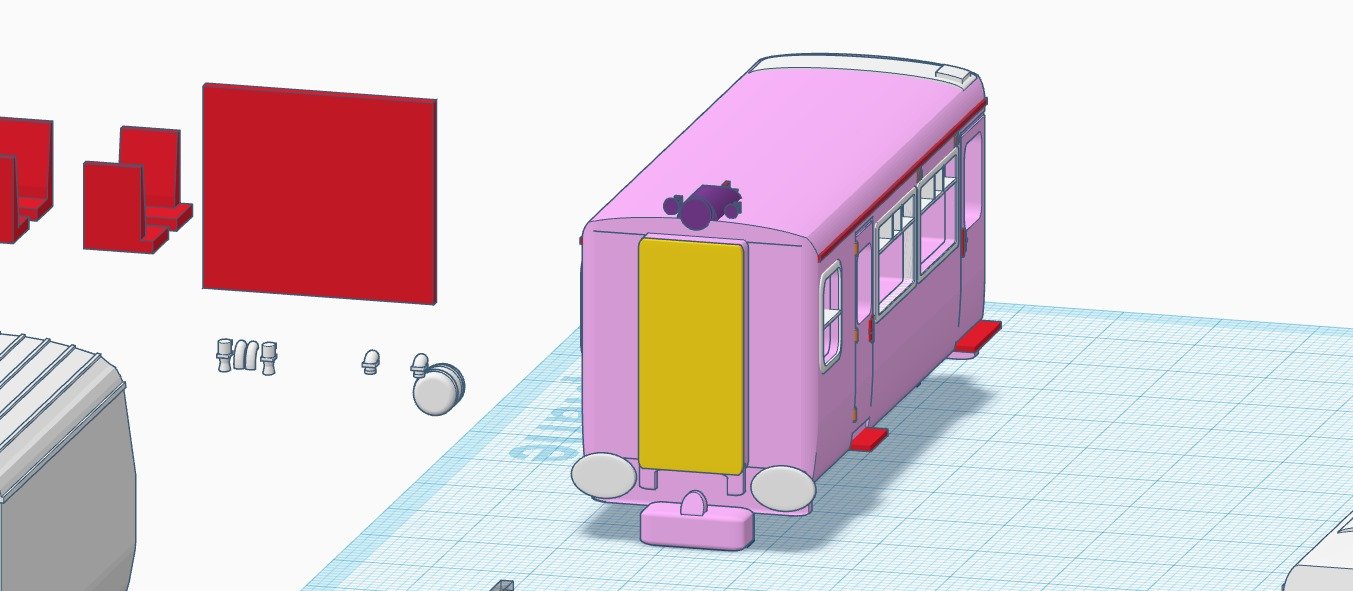
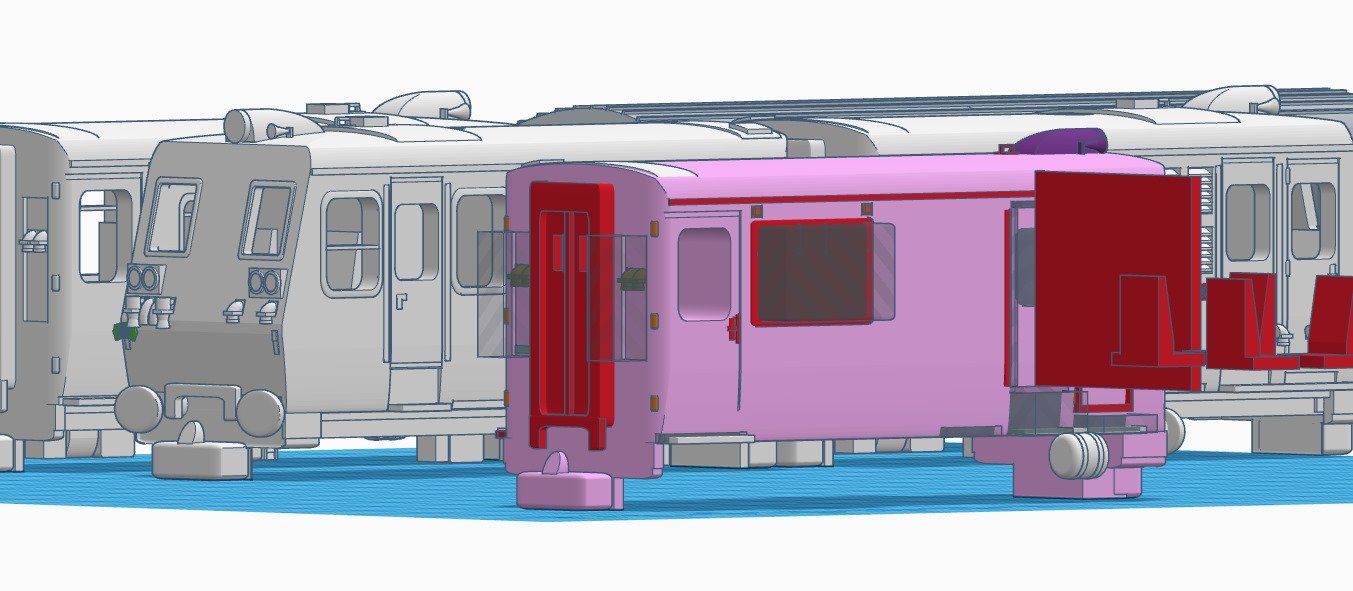
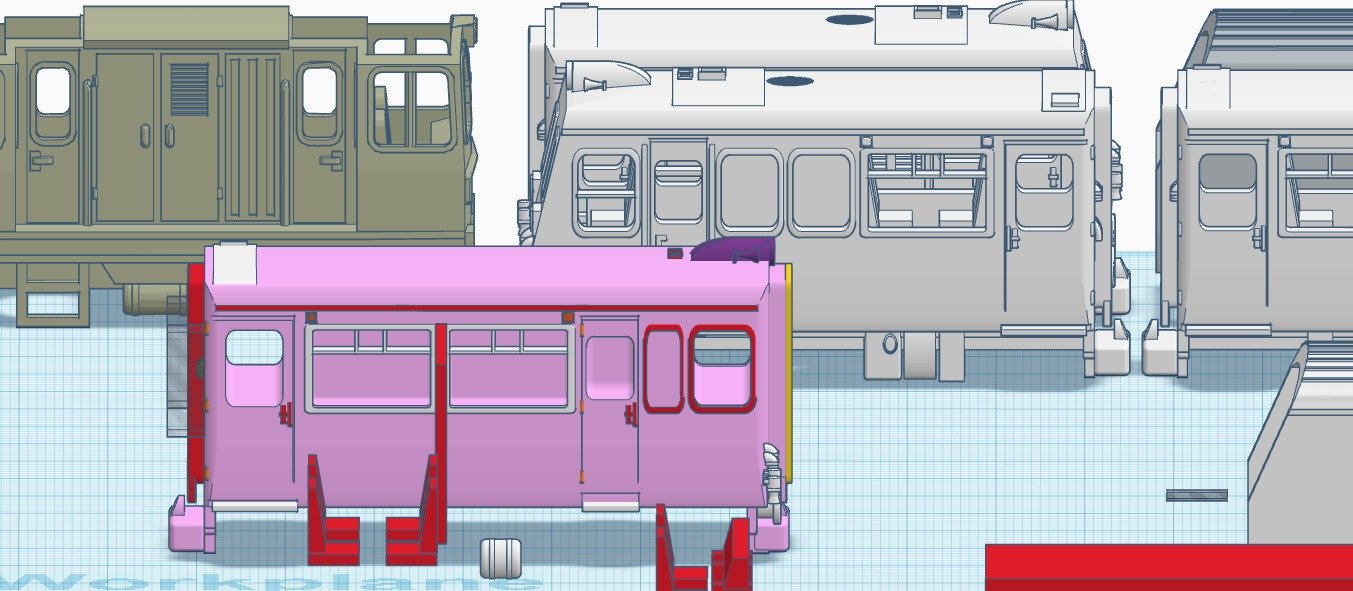
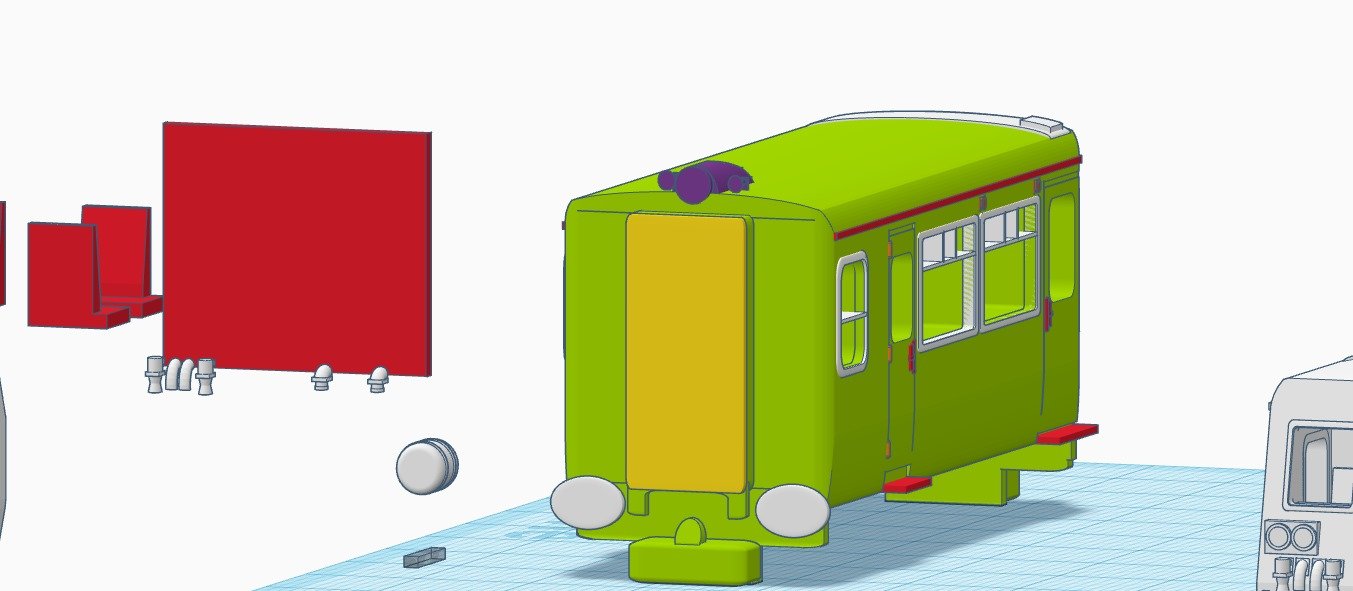
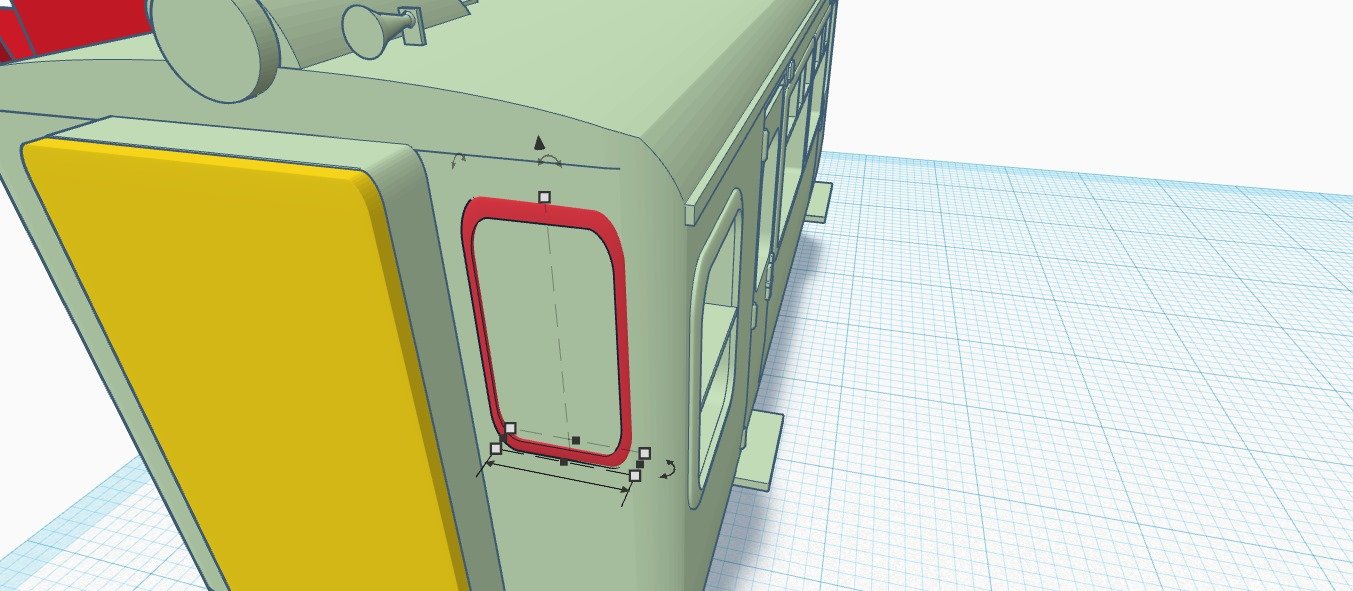
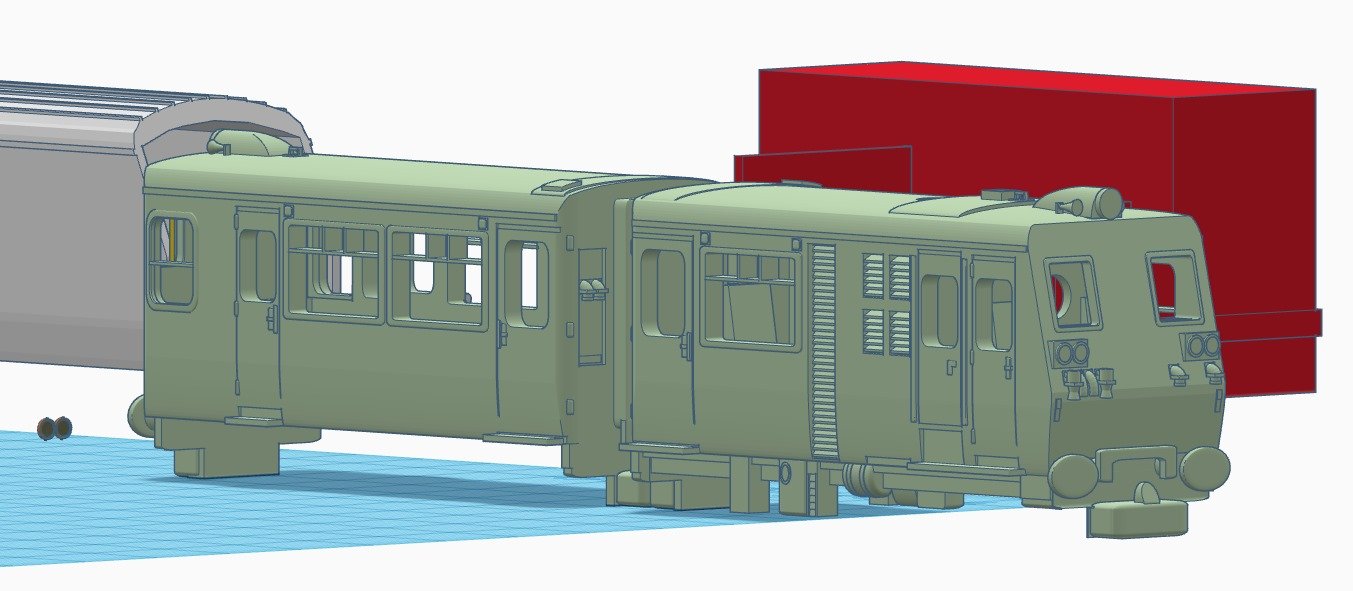
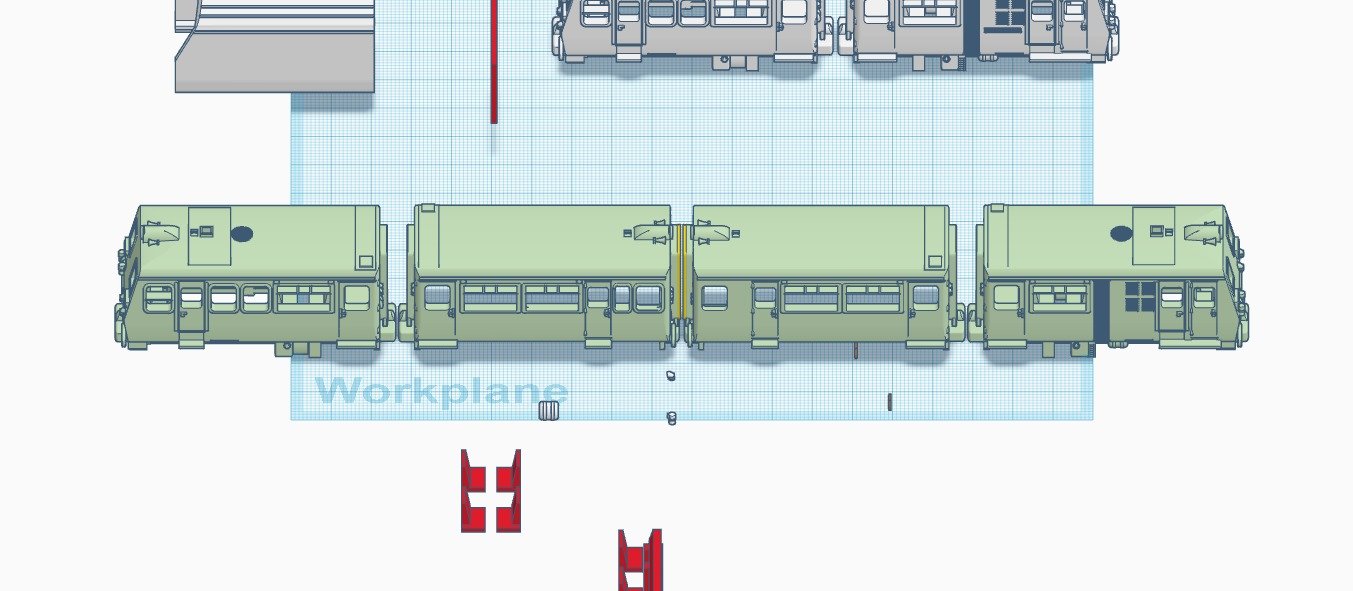
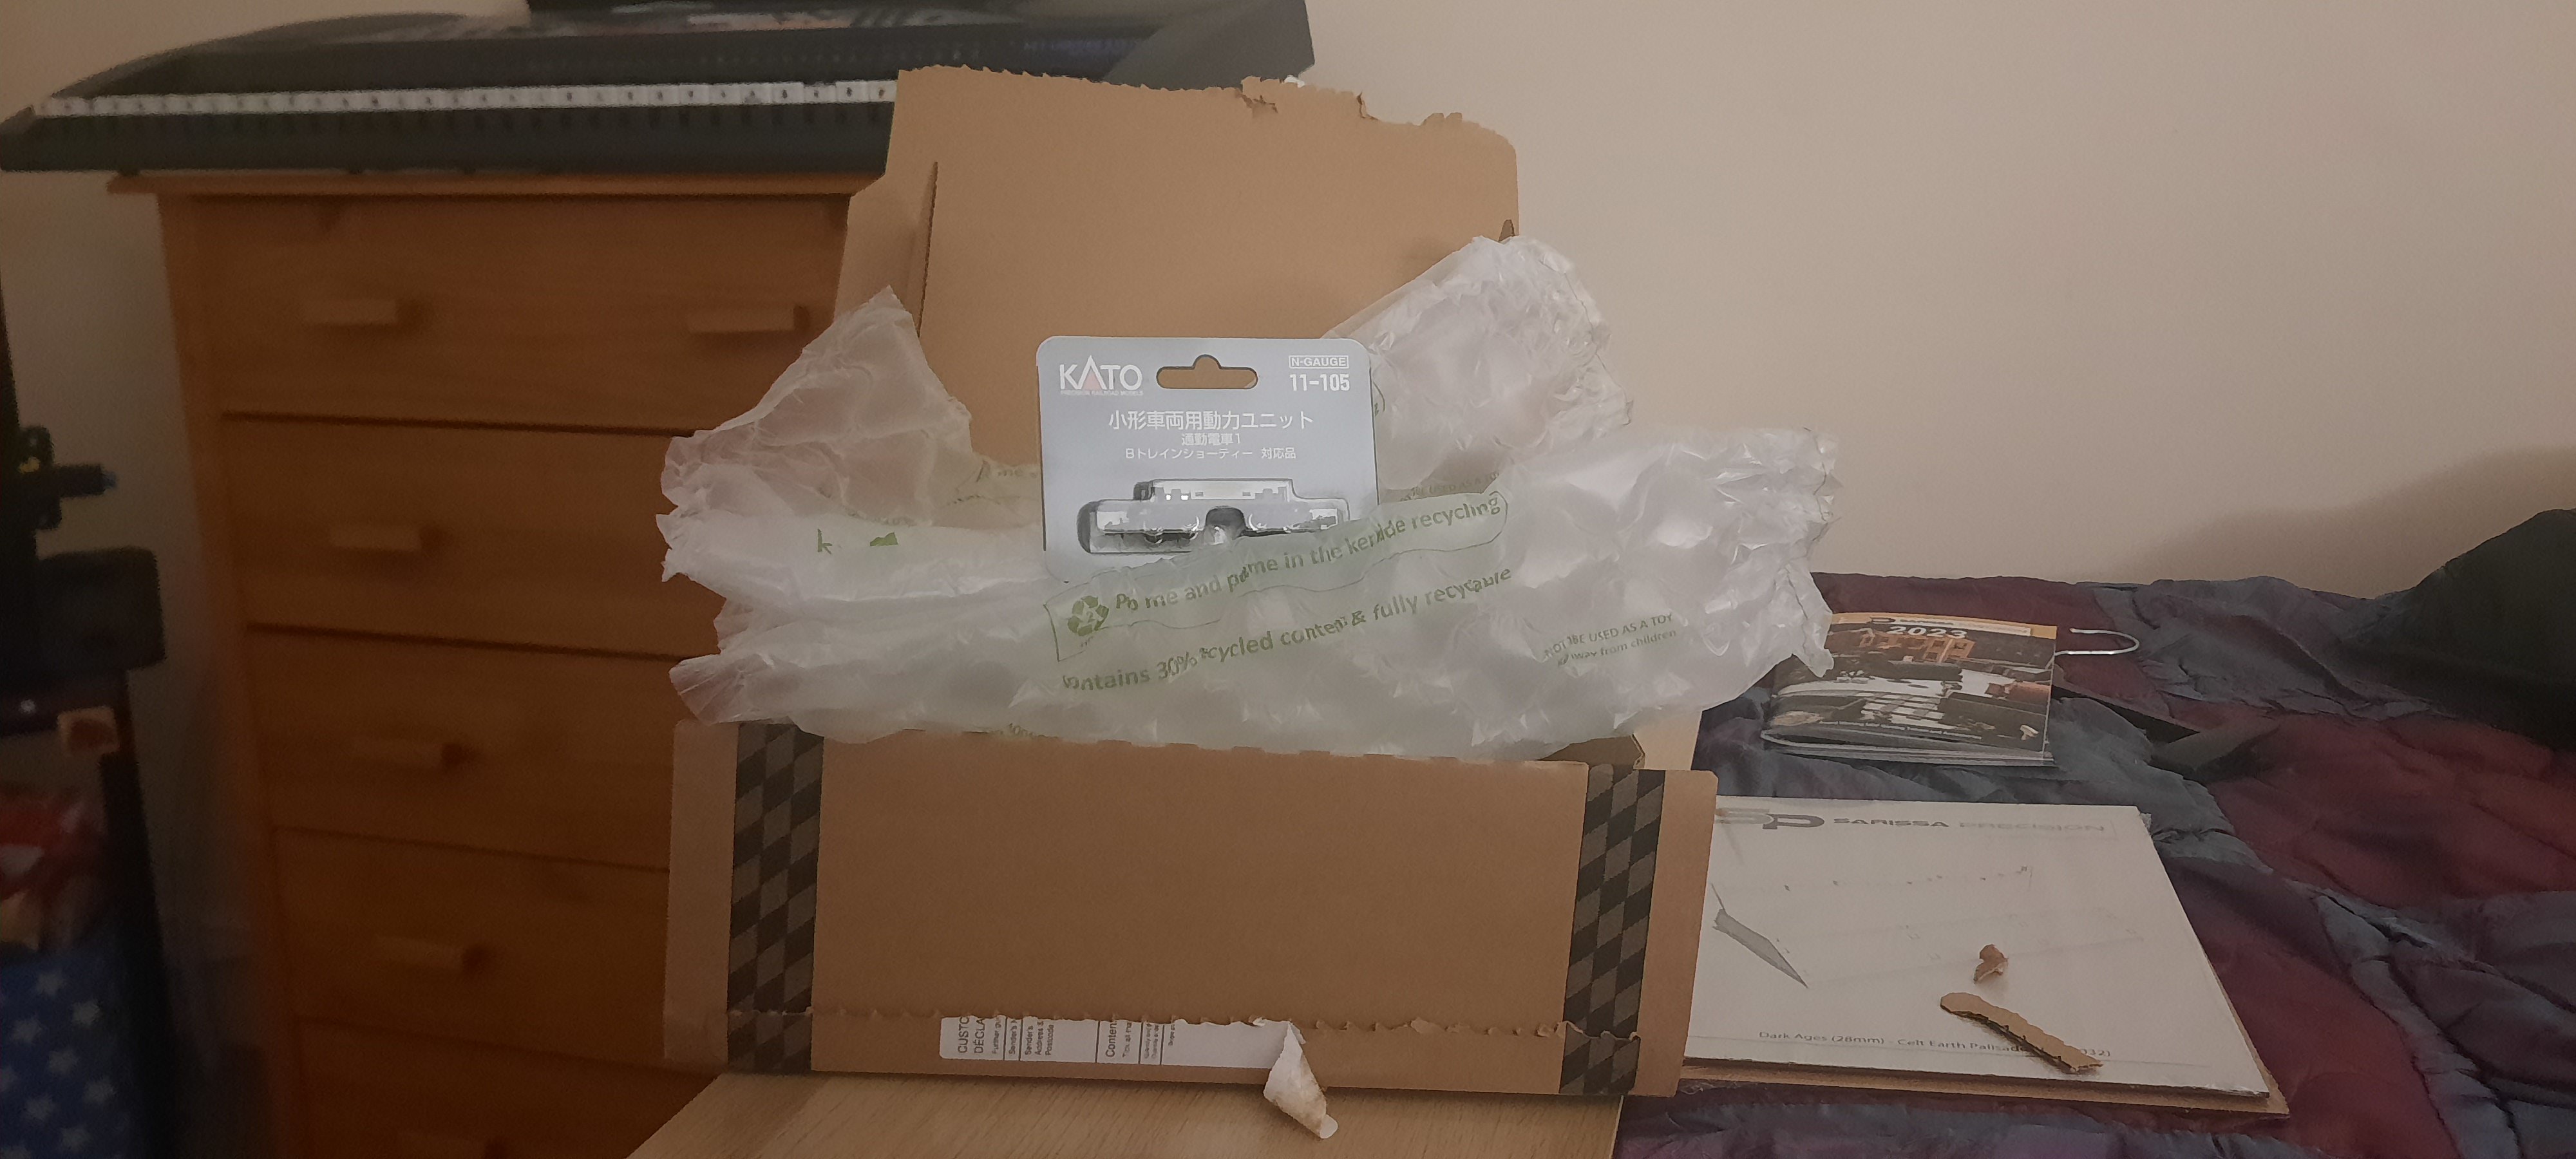
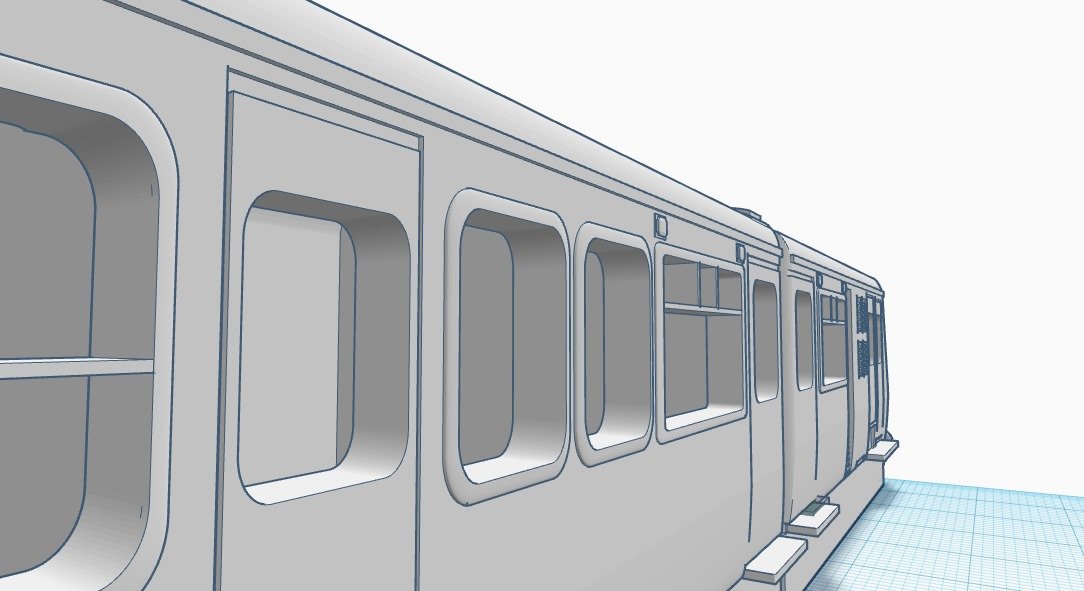
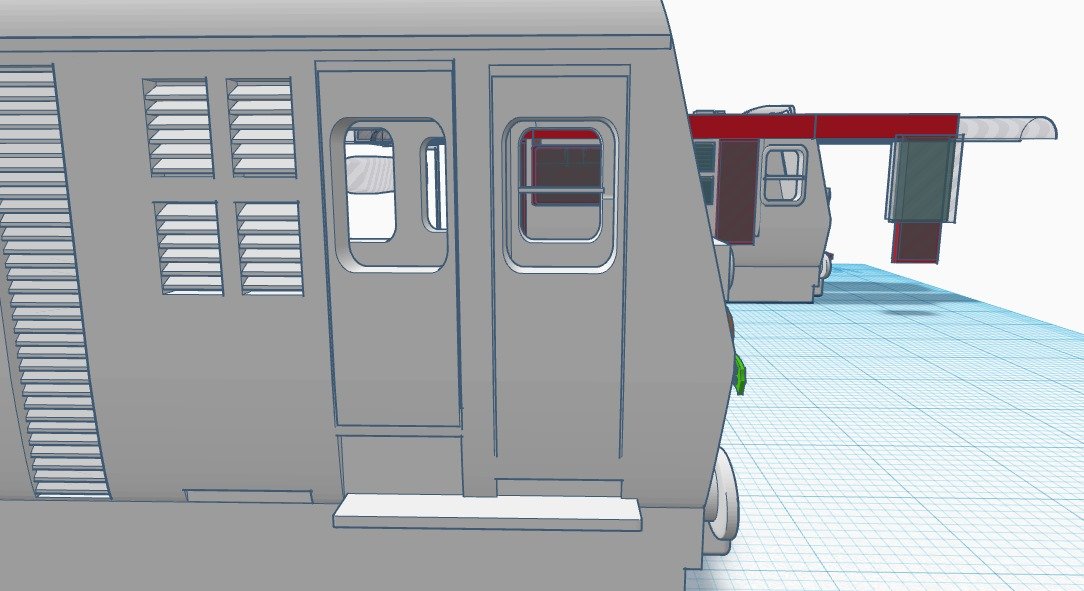
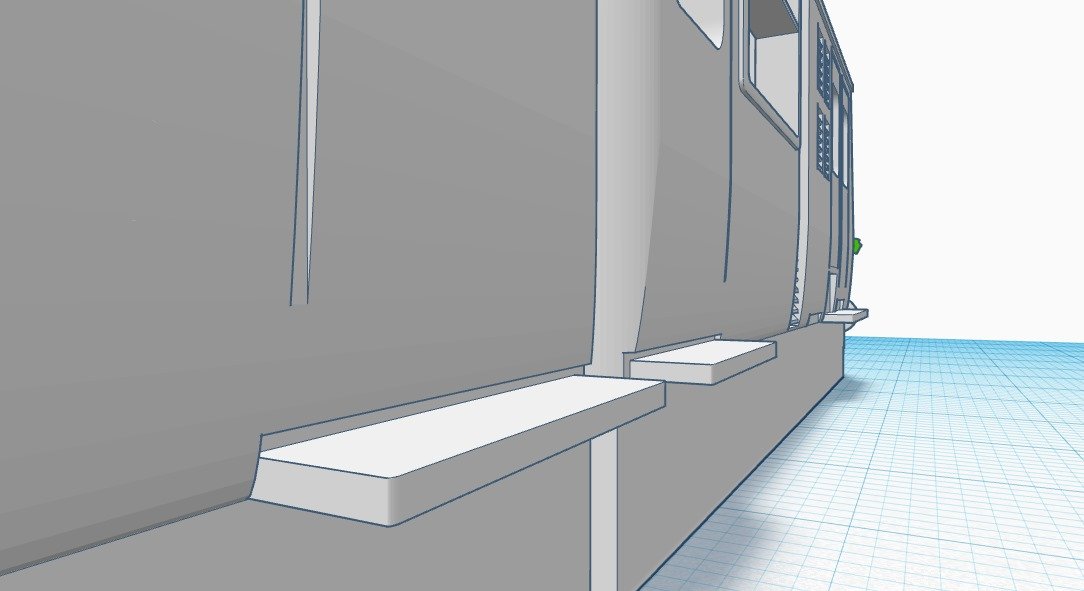
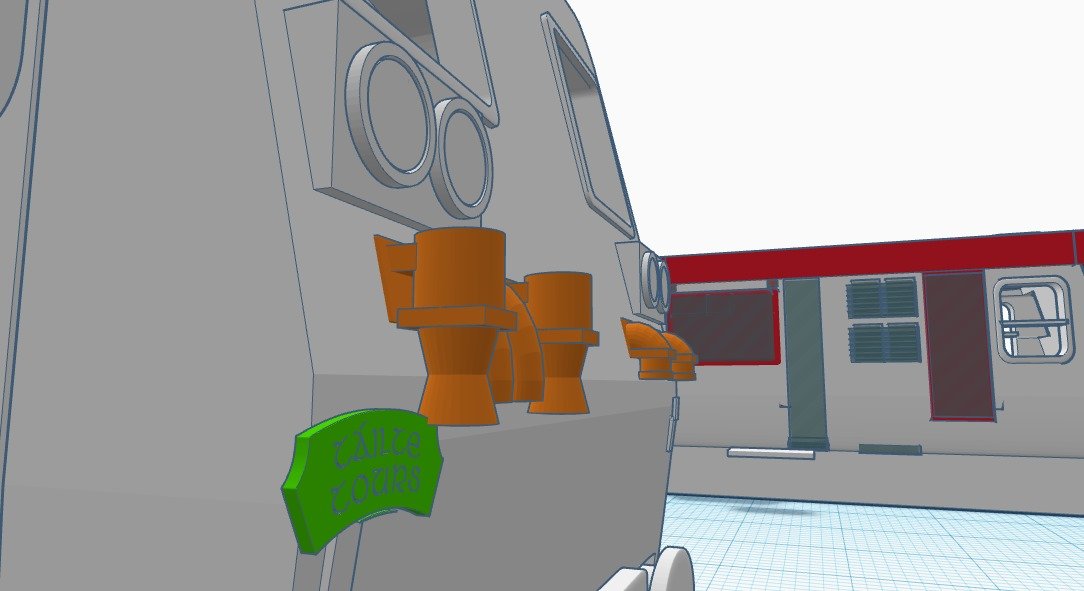
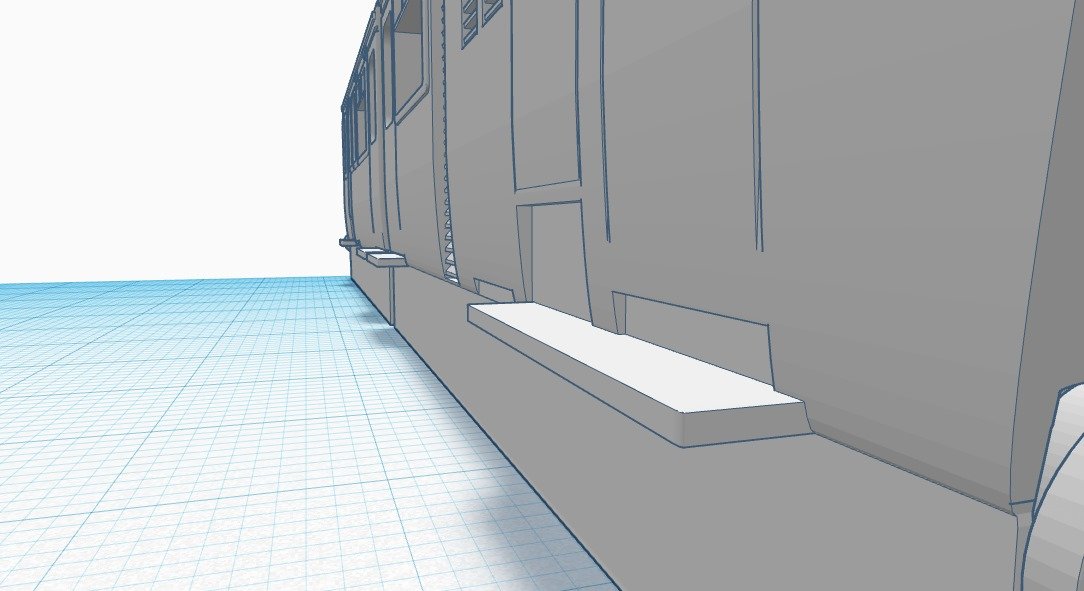
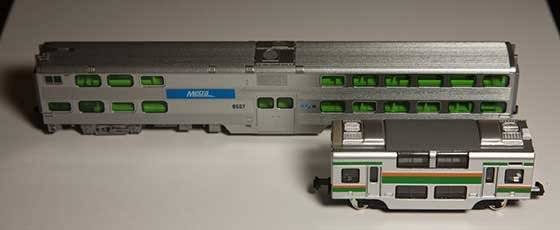
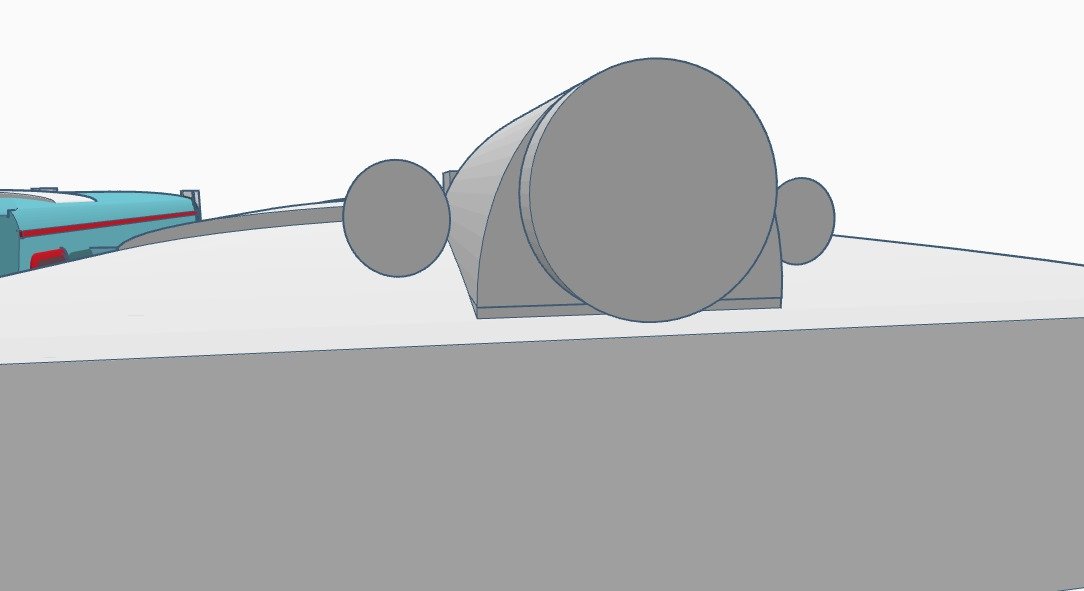
Baby 80 update, contiued....
A bit of work this evening on making some physical modifications before editing the files....
The chassis for the TSO / DTSO didn't fit in the shells as they where roughly 1mm too long in length, so, to the sanding paper they went! Sanded down each end equally & then tested till fitted.
After getting the chassis to fit, it became apparent that the bogies didn't fit on the chassis, as they clipped. So, chassis removed, the overhangs were trimed off with a craft knife & the ends yet again sanded down. Bogies fit on the chassis, yay!
Hang on, they don't fit on the coach, as they overhang by a few mm. Sigh.
Decided to take the hacksaw to the chassis, now they & the bogies fit!
I will of course fix these in the files before the next prototype print.
Now that its finally on the track, i can see that the PC is one coupler height too high, so, that will also be fixed in v2 of the 3D model, along with triming the inner side of the underframe details to allow freer movement of the bogies.
But, as of mentioned earlier, this is to be expected & is all part of the first prototype.
Attached images show the problems, the modifications & the DTSO & the mini Vale locomotive by Daves Railway Bits....
I shall update the 3D models on Monday!