

djkonore
-
Posts
180 -
Joined
-
Last visited
-
Days Won
2
Content Type
Profiles
Forums
Resource Library
Events
Gallery
Blogs
Store
Community Map
Posts posted by djkonore
-
-
Wonderful, thanks for posting Eamonn.
-
As I said, it was'nt featured on the 141/181 models, but looks like it will be on the 071's. Fair play to Paddy and his constant efforts to leave no stone unturned.
-
Just looked at a few photos there and I don't see any blanking plates on the cab sides of any of the GMs...
Highly unlikely, but could it be 082's nameplate?
As seen here

-
I notice from the 071 pre-production pics the they have included the blanking plate under the side window, presumably installed after the removal of the staff collector. A feature not present on the MM 141/181 models (post staff collector era). Small details like this lead me to believe that Paddy is building on the experience and even further improving on the quality of his previous models.
-
Found this good video showing the interior of them on the radio train
Nice shot of Kildare station at 3:47
-
I love that Maxol garage.
-
Is djkonore hanging onto the side of the lifeboat? I threw him a lifeline yesterday, maybe he's being 'processed'..?
Thanks for the updates on the processing wait lads, my abandonment issues were creeping in
Then when I did get cleared, the mot insisted on some "quality time" ..... so I obliged
Anyway great to be here at last!
-
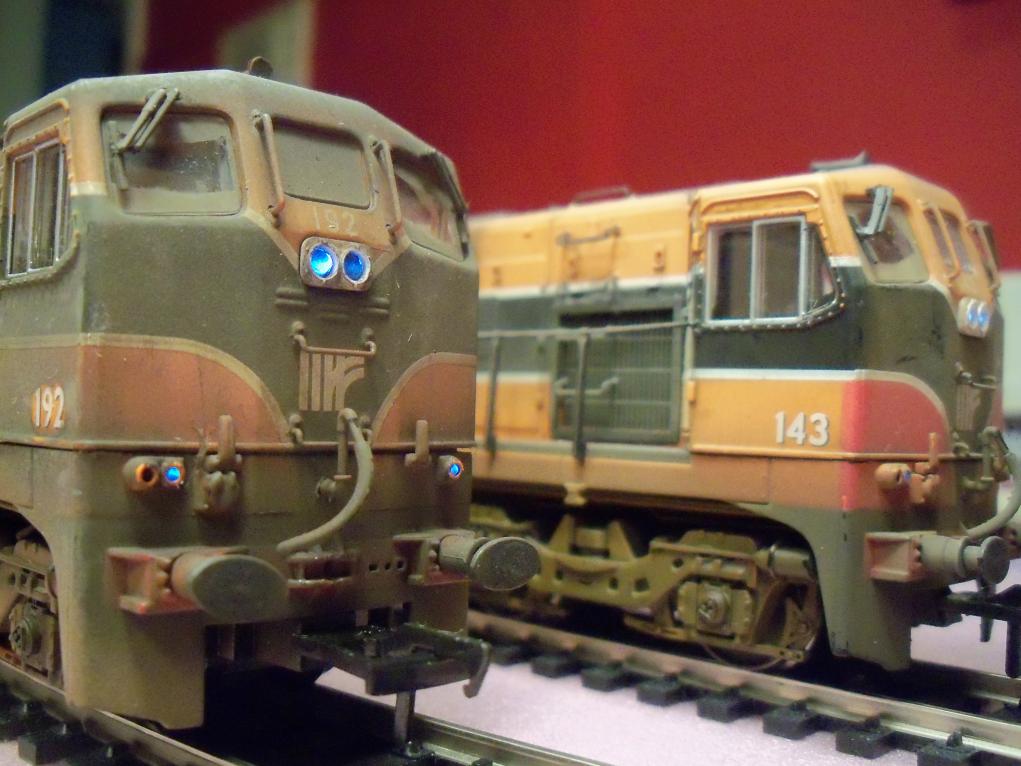
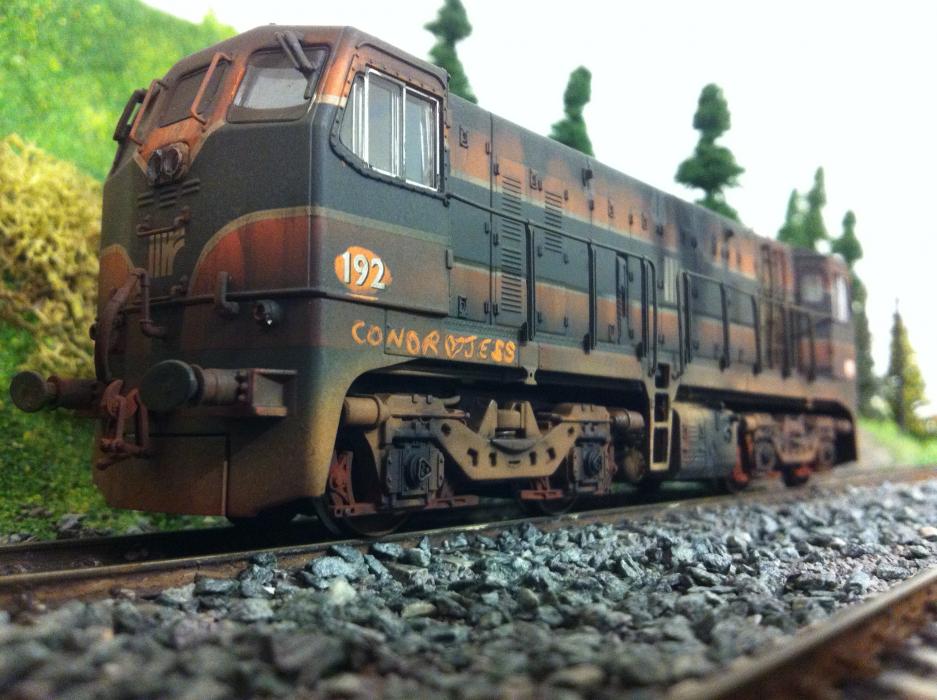
Do we know Conor or Jess? Nice work on the loco.
This was my weak attempt at getting my girlfriend to be more accepting of my model train addiction. She thought it was romantic until I started spending more time with it than with her
-
Beautiful
-
Freight Duties (with sound)
-
 1
1
-
-
Looks like I'll have to wait a bit longer for an IR 071 Class. Any estimates on when that will be available? I guess it depends on how the others sell first.
-
Hey Anto, did you need to get planning permission for that helix?
-
And Veissmann’s new P&T Tamper tries to tamp imaginary ballast
That yoke is deadly lookin!
-
Nice hoover. Is she a Dyson?
-
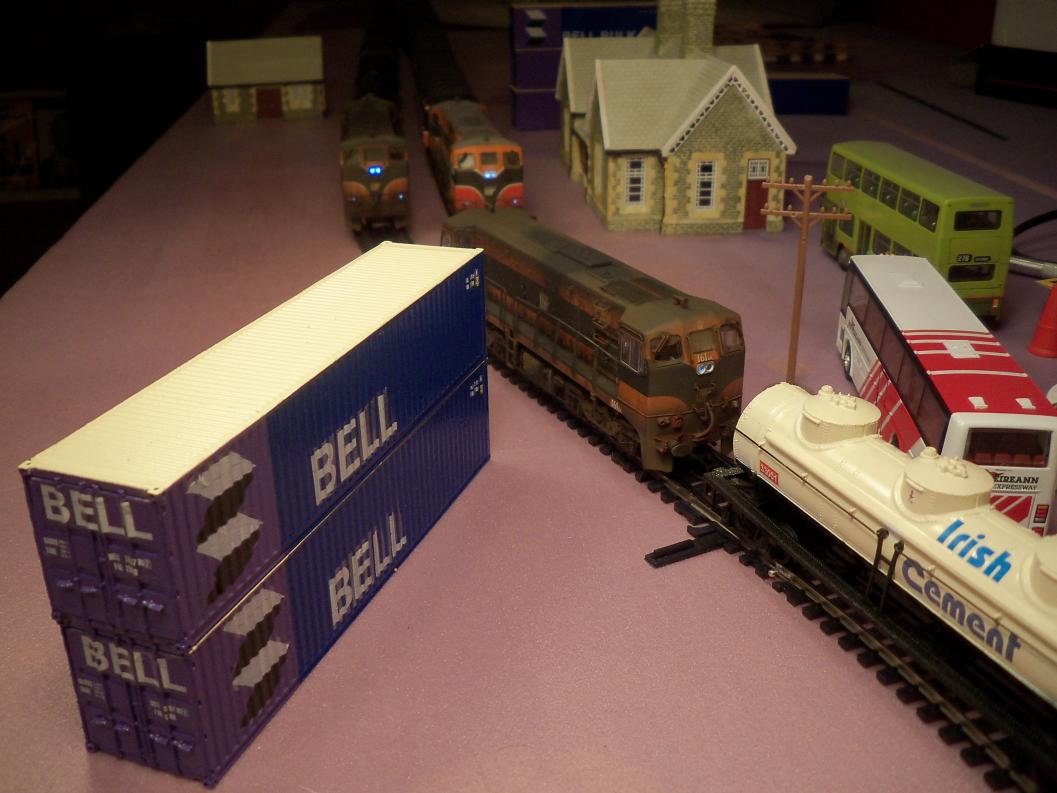
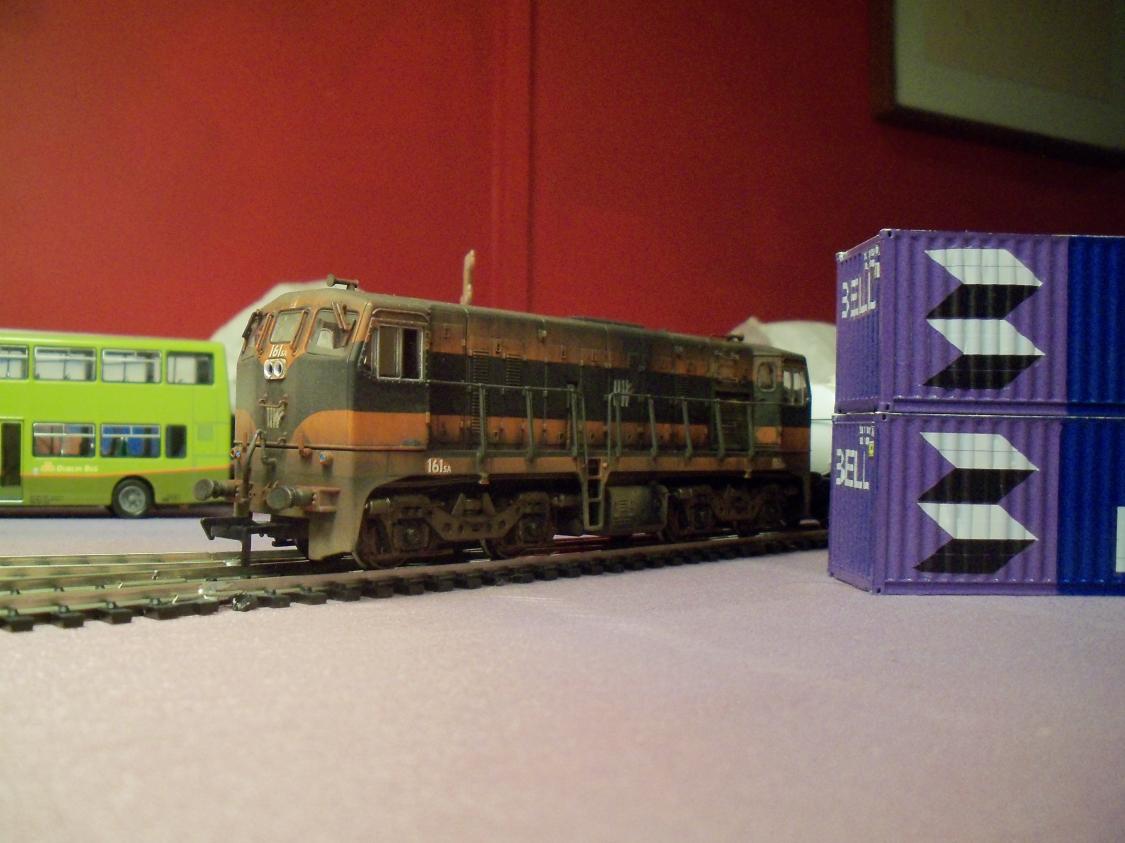
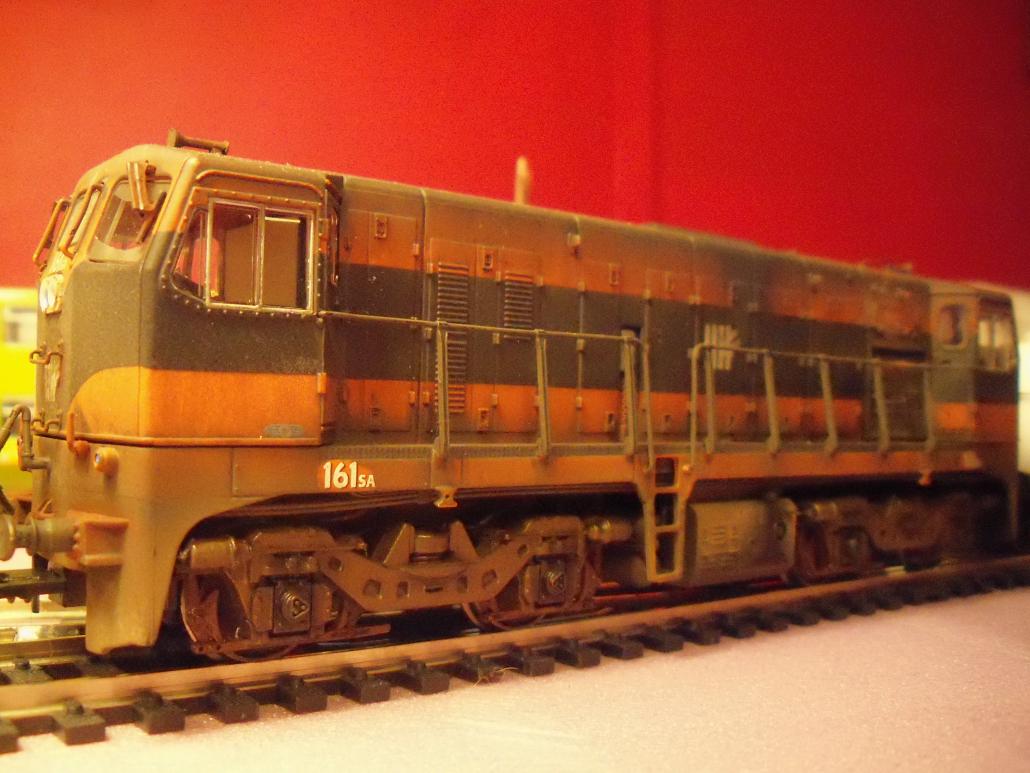
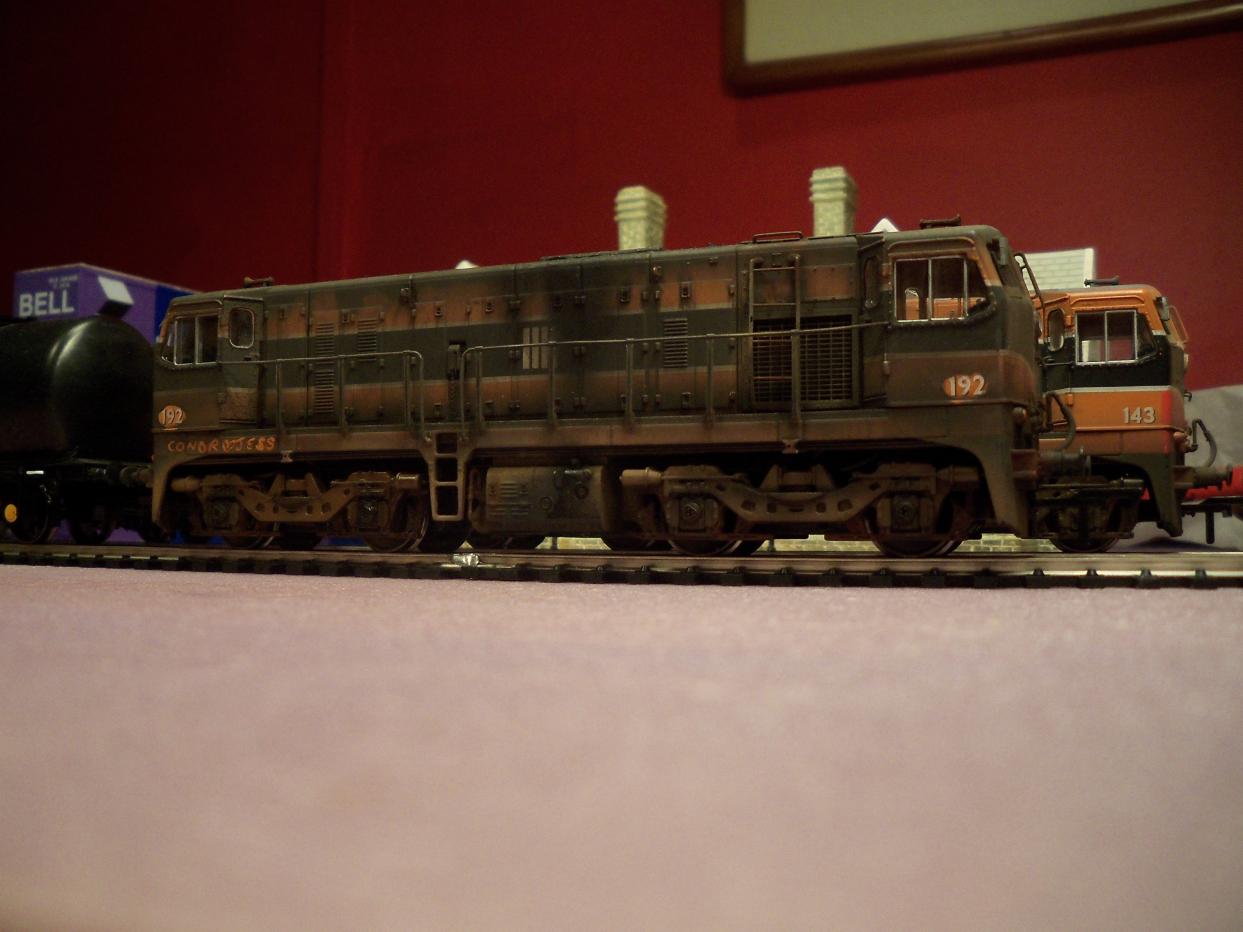
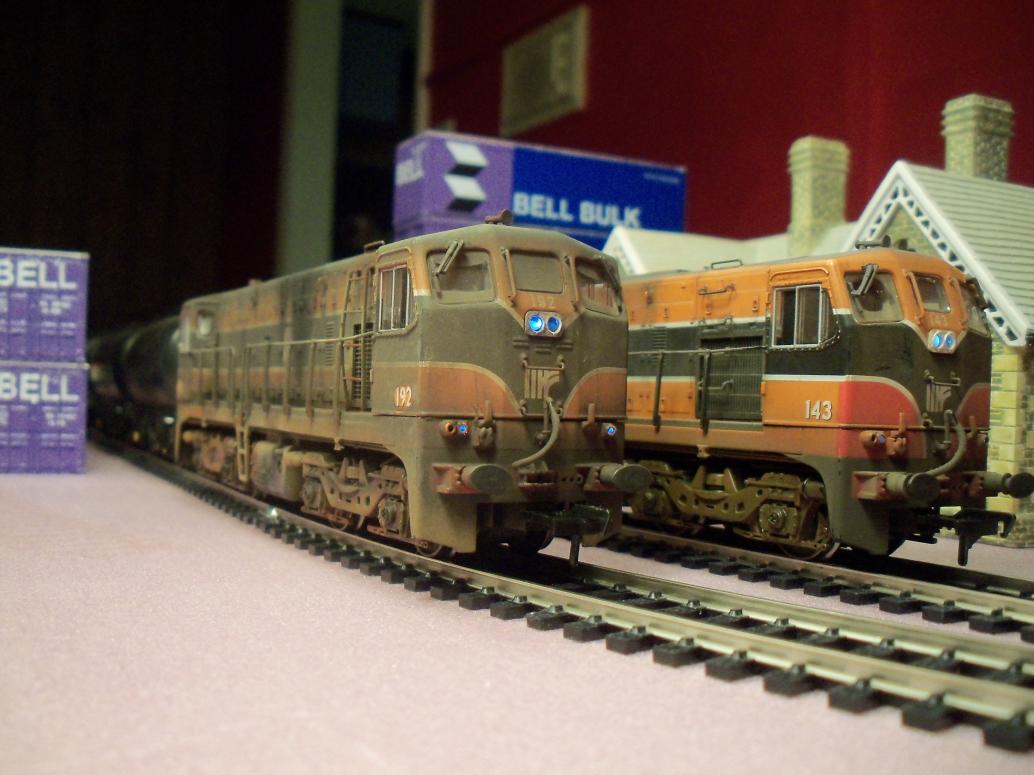
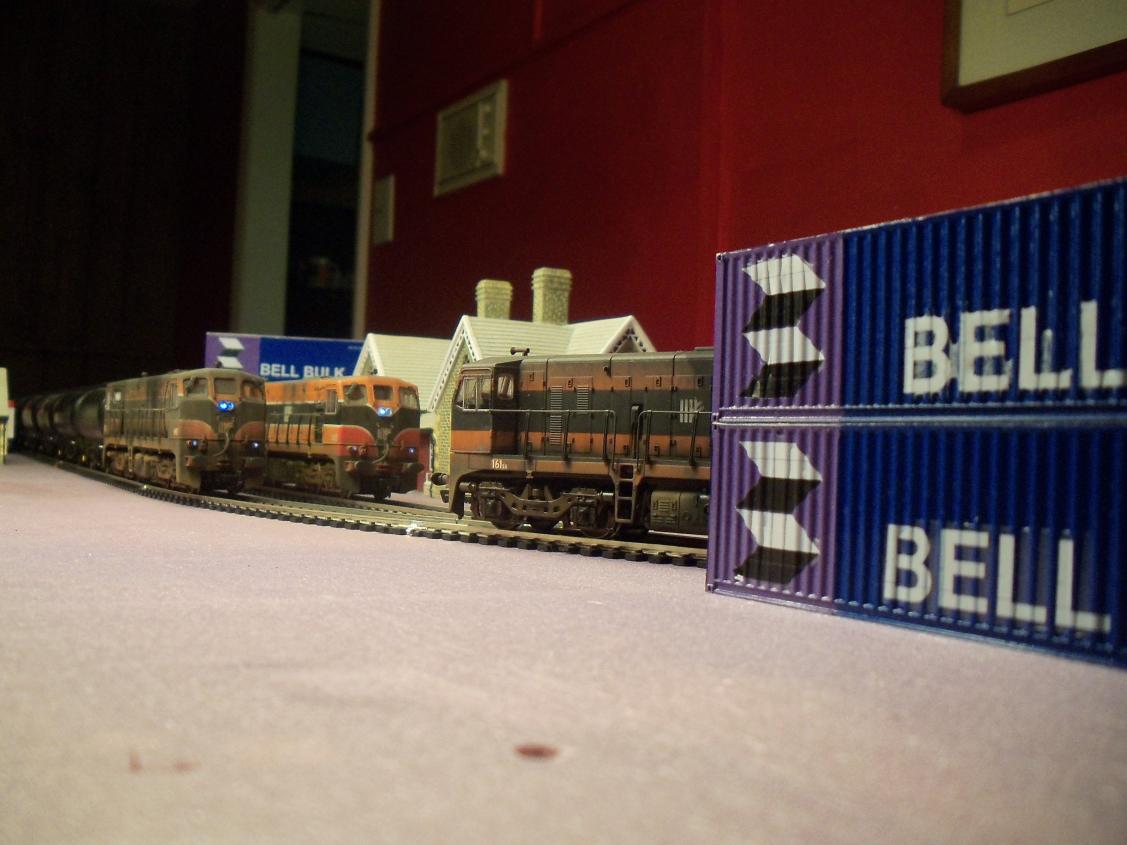
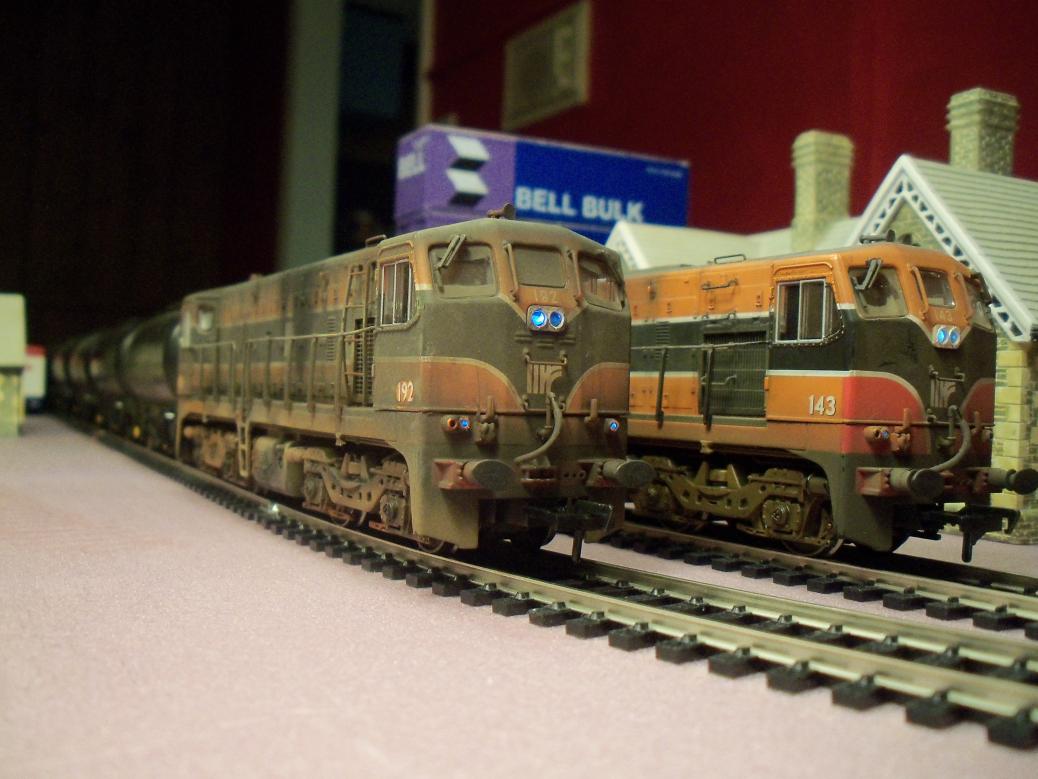
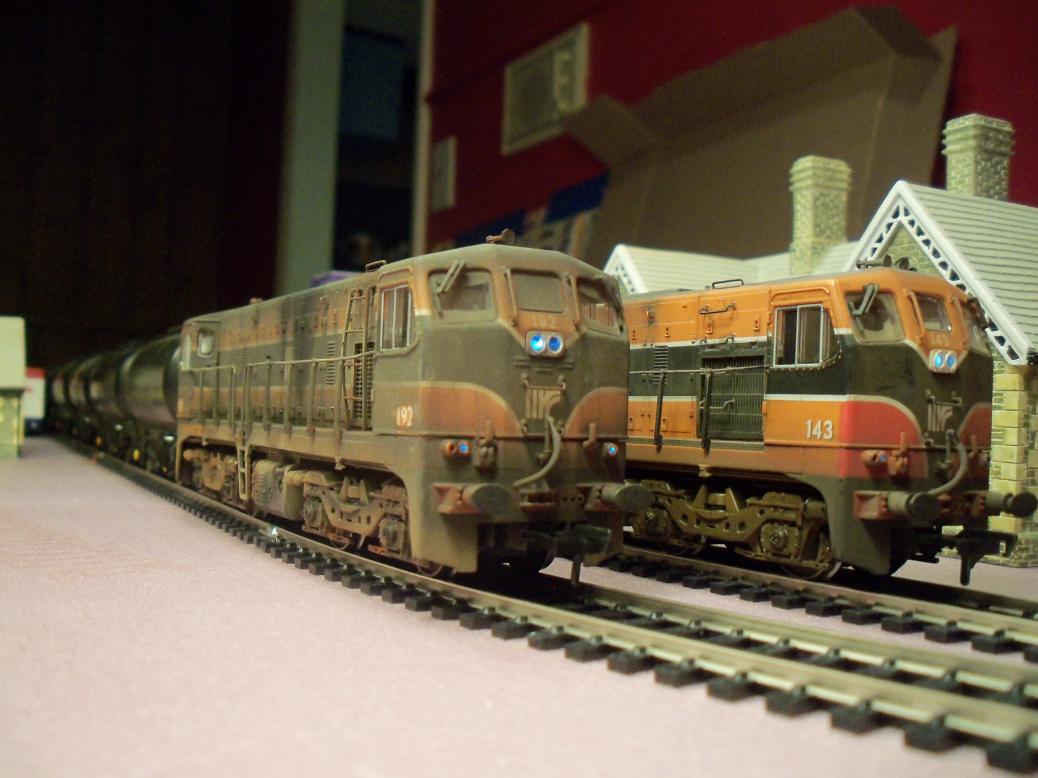
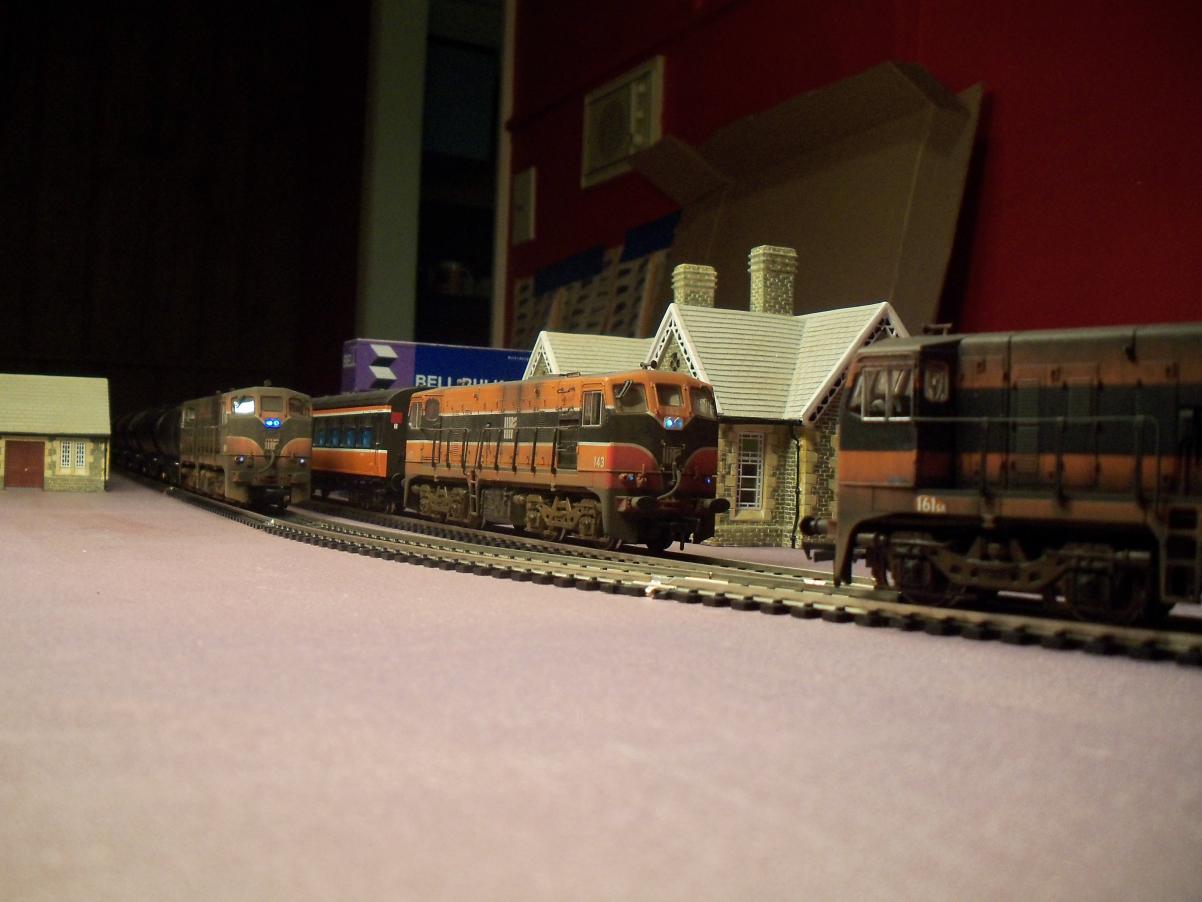
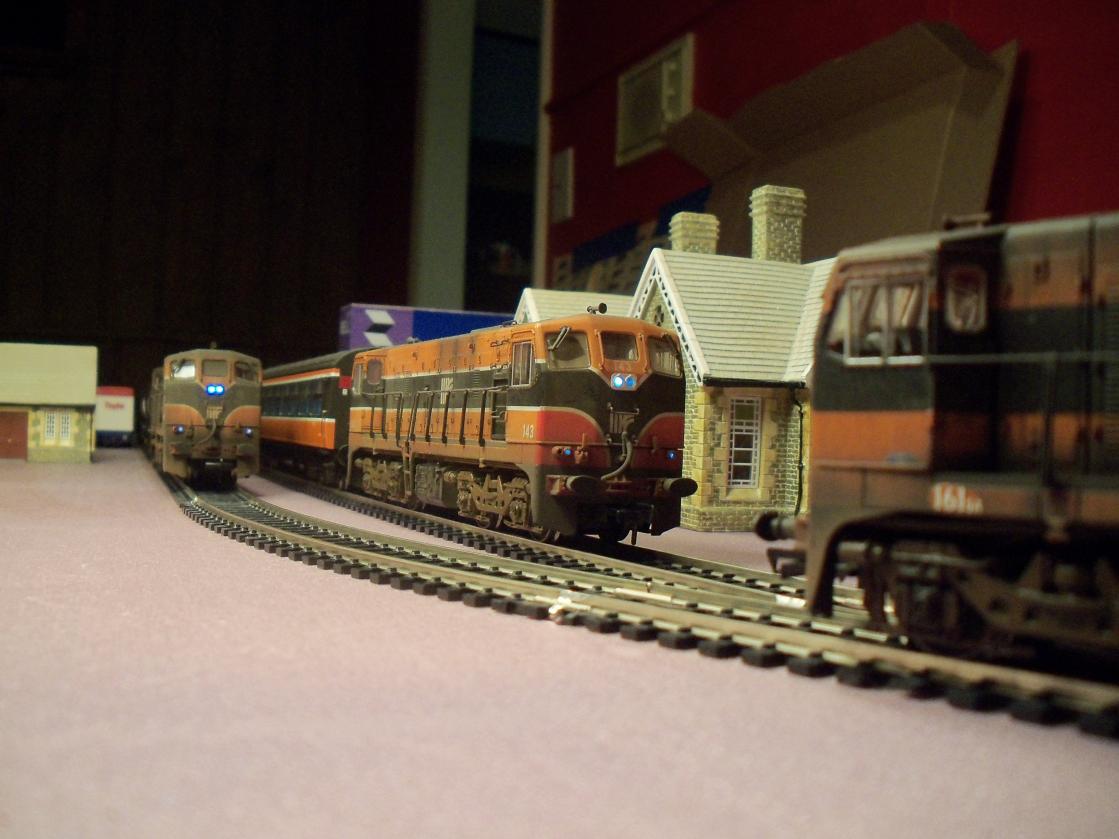
Does the heart good to see so many dirty GM's in the same photo:)
Where did you get the containers?
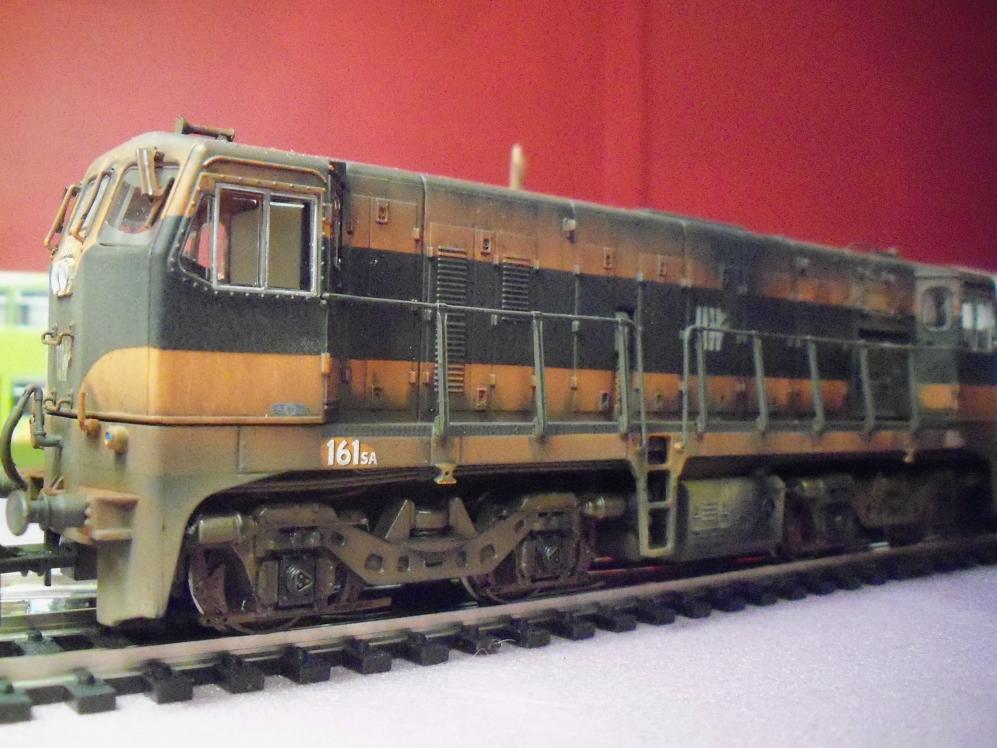
Anthony "dirtied" 161 and 192 for me. He also "re-branded" 161 with IR logo's for me.
The 40' containers are Dapol, I got those from Hattons. The 30'ers came with two 60' flat wagons that I also got from Hattons. All the decals are from Weshty.
-
Bogie Wagons –Container & Timber
[This entry was originally posted on the old site.]
With thanks to MV038, IE201 and others for their previous posting on the above type wagons. I decided I’ll have to have a go and based the models on what has been already been done by others with a few of my own additions.
Collecting Hornby 60’ wagons and cutting the ones down to 47’ for Container use was the first stage. I noted the difficulty in getting a good join between the sawn wagon parts and after a few goes I hit on this method which gave me a “true meet” between the 2 half’s.
I placed the 2 parts to be joined on an old steel ruler, applied Epoxy Resin (Z-Poxy 5 –minutes).
I used bulldog clips to hold the 2 parts together and other clips to hold the body to the steel ruler to keep it flat.
You should end up with a good strong join.
Once the first one was completed, it was down to assembly line practice.
Buffers were made from plasticard with a brass pipe shaft inside Evergreen Tube 3.2 mm (Code 224).
Undercoat and then test run
I also included a couple of pocket wagons I had resprayed and identified the potental problem with Dapol and old Hornby couplings.
Timber Wagons are more of a challenge. Working from what others had done, along with copies of Wagons drawings (thanks to 3wheeler) and closely examining available photograph I came up with the following construction method.
Plasticard with Evergreen Channel 3.2mm (Code 264) 0.4 x 2.0 strips (Code 114) were used.
The ends were covered with the 3.2 mm channel.
They were heated with a hair dryer to mould into the shape required.
I concluded from the drawings that 5 pallets with upright stanchions at each corner where fitted across the body of the 60’ wagons.
These were made from plasticard, channel, strips and Evergreen square tube 3.2 mm (Code 252) and then attached to the body. Small piping is placed into the square tubes to bring them up to the correct height. Brake wheels (brass etches from Hursts) were fitted to each side of the wagon.
Awaiting more parts before completing the build and moving onto the painting stage.
Wagons painted in MIR red Oxide.
Wagons loaded
Paint and transfers completed. I loaded the containers with lead airgun pellets for weight.
Timber wagons painted.
Timber loads were built around foam squares to reduce the overweight and to stop these wagons being too heavy.
Wagons loaded.
Container Wagons in action.
Timber train passing.
Close up of the pocket wagons.
The Wagon Project took a lot longer than I had anticipated and I am happy to move on to my Hunslet rake project.
Those container flats look amazing
-
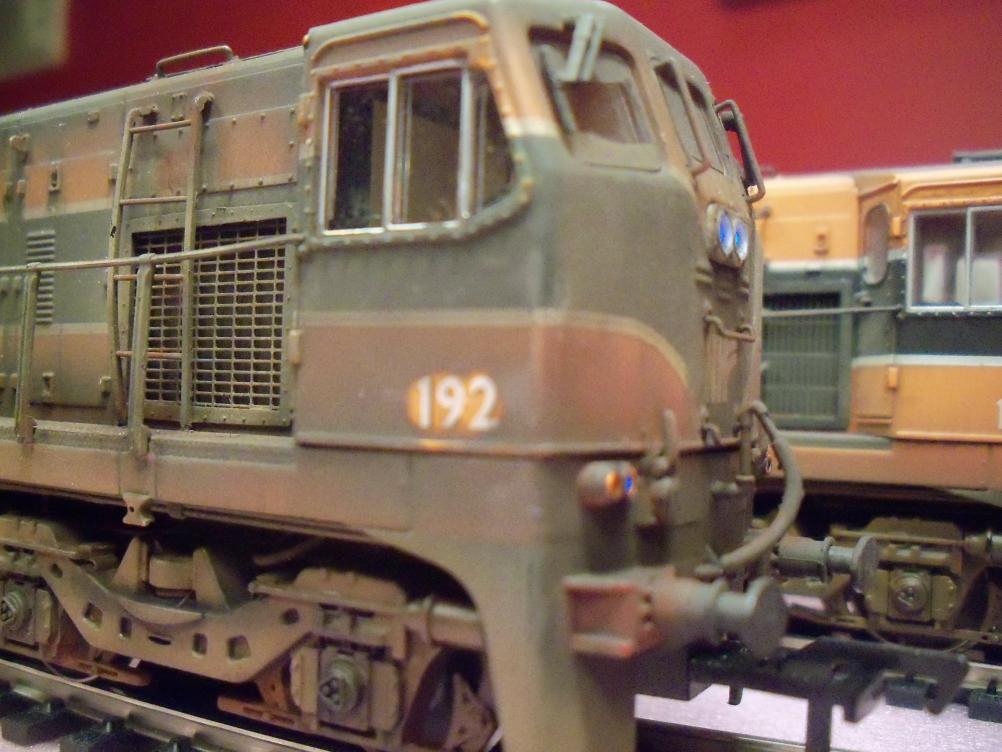
I recently weathered these for djkonore in the States
[ATTACH=CONFIG]159[/ATTACH]
Another happy customer
-
-
-
-
-
-
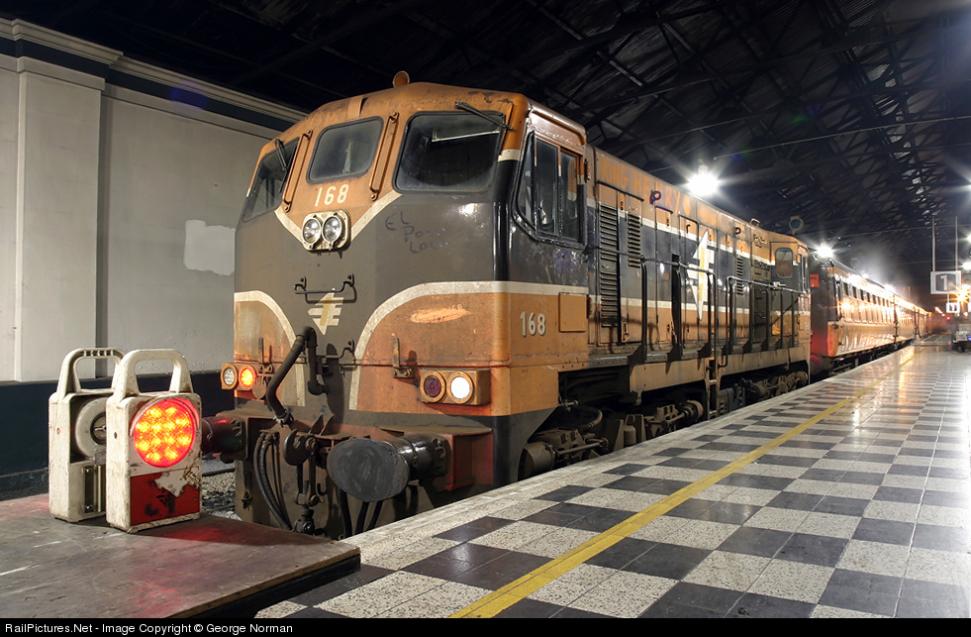
Weathered for me by Anthony. I think the picture speaks for itself...


Ballinafeckin Layout
in Irish Model Layouts
Posted
Hey Anto, cheers. Ye, I gotta sort that ladder out. She'll be coming off again soon, when I get a sound chip for her from Gareth @ the Belfast Model Shop. Just got finished putting down some more sidings. I'll put some pics up soon.