

mrhd
-
Posts
24 -
Joined
-
Last visited
Content Type
Profiles
Forums
Resource Library
Events
Gallery
Blogs
Store
Community Map
Posts posted by mrhd
-
-
Thanks for all the comments and advice.
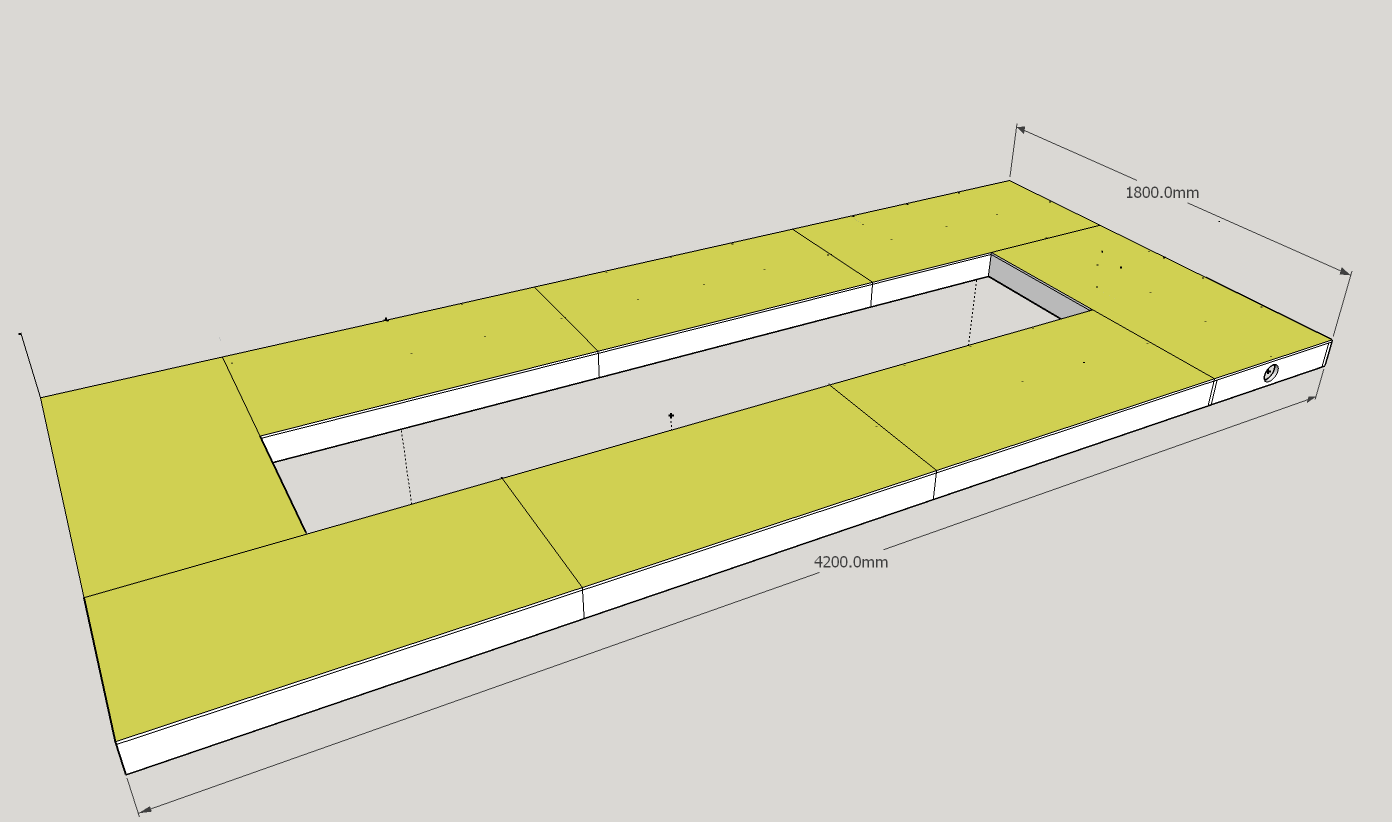
So far all I have is the plain baseboard, it is ring of eight 600mm x 1200mm boards.
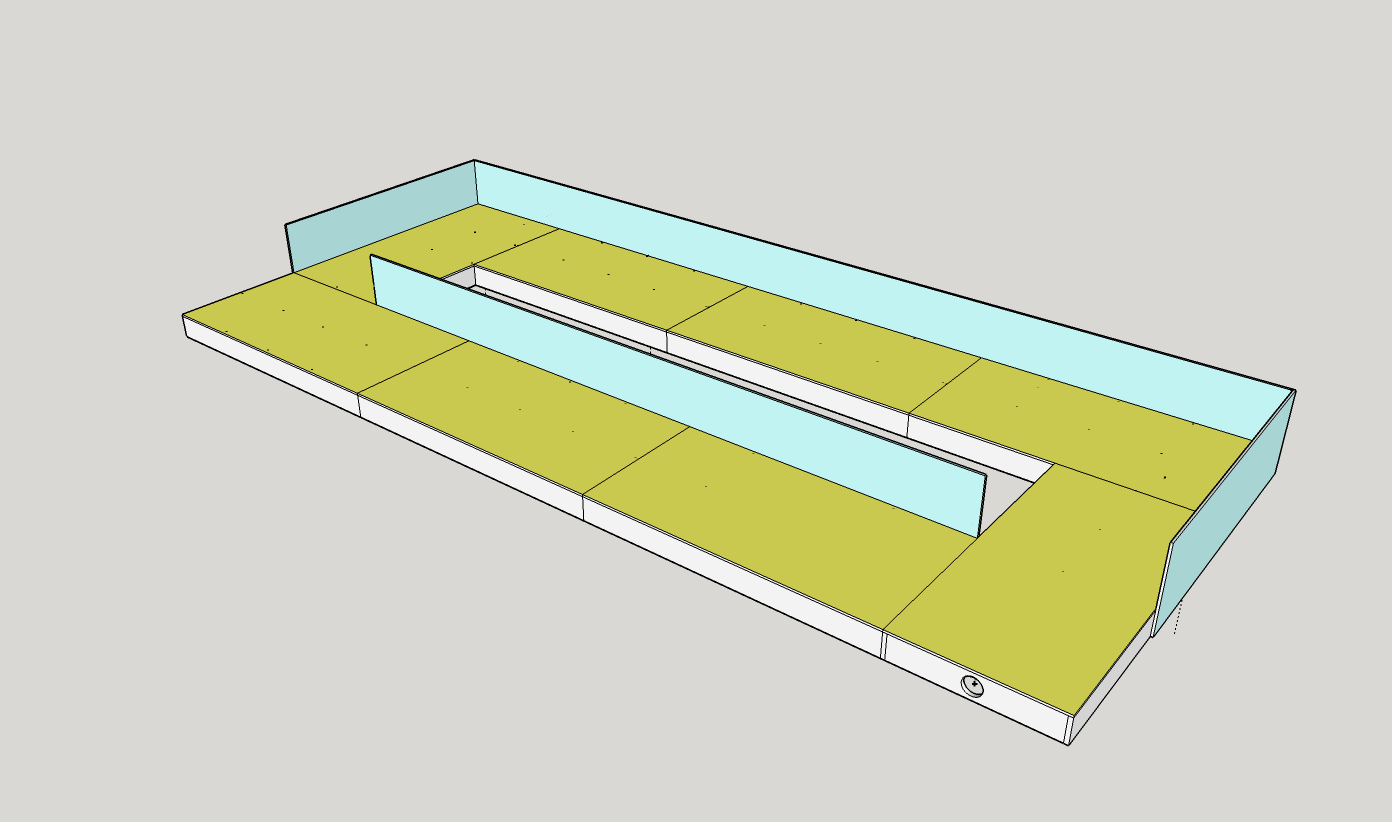
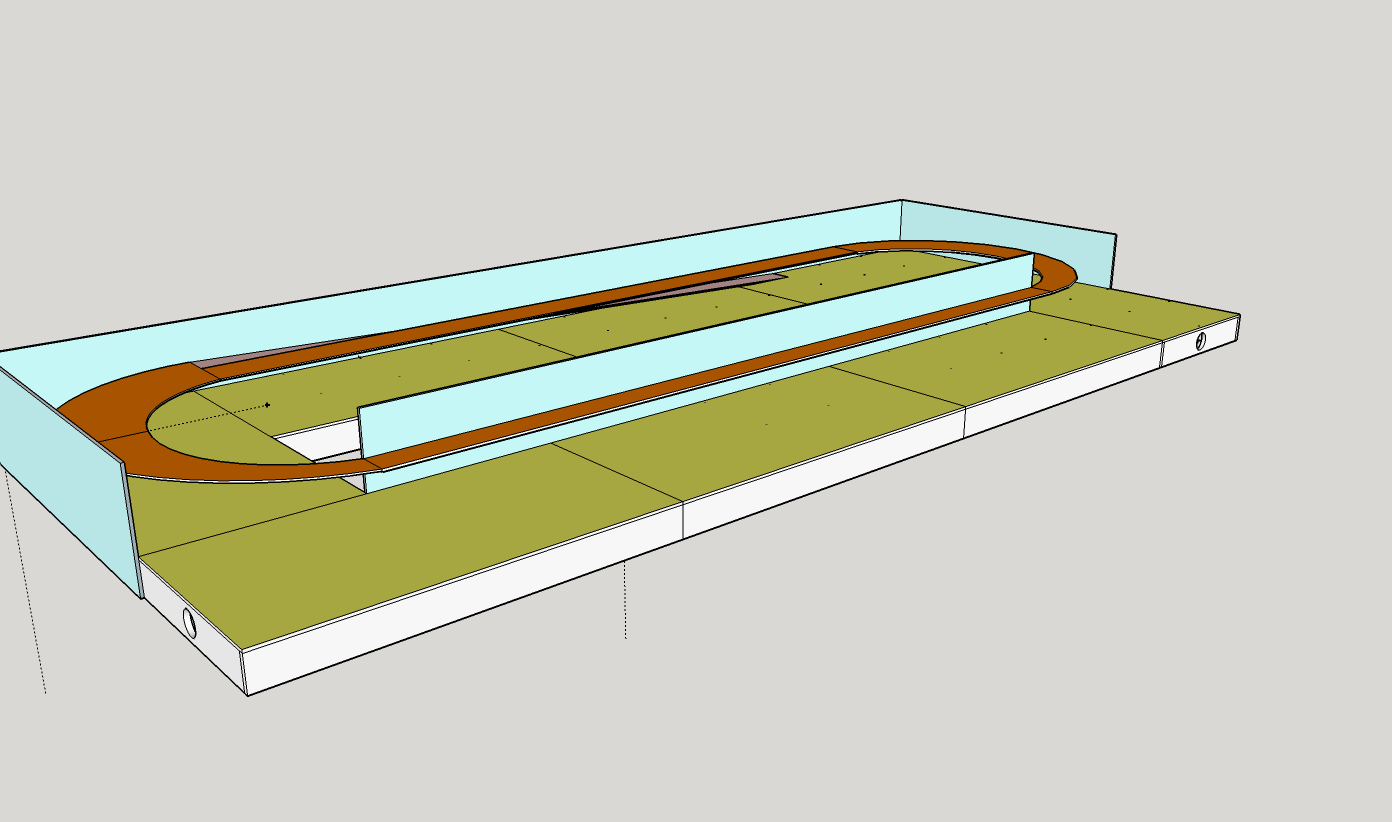
I am thinking I will put a back-scene support around 3 sides and the main scenic area would have most of the track at base-board level with an elevated "branchline" at the rear of the scene which would run in a loop and have an access ramp at the very back. I plan to have scenic breaks at the left and right of the front portion, at least one of those would be a rail over-bridge I am thinking, and I have to use that retaining wall kit somewhere

I am not big into shunting hence the desire for multiple roundy-roundy levels to allow me run multiple trains simultaneously. I would like to have landscape on the sides and some at the back maybe. I would prefer to keep point work on the upper level to a minimum so that I dont have to worry about failing point motors in inaccessible places. The more complex track work would be on the lower level with point motors easily accessible from under the baseboards. The clearances are really only critical where there lower level main-line crosses under the upper level line at either end of the front scenic section.
I have been following Charlie Bishop's Helix build on Chadwick and he had to reduce the gradient on the helix alright and used the 'powerbase', hopefully i can get away with more as my trains are shorter than his.
@Broithe mentions 4in/8ft (~4%) without too many problems, that sounds encouraging and I have the space for that. Once I get the backscene boards on I can do some trials when there is less chance of a loco taking a dive over the edge.

-
 2
2
-
-
I am looking to build a two level layout with an incline to move between levels and I was looking for advice on clearances between levels.
I have been measuring my rolling stock (MM locos and IRM wagons) and they all seem to come in around 60mm give or take in height. I also have a plastic kit retaining wall in the parts box which is about 70mm tall. So I was thinking if I allowed about 80mm (plus 10mm for the plywood) clearance for the upper road-bed would that be enough.
I have about 3.5m of a run to climb the 90mm giving about 2.5%, by moving up to 100mm it would be creeping up towards 3%. The rakes will be short - max 5 coaches or 6 wagons typically - and they are all modern locos which should cope with 3%. But if it is too tall then I would have to build-up the ground under any kit bridges or tunnel portals so no point in going too high.
Has anybody on here used tunnel portals or bridge kits, if so what seems to be the standard heights for loading-guage underneath and/or the height of the bridge deck.
-
1
-
-
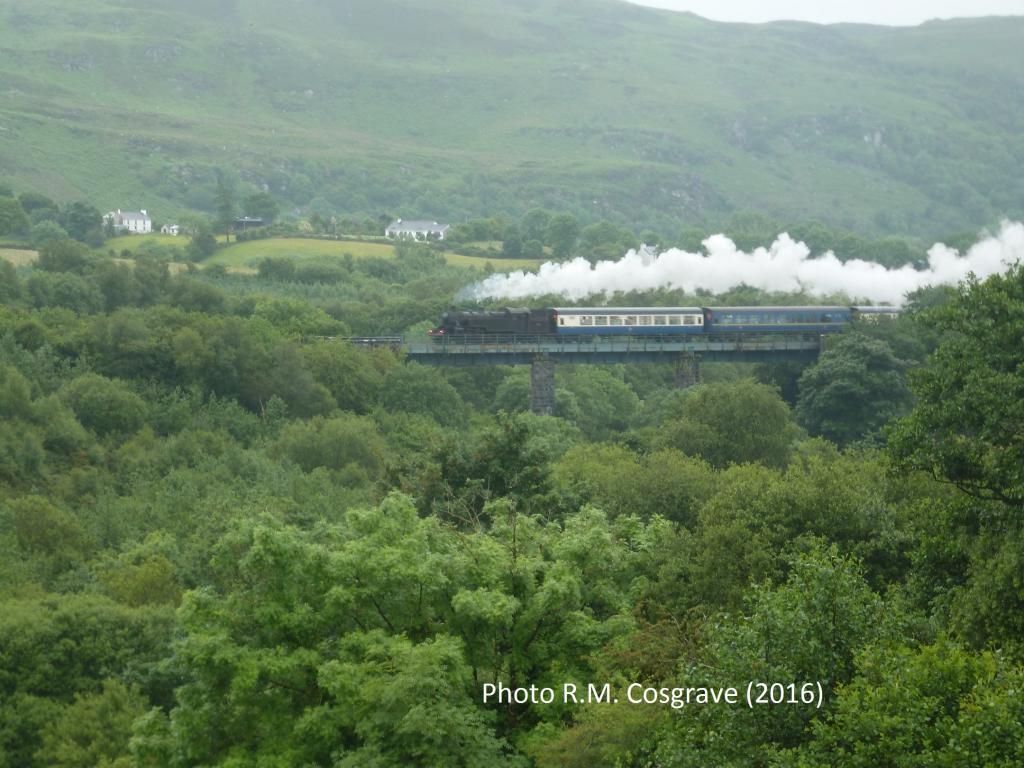
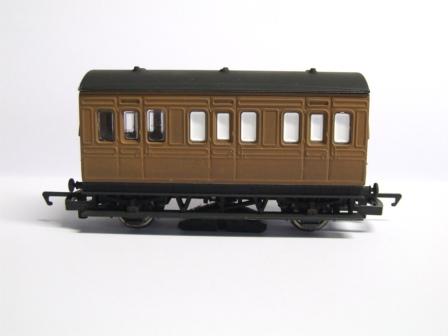
This picture was taken by my father-in-law at the viaduct in Headford Co.Kerry between Rathmore and Killarney stations last Saturday 18th
-
I might be in Dublin on saturday. I am not sure of my travelling arrangements and was wondering if I am on public transport, what is the best way to get to St. Pauls, is it best to go via DART and if so which is closer Killester or Harmanstown
If I take the car what is the parking like at the venue.
-
Hi Dave
the fold-away fittings for the mimic panel are interesting. Can I ask what are the called and where did you get them?
regards
M
-
-
Hattons have them http://www.hattons.co.uk/Search-Results?SearchTerm=36-060
I have ordered the bachmann buffers from them and they only charged me the standard postage about £3 IIRC. If you are only getting one packet then that isnt too attractive but of you want multiple packets it isnt too bad.
-
If the ebay seller will post them to N.I. then you could try using parcel motel http://www.parcelmotel.com
-
Hi
I am about to start construction of my first decent layout (IR modern image - MM 141/181, 201's etc) and I was wondering what if anything are you guys using for track sub-roadbed.
Our U.K. neighbours seem to all go with 3mm cork-sheet and the US seems to prefer Homasote which seems to be some sort of fibre-board.
However some people don't bother with anything, including the author of an article I was reading recently (in BRM i think), he argued that modern locos are much quieter and a lot of the time if the cork is glued down properly the sound transfers to the baseboard anyway.
regards
MRHD
-
I have a couple of MM 201's and 141/181's and I am only now getting around to adding the extra detailing parts supplied with them
I can figure out some of them like the 201 buffer beam blanking plate and the extra grab rails etc. Like wise with the 141 horn etc. I have been looking at some of the shots on eiretrains.com
But I still am a bit lost with some of the bits, there are what look like blank steps in the 201 and maybe some aerials. Also guidance on colours to paint the hose connector ends.
Has anybody else completed the detailing and would you have photos showing what goes where.
-
The levels are 3" apart. I copied Everard Junction's method, see
If you get your levels right then it's down to how good your Loco traction is. I've pulled a rake of 10 coaches but the Loco was protesting at that. 6 or 7 coaches should be no problem if you are pulling up the Helix rather than pushing. I would not recommend a Helix for Steam Locos as a rule but I did manage a rake of 6 coaches with my UTA Jeep.
Thanks Kirley
All my stock is Modern Image IE, with just one Hornby Flying Scotsman from the steam era. I have seen the Everard Junction Channel alright but it is nice to get first hand experiences and knowledge from someone who is using the same locos and stock.
regards
MRHD
-
Hi Kirley
I was just looking through your complete thread and saw your helix. I was wondering how far apart are the road beds/levels on your helix and what length of train will a 141/181 or 201 pull on the helix up-hill trip.
regards
MRHD
-
It doesnt matter which leg (annode/+ or cathode/-) the resistor is connected to. Its purpose is to drop the current flowing through the LED. V=IxR where V=voltage which is a fixed value so if R (resistance) increases then I (current) will be decreased proportionally.
The polarity is important though, an LED wont light up if the current is flowing through it in the reverse direction.
The annode/+ (long-leg) must be connected to the positive side of the voltage supply, in the case of DCC the Blue is a common positive so the Long leg side of the LED must be connected to Blue with the short leg connected to the appropriate function negative which could be white/yellow/green depending on the Function button to be used.
-
Hi
I see that Bachmann's 21 pin decoder (36-557) now has 4 function outputs. Would that do for 201's and run the cab lights as well. I seem to remember reading somewhere that the old 3 function 36-554 would work in 201's but that you just wouldnt have cab lights.
Has anybody tried this combination.
-
Everard Junction on YouTube did a tutorial on DIY coach lighting recently which is very good
For commercial stuff if you are this might be an option http://www.newrailwaymodellers.co.uk/Forums/viewtopic.php?f=24&t=21586
-
I had a look at it last night next to my 141/171's. I havent done any Rolling stock with it yet, just lining on my loco respray.
The Vallejo orange is dark alright, closer to my IR liveried loco, the IE liveried ones have a brighter shade of orange.
-
I used Vallejo German Orange via an airbrush and it isnt too far off. I got the recommendation from someone on here or maybe on the old yuku forum but I cant find it at the moment. The other poster had used a paint from Citadel range which was their equivalent of the Vallejo one.
I get mine from Prince August in Corkl http://shop.princeaugust.ie/paints-and-brushes/german-orange-acrylic-paint/.
-
After a bit of a delay caused by a bad choice in masking I am finally making some progress again
I have the warning panel and the silver cab ends painted. Next is to try the orange lining
-
Hi BosKonay
Its a Badger Renegade-Velocity. It has a really fine needle which I managed to get blocked a good bit in the beginning but I am getting better with the cleaning and paint thinning.
-
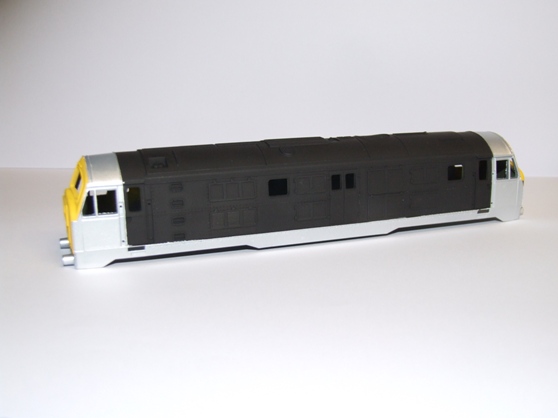
So with a little confidence I decided to convert a second hand BR Class 29 I have (collectors look away now). All my rolling stock is IE Diesel, so the BR livery is a bit out of place. I decided to try my hand at IE-Freight Silver and Black. The long term plan is to respray some MKIIIs to suit my 141/181 and 201 Locos.
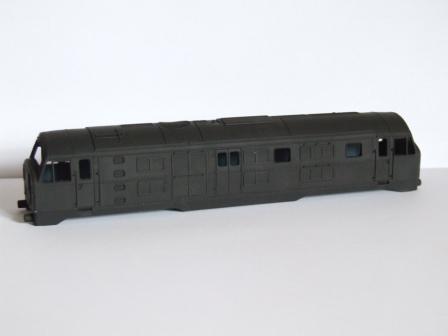
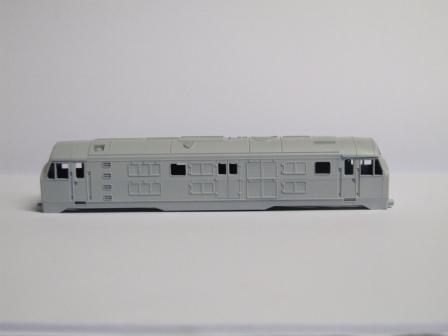
After cleaning it down I gave it a coat of primer
Then I gave it a coat of black, from some reading I have been doing since I should really have started with the lighter colours
My next task is to mask it up and spray the yellow warning panel.
I have been reading, that to stop paint bleed, I should give it a light spray of the black over the masking tape before spraying the yellow. Should that black be allowed to dry completely overnight or can I let dry for 10-15 minutes before spraying the yellow.
-
The first thing I decided to attempt was a 'make-over' for my Hornby track cleaner
This is what it looks like out of the box Hornby Track Cleaner
This is what mine looks like after a few false starts
-
Hi All
I got a gift of an airbrush for Christmas and I have been experimenting with it to get the hang of it.
I started off using Humbrol enamels but I struggled to get a decent finish. Then I discovered Vallejo acrylics and I am much happier with them, at least until the skill level increases.
I also started off using the car body aerosol primer but again I was disappointed with the results. Then I came across the Vallejo coloured acrylic primers while watching the ScaleModelMedic channel on youtube and I found them much easier to use.
Anyway with all this practice I said it was time for a project or two


Advice on clearance between decks
in General Chat
Posted
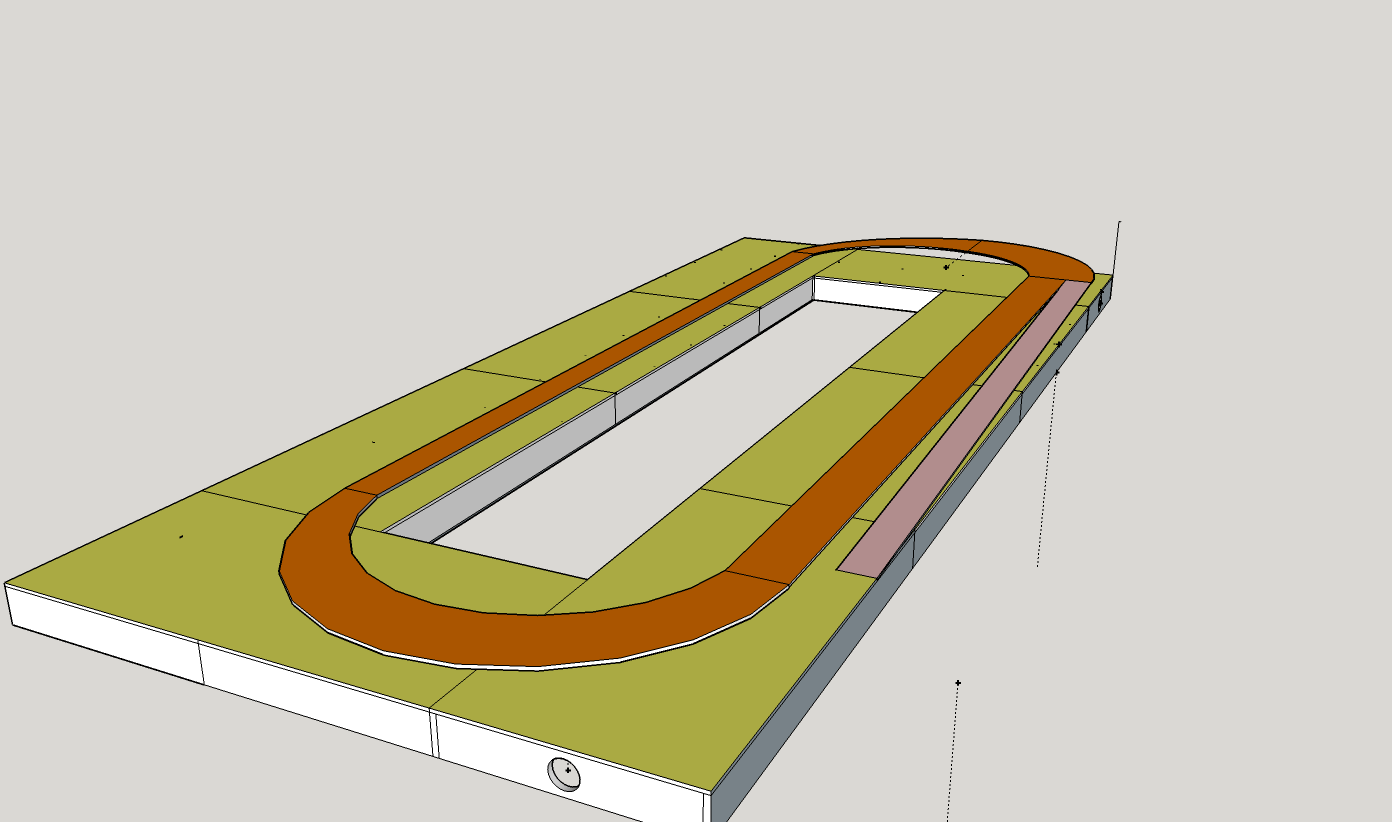
Thanks @DJ Dangerous your comment about a longer run-up got me thinking and I realised I only need the full clearance where the upper and lower levels cross at the front. So I can drop the upper level to ~6cm along the back and have a shallower up-ramp, and I can make up the remaining 3-4cm of clearance by sloping the upper level upwards as it comes from the back to the front cross-over point. I reckon I can achieve a maximum of 2% this way which should be fine for MM locos.