

fishplate7
-
Posts
133 -
Joined
-
Last visited
-
Days Won
2
Content Type
Profiles
Forums
Resource Library
Events
Gallery
Blogs
Store
Community Map
Posts posted by fishplate7
-
-
5 hours ago, jhb171achill said:
It's the middle of the dark days of the "troubles", maybe 1976-ish, when bomb scares, as well as REAL bombs were an almost weekly occurrence.
I was returning to Dublin on the "Enterprise". It must have been mid-winter as it was dark at Central Station in Belfast, and there was a line of buses for Dundalk. The line was closed somewhere between Portadown and "the border". No local trains beyond Lisburn. We were to be bussed to DDK where we would get on a scheduled local which would be held for us. Naturally, half a dozen tired-out Laminates and Park Royals, and a spluttery genny van were of much greater interest to me than a Mk 2 set of either NIR or CIE ownership.
I got off the bus in Dundalk and just happened to be the first one into the carriage - a 1904-series laminate brake. I sat down and immediately noticed a suitcase-type bag tucked under the table! I don't think I've ever moved so fast..........
I got out and told a man in CIE uniform that there was a "suspicious package" under the table and showed him where it was. He stared suspiciously at it. I expected him to start waving his arms and yelling for everyone to get out of the station RIGHT NOW!
But - he stared harder - poked it with his foot, and then gingerly lifted it and carried it off the train.........!
Had that been what I thought it was, and what it often actually was, both that adventurous railwayman and I plus bits of the train and GNR architecture in the station, would have been splattered in tiny messy bits all over Dundalk........
(The haulage was a 141, and he went like the wind! Great run, once we DID get going!)
Thank God you lived to tell the tale....and write excellent books!
-
 1
1
-
 1
1
-
-
Great thread with some fascinating stories! We had no railway connection in my family. My dad worked in the bar/pub industry and mum was the homemaker. But I grew up facing the railways and that's where my interest started! My uncle lived in Kilcock, and I would spend my Summers on the farm. Kilcock had the railway, and a station, and most importantly, a signal cabin! So in the Summer of 1972 I started off my railway odessey as a young teenager in the cabin, learning about signalling, single line workings, bell codes and mechanical staff exchange!! Frank, Ned and Paddy were the three signalmen at the time. The cabin was open 24/7 and if memory serves me correct, Maynooth was closed at night/weekends with the long section from Clonsilla to Kilcock (open to correction on this one!). Frank was a nice but stern man! I was with him in the cabin one day, and we had a train in the section coming from Enfield heading to Dublin. He was only a few minutes away. I had been practicing many minutes before that, setting the down points for the loop and main road, setting the locking bar etc. The points lever could be a difficult enough lever to pull/push depending on distance. Anyway the road was set correctly for this up train in the section (interlocking would simply not allow you to set the road incorrectly). I noticed that the up starter, which was high up on the bank, was only partially 'off' unlike the previous times. This could have happened due to a problem with the crossover! I brought this to Frank's attention. Well. it was like WW3 had started!! Frank didnt know whether the train has passed the up distant or not, and mechanical snatching was in operation anyway, so he would be coming through at 70 mph, and the staff was set!! Quick as a flash, Frank slammed back the distant, home and starter levers, slammed back the locking bar lever, slammed back the down crossover lever, remade it, not happy, remade it again and then remade the road! Pulled everything off and the up starter dropped nicely!! Panic over! I had a Sony cassette recorder at the time and I have a lovely tape of an evening spent in that cabin with Ned. The phone conversations were great. Signalmen were always trying to 'push' the train down the line to the next station into the loop to cross another train! In those days with so many trains running you were guaranteed a crossing. Around that same period, I recollect Sean Regan, was doing relief in Kilcock, and was badly injured when the snatching arm broke on a down train and it struck him on the body (he had been waiting under the stairs apparently). He was out of work for a long time. Anyone familiar with the concept of having ' a spare staff' in the cabin??
-
7
-
-
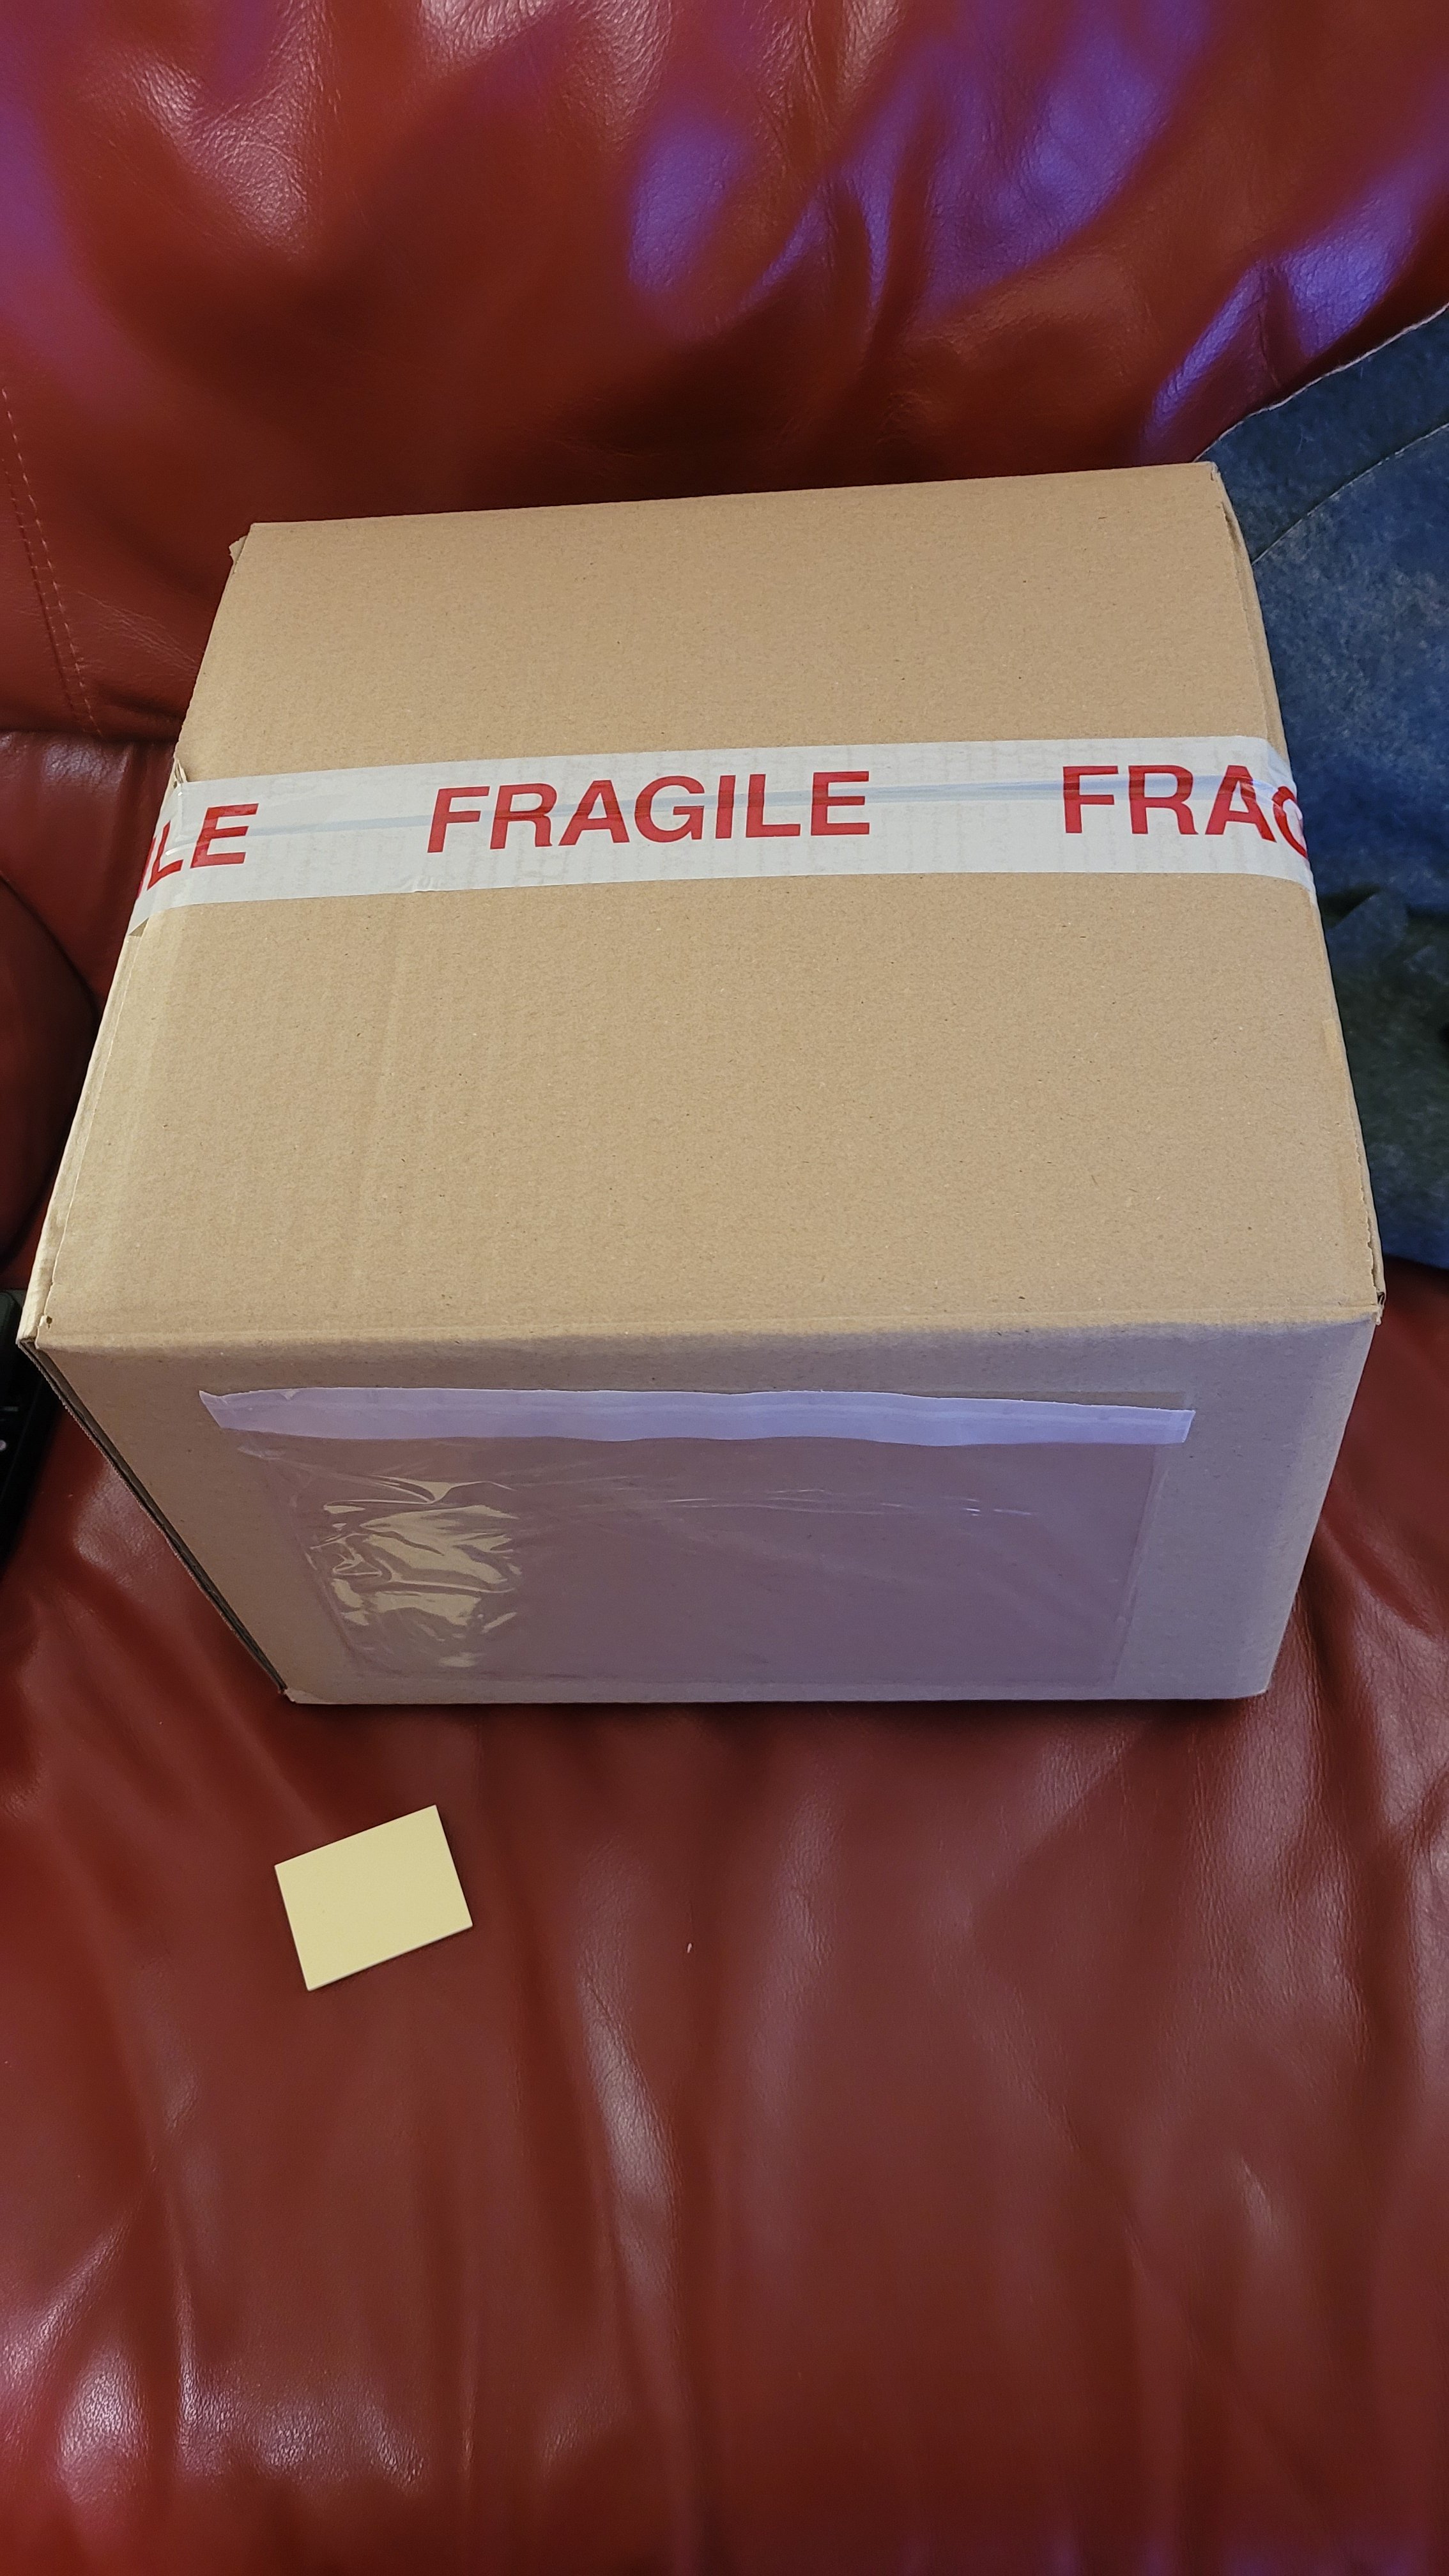
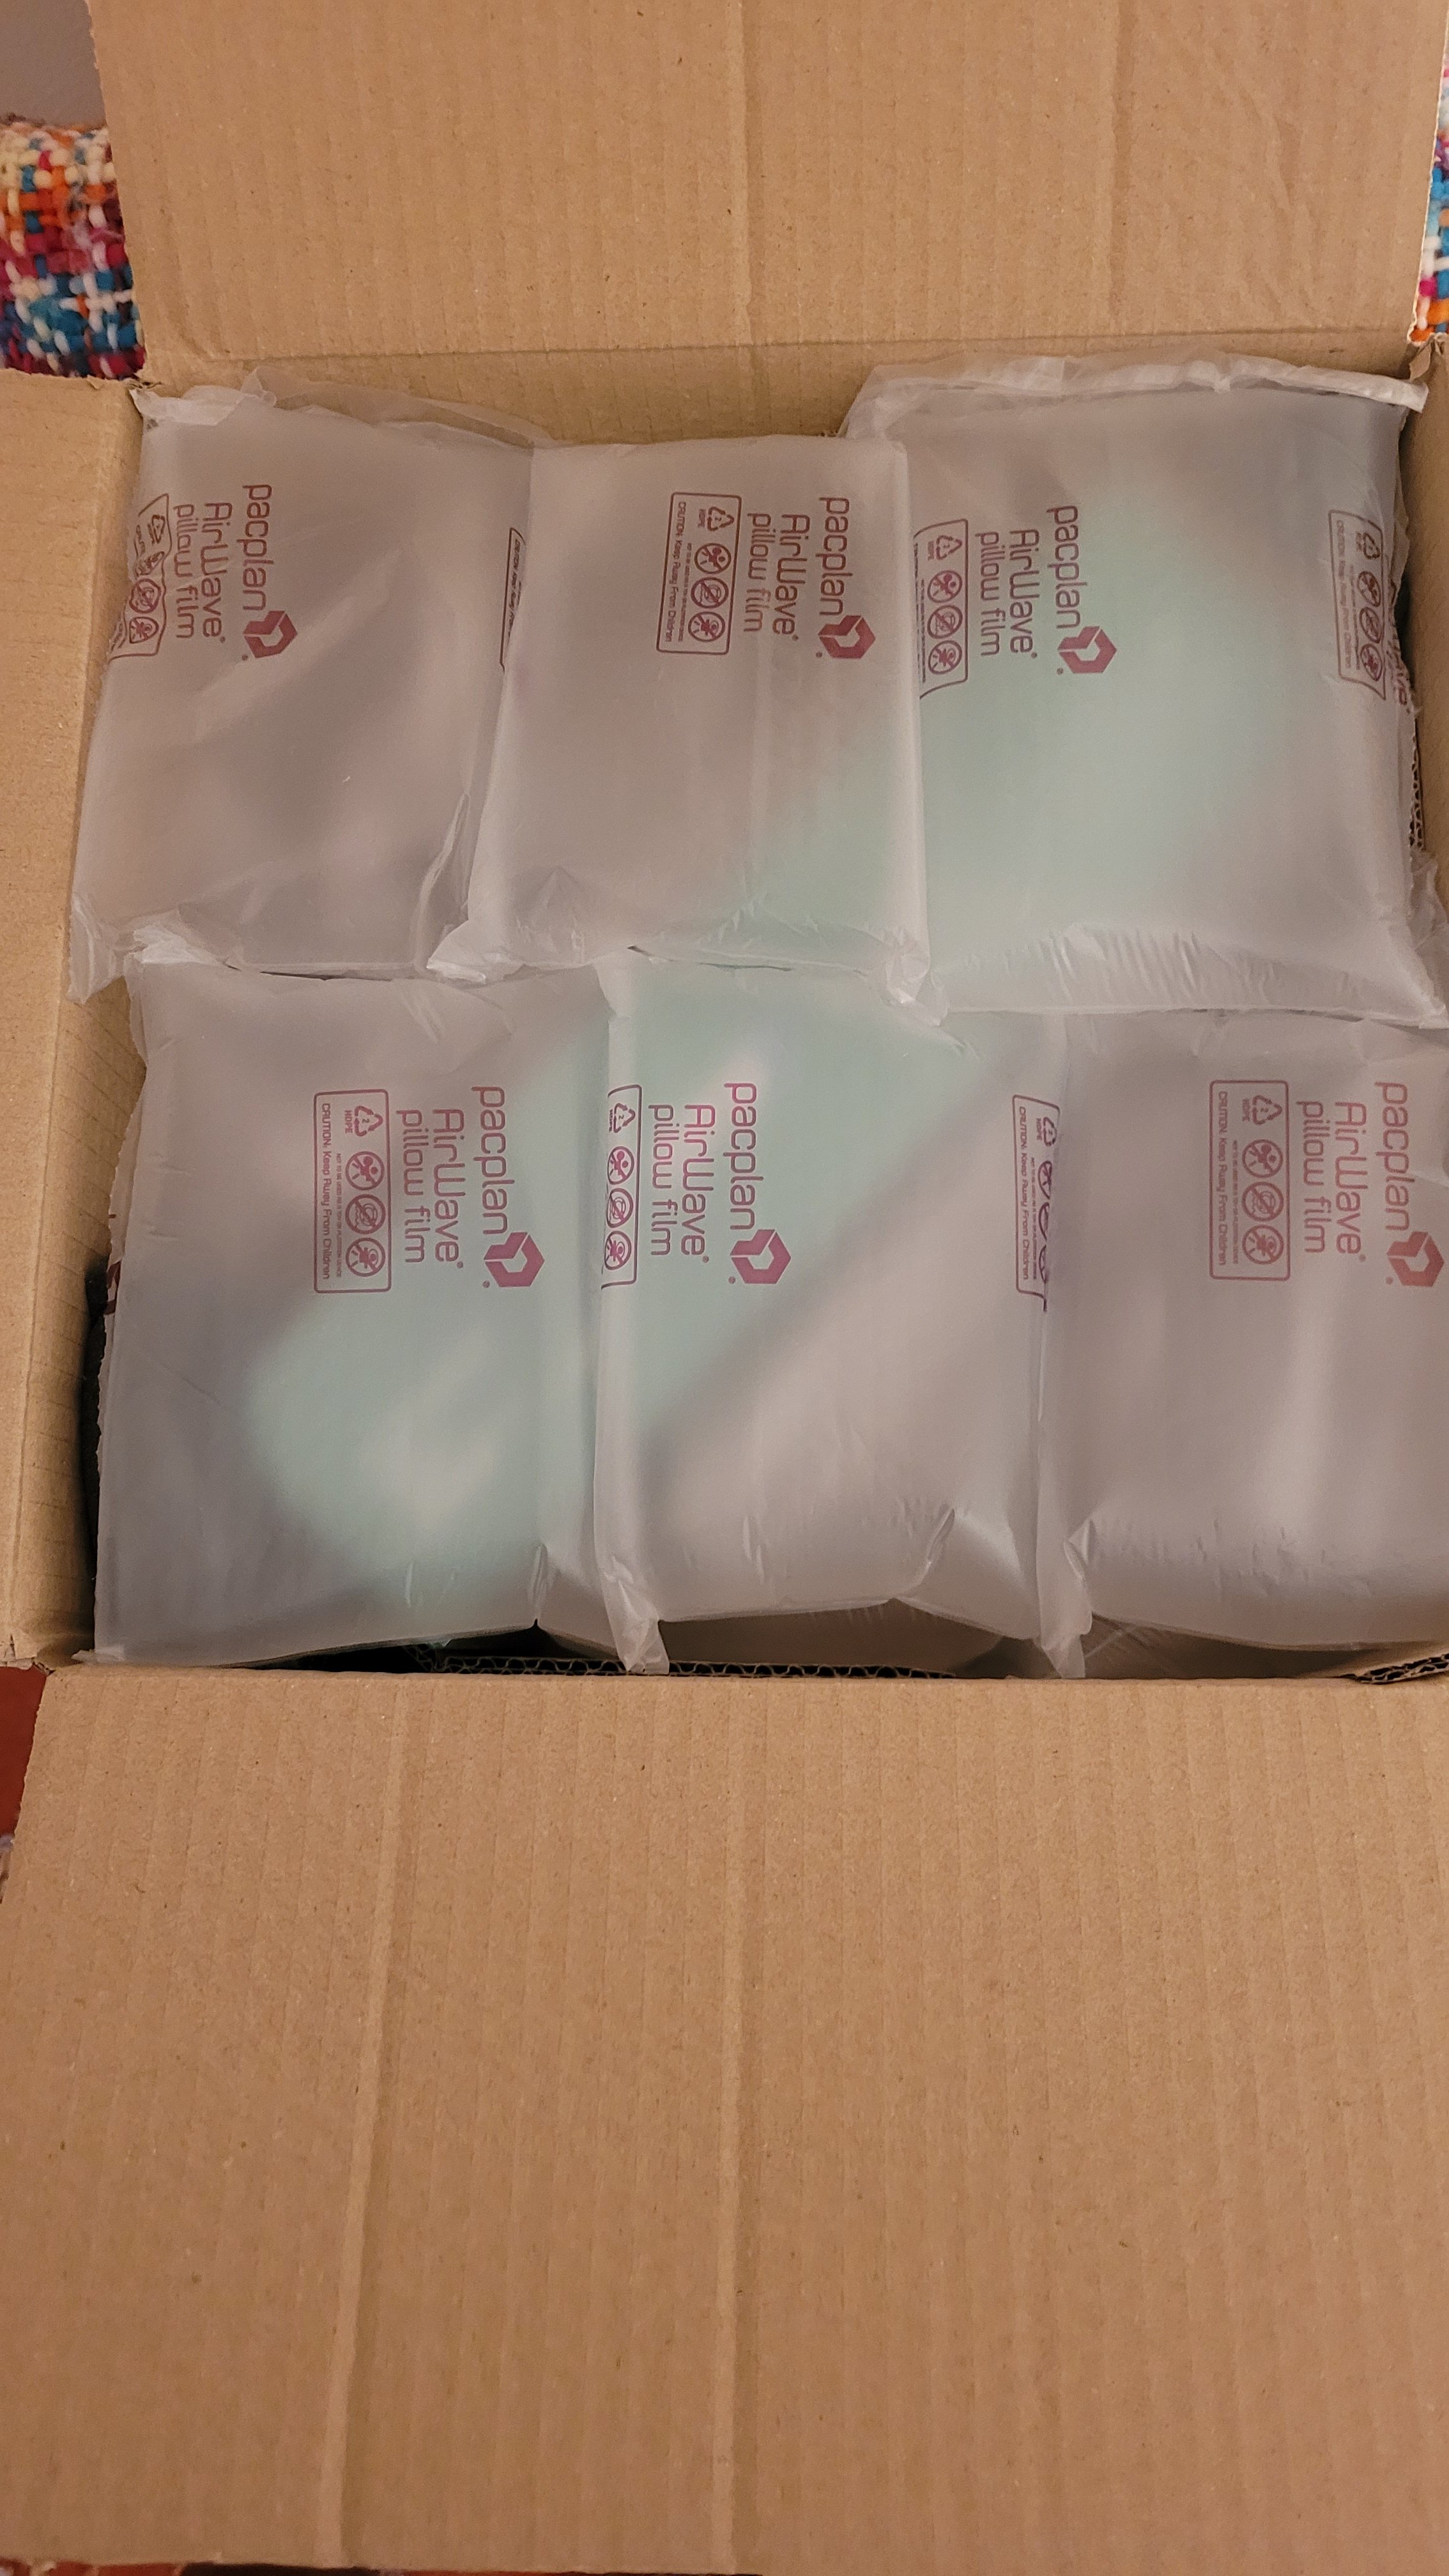
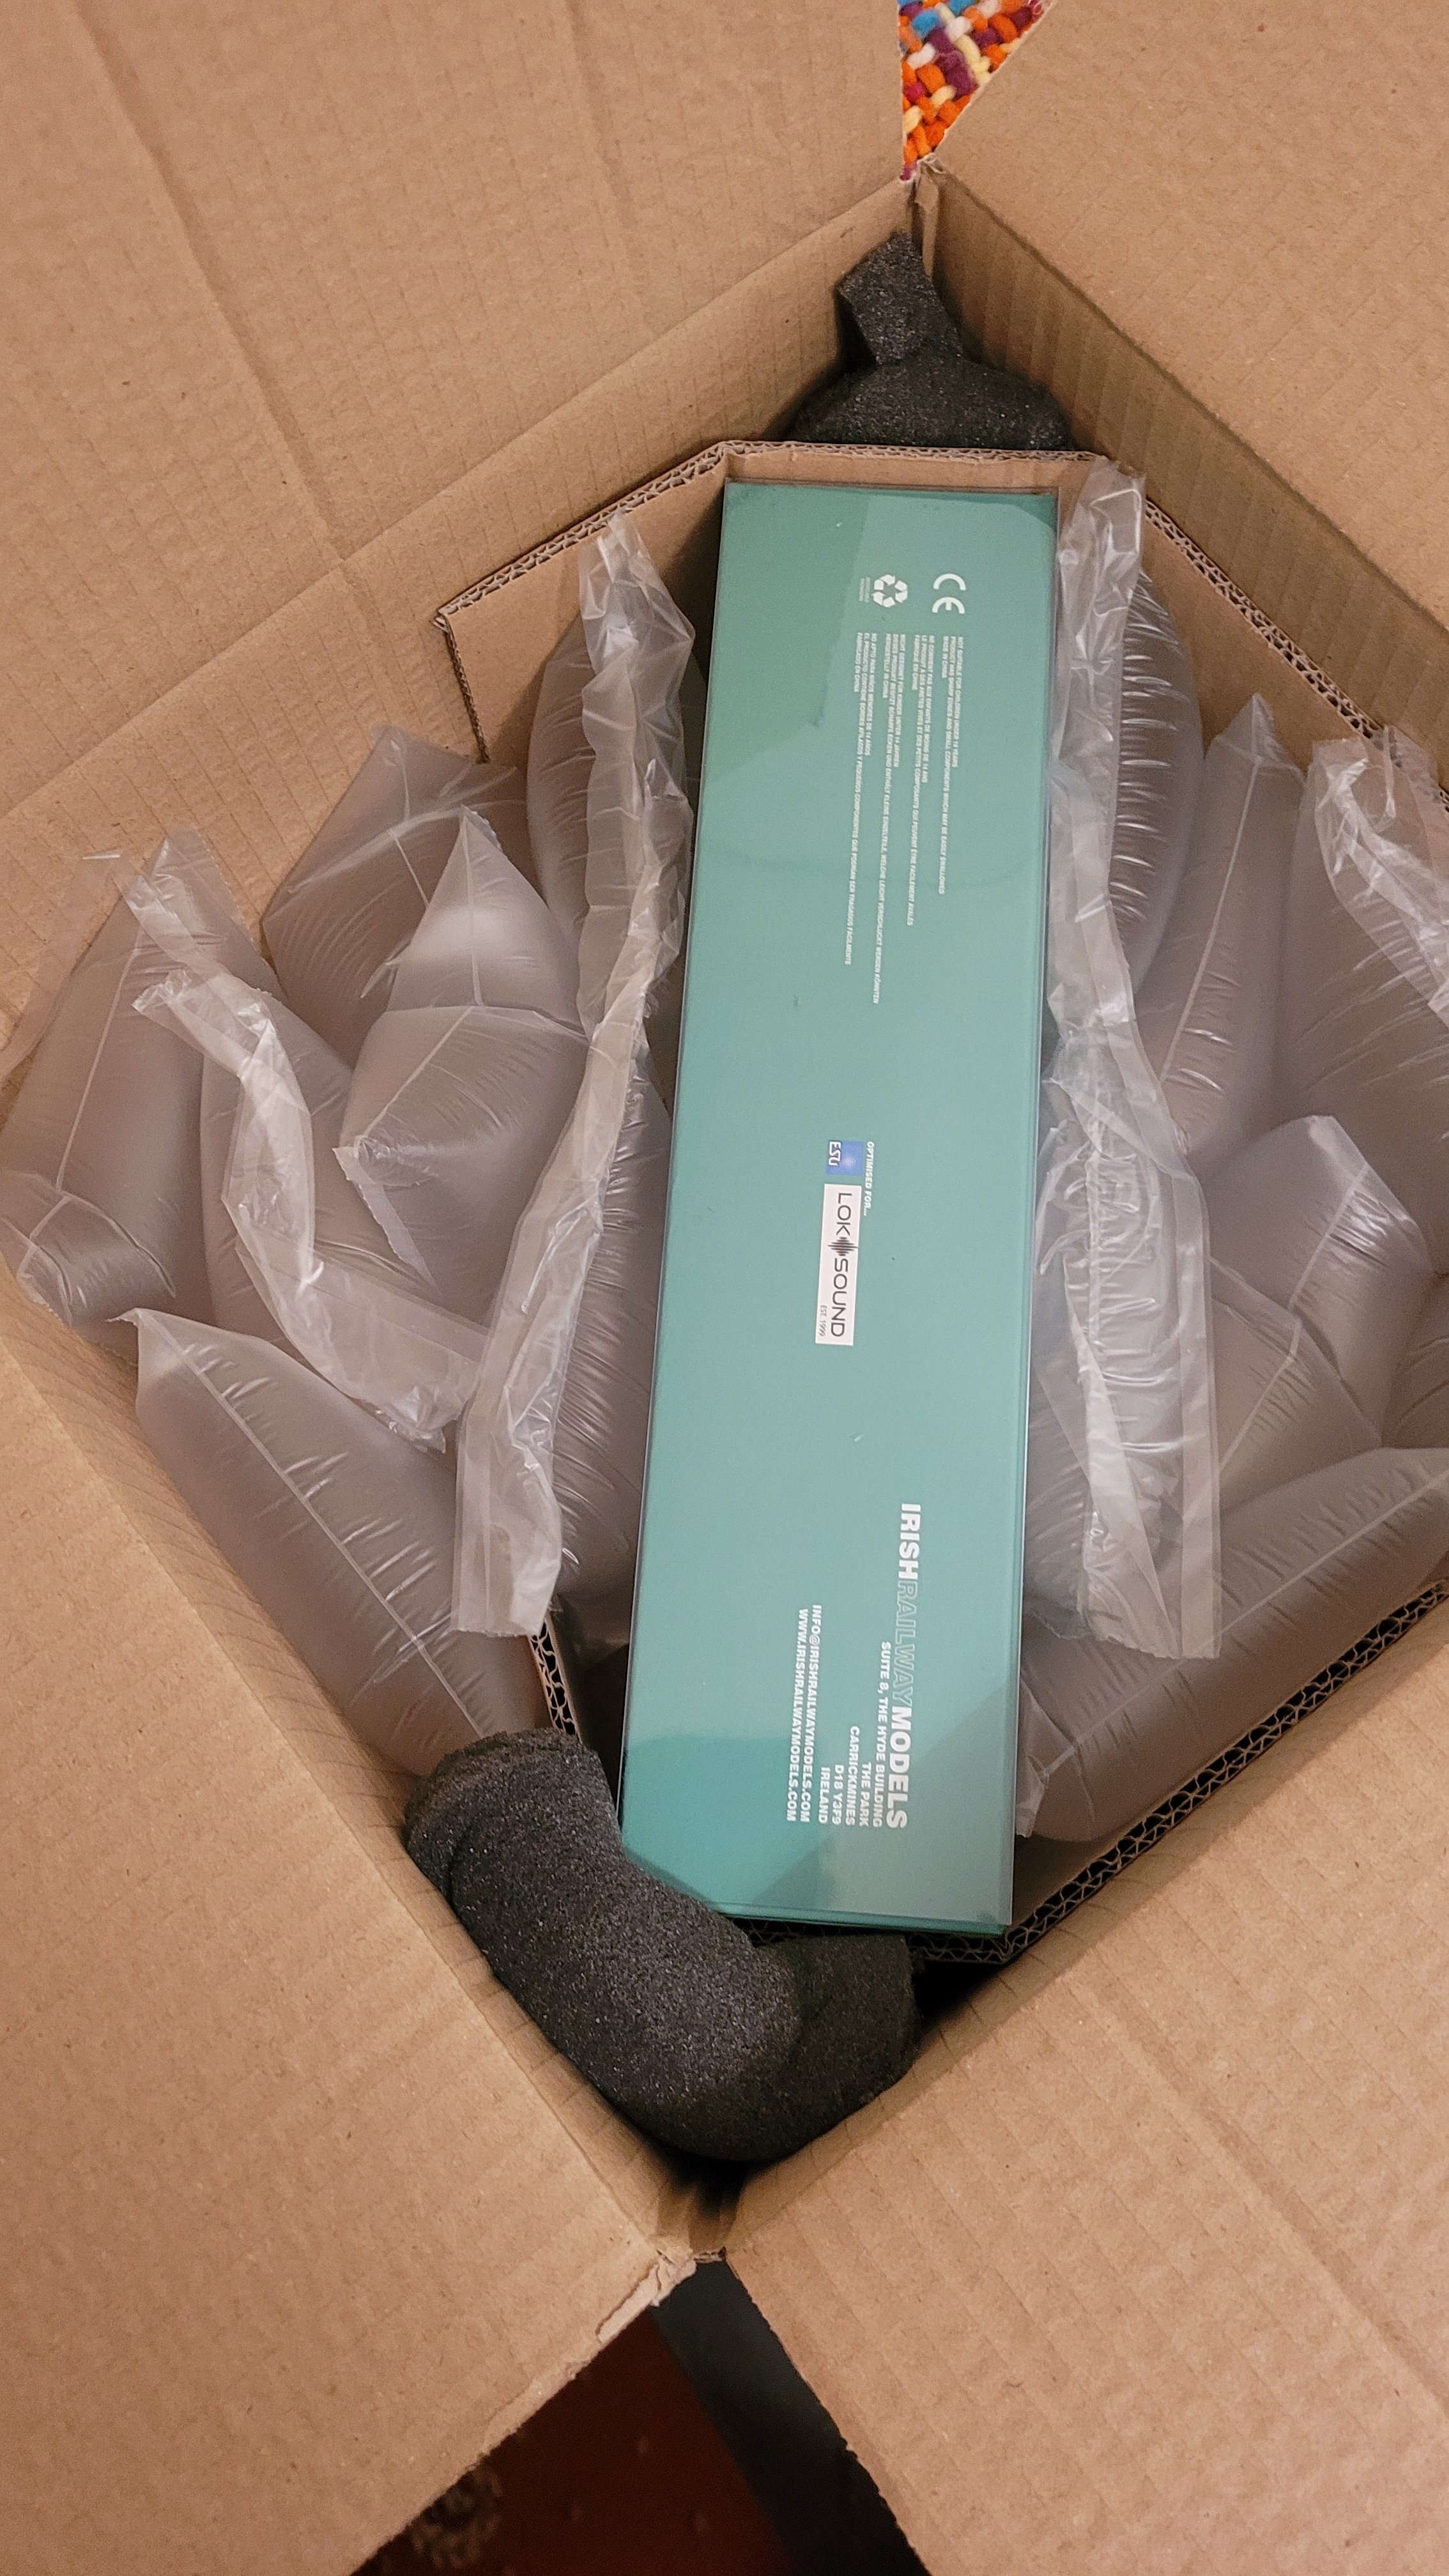
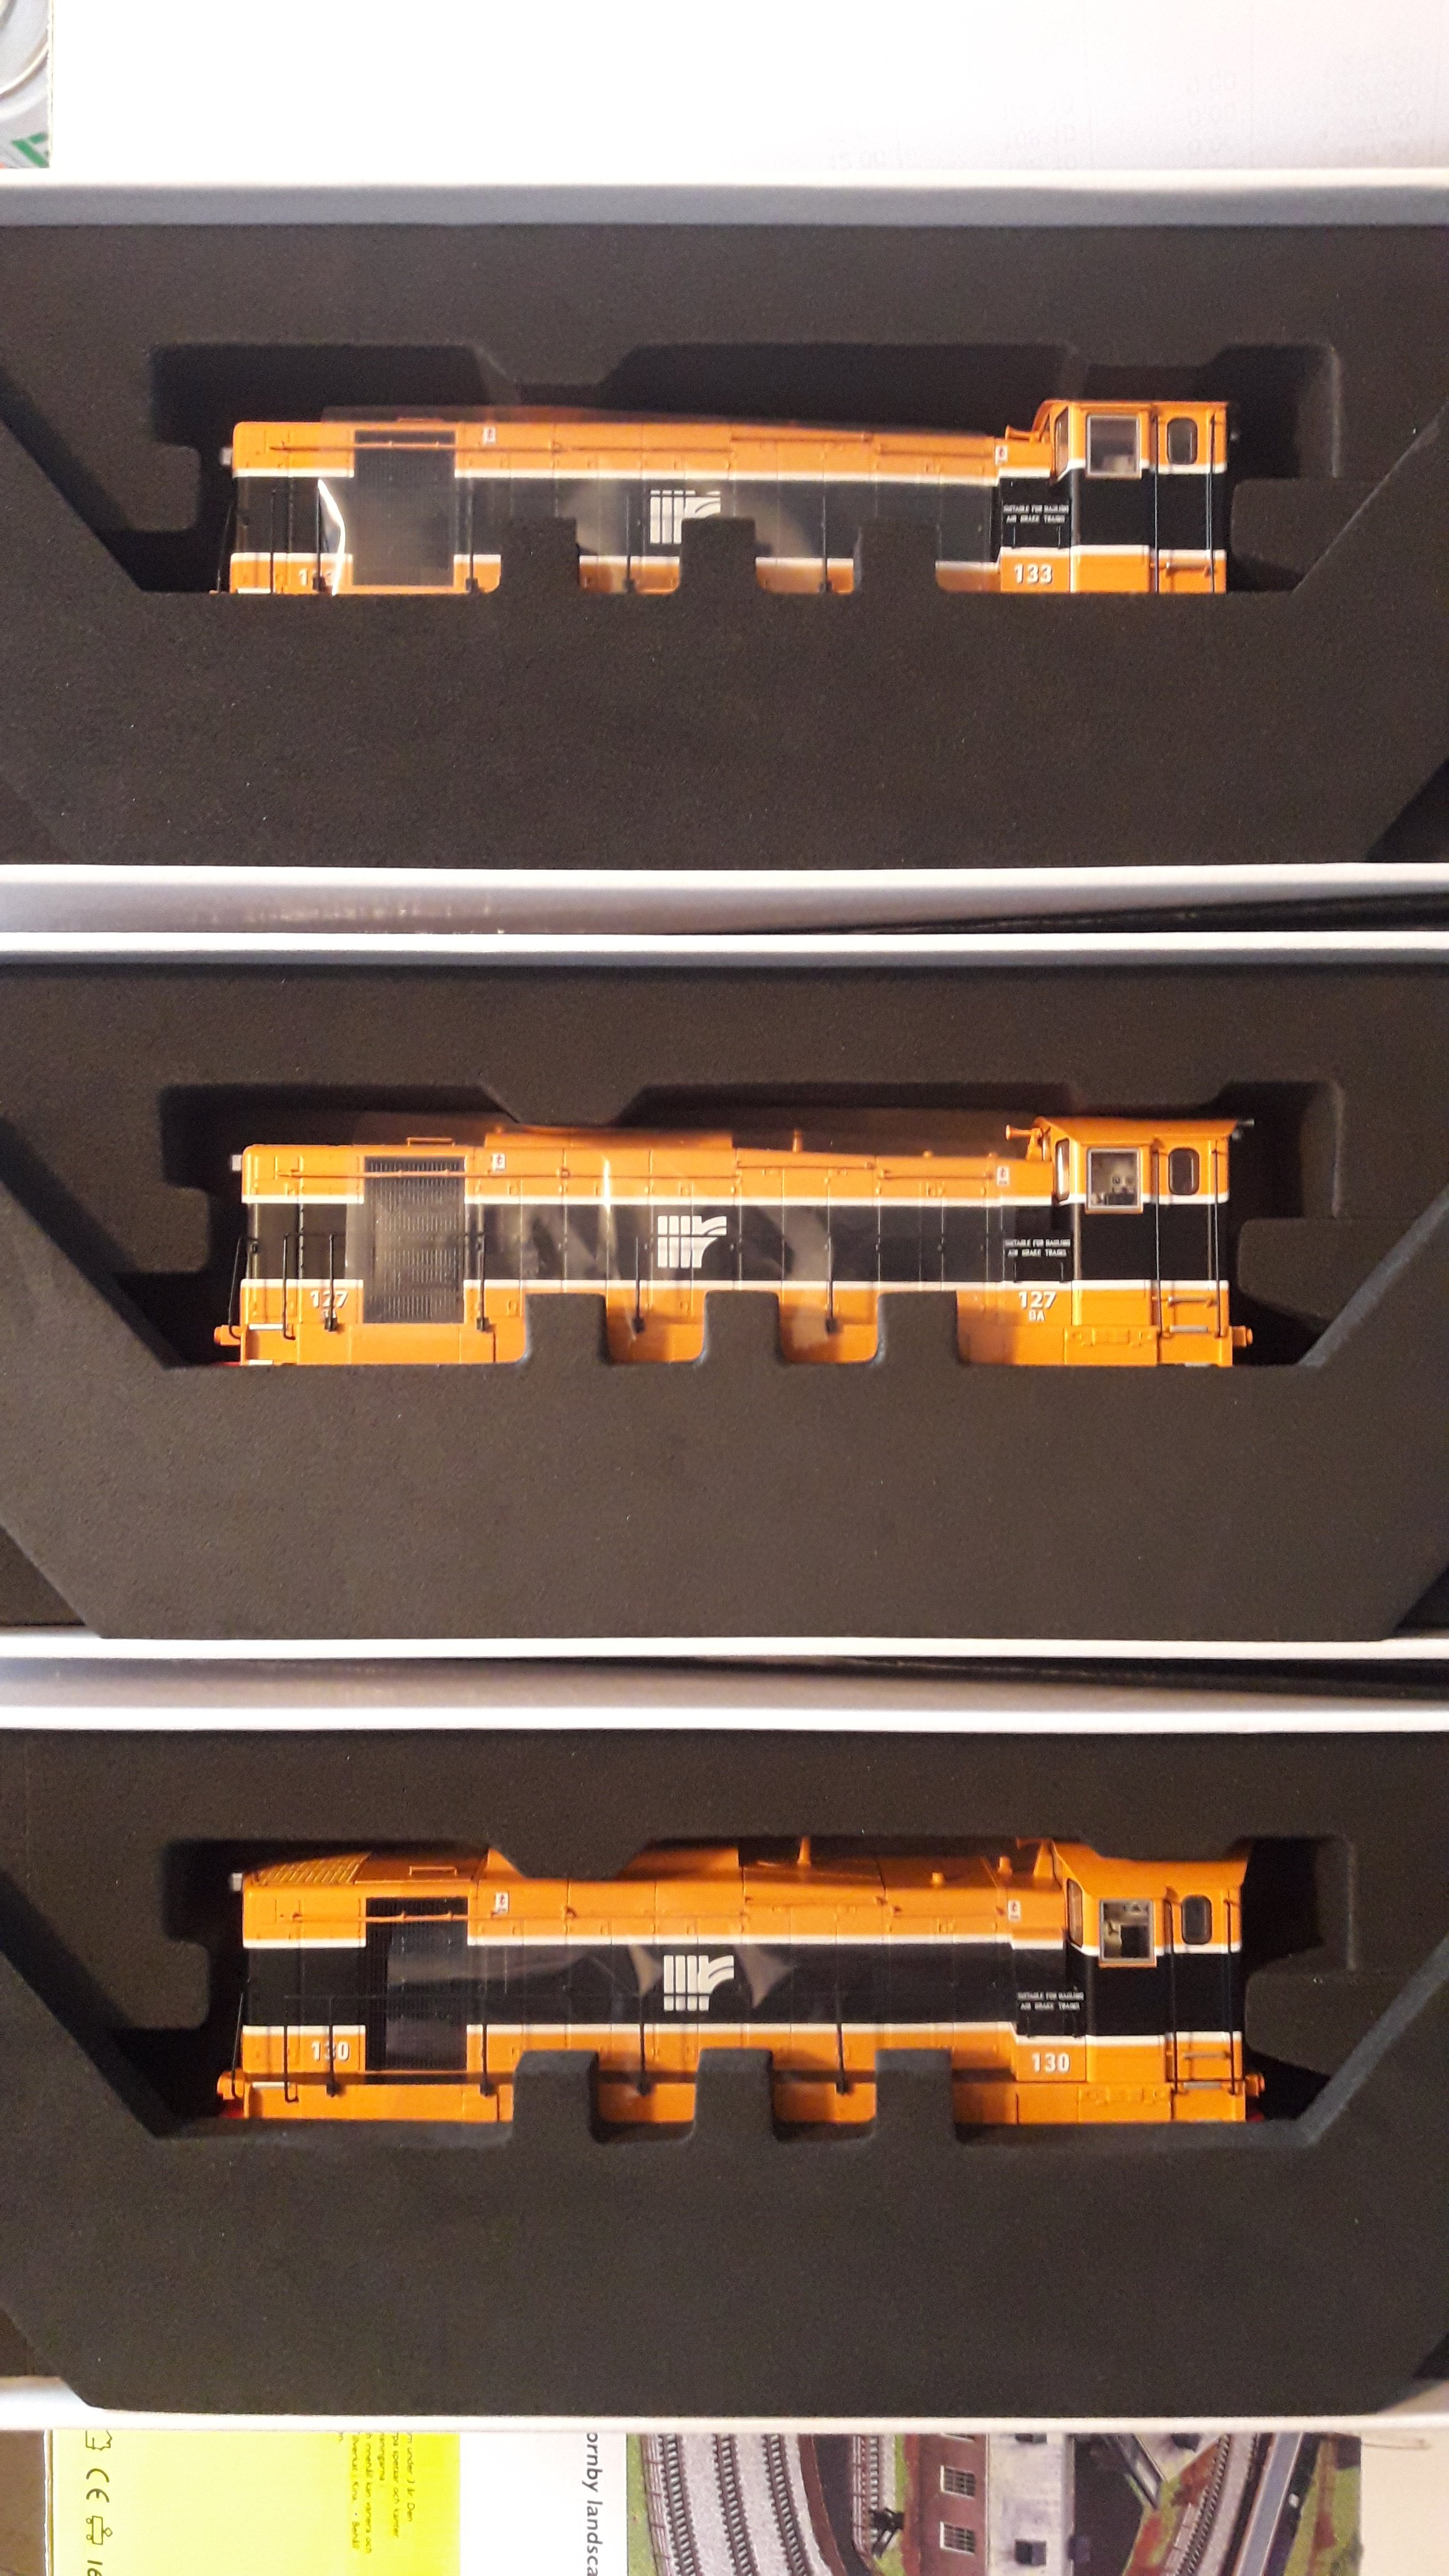
I collected my locos earlier today from the Depot! I have to say the packaging is first class and streets ahead of anything I have seen before! See attached photos. They are solidly protected all round with absolutely no 'wriggle room'! Hats off to Noel & Pat in Parcel Planet for not only checking that my order was correct, but then going in search of my other three orders (which were originally going to be posted to me), which they then found! And hats off also to IRM for investing in the high quality packaging! I have only looked at two so far and they are jaw dropping! Cannot wait to get them out on the road!! Really well done to all in IRM!

-
9
-
1
-
 3
3
-
-
11 hours ago, WRENNEIRE said:
Raheny pensioner panicking
Confirmation money invested in IRM
No text yet from An Post
Bray on this Sunday, I will be lynched!
Jasus.......................Bring a box of Viagra with you just in case you are lynched Dave....you'll then be able to raise yourself up from the dead!!
-
 3
3
-
-
Congratulations all and very well done!
-
1
-
-
Wow! Yesterday's IRM announcement has firmly set the bar at its highest ever in terms of quality, finish and innovation! Really well done to everyone involved! NIR is not my era unfortulately, so I'll be stashing my hard earned for the next of the promised announcements, whenever and whatever that may be!
-
2
-
1
-
-
On 5/7/2021 at 12:48 PM, connollystn said:
We'd be lost without Wrenneire - picked up a few nice (rare) wagons off him recently.
They say he's a Legend! I'd agree!!
-
3
-
1
-
-
Very impressive! Unlike Noel, I'll send a fleet of locomotives - a single 141 won't be able to pull what I'm looking for!! Looking forward to seeing these go into production.
-
Ordered decoders from YouChoos about two weeks ago. Value c. £170. Arrived 4 days later. Perfect condition. Delivered by An Post. Nothing additional to pay! And the cost was excluding UK VAT in anticipation I would have to pay VAT here. It seems to be for the moment that if its delivered by An Post you could be lucky; if you use a courier however, you are almost certainly going to pay handling charges etc.
-
1
-
-
I would be interested also Robert.
-
1
-
-
Here is another example of the same wagon. Scroll to 8.05 on the video.
-
4
-
-
On 18/1/2021 at 1:42 PM, Vlak said:
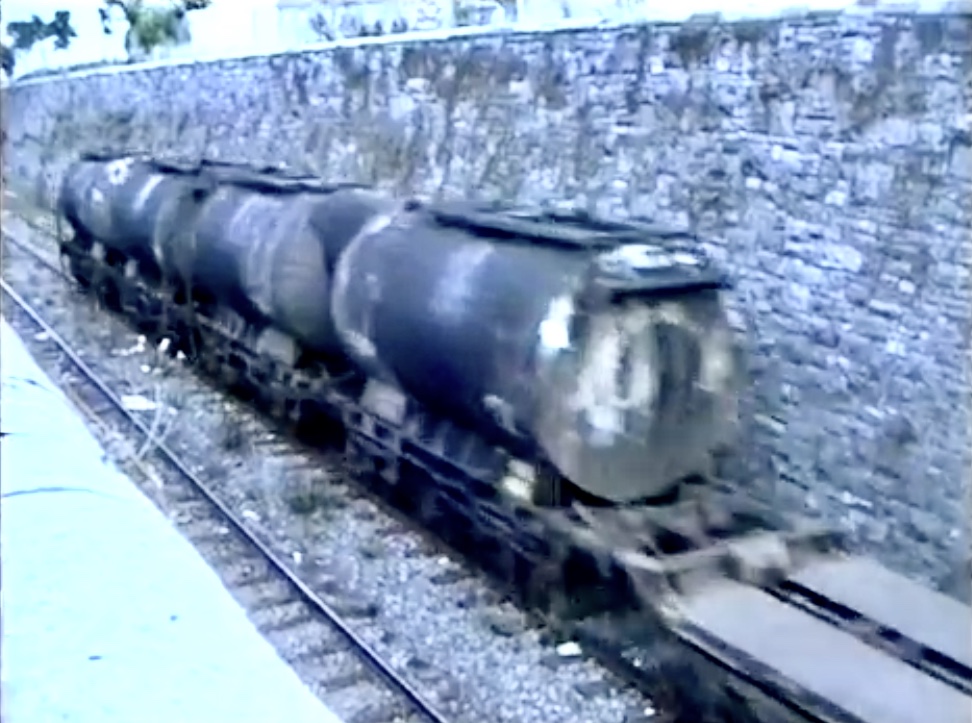
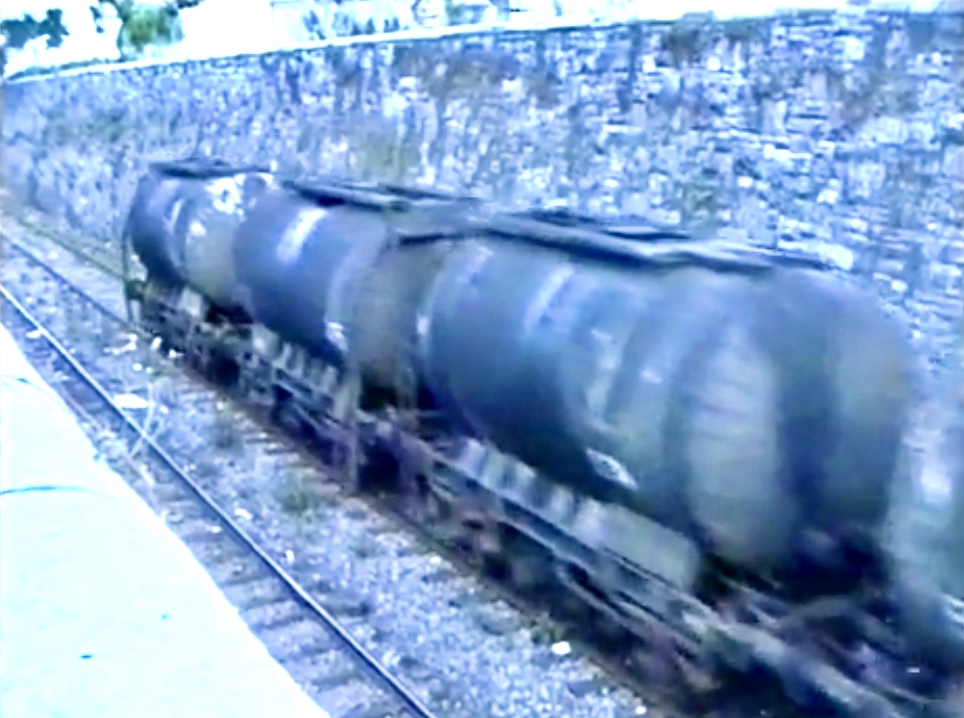
Something which seems to, perhaps, have been overlooked in terms of freight are the Jumbo Tar Wagons. These were 2-Axle wagons which were used for the conveyance of Bitumen to both Sligo (and possibly Galway?) for Cold Chon. They were loaded in Alexander Road at their Tar Terminal and usually added to liner trains for the run west. Based on what little information I can gather the traffic didn’t really amount to much more than 3-6 wagons per train at a time. The traffic flow seems to have ended around 2001/2, although the bogie wagons (which contained ISO Bitumen containers which were used to Mallow for Council use) seems to have lasted into until 2003/4.
It has been challenging to find photographs of these wagons in detail, other than a few photos with them in the background, but they appear to have been constructed / modified by CIE using Bitumen tanks mounted on short wheelbase 20ft flats (same as the Cement Bubbles it would seem) with the same tank anchors as was the case for most fuel oil & latterly Esso Oil wagons. Two tank designs appear to have been in use, one with a flat end and another with a more rounded end with ribs.
I attach two screen shots taken from the video linked below which provides a little more detail (hope the author of the video doesn’t mind!); it would seem that unique to tank wagons here the ladders were positioned at the end of the tank rather than in the middle. I would also hazard a guess the reason they gained the name ‘Jumbo’ was due to their larger more bulky tank design in comparison to the oil tanks to account for the lagging.
Video of a typical formation for Jumbo Tar Tanks:
Further discussion / information or even photos & drawings welcomed.
 On 18/1/2021 at 1:42 PM, Vlak said:
Something which seems to, perhaps, have been overlooked in terms of freight are the Jumbo Tar Wagons. These were 2-Axle wagons which were used for the conveyance of Bitumen to both Sligo (and possibly Galway?) for Cold Chon. They were loaded in Alexander Road at their Tar Terminal and usually added to liner trains for the run west. Based on what little information I can gather the traffic didn’t really amount to much more than 3-6 wagons per train at a time. The traffic flow seems to have ended around 2001/2, although the bogie wagons (which contained ISO Bitumen containers which were used to Mallow for Council use) seems to have lasted into until 2003/4.
It has been challenging to find photographs of these wagons in detail, other than a few photos with them in the background, but they appear to have been constructed / modified by CIE using Bitumen tanks mounted on short wheelbase 20ft flats (same as the Cement Bubbles it would seem) with the same tank anchors as was the case for most fuel oil & latterly Esso Oil wagons. Two tank designs appear to have been in use, one with a flat end and another with a more rounded end with ribs.
I attach two screen shots taken from the video linked below which provides a little more detail (hope the author of the video doesn’t mind!); it would seem that unique to tank wagons here the ladders were positioned at the end of the tank rather than in the middle. I would also hazard a guess the reason they gained the name ‘Jumbo’ was due to their larger more bulky tank design in comparison to the oil tanks to account for the lagging.
Video of a typical formation for Jumbo Tar Tanks:
Further discussion / information or even photos & drawings welcomed.
Hi Vlak. My video! Yep, no problem at all using it. That's what they are there for! Interesting topic too! Cheers. Eamonn
-
This question comes at the right time for me! I hope to start building my layout in l2021. It will be based on a single line MGWR station with passing loop, and some other stuff as well. So it is opportune for me to consider this question whether the simplicity of layout and quantity of trackwork I require makes 21mm a better prospect. I joined the EM and P4 societies to be better informed of what would be involved. Over the years I have a amassed a healthy collection of MM locos, Irish coach and wagon stock etc. Having weighed up all of the pros and cons, I am of the view currently that the tasks of (a) converting all of my rolling stock, and (b) scratchbuilding all of the 21mm trackwork is a bridge too far for me and the nearest I will get to it will be to run current stock on Peco Code 75 bullhead trackwork and points (or similar) with some clever track weathering to give the illusion of a wider track gauge.
I should have added that yes I would love to model in 21mm if the trackwork was available off the shelf, and the rolling stock conversion could be managed without too much difficulty!
-
4
-
-
15 hours ago, Noel said:
I've successfully used 121 sound decoders from WheelTappers for some time and very pleased with them. Excellent prototypical driving features and independent control of the head lamps (ie coasting, braking, throttle hold, etc). Some nice additional functions like kadee uncoupling, cascading train coupling snatch and converse buffer clashing as an entire train comes to a halt. Full lighting support for double header consists. I just love driving these wheeltapper projects like real prototypical trains with real stopping distances and procedures. They are the very same ESU LokSound V5 decoders that MM supply so no issues with warranty (ie just better sound functionality). Cost seems the same. I'm just a happy customer using these for years driving my MM baby GMs even before the 121s came out. They also consist (double head) really well with MM 141/181 locos as was common practice on the real railways. Have fun and enjoy.
Agree 100% Noel. I have bought some recently and I'm getting immense fun from driving these locos, which takes a bit of learning! Nothing better than applying F5 (brake), then F18 (Heavy Load) then set it to speed step 12 for example, then finally disengage F5.....and wait! The engine revvs and the loco strain as she pulls away with a heavy load is a sight and a sound to behold. Highly recommended!
-
1
-
-
On 24/11/2020 at 9:25 PM, Dempsey said:
Did the 121s run double headed together or was it just with the 141s 181s?
Loads of examples of 121's in Supertrain, IR and IE double heading in the past.
Here's an example!
-
4
-
-
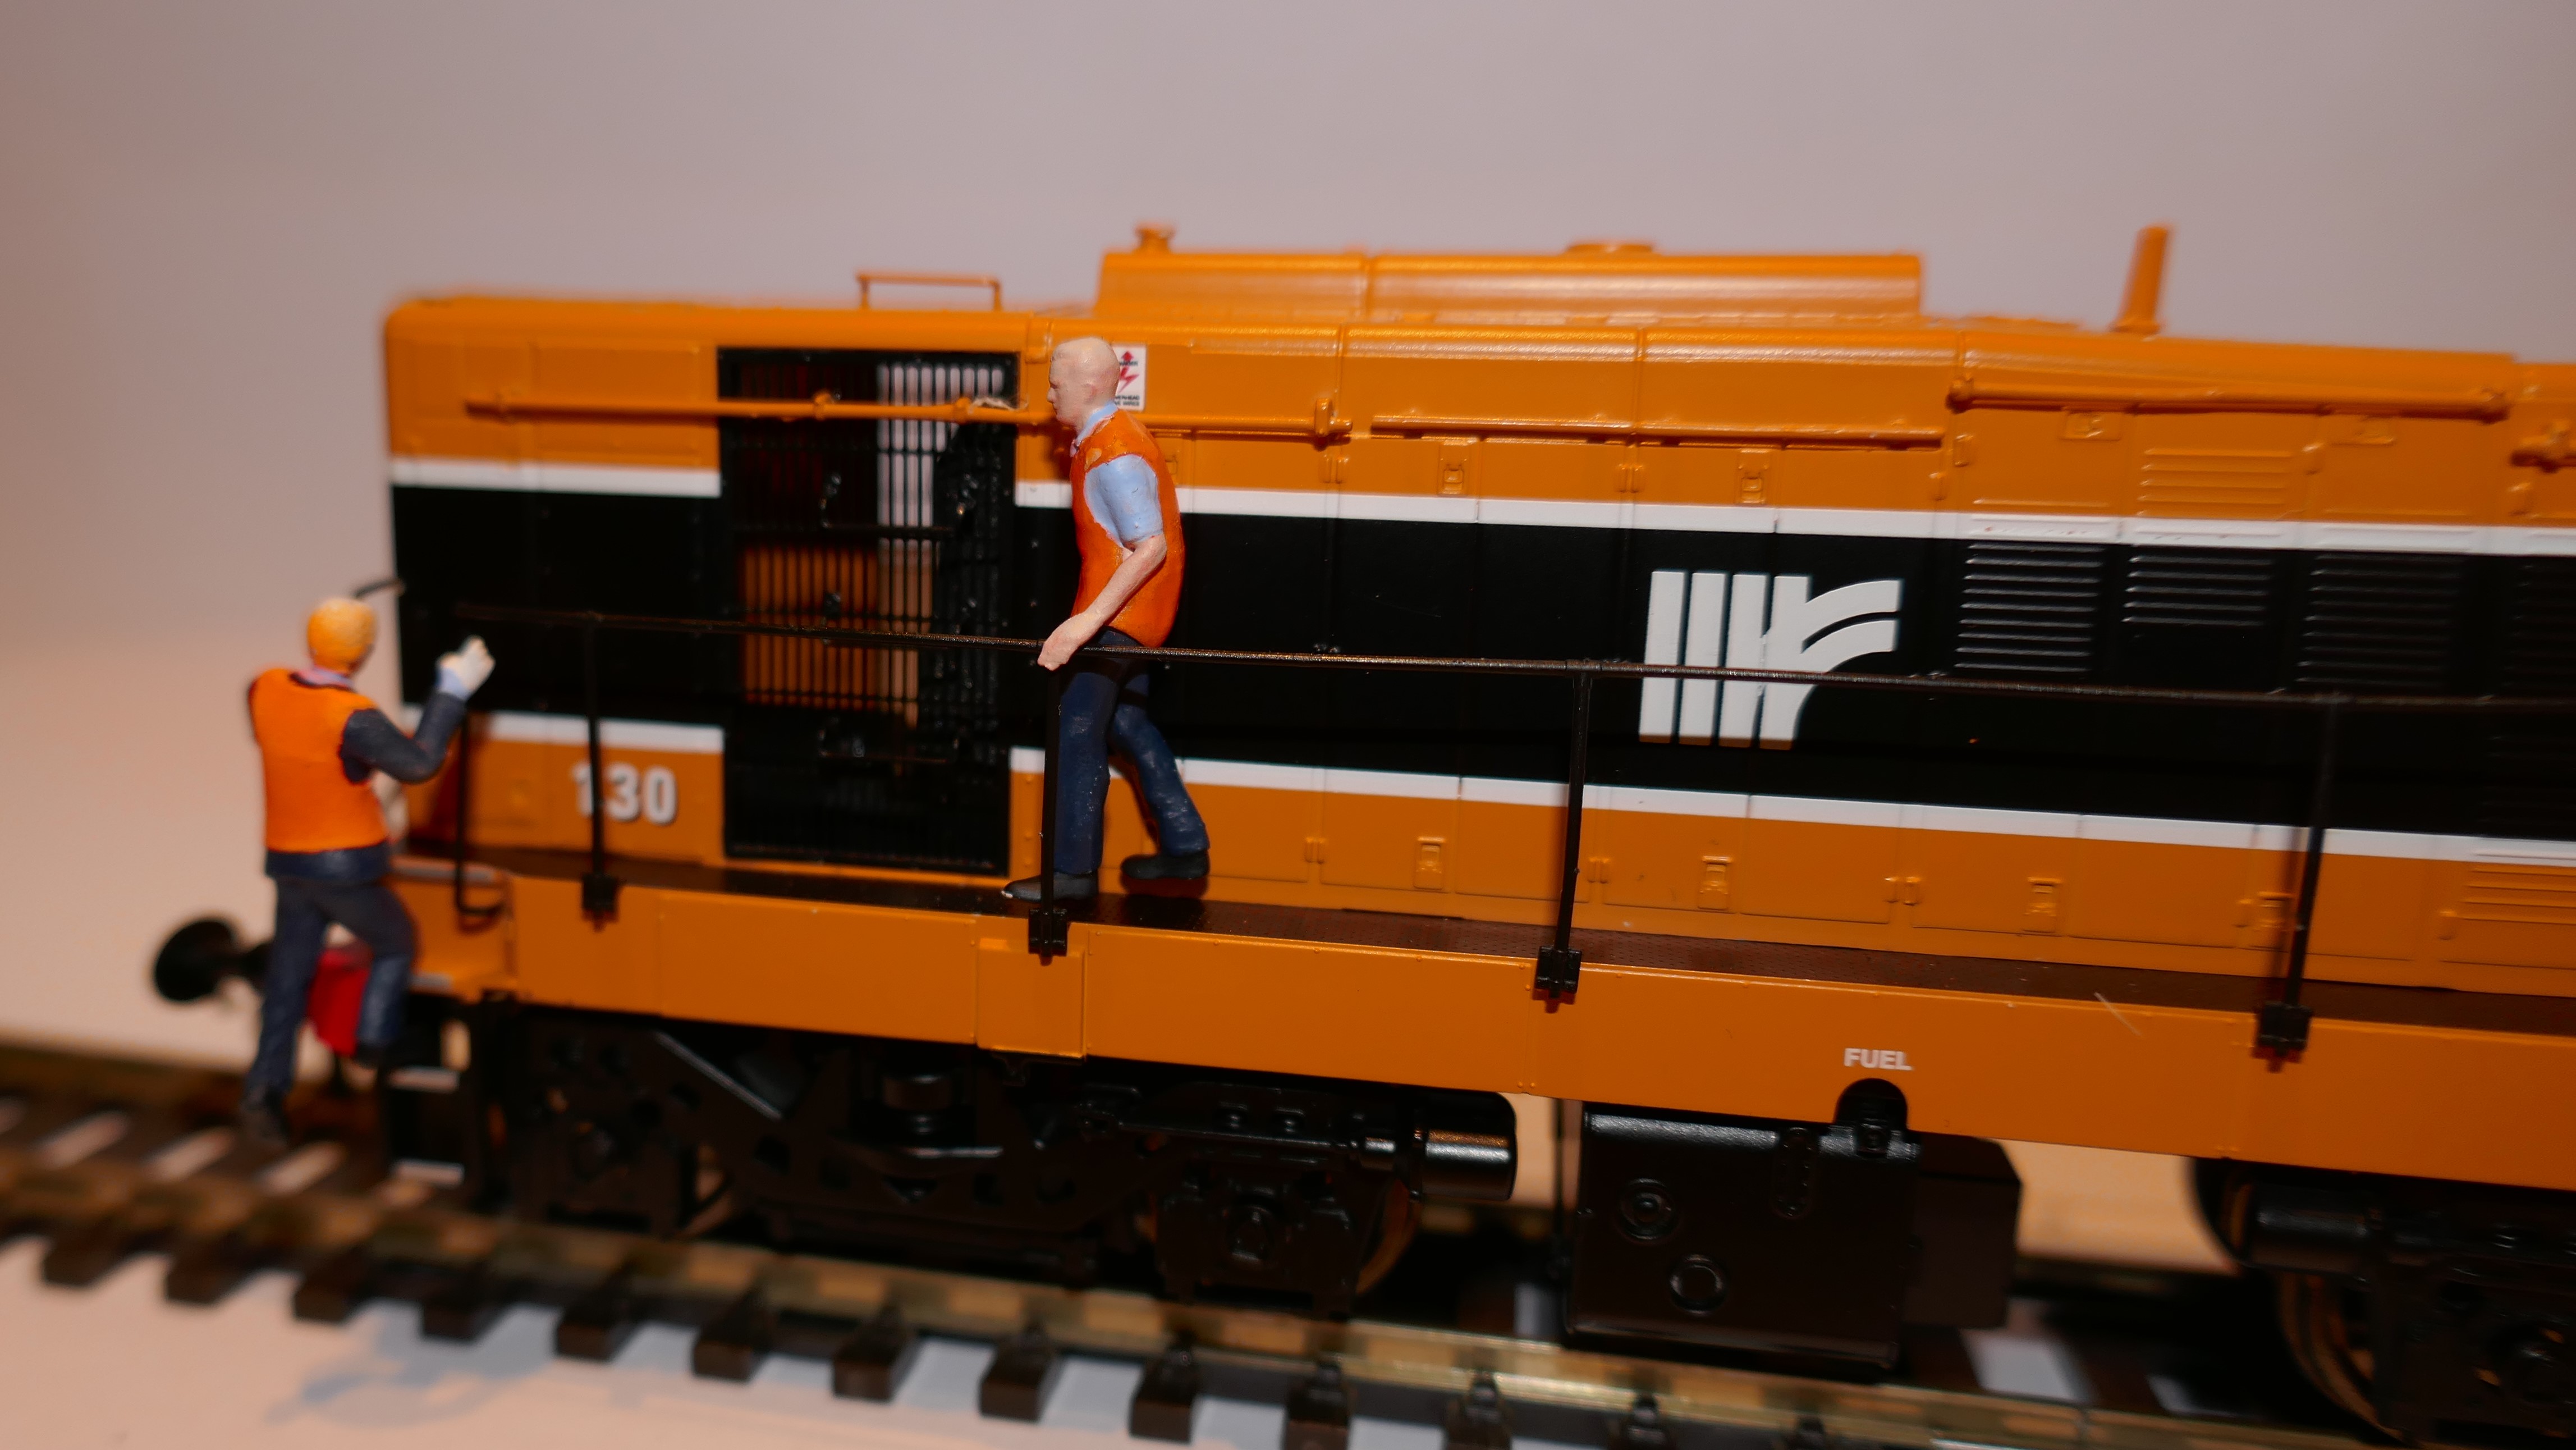
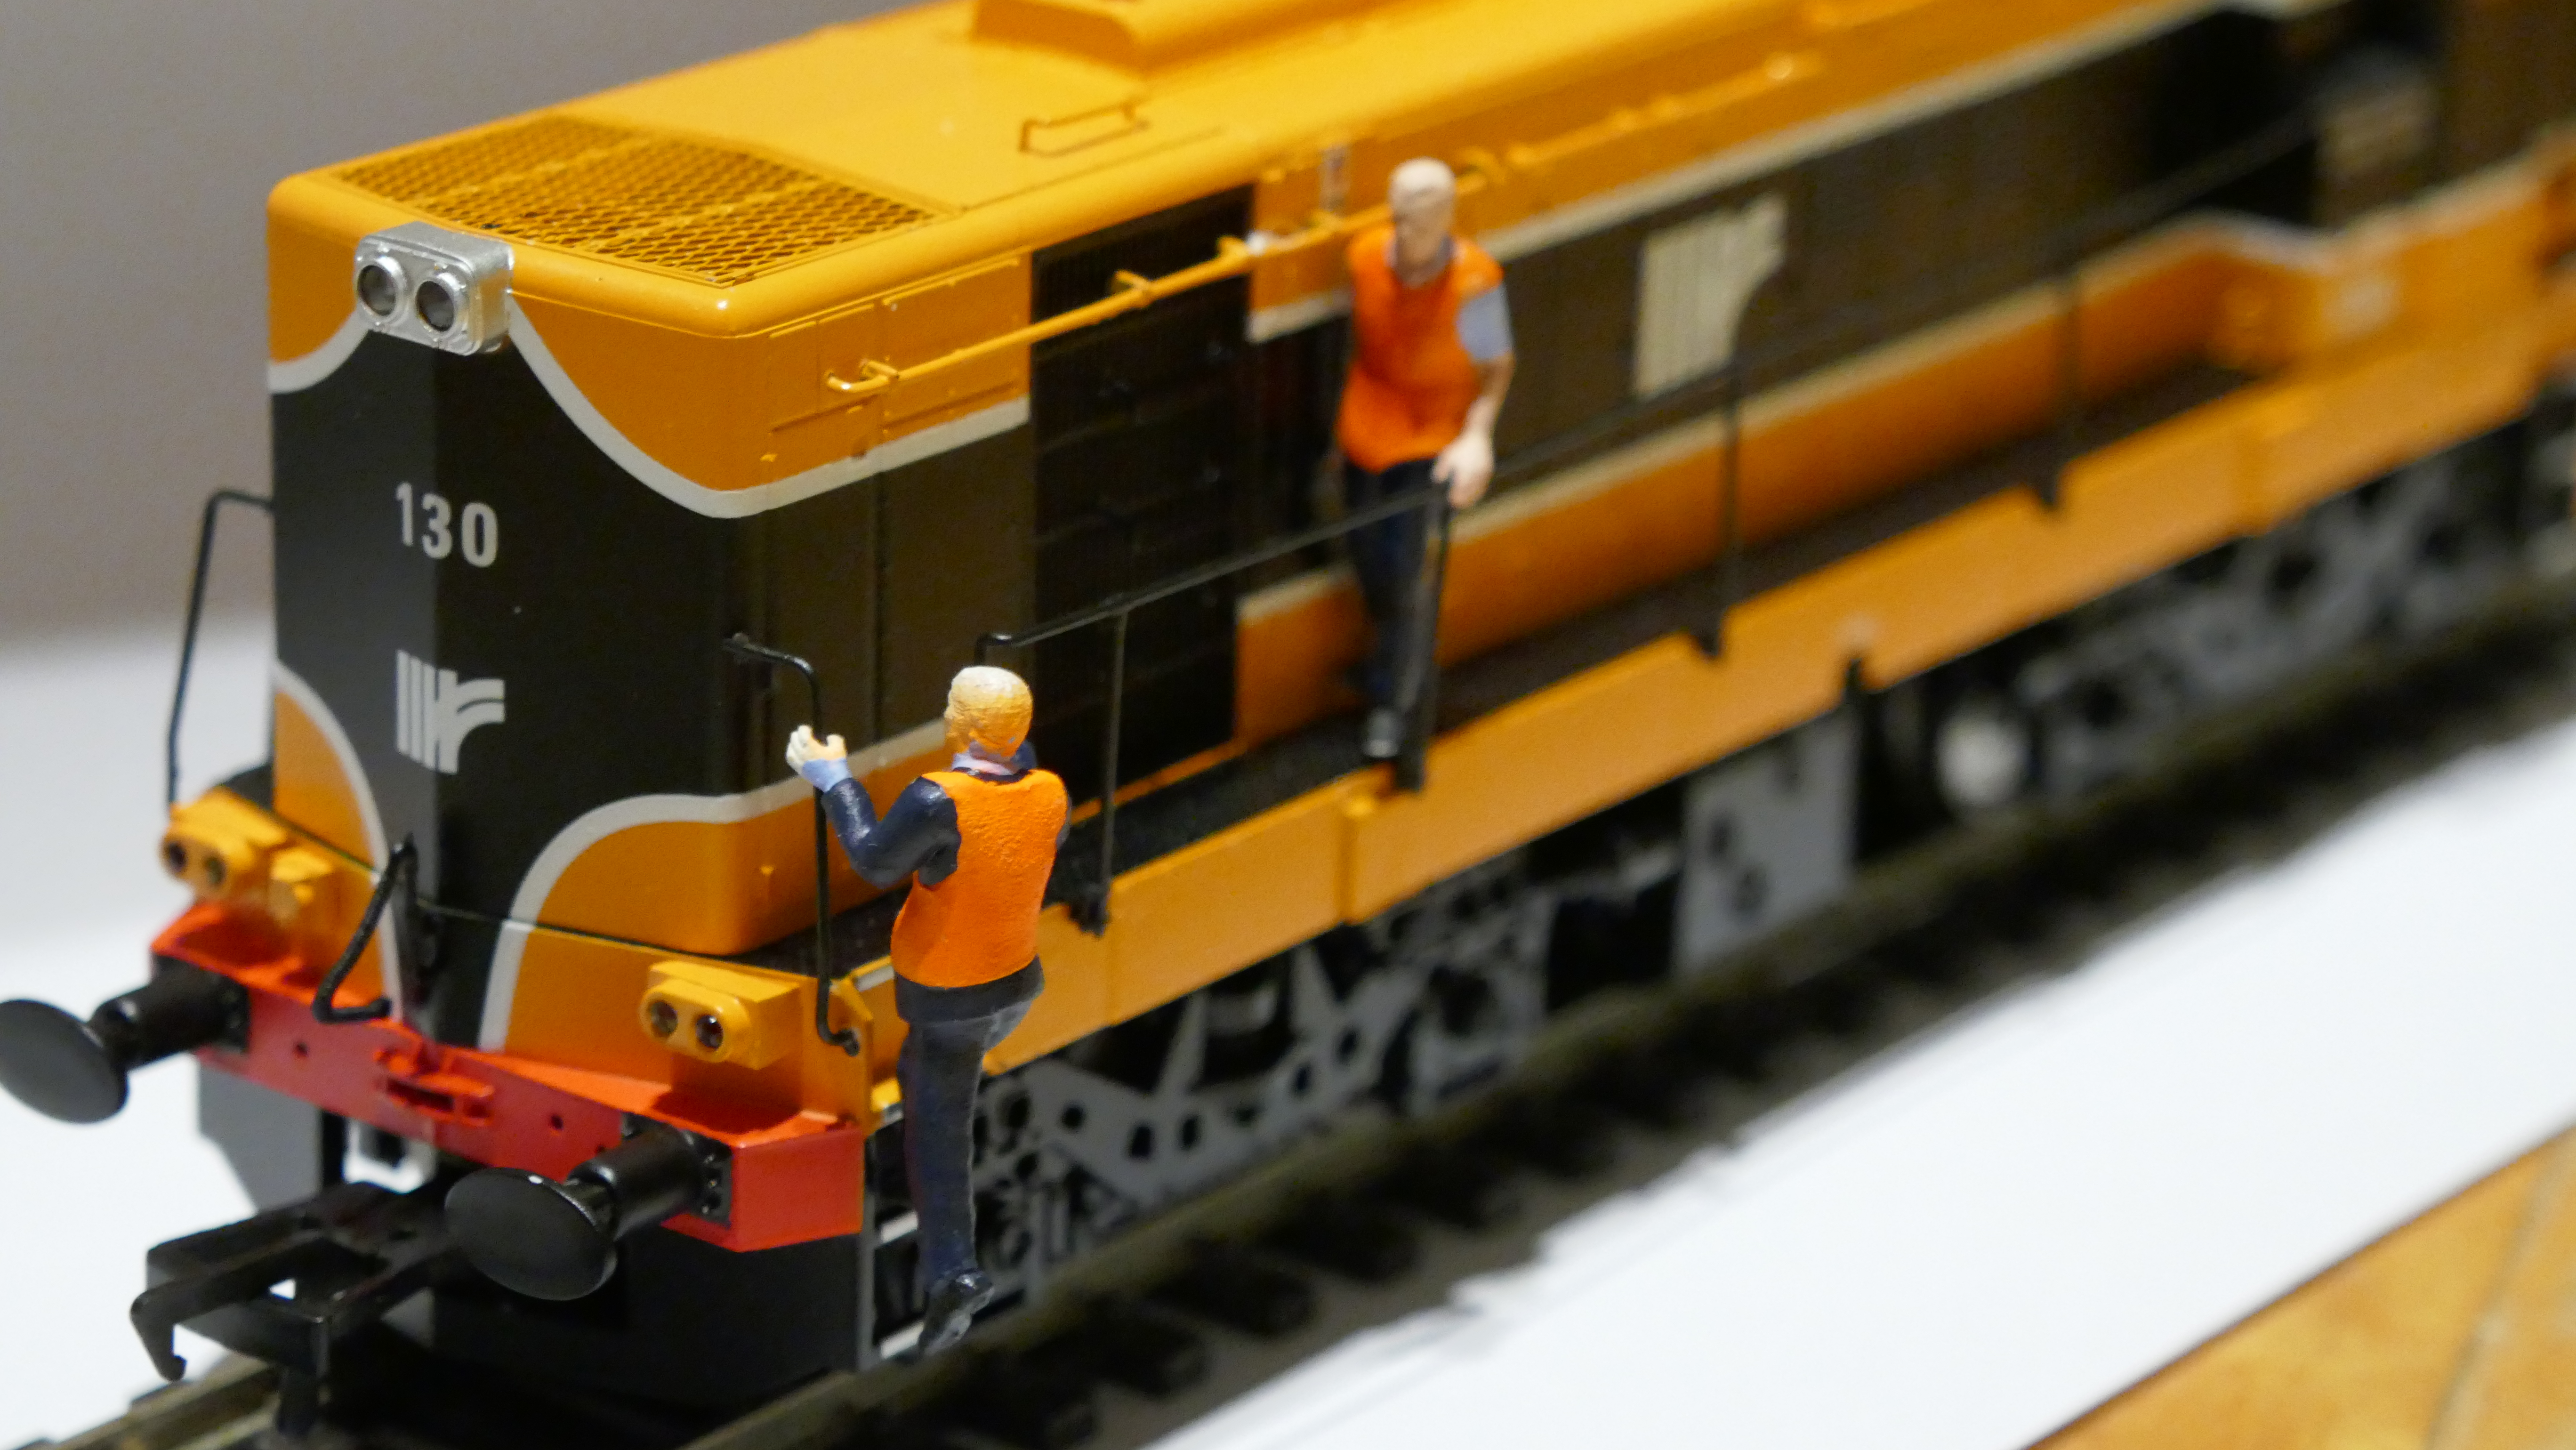
Well when you have the brand new MM 121's, then there going to need a crew to operate them and keep them in tip top working order! Enter Glenderg Models who gave me a sneak preview this evening of some prototypes figures he is working on!! They look absolutely fantastic! I suspect there's a Ken Fox, a Lar Griffin, maybe even a Noel Enright in the production line, with more surprises to come! Looking forward to their release! And yes, I have Richie's blessing to post them!
-
9
-
 4
4
-
-
1 hour ago, leslie10646 said:
Great stuff, Fp7. Wonder where you got the wagons from - they look familiar!
Indeed they should Leslie! And with more bespoke Provincial Wagons to add I will soon have a right old stable of Irish loose coupled goods wagons to improve it even further!
-
1
-
-
Well I have waited a long, long time for this day! And with huge thanks to Sean Hogan for the use of his excellent layout, the nourishment and the constant banter flowing between Sean, Joe Dave, Richie and myself, here is B131 in action with a rake of 22 goods wagons from all over the island. The sound is via Wheeltappers 645 decoder, which I know is not prototypically correct, but it's all I have and it sounds terrific, not to mention the driving experience which must be the closest thing to driving the real thing!!!! Paddy Murphy has brought the best Christmas present to me so take a bow and take a well deserved and well wearned rest!
-
10
-
1
-
3
-
-
Taken lunchtime today! No words needed!
-
15
-
1
-
 1
1
-
-
1 hour ago, burnthebox said:
As much as I like the Black and Silver, THAT FRONT FACE...reminds me of the Noddy toy trains with THAT SMILE...

BTB
Hahahaha...I see what you mean BTB!
-
I was never a fan of the black & silver in reality Noel! That said, the livery in model form does grow on you and it is, after all, part of the livery history of the 071's. So on that basis I would keep it as it is in silver & black, and give it the weathering it deserves, which you are more than capable doing! Have a look at a video I posted on YouTube some time ago. From 3.55 on you'll get a good idea of the condition of the loco up close and who is winning the war on rust!! Looking forward to seeing the result! Eamonn
-
2
-
-
1 hour ago, murrayec said:
Just to clarify;-
This model is from a kit of parts made by Brendan Kelly, Brendan built 4 of these models a few moons ago from his own patterns for members of the MRSI club.
The Model Railway Shop did produce a kit of the GSR Class 800, but that was a different animal!
Eoin
Thanks Eoin for the clarification!
-
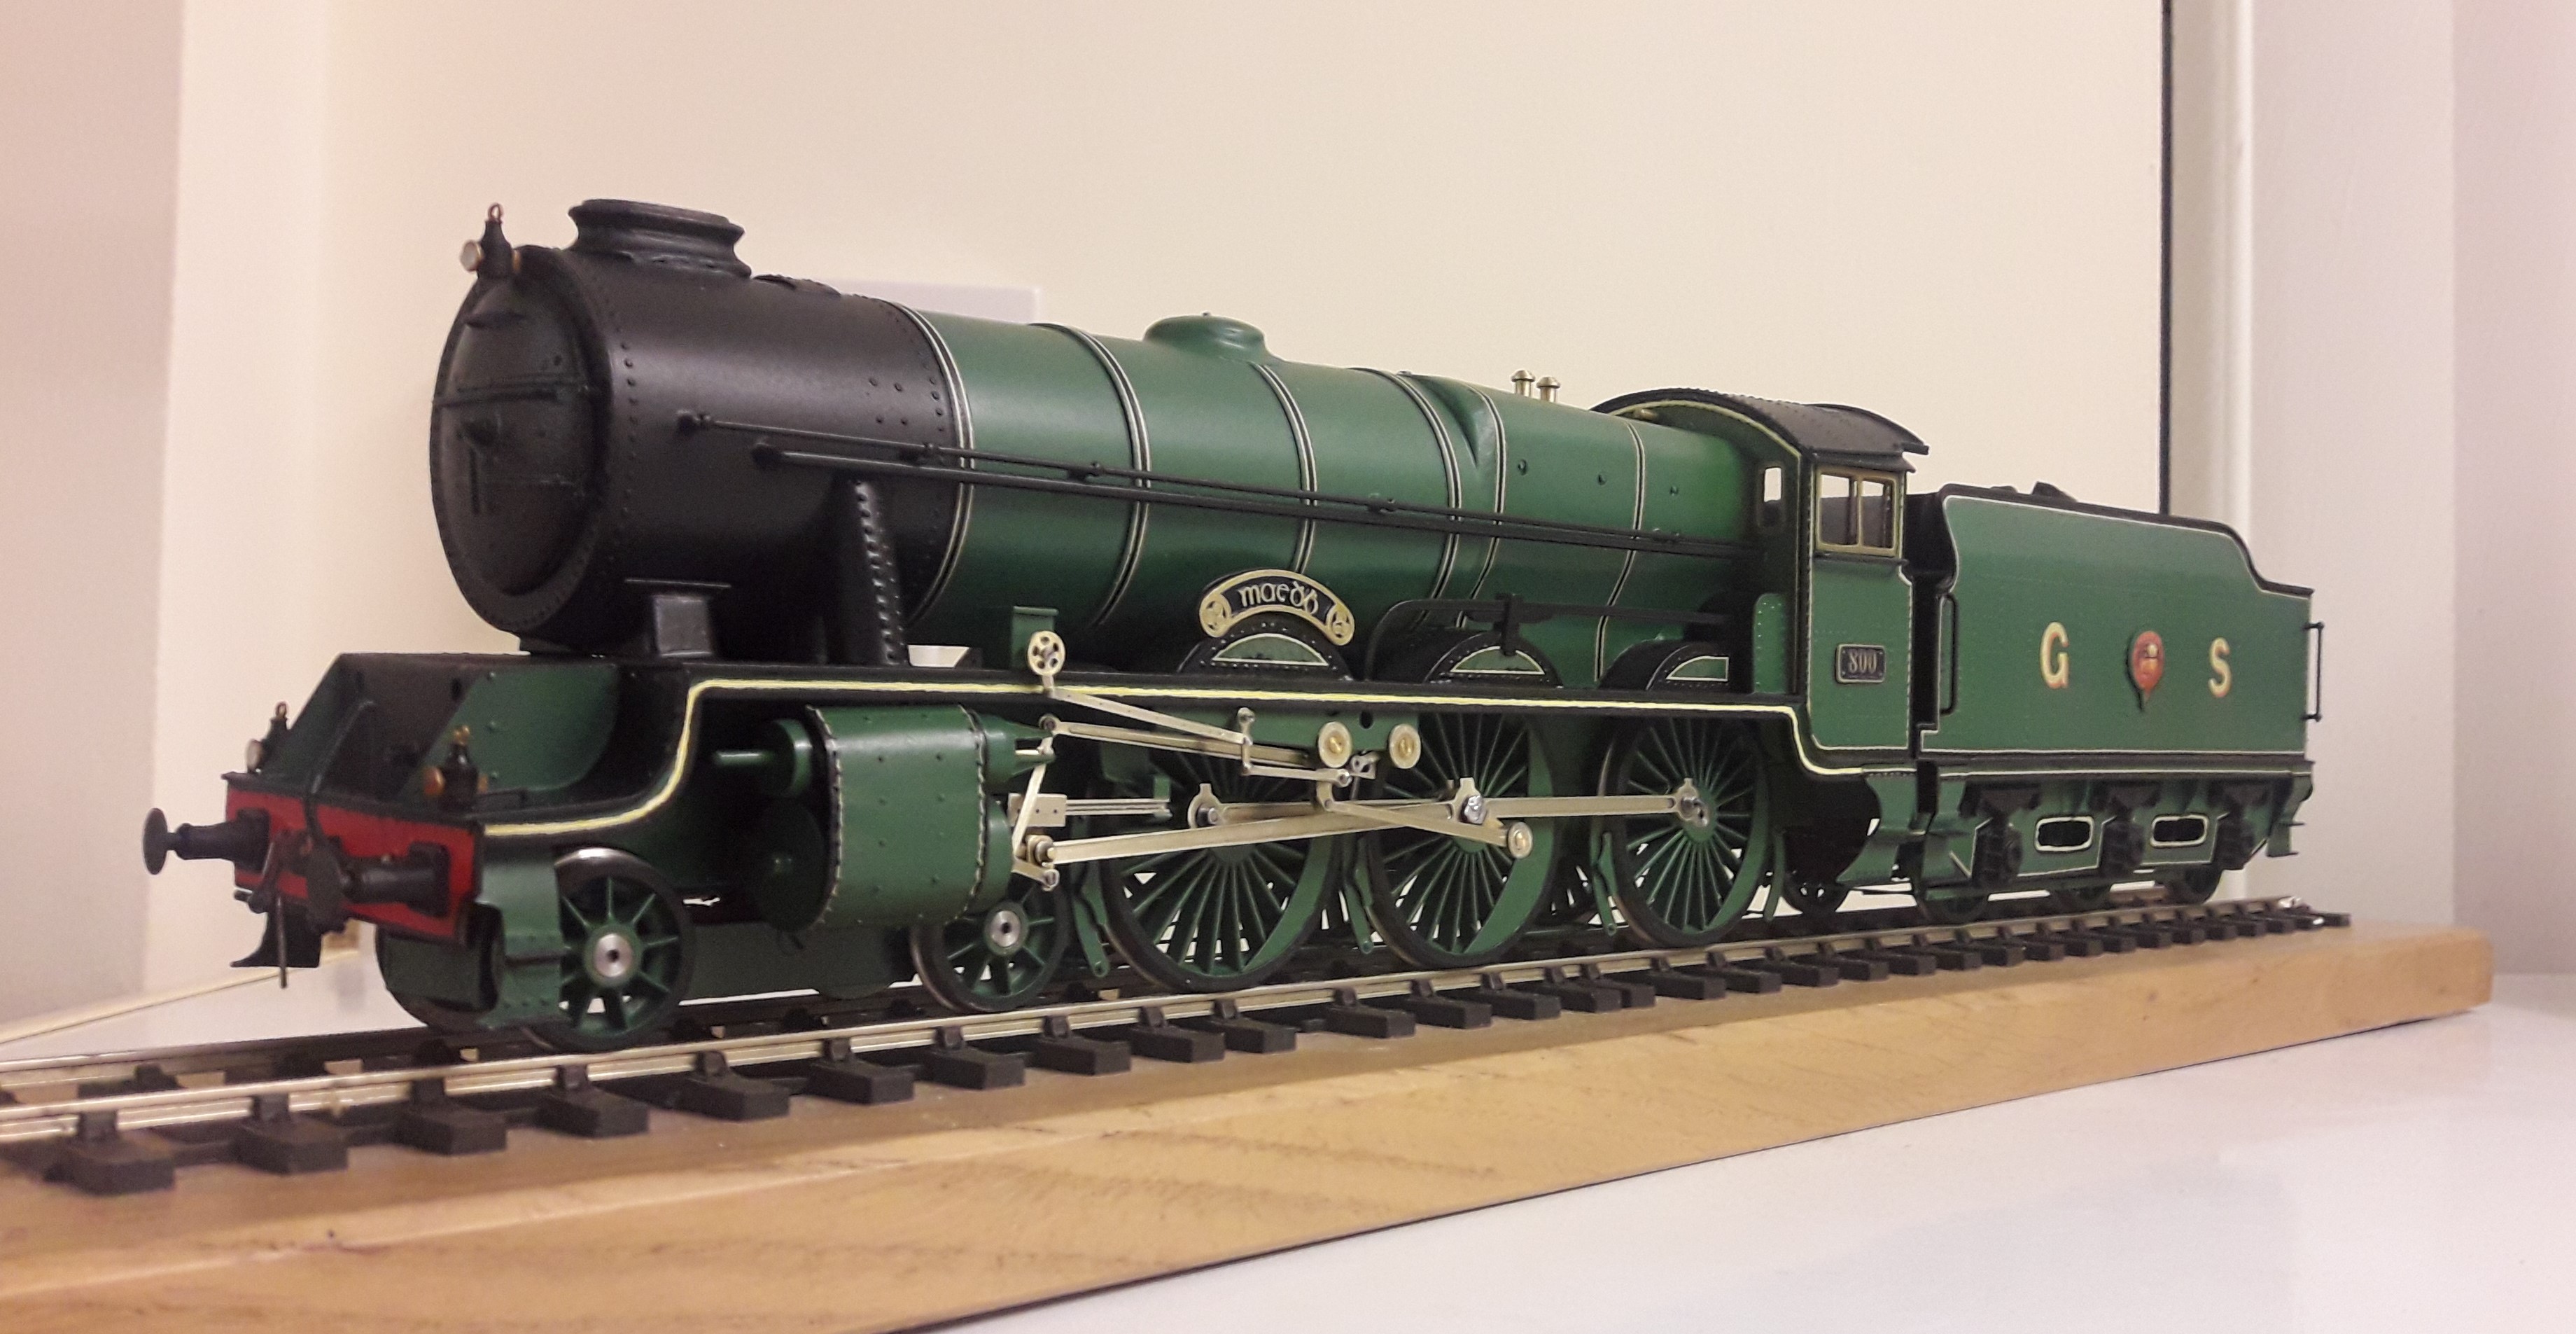
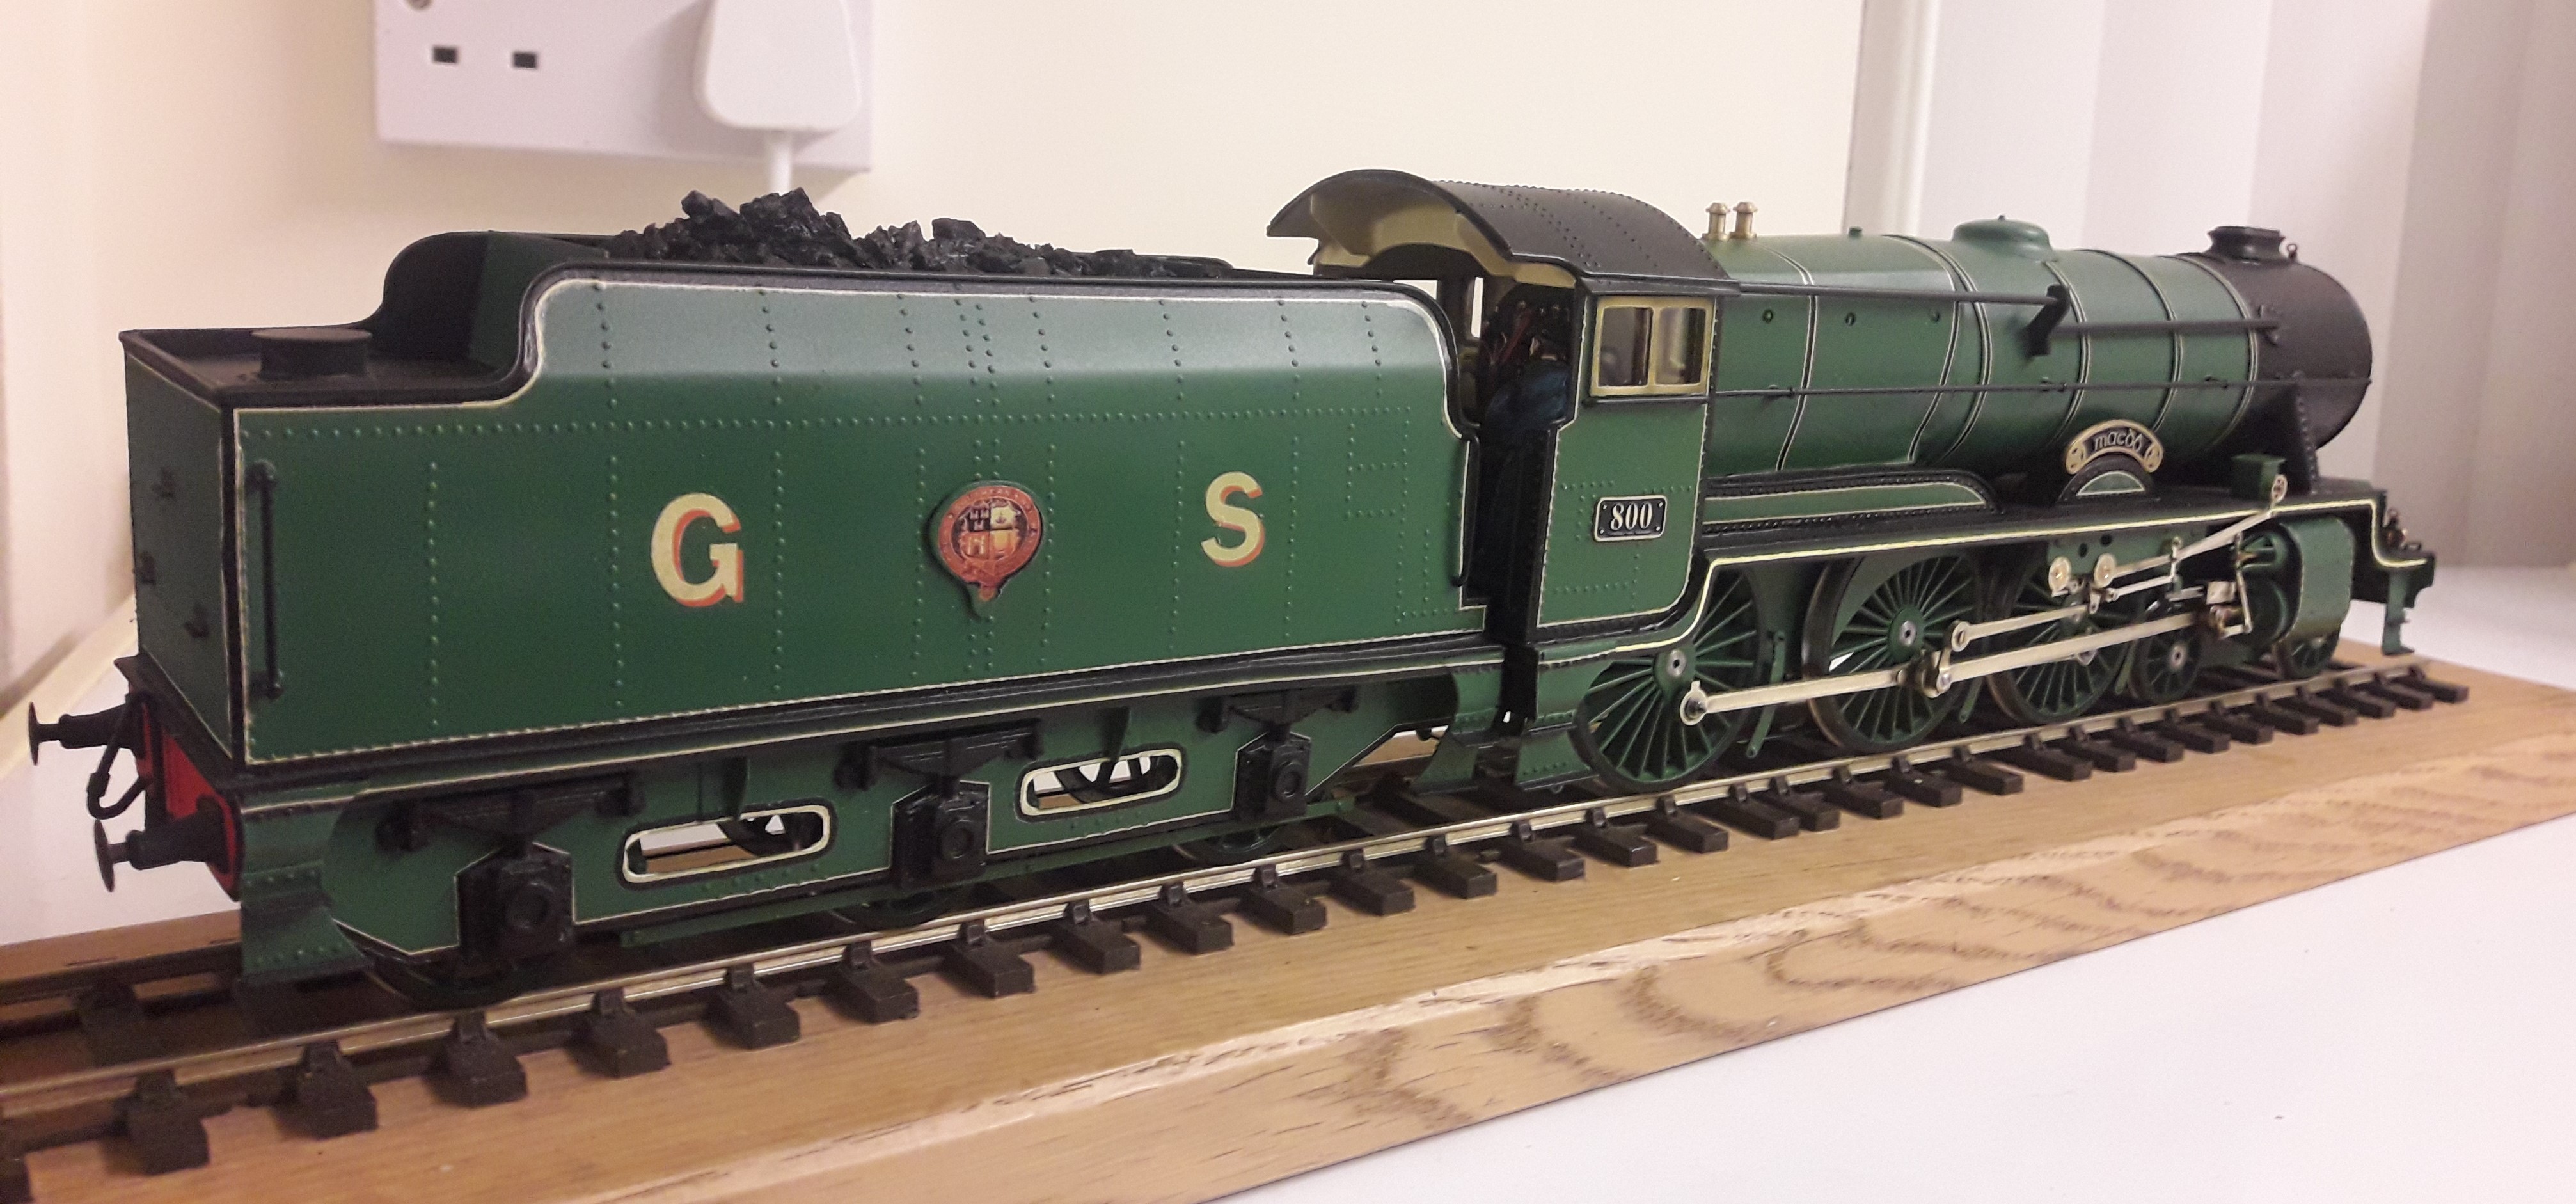
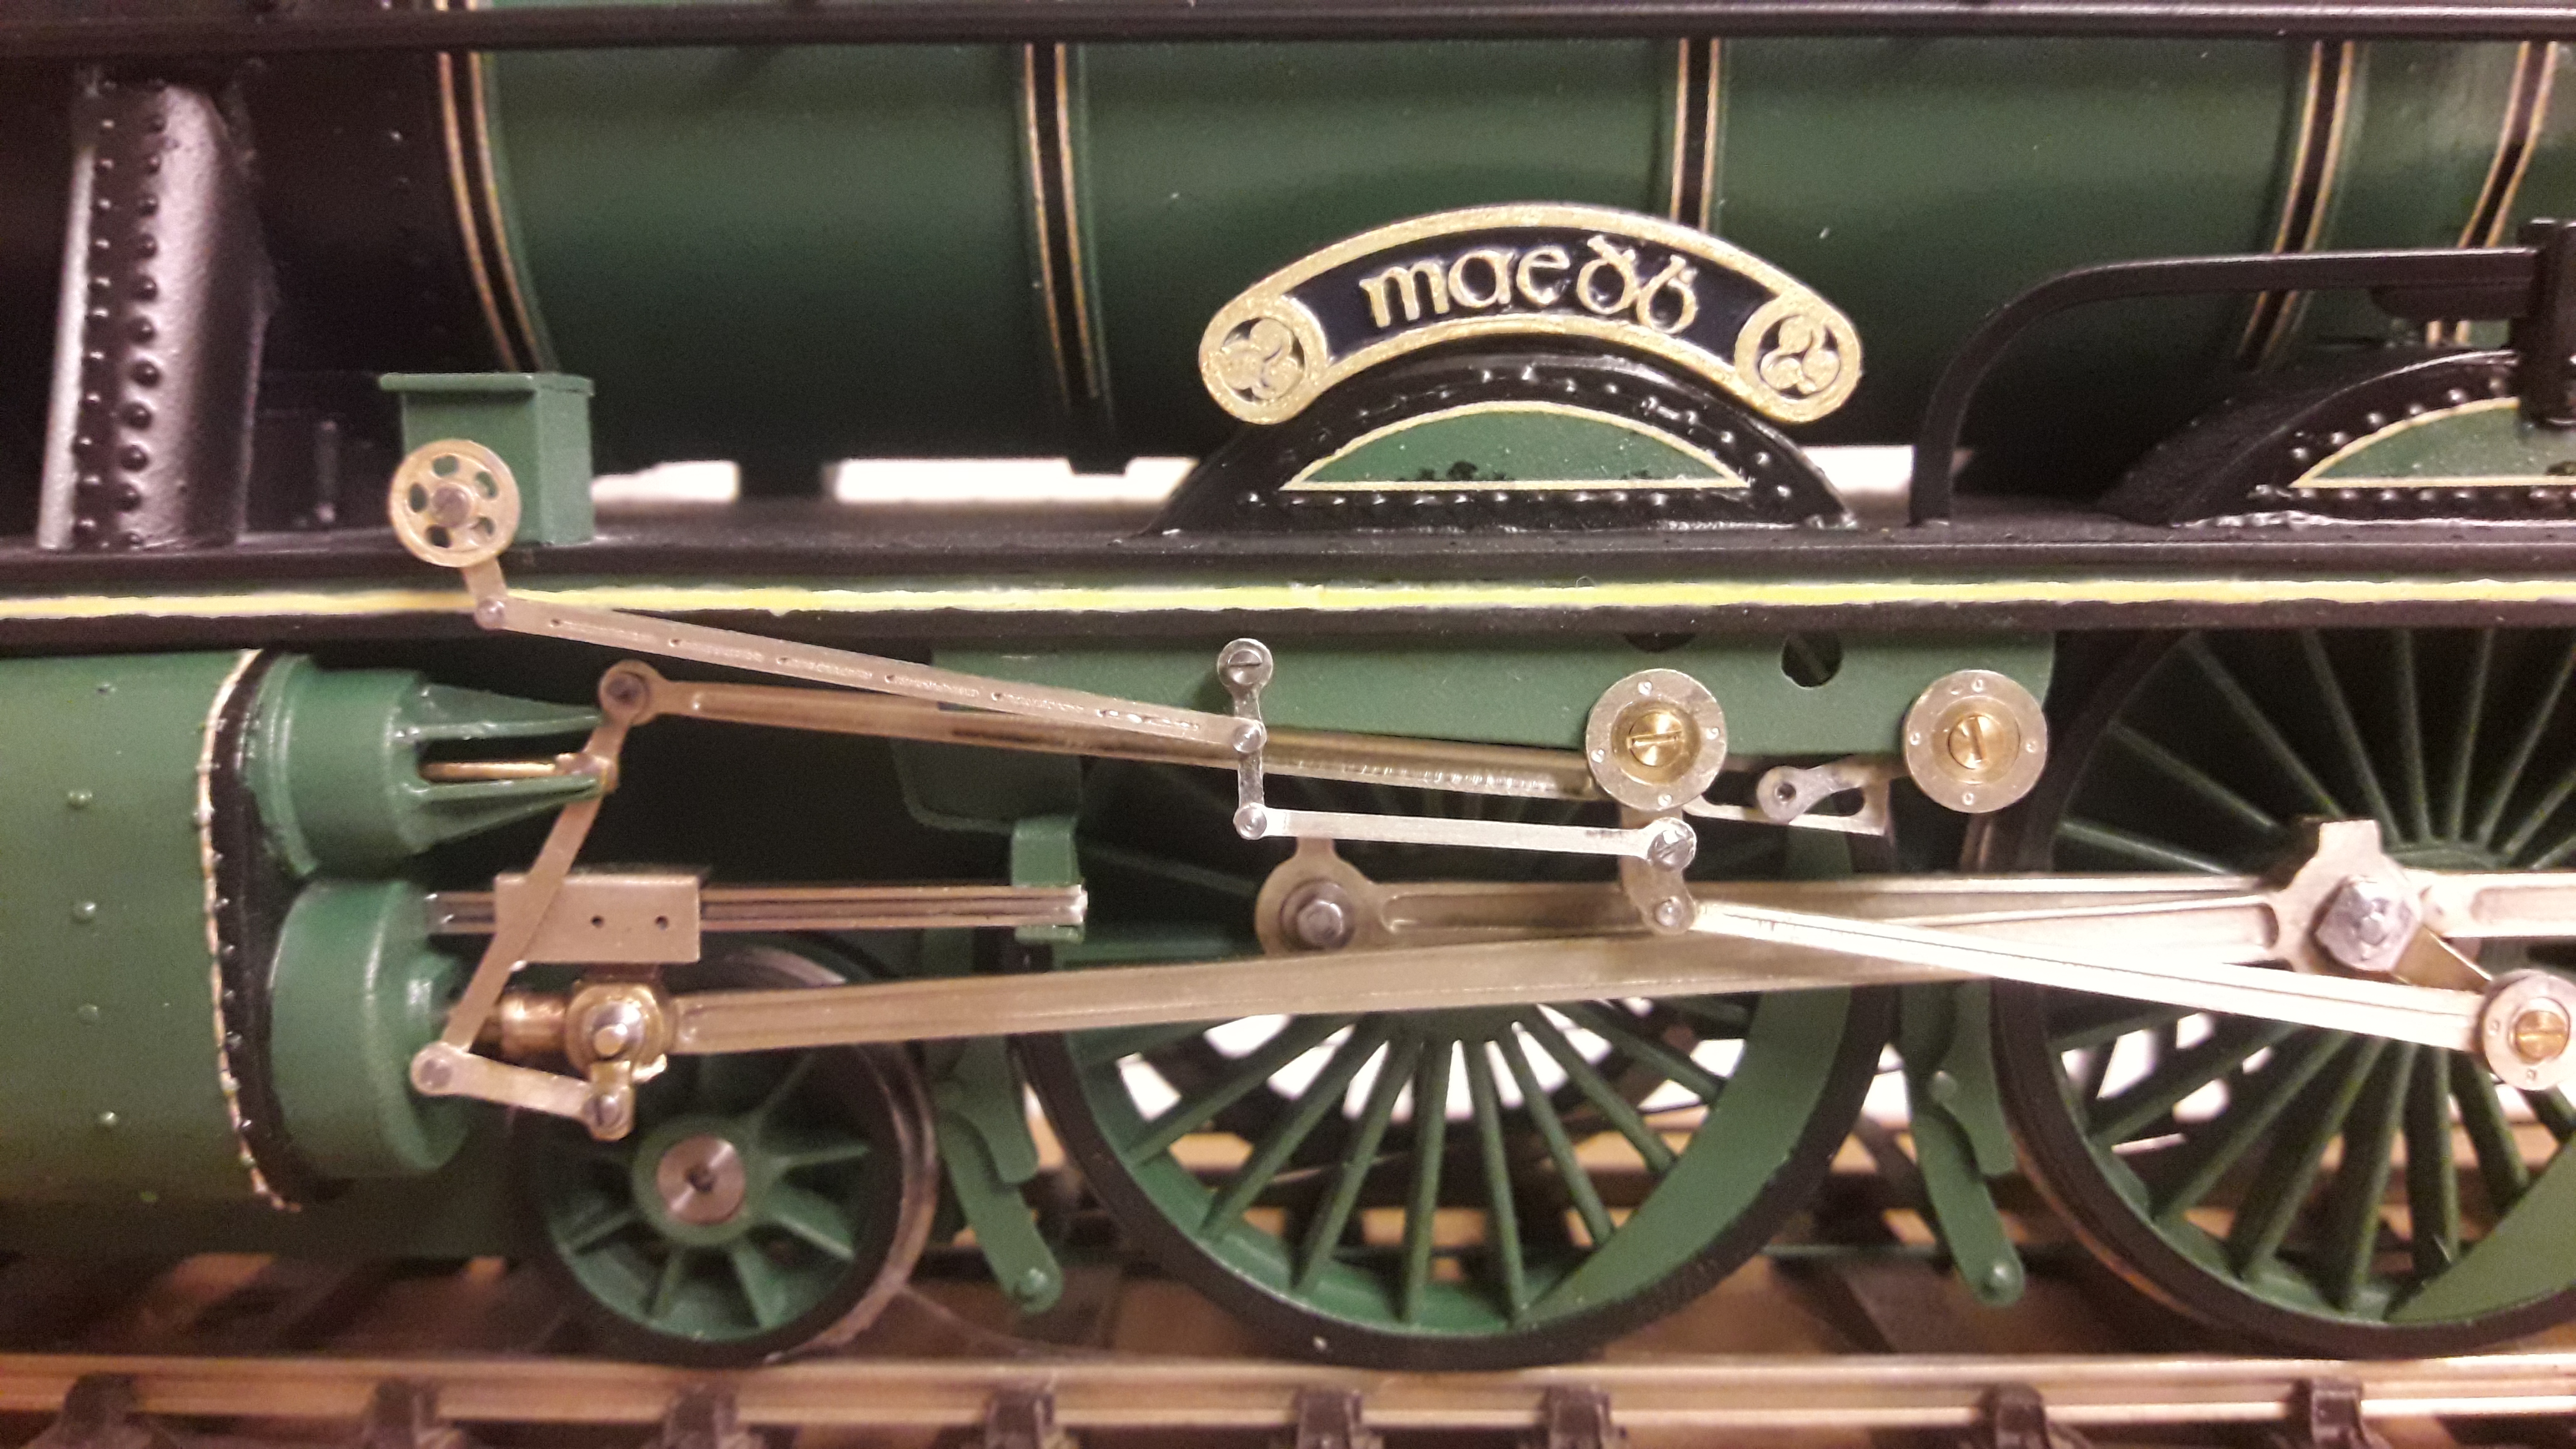
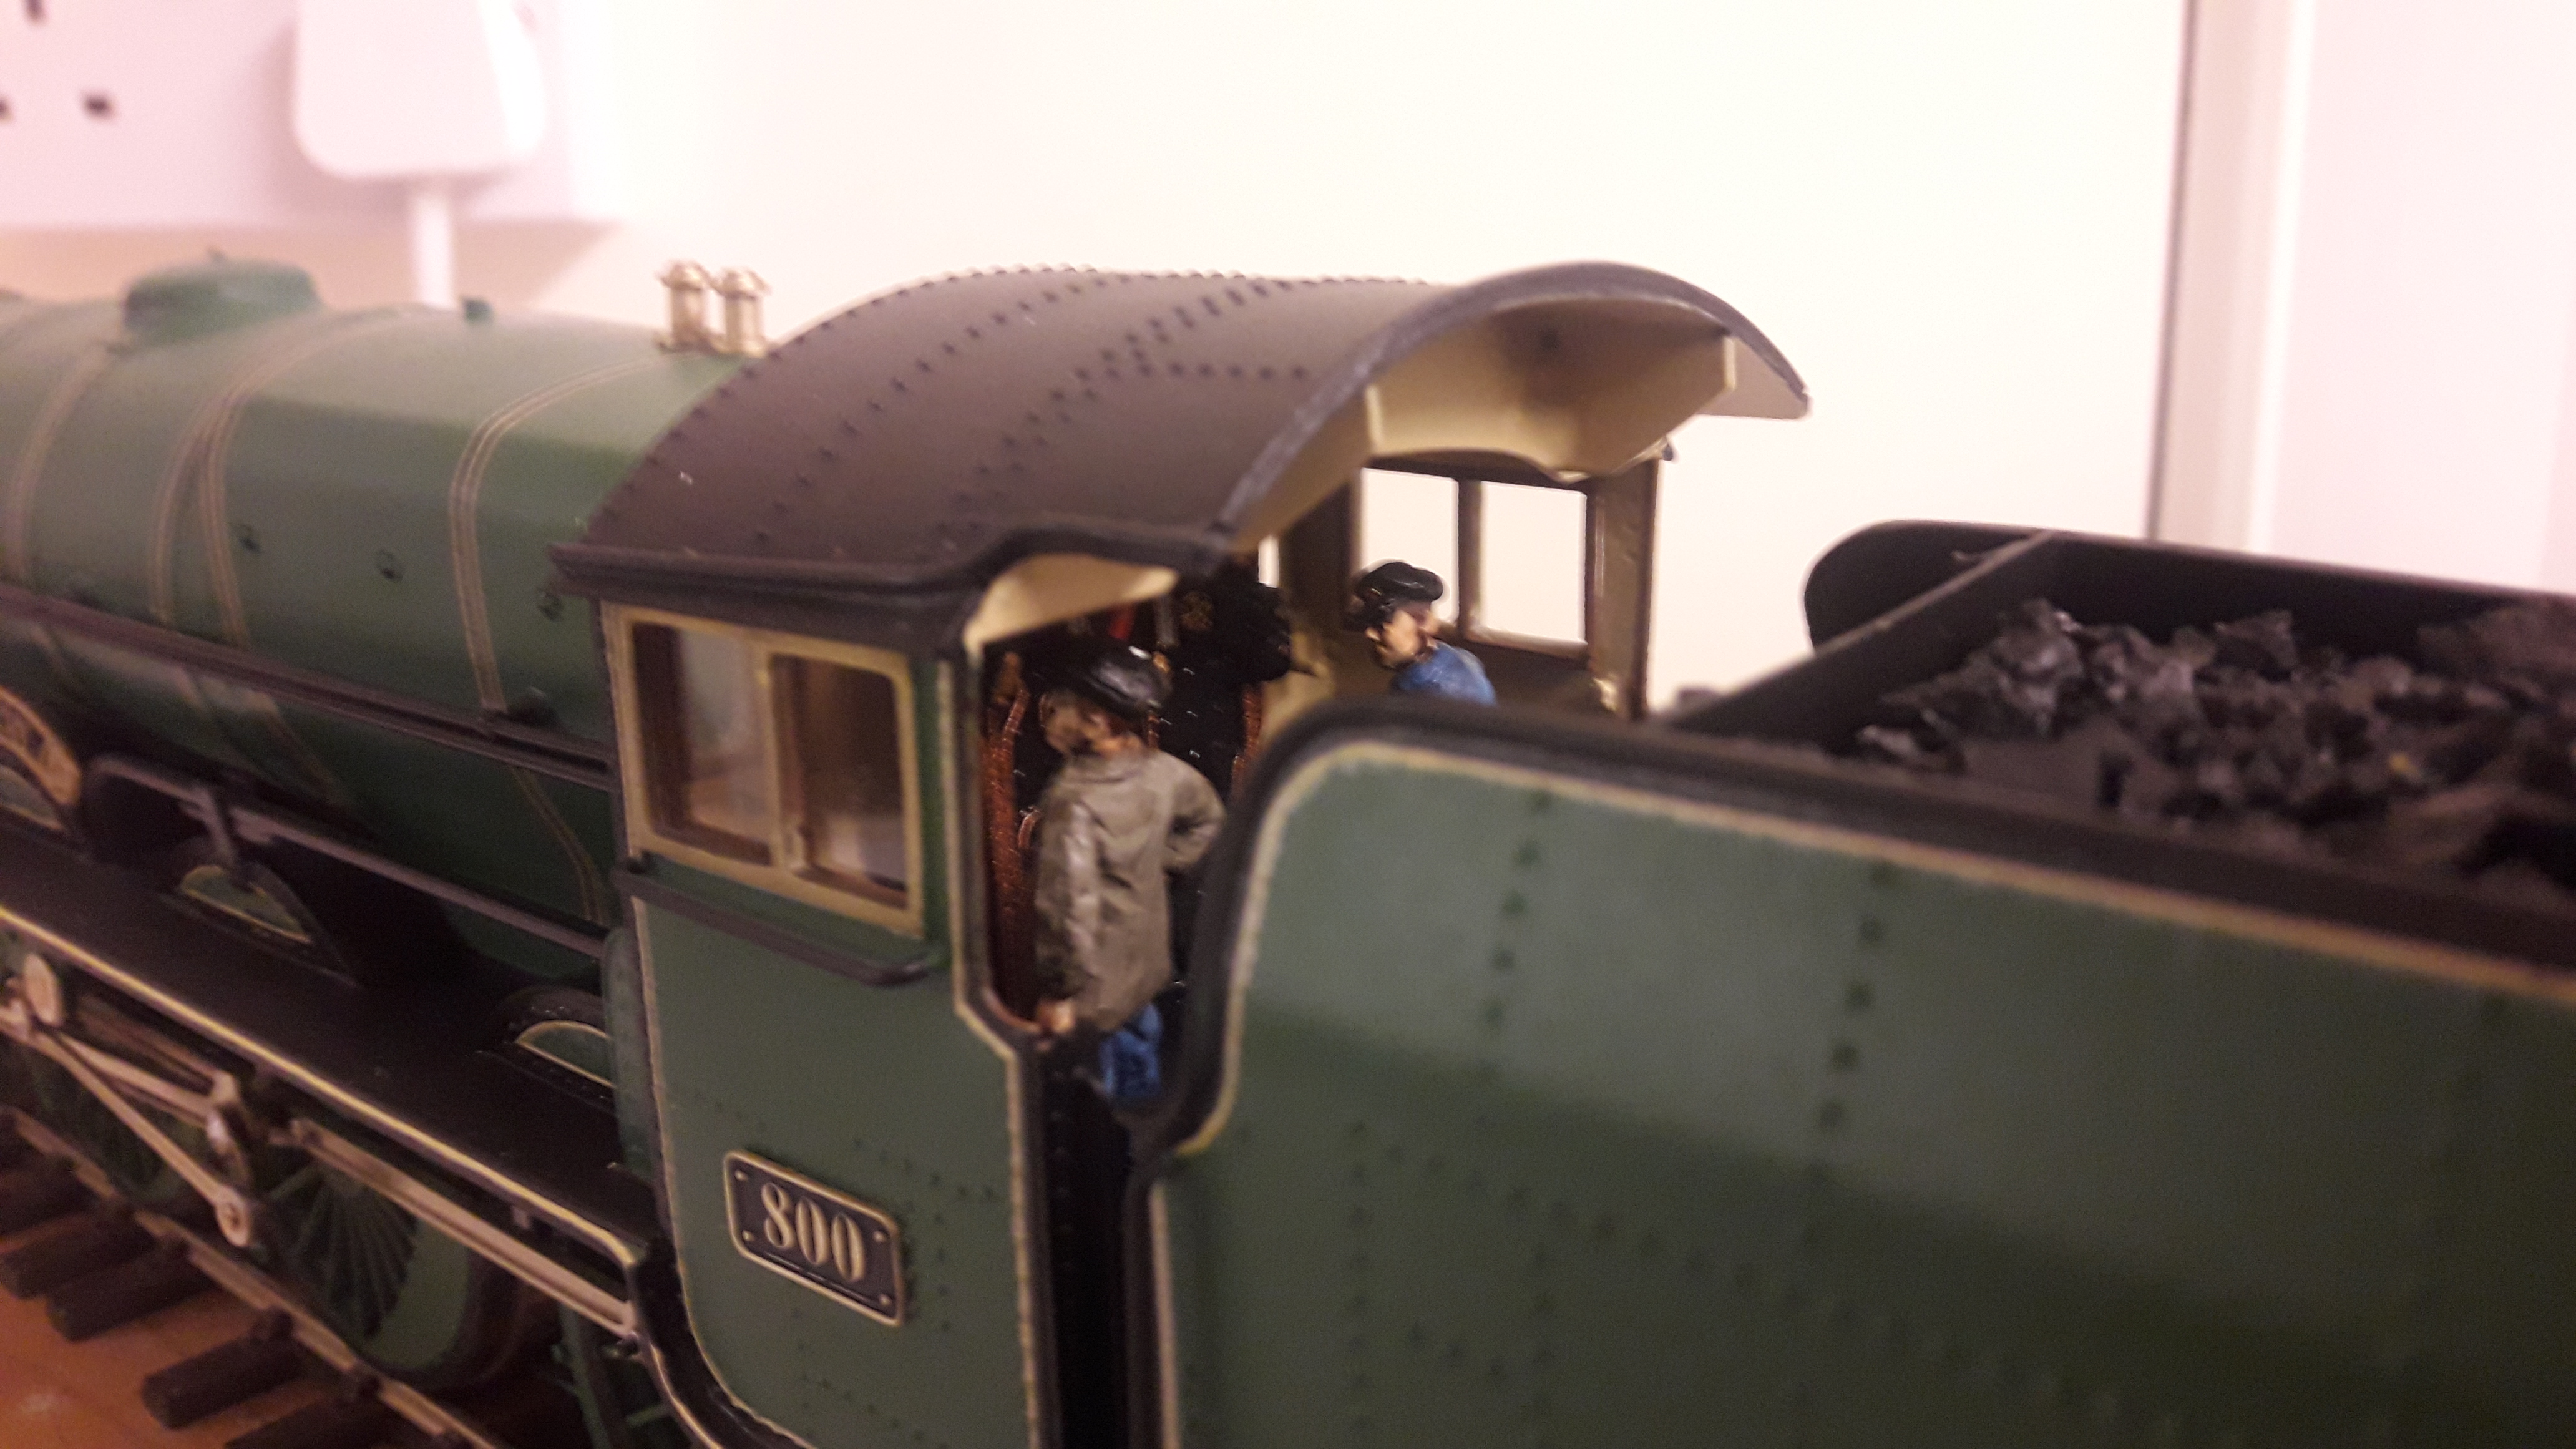
Some photos for us fellow modellers to drool over! With the kind permission of, and on behalf of Sean Hogan who commissioned it, this is his recently completed gauge O, 7mm working scale model of the GSR's flagship 800 class steam locomotive 'Maedb'. It was built by Brendan Kelly from a kit, which I believe was produced, many moons ago, by the Model Railway Shop in Monck Place in Phibsboro, Dublin. Eoin Murray then completed the valve gear, painted, lined and detailed the model. The photographs do not do it justice - it is a magnificent model in every respect, and massive credit is due to the skills and talents of Brendan and Eoin in bringing it to fruition!
-
12
-
6
-
-
Eoin. That's excellent. Many thanks for sharing!
-
1
-
.JPG.bda80e15719080bc1f4ea5b7377d34a3.JPG)
.JPG.182456a249f78a35db4af30de3f07b14.JPG)
Back in the Day
in General Chat
Posted · Edited by fishplate7
relocate text
I dont know the answer bufferstop but I'll find out! That's a shot of Frank (Bohan)'s back in Kilcock in the early/mid 1970's if thats any help!