Adrian
-
Posts
98 -
Joined
-
Last visited
-
Days Won
3
Content Type
Profiles
Forums
Resource Library
Events
Gallery
Blogs
Store
Community Map
Posts posted by Adrian
-
-
4 hours ago, Dempsey said:
This could also be done on Instagram for those who us it as hashtags can be applied to posts
Definitely! Something to tie us all together as a community.
The reason I was suggesting this is that when I started back into modelling about 18 months ago, I saw so much activity on Twitter for UK modellers and thought it was great - I was looking for an Irish community on there and just couldn't find it, so I honestly thought we weren't as active. I then got put onto this forum by another member and was surprised and delighted to find a whole thriving Irish modelling community on here to take part in. And you were all so welcoming as well.
So it got me thinking about how many other Irish / Irish-themed modellers could be out there not knowing about the forum and if we simply used a hashtag like #tmrgire on Twitter it might help attract them.
Anyhoo, rambling over")
Love this by the way
")

-
 1
1
-
-
Hey folks,
I'd be interested in opinions on this. Having used Twitter since I started back into modelling I've noticed there is a vibrant UK community which uses the hashtag #tmrguk - it makes it very simple to filter out all the noise and just get railway modelling tweets. There is also one for #tmrgusa which was started recently.
I've searched for an Irish equivalent but there doesn't seem to be any? (Please correct me if I'm wrong!)
If there's none, then I'm proposing that we (as in the Irish Railway Modelling Community) could start using #tmrgire (it's case insensitive so #TMRGIRE would work as well, it would stand for The Model Railway Group Ireland) for any Irish Railway tweets - this would help Twitter users to find railway modelling tweets specific for Irish Railways. You can also put the hashtag in your display name. I'm gonna start using it anyway and hopefully others will join
For anyone concerned with duplicating content I find Twitter very good for small day to day stuff, posting quick pics of minor work and getting feedback - and the forum here is much better for longer form discussions as well as major layout updates etc.
There's no onus on anyone! I'm gonna do it anyway so just posting here to spread the word. @Irish Railway Modeller you could also start using it when you Tweet if you like
Have a good day everyone!
-
7
-
-
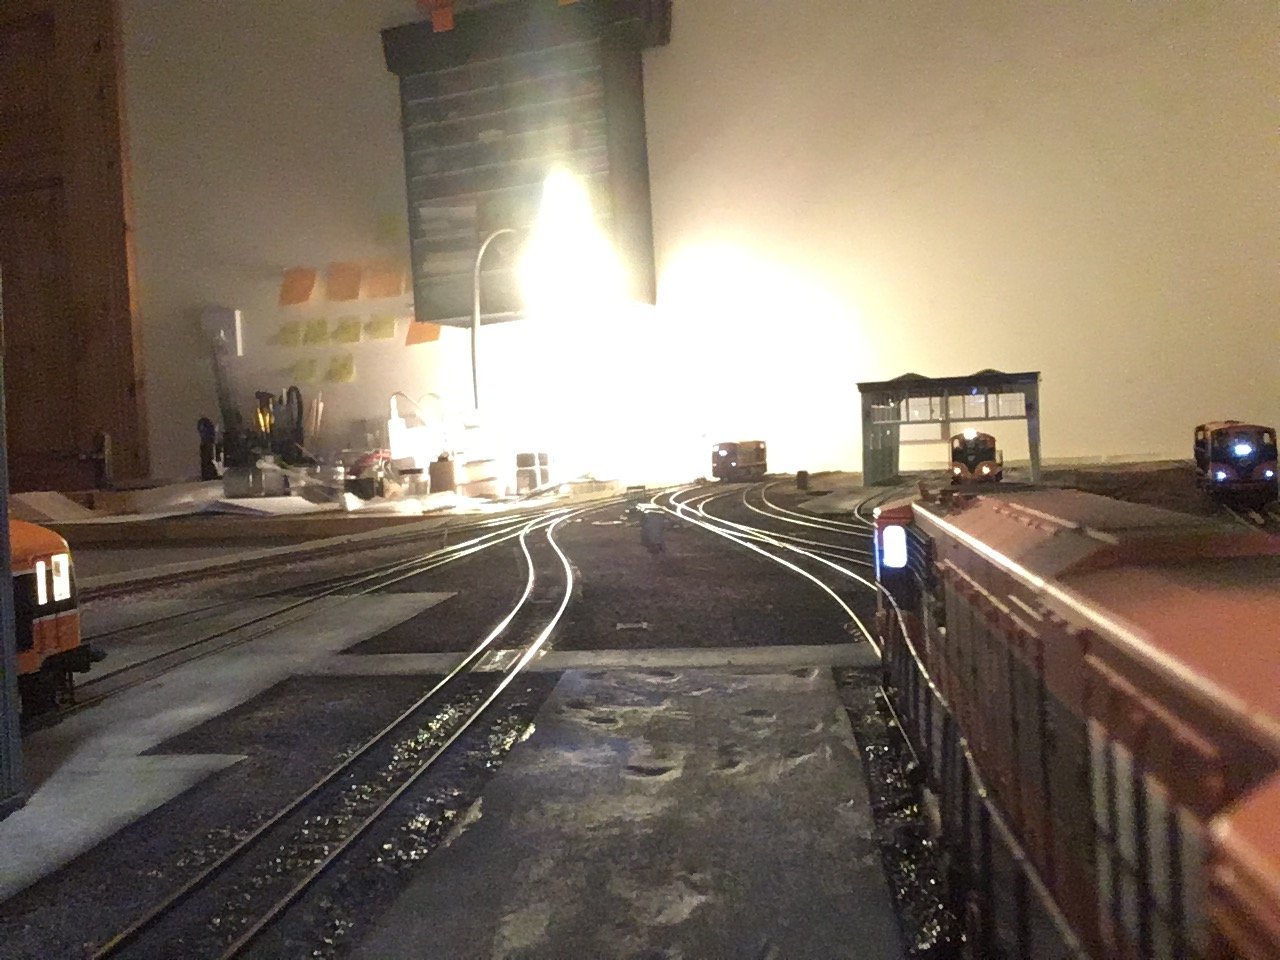
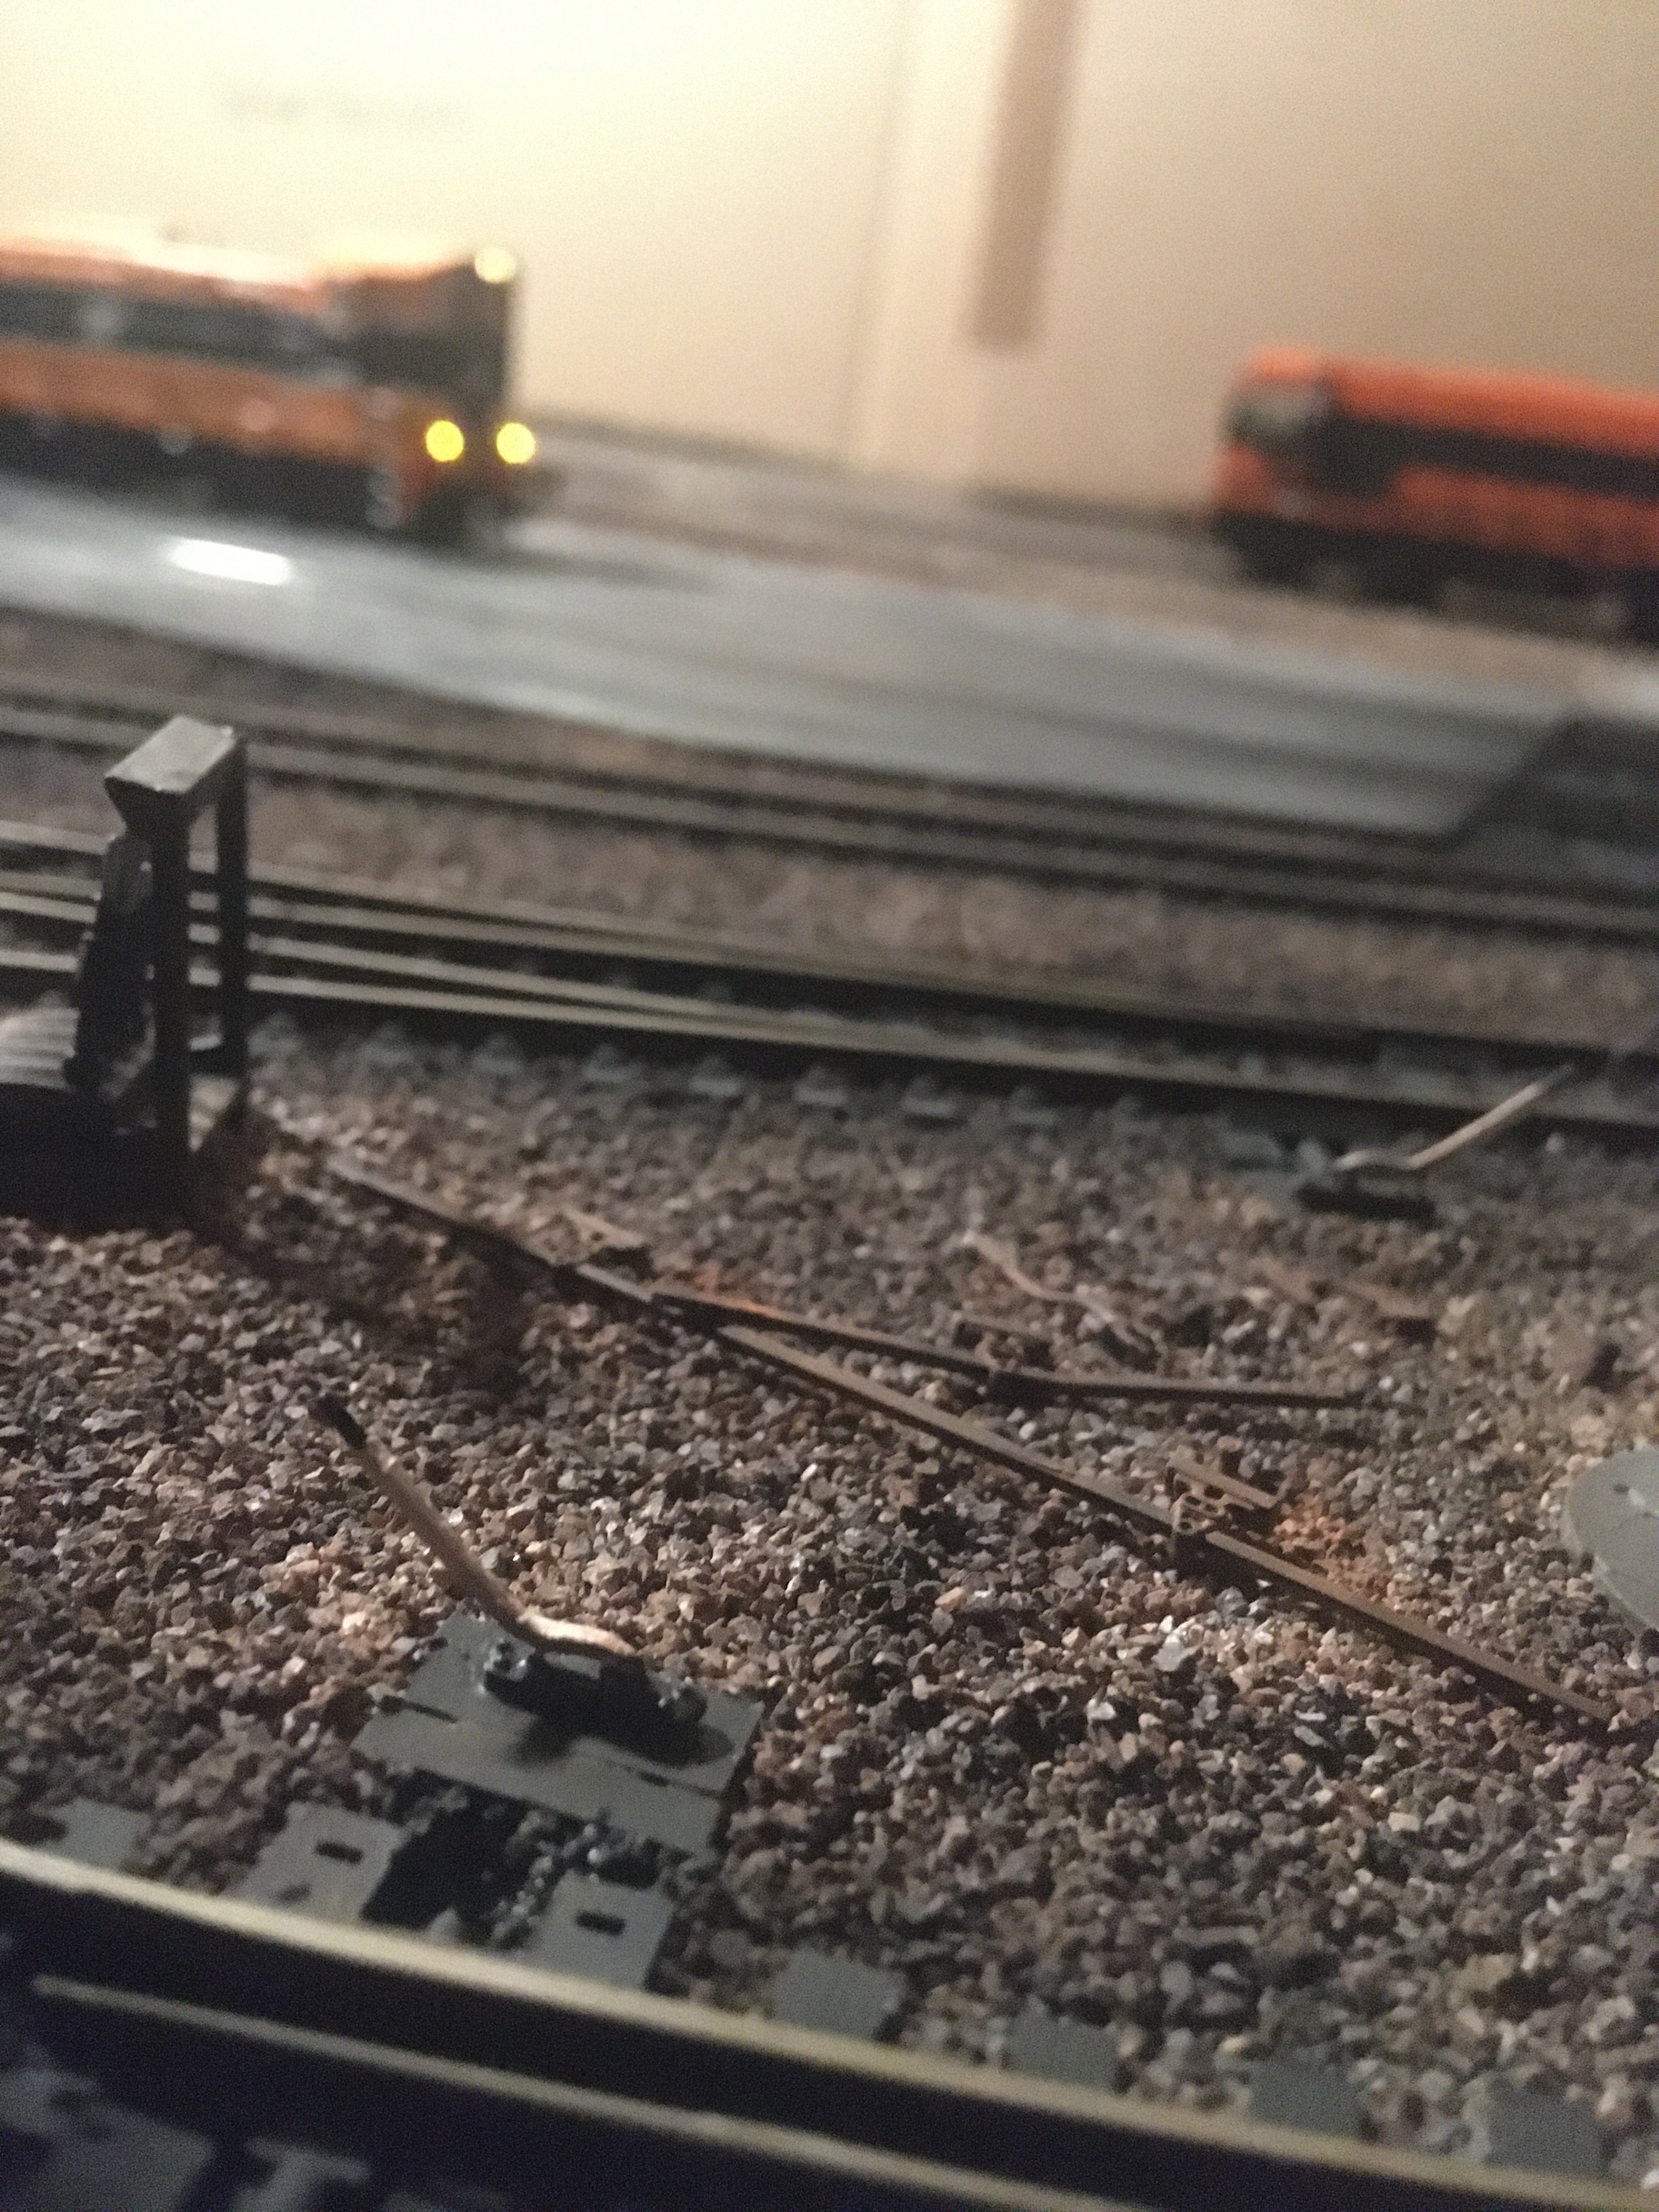
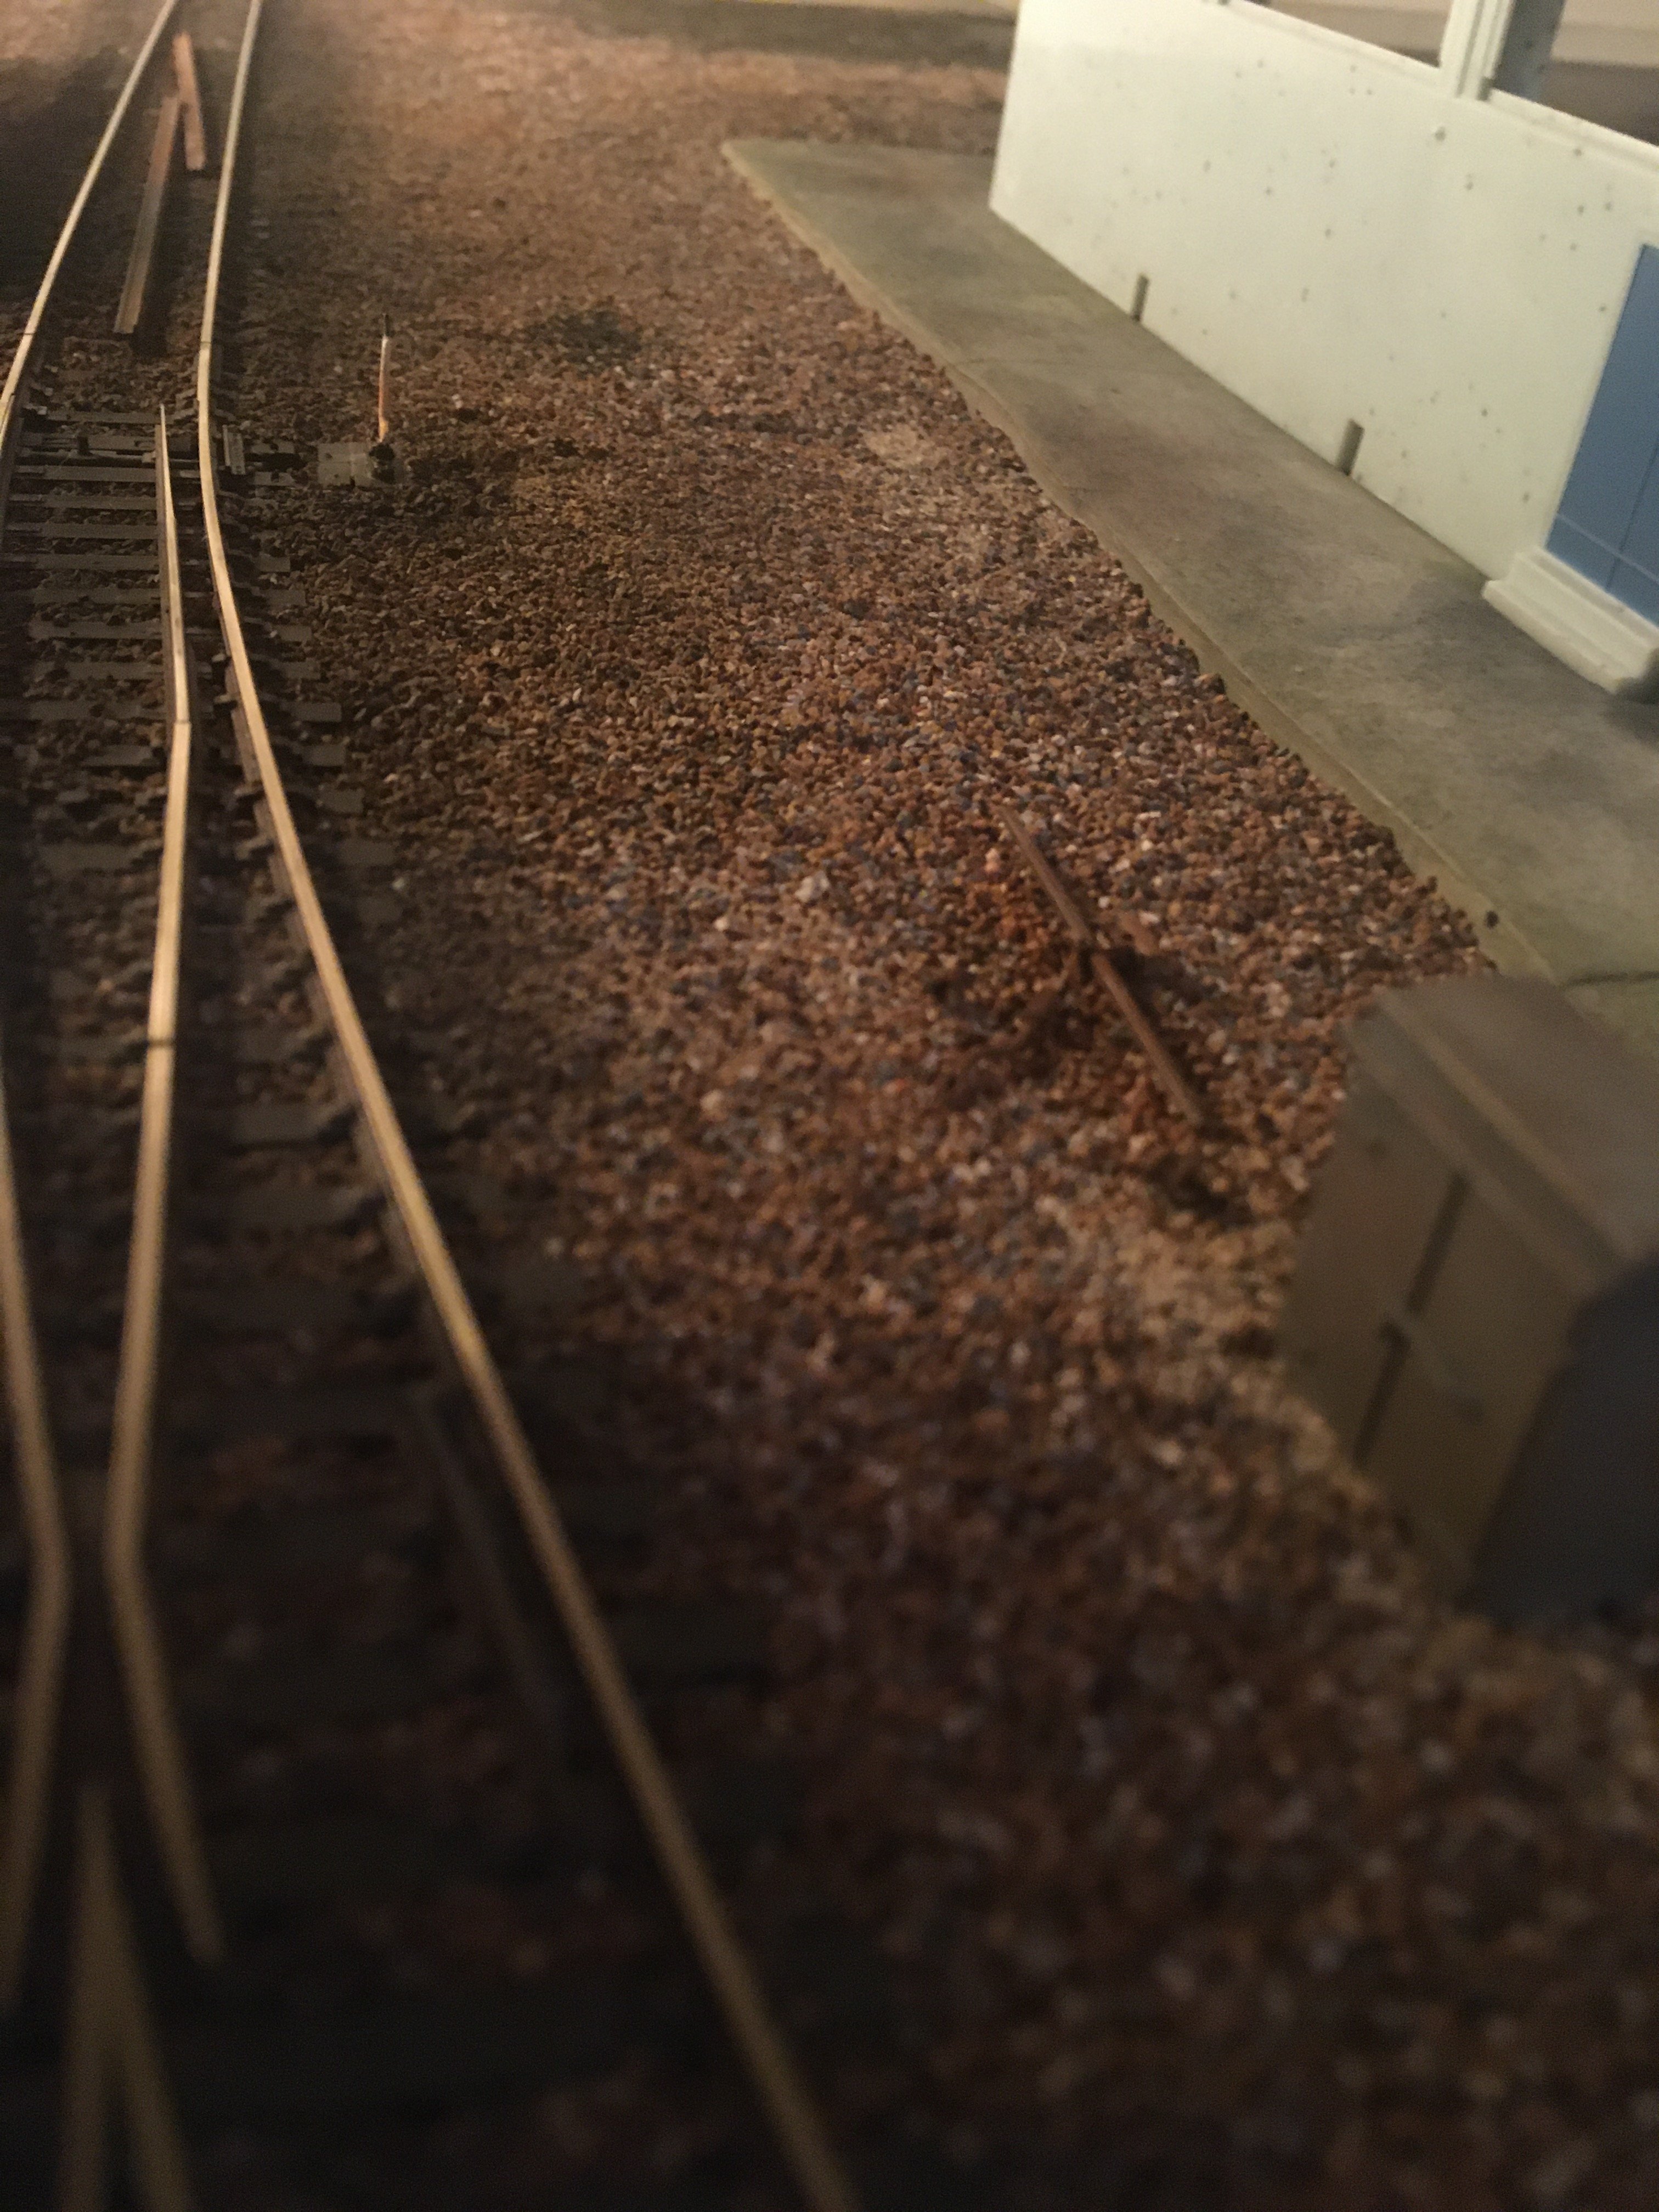
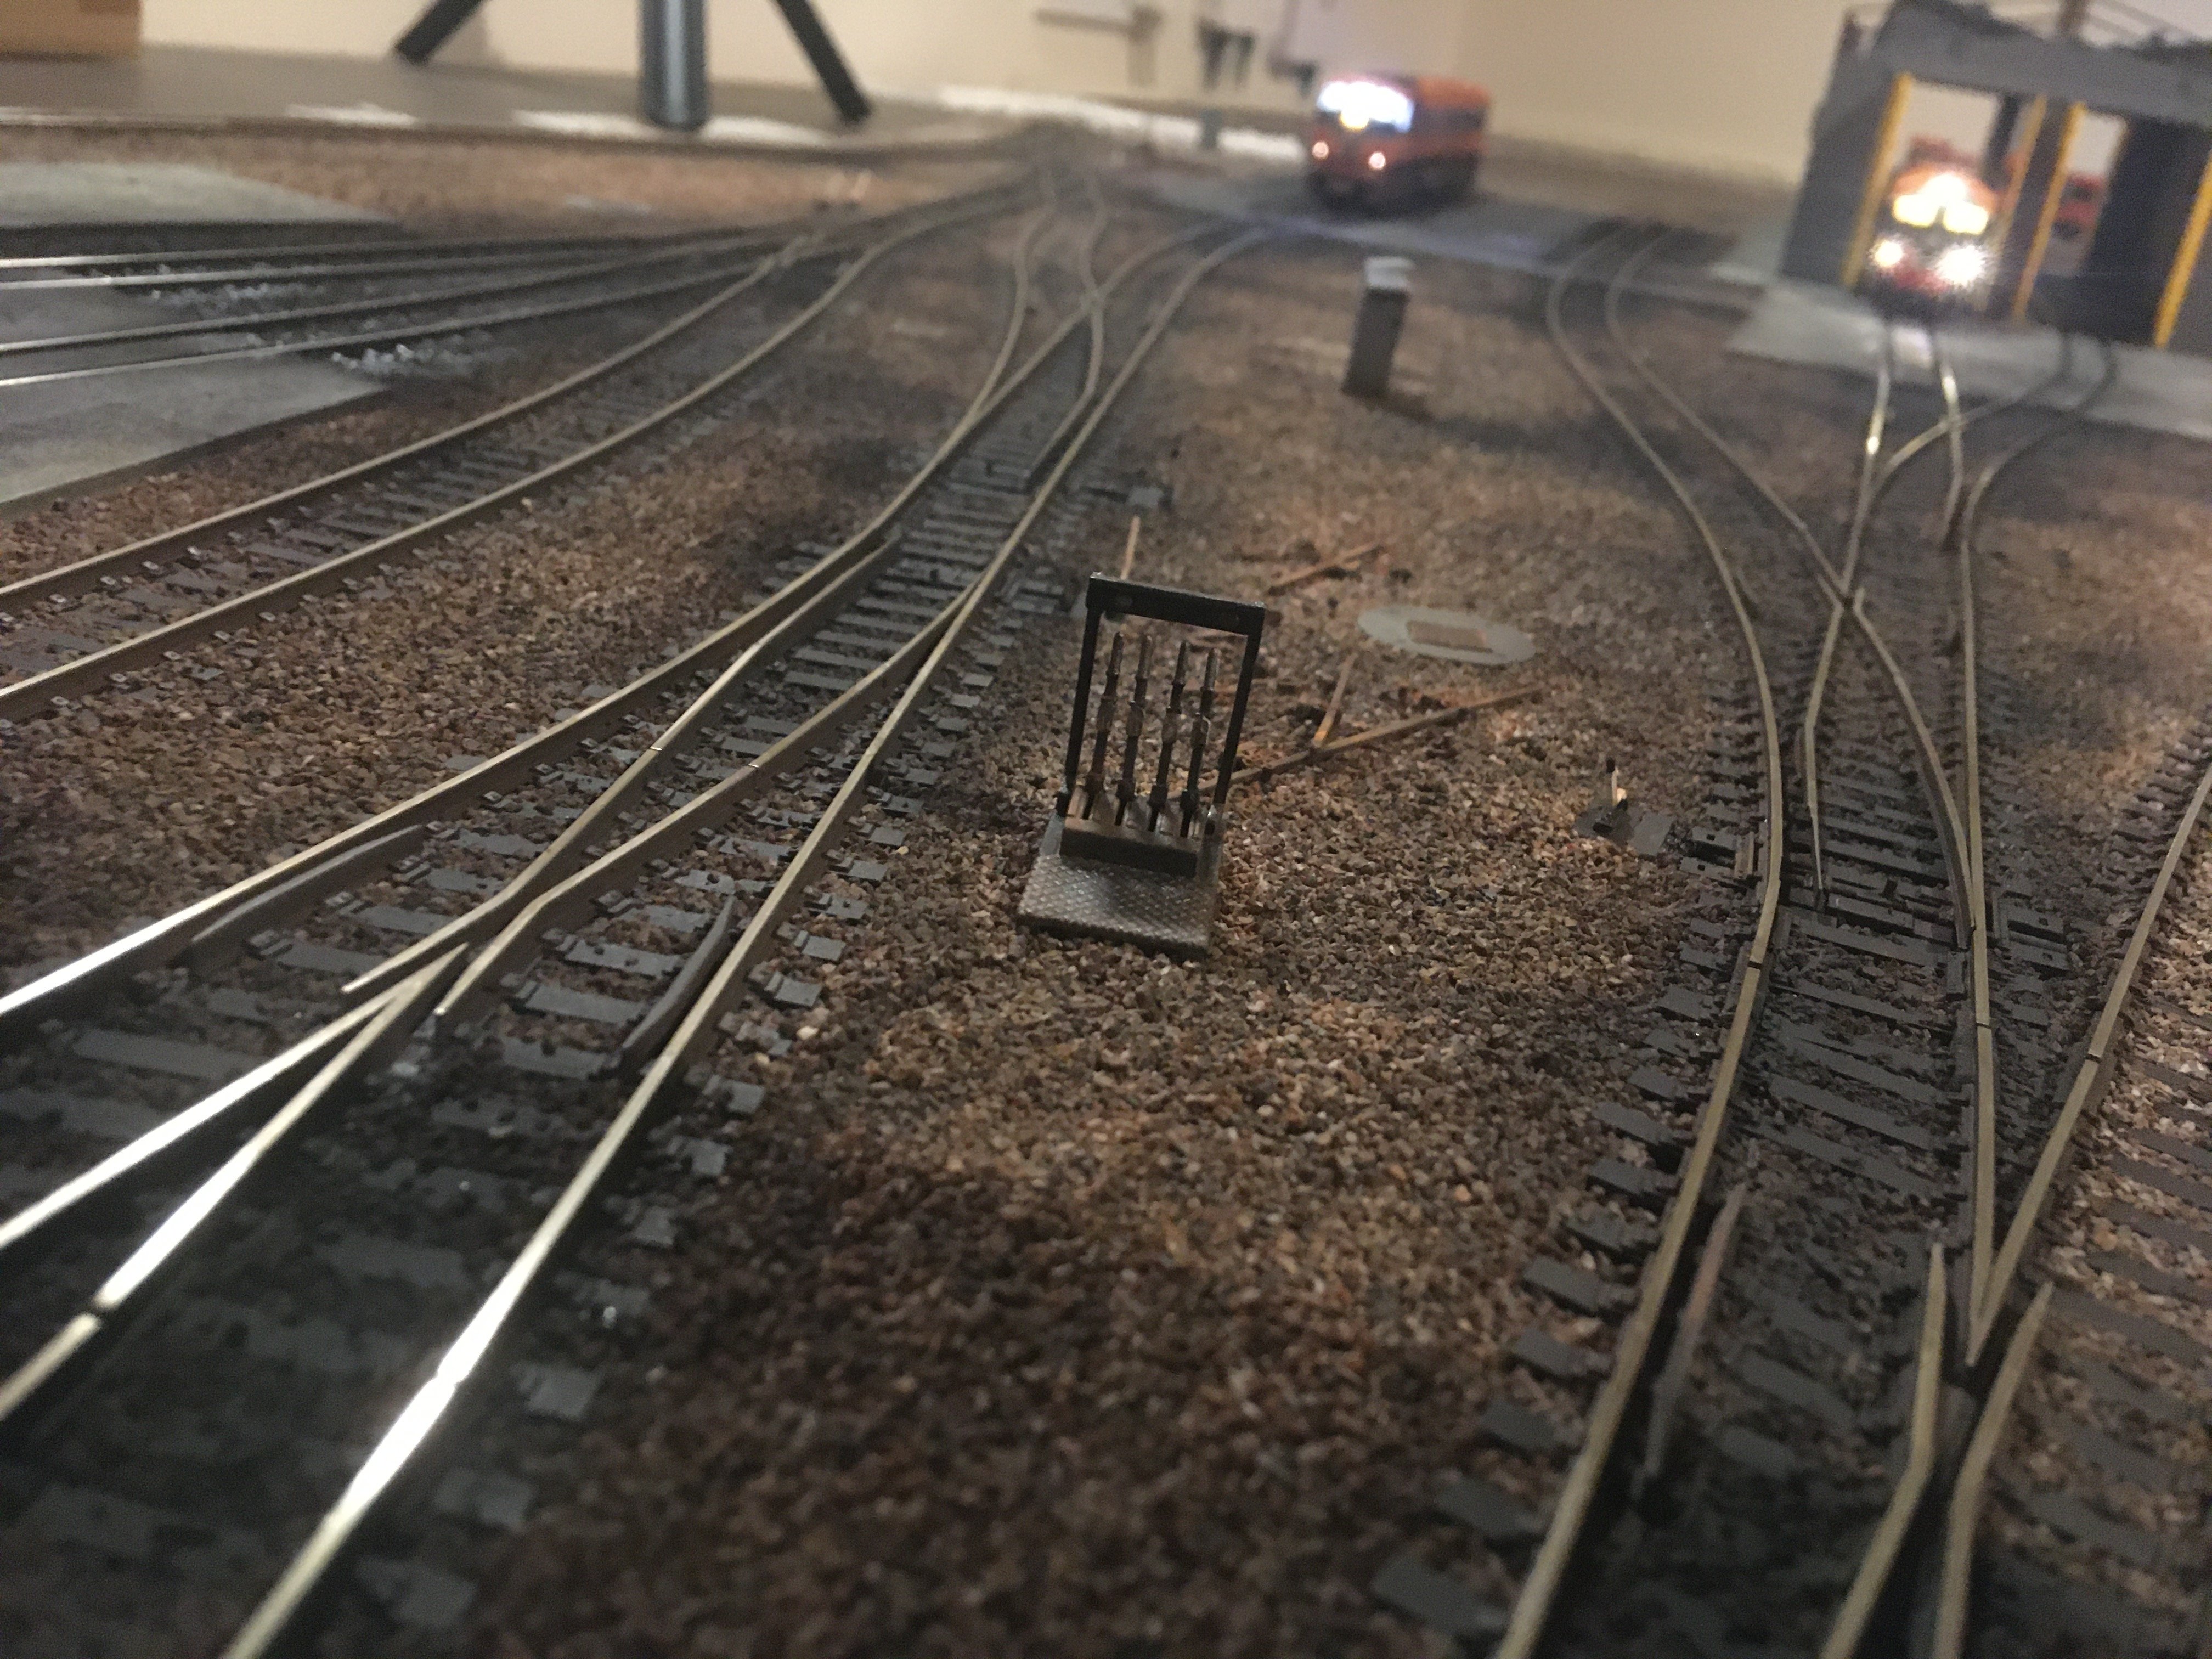
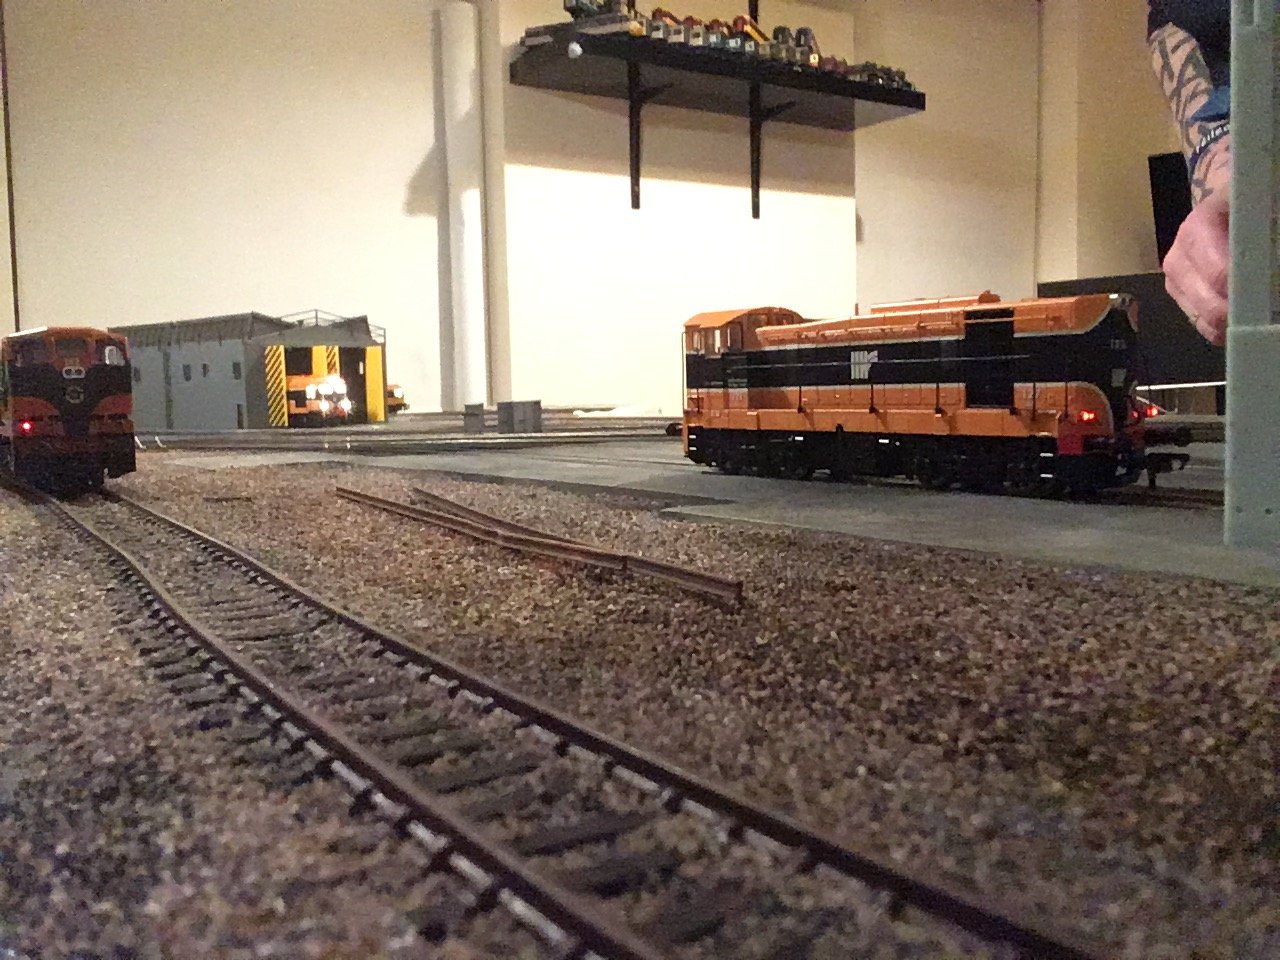
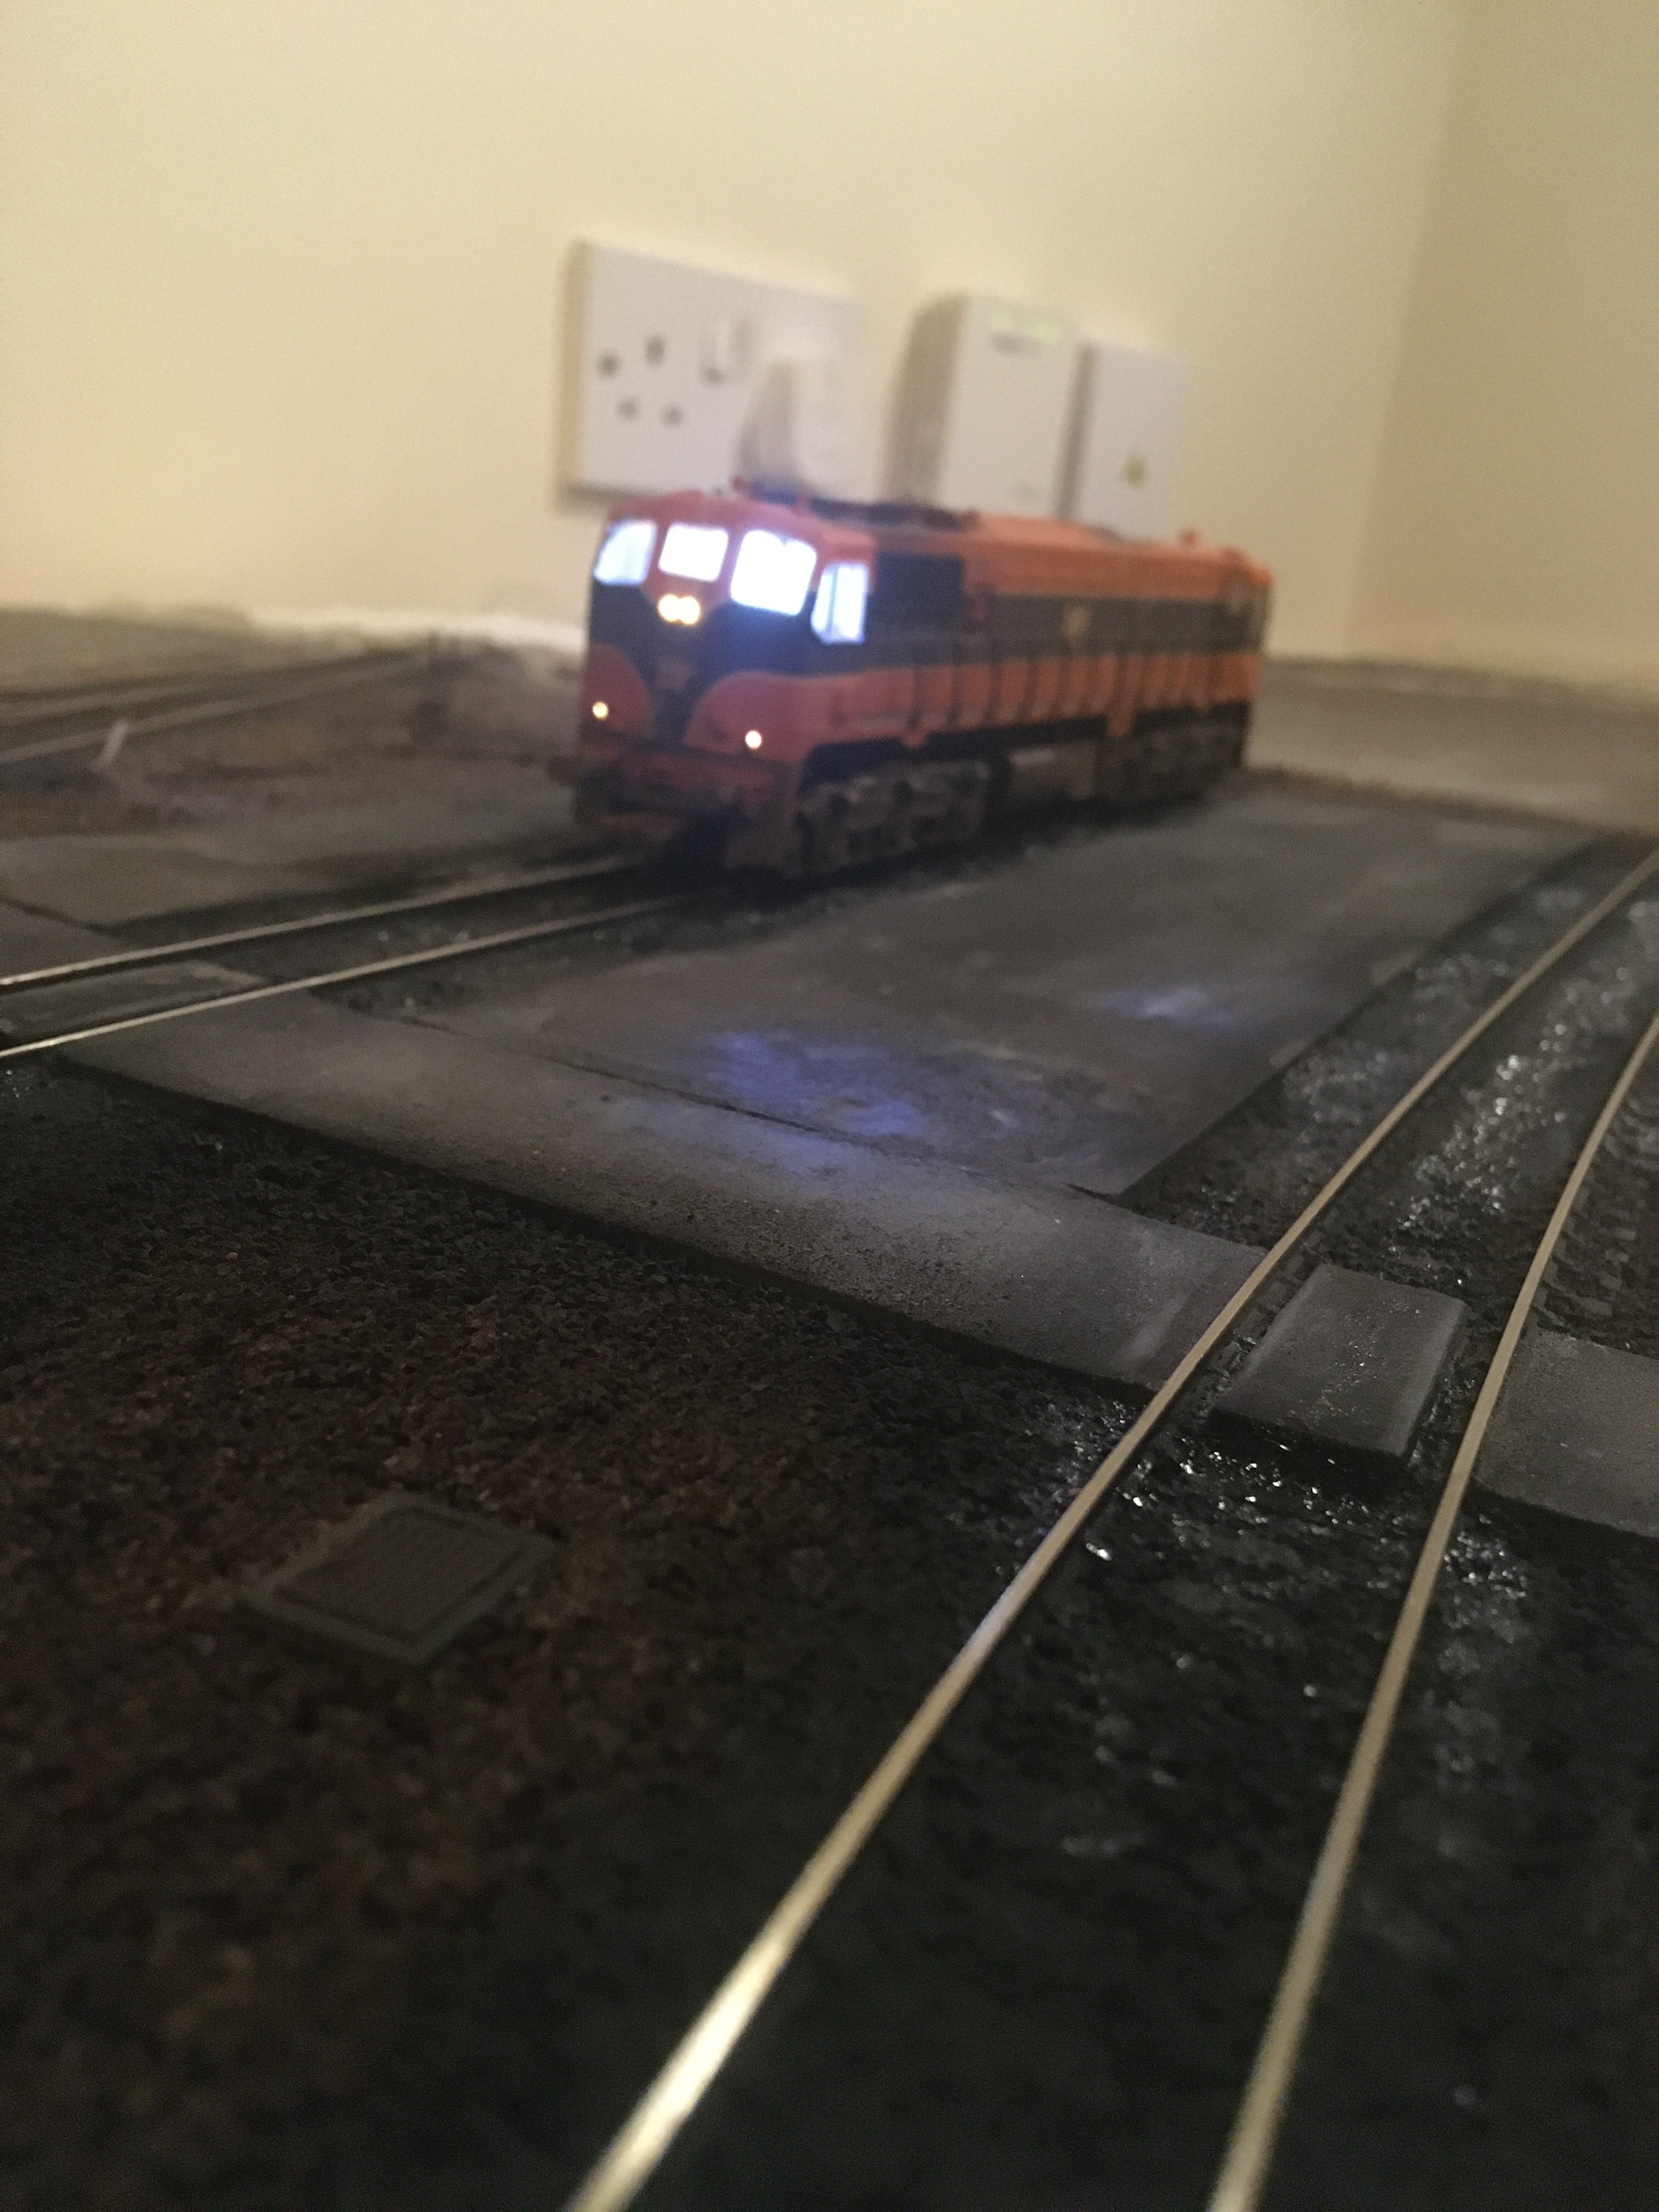
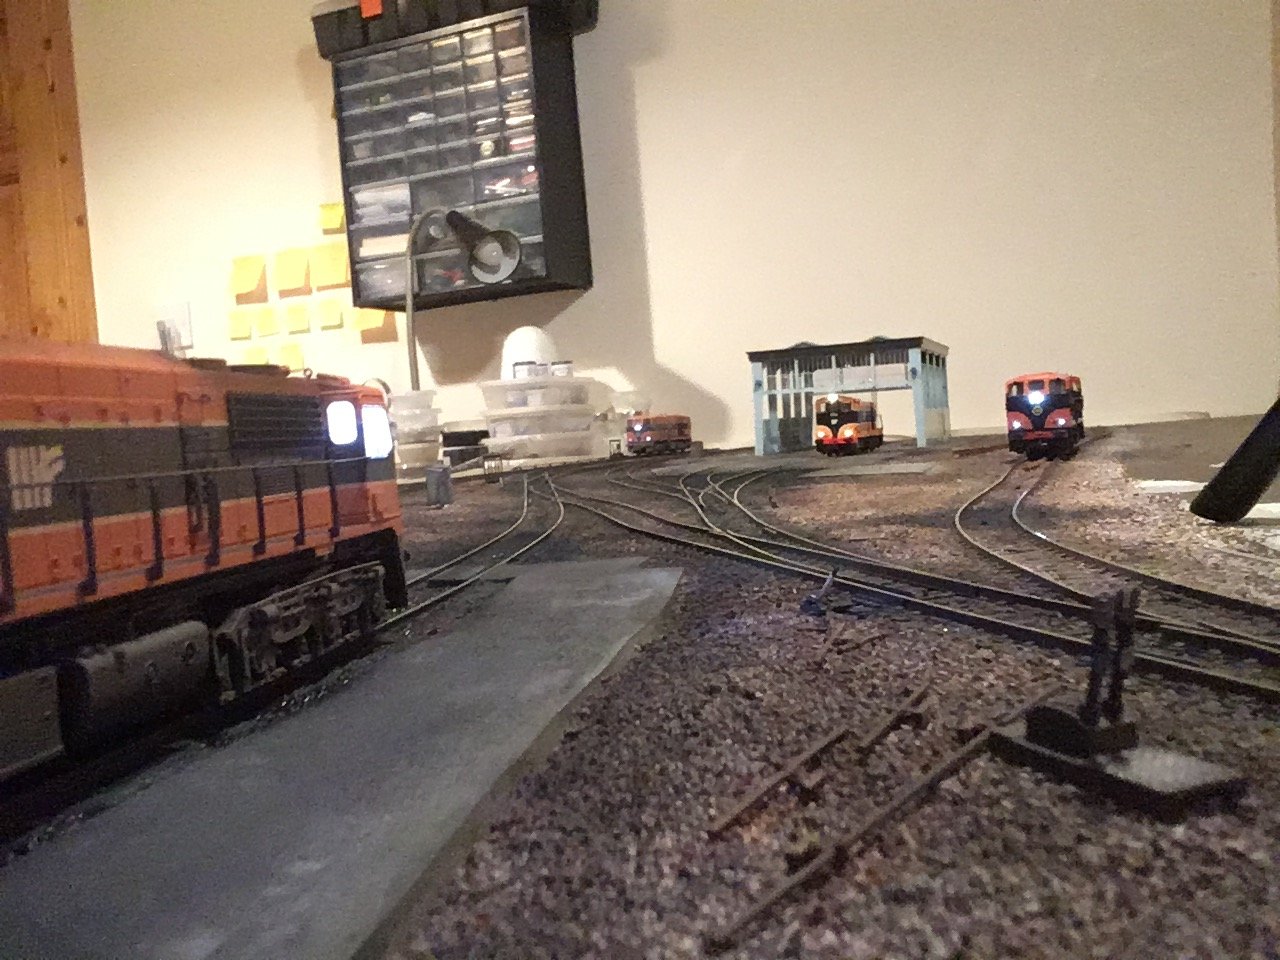
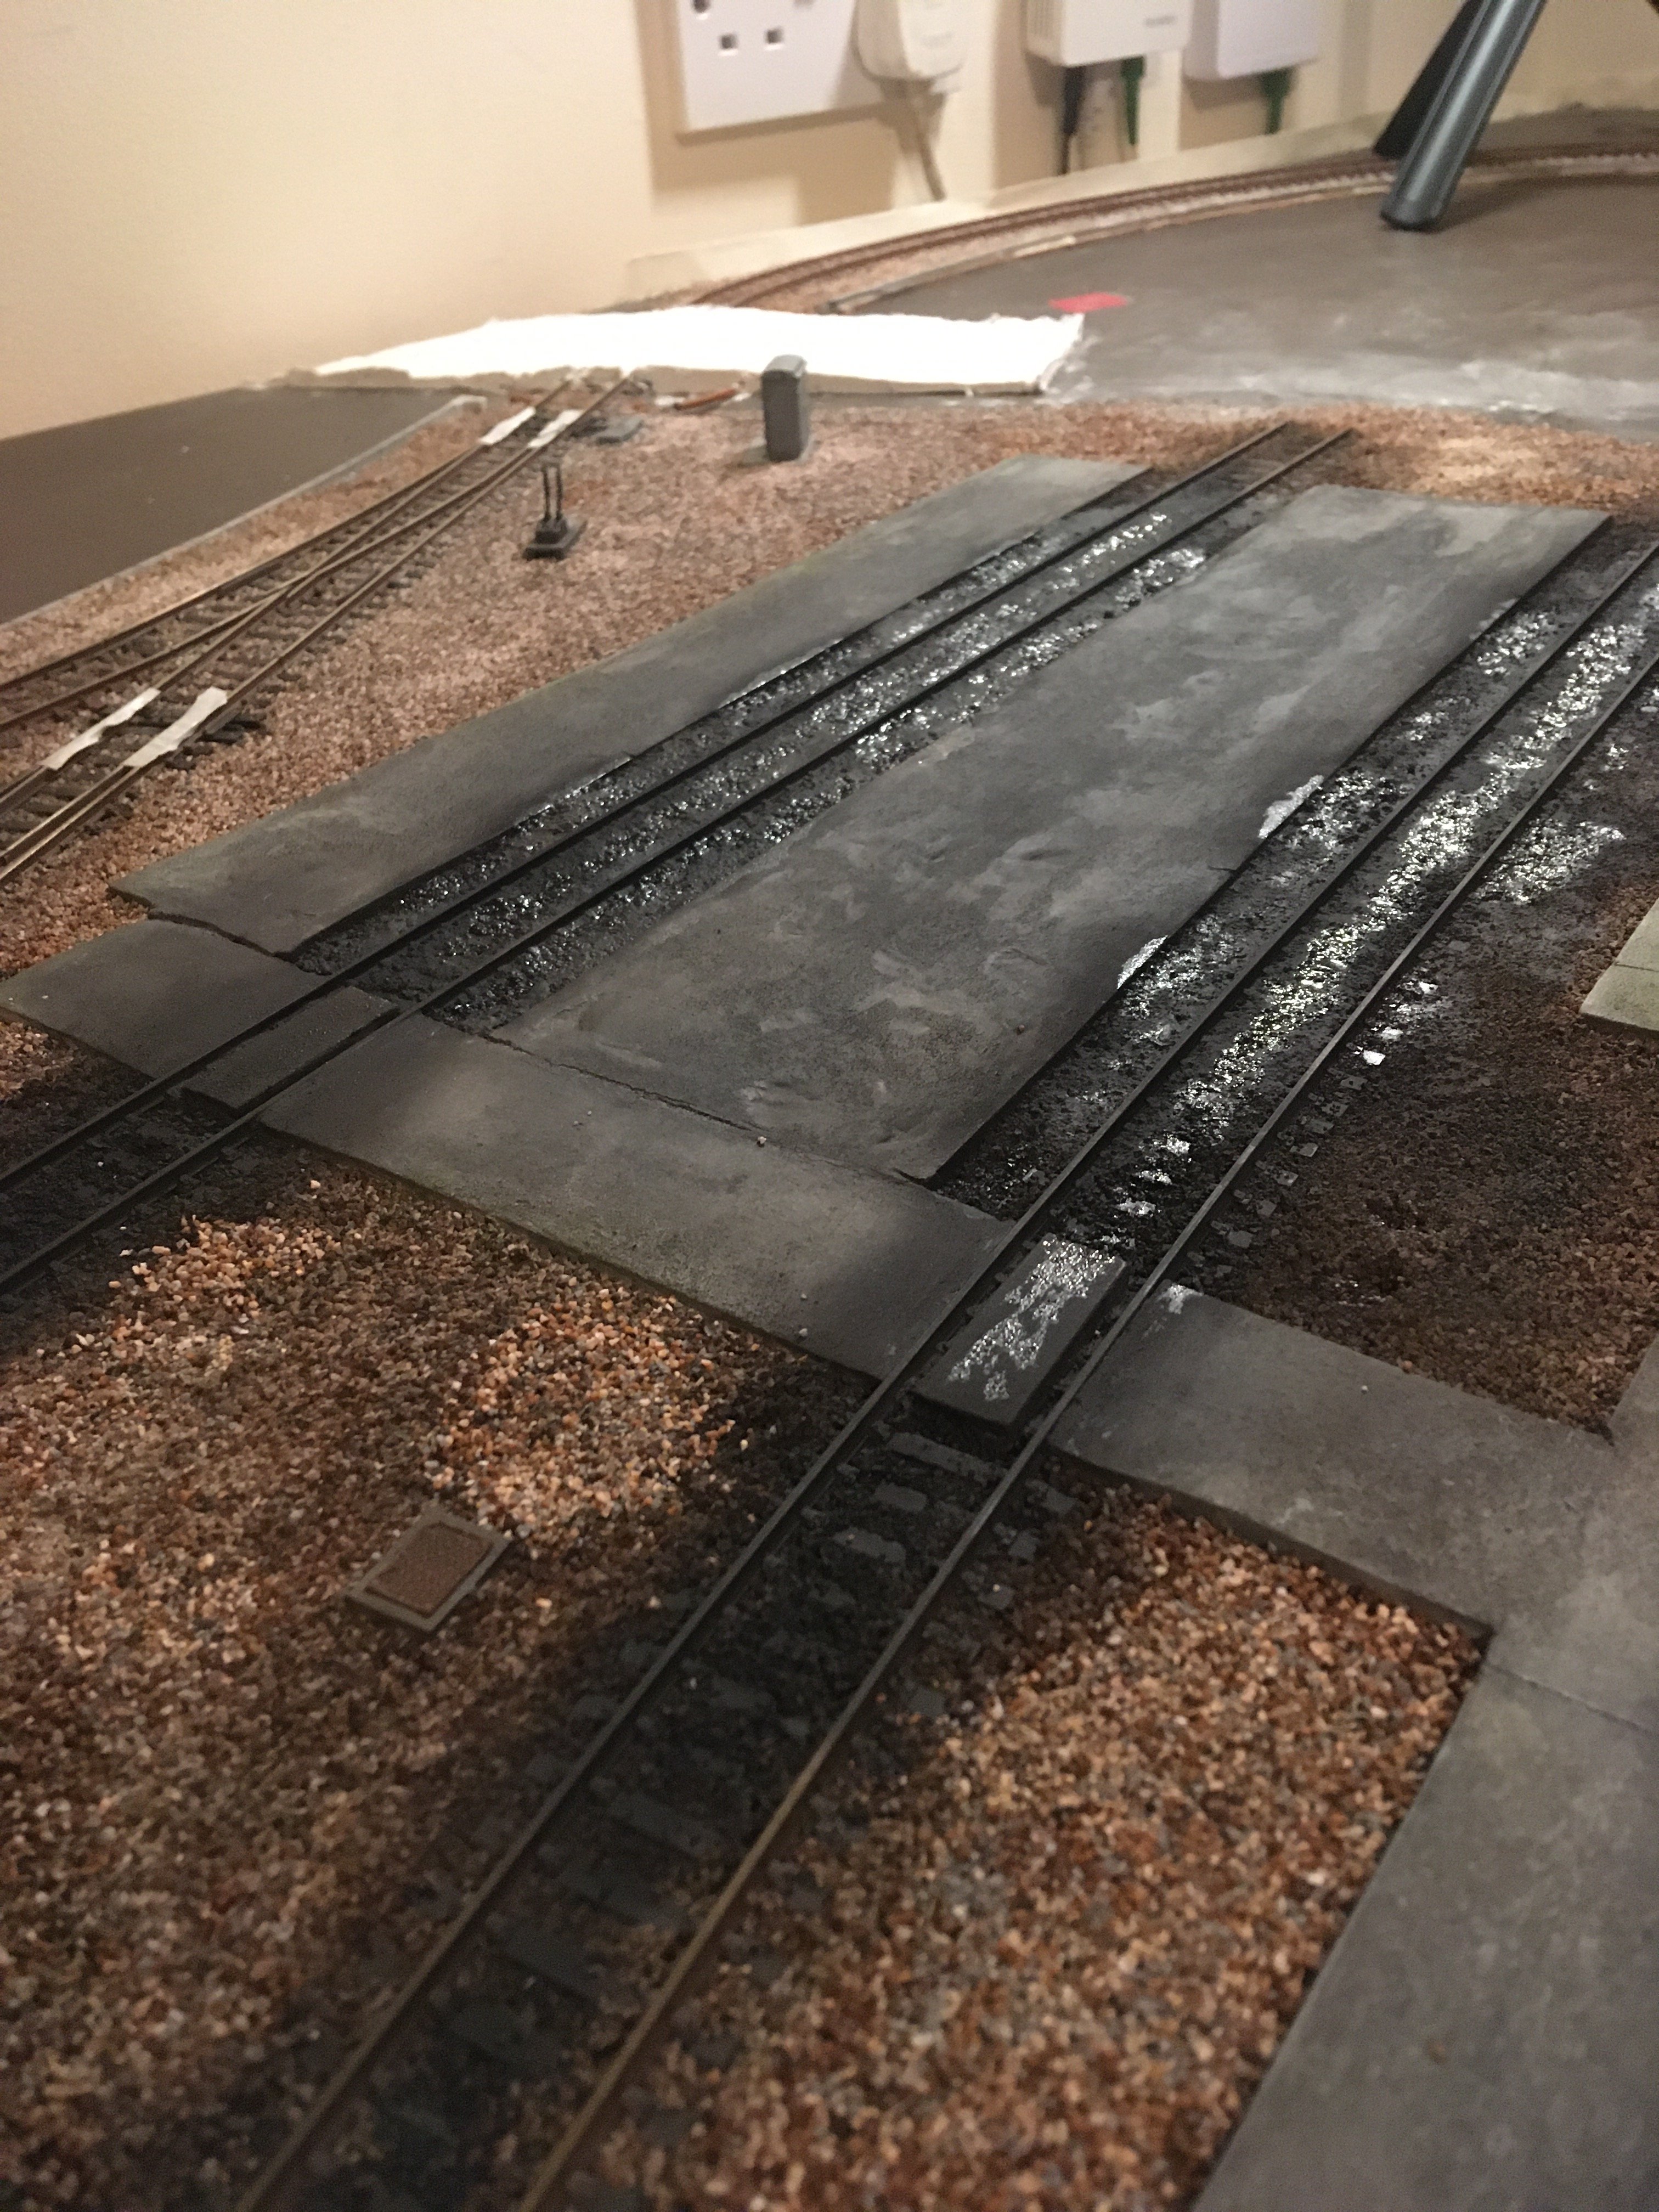
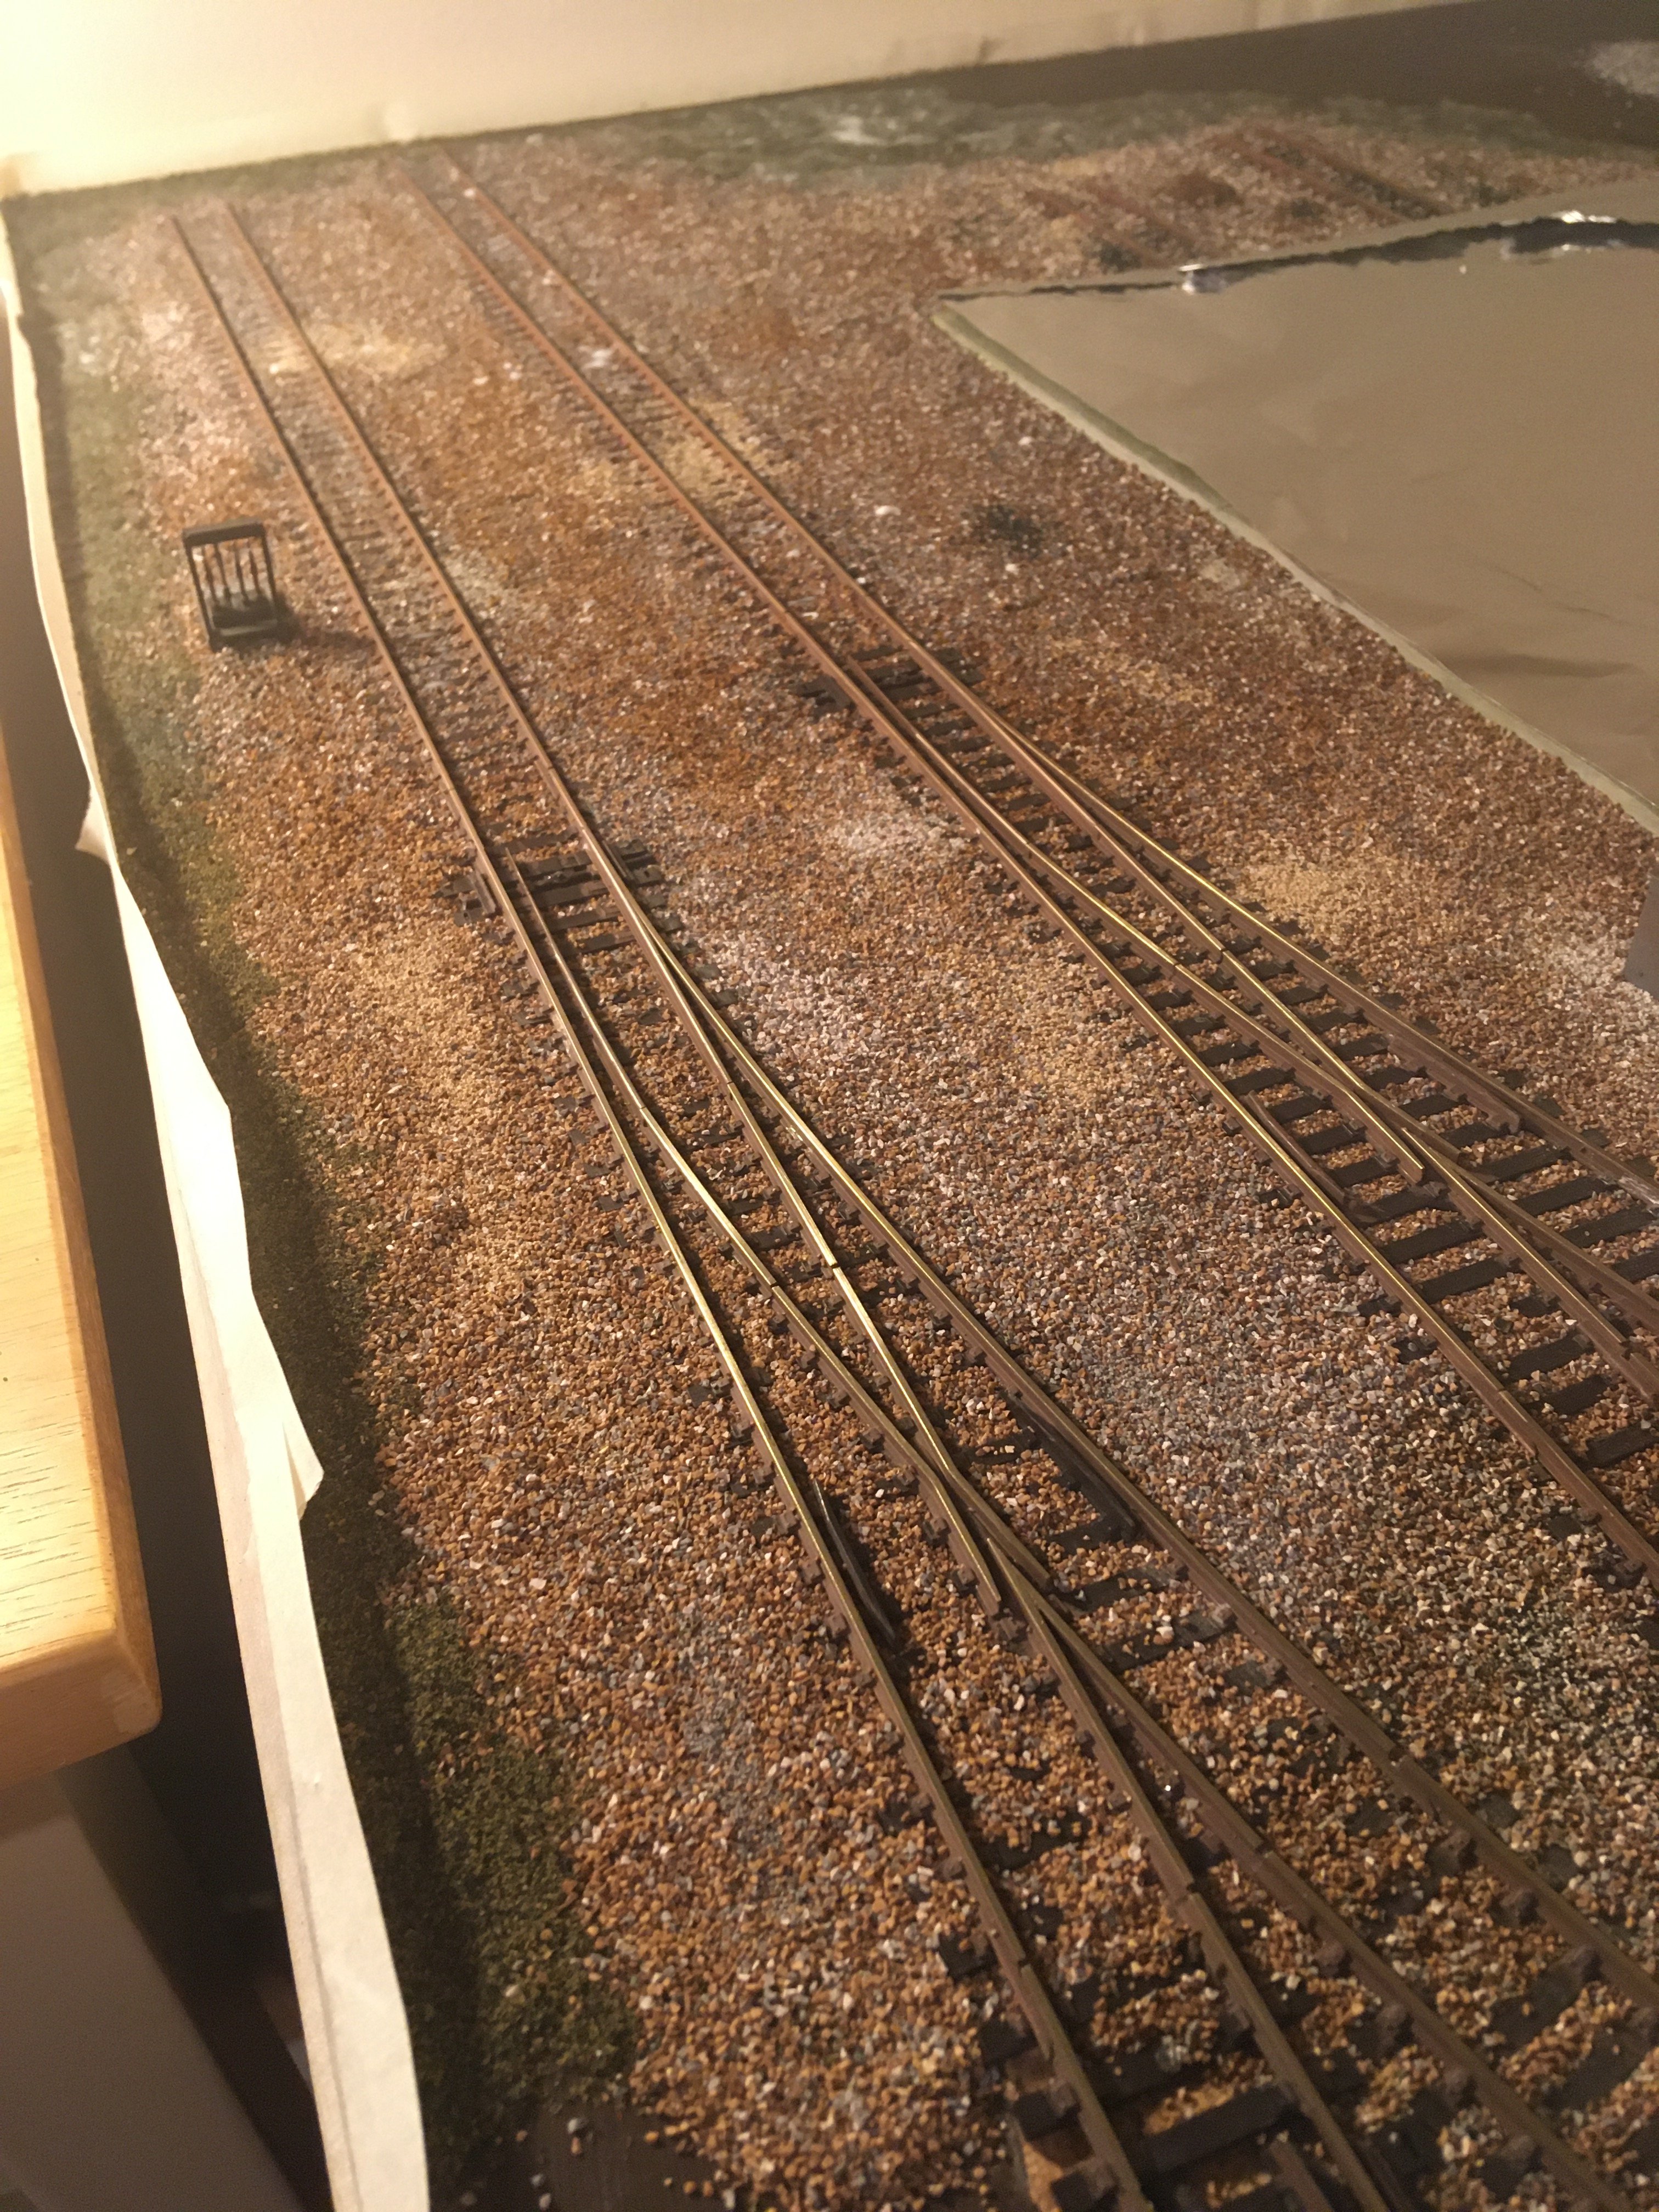
Phase 2 is complete! So in this phase I concentrated on getting the ballast in place with a base level of weathering and some trackside details. I've gone for a really dirty, oily 1980s depot look, with lots of spilled oil around the tracks as well as oil leaks from the locos along the most used routes in the depot. Things are much cleaner nowadays but they really didn't bother cleaning anything in the 80s! Have included a set of reference photos as well that I was working from.
I also experimented with point motors, manual levers and point rodding to see how it would look - it turned out great but the point rodding was very fiddly (especially as I had already laid the ballast and had to dig some of it up). In the end I decided that in our depot, the last of the old point rodding was about to be removed and replaced with manual levers, and some of the previous point rodding was just lying around, rusting with time. This will eventually be overgrown with grass and weeds etc. in the next phase.
Honestly, I'm delighted with this result
One thing I found as well is that as most phones have cameras at the top, if you hold the phone upside down you can get a much more realistic perspective Also, reversing the camera and placing the phone in unusual places can give you great, normally unseen shots looking out from the back of the layout - just a quick tip for any folks reading this
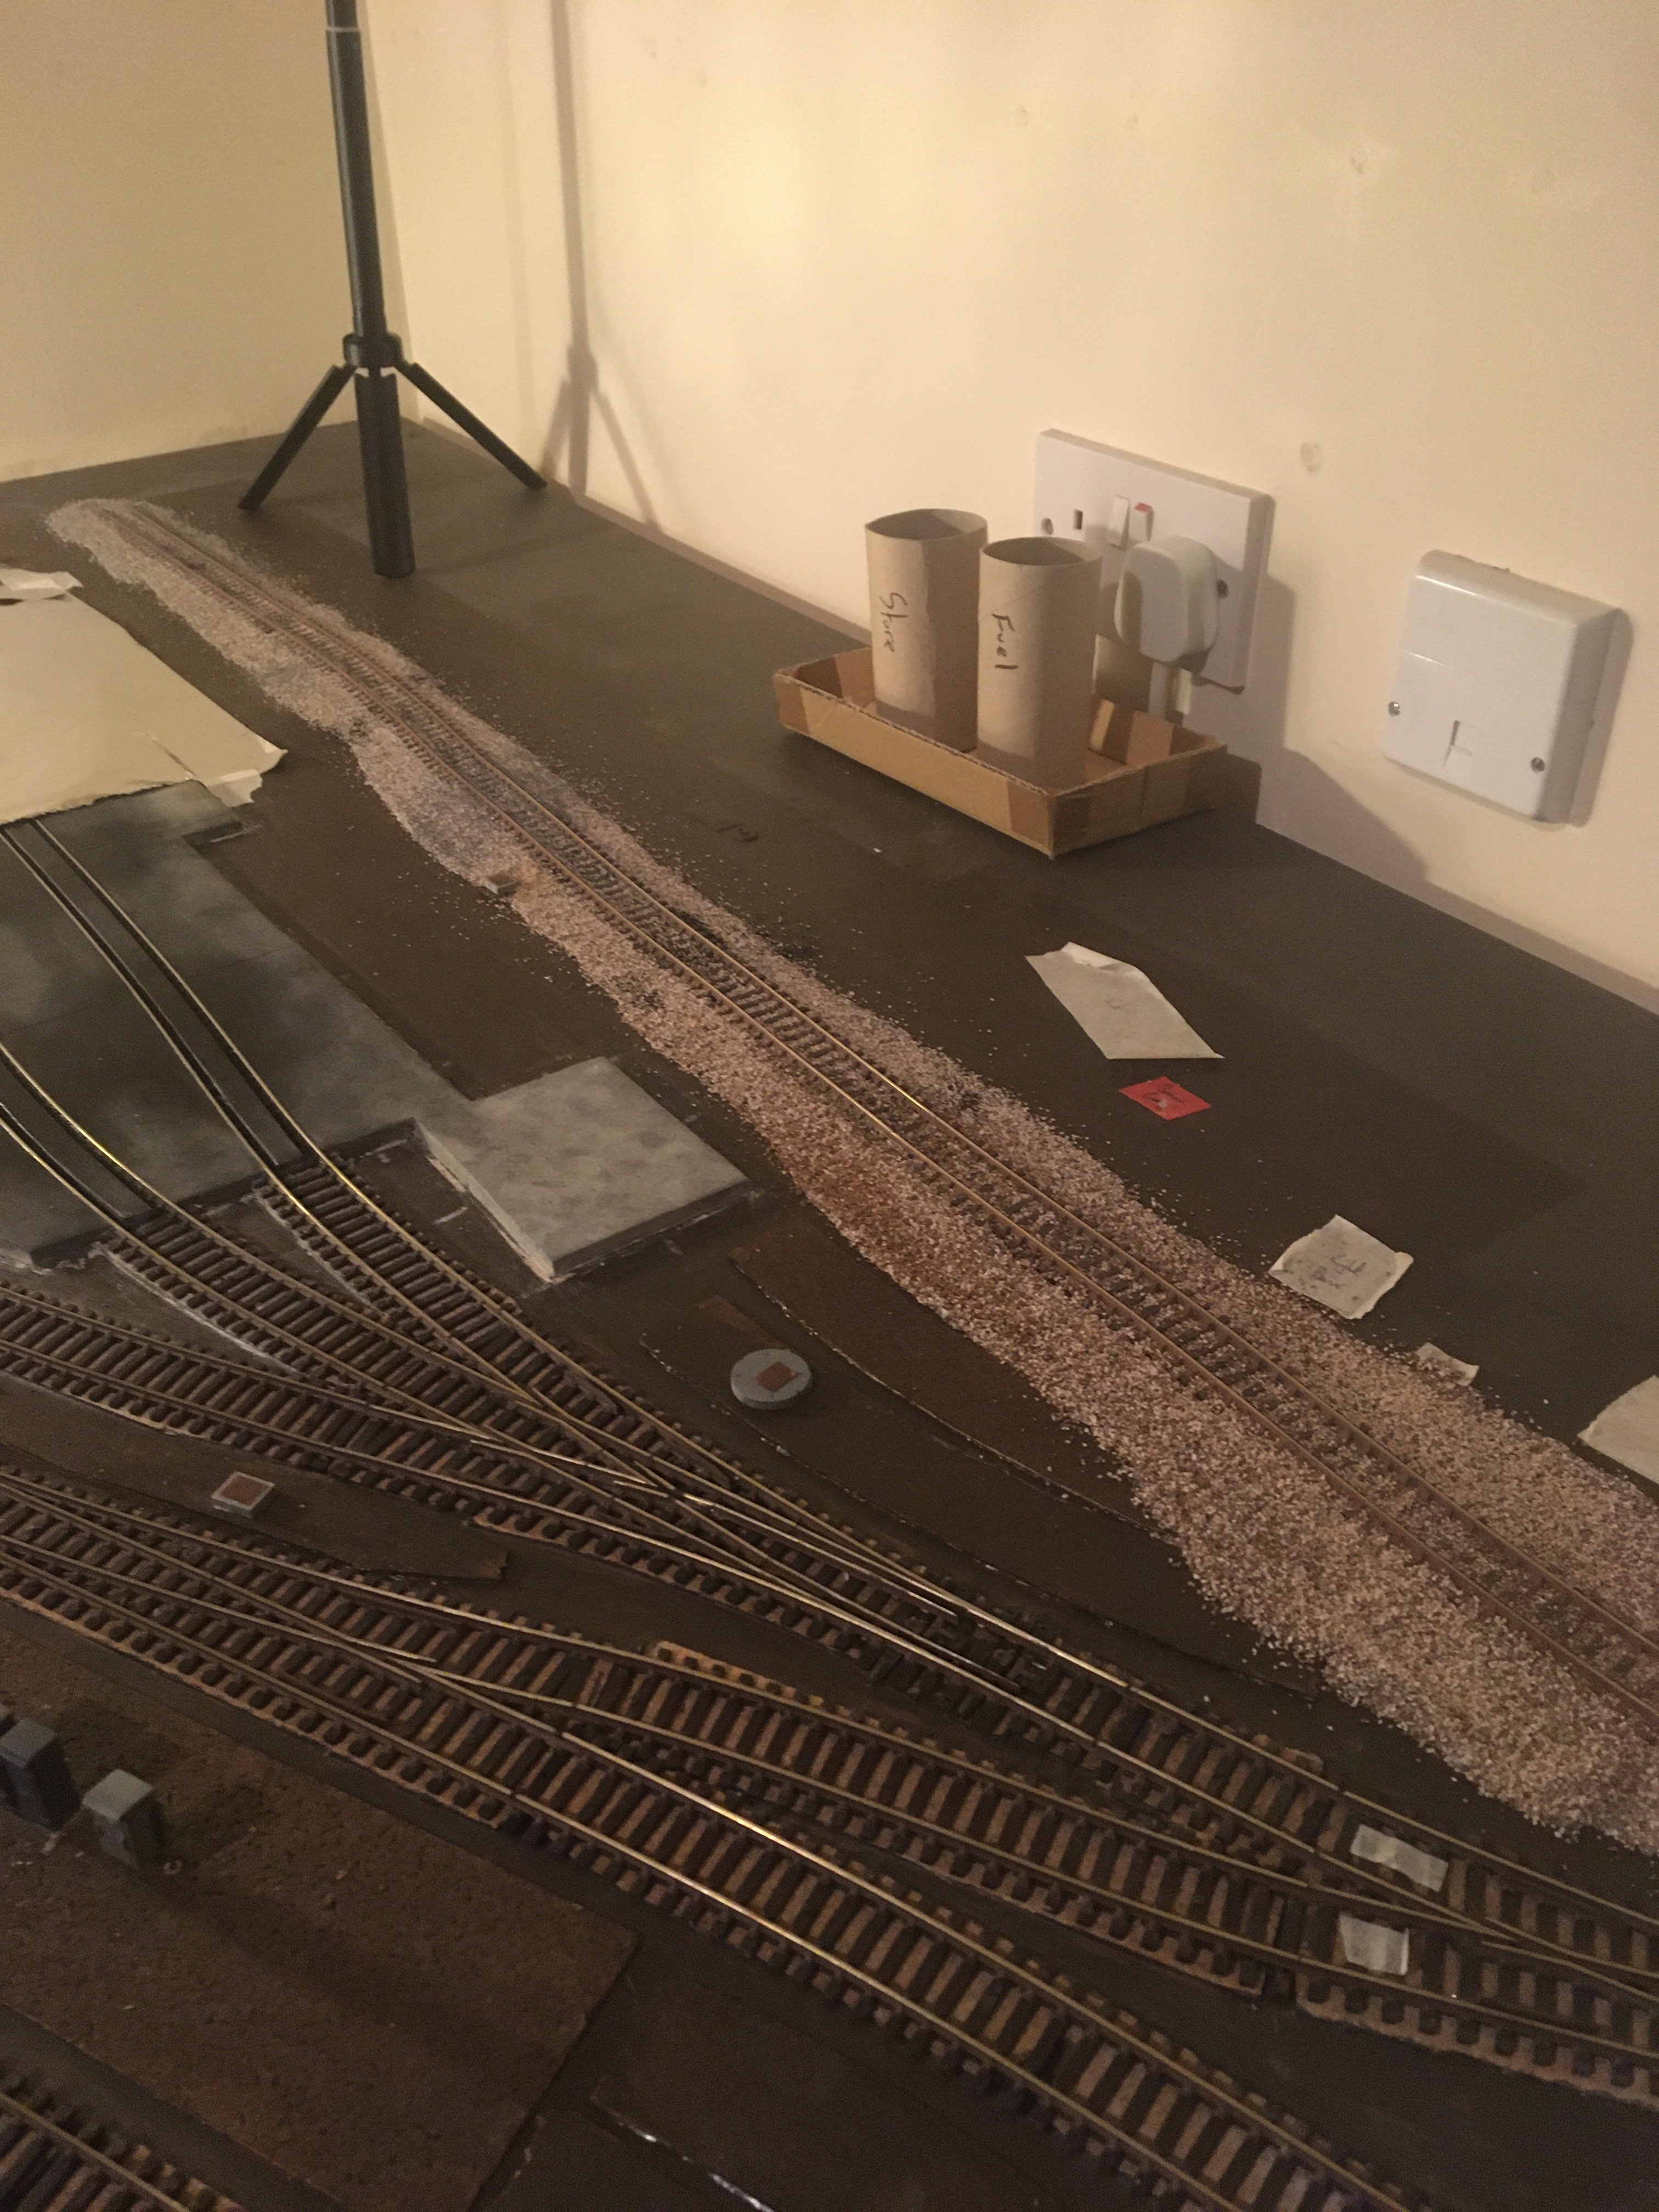
In the next phase (Feb - Apr) I hope to complete:
- Backscenes
- Fuelling point
- Level crossing road surface
- Static grass and overgrown areas
- Weathering of the sheds
- Practice weathering on some old locos and body shells that I have - no way I'm starting on my lovely Irish locos!
As always, I welcome any feedback / thoughts / ideas people have - enjoy the photos and the short video at the end!
---
Reference photos I was working from:
Looking across the depot from the fuelling point into the setting sun (got this shot totally by accident when the phone looked directly at the light bulb
)
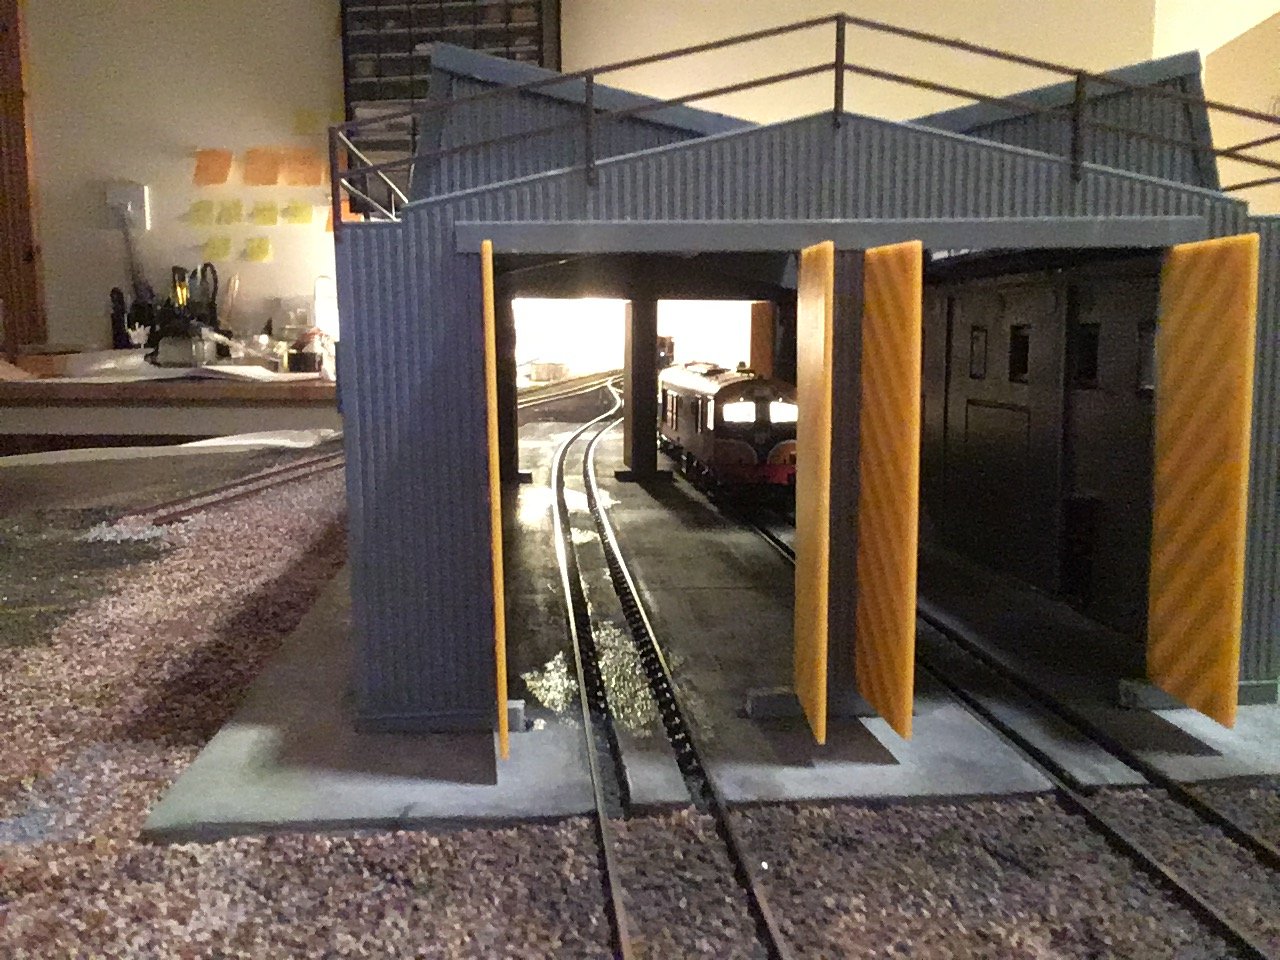
Looking through the engine shed with light reflecting on oil stains
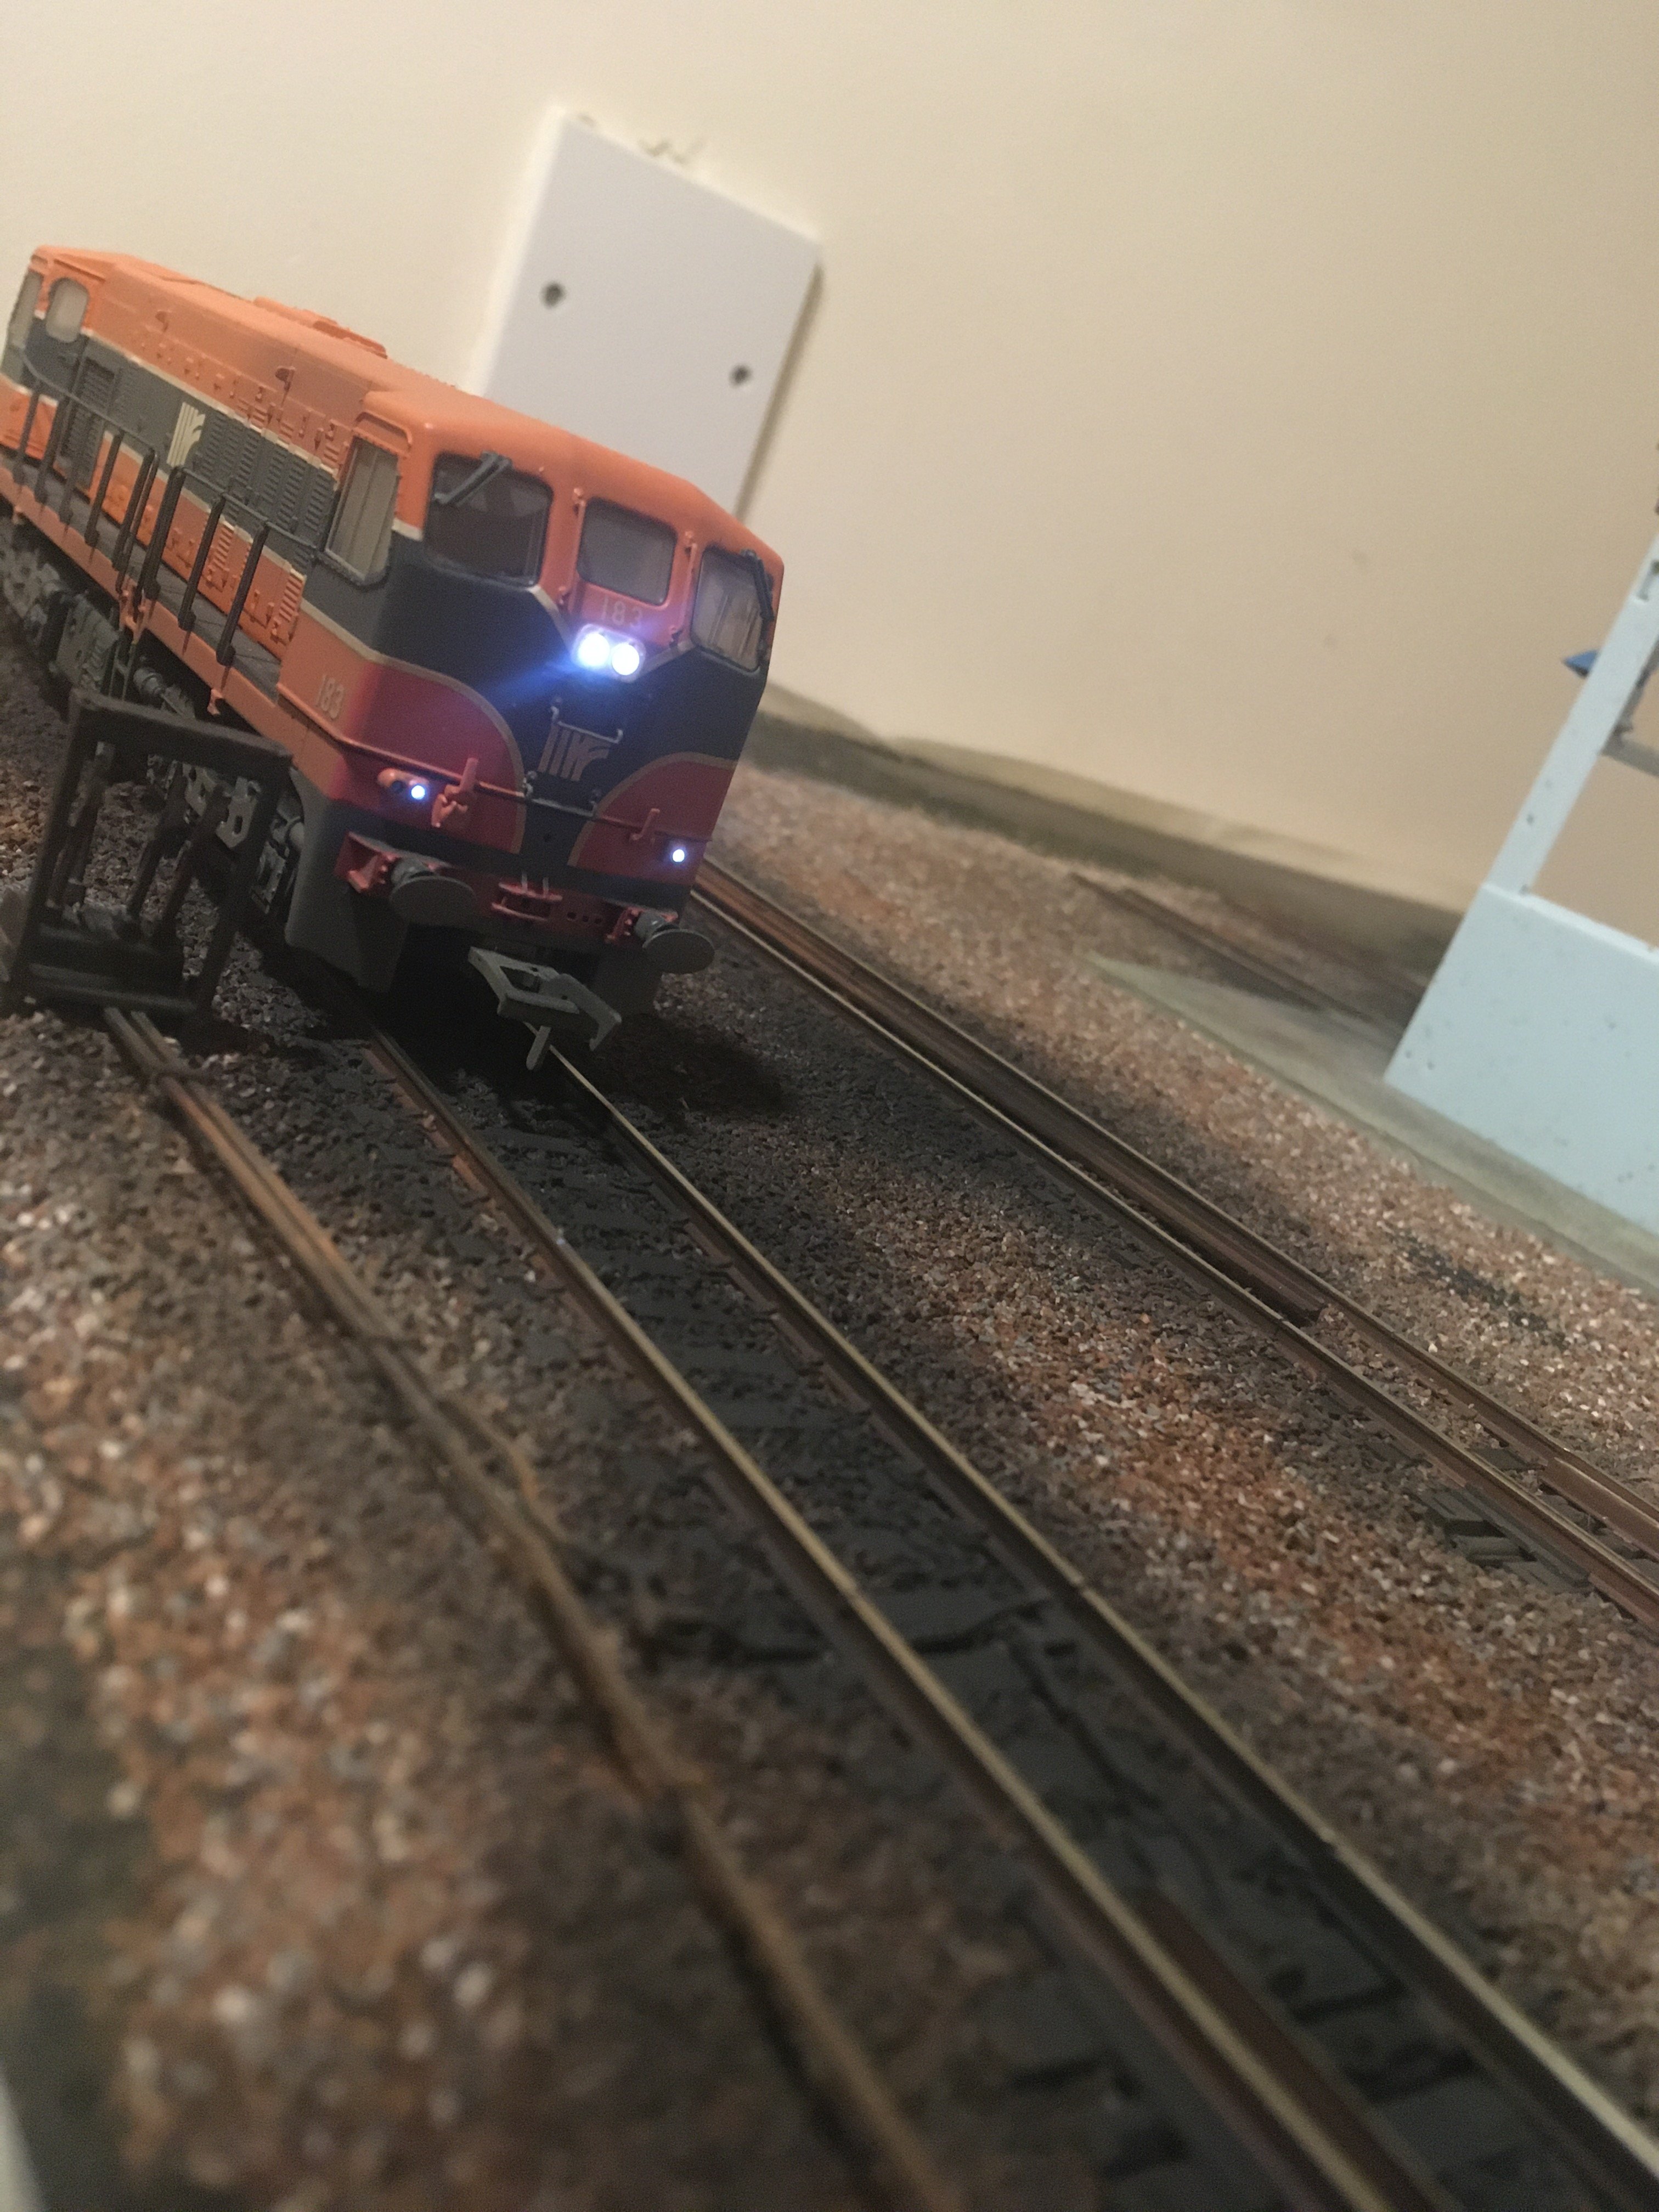
#183 in the headshunt with old rails and the last of the point rodding still in place before being replaced in our fictitious depot
Obsolete point lever frames and rusty point rodding, with manual point levers, a relay box, manhole and rusted rails
This siding in the foreground will be a little overgrown and used for fuel tanker deliveries - I'll probably add some fuel pumps into the ground for pumping fuel from the tankers to the fuelling point
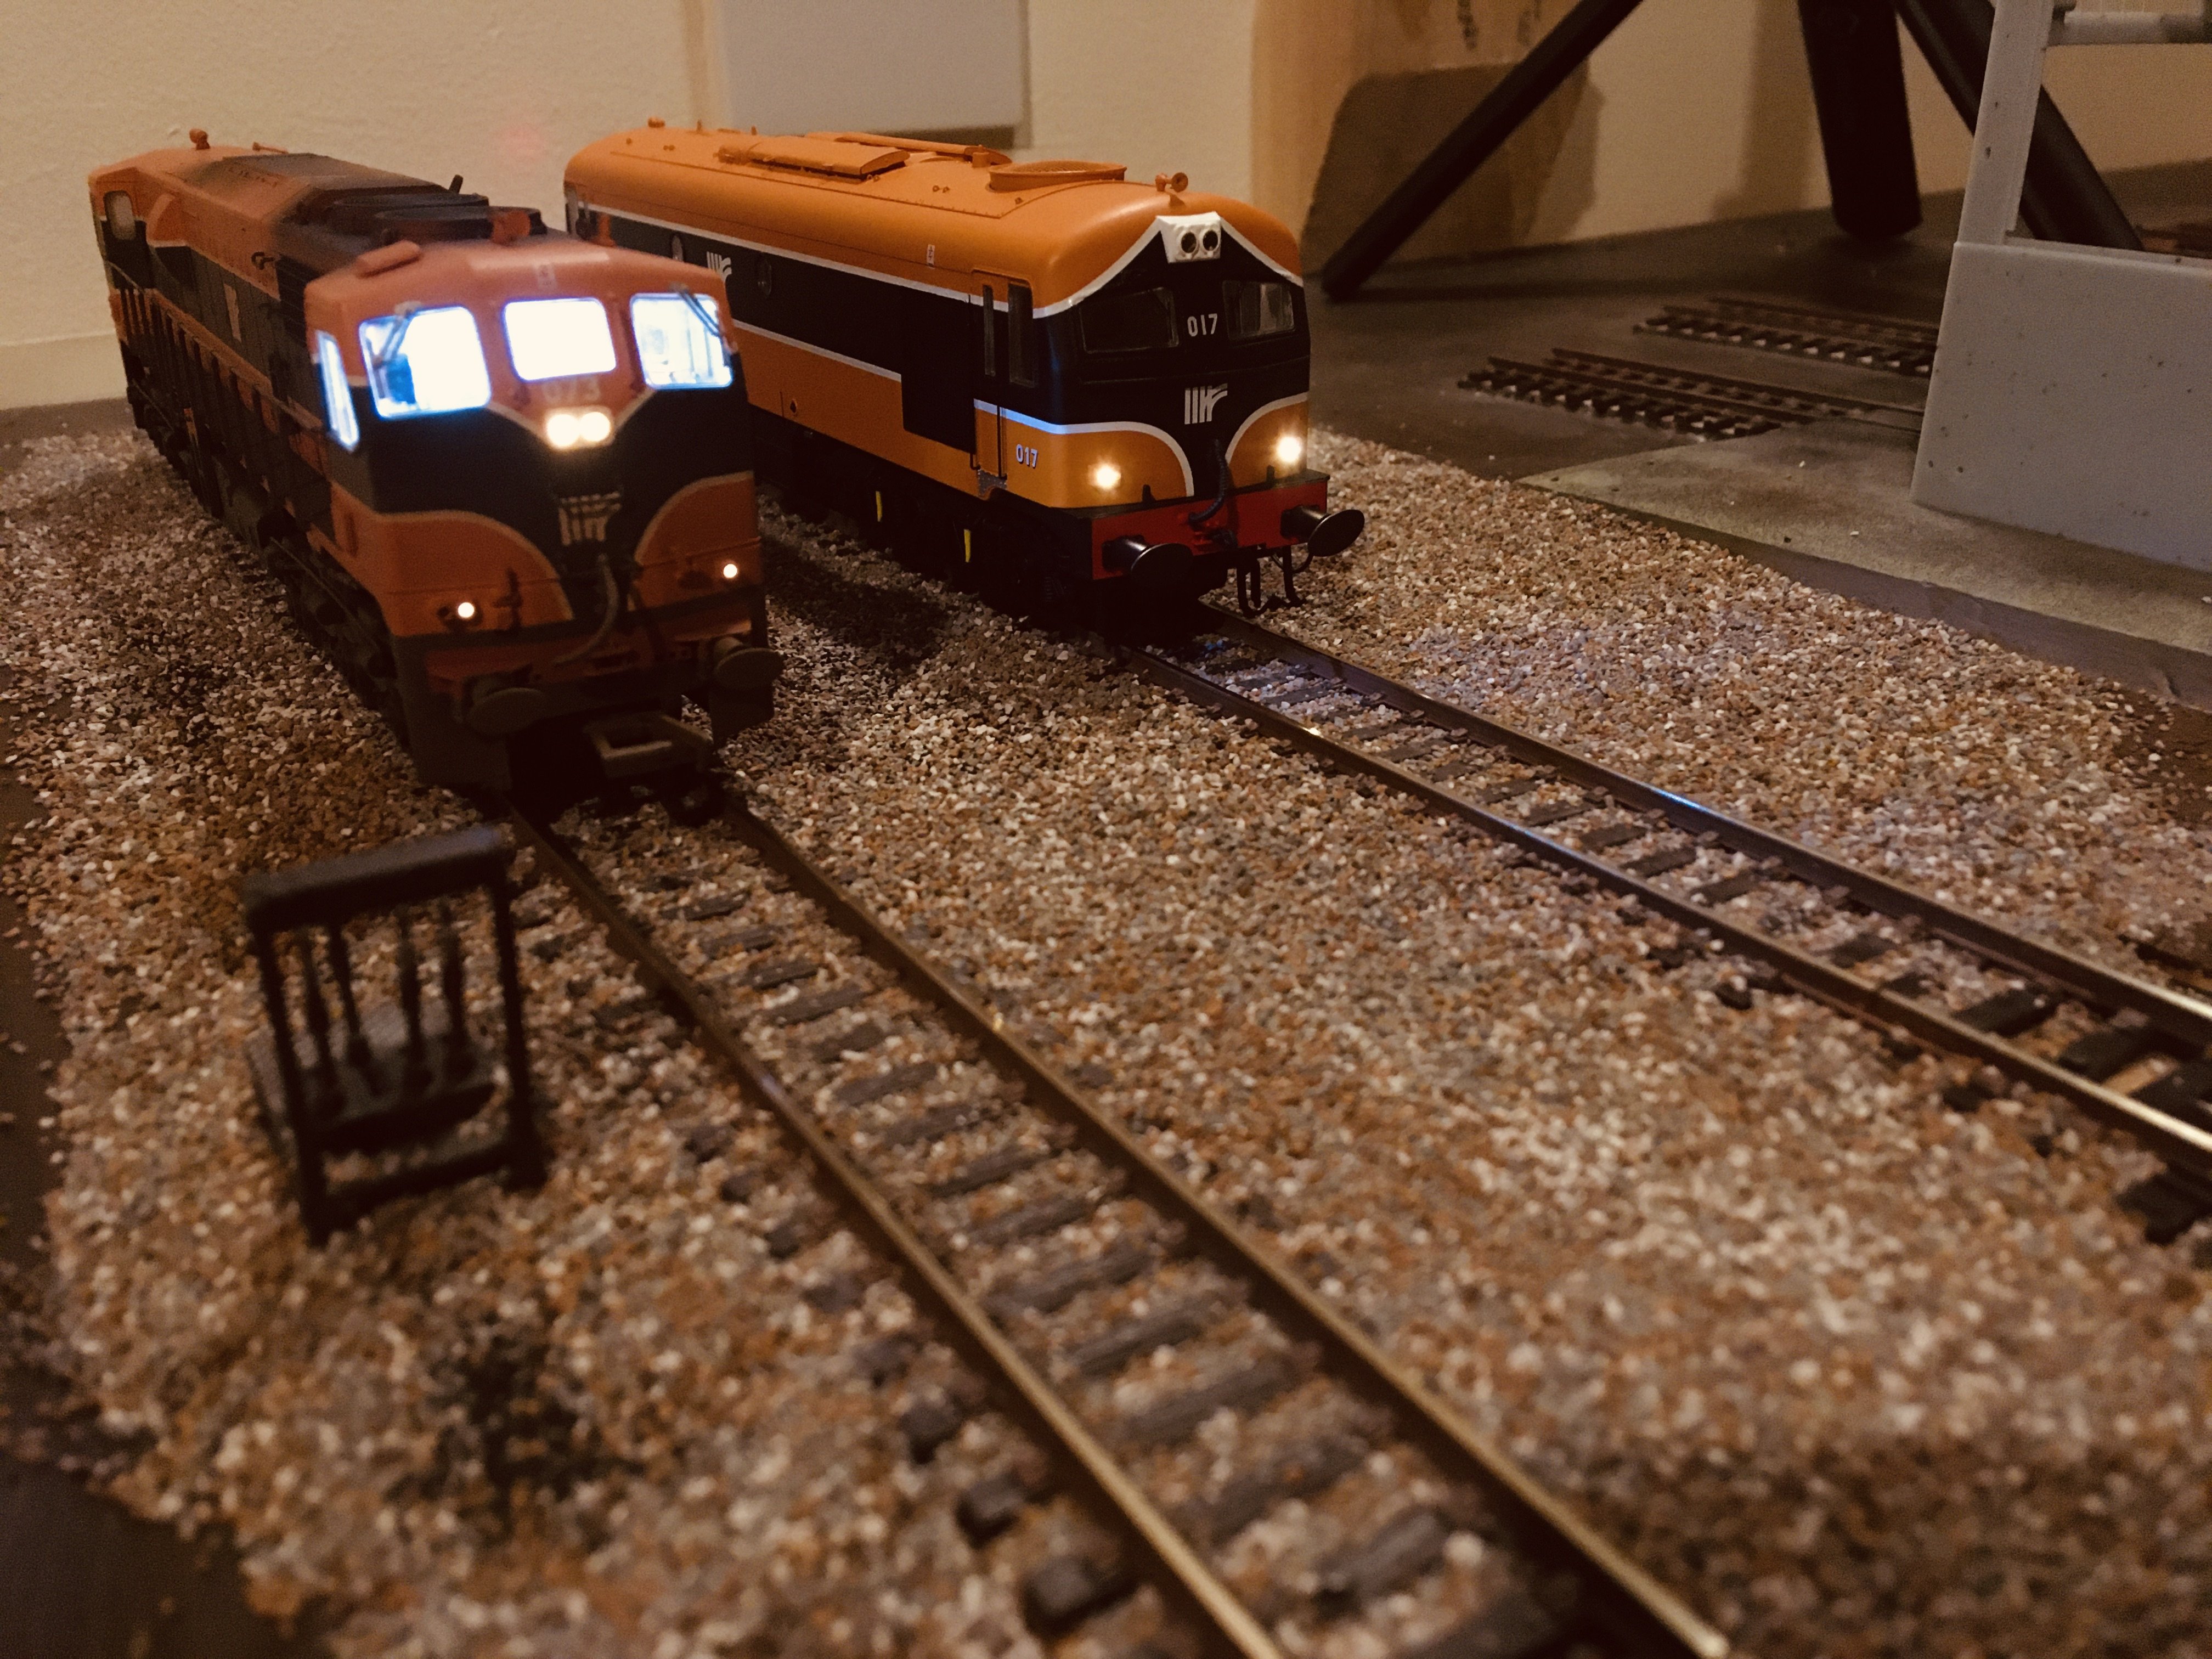
#073 sitting on the fuel point, with oil stains reflecting the light
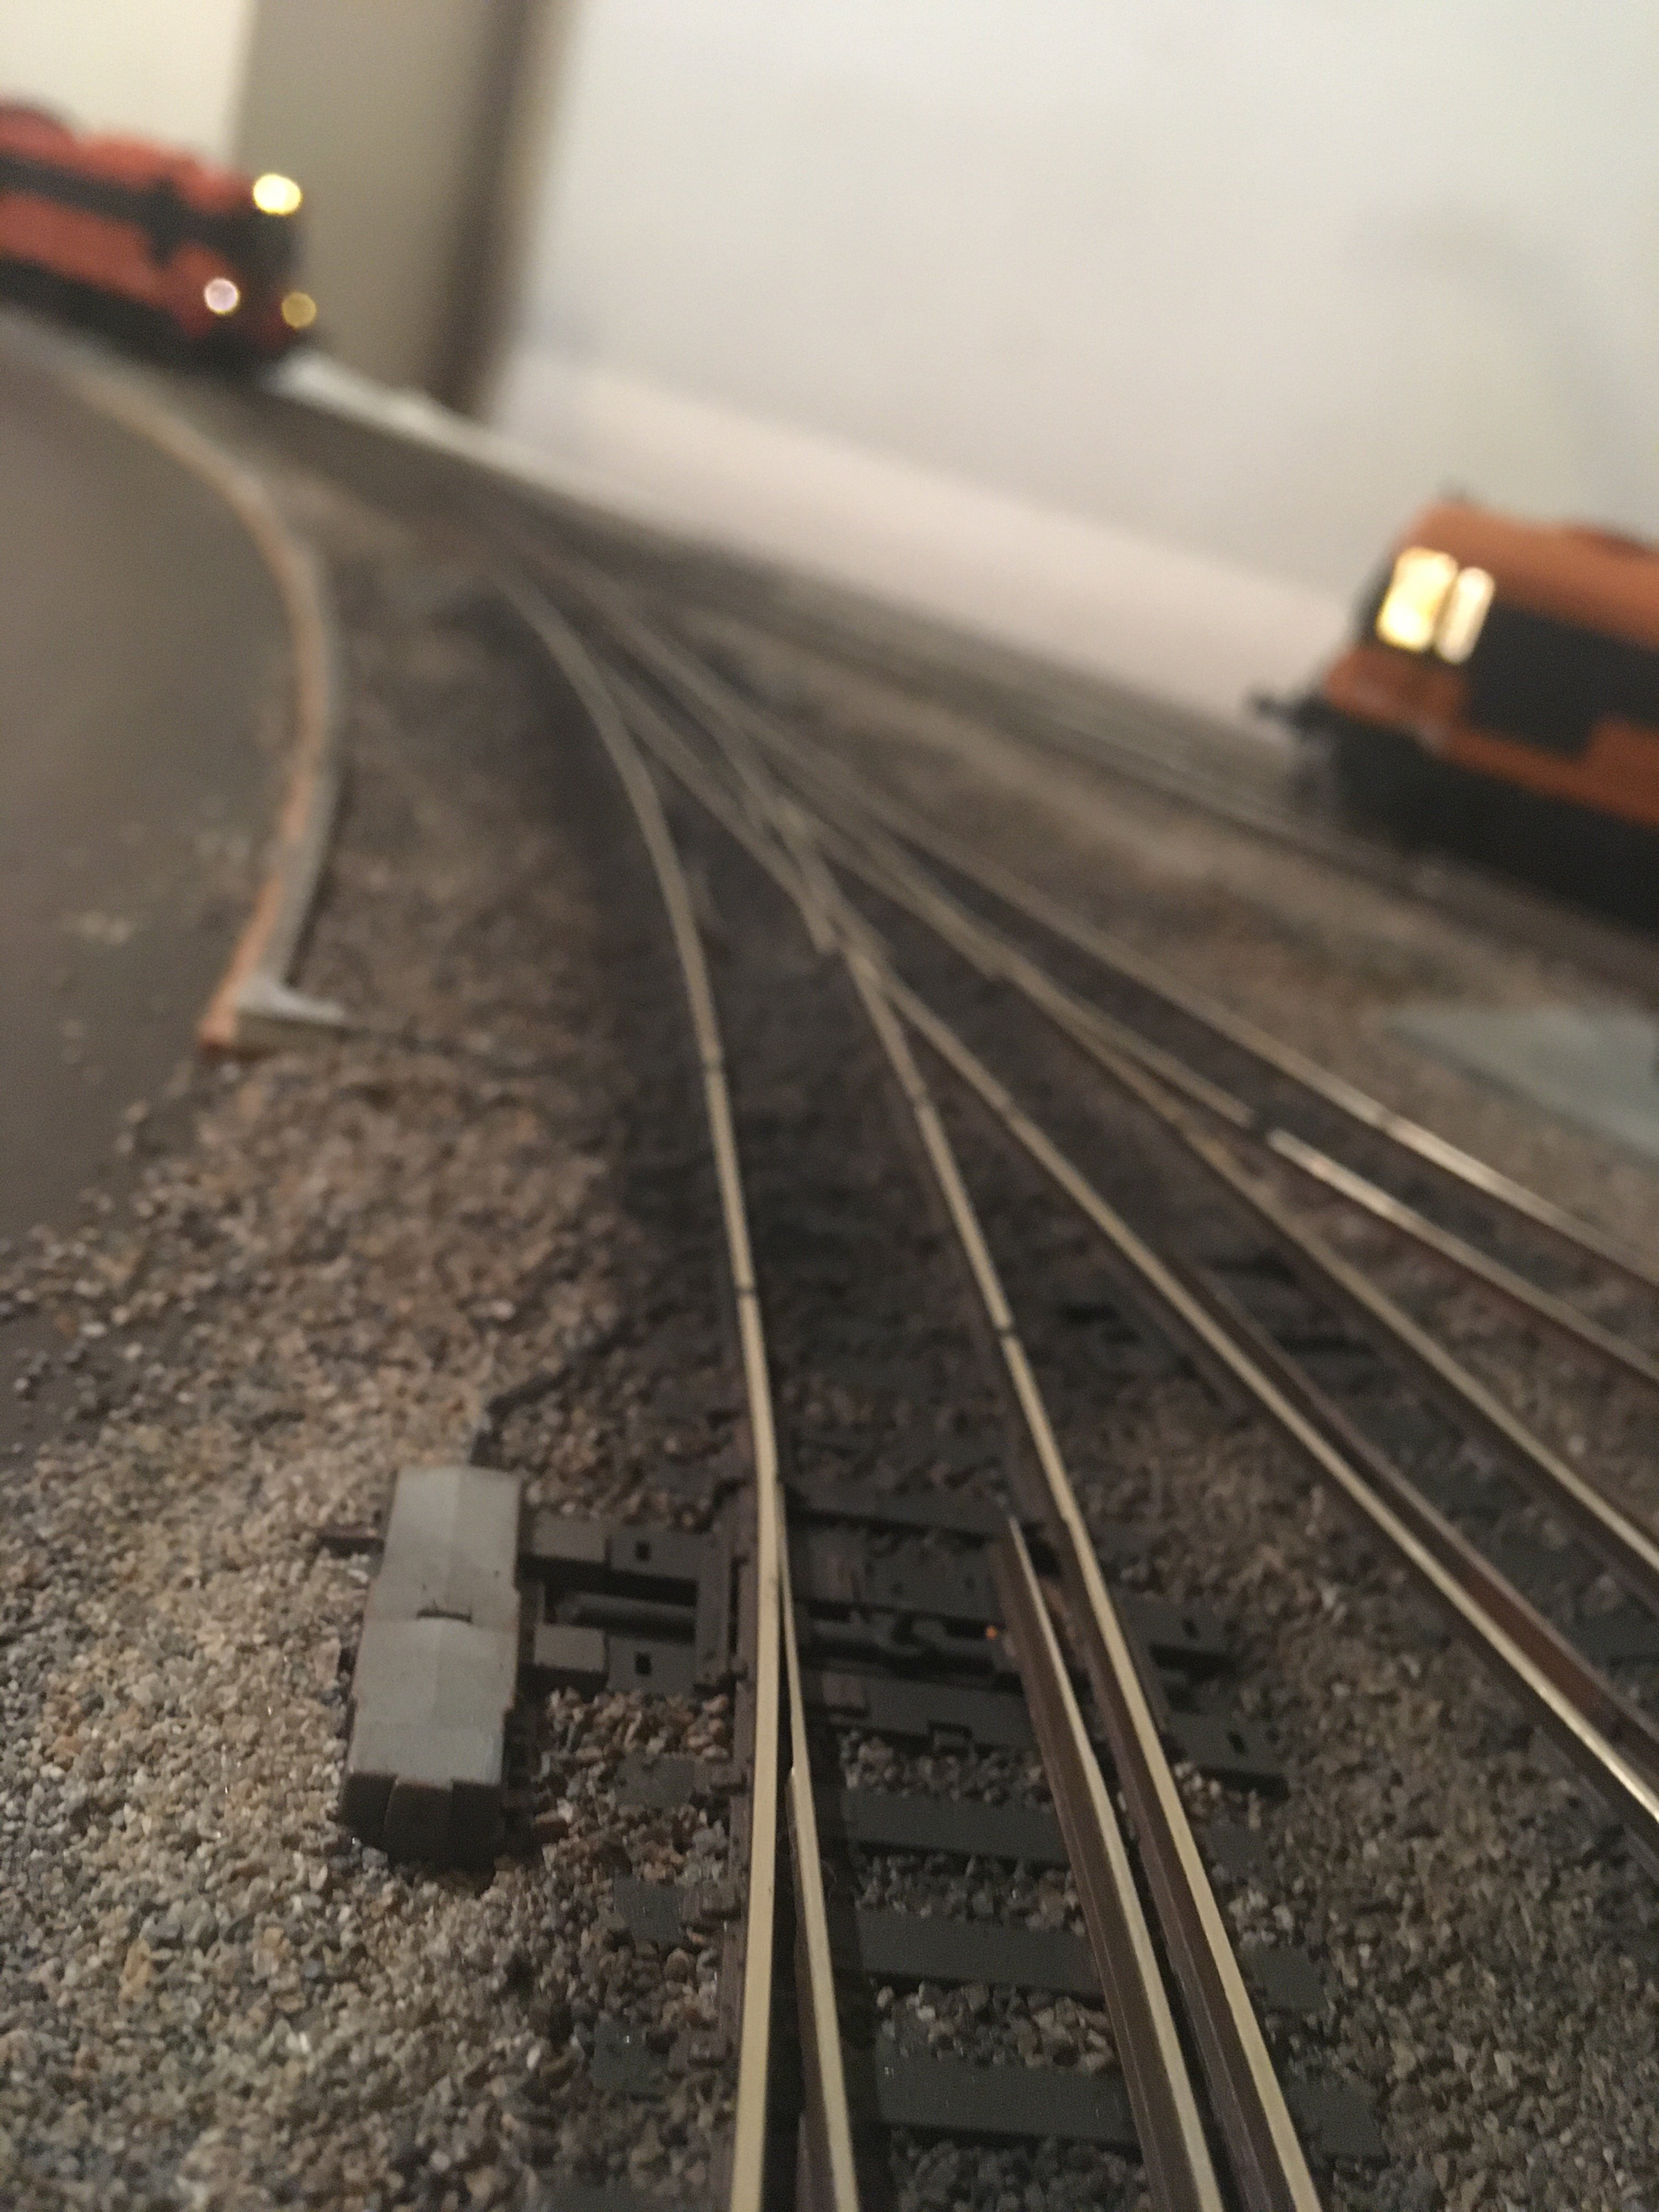
The other section of the layout (initially just for loading locos out of sight, but I decided I might as well practice here too and make this section more modern) has electronic point motors, with cable trunking emerging from a (future) tunnel and exposed wiring to the motors and relay boxes
Note the oil stains where locos idle, waiting for release from the sidings, between the sidings will have some weeds and static grass added in the next phase. The rusty siding to the lower right is no longer used and will be totally overgrown.
Cable bundles running from the trunking to the relay boxes, these will also be overgrown with weeds
Another unusual perspective, I love the foreshortening effect on curves when seen from this angle
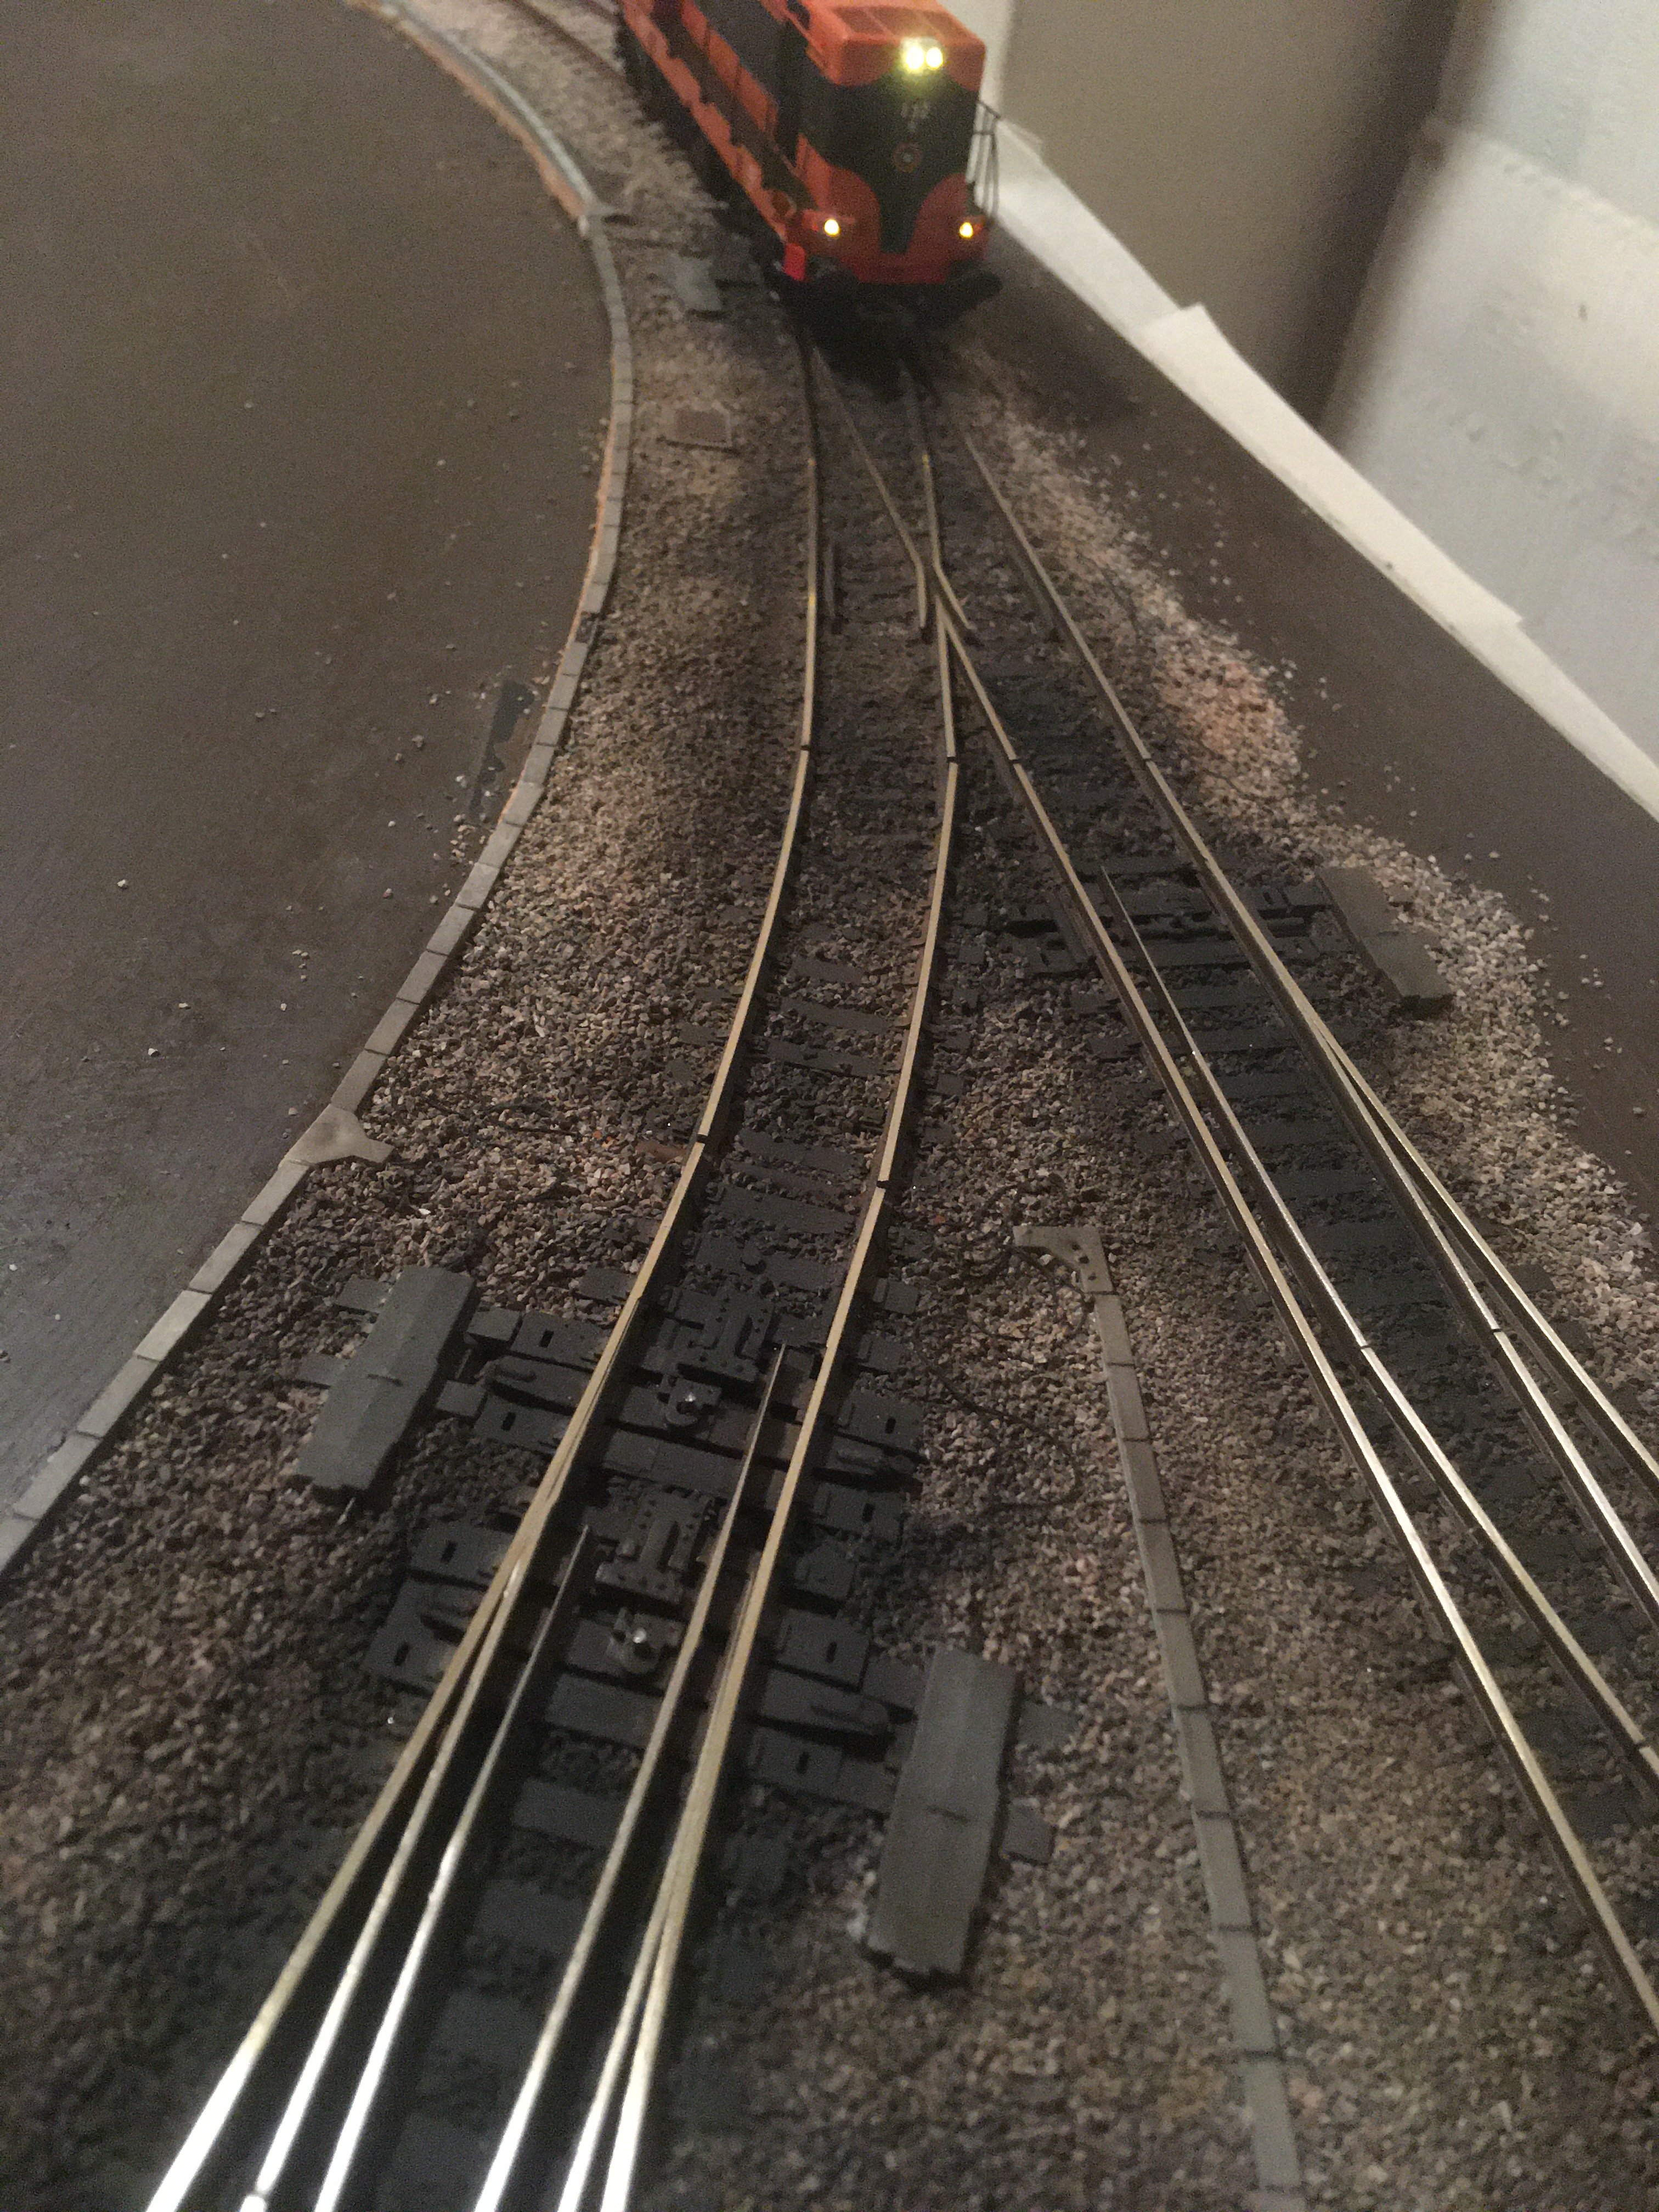
Murphy Models class 071 #073 on a short move from the headshunt into the fuelling point
-
8
-
 5
5
-
On 2/2/2022 at 7:12 PM, Grange Castle said:
I'll be honest I don't know the details on trains etc, I just like them !
I’ll be the same on mine, keep it as close as I can but not at the expense of leaving locos on the shelf
Your collection is really impressive, looking forward to following the progress
-
1
-
 1
1
-
-
Just read all 11 pages of Duggort! Fantastic layout, you should be proud
looking forward to.m seeing your progress with the extension
-
2
-
-
Nice layout
Just catching up on it, good job on the ballast weathering!
-
1
-
-
^^ latching sounds about right - on Lenz it’s the same, edit the cv settings for the functions and turn on momentary
-
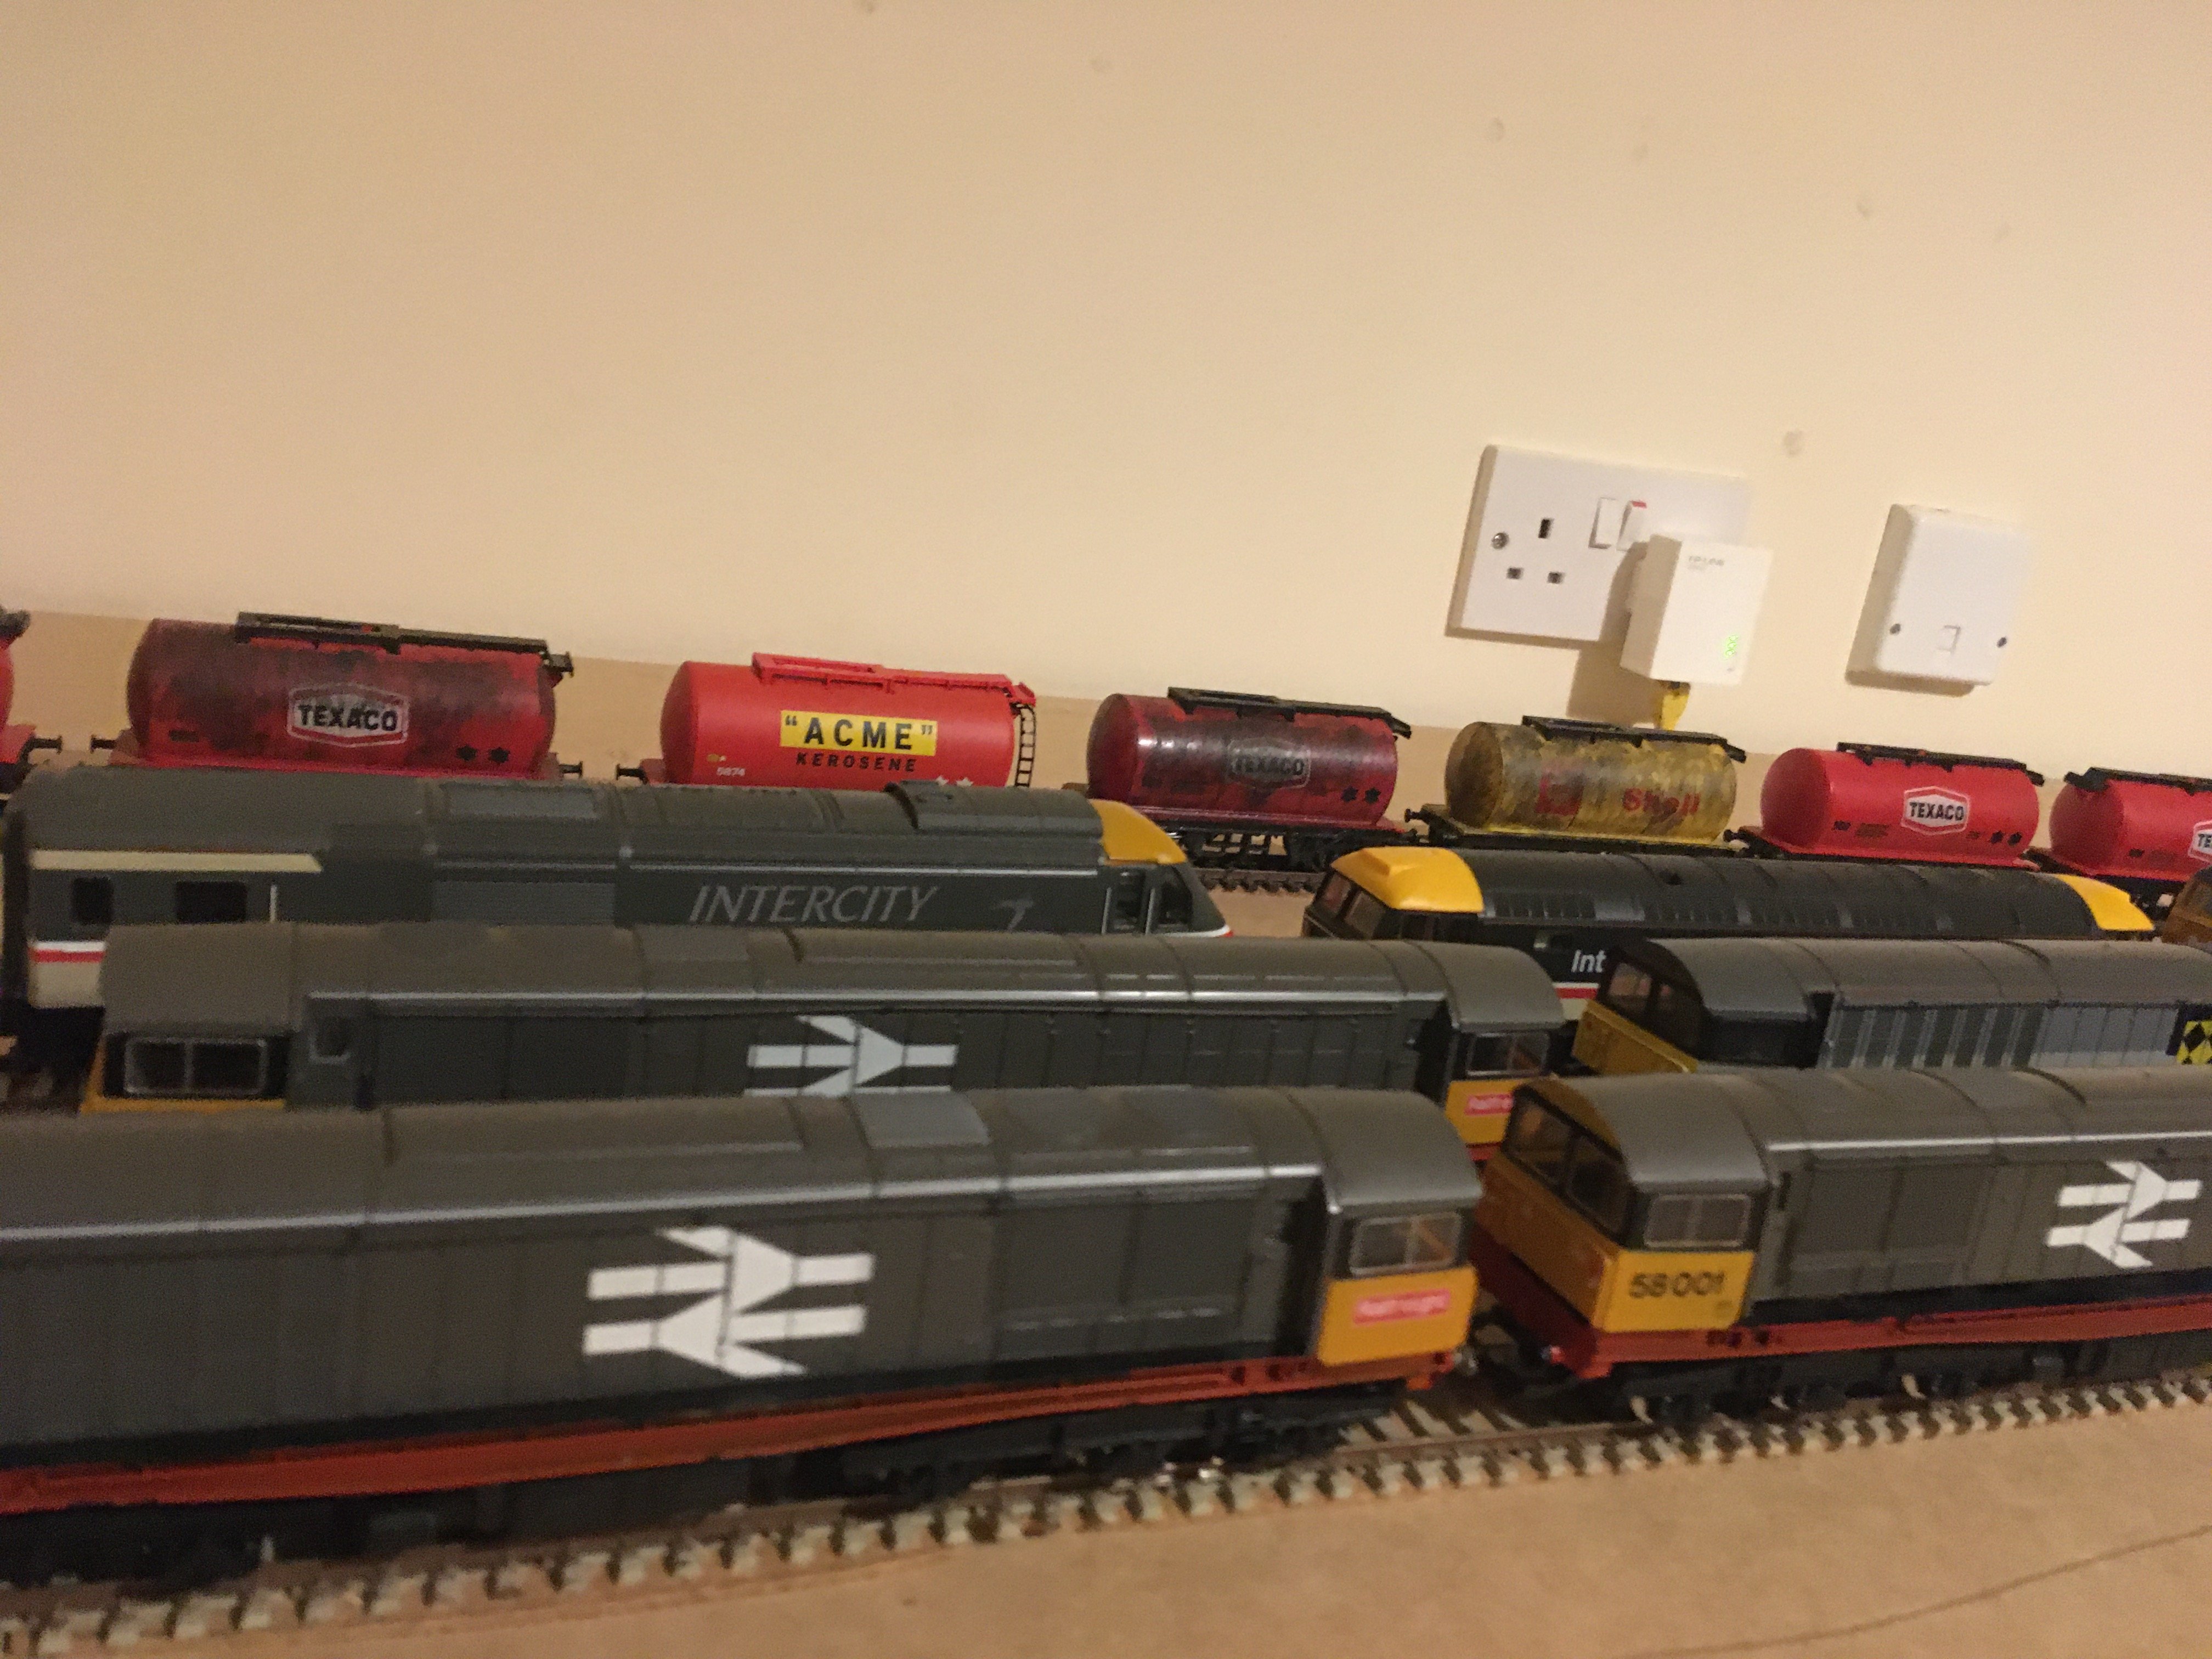
Love it, that’s some lineup of locos you have
-
 1
1
-
-
On 27/1/2022 at 10:30 AM, Noel said:
Wow that's an amazing return to the hobby after 25 years. I returned in 2014 after a similar absence and found things had moved on so much since I had left, so much new stuff and materials to learn. Well done, progress so far looks excellent. Layout looks fab. Btw, those carpentry skills looked spot on too. Enjoy layout, its like gardening, and will never end nor complete, but the journey is so enjoyable.
I suspect none of us would have got into or back into the hobby without Patrick Murphy's successful business endeavours.
Thank you very much Noel, appreciate those comments! Especially the carpentry which was never my strong suit

Just finished a video series on creating oily, grimy ballast at the fuelling point - if you're interested check it out over in the tutorials
-
3
-
-
This is a very quick series of videos on how to get that dirty, almost smooth, oily ballast typical of a filthy fuelling point. I experimented with fireplace ash, coal dust and baby powder to get the right consistency and found that a 3:1 mix of baby powder and coal dust did the trick. My wife thought I'd lost it when she found me in the sitting room scooping coal dust out of the bucket with a spoon!
Here's the end result:
The playlist has 5 x 1 min videos - jus enough for a cuppa
You can watch individual videos or the full playlist is below...
* Step 1: Add the baby powder / coal mix
* Step 2: Airbrush a base layer of grime
* Step 3: Spray on a heavier oily layer
Full Playlist-
4
-
1
-
-
Cheers Jason, I like keeping it short and simple with minimal waffle - enough of that online!
-
Thank you Dave! Missed your comment so sorry for the late reply
Lots of work done in the last few weeks so stay tuned for an update this week
-
2
-
-
23 hours ago, JasonB said:
It's hard to beat the whine and the sound of pure power from an 071, but the 567 engine comes in a close second for me.
Yep total agree, that 567 engine is very unique, I’m delighted with it
-
2
-
-
Delighted with these class 121 sound chips for Christmas
, checked with all the Irish suppliers but eventually got them from Roads & Rails in the UK.
1st is #127 with the newer 645 engine sounds, 2nd is #132 with the older 567 engine - enjoy!
-
8
-
1
-
-
Very nice dude, looking forward to following this!
I’ve just caught up on this thread and have a noob question: you mention brake fluid for stripping the coaches in the first few posts...do you mean actual car brake fluid and if so why do you use this? Presuming it’s something to do with not being too harsh? Thanks in advance
-
2
-
-
Having fun with ballasting, first section is gluing now. I love the creativity you can unleash
Going for a brownish mix around the main areas of the depot with plenty of variation, second pic shows an oil tanker siding a bit away from the main track work, so different ballast mix
-
4
-
1
-
-
Yep, maybe so, the 071 just does it for me cos it’s the one I remember most from being a kid and getting the train in the 90s (born in 1980 in Carlow so didn’t see too many A classes) - for me that’s “the” train sound and gives me goosebumps
-
4
-
-
Ballasting has commenced!
-
6
-
-
Oh I’m loving this! Evening time at the depot after fitting the MM 071 sound chip and the IRM A class EMD sound chip to my new MM 073 and IRM A class 017 - the sound quality is way better than I expected, full of bass and sounds even better in real life - the rail squeal effect is my favourite
-
5
-
1
-
-
Very nice, love the weathering on the station building, very realistic
-
1
-
-
Very nice, just caught up. Liked your solution for fitting the point motors and then putting them through the whole from the top, I...didn’t do this and using Seep PM1s instead contorted myself trying to align them from underneath using a flashlight - never again! Looking forward to seeing more updates
-
13 hours ago, the Bandon tank said:
Enjoyed that, very informative thanks for shearing.
You’re welcome
-
17 hours ago, Rush and Lusk said:
!'m learning so much from you Adrian - excellent work.
Delighted to hear that
-
12 hours ago, Adrian said:
So trial and error on the first attempt but once figured out, the second hardstand went much smoother. I'll have a video up soon which shows the technique so will plop a link down here for ya
Got the videos organised and have them in a playlist for easy watching - they're quick and to the point - 15 mins in total - have fun!
Posted here:
-
3
-


Gort Station
in Irish Model Layouts
Posted
Amazing work Noel, just read all 7 pages and caught up to now. Attention to real life detail is class and I’m looking forward to following along with you from here")
I also love comparing the first few sketches of a layout with the most recent photos - it gives you such a sense of achievement and keeps the motivation high!