
scahalane
-
Posts
855 -
Joined
-
Last visited
-
Days Won
4
Content Type
Profiles
Forums
Resource Library
Events
Gallery
Blogs
Store
Community Map
Posts posted by scahalane
-
-
Looking good, love those oil tankers, is that scenic rust you used for the weathering, works very well.
-
Lovely job.
-
Looking good, a bit of weathering would really help to set them off alright.
-
Great job, definitely need to get me one of those or two.
-
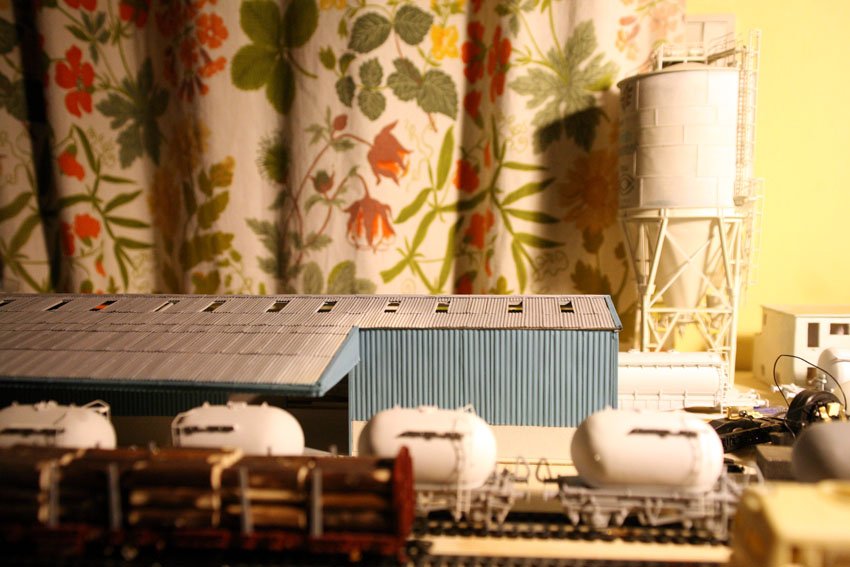
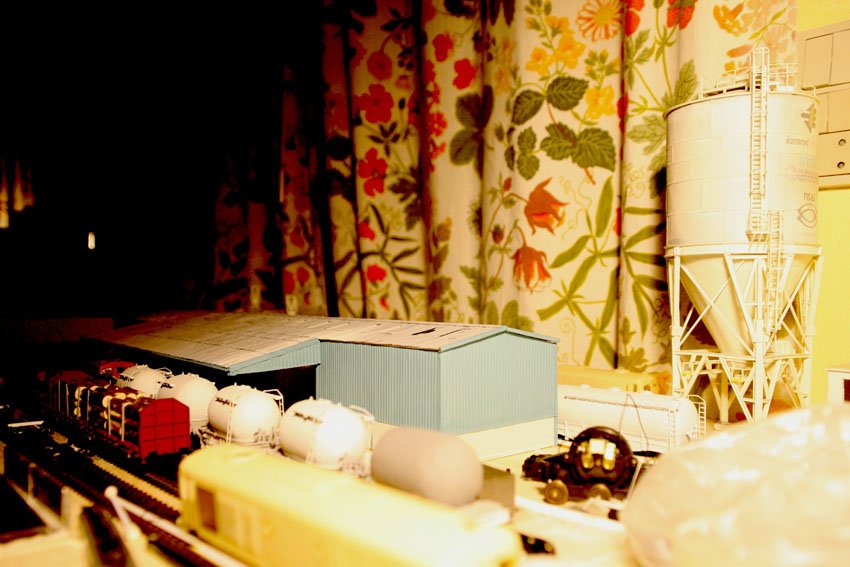
A few updates to my workbench. Finally got back to finishing my cement depot, nearly there just a few details and some weathering left to do. Also added some detail and weathering to the cement storage shed.
A couple of paint jobs on the go with my cement bogie wagons, bubbles and an a class.
Hope you like.

-
Looking forward to see how this develops, keep us updated.
-
That's some collection, and the layout looks to be coming on very well. Keep us updated.
-
Top class, I love the versatility of paper and card. Do you work it out in 3d cad first ( what software do you use?) or do you design on paper old school??
-
Great looking video's there Anthony, love that double headed 121 with bubble rake in particular, keep them coming.
-
Sorry to hear your getting out of the Irish scene, I was looking forward to seeing how your layout would progress, it looked challenging. If the prices are good might be interested in a 141.
-
Great shots, fantastic looking work you captured the look just right, and credit to Des on yet another splendid looking kit.
-
George, always a pleasure to see your work, top class as always.
Eamonn fantastic paint job, really brings it to life.
-
Farewell to a great looking layout. Look forward to seeing how the new one progresses.
-
Top class weathering job RetroHerbie.
-
 1
1
-
-
Absolutely class work there Scahalane,
Certainly wets the appatite for the rest of us without MIR kits! Roll on the fortcoming 071's in the autumn :-) Nice weathering too. Can ya tell me where did you source the 1mm tamiya masking tape? I have a job for that. A rake of Mk3s to paint! Cheers.
Thanks for the kind comments all.
Shinkansen, I used 40mm tamiya tape sliced into 1mm strips, worked fine. I think you can get 1mm tape but not sure from where.
-
Great stuff there Richie, keep us updated.
-
That is sheer class!
-
That looks fantastic Des, coming together really well.
-
Great photo's, just the detail I need to finish my own SF model.
-
Fantastic work there Kirley, bought the Bill Bedford bending jig myself but find using a pair if plyers just as good.
-
(updated from old site)
Here's a few things on my workbench at the moment. Its part of my long term plan to build a compacted version of Kent station Cork in various stages starting with the cement depot site.
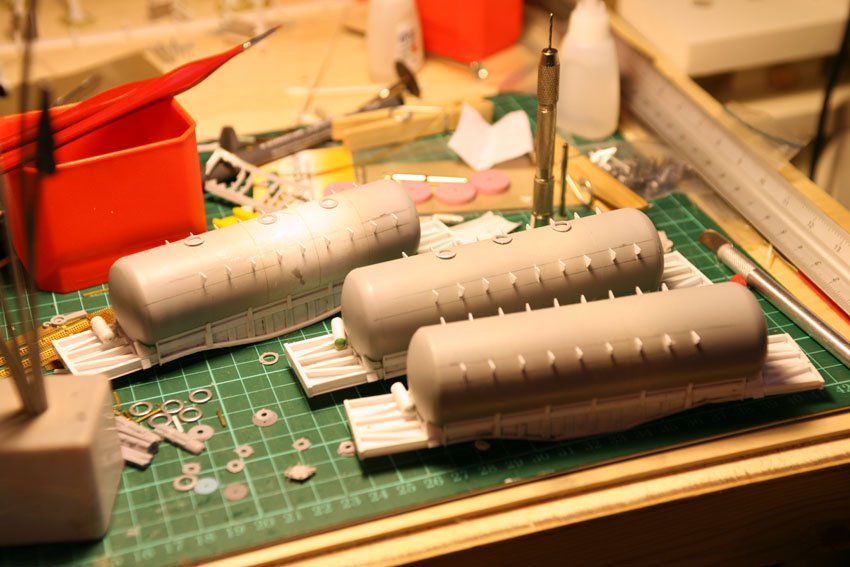
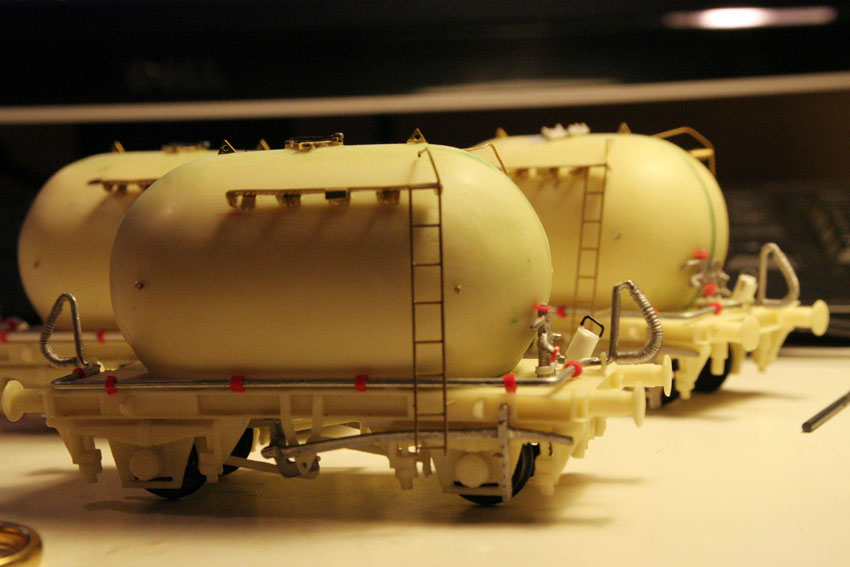
Here's a few MIR cement bubbles that I've added some extra detail from Westy's brass etch and a few bits of my own.

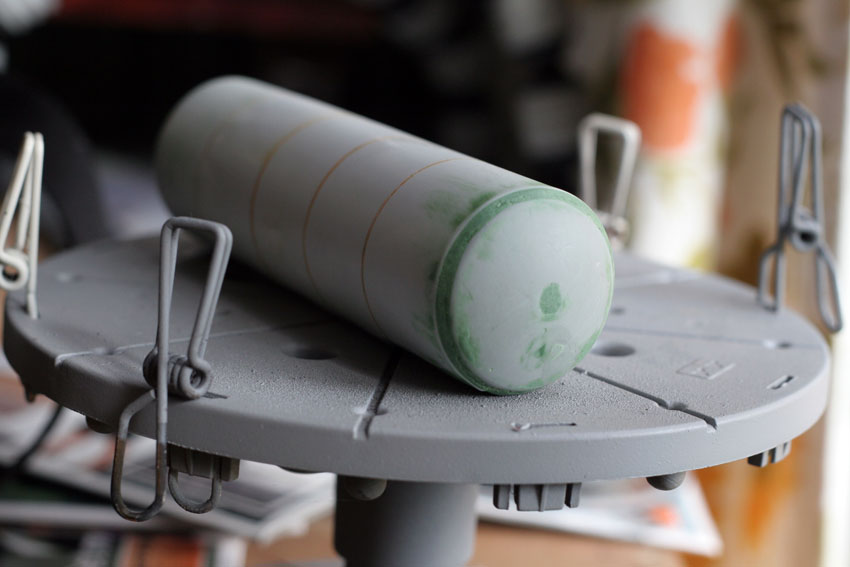
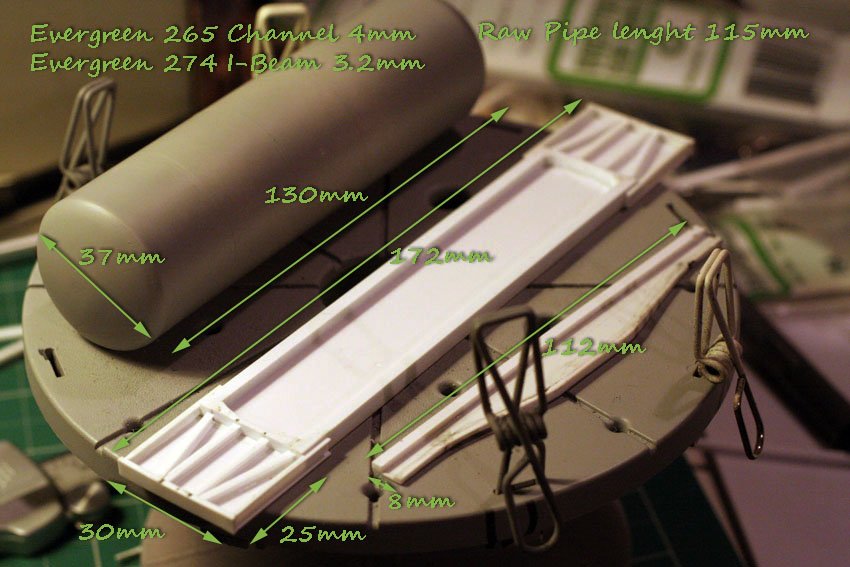
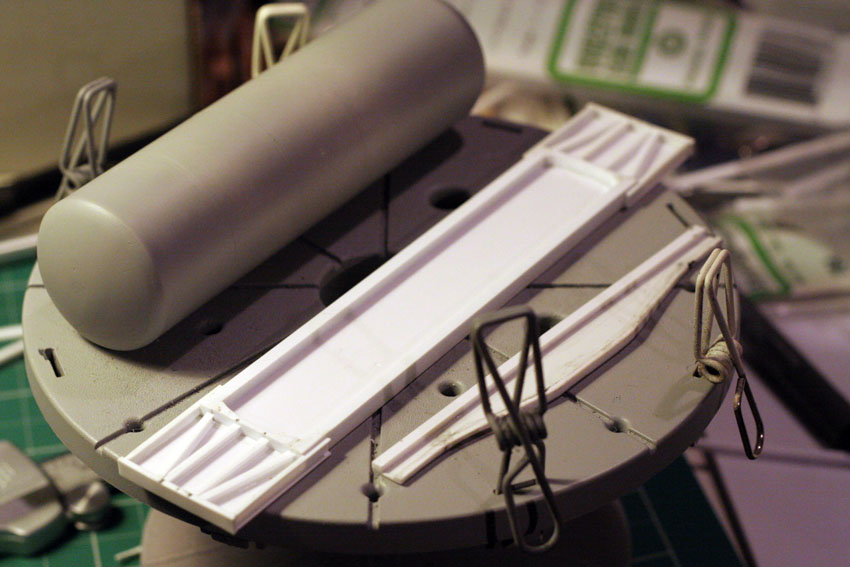
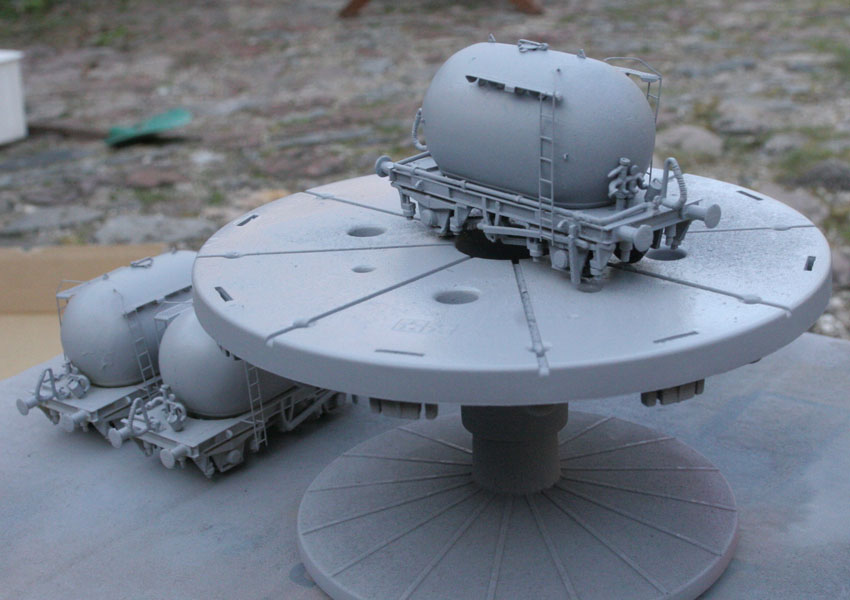
Here's a few scratch build bogie cement wagon's I'm work on, the cyclinder shape was made from the tube of a vacuum cleaner in cased in plastic card.
y25 bogie's widened to suit.
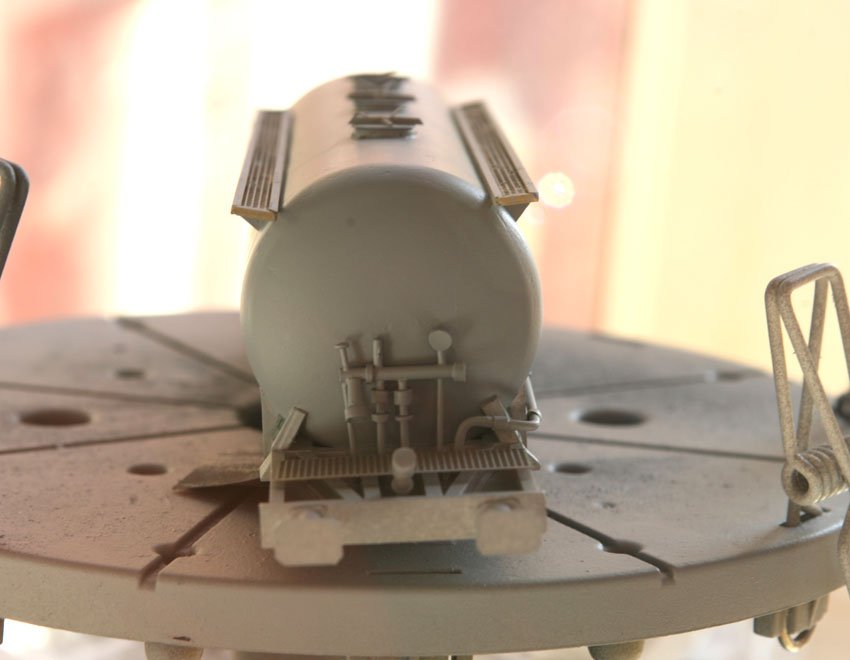
Added detail.
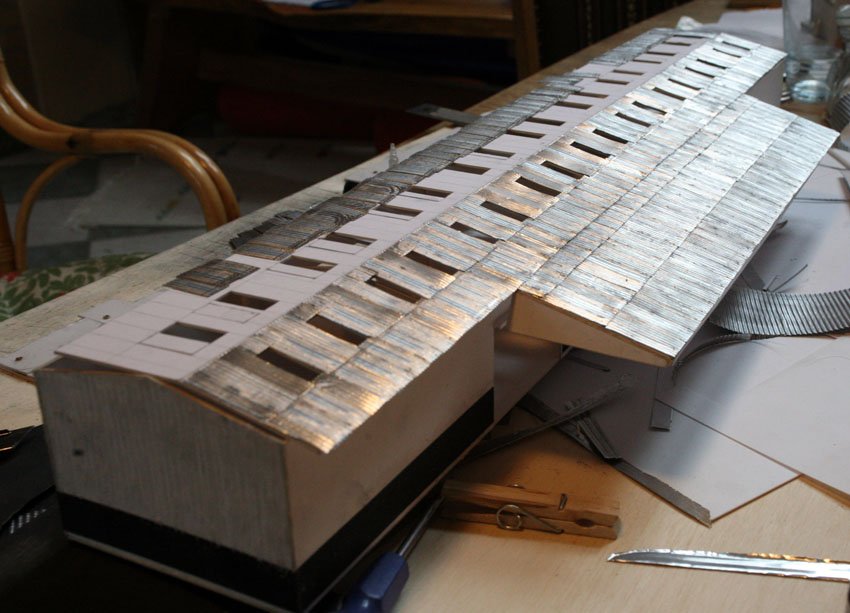
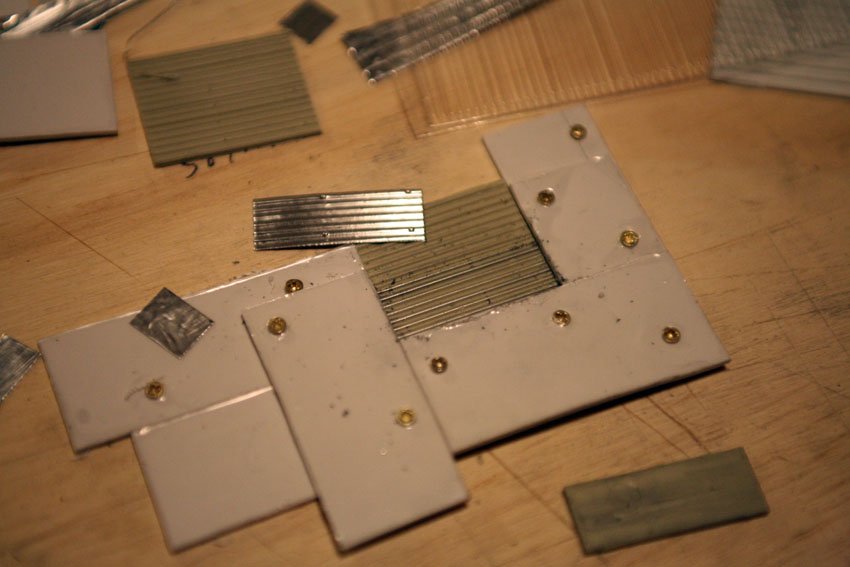
This is based on the cement storage shed at Cork. I created the roof from foil trays cut to shape and pressed on to a Will's corrigated plastic sheet. There was a tutorial on one of the Model Rail mags and it works a treat.
The side's were done in a similar way.
Here's the jig I used to hold the foil and plastic sheet in place while pressed using a block of timber.
Painting Stage.
Here's the cement silo...still not finished hopfully very shortly now!!
Some detail I'm adding to a Silverfox a-class.
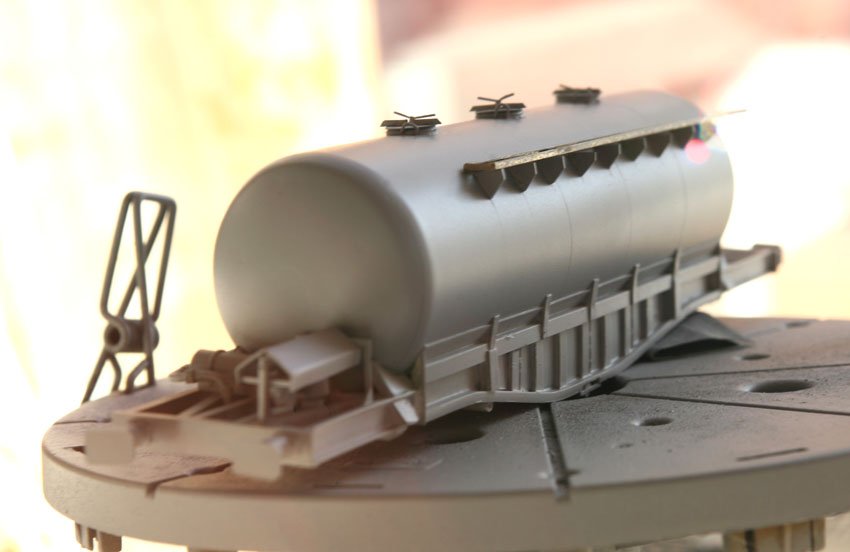
I bought this kit 2 years ago but only got around to doing something about it at Christmas. I've been building it on and off over the last 2 - 3 months and finally got it finished or nearly bar the lighting. Its my first attempt at building an MIR model and I most say I really enjoyed it. The kit itself requires a small bit of chop and change but that's where the fun lies.
After filing, sanding and general clean up of the resin body I used a blunt scalpel and ruler to scribe more visible the various doors and panels, I also continued the vertical lines from the sides over the roof space.
In figure 1: I've filed down the roof a bit on the first 4 panels from the exhaust port which I had drilled out and shaped. I glued a strip of plastic card along this surface allowing a space at both sides of it while leaving it flush with the other two roof panels. The rivets were created by drilling light indents and filling them with pva from a cocktail stick. In Figure 2: I raised the roof slightly with a piece of plastic card. In Figure 3: I cut out a small hole and added a piece of plastic for what ever that is I've no idea. The grab handle is just a piece of brass wire shaped and drilled into position. In Figure 4: I filed down the over sized vent and replaced the horn with some plastic spares and rounded piece of plastic for the antenna. In Figure 5: I cut a hole for the vents and built it out slightly with some plastic strips. I drilled out the cast resin brake wheel to add more depth to it, putting a small border around it and replacing it with one I ordered from Precision Castings, although it was a bit big and I had to file it down.
The body was coated in Halfords grey primer and after the usual sanding and filling was touched up with some Mr. Surfacer and re sanded. I drilled some holes for the main head lights and added some cut plastic pieces for the pilot lights having removed the older type resin ones. I drilled out a number of holes to suit for the grab handles etc which were made from brass wire. I used a small piece of plastic to continue the cab frontal rim around its side and a small piece of brass plate was also added here.
Various bits and bobs.
I cut out a template for the masking using tamiya masking tape.
The model was first given 3 coats of white then 1mm strips of tamiya masking tape were placed for the lining. This was then resprayed with white to fill the gaps in the tape and when dry got its first coat of orange.
I thougth the CIE golded brown shade of Precision enamel suplied was too dark for what I wanted so I mixed my own using a small bit of the golden brown with mainly precision yellow lining. I used humbrol red for the buffer section this was the hardest to mask properly.
Added dayglow panels with Humbrol orange 209 gloss and faded back with a spray of warm white.
Ready for the black coat.
Masking finally off and decals added.
Let the weathering commence: Following previous posts from the likes of George and Anthony and having watched Model Rails 'The Weathering expert' umptine times, I got stuck into my first weathering job. First off gave the shell a light mist of humbrol black to pick up raised detail. Then a light coat of Railmatch Frame Dirt.
Having let sit for 2 hours this was then rubbed off with cotton wool buds using vertical strokes leaving a build up of grime in the recesses etc. However I think 2 hours was a little too long and found it hard to remove which damaged some of the decals.
Another spray of frame dirt for the sides and underframe. Railmatch Roof Dirt for the roof rubbing back the roof edges. And a light mist of Brake Dust for the underframes.
The finished model with glazing added, Railings, wipers etc.
I also used some tamiya weathering master mud and sand for the chassis which is a Athern SD9 and soot for around the exhaust port and some of the sides.
Comments welcome, hope you like.
-
1
-
-
Thanks for the reply's guys, I just bought the DC kits one, so we'll wait and see, I'll let you know when it arrives how it looks.
-
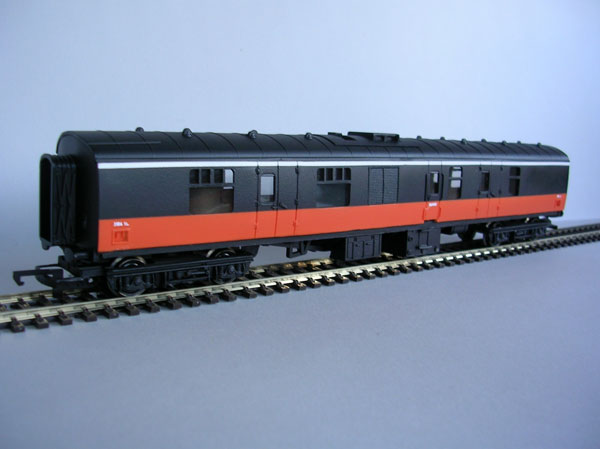
These are the kits I'm referring to, although the image on the Dc kits site is very small it looks similar!
Here's a link to their site: http://www.dckits-devideos.co.uk/shop/kits_modelling/irish_railways_inc_murphy_models_rtr_kits_transfers/irish_rail_cie_mk1_steam_generator_van_kit.php
DC kits version £30
Silverfox version £43
-
Best of luck with the new site. Its starting to take shape nicely.


scahalane's Workbench
in Workbench
Posted
Thanks for all kind feedback, still a lot to do so I'll keep you up to date as I go. Yes Shinkansen there all scratch built based on actual buildings around Cork train station.