
Aussie Phil
-
Posts
137 -
Joined
-
Last visited
Content Type
Profiles
Forums
Resource Library
Events
Gallery
Blogs
Store
Community Map
Posts posted by Aussie Phil
-
-
Thanks for some more great photos. Merry Christmas to you and your family. All the best for 2014 mate.
-
In my top five favourite layouts. Stunning... If my work can be half as good as yours I'd be over the moon. Simple beautiful. It's 4D art mate. Merry Christmas and all the best in your modelling endeavours in 2014.
-
Brilliant modelling. Top notch. Wouldn't have thought to use balsa to pack the extension. Can't wait to see her completed
-
Nice work mate. Where does the running shed sit in relation to the timber platform?
-
Wow it's rare to see aircraft models that don't look like toys but this is sensational. Love the weathering and attention to detail. It must be a big bugger in 1:32 scale. Jealous mate
-
Layout looks great. Love the effect on the concrete. Would be a great way to do a road as well... Might have to steal the technique for my own layout.
-
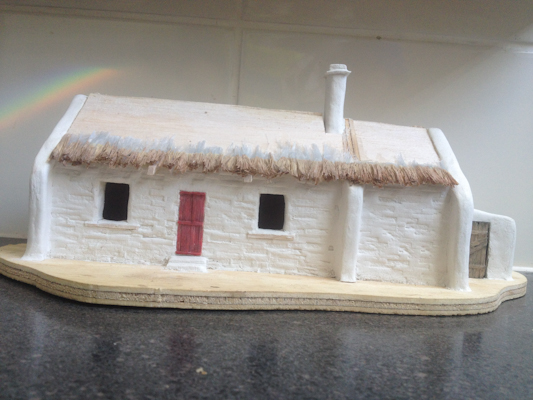
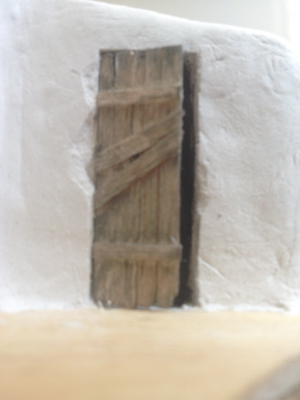
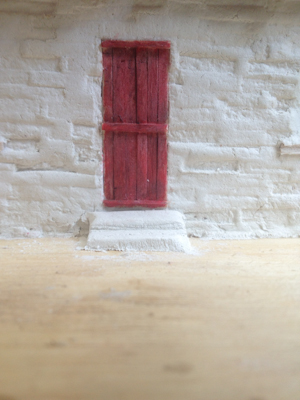
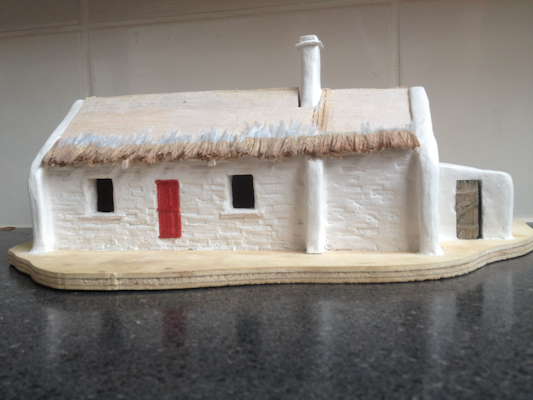
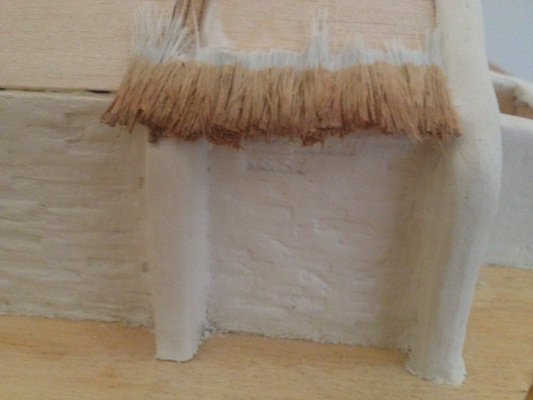
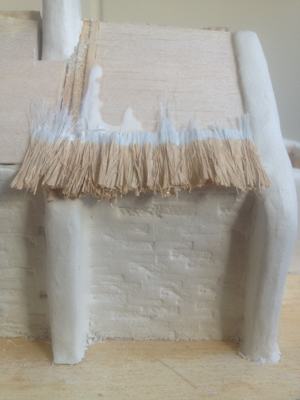
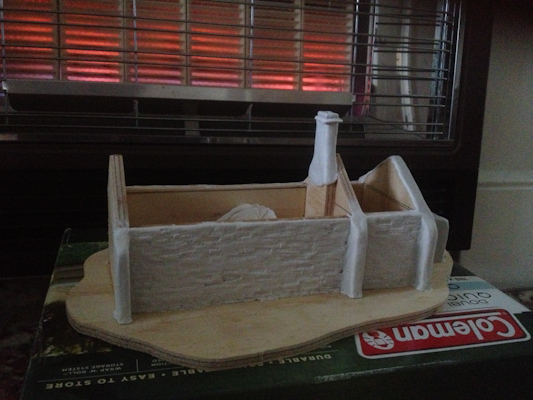
So all is going to plan and progressing slowly. The thatch has been made using duster purchased at the $2 shop and is coated with wood glue while still on the pole and then trimmed and placed when ready. The colouring is a mixture of browns. The doors are made from balsa wood and cut to size and glued. Then painted and weathered. The windows have been cut out using a dremel and took some time but came together well.
Thanks all for advise and tips regarding track and grass techniques. Will all come in handy and indeed will be used when I progress to that stage.
Cheers again and hope you like the photos.

-
As always hats off to ya. Brilliant.
-
Looks great can't wait to see more. You are in front of me by a fare way. I haven't even laid track.
Can't wait to see more progress. Best of luck and keep the photos coming.
-
That's actually an interesting point. BnM track almost always looks as it it's (a) three quarters submerged in weeds and mud, and (b) extremely uneven to an extent that in model form would just put locos off the track. I wonder how you would reproduce it - probably best smooth track with lots of grass growing round it?
The plan will be to have it twist and turn but not to the point where it will derail the trains. Won't be as dramatic as prototype but will be enough to make it noticeable. Have trialled a stretch and it worked well. I will just be using peco code 100 ho track (which is code 50 in O scale) as sleepers are never visible. In the yard area will build own track with metal sleepers.
Hopefully, fingers crossed, it will all come together.
-
The best thing is too that on a cold wet day like we have today in Melbourne you can easily dry your model in front of the heater
-
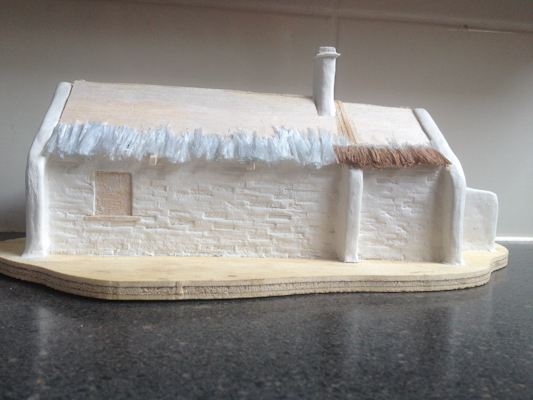
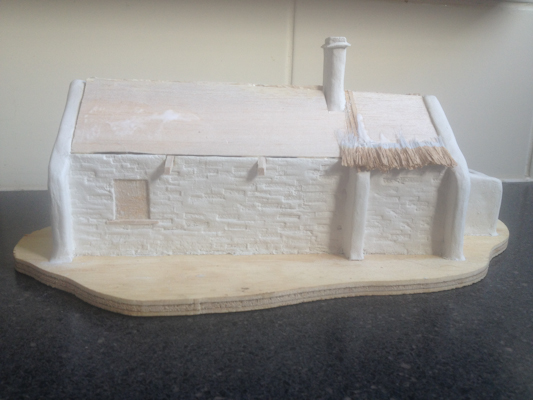
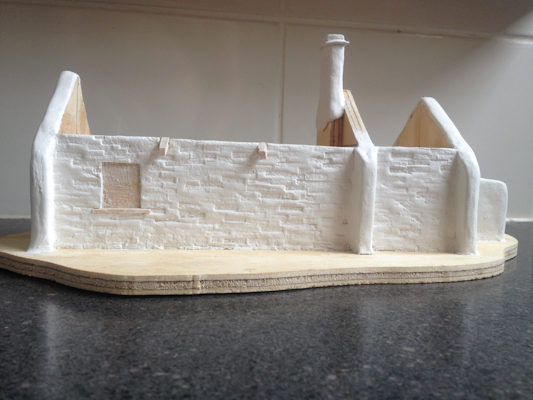
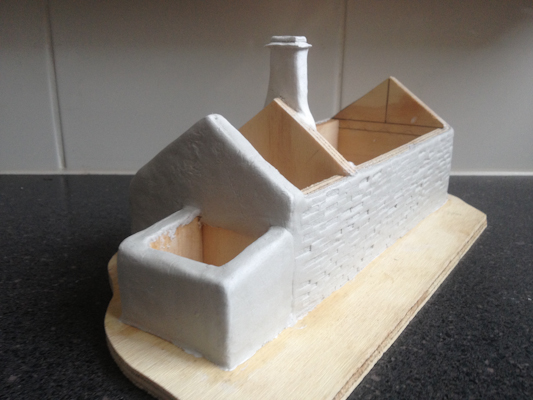
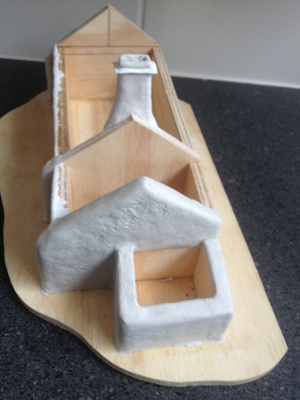
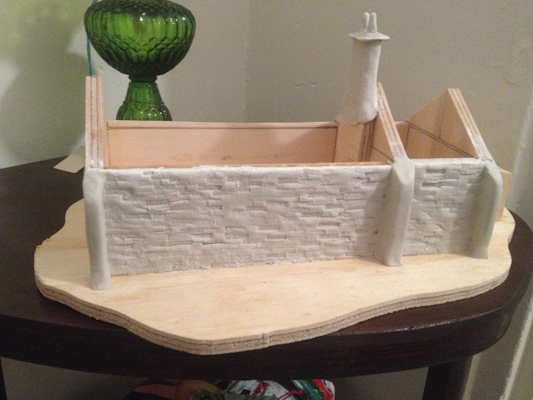
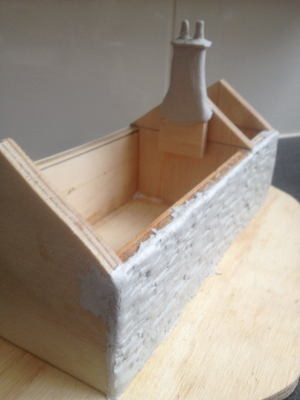
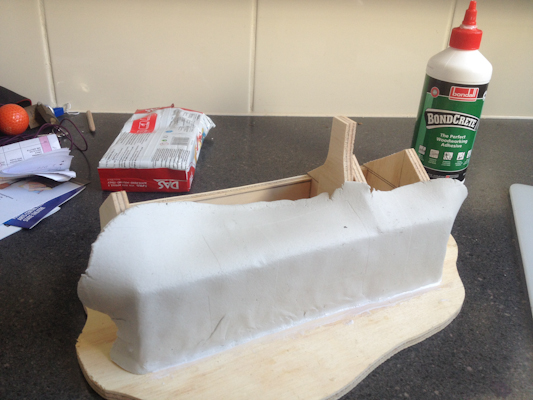
So after building the frame work it was time to add the DAS clay and detail the walls.
Simple process
1. Apply wood glue to the walls
2. Roll out the clay flat and score side joining the timber
3. Remove air bubbles (make sure you keep your hands wet)
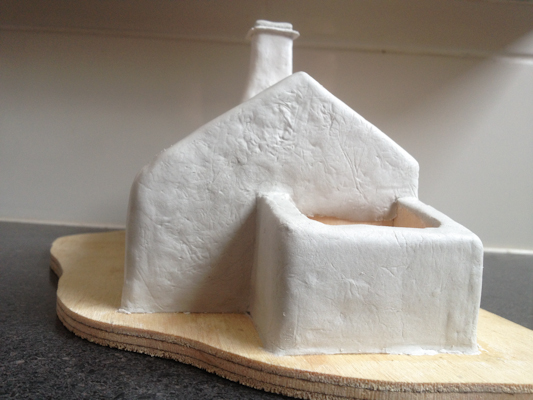
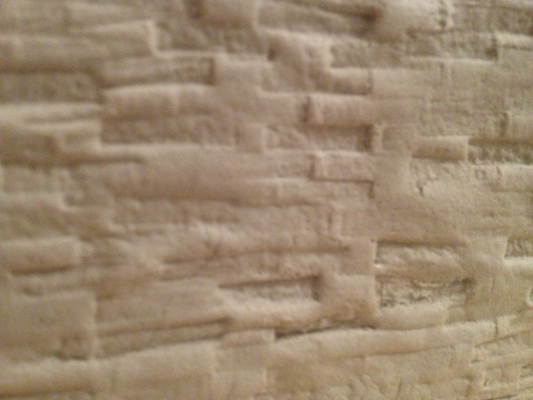
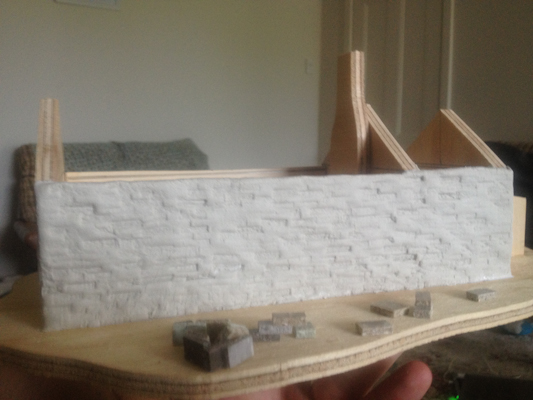
4. Add texture and detail - for the brick work I used blocks I purchased a while back from USA and for the lime rendered I used a piece of non stick cooking paper scrunched up and the rubbed onto the clay.
5. Add extra pieces of clay as required using score and wet then rub into place.
6. When dry carve into final shapes with small chisel or scalpel blade
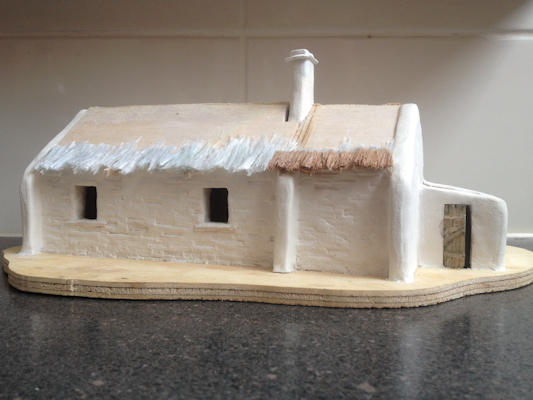
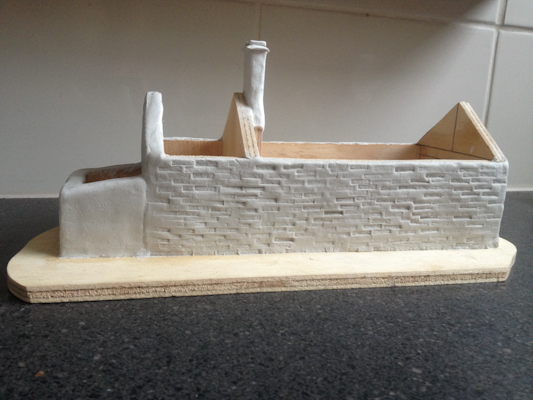
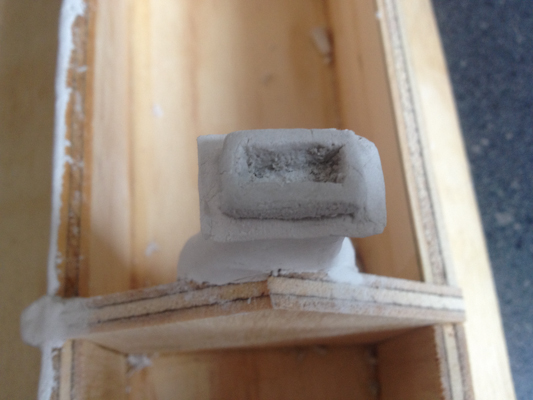
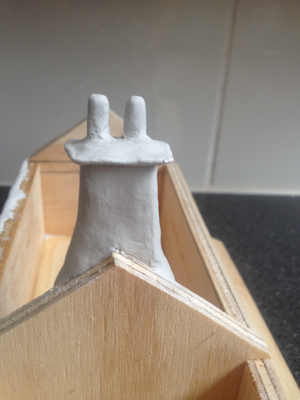
For the chimney I made it using 3 pieces. First the main body which is attached to timber. Then a small square for the decorative work. Finally a square for the top which after placed I then carve out the centre while wet and smooth when dry. You'll notice in the photos the chimney changed shape. Was after noticed in photo had detailed wrong type so quick snip and change took place easily.
DAS clay is extremely easy to use and forgiving. I encourage everyone to have a go and build their own architectural models. Its great fun. Always free to answer any questions as well. Just post on thread or personal message me.
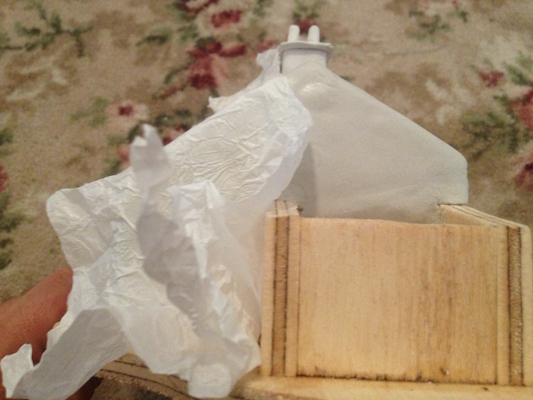
Next is the roof which will be another experimental adventure using a feather duster and some balsa wood.
Hope you like and will keep posting as the model progresses. Now have to get back to some baseboards for a little while
Phil
-
That would have been an expensive exercise. BEMO HOm stock doesn't come cheap; engines are generally over GBP £200 to £250 each, and even the tiny coaches are getting on for about £50 each new.
Years ago, I bought a BEMO RhB G4/5, based on the preserved no.108 at Landquart. I felt intense pain handing £320 over the counter. For that reason alone, I have kept it. I will probably arrange for it to be put in my coffin when I die - the model owes me that much!
Similar for me. Have a couple of Bemo Metal Models which cost AU$600 each. When I was selling my stuff which was a collection around $5000 worth new I had to keep them for two reasons... One would never recoup close to the original cost and secondly they were the first locos I saw when first I Switzerland.
BnM stuff far cheaper... scratchbuilding always is
-
Impressive craftsmanship can't wait to see the layout progress further. Thanks for sharing.
-
 1
1
-
-
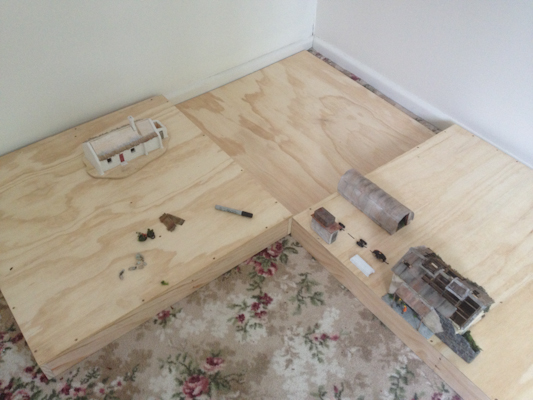
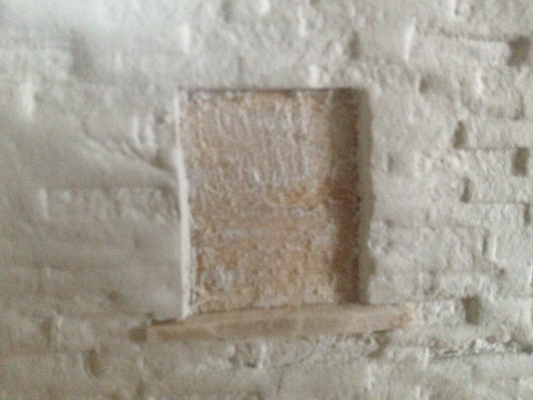
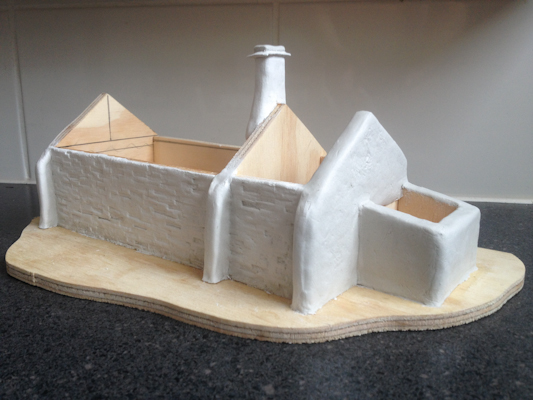
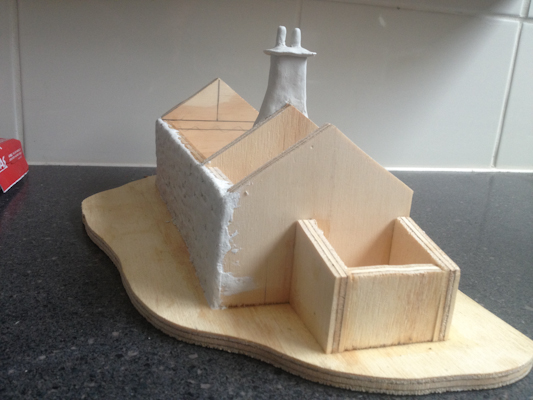
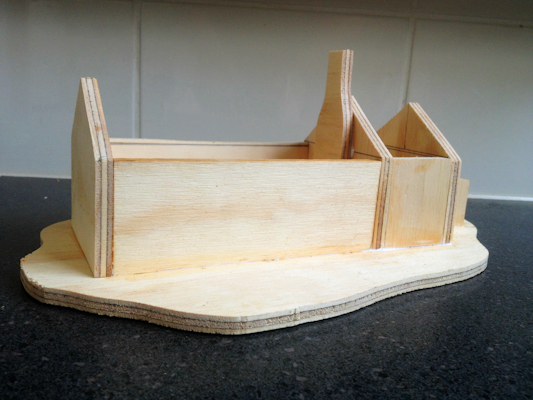
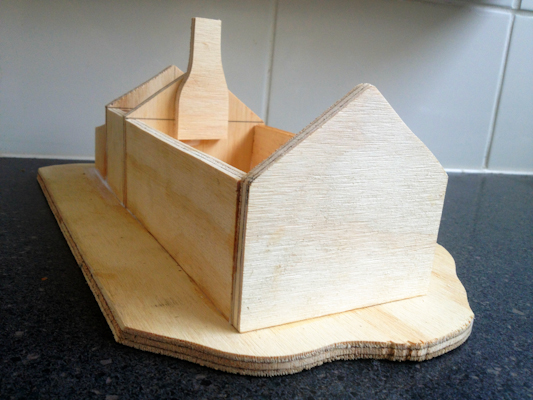
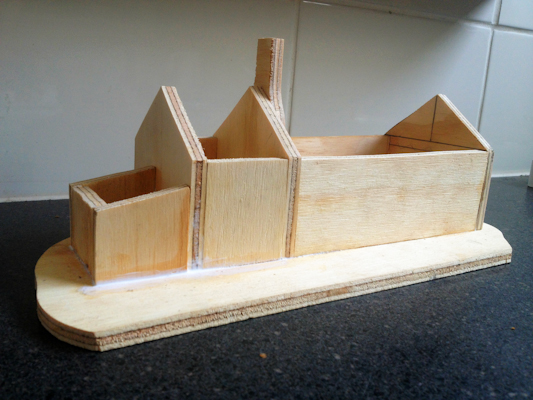
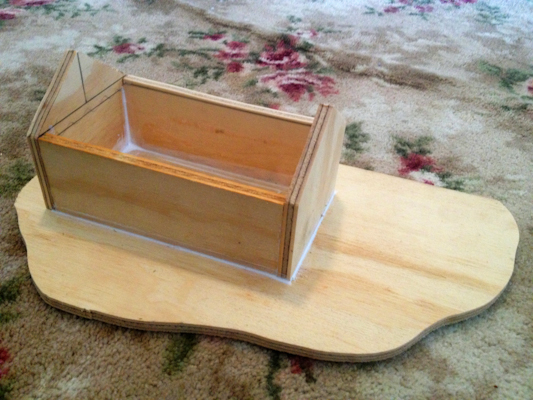
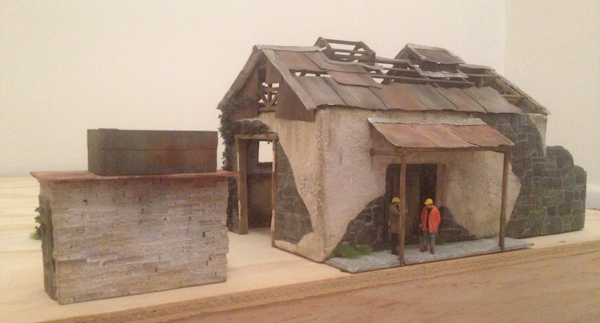
So today took a break from building baseboards and looked for a bit of a change. With a piece of spare plywood I decided to start building the farmhouse for the layout. It is based on the family home of my girlfriends Grandmother in county Clare. I visited the house last Christmas and have used a selection of photos I took on that occasion, along with some family photos from when the house was still lived in. It will be modelled with the original thatch roof and with stone whitewashed walls. The frame will be covered with DAS clay and sculpted while the thatched roof will be crafted using fibres from either old paint brushes or a broom. Will post more photos as I progress.
Cheers for the continued support
-
Just moved this from an old thread. NIR Ballast Wagon.
Built from Cambrian Models kit C67 SR 40T Hopper Wagon, SSM Transfers, Ballast is from Woodland Scenics Med Grey. The paint is Humbrol Insignia yellow 154. Not a bad kit to build but some tricky bits on the two ends.
[ATTACH=CONFIG]10094[/ATTACH]
[ATTACH=CONFIG]10095[/ATTACH]
[ATTACH=CONFIG]10091[/ATTACH]
The second shot could be mistaken for a prototype shot. Great modelling
-
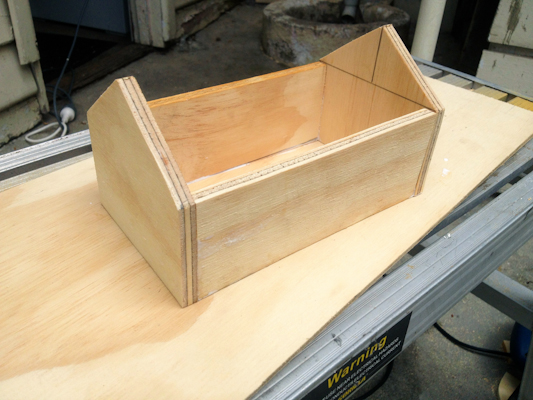
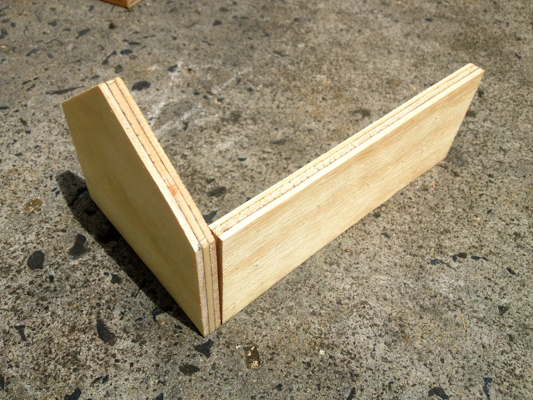
Seeing as though I have been in new house a week thought it was time to get started on new layout. Ply board and pine are the timbers selected... Only because they were on special and dead cheap (I prefer MDF). Glue and screw technique used to bind and after three hours (I procrastinated for a little while) first board done and dry. So for the first time my buildings have somewhere nice and stable to sit
-
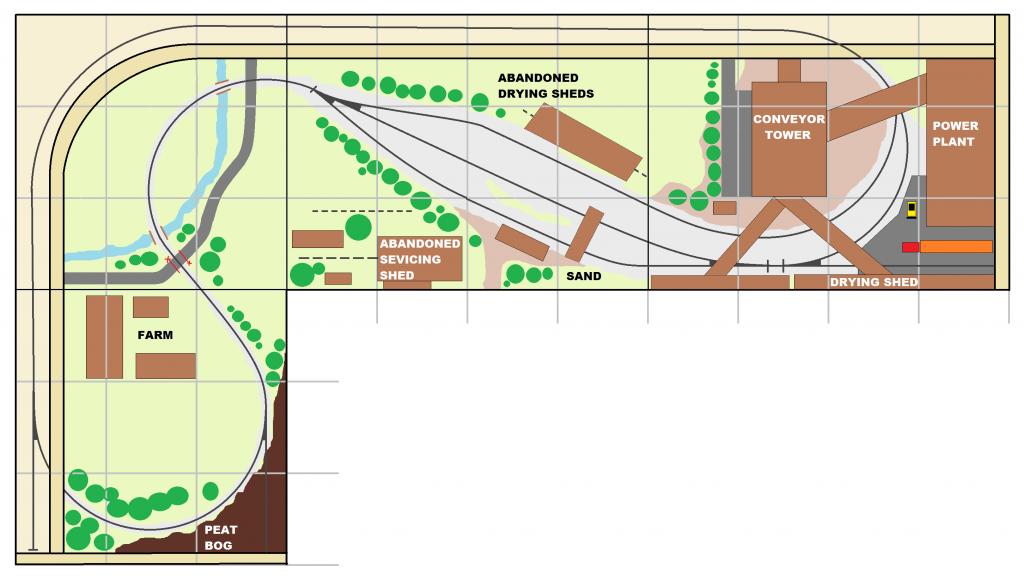
The layout has changed as the room is bigger and better than expected in the new house. The layout is going to be in four modular pieces and designed as an exhibition layout. Same profile as previous but with a little more wiggle room could explore the area more and make some alterations I was wanting too. The fiddle yard is gone and all staging will be completed in front of shop. There will be more room for a farm and the addition of a creek running along side the road. Two drying sheds have been added with the addition of extra conveyor belts. Will post photos of progress soon.
-
Little if any of my work is original Phil and I've been inspired and helped by many over the years.
For layout design and all things constructional, you can't go far wrong with Iain Rice. 'Finescale in Small Spaces' has lots of layout plans, but also goes into detail on layout composition, sight lines, view blockers and the like. We are creating a 3D picture, so getting composition right is a bit part. Any of Iain's other stuff is also worth reading too and it is all fairly simple and just good common sense.
Barry Norman's 'Landscape modelling' has been out a while now but dealt with the basics of scenic work and is still relevant today.
Even older are John Ahern's books on buildings & locos. written first in the early 1950s, I nevertheless still refer to them as they deal with basic skills such as how to do building shells, make simple chassis etc.
The books that currently get most use are Martyn Welch's The Art of Weathering and Gordon Gravetts ones on Trees and [just out] Grass. The weathering book does buildings and track as well as locos and stock and is just invaluable because he takes you step by step through the process and tells you exactly what colour paints to use. Gordon's books use the same method and add in materials, where to get them and even how long a model might take. Very readable and believable too.
While I'm reasonable confident with scenic work these days [& have the key tools such as the static Grasstech machine], waited for Gordon's new book on grass before doing that phase on Arigna town because having seen his work numerous times, wanted to get that step by step approach.
If you can afford 3 books, I'd go for these last ones mentioned. If only one, get the Gravett 'grass' book.
Magazines are also a good source of ideas and don't just stick to mainstream 'British/Irish' ones. the US Model Railroader has lots of good ideas, while Narrow Gauge & Shortline Gazette is also fab if you can find it. Model Railway Journal is a regular source of ideas, though can get a bit technical at times.
Also been very fortunate over the years to meet some wonderful people at my local club & various shows. If you have a local club, it is always worth joining. Mine has most of the mags on subscription too, plus a range of more expensive tools like lathe, grass tech etc.
Most of all, never be frightened to experiment. A small diorama or little cameo scene can bring quick results and build confidence.
Thanks a lot mate. Will start tracking down those books in the next month. Once again love your work and can't wait to see more. I have started experimenting with DAS clay and can recommend it if you in future get interested in architectural scratch building.
-
David this is truly inspirational and challenges me to gain a higher level in my own modelling. If you don't mind I may pick your brain with a few questions here and there along the way. You have an attention to detail that is breath taking. The small details really make it. Can you recommend some good books to get to guide me along with my own layout?
I can't wait to see more and thank you again for sharing.
Phil
-
Guys, also what's the best method of removing the decals, heard nail remover polish remover works
Nail polish remover would be similar to what I was talking about. Just had a look girlfriends and it is high in alcohol too. You want anything high in ETOH
-
Guys, also what's the best method of removing the decals, heard nail remover polish remover works
I use iso alcohol and a cotton tip. Can get it in most hardware stores here in oz, not sure if ya can get ya hands on it over there. It is also good for a faded paint effect. Apply dull vote to your model and the run on a small amount to the area you want to fade. Best thing if you don't like effect reapply dull or gloss cote and its gone.
-
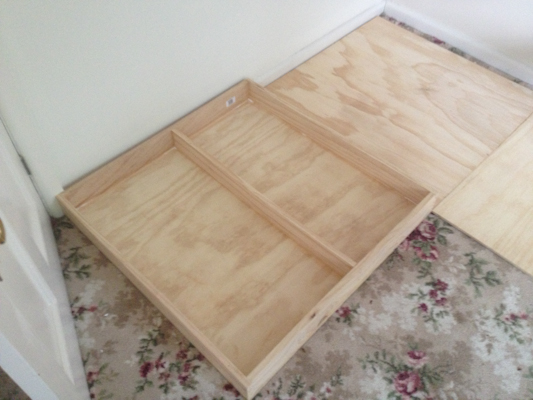
Baseboard one of four completed today. Have decided to build the layout as an exhibition layout and changed plans to maximise space in new room so will be an L shape. Photos and tracks plans to come.
-
Wow that's amazing. Every shot blows me away. Can't wait to see what will come next. You have such a high level of technique that it will be a most amazing layout when it is completed.


Modelling the Bord na Mona
in Irish Model Layouts
Posted
Merry Christmas and a happy new year to all. The buildings are done and track will go down in the new year. Happy modelling to all over this festive season.