
Dhu Varren
-
Posts
547 -
Joined
-
Last visited
-
Days Won
1
Content Type
Profiles
Forums
Resource Library
Events
Gallery
Blogs
Store
Community Map
Posts posted by Dhu Varren
-
-
Cometh the moment, Cometh the man, & Dhu Varren sir you have surpassed the word masterclass, that's modelling & respraying on another plane, your skill shows no bounds. I have just one very simple question, the paint is it enamel or Acrylic, & I'll confess I have nooooo knowledge whatsoever about Acrylics, TIA
BTB
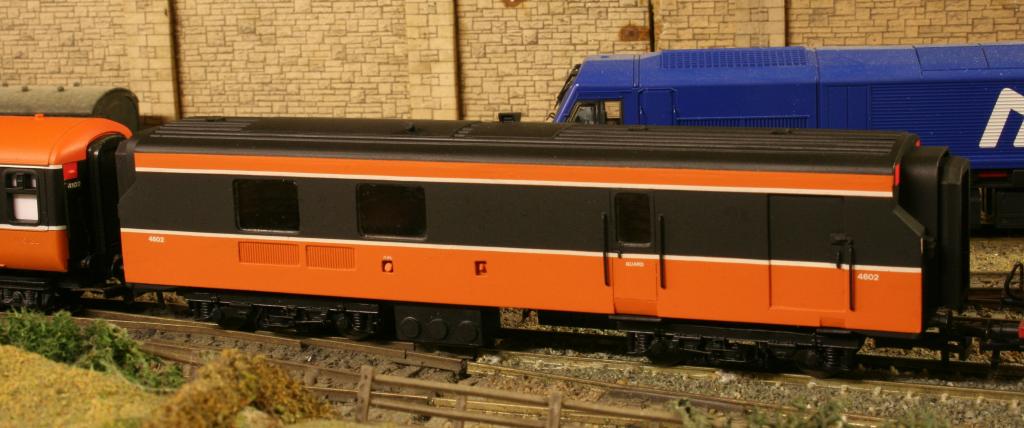
BTB, The paint used is Revell enamel, a mix of 30 Orange gloss and 85 Brown matt. This was matched to the colour on my MM Tippex liveried Cravens coaches, and gives a lovely semi gloss finish which takes masking tape well. The black is also enamel by Revell, but is satin finish straight out of the tin. The whole thing is finished off with Railmatch satin varnish which gives everything, including brush touch ups and decals, the same consistent finish.
Due to the problems, and cost, of getting paints by post these days, I prefer to get paint such as Humbrol and Revell locally, as it is quite readily available, and mix it to the required colour.
-
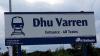
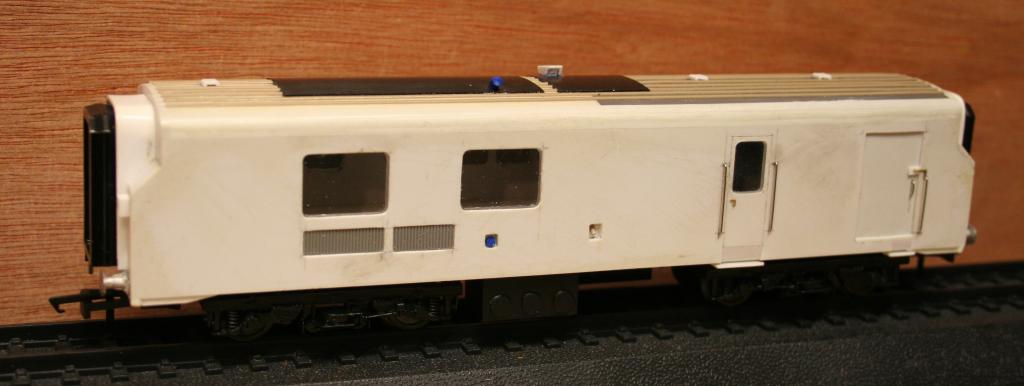
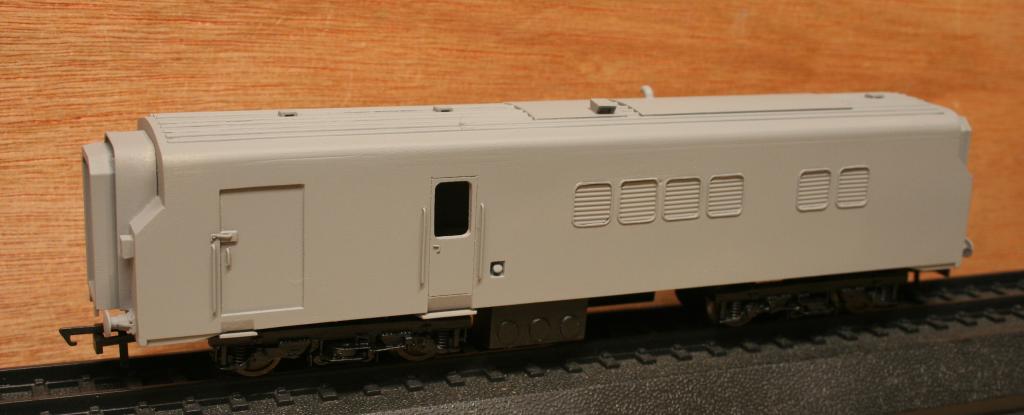
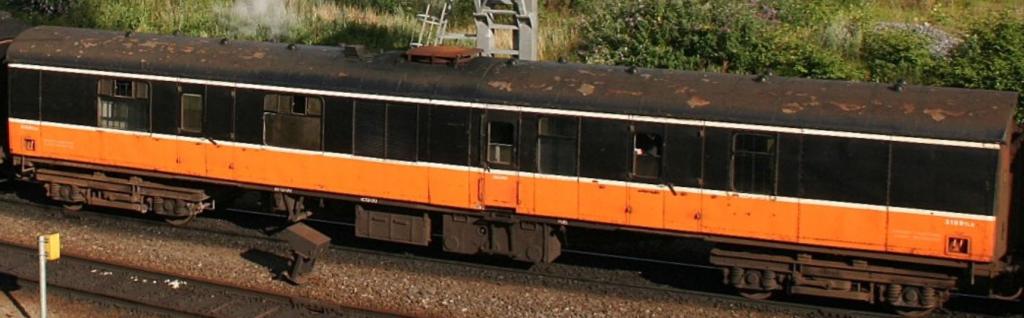
After three years of being on and off the back burner, the EGV is finally complete. The long delay has been mainly due to lack of roof detail, and being overtaken by other projects, but eventually sufficient information was obtained for the build to proceed.
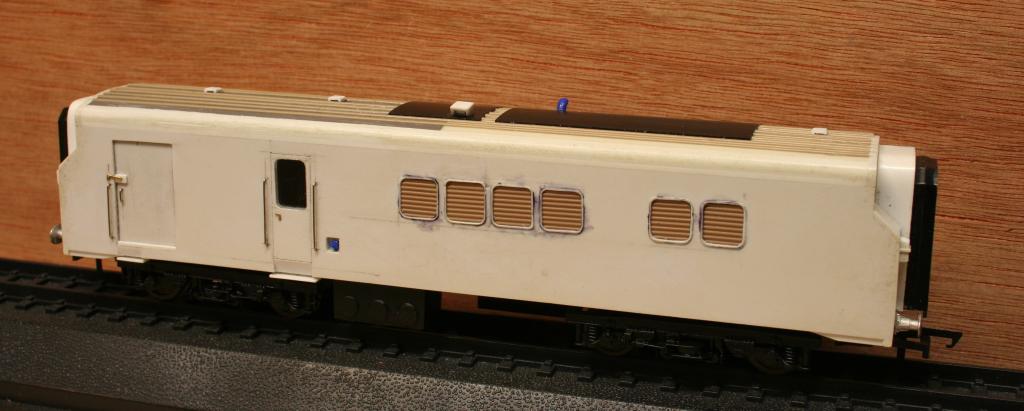
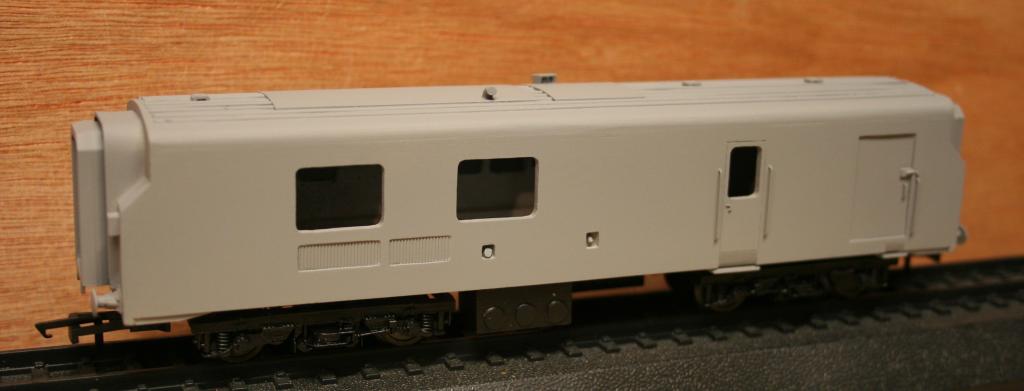
The pictures show the completed van, firstly in bare plastic, then in Halfords grey primer, and finally fully finished and painted.
The van is entirely made from plastic sheet, rod and strip. The only commercial parts used, were the two Hornby brake van roofs used to form the basic roof profile, the gangways are by Jouef, and the buffers are by MJT. As with the earlier RPSI van, the EGV is running on Jouef Mk 3 bogies, until such time as something more suitable comes along.
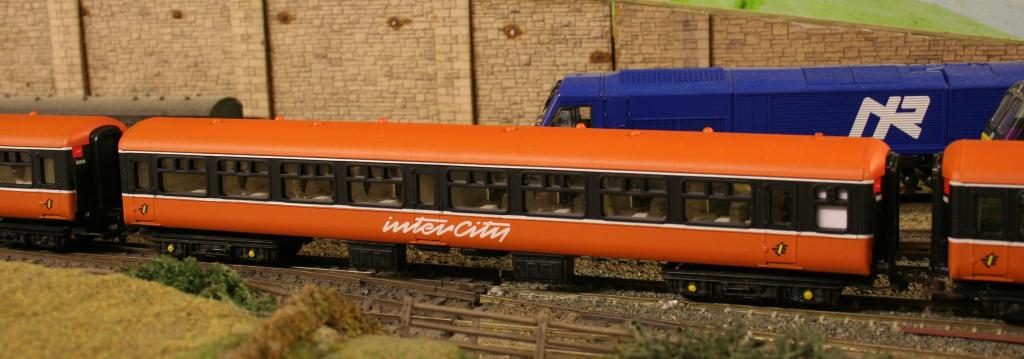
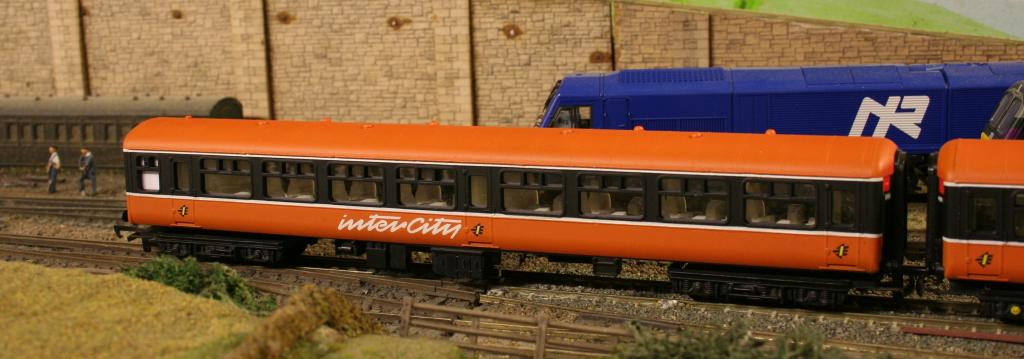
The final two pictures are of a couple of Hornby Mk 2s reliveried, to go with the EGV. As per the prototype vehicles, the InterCity logo is located in different positions on the coach sides.

-
 3
3
-
 1
1
-
-
That's what I thought myself DV! Did you get your own A Class finished?
No IT, it is still a work in progress. I scratchbuilt the chassis two years ago, http://irishrailwaymodeller.com/showthread.php/4531-Chassis-for-001-Class, more as a challenge, and fitted the body, but it is on the back burner for now.
-
Sounds pretty good to me. I played around with various sound files for my A Class, and ended up using an EMD 567 sound file, as it sounded better than the correct EMD 645 one.
-
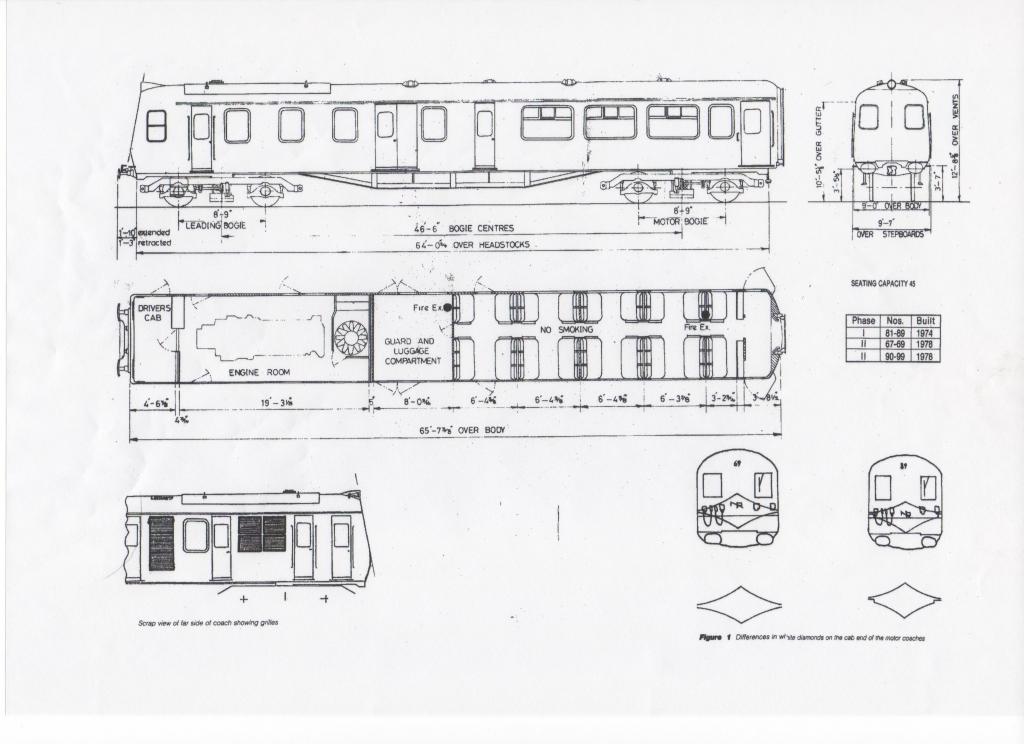
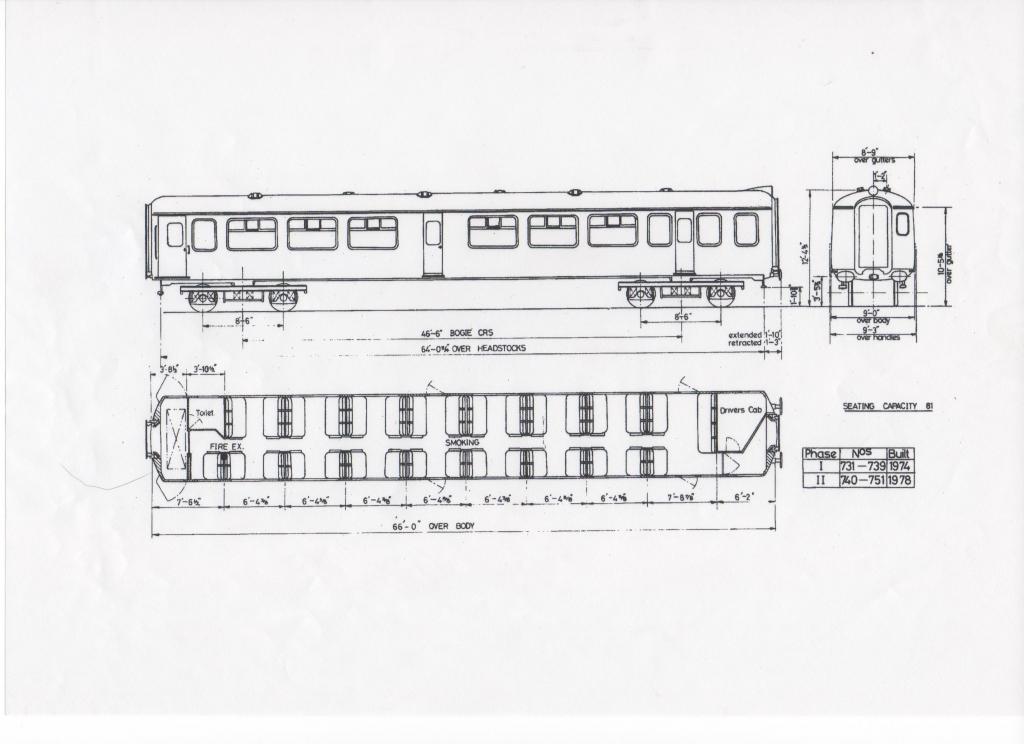
All the original 80 Class vehicles were built using Mk2c coach design. Some later intermediate and driving trailer coaches were converted from Mk2b coaches. Mk2a coaches were never used for 80 Class vehicles.
It depends how accurate you want to be when building an 80 Class, but if you want to be accurate, the Lima Mk2b 2nd class coach is the only vehicle suitable as a donor vehicle for conversion for any of the three 80 Class vehicles. The passenger window spacing on the brake vehicle is incorrect for converting to a power car, and the 1st class coach window spacing is incorrect for any of the 80 Class vehicles. I am not sure if Bachmann produce any Mk2b or c vehicles.
To produce the 80 Class power car requires major surgery, regardless of what donor vehicle is used.
-
A question
Whats the right diameter wheel for the B5 Bogie as used on the converted BSGV
regards
Dave
3ft diameter wheels are the order of the day for both B4 and B5 bogies.
-
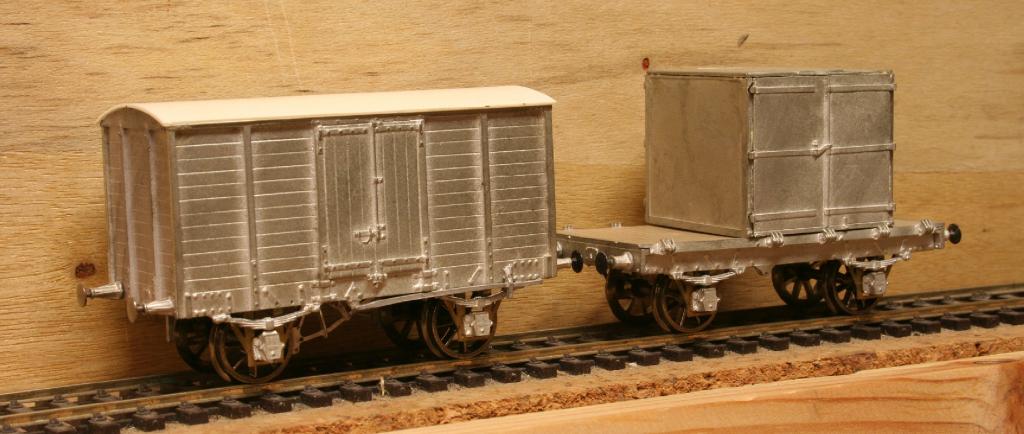
Below is a picture of two Jeremy Suter wagons under construction. I picked them up at Modelrail Glasgow some years ago.
The closed van is all but finished, and the bread container wagon still has underframe detail to be fitted. The container wagon can be built either as a GNR version as shown here, or an NCC version with outside W irons. Two bread containers came with each container wagon.
Both wagons shown here were supplied with one floating axle to give a three point suspension.
-
1
-
-
Yes, it is Tom Ferris's Online Video 'Irish Railway Miscellany' original version, without the titles and credits.
-
Have many fond memories of the original Ballymena station. My mother's family lived in Ballymena, and we spent Christmas there every year when growing up. It is such a shame they had to knock down such a marvellous building and replace it with such a monstrosity. At least the beautiful subway with the long sloping ramps is still there.
-
Changing CV 29 will not sort the problem with the lights. It will change the direction of travel right enough, but it will also change the lights over. The simplest way to sort the lights problem is to change over the wires to the motor, which will reverse the direction of travel, but leave the lights as they were.
-
It depends on what you class as a Jinty. The name Jinty normally refers to the LMS Fowler 3F, which has a wheelbase of 16ft 6ins. The loco in this post, referred to as a Jinty, is in fact an LNER J72, which has a wheelbase of 13ft 8in.
The Bachmann 3F Jinty wheelbase is 66mm, which is an exact scale 16ft 6ins. I have no idea whether the Mainline J72 wheelbase is correct to scale or not, as I do not have one to measure.
-
I would suggest that it is highly unlikely that the Cravens coaches shown in the trains of Mk 2 AC coaches earlier would have been in service. Although both types of coaches are vacuum braked and could run together, from a passenger point of view, the gangways on the Cravens are totally incompatible with the Mk 2s. The Cravens are steam heated, so there would have been no heat available, and the electrical systems are probably not compatible either.
Three Dutch vans were rebuilt to run with the ex-BR Mk2A rakes of the early 1990s. The original builds could run with any vacuum braked stock such as the Mk2D Aircon stockThe original Dutch vans could run 'out of service' in a train of Mk 2 AC stock but, like the Cravens, their gangways were incompatible, and their electrical systems were not suitable for running air conditioning.
The three rebuilt Dutch vans were only suitable for use with the Ex BR Mk 2a & 2b coaches obtained secondhand in 1990/91, as these coaches, unlike any other IR coaches apart from Mk 3s, were air braked, and their electrical systems totally different to any other IR coaches.
-
My first thought, and the same thought occurred when I read the original post under Celbridge, is, what happens if a branch train is already in the isolated section when a mainline train hits S1. As I see it, the branch train stops, straddling the crossing, and gets T-boned by the mainline train.
A safer option would be to have a 'first come, first through' system, where the first train to reach the crossing, regardless of which line it is on, prevents the other train from reaching the crossing until it is clear.
Alternatively, a modification to the isolated section so that if a branch train is already in the isolated section when S1 is activated, the track power stays on until the branch train is clear of the crossing.
Moving the isolated section to be totally on the approach side of the crossing, leaving the crossing live for the branch train to keep going in the event of an approaching main line train, is another option.
-
I know absolutely nothing about the GSWR, but my copy of this book has the vehicle in question as No 140, not 160.
-
Tony, operations always were going to be a bit restrictive on a layout such as this, but can be made a little bit more interesting, as Noel said earlier, by operating sound fitted locomotives, which adds another dimension to operations. A fiddle yard beyond the bridge would also add some interest in that short trains could 'run out to the Nestle factory and back' which would add purpose, and give a little more length for shunting operations. Some sort of card system for deciding what wagon should be shunted into which siding would add a challenge to what otherwise could just be aimless shunting. Many years ago, before PCs, I built a large Motive Power Depot, and movements were decided by a program on a Commodore 64 home computer, so you couldn't just move the loco you felt like moving, the computer told you which one you had to move, and inevitably it was tucked away at the back of the shed, and required two or three other locos to be moved first.
It would be a shame not to finish what you have put so much effort into so far, and it is all good experience for future projects.
-
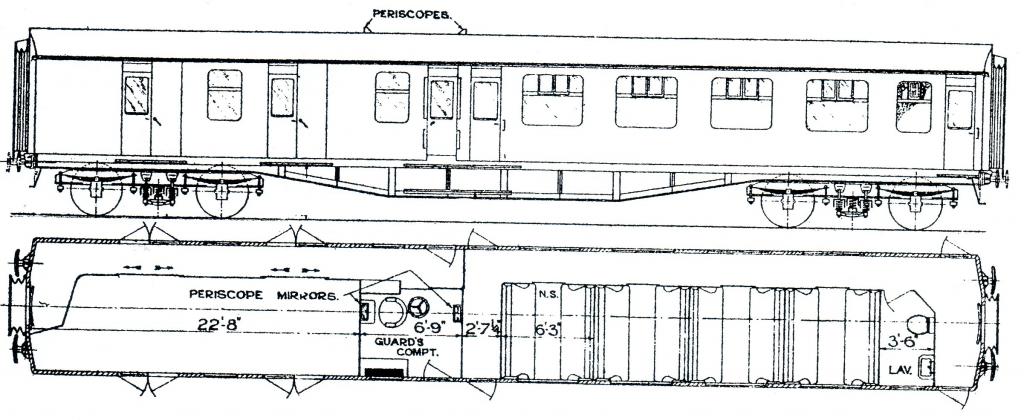
Having done some research into BGSVs for my own conversion, the BSK seems to be the easiest and most consistent conversion.
According to the BR drawing, the BSK sides are a mirror image of each other, except for the toilet window at the passenger compartment end. There is only a blank panel on the opposite side of the coach.
The BGSV conversion is the same on both sides. Starting at the toilet end, the vestibule door and toilet window are blanked. The second compartment window is converted into a double door. The fourth compartment window is converted into a grille. The centre vestibule door, next to the fourth compartment, is blanked, and, the last set of double doors is blanked.
The picture shows quite clearly the doors that have been blanked.
Mk 1 BSKs are readily available on the secondhand market from Hornby and Lima. New BSKs are available from Hornby and Bachmann.
-
I love that NIR set. Would really like to have an early/mid 90s mixed NIR Mk2 set with all the accurate markings and numbers, big project I know. NIR's Mk2s always really interested me.
Without wanting to hijack Noel's thread, here is a link to a thread I did a couple of years ago on NIR Mk 2s. http://irishrailwaymodeller.com/showthread.php/4163-NIR-Mk-2-Coaches
-
Here is a tip that might be worth trying for masking up a 1mm line. I used the method a number of years ago with great success.
Stick a length of masking tape onto a piece of glass, or a mirror. With a sharp blade, make two cuts 1mm apart down the middle of the tape. Remove the 1mm strip.
Stick a piece of clear tape (I use low tack) over the top of the remaining strips of masking tape, and pull off all three pieces of tape from the glass ensuring they stay together.
Apply the tape to the coach side with the 1mm gap where you want it. Once in place carefully remove the clear tape, and smooth the masking tape to ensure a sound edge for painting.
-
What's a "Micro Sol" Dhu Varren?? I tried to apply some lining from Railtec to a Mark 2 Super train Gen Van but I had trouble trying to keep the lines straight & also getting them to stay on! I'm interested in hearing from you guys the best way of doing this procedure...
Micro Sol and Micro Set are decal fixing fluids which soften decals to help them conform to raised features like door hinges and handles, and also improve adhesion. They are similar to Humbrol Decalfix, but I find them better.
I agree it can be difficult to get lines straight, but keeping them moist and careful jabbing with a moist firm paint brush can knock them into position.
-
Thanks DV
Hmm
I'm probably missing something but I thought 'inkjet' printers cannot print the colour white. NoelYou are quite right Noel, inkjet printers cannot print white. It is the transfer paper that is white. Transfer papers can be either clear or white.
The coach in the picture has a one piece decal with the blue printed on to white decal paper. All the white showing is bare decal paper. In this case, the paper used was white transfer sheet for laser printers.
-
A very tricky one is now facing me, to add both tippex white lines to a mk2d super train EGV to convert it to IE/IR EGV livery. The white lining is only 3" in real life which would be 1mm in 1/76 scale. It looks like I will have to remove the roof and all the black grip rails and handles from the coach sides. It will be tricky to use two masking tapes and leave exactly 1mm between them.
Noel, my answer to Tippex stripes is to use an A4 sheet of inkjet white transfer paper. Using a PC, mark out 1mm strips on an A4 page and print to the transfer sheet. Slice the transfer sheet along the printed lines with a sharp blade, or guillotine. Apply to the coach sides using Micro Sol, or such like, to softer the transfer to conform to any raised features. Using an Inkjet printer, any of the marked lines left will wash off the transfer stripes, a laser printed sheet will not. A coat of varnish on the finished coach will protect the stripes and give a uniform finish.
-
Well DV I thought that's what he did !!! But then what do I know, I'm sure he'll be on here very soon to tell, ths is great fun finding out how to spray, & I don't have a spray gun setup.... but the cans used correctly can ( no pun ) do the job...
No BTB, what Noel did was:-
1. Undercoat the coach with grey primer.
2. Spray white at the top of the coach.
3. Mask the white with narrow masking tape.
4. Mask the bottom grey below the windows with masking tape.
5. Spray window area and roof with black.
6. Remove all masking tape to leave white top, black window surrounds, black roof, and grey bottom.
7. Mask the bottom of the black below the windows.
8. Spray the tan.
9. Remove the masking to reveal a very neat finish to the coach.
My suggestion was to do steps 1 to 3 & miss out step 4.
5. Spray the tan to give a good even coat on the bottom of the side.
6. Mask the top of the tan below the windows, and spray the black on the side & roof.
7. Remove all the masking to reveal a very neat finish to the coach.
The same excellent result with one less masking step.
-
To save one lot of masking, after masking off the white why not spray the tan colour first before the black, then all you have to do is mask the tan and spray the black.
-
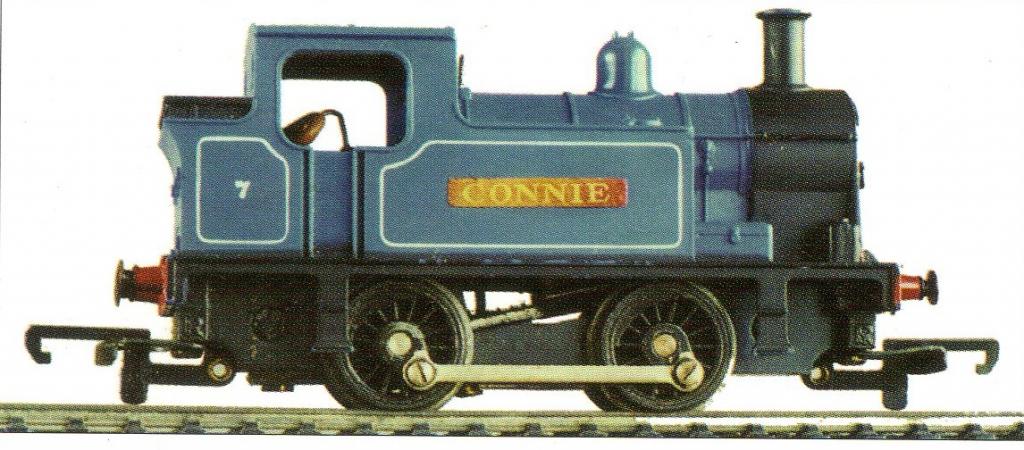
super-high-speed 0.4.0 "Polly". Anyone remember that?
Aah, Polly and her high speed sisters Nellie and Connie. Polly was red, Nellie and Connie were shades of blue. Could outrun anything else on rails, providing they stayed on the rails themselves.

 I'm probably missing something but I thought 'inkjet' printers cannot print the colour white. Noel
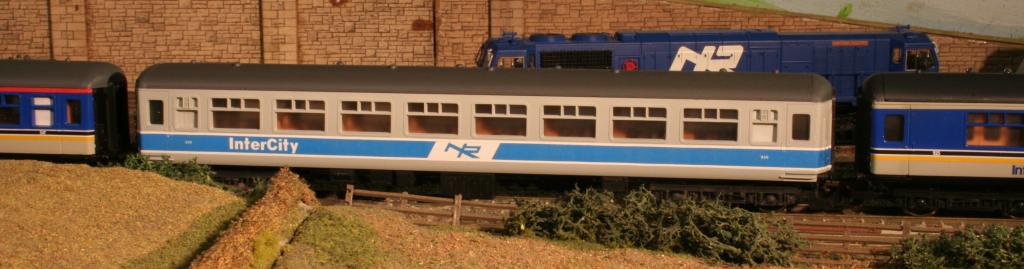
Nir sets x 2
in For Sale or Wanted
Posted