

Noel
-
Posts
7,478 -
Joined
-
Last visited
-
Days Won
149
Content Type
Profiles
Forums
Events
Gallery
Blogs
Store
Community Map
Posts posted by Noel
-
-
. . . I keep trying to persuade the other IRM all-stars that it should be the first IRM loco project. Don't think they share the same enthusiasm though!
Thank God
 the entire modelling community has long been waiting for a top quality RTR model of the popular A class The gaping hole on the superb MM product line.
The "Dalek" is a very nice looking model though.
-
Model engineering master class
-
Nice photos as ever.
My hint of OCD for colour matching, patterns and symmetry balks at the sight of mixed and incompatible liveries (i.e. 207 hauling intercity)
-
Thanks Noel, all this advice helps. What track are you using by the way?
I'm thinking seriously now about the move to a new garden shed which will mean that Omagh North could be relocated and take on a whole new design.
Hi Tony. Your welcome. I've just added a few extra pics in the post above showing before and after. I used Peco code 100 track. However, I bought our track 23 years ago when much RTR stock still had pizza cutter wheel flanges so would not run over code 75 track, but if I was starting off again today I would have gone with code 75 because modern RTR stock for at least the past 15-20 years has wheel flanges that will run over code 75 track. The lower level inner branch line loop which has not yet been laid will be code 75. Noel
-
Hi Tony
Two pics below of woodlands before and after the airbrush was used to weather and blend the ballast, rail and sleepers. As you can see, before looks hideous and toy like, but the after looks dulled and less contrast. Air brushed using railmatch sleeper grime thinned 50% with acrylic thinners. It might also save you having to hand paint the rail sides as a separate step.
Before
After
Hope this helps.
This is a pic (below) of the ballast still wet just after I had applied the water PVA glue mix to it using an eye dropper. I first gently sprayed tap water on the dry ballast after it had been positioned, to wet it so PVA mix would flow through it, and then used an eye dropper to apply PVA/water mix (50/50%) (few drops of fairy liquid in mix) and allowed it to dry for 24hr before painting. You can see from pic below its fairly wet but when PVA/water has dried it is clear with no visible PVA.
-
Noel and Mike, glad you said no to use the emery paper, was a very fine grade. I started doing a little last night but will finish with a solvent and cloth today. The Woodland Scenics grey ballast looks really awful, I've bought one of those shakers full and to be honest I feel its so grey! Here's a small sample, laid but not glued.whats your opinion?
[ATTACH=CONFIG]27463[/ATTACH]
Hi Tony
It should look a lot better when its weathered in.
In the sample below I used Woodland scenics 'buff' coloured 'medium' ballast which looked hideous straight out of the container, but after it had been weathered with a single spray of 'sleeper' grime, which btw painted the rails sides, sleepers and ballast in one go, it looked a lot better (see below). The 'buff' like the 'grey' is very bright straight out of the container and contrasts too much with the plastic sleepers, but the overspray of sleeper grime on top of the lot blends it all together. I will try and dig out a photo where I used 'grey' medium ballast.
Woodland scenics medium buff ballast after the ballast, sleepers and rails over sprayed once with RailMatch sleeper grime. The overspray does a lot to blend the whole lot together removing stark contrasts.
The track in the pic above in on a 3mm track bed which would be suitable out in the country side to create a shoulder, but in the environs of railway stations not needed as it would all have been fairly flat (i.e. like photos of Omagh North). Perhaps make the ballast area just a little wider than the track in your photo.
In my case I did not pre-paint the track work, nor rails, I just over sprayed the lot in one go once the ballast/pva/water mix had dried. Before the overspray the buff looked ridiculously bright compared to the unpainted sleepers.
TIP - How I removed paint from rail surface: After over spraying the track, ballast and rails with sleeper grime (50% thinned), while it was still wet, I used my index finger tightly wrapped with a small piece of kitchen paper to run along the top of the rail and removed most of the paint just from the top of the rail, being careful not to come into contact with the top of the rail sides, sleepers nor ballast. Than about an hour or two later before the acrylic paint had cured, but was touch dry I used a cotton bud just dampened with methylated spirits to run along the top of the rail to remove any residual paint. It comes off much easier at this early stage before it has had time to fully cure.
-
Noel
Send me a PM with your e-mail address and I will send you a set of instructions.
For some reason the tumblehome sketch is not uploading correctly
Thanks John for posting the above.
PM sent.
Noel
-
Tony, try to avoid using abrasives to clean the track. A solvent would be better as it does not mark the railheads. Cut away those little finger tips, just be careful!
+1
Don't scratch the rails with rough materials because the abrasions will collect track dirt ever after
-
Superbly informative post JB. Many thanks. Noel
-
Well done Kieran completing that fleet of new rolling stock. Love the interesting and diverse colour schemes.
Respect. -
Looking good - great weathering job.It really does make a difference.
Cheers JB + Kieran. Well learning.
The main thing is it has opened up another aspect of the hobby for me which I am enjoying. Looking forward to weathering the IRM ballasts later this month when my order is delivered. I added some background rail noises to the video which was interesting. I'm thinking of making up an app to play selected background sound mixes in a loop. -
Love the flying snail.
She looks really well. -
Hi Guys
In light of my ongoing learning curve painting old RTR coaches, I am wondering if I could ever become proficient enough to use etched brass sides to convert or improve RTR stock (i.e. laminates, bredins, etc). These are probably questions for specialists like John M, and/or others who have successfully used brass etched coach sides with RTR or plastic coach kits. The questions are:
- How does one successfully use etched brass coach side overlays but avoid the sometimes seen air gapping between the roof along the sides in places, and also avoid the sides sitting flush or even proud of the roof, which instead should often overhang the coach sides marginally (i.e. often with a drip rail)?
.
- How does one ensure the brass sides do not finish short of the roof ends or coach ends (i.e. finish either flush, or have roof ends very marginally overhand the coach ends)?
.
- How does one form the tumblehome without specialist tools, or do some suppliers of etched brass sides supply the sides with tumblehome pre-formed?
.
- Is it better to have the sides fixed to the roof and coach ends with removable chassis and under frame, or visa versa (fixed to the chassis and ends with removable roof)? Does the latter risk air gapping?
Many thanks in anticipation.
Noel
- How does one successfully use etched brass coach side overlays but avoid the sometimes seen air gapping between the roof along the sides in places, and also avoid the sides sitting flush or even proud of the roof, which instead should often overhang the coach sides marginally (i.e. often with a drip rail)?
-
[ATTACH=CONFIG]27460[/ATTACH]Bit of a jump in progress!
So really all this lovely little model needs is various handrails, vacuum pipes, minor details and your couplings of choice and off you go...
There are a few interesting bits to add though. There's four handrails for a shunter to hang onto at the front - these have a curious round top and are towards the edge of the loco. I did bring these inboard so that they would be a bit more robust.... I formed the round top from a small blob of crystal clear and a lace pin. Worked well!
Painting has, so far, gone ok, so nearly finished and final detailing - including etched nickel silver door handles from a deltic!
Hi Richard. She looks really well with very nice crisp paint finish. As a matter of interest what paint did you use for the black? Noel
-
Finished lightly weathering 25 wagons. On next batch will try some alternate methods like washes and powders. This is addictive.
Wagons after visit to varnishing shop - Humbrol Acrylic matt spray can varnish
Wagons back on the layout
CIE Decals from Weshty
Video of rake of recently weathered wagons. Some sound editing to add to the DCC sound coming from the loco.
I just love the diversity of loose coupled goods trains of that era.
-
Noel, I am assuming that the picture (TOP) is the real thing and the one below the model. The grass looks like it really is growing. What is the ballast type you're using - looks great!
Hi Tony. Apologies I missed this question last week. Top picture used:
Ballast = Javis Granite Chippings (extra fine) REF JXG7 7lb
Static Grass = Heki Nr 3360 Sommerwiese 100g (ie Summer Meadow)
Bottom picture was Woodland scenics medium buff ballast. Both top and bottom were lightly airbrushed once with Railmatch acrylic sleeper grime diluted 50/50% with acrylic thinners. The airbrush made one pass for each rail side, one for the sleepers between the rails, and one for each ballast shoulder.
As a young boy I walked home from school along the railway, it had just closed and I remember clearly picking my way along the paths created by railway employees and permanent way men. The granite chips were grey though I do recall a brown rusty deposit on them. I think Noel has been able to replicate this well on his samples by spraying along the sleeper ends over the ballast.As for track painting - I found that it took two coats to really kill the shine of the Peco rails. I also think that rusted rail and pretty heavy in colour and therefore may even take a third coat of slightly deluted Rail Match sleeper grime.
Did you use a paint brush or airbrush for the rail sides?
-
Really outstanding photos as always - but:
I read elsewhere today someone complaining - rightly - that some photo-sharing site had taken down all their pictures, and a few years ago this happened on a grand scale with some other website, where people had put enormous effort in putting up quite huge collections of their photos.
Maybe I'm many steps behind the pack here, but I presume that all who post on things like flickr or Dropbox or equivalents, have retained their valuable work on memory sticks and other forms of media? A few years ago, VHS video, despite its shakiness and graininess, was hailed as the way to go for the future. Now it, along with the mini-cassettes that followed, are ancient history and you can barely even get a VHS player now. With so many forms of media nowadays, and not one lasting more than a few years in popularity, it appears that it is good sense to retain one's photos in several forms together.....
Hybrid - Multiple independant physical and cloud backups on multiple media stored on multiple sites (ie: fire/theft/radiation/magnetic/emp protection). The other big problem on the horizon is cloud or hosted photo libraries and videos that become effectively lost when someone dies, unlike the old days when families found family photo treasures in picture frames, physical photo albums and boxes stored in an attic. Nowadays few family members know the deceased's passwords nor even where their cloud service might have been. I advise my pals to store their important passwords in a sealed envelope with their will, especially their email passwords as they are the key to retrieving most lost accounts. Given human mortality is hovering approximately there or there abouts consistently about 100%, its advisable to ensure somebody can retrieve family photos and video from cloud storage and electronic media, when one eventually passes through to the next life.
-
Hi all,
Here is what i have for sale in wagons/coaches
Looking for 35E per craven/mk2
mk2 restaurant 5411 (galway livery)
mk2 generator van 5602 (black roof)
mk2 restaurant 5401 (black roof)
Craven 1149 CIE
Craven 1504 CIE
Craven 1515 CIE
Craven RPSI 1539 (bottom of is green+ with decals) themodelshop repaint
Craven 1523 IE
RPSI Mk2 x3 60E for the 3
Silverfox br Van 3161 CIE 60E
Dapol CPW wagons (modelshop belfast repaint into irish colours) + containers in each one x4 (picture aviable on request) 65E Each
Still a few locos left at per this thread
http://irishrailwaymodeller.com/showthread.php/6166-Selling-Engine-Collection
Lukas
PM sent
-
One of the problems with the space is I have half an engine shed and half a platform, very poor design I think. This is where we learn from our mistakes and move on I guess.
[ATTACH=CONFIG]27452[/ATTACH]
Hi Tony. What you have done above so far is really excellent progress and appears built to a very high standard. It looks really well and your track work is immaculate with lovely flowing curves and ultra neat joints (not a single kink or angular joint in sight).
Perhaps you are being a little hard on yourself. As your original objective was a goods shunting layout, this will look fabulous when filled out with lineside detail, scenery, backdrop, etc, and yet allow you to shunt and juggle clusters of wagons from sidings to shed which seems long enough to have two wagons loading internally and a few more outside on goods platform loading area, not to mention direct loading from trucks on sidings and horse/carts.
As suggested perhaps a pair of points near the platform mouth adding another run around loop for goods wagons. Perhaps parking a passenger coach on one of the platforms with a few figures will add still leave enough room for the loop to operate with goods wagons, while adding the perception of a busy station. If using steam locos then obviously non-tender locos may offer more flexibility (i.e. tank engines). Don't loose heart to early. Wishing you all the best whatever direction your layout takes. Noel
-
Hi Tony, would it help if you added a pair of cross over points between the two platforms ends so that you would have a longer passing loop? It might act as a loco release for running around wagons. Noel
-
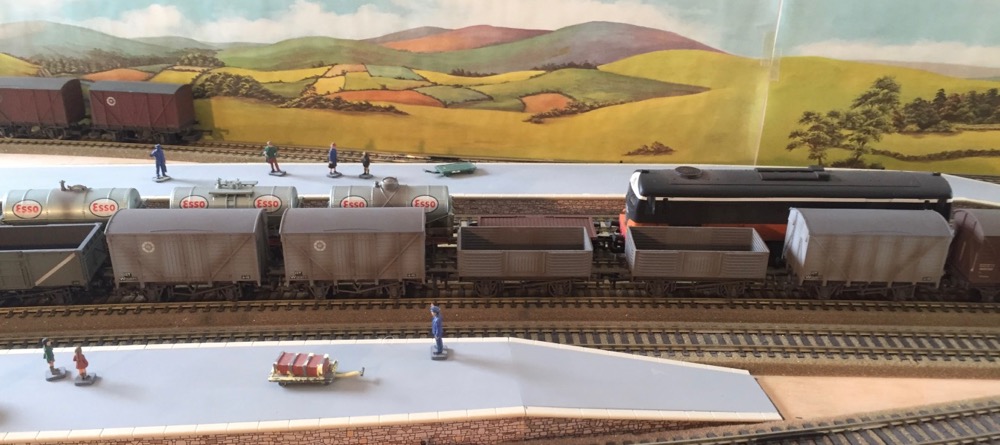
A slightly more entertaining video clip of pseudo CIE 1968 goods train. I'm finally learning how to use some of iMovie's features. Best viewed in full screen with the sound turned up.
Enjoy-
 1
1
-
-
Good grief Popeye that is absolutely stunning. And the motor setup looks like a precision performer.
-
Hi Tony. What loco are you using and does it have a sound chip. A sound chip on a very smooth low speed loco can make shunting operations seem very interesting and realistic, with pauses as wagons are coupled and uncoupled, horns and whistles, slowly moving a wagon or two from one end of a yard to another, buffer clashes, flange squeal, etc. Once you have track ballast, ground scenery, and a back scene, the loco will have the illusion of travel once it has a mini world to travel within. All the best. Noel
-
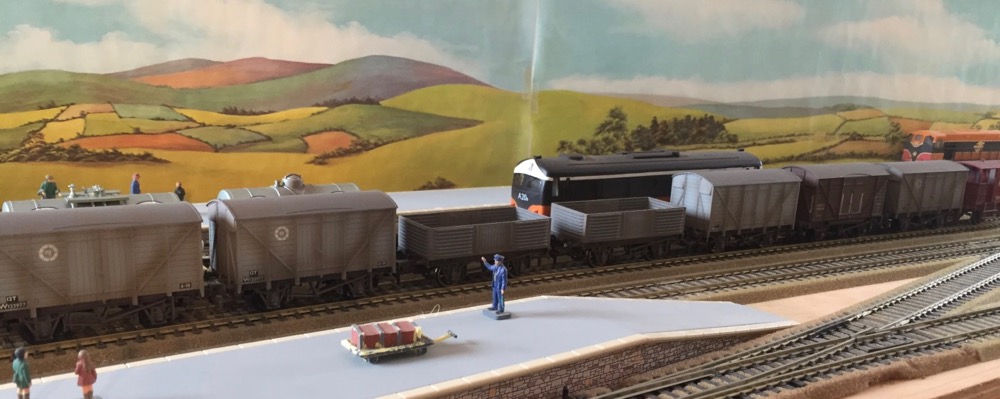
Short video clip (phone) of late 60s, early 70s CIE goods train with 23 wagons many recently weathered lightly. Wagons are a mix of converted Bachmann GWR/LMS vans, Lima vans, BR mineral wagons (poetic license), cattle wagon, MIR cements, IFM beat + brake van, and Valve design 3D beat wagons on Dapol chassis.
Initially I didn't like the 3D beats at all, but now they are painted and weathered @ €33ea finished on Dapol RTR chassis they don't look too bad considering the compromises and errors, and personally pass my 'duck test'. I have weathered about 10 other wagons, so now time to move on to some loco kits and more passenger resprays.


 Respect.
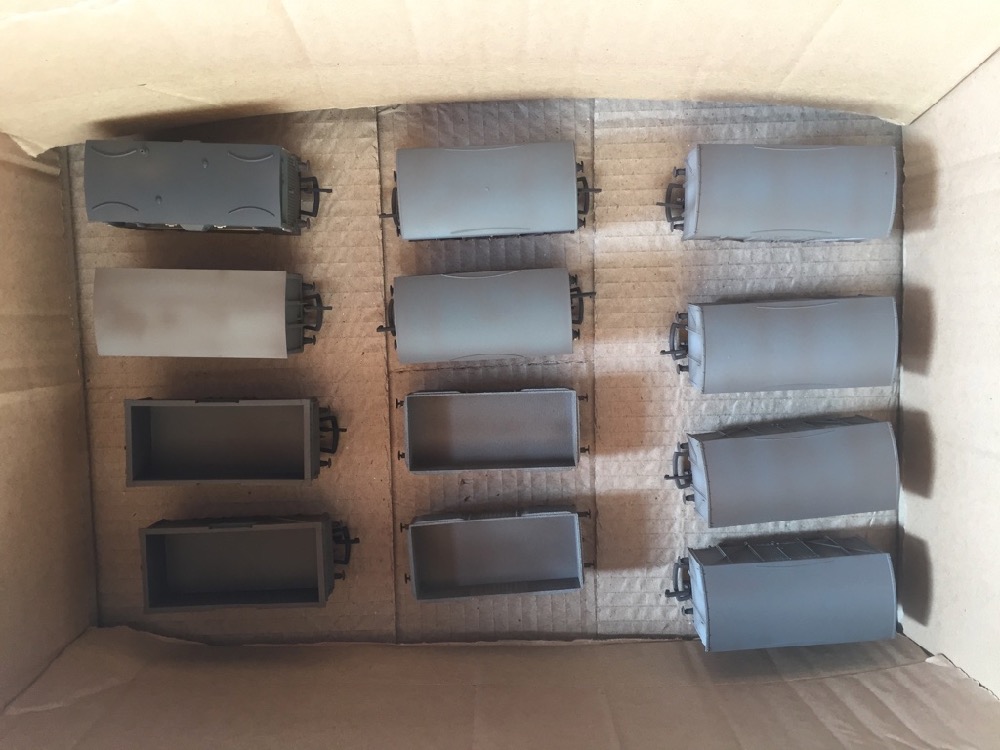
Kirley junction
in Irish Model Layouts
Posted
Agree, it is excellent. Reeks of real atmosphere. Superb job on the rolling stock.