

Sean
-
Posts
812 -
Joined
-
Last visited
-
Days Won
2
Content Type
Profiles
Forums
Resource Library
Events
Gallery
Blogs
Store
Community Map
Posts posted by Sean
-
-
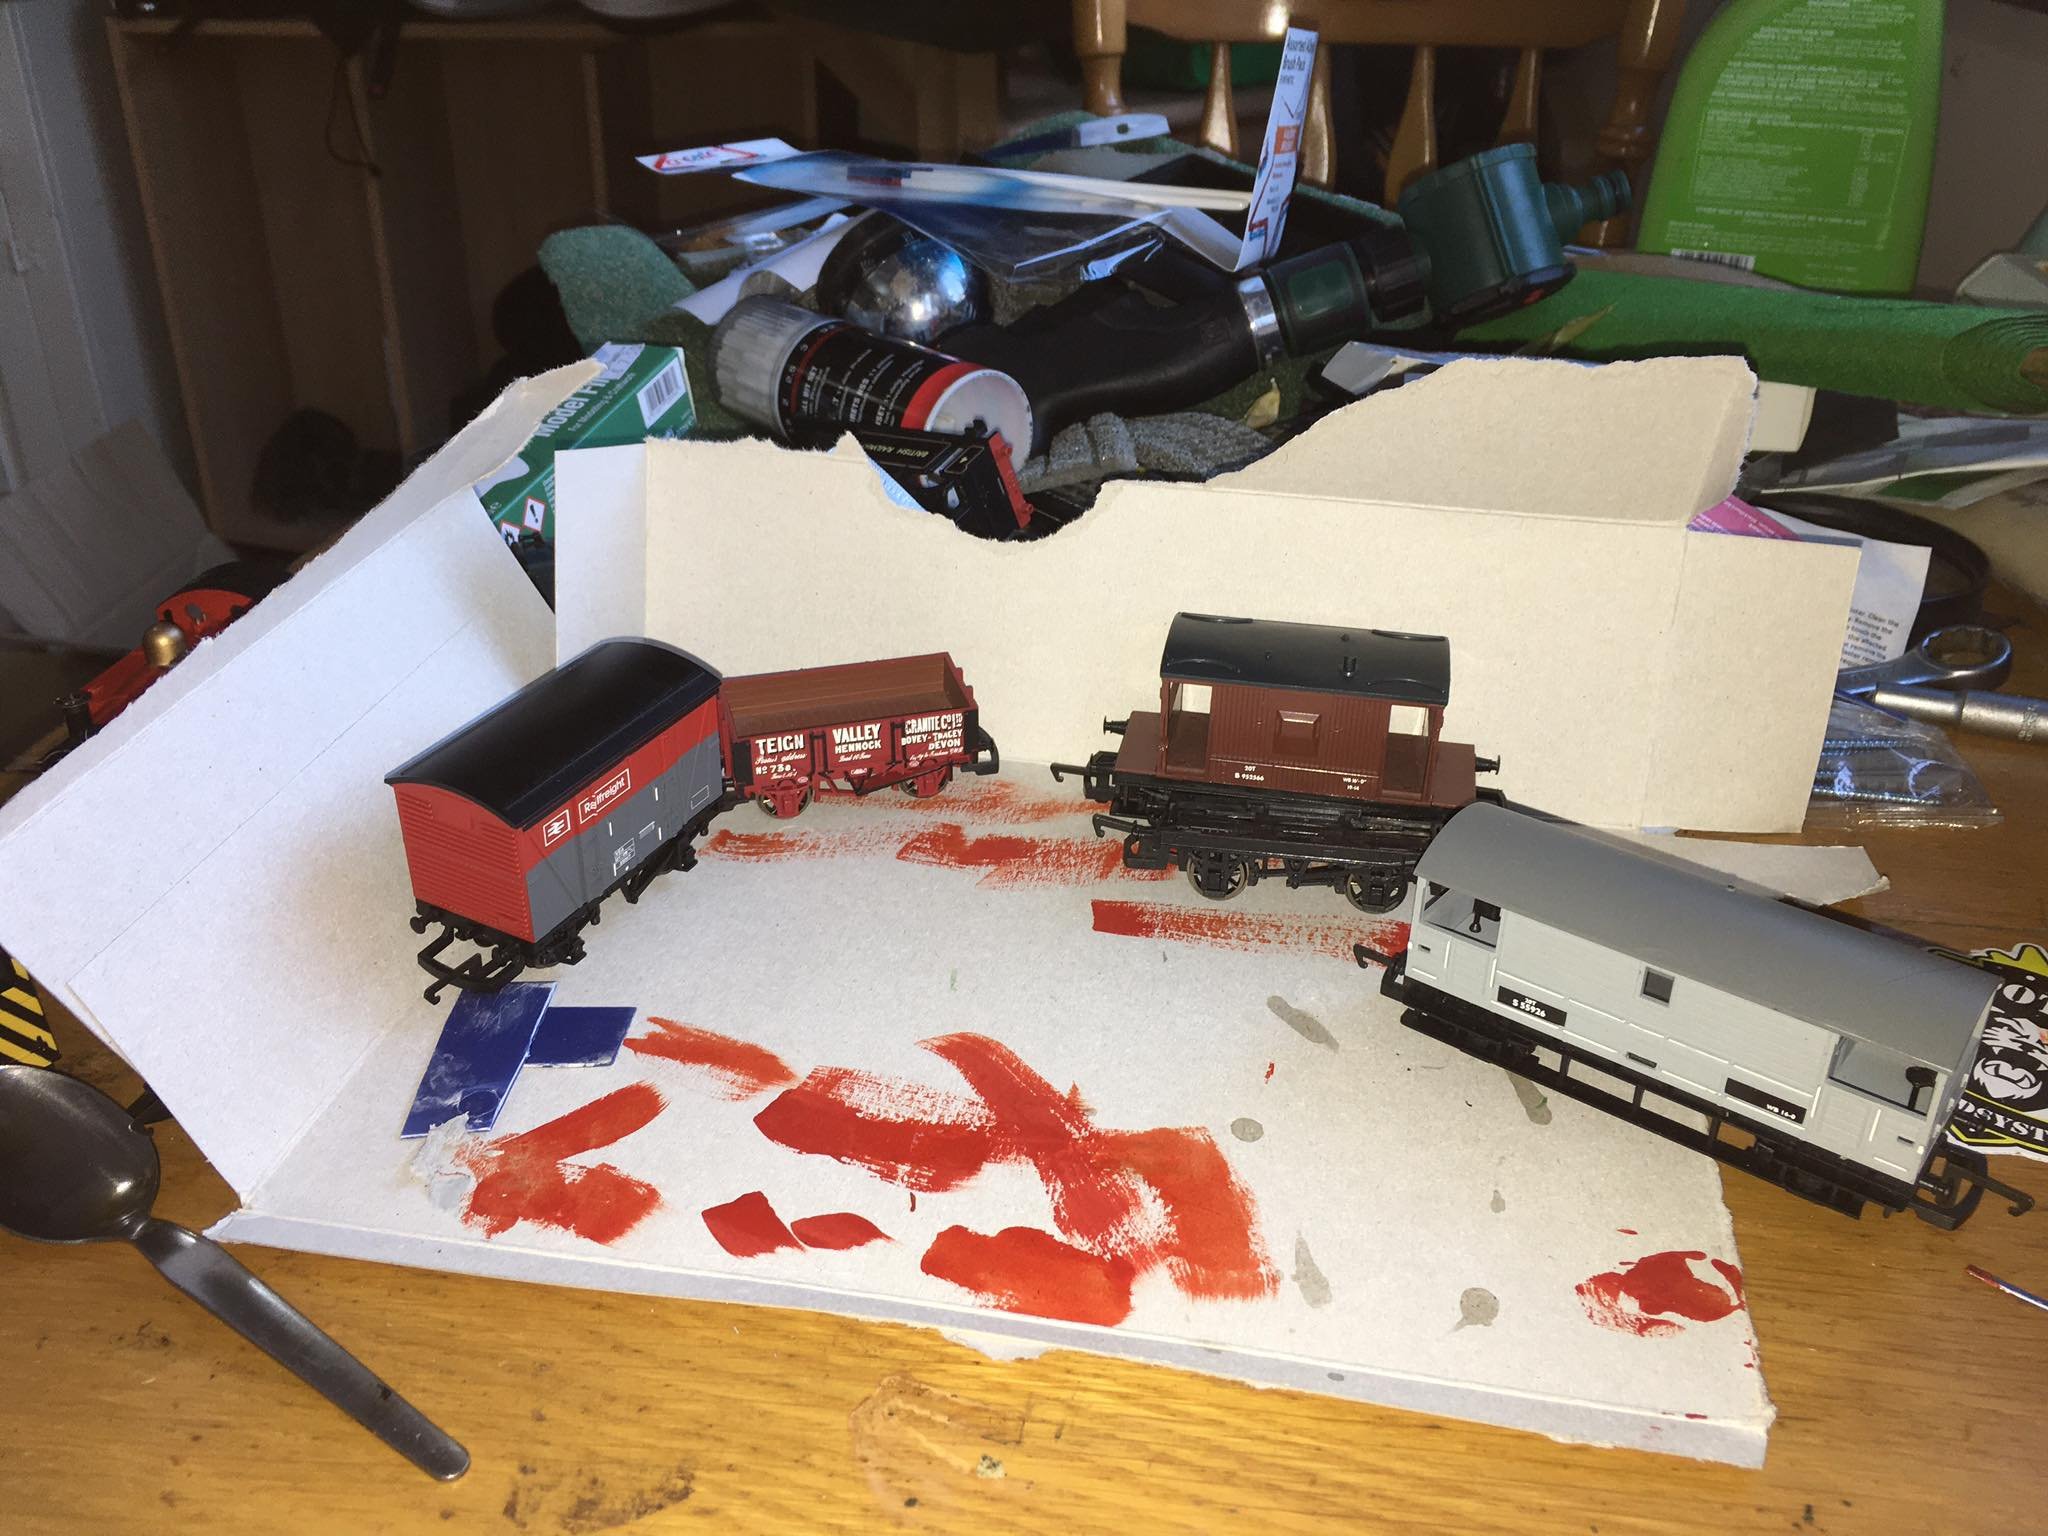
as mentioned on the other thread, ive been trying to increase the amount of cie stock ive got without spending too much money so ive been looking for ways to convert existing stock to cie without too much effort/expense.
Ive picked out a range of stuff from my collection that I can see will easily convert into cie stock so im starting this thread to keep track of what I do, The majority of the stock I am working with is available cheaply in some form or other on the hornby railroad range in some guise or is available in abundance second hand. Surprisingly I think I have enough stock here to fill out the layout with the exception of a larger diesel engine which is one thing i reckon I will just buy when funds allow.
Interestingly the cheap hornby wagons seem to all come built on one of two common chassis, this actually helps quite a lot as can be seen later in the thread. the teign valley wagon is a bit more detailed and seems to have its own individual chassis but aesthetically its the quite close to cie wagon photos so its in for this job.

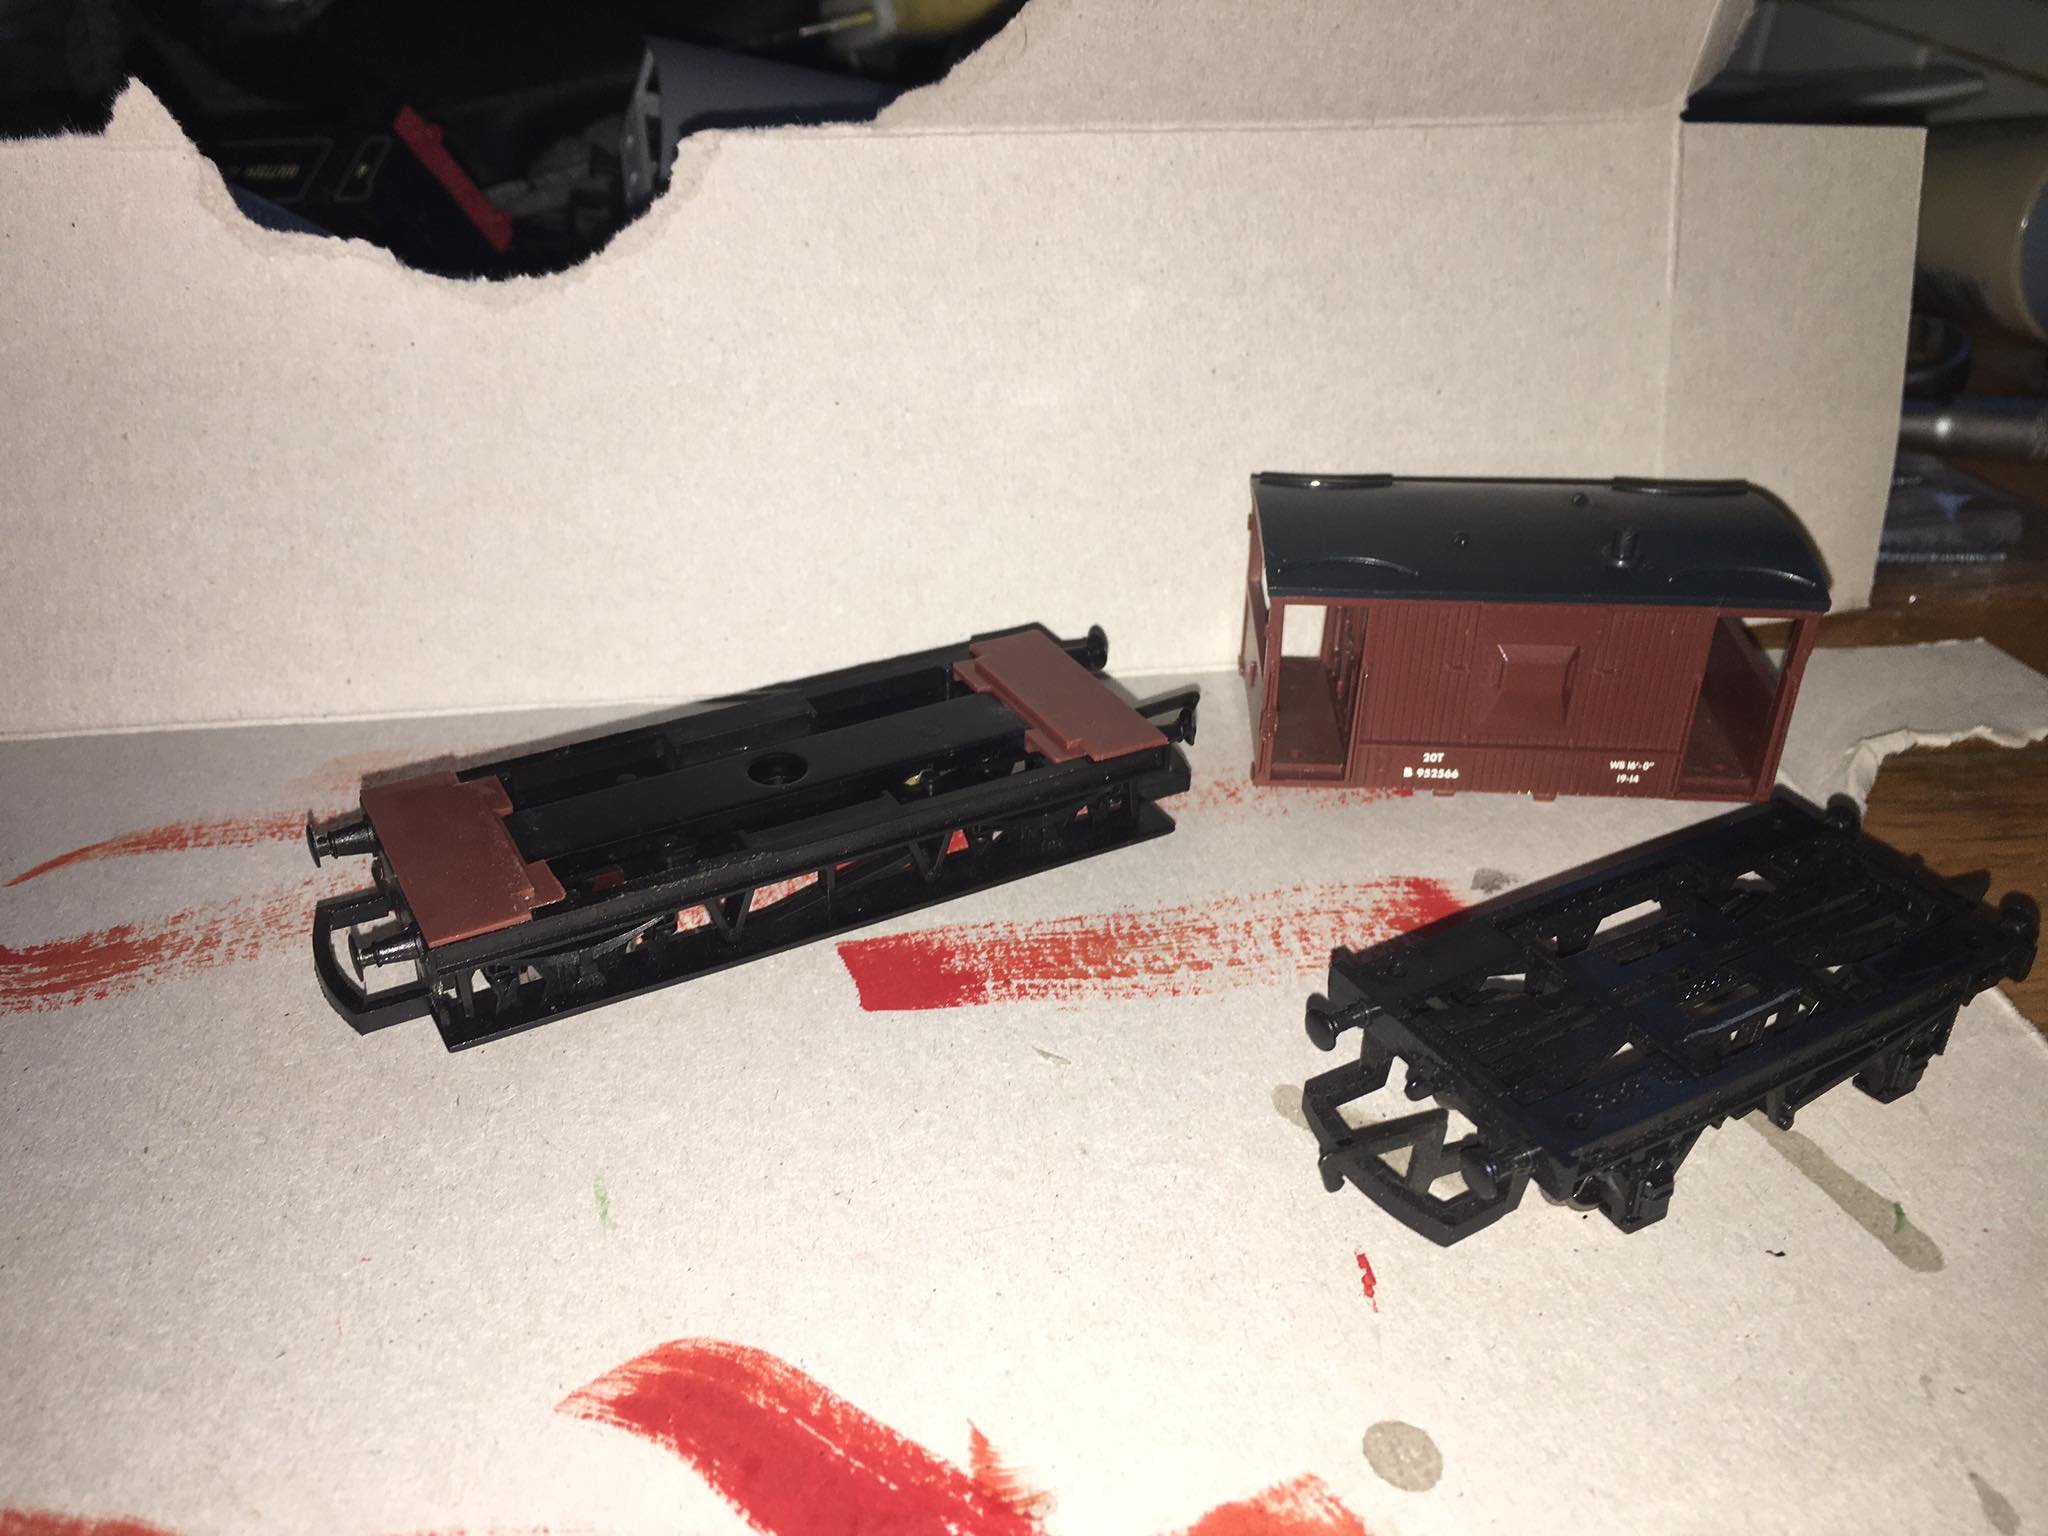
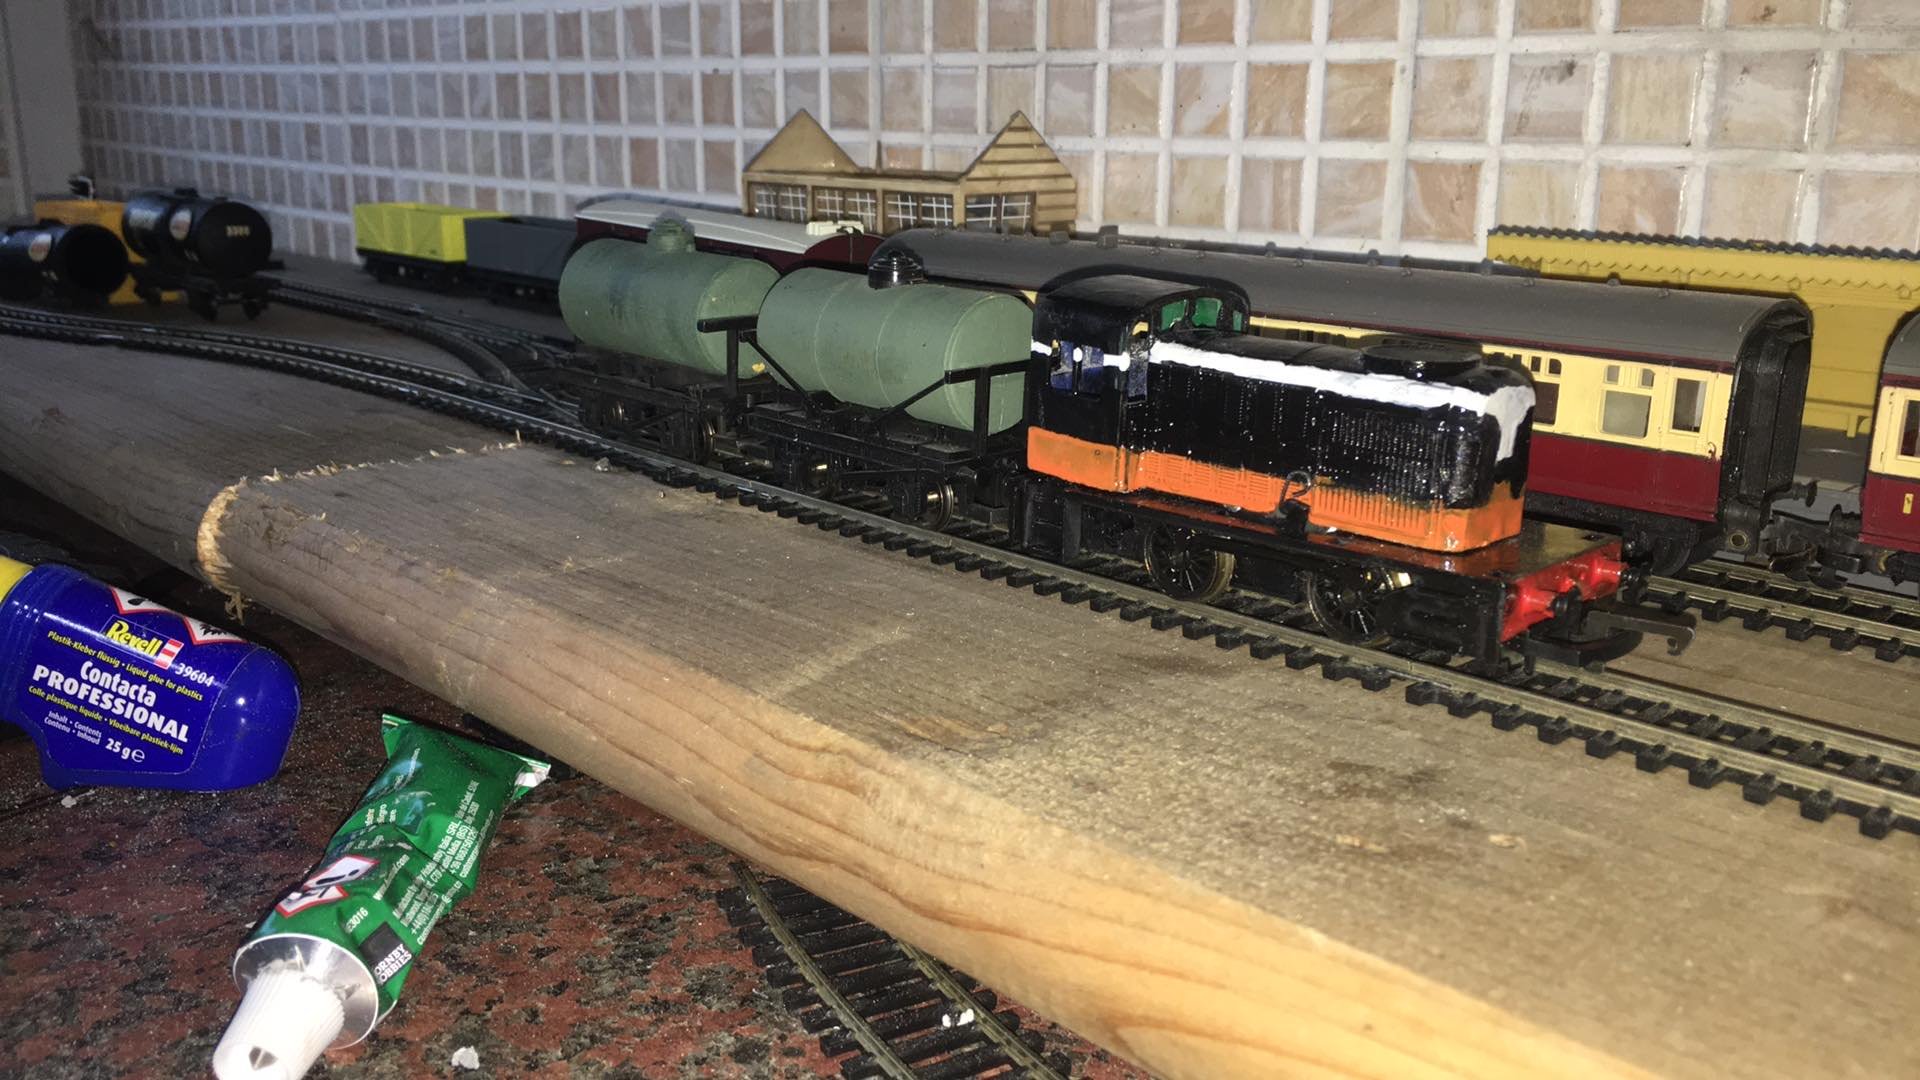
so these are the first few wagons that seem the simplest to turn into Irish stock. the van and 5 plank wagon I am just going to respray into grey, later on I will add cie decals but its not a job for today, the grey brake van can pretty much stay the same until decal day as its not a million miles from an irish van it may get some body mods in the future but its okay as is for now. I couldnt decide on a colour for the brown brake van so its staying brown for now. It is however being moved from the long Hornby wagon chassis to the short one. im not sure how accurate this will be from an Irish standpoint , but it will make shunting a bit more interesting on my layout and im not a huge fan of brake vans with the open platform on either end anyway.
getting this stuff apart is all very straight forward with plastic clips located on the underside to get the bodys off on a few seconds. the entire wagon including chassis is being painted grey with details to be added back on afterwards on order to reflect on the colour of the cie wagon, the vans seemed to mostly keep black chassis so this will be left alone for now. once the van is off its chassis we can see its the very same as the other short chassis which I will be moving the brake van onto. I have a few more coal wagons built on this shorter chassis which would also be suited to conversion although in my opinion they do not look as good.
for paint I have chosen the very versatile Dealz primer grey rattlecans, I think the colour should be okay, if not at least they can be primed to take the correct colour.
as we wait for this to dry its time to tackle the brake van,
in theory it should just clip onto one chassis from the other as they are sold new like that,but we will see.
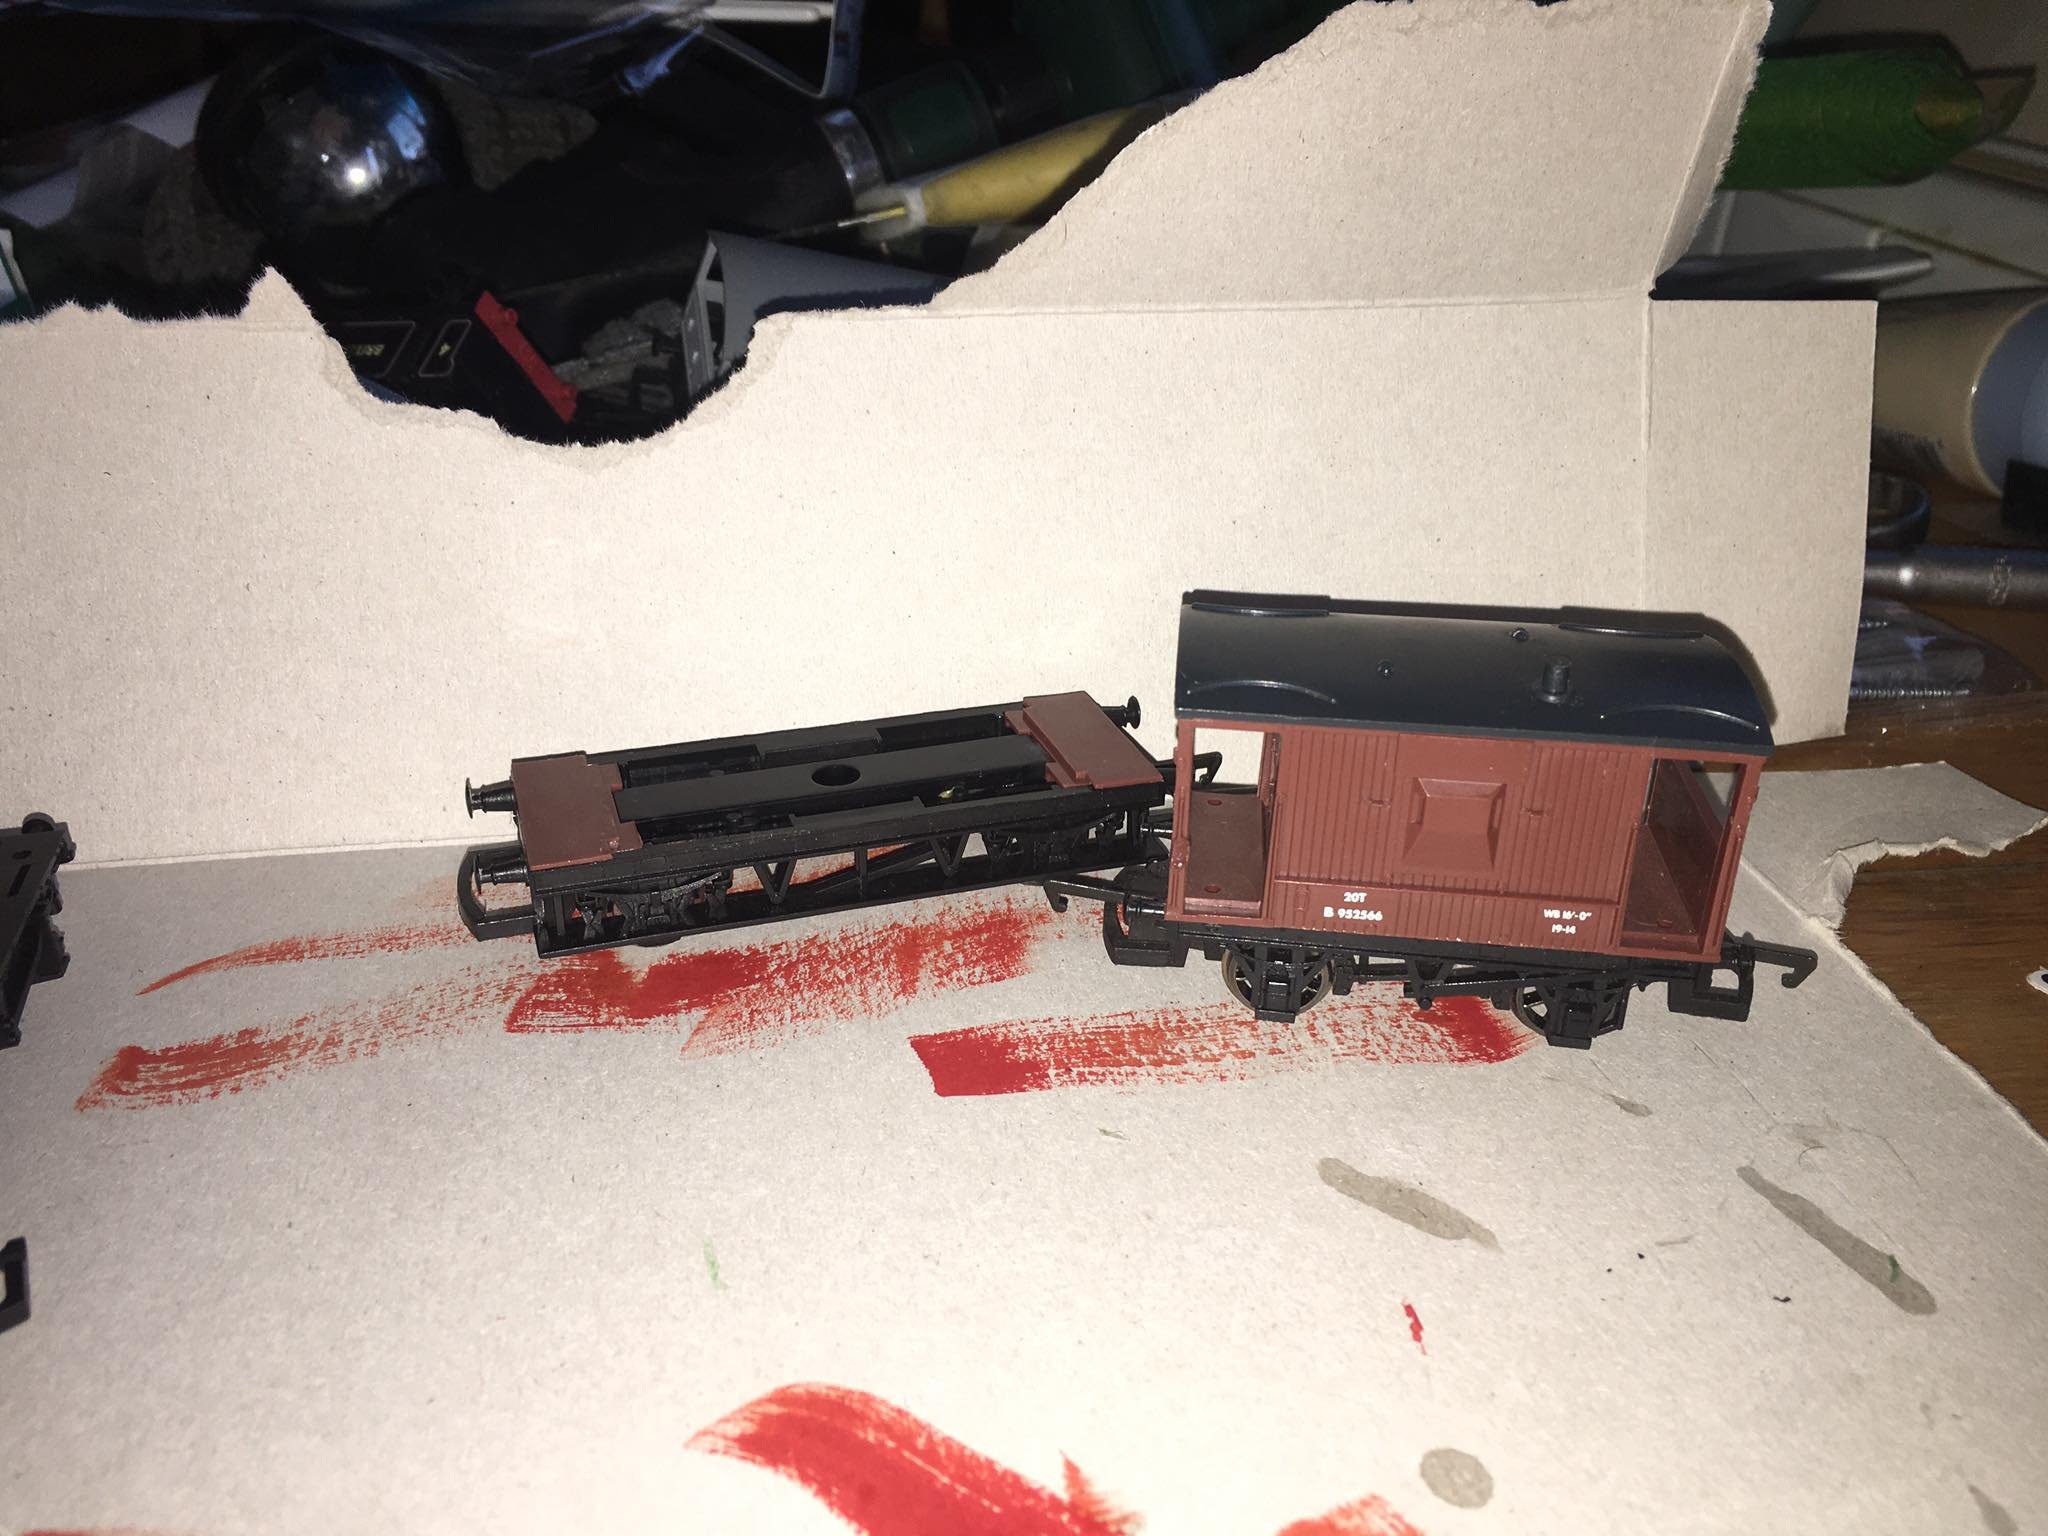
unfortunately not, but a little dab of model glue onto each corner sorted that out easily.
as the glue dried and the rest of the stuff went back together i put some small details back onto the wagon so it doesnt just look like a primed wagon.
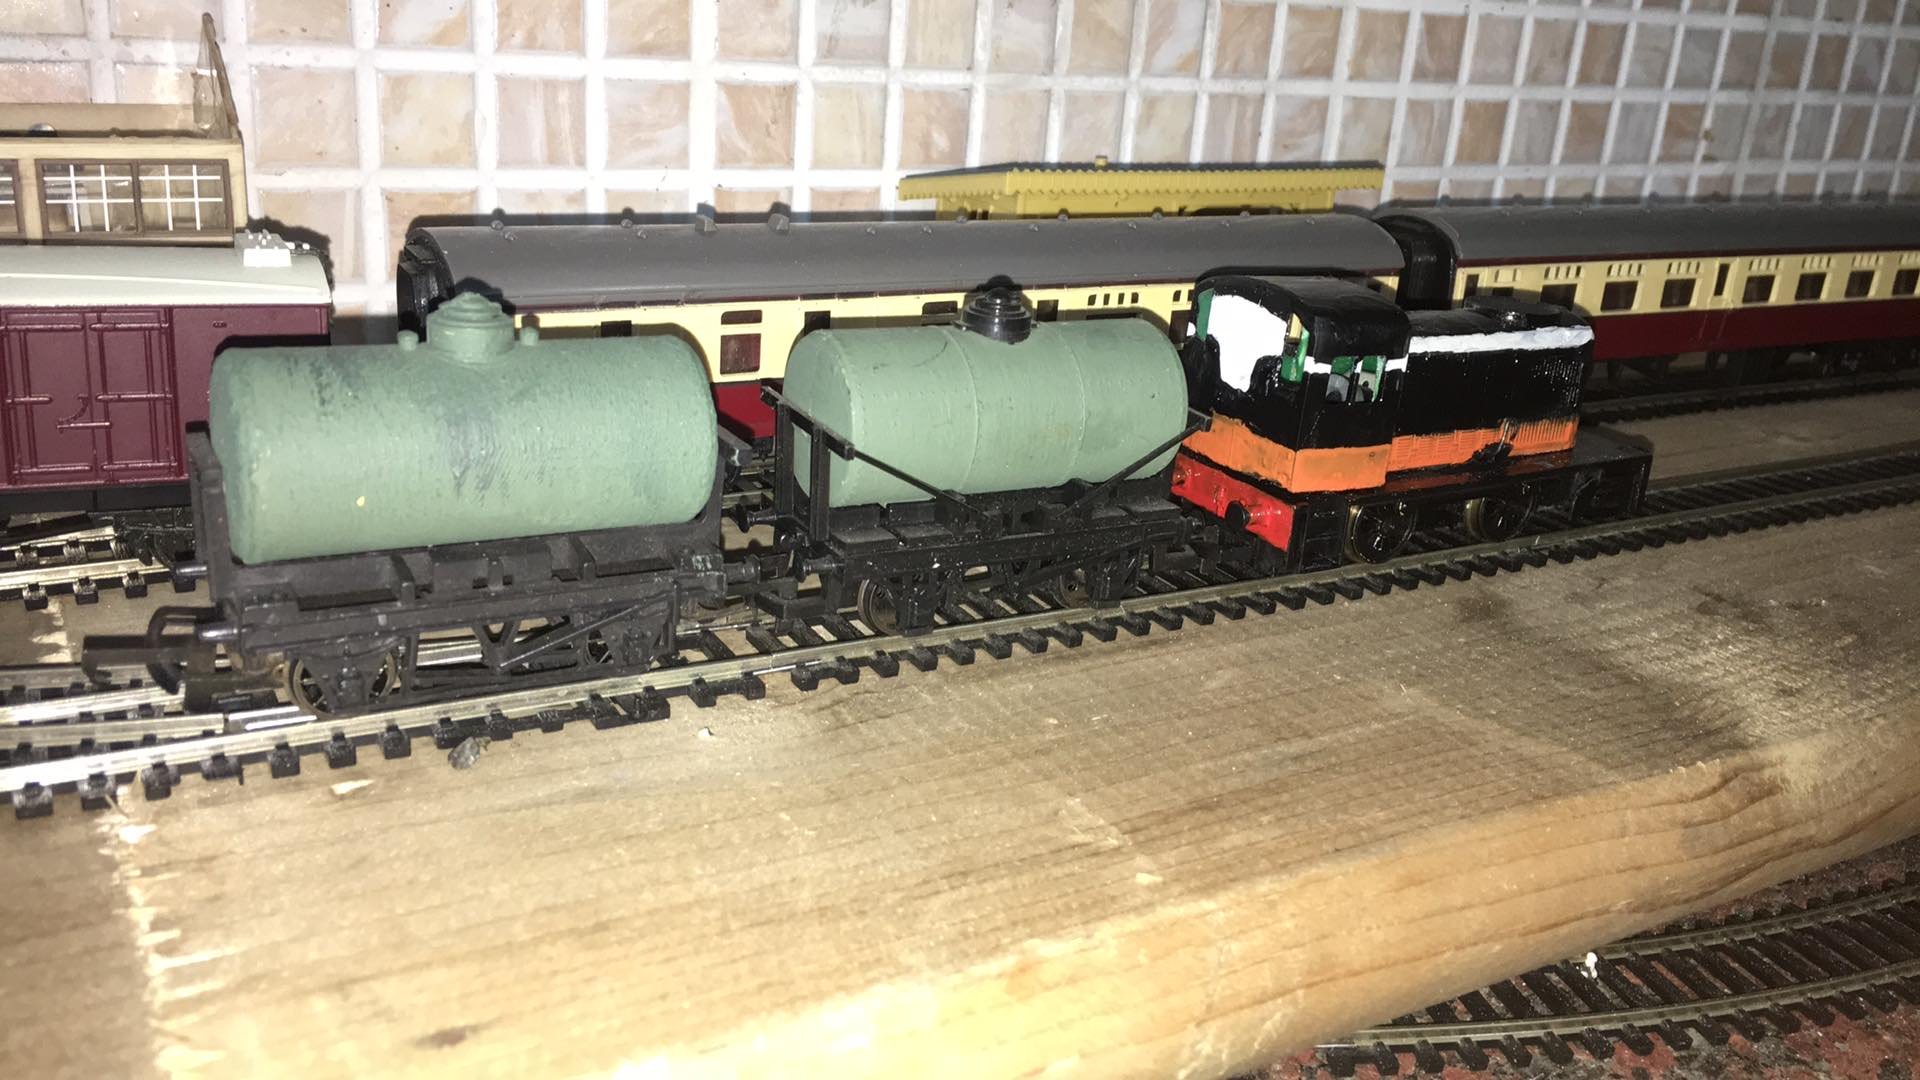
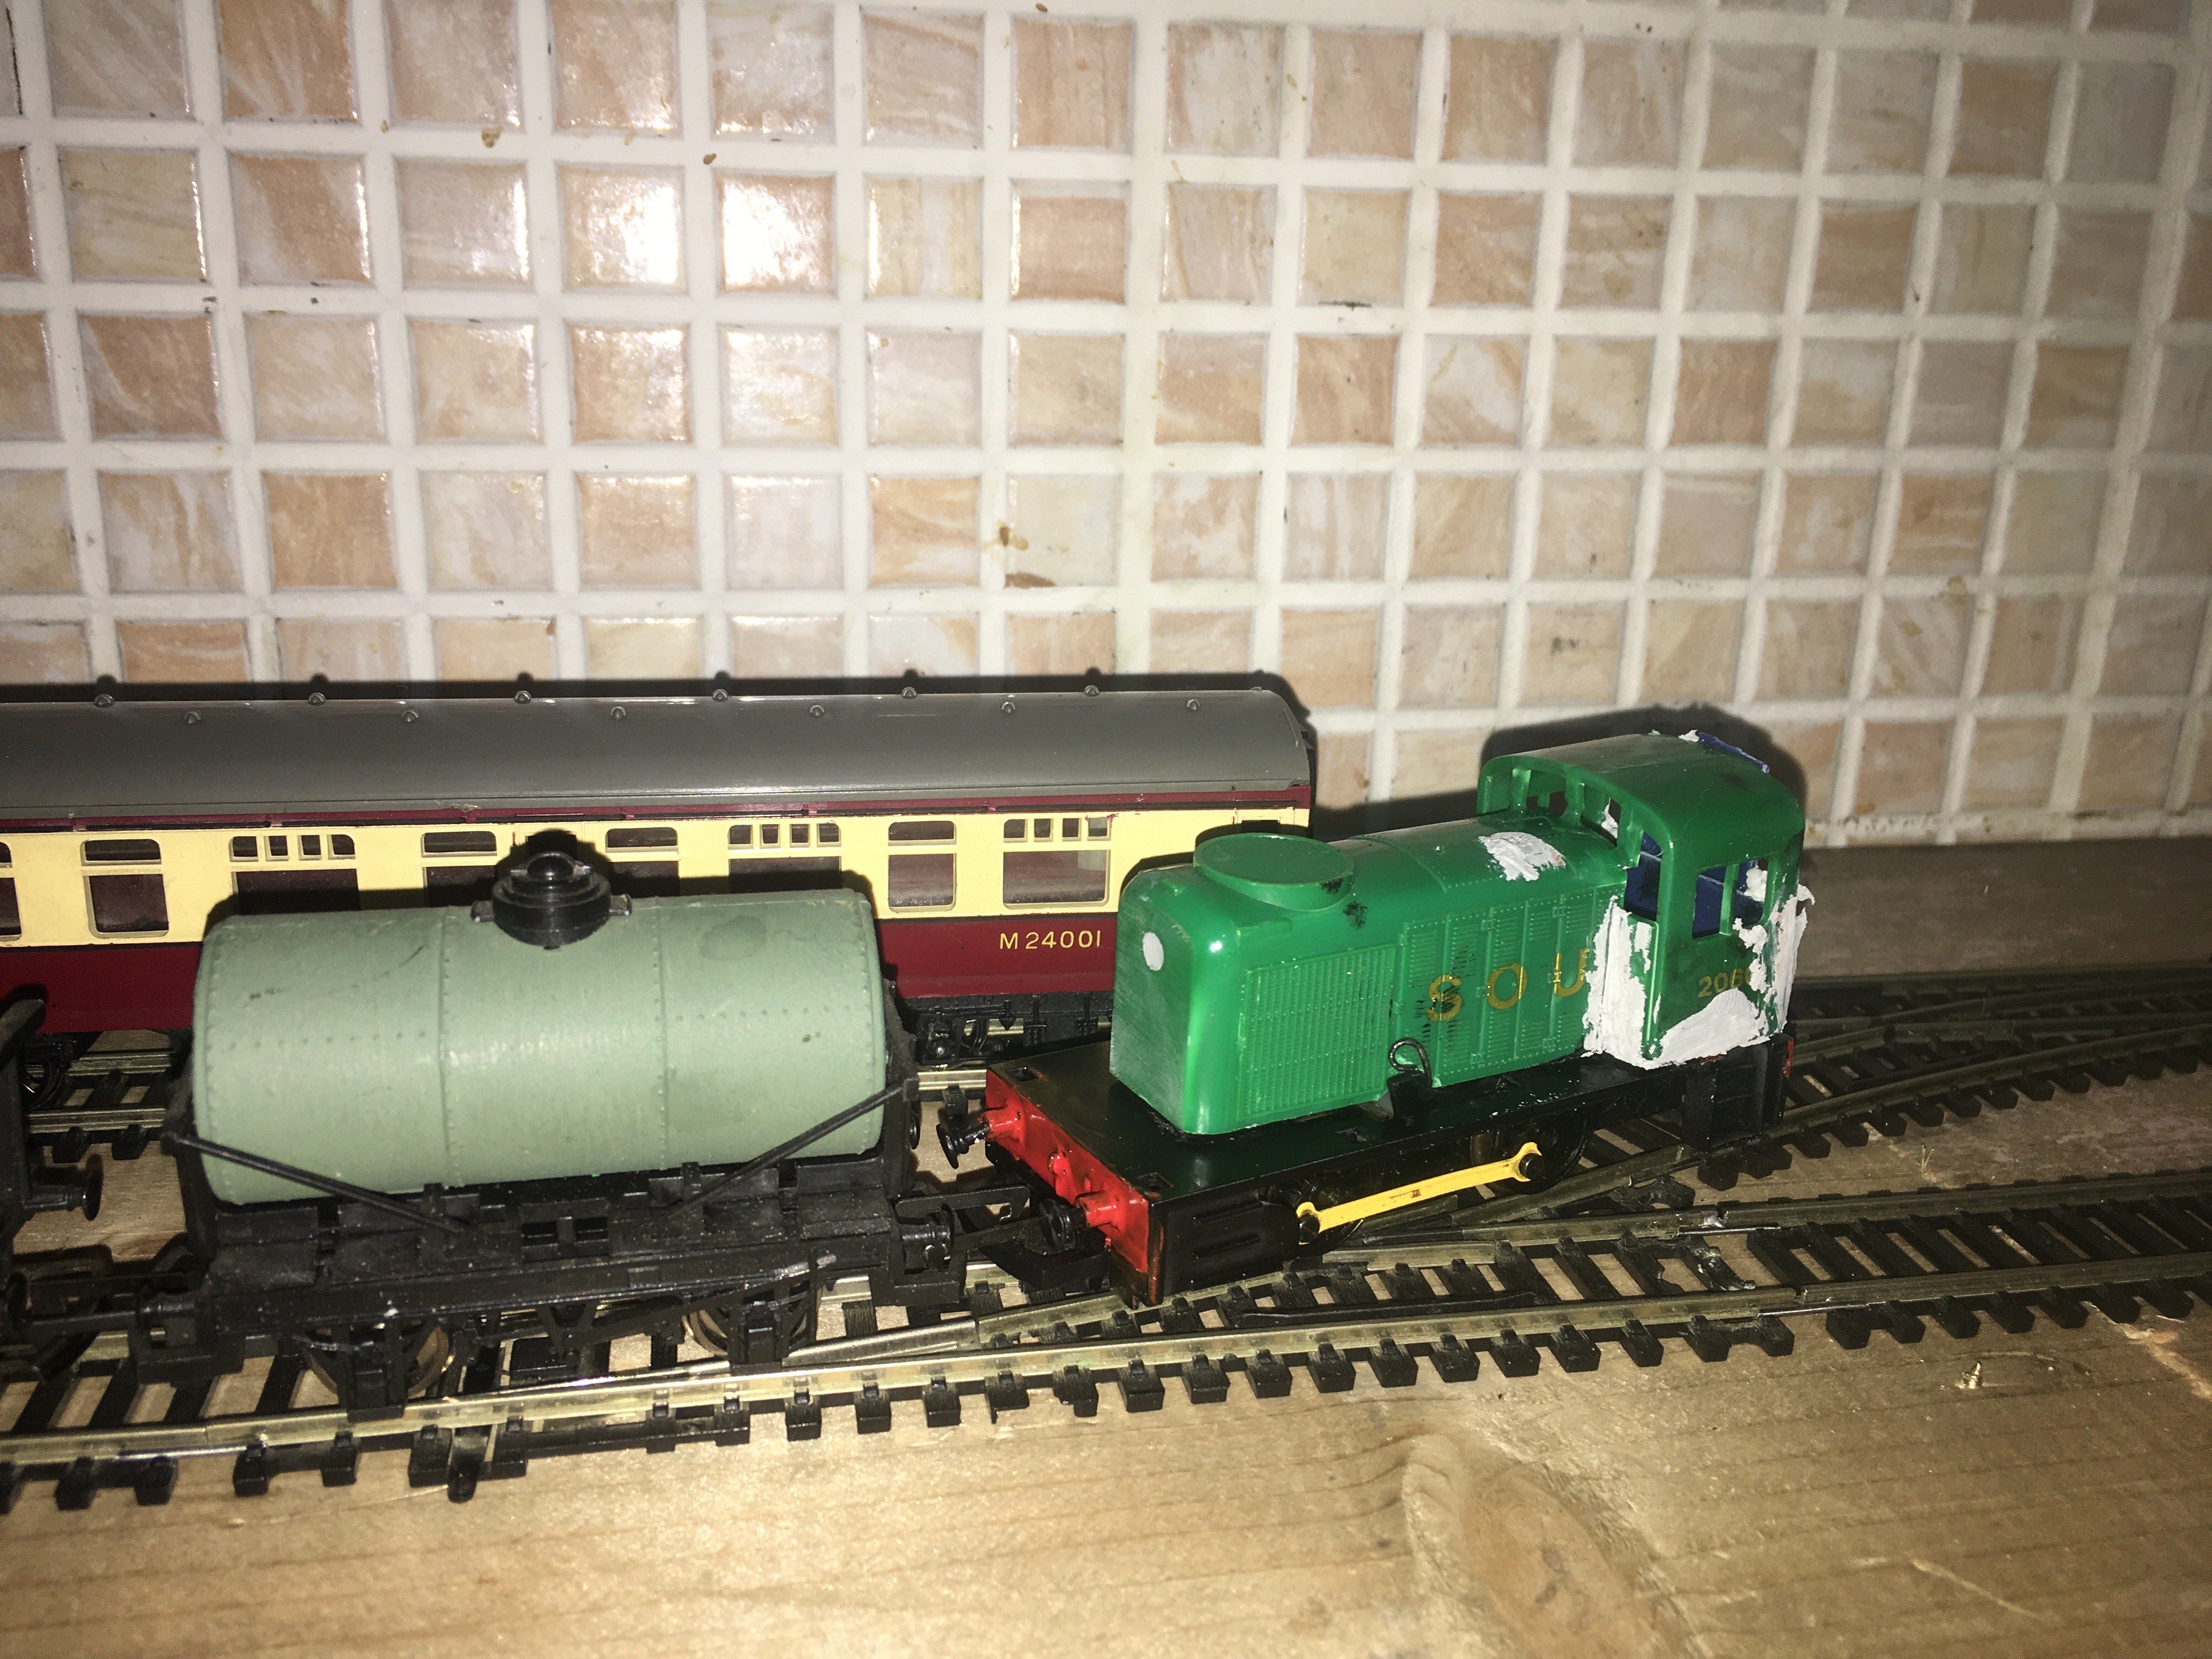
now the imaginary hornby cie tank engine finally has some appropriate rolling stock to pull behind it, will surely look good when detailed with decals etc.
New shortened brake is looking right at home behind the tanker train.
I have one more item of freight stock to start building before i start to focus on passenger stock. the four wheel coaches I am intending on turning into some sort of heritage train in cie green. the cleaning car has long since had its cleaning mechanism removed and the blanked out windows will make it convert into a nice little brake coach, these all run on the long hornby chassis and are available for next to nothing all over ebay.
-
 3
3
-
-
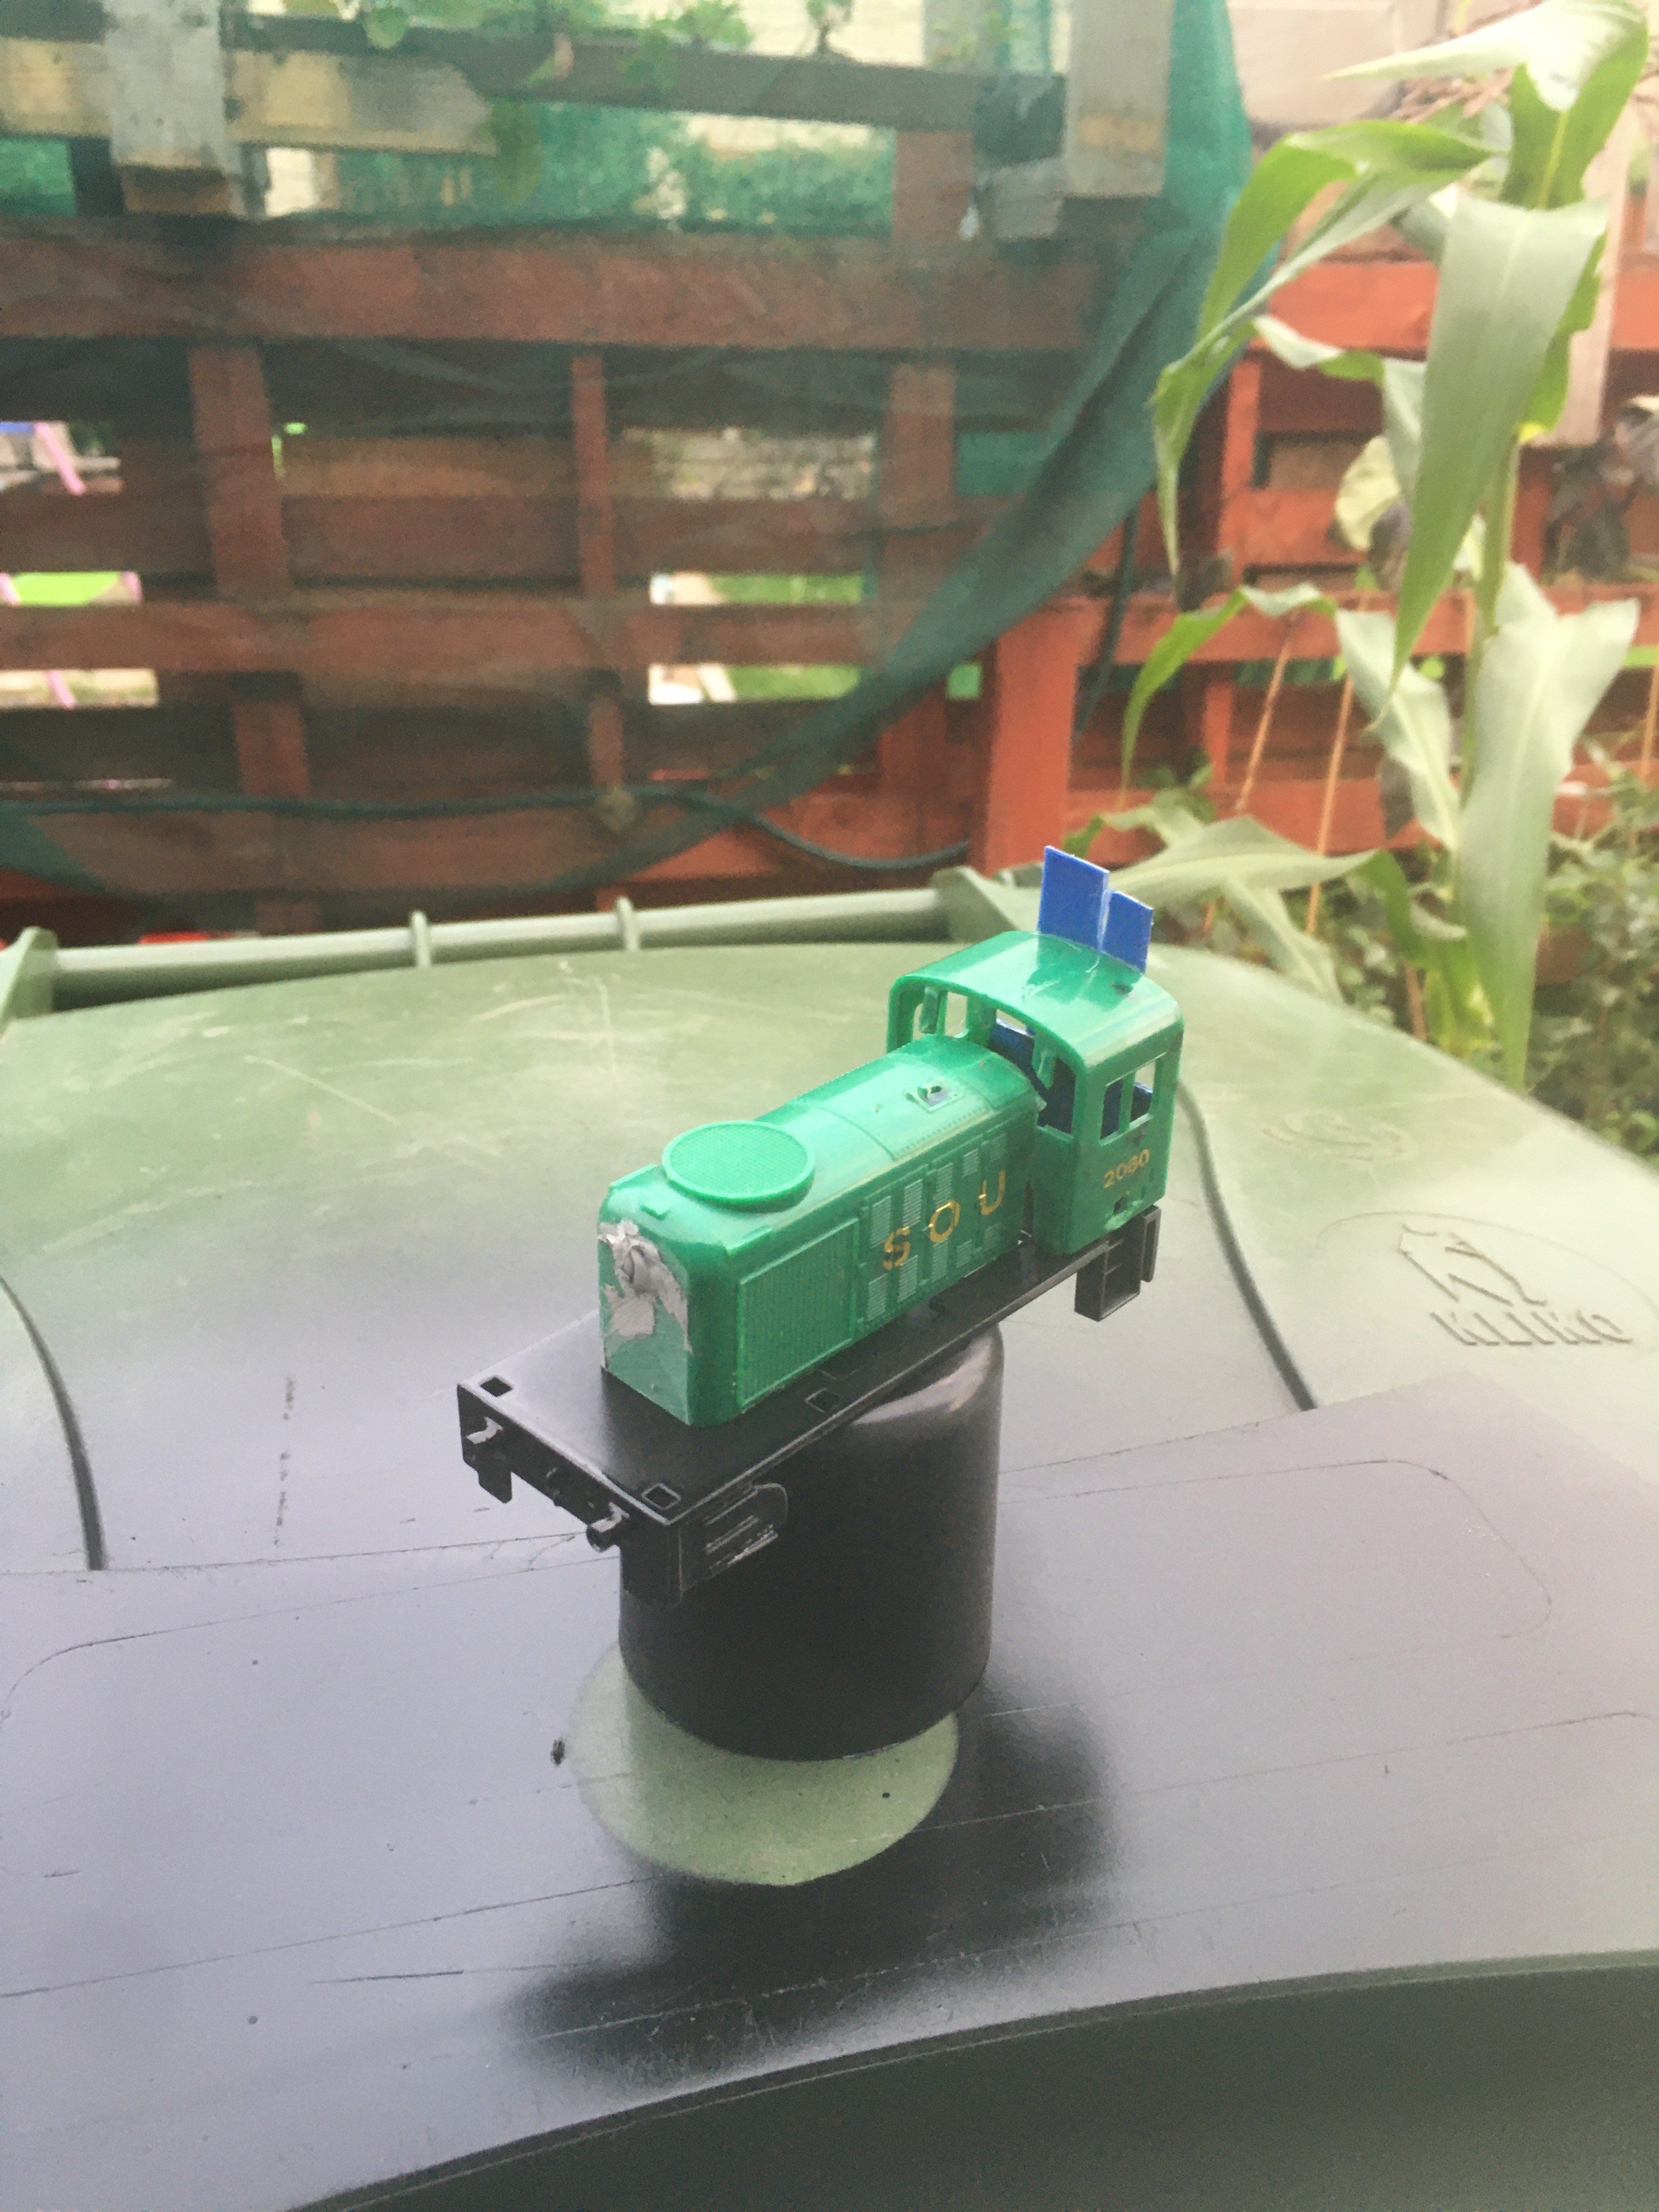
So as I havent painted a straight line by hand in over 100 years I decided to do the first paint job without any sanding or filling as i knew it would be an absolute horror show either way, and well i wasnt wrong so theres little need to share this example

experimented with adding the third wheel, which the chassis could successfully take however once the footplate was installed back on it was locking up the new wheel so I will need to revisit this later with a dremel when it goes back in for another paint job after ive had some more practice with a brush however for now I am very happy with what I was able to pull together in just a few evenings with mostly scrap and a chassis to run it on.
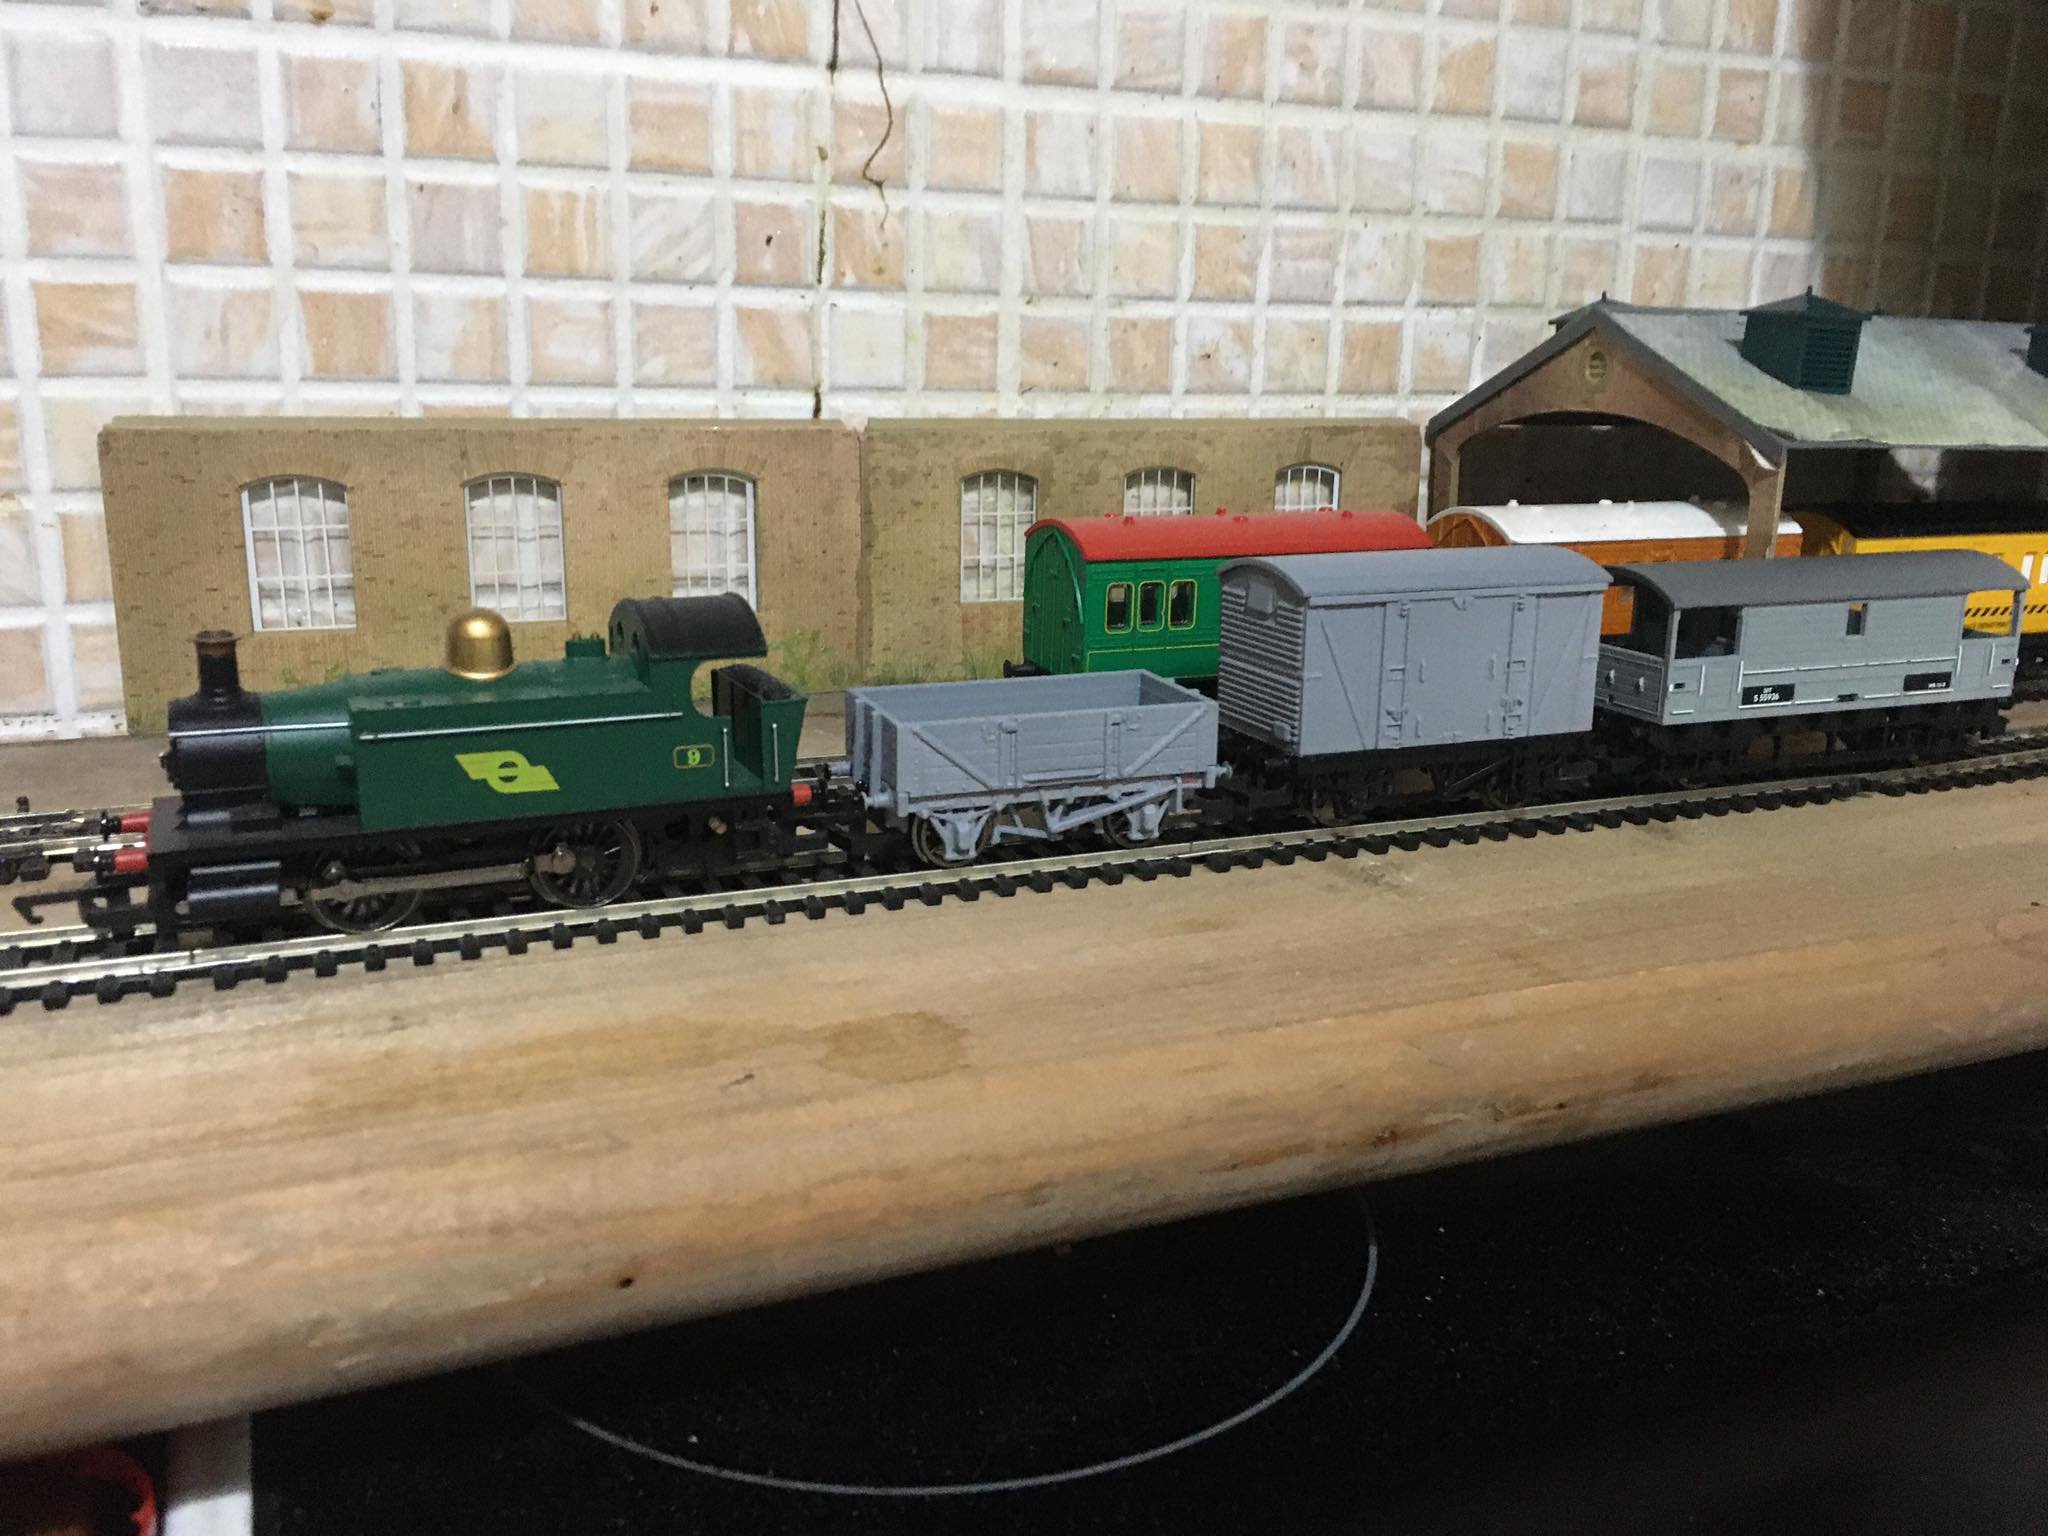
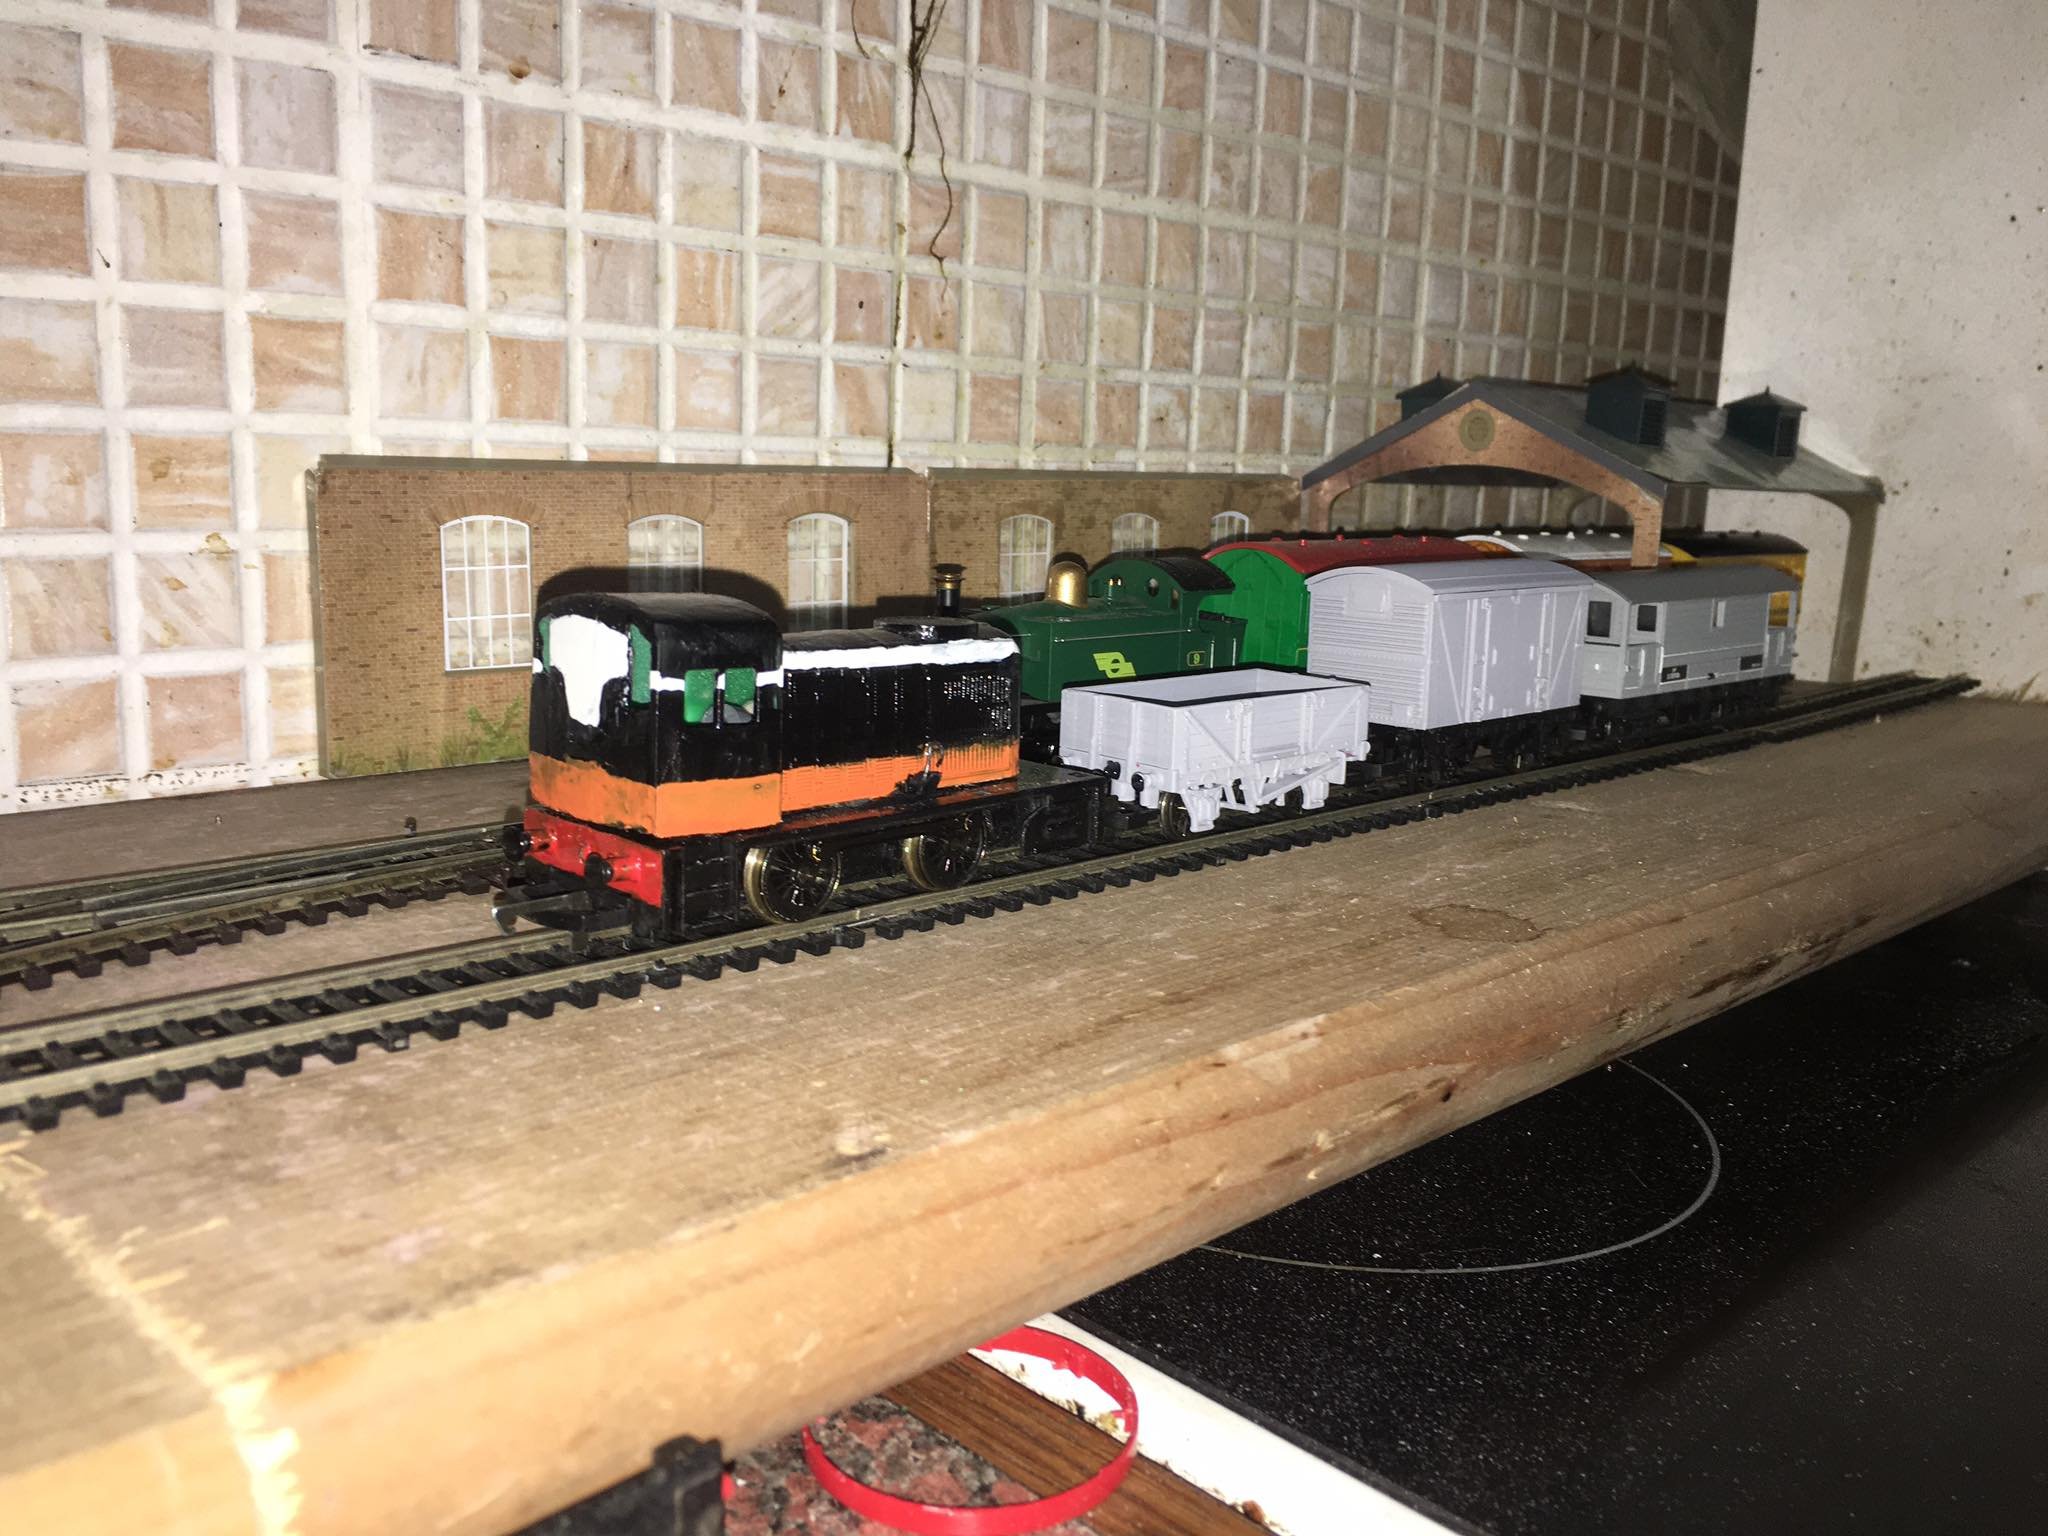
back on duty breaking up the incoming tanker train.
waiting for passenger services to leave in order to move test freshly converted load around the network.
-
4
-
-
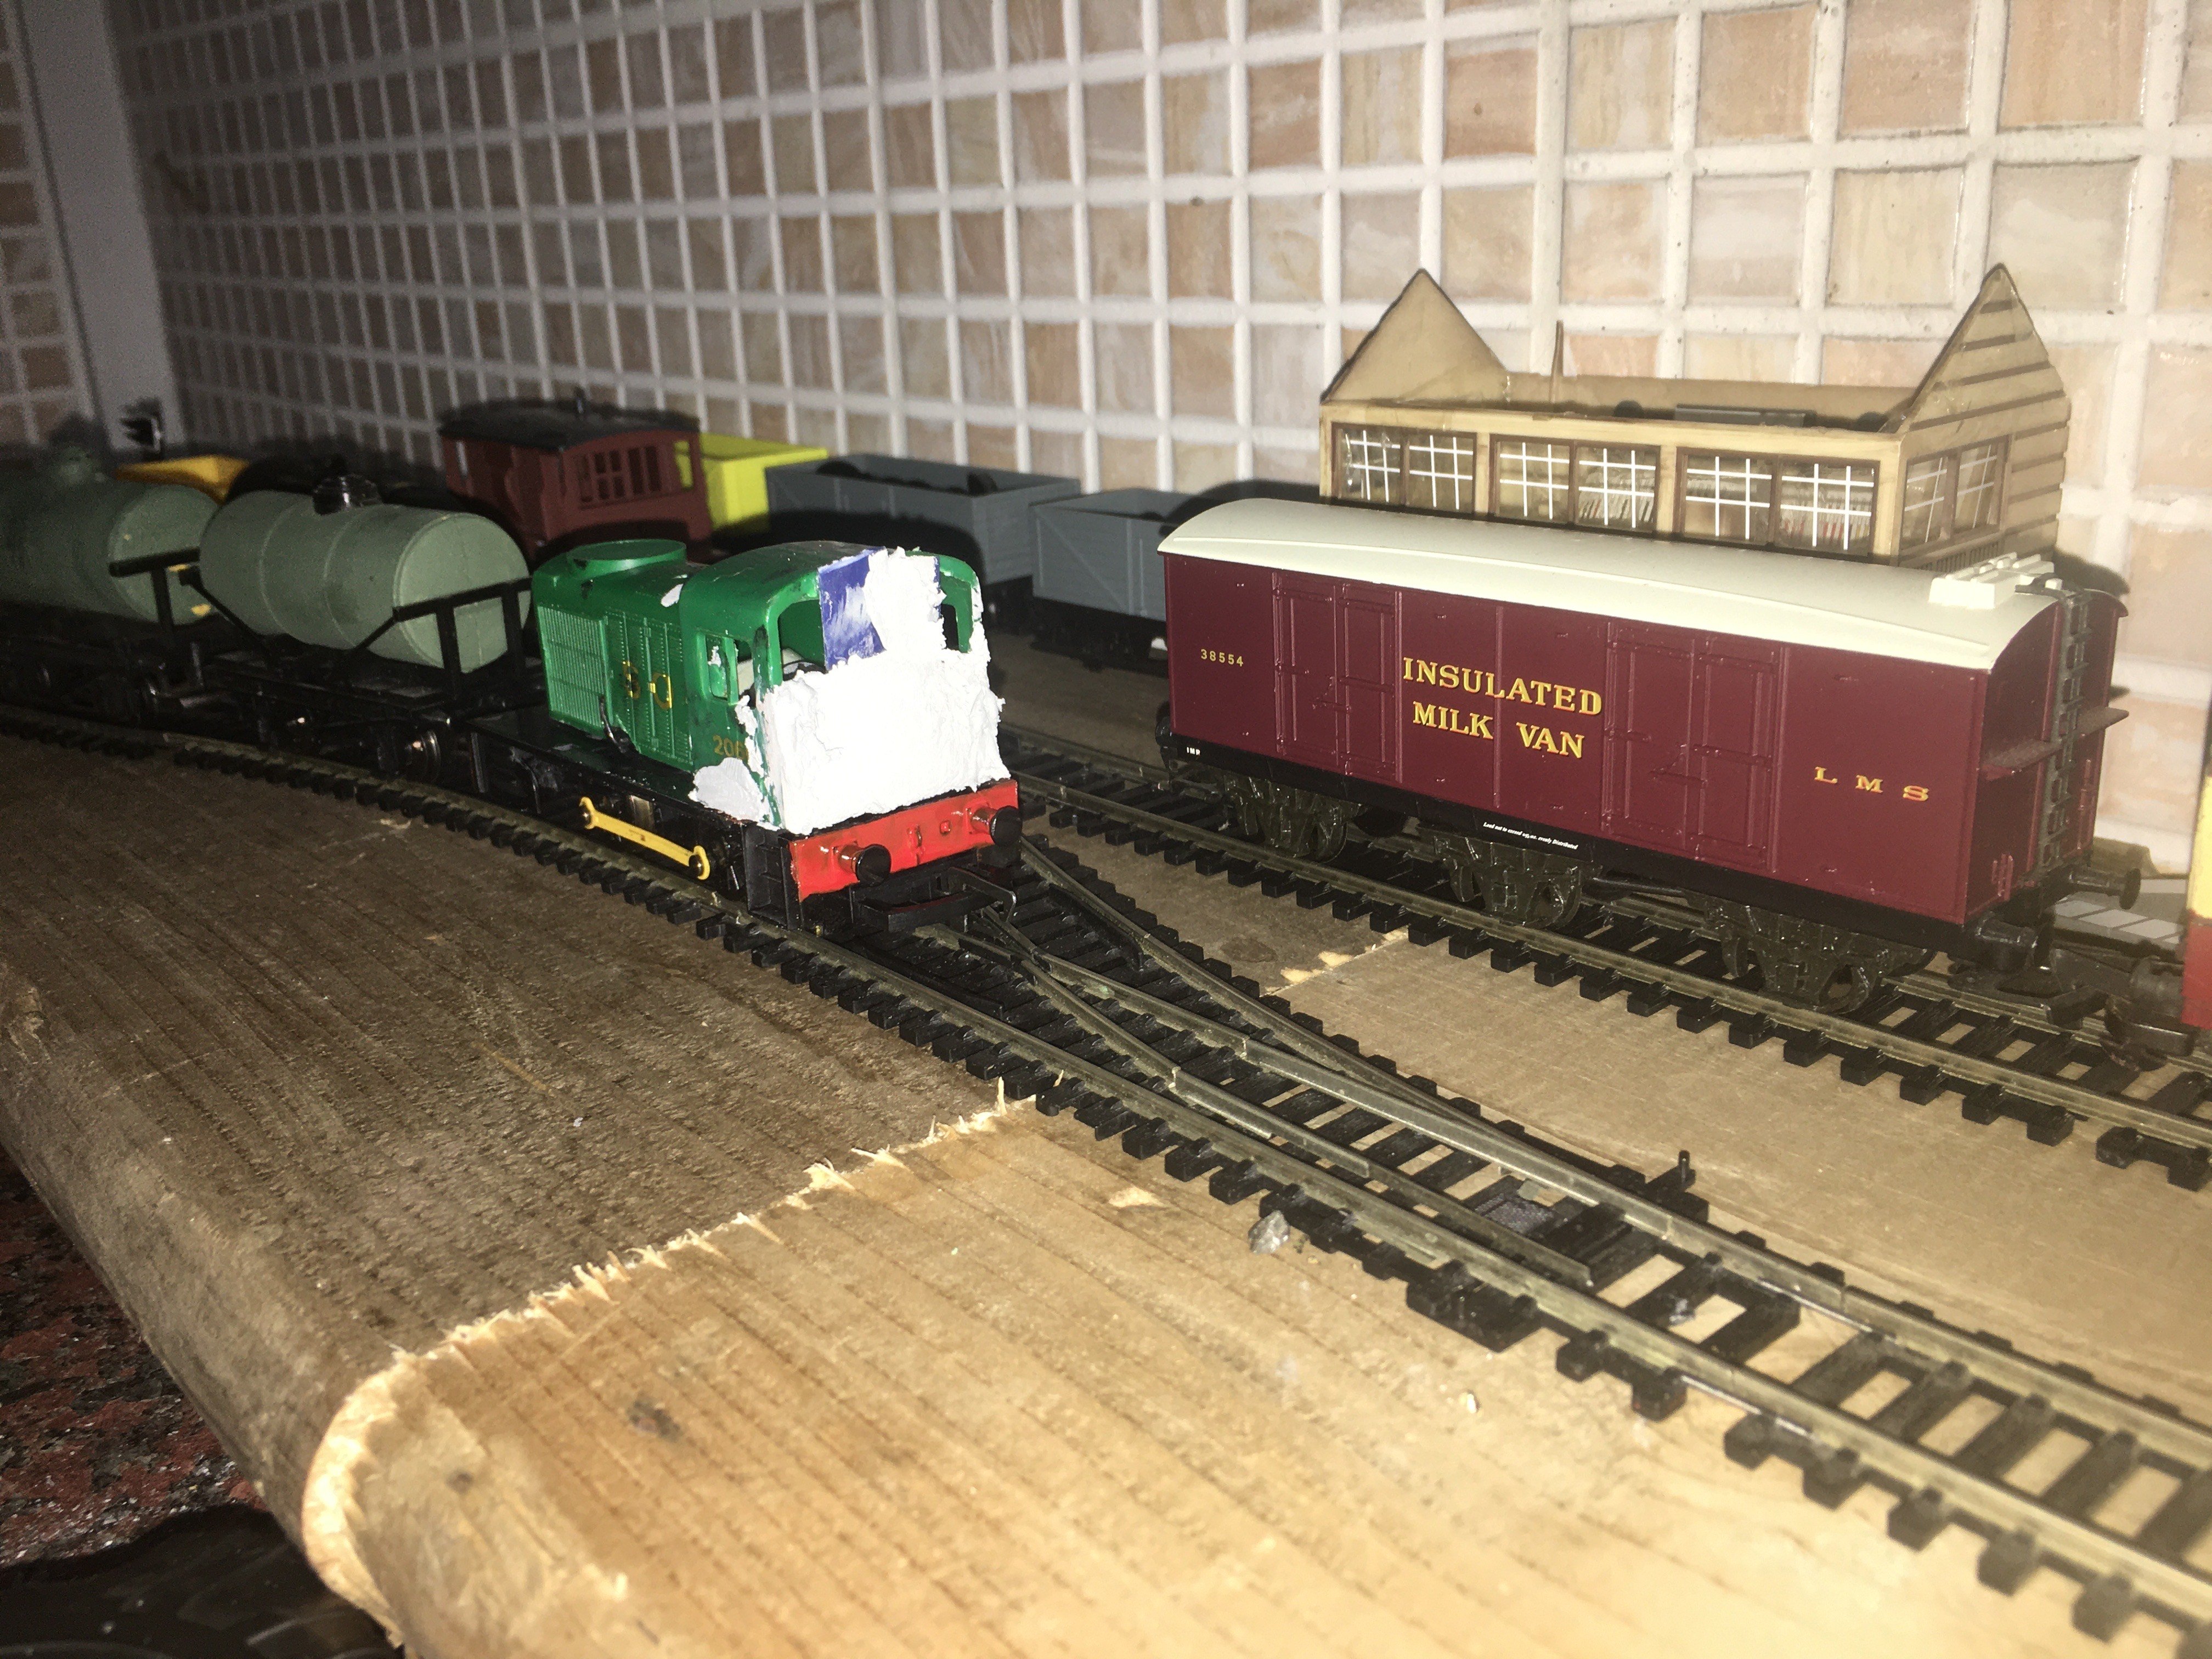
after a good session of trimming,gluing and filling its straight into service shunting the incoming tanker train before a slot becomes available in the paint shop, soon she will be sprayed up into her original cie livery.
-
1
-
-
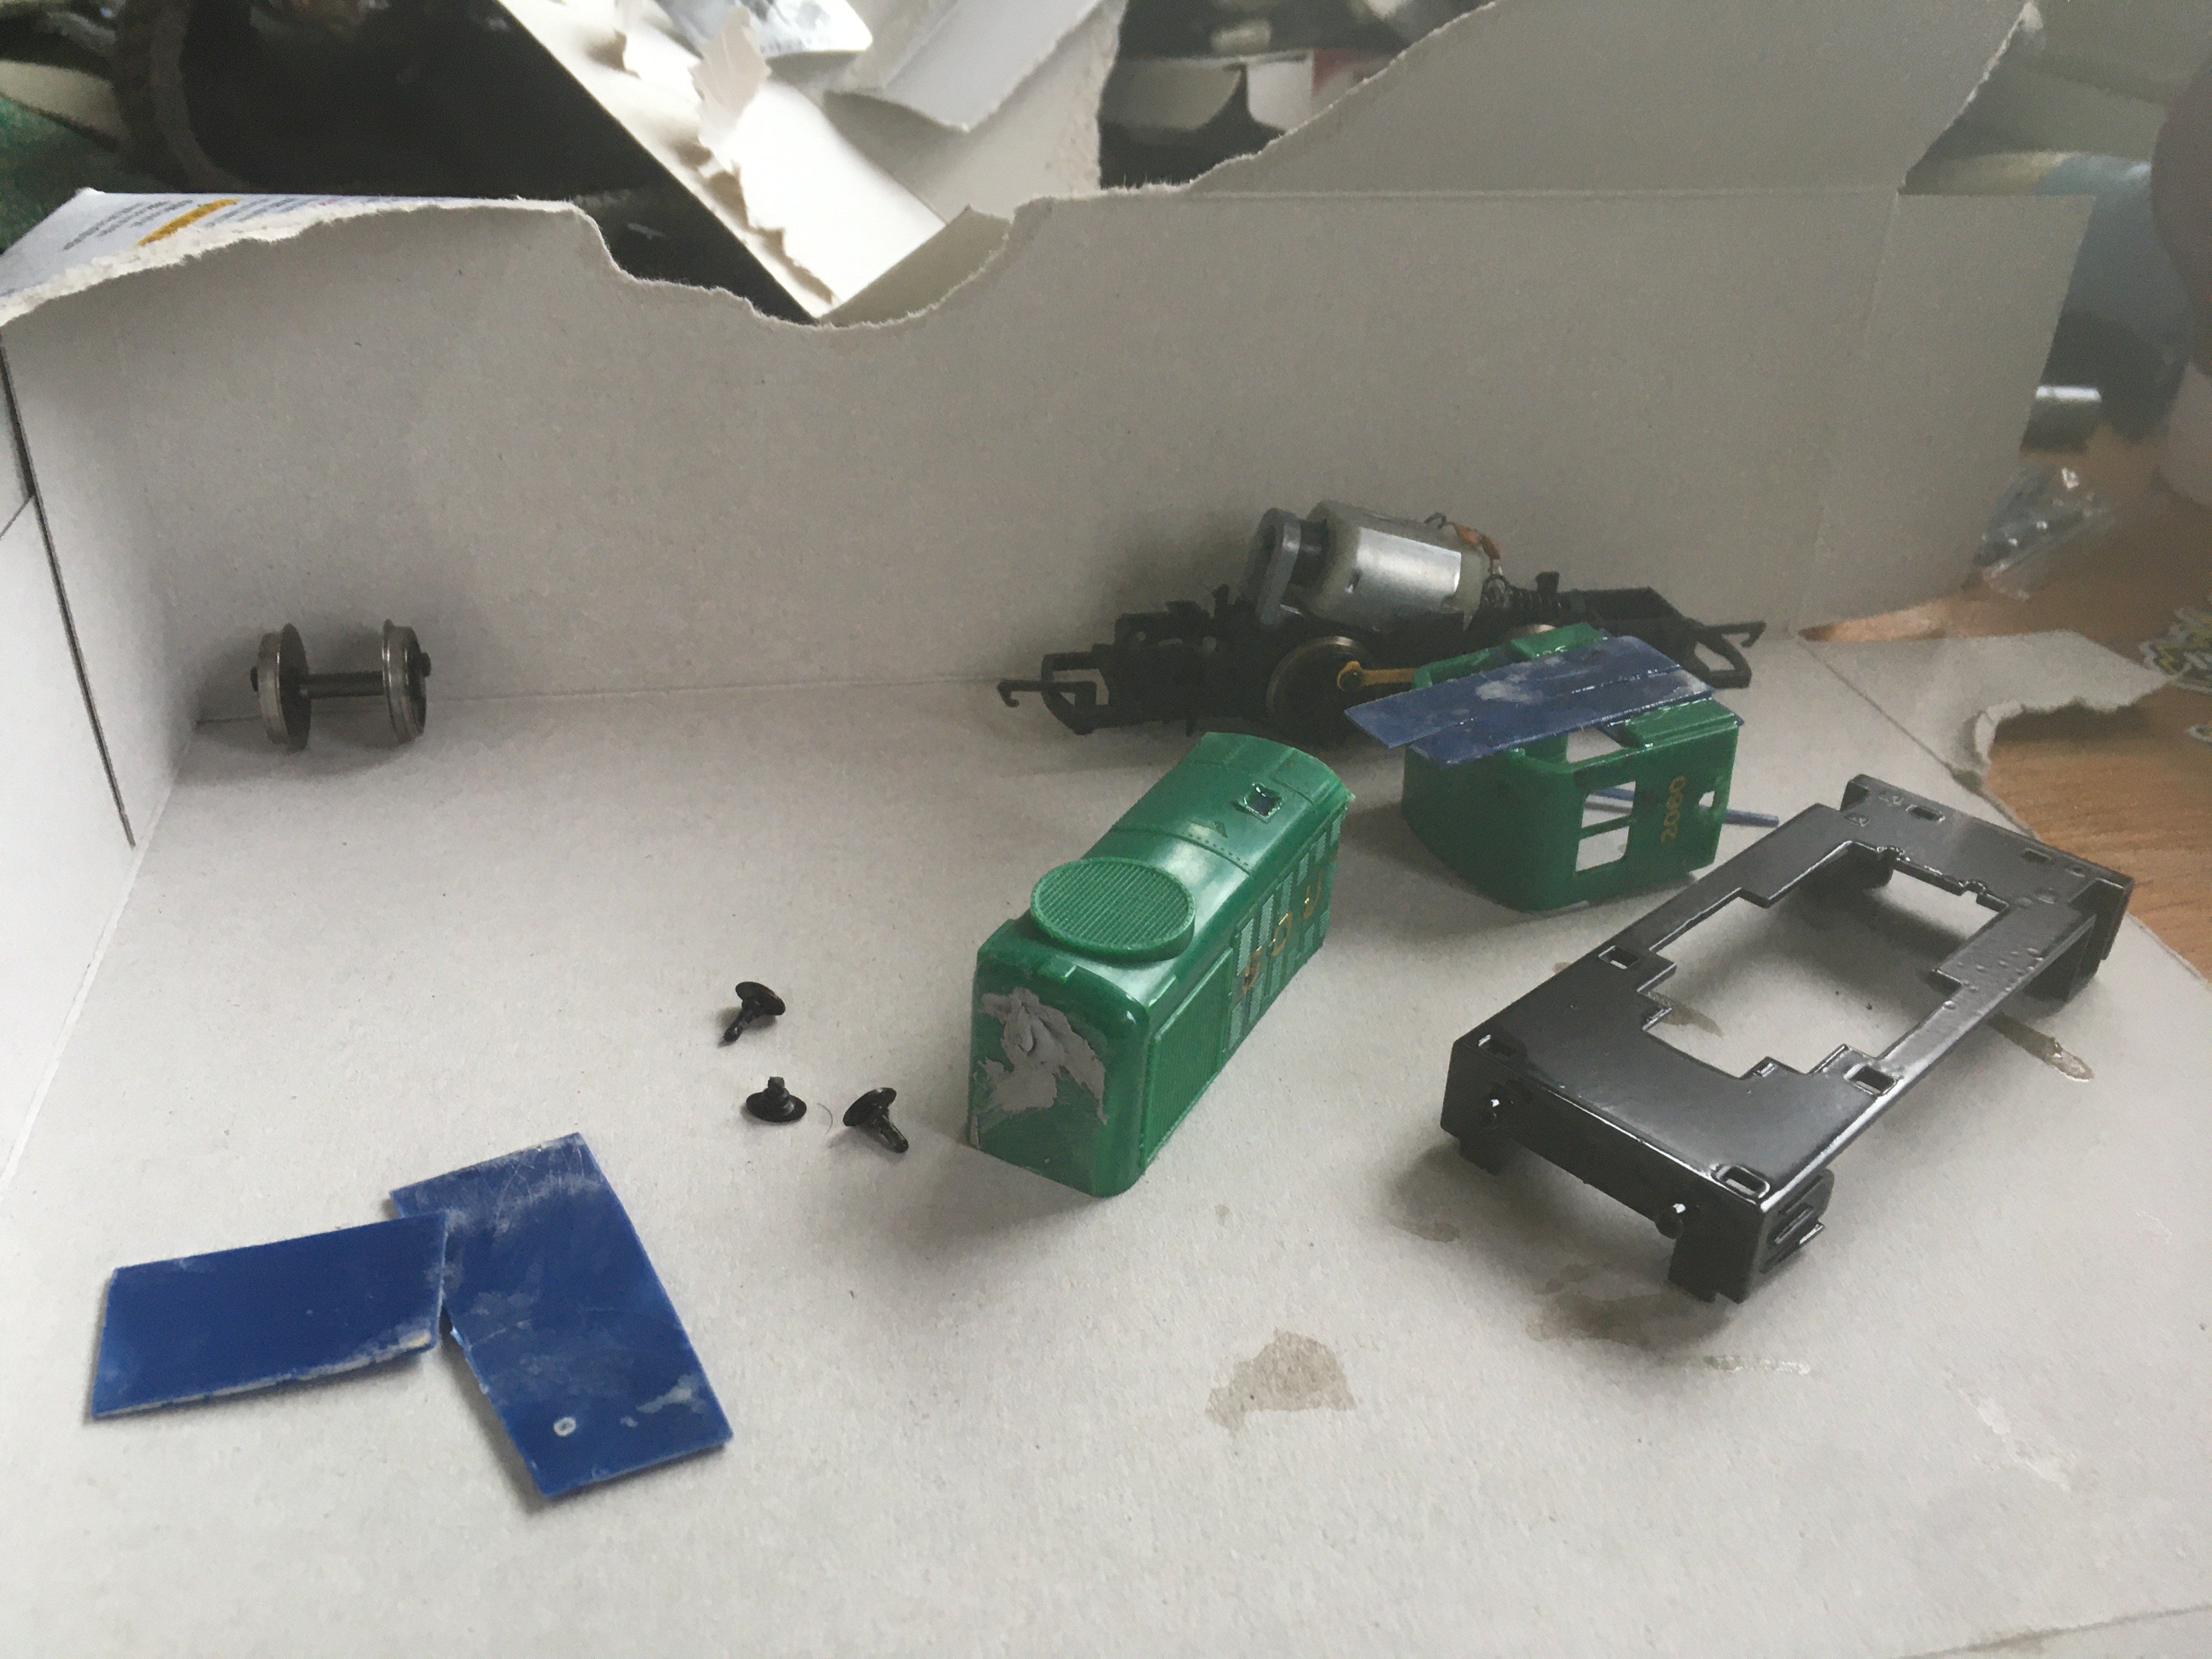
In all my years of playing with model trains I have never built any of my own items of rolling stock, but as I am trying to add more CIE stuff to my collection(on a budget!) I thought it would be a great time to start.
I havent modelled anything except for badly put together airfix kits when i was younger so I am modelling from a complete beginners perspective on this one!
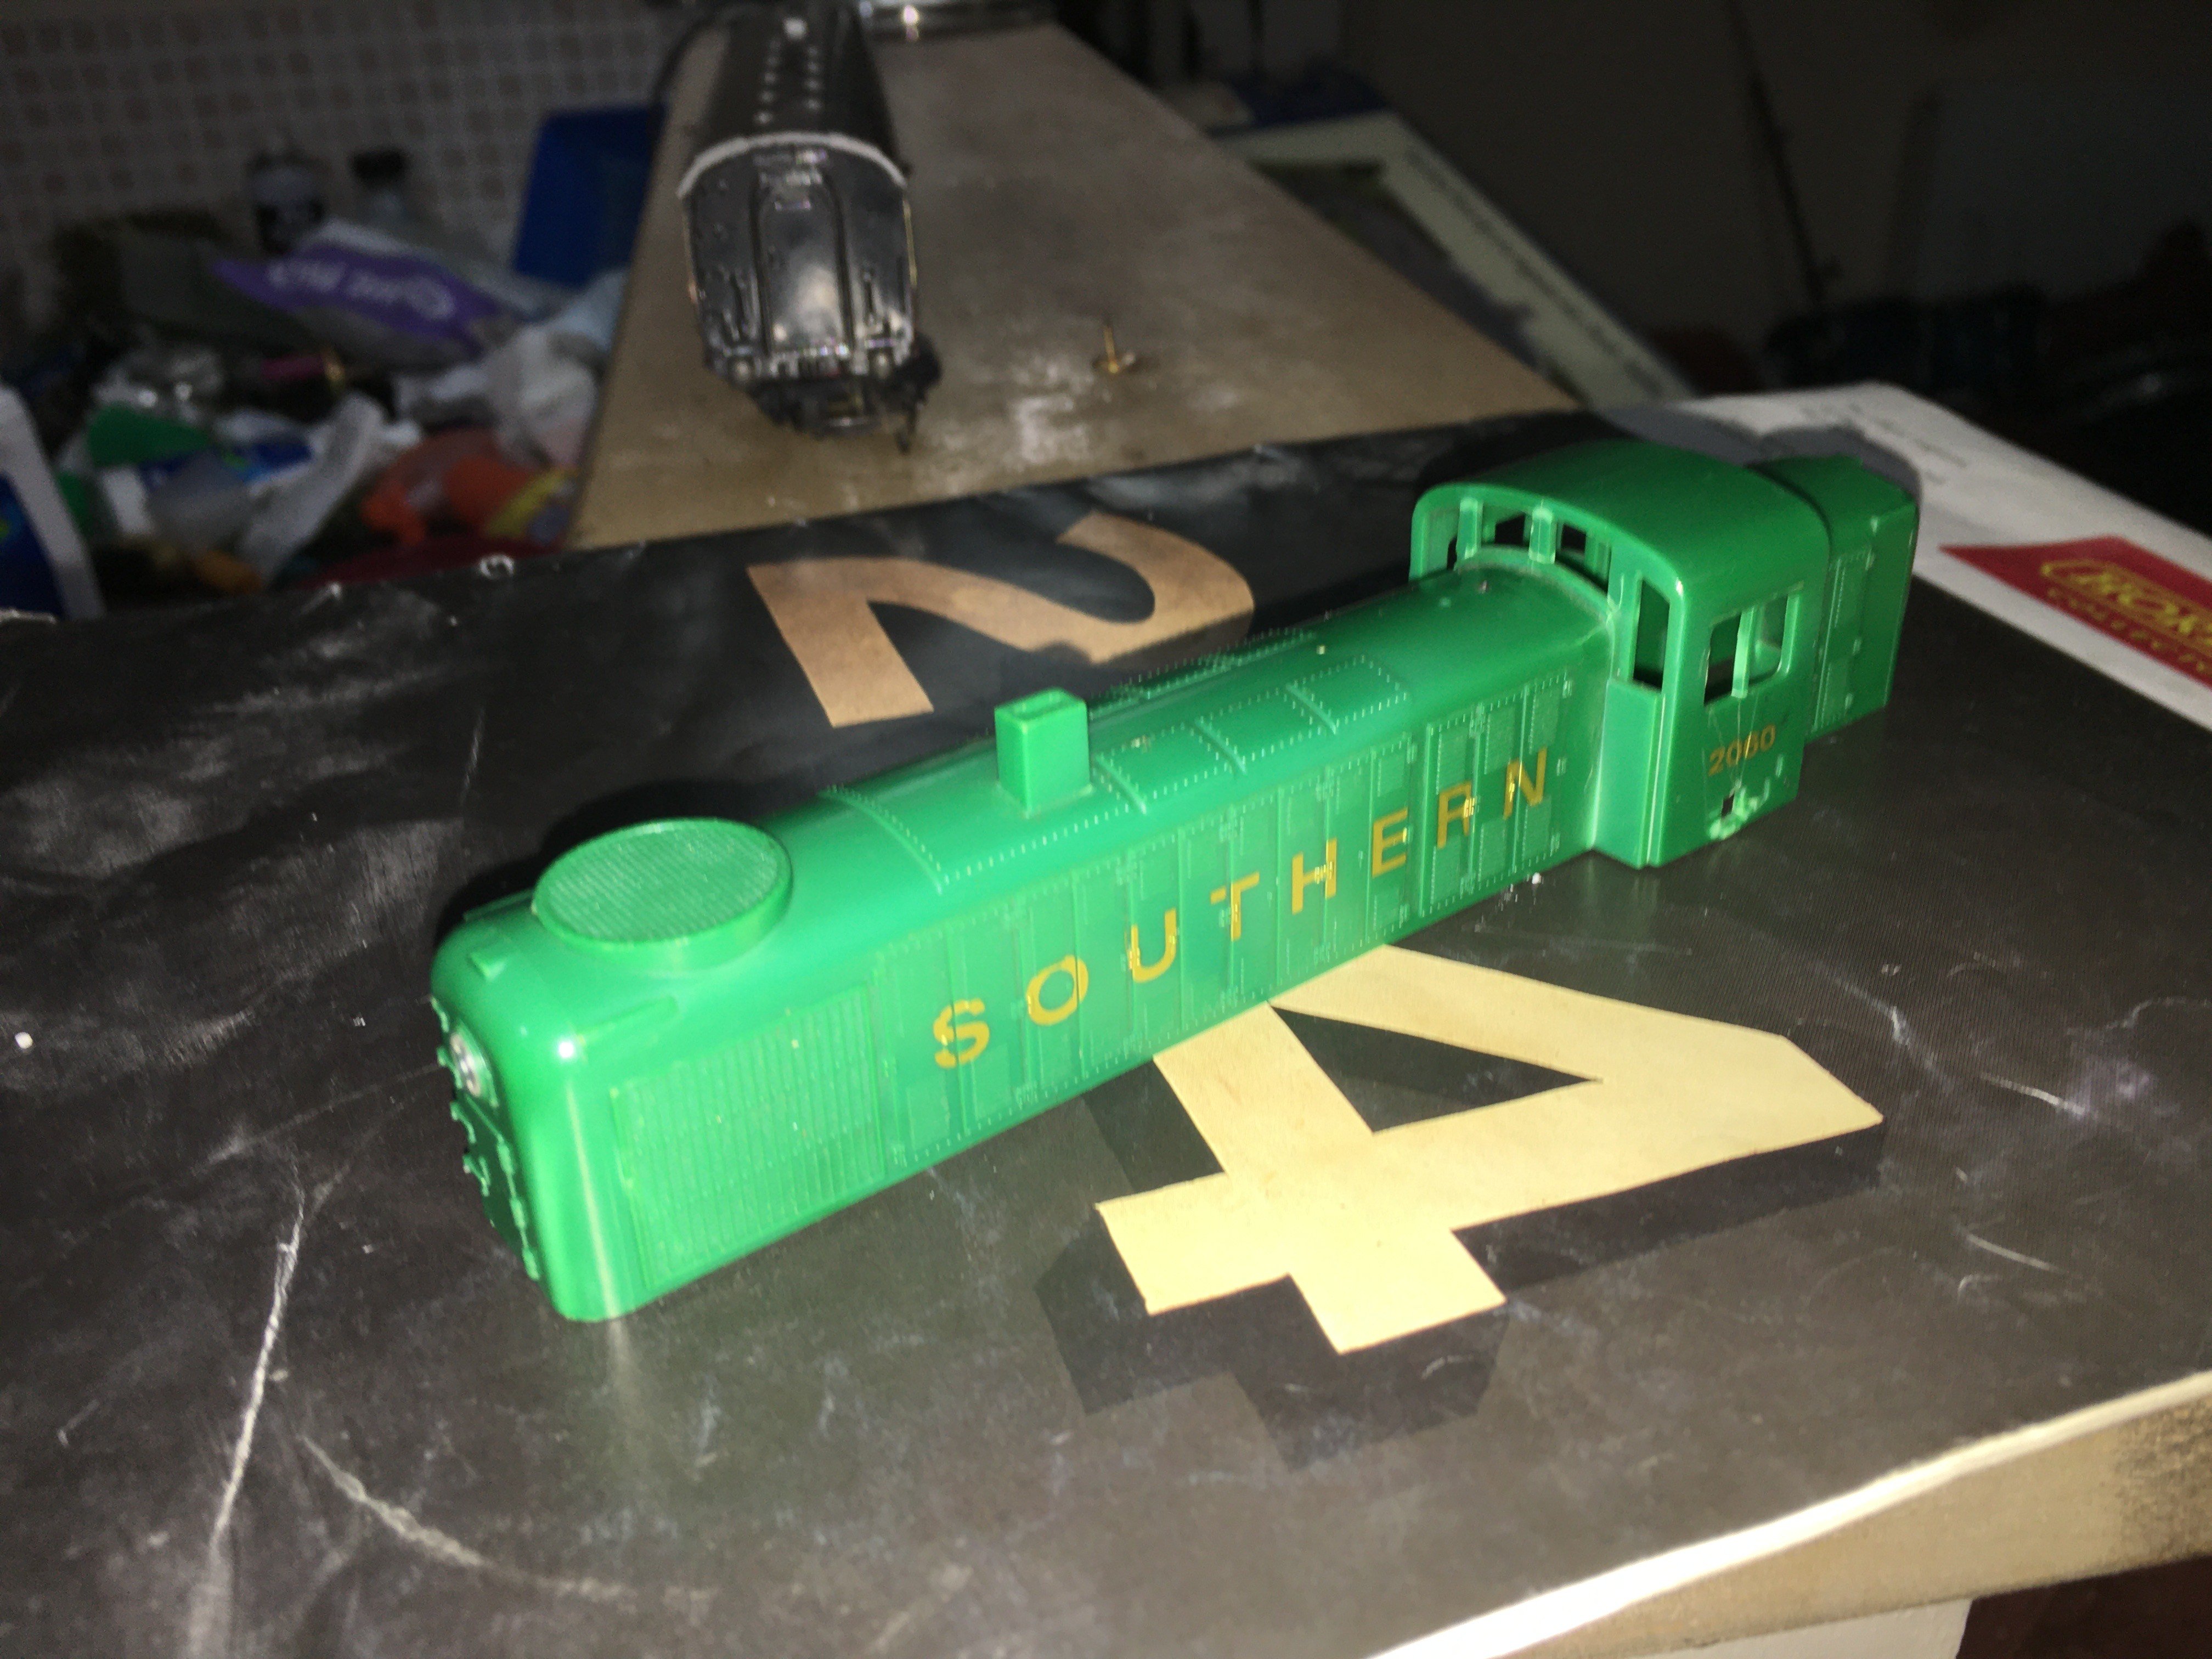
This body shell comes from a toy HO guage set I had years ago, has been knocking around in my model box for years as i had always thought about trying to turn it into a 121 "one day", however of course that day never came, in the past couple of weeks I have been looking at photos of a lot of old stock to see what i could repaint or remodel into cie vehicles and so the E class popped up.
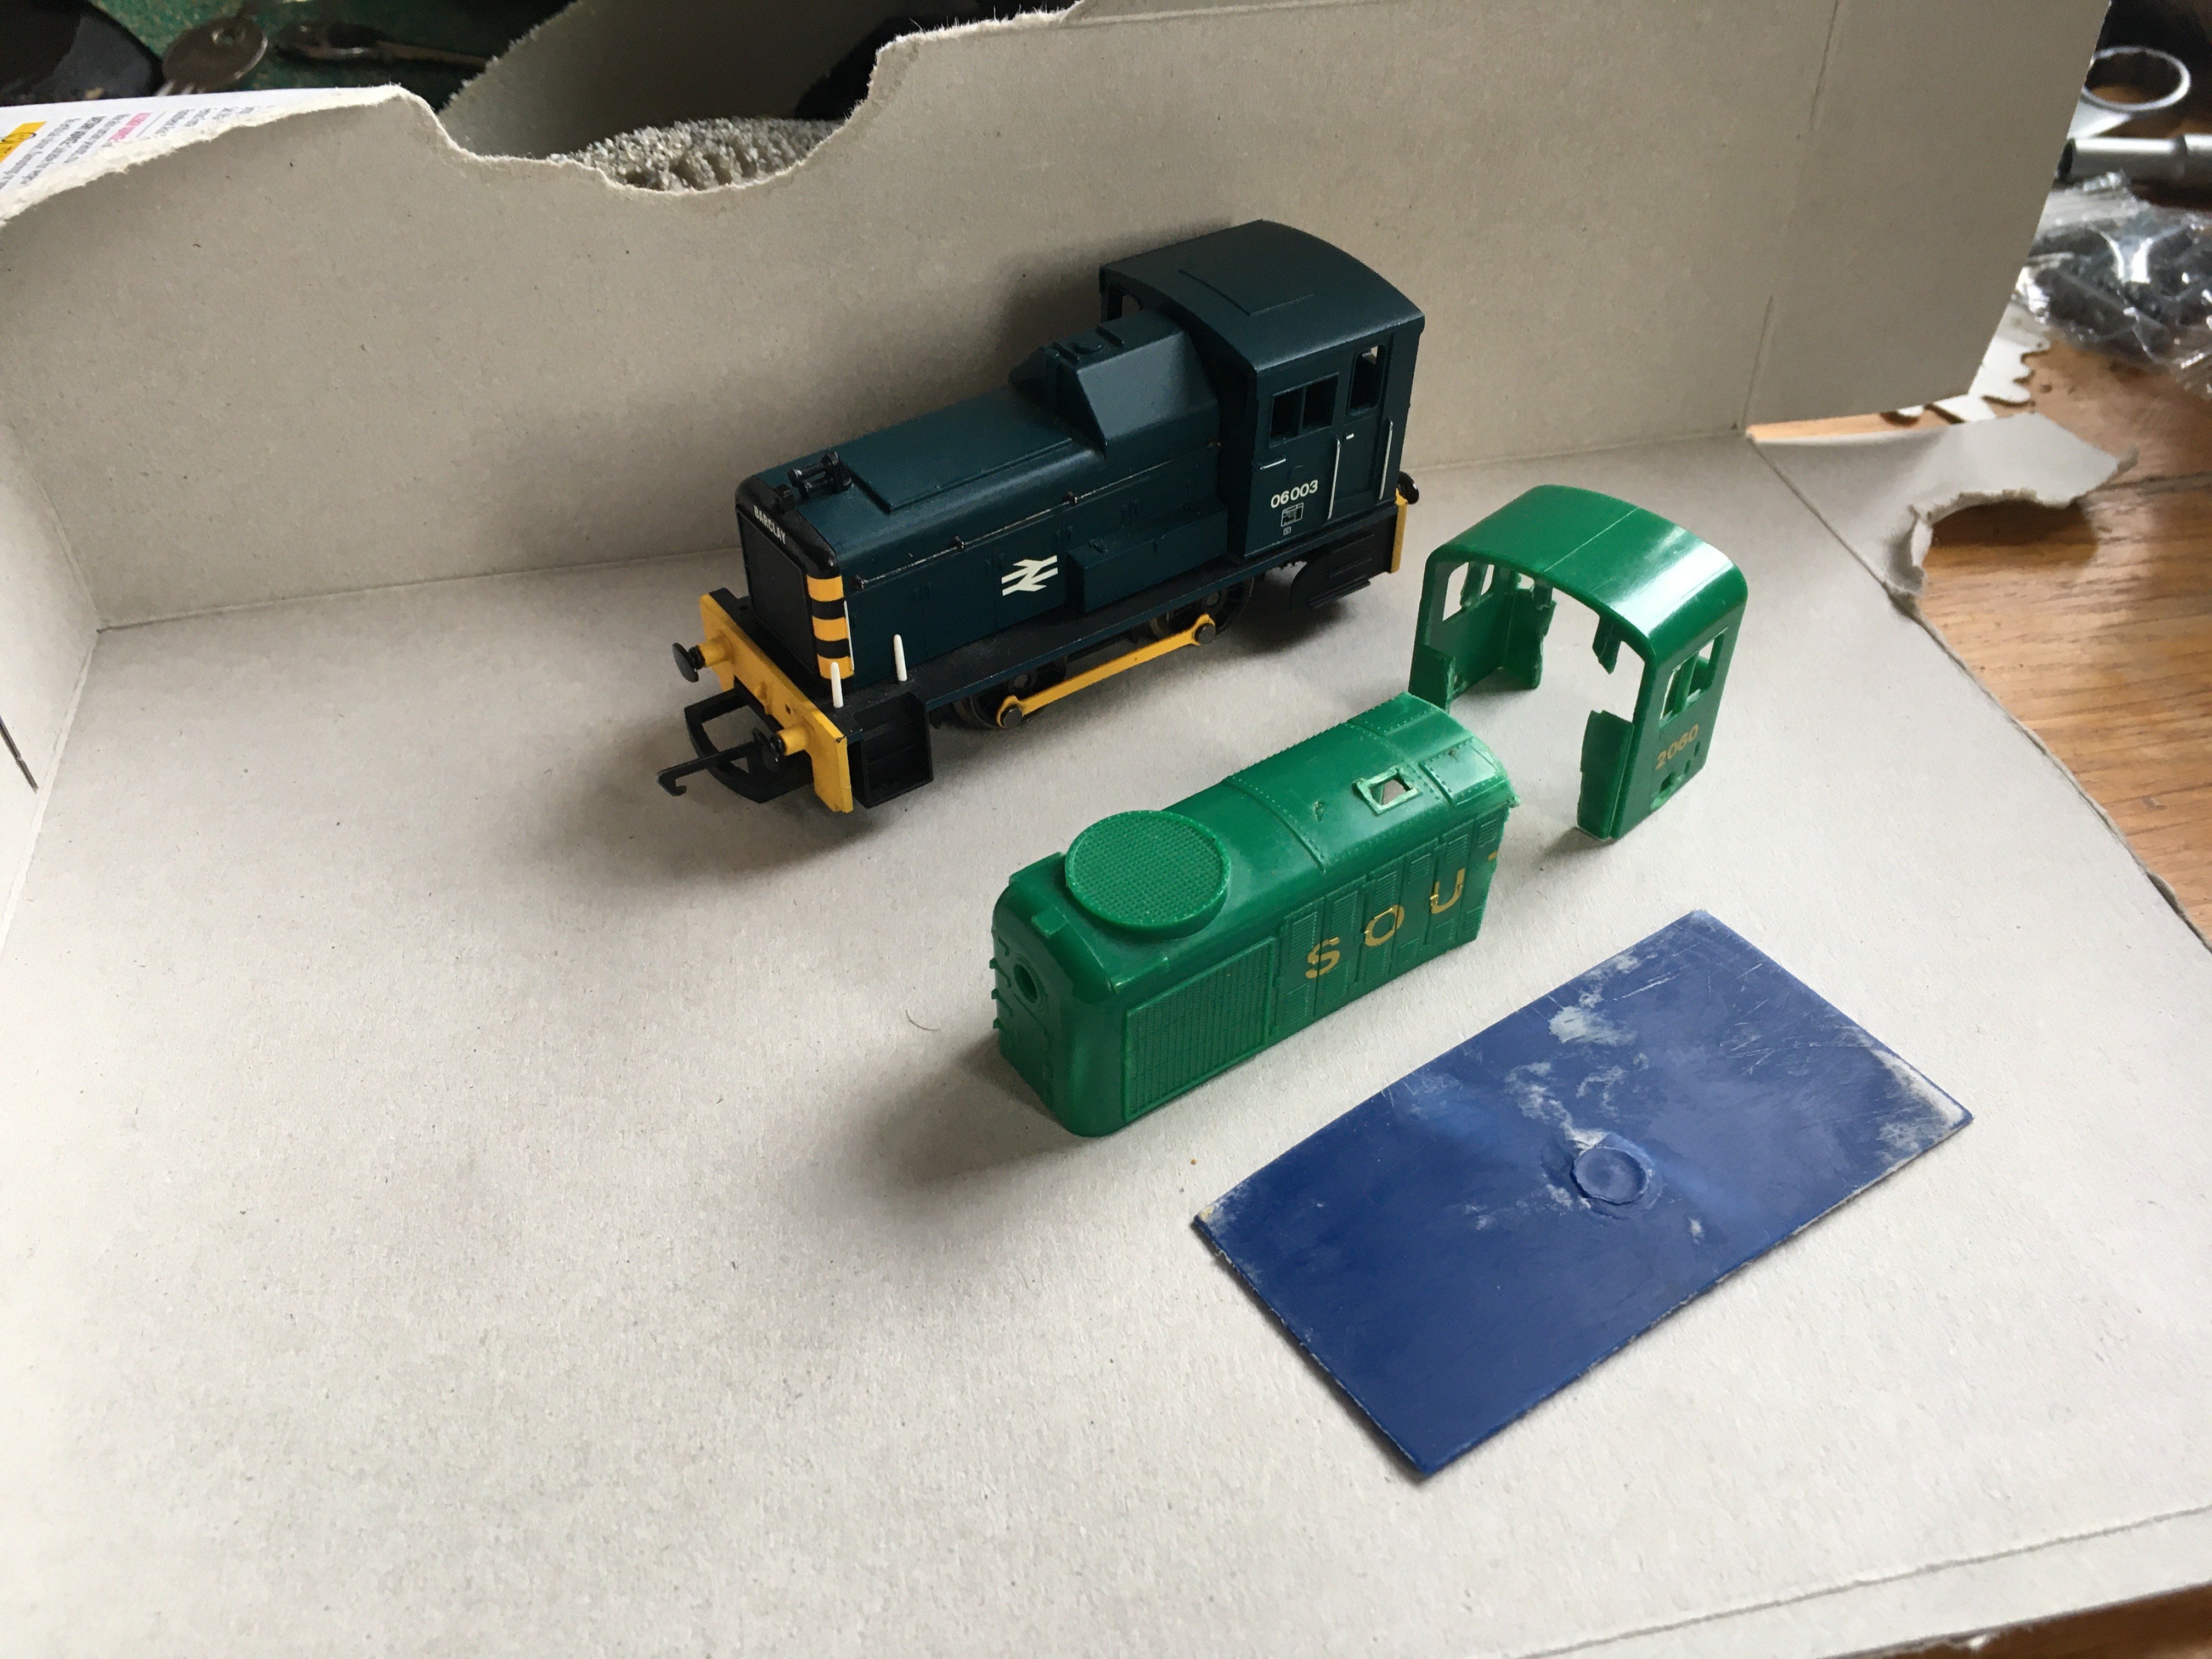
I had been comparing this to my Hornby class 06 but thought there was too many differences for me to be able to do a convicing conversion when i came accross this old bodyshell and noticed that it shared a lot of details with the E class, big square opening near the front with a round opening on top, and louvred doors running back along to the cab, I thought great ill mate the body to the cab of the class o6 and that will be an ok first conversion, I will use some artistic license to make it into an 0-4-0 loco and it will look great on my new layout.
On closer inspection I decided that the cab on the HO Loco had a closer window arrangement and although it had no door i would either cut one in later with the dremel or just leave that detail out, however now that im feeling a little more confidecent i may end up using the sides from the 06 cab to detail more when im done.
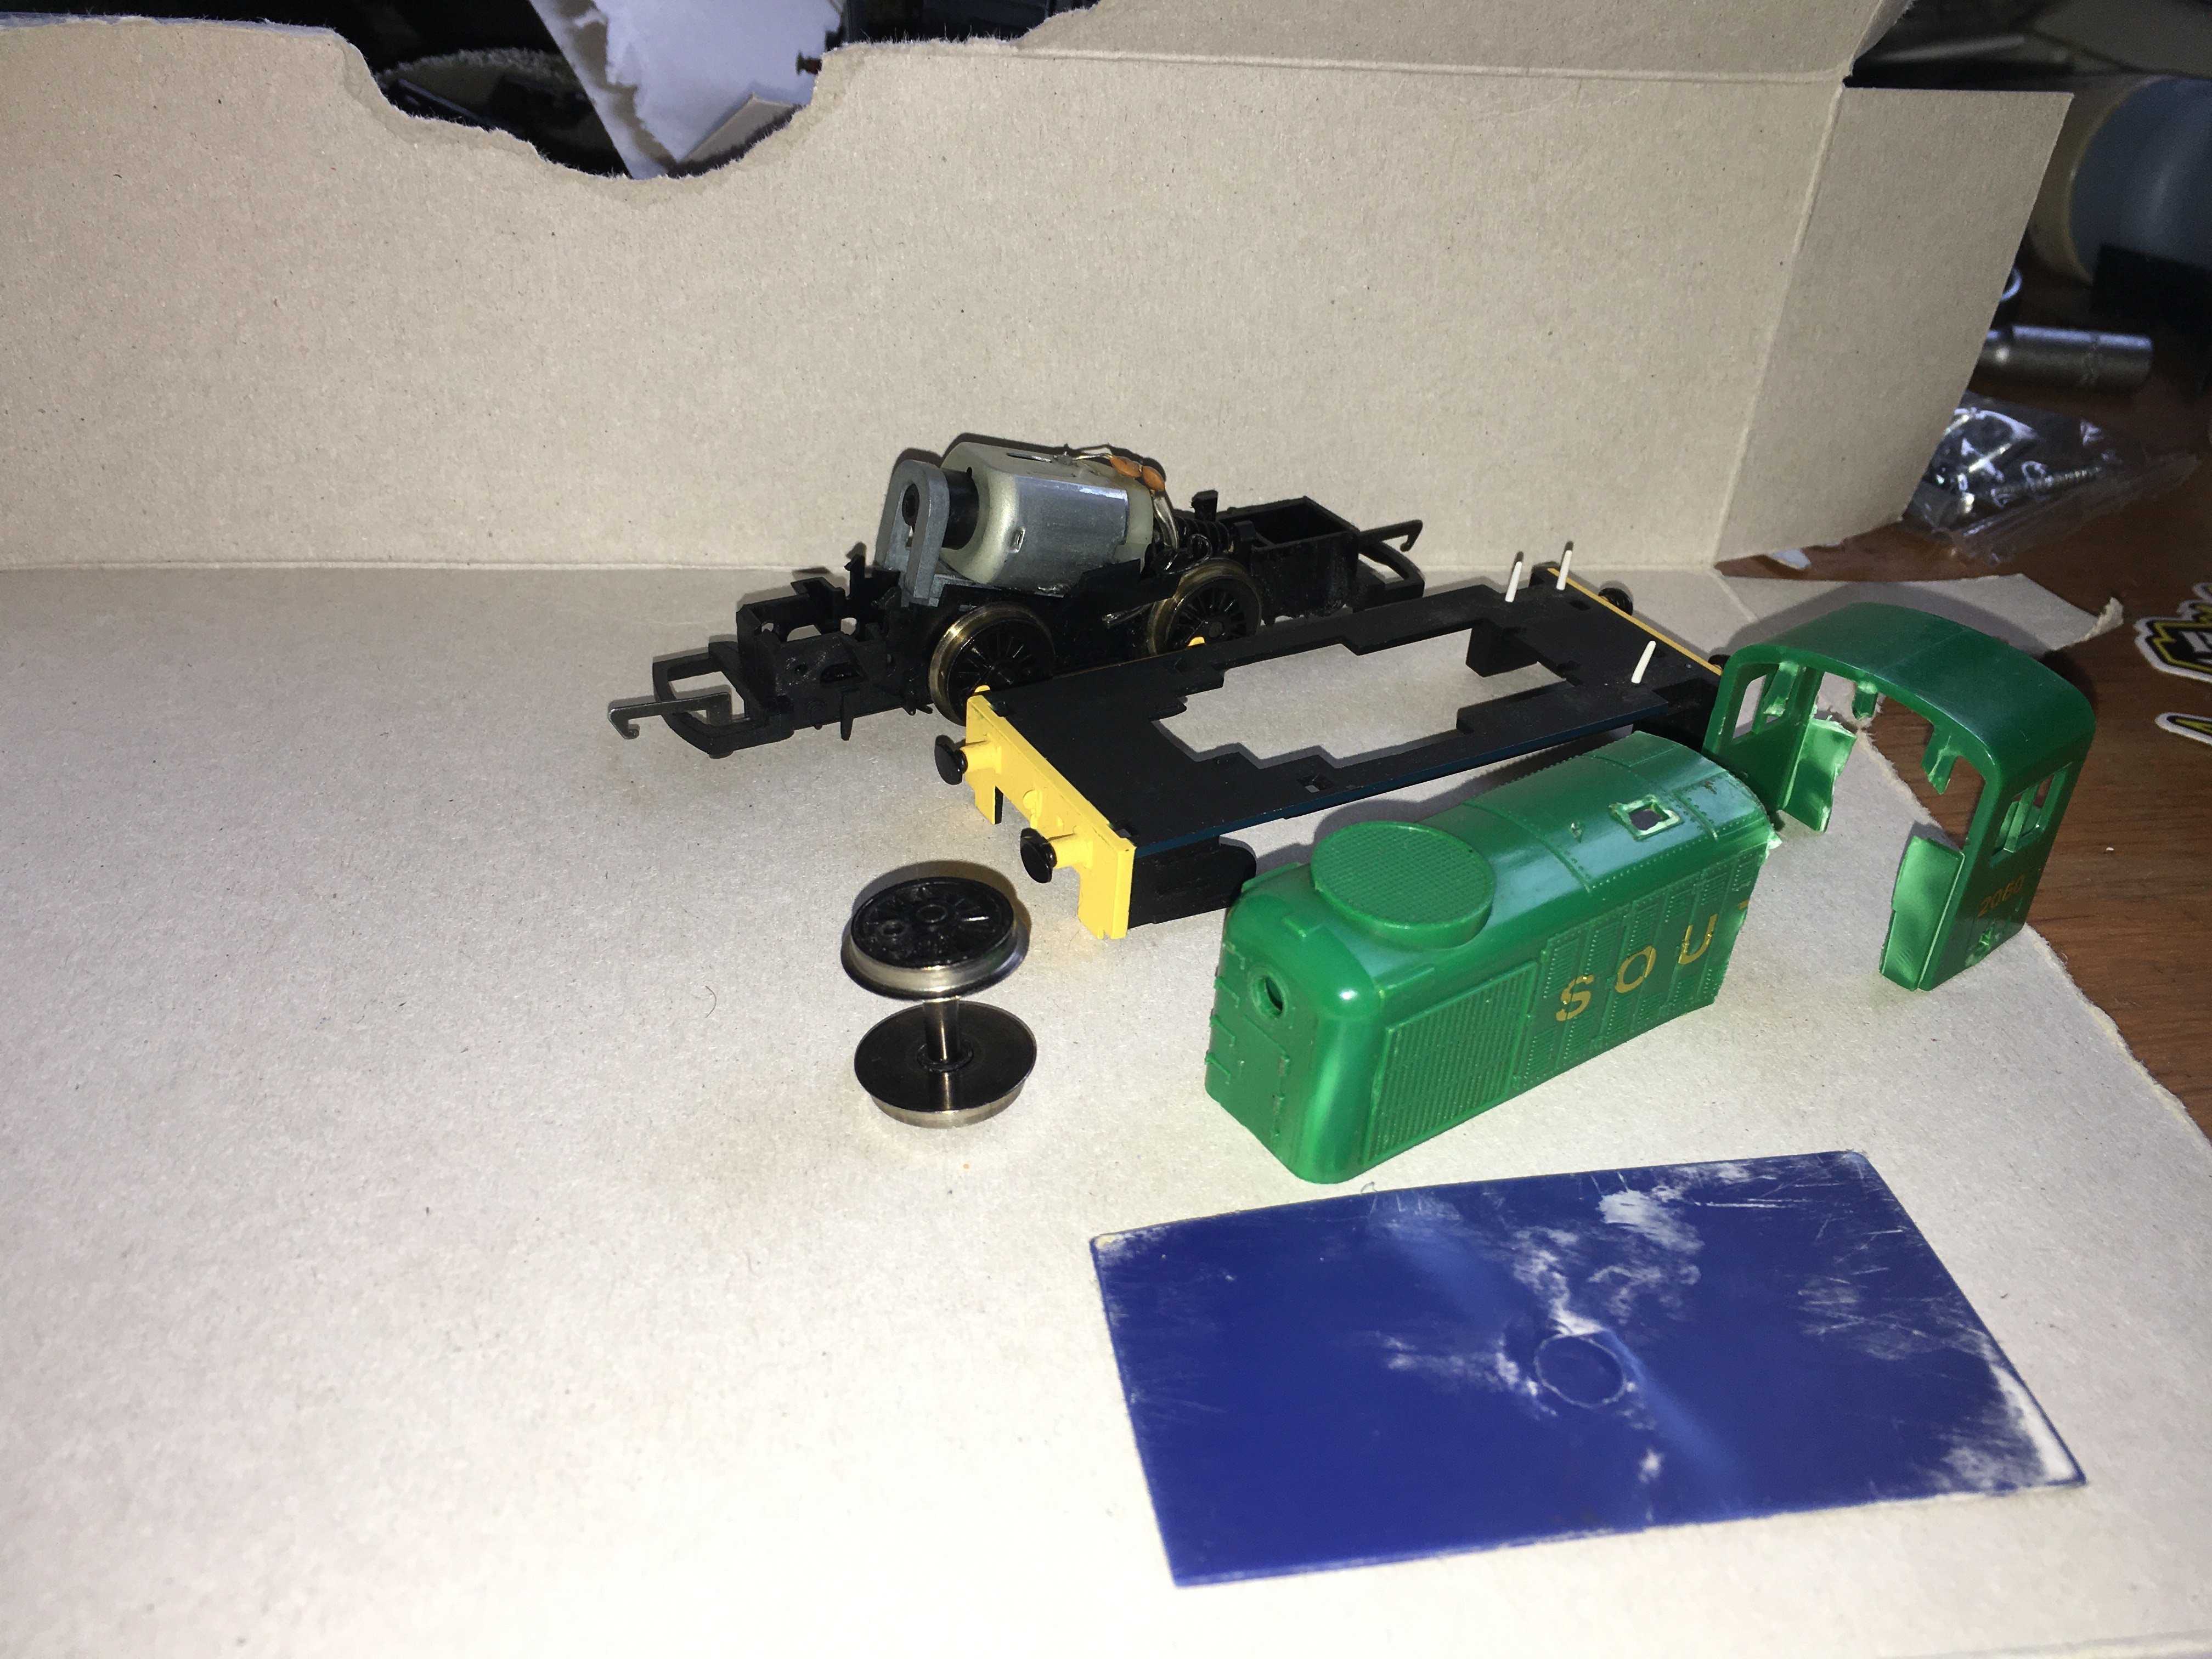
So after undressing 06 and hacking away at the bodyshell for around half an hour with a blunt instrument I was left with this, notice how I have also dug out a spare set of loco wheels from my spares box ;) the plastic card is just a random bit of plastic card i found in the house.
now time to start trying to turn it back into a locomotive!
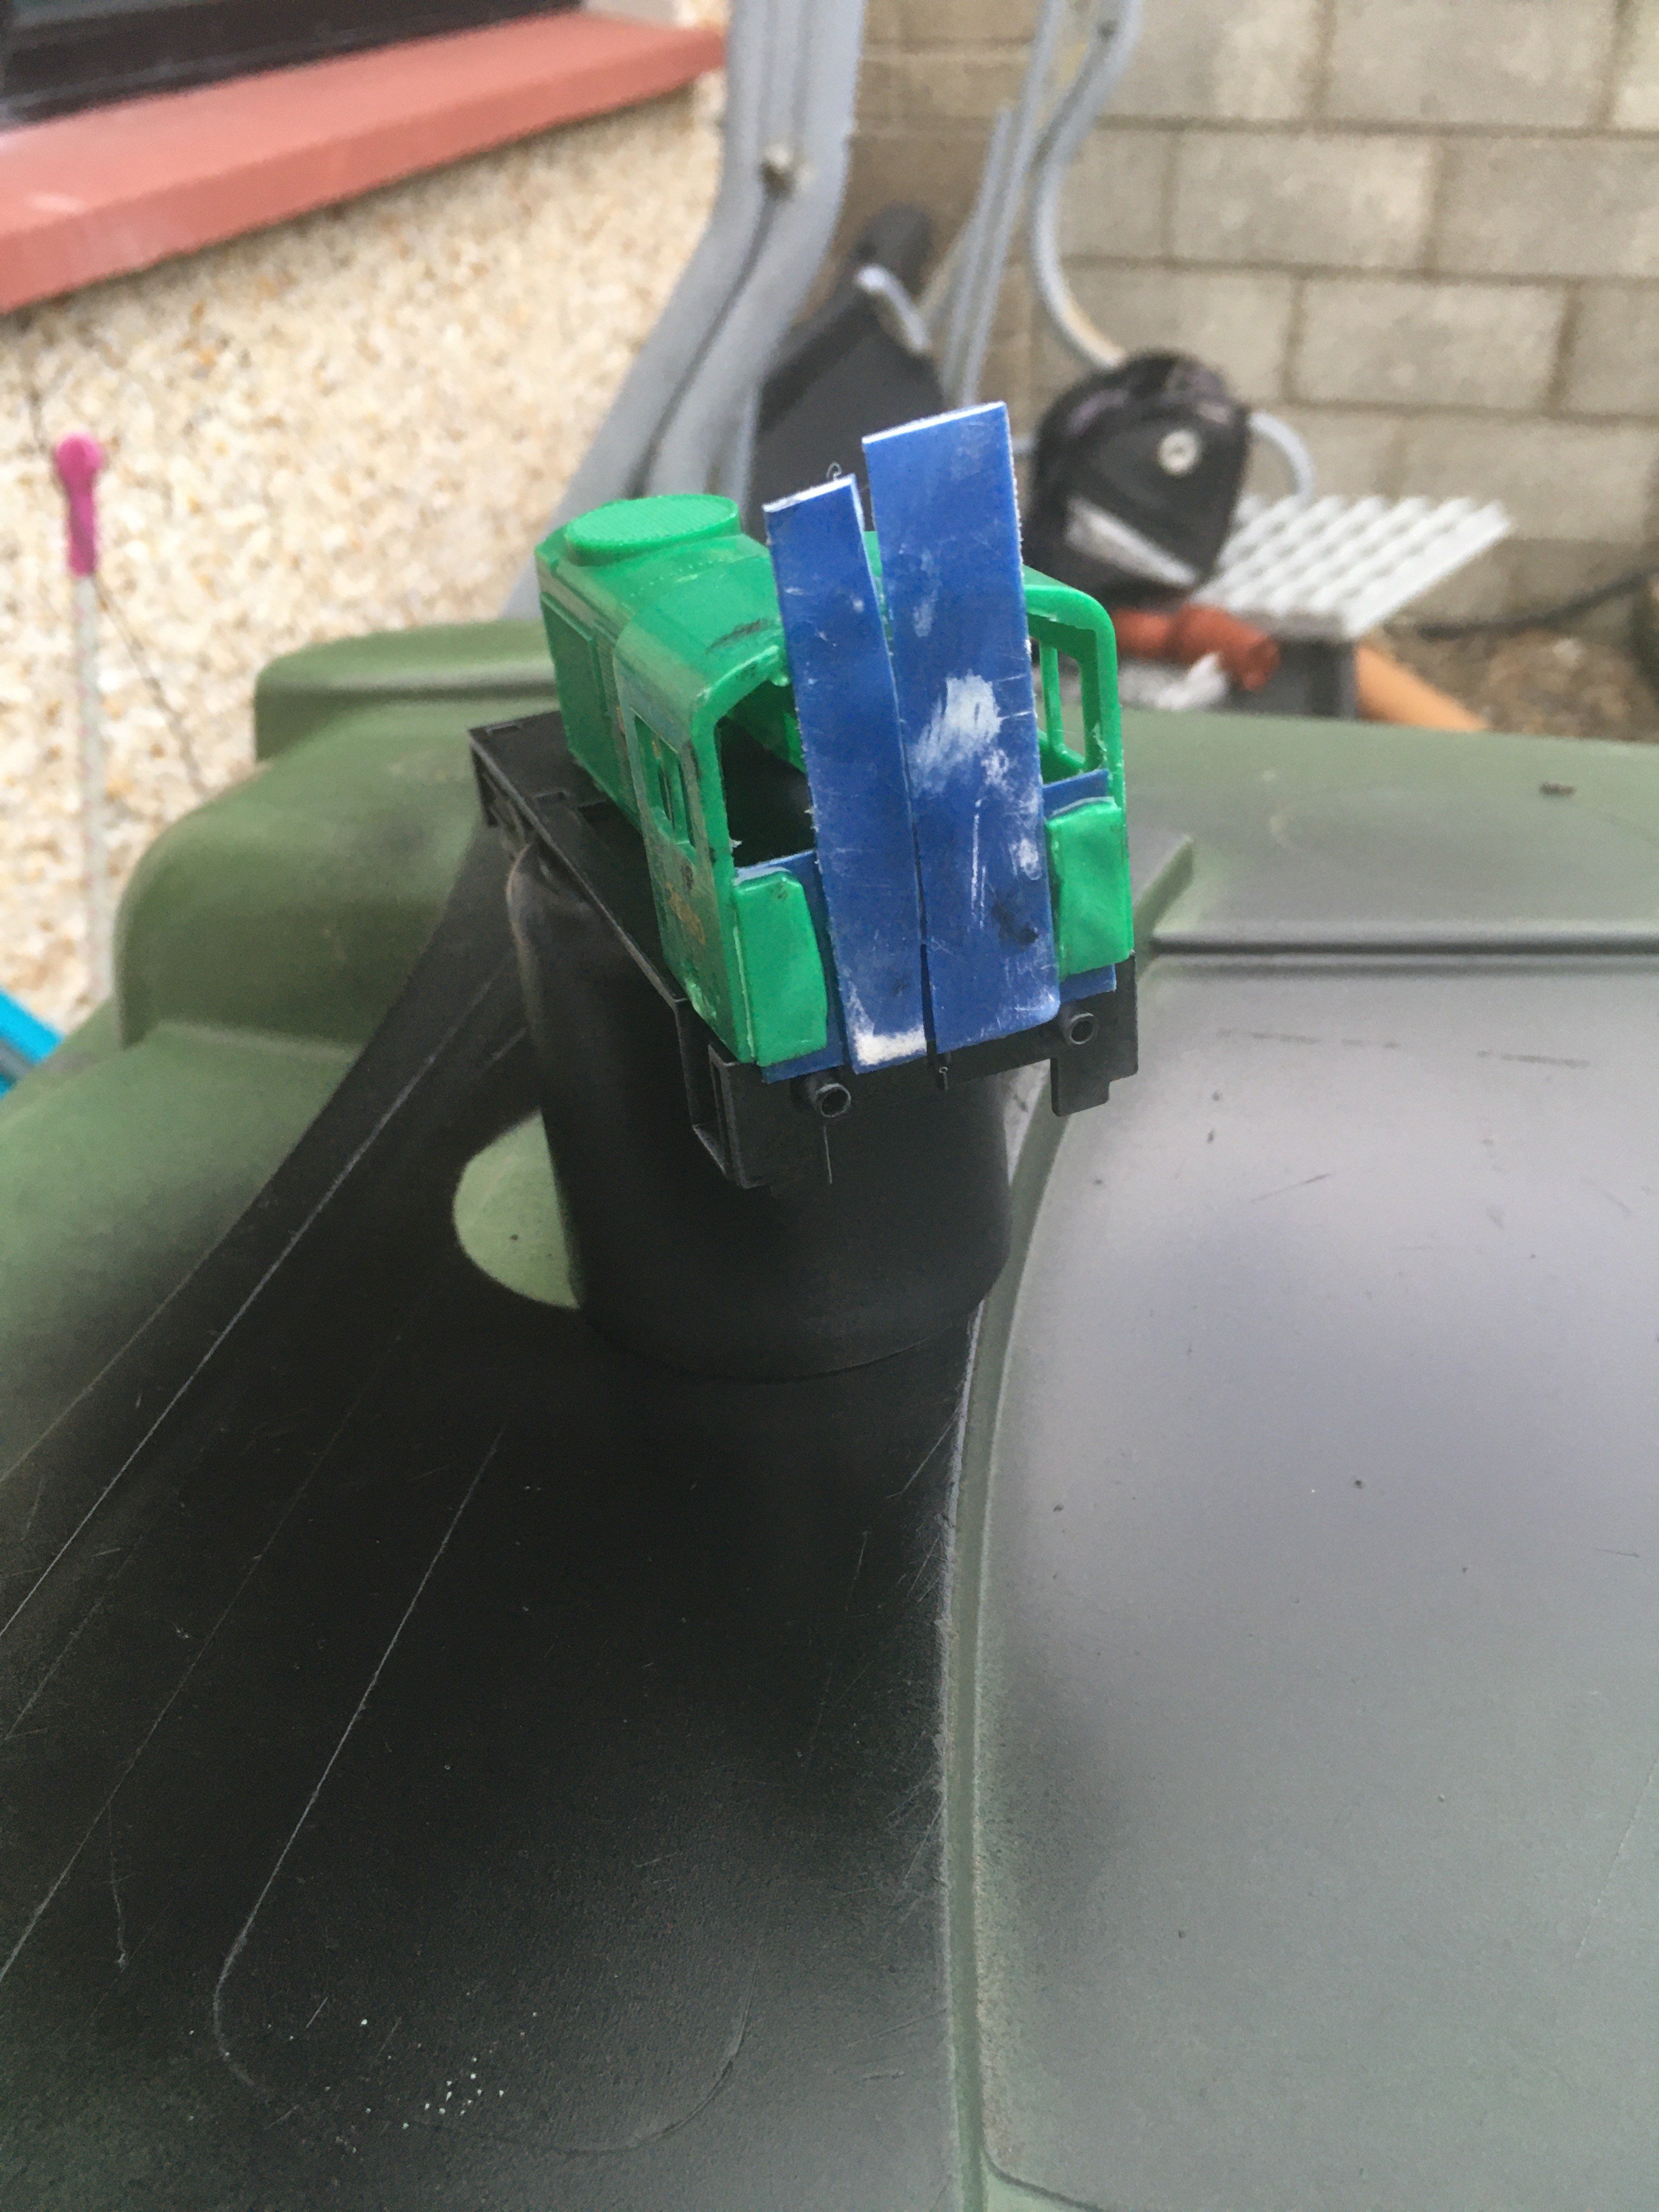
So a little while later this is what i have ended up with. the back of the loco has been built back up with plastic card and now needs to be trimmed down to shape, the 06 footplate got its buffers removed and a spraying of black paint, the engine section has had its chimney filled in as well as the headlight hole on the front, I did sand the front flush to look more like the E class however the blob of filler has meant i need to do it again.
finally starting to look like how its supposed to, the body will be able to slide forward a few mm on the footplate when i trim off the bottom of the plastic card which will improve the overall look, im really looking forward to getting the 2 body pieces mated together and looking nice so i can put a cover of black paint on.
-
4
-

.jpg.3192b8082b2a3b5c250ed10765368444.jpg)

.jpg.facf1458e0f00fc8b023fb6fbcd752ef.jpg)
Seans workbench thing
in Workbench
Posted · Edited by Sean
So the reason i had been keeping an eye on the wagon chassis size is because i am considering container traffic on my layout and have ordered some oo guage 20 foot containers as I think they should fit just nicely on a large hornby wagon chassis if my measurements are correct.
Unable to wait I found some HO guage containers that i could print out and make up on card, unfortunately i am limited to grayscale printing on blue card so they dont look amazing but give me an idea what to expect when the plastic ones get here.
much to my surprise these fit really well onto the smaller chassis with just a little overlap, if it was scaled down just a tiny bit it would fit onto this flat perfectly and look great.(and of course printed on proper card in colour)
unfortunately the container is a bit too short for the larger chassis but according to my measurements the oo containers should make up the extra cm and fill the bed, I think it would also be possible to take a lot of the underside plastic off this chassis with an exacto knife so it looks more like a proper container skeleton as well so it will be interesting to see how these progress next week.
they do look half good being pulled out of the yard in a rake though. the great thing about working with either of these wagon chassis is that hornby sell a 3 pack of them for 20 pounds on their website and there are a lot of used wagons on ebay etc which would suit for these types of conversions.