

David Holman
-
Posts
3,721 -
Joined
-
Last visited
-
Days Won
100
Content Type
Profiles
Forums
Resource Library
Events
Gallery
Blogs
Store
Community Map
Posts posted by David Holman
-
-
Certainly does! I've got that book. Will check it out.
Many thanks.
-
Wouldn't use cork sheet if it comes as a roll. Tis a devil of a job to get it flat. Cork floor tiles work really well though. At the moment they can be got from Wickes. A pack of 9 does a square metre. Very easy to cut and lay.
-
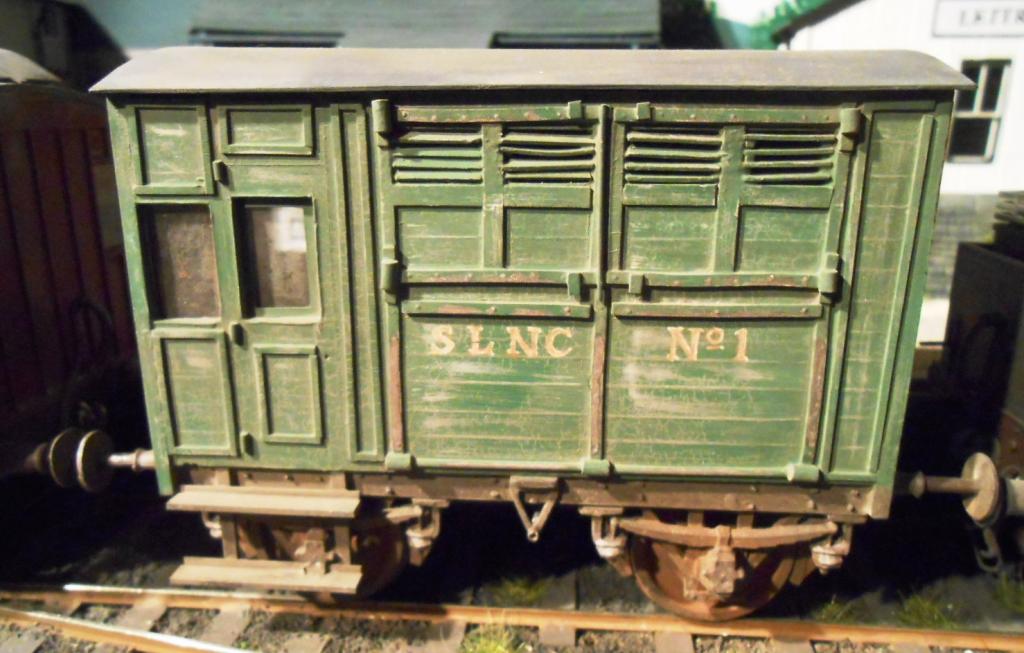
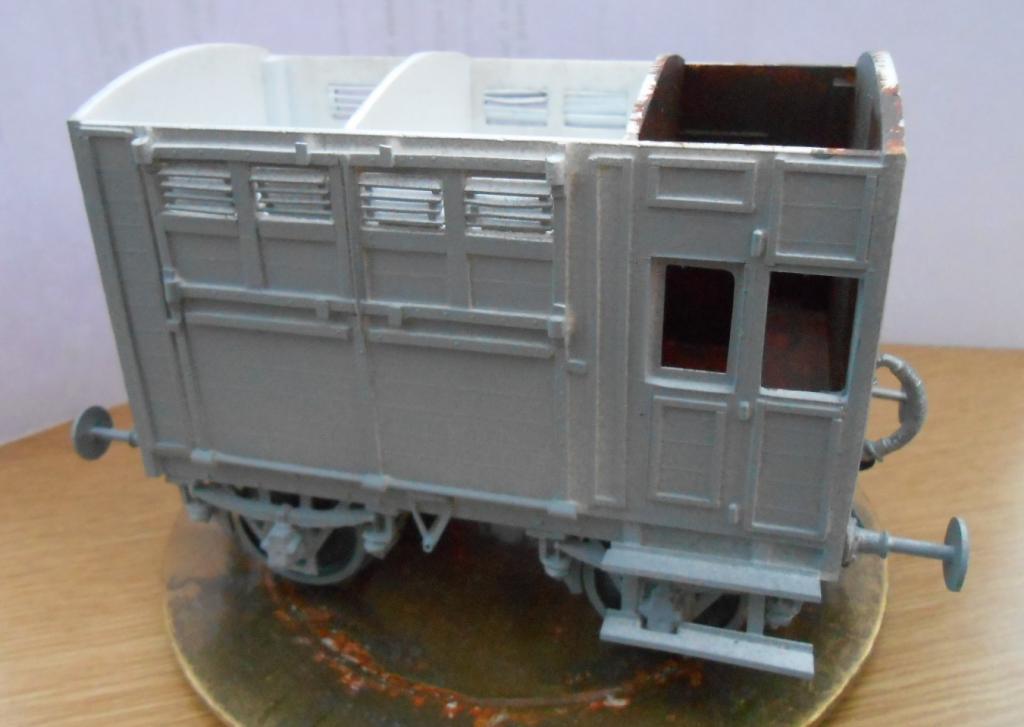
Here's one to test the historians. Am currently finishing off a couple of those low, rounded end vans. Obviously somewhat ancient, they still seem to crop up in photos, even in the 1950s - possibly rebuilds of the 'semi-covered' versions of even earlier. Cattle vans also seem to follow this pattern too. Anyway, though the Sligo had several [and running numbers are clear in photos], I can't find pics of GNRI/CIE of this type. As I'd prefer to model the latter [probably got enough Sligo wagons for now], does anyone know of any running numbers, and indeed, where the GN [or CIE] logos would have gone, please?
Hopefully the picture below clarifies the wagons I mean. Mine are resin cast sides, which I did from my own masters. Very easy to do and worthwhile even for just 2 wagons. May eventually do more if I can get the numbers! There are 3 GN fitted vans behind, done in the same way. Will post more pics once they are weathered.

-
Thanks as ever for the positive comments.
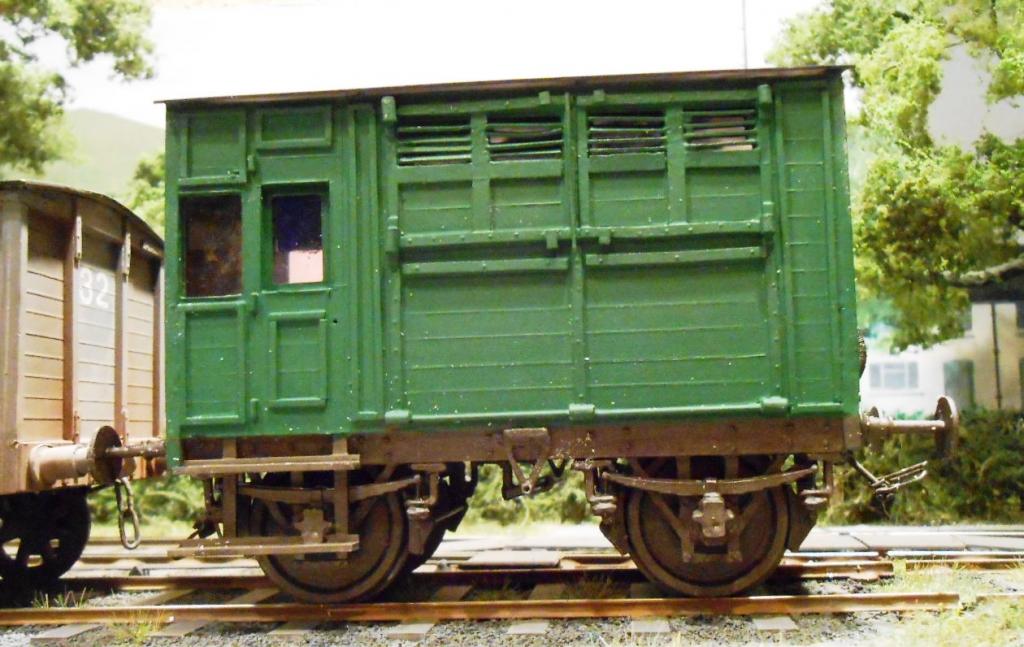
A couple of folk have emailed wondering about the fact that the box was green, whereas Sligo livery was a red/brown [where it hadn't peeled off]. Truth is I did it green cos the Alphagraphix card kit is that colour. However, managed to find a note in Desmond Coakham's Broad Gauge Carriages [p91] which has a pic showing the box at Manorhamilton in 1959, prior to the final auction and it was indeed green, though very tatty. Always grateful for constructive criticism - it is the path to ever more accurate modelling. Here is another picture of the box, which hopefully highlights the peeling/worn paint better.
-
Wasn't [isn't] the Isle of Sodor between England and Ireland? In some ways now a shame that Thomas & Friends are computerised - in the early series they were genuine Gauge 1 models.
However, am sure your ideas will be much more credible!
-
Vey much agree with BosKonay on the merits of cork, but continue to use it nevertheless & it does, as he says, work well as the ballast shoulder. An alternative is to use some sort of light foam underlay. the type sold to go under wood/laminate flooring springs to mind, but you'd need to be building a big layout [or laying a floor] to make it worthwhile buying as it only comes in quite large rolls.
-
You've been busy - and well worth the effort too. Even in primer they look rather classy.
-
If you think about it 5-600 smackers is not really a lot for a hand crafted [as opposed to factory made] model. Was doing a buildings demo at an exhibition a few years ago & was asked by one bloke if I did commissions. Told him I was still working full time, but if he didn't mind waiting, a building like the one on show had taken me around 80 hours work. Minimum wage at the time was around £5 an hour, so that made it at least a £400 model. Add in materials and research time could easily add another 25%. Note that is minimum wage - so would hope I would have been worth a bit more than that.
While operating a well known, entirely hand built layout a few years ago, we tried to estimate its value for insurance purposes. Built to museum standards, we guessed at around £30 an hour for such craftsmanship and gave up when we'd passed a quarter of a million...
-
Thanks - sounds like good advice. Think I will probably stick with 8' 6 wheelbase though, partly because of the proportions re slightly larger wheels and also because I've spent £14 on a set of profile milled connecting rods. The latter always a key starting point for me when starting a chassis - they go a long way towards eventual good running and con rods are a pain to make as well!
-
http://www.precisionscalemodels.com.au/wp-content/uploads/2010/12/V.R.-Walker-Rail-Motor-102-153-H.P.-Diesel-Rail-Car-Trailer.jpg
Here's an Australian model of a walker rail car
Wow, that looks a splendid model - and no doubting the parentage of the prototype either. Will add it to my files - it will be very useful.
Many thanks.
-
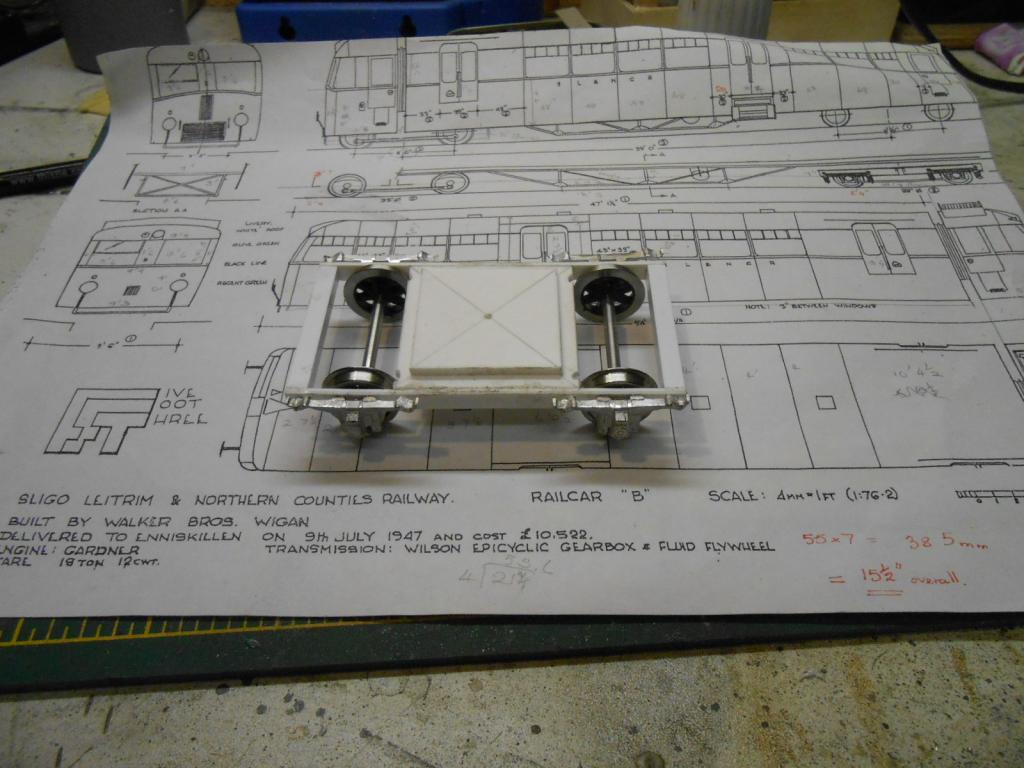
A new year and a new project – an attempt to scratchbuild a model of the Sligo Leitrim and Northern Counties Railway’s Railcar B in 7mm scale, 36.75mm gauge.
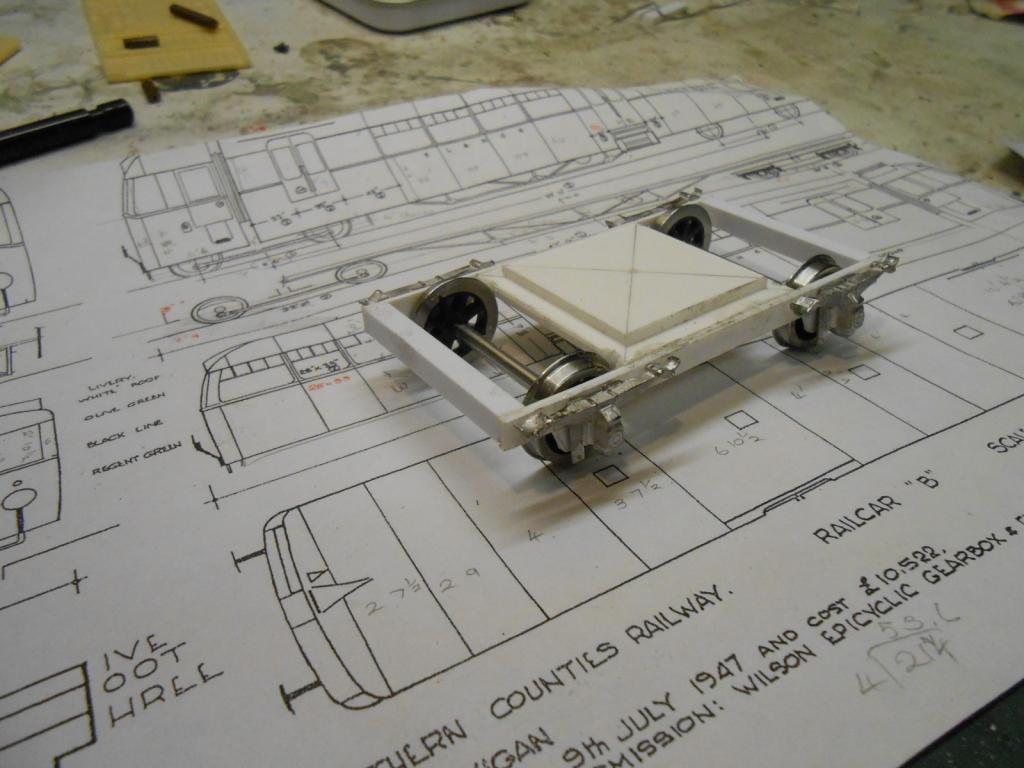
This afternoon, managed to make the trailing bogie – only a couple of hours work, but four or five times that in terms of thinking. As you can see from the photos, it is mainly made of plastic sheet: 60 thou for the bogie sides and 80 thou for the frame stretcher. The axle boxes are cut down ABS whitemetal of an early LSWR pattern. Decided on plastic partly to reduce weight, but also to speed up the process. Plastikard is so much easier to cut than sheet metal, though 10 thou nickel silver is easily cut with scissors. The tractor unit frames will be nickel silver though.
The bogie is pictured on a print of the plans on our website. Have drawn myself a 7mm scale version, but this has highlighted a number of problems with the original plan. It may well be that printing it has skewed some of the dimensions, as the wheel base of both bogies measures as 8’ 6”, but the given dimension is 8’. Among other contradictions, it shows the overall length as 54’11” over buffers, but this is the length when all the panel lengths are added up. This does correspond to the drawing [220mm], but the overall width, a stated 9’6, measures as 9’ 9 on the drawing. It brings back memories of one of the first coaches I built. It was a 4mm scale LSWR brake third, done from plans in the old Model Railway Constructor which involved cutting out a 10 thou overlay for the panelling. Only when the model was nearly complete did I start to worry that it was looking too big. Checking the scale on the plan revealed it was actually about 4.7mm to the foot. Words such as the one which rhymes with what rowers put their oars in [and how suck is written in the King James bible] were vented with great fluidity, but the mark 2 version somehow got built in half the time…
Anyway, as well as the above dimensions, the plan shows the driving wheels as 2’ 8 and the bogies as 2’ 4. Neither of these are readily available, so have gone for Slaters 3’ drivers and 2’6 wagon wheels for the bogie. Hence am thinking that, even if the wheelbase is only 8’, with proportionally larger wheels it should still look alright. That and the fact that the wheels are half hidden anyway. Nevertheless, measure [at least] twice and cut once, remains my motto – even if I don’t always remember to practice it.
An early problem with the drivers is that they are one eighth inch axles. Slaters do a 34mm back to back in 3/16, but not 1/8. Am waiting to see if they will do a one off for me, but if not will use brass tube to sleeve the wider back to back and bore out the main gear accordingly – the latter for someone down the Club who knows how to use the lathe methinks.
Otherwise, apart from ensuring the articulated trailer tracks properly, there is nothing I haven’t done before. Bodywork will mainly follow the examples of David Jenkinson in Carriage Modelling Made Easy, while I might well do a bit of resin casting for the seats. Exterior livery is well documented, but if anyone knows what the internal colour scheme was, I will be very interested. A case of watch this space – though am not expecting this to be a quick project.
-
Emery boards, new workshop files [old ones full of solder], which shows the missus did read my wish list.
However, also got a the Classic Commercials kit of a 1939 Austin van in 7mm scale. She gave me this too - though in actuality I'd bought it myself at the Reading Trade Show. However, if you tastes are as specific as mine, it pays to be careful!
-
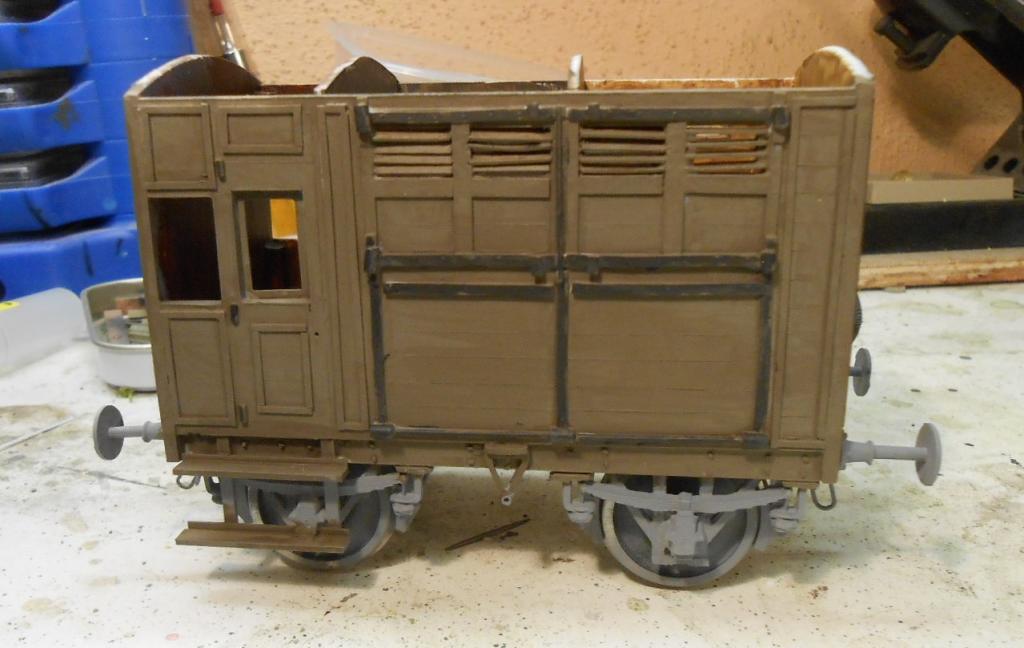
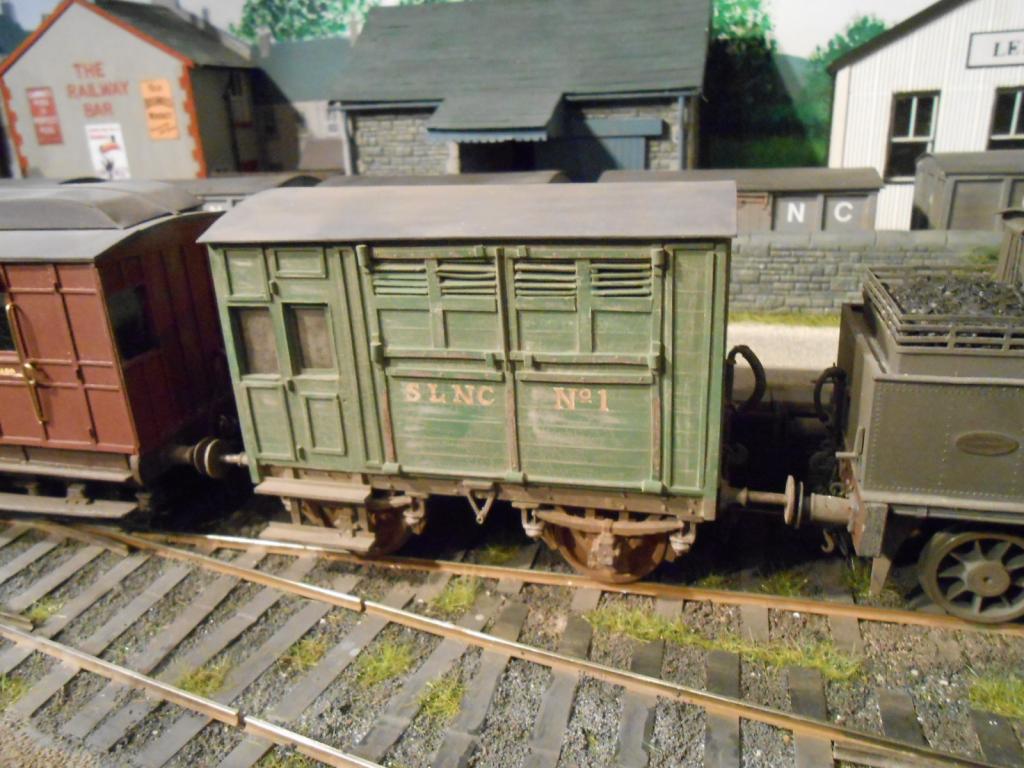
Here are some notes about my latest wagon for Arigna Town and the rather extensive weathering job I gave it. The model is of the Sligo Leitrim horsebox, actually a WLWR model, given to the SLNCR after their own was damaged in an accident. The Sligo’s van had been old, but the replacement was even older…
As with much of my stock, it begins with an Alphagraphix card kit, though as usual it is only used as a drawing. Bodywork is a plastikard shell, embellished with Evergreen strip. Running gear is made from whitemetal castings, supplied by Alphagraphix, while wheels are the usual Slaters, opened out to 34mm back to back, to suit Irish broad gauge in 7mm scale. The first photos show the completed model in primer – Halford’s automotive spray can – which was then brush painted in overall grey brown acrylic [using artists colours], as I wanted to simulated bare wood showing through old, faded, peeling top coat.
The Alphagraphix card kit shows the horsebox to be painted dark green, so next day a top coat of Humbrol dark matt green went on and this was then left to dry and harden for a couple of days. The next steps are largely copied from Martin Welch’s book ‘The Art of Weathering’ and involve using Humbrol Liquid Poly to partially dissolve the top coat and begin to expose the acrylic wood colour underneath. This is the clever bit, because we don’t want to put the base wood colour on top of the main coat – that is just not how it happens on the real thing…
The next pictures show the effect of the Liquid Poly on the top coat. Suggest you use your computer to zoom in on the surface and see how it has become crazed and cracked. As before, this then needs to be left to harden for a couple of days before the next steps.
Once hardened I then used a small flat screwdriver blade to scrape away at the crazed paint, exposing bare wood beneath. A glass fibre pencil was used in the same way to remove even more paint and therefore almost bare planks in places. Where metal strapping was exposed, this was later over painted with a mix of Humbrol grey, gunmetal and bauxite [64, 133, 53] – these colours also used on the underframe. The lettering went on before this – done by hand using a white gel pen, then a fine tipped orange marker on top. Again this got gentle treatment from the fibreglass pen to wear it down.
All of this work not only scrapes the paint back, it also fades it to a lighter shade, as per real life. The final act was to give the whole model a thorough dusting with weathering powders [Freestone Models], including the roof, which had earlier been painted in Precision roof dirt. Still need to add door handles, but hopefully the model now looks as it would have at the end of its working life – dirty, faded and rather worn out.
-
Wonderful stuff - always look forward to seeing the latest postings. Have done outside Walschaerts and dummy inside Stephensons, but inside motion really does move it up a level, even in broad gauge.
-
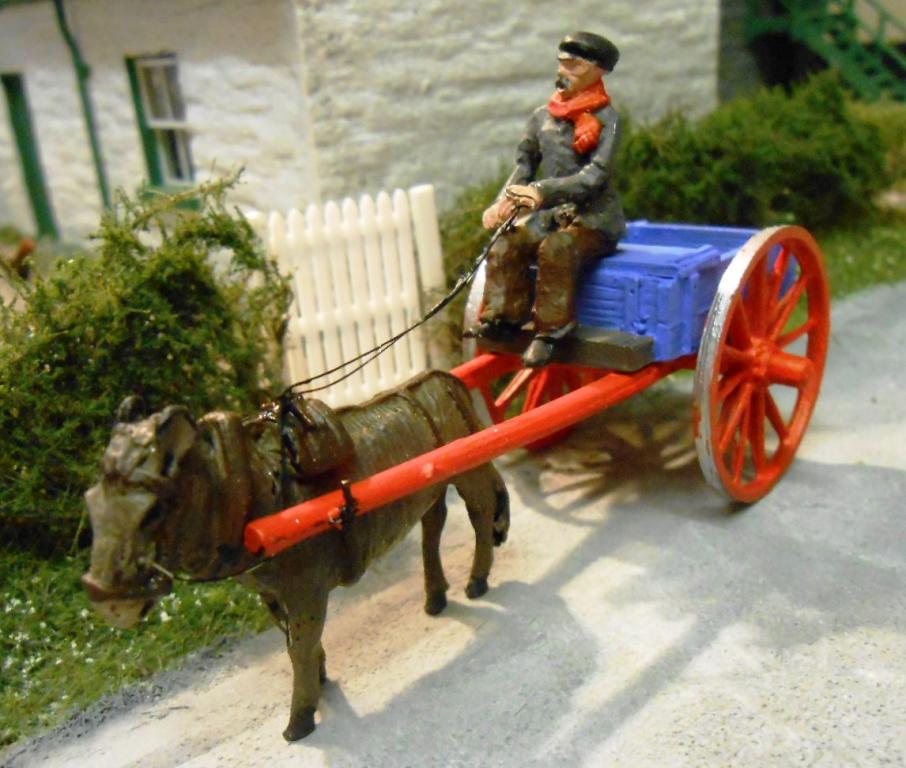
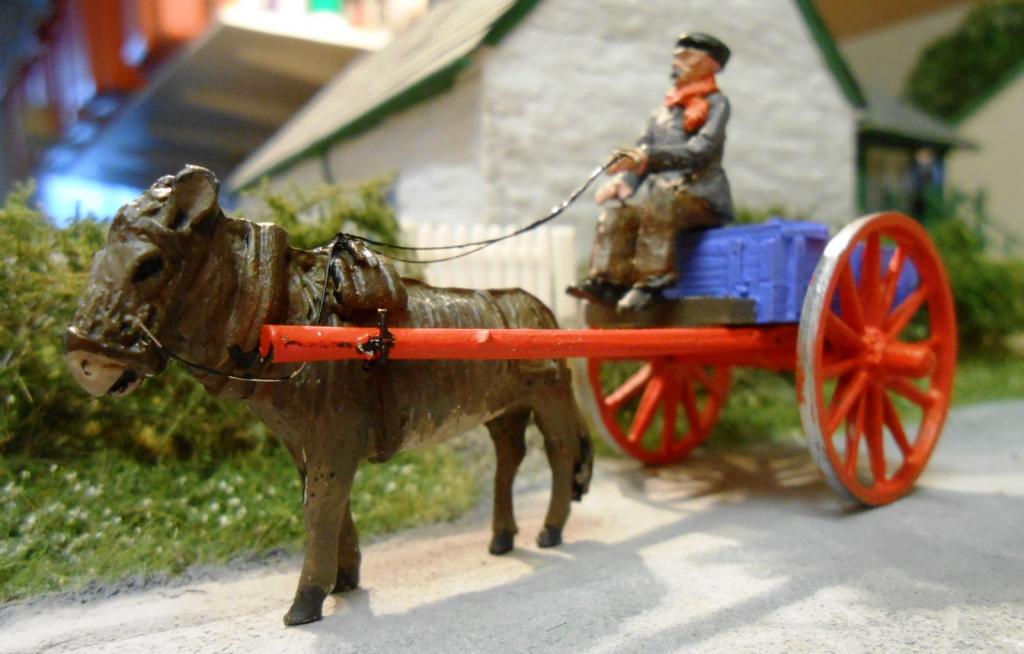
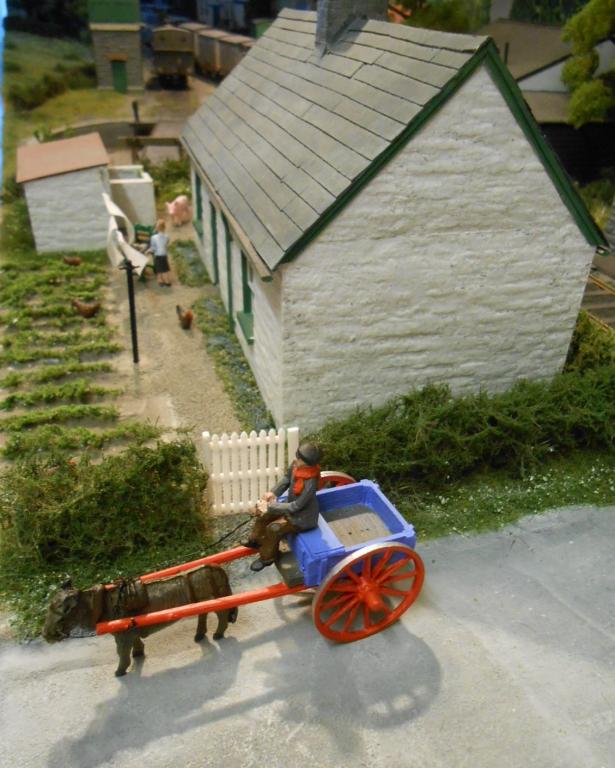
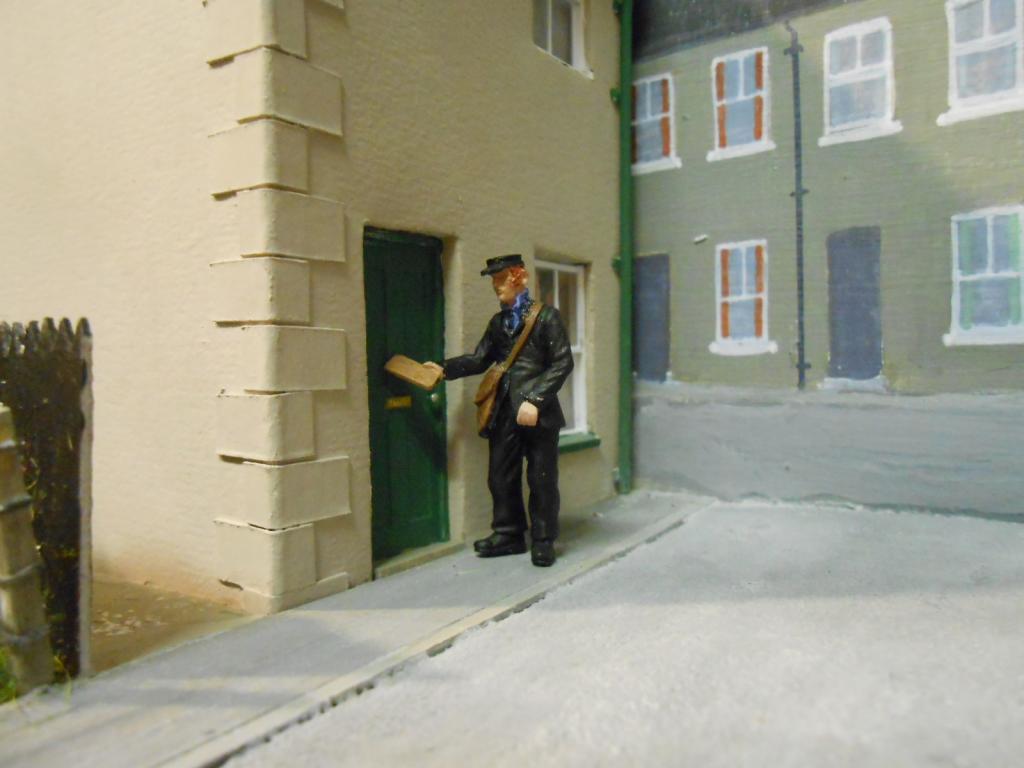
As we know that one of our group was/is a postie, am now wondering who will admit to being the prototype for the model below?
The models are whitemetal, from PLM Castaways. No painting instructions, but the Web is endlessly helpful [Google images of donkey carts worked well]. Nowt on the harness either, but again, the web has plenty of advice on how to harness your donkey, should that be your thing... Used single strands of fine wire, stripped out from multicore for the reins, but they are VERY basic and my levels of patience are very selective! Still have to decide what load to add. Turf one possibility, though this is a coal mining area. An thoughts on final detailing most welcome.
-
Now there's a thought. Thanks minister - will have a go.
-
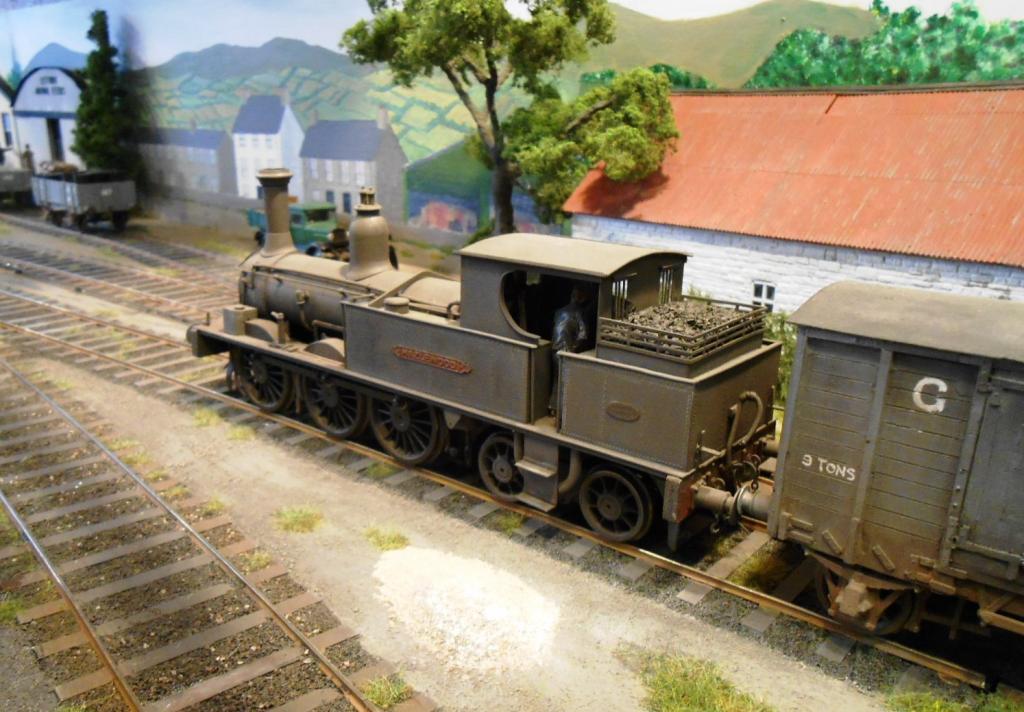
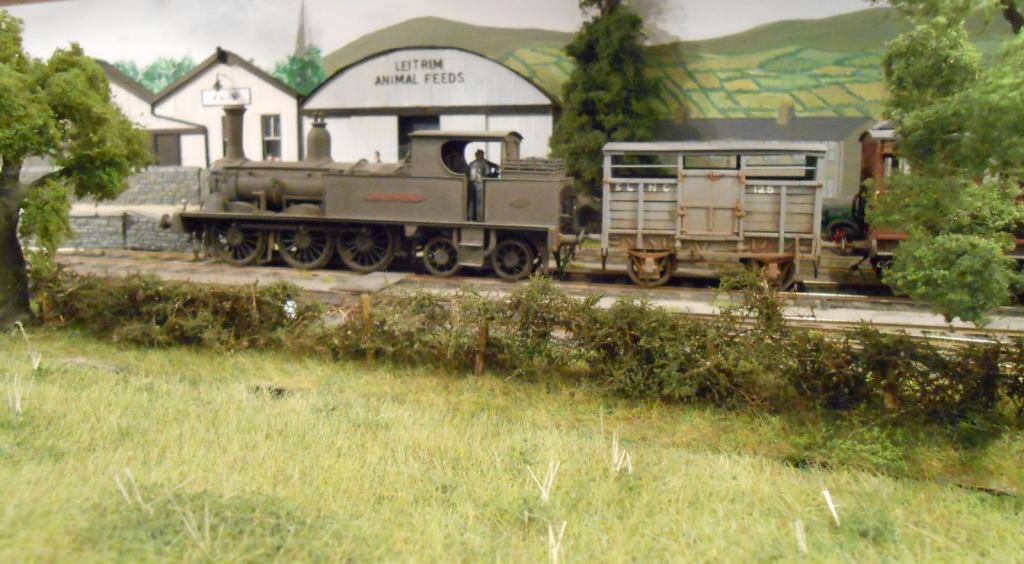
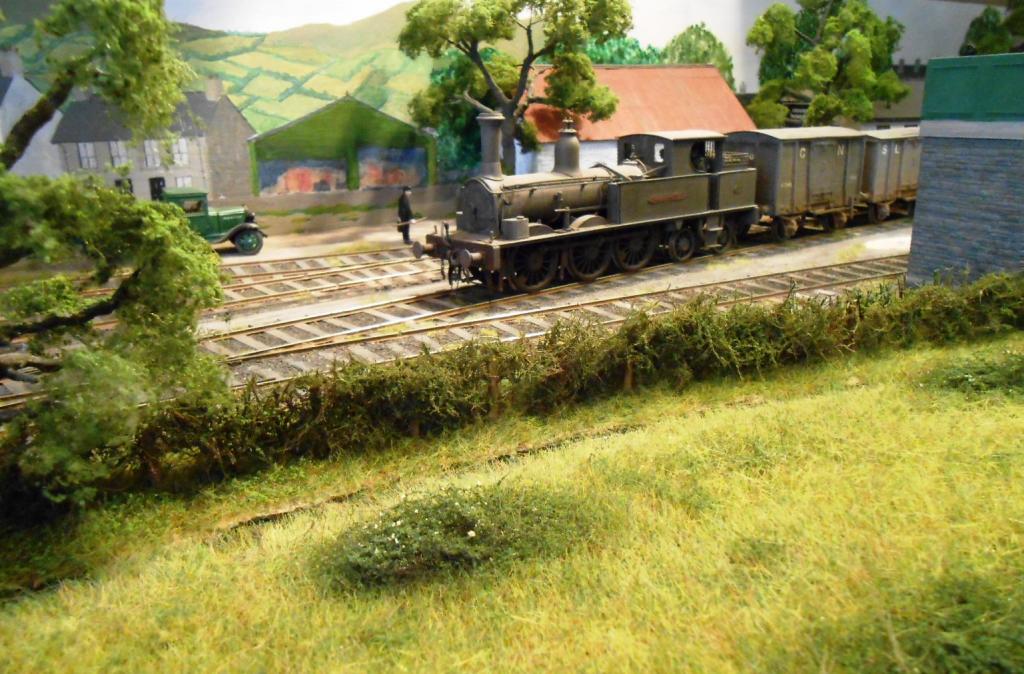
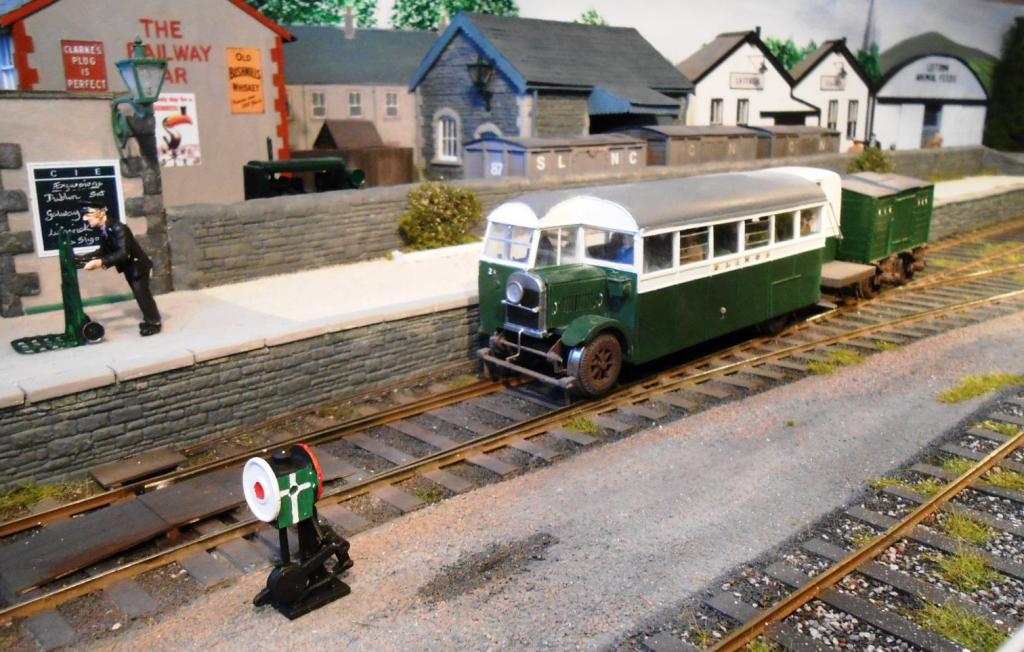
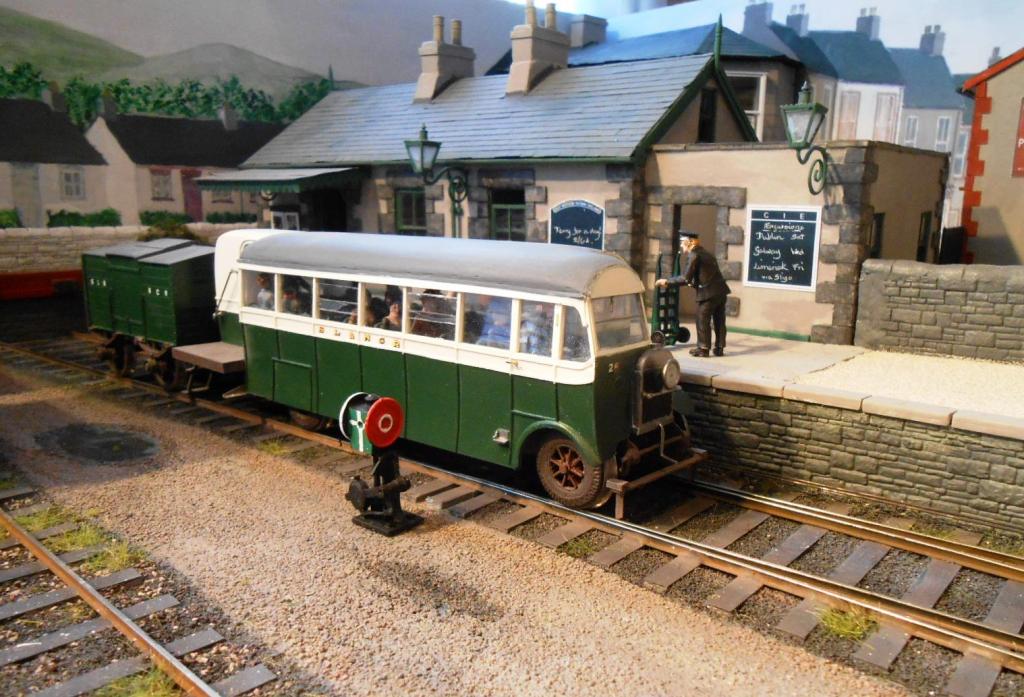
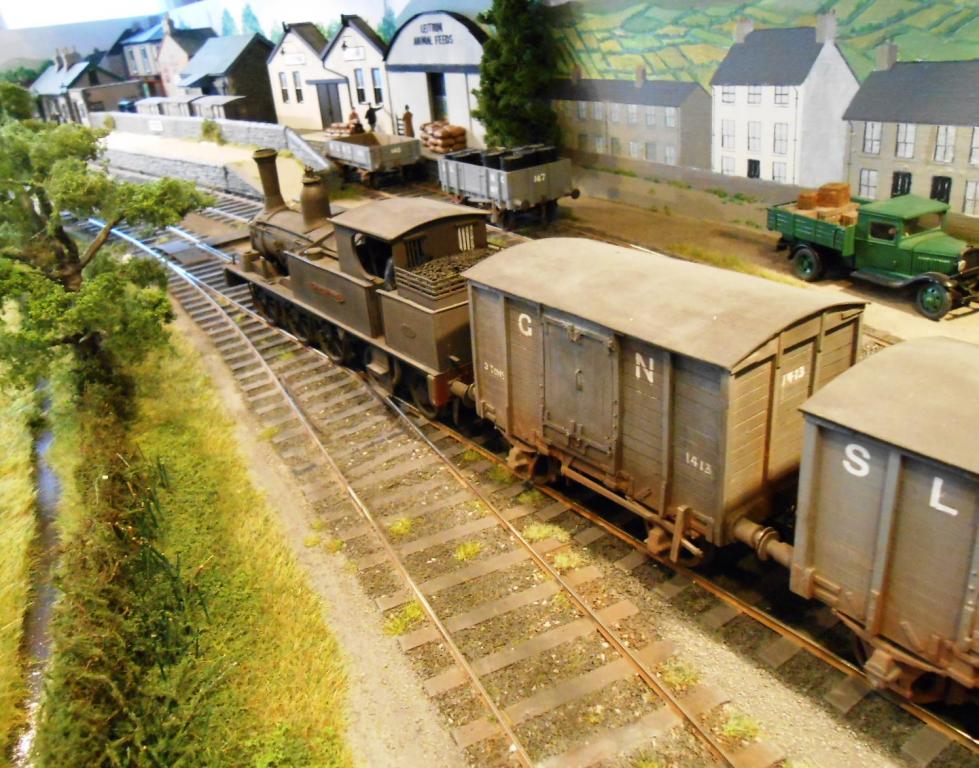
Below are a few more pictures of the layout in its more scenically finished state. Essentially they try to portray the arrival of a goods train, with SLNCR Small Tank in charge, plus some shots of it shunting. Have tried to take the pictures from 'natural' angles - either the top of the water tower, trackside, or beyond the hedge looking across the station.
The are a couple of shots of Railbus 2a arriving as well.
-
 1
1
-
-
The best thing to do is to study pictures of the area you are modelling. Ballast is highly variable in colour & may be a good idea to mix two or more to get the effect you want. Don't forget that mainline ballast will be different from that used in goods yards too. For the latter I've used Woodlands fine cinders [even in 7mm scale] and would recommend that in 00 as well. For running lines, Woodlands medium works quite well. A serving railwayman at my model club reckons about 8 lumps between each pair of sleepers is about right. as he drive a Javelin for a living, presume he got that from being stopped in the station, rather than 140mph between...
A mix of 2 brown to 1 grey looks good on our club layout, but then it all needs going over with paint, powders or whatever to simulate brake dust, oil etc, depending on which part of the track you are modelling. It is these little extras that will really help bring things to life and there are lots of colour pictures in book & on the web now to help.
-
While cannot comment on the accuracy of the models re the prototype, they certainly look the part and that is a real tribute to your workmanship, in particular the quality of the final finish. Tempted to say with those standards, why aren't you scratch building in 21mm gauge?
Guess I already know the answer - time and output. And why not. Lovely stuff.
-
Must have missed this, but glad I noticed at last. Really top bit of work in a great setting.
-
There are a few colour photo albums which might help you. Tom Ferris has done two 'Irish Railways in Colour', while the is also Irish Traction in Colour by Colin Huntress. Actual quality of film that long ago means tones can't always be trusted, but then again, most stuff had a fairly heavy covering of grime.
Nice to see someone new getting interested and the website can usually find someone with the answers you want - often a long way from Ireland! Check out the links to photo-collections too, there are some real gems.
-
Proper job. Like railcars and DMUs there are lots of subtle curves, plus a full interior to cope with. Well done!
-
Who would have thought a request of what colour to paint a 40 mm high figure could produced such a response. QUOTE]
its cos we're a sad bunch of lads[ATTACH=CONFIG]10686[/ATTACH]
Well, here he is. Don't think the cap is 'standard', but the black uniform bit certainly not difficult to paint. With the harp logo being no more that a scale 1mm and the wrist bands a mere 0.1mm, am thinking nobody will mind me missing them off.
-
excelent!
Who would have thought a request of what colour to paint a 40 mm high figure could produced such a response. The very best of what this forum is about.


Sligo horsebox
in Tutorials
Posted
If you do try liquid poly over the top coat, make sure that the undercoat has not only dried hard, but also polish it too (finger or cotton bud), to further harden the paint, otherwise the undercoat will craze as well and you will be back to bare pastic or metal.