gibbo675
-
Posts
205 -
Joined
-
Last visited
-
Days Won
7
Content Type
Profiles
Forums
Events
Gallery
Blogs
Everything posted by gibbo675
-
Hi Folks, I have now fitted the underframes to the undersides of the PC3 and PC4 This was a test fit to see that the bogies had clearance which is why the base plate has been cut back to allow clearance for the tilt ramps. PC4 with its underframe fitted, PC3 is similarly adorned. The next job will be to fit some of the other underframe details, these will have to be worked out by photographs. Gibbo.

-
You are of the Tribe !
-
Hi Darius, I've no comeback for that other than to say, "The archaic ones are the best !" Gibbo.
-
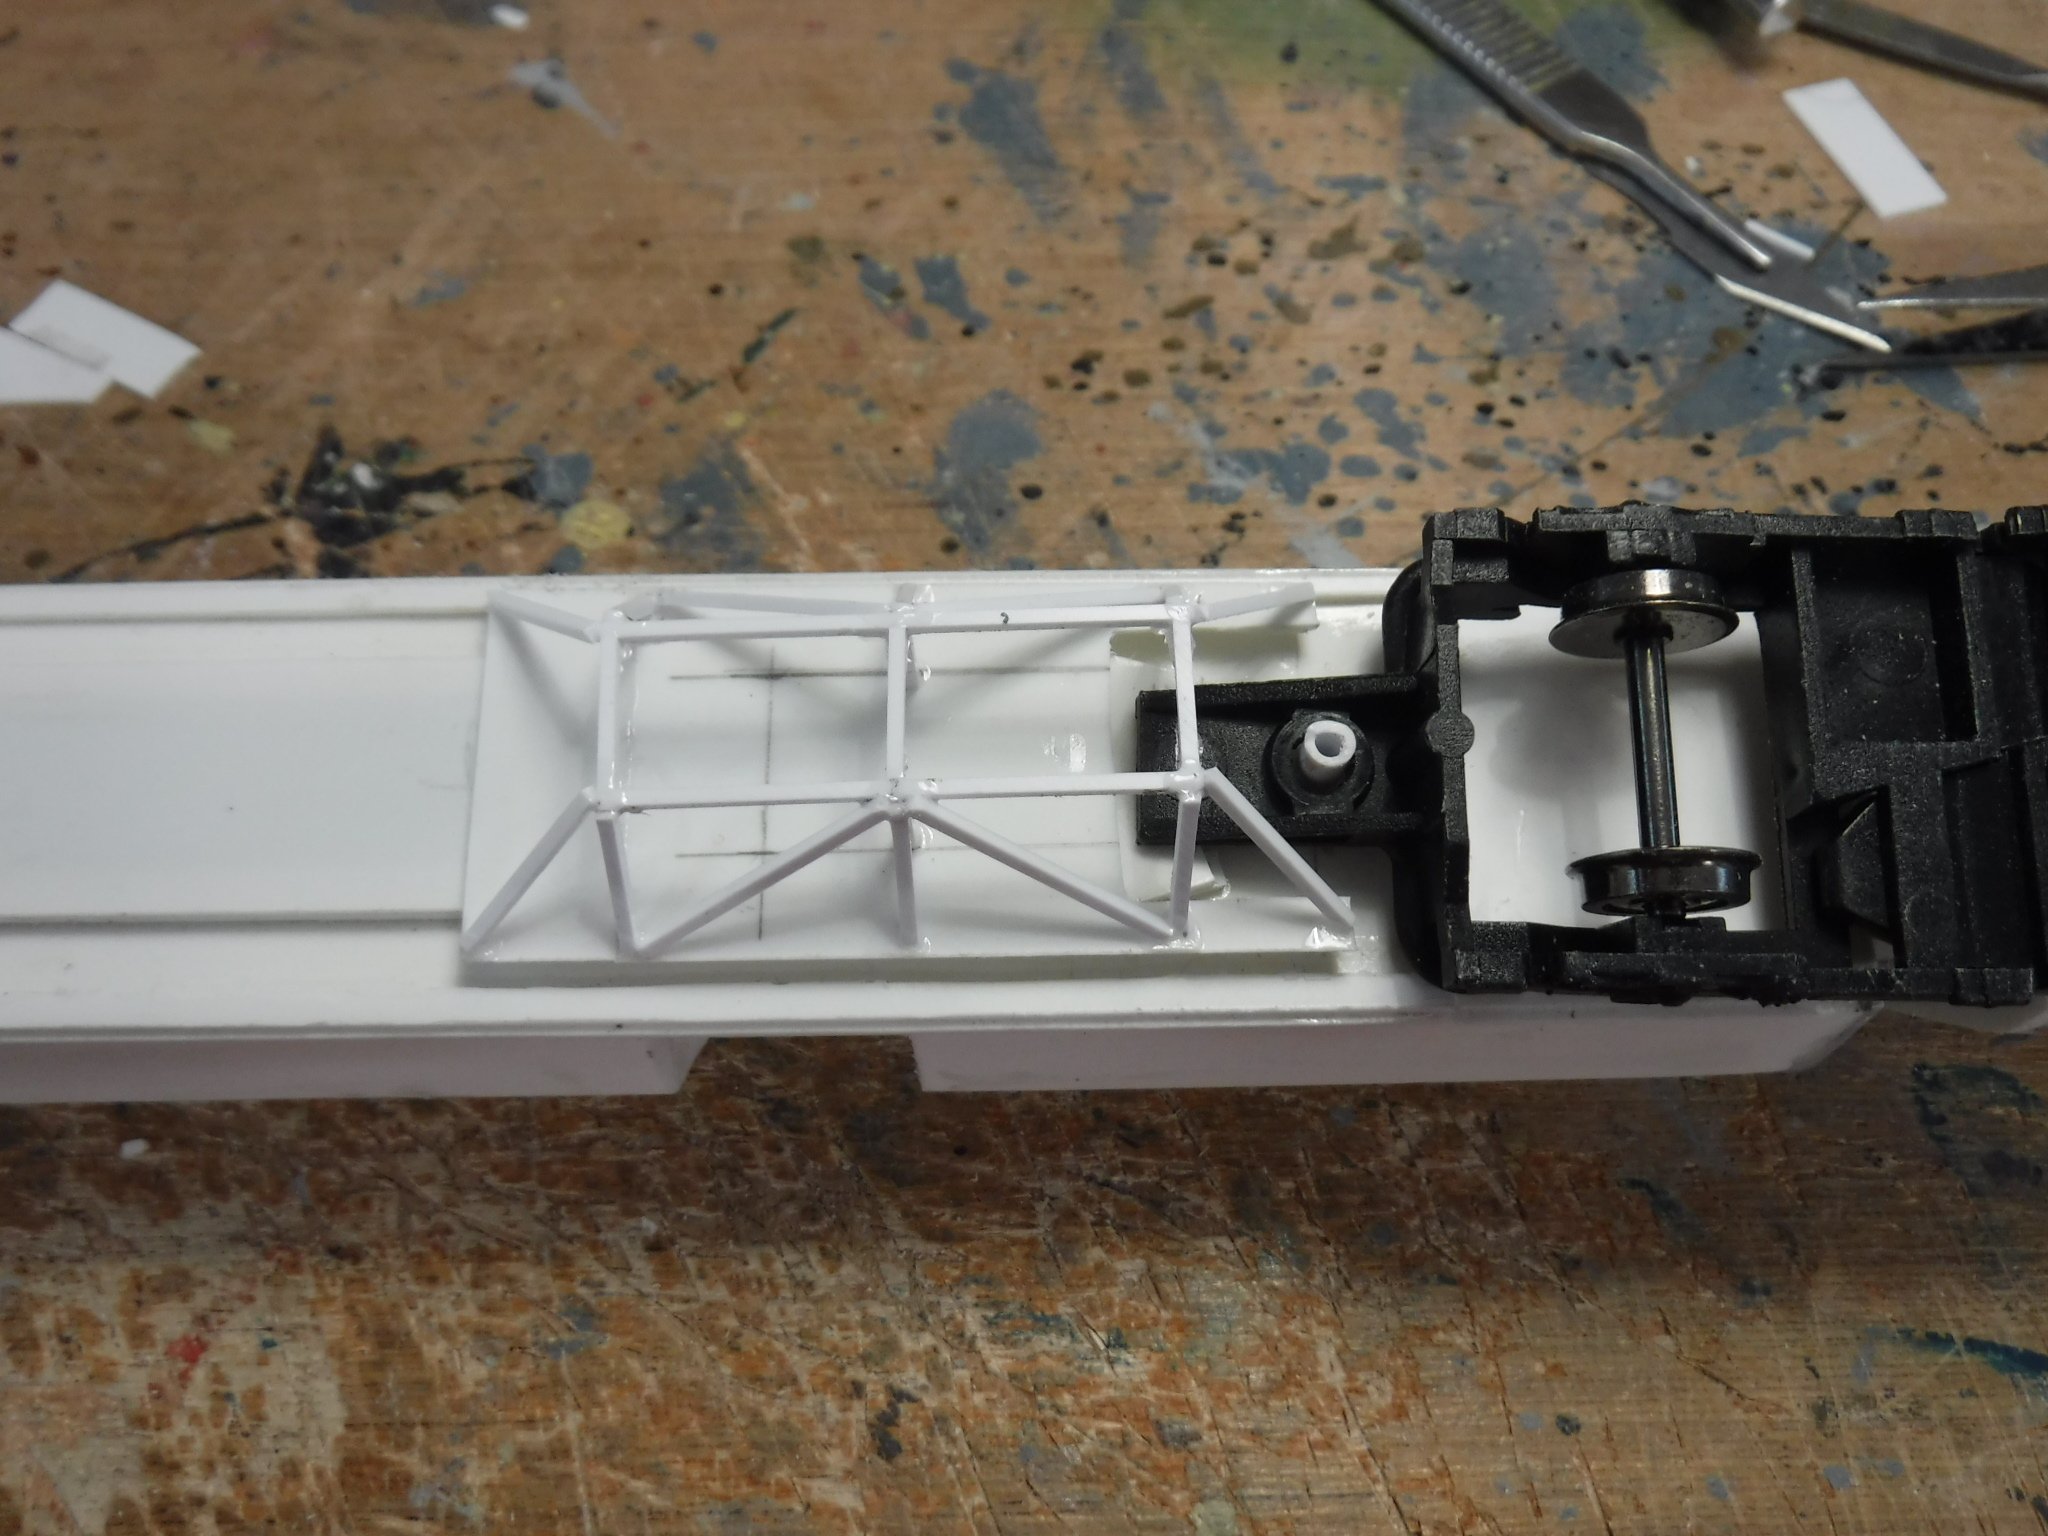
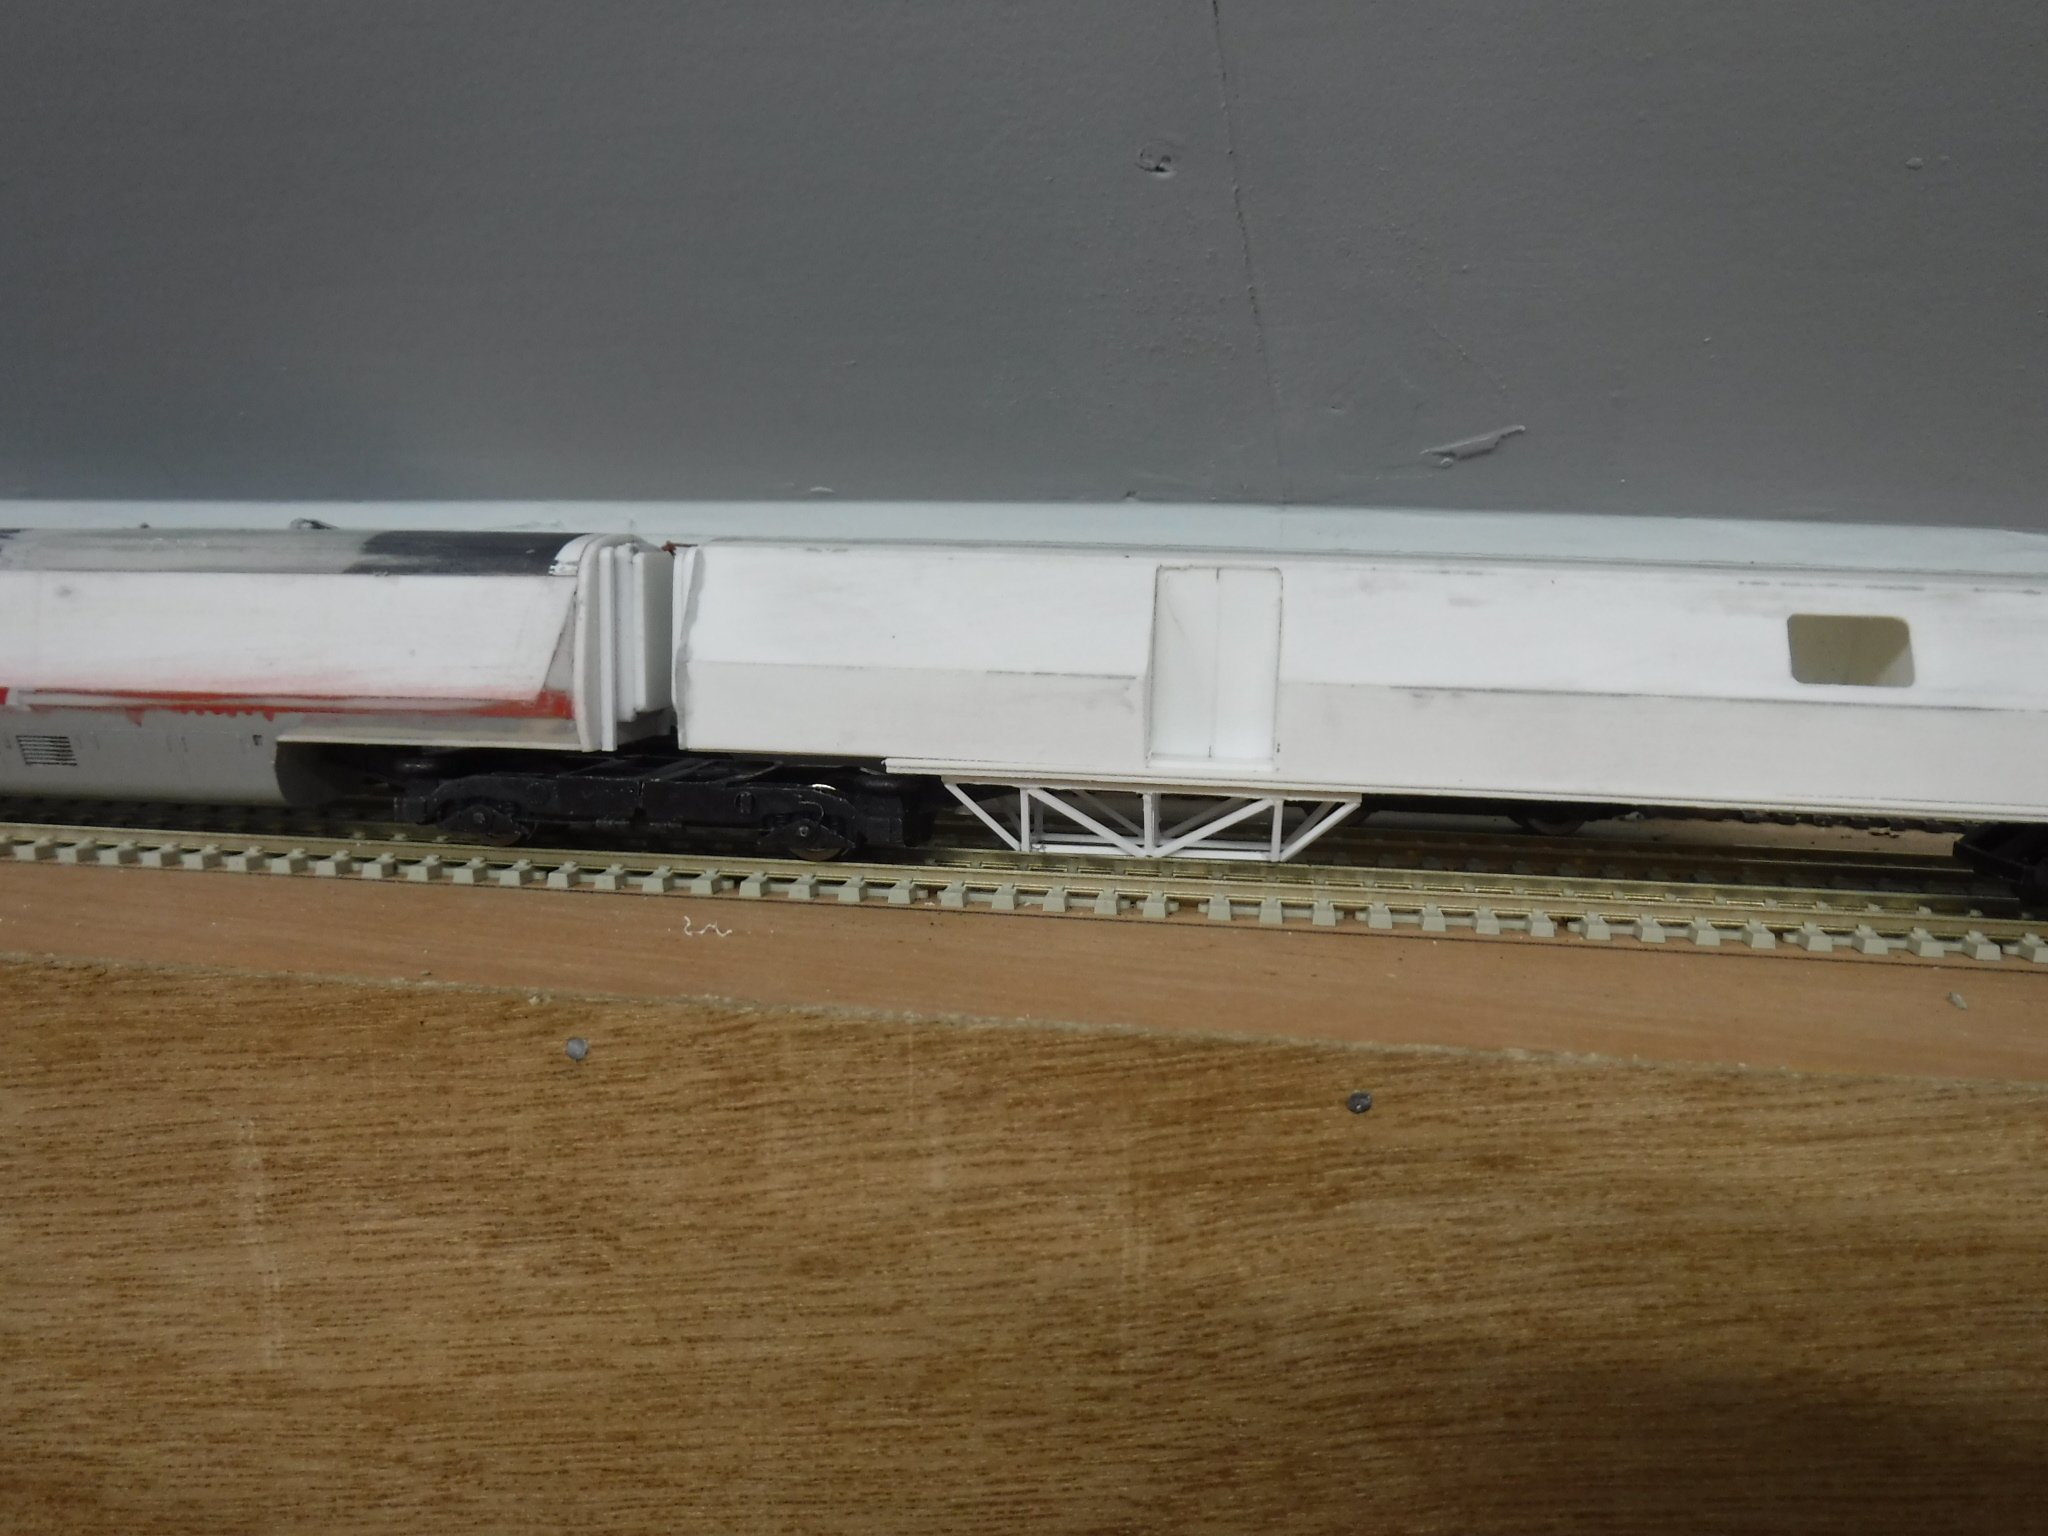
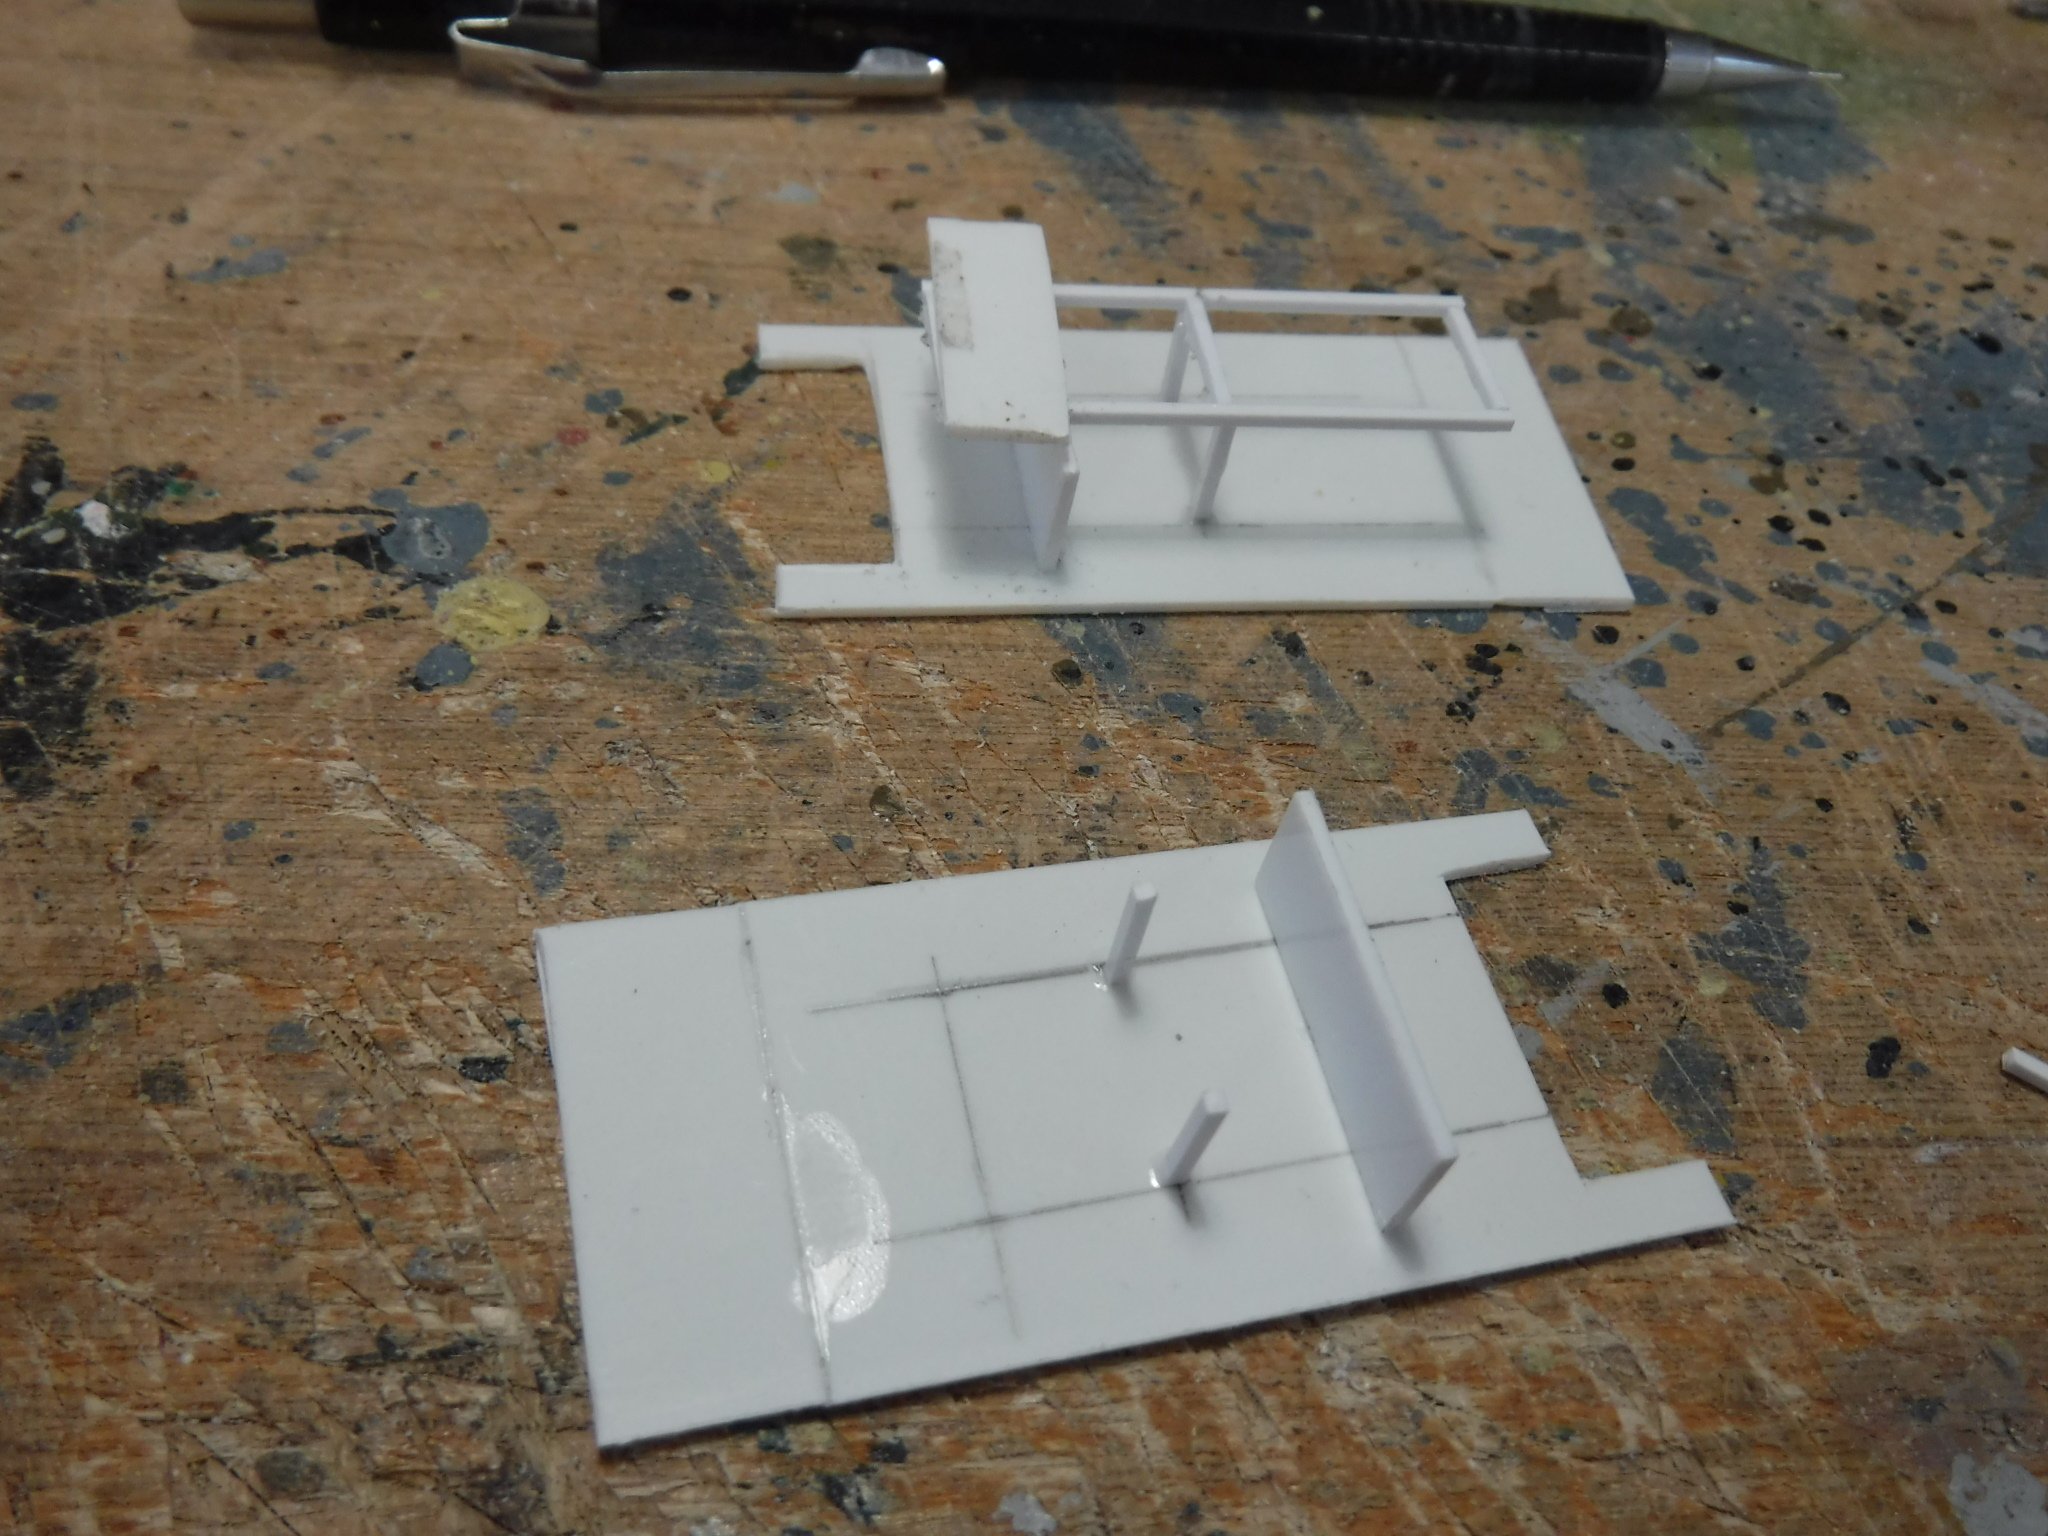
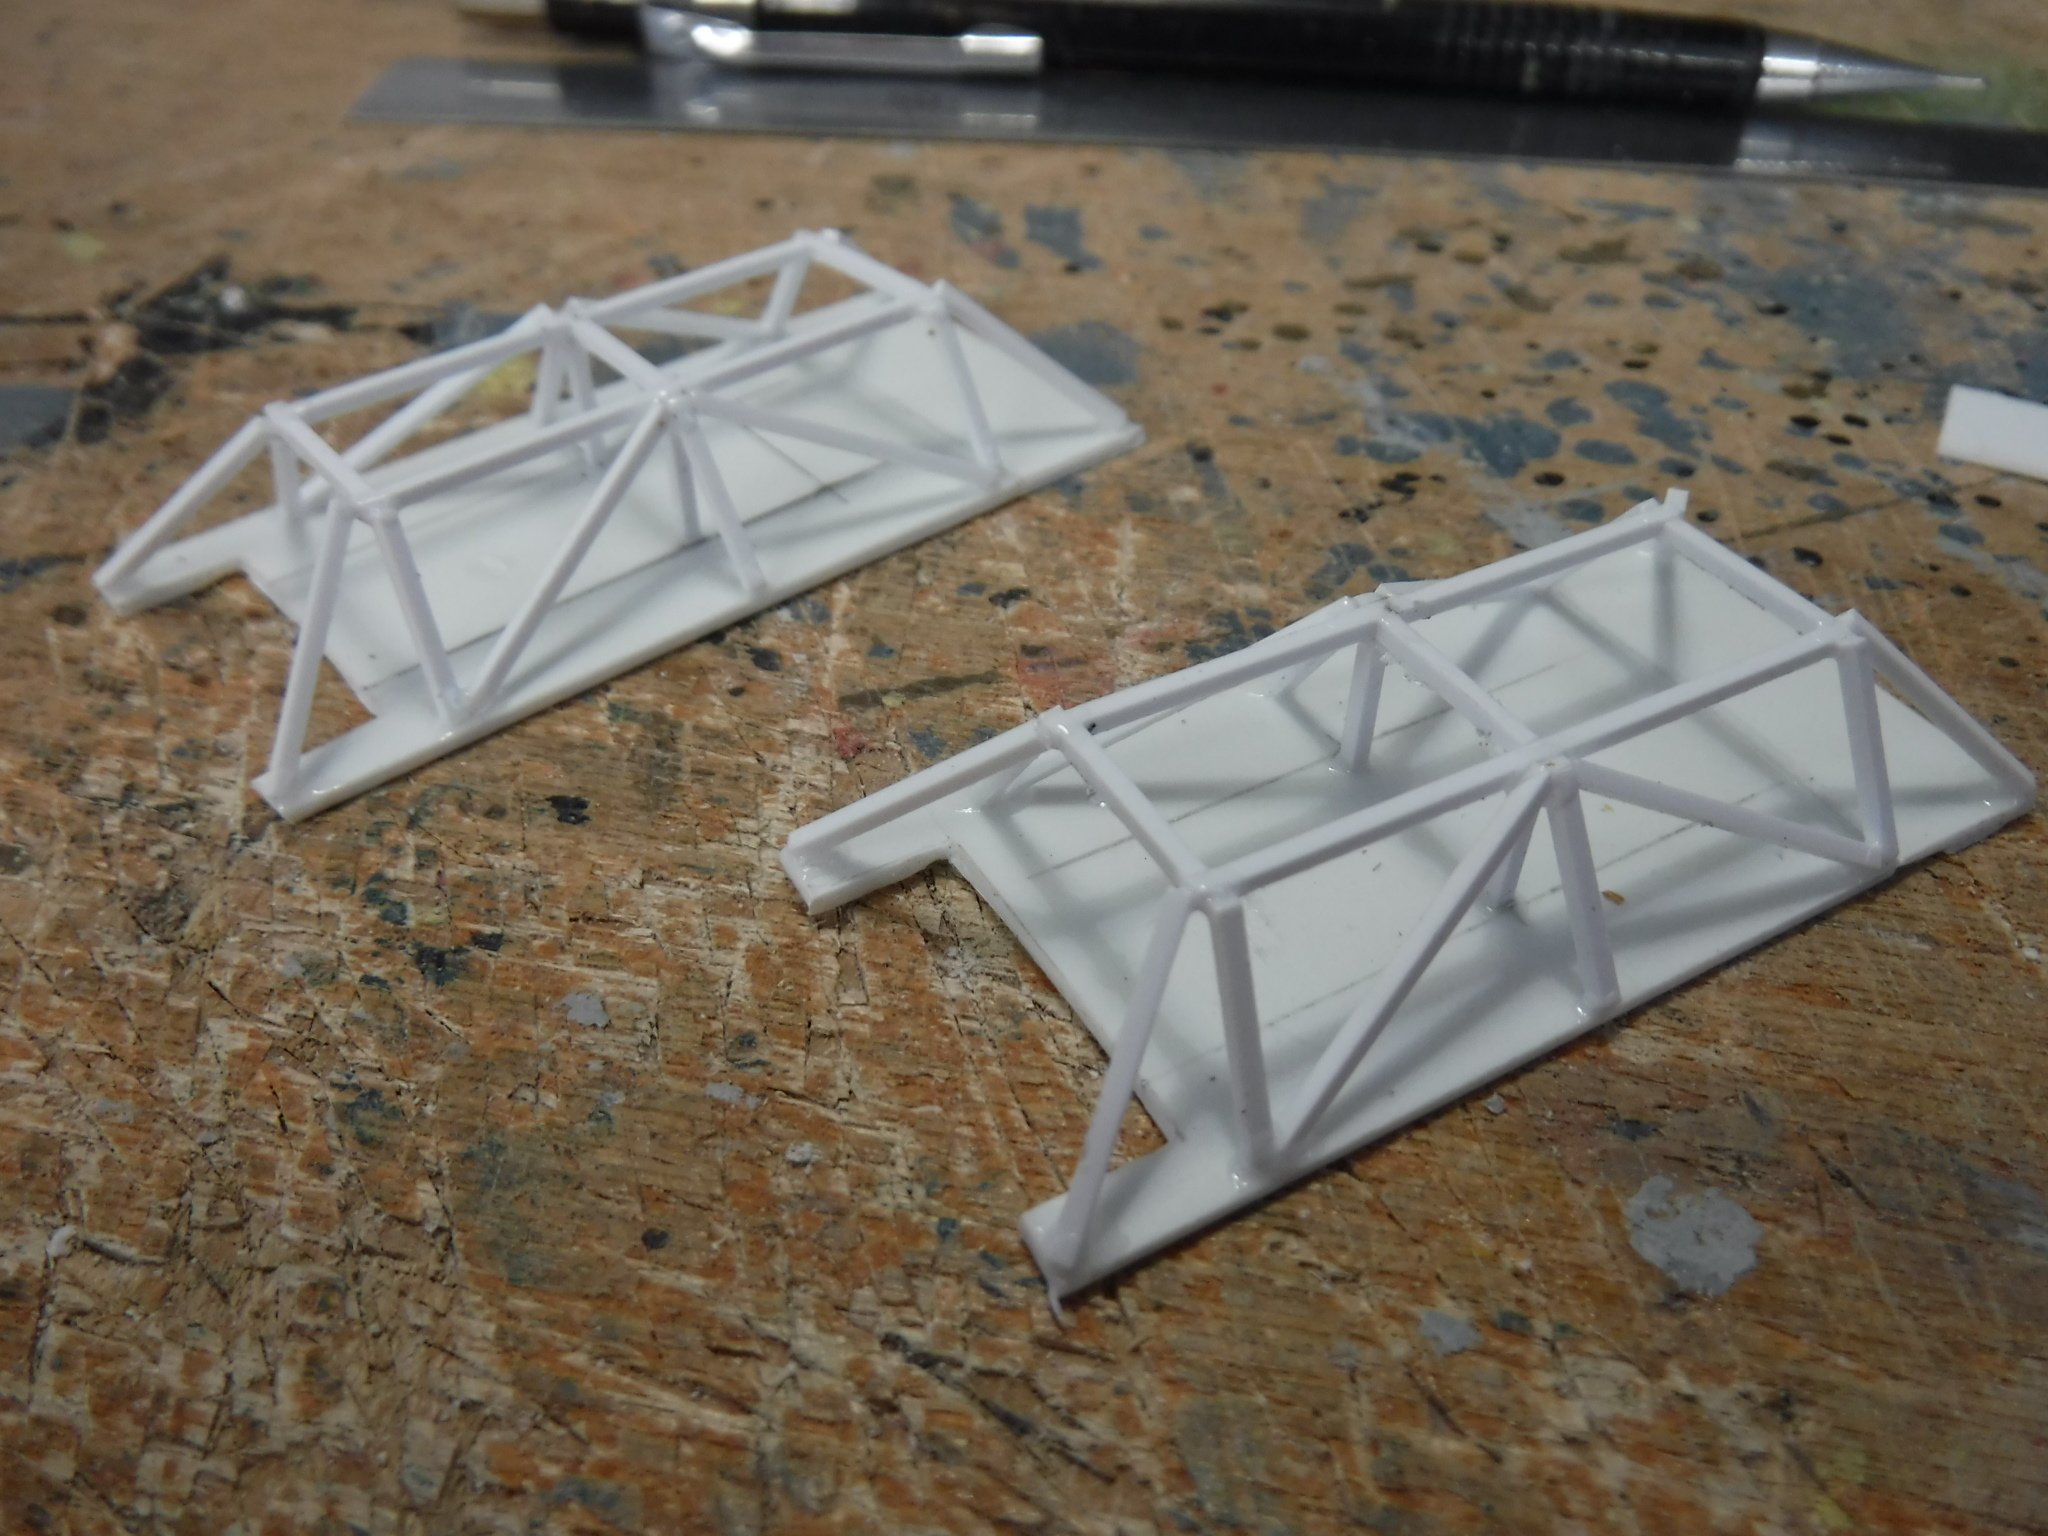
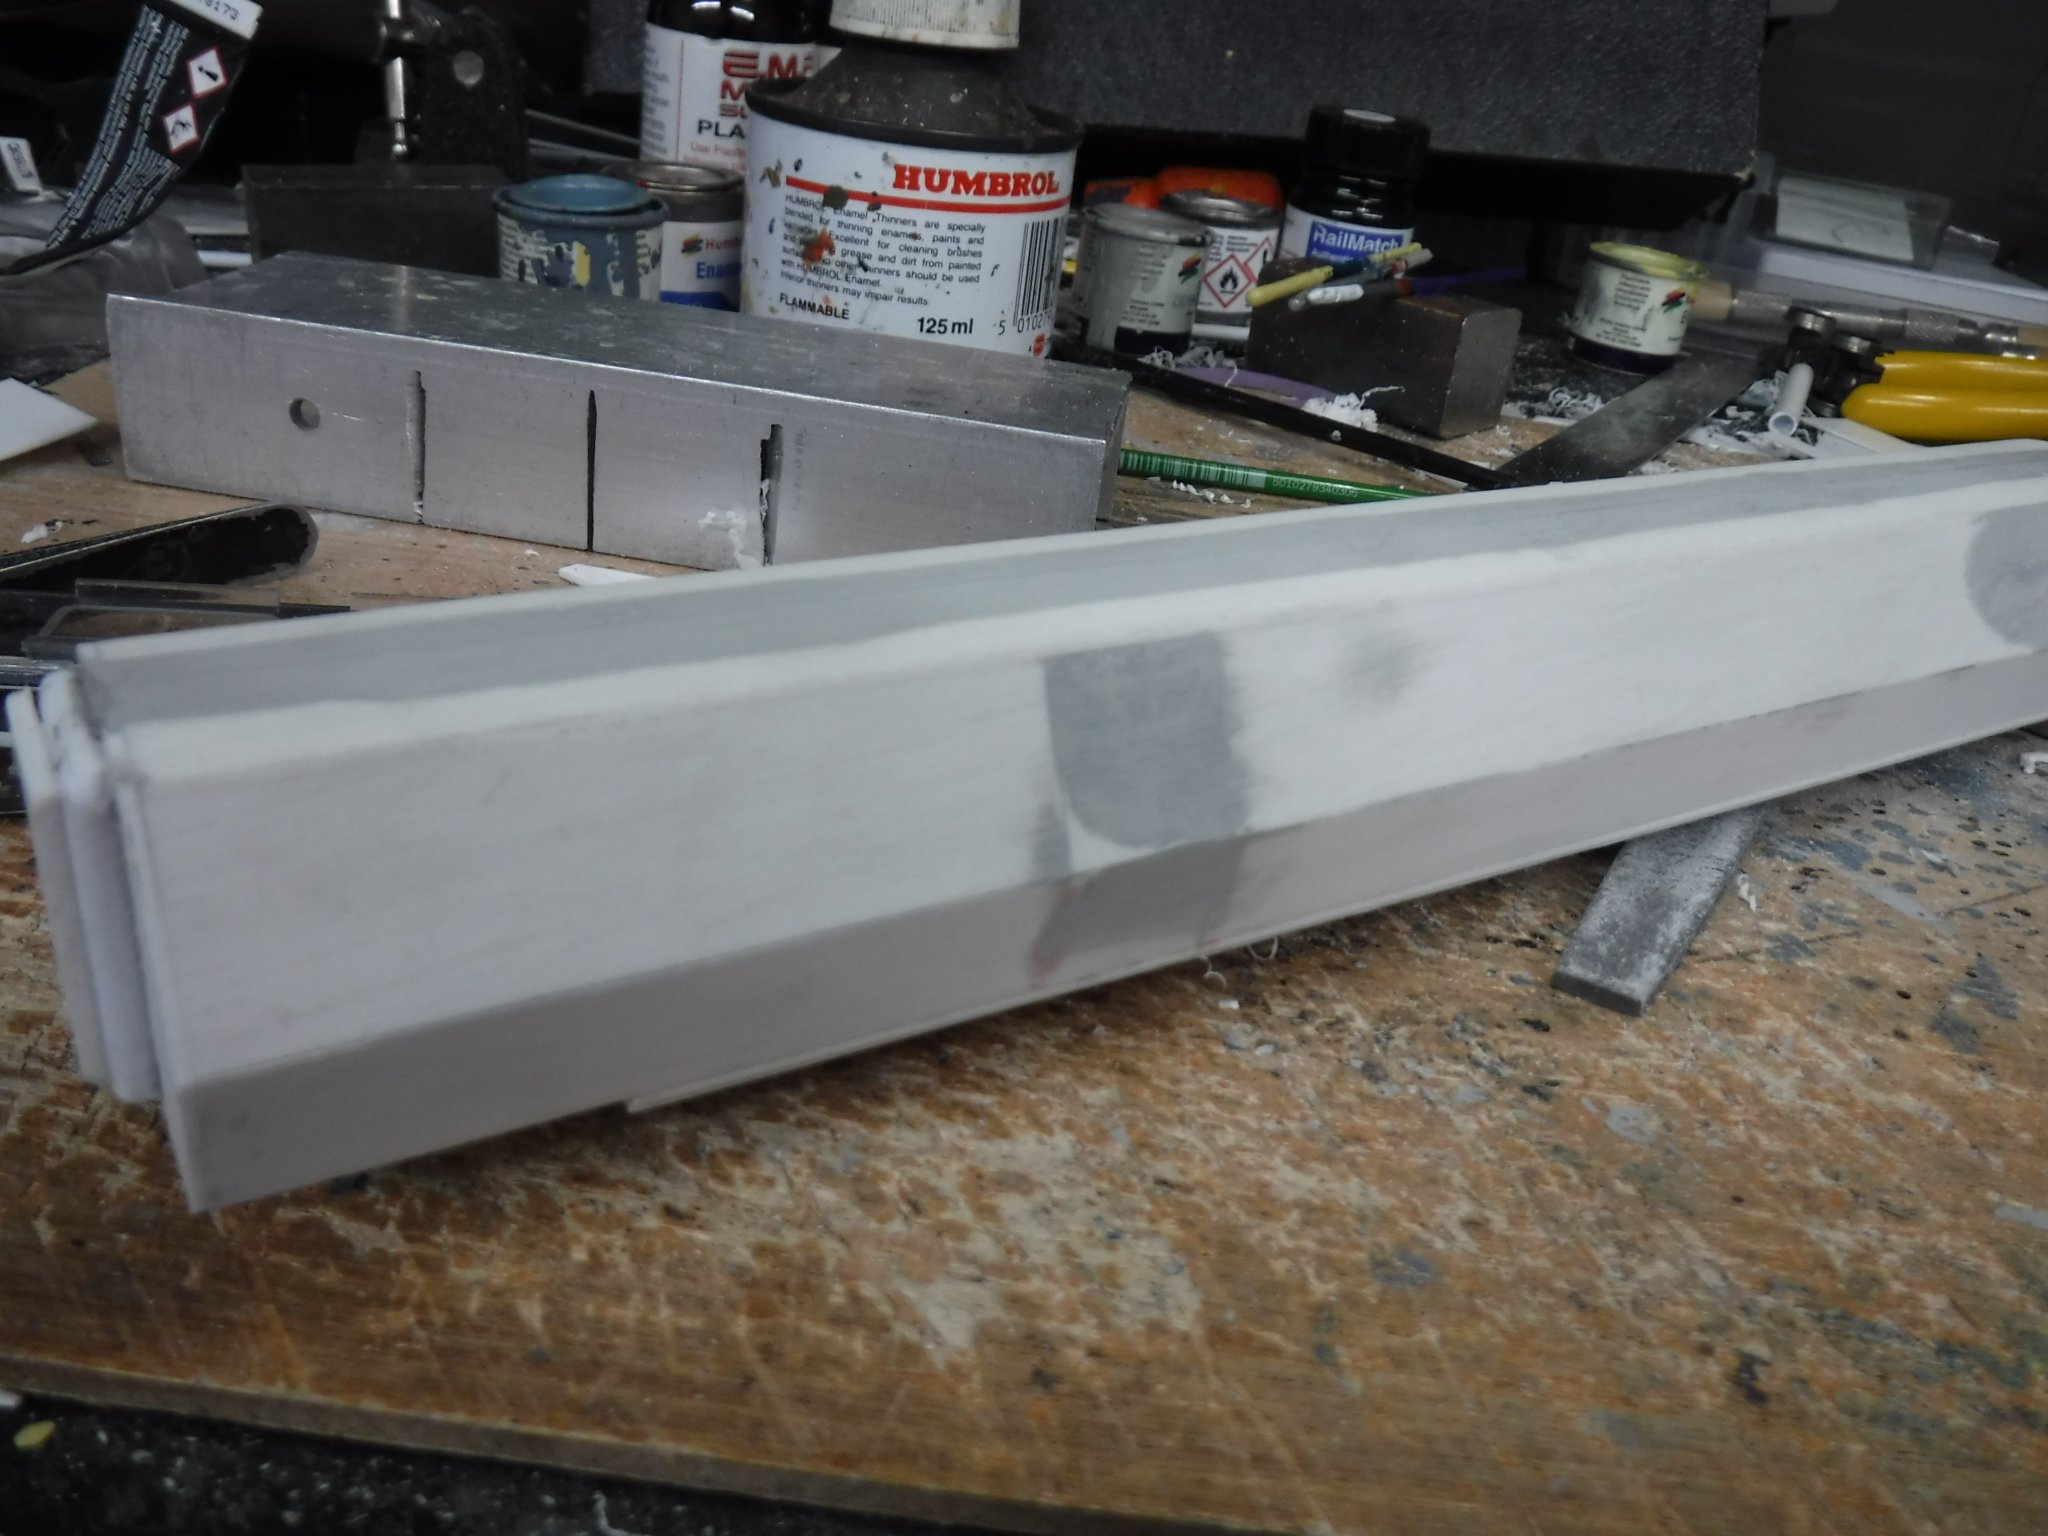
Yo Dudes, I have been making up the underframe details to the POP II train. I decided to build the framework onto a base as it would be easier to position and get square upon the model proper. Fabrication began by making up the lower part of the frame work from .040" Plastruct rod, the next job was cutting out the base plate and positioning the two central stanchions that the lower framework was to be attached. Once cured I glued the lower framework onto the stanchions and to get the framework parallel to the baseplate I used a temporary prop which was secured by a very small spot of glue so that it may be removed later. This shews the base plates with the stanchions in place with one having the lower frame positioned with a weight to keep it on the prop. I then made up and fitted all the other pieces and once the majority of the structure was cured I removed the prop and fitted the diagonals as the final four pieces to each structure. The whole will then be attached and with luck will clear the bogie tilt mechanism. The structures will have the various points and edges filed down before fitting. Gibbo.
-
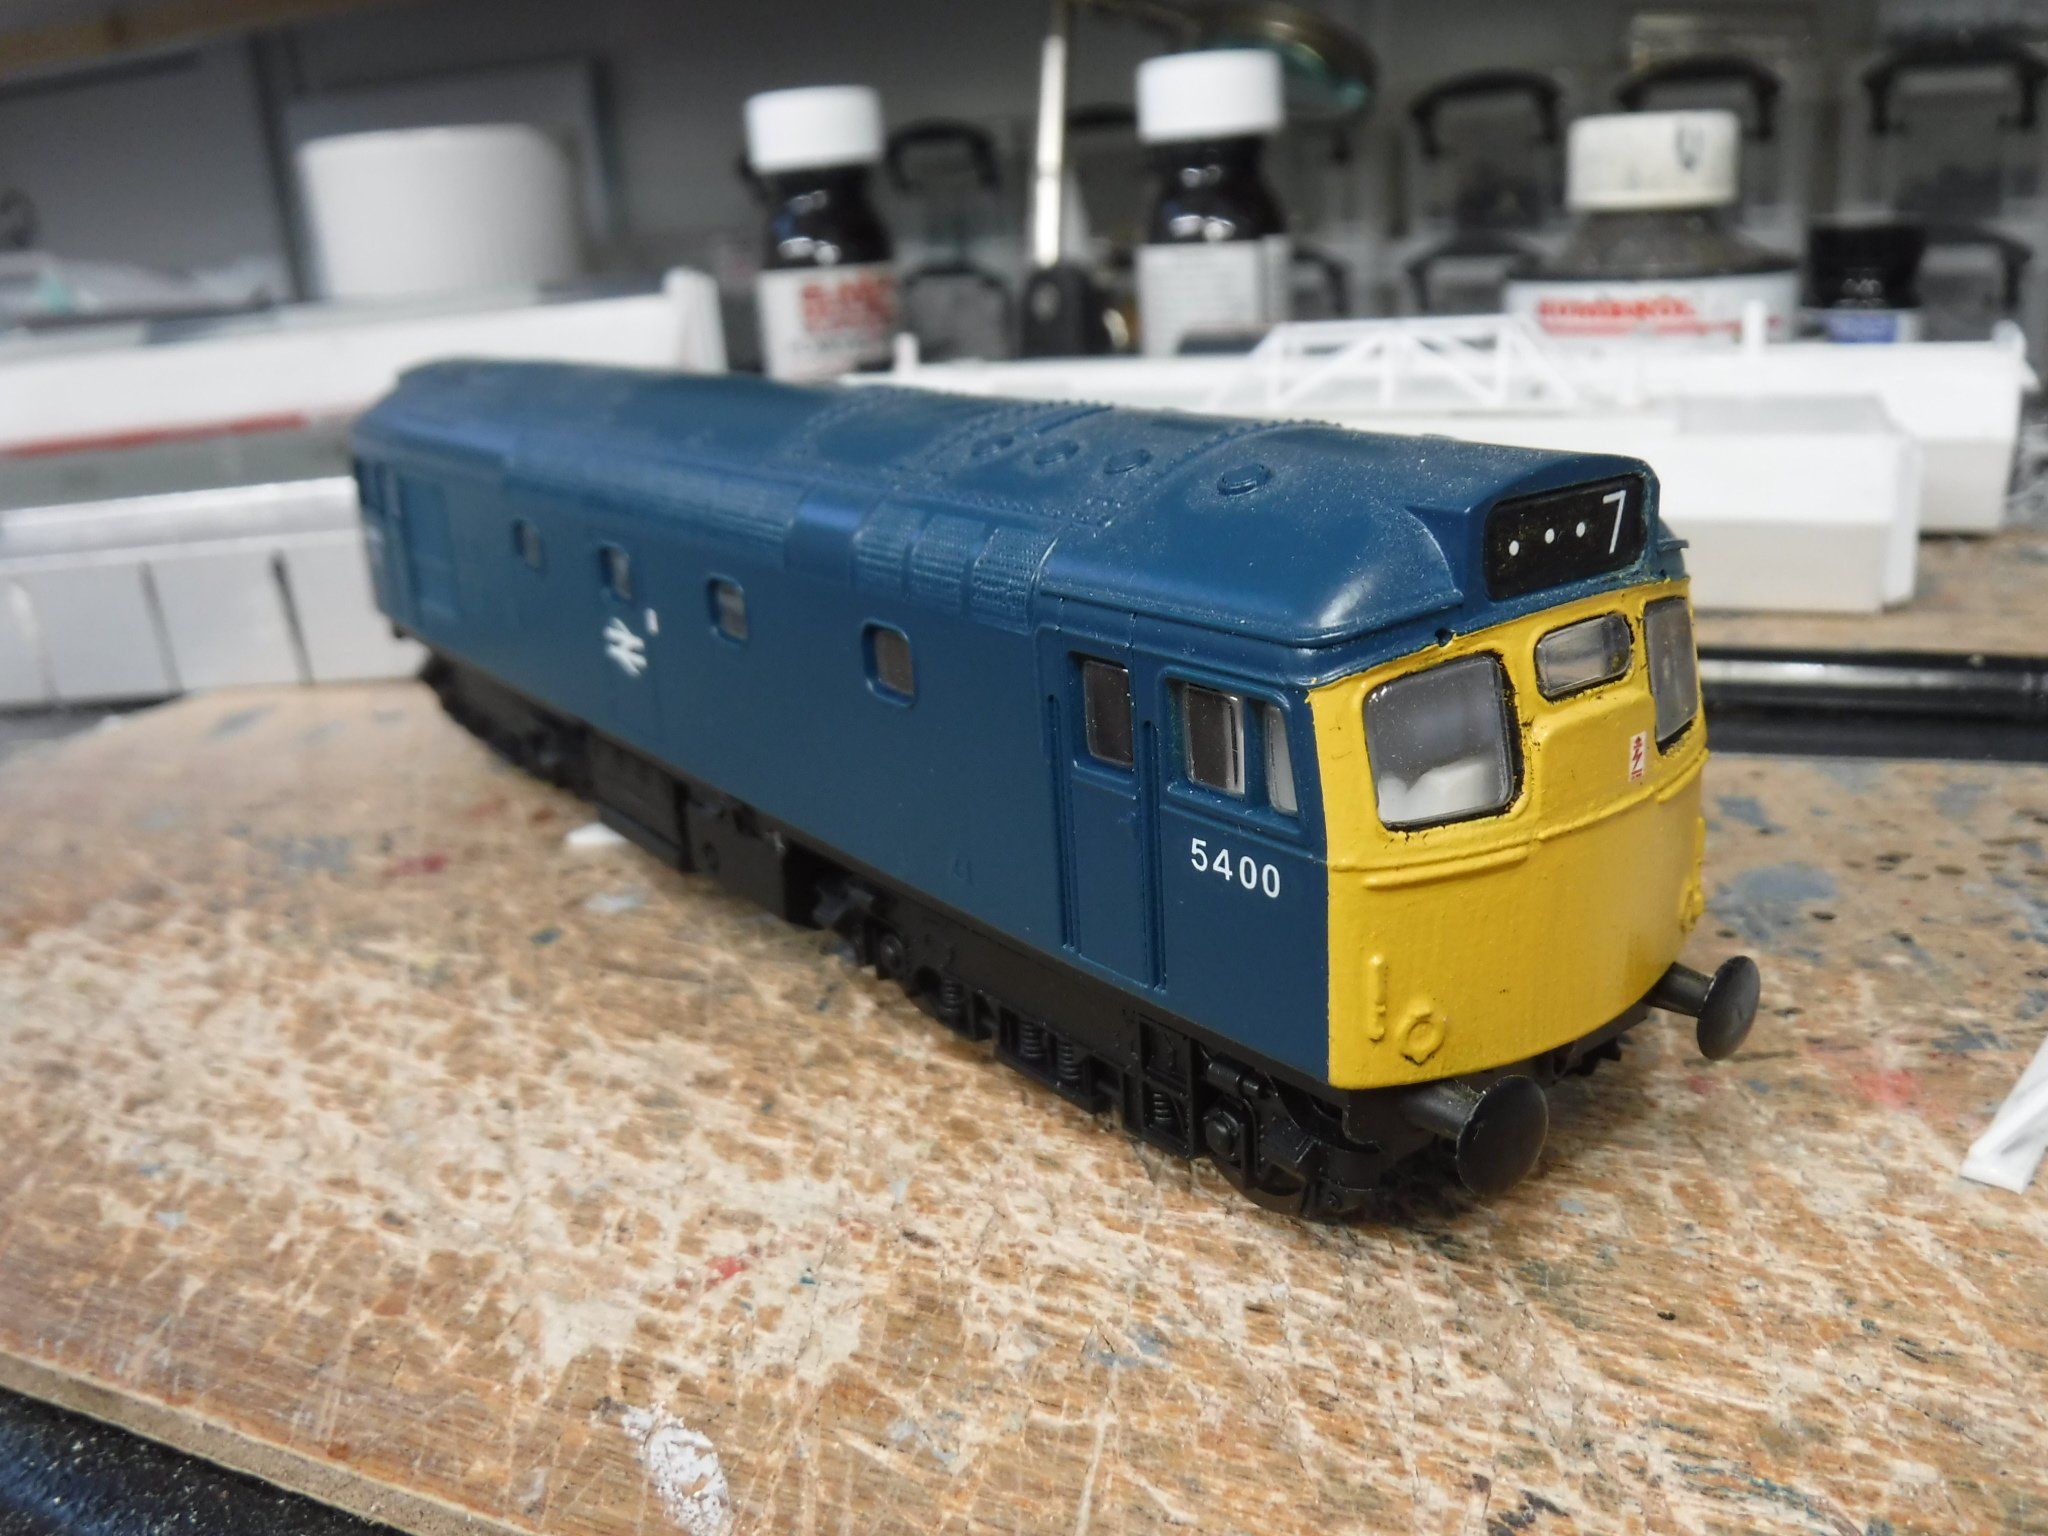
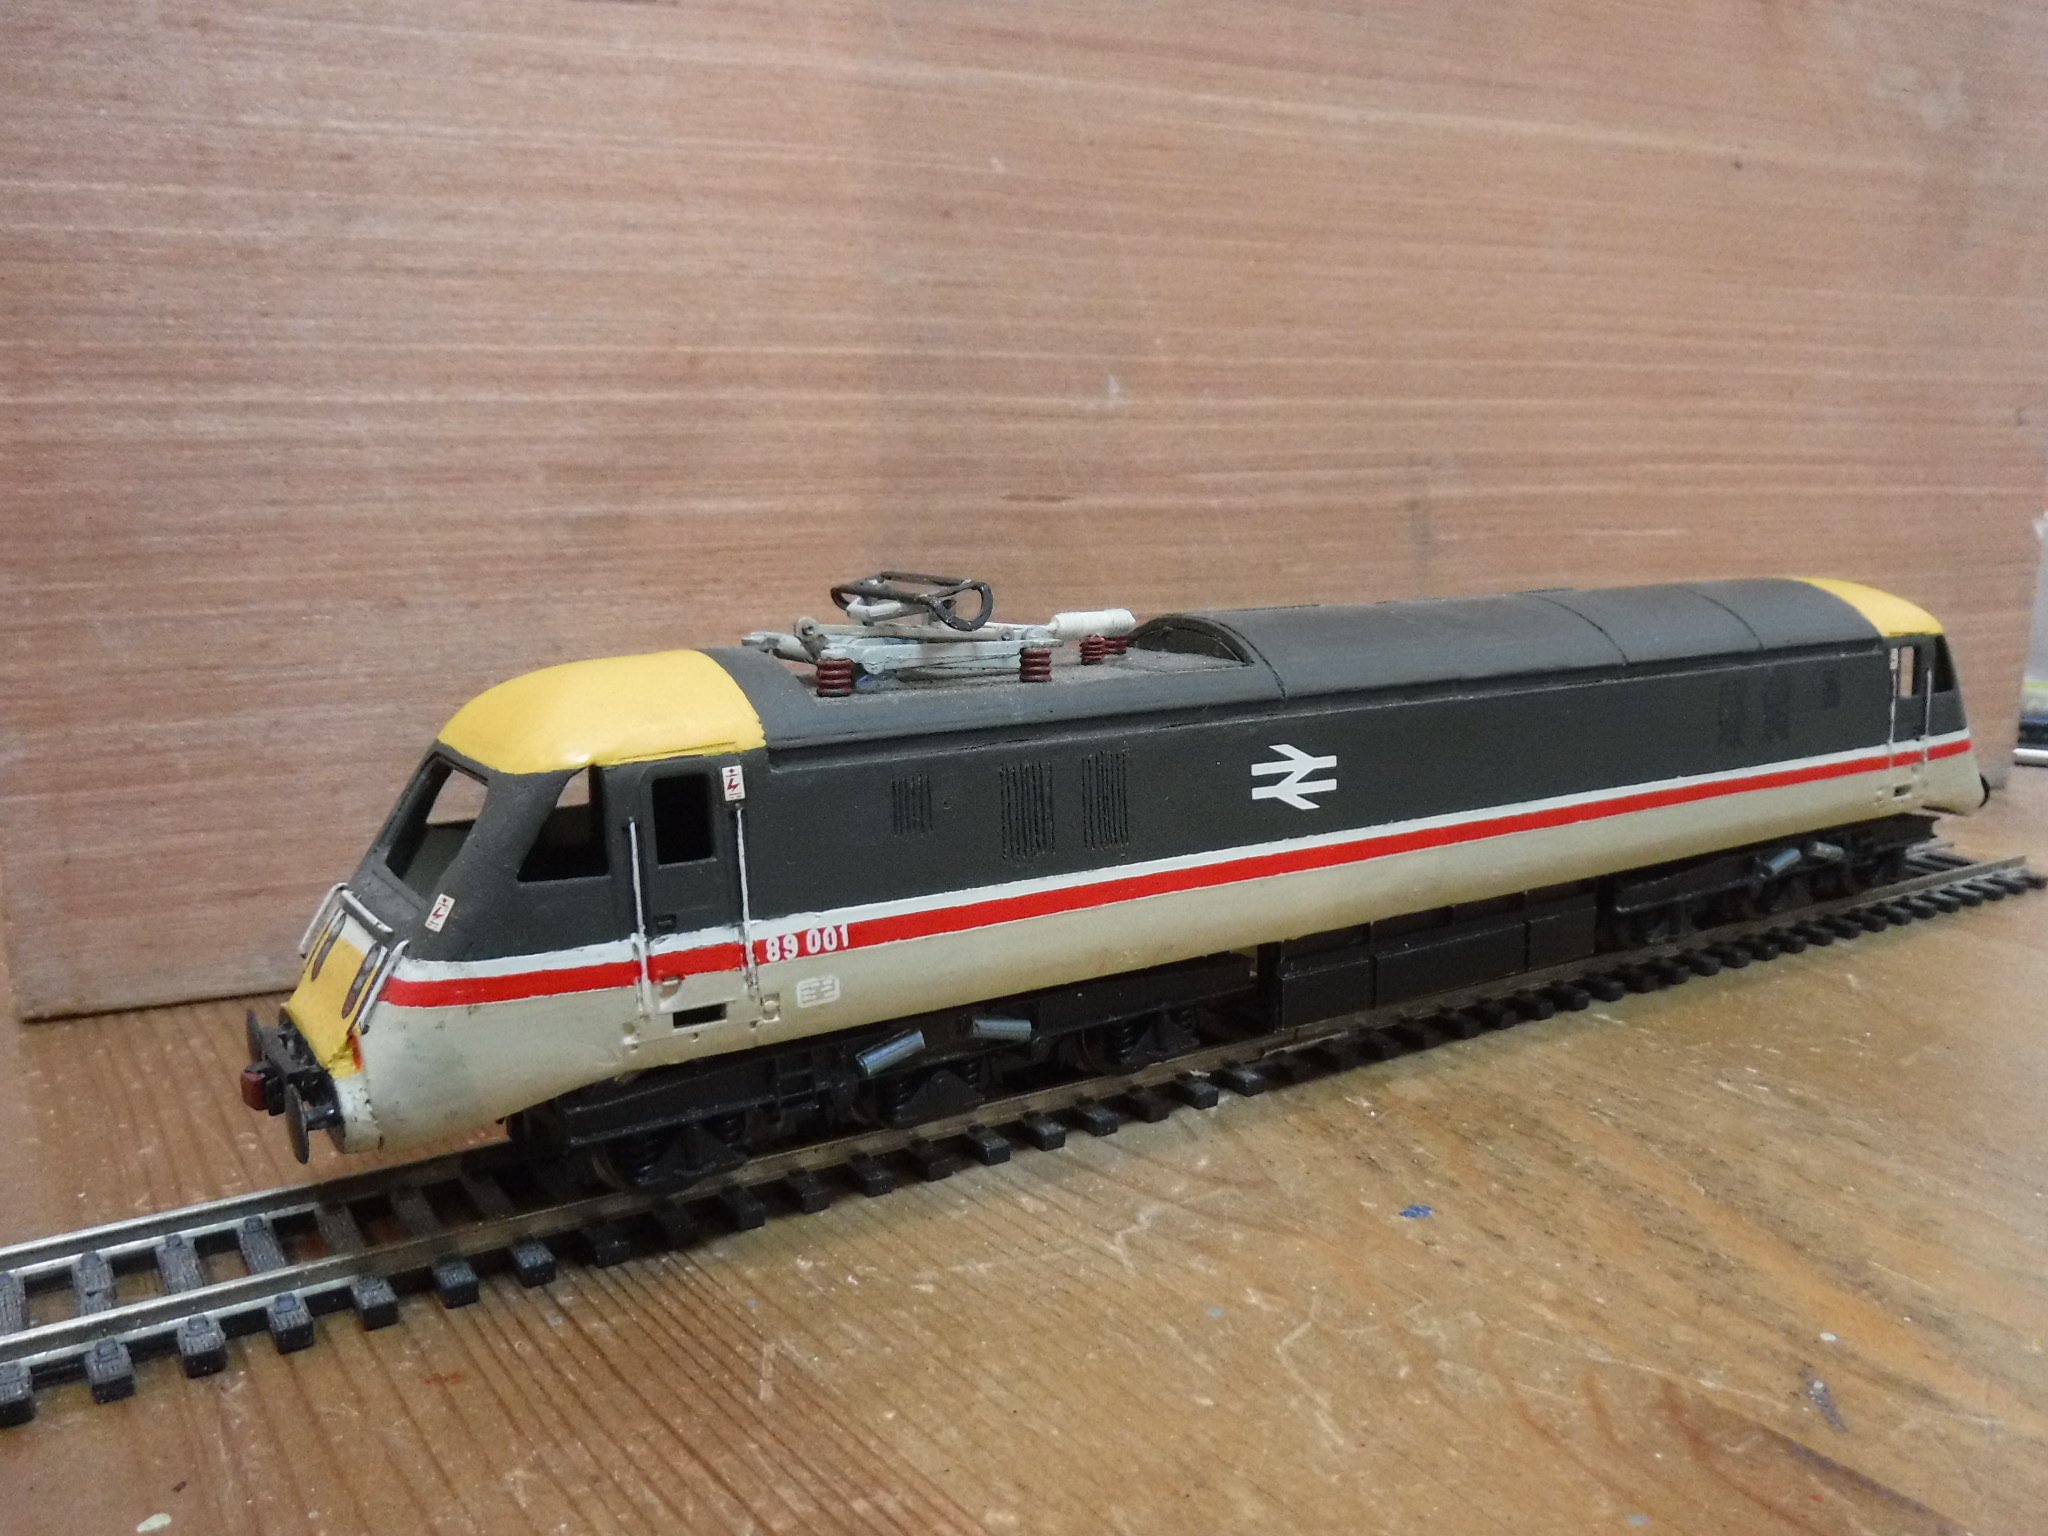
Hi Darius, You won't need any extra weight to get it to pull trains. How does the new motor fit ? You noted it at the start of the build however you haven't shewn any details of its fitment. Here is my 27, it's a Lima one so I cheated slightly. This is a short lived livery variant of the late 1960's early 1970's in that the yellow does not cover the cab side windows. I painted the inner edges of the cab front windows black to give the appearance of rubber mounts. as with too many of my models I need to finish it off by putting proper buffers on it and fitting hooks and hoses. I did fit Hornby class 25 cab interiors to it which has added a little extra tot he Lima model. Gibbo.
-
Hi Mudsy, Are you taunting me with the above post ? If you are, then here is my comedy response for your amusement : "Ha ! Ha ! Box openers !?! I got into loads of bother on RMWeb for using such terms, not that I care. Buying stuff is not modelling, it is buying stuff and then opening the box, hence the term "BOX OPENER". It isn't a derogatory term, it is an observable fact that some folks mislabel themselves as modellers when all they do is open boxes and plonk the contents on the track laid over the carpet in the back bedroom at their mother's house. My-My haven't the Chinese been busy for your benefit , etcetera, etcetera, etcetera, ad nauseum !!! " I'll probably get booted off here for that, unless of course humour is not understood as wasn't in England some time back. With regard Missenden, I'm not sure they would have me, I'm rather too............ how might I put it............Anarchistically individual in ones own approach to life. More seriously, many thanks for the fine compliment in that you class my work as constructive modelling. I post my work as an encouragement to those that wish to have models of an unusual nature, those prototypes that are not available rather than to showcase my own work. I wish that my work serves as example that lots of pleasure may be had from constructing such models and also that something worth while comes of that work. There are many decent models that may be improved and adapted to render rare subclasses, or as with my APT project some types that were proposed but never actually built. Imagination is a most powerful tool, seeing what is available and may be built or converted either by cutting and shutting, kit bashing, and even scratch building. There are plenty of drawings available, in fact I was gifted quite a lot which I ought to file into the IRM library. My current APT project has been languishing in a storage box for far too long now and yet strangely only got properly started after buying a full fourteen car version from Rails of Sheffield. Yours truly - BOX OPENER - guilty as charged !!! I have the Rapido APT-E also for the same reason in that I have always thought that the APT is the best train ever from the point of view of an engineering project designed to revolutionise railway vehicle dynamics. From the audacity of that premise alone it is to my mind indeed the best train ever. The APT project was born out of outright imagination which is another reason that it is the best train ever. should you start building stuff then all the left overs and spares may then be made into something else so nothing is wasted and it all comes in eventually or you could swap bit with your mates. The Motorail flats are left overs from MK1 cut and shuts. The postal vans because I wanted a mail train with a class 40 at the head (I have some class 40's at the ready in the nearly started box) I have an ongoing project to bash, kit build or scratch build one of every class of main line diesel and electric locomotive, including subclasses, from models from before 1990. Old Hornby, Lima, Mainline and Airfix as feed stock. The Irish scene would be perfect for someone like me for I would cut and shut myself silly using all sorts of different methods to create prototypes that are not available commercially. I see that things are improving that way and this is a good thing which will only improve with time however there is always room for adaption and conversion of other things to add that extra. I build cranes for that very reason: LMS Craven 50ton crane, currently in the nearly started box along with too much other stuff. Get on and build stuff, whatever it is you like the look of or is unavailable in the shops ! Gibbo.
-
Hi Folks, Second post regarding works done today, it is the DPC2 which has had the rear part of the roof altered to match the other power cars. The section under where a pantograph could be mounted was spliced in from the offcut that was left over from making the DPC4. the DPC2 and both of the DVT's have had the windows in the van doors cut and shaped. There will be filler and sanding to do and windows to fit before painting however the project is going well so far. The area of roof that is flat may be seen either side of the section over where a pantograph may be fitted. The scheme was to use a roof level jumper cable and only use the pantograph of the adjacent power car for power collection. The outline of the doors will be scribed in after the body shells have been glued together and sanded down. Gibbo.
-
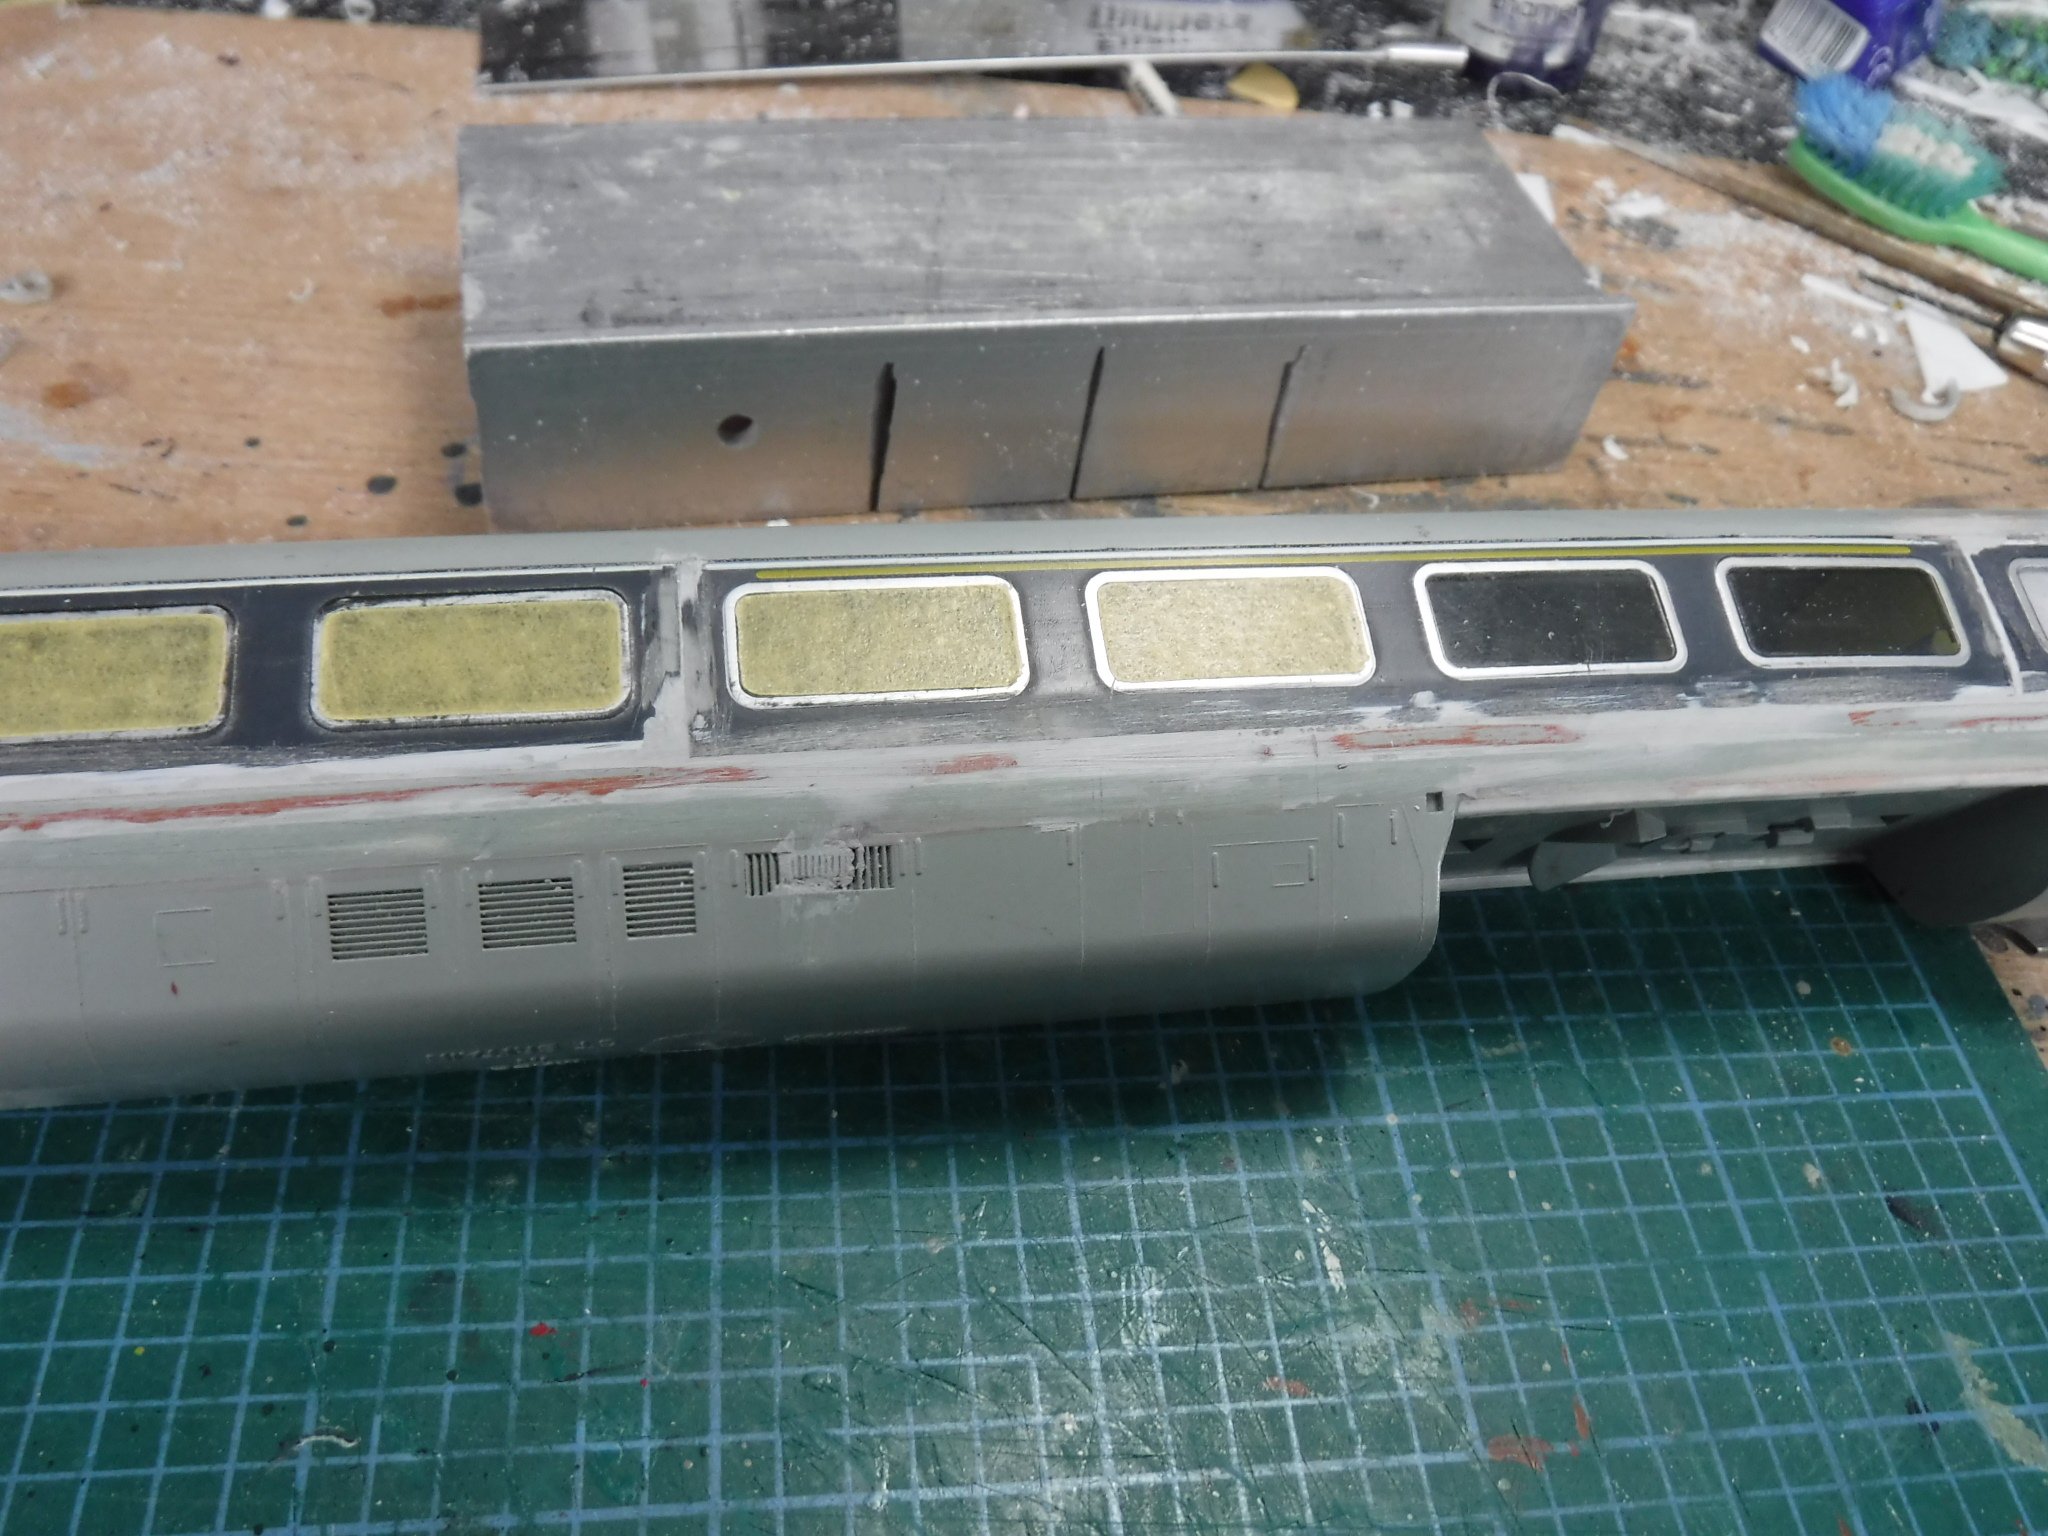
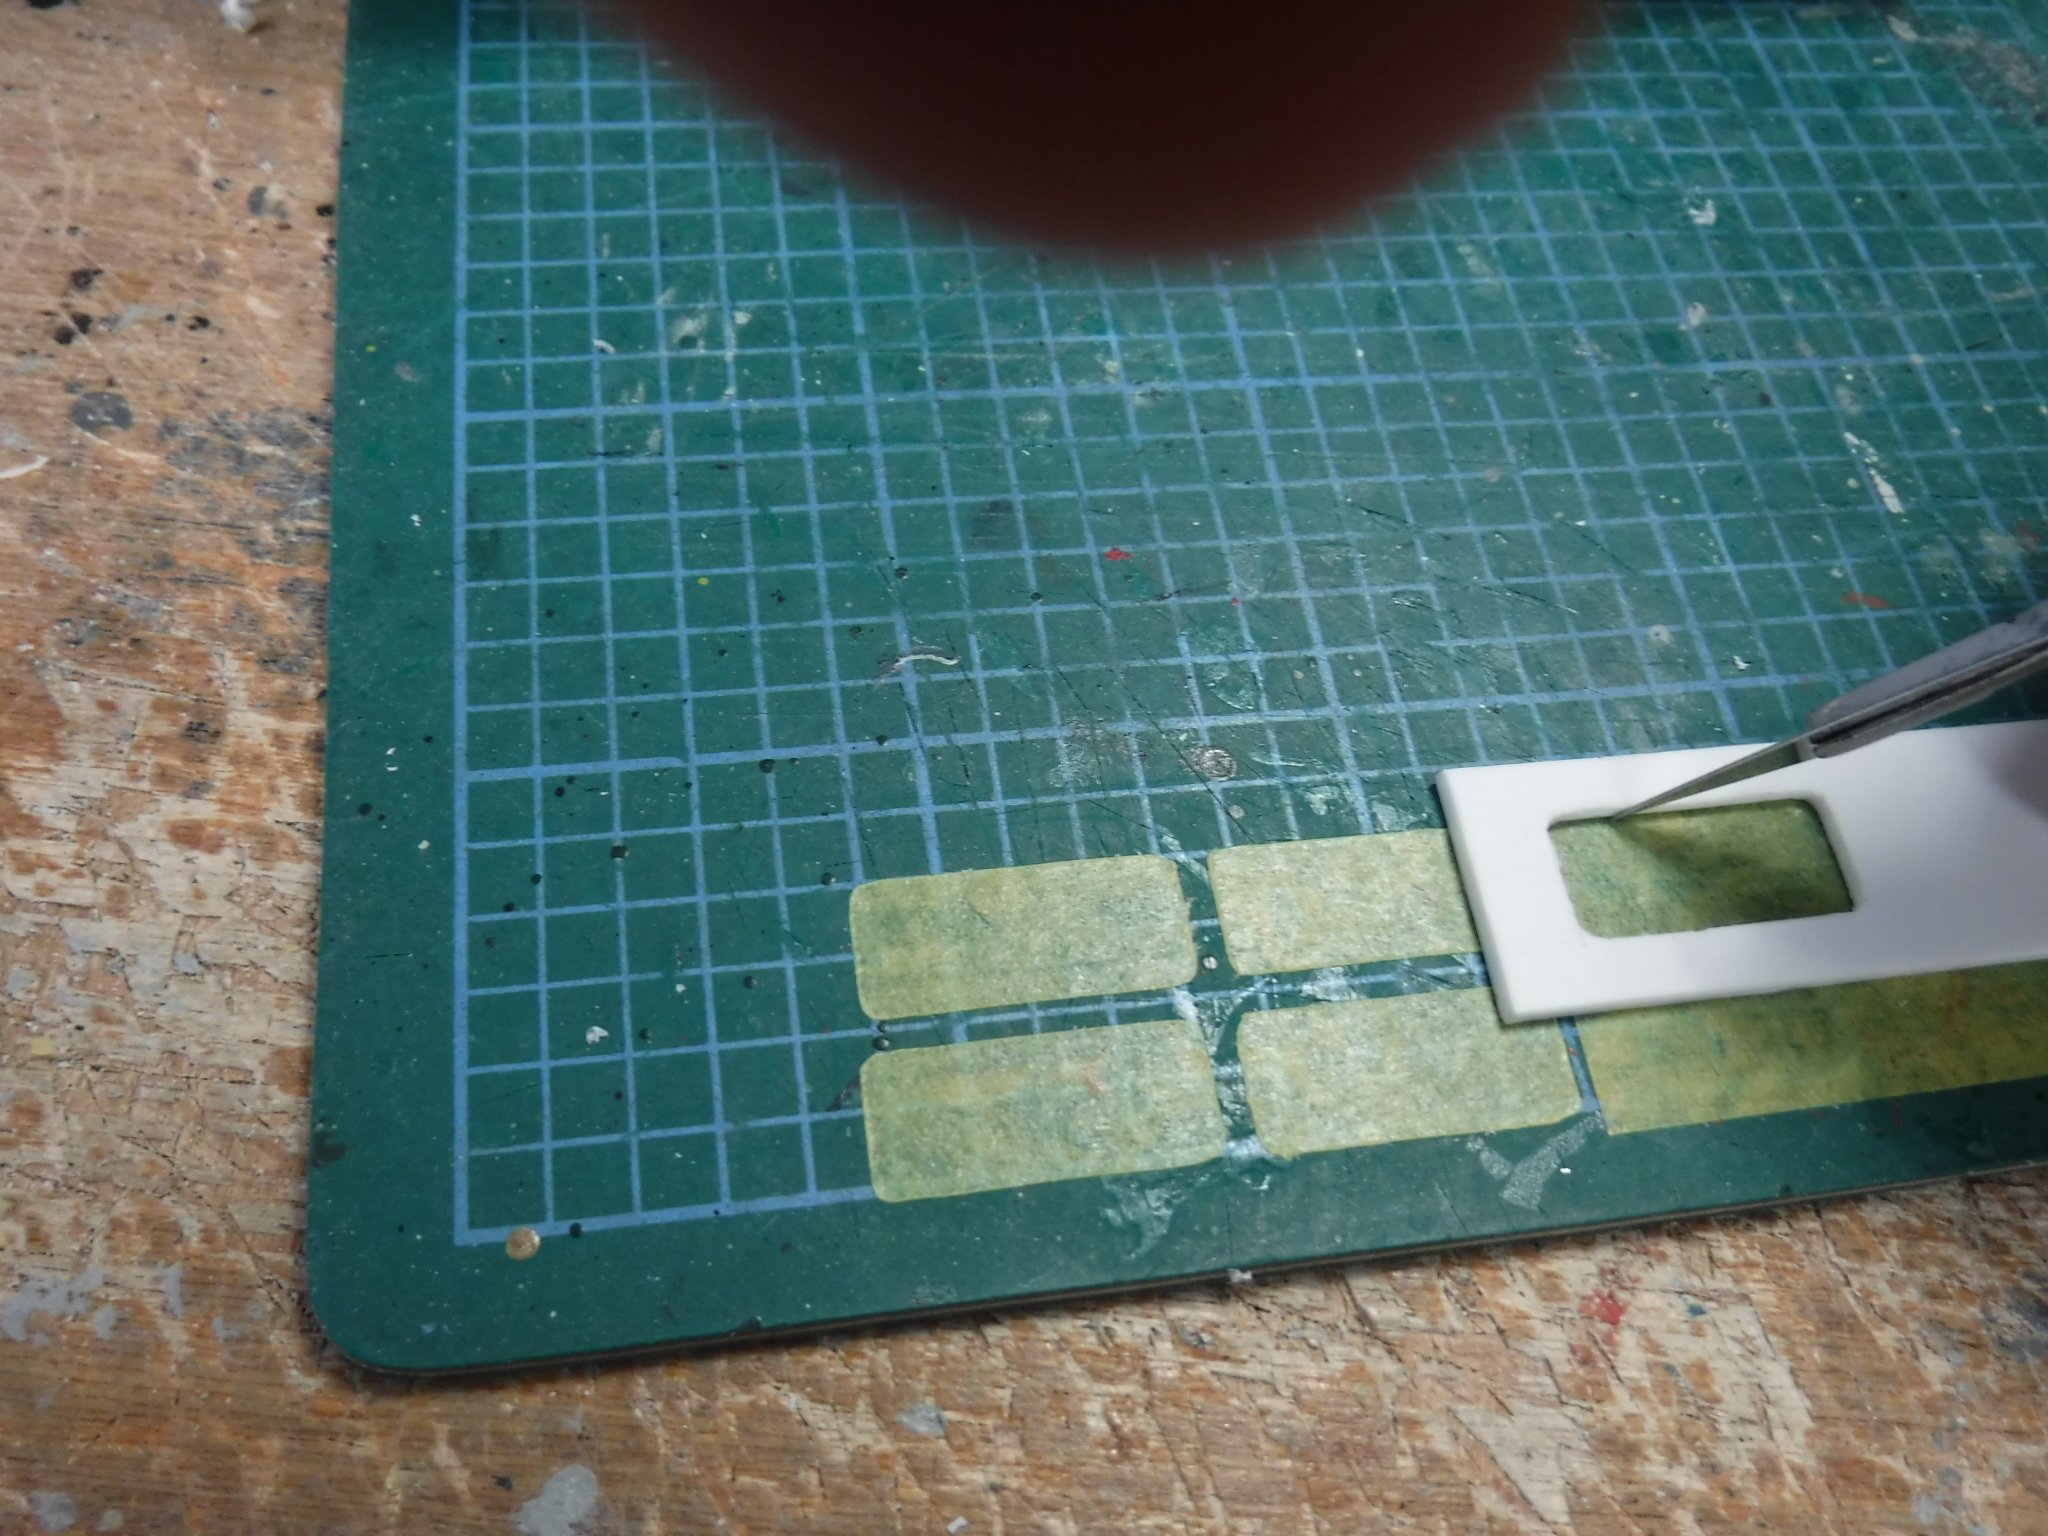
Hi Folks, Today's job is one that requires a Podcast, (Dimitry Orlov entertains today) as I'm masking up the windows ready to start the paint job for the APT coaches. I have made a cutting jig for shaping the masking tape, I lay out a strip onto my cutting mat and then using a brand new blade very carefully cut around the inside of the jig to then peel away the excess leaving the piece of masking required. it is then a matter of lining up the masking onto the windows appropriately. Masking tape blanks and the jig used. Masking applied, I intend to get some silver window frames made up from vinyl decals rather than paint the window frames on as this will be far too much like trouble. Gibbo.
-
Hi Musdy, I was blissfully unaware of said college ! I might give them a look up and see what there is to be seen. Cutting and shutting Mk1's was a speciality of mine and now I've got loads of them, and Pullman cars, they mostly need painting and lining though. As for shying away the trick is to buy second hand tat from eBay, that way if it goes wrong you have not ruined a good model and second there is always the chance that whatever you do will improve it ! Here are a selection of cut and shuts I've built, some of which are finished and some are in the nearly started category: Mk1 Leyland coach form Hornby Pacer bodies. Mk1 BG's Mk1 FK MK1 SK First class parlour with kitchen and coupe std K steel Third class brake and third class parlour with kitchen std K steel Third class parlour and third class brake std K steel Third class brake std K Manchester Pullmans form Airfix Mk2's
-
Hi Musdy, There isn't really a chassis as the body shell is in two parts, top and bottom. These were together for both the reprofiling of the nose end to taper it and also to the nose off also. I used a razor saw to mark out along the mould line that shews where the joint is and then worked around the groove to cut the nose off. The bulk head is attached to the bottom piece and is filled behind with Milliput to strengthen it and will be glued and filled once the body shell is finally fixed. I did take the bogies off although they were reattached to work out the buffer heights. This is what I'm working from: https://www.apt-p.com/APTNoseEnd.htm As may be seen it has both photographs and a decent diagram. Gibbo.
-
Yo Dudes, I've been mostly sanding down filler on the remaining coaches however I had more excitement when the postman delivered an extra Driving Trailer Second. The whole point of getting this DTS is so that I could have one with the nose in the up position so that it could be used to form up test trains and the like. I even went to the trouble of opening out the drivers windscreen despite the fact that it cannot be seen at all once the nose is fitted, I won't be bothering to glaze it though ! Here it is almost finished, there will be a bit of filler to put round the top of the bulk head which I can only do after the body is finally fitted. This will be done after the interior is painted and so far only the seats have been painted. Gibbo.
-
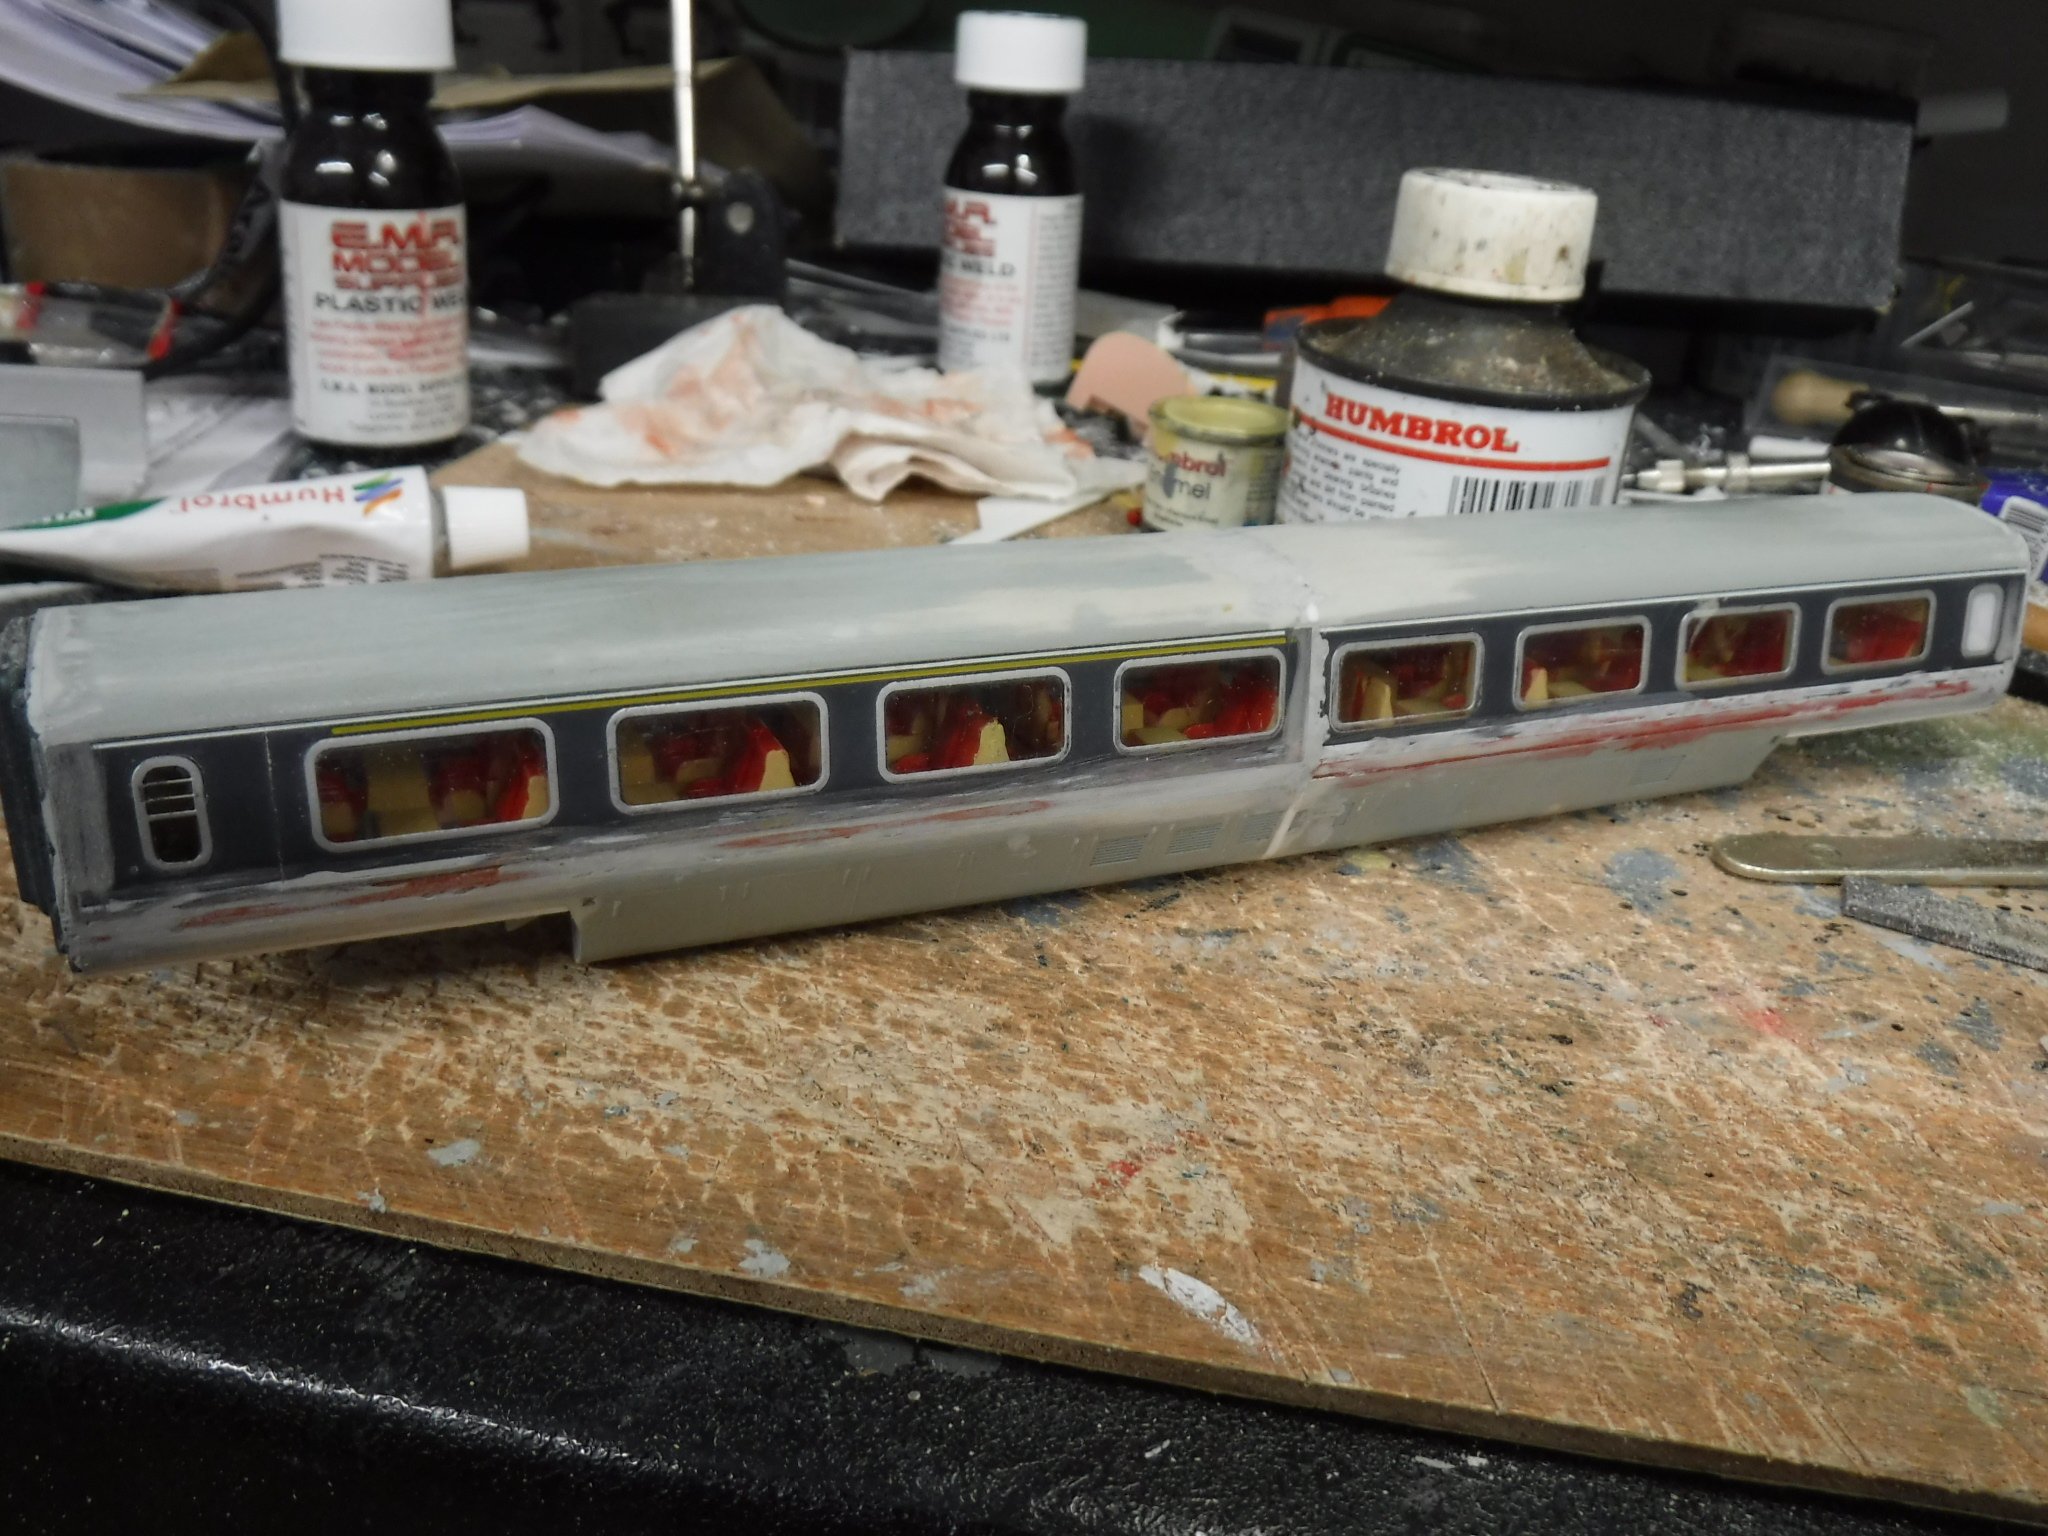
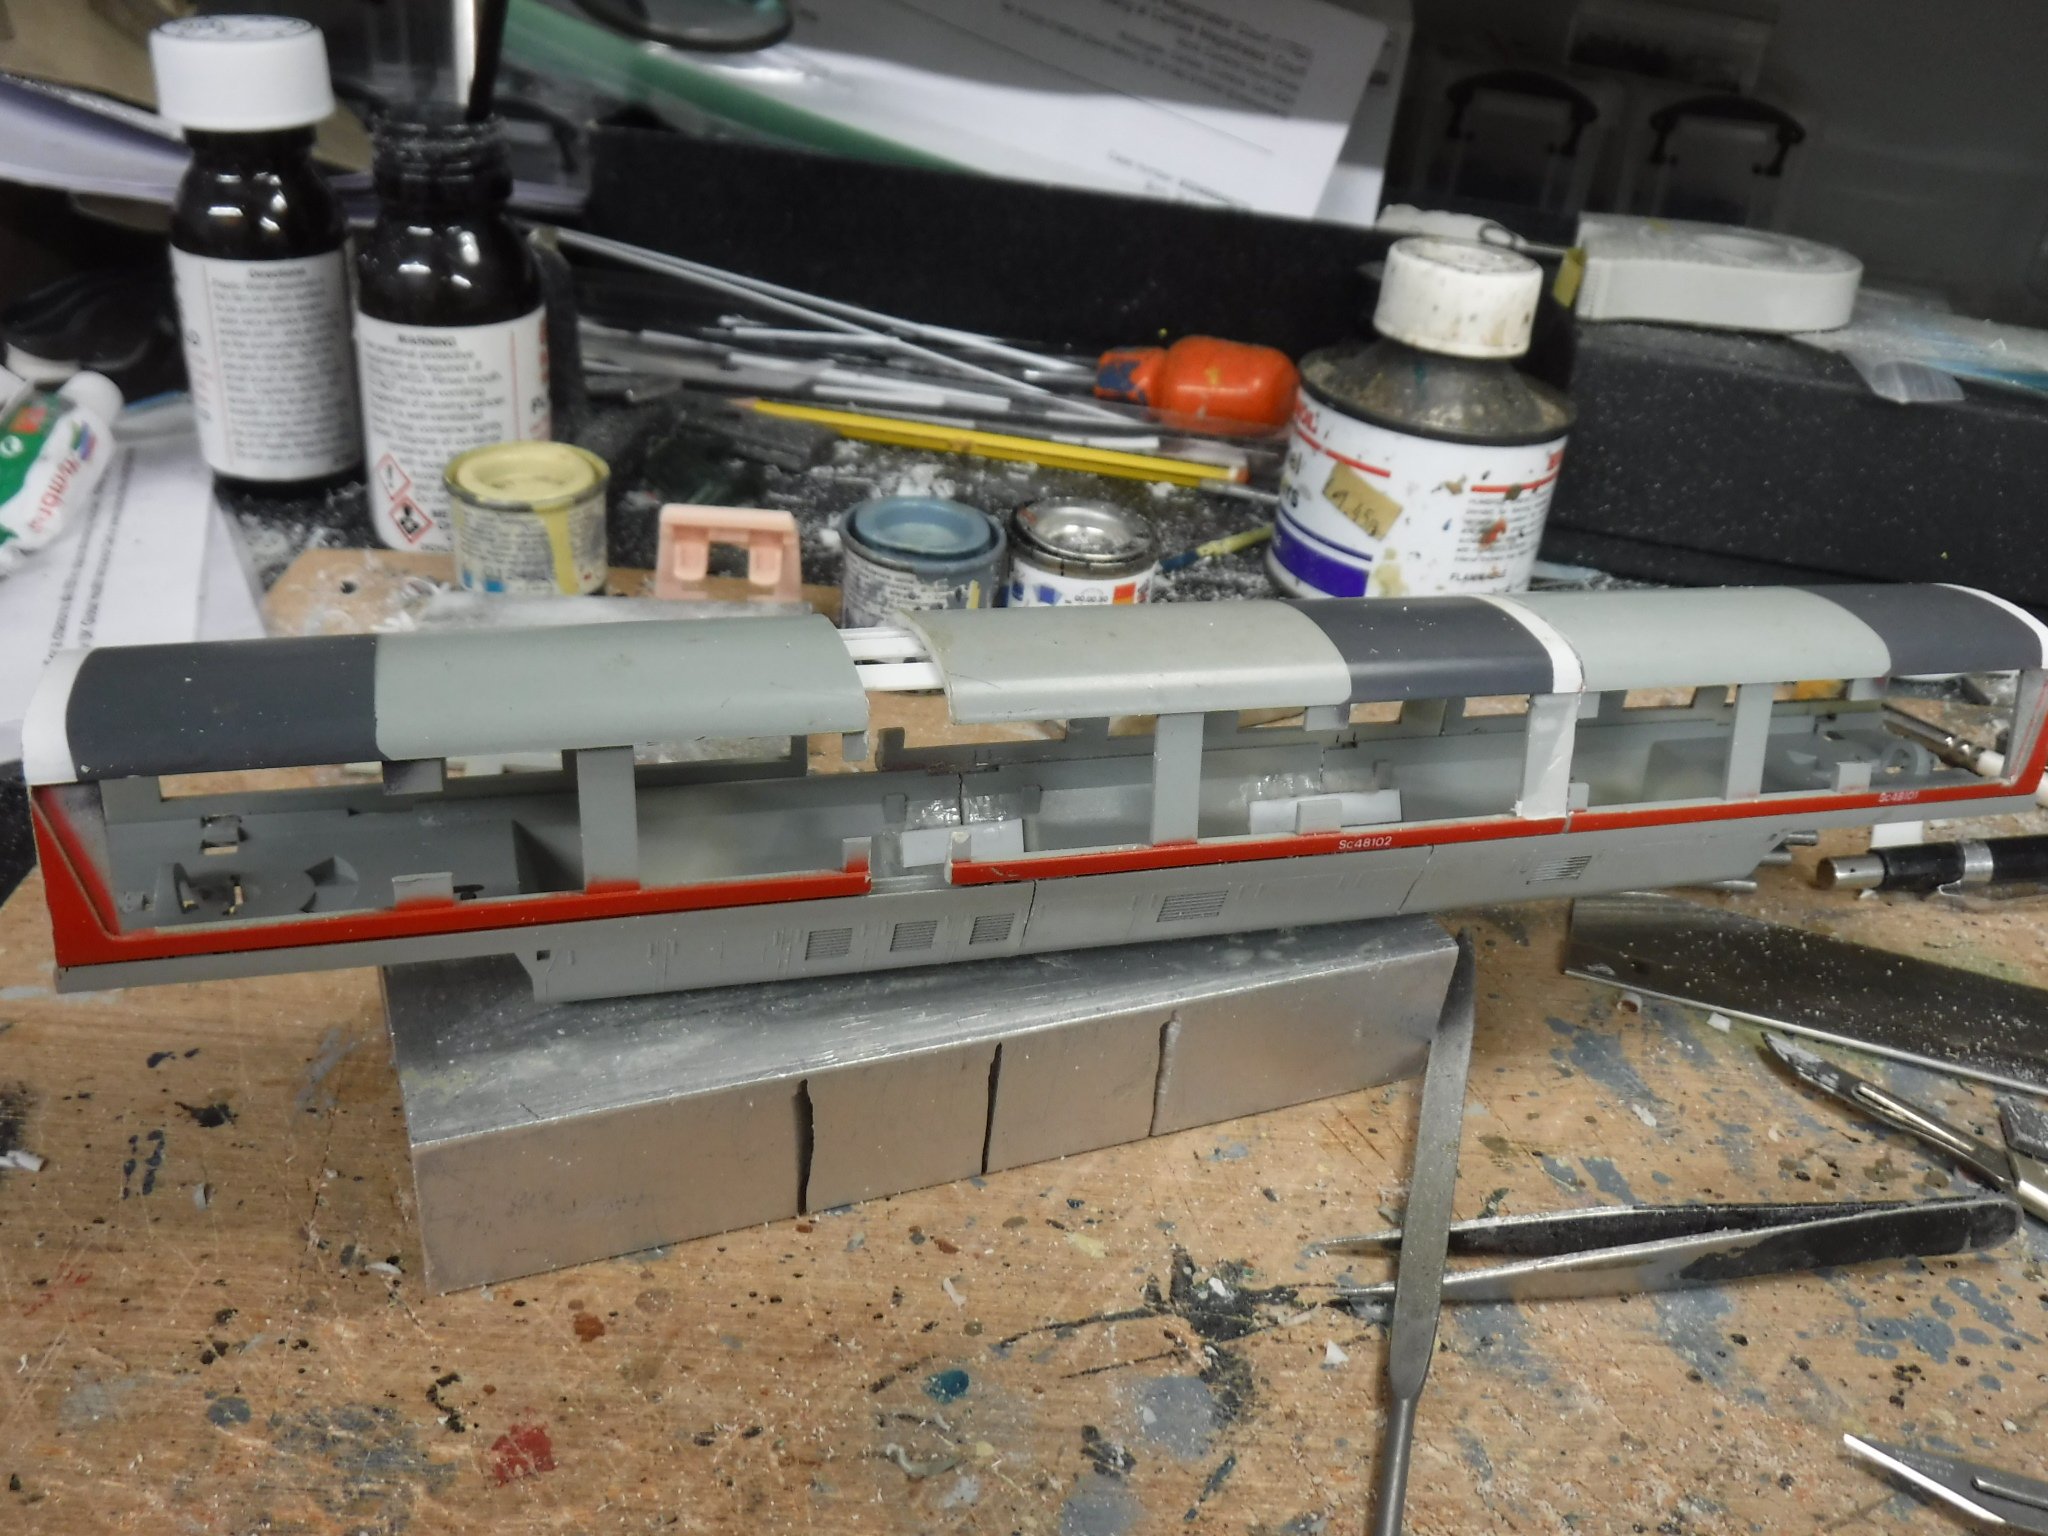
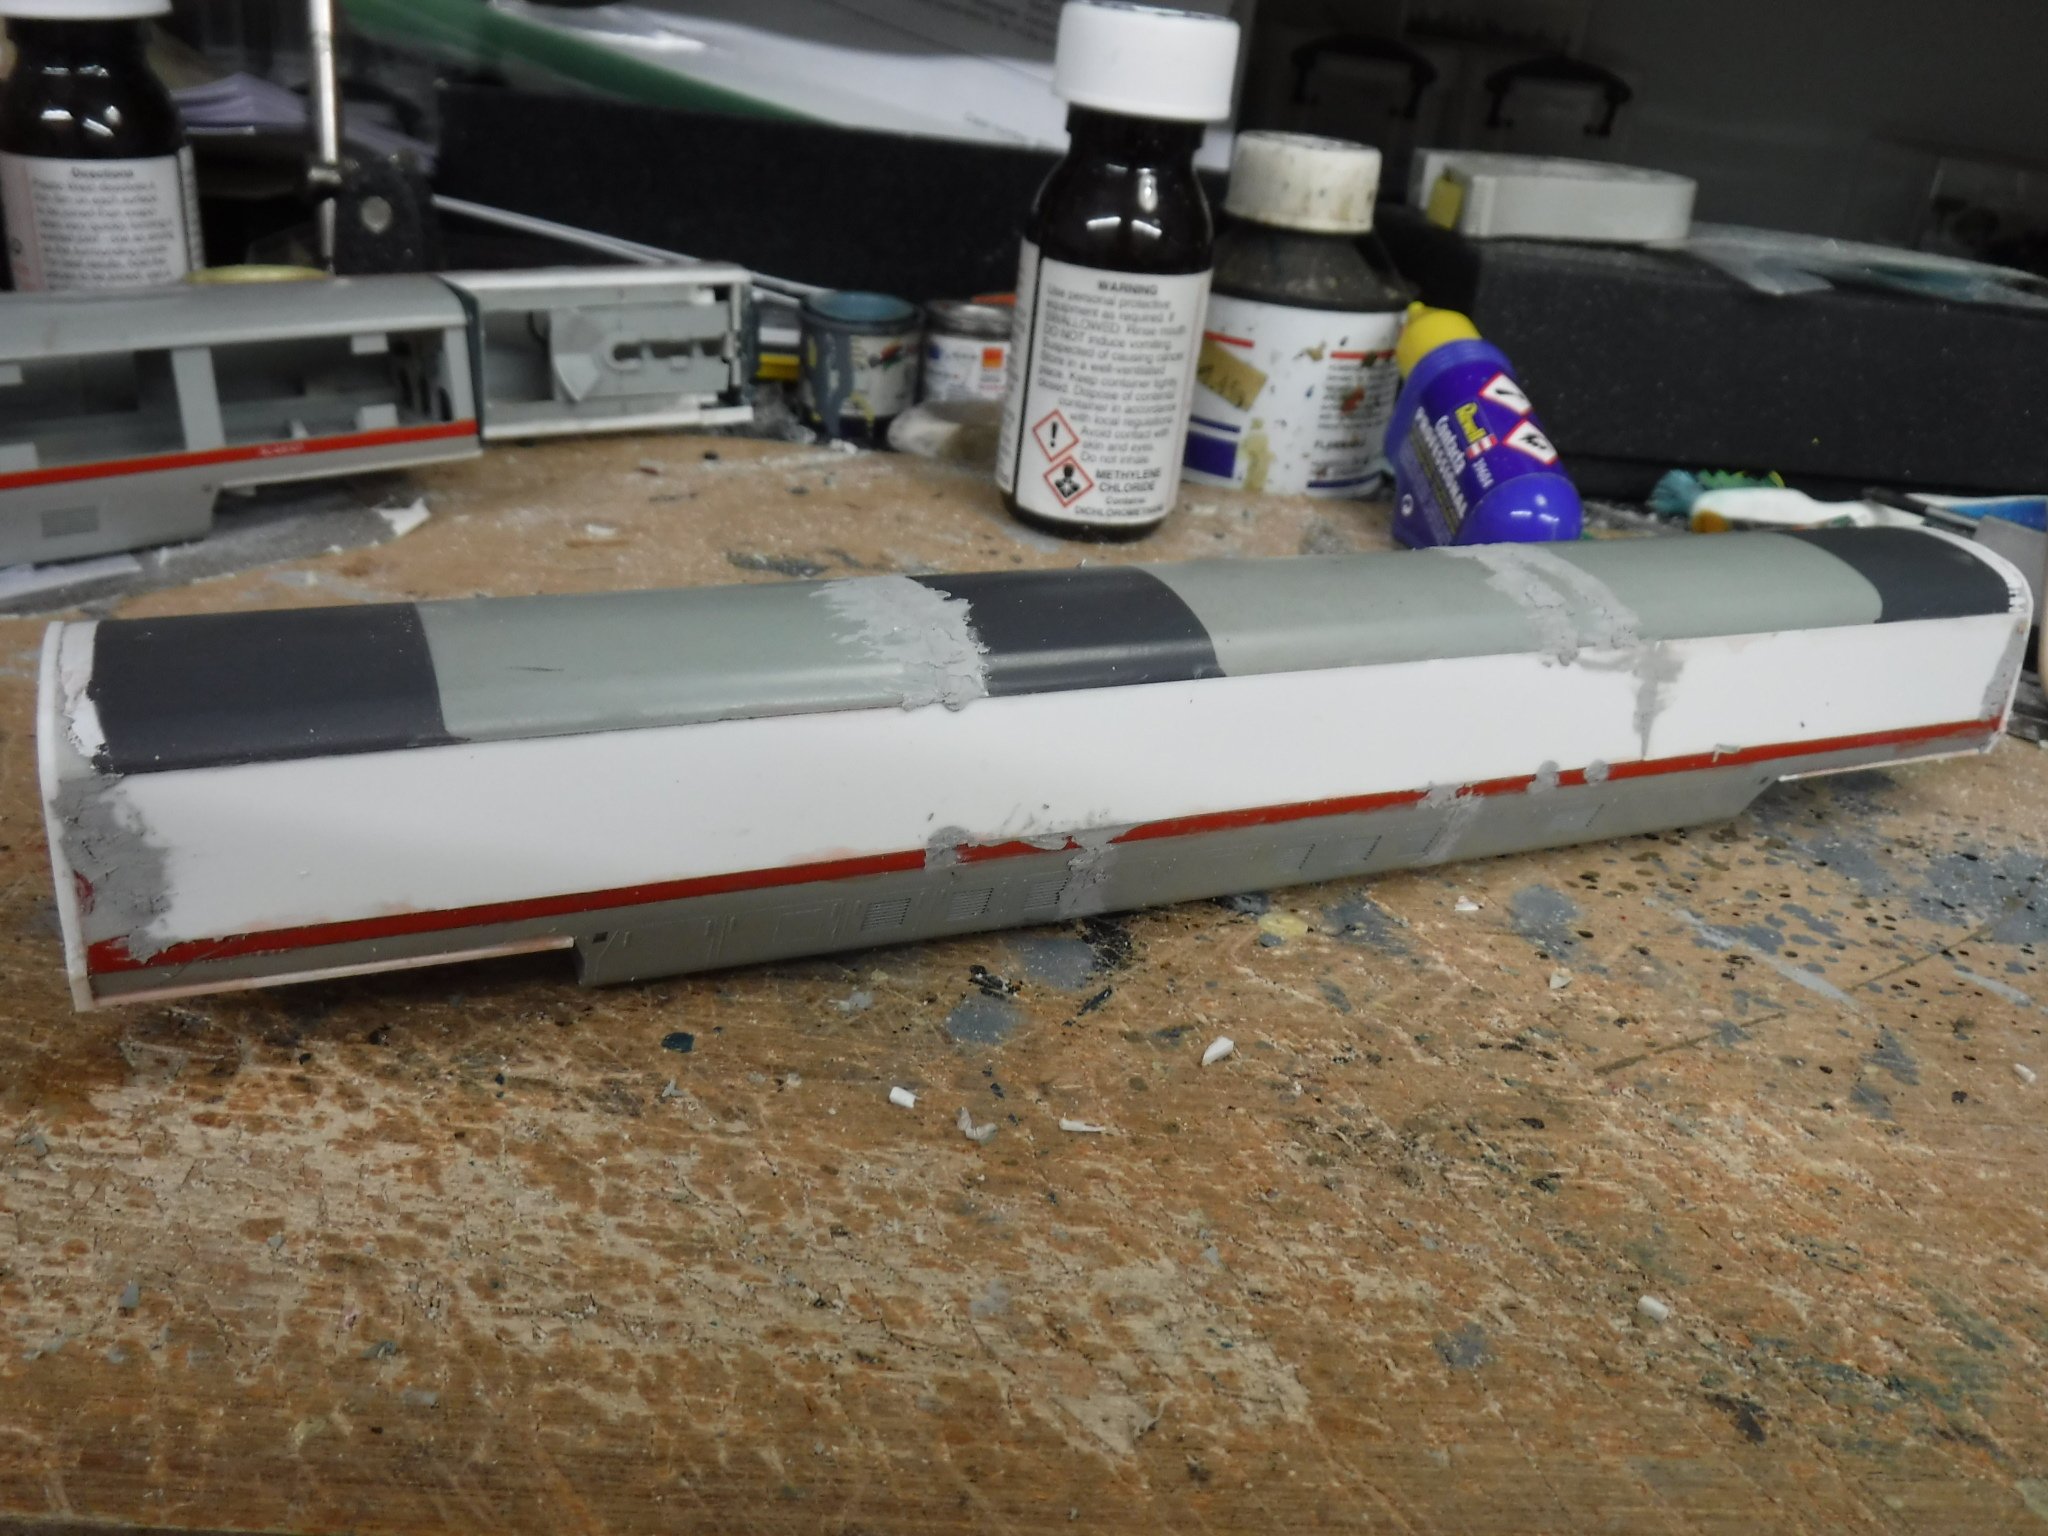
Hi Folks, Most of the coaches have had their interiors fitted and have been glued together. Once the glue had cured I set about filling all the joints and sanding down the sides so that they will be flush ready for primer. The ends of the coaches also required filling where they clip into place, the eradication of this joint looks better already and they are not even painted. This is a bit of a boring job however it should make the finished model a lot better than having lumpy transfers and wonky paint lines as a result of uneven surfaces and groove where the body halves join. Sanded filler always looks patchy, no doubt there will be more filler to deal with after I have primed the body shells. Gibbo.
-
Hi Folks, I altered the seats in the first class sections by doing yet more cutting and shutting. I took from the split in the centre of the carriage to one bay form the end and reversed them so that they lined up with the other end and glued them back in place, quite simple yet it does look a lot better. One of the altered first class sections, the unaltered bay is over the bogie pivot pin and I decided that was too much like trouble to try and reverse. The main job I have been doing today was lining transfers on the postal vans, only the lining across the ends of the vans to apply now. Gibbo.
-
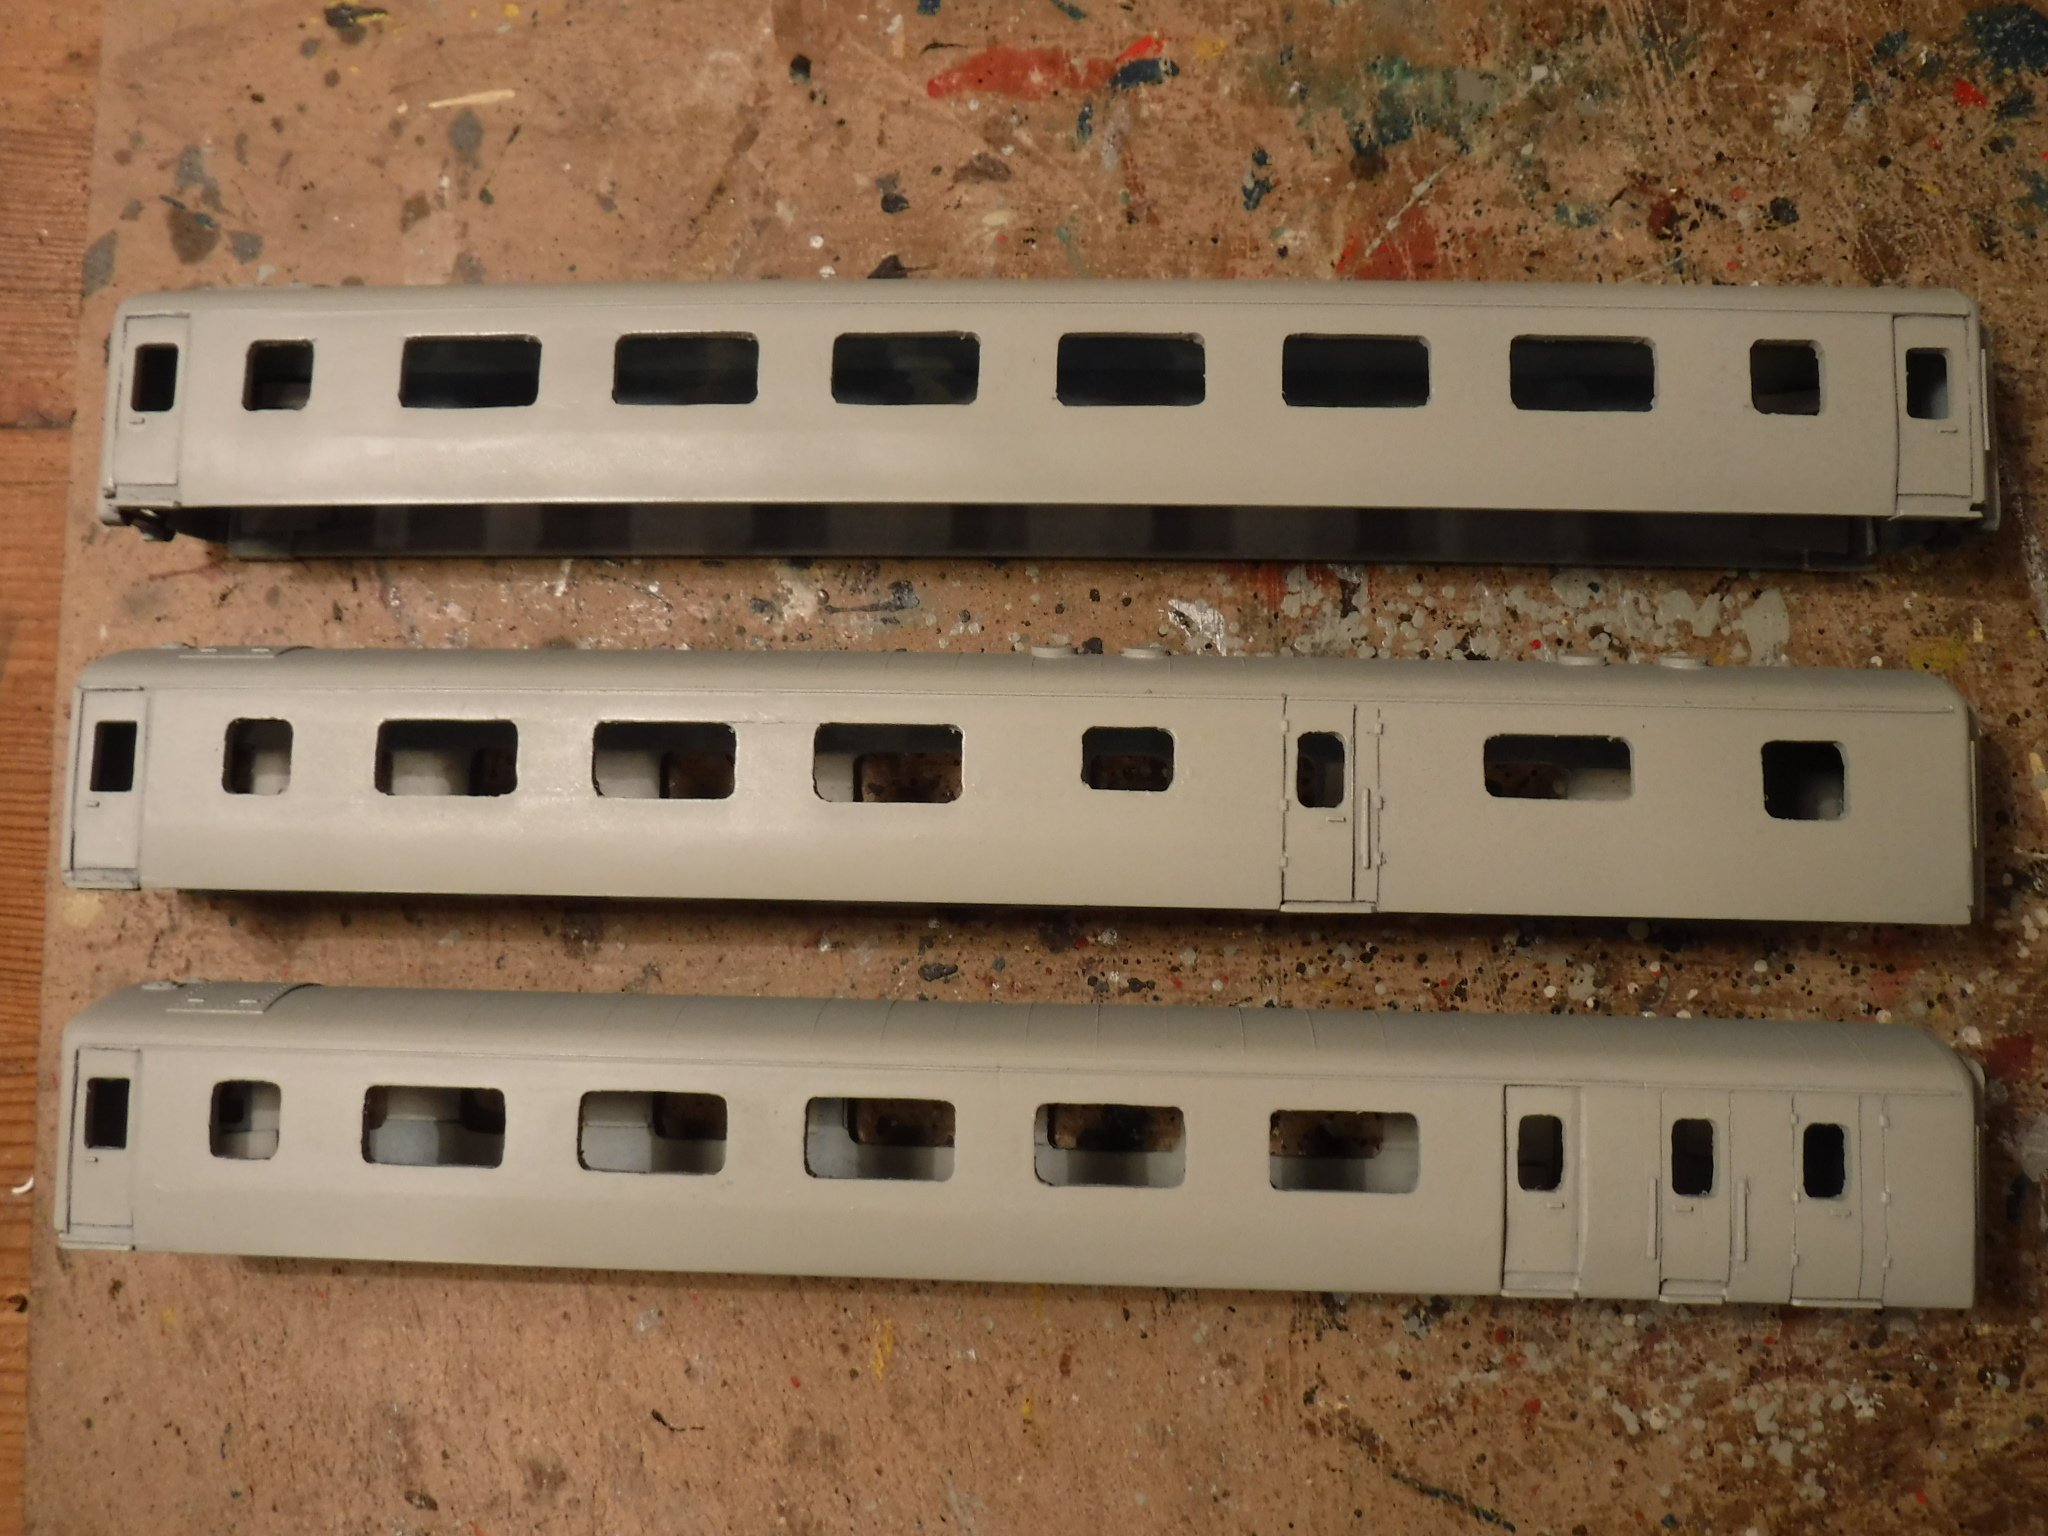
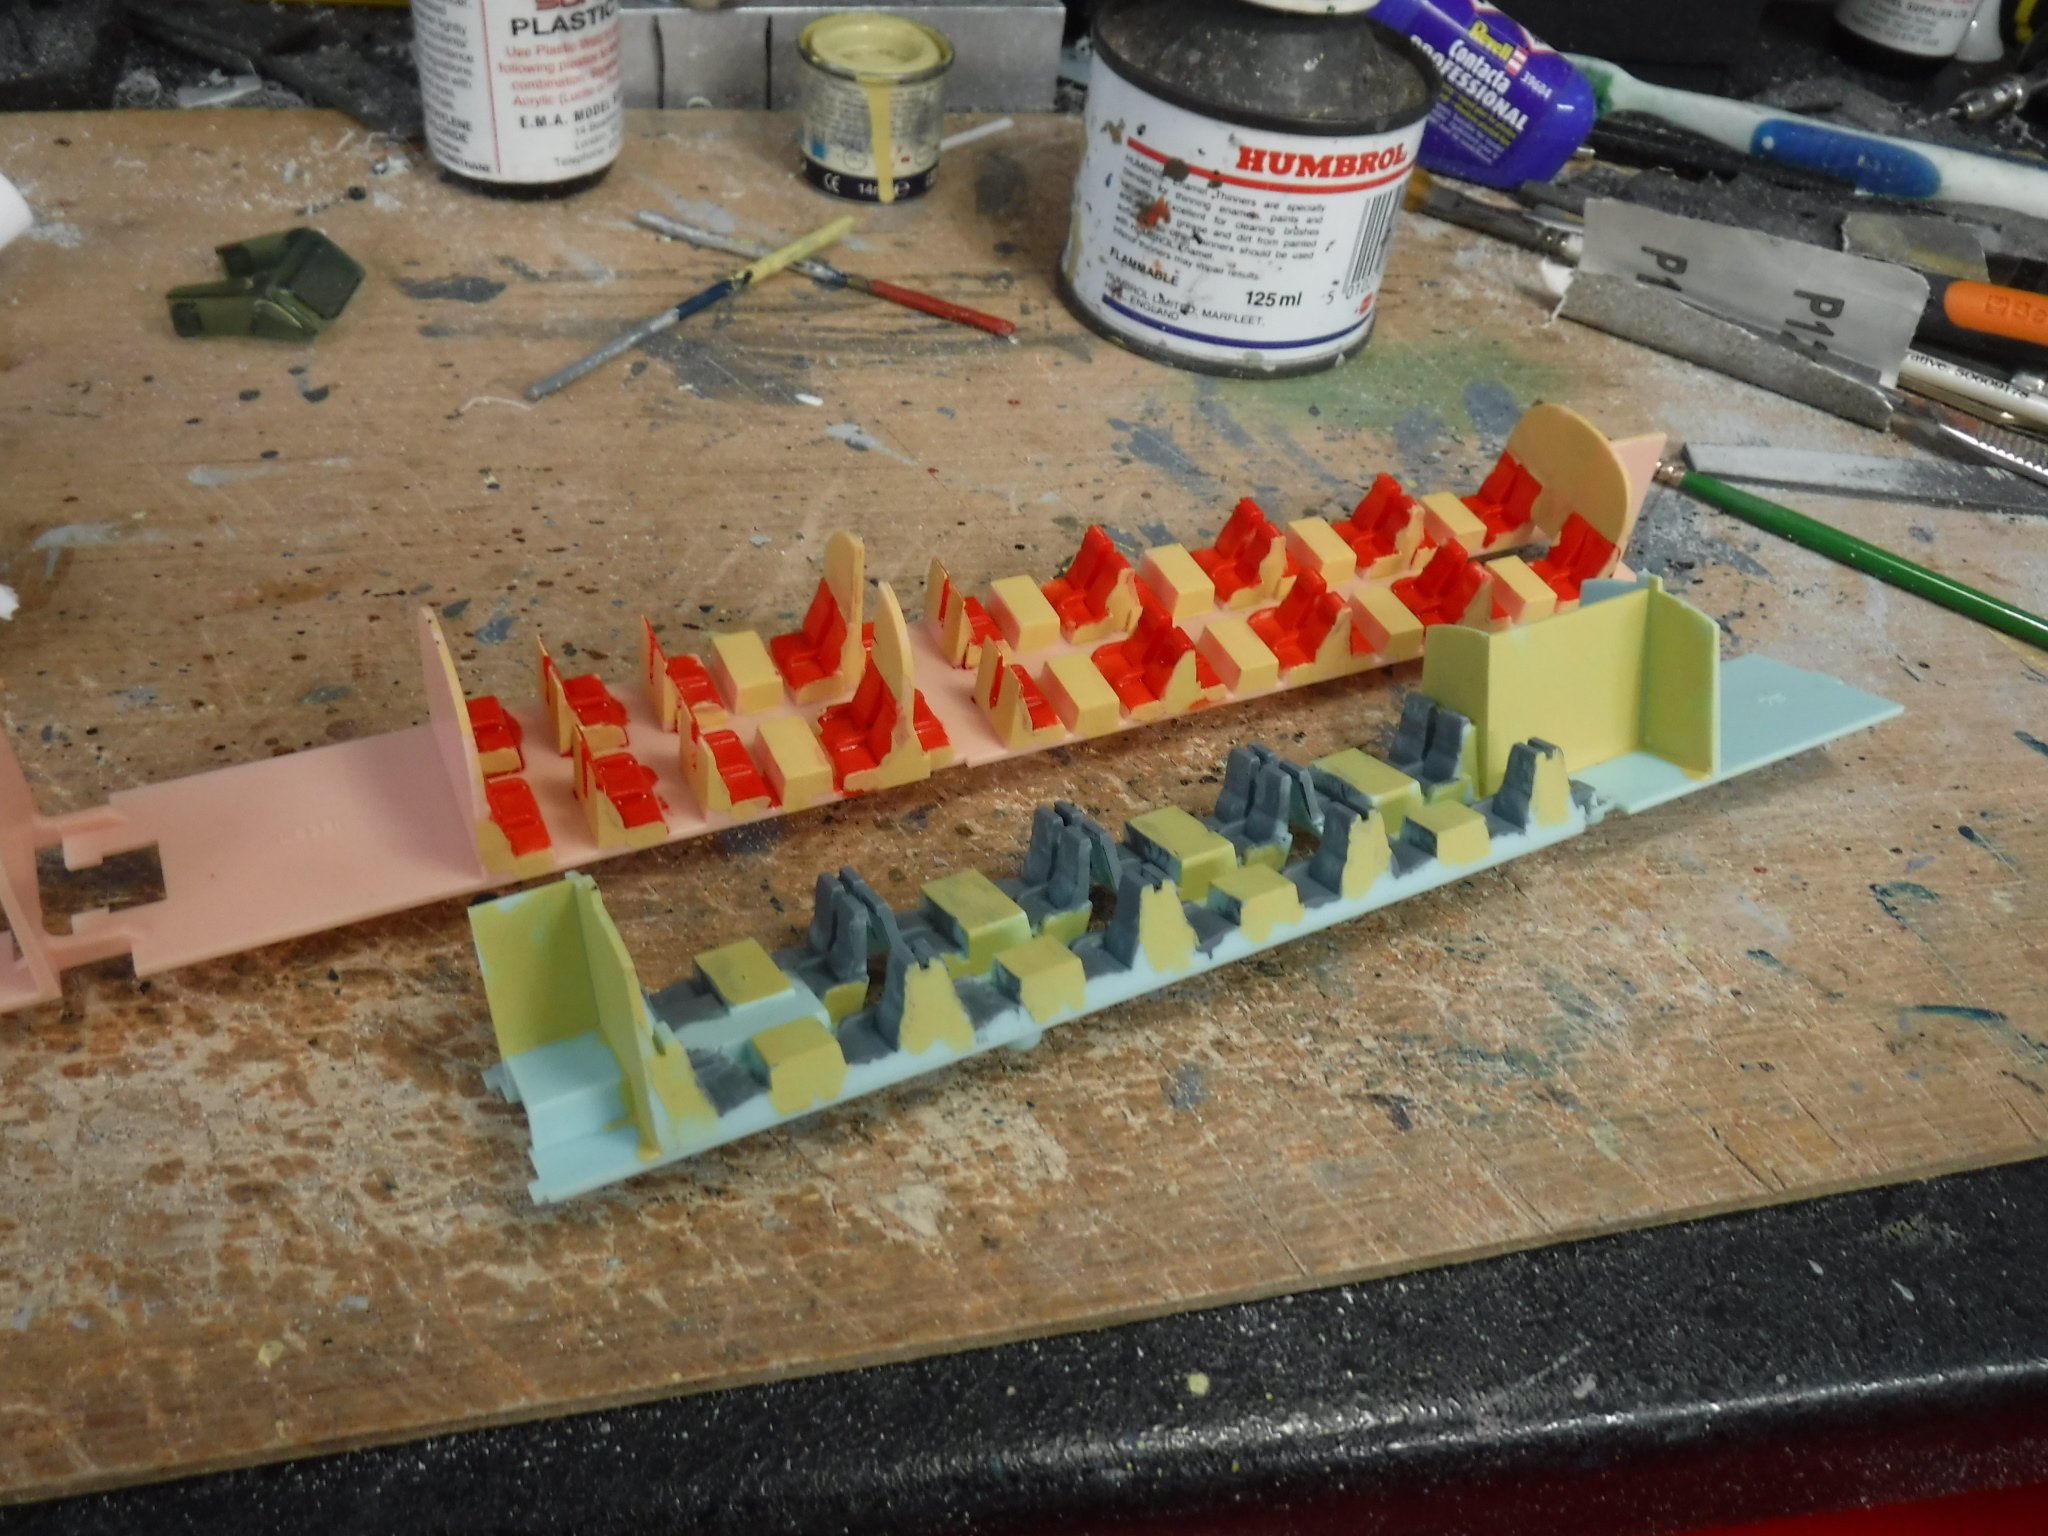
Hi Folks, I have been fitting the glazing and seating to the APT-P stock today, the POP II train has been shunted into the nearly started siding along with the postal vans. All but one of the coaches have been glazed by cutting at the mid point between the windows to fit two pieces into each side which requires only minor filling at the joint and on some minor filling at the ends due to the slightly different dimensions of the first and second class sections of glazing. The one coach that has not been made up from two sections per side is the TS3 which is for the APT-R/S/T versions, it has eight sections per side as it used up all the left over sections. A little more filler required on this one. The pencil marks are to line up the inner edge of the window so that the marking out of the cut could be made. The other job was to cut and shut the seating to be placed inside the various coaches. I have painted the seating up in red for second class and unclassified and a mid blue for first class. I haven't worried too much bout seat arrangement so long as there are seats is good enough for me. worse still the aisle swaps sides in first class as the seating is 2+1, Rule 1 applies in this case ! The seats for the buffet car should really be second class pattern but I didn't have enough so I used left over first class which have sine been repainted red. i did however build up the kitchen and serving bar area also since painted. Gibbo.
-
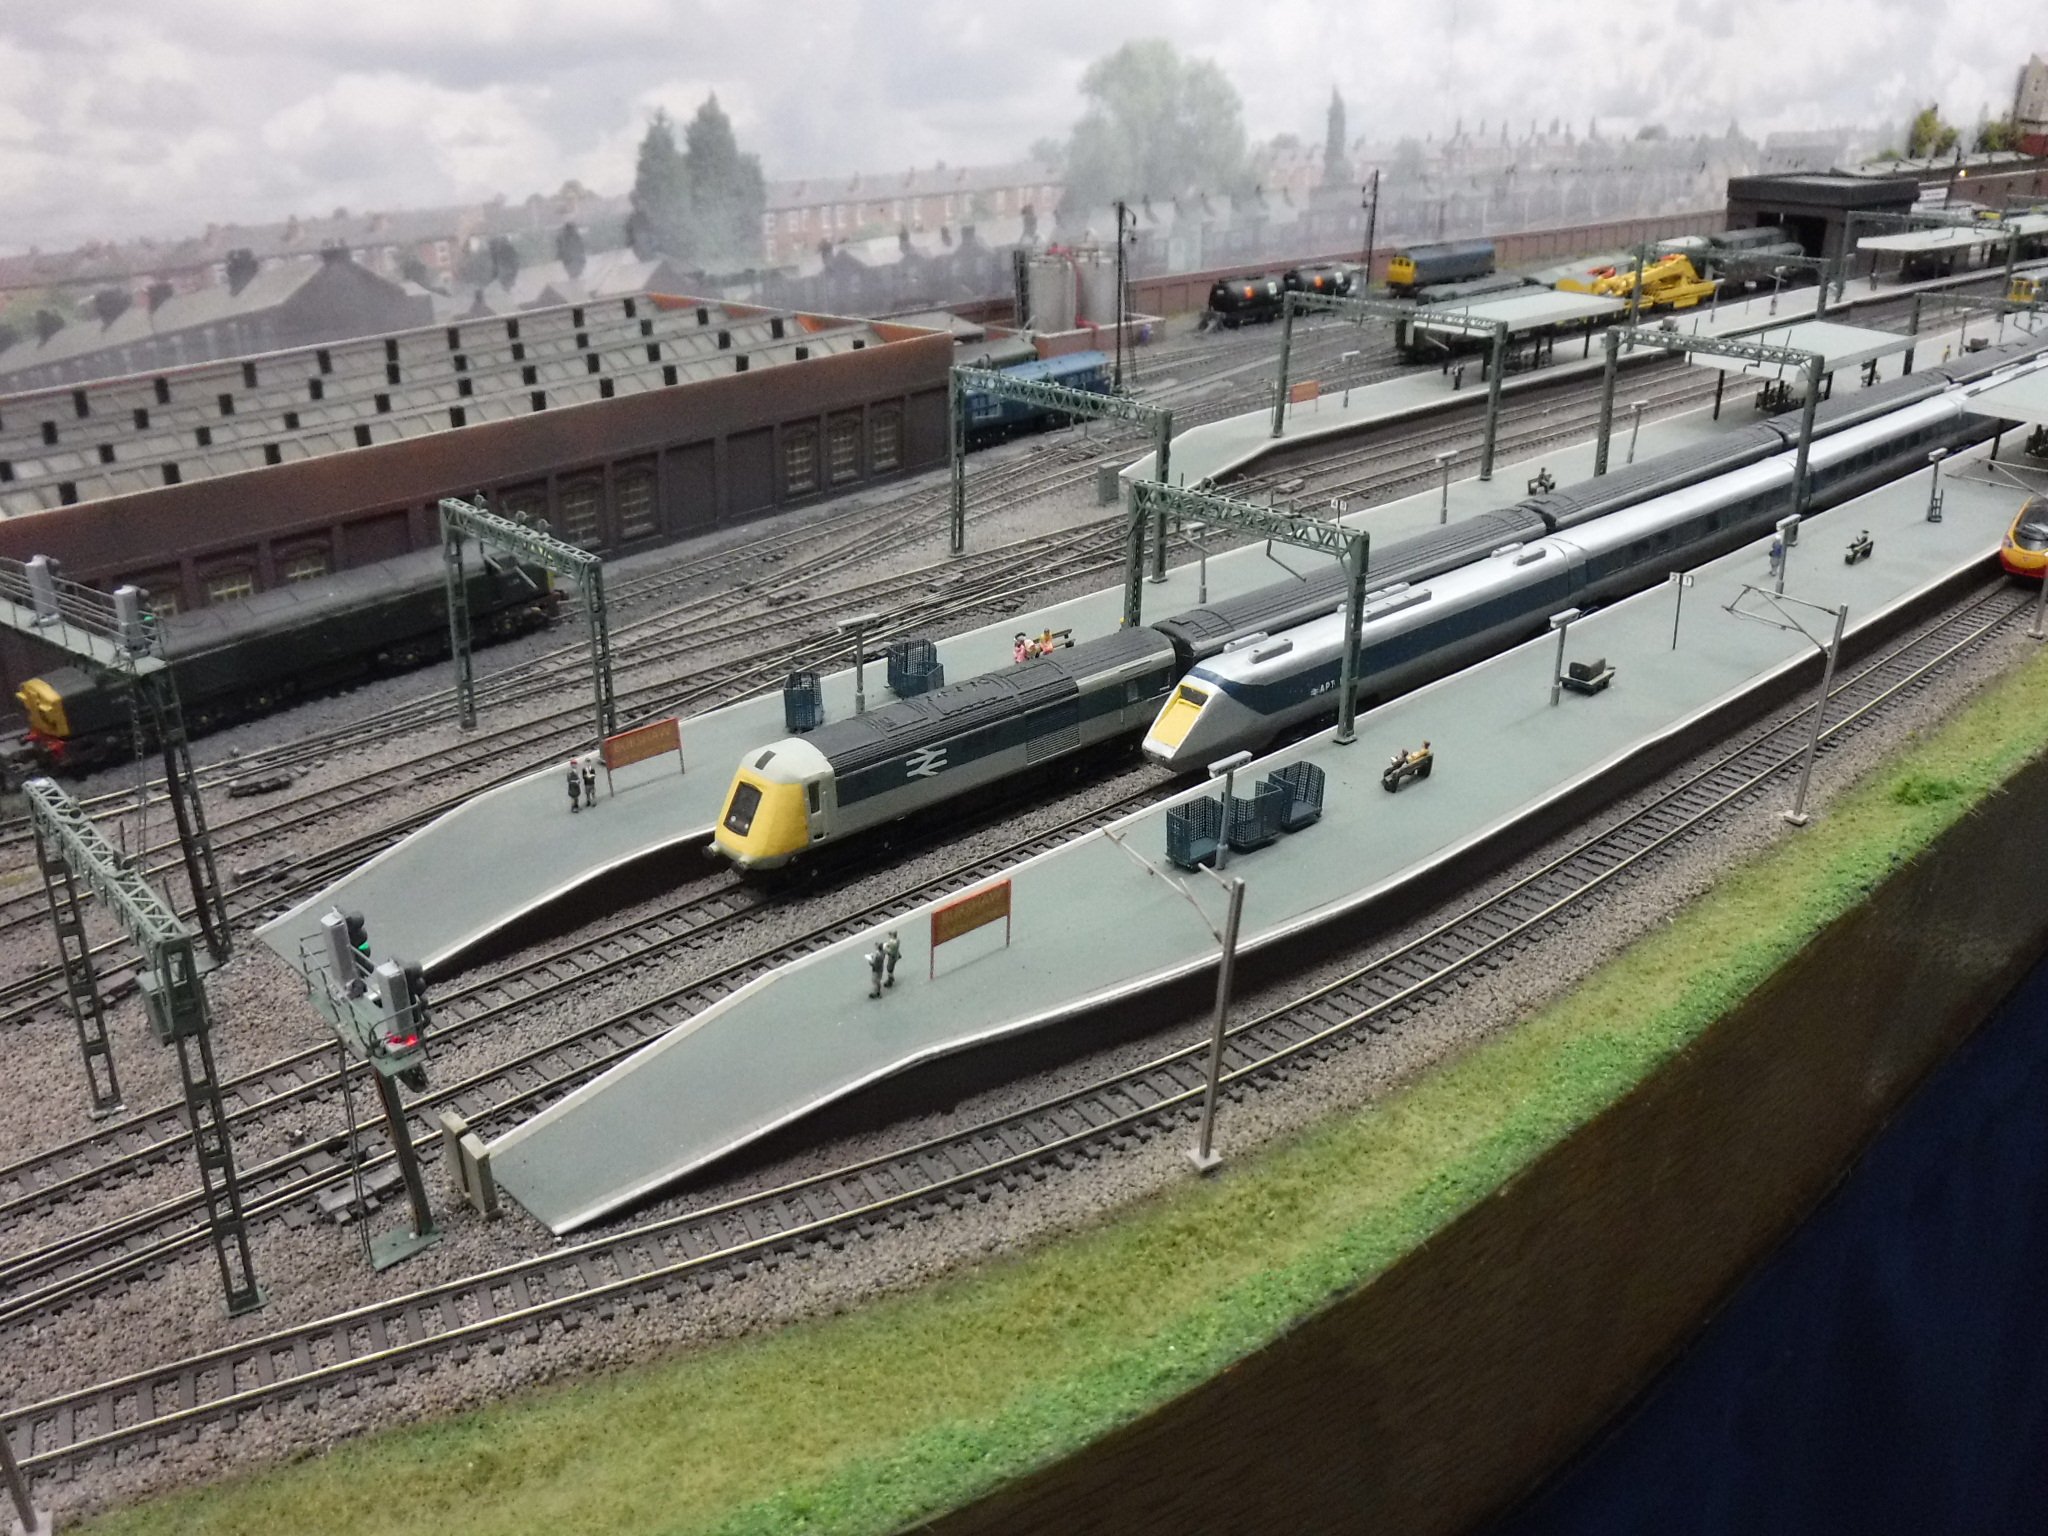
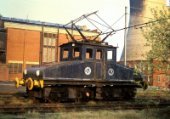
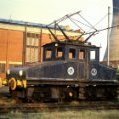
Hi Folks, I've been perusing the website noted by @commerlad and I found this photograph: The reason it interests me is that I built this one. It is an N gauge APT-e that I built for a friend of mine and it runs on his Burshaw North Western and Nine Mills layouts on the British exhibition circuit. It is made form a Graham Farrrish class 91 chassis somewhat altered with modified B4 bogies taken from some Mk2 coaches. Here it is again on Burshaw North Western alongside the Prototype HST. Gibbo.
-
Hi @commerlad I had already discovered that web site, and have used all sorts of information from it so far into my build. Thank you for including it all the same, and also thank you for posting on my thread I do like the communication, by all means ask any questions. Gibbo.
-
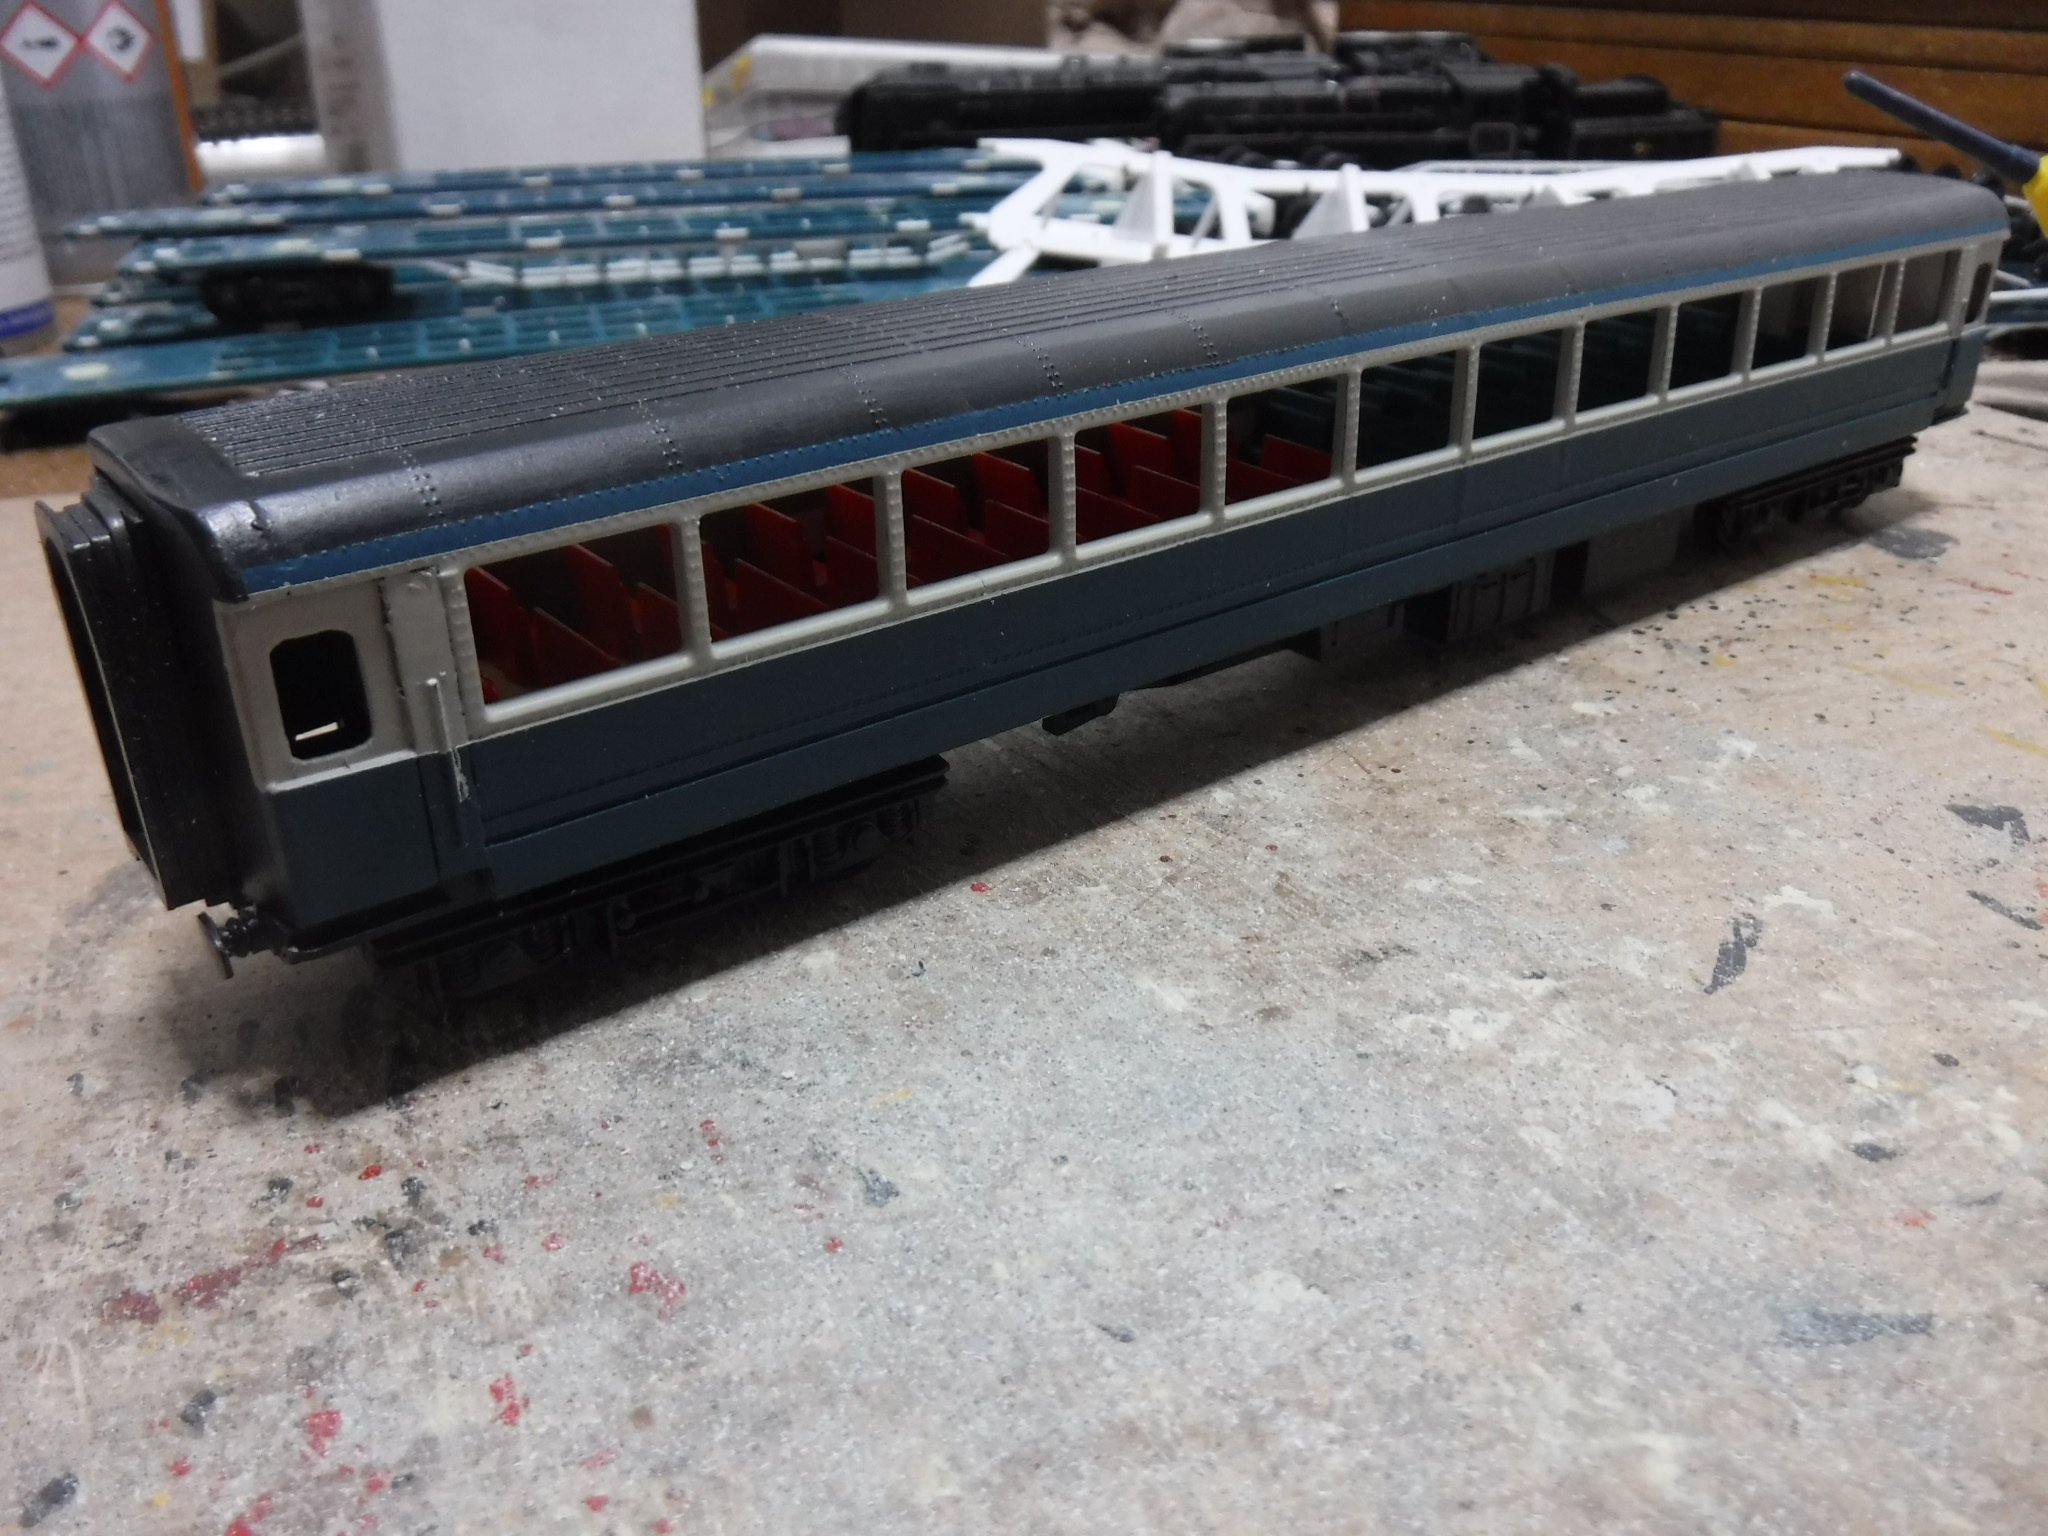
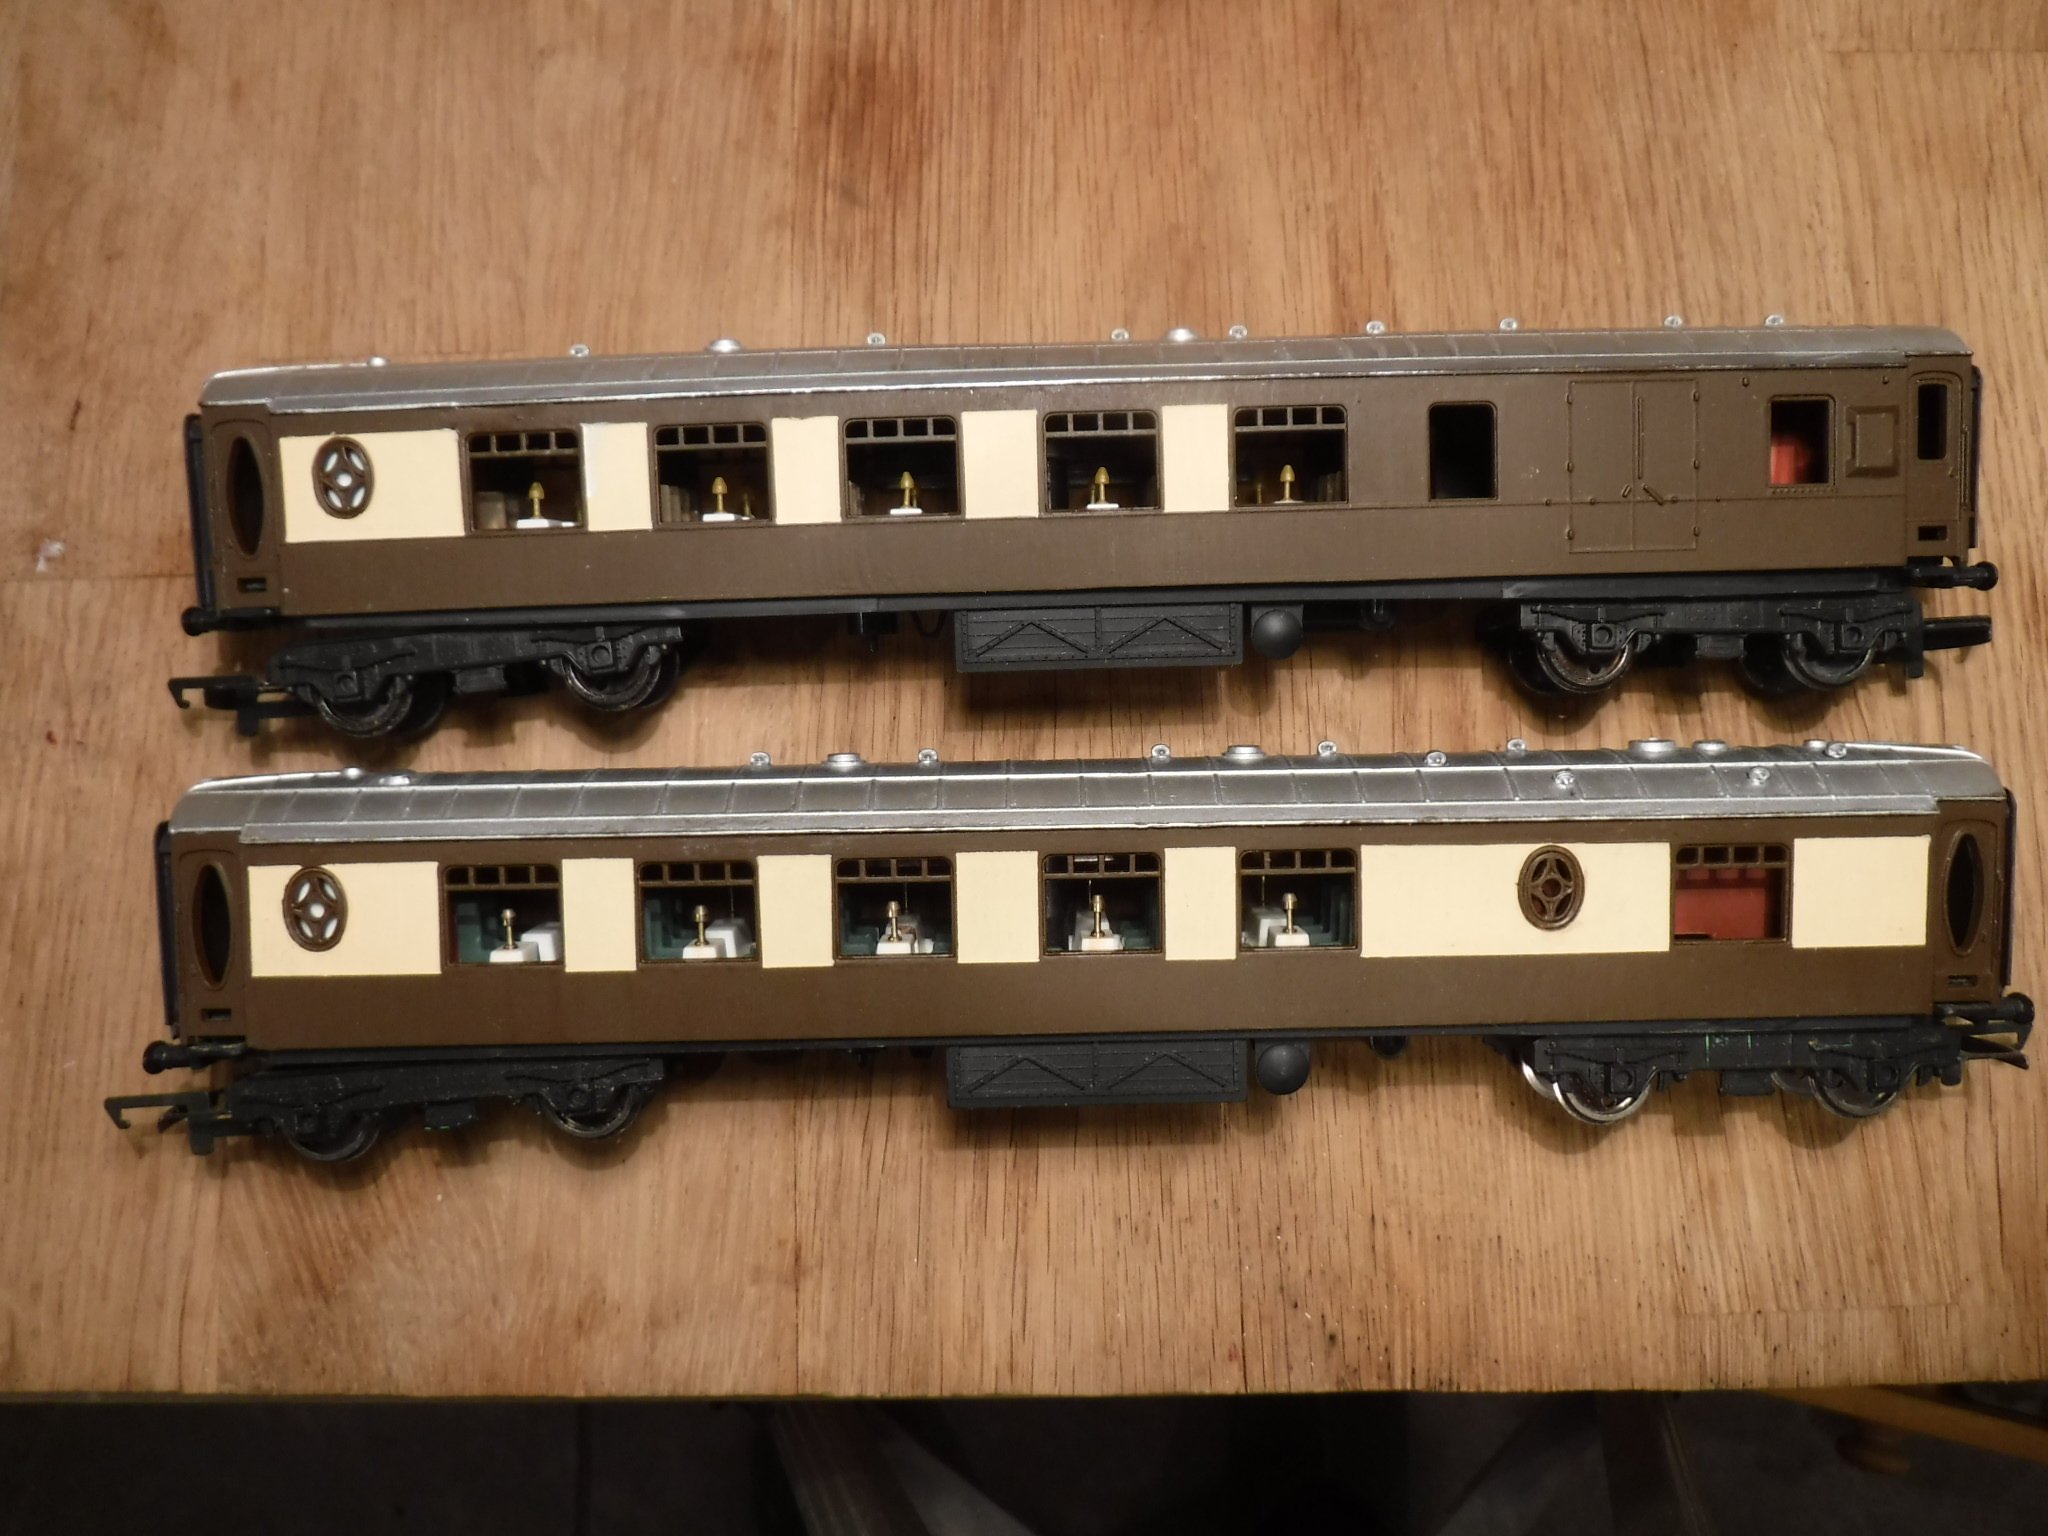
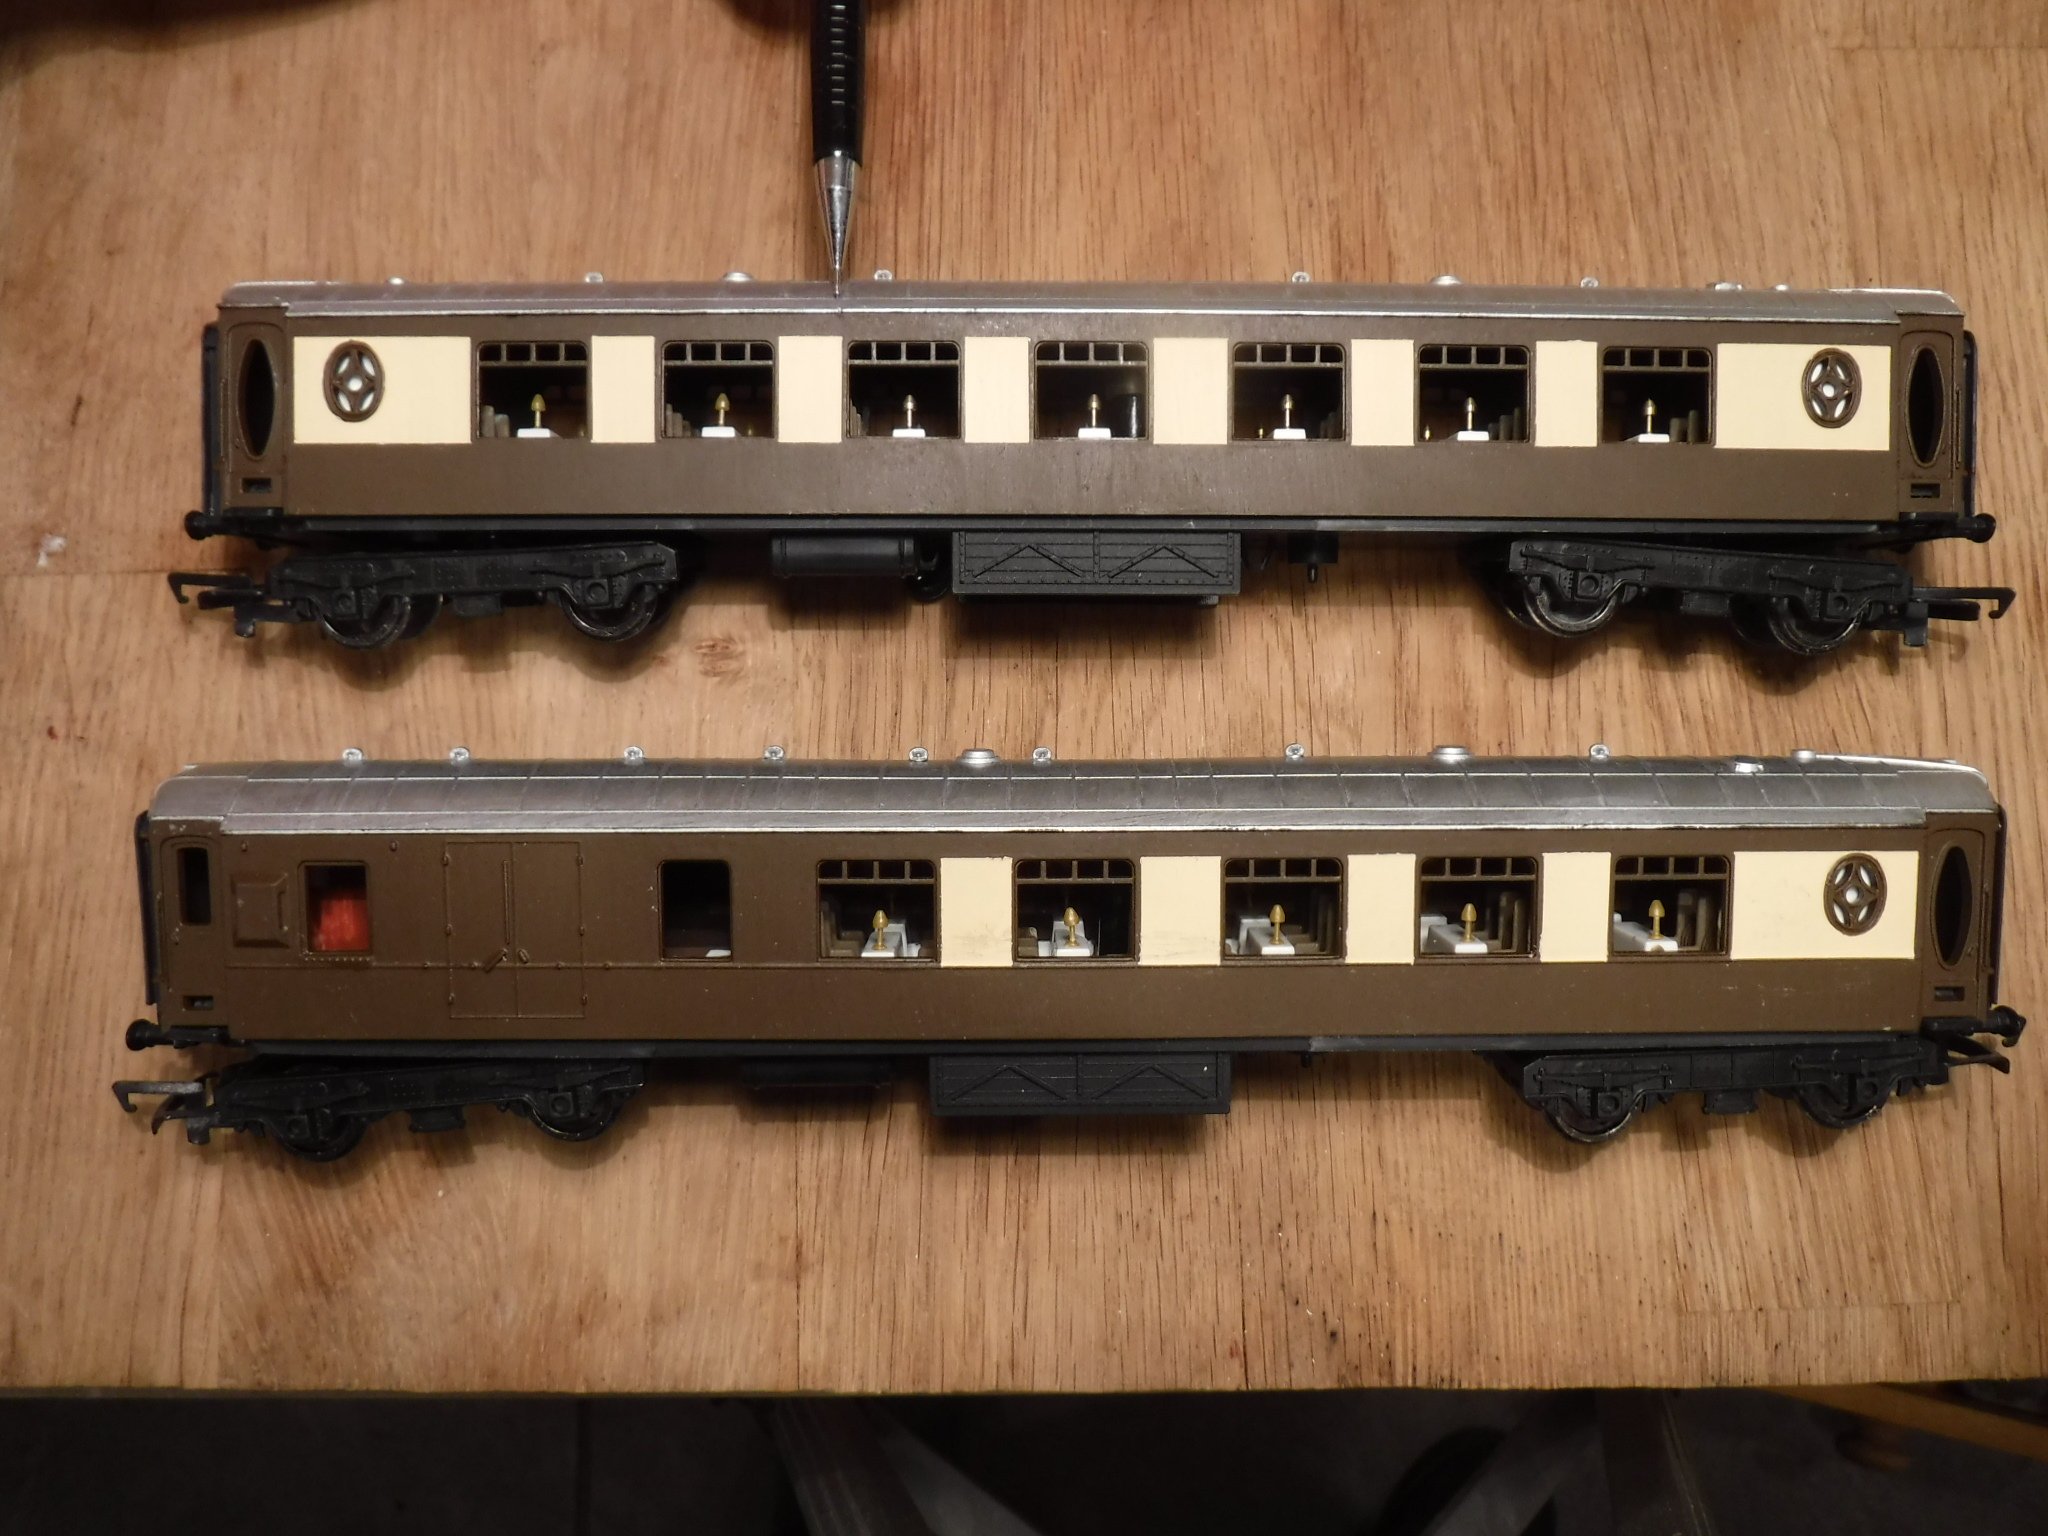
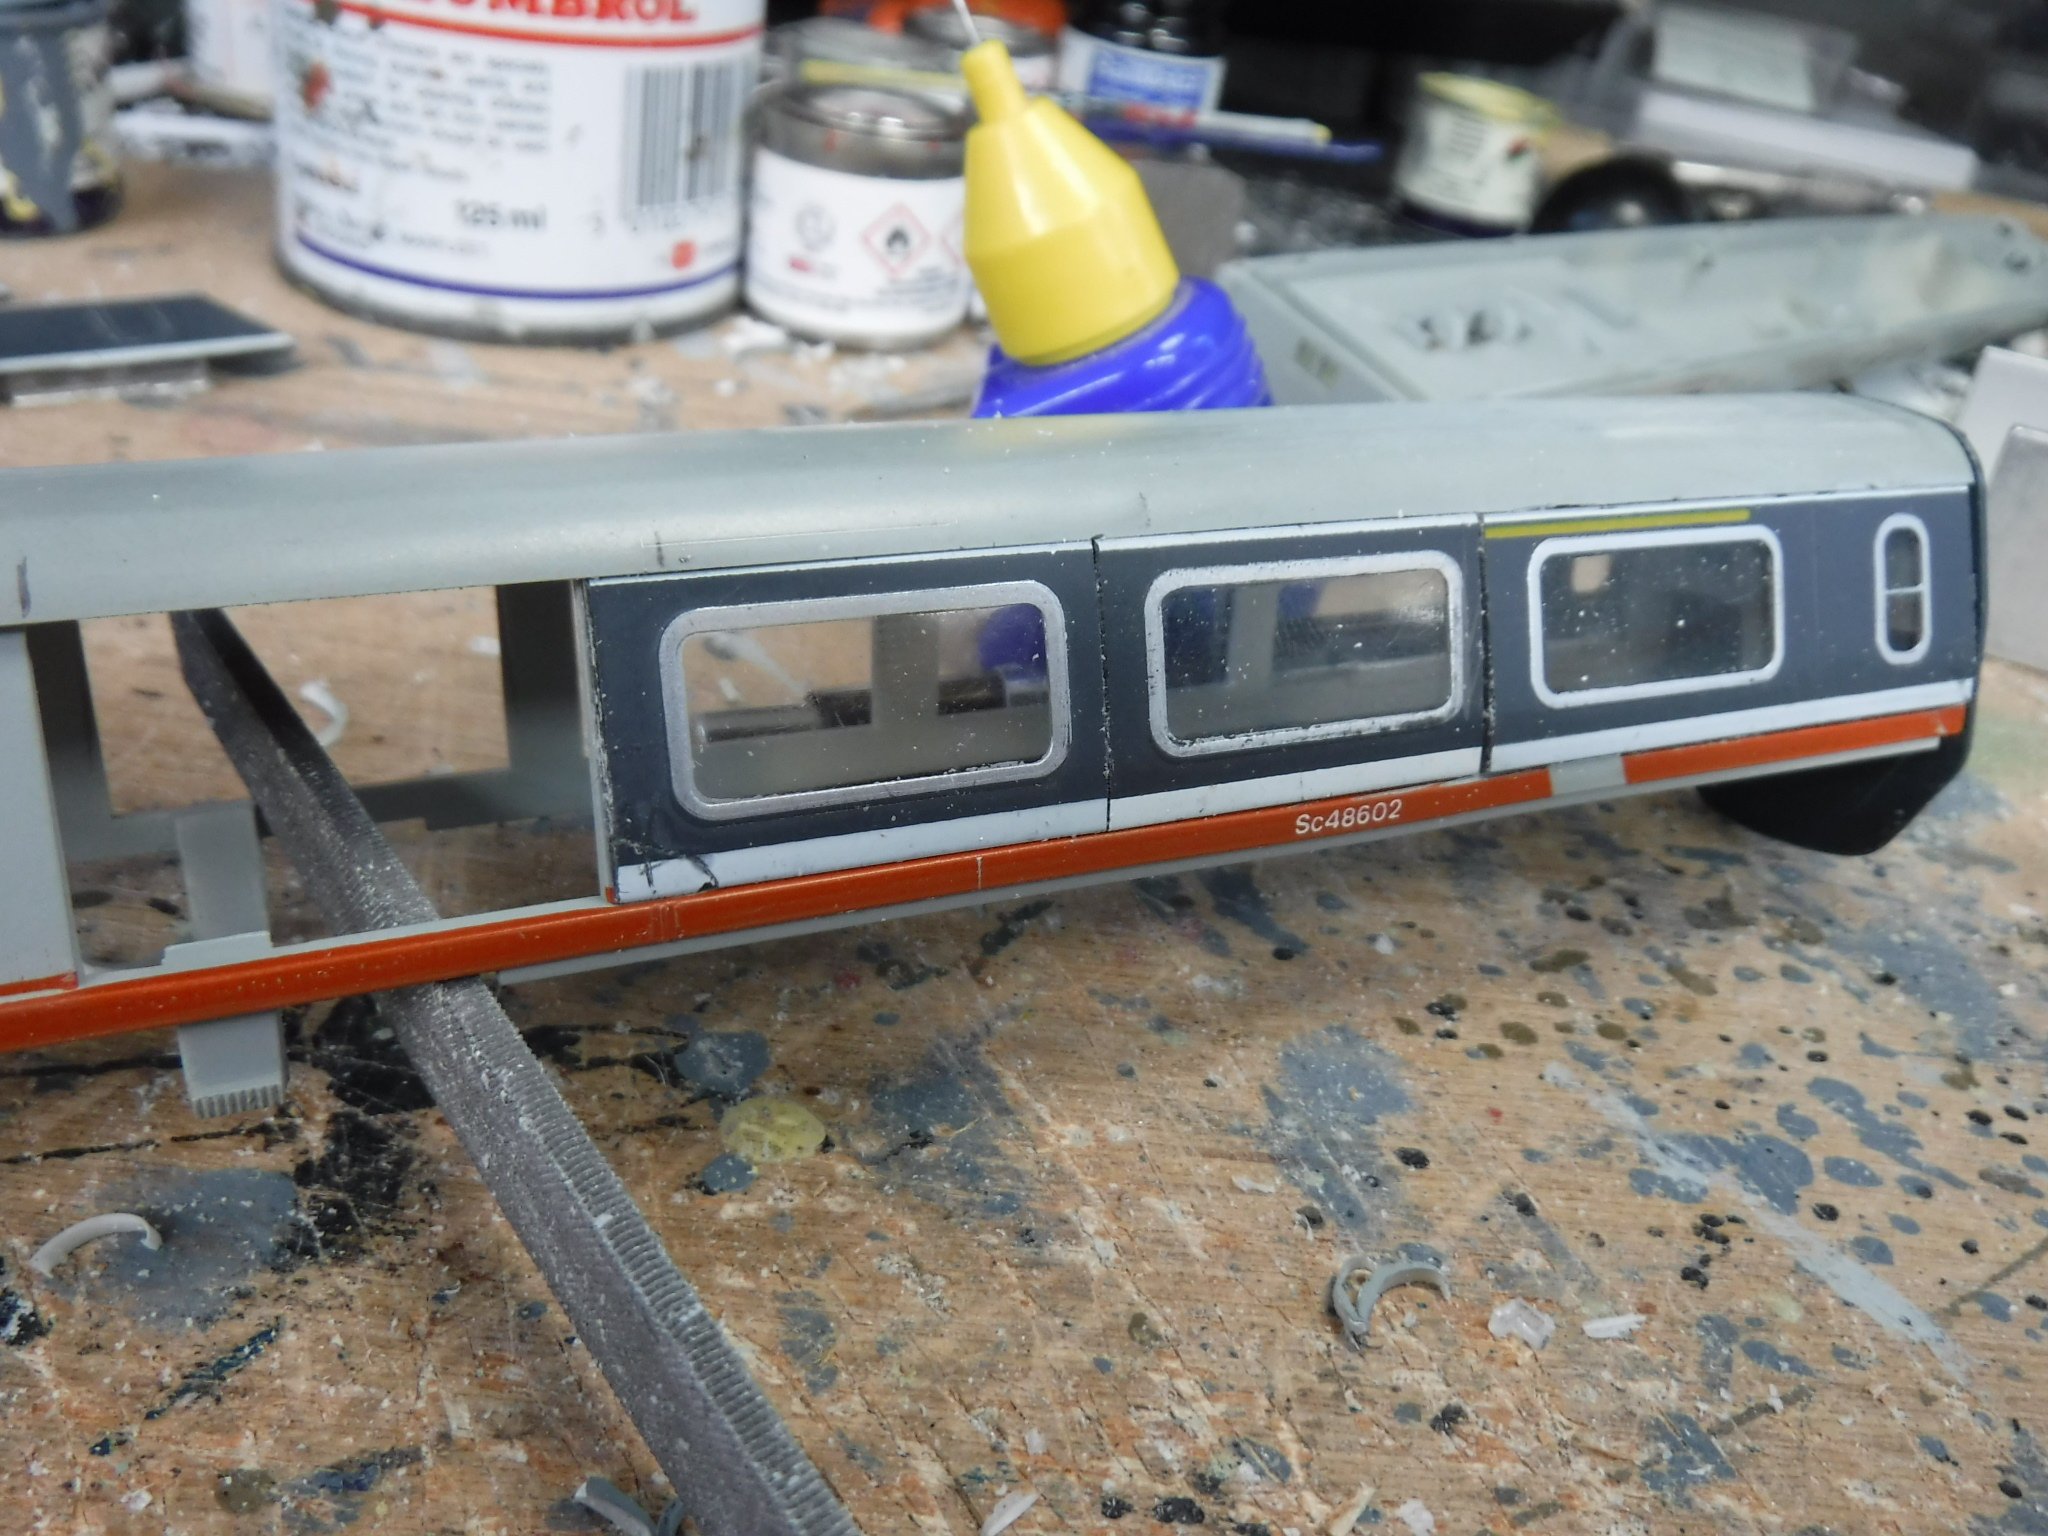
Hi Folks, Hindsight has struck again ! This time in that I found some more photographs of the POP II train on a website dedicated to test trains and it seem that PC3 only have one set of side doors on one side only. My annoyance at myself being that one of the sets of doors that I had cut in now had to be filled in again, just grand. Said website: http://www.traintesting.com/Index.htm POP Train: http://www.traintesting.com/POP_train.htm There is some fascinating reading and unusual photographs about all sorts of engineering problems on this website, very good indeed. Newly filled in doors. After filling and sanding, as well as may be expected but annoying al the same. The upside of all this is that I found out that the side windows of PC4 were offset and I thought that they were directly opposite and so with a bit of calculation I worked out the positions of both of them. One side was the same as the spaceframe POP train and the other was almost central to the car itself. I also found some good shots of the ends so that PC3 could have the end door and PC4 its end door and windows marked out correctly. Don't look at the wonky track pin ! In other news I've started reassembling the first two of the articulated coaches for the rest of the project, photographs to follow. Gibbo.
-
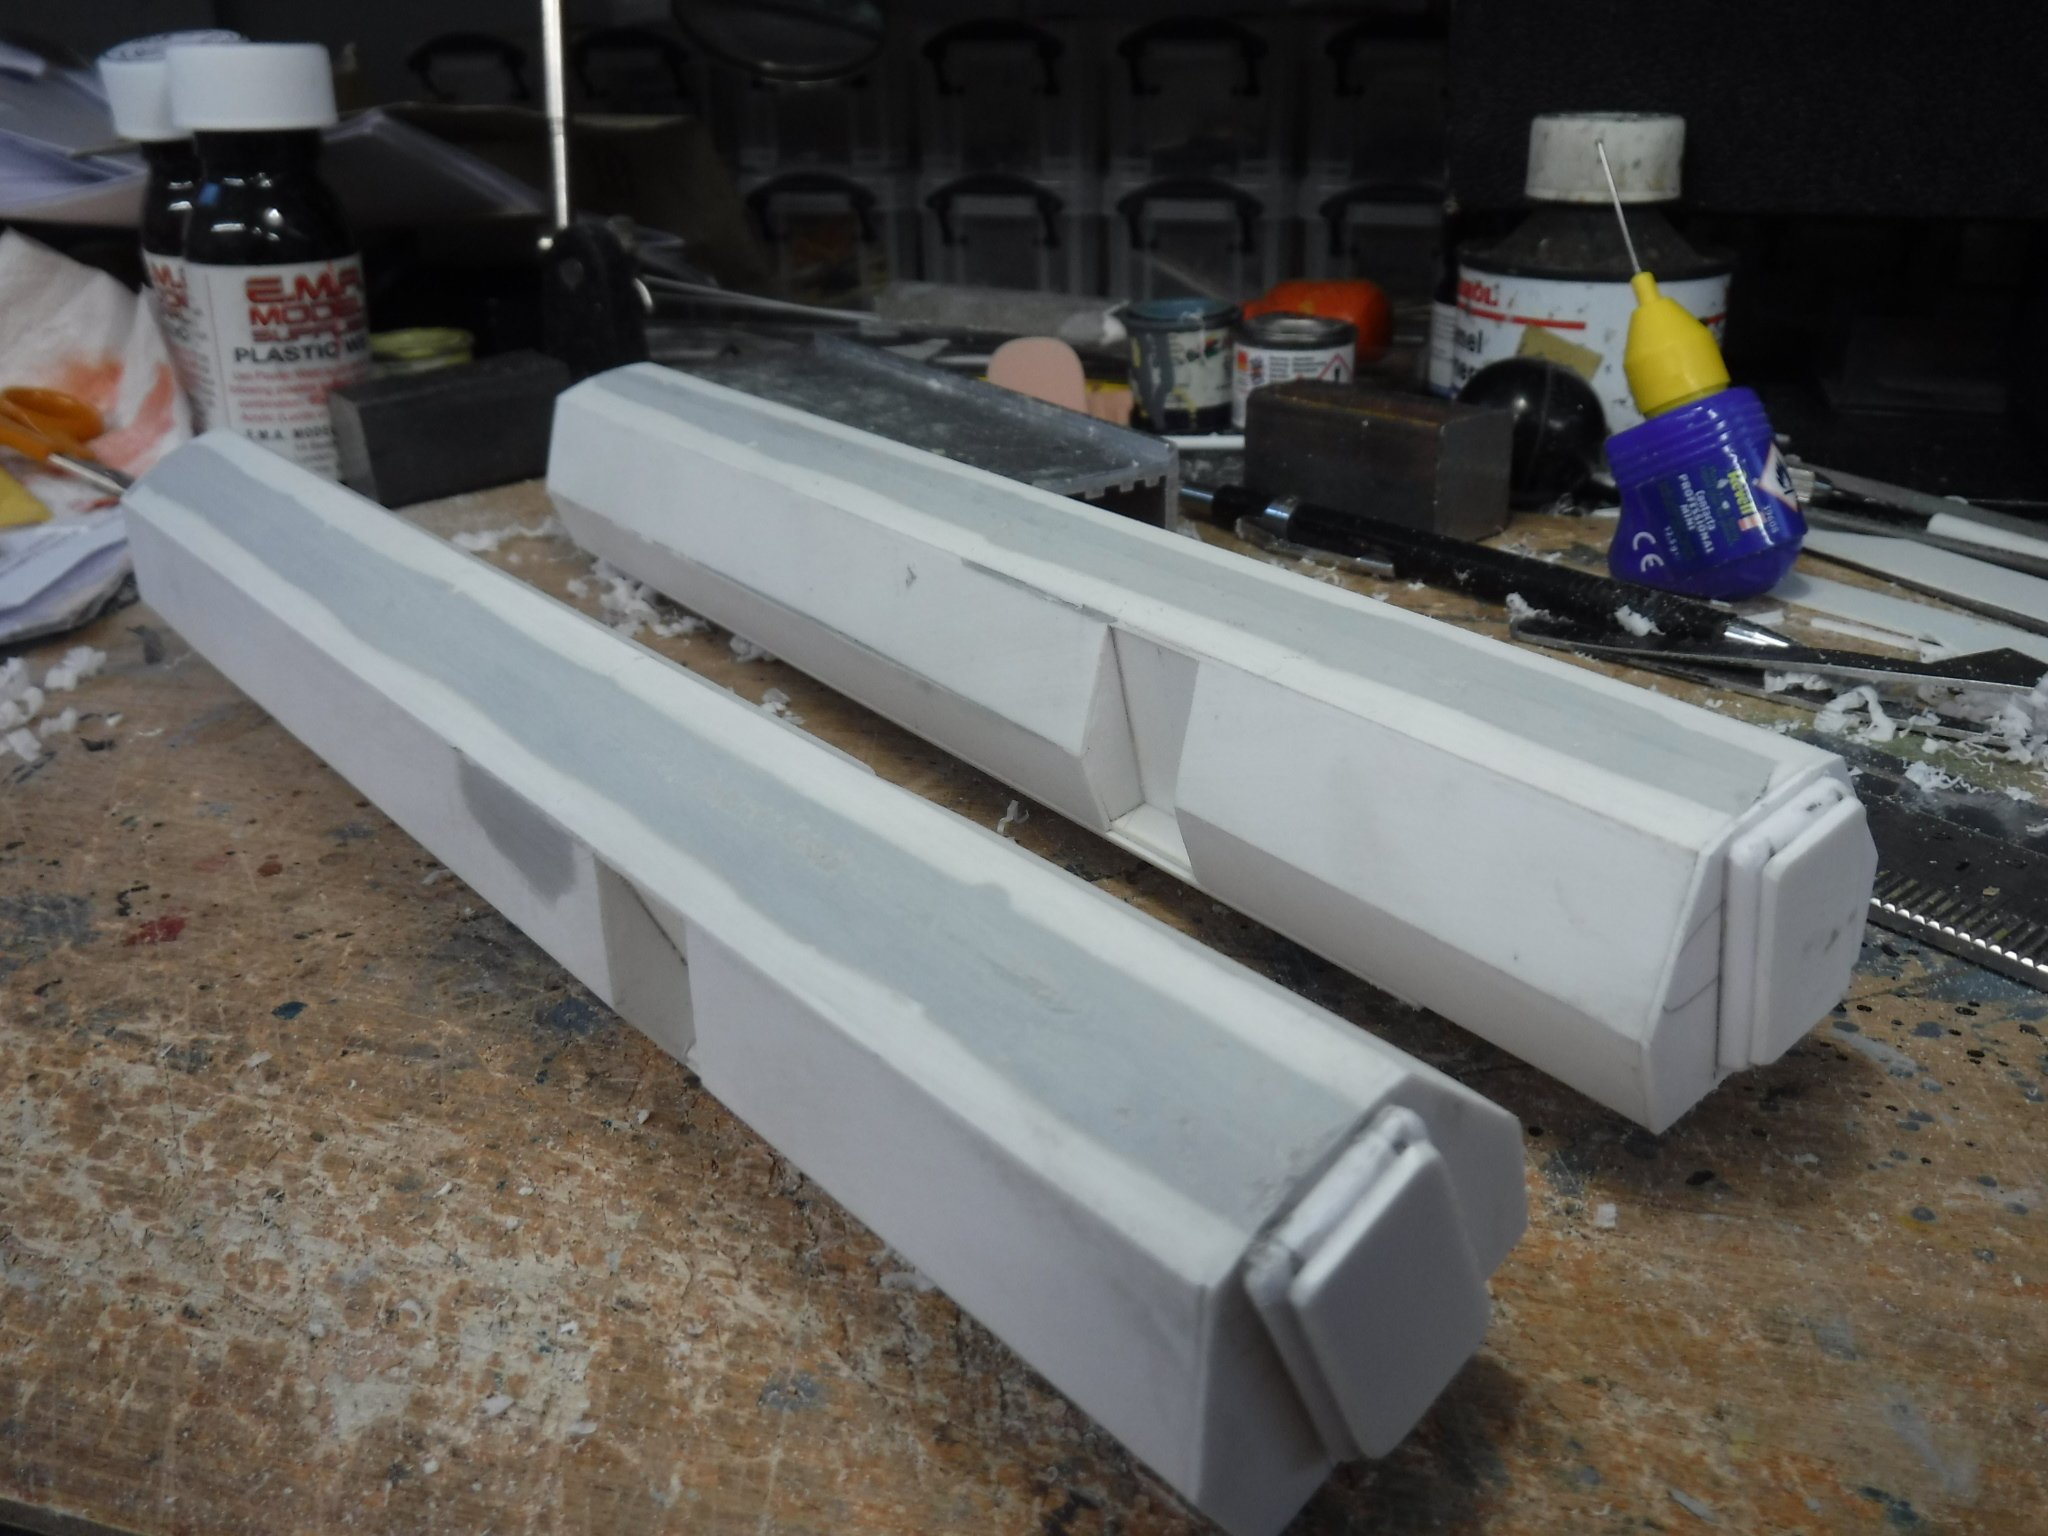
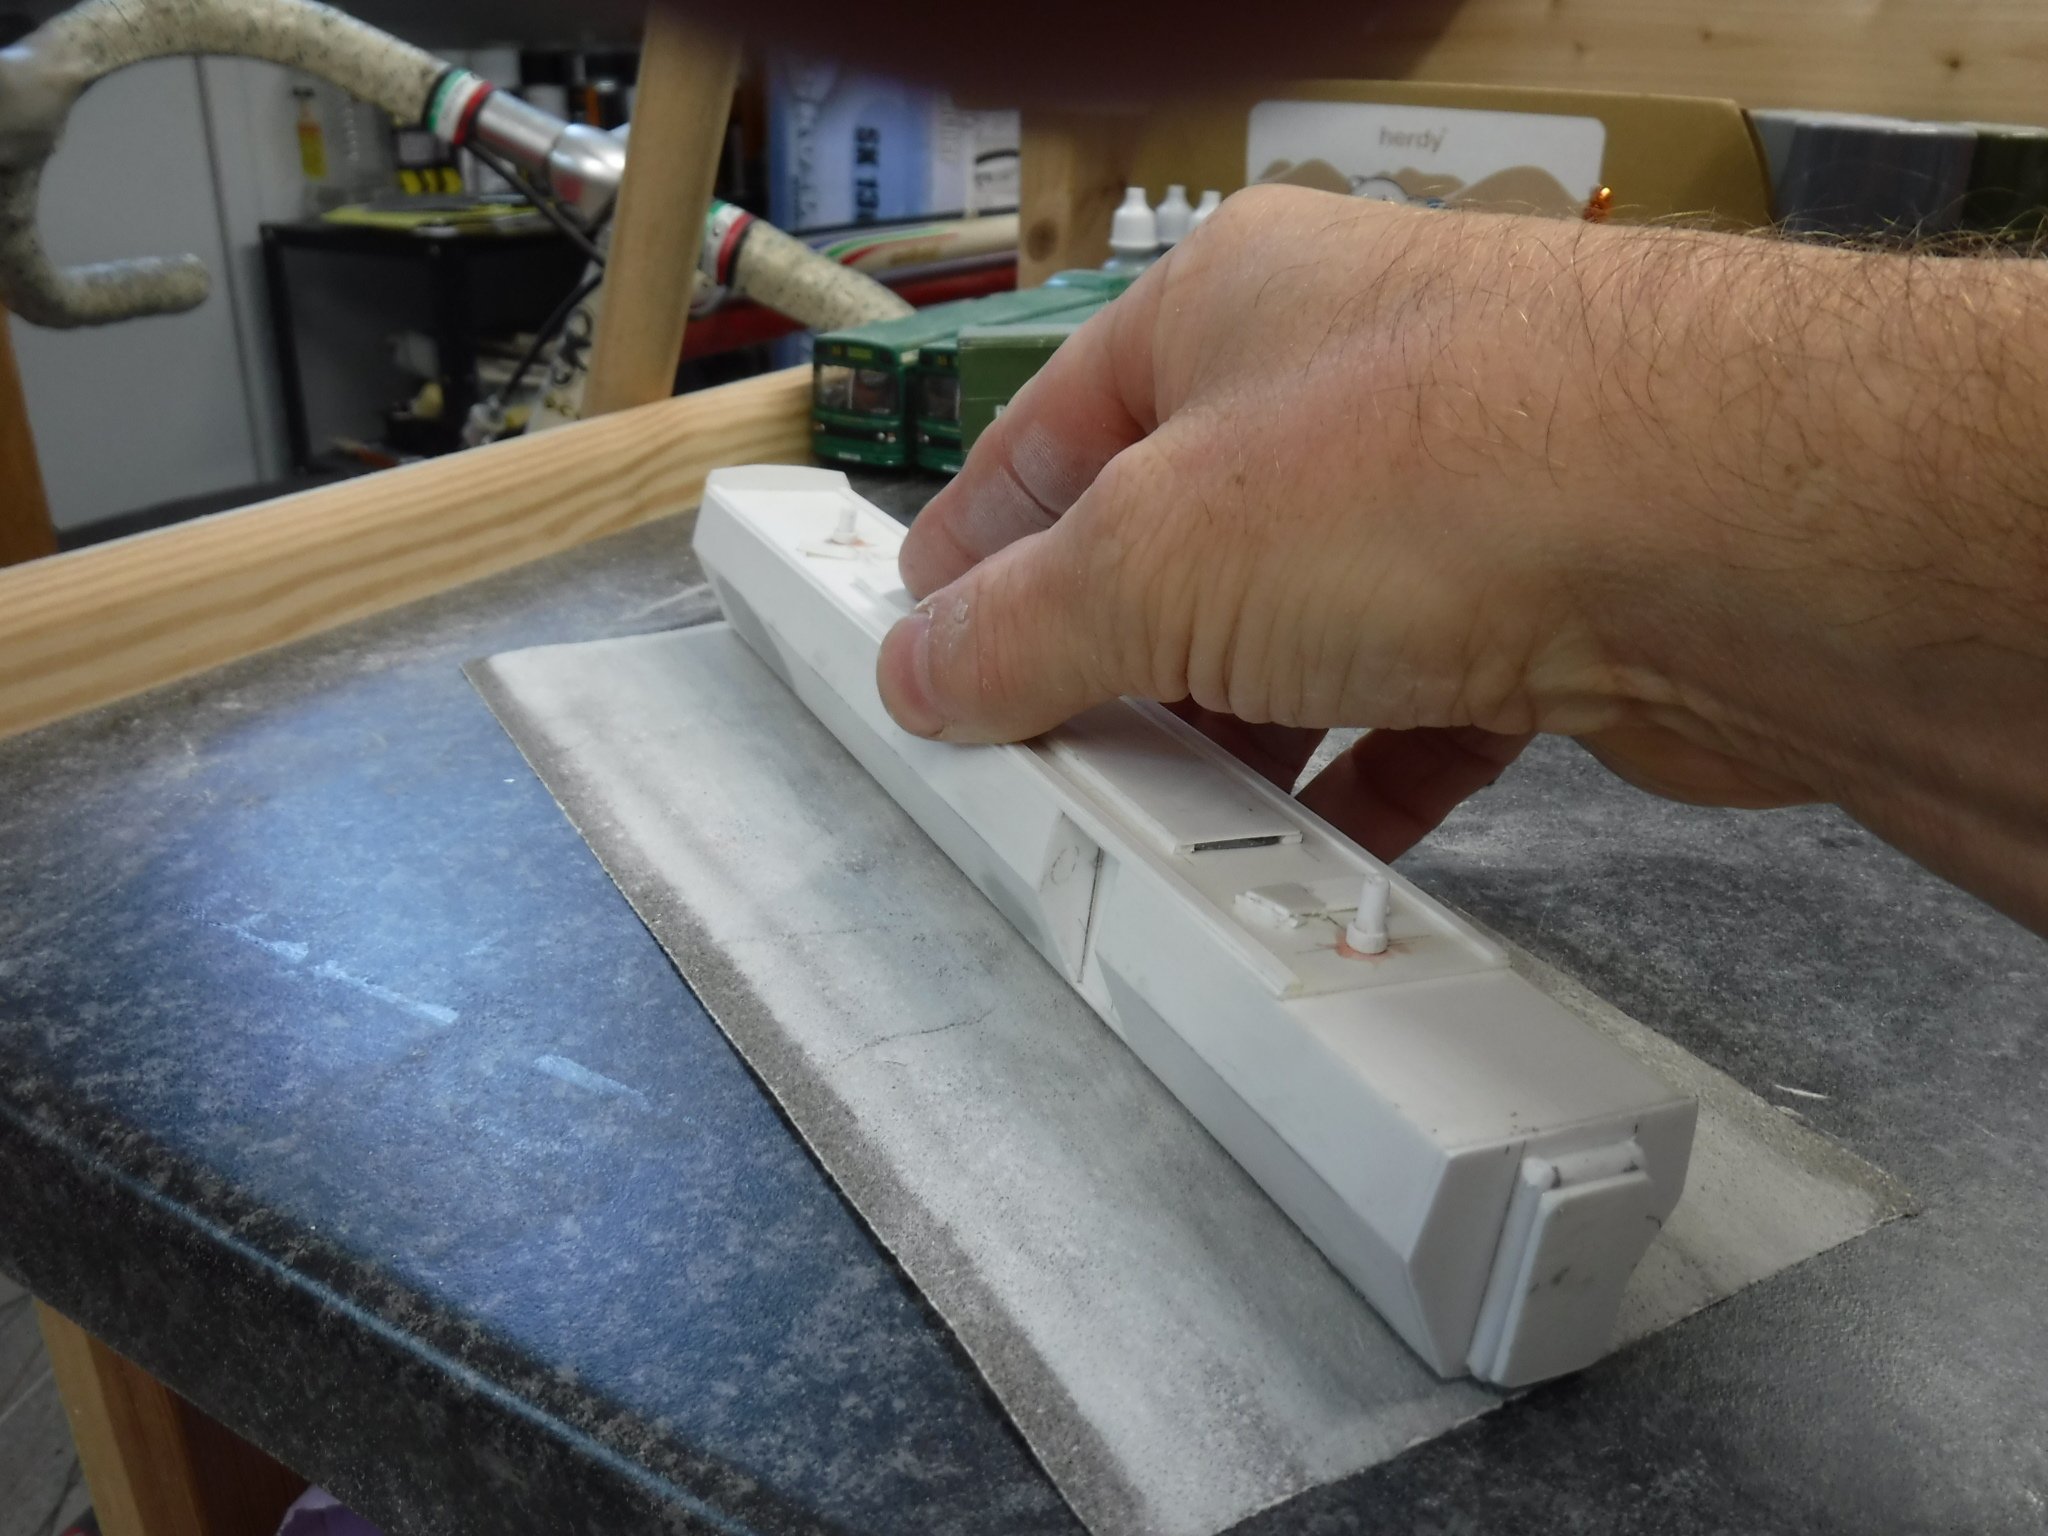
Yo Dudes, Still "Badgering" on with the APT POP II train, The tilt ramps were added to Pilot, as may be seen the bogie mounting has been altered as the coach has been made from leftover bits and bobs. The glue shews up pink because the brush used was to glue the top and bottom halves of the body together and it joins along the lower edge of the red line. The corridor ends connections being fabricated from .125" Plastruct rod, I filed a 1mm flat along their axis so that they would have a decent adhesive area and also that they wouldn't roll around while the glue cured. The tops of PC3 and PC4 have had filler applied to create the peaked roof section. Once the filler had cured I used a sheet of 120 grit sand paper to flat off the filler and create the angle required. The moment after applying the filler I had a thought that I should have glued a 1mm piece of strip along the centre of the roof as a datum to both fill and file to, good old hindsight ! The result of the sanding has turned out quite well despite my idea of fixing a guide to the roof being about five minutes too late. There a re a few small low patches which will be treated remedially. The wavy edge of the filler is due to slight undulations in the roof and despite the wavy edge the formed roof is actually flat when checked with a straight edge. I filled and sanded the undulations in the body sides in the same way as may bee seen from the patches of filler on the body sides. The corridor end connection were also filled and sanded to shape. Gibbo.
-
 Hi Folks, Three things: Here is my first attempt built about thirty years ago from two halves of a Hornby HST and class 58 bogies. Not only have I managed to undercoat it my Silver Fox Kit when paced upon its bogies it does run ! There is the theme tune: Gibbo.
-
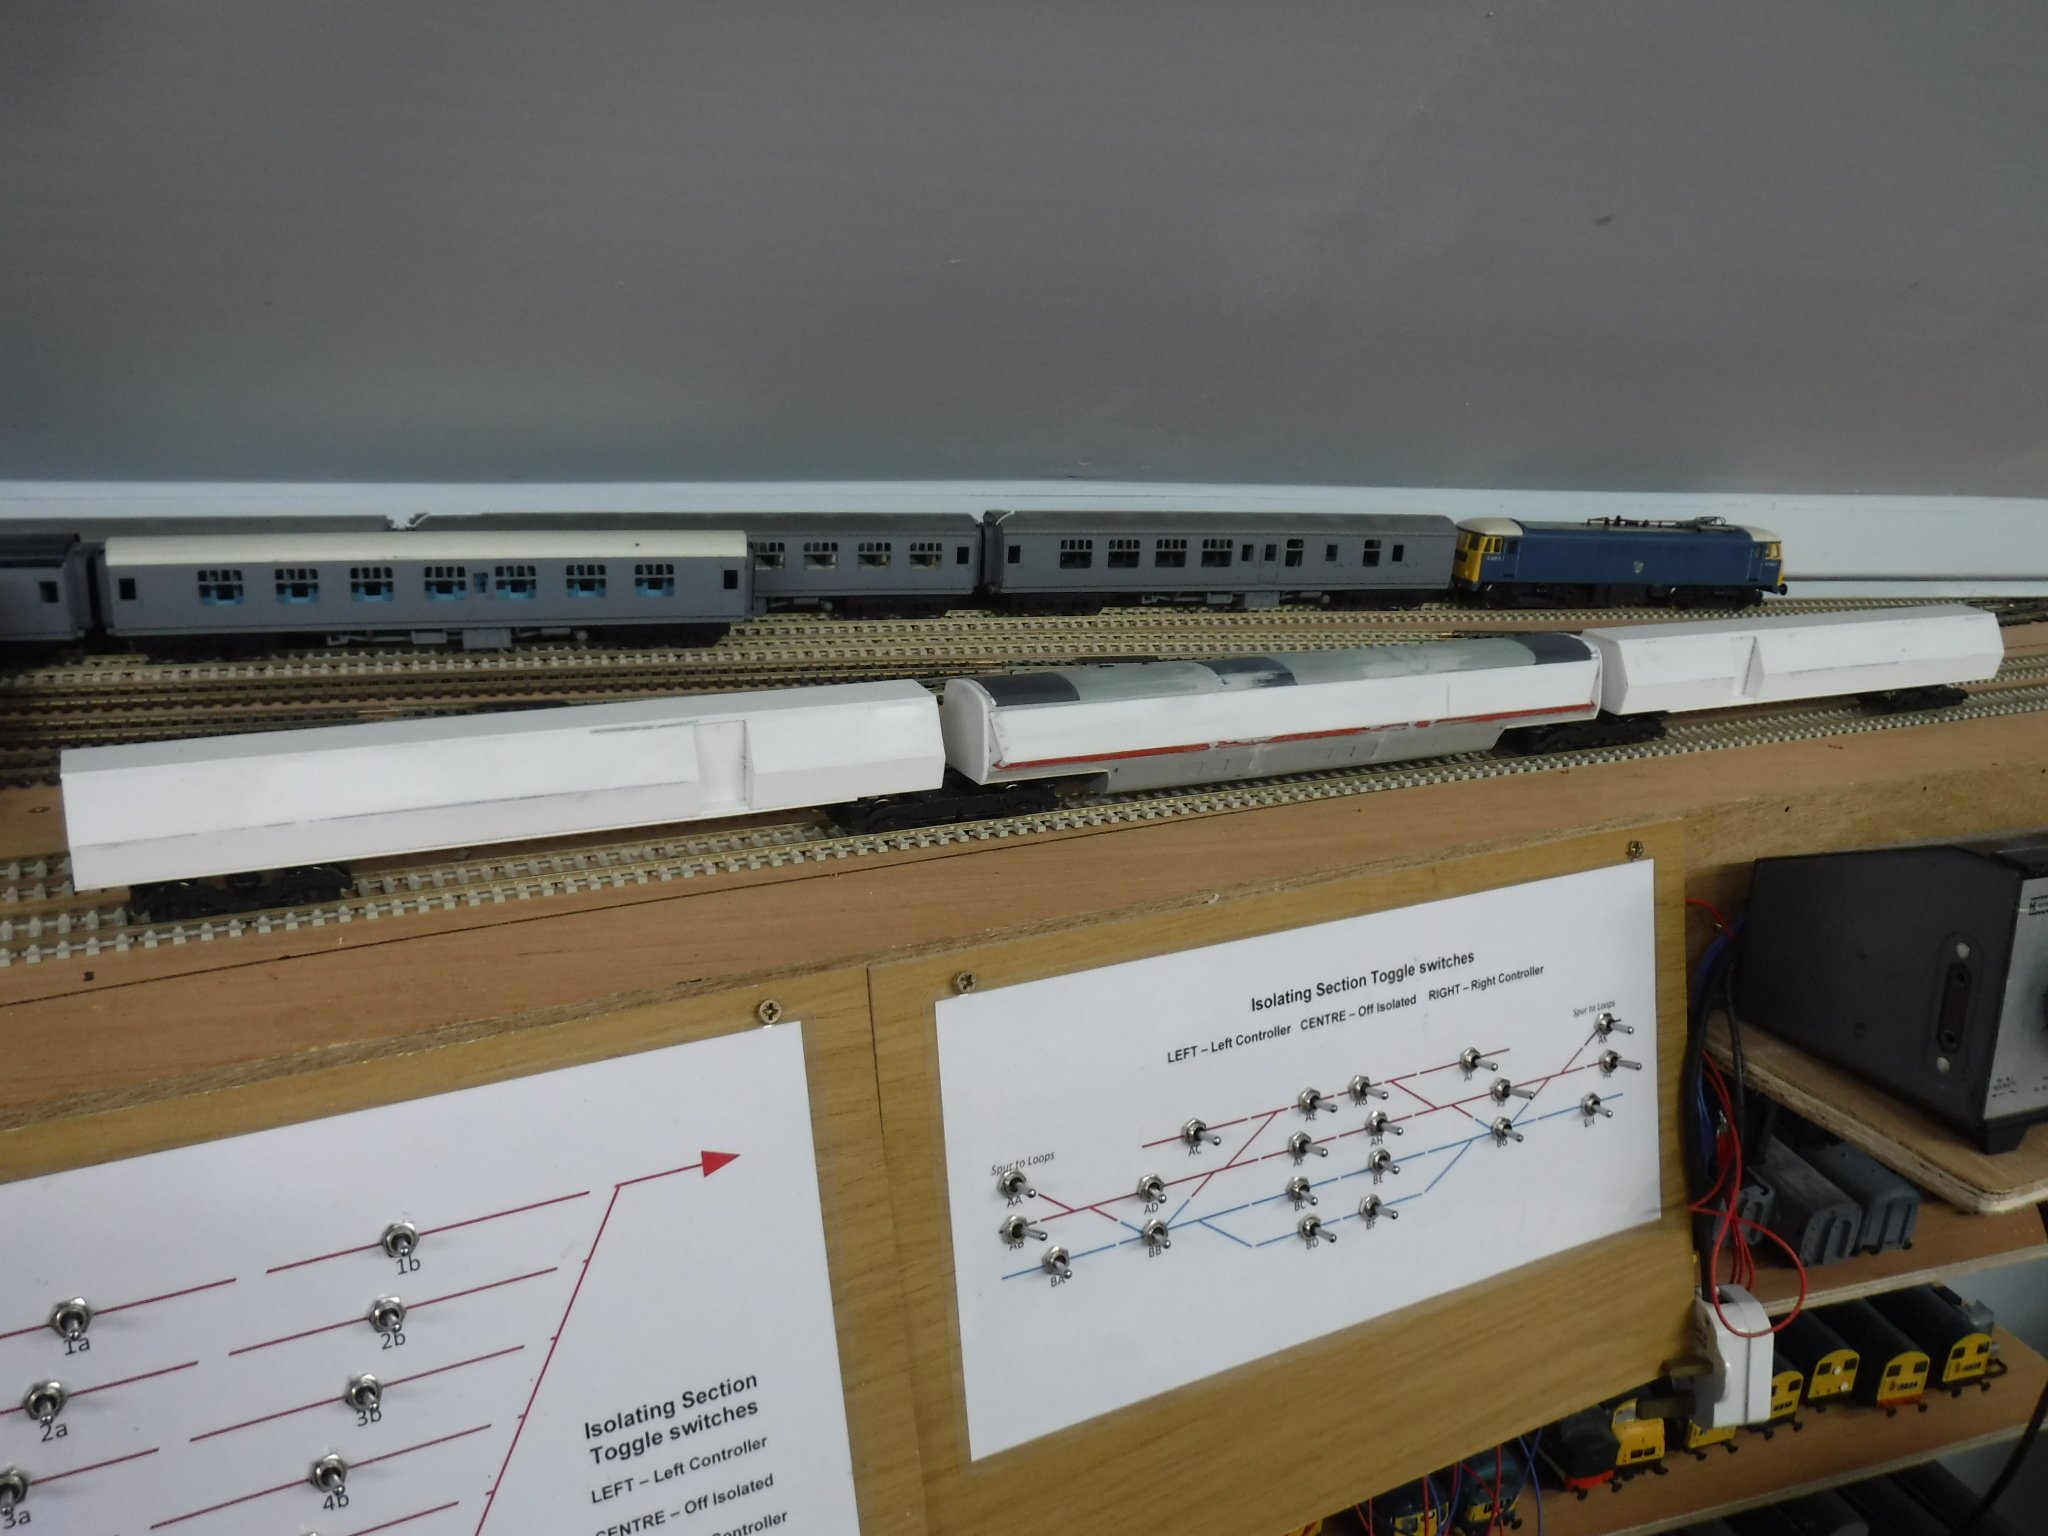
Hi Folks, Here is POP II on its bogies, the end two have tilt and the centre car is yet to be attended to. The centre car is made form bits all cut and shut and so does not have the tilt slides, they will have to be remade as I have done with the outer cars. All three in formation, I should really get on and paint the Mk1 set instead of building more stuff but that would be boring ! Gibbo.
-
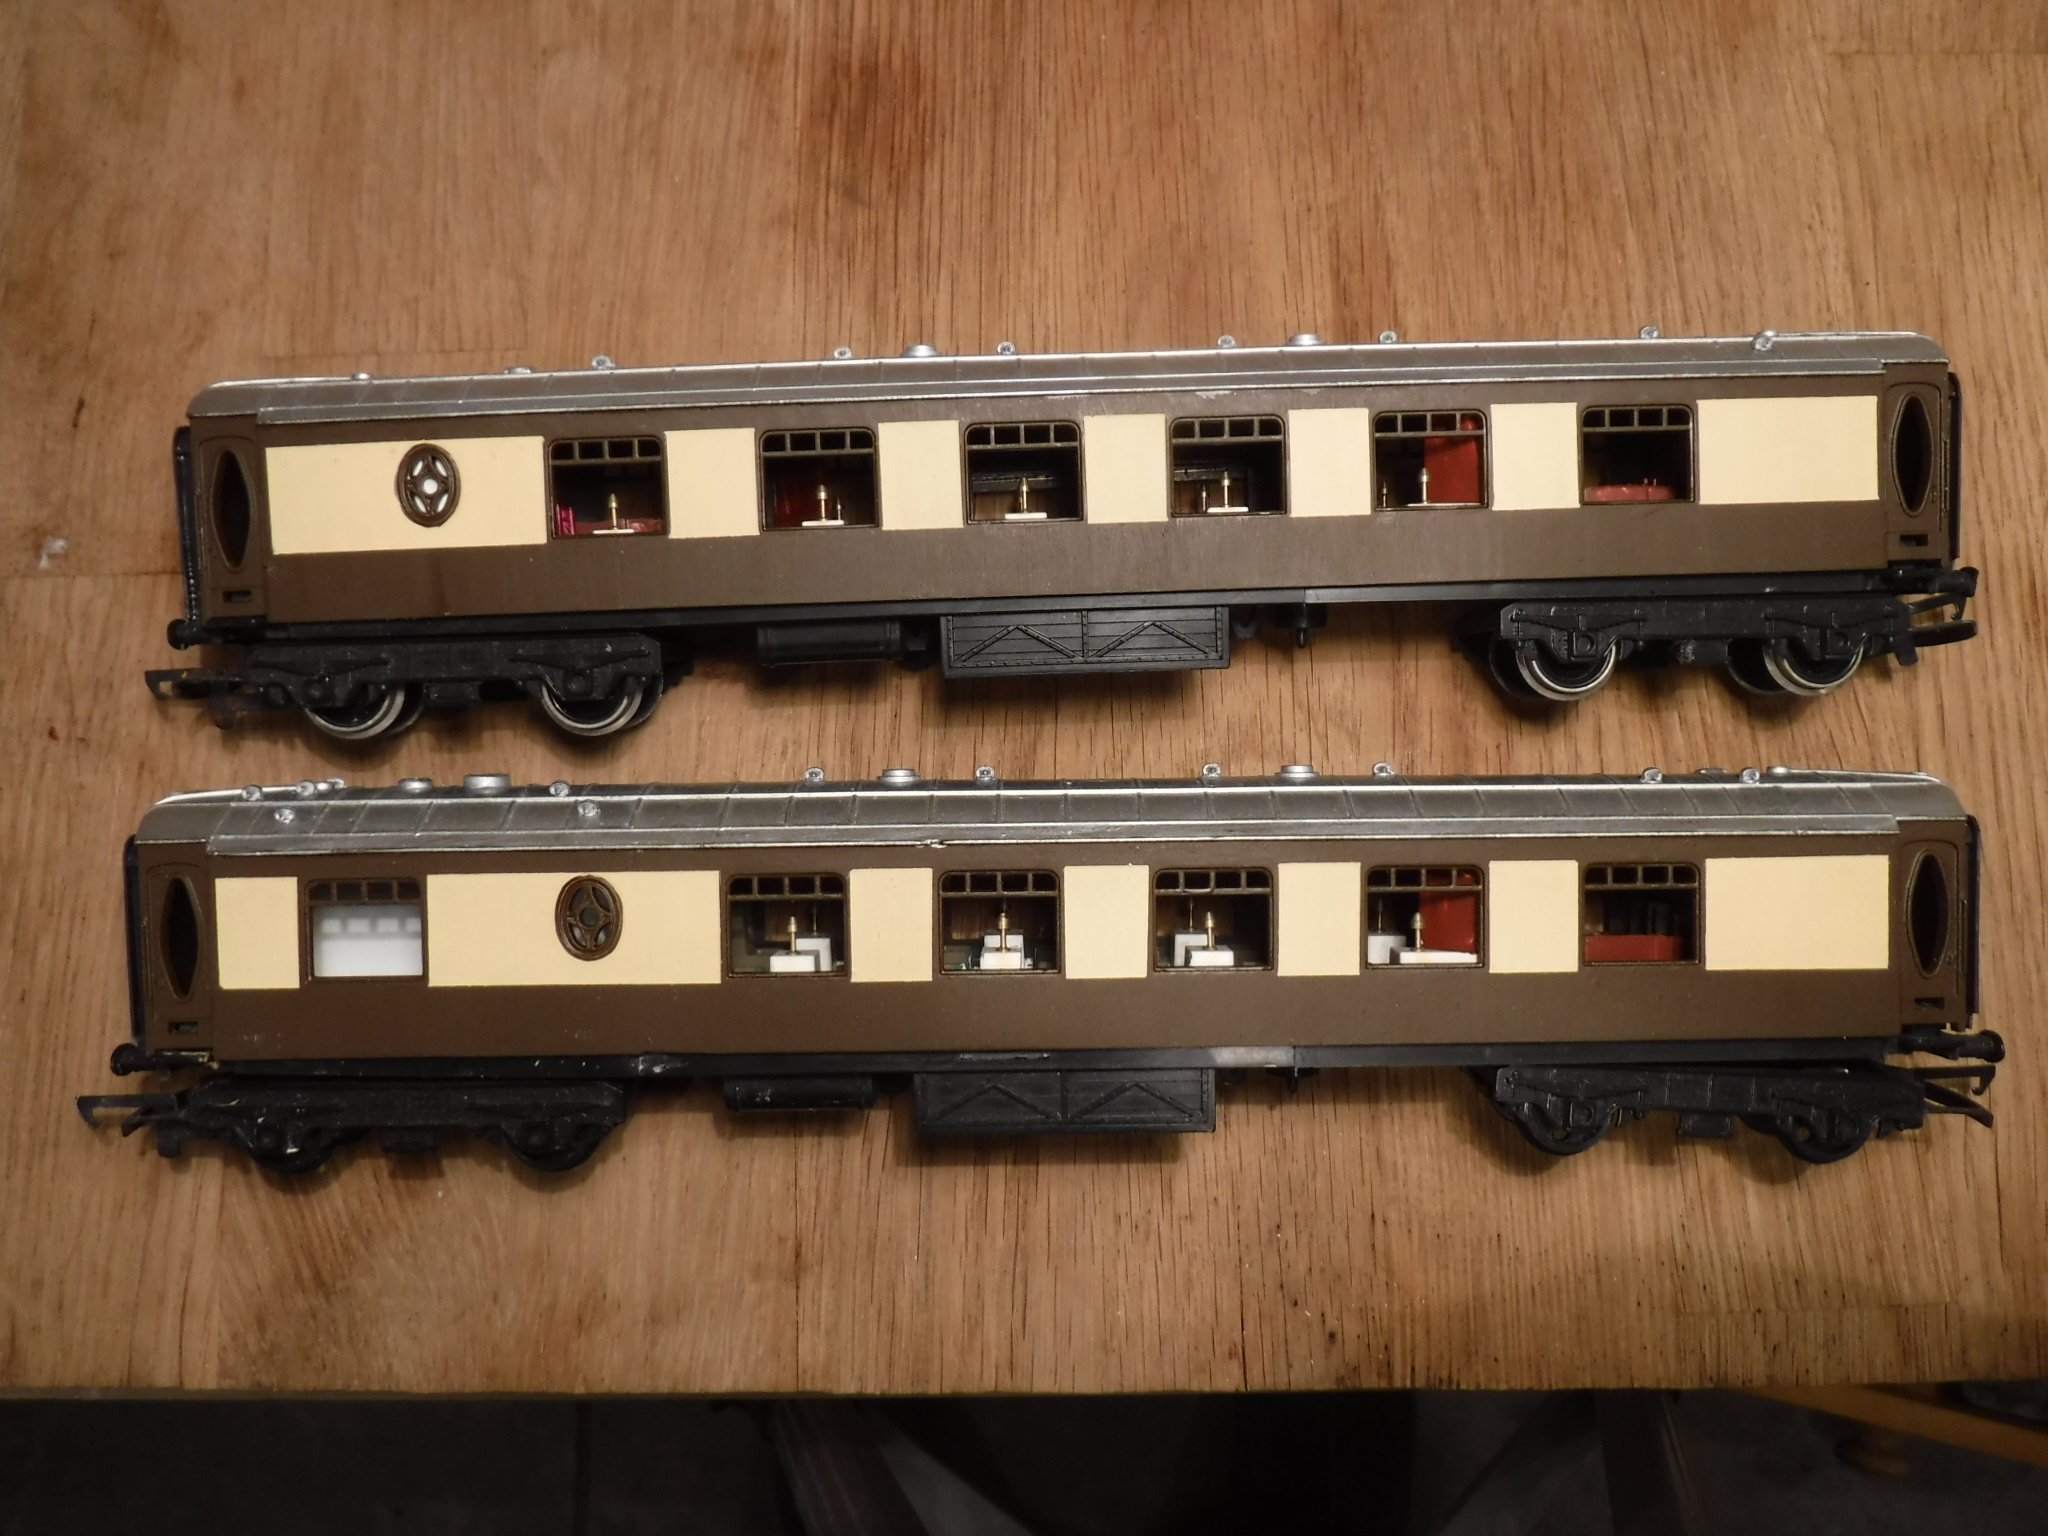
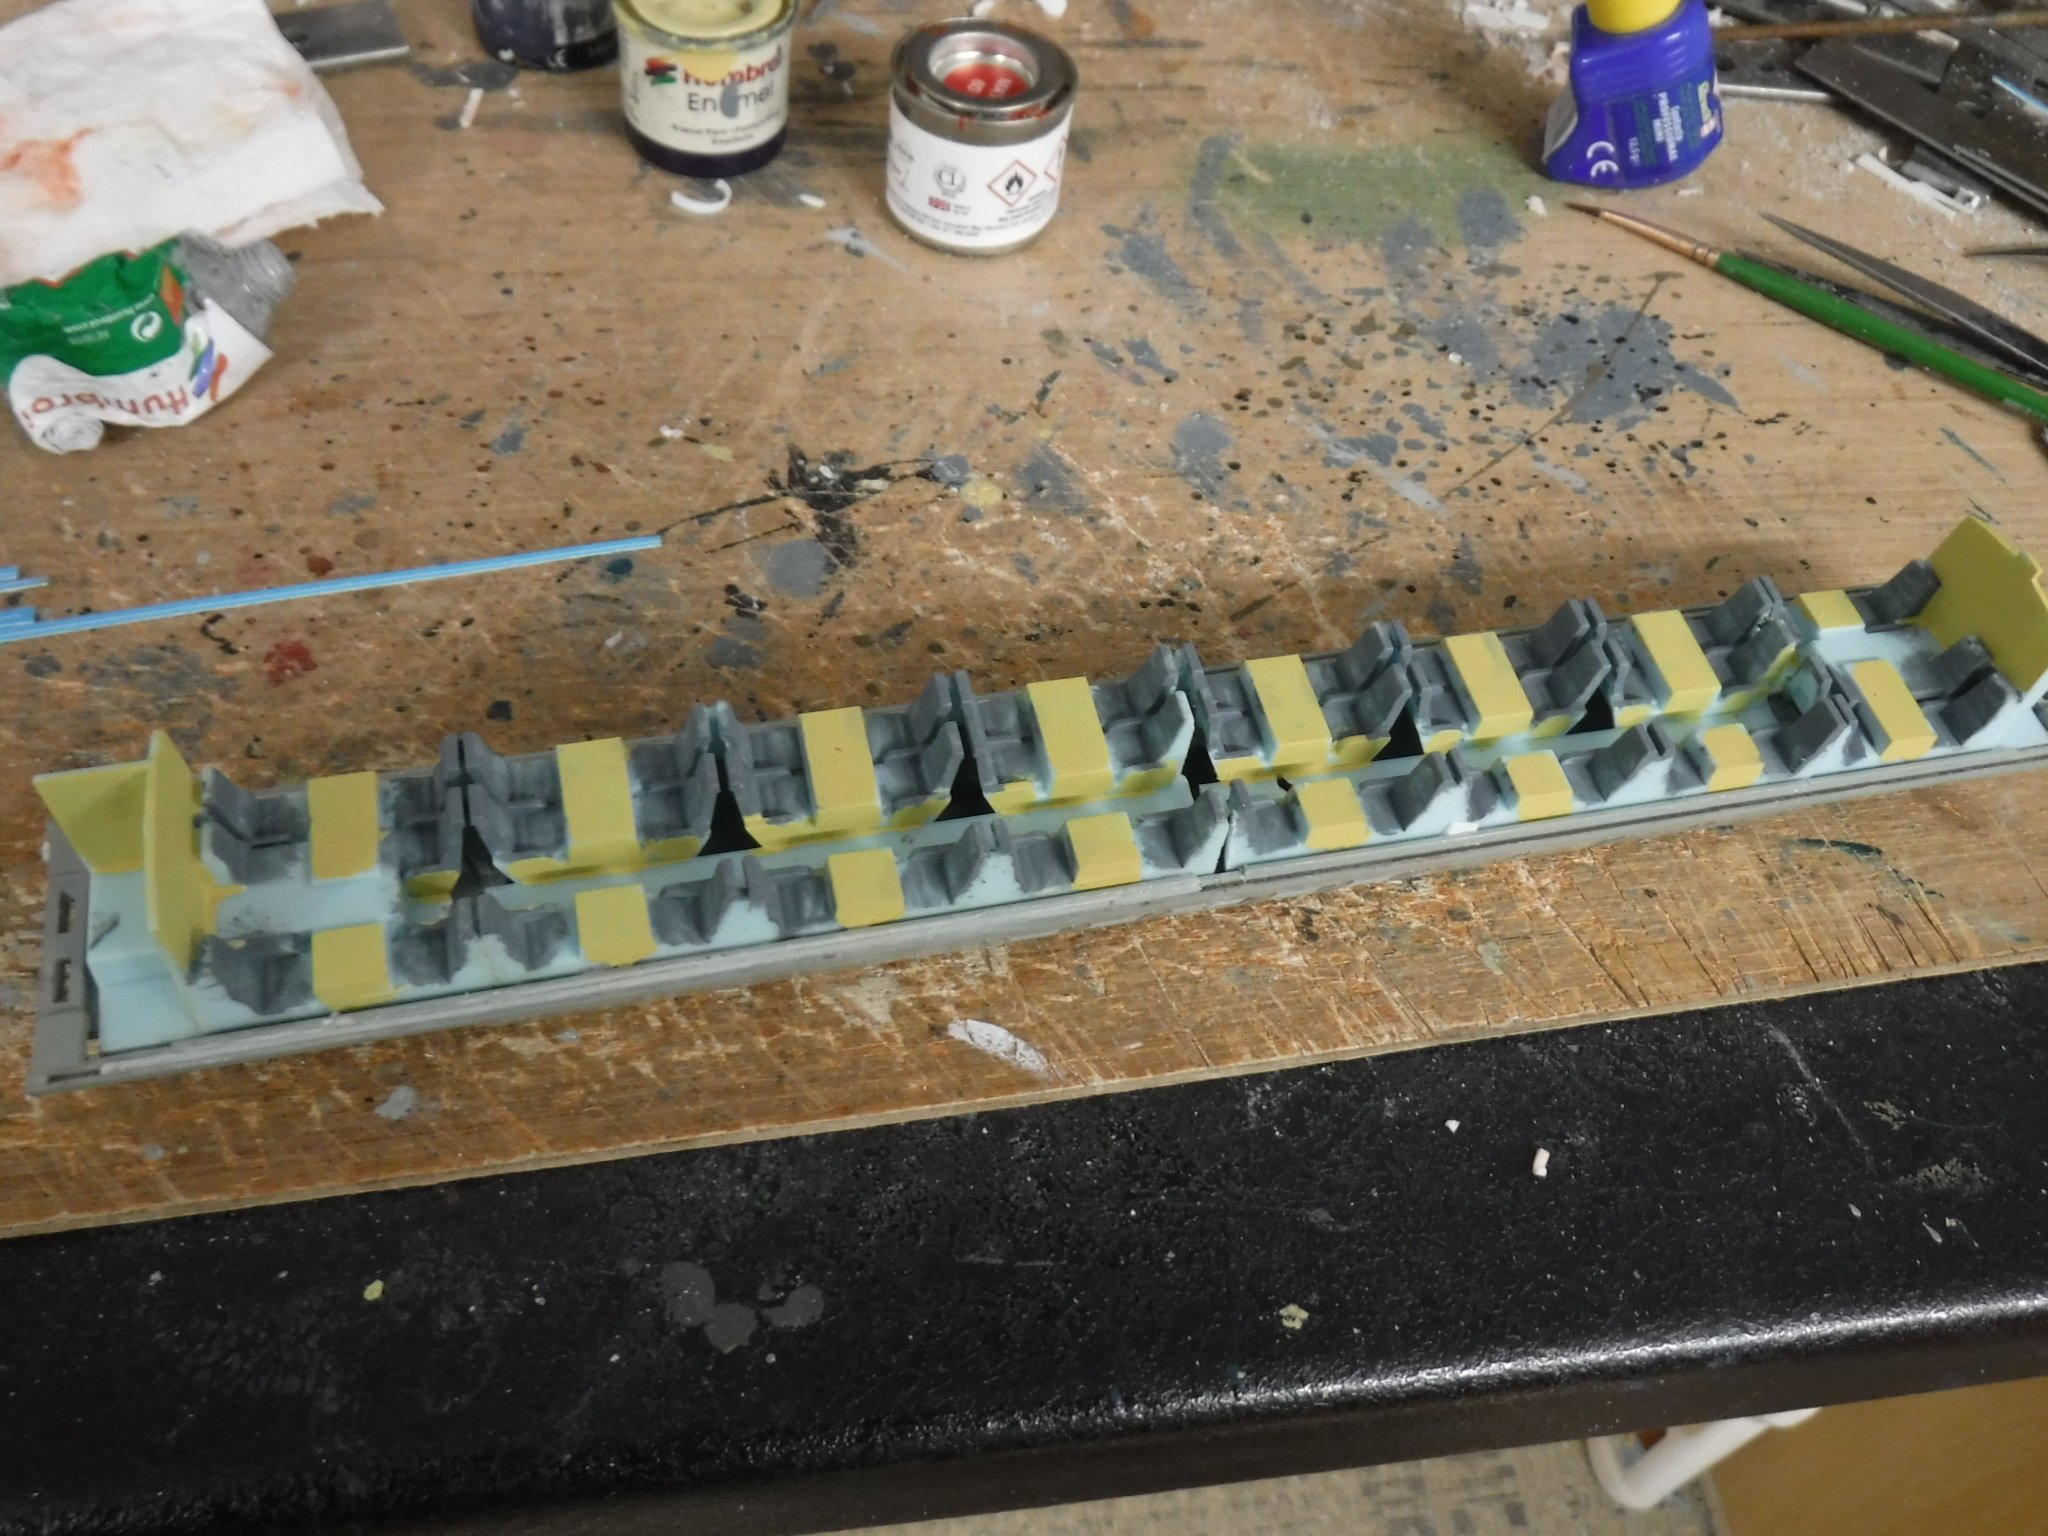
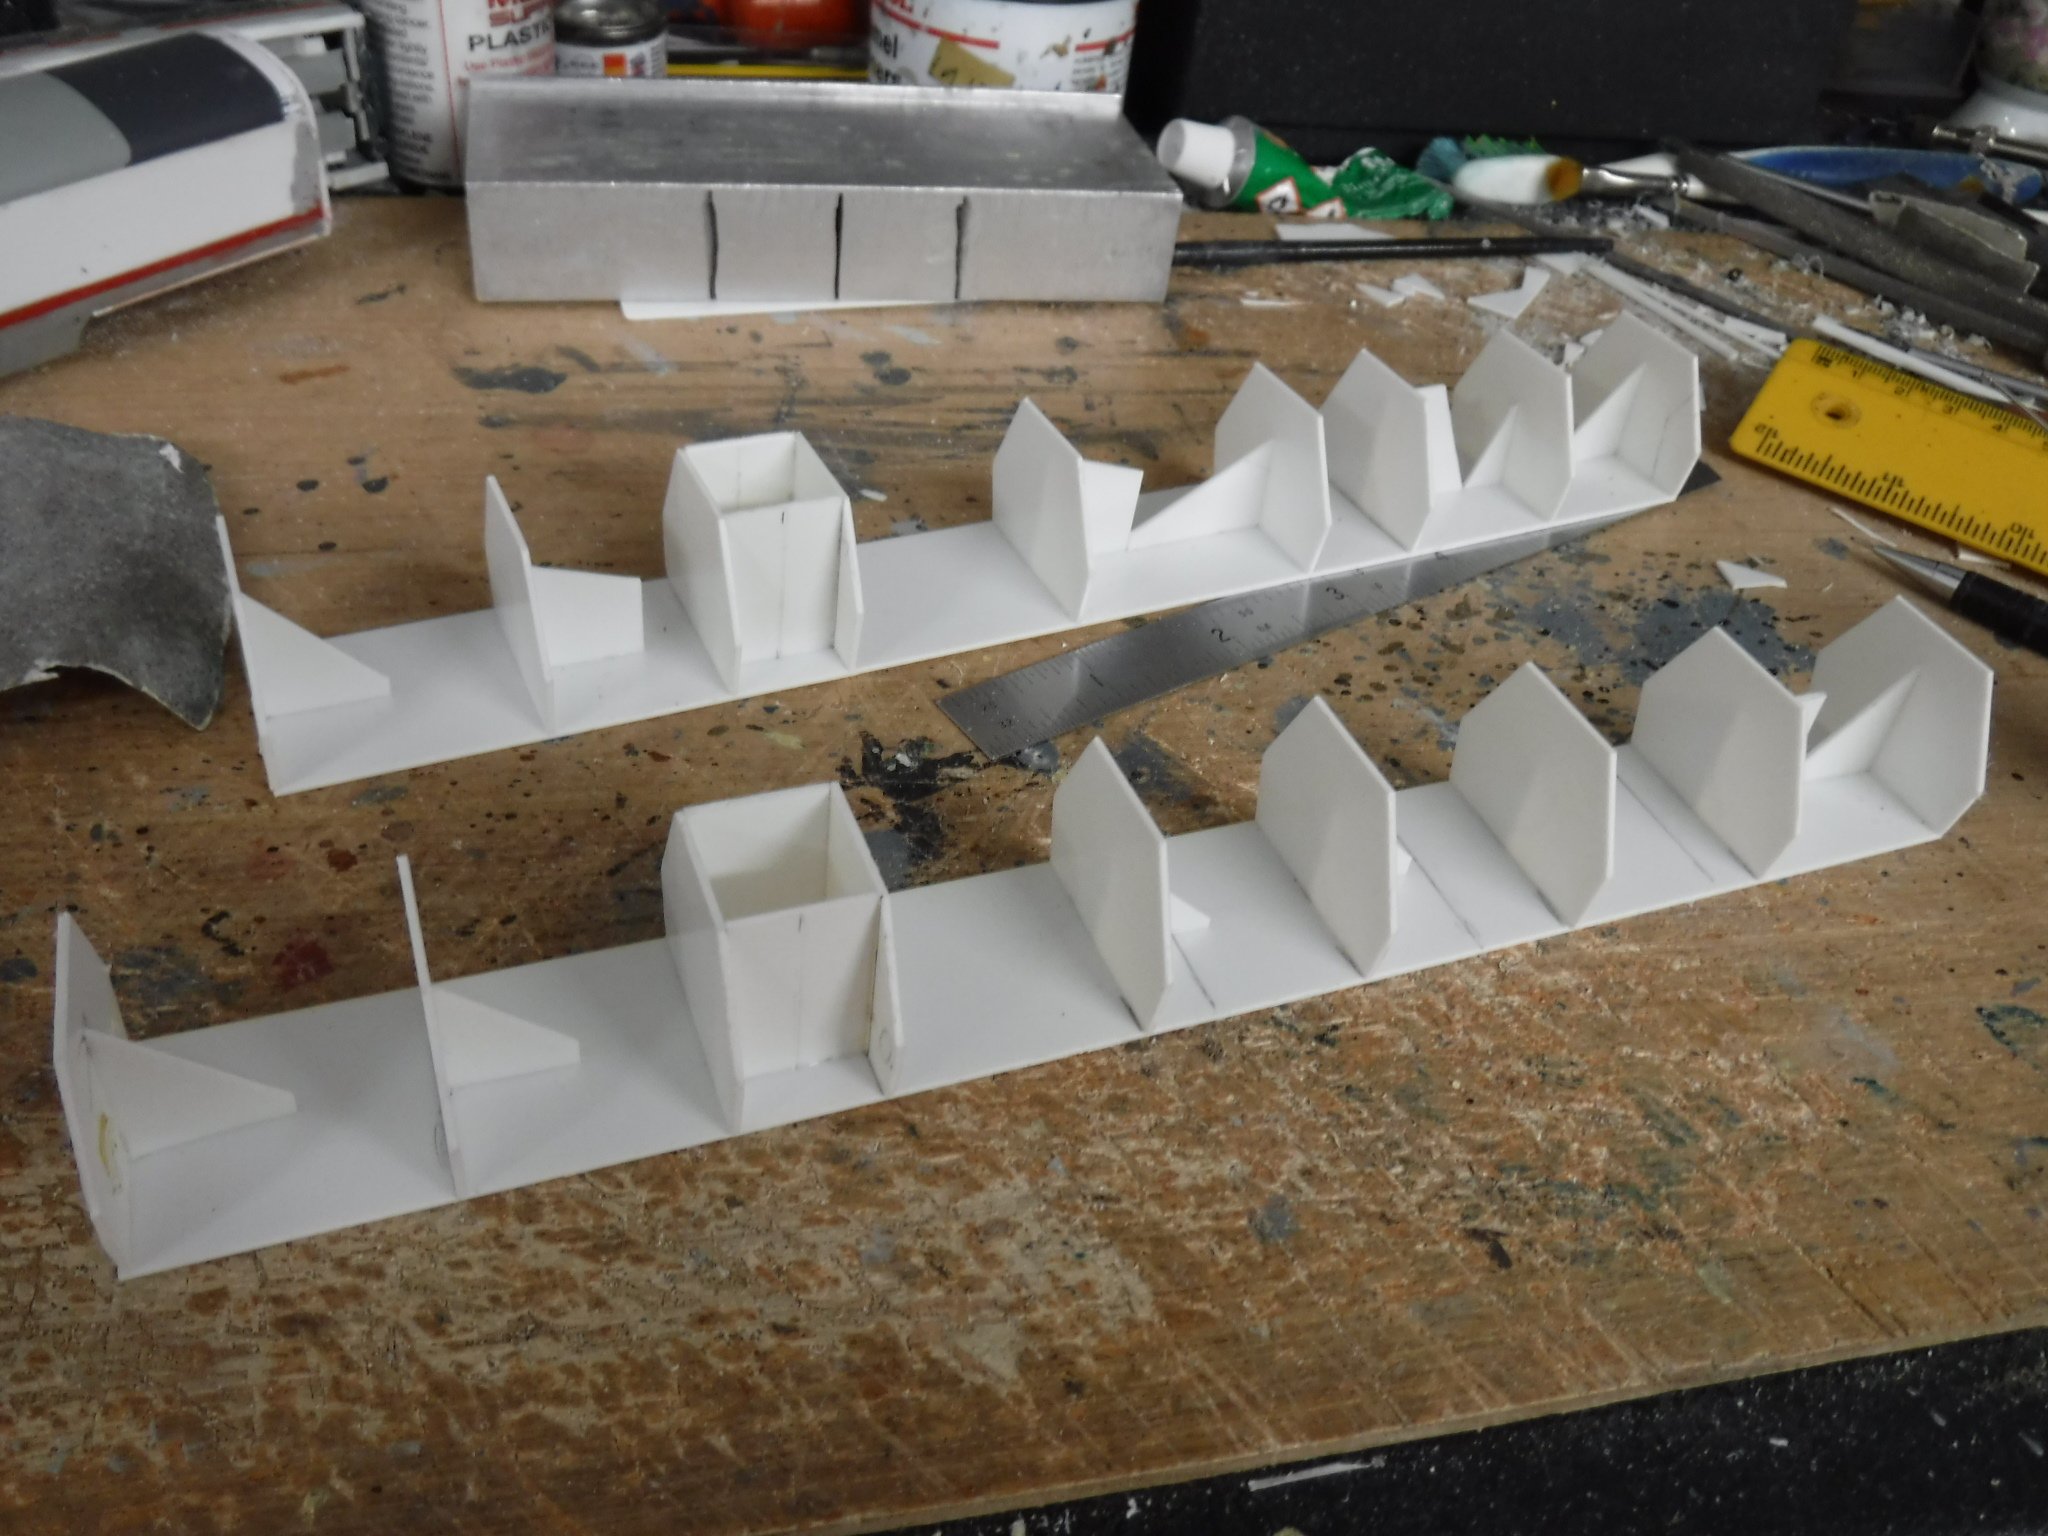
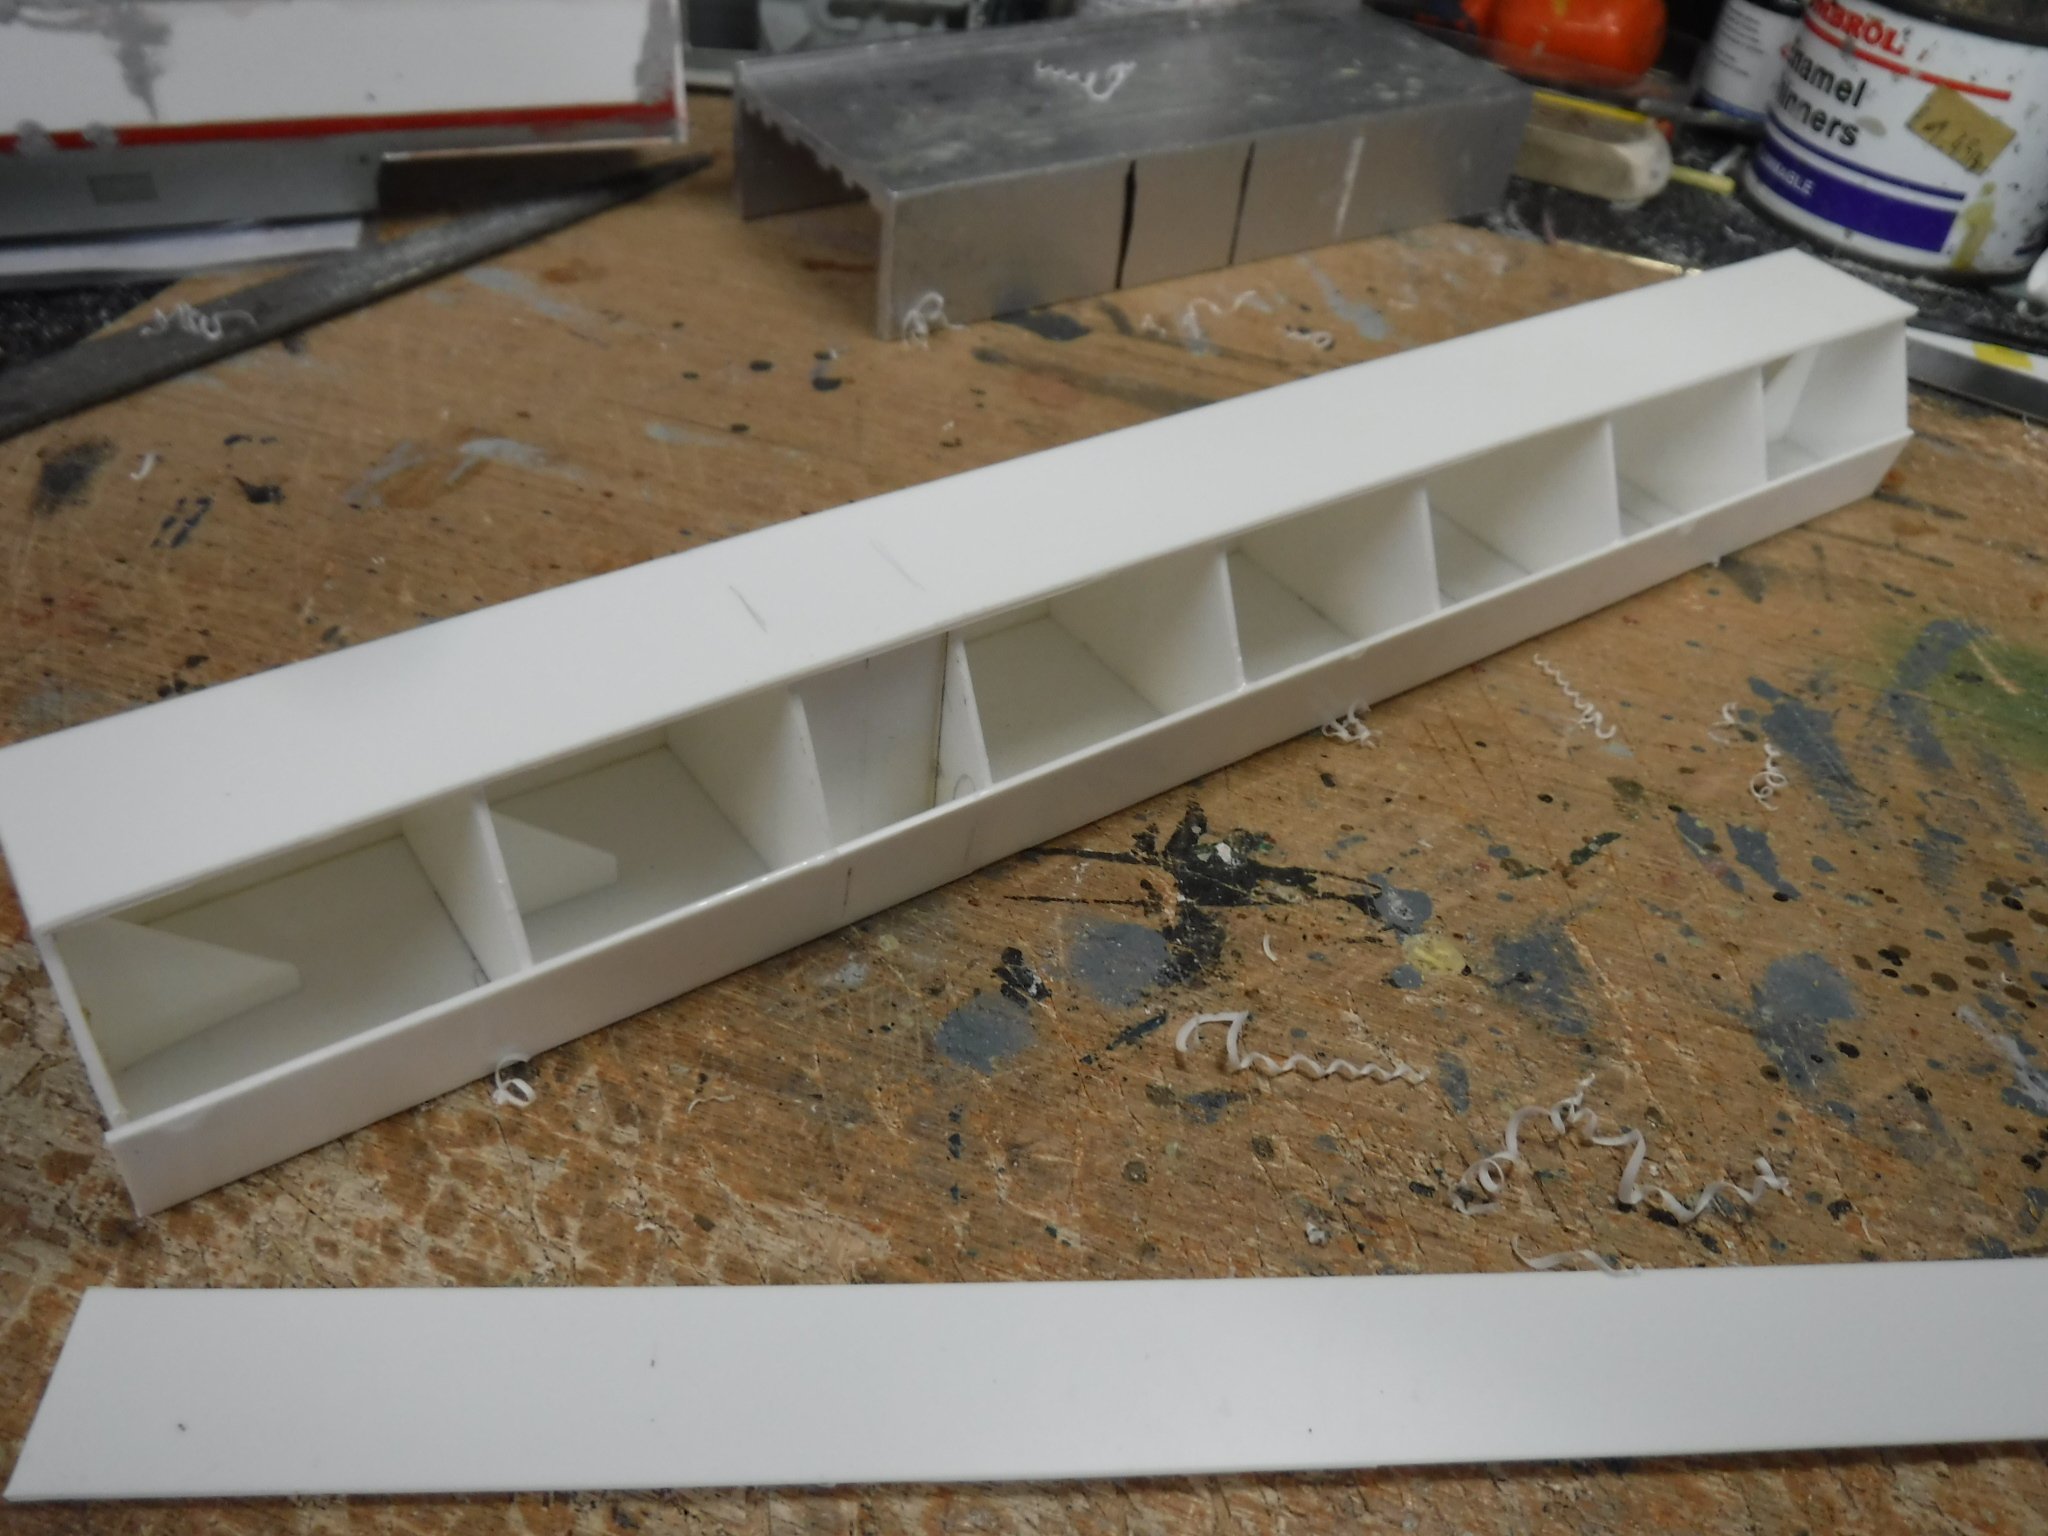
Hi Folks, Here are the beginnings of the POP train's outer two cars, They have been made from .040" plasticard form drawings supplied to me by a friend who has one of the Leadley Kitts POP train kits. His one was one of the original space frame design, the version I'm building is the same two vehicles after the side had been fitted with cladding and the centre car added. Base plates and entrance vestibules with the shaped bulkheads in the back ground. The first bulk head was made and checked for symmetry before using it as a template to cut all of the other bulkheads, this way they all end up the same shape although due minor disparity I marked them with an X so that would all face the same way. The bulk heads had gussets fitted so that they would stand perpendicular once glued in place. The gussets were mostly made from scraps. The one in the rear has a compartment for seats and will have a window which is why the gusset spacing is slightly odd. If you look carefully you can see the doors have been scribed onto the vestibule sides. The roof was fitted next and was cut slightly wide, this was done a flat surface and weights were placed on the top so that it stayed flat and straight while the glue cured. the lower bodysides were then added again using a flat surface as a datum to align the pieces. The upper sides were fitted last and had an angle scraped onto them so that a sharp edge would be formed at the waist line. The cuts are for opening out the vestibule are to be seen in the front one, the rear one having already been cut and trimmed to shape. Gibbo.
-
Hi Folks, On the topic of borders, the most important border is that between your own mind and the mind of the government. After all the word govern means to control and the word mental pertains to the power of the mind, therefore once contracted with any government agency you are obliged to perform to contract. One thing that requires better understanding generally is the term title as your title is a legal fiction and your name is your name. Your name and title have different standing in law by way of ownership. You own your name and the government own your title and is noted in the big book of law, Job 32:21-22, quite simple really. By not claiming title you may then claim your dominion which is also noted in the big book of law, Genesis 1:26. With regard the term legal fiction any commercial instrument is in law a legal fiction, that means the deeds to your house, Tesco's, your car insurance, banks, the local council, the fire brigade, even Irish Railway Models are all legal fictions. The big book of law is very likely a legal fiction also although proving that would be quite some task however it is present in every court of law in the land so it must have significance even if most folk completely ignore it as such. Some of you will now call me a conspiracy theorist, so be it carry on if it makes you happy. Better to prove me wrong by way of equitable claim or evidence as it is otherwise known. Gibbo.
-
Dear Larken, I don't do commissions if that is what you are asking, very sorry if that disappoints. The one I built was for a friend and was a gift for he has been generous to me previously. Why not copy the information that is contained within the thread a Hornby compound and a Patriot body shell won't cost that much and all the drawings I used are also on the thread. All you need is some plasticard glue and filler, just steady away and follow the thread, its all described. You will find it easier than it looks guaranteed ! Post you build on here, ask questions about techniques should you be unsure. There is every confidence in you from all that read this thread, I know this or I would not have said so. Just checked eBay, (England) and a Patriot body is £12.00 and a Compound good for a cut and shut £25.00 on a buy it now. That's a lot of fun for £37.00 plus postage. Gibbo. Hi folks, Here is the best drawing I have of the V class: Gibbo.
-
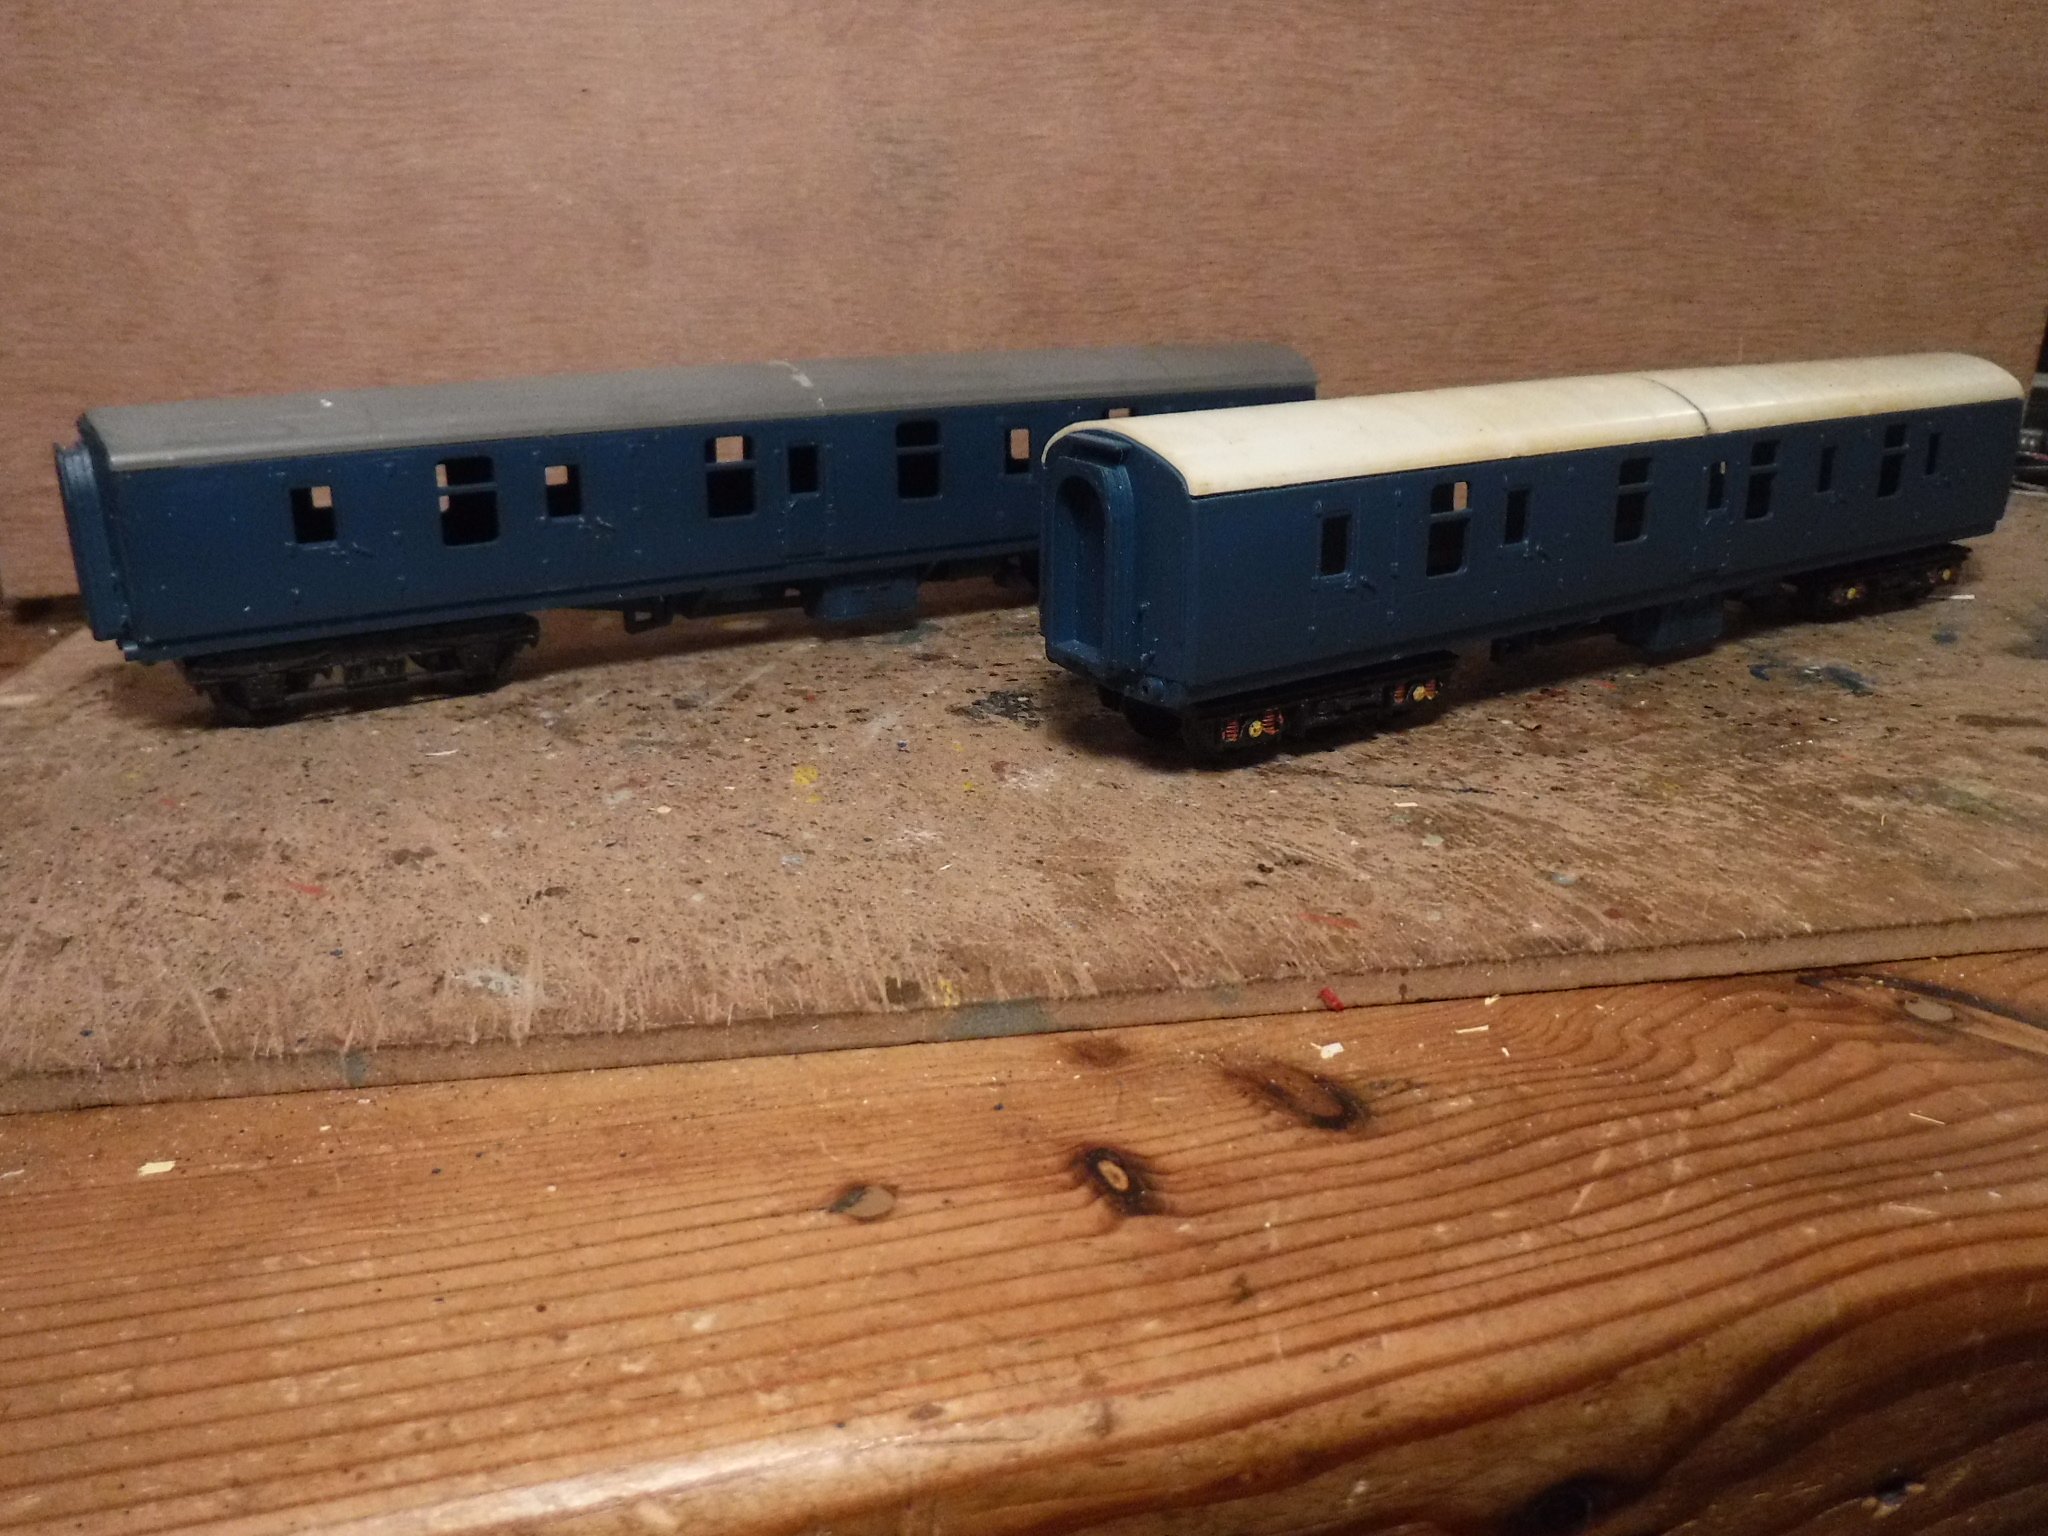
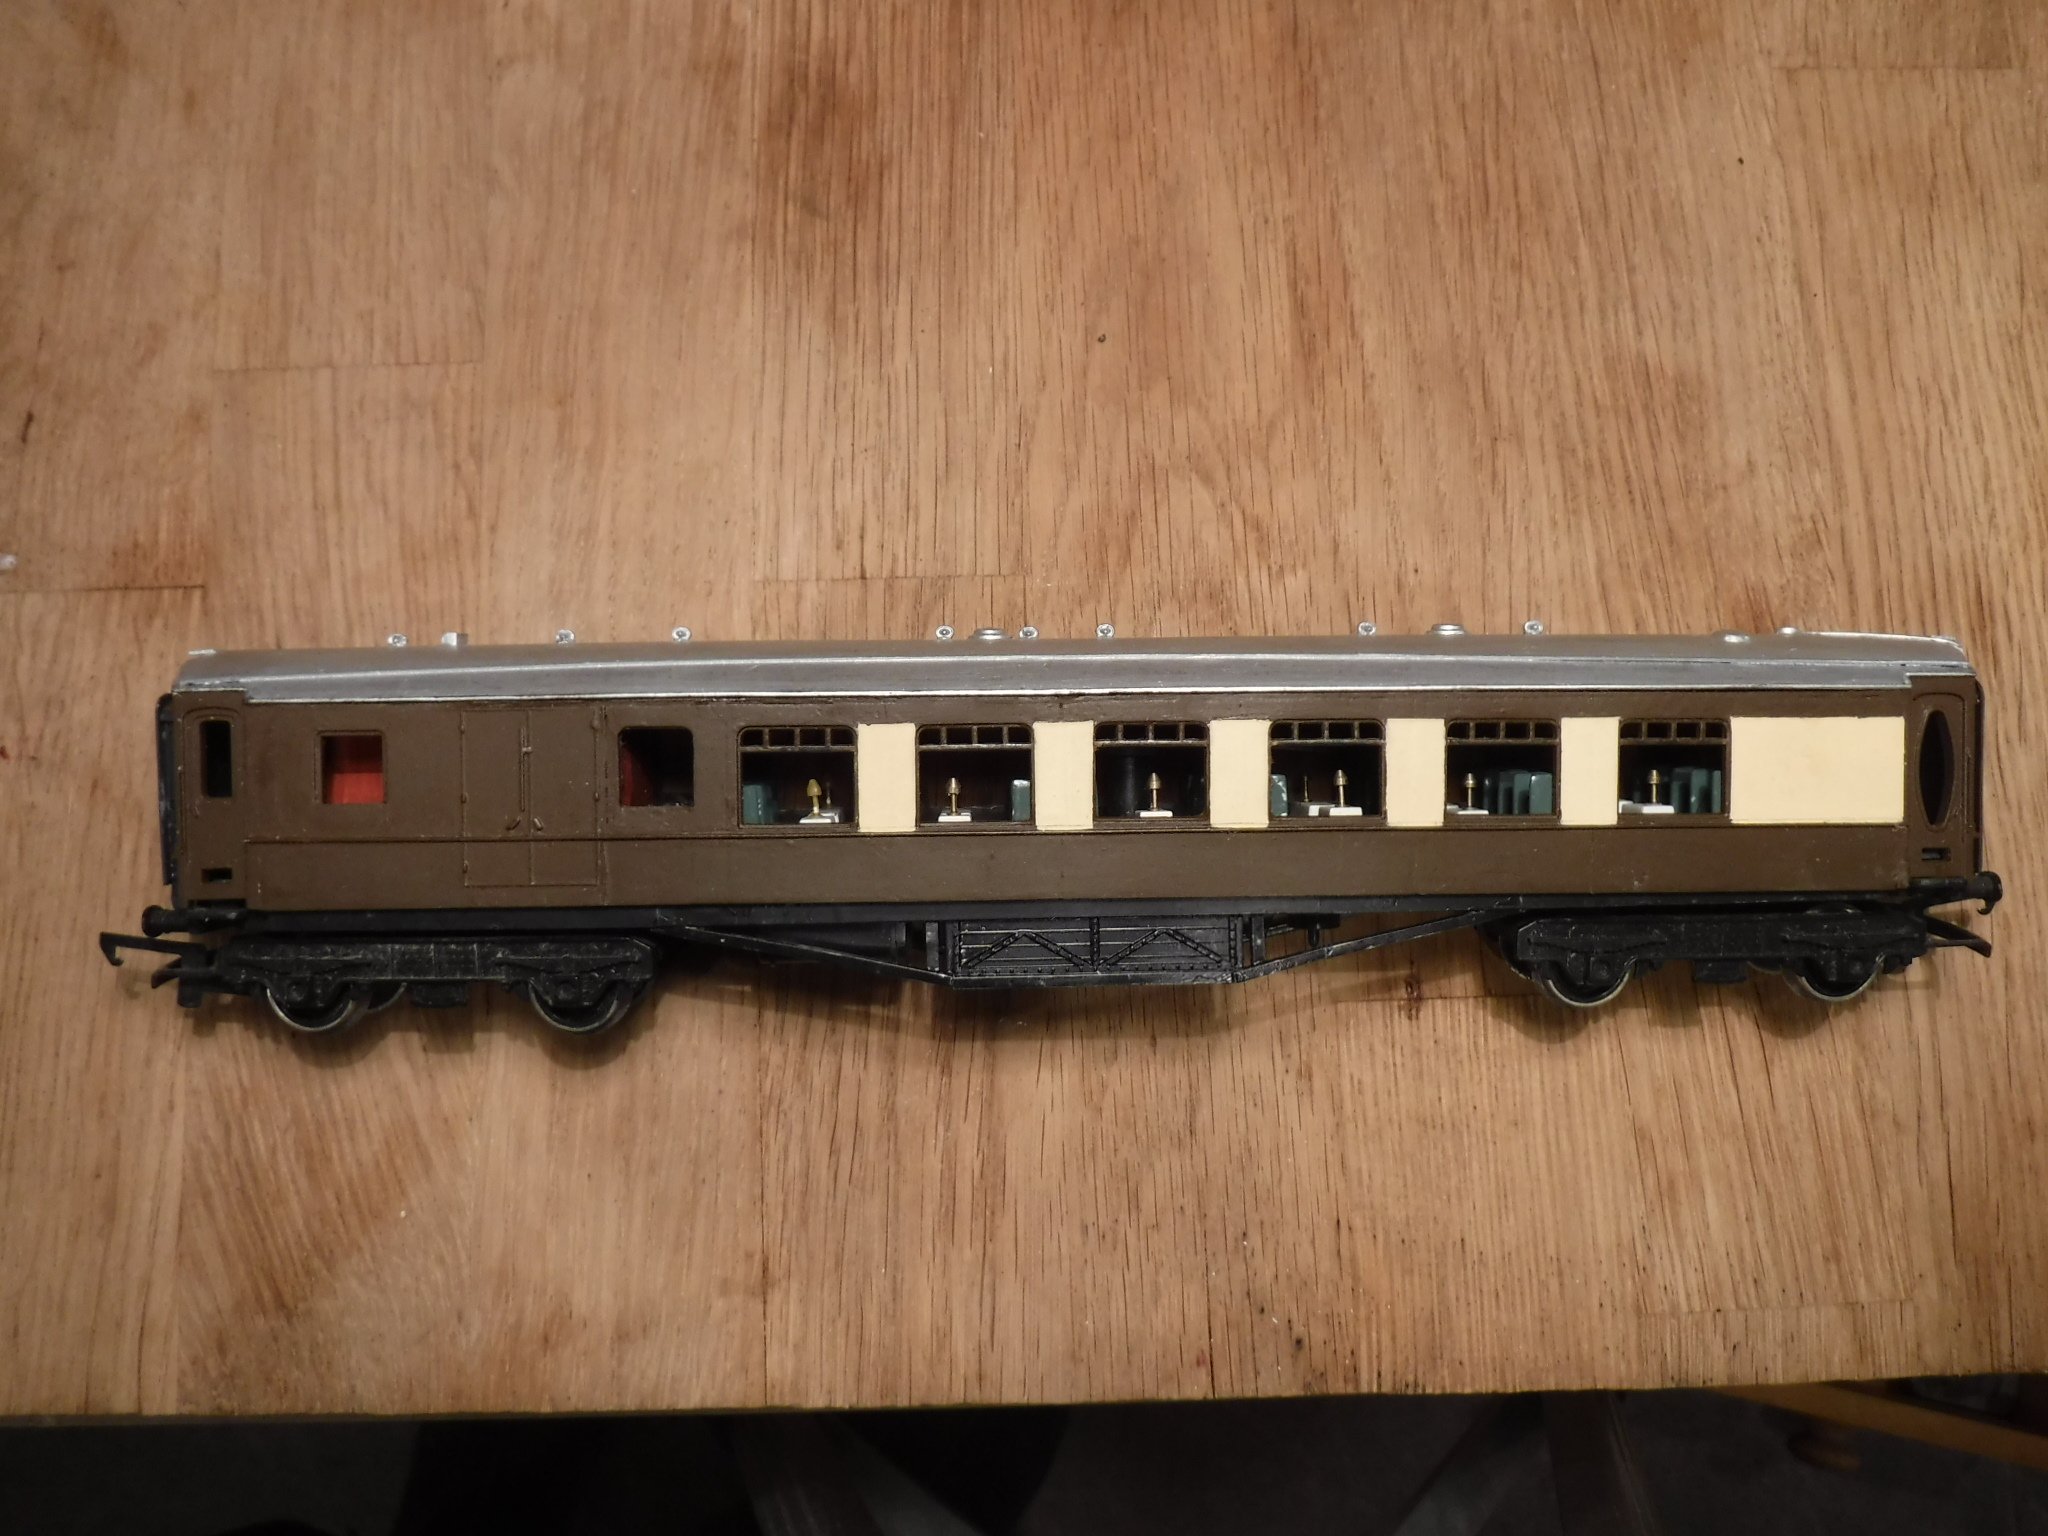
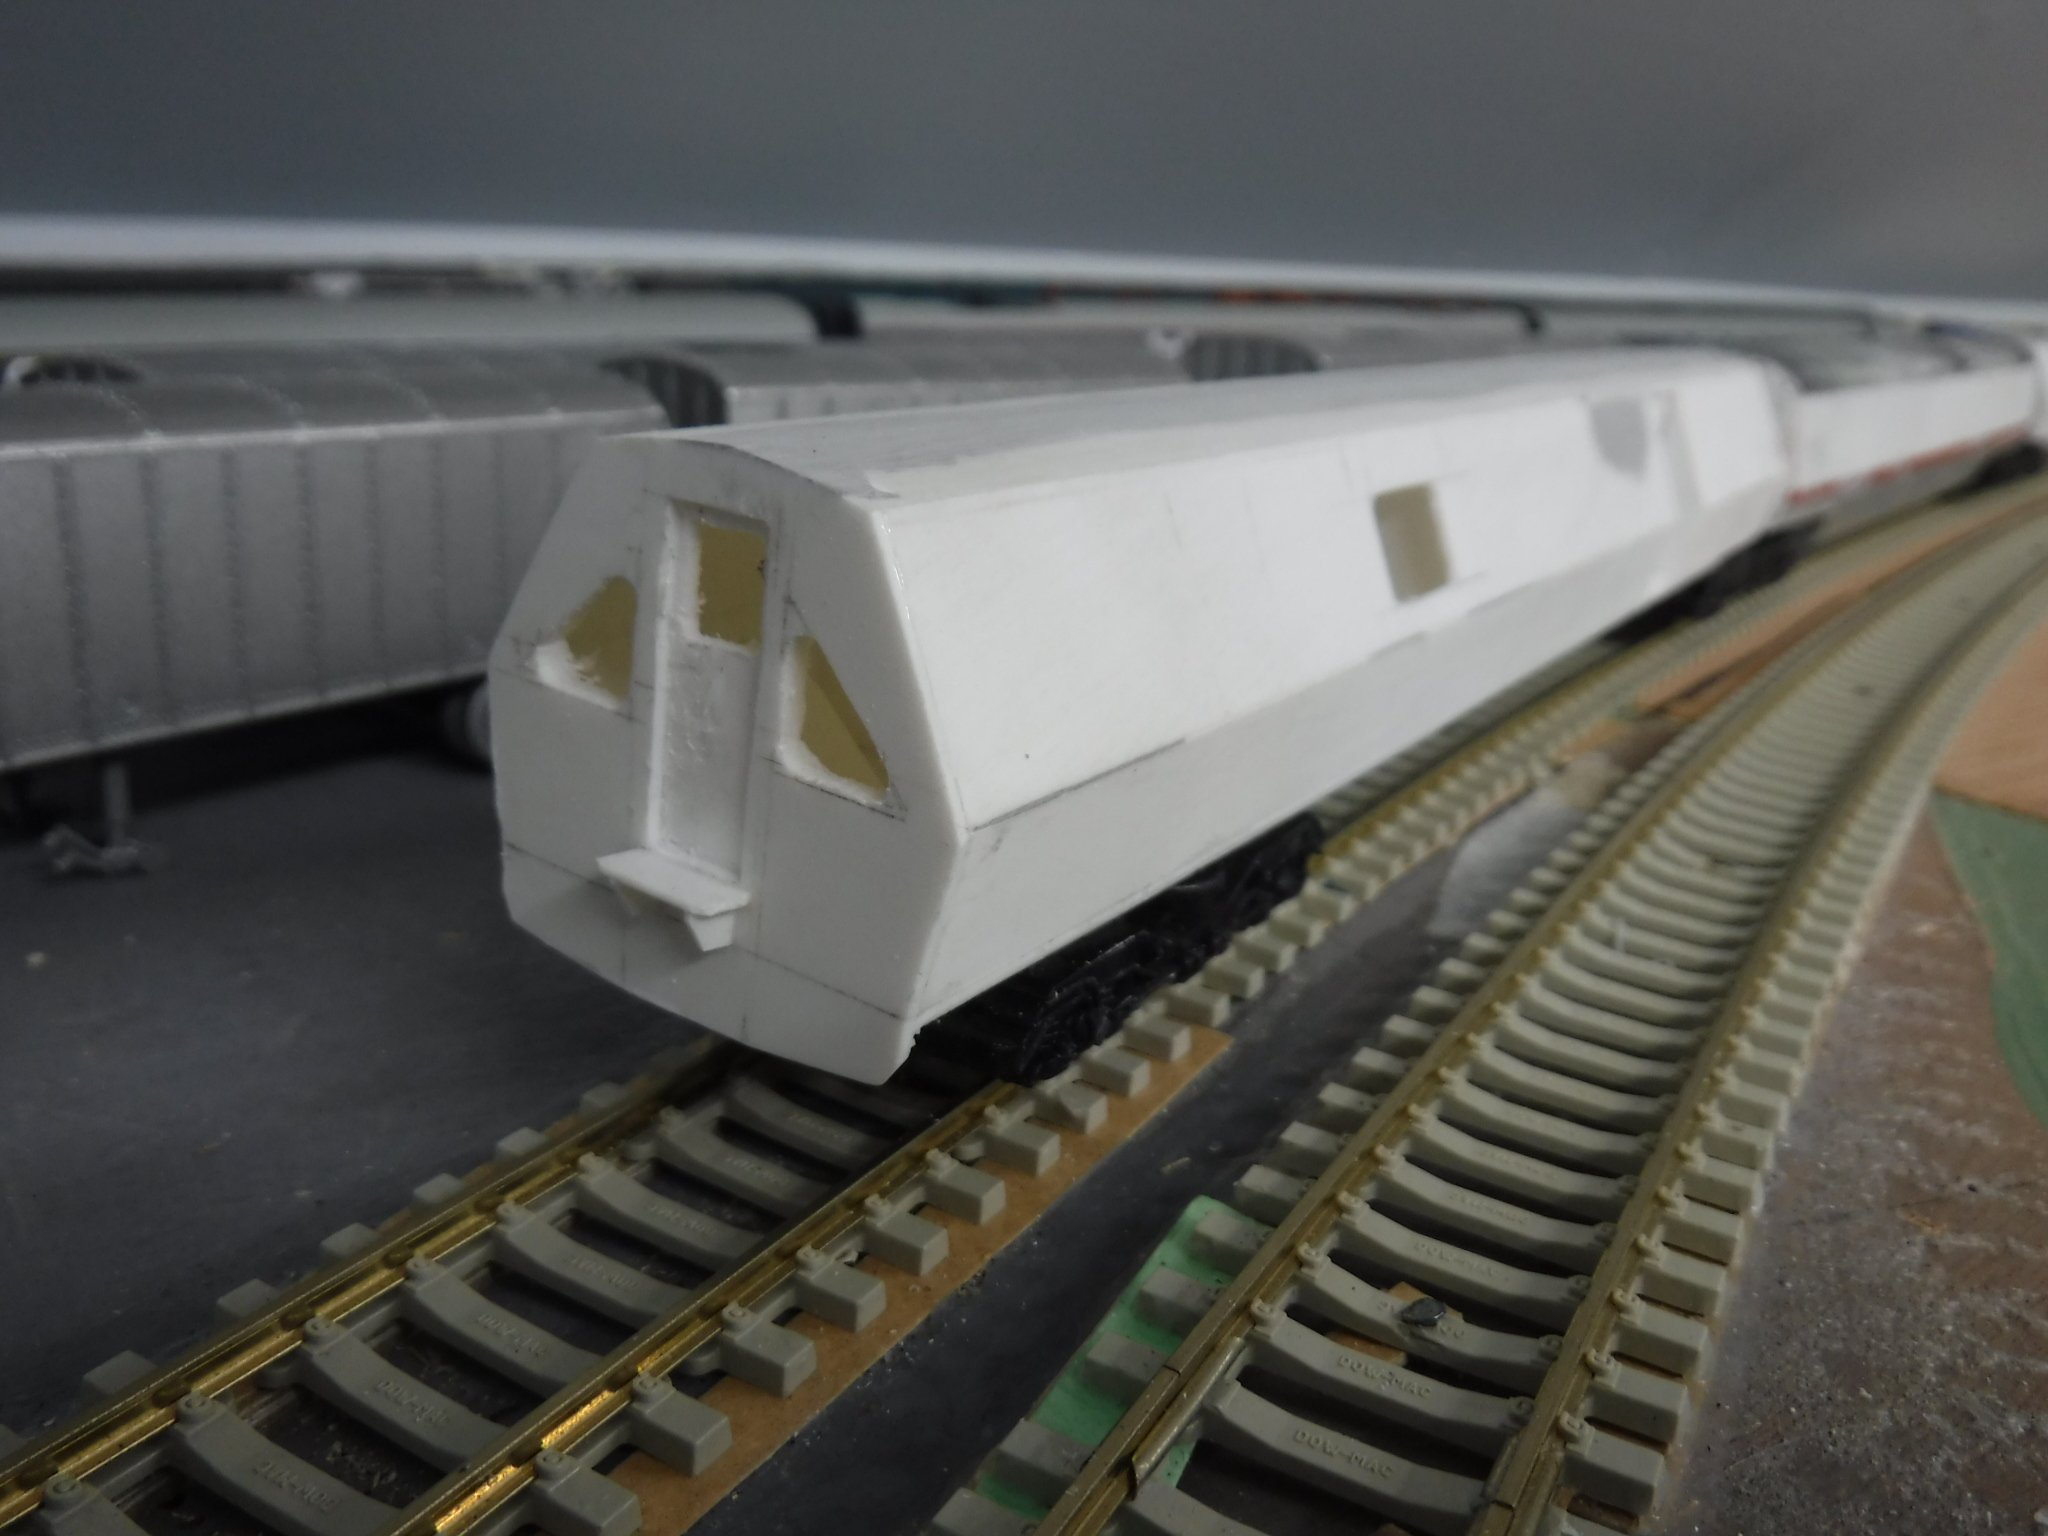
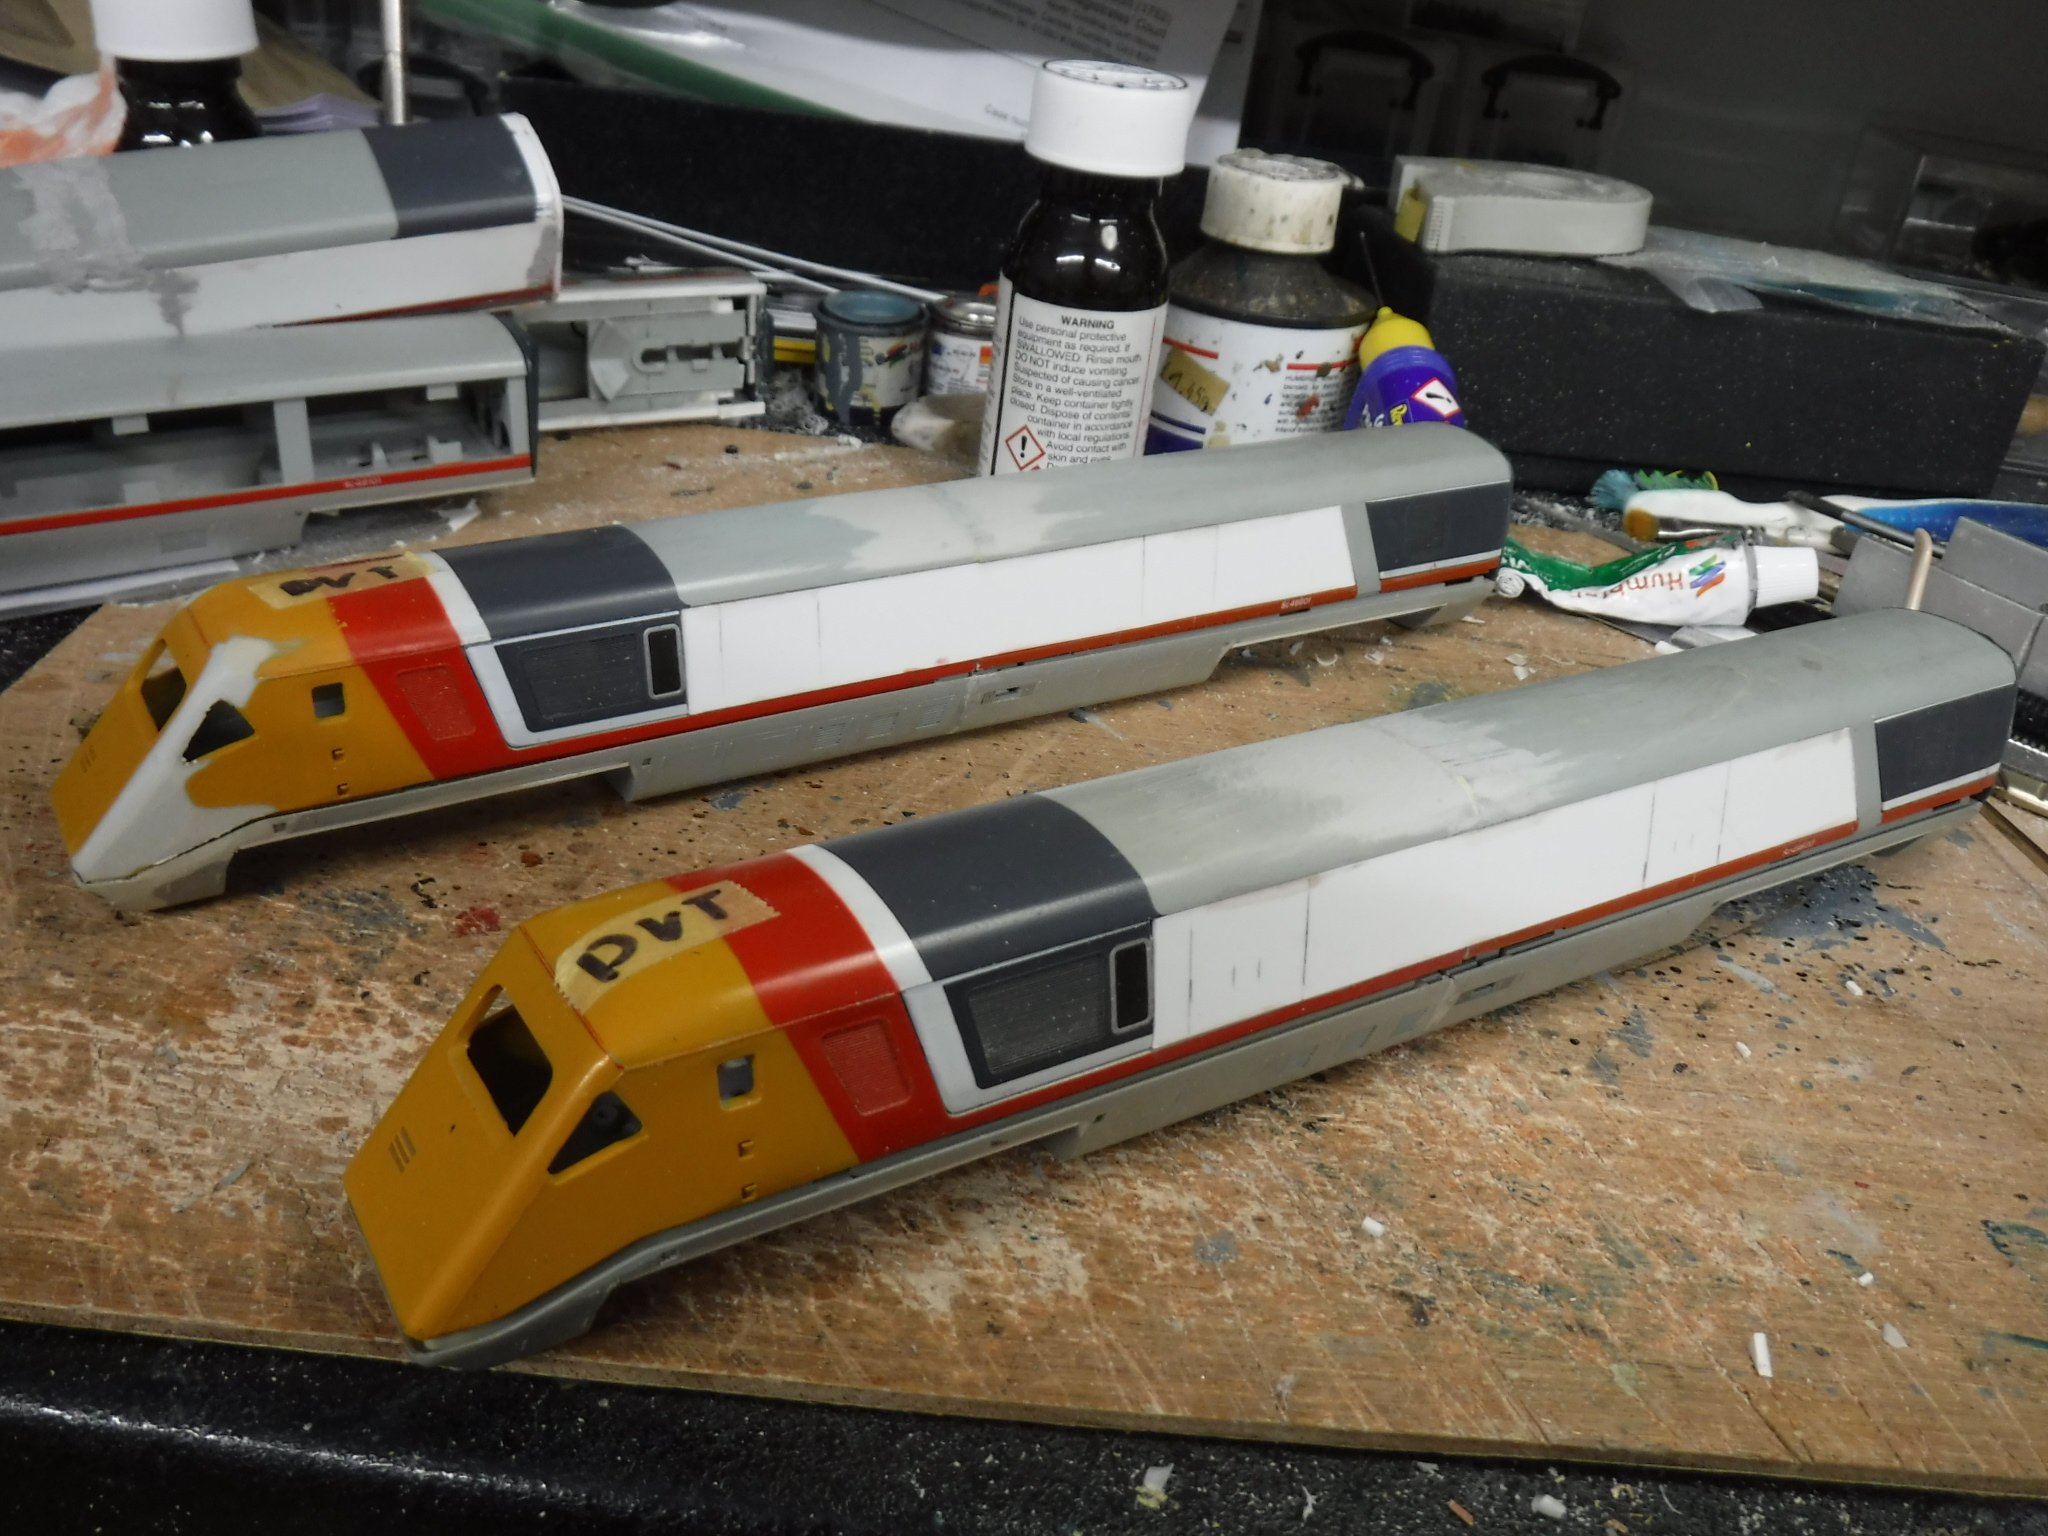
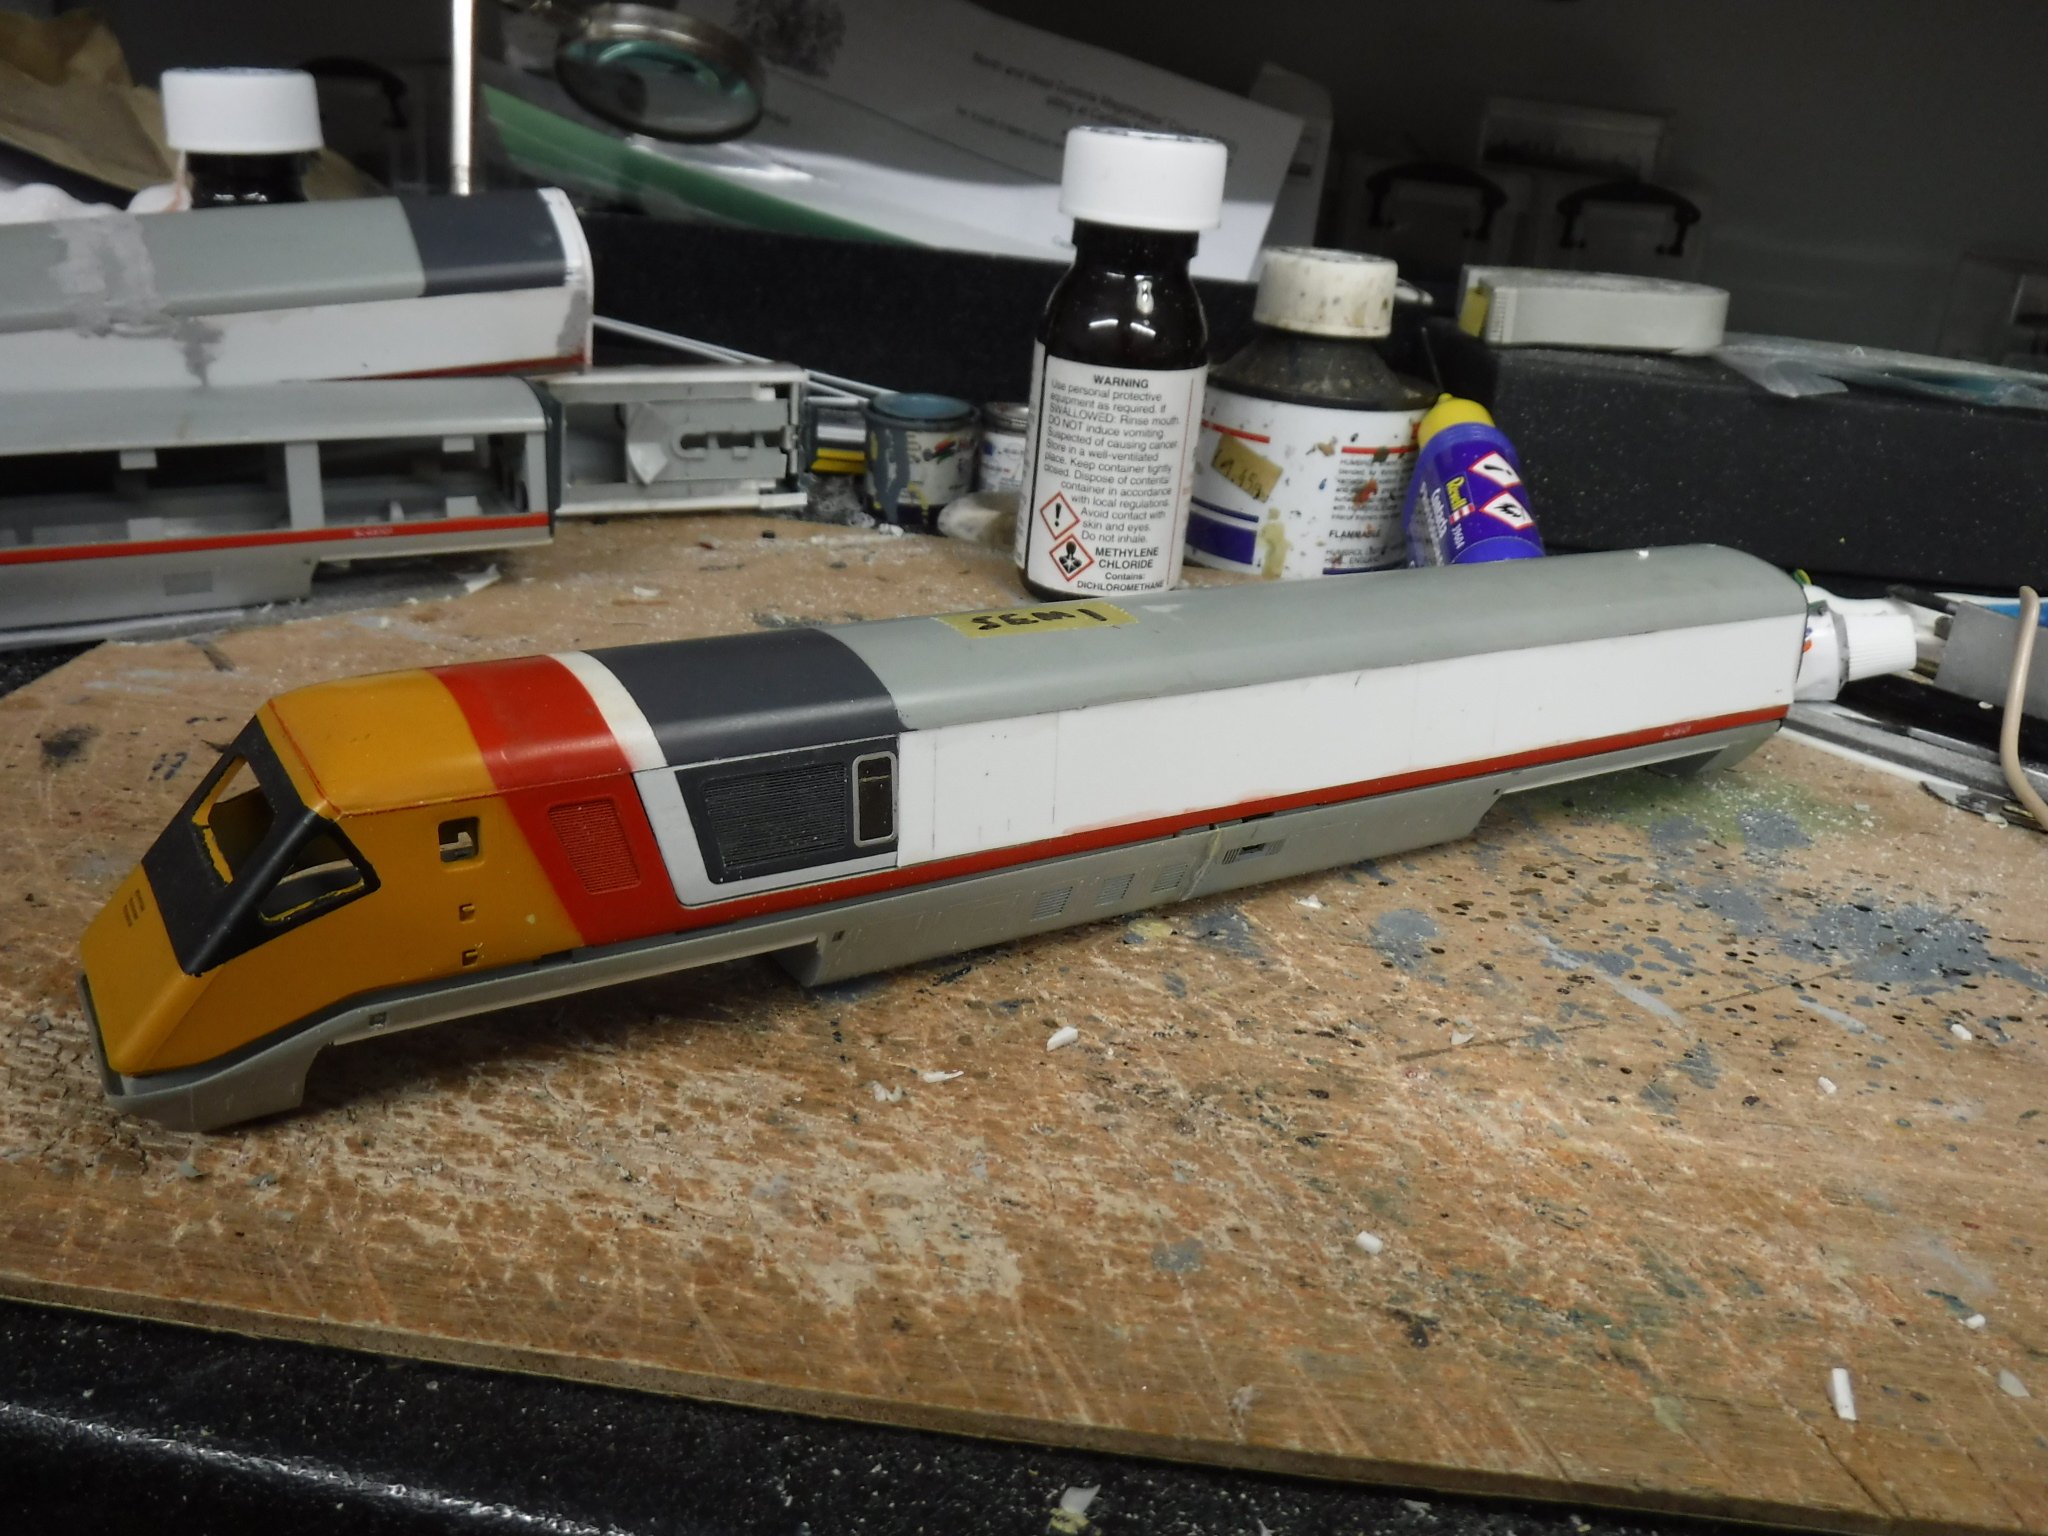
Hi Folks, I've been working upon two DVT's, a DPC (driving power car) and a test car known as Pilot which was marshalled between the later iteration of the POP train. The two DVT's, the pencil lines shew where the van doors will be. The DPC, there is on ly one van door as the rear of the vehicle would have had traction motors fitted into it. As you can see Pilot was made form all the left over bits hence it is made from three sections as the left overs were not long enough to make it from two sections. d Pilot with the side blanked off, it had no windows, and all of the joints filled. The bogie pivot mounts had to be moved as the sections were from non articulated bogies. The POP train sections will have to be scratch built. Gibbo.
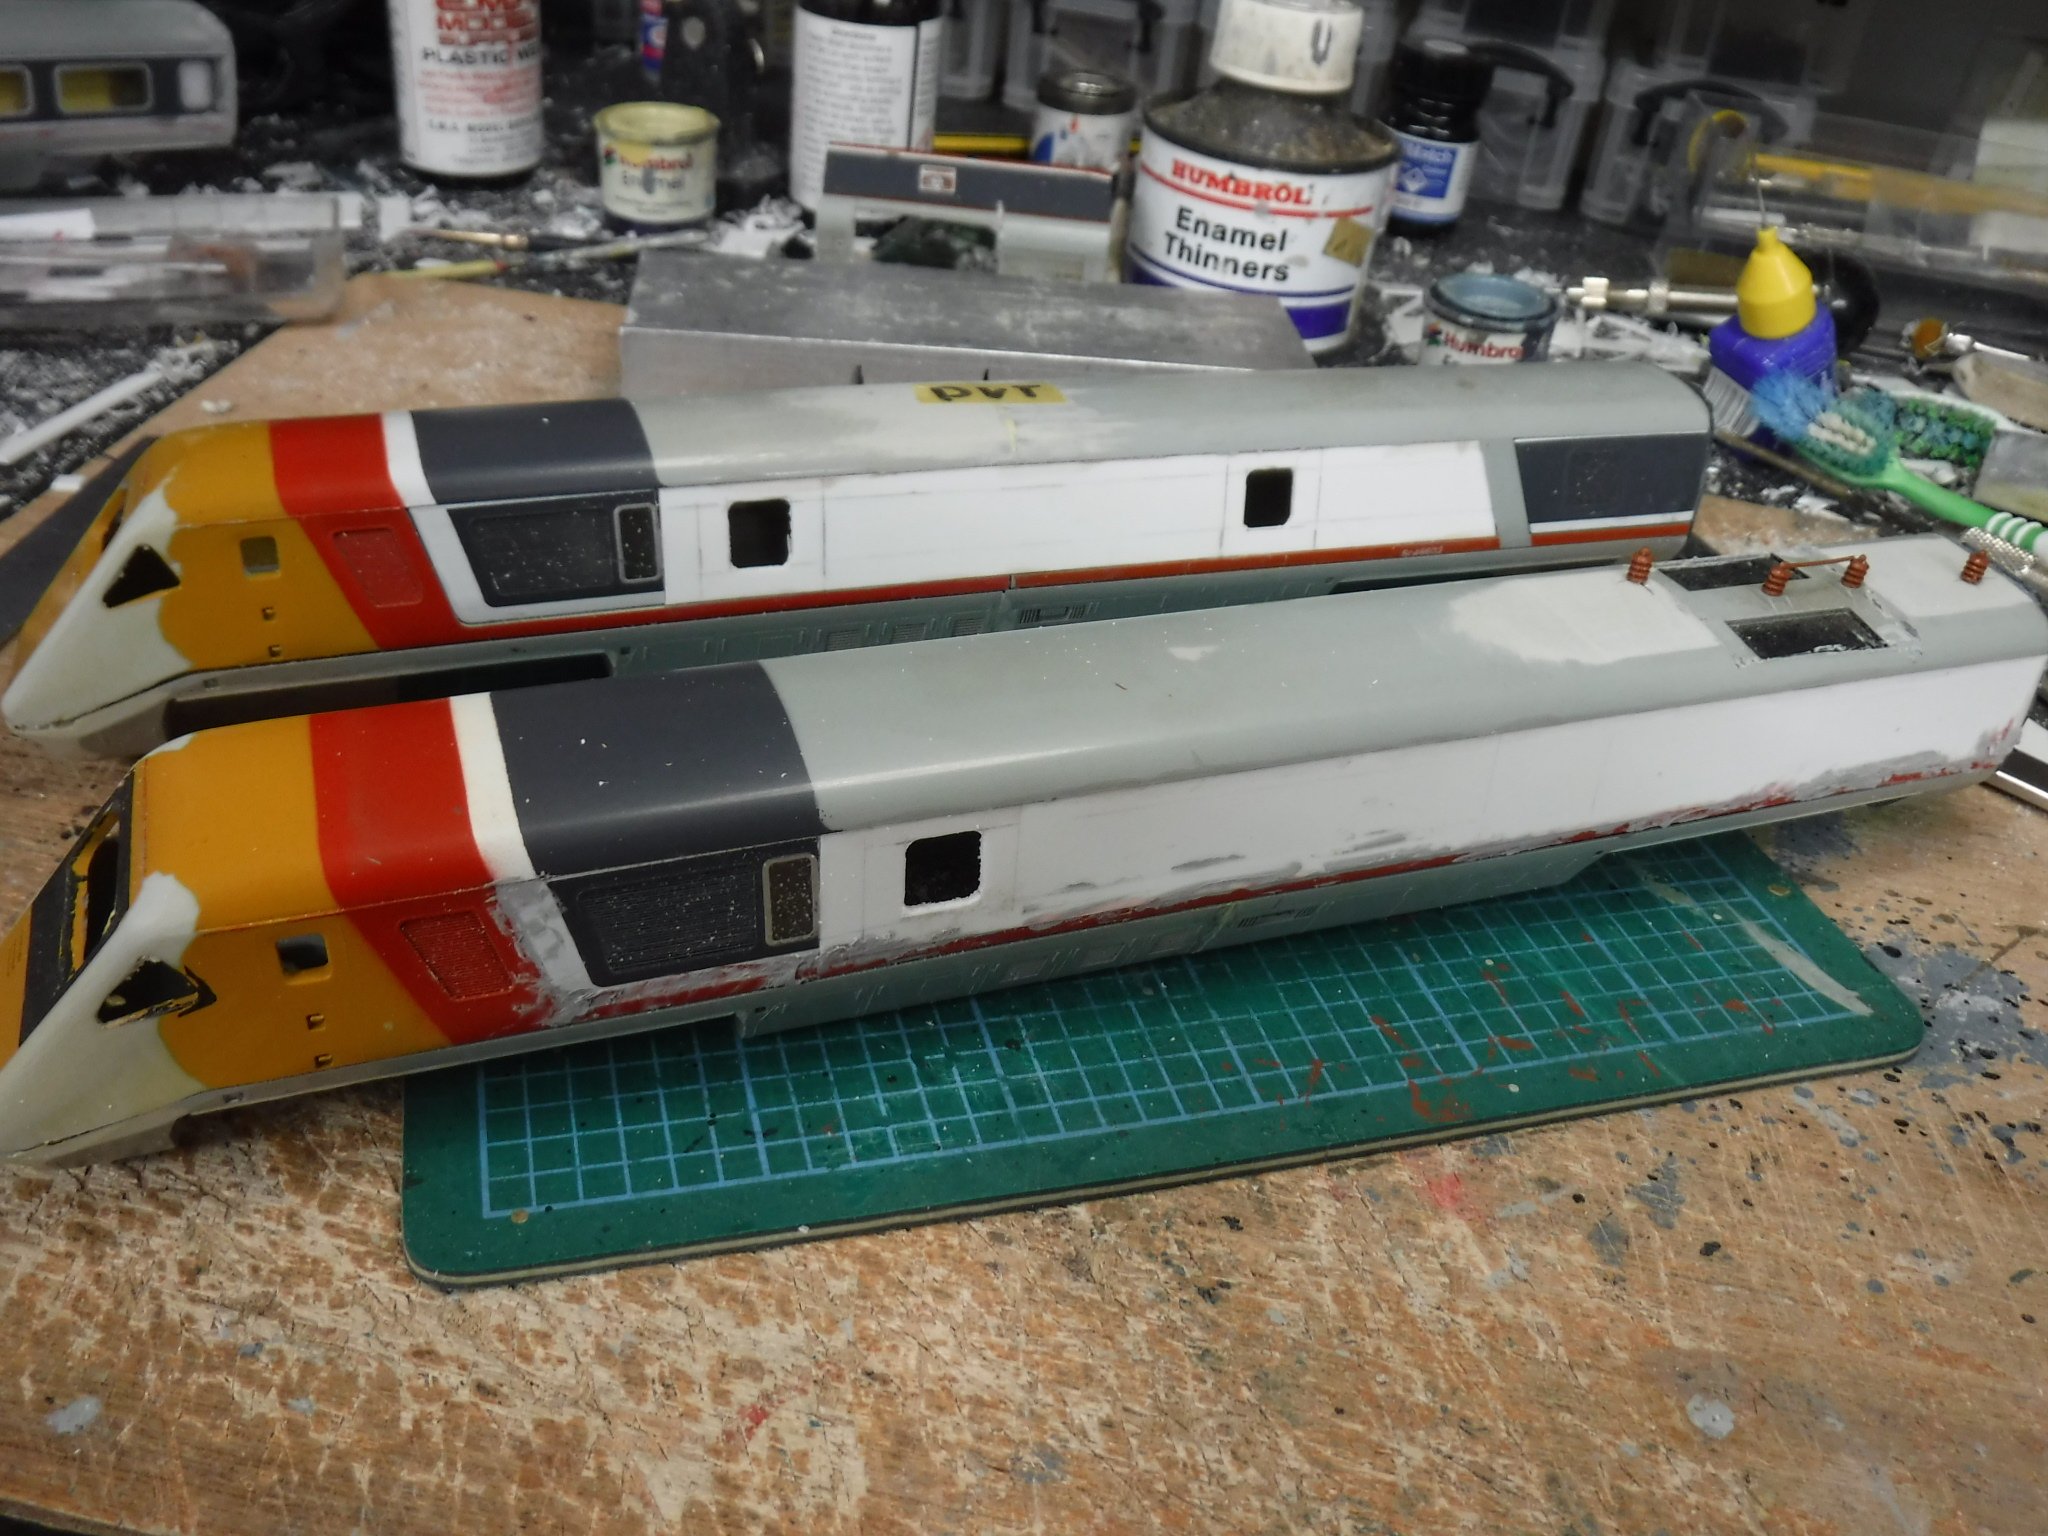
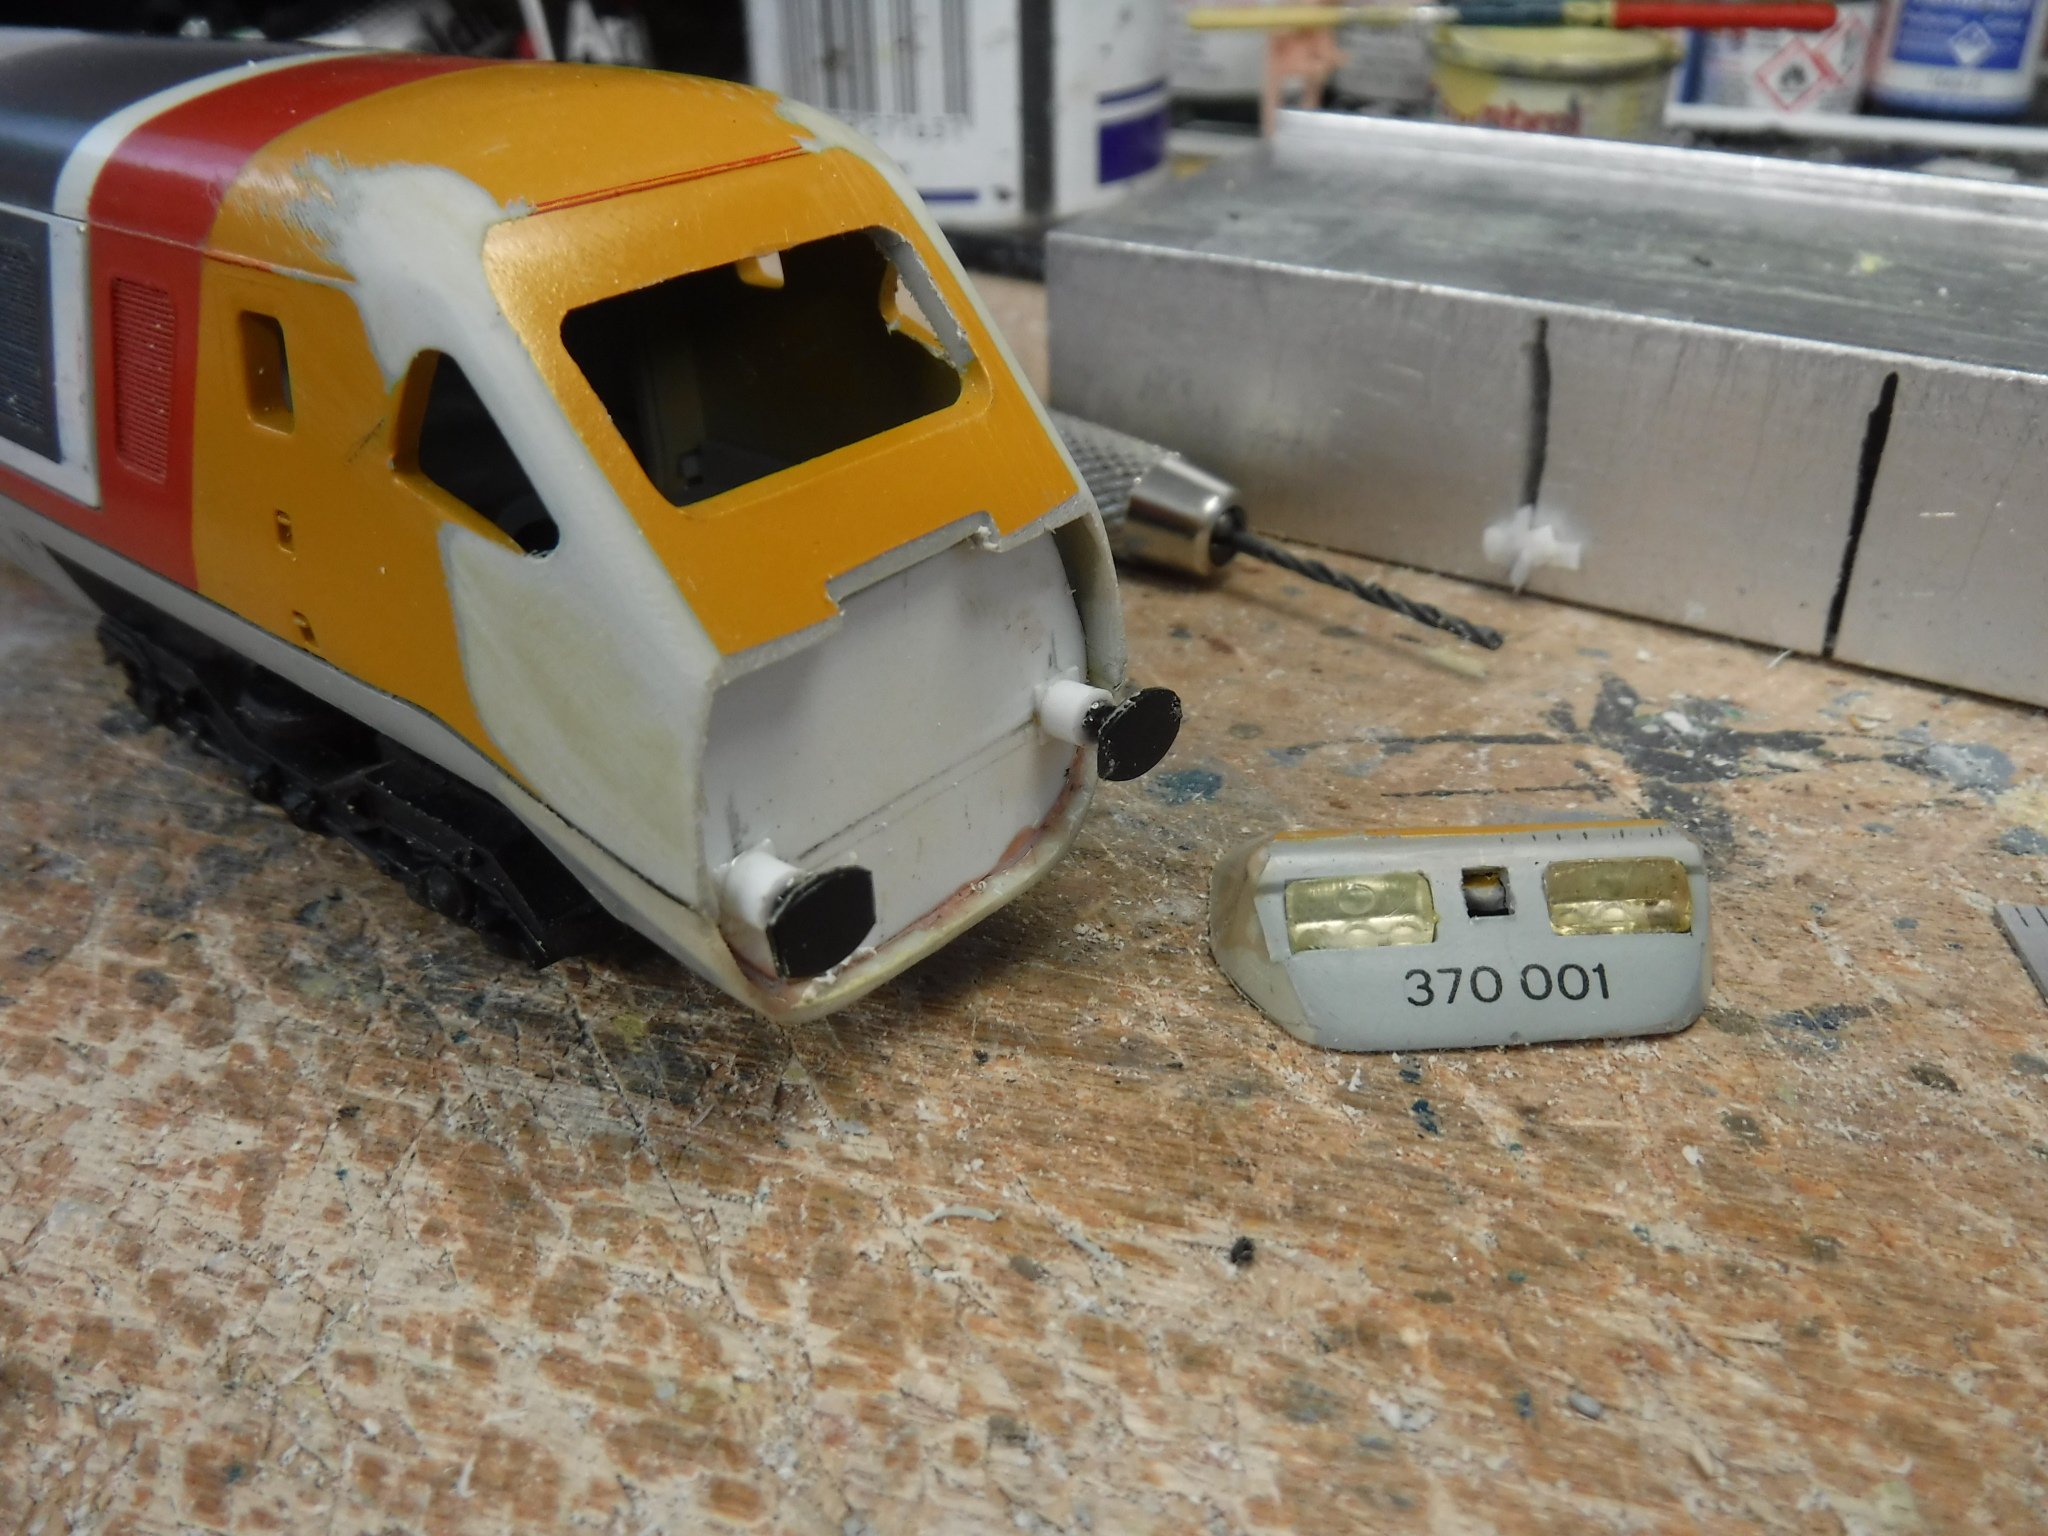
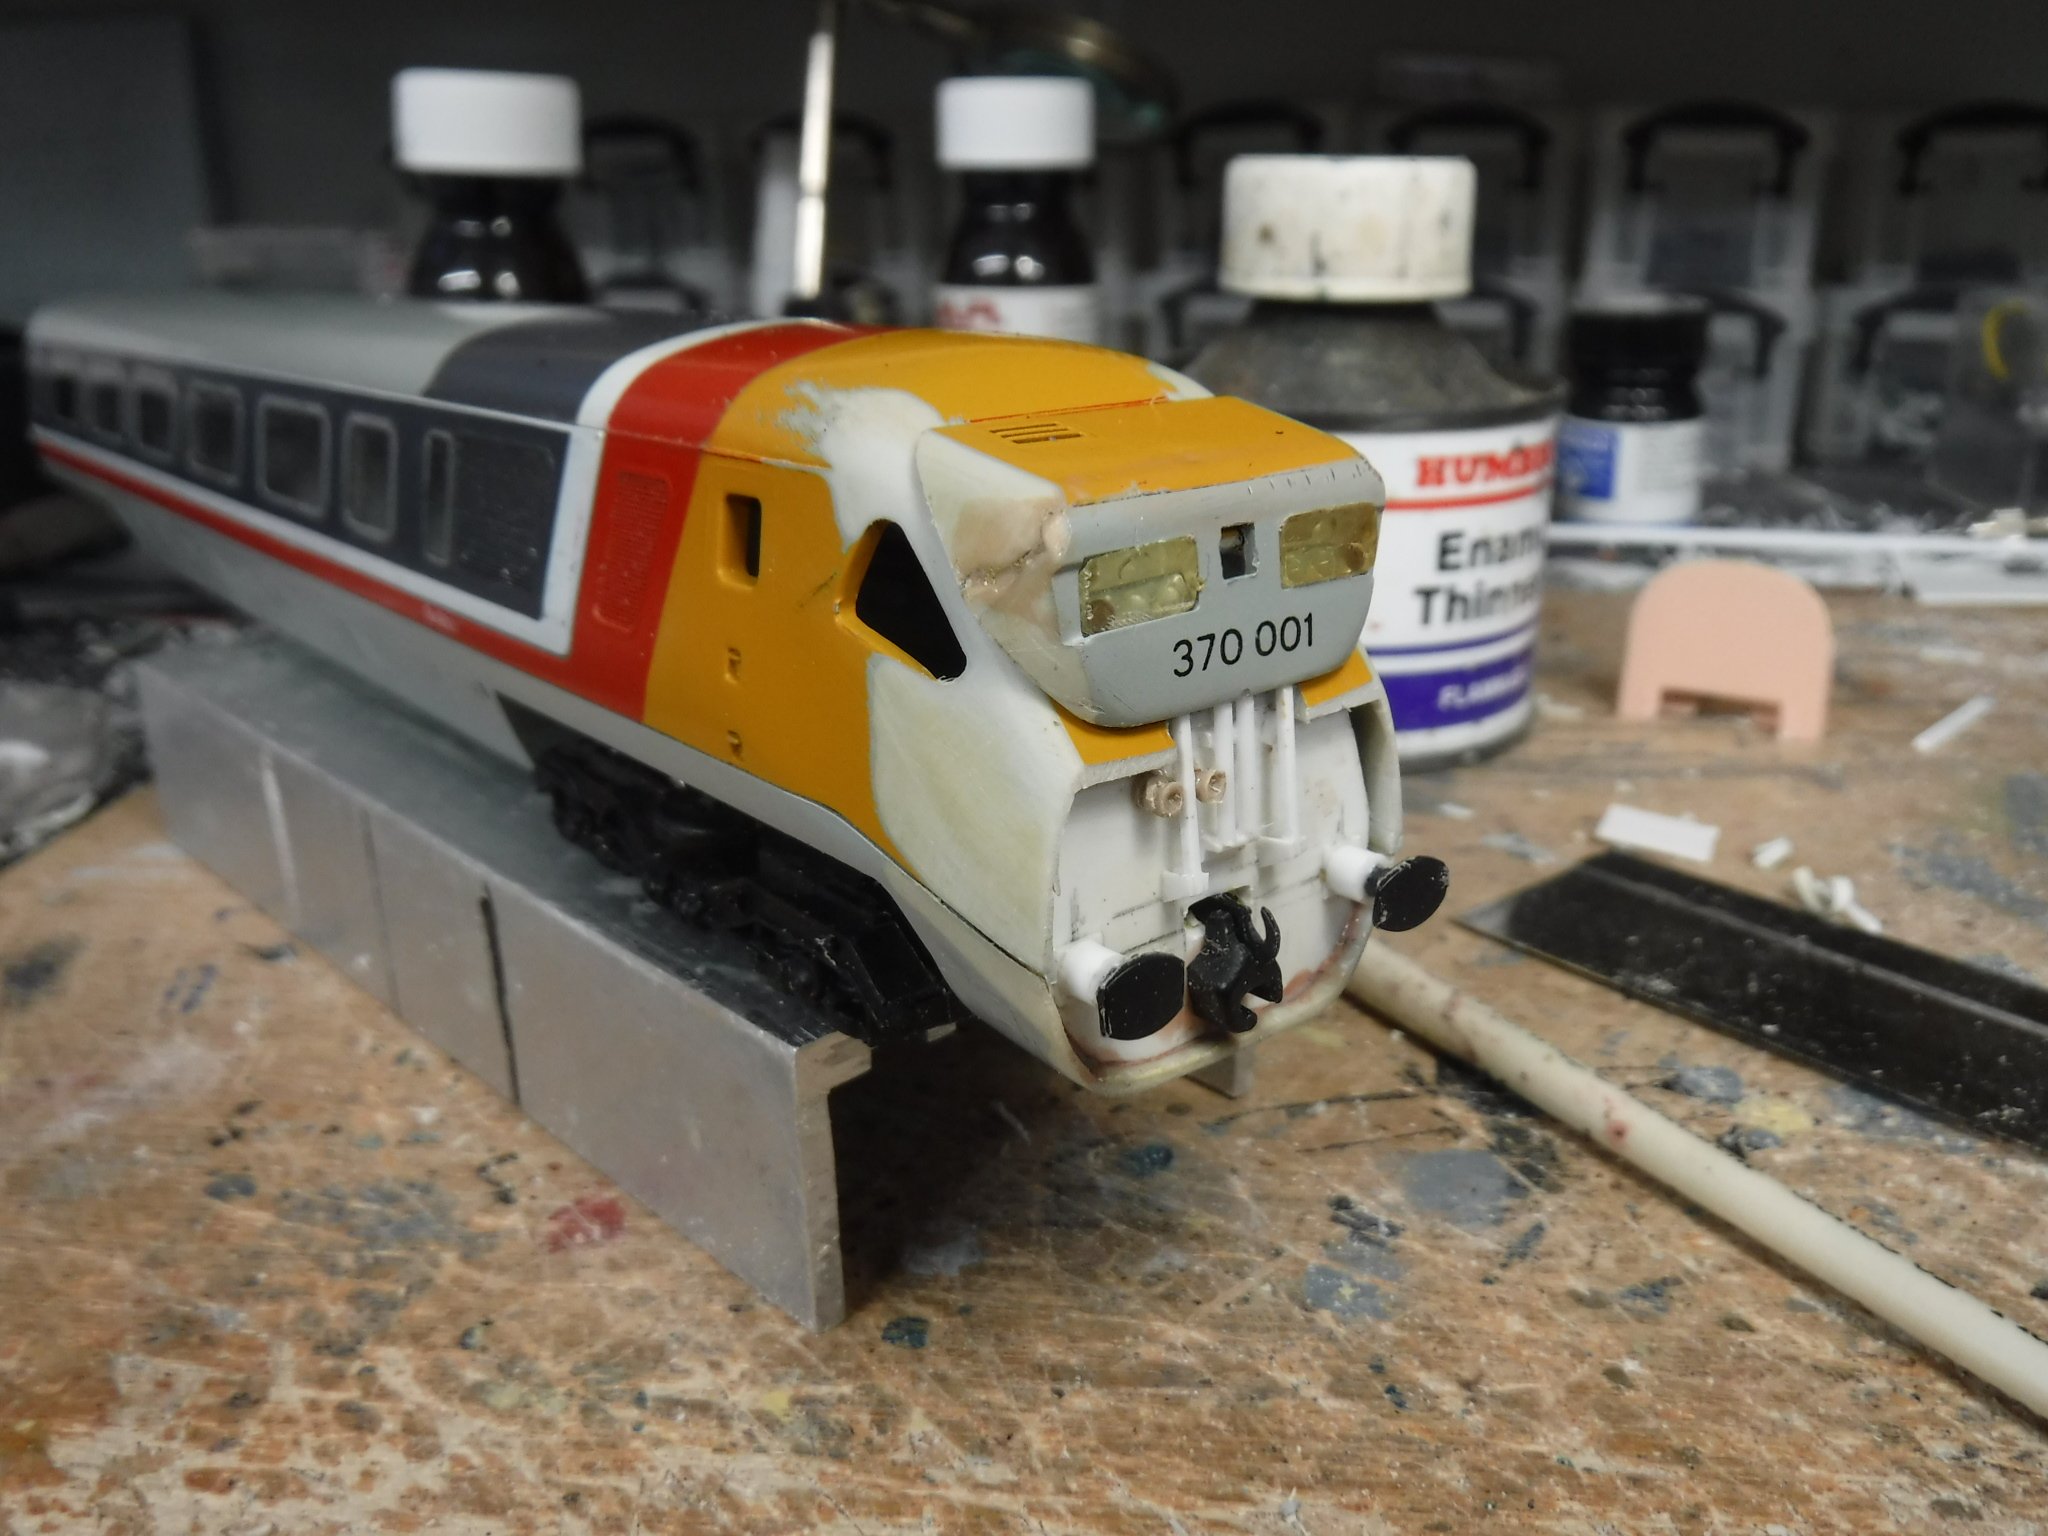
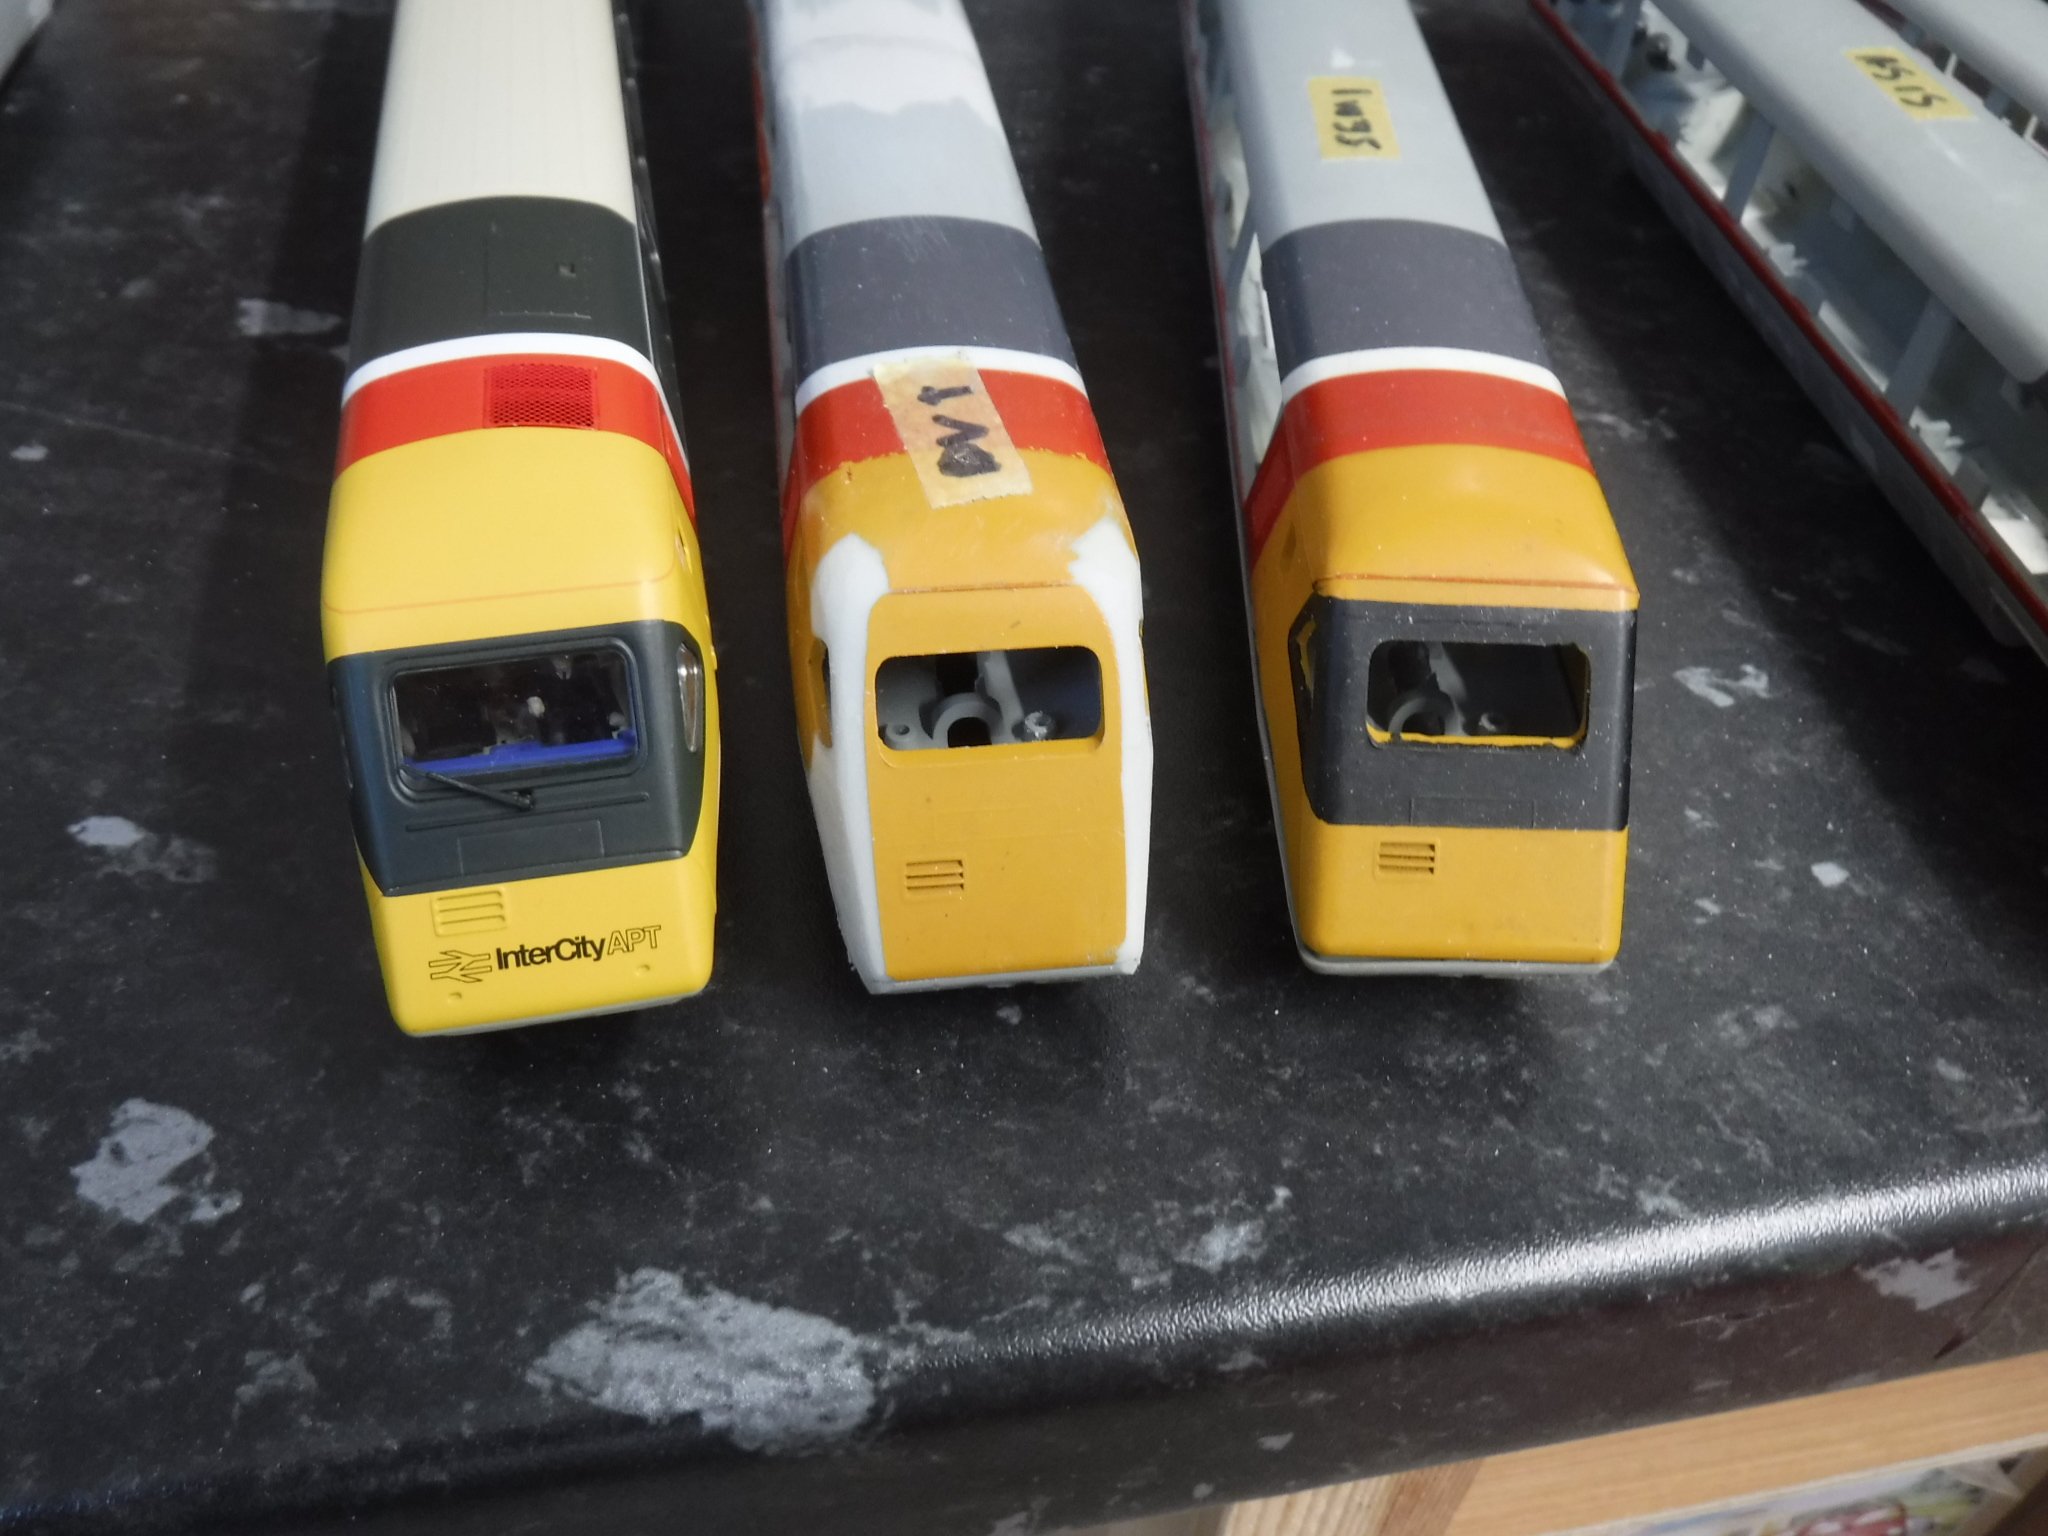
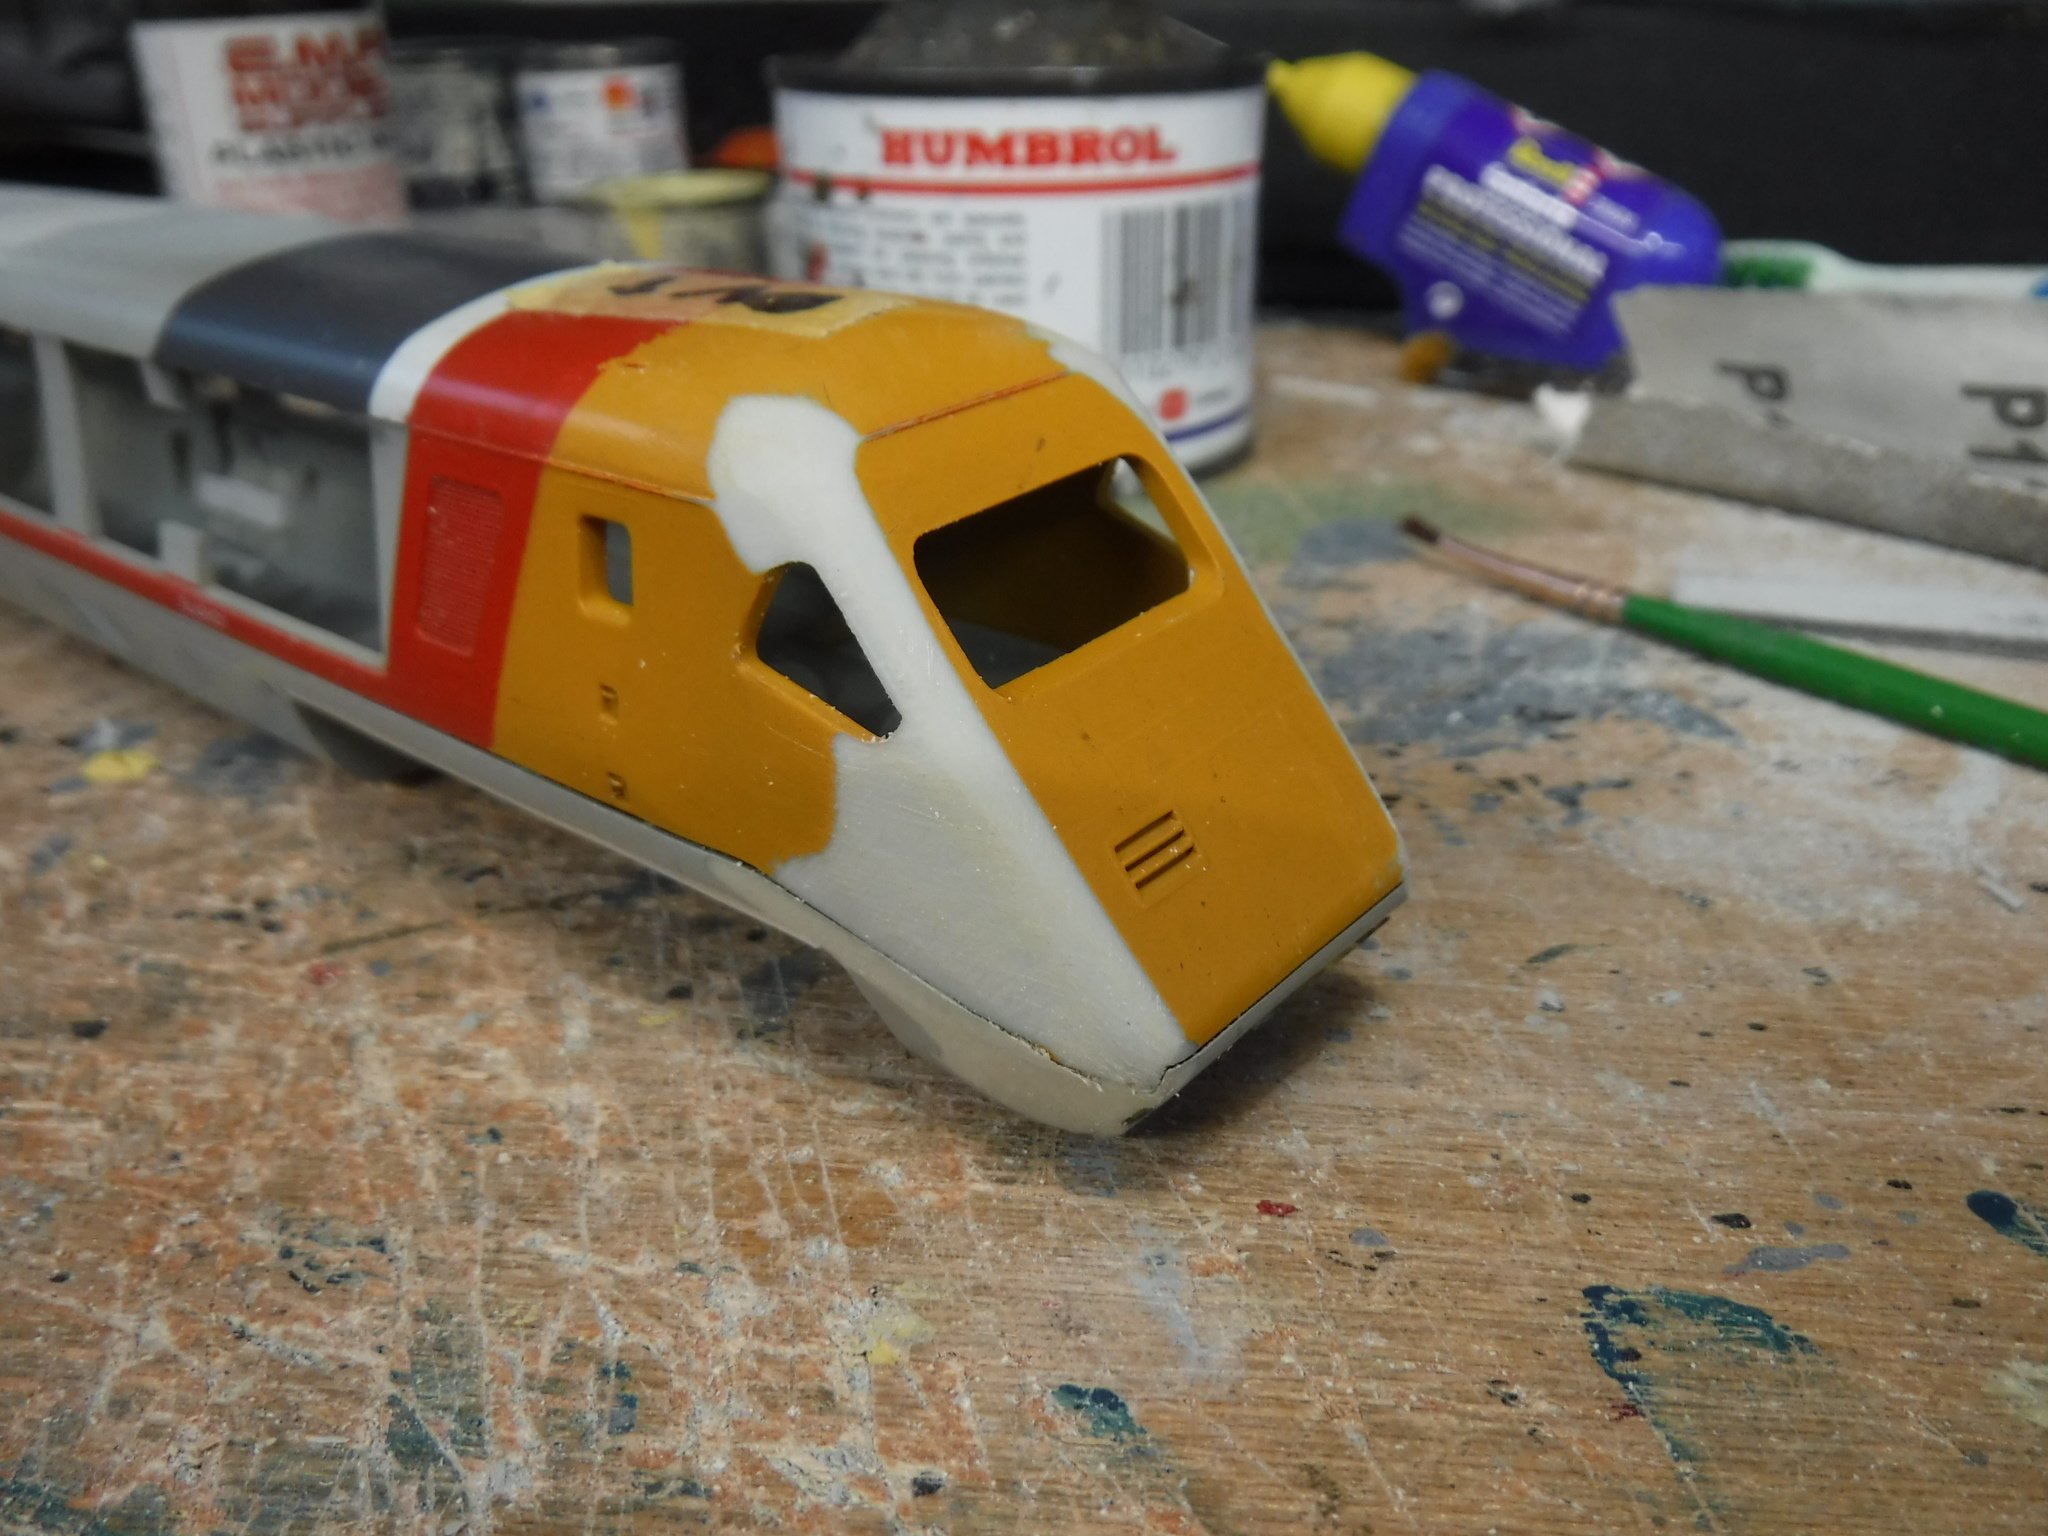
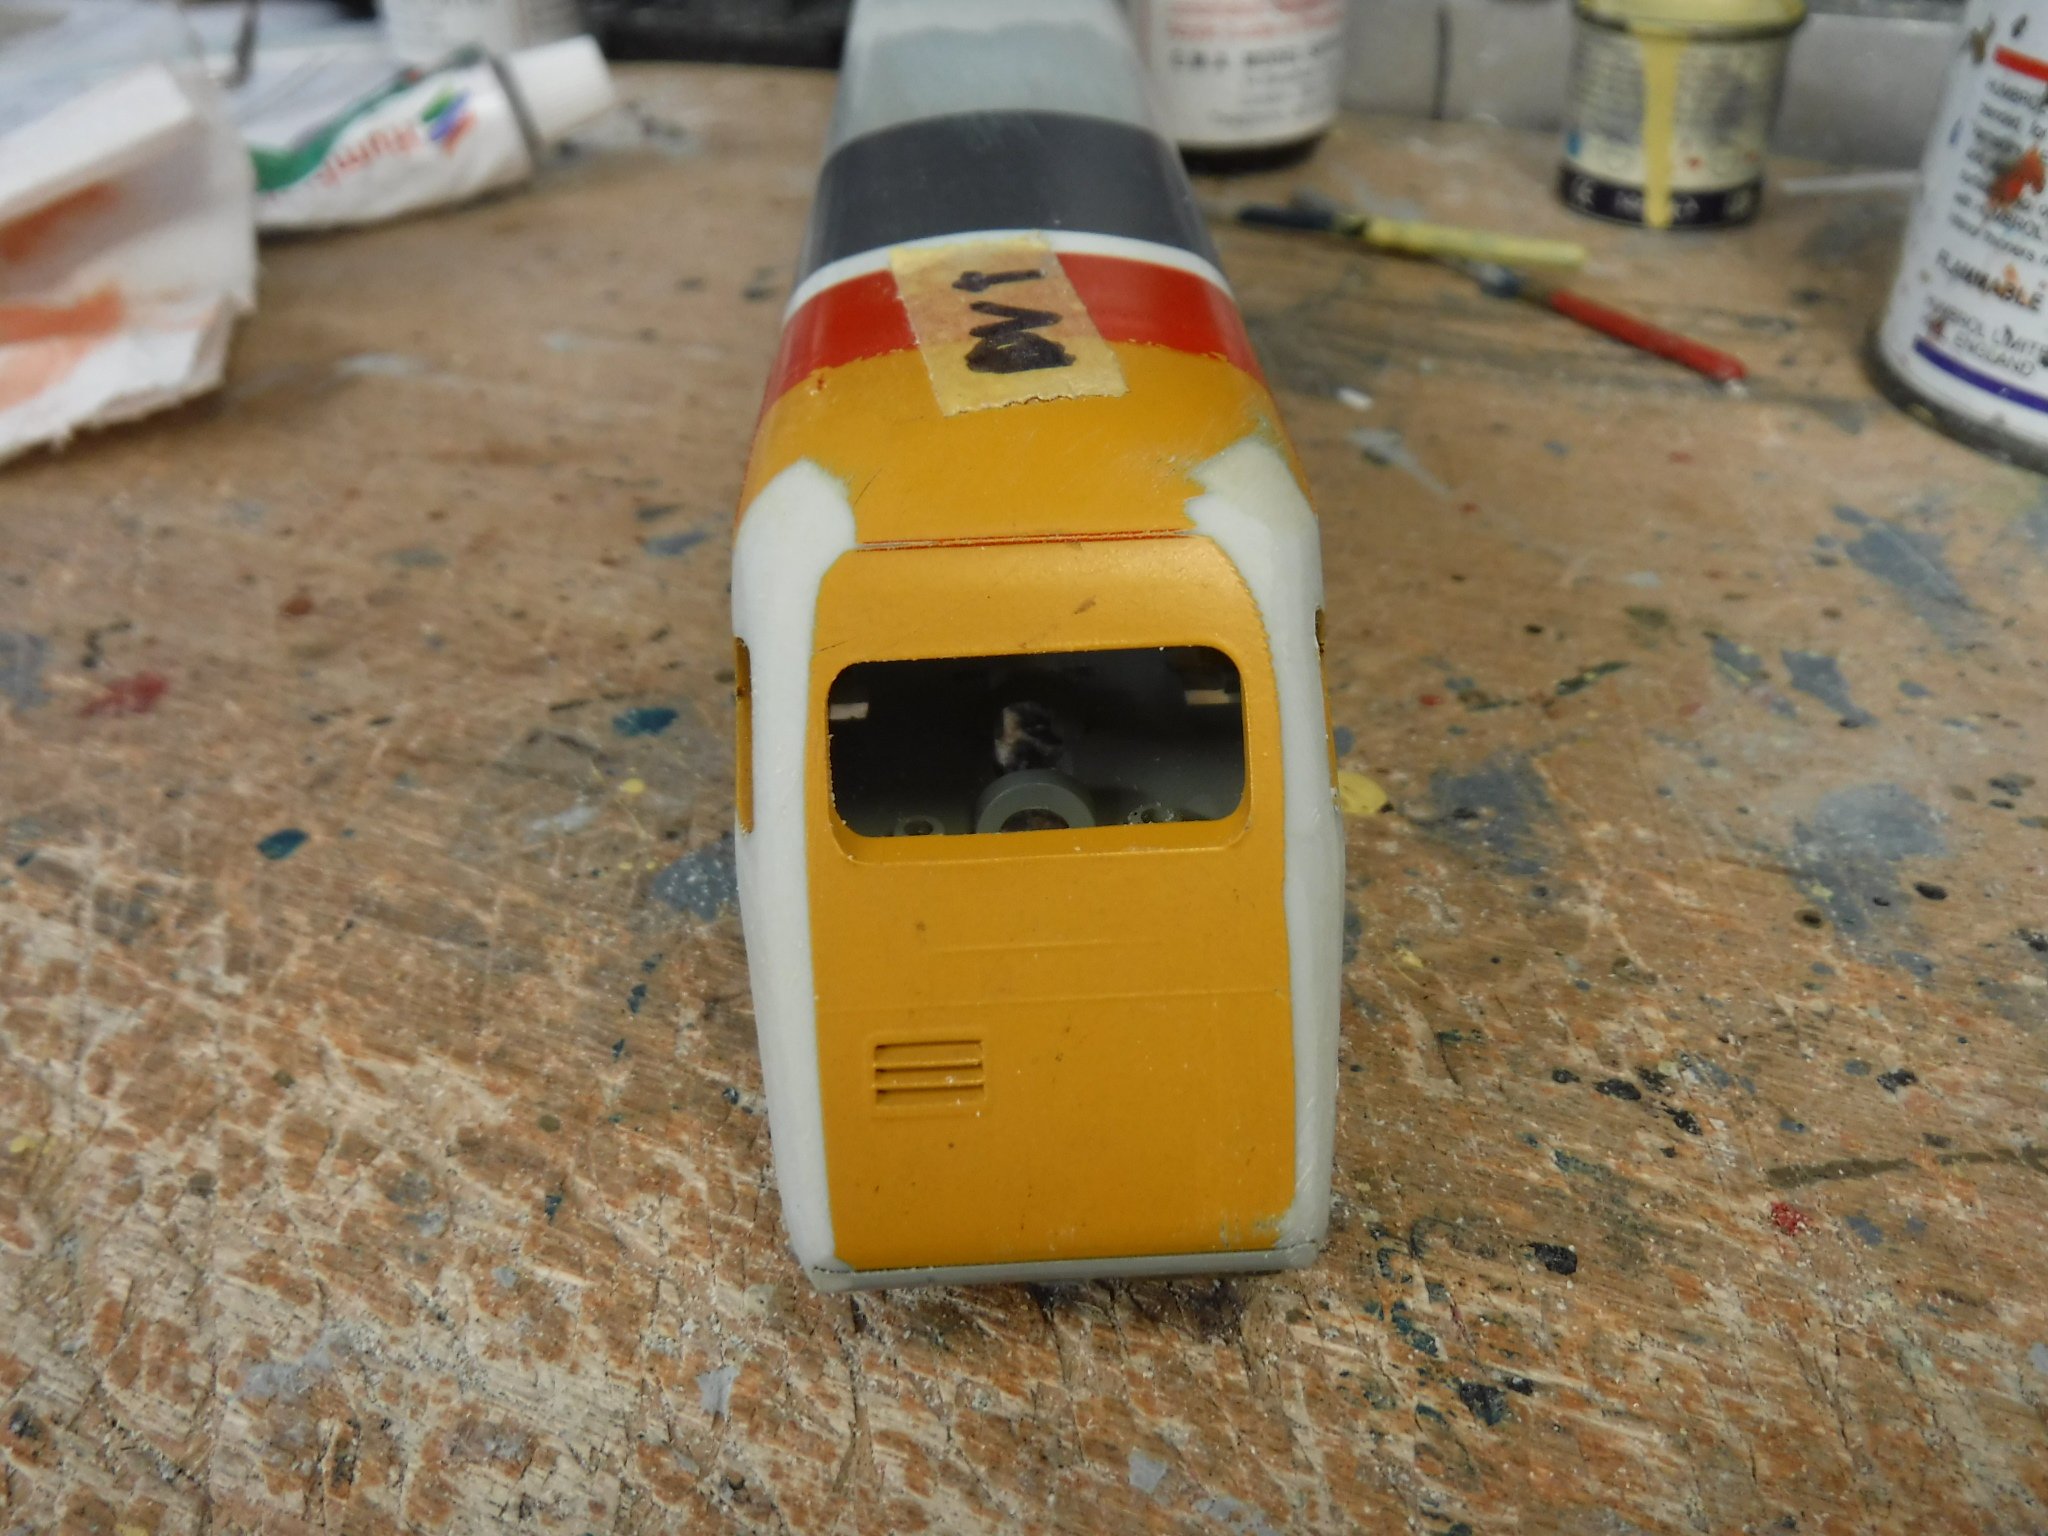
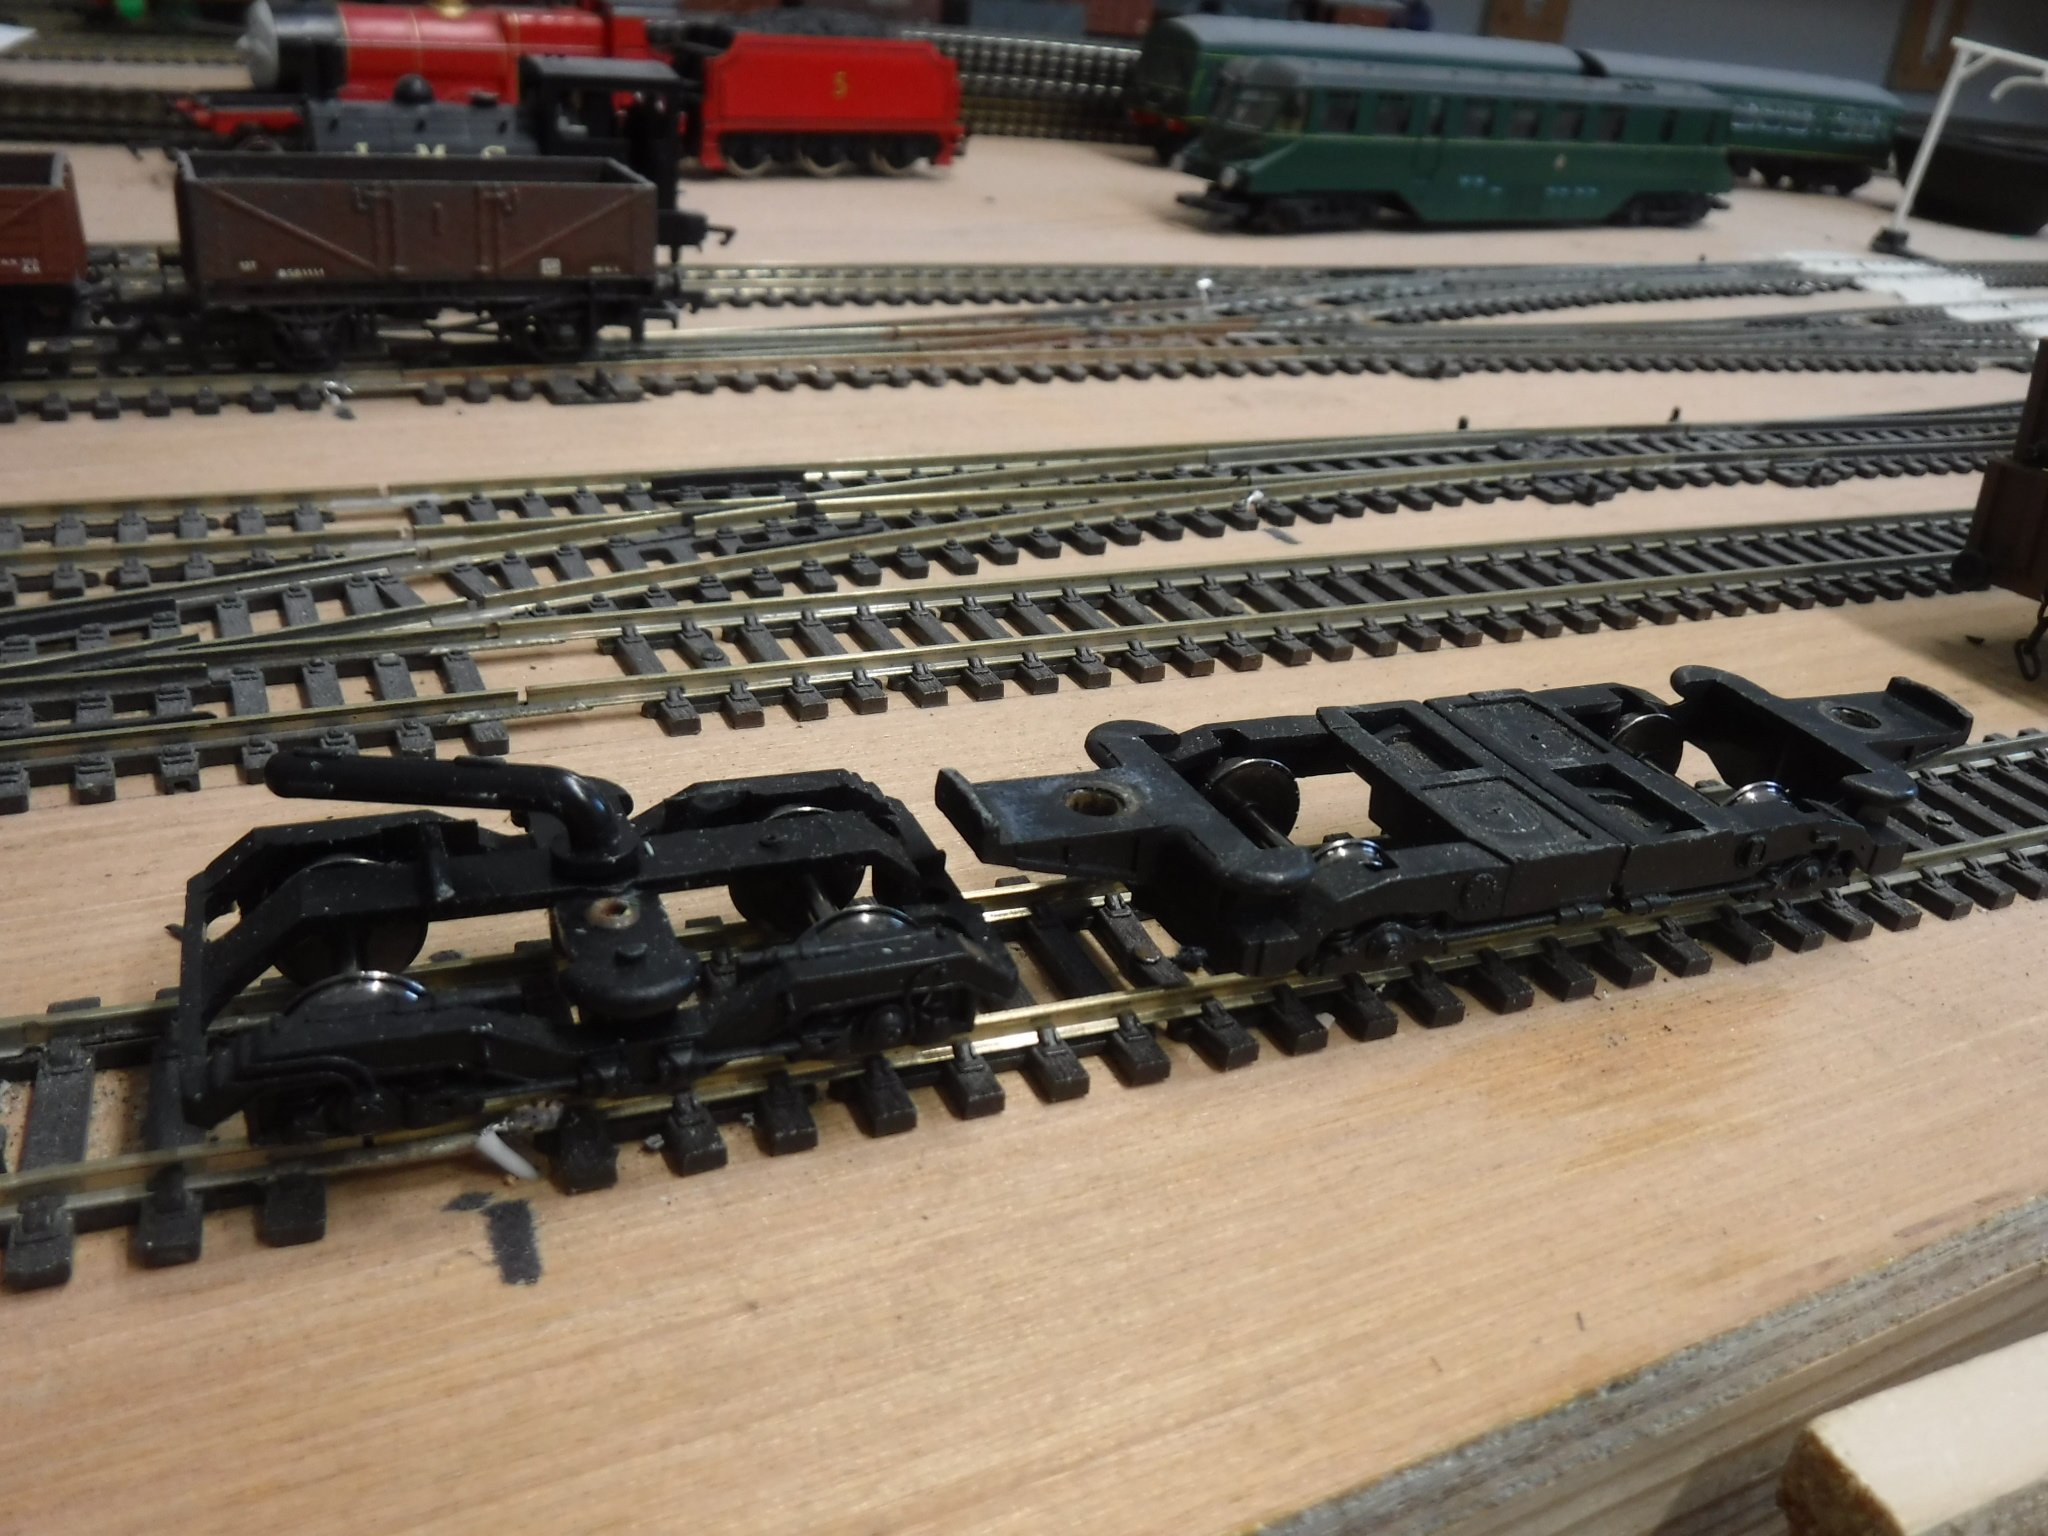
-
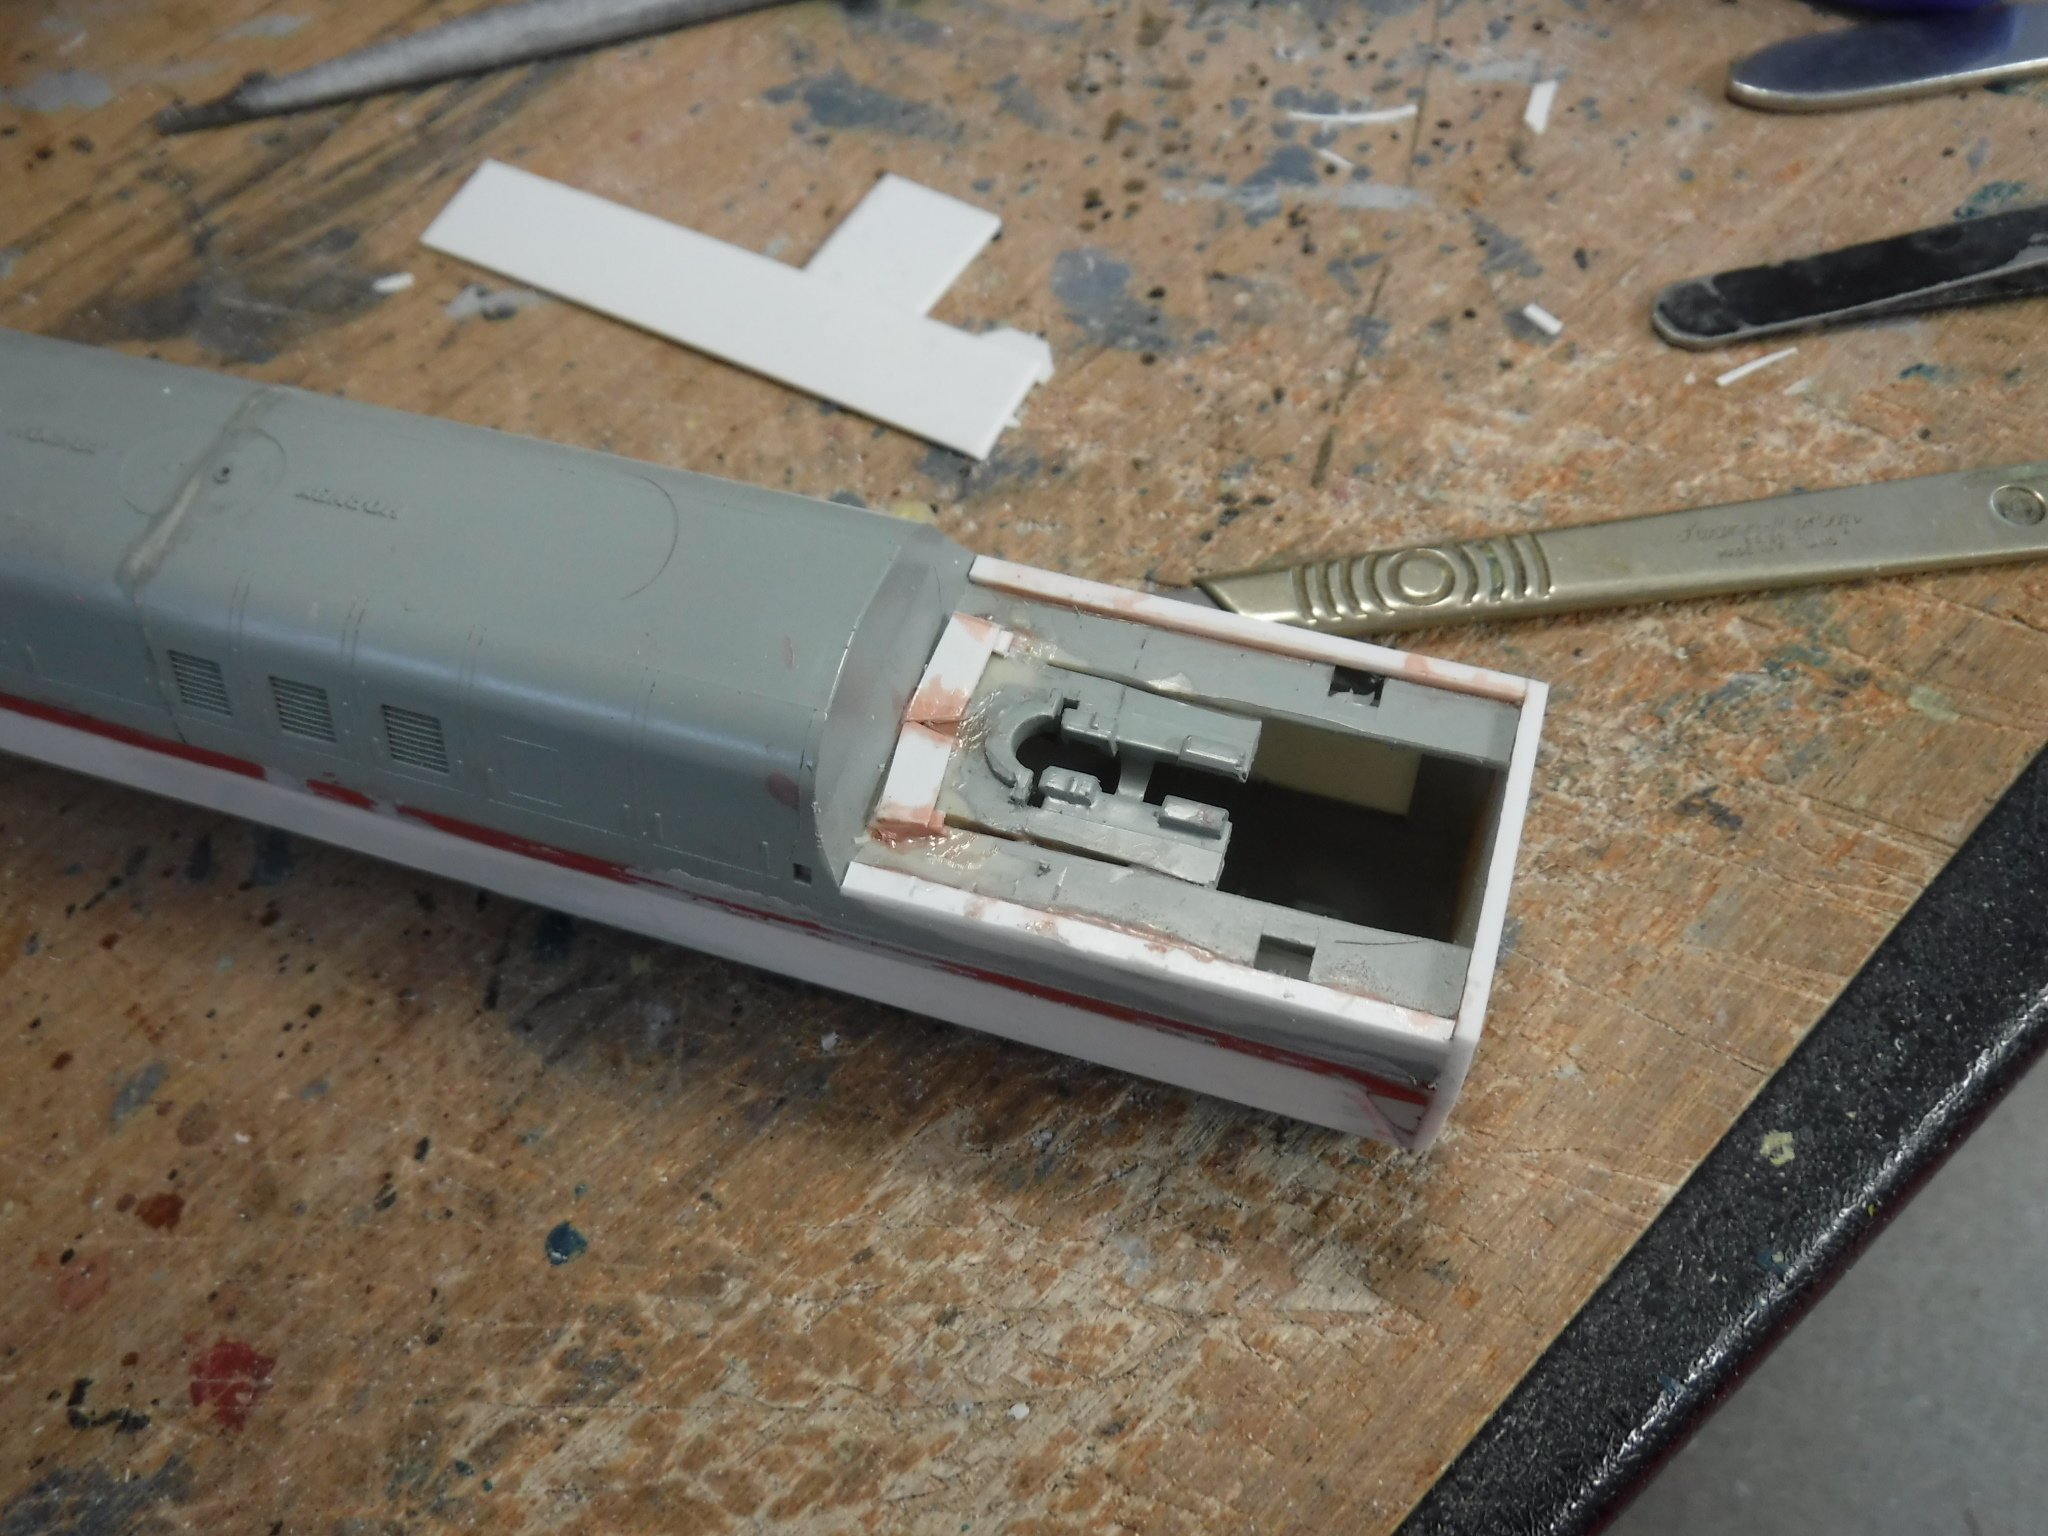
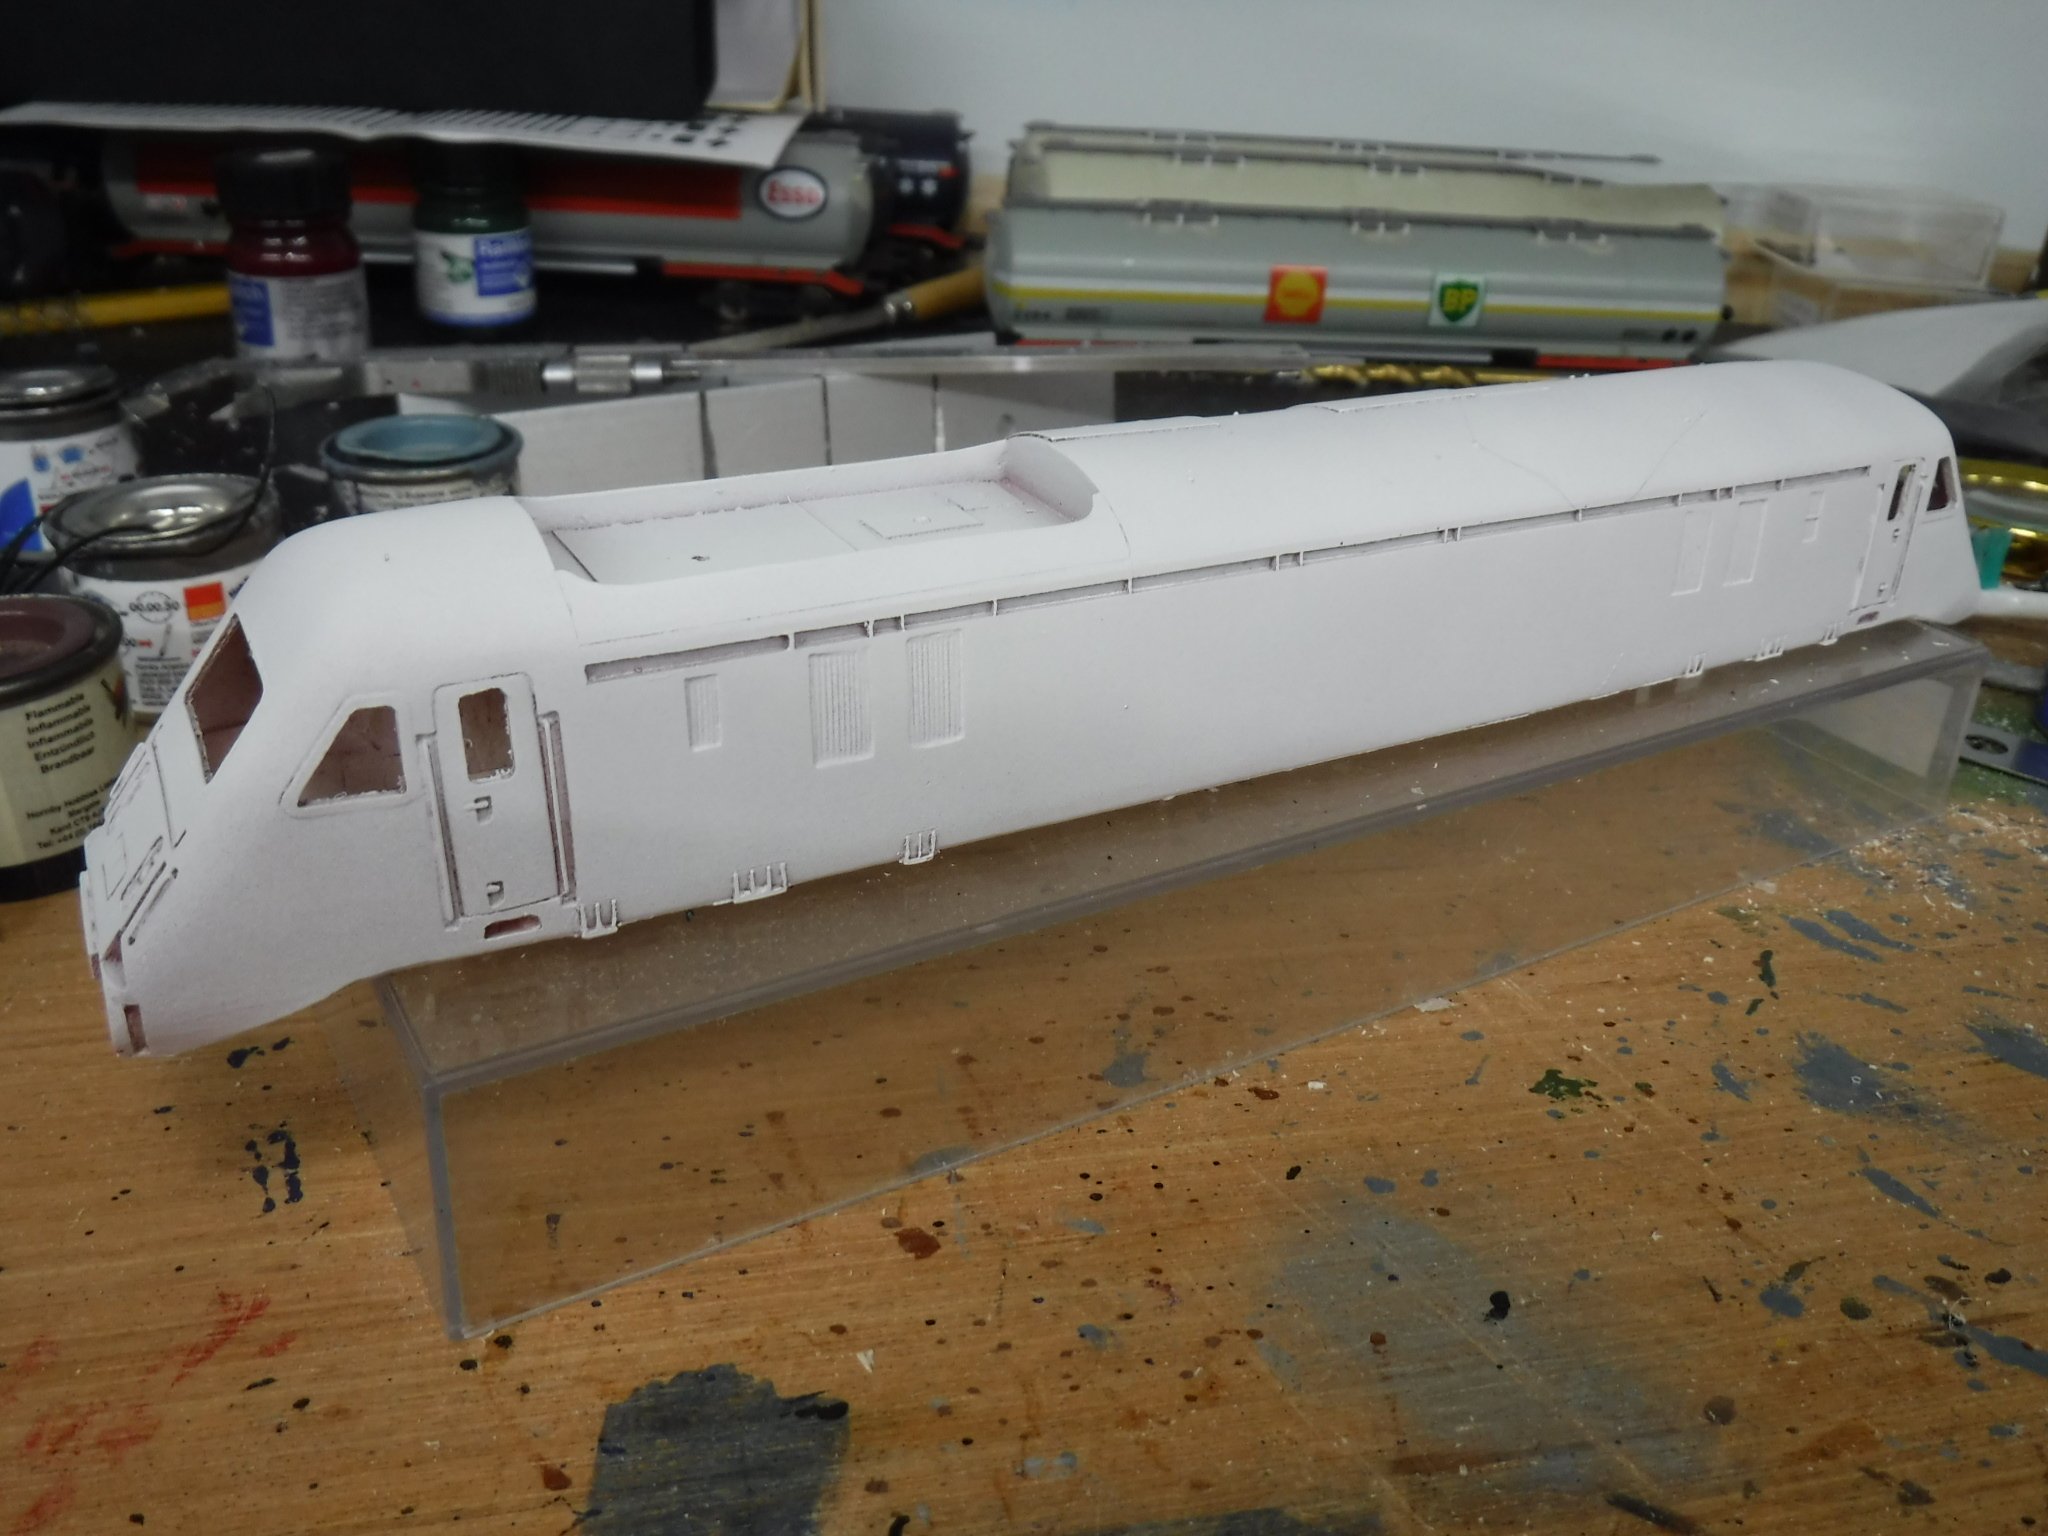
Yo Dudes, I've been steady away with the APT project, my eyes are still googly from doing postal van lining which still requires to be finished. So far I have been jointed, filled and sanded most of the cut and shut parts of the bodies although some bits will have to be done once they are fitted back together and ready for paint so those bits will have to wait for now. In preparation for fitting the coach bodies back together I have painted all the seats and internals ready for reassembly as one together I won't be able to get at them. These seat units will have to be cut a shut to fit the respective vehicles but at least they are painted. I'm not too fussed about the shade but they will look a lot better than pink and light blue plastic, I didn't paint the floor as it can't be seen once together. Painted seat units ready for cutting to fit appropriately. The next job was to remove all of the bogies to make working on the coach bodies easier and also so that spray painting will be easier. For paint colours I have chosen RAL 7043 Traffic Grey B and RAL 7032 Pebble Grey, Railtec transfers do a full set of APT markings along with red and white stripes so only the two shades of paint are required. Masking the windows is a challenge to be dealt with however I have an idea which may work. While the bogies were out I fitted new wheel sets of the correct size, these are 10mm Lowmac wheels from Peter's Spares. Bogies with the Peter's Spares 10mm Lowmac wheels fitted to them. The original Hornby APT was a bit square looking at the cab ends, the rest of it was pretty well proportioned, and so I took the step of filing one of the cab ends to improve its shape. It came out very well and much better captures the look of the real thing comparing well with the new Hornby model. Fortunately the front corners of the nose end are quite a decent thickness and allow for a reduction of almost 3mm across the front edge. I shall get all of the cabs to a similar condition as the shewn below and then I shall do the relief details around the head lights. I plan to fit clear glazing to the cabs and so I also filed a taper the area around the cab side windows. The windscreen requires a slight enlargement which is also on the job list. Juxtaposition of the new Hornby, old Hornby modified, and the old Hornby original. Side profile view. End on view. Gibbo.