gibbo675
-
Posts
205 -
Joined
-
Last visited
-
Days Won
7
Content Type
Profiles
Forums
Events
Gallery
Blogs
Everything posted by gibbo675
-
Hi Mick, It will be available freely on the internet so that we may all be benefit from what it has to say. It will be about your duties as the executor of your own will as a living man instead of acting as an attorney upon your own behalf when executing your own will. All things are done by way of consent and it is how that consent is garnered and thereafter who you are actually acting on behalf of when claiming property that is then not yours. I am well aware that this all sounds completely bonkers but it actually most important to all of us, and also why the world is somewhat upside down generally. Gibbo.
-
Hi Leslie, If only you knew ! Here is are excerpts from the book I'm writing: "Therefore, in your acceptance of title you unwittingly become a servant of Crown Corporation as an administrator of the lowest rank of Crown Corporation’s holdings, and in doing so you are not any longer the administrator of your own estate. Instead you are acting as attorney on your own behalf as the Kings servant and as such you are automatically subject to all of the Civil Statutes of the Crown Corporation’s governance structure. The government that is headed by the King is actually nothing more than the CEO of Crown Corporation’s operations in the United Kingdom. When performing to contract in acting as an administrator of the King’s will you are subject to the particulars of the contract, the government statutes. This means that you are then also personally liable to pay the charges that are levied by the Crown according to the entitlement of the rank and privilege of the title claimed. As noted above most of us claim to be of the lowest rank offered that of MR which has the lowest cost of any attorney acting in court. Should you may make a claim against the Crown Corporation for any reason you see fit from, access to credit to fund a venture, or to settle either a civil or criminal action, then charges for your attorneys work apply to you privately for the privilege of publicly accessing the wealth held by the Crown Corporation for the benefit of all of us. These charges are in the form of taxes, banking charges, prescription fees, parking charges, council tax and any and all other associated government charges." Gibbo.
-
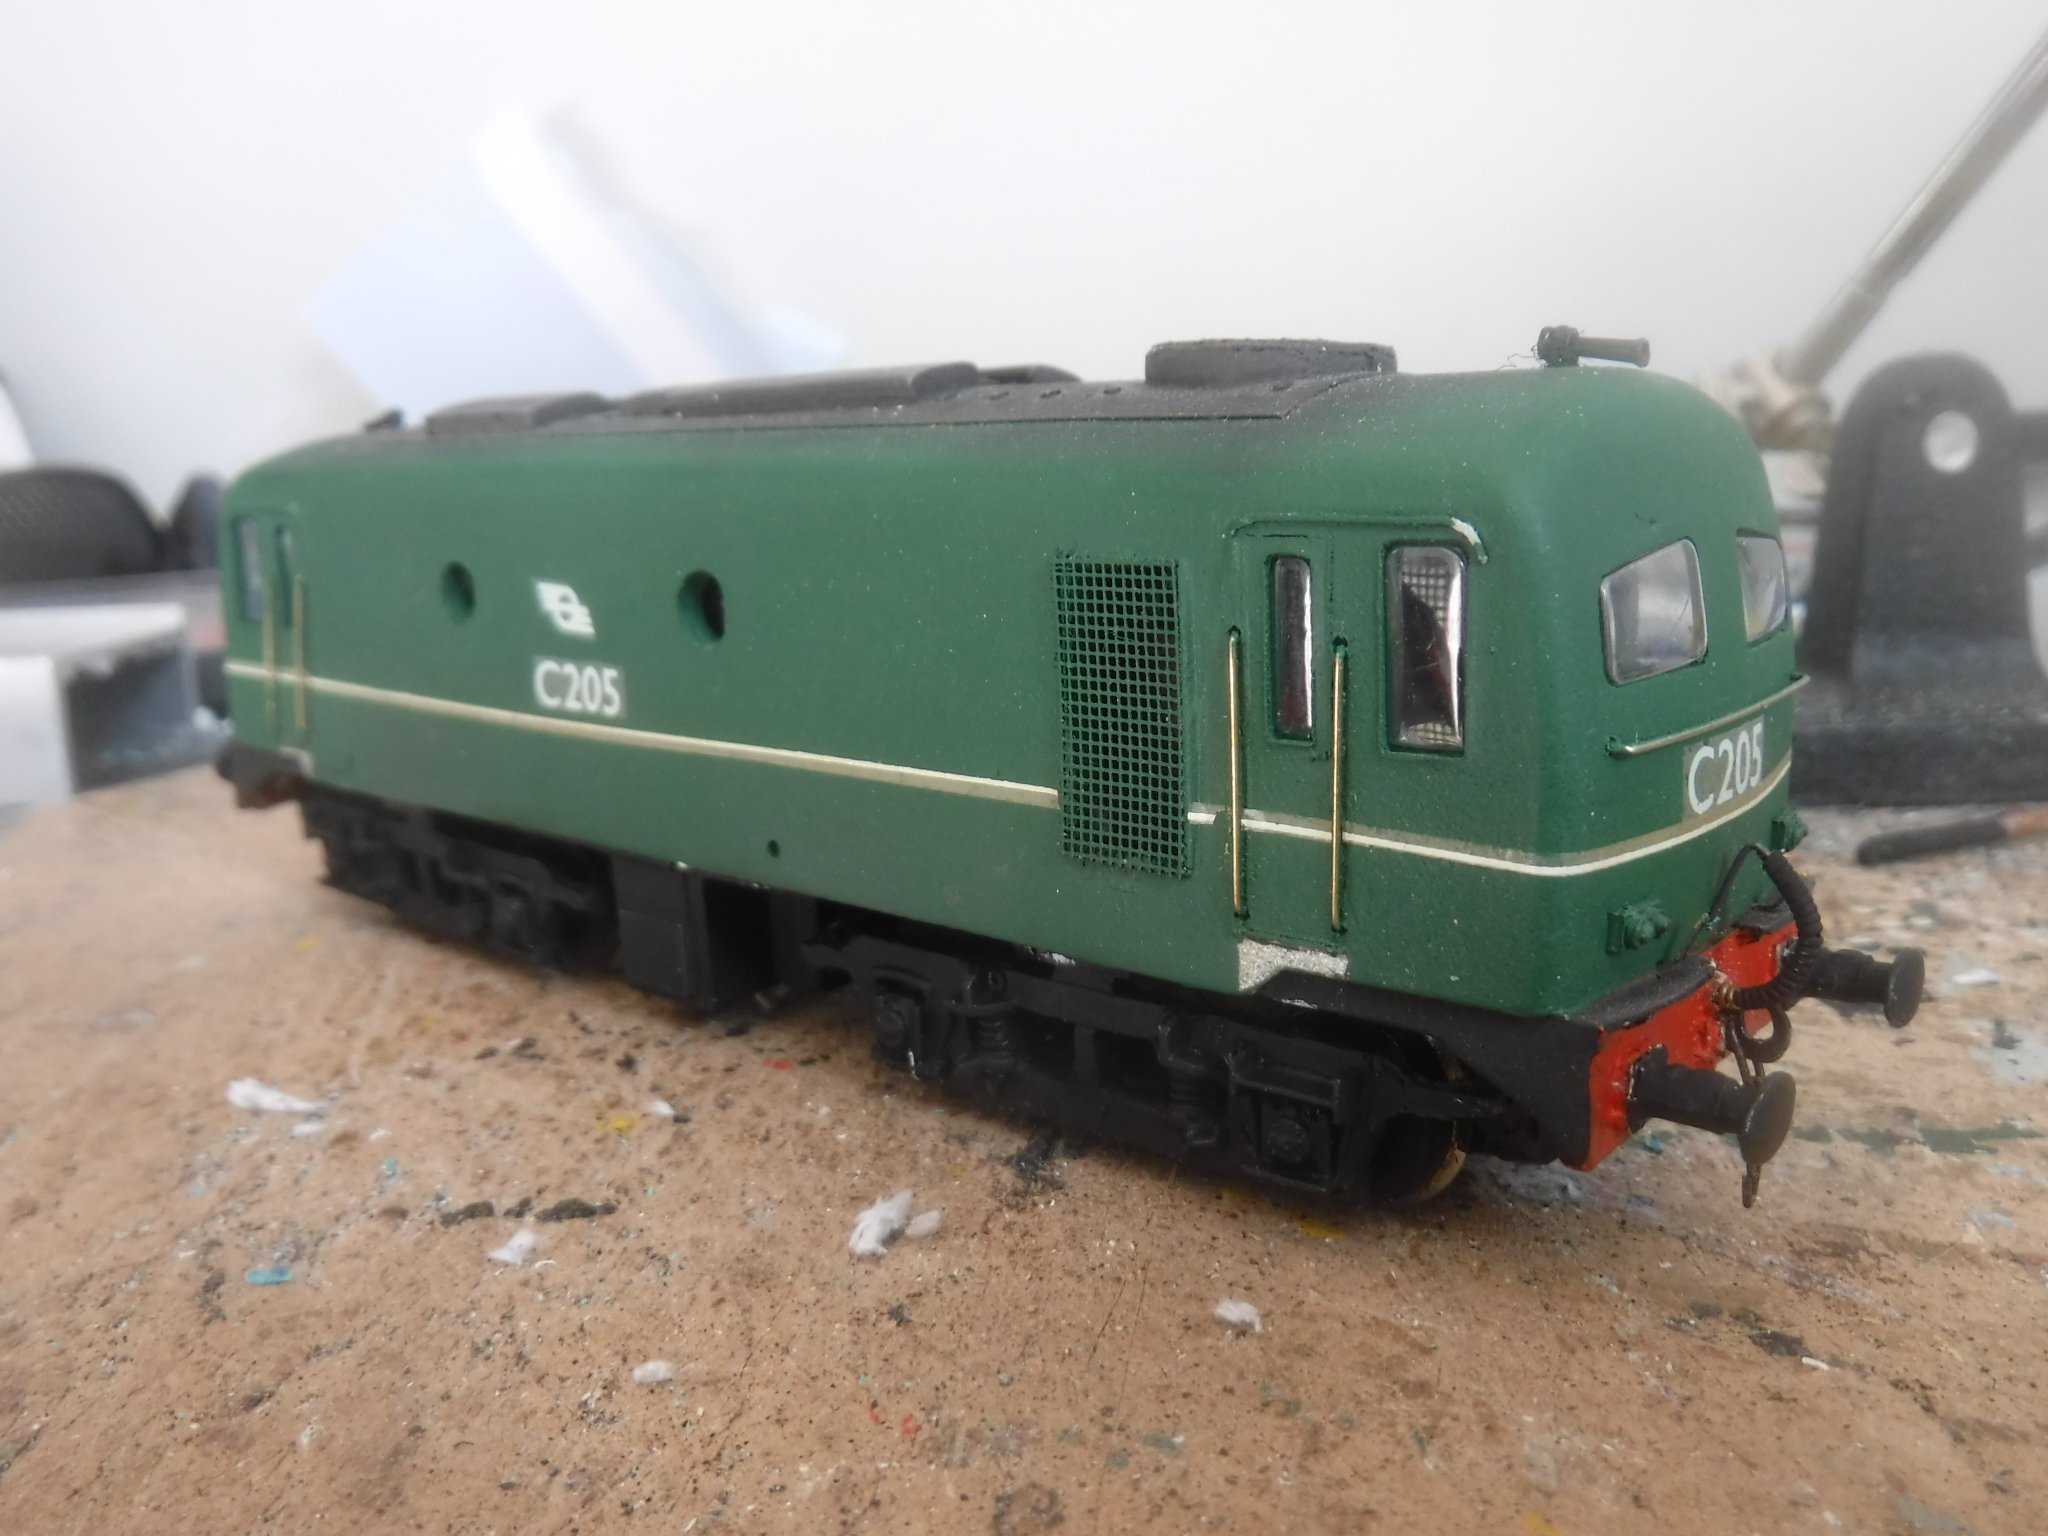
Hi Chaps, A spot of painting today, the colours I used were Ford Ivory White and Skoda Pacific Blue. The blue is perhaps a tad dark but it will have to do as first its all I had and second its done now ! Gibbo.

-
Hi Chaps, A spot of painting today, the colours I used were Ford Ivory White and Skoda Pacific Blue. The blue is perhaps a tad dark but it will have to do as first its all I had and second its done now ! Gibbo.
- 86 replies
-
- 11
-

-
Shcwubbery ? Why not a Whrockewry ?
-
Hi Chaps, I can't see any class 20's, confused. Gibbo.
-
British locos and stock that can be disguised as Irish
gibbo675 replied to Westcorkrailway's topic in Irish Models
Hi there Galteemore, Here are some of mine to be going on with, all built from Hornby Stanier coaches. They are all featured on my ongoing thread along with all sorts of other projects. GNRI L14 open third brake. GNRI K15 open third. GSR Bredin corridor third. GNRI F16 corridor composite. Gibbo.
-
British locos and stock that can be disguised as Irish
gibbo675 replied to Westcorkrailway's topic in Irish Models
Hi There HT, Interesting thoughts regarding Hymek bogies, I used Hornby Hymek bogies for a BR class 82 which was a Trix body conversion. I also changed the wheels out for larger ones that I acquired form Peter's Spares which were listed as Hornby tender drive wheels, I had to make sure that got the correct ones in that some are insulated and some plain metal and some are insulated with traction tyre grooves. As for cutting and shutting locomotive bodies I've never had a problem with the grade of plastic that Hornby use as it generally takes solvents really well. I usually fit a backing strip made form either .030" or .040" plasticard as well. Gibbo. -
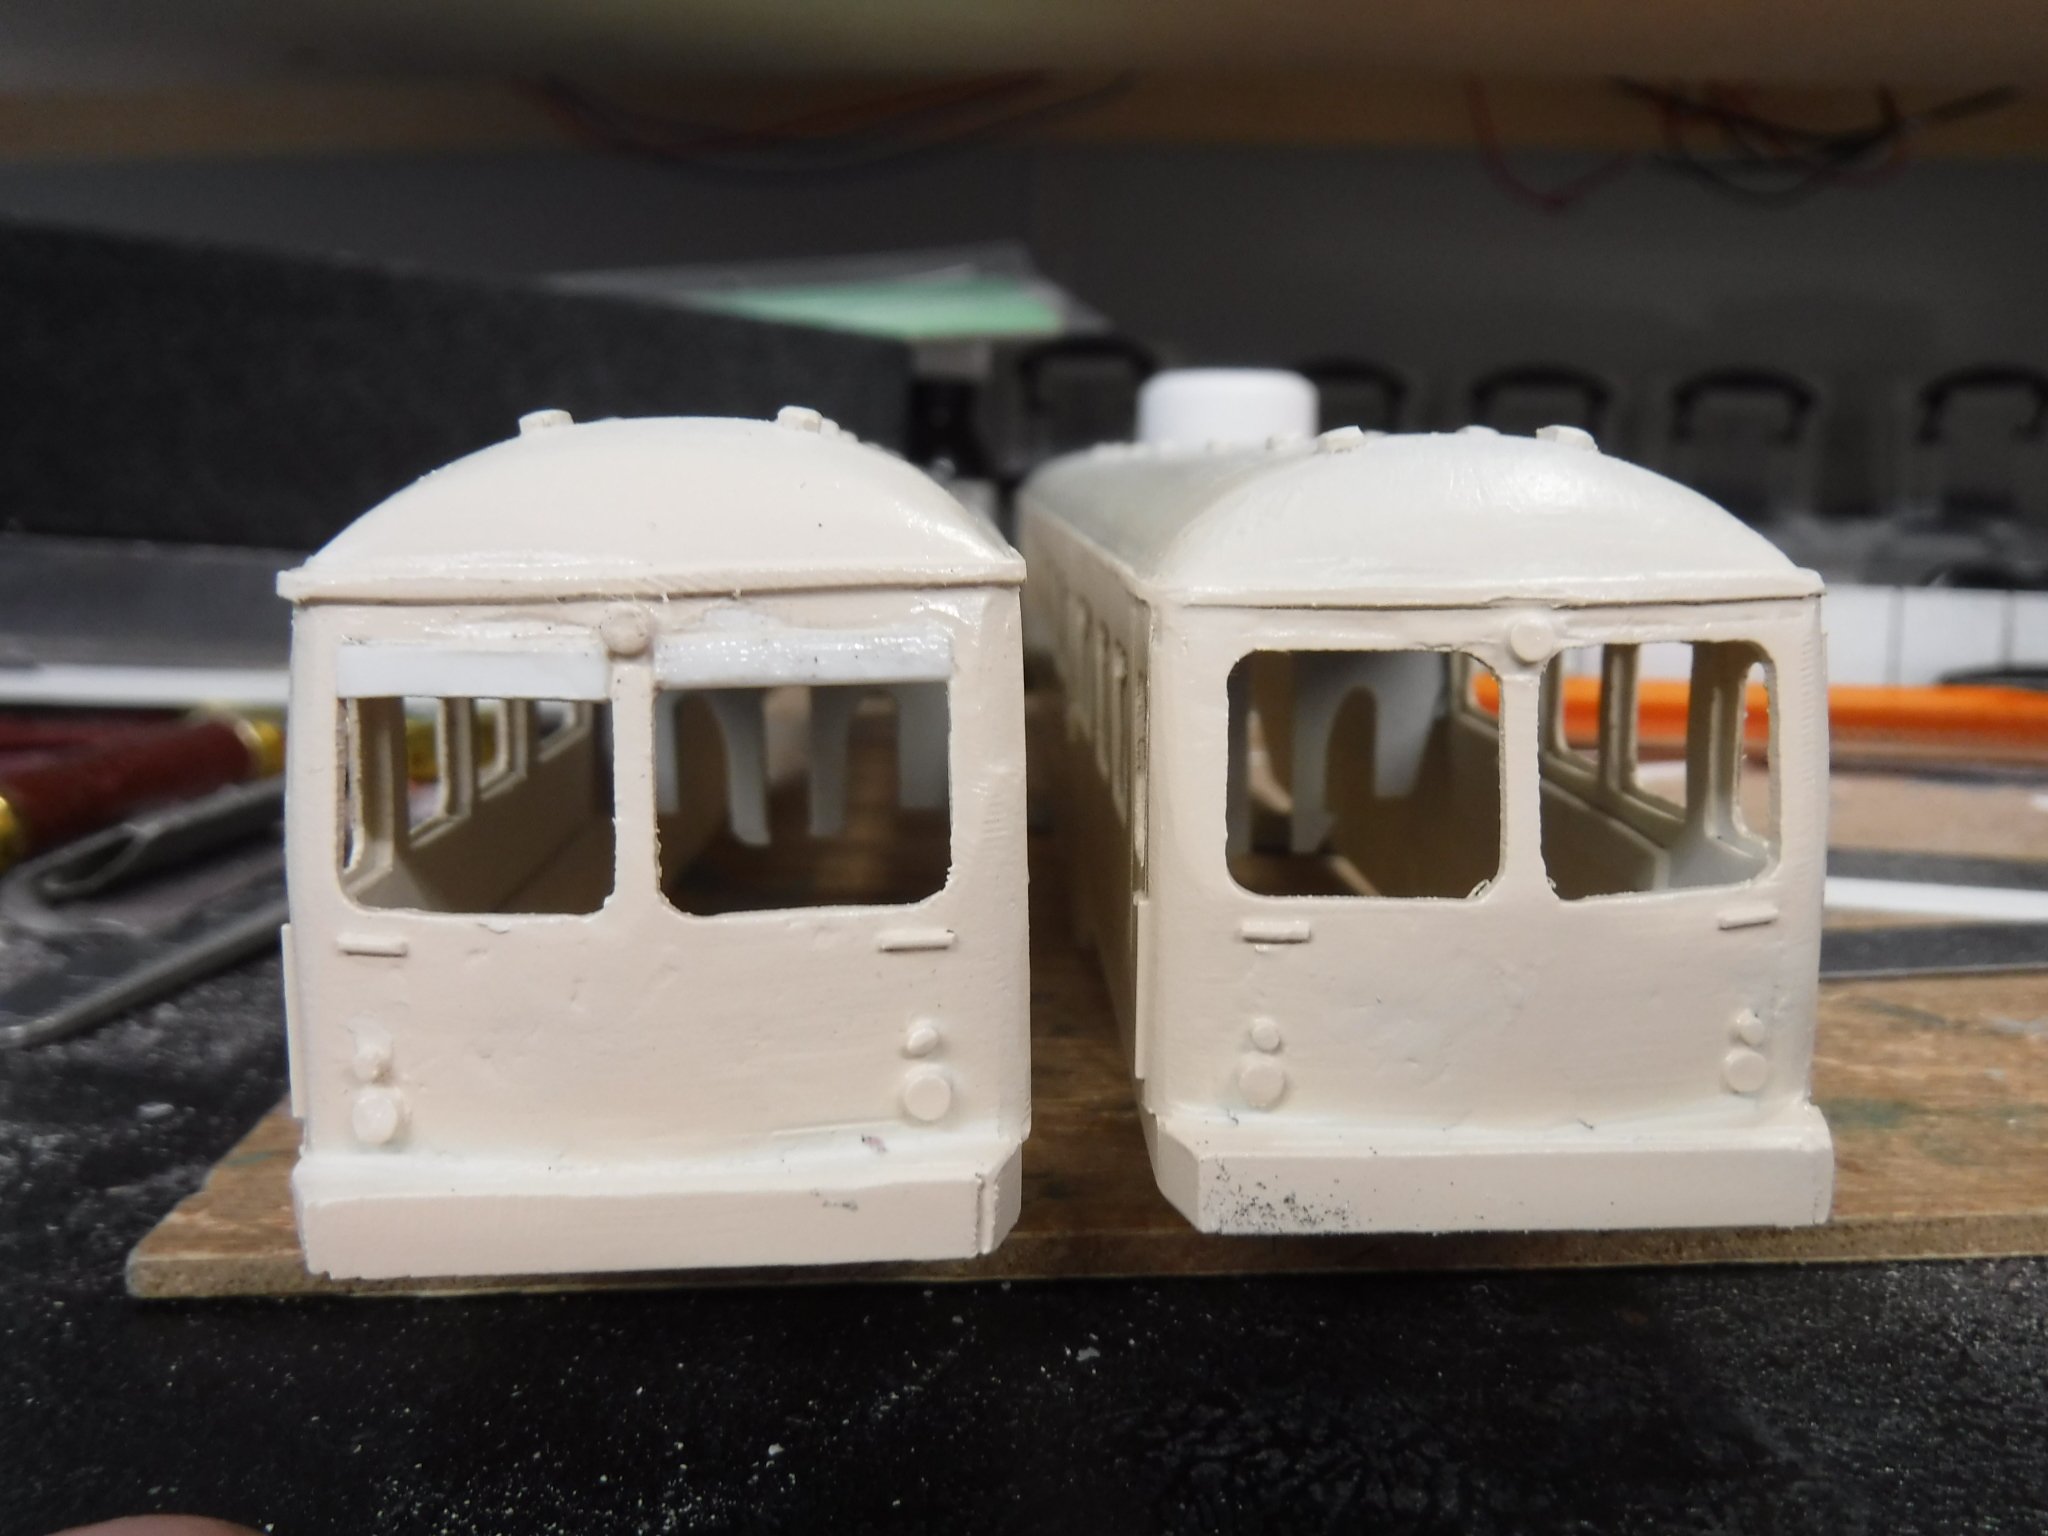
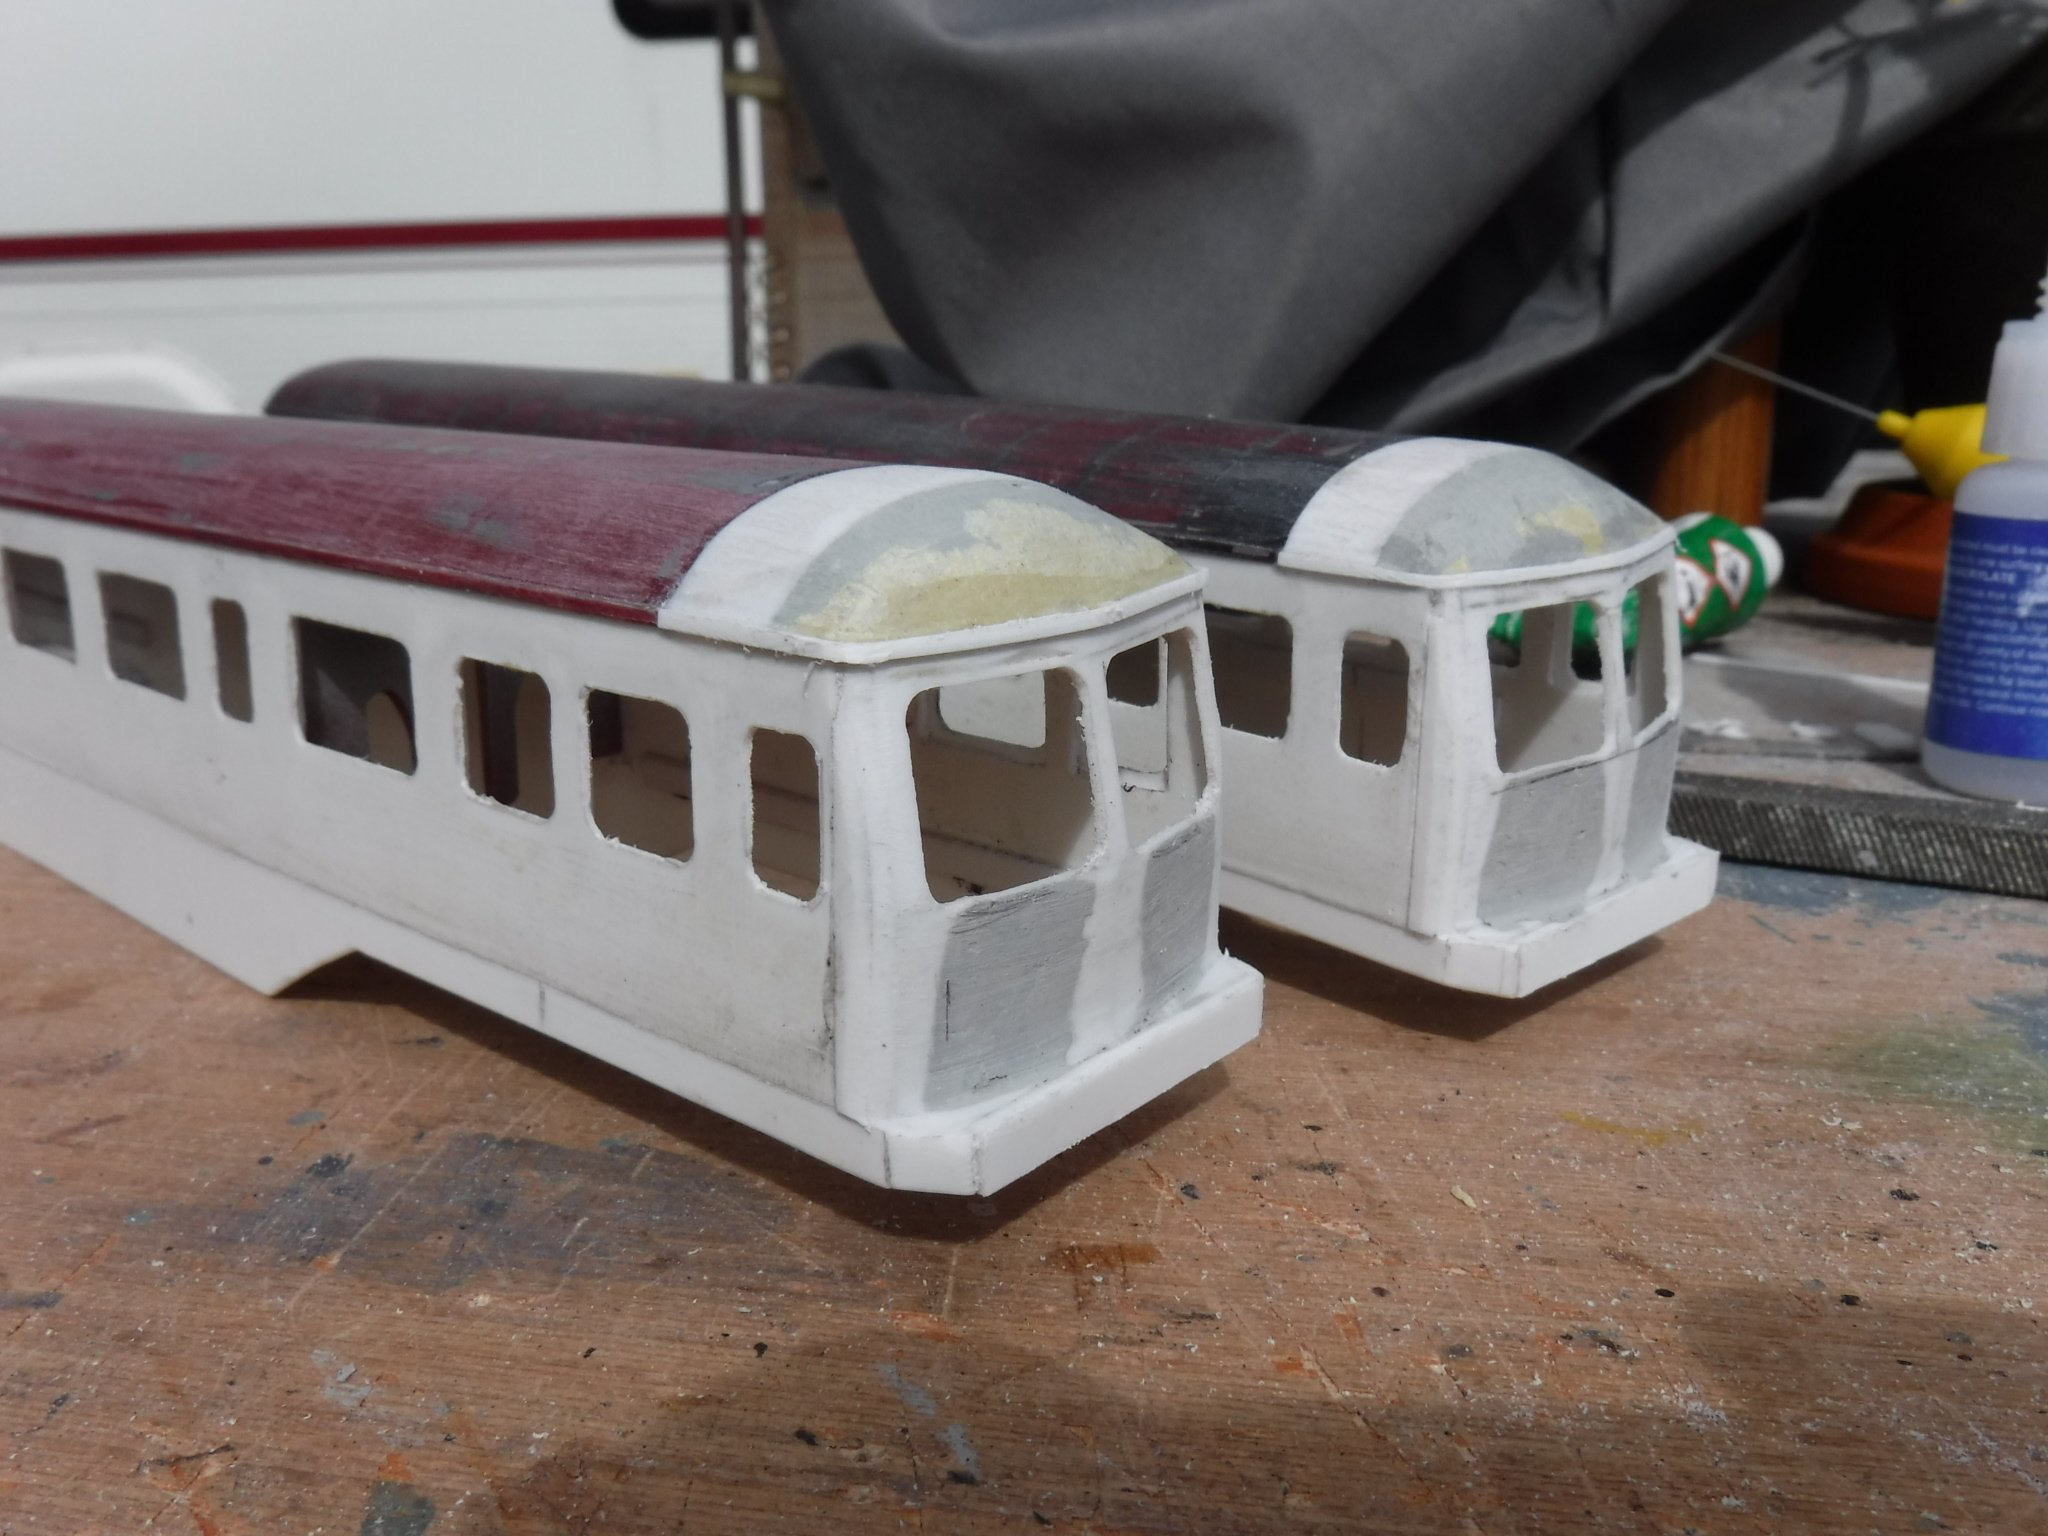
Hi Folks, I've now altered the cab front windows and I'm much happier with how they now look. The model captures far better the look of the prototype. The windows have had fillets fitted into their tops and outside edges and when filed back .030"-.035" is left at the top and .045"-.050" is left at the sides. I may apply a little more filler as the cab fronts are not as smooth as I would like. Gibbo.
-
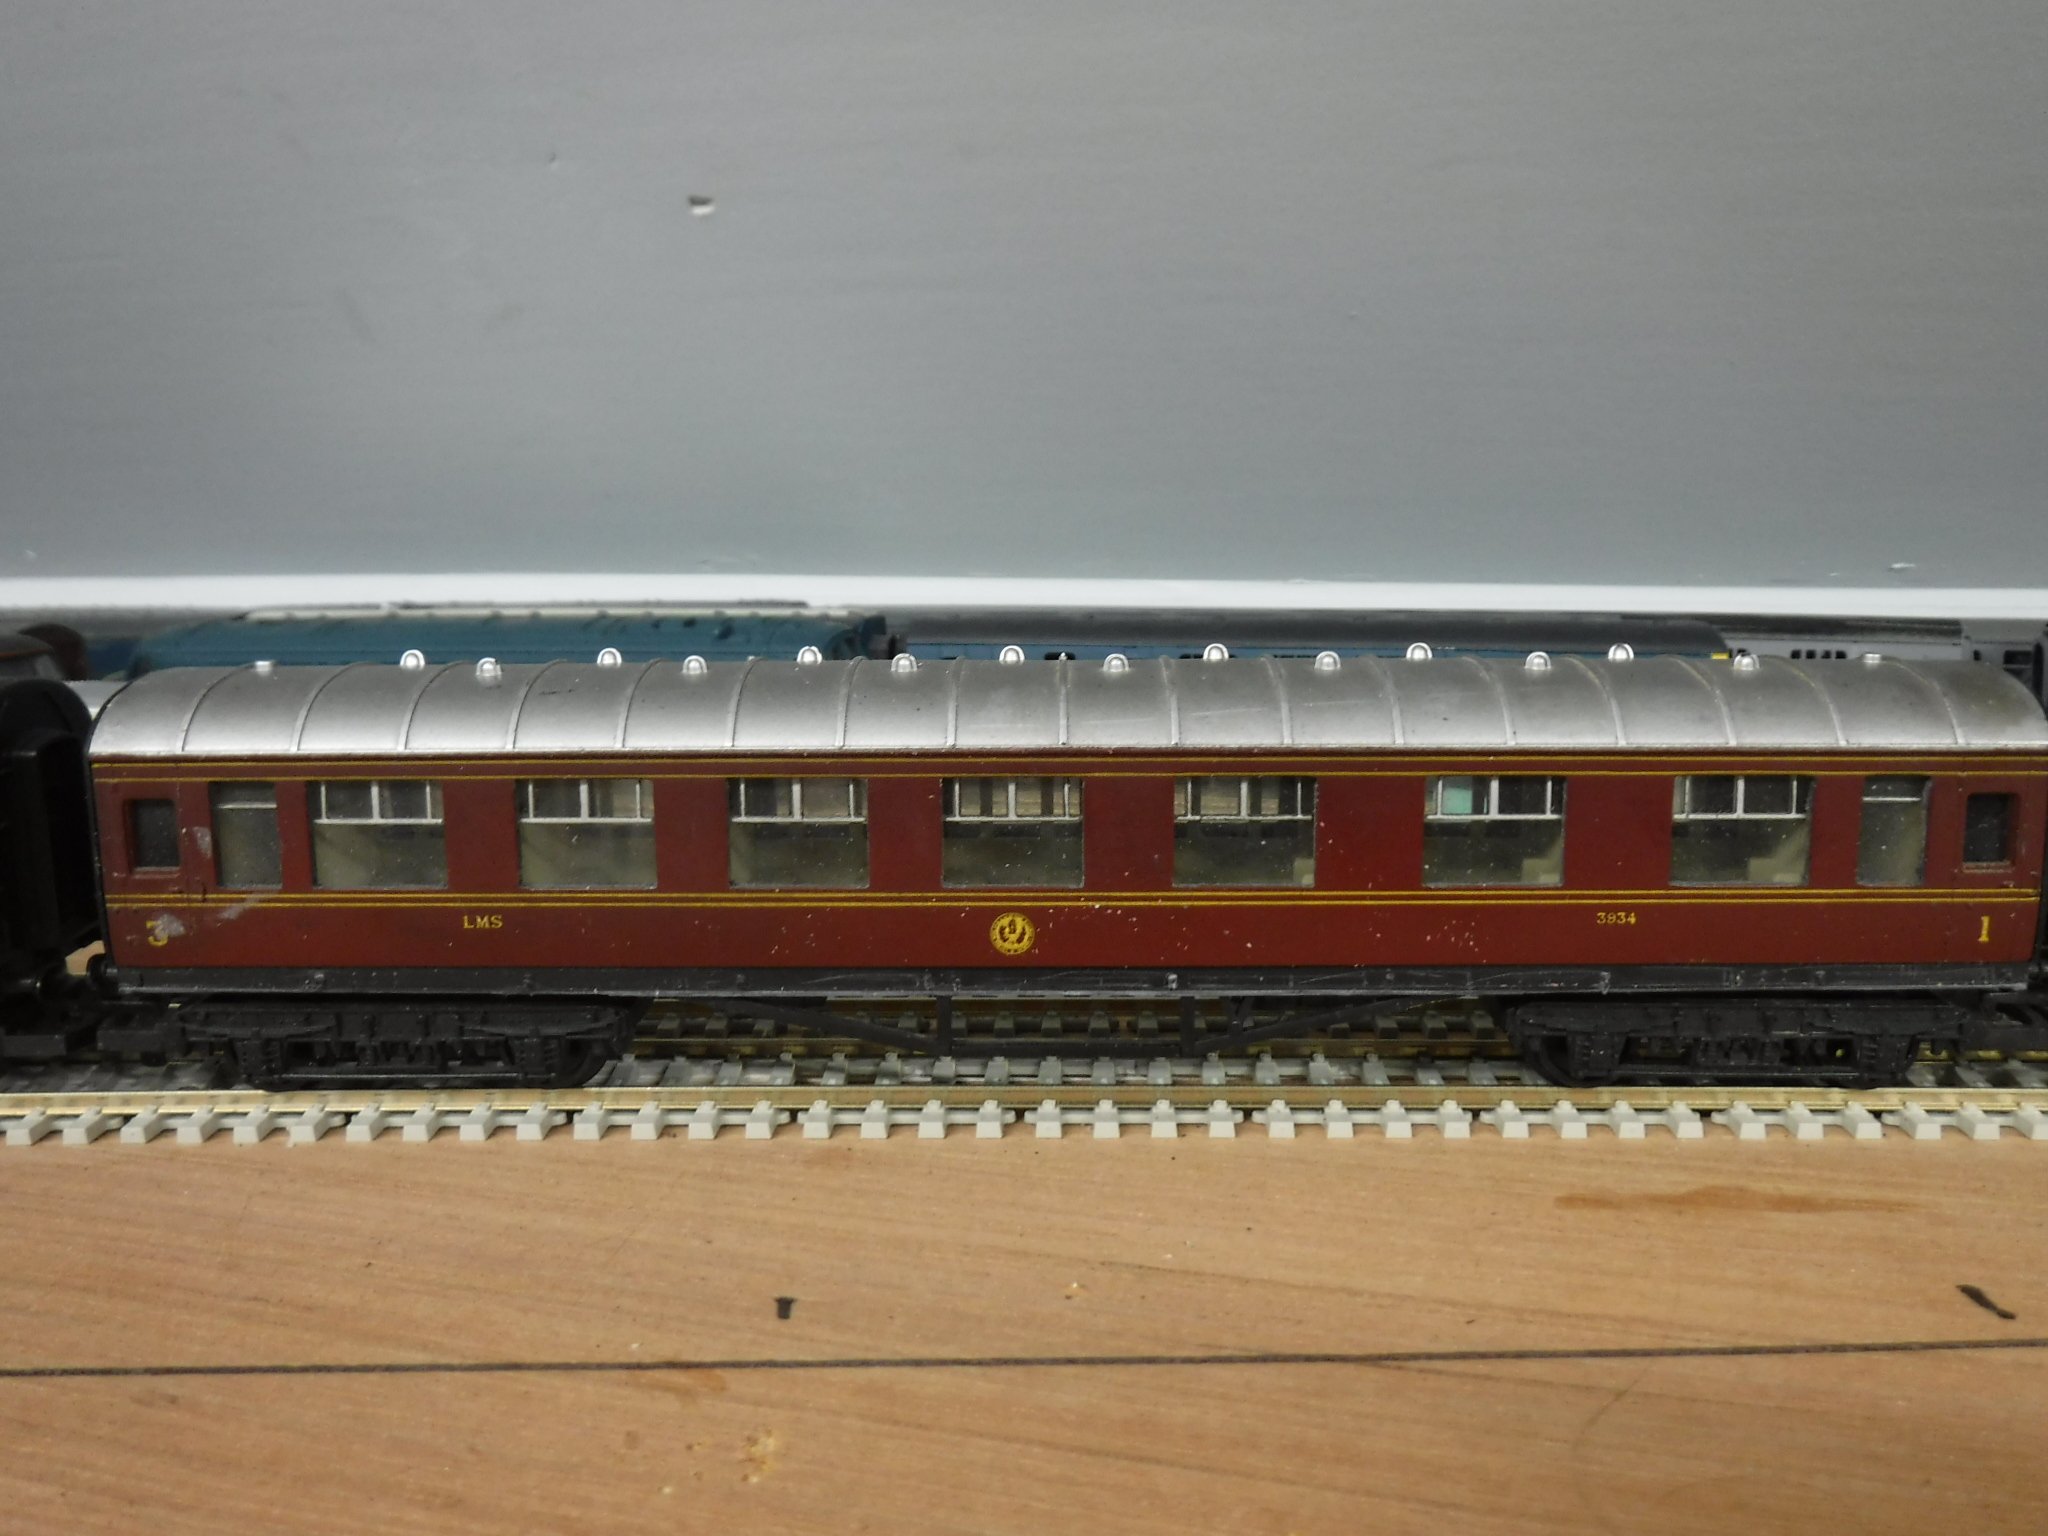
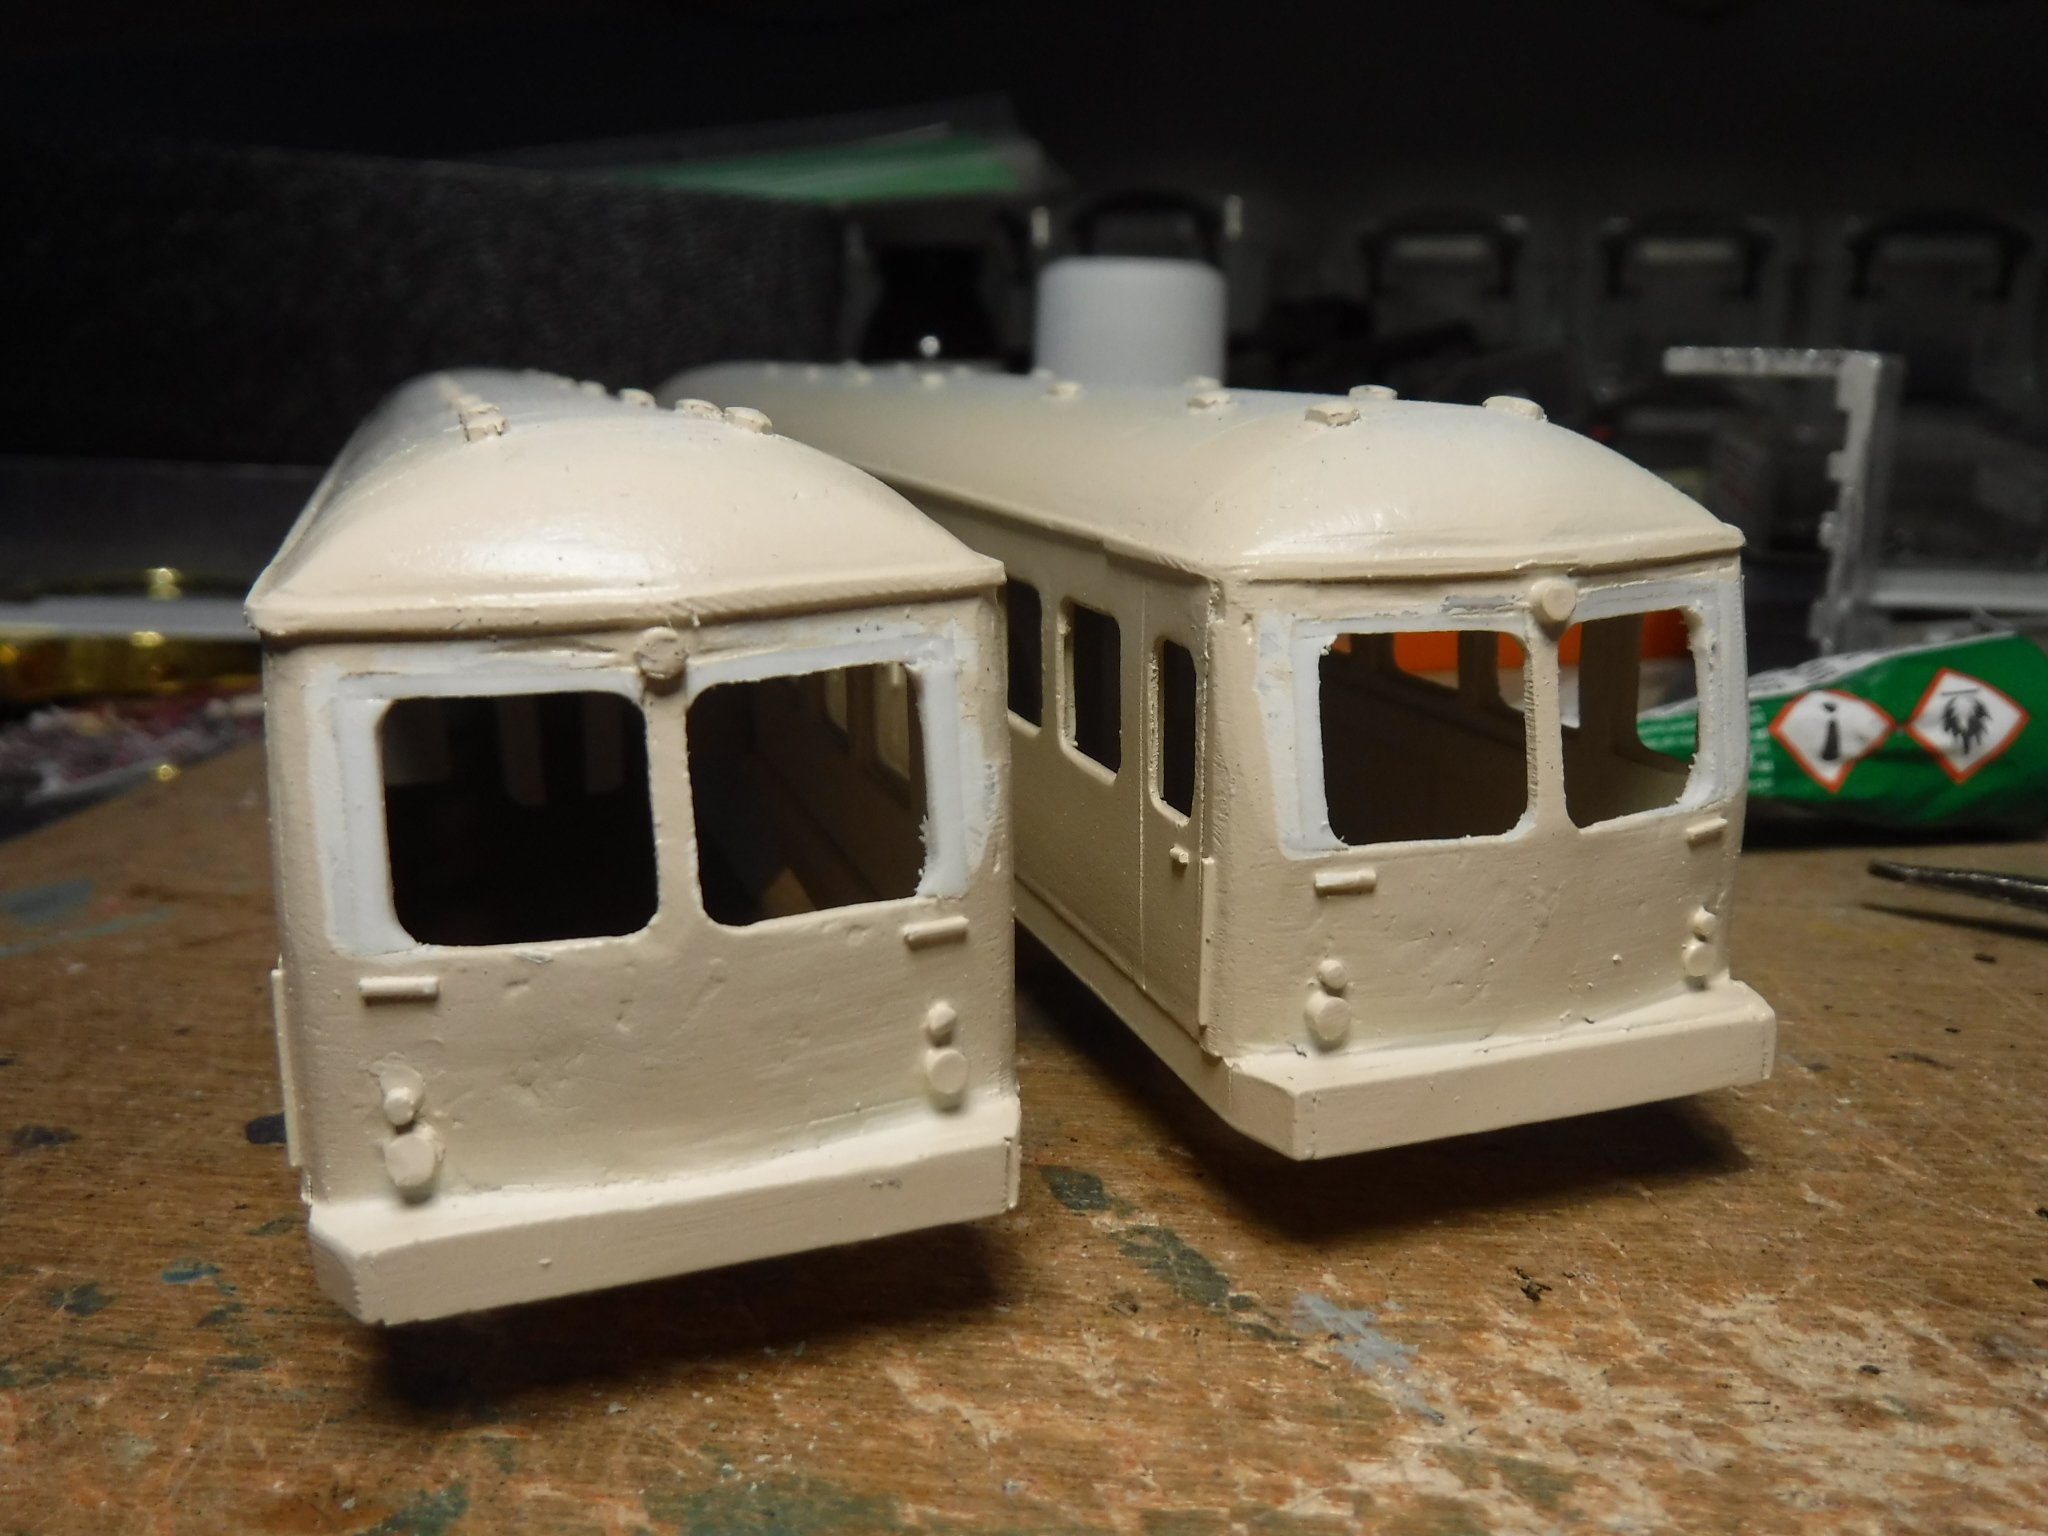
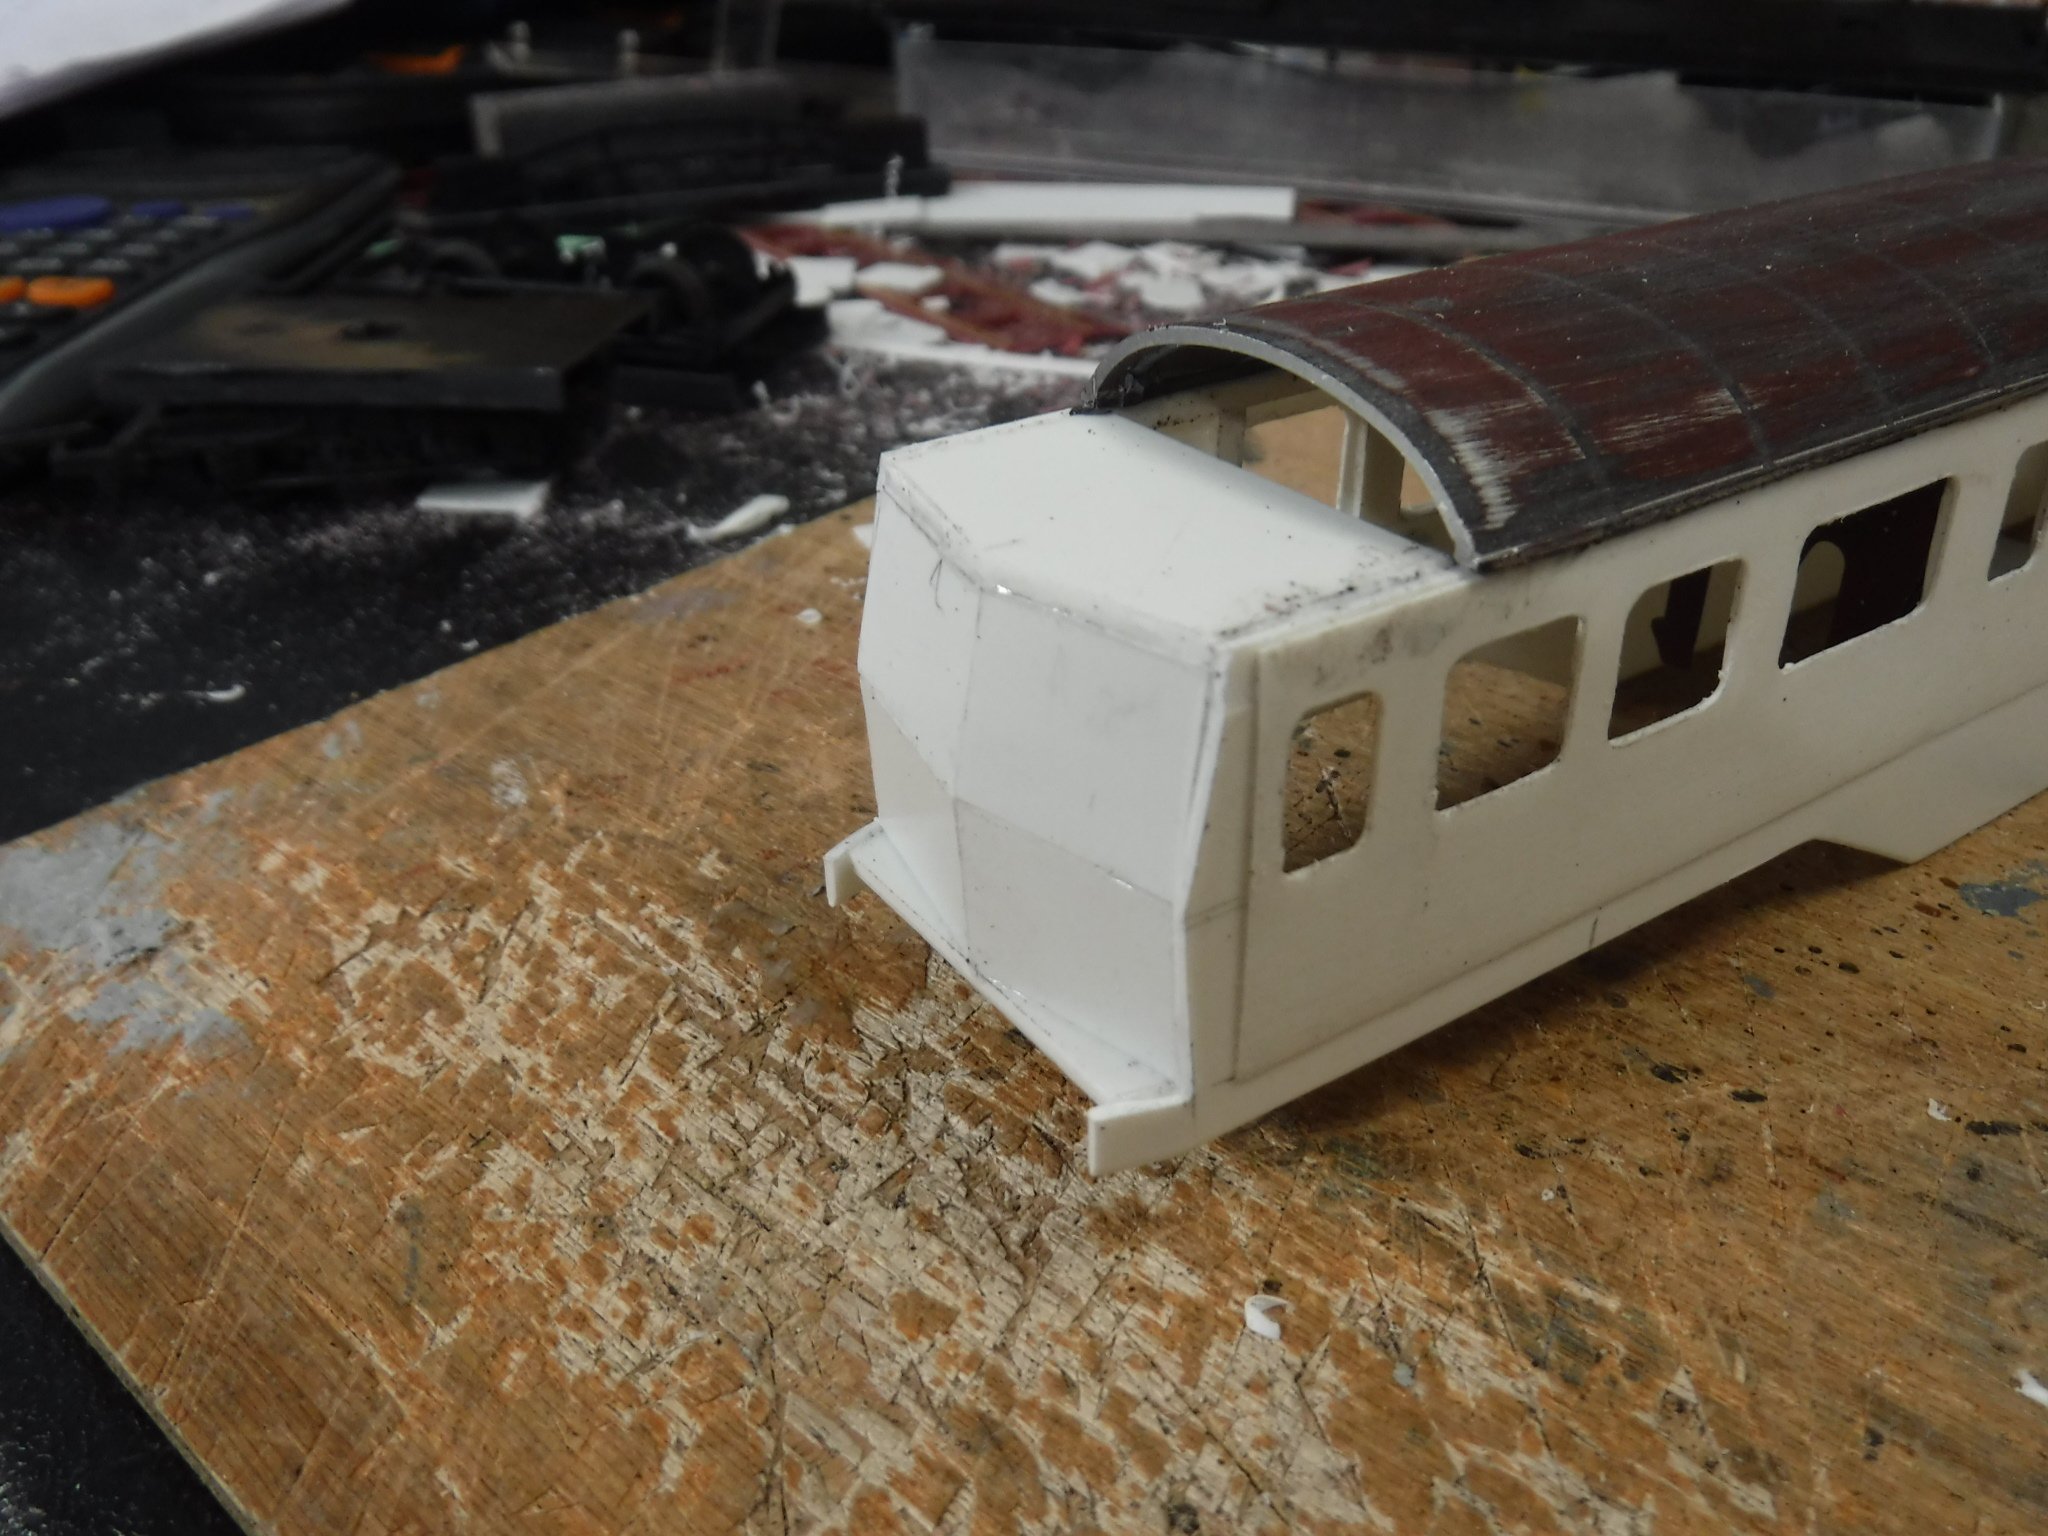
Hi Folks, I've been looking the the above photograph of the front end and I've decided that the windows are too high and make the cab front look too tall. Despite the shiny new paint I have taken the decision to reduce the size of the windows by about .035" which ought to change the appearance of the cab front's aspect ratio from tall to wide. The one on the left has had fillets glued in place and the one on the right is as yet unaltered. Having built DMU cab fronts before I know that sizes and shapes are rather subtle and that very small changes make huge differences in the appearance of the finished article. A bit of filing and a squirt of paint should make all the difference in time. Gibbo.
-
A 3d printed 800 class for 00 (and a WLWR goods loco)
gibbo675 replied to Killian Keane's topic in Irish Models
Hi Folks, It is my guess that on the majority of British locomotives as cabs became more commodious, boilers became larger and higher boiler pressures higher and therefore greater then the lagging of the doorplate became the norm. I do know that some North American railways removed lagging of the door plates in winter to keep the cabs warm, however the winter weather in parts of the USA and Canada is somewhat colder than Britain and Ireland. Gibbo. -
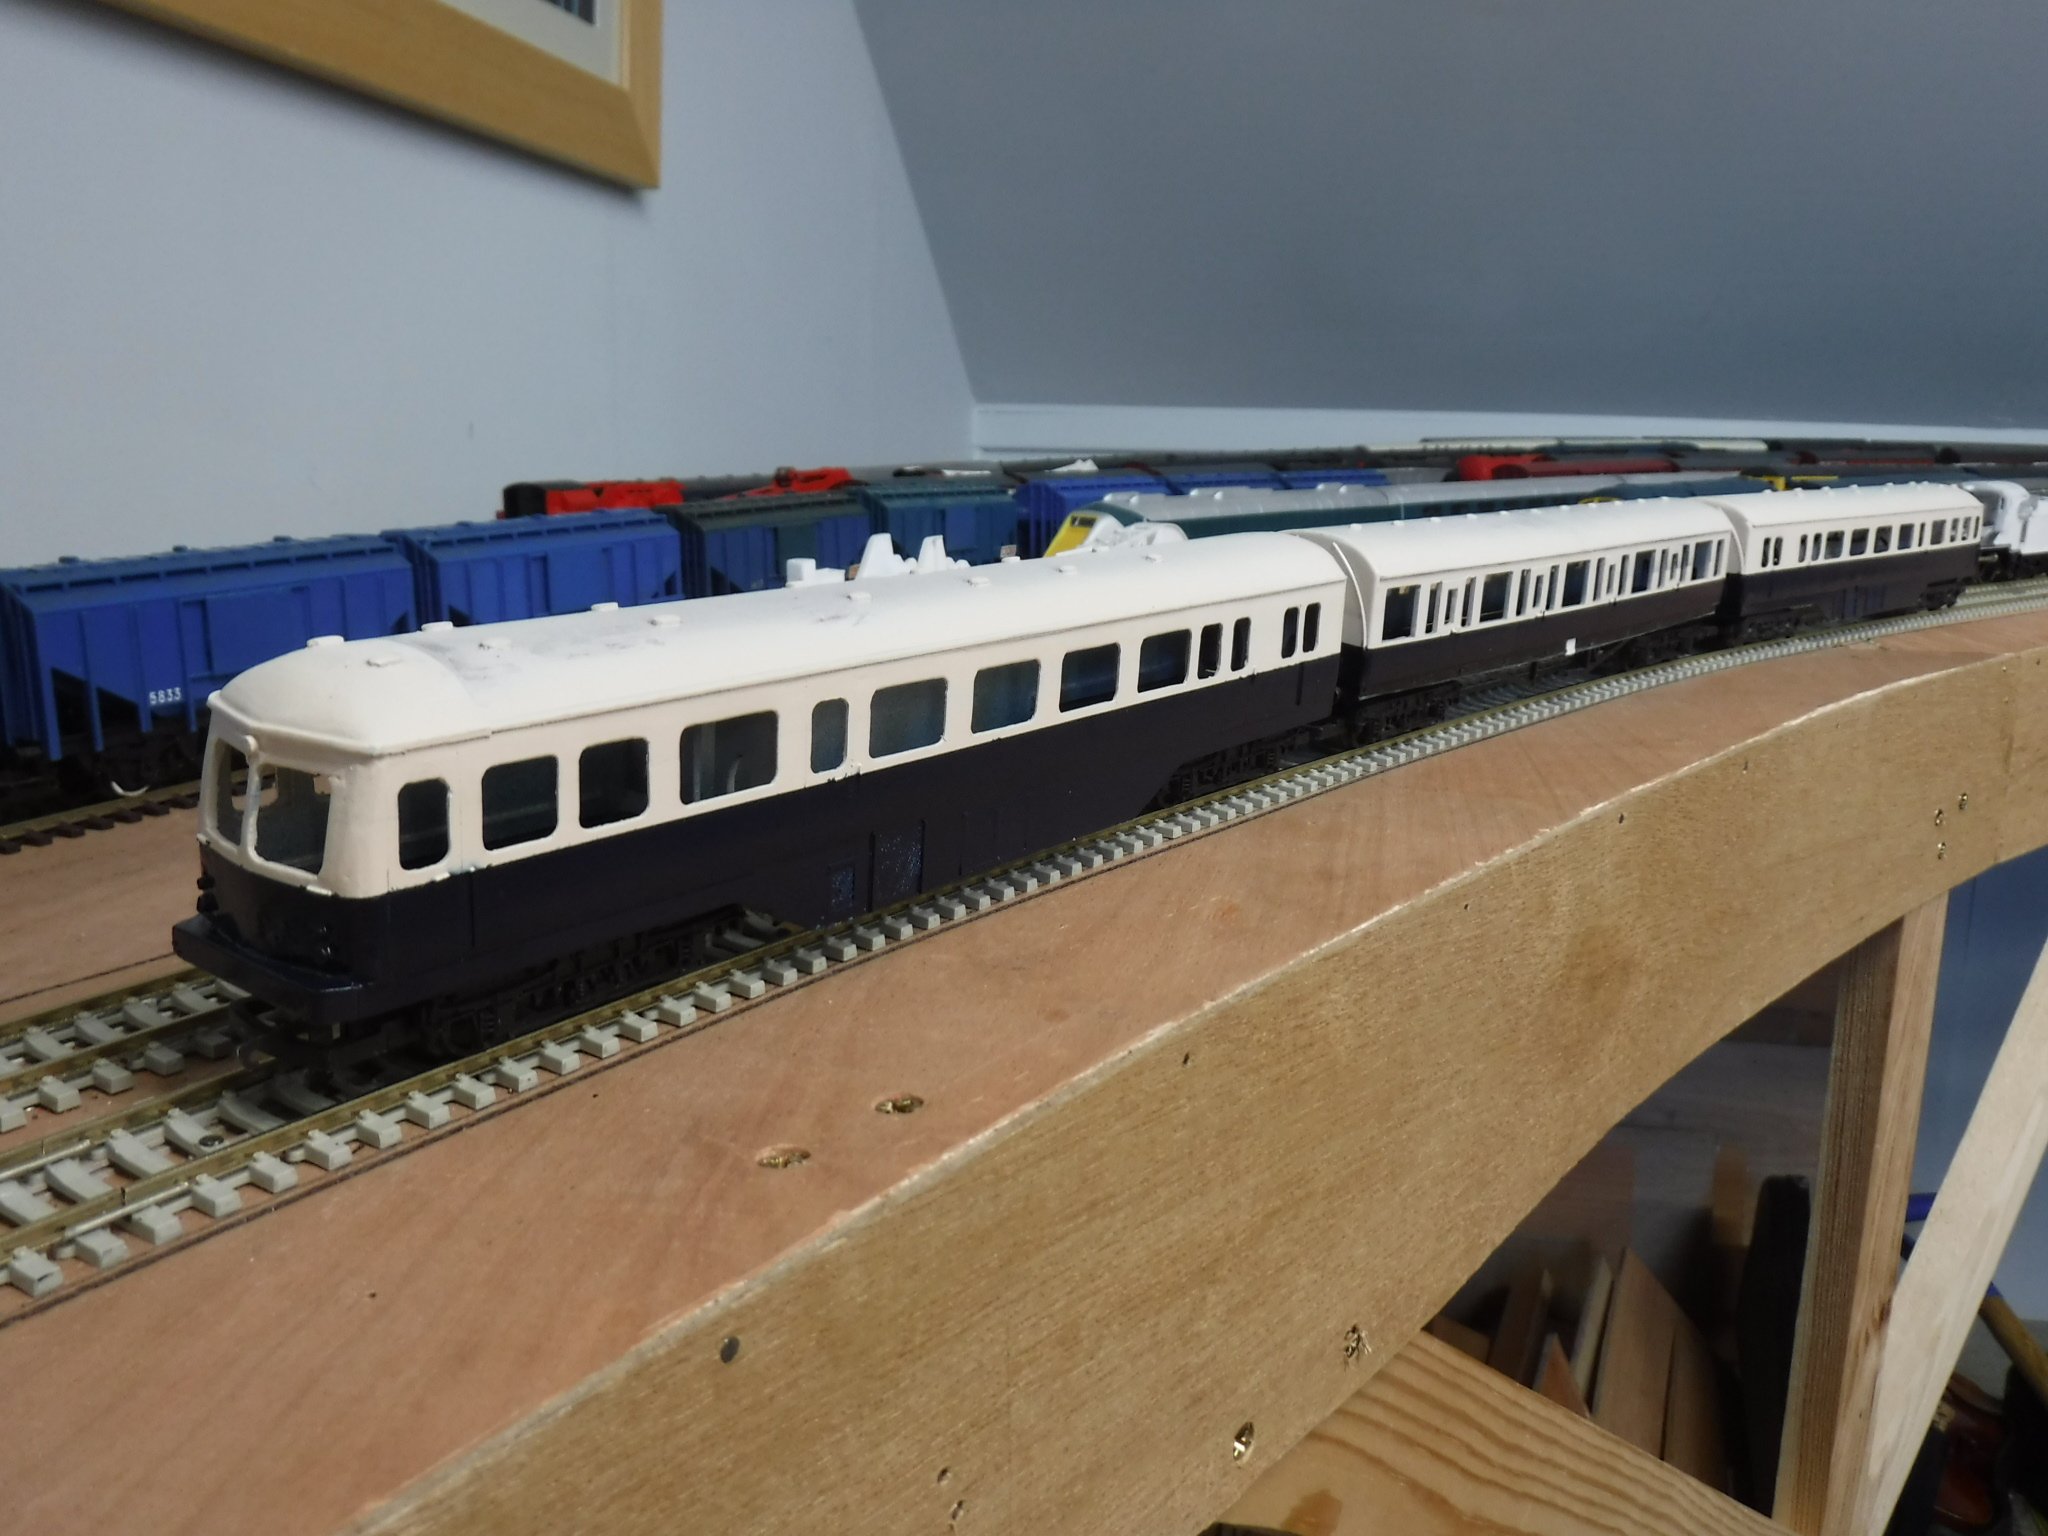
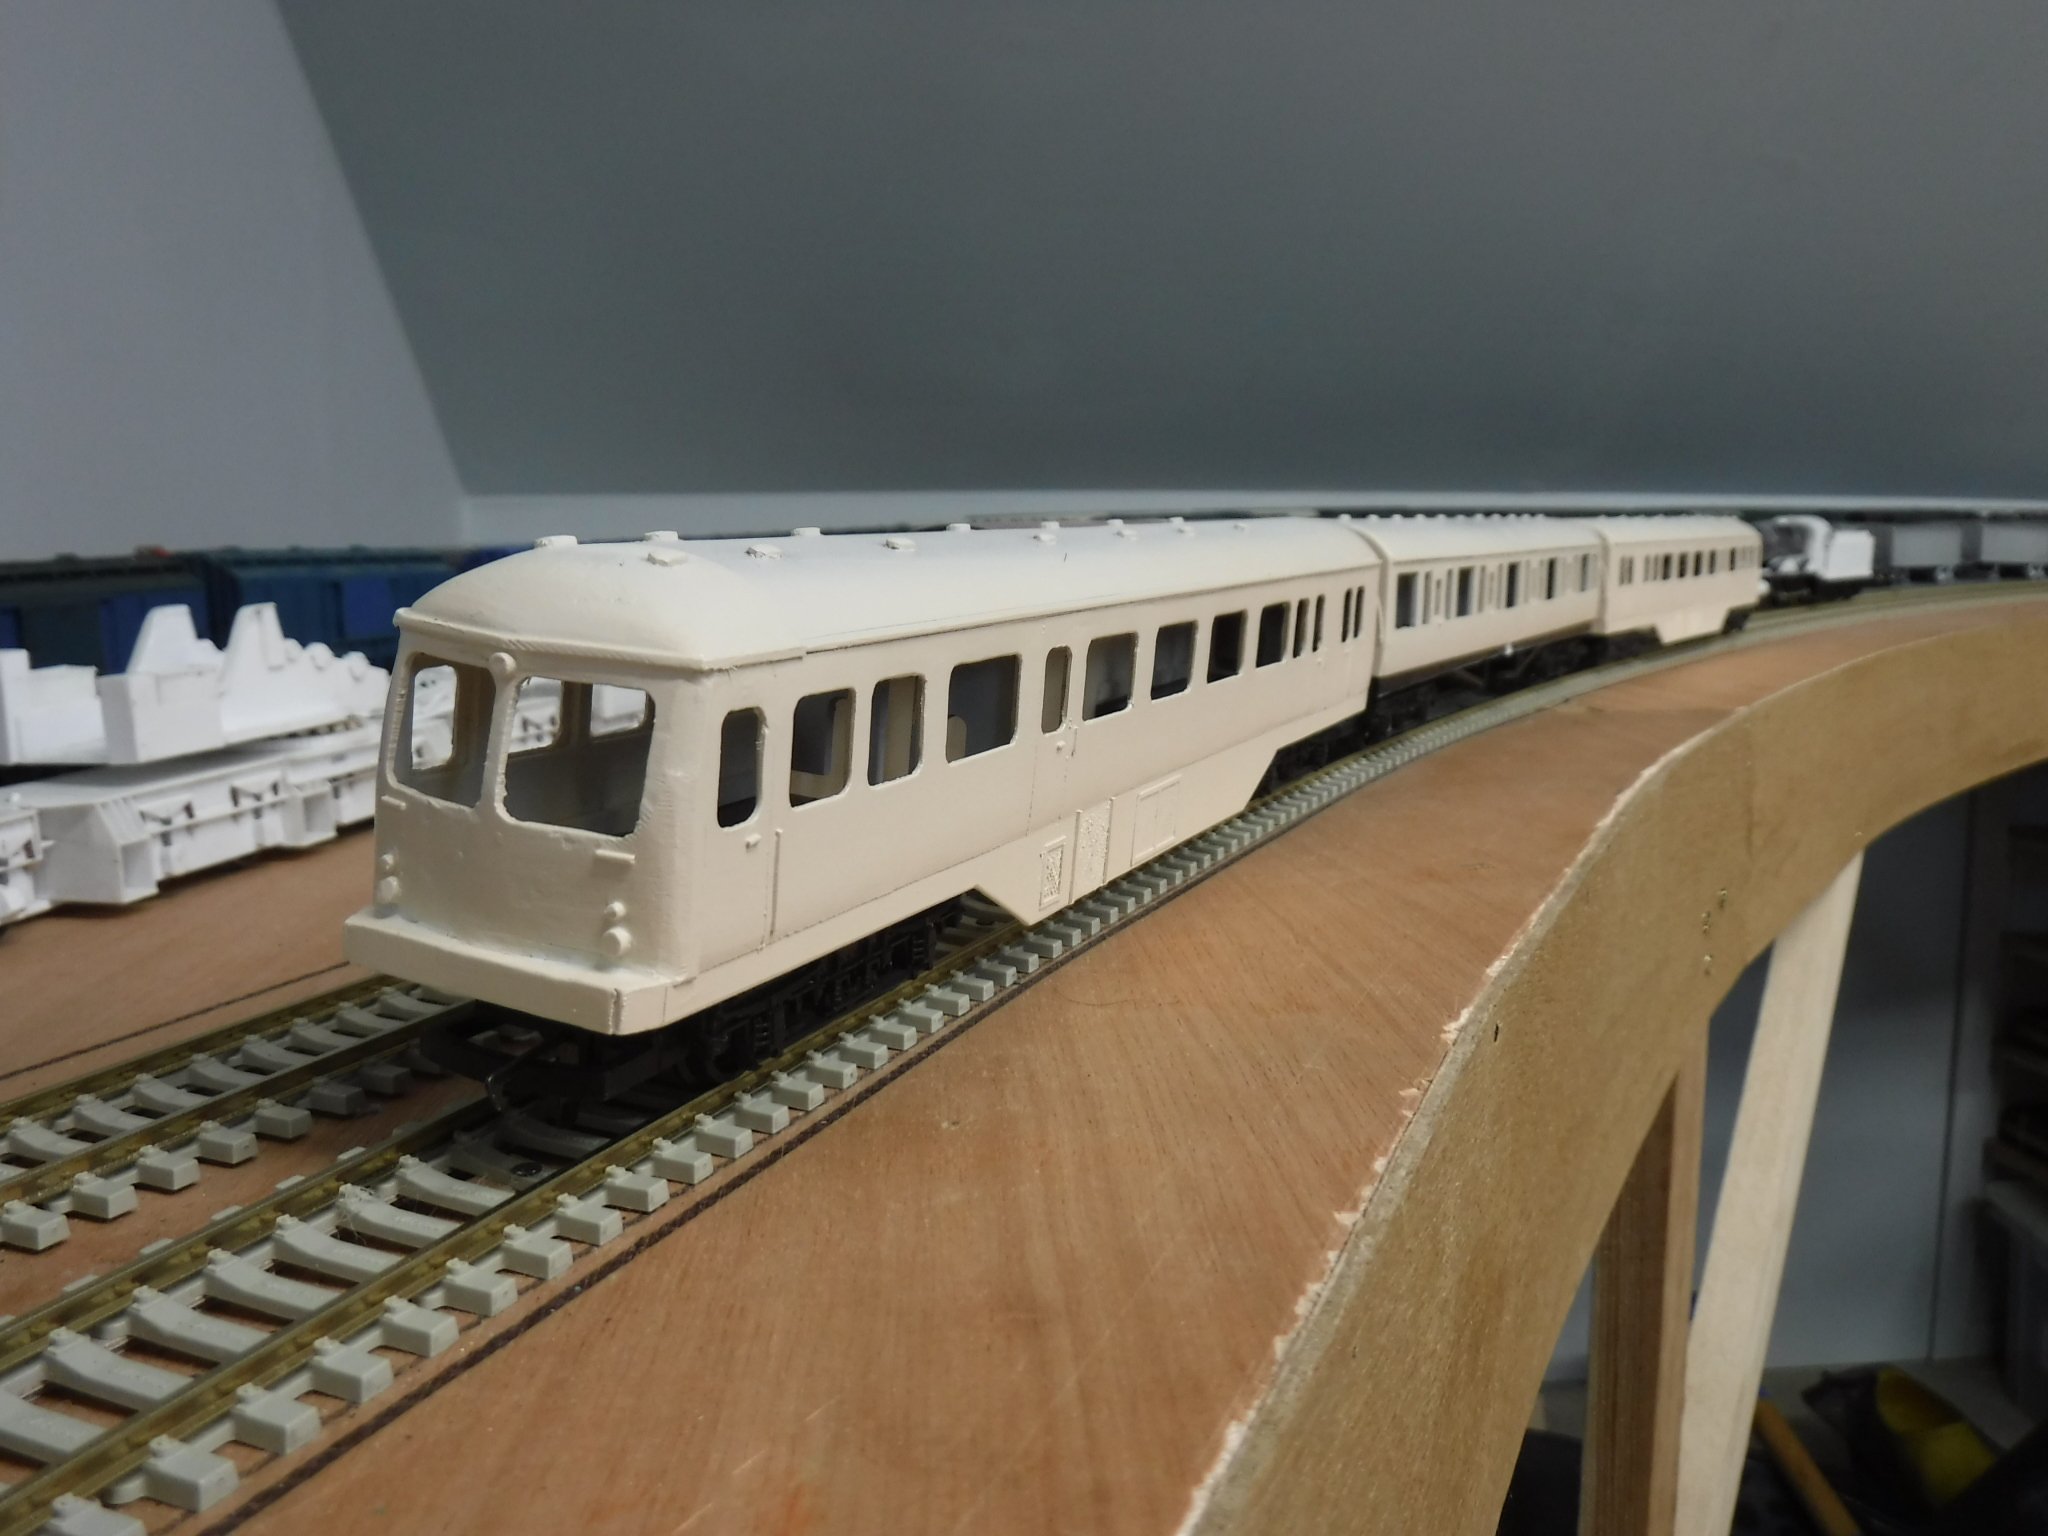
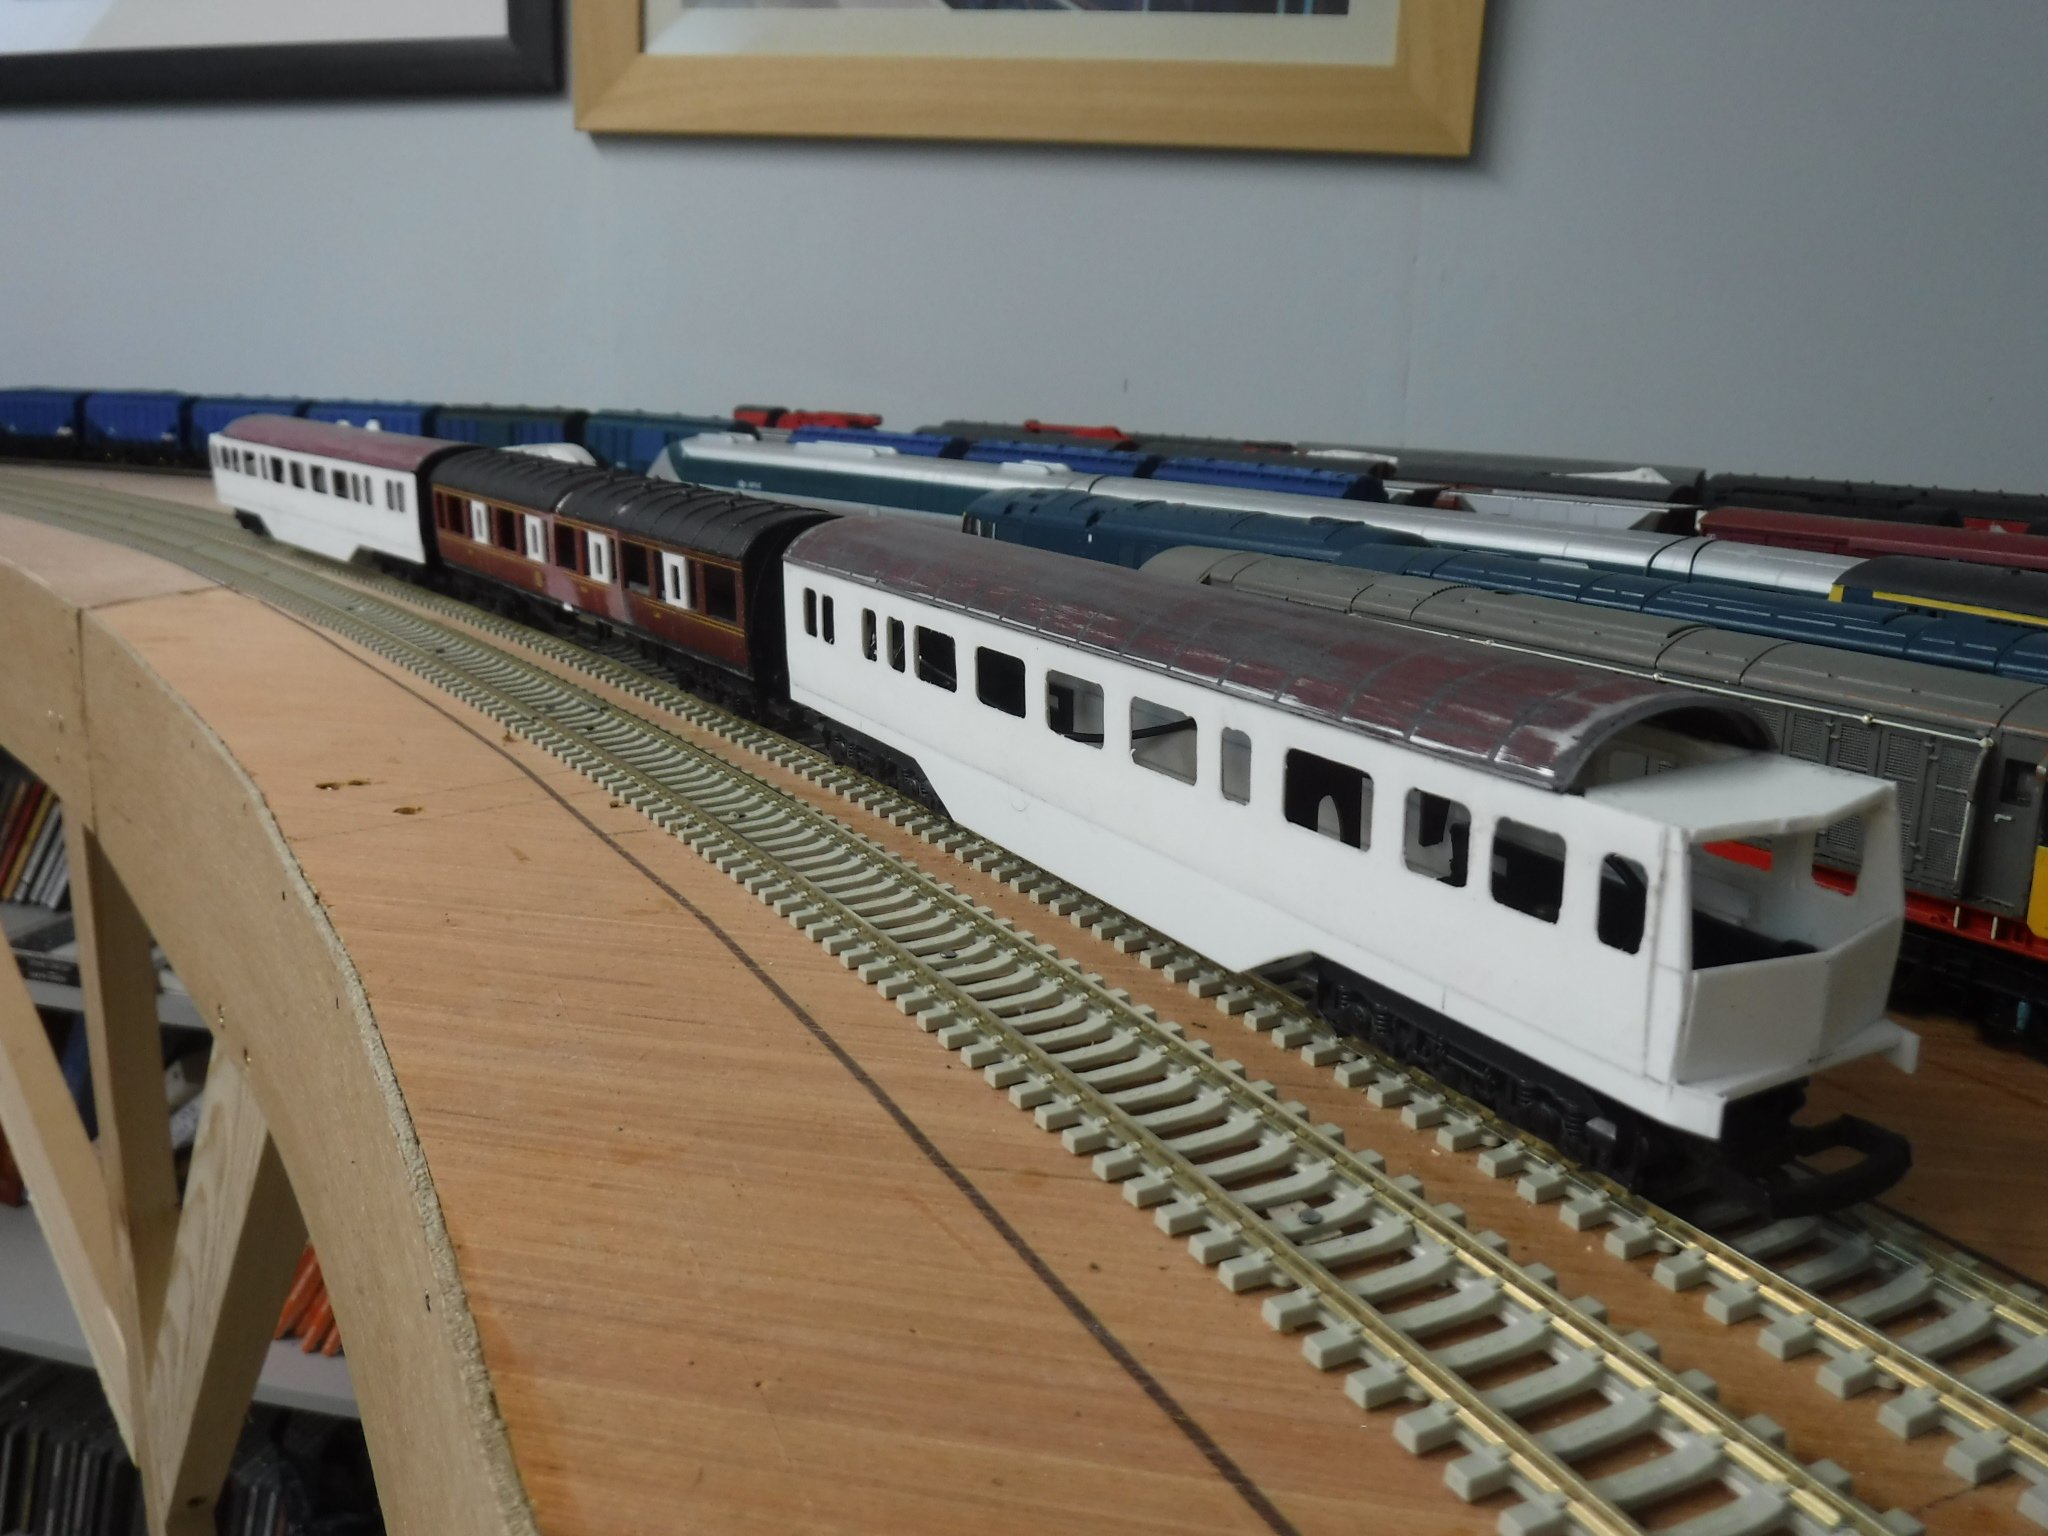
Hi folks, I thought you may interested in one of my latest projects, so here is my AEC railcar which is now being painted. I shall post more once it is in finished state. The build is detailed within my ongoing thread should you wish to see how it progresses, the K15 is also featured. A three car unit with a K15 open third as the centre car. Gibbo.
-
Yo Dudes, Here are the photographs of the radiator details on the underframe valances that I didn't take yesterday. The photographs also shew the shade of the Ford Ivory White that I am using for the GNRI Blue and cream livery, we will get a better idea once the Skoda Pacific Blue is applied. Radiator details scribed into place and outlined with micro-strip framings. Something I forgot to mention was that the outlines of doors were scribed in at the same time. Progress so far with the K15 open third within the train. Gibbo.
-
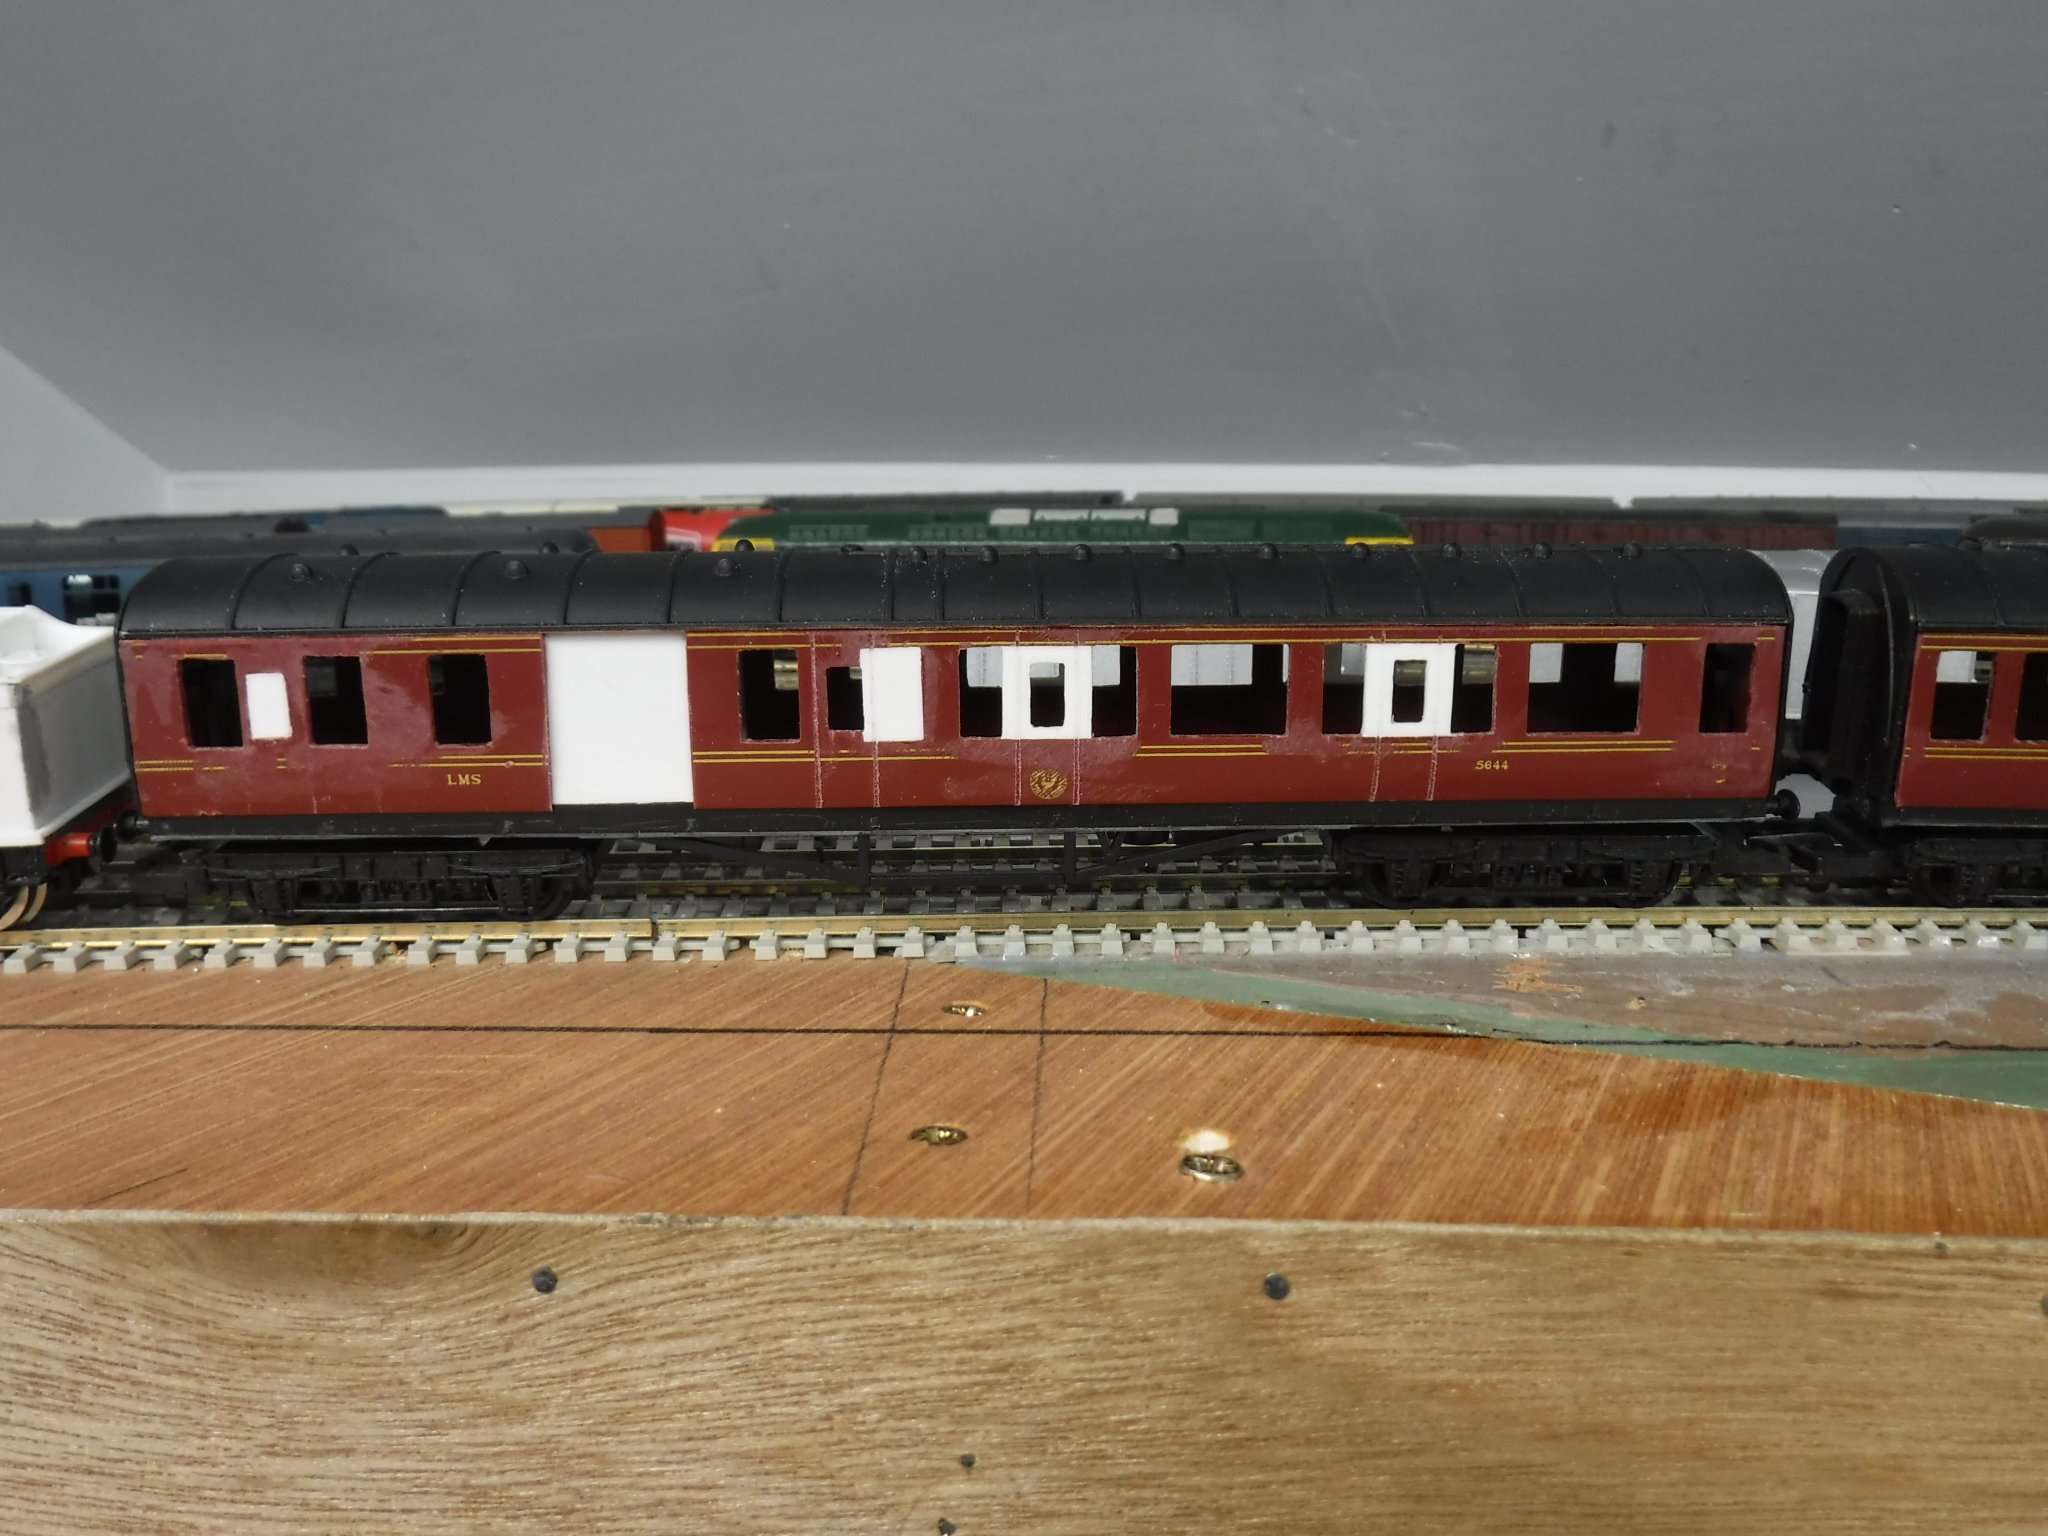
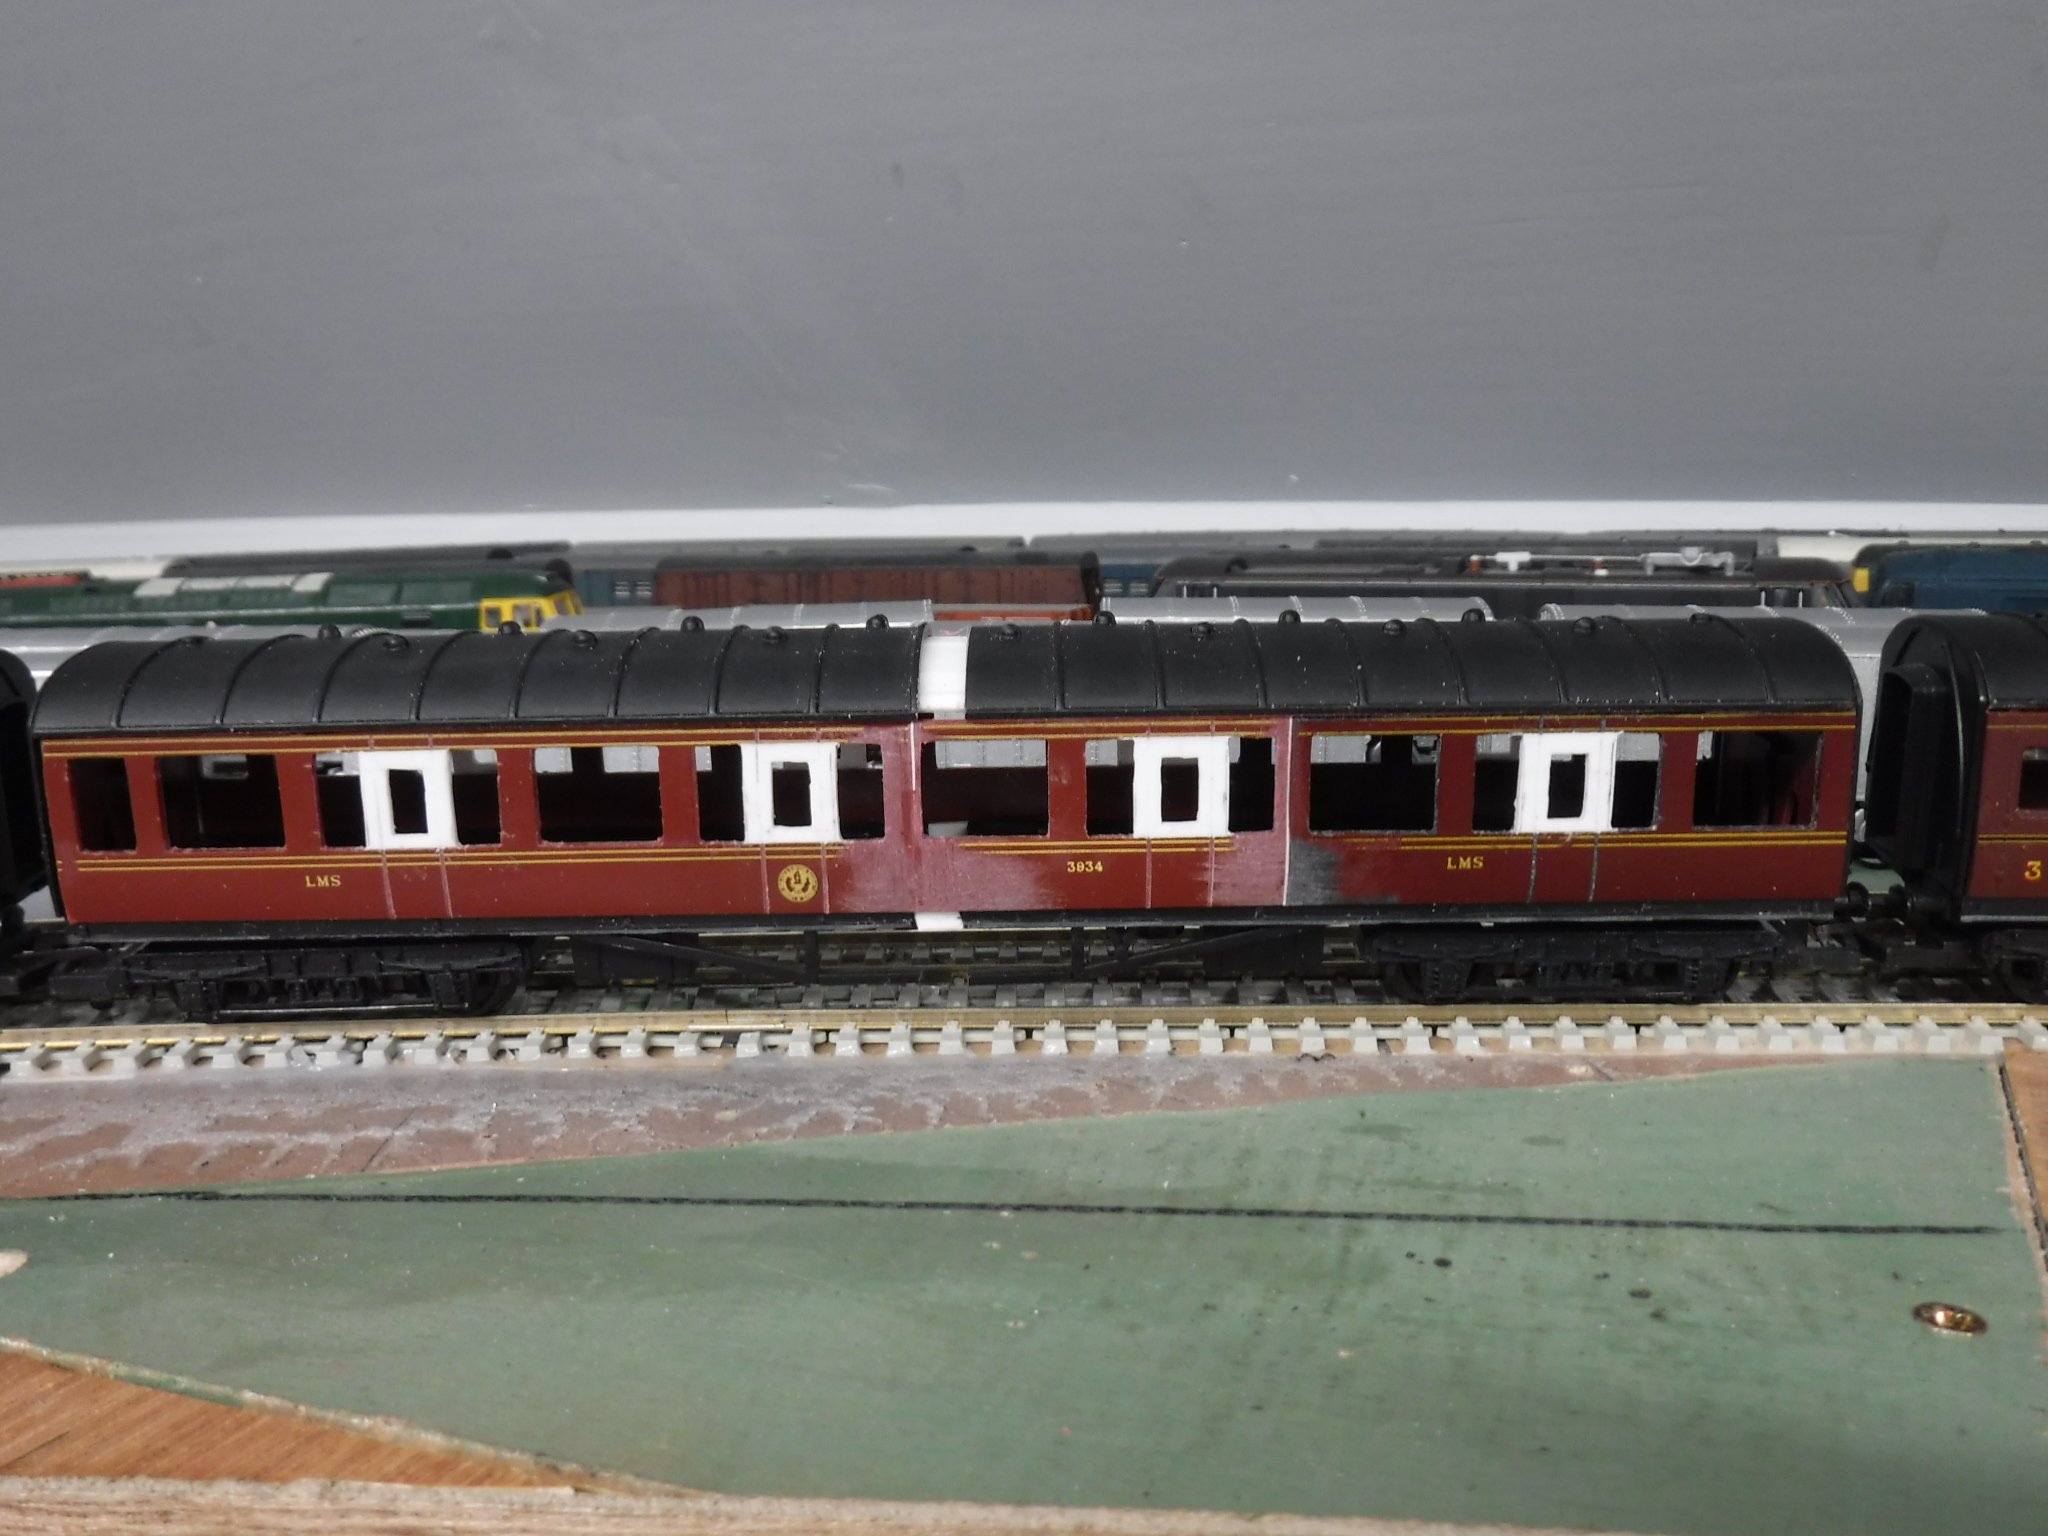
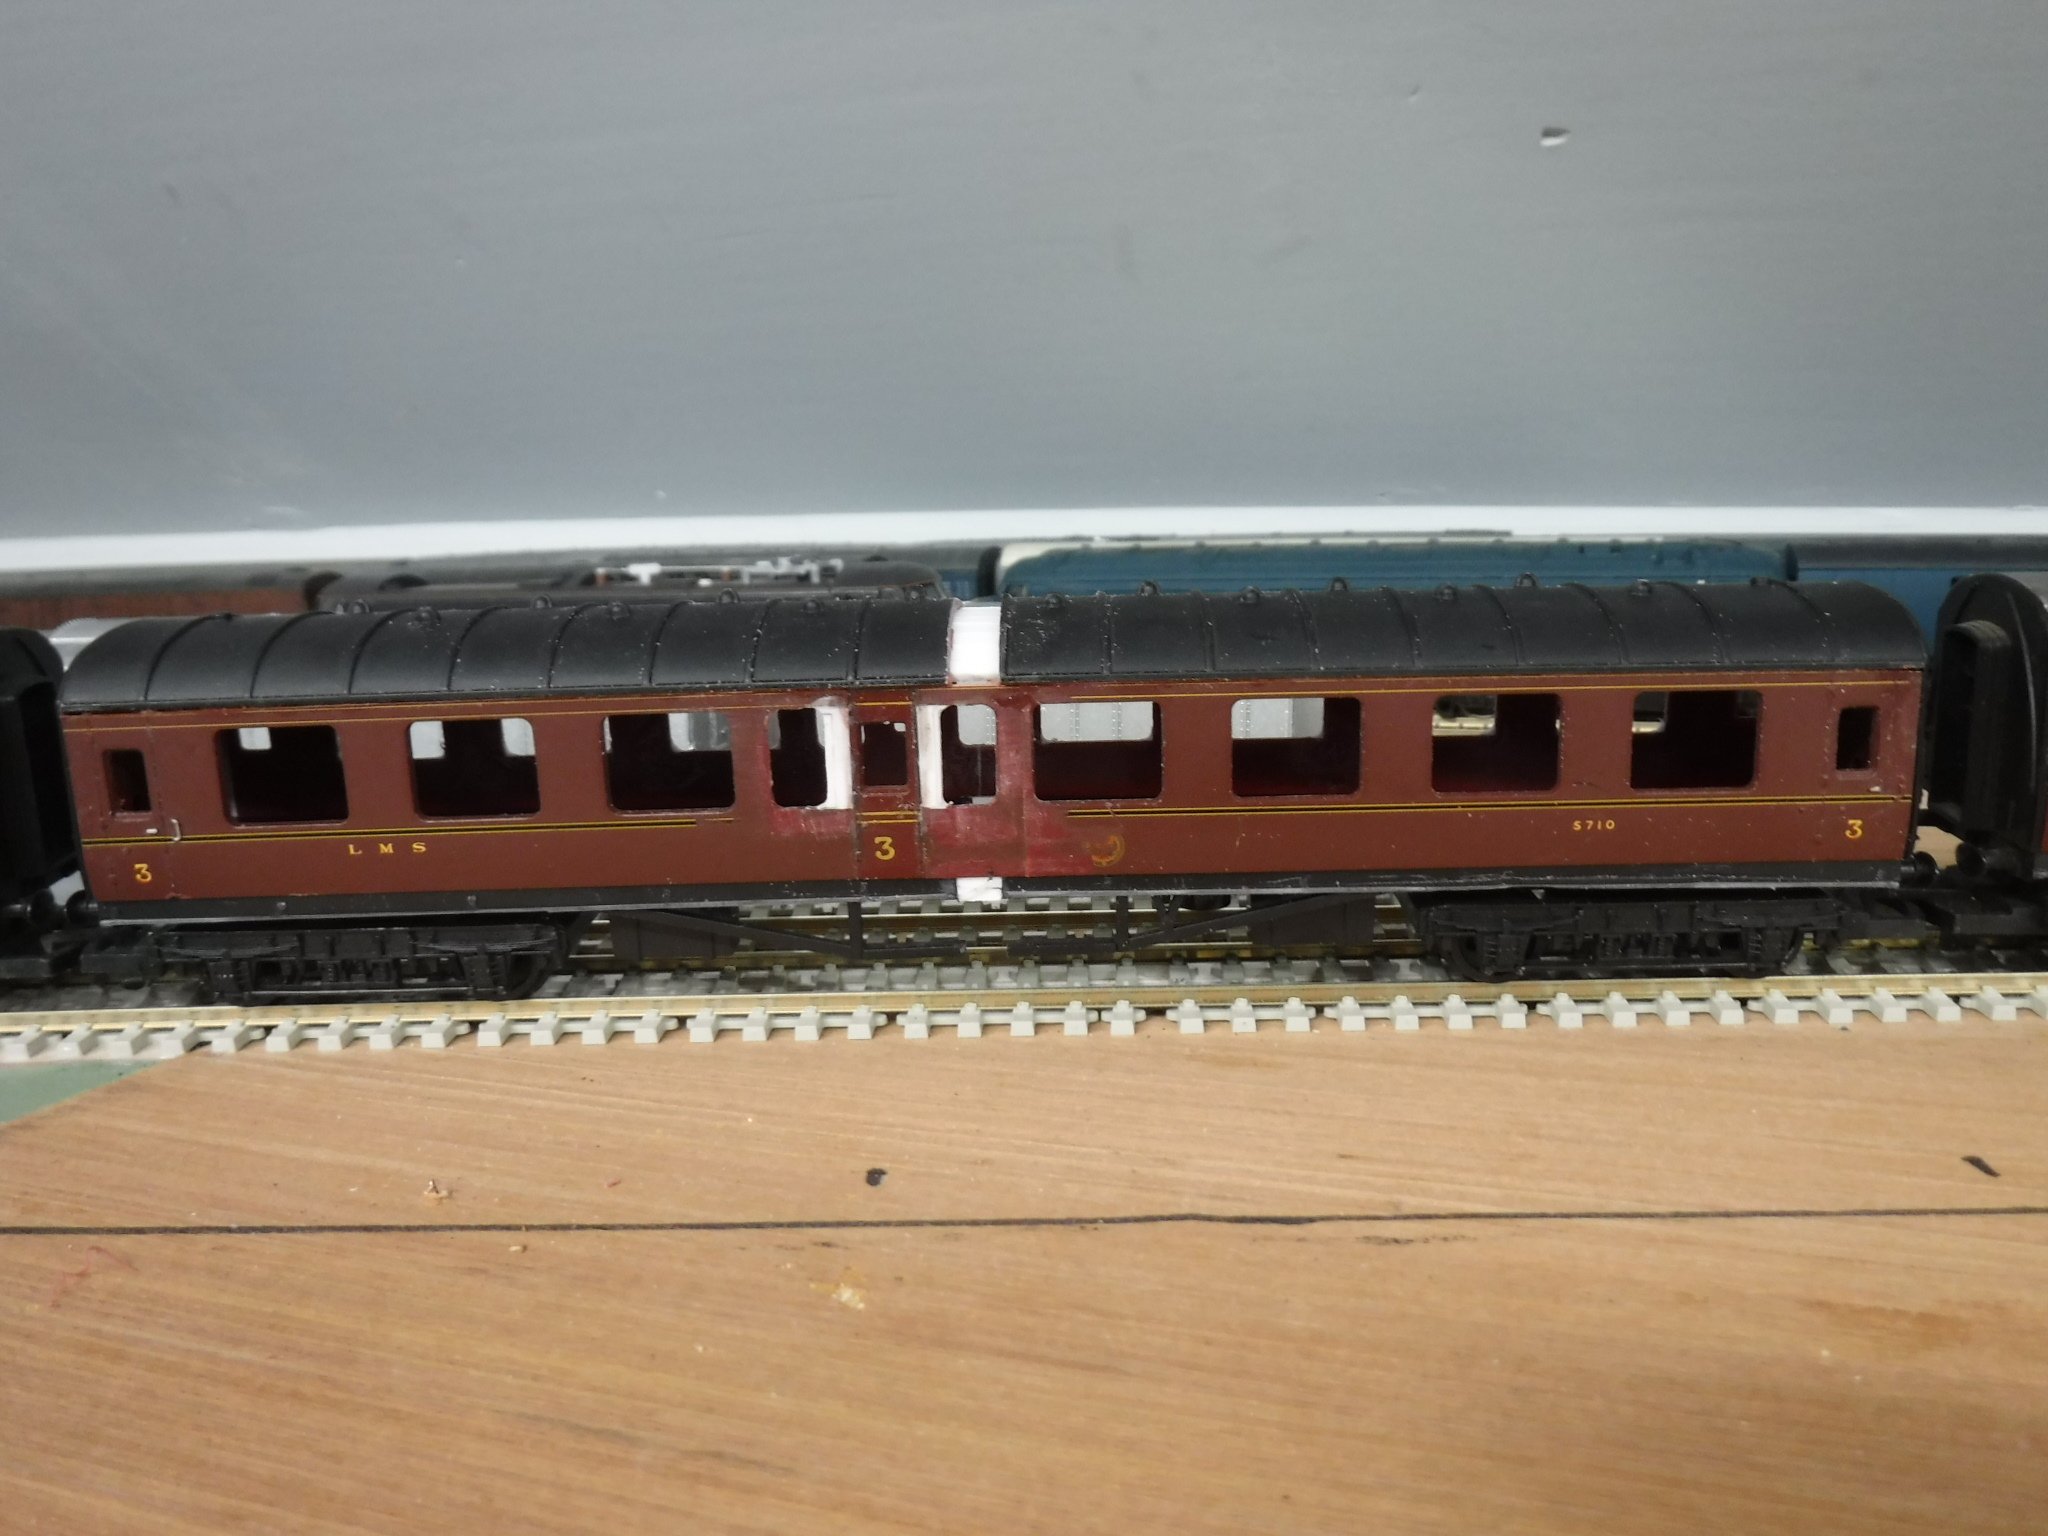
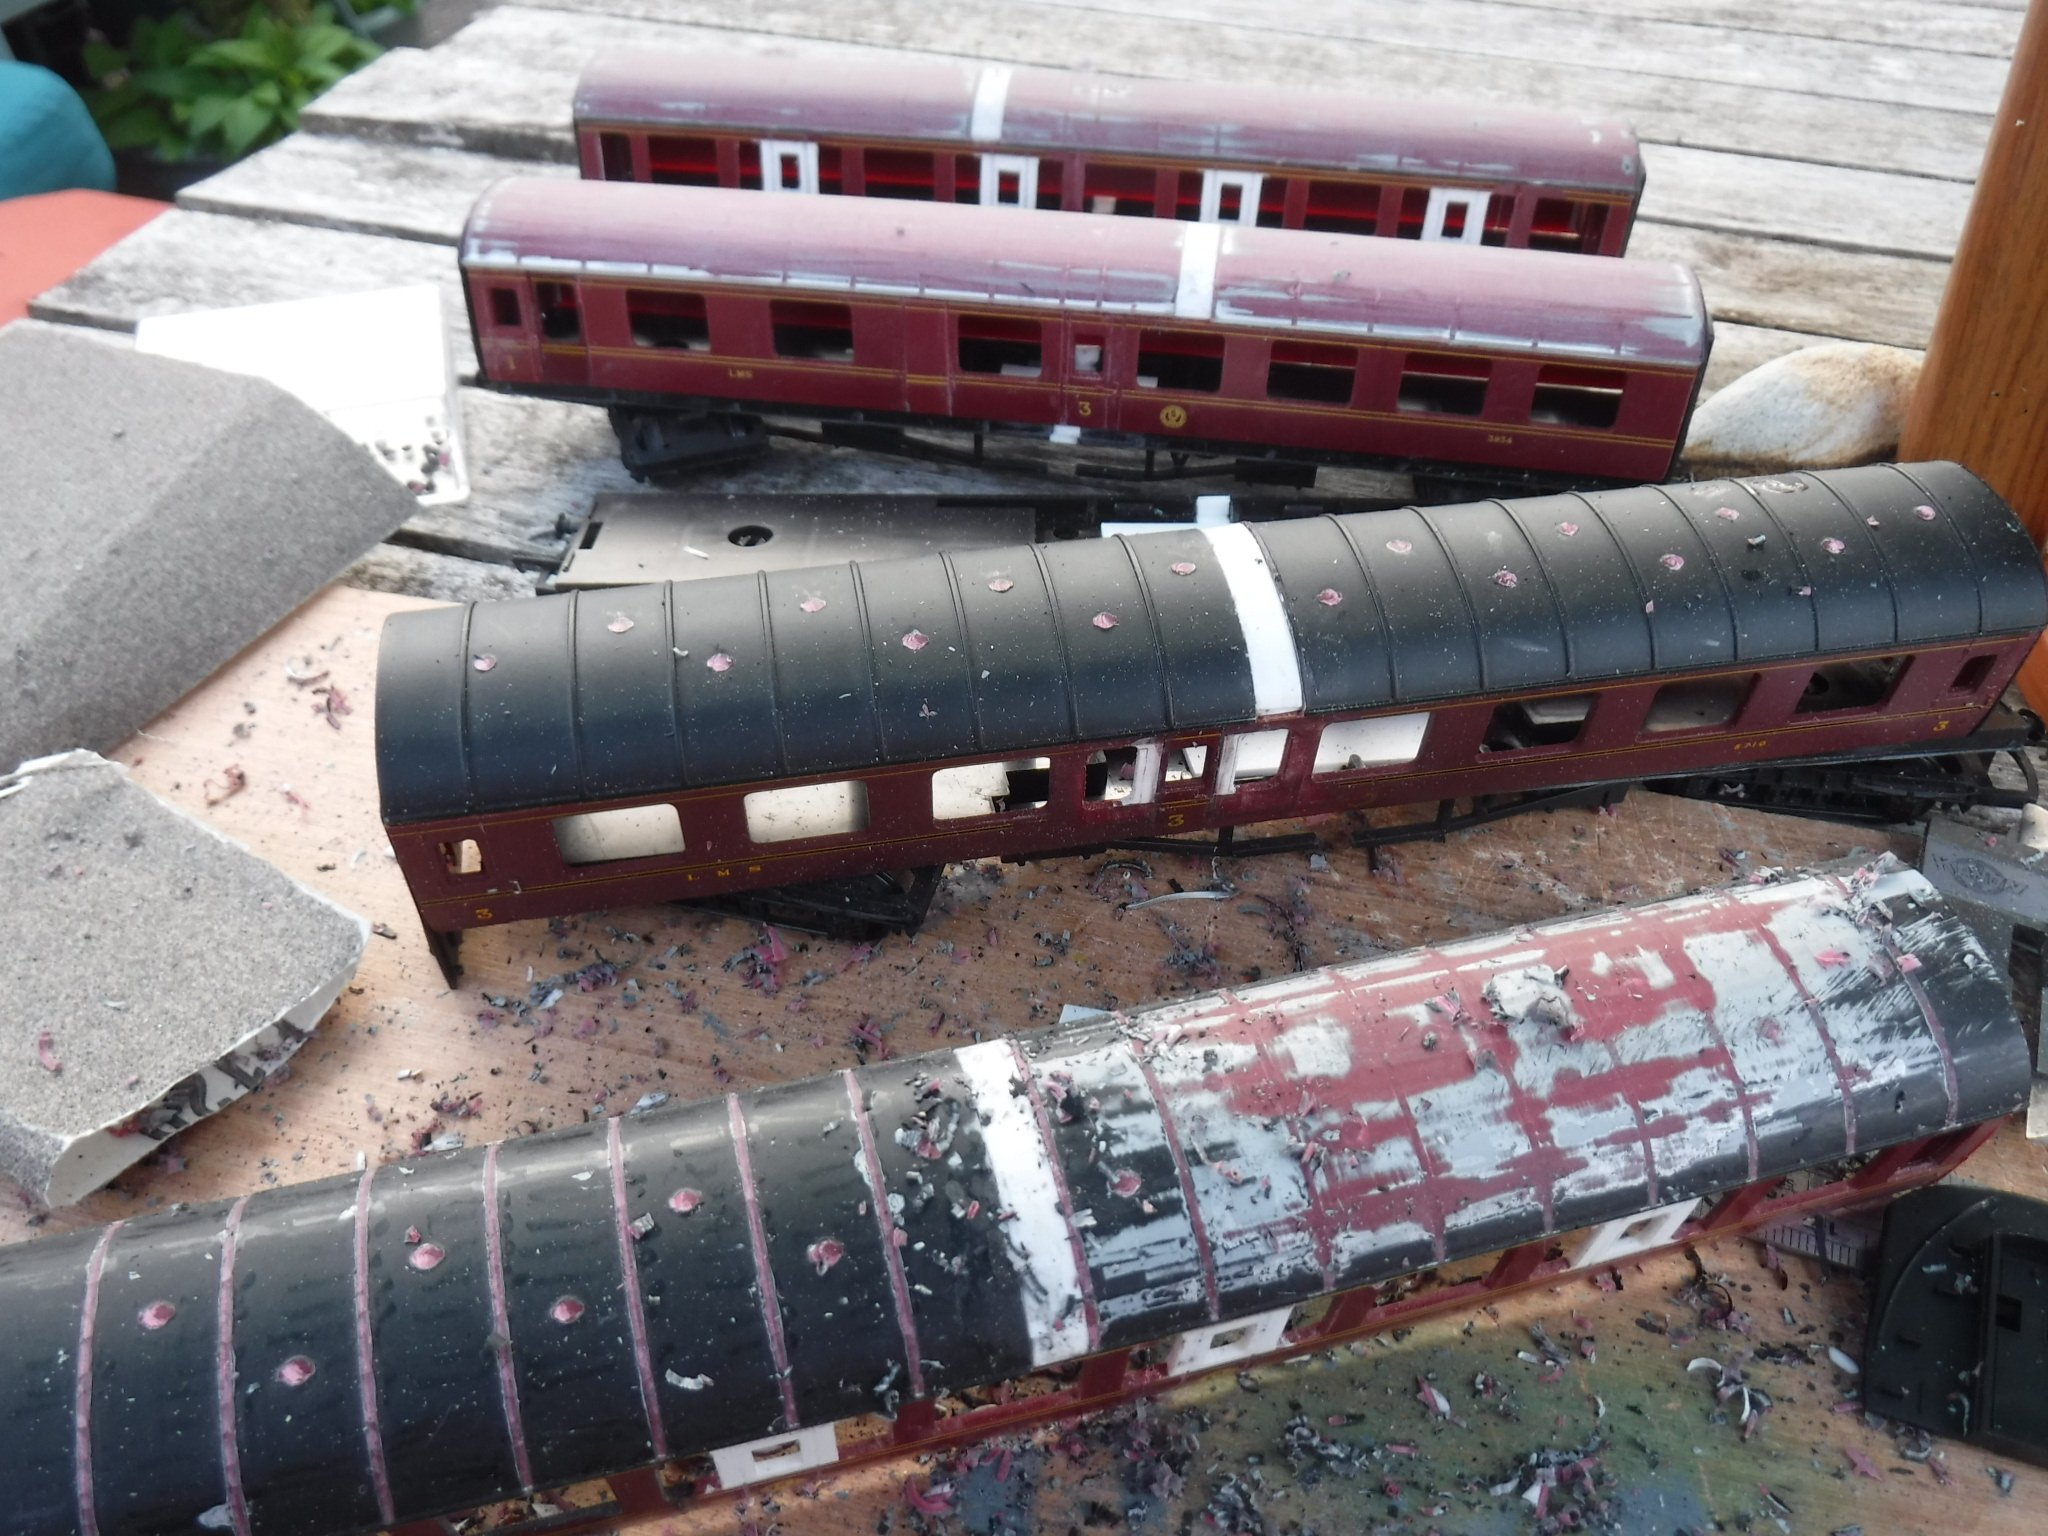
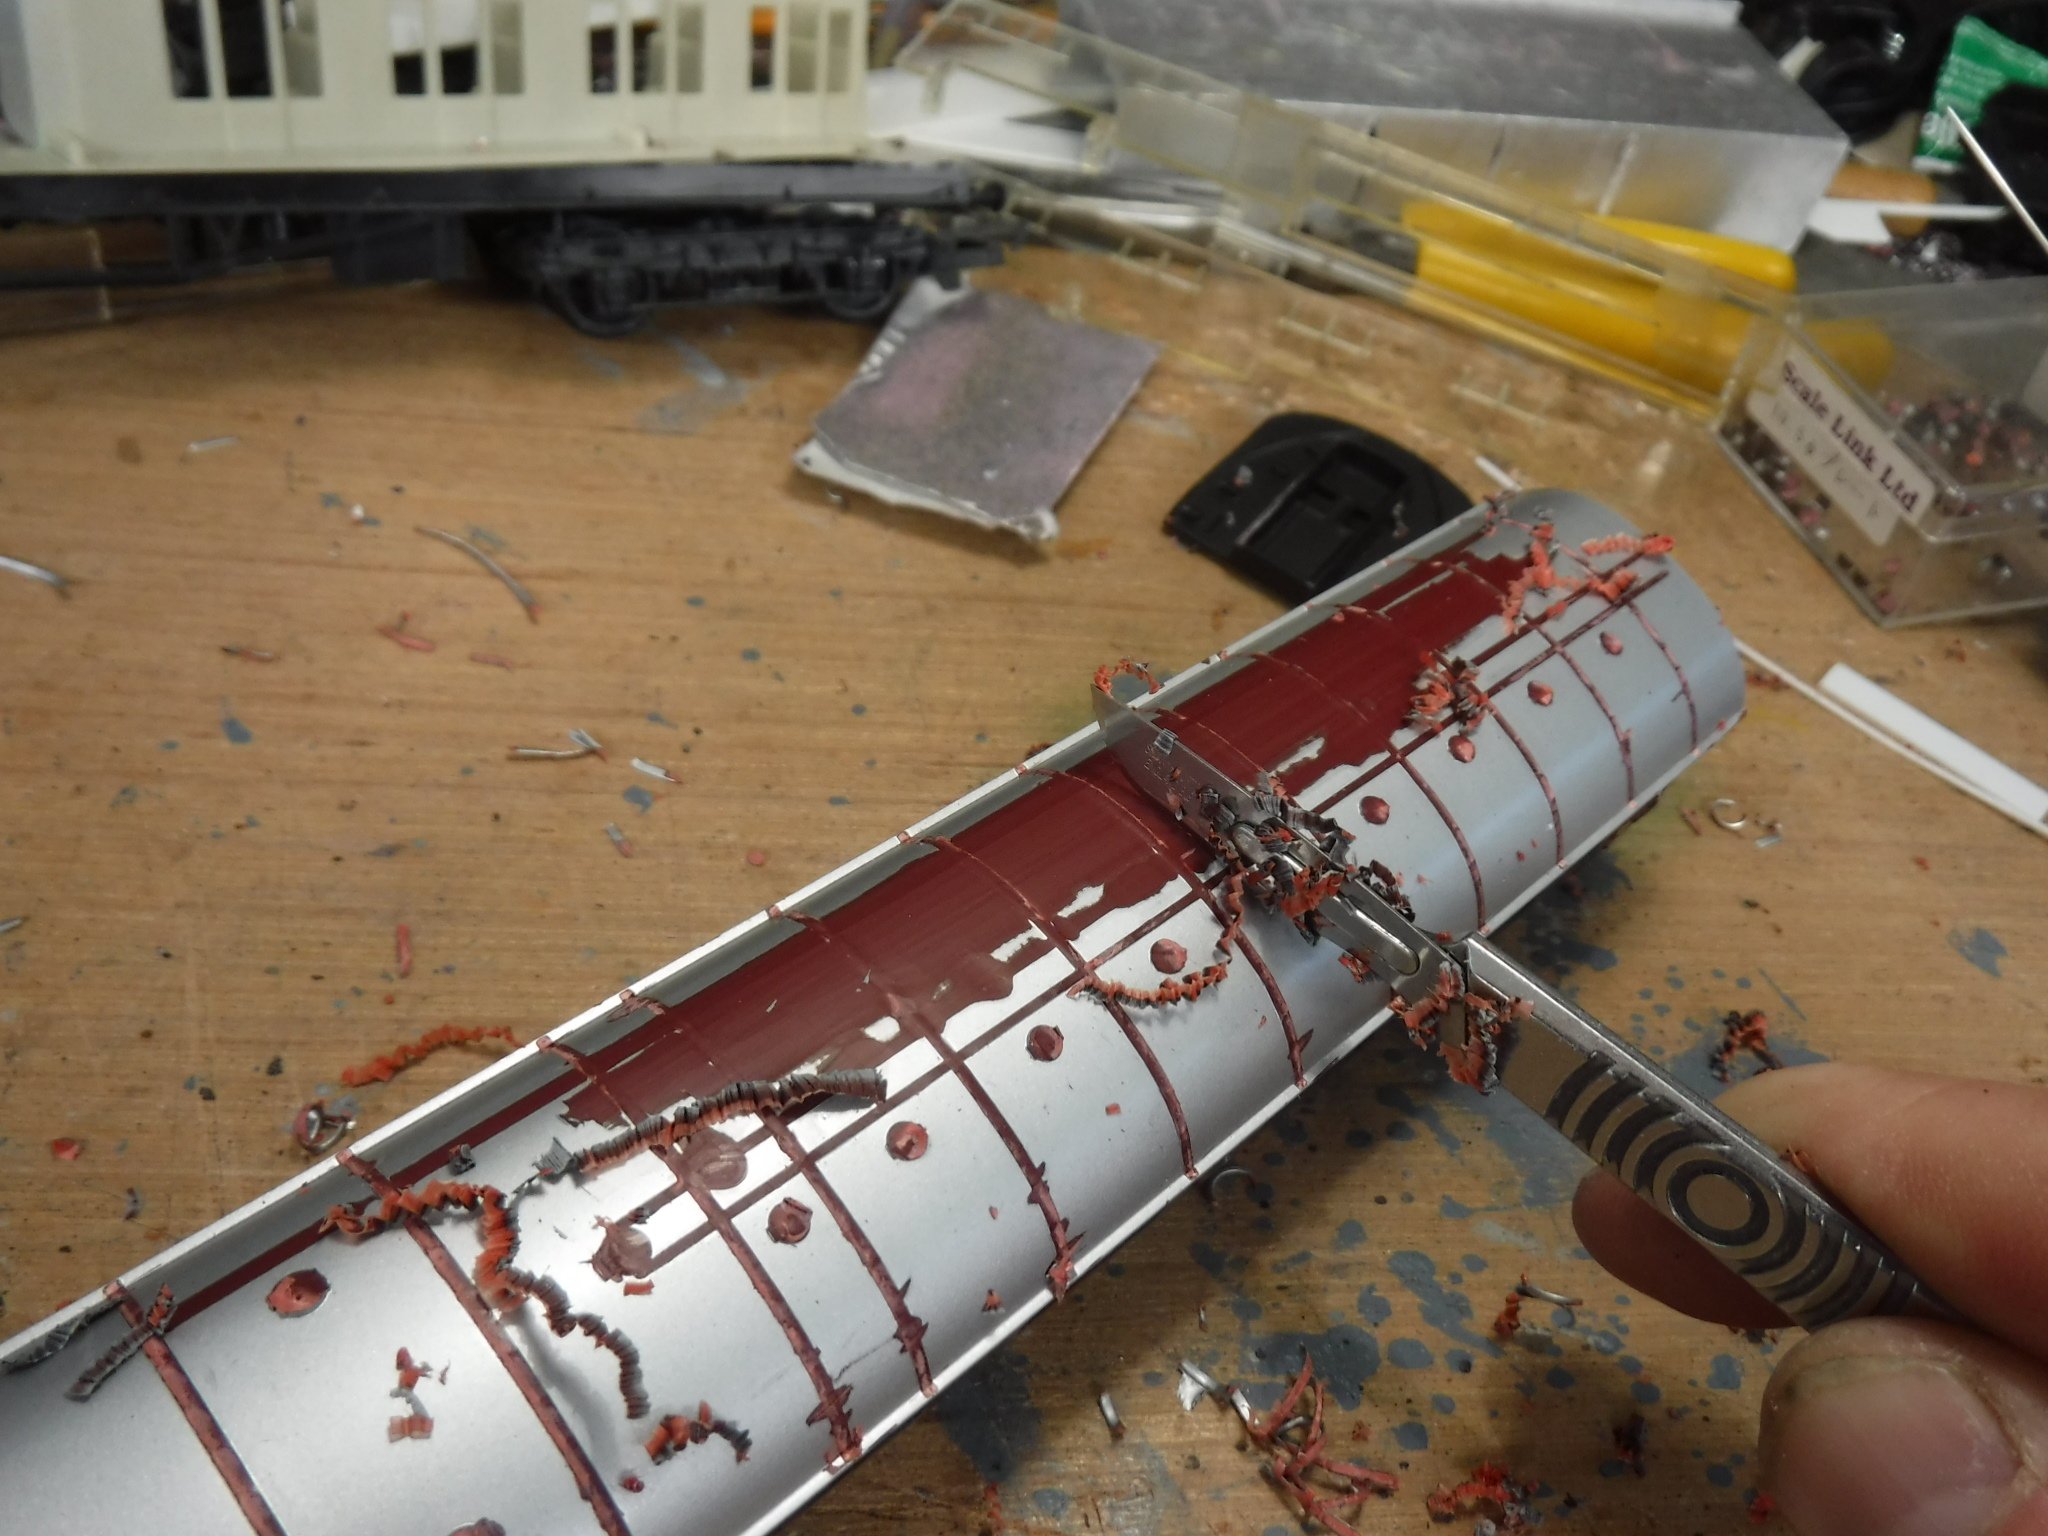
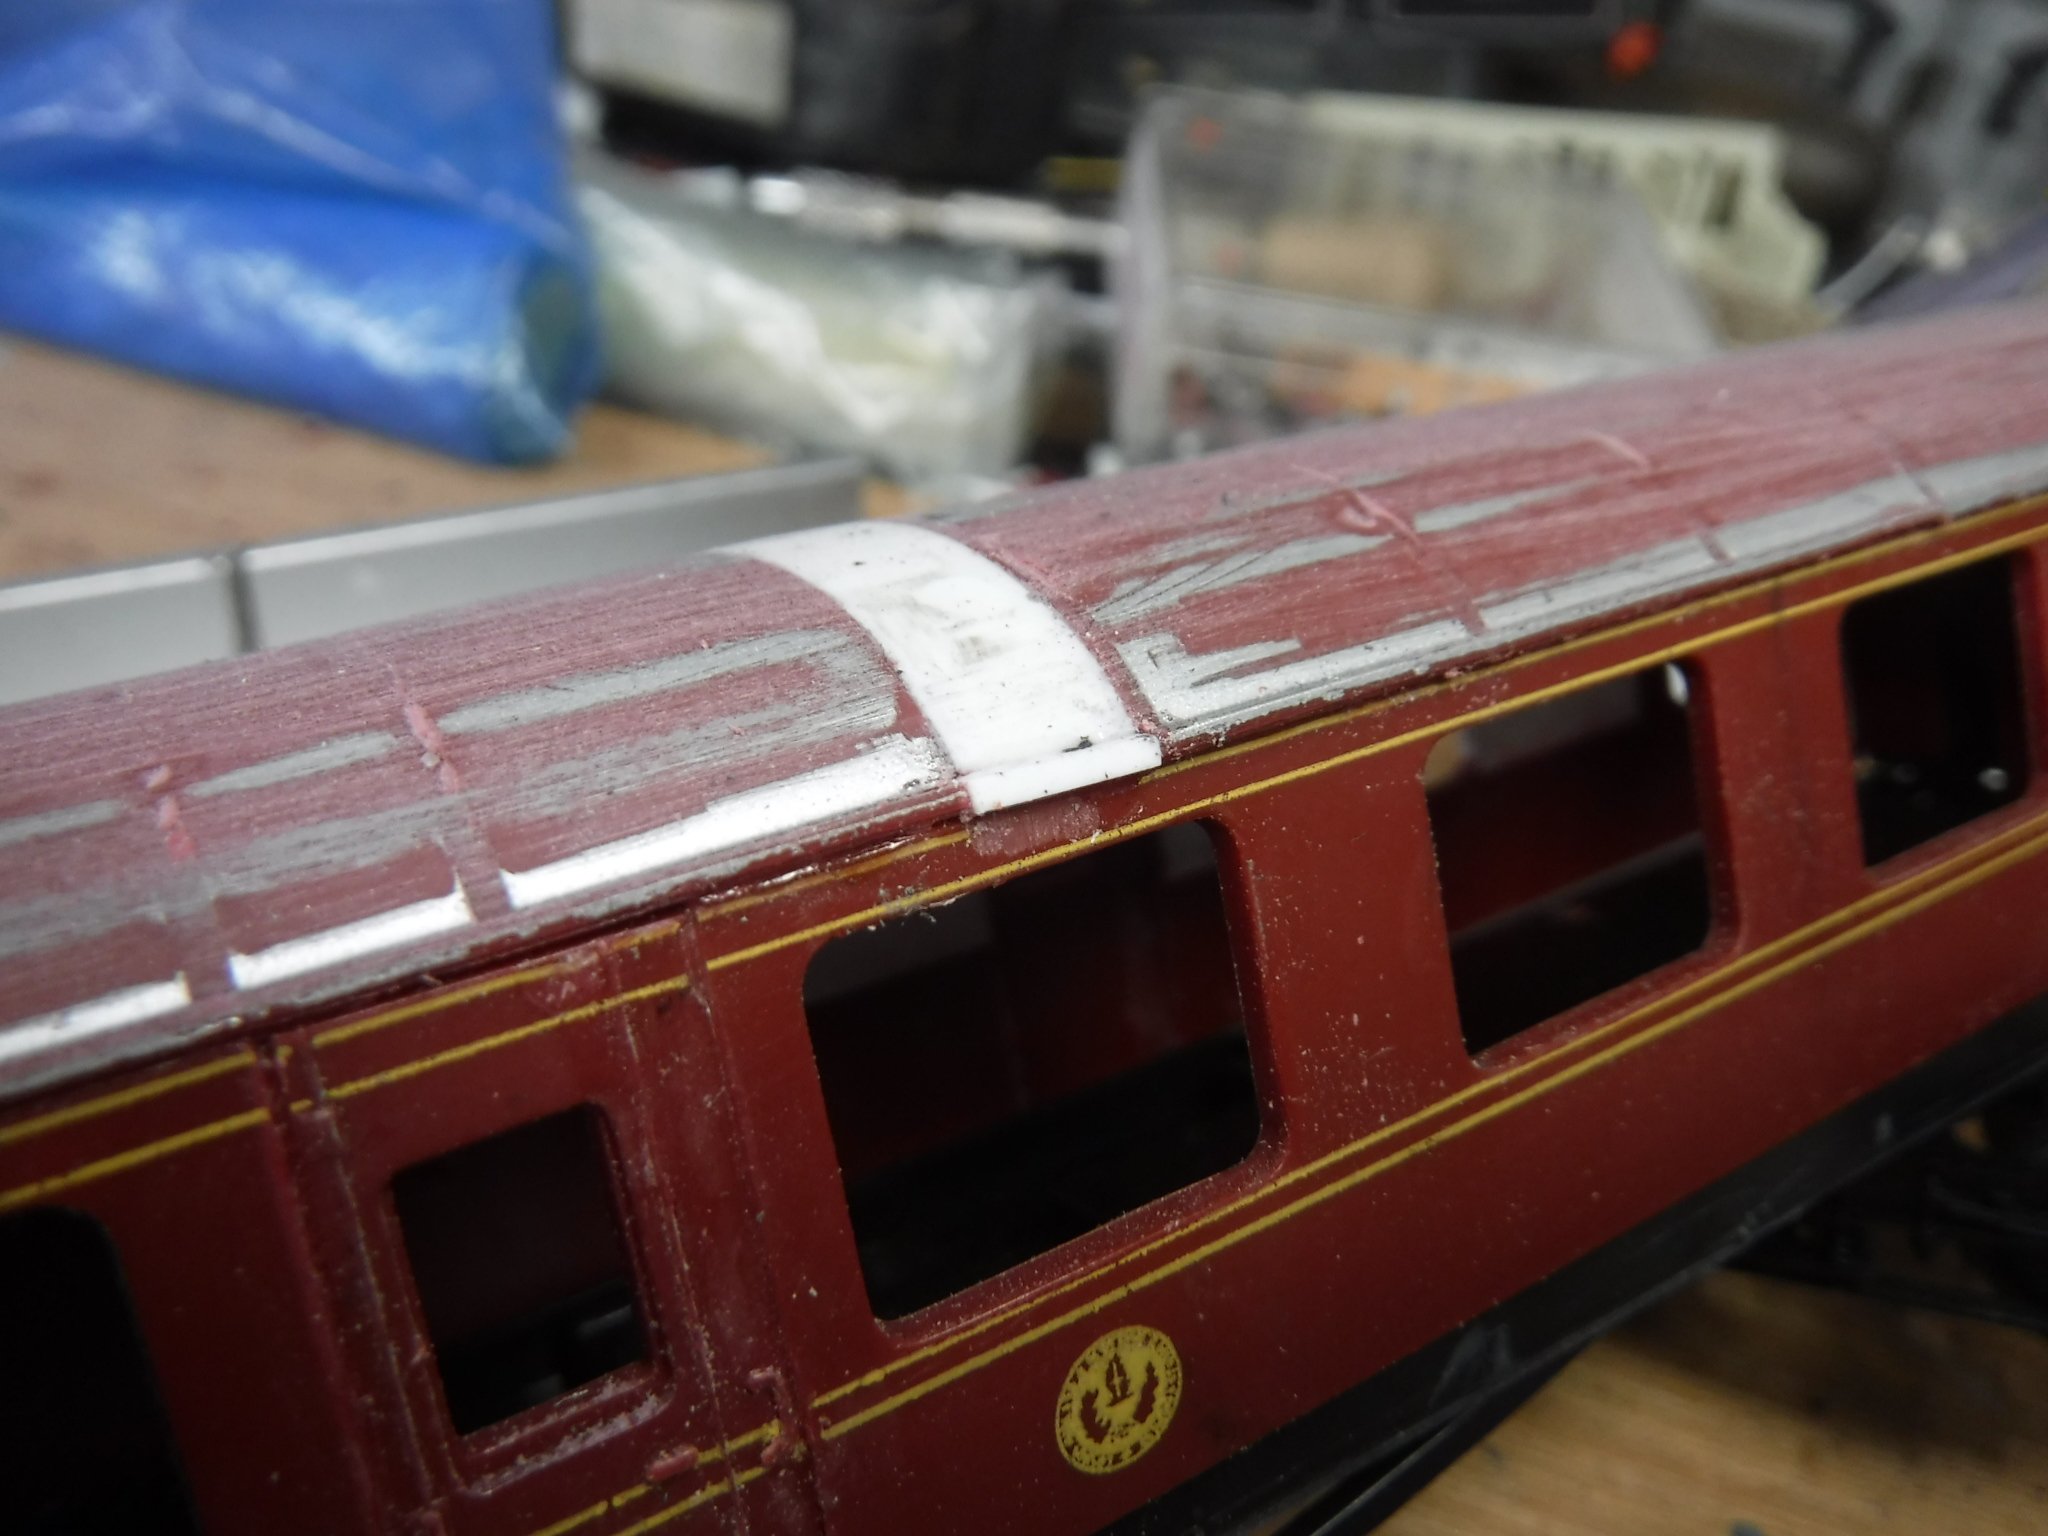
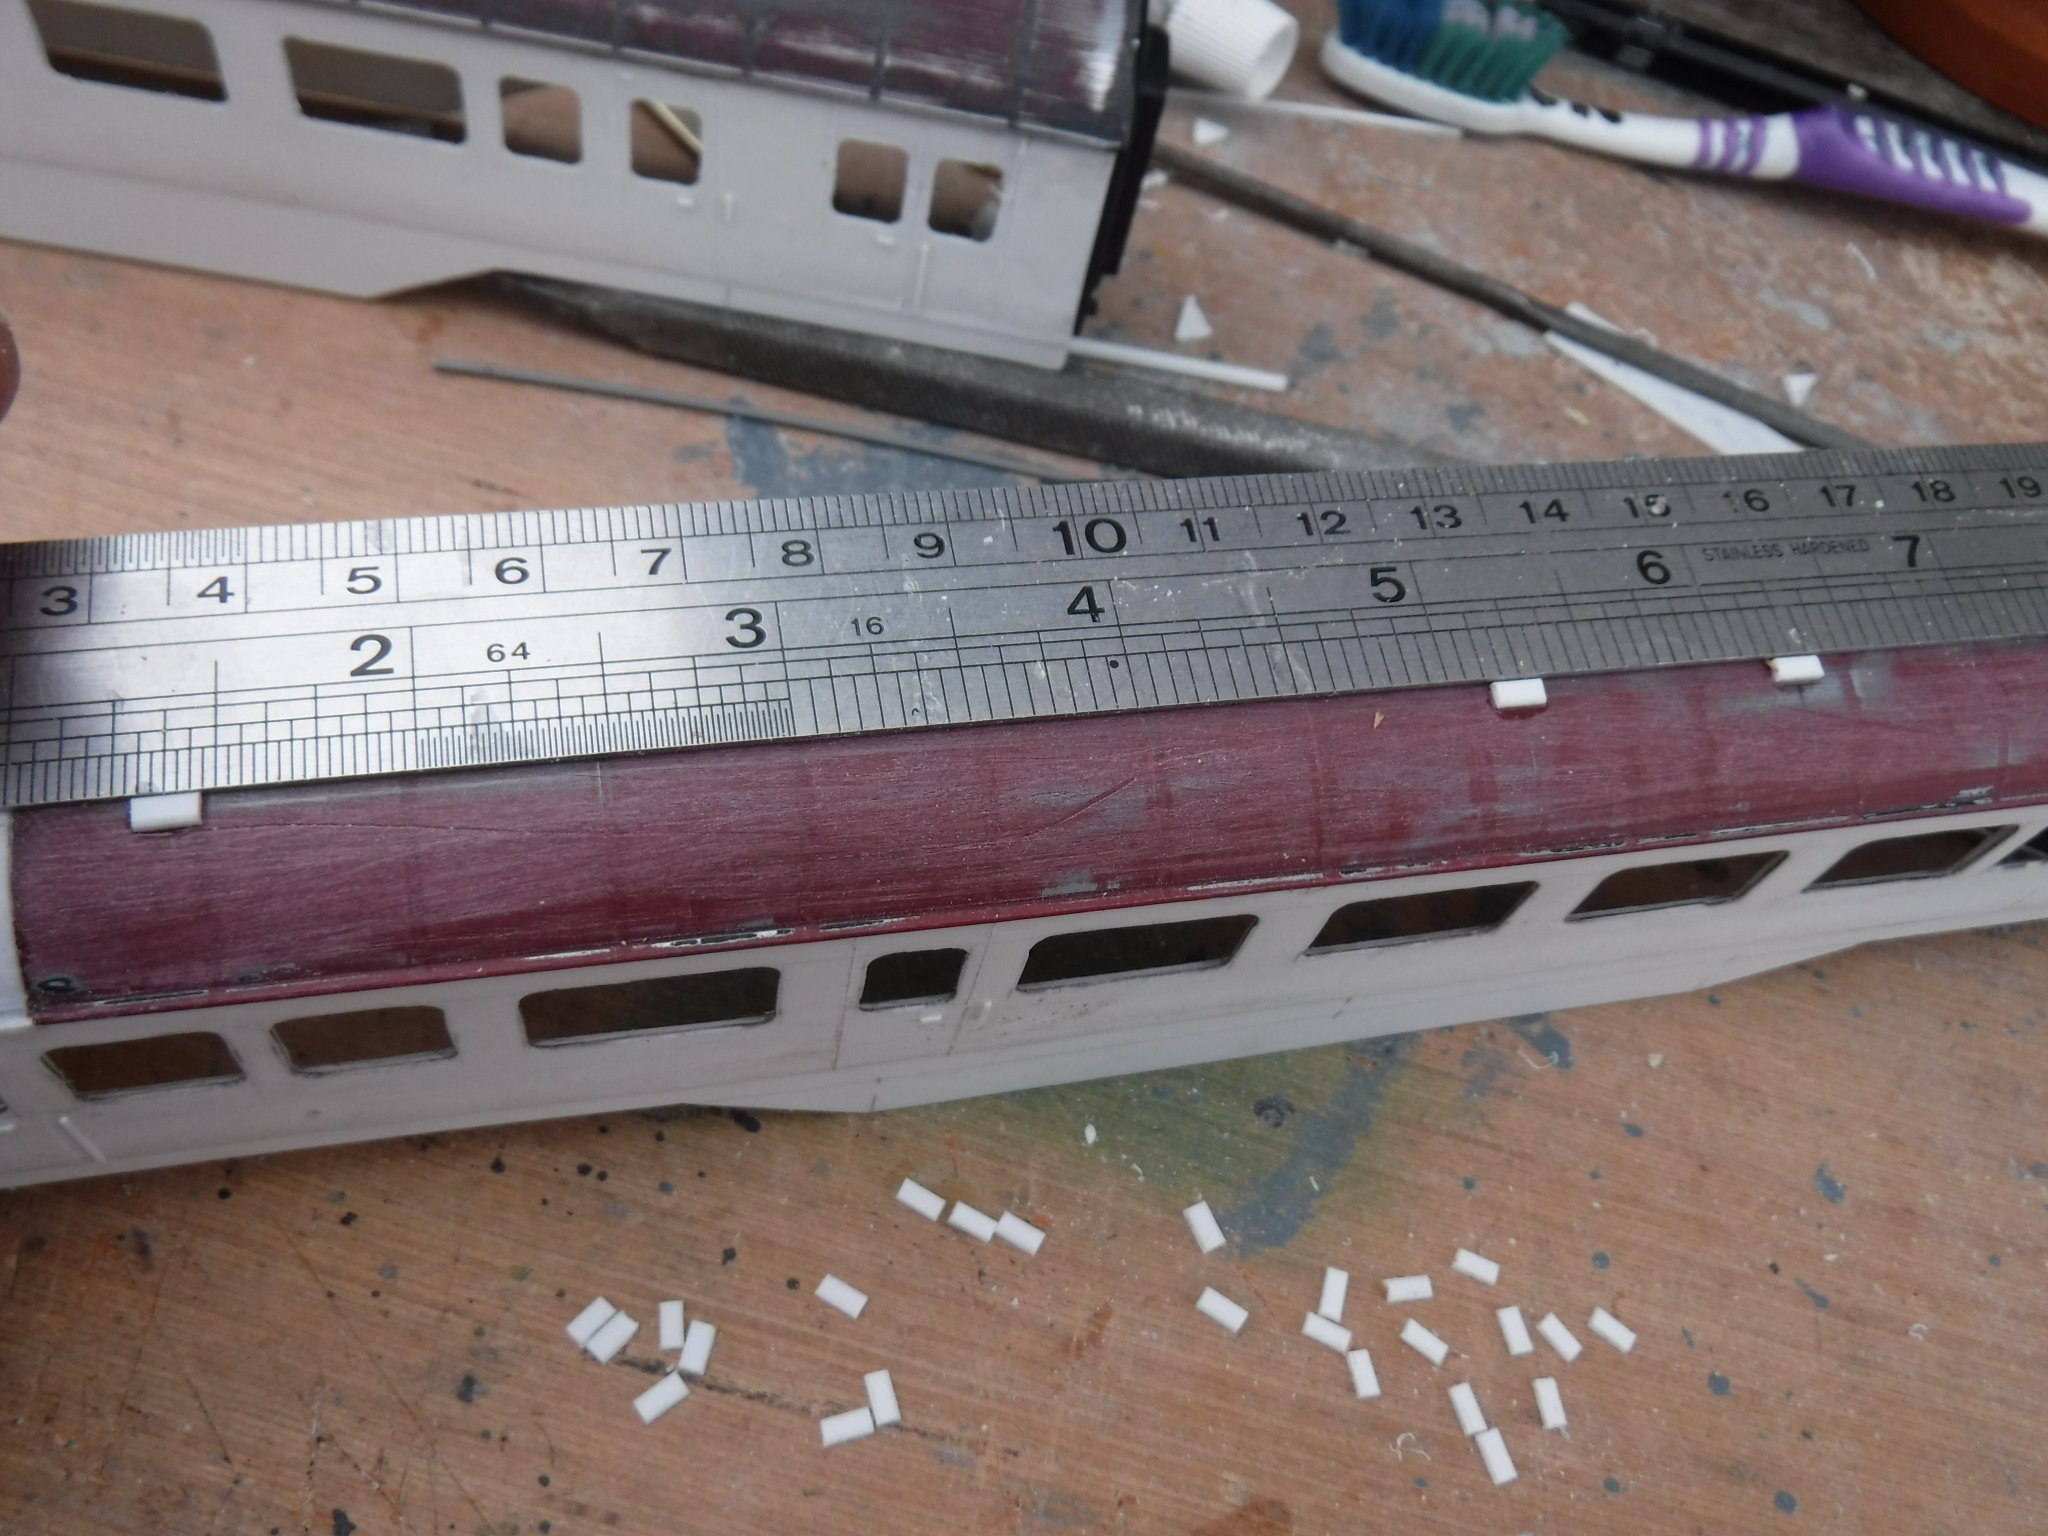
Hi Folks, I'm still back form my holidays and still on with the toy trains. This post concerns the roofs of the coaches generally and the gap in the roofs of the coaches that were lengthened. The roofs of the Hornby Staniers have great thick beads on them so they have to be cut off also the roof vents are in the main of the wrong type and in the wrong positions. I use a Swann Morton No. 10 to cut off the beads and the vents almost flush and then I scrape off the paint which pretty much removes the residual of the beads and vents before filing locally and sanding generally. An awful job and rather boring when there ten roofs to do. Two in the back ground done, one with vents removed and one with vents and beads removed having the paint scraped off. Using the underside of the No.10 blade to scrape off the paint and high spots. The coaches that were lengthend had strips of .030" and .020" plasticard fitted over the joining strips in the roofs. These were 38mm for the bottom one and 40mm for the top one, the width was suited individually. They were curved into shape before fitting and once cured the ends were filed flush with the sides of the coach and filed to match the roof profile where proud. Where they are low they will be filled and sanded later. A .040" square rod is used to make up the gutter which is later filed to match the profile of the the original gutter. Shewing the make up pieces and gutter, a small amount of filler will be required for this one as it is slightly low in places. Gibbo.
-
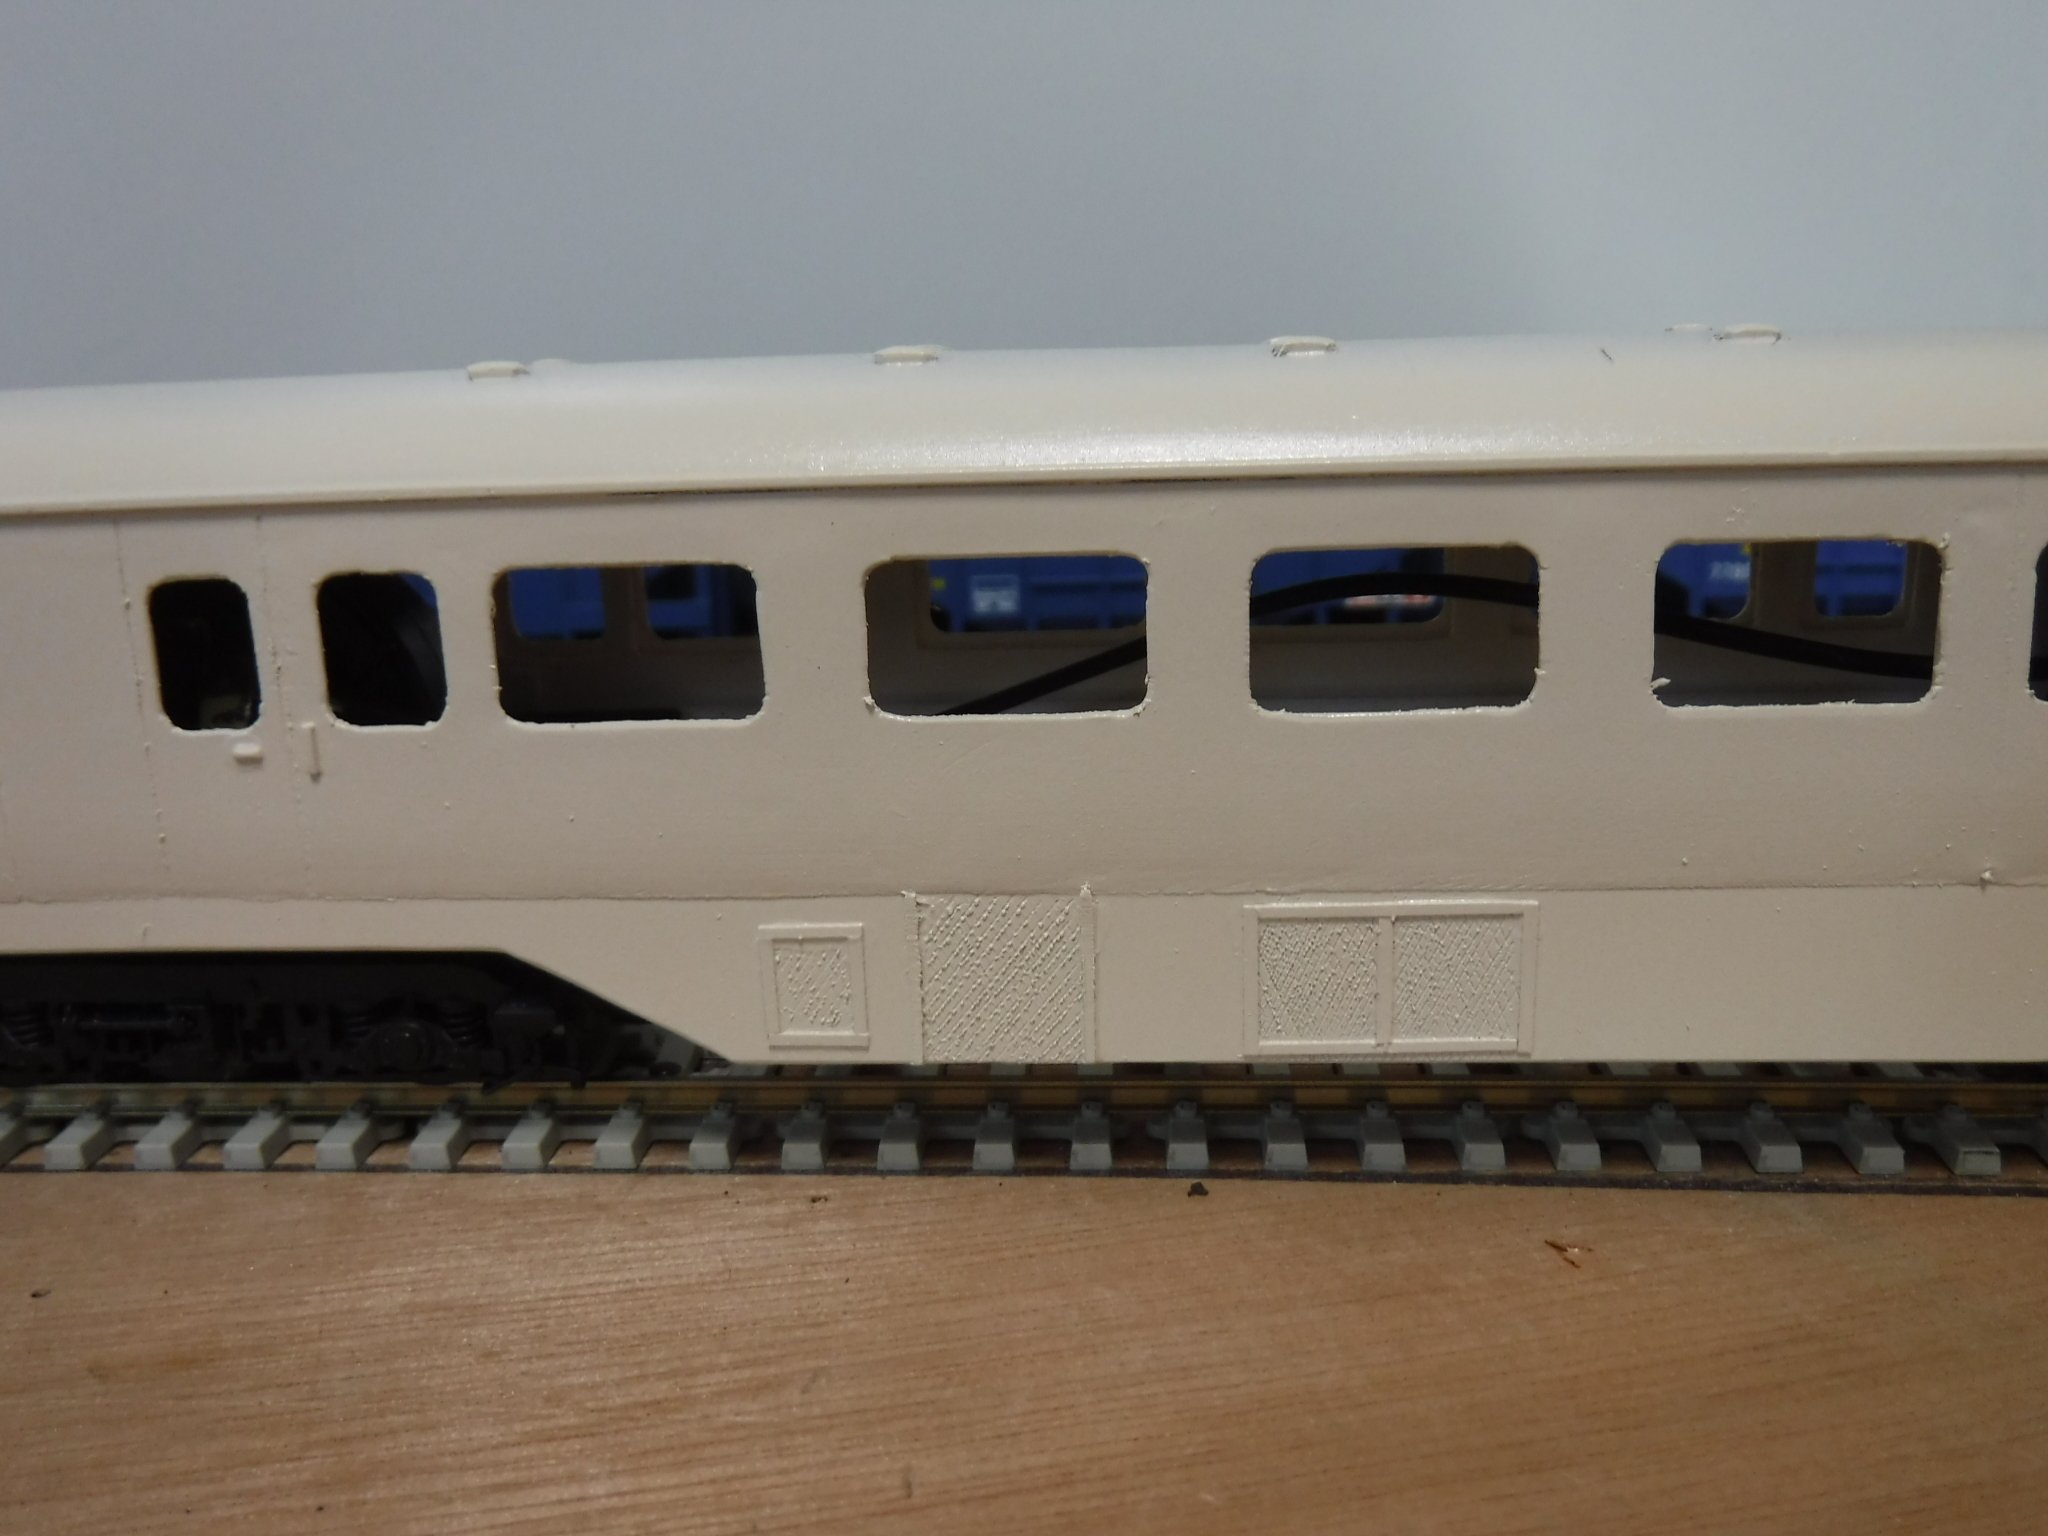
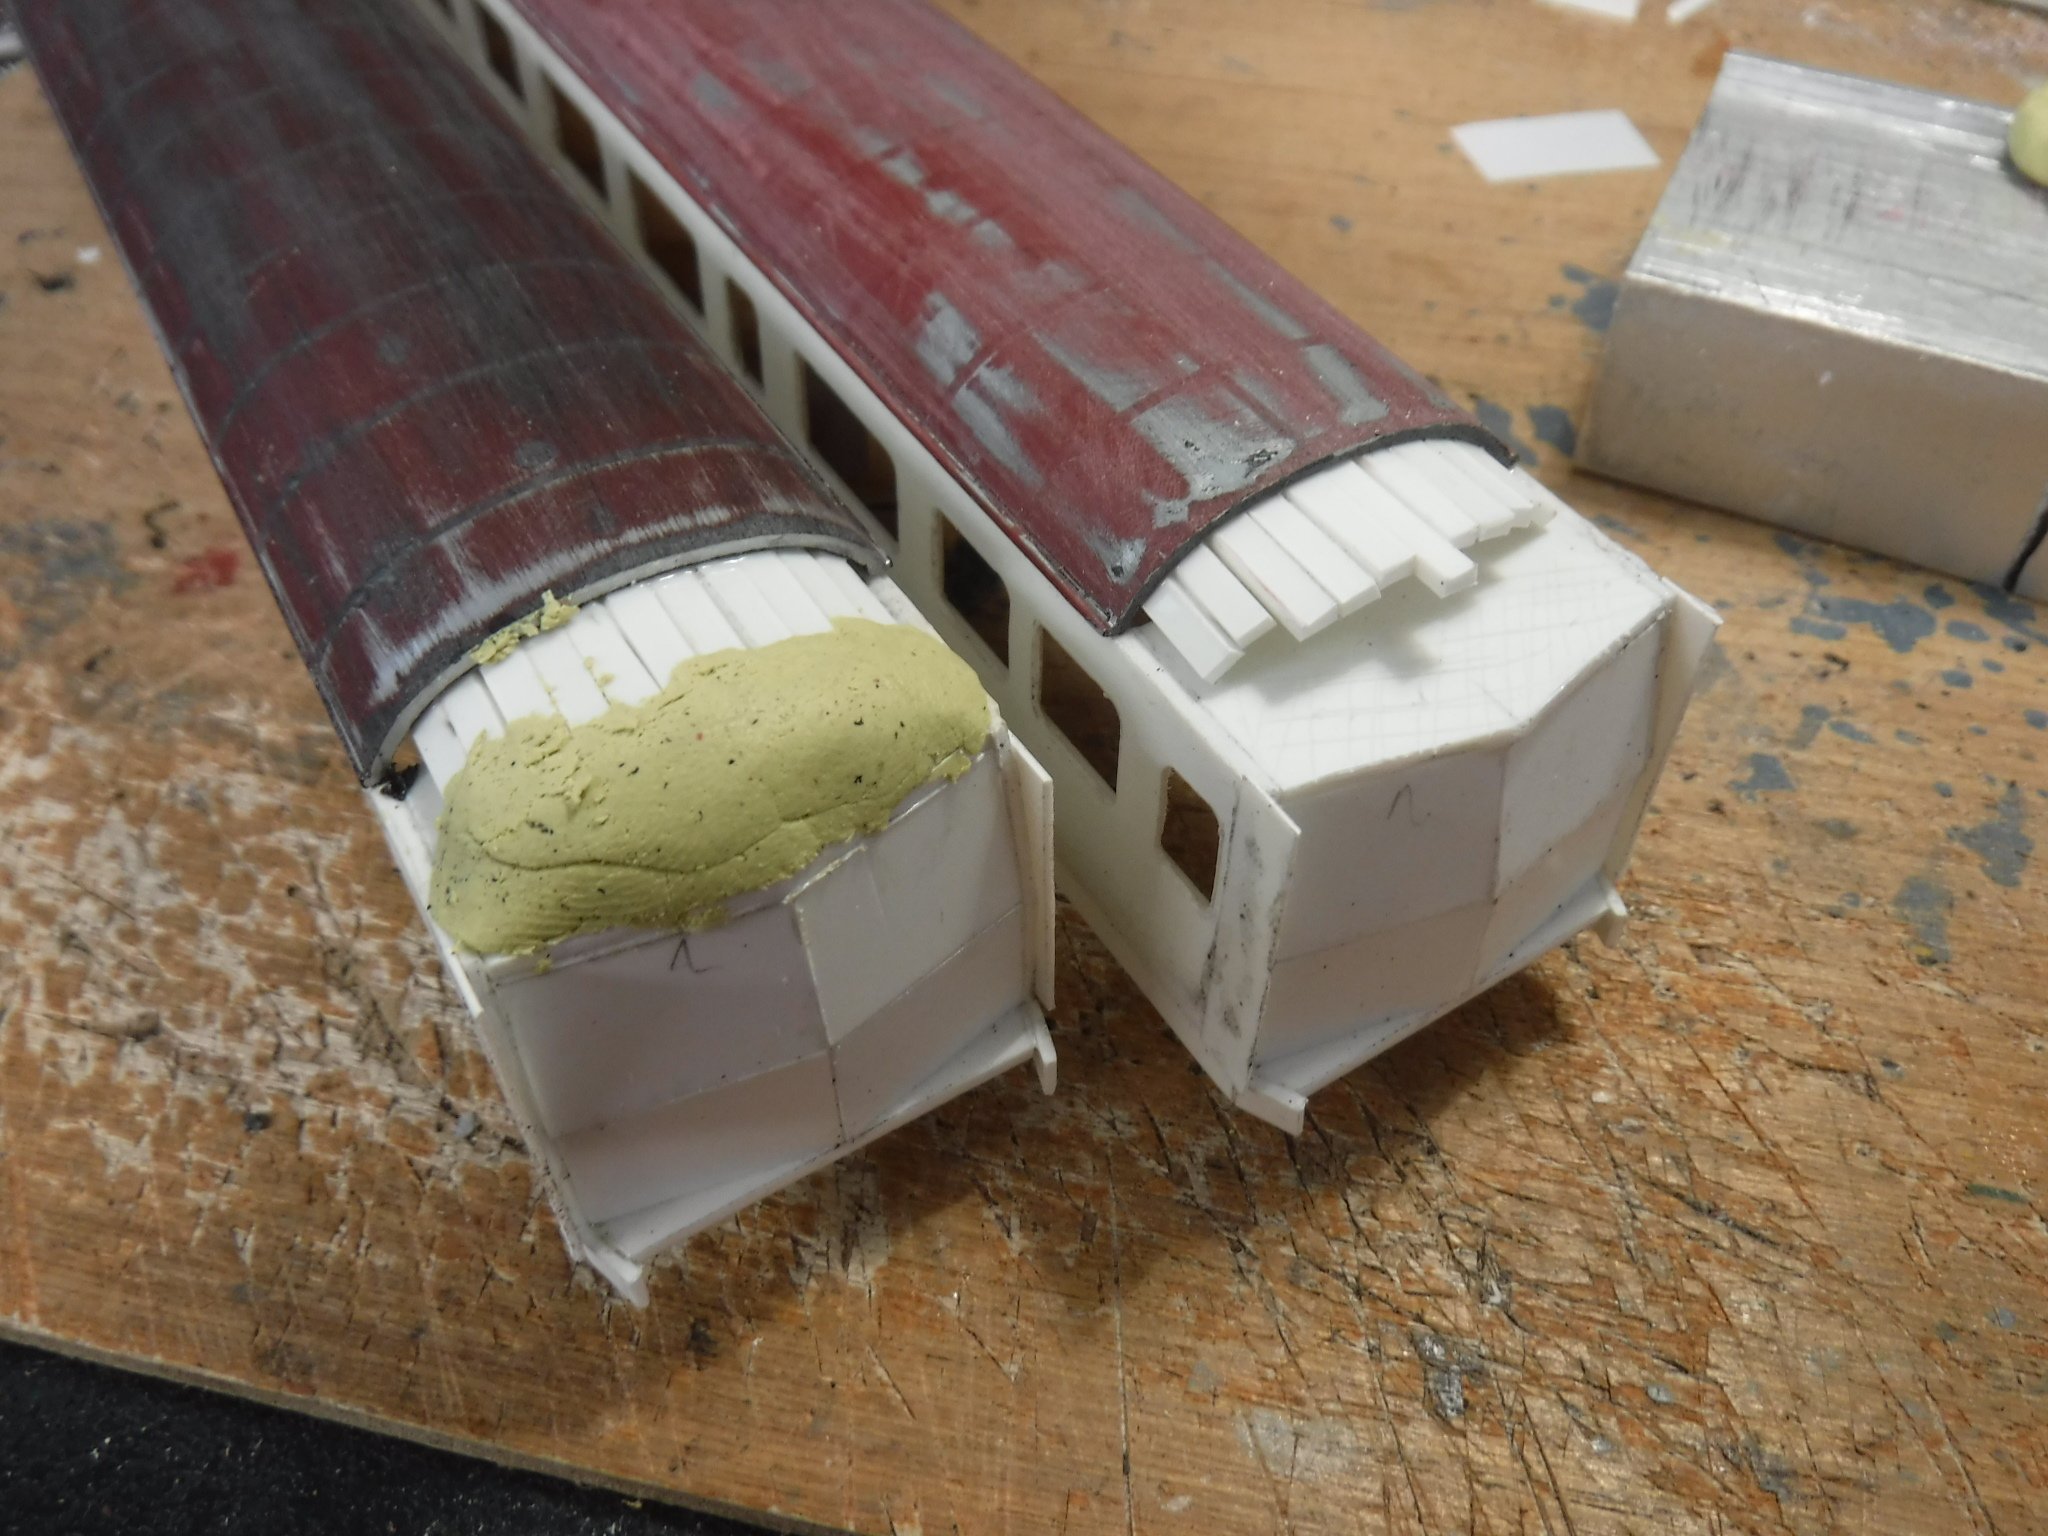
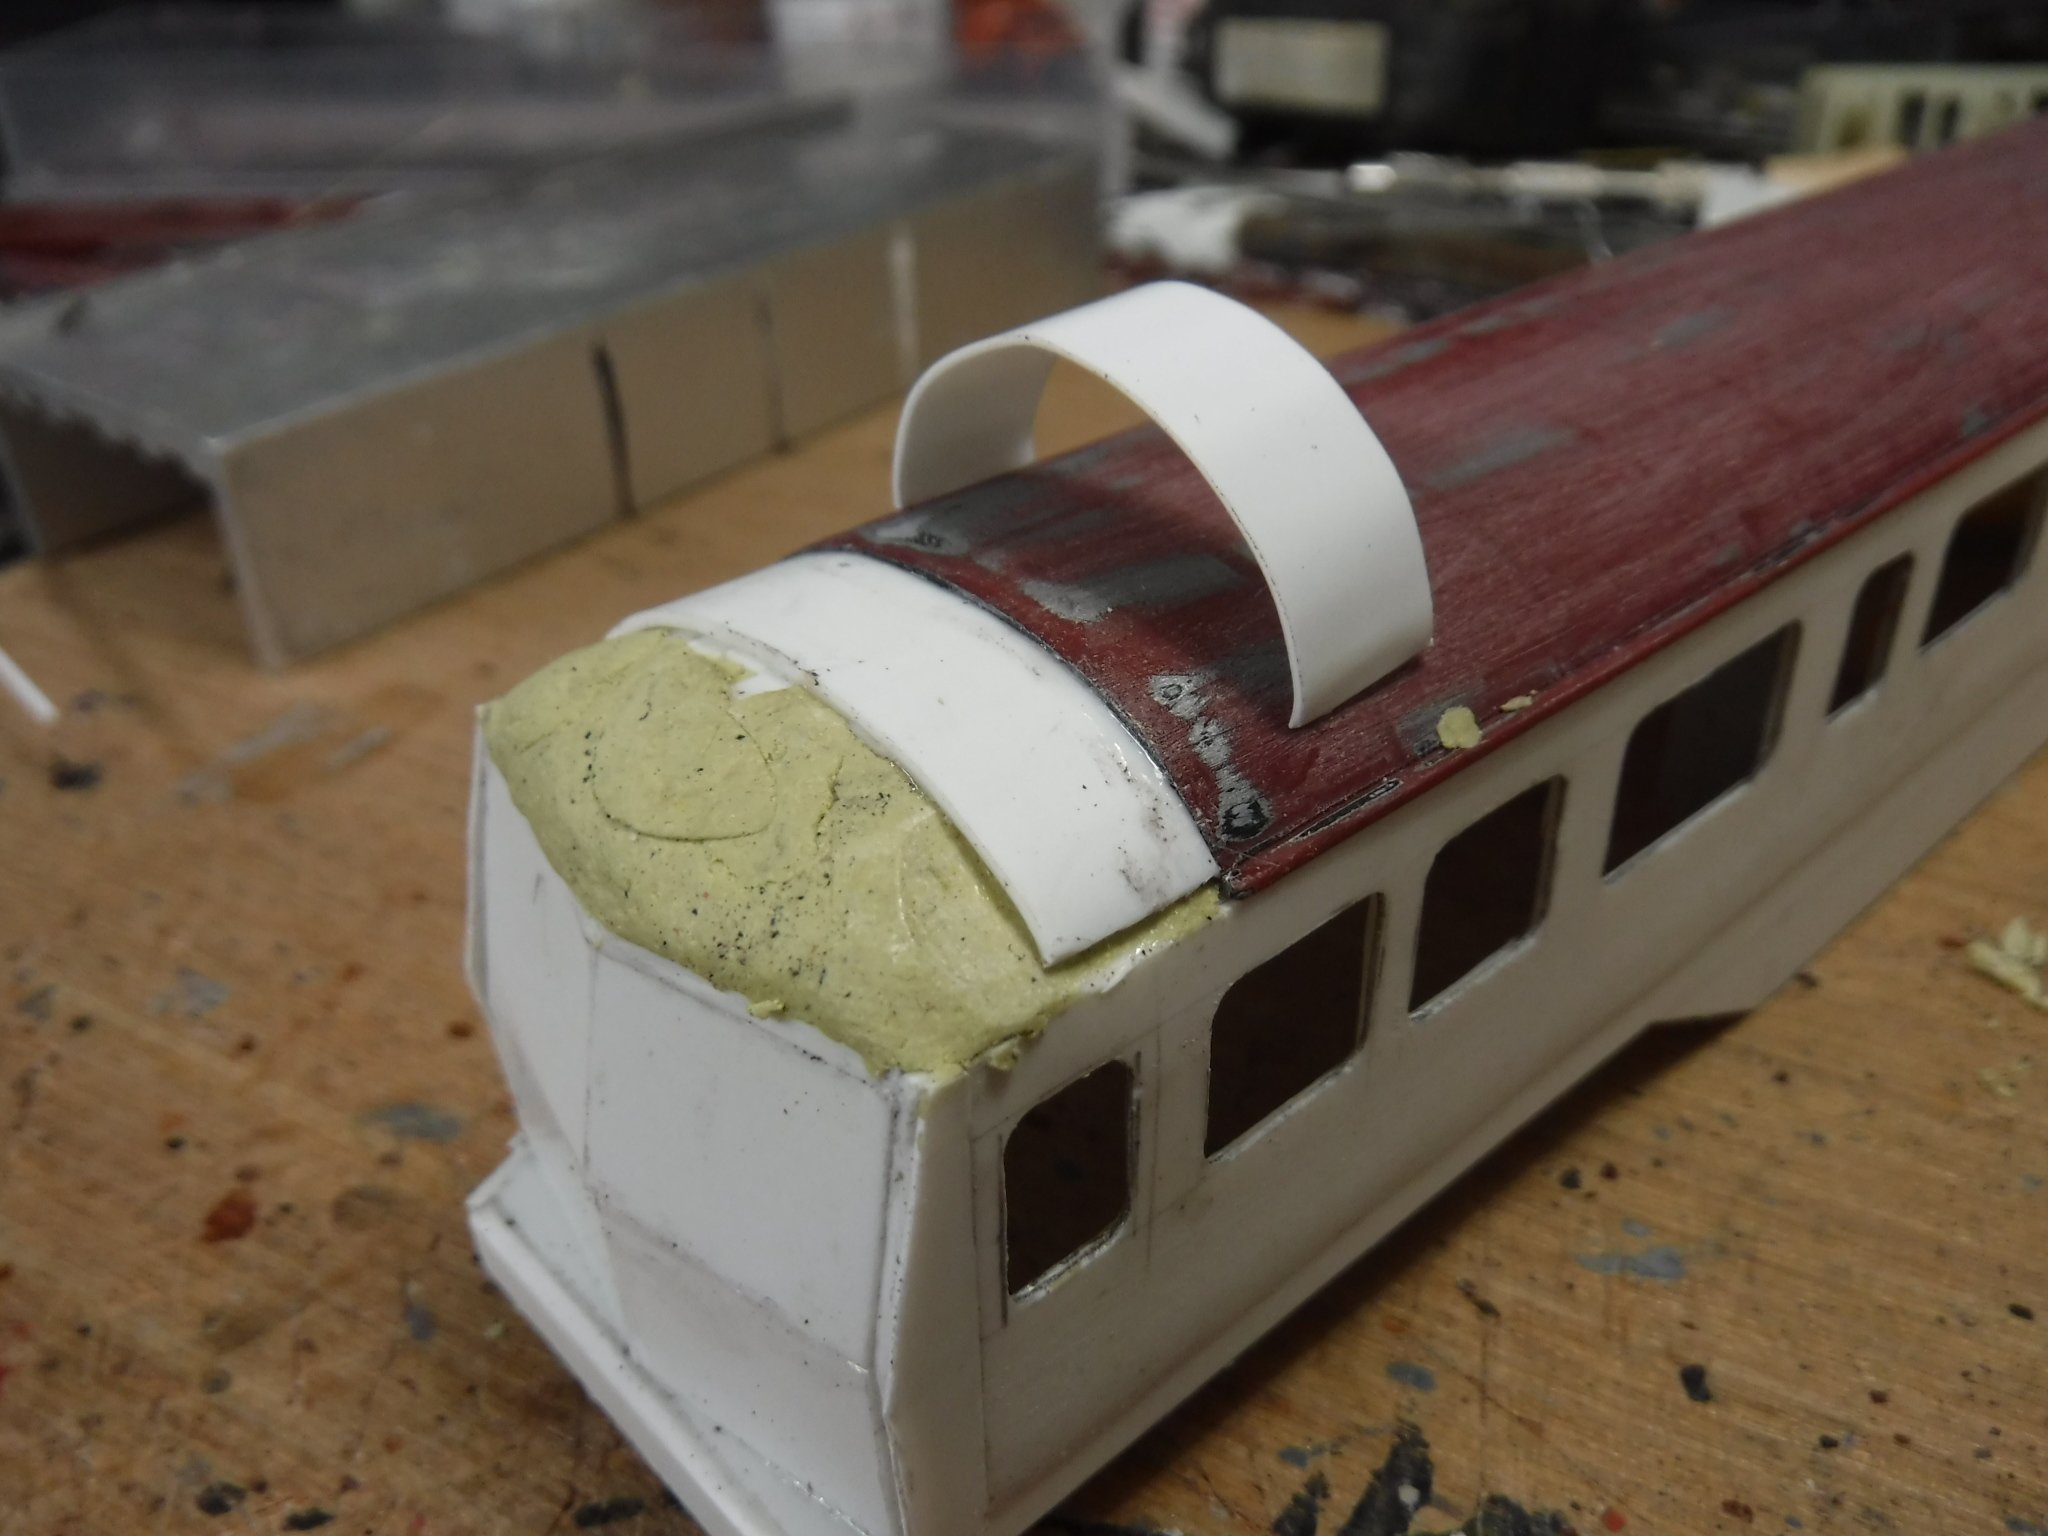
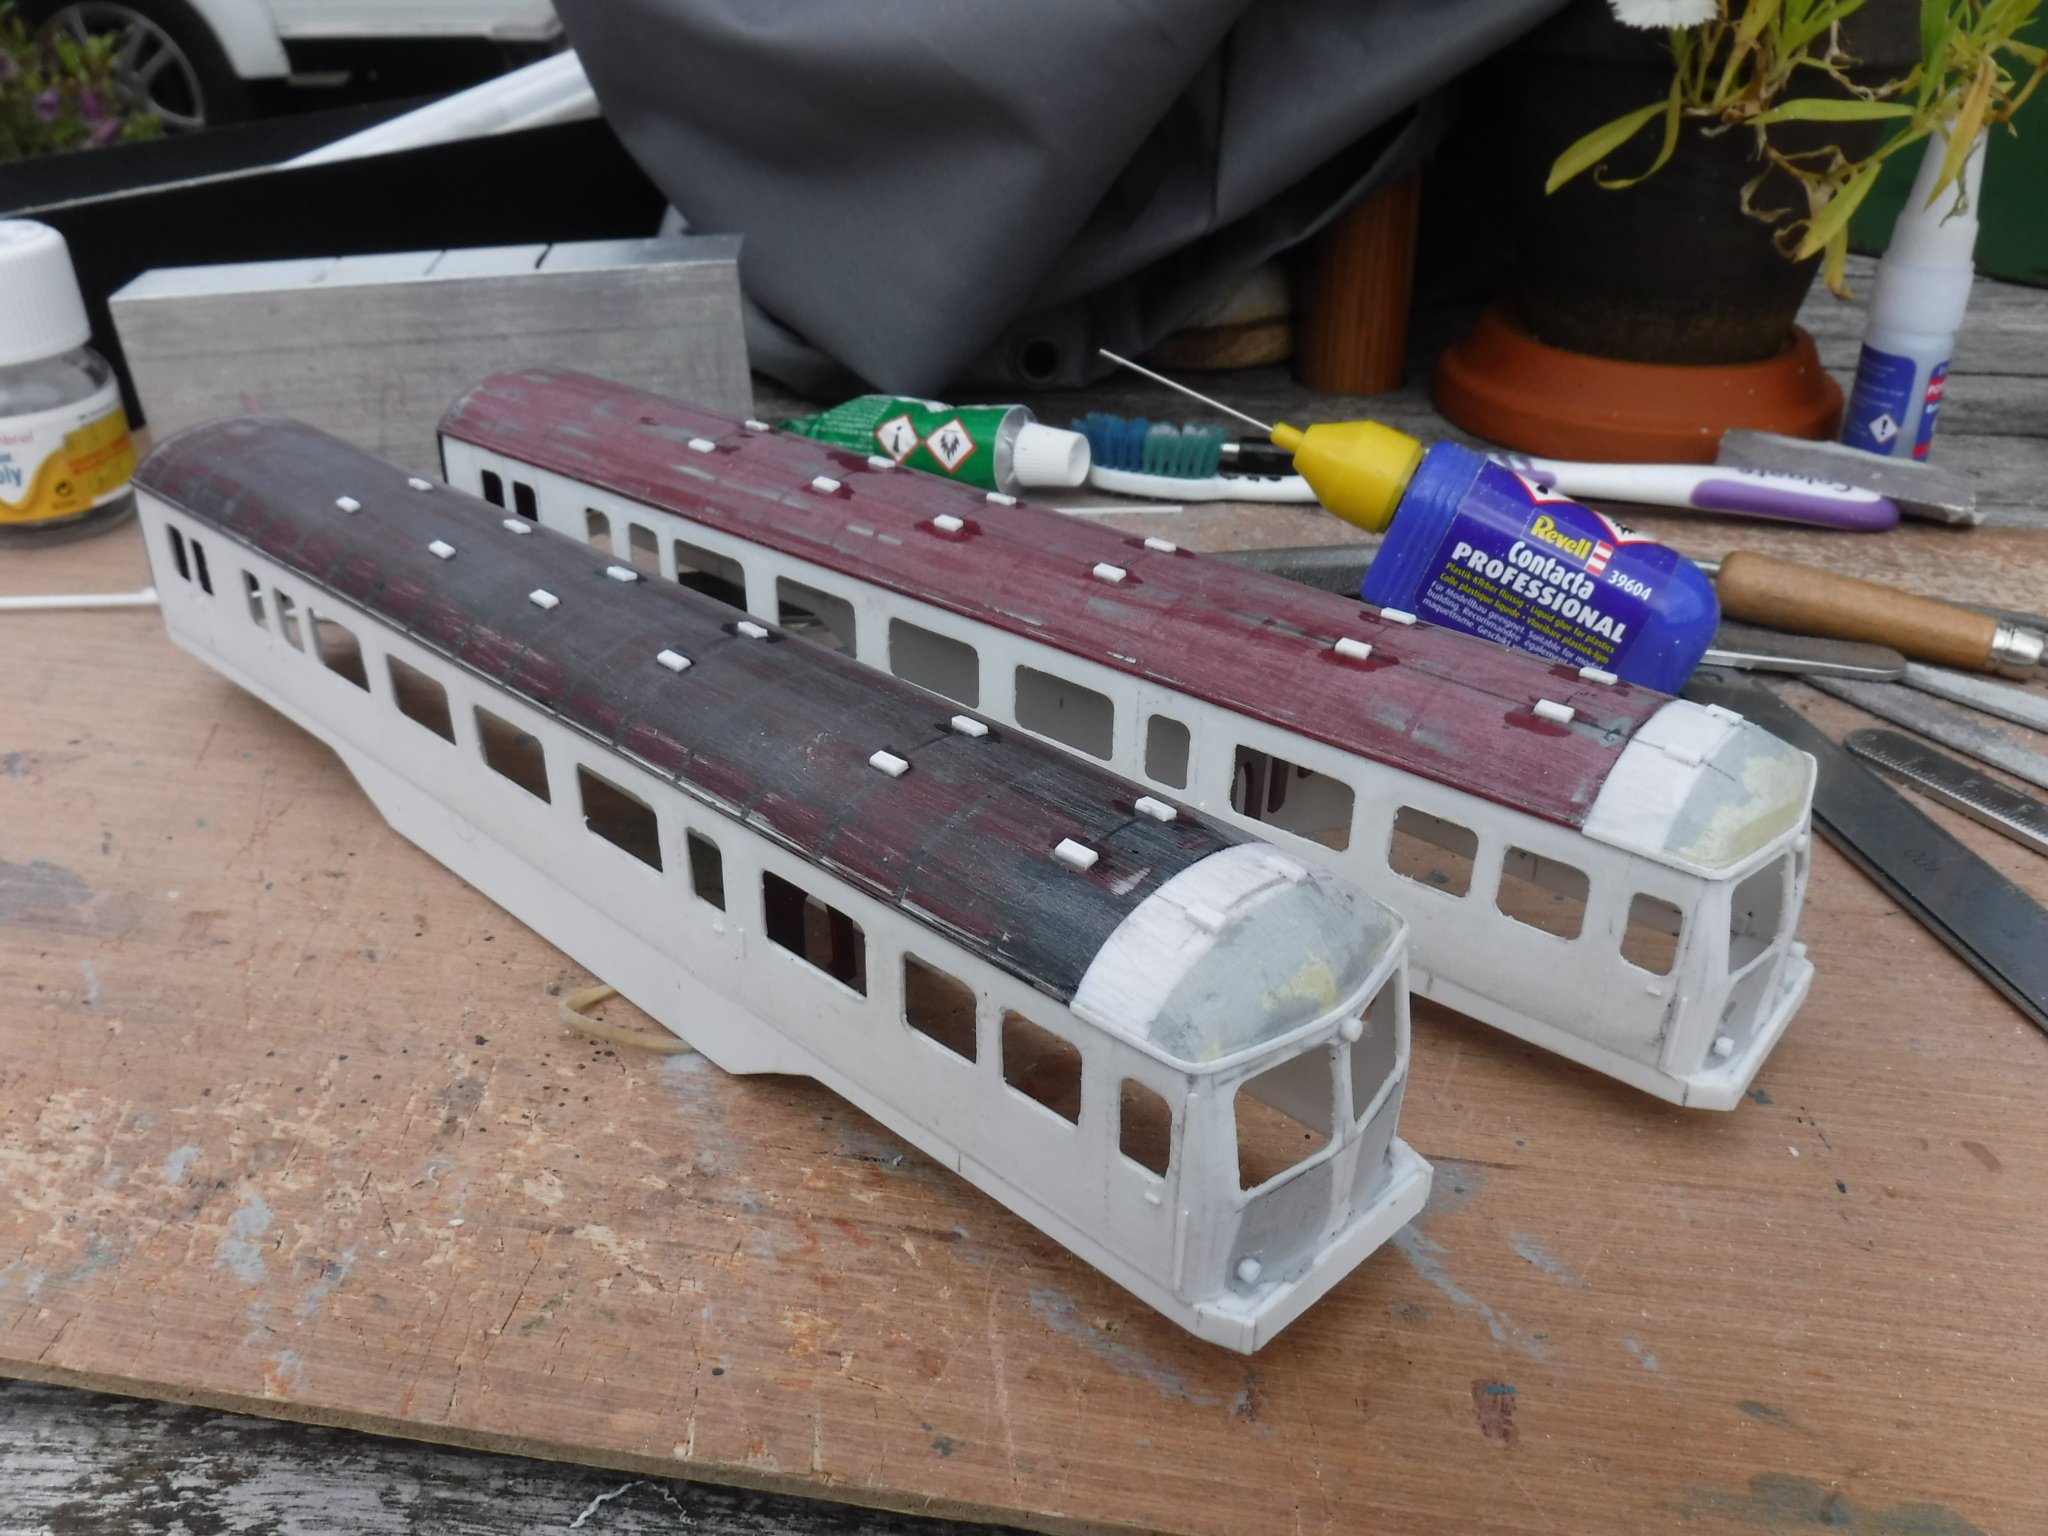
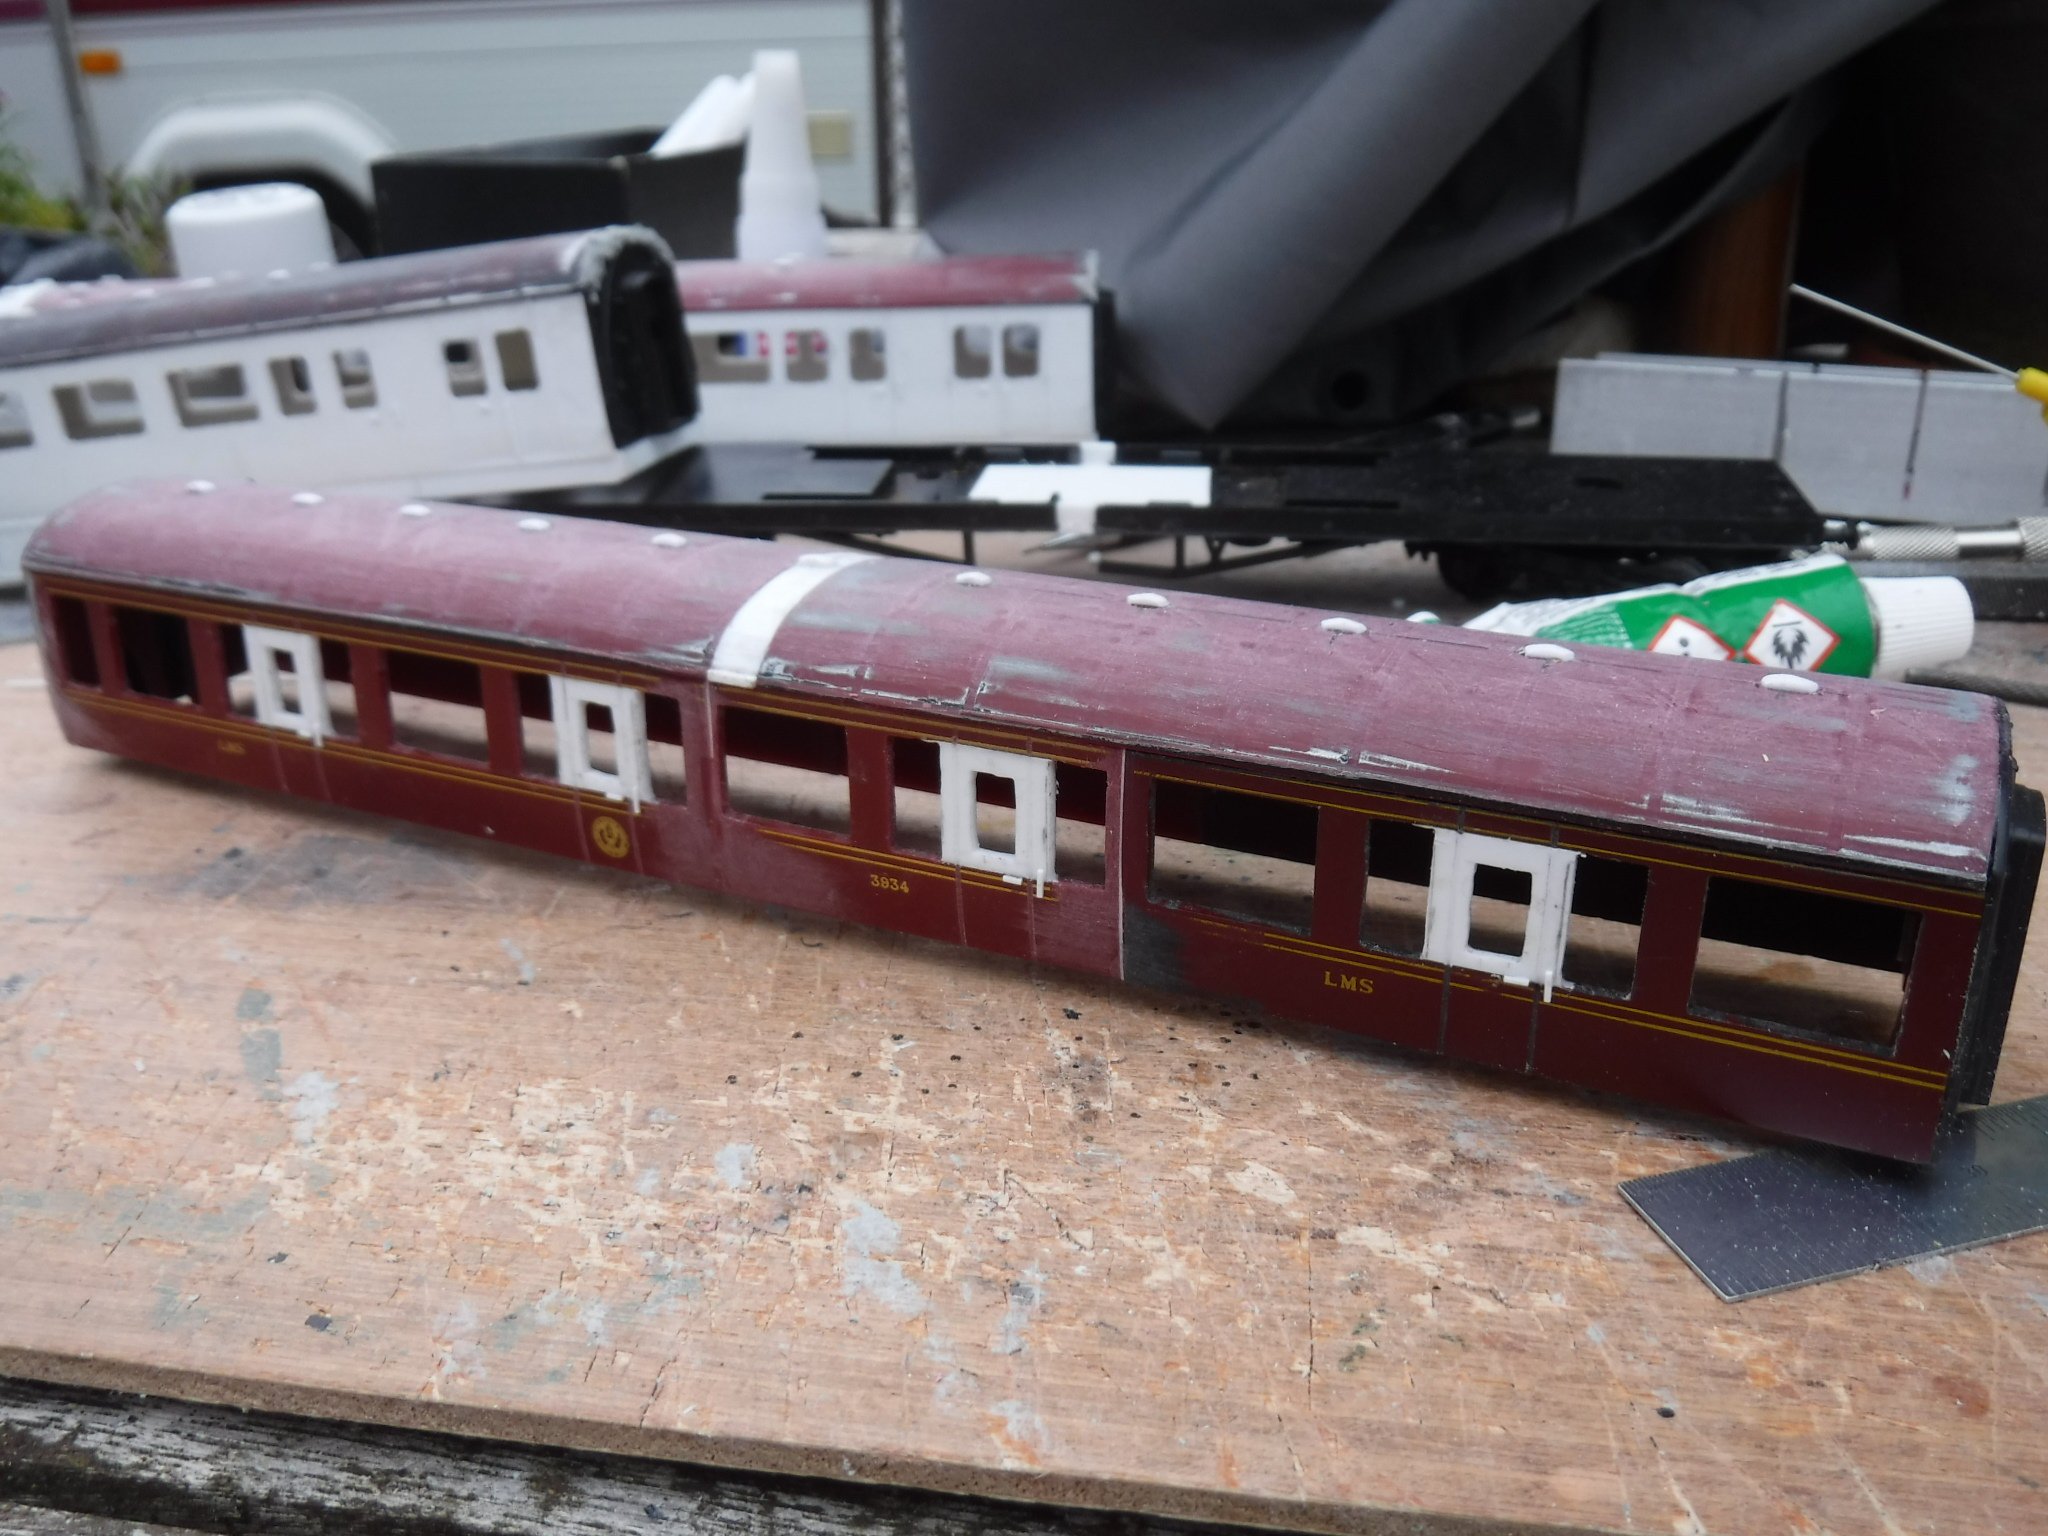
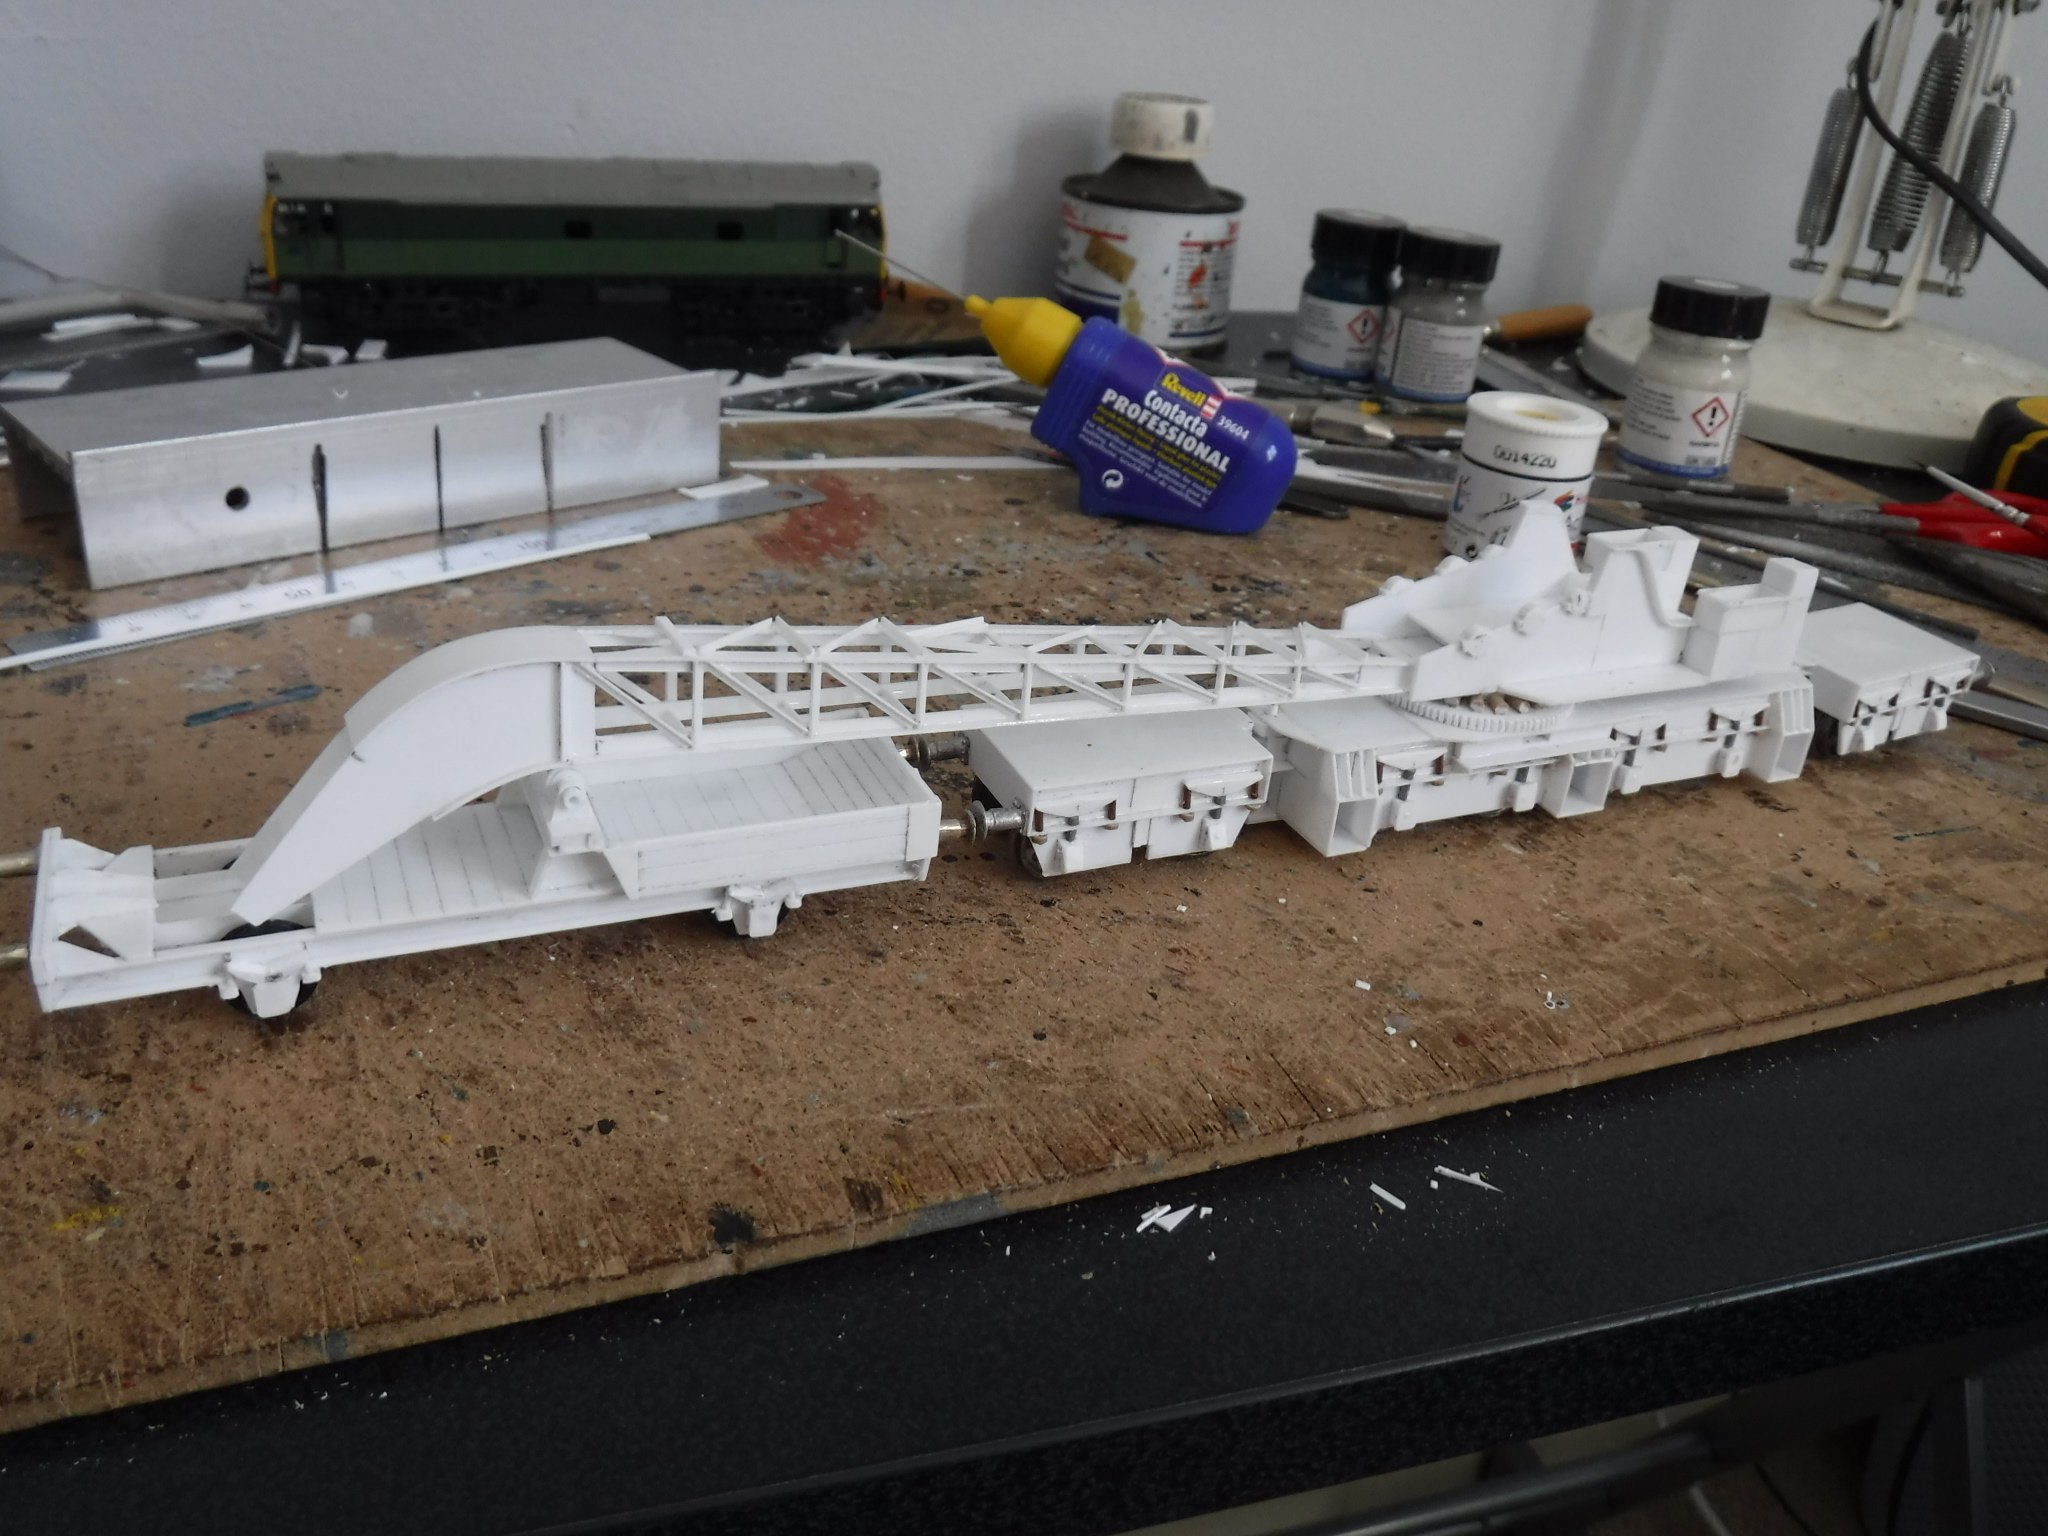
Hi Folks, I'm back from my holidays, on with the toy trains. This post concerns the cabs and the roof details. The front end was fitted up with a .060" former placed at gutter height over the cab, this gave form to the profile of the front of the cab. Then four pieces of .040" plasticard cut and fitted in, as the cab front is angled in four axis each piece was slightly trapezoidal instead of what may be thought top be square, The pieces were cut slightly oversize and square and cut and filed to fit first doing the bottom pair one side at once and then fitting the opposite piece to it once the first piece was secure and squared up. The former over the cab roof with the four pieces that make up the cab front. Once this was done I glued strips of .040" to the underside of the roof to a position just behind where the radius of cab roof dome would run into the level of the roof line. I then scored the former over the cab roof before applying Milliput filler to the approximate shape of the cab roof dome. The next step was to cut some .030" strips 9mm X 38mm which were formed to shape and glued into place over the strips on the under side of the roof. Once these had cured I then cut some .020" strips 9mm X 40mm to make up the full thickness of the roof. I then made up the roof dome with Humbrol filler, I also applied some to the front of the cab under the windows to allow a rounded profile. Cab roof dome both before and after filler. The make up strips for the roof, this is because the units are longer than the Hornby Stanier coaches that I used for the roof sections. The extended side sheets had a .020" shim fitted ahead of the cab doors as I had cut the outer skin of the body flush with the edge of the cab doors. In hindsight I would have extended it as I did the inner lamination piece. Once cured the extended side sheets were cut back flush with the front of the cab fronts and then filed to a suitable radius. After the filler had hardened I filed the whole into shape making sure that the roof profile met the sides at gutter height squarely and then cut and filed out the windows. the next job was to fit the gutters. For the gutters I used .040" square rod as this is slightly larger than required and allows for the gutter to be filed to size and squared up if necessary. The gutters were attached with cyanacrylate glue as it was attached to the Milliput. Shewing one cab roof dome basically to shape and one as rough filler also the areas of filler to allow for a radiused instead of angular lower cab front. The near cab gutter is .040" as fitted the far one has been filed to shape and thickness. The roof vents were made from .040" plasticard cut into 2mm wide strips then further cut to 4mm long. I marked out the roof in pencil and fitted the ones at each end making sure that they were in line using a steel rule. Once cured it is a simple task to place a dab of glue into each position, fit the vents and then using the end two vents as datum aligning all the newly applied vents to the edge of the steel rule. Roof vent being lined up against the steel rule. Once all of the vent were cured I cut 30* angles off all four corners and then filed and sanded them to shape. The last job was to fit the maker lights and tail lamps form plastic rod. The shaping of the roof vents is not obvious in this shot however they are pretty much in line which is the main thing. I then scribed radiators into the underframe valances and fitted up .030" X .010" and .020" X .010" framings around the scribed areas but I omitted to photograph them so you will have to wait for that picture. The intermediate trailer car for this set is one of the K15 open thirds, complaints will be explained away by telling you that I have two of these so that is what it will be ! I fitted, roof vents, door handles and grab rails to this coach at the same time as to the units. All have so far been primed with Halfords white primer followed by two coats of Ford Ivory White, again from Halfords. I have some have some Skoda Pacific Blue to compliment it so we will see what that looks like once the ivory is hard enough to take masking tape in a few days. Gibbo.
-
A 3d printed 800 class for 00 (and a WLWR goods loco)
gibbo675 replied to Killian Keane's topic in Irish Models
Hi Folks, I haven't got any photographs of the cabs of the 800 class locomotives, I only commented for I used to work on steam Locomotives at Riley & Son's in Bury for almost 20 years and as such I'm familiar with steam locomotives and how they are constructed. I know about doorplate patches as I used to either fit them or cut them out and weld new sections into place, sometime the whole door plate would be changed out depending upon condition and the budget of the customer. Gibbo. -
A 3d printed 800 class for 00 (and a WLWR goods loco)
gibbo675 replied to Killian Keane's topic in Irish Models
Hi Killian, I note with interest that you have modelled the rear of the fire box with the doorplate radius patches in place. When the locomotives were new these would not have been in place as they are repairs due to caustic stress grooves due to the flexing of the plate in the mid point of the radius of the door plate flanges. When the locomotives were in service was the boiler plate uncovered as shown ? If it was not lagged and sheeted those locomotives would have had roasting hot cabs especially in summer. Perhaps as preserved the lagging was removed as it may have been asbestos and the sheeting not replaced due to poor condition. Gibbo. -
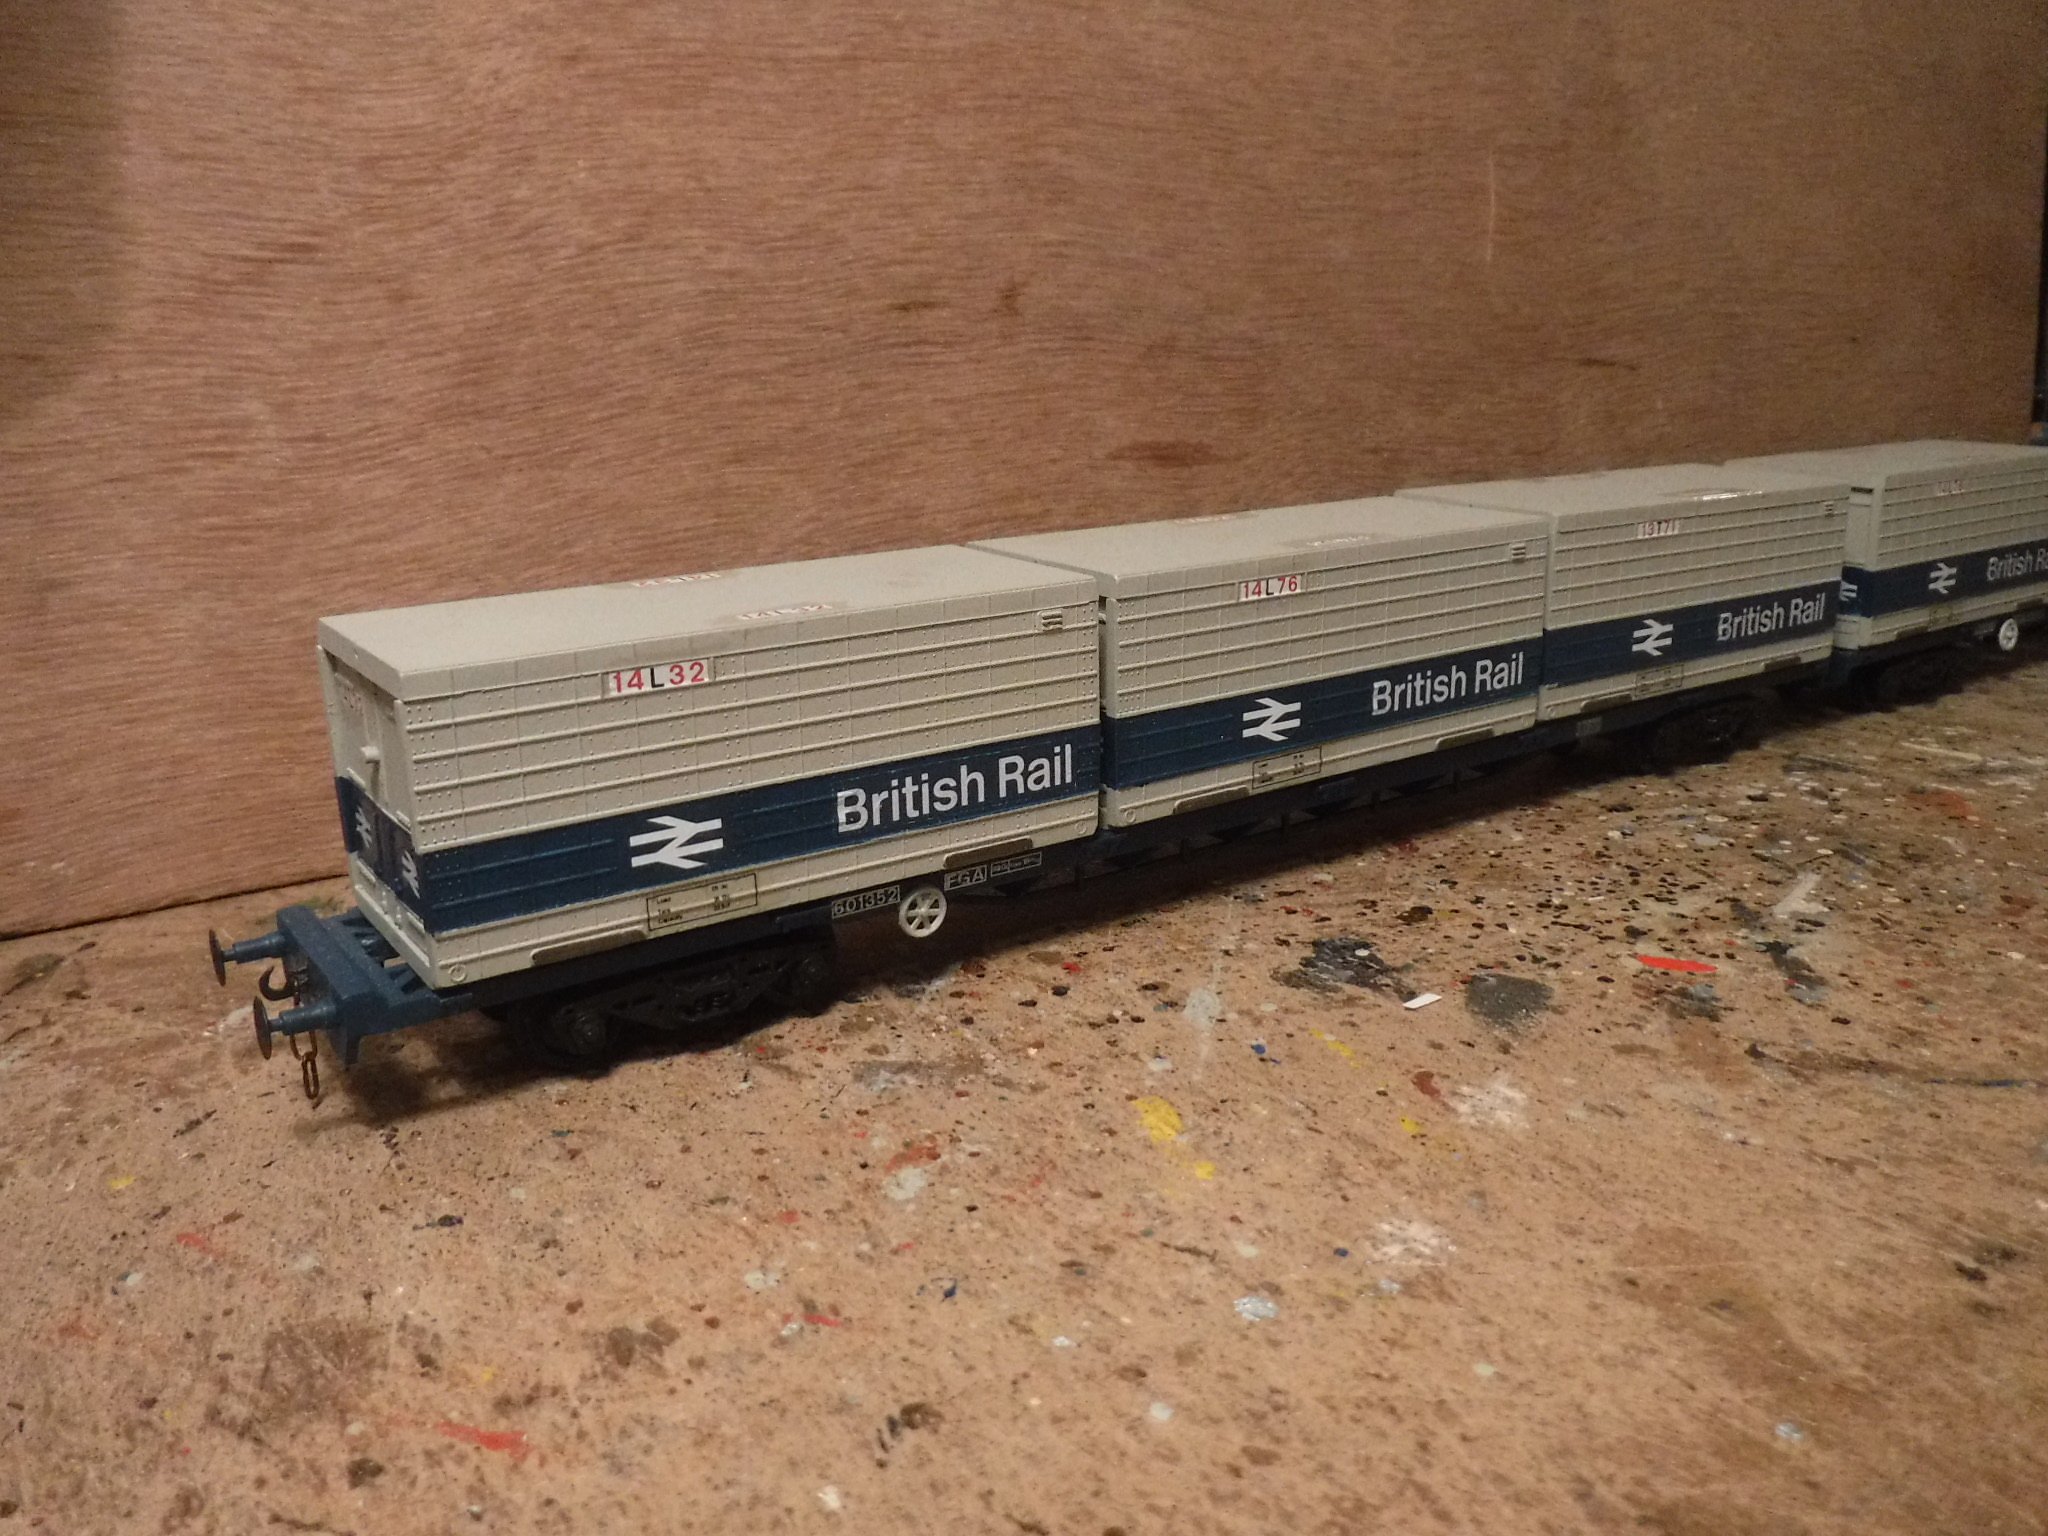
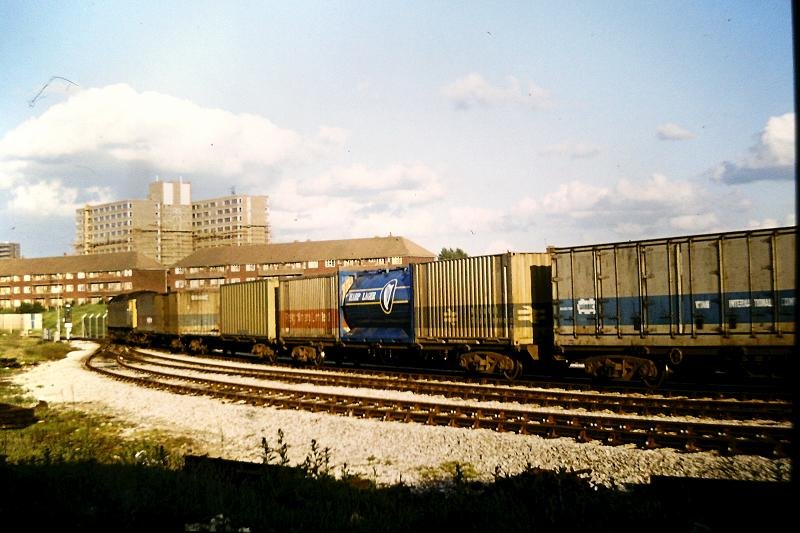
Hi Folks, Interestingly I have built some BR Freightliner containers from the late 1960's onwards that were grey with a blue strip which were used primarily for the ferry workings between Britain and Ireland for various cargos. An easy conversion from the Hornby 20' container box. My Hornby containers repainted. A Trafford Park Holyhead train in the 1970's with some Blue Strip Freightliner boxes and a Harp tanker on its way back to Dublin. The blue striped box on the left of the photograph is of a German container line which confused me when researching the blue striped Freightliner boxes. Gibbo.
-
Hi Folks, I use Railmatch enamels and Humbrol enamels with Johnsons Pledge to seal transfers and give a satin finish, and if I'm using rattle cans I have a selection of RAL numbered paints that I buy mixed from auto finishing suppliers with Halfords satin varnish. When using the Halfords varnish I use two light coats of B&Q PU floor varnish to seal over the transfers or they curl up due to the varnish attacking them. I wait two days for the floor varnish to dry so that it does not dissolve and then a light coat followed by a finish coat applied slightly more heavily. The Halfords varnish gives a consistent finish and applies well however it cannot be used over enamel paints as it dissolves them crinkling them surface as paint stripper does other wise everything would get a coating I have always found Humbrol dullcote comes out either flat matt or high gloss and very rarely satin as it ought to be sometimes fading from one to the other from one end of a model the the other however it is stirred, shaken etc. to the point I will not use the stuff at all. Railmatch paints always give consistent satin finish, it is that there has to be a gloss coat for transfers that the top coat of varnish very rarely give consistent finish afterwards that causes me a lot of trouble. I have to say inconsistencies in paint drive me bonkers. I'm definitely a builder and not a painter from that point of view. Gibbo.
-
British locos and stock that can be disguised as Irish
gibbo675 replied to Westcorkrailway's topic in Irish Models
Hi Folks, Tell us @Mike 84C what was the last one supposed to have been ? Gibbo. -
British locos and stock that can be disguised as Irish
gibbo675 replied to Westcorkrailway's topic in Irish Models
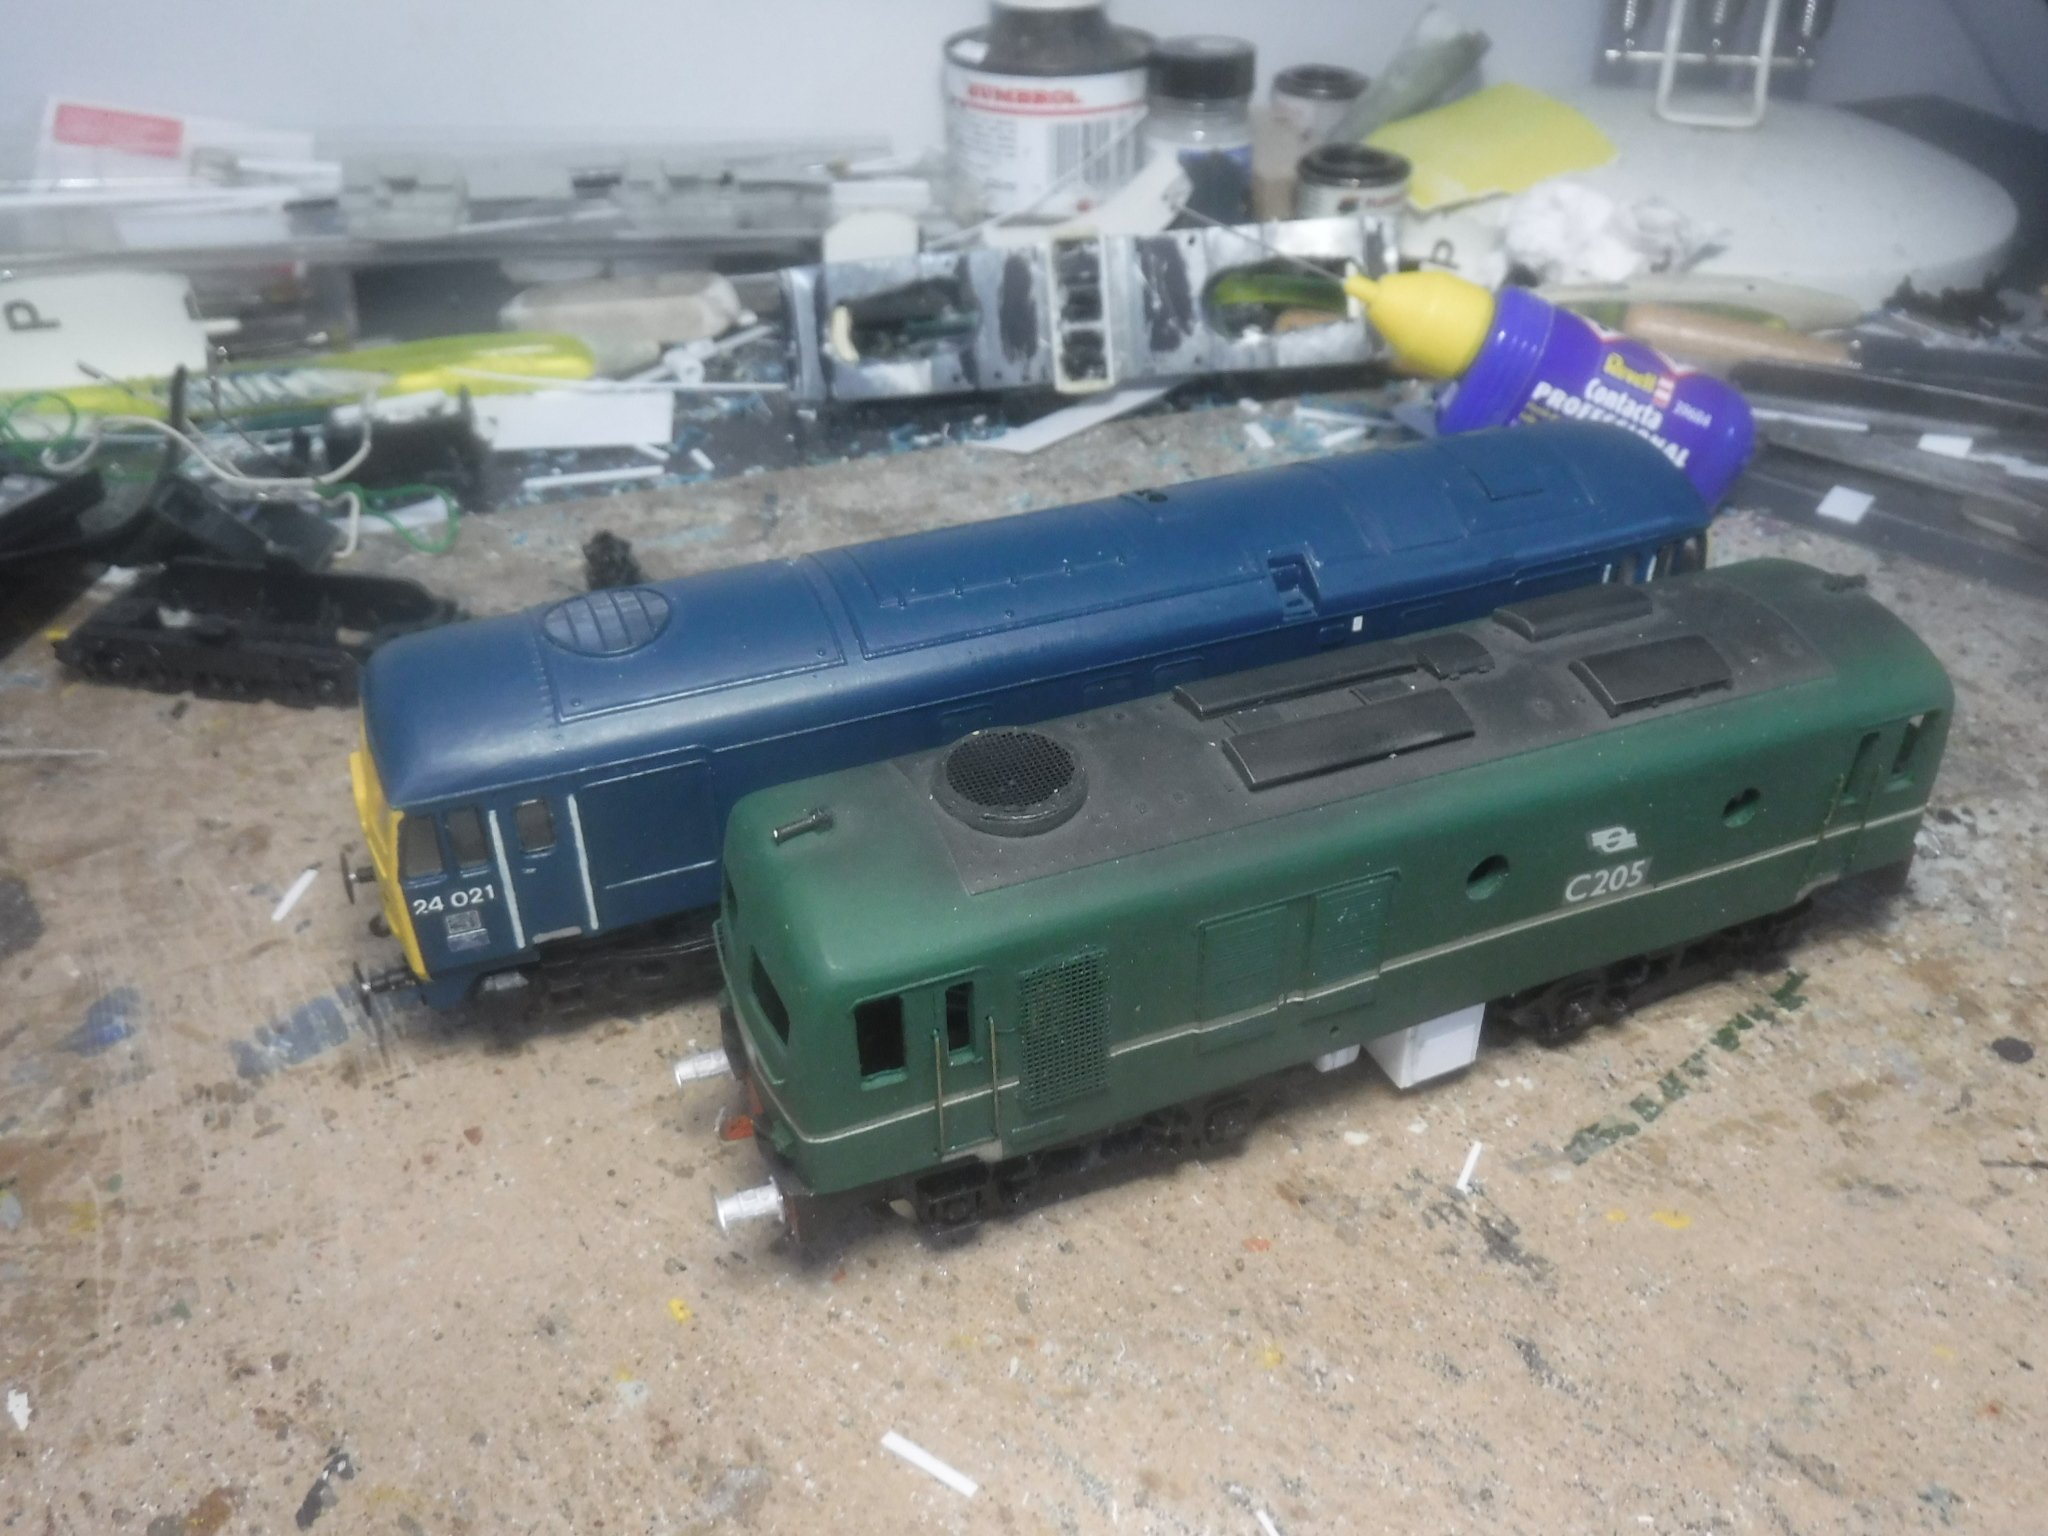
Hi Mike, I built one of those a couple of years ago for my mate in Sligo and used a Hornby class 29 chassis with slightly modified bogies. Scrubs up reasonably ! Next to one of my Hornby class 24 conversions as a size comparison. I do like @LNERW1 idea of using a Lima class 33 body as a basis for a body of an A or C class although the bogies are all wrong. The C class could be cut and shut using Hornby class 29 bogies and the off cut from the body might do to space out for a C class using class 31 bogies. The B class might also be made form a lima class 33 body and class 31 bogies. Scratch building and cutting and shutting really aren't all that difficult especially when using an existing body as a conversion. Get busy lads; Gibbo
-
Hi John, Here is that very tank wagon on the tender frameset: https://www.departmentals.com/photo/023204-02 Gibbo.
-
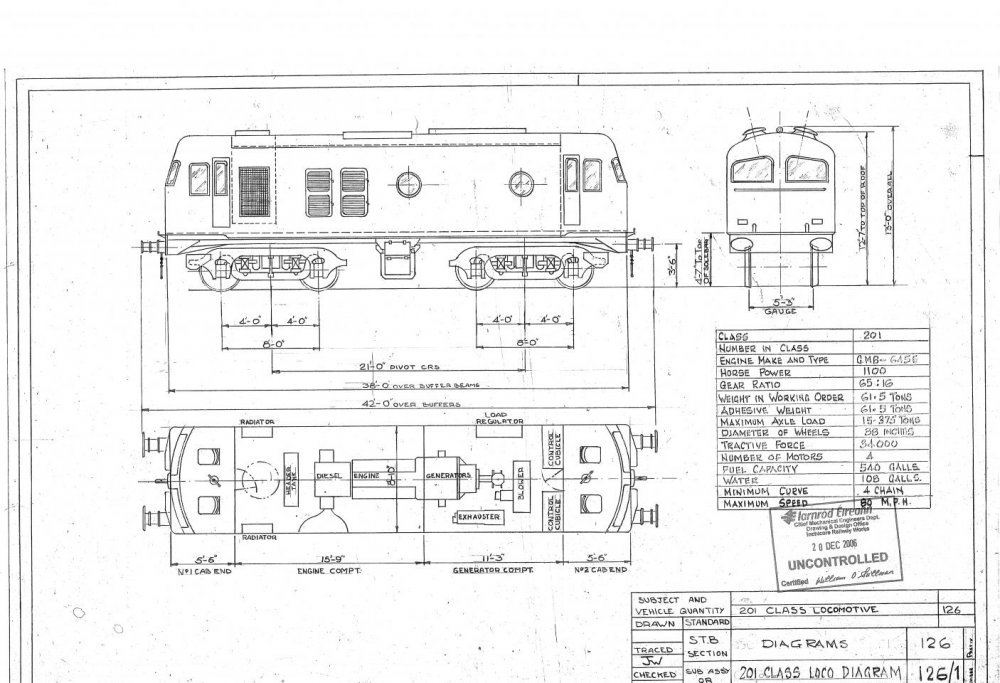
Hi Folks, Which version does this drawing represent ? The reason I ask is that I'm building it for a friend despite not being overly familiar with Irish stock. Progress so far. Gibbo.
-
Hi Phil, Should you look to others for salvation they will in time steal everything from you, I think that should you look more closely you will see that Politicians, Police Forces, Courts and Prisons are being dealt with by Natural Law as we speak. It is not as subtle as it once was but it is becoming more and more obvious, politicians have led lots of people astray. Natural Law cannot be corrupted, only the corruptible may be corrupted. I do not take sides however, I do observe what is plain to see, that I point it out does not make me the opposite of what I note only the observer of what I note. My position is central under my own clear conscience. Look up, White horses between the battle lines, on a certain streaming platform, broadcast live from Sligo this very morning by the inimitable Sage of Ballymun. Rather synchronous I would say. Gibbo.
-
Hi Phil, Natural law in full effect there. Should everyone have respected each other and their respective sensibilities and also treated others in a way that they may have wished to be treated themselves then I would guess that the site you reference would still be going strong. The pendulum of the mind oscillates between sense and nonsense, not between right and wrong. Every form of addiction is bad, no matter whether the narcotic be alcohol, morphine or idealism. The privilege of a lifetime is to become who you truly are. (Carl Jung) Gibbo.