.png.c363cdf5c3fb7955cd92a55eb6dbbae0.png)


AnUnknownConsciousness
-
Posts
17 -
Joined
-
Last visited
-
Days Won
1
Content Type
Profiles
Forums
Events
Gallery
Blogs
Everything posted by AnUnknownConsciousness
-
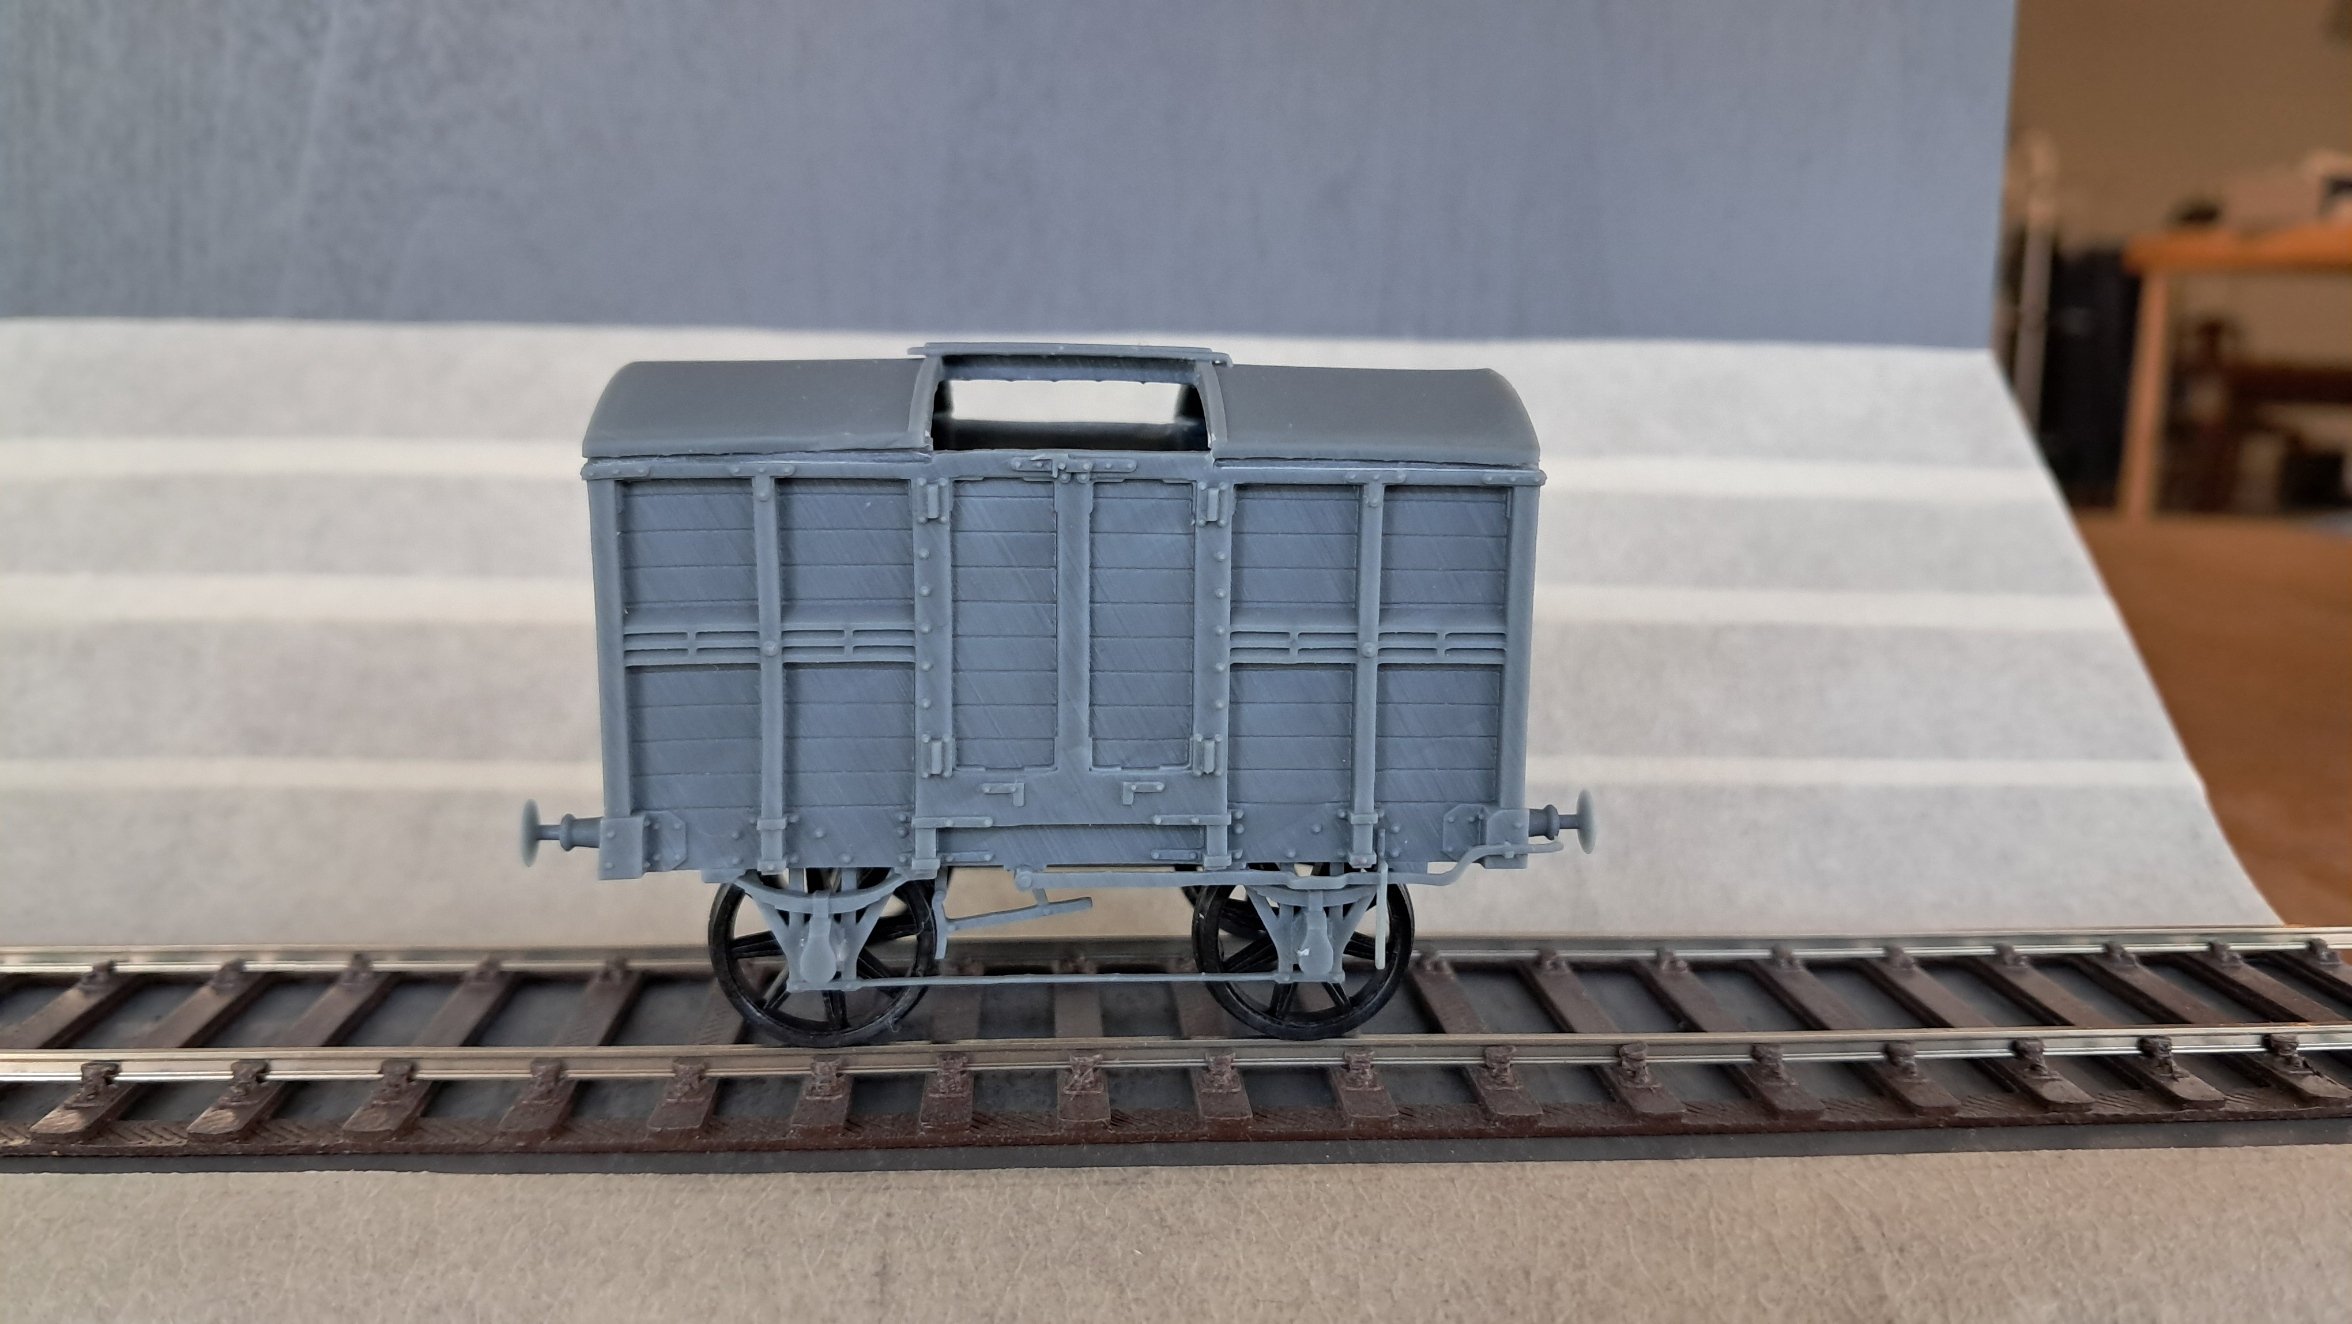
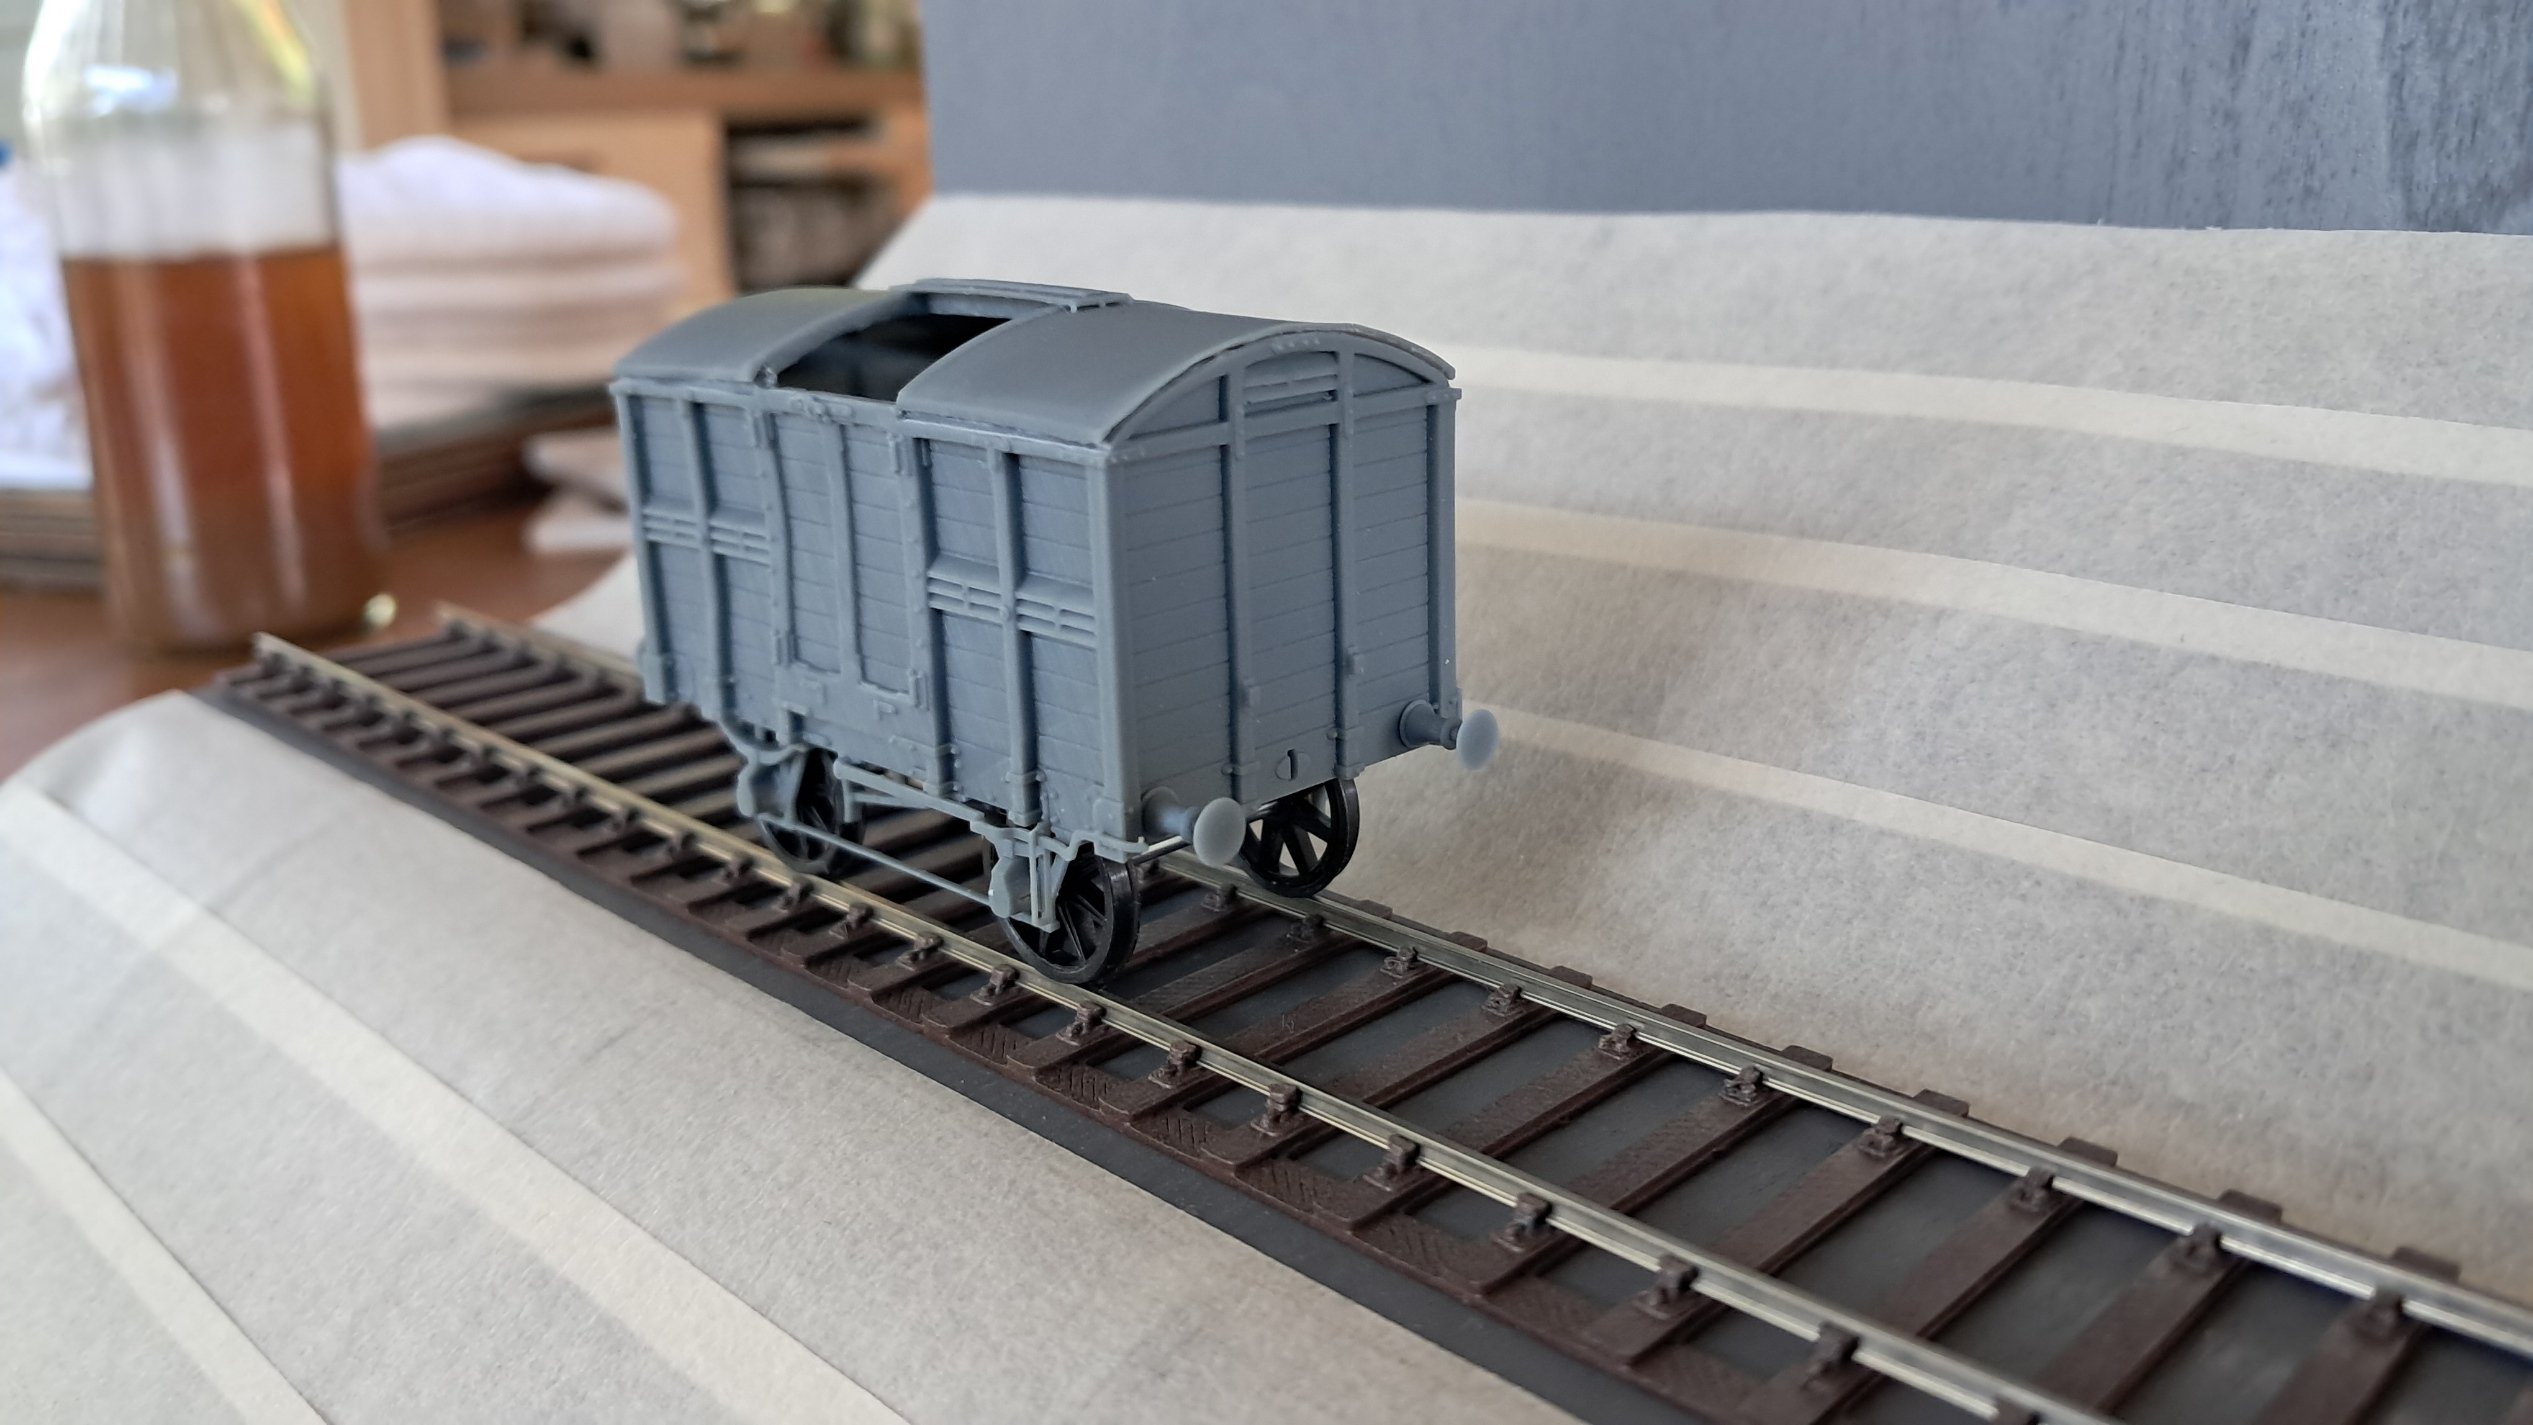
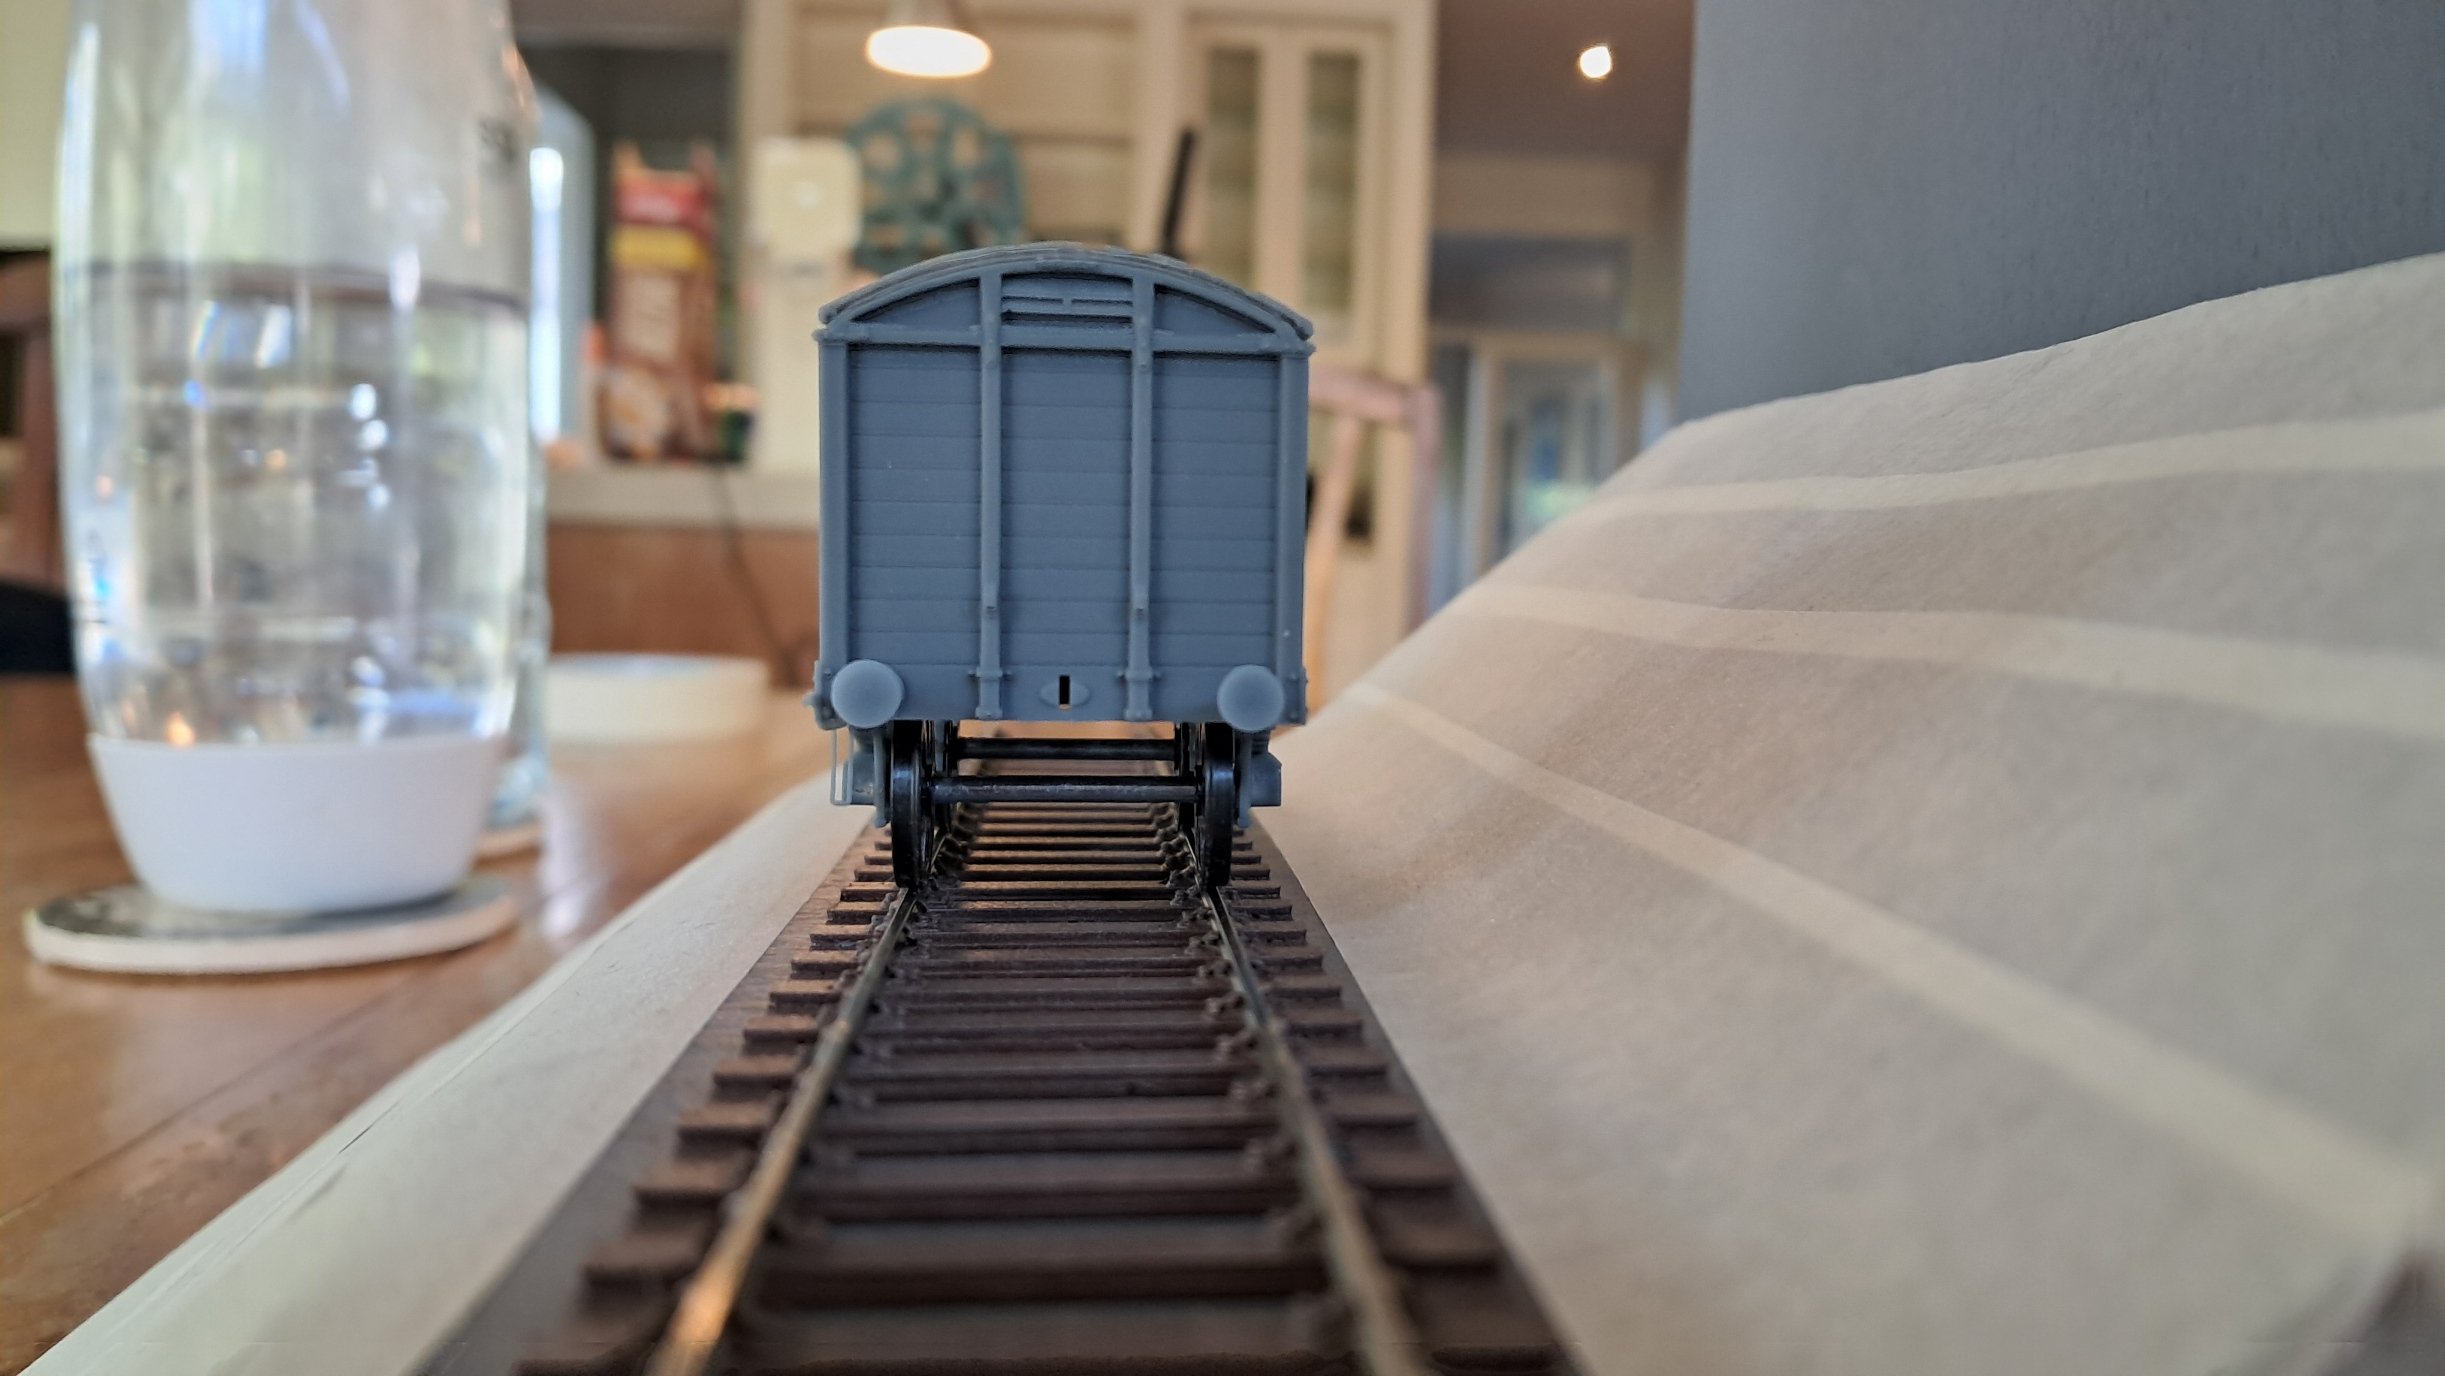
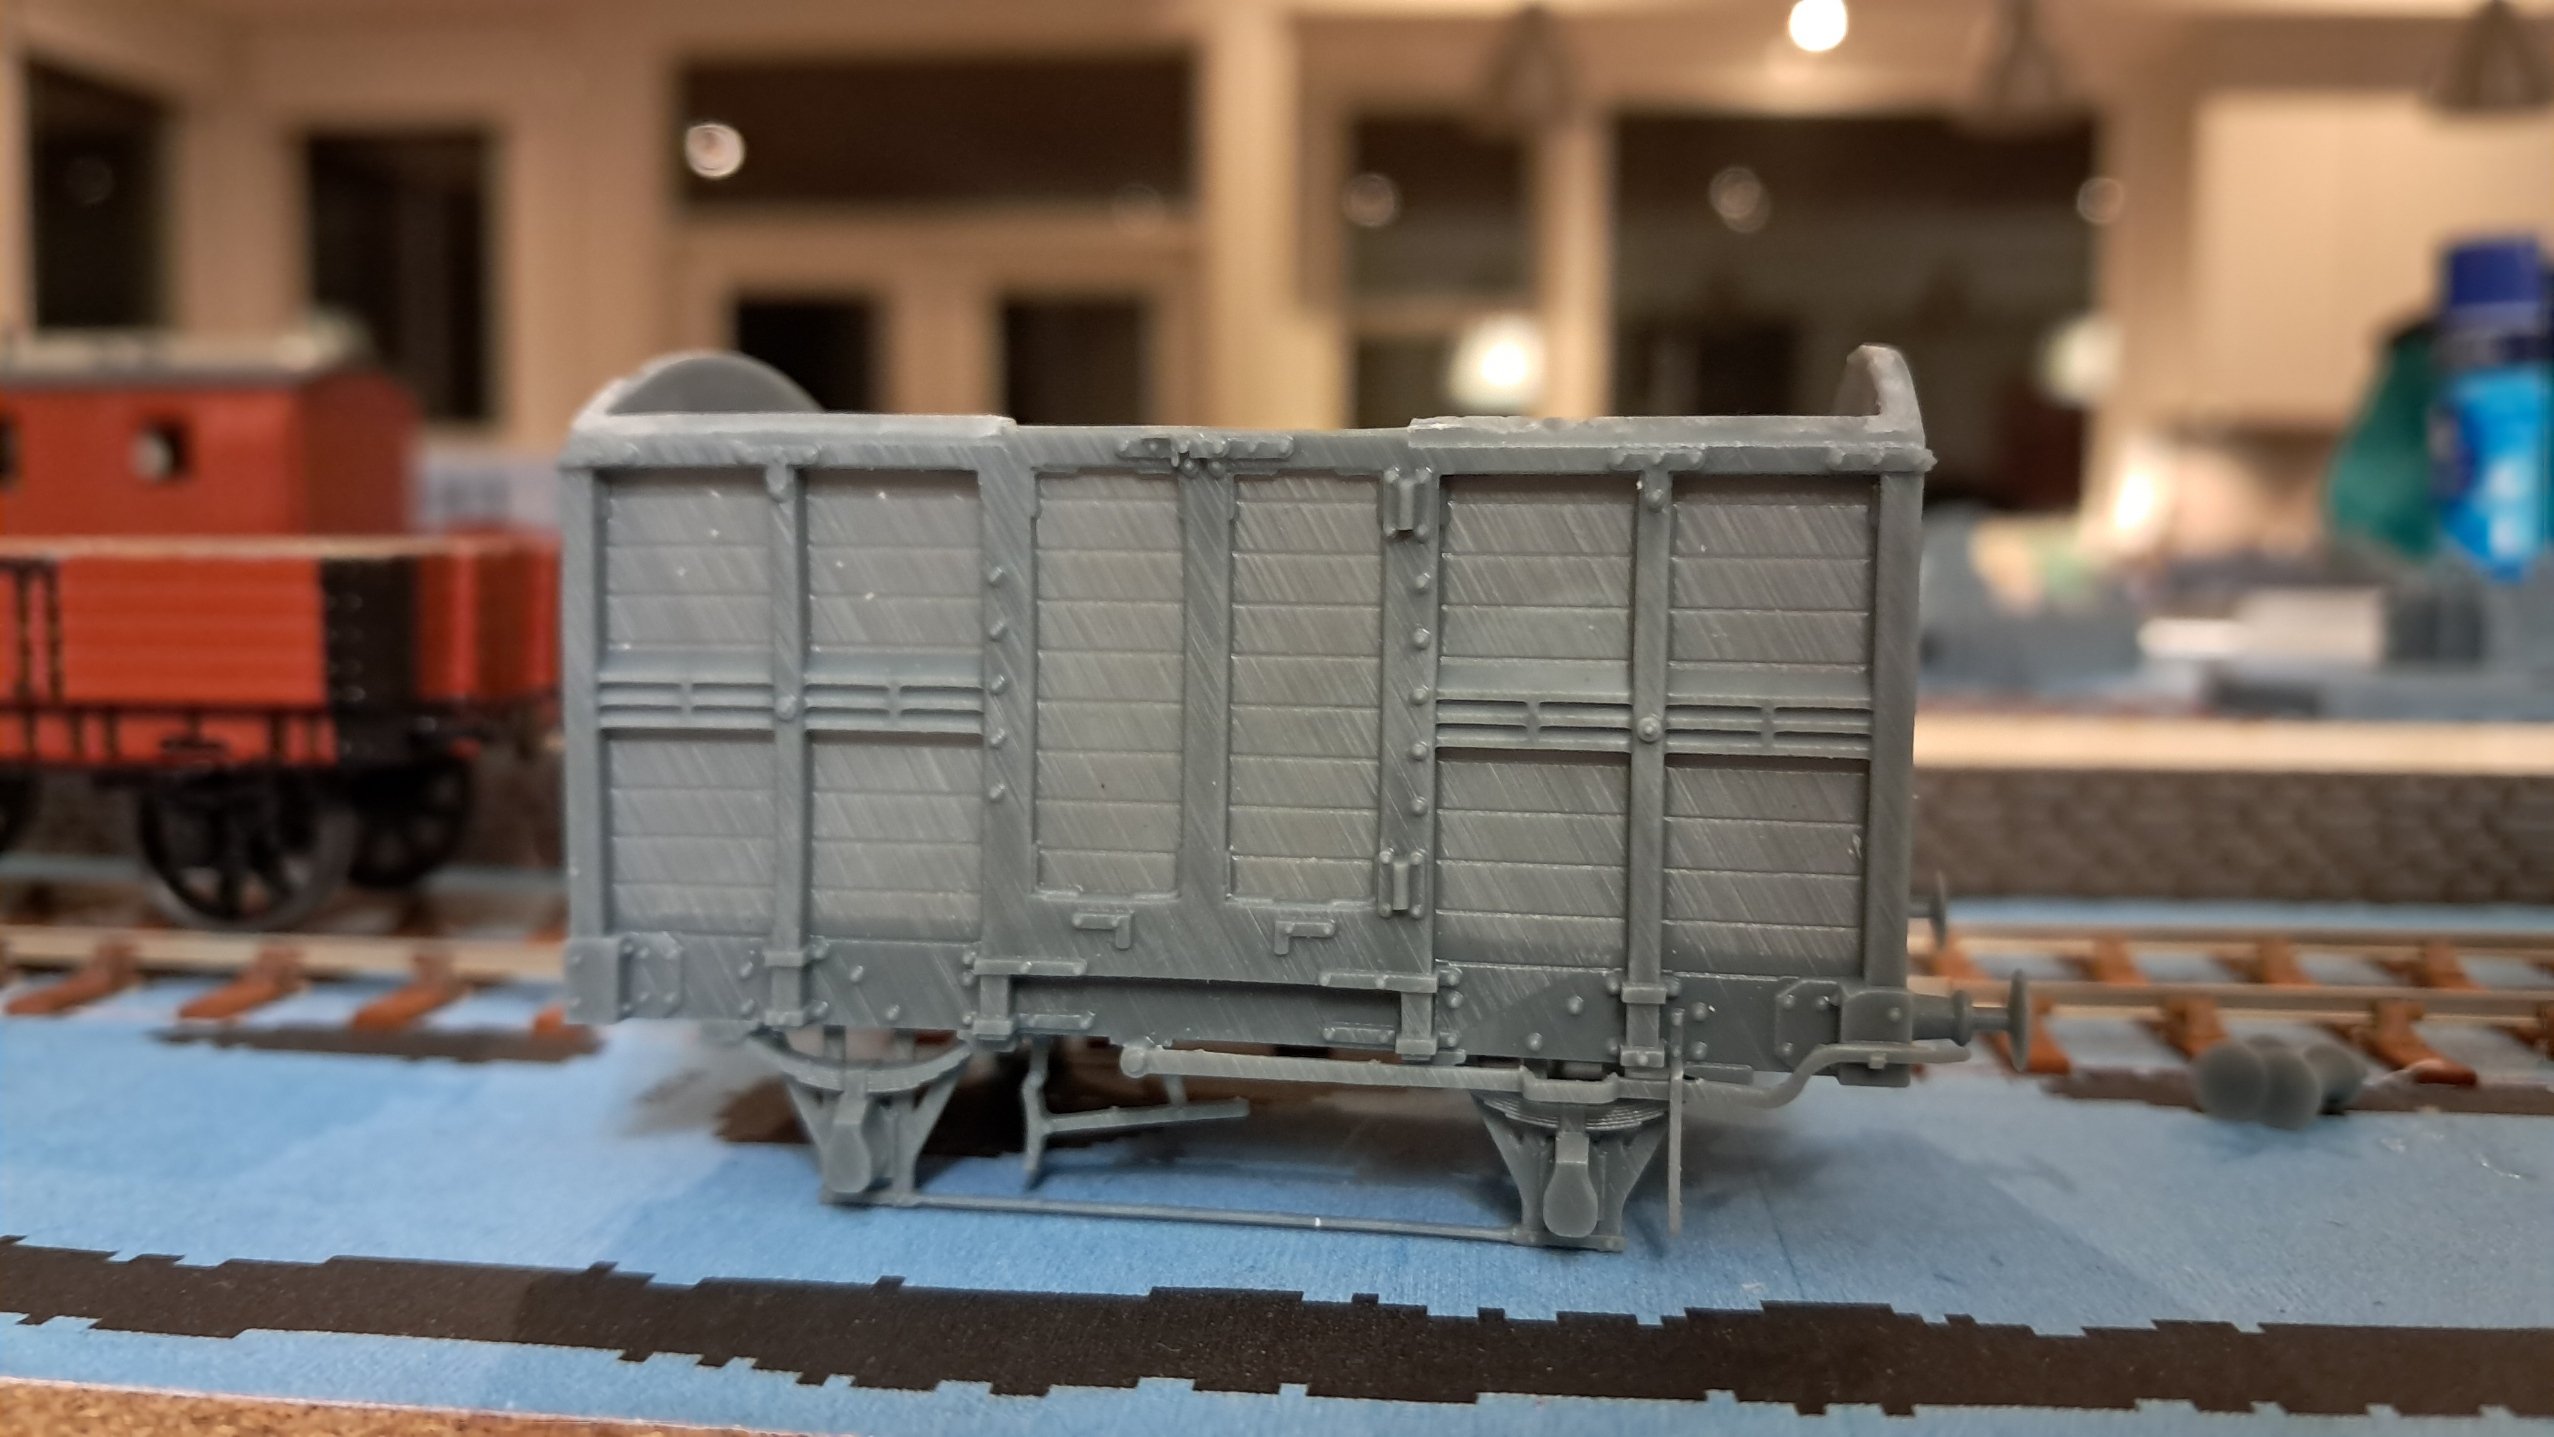
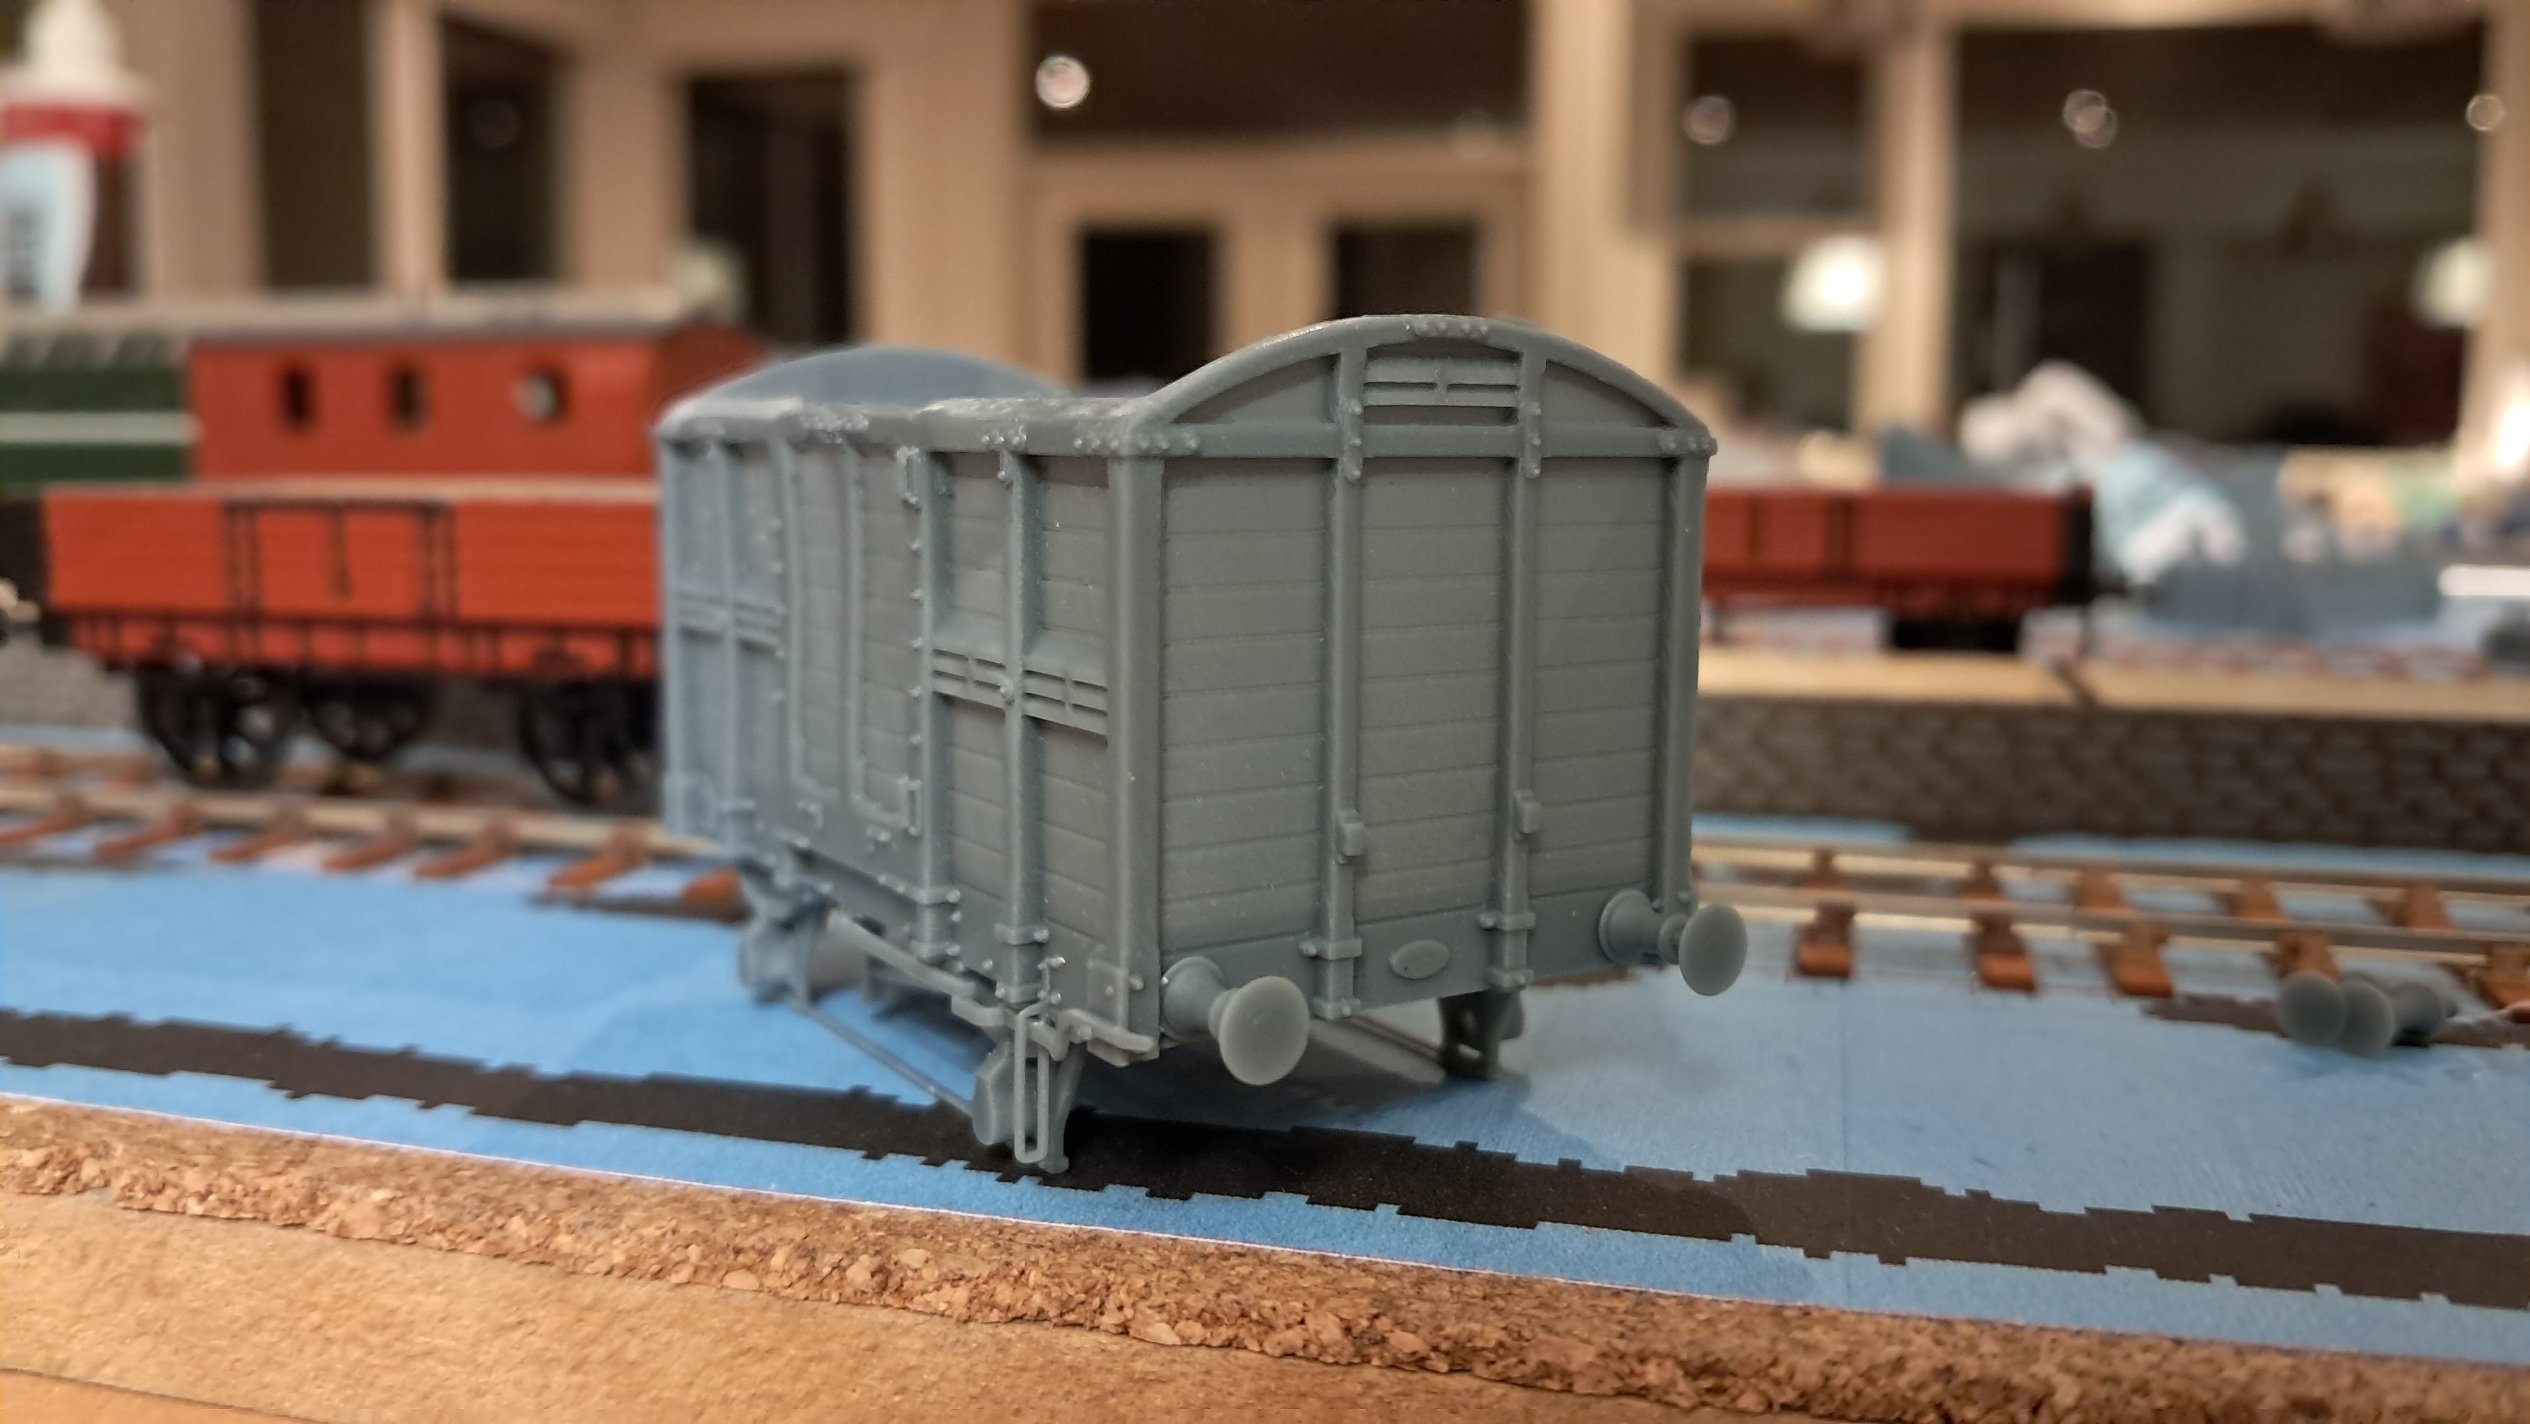
Roof attachment needs re-doing after thickening the walls, which I forgot before I printed it, axleboxes need some slight thickening, I still need to do the lower door latches, and there's still a bit of door warping to resolve, but it's a step closer. In the process of making the axles I've discovered that my drill isn't quite cocentric. Not enough to cause issues elsewhere, hence having never noticed, but enough that there's a distinct wobble in both wheelsets fitted to the wagon. Hopefully there won't be too much more of a wait for 28mm axles from the S4 Society, but in the meantime I may have to get one of my lathe-owning friends to do some for me, as while fine for display purposes these two would be very distracting in operation. Regardless of the issues, it's immensely satisfying being able to look at it and really see the proportions of the correct gauge. Sara

-
The Irish Railways 3d printing thread
AnUnknownConsciousness replied to Rob R's topic in Irish Models
At least in my case it's less of a "this will happen" and more of an "I could see this happening and would rather not chance it". It's entirely possible we'll find out in 10 years that 3D printed loco chassis work fine and have no issues, but I'm happy to leave the testing of this to others, particularly as I can design my own chassis etches. -
The Irish Railways 3d printing thread
AnUnknownConsciousness replied to Rob R's topic in Irish Models
This is the reason I've never gone for printed loco chassis, though I do know people who use the method. I have coach and wagon bodies that I printed as far back as 2019 which have survived well, so I'm confident rolling stock and bodies are fine in at least the medium term, but anything with more strict requirements for maintaining dimension and with additional considerations (vibration stresses from motors and running gear, etc) I'd rather not take the risk. It's for much the same reason I ended up going for Exactoscale chairs for my P4 layout rather than 3D printed despite the significantly greater cost - being unsure how long resin printed chairs will last considering the constant shear forces caused by rail expansion and contraction. -
Ah interesting. Very modern of them, particularly using 10-spoke not 8. I'll have to add some to the stockpile for future use when I next order wheels.
-
Ah, that's very useful to know - did they have plain or split-spokes? All mine are split-spoke, I have 25 wagons worth sitting here, though a good half of that will go to Highland stock for Thurso, and likely a chunk more to 21mm Australian models, which use the same wheels.
-
Of course, thank you! I've just replied. On an unrelated note, I've been out all day, but my partners informed me my parcel containing steel rod for axles has arrived, so when I'm home in a few hours I'll have a crack at getting a couple of axles sorted. I only have 14mm wagon wheels in stock at the moment so it won't be quite right - I intend to use 12mm ones as the closest P4 spec wagon wheels I can get to the MGWR 3' 3 1/2" ones (ignoring Gibson loco pony wheels at more than 2x the cost) - but the 14mm ones can go under some Australian stock once I start printing it, so no loss. I did at least have the foresight to put a 21mm B2B gauge in my last S4 Society order so I'm all set there, even though I forgot track gauges! Sara
-
Thanks! I spent some time reading your thread a week or two ago, which was a huge inspiration. It's great to see there are a few 21mm modellers around - I have to say I wasn't quite sure what to expect in that regard, but having spent a couple of weeks looking through some threads on here there seems to be more than than I was expecting. Joining the IRRS is somewhere down the to-do list, so I'll undoubtedly take your offer up at some point, it's very much appreciated.
-
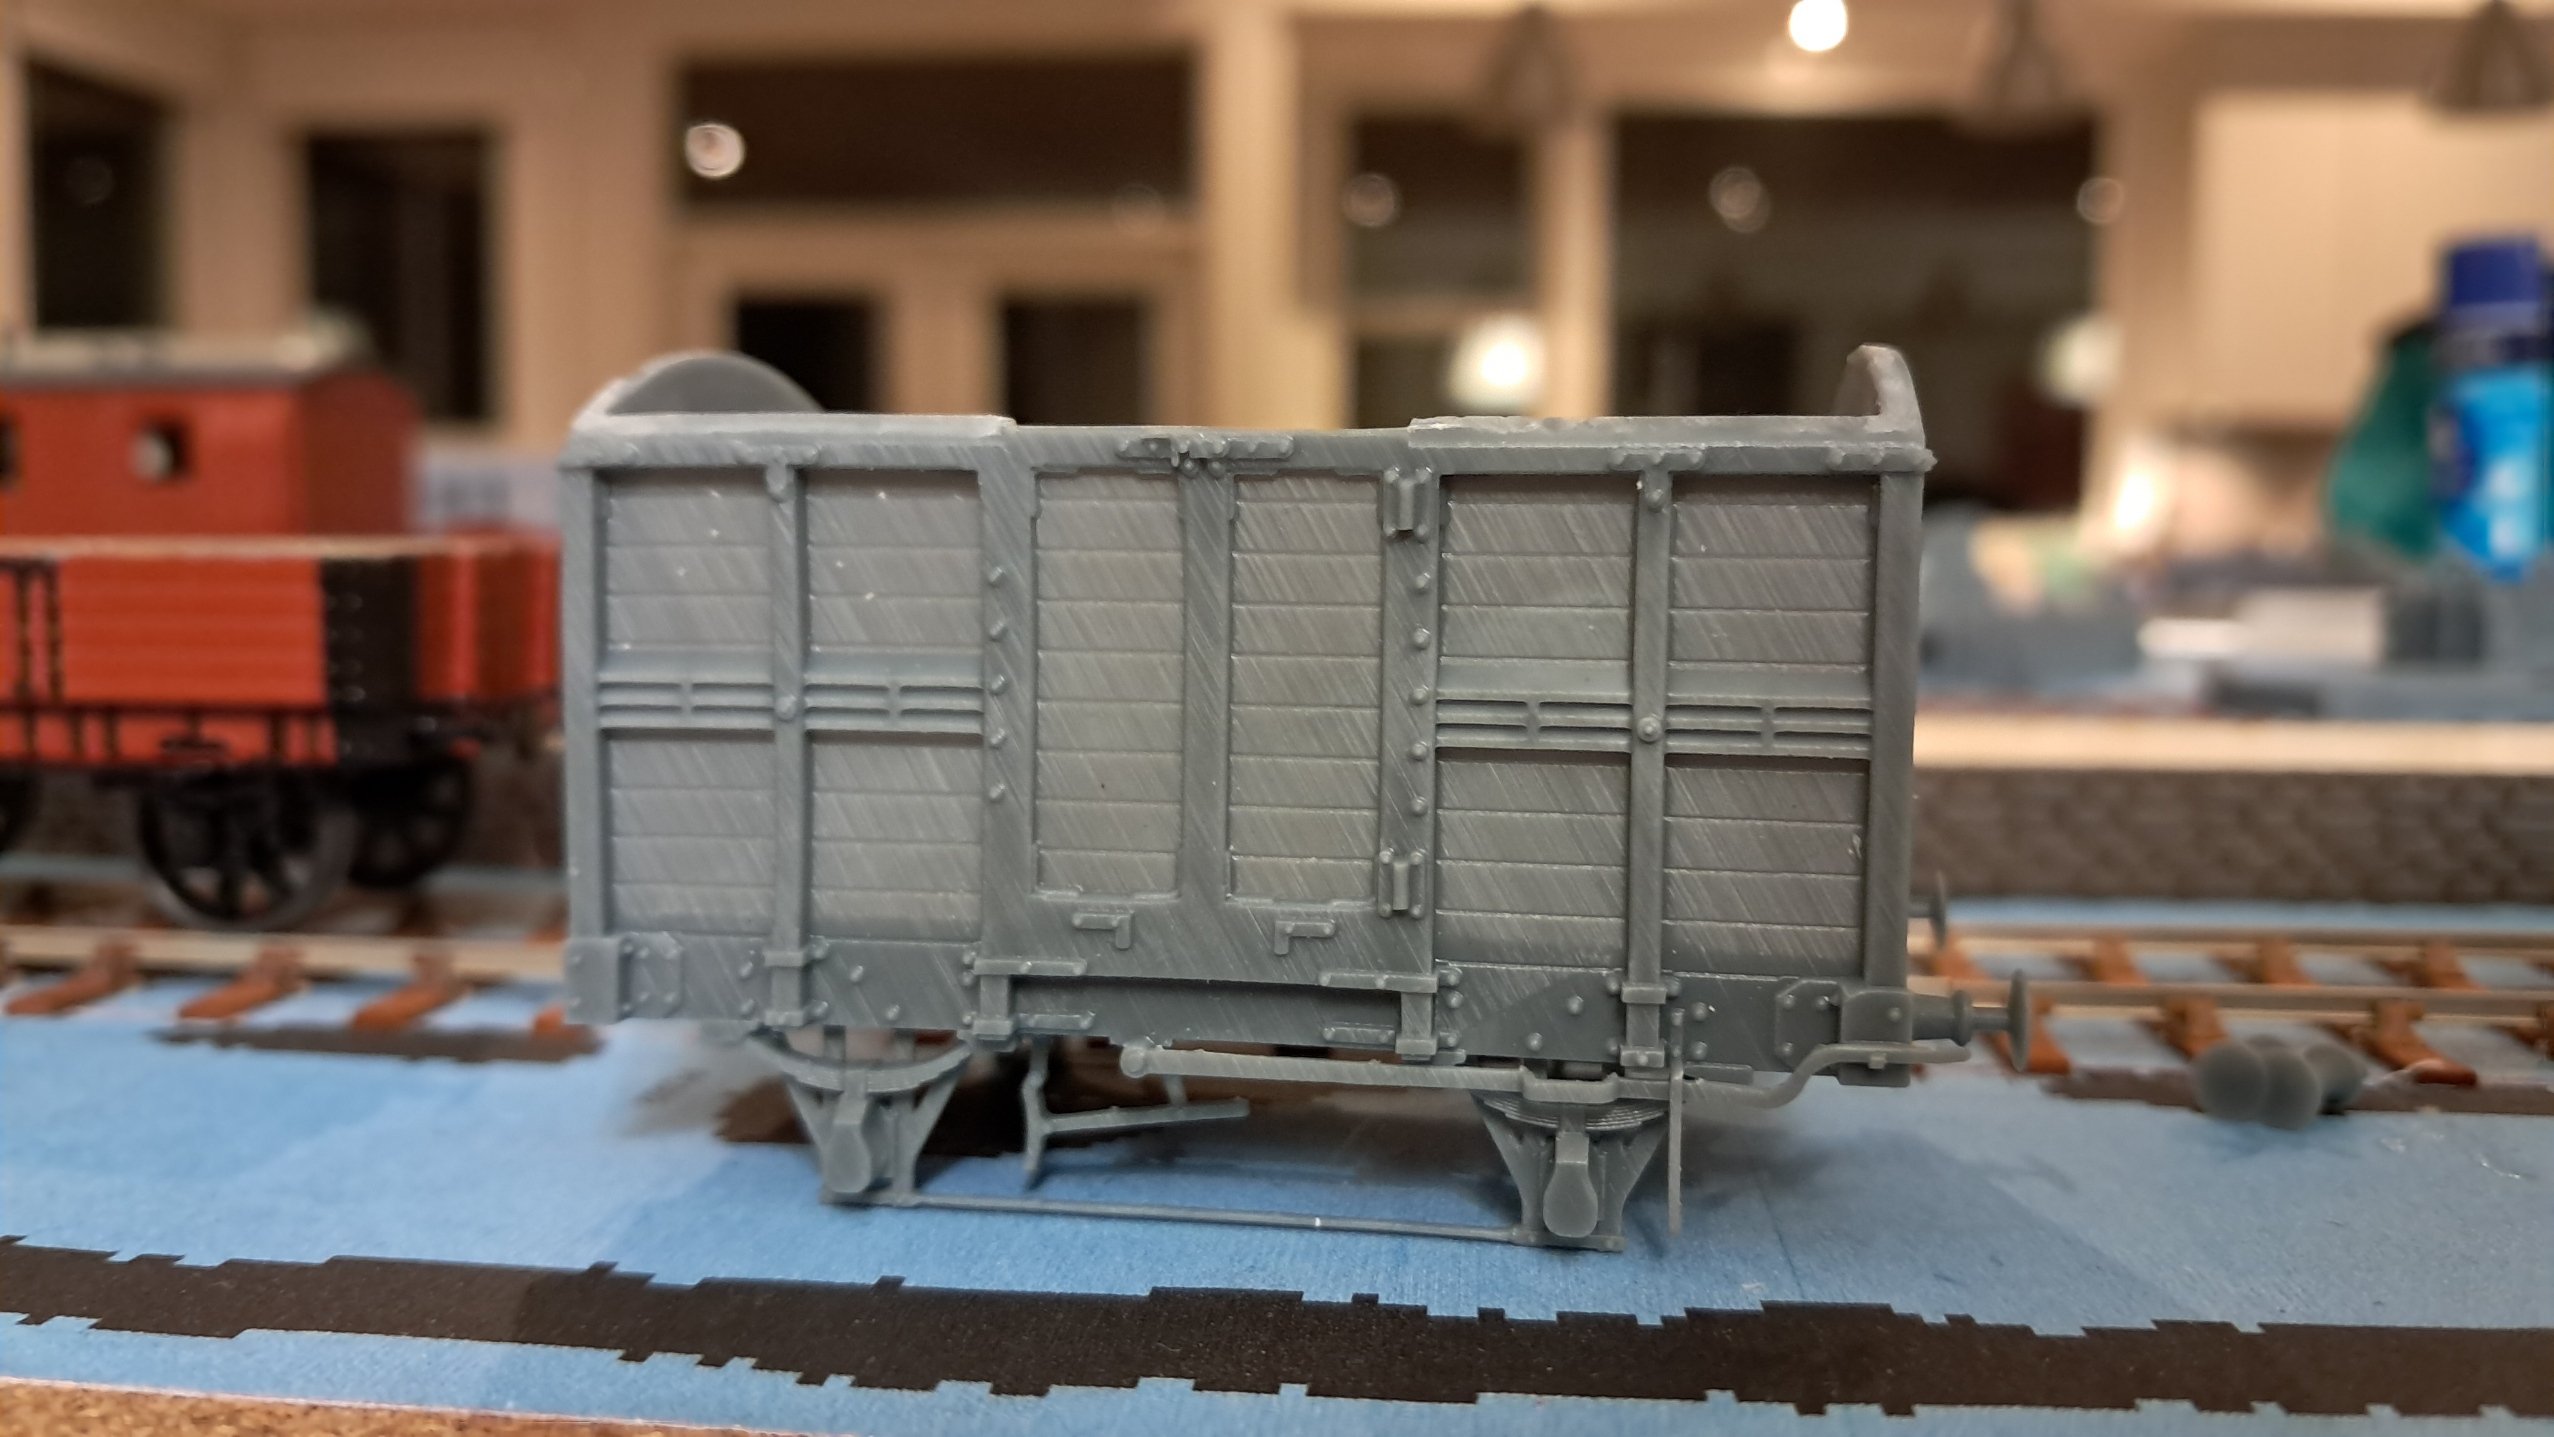
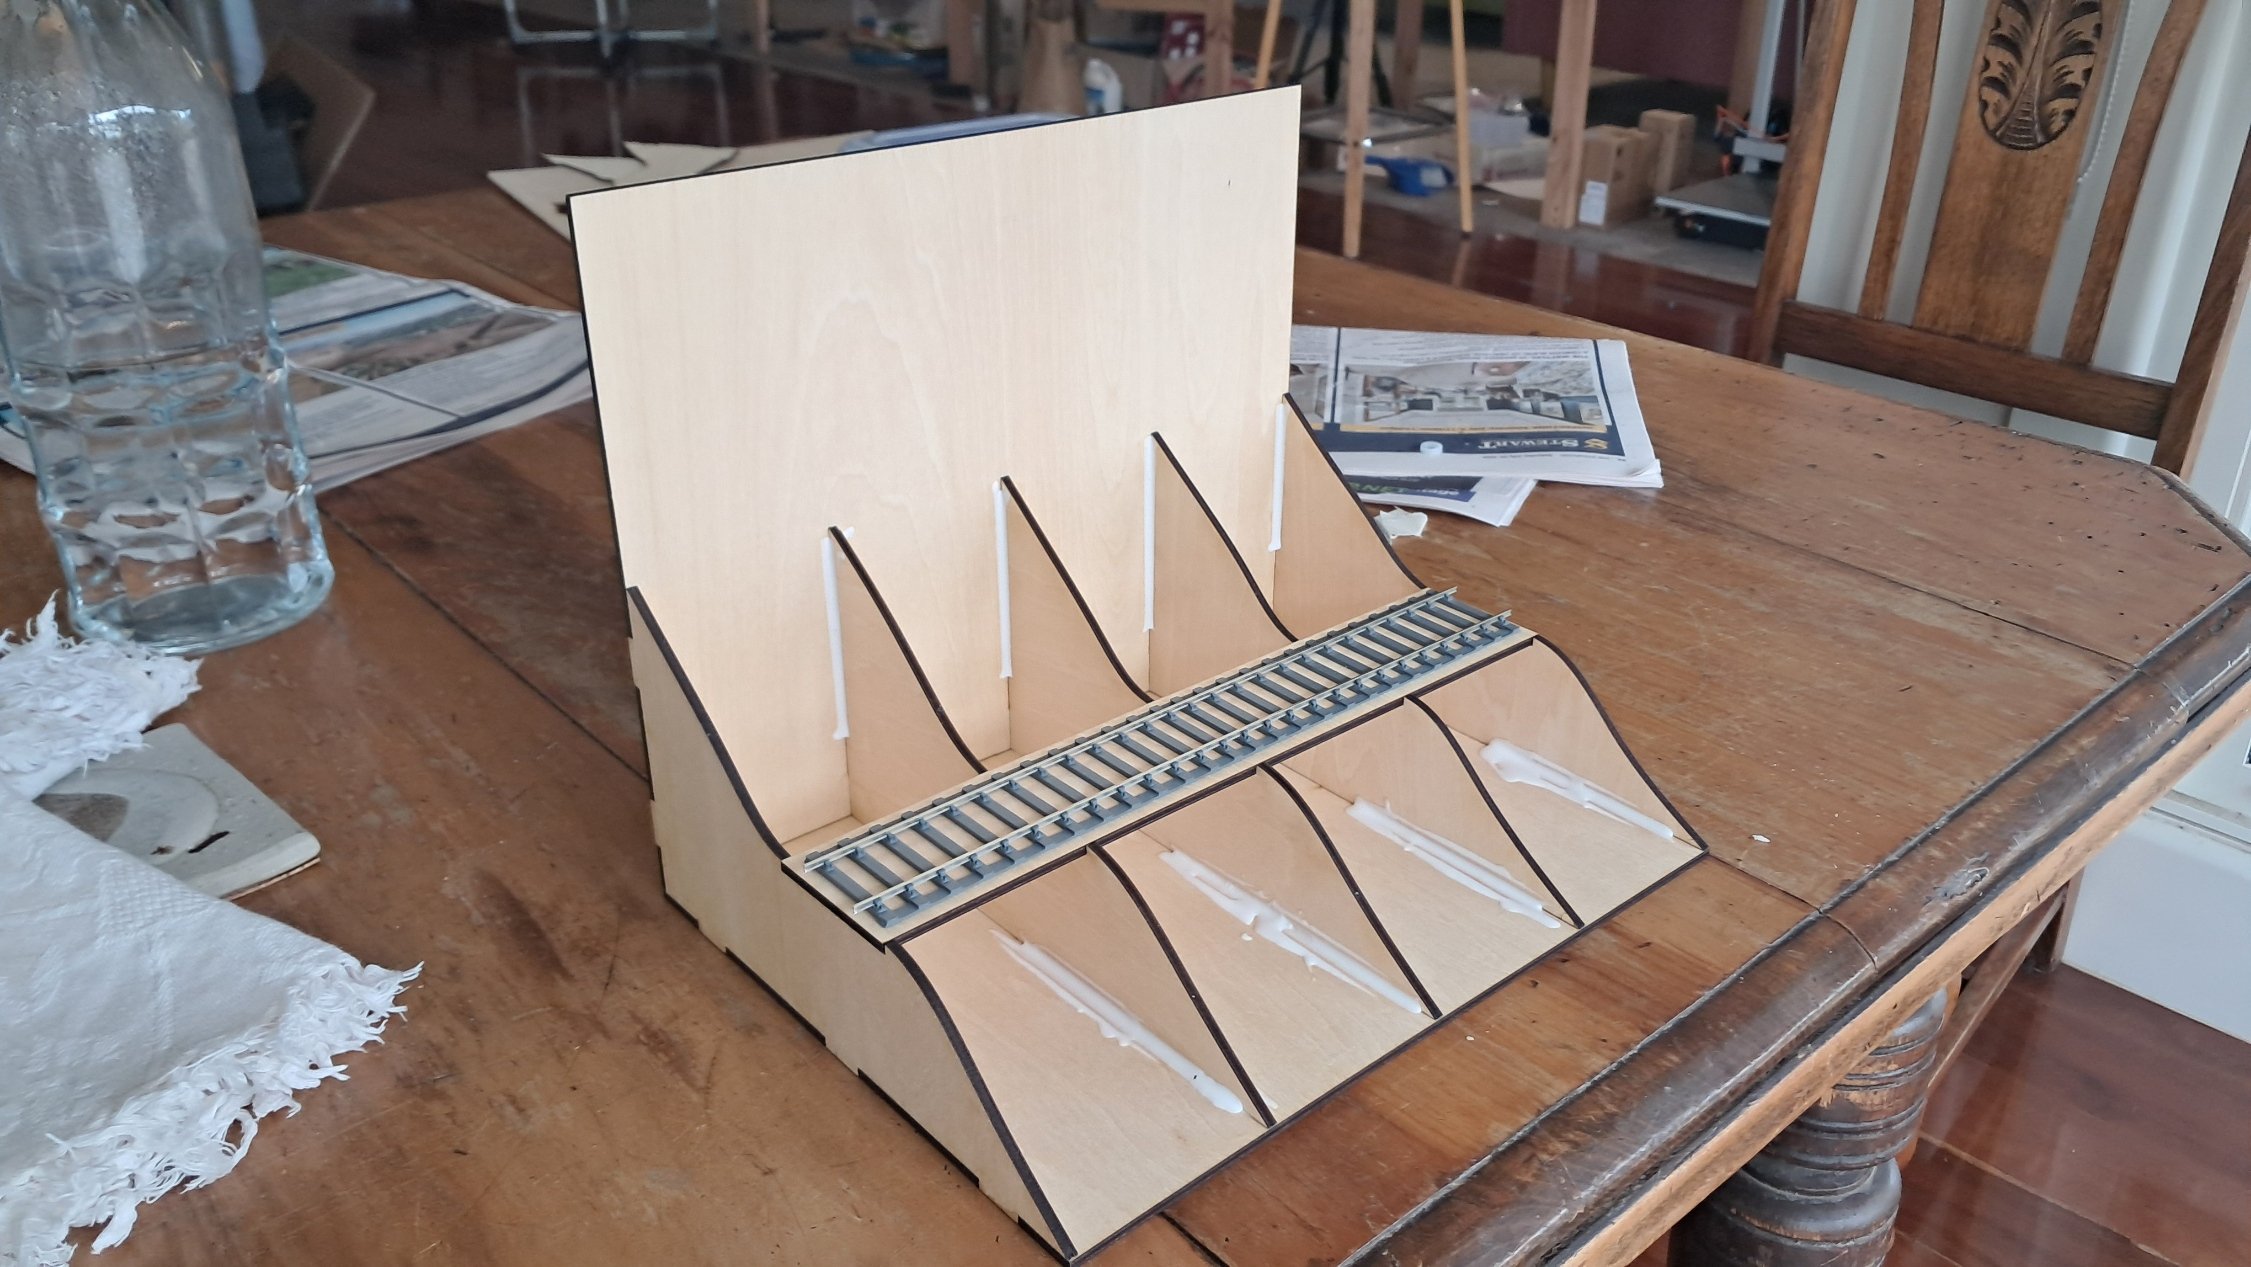
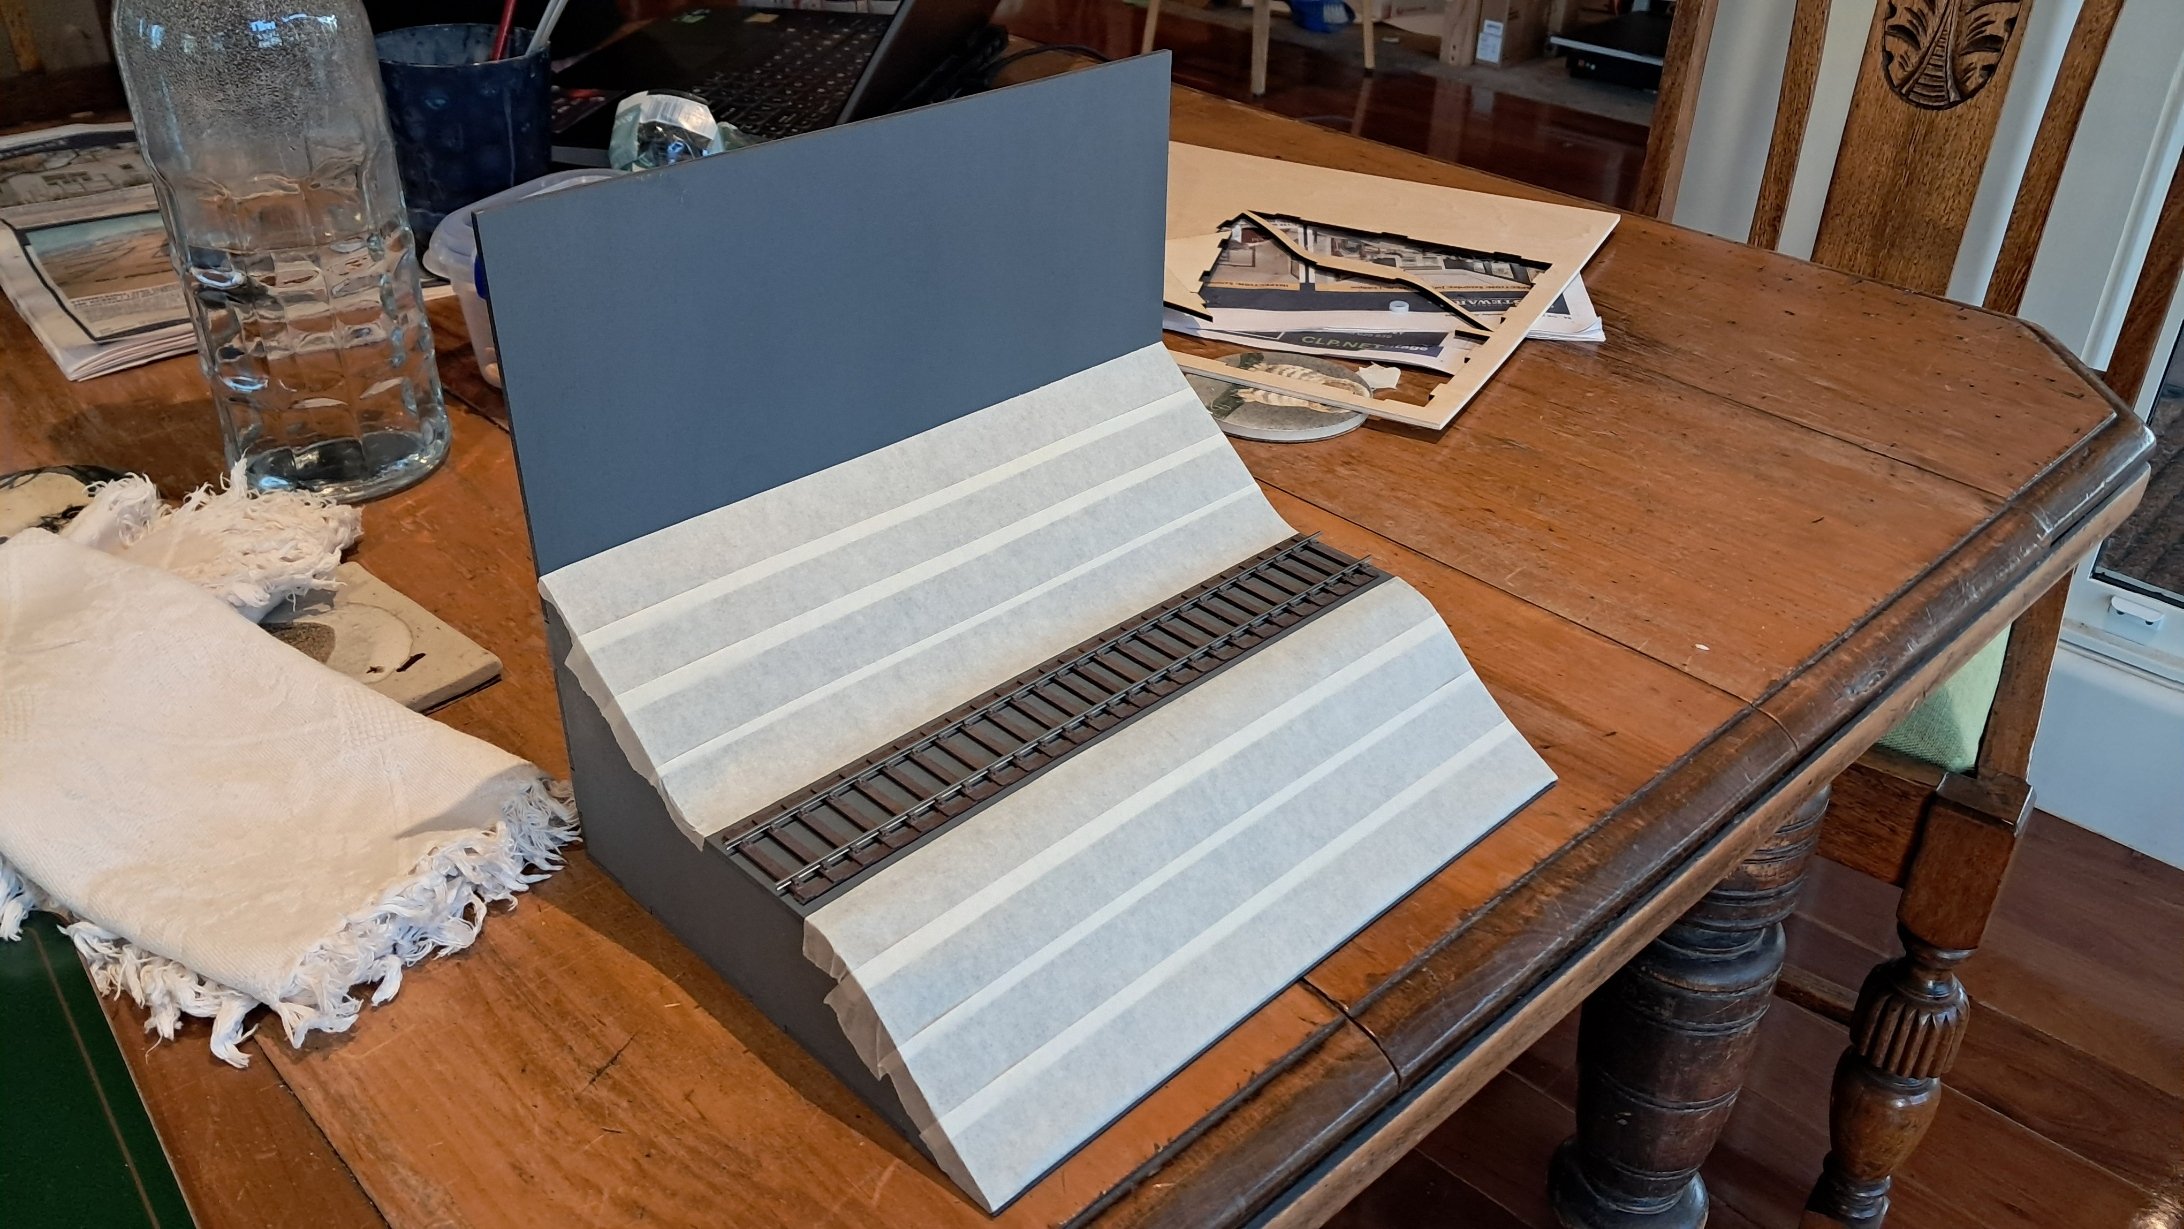
Further to my posts of my 3D printed MGWR covered wagon in the 3D printing thread, I thought I'd start a thread for my work. I'm not expecting rapid progress, because this is a side-interest to my main one (Highland Railway c1900 in P4, my work on which can be found in threads on RMWeb and the S4 Forums, covering my in-progress layout of Thurso and other works), but will hopefully build things up over time. All stock is intended to be to P4 standards on 21mm gauge, using Gibson wheels. The origin for my interest in Irish railways, aside from having the shared railway gauge with my other main interest, railways in Victoria and South Australia, comes from a trip to Ireland back in 2023 to visit my uncle in Dublin. As my father had spent a brief amount of time in Belfast in the 1990s, he was interested to see how it's changed, so we spent some time there, including a visit to the Ulster Transport Museum. Safe to say I left with a handful of books, and the start of my interest. Fast-forward to a couple of months ago where I started looking at making some models of early (1850s-70s) Victorian locos, stock, and a small layout as a side-project, as this is a period that a) has never been seriously modelled that I know of, and b) is of such personal interest to me that I'm in the (very slow) process of writing a book on the topic, which has led to many days trawling through old newspapers and meeting minute books. I decided to work to 4mm instead of HO, because I'd be making everything from scratch anyway, obtaining suitable wheels would be far easier in 4mm (to get right diameter and spoke counts), and it would give me more space for motors and gearboxes. As can probably be guessed from my working in P4, doing anything in 16.5mm gauge was utterly out of the question. In the process of working out how I would go about building a small layout to display these models on, it occurred to me that, as I would already be working in the gauge, it would be an excellent opportunity to add some Irish models to the collection. So out came the books I'd bought in 2023, one of which is a copy of Outline of Irish Railway History, complete with a lovely illustration of Lm class no.82 'Clonbrock'. Some further research, and the discovery of the short-lived blue livery, locked in the MGWR as the subject to be modelled, primarily as I love the distinctiveness of the Atock 'flyaway' cab, the sleekness of their 2-4-0s, and the blue livery, having re-discovered my photos of the saloon in the UTM wearing it. Some more books were ordered, the excellent 'Locomotives of the Midland Great Western Railway', and Ernie Shepherd's Illustrated History (which is yet to be arrive), and a couple of wagon drawings purchased from HMRS - the covered wagon referred to earlier, and an 8t open cattle wagon, which is next on the list once I've revised the covered wagon. To start with, we have the van in question, with apologies to those who've already seen these photos on the 3D Printing thread. Some changes required - namely I forgot to mirror the door hinges, forgot to add the bottom door latches, and neglected to add a slot for couplers. I exclusively use Smiths screw and 3-links, so these will be getting those when I have a finished version done. I also plan to slightly thicken the walls, to reduce warping. After a lot of thinking about how much I can be bothered making my own axles, as the S4 Society are out of stock of 28mm axles, I decided the temptation to get something on wheels was too great, so ordered some 2mm steel rod to make a few to get me going while I wait for the Society to get more stock. The rod, and some 1/16" plywood for me to cut some sleepers with, is due to arrive tomorrow. I have some Proto87 Code 55 rail and spikes in stock - which is undersize for MGWR 95lb rail, but will do to have a play around, as it's been a while since I've built flat-bottom track. In the meantime I've started on a photo diorama, using Templot 3D printed track and some bullhead rail borrowed from Thurso's stocks. It's very rough, as my filament printer only has a .4mm nozzle, but will do until I can make some track gauges (to stand-in until I put together enough for an order from the S4 stores to include proper 21mm gauges) to put something together using the Proto87 components and some lasercut sleepers. The landscape was cut out of 3mm ply on my laser-cutter and glued together (with some difficulty thanks to the ply warping...) The ply then got a coat of grey primer, the sleeper base painted, and some masking tape laid over the contours to form a base for papier mache, which is where it currently stands. The module is 245mm long, so should nicely fit just about anything I want to make. This is where I'm currently at, though I'm hoping to get some papier mache down on it tonight, and possibly get some grass etc down over the weekend, along with a revised print of the covered wagon (and maybe one or two of my Victorian 21mm models, which also need some revisions). Sara
- 9 replies
-
- 11
-

-

-
Not entirely sure how I managed it but I started the same thread twice
-
The Irish Railways 3d printing thread
AnUnknownConsciousness replied to Rob R's topic in Irish Models
It's certainly the area that has the biggest impact I've found, and I'd definitely recommend trialling different options and methods to find what works best. Once you've got a method that works well for what you're doing, life becomes about 100x easier though. As for the smell I've heard some of the plant-based resins are pretty good in that regard, though I've never tried any - my printer lives in the laundry with my laser cutter, which is by far the bigger cause of smells! Best of luck with it. Sara -
The Irish Railways 3d printing thread
AnUnknownConsciousness replied to Rob R's topic in Irish Models
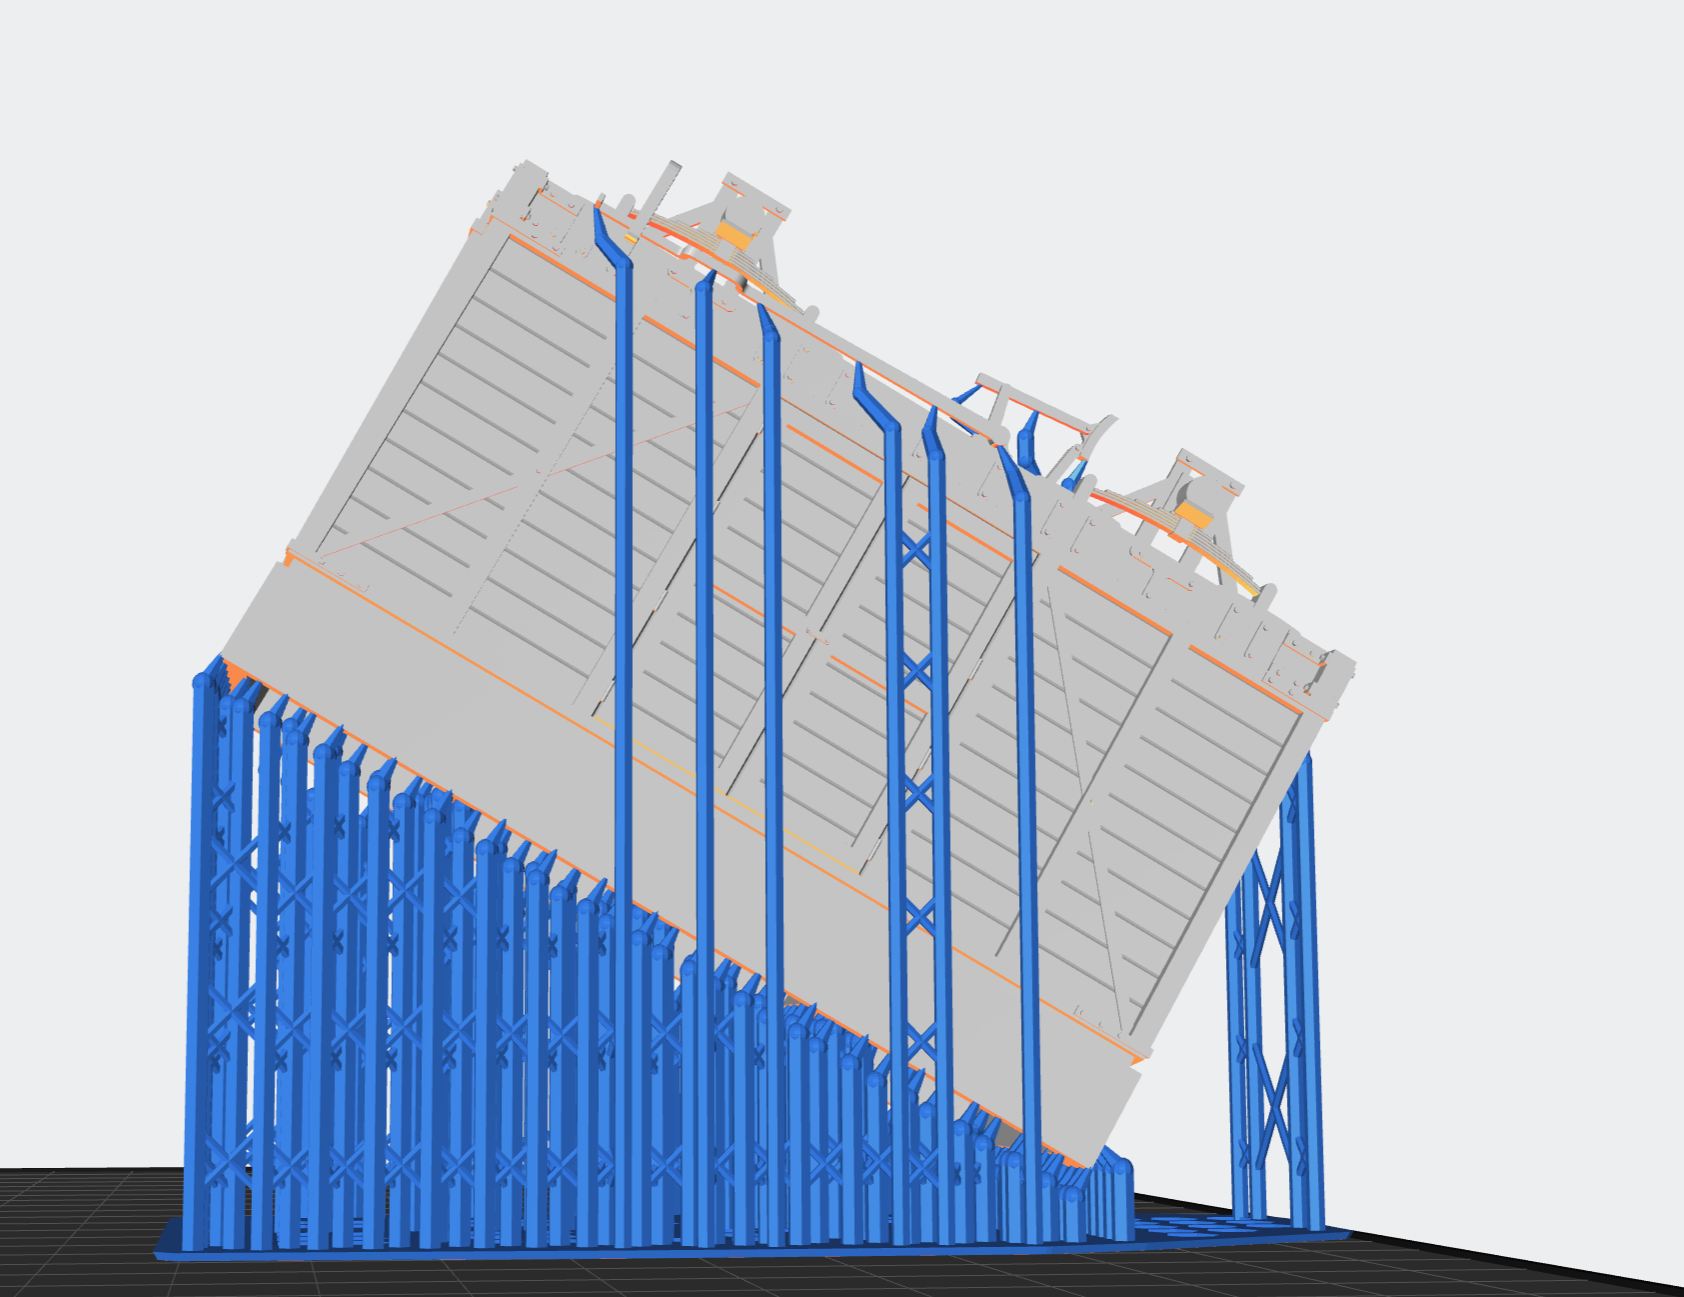
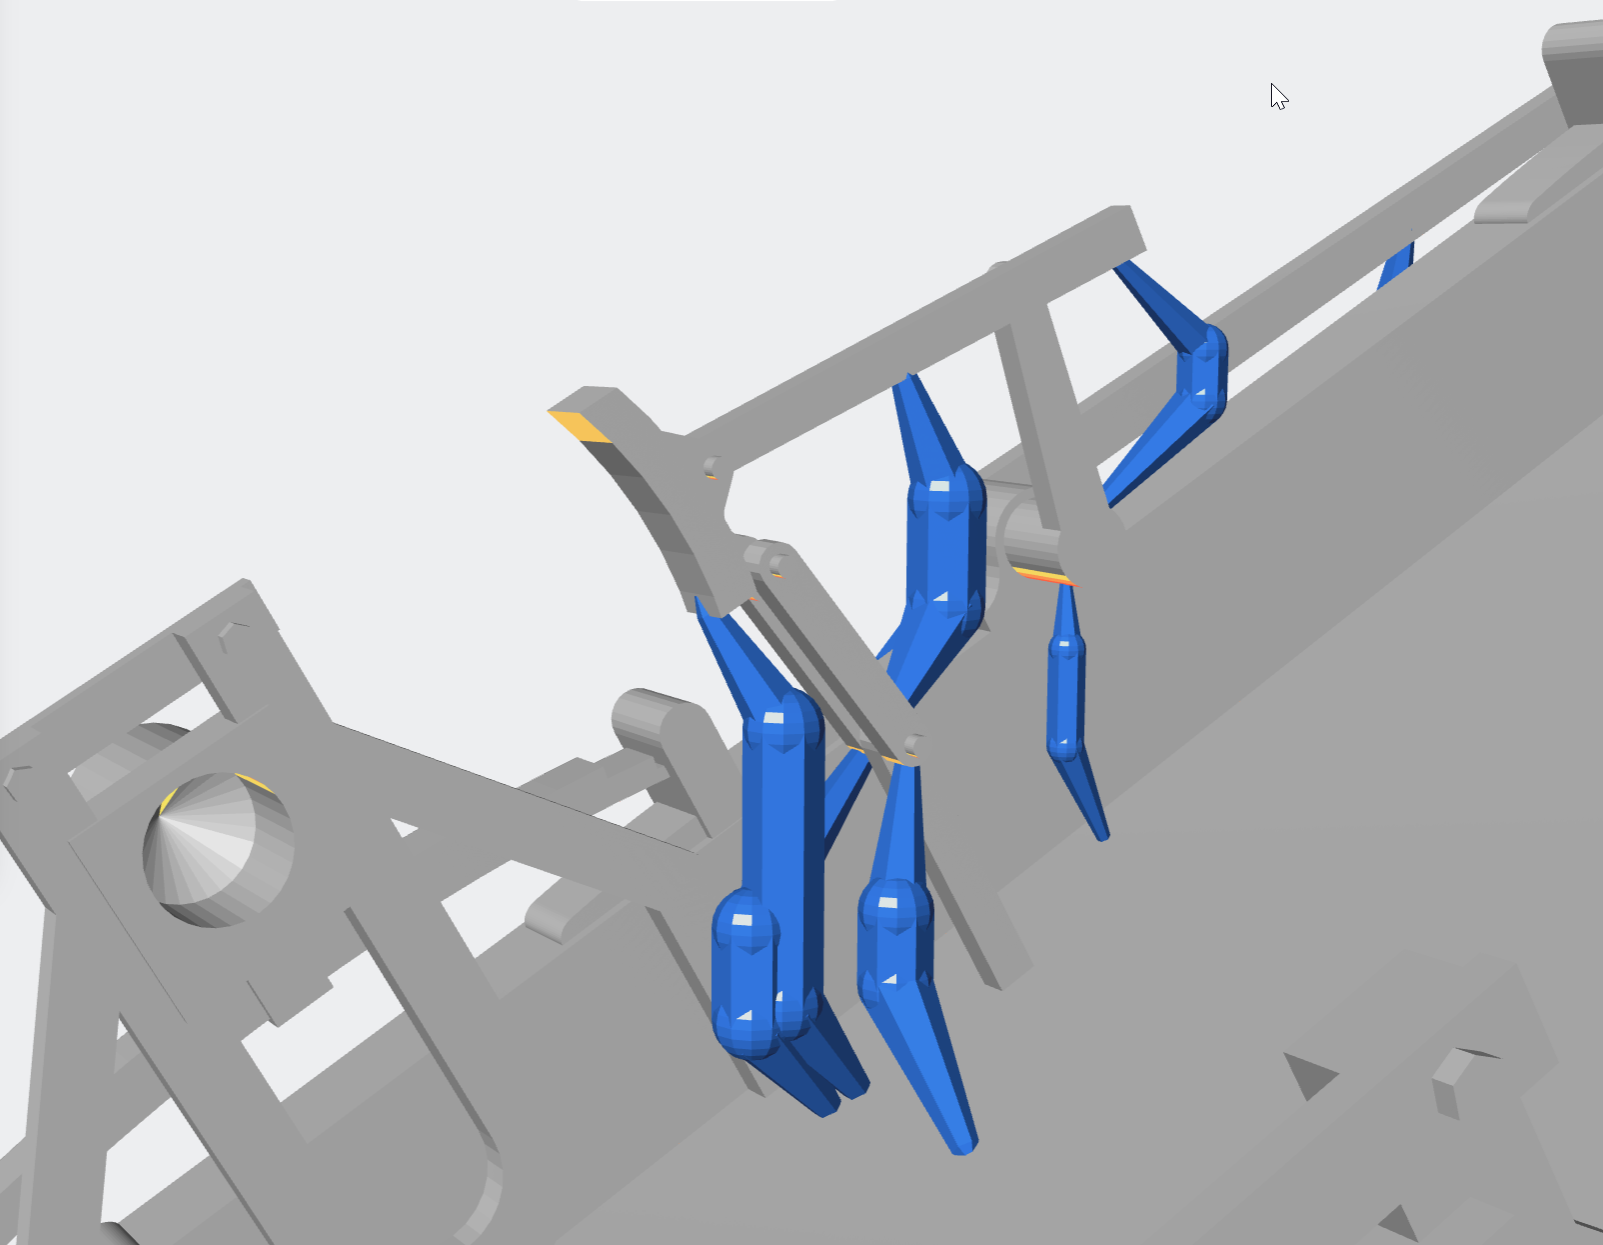
I actually don't fit supports to the floors. Completely random thought one day, I wondered whether the combination of side/end walls for attachment points and the angle of the print would mean the floors would work without supports. Surprisingly it did, and every wagon I've printed since has been like that. Now, if you printed flat-to-build-plate, it'd probably be different, but I print on a 25-30 degree angle, so every floor layer has 3 points of connection - sides and already-printed floor. Coaches are slightly different as I print with the compartment walls in place, but even then supports are only to the strips and detail parts. All my supports are done manually - which is very tedious (especially when you get half-way through and realise you missed something on the model), but I've found it a much better way of getting a cleaner result. As for the longer post-cure, I couldn't say, I haven't tended to find parts warp after I've finished them, though the post-curing time does a lot for the malleability of parts. I usually go for 10 minutes. If it's in a warm environment that can have an impact though, much the same as for cast resin kits. I've never printed grab rails or smokebox door handles, and would personally always go for brass parts (especially for handrails), though if I were to print smokebox door handles I'd do the same as I did for lamp brackets on an Australian model I did a while ago - separately fitted parts with a locating plug, meaning I could optimise the rotation and support placement. This wagon, and the one next to it, were both printed the same as as the MGWR van (i.e. strip supports to the top of the walls, and additional supports only where needed), and to my eye you couldn't really tell there were no supports to the floor - except that it's a lot cleaner than I used to get with supports. The slight bowing at one end is something I'm working on, not helped by how thin it is. That said once it's in a train from normal viewing distances I don't tend to notice it. Getting the brake gear to print is something I've found to be slightly less complex than one might imagine, it mainly comes down to support placement and minimum thicknesses. As a general rule for anything unsupported like the brake gear I work to about 0.4-0.5mm thickness. From there it's just a process of making sure there's a similar thickness where parts join, and being careful with supports. I find it very easy to go overboard; it's surprising how much you can get away with when it comes to smaller parts. I didn't save the slicer file for the MGWR van because of needing to make the adjustments mentioned, but this is how I did the support arrangement on one of my HR vans. Occasional support to the brake lever, and similarly minimal supports to the brake rigging, as I've found the biggest risk is breaking it while removing it from the supports, rather than anything to do with the print failing. Designed and supported in this way I'm yet to have a failure or breakage that didn't involve me not being careful while removing supports. Hopefully some of this is of use or interest. Sara
-
The Irish Railways 3d printing thread
AnUnknownConsciousness replied to Rob R's topic in Irish Models
Very interesting, I'll have to give it a try. I'm exclusively screw/3-links for couplers so magnetism not a problem either way, but brass would be easier to work with than steel. Having had to make some custom steel axles for a couple of loco projects it's not something I'm keen to repeat unnecessarily, though I'm sure the correct equipment (lathe) would make a huge difference. Not a fun endeavour I have to say! As for Mayner, I've seen some of his postings both in this thread and elsewhere, though it hadn't clicked that he was in NZ. My thoughts on the matter are that it's an issue of trying to manage postage time/cost and risk of damage in-transit. The latter can be mitigated, though I always have it in the back of my mind for long-distance shipping, the former two less so. I know personally I've been put off buying models and parts from some places in the UK because of the postage cost, hence the discussions with my friend for a more local distributor. The question as far as anything Irish I design, is would him being in the UK complicate things (due to EU vs non-EU) in a way that me being in Aus might not - not something I can personally comment on. All of which is a moot point for now, as the focus is on fixing up the issues and getting some running examples! My omissions on the test model (another one of which I noticed earlier), were that I forgot to mirror the door hinges, so there's only one set out of four; I forgot to do the lower door latches, and I forgot to put a slot in the buffer beam for 3-link couplers. I may also bevel the door edges slightly to leave a bit of a groove where the doors sit. The hinges and slot have been added to the 3D model, but am yet to do the door latches as I've had to bunker down to finish a uni assignment. Hopefully a tomorrow problem. Sara -
The Irish Railways 3d printing thread
AnUnknownConsciousness replied to Rob R's topic in Irish Models
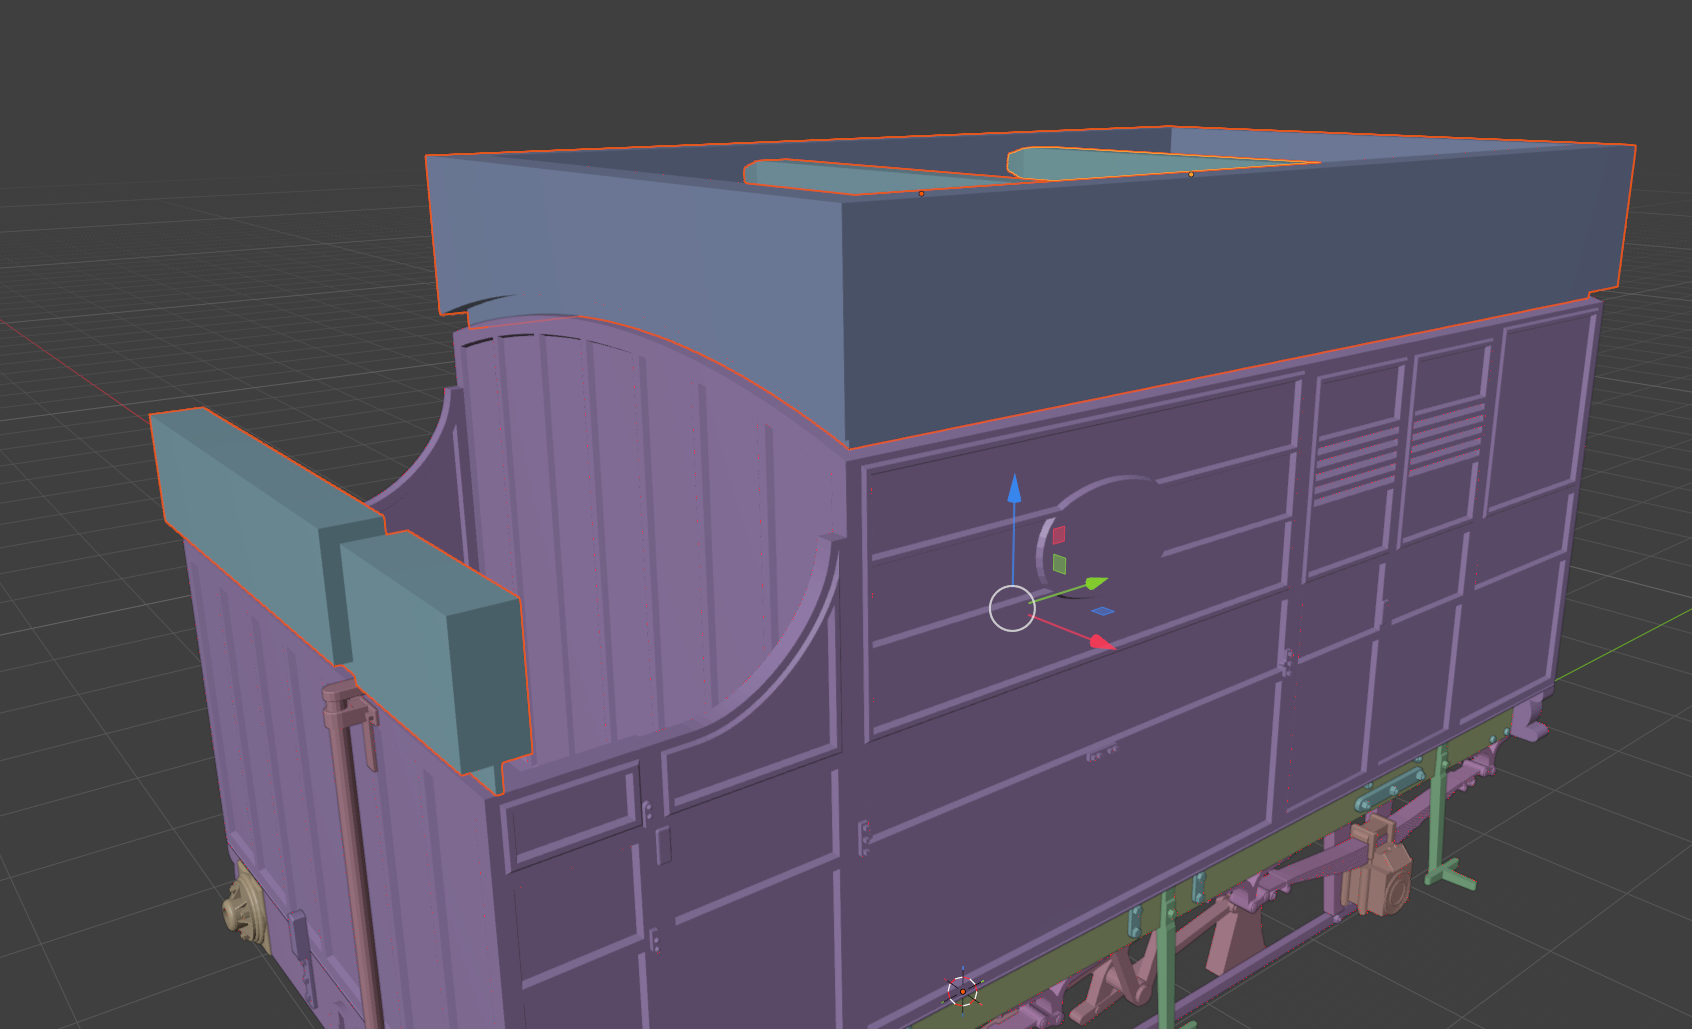
Thank you. Realistically it wouldn't matter, I just like keeping things as close as reasonably possible to prototype dimensions where it's going to be visible. I do all my designs at 1:1 scale before adjusting for 1/76.2 which doesn't help, but makes it a lot easier to follow drawings - I used to do the design work at scale and I wouldn't like to calculate how much time I wasted converting dimensions! Some combination of additional supporting and slightly thickening the walls should do the trick. The bigger issue is the roof, I made the edges far too thin (nearly knife-edge) and the test-print was a failure, so it at the very least will need some thickening, but that's easy enough. Thank you. I'm slowly working with a friend who's a UK based modeller with the end-goal of getting some of my other designs (Highland Railway stock) available, so it's entirely possible. Given postage costs from Australia to Ireland and the UK I wouldn't fancy doing the distributing from here, knowing how prohibitively expensive that would make it. Sara -
The Irish Railways 3d printing thread
AnUnknownConsciousness replied to Rob R's topic in Irish Models
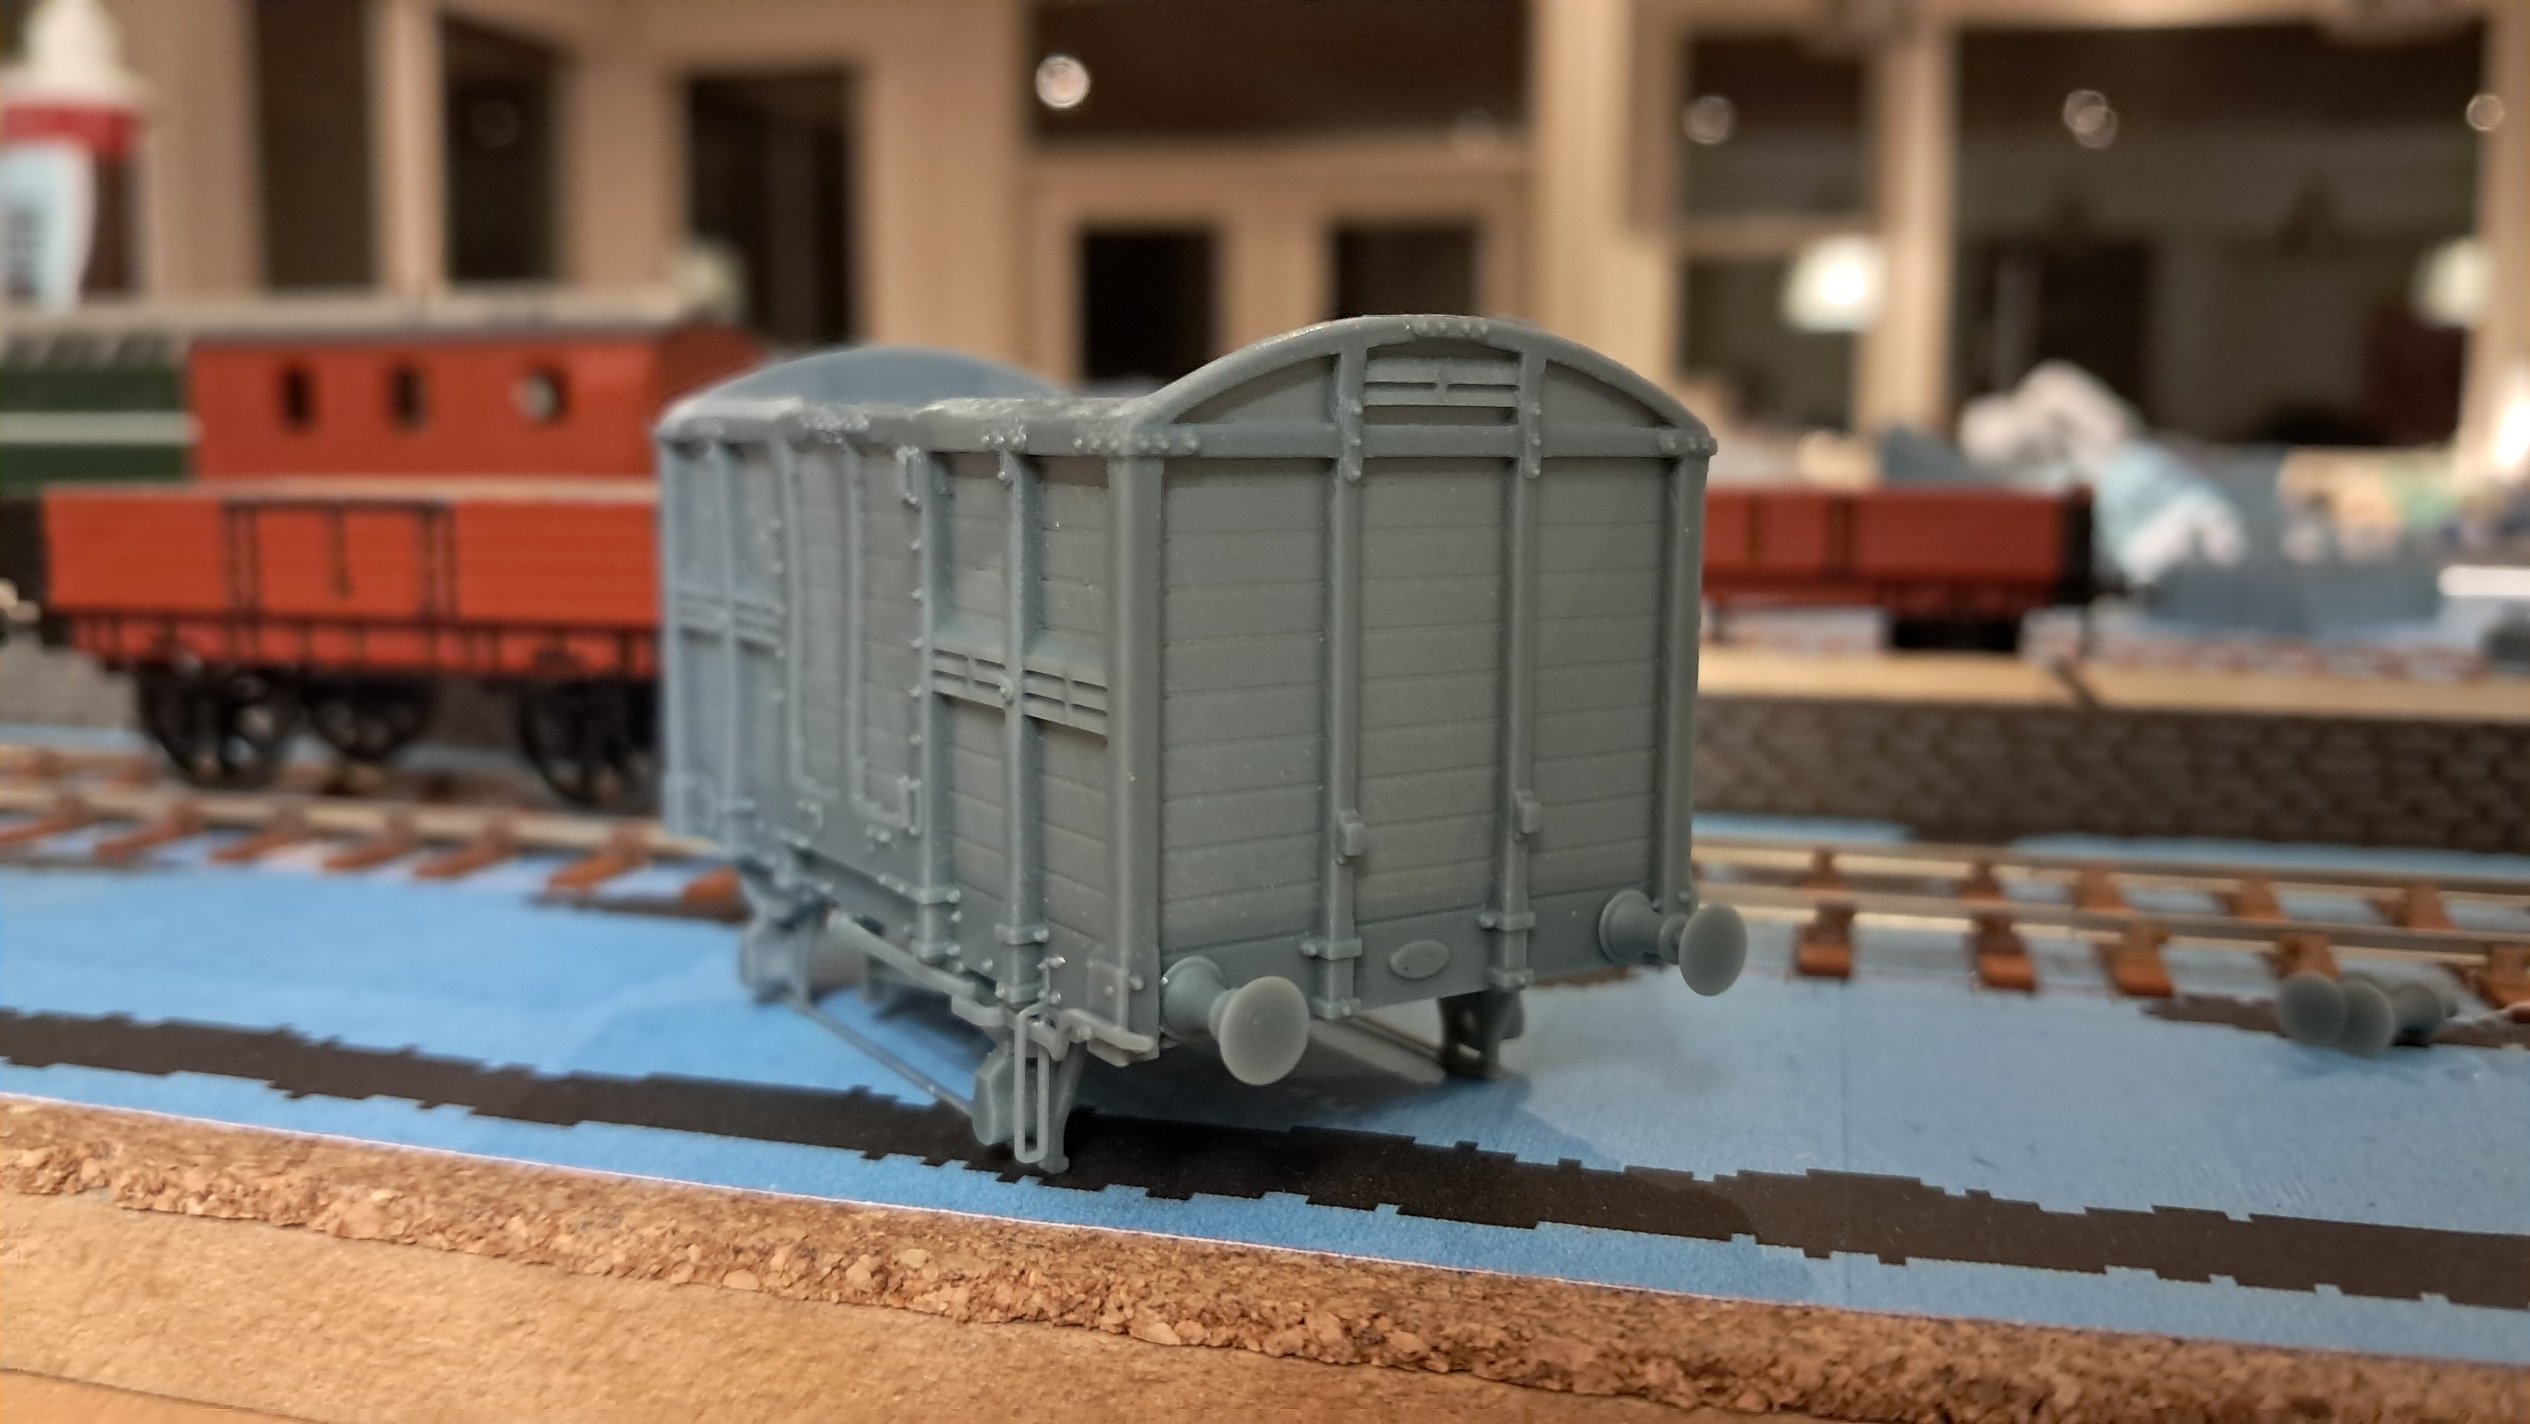
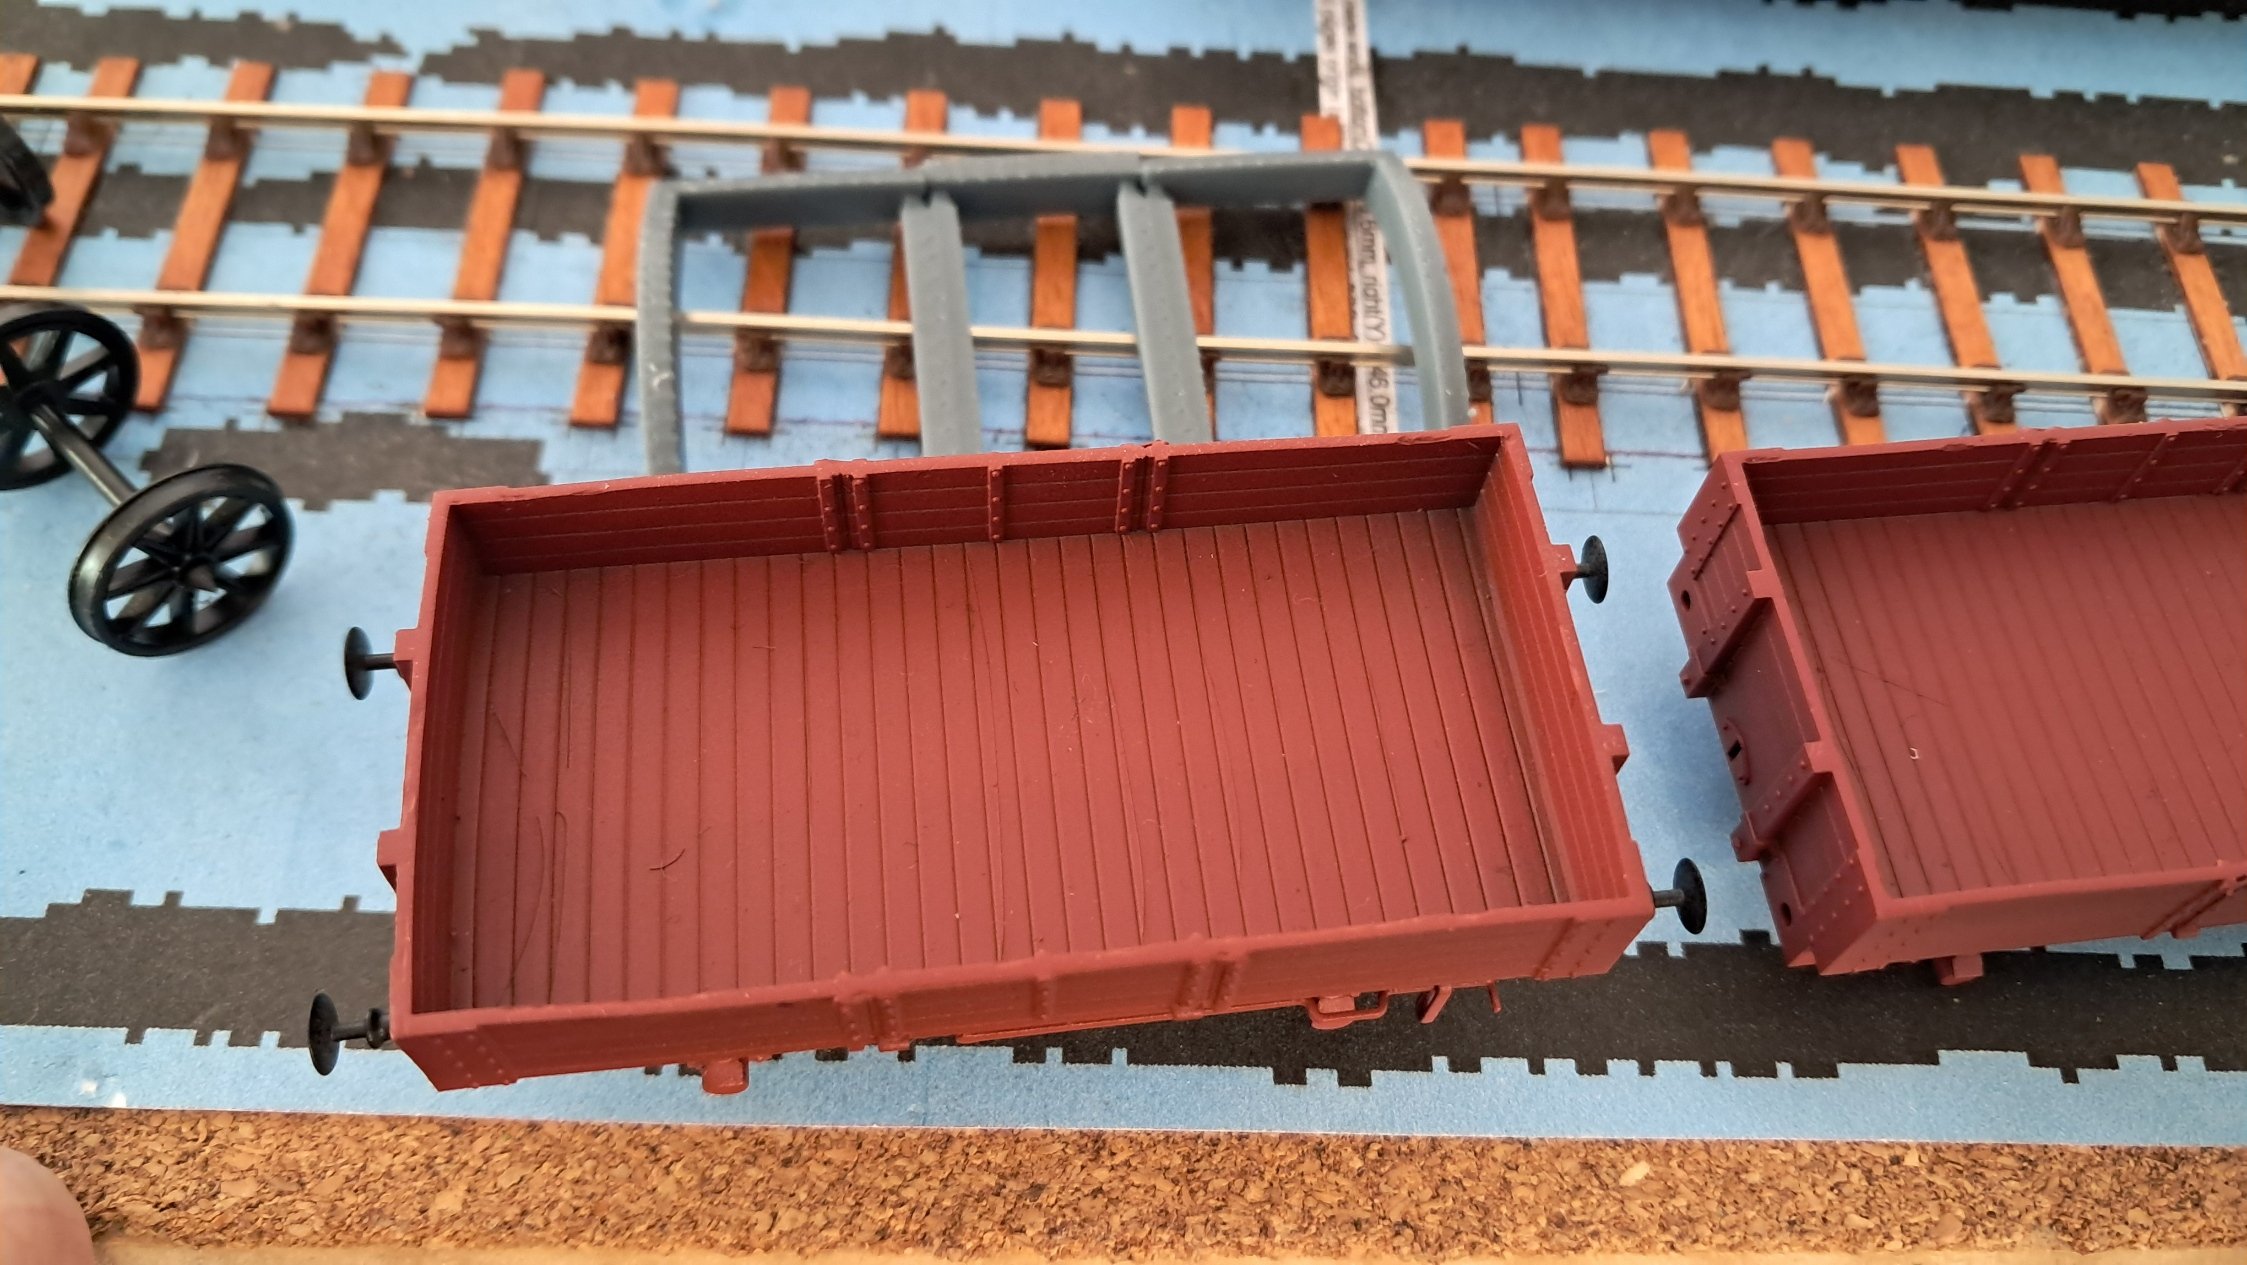
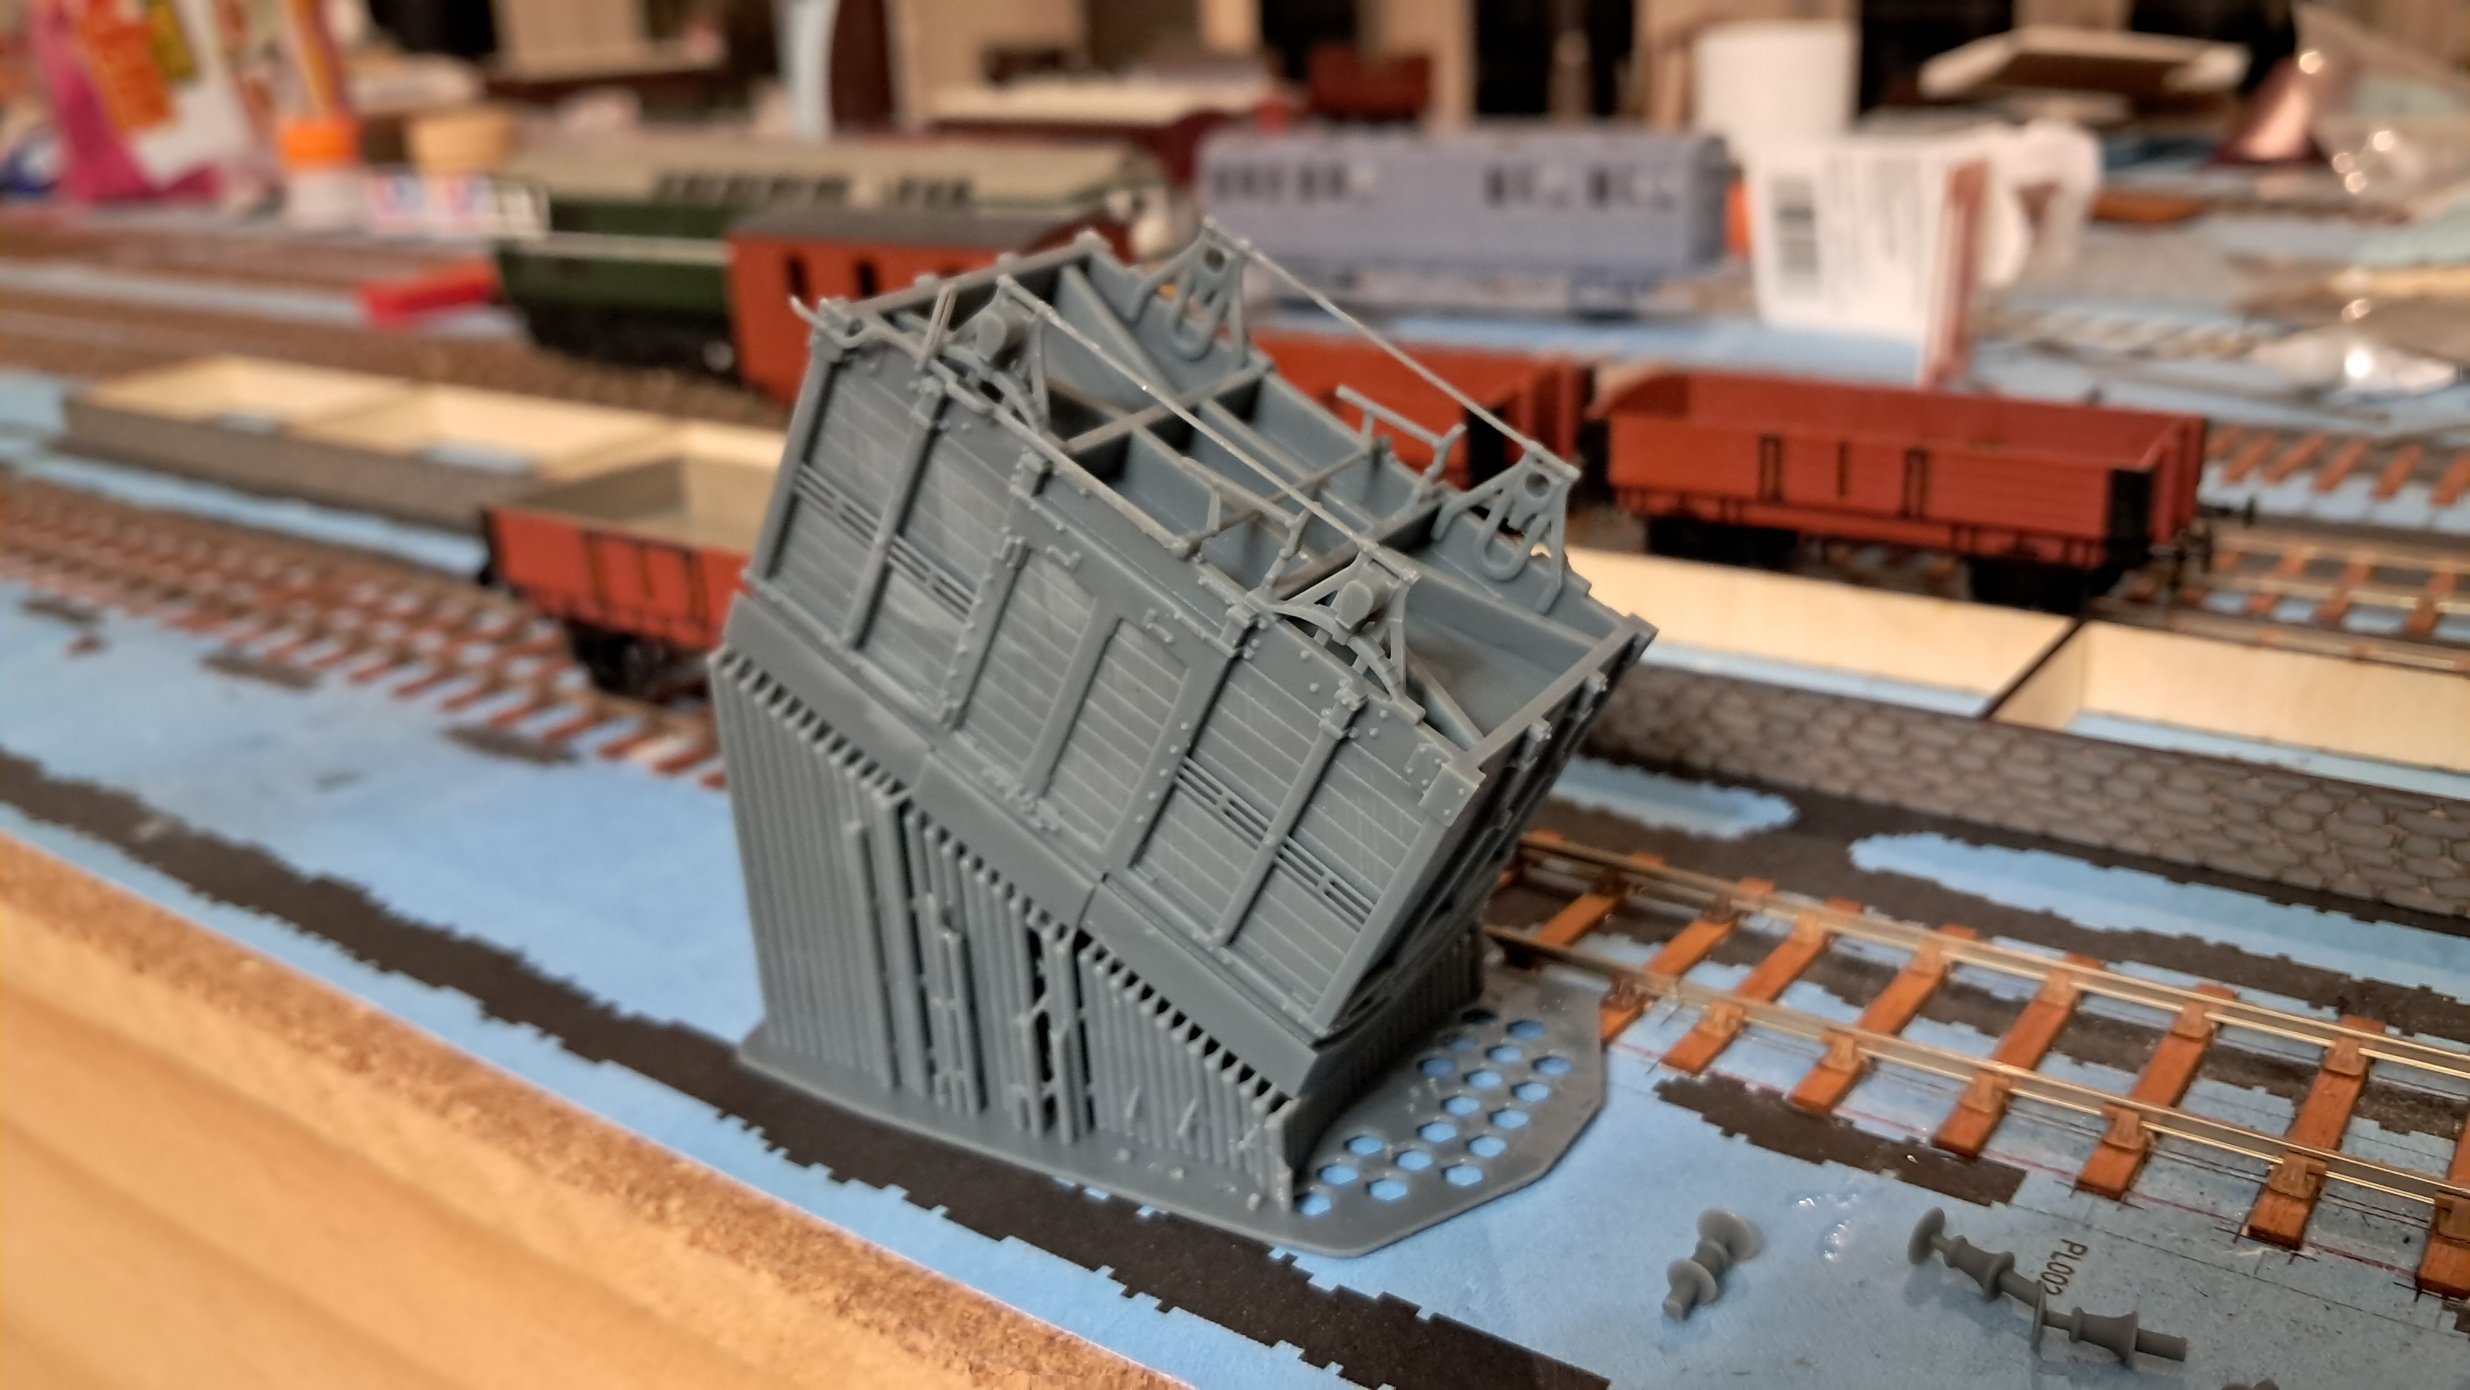
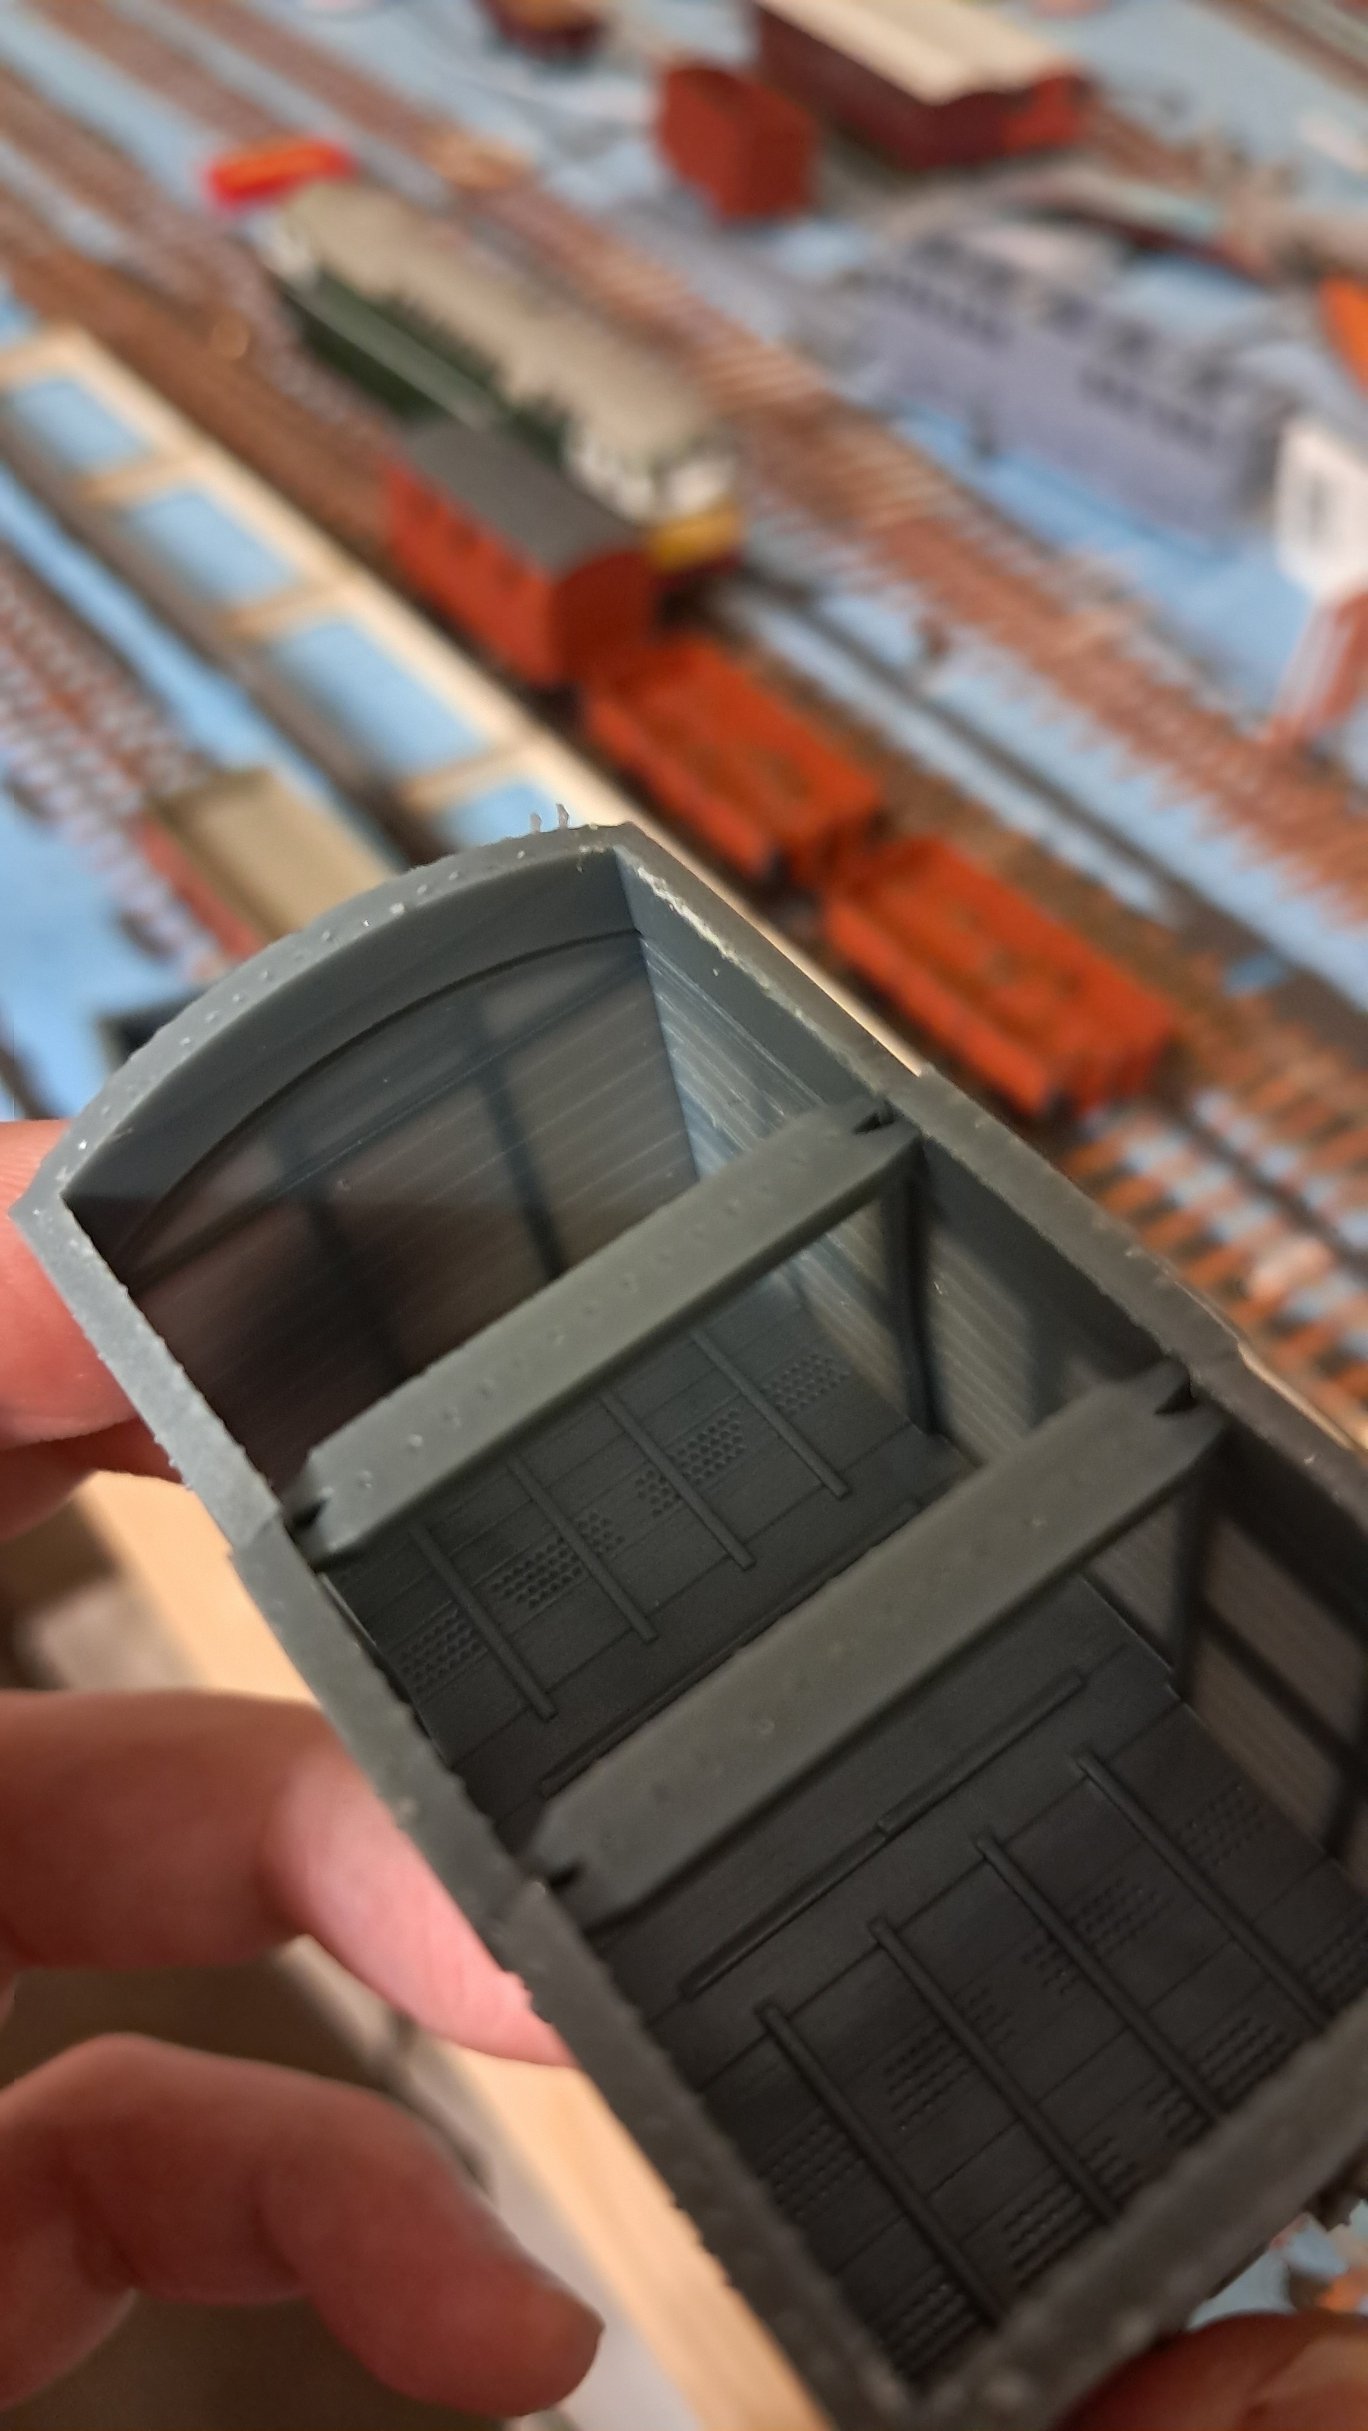
Thought I should produce some actual models to add to my theoretical additions to the discussion, so here's my crack at an MGWR D175B 8-ton covered goods wagon, drawn up based on the HMRS drawing. This is the first print, and there are two accidental omissions if anyone spots them - one a detail part, and the other something rather important for getting an operational model - but I don't have any 28mm axles so I wouldn't be able to get it running anyway. I ordered a stack of 28mm axles from the S4 society a month or so ago, who are apparently out of stock and unsure when they'll get more, so unless anyone has suggestions for other sources it may be a while before I have a running model unfortunately. The layout it's sitting on is my P4 model of Thurso in Scotland (very much WIP), and with the exception of the Heljan class 26 and two Hornby Generics in the far background, all the stock behind it is similarly printed to my designs. The model after post-curing. I remove supports from detail components (in this case the bracing between the W irons, brake rigging, and a couple of other spots) before post-curing, as it's easier to do it without damage while the resin is still pliable. The inside shot shows some extra lateral supports I've been using to reduce twisting, but I still ended up with a tiny bit through the body (due to the thin planks; 0.5mm thick, or a scale 1.5") so may add a couple of small removable lateral supports inside the body to mitigate this. Other vans I've done have been completely covered so I've had thicker walls, as it hasn't mattered, but here I want the detail visible. And with the support strips removed, and buffers fitted at one end to see how it looks. You can see a bit of the twist through the body in the second shot. Once I can get my hands on some axles these will be going on 21mm gauge to P4 standards, to go with some early 5'3" Australian models I'm working on. I have the drawing for the matching 8t cattle wagon, the Ernie Shepherd 'Illustrated History' book on the way, and a copy of 'Locomotives of the Midland Great Western Railway' arrived earlier this week, so I have plenty of ideas forming about what to do next once I have this refined a bit more. Sara
- 138 replies
-
- 10
-
-
-
The Irish Railways 3d printing thread
AnUnknownConsciousness replied to Rob R's topic in Irish Models
It's certainly a bit of a compromise. As far as available hobbyist equipment goes for 3D printing, the options are filament or resin, unless you start looking at outsourcing printing which is where the money and time cost you mention starts to come into it. -
The Irish Railways 3d printing thread
AnUnknownConsciousness replied to Rob R's topic in Irish Models
I've tended to make mine as single-piece bodies with add-on roofs, footboards, etc, to provide strength and stability. My experience has been that resin prints have a tendency to want to warp, and I've found having single piece body+chassis mitigates that, though I use separate pieces for detail parts where it may be more trouble than it's worth supporting them as part of the print, or parts where it's otherwise not practical to make them part of the print. These generally end up being roofs, buffers, and footboards. Whilst assembly would provide the same stability, it relies on parts remaining straight for long enough to assemble them, which I've found to be a challenge. There are also cases where single-piece prints make supporting the print easier to reduce clean-up. -
The Irish Railways 3d printing thread
AnUnknownConsciousness replied to Rob R's topic in Irish Models
For drooping like that I've found it helpful to add sacrificial strip supports to objects, as below. I generally go for 0.25mm thickness at the connection point, with the main strip 2-2.5mm thick. This provides enough strength to hold the part to the strip, while being easy enough to score and break off with a scalpel without damaging the model. I also print on an angle, and this has the benefit of countering just about any angle-based twist in the model before it reaches the actual model, which is the reason for the depth of them; for a flat-to-build-plate design it may not need so much height. All my designs are printed as one piece body+chassis with separate roofs, with the bodies printed roof-to-build-plate. Not an Irish model (still working on my first, but this one is for 21mm BG) but this is how I've done the arrangement on one of my models. I then put all the primary supports onto the support strip - minimising slicer-based supports on the actual model, except where absolutely necessary, as this reduces clean-up. I expect a support similar to the one furthest to the left in this screenshot would do the trick to keep your buffer beams nice and straight. The SLNCR 0-6-4T's are a lovely class of loco so I'm looking forward to seeing how it progresses! Sara