Broadstone
-
Posts
66 -
Joined
-
Last visited
-
Days Won
3
Content Type
Profiles
Forums
Events
Gallery
Blogs
Everything posted by Broadstone
-
"Voiding the Warranty" - Mol's experiments in 21mm gauge
Broadstone replied to Mol_PMB's topic in Irish Models
Rob R produced these for me in S Scale Irish Broad Gauge and they are excellent. -
So sorry to hear about this Colonel, shocking! And thanks all for the great advice, we can all never be too careful.
-
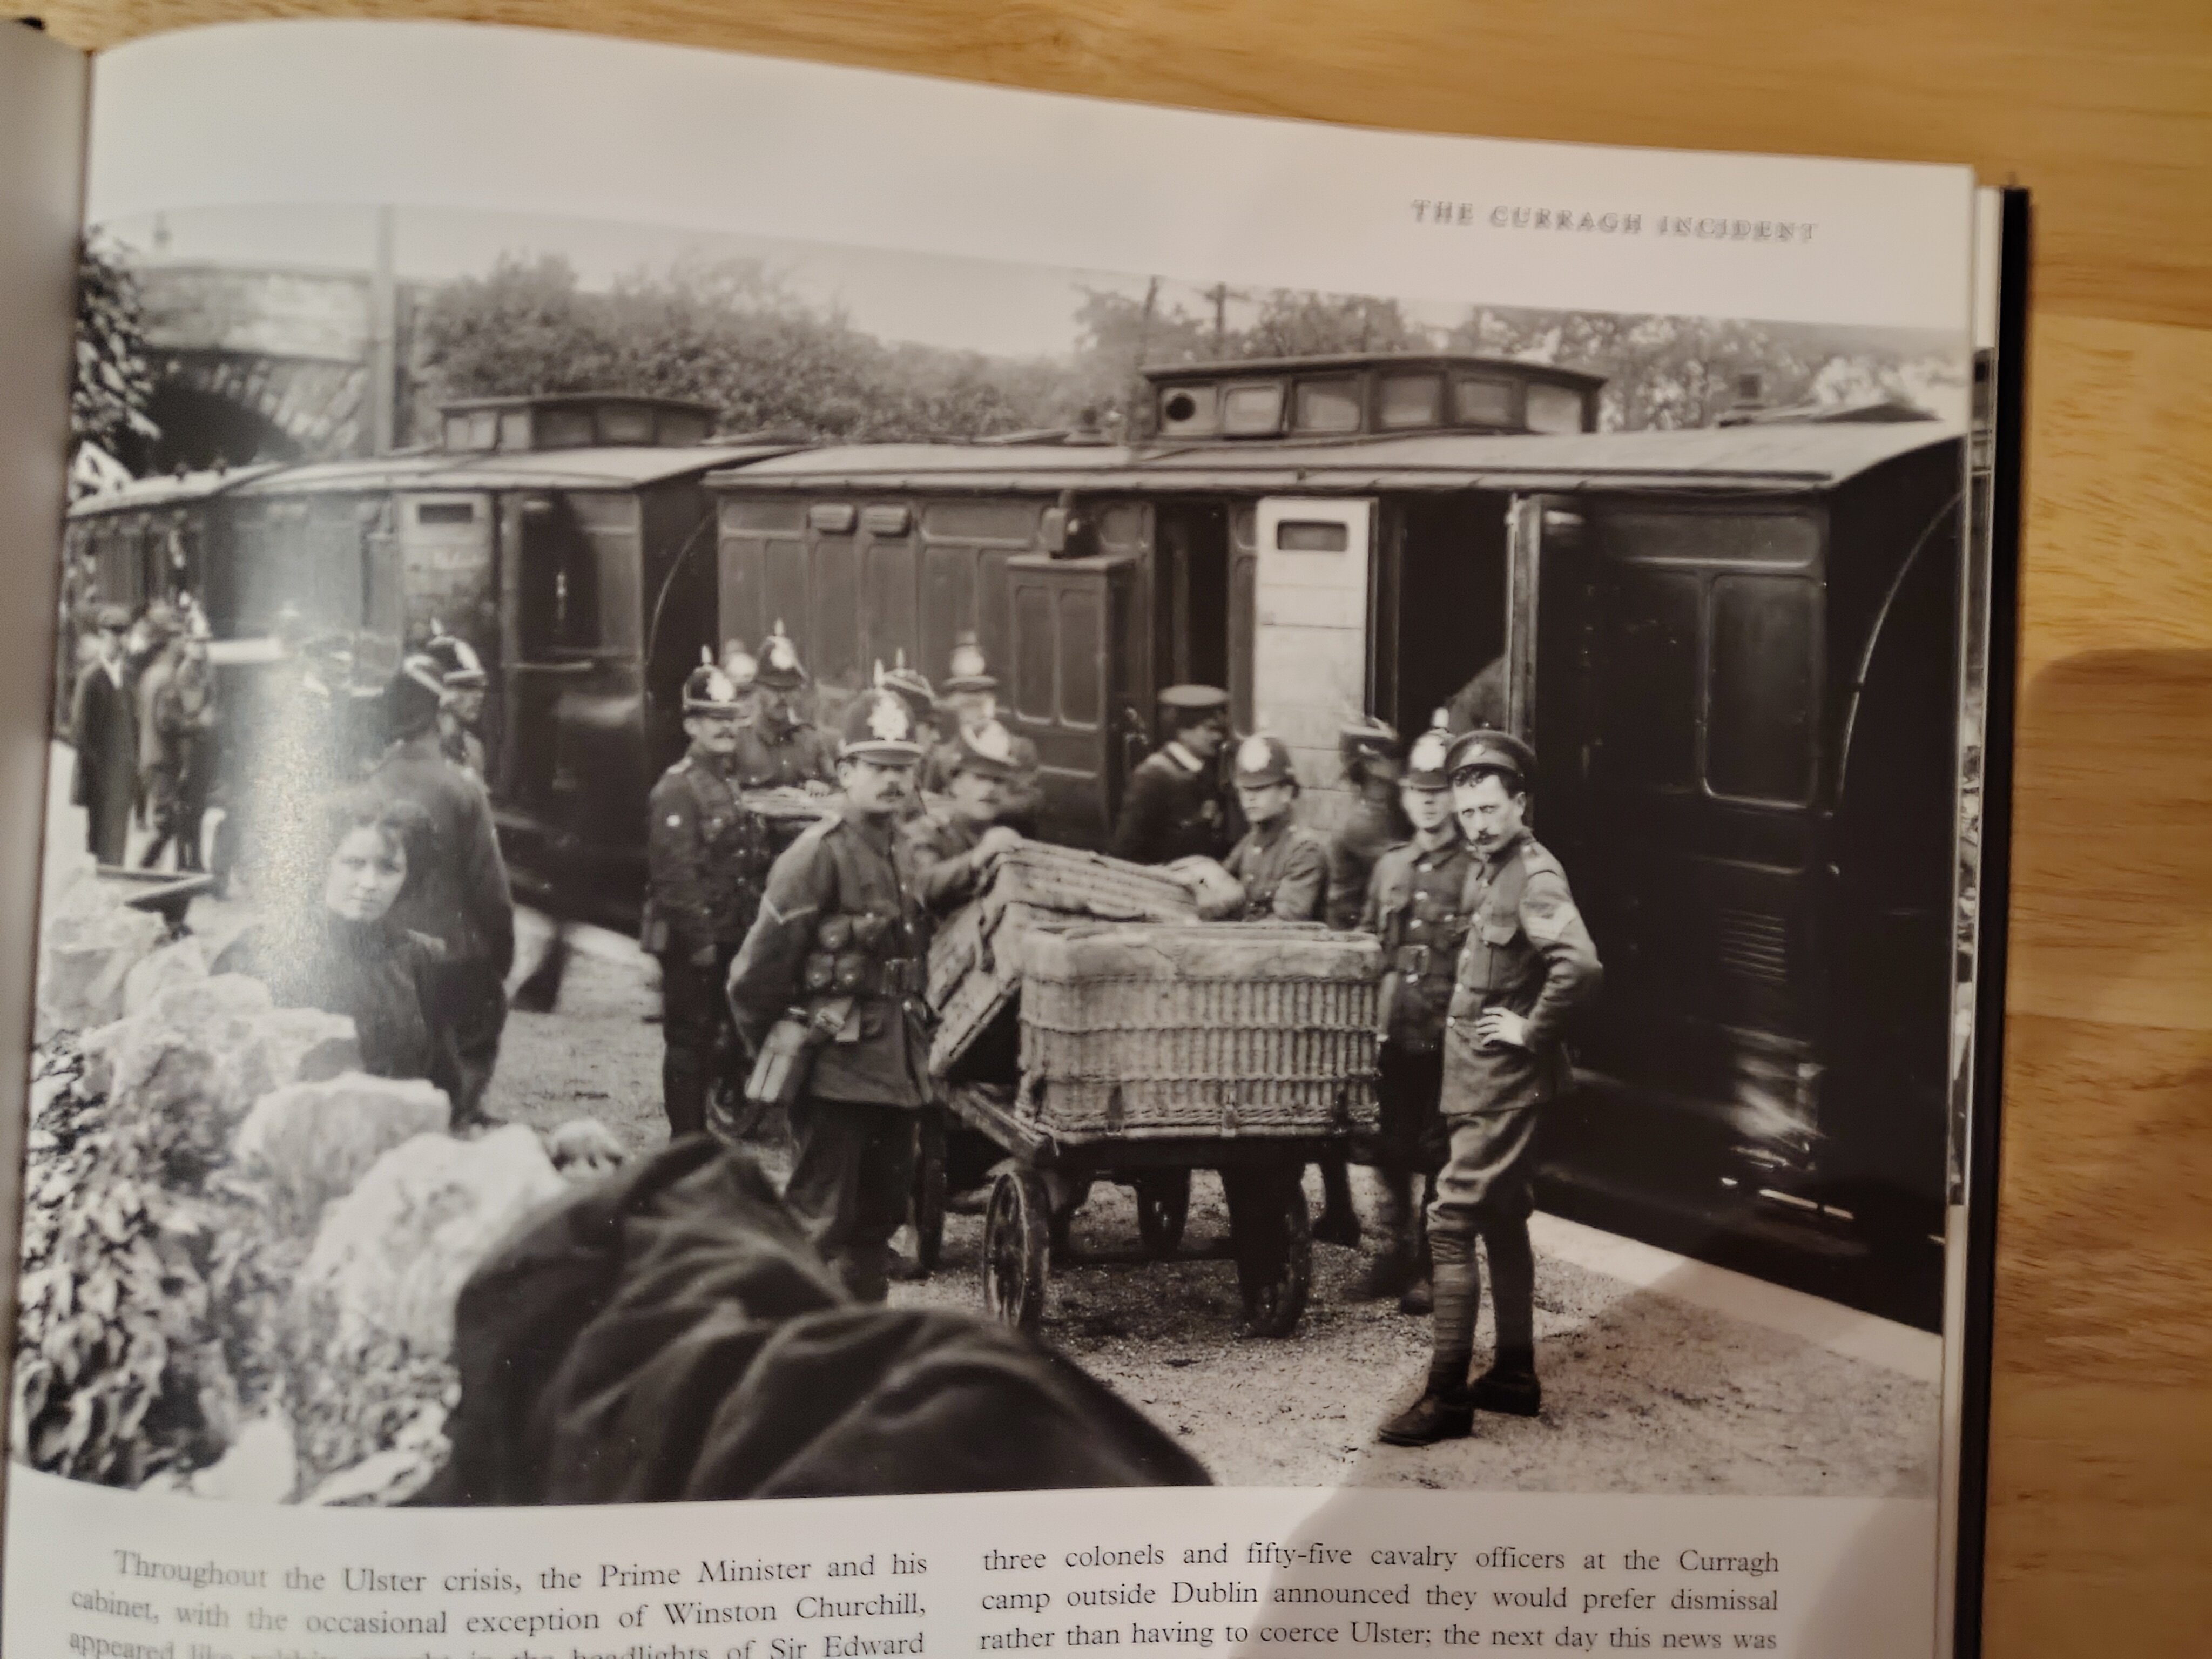
Here is a picture of 2 of these vans at an unknown GSWR station in, I think 1914. Its from a book called "The Irish Century" on a page about the Curragh Incident. Apologies for the quality, taken as a scan with my phone!

-
I salute Rob for taking this step and making his excellent design available for all. Rob has designed several British standard - gauge wagons in S for S Scale Model Railway Society members and they are generally held to be the best designed and printed within the Society. I was delighted when Rob said he was going to produce this MGWR 3 planker and it has turned out very, very well! I'm sorry to say that my wagons are not finished yet. I need to letter them but am first going to tone down the satin black I have used to a dark grey. After lettering they will be weathered down - these were working wagons afterall that spent their life outside and being worked hard. I hope to hear of more of Robs wagons built in other scales.
-
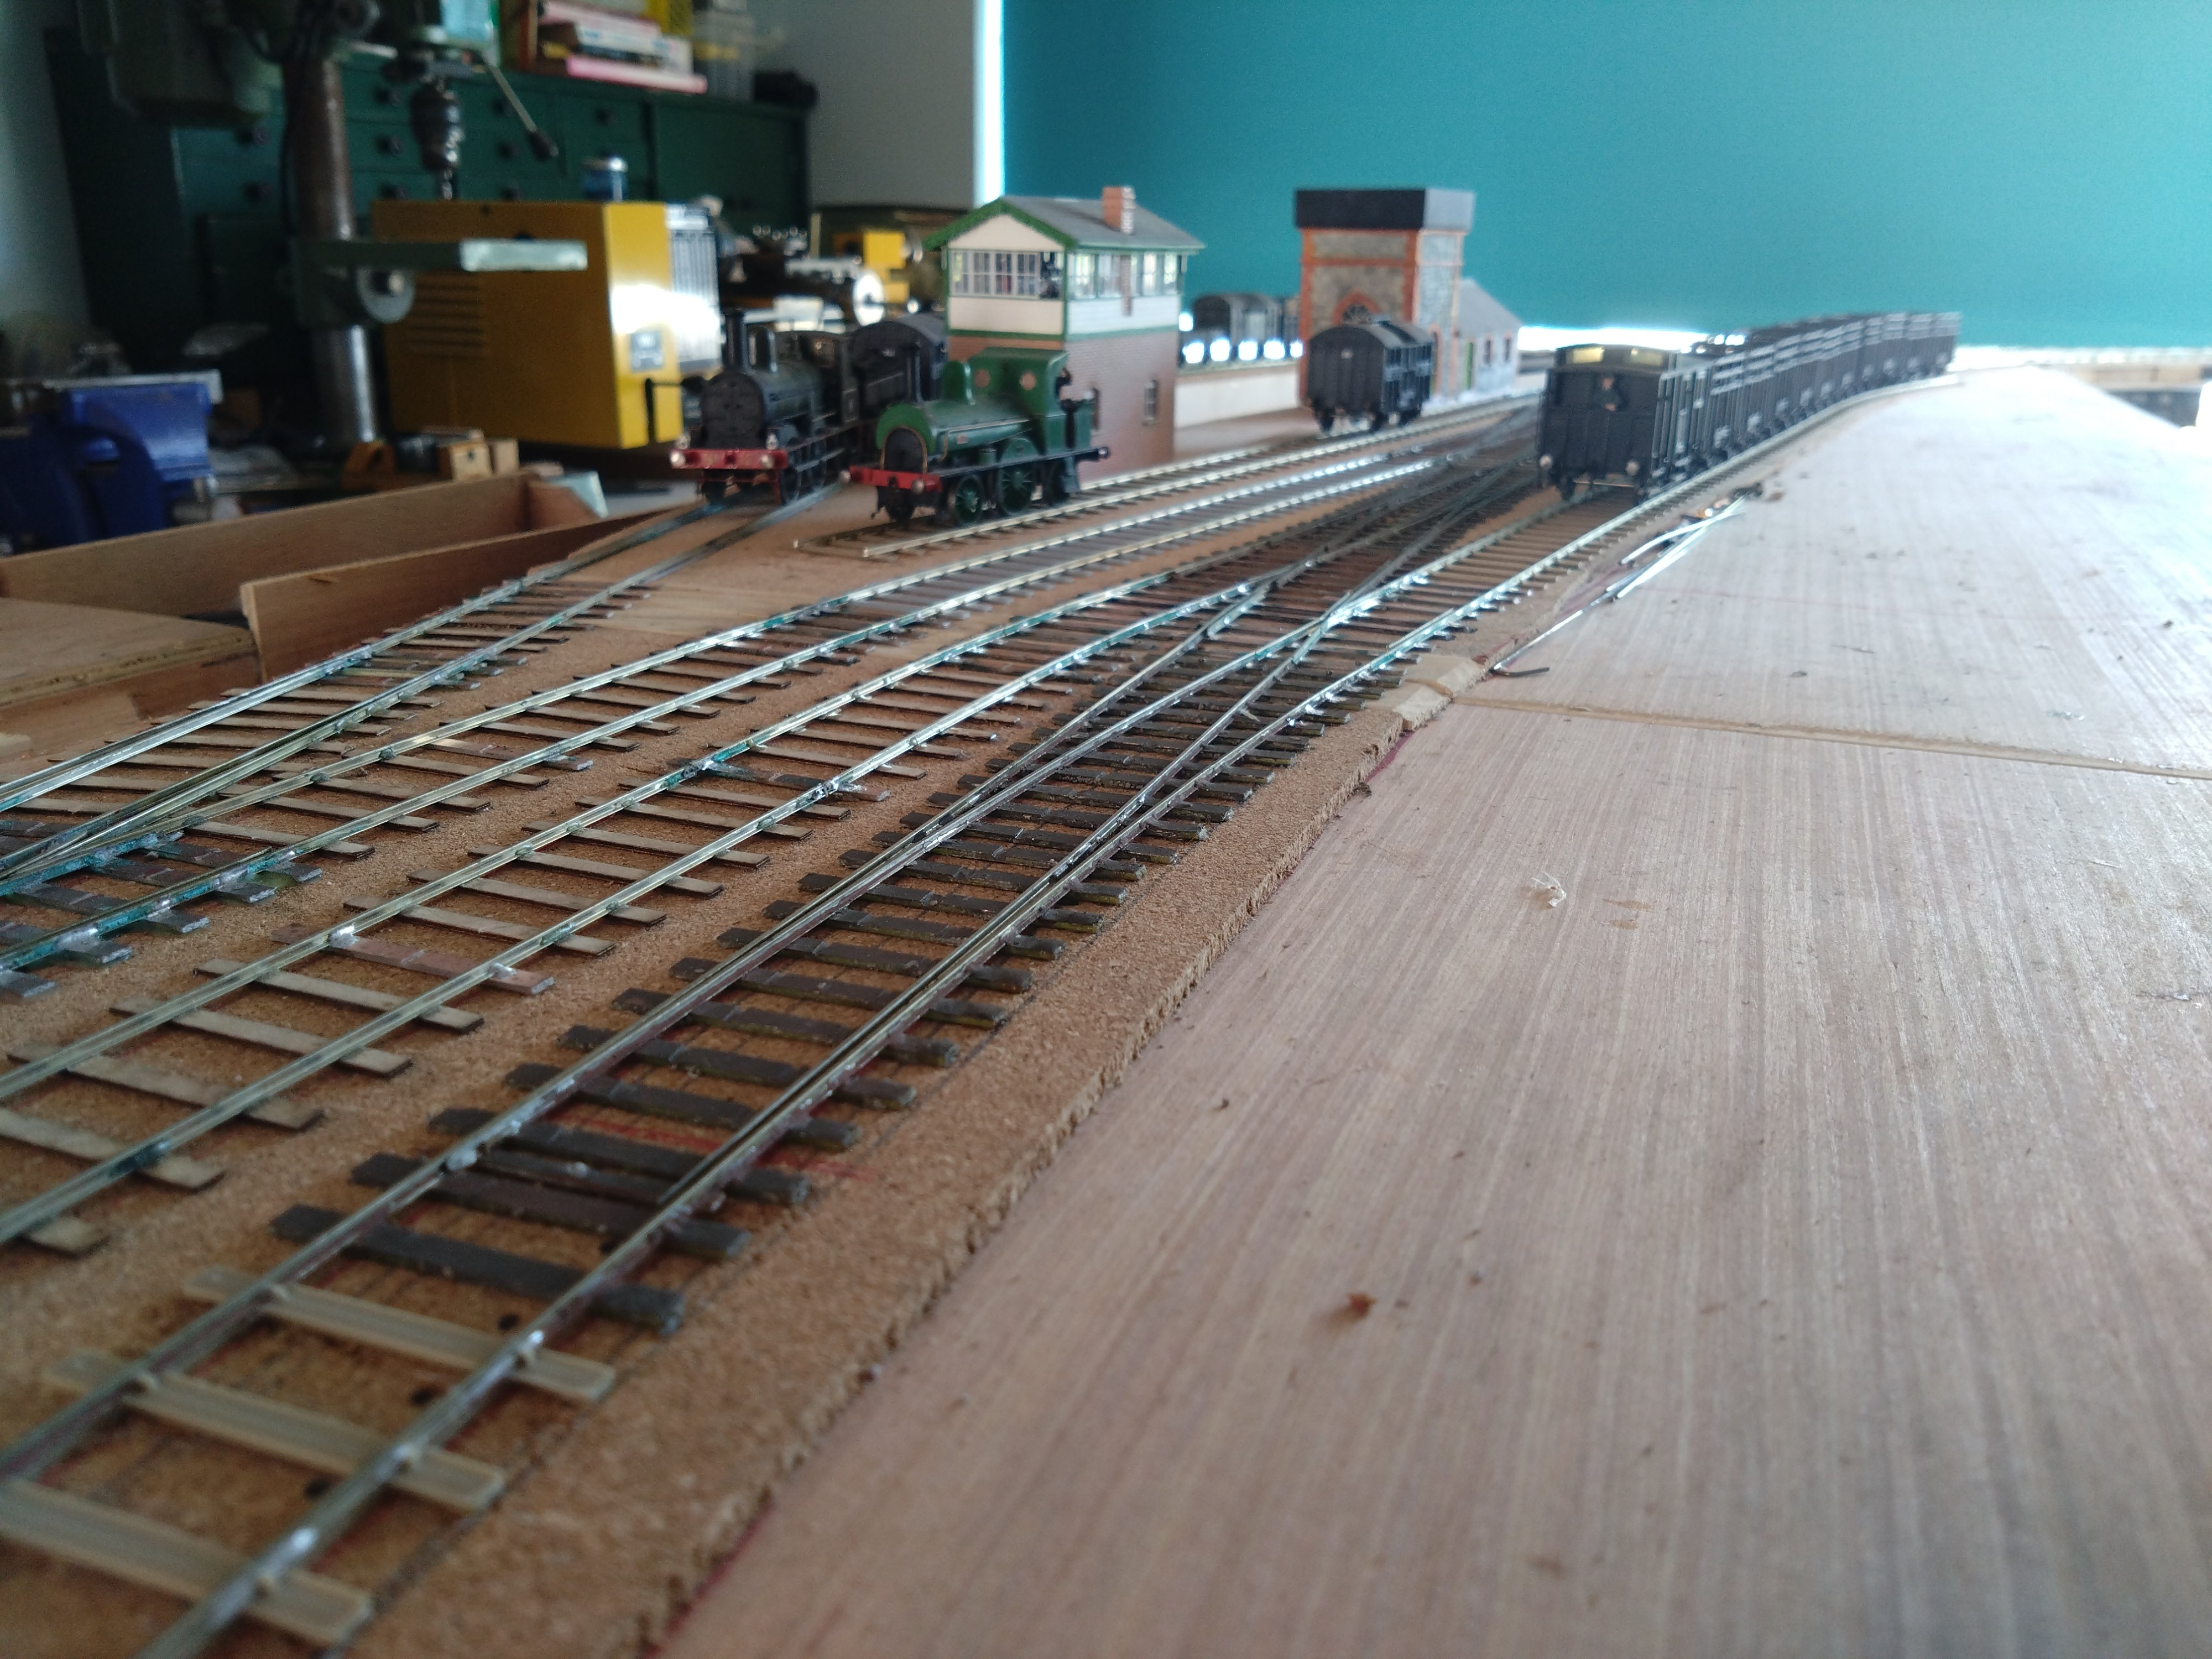
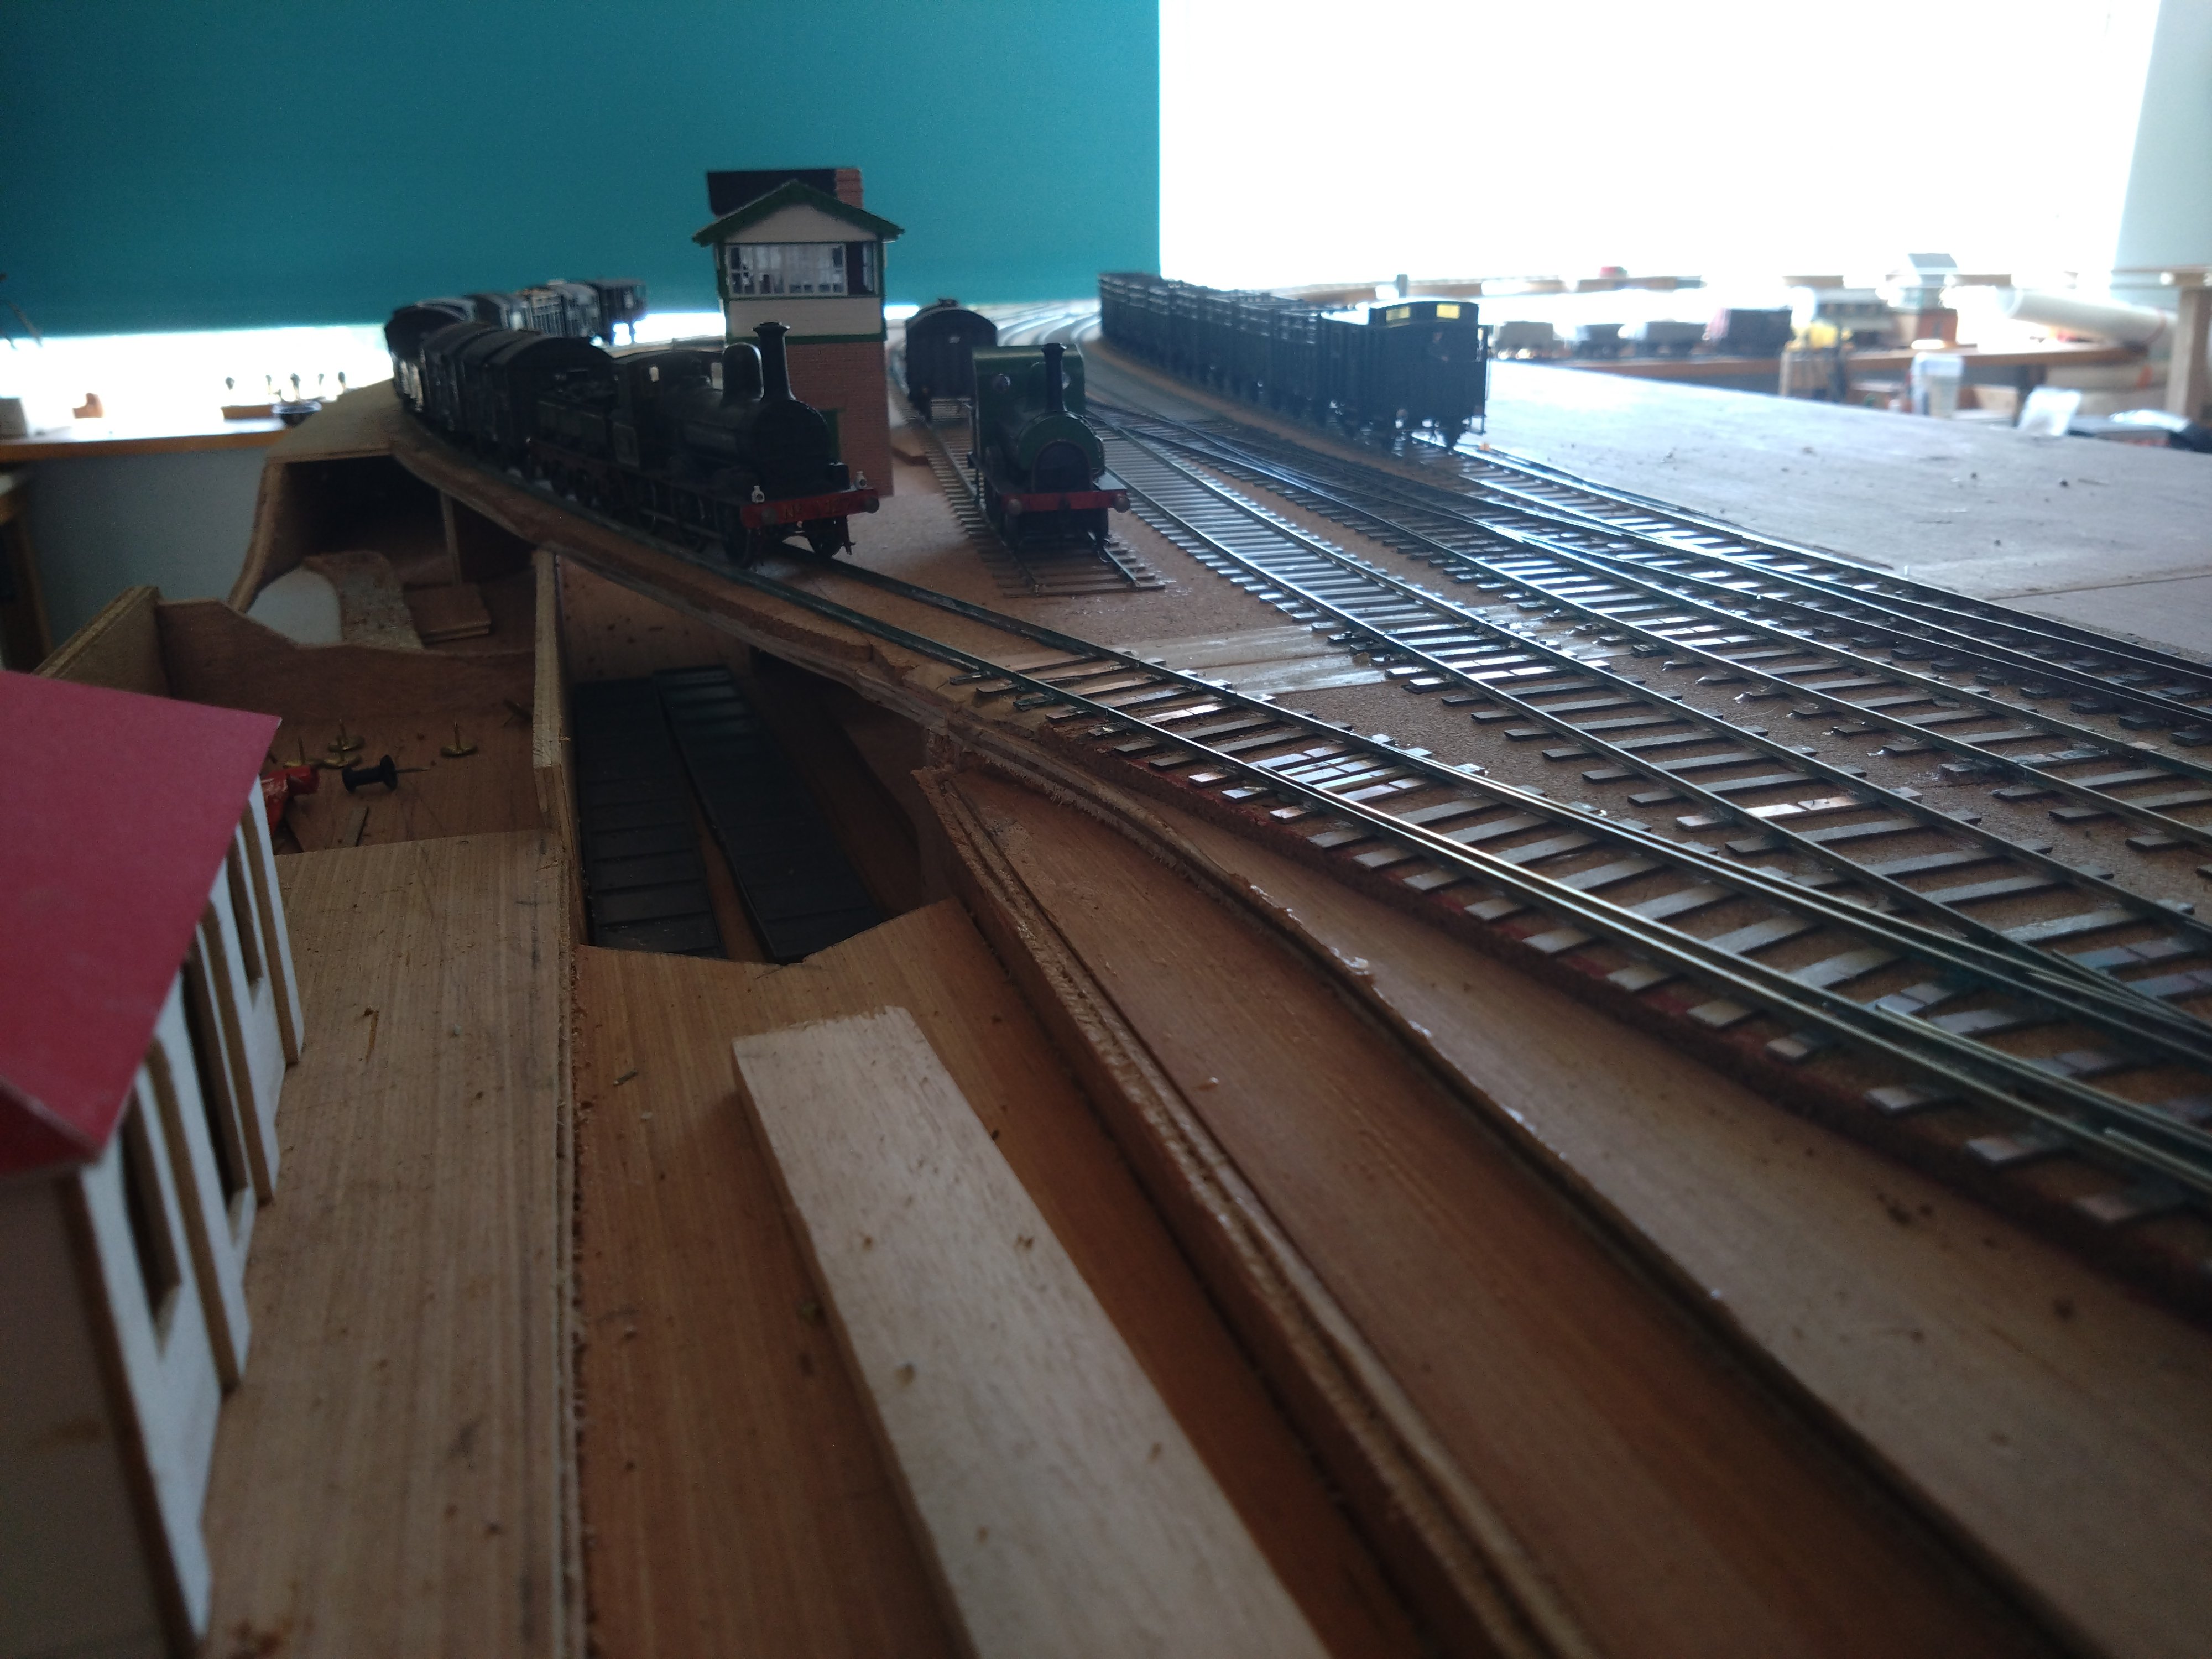
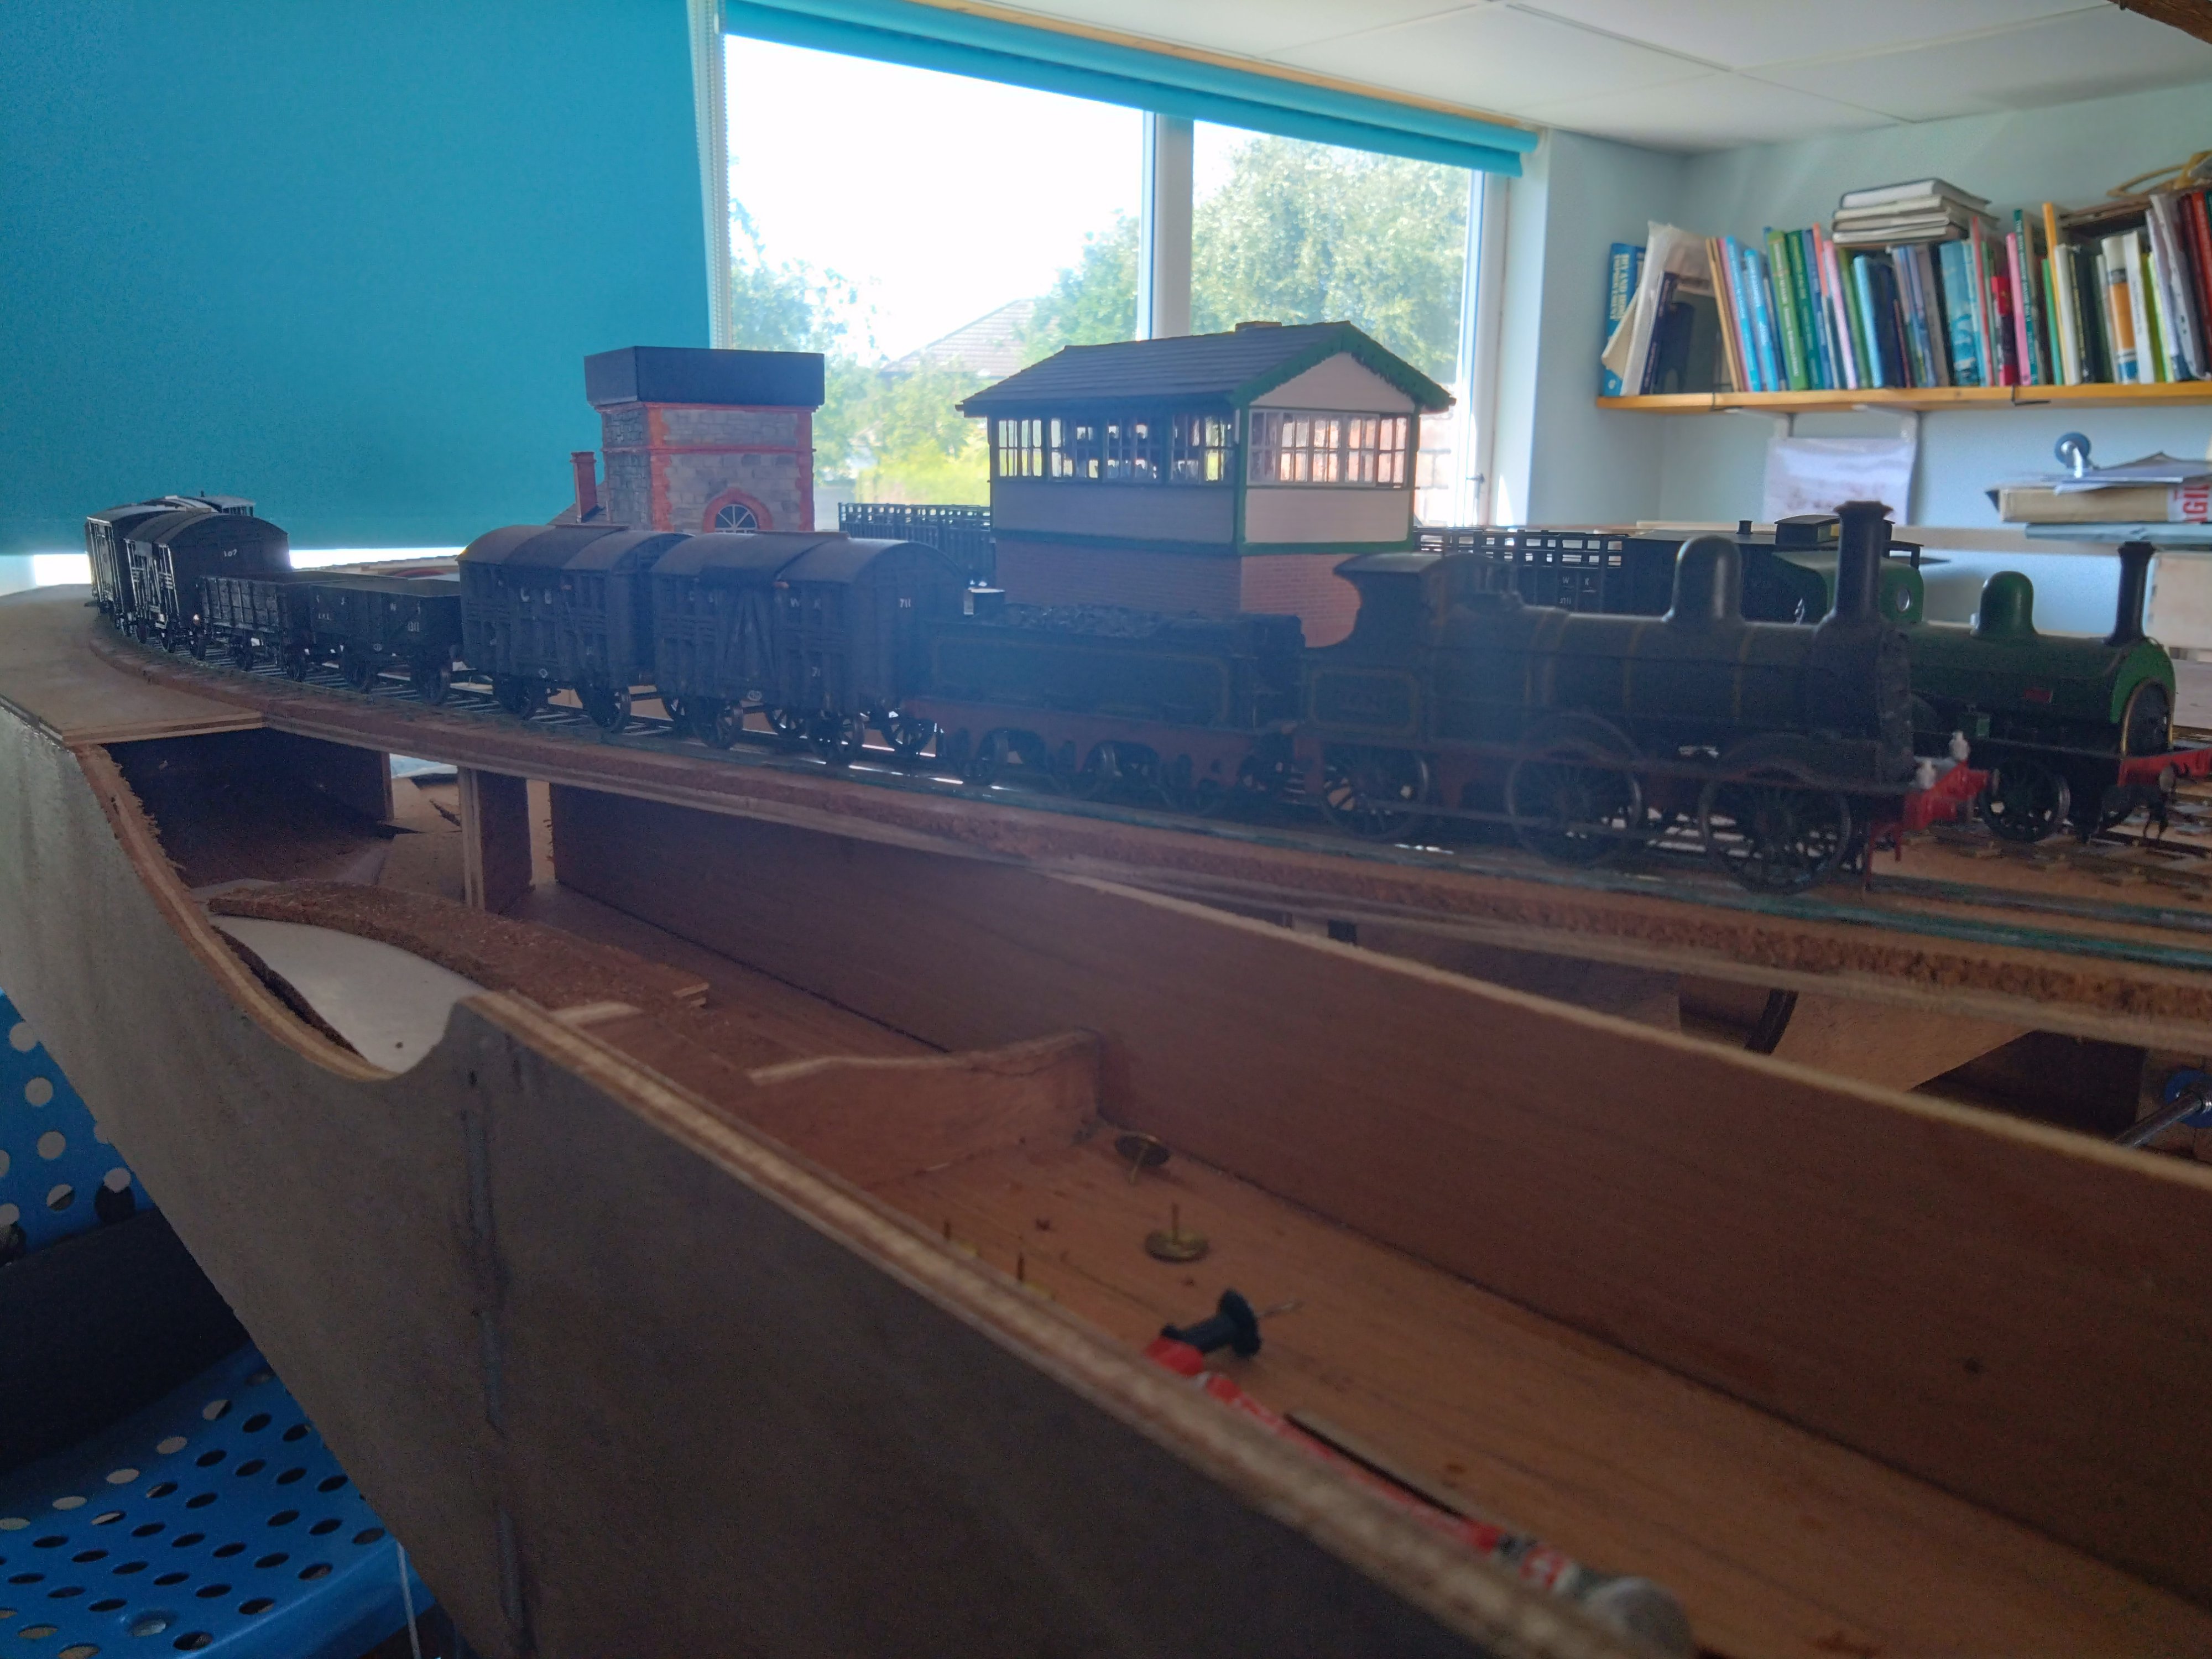
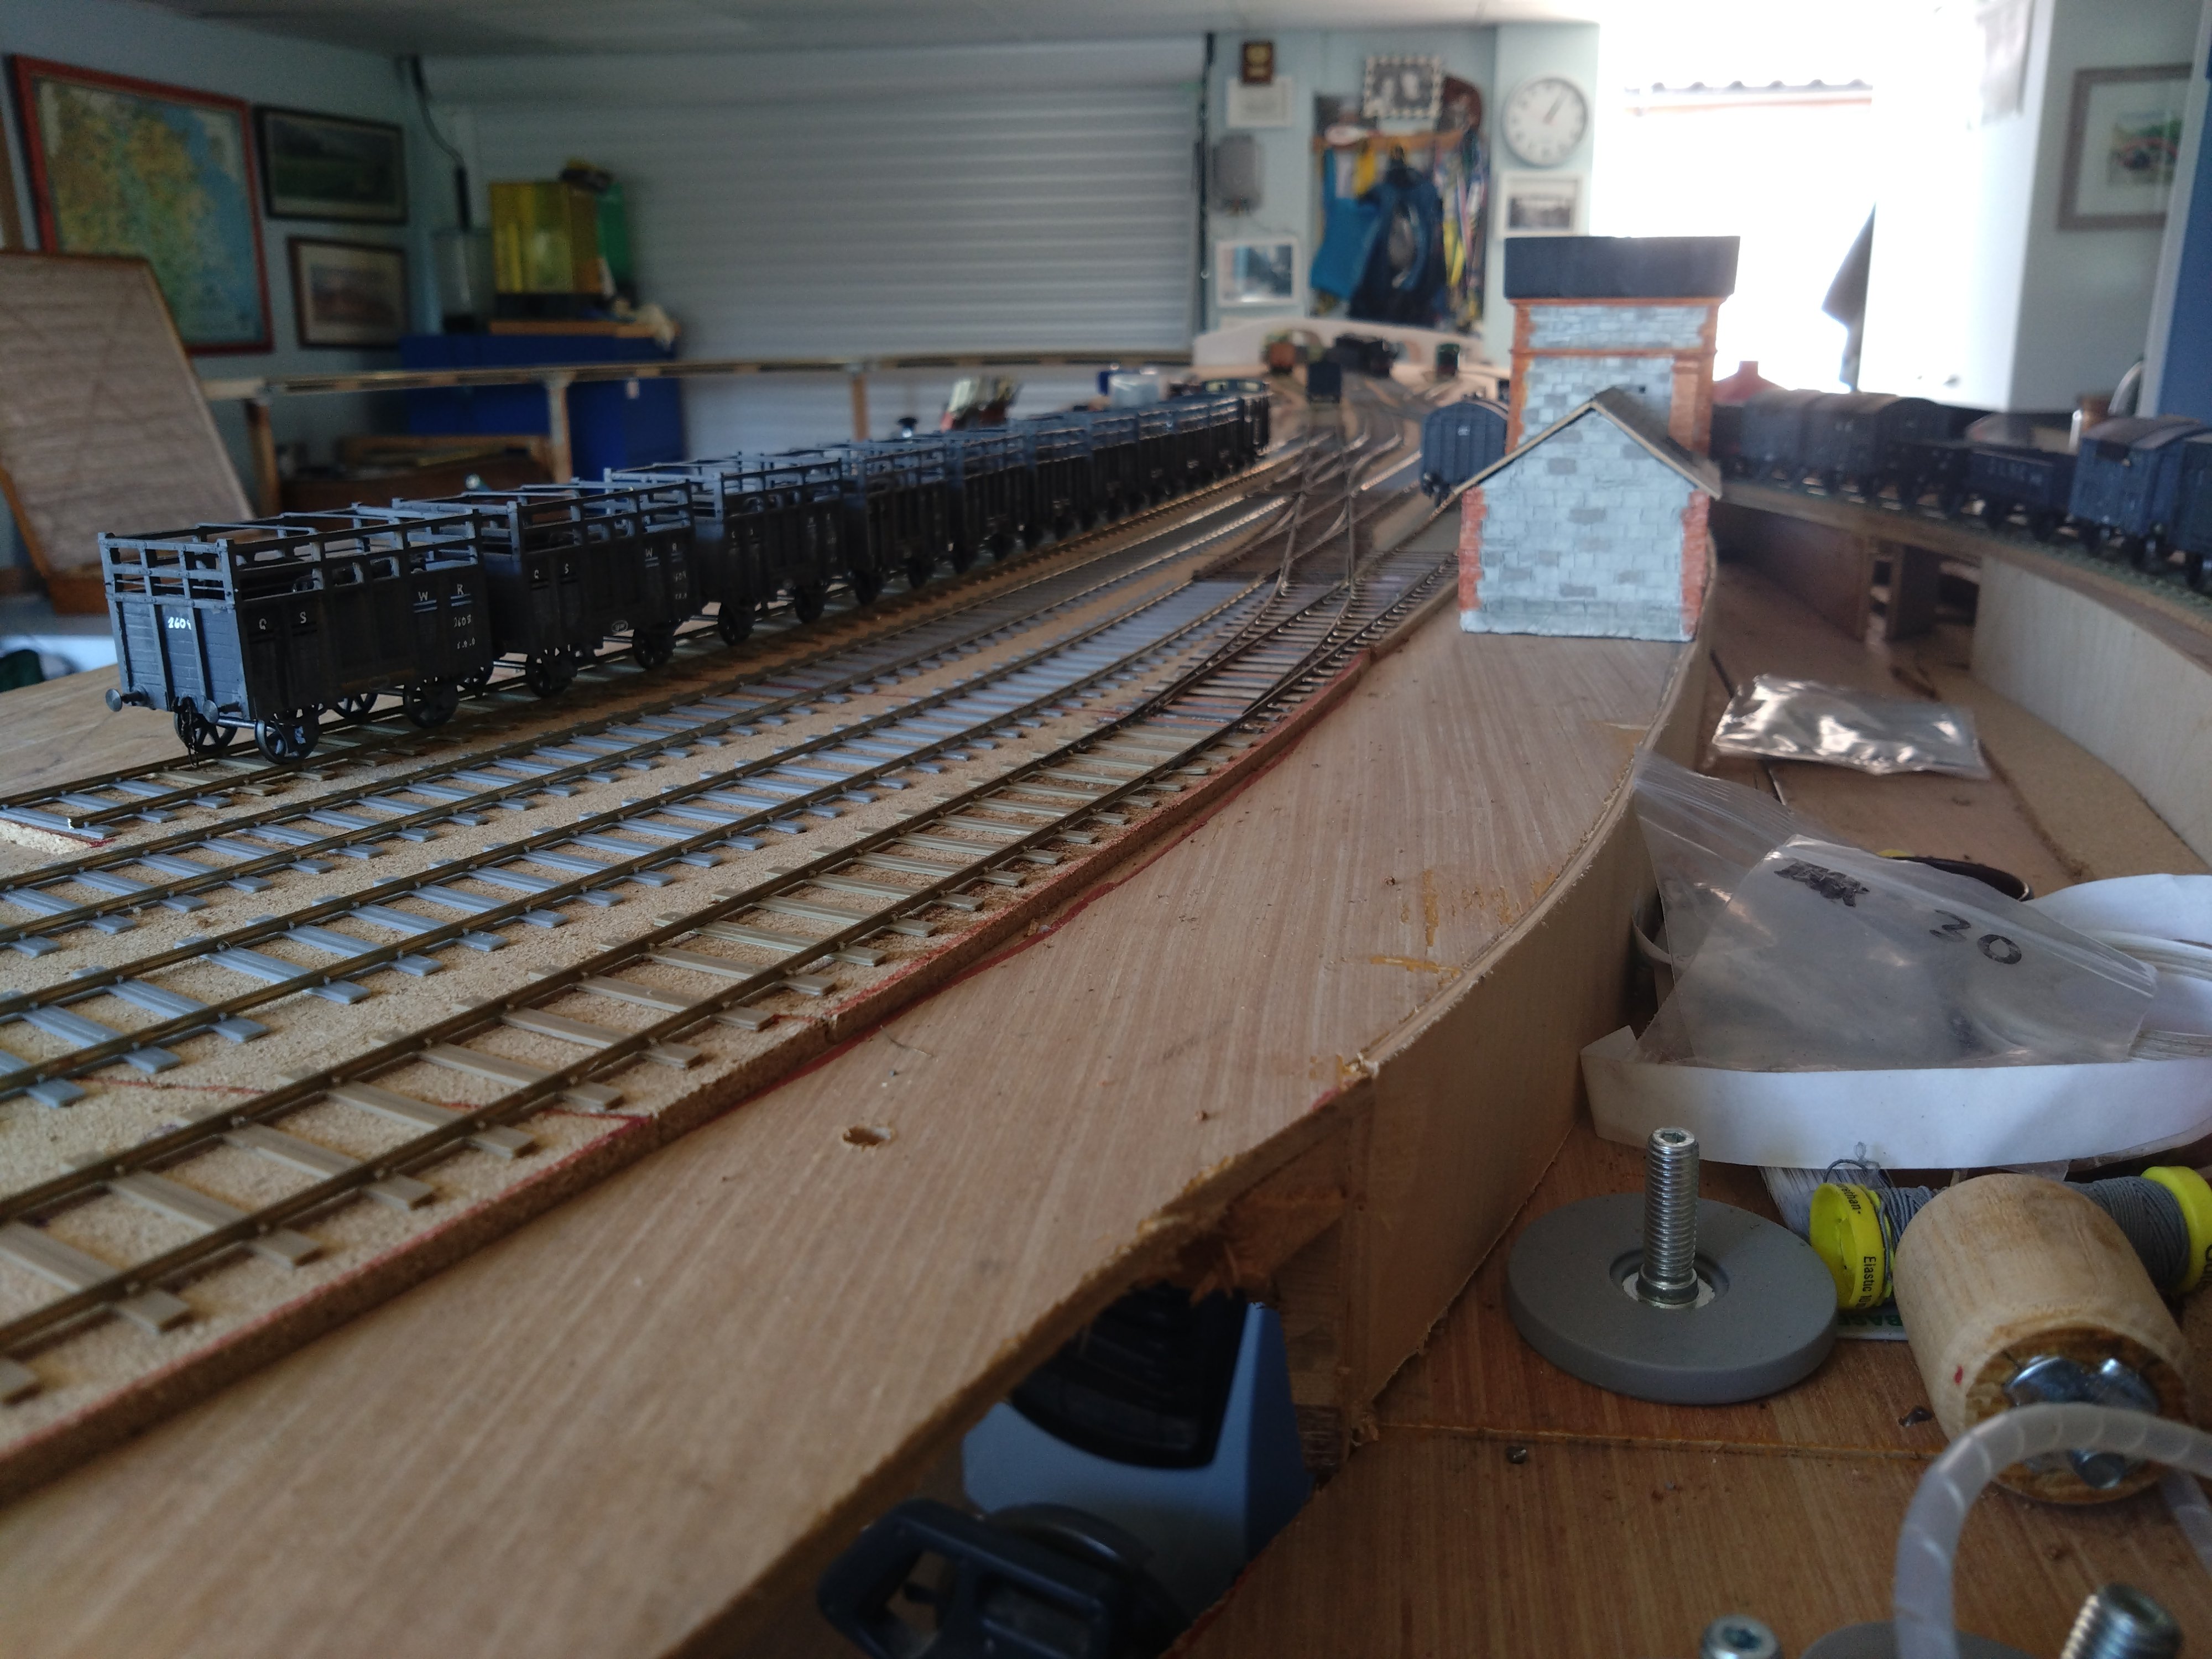
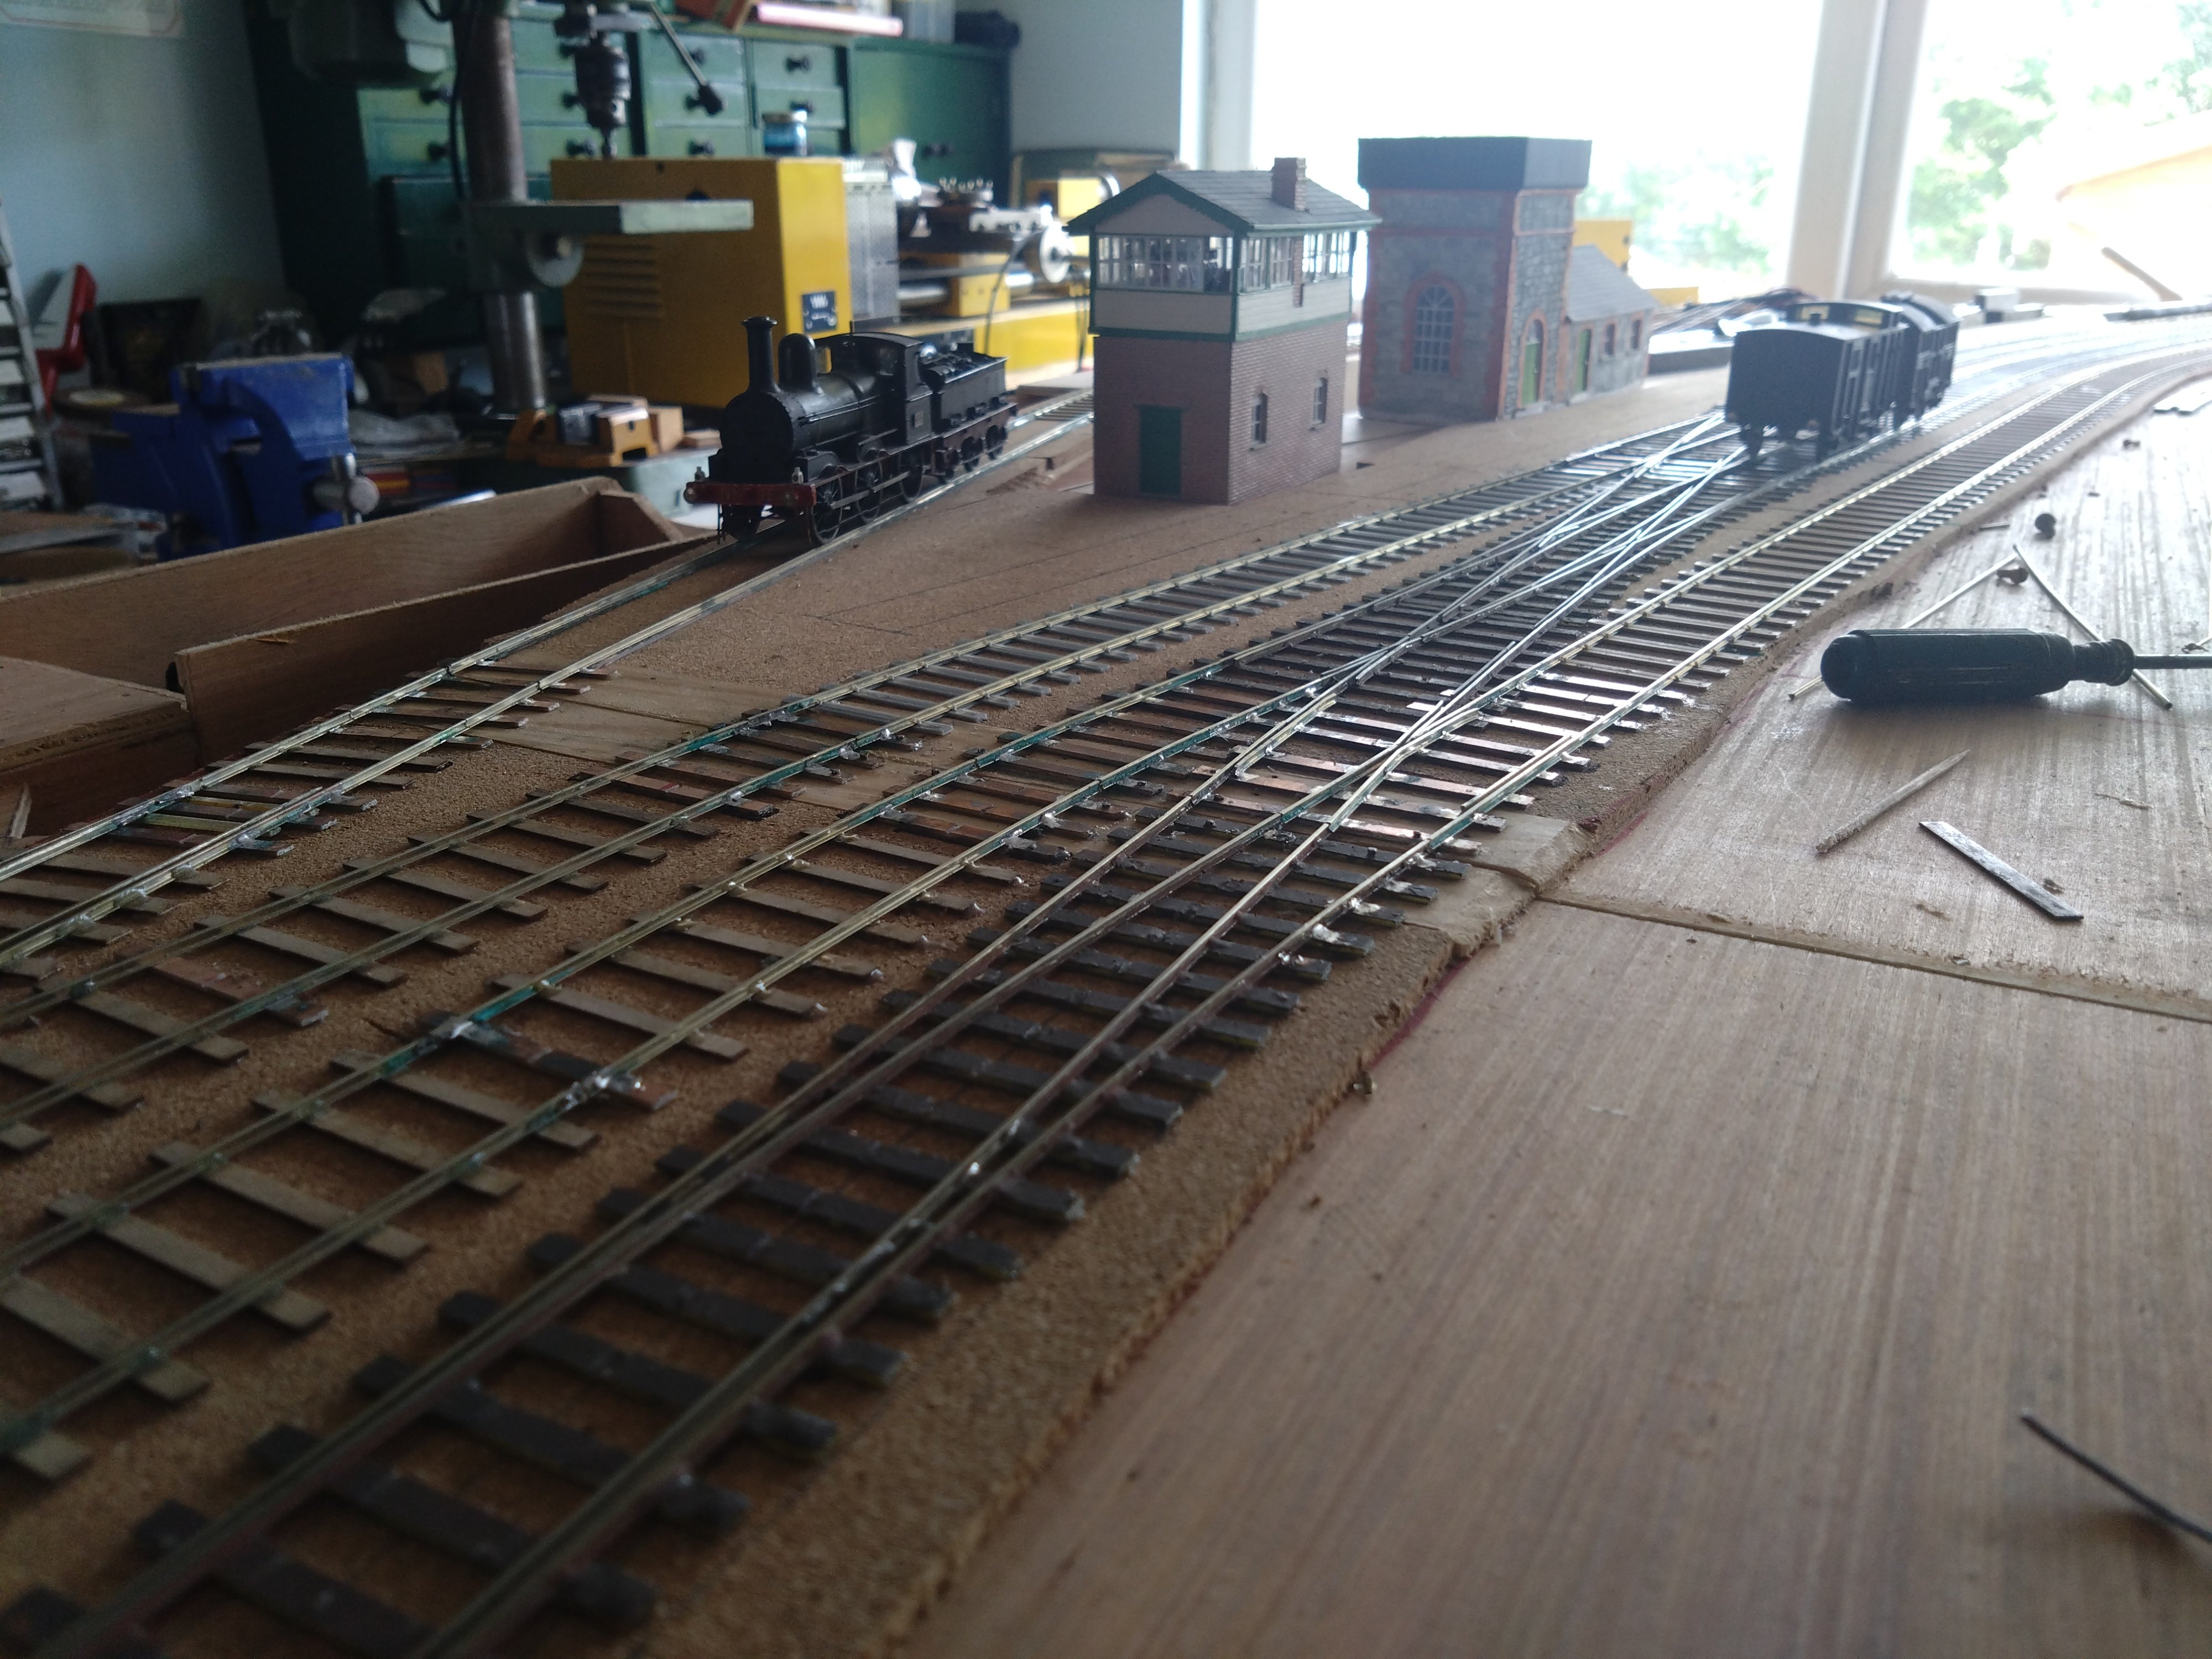
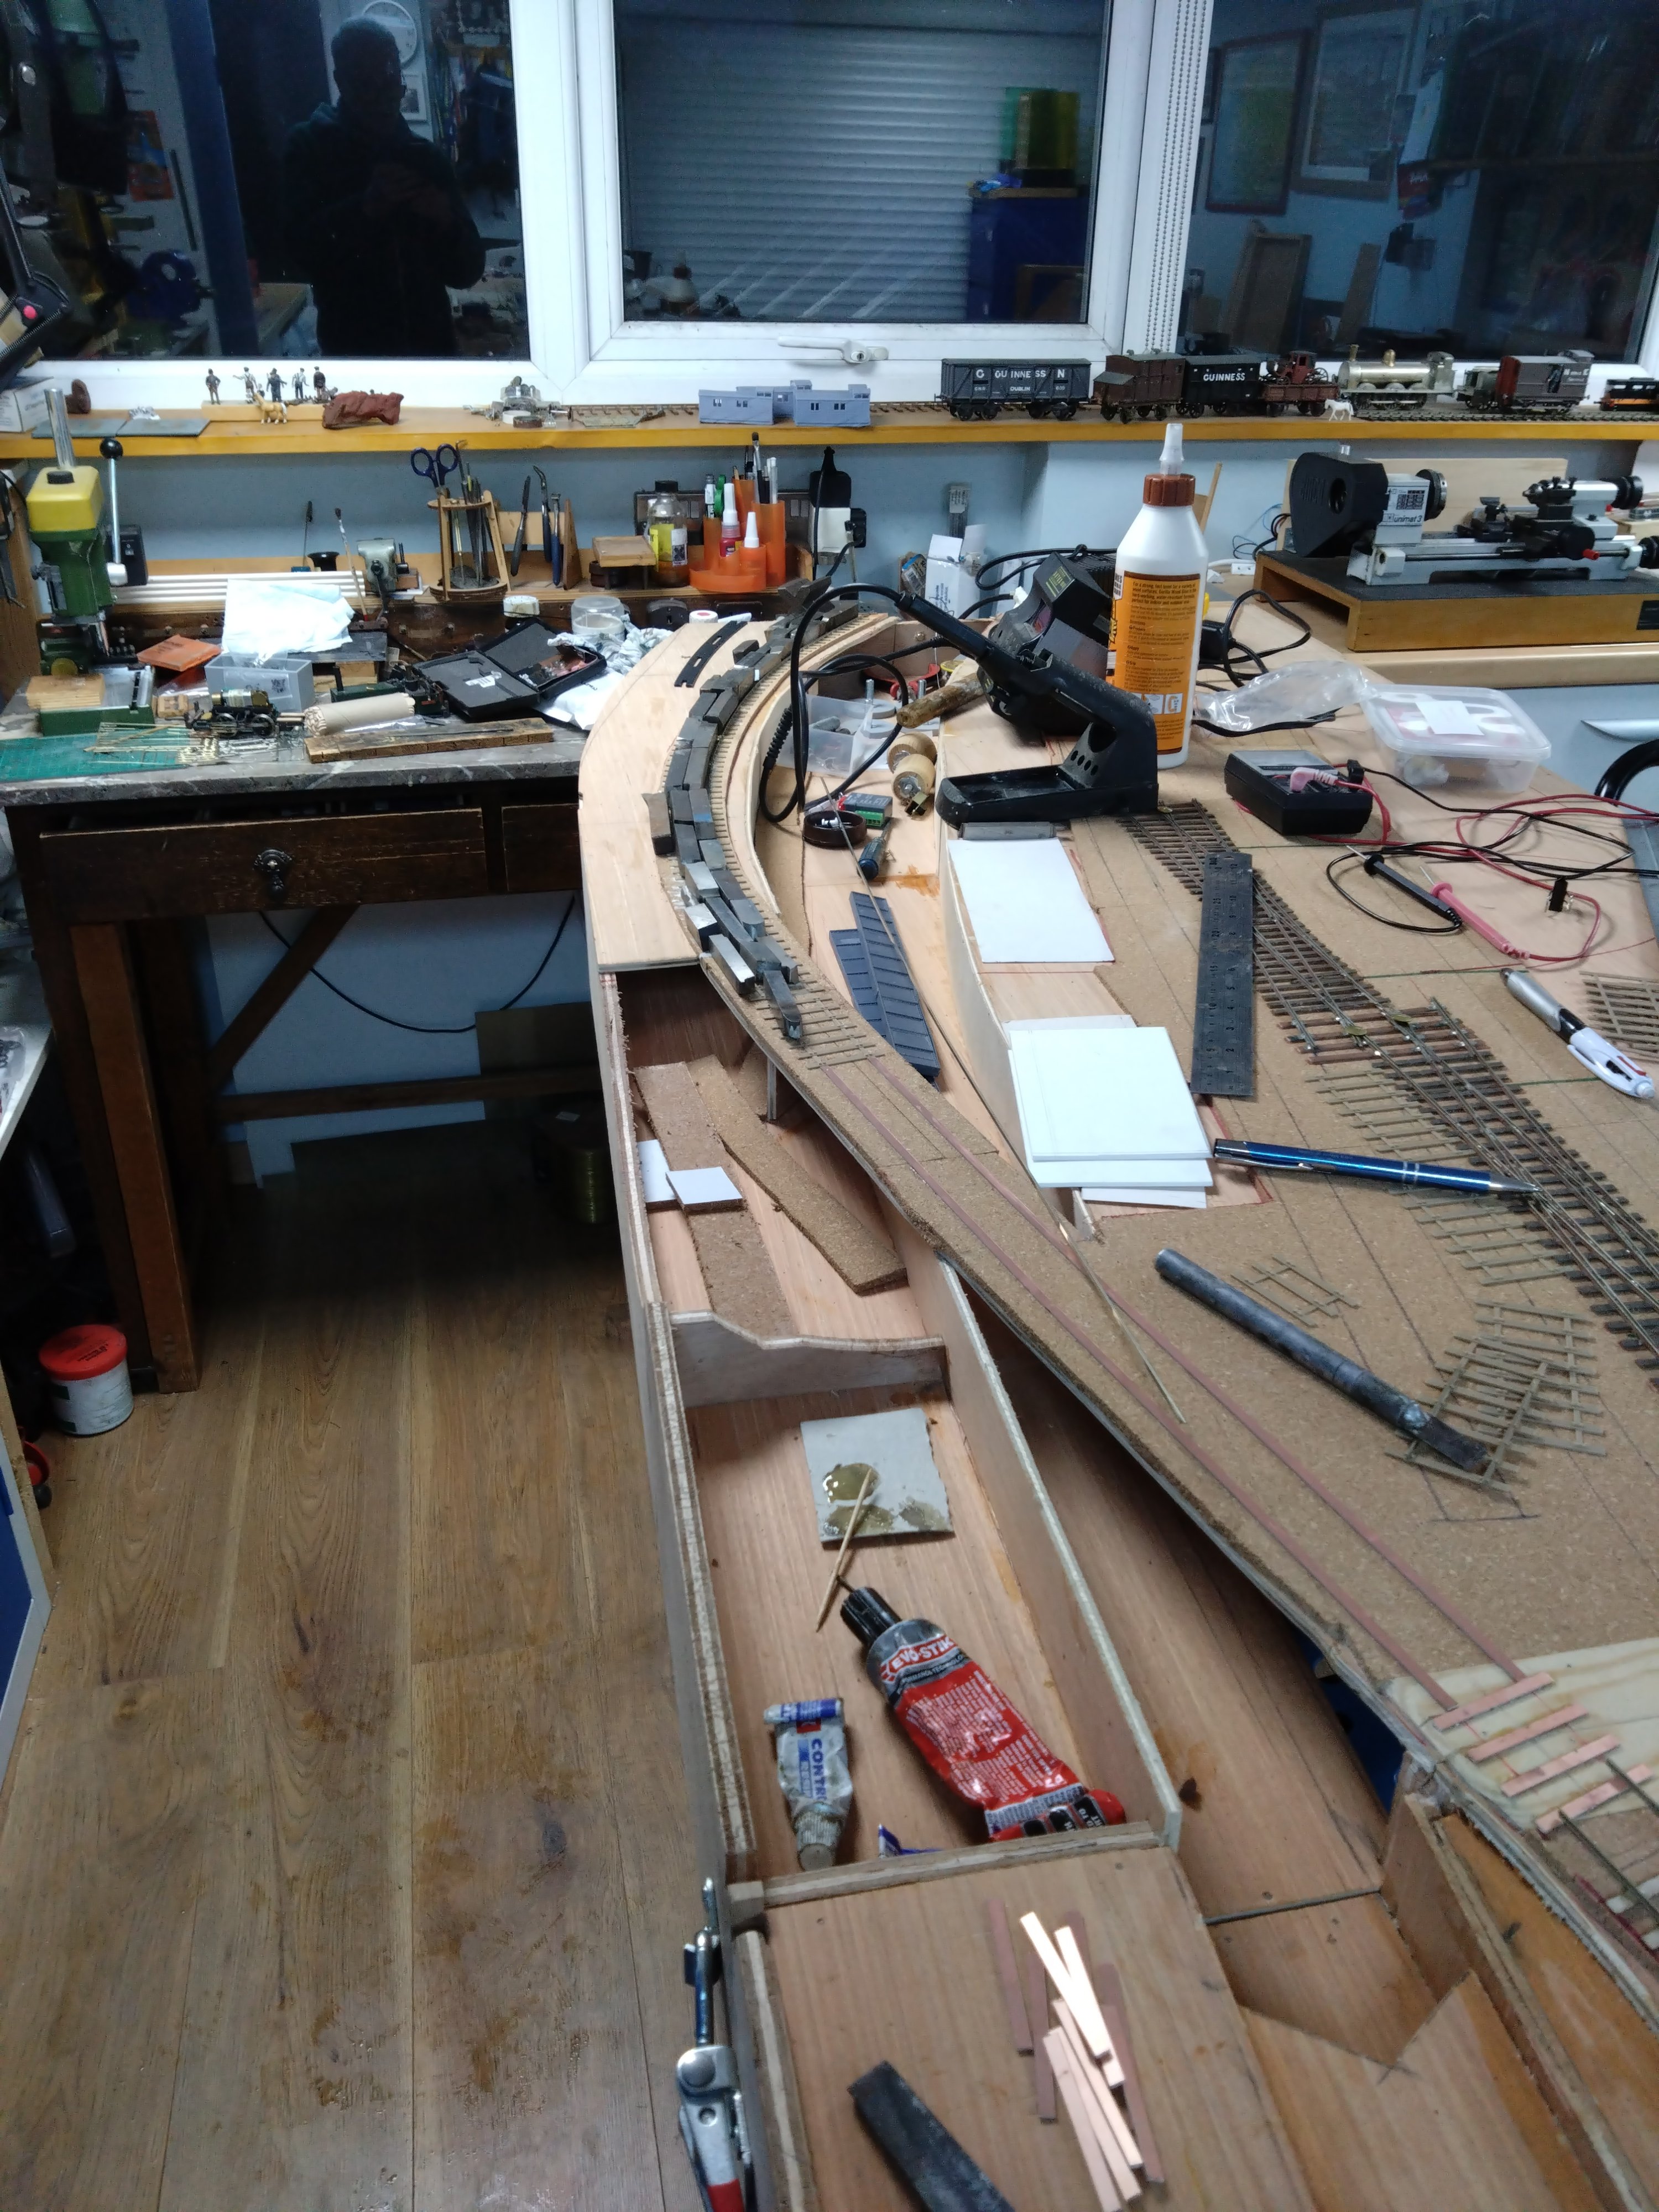
Thanks very much for the all the comments, it makes it all worthwhile and gives me great encouragement - as at times I think I've bit off more than I can chew! But last night I finally finished building all on the track on the scenic part of the layout, so a major milestone. I just need to finish the trackwork going round the curves at either end to the fiddle yard. Then its the not so enjoyable task of wiring it all up and connecting the lever frame to the points. I'm hoping to have all that done by say the end of August and be able to run trains - what it's all about afterall! A huge help in the track building has been the 3D designed and printed sleeper bases with spikes made by Rob Rayner. Sliding in PECO Code 75 flat bottom rail has meant I have in effect my own lengths of 'Streamline'. I have then made all the points using copper clad sleeper strip and will do a seperate post about that soon. Thanks Rob, a huge help! I'm really grateful Mayner for those 2 pictures. I am probably going to have to improve the signal box and a friend in the S Scale Society (SSMRS) has offered to lazer cut some windows for me - an improvement on my scratch-built offerings. A good shot of the Cattle Office. I'm no photographer and have used my smartphone. But hopefully you'll get the gist and feel for the layout. The set of crossovers by the signal box including a double and single slip, took a lot of time to make but were as Mayner says, an integral part of Liffey Junction and enabled stock and engines to move across and between the cattle sidings and those that served the Coke works and the MGWRs sleeper mills. And I have a great photo from the IRRS Journal looking across the yard towards a huge pile of tree trunks obviously destined to become sleepers. You can just see 'Elf', the MGWR 2-2-2ST which will be on junstion pilot duties. My previous Irish BG layout was Kilbrandon a GSWR through station based on Killorglin on the Valencia Harbour Branch. Since, I have become as interested in the MGWR but have yet to build much Midland stock. Another SSMRS member is producing some Midland 6 wheel coach bodies from me and I will do another post about this fairly soon. And Rob has designed a superb MGWR open wagon and I'll be building a few of them. So, progress is being made and I am getting a lot of valuable help; a feature of this great hobby!
- 58 replies
-
- 14
-

-

-
Hello Fiacra, thanks for enquiring. I'm doing loads of work on the layout and will have a photographic update before the weekend. I'm more of a modeller than a social media person but I nearly have all the main layout track complete and have made a couple of buildings including the signal box and water tower. Hopefully the attached will whet your appetite for now............
- 58 replies
-
- 18
-
-
-
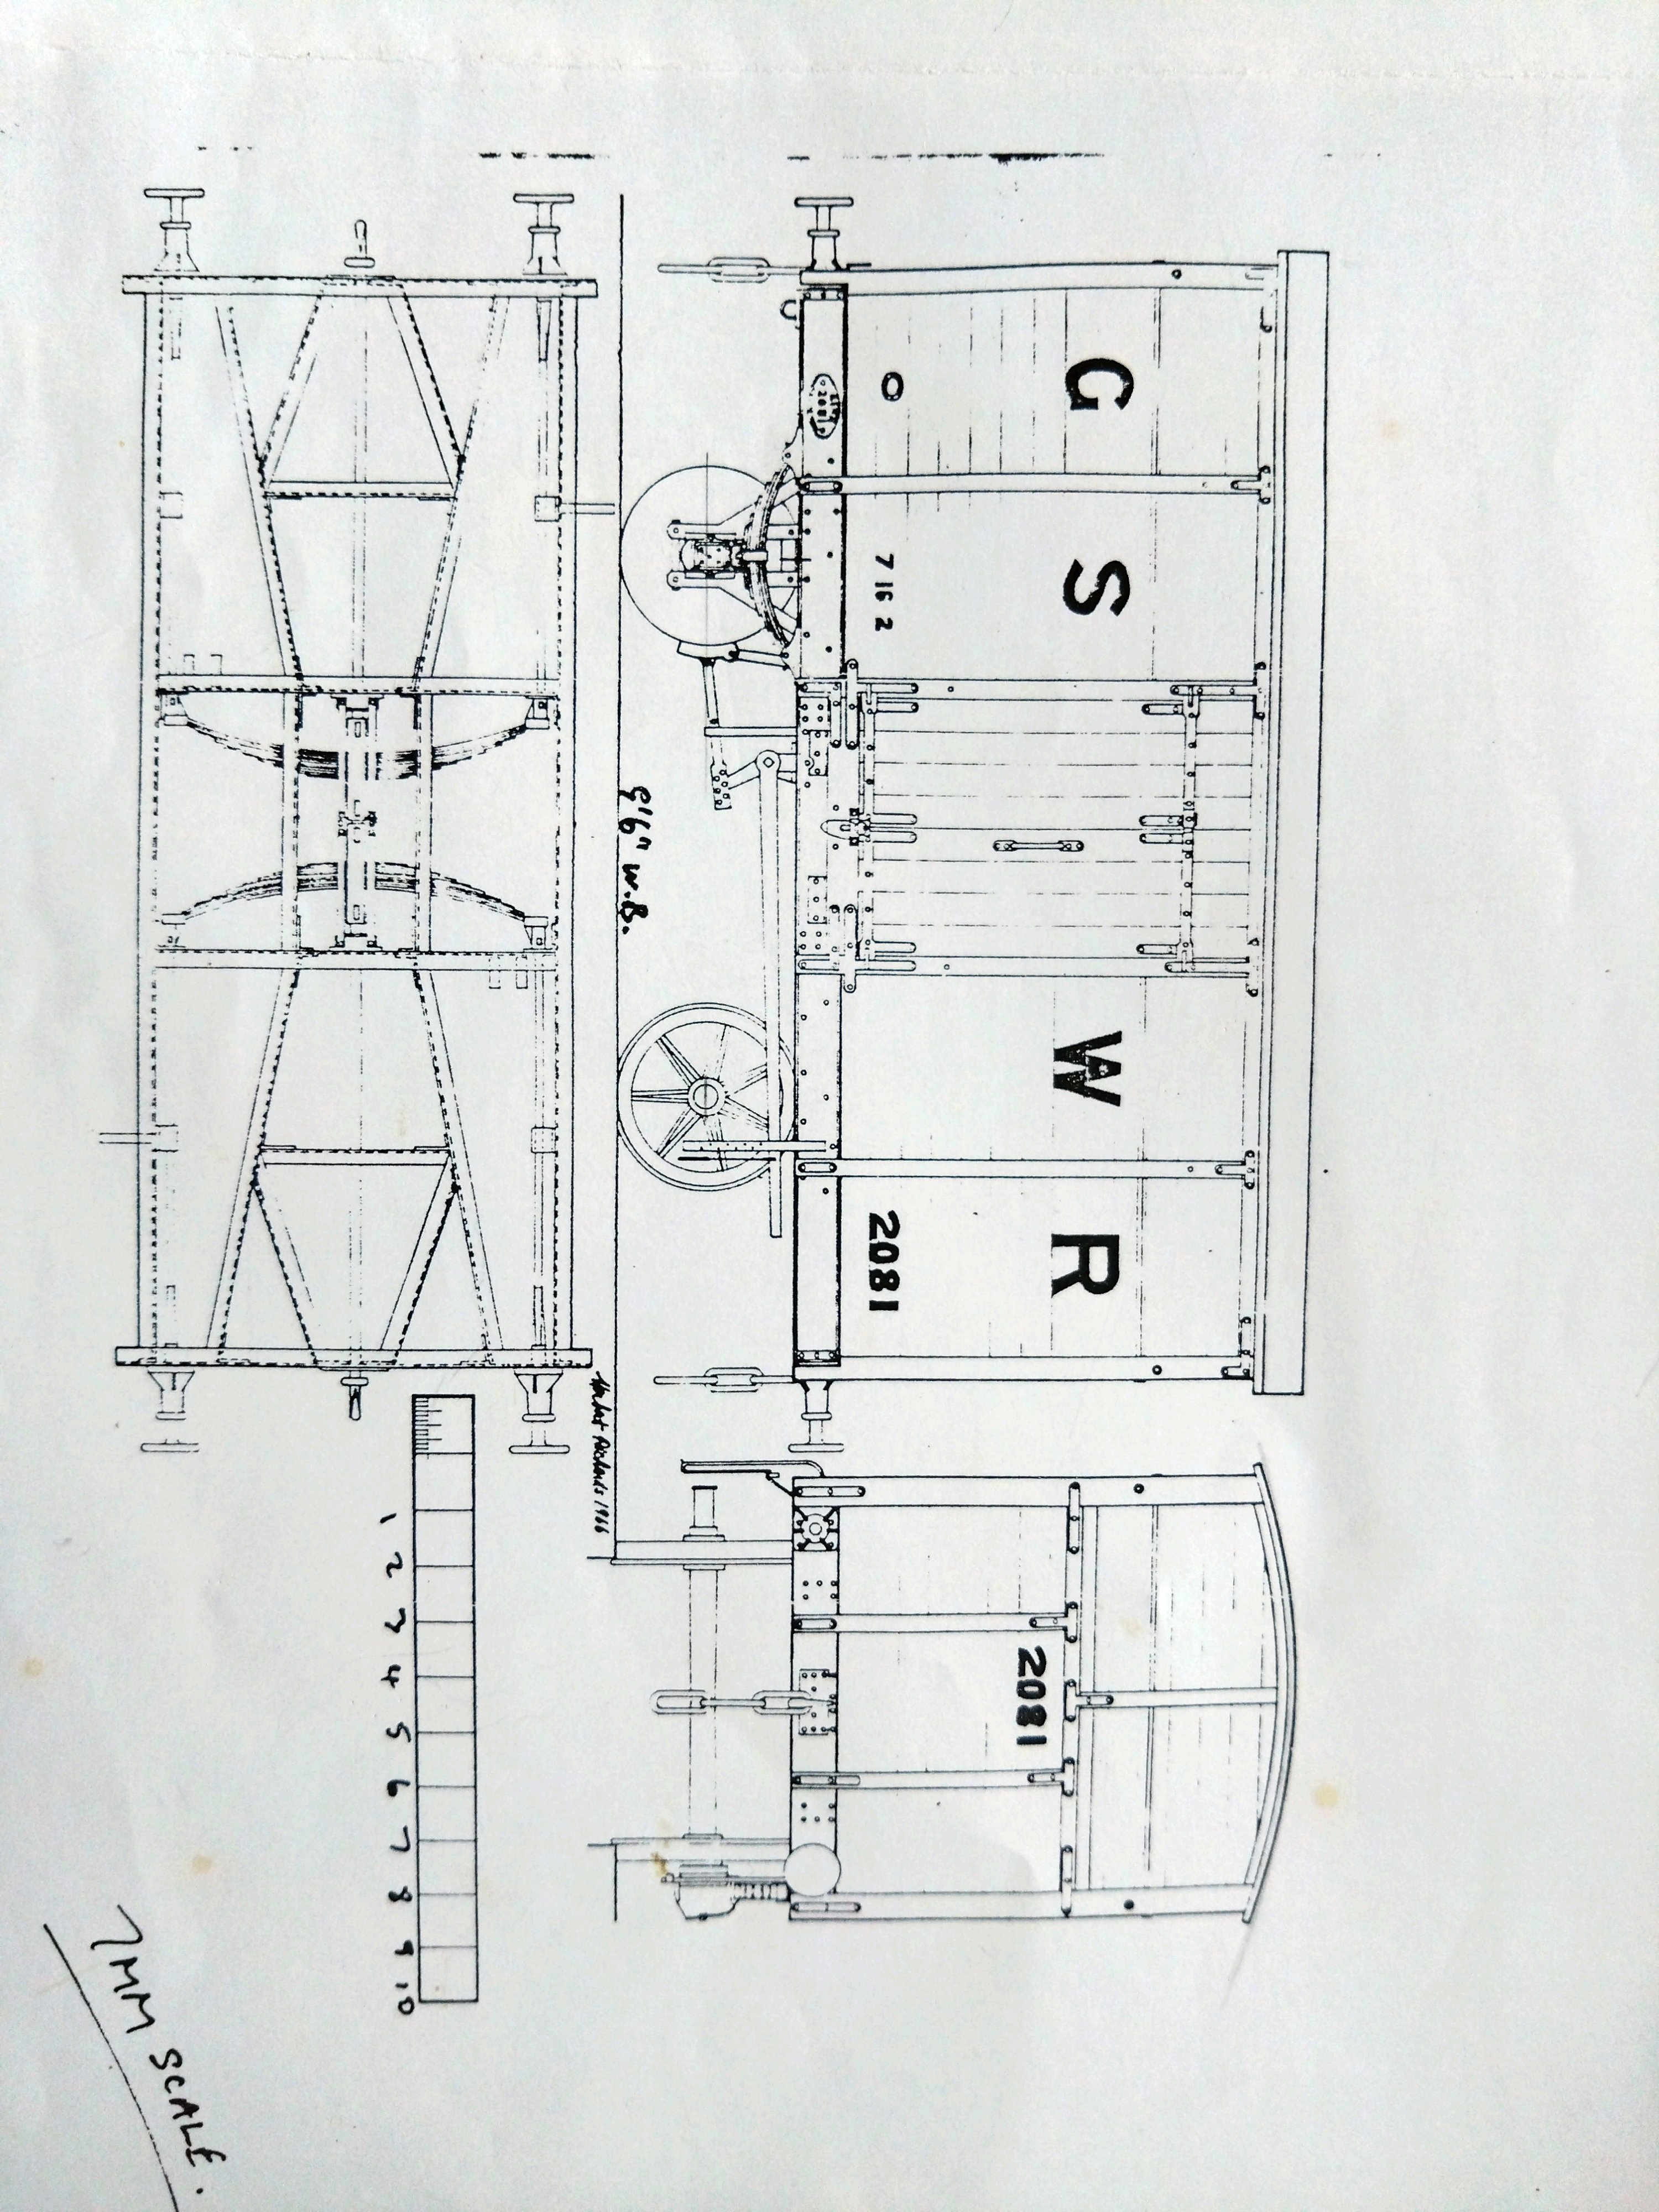
Actually the drawing I have is also a bit distorted in the left hand framing. So a scan would be no better. They are attractive vehicles.
-
Dear All, I hope this helps. They had 9'6" wheelbases. I'm sorry that the quality isn't that great - I will try and scan it properly in the week.
-
That's a good point David about the spikes. I tried putting them in and found it too onerous and am not sure they were missed, mainly because people focus on the trains and scenery? But Rob's bases are a big step forward and the track looks good and is very strong as a 'monocoque' over a length as opposed to a single sleeper. I must look again at Northport Quay and your use of AJs! I'm considering them.
-
Superb modelling by the way Mol!
-
The Templot plug track is excellent. I think its just for bullhead track though, not spiked flat bottom?
-
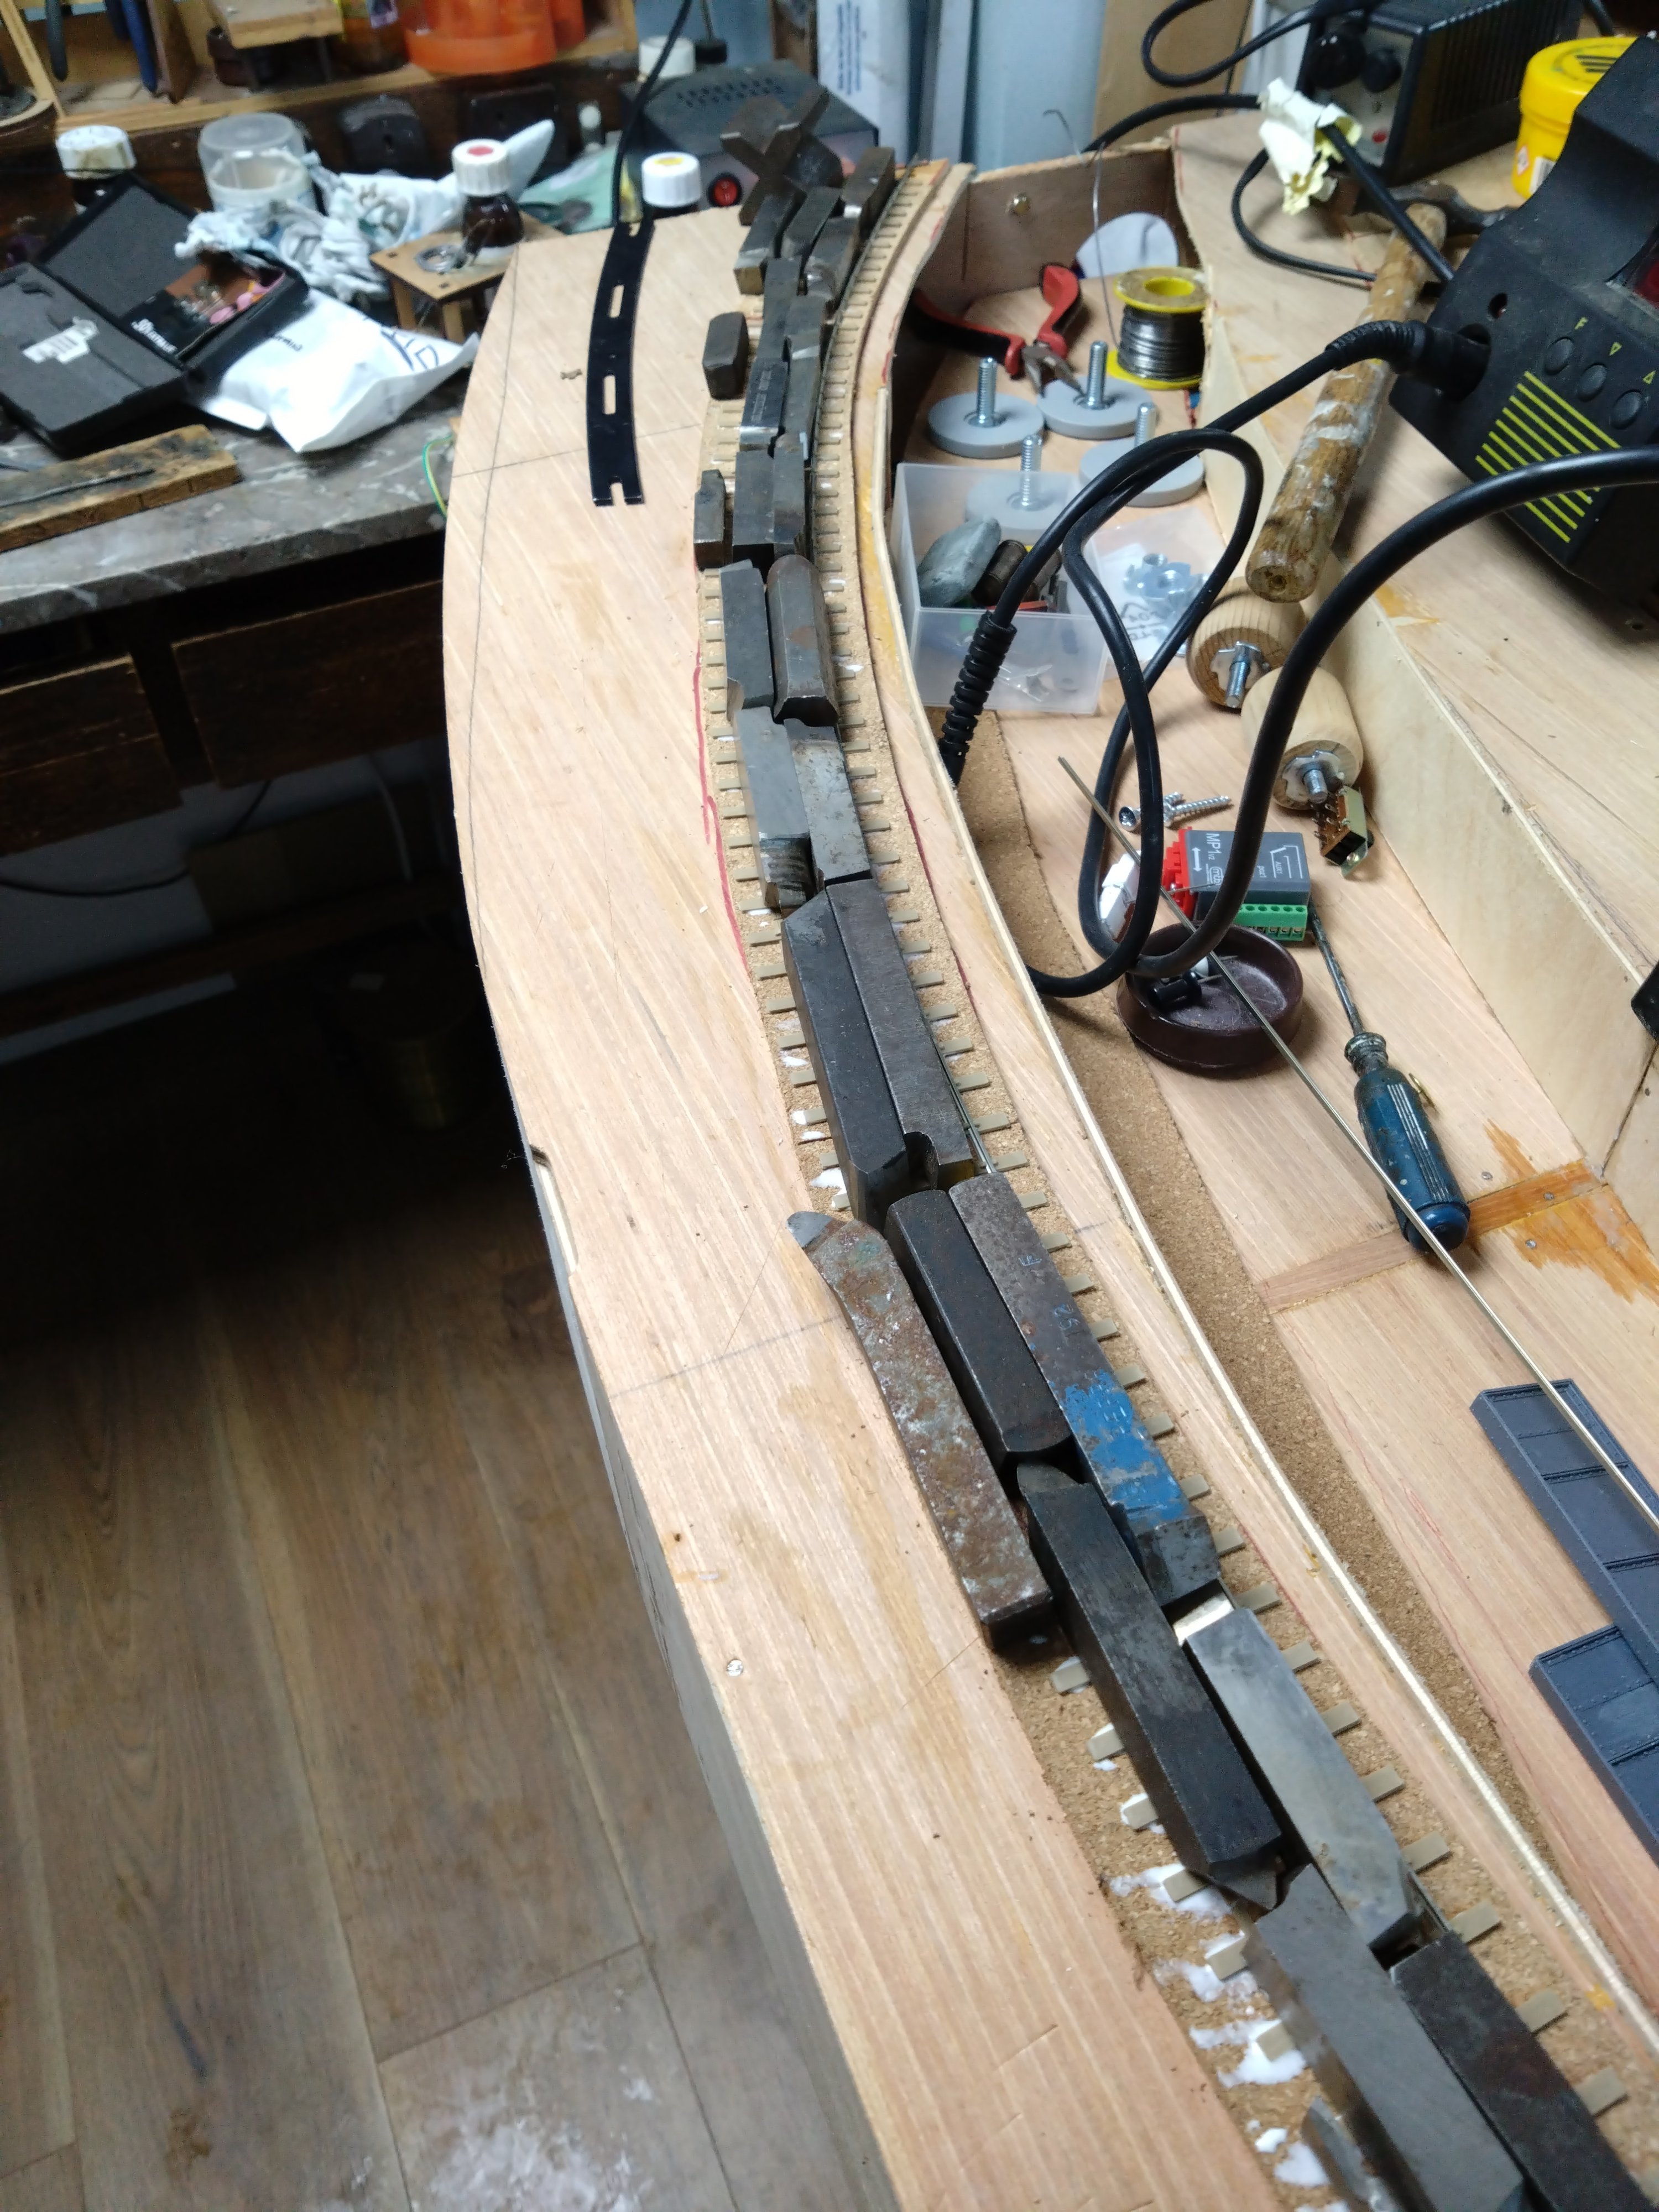
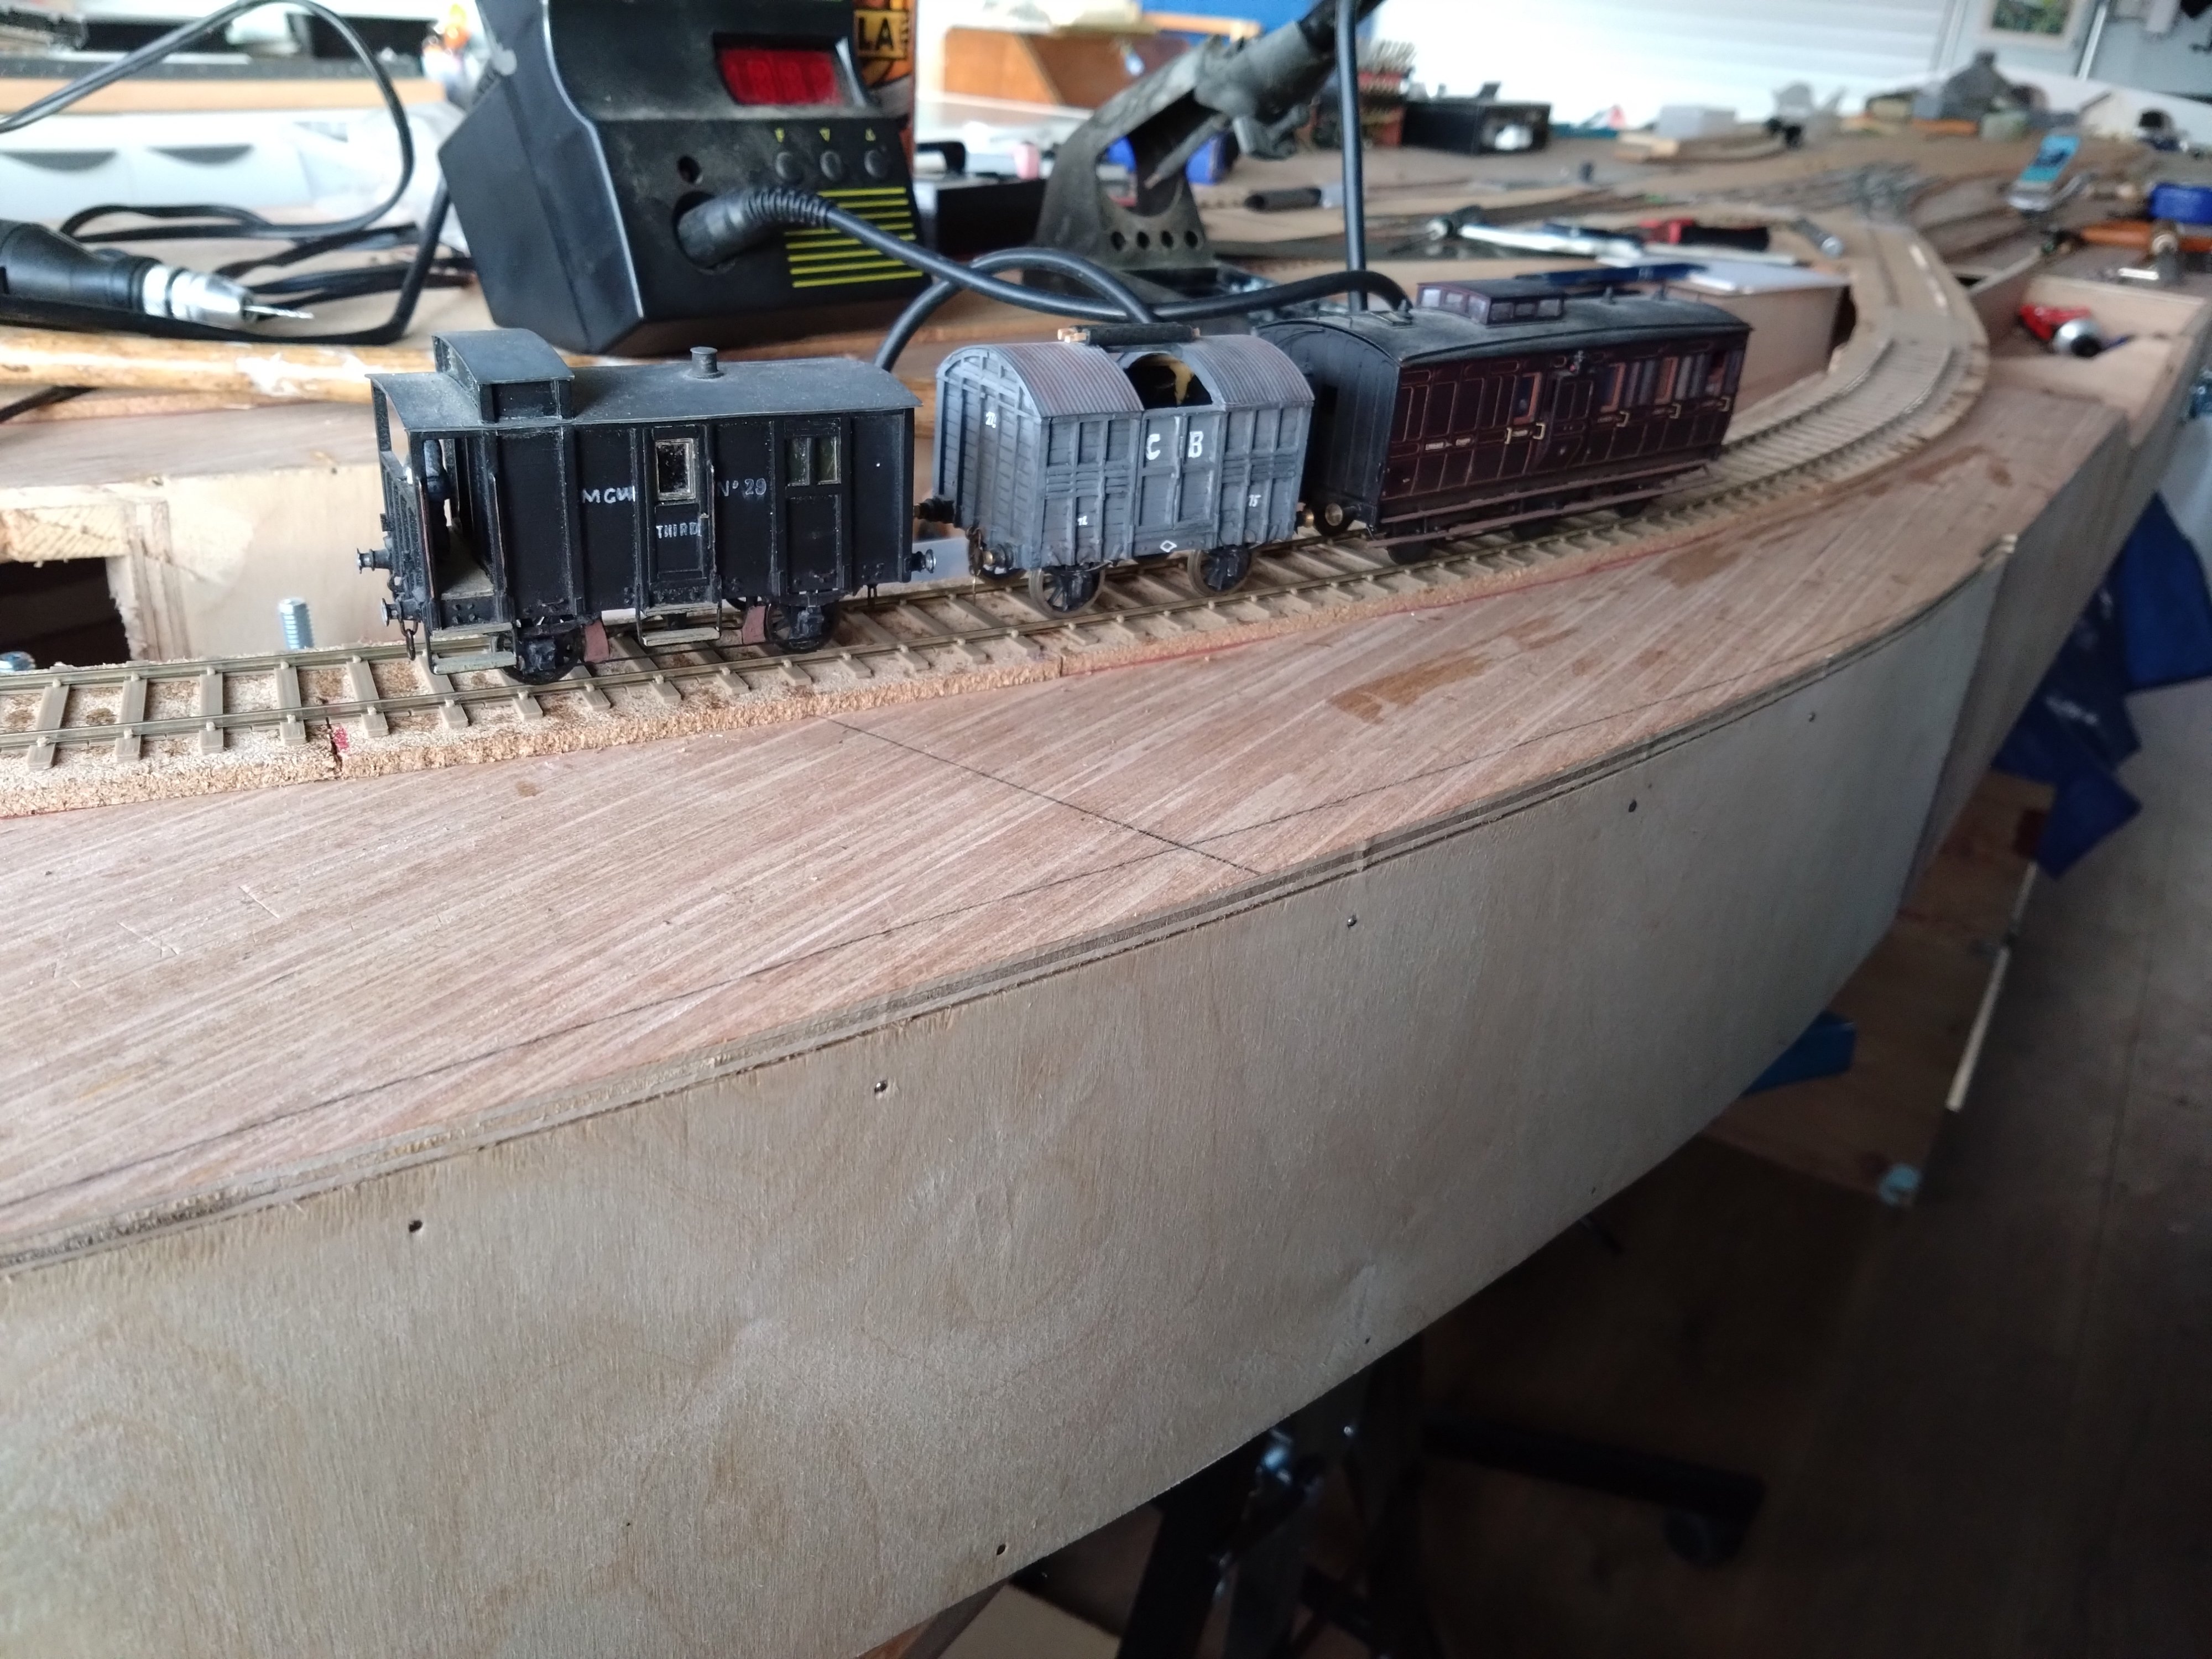
I have now managed to construct a yard length of track on my layout Broomebridge Junction using Rob's 3D printed track bases and Peco Code 75 rail. I picked a section of track on a 4' radius curve and as the photos show, it looks great. I took my time and learned on the job, but I like that aspect of modelling. I'm really pleased with it and think it looks the part from every angle and is the closest I've come to getting that Irish Broad Gauge spiked FB look - hitherto all my track has lacked spikes and has looked a bit 'naked'! I picked the Liffey Branch from Liffey Junction which in my Broomebridge Junction layout is single track because I dont have the width for the full double track. As I have said it is 4' radius as this an oval continuous run layout. First of all I test glued a length of Rob's sleeper base on the cork using Gorilla woodwork glue and left it overnight. Success, it was glued solid. Secondly I then got enough bases and cut the webs on one side and threaded a yard length of Code 75 rail through before curving and then glueing it down on the cork underlay. Then I weighted it down overnight with loads of tool steel to hold it while it set. I checked the curve against a 4'radius curve I have and made a few adjustments before the glue set. Thirdly, next day I removed the weights then threaded the second rail through. This took some time because the spikes really do hold the rail which is what you want really! Fourthly, I ran some stock up and down and found that at 25.1mm gauge it was a bit tight because you need some gauge widening. I therefore very carefully used a 25.3mm gauge and my soldering iron on a low heat to heat the rail and very gently shift the outer rail outwards by 0.2mm or until the gauge dropped between the rails. Success, all my stock moves through the curve successfully. And the track looks great. Excuse the layout building chaos btw! In future I'll probably thread both rails through before glueing down what would be in effect a length of flexi track. It would also make it easier to curve. These bases are great and the track, even before painting and ballasting, looks really great. Thanks Rob, this a definite game-changer. My problem now is to make sure my pointwork looks as good!
- 27 replies
-
- 17
-
-
-
This looks to be a real game changer from Rob as it is so difficult to realistically model spiked flat bottom track in a reasonable time. The bullhead boys are very lucky with plastic chairs produced in all the main scales (including S) to match proper rail and be fixed to wood or plastic sleepers. But for flat bottom, most people either solder flat bottom rail to copperclad sleepers or glue it to wooden sleepers, or perhaps a combination of both. But then there's the spikes! On my old layout I tried adding bent staples or bits of wire and decided that they looked a bit naff for a lot of work (4 holes and 4 bits of wire per sleeper). In the end I decided it probably wasn't worth it and was in any case a potential threat to my sanity with a big layout. Rob has sent me a batch of these 3D printed plastic bases and they look really good. Sleepers 1mm thick to match my copper-clad track, good to gauge and fine 'spikes' that look the part and strongly grip the rail. After Christmas I am going to construct a length of track on my, very slowly evolving, Broomebridge Junction layout and properly test them out. I'm not anticipating any problems to be honest and know I'm going to have a length of really good looking and robust track, complete with Spikes! I'll report back in due course on this thread. Thanks Rob. The downside will be that I'll want loads more! I think it's getting high time I brought my own printer and mastered these dark arts. I admit that I work to 25mm in S David! What's 0.003mm between friends?
-
Wow! Brilliant picture Rob.
-
Trevor was a very fine modeller and man. As David and John have said he had that rare combination of artist and model engineer to a very high degree so that everything ran and looked so fine. He also did everything to that very high standard - baseboards, track, buildings, stock, signals - and usually from metal, wood and card, very little plastic. The other thing about him was that despite his sublime skill, he was always ready to share and show his knowledge and techniques and was never judgmental about other's work - a quality held by David and the Gravatt's, to name a few. It's fair to say that quite a few S scale locomotives have been through his hands, growling, jerky old dogs of engines would always return like sewing machines! I got a lot of help from him when I was building Kilbrandon as he asked if I needed any help and built the Kerry Bogie, although the tender is from etches for a 101/J15; it runs beautifully. He also fettled my MGWR 2-2-2ST 'Elf' so that it ran better and could actually haul a train! He also built me a NER Long Boiler Goods which I got professionally painted - Trevor's skill deserved a great finish and I would have only ruined it. There was a big turnout of family and friends at his funeral. He was a very fine man all round and the S Scale fraternity have lost a giant. But his inspiration and example will live on for a very long time.
-
I don't know how I managed to miss the development of this stunning new layout of yours David, but having just read through the whole thread, I'm very glad that I have caught up; it's another beauty, well done! Not only is your modelling brilliant, the design and the learning and your honesty about what doesn't always work first time is refreshingly honest and very inspiring. I was put onto this layout by a friend Richard who attended the recent Chatham show, sent me some pictures and declared it the best layout there. From the pictures he sent and those on this thread I am highly impressed. You have squeezed a lot in but it looks so spacious - that backscene is a work of art in itself and gives the layout such depth. And the detail and the cameos are marvellous. I considered using Alex Jacksons on Broomebridge Junction but am once again using 3 links with all their limitations. But, having myself some of Richard Chown's 7mm wagons note that he used them, but very much in the old pre=magnetic way where a ramp pushed them up to uncouple. They worked for him though and clearly do for you; they are probably the most unobtrusive of the auto-coupling systems. Thanks again David, another brilliant layout! Paul
-
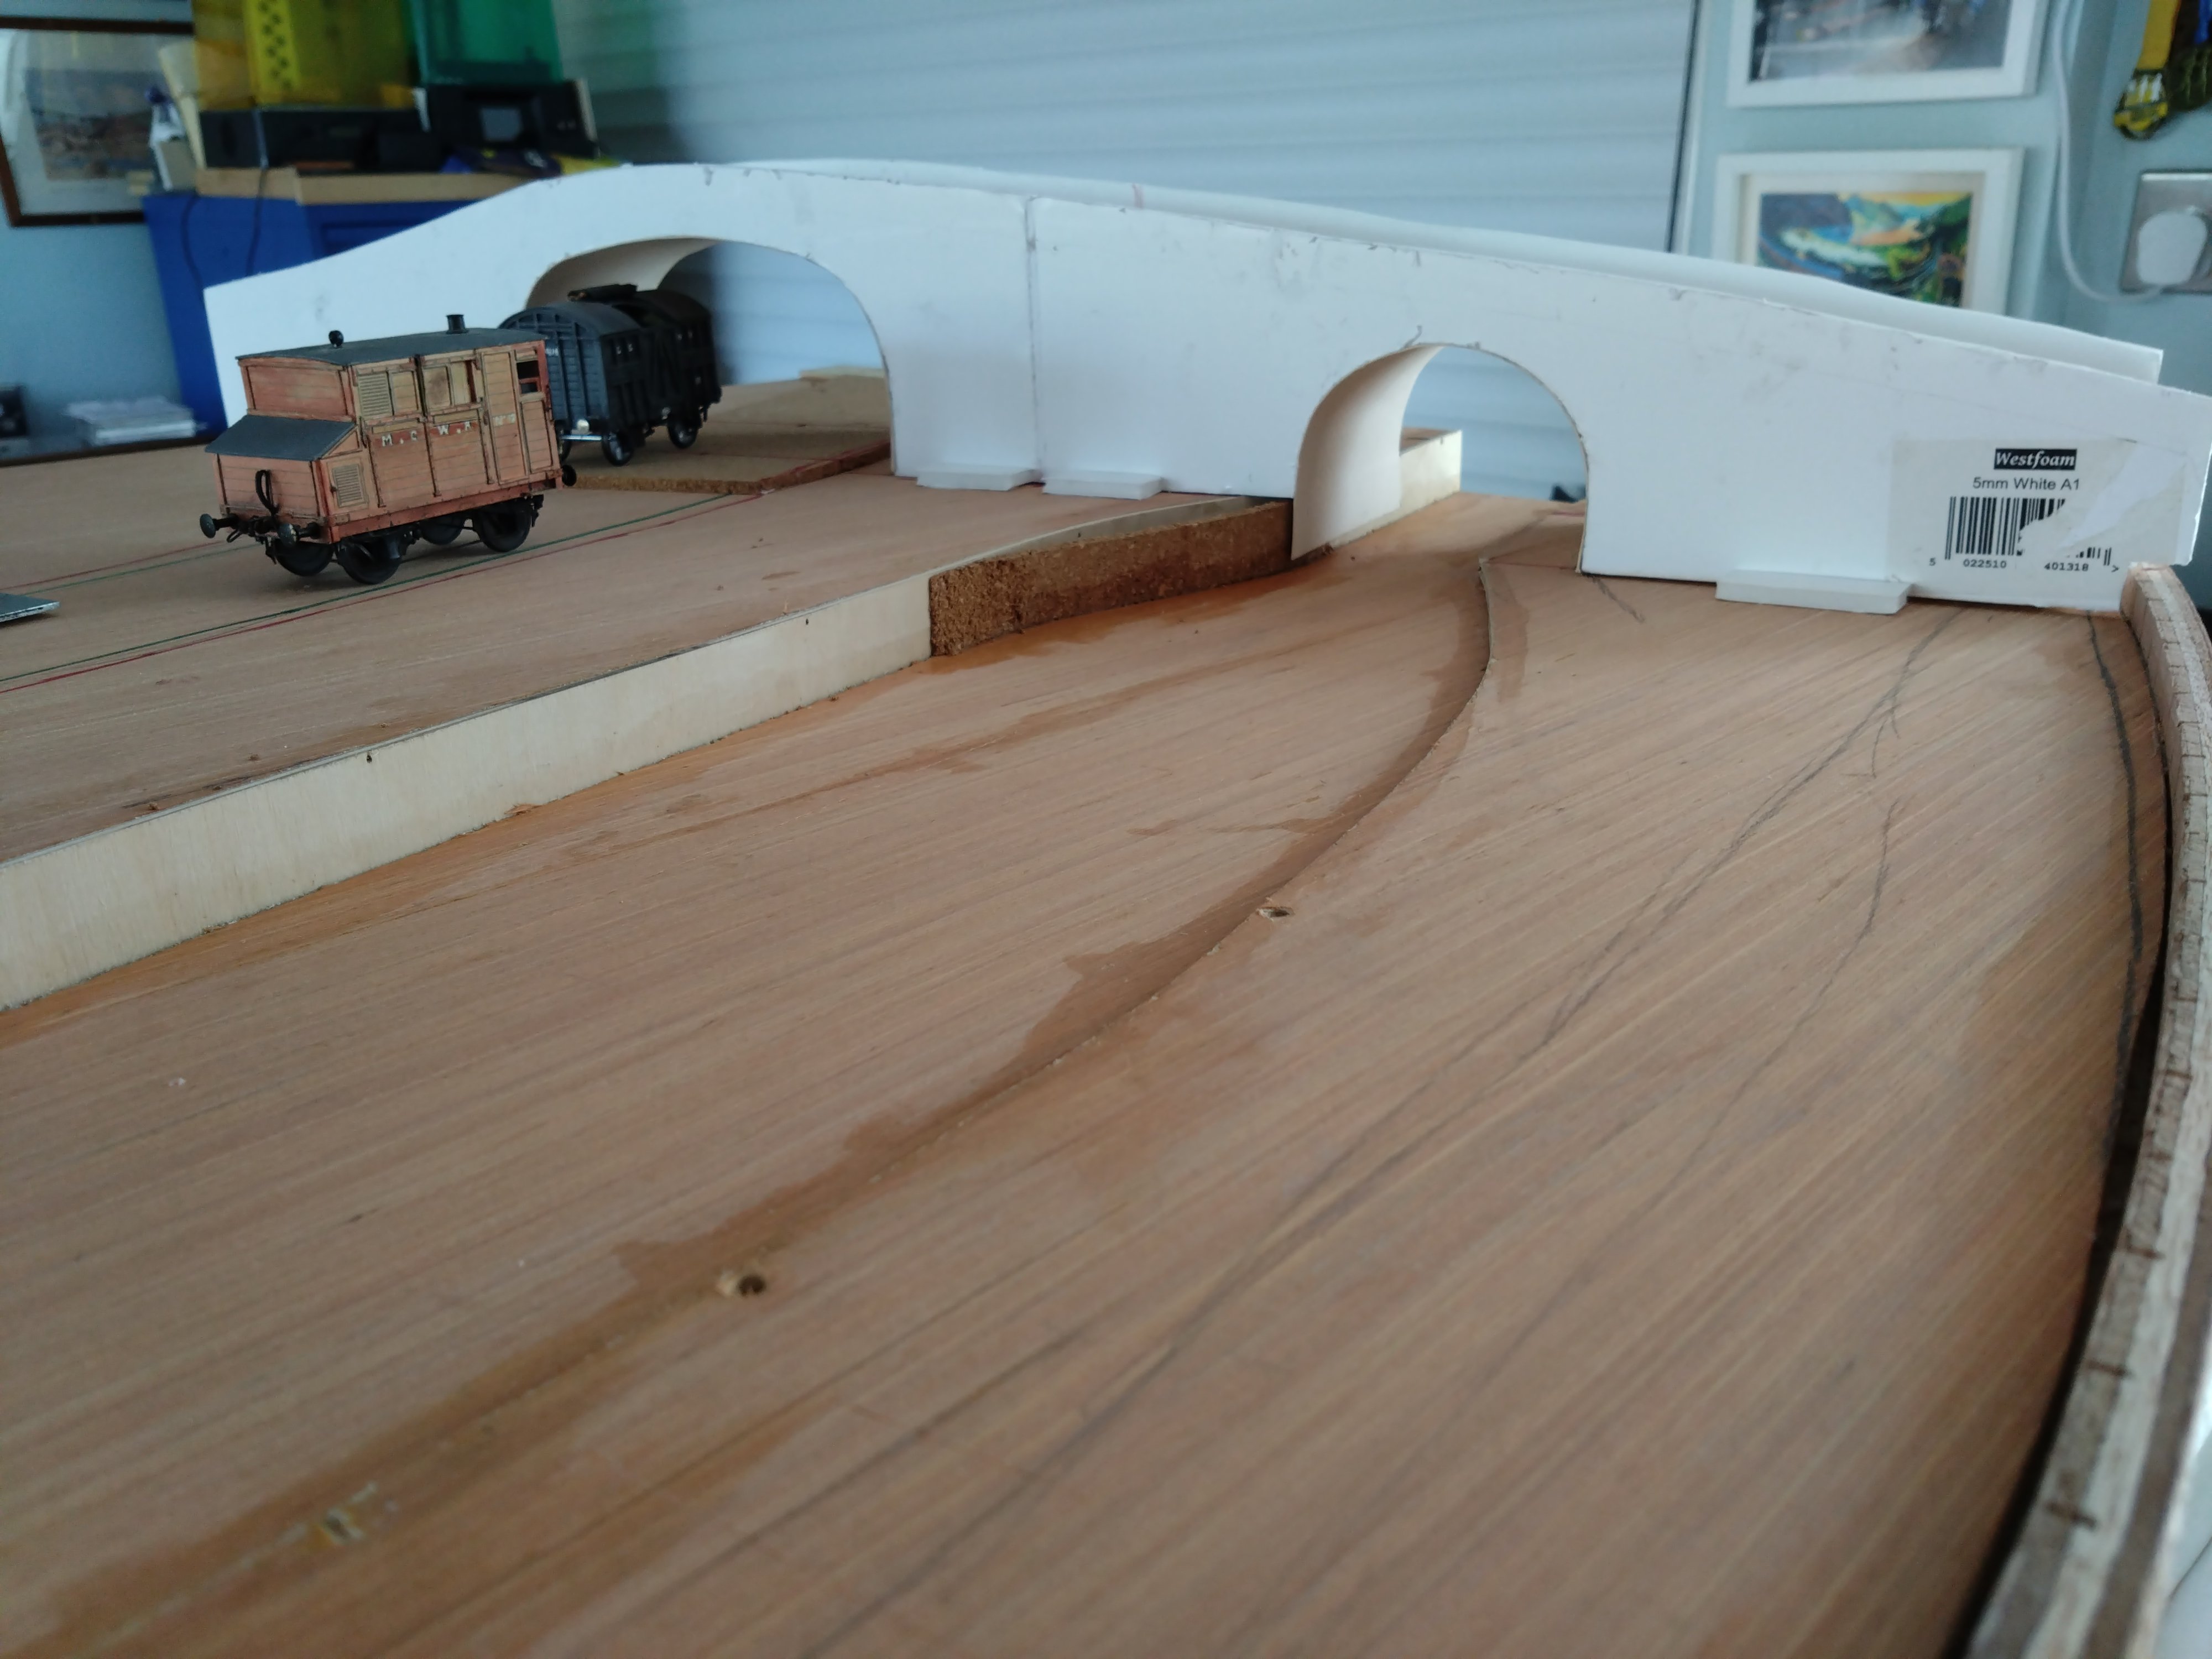
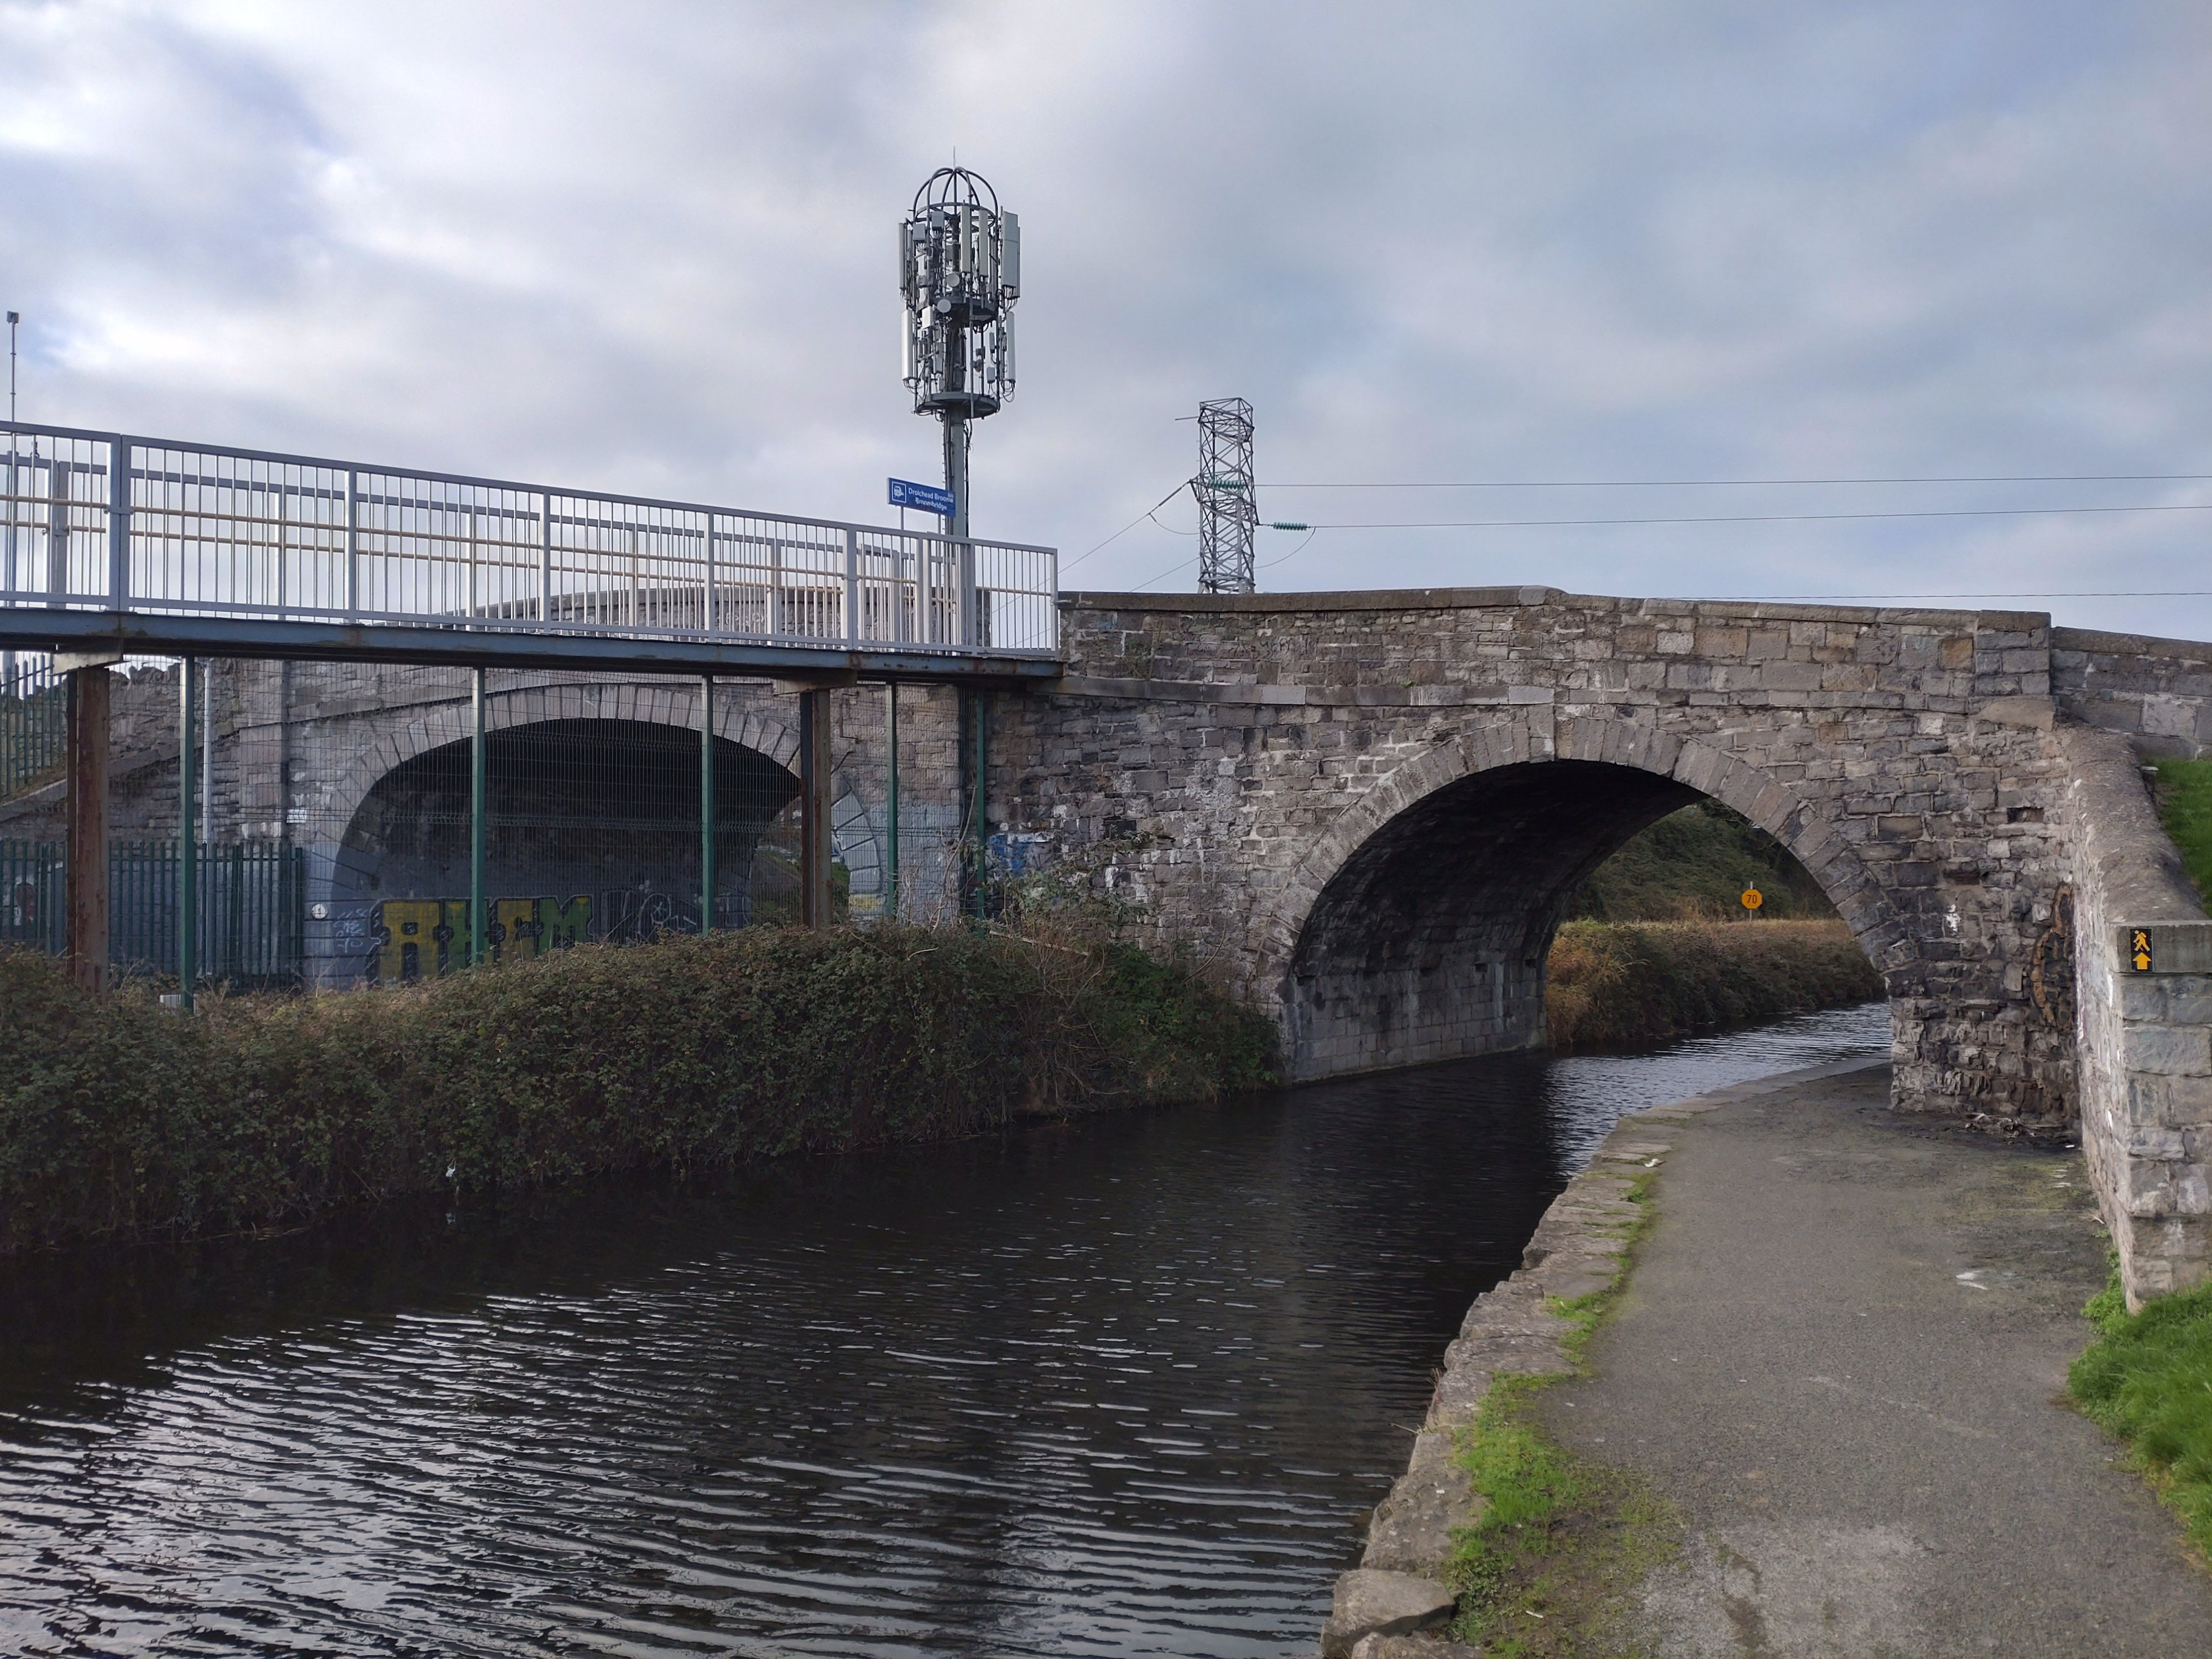
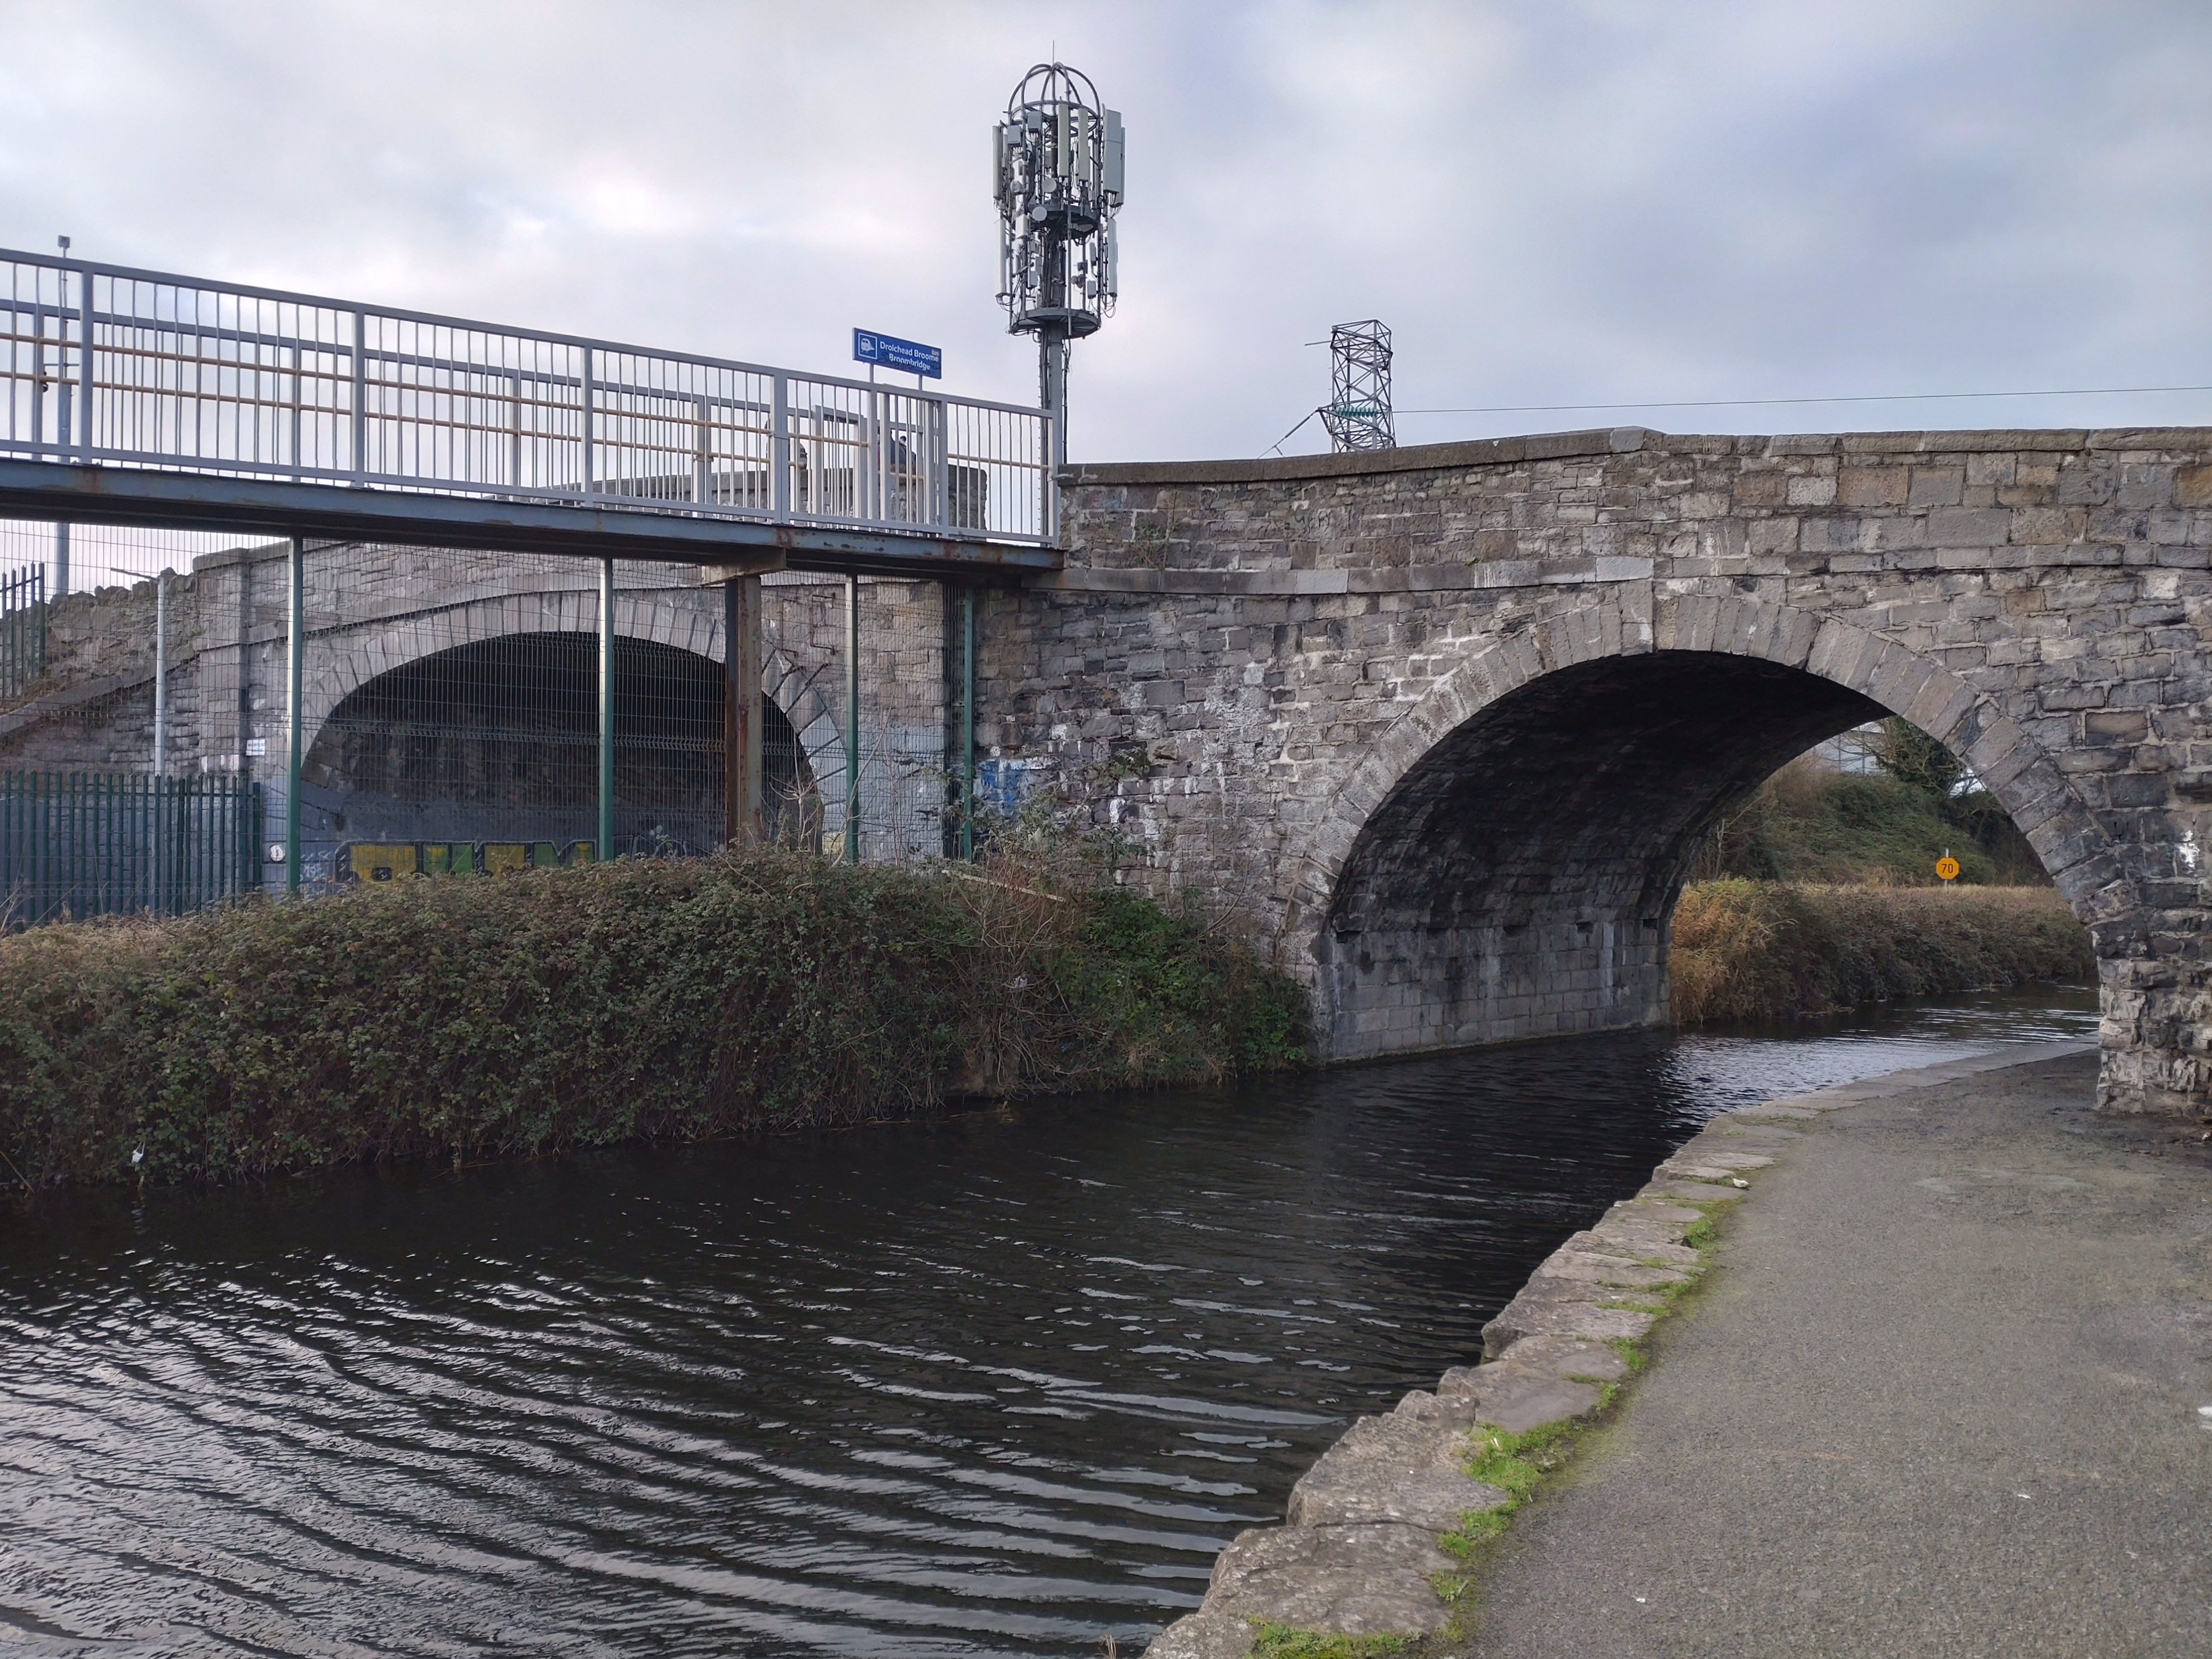
I have this week started building a model of the actual Broombridge over the canal and railway. I did do an earlier mock-up in card, but revised it following my recent trip to Dublin and getting some more accurate dimensions. The carcass is from 5mm Foamboard. It will later be covered in DAS modelling clay and the stonework carved in, plus the adding of coping stones along the parapet. The distance between the railway and canal on my model is greater than on the prototype because on my model the tracks are curving around instead of straight. The photo also includes my model of a MGWR Horsebox, such a unigue vehicle with its integral dog box.
- 58 replies
-
- 17
-
-
I brought one of the 7mm Alphagraphix card kits and, having asked Roger Crumplehome beforehand at the Warley Show years ago, re-scaled it to S on my photocopier to produce an S Scale model. I used S Scale Society castings and a bit of scratch-building to complete it. I did do a write-up for New Irish Lines a few years back. The colour is wrong on mine and may have faded a bit. I suppose I am pretending that the real ones faded also but maybe not in my period. I may investigate using Ink to deepen the colour. And I must build a few more.
-
They are lovely models John. If I was a 4mm modeller I'd have brought a few myself.
-
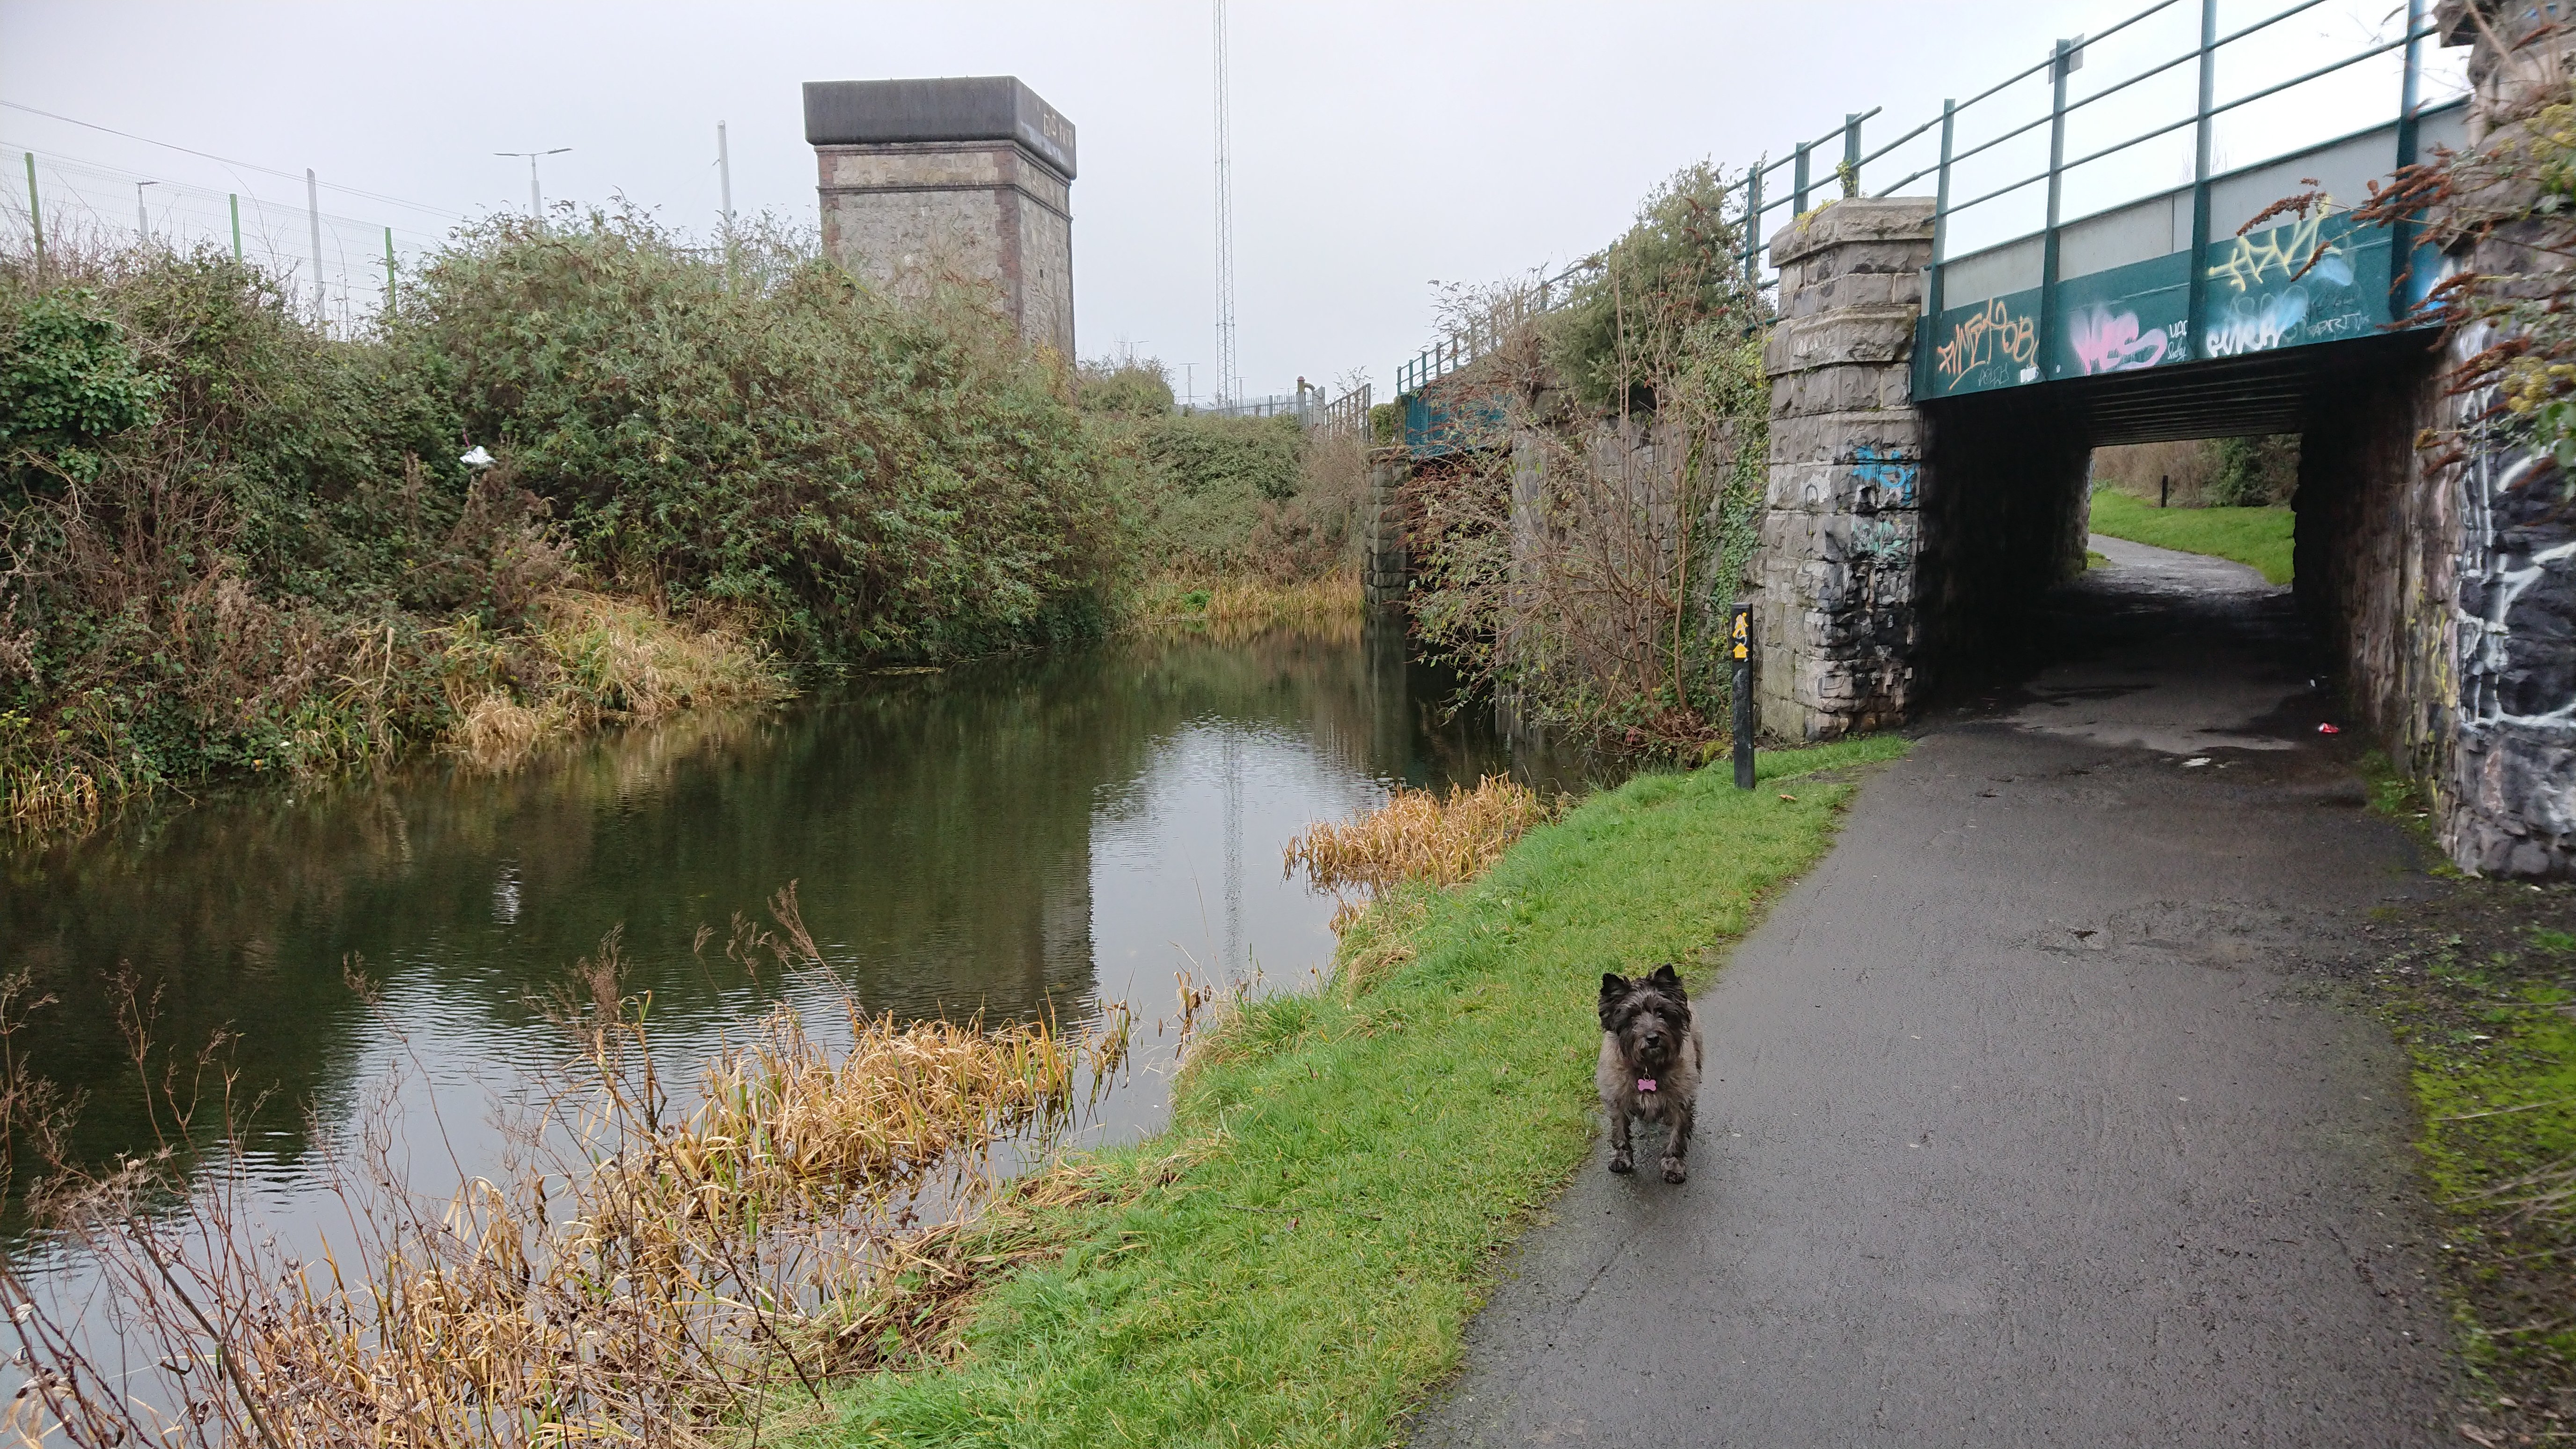
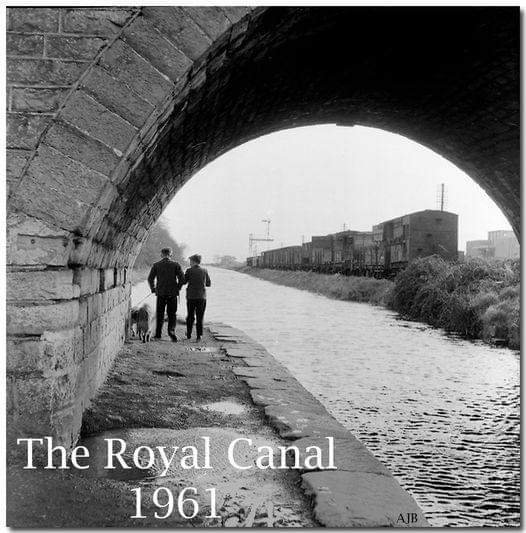
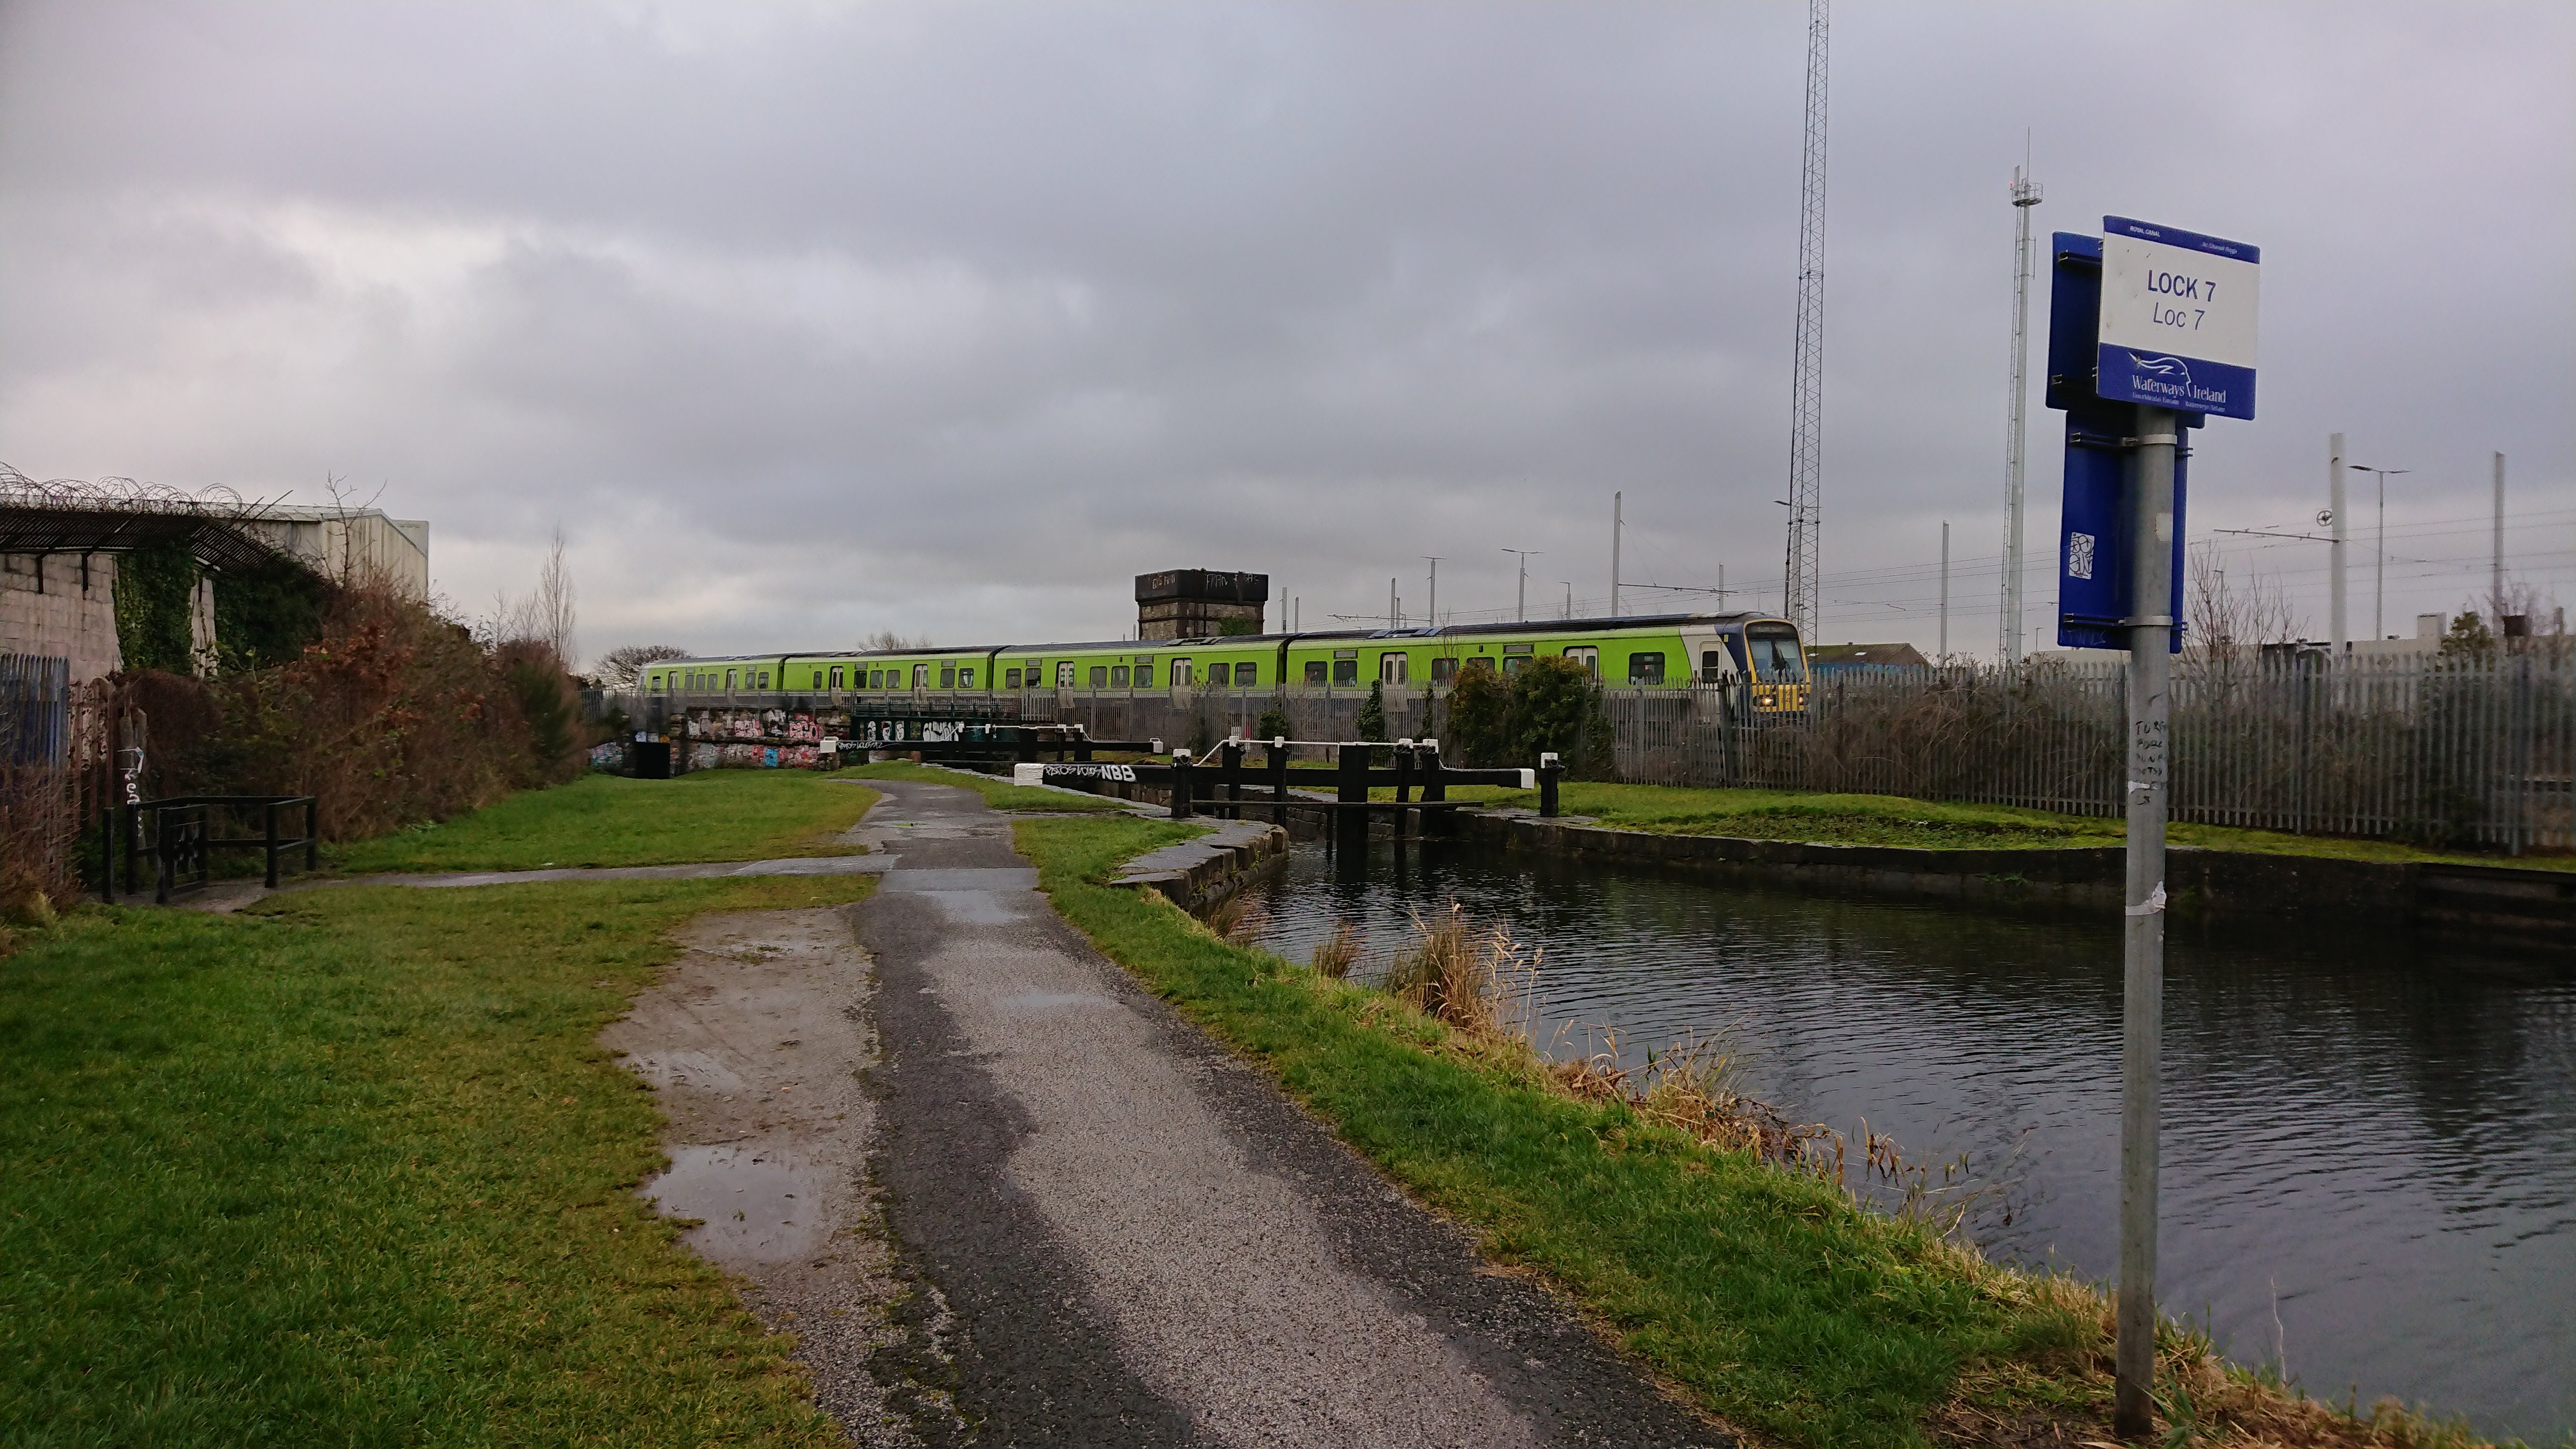
I've just returned from a few days in Dublin and did much walking along the Royal Canal and 'bazzing' around Broombridge and Lock 7 where the railway crosses the canal. And the measuring tape was deployed to get a few bridge dimensions much to the embarrassment of my Wife and perplexity among some locals - but hey ho, all in a days work of a railway modeller! Attached are a few images of the place now and a few years ago to give an idea of what I am trying to achieve:
- 58 replies
-
- 12
-
-
Good point Rob. I'll have to twist your arm to build some stock and give you full running rights! I'm intending to illustrate Hamilton and his Wife on that famous occasion in some way. Even though it occured long before the railway was built.
-
Thanks again John, re-reading your post, I may well be setting a stiff time target. But I did recover the double slip and single slips from Kilbrandon and am re-using them on Broombridge, so that is going to save me a lot of time and trouble. And I have started drawing out the buildings so some progress has already been made. Intending it as an exhibition layout also focuses the mind!
-
As above to Gabhal, its 4'4" David, so in line with Fintonagh and Northport Quay as well as Arun Quay. I like looking 'into' these layouts and another advantage is being better able to control the sight lines and hide where the tracks disappear. I've long noticed how in real life trains disappear behind buildings and trees without the need for bridges and tunnels. The actual Broombridge will hide the trains going off to the right, whilst on the left the water tank and some trees will hide them as they pass through the backscene. Yes auto-couplings are 'satan's spawn' and I'm not sure any of them work 100%. I'm experimenting with Jackson's as a friend of mine uses them fairly suuccessfully on his EM layout, even when it went to shows. I'm hoping to limit their use through the passenger and cattle trains being in 'rakes' with 3-link couplings inbetween and an auto coupling at the end. And most goods trains will be the same, just passing through from the MGWR and GSWR down to the docks. So, I'll just need to fit auto-couplings on the engines, brakevans and a few wagons likely to be shunted into the various sidings. I really like 3-links but after 20 or so years of taking layouts to exhibitions, it is undeniable that they can get a bit tiresome by the Sunday afternoon of a weekend show! I'm hoping that Broombridge will have a decent balance between some shunting and watching trains ambling slowly through the scene. We'll see. Ah, Ballyconnell Road, a brilliant layout and a really nice group of excellent modellers. Which show was that David?
-
Apologies, I made a mistake Gabhal! Its 4'4" and I'm not that tall!! I think I must have started typing 56" then switched to feet.