gibbo675 Posted June 22, 2024 Posted June 22, 2024 Hi Folks, This thread is to run in conjunction with my other two as the three will compliment each other as far as types go and the parts bin special way that I cut and shut models. The chassis is fairly easy although quite brutal as the rear end is chopped off including the bogie just behind the rear wheels I filed a flat so that the cab floor would sit upon it being carful not to take out too much as there is a pocket for a magnet that must be left with some strength to it. The cuts to the body is as severe for the tanks and boiler were cut from the smoke box and won't be used any further as I used the boiler from the Midland Compound that was spare from the V class. The first thing I did was to cut the compound's smoke box from the boiler and then attached the boiler to the tank engines smoke box. The barrel length from the shoulder of the fire box to the rear of the smokebox measures 44mm the same as the Fowler tank, which makes things easy. The rear of the fire box is then trimmed back so that its total length is 25 mm the same as the WT tank. I then made up was the cab sides and spectacle plate from .040" plasticard, I shall produces a sketch drawings in the next post. This was then attached to the rear of the firebox and left to cure ready for the next job which were the running plates. these were made from 11mm X 71mm .040" plasticard which were trimmed and notched to fit into the front of the cab. I then made extensions to fill the gap between the lower cut edge of the fire box and the boiler, these will be suitably laminated and carved back to shape to give the form of the lower firebox and the underside of the boiler. Gibbo. 10 1 1
gibbo675 Posted June 29, 2024 Author Posted June 29, 2024 Hi Folks, I've been busy with the V class 4-4-0 this last week although things have started moving again with the W class. One thing is that I've sourced a decent enough drawing to work from, it doesn't however shew the whole of the tender but that isn't too much of a problem as I am familiar enough LMS Stanier tenders from which it is derived. Arrived today is the Bachmann LMS Fowler tender frame set which is of the correct dimensions regarding length and wheel base. The tender tank is the cast off from the V class project as it is too wide, too long and the wrong shape for the V class. Very usefully the tender tank is of the correct width and the front bulkhead is of the correct style for the tenders trailed by the W class locomotives and will be modified soon enough. What I have done is to file and sand down the filler on the body shell of the locomotive and also to position some window blanks for the cab side windows. The cab windows have beaded edges and my way of representing beaded window edges is to glue a bank onto the site of the window and when cured cut out and file out the window through the blank. When finished all that should be left is the beaded edge around the window aperture. Window blanks for both the W and WT class locomotives. The window blanks glued into place, the upper edge is 1mm from the top edge of the cab, the front edge of the front window is 3mm from the front spectacle plate, and the dimension over the outer edges of the windows is 15mm. The cutaway at the rear edge of the cab has been marked out , the glue has partly obliterated the marking out, and is 1mm form the top edge of the cab and 10mm X 2mm, the corners are radiused. Gibbo. 2
Hadren Railway Posted June 29, 2024 Posted June 29, 2024 7 hours ago, gibbo675 said: One thing is that I've sourced a decent enough drawing to work from, it doesn't however shew the whole of the tender but that isn't too much of a problem as I am familiar enough LMS Stanier tenders from which it is derived. I may, once again, have something which could help with that: 1
gibbo675 Posted June 29, 2024 Author Posted June 29, 2024 14 minutes ago, Hadren Railway said: I may, once again, have something which could help with that: Cheers for that, I shall make good use of it. The last drawing you sent on I placed in the library with credit to your self. Gibbo.
gibbo675 Posted June 30, 2024 Author Posted June 30, 2024 Hi Folks, I have fitted the cab roof today formed form a piece of .040" plasticard, I also cut and filed the cab side windows to shape. The cab roof was cut a slight too long to allow for trimming back. The stiffening rib is to be seen with the elastic band to hold shape while the glue sets. Cab roof trimmed and filed to shape, the spectacle plate windows are next along with the little holes to patch up. The holes are from minor miscalculations fitting the cab over the chassis, nothing a dab of glue won't fix ! I shall also fit the rain strips and ventilator to the cab roof at the same time. Gibbo. 4
gibbo675 Posted July 2, 2024 Author Posted July 2, 2024 Hi Folks, I've been working on the tender and this is how far I've got with the job. The Hornby tender tank had 5mm cut from its length, I did this by measuring the thickness of the rear end which was 1.5mm and added the 5mm. Very conveniently the red line of the lining is in just the right spot to use as a cutting guide. The next job is to cut the excess from the rear of the tank and file it flush so that it fits squarely and that the tank body measures 79mm. The coal load also needs to be cut back to position the rear bulkhead, this measurement is 22mm from the rear of the tank once the rear is refitted. The cut back tank. The next job is to fit a floor to the tank, the floor has to have a rectangular hole to fit over the chassis. The floor measures 85mm X 35.5mm, the hole is 72.5mm X 25.5mm and was filed to fit snugly onto the chassis. The tighter the fit the better it will sit on the line of rivets above the leaf springs. The hole is set back 6mm from the front edge, and when glued in place there is a 3mm ledge at the rear. This shows the hole in the tank floor, There is a step under the front of the tank that requires cutting off and filing flush. To fix the tank onto the chassis I made up a lug that accepted one of the original fixing screws from 1/8" and 3/16" Plastruct tube a slight over 5mm long. It was held in place by the screw with glue applied to its end the tank was then positioned into place and once cured and attached to the tank it was filed down so that it would correctly locate. The fixing lug in place. The rear screw was fitted into a rectangle of plasticard 30mm X 14mm which was positioned into the rear of the tender, the tank put into position and then the plasticard piece was pressed into place and glue applied. Once cured I drilled a 1.5mm hole for the screw to locate. The plate with the screw hole drilled. The tank then needed alteration to change its styling from Fowler to Stanier pattern. I marked it out the easy way by using a Stanier Jubilee tender as a template and then cutting out to the pencil line drawn. The tank top and rear bulk head fitted, both made from .030" plasticard. The bulk head needs to be at least 16mm tall so that it may be cut to the correct shape. The plate extensions to the front of the tender made from .060" plasticard, also showing the front bulk head. All three pieces were scribed put using the tender tank as a template. The curved tops to the bunker sides were made up from .060" plasticard strips 2.5mm wide and about 60mm long. This is so that they may be cut back to shape afterwards. These had an angle scraped onto one edge which was at the angle that the plates are when fitted, the bunker bulkheads require the ends trimming to suit to make sure they sit correctly. This shews the extensions after trimming and filing, the filler is because I was a little over keen with the file. The radius of the curved sides starts 2mm down form the top of the original tank proper and blends into the extensions by about 1mm, this will give as near to the correct profile as possible. This shews the filler over the joint of the front extensions. The front extensions were scribed in the same way using the LMS Jubilee tender lined up appropriately. Progress so far. Gibbo. 9 1
Patrick Davey Posted July 2, 2024 Posted July 2, 2024 Excellent progress!! Capturing the handsome lines very well!!! 1
gibbo675 Posted July 9, 2024 Author Posted July 9, 2024 Hi Folks, I've finally got around to cutting out and filing to shape the spectacle plate windows which for what ever reason I hadn't done earlier. While I was at it I fitted boiler bands in the correct positions, these are from .010" X .020" microstrip. To fit them I mark off where they are to go and then fix one end so that it is running squarely over the model and once it is cured I can then pull it tight around the boiler and brush Humbrol liquid poly over it. The boiler barrel is done in two halfs and with the fire box I do one flat side at a time or the sharp radii can cause trouble. Boiler bands part way through the job. Gibbo. 6
gibbo675 Posted August 22, 2024 Author Posted August 22, 2024 Hi Folks, As I've been off on my holidays and busy with AEC railcars and GNRI coaching stock the locomotives have been on the back burner. I have finished the body work of the W class locomotive by fitting the top feed and pipes, safety valves, reversing rod, the ejector exhaust pipe the cab steps and the buffing plank of the engine to tender drag box. The drag box has a lip fitted to the inner side of it that engages the chassis so as to secure the rear end of the locomotive, the body may be removed by prising it with a screwdriver or similar. This shews the details as listed above. The cab steps and the drag box are all connected by way of packings and gussets to strengthen the whole so that it all self supports. The strip of .020" plasticard that forms the lip may be seen. The rear of the drag box. The tender also had some work done in that it was fitted with steps at the same time as the locomotive. I used .020" square strip as handrails. The tender has since been painted. As noted the locomotive has also been painted and I acquired transfers from Railtec, the transfer sheet used is for NCC Jinty No. 19. I chose this locomotive so that I could cut the number plate transfer and swap it all around to number the locomotive 91 which was named, The Bush. I have to say that my little plan worked very well, in fact better than expected. All the transfers have been sealed on with B&Q PU floor varnish before I spray the whole with Halfords satin lacquer, the floor varnish will stop the transfers curling up as the spray lacquer attacks them otherwise. If you look carefully you can see the joins however from normal viewing distance it looks just fine. Gibbo. 5
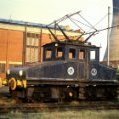
gibbo675 Posted August 23, 2024 Author Posted August 23, 2024 Hi Folks, Here is the W class, not much to do to finish it off only an engine to tender coupling, the number transfers to the buffer beam, refit the handrails which are on the mess that is my work bench. I haven't any lining transfers so it is to be unlined, my friend can sort that out if he wishes. Nearly there Gibbo. 12 3
gibbo675 Posted August 25, 2024 Author Posted August 25, 2024 27 minutes ago, jhb171achill said: Excellent job! Hi JNB, Thank you very much ! I do wish that my work spurs others on to do similar which was the main aim of actually joining IRM as I found initially that information was quite hard to come by. There have been various members that have supplied drawings and details that have assisted greatly my work and they have been key to the finished article, thank you to those that have assisted also. The descriptions photographs and diagrams included in this thread should be of guidance and anyone that regards themselves a modeler will be able to work the rest out with ease. Gibbo. 3
gibbo675 Posted August 31, 2024 Author Posted August 31, 2024 (edited) Hi Folks, Here is the W class with six on. DSCF2446.MOV Gibbo. Edited August 31, 2024 by gibbo675 Actually writing a brief description. 1 1
Recommended Posts
Create an account or sign in to comment
You need to be a member in order to leave a comment
Create an account
Sign up for a new account in our community. It's easy!
Register a new accountSign in
Already have an account? Sign in here.
Sign In Now