
33lima
-
Posts
183 -
Joined
-
Last visited
Content Type
Profiles
Forums
Resource Library
Events
Gallery
Blogs
Store
Community Map
Posts posted by 33lima
-
-
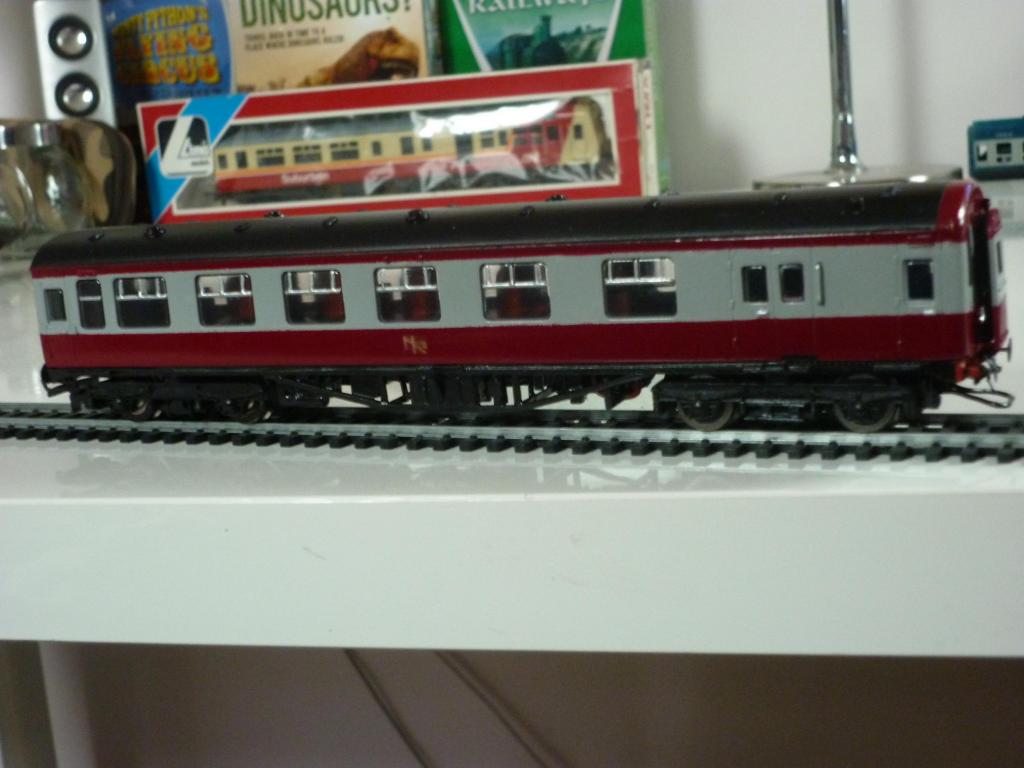
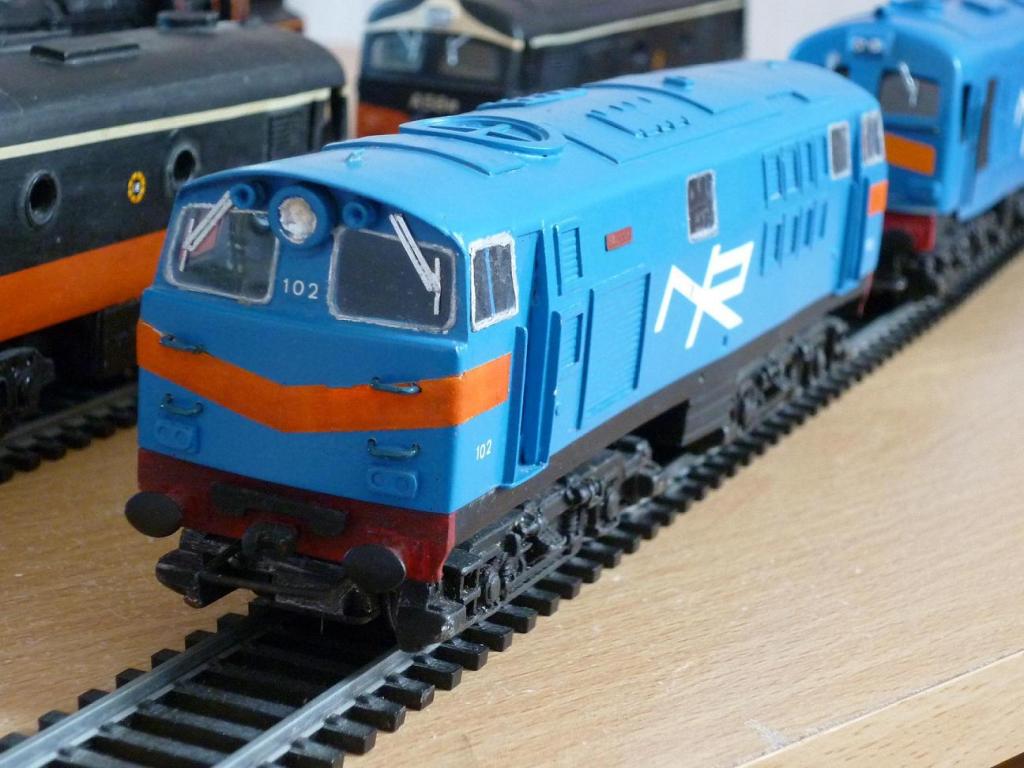
Some more pics of the powered car, now numbered '39' (Maybex bus numbers) on the cab front at any rate and with NIR logos, some additional footboards at the cab end and on its bogie and the underframe given a final coat of satin black. The NIR logos are hand-painted waterslide transfers, brush painted onto some clear decal film in the borders of a set of Almark RAF roundels then carefully trimmed and applied. The interior of this car is open seating, scratchbuilt from plasticard and with a tab between the middle seats to hold down mostly out of sight the wire between 5-pole powered bogie and trailing bogie.
Pics of the other cars and the full set to follow later; the bodyshells having been flush-glazed, all that's left is clipping them on and applying numbers and logos.

-
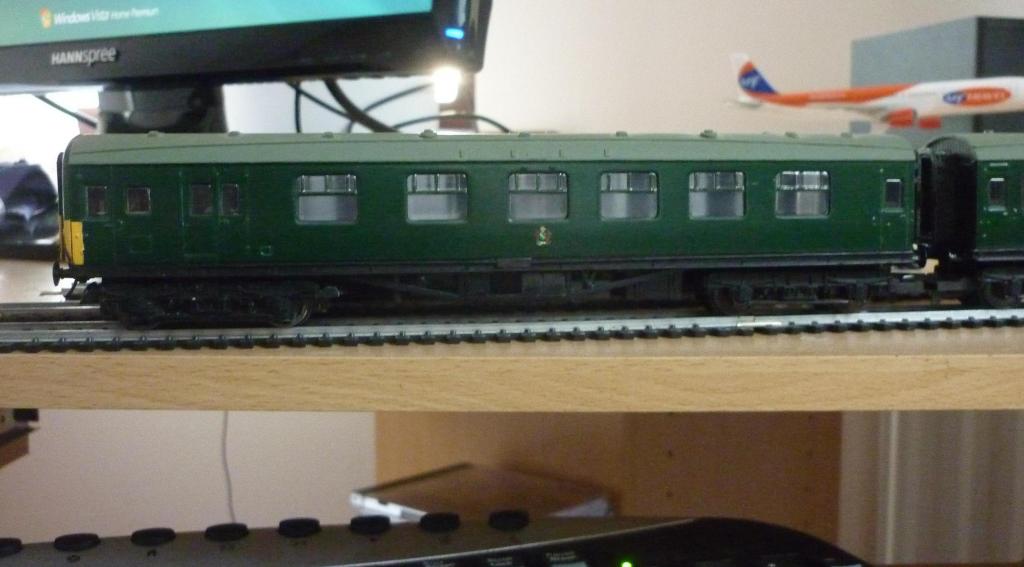
Thanks Nelson! Couple more pics of the powered car, in natural light which is always better ('Gods light is best', photographers supposedly say), taken from the opposite side.
This is one of the two cars with the scratchbuilt, open seating unit.
Below for comparison is a pair of recent pics of my early 1990s model of one of these (36-39 series) cars, my second MPD set, like the earlier, NIR-liveried set with modified Hymek motor bogie and in this case carrying the rainstrips & roof board mounts the 'Festival' coach conversion MPDs retained in UTA days, but seem to have lost by maroon & grey era (which for MPDs started a couple of years before NIR's 1968 debut). This model also has a small square window behind the driver's door and the hatch below it for the tablet exchanger, which from photos, seem to both have been plated over by the late 1960s, with the tablet exchange kit presumably either removed or operated differently (perhaps after the 70 Class took over the premier NCC main line services, from 1966). I still haven't got around to making an interior for it! The green car also lacks the two-part tall grill behind the brake compartment on the LH side, seen on the new model, where heat exchangers were fitted from 1960 onwards (early enough for my wasp-strpied UTA cars to have them too; but my sources are better now!).
-
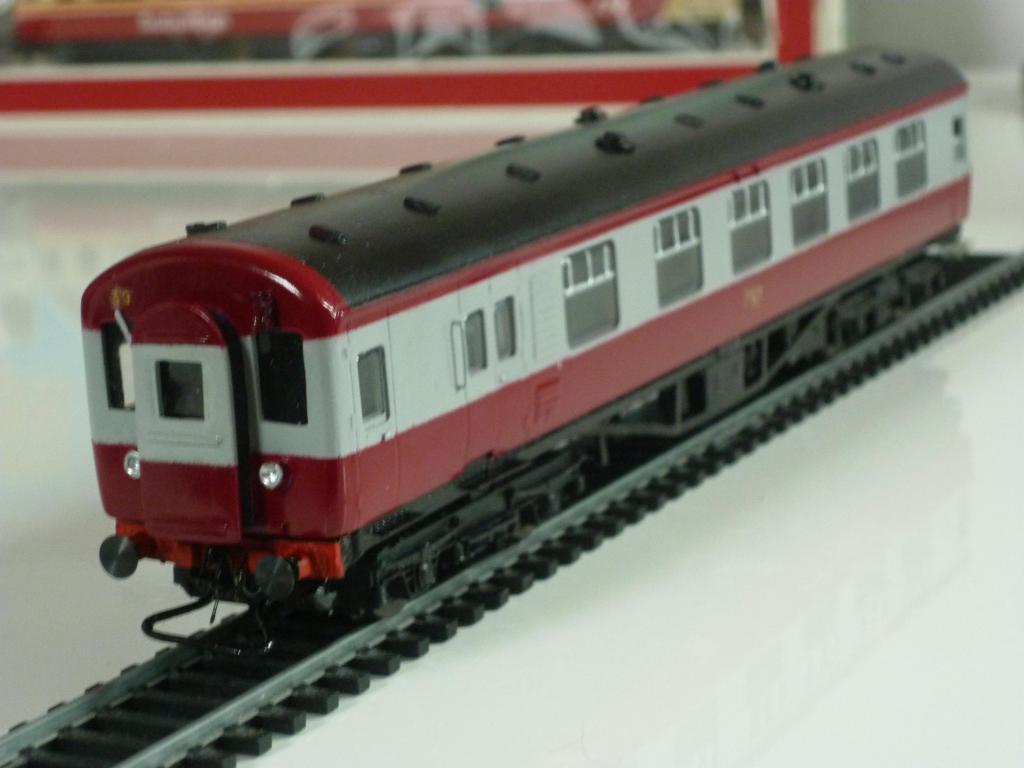
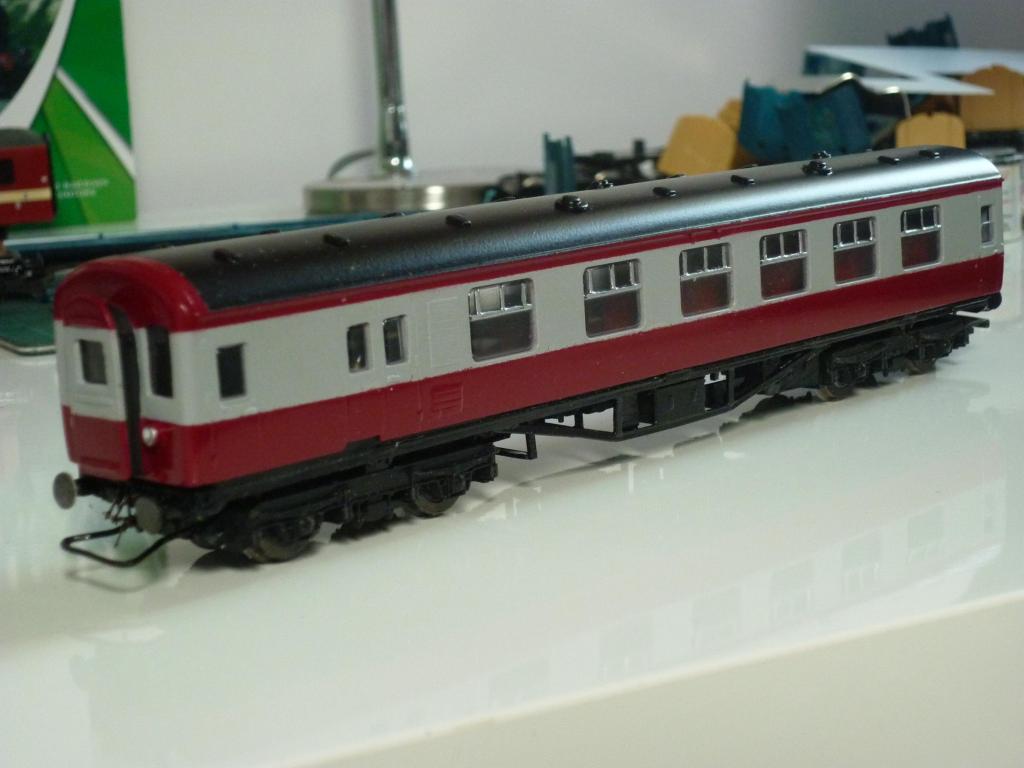
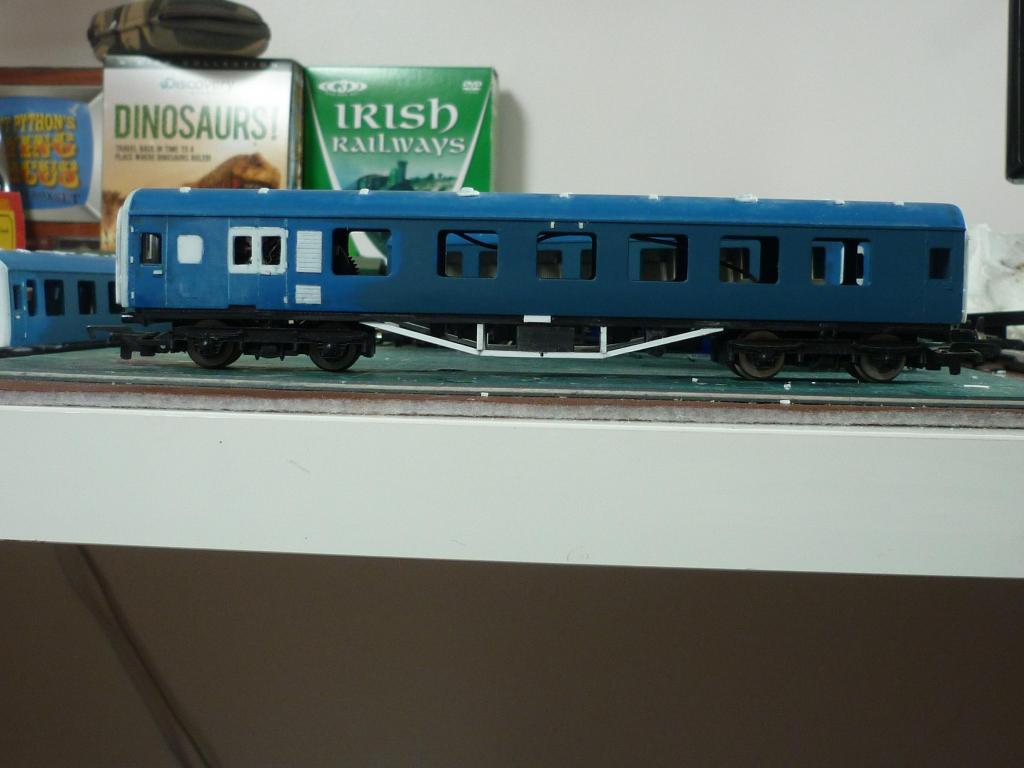
Right, the powered car is now about done apart from numbering, and here she is.
Since the last pic, I have replaced the plasticard disc buffer heads at the cab end with turned brass ones; painted the buffer beam red; fitted handrails either side, ahead of the guard's doors, made from a cut-down staple pushed into carefully twist-drilled holes; and added a wiper and some air horns to the cab front, both secured with Humbrol Clearfix (a wisp of which you can see in the pics but this just wipes away without affecting paint, hence its suitability for attaching things to a painted model). The air horns were made from small sprue trimmed into shape, mounted in pairs on a small back plate and pre-painted maroon, for easier fitting. The sit of the bodyshell had been adjusted on the chassis and it's now a decent clip fit via front and rear lugs glued in place and painted black. As well as numbering, I need to add and paint reddish-brown a wire exhaust pipe to the right of the underfloor engine, which I'd forgotten about, but it's an easy job. Basically job done, for that car anyway, the other three will now get similar treatment.
Behind the car in the pics below is my original 1992 model, one of the sliding door MPDs. This started out as a repainted Hornby Stanier brake 3rd, complete with ribbed roof, too few passenger compartments etc and just a plasticard MPD cab. I later modified it to the present form, adding a couple of extra compartments, accurate roof detail, the sliding door etc; it still lacks a lavatory but otherwise it's a reasonable replica of MPDs 44 & 45. Power is a Tri-ang Hornby Hymek motor bogie with sideframes filed back and LMS bogie frames glued on top. With a more modern Hornby 5-pole motor and trailing bogie pickup the new model should be a better performer as well as a somewhat better and more accurate model. Again what looks like a scratch on the lower cab front of the new model is that wisp of Humbrol Clearfix which I have since wiped off.
Nearly there!
-
A magnificent collection Kieran, bravo! Took me 20-odd years to acumulate 8 MPD cars and you made it in about 5 months! Particularly like the double-enders and also 59 & 60, I don't think anyone else has done an accurate model of this large batch of MPDs. Great stuff and thanks for posting all those pics.
-
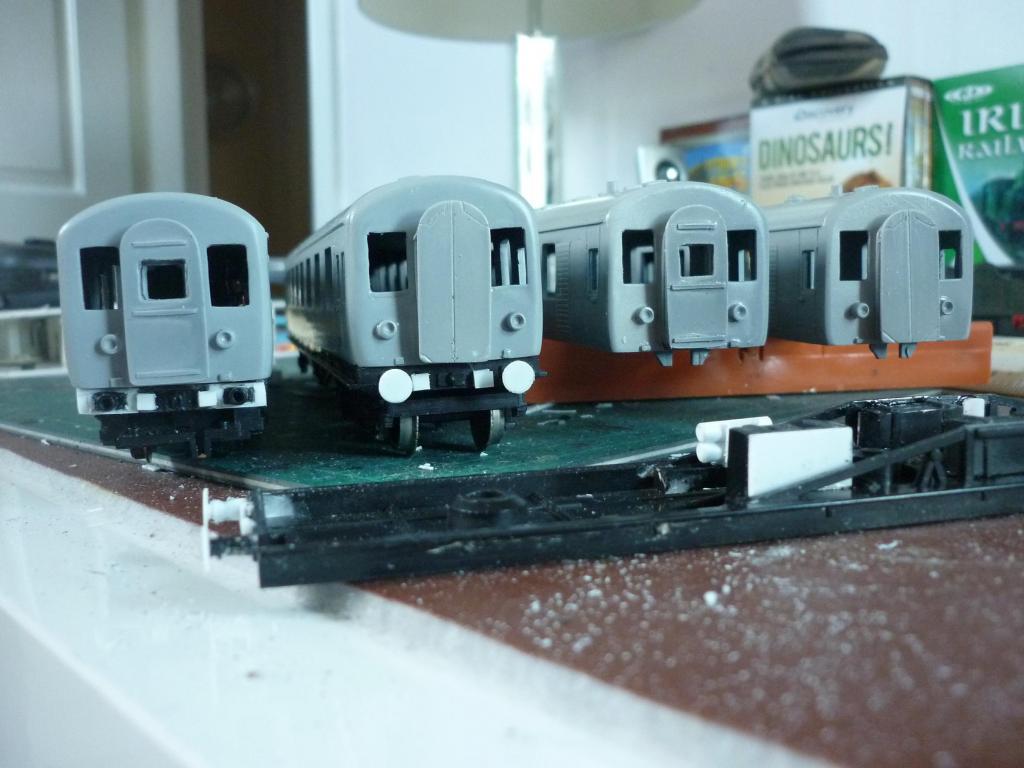
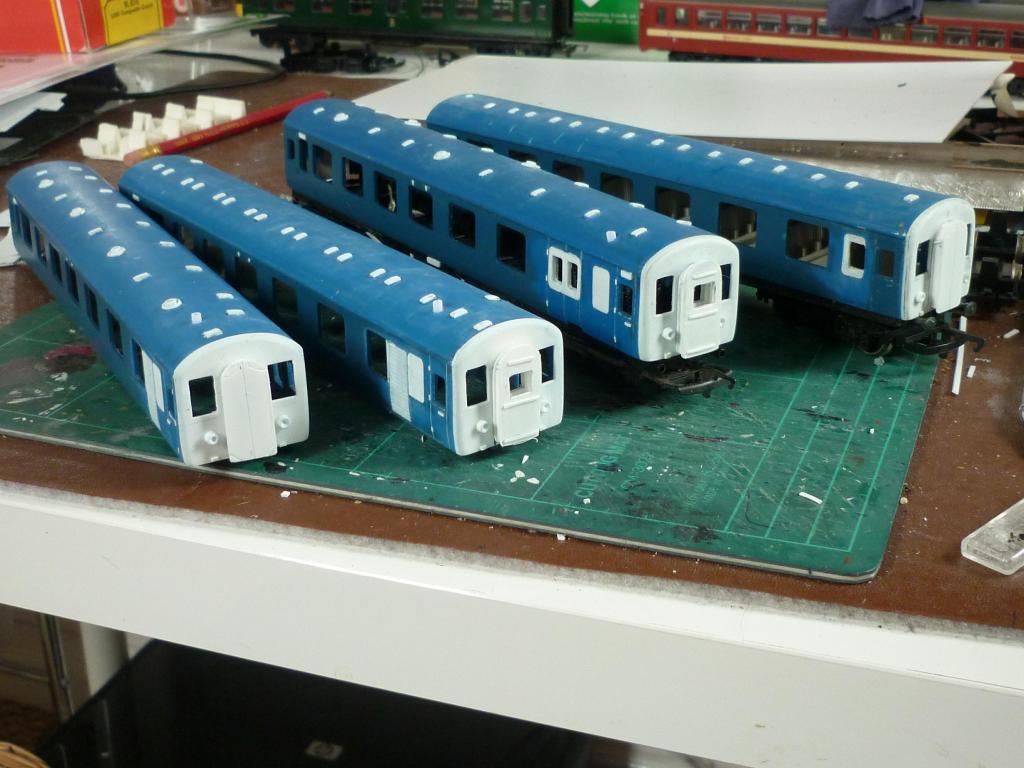
Latest progress on this 4-car set!
Bodies have been masked and roofs spray-painted mat black (which, like the previous 70 Class model, turned out a to-me-pleasing satin finish). Grey sides were carefully touched up where the maroon had bled thru the previous masking.
Having finished the underframes - three power cars complete with plasticard and tube engines, engine mounts, air tanks, fuel tanks etc and a trailer with LMS-style underframe - most of the recent effort has concentrated on the interiors. Two of these are adapted Hornby Stanier compo units, the main modification being removing the toilet from the cab end and fitting a rudimentary driver's cab. Two interiors with basic seats (for the open layout vehicles) were scratchbuilt from plasticard. Ballast was added from fireclay pushed into voids in underframes and under some seating.
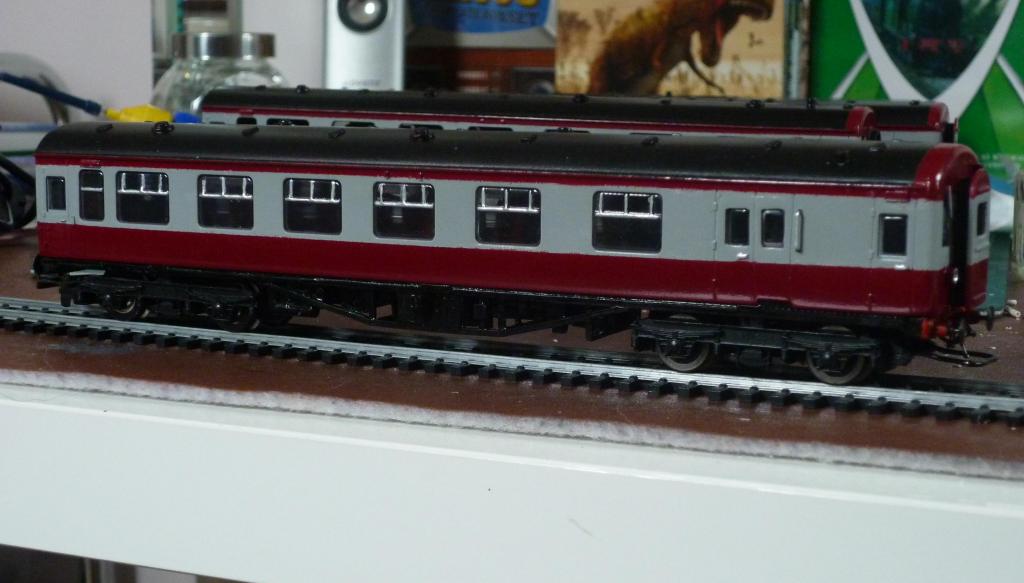
Above you can see one of the modified Stanier seating units, next to its bodyshell (a 42-43 series power car with compartmented layout). I still need to box in the front seat, where c.1960 a heat exchanger was fitted, as visible from the grill and the partially-plated over leading passenger window, on the front RH side of the body.
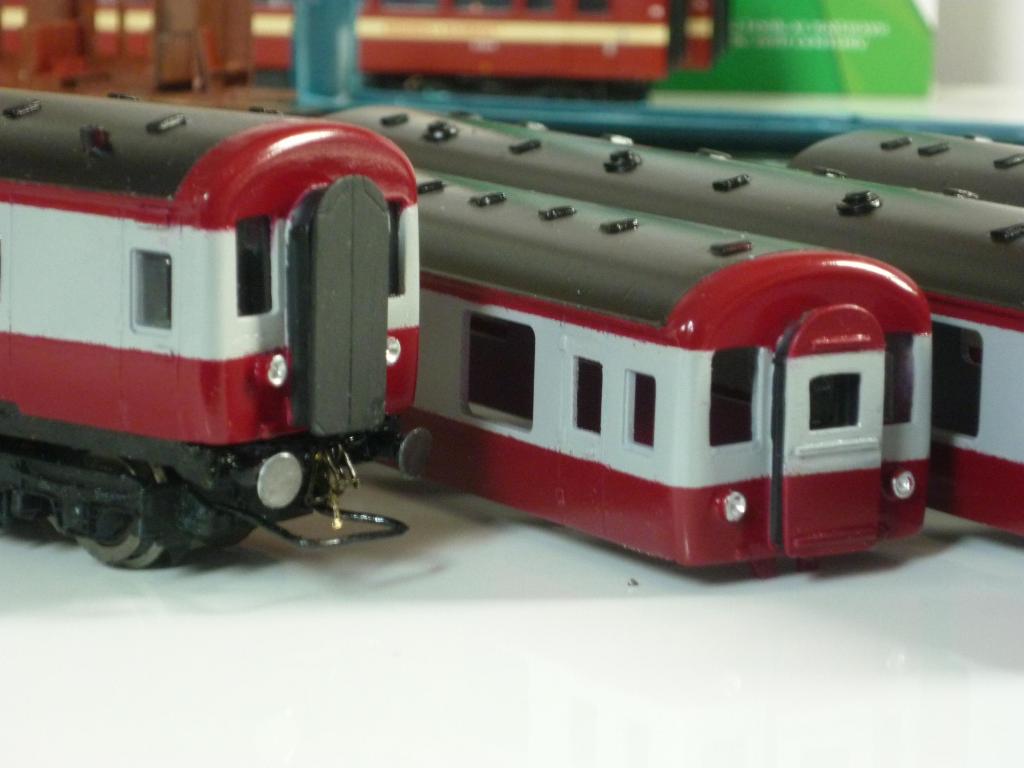
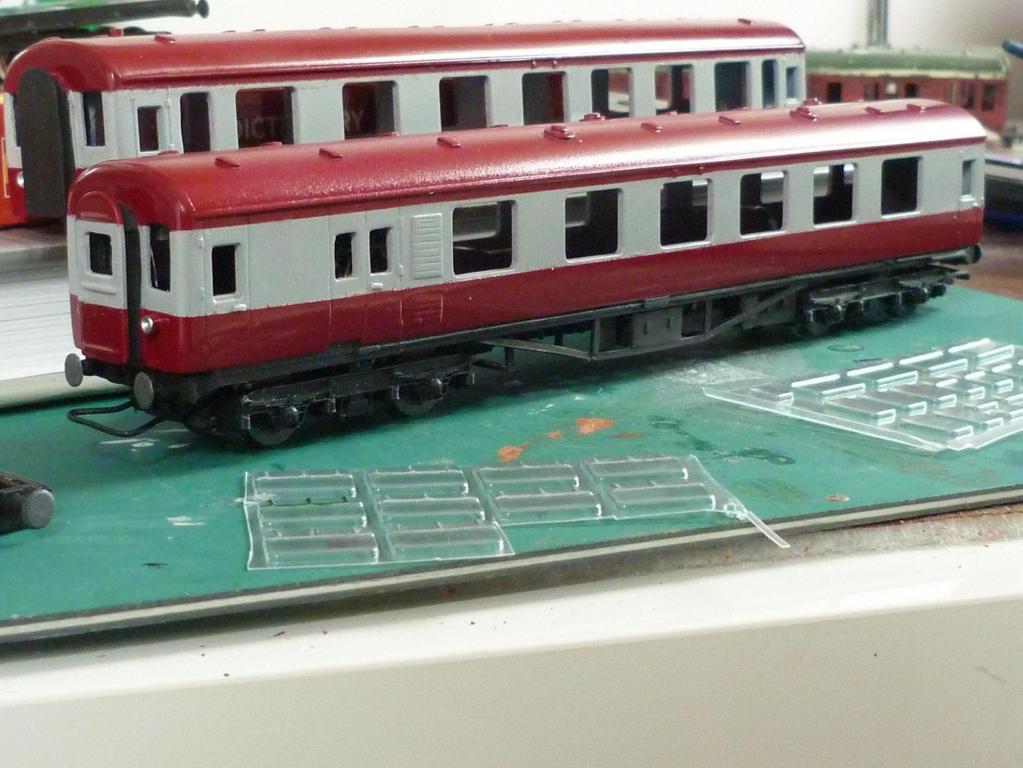
Below is the powered vehicle, one of the 36-39 series and the only vehicle in this set with guard's accommodation; in these vehicles, without the large sliding doors fitted to most such MPDs. This sits on a modified Hornby Calder Valley DMU trailer chassis with 5-pole HST trailing and motor bogies and the same DMU's bogie frames clipped in place of the HST's. The front coupling has been replaced with a less conspicuous wire loop to permit hauling a brown van or freight. The buffer bean has been fitted with an etched brass screw link coupling. SE Finecast flush glazing has been added. I need to adjust the sit of the body on the underframe a little. I plan to replace the plasticard buffers with brass ones, for this and possibly all the cab ends.
The last pic shows the powered car refitted with the alternative plain board corridor connection cover, and next to it, the un-powered trailer with the more attractive but less common windowed and painted type.
I have started making air horns and the next job will be completing the heat exchanger compartments, flush glazing the other 3 cars, fitting everything together and checking fit, sit & running, then adding the air horns, wipers and other final details. I've also started work on another 80 Class set, the cut-up BR Mk2 coach parts for which you can probably see in the first pic.
-
Ford Monza Blue looks ok, to my eyes:
-
Lovely jubbly! A fine model of a distinctive coach. Nice work on the interior, all you need is somebody to prop up that fine bar!
-
It's also worth bearing in mind that a 1/76 scale model painted in exactly the original colour will appear too dark, because of 'scale effect'. This concept has been out in the open since at least the days of an Ian Huntley article in a modelling mag maybe 30-40 years ago, but is explained online here:
http://www.cybermodeler.com/color/scale_effect.shtml
...and that's before we get into the weathering effects of the sun/oxidization & general exposure to the elements, not to mention whether the sample in question is viewed under artificial or natural light.
-
Aha! So they did after all go for 4+4 seating bays (x4=32) during the MPD conversion, then, not counting the bench and single seat at the bar! Thanks for uploading!
-
Thanks David!
Yes the vacuum-formed windows are the venerable South Eastern Finecast 'Flushglaze' product, still available for a wide range of coaches and locos:
http://www.sefinecast.co.uk/Flushglaze%20Windows/Flushglaze%20Windows%20Page%201.htm
Highly recommended. Some, like the Hornby LMS variety I'm using here, come with moulded-on ventilator framing. Others, like those for the Hornby and Lima Mk2a/b coaches, come designed to fit around the ventilator framing, where these are moulded as part of the coach bodyshell.
-
Latest progress!
Three underframes - real power car, one dummy power car, and a trailer - have now been completed, apart from two needing the distinctive cable ducting between junction boxes being added to the sidesoles and in the case of the outer cars, etched brass couplings being fitted.
All four bodyshells have now had the NIR maroon (Damask Red car spray, on top of ford Polar Grey) and had the inner ends and front corridor connections brush painted in matt black. Corridor connection covers are shown push-fitted, including the two plain black ones; all of these can be removed or exchanged between cars to preference. Tho not as common as time went by, I prefer the version with the small window.
Getting the height of the cab front windows is a little tricky as, when painted, these should be just high enough to reach the upper maroon, leaving none of the lighter colour visible above.
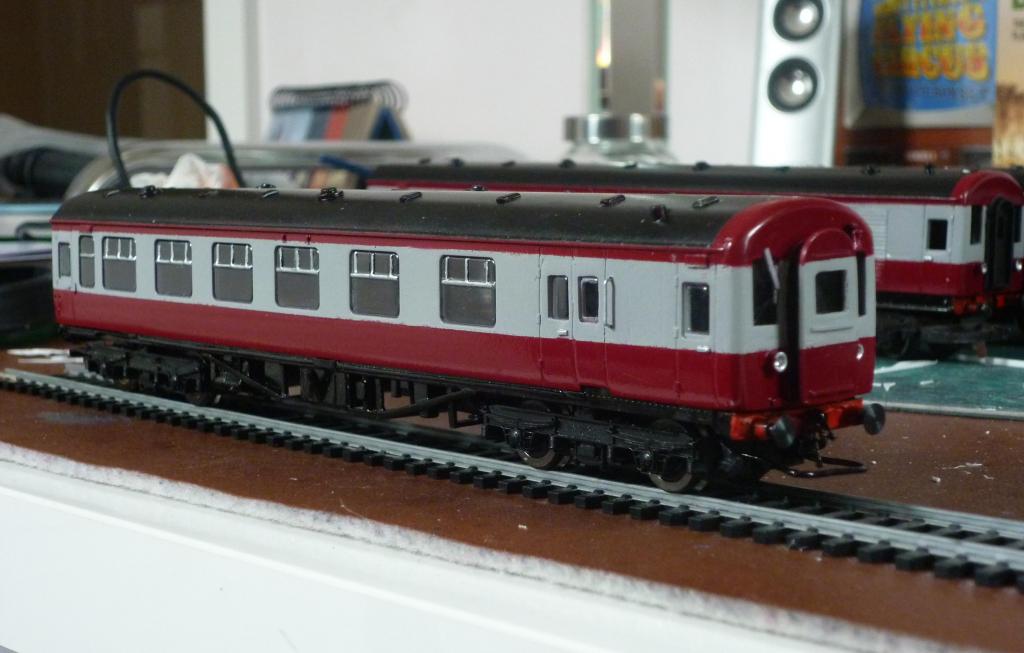
The power car, 36-39 series with the slam-door guard's compartment, is seen fitted loosely to its underframe. With its HST bogies now having Hornby Class 110 DMU bogie frames, this one at least has (round) roller-bearing axle boxes, which is correct for MPDs; the other underframes will just retain their (square axle-boxed) Hornby LMS-style bogies. I have cut away the front coupling and replaced this with a florist's wire loop which will not interfere with the cosmetic screw-link coupling to be fitted and will also enable brown vans, freight wagons or even other MPD cars (or trailing coaches) to be hauled. You can see the side grills for the heat exchanger fitted c.1960, behind the guard's doors. Roof vent layout is based on photos, and is basically as built but less the bowed rainstrips and the train name board holders, tho by late NIR days, some roof ventilators seem to have been removed.
Air horns and some other details have yet to be fitted. Flush glazing is being prepared, and interior units need to be made (for the two cars with open seating) or adapted (for the two with compartments).
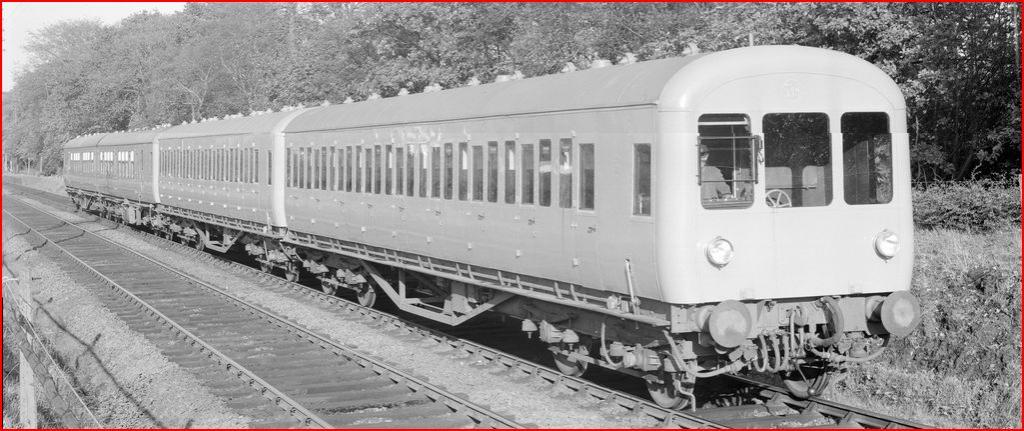
PS in the background of the first pic is a damaged Tri-ang L1 which at some point will be converted into a GNR(I) S Class! The old Tri-ang suburban coaches also visible are at present slated to become a simple MPD conversion (no tedious cut and shutting, accepting having too few compartments) with a couple of the same maker's mainline coaches, all painted in 'eau de nil', as a representation of the 'turquoise train' seen on the Bangor line in the very early 1960s. I've decided in the absence of other info that this might well have been a new MPD on test on that line, before it was cut off from the rest of the network; like this new set pictured at an unknown location, captioned as taken in October 1959.
-
If it is any use to you, I have three drawings of 90/549 all showing different interiors, the last one from 1957 after conversion to an MPD trailer.
Hi and thanks, the MPD converision drawing would be very useful, both for Kieran/Kirley, who's building a model, and for me, as I may do some day and tho awash with drawings of GNRI catering vehicles, for some reason never got any NCC/UTA diner drawings from UFTM.
Are you able to scan them, if I pm you with my email address? Or better still, can you attach them here?
Thanks again!
Ivor
-
Thanks Kieran! Managed to find a drawing of 90/549, which I just emailed, tho it looks like you'll need to make some assumptions about the UTA's increase in seating, which was possibly at the expense...sharp intake of breath...of the bar!
-
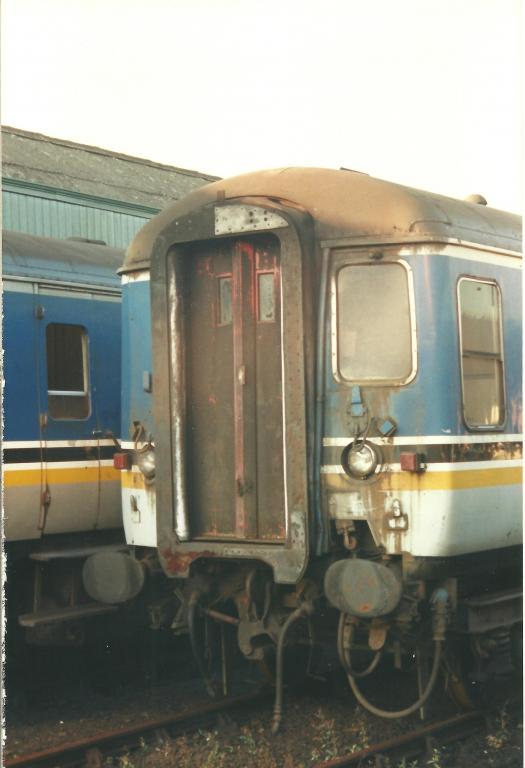
PS in case anyone with an eye for detail is wondering why I modeled the sliding doors in the brake compartment to sit flush with the sides, instead of recessed...many pictures confirm that these doors were built that way. I'm not sure when they were adapted to sit flush when closed (as seen in NIR days) but (i) all the pics I've ever seen of MPDs in UTA green (Brunswick or 'eau de nil') show flush doors, the few that appear recessed actually being open, I'm fairly sure and (ii) conversely, all the pics I've seen in late UTA/NIR maroon & grey show the doors sitting recessed when closed.
The only exception that comes to mind is a pic of one of these 'suburban' units captioned as taken in 1970, which shows the car in maroon & grey with MED-style 'wedge' on lower cab front. This car still has the sliding door sitting flush. It seems likely that the 'suburban' MPDs were converted to recessed doors when between 1968 & 1972 they were rebuilt to open seating, losing most of their slam doors and gaining a corridor connection. It seems reasonable to surmise that recessed doors were fitted to the other MPDs with sliding brake compartment doors, at or soon after this time.
So as a general rule, MPDs in any UTA green livery should have flush doors; in maroon & grey, recessed. Naturally this excludes MPDs with no brake compartment and those built with slam doors for the guard's accommodation.
-
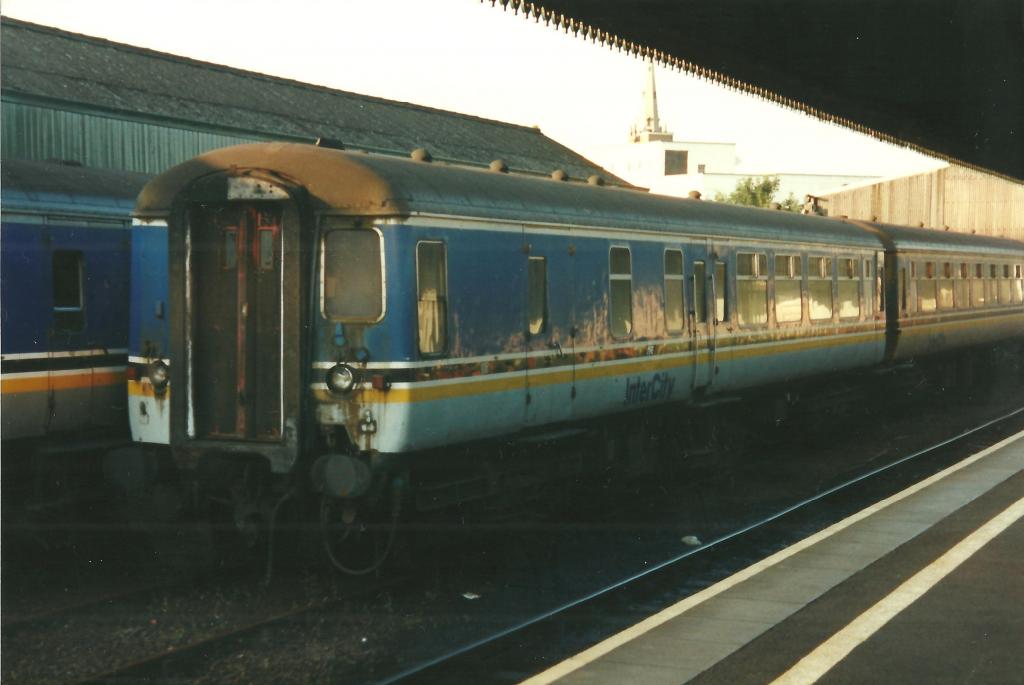
Are these any help? Bangor, 1993, 916 if I'm reading the number right:
-
Sputnik update!
Below are a few pics showing the current state of play.
All for bodyshells have now received their coat of ford Polar Grey. Work on the underframes is proceeding slowly but surely. for the 36-19 series power car (nearest camera) the underframe work included cutting away the platform over the leading bogie to accommodate the HST power bogie, then removing, modifying or adding various components to produce an MPD-like layout, including new underframe trussing, absent entirely on the Calder Valley DMU centre car chassis used. Because this has angular rather than straight buffer beams, these had also to be rebuilt.
Work on two of the three modified Hornby Stanier underframes for the two dummy power cars and trailer car is well under way. For the latter the old, GWR-style battery boxes needed cut away and replaced with a single LMS-style one, on one side only, centred. The other needs one of the battery boxes repositioned and another added as well as various other MPD-style components added. Both need new, round buffers and all three need the little square plates seen on MPD buffer beans, added from plasticard. Outer cars will receive etched brass screw link couplings tho likely with wire loops on the bogies to enable them to haul brown vans, conflats or other suitable wagons.
Note the two different types of corridor connection cover, loosely fitted before final painting, and the fact the two rear cars - dummy powered cars in the 40-14 and 42-43 series - have lost the front seat row, with the window half plated over and a grill for the heat exchanger fitted to many MPDs about 1960. also the wider-spaced headlights, on the trailer (second from the camera).
Next job is to finish work on the underframes and mask and paint NIR maroon. Then the interior units, air horns, wipers, flush glazing outer couplings and other final details.
-
Now, isn't that a sight to warm the hear of any railcar fan! Lovely! Especially like the way you made the curved perspex corridor connection for the car in original livery (Pale Green upper cab front). With one of the double-enders evidently getting 'Enterprise' red over blue, the only major MPD livery not featured in that great line-up is 'eau de nil'.
Keep the pics coming, please!
-
Wow! Looking great. If there's one thing better than a good MPD, it's two good MPDs. The 4-car NIR set looks a treat, on the move. Lovely piece of work.
-
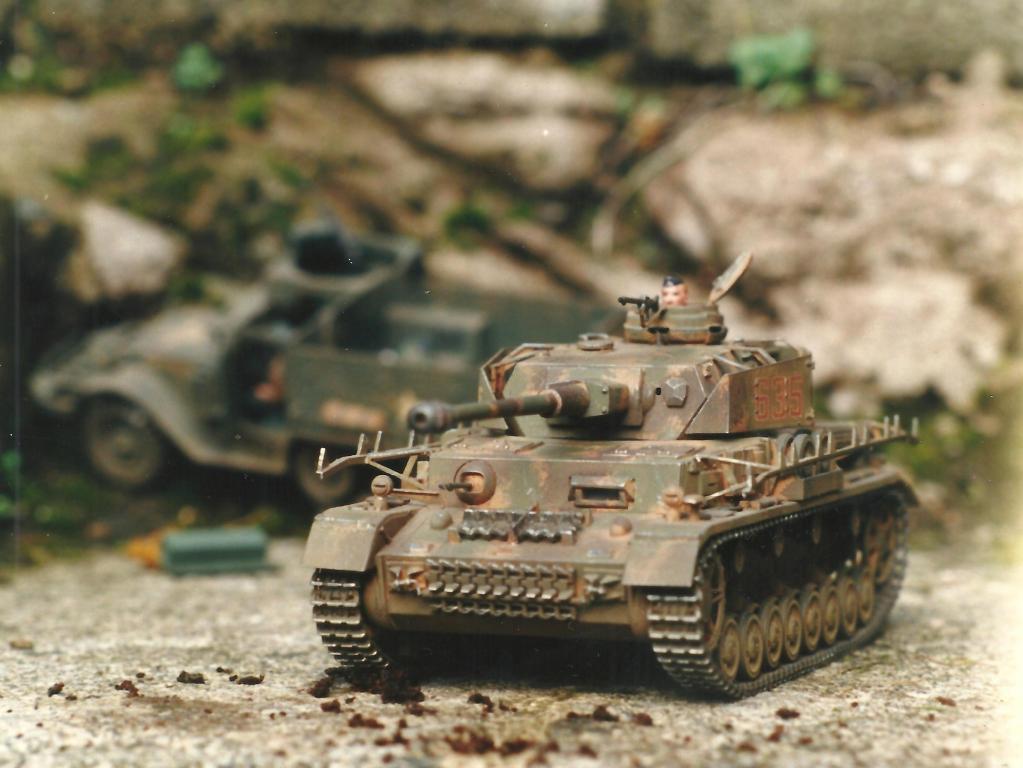
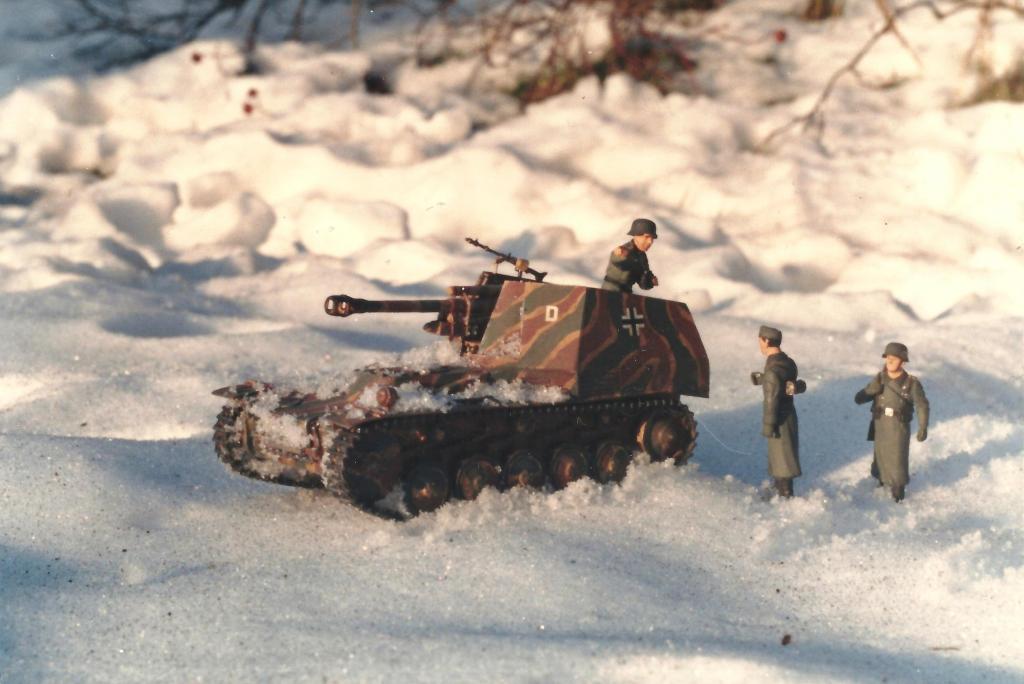
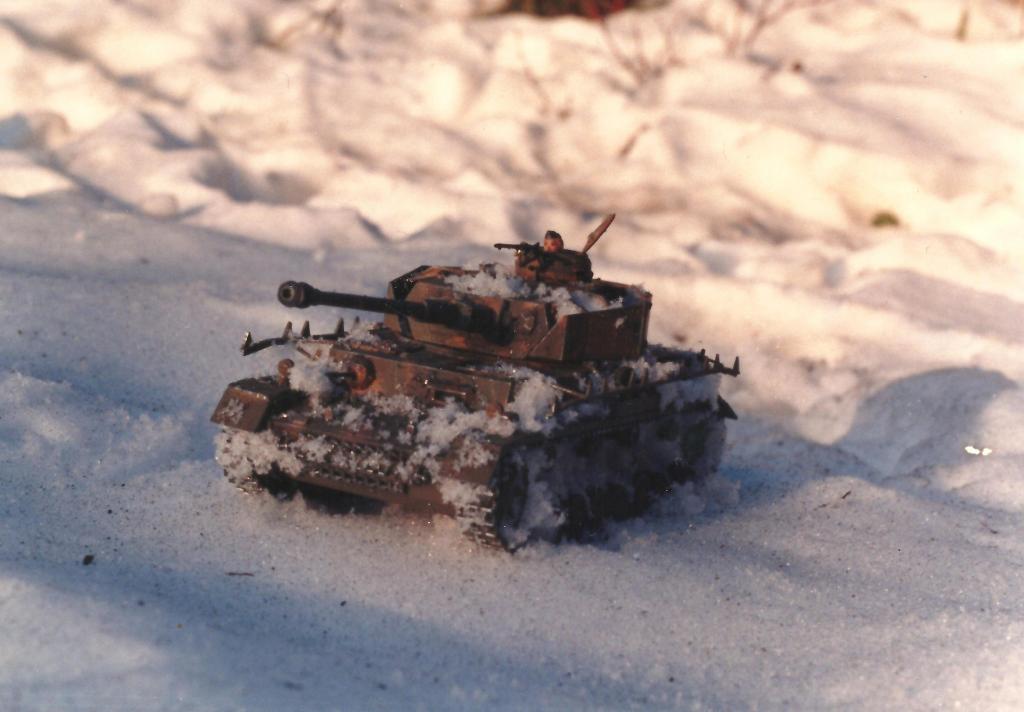
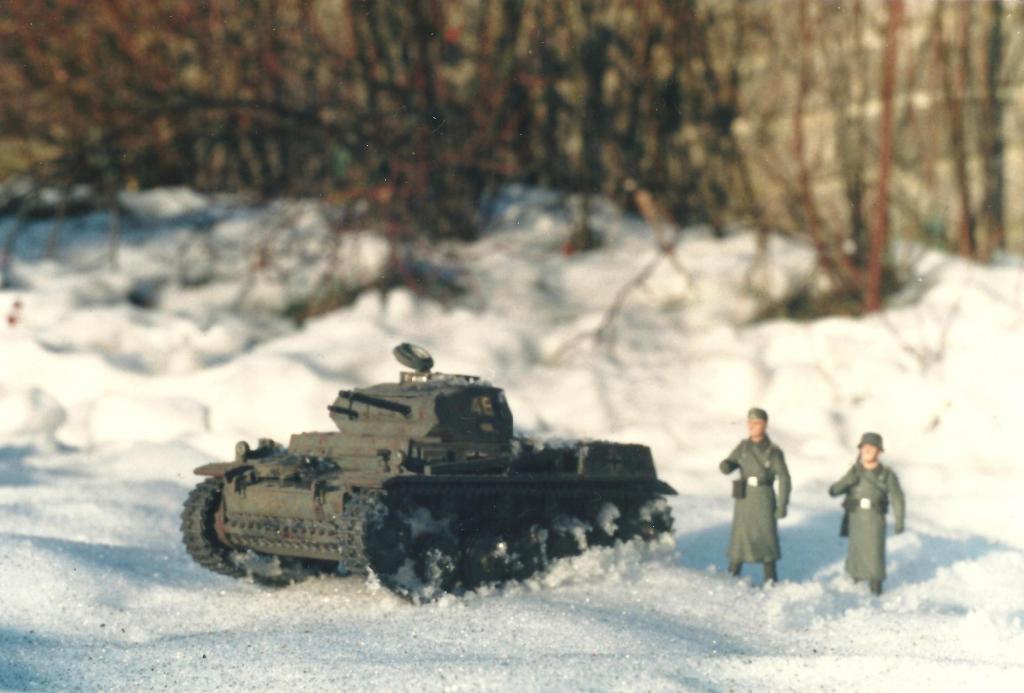
No helicopters I'm afraid, just some more panzers, pictured back in 1984:
That Italaeri 1/35 Panzer IVH again, this time in warmer climes:
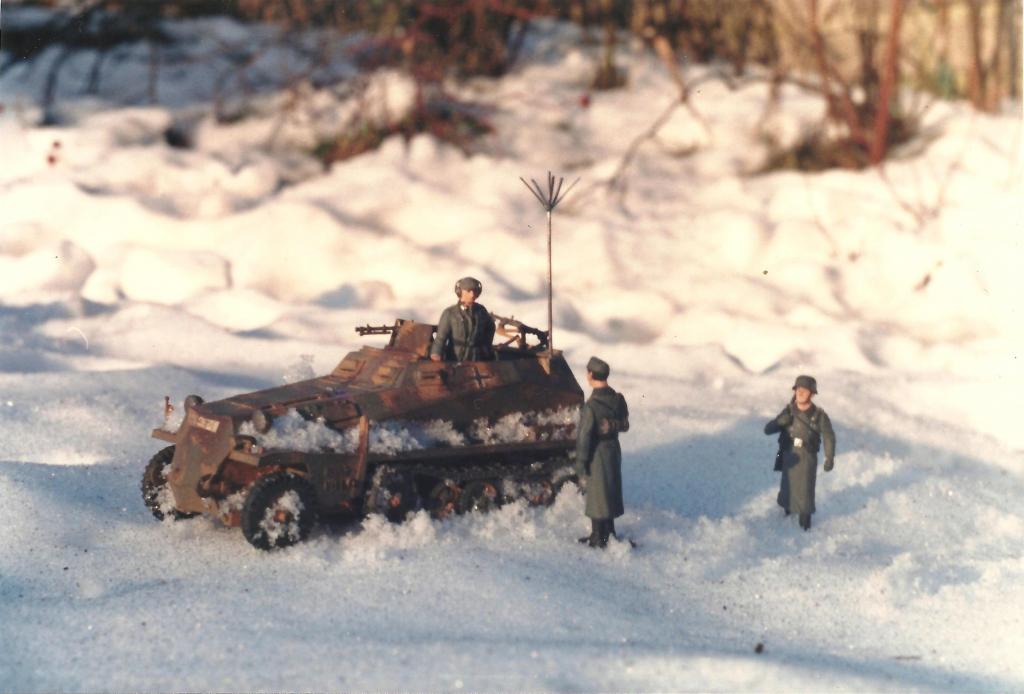
Next, the weather has turned colder again! The Wespe 10.5cm SP gun was converted from the Tamiya Marder II, the former vehicle not being available in 1/35 kit form, back then; I also converted an Italaeri Panzer 38(t) to a 15cm SP heavy infantry gun. The Sdfz 250/3 command variant is I think a Nitto model; it came with the overhead 'bed-stead' frame aerial as seen on Rommel's half-track 'Greif' but as my aim was to produce vehicles representative of those used by the units of a Panzer Division in 1944, I replaced that with the later 'pole and star' aerial, although retaining the early body shape.
-
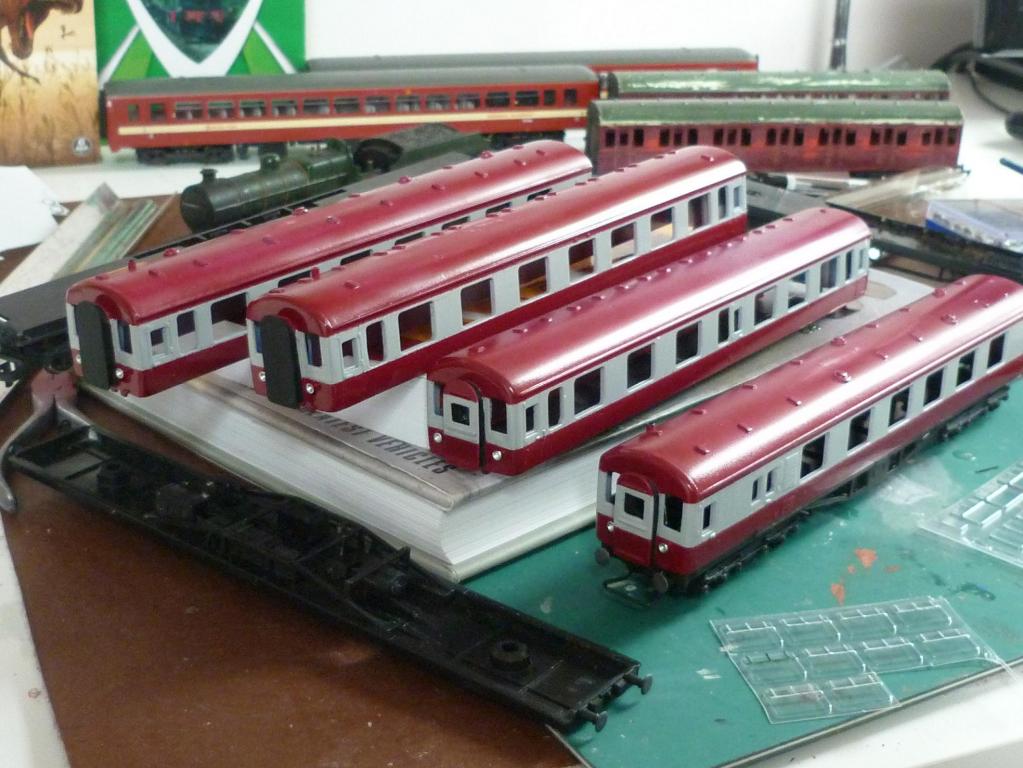
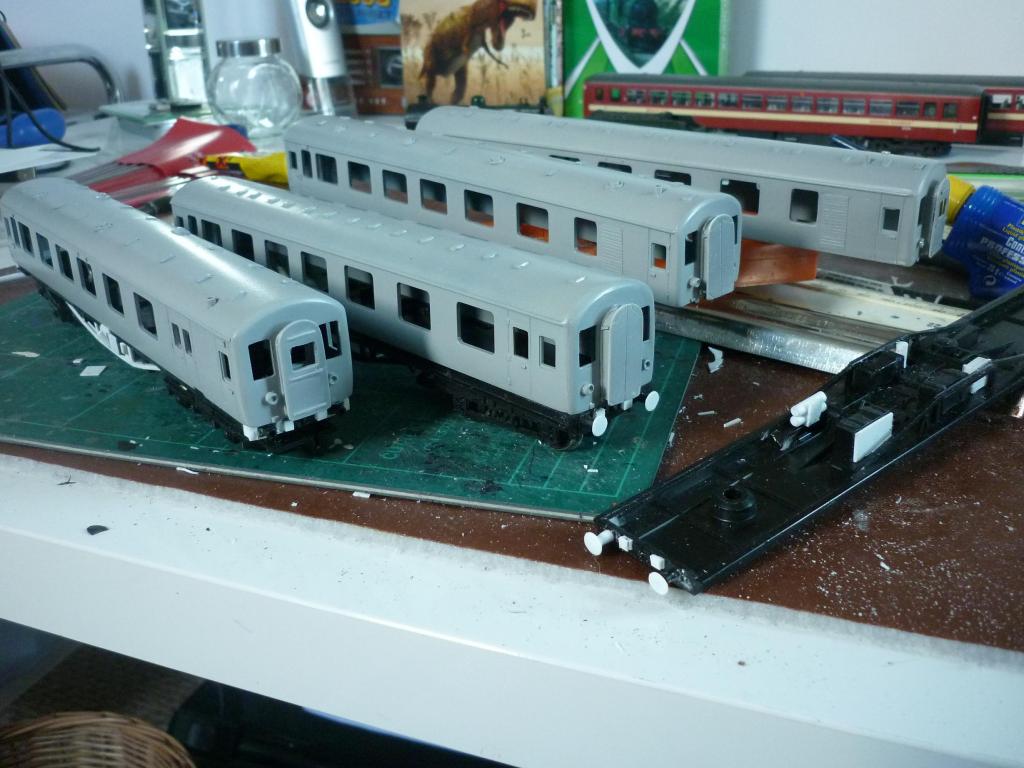
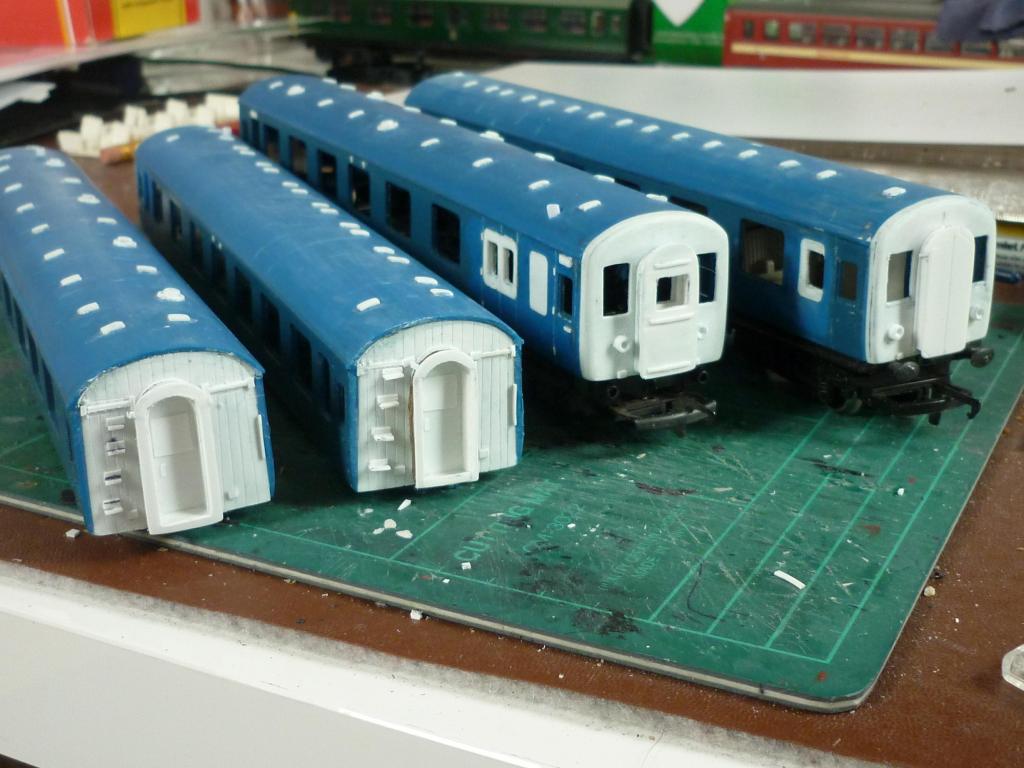
Here's some pics on the latest progress on this 4-car MPD set.
The 4th car - a trailer, on the right in the group shots - has now had cab, roof and corridor detail added, as well as some filling-in of windows to replicate the differences in the prototype - in this case, a middle passenger window converted into a half window + door; and a half-window behind the cab reduced to a door-sized window. I need to sand down the door fittings around the window ahead of that and re-scribe, and fit hinges to, the newly-formed door window behind it. Headlight position on MPDs seems to have varied, with the original units having theirs quite close either side of the corridor connection, but this type of trailer had them further out, so the difference visible in these pics is deliberate.
Grills have been added to one side of both the non-brake dummy power cars and the leading passenger compartment's window on that side half covered over, where the heat exchanger was fitted. To make these grill, rather than make a mess trying some thing too clever, I scribed rows of closely-spaced lines on some very thin (10 or 15 thou?) plasticard sheet, cut it to size and glued in place, sanding lightly afterwards to reduce their prominence.
Two types of corridor connection cover have been made: two each of the plain board and the windowed version. The former seems to have been much more common by NIR days but the latter looks more attractive.
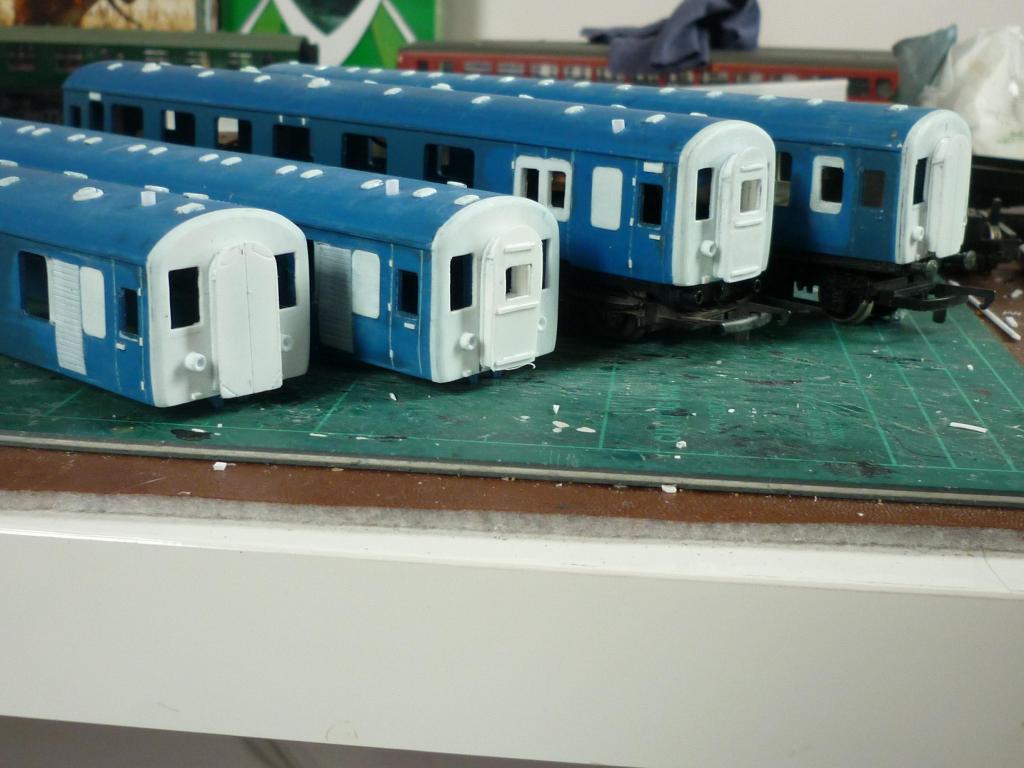
The three unpowered vehicles (two dummy poser cars and a driving trailer) will be fitted with a modified, lowered Hornby Stanier chassis - the unpowered trailer at the back in the pics has had one fitted before modification, to check fit. The power car (no.39) has been fitted to a Hornby Class 110 'Calder Valley' DMU centre car chassis, modified to take HST power and trailing bogies which have been fitted with the bogie frames from the same DMU - this involves cutting away the platform over the space where the motor bogie willl be, but leaving 'shoulders' each side to take the pegs either side of the bogie frame - here, the empty HST chassis was used as a template for the shoulders. Work is already under way to modify this chassis further, the better to resemble an MPD one, starting with removing some extraneous components and fitting underframe trussing.
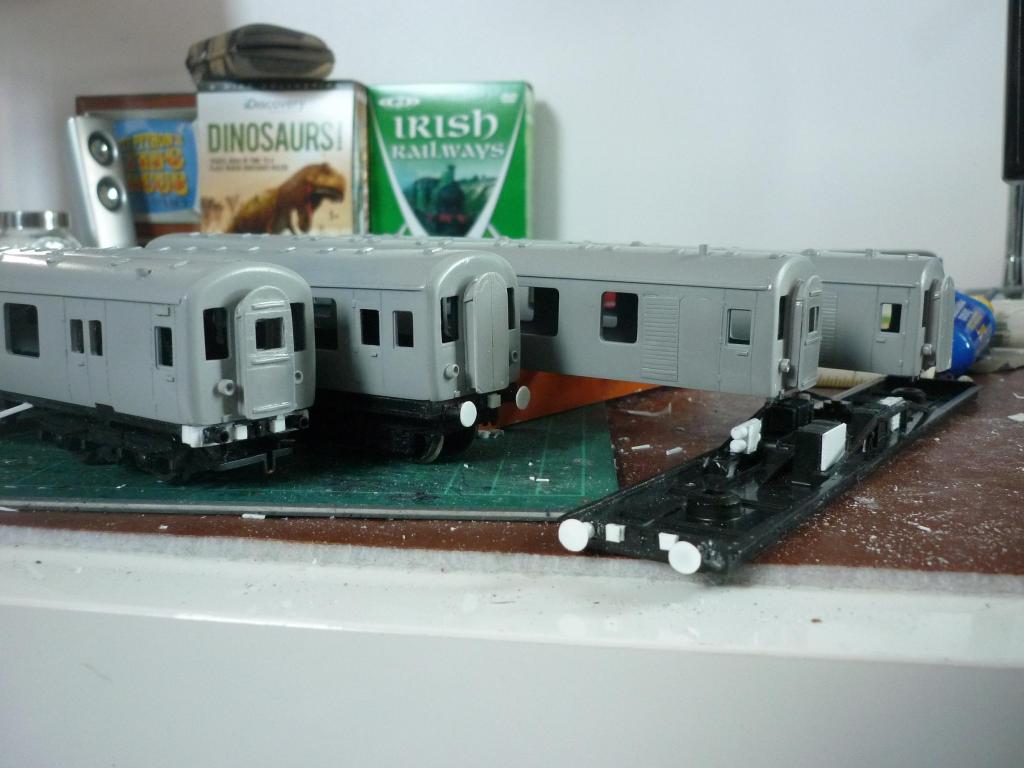
The last pic is 39 side-on, sitting on the Calder Valley trailer chassis. The small brake compartment behind the driver's cab goes some way to hide the 5-pole Hornby Ringfield motor bogie. Further digging thru photos showed that by NIR days, this vehicle had lost the little hatch (with small window above) which was designed to cover the tablet exchange apparatus. So I had to fill in the window (which I had opened up, earlier!) and remove and sand smooth the hatch below it. I'll replace the front bogie frame with one without a tension lock coupling, later, tho I may fit a wire loop to permit hauling an NCC 'brown van', one or more of which were a common sight behind an MPD, even into NIR days.
Three power cars and one trailer will provide a bit of flexibility, with the former able realistically to haul quite heavy goods trains, if desired. Nearly all MPDs had driving cabs, including trailers, the main exception being diners and a pair of LMS-type coaches (526 and 527) which were fitted to run with MEDs and MPDs.
Next job will likely be priming the bodyshells with car aerosol grey primer. Cab-front horns on power cars have been left till after painting in NIR maroon & grey.
-
Hello everyone,
I totally understand that this is a railway forum so I'm sorry if I'm breaking any rules here, will get back to railway modelling soon, tell me if you like these types of posts or would you rather see railway ones only?
Thanks
Nelson
Very possibly, even tho the other modelling forums here don't specifically cover AFVs; but as I'm a tank nut too, in for a penny:
Italaeri Panzer IVH, Tamiya Panzer II:
-
Thanks Kieran - your MPDs must be nearly ready, too, look forward to seeing more pics of them when they're all up and running. Sputniks rule, OK!!! Today, Kirley Junction; to-morrow, zee vorld! HAH!
-
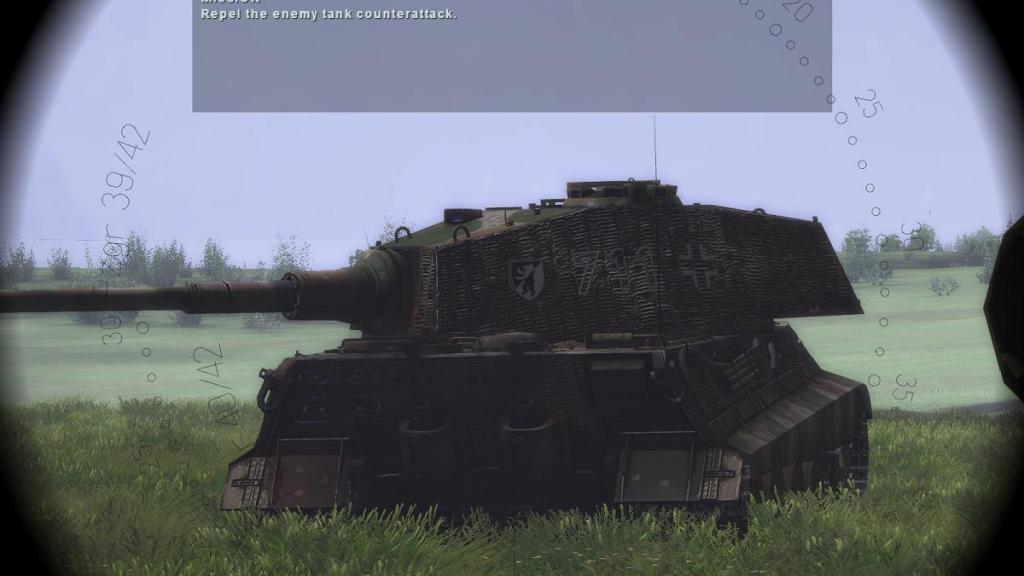
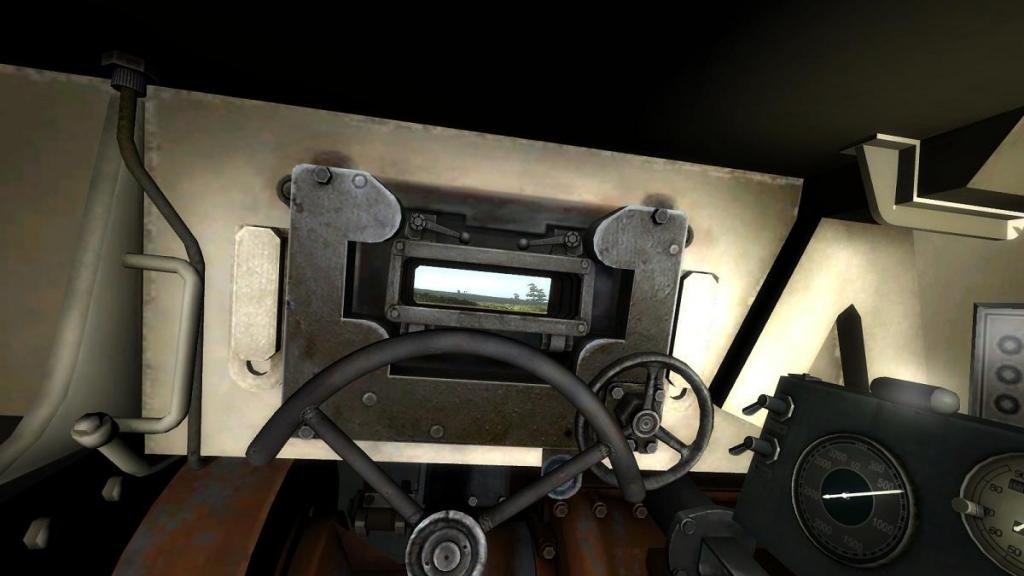
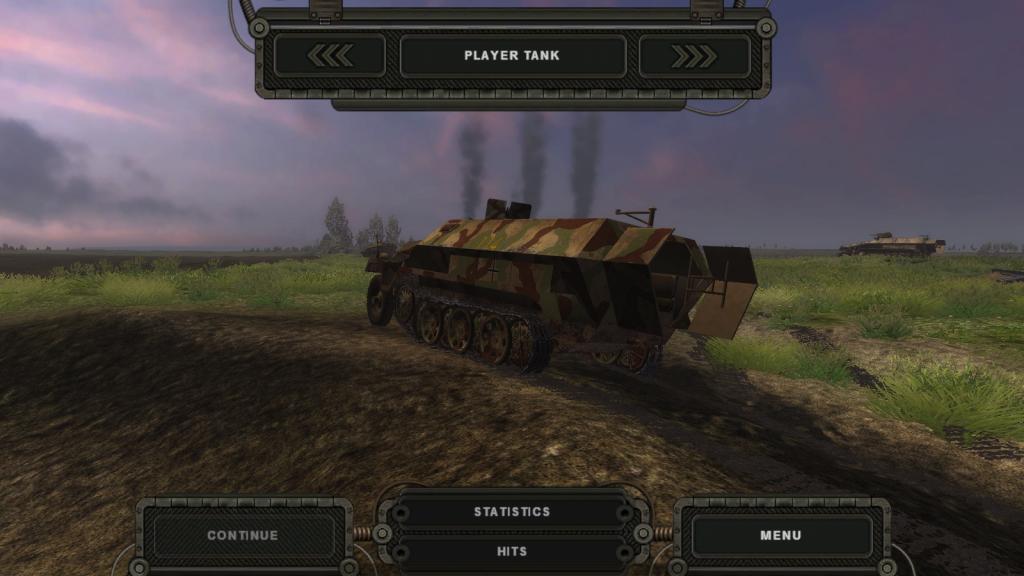
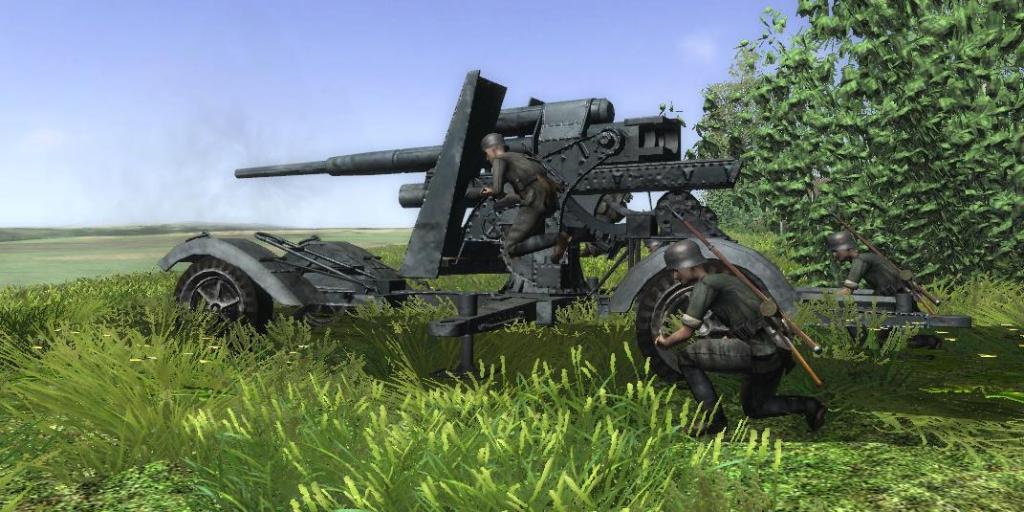
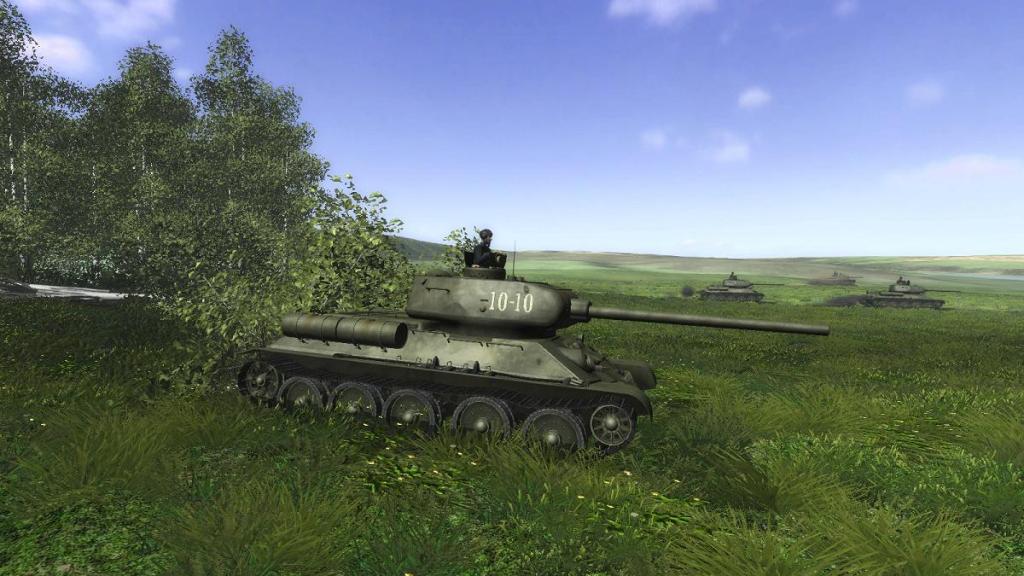
Tried WoT but not into multiplayer with it's artificial 'tiers', grinding or free-to-play or pay-to-win and all the gamesmamship, plus it's too 'arcadey' for my tastes. No realistic functional gunsights and no interiors either, unlike Steel Fury, a proper tank combat simulator which also has AI-controlled infantry, towed and 'off-map' artillery and airstrikes:
-
Nice model Nelson, is it a 1/72 job, or you into that 'Bolt Action' wargaming which I gather uses about 1/56th?
Anyone interested in tanks should give this a try:
Like they say, travel to interesting places...
...meet interesting people...
...and kill them:


'Sputnik' - another MPD railcar set
in Workbench
Posted · Edited by 33lima
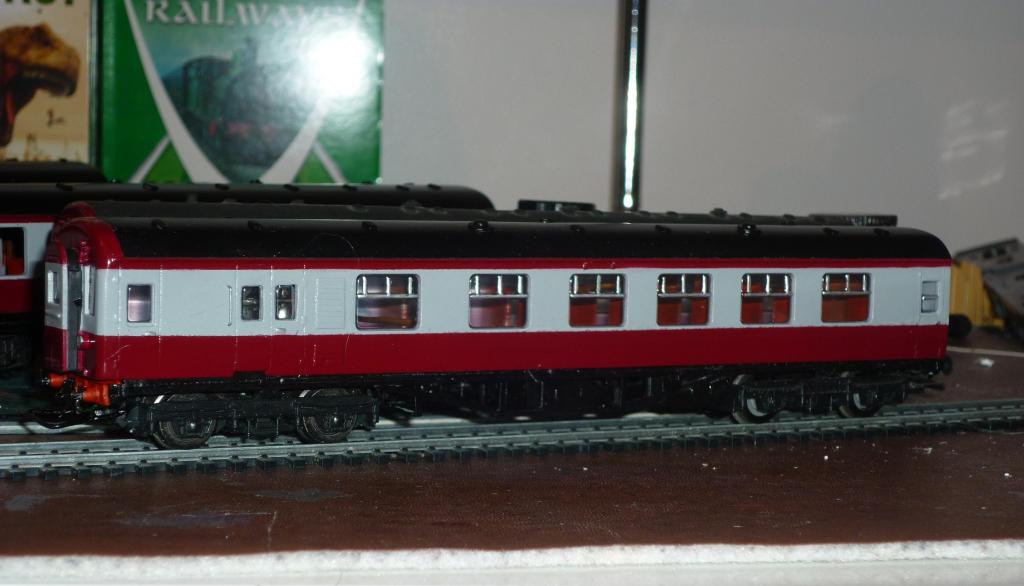
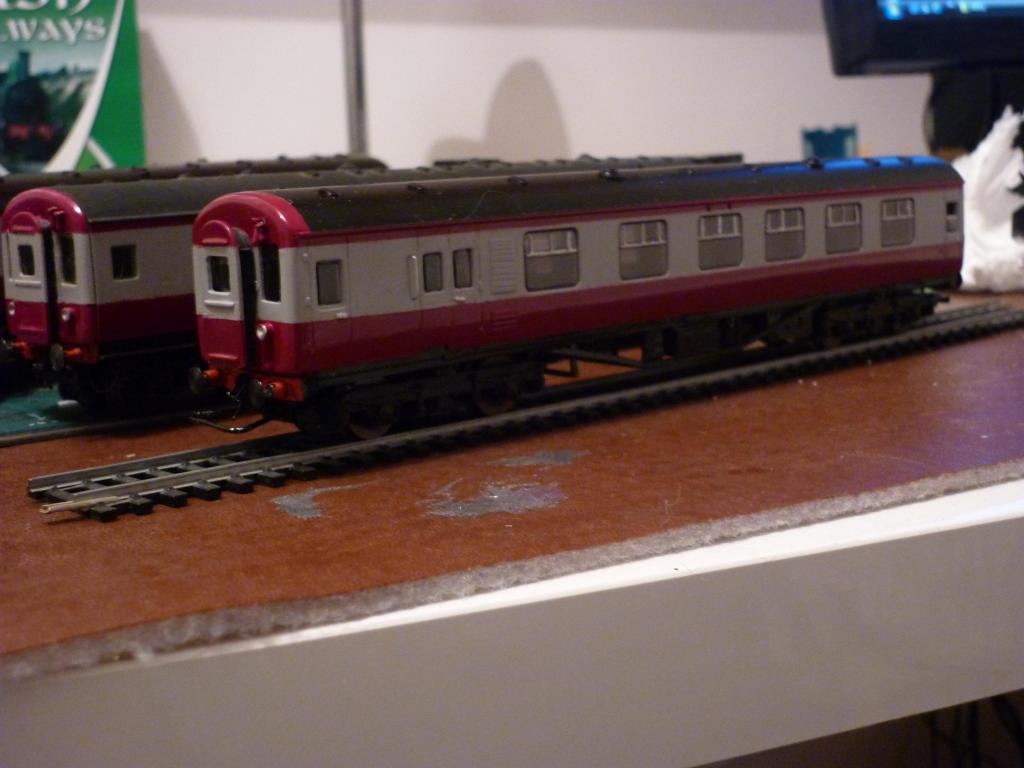
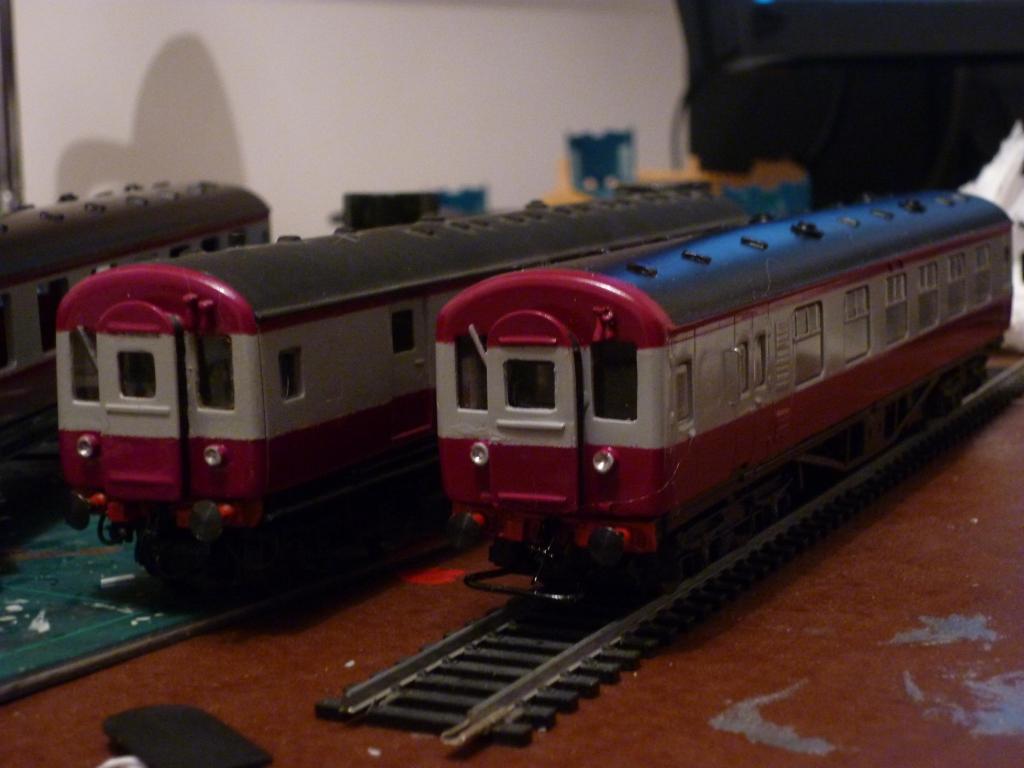
OK here are some more pics of the completed set, now just needing a test run.
The new 4-car set is nearest, with my 1990s NIR 3-car set behind.
The new set is designed to be run as either a full 4-car set with 36 at one end and 532 at the other, both being fitted, under the cosmetic etched brass screw link coupling, with wire loops to enable a brown van to be hauled; or with just the 3 power cars hauling freight in true Multi-Purpose Diesel fashion, leaving the trailer behind. Though more common in UTA days, even in later life MPDs in maroon and grey were sometimes seen hauling short rakes of vans or conflats.