
33lima
-
Posts
183 -
Joined
-
Last visited
Content Type
Profiles
Forums
Resource Library
Events
Gallery
Blogs
Store
Community Map
Posts posted by 33lima
-
-
Some great pics, in case you haven't seen already:
-
Hi Ivor you should get a picture or video of a 4 car set with 2 driving cars at each end before they go west
Too late Michael - she's all wrapped up, next stop, Galway!
-
Really superb and beautiful piece of story-telling there David. You got me hoping the mechanic will be able to get the old fellow's car started!
-
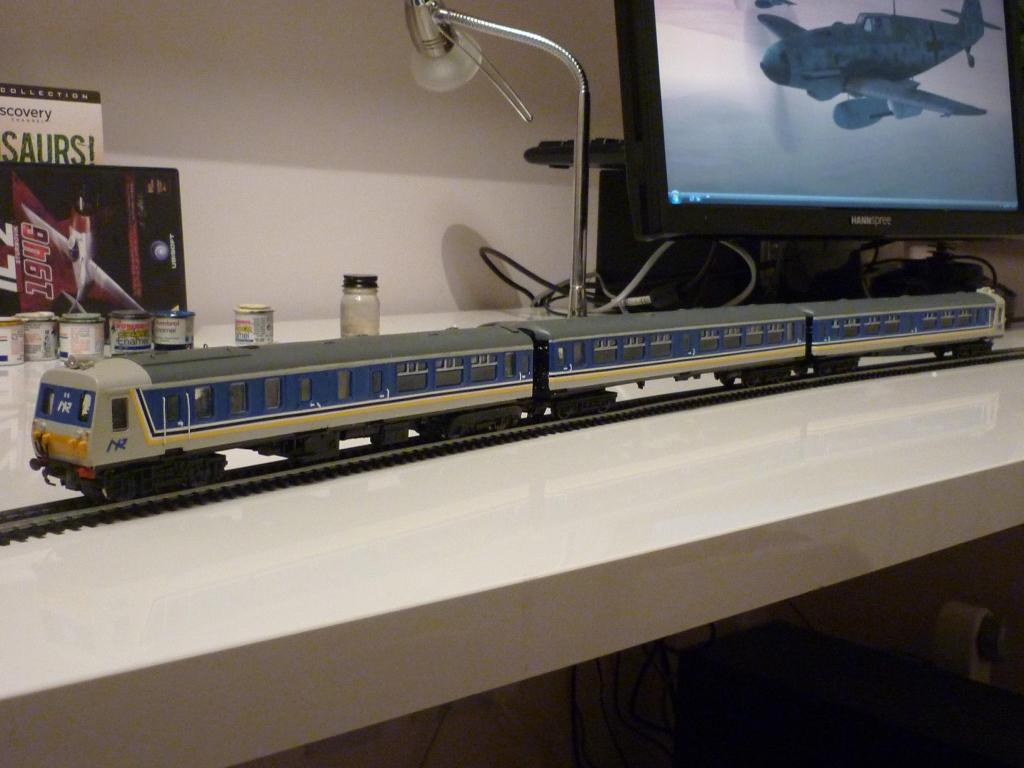
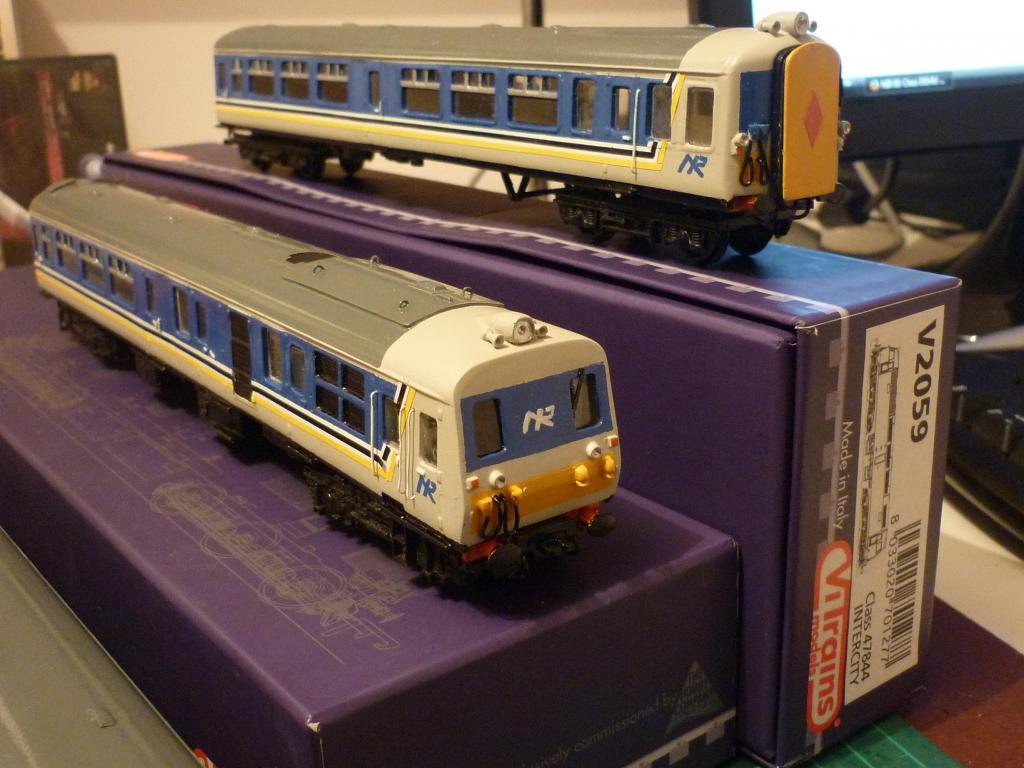
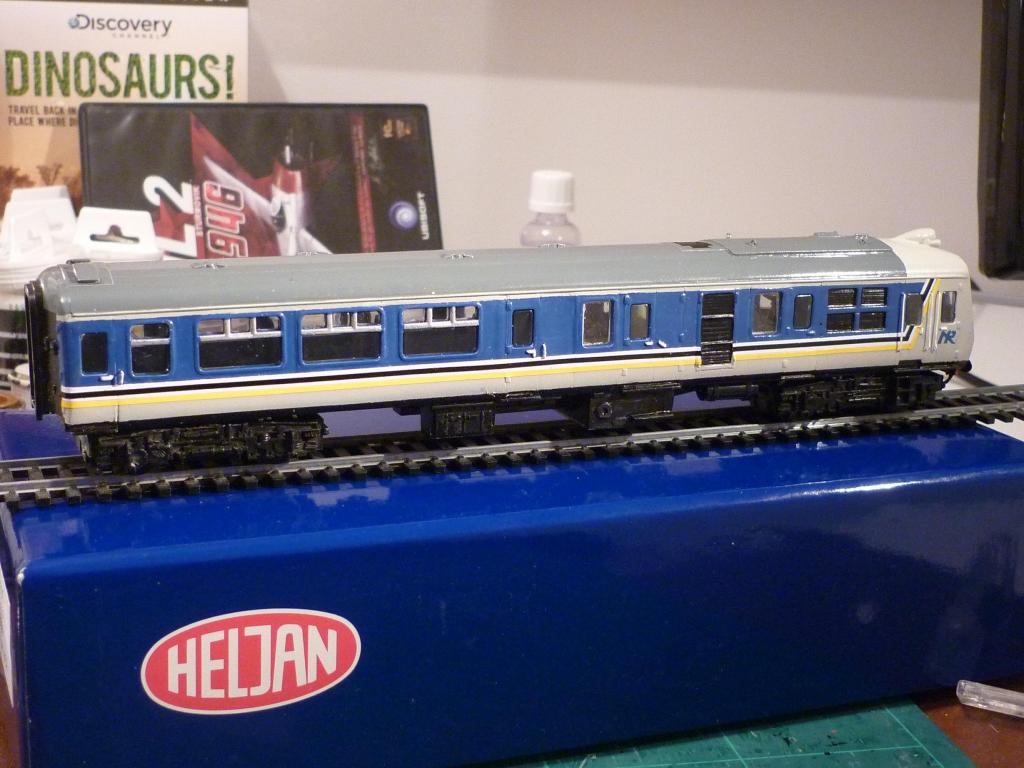
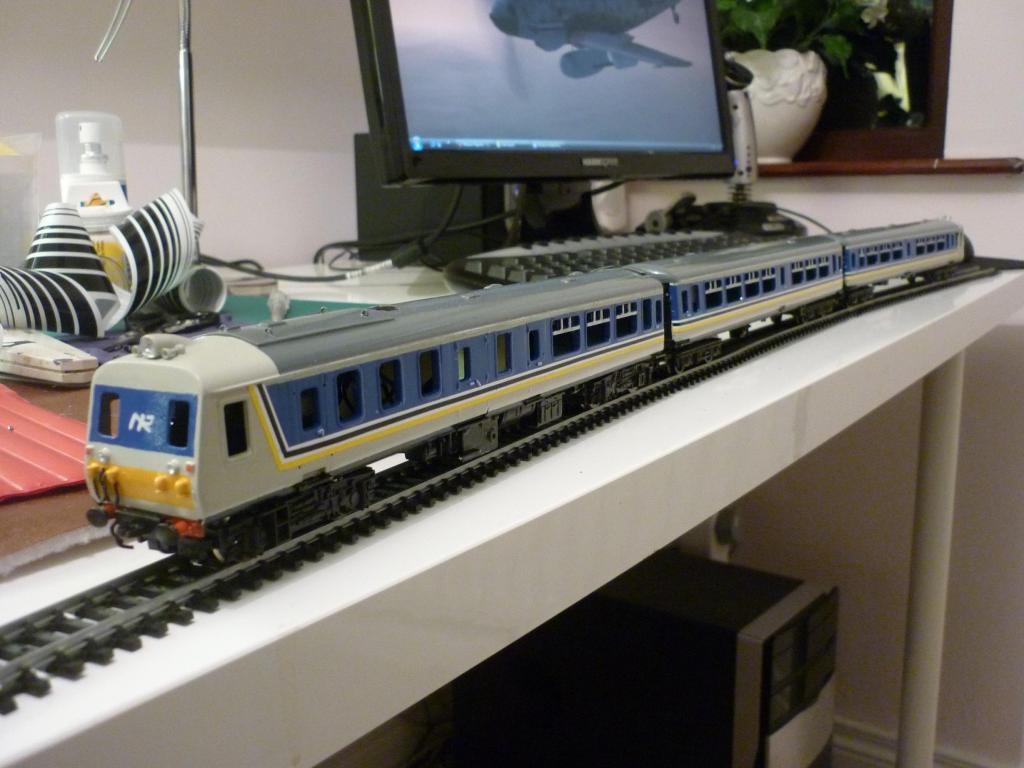
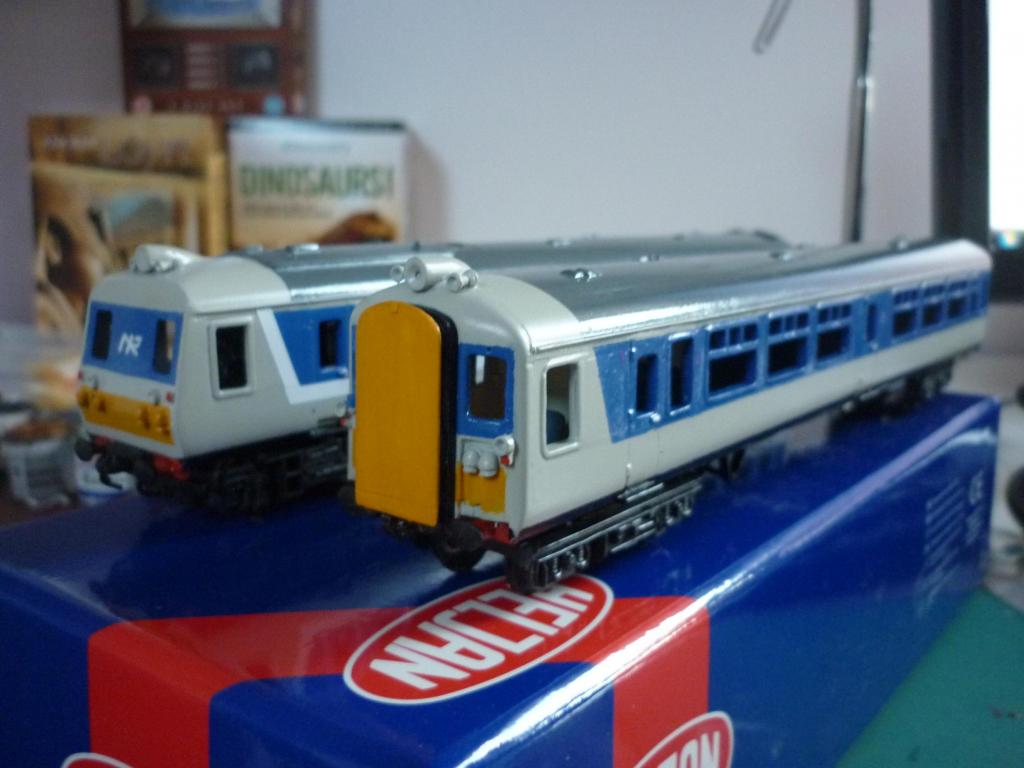
Right - the model is finally complete, the last acts being to put a dab of varnish over the little white italic NIR side logos and to fill a couple of voids under the power car underframe with a bit of extra ballast (fire clay of all things; more maleable than plasticine and quite heavy).
Two details I didn't get quite right are that I think the roof cowls at the rear of the power car should have a slightly bigger gap between them; and the toilet windows on the centre-door trailers I chose to model should have a slightly higher lower frame, above the level of the other windows. Next time...!
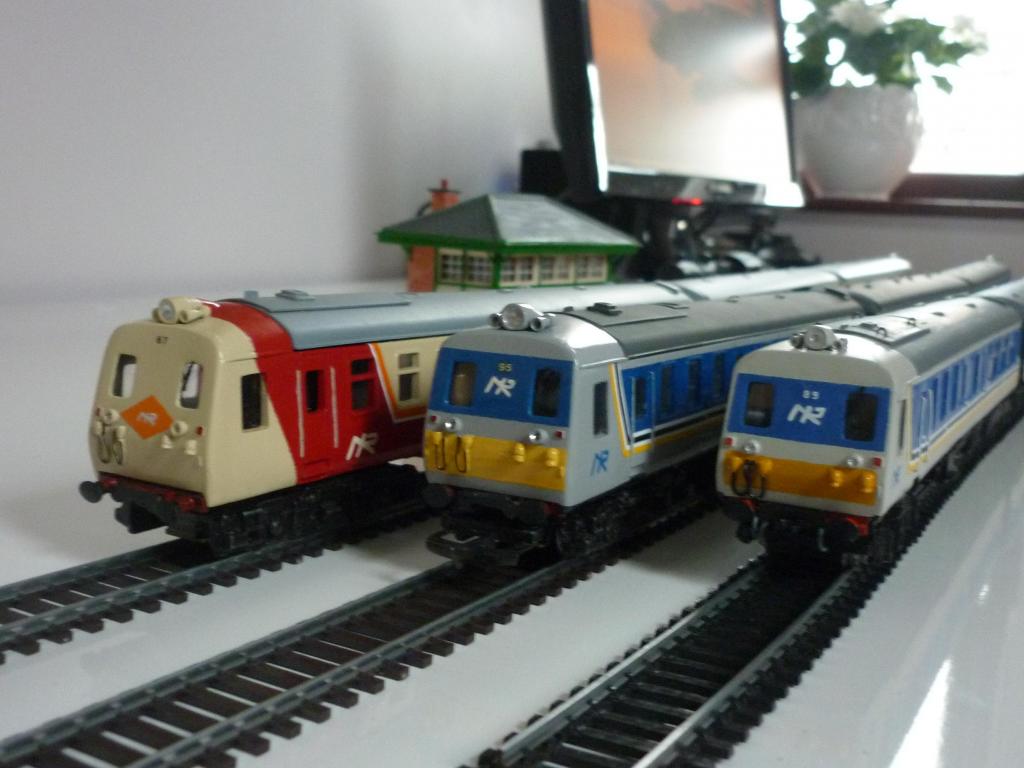
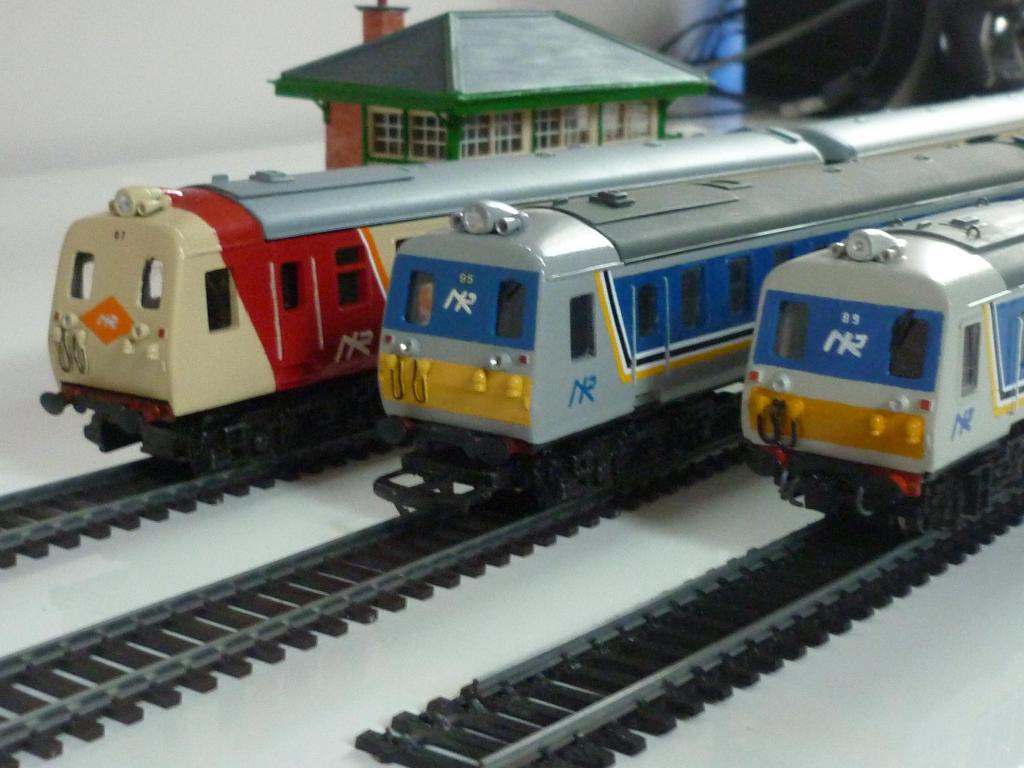
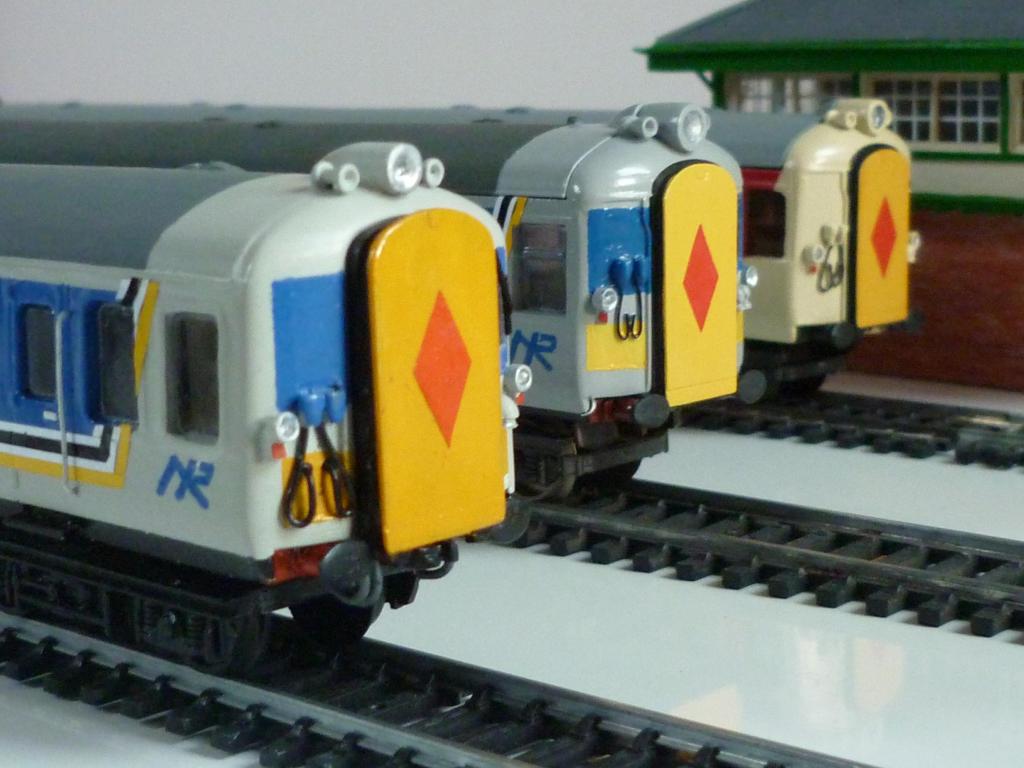
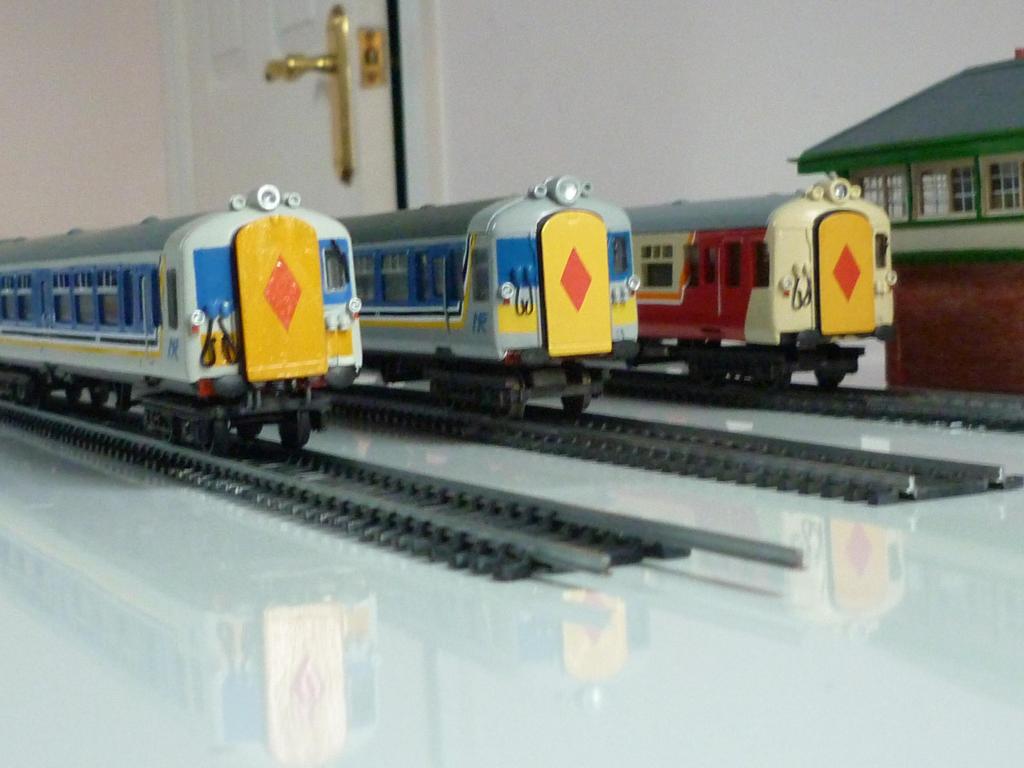
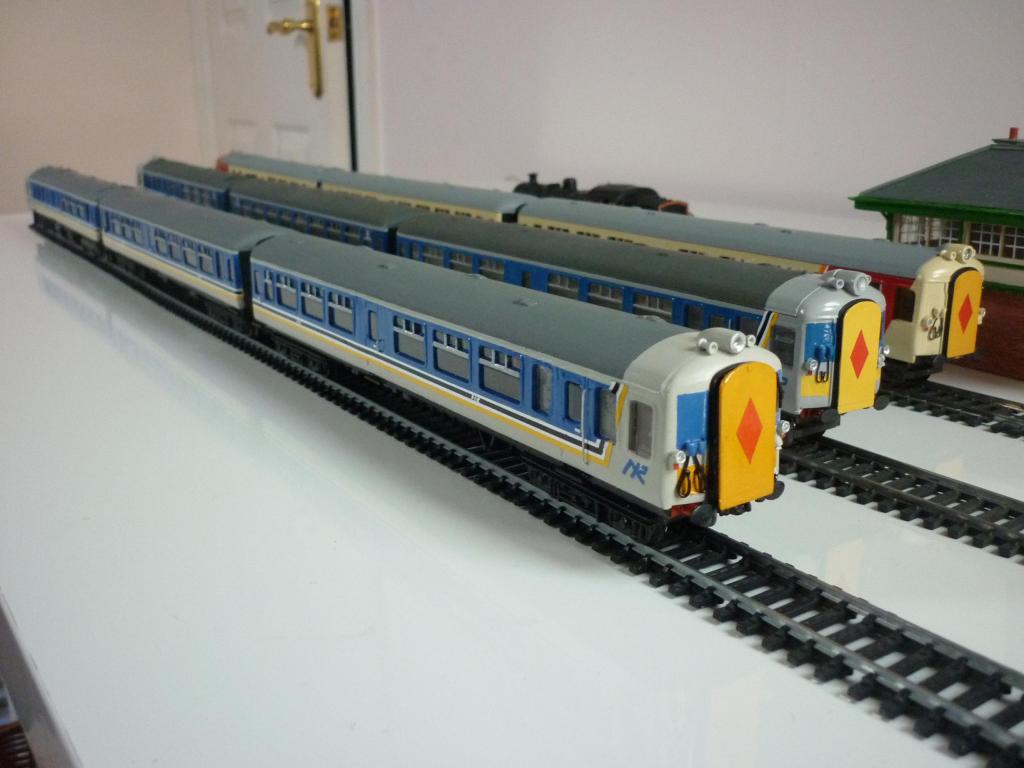
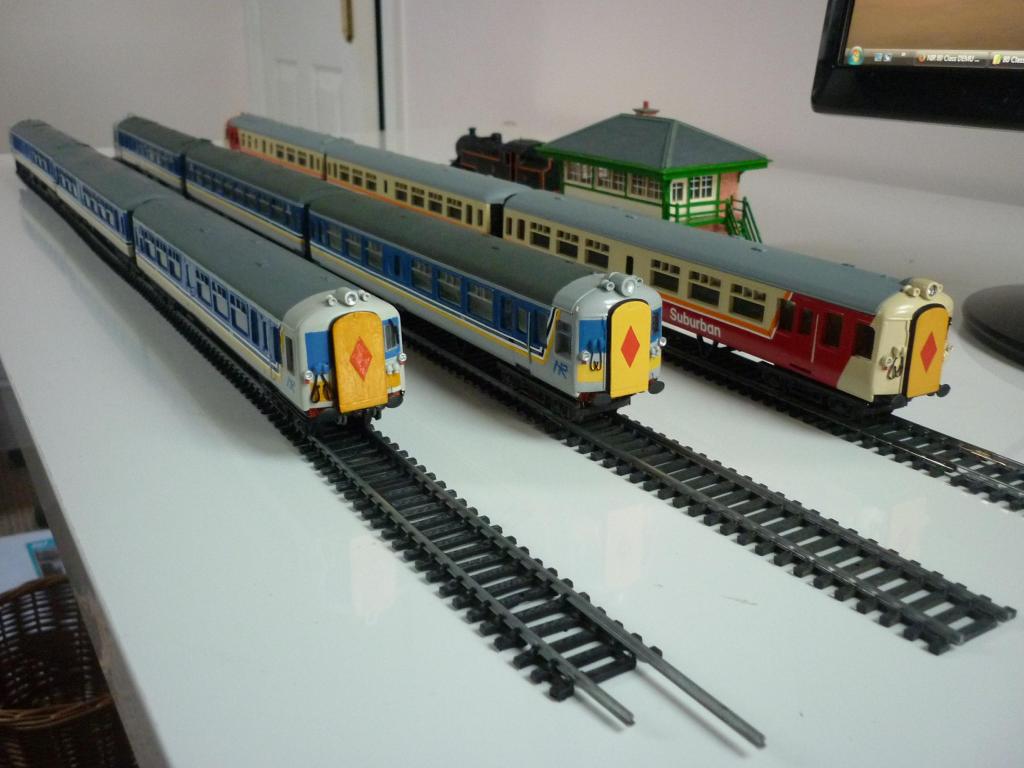
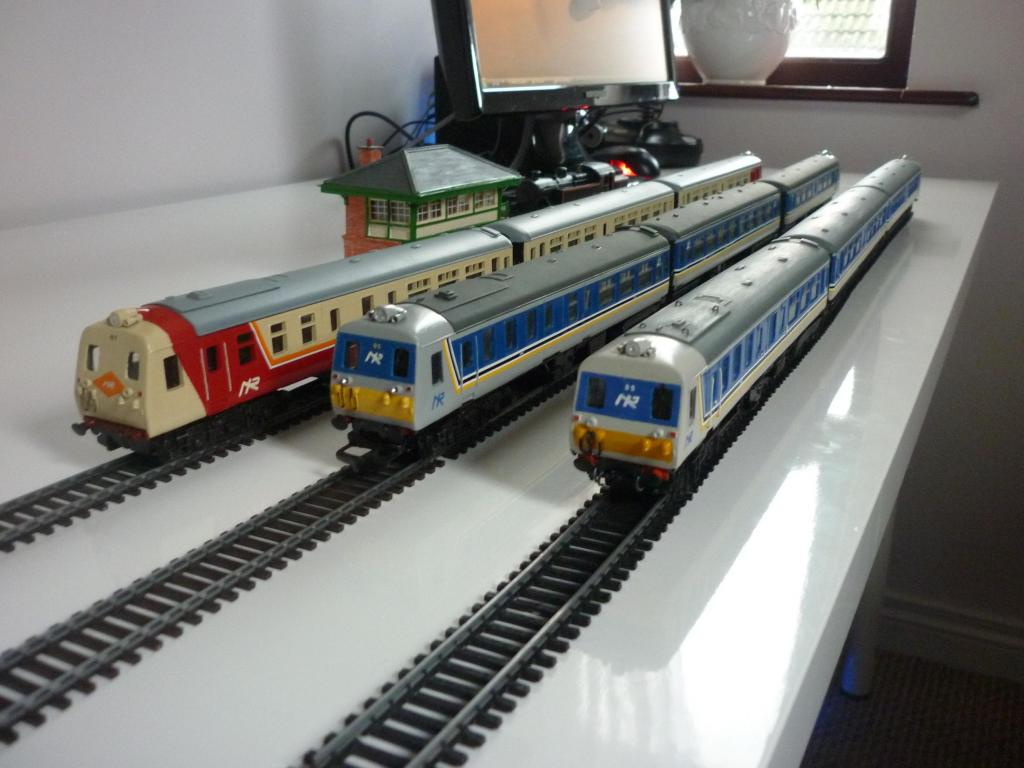
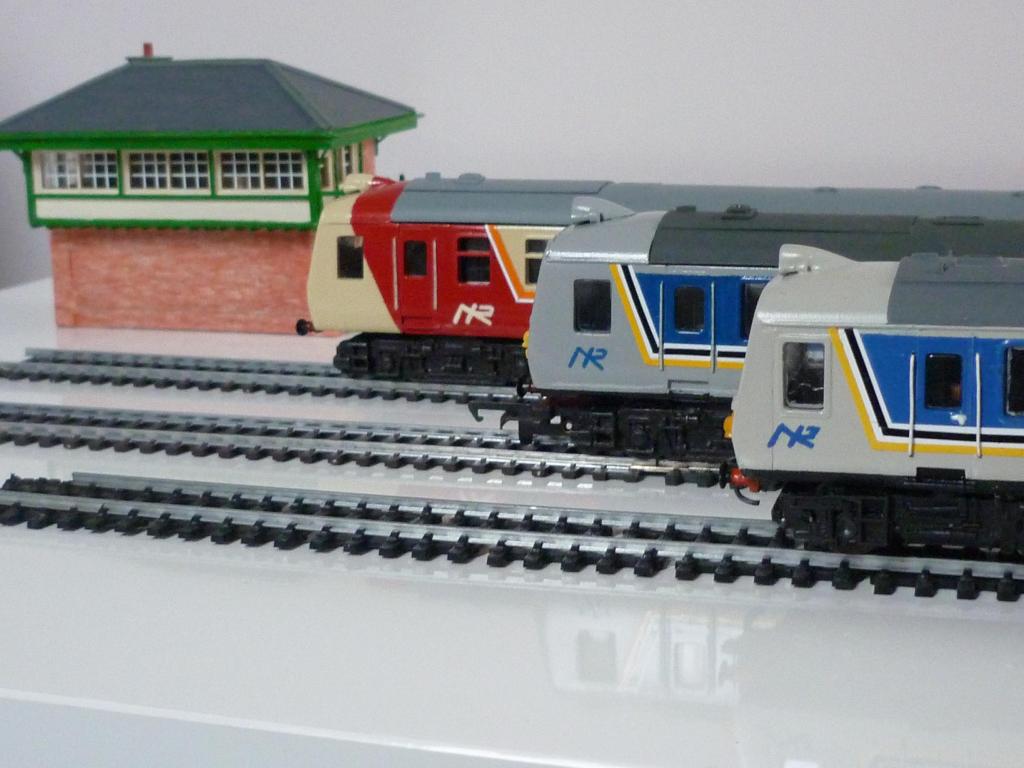
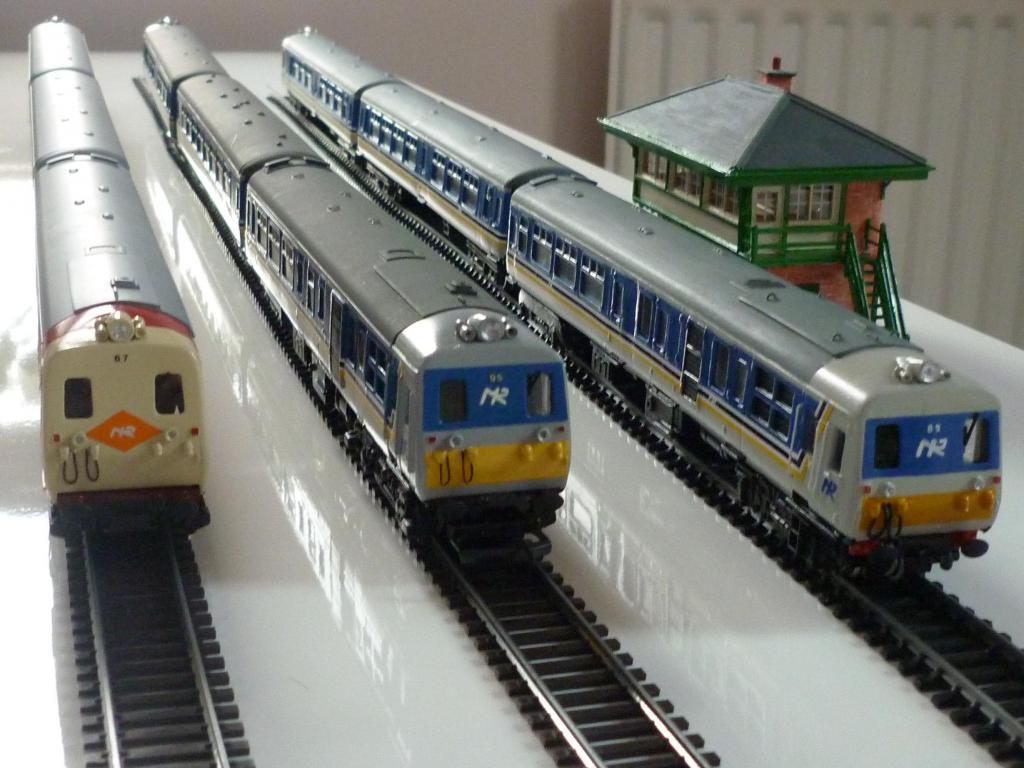
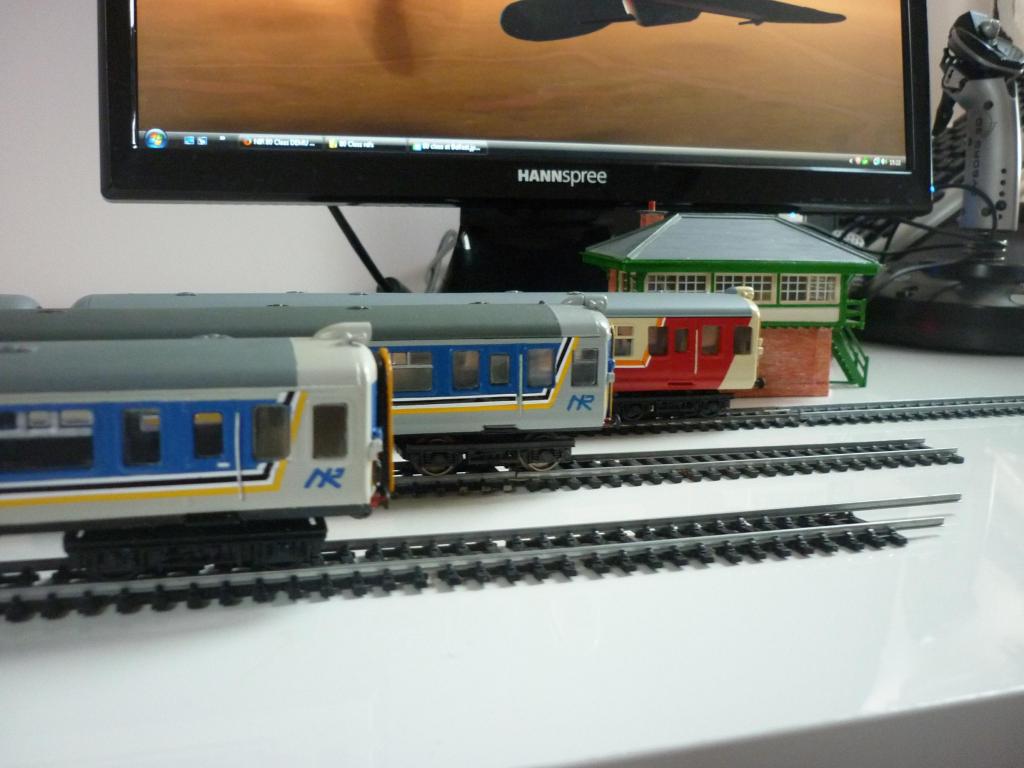
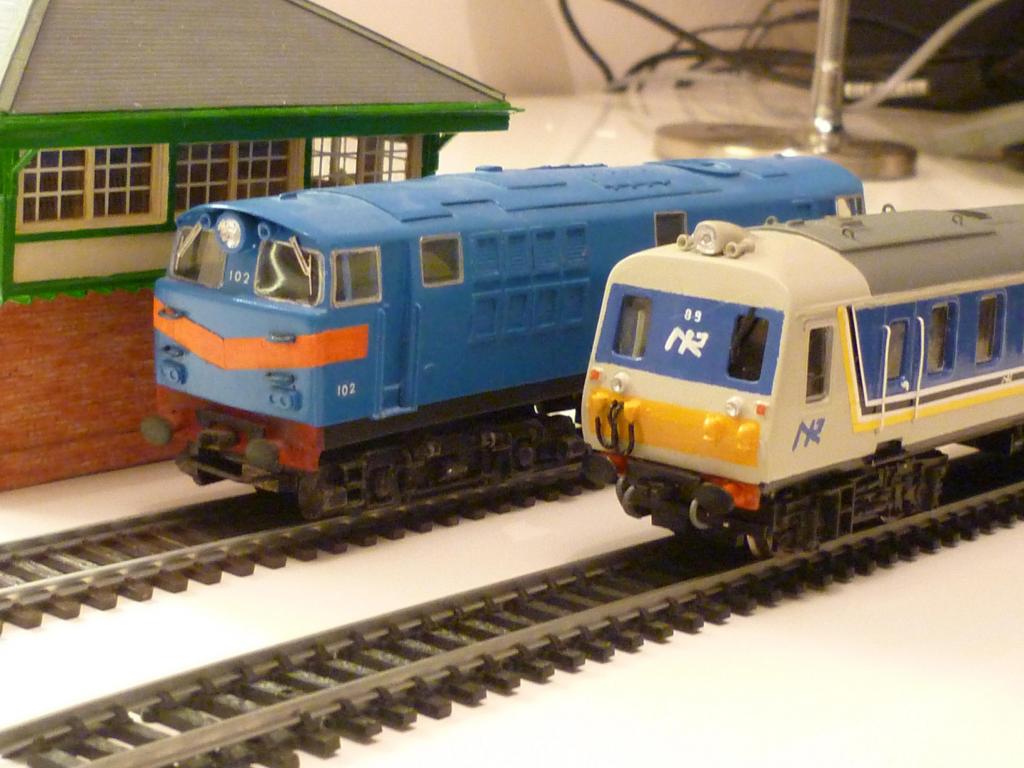
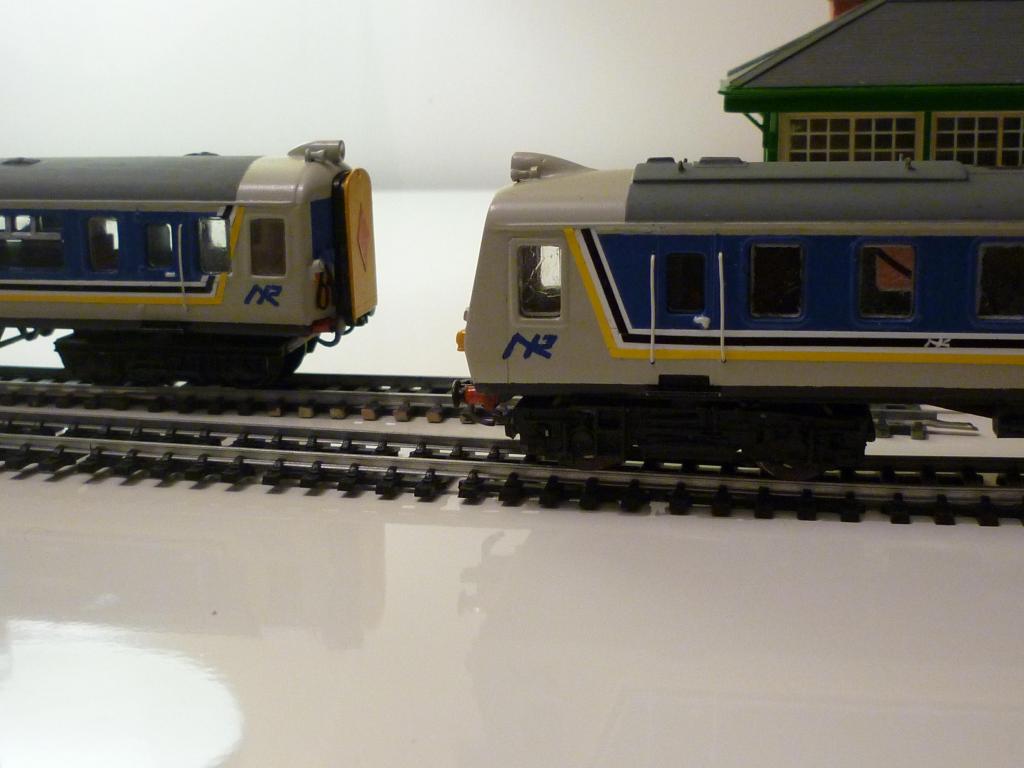
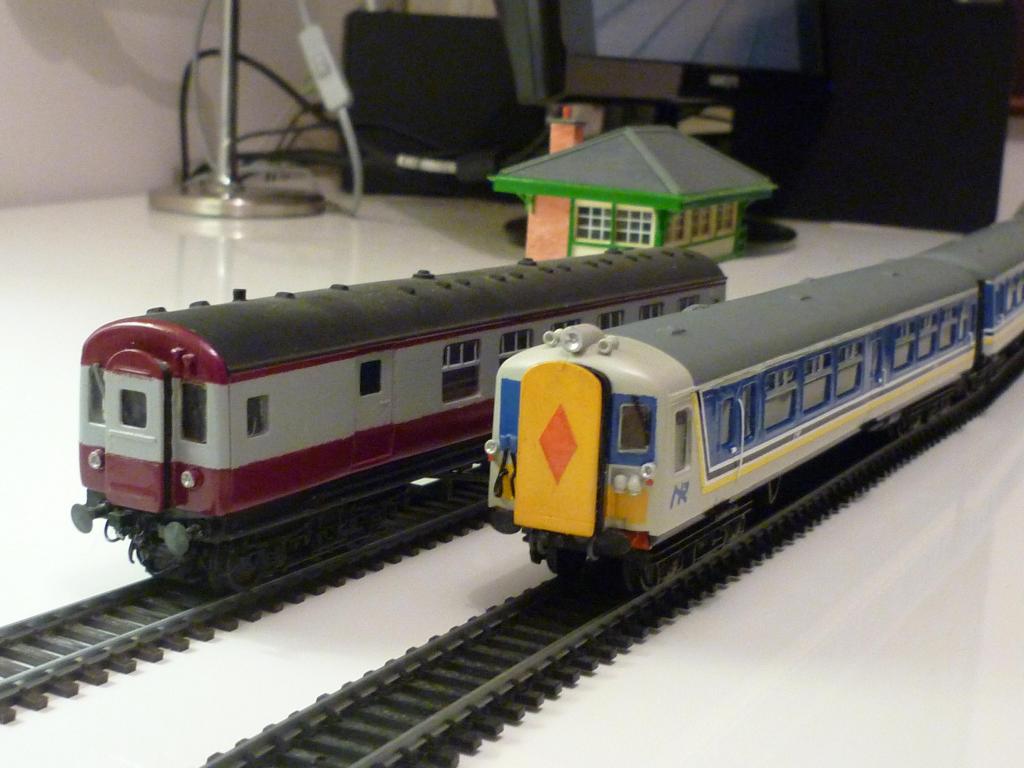
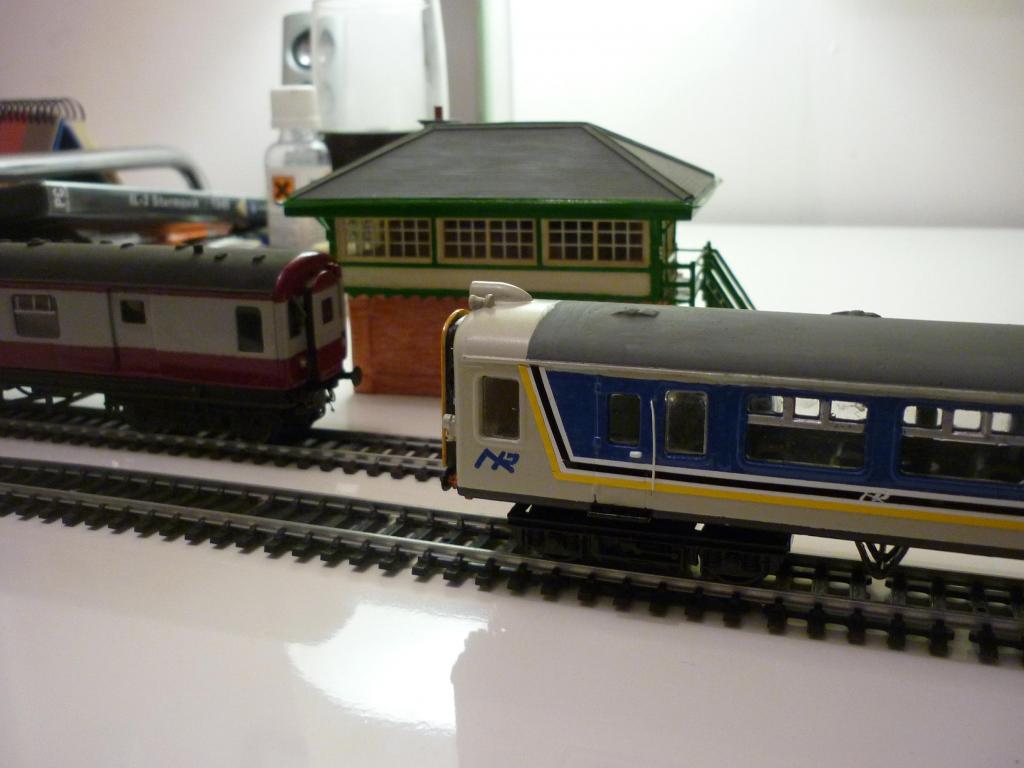
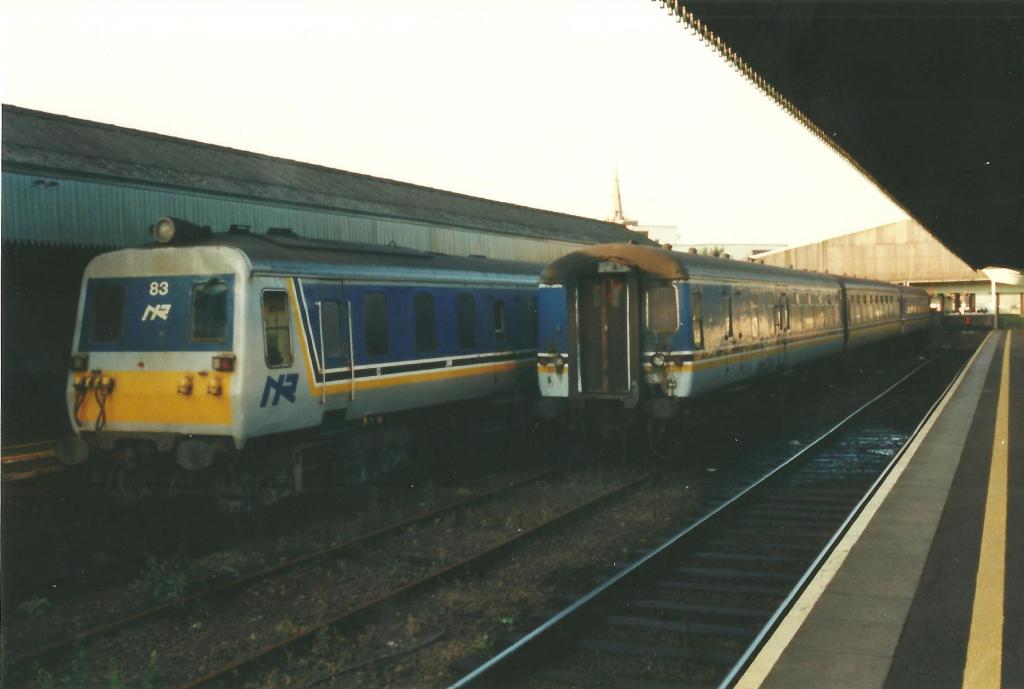
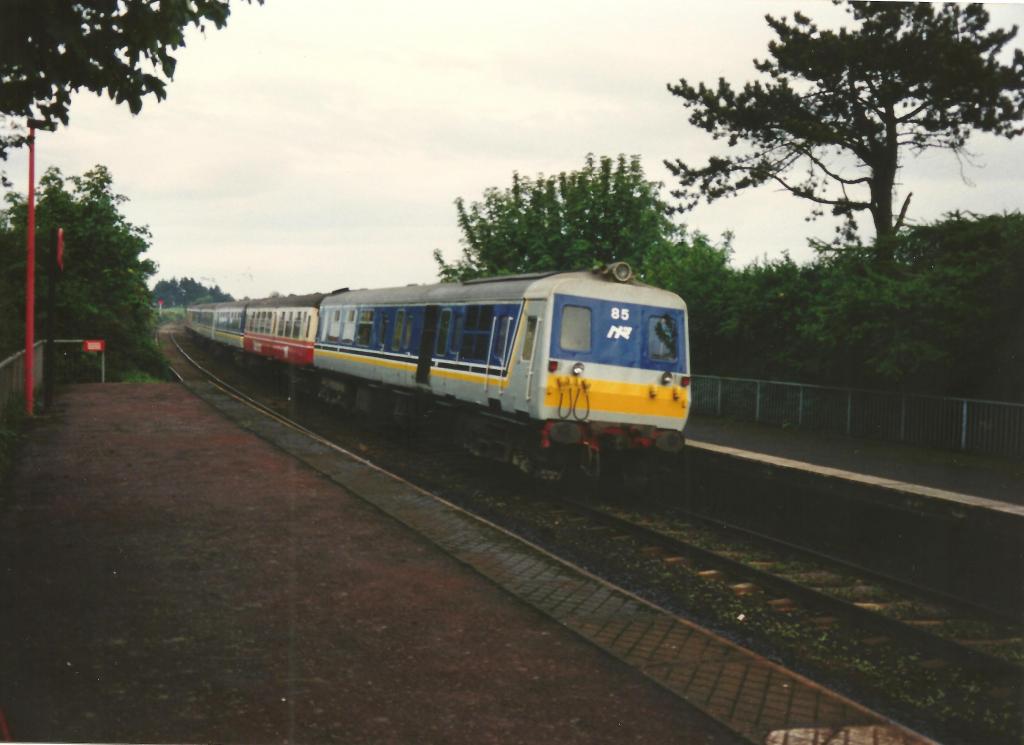
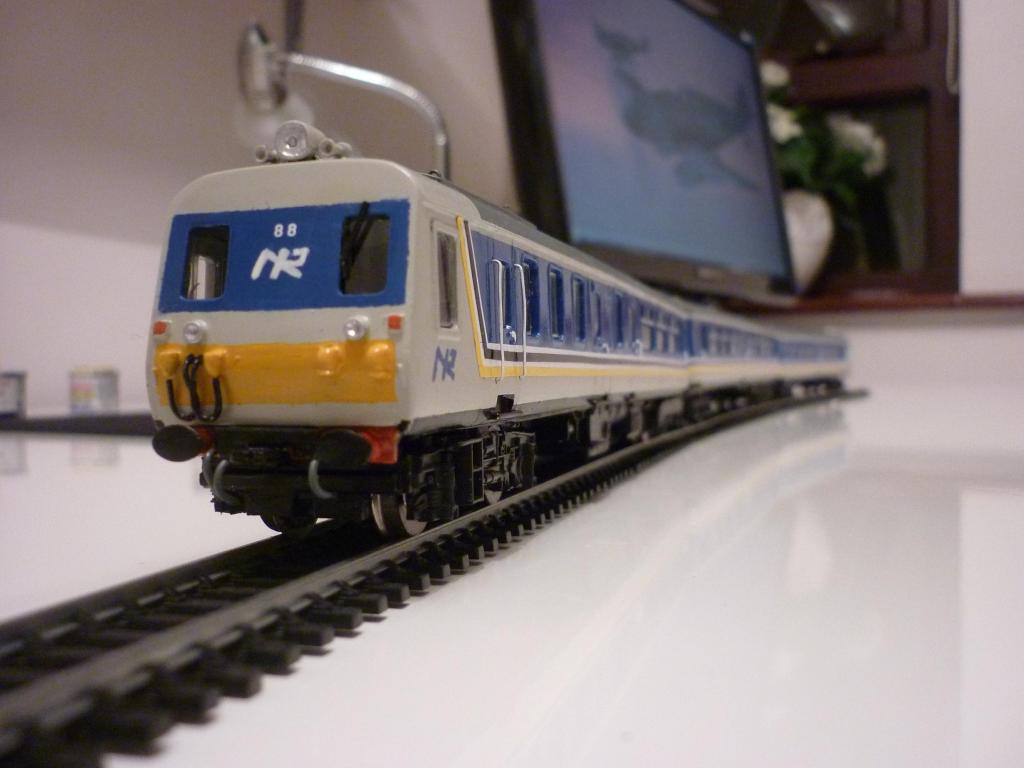
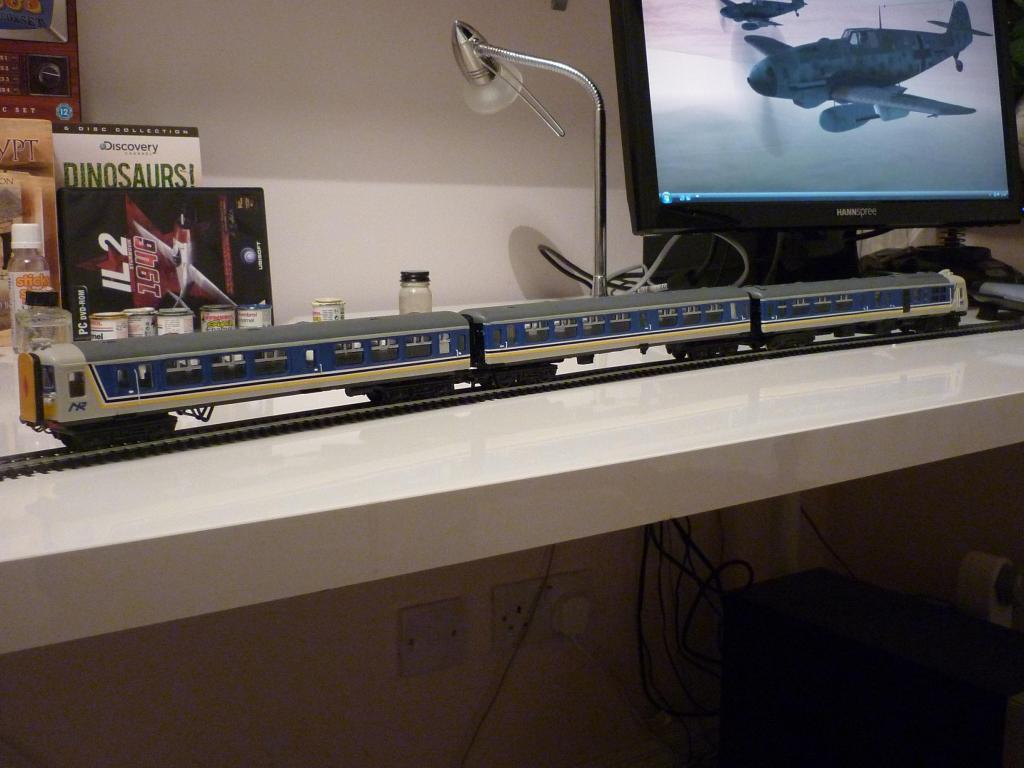
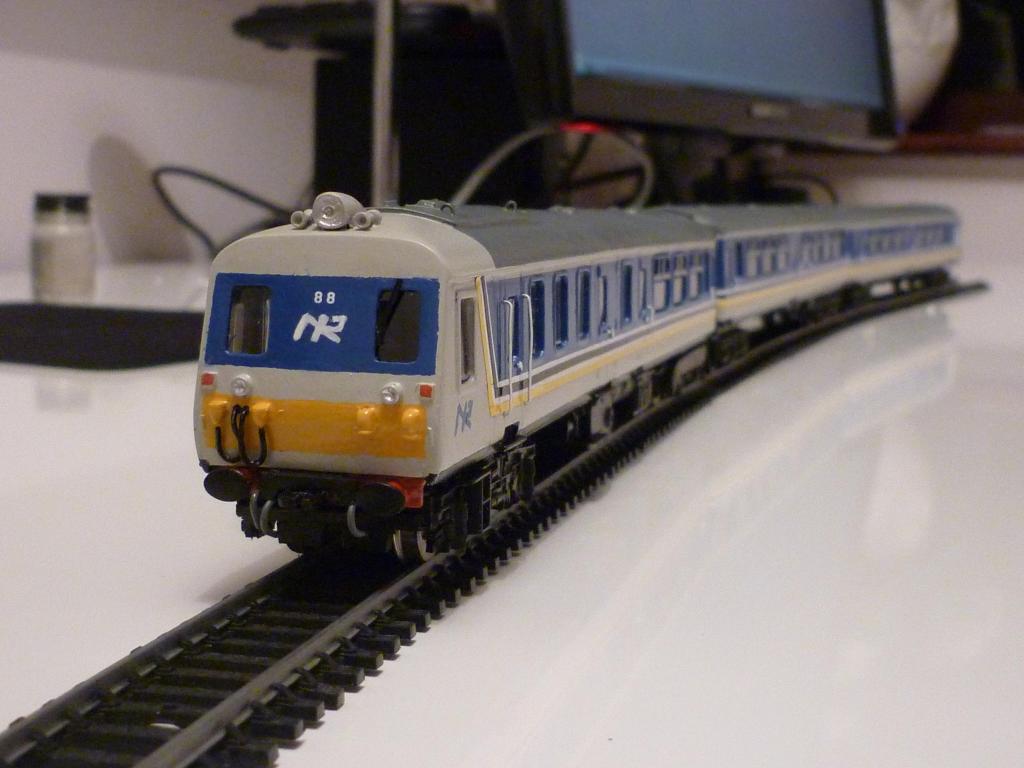
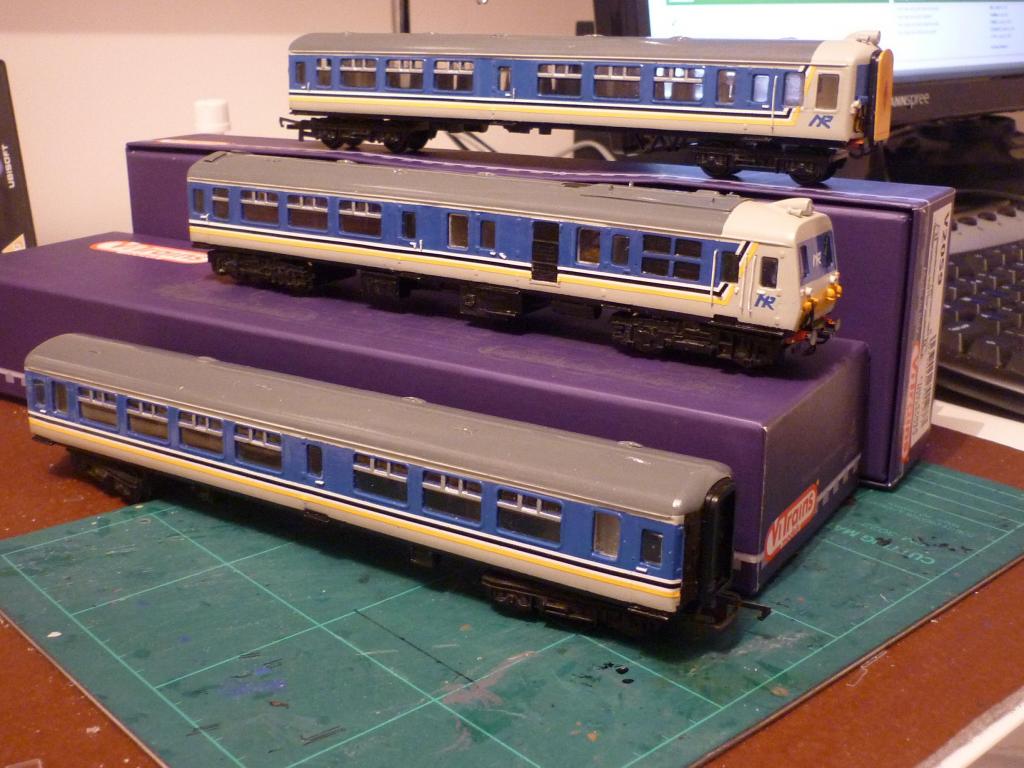
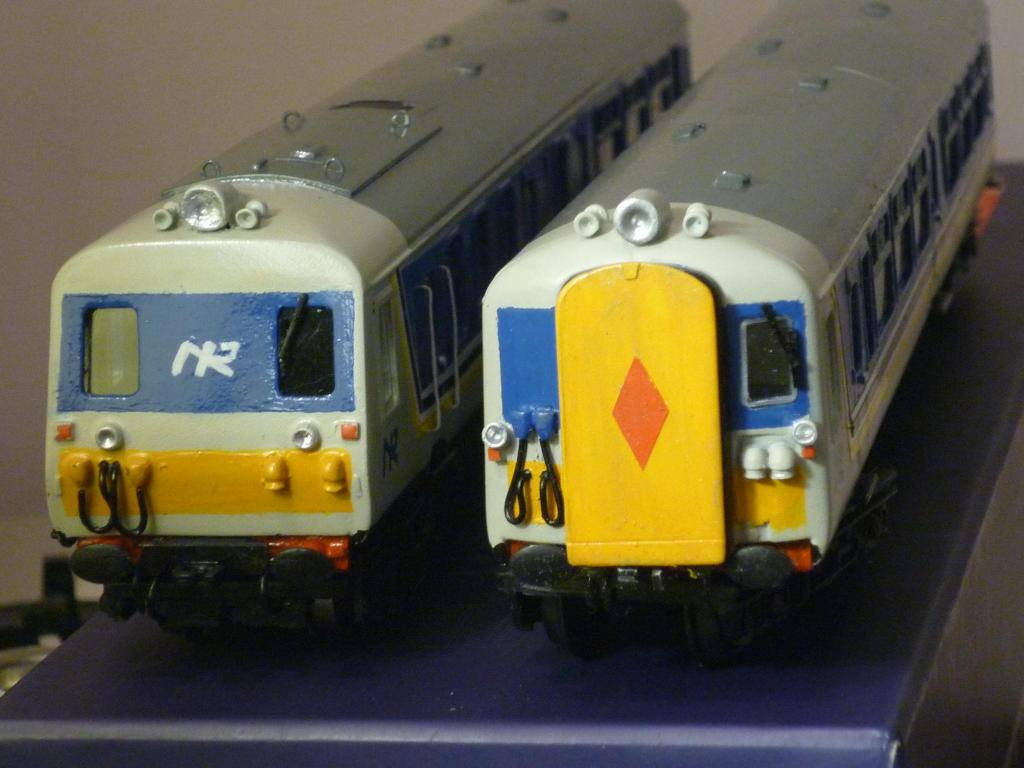
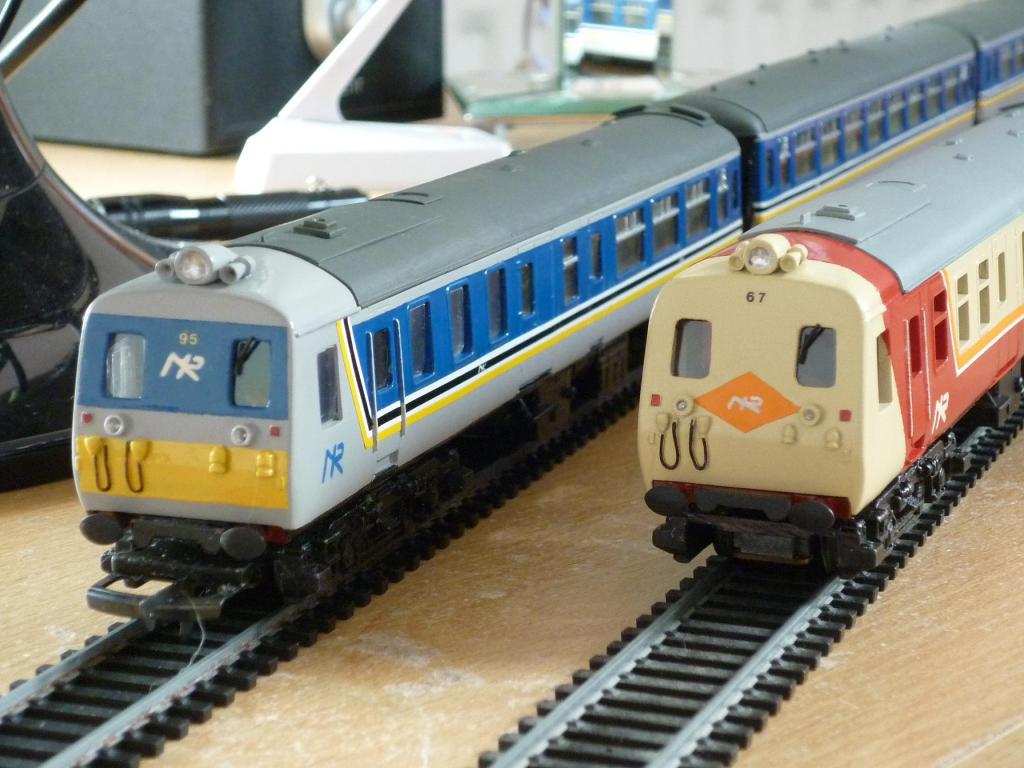
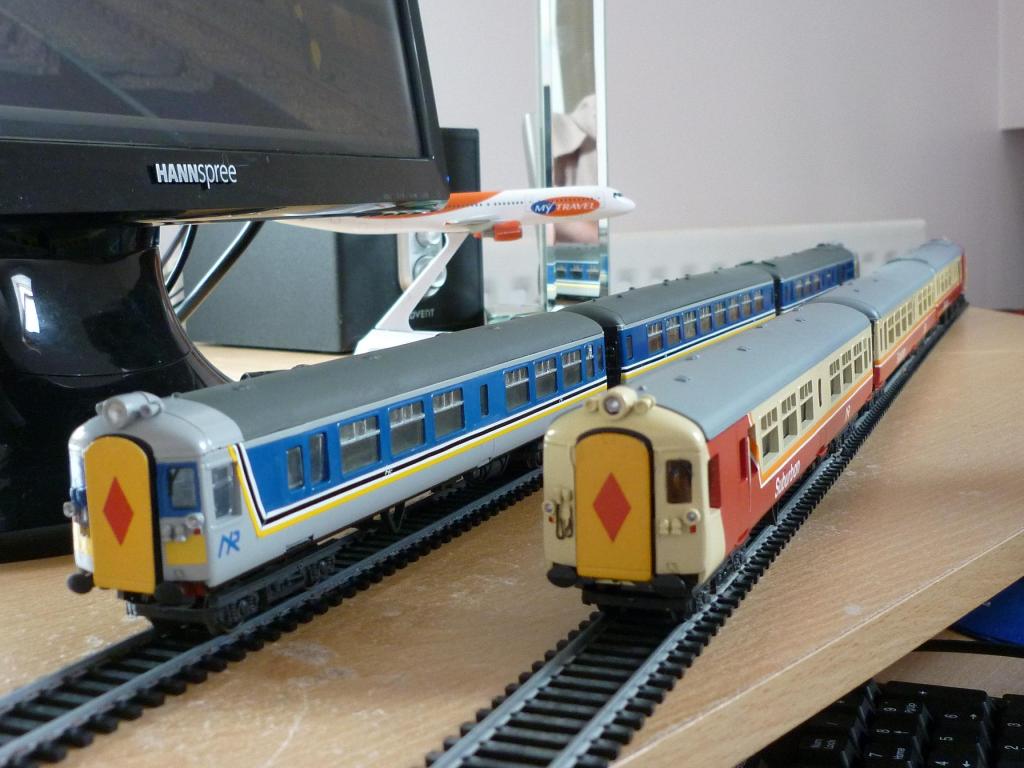
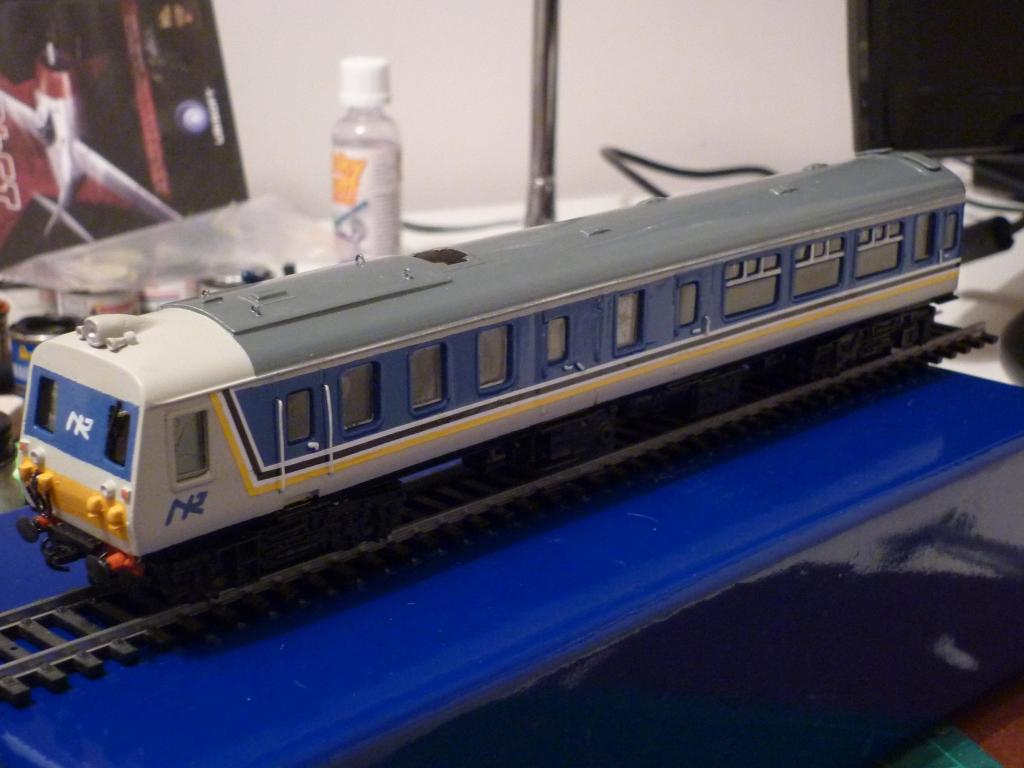
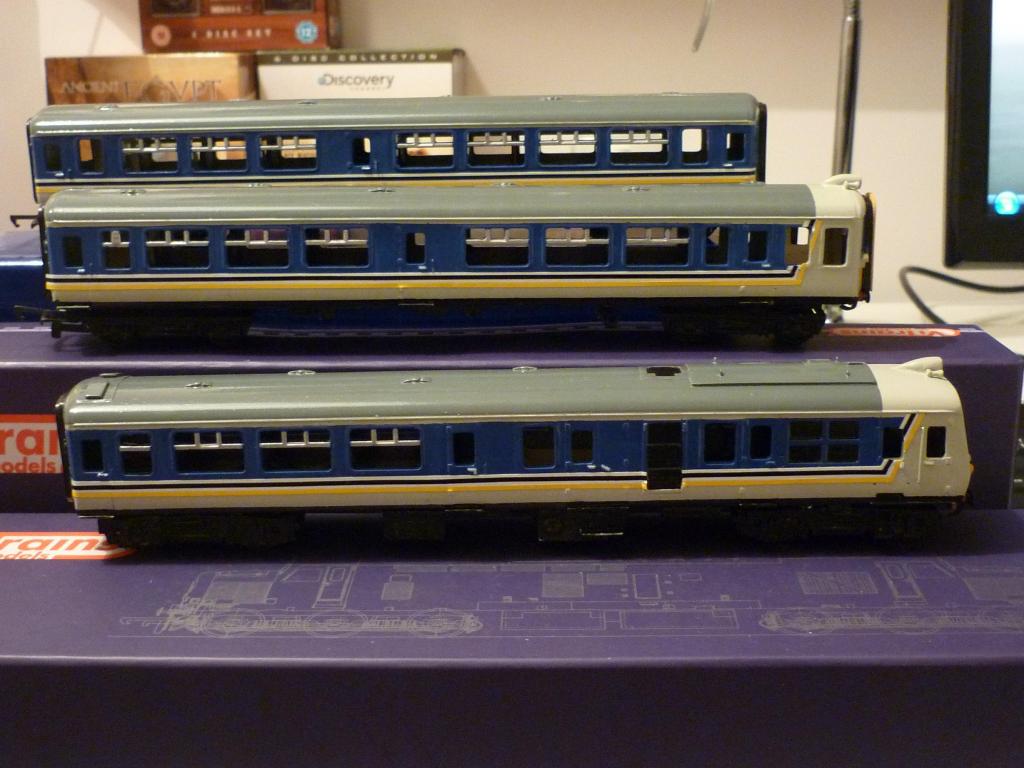
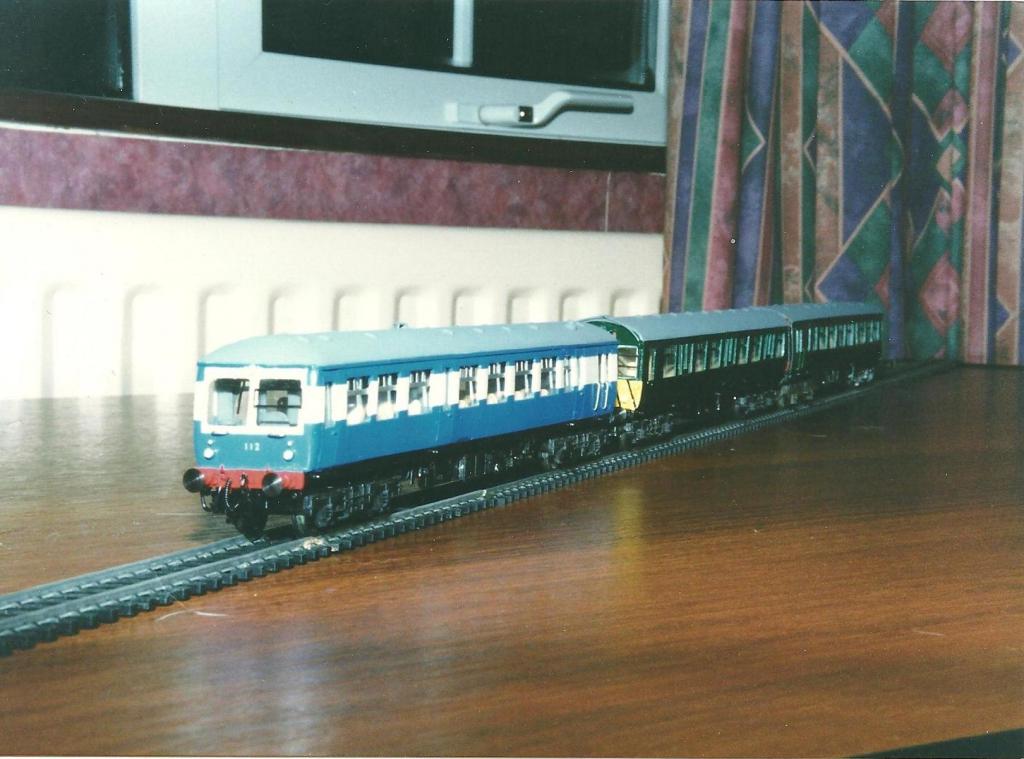
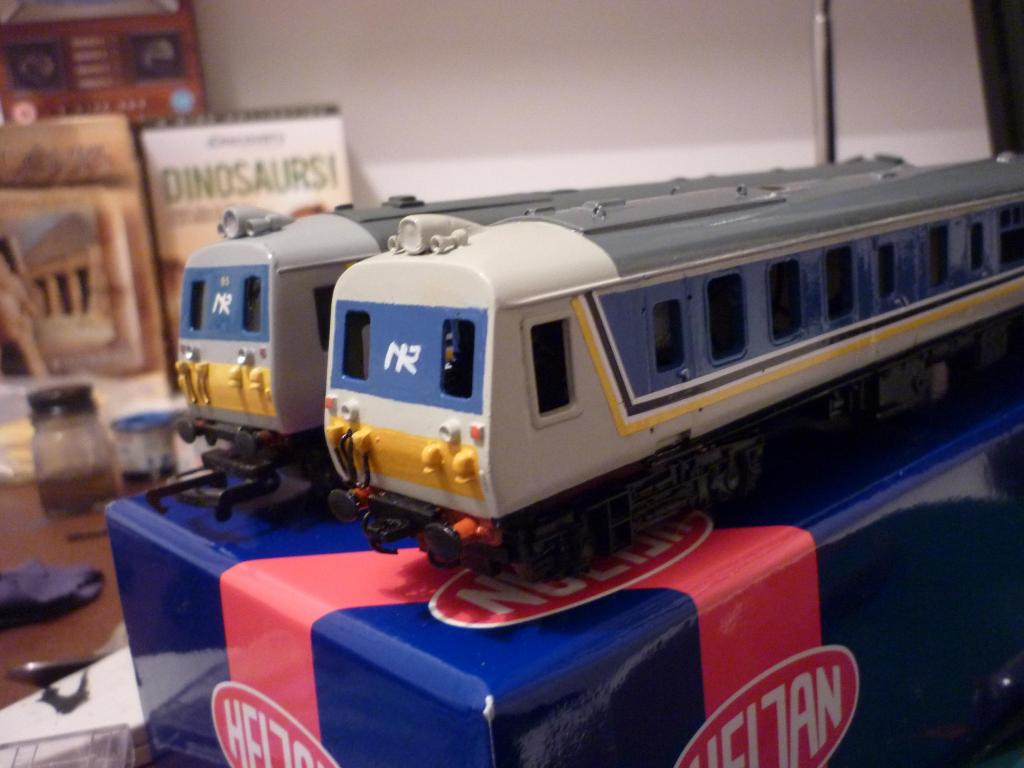
To finish off this thread at last, I thought I'd indulge myself by uploading a set of pics I took earlier today, that I won't be able to take again, after the set is boxed up for despatch - the new set, alongside the two I made in the early 1990s. I still think that the grey-blue and cream-red liveries these sets wore back in those days are the most attractive they ever carried, before or since. I'm rather glad that I made, and have now repeated, this effort at preserving in model form the appearance of these units in their heyday. One day, I hope to travel again on a real set that has escaped the cutter's torch and made it back into passenger-carrying service in preservation. I'll end with a warm 'thank you!' to everybody who's followed this thread and especially those who've made such kind comments. And to TrainModel, whose infectious enthusiasm was the real inspiration behind this project - thanks, Michael!

-
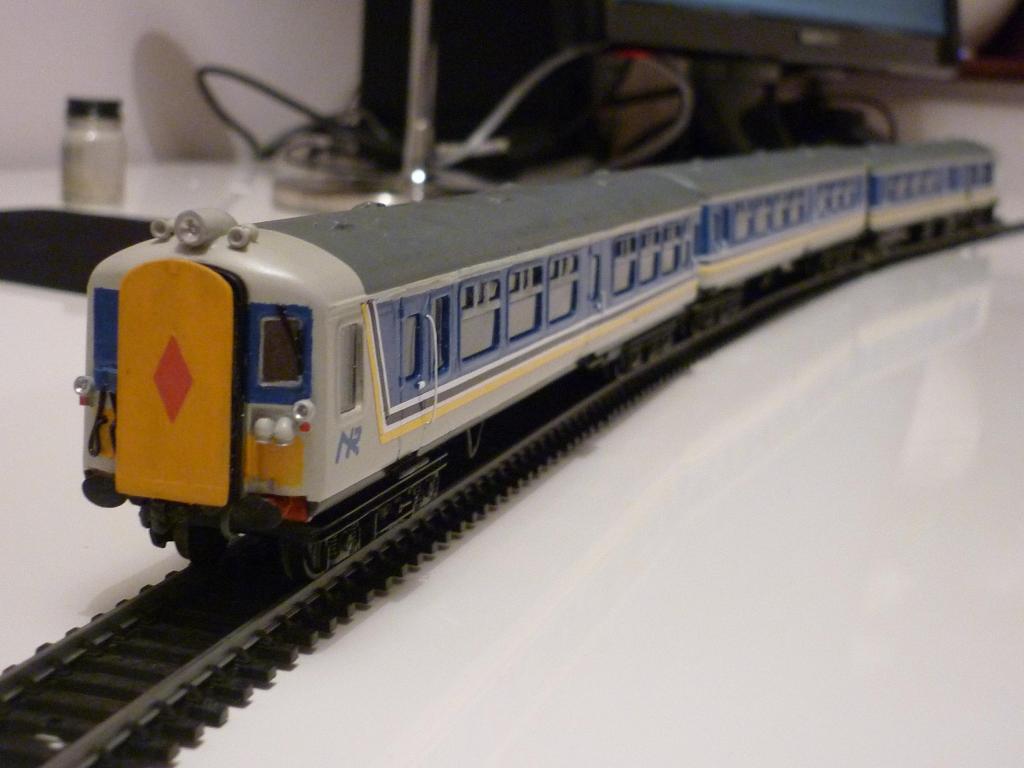
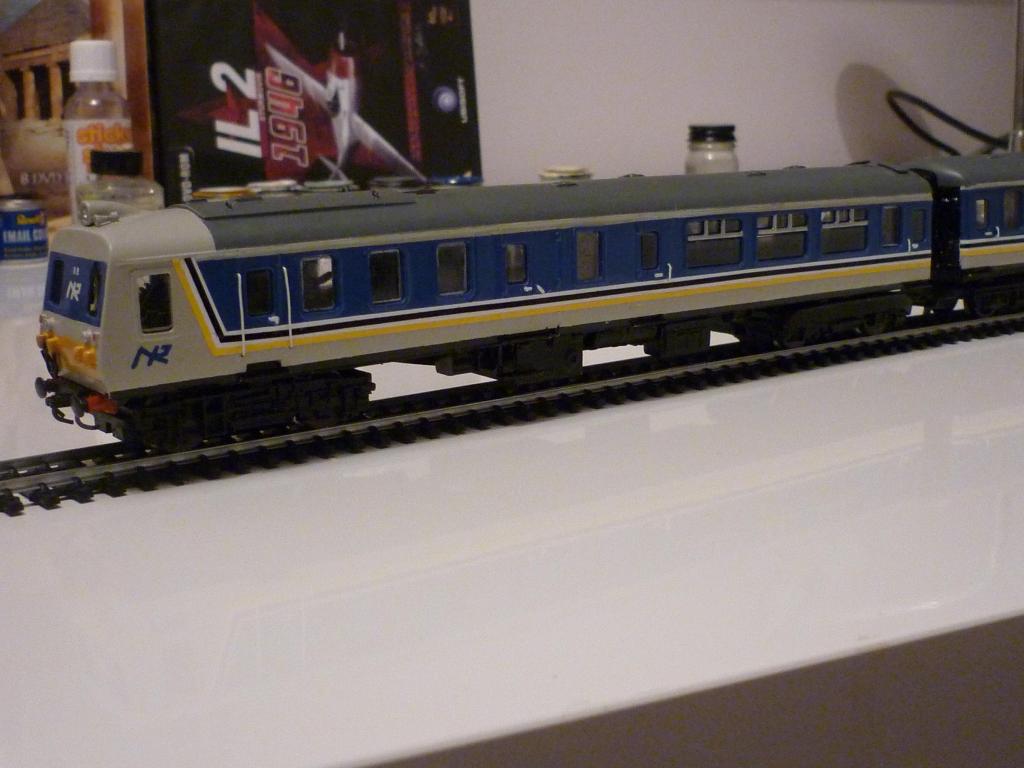
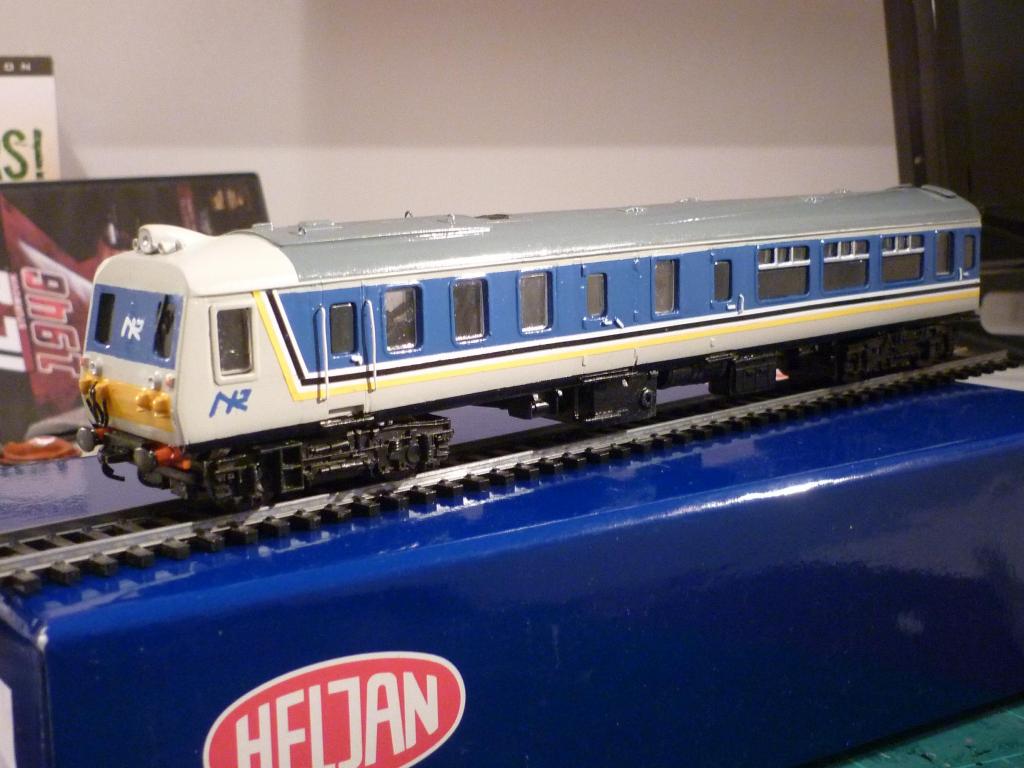
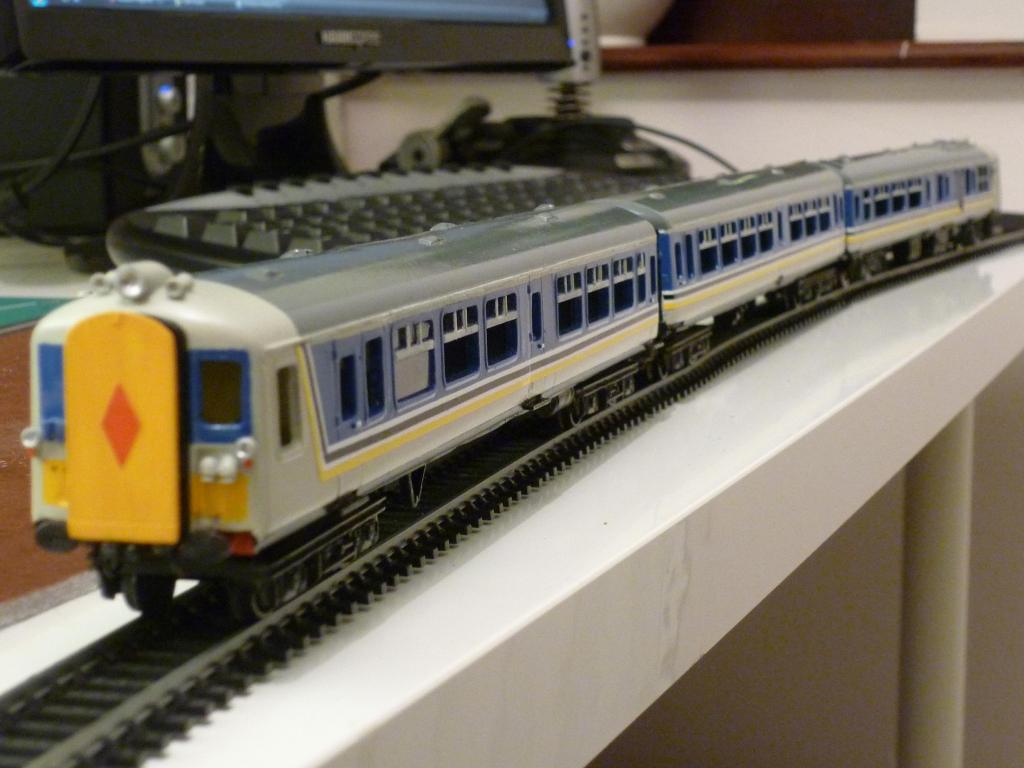
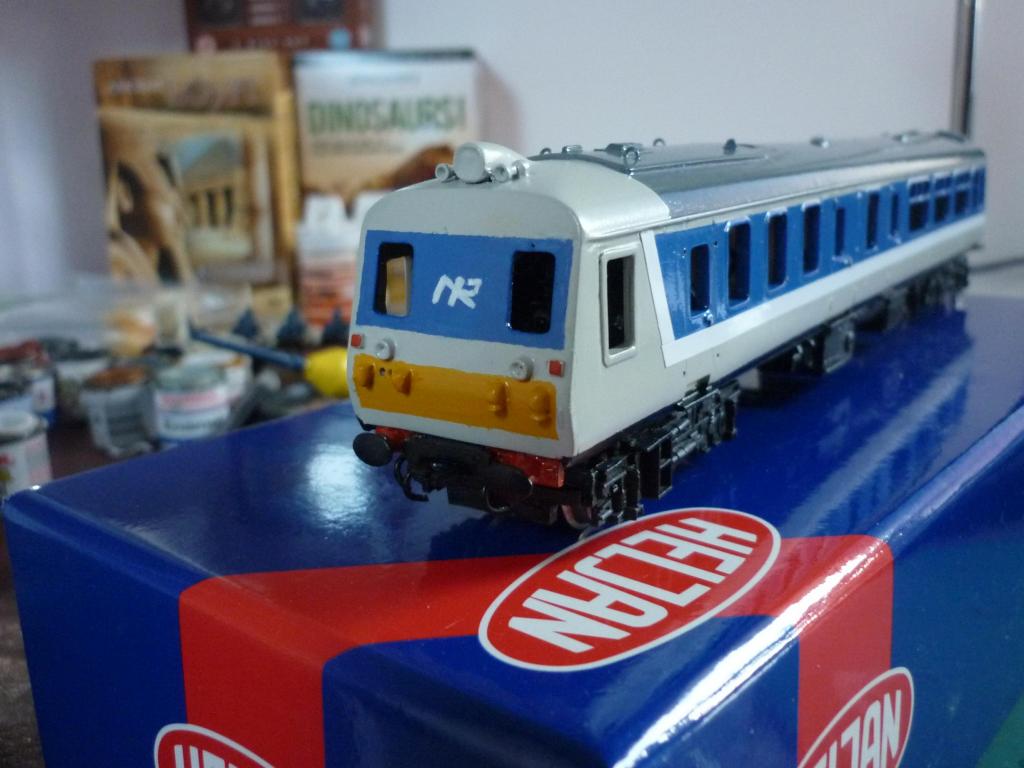
Just about done now. I added some thin plasticard under the power car's rear bogie mount to lift that end a little, more level with the next car. I replaced the red diamond on the driving trailer corridor connection cover with a larger one, as the original was a bit small. The little white italic NIR logos were added to the black lining, two each side. They are not very neat, having been applied with a home-made 'mini-brush' made by slicing about 2 mm down into the end of a matchstick, prising the halves apart slightly, then inserting between these 'jaws' a single bristle from an unused shoebrush and then super-glueing them shut to grip the bristle. Quite clever, I thought, but alas not that successful; or maybe my hands are less steady than 20 years ago. Anyway I didn't attempt to add the car numbers! But the power car's cab front number has been changed from 88 to 89. Don't worry Michael, what looks like a scratch on the front blue panel is just a hair or fibre that I didn't notice when taking the pic!
-
Test run completed; if she'll run on track I've laid, she'll run on anything, hopefully
-
Great Model, the only small point is number 88 was wrecked in the early 1980's so sadly never lasted until this paint scheme was introduced. Numbers 94 to 99 would be fine.
But it is a great model and possibly the best 80 I have seen.
Whoops, mis-read my 'Irish Railways Traction & Travel' which as you say shows 88 as withdrawn in 1983 and scrapped in 1988. Power car now re-numbered to ex-suburban car 89, saves having to worry about the nameplates 94-99 carried! Earlier numbers than 94 are ok, as the set is in the post-sectorisation blue & grey, with no 'Intercity' lettering and some other subtle variations.
...and yes Nelson, well spotted, my PC's current wallpaper is a Bf109, my favourite the 'Gustav' (G6 version), from IL-2+Dark Blue World. But I digress!
-
OK, we're about done now, just some odds and ends which I'll finish over the weekend, including a trial run as a set.
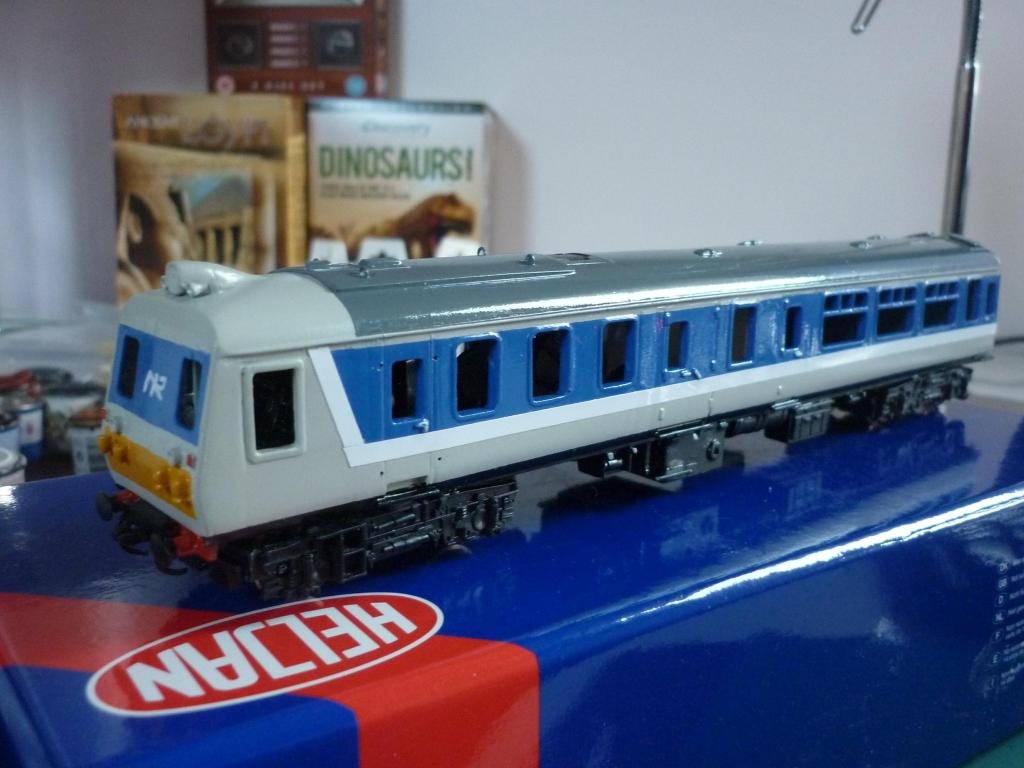
A coupling loop was fitted to the rear of the ex-HST rear bogie on the power car; this was made from a loop of piano wire with a strip folded from thin sheet brass cyano-ed to the outer loop to prevent it riding over the next coupling when running driving trailer first. I also made cosmetic overlays for this bogie from sheet and strip plasticard.
Roofs of all cars have been matt varnished (likely to get another coat once it's fully dried) and the insides of the two toilet windows have been painted white. Pipes on the buffer beams under the cabs were painted dark grey to lift them a bit against the black.
All being well, she should be be on its way to Galway on Monday, Michael!
-
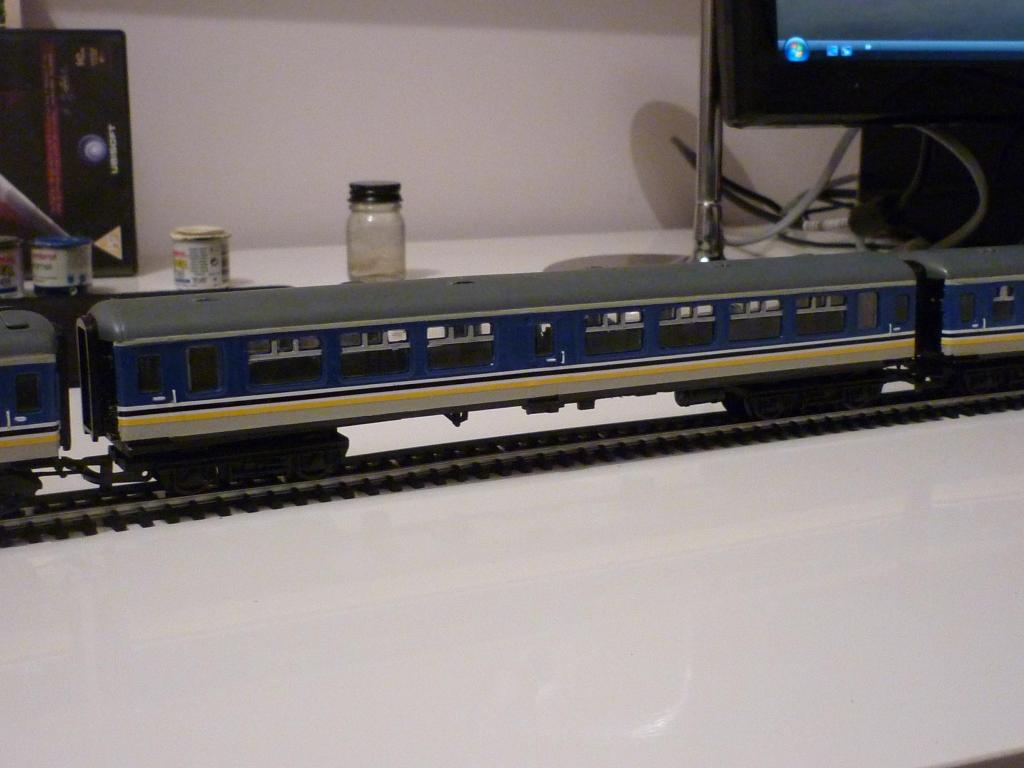
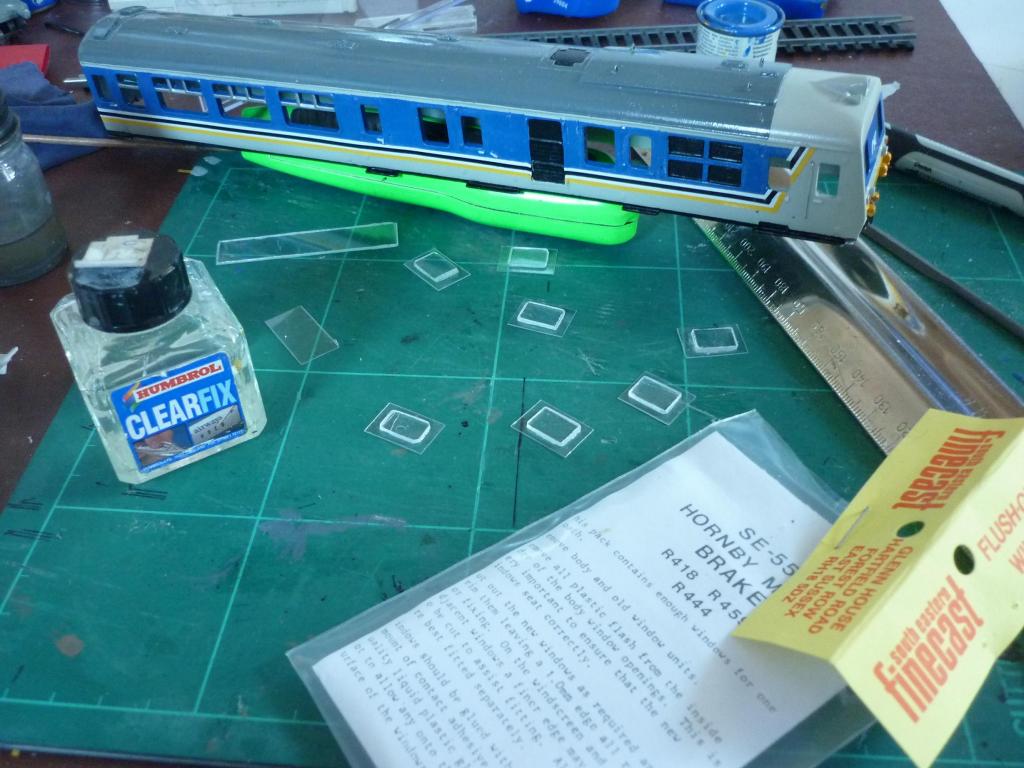
OK a few more pics showing the cars now all flush-glazed, again using a combination of the trusty SE Finescast set for the Hornby Mk2a and Glenderg's CD cover method. In most cases, the latter were stuck to thin acetate 'backing' with Humbrol Clearfix and fitted from inside, but for the driving trailer cab front window, this was bevelled at the edges and when fitting snugly, push-fitted from the front and secured with varnish applied from the rear.
The jumper cables have now been refitted to the driving tailer cab front and a plasticard strip wiper fitted to the window. NIR logos had previously been brush-painted onto the cab sides as per the motor car (except they are the larger size on both sides). The short length of Trimline that carries around the curve at the coach ends tends to lift for lack of length on the far side of the curve but some carefully-applied Clearfix (which has the advantage that paintwork isn't ruined if you have to wipe off excess) dealt with this, where it was happening.
I now need to do the odd bit of paintwork like flat varnishing the roofs and another coat of yellow on the corridor connection cover, plus re-fit and paint white the remaining grab handles. Plus I need to fit a coupling to the power car's trailing bogie, apply its cab-front number, and sort a few other minor details. Nearly done at last - it'll have taken about three months all told, perhaps a month longer than my first set in the early 1990s, also pictured below (in red and cream 'suburban' sector livery) beside the second one also from that time, though the first one didn't get flush-glazed and neither got any buffer-beam detail.
-
The 80 class is superb 33lima and I would love one in the future myself when you get a bit of spare time.
You're on the list, if you're still interested when I get the time!
-
Thanks for the positive comments guys, it's really encouraging! And yes Nelson, I have another one or two of these to make, but it looks like it'll be a 70 Class DEMU, next, for a bit of variety if nothing else.
No Rich I haven't tried Cliffs of Dover. My 512Mb 8800GT isn't really up to it (tho it plays Rise of Flight reasonably well) and the single-player campaign sounds a bit weak ('Spitfire girl' or no 'Spitfire girl'). It's only since I tried the Dark Blue World mod, which seems to support the ETO much better than previous iterations, that I've really got into IL-2, tho I've played it on and off from the first version. In between sessions on the 80 Class, I'm currently having a blast with FlatSpinMan's and Bloelcke's Defence of the Reich campaigns, well worth trying if you miss the sort of missions you get in European Air War: http://combatace.com/forum/307-mission-reports/
-
Work has now been concentrated on the power car, which is now basically complete.
First task was to apply the flush glazing. The tricky bit here was dealing with the larger rectangular windows - eg the three on the LH side at the engine compartment - which had their horizontal framing removed during construction, and which therefore aren't covered by the SE Finecast Mk2a Flushglaze set.
Home-made flush glazing was made for these by cutting approx 9mmx12mm pieces from the clear front of a CD case. Corners were rounded and these were then 'glued' onto a slightly-larger rectangle of thin clear plastic sheet, using Humbrol Clearfix. They were then fitted and glued from the inside in the same way as the normal flush glazing. They are slightly recessed; I could have simply used the CD cuts and tried to keep them more 'flush' but they would have been liable to be dislodged on handling and more difficult to refit without messing up the paintwork.
Next, the cab-side NIR logos were hand-painted on, in Humbrol French Blue. The logo on the RH side is smaller on the model as it was in real life, as it fitted onto the cab door on that side.
Next I fitted the cab-front glazing. These were not flush-glazed as the plasticard - tho re-inforced on the inside - is thin enough to make this non-essential. I then fitted a wiper to the LH window. This was made from two strips of plasticard painted black and 'glued' in place to the window with Clearfix. This replaces the wire one I'd made as I think it's neater.
Finally, I re-fitted the wire handrails and grab handles, and painted these, and the door handles, white.
All that remains now for the power car - apart from fitting a grab handle I missed and numbering - is to fit a coupling or loop to the rear bogie (having had to remove the extended HST one) and give the roof a coat of matt varnish, which I'll leave until all three cars are finished. At TrainMan's request I'm not going to bother with cosmetic sideframes so the bogies will stay as they are. The offset front step is pretty-well in the correct position for the 80 Class and I've cut some excess plastic away from the Hornby one's front 'skirt' which somewhat improves the appearance.
-
What a difference from an RTR wagon or kit! I like my locos and coaching stock clean, but you've proved that goods stock really looks best weathered!
-
Very nice Michael! Hadn't a clue what was going on tho, until I found a Youtube clip showing how the Faller system works! What will they think of next! And there I was, thinking that Triang's Minic Motorways were neat back in the '60s! Lovely little piece of suburbia you'll have there!
-
This thread might be of interest;
http://irishrailmodel.com/showthread.php/1574-D301-Class
...also the drawing here:
http://irishrailmodels.com/2012/01/25/d301-class-locomotive-drawings/
...and Steve Johnson's modelling article in Issue 5 of 'Irish Lines', here:
https://www.dropbox.com/s/zgbbr6m6jvvi1cp/Irish%20Lines%20-%20Issue%205%20-%201993%20Winter.pdf
-
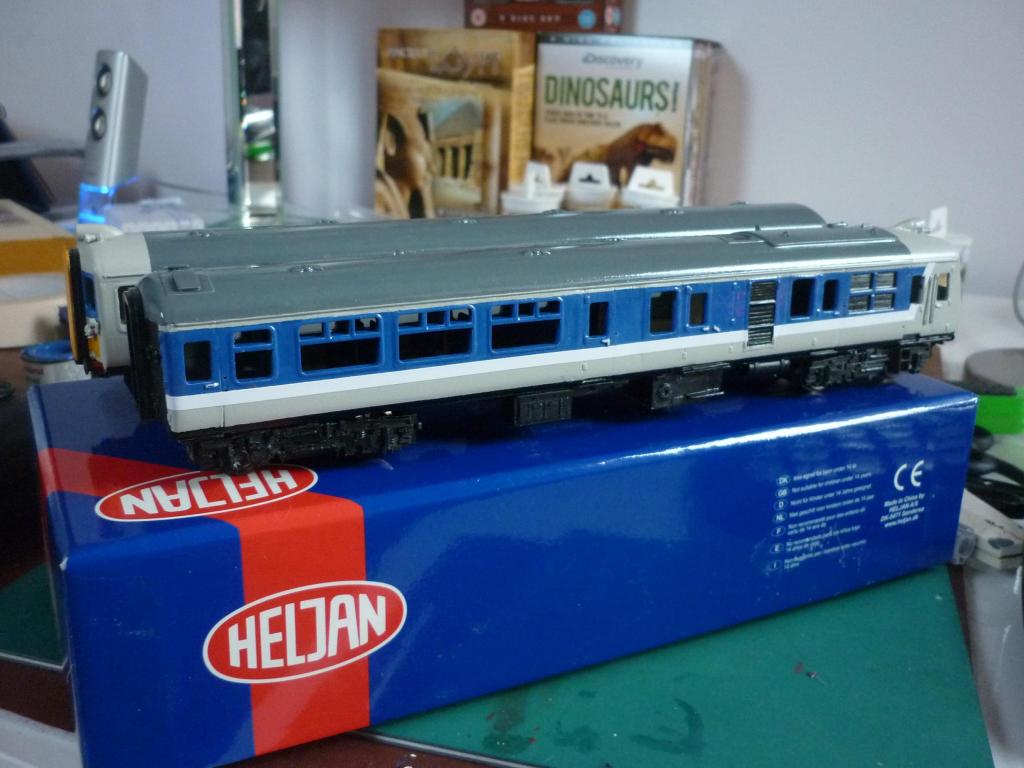
Update after some more work this weekend, showing the Trimline lining applied to all three cars. Passenger window frames have also now been picked out in silver, as have the insides of the lights. The Trimline sometimes tends to lift where turning the corners of the coaches at the ends and will be stuck down firmly later.
Flush glazing is starting. I discovered that I needed to file back the inner edges of the ventilator framing to get the SF Finecast flushglazing to fit, a common situation on thicker-bodied coaches like Lima or Hornby Mk2 coaches. I had already cut this back a bit but needed to repeat the process, likely as painting had undone some of my work. Some windows aren't covered in the flushglaze sets and will have to be made separately, possibly using CD jewel case covers.
-
Thanks for posting Leslie, I hadn't taken any pics of the BUT set or the GN coaches before despatching them (in fact I had forgotten all about making the BUT set) so this is the first time I've seen them, since...when was it, about 1997? Would love to see pics of the other coaches too, how many were there, three or four, can't recall now, one was a kitchen car I think. There must be about two miles of plasticard strip in that lot!
Still have your brass K15 unbuilt, give me a shout next time you're 'in country' and I'll drop it off!
-
Contemplated this back in the 1990s but I don't think there's a lot to be gained. The bogies aren't the same I believe and a set of valances isn't a big help (easy to reproduce in plasticard and not needed at all for some periods). Might as well choose any other DMU chassis, especially if the length is about right. I ended up making bodyshells from thicker plasticard bulkheads and thinner plasticard sides, epoxied to MJT aluminium roofs, with a Tri-ang motor bogie for the UTA set and a Black Beetle for the GNR(I) one. These days there are obviously other options for the power train.
-
Hi Popeye
I used this stuff for the lining, ModelTechnics Trimline:
http://www.modeltechnics.com/trimline.htm
I contemplated trying to make, print and apply the lining stripes as home-made decals using white decal film but there were a lot of points in the process, up to an including application, where I was concerned this could produce an inferior result if not go completely t*ts up. The Trimline has an appreciable thickness even after you have scored on door or panel lines but it goes with the medium-to-semi-gloss finish I prefer and it produces a neat, durable result so I settled for that.
-
Hi Rich
there are various suggestions in some archived issues of 'Irish Lines'; admittedly, while Model Irish Railways was still in business, this was before the likes of Provincial Wagons, Murphy's Models et al came onto the scene: http://newirishlines.org/archive-2/
For example, issue 5 has a piece by Steve Johnston on making a D310 class 0-6-0 diesel from a Lima BR Class 08, and an article by Jim Maguire on 'Kits and RTR adaptions for Irish railways'. issue 6 has a piece on converting RTR carriages by Steve Johnson, including making a Park Royal from a Hornby Stanier.
There is also, as Glenderg mentioned, a lot of useful information on RTR adaptions (for coaches in particular, but also some on goods stock) and some inspirational pics of such things, in 'Modelling Irish Railways' by Steve Johnson and Alan O'Rourke:
http://www.amazon.co.uk/Modelling-Irish-Railways-Stephen-Johnson/dp/1857801857
PS the pics at the bottom of this page give some idea of what was, and could still be, achieved by simply repainting readily-available 9now second hand) BR RTR diesels (tho the Hymek would have looked better in maroon or light blue as an NIR Hunslet with some cosmetic cab-front modifications, and if you're going to repaint a Lima Class 33, you might as well at least sand down the cab roof cowling and replace the two front window pillars with a wider, single central one):
-
Don't have a layout yet Kirley, just a partly-ballasted double track oval in the garage, but am looking forward to seeing it running on TrainModel's excellent layout when he's taken delivery, which hopefully won't be TOO long now:
-
You're too kind, really guys, especially as those close-ups really expose my limited abilities with paint!
Final pics for tonite, showing the Trimline completed on one side of the power car; also the latter's interior, complete with soldered rear bogie pickup wire extension and seating and floor/bulkheads made from plasticard sheet, cut away as needed at the rear to allow for the swing of the bogie clips and pickup.
Original 1992 model in the background of the first pic.
-
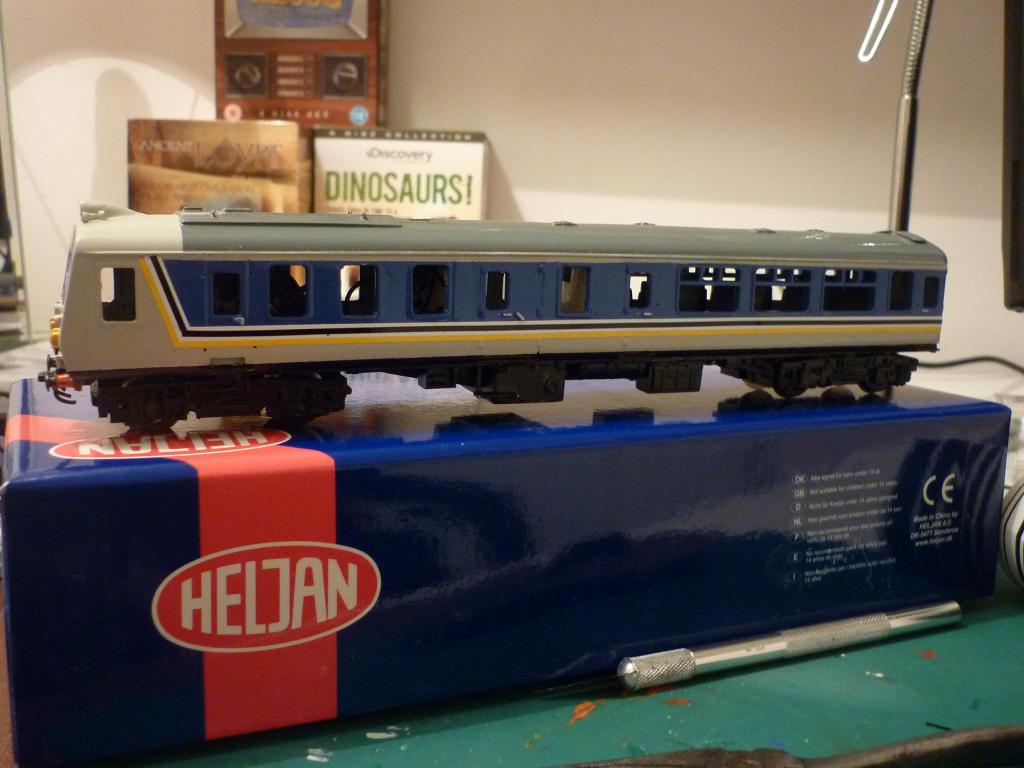
Painting is now well under way. All three bodyshells were sprayed with Halford's Ford Polar Grey. This turned out to be a slightly warmer shade than the more blueish-grey version I used back in 1992, but I think it's at least as good a match for the NIR shade. When this was thoroughly dry, the sides were masked and the upper panels brush-painted on with Humbrol gloss French Blue. It was hard to get the masking tape into the narrow strip under the gutters and a certain amount of touching up was necessary.
Next, the blue and then yellow panels (Humbrol Lufthansa Yellow) were painted on the cab ends of the motor car and the driving trailer. The buffer beams were painted a bright orange-red shade and the roofs brush-painted in Humbrol gloss Dark Admiralty Grey (they will be coated with matt varnish later).
The 80 Class in this 1990s livery had a black strip along the bottom edge of each side at about solebar level and these were brush-painted Revell Satin black after more masking. The roof and side grills on the motor car were touched in with Satin Black.
At this point, I brush-painted in the white NIR logo to the motor cars cab front. I then cut the wire between motor and trailing bogies and soldered in an extension wire, to allow for the extra distance between the ex-HST power bogies, and checked it moved freely and still ran on some test track.
I then glued back in place the corridor connections I had removed at the outset. Finally, I started the process of applying Model Technics Trimline adhesive vinyl stripes to the motor car sides, below the blue panels. I had forgotten how fiddly this is to apply, but the end result, tho thicker than waterslide decals, is, I found when using it on my 1990s 80 Class sets, precise, neat and durable, so I ended up using it again. So far I have only applied the deep white line; next will be a shallower yellow one below this then a black one along the centreline of the white strip. Finishing the lining process will be the next step.
-
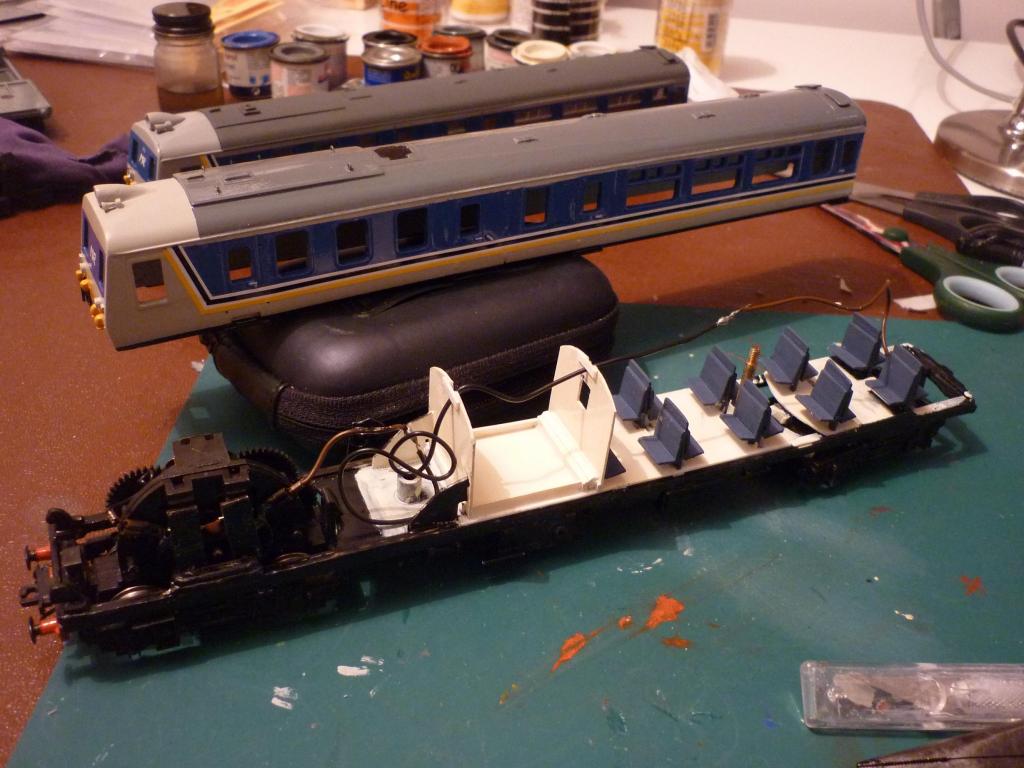
OK, the first interior/seating unit has just been built. I started with the driving trailer, adapting the seating unit that came with the donor Hornby Mk2a TSO coach.
Courtesy of Google, I recently stumbled on this article by Shane McQuillan, which described his effort at an 80 Class set, from the May & June 1984 'Practical Model Railways':
http://www.preservedthumpers.co.uk/nir80model.html
I had been vaguely aware of this model back in 1992 when I built my own, but what I didn't know until I found this article was that it includes works drawings. While these lack underframe detail, they show interior layouts, so they came in quite handy!
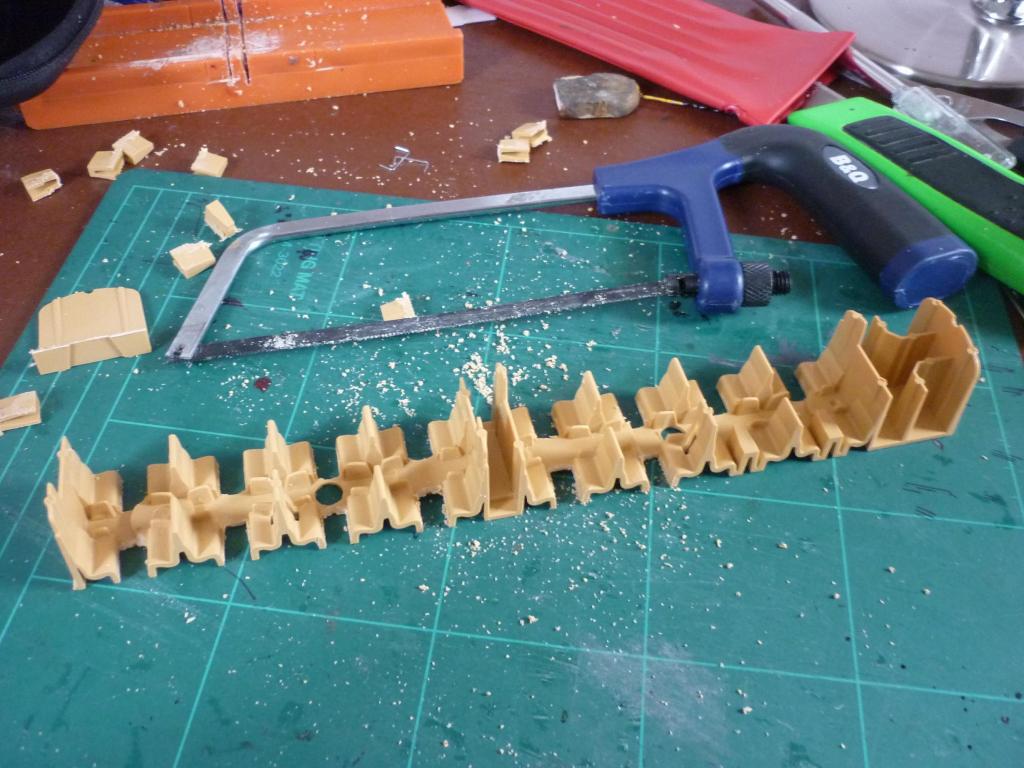
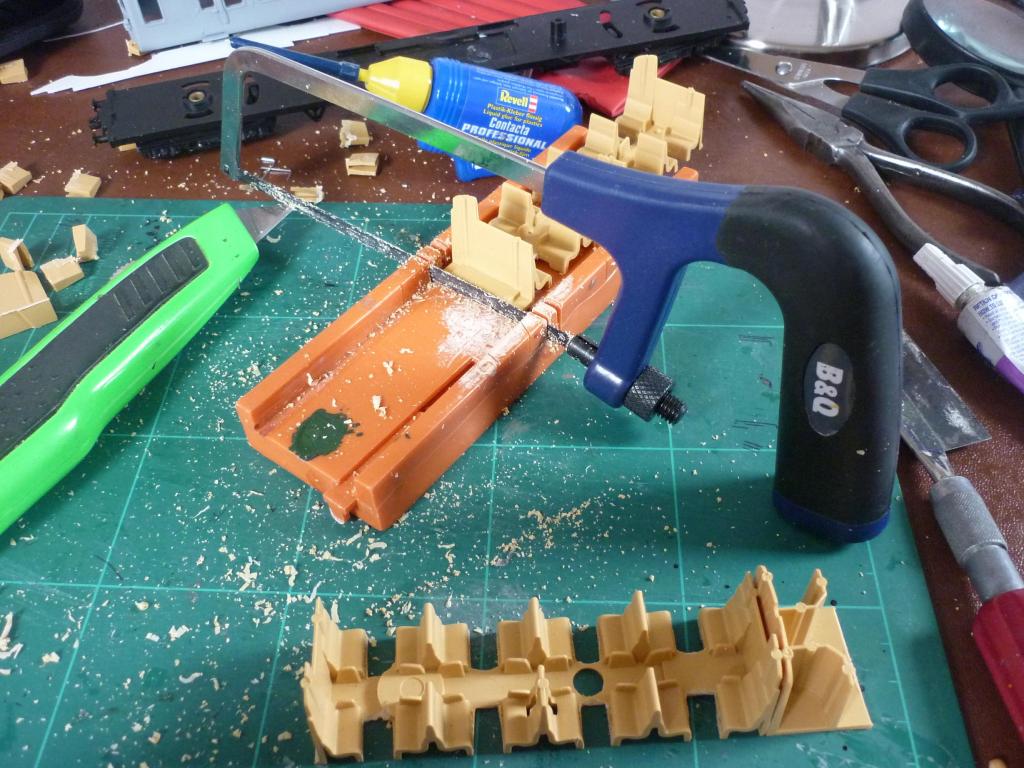
I have little patience with making interior detail and have 'left it till later' in several of my models. Not this time though. So it was out with the junior hacksaw, (battered) mitre box and Stanley knife and off I went.
First, I removed the tables in each seating bay by making a hacksaw cut in from the base each side, as far as the central aisle. The tables were then folded up and removed and the gaps tidied up.
The interior units have a central vestibule and feature double toilets at one end, and no corner driver's cab of course. So the next job was to cut up the unit into sections, re-assembling these to recreate seating bays and a single toilet which all line up with the different window layout on the 80 Class car.
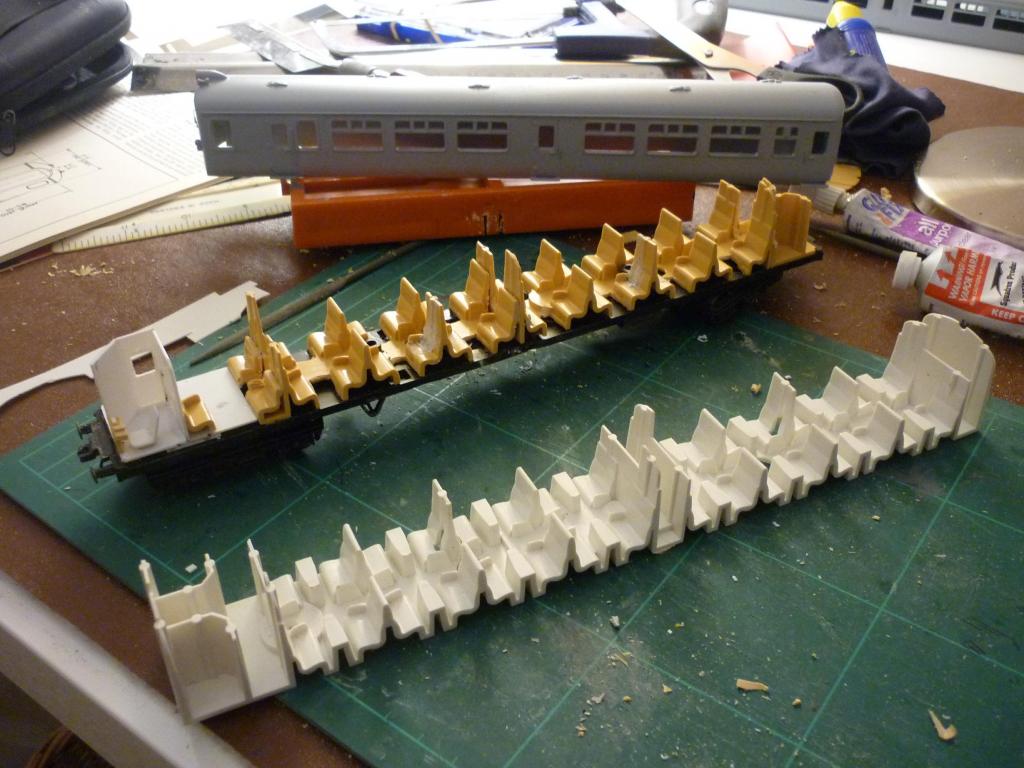
Finally, I added the driver's cab partitions and seat from plasticard, and a basic representation of the driver's desk, on a new plasticard floor extension. The real unit has 2+3 seating but I didn't mess with the donor unit's equally-divided seating (3+3 or 2+2?).
The new unit was glued in place on the chassis/underframe unit. Before doing this, I had to replace the coach's metal ballast weight. This is a rectangular bar which sits in a recess in the chassis/underframe unit, but it sits proud of the recess and fouled the reconstructed seating unit, as the latter's corresponding recess was no longer in the right place. So I replaced the weight...with three pennies!
One down, two to go...!


NIR 80 Class DEMU
in Workbench
Posted
Way-hey! The bl***y tracker is still showing it 'at the international mail centre, being prepared for overseas (!) delivery"! But the picture tells a different story!