
33lima
-
Posts
183 -
Joined
-
Last visited
Content Type
Profiles
Forums
Resource Library
Events
Gallery
Blogs
Store
Community Map
Posts posted by 33lima
-
-
There were 2 driving trailers with the small windows,the others were more normal size.
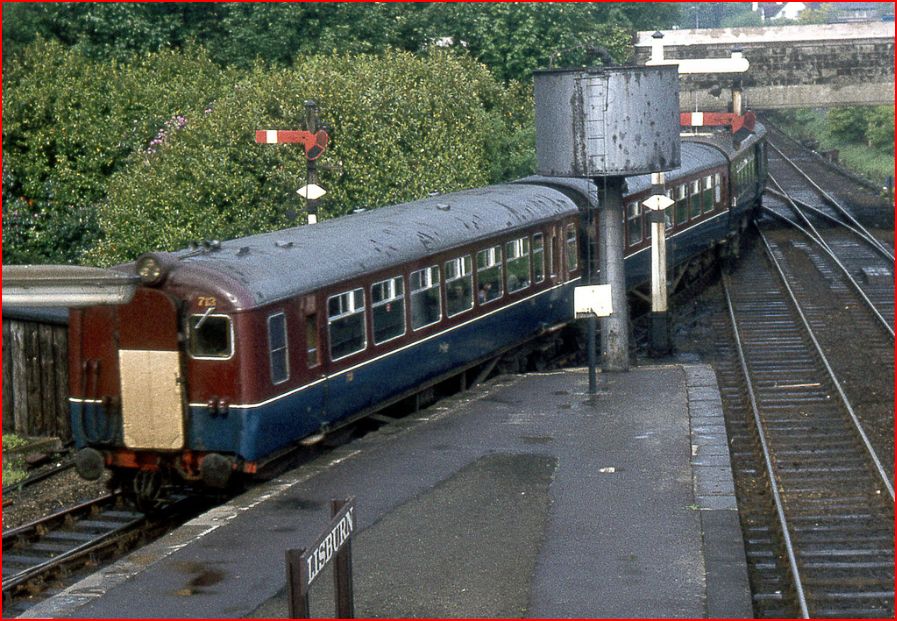
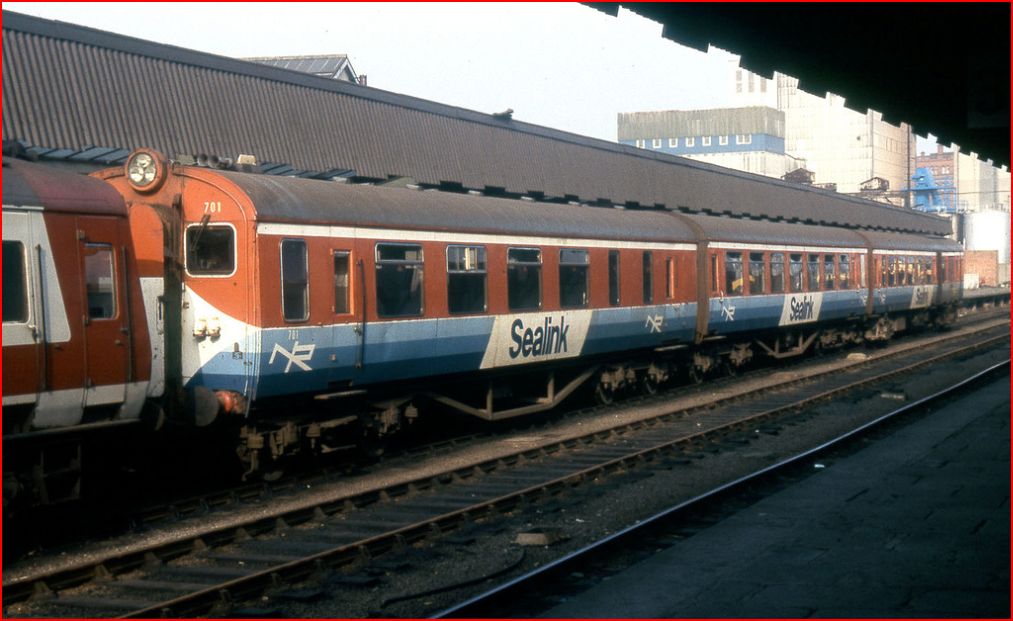
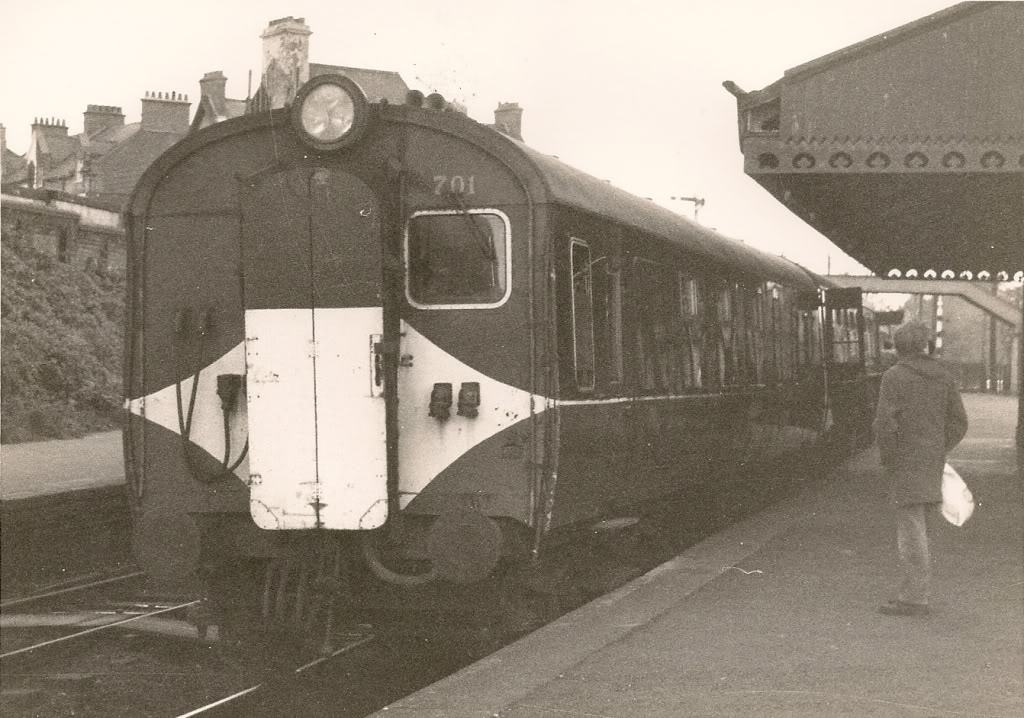
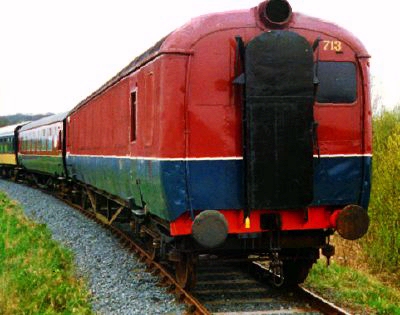
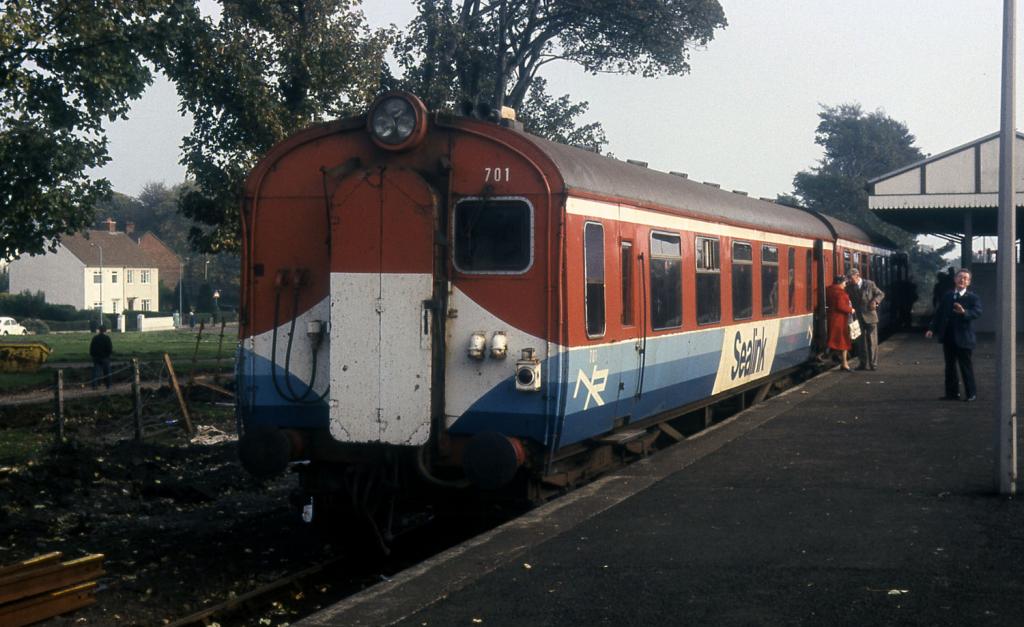
From the pics I've seen, the two original trailers (711, 712, the type I have modelled) and the other two added 1968-9 (713, 714) all had these small windows. So did 701 (part of the Sealink-liveried set) and 703, the trailers converted to driving trailers in the 1970s. Don't think I've ever seen a 70 Class driving trailer with anything but a single, small window, apart from 714 (and I think also 713) which had an even smaller window on the other side of the corridor connection, in the maroon and grey era anyway. A hard target for stone throwers but not the nicest feature of the 70 Class, on power cars or trailers.

-
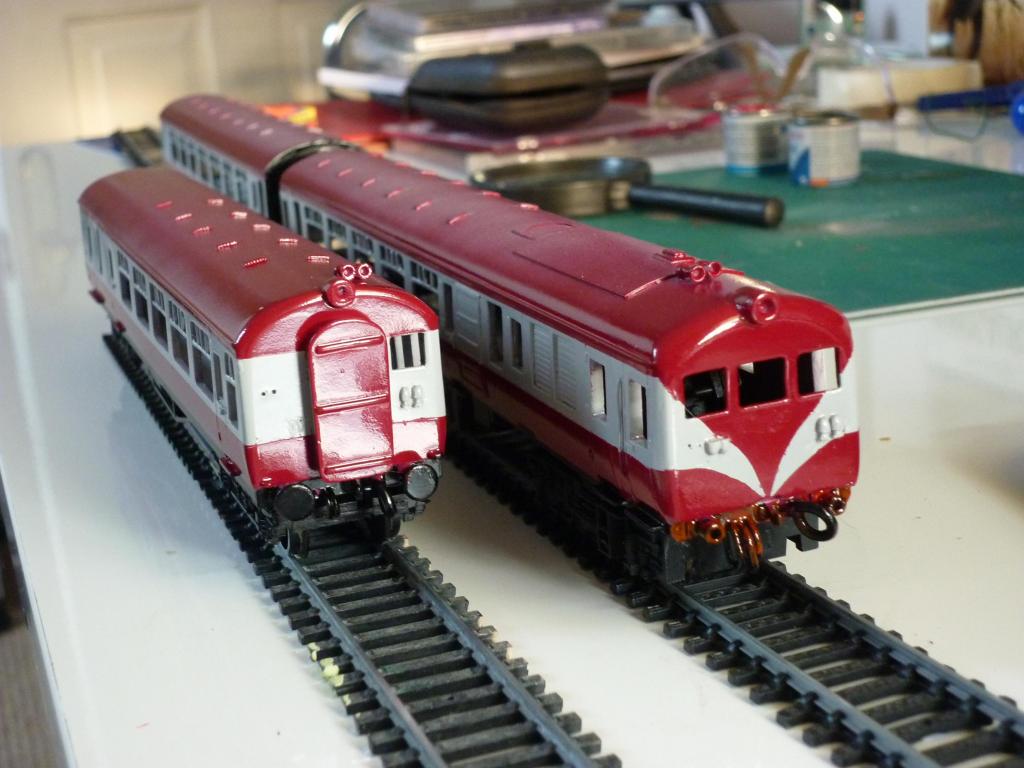
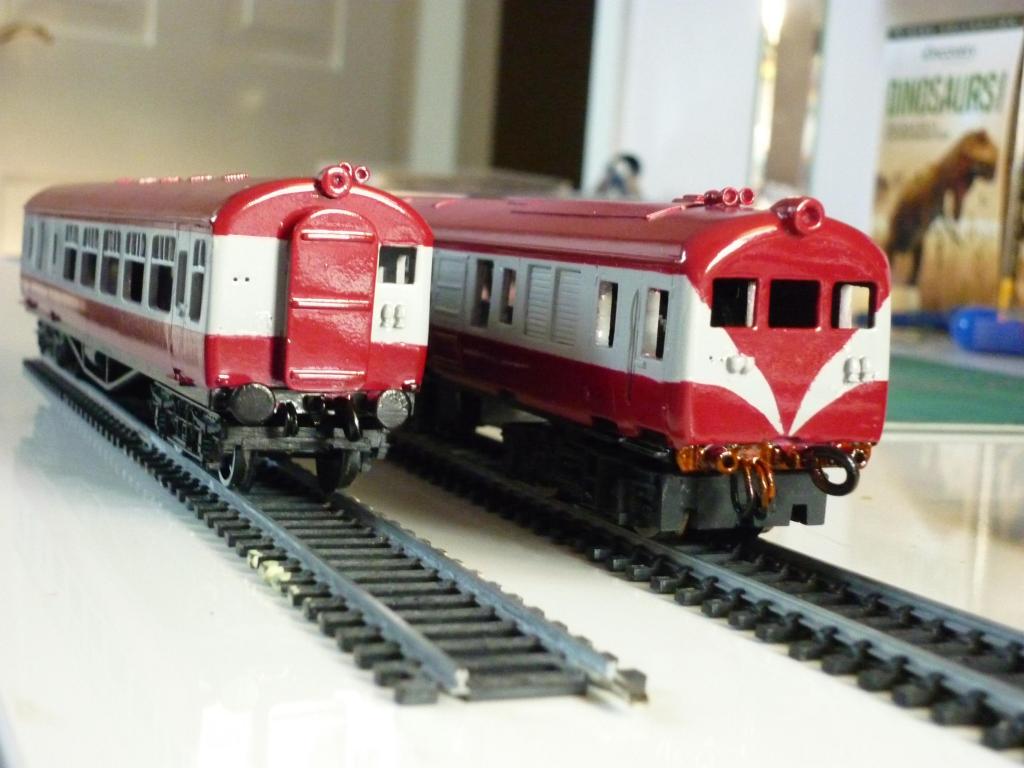
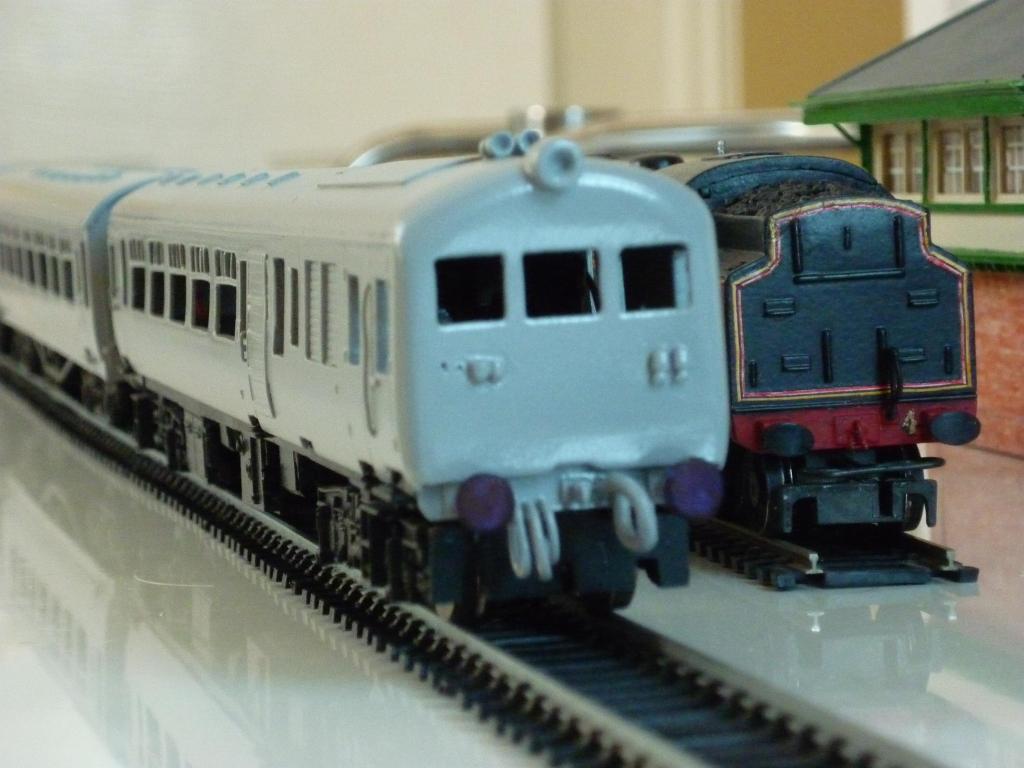
Nearly done now. Power car roof needs a second coat, a lost buffer or two need found or replaced, a proper test run made and any final adjustments sorted.
I couldn't find any decal film for the cab front crest so used four little cuts (one for the shield, three for the banner) from a white sheet intended for PC printing of transfers, which is self-adhesive. The red detail was applied with a thin, pointed sliver of plasticard; not very precise but like the last one, but it captures the look, at normal viewing distances.
The lack of flush-glazing is a bit noticeable in the power car due to the thick sides and lots of non-standard windows but less so in the passenger window area and the cab front as the glazing strips in those areas are inset, sitting in a recess. Not a big issue with the trailers as these are relatively thin-sided Hornby Staniers; the usual flushglaze sets weren't usable as I opted to reproduce the wider (BR Mk2-width?) windows fitted to the 70 Class.
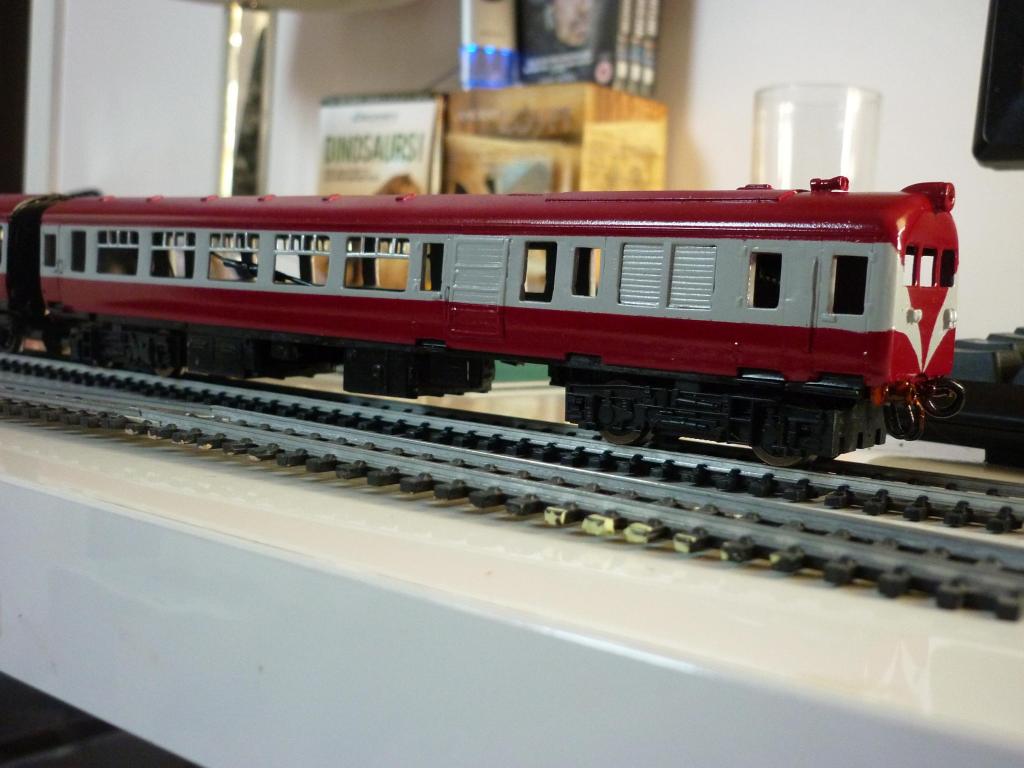
Seats in the centre car and power car are red, blue in the driving trailer which is right according to the Midland Irish Broad Gauge Carriages book by Desmond Coackham. Modified RTR seating units were used in the trailers, scratchbuilt for the power car, but with a gap at the inner end because of the room needed for the wiring to the trailing bogie.
Wipers are just little bits of strip plasticard glued at an angle, painted silver and stuck to the sides of the window with Clearfix, which doesn't damage paintwork. All vehicles were ballasted with fire cement, pushed into voids.
I ended up leaving the Hornby HST bogie frames alone; they're not too bad for a 70 Class power car and that soft plastic is easy to mess up once you start hacking it (and not the easiest to fit replacement bogie frames to either).
Handrails are thin florist's wire, painted white which I think is right. Similar stuff painted black serves as the jumper cables; I fitted these only to the outer ends, having fitted steps which left no room to the inner ends before I found a photo (in that Midland book) which showed that the inner jumper cables were fitted high on these ends, not at buffer beam level as I had assumed.
I have a sheet of waterslide gold numbers somewhere and if I can find that again, I'll number the fronts of power car and driving trailer, at any rate. I'll post some better pics before despatch, in better light.
.
-
It seemed to be a favourite pastime of both the UTA and NIR to paint their railcars in various liveries during their lifespan.
Yes indeed, all the fun of the fair. I'm tempted to paint a complete MED set in the 1959 eau de nil colour, in memory of 'the Turquoise Train'* seen on the Bangor line for a season or two in the early 1960s, but I've never unravelled that mystery. Colm Flanagan's 'Diesel Dawn' has a colour pic of what's said to be the only MED car known painted in that light shade but it has cream or ivory uppers. I'm fairly convinced of what I saw - a complete railcar set in overall eau de nil, probably including at least one slam-door trailer. But I'm reluctant to take the plunge until photographic confirmation is unearthed, or someone else tells me, 'Yes, I saw the Turquoise Train, too!'
Funny enough I have no recollection at all of the c.1965 bright green and cream Bangor section livery carried by some MED sets but I do recall that elusive eau de nil one.
* The scene - on holiday in a rented bungalow, Carnalea, one balmy summer in the very early 1960s, watching the trains go by from down by the shoreline. 'Look at that train! What's THAT colour called, Daddy - turquoise, you said?'
-
Yes it's great to see the AECs brought back to life. Good to see somebody else had a go at the short-lived cream and sky blue, like it or not as a livery, it's a little-seen part of local railway history, now preserved in miniature - what it's all about, really. First class, and pun intended!!
-
Oh deary me heirflick! Where do you get these?
Probably dreamed them up in a tender moment.
-
Hello everyone,
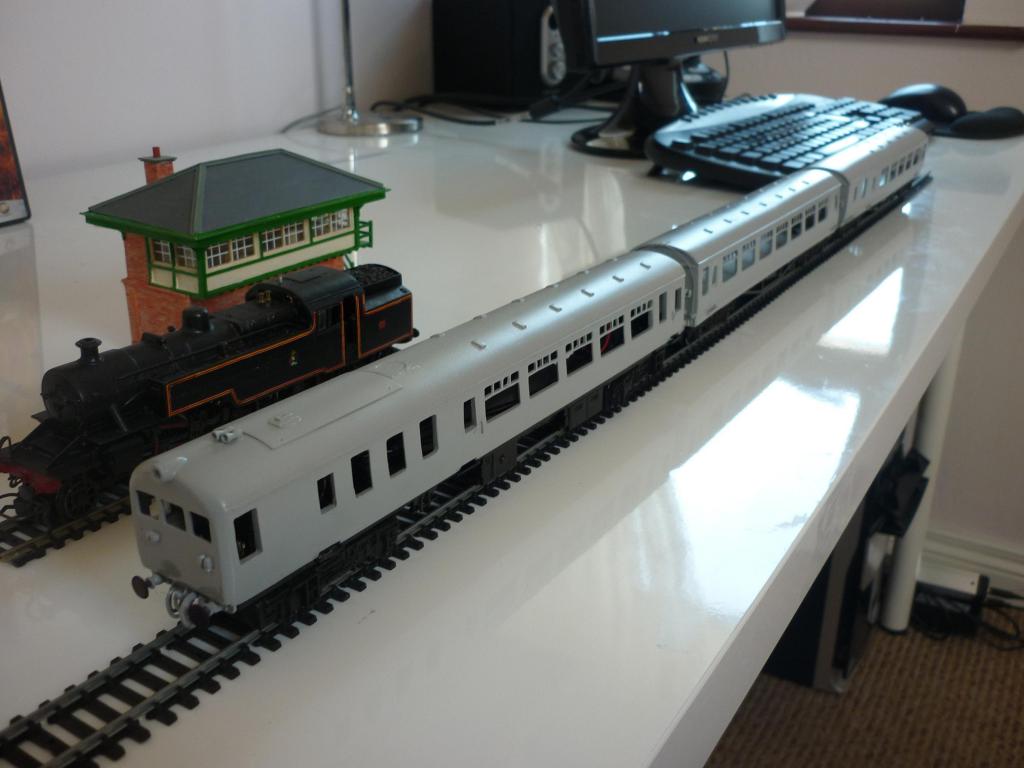
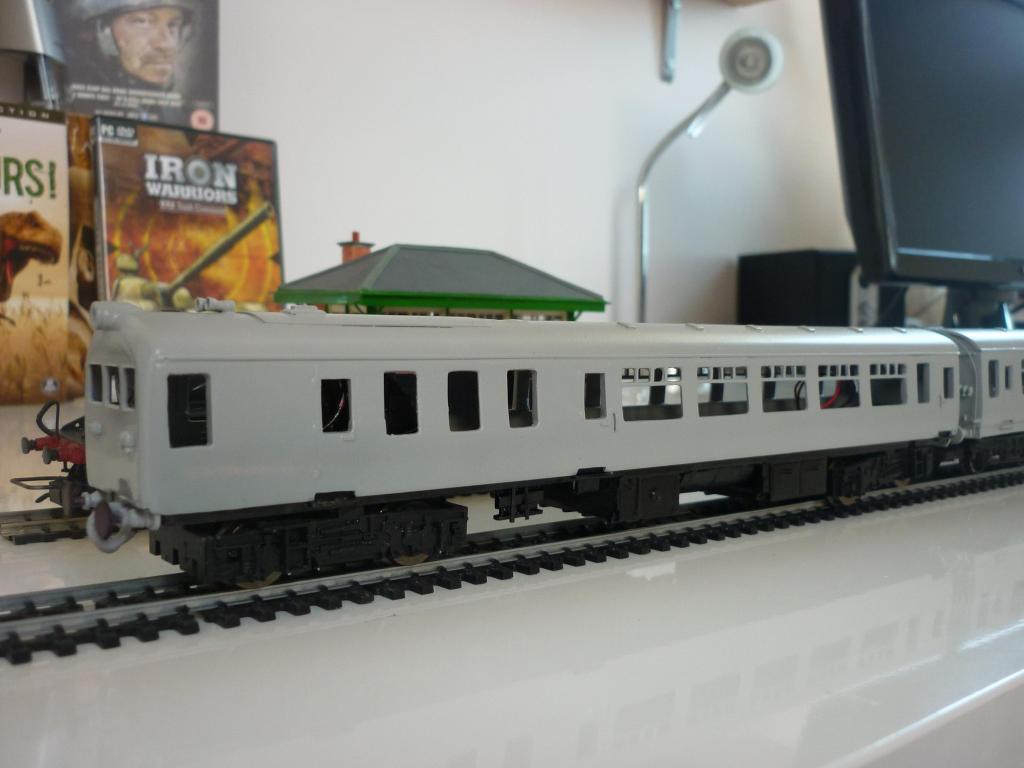
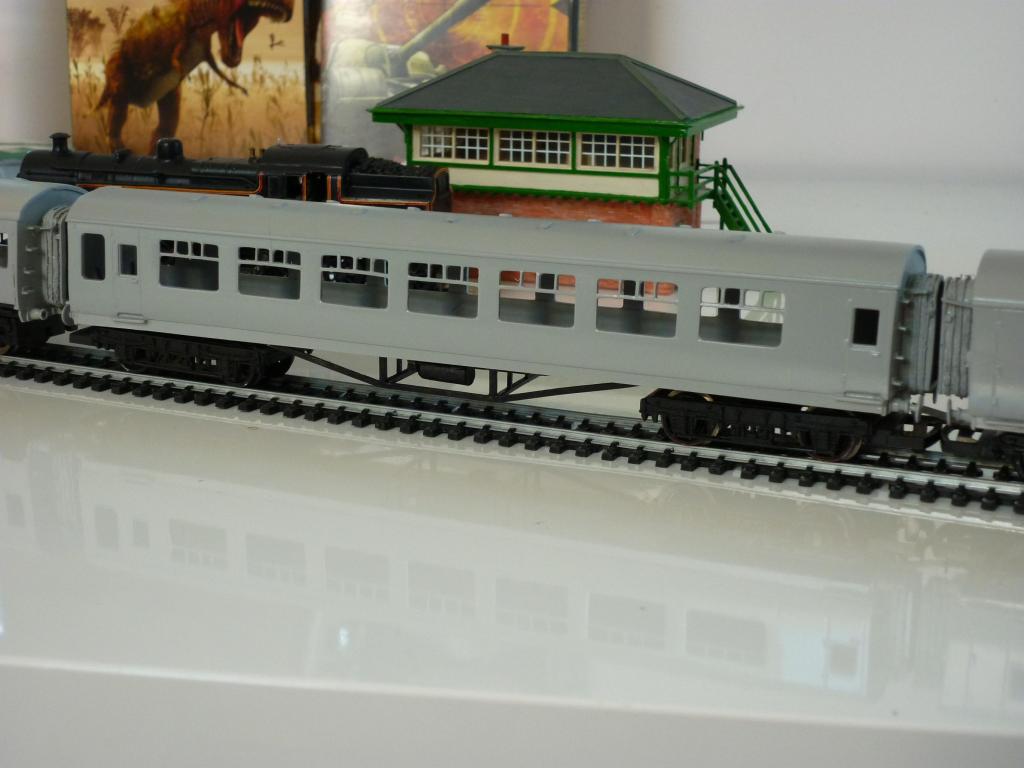
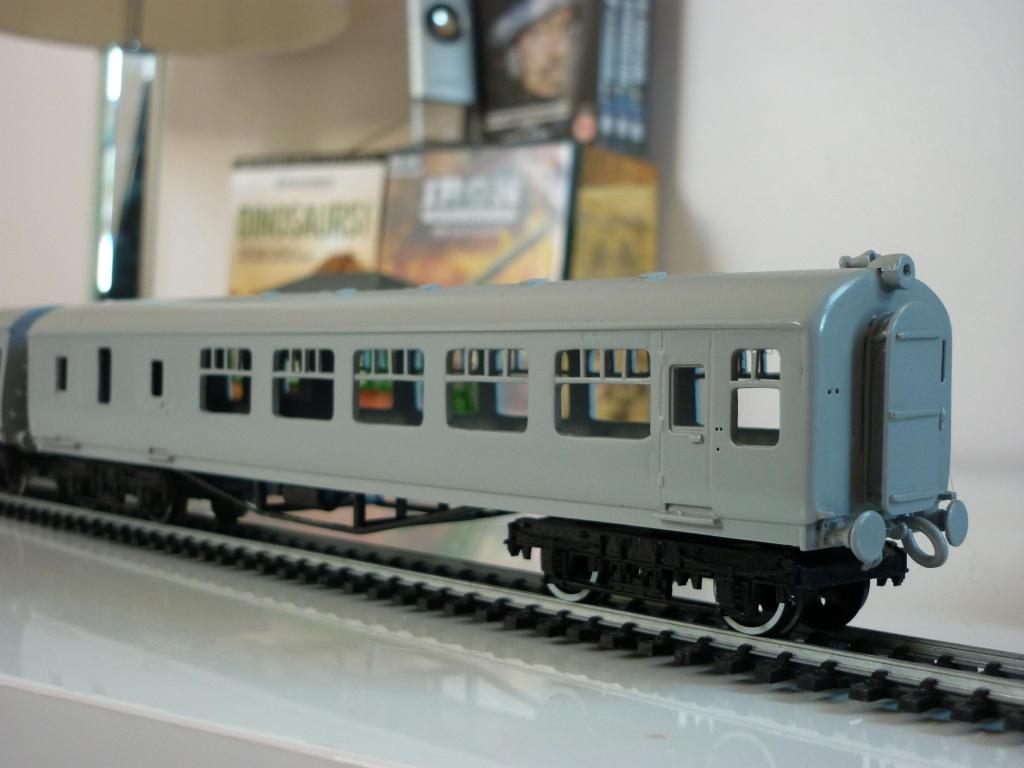
This is my recently finished Dapol coach kit which has been painted into the UTA livery, although not 100% accurate it is close enough for me as I have no carriges to run with my engines.
[ATTACH=CONFIG]13397[/ATTACH]
[ATTACH=CONFIG]13398[/ATTACH]
[ATTACH=CONFIG]13399[/ATTACH]
I'm sorry for the bad cropped photos, I only took quick shots, next to come over the next number of weeks are 6 more GNRI resin kits and a NCC U2.
Many thanks
Nelson
Nice 'Larne steeler' look-alike there Nelson. Remind me again please - what do you use for the straw/yellow lining? Been thinking of lining my UTA green LMS paneled repaints.
-
[ATTACH=CONFIG]13834[/ATTACH]
Edit - well that didn't work, either.
Pic of model MPD with windowed corridor connection cover - as seen on MPD 63 in Irish railways in Colour #1 - is in the 3rd pic of post #1, here:
...and in UTA livery for real, here:
-
Sorry seem to be having diffs with a couple of images, as if the Manage Attachments thing isn't working right or i've hit some kind of site limit! Will see if I can find pics online.
Hope this works - my MPD with the more attractive windowed corridor connection cover:
[ATTACH=CONFIG]13833[/ATTACH]
-
Yes Kieran that pic looks pretty representative of the front end of corridor MPDs in the NIR era. The pic below may be a bit sharper as regards detail.
The other pic at Waterside shows a more attractive corridor connection cover, with small window and three tranverse ribs, which was sometimes seen in the NIR era pained maroon and grey so this would be a legitimate alternative - I have on fitted to one of my Festival-type MPDs, also pictured.
For the slam-door 'suburban' MPD, probably only a few of these were repainted in NIR maroon and grey before they were rebuilt, losing most of the slam doors and half-windows and having new rectangular windows fitted over most seating bays. One of the few repaired before conversion is below, complete with MED-style cab front chevron. most 'suburban', slam-door MPDs probably stayed in UTA Brunswick Green + wasp stripes, until they were rebuilt.
[ATTACH=CONFIG]13830[/ATTACH]
-
any further updates on the finished wagons. QUOTE]
The wagons are on the "back burner" as I'm working on some MPD's.
As you can see above the is a lot of "Cutting & Shutting" to be done. Nearly every one of these MPD's were different.
Power Cars will have Black Beetle Motors fitted, a first for me trying out these motors.
Lovely job - great to see some MPDs will be joining your 80 Class sets soon! Can't wait to see these finished; must dig out my 80% complete suburban MPD after seeing these! Really like how you're tackling the sides for the later cars, to get the slim windows - great job!
Minor points of detail - from studying pics, the MPD's big sliding brake compartment doors, when closed, always seemed to sit flush, in UTA green days - the recessed appearance seemed to start in the NIR maroon & grey era, for some reason. And I don't think the slam-door suburban cars ever carried corridor connections, until after they were rebuilt as open configuration with mostly new side panels - they just had three windows in front, like this one:
-
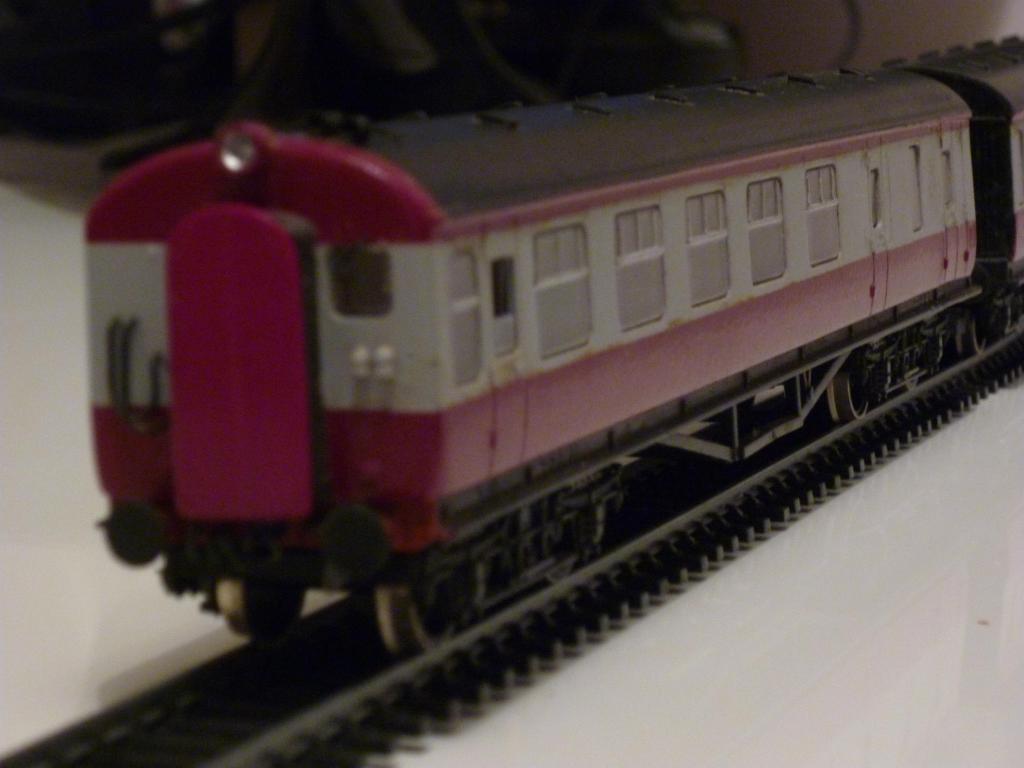
OK some more pics of the weekend's work, which was basically finishing off the spray-painting. Ford Polar Grey was used on top of the grey primer, followed by BL Damask Red after masking. The 'V' shape on the power cab front is of course the tricky part to mask, especially as I had to mask around the jumper cable fittings. Results were not too bad and overall the appearance is rather better than my original build from the early 1990s (pictured below).
Before painting the coach ends I had to shorten a couple of the plasticard corridor connections as they were a bit long and risked fouling each other on corners. All were then painted satin black, along with the buffer beans and the sidesoles fixed to the trailer and driving trailer bodyshells.
Finally the passenger window ventilator frames were picked out in aluminium.
Roofs will be painted dark grey or perhaps matt black; from my NIR MPD set I think the latter better approximates an in-service appearance, even if the car spray finish is more ex-works (or ex-coach washers). But I'll leave the roofs till after fitting the glazing and the remaining wire handrails. And till after making seating units; I plan to try adapting RTR units for the centre car and driving trailer which are side-corridor jobs, and maybe an RTR Mk2 seating unit, with tables removed, for the power car.
-
OK haven't been here for a while but not entirely idle!
Latest pics below - sorry no interim ones taken!
Progress has consisted of:
- trailer and driving trailer chassis made from laminated rectangles of plasticard. These sit up inside the bufferbeams/sidesoles which are integral with the trailer bodyshells. Trussing was added from plasticard strips. Underframe components seem to have been limited to some small boxes and a cylindrical tank on one side and these were built up from a piece of dowel and some more plasticard.
- power car underframe built by cutting a Hornby HST chassis into three and adding plasticard inserts between the middle part and the outer parts, which take the HST power and pickup bogies. The HST battery boxes and fuel tanks were left in place and some additional components were fitted, from plasticard, referring to pics. Plasticard steps were added to the sides tol align with the dors, as the power car body was not made with integral sidesoles.
Buffer beam detail was added to the cab ends, consisting of three wires on one side and a thicker, insulated wire on the other side for the vacuum pipe.
A pic in the Midland Irish coaches book showed a centre trailer with four rather than two connection sockets so I had to add two more to the inner ends of the trailers.
Next came the nightmare part, adding window ventilator frames, four pieces for each passenger window, all cut from plasticard strip. With extra liquid poly run into the joints when the first application had dried, these are not as fragile as they might seem and will be ok when backed with glazing strips. This tedious job was the price paid for opening up the windows on the trailers to the correct width (BR Mk2 approx) instead of leaving them as they were (Stanier width)
All three vehicles were then painted with car aerosol grey primer and after filling & sanding any significant remaining blemishes, they were painted in Ford Polar Grey car aerosol (I belong to the school which considers that the lighter UTA/NIR shade is not best represented as white, tho the Ford shade is perhaps a little on the dark side).
Next step is interior detail, adding a coupling to the rear of the power car, painting the maroon areas, grey roofs and black ends, then adding the glazing strips and replacing the cabfront cables removed for painting.
Getting there at last!
-
Hilarious! Nothing like a good laugh at the end of a long day!
-
Next, roof vents were made from rectangles cut from strips of thicker plasticard sheet and fitted to both centre car and driving trailer. Numbers and spacing are reasonably accurate, judging from contemporary photos, notably the fie shot of a 3-car set just past the 'Blahole' at Whitehead in May 1967 on p.74 of 'The UTA in Colour' by Derek Young (anyone interested in the era MUST have this great book).
Little sections of plasticard were added to the driving trailer to simulate door handles and hinges; the centre car is next in line for this.
After that it was back to the ends. For the three extended corridor connections, I added the support struts, two each side at the top, from plasticard strips with a pre-drilled hole for a little wire hangar, which was glued between this strip and a little wedge-shaped piece of plasticard at the bottom. The folded cab-end connection just got a strip of card glued in place' I may try to improve on this but don't plan on cluttering up the cab front with rather breakable and hard to paint over fittings like this and the various little drain pipes, which can easily look messy, or overscale, or both in 1/76 scale.
Also to corridor ends, I added plasticard steps one one side and on the other, a little piece of plasticard strip for a basic lamp bracket, a horizontal support frame and - tho I'm not sure if it's accurate - a couple of multiple unit cable sockets, as fitted to the front of power car and driving trailer.
MU cables from U-shaped loops of florist's wire were added to the driving trailer cab front. To each buffer bean, I added two buffer shanks made from sections cut from plasticard tube filed to produce roughly the right 'necked' shape and fitted to rectangular backing plates with a hole pressed in each corner to gibe the impression of a bolt. Also added was another rectangle in the middle with a plasticard coupling hook in the centre; cut to shape for the cab end and a 'vestigial' oblong for the hook under the inner corridor connections.
Buffer beams similarly fitted were added to the ends of the power car, behind which will fit a modified Hornby HST chassis.
Getting there! Next will be the door fittings on the centre car, then I'll make a start on the power car chassis.
-
OK been quiet for a while but not entirely inactive!
Next step was tackling the centre car bodyshell, again using a Hornby Stanier donor coach's unpainted shell. The intended prototype is what the UTA works drawing, my copy supplied by Mark Kennedy from the UFTM's collection, describes as an 'E' TYPE TRAILER, DIESEL ELECTRIC. These were numbered 721-725 and were the most common type of 70 Class trailer, built with 56 second class seats in seven compartments off a side corridor, 57 feet over headstocks. Apart from having two toilets at one end and evenly-spaced windows, the main difference to the Hornby Stanier compo is that the latter's LMS-style passenger windows are narrower and need widened to be strictly accurate, as per the driving trailer and power car. Unlike the driving trailer, opening out the existing windows wasn't so easy so I opted to chop out all the vertical panels between the windows and replace them with thick plasticard, spaced to give the correct window size and roughly the right spacing.
End panels were cut off and rearranged back in place to give the different window layout at the end with the two toilets, instead of one either end. Corridor connections were fabricated with a plasticard frame wound around with fine cord, as per the power car. Door lines were then re-scribed and a small rectangular cut-out made at the bottom of each door.
Next job was adding plasticard buffer beams and sidesoles, stuck up inside the 'skirts' of the sides and ends. Steps were added under each door, as usual from strips of cut plasticard. The chassis and interior unit will be a clip-fit inside this, a technique I've used with other models in the past, including Leslie's GN coaches.
I then returned to the driving trailer. The cab end's folded corridor connection was added from plasticard strips and a plsticard sheet cover was fitted, modeled on one seen in pics with three transverse re-inforcing ribs and no window. Headlight and horns were added, made as per the power car from a black sprue offcut and shaped plastic rod, respectively. Door scribing & bottom cut-outs were applied and buffer beams/sidesoles made and fitted, as per the centre car.
-
Hi Nelson
I just used medium-coarse grade sandpaper - 180 grade, hand-held, no sanding block. Then fine grade, 400. All just what I had 'in stock' from the last visit to B-and-you-know-where. Worst bit was getting the ribs off the roofs, which were just sliced off in one go and in one piece, slipping the point of a Stanley knife blade, held horizontally, under the edge just above the gutters and slicing across with the knife held flat. Then the sanding...and more sanding...then still more. Still need some spots of filler where cutting off roof vents left a mark...then more sanding
-
Thanks for the kind comments guys!
Next step, I decided to start on the driving trailer, rather than risk early insanity, cutting and fitting all the vertical window ventilator struts to the power car!
Donor coach was an unpainted maroon-coloured Hornby LMS Stanier bodyshell. Although the intended driving trailer prototype is a brake coach, the Hornby compo I used is, in general, a slightly better match than the Hornby brake third version.
First job was cutting out a panel from the sides at each end (four in total) to the length of an end door and a toilet window (where present). These panels were then glued back in place, but reversed. This reversal puts both toilet windows at the same end (instead of one each end) and brings the doors at both ends further in, away from the coach ends. This formed roughly-correct sides for driving trailers 711 and 712, with the corner cab and toilet at one end, and double doors and brake compartment at the other.
Next I cut three end panels - one for the corridor end which fits in between the coach sides and underneath the roof, and the other two full-size, to fit over the cab end. The former was sanded to a good fit then glued in place, after the chassis securing lugs were cut off the existing end panel (which also has slots for the crude Hornby slip-in coach end panel/corridor connection). The two cab end pieces were laminated together after I had cut a square in the inner one, bigger than the cab-front window, to provide a recess for the can front window glazing. These were then glued in place to the bodyshell and sanded to fit. The corners of the cab end were then filed and sanded round; other driving trailers had a rather less attractive square-cornered end.
Then I widened the front five passenger windows to match the power car, the 70 Class windows being wider than the LMS-style ones on the MPD railcars, approximately the same width as BR Mk2 coach windows. This means I won't be able to use proprietary flush glazing but the appearance will be more accurate.
Finally for now, plasticard fill-in panels were glued in place to fill half of the brake end passenger window and all of the next passenger window, on both sides. the latter with a door-sized window cut into the centre.
Next step will be some sanding and filling, scribing door lines, then adding detail to roofs, sides and ends.
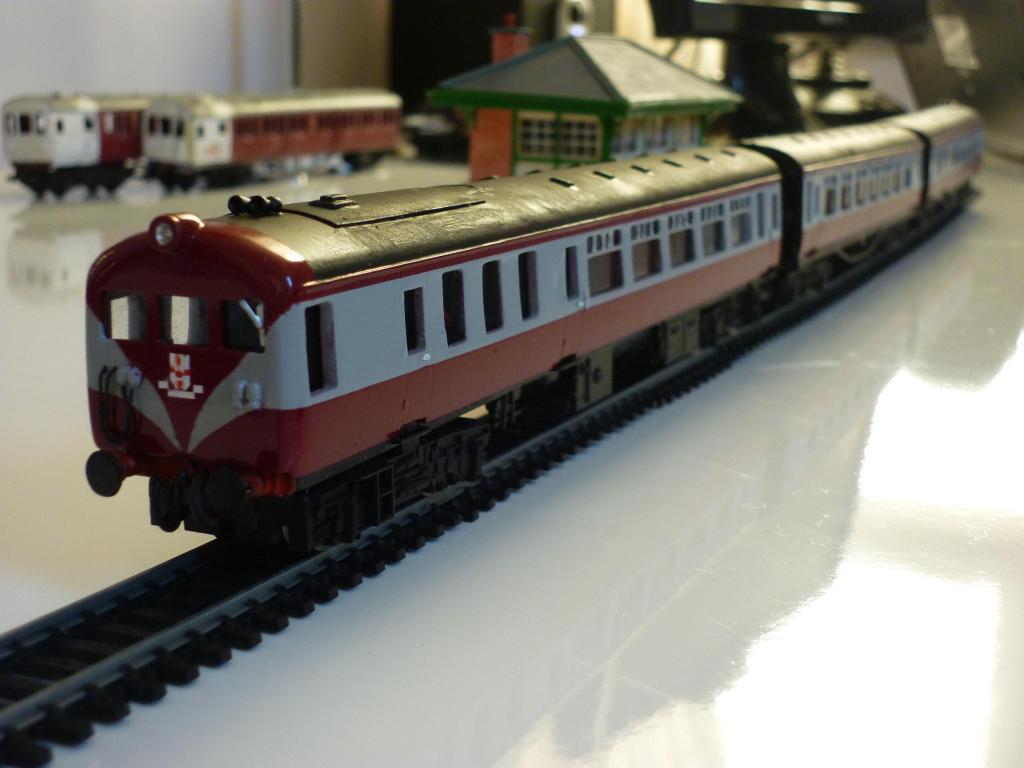
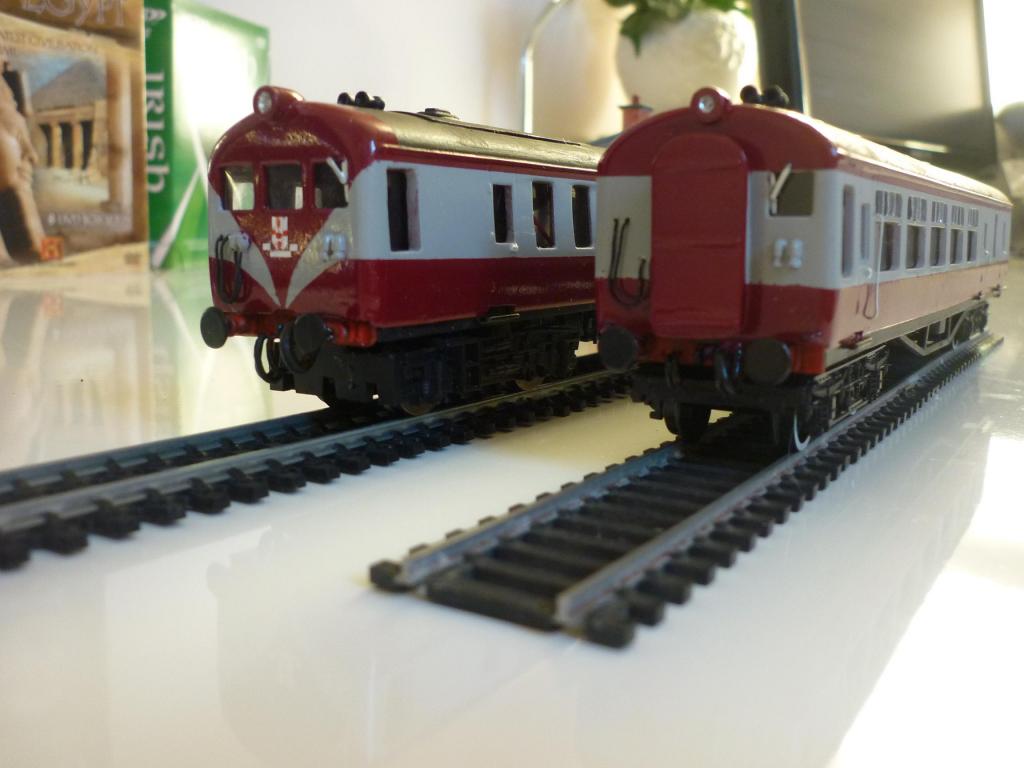
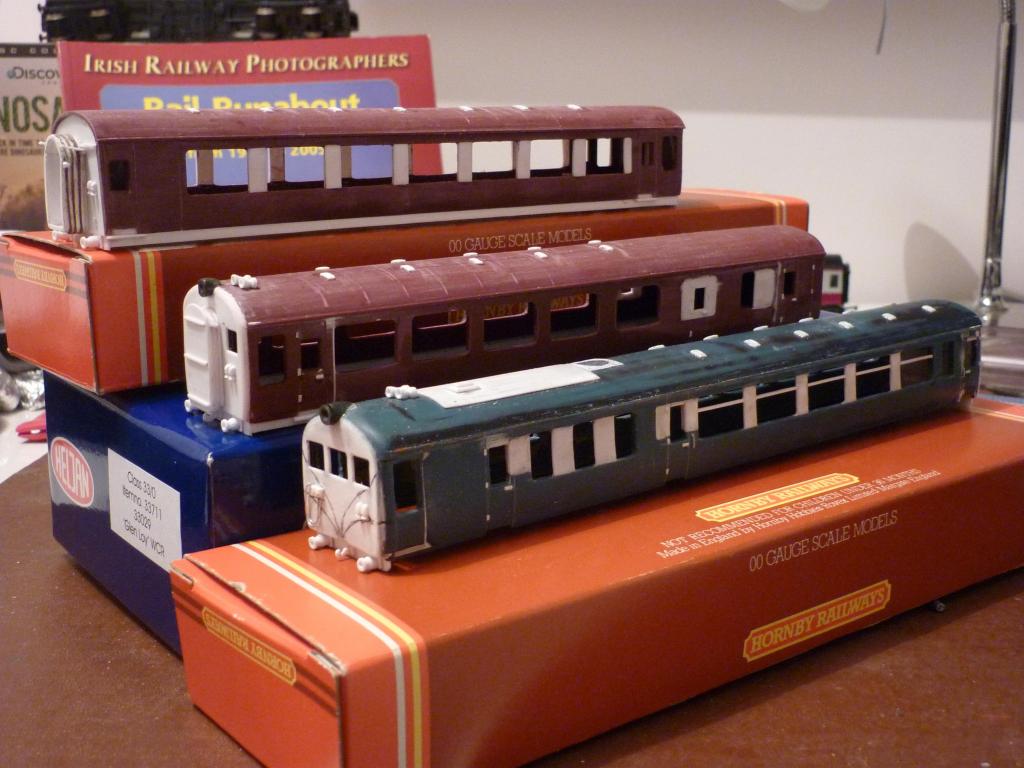
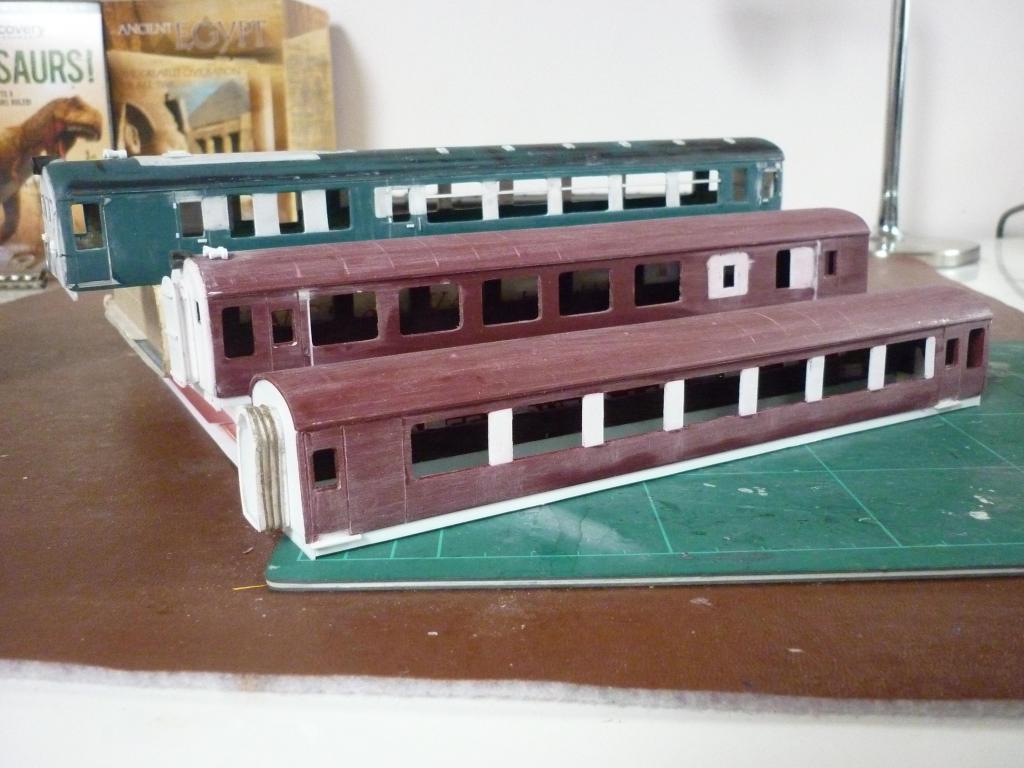
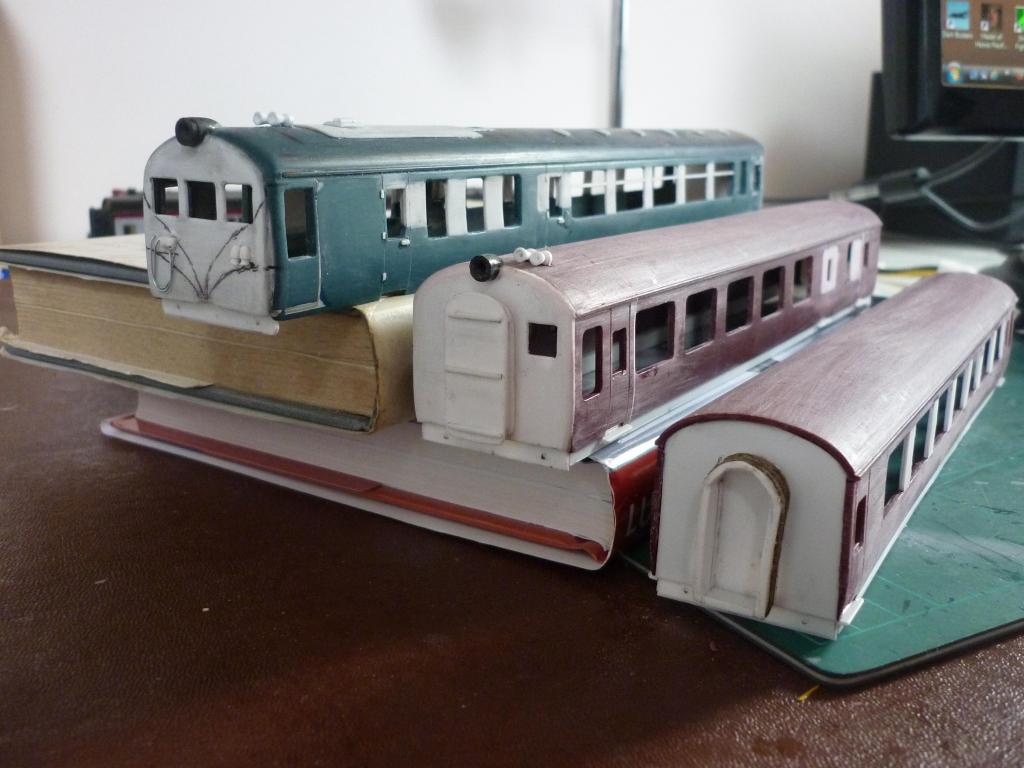
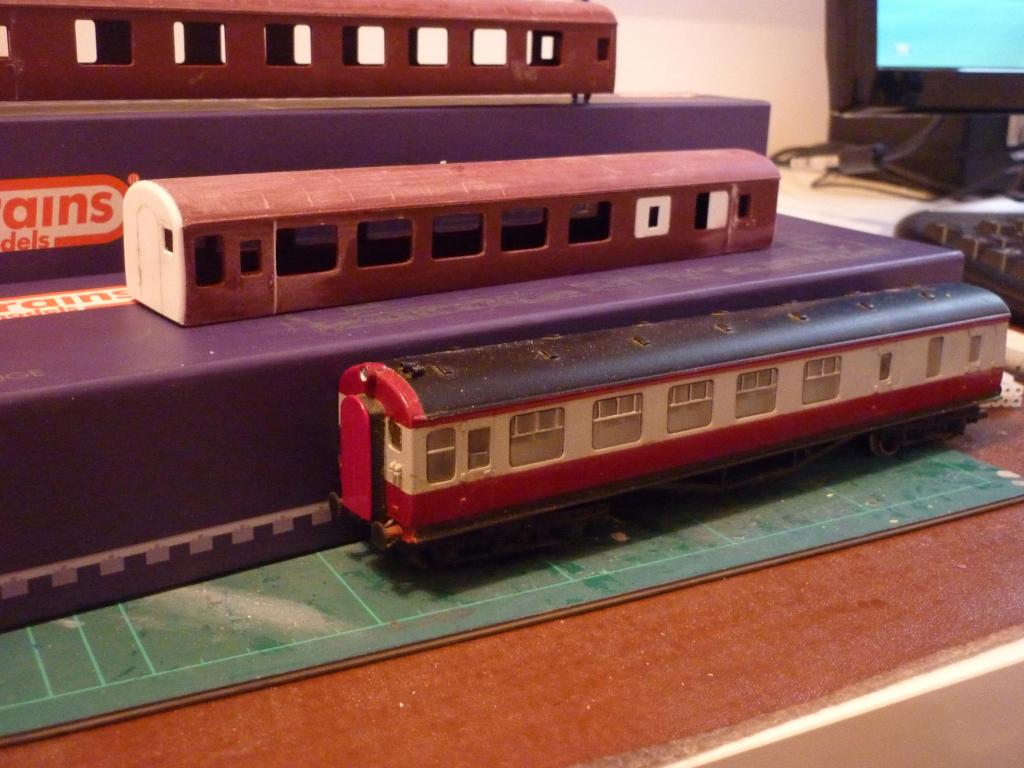
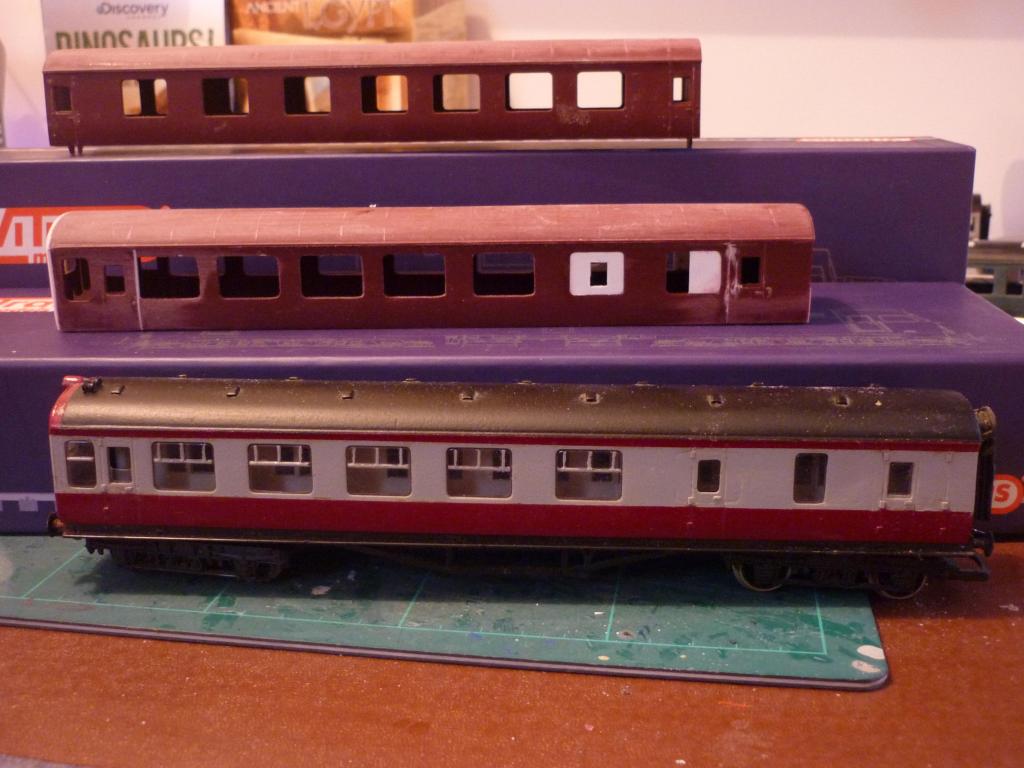
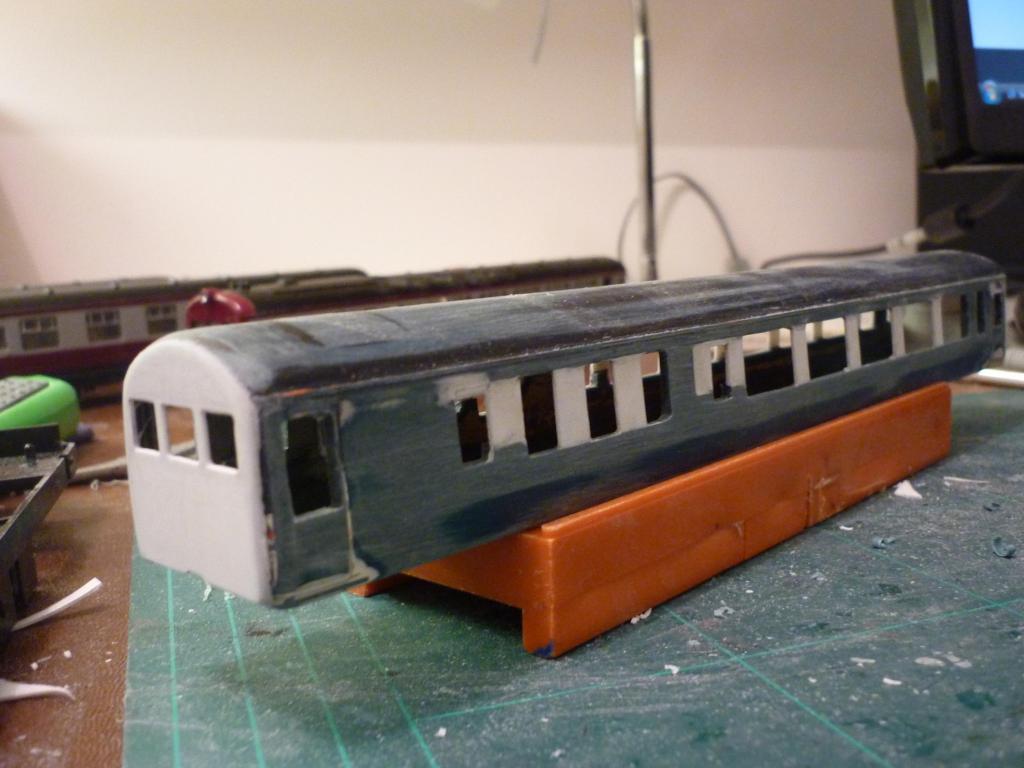
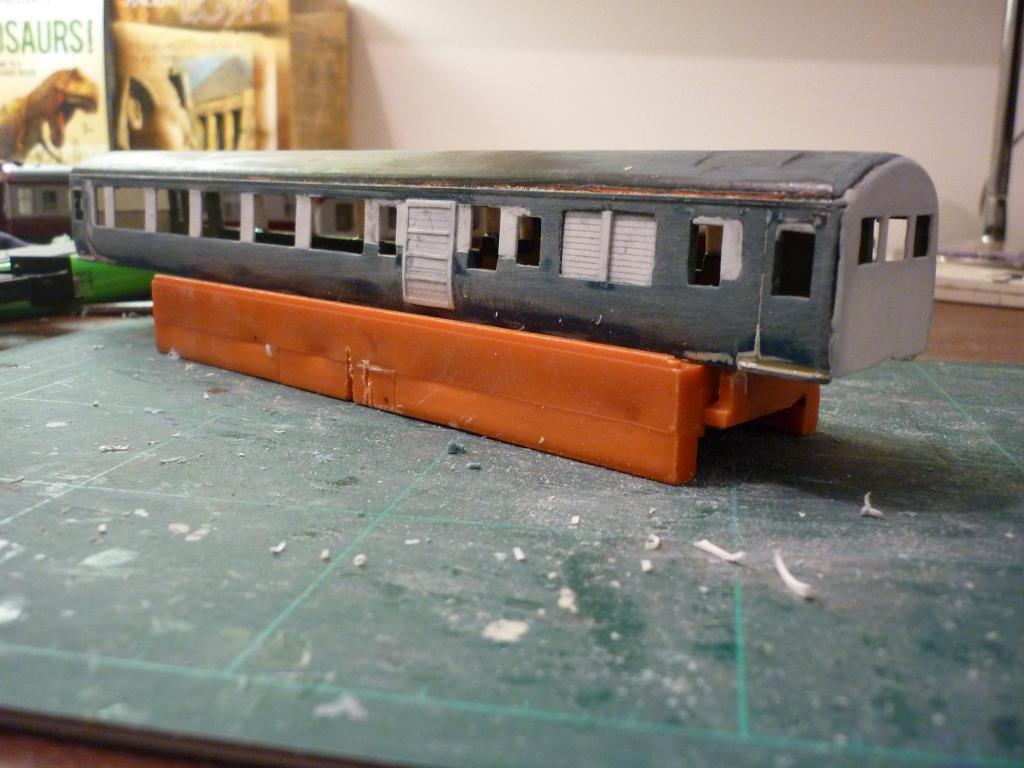
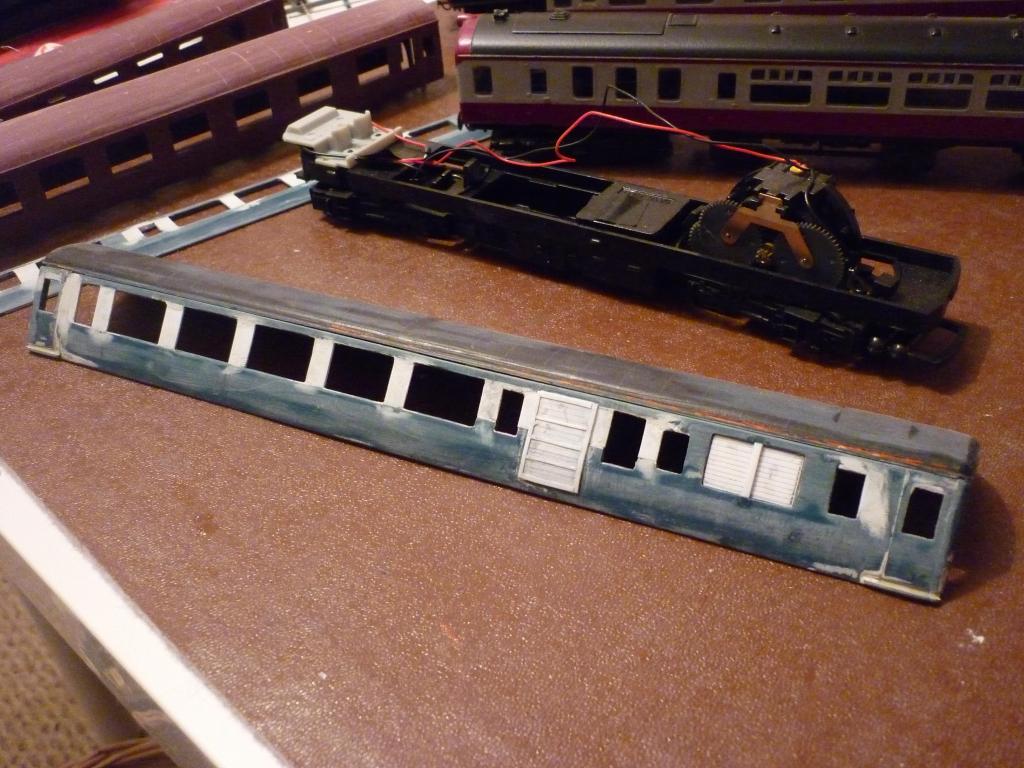
The pics below show the current build of the driving trailer beside the basic bodyshell (untouched apart from removal of roof ribbing and vents) and my original 1990s model.
-
Right - slowly but surely she's coming on.
Next step was bracing some of the plasticard fill-in pieces from the inside, to increase strength. The pillars between the passenger (and LH engine compartment) windows were left thin, as these will have their own glazing strips recessed closely behind them.
Door lines were scribed on the sides, and little rectangles were cut out of the tumblehome, under each door.
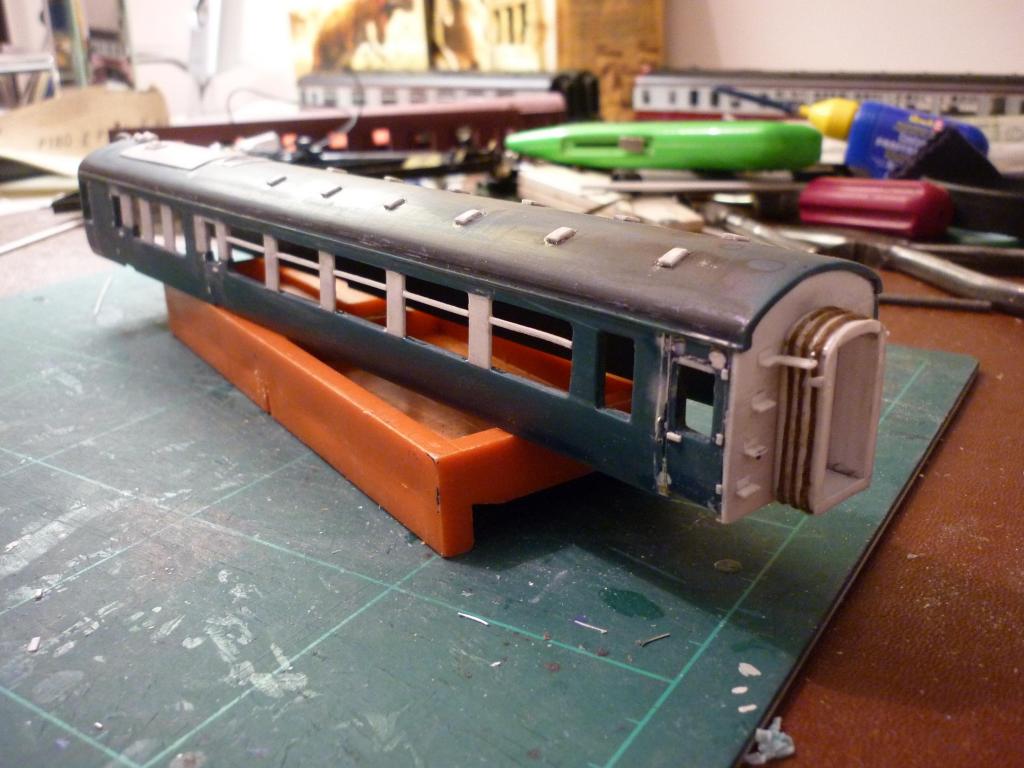
Roof detail was next. The engine compartment cover was made from thin plasticard sheet, with two oblongs of thicker strip forming the exhaust port at the front, a little slot for the exhaust opening itself being formed in the top piece. I didn't fit the little fin (train radio aerial?) ahead of this as it didn't seem to appear until some years into service life. Unlike the 80 class, the engine compartment cover on this DEMU lacks the four corner lifting lugs, but looks to have a socket near each corner; so these were drilled in. Behind this, a lattice effect for the fan grill was scribed in the roof and the surrounding frame cut from a square of very thin plasticard with a circular disc cut out. Little holes were drilled around the edge, to simulate its bolts.
Roof ventilators, in two rows of six, were cut from strips of thick plasticard, fixed in place and sanded lightly to round their edges. The two air horns, one long, one short, were made by carefully twirling the tip of a fine No.1 modelling blade in the end of a strip of circular plastic rod to form a conical recess. The exterior was then filed back with a small file to form the outer cone shape, leaving a disc at full width of the rod to form the body of the horn. They were then liquid poly'ed in place.
The cab front headlight was formed from a strip of thick kit sprue, with the front hollowed out. The rear was cut then sanded to enable it to fit over the cab front. with a little filler to blend it in after glueing in place.
Door hinges and handles were then cut from different thicknesses of plasticard strip and glued in place. Wire hand and grab rails were made from thin florist's wire, holes drilled and fitted; they'' be removed for painting.
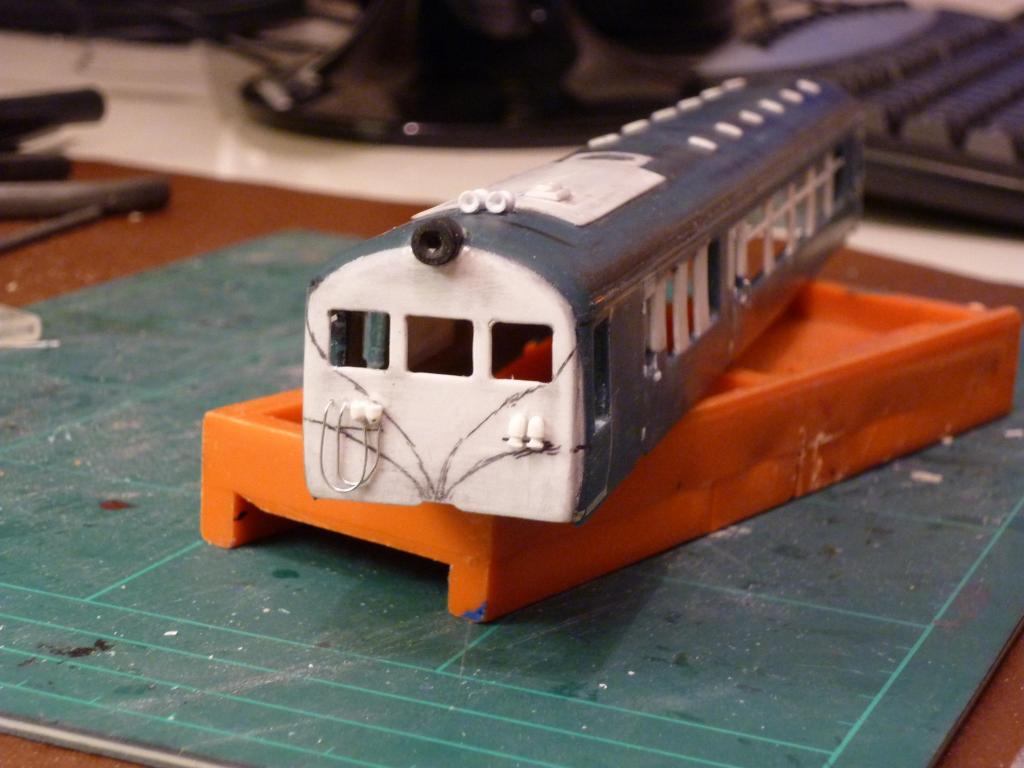
On the cab front, plasticard strip, suitably sanded and filed, produced the two MU jumper cable sockets under the driver's window and the two cable connections under the opposite one. Florist's wire cables were made and bent to shape; holes were then drilled to take the outer ends. Again these will be removed for painting.
At the other end, a corridor connection was made from plasticard sheet, and loops of linen thread wound round the outside and glued in place, to simulate its folds. The supporting arms were made from strip and wire, one each side. Four footsteps from plasticard sheet were added on one side, and a couple more MU cable sockets on the other. I don't have decent pics of this end of the power car so I'm guessing a bit here!
On the sides, I have started adding the passenger window ventilator frames from thin plasticard strip. Next task will be completing this, a bit of general sanding and finishing, then on goes the primer!
-
Nice work, great to see the RTR steam loco conversions in particular, a really good way to get an Irish steam stud up & running, especially if like me you weren't born clutching a soldering iron and/or considerin them primarily an instrument of (self-) torture! Keep 'em coming!
-
Having cut transverse spacer 'planks' from plasticard, these, the sides and the roof were re-assembled with the usual liquid poly. Once the glue had dried, I cut new front and rear ends by drawing around the body while held against a 30-thou sheet of plasticard; after cutting these out, they were glued it in place. Once dry, they were trimmed and sanded back to shape.
Next, the edges of the cab end were sanded to round and blend it into the sides. The position of the three cab front windows was marked and these were then carefully cut out with the tip of a fine blade in a no.1 Exacto-type knife, starting with a hole in the middle then carefully squaring off and enlarging, finishing the edges with a small file.
There's a small cut-out at the bottom centre of the cab front and this was carefully trimmed out with the same no.1 knife.
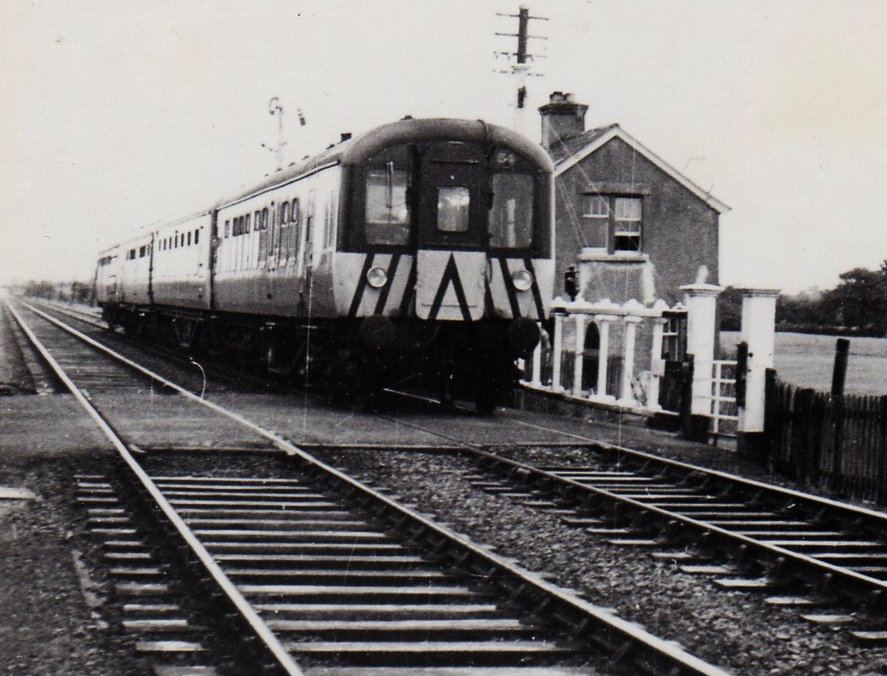
The flat front end and and small windows gave these units a rather ugly appearance compared to the UTA's earlier MPDs and MEDs (and even the later 80 Class) but I daresy drivers appreciated the extra protection from stone-lugging vandals, which I'm guessing was the reason for their adoption.
Now it's beginning to look like something, I think I'll carry on with the power car before doing any more with the trailers!
-
Ok bit of a slow start on this one but here's the most recent update & pics.
The roof vents and the over-prominent ribs were pared off the roofs of two Hornby Stanier composite bodyshells, with a common-or-garden Stanley-type knife. Although the type of 70 Class driving trailer I'm modelling has a brake compartment - numbers 711-712 - the compo is possibly a better fit than the Hornby Stanier brake third, needing somewhat less re-working of the sides. Some re-working of this and the centre car will be needed, not least the windows. on the last model, I retained the LMS-sized passenger windows to permit use of standard Flushglaze replacements. This time, I think I'll model the trailer windows the correct (wider) width to match the power car - the Stanier sides are quite thin, enough to do without the flush glazing.
As for the power car, this proved a bit harder work than I expected, mainly because the sides of the donor airfix Mk2d are the opposite - very thick, too much so even for the Mk2a flush-glazing I planned to use.
I ended up cutting away both sides below the gutters, then taking out a strip each side, along the top. This brought the tops of the air con windows up to about the right height and also lost the -skirt' effect where the bodyshell overlaps the solebars.
I then made a long horizontal cut each side, to deepen the passenger windows and some more cuts to provide other windows in the right places, including the trio on the LH side of the engine compartment.
Gaps were filled in where needed with strips of plasticard sheet, notably the pillars between the passenger windows. This plasticard is thin enough to permit glazing strips to sit reasonably flush, behind the passenger and some other windows.
Two grills were made from scribed plasticard sheet and fitted to the RH side of the engine compartment. Strips from the same material were added as framing where required. I've just applied and sanded down the first filler to the sides.
Not having to cut and shut pieces from each side will at least give them somewhat greater strength than the 80 Class, overall.
The Mk2d roof, with all detail sanded smooth save the gutters, had the ends cut off: the corridor end cut square and the other, leaving rounded corners for the cab end. I glued a series of plasticard tabs along the inside, each side, below the gutters, to help position and secure the sides, when re-assembled.
Next step will be cutting some bulkhead/spacers to fit width of the 5-pole HST chassis (which will need lengthening and new underframe details) so that the power car bodyshell can be re-assembled and cab and corridor ends made and fitted.
-
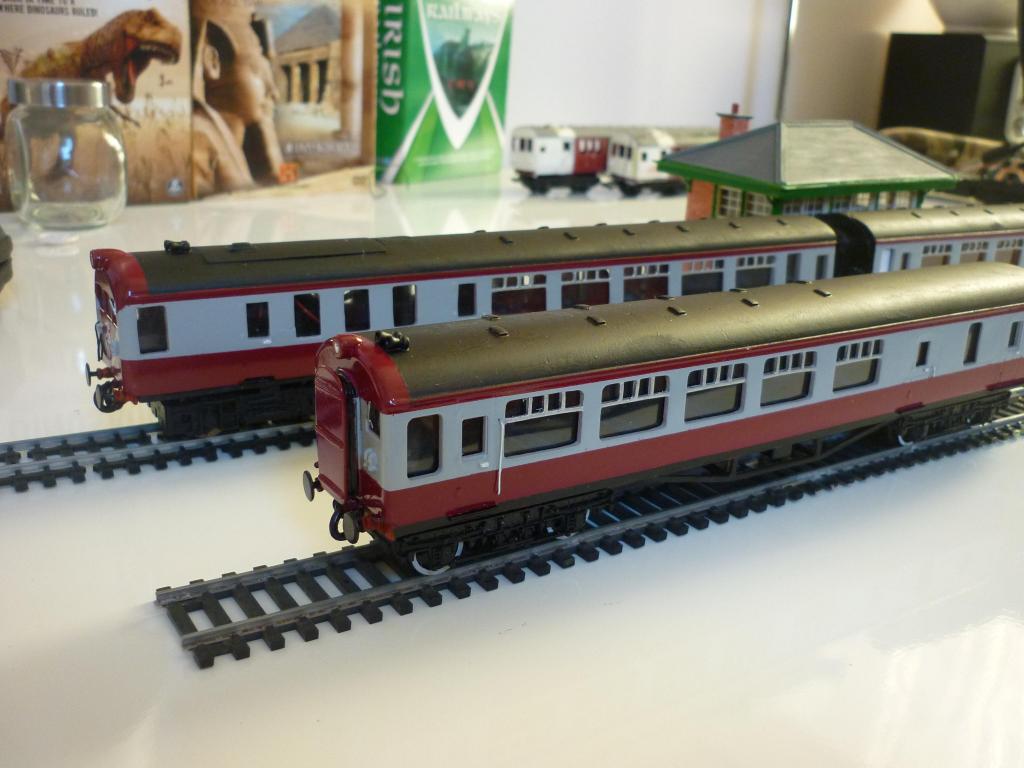
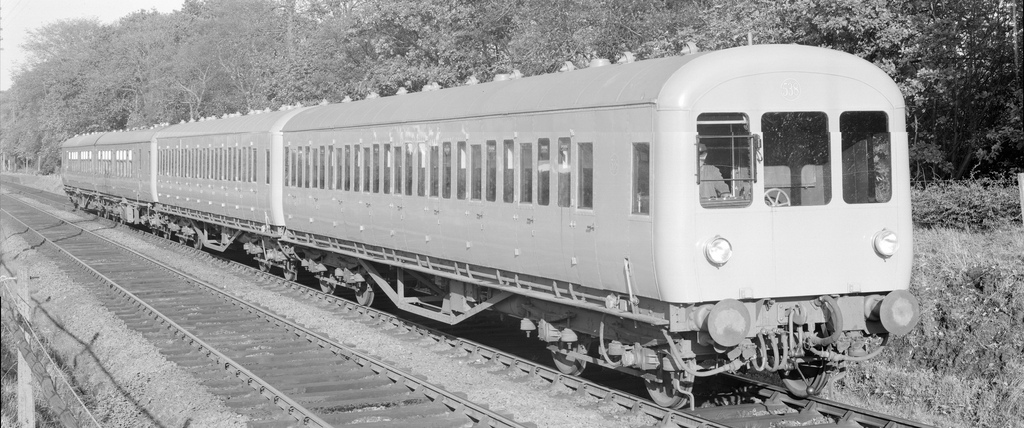
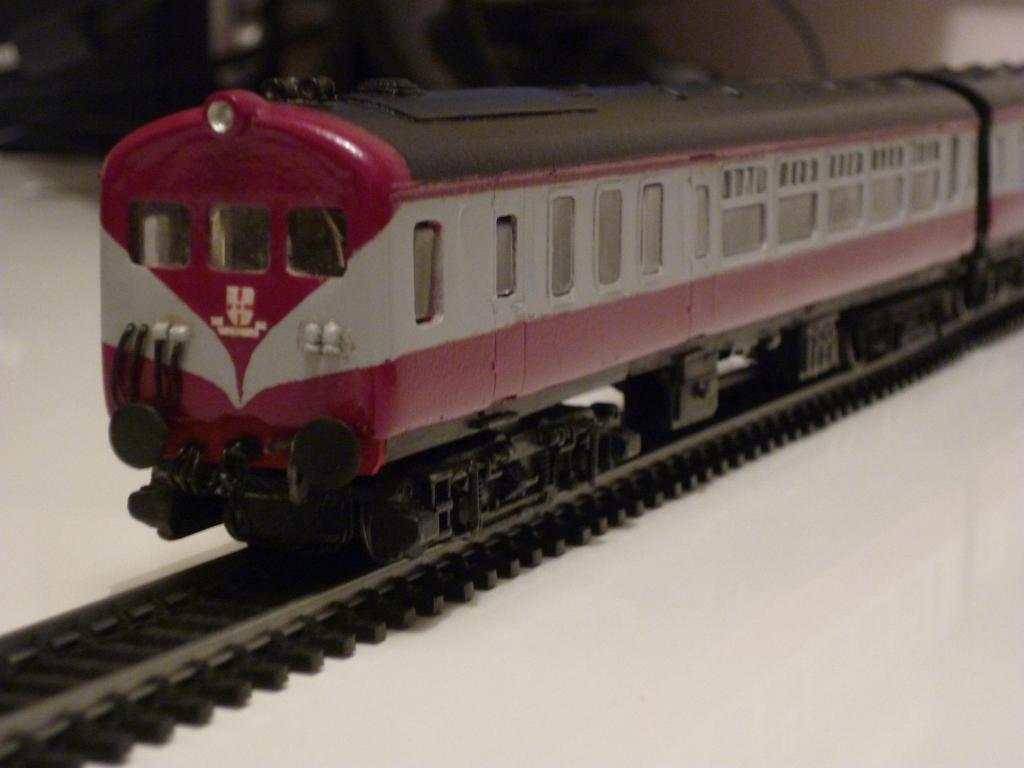
Next project is another Diesel-Electric Multiple Unit, this time a 'DE' (Diesel Electric) as the 70 Class was originally designated.
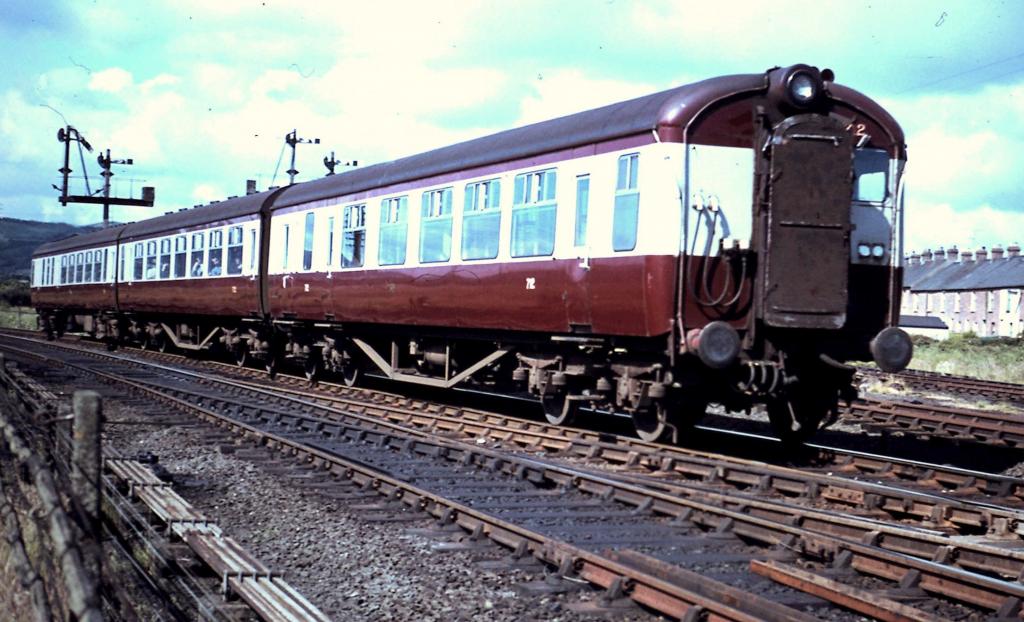
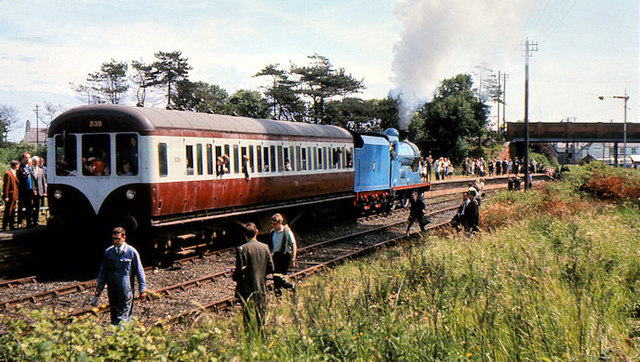
On current plans, the model will be finished in original maroon ('red') and oyster grey livery, not the later blue uppers, maroon lower sides - apologies to those who knew and loved it, but the latter colour scheme, though smart enough when clean and seen in good light, is to my eyes one of the dullest railway liveries ever, more so even than UTA Brunswick Green and not a patch on those that preceded or replaced it! But as they say, 'de gustibus, non est disputandum'.
Although I was a fairly frequent (mostly holiday seasonal) rail traveller in NI on the Bangor and Northern Counties lines during the 1960s and early-to-mid 1970s, the existence of these sets basically passed me by. I was conscious of two basic types of railcar, which only much later I found out were called Multi-Engined Diesels (MEDs) and Multi-Purpose Diesels (MPDs). So varied were the cars in each of these types that it was not clear to me at the time that they were successive and (apart from a couple of dual-role trailers) incompatible generations of railcar; my first attempt at a model comprised two or three Playcraft (HO) coaches, a 'borrowed' Tri-ang Blue Pullman motor bogie squeezed into one end of the brake coach, a plasticine MED cab at one end of the set and a plasticine MPD cab at the other. This was replaced by a repainted Metro-Cammel DMU which was what I'd always really wanted but was only able to get when Tri-ang restored it to their range in 1970, after several years out of the catalogue.
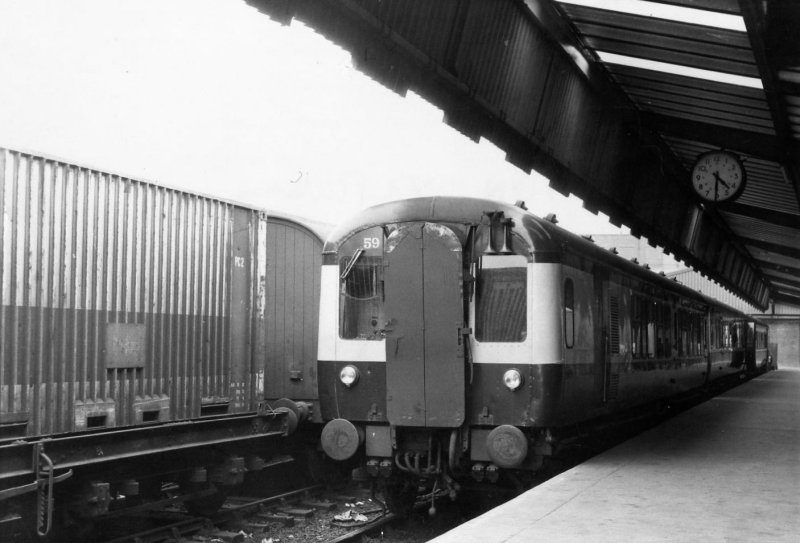
So to me at the time, the 'DE' was just another variant in a widely-varied family of UTA/NIR railcar trains. Nowadays, I know that the 'DE' was the final generation of railcars built by the Ulster Transport Authority. And that whereas the MEDs and MPDs were truly pioneering designs, the 'DEs' were much more conservative, bodies built locally around a British Railways 'Hampshire' DEMU power unit. Having achieved the long-term reliability that seems ultimately to have eluded the MPDs, this became the pattern until quite recently, with 80 and 450 Classes following (and the latter in fact re-using the engines from retired 'DEs'). Having about 1991 obtained photos and tabular specifications of the 'DE'/70 Class in the second edition of 'Irish Railways Traction & Travel' and in CP Boocock's 'Irish Railway Album' plus UTA works drawings from the Ulster Folk & Transport Museum (courtesy of Mark Kennedy), I made my first model of the type back then.
This project will essentially be a repeat of that model, with some modest enhancements. While 6-car sets (a power car at each end) were common on NCC main line express services (and later on the GN to Dublin), 3 cars were common elsewhere, notably on the Larne line. Power on my original set was a Tri-ang Hornby Hymek motor bogie, with minor cosmetic modifications, fitted into the front of a modified Hornby Mk2a TSO coach.
For the new model 20 years later, I considered various alternatives to construction, including plasticard overlay sides and different donor coaches. But for a good balance between accuracy, ease/speed of production and quality of finish, I opted to use the same basic donor-coach-hacking method as last time but with a different approach to the power car bodyshell. This time the power is to be provided by a modified Hornby HST 5-pole motorised chassis and as even less of a Hornby Mk2a coach would be needed, I opted to use a spare Airfix Mk2d bodyshell as a basis. I had originally bought two of these for converting into trailers for my good old Tri-ang 'Blue Pullman' but that can now wait!
The real 70 Class had new bodies with wide passenger windows which were about the same size as those on BR Mk2 coaches, though with three vertical ventilator stanchions, not two. Colm Flanagan's most impressive 6-car set, as seen running on 'Bleach Green'
I believe is formed from Hornby Staniers, two lengthened for the longer power cars, and thus has passenger windows which are rather narrow, though benefiting from the ability to use Finecast Flushglazing which gives it a very fine appearance:http://newirishlines.org/2009/09/27/the-utas-finest-train/
Colm has also made a model using the Worseley Works etched sides, and these provide the correct, wider passenger windows (though a half-window just behind the tall side grilll on the power car's RH side should actually be ahead of it):
http://www.lmsncc.org/class_70_dmu.htm
At any rate, to adapt 'The Rifleman's Creed', there are many ways of modelling an 80 Class, but this one is mine!
Here are the basic components: one Hornby HST chassis (with 5-pole motor), one Airfix Mk2d bodyshell, and two Hornby Stanier unpainted composite coach bodies. Rather than using the Staniers' chassis/underframes, which are a bit crude and need many modifications, I will - as I've done on some other models - fit buffer beams and solebars directly to the bodyshell and make a new, clip-fit floor/chassis unit for the two trailers. The power car's underframe will be a modification of the HST one, which will save some of the trouble of converting a Mkk2a one, as described for the last project, the 80 Class.
Thanks to the internet and several books I didn't have back in the early 1990s, - notably must-haves'The UTA in Colour' by Derek Young and Colm Flanagan's 'Diesel Dawn' - I now have many more reference pictures than I had back then. So I hope to be able to improve on some details, although I believe the original model is basically accurate, apart from the narrower passenger windows in the trailers.
…to be continued!
-
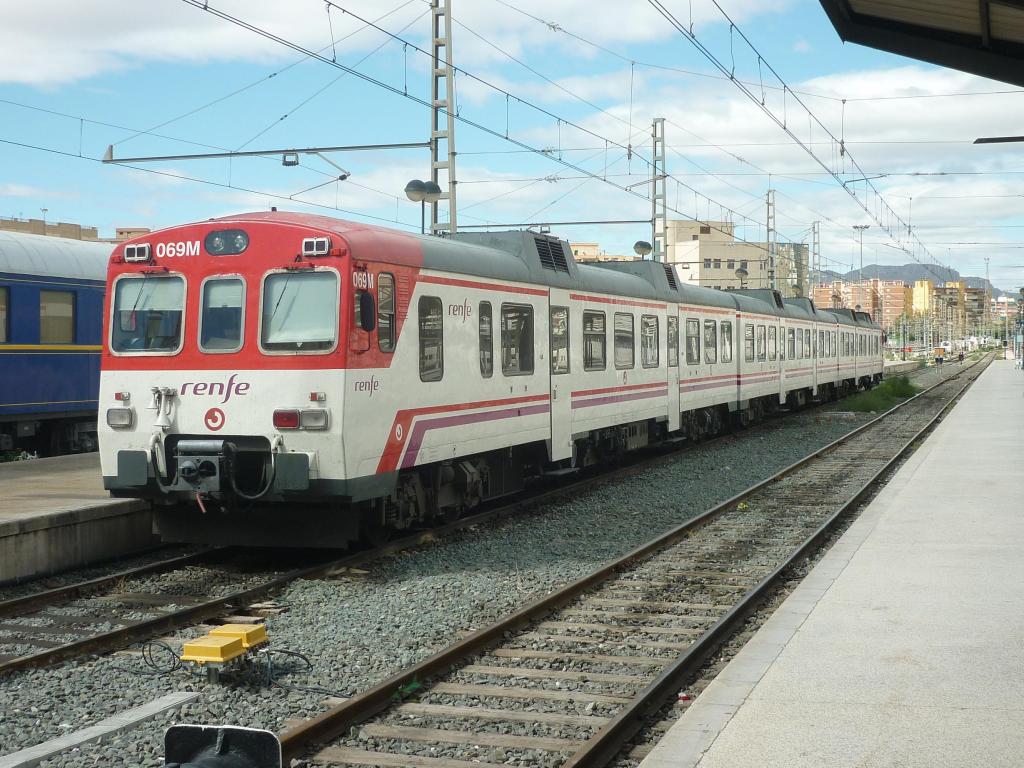
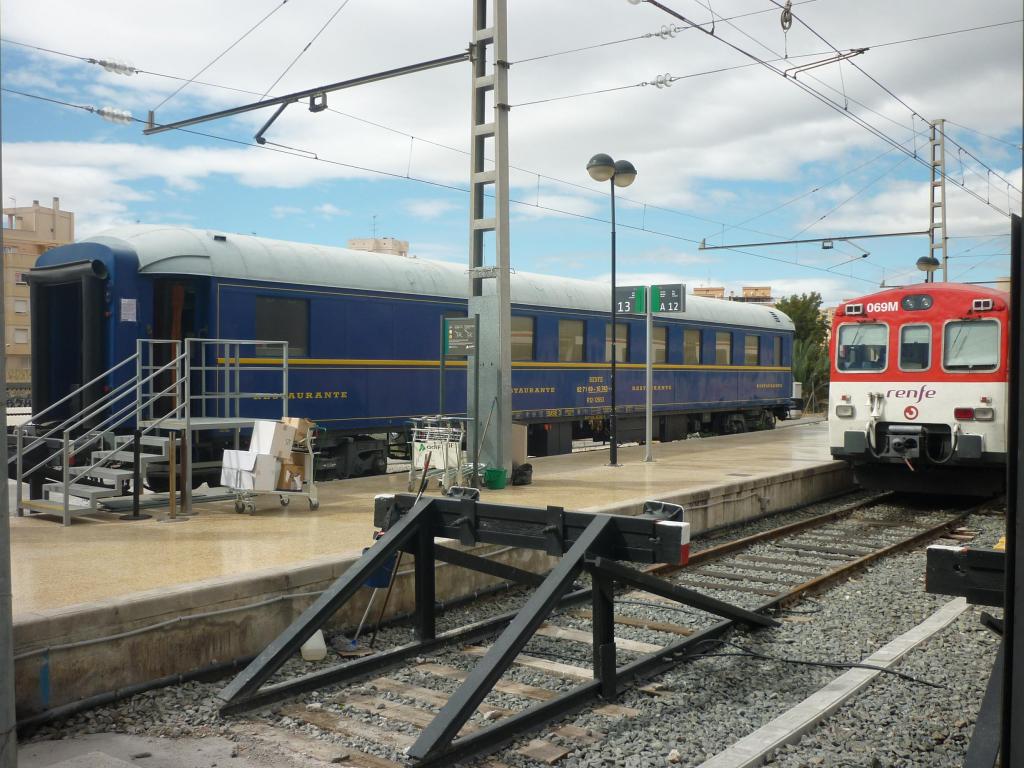
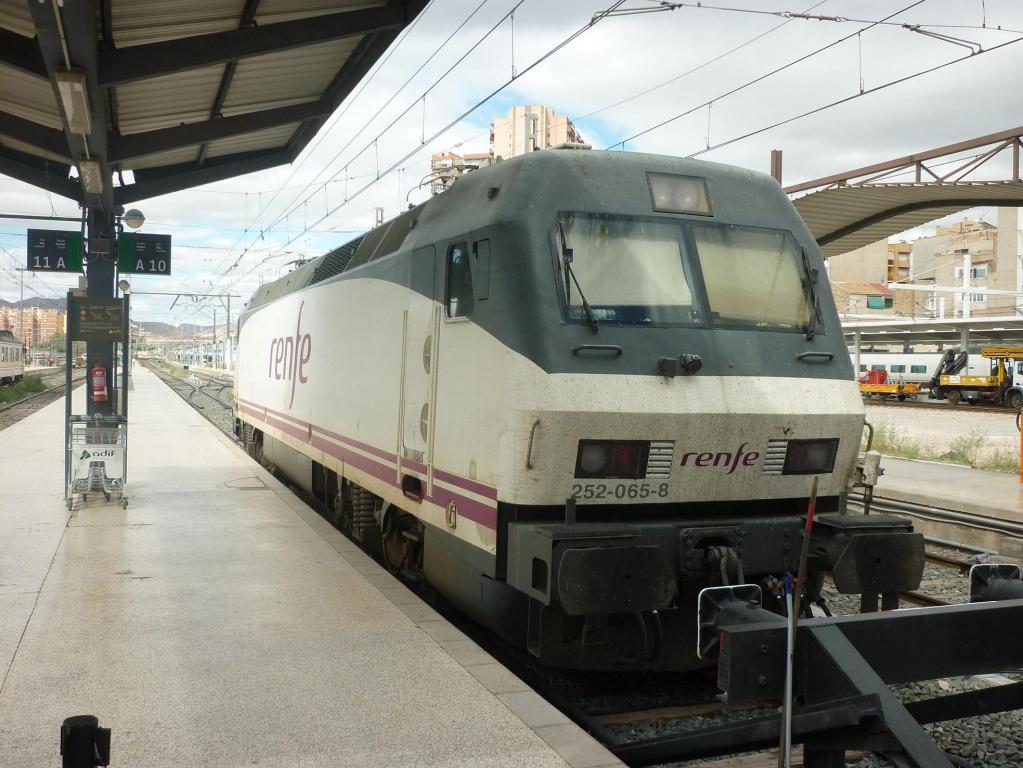
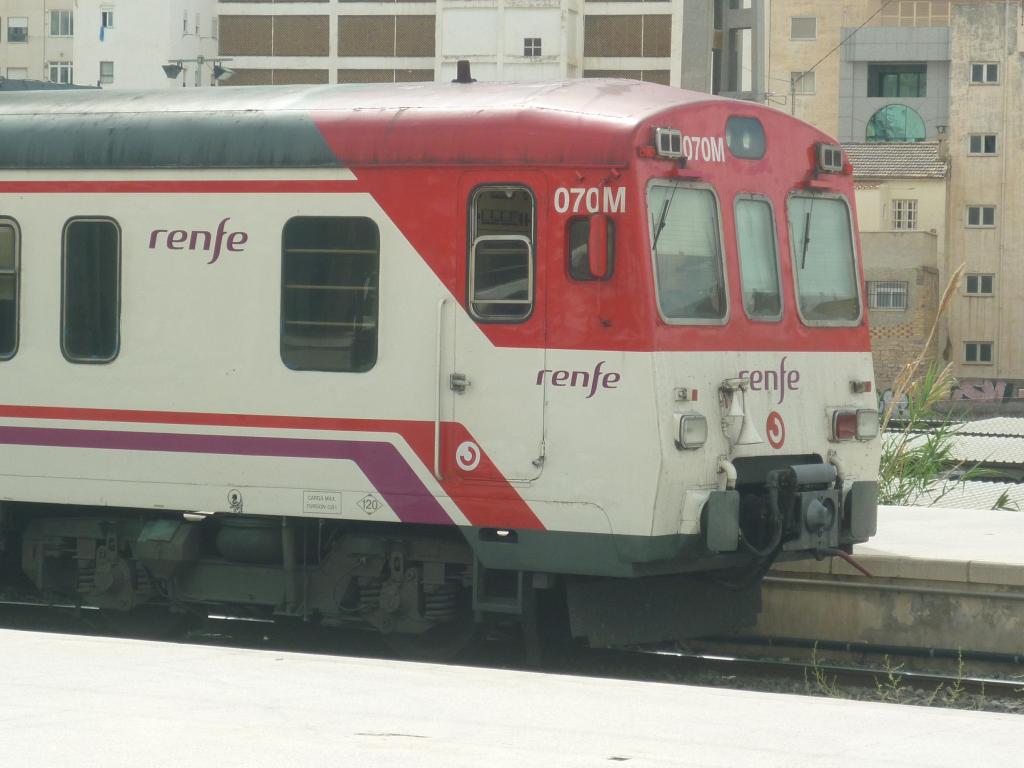
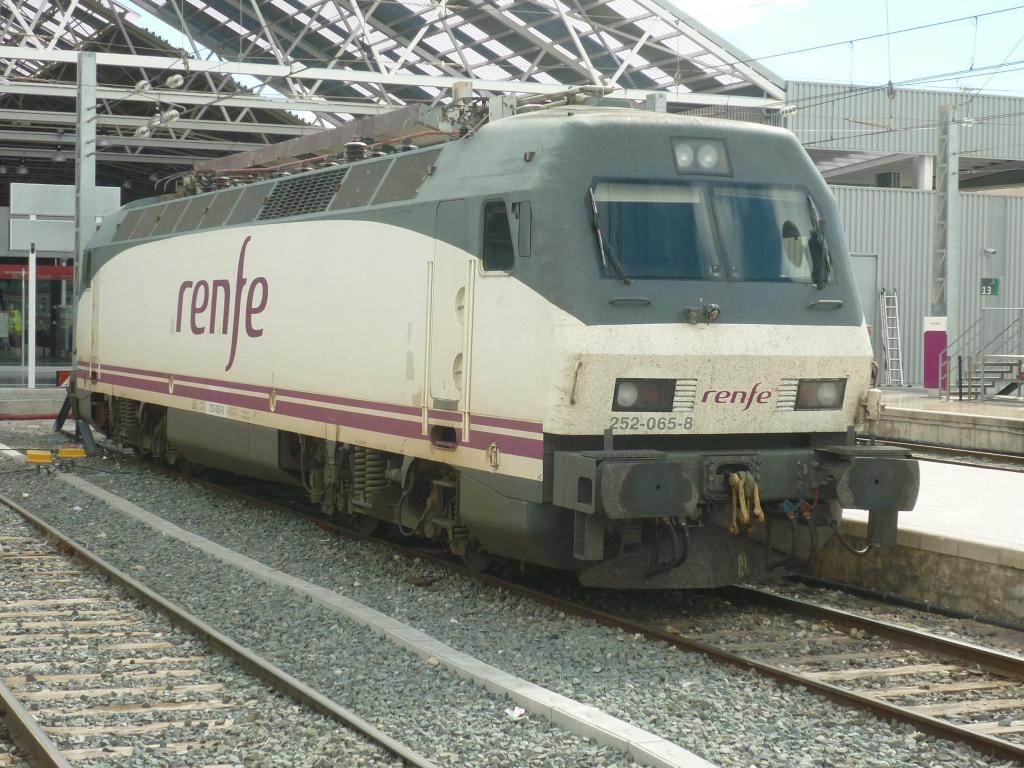
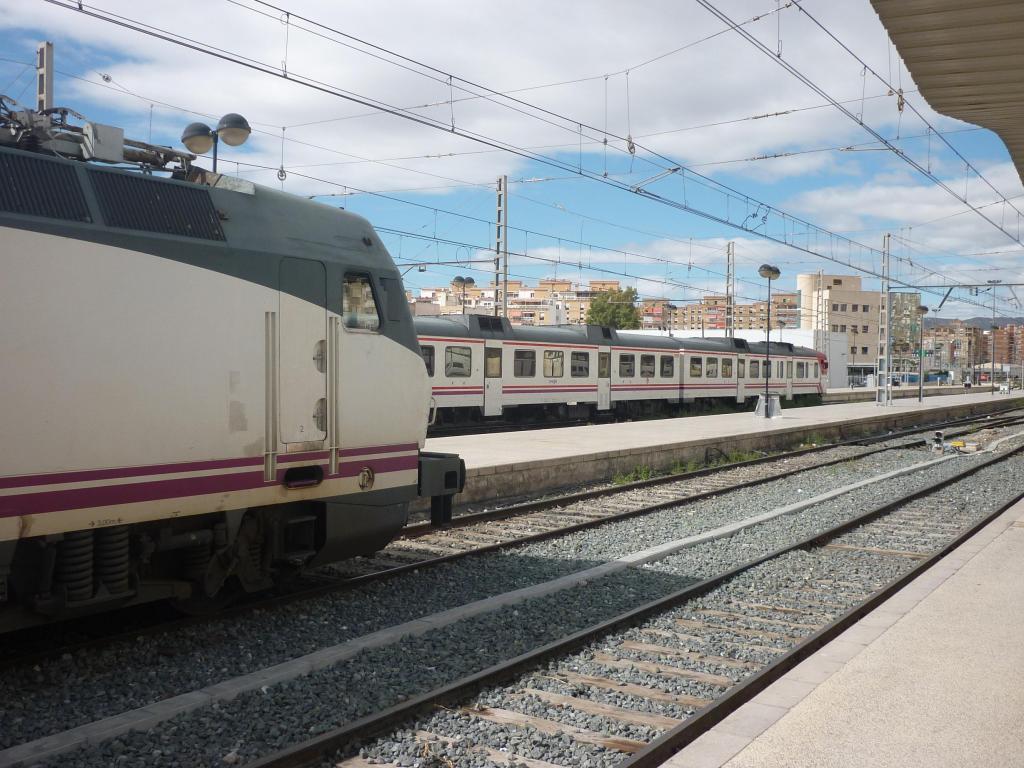
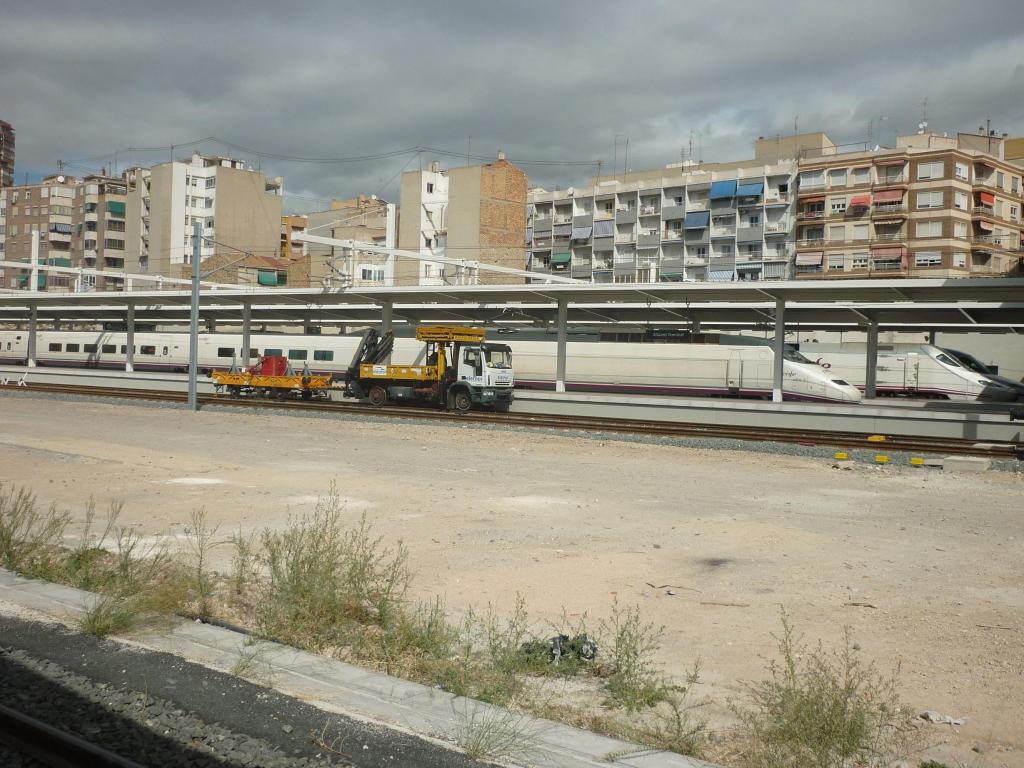
Since you started...
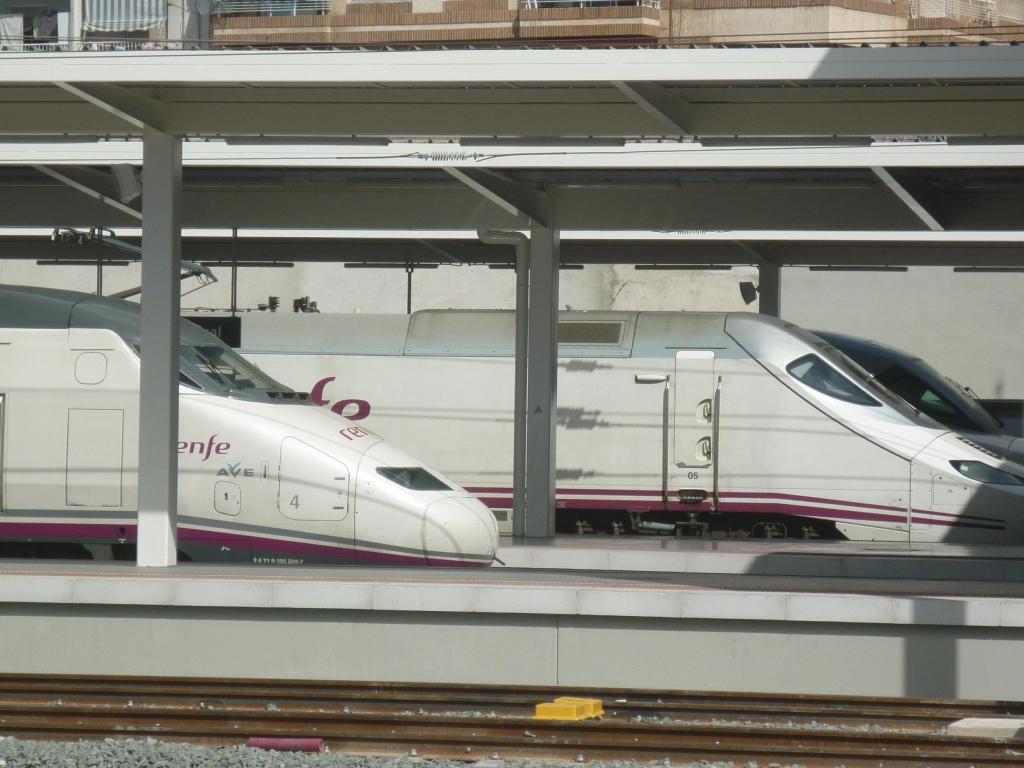
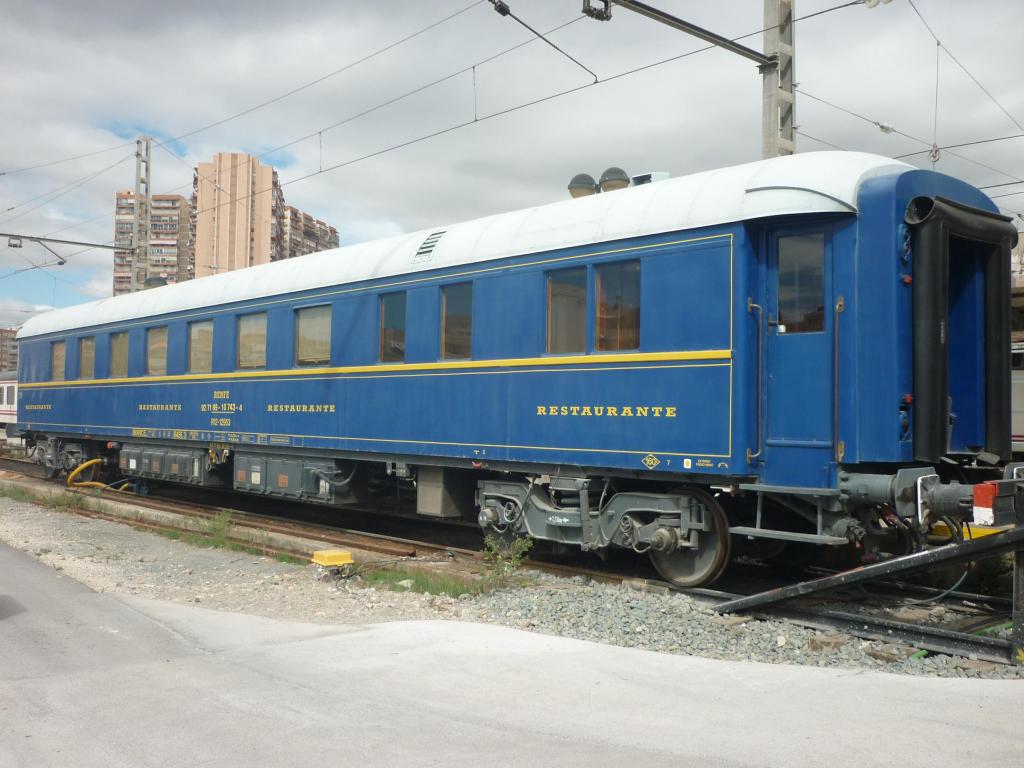
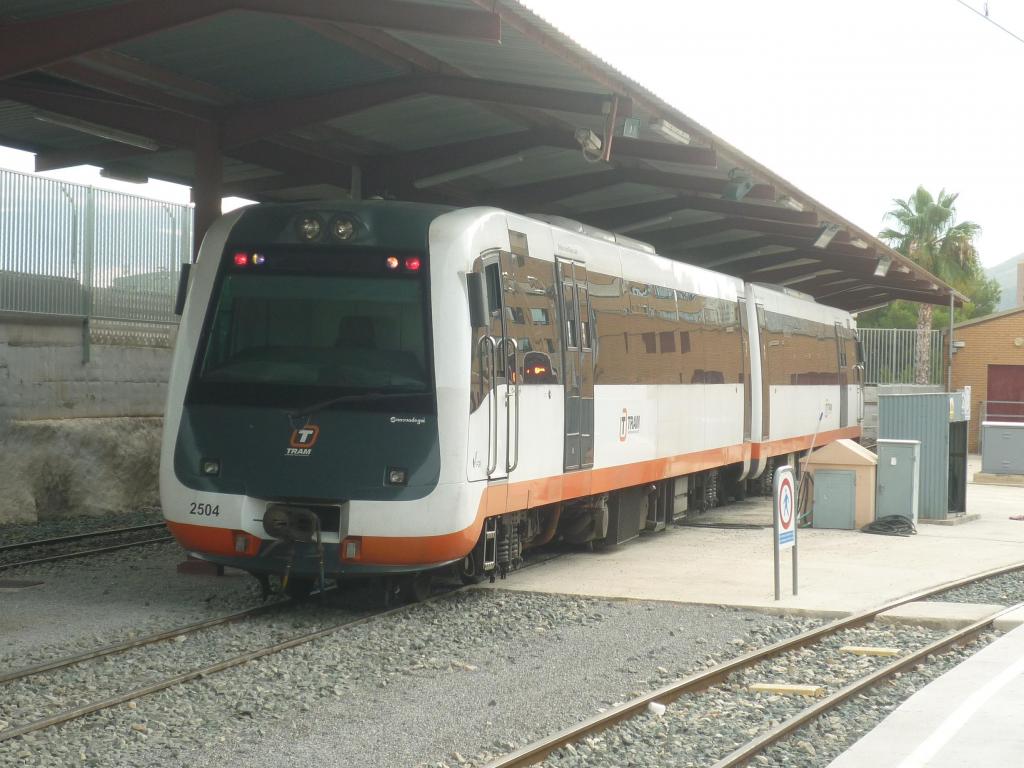
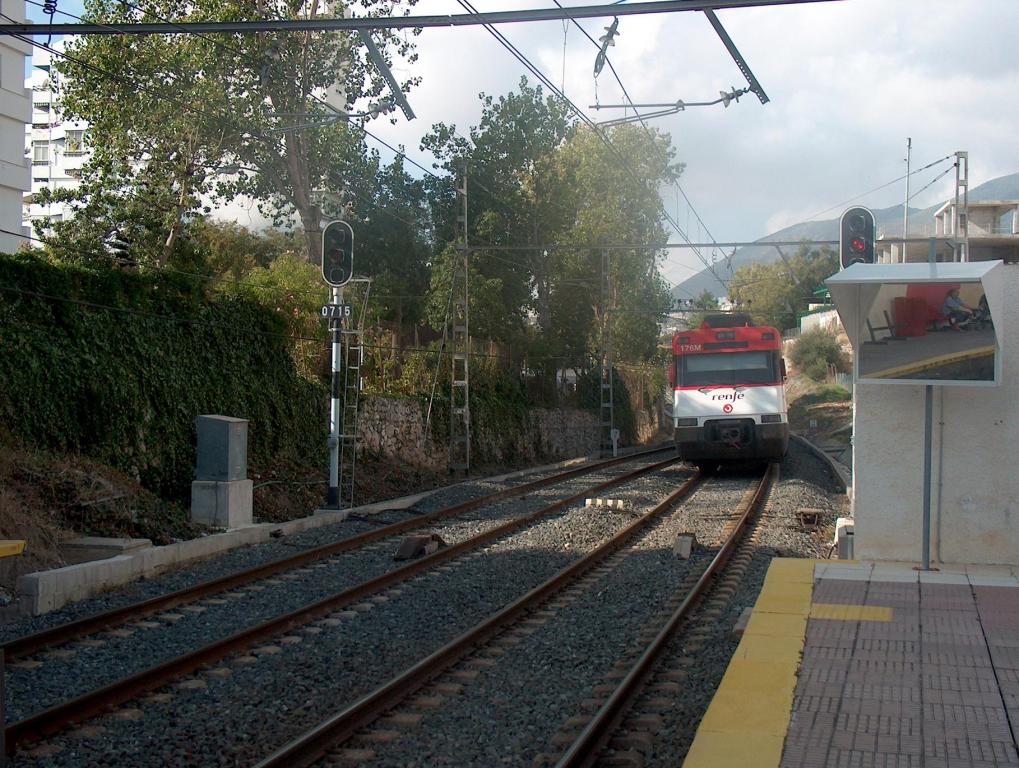
Some pics taken at Alicante station in September this year:
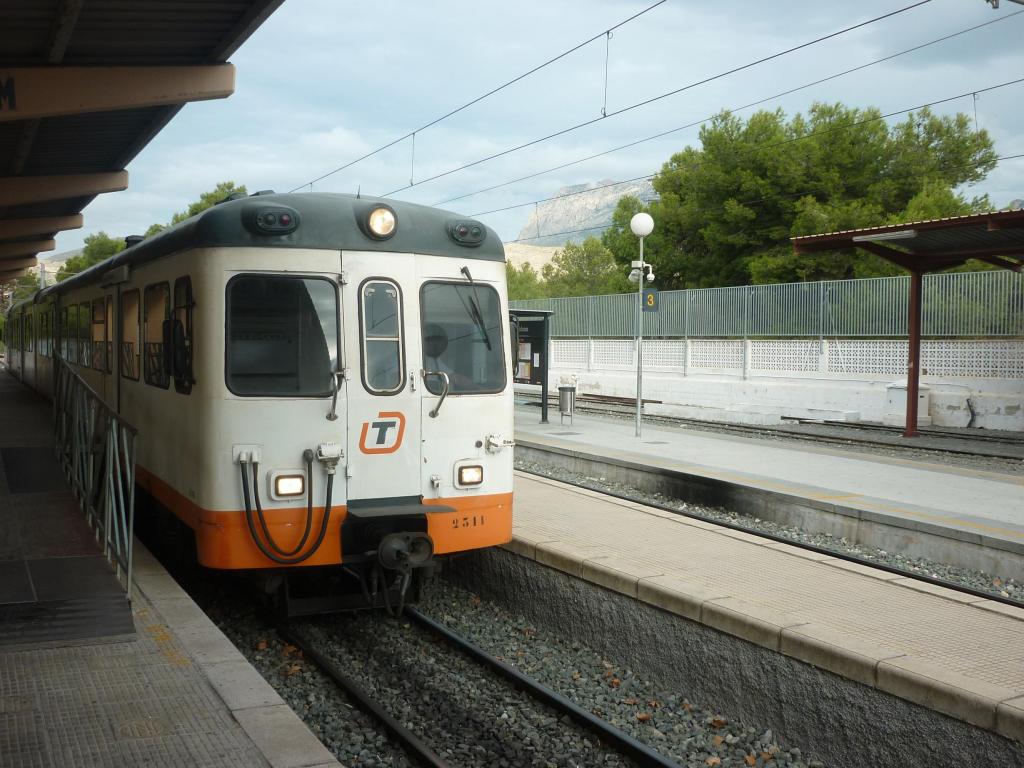
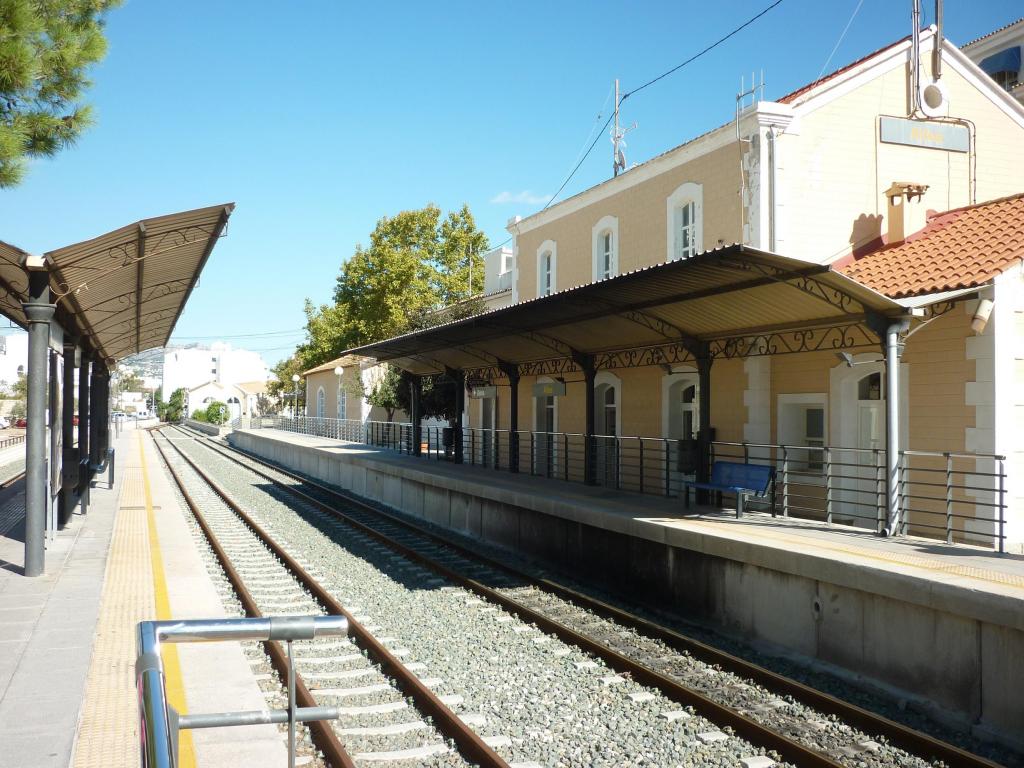
The Alicante to Denia light railway/tram, two at Benidorm station, the middle one the pretty little station at Altea:
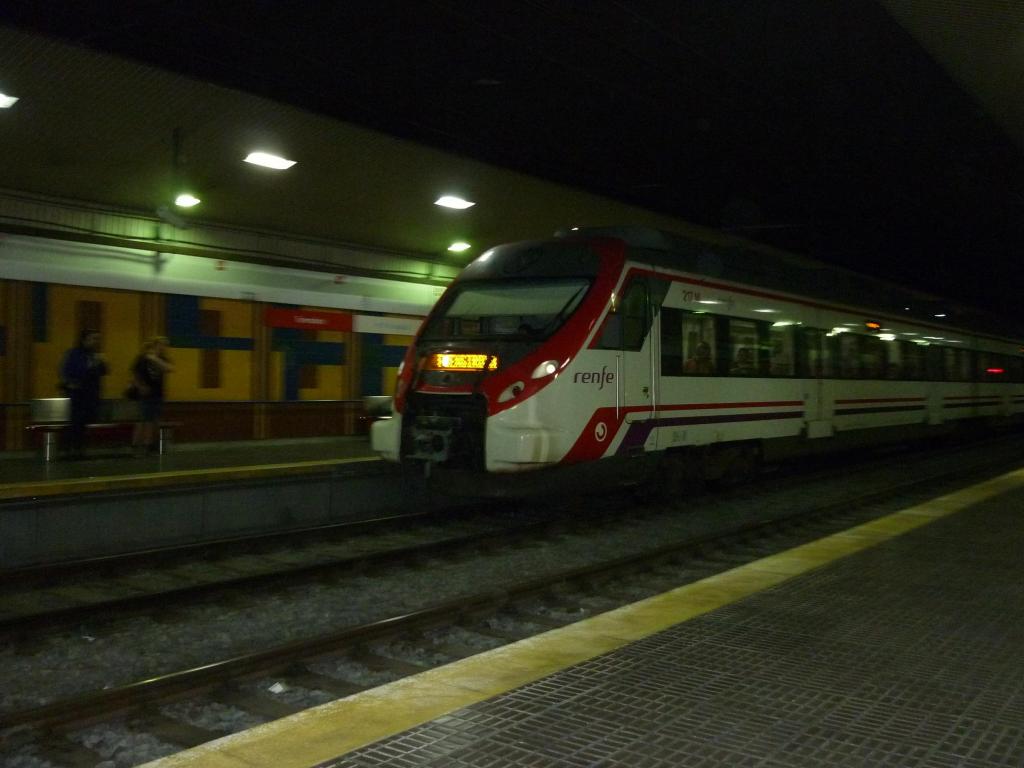
The Malaga/Fuengirola RENFE line, at Benalmadena/Arroyo de la Miel and at Torremolinos's underground station:
-
Just found this, posting in case you haven't seen it:
Funny that the GM-hauled rake seen leaving Connolly is an 80 Class DEMU on arrival in Central but some nice stuff including interior views of NIR loco-hauled Mk2s in that era.


GVS and Adelaide lookalike
in Irish Model Layouts
Posted
Cheers Andy. My distinct railcar memories start with the wasp-stripe era, tho I recall seeing an 'ivory' upper on a railcar with a corridor end leading as it negotiated the bridge at Bridge End just beyond Queen's Quay which must have been no later than about 1961-2. And some eau de nil stuff at Yok Road - and that elusive 'Turquiise Train'. I know many MPDs were turned out in that colour from new from about 1958-9 and wonder if one of those was tried out for a while on the Bangor line, tho they say there were only two MPD visits to Bangor and neither fit that period. But when no less than Richard Whitford doesn't remember the 'Turquiose Train' (I quizzed him in the mid 1990s) I begin to doubt my sanity...