33lima
-
Posts
190 -
Joined
-
Last visited
-
Days Won
2
Content Type
Profiles
Forums
Events
Gallery
Blogs
Everything posted by 33lima
-
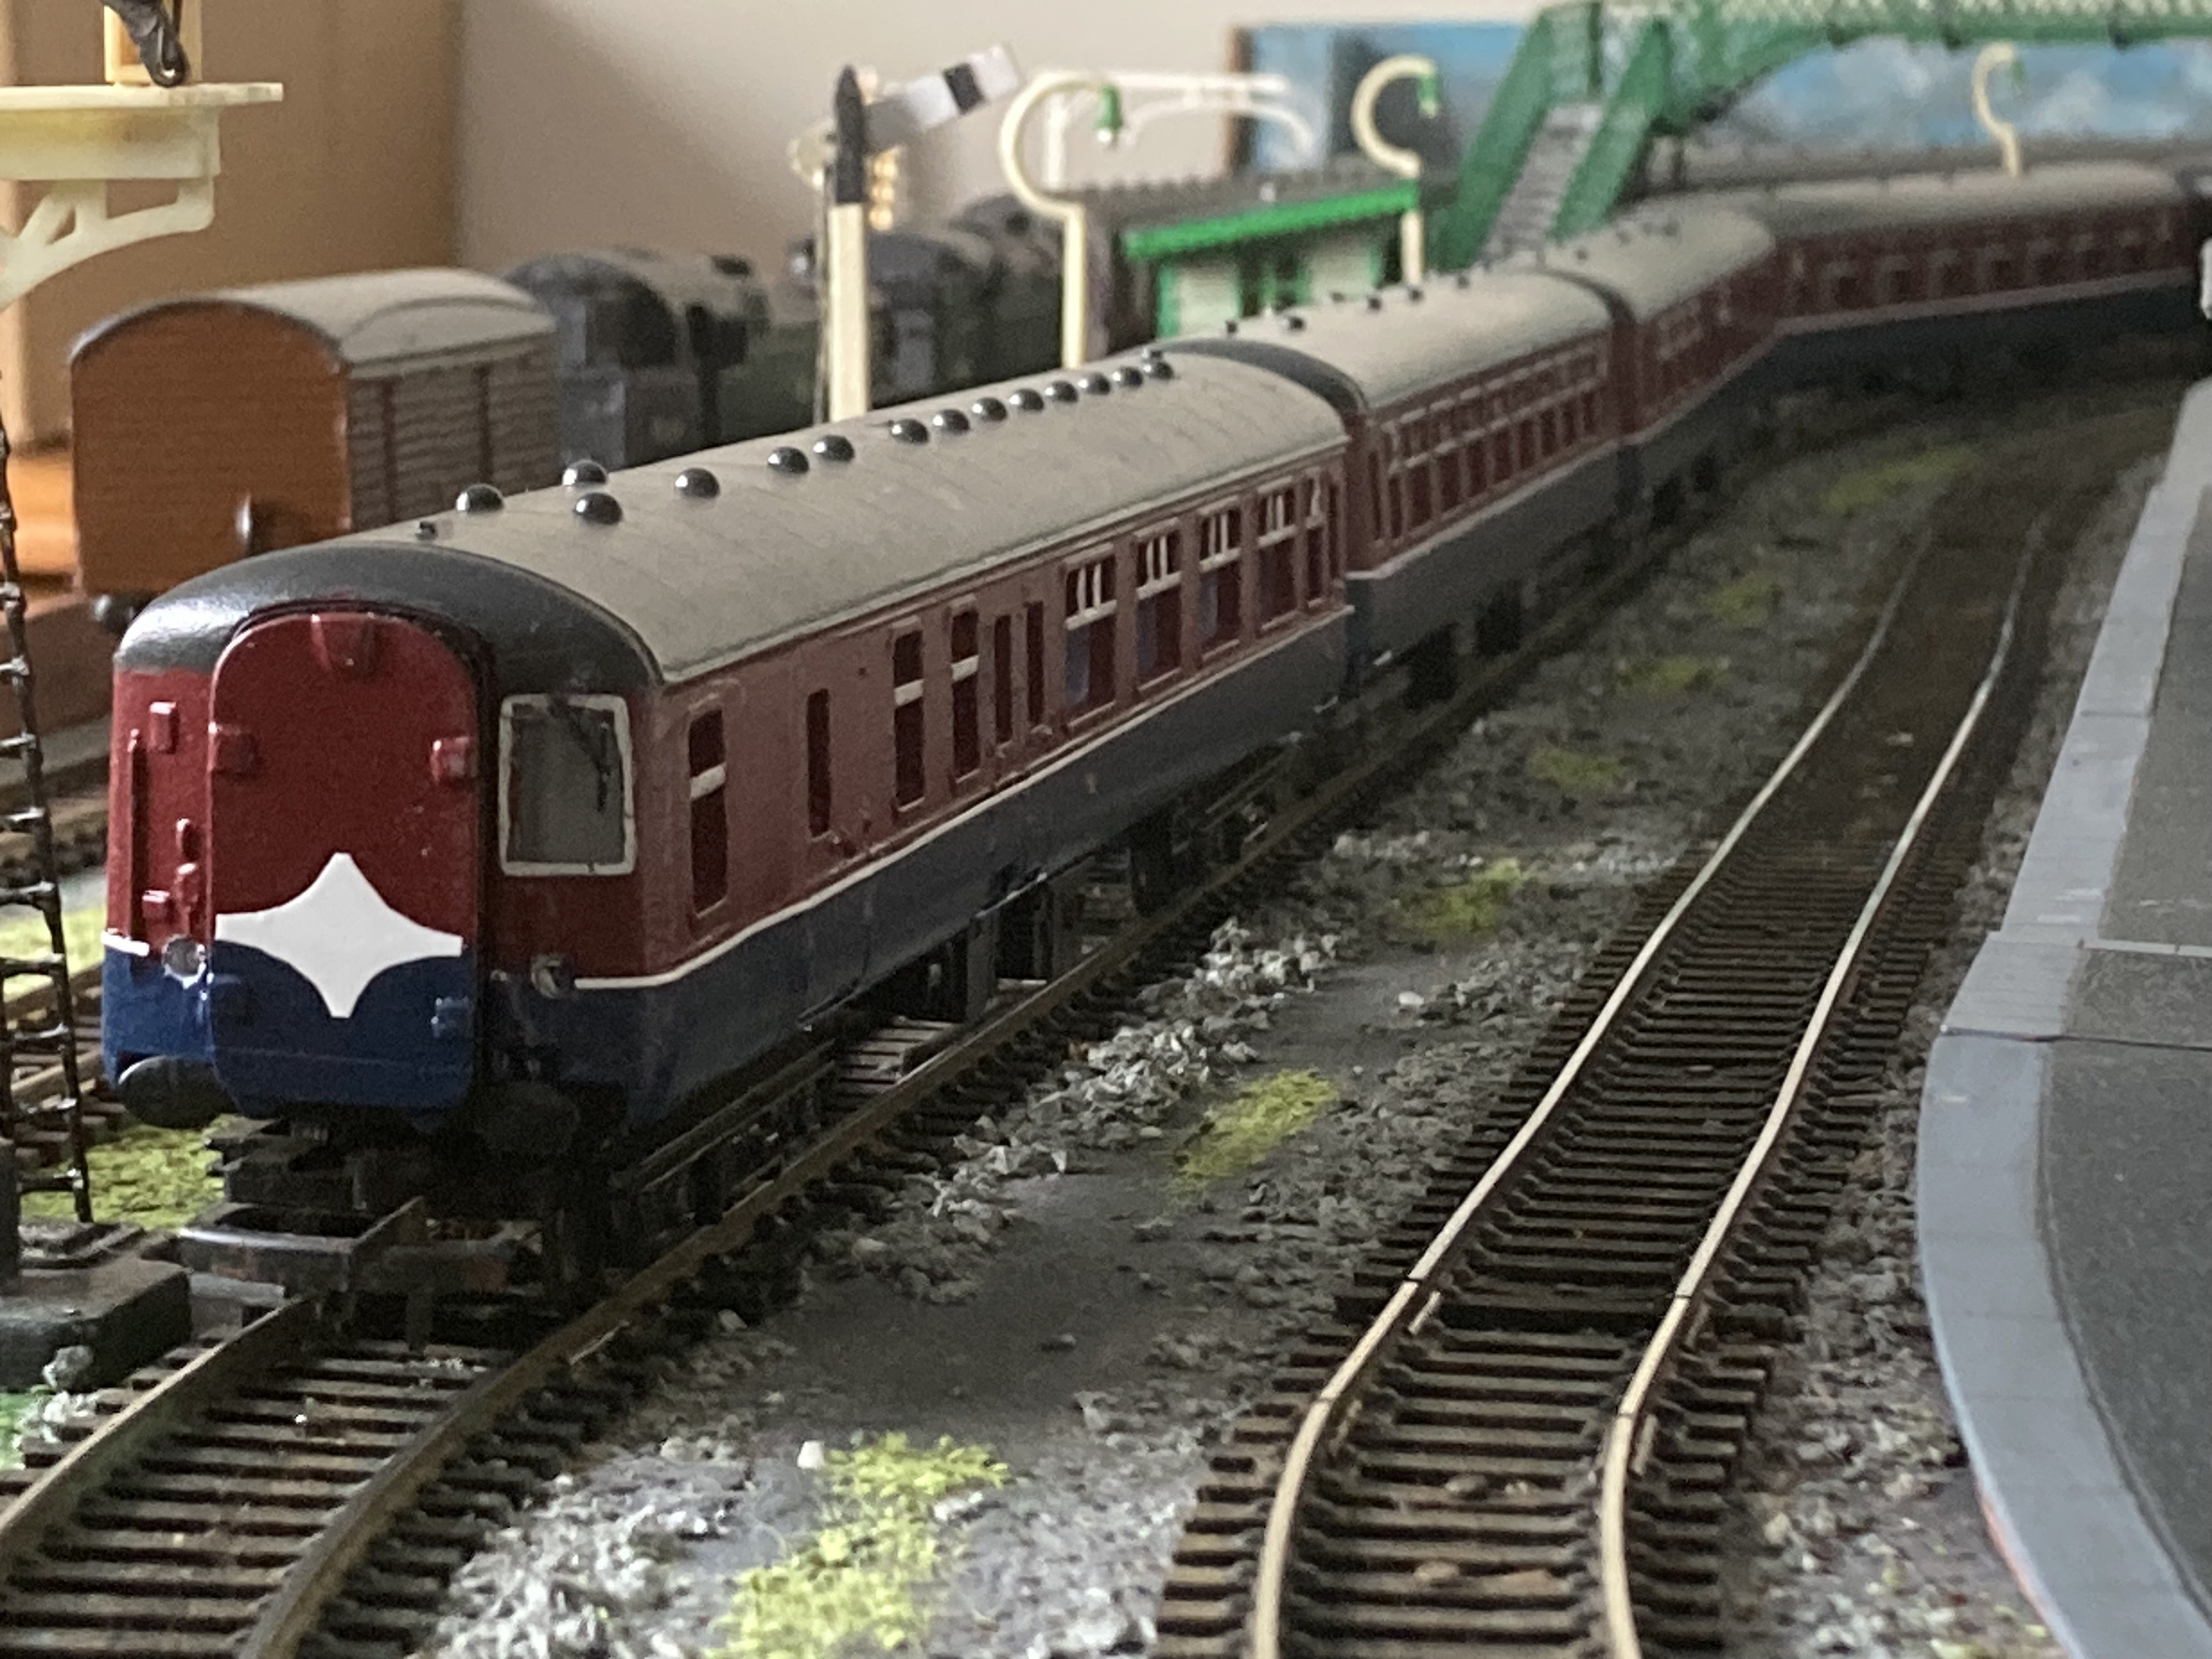
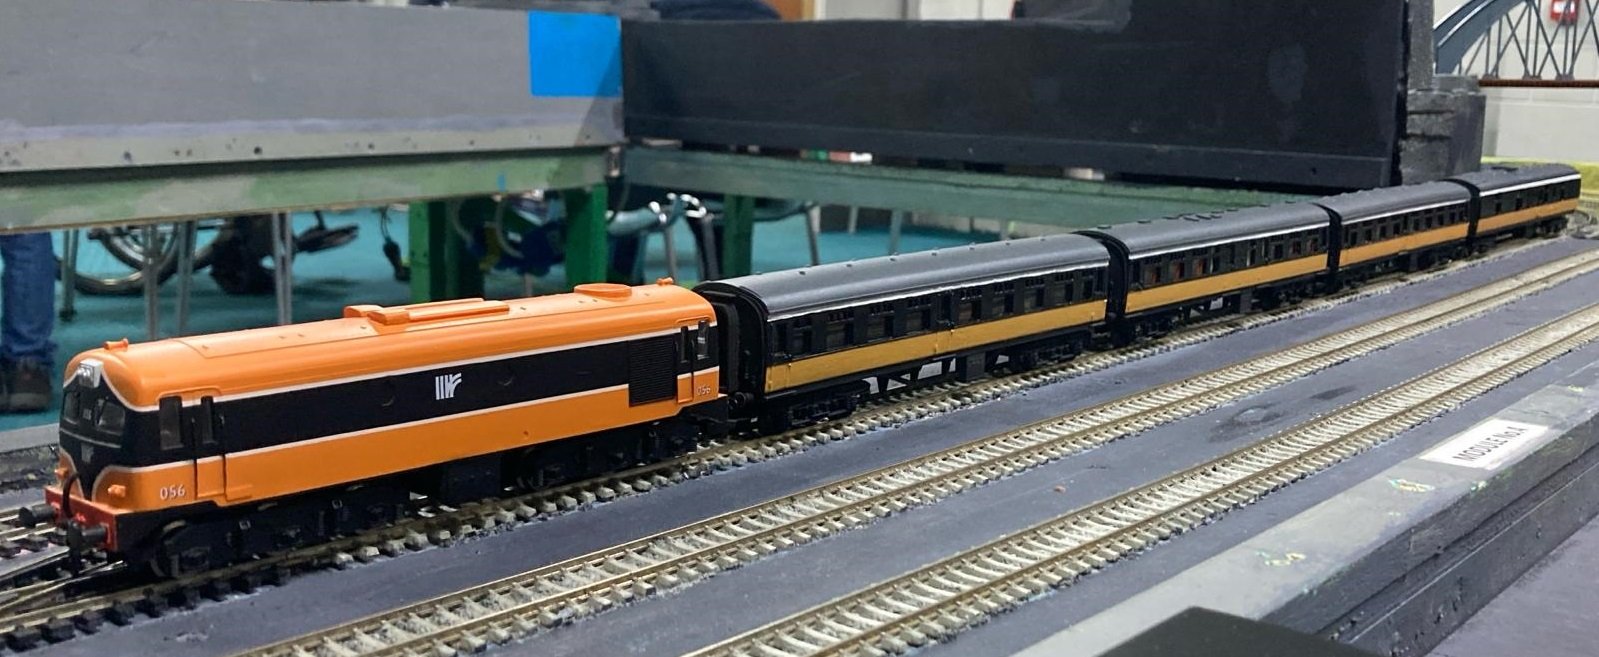
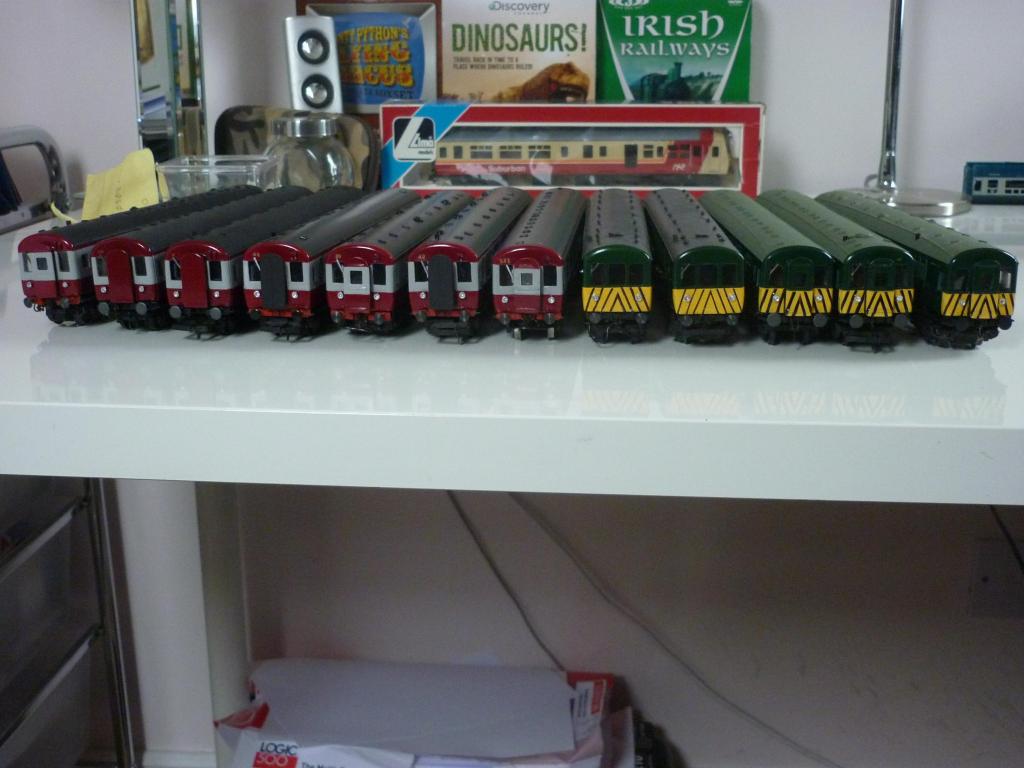
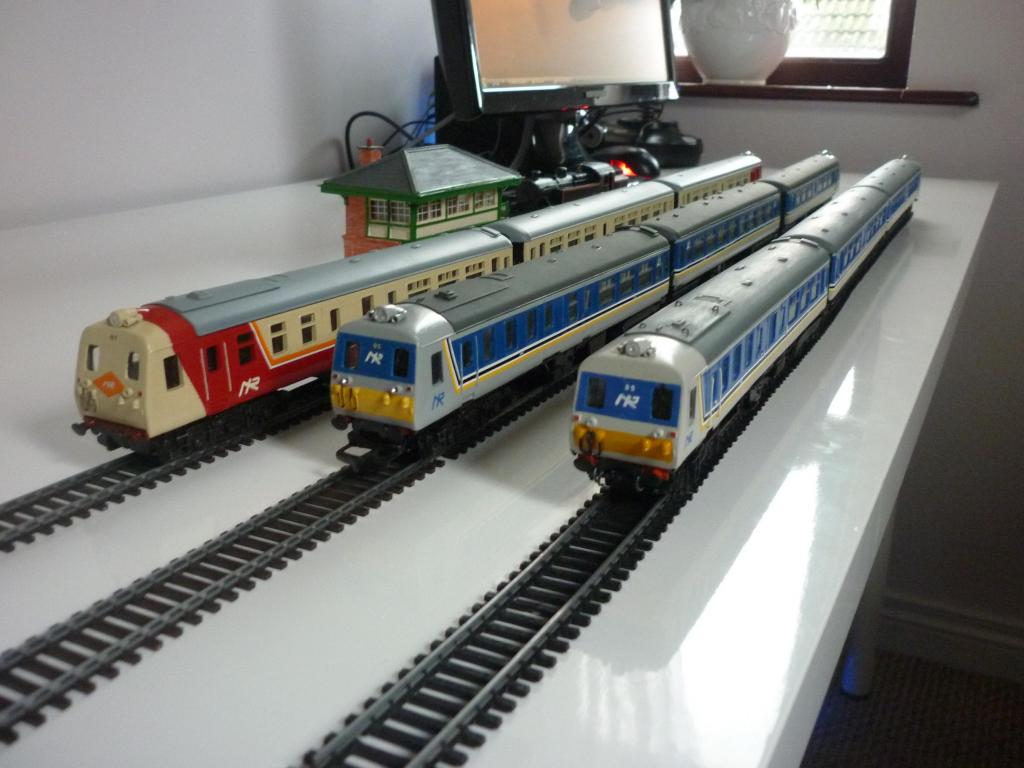
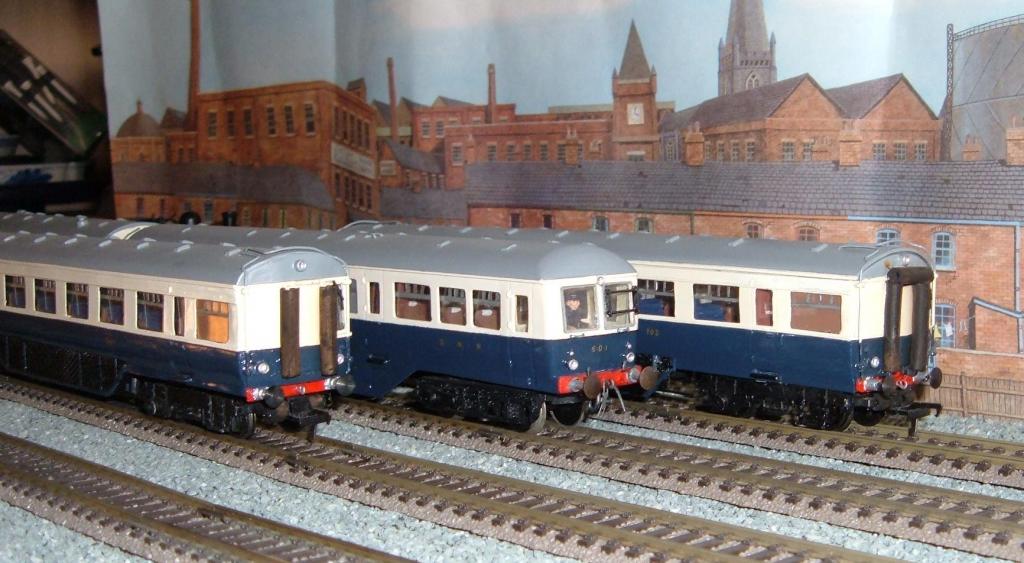
Like the Tri-ang Hornby Mk2s, the Lima Mk2s - with their very thick bodyside moulding and deeply recessed windows - were something of a step back from the near flush-glazed 'scale length' Triang Railways Mk1s introduced in the 1960s. Flush glazing is awkward due to the need to reprofile the window edges and fit the three ventilator pieces individually. They are also awkward to dis-assemble for rebuilding due to the somewhat fragile but tightly-fitted roof/glazing piece. But they are cheap as chips, ones with the metal wheels run very freely, and they provide a good basis for comparatively inexpensive rakes of NIR coaches - I have five NIR 'bumblebees' (plus two of the three-packs Lima released in that livery), another five in original NIR Enterprise, and another four in NIR 'blue band', including some adapted as driving trailers, diners and a genny. I also used Lima Mk2s for my 1990s NIR 80 Class sets, as other have done.

-
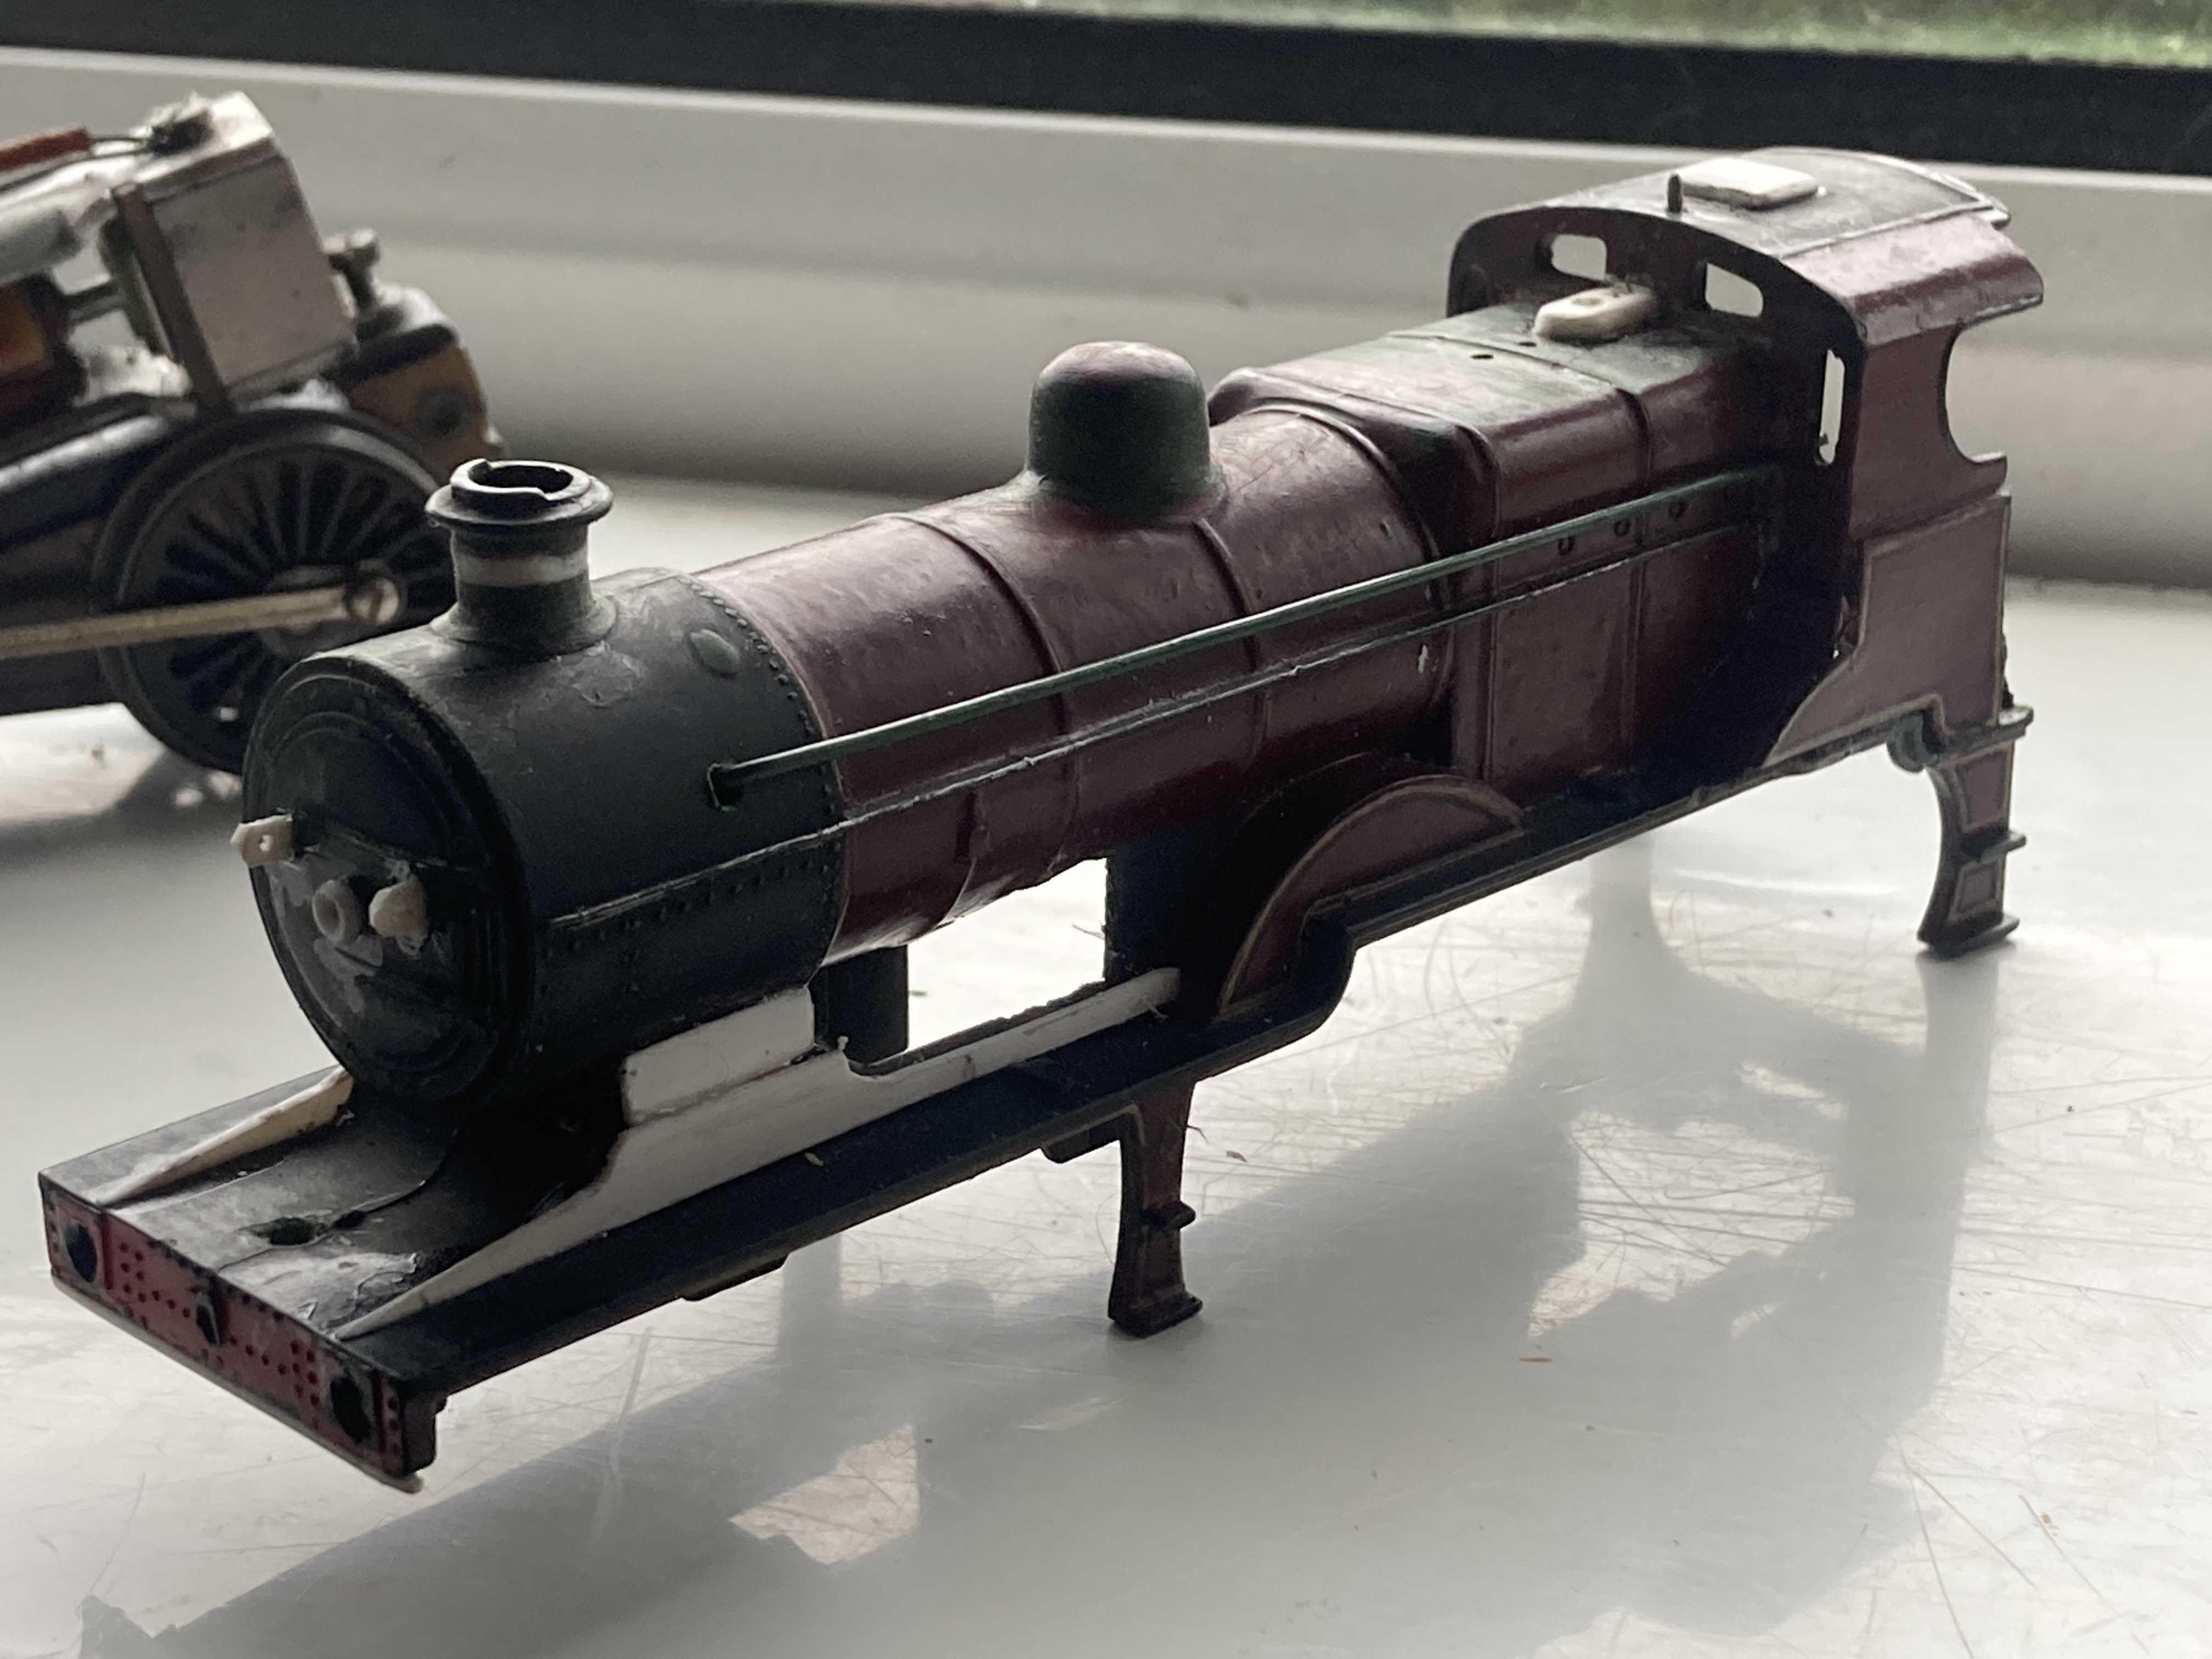
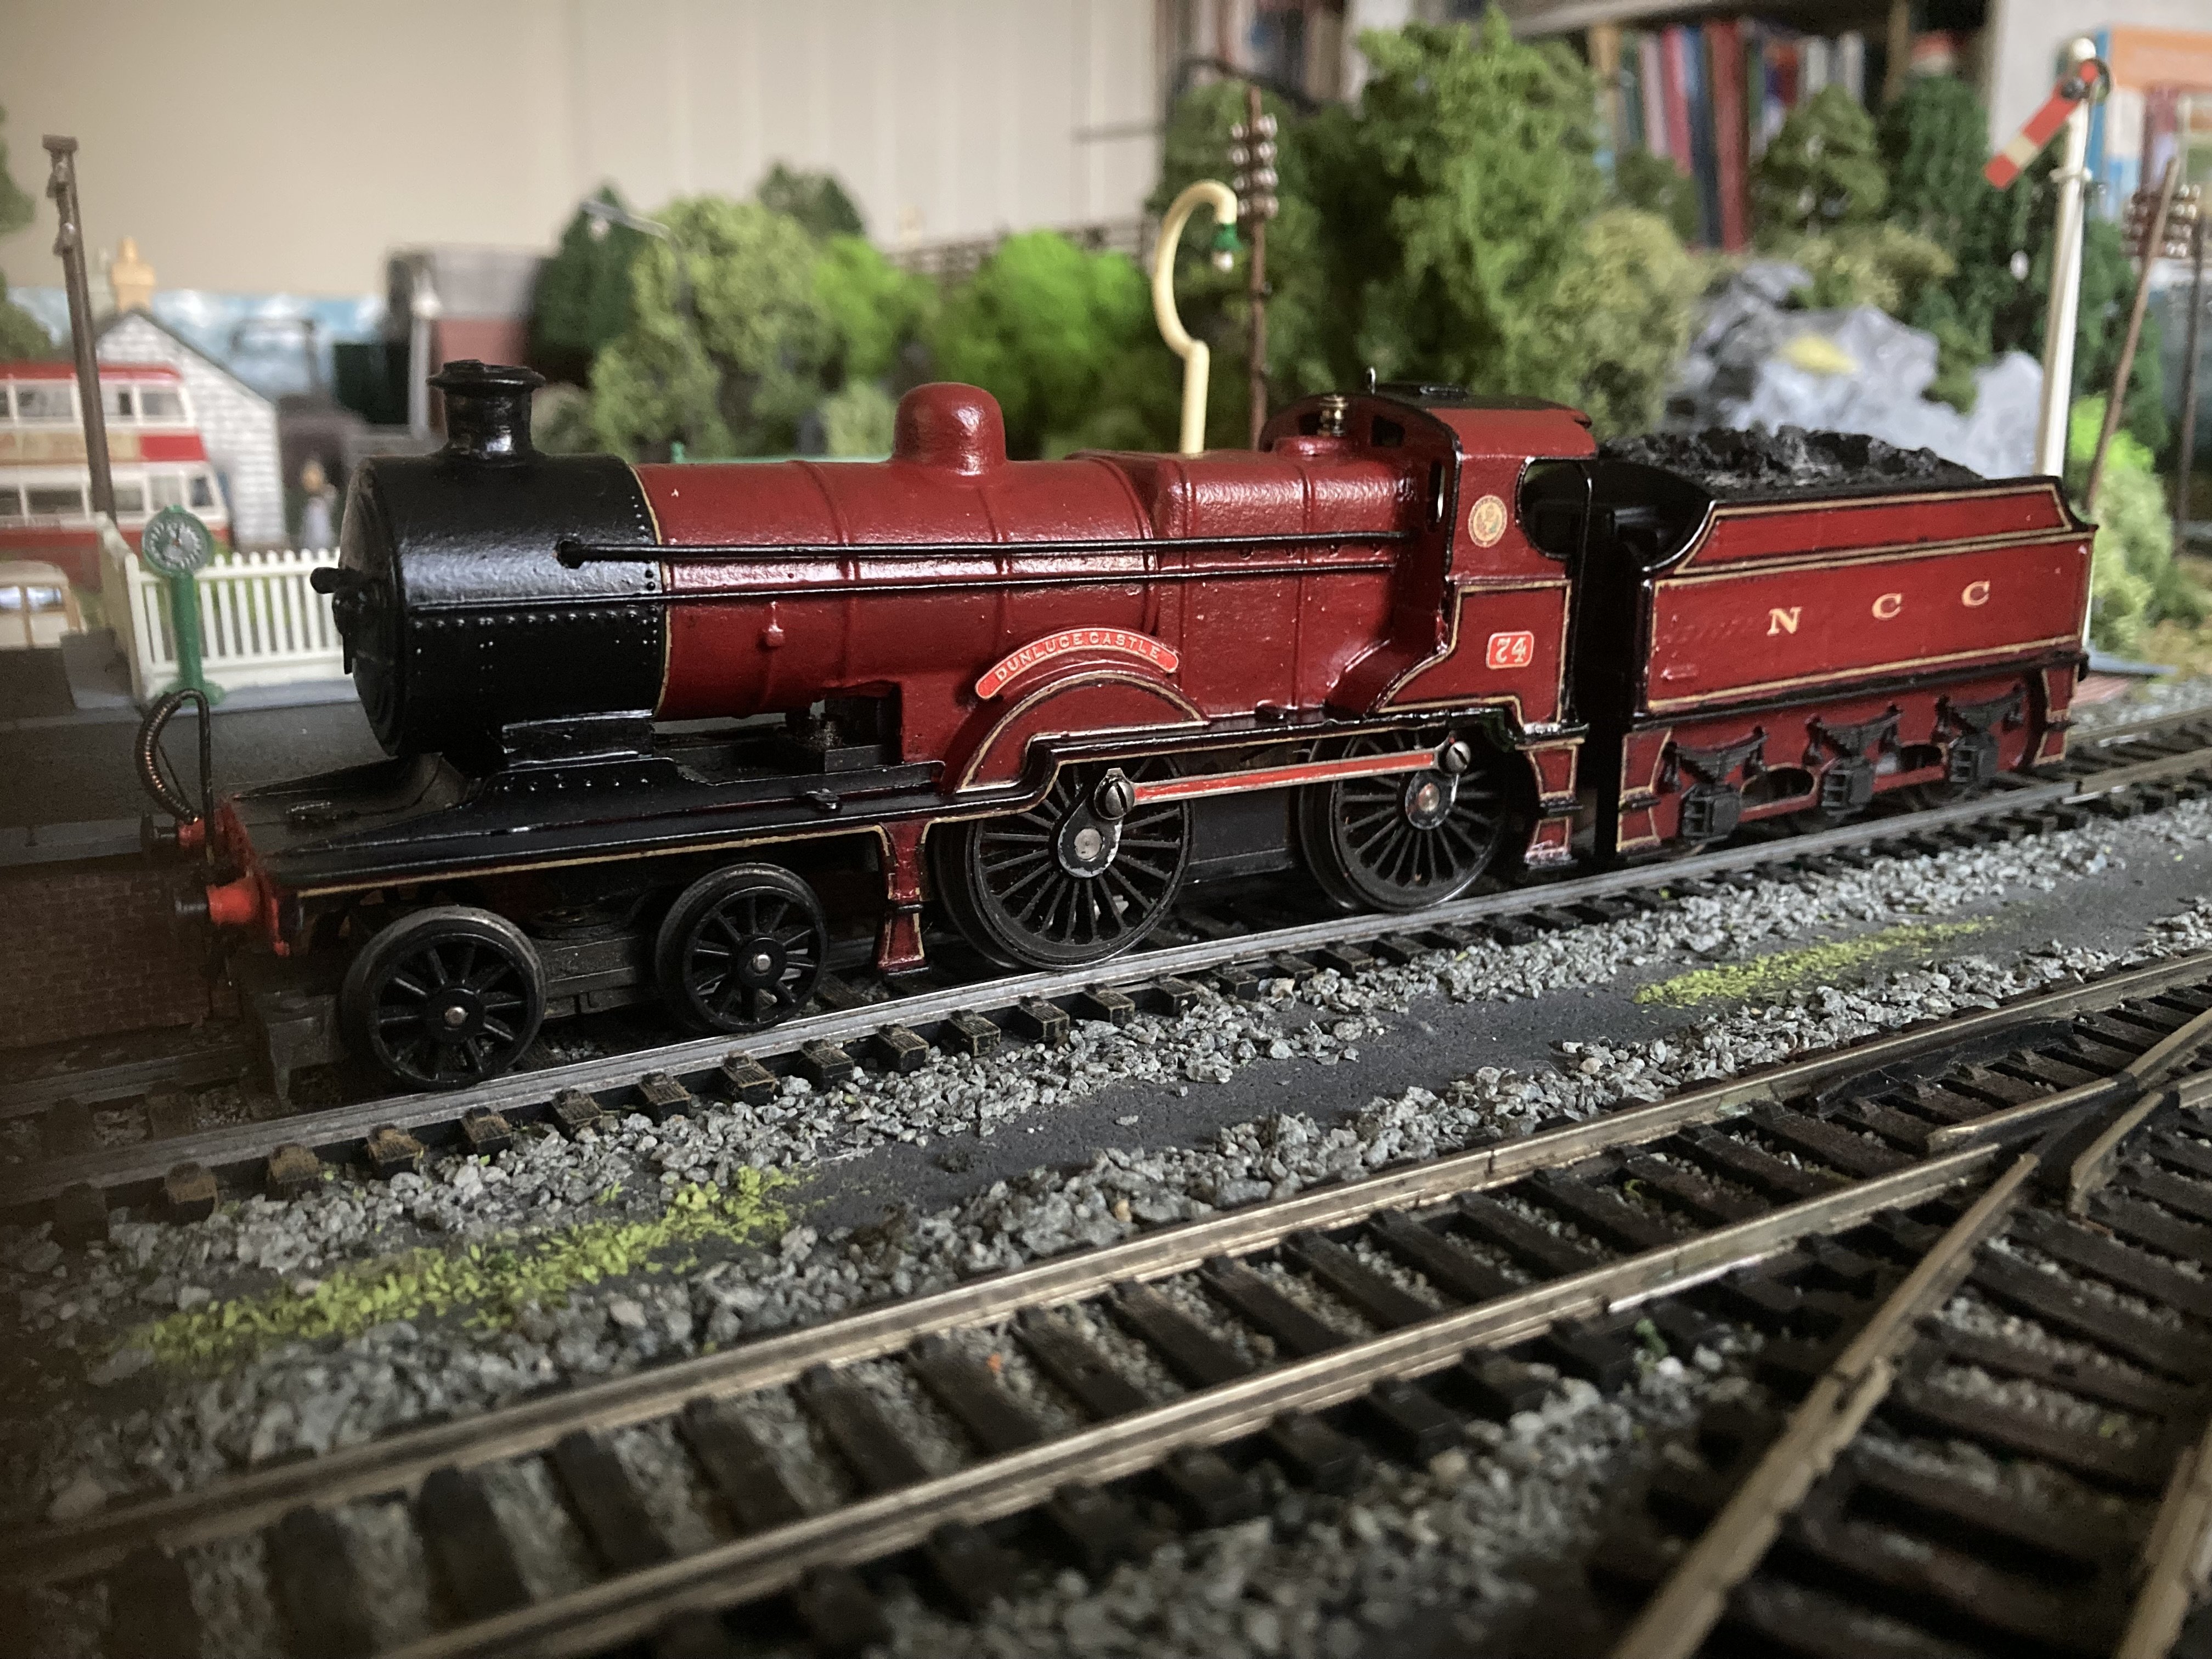
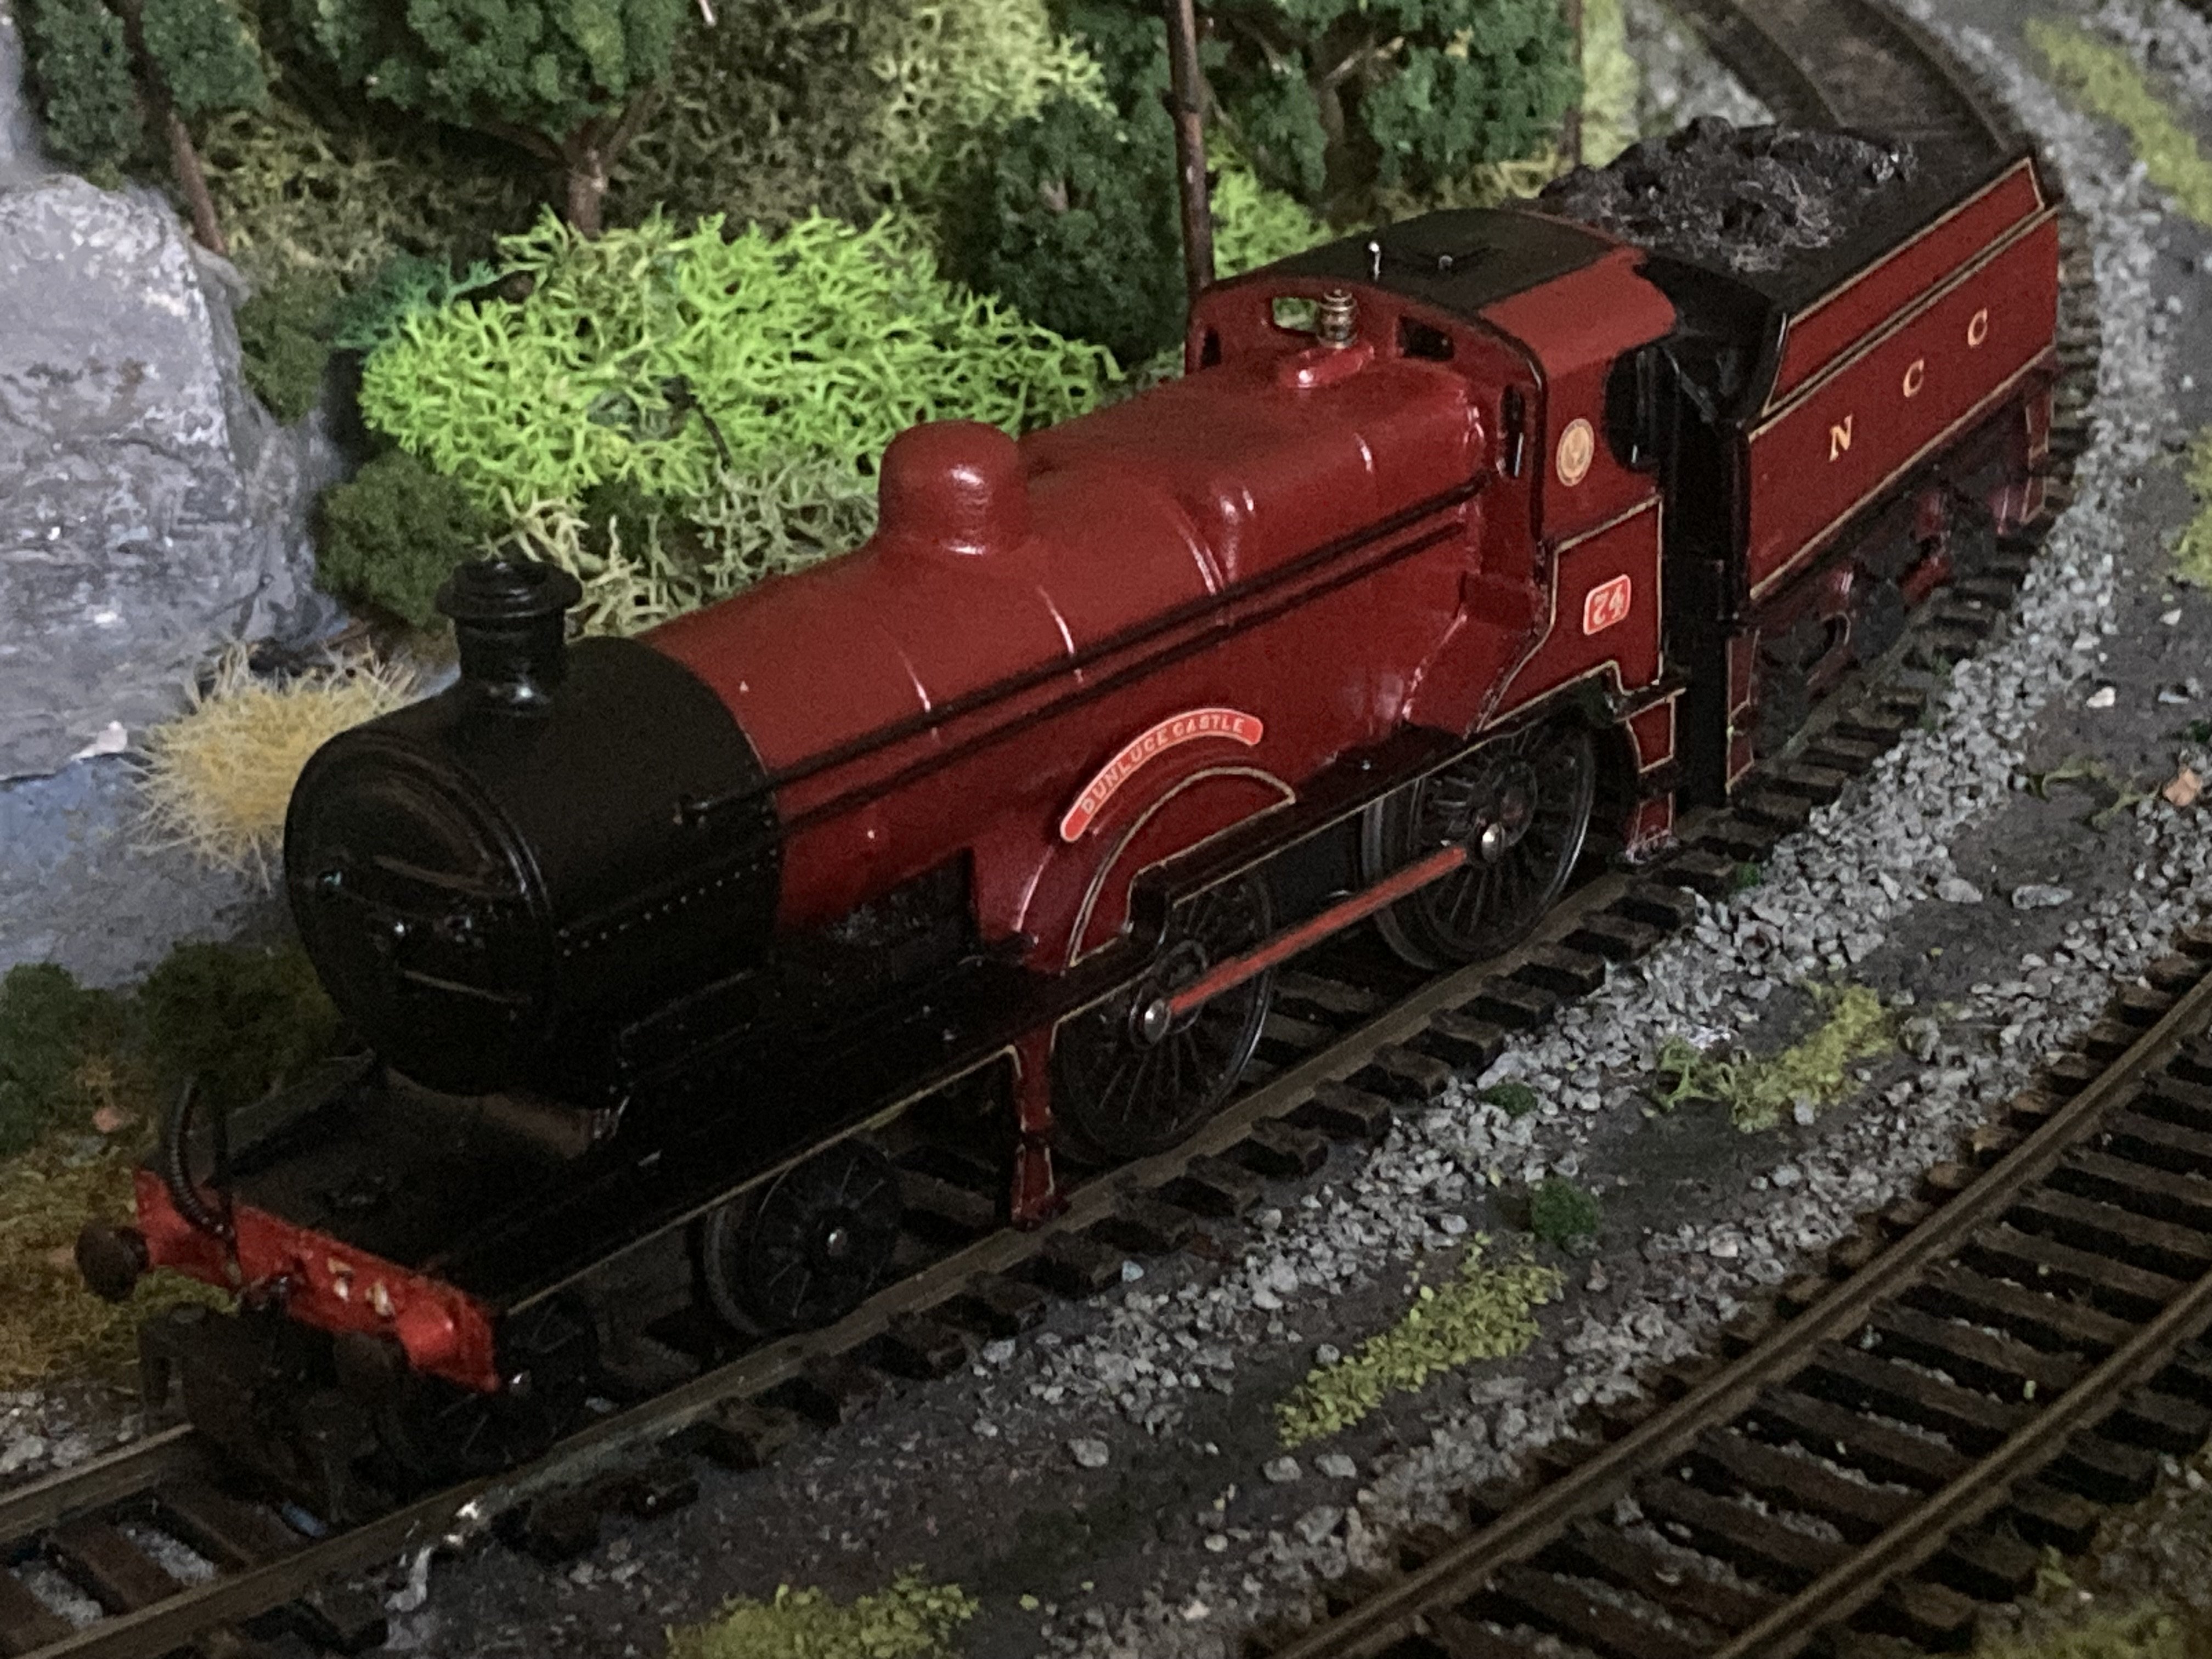
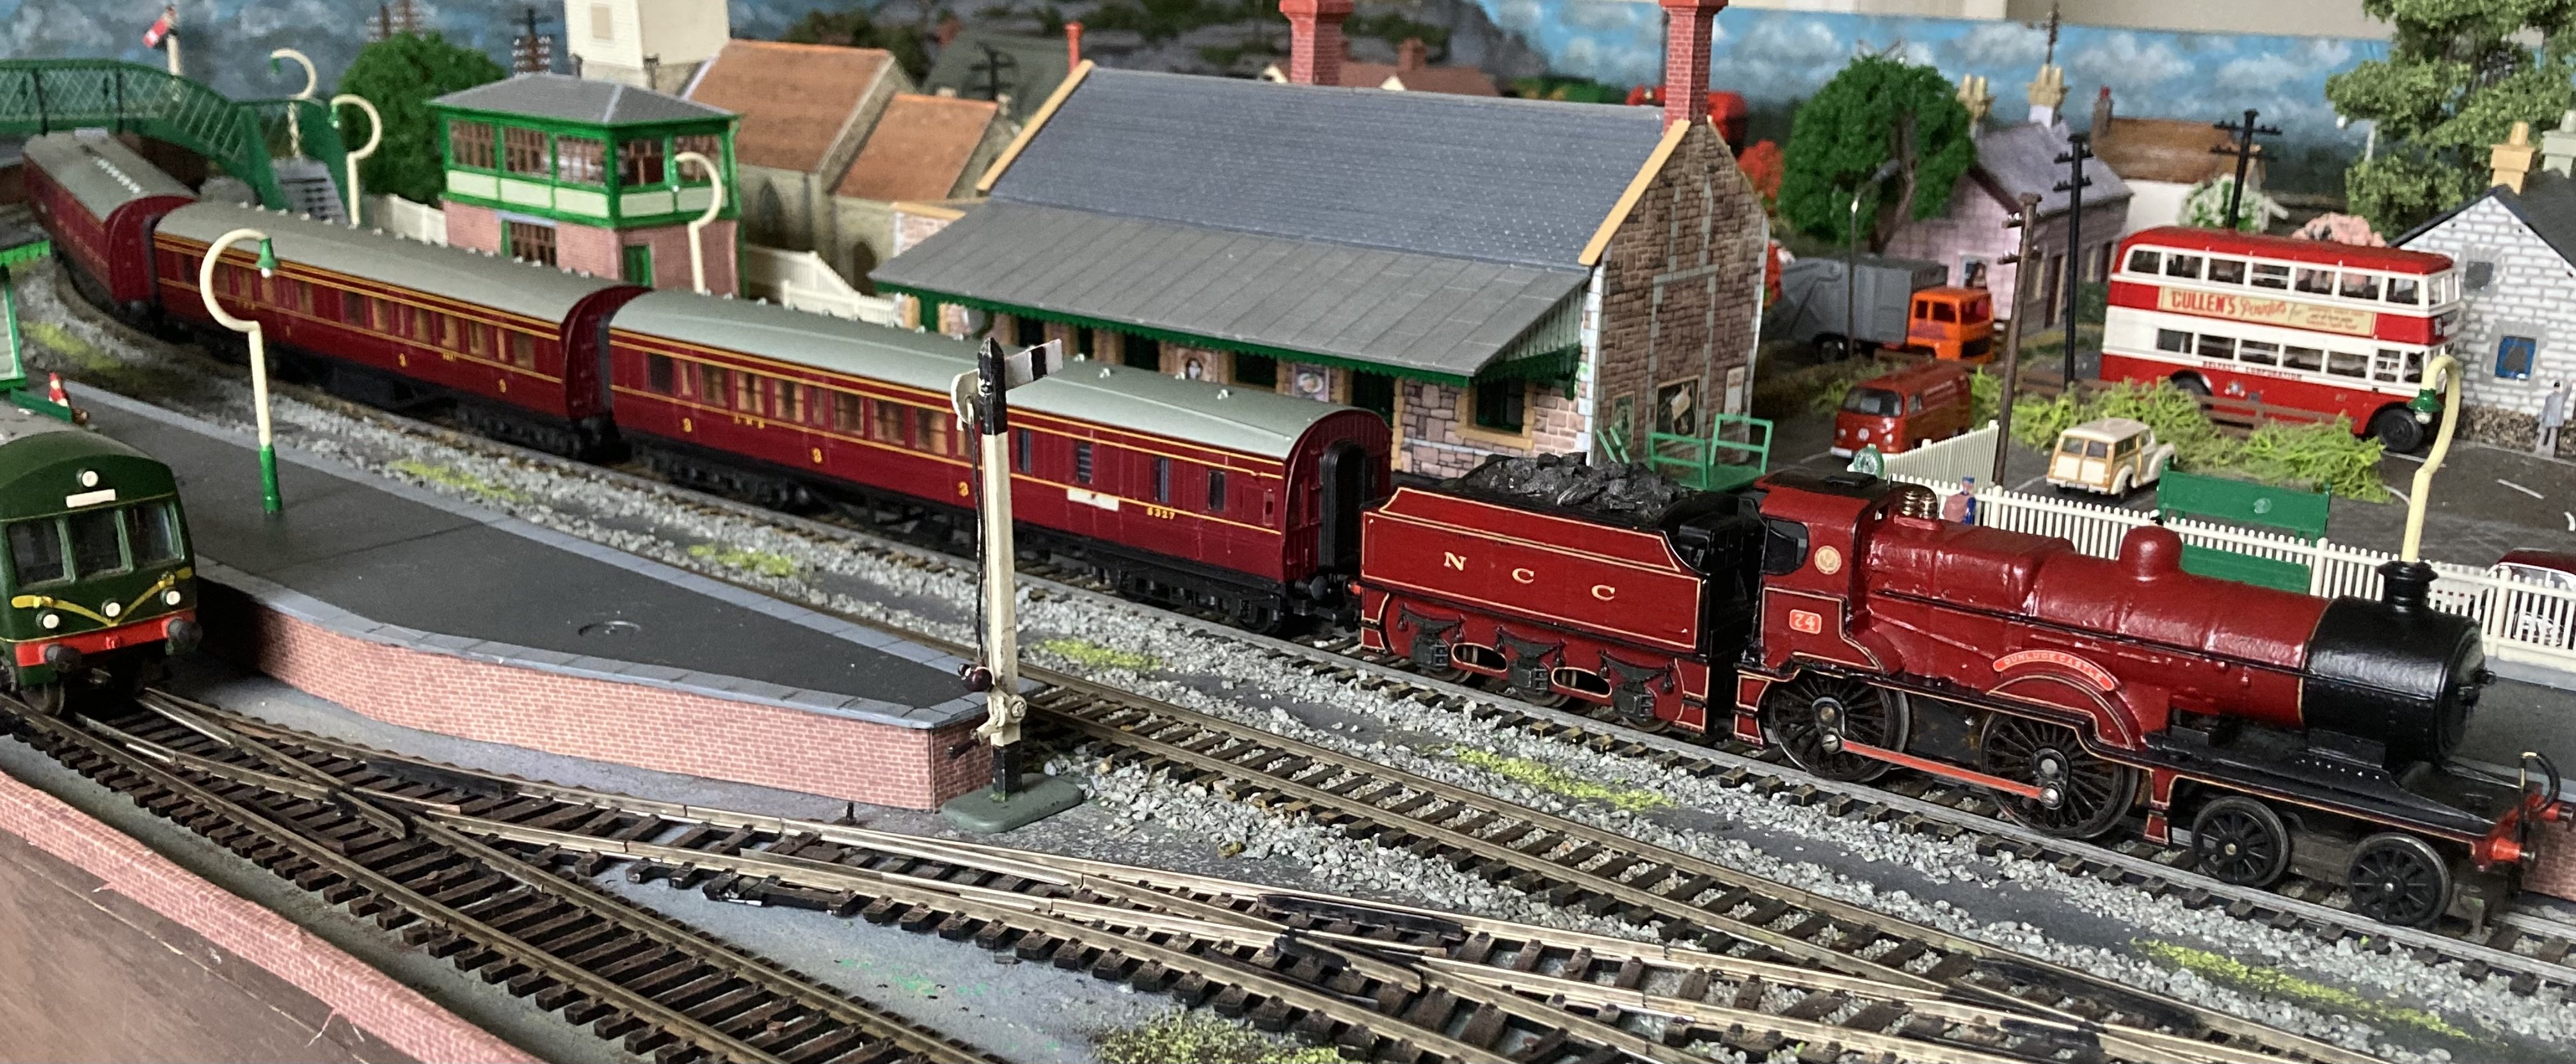
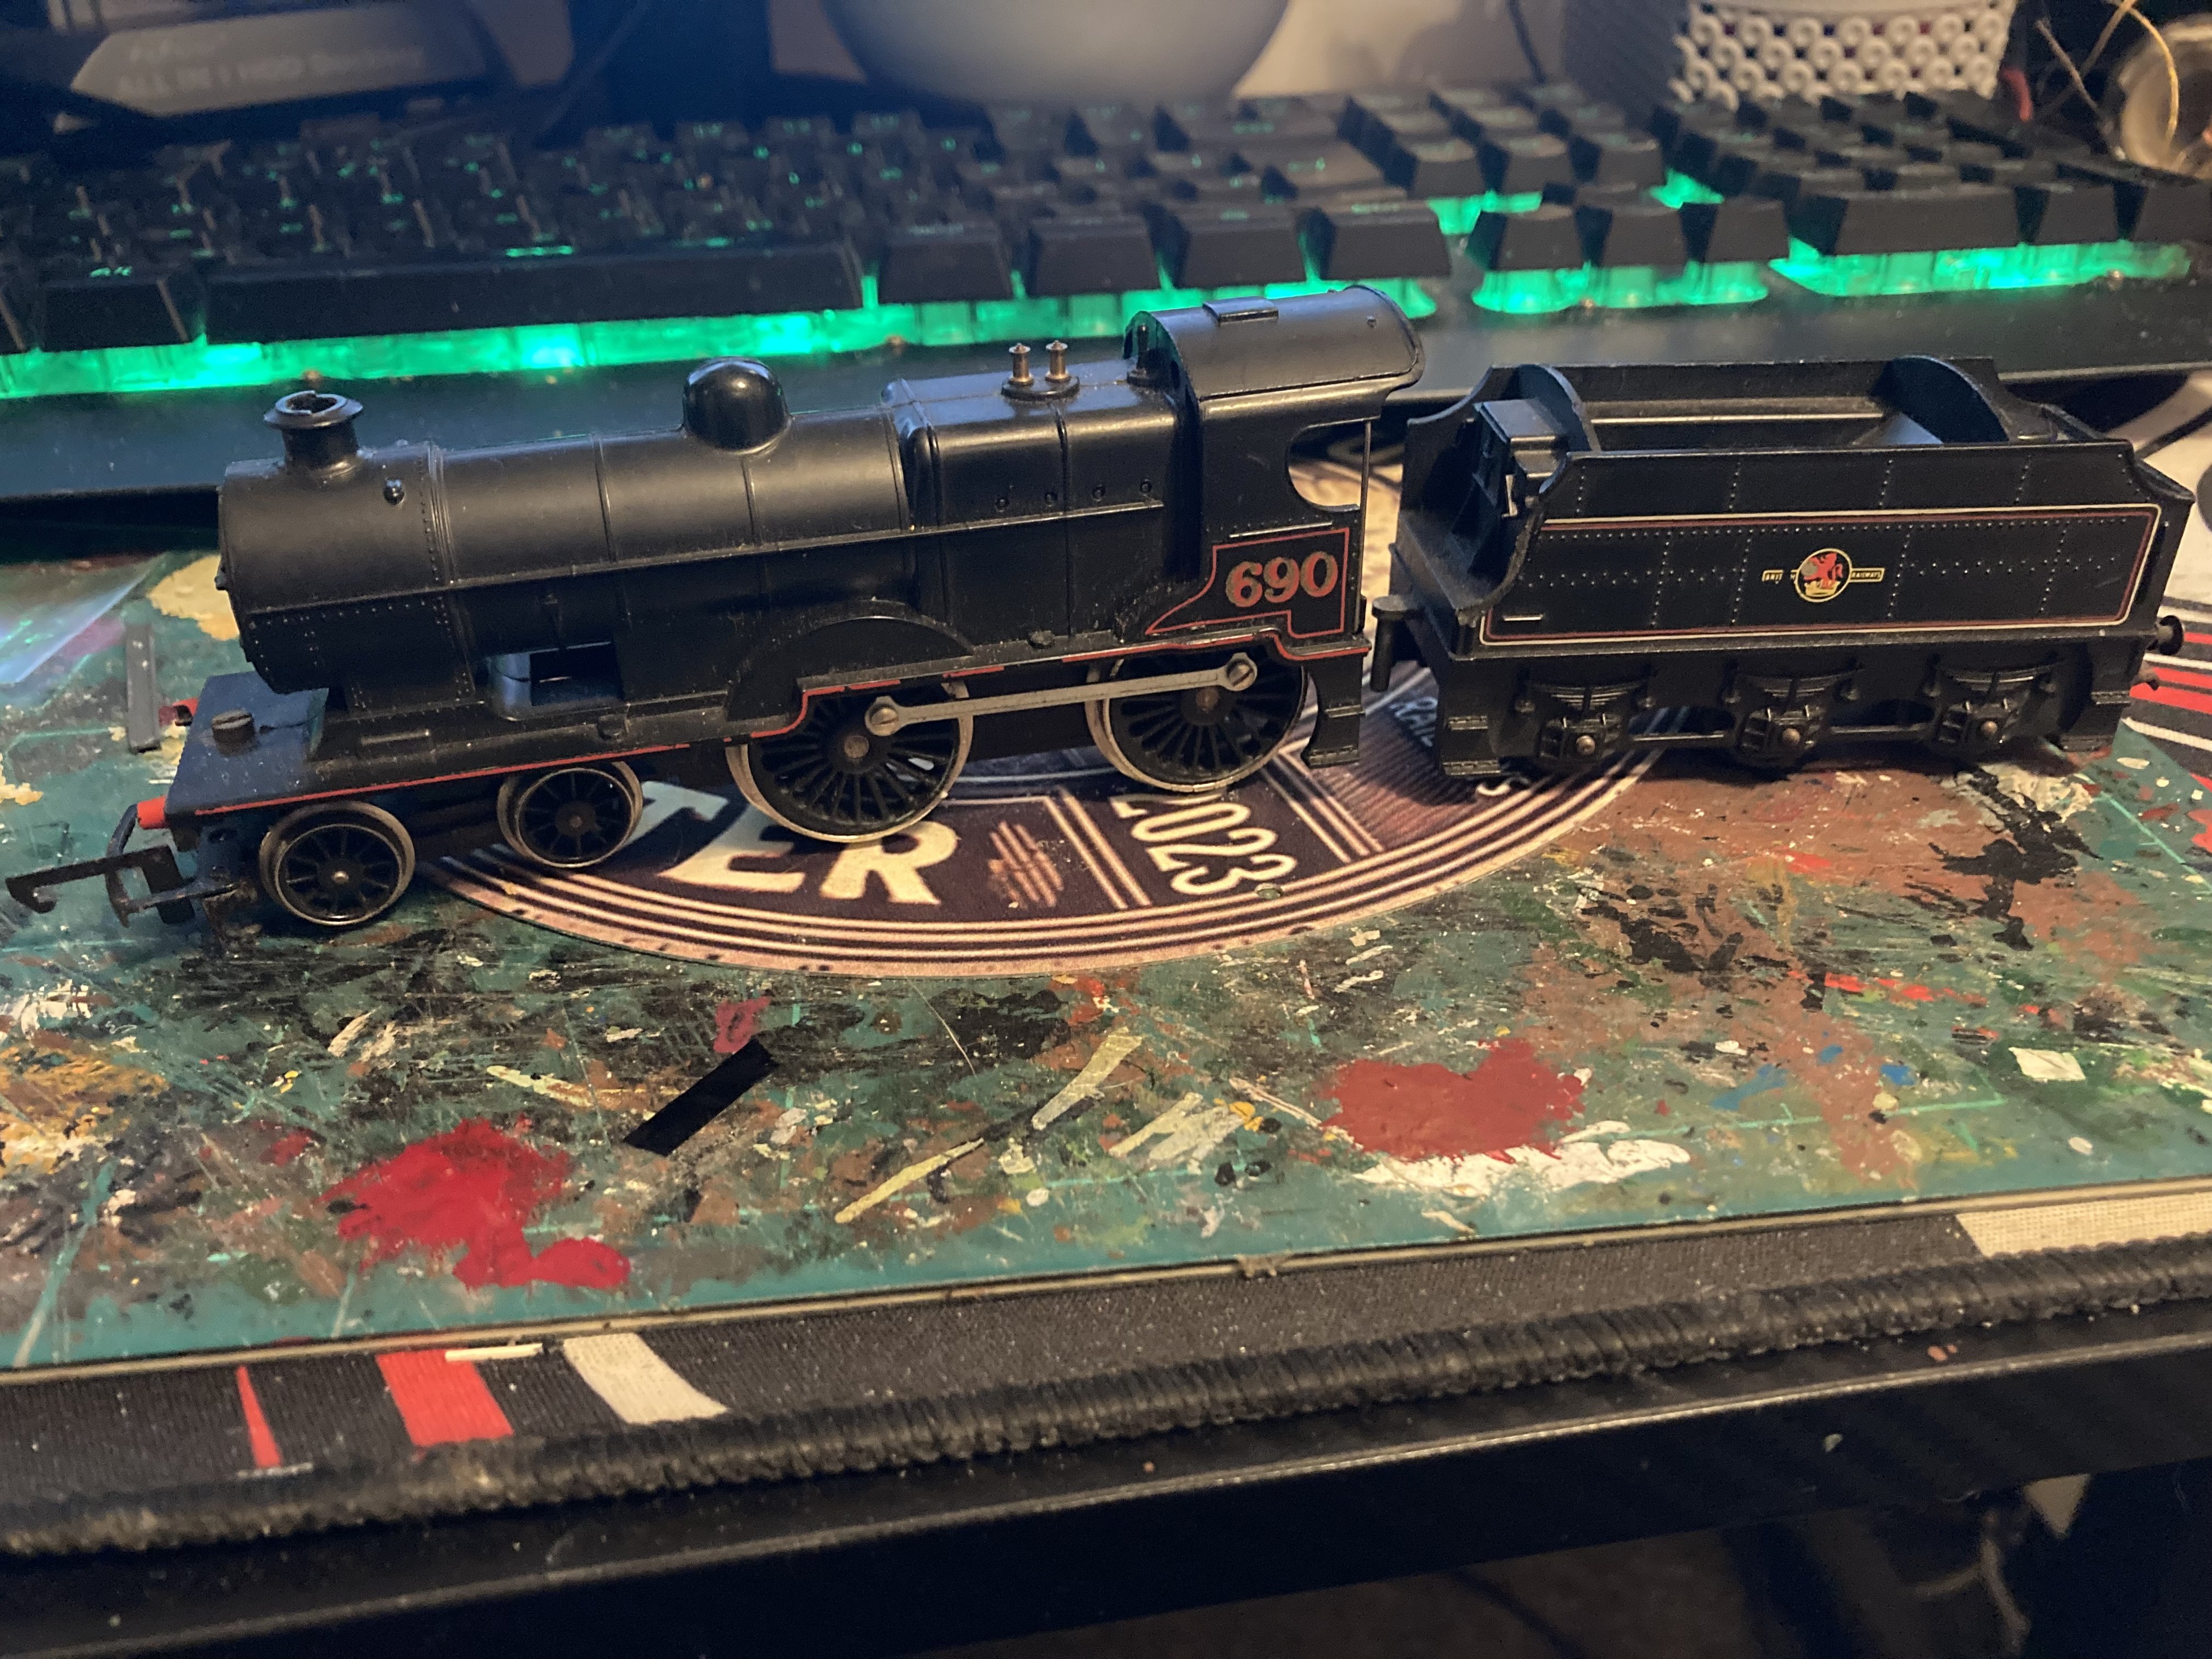
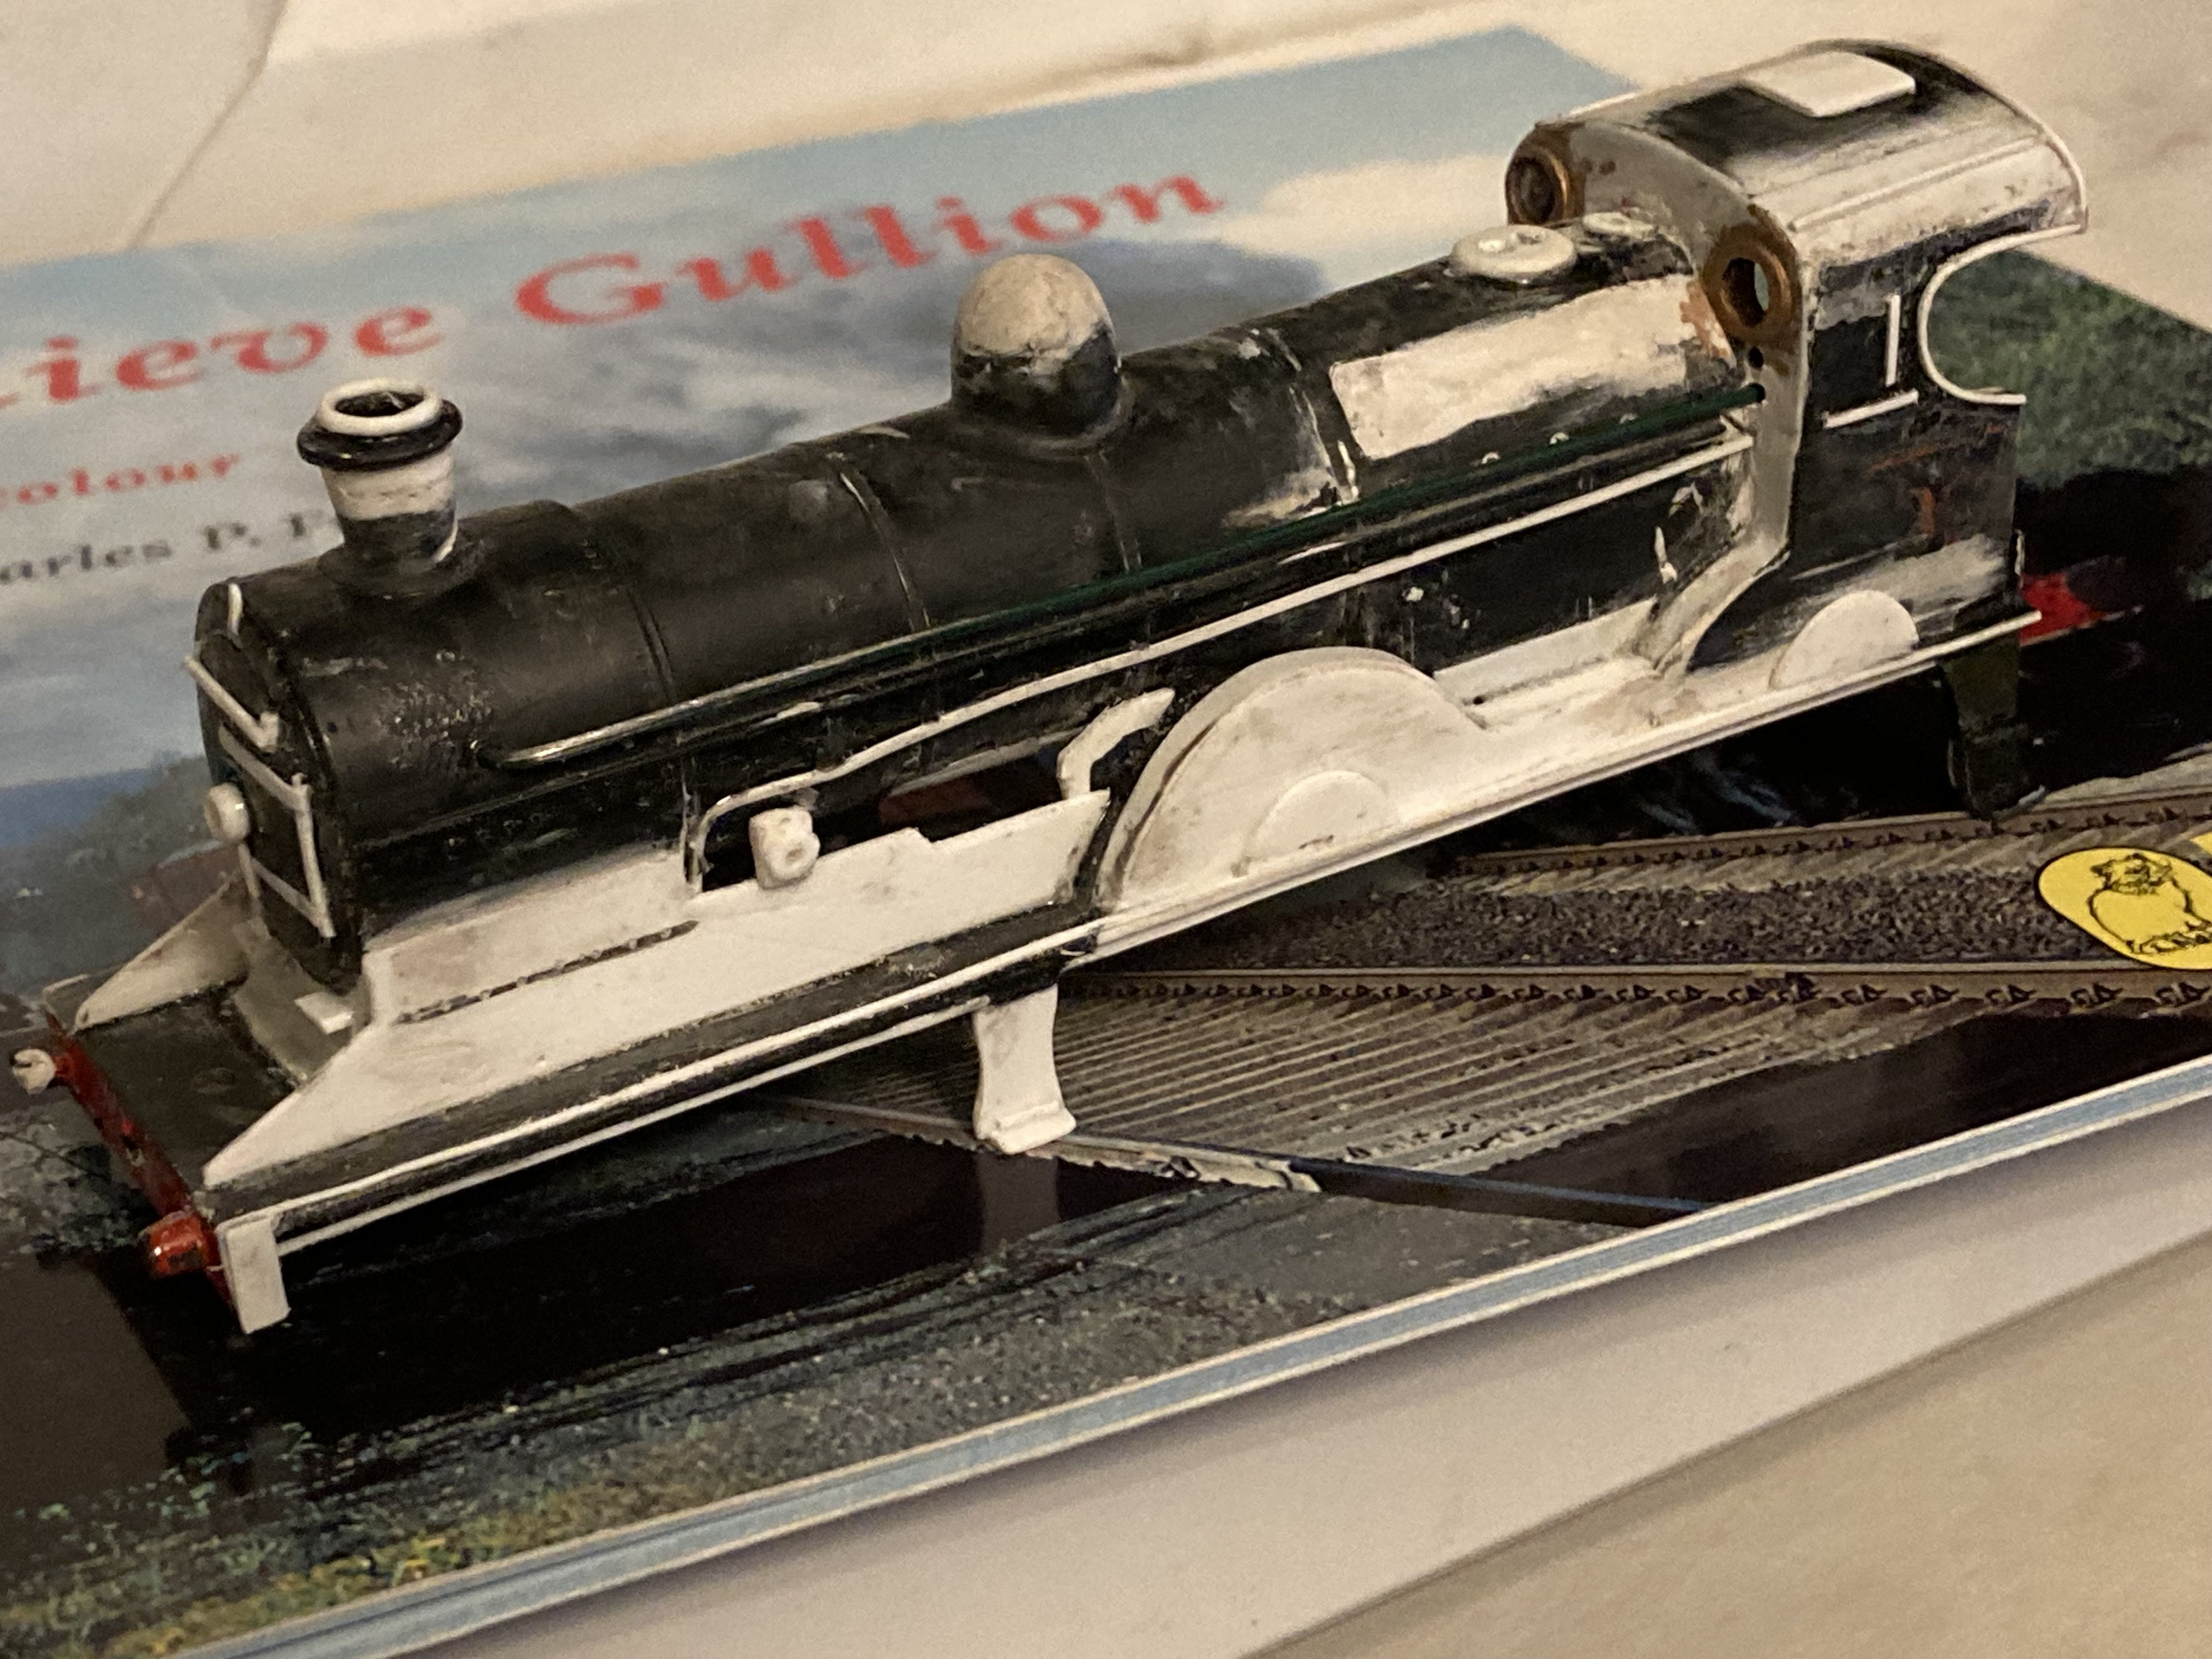
An eBay acquisition about a year back was an LMS 2P 4-4-0 in lined crimson lake livery. It seems to have started life as a Tri-ang L1 (the one whose mould Tri-ang Hornby adapted to resemble a 2P) because a previous owner had modified the cab with (paper) card. The aim was to make a look-alike NCC U2 as many have done, but preserving the livery. In the event, the need to remove the steam pipe on the RHS of the boiler (and fit a wire one on the other side) meant I ended up carefully painting over the original crimson lake (with Humbrol 20 crimson gloss IIRC, with Maston clear matt lacquer on top). The too-long tender was Ieft alone. The loco received in plasticard new upper front frames, safety valve base (further back back), a raised chimney, a new cab roof vent, smokebox door handrail and wheel, and a wire cab roof whistle. Railtec decals completed the model, the set for preserved 'Dunluce Castle' - these are great, complete with an embossed effect on the cabside numbers. Has all the other inaccuracies inherent in a limited re-work of the base model but looks the part to me.
- 1 reply
-
- 14
-

-

-
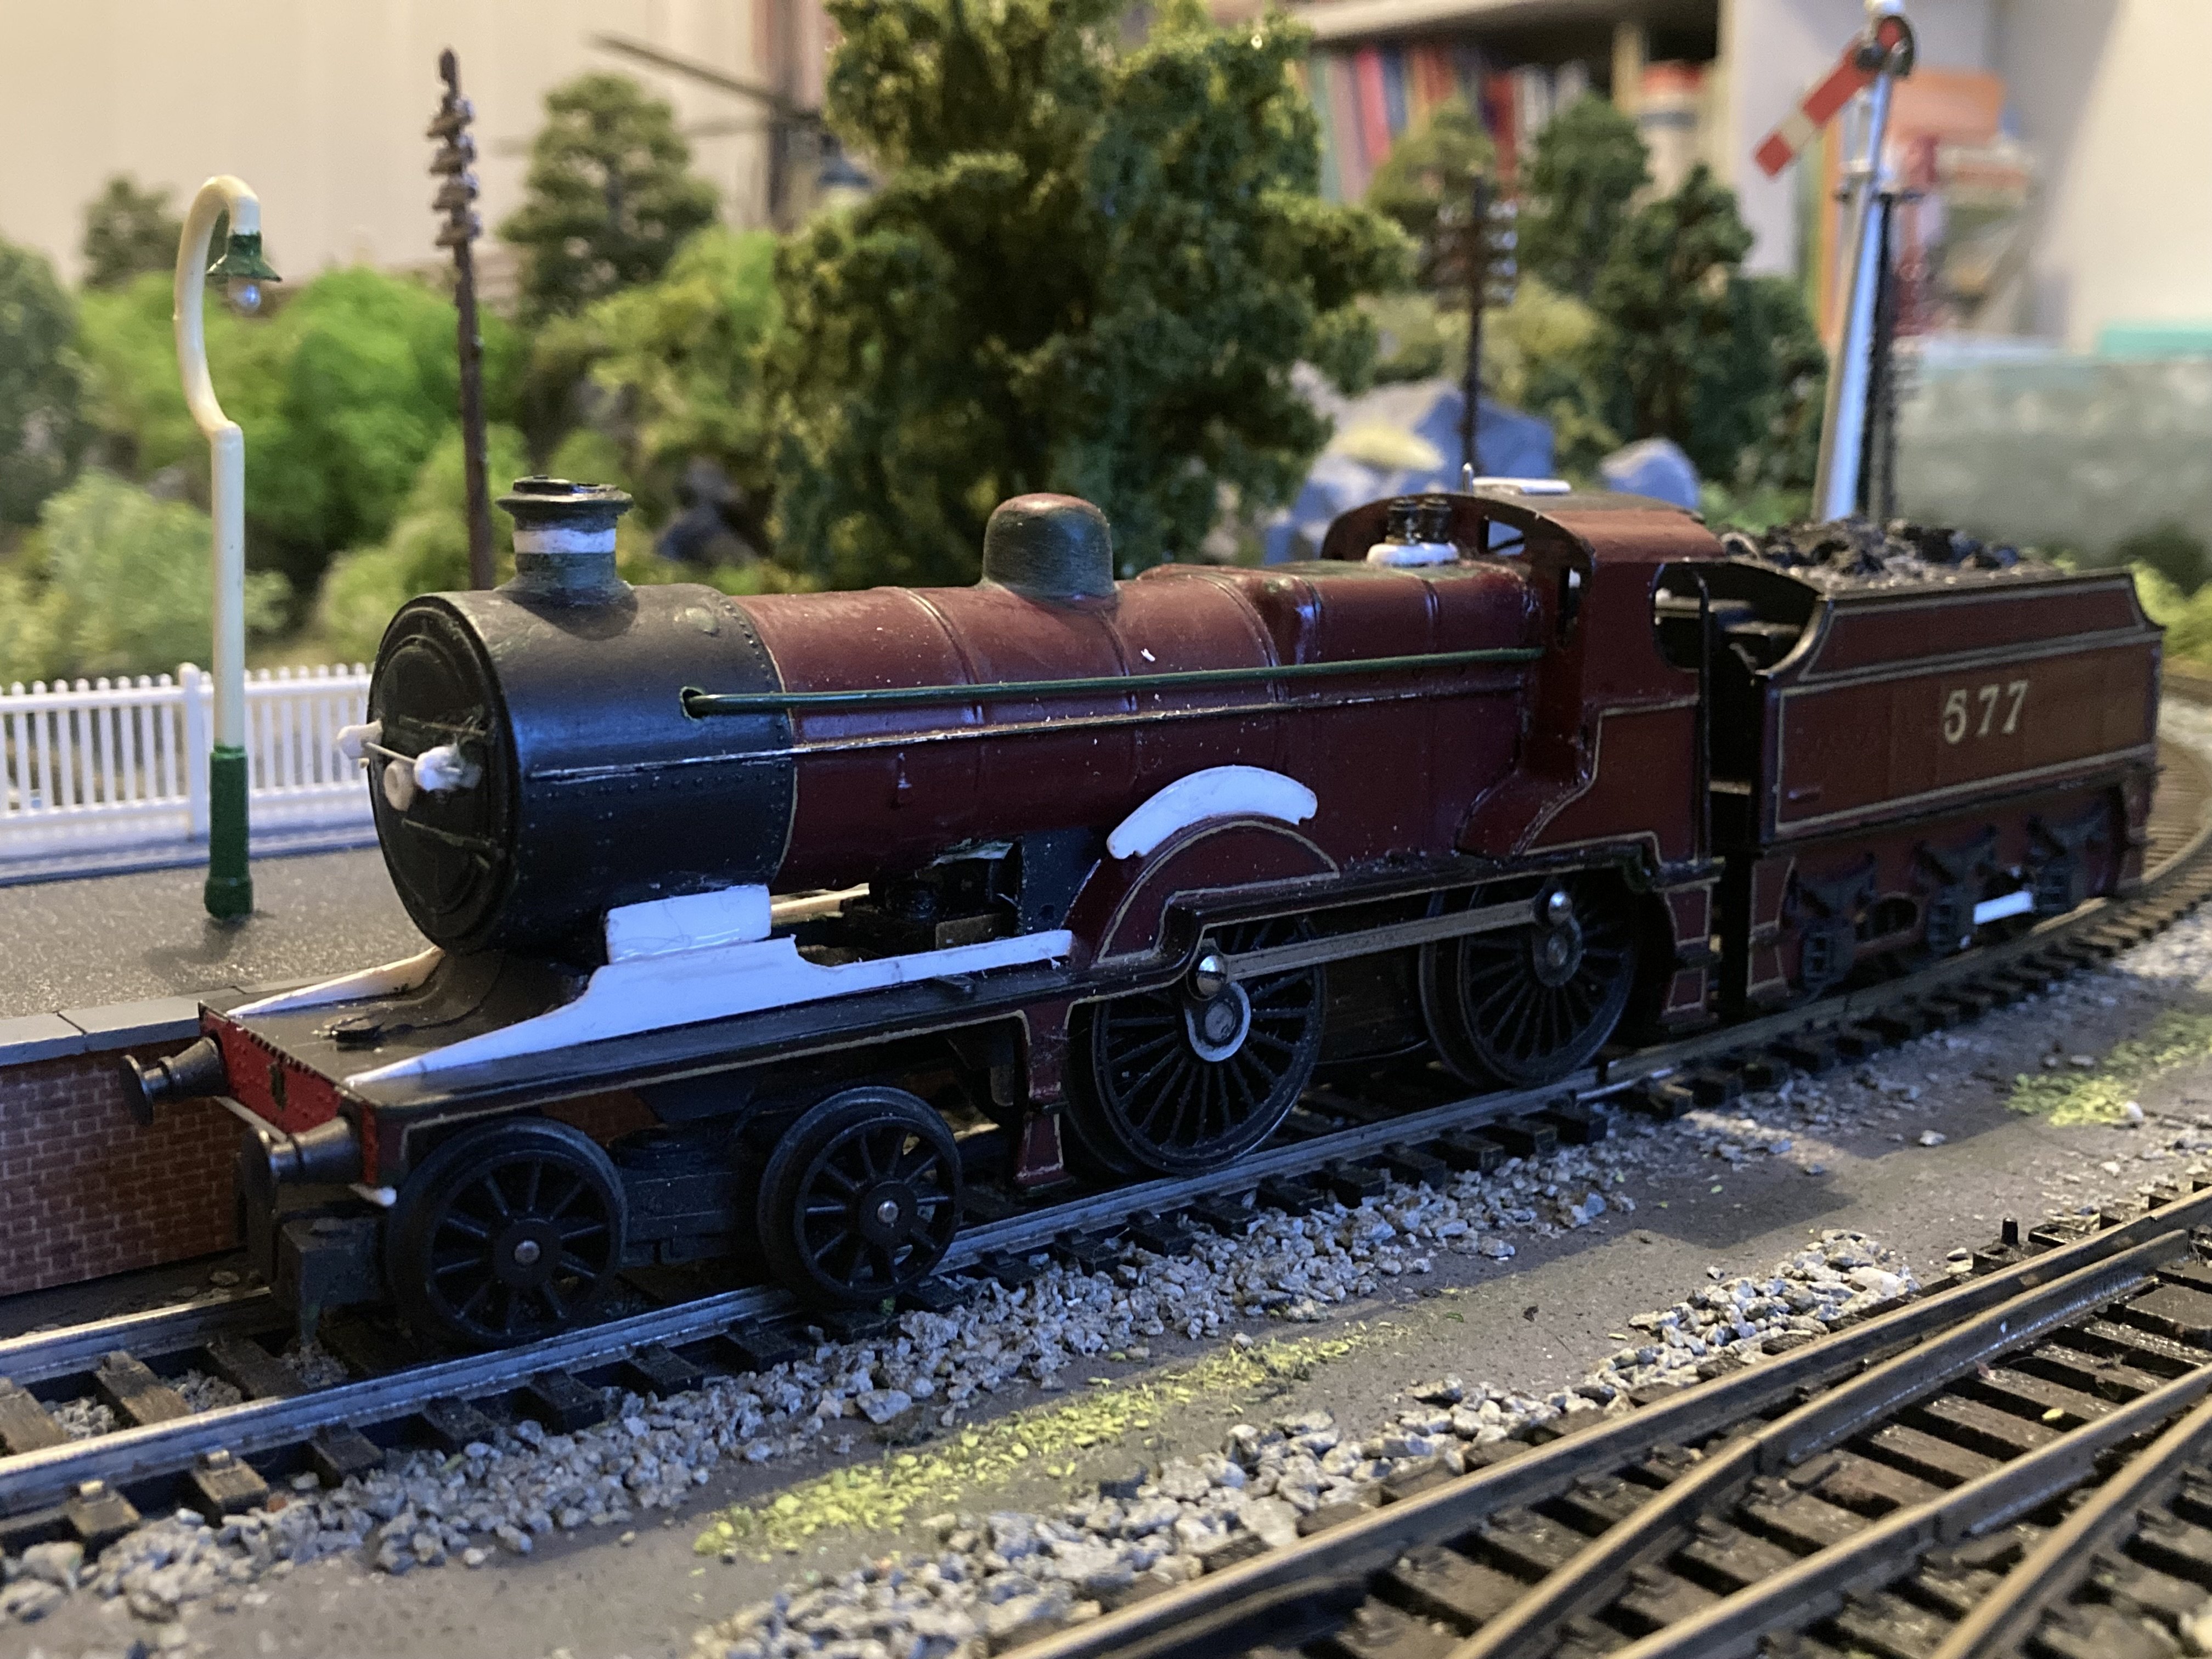
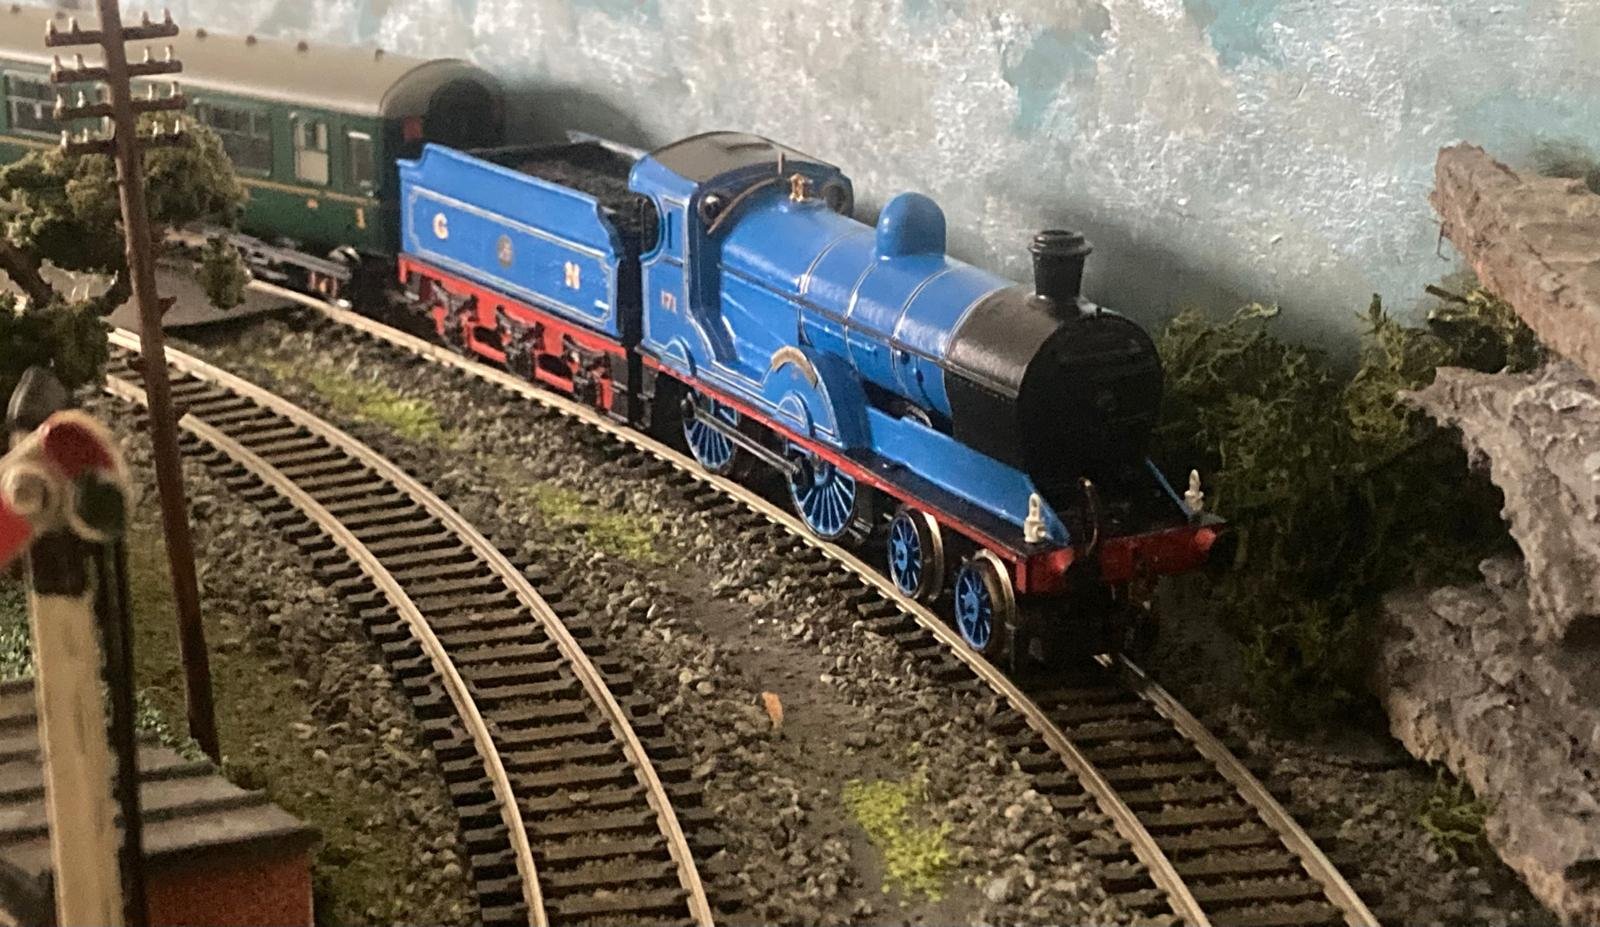
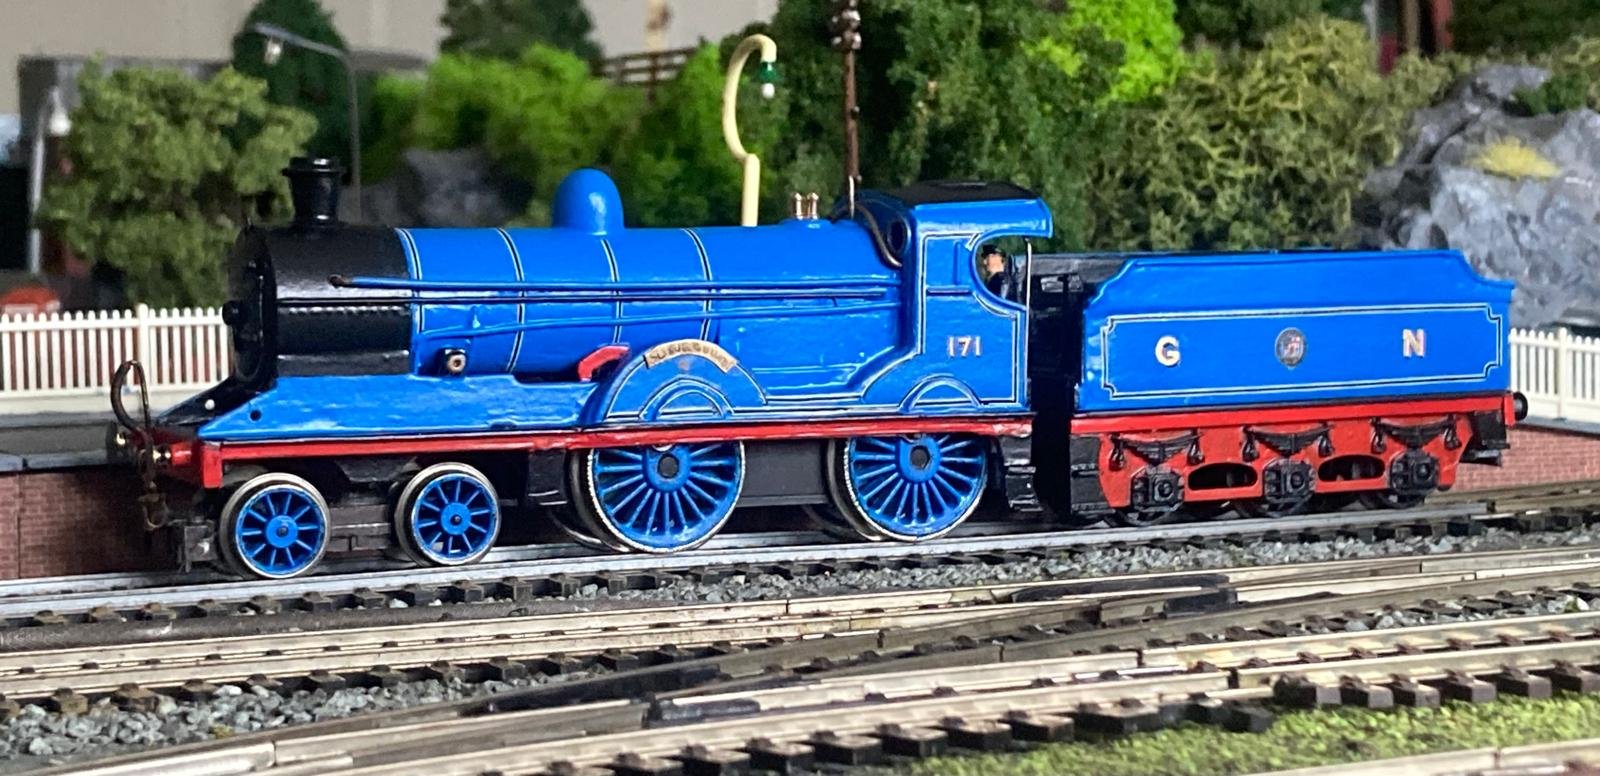
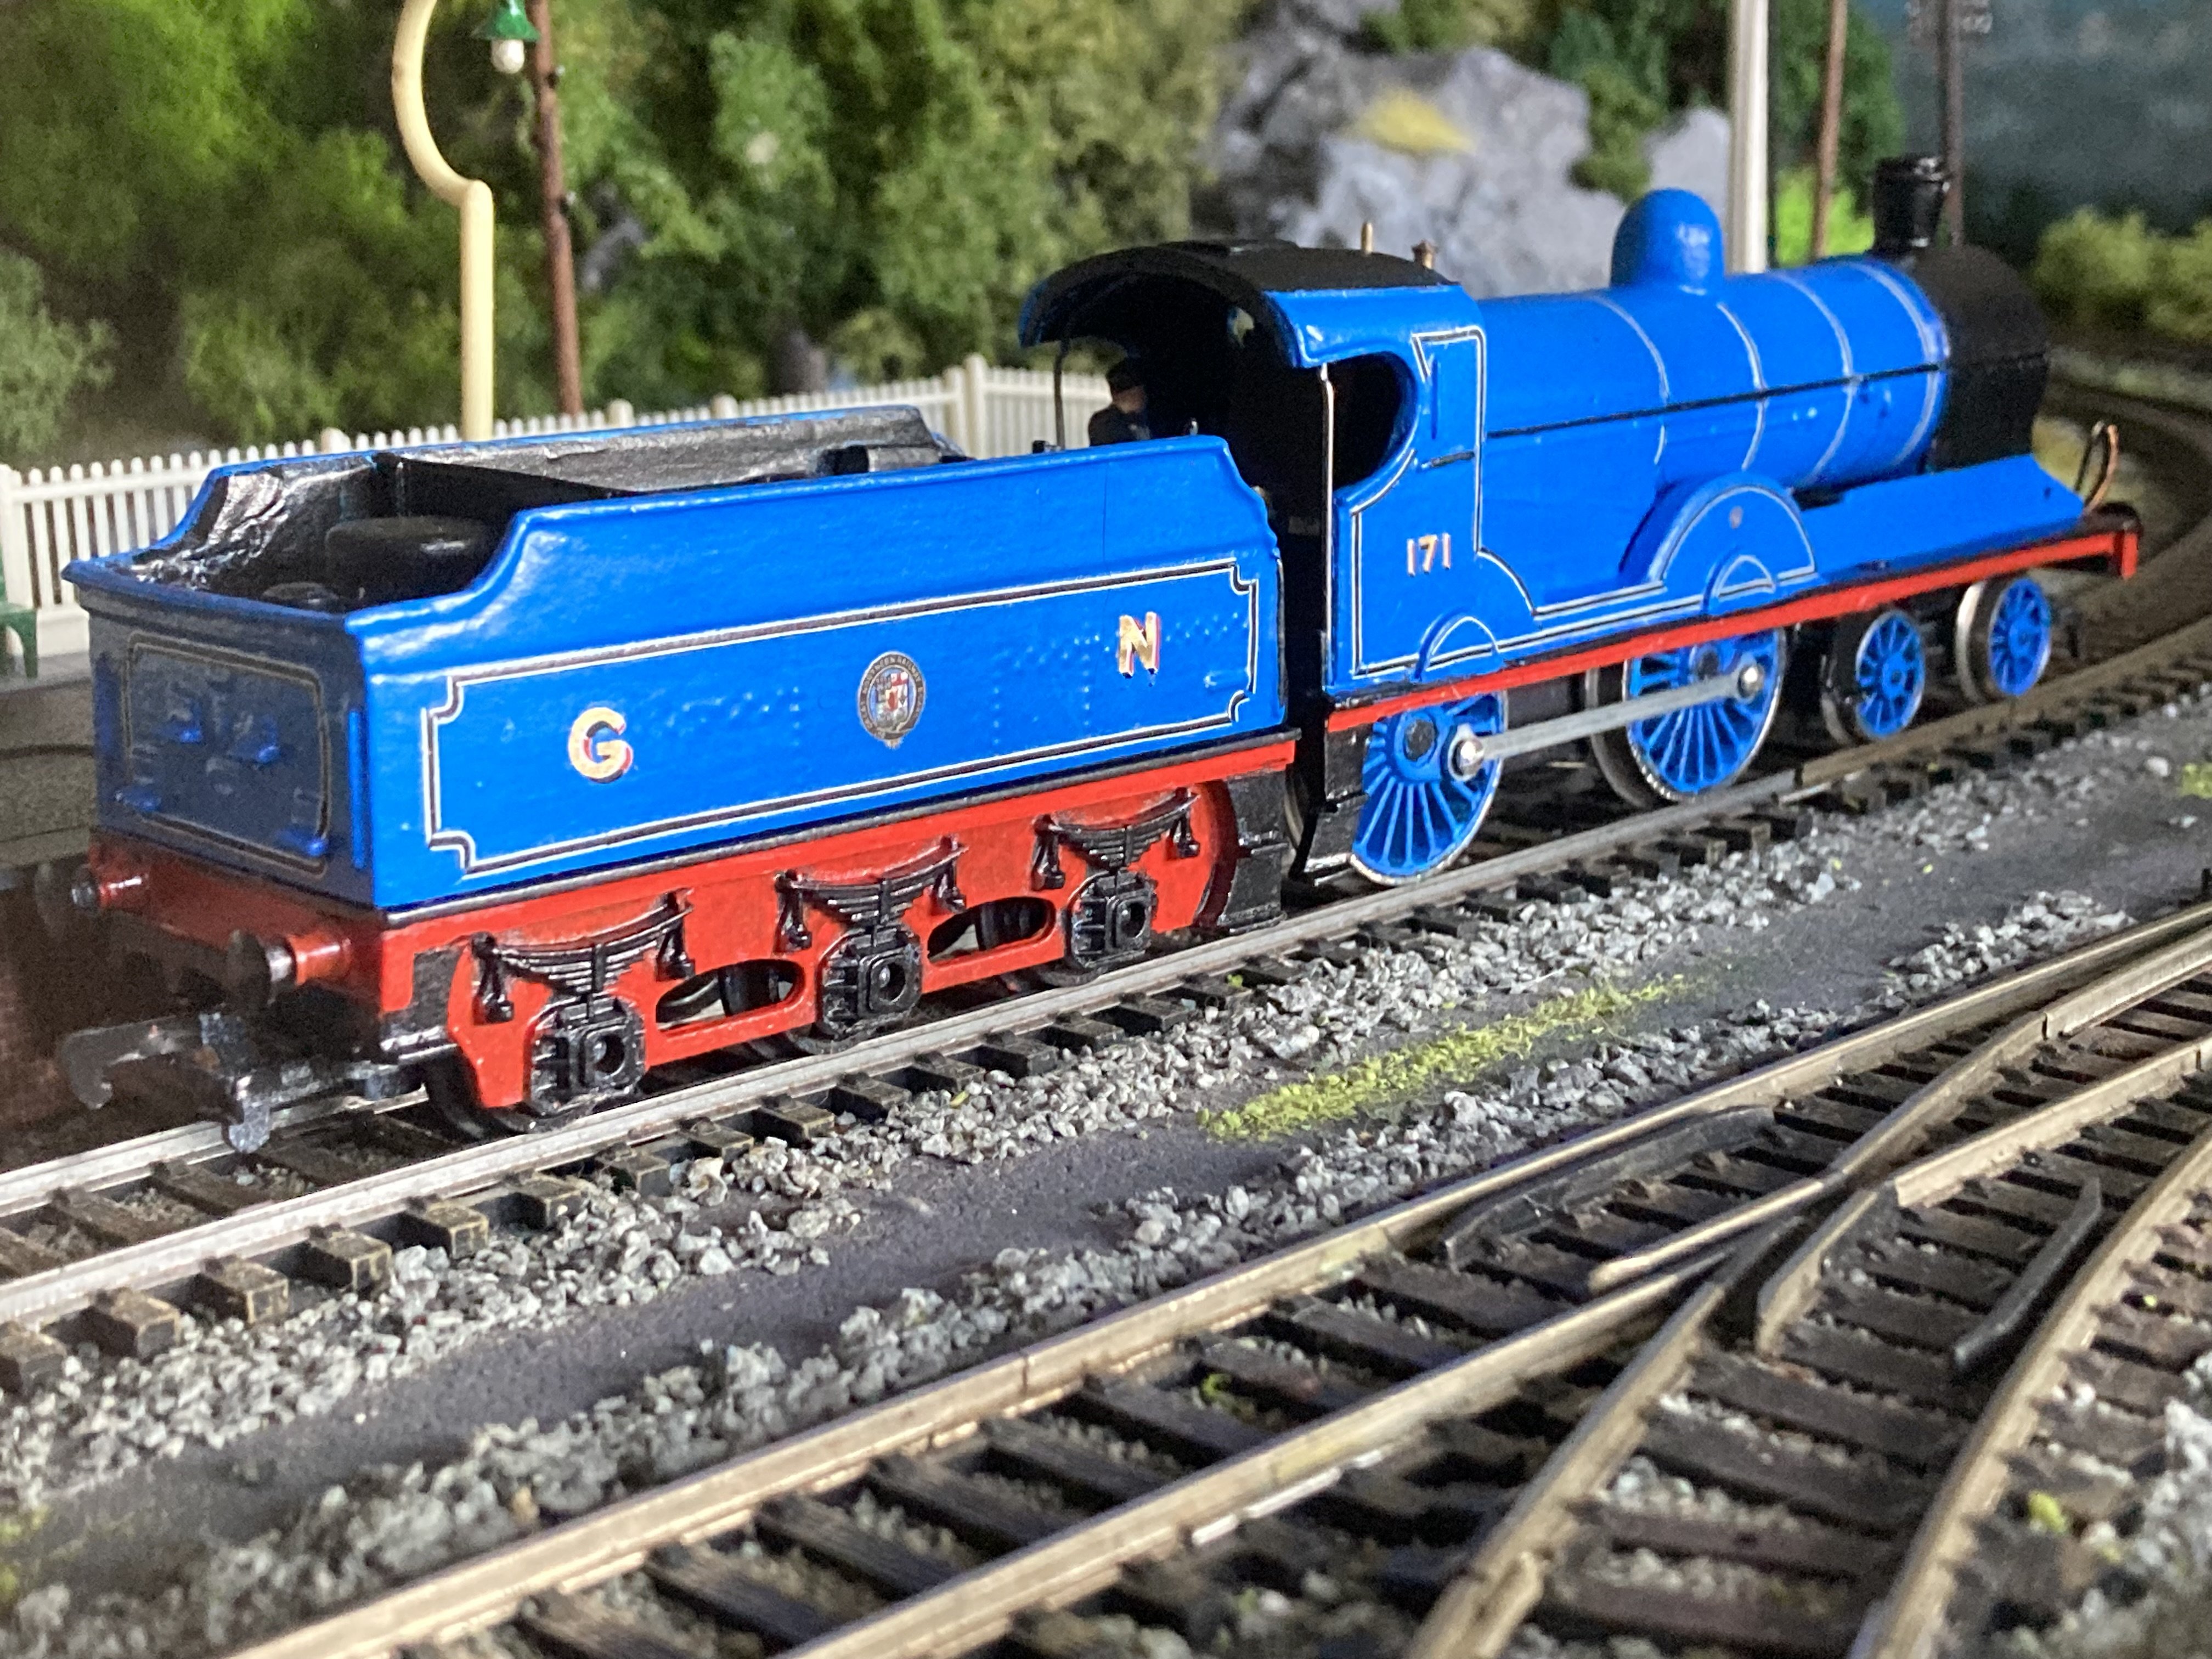
Having applied the varnish, t'was high time for the job I was really dreading - lining. In my 1990s model, I used some proprietary waterslide lining on the tender - some of which I still had, but not enough, even if it was still usable. For the loco, I hand-painted the white on boiler and cab sides then applied the black with a fine marker pen. Decals apart from cabside numbers were not needed as this was for running with UTA stock. For the GNR(I) crest, I used the Railtec GNR railcar set. A helpful recommendation via Facebook meant I used Fox GNER letters for the tender. But I could not find the waterslide lining I got in 1990 so with considerable trepidation, I opted for what I could find - HRMS 'pressfix' LNER loco lining. They offered a 'methfix' alternative but I suspected I'd make even more of a mess, using something so exotic and unfamiliar. So HRMS pressfix it was. Painstaking but do-able, I found it, even though I had to twist some sections a bit to get the required shapes and curves. The results are not 100% right, but considering the right mess I feared I'd make, I'm well enough pleased with the results. As for nameplates, I was unable to print my own decal versions so ended up using the decal paper, painted gold, with letters written with a fine pen and then cut to shape. If I come up with a better alternative, they are just PVA-glued on. Larger, turned brass buffers have been fitted, along with an etched brass screw-link coupling and a wire vacuum pipe. Front coupling removed. A final touch was to blacken the outer edges of the silver wheel rims and the connecting rod with a Sharpie pen- after most of the pics below were taken. This makes those big, shiny front bogie wheels a little less conspicuous. A better chassis (eg a Hornby T9, without the mazak rot) or extra pickups would be an improvement, perhaps. I might also add a small front coupling so she can run tender first. I did add a couple of front headlamps with little jewels as per recent appearance when running and may add then also to the tender rear. Anyhow, 171 has stretched her legs both on the home layout and at Glenabbey MRC; it only took me thirty-odd years!
- 10 replies
-
- 17
-
-
-
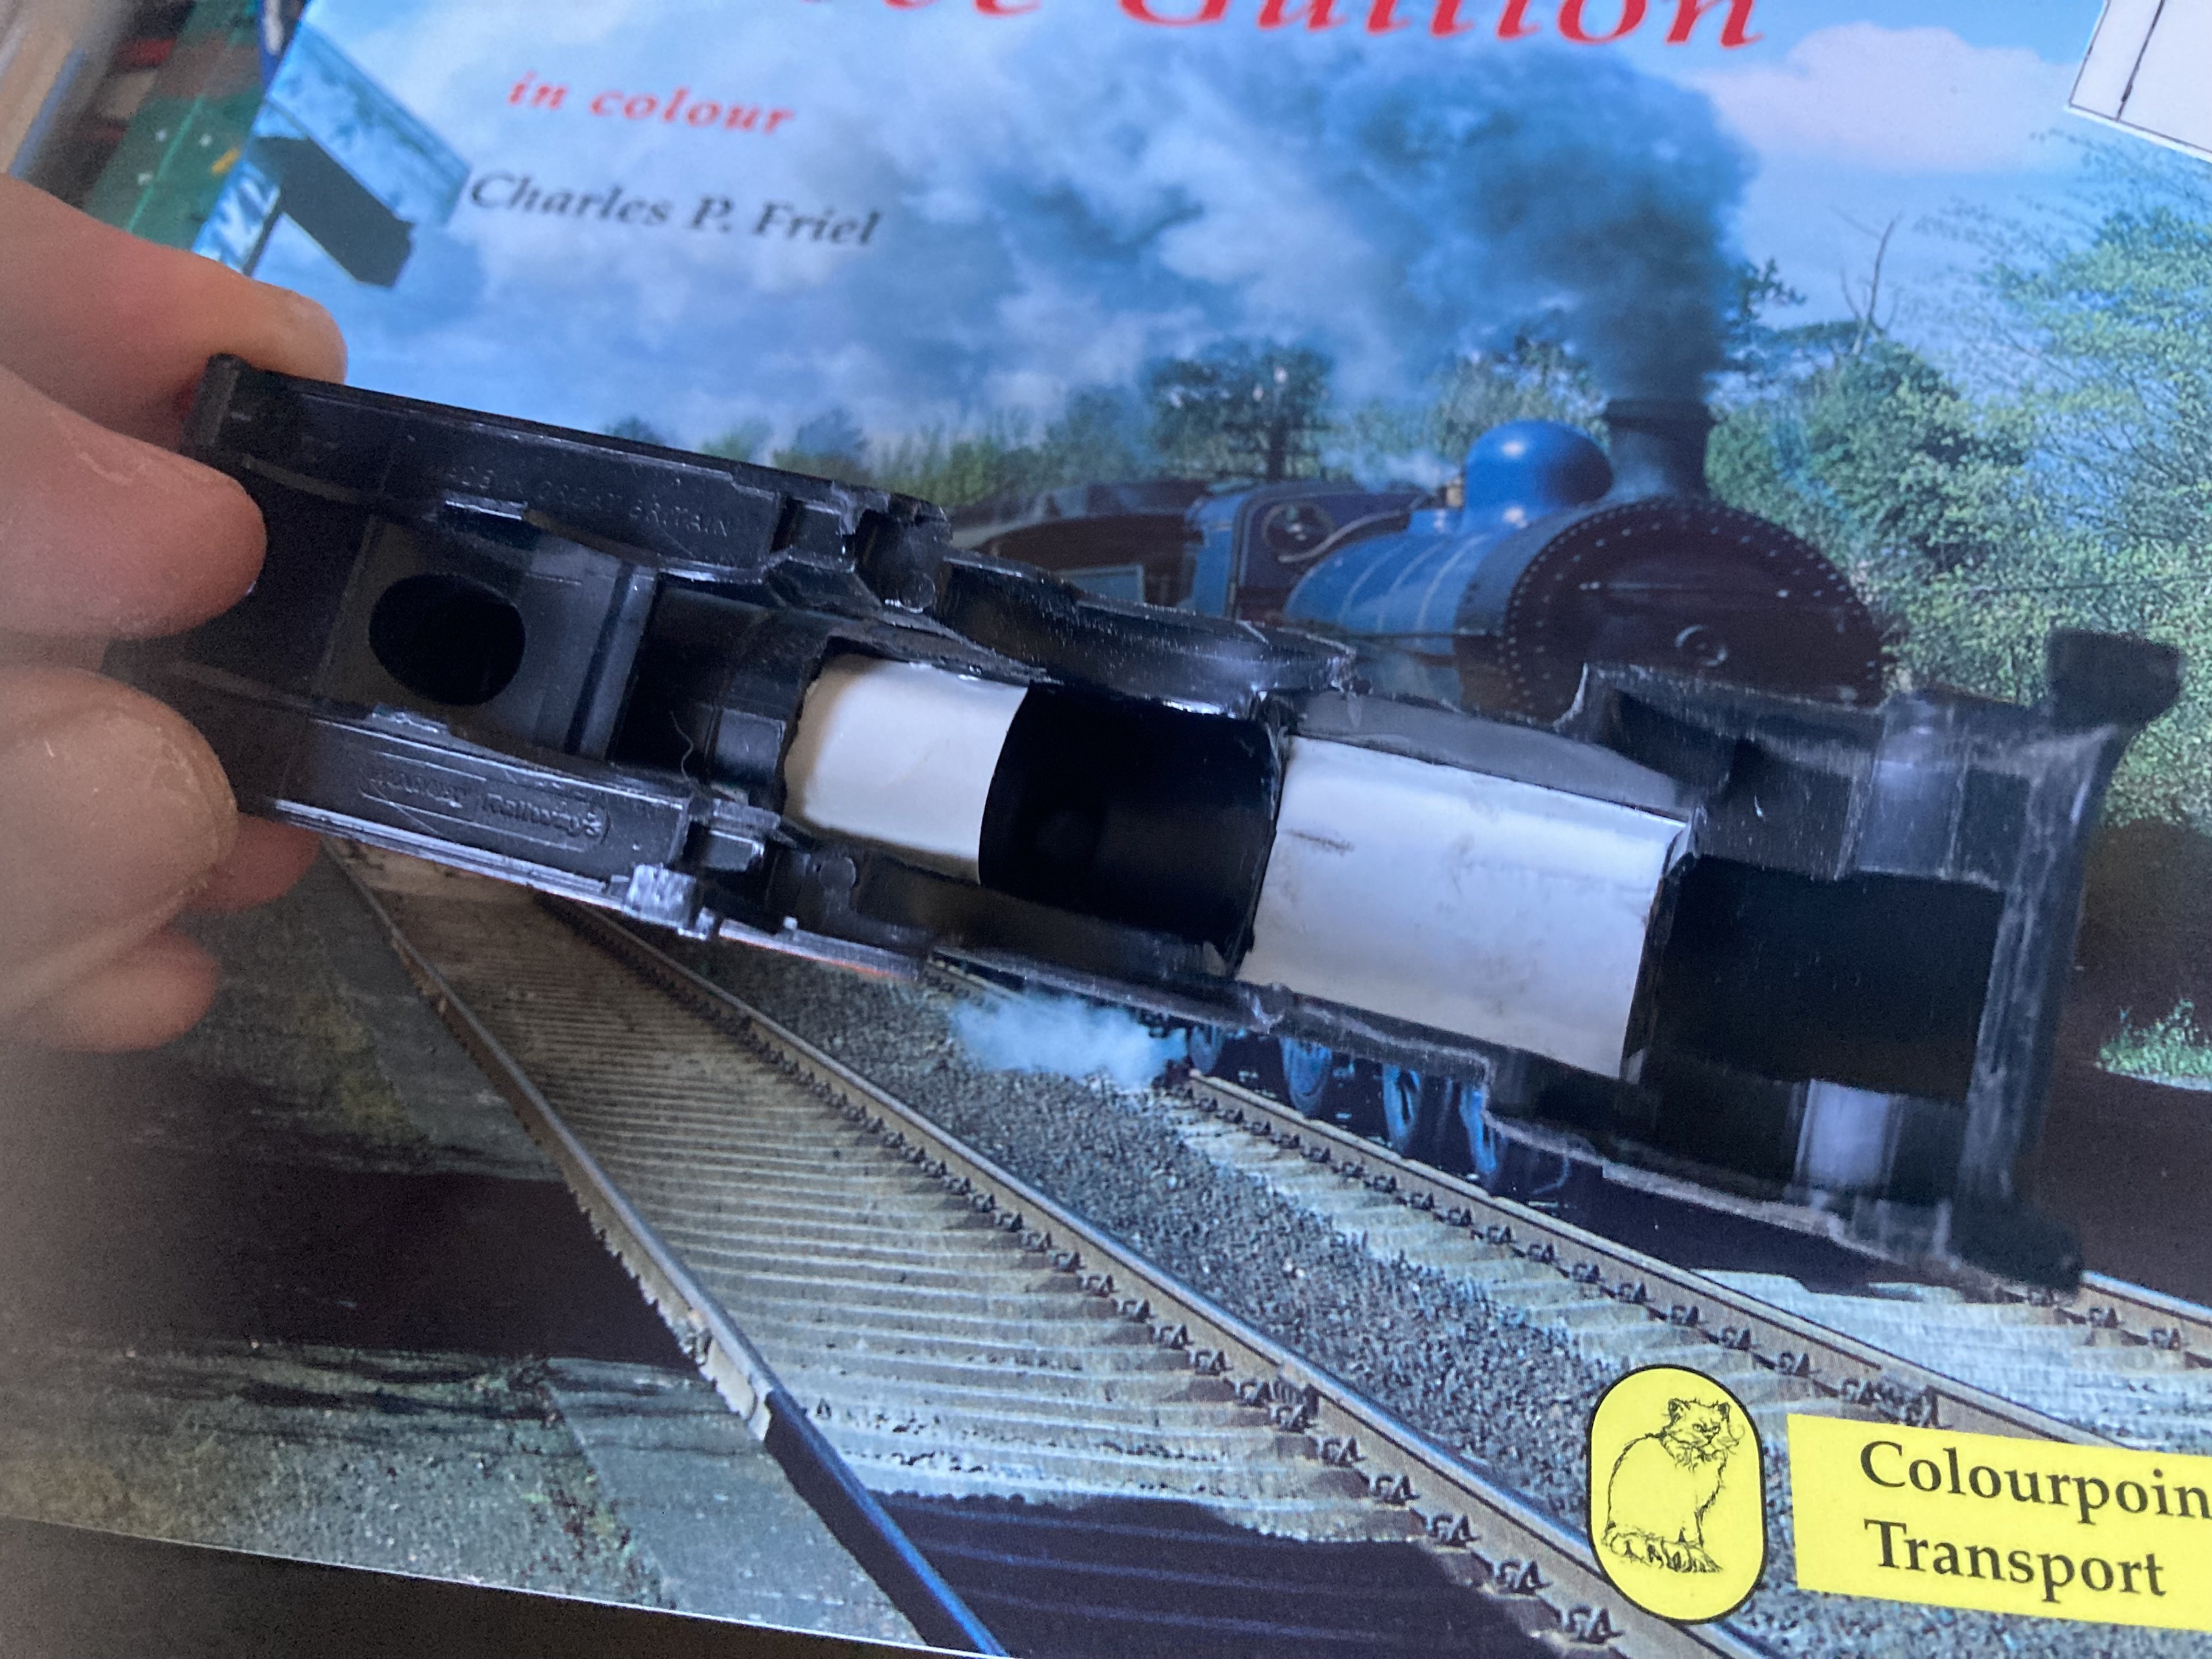
For painting, I brush-paint then finish with rattle-can spray varnish, to get a good overall final sheen - Marson One clear lacquer matt or satin, usually in stock at The Range, is my preference. Looking at what recommendations I could find online - eg Humbrol Mediterranean Blue or a Railmatch Caley blue - and studying many pics of the real thing and models, I could not find a ready-mixed colour I was happy with, including the nearest Vallejo blue I could find... ...and ended up mixing two Vallejo blues to taste. The results lacks the slightly grey-ish tinge of the real thing and for some reason, comes out too strong a blue in many iPhone pics, but I settled for it, having first tried an unmixed blue, as seen on the tender build pics and on the loco on the one above. As you can see, I have left the original moulded-on handrails in place - these are quite fine in real life and replacing them could have ended badly. Florist's wire provided the LHS steam pipe along the boiler, the moulded one on the other side having been cut off. Similar wire added the pipework on the upper cab front. In these pics you can see the re-profiled tender rear frame, where the lower rear step was cut away. I could have cut back the front of the smokebox a little but that seemed a lot of surgery for modest gain. I settled for sanding back the smokebox door a little and adding a wheel in place of the lever and a small handrail in place of the numberplate. Also two footsteps below. I missed the small handrail below them maybe for another day, along with the cabside glass windshields. To be continued!
- 10 replies
-
- 11
-
-
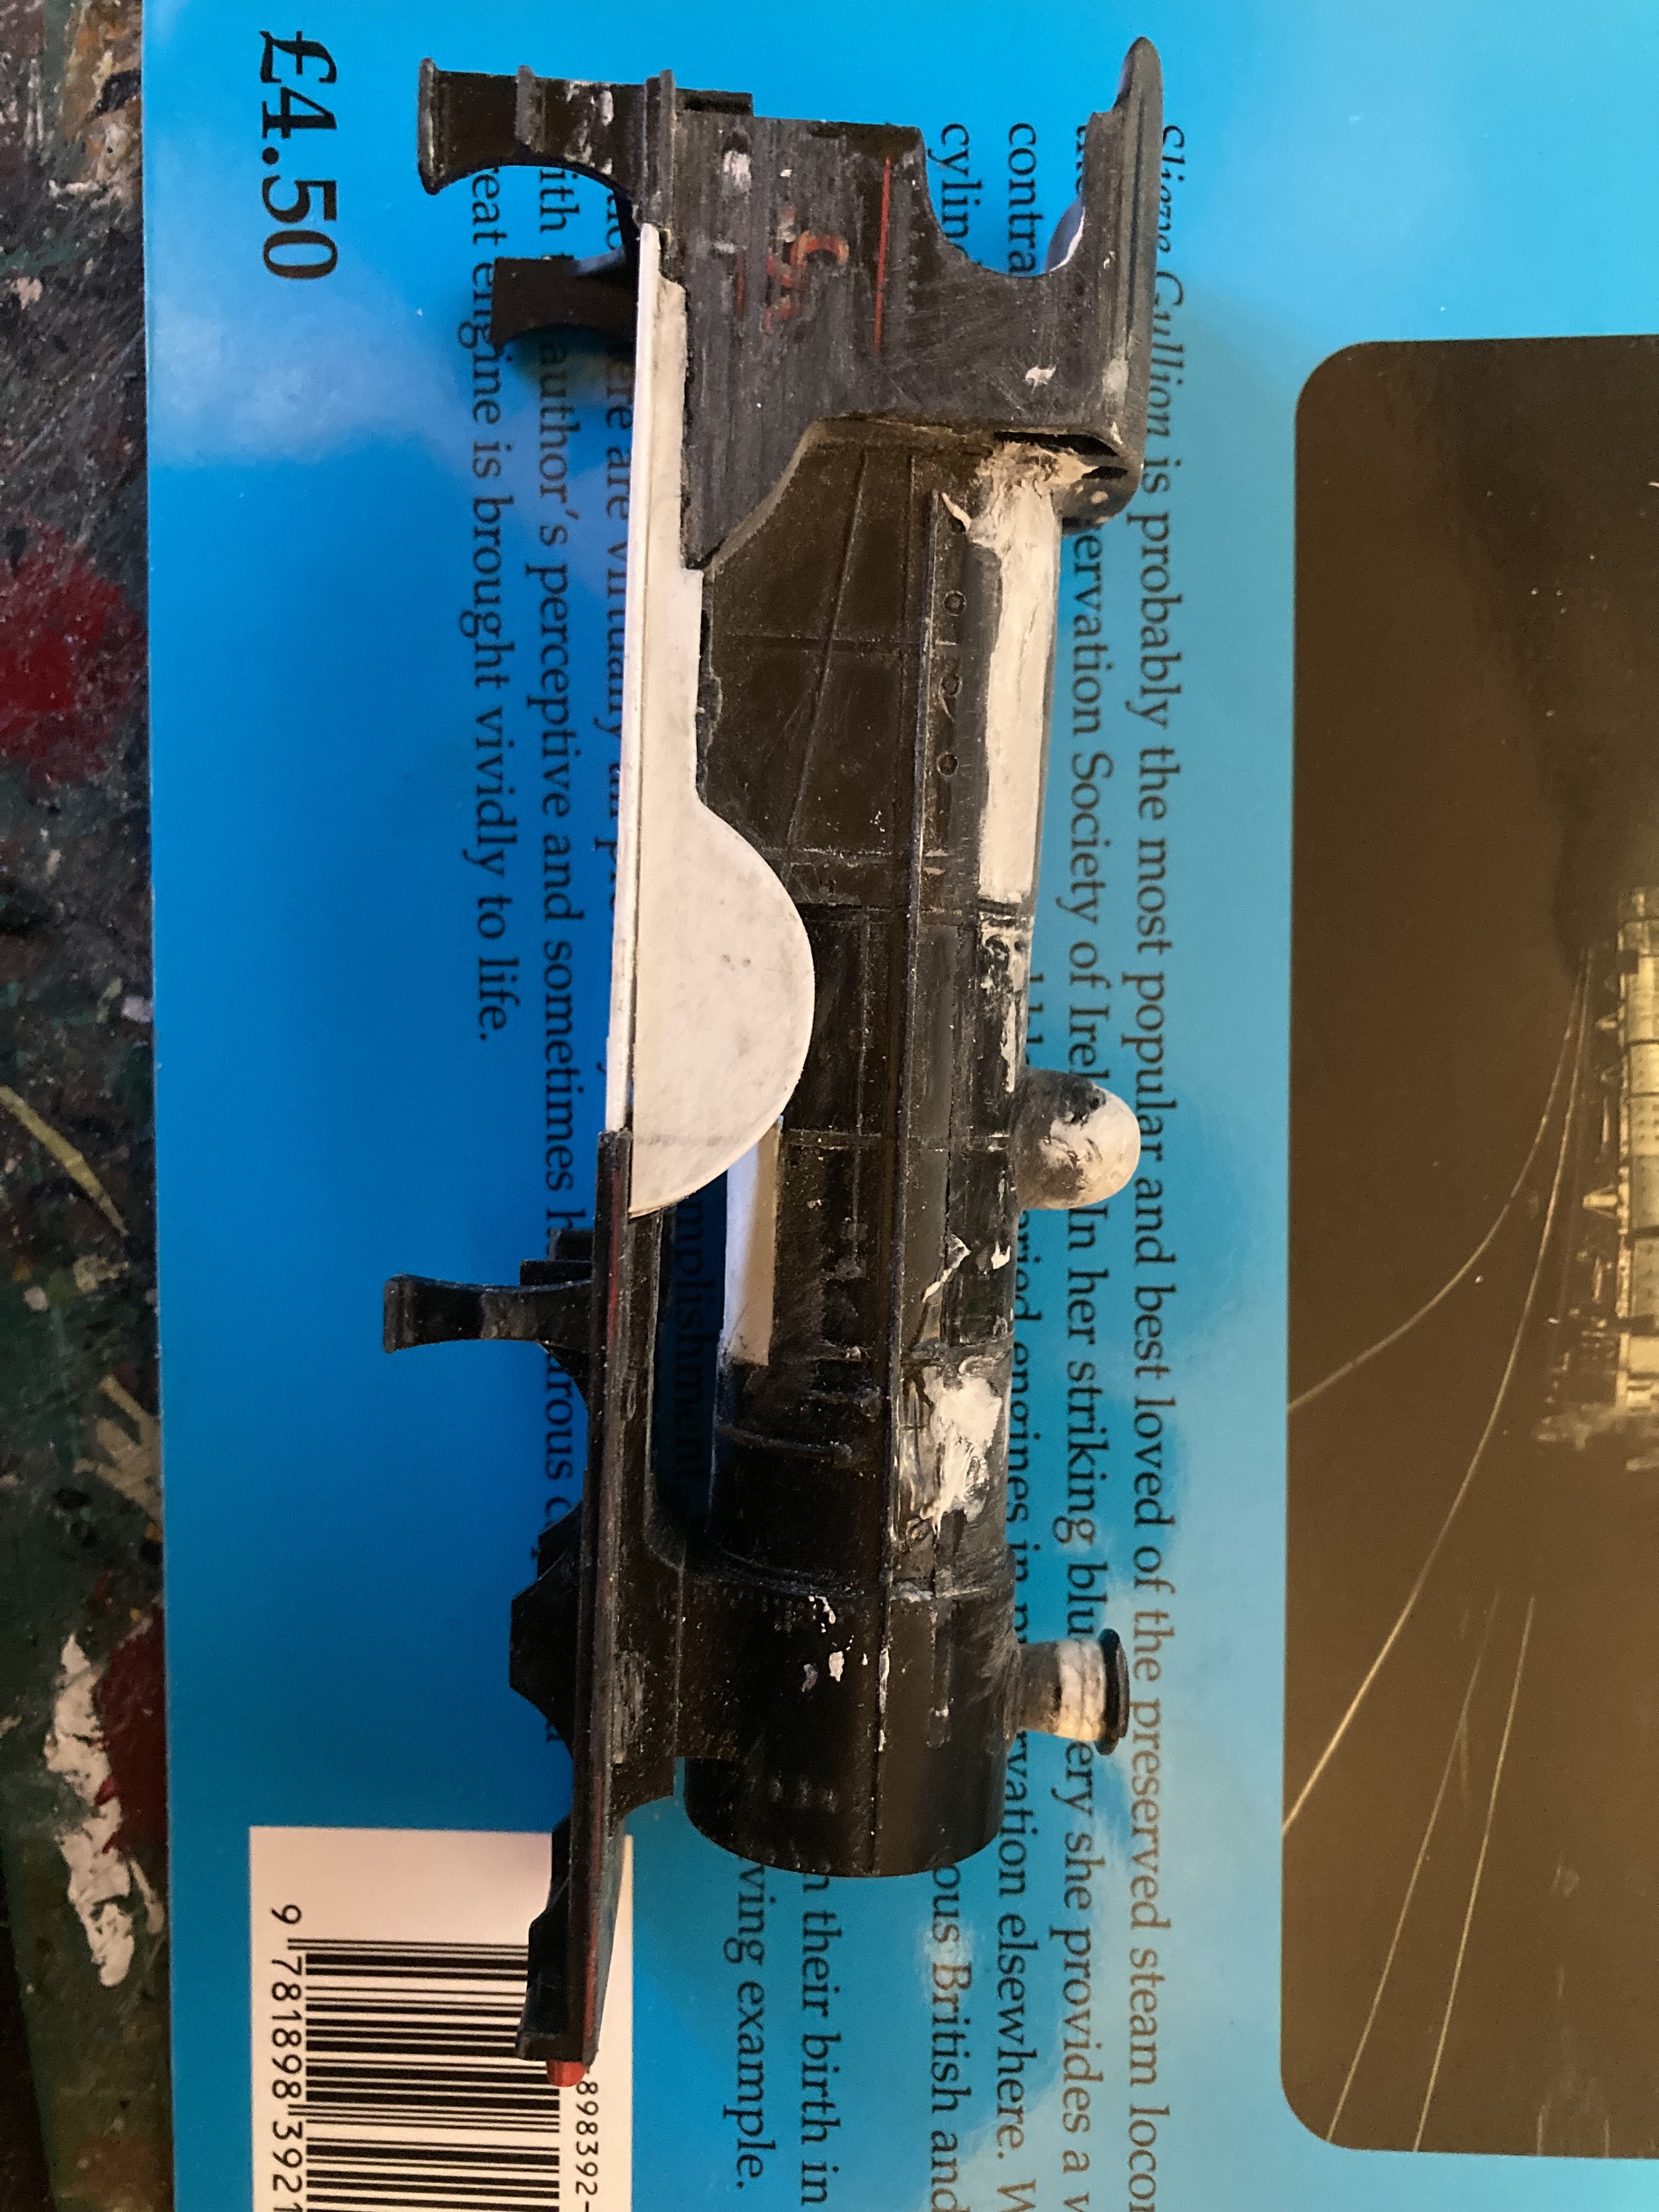
The tender was a project in itself. The only work I did on the tender chassis was to cut away the lower step on the rear and curve the adjacent profile of the frames (not yet done, on the pics here). I squared off the top of the rear bulkhead, cut away most of the internal detail at the front and replaced that. I should have moved the rear bulkhead back a little and modified the details there too, but left 'as is'. A damaged side panel needed fixed and a new upper panel added each side and at the rear, with new 'beading' fitted along the top; all from plasticard, apart from the wire stand for the tender handbrake (maybe there should be two? stuff like that, and adding maybe some tweaks to details, I can fix later). Four footsteps were added to the tender rear - I've seen pics with two and with four. This is intended to represent the tender most usually seen on the 'S' Class, not the (compound?) one with the flared-in upper panels she has at time of writing. Main reference used for details not often visible was an online build piece on an etched brass tender! To be continued!
-
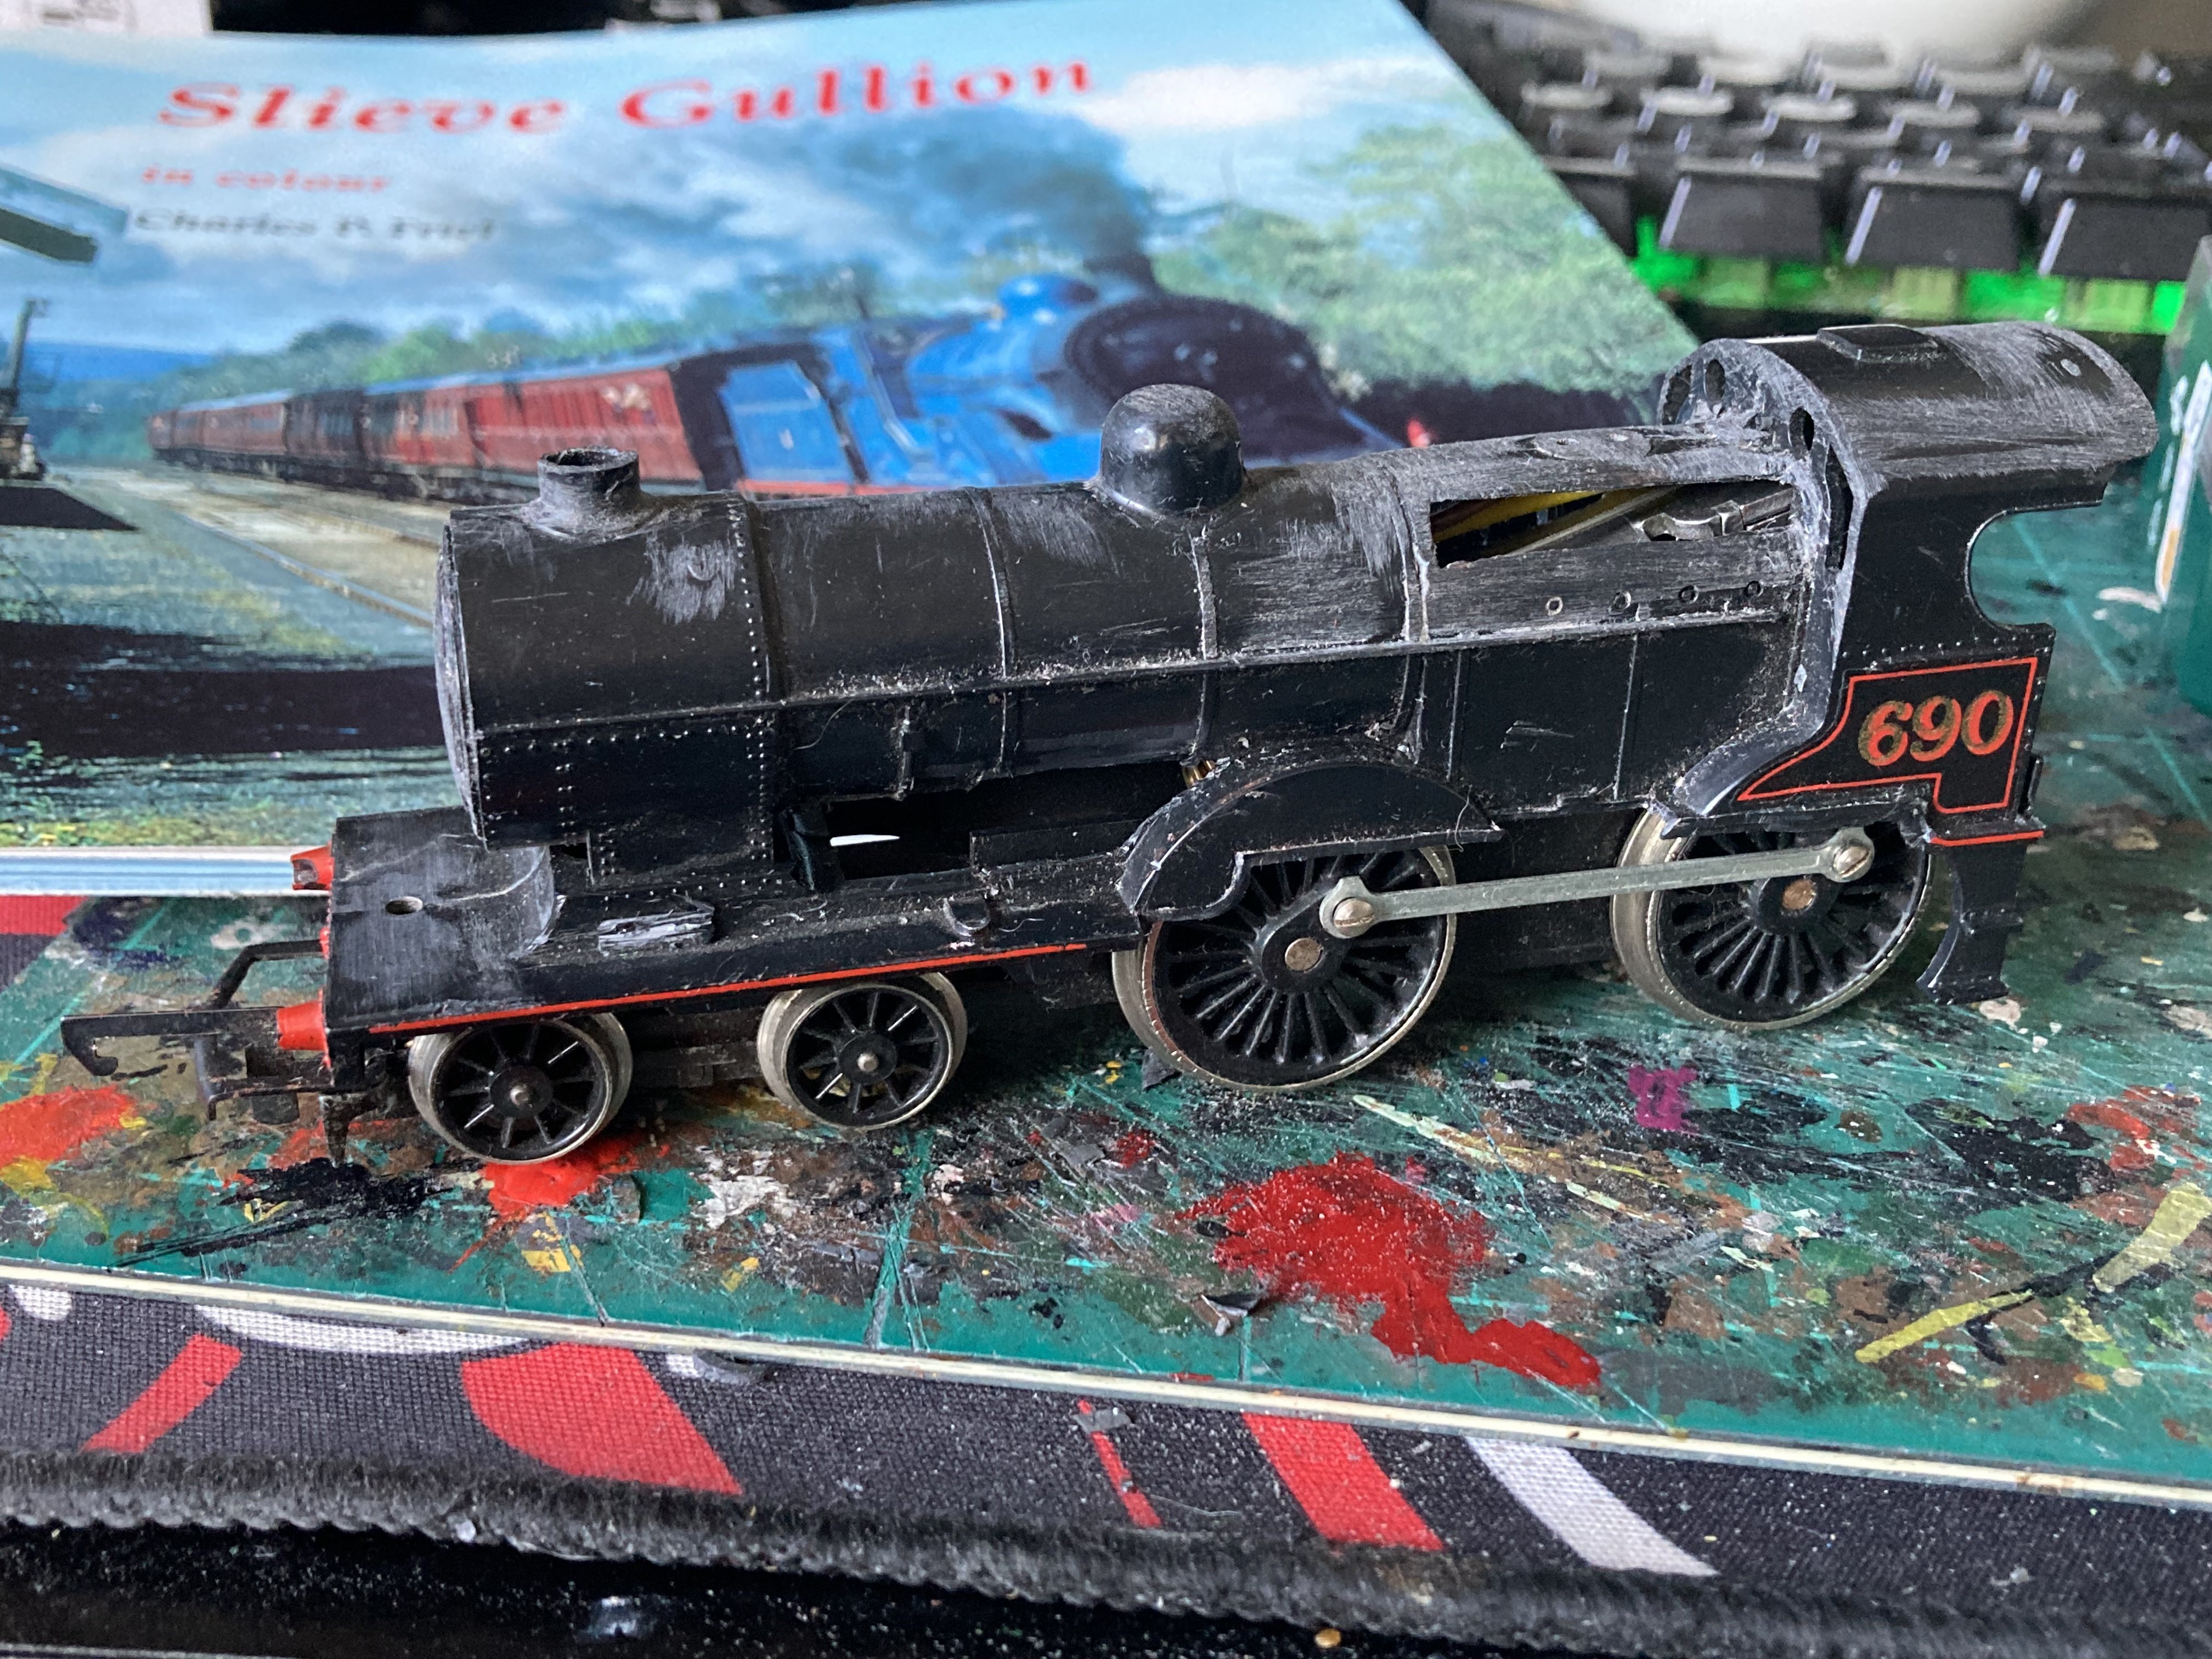
Some pics of a recently-modified Triang-Hornby LMS 2p. Been meaning to do one of these for myself, ever since making one for a fellow-modeller in the early 1990s. Sources included Charles Friel's essential photo-survey published by Colourpoint in the 1990s and of course the many pics available online these days. The basic model. Main issue is that the running plate of the loco should be lower, in relation to the chassis. Adding a little to the 'skirt' helps only a little but I decided to settle for that, to avoid a more drastic rebuild. Almost everything needs changed. In particular, we need to change the firebox top from a squared off to a rounded cross-section and give the cab roof a flatter-topped aspect. And of course drop the centre section of the footplate and add new splashers. Cabside steps need modified so the lower step is swept back and a central one added. The dome needs a more rounded top and the chimney needs raised and given a tapered profile. Lots of razor-sawing and general hacking was needed, followed in equal measure by the application of plasticard and model filler - I like the Revel variety. The white of the plasticard shows were details were added, including what I assume to be a visible section of the reverser lever ahead of the foremost splasher and what might be a a mechanical oiler above the new frame, further forward. A first coat of primer highlights were some fettling is needed before moving on. To be continued!
- 10 replies
-
- 14
-
-
-
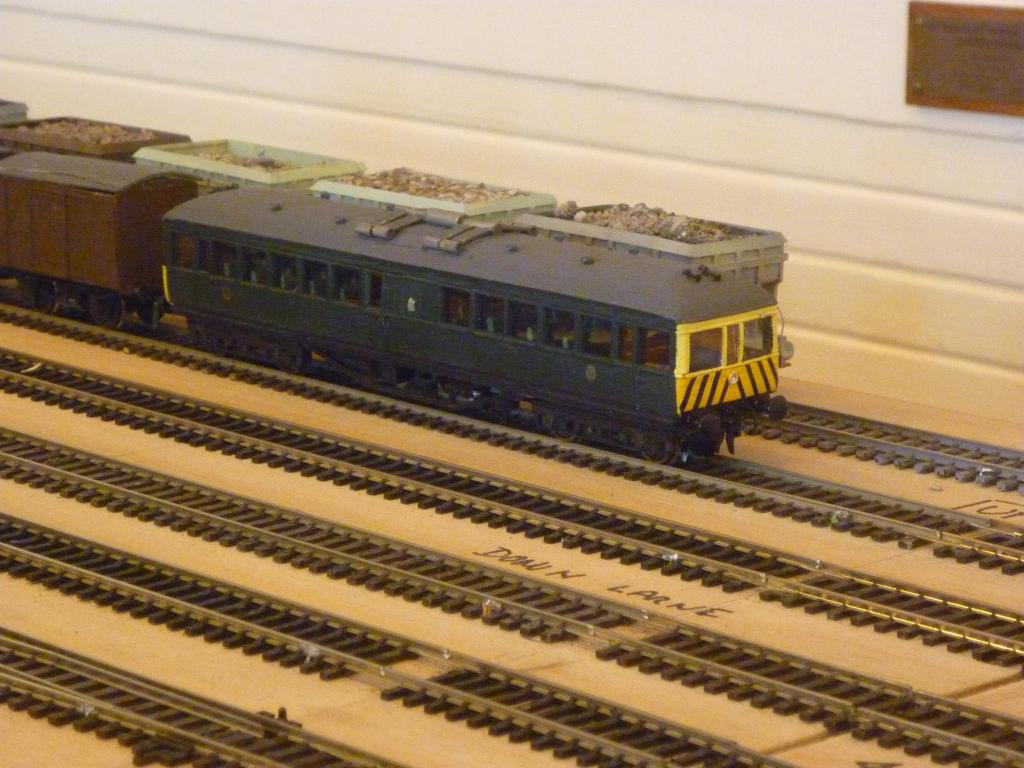
I was happy just to repaint a few ínto black and tan, and add a converted Mk1 genny. Tried to stick to ones without the bowed ends and may replace the clip-in underframe units at some point. Usually seen behind my black and tan A or C Classes. Have a second rake repainted in lined mid green.
-
Speaking of yellow things, where's the flying, thumping banana? Aka the Last of the Eighties, aka the NIR Sandite train? Seems to have disappeared from her siding at York Road Works. Indoors, being readied for her next/last Sandite season?
-
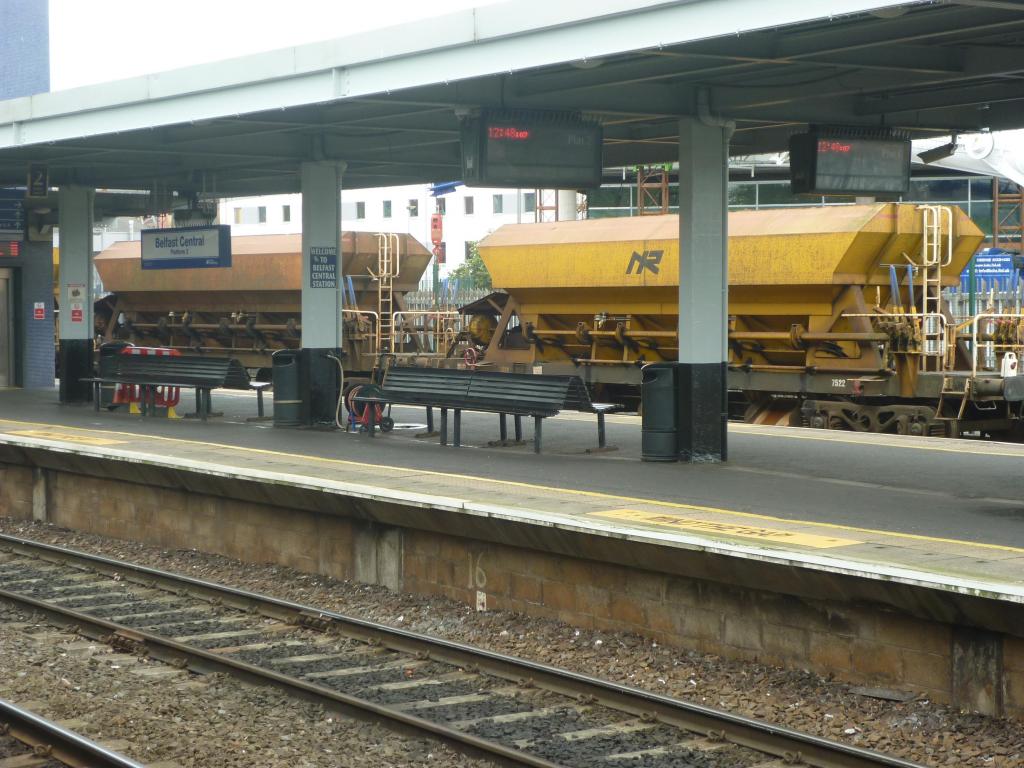
Snapped the hopppers at Central on Saturday, on the way back from the UMRC show:
-
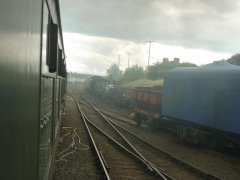
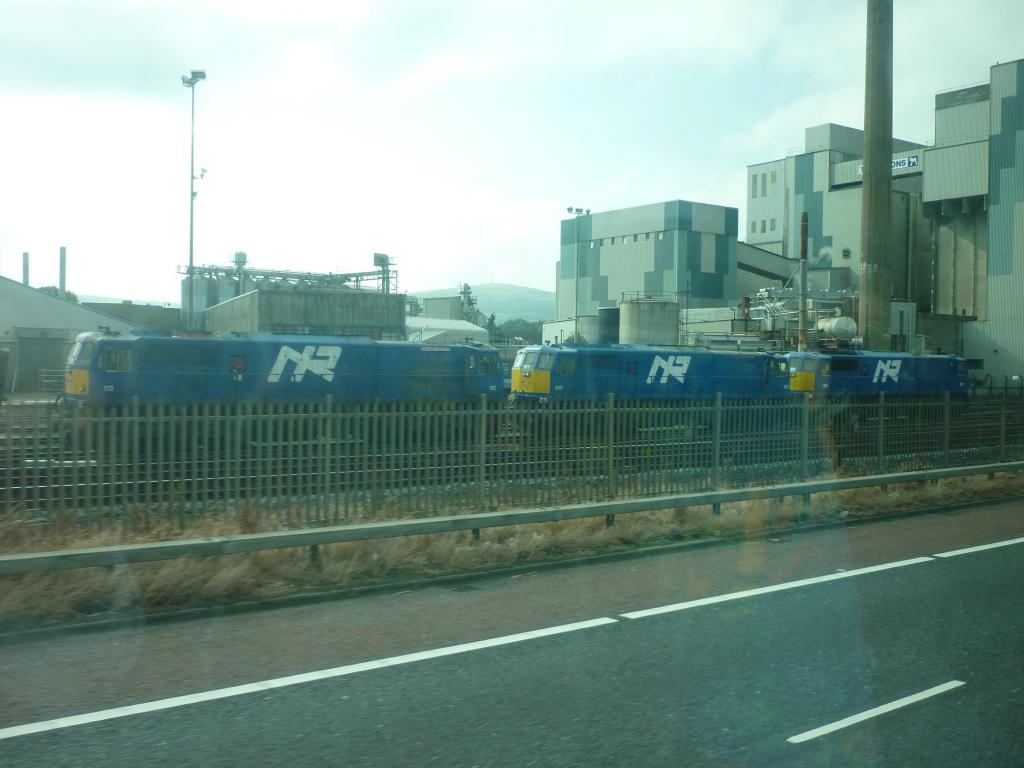
Still there today (25 Jul 17), as seen through a grimy bus window...
-
Very nice! A rake of three might have been enough, though...
-
Pics are up on Flikr, for those unable to make it: Bleach Green: https://www.flickr.c...157657599108826 Lisburn: https://www.flickr.c...157657247251099
-
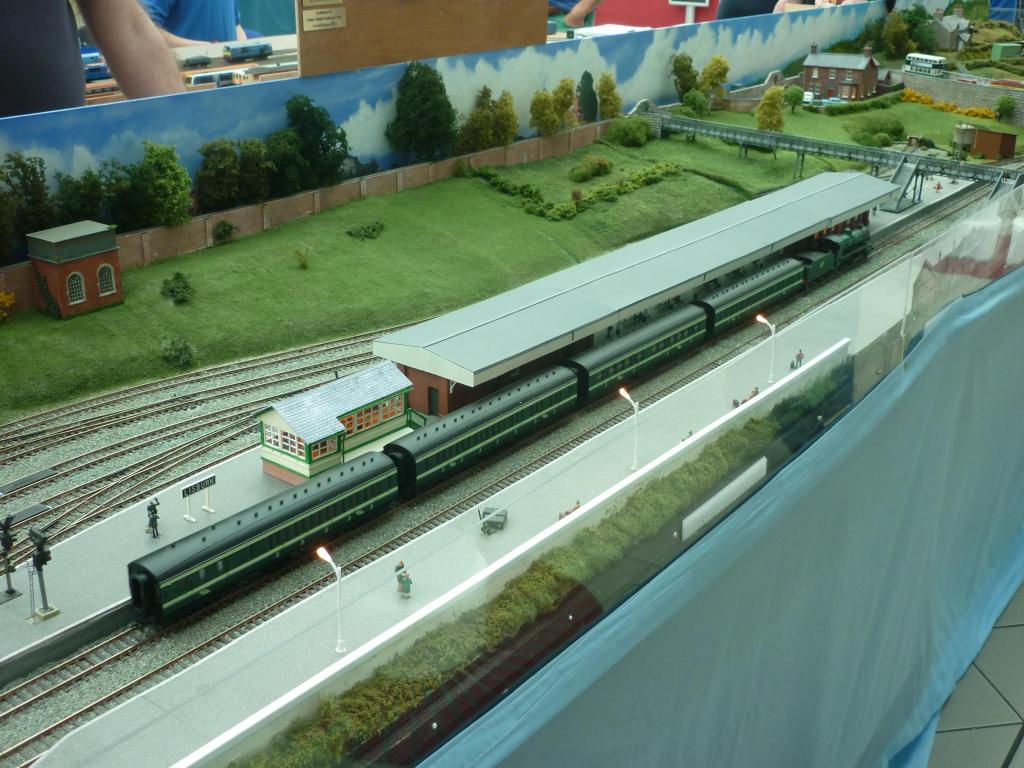
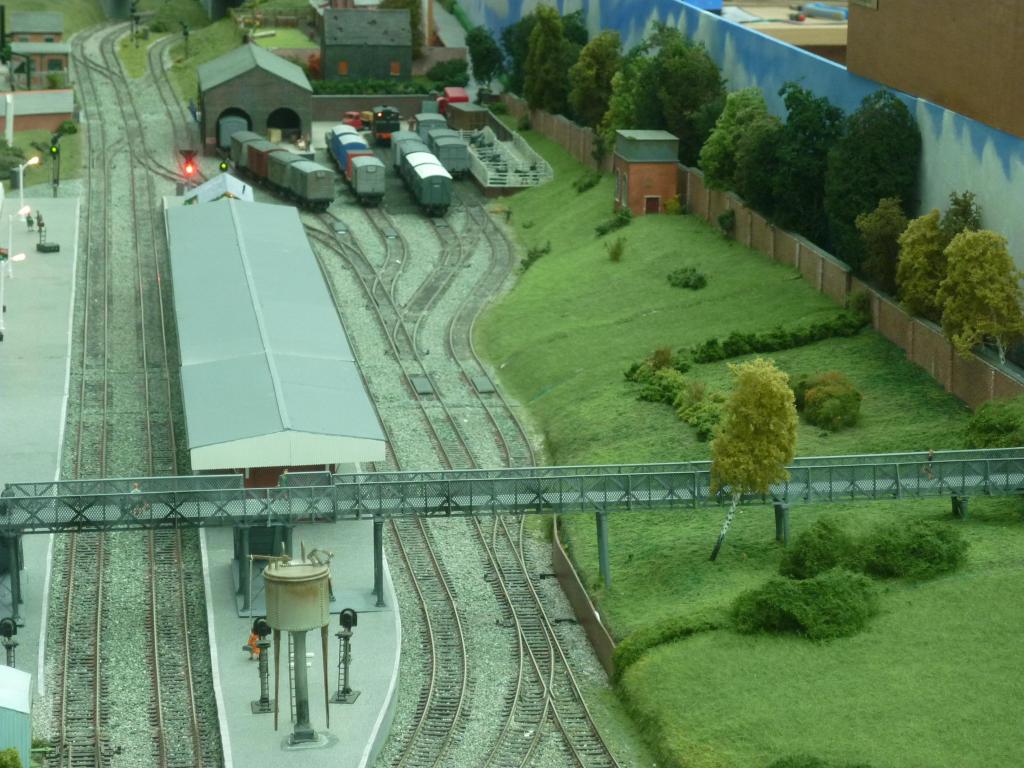
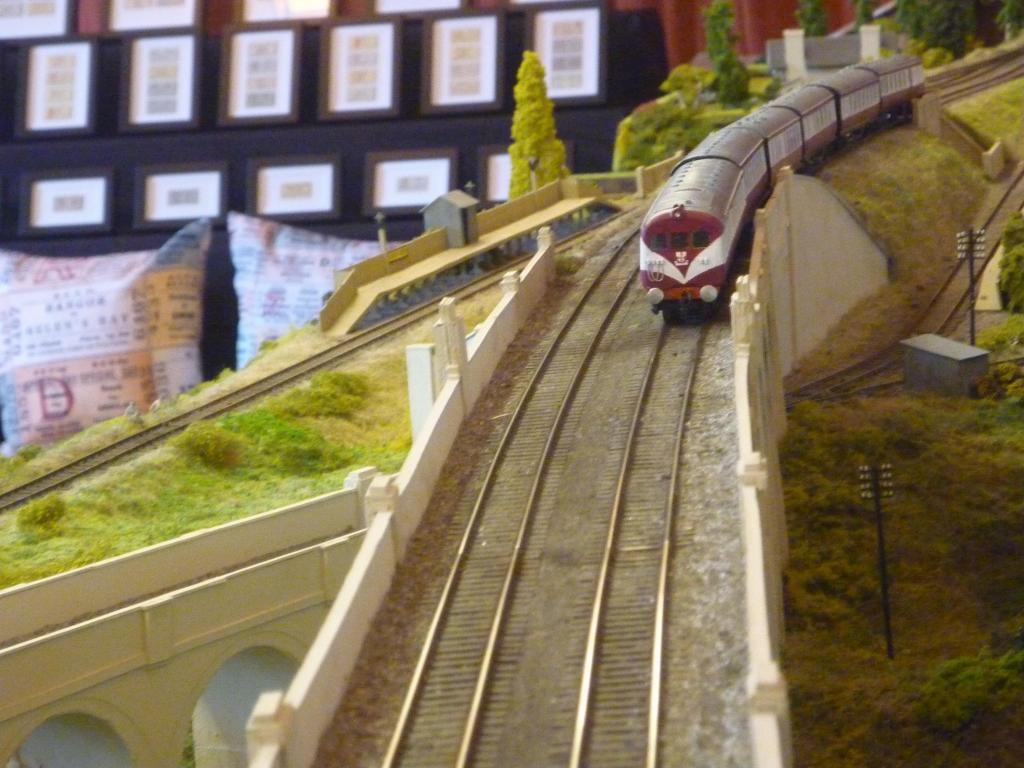
Didn't make Saturday as originally planned, but got up today. Highlight of course was seeing Bleach Green, the current BRM piece serving as a nice appetite-whetter. Well no, the highlight was being invited behind the scnes and meeting Colm and Ken whose layouts and stock - and a certain Irish DMU book by the former - account for about 90% of my motivation in returning to the hobby in the last couple of years. Being able to see and snap a fiddle-yard full fo NIR & UTA stock was not to be forgotten. Will post the pics on Flikr; in the meantime here are some of Bleach green, the other outstanding local layout 'Lisburn' and some O Gauge GNR(I).
-
You might be interested in this, then, if you can find one second hand: http://www.marksmodels.com/?pid=6452
-
Thanks John, too kind! Re RTR railcars, there's these, from Silver Fox... http://silverfoxmodels.co.uk/nir-ir-ie-2600-class-railcar-aecpark-royal/ ...basically, repainted BR Cravens DMUs. Though too short, you could get a roughly comparable result by repainting a Tri-ang DMU, after cutting away the two cab front window pillars and replacing one, in the middle; and preferably rounding the 'peak' in the cab front (and possibly repositioning the three headlights to more correct positions). Two power car bodies would also be preferable as the AEC power cars all had brake compartments, IIRC. With just a repaint, a Tri-ang DMU is not bad for UTA railcars 6 & 7, though again, two power car bodyshells would be better than just one; and again, the cab roof peak should be rounded. Stick a Grafar suburban coach in the middle for a trailer. Steve Rafferty had such a set and it looked the part - there's a pic in issue 5 of 'Irish Lines, available here: https://www.dropbox.com/s/zgbbr6m6jvvi1cp/Irish%20Lines%20-%20Issue%205%20-%201993%20Winter.pdf UTA and NIR MPD railcars can be made by motorising a repainted Hornby Stanier coach, perferably the compo as the brake third has much too big a brake compartment. All tyou really need tyo do is creat a cab at one end. At its simplest, cut a window either side of the corridor connection at one end, or laminate plasticard over the end to give a rounder profile. Other stuff is optional, like trimming off the roof ribbing or hanging simulated mechanical components under the floor of the power car. Works drawings of most of the older railcars are in my RMWeb gallery, which with suitable pics can assist in selecting suitable RTR donors: http://www.rmweb.co.uk/community/index.php?/gallery/album/2408-uta-railcar-drawings/ Recommended reading would be: 'Diesel Dawn' by Colm Flanagan, covering the early railcars, up to the 1970s: http://www.amazon.co.uk/Diesel-Dawn-Contribution-Development-1931-1967/dp/1904242081 A 1990s edition of 'Irish Railways Traction & Travel' by Peter Jones, which covers not only then-current railcars but also withdrawn ones: http://www.stmarysbooks.com/product/94855/irish+railways+traction+%26+travel/#.VdShOJerEl8 ...and 'Irish Railways Locos, Multiple Units & Trams', by Robert Pritchard, to bring the picture up-to-date: http://www.amazon.co.uk/Irish-Railways-Locomotives-Multiple-Handbooks/dp/1909431044
-
Who says railcars/DMUs aren't popular with modellers here? http://irishrailwaymodeller.com/showthread.php/2279-UTA-suburban-MPD-set http://irishrailwaymodeller.com/showthread.php/3478-Class-80-Builds http://irishrailwaymodeller.com/showthread.php/3459-UTA-Multi-Engined-Diesel?p=53934#post53934 http://irishrailwaymodeller.com/showthread.php/2345-NIR-80-Class-DEMU http://irishrailwaymodeller.com/showthread.php/2678-NIR-70-Class-DEMU http://irishrailwaymodeller.com/showthread.php/78-Kirley-s-Projects?p=48753&viewfull=1#post48753 http://irishrailwaymodeller.com/showthread.php/4548-NIR-450-class-from-bachmann-150-1 http://irishrailwaymodeller.com/showthread.php/625-GVS-and-Adelaide-lookalike?p=26604&viewfull=1#post26604 http://www.rmweb.co.uk/community/index.php?/topic/101451-uta-railcars-no6-7/ http://www.rmweb.co.uk/community/index.php?/topic/79300-nir-80-class-demu/ http://www.rmweb.co.uk/community/index.php?/topic/49402-uta-med/ http://www.rmweb.co.uk/community/index.php?/topic/100199-uta-railcar-no-1/ http://www.rmweb.co.uk/community/index.php?/topic/56180-out-of-storage-some-of-my-old-uta-and-nir-stock/ http://www.rmweb.co.uk/community/index.php?/topic/87521-multi-purpose-diesel-mpd-build/ ..and because a picture is worth a thousand words...
-
Looking good! You're right about the cab being too long. It's also too far back - the GA drawing appears accurate in this respect. Ideally the cab needs cut free, moved forward a little and a bigger slice taken vertically out of the rear. I think the front and rear cab sheets fold up from the floor unit which latter can be trimmed accordingly and the rear, then re-attached. Just cutting away some of the excess length at the back will make a difference (you may want to increase the width of the top, open section of the coal bunker, at the same time, to improve the cross-section). But leaving the cab front where it is, means the cab front, the last step in the side tanks and the rear driving wheel centres don't line up right, in profile view. I would definitely suggest trimming away the little 'skirt' under the footplate/running board all the way along, rather than taking the new plasticard tank sides all the way down to it. It's not that deep, but it's enough to make the big side tanks look too deep, at the front - all the way along, in fact. It'll leave a little gap above the cylinders, unless you can move them up a little, but better that, than deepening/distorting the outline of those distinctive side tanks. May seem like a lot of bother for comparatively little return but you are already doing a fairly major conversion job and might as well make those few extra cuts that will make all the difference to the accuracy of the finished model, rather than (as I have done in the past!) hold back, thinking 'It'll be near enough!', then wishing after I done all the painting and finishing that I had gone a bit further!
-
Should be there. Per Colm Flanagan, Bleach Green is to be there, too.
-
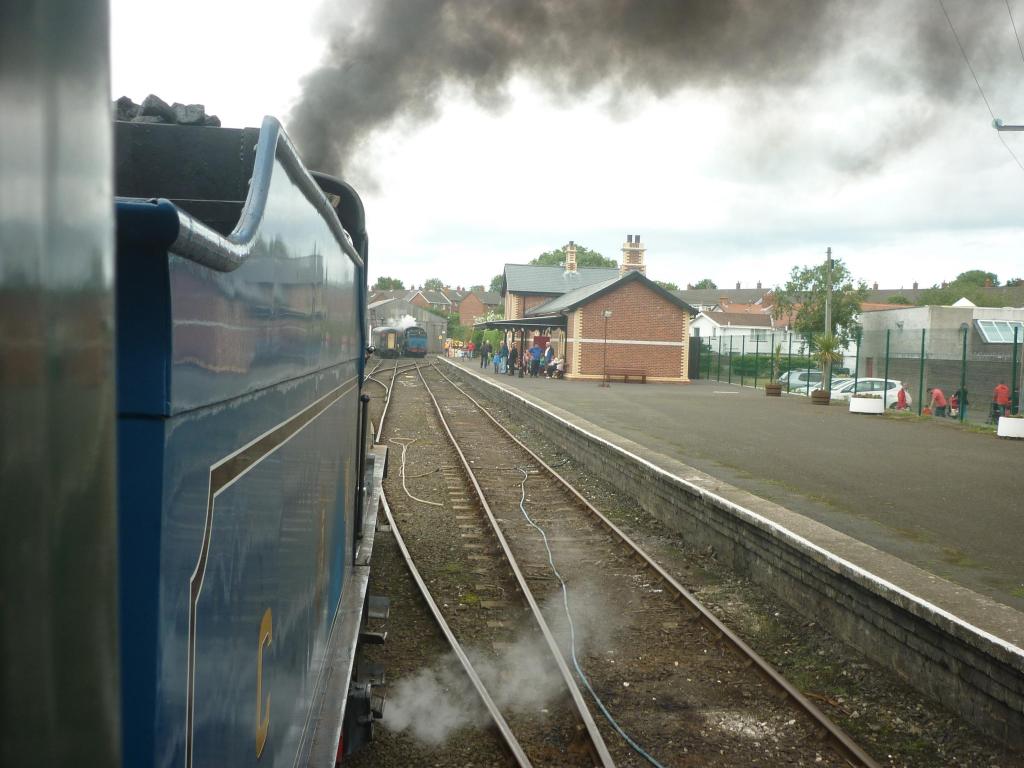
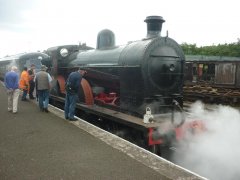
Thanks, guys. I've put some more pics in the albums, including some 'boring' shots of various bits for reference purposes, here... http://irishrailwaymodeller.com/album.php?albumid=52 ..and here: http://irishrailwaymodeller.com/album.php?albumid=101 I was a bit disappointed that the engine for the day had been changed from 4 to 131 in the last few days, but being right behind a GNR(I) 4-4-0 that had been brought back to life by the magic of the RPSI, sort of made up for that!
-
-
-
-
-
-