33lima
-
Posts
190 -
Joined
-
Last visited
-
Days Won
2
Content Type
Profiles
Forums
Events
Gallery
Blogs
Everything posted by 33lima
-
-

-
-
-

-

-

-
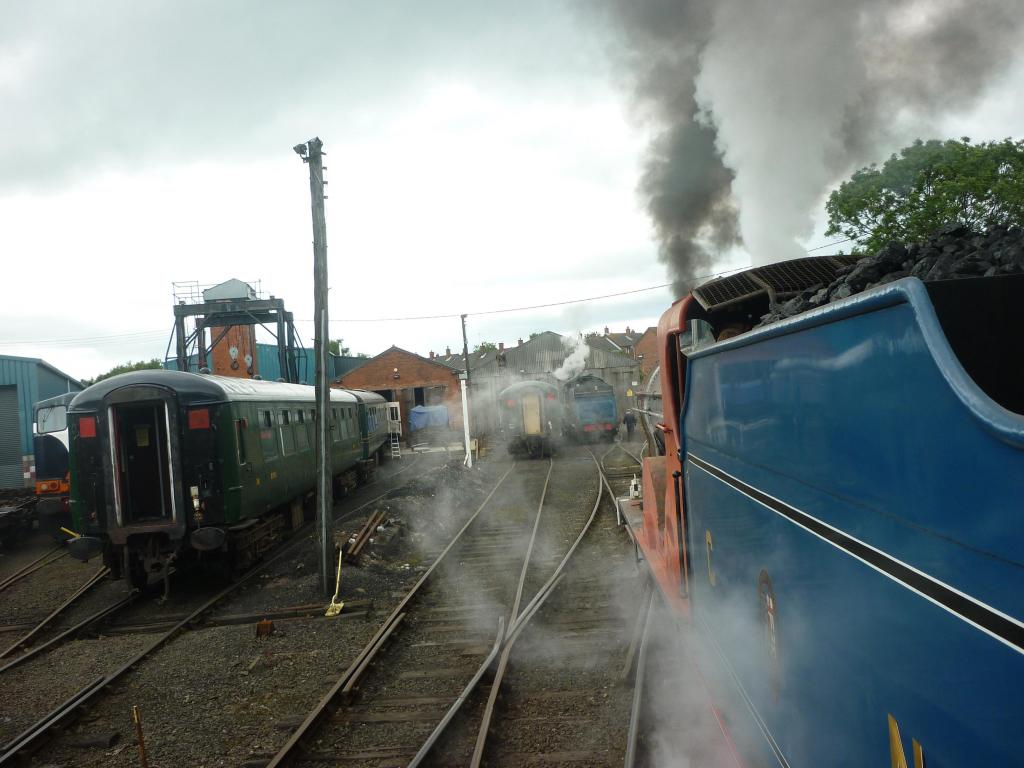
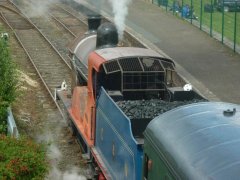
Some pics of the RPSI's newly-restored GNR(I) 131 in steam for short hops for the Whitehead Food and Folk Music Festival, earlier today (and a DMU, can't have these ancient overgrown kettles taking over the place): :

-
Thanks Nelson, I'm sure your WT will set a very high standard. Re Whitehead to-morrow (25 July) the RPSI page for the open day has been changed to say that 4-4-0 131 is the engine in steam, rather than 4: http://www.steamtrainsireland.com/events/
-
Looking good - keep the pics coming! The real no.4 is supposed to be on show at the RPSI open day at Whitehead on Sat 25 July which I hope to get to - shout if you need any detail pics taken, though there are plenty online these days, something I wish I'd had back in the early 1990s when I tackled a jeep, much the same way you're doing. You'll want to move the whistle to the front of the cab roof and I think the roof hatch was in two pieces with rails front and rear (at least that's what I ended up with). The valve or sandbox filler things on the forward footplate (behind the steam pipes either side of the smokebox) also need hacking off and there were two small rectangular plates welded between the boiler and the top of the water tank each side, level with the filler, presumably to deflect water that would otherwise have flowed down between the boiler and the tanks. Footplate valences also benefit from being cut or filed back up to footplate level, notably behind the front buffer beam and under the rear bunker. IIRC I cut off the complete front footplate and its triangular stiffener plates, and replaced the lot with plastcard, with the buffer beam glued back in front. Ah, the memories your pics are bringing back!!! 'U' shapes folded from stiff florist's wire, with the top part bent to fit the bodyshell, when faced with plasticard strip, make good replacements for the cab and footplate steps, like these: I think Colm reckoned the fronts of the water tanks need to be trimmed back a bit - but if they really extend too far forwards towards the rear of the smokebox, I can't see it, from studying photos. Colm's WT build article is in the June 2006 Railway Modeller and well worth a read, including some excellent colour pics of excellent models, the Mogul as well as the jeeps. My 1990s effort was in (original) Irish Lines number 7, summer 1994, which article included the works drawing with the correct steps in the lower line of the water tanks - article with drawing available in the NIL archive, here: https://www.dropbox.com/s/c8xw456e8ao4ila/Irish%20Lines%20-%20Issue%207%20-%201994%20Summer.pdf Pics like this one are as good, though, perhaps better: http://www.steamtrainsireland.com/images/photonews/090131/090131_No4Curragh_PatGantly.jpg I think if you keep the cab rear where it is, the bunker behind it is a little long, but like you I left this alone, to retain the bit in the middle with the fixing screw! EDIT - now I remember - I actually ended up with a long bunker, because I moved the rear cab forward a little. I did this to avoid too wide a pillar behind the cab door, which you get if you just fill in the 'bite' to the top rear of the cab door. There's a bit of 'excess length' somewhere in the Fowler, and I contemplated moving the complete cab back a little and filling in all the gaps left ahead (yuk!), or cutting back the rear of the chassis block and shortening the bunker, before deciding a bunker that was a little too long was the 'least worst' solution, for me anyway. Another thing to check is the width you end up with, of the top section of the bunker, above the angled plates; too narrow or too wide, and it can mar the appearance, seen from the rear, of an otherwise good model. Anyway do please keep the inspirational pics coming! PS here's a snip of the Irish Lines drawing; actually, my model's bunker looks about the same as this, so maybe I was more careful than I remembered, but then the smokebox/watertank gap is big, not like in the above photo, hence be wary of works drawings:
-
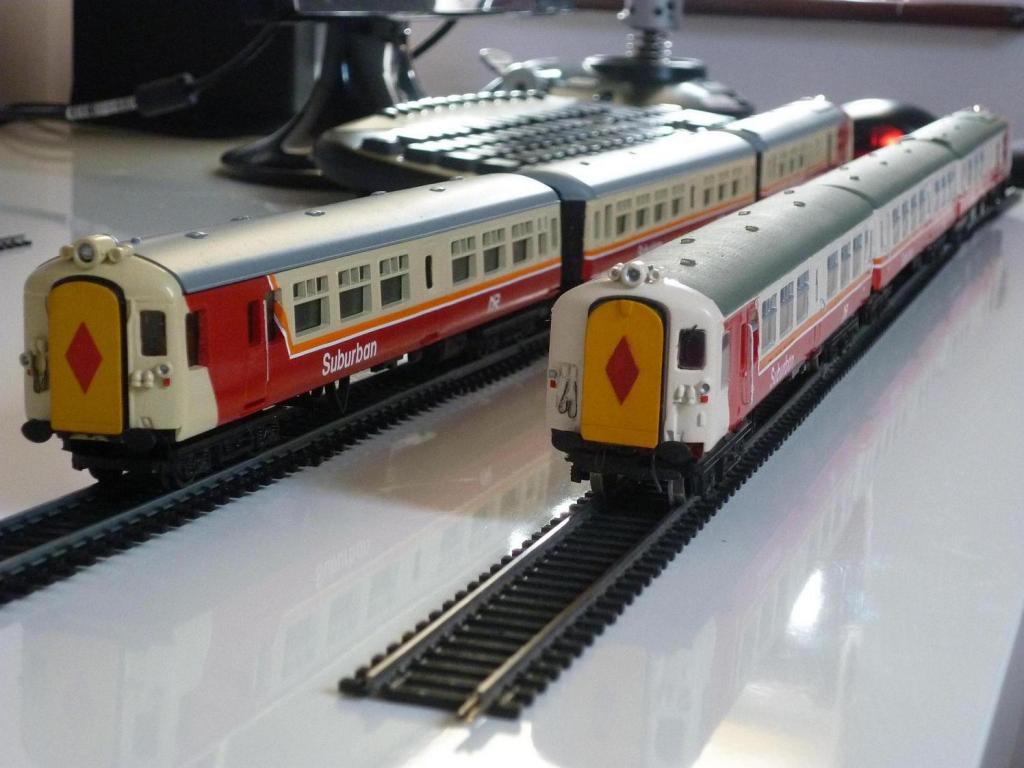
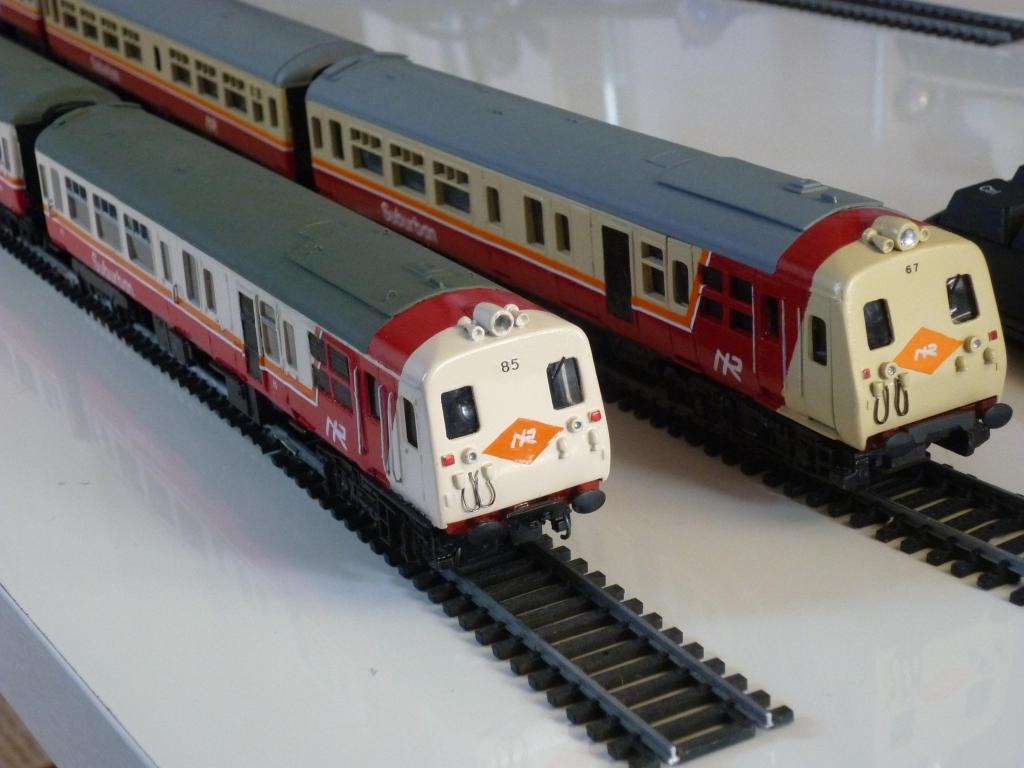
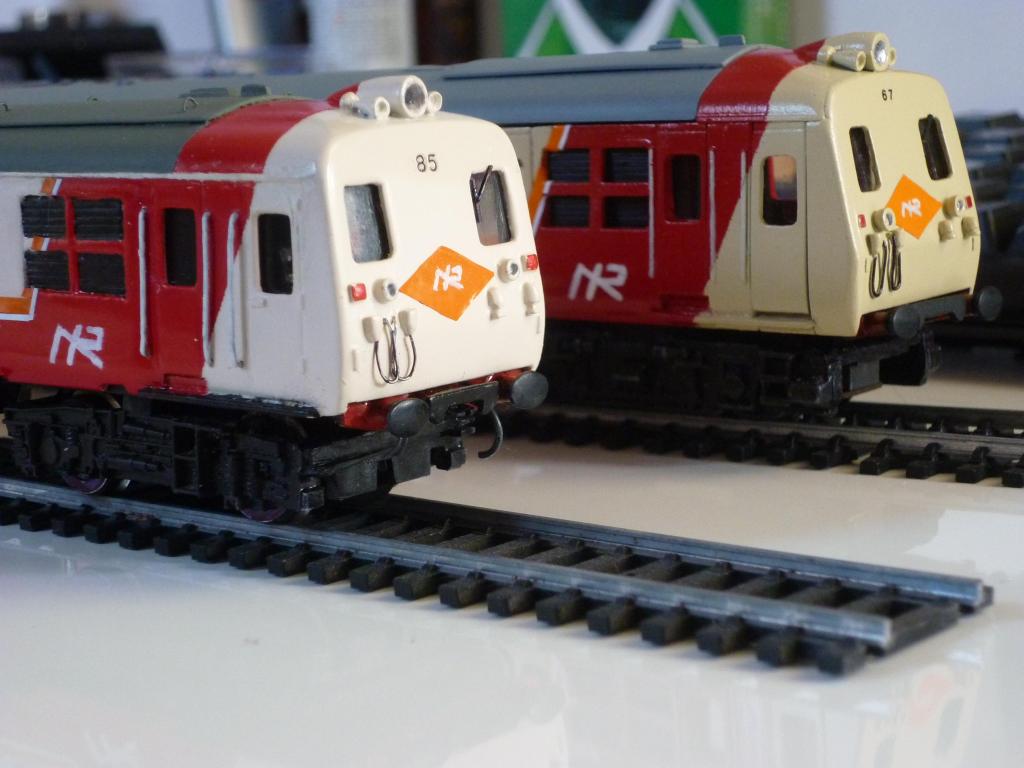
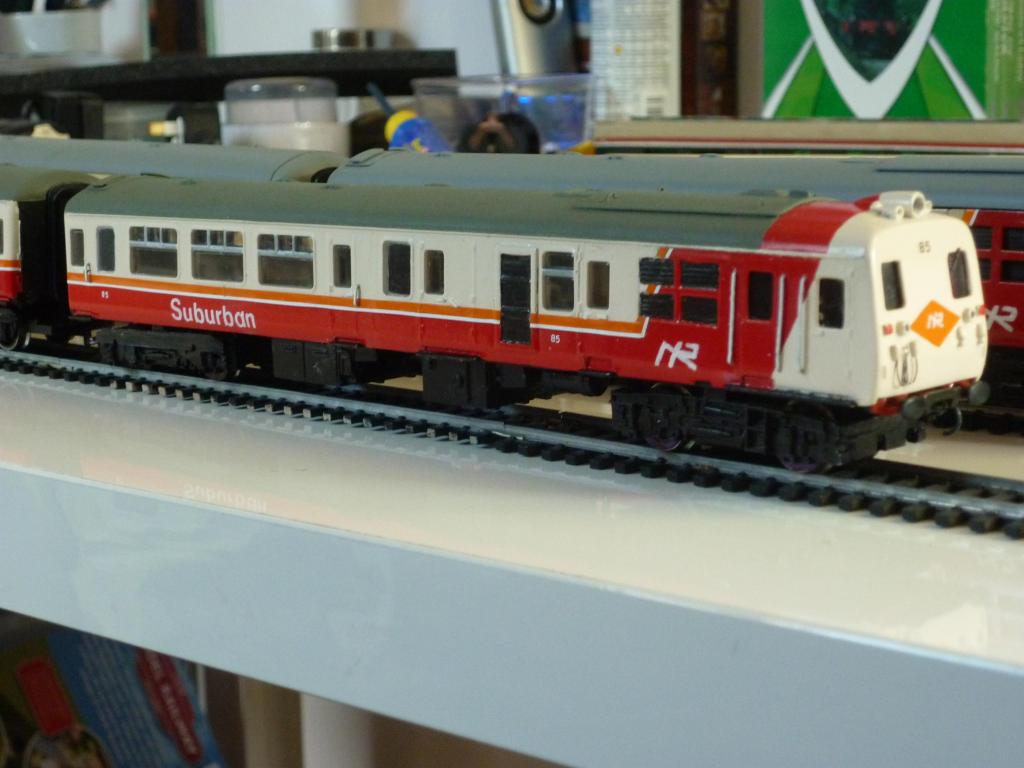
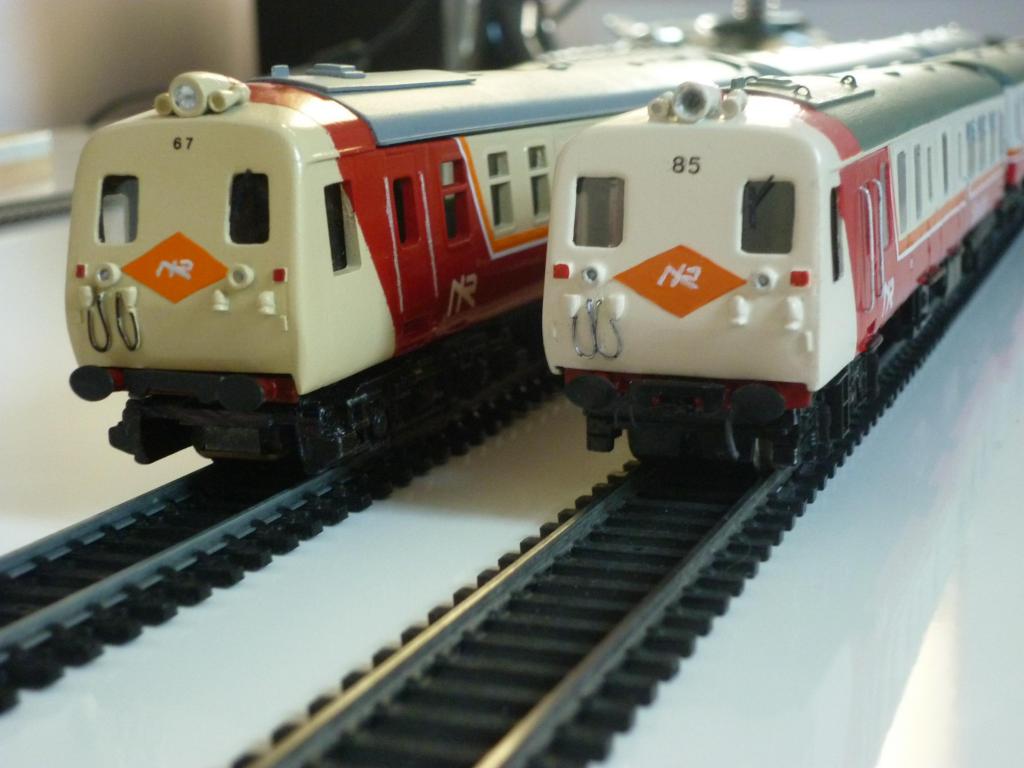
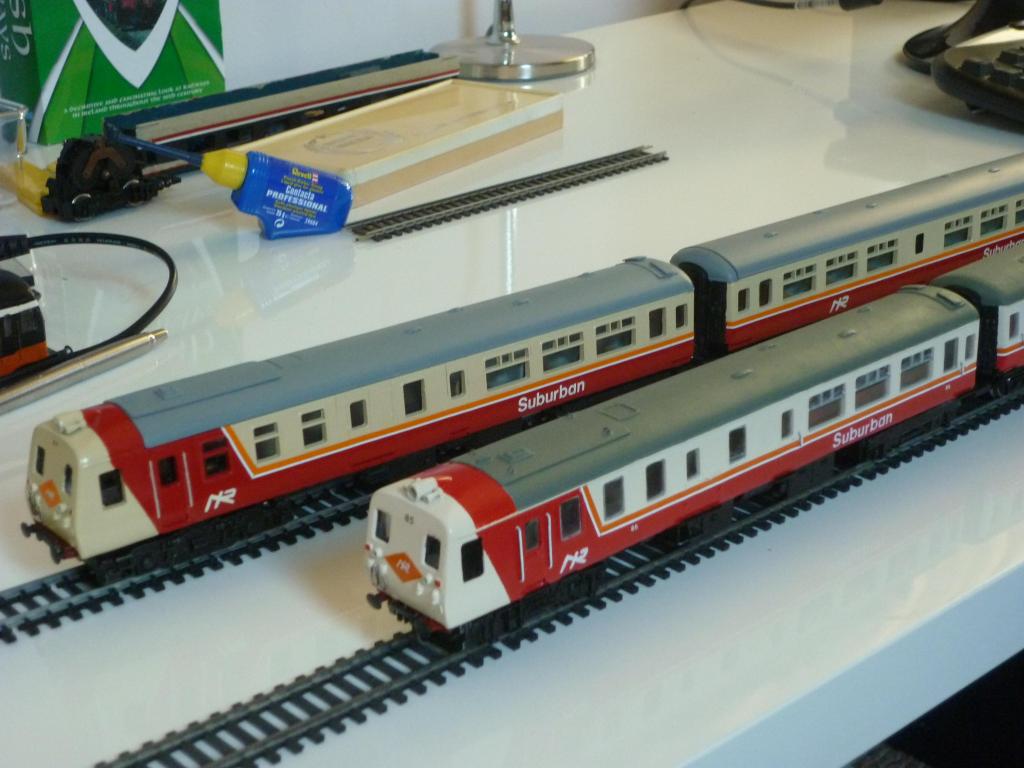
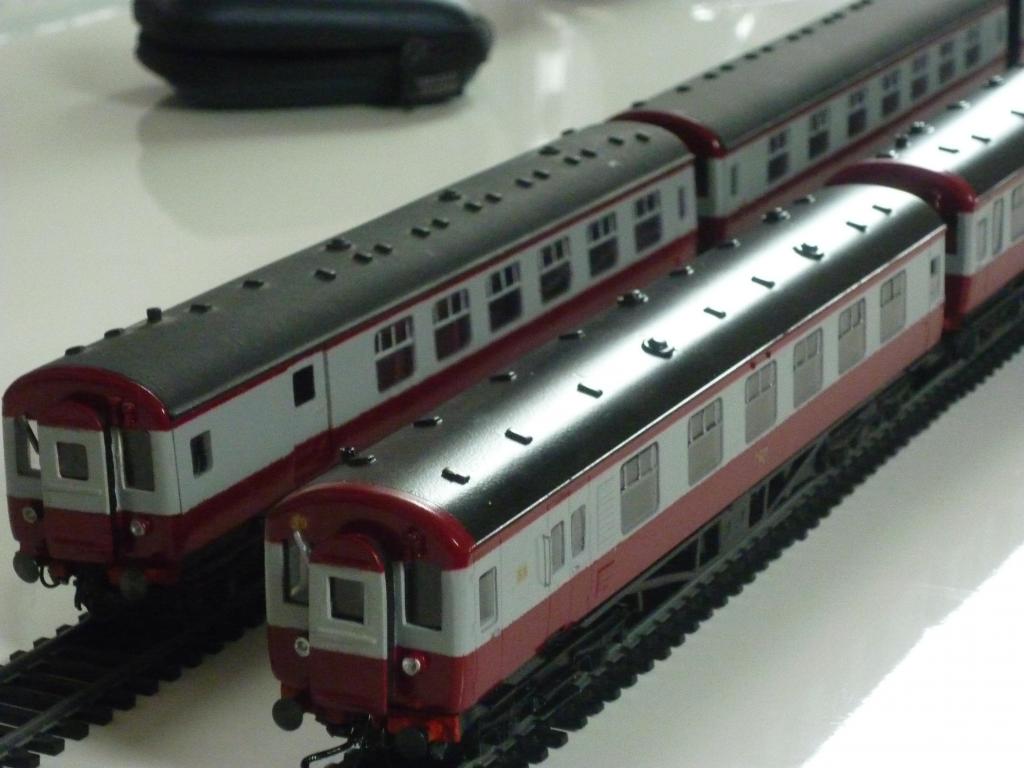
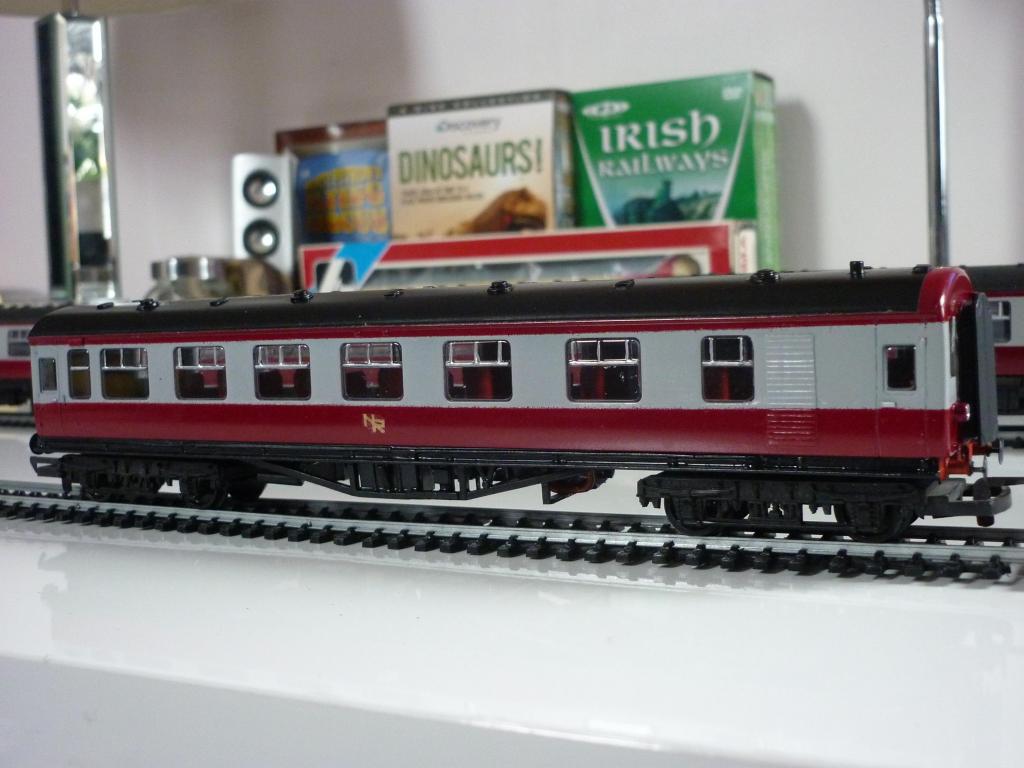
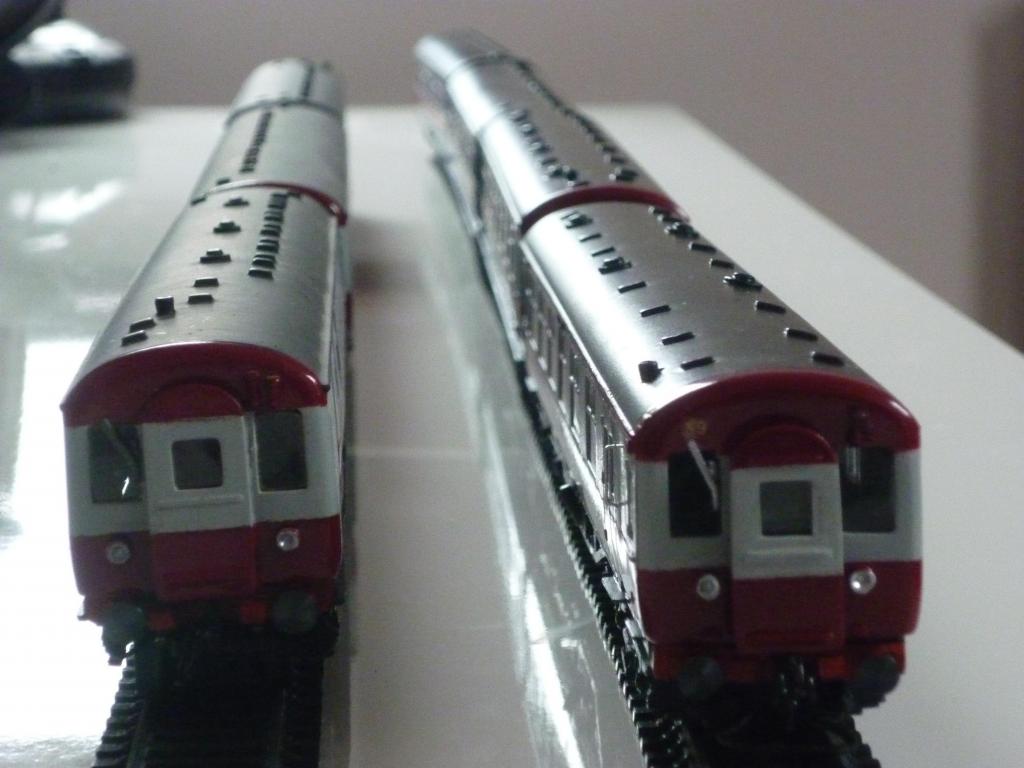
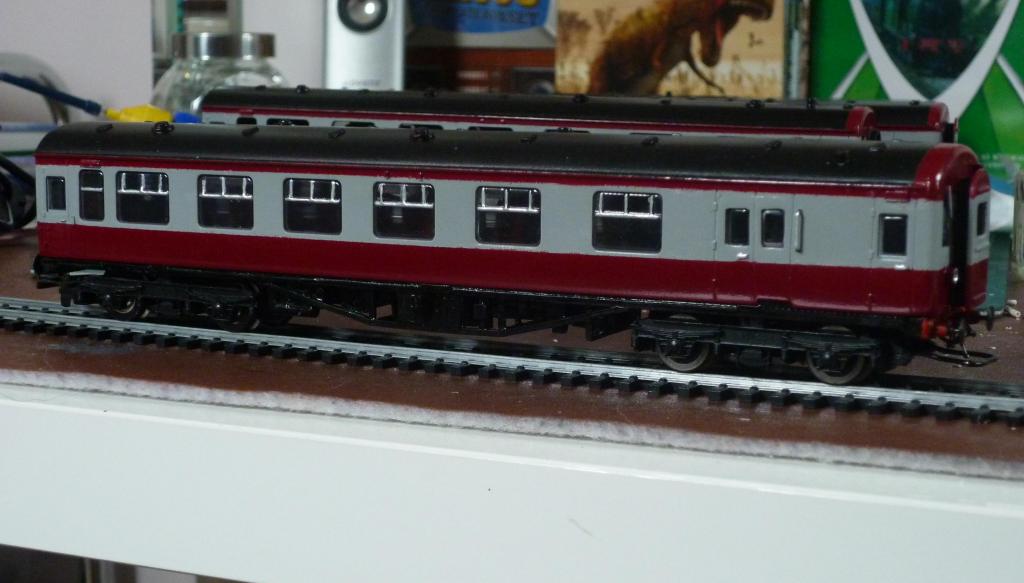
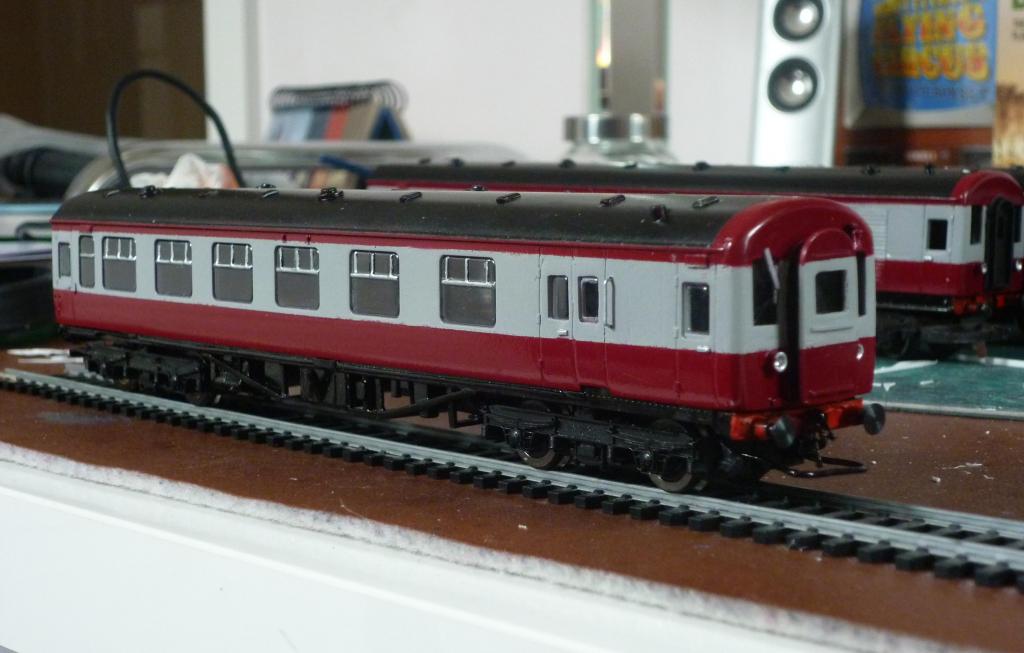
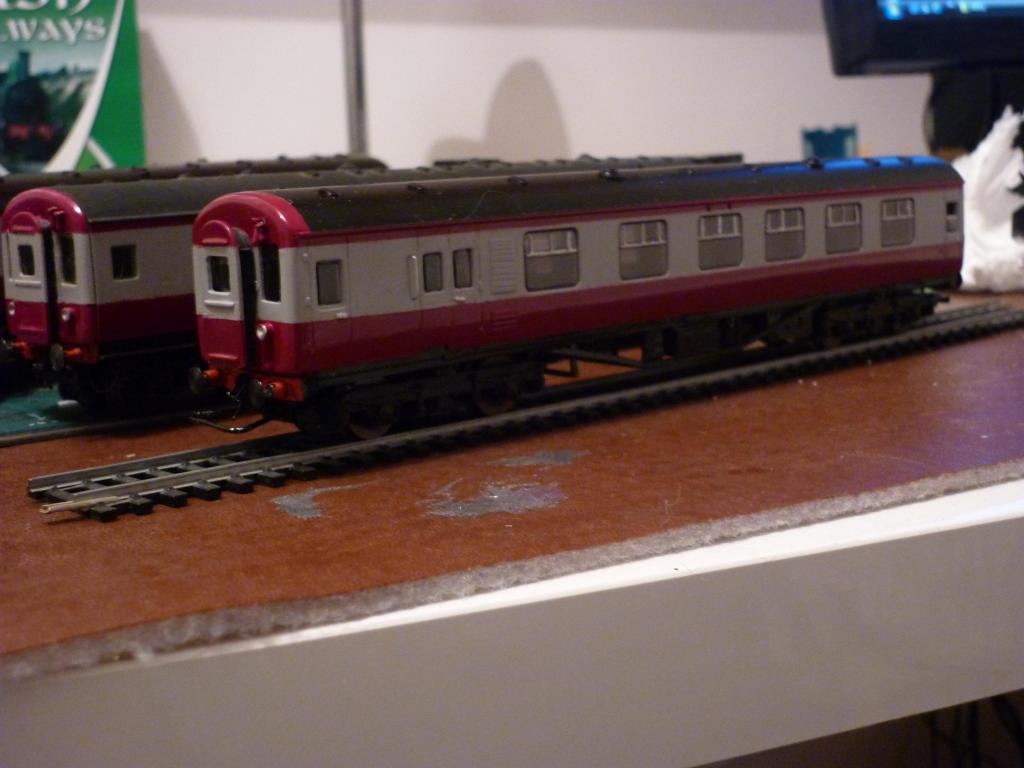
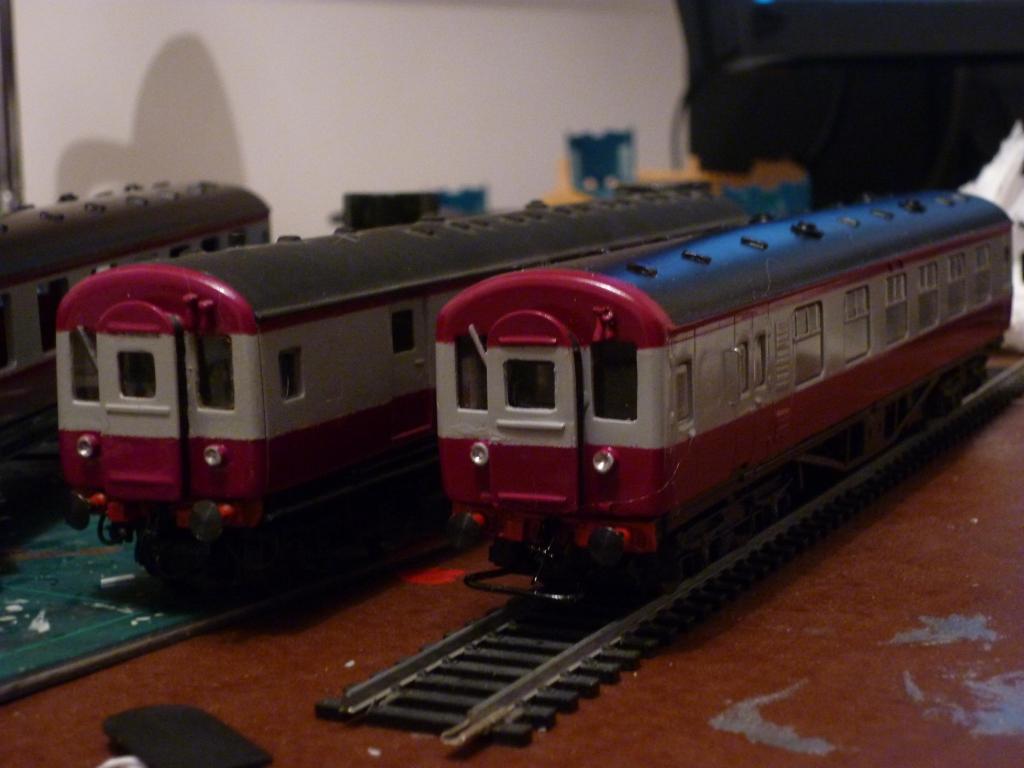
Have just about completed a second set, finished in surburban sector livery and seen below alongside my original model, from the early 1990s. I think I prefer the Ford Ivory I used this time as cream, in place of the somewhat yellow Triumph Honeysuckle used originally (which I could have got mixed but is no longer on the shelves). The other colour is the same, Ford Monza Red IIRC...or was it Flame Red? Anyway, the new model was made exactly as per the intercity/corporate 'bumblebee'-liveried set, from two Tri-ang Hornby Mk2a TSO coaches and one of their Mk2a brakes. Apart from the livery, the only difference is that this time the Hornby HST bogies in the power car are fitted to a modified and extended HST power car underframe, instead of modifying the coach floor unit. Suburban lettering is 5mm Helvetica Letraset or Eddings rub-down transfers (protected by a light coat overall of varnish), car numbers are Ratio coach numbers, white & orange lining is Model Technics Trimline. NIR logos are hand-painted.
-
Looking good, have still to tackle one of these myself so it's nice to have a shot of inspiration! Keep the pics coming please!
-
Hmmm...that's not how I remember the MEDs...to me, they were quiet, bright, clean and modern, and we usually favoured riding in the power cars, as as you had a view ahead (provided the driver didn't pull down the blinds) especially after they lost the first class section, up front. The 450 Class power cars, now that was a rattle-fest on wheels. As for the MPDs and their reputation for unreliability, well, while we were regular travellers during holidays only, we never had any problems with MPDs. Except for one summer ride home from Portrush to York Road. A bunch of football fans got on at Ballymena or thereabouts and from that point on, until some police came over the fields and joined the train where it had halted nearer Belfast, we were stopping frequently due to the beggars pulling the communication cord.
-
Yes many thanks for the great video clips Nelson. And it did my heart good to see that the UTA ex-GNR AEC set I built 20 years ago for Steve Rafferty, like the BUT ones, is still in commission and running, and in such illustrious surroundings as 'Bleach Green'. Ivor
-
Hope so Leslie if I remember to screw my head on that particular day! How did you find the Black Beetle? I remember not being greatly impressed by its pulling power. Not sure a single one would manage the six car set in Colm's pic that the old Tri-ang unit is apparently hauling uphill, (IIRC without extra pickups too, which would likely have improved any issues with running); the big advantage being it fits under the bodyshell so no need to mount it in the brake coach, as in Steve's model. Plus it's not quite as ancient/worn. Anyway nice to see model, motor bogie and owner are still on the go!
-
Ditto Leslie, one of these days...! AND I just realized the maroon and grey BUT set in the video clip was one I made for Steve Rafferty back in the day...recognised it from the still pic Colm posted over at RM web...so I missed meeting Steve after all these years too!!!
-
Missed it again, darnit! Loved the super BUT set on Bleach Green, I presume one of Colm's. And the spoil wagons...and that D-Day SR layout...great excuse to combine trains with Churchills, Shermans, carriers etc.
-
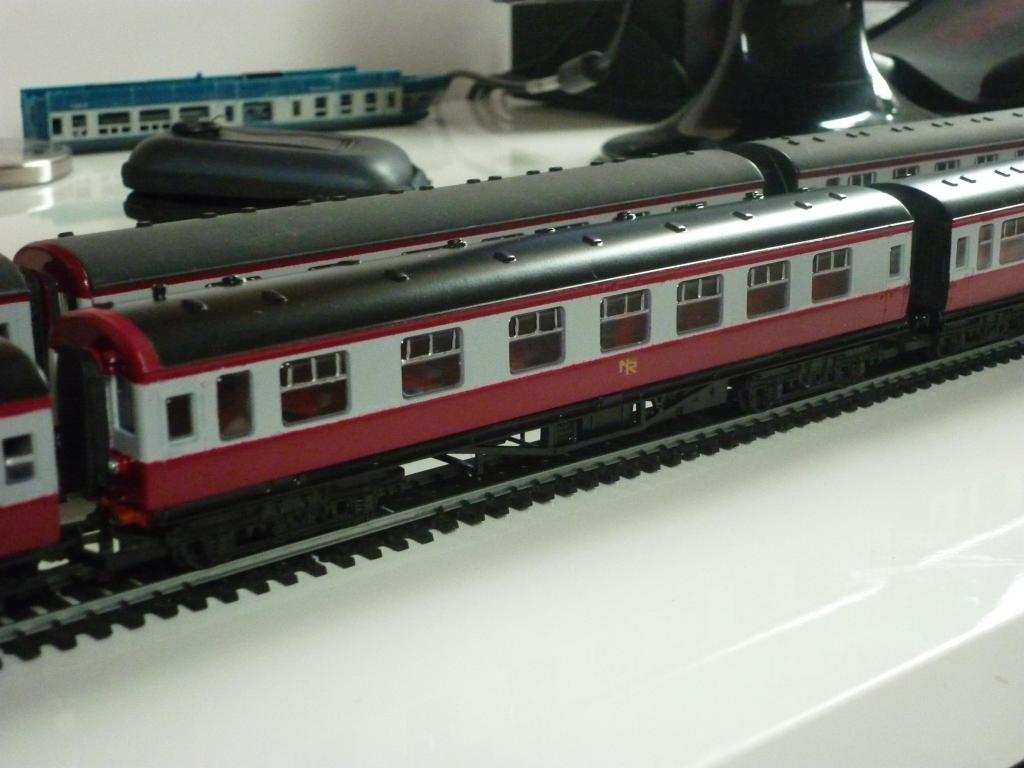
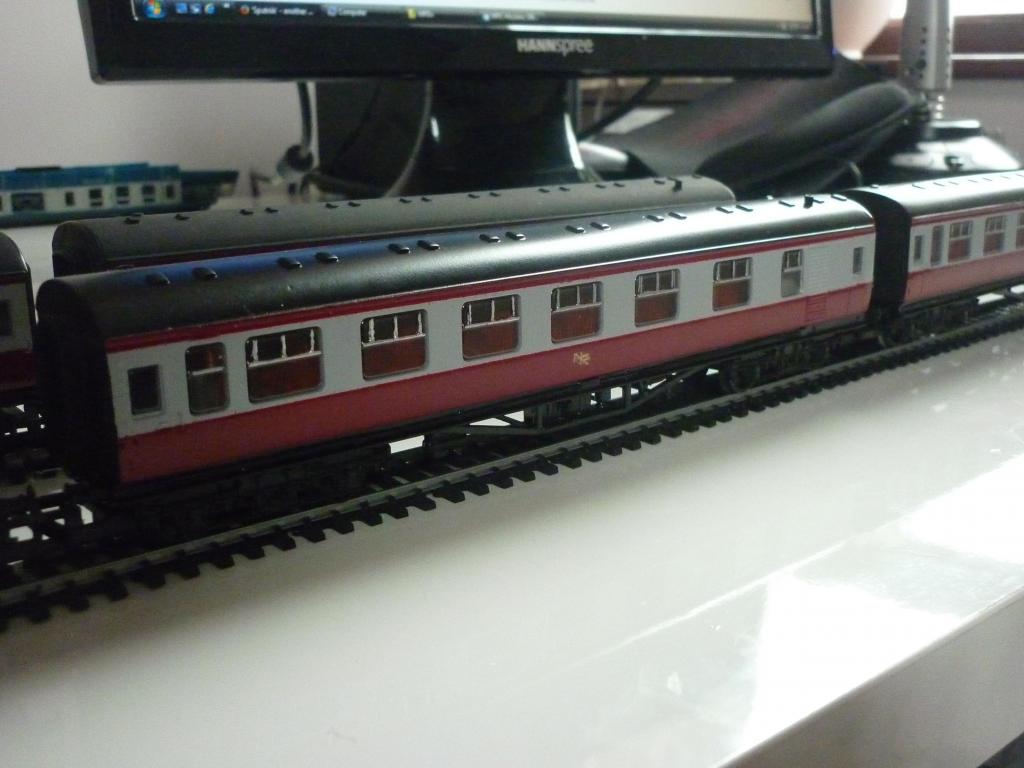
Thanks for the kind comments, guys! Some final pics taken during running trials, which were successful with no adjustments needed, except to the 'sit' of one car. Beforehand I had shortened the arms of the wipers and painted them a duller colour. All done! Middle pic shows the powered car chassis which, to recap, is a Hornby 'Calder Valley' DMU centre car slightly modified to accept Hornby HST 5-pole motor bogie with DMU sideframes and suitably modified underframe; plus plasticard interior unit. The variations in colour are down to dull natural -vs- fluorescent lighting.
-
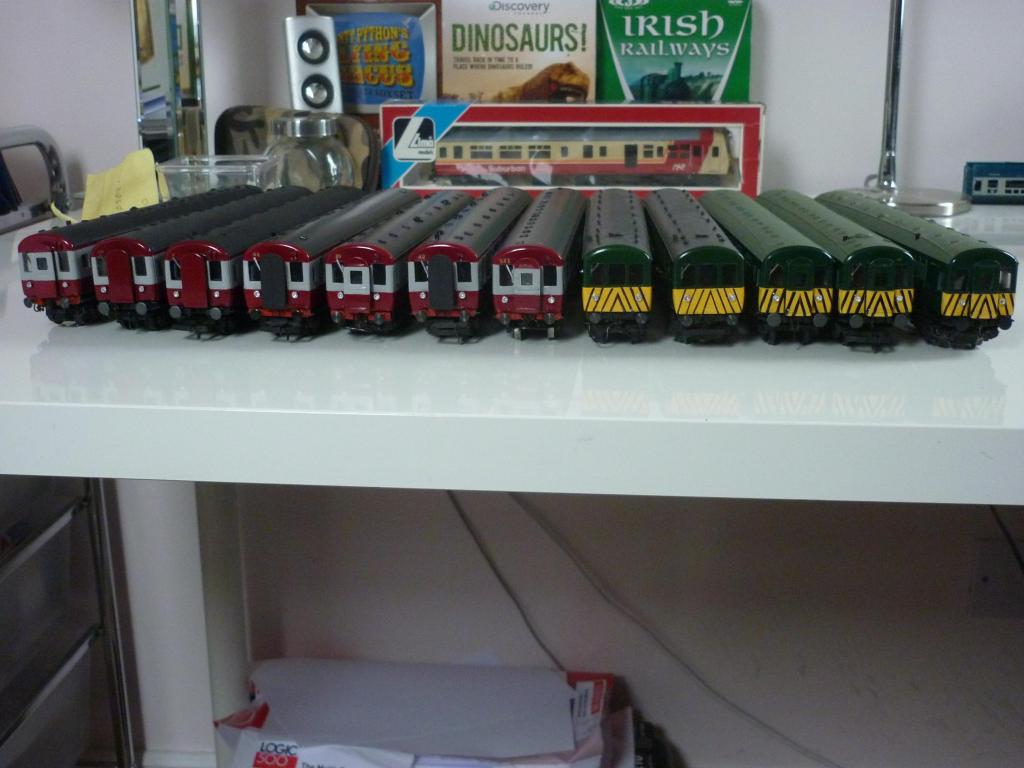
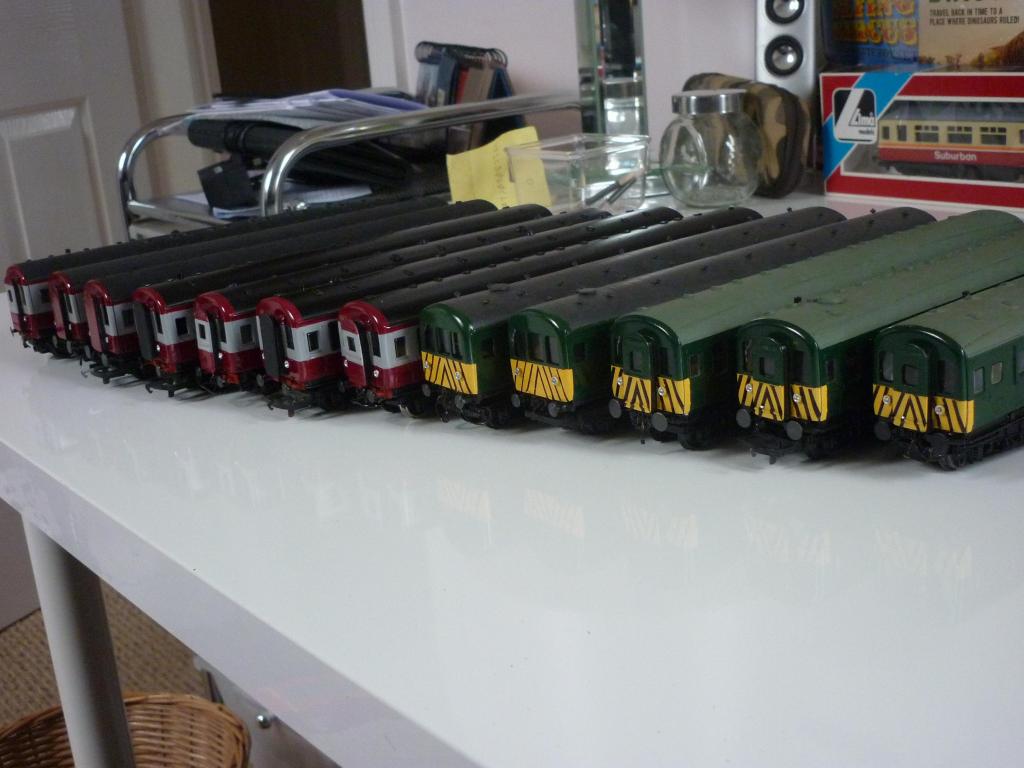
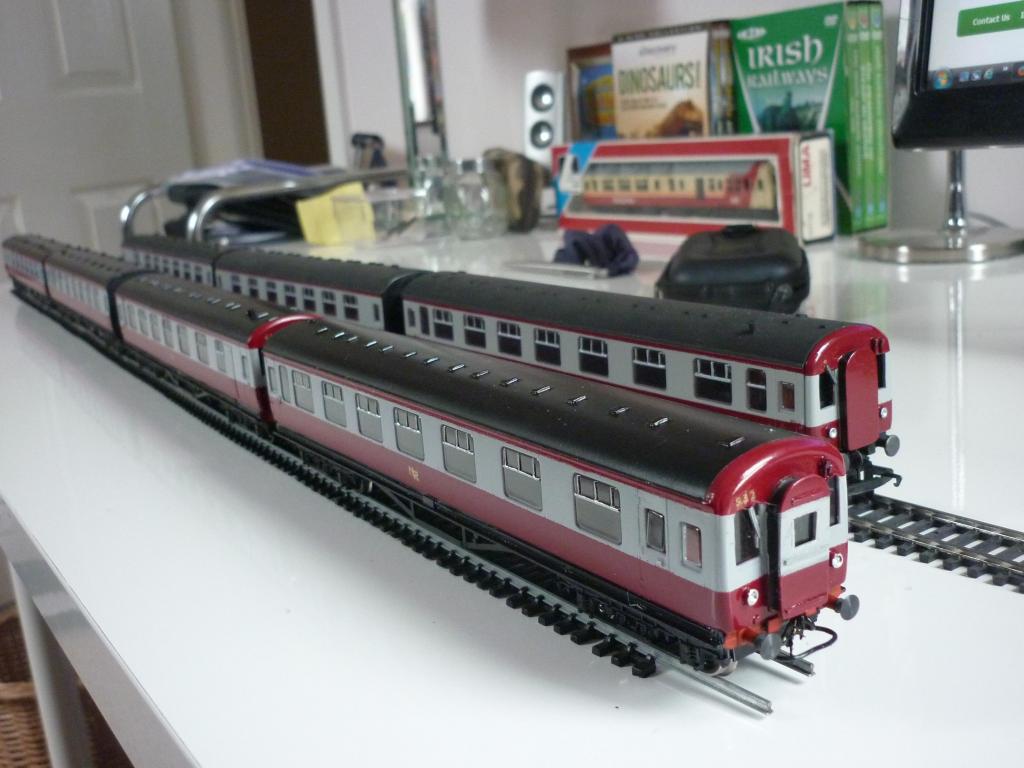
Finally, some pics of all the MPD cars I've built over the years. From left to right, NIR 3-car set, made c.1991; NIR 4-car set, just completed; UTA 2-car 'suburban' set, started c.1995 but just recently completed; and UTA 3-car set, built c.1994.
-
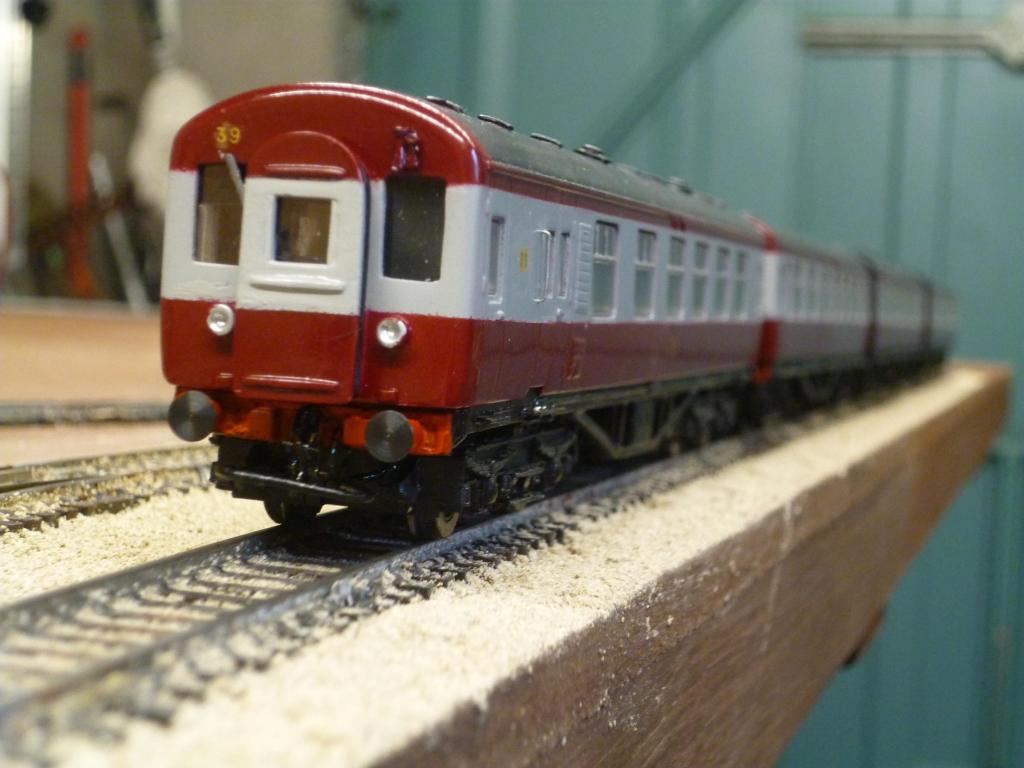
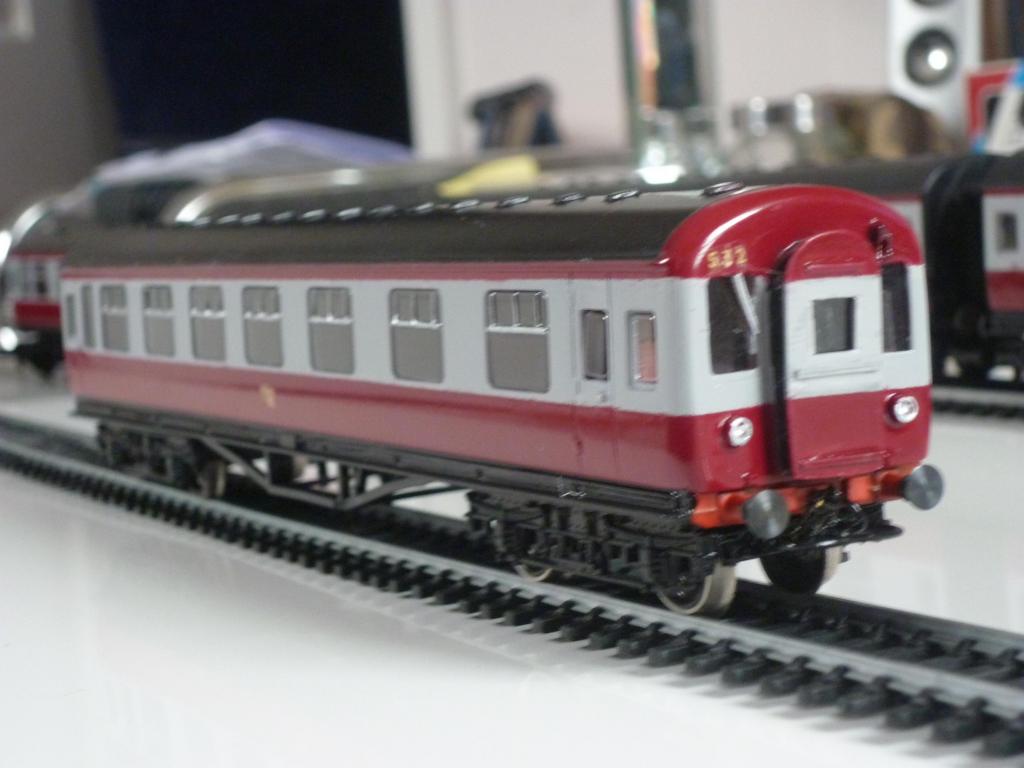
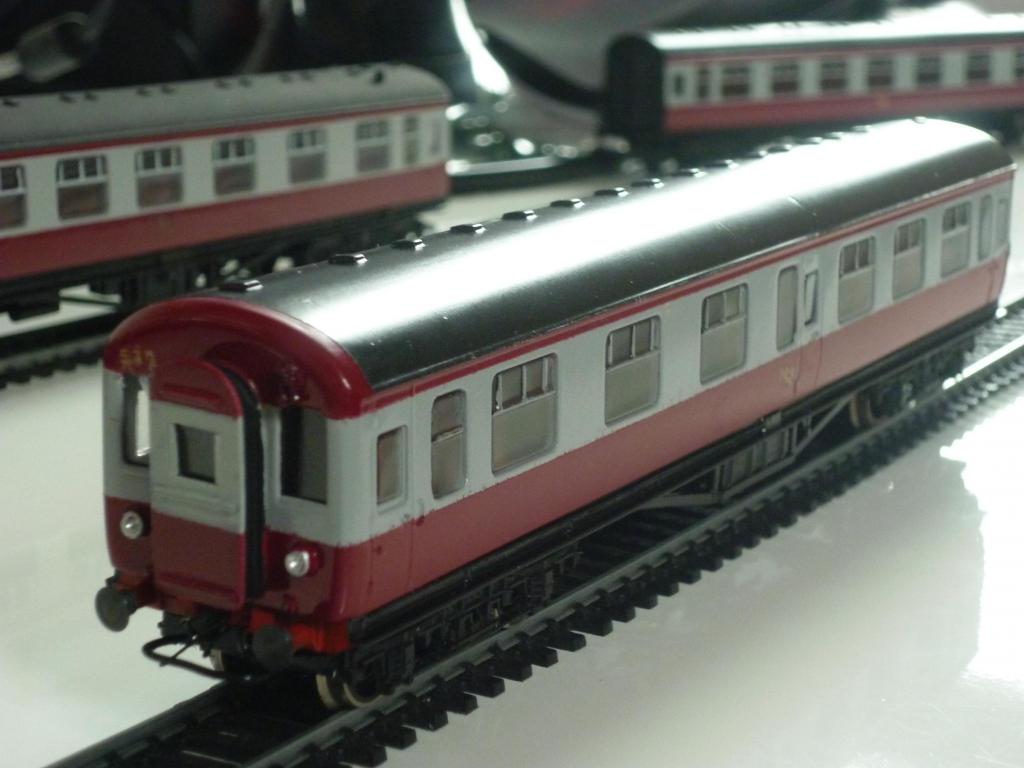
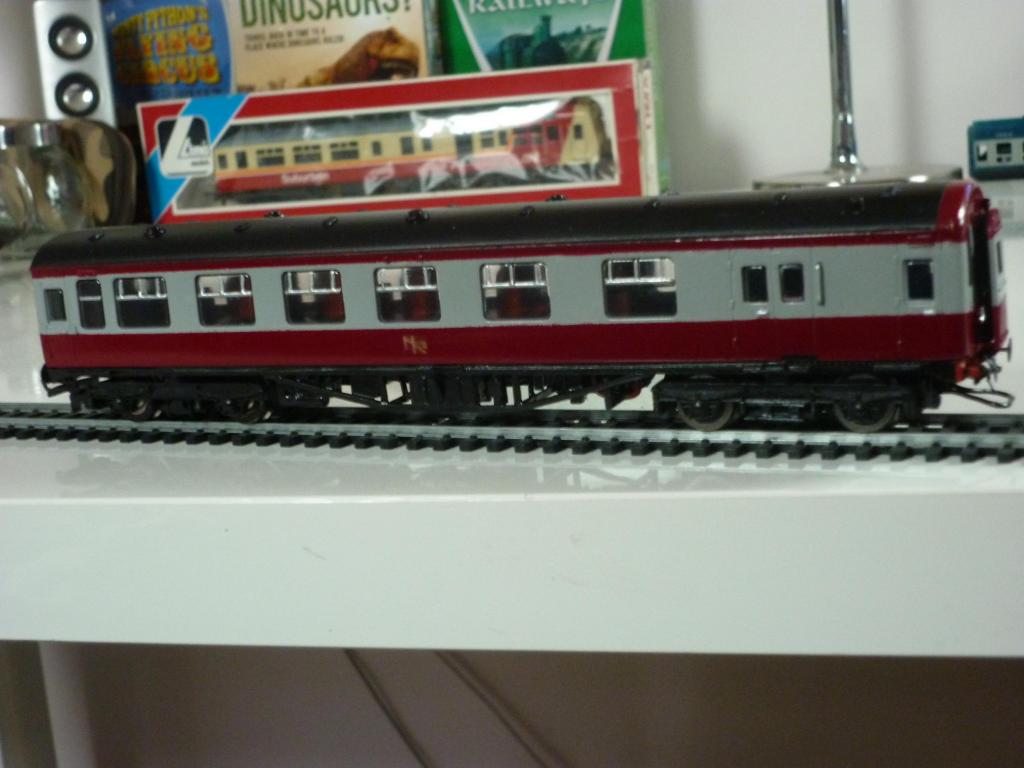
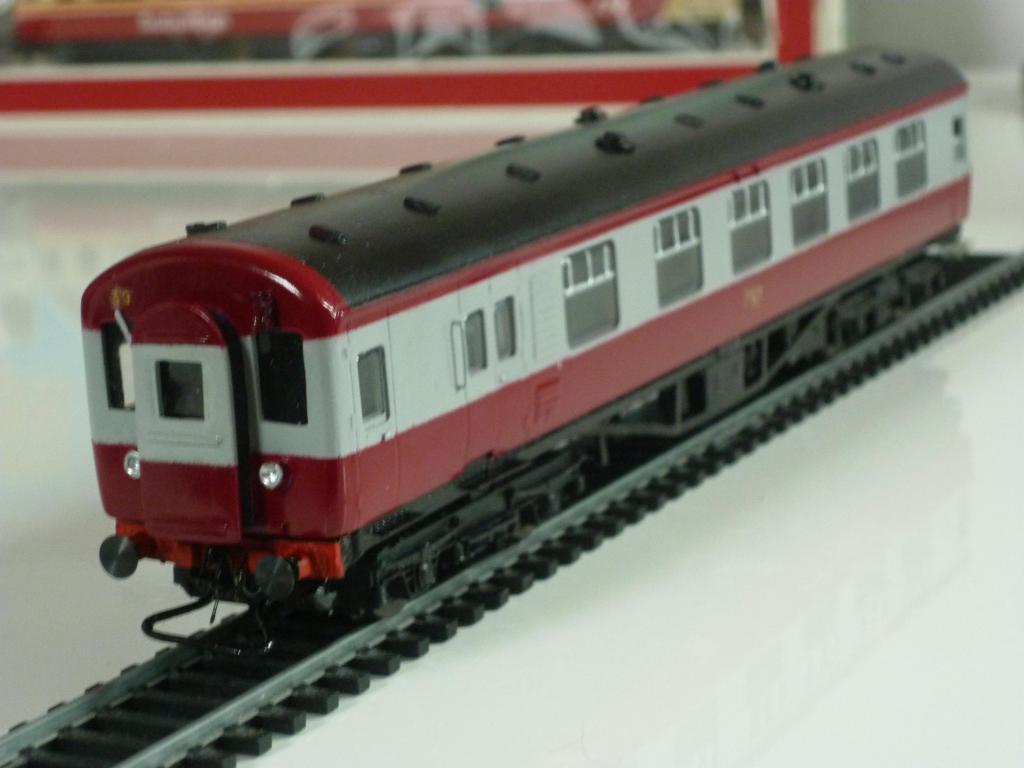
...some more pics of individual cars. To recap: the powered unit, with the brake compartment, is 39; the other two dummy power cars are 40 and 42, differing mainly in that 42 has open seating, 40 compartment, with associated differences in roof vent layout. The 'mule' or trailer is 532, which has corridor seating. The latter survived in worn NIR livery at Whitehead into the 1990s, but I'm not sure if she survived the later fire. Power car 39 (with 45 to the left, from my original set): Power car 42: Three-car set comprising (R to L) 40, 39 and 42: Power cars 40 & 42: Trailer 532: Power car 40: Power car 42: Trailer or 'mule' 532, again: By about the time NIR took over, MPD power cars had acquired a tall grill beside the heat exchanger, visible on the LH side of 39 and on the RH side of 40 and 42. When the exchanger was fitted in the early 1960s, the latter two cars lost a row of seats in the front compartment, evident from the smaller leading passenger window on the RH sides. The grill was a later addition, being absent on some UTA era pics. Not only did different MPD batches differ in appearance, they also changed over time, so reference to photos is always desirable, when modelling these pioneering diesel railcars.
-
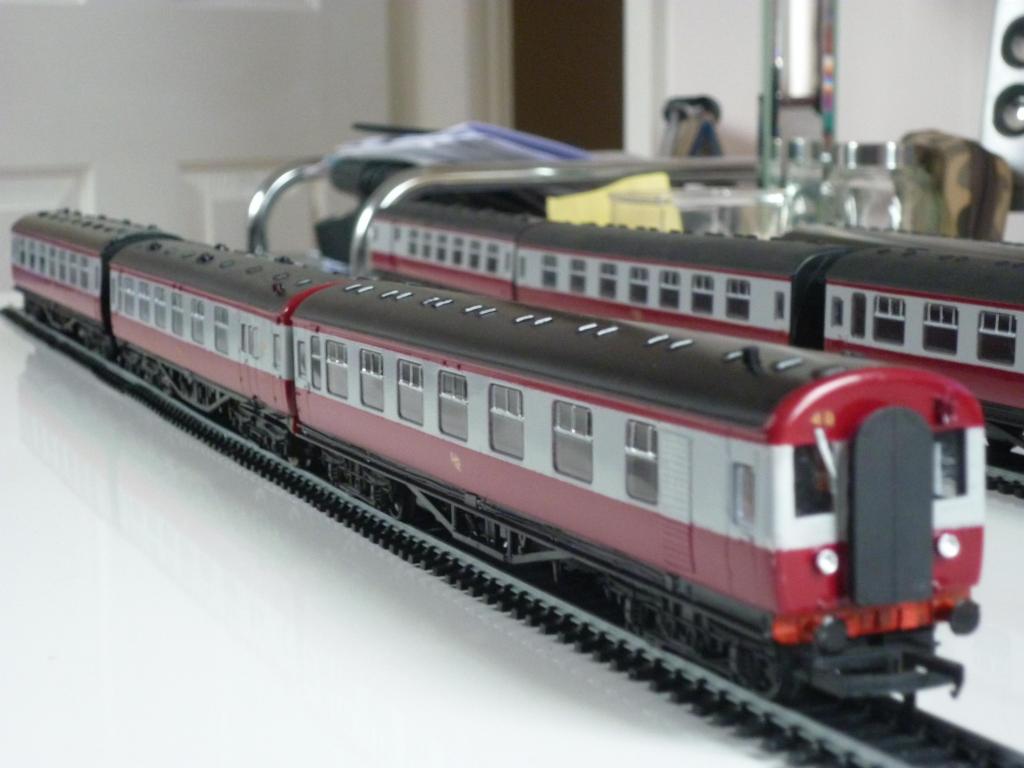
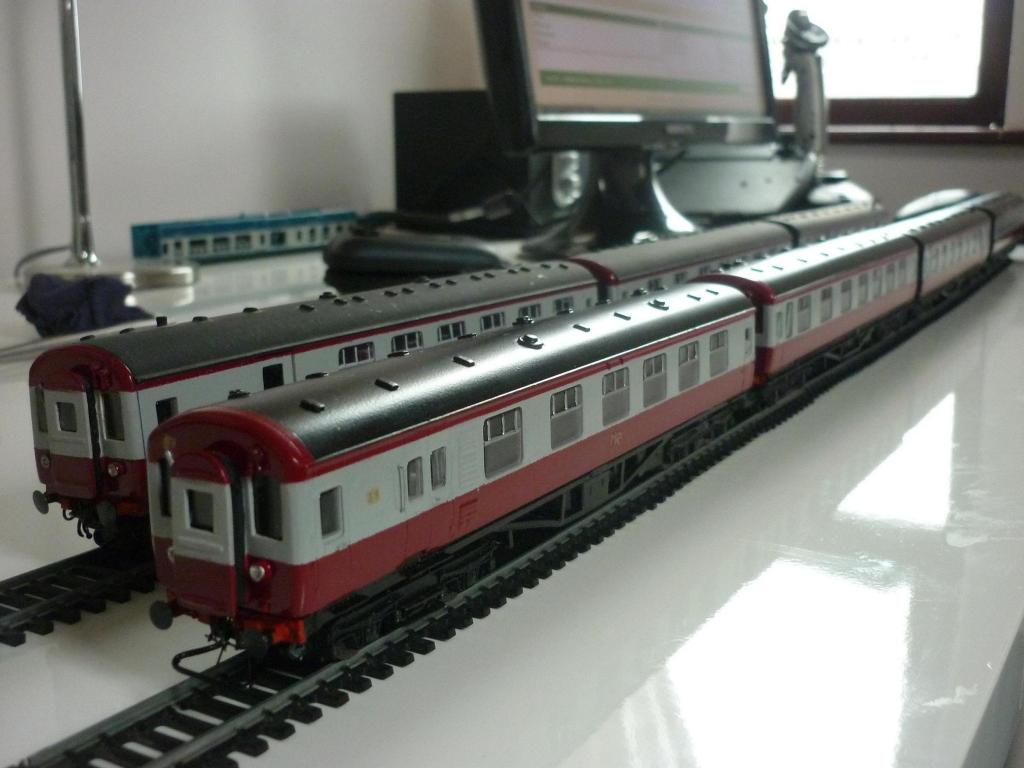
OK here are some more pics of the completed set, now just needing a test run. The new 4-car set is nearest, with my 1990s NIR 3-car set behind. The new set is designed to be run as either a full 4-car set with 36 at one end and 532 at the other, both being fitted, under the cosmetic etched brass screw link coupling, with wire loops to enable a brown van to be hauled; or with just the 3 power cars hauling freight in true Multi-Purpose Diesel fashion, leaving the trailer behind. Though more common in UTA days, even in later life MPDs in maroon and grey were sometimes seen hauling short rakes of vans or conflats.
-
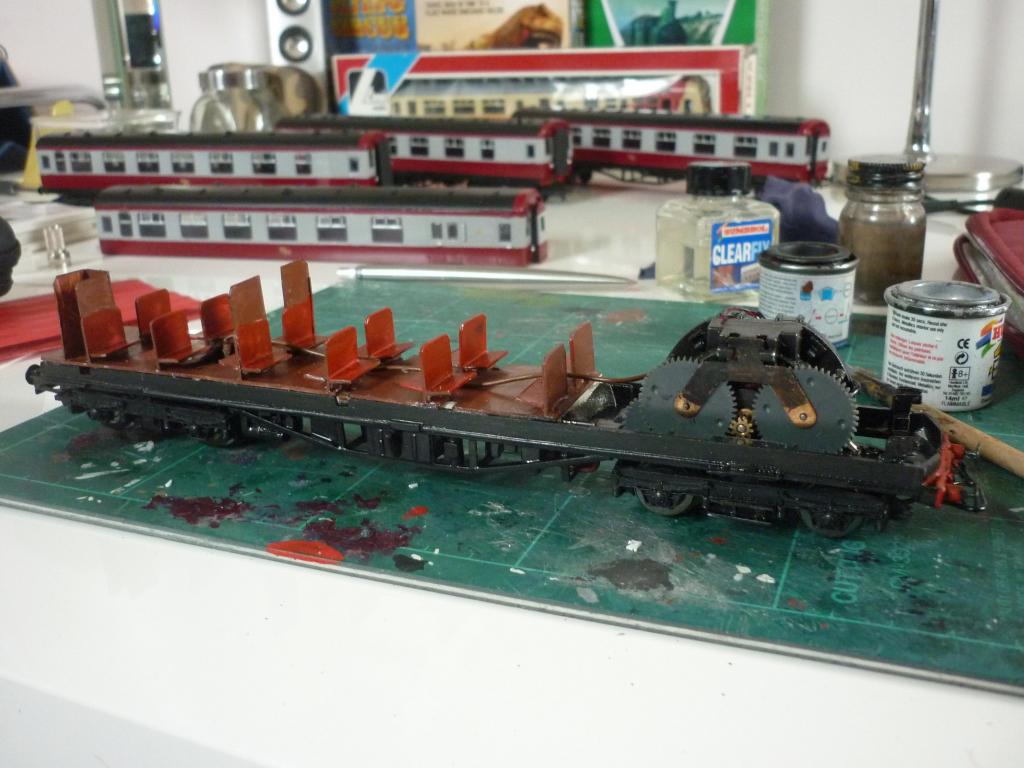
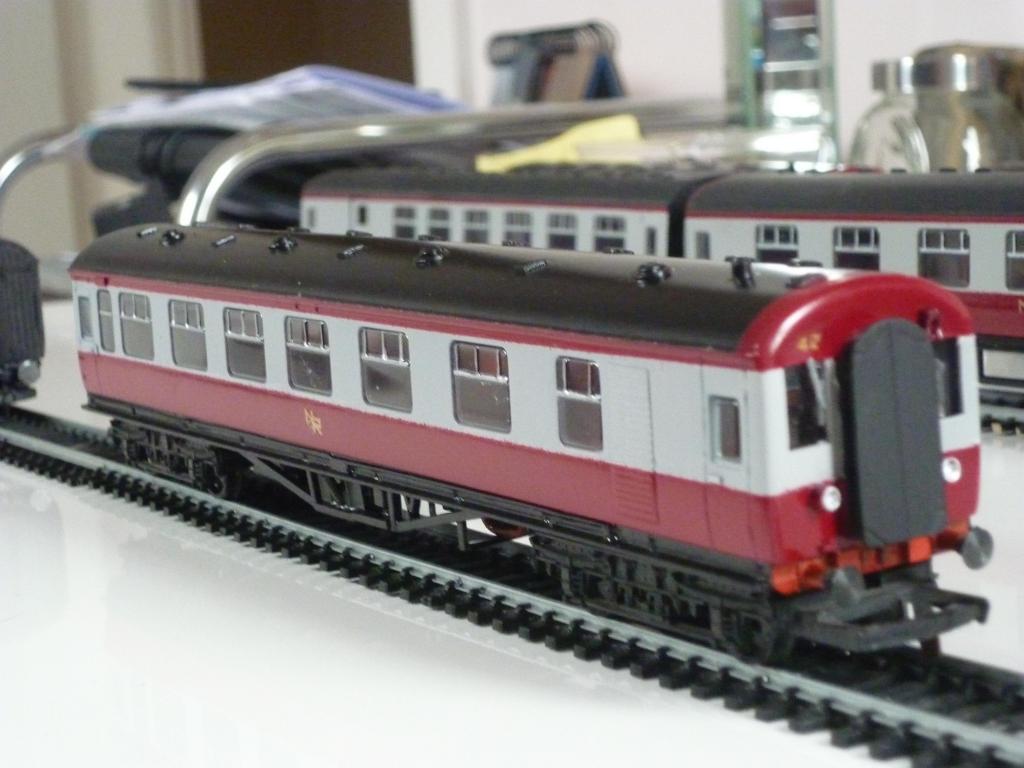
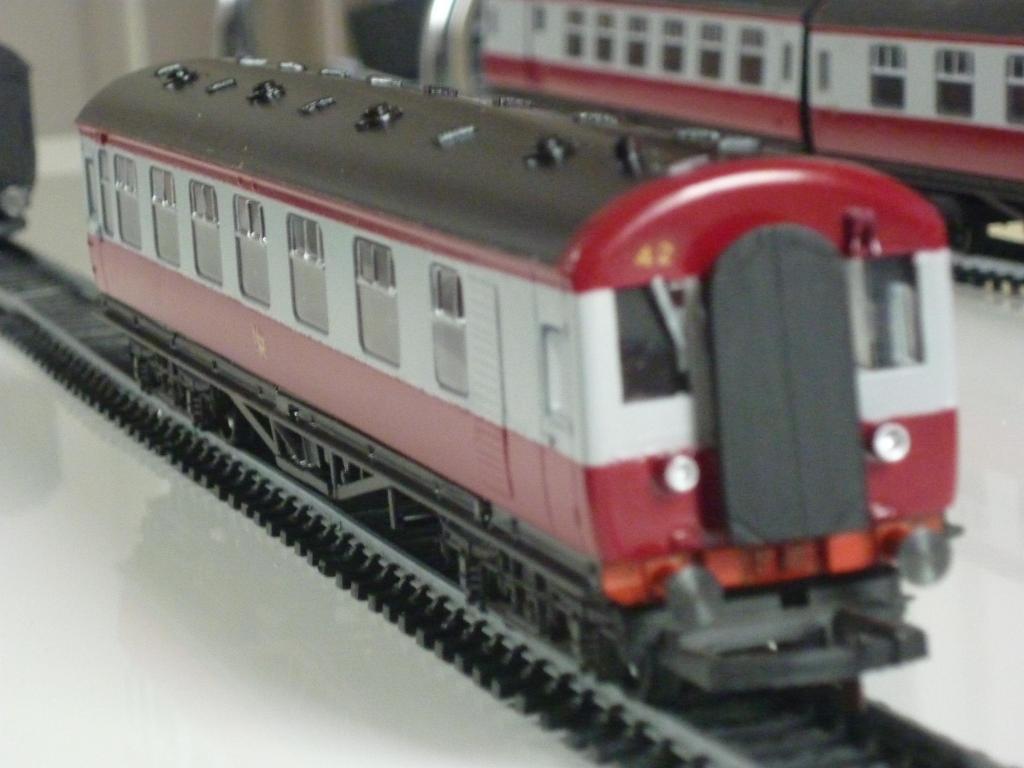
Some more pics of the powered car, now numbered '39' (Maybex bus numbers) on the cab front at any rate and with NIR logos, some additional footboards at the cab end and on its bogie and the underframe given a final coat of satin black. The NIR logos are hand-painted waterslide transfers, brush painted onto some clear decal film in the borders of a set of Almark RAF roundels then carefully trimmed and applied. The interior of this car is open seating, scratchbuilt from plasticard and with a tab between the middle seats to hold down mostly out of sight the wire between 5-pole powered bogie and trailing bogie. Pics of the other cars and the full set to follow later; the bodyshells having been flush-glazed, all that's left is clipping them on and applying numbers and logos.
-
Thanks Nelson! Couple more pics of the powered car, in natural light which is always better ('Gods light is best', photographers supposedly say), taken from the opposite side. This is one of the two cars with the scratchbuilt, open seating unit. Below for comparison is a pair of recent pics of my early 1990s model of one of these (36-39 series) cars, my second MPD set, like the earlier, NIR-liveried set with modified Hymek motor bogie and in this case carrying the rainstrips & roof board mounts the 'Festival' coach conversion MPDs retained in UTA days, but seem to have lost by maroon & grey era (which for MPDs started a couple of years before NIR's 1968 debut). This model also has a small square window behind the driver's door and the hatch below it for the tablet exchanger, which from photos, seem to both have been plated over by the late 1960s, with the tablet exchange kit presumably either removed or operated differently (perhaps after the 70 Class took over the premier NCC main line services, from 1966). I still haven't got around to making an interior for it! The green car also lacks the two-part tall grill behind the brake compartment on the LH side, seen on the new model, where heat exchangers were fitted from 1960 onwards (early enough for my wasp-strpied UTA cars to have them too; but my sources are better now!).
-
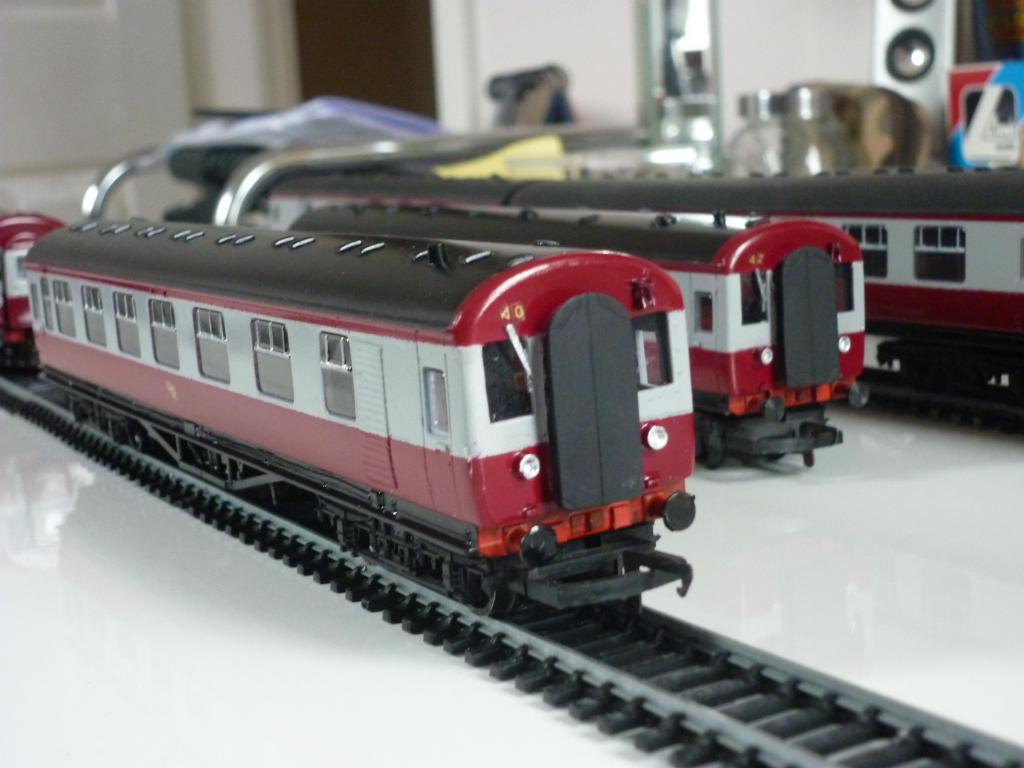
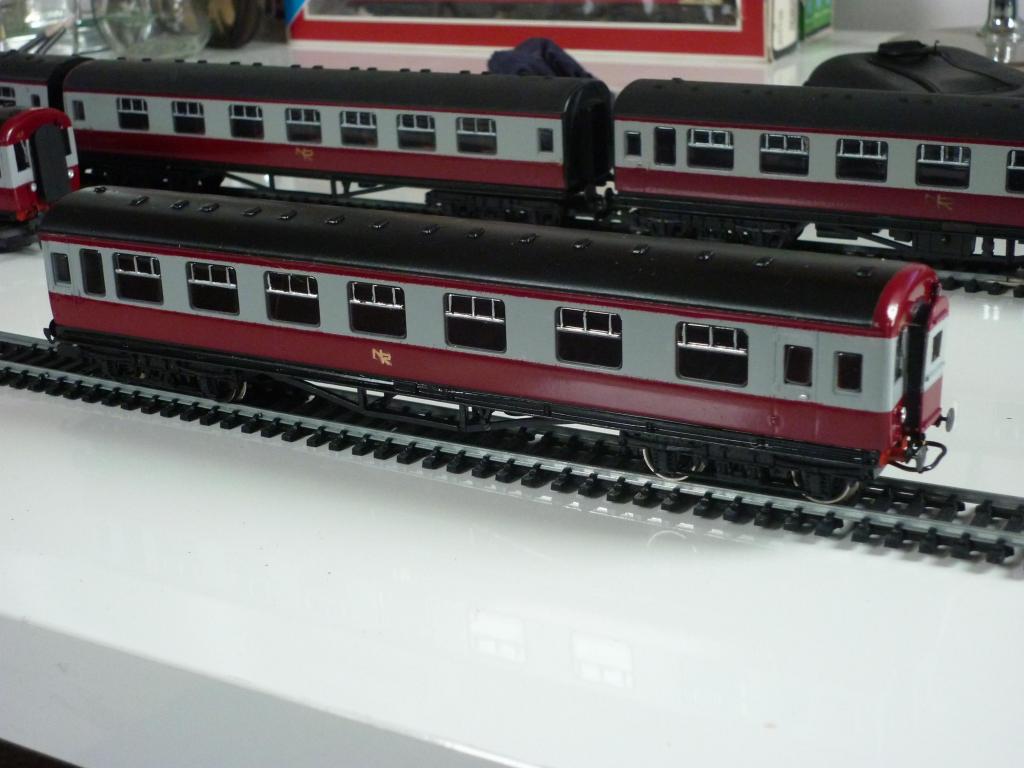
Right, the powered car is now about done apart from numbering, and here she is. Since the last pic, I have replaced the plasticard disc buffer heads at the cab end with turned brass ones; painted the buffer beam red; fitted handrails either side, ahead of the guard's doors, made from a cut-down staple pushed into carefully twist-drilled holes; and added a wiper and some air horns to the cab front, both secured with Humbrol Clearfix (a wisp of which you can see in the pics but this just wipes away without affecting paint, hence its suitability for attaching things to a painted model). The air horns were made from small sprue trimmed into shape, mounted in pairs on a small back plate and pre-painted maroon, for easier fitting. The sit of the bodyshell had been adjusted on the chassis and it's now a decent clip fit via front and rear lugs glued in place and painted black. As well as numbering, I need to add and paint reddish-brown a wire exhaust pipe to the right of the underfloor engine, which I'd forgotten about, but it's an easy job. Basically job done, for that car anyway, the other three will now get similar treatment. Behind the car in the pics below is my original 1992 model, one of the sliding door MPDs. This started out as a repainted Hornby Stanier brake 3rd, complete with ribbed roof, too few passenger compartments etc and just a plasticard MPD cab. I later modified it to the present form, adding a couple of extra compartments, accurate roof detail, the sliding door etc; it still lacks a lavatory but otherwise it's a reasonable replica of MPDs 44 & 45. Power is a Tri-ang Hornby Hymek motor bogie with sideframes filed back and LMS bogie frames glued on top. With a more modern Hornby 5-pole motor and trailing bogie pickup the new model should be a better performer as well as a somewhat better and more accurate model. Again what looks like a scratch on the lower cab front of the new model is that wisp of Humbrol Clearfix which I have since wiped off. Nearly there!
-
A magnificent collection Kieran, bravo! Took me 20-odd years to acumulate 8 MPD cars and you made it in about 5 months! Particularly like the double-enders and also 59 & 60, I don't think anyone else has done an accurate model of this large batch of MPDs. Great stuff and thanks for posting all those pics.