Si2020
-
Posts
215 -
Joined
-
Days Won
9
Content Type
Profiles
Forums
Resource Library
Events
Gallery
Blogs
Store
Community Map
Posts posted by Si2020
-
-
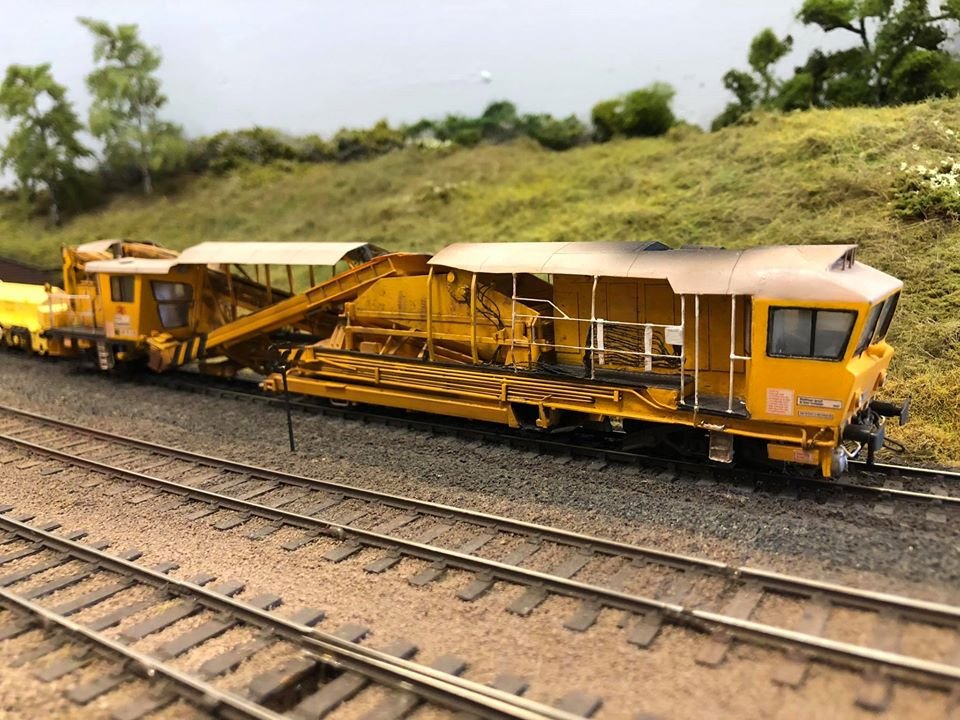
These things are like Gremlins, detail and weather then after midnight and they multiply!!


This was taken whilst the PW team were testing the rack in the yard as being the crazy bunch that we are......... we plan on shunting a rake of grampus (or is it Grampi??
 ) into the yard!!
Good job we have a breakdown crane!!
-
 7
7
-
-
-
On 4/10/2021 at 6:33 PM, Robert Shrives said:
Hi
5Ps and all that - proper planning prevents poor performance !
Can you fit a master and slave decoder one in each cab area and just link pick up wires?
Robert
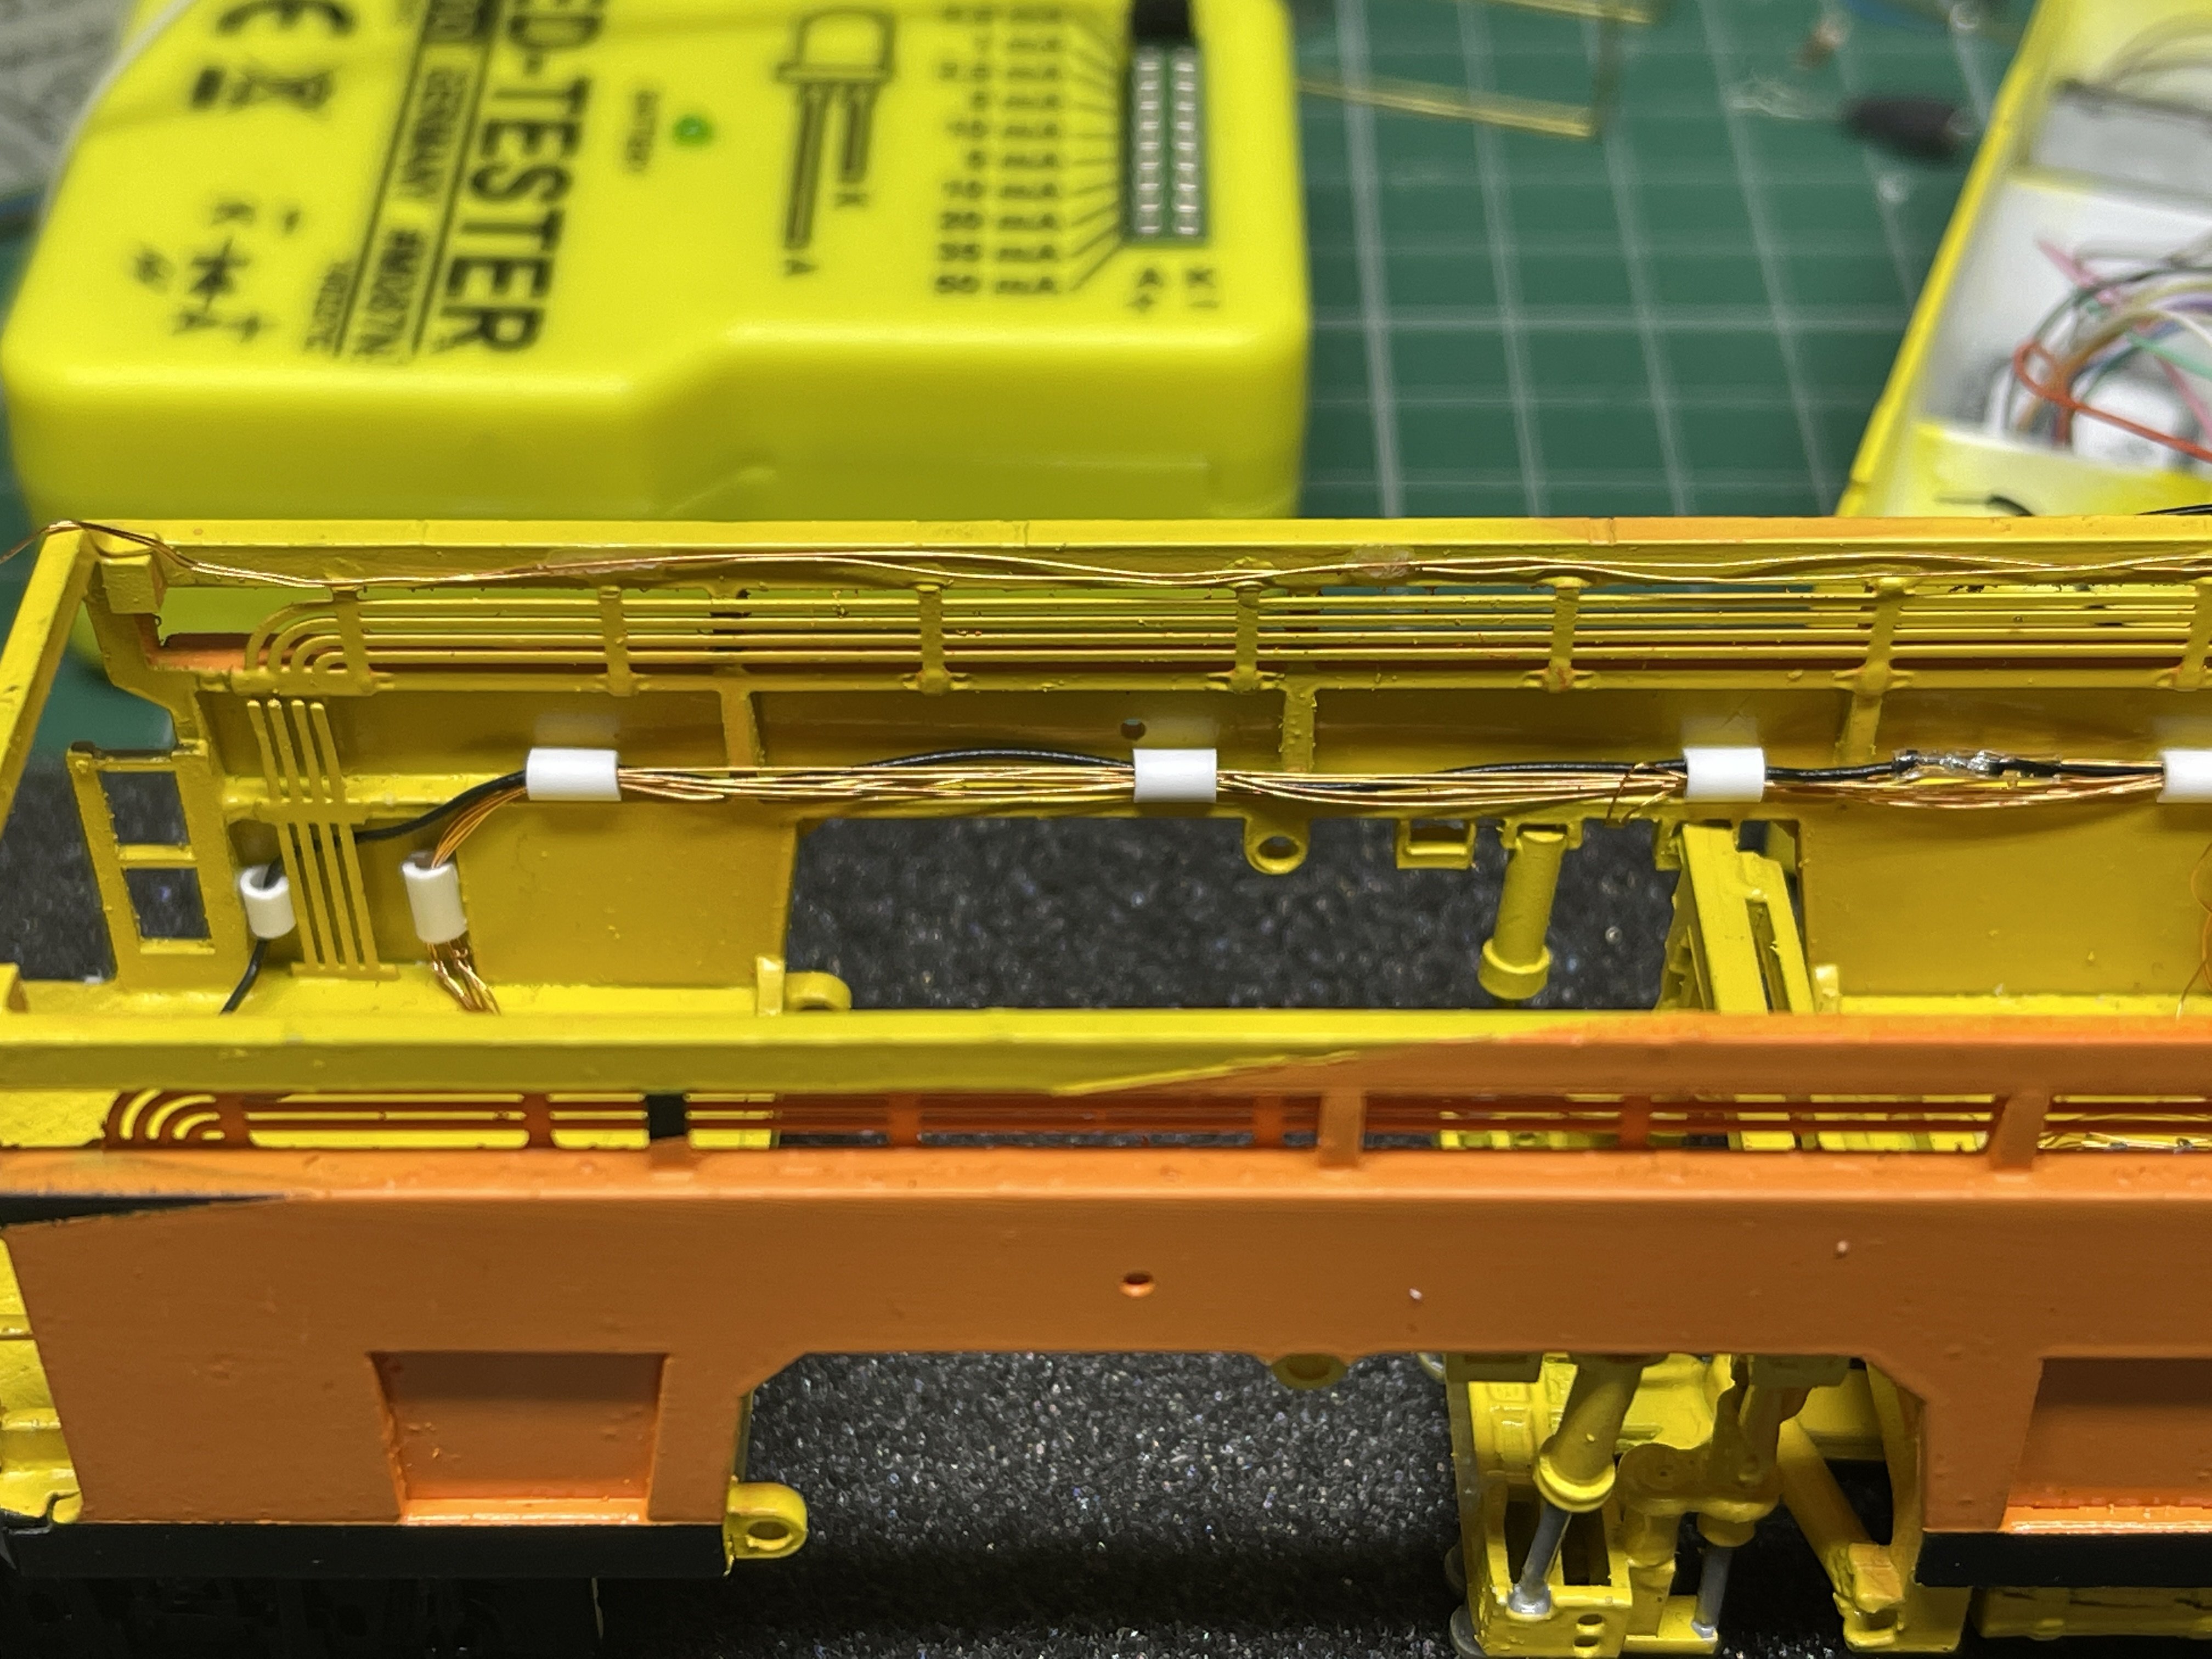
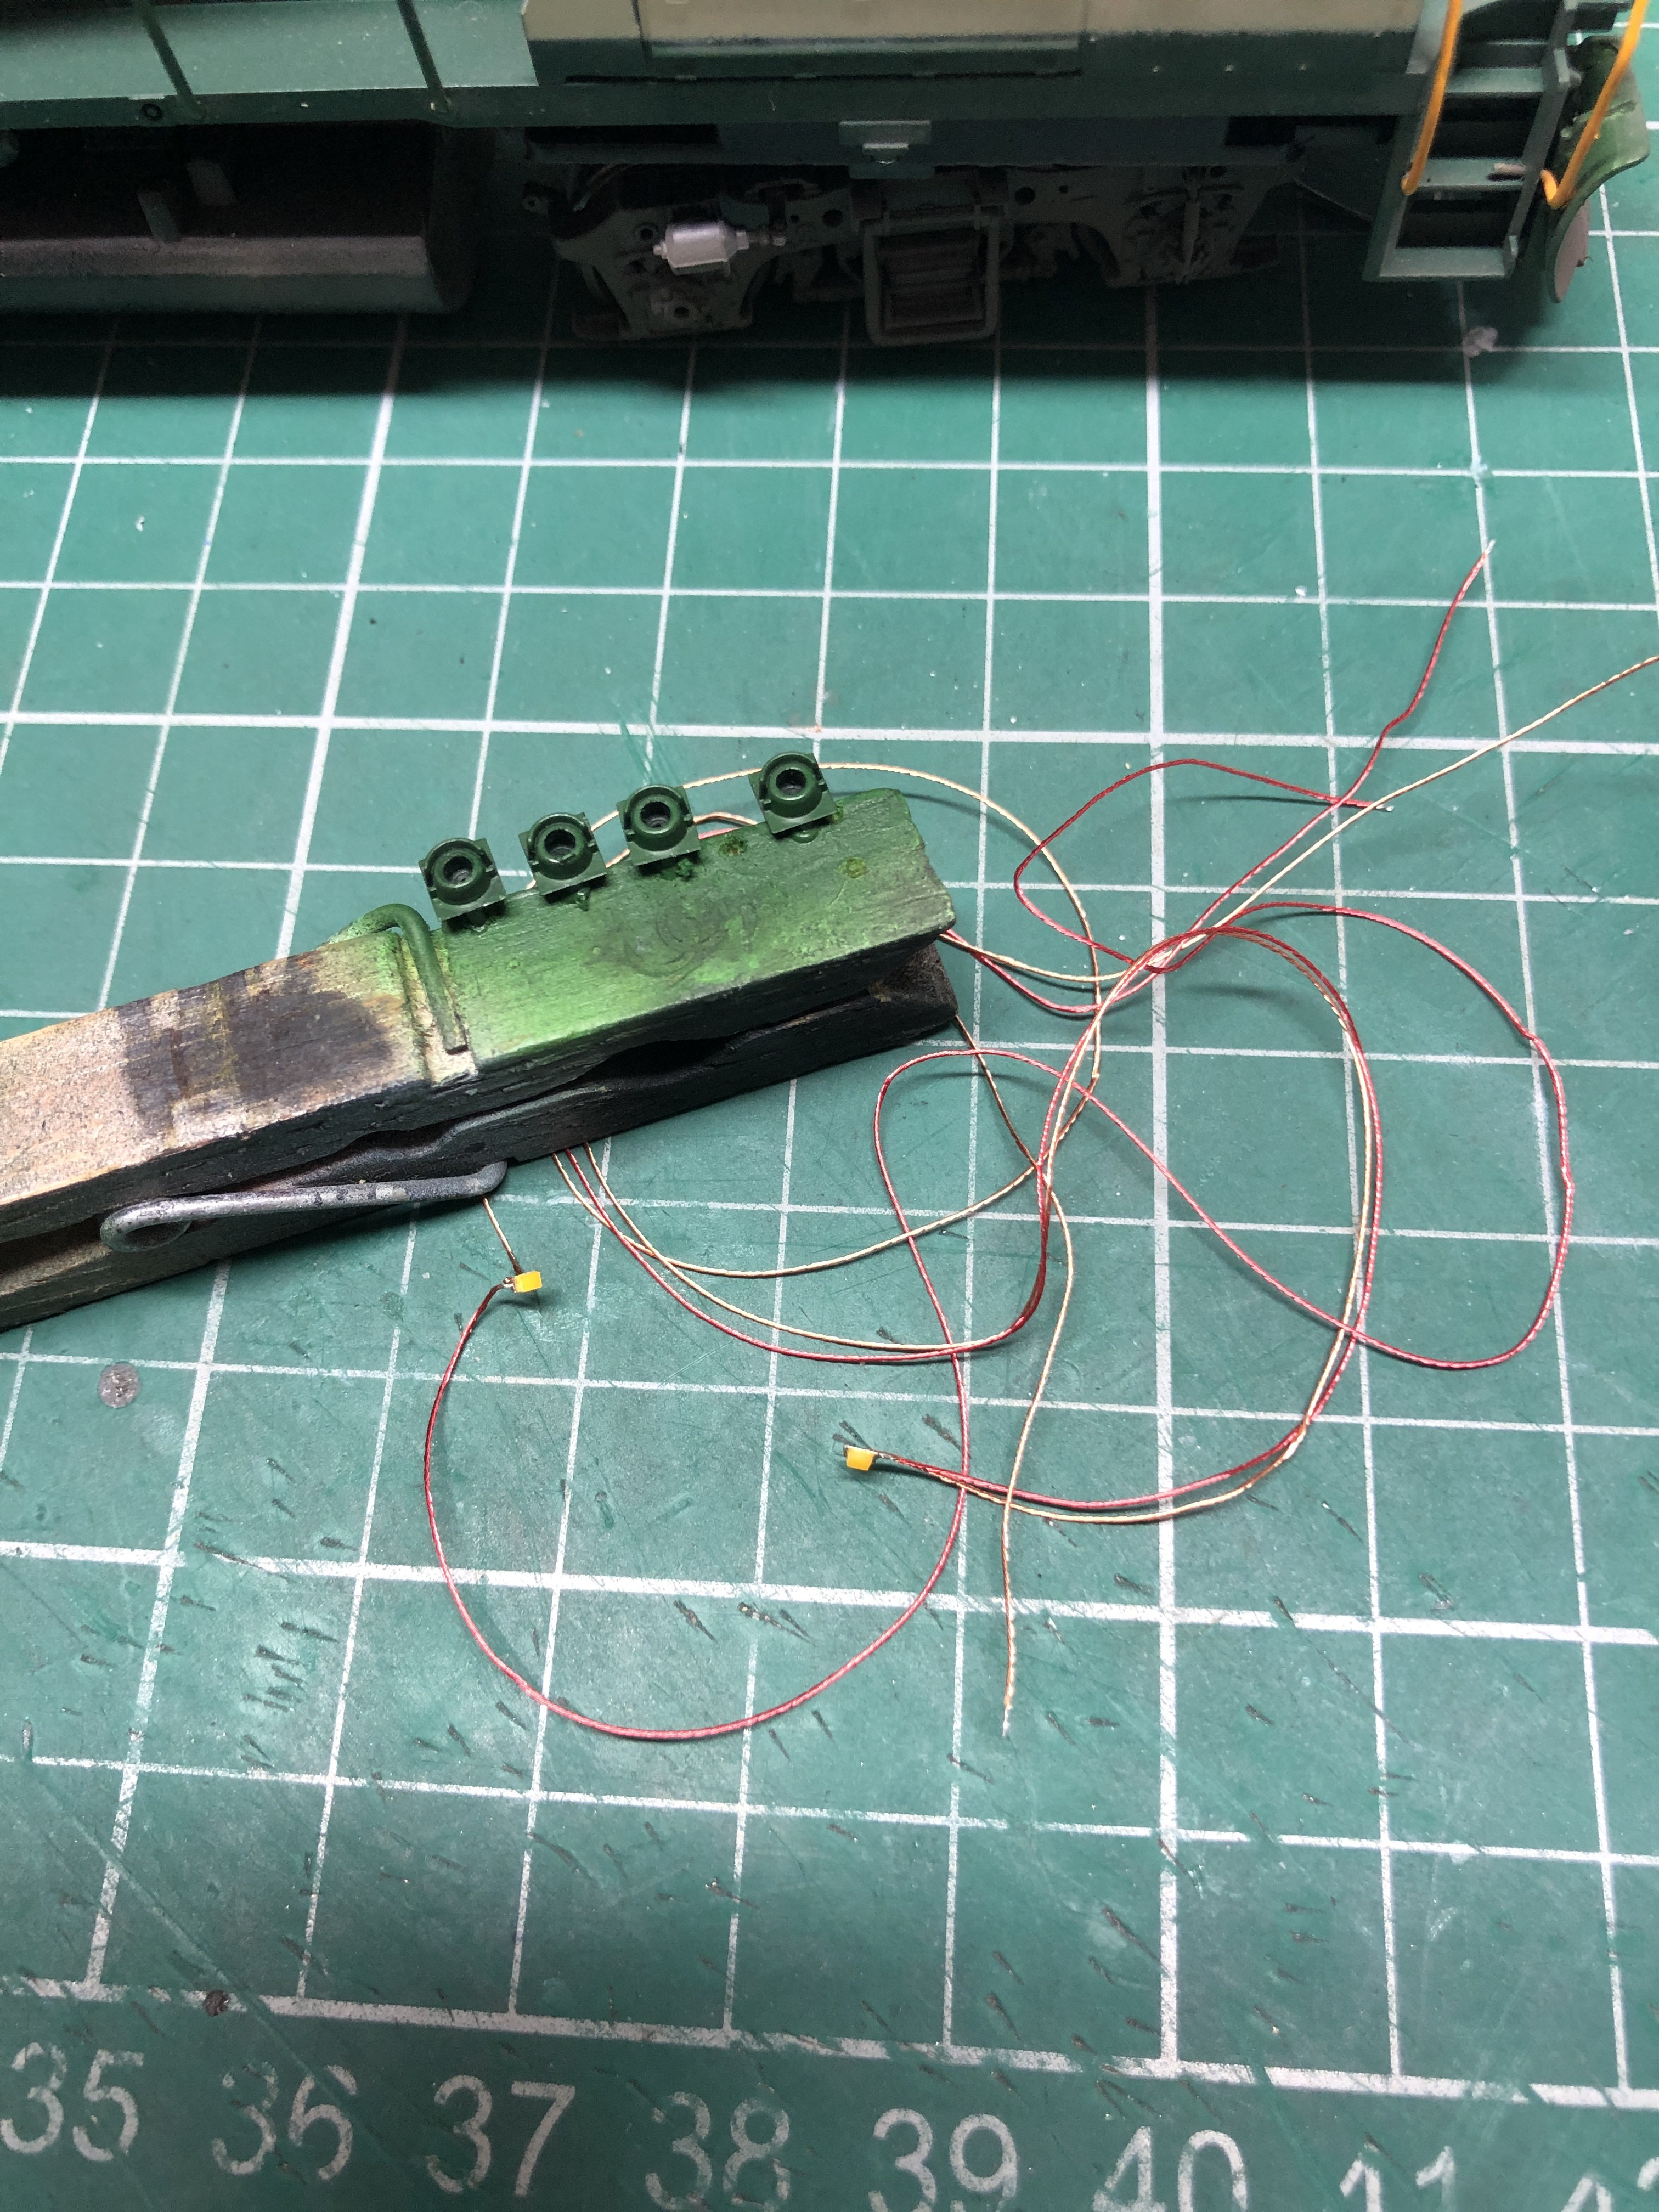
I wish it was that easy Robert, The model has a sound decoder and a function decoder fitted inside what would be the engine housing. The main issus is the sound decoder only has a few powered outputs with the remaining ones being logic and there isn't enough room to fit a ESU 21 pin board that enables the logic ones to be converted into a power ou put. Plus the marker lights are controlled by the sound decoder to make best use of the outputs as this thing looks like a christmas tree when its lit up

-
21 hours ago, Robert Shrives said:
Wowser! That looks a job for the loom shop, hate to have to test all the cables ! I guess all for leds on the ends and in the tool hole. The finished job will be brilliant. Thanks for sharing. I think you deserve a lie down!
Robert
Thanks Robert,
Yes its for lights with each end having the following
2 x Marker lights
1 x Day light
1 x Night light
2 x Tail lights
1 x Cab
2 x external working lights
1 x Top light
So around 20 wires for the leds to be threaded back to the decoders. There are some more wires ie pick up etc to add even more in to the mix.
The job has been made a bit more difficult as it was sent to me to install the lights with no thought to how the wires would run etc. When i get roud to building my two then it will hopefully be a
little bita lot easier to install the lights.Thanks
-
1
-
-
-
A bit of wiring going on
-
4
-
 1
1
-
-
Hi all,
So not much has been happening on the layout recently as I've been busy with work and doing a couple of extra bits that I do.
But you may have noticed that the layout now has a name, No Place.
Now you are probably thinking he's lost the plot, (well I might have but thats a whole other story) but No Place is a small Village near Beamish in the north east corne of England. Just below the area seen on maps of dragons and other mithyical beasts!!
Its ideal as I wanted to be able to swap the buildings on the layout to move the layout to different areas of the country to enable me to run different stock.
-
1
-
-
12 hours ago, Robert Shrives said:
Hi True, at the Derby model show in the assembly rooms I saw a TT layout have its fiddle yard wrecked - big picture windows and hot sun - the rails ripped out of the plastic sleepers and bent every which way- heart breaking I expect stock suffered as well. No idea what they did for Sunday other than nurse hangovers ! On the Ffestiniog railway where clearances are minimal fishplate mnt is key but the last heat wave saw track getting excited and several 5mph restrictions imposed and some late in the day ballast drops to increase shoulders. Best left to sort itself out , but have in past pulled rails uphill in autumn to open up gaps nearby, this and rail anchors help in hot weather. I think the practice of having almost real rail lengths with gaps in 2mmfs is not a bad one - I wonder what the lads did on Fencehouses with it long straight sections.
happy modelling
Robert
MIne was seeing Bath Green Park at one of the Exeter shows which i was exhibiting at and their fiddle yard got a hump in it. At one of the Railex shows whilst helping on Mini M-S-W with Alan we had all but one loco shunt down with the heat in the hall. It can be a strange one with the effects.
Totally agree with the clearances on the FR and as you say best to leave the track to settle on its own as it normally returns to its starting point with the occasional help need.
I'm tempted to do a test peice and het it up to see what happens.
-
 1
1
-
-
14 hours ago, Robert Shrives said:
Reminds me I ought to get on with my 2mmfs Scottish terminal micro mini affair. I have more rail and sleepers ex ebay to hand to help while away a few hours . I have a selection of unused points I was offered a while back - a big cheat but never look a gift horse etc !
Great work and flowing curves do look good. I have a packet of the brass cast sleeper units for base board and connections - hopefully solder rails to these and add a dropper soldered through a hole in outside of sleeper, have to saw in two of course but a neat casting.
Robert
Im the same, boxes of random stuff that has been "gifted" to me over the years and one day I will hopefully get to use it all.
When I started building this the brass chairs hadn't been thought of so I used the copper strip and will probably leave them at the board ends as I have put down small sections of rail of about 1 cm long to act as sacrafical bits incase they get knocked plus they will be covered by some of the scenery.
At the end of the rail sections on the rest of the layout, I will be doing the same as you and using them as anchor points for the ends. I did contemplate about soldering them to the rail but want to have the rail to have the abilty to move with heat.After seeing a few layouts developing track buckles and witnessing the effect of heat on real rail it makes you think. I may be going slighty over the top but when you have seen fishplate bolts loosened and the 65-lb rail expand to fill a 1/2 inch gap quicker than you can blink its made you think about how it effects the model.
-
1
-
-
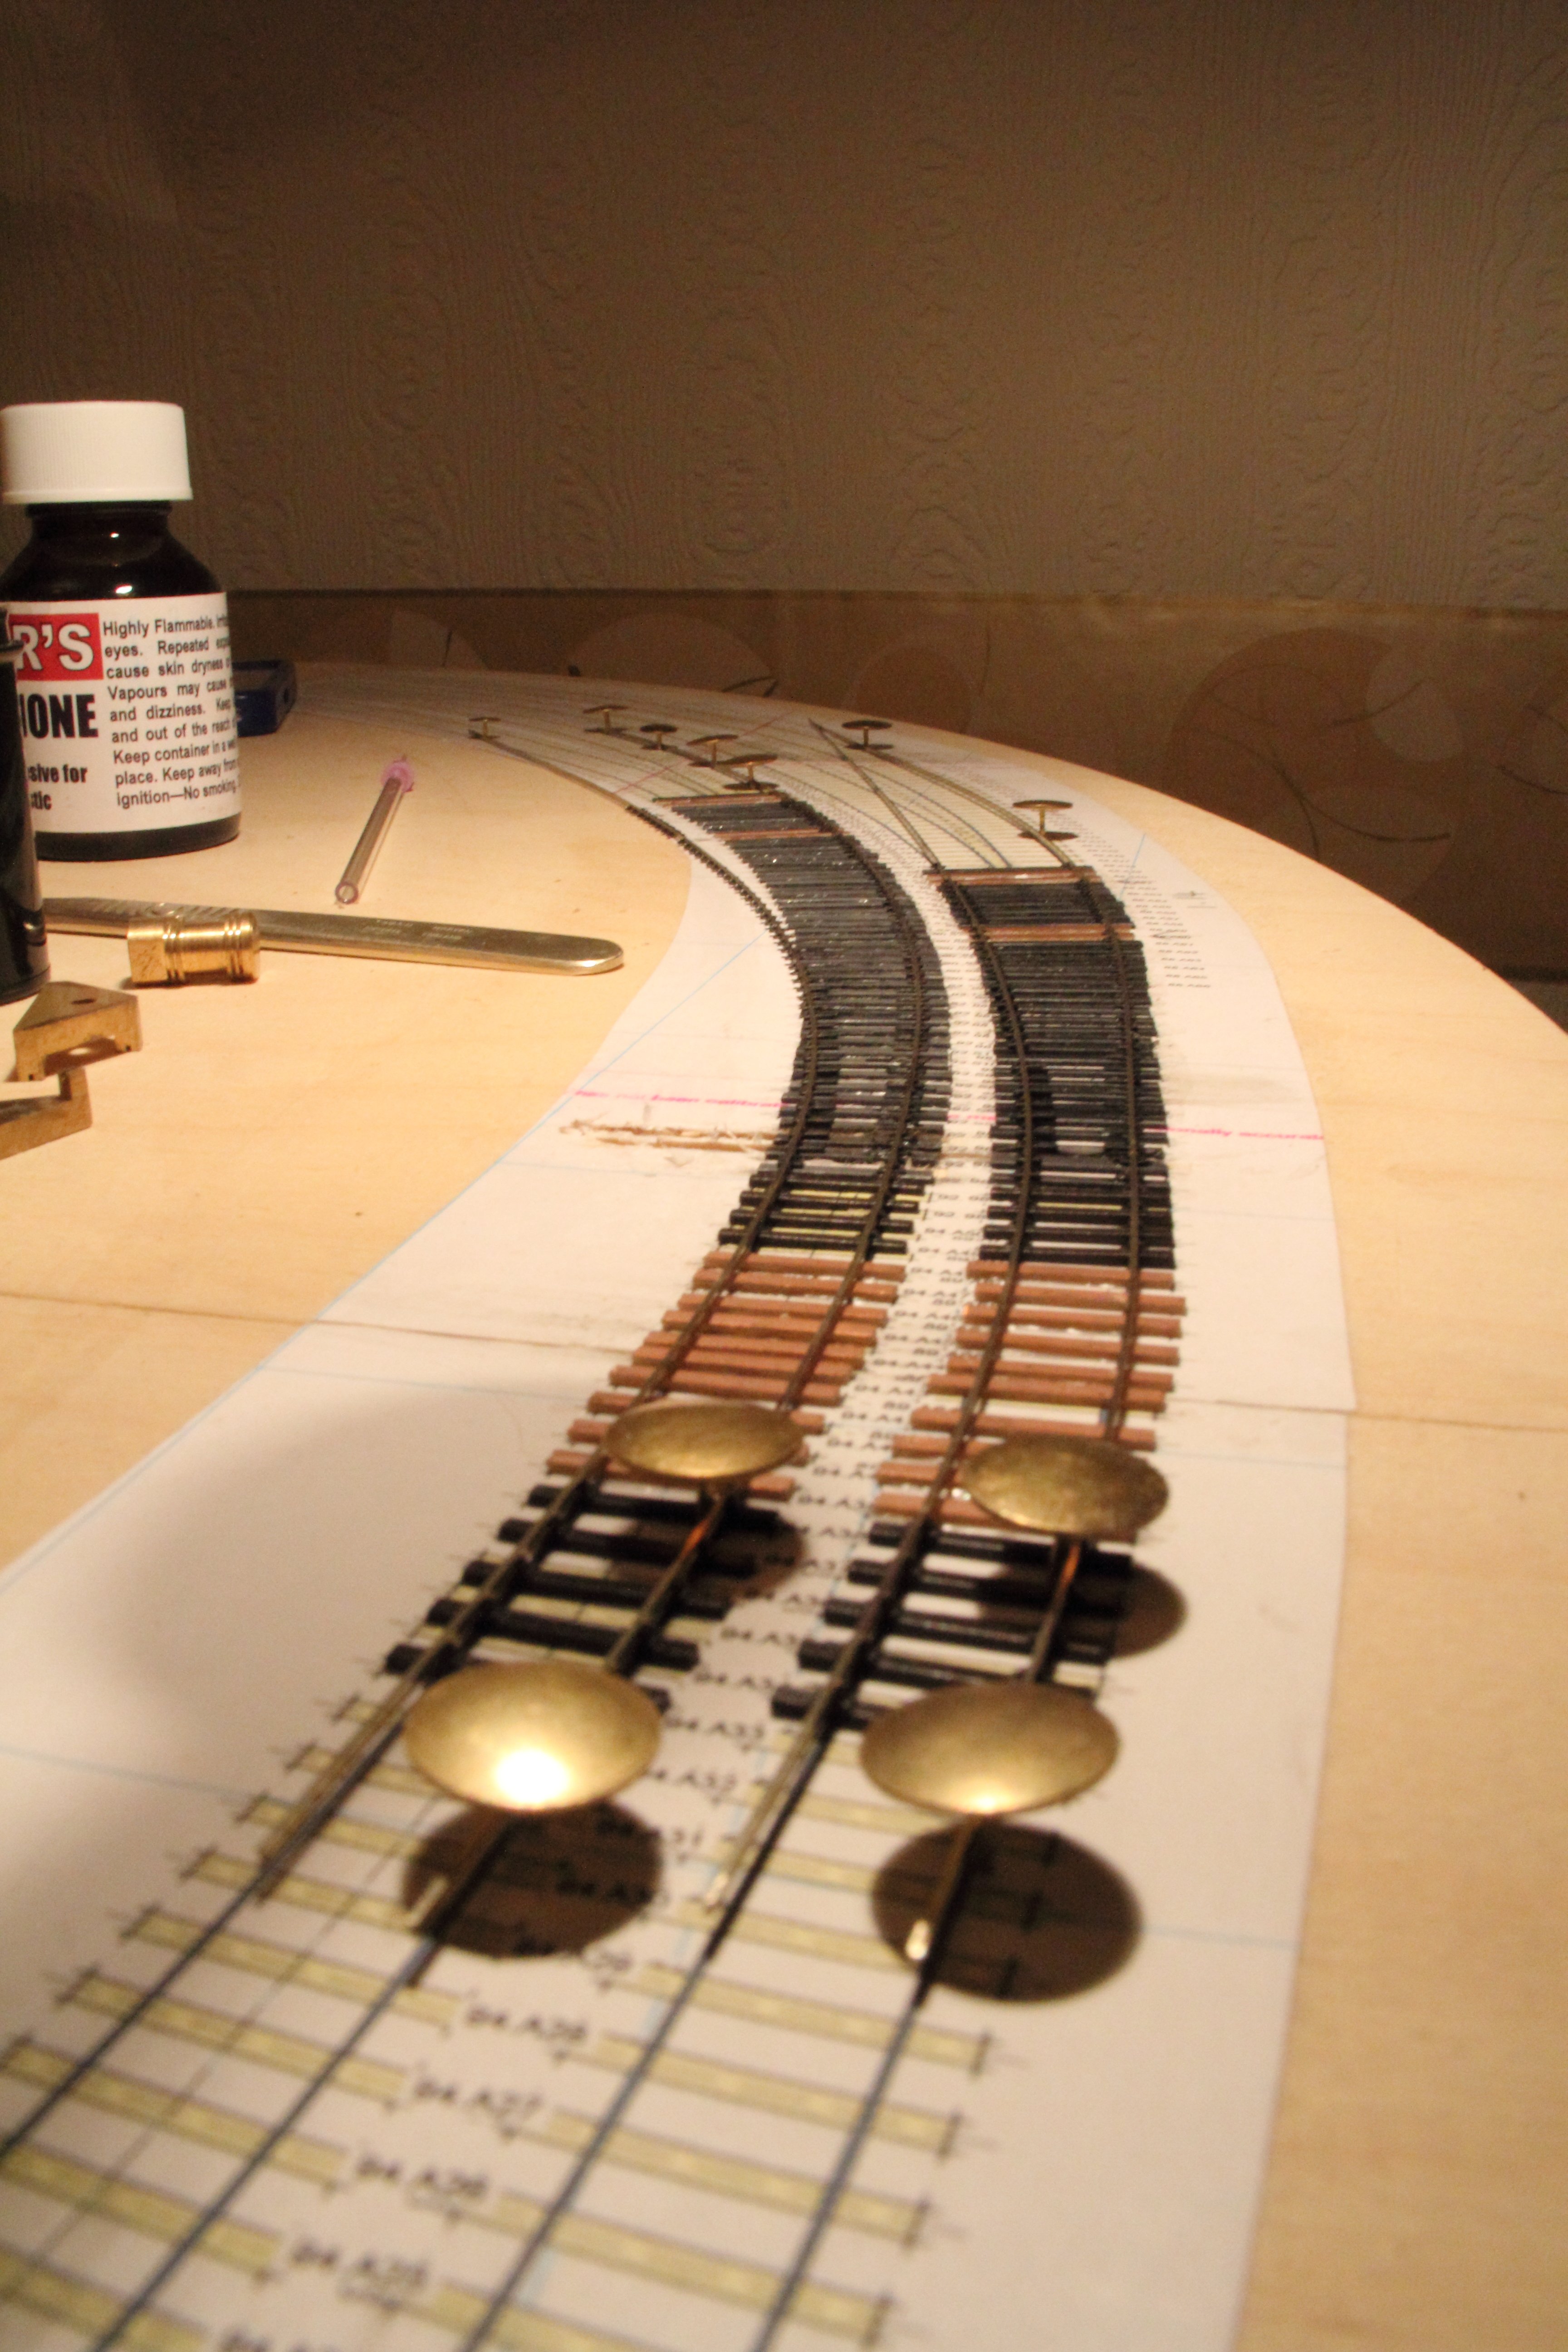
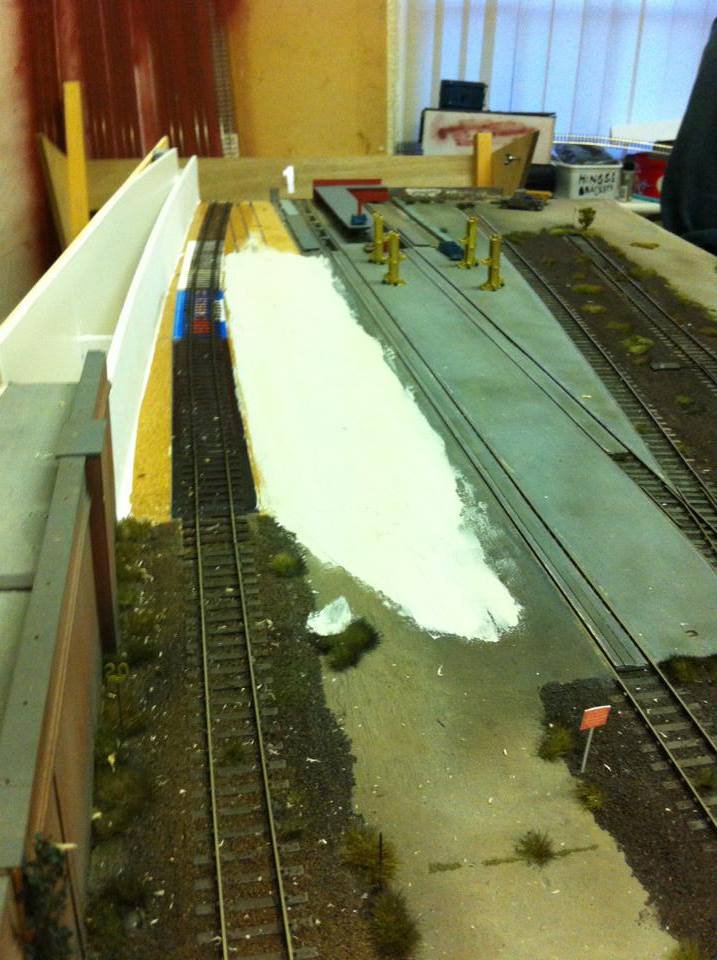
HI all,
The track laying was progressing along. To try and get nice flowing curves it was case of pinning the rail in place and then gluing the chairs to the sleepers whilst keeping an eye of the curve.
The photo shows the entry and exit points in the fiddle yard.
-
3
-
1
-
-
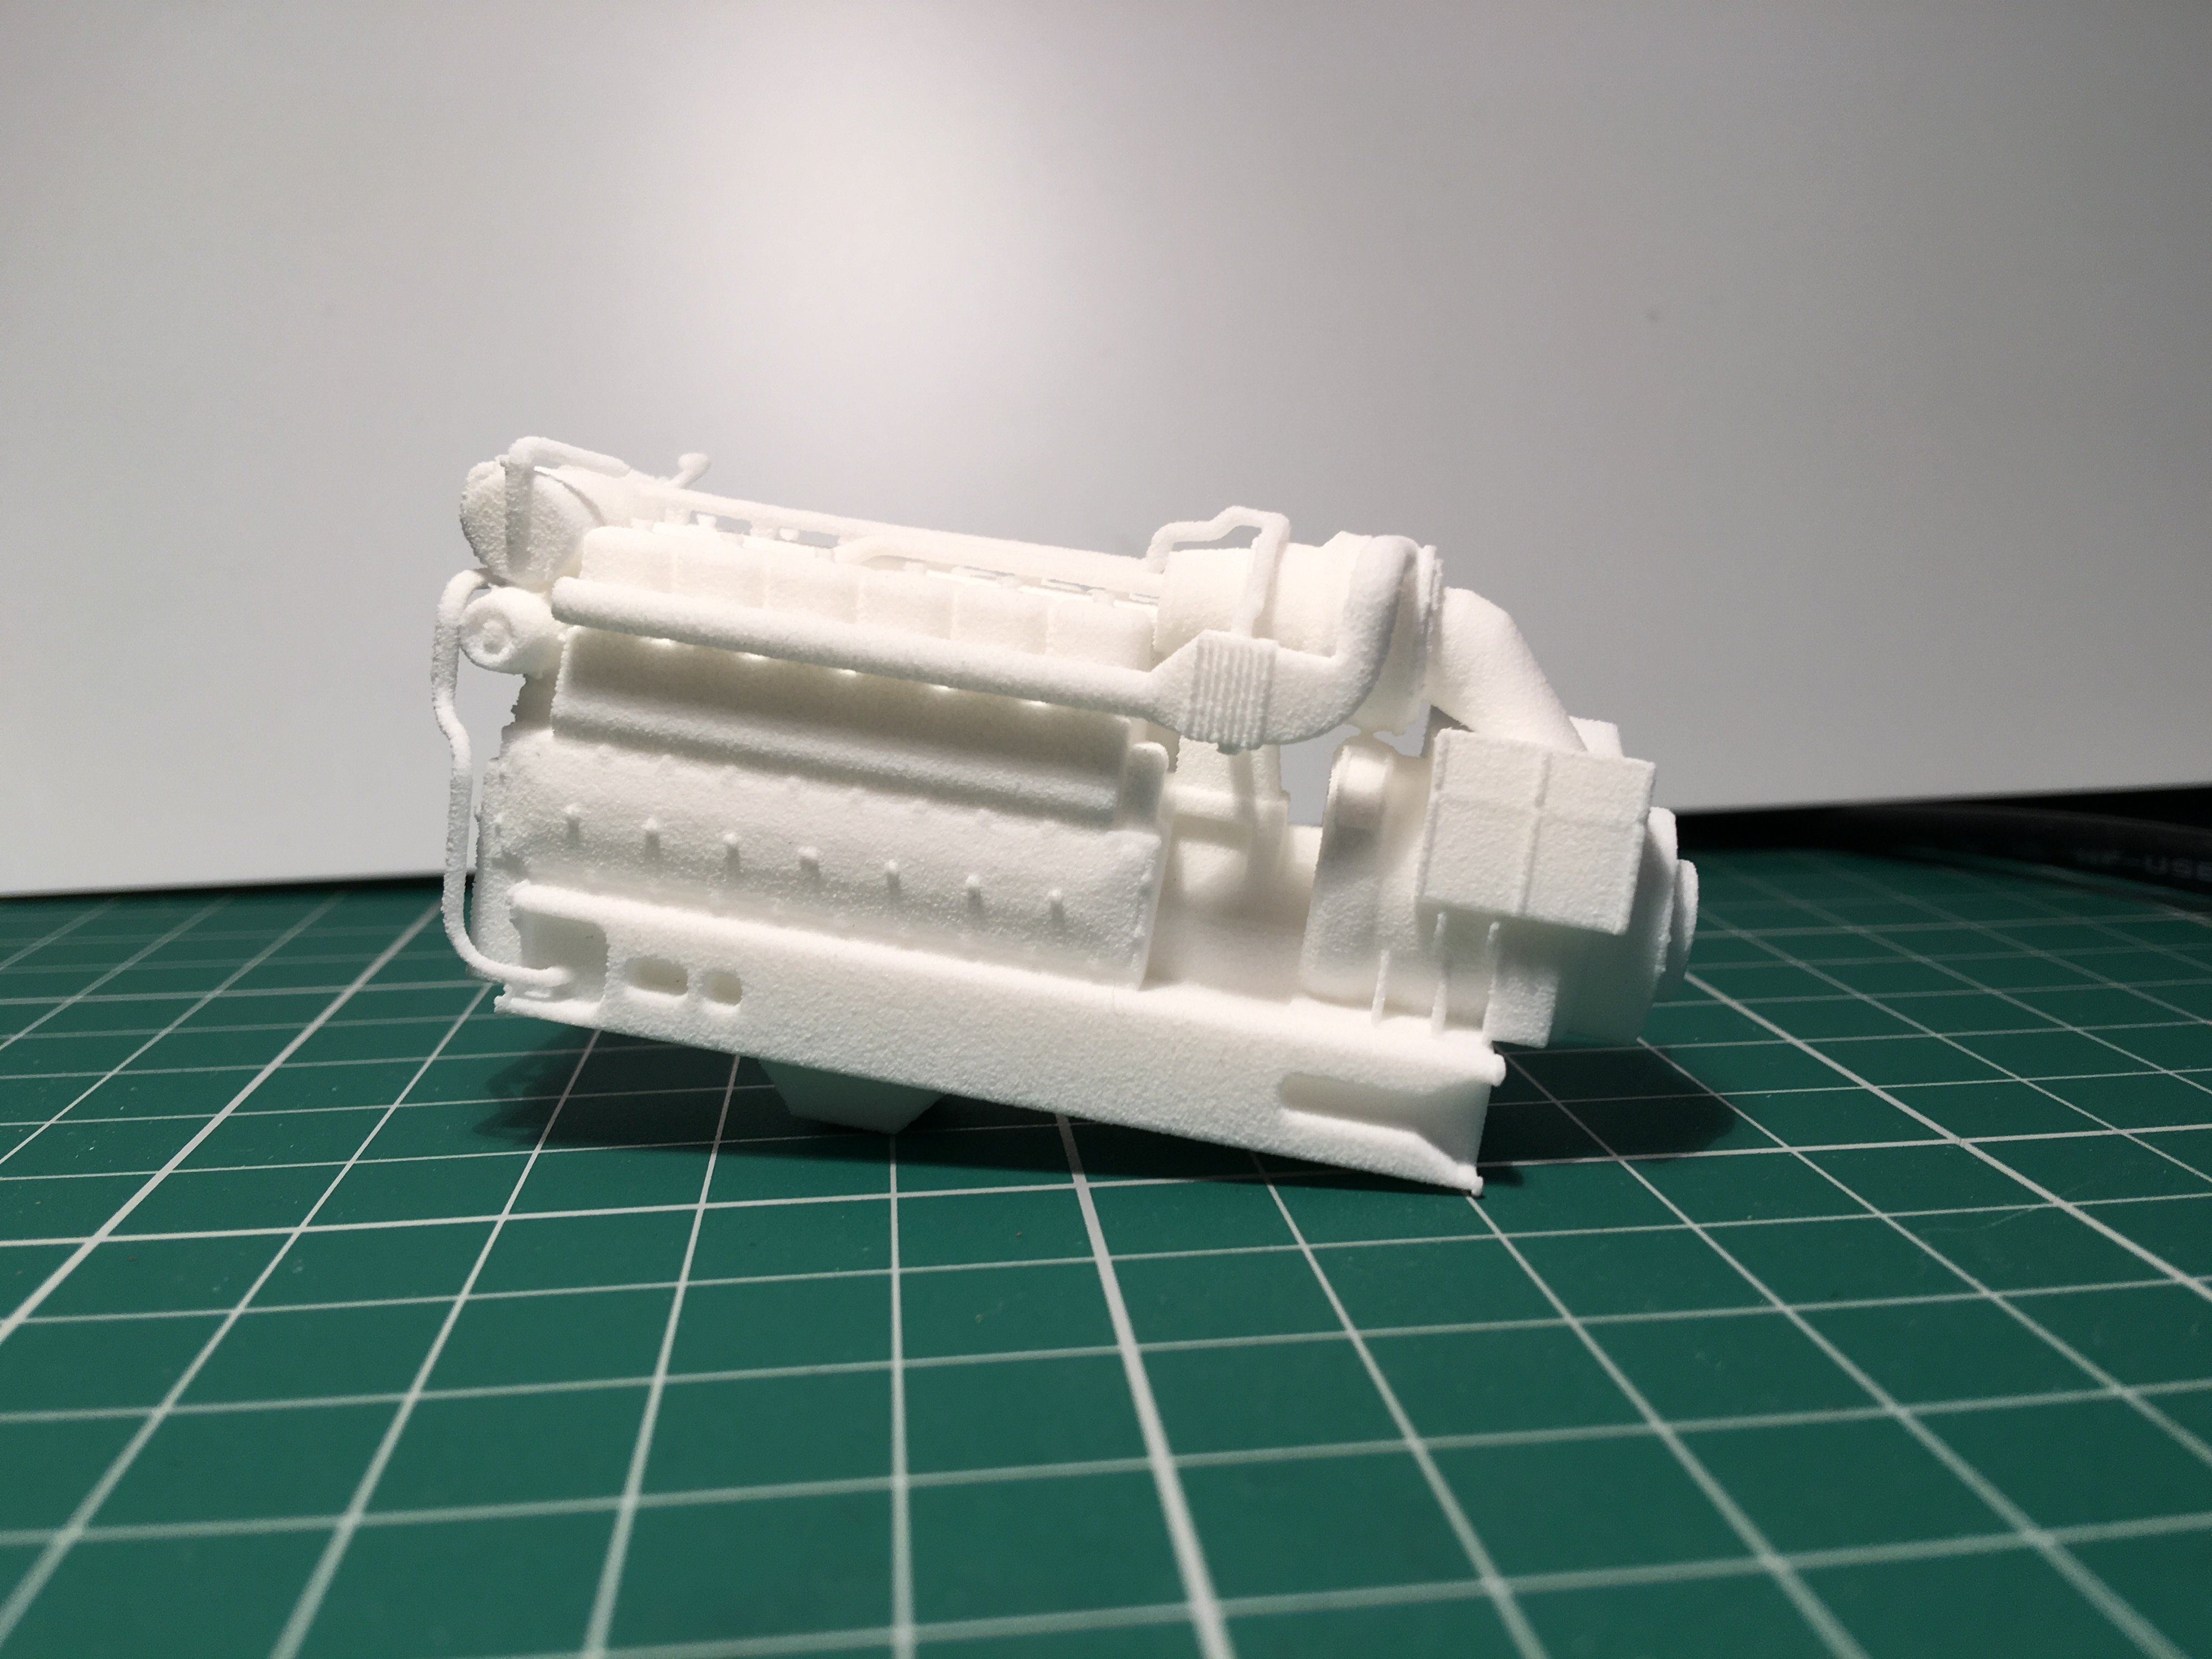
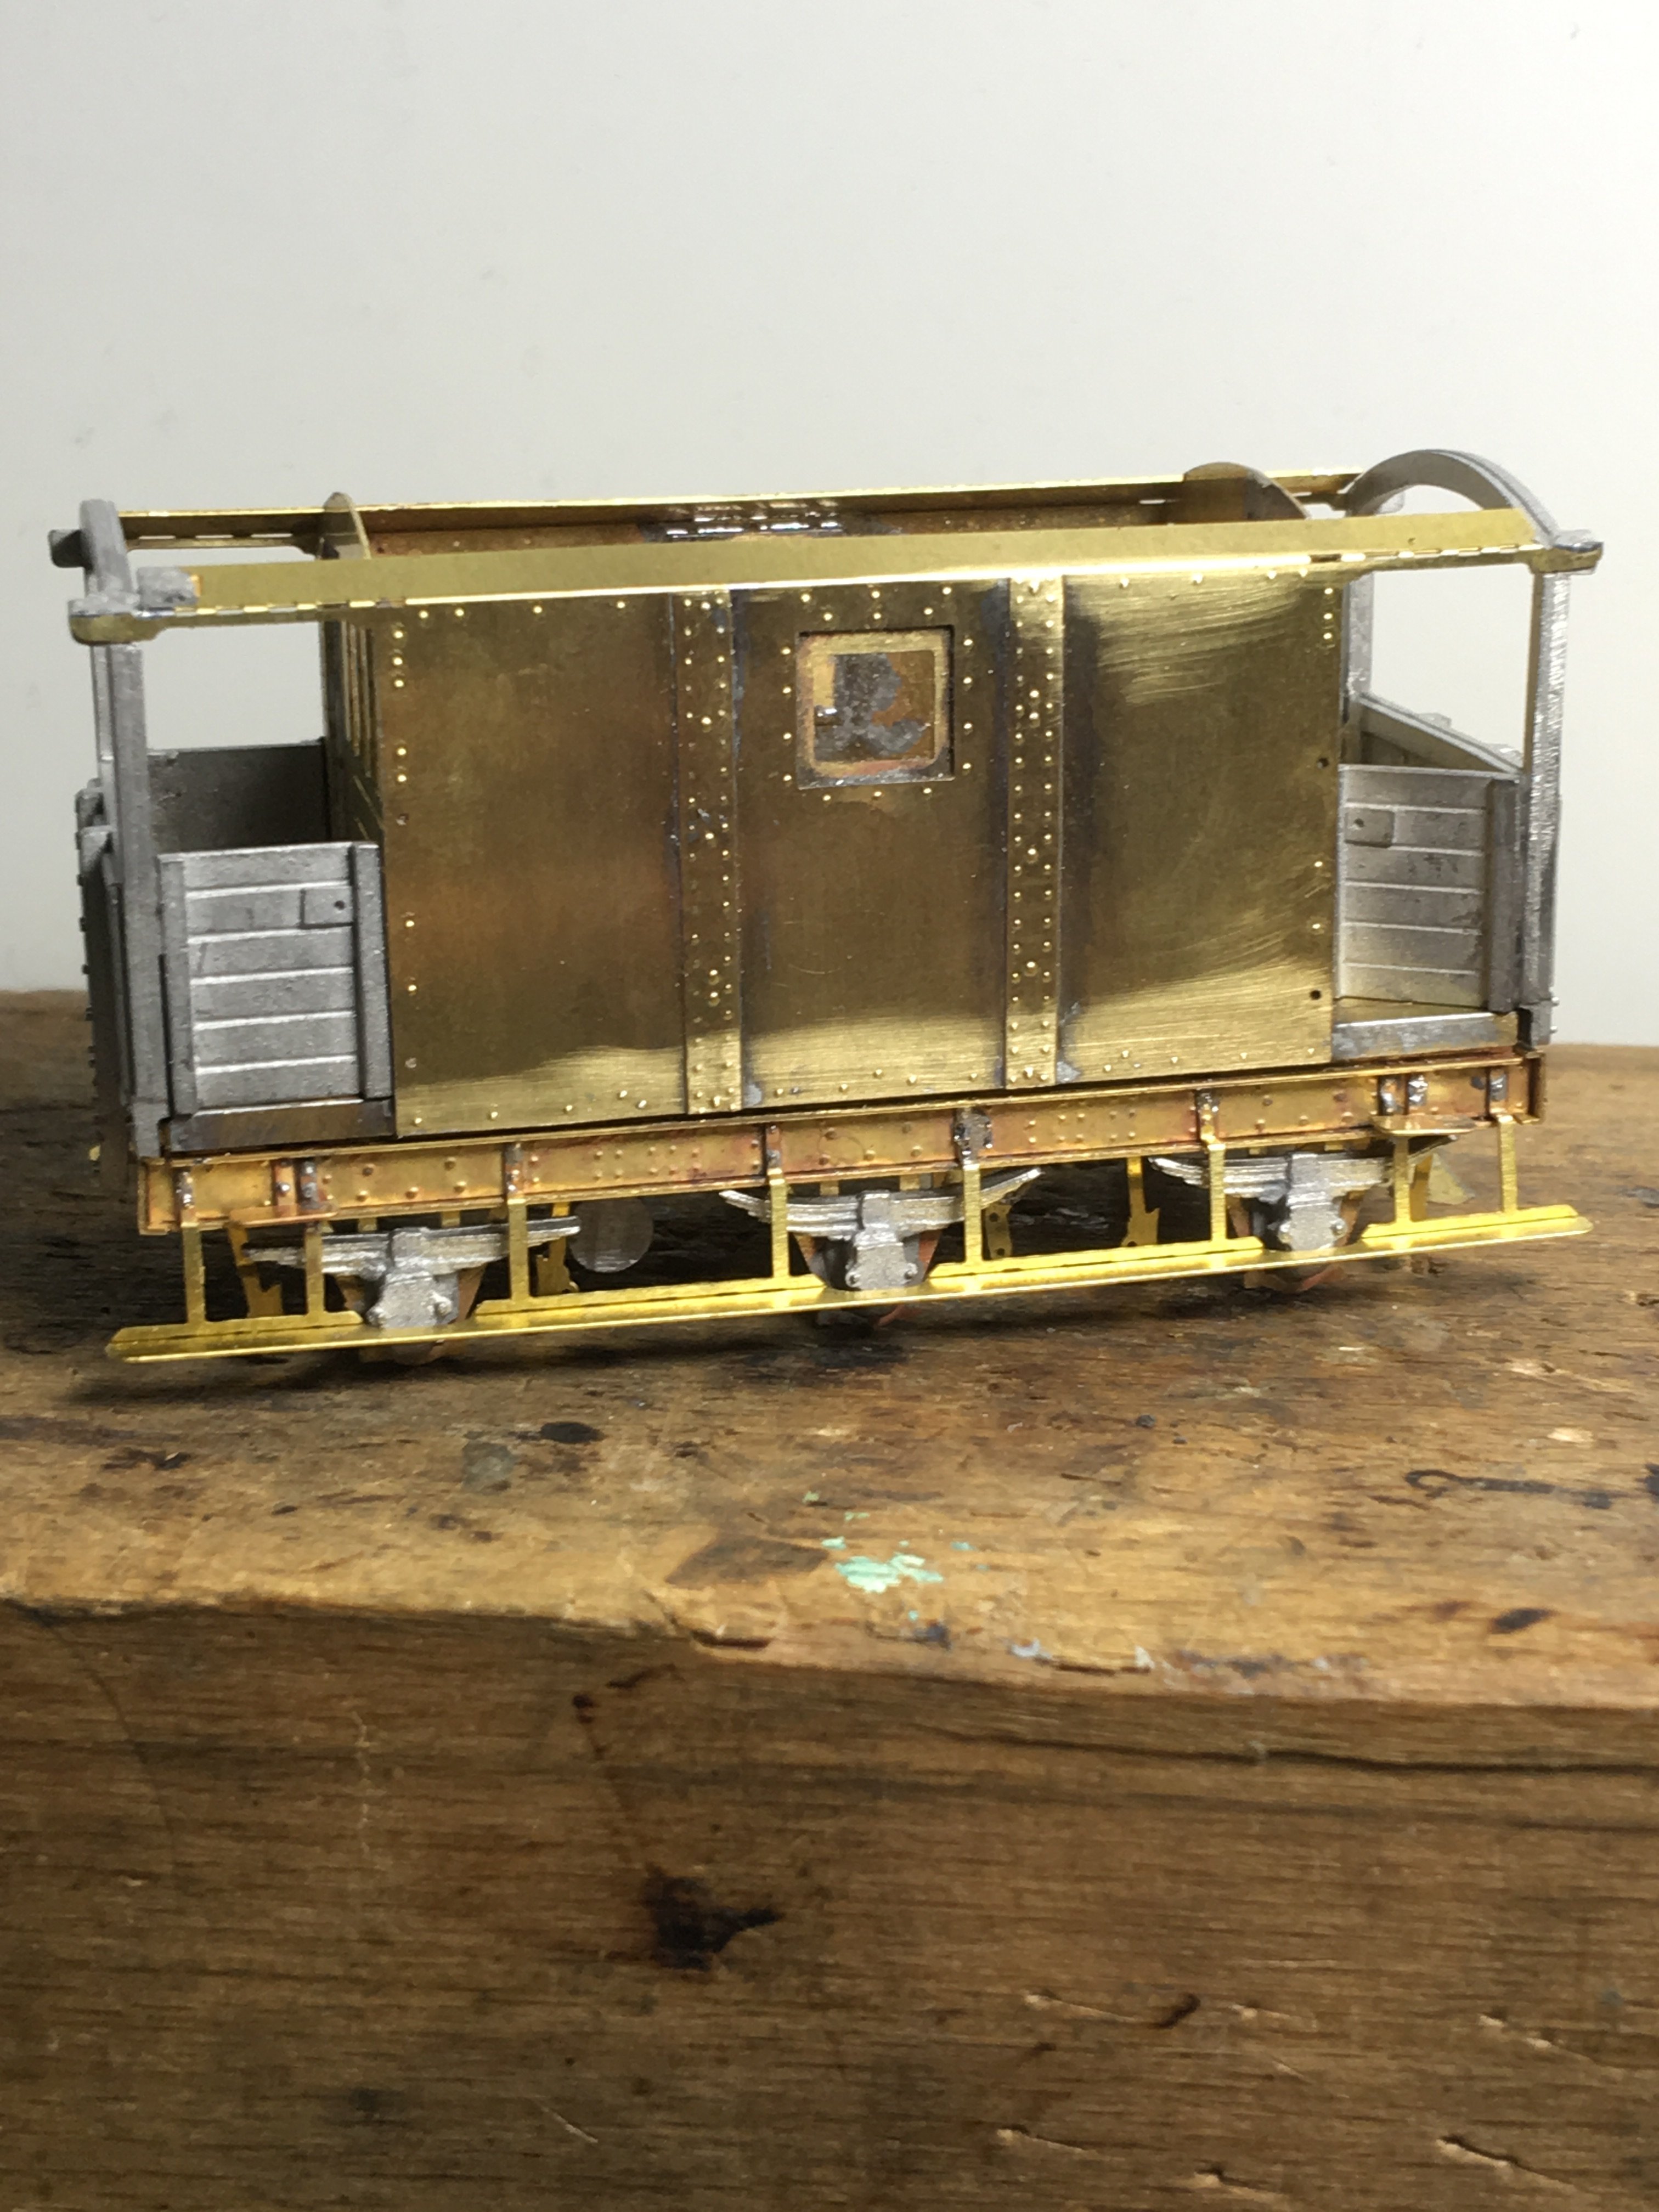
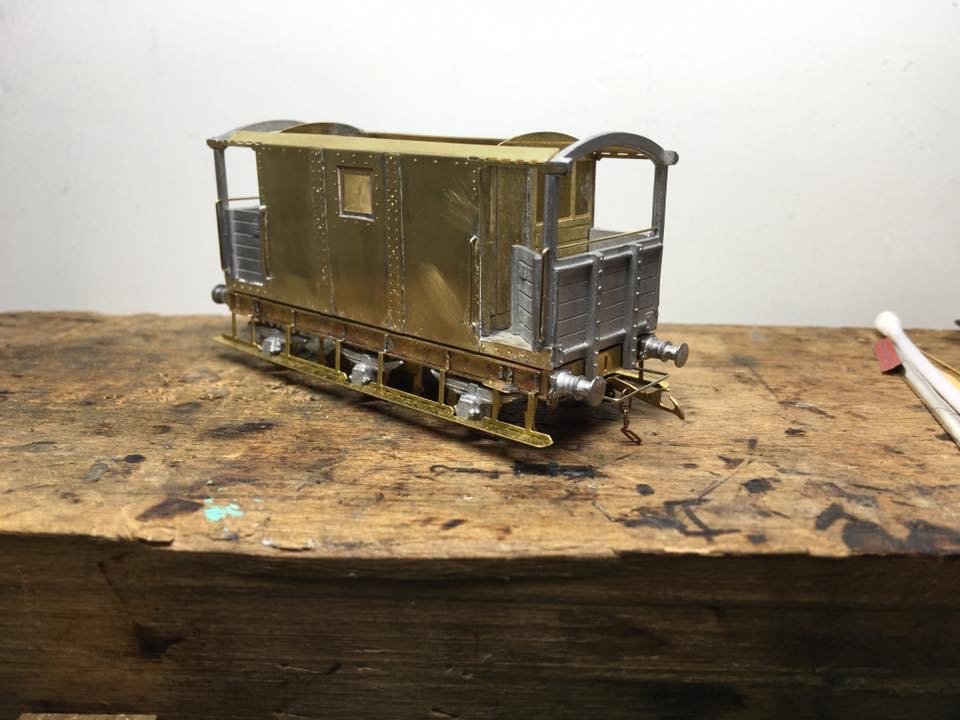
HI all,
Had these come in on the bench to be cleaned up, painted and mounted on custom cradles.
-
5
-
-
21 hours ago, Broithe said:
Facebook has just suggested that I might be interested in this picture, so I thought it might be worth mentioning here.
© Ian Krause.
Hi,
I saw that one as well. Not seen any photos in this direction before and its an intresting view with lots of detail information on it. Things like the run of the telegraph poles and the stay on the down signal. Not sure that we can add it as the embankment on our model isn't deep enough at this point, plus we will probably catch it when cleaning the track.
-
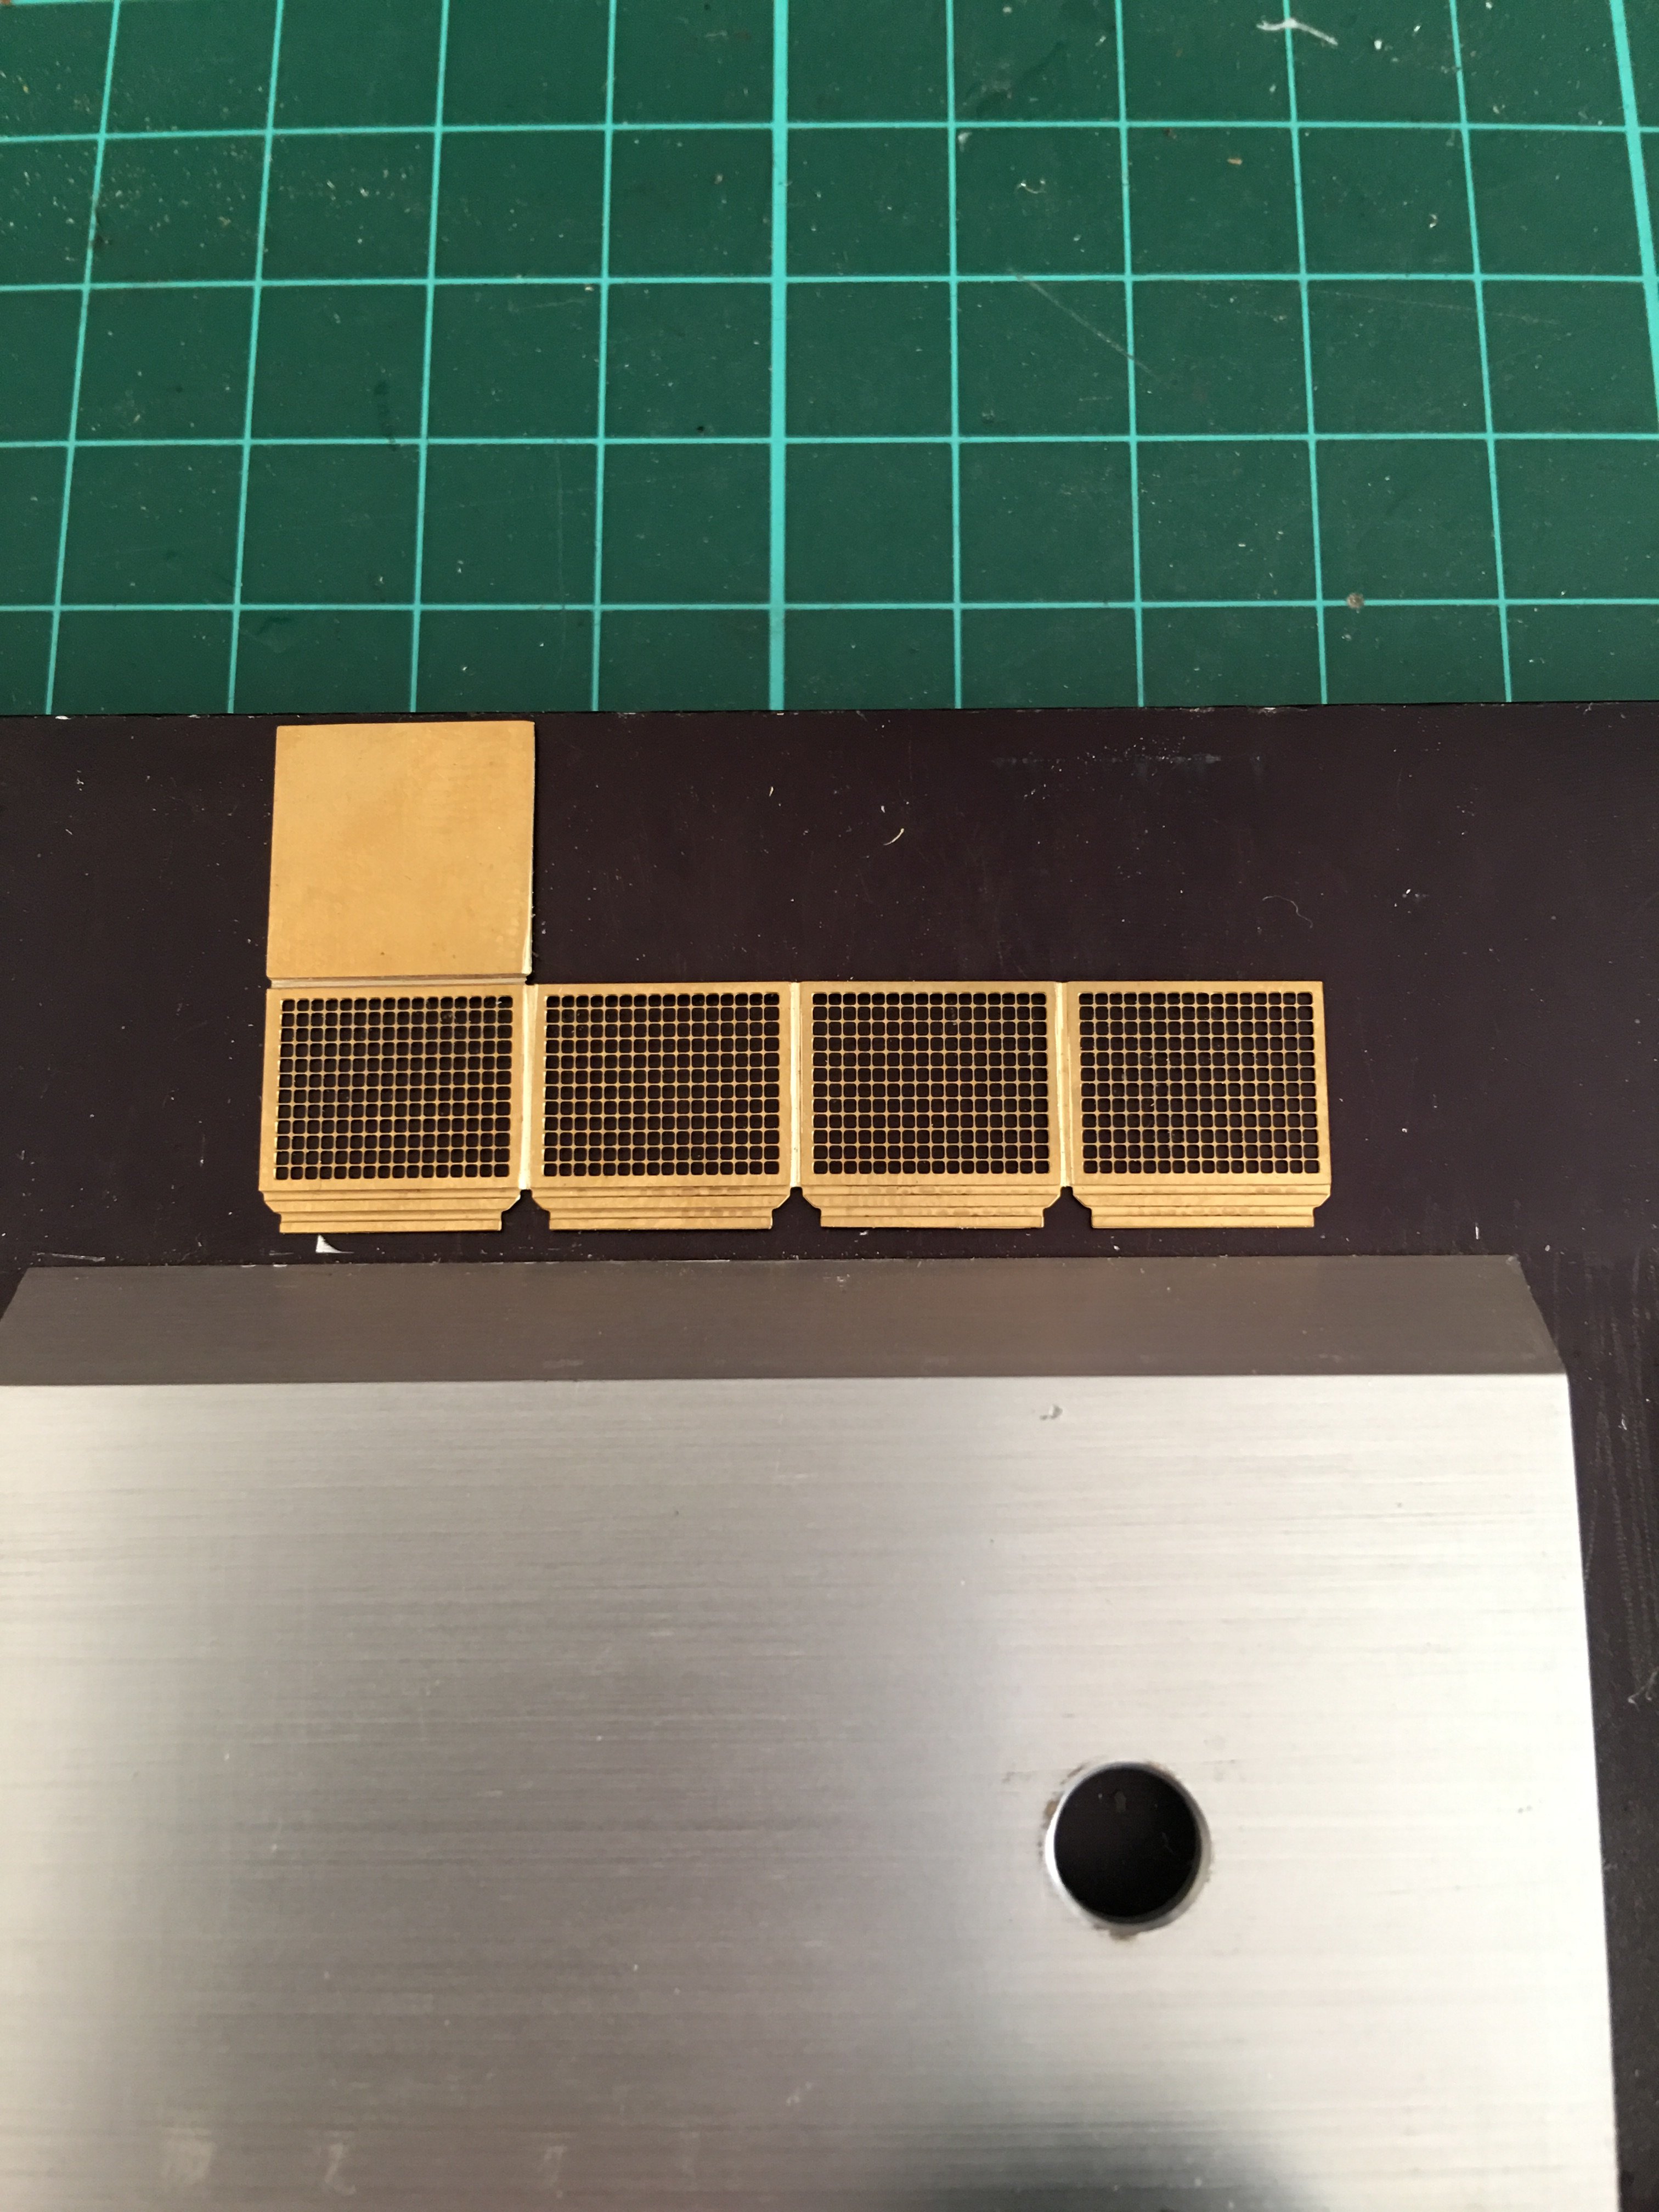
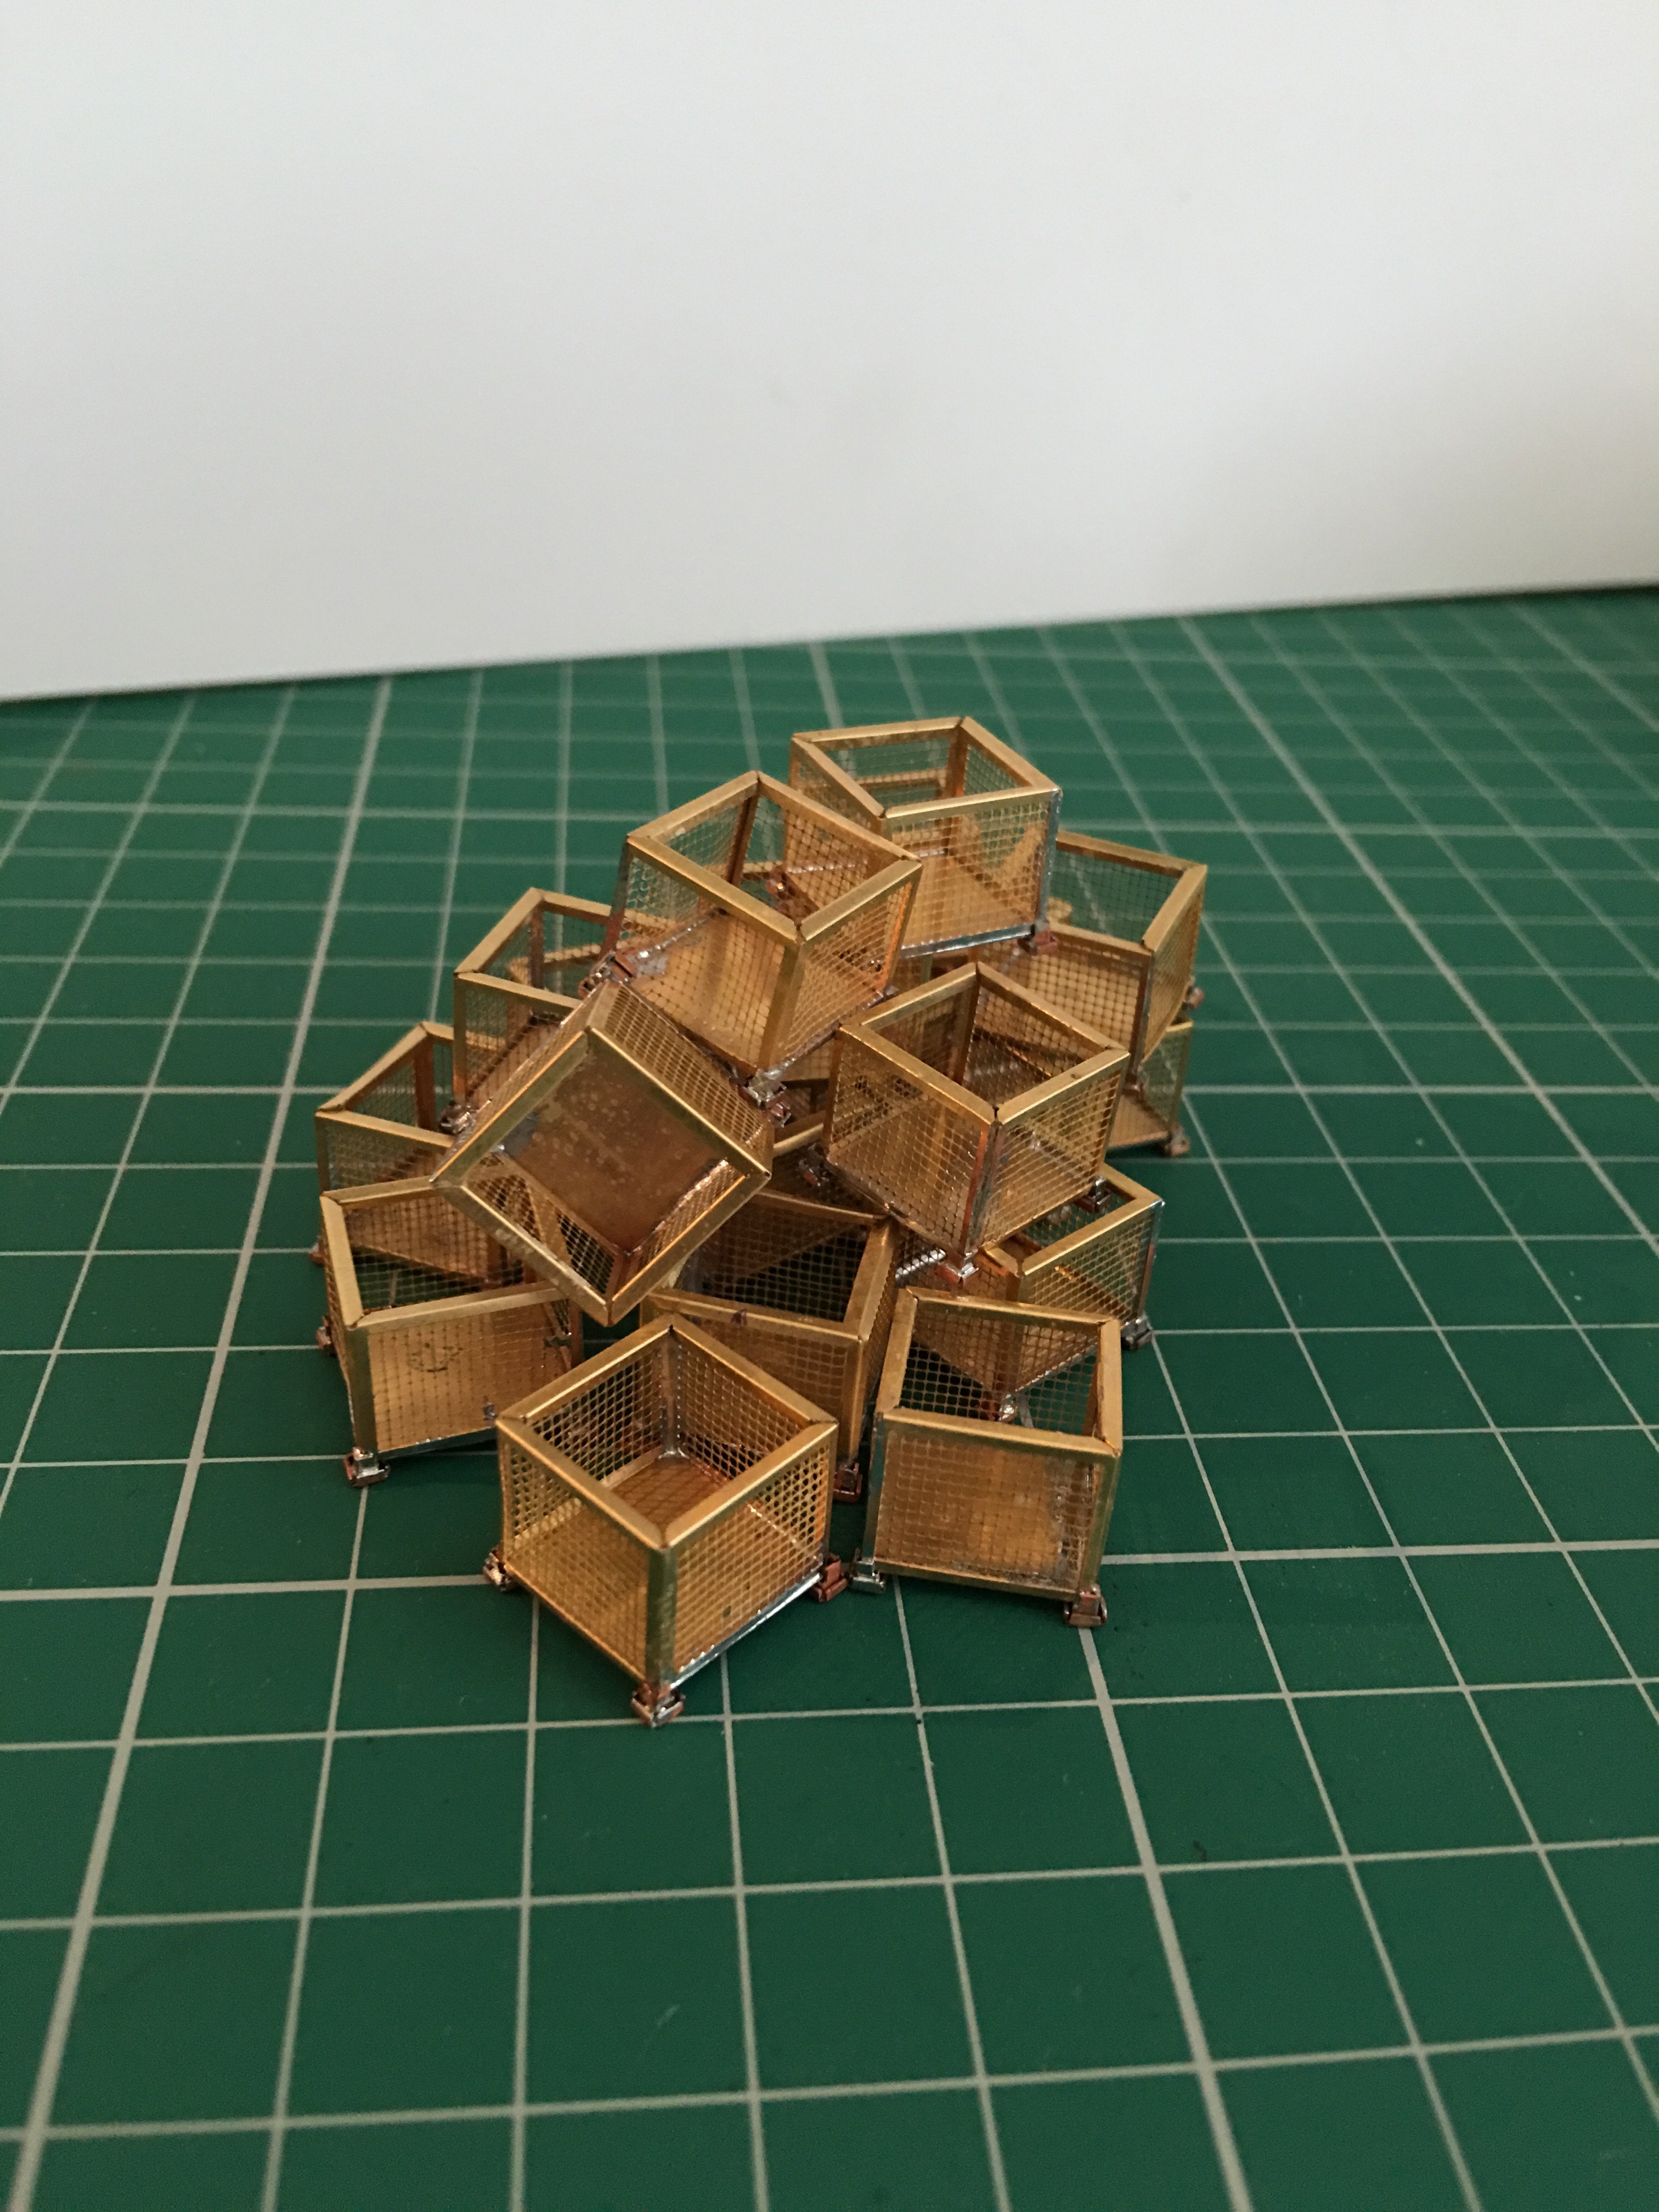
hello,
So had a few of these to make next
There was about 60 odd in total which kept me busy for a few days.
-
5
-
2
-
-
This one is a bit out of order but it shows the hard standing going down on the extension
-
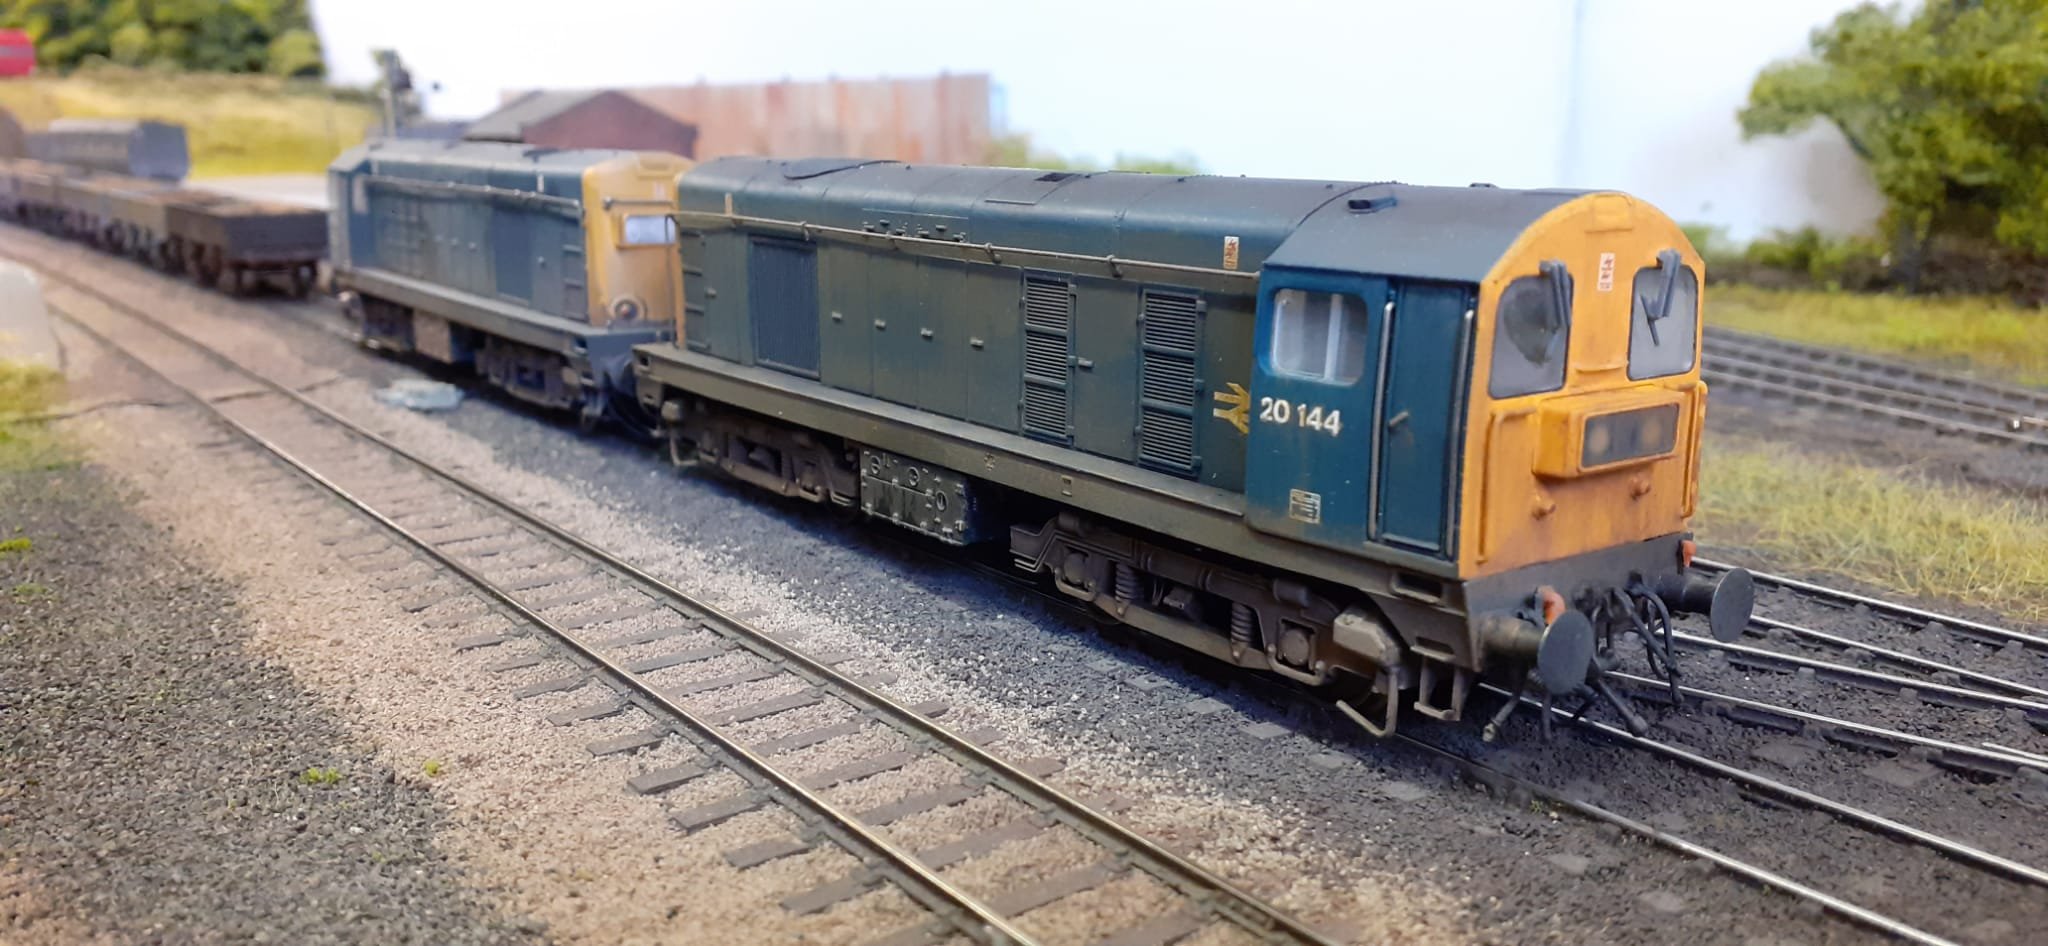
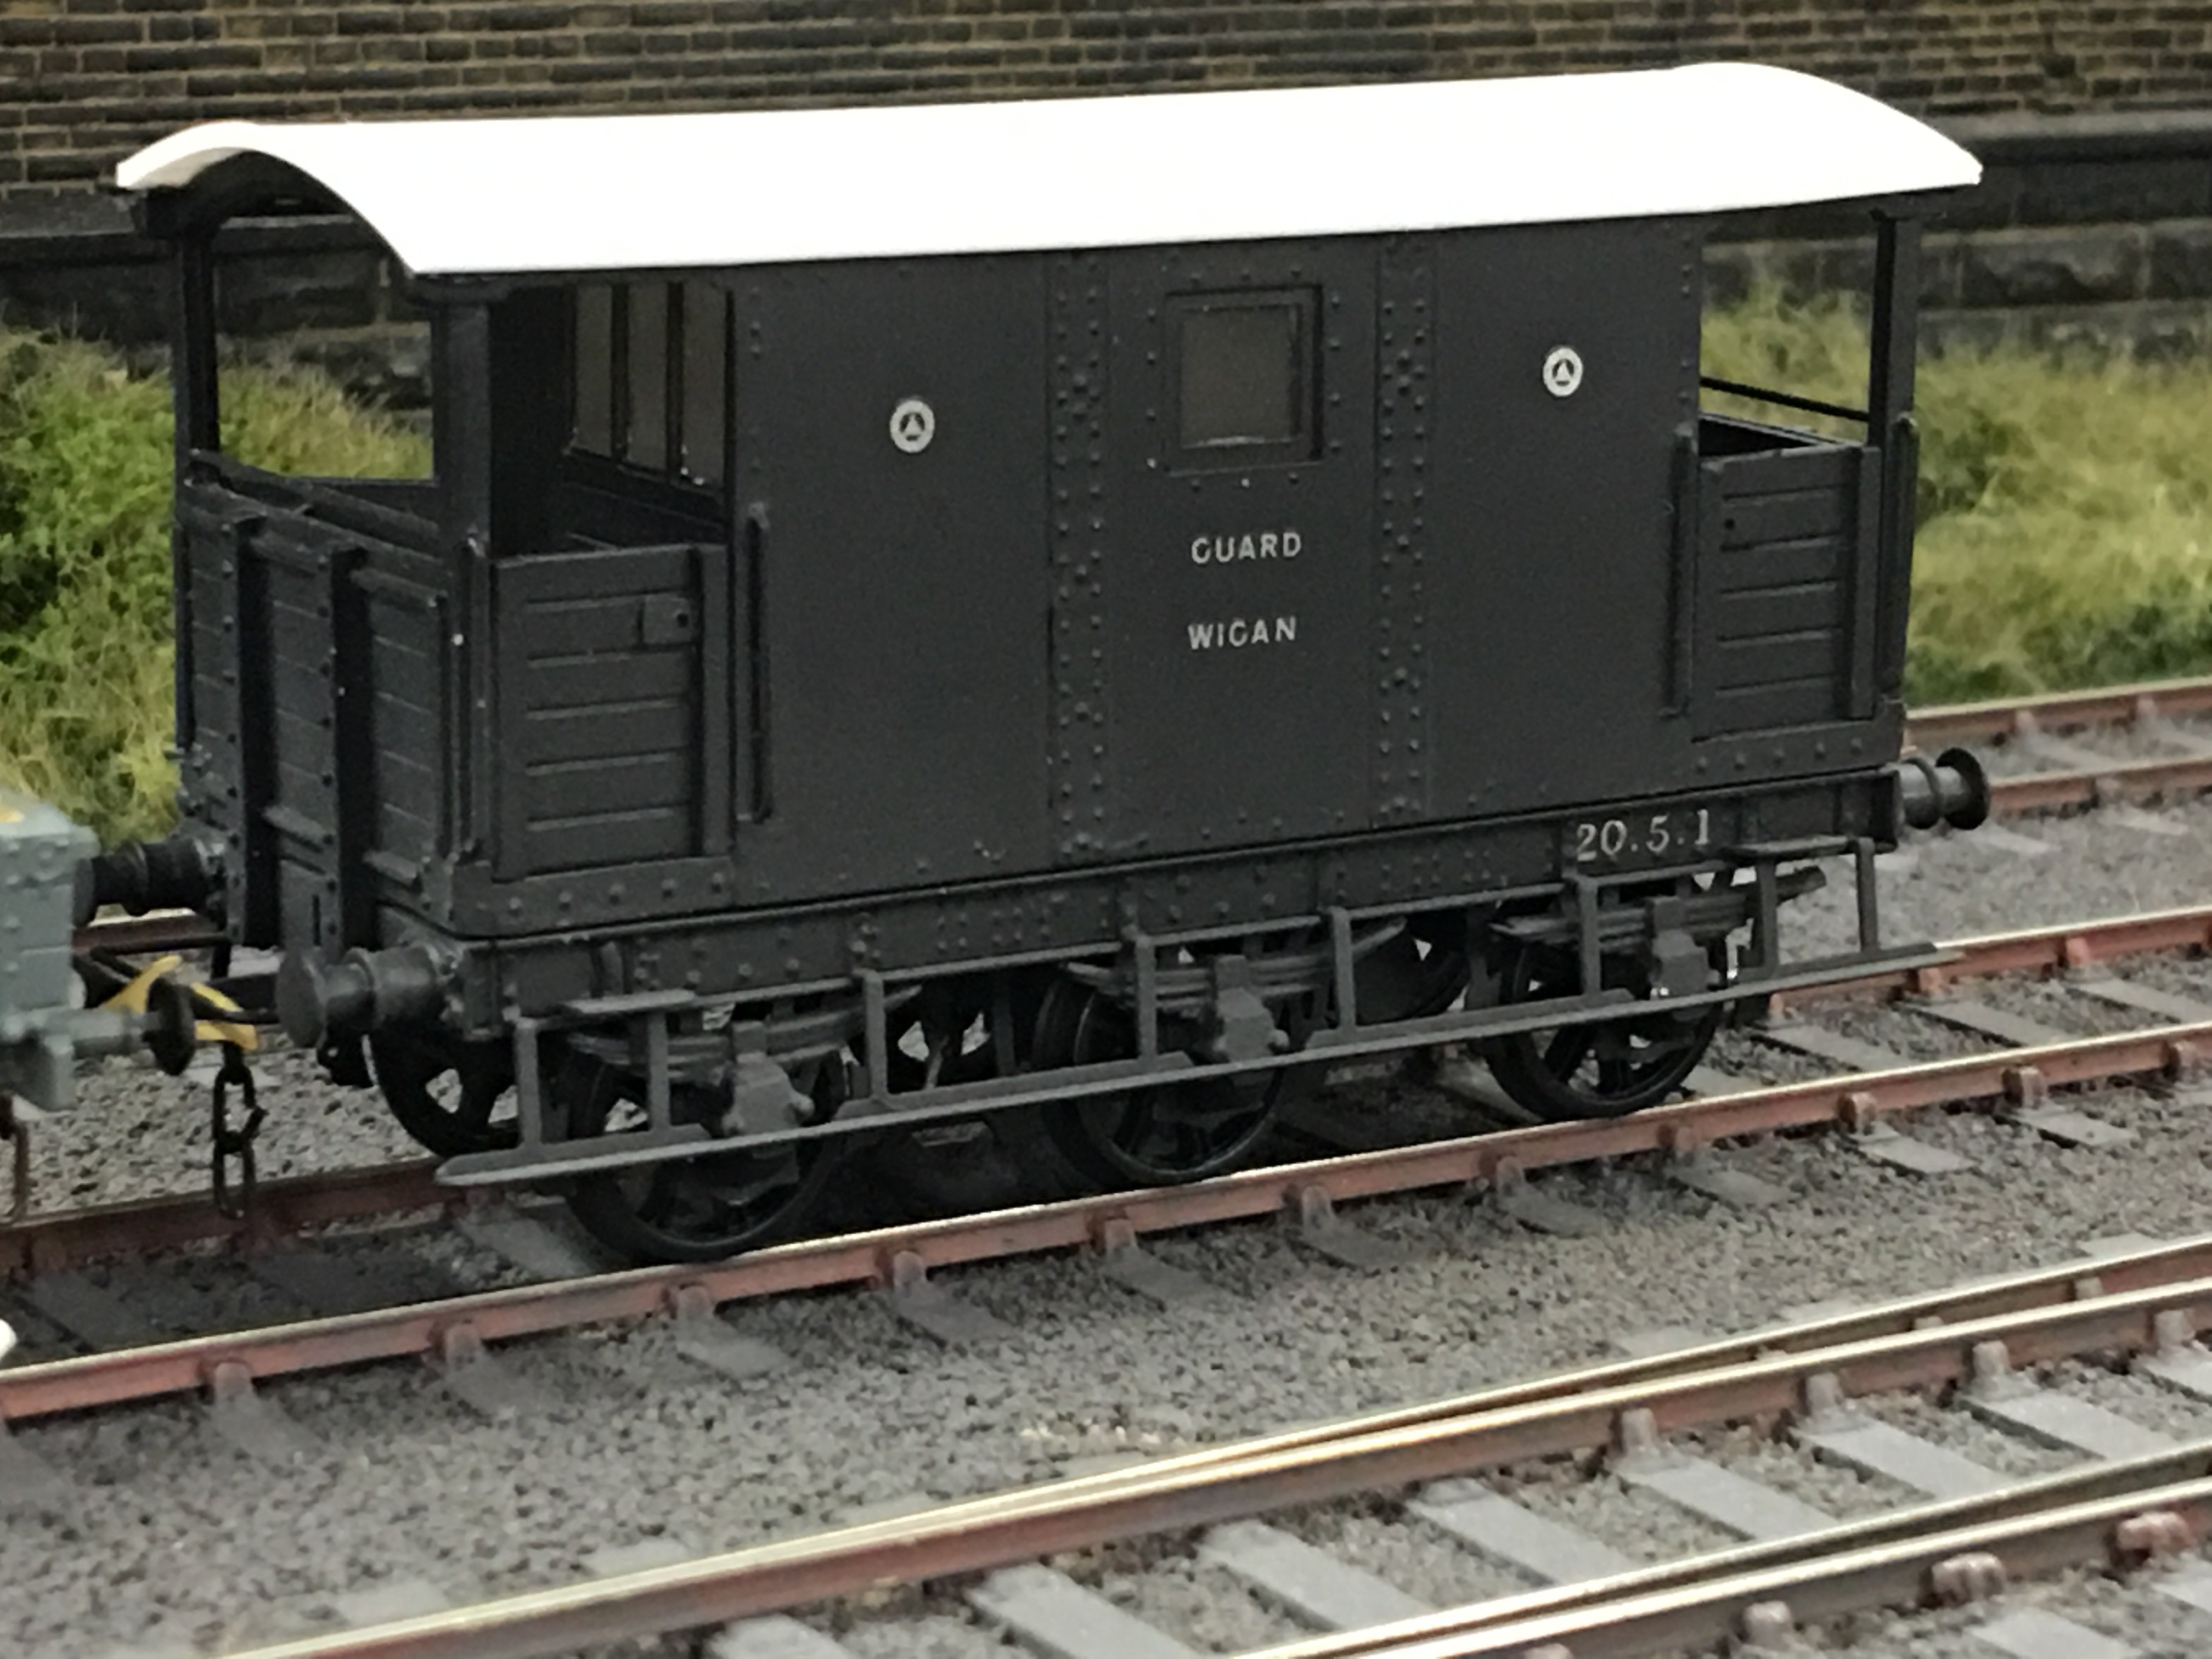
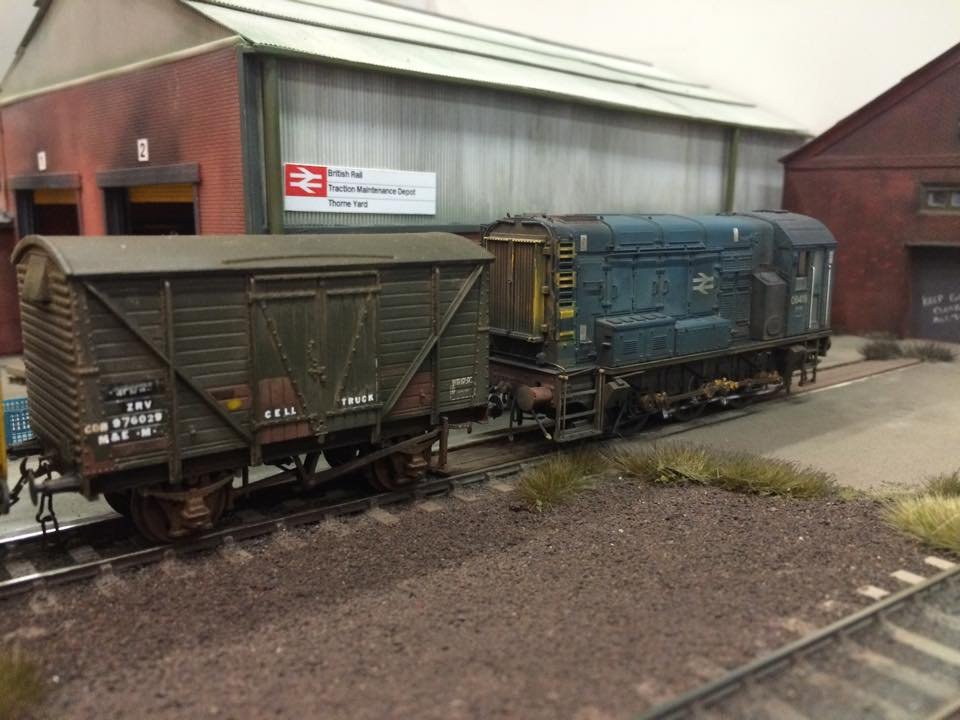
After a coat of L&YR blackberry black, some transfers and some wheels it made it on to the layout for a show or two.
The roof needs replacing with some brass sheet as the plasticard that it comes with is too thick and I will also add the missing rainstrips and chimney to prevent it being knocked off.
-
7
-
 1
1
-
-
1 hour ago, jhb171achill said:
Can it be Friday more often, please?
Superb photos, superb angles, very well composed, and amazing scenery. That's the sort of layout I like, where you can lose yourself in the entire scenery and background...... excellent stuff.Thanks,
We can't take credit for all the photos that are posted up as some are from the British Railway Modelling Magazine article that was in the May 2019 issue after we had a photo shoot at the 2019 Doncaster BRM show with Andy York.
We also do a few phtos for those Accurascale guys as they keep sending us stuff to
playtest on the layout 6 minutes ago, Mike 84C said:
My truck going over the railway bridge loaded with bags of fertilizer! Did that many many times. After my all to brief sojurn with BR
I have to admit you may have been going a different way since that photo as I don't think we have had the lorry on the layout since. We have that much 80s stuff to go on the various 80s layouts, we have plus a couple of future ones that are in the pipeline
-
1
-
 1
1
-
-
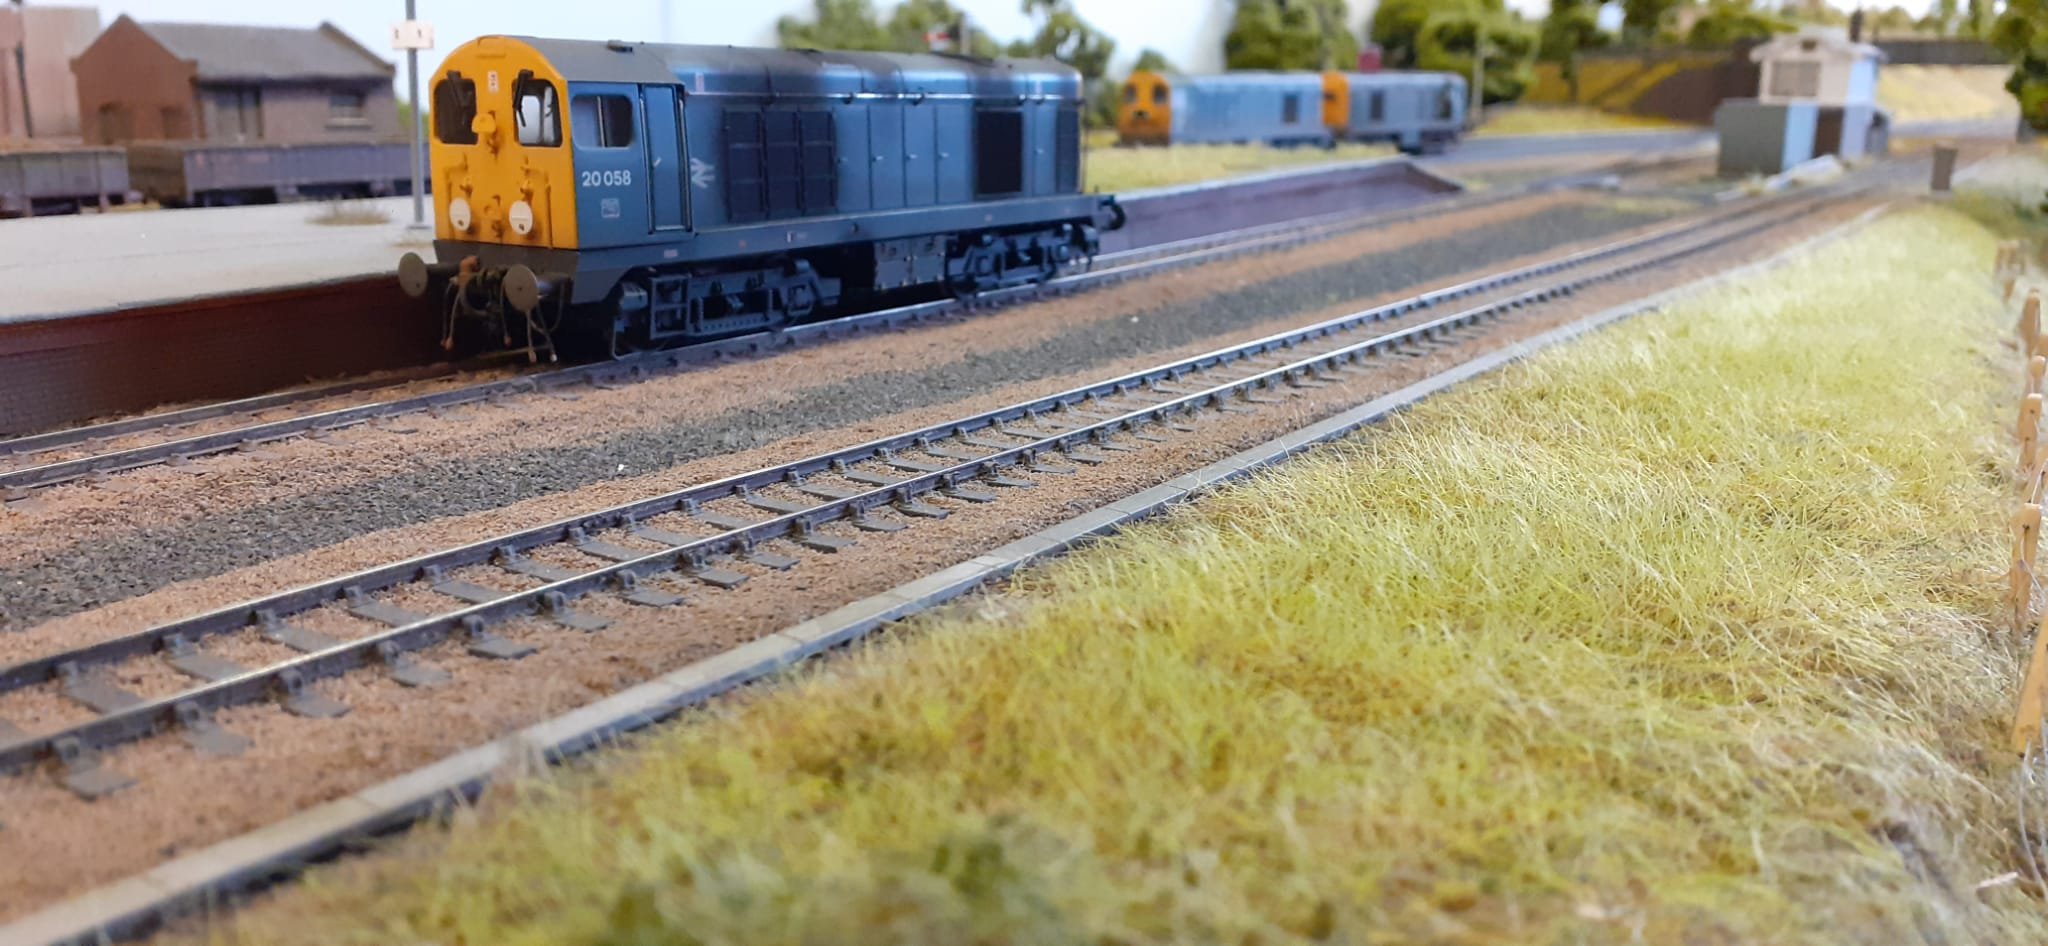
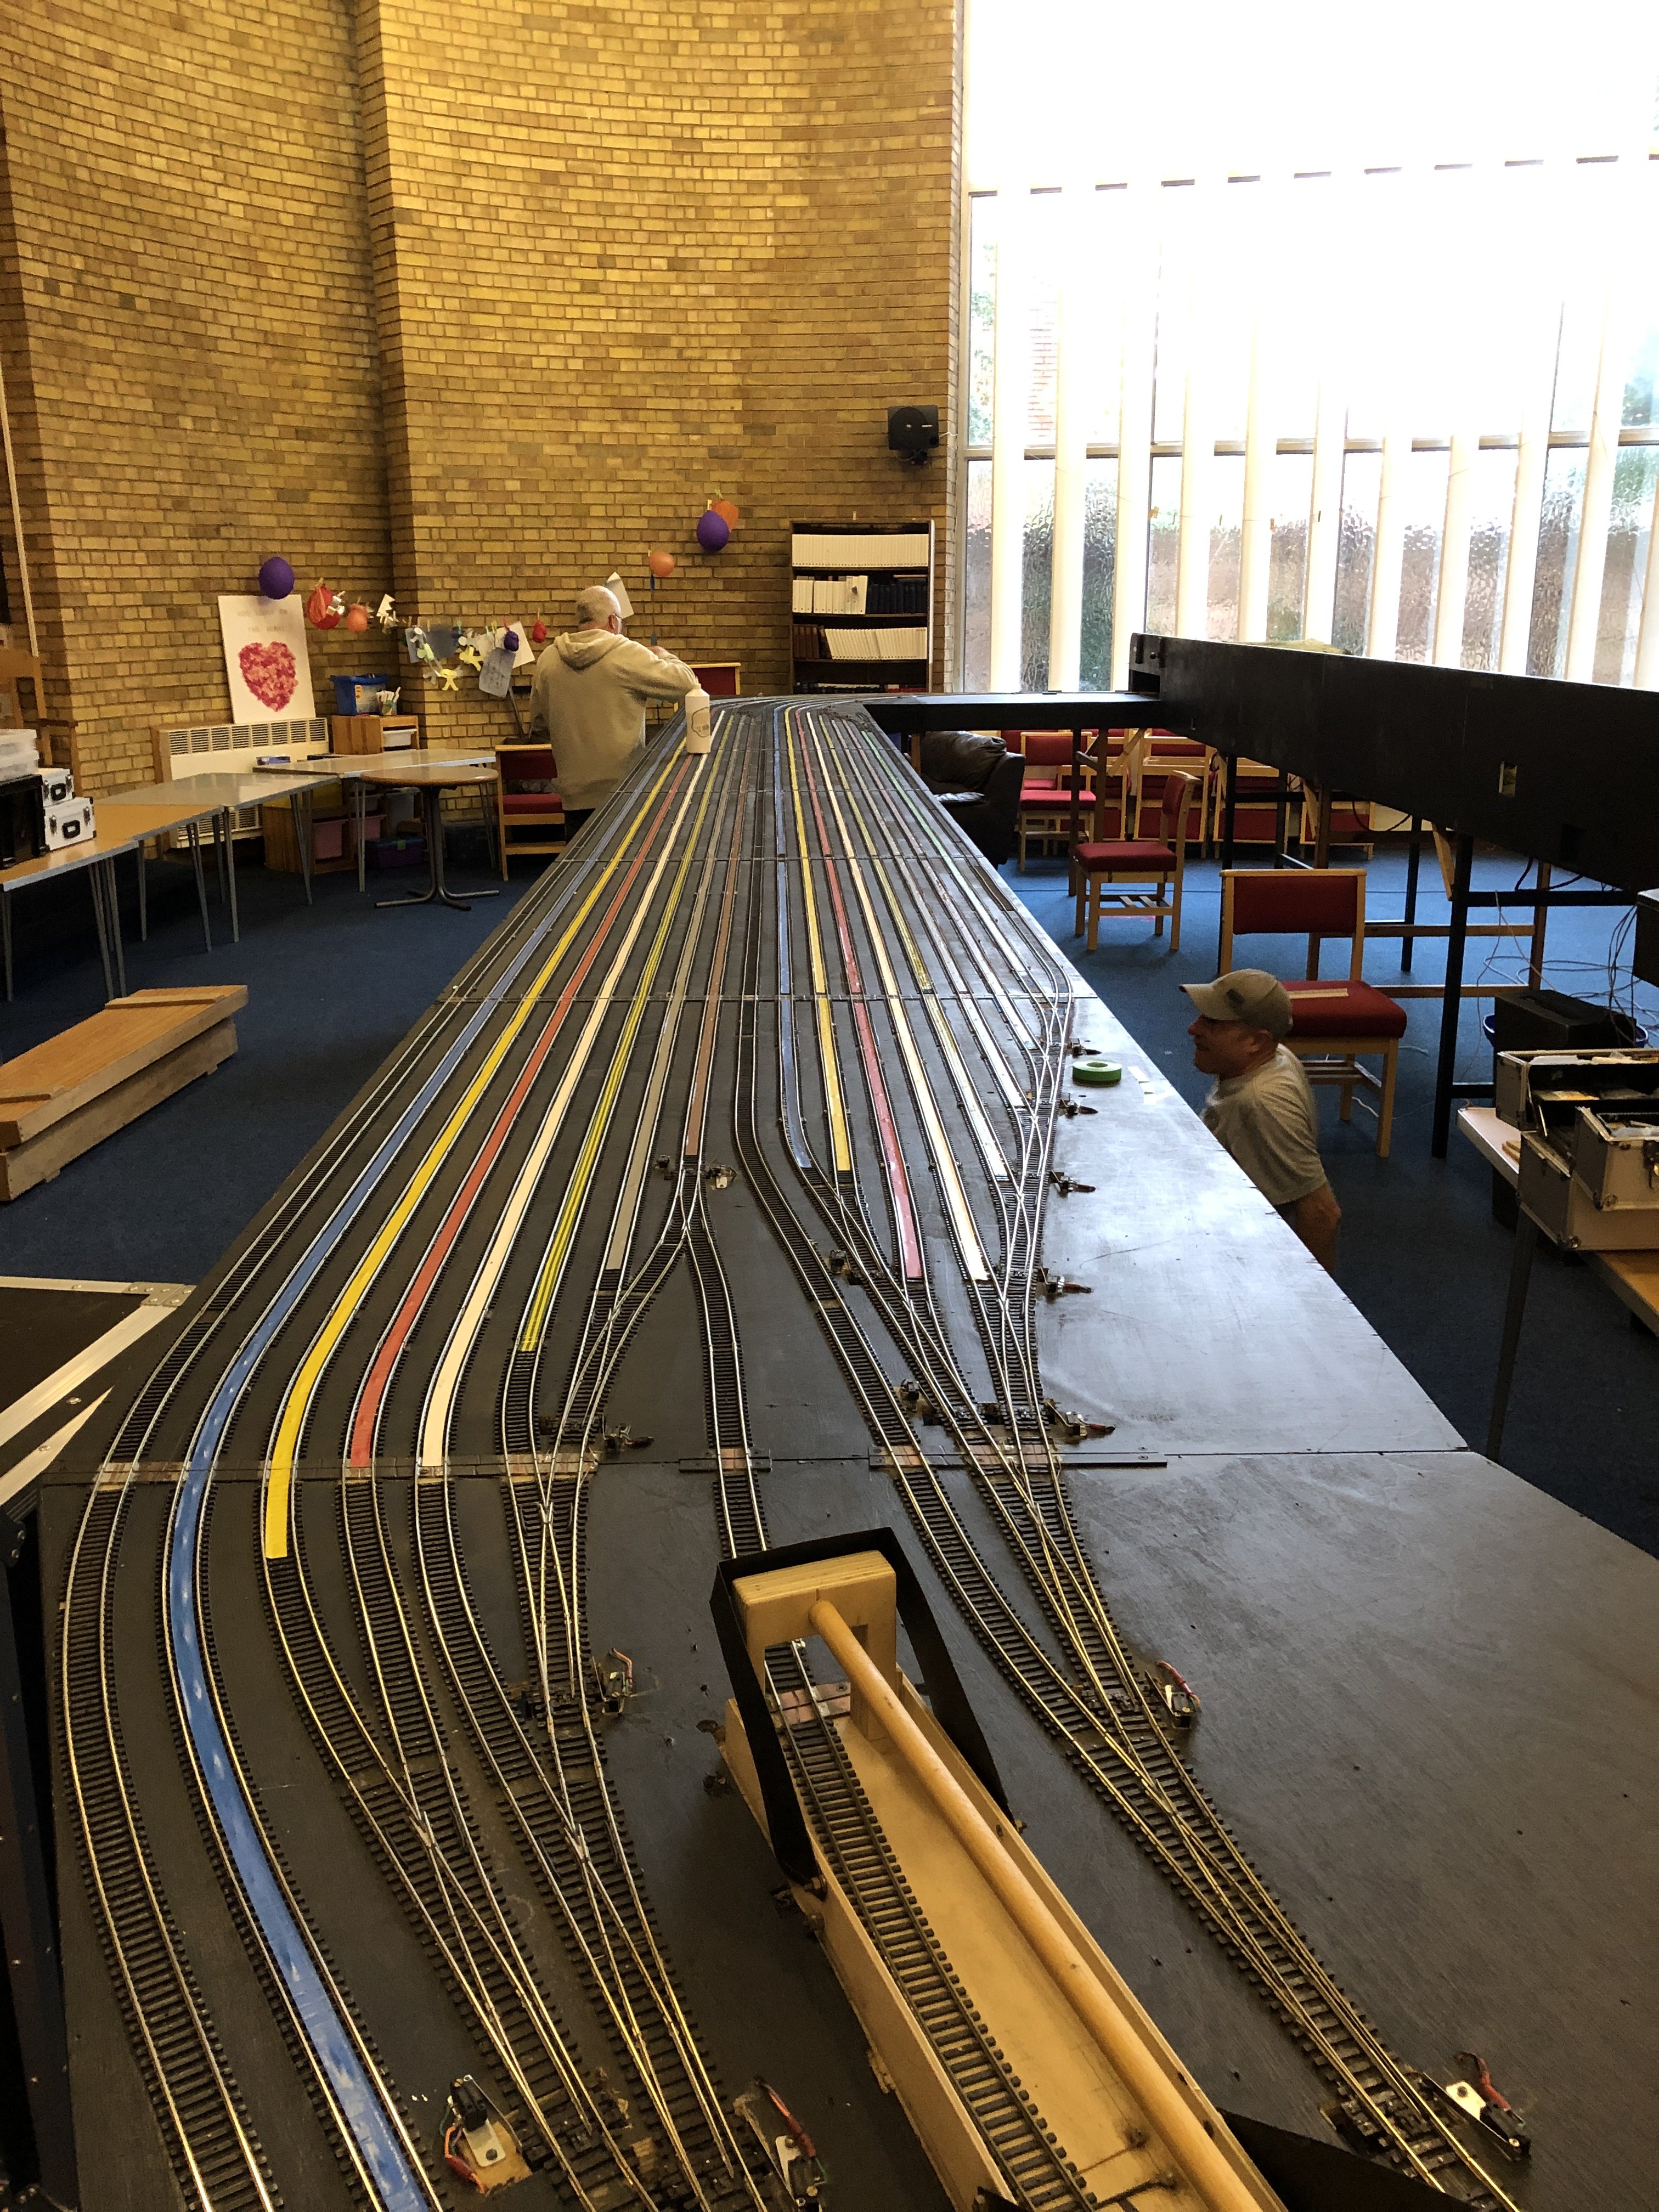
When we are at shows we have as much intrest in the fiddle yard as we do in the front of the layout,
Seen here during one of our working weekends having the colour tape added to make it easier for guest operators to see which road they are driving in to.
-
4
-
1
-
-
On 26/7/2021 at 10:10 PM, Midland Man said:
Looks great Track looks amazing
Thanks
-
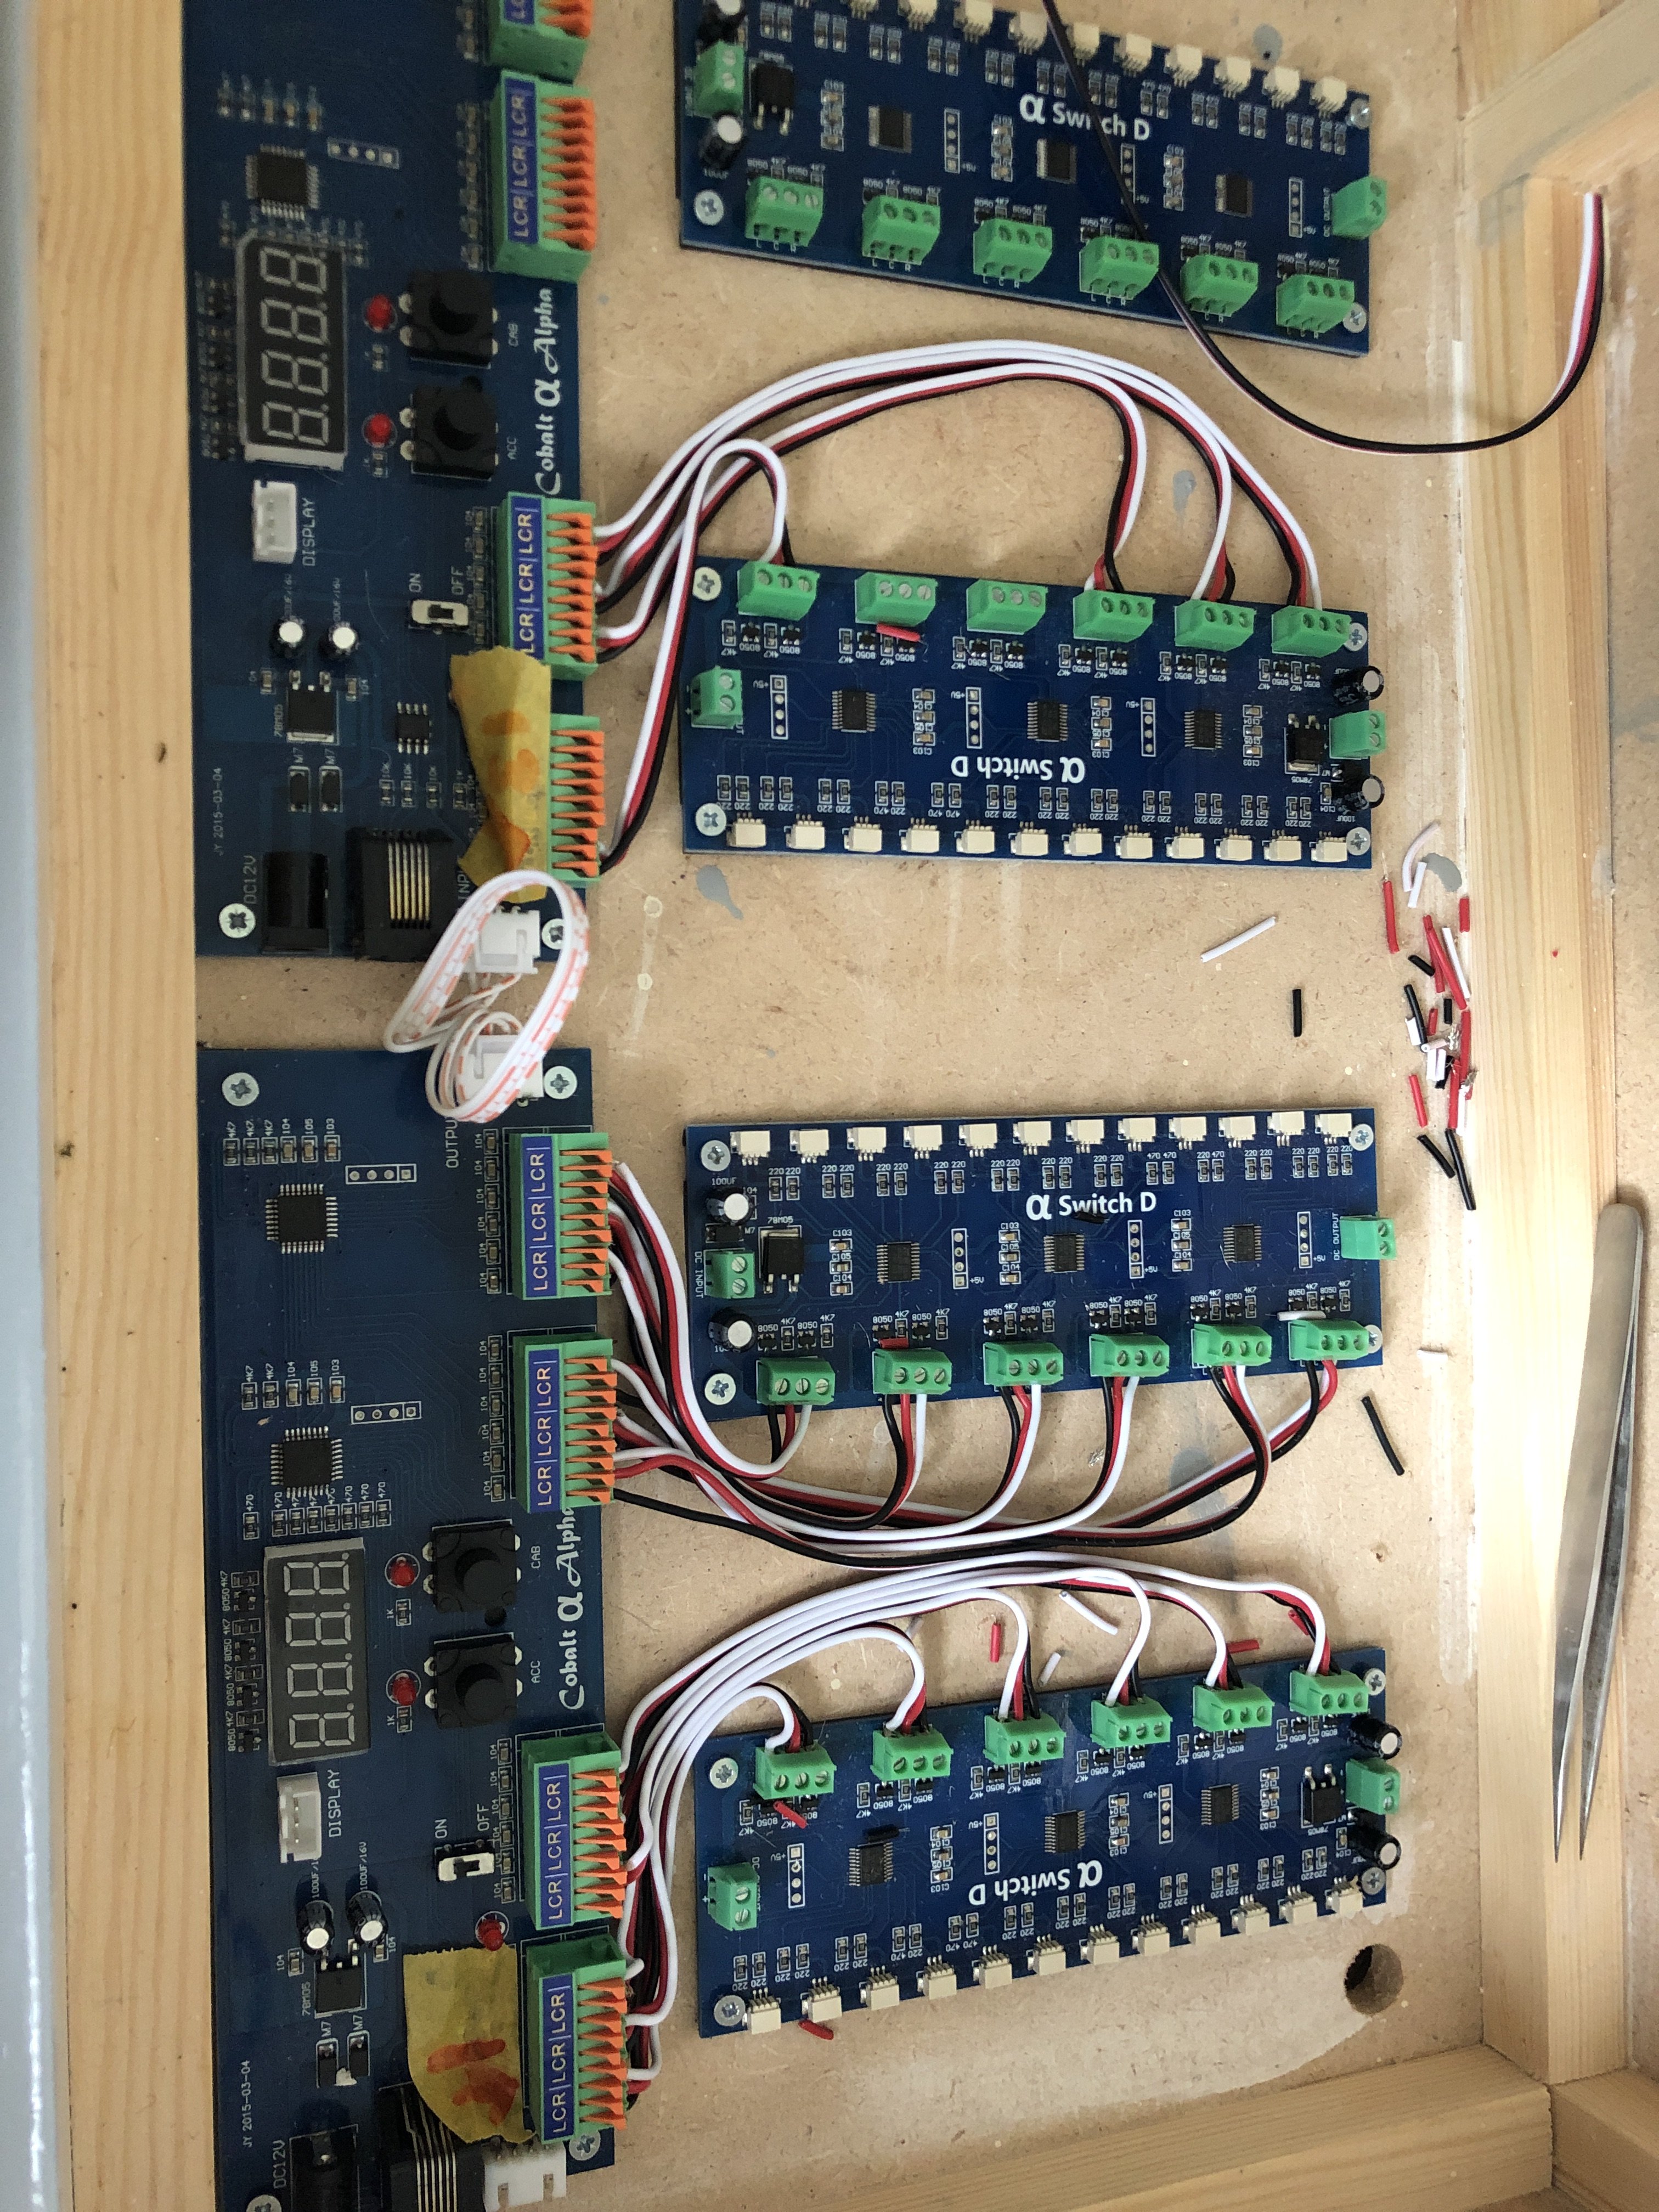
A bit of panel work on the bench, well the office table as the panel won't fit on the bench with all the bits on there at the moment.
-
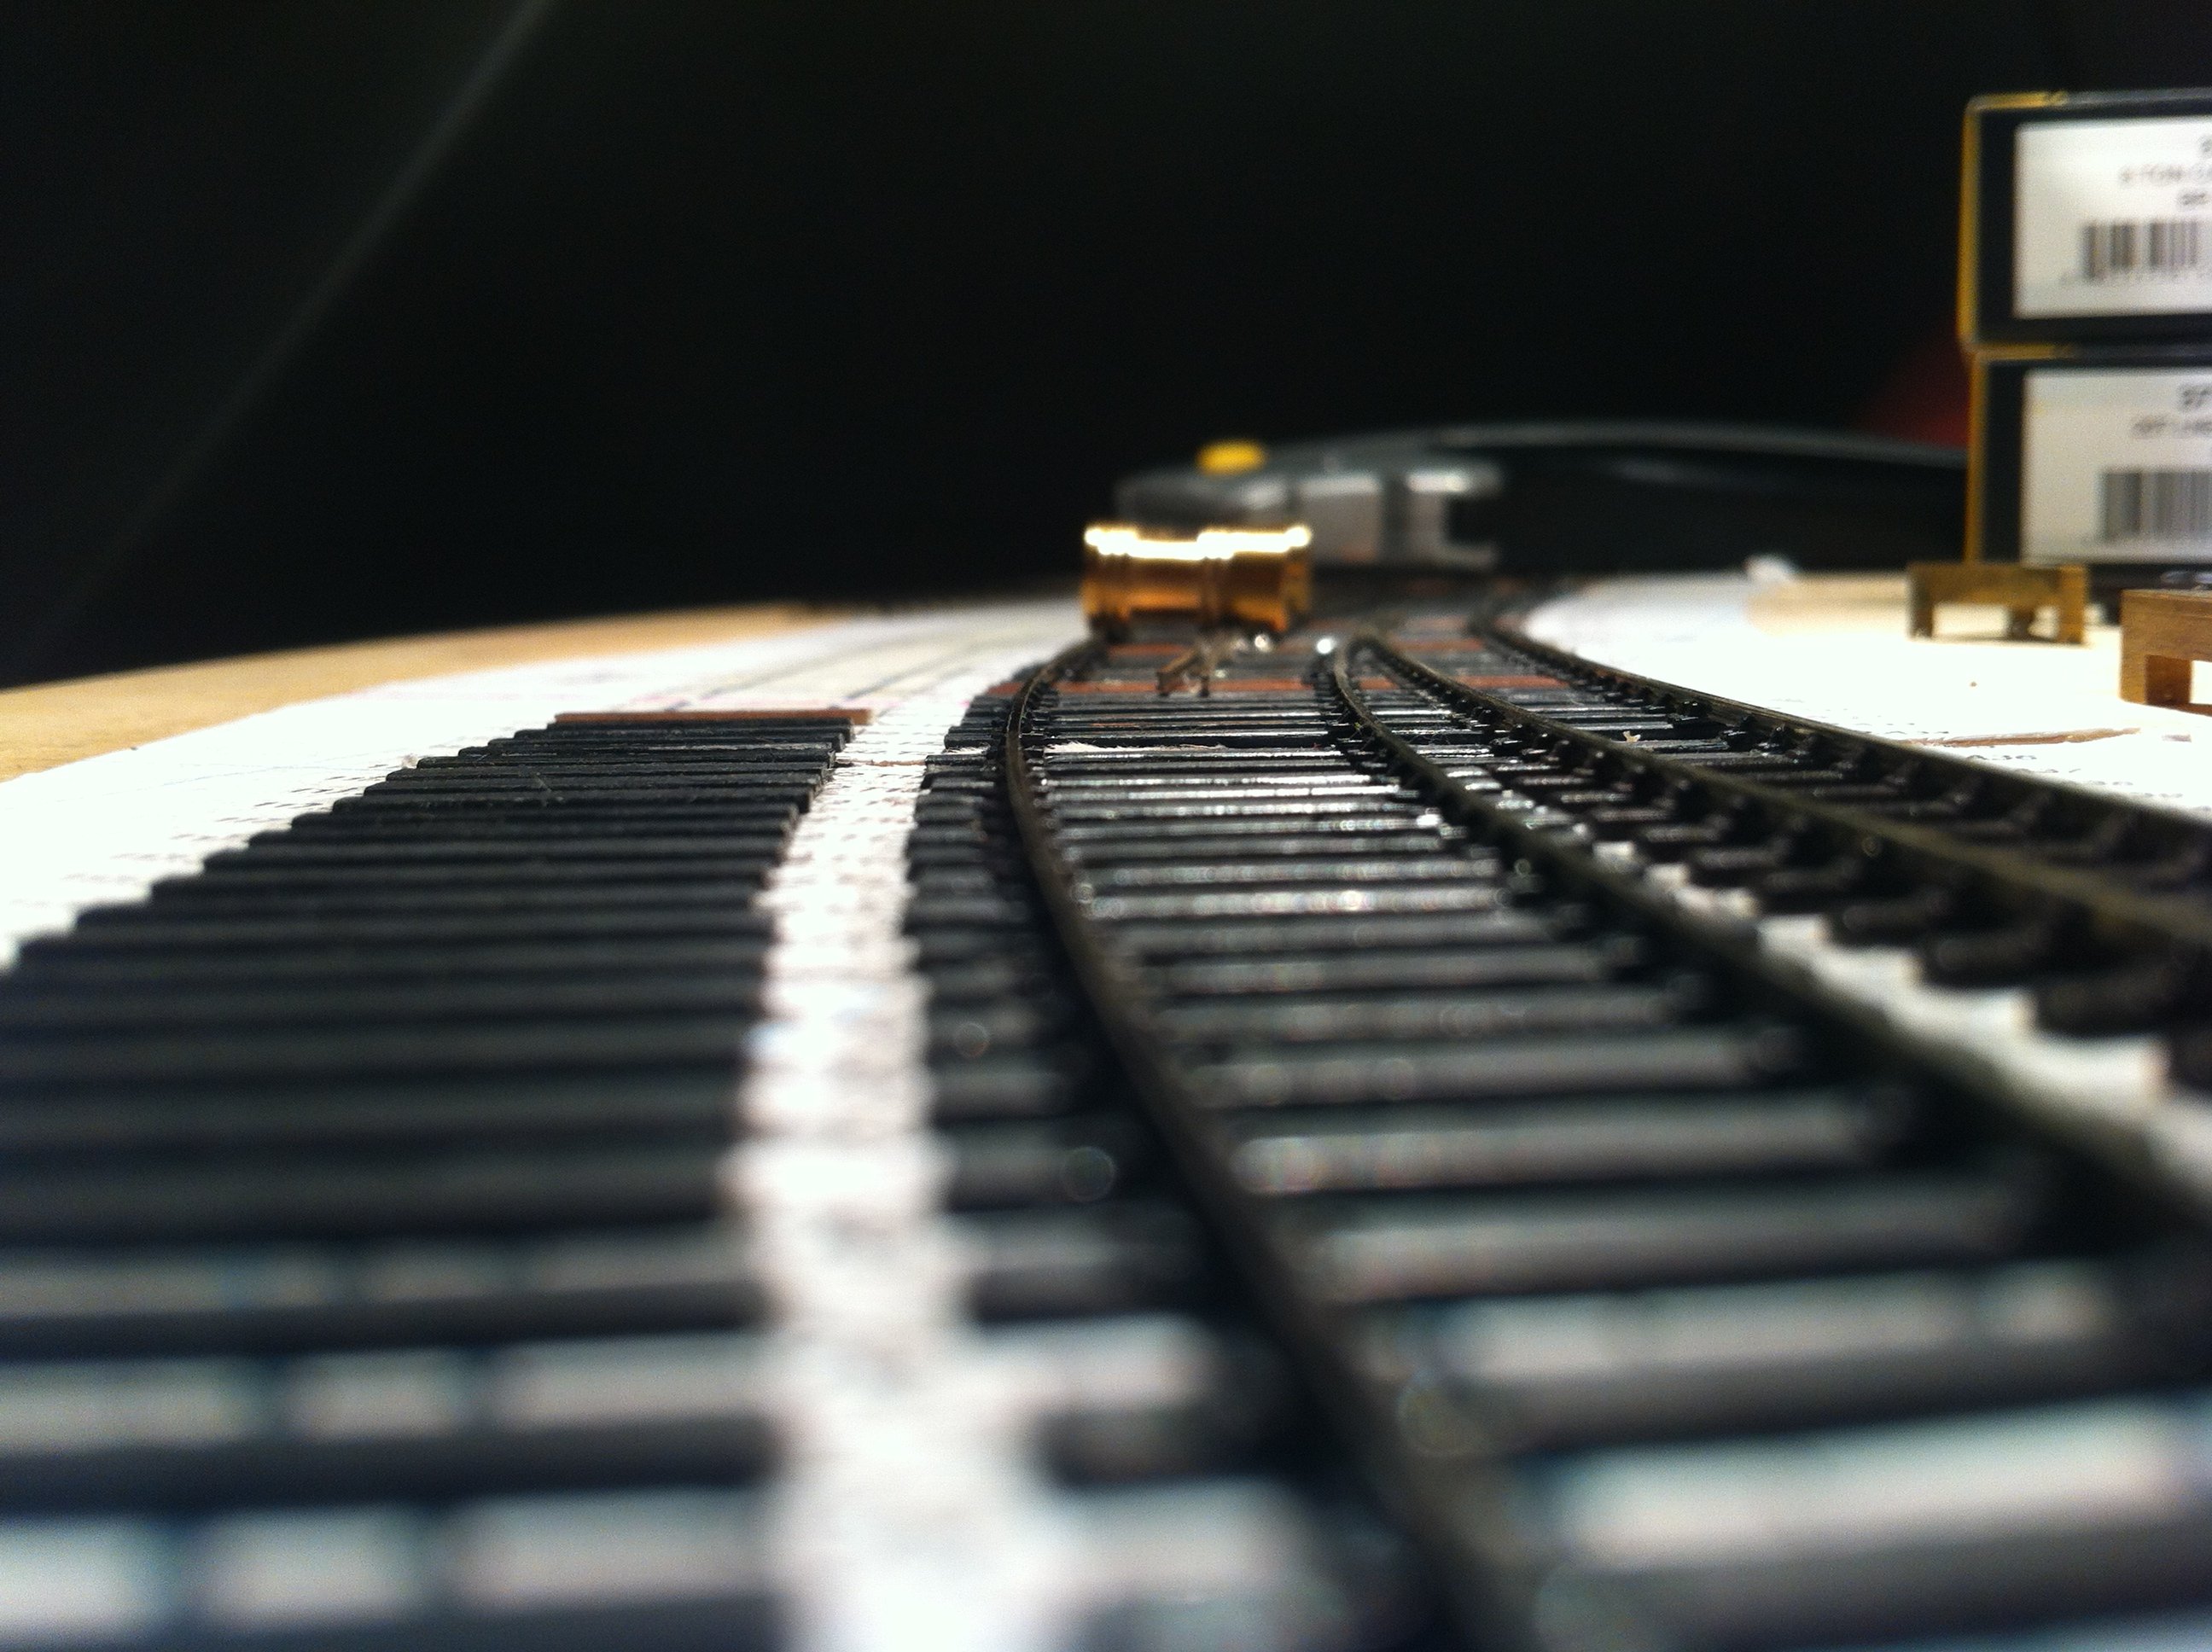
A view down at track level which won't be possible once the scenics are done.
-
3
-
1
-
-
-
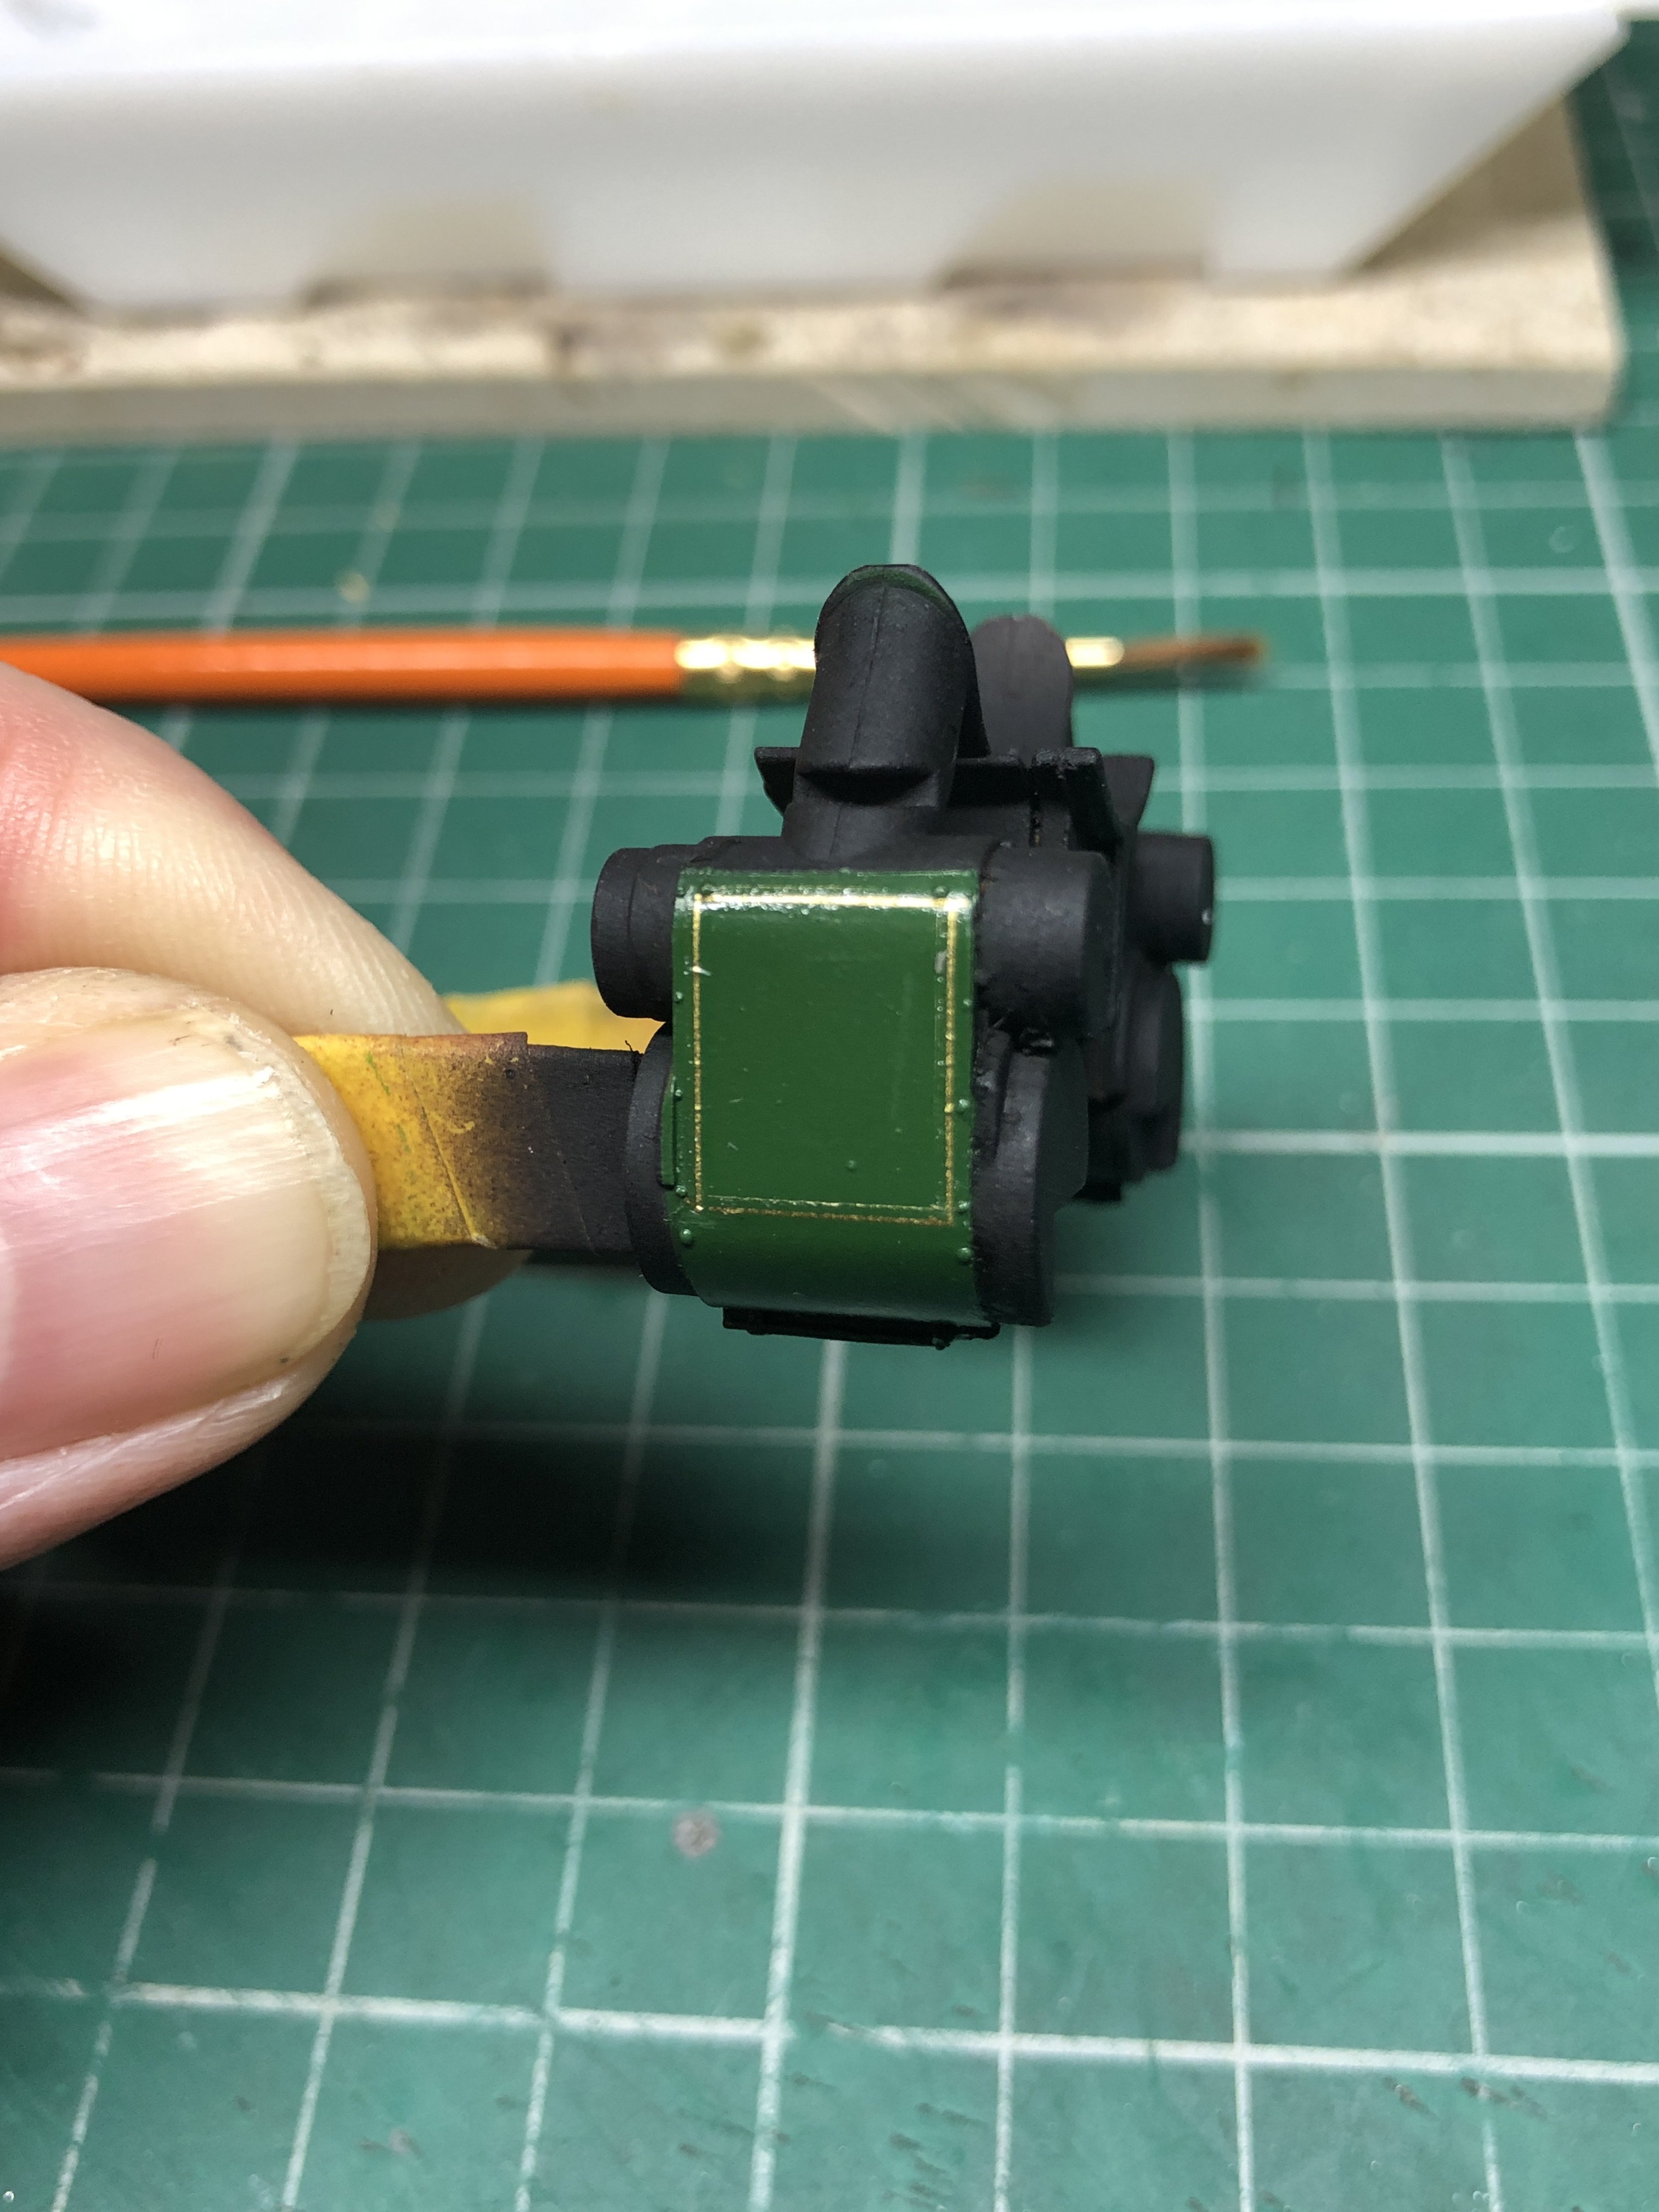
Hi all,
A mixture of things on the bench at the moment with lots of re-spray and lining work happening and some some ditch light fitting
-
5
-
-
After a few more hours I ended up with this.....
Still door handles and handrails to be added and then on to painting.
-
1
-
1
-
-
HI,
I use various sizes of pin vice that hold bits from 0.3mm up to 3mm.
Drill bits I use are from Expo tools and they last me around 8-12 months with the cutting edge becoming blunt after that but then I use then a lot and once blunt I still keep them for drilling in to softer materials and for applying glue etc. I also have a set of PCB drills to do anything in plastic as that seam to work better than anything else.
One of the issue is that unless you are using a pillar drill as you drill by hand the dill bit flexes due to the movment of your hand. When using the samller dill bits I only have a few mm of the drill bit sticking out of the bottom of the chuck it try and give it a bit of strength whilst drilling. Also dont press down as you drill let the drill cut at its own pace as this also helps to prevent breakages.
Lubrication wise, I don't on anything other than white metal and for white metal I use a bit of spit as it works better tha anything else.
Thanks
Simon
-
4
-


No Place - 2mmFS Layout
in British Outline Modelling
Posted
The track work is progressing along. A couple of bits need tidying up and then on to the electrical testing.