Nigel
-
Posts
23 -
Joined
-
Last visited
Content Type
Profiles
Forums
Events
Gallery
Blogs
Everything posted by Nigel
-

I'd like to see this fit around the M50
Nigel replied to Flying Scotsman 4472's topic in Trucks, Vans and cars
I hope that's not going out on the ferry... -
I'd like to see this fit around the M50
Nigel replied to Flying Scotsman 4472's topic in Trucks, Vans and cars
What I want to know is, what kind of a clutch is in those giant trucks? How do you get that lot moving from standing? -
...Ah sure gwan in. Ah no. Ah gwan, gwan, gwan. Ah no Mrs. Doyle. GWANNN!!!
-
And in full CIE uniform, too...
-
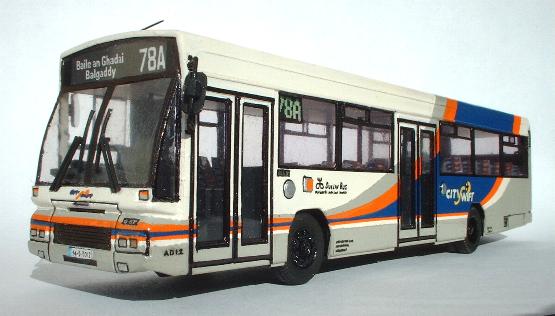
Lovely subtle weathering on the blue and cream bus. Subtle is the key. Another thing caught my eye, the conductor standing with his back to the windscreen on the green bus. Very typical of these buses in service. Well done!
-
Just another quick update. I have left the Shapeways models on the website for now. However, I checked in today, and I see that since Oct 7th, there has been another price increase. A massive increase, which appears to be in the region of 20-25%! Given the unwieldy and unfriendly format of the Shapeways website, I find it difficult to find out exactly what the increase was, or how to fix the price I want to sell them at. I have absorbed a little of the increase, but now it looks like 33 seat schoolbuses will be in the region of €50, and 45 seat schoolbuses and U buses over €60. I thought Shapeways policy was to keep 3D printing cheap and affordable, and that's why their production methods were so rigid, but these increases defy that. I need to get back to my other manufacturer, I-materialise, in the US, and see where their prices are at, although I imagine their prices will keep pace with the market too. I will post back here again. Finally, as an aside, I did look at that 3D printing shop in Rathmines, but they took one of my expensive prototypes and either lost it or dumped it. Very strange people in that shop. I'd keep well away from them.
-
Hi, I don't check in here very often. SS class schoolbuses are still available from Shapeways, but the whole project has been stalled this year, as I am away constantly, and just far too busy. The grey prime material comes from a US-based company called I-materialise, and is far preferable to the rough and tough white material from Shapeways. At twice the price, it is too expensive for most modellers, which is why I left the Shapeways models as they are. I will eventually make the grey prime material available too, for those that want to stretch to the far superior material. However, the SS class schoolbuses need an update before I-materialise will accept the drawings, which is why I cannot make them available right now. I am considering a bodyshell only option, which would make them more affordable, or a grey prime bodyshell with a cheaper Shapeways chassis and floor. But, as I say, the drawings need some updates first. The 3D drawings are very complex indeed. The UTA Royal Tiger has not been shelved, it is still on my Mac, and is well under way, but I simply never get to sit down to finish it. If anyone is particularly interested in progress, see me at the three day model railway show in Raheny. Finally, if any benevolent person wants to bequeath me a large sum of money, I can retire, and concentrate on finishing all these projects... In the meantime, progress will be maintained very slowly.
-
The location of that lorry photograph is on the viaduct outside Broadstone, formerly the Fosters Aqueduct in the late 1800s, when it carried a branch of the Royal Canal across the main road to a harbour where Phibsboro bus garage is now. The original stone aqueduct dating from about 1796... The aqueduct was later replaced by an iron bridge and road...
-
Quite a few people have been enquiring about the erstwhile Shapeways model buses, the CIE SS class schoolbus and the U class Royal Tiger. I have returned the 1:76 scale models to the Shapeways website - look for Irish Model Buses. Be aware that there is an additional delivery charge, Shapeways don't mention this until you order and go to your checkout page, and *poop* there it is! It was 8 or 9 euro when I last checked. I'd rather they put that up front with the pricing, but there you are. I have one more bus under development at the moment, slowly, and I hope to get back and develop the whole project more, when I can. Pressure of other commitments has it all on the back burner at the moment. As some modellers know, this 3D printed nylon material is very hard and unforgiving. It is porous and slightly rough textured, so will definitely need a sealing coat of something like Klear polish or filling primer before painting, and probably three coats of paint in order to get a smooth finish. With a bit of work, they are strong and accurate models. Vac formed windscreens are available for the U bus. PM for details.
-
Here's one for you... Nice models btw...

-
The last picture compares with the Shapeways model, though you really need to see the models close up and feel the difference. The main difference is that the I-materialise model can be sanded with ease, while the Shapeways nylon material is a very hard plastic which cannot be sanded easily.
-
I haven't been on the board with my own 3D projects for a while, as driving real buses on tour all summer takes priority. I am getting an odd slow bit of progress when I can. I must say though that I found the gray prime material offered by I-materialise infinitely superior to the Shapeways product, and that is definitely my own preference going forward at the moment. However, it is dearer, so may not be too popular with other modellers working to a tight budget. I will bring the I-materialise model along to the October model show if anyone wants to see it, and compare it to the Shapeways model. If you are interested in trying the 1:76 Bedford schoolbus on your Ultimaker, I would be delighted for you to 'borrow' the bodyshell drawing, as an experiment. I reconstructed the bodyshell to 1mm minimum thicknesses for I-materialise, although the floor unit still has thicknesses of 0.7mm, and is unsuitable for I-materialise until I amend it. I don't need a print, as I have everything I need from I-materialise. But if you think it will further your development of your own machine, I will let you use it for yourself, and would be interested to know how you got on. PM me if you want to follow that up, no problem if you feel it is unsuitable.
-
I have just received a 3D printed schoolbus bodyshell from I-materialise. This is in their grey prime material, which is not available from Shapeways, and far superior to anything Shapeways offer. Four photos here show the fine detail of the print. Very fine printing lines are visible, but these are smooth enough to be negligible, and the big difference between the grey prime material and the old WSF, is that grey prime can be cut and sanded with ease. It is a resin based material, similar to resin kits, whereas the WSF material from Shapeways was a hard nylon based plastic, that could not be sanded or smoothed. The grey prime is not as porous as WSF, and so should be far easier to paint. I will report when I have tried mine. And now the bad news. You get what you pay for. This print worked out about €25 or €30 dearer than the equivalent Shapeways print in WSF. That means that at best, these models would retail 60%-75% dearer, or more, than Shapeways. The short wheelbase SS schoolbus would work out at over €80. That is very damned expensive. But the quality is much better. Typically, the more common bus types will continue to be made available as resin kits, and this 3D printed medium will be the reserve of more exclusive, one-off types, that would not merit a minimum run of 50 resin castings. It may be possible to reduce the cost somewhat, by reducing the shipping costs on bulk orders, and possibly by offering a 'bodyshell only' offer, with floors, wheels and seats at the modeller's own discretion. At this point I am open to any and all comments on this. What would modellers be looking for, based on the apparent pricing costs of 3D printing, and the quality issues with the cheaper materials? I may continue to make the models available in WSF through Shapeways, but I cannot give any guarantees about what you will get from them. Individual quality of prints varies widely, and Shapeways appear quite content for quality to be a lottery, depending on who prints your model. This grey prime material from I-materialise appears to be far better quality, but you pay for it, unfortunately.
-
The KD is ideal. The smaller HO wheels will suit the KD, and the narrower track of a HO chassis wont be as noticeable. All you need now is the bouncy suspension...
-
I haven't done much with Faller in a good few years, but it appears that developments have moved on. A lot. Have a look at the following link. I might be inspired to take it up again... http://www.midlandred.org.uk/dc-car_news.shtml
-
Sorry to say I didn't get around to checking out that undulating layout yesterday. And then today, I did... That would be an interesting experiment with Faller. Where can you buy one of those baseboards? I'd like to try laying the wire down on that. Has anyone here tried one of these? Are they available in Ireland?
-
A few more thoughts. The success or otherwise of a Faller motorised model depends largely on the weight of the model. All the Faller models themselves, of course, are plastic, and very lightweight. Resin model kits lend themselves very well to motorising, because of their similarly light weight, and the possibility to include the Faller mechanism during the assembly. It will most likely, of course, be necessary to cut away a part of the floor and seating area, in order to accommodate the mechanical parts, in particular the bulk of an AA or AAA battery holder. The battery holders are available through most model railway hardware and electrical suppliers. How or how much to cut away depends on the Faller chassis chosen for the job. If as much of the existing floor as possible can be retained, it will be better for the strength of the model. I cannot make much in the way of recommendation; some experience of kit building or scratch building would be advisable before undertaking a Faller motorising exercise. Scratchbuilt models are probably the most recommended for motorisation, as the requirements of the Faller mechanism can be designed into the construction of the model from the very beginning. My Plaxton Verde bodied DAF single deck bus was scratchbuilt not long after the real buses were newly delivered in 1993. My God, is it really that long ago? The model is basically a simple bodyshell, front, back, sides and roof, assembled as a single unit. Into this fits a specially hand built chassis cassette, with the motor assembly, reed switch and wiring. It was designed as a kind of cassette box rather than a simple flat plate, for strength and stability. It is all built in plasticard, using plastic solvent adhesive, for strength and light weight. There is no interior detail for space reasons, but it helps immensely if everything inside is painted matt black, so that nothing untowardly intrusive inside spoils the realism of the model. Diecast models generally do not lend themselves to motorisation quite so well. This is due to the excess relative weight of a metal model, and possibly also the difficulty of cutting and working with hard, diecast metal. However, there have been some successes. The other video on this thread shows an EFE diecast AEC single decker bus*, which has been motorised to excellent effect. The Model Railway Society of Ireland have managed to motorise a couple of EFE double deckers for their massive O'Connell Street layout. The thing to watch with these older style halfcab buses is that the exposed nearside front wings can leave very little clearance below for a steering axle. It is a very fine balancing act to get the steering axle to operate freely and reliably, while retaining the proper appearance of the front of the bus. (* EDIT - There once was a Concept Models plastic kit of the same AEC single deck bus. Perhaps this motorised model is the Concept model, as it appears to run very lightly and smoothly.) I have a doubt that Corgi diecast model coaches would lend themselves to motorisation so well. The interior space is there, of course, but I find these models quite heavy indeed, and I imagine their motorisation would be troublesome and unreliable. The Faller steering axle has a tendency to 'sag' with prolonged operation, giving a down-at-heel appearance to the model, and front wheels that bow outwards. If you remember the front axles of vehicles of old, the front wheels were angled slightly 'in' at the bottom. Realistically, the Faller steering axle would want to recreate this, to counter the effect of sagging wheels. A heavy diecast model would only exacerbate this. It would actually be possible now to motorise N gauge models, as N gauge models are available in the Faller range. How they fare in terms of scale speed or reliability of operation I do not know, as I have never tried them. One obvious restriction, however, would be battery space, and I imagine even an AAA battery would be a tight fit. On a different point, let me make an advanced observation about laying the guiding wire. This should not be an afterthought, but as important as the motorised model itself, for realism. After reducing the speed of the models by reducing the voltage to the motor, to make them appear more realistic, it is important to make them steer realistically too. If someone were to put a camera right down at road level on your layout, and film the moving model bus, will it look realistic? Motorised model buses, and this applies to model trains on tracks too, do not look realistic if they travel along at a set speed in a straight line, and suddenly 'twitch' into a curve. Imagine a bus driver on a road, he does not spin the steering wheel hard as he approaches a bend, as the ride would be uncomfortable to the passengers. Rather he turns the wheel smoothly and steadily into the curve, relaxing the wheel smoothly again as the road straightens out. How do we recreate that in a model? Well, there comes a point where a straight run of guiding wire meets a curve (or a point junction) on a road layout. You hopefully have ascertained the minimum turning radius required for your model, so that it does not overshoot the wire and head off into unguided territory. Where that turning radius meets the straight, there should be an easing of the curve, say over just four or five inches, where the straight gradually curves, or vice versa. A set of draughtsman's French curves would do the job, but it is surely something that can be planned by eye. It doesn't have to be razor accurate, but it is worth seeing your model road from your model bus driver's eye, and laying the guiding wire as realistically as possible. Pushing your motorised model around in chassis only form may assist in getting a close idea of exactly where you want your front wheels to be at any point of the path. Imagine the model bus driver turning his steering wheel, and how the road wheels react. Place the front wheels, not the guiding wire. Wherever the front wheels are, pinpoint the magnet position. There is your mark for laying the guiding wire. The rear wheels will follow in their own way, of course, just like the real thing.
-
Just a quick few points. There are any number of ways of cannibalising a standard Faller model to motorise your own model. You may be lucky to find a Faller model with the same wheelbase as your own intended model, which makes things slightly easier. Otherwise, the chassis can be cut to fit. Faller models are to HO gauge, which means the wheels are generally smaller, and the wheel track narrower. The Faller wheels are important to retain, as the rubber tyres are designed to give traction to the model, and any other wheels are most unlikely to work properly. It is possible to widen the track of the wheels to suit a wider OO gauge model. Rear wheels pose little problem. For front wheels, however, while they can be widened out with thin spacers behind the wheels, you must bear in mind that this will greatly increase the forward and back swing of the steering mechanism, and consequently, the wheels will need a much bigger well to sit into. It is vitally important that the front wheels have wholly adequate clearance to spin freely within the full extent of their left to right steer. Remember too, that the central pivot that allows up and down play, to keep all wheels in contact with the road surface, mean that the front wheels need additional clearance to steer and spin, in every axis. If the front tyres come into any contact with the wheelarch, or a hidden corner of the floor inside, or any other bodywork, this will serve to brake that wheel, and the model will be thrown off it's magnetic course, and will not follow a track properly. Most Faller failures are due to front wheels not having adequate steering clearance. Faller models run on 3V motors, powered by a pair of 1.5V rechargeable batteries. I find the scale speed of these off the shelf models particularly unrealistic. I prefer to discard the supplied batteries, and use a single 1.5V AA or AAA battery. The result is that the motor only runs on half power, and the slower speed is much closer to an apparent scale speed of 25mph or 30mph. Buses generally don't steer into tight curves at 40mph or over! The next potential for failure is the radius of the guiding wire hidden under the road surface. The models generally speaking, take a minimum radius of about six inches. However, as the wheelbase of the model increases, so too does the minimum radius required to steer without losing contact with the guiding wire. Jim Poots model of the CIE M class Leyland Leopard, for instance, represents a 40' bus. It is an ideal model for motorisation, but will require a wider turning radius due to the long wheelbase. When laying the guiding wire, it is important to take your model with the longest wheelbase, and check it manually at every inch of the turn, to ensure that the wire is laid to a suitable radius. It is generally too late after the road modelling is finished, to alter the guiding wire. When laying out a finished road, it is best to lay the guiding wire first, using your longest model to pinpoint the minimum safe operating radius required. Then, when the guiding wire has been fixed in place definitively, run the model, or better, push it gently by hand, inch by inch, and using a pencil, mark the front and rear overhang extremities on bends and curves, and also use a pencil to track the path of the inside rear wheel on curves. Use these pencil marks to ascertain the clear running space necessary for your bus, and then it will be possible to lay kerbs, traffic islands, buildings and other vehicles, coming very close to the moving model, but not interfering with it's running path. Avoid hills if at all possible. There is a reason for that. A fully charged light Faller model will climb a reasonable hill with ease. It would be interesting to see it cross a low hump backed bridge, for instance. However, after two hours or so of running, the battery will start to become weak. It may well have four hours or more of flat running left in it, but it will give up at the slightest hint of a hill. So if your Faller model is expected to climb hills, you will go through batteries at an awful rate, and the annoyance of constantly replacing them, and being left with half-powered batteries, makes it unwise. Keep the running path as flat as possible. It would be interesting to model a three axle bus with Faller. In this case, the powered rear axle would be the double wheeled axle on the real bus, usually the second axle. It should be possible to source a third pair of identical wheels, fitted to a plain axle bar. However, this third, unpowered axle, must bear no weight of the model, and ideally would sit in a vertical slot in the chassis, giving it ample vertical clearance to slide up and down (at least 5mm) so that it bears only it's own weight, and can skid sideways as the bus turns. Perhaps wheels with plastic rather than rubber tyres would ease this. If the third axle carries any weight of the model at all, what it may well do is lift the powered axle off the road surface at any imperfection, and the model will fail with regularity. Some bus modellers in the UK have gone a step further, and engineer their own hand made steering axles and propulsion units. The Faller models are quite expensive, and if you have the workshop and the engineering skills, perfectly good mechanics can be constructed in brass to replace the Faller units, at much less expense. Finally, if you are particularly experimental, the Faller chassis incorporates a reed switch, which allows the model to be stopped by way of introducing a magnet or solenoid beneath the road surface. By switching on or off this magnet, the model can be stopped or started on the road, at a bus stop, for example, or a level crossing. If you study the wiring of the Faller chassis, you will see that it would be possible to wire a pair of red LEDs into the circuit, to use as brake lights! So when the reed switch disconnects the motor, the battery power is redirected to the brake lights, and when the reed switch reconnects, the power returns from the brake lights back to the motor. Bright white LEDs will serve as headlights too, but it might be advisable to wire them to their own battery on a completely different circuit. Modern LED torches often come with tiny flat batteries that will last a very long time, and are worth investigating as a seperate circuit to the motor circuit, with their own on/off switch. Some videos of the Dublin Bus Plaxton Verde in action at some model railway exhibitions.
-
Dear God, I was a lot younger when I wrote that. How embarrassing! Where has the time gone...?
-
The original 33 seat SS1-100 may appear again very shortly. I have made a few alterations, to try out one or two ideas that have been bugging me. The prototype will arrive very soon, and based on that, if it works, it will be reissued, followed in turn by the other models, as I do the alterations on them as well. I am still working on a third model, so progress behind the scenes is slow, but ongoing. However, I don't want to tempt fate, so let me see what this prototype is like, first.
-
Apologies for the long hiatus in information. I haven't had the time to dedicate to the project recently, so not getting much done. I am currently making a few small alterations to one of the schoolbus variants to experiment with a different manufacturer and material. If the result is suitable, I can make these available again, although they may be a tad more expensive. I was hoping to avoid extra expense, as they were dear enough as things stand. I think I may give up on Shapeways. I raised a few issues with them over a year ago, and was promised a lot, but they can't or won't deliver. I wish they would be honest with me. Apart from painting difficulties, the quality standard of any models I received was a lottery. Some were good, some were awful. A lottery is not good enough for models I advertise to customers, which is why I had to withdraw them from sale. Shapeways farm out printing work to a number of different manufacturers, and herein lies the main problem, I think. But that is of no use to me, or to you. While I am making the alterations to the drawings for another manufacturer, are there any comments or suggestions from modellers who have constructed the original Shapeways schoolbuses, with regard to the assembly? Not the painting, as there will be a new material which hopefully won't have the painting issues associated with the white nylon material. But I am interested to find out if there was any difficulty with the glazing, for example, or access to all parts of the floor area, or the cab details. Or any comment on the bodywork details that needs amendment.
-
Hi, don't worry, the schoolbuses will return shortly. There were painting issues with the type of nylon plastic used in the original prints, and I am investigating something better. If I can get a better material, I would rather wait and offer that. Will have news posted here as soon as possible. Many thanks for your interest and support.