

Irishrailwayman
-
Posts
842 -
Joined
-
Last visited
-
Days Won
24
Content Type
Profiles
Forums
Resource Library
Events
Gallery
Blogs
Store
Community Map
Posts posted by Irishrailwayman
-
-
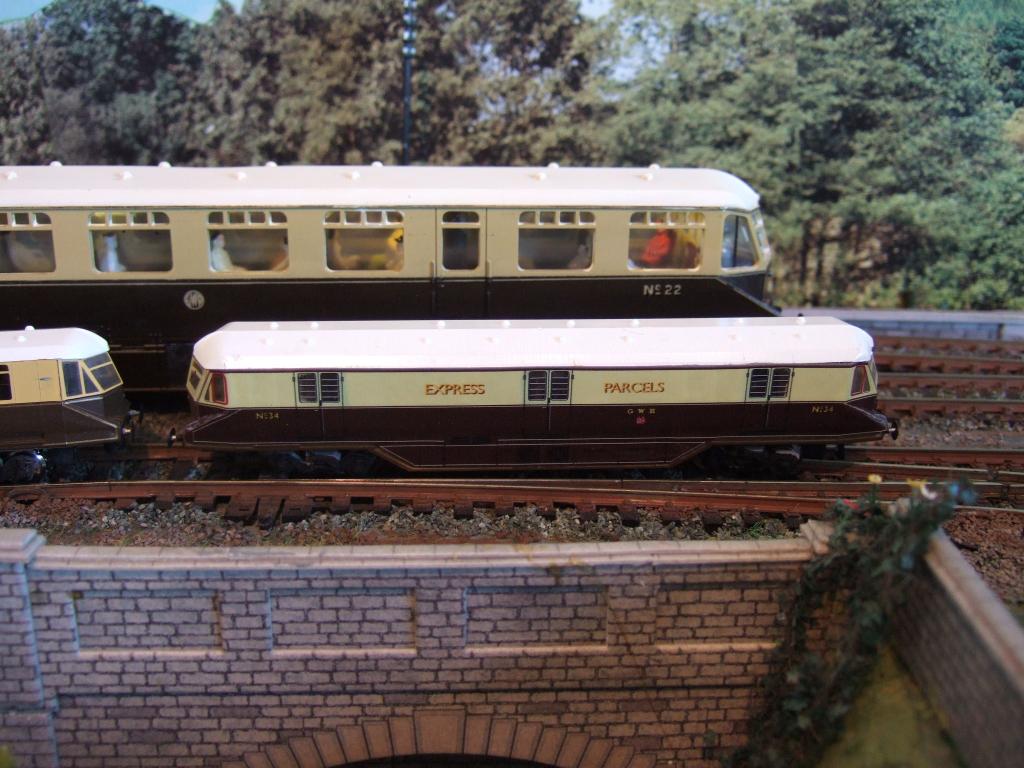
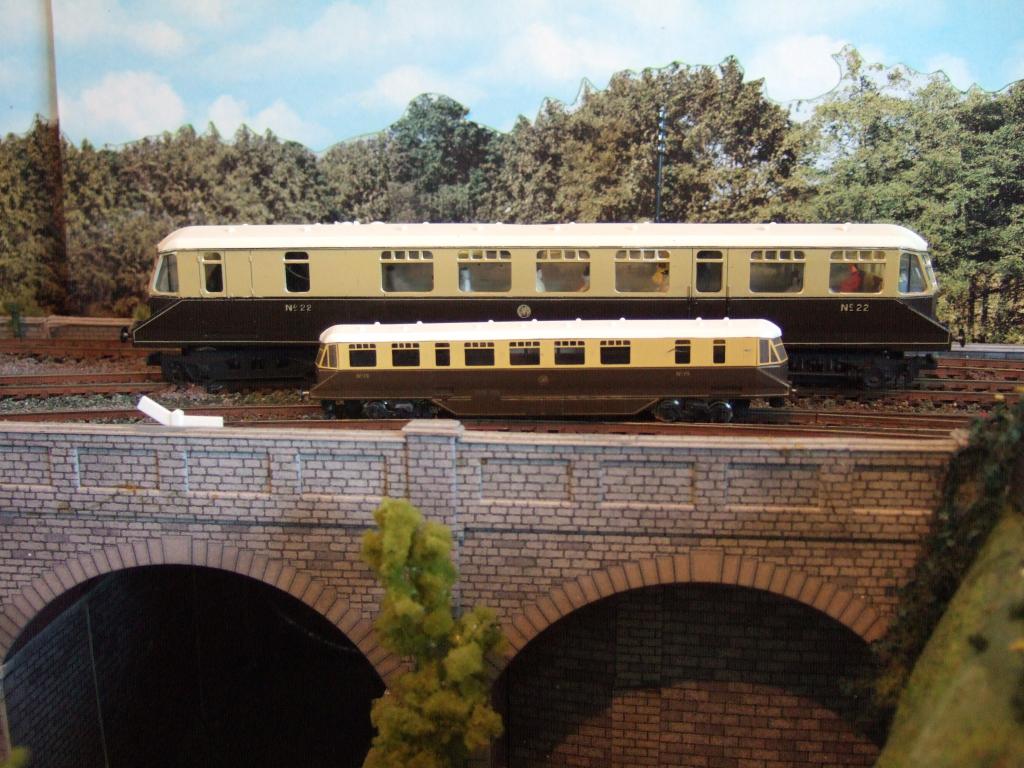
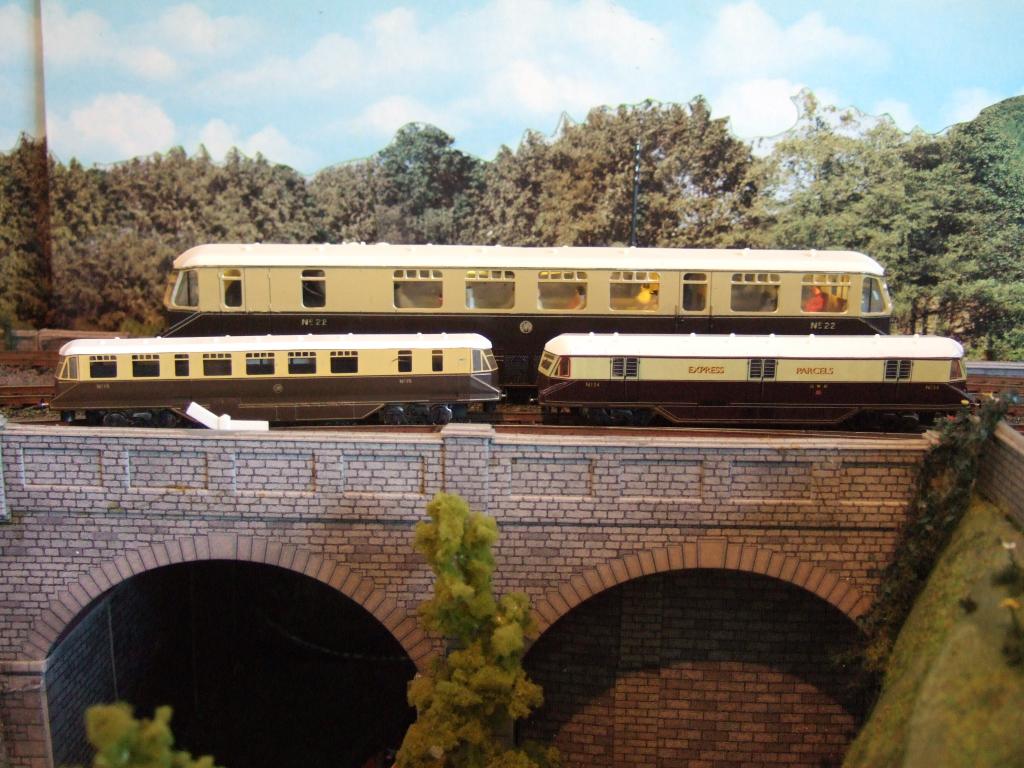
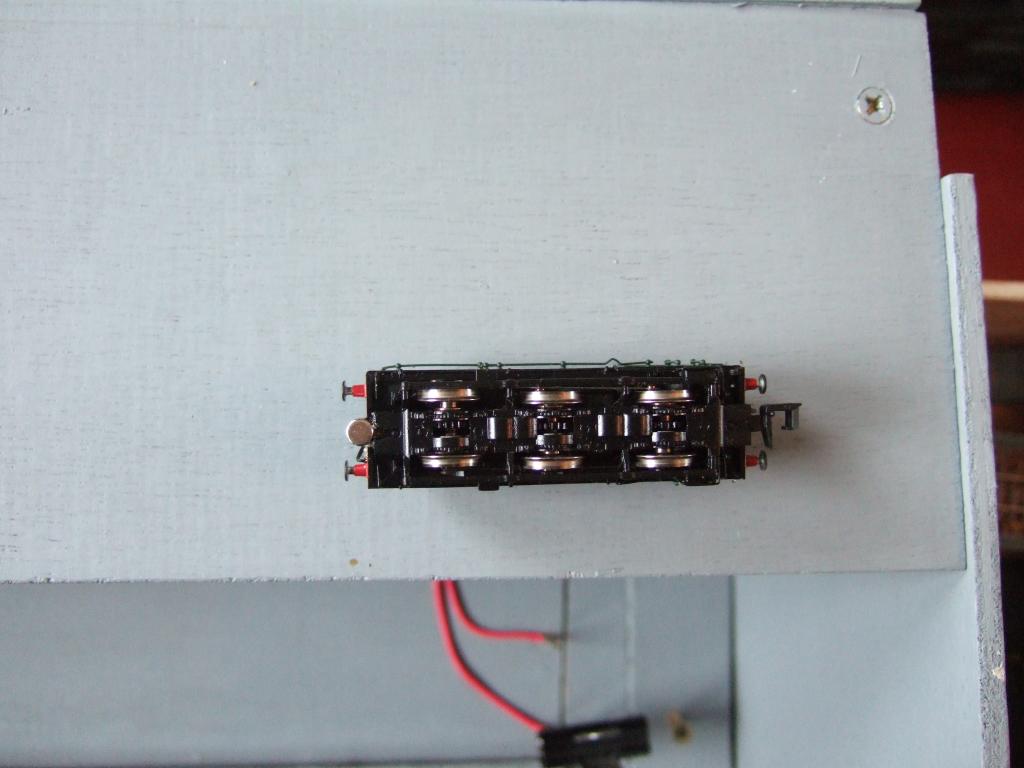
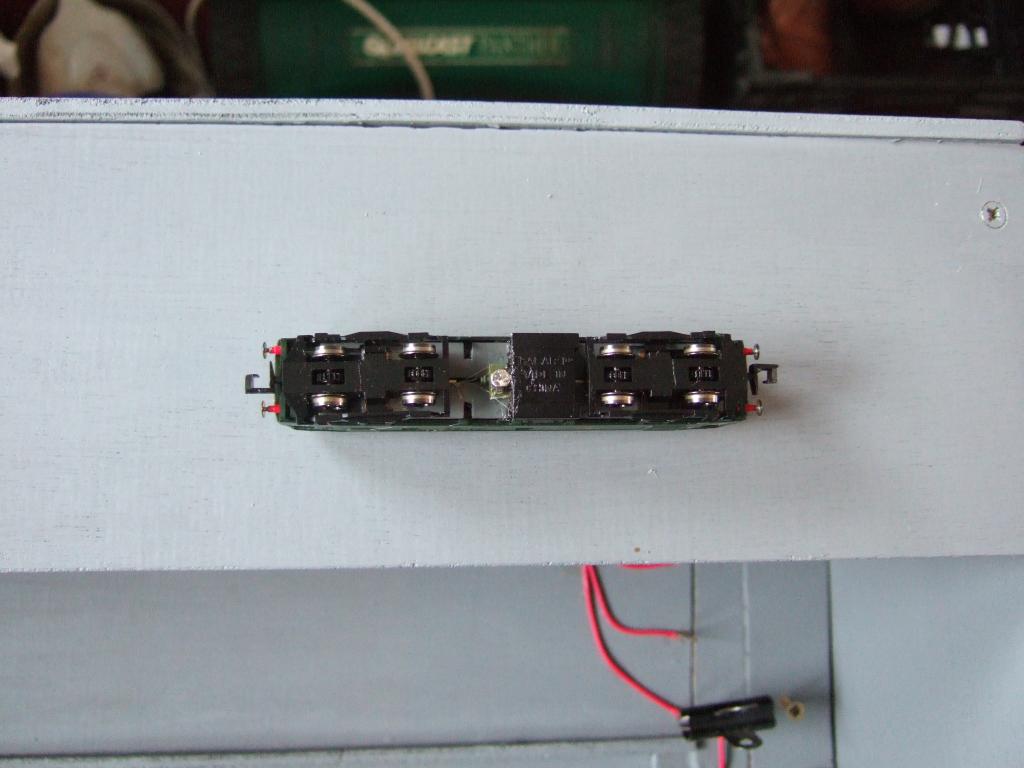
Just completed adding new DC chassis - GreenMax 18M (from http://www.wellingtonmodels.com/index.php/6/) to two GWR Railcar bodies kindly given to me as gifts by David Heath and Sean Ryan. I converted one into an "Express Parcels" railcar with GWR crest logo No 34 by attaching vinyl overlays from Electra Railway Graphics (see http://www.electrarailwaygraphics.co.uk/ under Heritage Range). The other I retained as railcar No 19 with GWR round "art deco" logos. Models shown here posing on Ballybeg with their bigger "OO" DCC cousin from Shunters Yard!

-
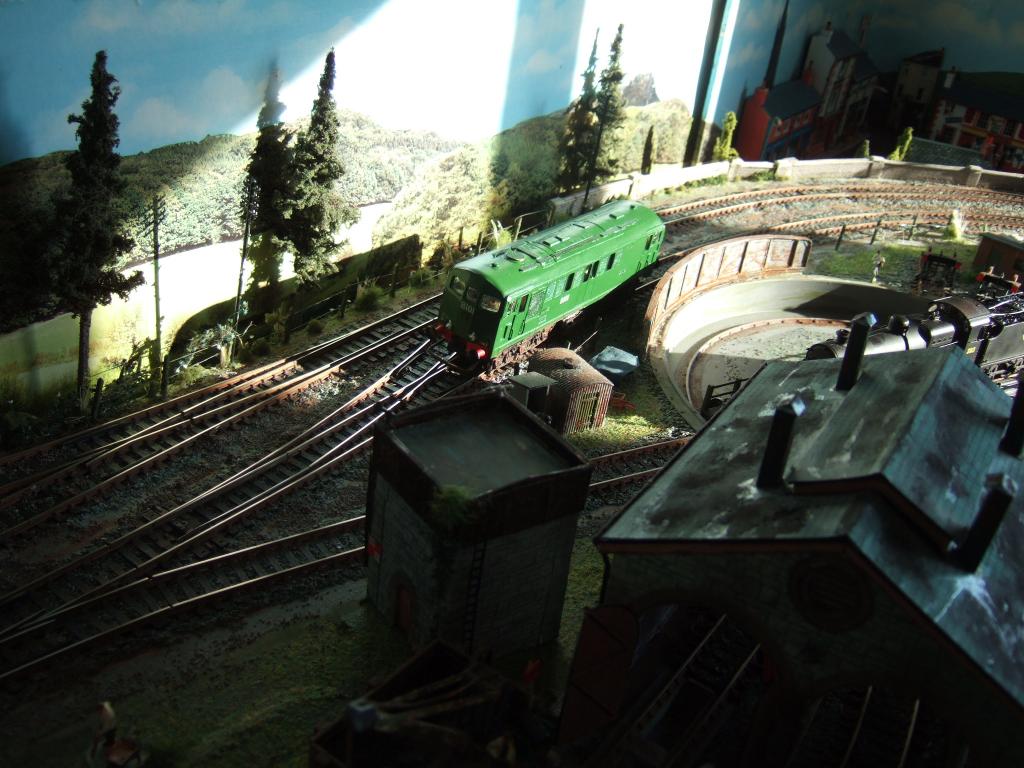
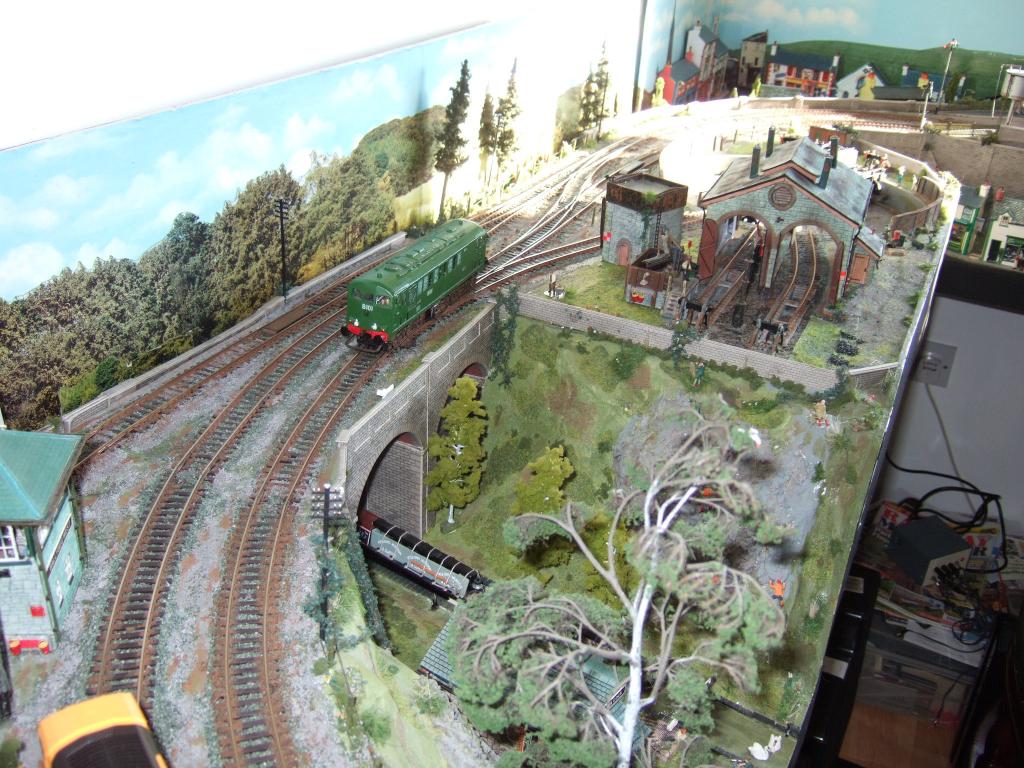
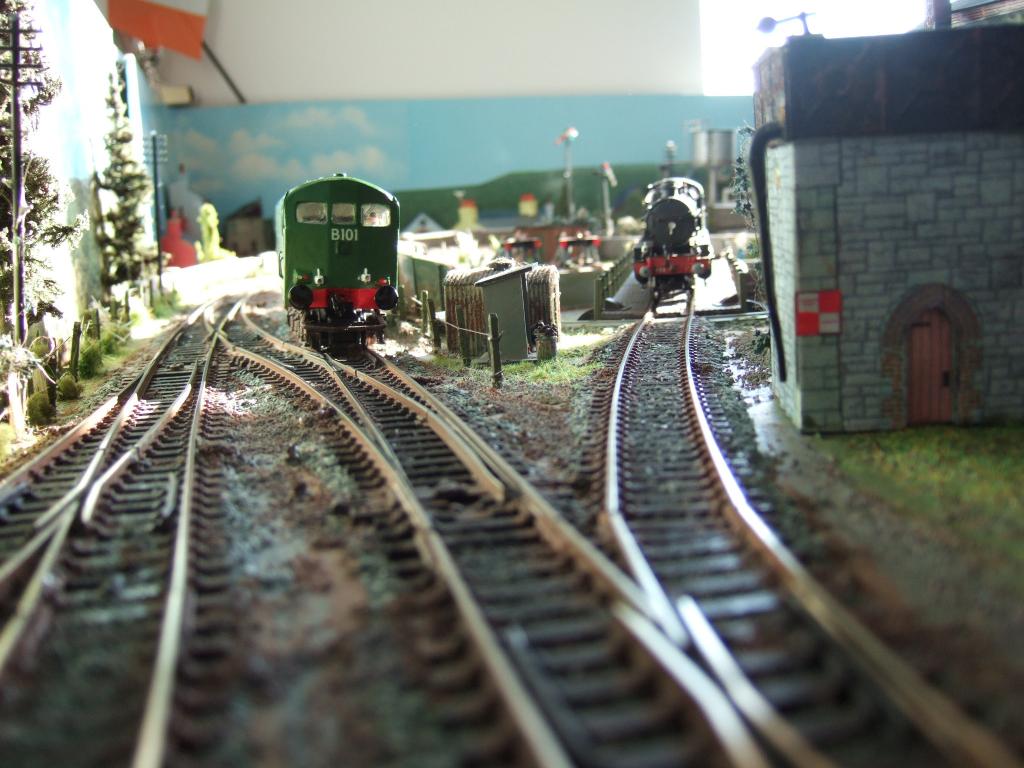
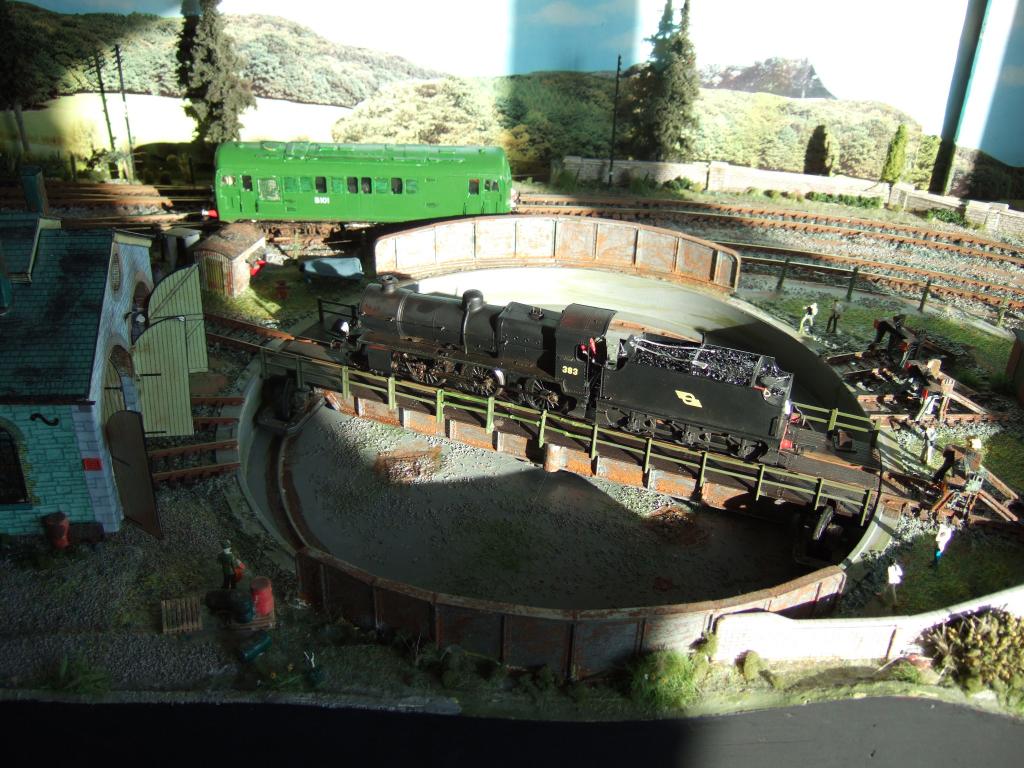
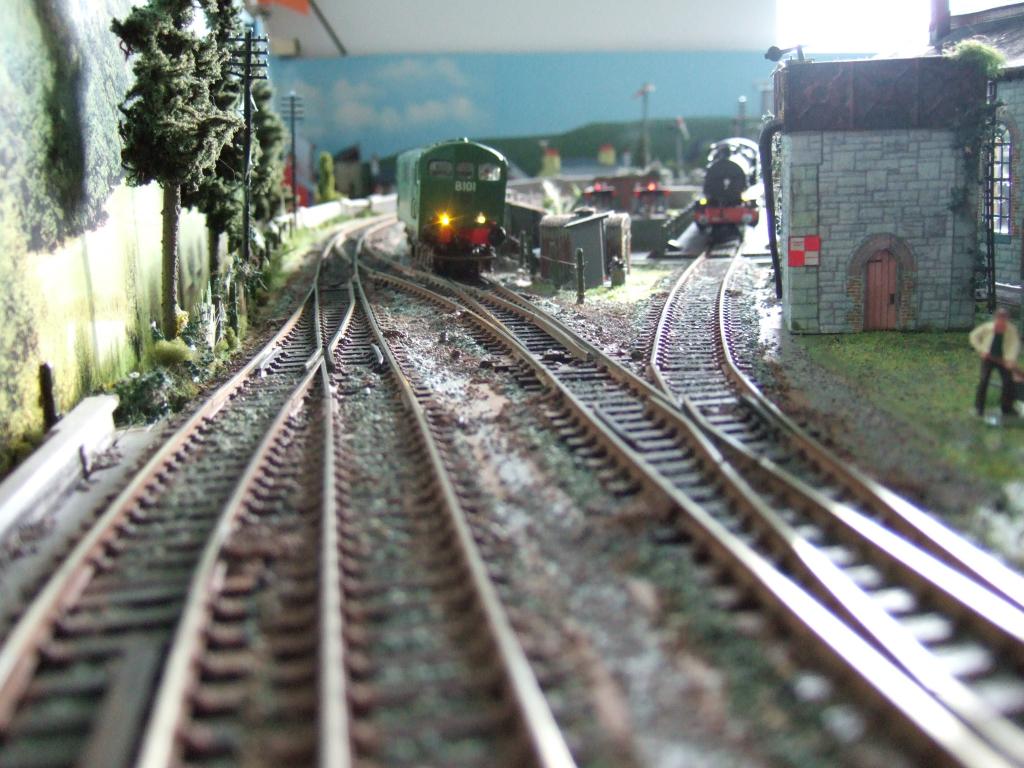
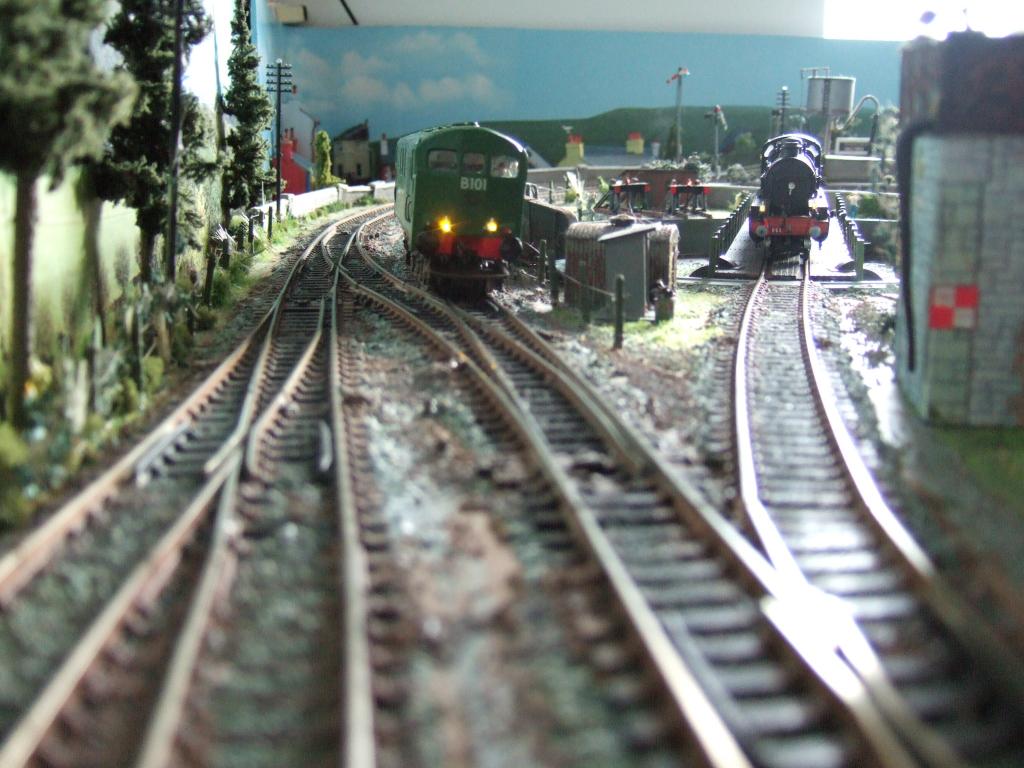
I'm just imagining what was happening that morning in Ballybeg. 383 is being prepared for the morning goods train, while the 101 is trundling through light engine to Limerick Junction to pick up beet empties....
Mogul 383 rapidly reaching the end of its days on the main-line, CIE men unsure of this new-fangled technology involving diesel locomotives...
-
Great scenes and variety of rolling stock.
-
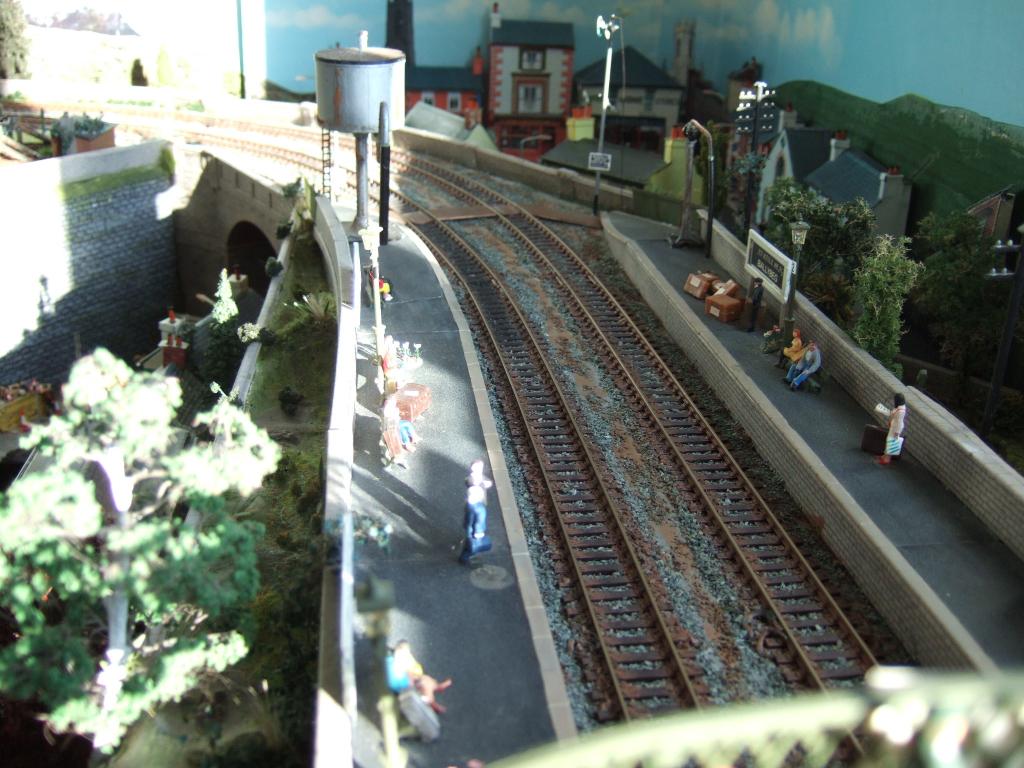
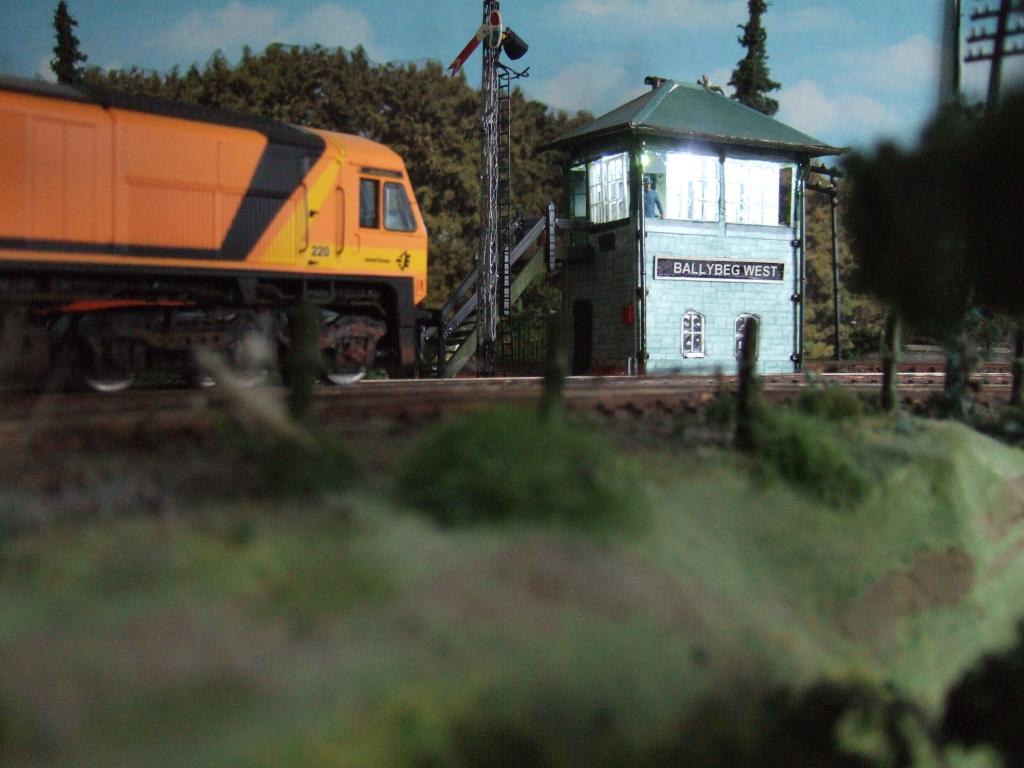
A few atmospheric shots of Ballybeg with an Autumnal sunrise. First, early diesel days B101 waits for the road while 2-6-0 Mogul 383 rests on the turntable. Lastly in a much later era, a shot of 220 getting the road by Ballybeg West signal cabin...
-
 1
1
-
-
A mighty collection there!
-
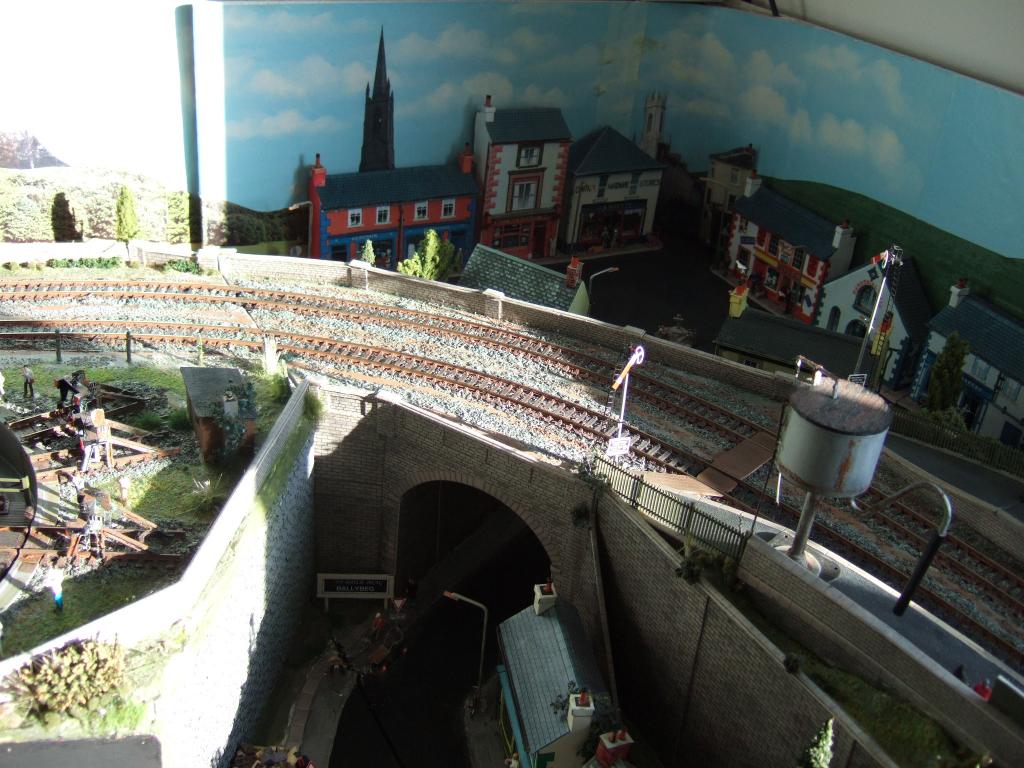
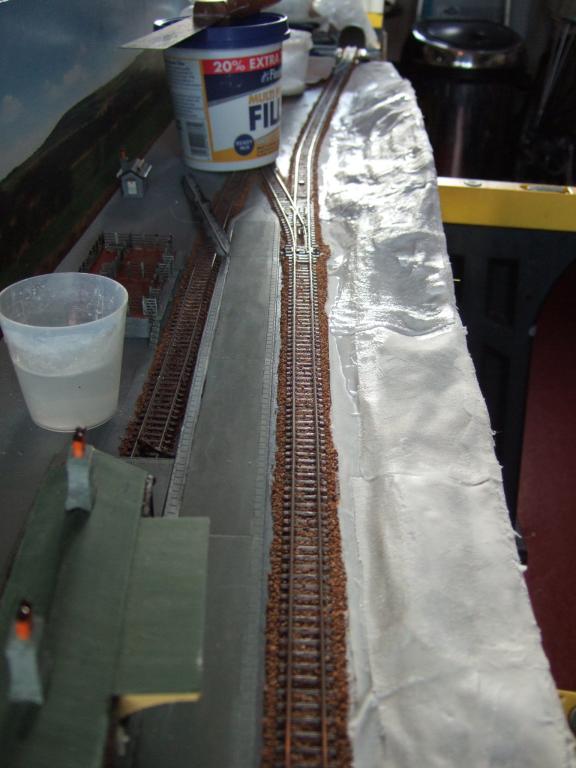
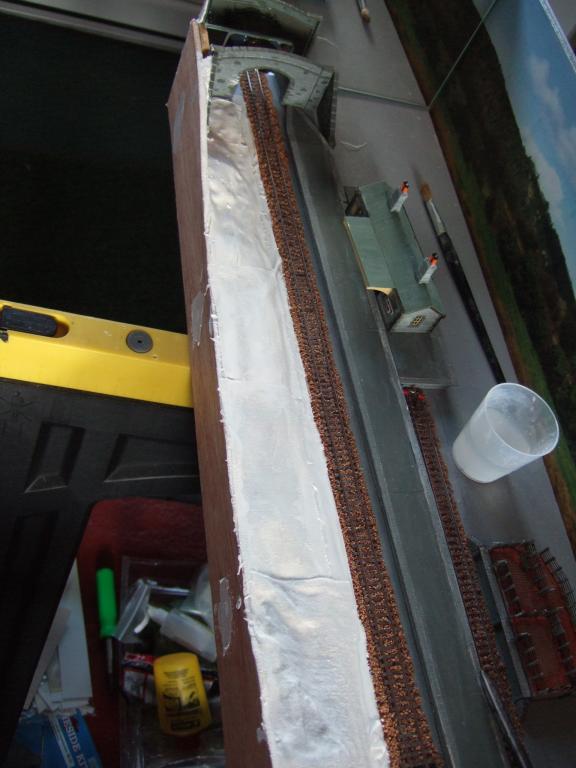
Bridge now in place and work commenced on scenery using crumpled damp newspaper/PVA glue as a base for Polyfilla impregnated cloth. Further layers of Polyfilla to be added allowing each to dry and harden. Looks like a heavy snowfall but this will change when an undercoat of grey paint is added to protect the hard shell!
-
Looking good - I like the trees, you can never have enough of them.
-
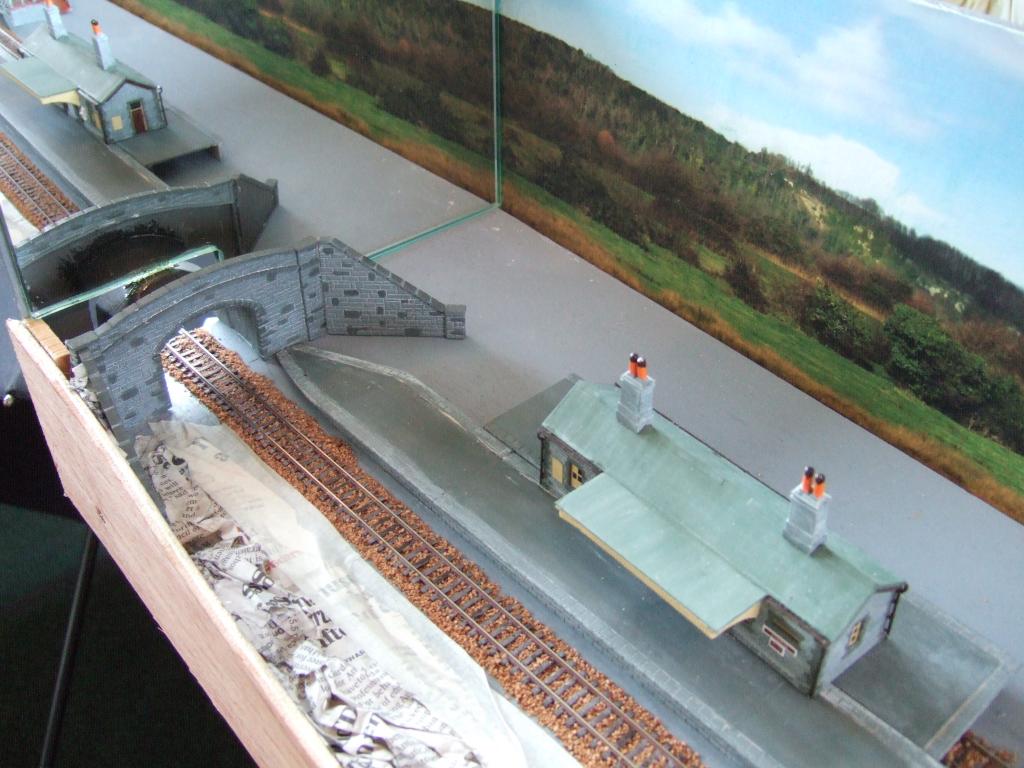
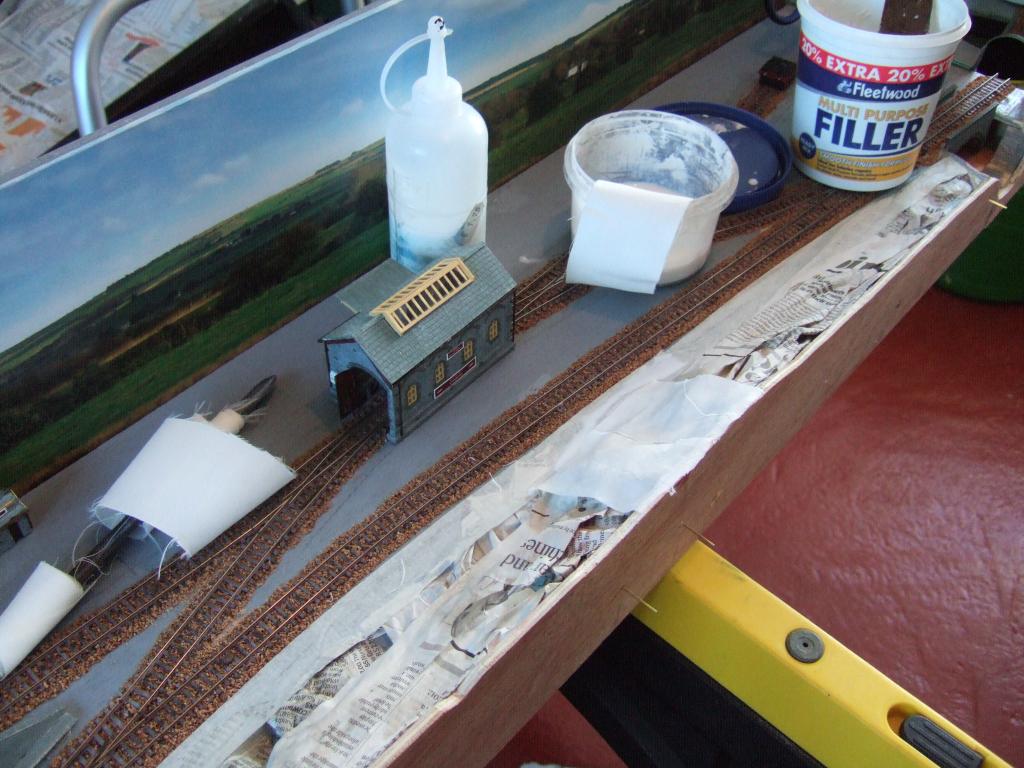
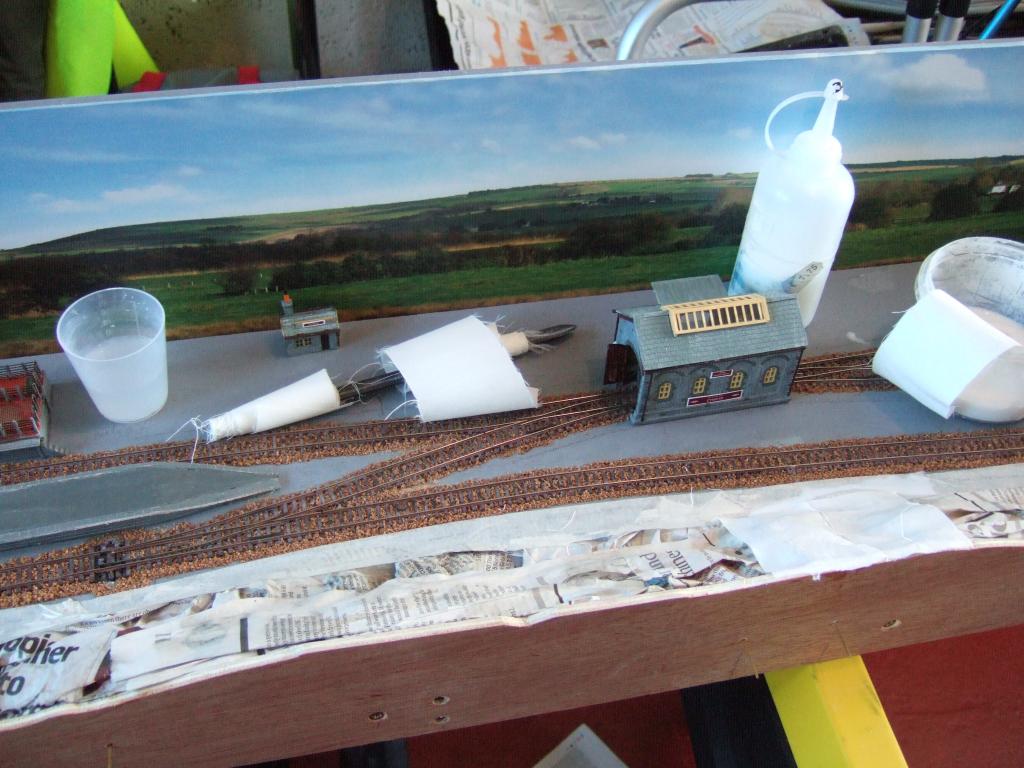
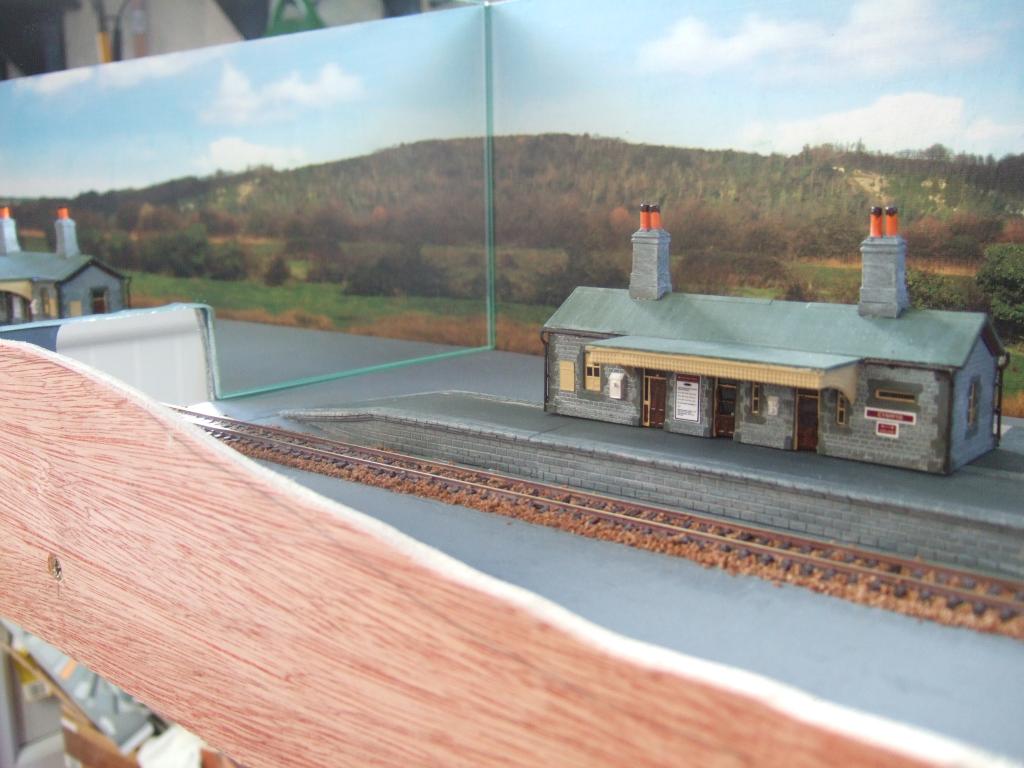
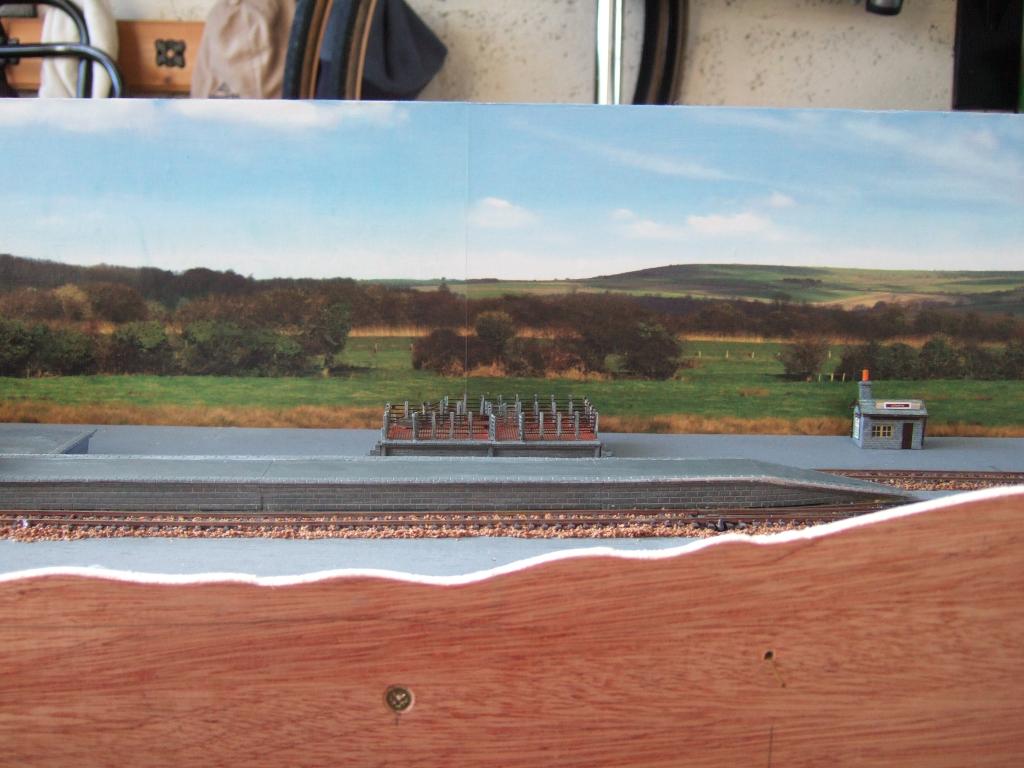
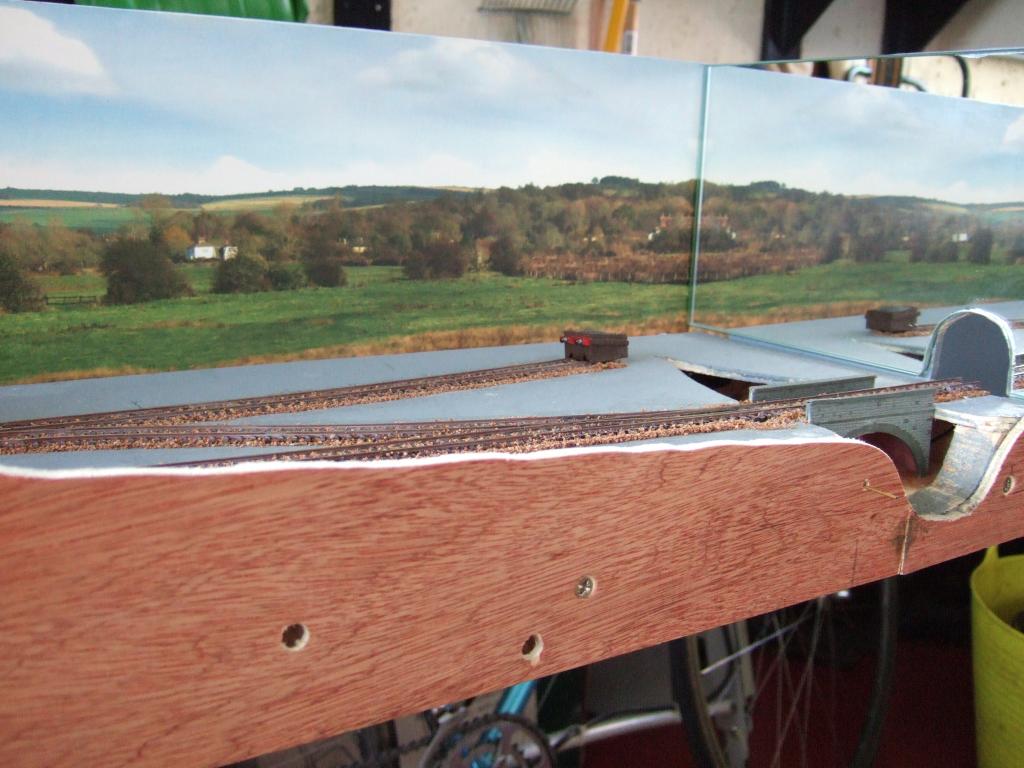
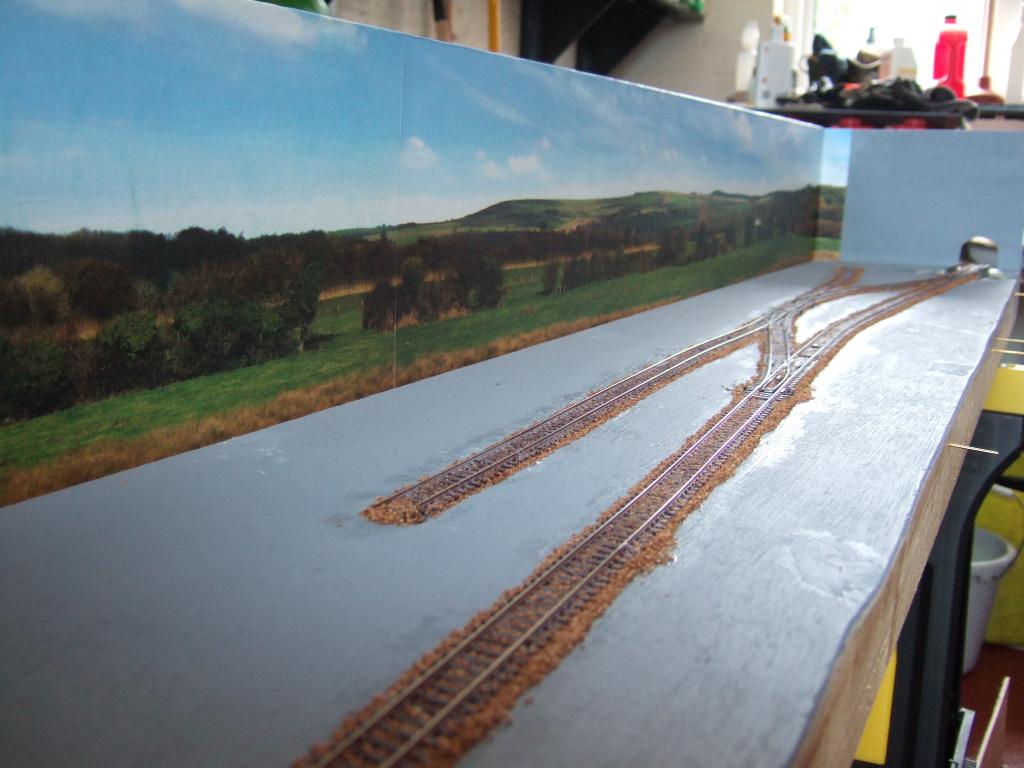
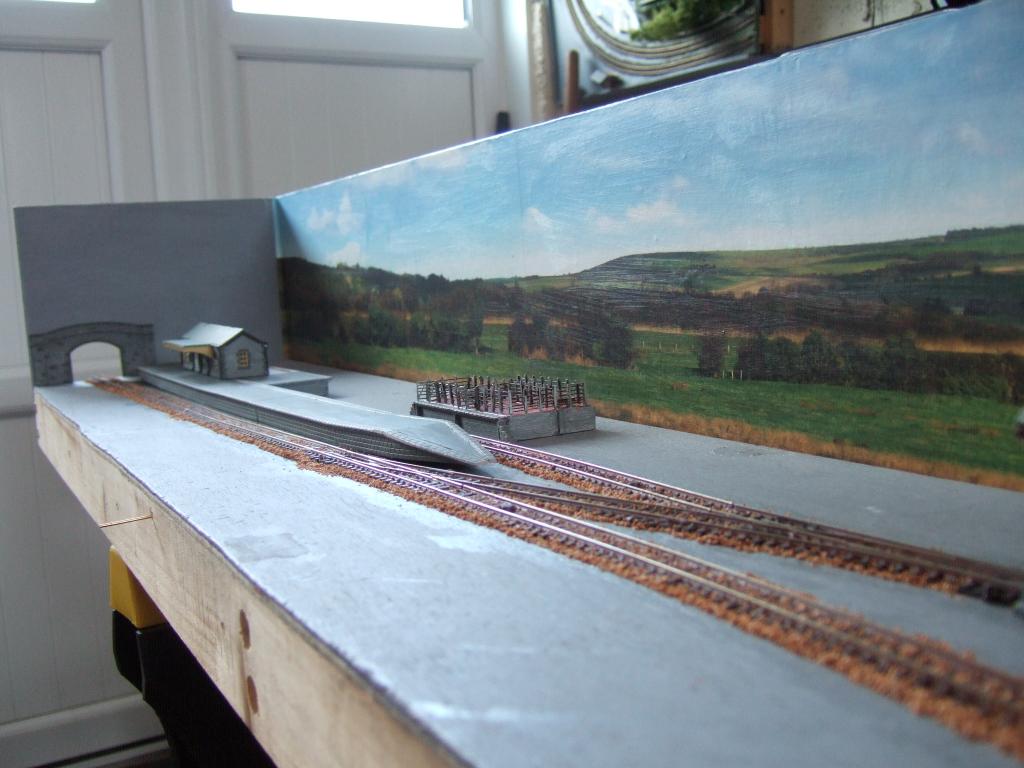
Moving on to the scenic work: first it is necessary to add the fascia/front board suitably shaped to suggest undulating countryside beside the rails. Next the specially cut mirrors are added to each end for an "infinity" or continuity illusion. The platform is glued in place allowing rolling stock to clear each side and ends. The completed buildings are placed temporarily to allow the landscape to be created around them and for the composition to flow as naturally as possible.
-
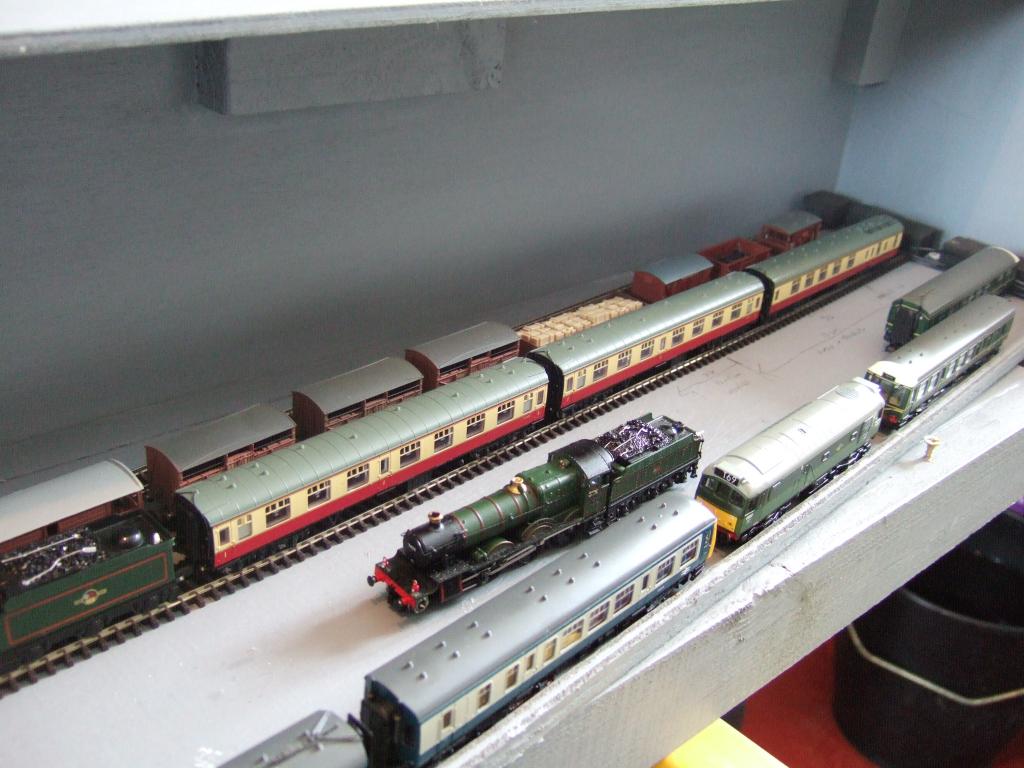
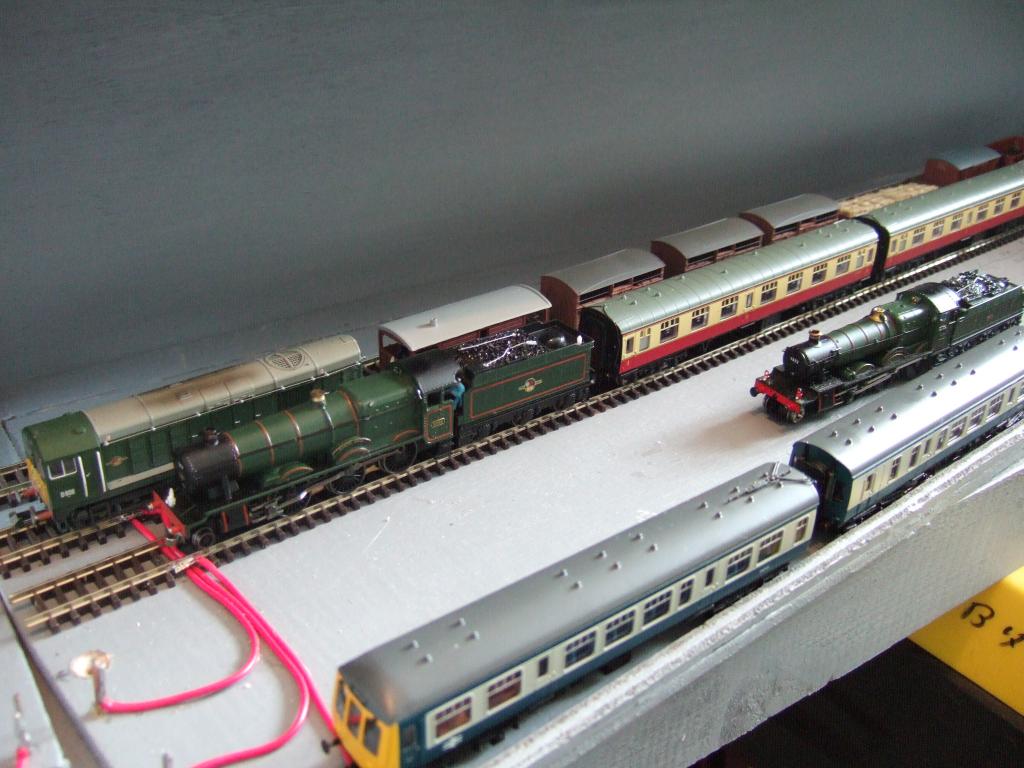
Rolling stock is a mixture of GWR and early BR fitting either era (if Cynwyd had survived Beeching's cuts) or combined as a "might have been if preserved" line. Stock has been fitted with tiny magnets to activate shuttle at each end of train formations. Testing complete and all working well.
-
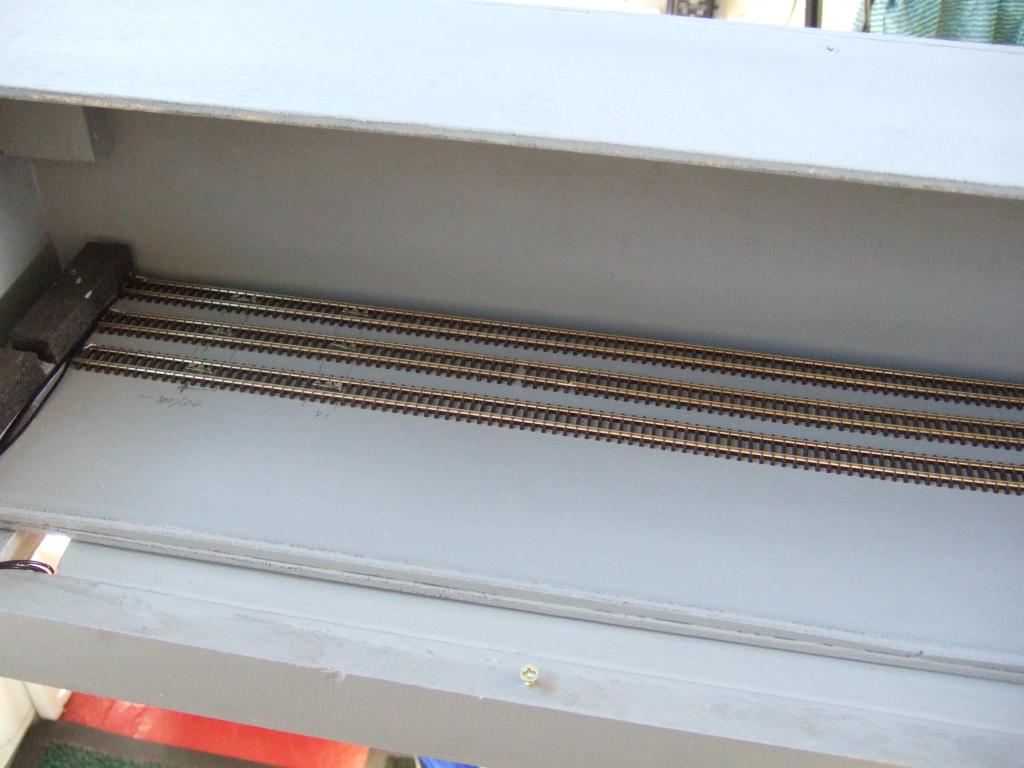
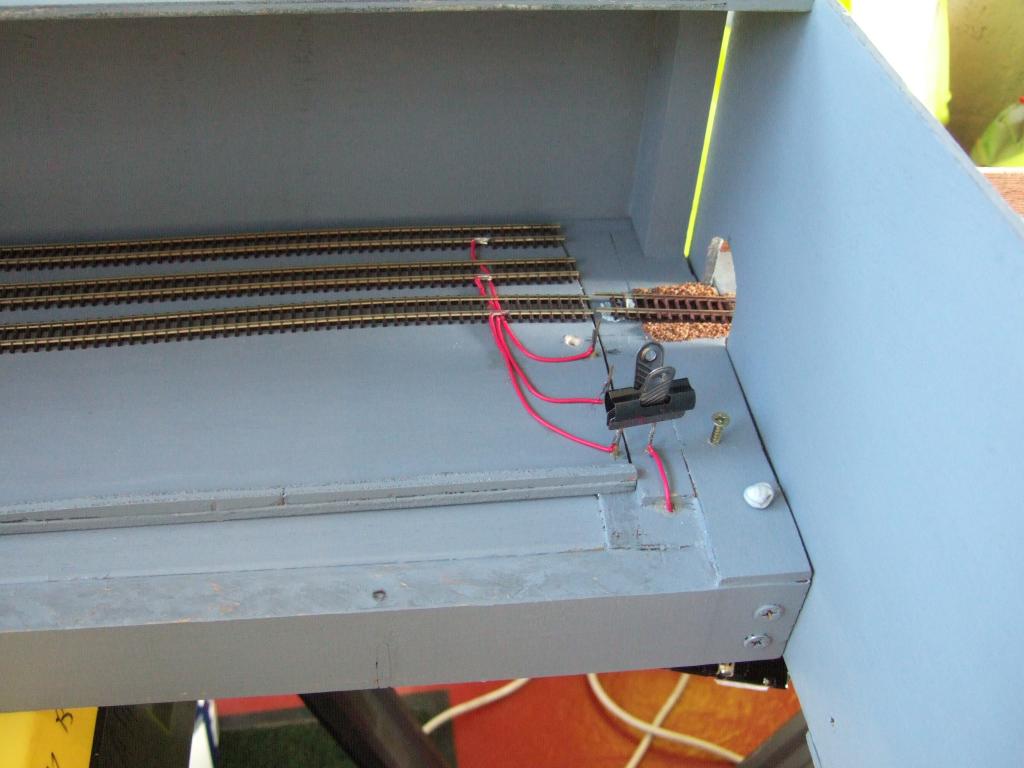
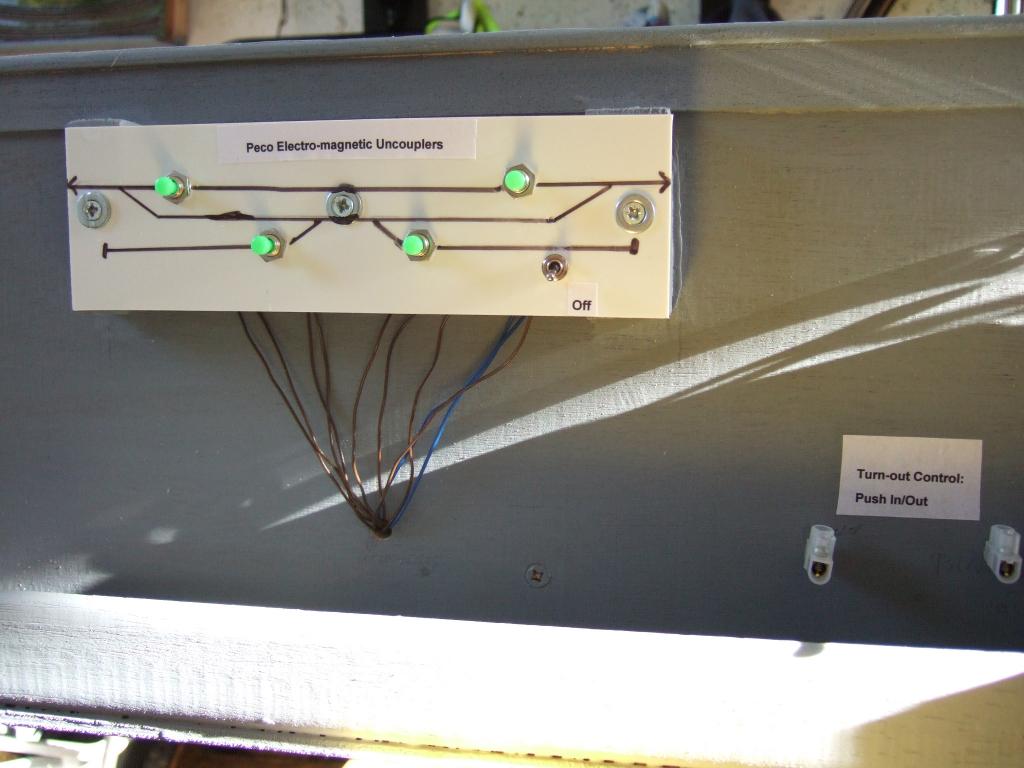
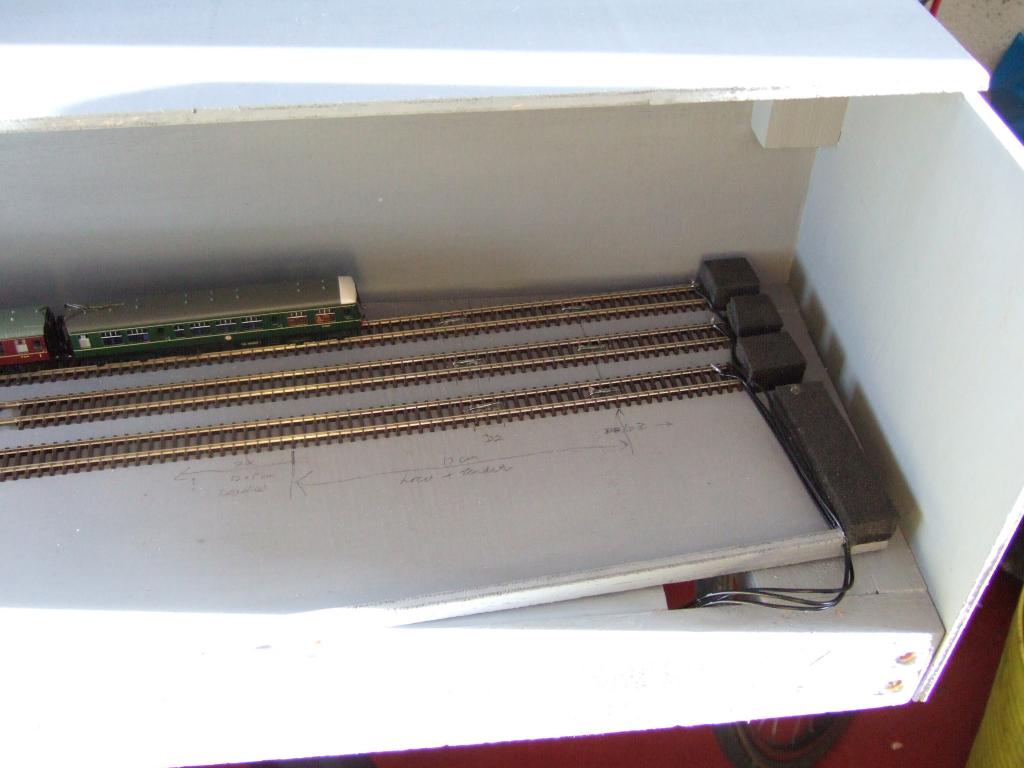
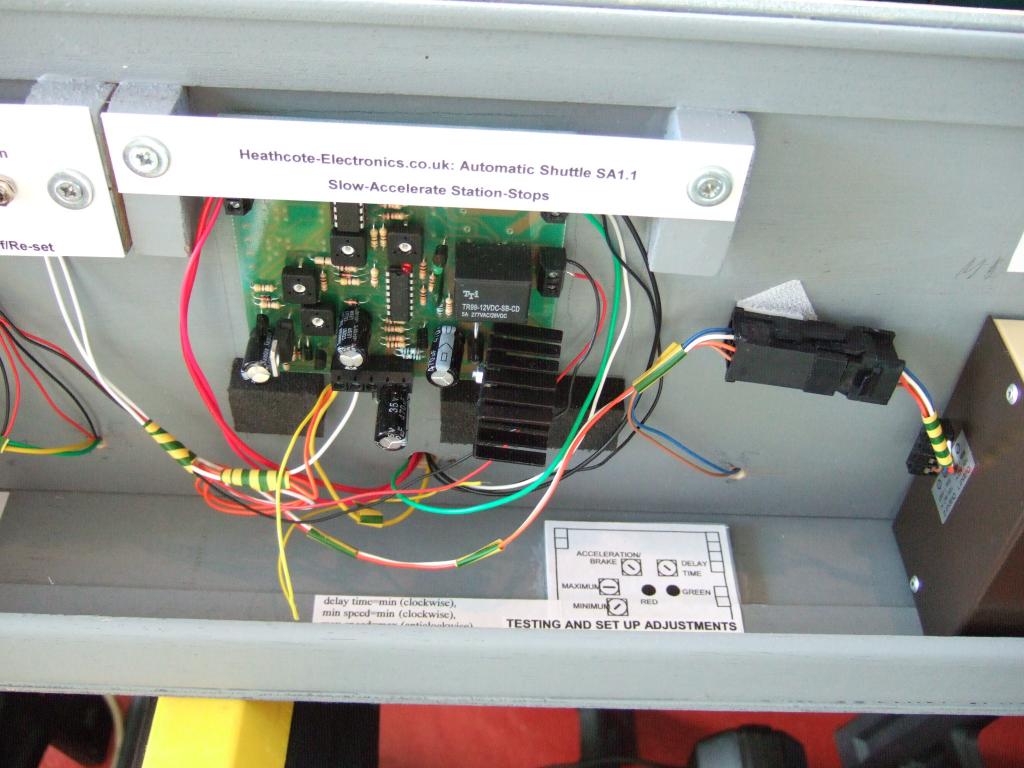
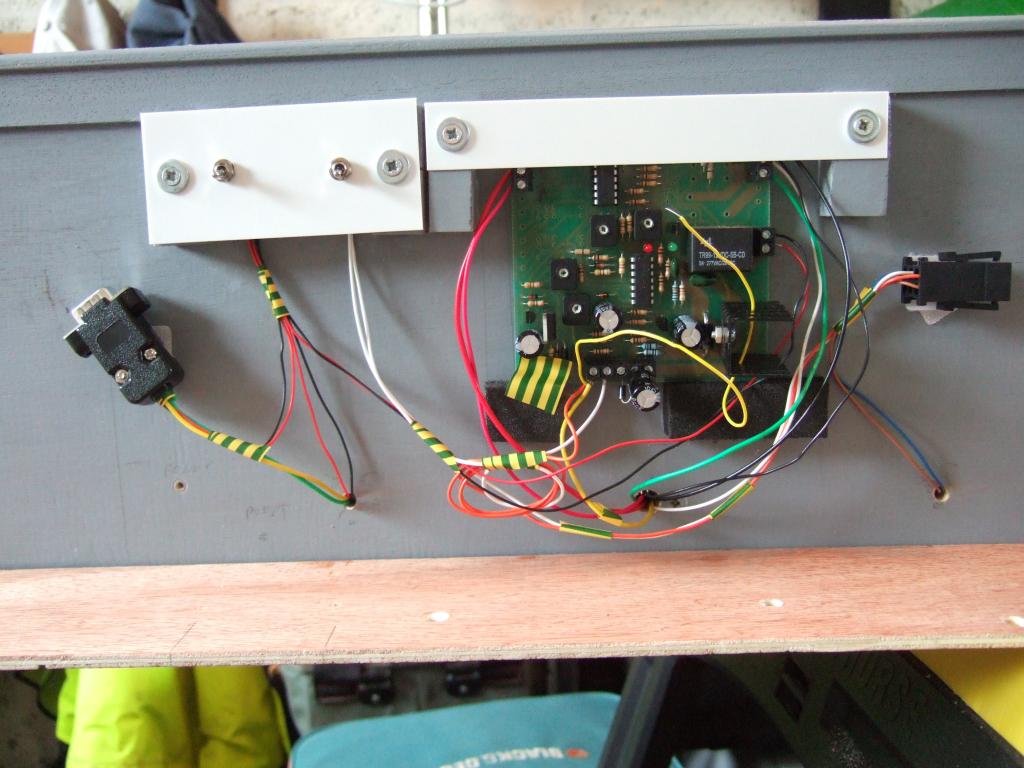
Wiring completed, controls labelled and ready for testing. Each piece of rolling stock (at the front and end of each train formation) must have a small magnet attached beneath it in order to trigger the reed switches buried in the track ballast and wired to the electronic shuttle/station-stop board. This enables the automatic train shuttle to work: slow start, acceleration, slow down entering station, station stop, wait time, slow acceleration, full speed to end-of-fiddle yard, stop, wait time, reverse and repeat sequence. Each parameter can be varied as appropriate.
With three lines on each fiddle-yard sector plate, a different train (5 in total, one in-transit) may be released from either fiddle-yard by gently moving the appropriate running line into place manually and connecting it electrically using the bulldog clip.
The main-line may alternatively be operated manually at the flick of a switch. The Goods Yard works on manual only with the turn-outs operated easily by simple push/pull rods (elegant and simple!).
Goods wagons will need modification to operate with the Peco Electromagnetic un-coupler system. Then the canvas will finally be ready to develop the scenic section of the lay-out...
-
Provincial wagons make the beet wagons http://www.provincialwagons.com/12.html I also think the retro 071 would sell real well. It's a great job by IE and loved by gricers. Can't wait to see the 1916 items.
Irish Freight Models do one as well which I quite like: http://www.irishfreightmodels.com/index.php/shop.html#!/CIE-Irish-Rail-Bulleid-open-Wagon/p/14644538/category=3461102
-
Nice work!
-
There's something about O gauge that looks soo real... Just need a BIG house to fit it all into!
-
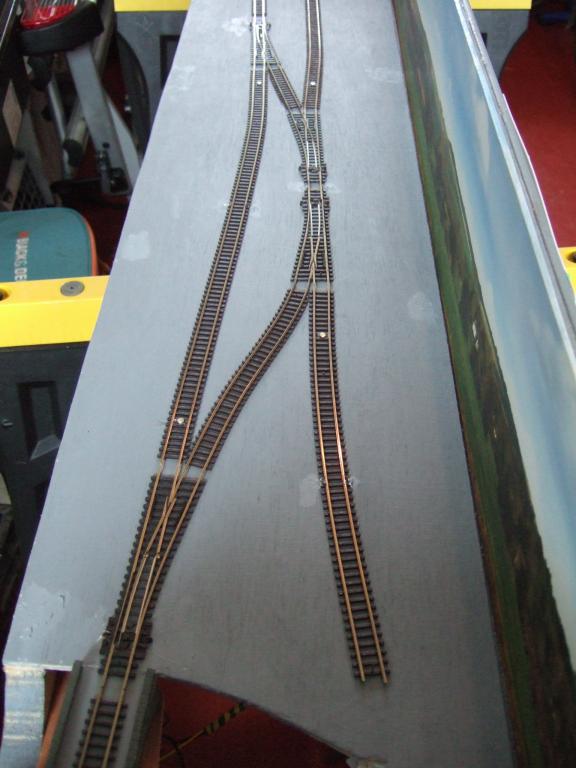
Thanks Sulzer. Just finishing boxing off the fiddle-yards, then a lick of paint and complete the under baseboard, then the scenery: convert the track on a flat surface to look like a railway carved into the landscape...
-
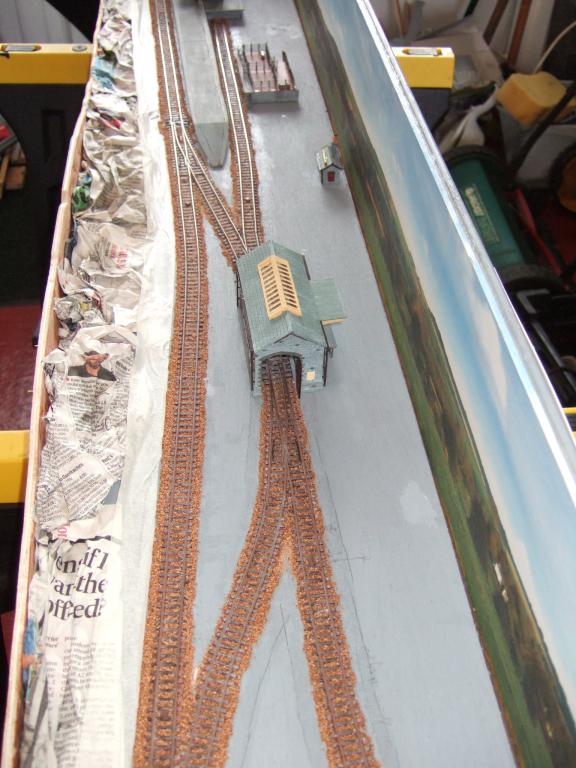
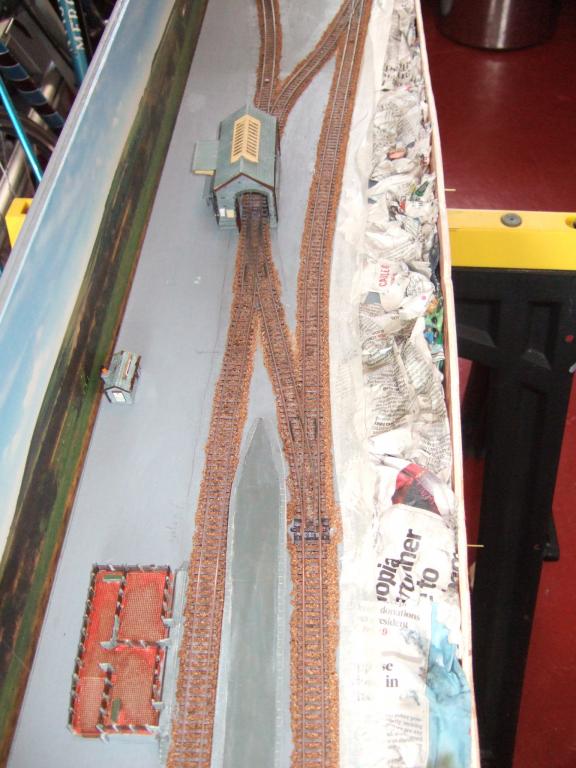
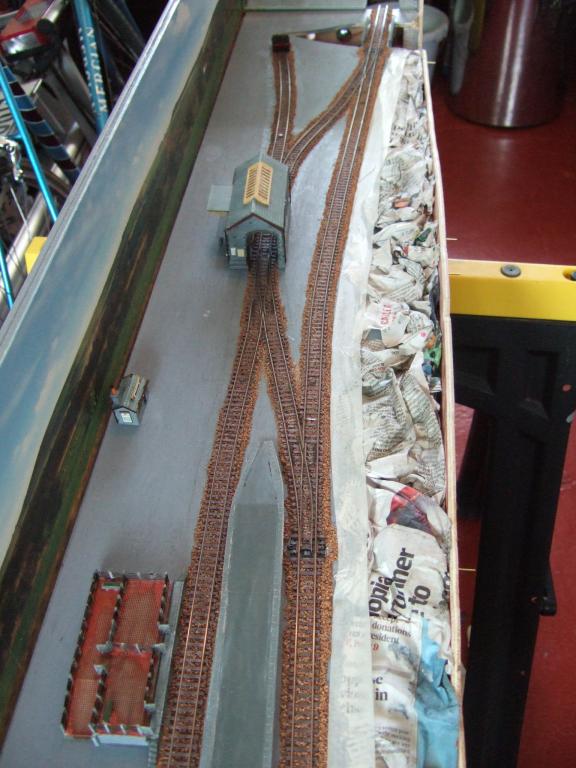
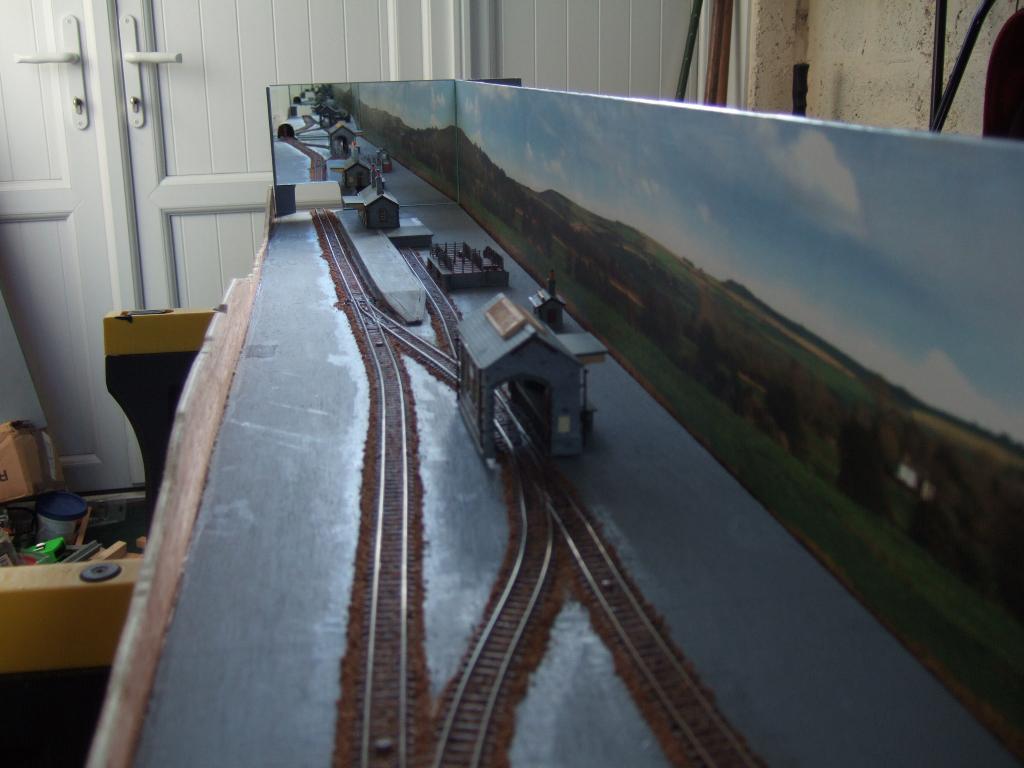
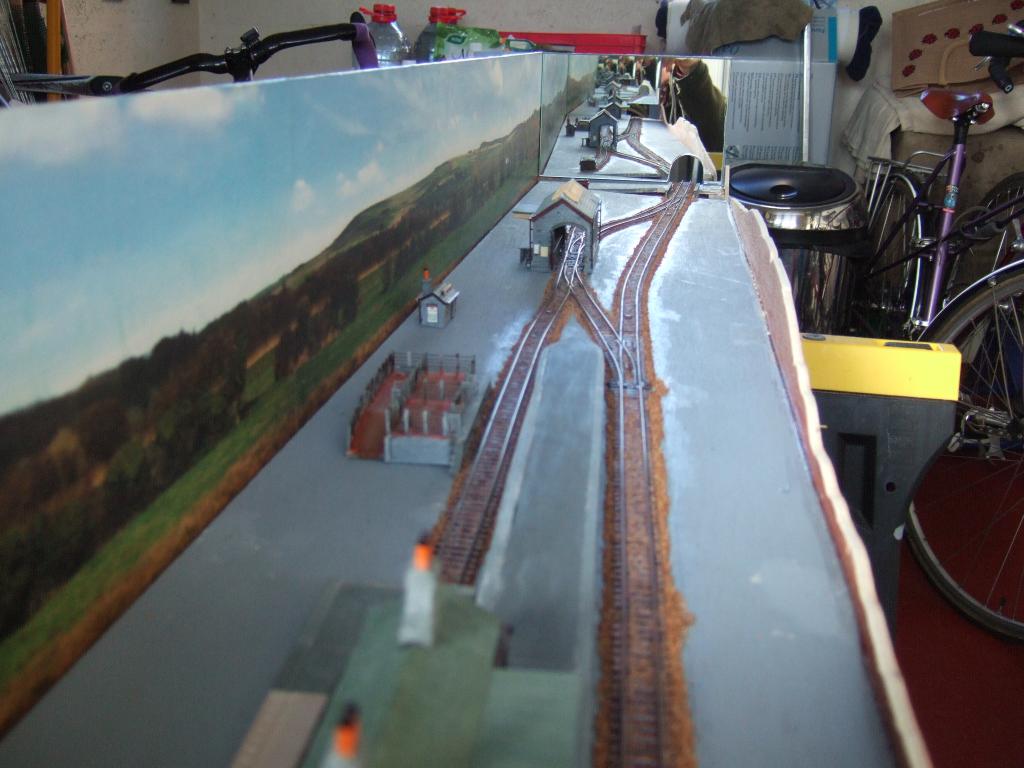
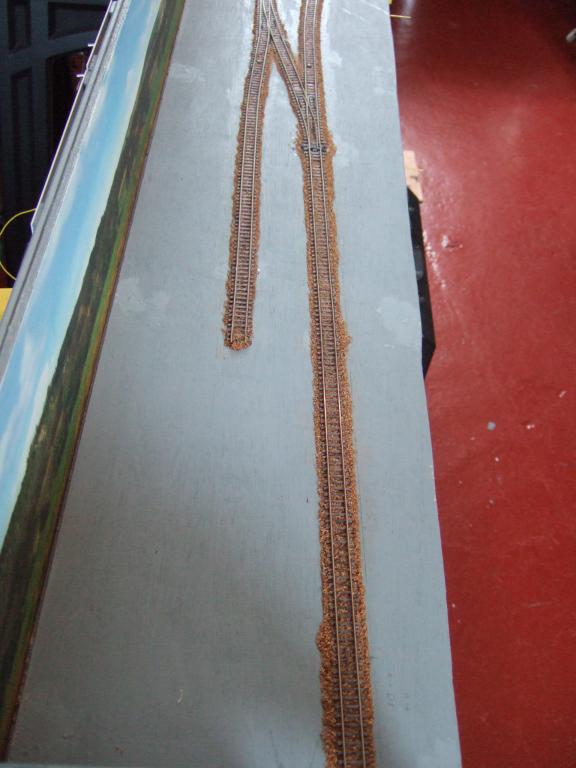
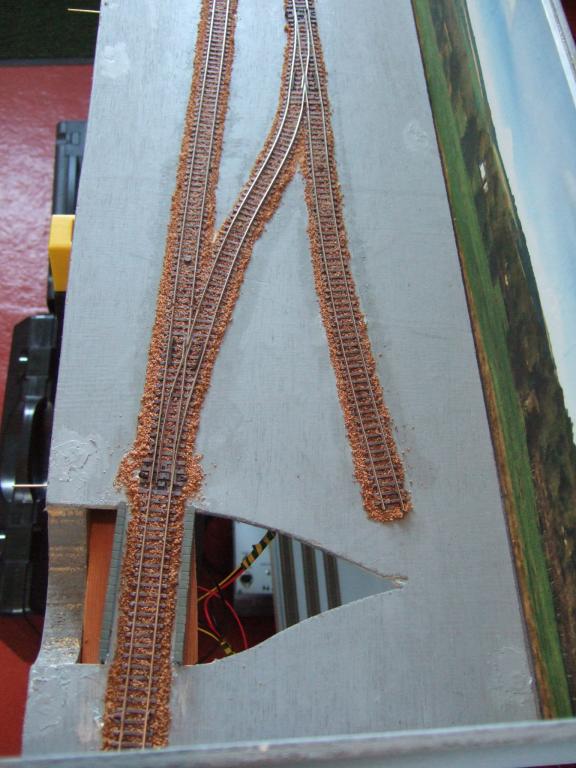
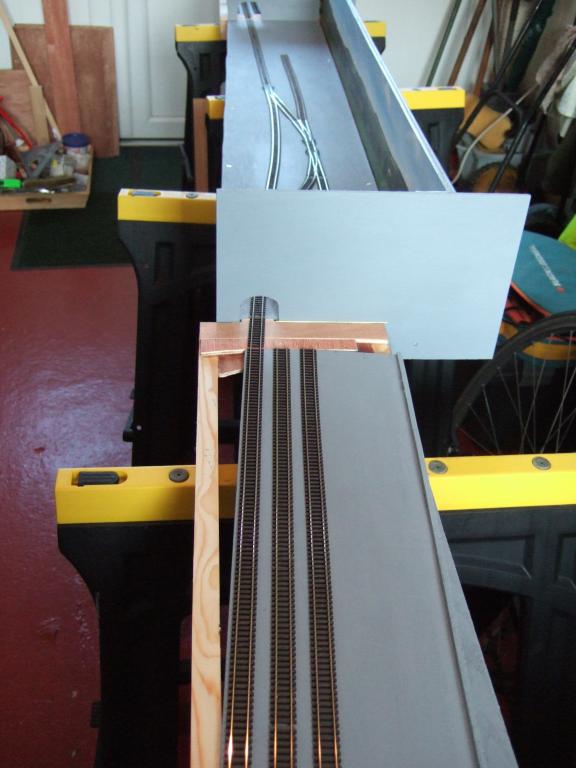
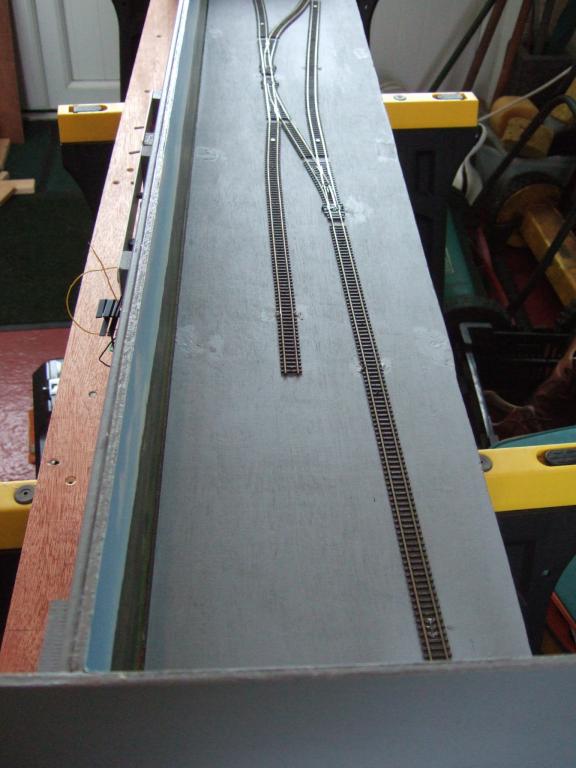
For this prototype I chose Peco brown stone ballast (fine grade PS-28). I used Deluxe's Ballast Bond product which worked really well - just drop the liquid from the bottle onto the dry ballast powder brushed carefully against the track bed. Two pics here show someof the buildings fitted roughly for size. Note the push-rods for the points operable from front and back of layout.
Next up: complete some more woodwork, re-test layout operation, commence groundwork for scenics and fitting of buildings,mirrors etc...
-
This is an absolutely amazing announcement, I need to get multiple jobs now
..or keep doing the Lotto
-
Unfortunately, the Lokprogrammer cannot alter the sound program on a decoder. To make any changes, you need to have the original sound programme, amend it, and reblow the decoder. For GM locos this is easy to do, as NIRCLASS80 says, you can download a suitable sound program from ESU, amend it as required, and load it onto a Loksound decoder. Apart from GM locos, BR locos are not available from the ESU library.
Correct. Also, each manufacturer's chip needs different equipment for re-programming. The original soundfiles are owned by the supplier companies.
-
Info. New three-pack of grey CIE Ranks 4-wheel wagons have been announced by Irish Freight Models (€120). This extends availability of this model beyond the card version available from Alphagraphix. See: http://www.irishfreightmodels.com/
-
Great work Gerry.
Thanks Eamonn. The design is such that the scenic section can be easily stored on a shelf/bookcase and be set up for use/exhibition quickly by simply bolting on the two fiddle yards at either end. Perfect for those who "don't have enough space to own a model railway"!
-
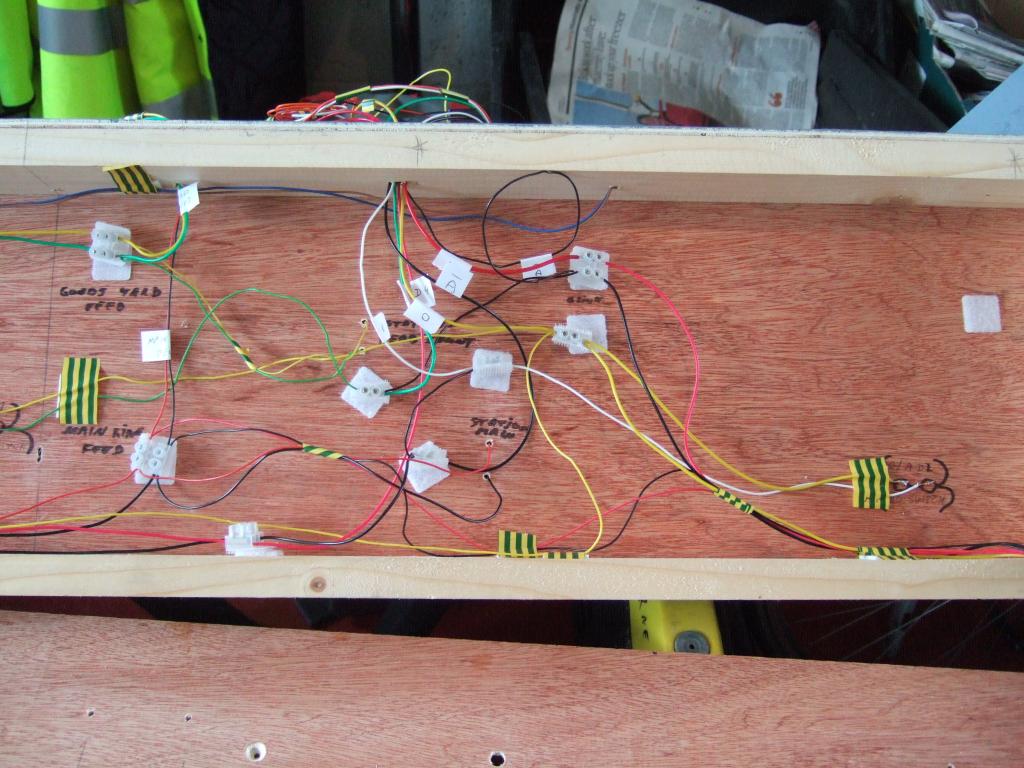
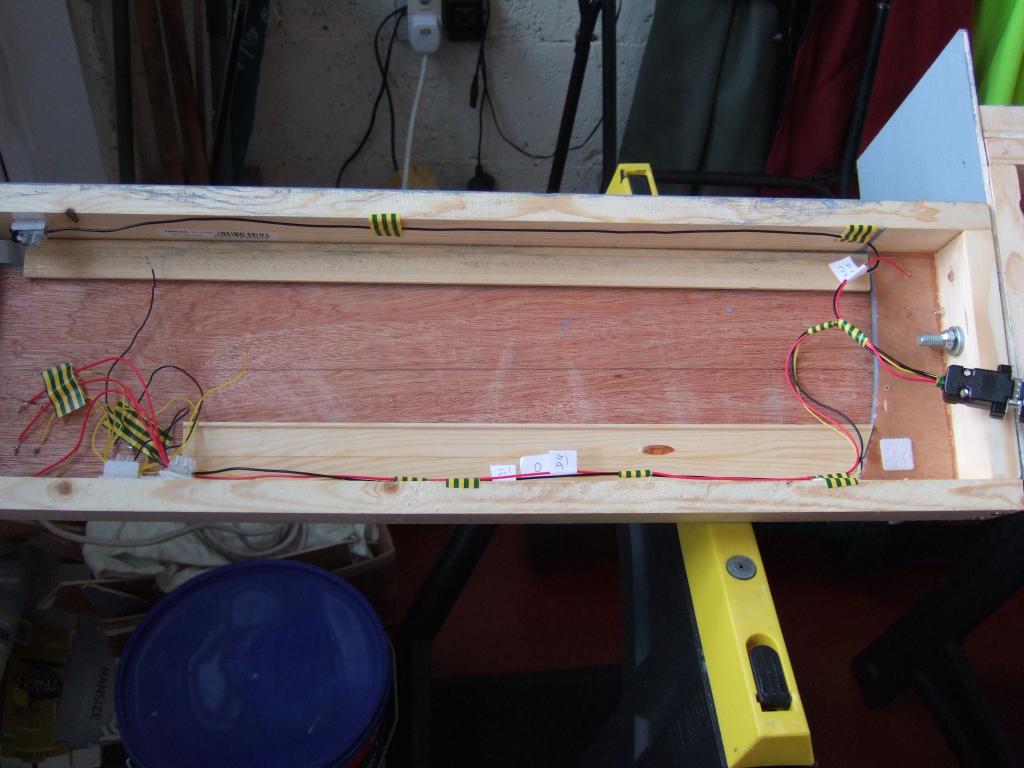
Just completed wiring of trackwork for Cynwyd. Power is by DC using a Morley Controllers Vesta Zero Two double controller: one output for the main-line and the other for the Goods Yard for Manual Control. Automatic Shuttle between the two 3-way sector plate fiddle yards (with intermediate station slow/stops in both directions) is provided by way of a Heathcote Electronic's system SA1.1. This requires a separate 16v AC power unit (Gaugemaster M1 Twin Output transformer) and a DPDT switch on the main-line. Reed switch sensors are fitted between the rails and these are activated by tiny magnets fitted to the front/end of rolling stock. The sector plates are moved manually and a connector clip ensures only the appropriate line is energised. With three lines per sector plate, this will enable 5 trains to be readied for use at any one time. Additionally, four Peco electromagnetic uncouplers have been fitted around the Goods Yard to enable remote shunting of goods trains. Power is provided by the second 16v AC output of the Gaugemaster M1 Transformer. The electromagnets only work when pushing a button switch and these attract a metal attachment on the Peco ELC couplers. These will be operable from either the front or back of the layout allowing for home or exhibition sessions of playing trains. Points/turnouts will be operated by push wire again from back or front of the layout.
The resulting wiring looks like spaghetti junction but has been carefully colour-coded and labelled for future reference!
Next up: more wood to box off the fiddle yards for exhibition purposes (removeable for home use), ballast the track and then to fitting the buildings and scenery in place...
-
A busman's holiday never looked so well!
-
Hi Irishrailwayman
this is not a critical comment but maybe you would consider next time to curve the background it might look smoother
Best regards
Walter
Thanks, the technique I am using here is to have mirrors at each end for continuity rather than curved ends. The idea overall is that the scenic section (4ft 6ins) is readily stored on a shelf yet can be set up quickly with the fiddle yards for operation. Similarly, the units will fit into a car for transport to exhibitions etc.
-
Hi Irishrailwayman,
WOW real Wood and no Paper,The Basebord has Class
best regards
Kinvara-Train
Thank you. The sequence of photos show how the model builds up from one stage to the next and provides a nice record for later when the completed presentation is ready for exhibition.
-
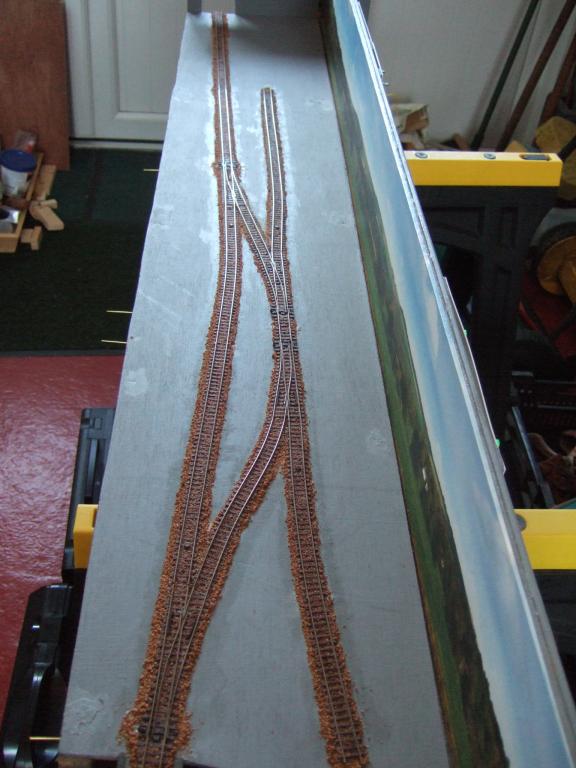
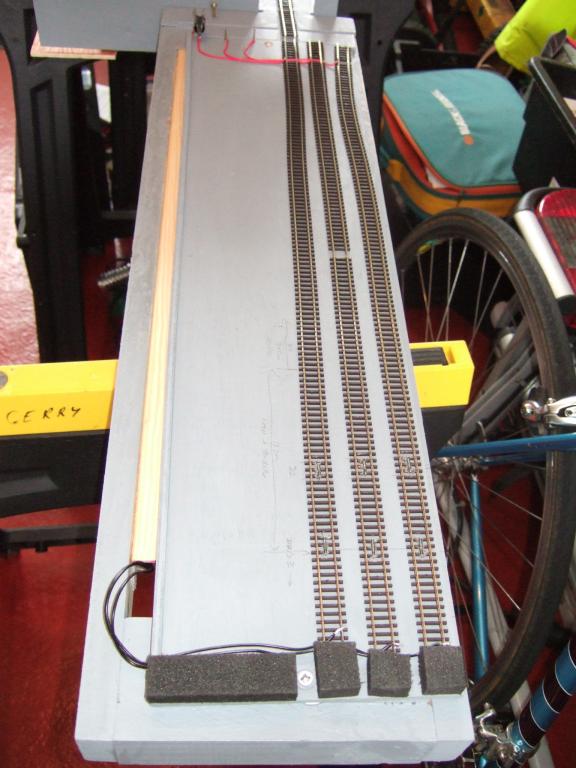
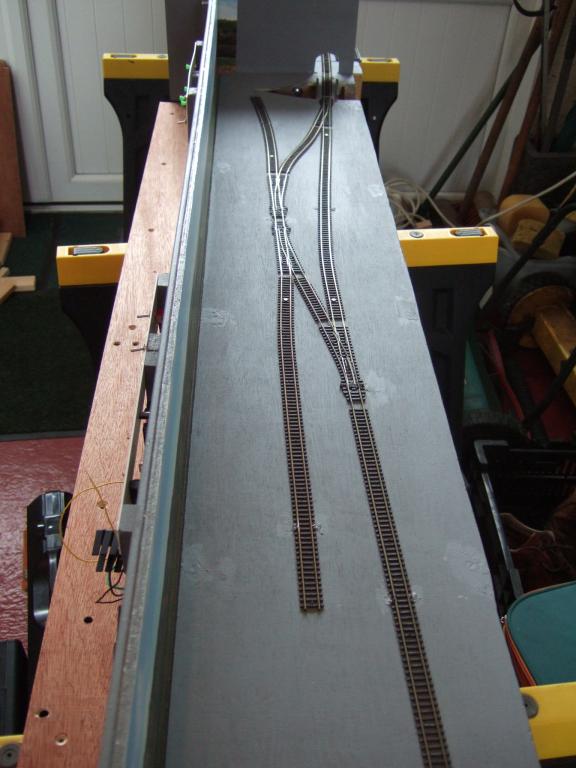
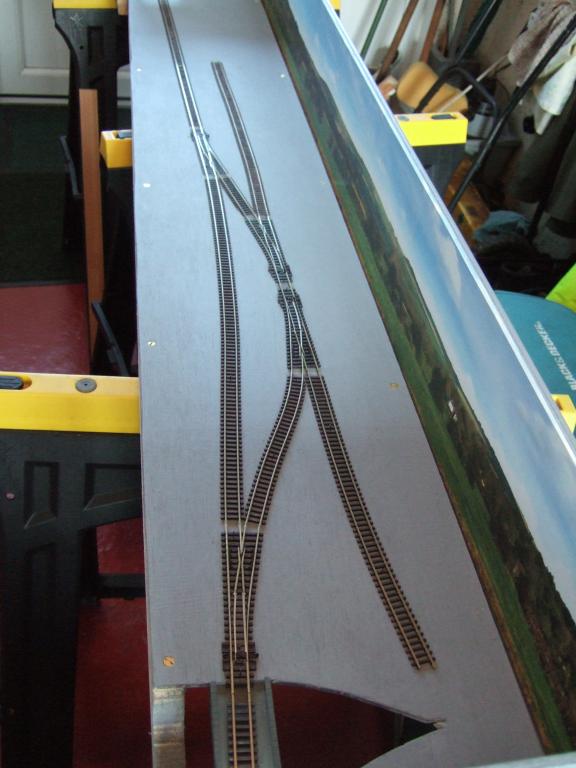
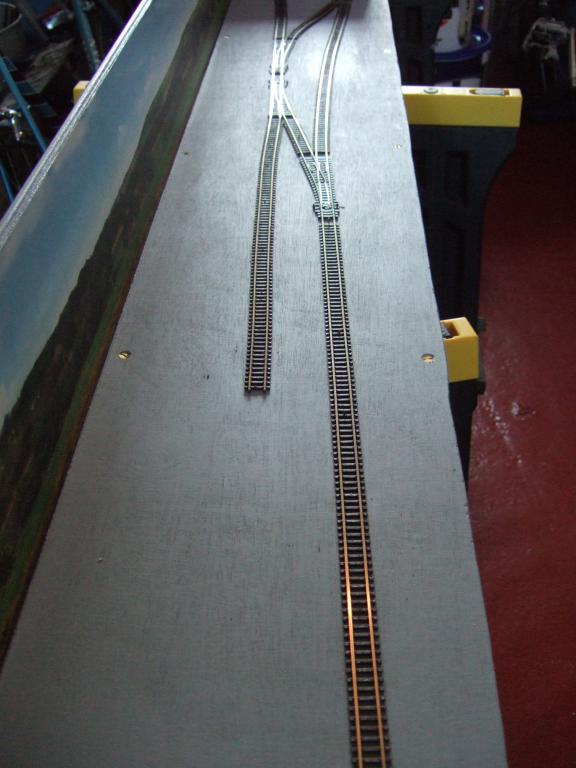
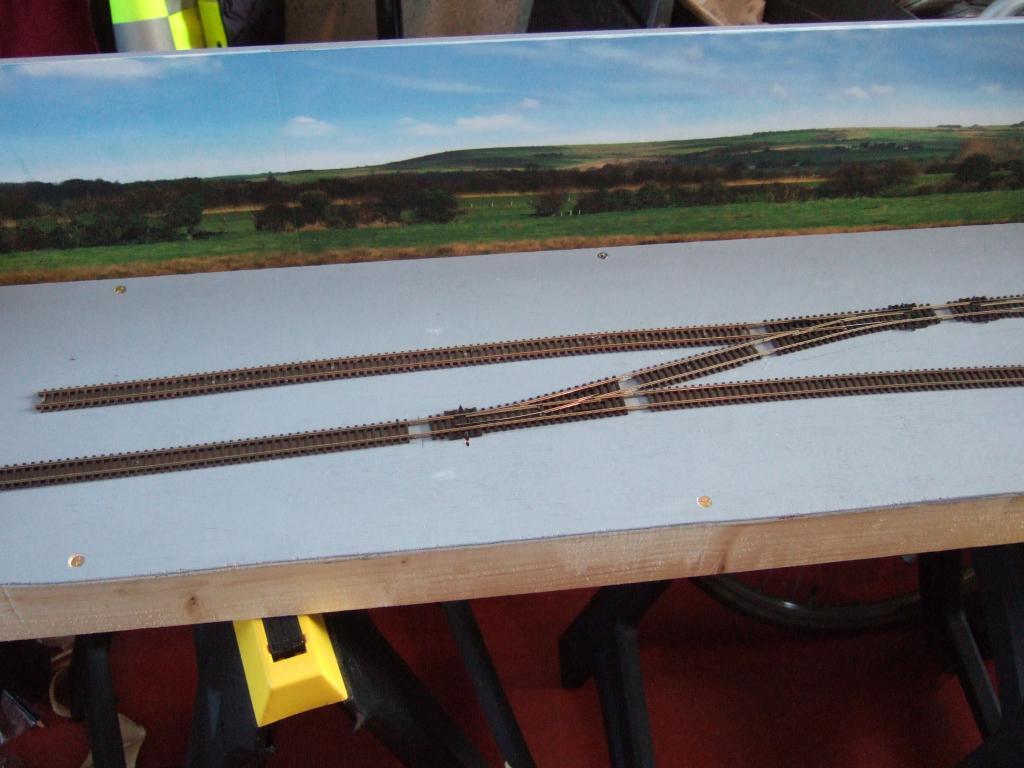
Track laid down ready to wire and fit buildings down.


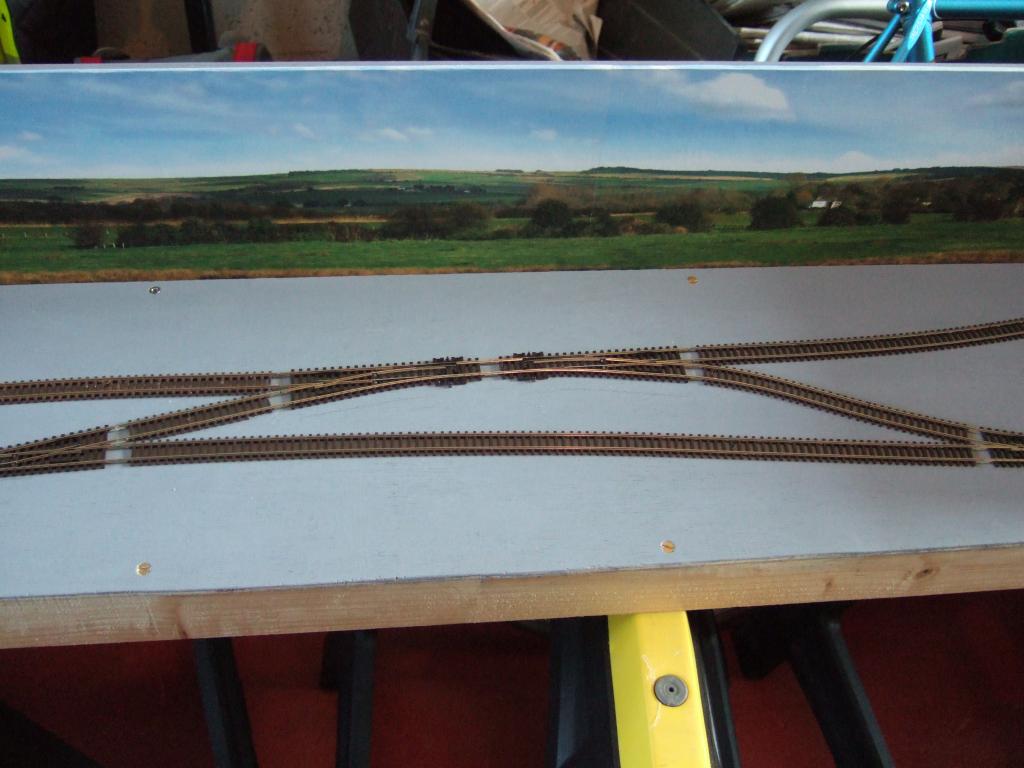
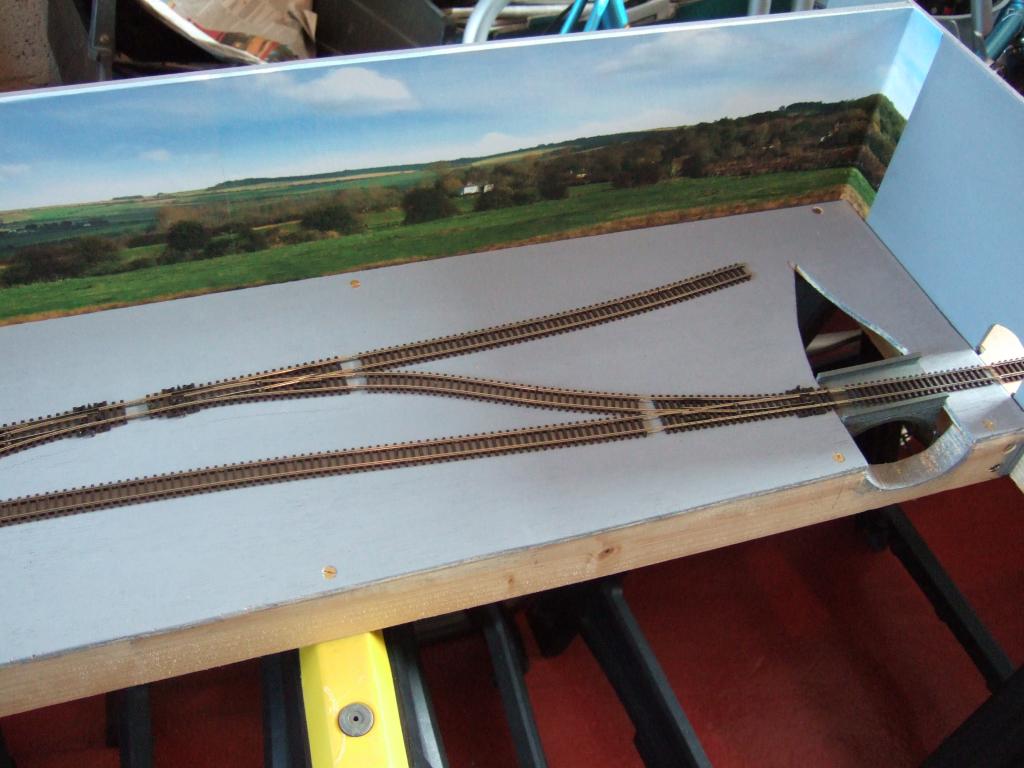

Shunters Yard Compact Shelf-top Exhibition Layout OO gauge GWR outline DCC controlled
in British Outline Modelling
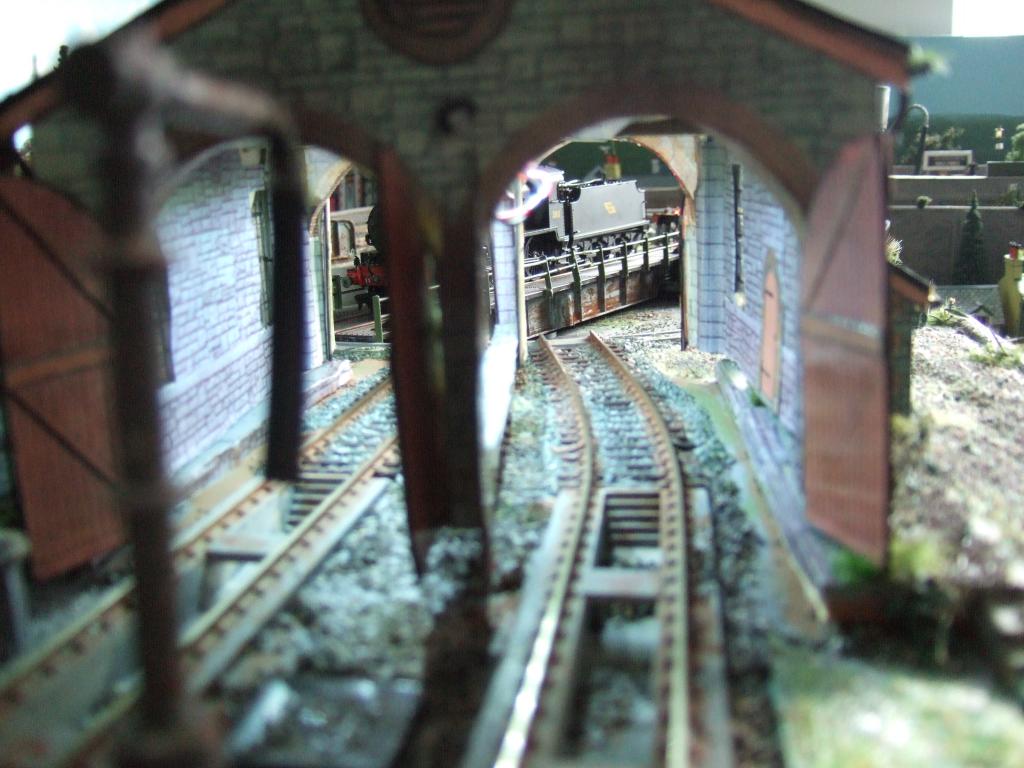
Posted
Shunters Yard has been completed for some time and has made its exhibition debut in Wexford in October 2015. I am just now getting around to posting some atmospheric photos of the final result. First a range of views without rolling stock...