Sean
-
Posts
889 -
Joined
-
Last visited
-
Days Won
3
Content Type
Profiles
Forums
Events
Gallery
Blogs
Community Map
Everything posted by Sean
-
oof thats no good for a cheapskate like me!
-
Give me a week or 2 and im planning to order a 201. 141 and C class in n guage, fingers crossed they arent too crude. just been put off by the postage price so far.
-
thanks mike. this is one of the threads i read through before finally taking the plunge on n. have you got any experience with the shapeways kits? i want to try and get them working on a kato chassis.
-
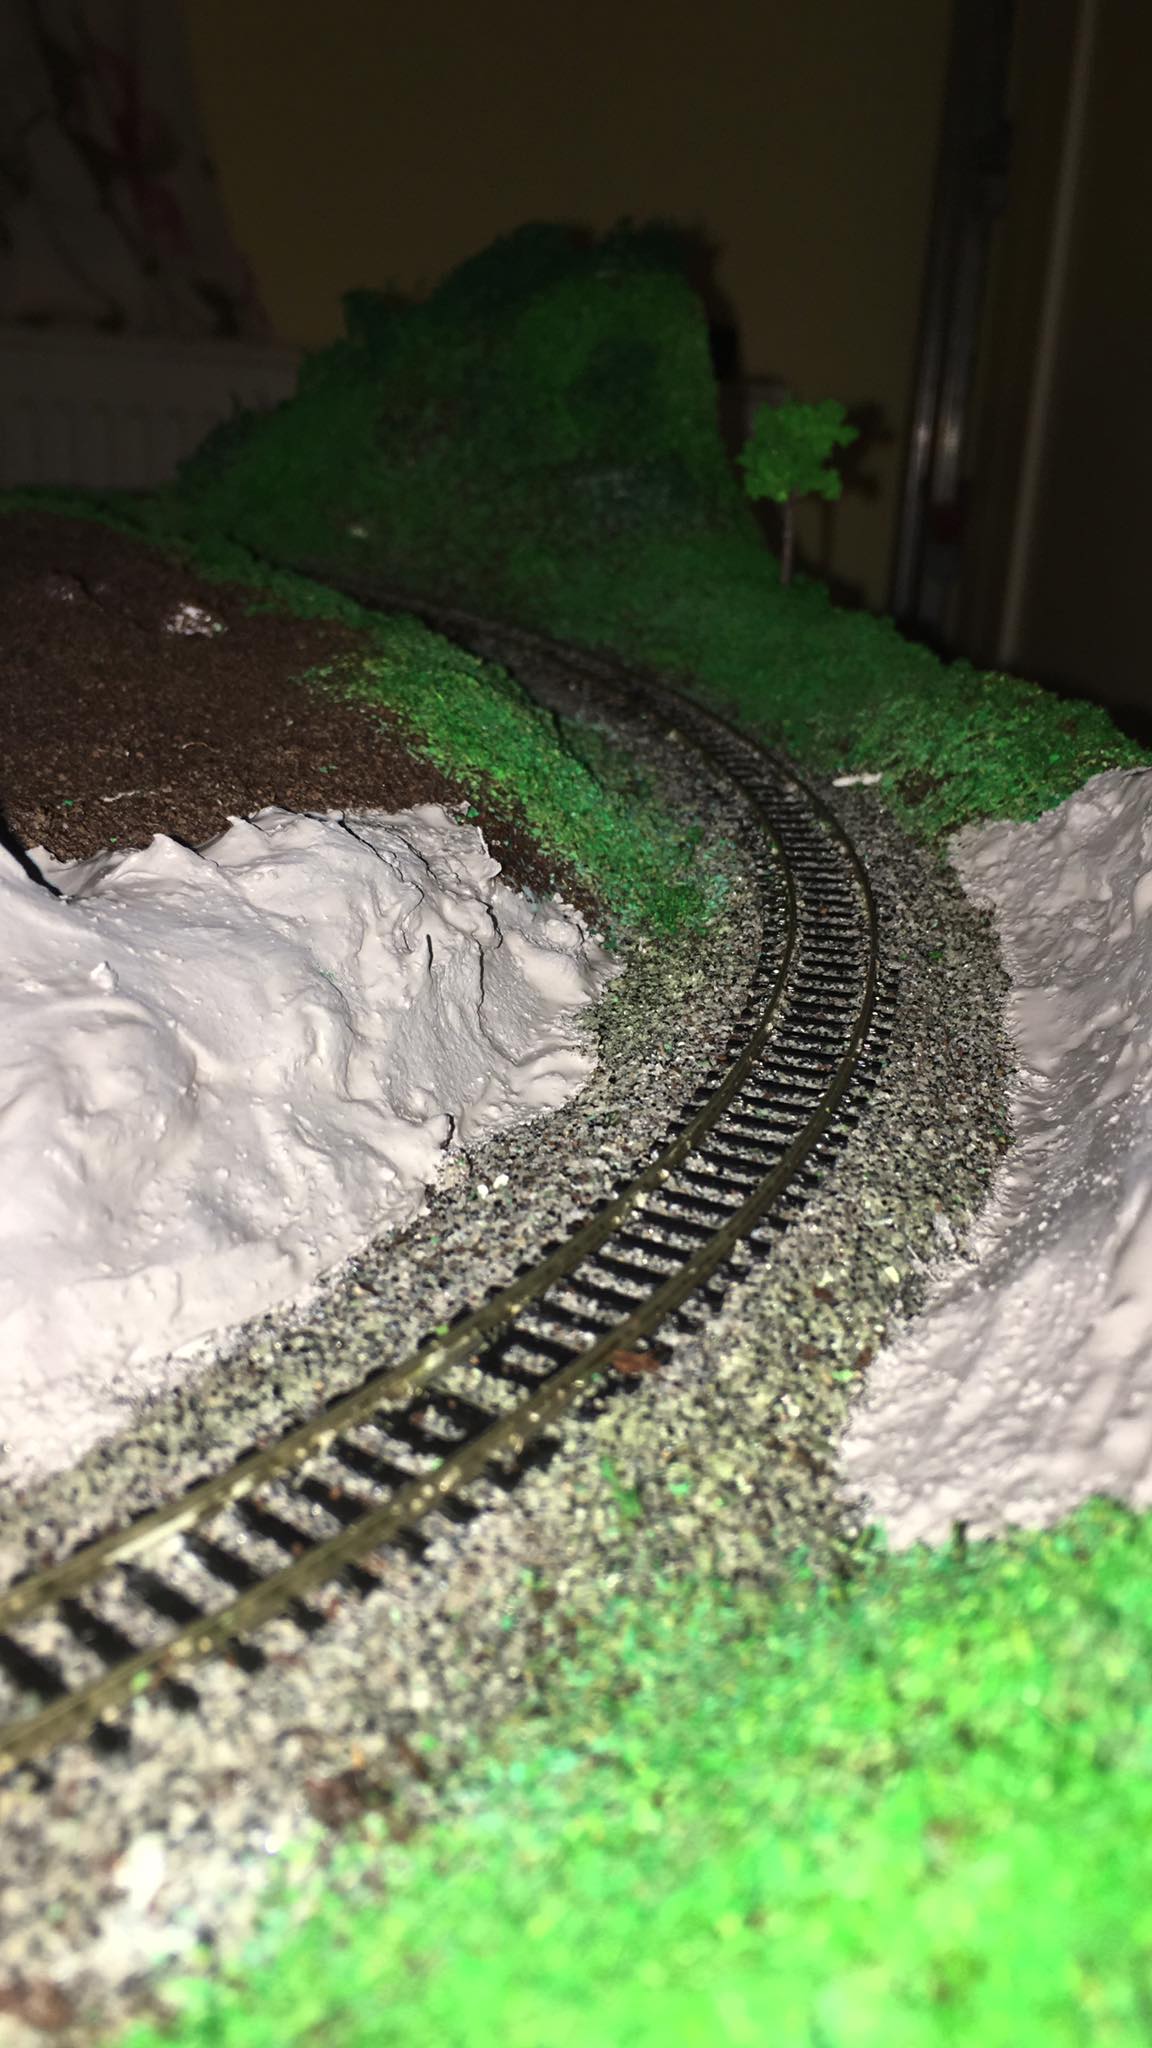
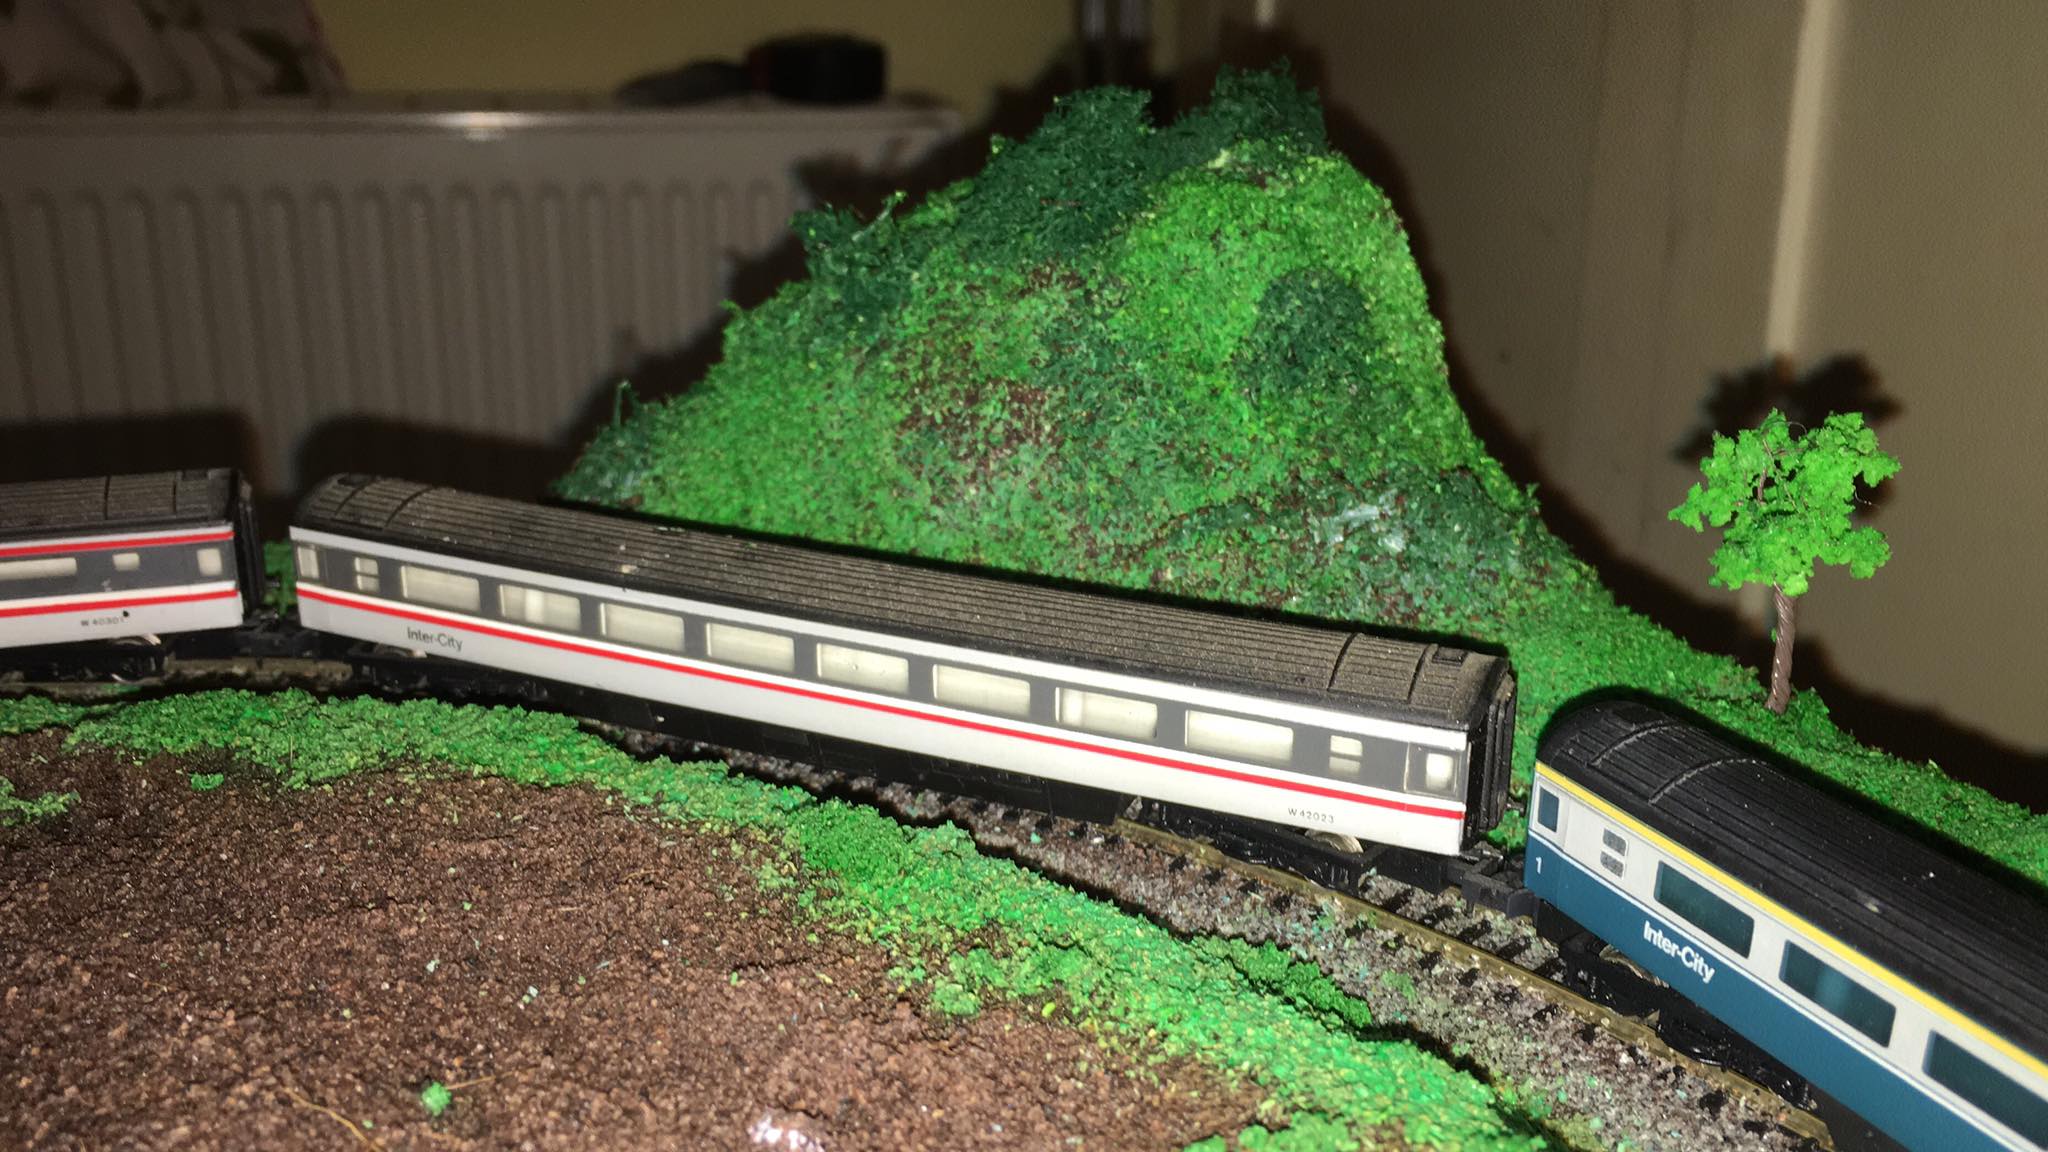
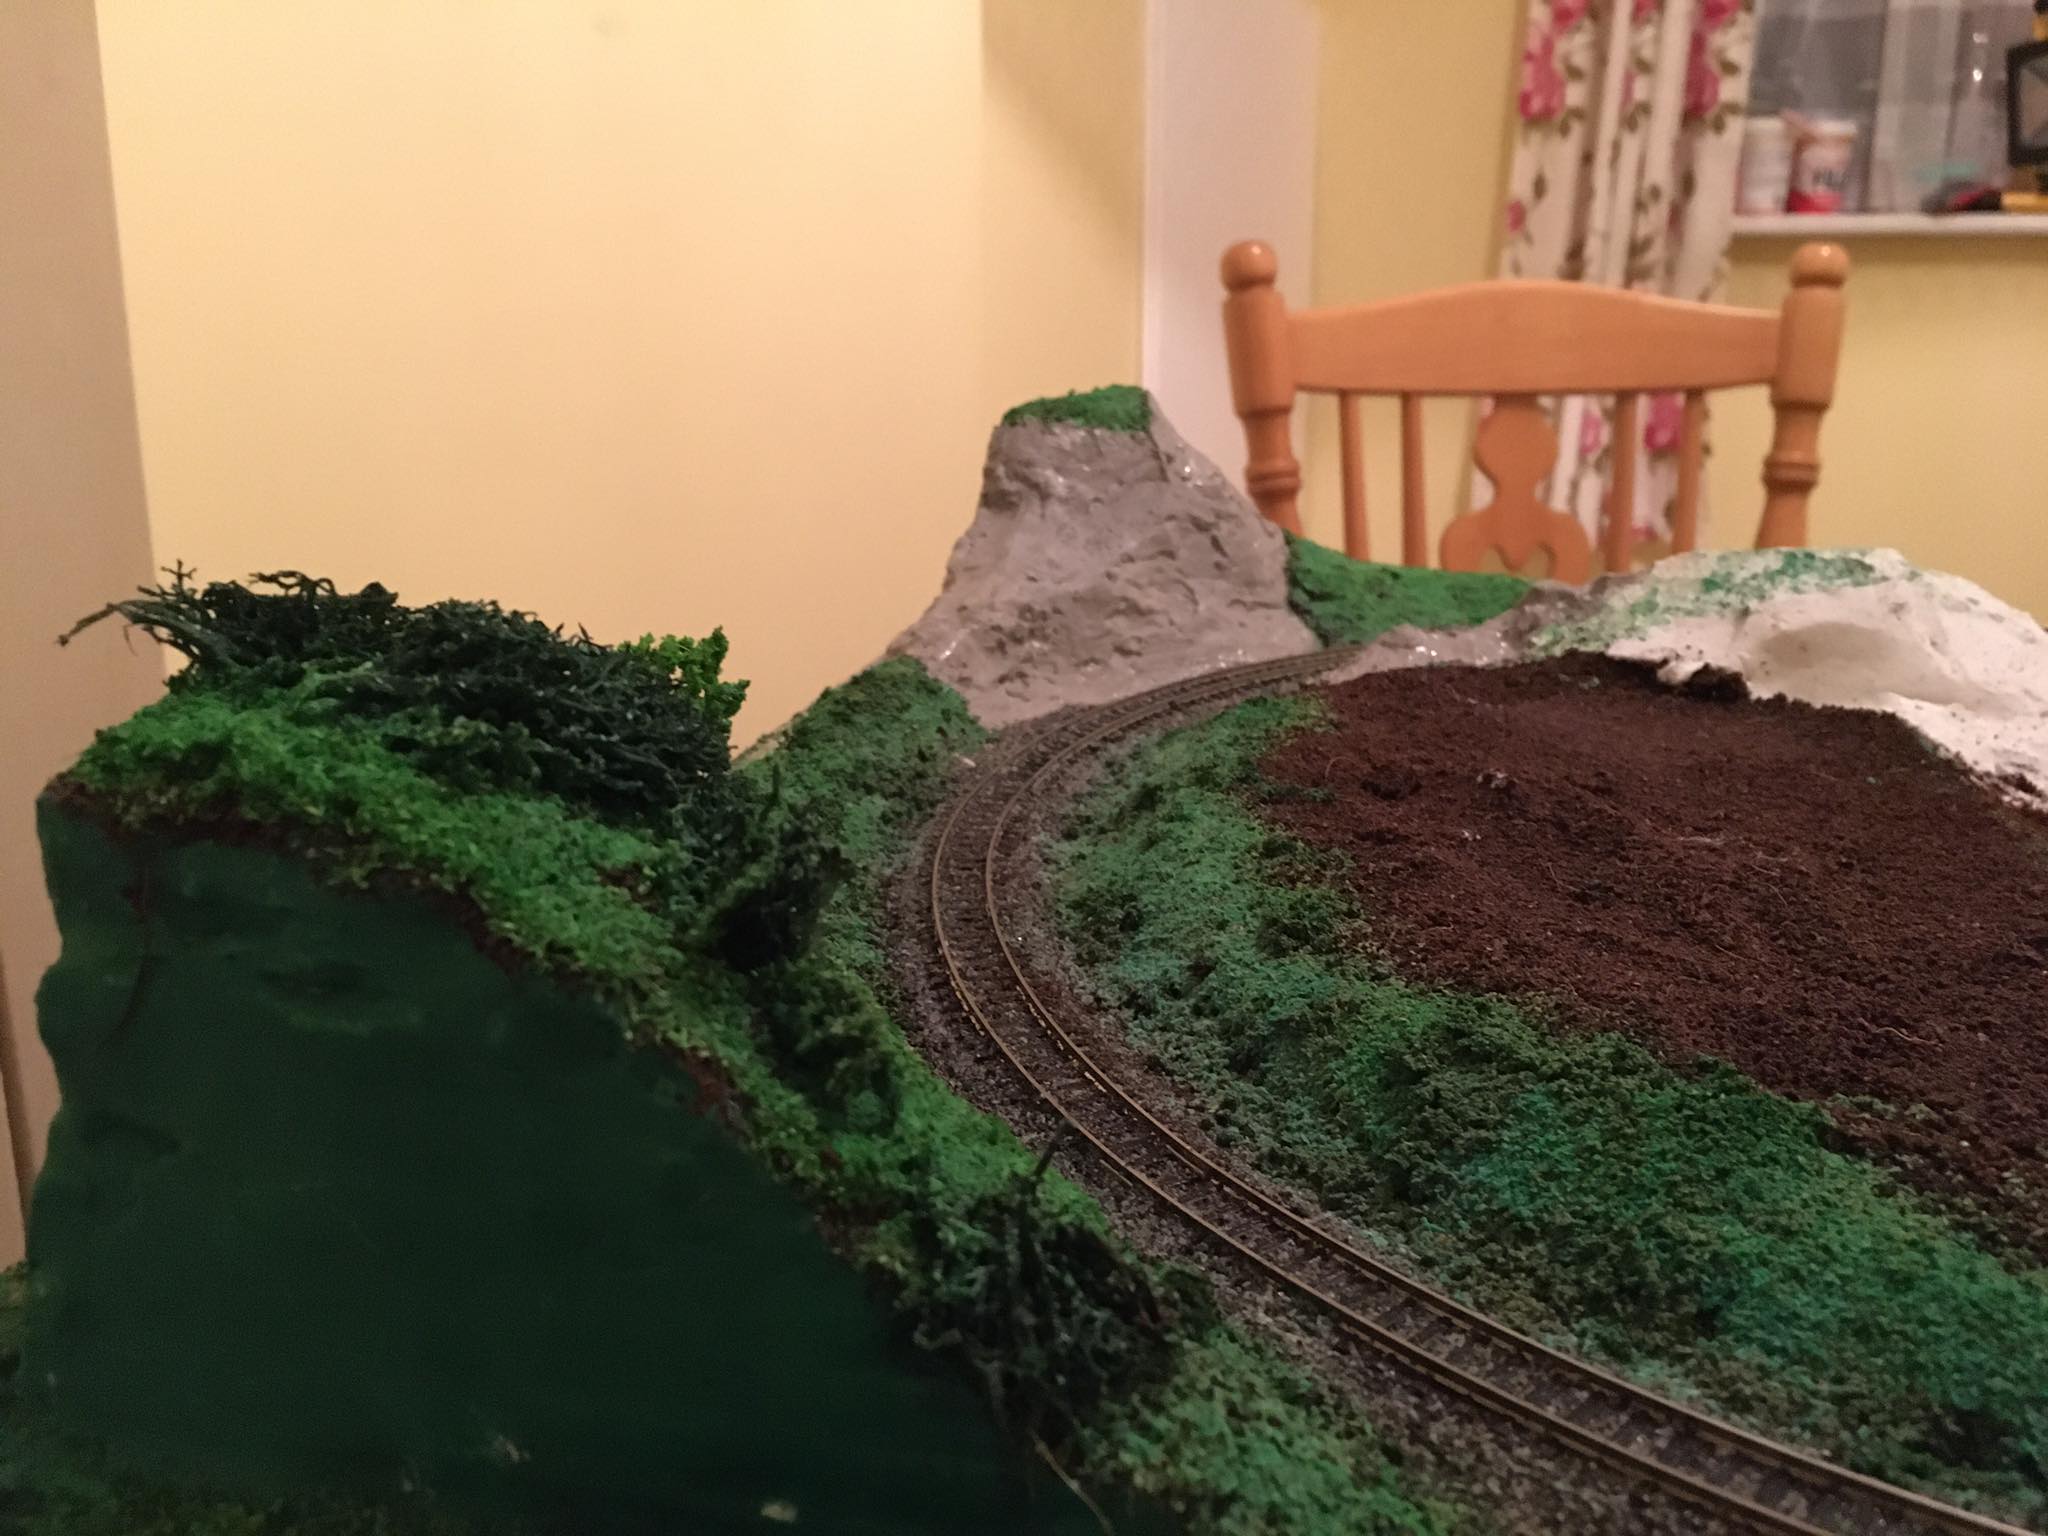
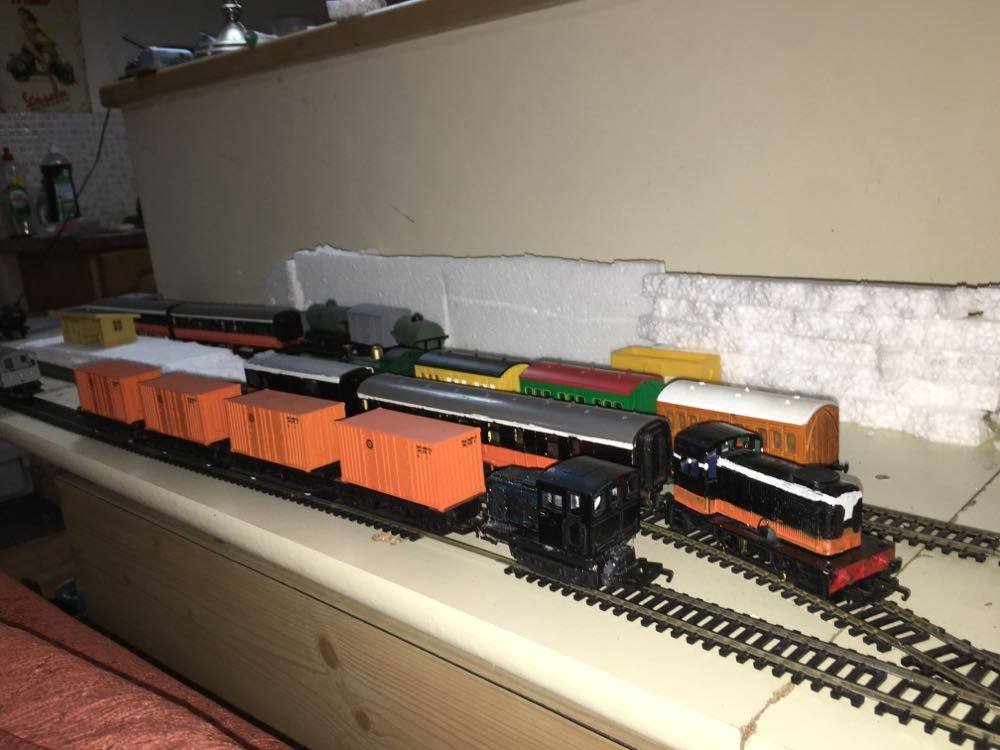
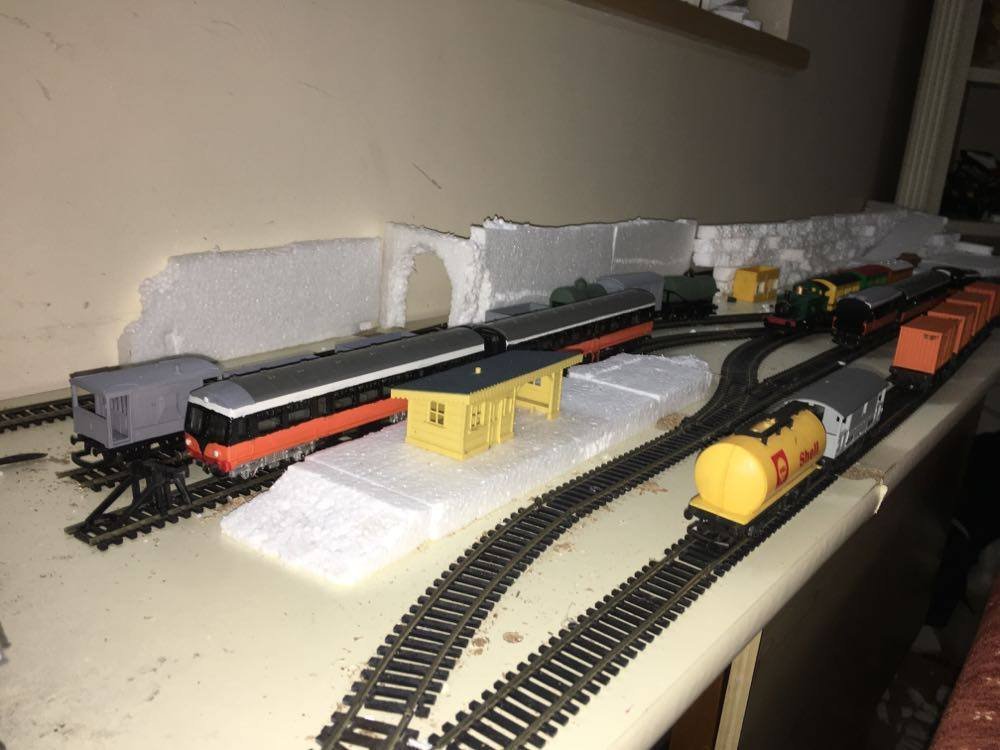
Been a nice productive weekend here on the line. im falling in love with n guage and the speed at which projects can progress and what can be gotten into the space. mk3's landed so i could finally size up the passenger platform. was pretty happy to get the final thing built to that curve on the first go. the platform can accomodate a 141 and a train of 3 mk3's with the loco or generator car coming to a stop in the tunnel. next, i decided i was gonna pick a section of track to start to build up a nice lineside scene and thought the trackside banks around the forest would be a perfect starting point. but first i said i would try a spot of ballasting, and well considering how well it was looking i kept on going until i had used up the entire bag, ittl need touching up here and there where a few bits of scatter has landed down on it or it did not stick completley. but to say ive never ballasted before im pretty chuffed. railheads will need a clean befoer i try a loco but stock is going over it nicely. the oval has also now been seperated into seperate sections using plastic fishplates for independant loco control on dc so these sections will need to be wired next. rocky area with last white section of hill to be completled, then i will be able to finish the forest floor and built that up. forest end is shaping up really nicely. I havent started on the actual forest yet as i only got around to filling the last hills etc today. its nice being finally able to take pictures that arent a sea of white polystyrene landforms. ex BR stock on tow to the inchicore paint shop after a recent aquisition.

-
thats exactly it dave, and this is really inspiring me to construct a larger n layout after seeing that i can run decently long trains even on this small layout. the mk3's arrived today so i can finally start on the full lenght station platform
-
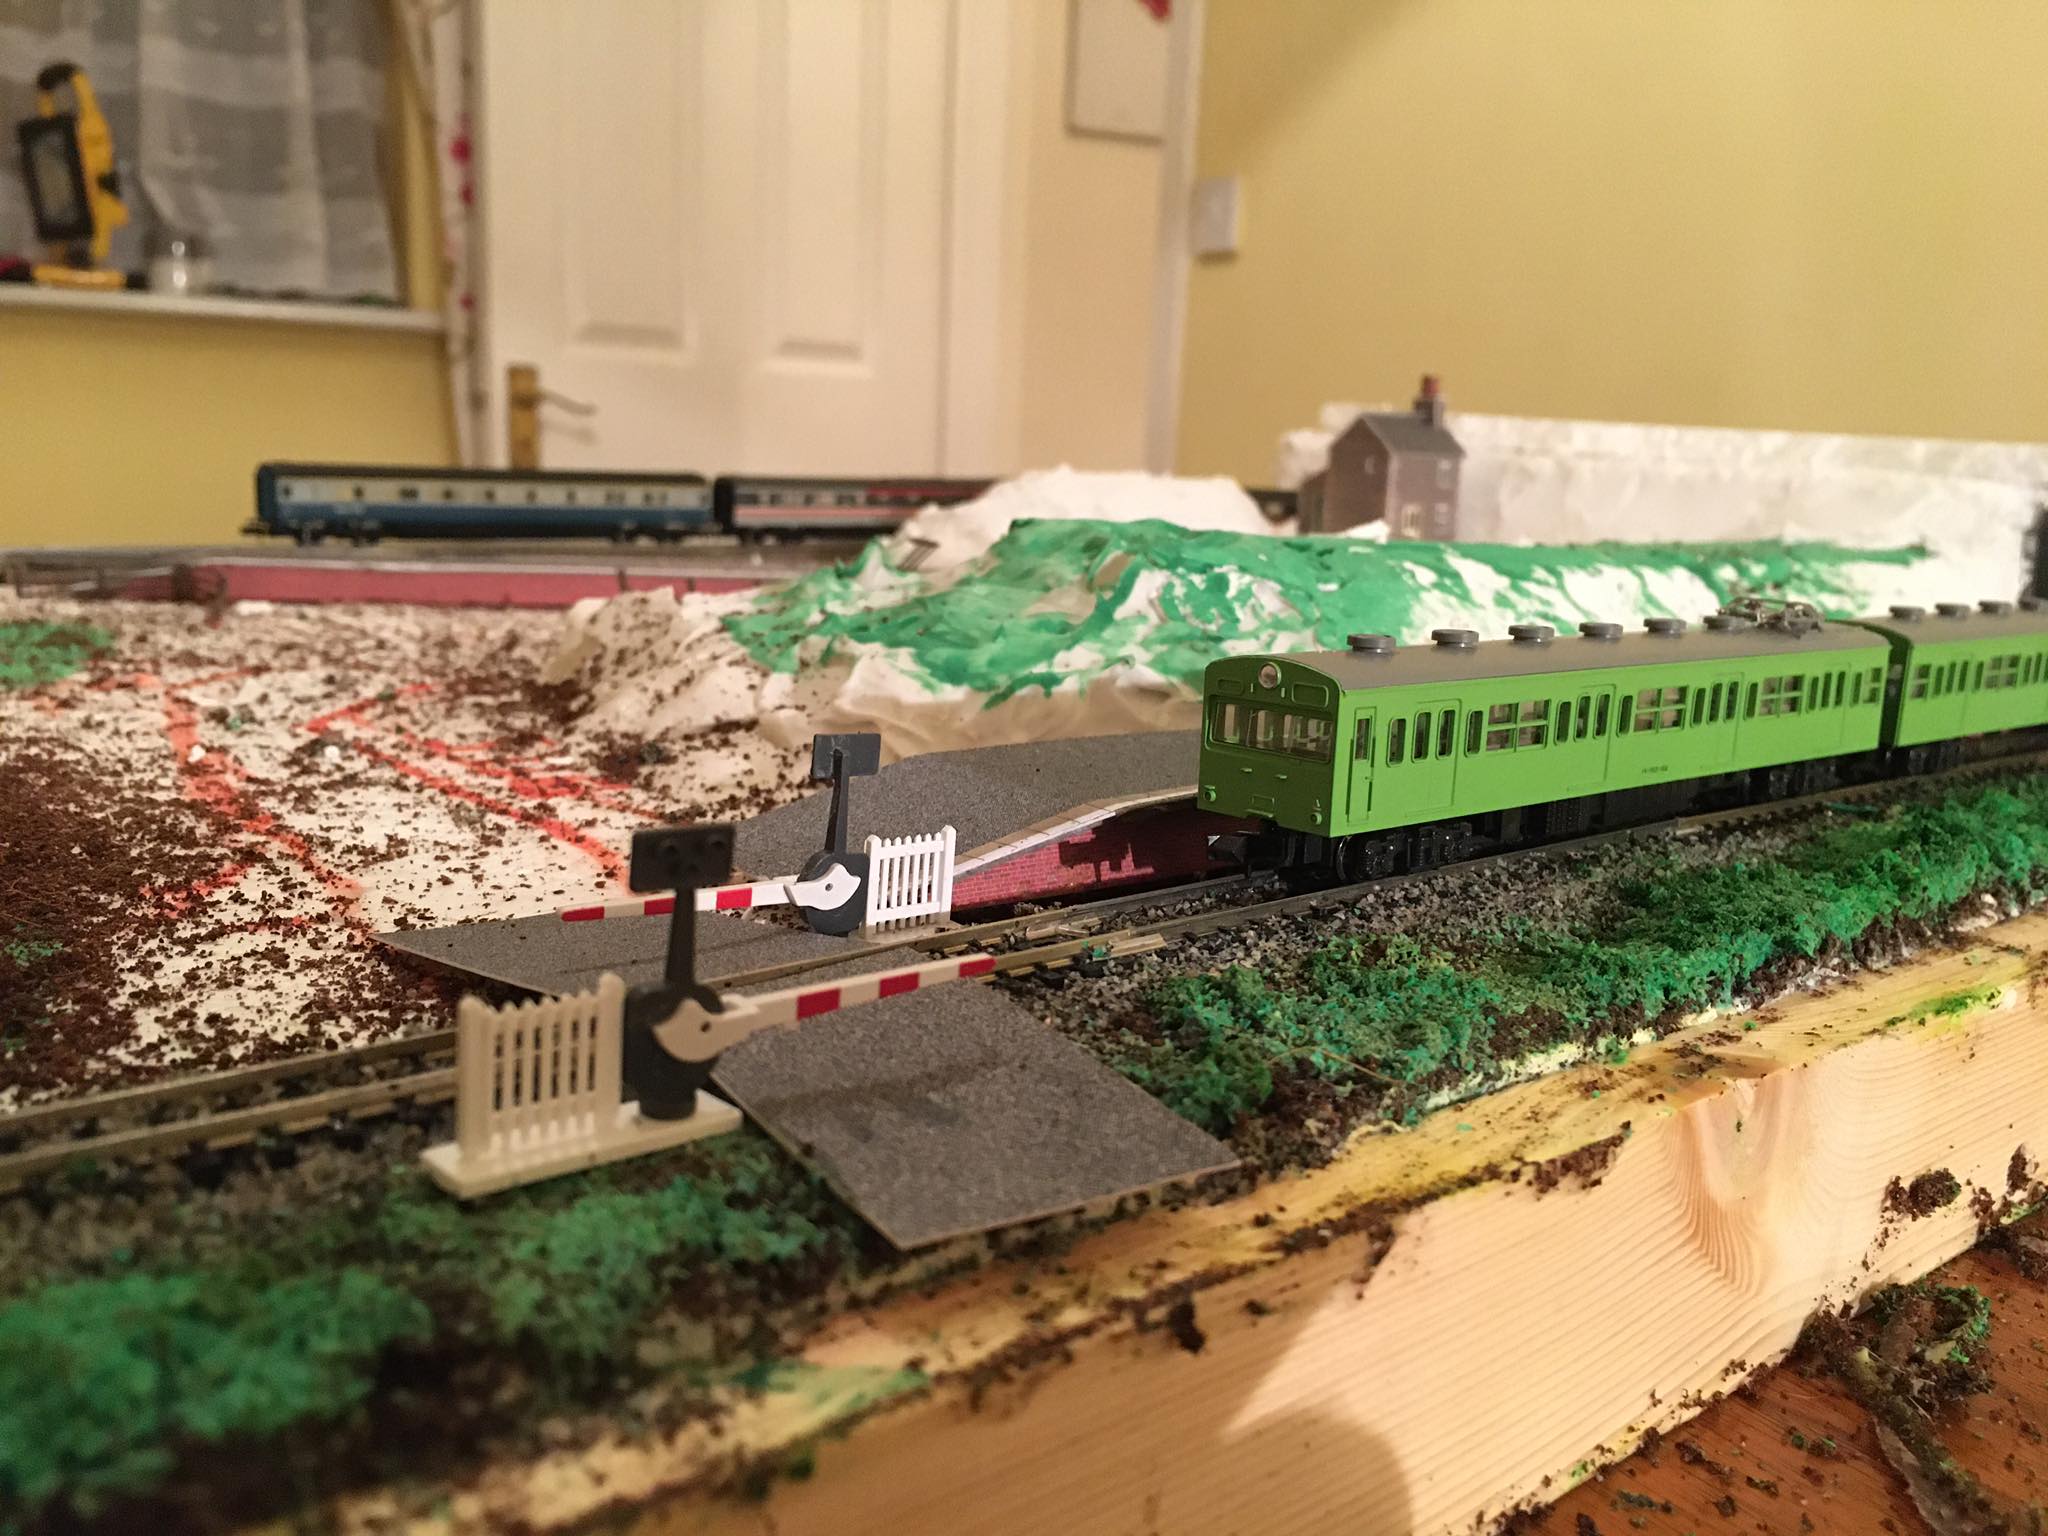
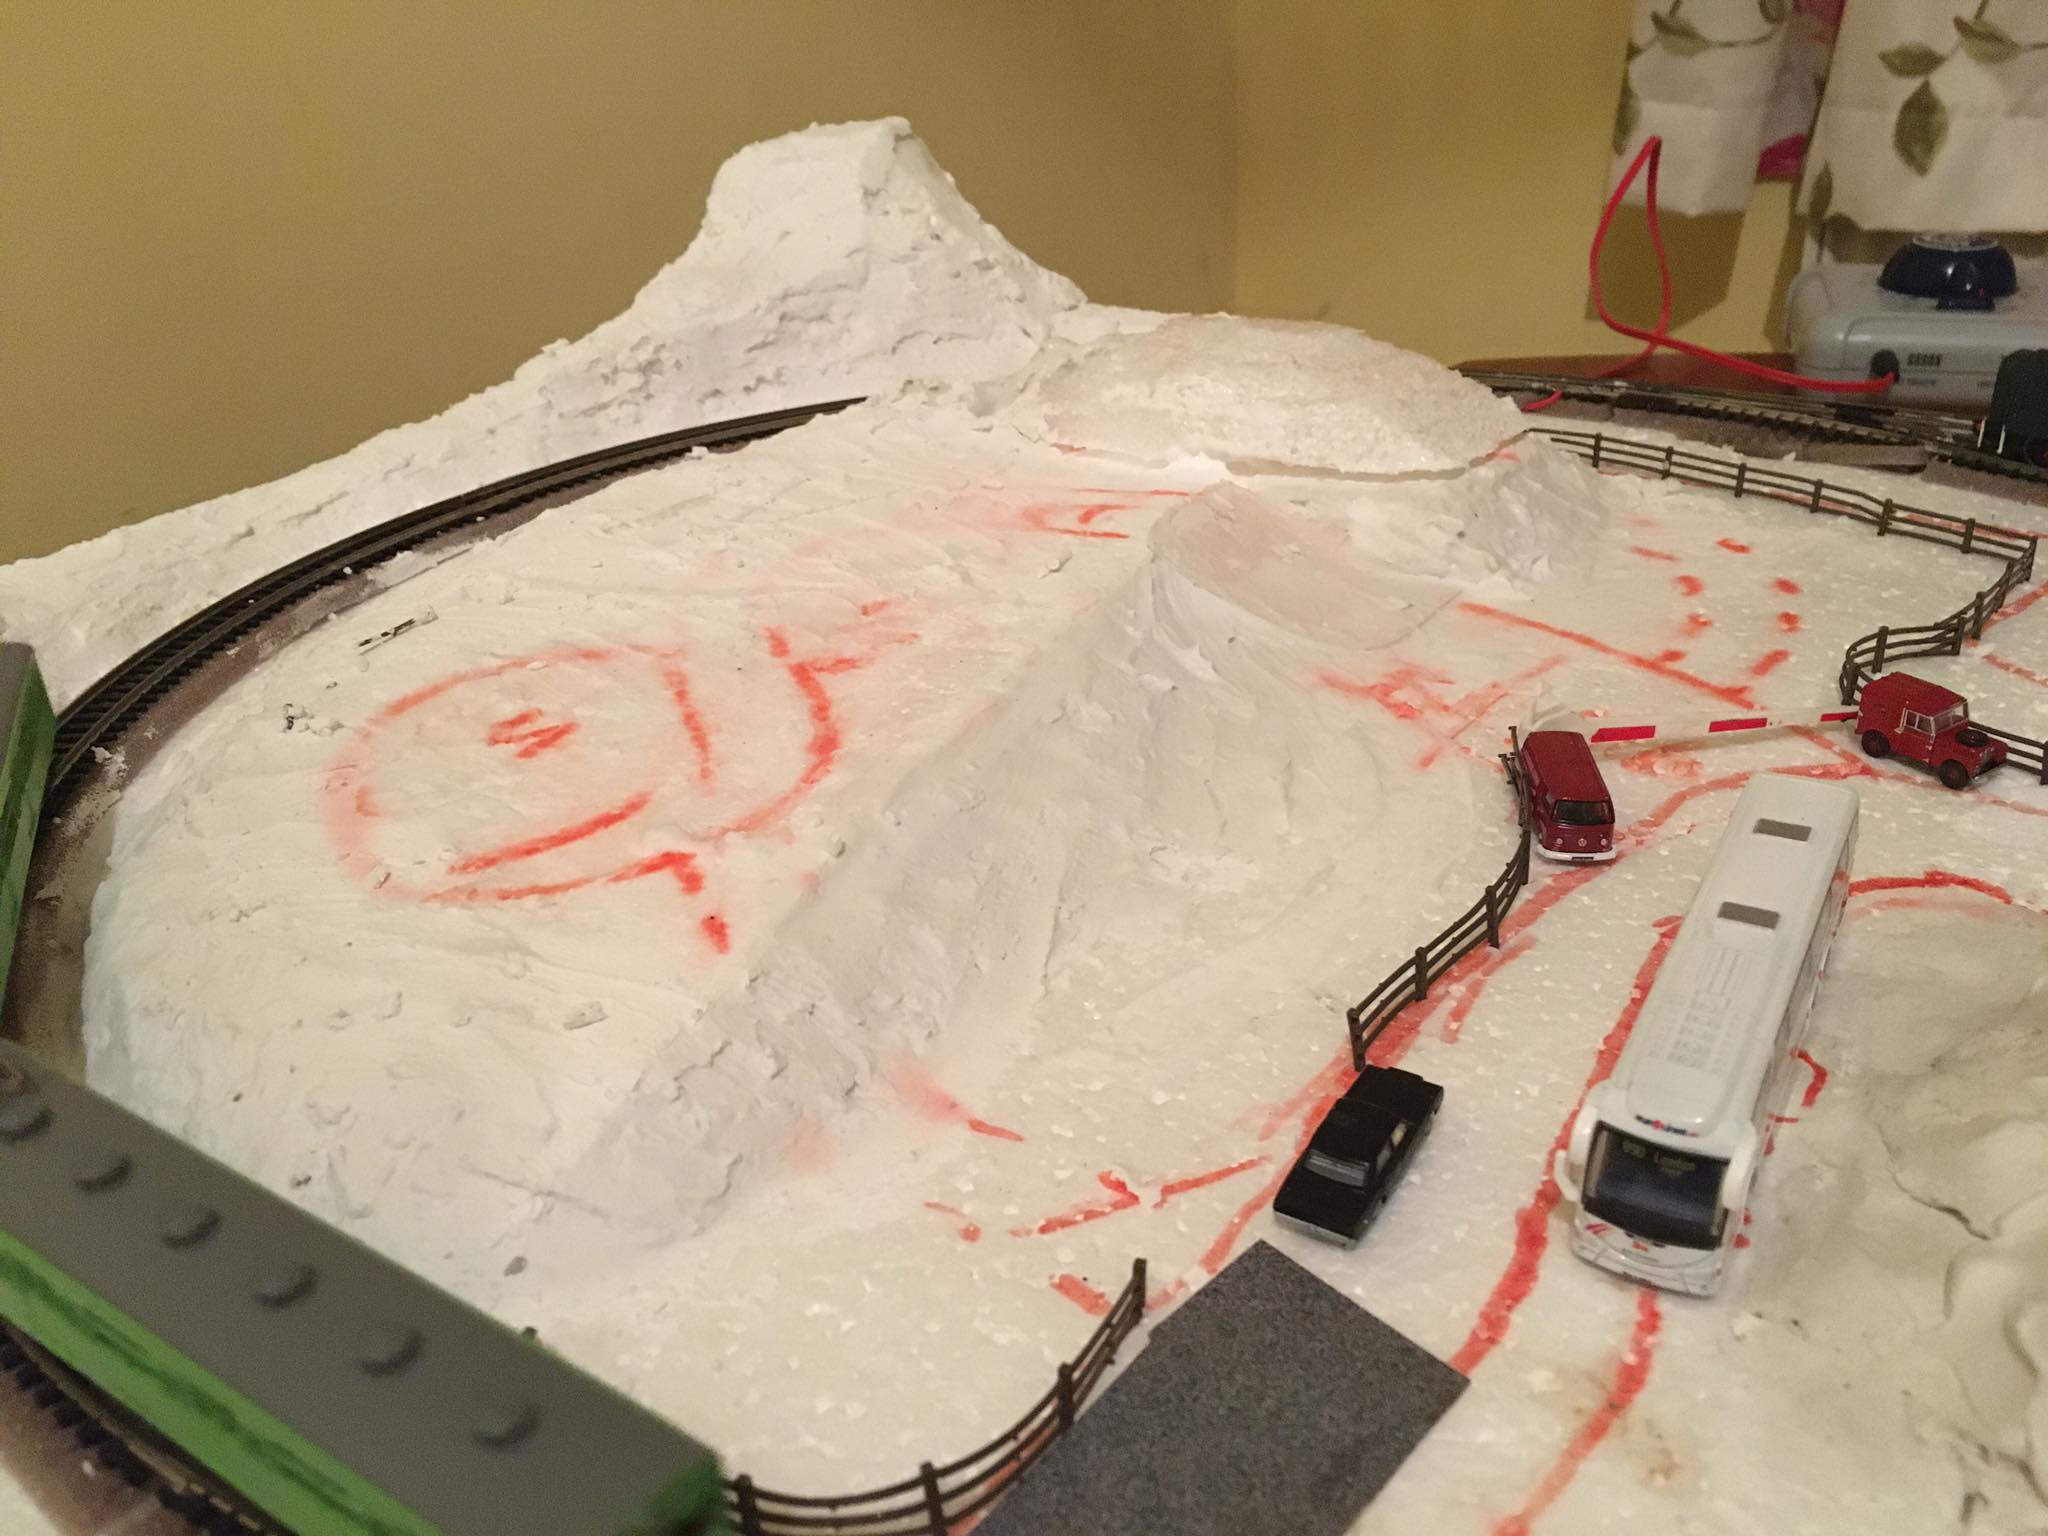
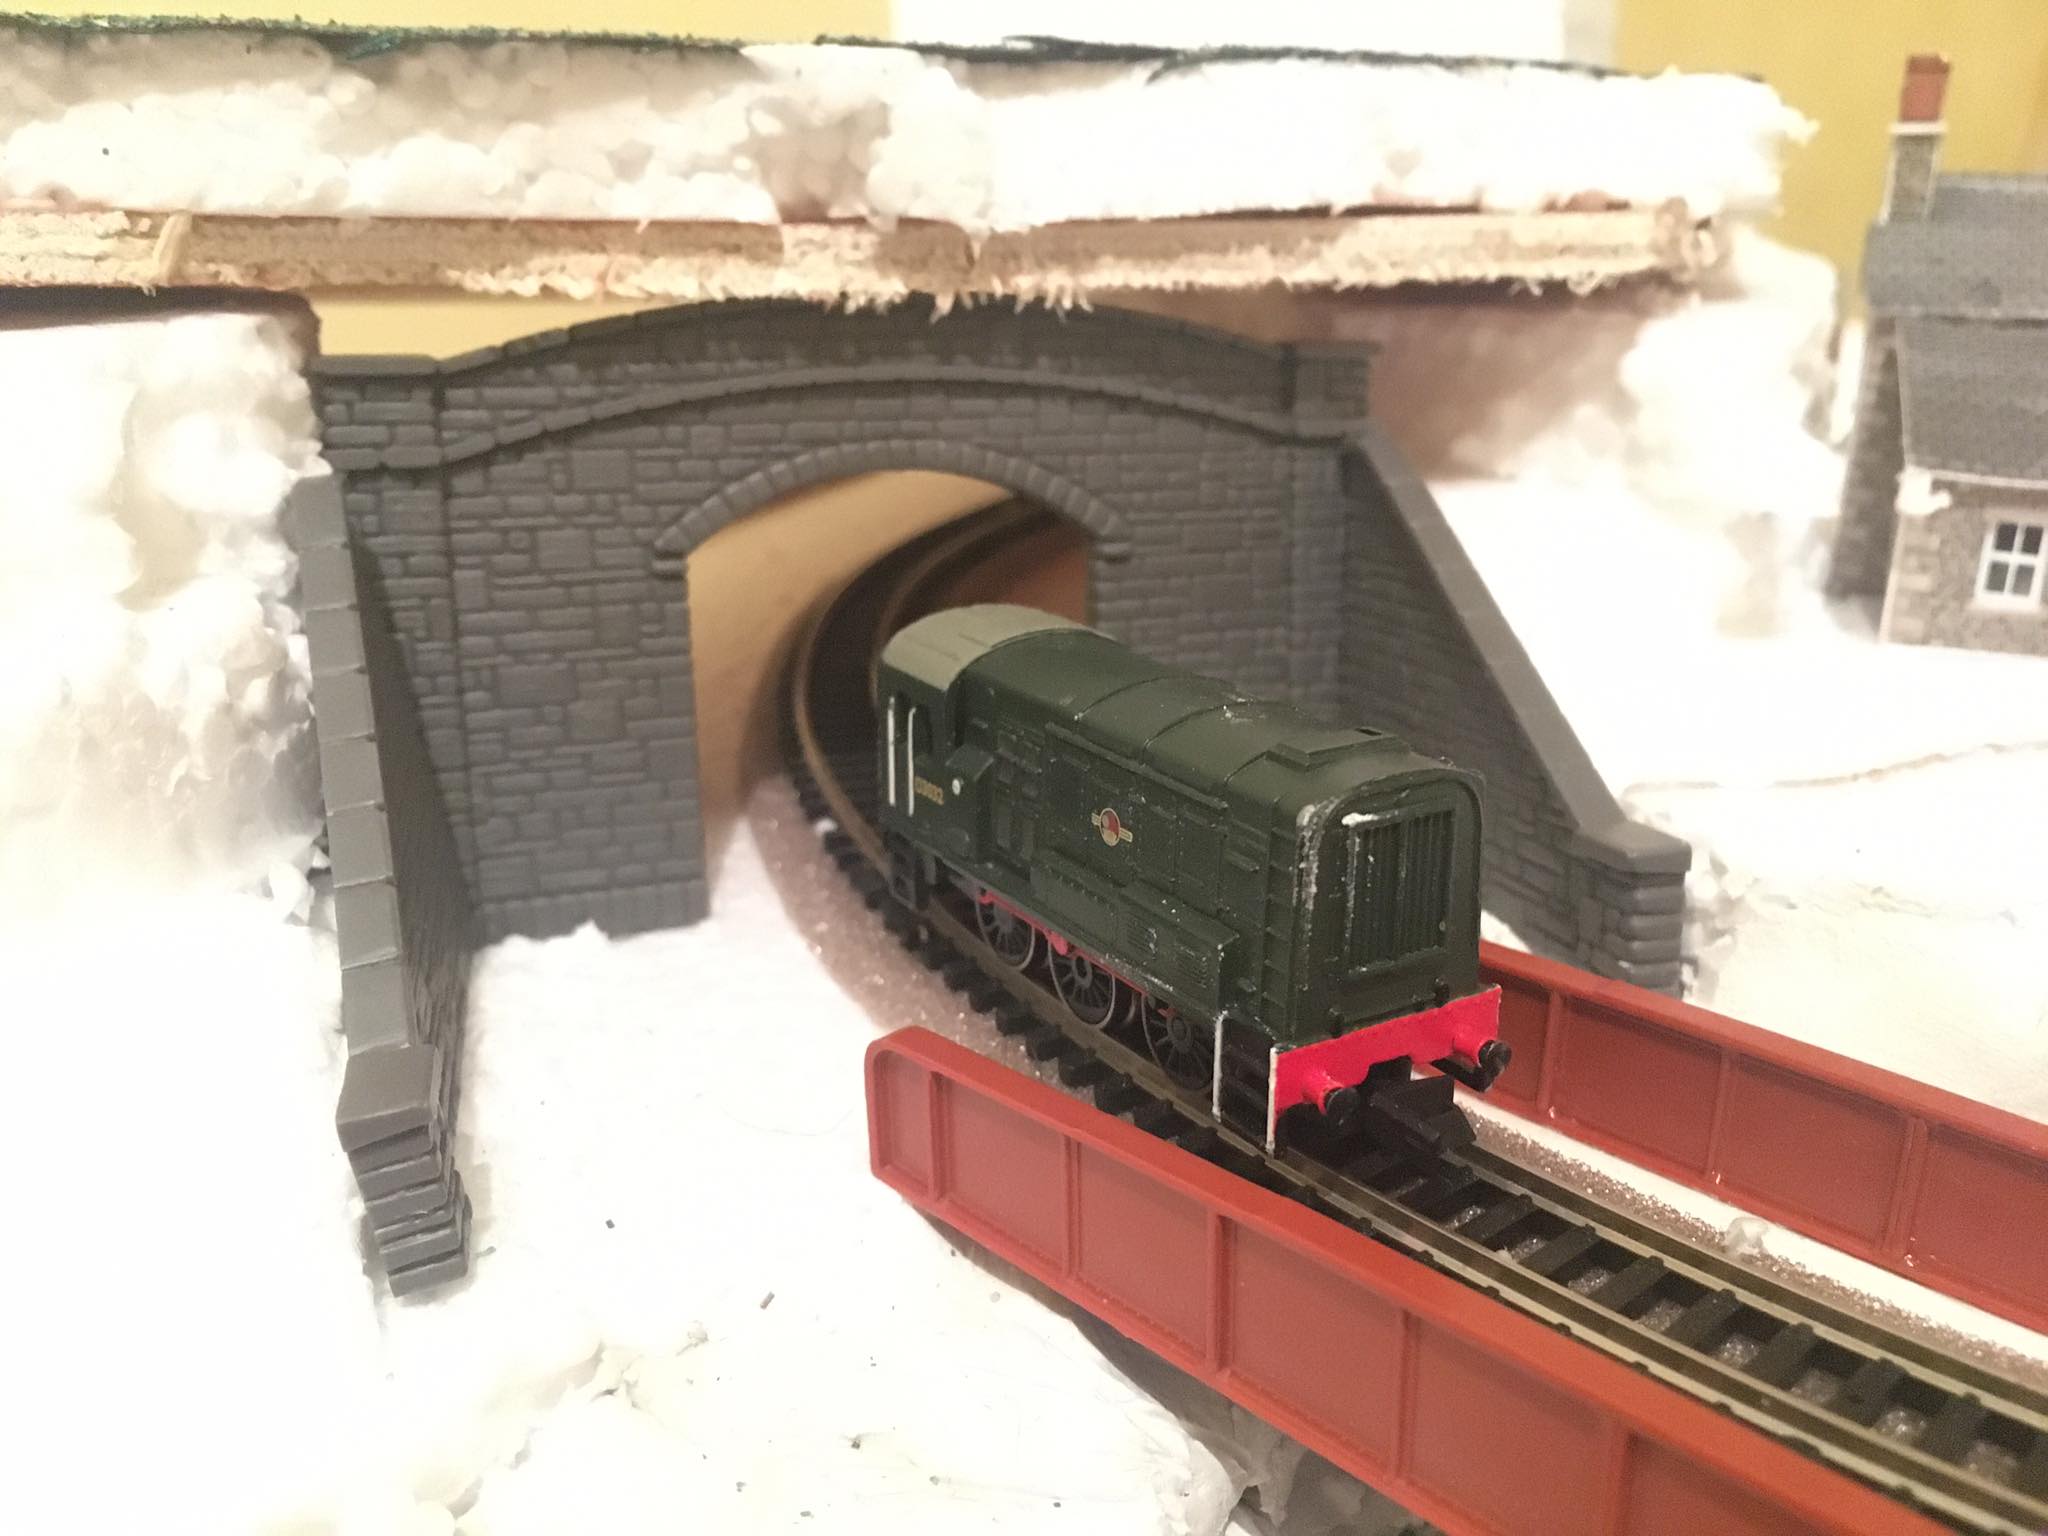
so with the micro shelved, and the TMD moving slowly, I was still without a place to run trains, particularly somewhere with a continuous run that i could just sit back to watch trains going around. until i started playing with an old farish class 08 set ive had for the last few years and looking at n gauge layouts on youtube i quickly fell in love with the idea of building a small layout in N as practically i do not have the space to create a decent sized oo layout. and my scatter brain approach tends to find it hard to actually comitting to a plan for a large scale layout this has become much more manageable and fun. Its only a simple oval with a single track station and a yard/siding on the other side, and im using this build to really focus on improving my scenic work and actually finish a project so that is ideal for what I am doing, there are a couple of isolated "dead" points in the trackwork which can be controlled via the controller in order to allow one train to stand whilst the other runs to the station freeing up the siding for them to swap over. there will be no backscene, as i intend to operate the layout from different "scenes" which will change depending on what side of the base board the user decides to sit at. There will be some efforts made to visually obscure the scenes which the user is not sitting at as this way points of interest can change over time. there will be a few unusual features on this layout such as a small coillte forest with 4x4 tracking and a ruined round tower which attracts tourists. I am trying to recreate the feel of what a railway running through the dublin/wicklow mountains may feel like but whilst also incorporating props from some of my other hobbies. the station itself will be based upon kilcoole as it is the only single track station i really know of around me but the line itself completley fictional and without too specific an era. as N presents enough challenges as it is already forest area slowly being fenced off and terrain building up. not a big area but the local 4x4 club hold leasehold for offroading here. out of a tunnel and over the bridge. fully loaded siding as the dart service runs round. this is just a simple yard/ loading dock. IMG_6600.MOV IMG_6602.MOV IMG_6607.MOV few videos capturing the atmosphere of just what im trying to achieve with this layout, im really looking forward to modelling this one to completion. I do particularly like the dart station level crossing scene.
-
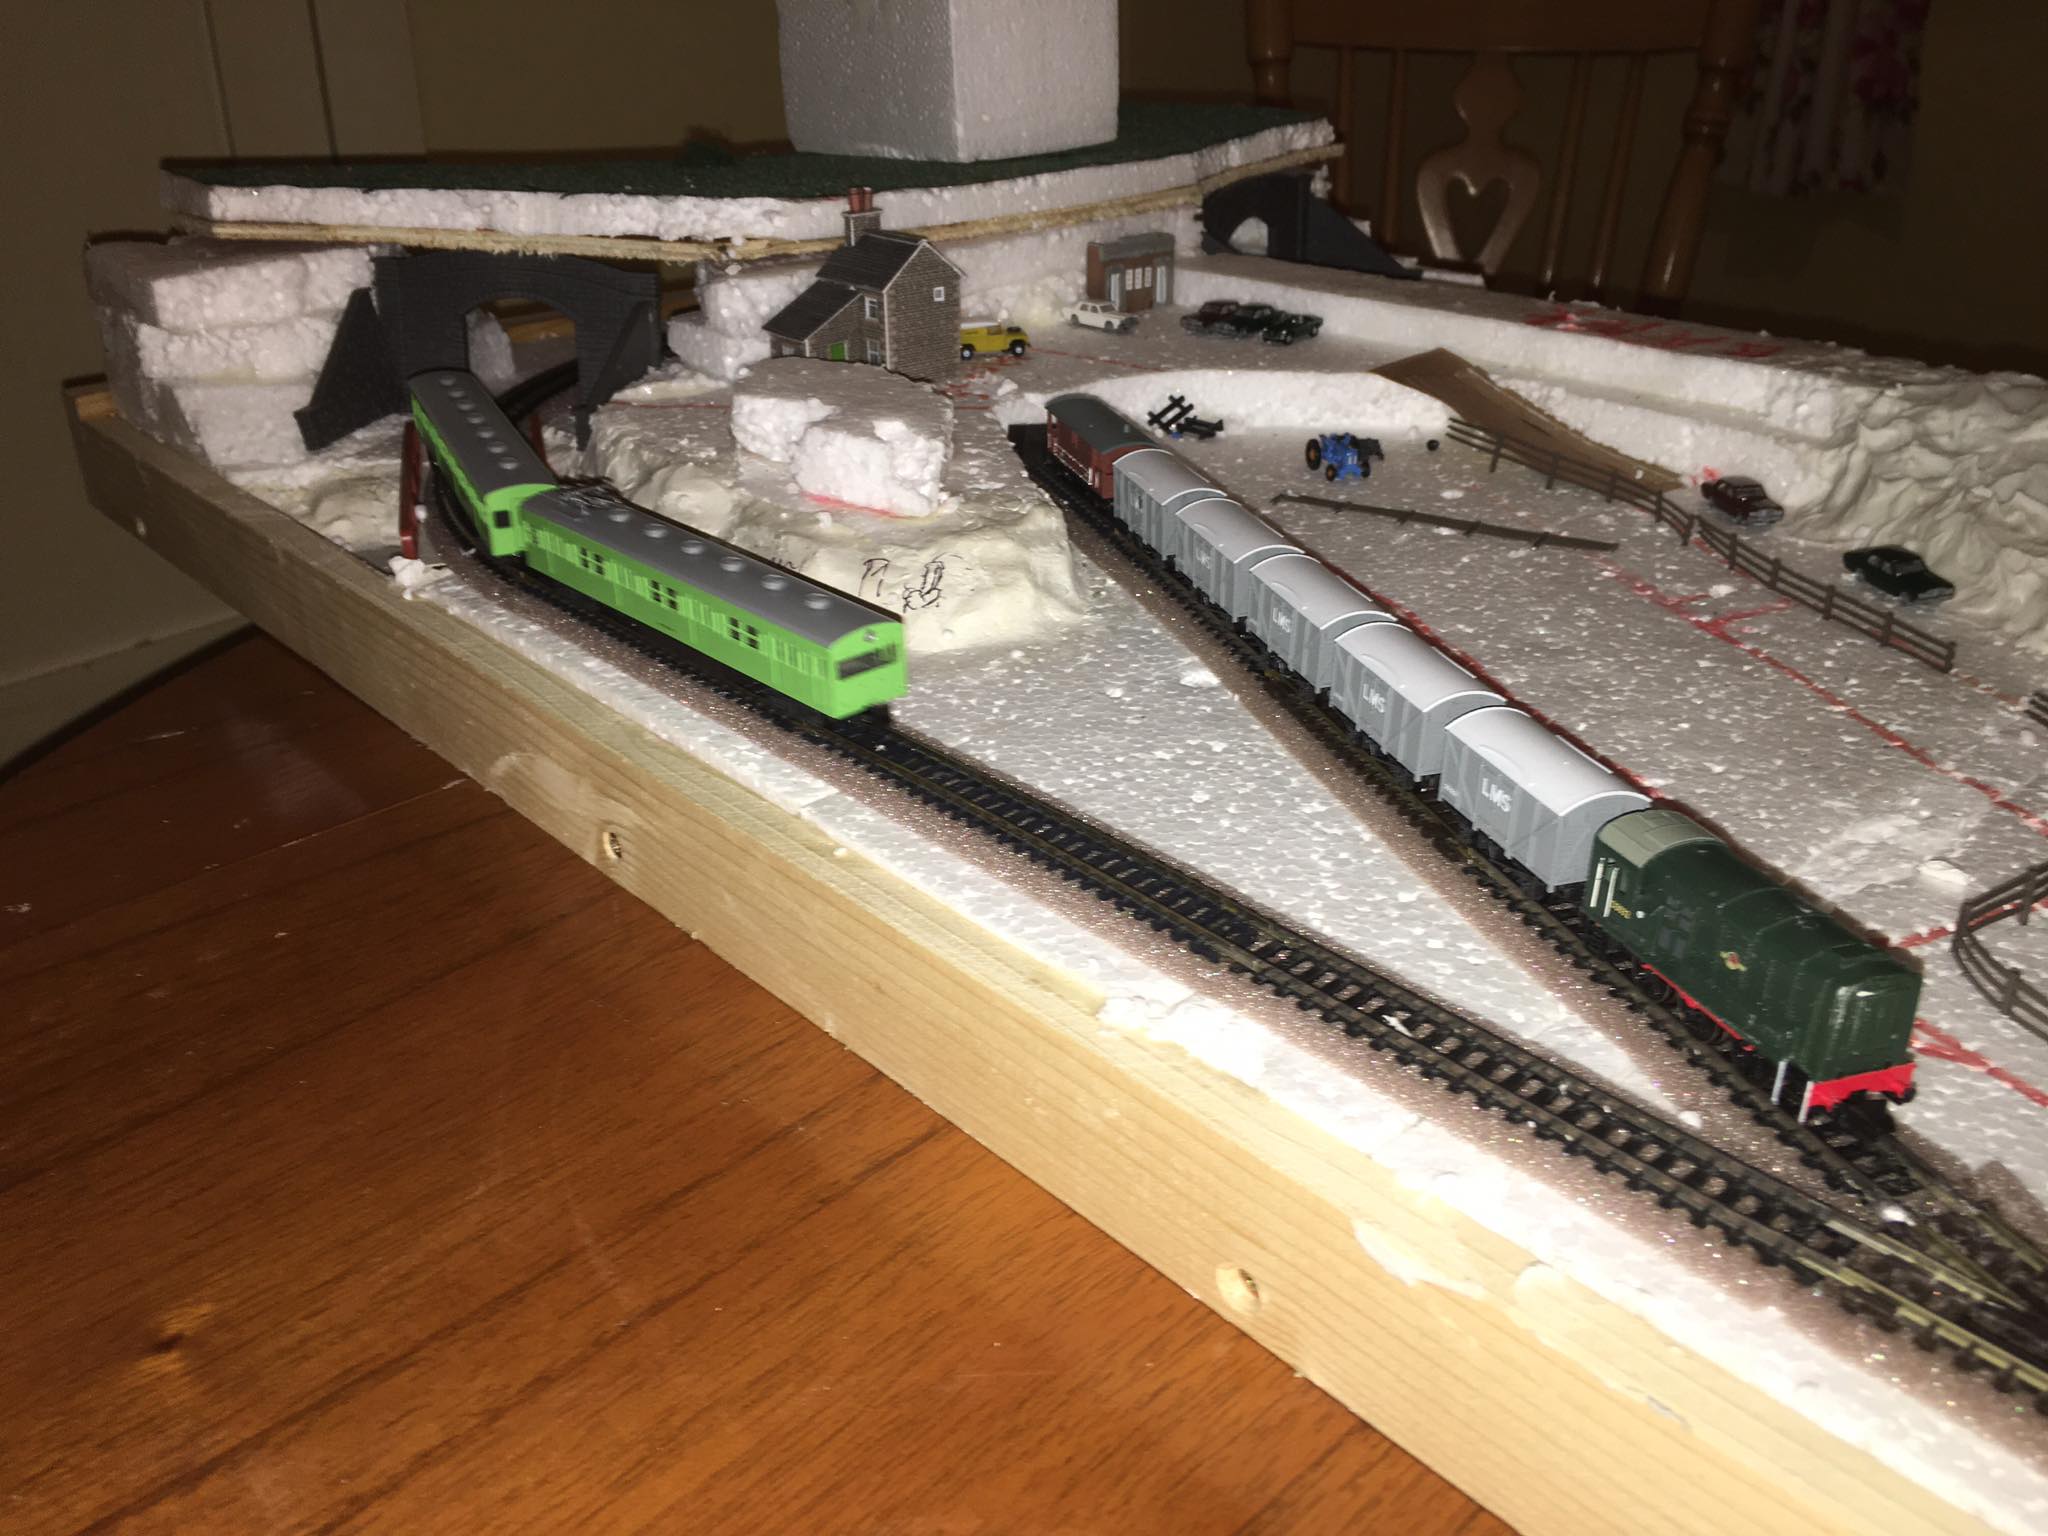
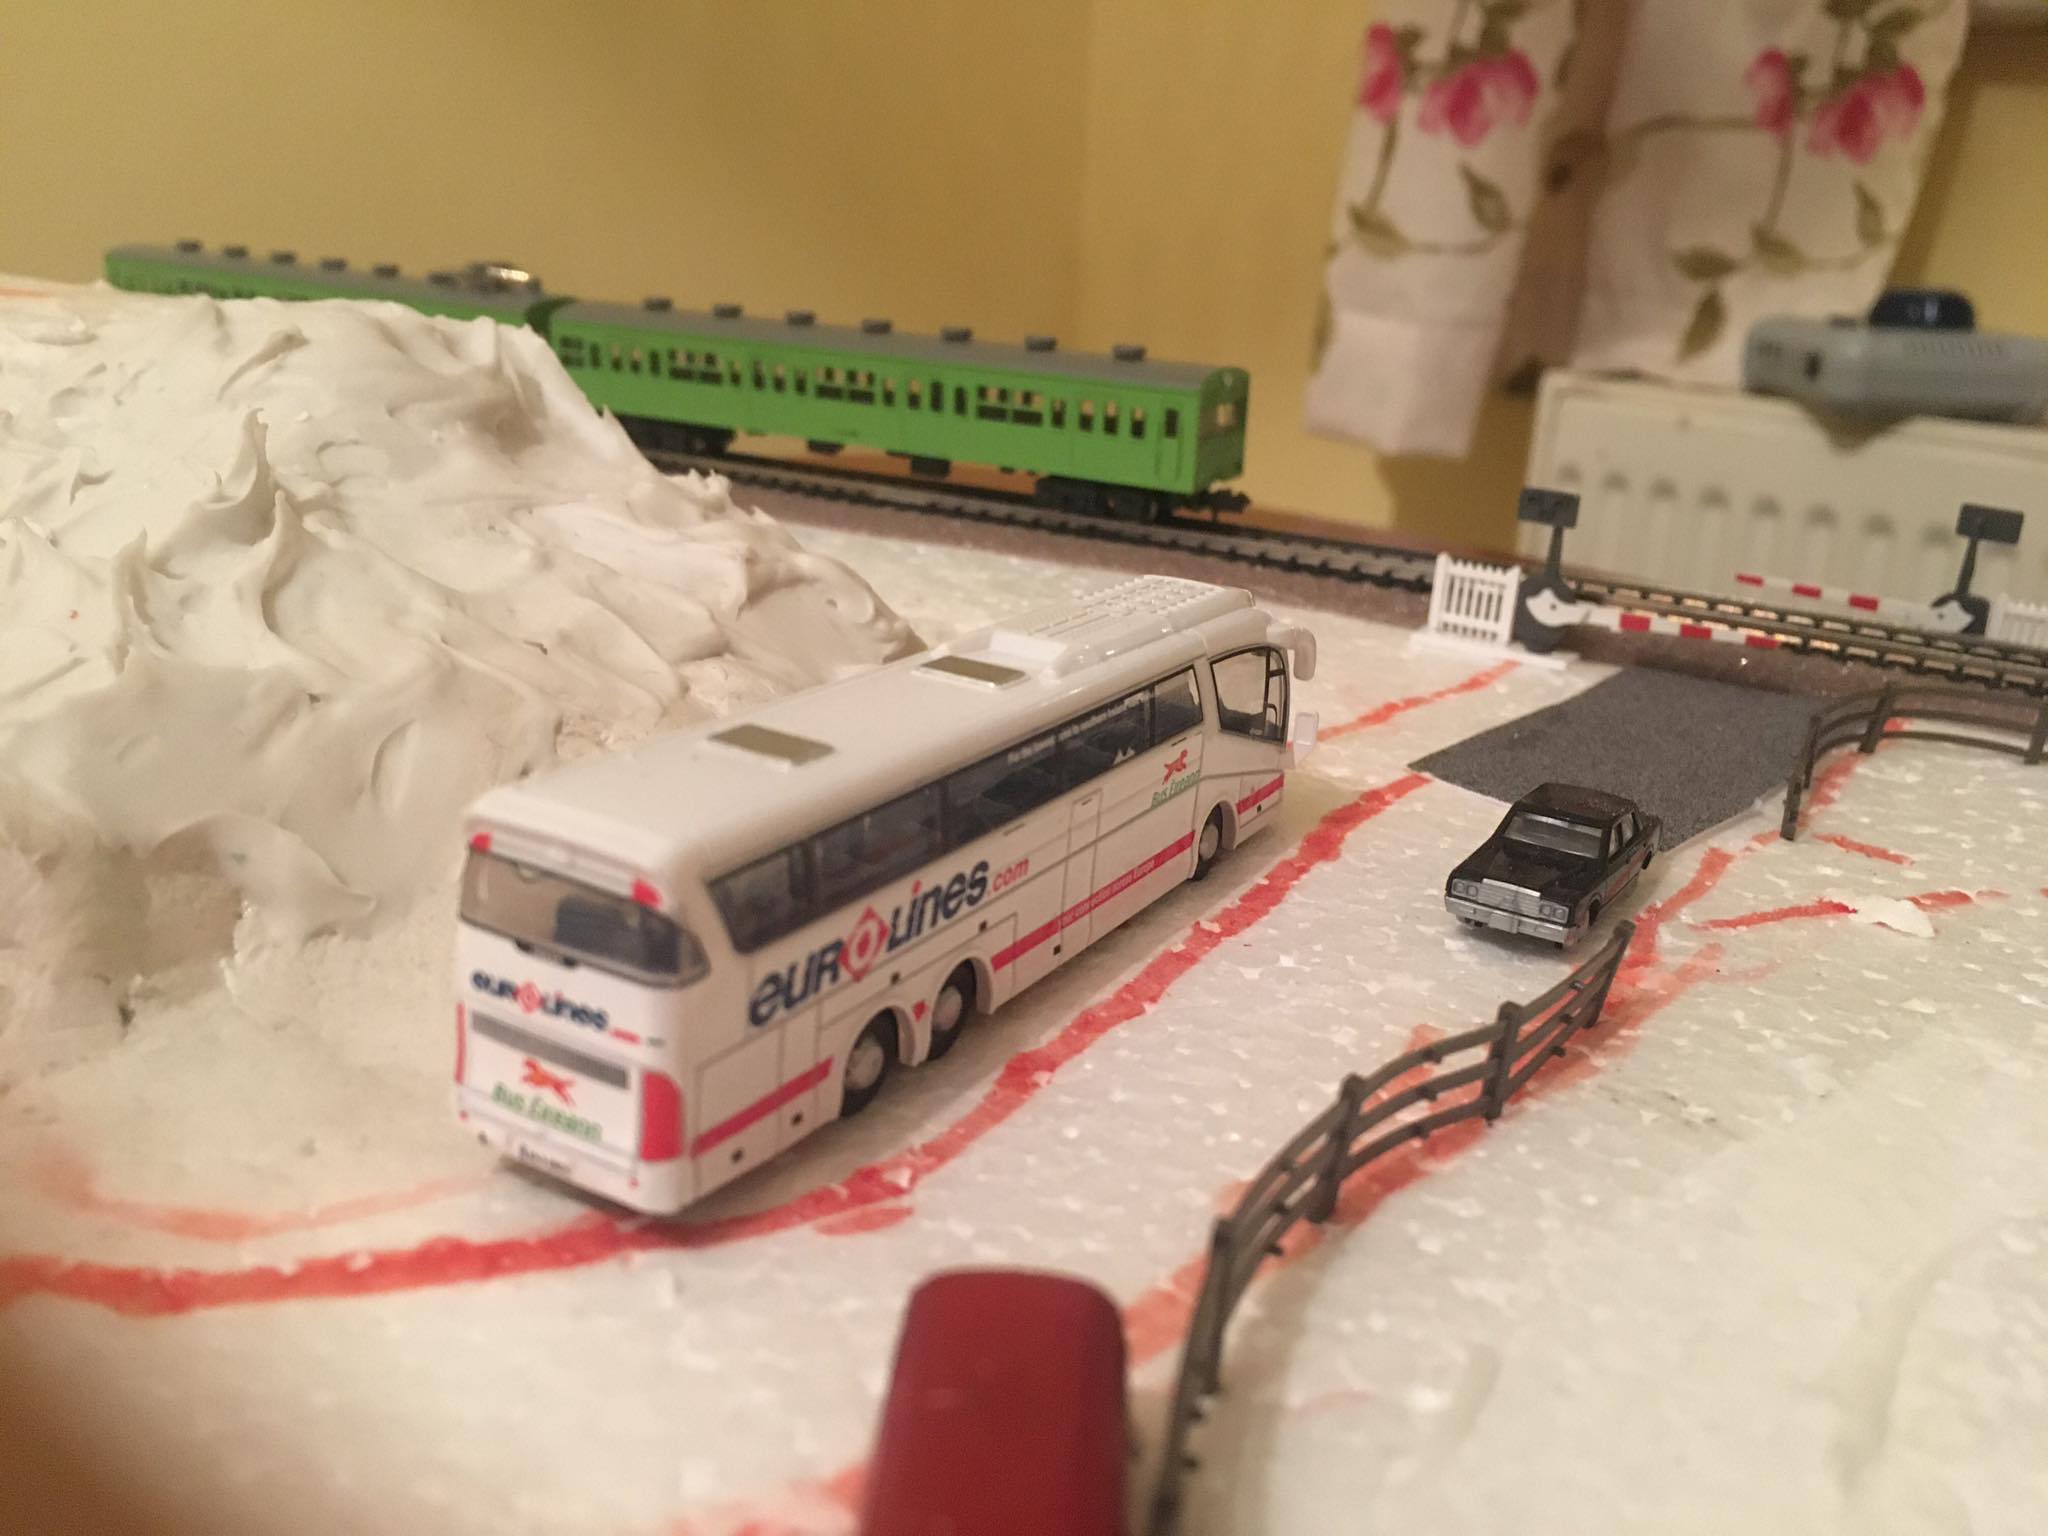
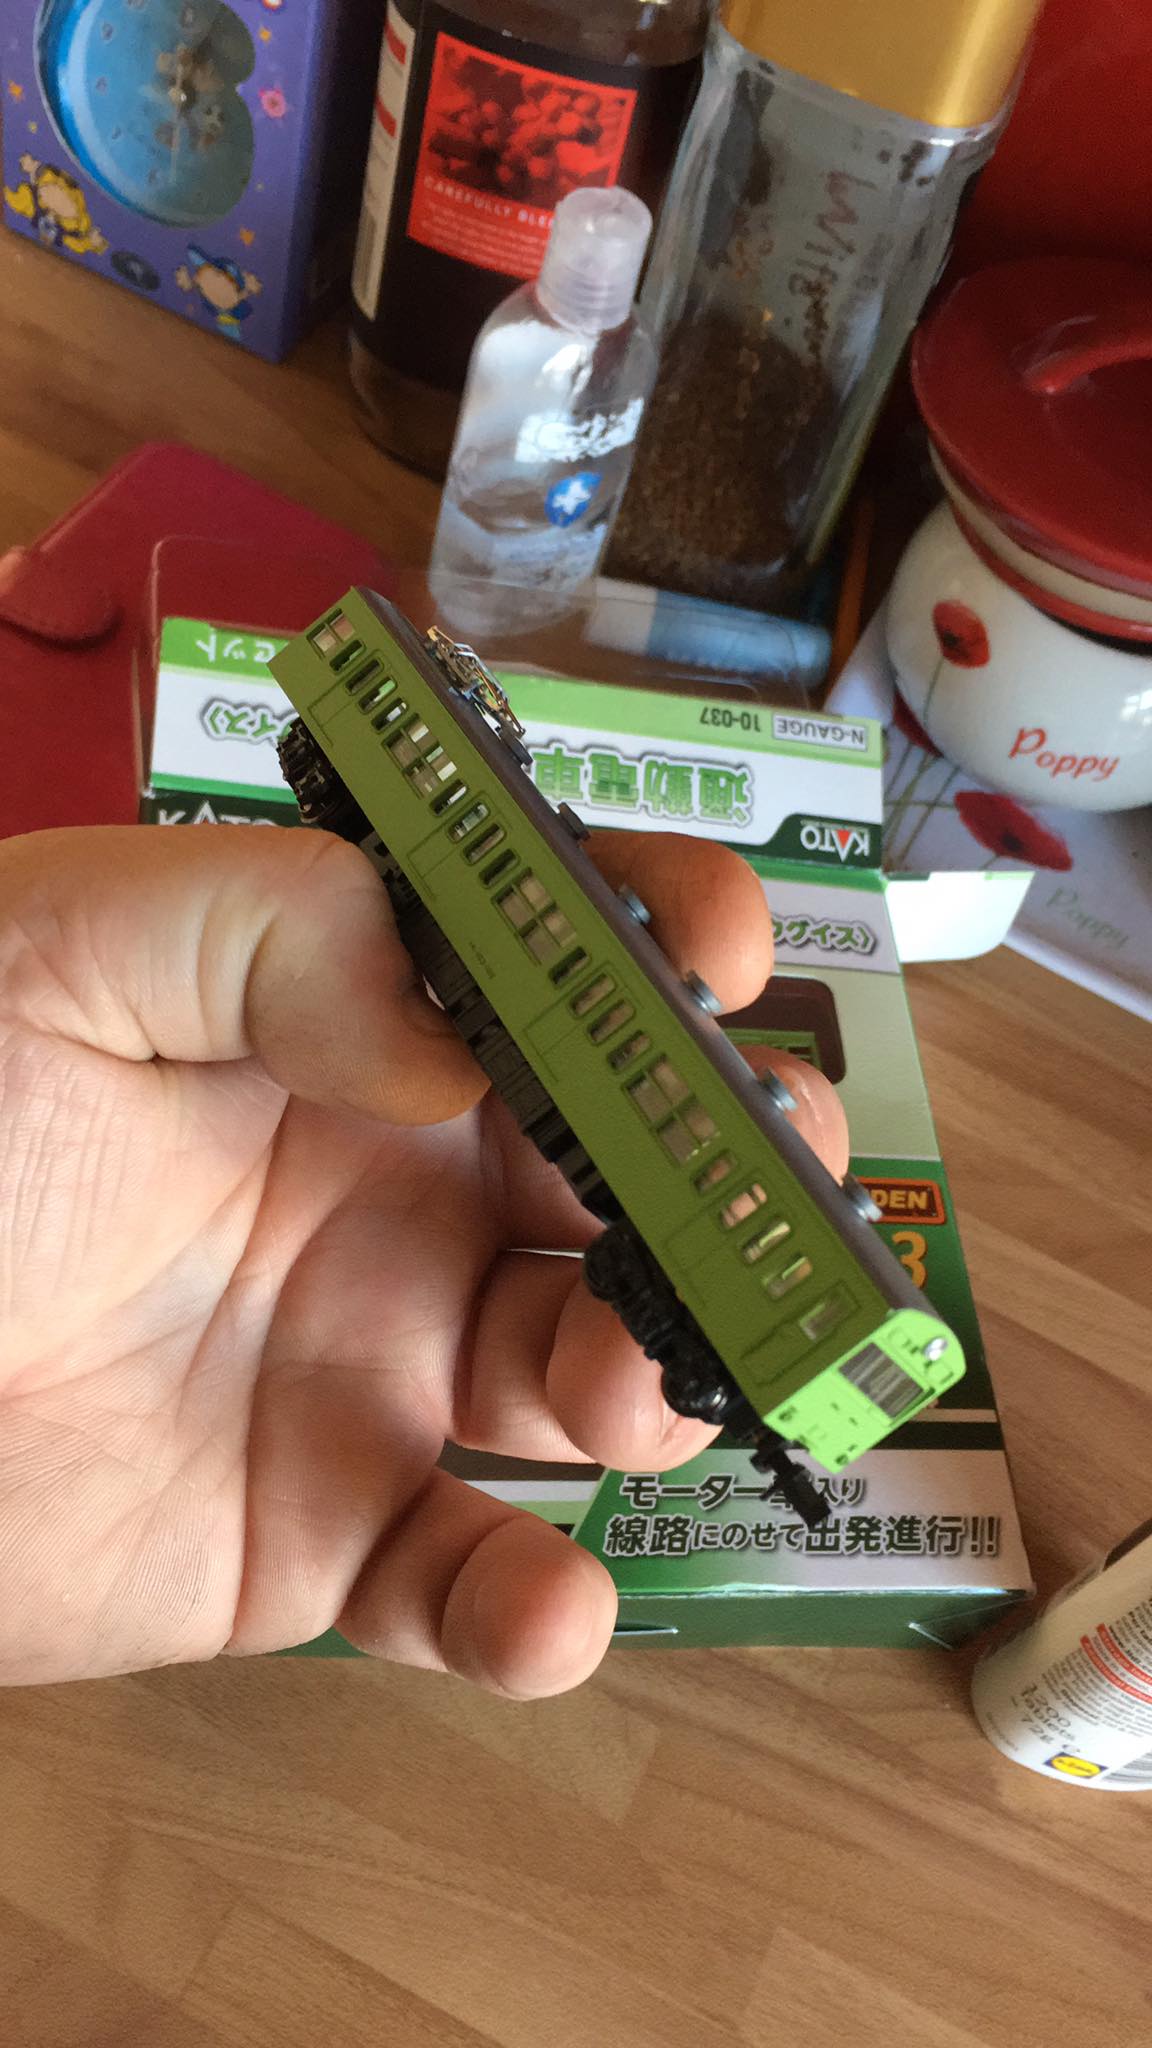
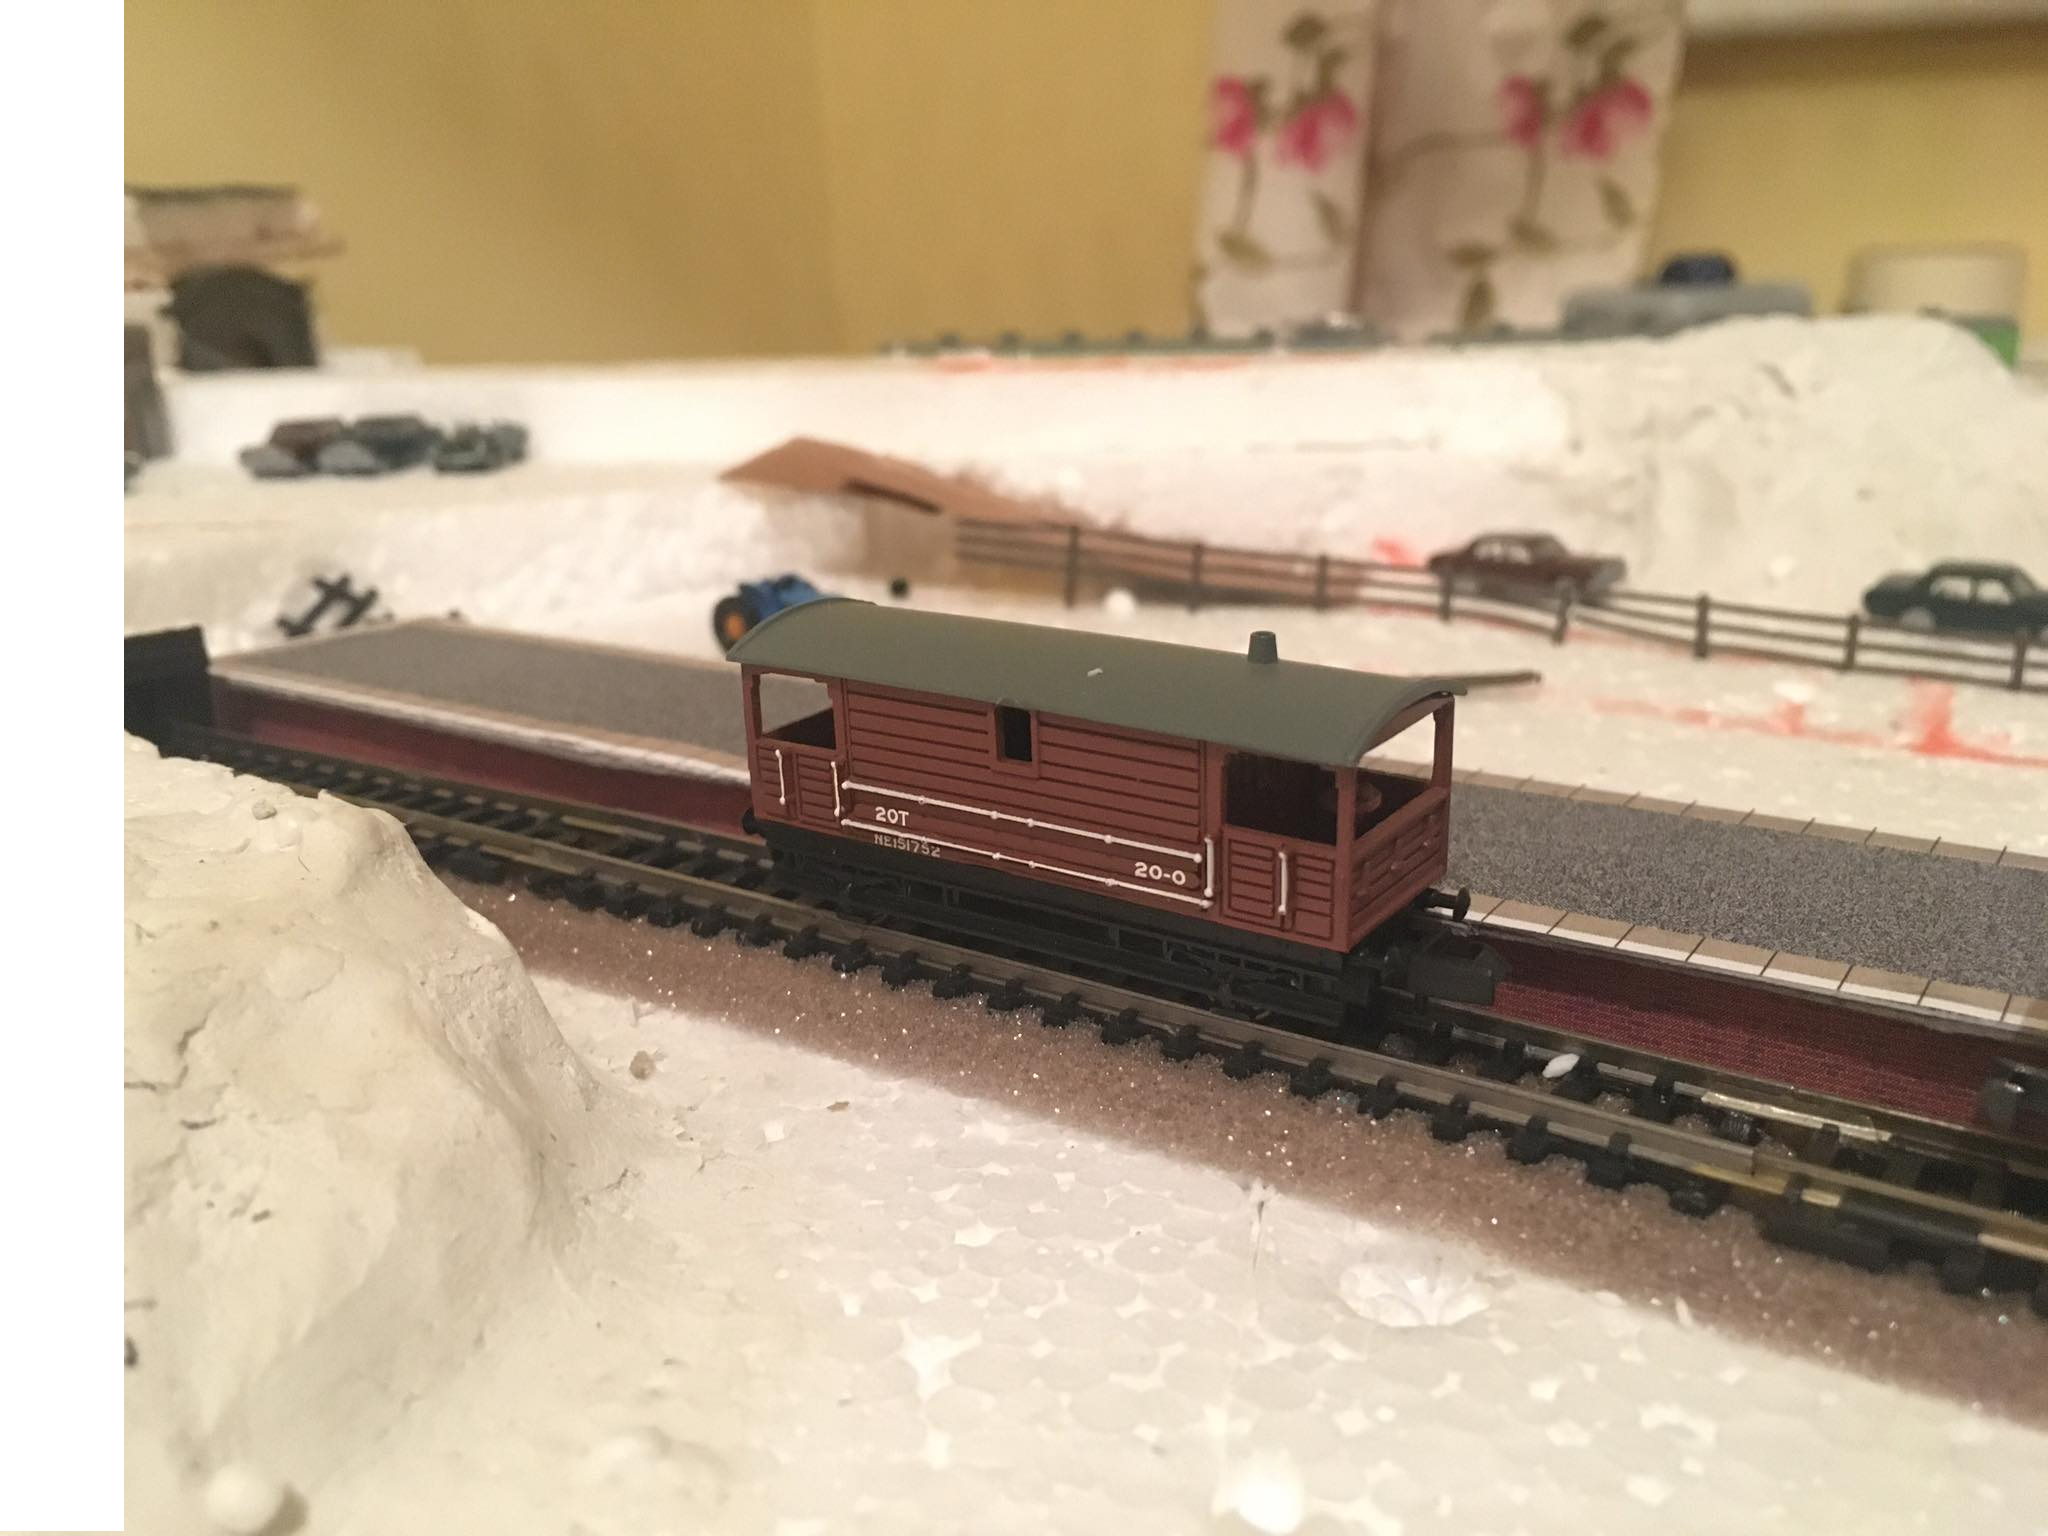
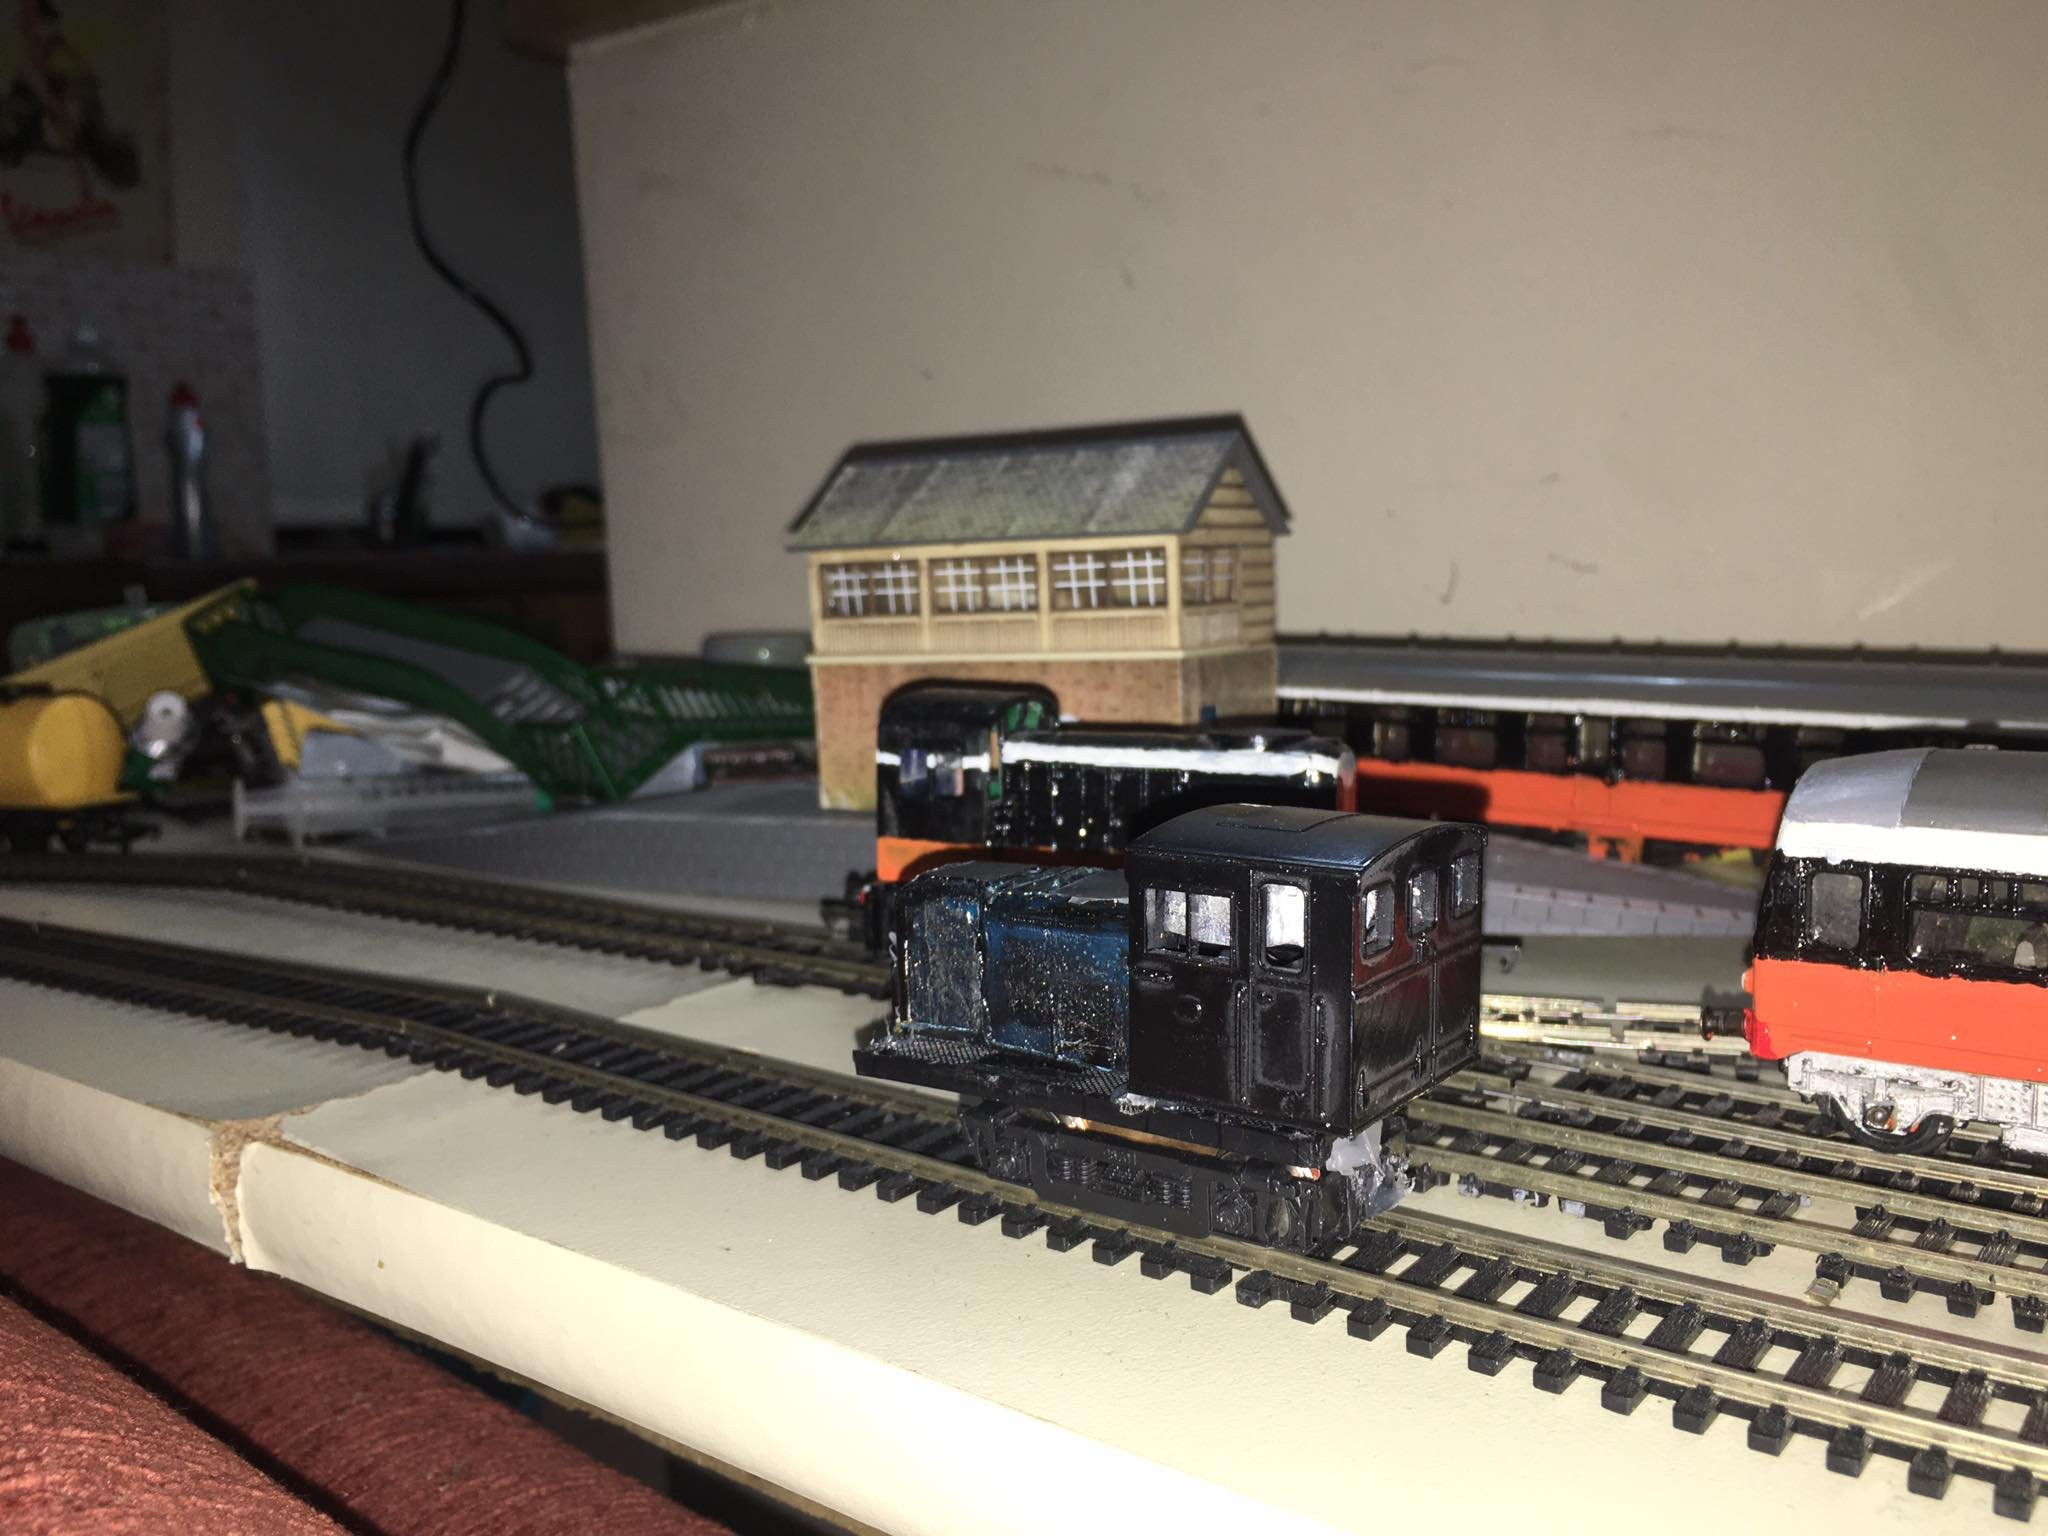
Hey guys so its been a long time since i updated this thread,a lot of the building stuff has fallen by the way side and with such a healthy array of OO rtr stock on the way i do not know if i will be making anything new in OO for a while. that being said I am a few weeks into a new n gauge layout build which was initially intended to be continental. however after seeing the potential of what can be done with Irish n gauge the focus has shifted into building an irish layout with a few suitable items of rolling stock to go along with it. so far I have kept things mostly simple. however i do have shapeways stuff and some farish mk3's to refinish with vinyl on the way which will be interesting. first on the chopping block is the farish 08. as the body of these are die cast, not a while lot can be done except for a respray and the correct decals applied. I have had this as part of a set for a good few years now but it has not seen regular use until lately and it is a little cracker of a unit. happy to plod along at a walking pace. from this same set, the brake van, in need of a suitable respray and a few details changing to make it feel more irish. I do have a soft spot for box vans, and when i seen that peco offer these rtr for around the same price as a dapol OO kit, I had to grab like 7 These come complete with slightly shorter looking couplings which peco say space the vans out properly to scale. they do look really nice in a train. the roofs pop off for easily repainting in grey. however as can be seen here. I have not been able to remove the white LMS lettering without taking off the greay paint so i reckon i will need to simply paint over it, these should look great when i get my hands on suitable transfers. Finally for the moment until the mk3's arrive and I am able to fund shapeways theres this kato 103 emu which im planning to refinish into a 2 car dart set, not entirely sure what era I will be aiming for with this as I have just been having too much damn fun playing with it, at about 60 quid this is a damn good little runner that can again easily move at a snails pace. I am definitely planning on adding at least another one to the collection when i get to building a larger N layout. its got metal wheels all round and makes a seriously impressive little click clack when its going around the layout. Also Theres this, not a train but definitely fits in the spirit of this thread and at 10 euro's from oxford I really am impressed with the level of detail which surpassed expectations on it. It even has a little Irish Reg plate which i assume is based on the real bus, cant really see it to well in this photo however.
-
it might be worth a try to simply remove the hook from the coach and pull with just the loco hook pulling the coach loop. they tend to just slot in and out on most of my rolling stock. I dont have any mk3's in particular though
-
new year new layout 1990s container terminal and tmd
Sean replied to Sean's topic in Irish Model Layouts
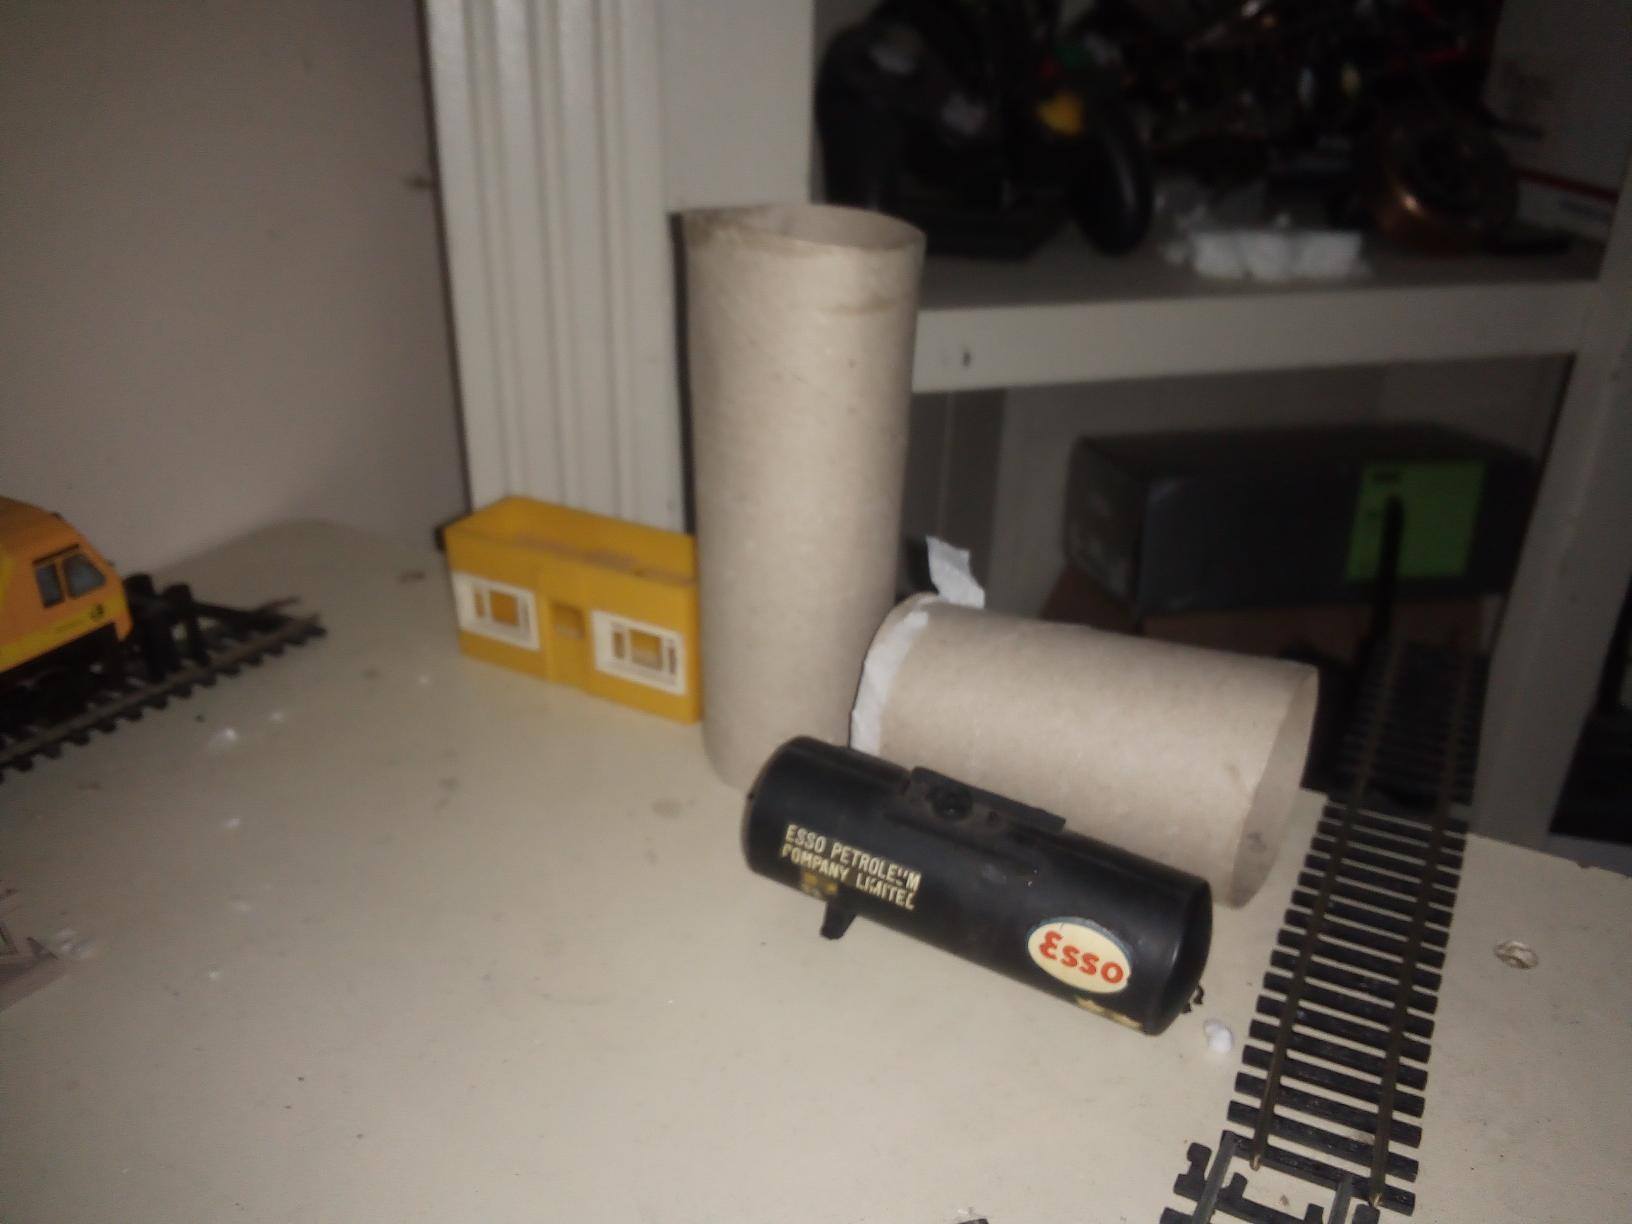
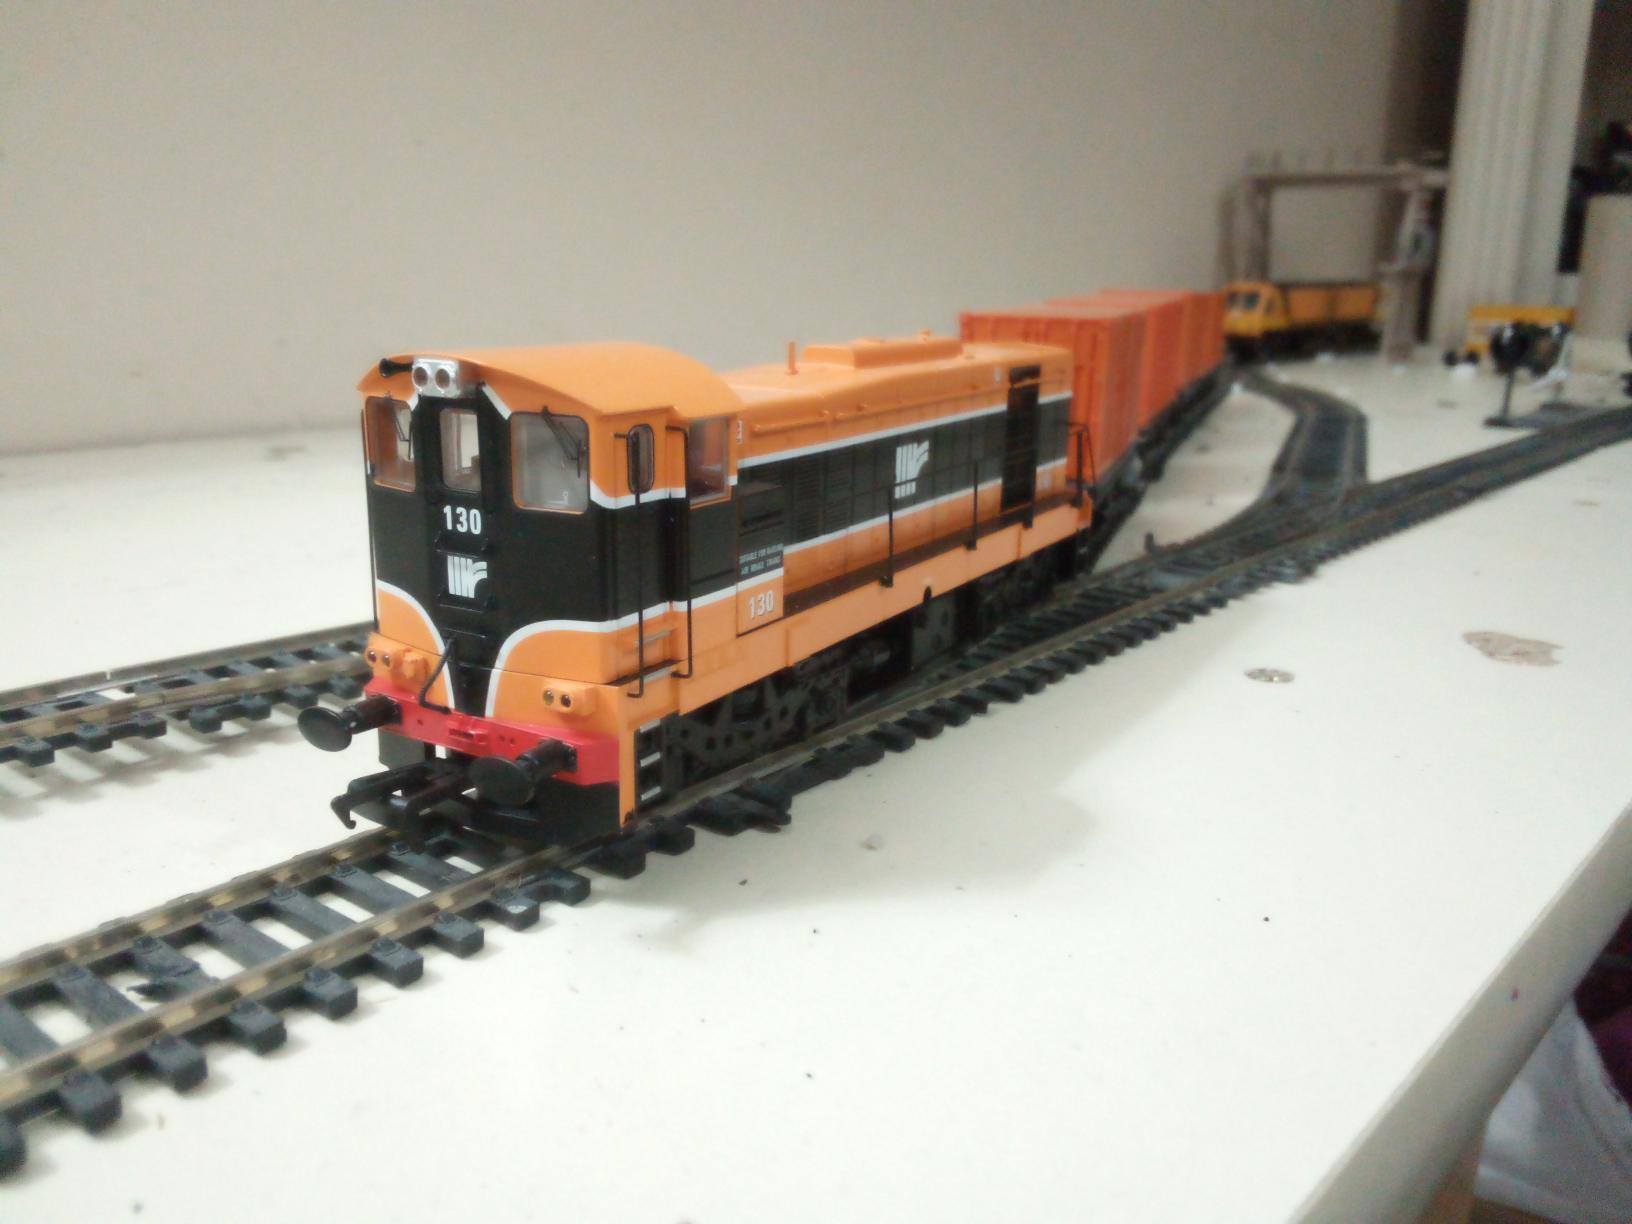
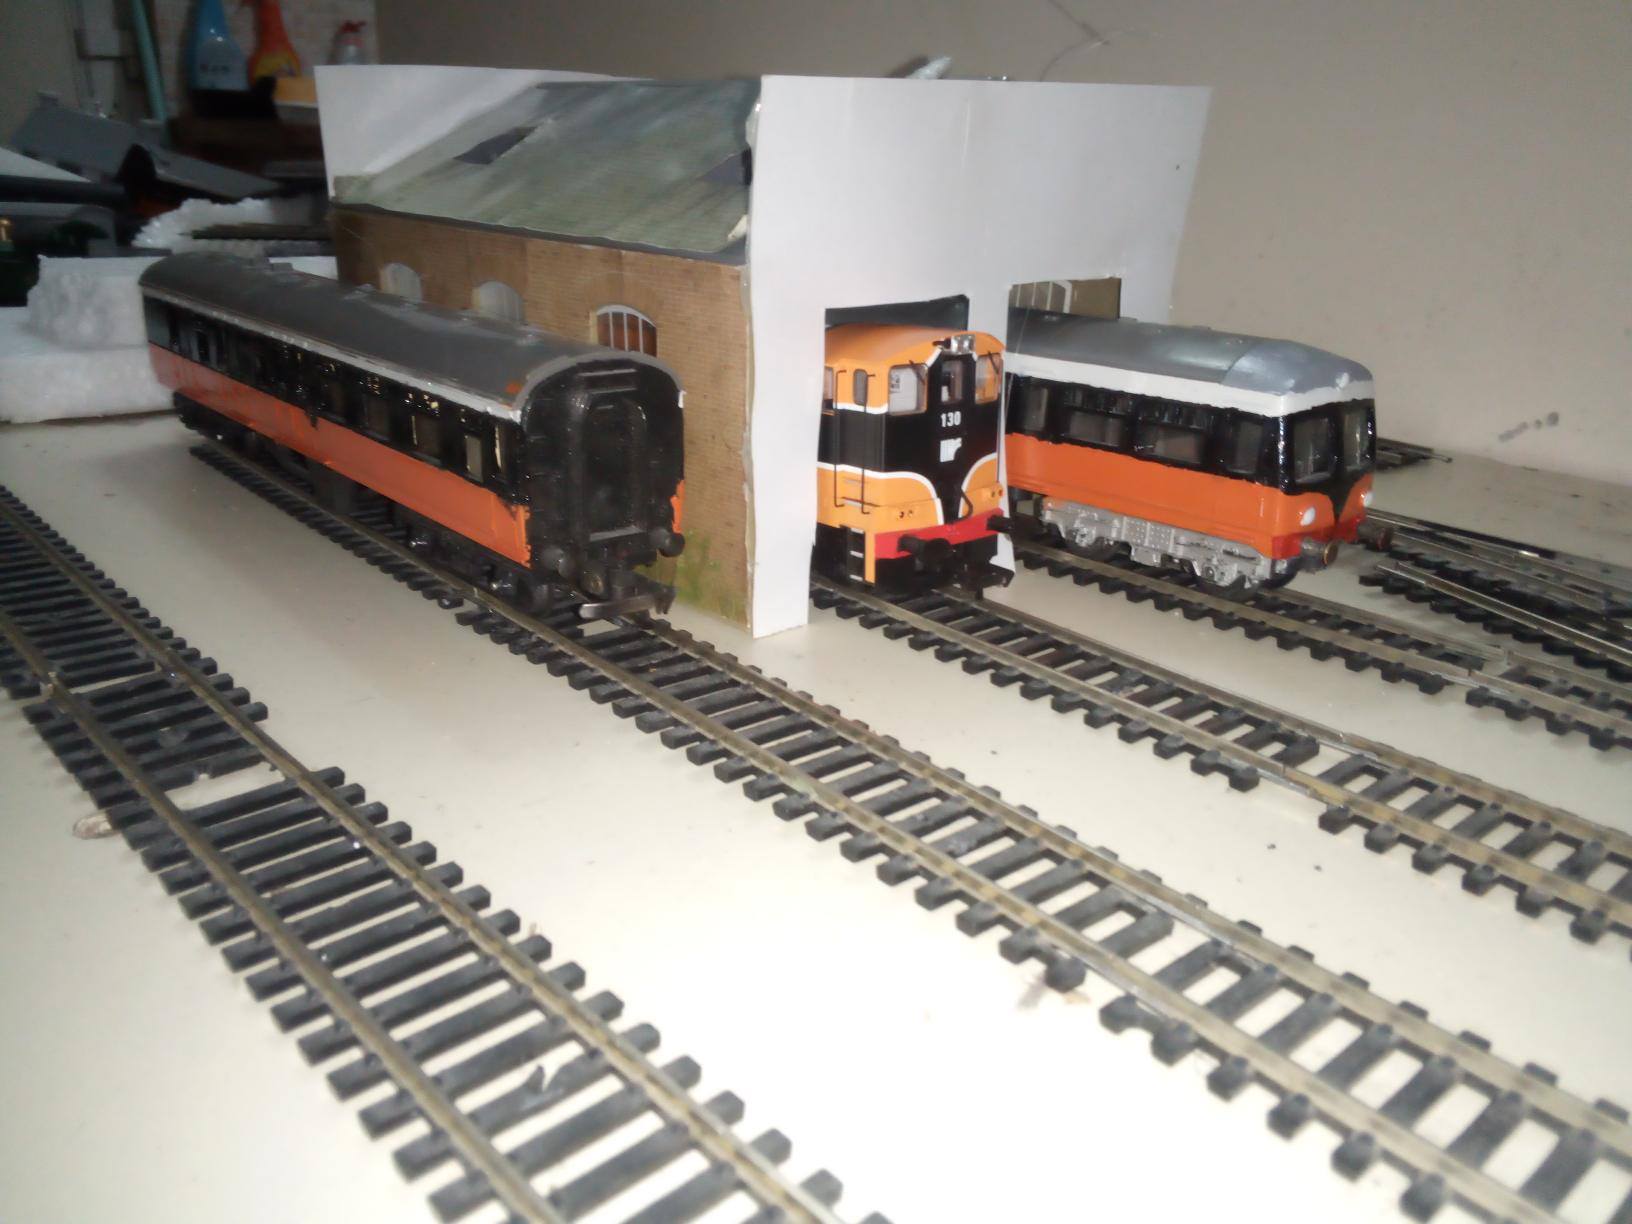
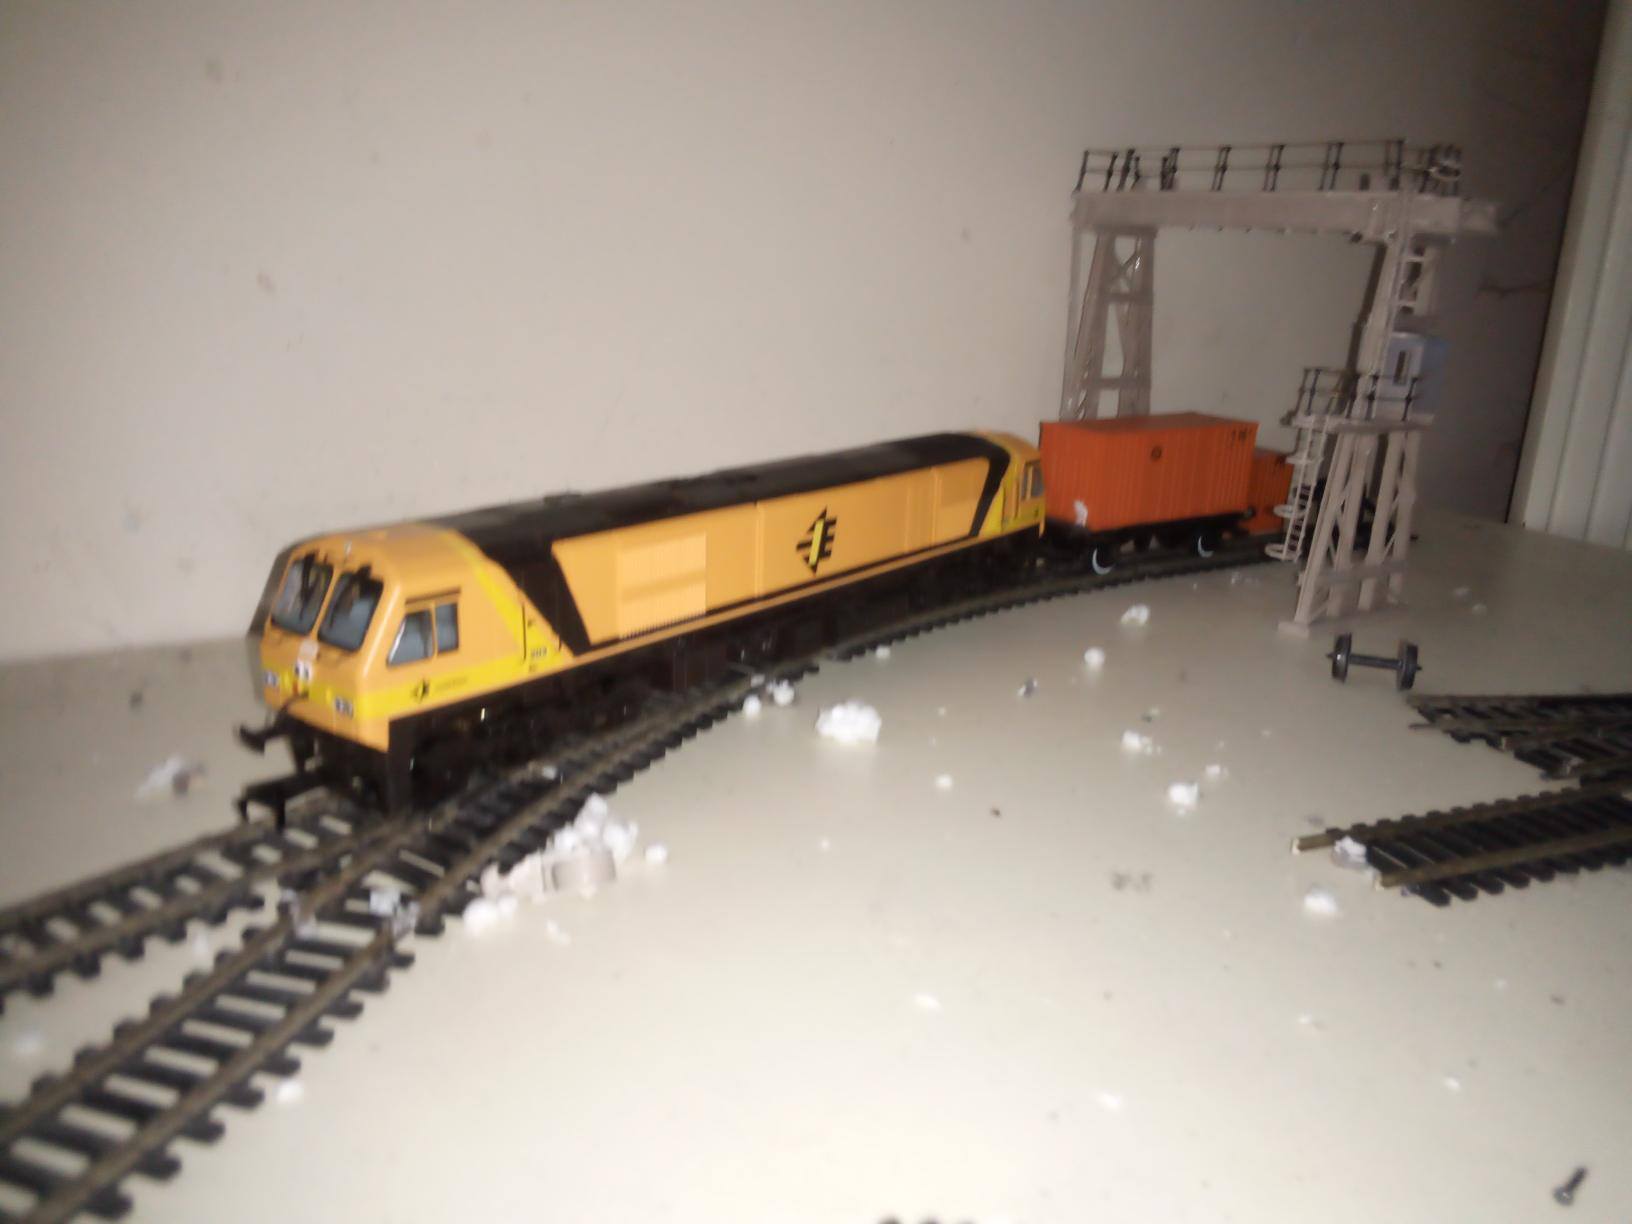
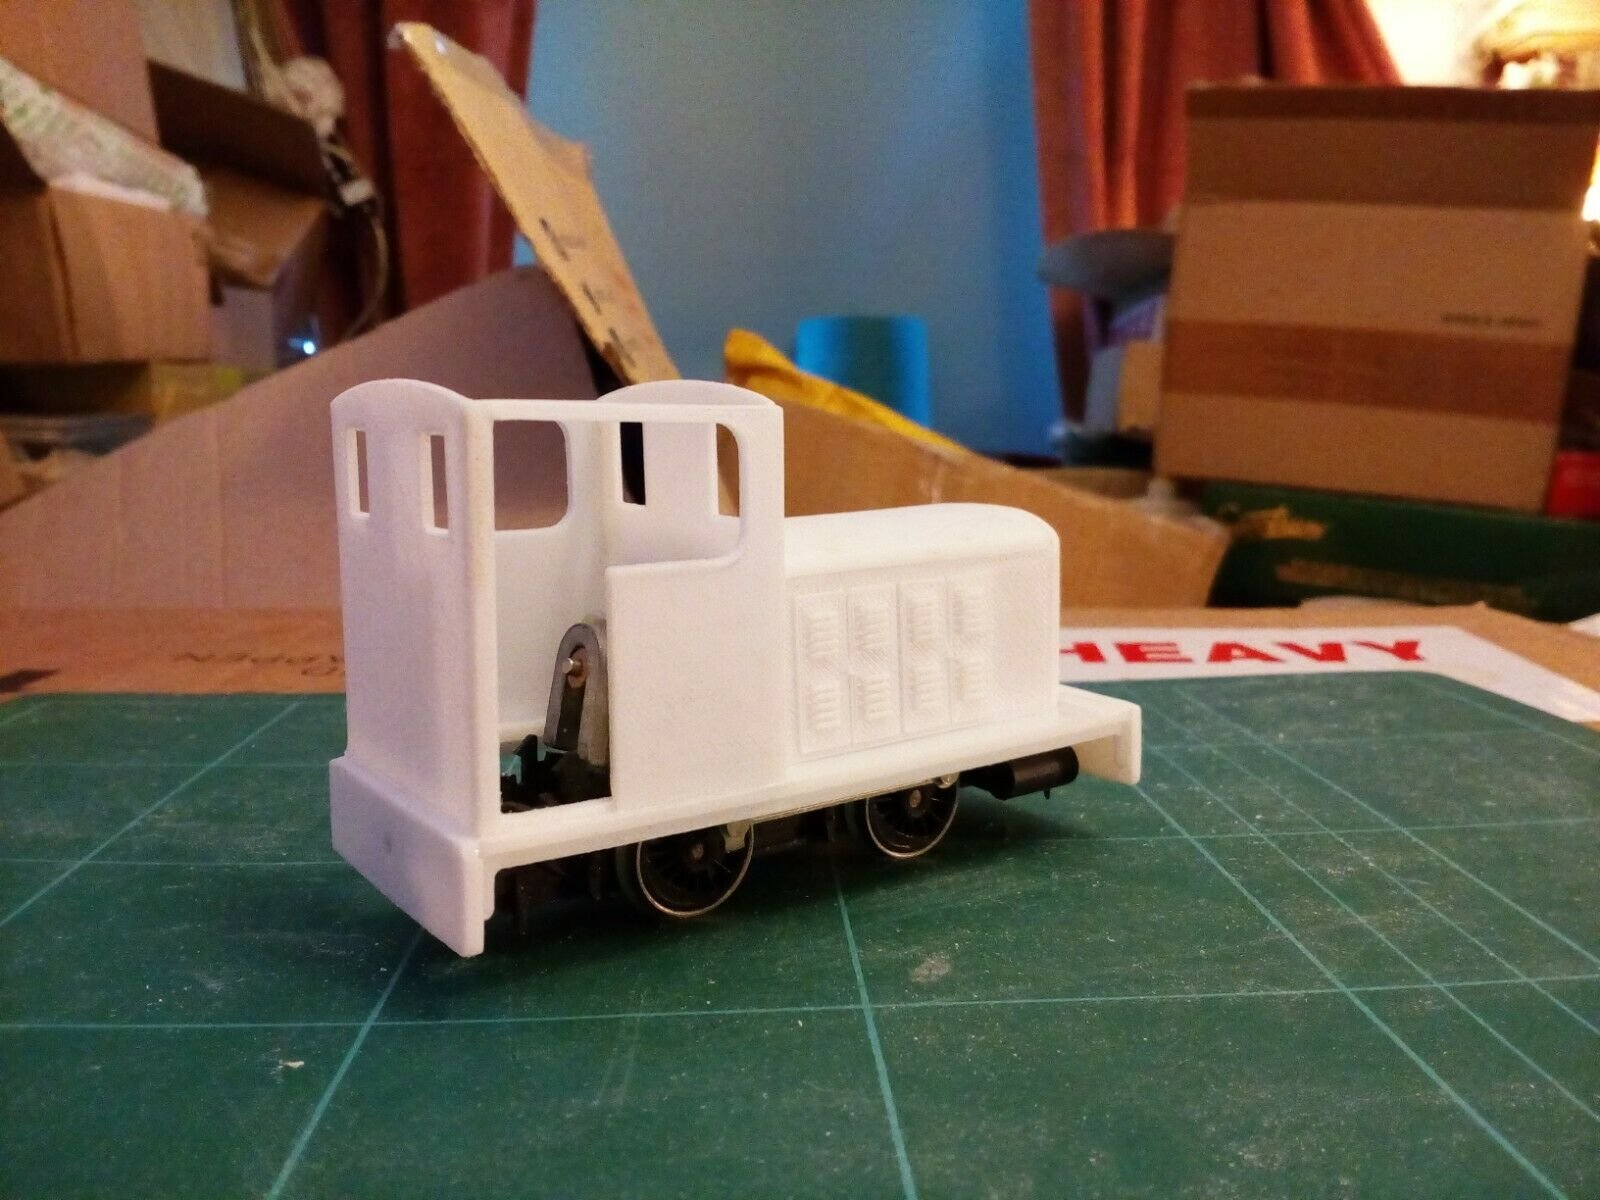
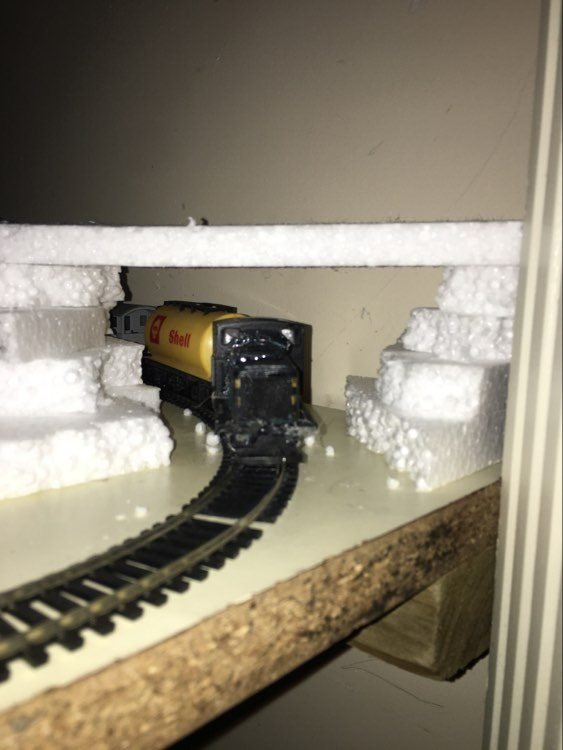
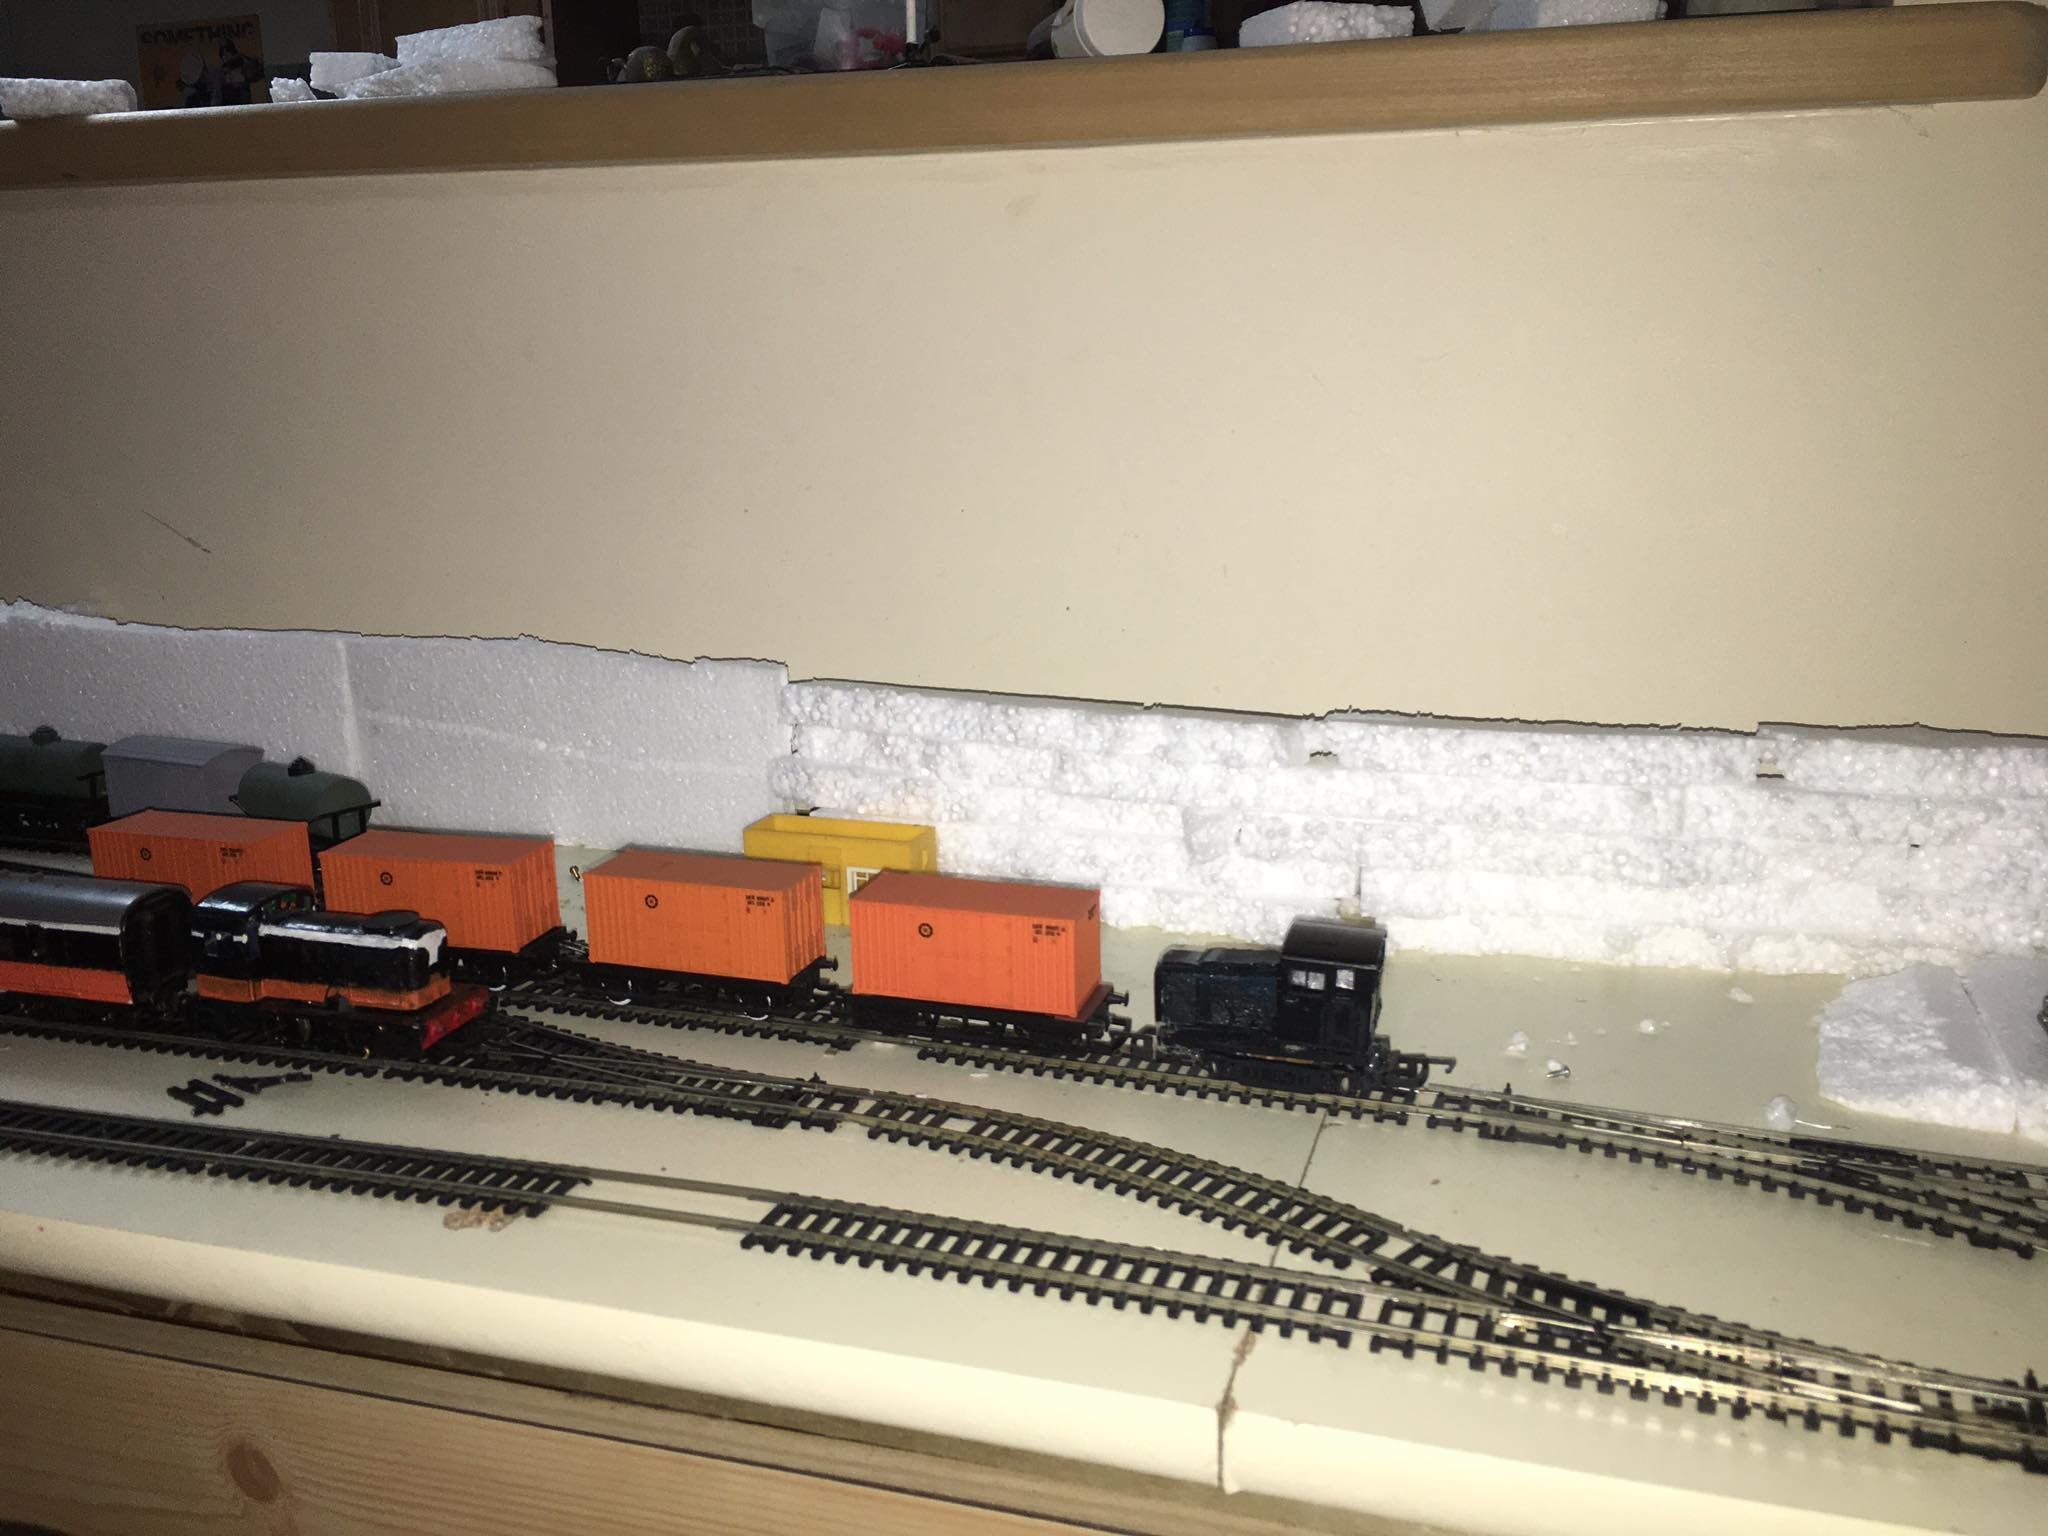
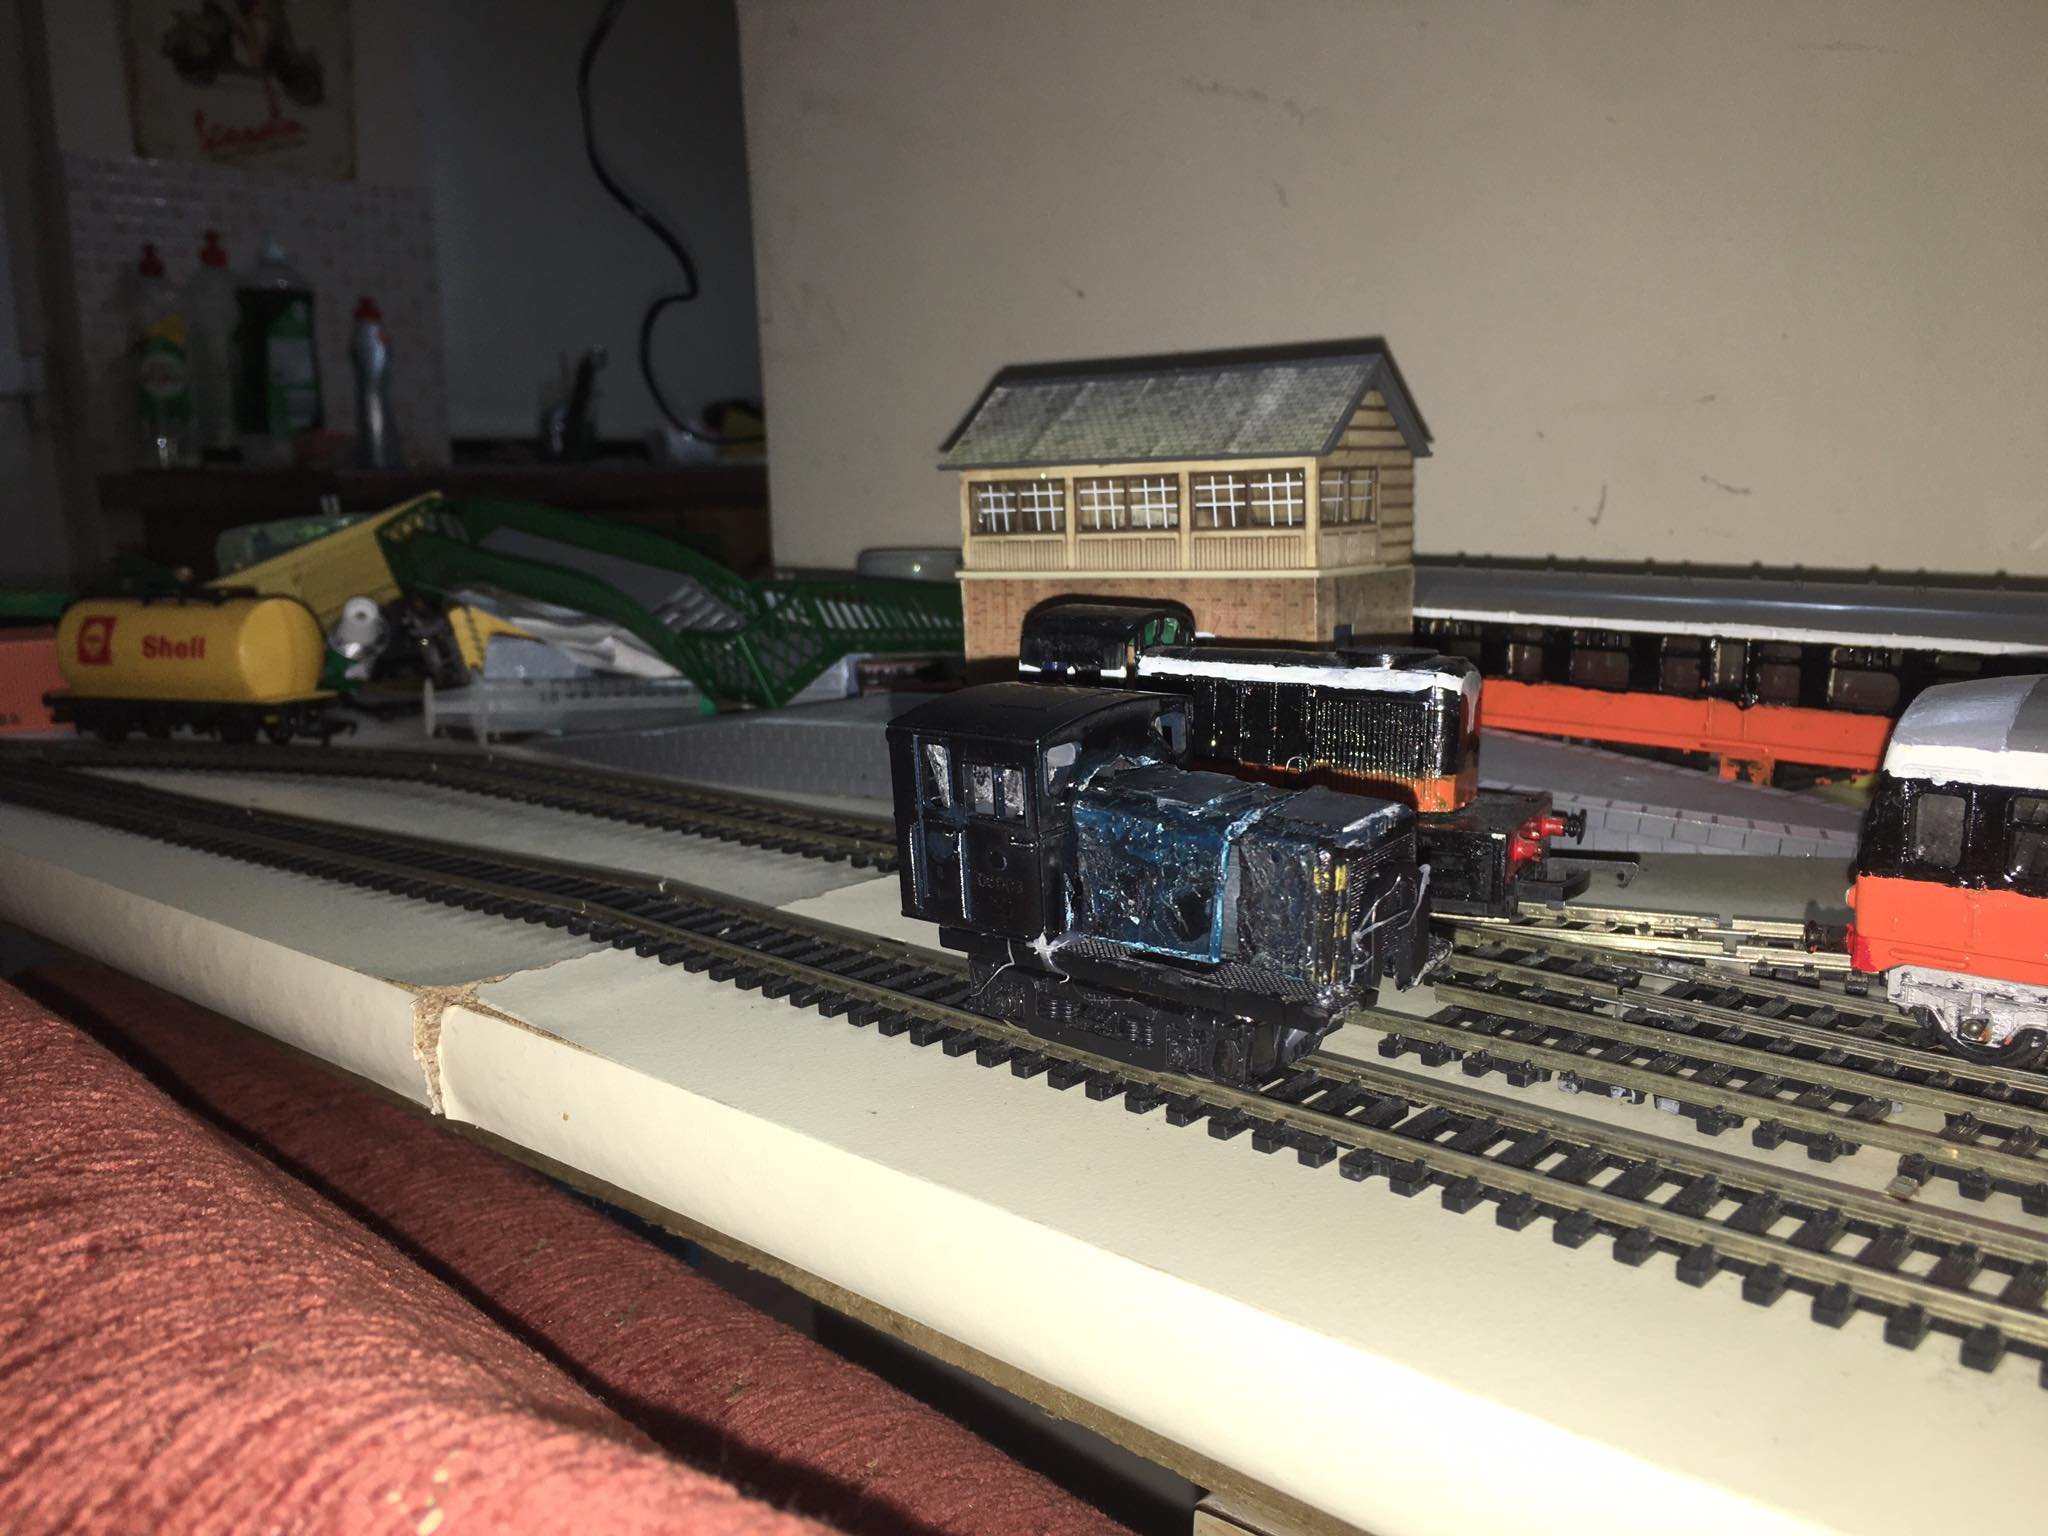
watching youtube videos of inchicore and one distinctive building with a 2700 poking its head out stood out to me so ive started a little project to convert my hornby shed into somthing similar. if anybody knows the building im on about and would have more close up pictures of it they would be greatly appreciated. i like this atmos, will look like a nice little yard when it all comes together. short container runs look great too, so these along with a couple of IRM flats and a few bells etc will look great on this. there are also 9 dapol tankers under construction(and 5 vans for the micro ) so there will be no shortage of stock to run on this. want to do up 4 in the alexandra road 40mph livery for fuel transfers on the layout. and other 5 can be generic for runs in and out of the layout. Since train lenghts are fairly limited this gives me excuses to acquire smaller runs of prototypical rolling stock to run on the layout without breaking the bank. PWD stock in particular would look the part in any of the sidings. I have also opted for the turntable so theres a dapol kit on the way should fill the little free space nicely. not a huge amount to report from the oil depot side of the layout cut up a few kitchen roll tubes and an old dapol tank to try and turn into big static tanks at a later time. and finally not really 90s but the little deutz that could So whilst i havent really done much i have fashioned up 3-4 little scenes of interest on a very small layout, so im pleased with that.
-
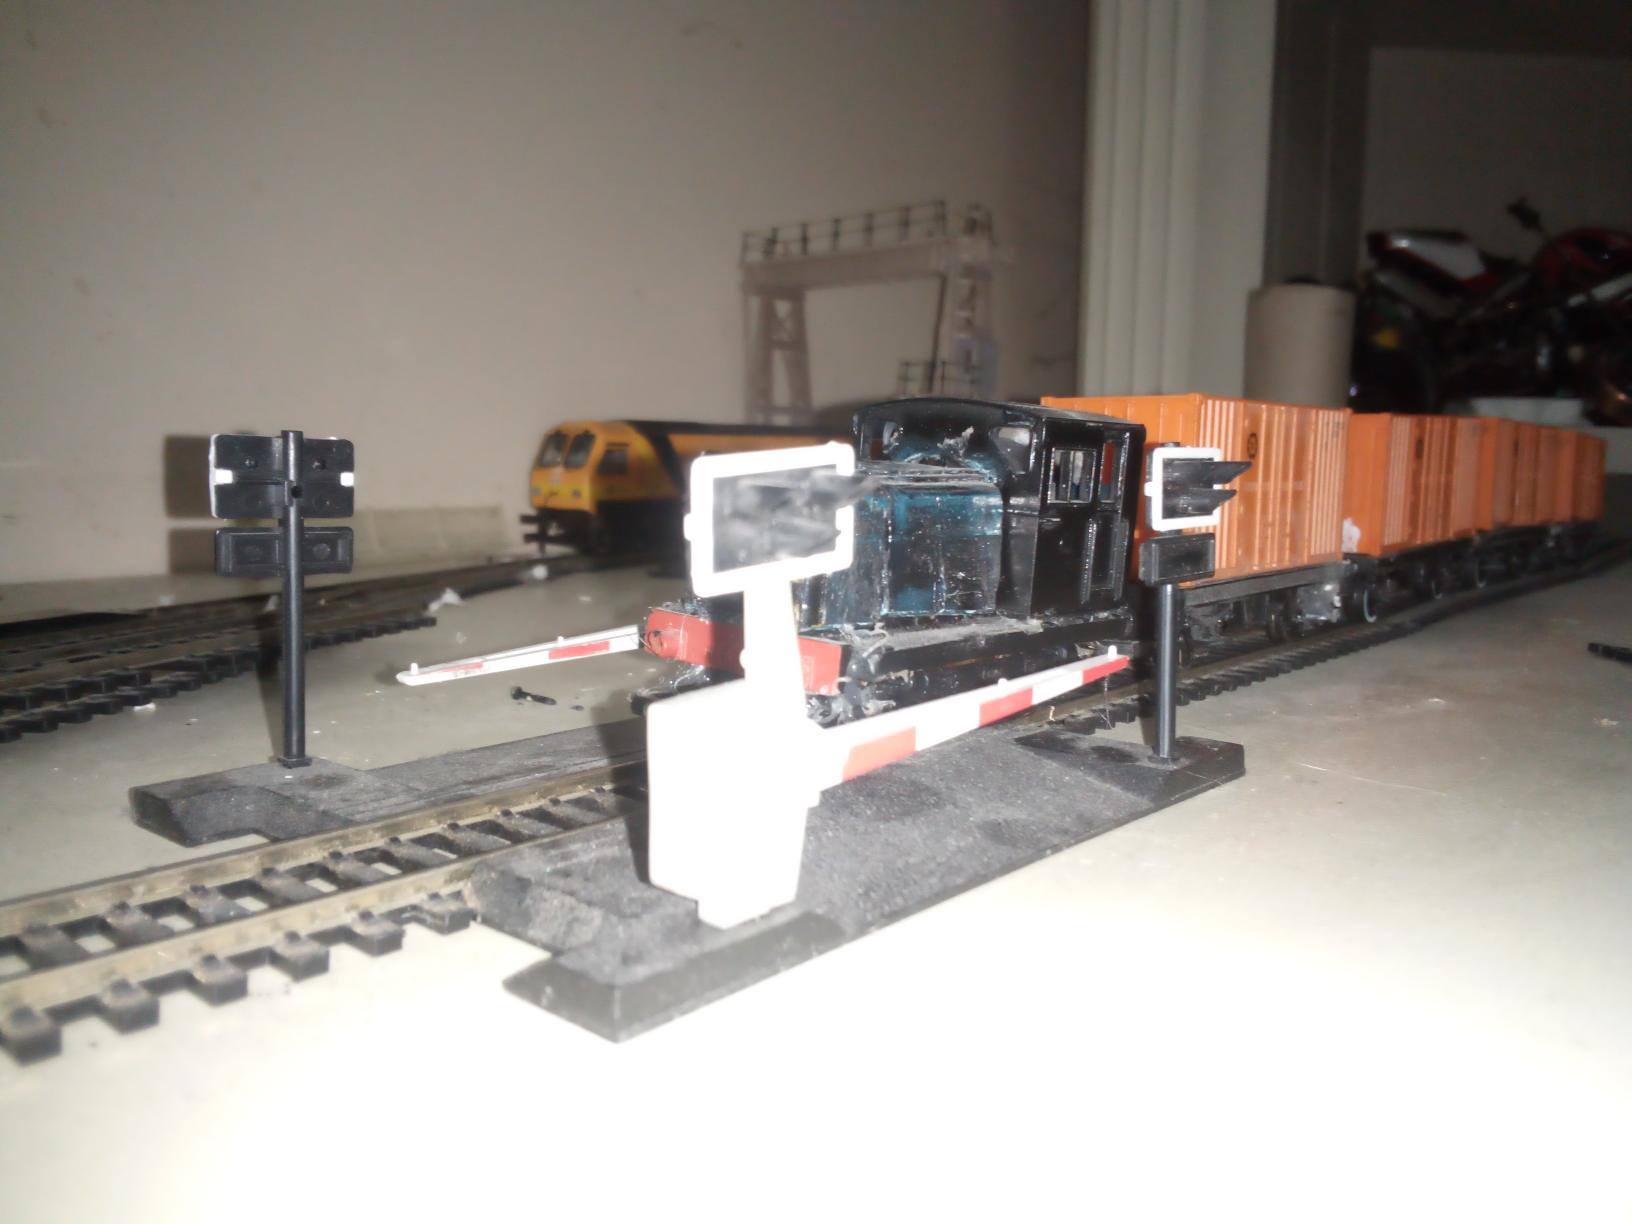
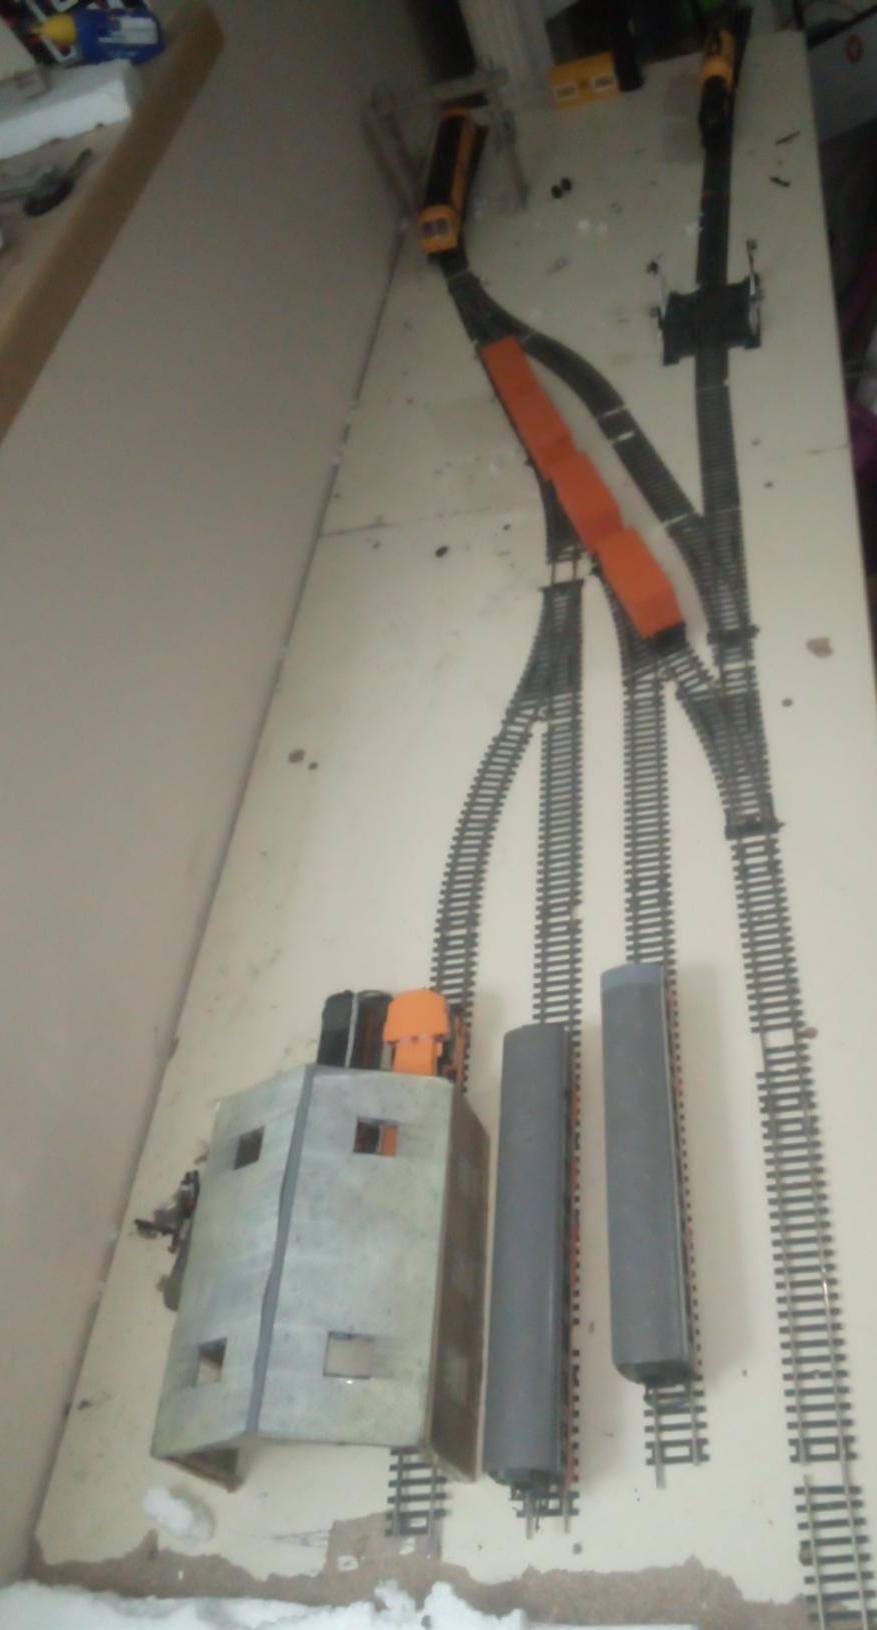
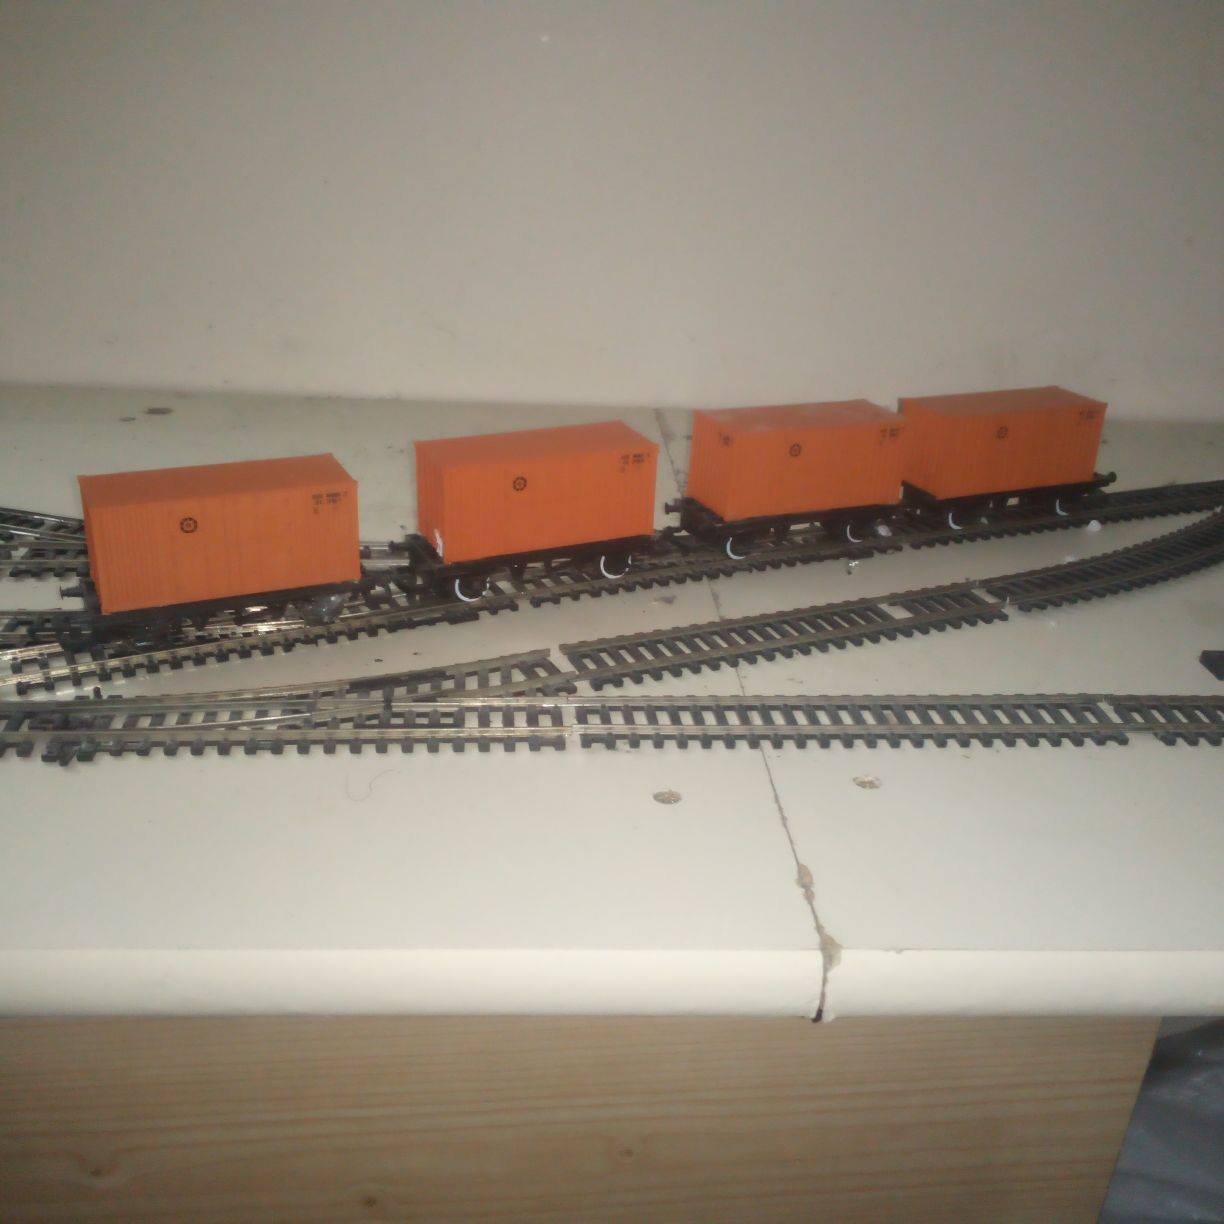
so with the arrival of some new murphys diesels over christmas the old micro layout had to be lifted, however, it had become far more than a micro layout and i fully intend to bring it back at a later time using the lessons learned and actually sticking to the spirit of a micro layout. but for now i want to model somthing that my slowly growing stable of irish stock would both run and look at home on. after much consideration a shunting layout was the way to go but i havent fully settled on a layout plan until the last few days and now that i have some track laid i think it will be very fun to operate indeed. as mentioned before, I really just like to sit and watch train runs, but its hard to find the 3-4 foot needed for a continous loop of second radius track, so the layout will be semi modular with the ability to remove the fiddle yard and later add a portable loop of track that can be lifted when the layout is not in use. but for now heres the track plan until i get a hold of a better camera. so essentially trains will enter from a fiddle yard on the bottom right most road, this will be a continous run in a later iteration of the layout however for the moment it will end as a siding at the end of the baseboard. this siding will function as an oil depot with tanker trains running in and out. there is also a level crossing to allow road traffic in and out of this area which will be later built up. left of this siding we have a goods loop and headshunt with an overhead crane for container traffic. the loop is designed for 2 longer items of rolling stock such as a set of coaches or 2 conflats however here it is holding a set of 4 2 foot flats. I will probabaly add a second track running under the crane here but i am unfortunately out of points for the moment. at the other end of the layout will be a 2 road tmd building with some sort of fuelling stand. this tmd will require regular deliverys of fuel from the depot at the other end of the layout. beside this depot are 2 sidings which serve both the tmd and the container yard, and therefore could be occupied by anything from coaches and locos awaiting work, to container rakes to permenant way sets. and as previously mentioned fuel deliveries. As 130 will operate the layout regularly i may opt to install a turntable in the rounded area of the track plan. the other open part of the layout will be modelled as a general industrial area 4 20 footers sit in the goods loop mm130 looks right at home amongst her stable of home made friends. a second lane can be added to the engine shed later 203 shunting a single container.as the crane line is also used as the layouts headshunt it must be kept clear at all times. this is why containers can be kept at the tmd sidings.i must also finish the crane. as always feedback is appreciated and im looking forward to putting a bit of work into this one as im quite fond of how the operating scheme will work out for me. I feel for a small area it surely packs a lot of operating potential.
-
This thread has opened a Pandora's box in my mind David.
-
video-1599341659.mp4 thats a grand looking wagon and the couplings seem almost better than the hornby ones, in any case i can tilt them slightly to suit my curves but they mix grand with hornby ones without any modding for the curves. Since switching from the hornby to a non pwm bacmann train controller, i must say the g class has improved 100% in its slow running and is going to be used a lot more often due to this now. still havent been motivated to start the2600 power car but its one of the last bits of stock for a while...... finished off the conflats when all that is said and done im gonna focus on weathering a little, as one of my building kits featured a weathering guide that looks fairly straight forward and not too hard.
-
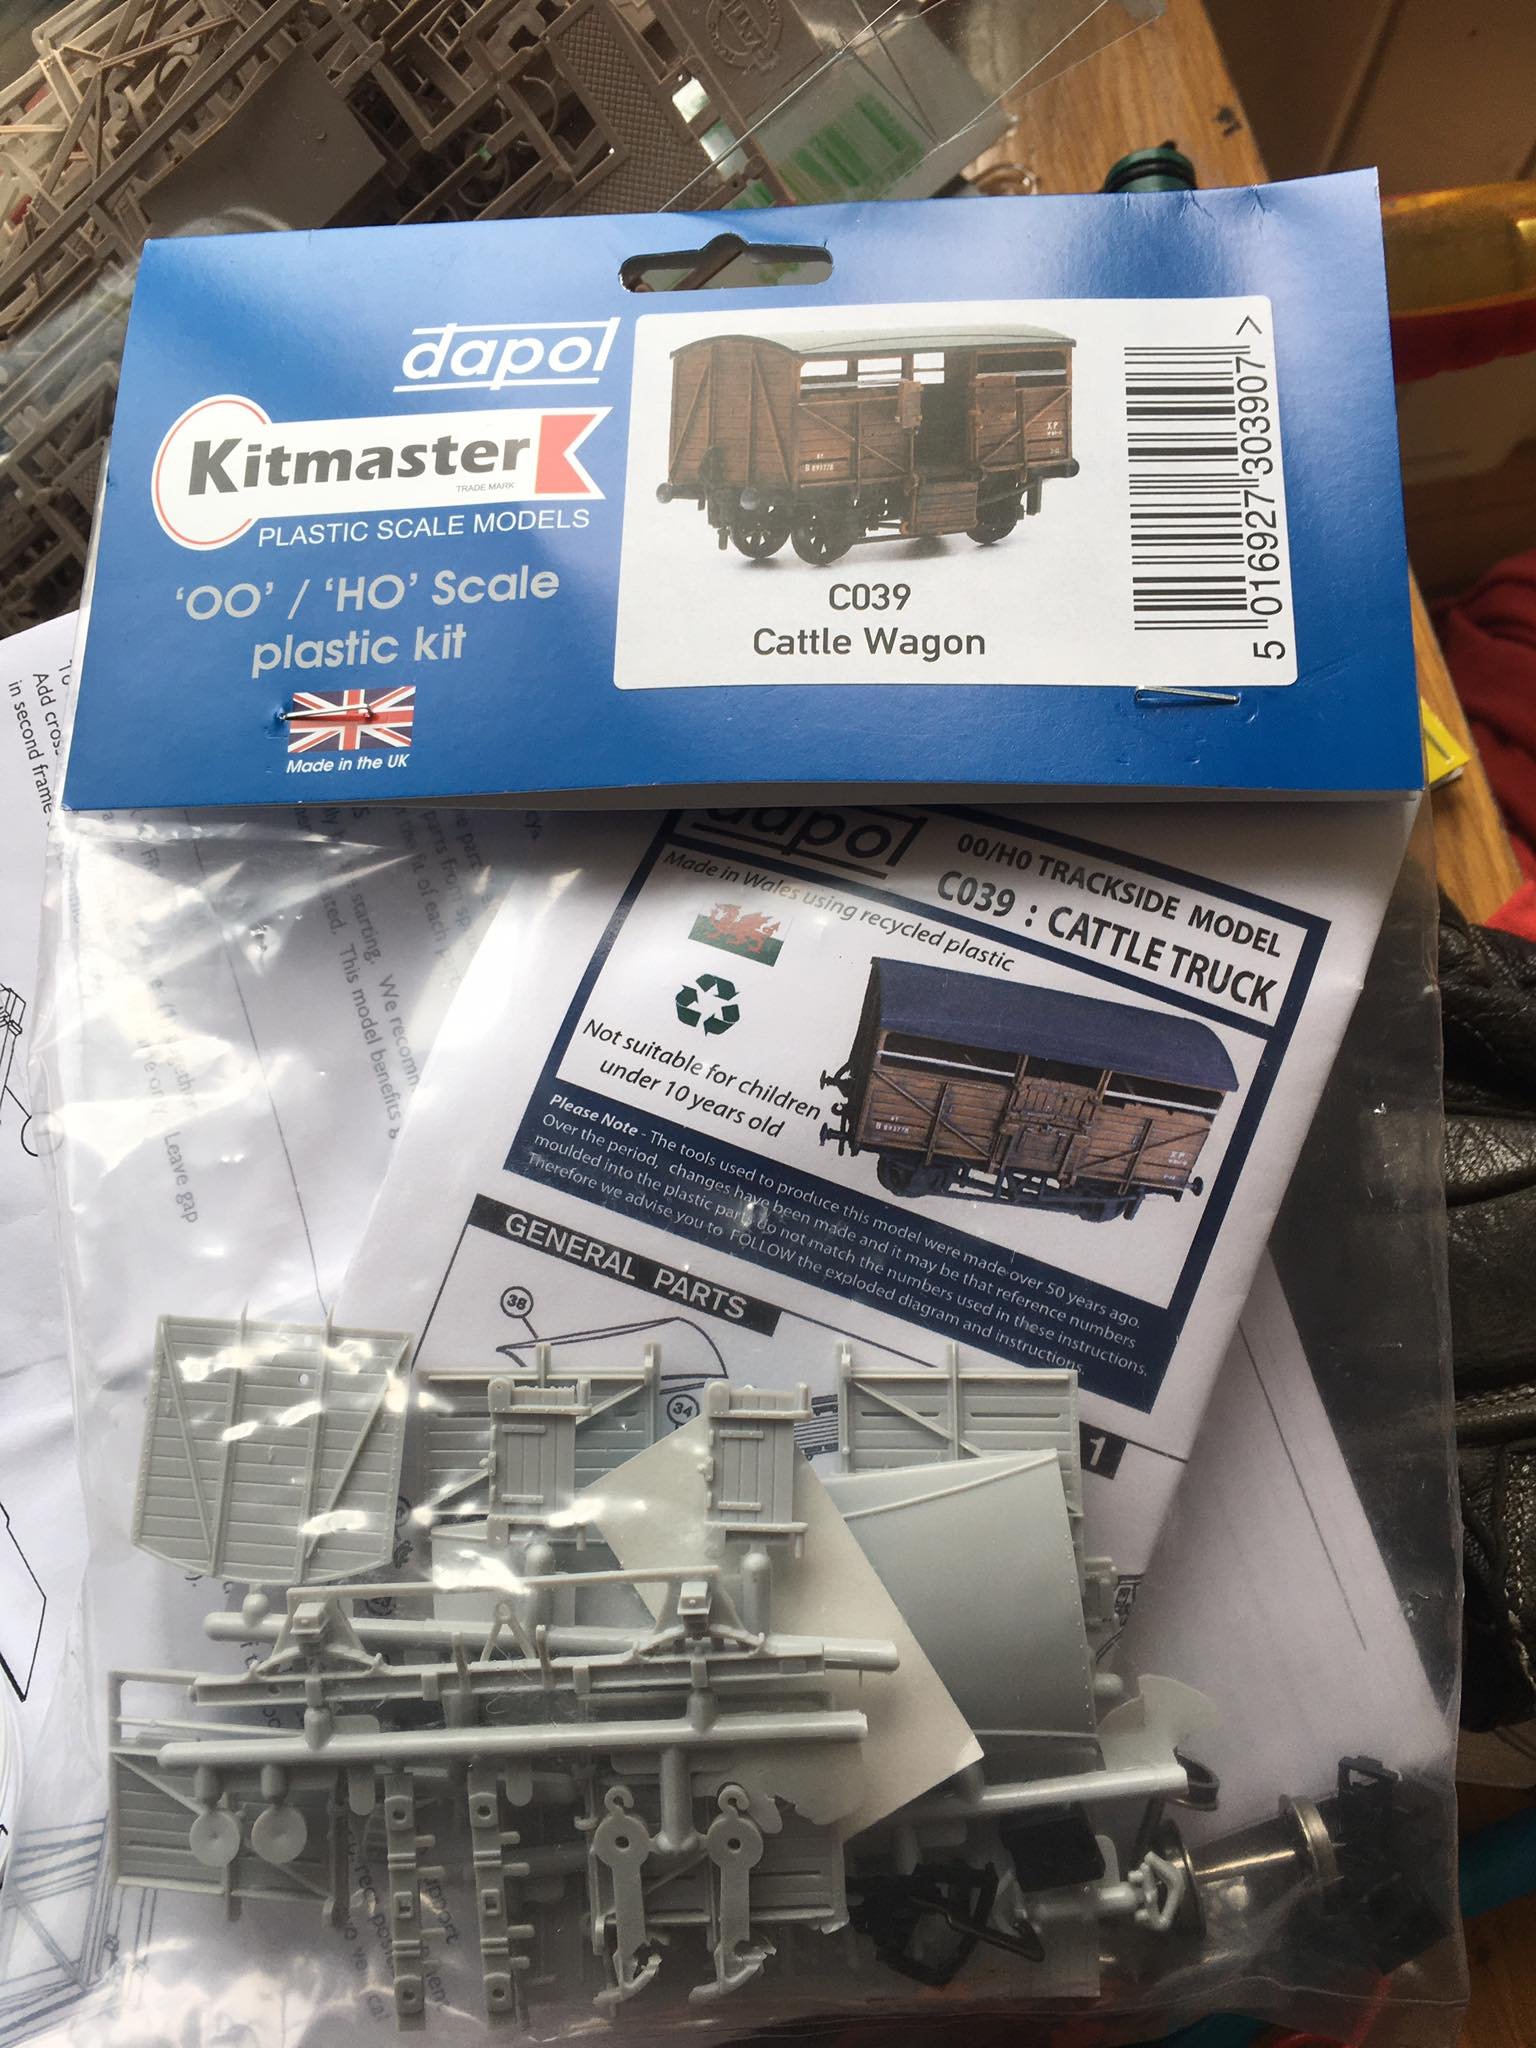
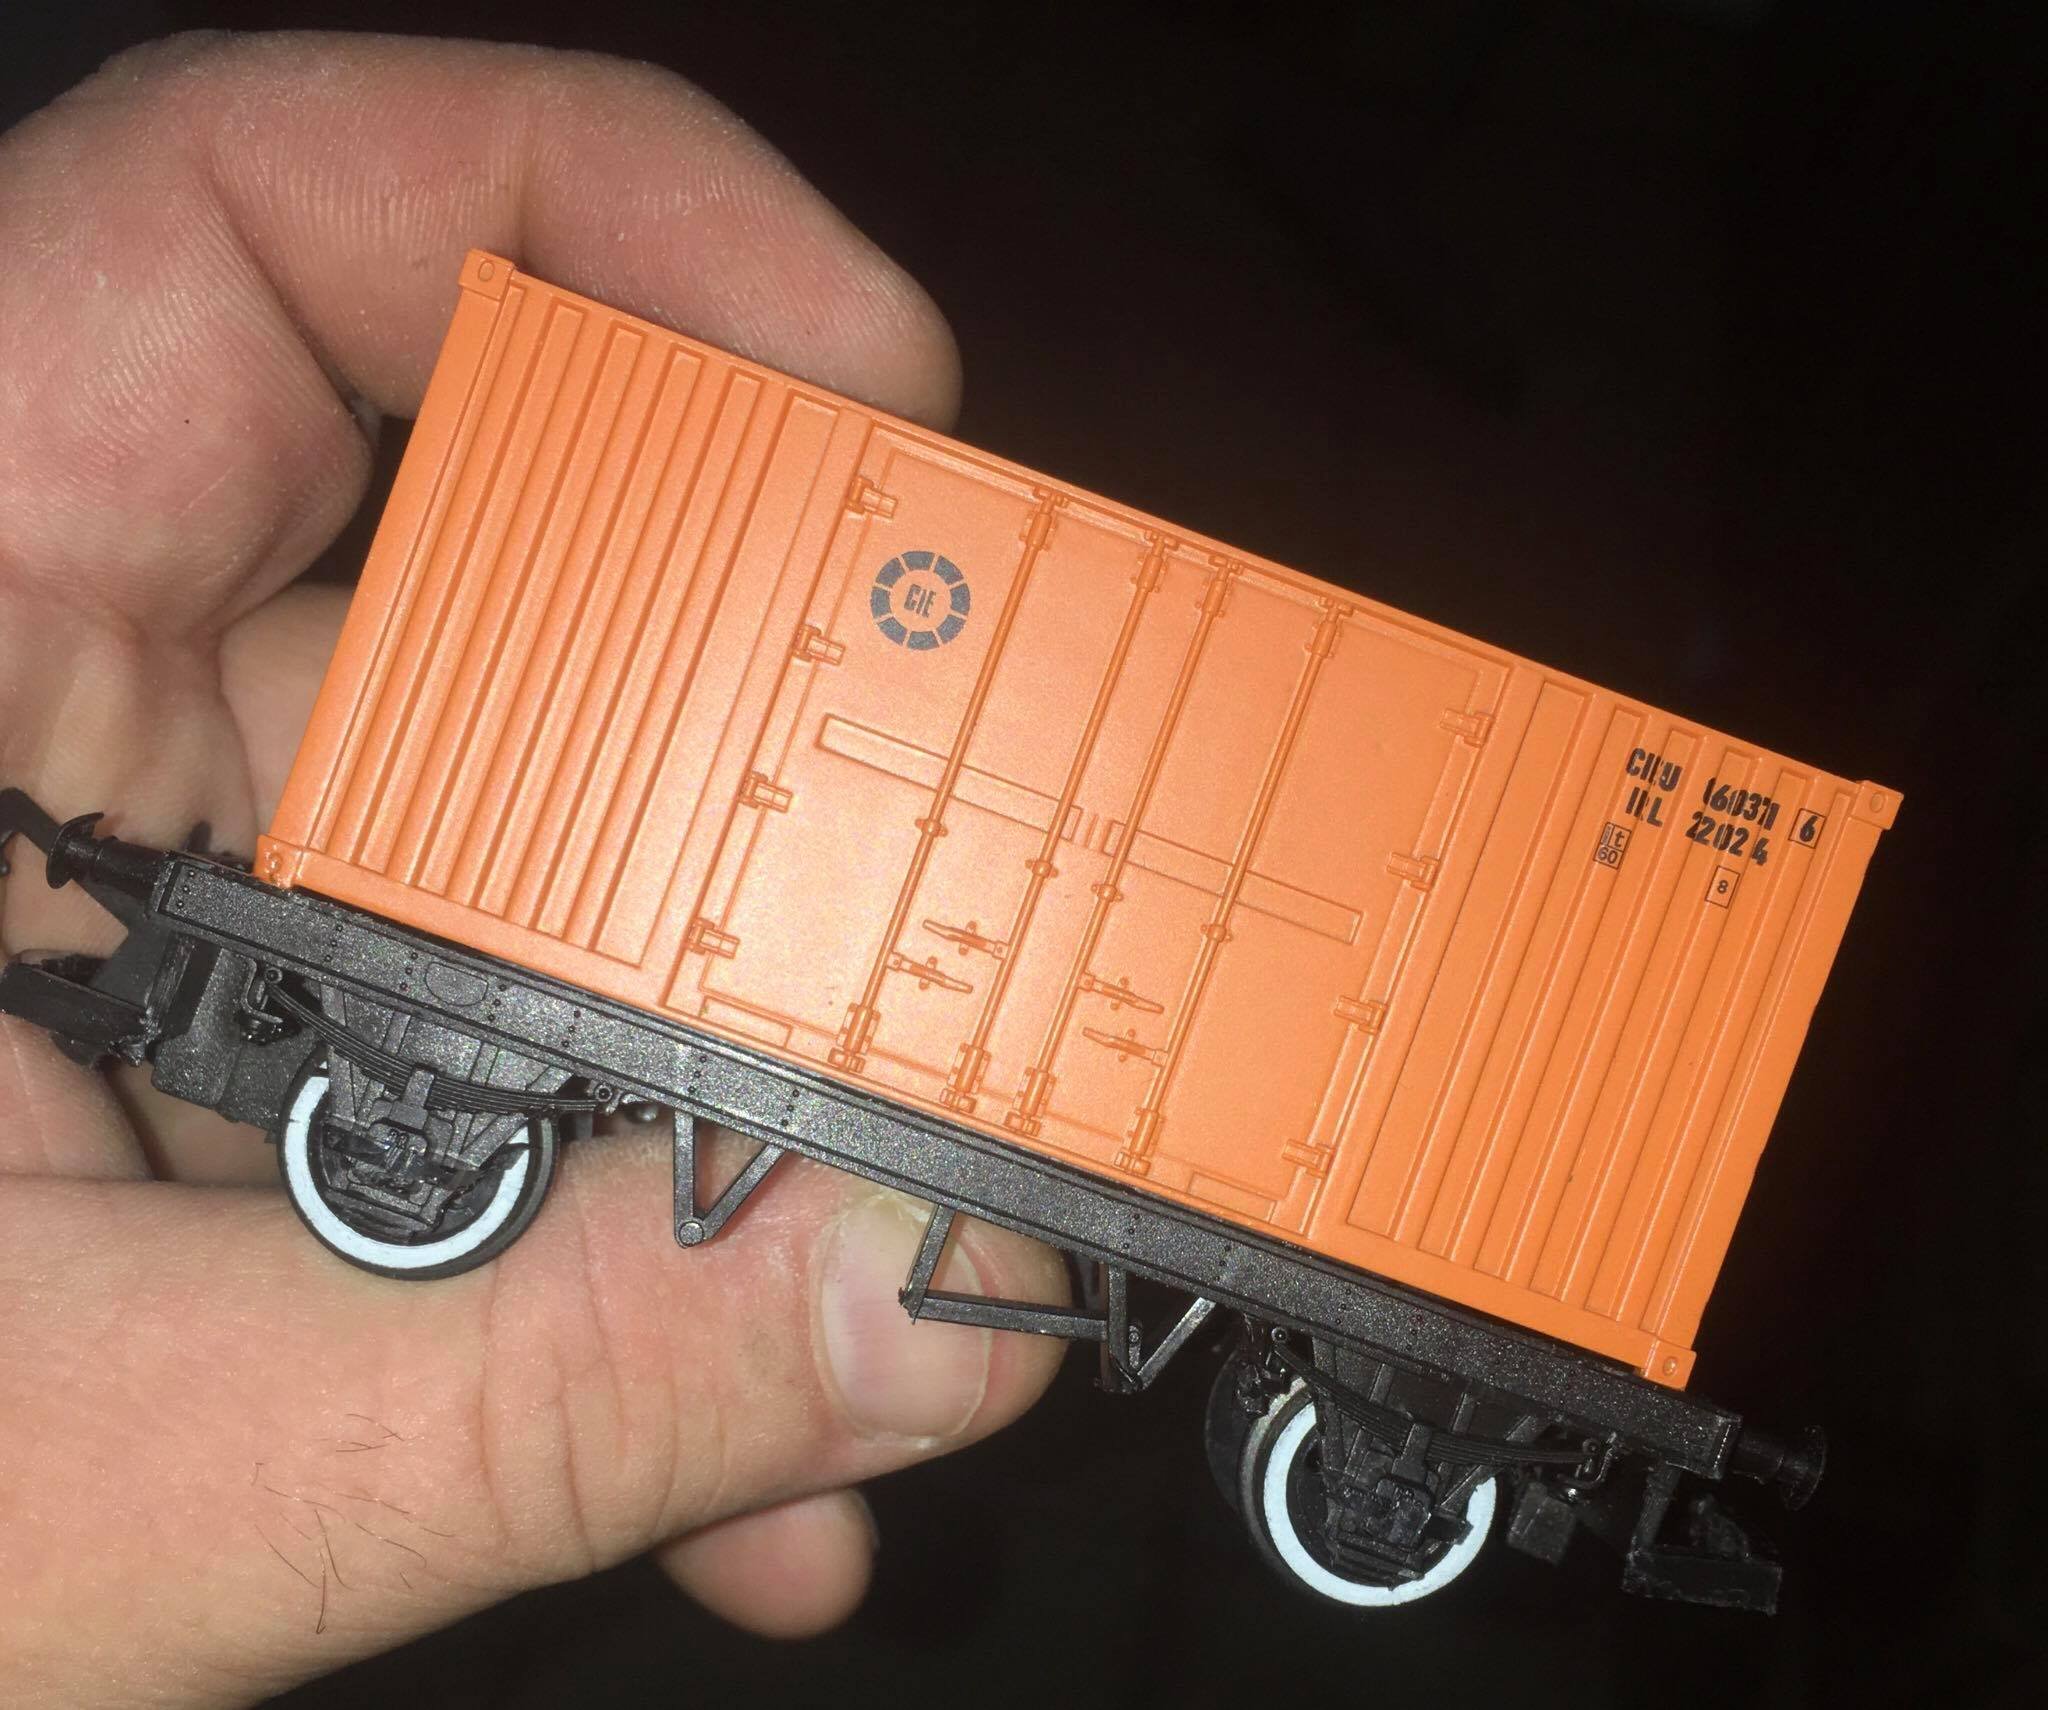
at 6/7 quid plus a lick of paint. the dapol self build/unpainted van line definitely ticking all the boxes for cie stock on the cheap. just got to make sure the tighter couplings will work on the layout before i go buying more.
-
Early Dieselisation - Continuous run "micro" layout
Sean replied to Sean's topic in Irish Model Layouts
video-1599199337.mp4 video-1599200022.mp4 got curious after this last post and decided to plug in a bachmann controller, MASSIVE improvement from this one. that makes the loco very usable now the PWM from hornbys controller was literally rattling it to bits lol -
Early Dieselisation - Continuous run "micro" layout
Sean replied to Sean's topic in Irish Model Layouts
video-1599192108.mp4 not done much for the week but had a bit of a running session tonight. what a great view to be sitting with my feet up on the couch. the g is a clunky little runner at times, rebuilt the E and added a bit of weight to it and its running much better now and more comparable to the other 0-4-0's I think the G may run better with a different controller as when i have a second loco elsewhere running on the track it crawls along smoothly at a stupidly slow speed just like it should be, and im using the basic old black hornby controller...when i try to run that loco on its own at a slow speed its all shaky like in the vid, so the issue is definitely an electronic gremlin of some sort to work out. have a nice package coming from dapo/ratiol today so should see some progress over the weekend. -
https://allscales.co.uk/finescale-figures-1-76-1-43/ these look to have a large mix
- 1 reply
-
- 2
-

-

-
I have an oval of n guage track and I would be lying if i said i hadnt been trying to work in 009 somewhere on the layout but thinking about it now it was pie in the sky. just had to google 0n16.5 as im not familliar with it and it sounds very interesting alright. found this chassis which can be gotten quite cheap and sits on whats looking like that 0-4-0 which my loco box is full of. looks like it may be yet another condender for a 4mm g class conversion, now youve gotten me thinking not much done on the actual modelling front since ive been working on and playing with the layout itself more but i did get around to finishing off a conflat today by removing the footboards etc that are usually present on the long hornby wagons. and cut it down to have more similar apparatus to an actual 20 foot skeleton. the plastic was very easy to cut through with the normal craft knifes. it actually cleaned the look up a good bit, a couple of the mroe delicate details i could of kept got broken so i just cut them off. since this yoke really is just a cobbled together lump of plastic and hot glue its needed a few adjustments internally to improve the workings of my home made mechanism and so i havent done too much modelling work on it. i have done a few cosmetic adjustments as ive been rebuilding the insides of it again and again, I did add some buffers tonight though and redistributed the weights around the caband its running more and more reliably all the time. I think the next step will be adding the 2 little headlamps on the flootplate at the front. cutting out the right sized windows however may be problematic as the cab has a few large bits of metal inside so not sure how im gonna deal with that just yet.
-
Early Dieselisation - Continuous run "micro" layout
Sean replied to Sean's topic in Irish Model Layouts
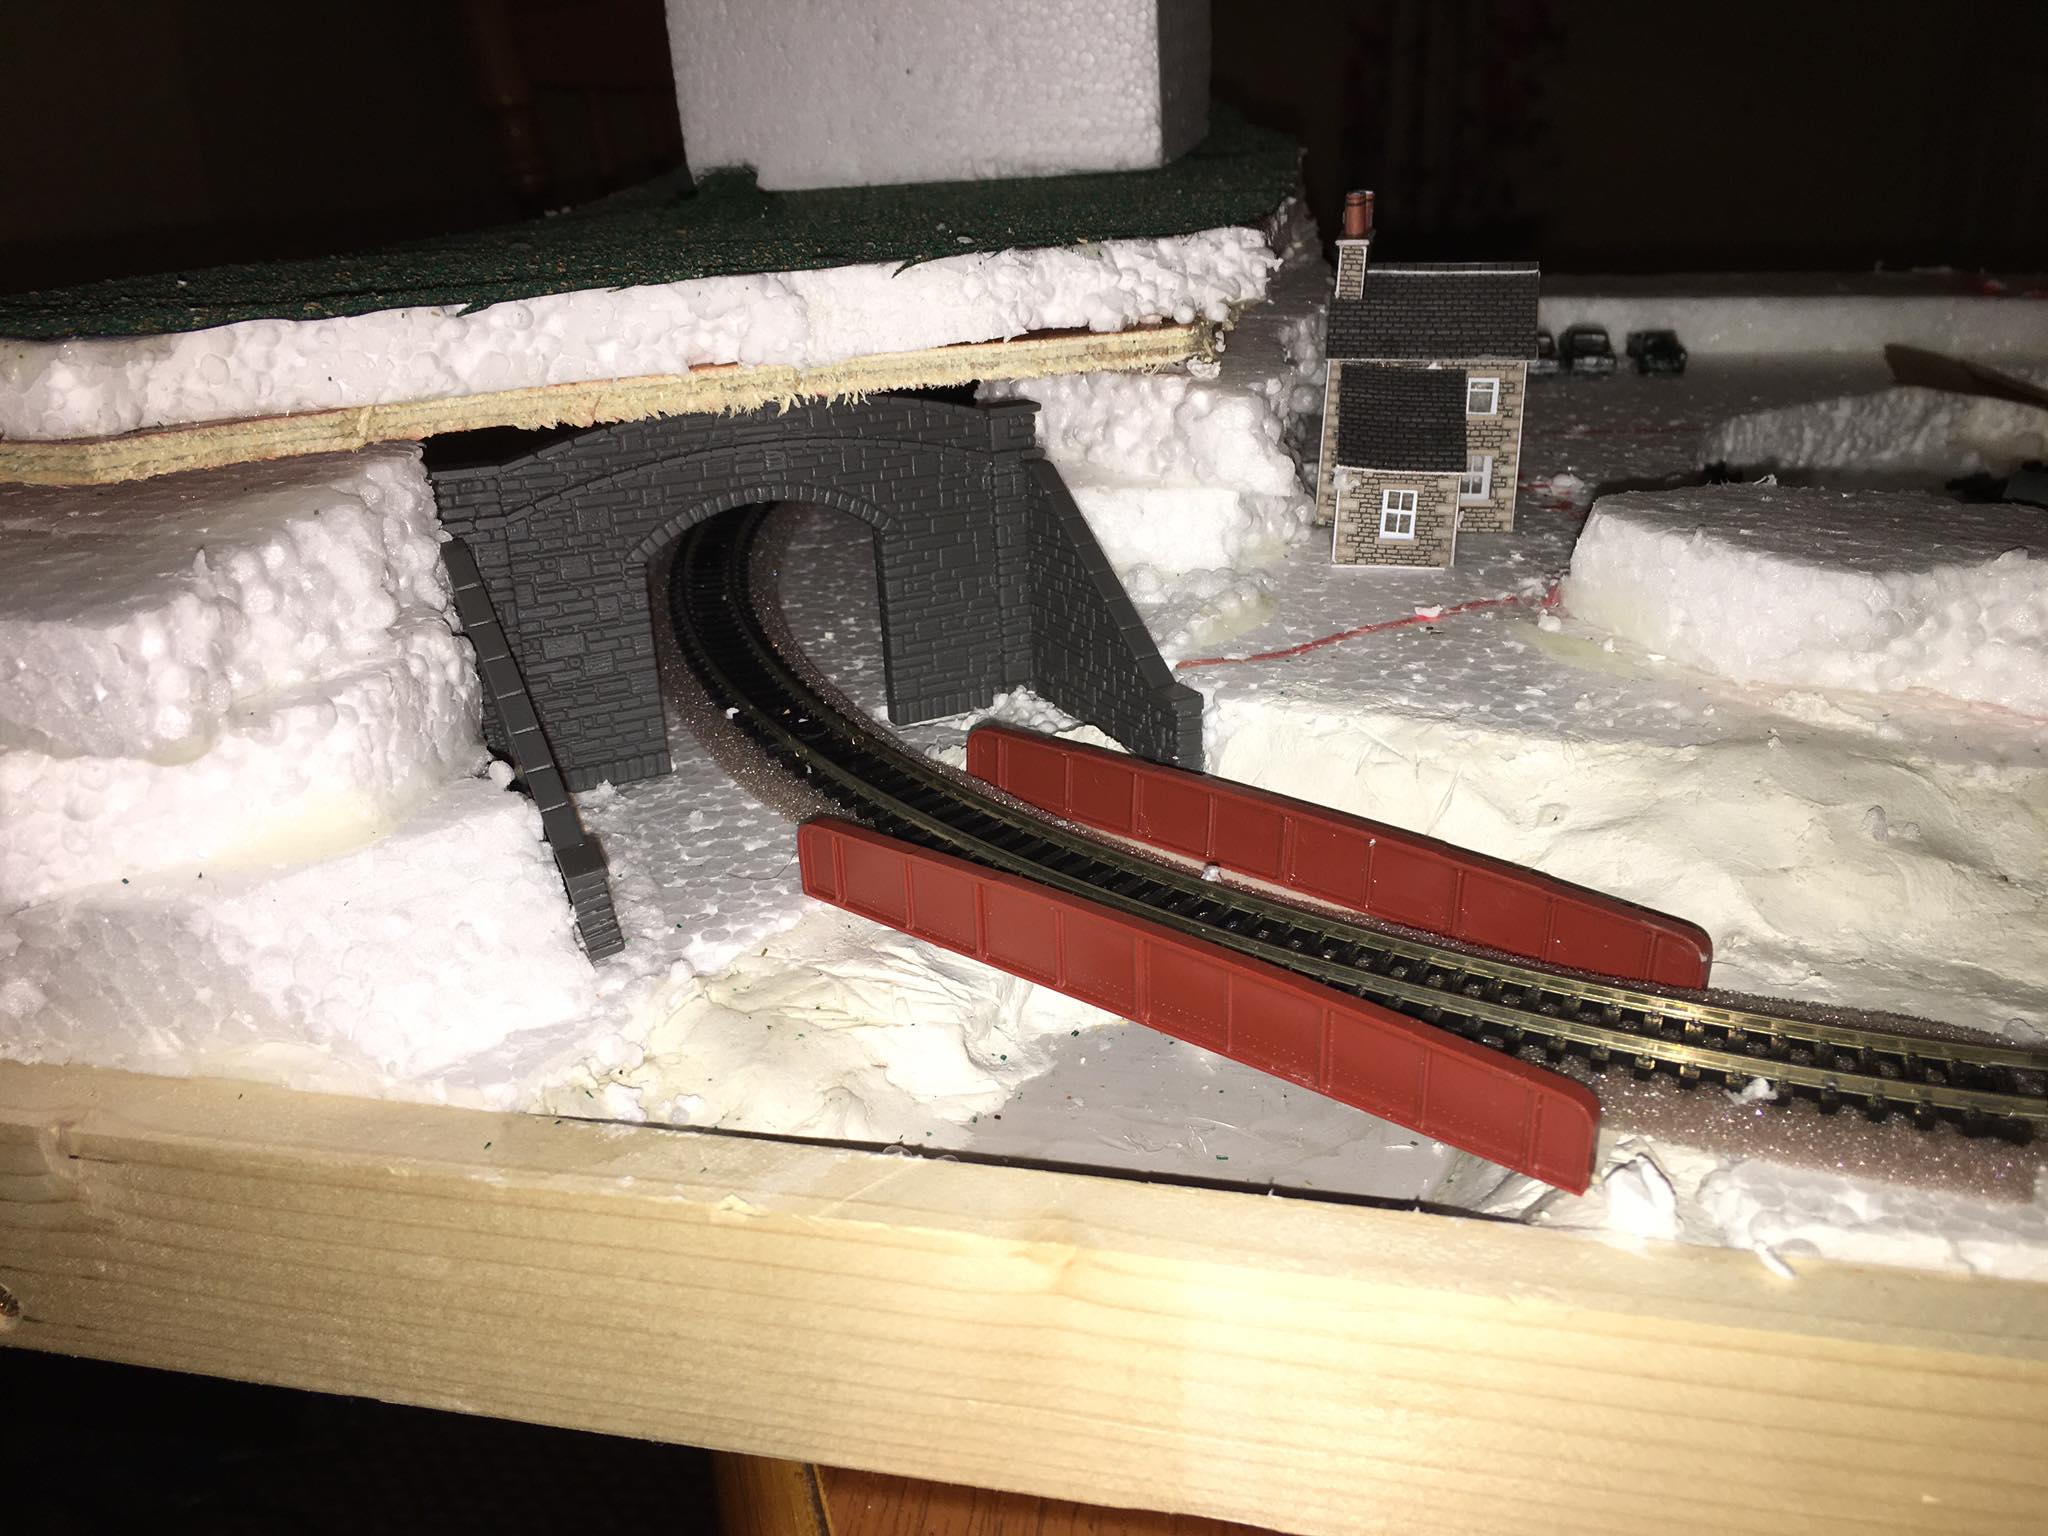
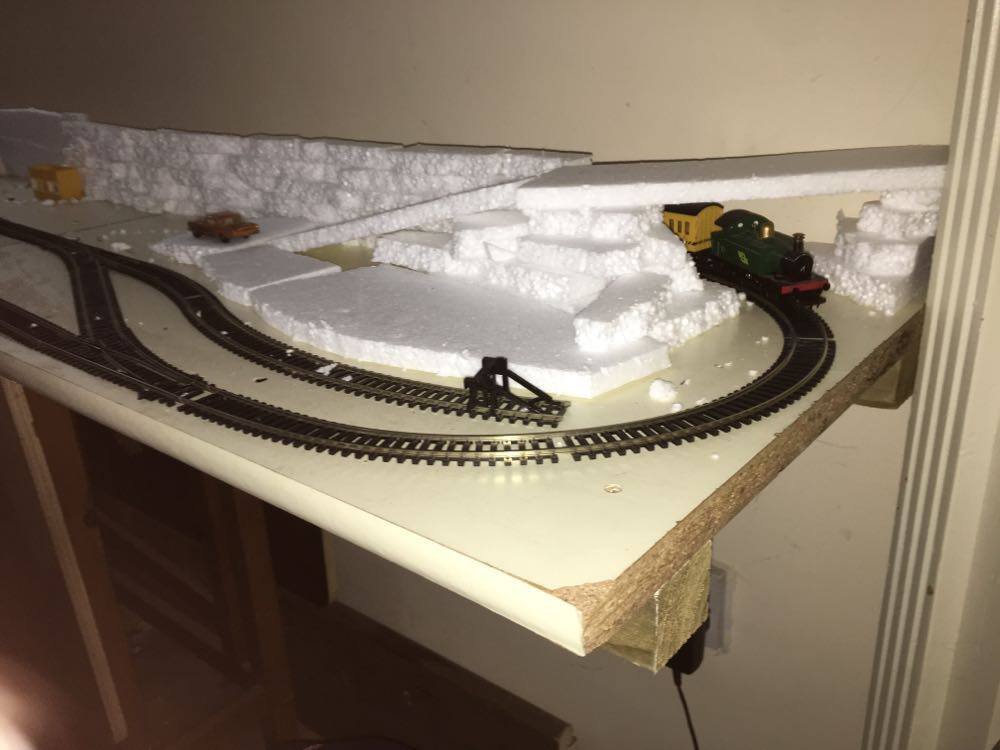
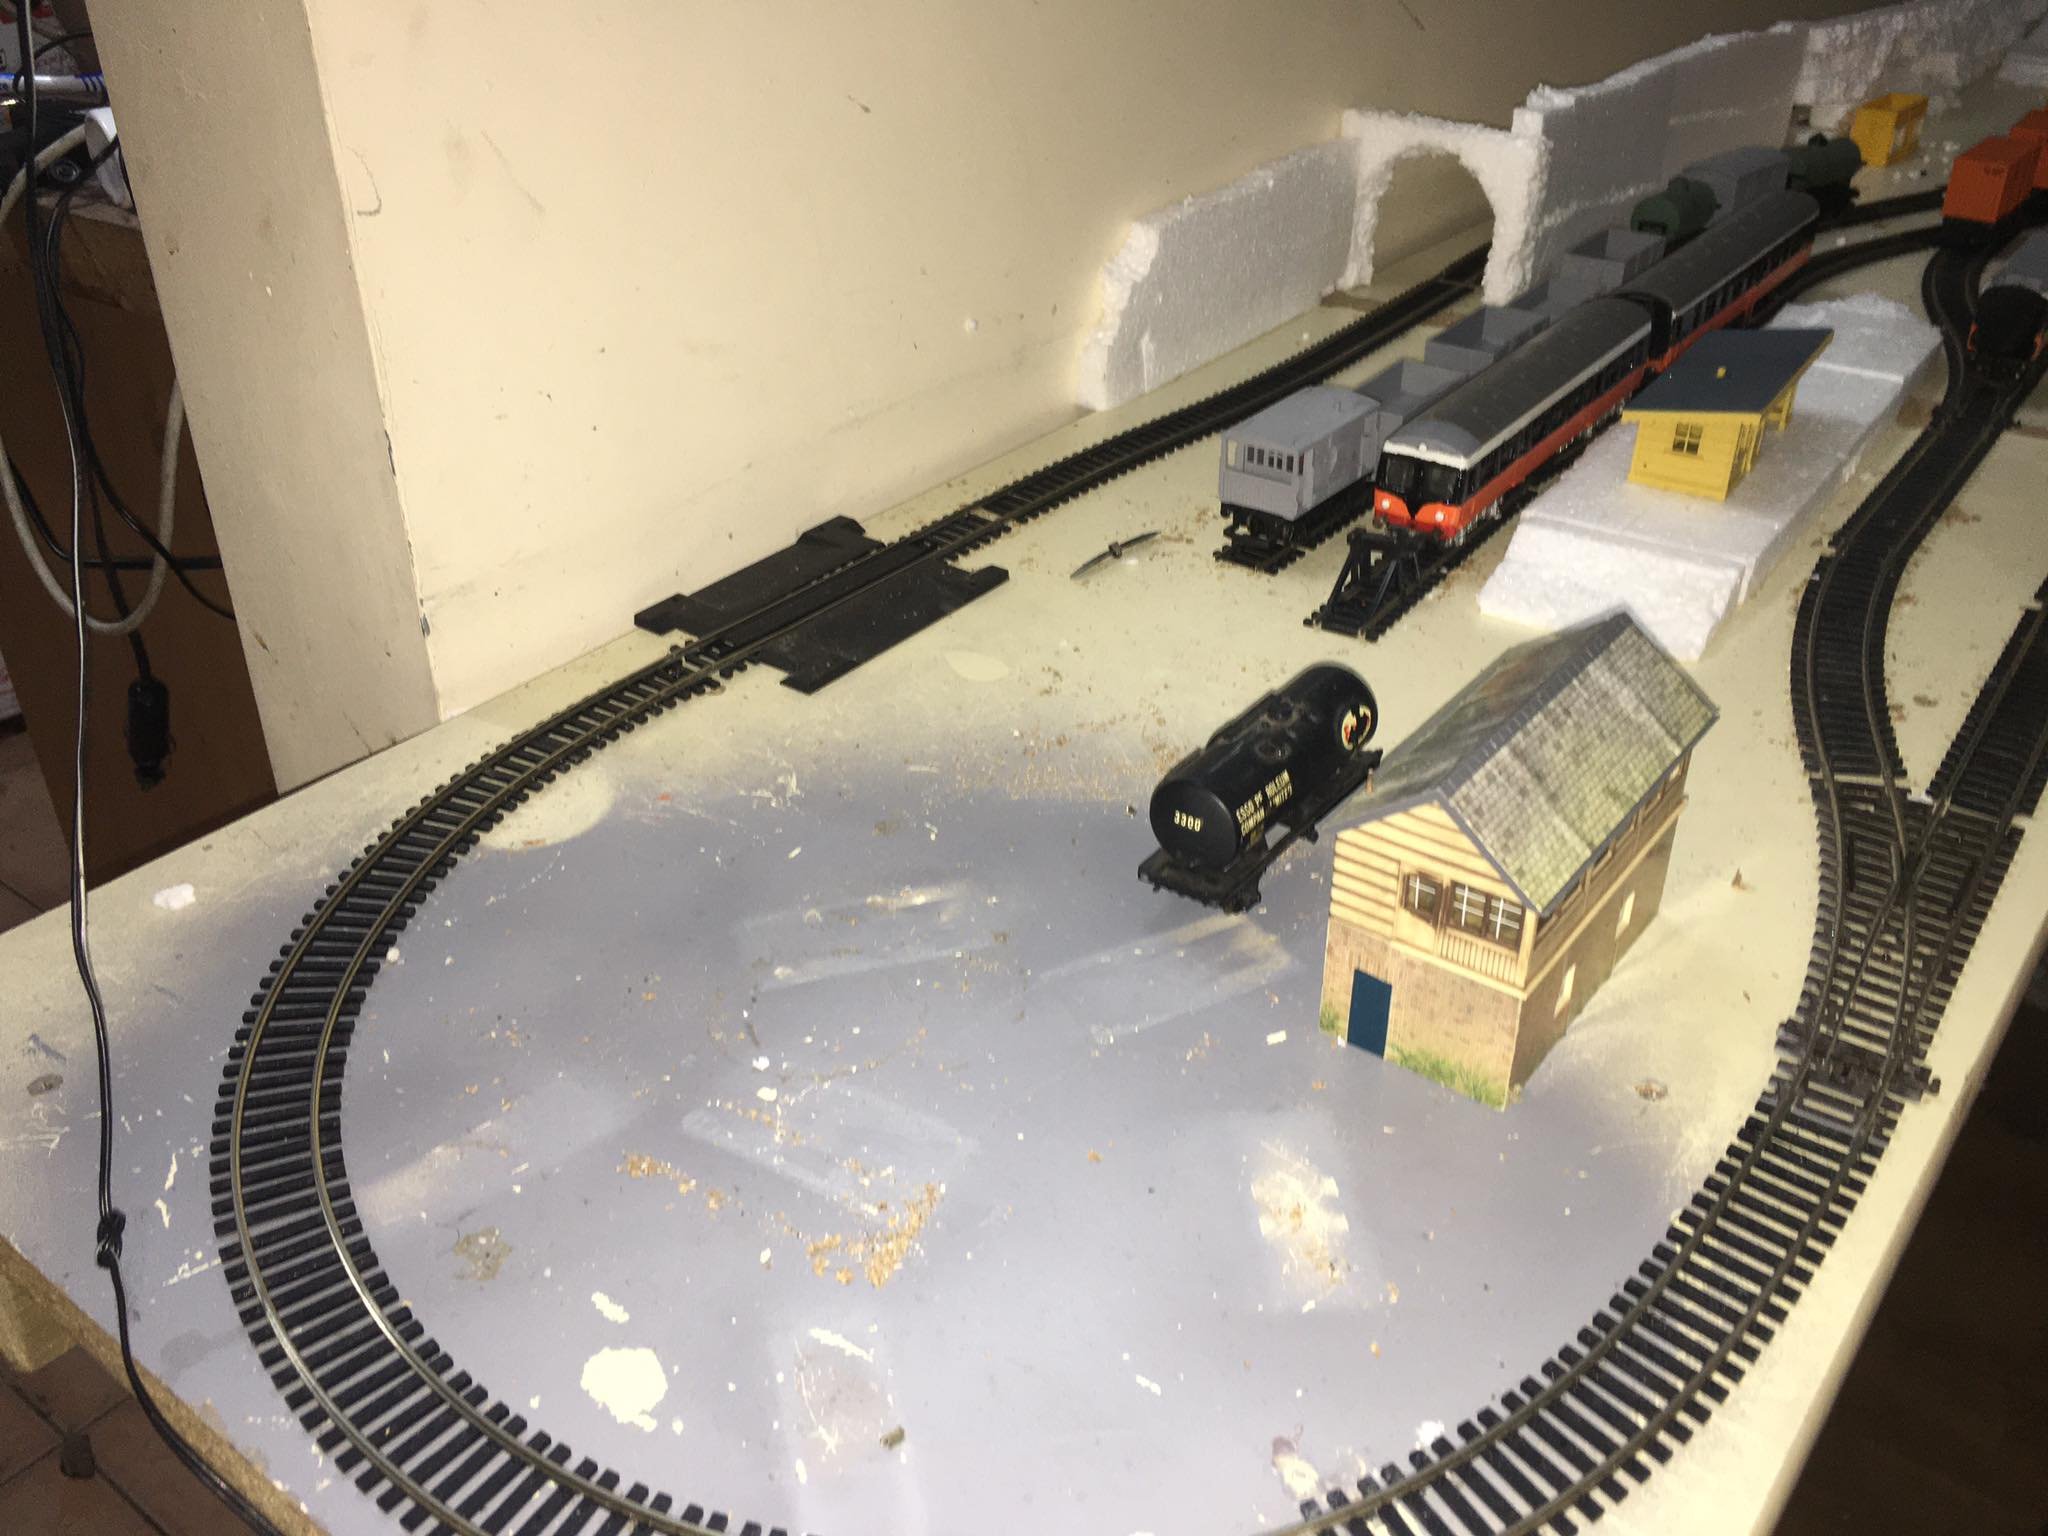
layout has progressed decently over the weekend, replaced the dodgy curve and the whole backscene straight with brand new flexitrack. derailment issues are finally a thing of the past. also finally own enough track to finish laying the sidings. went into one of the department stores also and came out with a free lifetime supply of polystyrene blocks too so been using that to mock up how the scenery should eventually look, when i get the hang of making scenery, i have more than enough to experiment with though was nice to be able to just cut out the desired station platform and go with it. this end is still bare, will probabaly eventually develop it with a small little village pub and cottage or the likes. its also adjacent the front door here so it will make for a nice viewing area for guests backscene starts by entering the tunnel, with retaining wall running along the siding. exiting the backscene which i eventually want to conceal with a concrete bridge running overhead trying to develop a bit of a freight yard down the other end of the board. the raised section would be both a cattle pen and a general loading dock which will handle a mixture of goods. road traffic would enter on the overpass , the rough broken polystyrene would be to eventually represent rock face which will form the backscene ,i can currently blow it down by coughing, but at least it gives a taste of the desired shape. in real life the line the the G is on would have run through a large goods shed, tried putting a shed here but i think its just not happening I might however just about squeeze in the ratio container crane which is another thing i just kinda want all along but thought it wouldnt go on the layout performance wise the layout and tight curves are running really well and since relaying the bad bend i seem to be able to get almost any item of rolling stock around them the one limitation that i have hit however is when i try to pull 2 large coaches around them both the E and G can do it but they both struggle a little at lower speeds with an annoying amount of wheelspin. pulling a single coach and generator van is no problem though and wont look too outta place on this layout as im trying to represent an early rural branchline. the railcar should get around the layout without any hesitation also which can make up the larger passenger services. a note on era im thinking roughly 1970 given my choice of yard and rolling stock, loose coupled goods(i think its called)....... the steam train would only appear occasionally as a preserved loco doing a railtour with the 3 4 wheeled coaches which will be repainted into cie green in due course. quite pleased with progress so far, will update again as more happens.
-
video-1598499214.mp4 since id already taken an axle from the 0-4-0 to work into the e class at some stage, i thought id cut out the coupling blocks and hot glue them in. working a treat. ready to model and paint the thing now. really a quirky kinda loco, i could see the sort of narrow gauge but on big track look growing on me. so now that i have 3 locos i can run on the layout im gonna focus on finishing off the stock i do have, and then at some stage when i do get a chance i will probabaly bulk buy a number of dapol vent van kits and oil tankers. that seems like more than enough to play with for a while
-
Early Dieselisation - Continuous run "micro" layout
Sean replied to Sean's topic in Irish Model Layouts
video-1598499146.mp4 Diesel traffic slowly increasing at the station, Im expecting a couple of points and more flexi on friday so i can replace some troublesome sections and finalise the track plan, am gonna be getting into scenics then. -
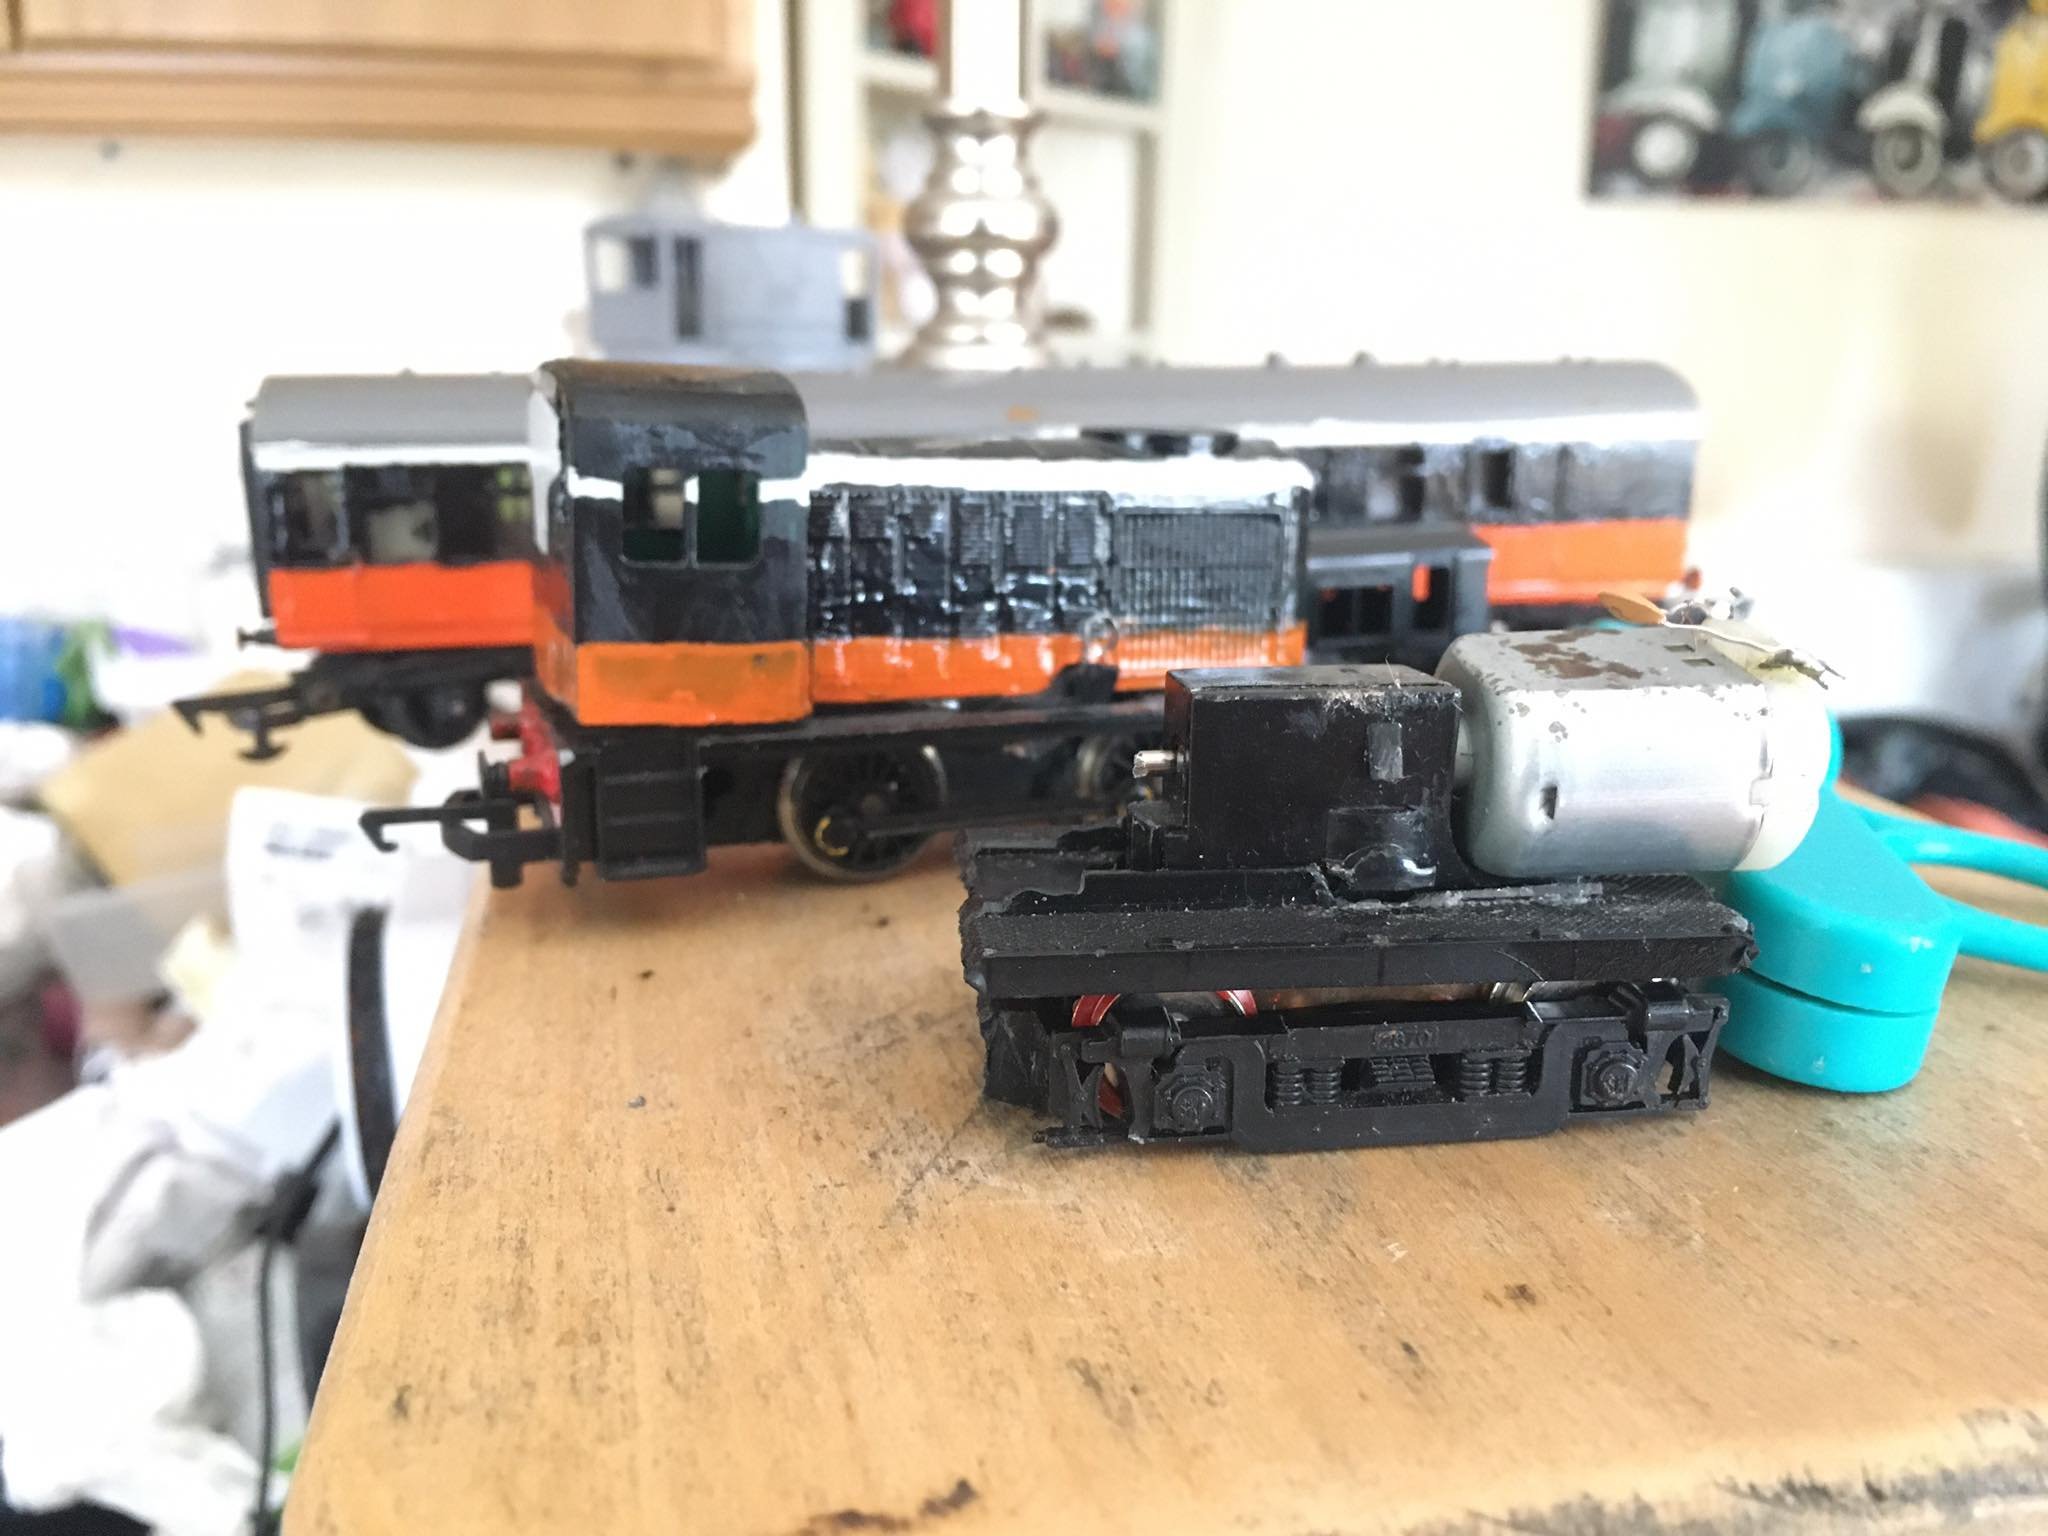
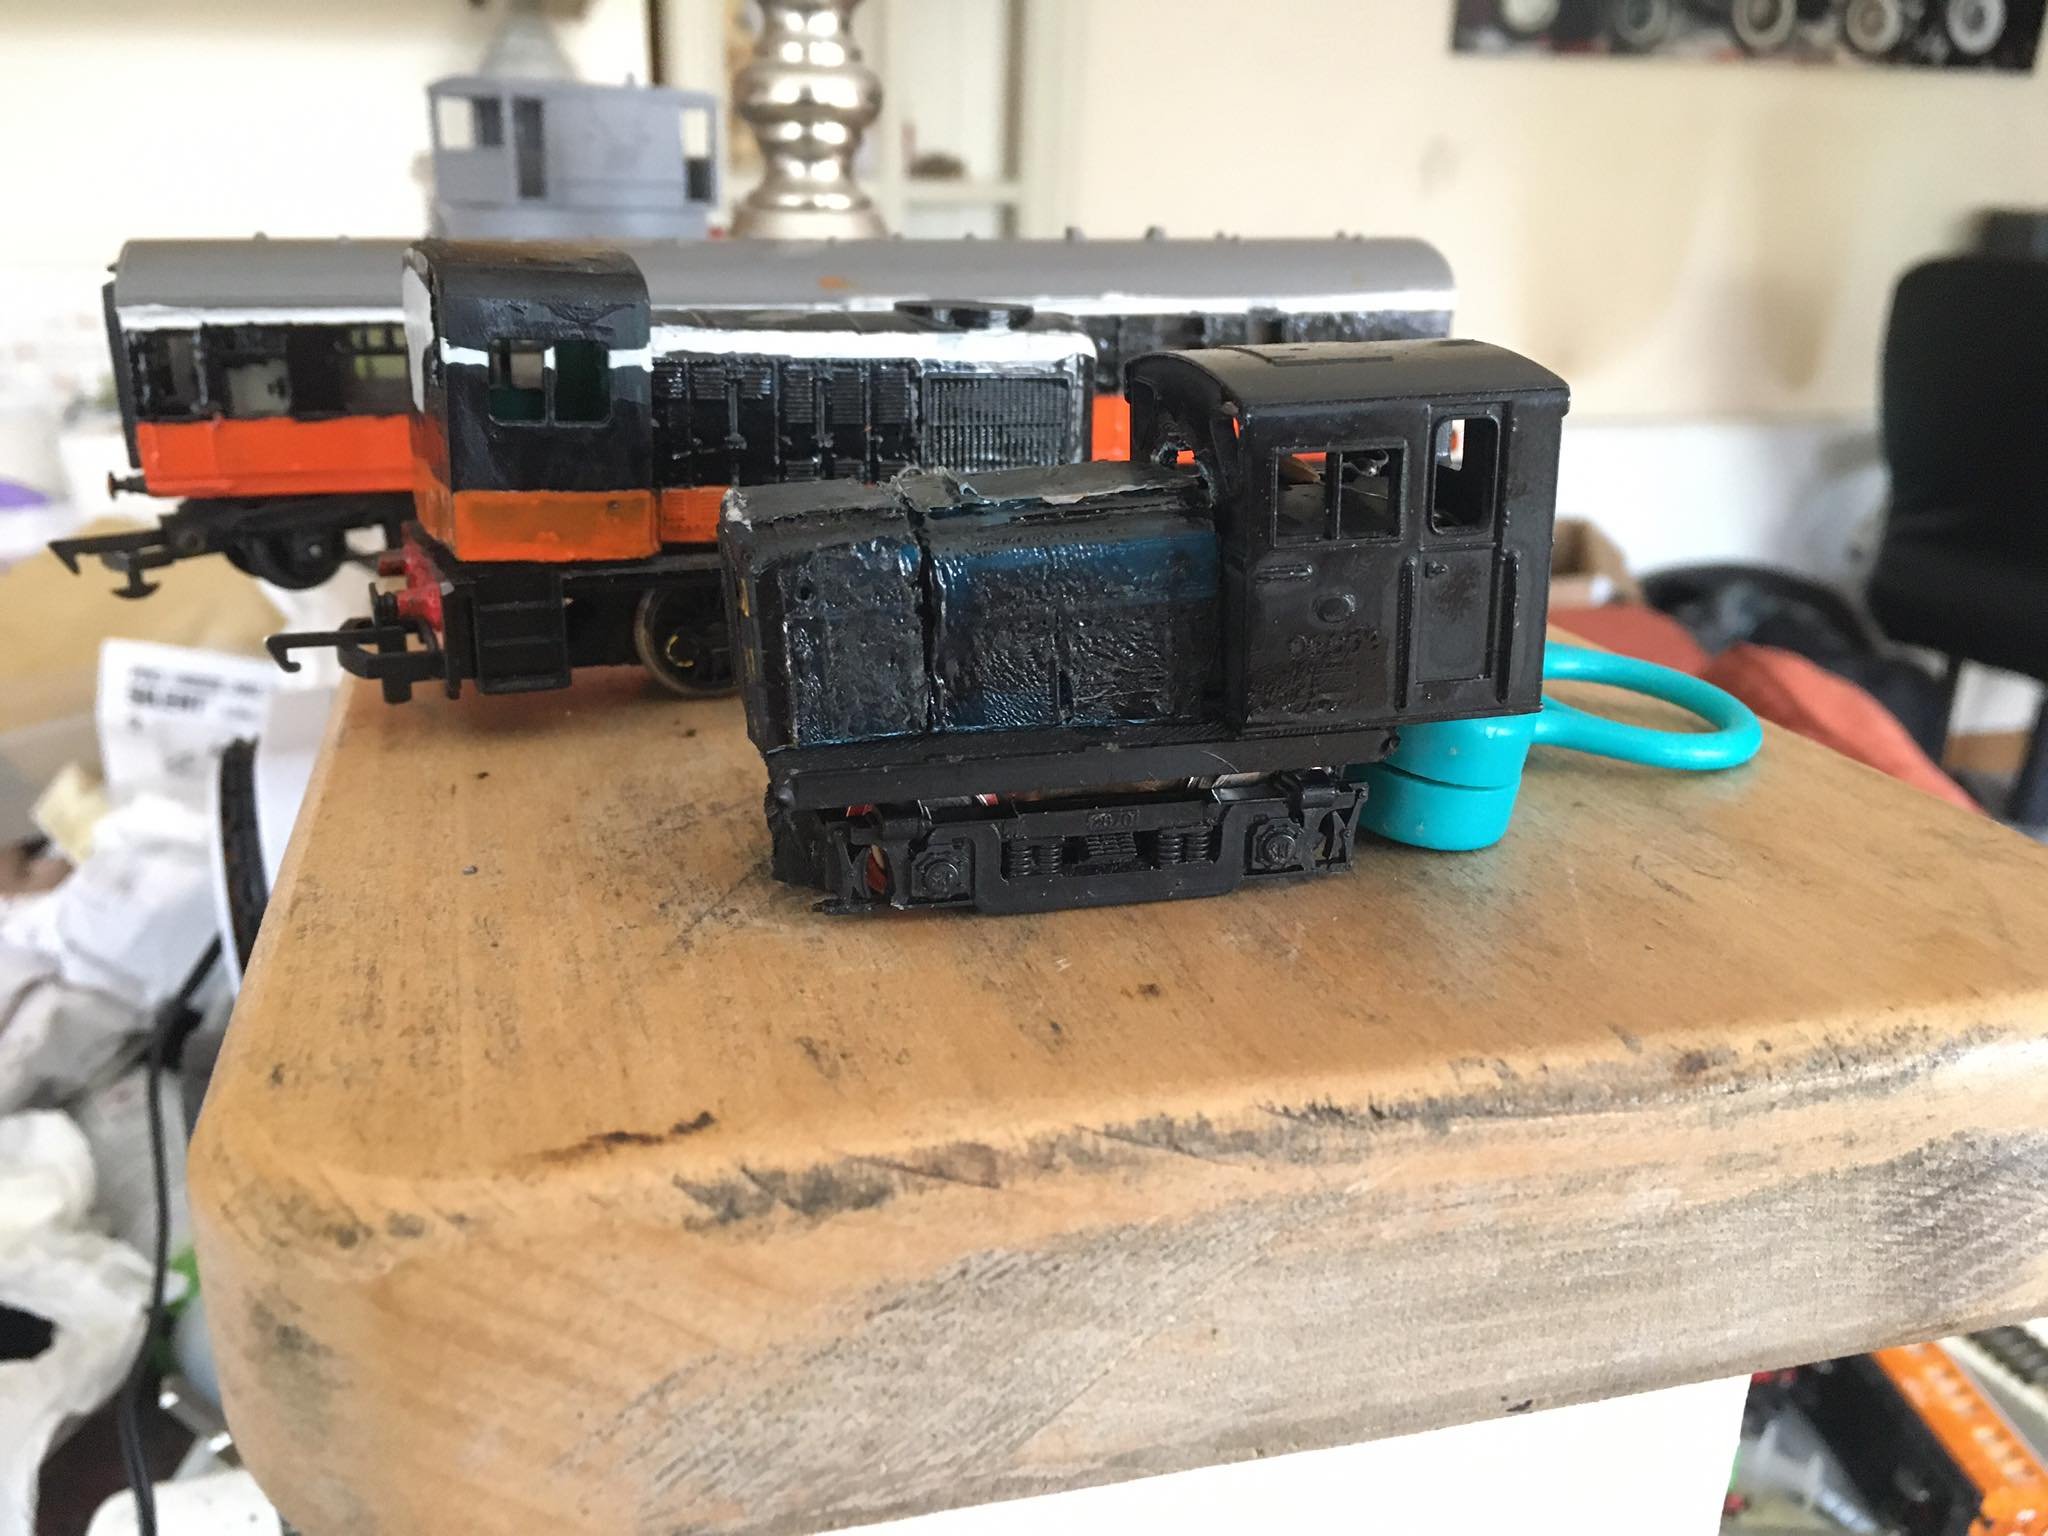
video-1598488777.mp4 well this is rather unexpected............. but a running g class has been cobbled together..... the only space to put the weights was into the cab, so now it wobbles at high speeds, probabaly just like the real thing XD. the 121 i started earlier in the thread wasnt really interesting me anymore, i had used the wrong type of plasticard for the job and it would never work on this layout anyway, and besides i can buy a nice one of them if i really want to.. so i dismantled it for the cab and body parts to form a new loco and noticed the bogies would come out easily, and when they came out i noticed that they were both the exact same moulding of plastic casing except one is wired for power pickup and the other has gears inside to drive 2 of the axles so i soon realised i could install the pickups onto the drive pickup without any mods at all (the bogie has all wheel pickup now). the problem now is that there is a swivel joint between the motor and the gearbox that moves the motor into the center of the chassis but after some fiddling i can see that with the plastic joint pulled off the gearbox shaft its the same sized shaft as the motor, so i start to wonder if i can just press this motor into the gearbox and leave it sitting ontop of the bogie to run things. so at this point i decide to pry the gearbox apart, there is a worm gear driving a small litle gearbox to drive 2 axles. i pressed the shaft off the wormgear and much to my delight the motor pressed straight on, and this is where we run into issues as i cannot get fit the motor onto the side of the gearbox without it sitting at a bad angle that would stop the mechanism from working anyway. I ended up grinding away the side of the plastic gearbox until the motor was sitting ontop of it with the shaft pointing straight into the box at a perfect angle. this meant i had to discard a gear and the bogie is now only one axle drive, but it was probabaly the only way to make things work. next problem the bogie had traction tyres in the past but they are long gone, so i reassemble using a drive axle and a pickup axle, and it works, but is wheelspin crazy, the loco is barely moving..... to combat this i have taken a couple of measures, the old chassis had a 50g weight from the factory, I reused this within the new loco, it was too big to fit in so i had to cut it in half and hot glue it into the cab body. the other thing thing was to replace the old traction tyre wheels with 2 off of the spare pickup axle as i dont think i could reliably run any tyres on this yoke now regardless. they literally just pressed off the spare pickup axle and onto the drive axle. its kinda funny now, cos if you jam the speed open too fast on the controller the little loco is more than capable of doing a little wheelie or flipping itself over! only when you rapidly go from like 0-70% speed in a second or somthing though, its perfectly usable at slow speeds otherwise. just need to add couplings too it now the modelling can wait till another night, didnt expect to get the mechanics done so fast like that anyway. steps and buffers will need to be sourced from some other scrap heap. although im begging to run out of scrap heaps!
-
video-1598373472(1).mp4 AEC back together and being pushed by its power bogie, paint tidied up a little bit. this should be a great little runner if crawling like this on a standard hornby controller video-1598373691(1).mp4 This design is decades old but after cleaning up the wheels and loosening it up its quickly becoming one of my favourite motors that i own. that double worm drive seems to be putting loads of power down too. nice to be able to watch the open motor in action too. Can anybody point me towards proper servicing info for these motors? it was a bit seized and barely running since i bought it a few years ago but think it might deserve a proper service after coming back to life so nicely.
-
Early Dieselisation - Continuous run "micro" layout
Sean replied to Sean's topic in Irish Model Layouts
the dock shunter was on my list of maybes, as well as the dapol class 04 body. that chassis seems to use the same motor setup as the railcar im making and i know exactly what you mean. independant worm gear to each axle and it can both crawl and fly faster than youd ever want it to. there has been some strange, far out experimentation happening during the course of the night, and it looks like i may already have components for a g class contender. its even motorised already. will explain things in the other thread as its a bit of a frankenstein all said and done but it does run its around the same lenght as my 20 foot container so i know the lenght of the thing is roughly to scale.
-
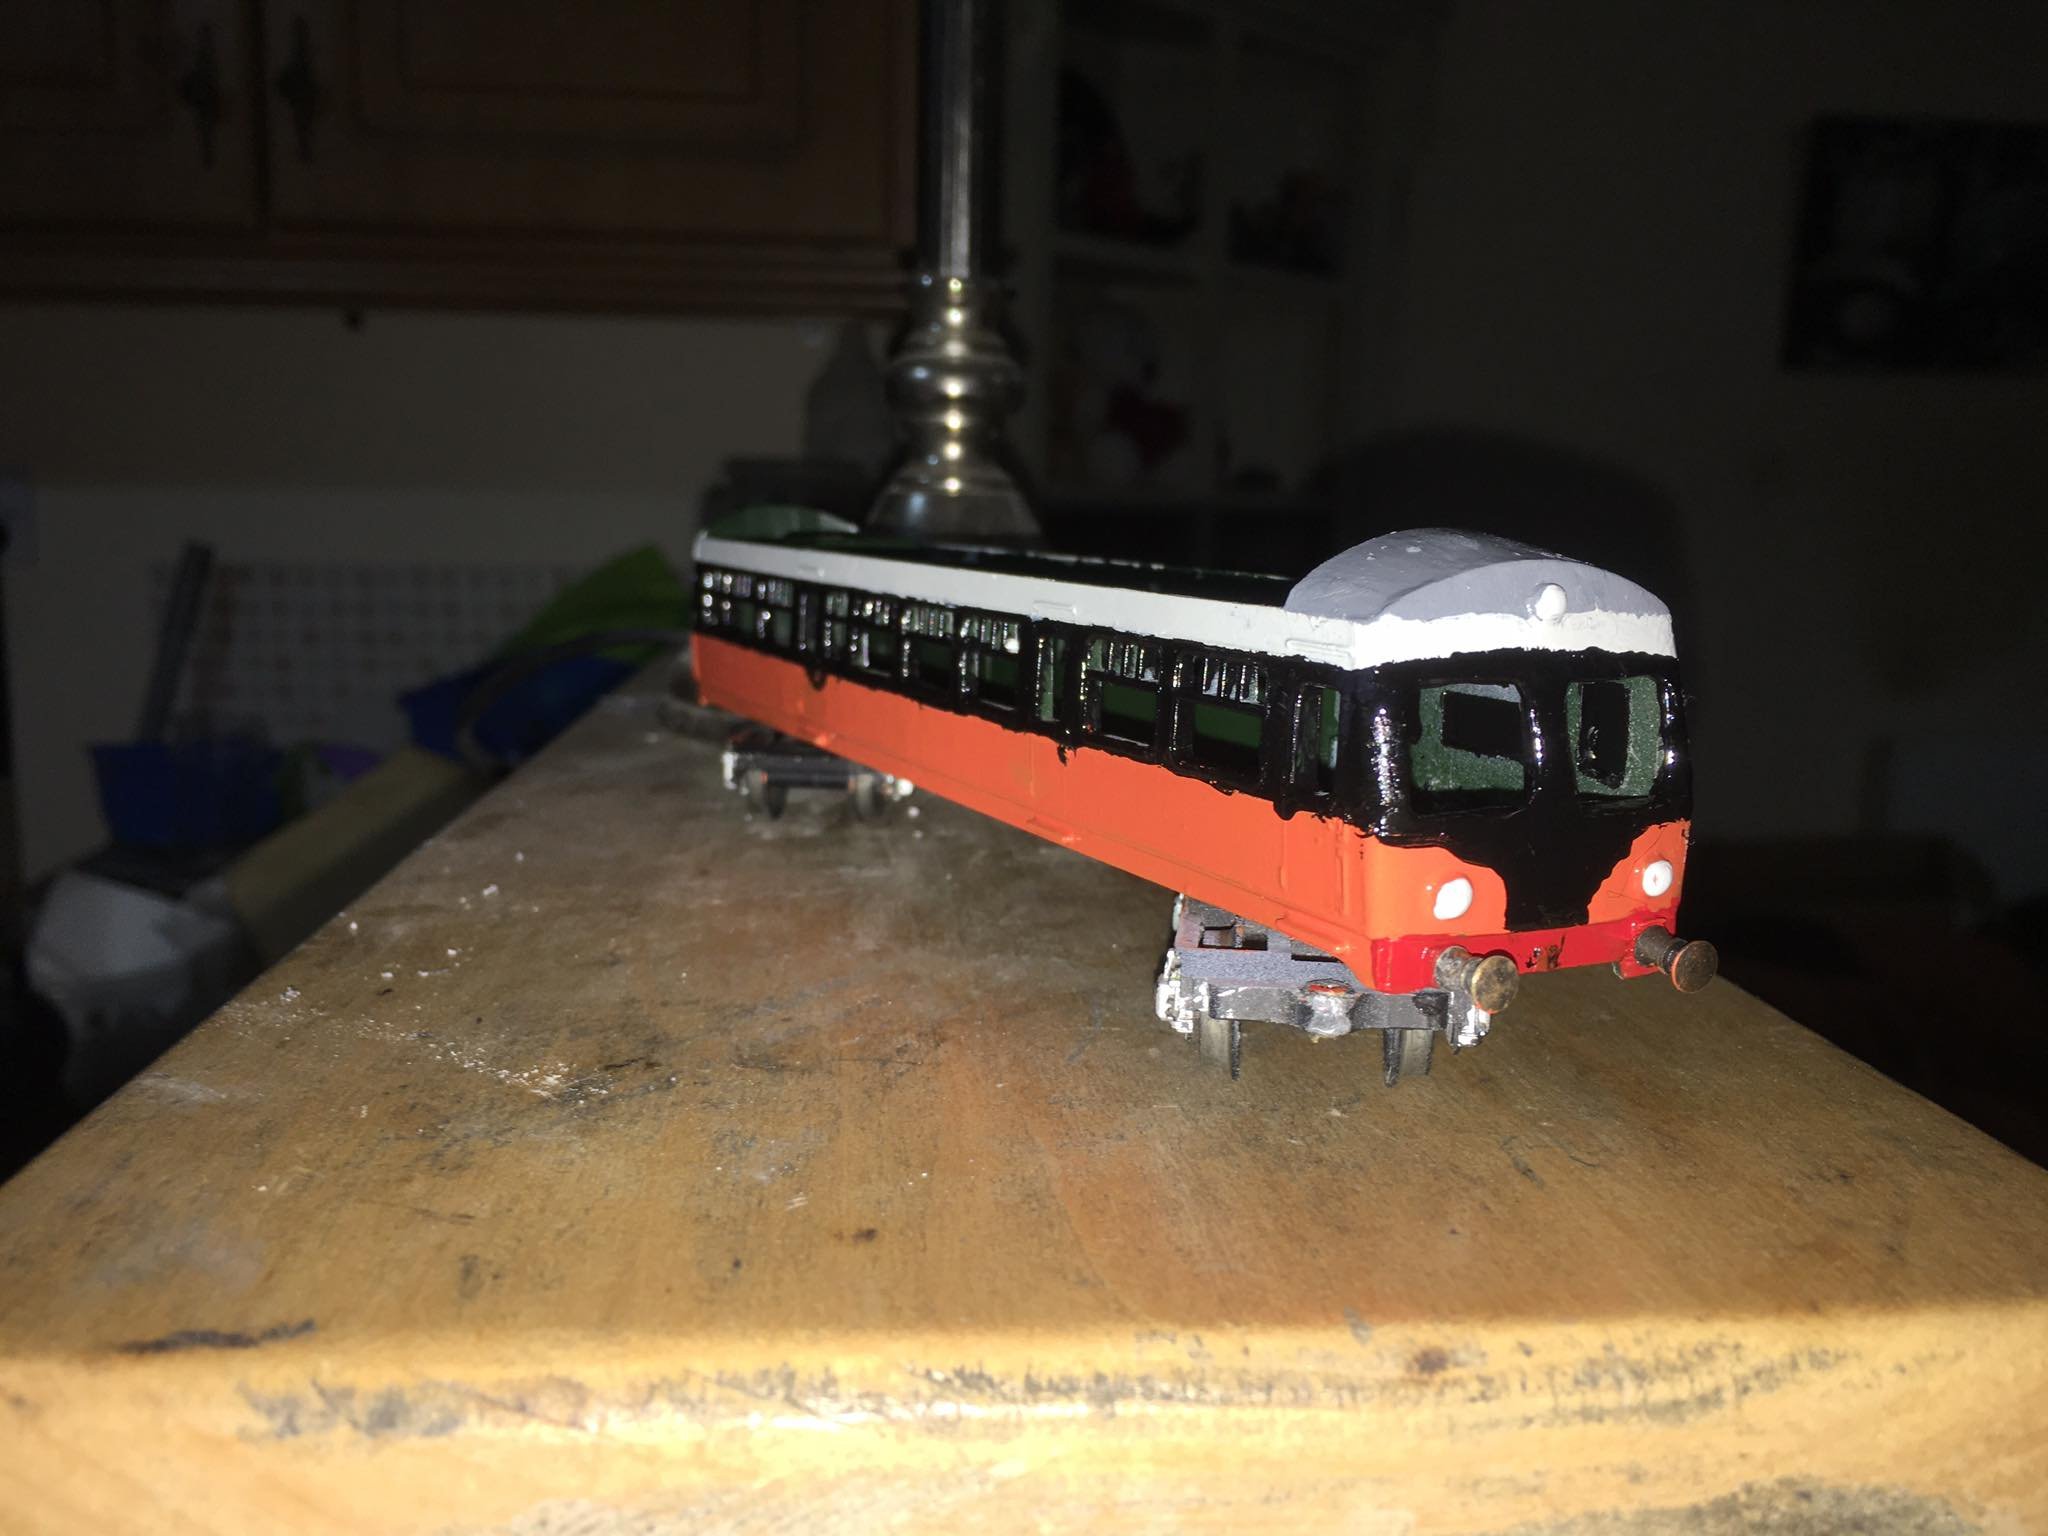
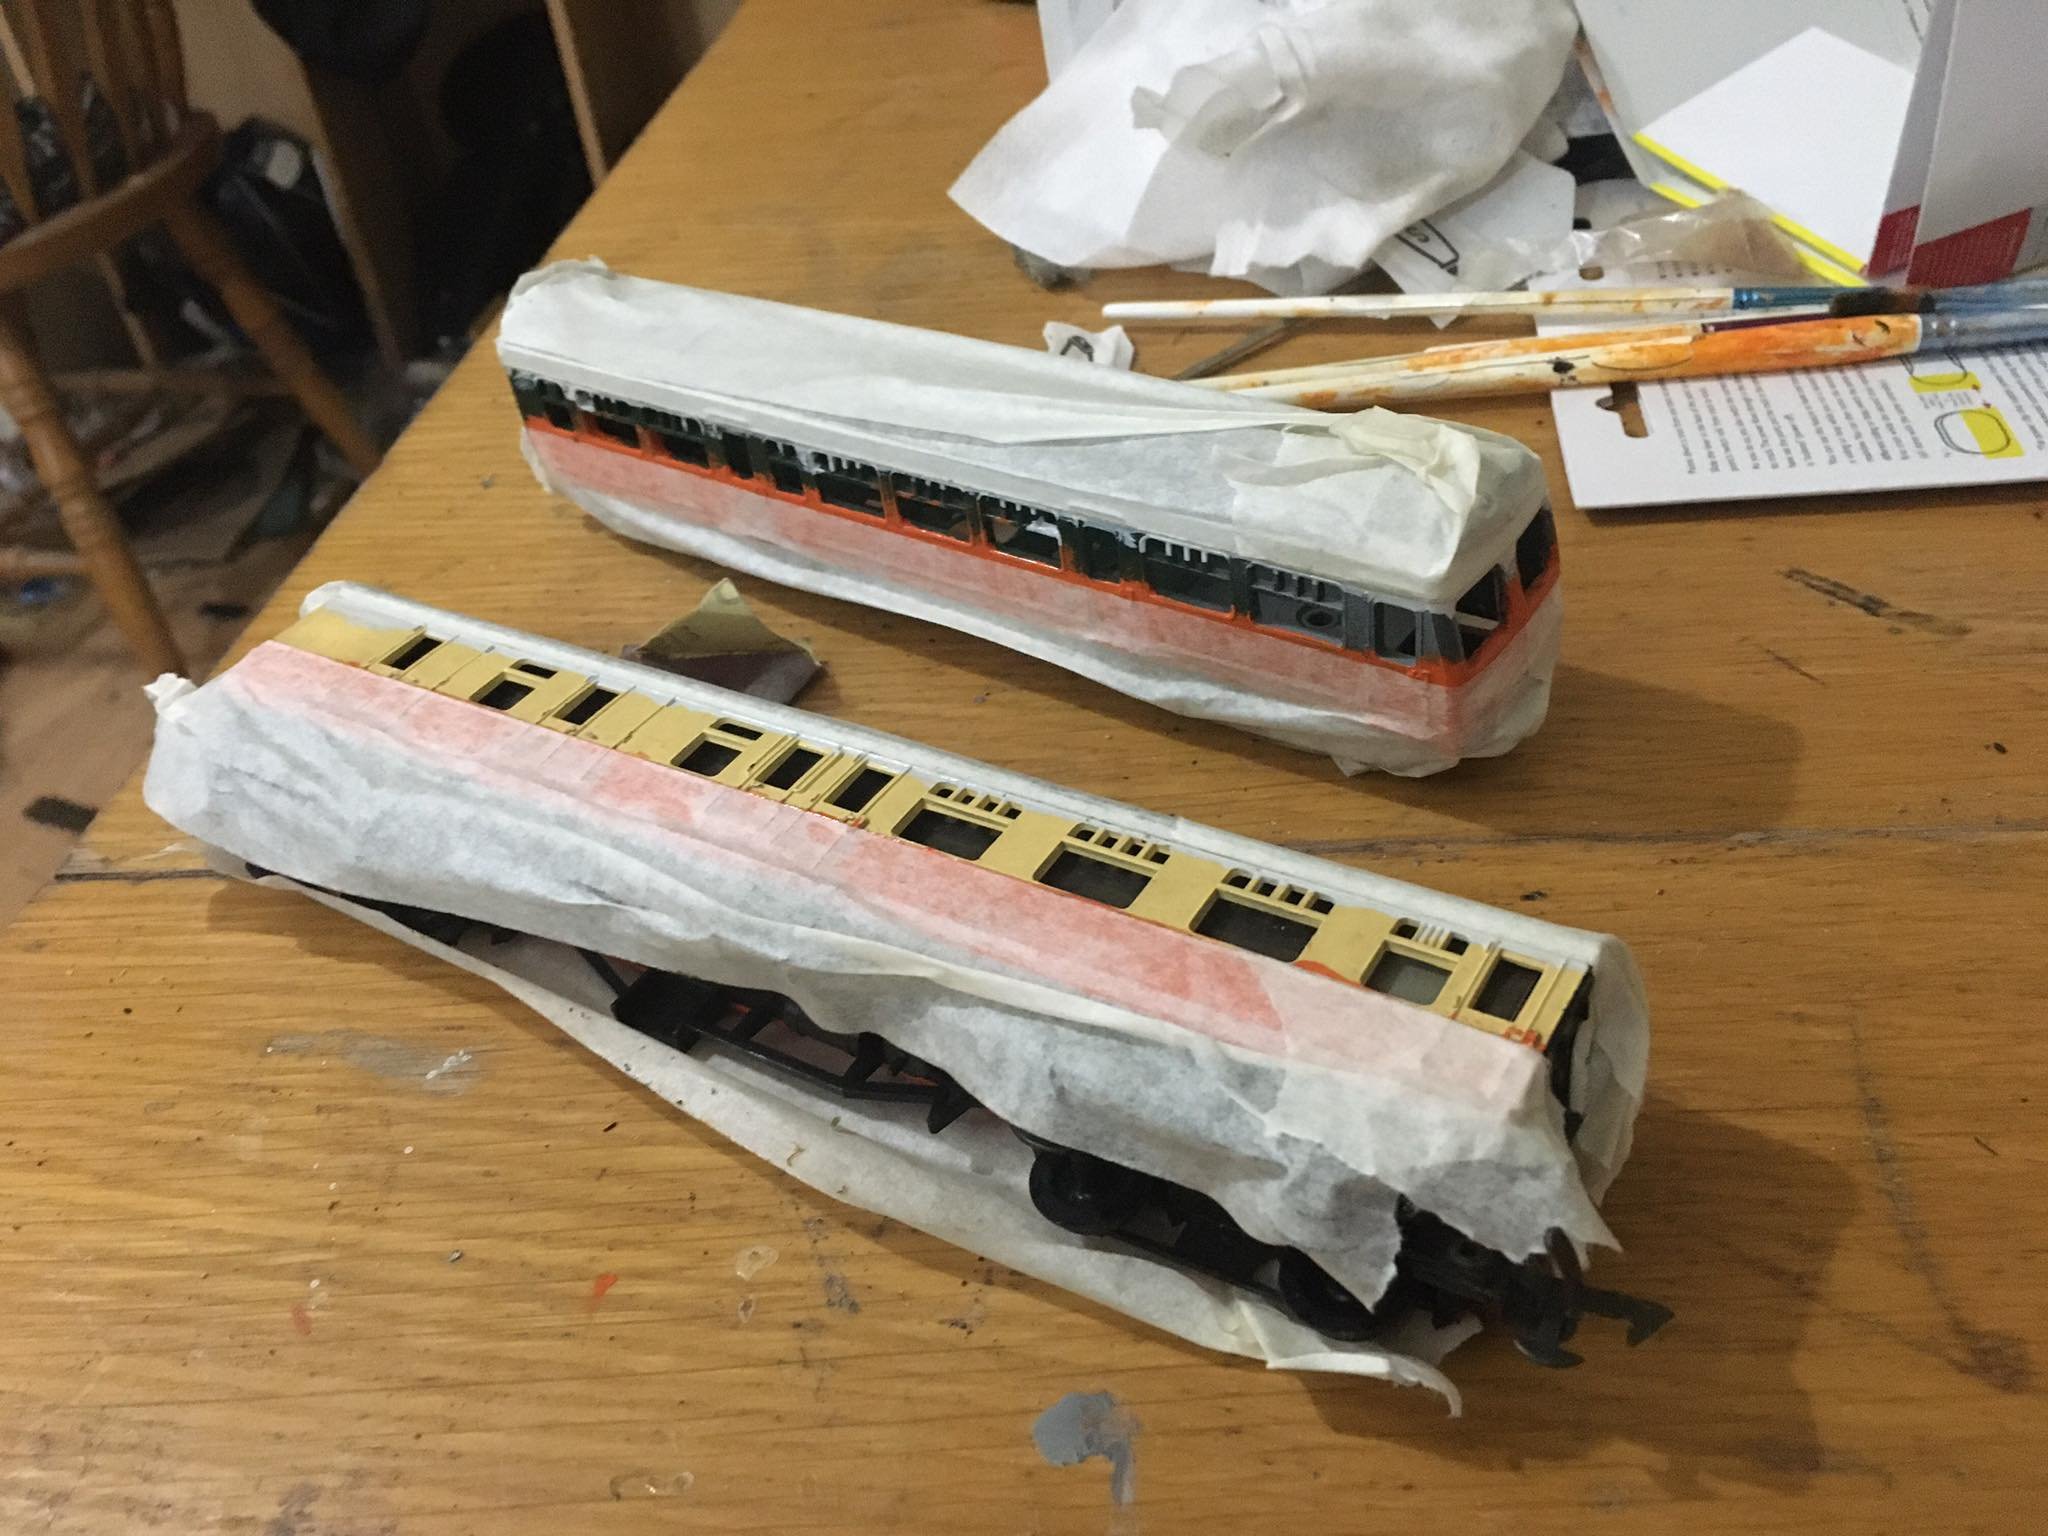
as usual the orange band will need sharpening up when the paint dries,as well as the white bit at the front(although the camera is slightly exaggerating that) but overall gotta say im really pleased with the looks of this one. already passing the 2 foot rule with flying colours and satisfys that dmu desire on the layout.
-
finishing up some coaching stock tonight. hopefully all masked around the same heights not as many guide lines on the dmu but followed a guide on here for keeping the striping in line so should be ok, the + shape on the doors seems to be at the same level as the guide on the other carriage white top stripe is the same height but a different width on the dmu Unfortunately there is no clear way to easily get the glass out of the coach so unfortunately it will take a little bit of extra time to paint around all the windows etc