Georgeconna
-
Posts
2,332 -
Joined
-
Last visited
-
Days Won
26
Content Type
Profiles
Forums
Resource Library
Events
Gallery
Blogs
Store
Community Map
Posts posted by Georgeconna
-
-
that statement has to get the 'best description of excelence award'.....and well deserved - great work george:tumbsup:
If there was a like button I would hit it!!! LOL. Spent many a frantic minute doing the homework on the school bus back in the day!! Thanks for the comments as well lads.
-
Knocked this out during the week. No idea of the type of Bus, Brief was to paint it Schooly like an a biteen of country dirt. Decals from Wizard Whesty. He has Expressway decals one out know as well

-
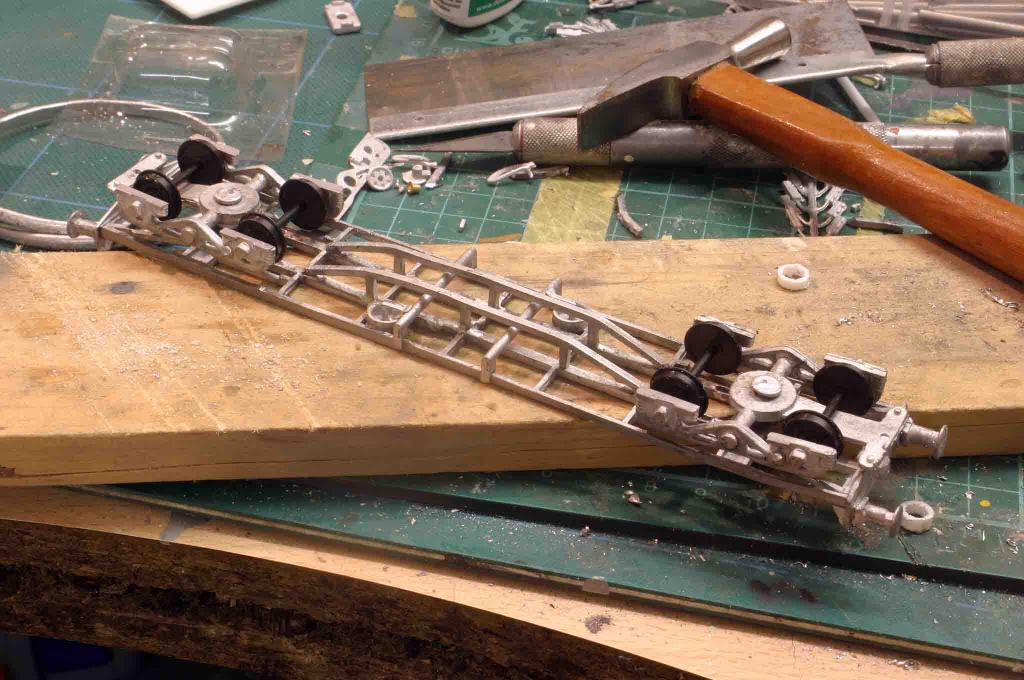
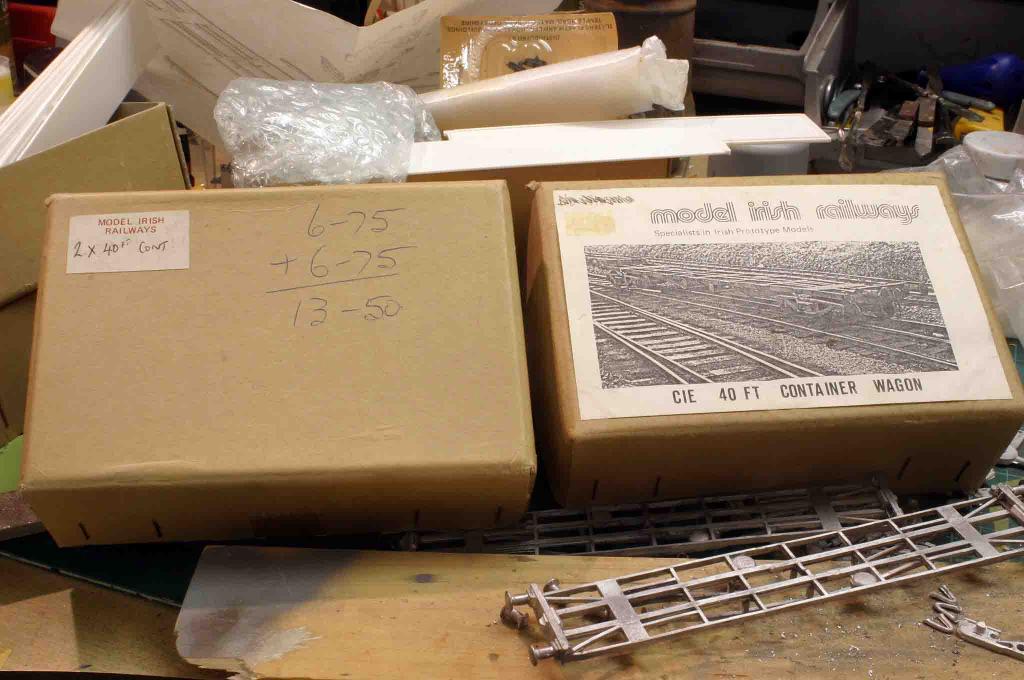
There 40ft and there flat, Mir kits from some chaps loft and it looks like he got them before I was born looking at the price!!
Soldered together using carrs 70 Deg Solder and an adjustable iron. Lots of tidying up to do and I need to put a spacer between the bogies and the frame due to the fact if you have a curve in your layout there gonna get stuck. Had to cut back the under frame too as the bogies snag that. White metal is great to work with but a tad messy with the filings etc.
-
The Airfix Skyhawk is a great kit. Is she gonna be Argie or Us ?
-
They will be in the MM shops in Dublin and Cork. I will let him know of the interest and see what he will do. The small tins are E4.25 I think. Not sure what the 50mls will be.
Cheers
George
-
They do the smaller tinlets of the other colours at the moment.
tks
G.
-
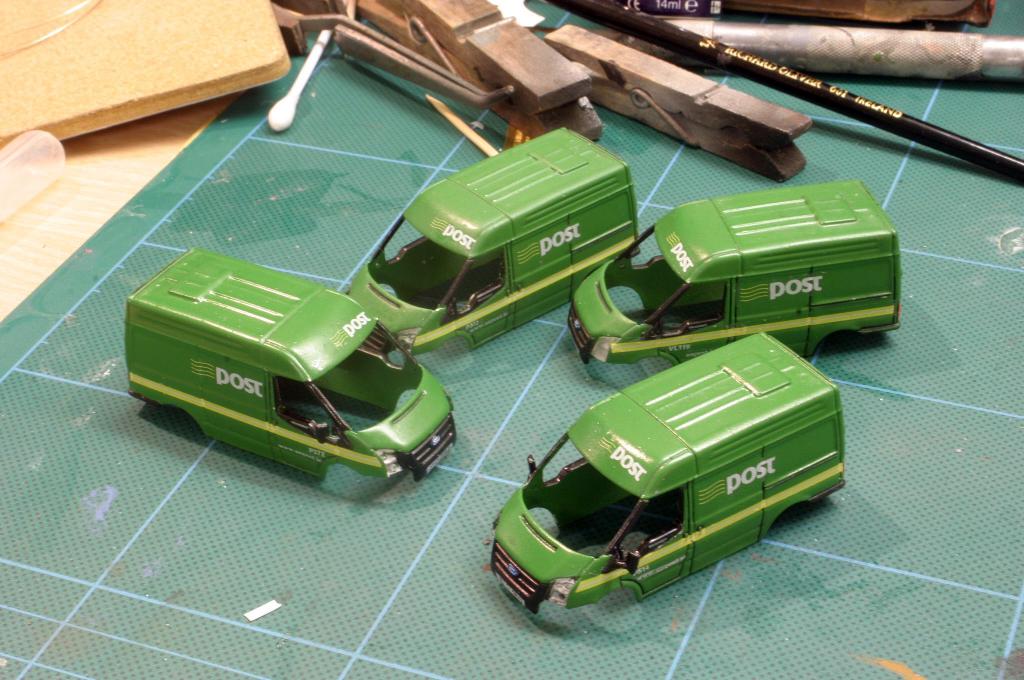
Few an Post Vans on the go too. These are oxford Diecast with Studio Scale Models Decals.Need one or two coats or Varnish to Finish off.
-
Lads,
I was asking Mark could he get the Larger size tinlets in the shop as he got small Tinlets last year which sold out pretty quick . Is there any interest in the larger tins as I can give him an idea of how many to order?
Cheers
George
-
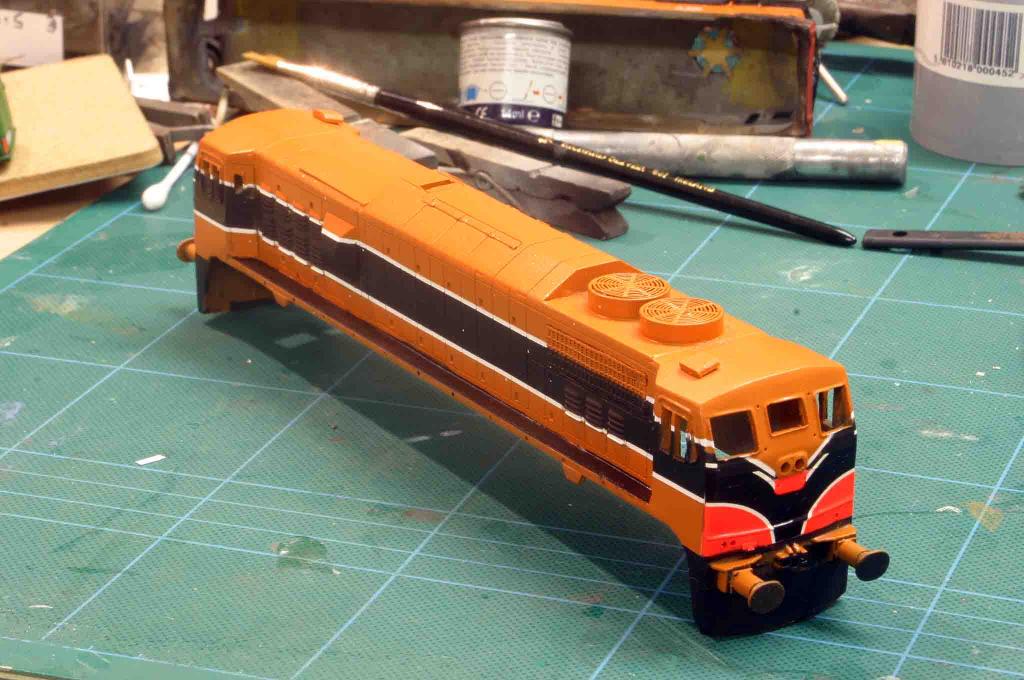
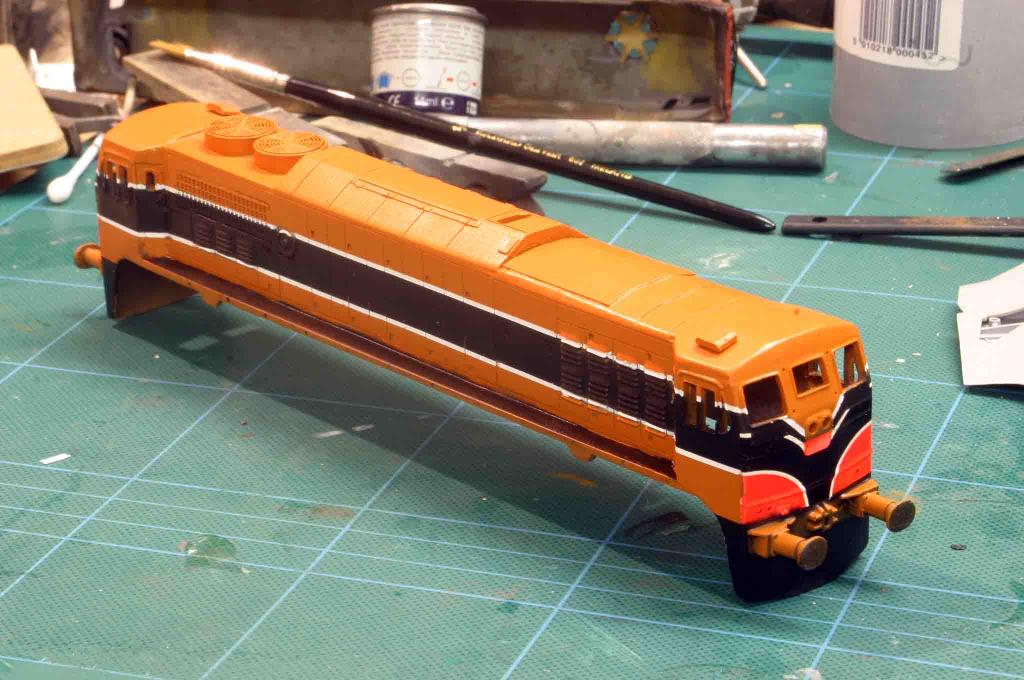
Started this last year and have got the decks clear of some other stuff so need to complete it once and for all. I have the main brass and bits n bobs on and have spray the White first using Revell Satin white. The masked that off using 1mm masking tape. Then the black, Masked that off and Phoenix precision paint.
I used a MM 071 as the template for the location of the white lines as as you can see the decal supplied by MIR are way too narrow hence the two white lines on the front, so I need to remedy that next when the decals dry. Microset was used to melt the decal around the raised detail.
sorry piccys are great as I shot them on low size file
-
Well its is their culture after all...
-
Dick Fearn
in News
Is that good or Bad. There will be diesels running in the Schedule next there!!!
-
yep, There was O gauge on sale at the Show. Not sure if they were repaints, There was a class 33 as a A Class and a couple of coaches. Not too sure of the Origins
I dont have any pics personally but check the threads mentioned above for piccys.
G
-
Its N gauge that one,There was a 16ft layout with DCC block system, The wiring alone made me weak there was so much of it. unreal...
-
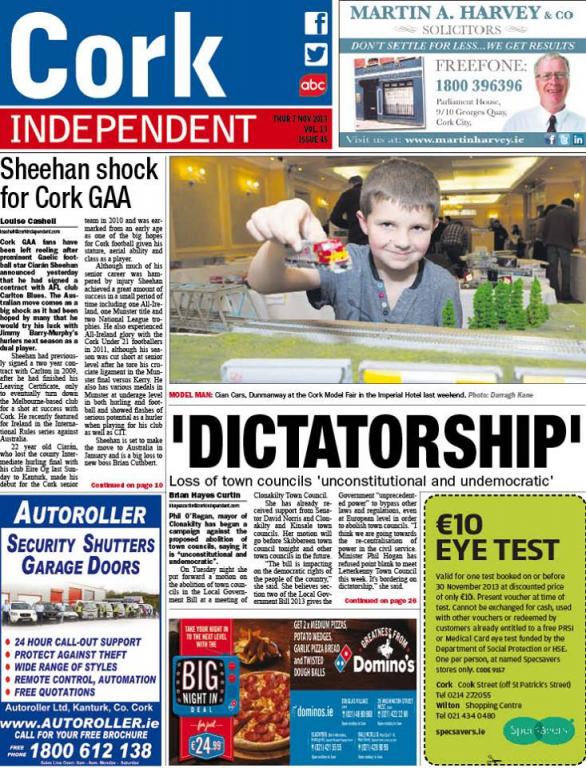
Front page on the local rag, Why don't they ever do this beforehand, could of done with the publicity
-
-
Good Catch on the Lima Coaches Sean, You would of been ill if you bought them last week in Dublin with the Difference in price!!
-
Shamrock Miniatures are the chaps that had them at the show along with the Punch and die set. Its is to replace the crap one I had all along. There is some serious weight in the tool which seems good and solid, tis 18cm or 7 inches long . Pleased with it.
Shamrock Miniature link: https://www.facebook.com/ShamrockMiniatures
It is made byRPtoolz email RPtoolz@gmail.com or website:http://www.rptoolz.com/?page_id=170
Heres a review of same taken from another site:
Each of the bending tools consists of a 5mm aluminium base which have between 1 and 3 tightening threads depending on which of the three tools you have, there are also two locaters and two silicon tube springs to lift and support the finger plate while you are slotting in the photo etched parts. The bottom of the base has a felt liner to help prevent the tool slipping or sliding around while in use, or perhaps most importantly so that you don’t scratch the dining table for those that want to stay married.
The upper bending plate with its fingers are made from machined 3mm black galvanised steel which should give you a life time’s service without deterioration. The fingers have a very sharp edge to them which seems to ensure precise clean bends. The fingers on the three bending tools breakdown as;
18cm:
• 1mm
• 2mm
• 3mm
• 4mm
• 5mm
• 6mm
• 8mm
• 10mm
• 15mm
• Angled point
And, of course, the bending plate on all models have the full length bending surface on the reverse side of the fingers.
In order to give this new tool a workout I went for the longest of the bending tools as I figured it would be the hardest to work with due to overall size. I then selected what I believe is the smallest components of photo etched parts that would be regularly utilised which was the three parts of a tool clamp, which I have always struggled with. I am pleased to say that the bending tool was a pleasure to use and easily managed to provide the needed bends. The only thing it could not do, of course, was provide the curve which I imparted over the round handle of a brush. I am sure however that given time RP Toolz will provide a tool system for this purpose as well and I look forward to watching this company advance into the hobby.
The thin screw nuts that tighten everything down was an area I was initially sceptical of, however it handled the job with ease placing the amount pressure required to hold the photo etched parts solidly in place while the bends are imparted and I also used the tool to hold a part while I cleaned up a cut edge by overhanging the piece on the side of the bending surface. I will say that the finish on one of the screw nuts was a little off as I found a burr that need to be removed, however I also accept that the burr could have occurred while in transit as it was packaged with several other tools. While each tool was wrapped in bubble wrap we all know that not all parcels arrive as we would like.
Conclusion
These bending tools are excellent and do what they are supposed to do without fuss and it brings this tool type into the price range of those on tight budgets. It holds parts easily and bends cleanly and I found the aluminium base plate a good surface for moving the photo etch around on while having control so that it did not fly off never to be seen again. I will say that if you are buying this for a younger modeller you may want to find an alternate bending blade as the included bender is like a razor blade and just as sharp with a guard on one side, my wife who works for the NHS said that it looks like a blade from a dermatome. So remember that if you are buying this product for a minor.
Cheers George
-
There is some piccys on the link below. I did not take any cause I was too busy so cant put any up. Take a peek if you wish.
http://irishscalemodeller.com/forum/viewtopic.php?f=9&t=1811&start=70
-
only heard bout the Punch and die set afterwards myself. Would of parted cash for that...Know where it is now though.
-
And the N15 is Chipped I just found out out.
Detail Matters can be found here:http://www.detailmatters.co.uk/
the SR ground signals are lovely
He had the 16ft N gauge American Layout running with DDC blocks and working signals (2 wires to the track me hole!!) his stall as next to it!! I was probably blocking your view...sorry..
-
My little Stash that I picked up yesterday
3 Hornby Clerestory at E12 each,Hornby N15 E50, 3 x RPSI Coaches @ E50, Classix Swastika Laundry from Decs Model Garages, Matchbox Stephens Rocket, Meng Models F-102, Studio Scale Models Sulzer, Level Crossing, An Post Decals, School Bus Decals, Etched brass Folding tool, 2 packs of Detail Matters SR Ground signals, Alpha Graphix Crossing Keepers Cottage, some Solder and flux and that me lot. My Dad got a SR Lord Nelson for E50 notes as well. Sweet!!
-
Just in the Door after some refreshments:cheers:, Very busy day, loads of Bargains to be had, RPSI coaches E50, Lima coachs set E100, Missed the 2 x 071 with DCC sound for E240 each!!. Argh!!!. All in all a good day, The amount of work to do these is unreal even for a smallish event, Lord knows how the Warley lads do it....
Leg are aching so its time to bed. I will link up some piccys when I get a moment.
Thanks for the Support Tom.
Regards
George
-
Been uses washes for the Aircraft models for eons so it is a nice effect when done right an when using the right shade and not too dark or black.
you should check out some tank weathering vidoes on the Hairspray technique, How would apply that on a loco!!
-
I know what you mean!!
Enamel all the way for me, I find If you matt coat it the wash wont flow as I want it too. Interested to hear about your technique though.
I leave it the model as is but be careful of the printed letters when your taking the wash back off as some of the baccy stuff comes of pretty easily!!


.jpg.2c033580727b0e3b7b50bf77f4c54c01.jpg)
Georges Workbench
in Workbench
Posted · Edited by Georgeconna
Ill stick all these in one post to save a bit of time:
First up is the Q kits a Class, Got a little packet of buffers this am (Off a Hornby class 31) and test fitted them on, I am quite happy with them. Somethings bugging me though on this Model and that is the white stripe, Its a tad too wide, what do ye think lads? I might reduce the width a wee bit. The bit of Fibre optic is for the running lights so gonna have good fun with that now shortly. The white plastic patch was needed as the drillbit shattered the moulded raised light housing. You would not believe how brittle this it is . need to re drill a re paint that it too.
Next up is the MIR 071, Painted black over the areas that needed and and she is a bit more presentable. Need to re fit that etch grill too. Next step is a gloss coat, Decals, Handrails, Lights.
The 40fts got their bogies and I fitted some hornby tension lock couplings with a dab of the ol Superglue to test run them. They will be fitted with Kaydees so I am waiting on a sample pack that was picked up from Warley last weekend (Freaked out at the price of It!!!). I need o put a 2mm shim in between the bogie and the frame as the wheels where touching the frames when cornering. Little bit of plastic tube did the trick cut on a square.
EDIT: just looked at these and the piccy quality is not great, I used a small setting on me camera so might up it a bit for the next ones.