Georgeconna
-
Posts
2,503 -
Joined
-
Last visited
-
Days Won
29
Content Type
Profiles
Forums
Resource Library
Events
Gallery
Blogs
Store
Community Map
Posts posted by Georgeconna
-
-
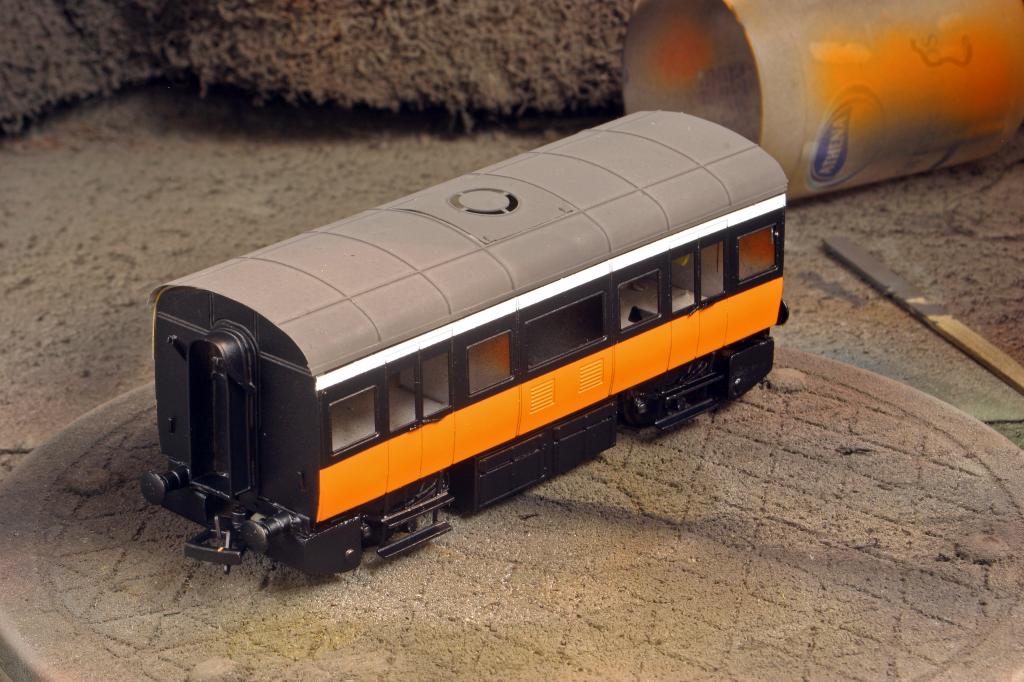
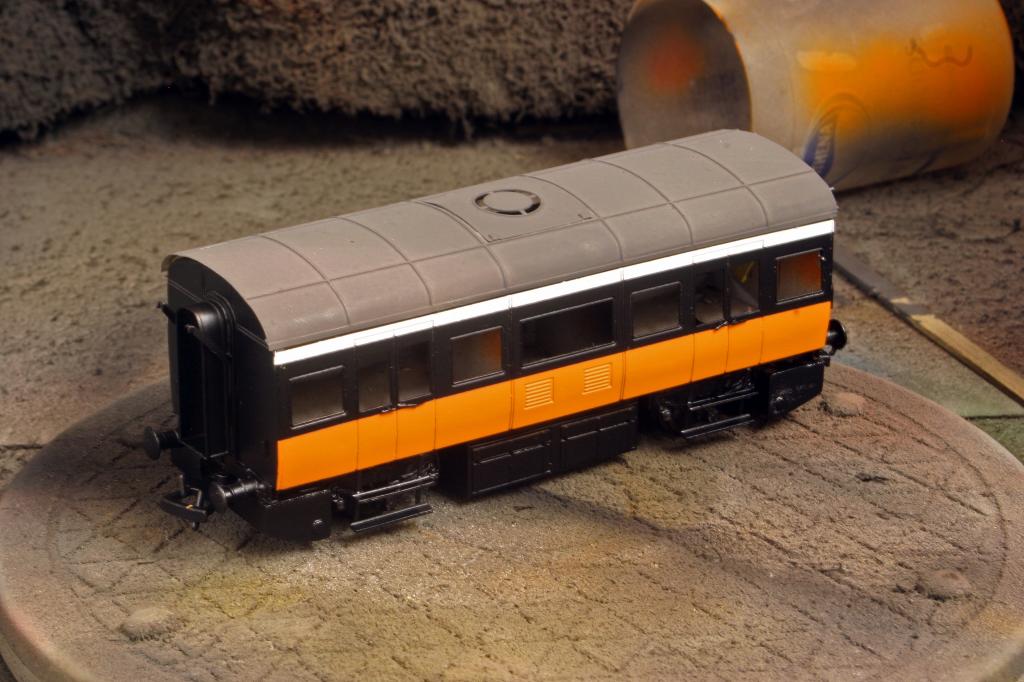
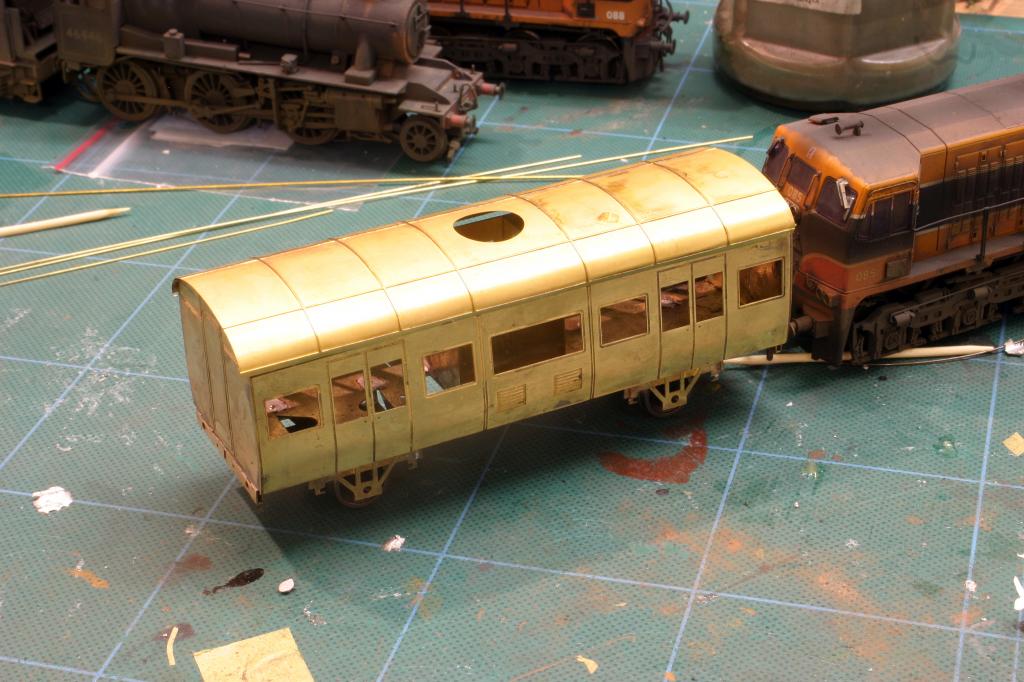
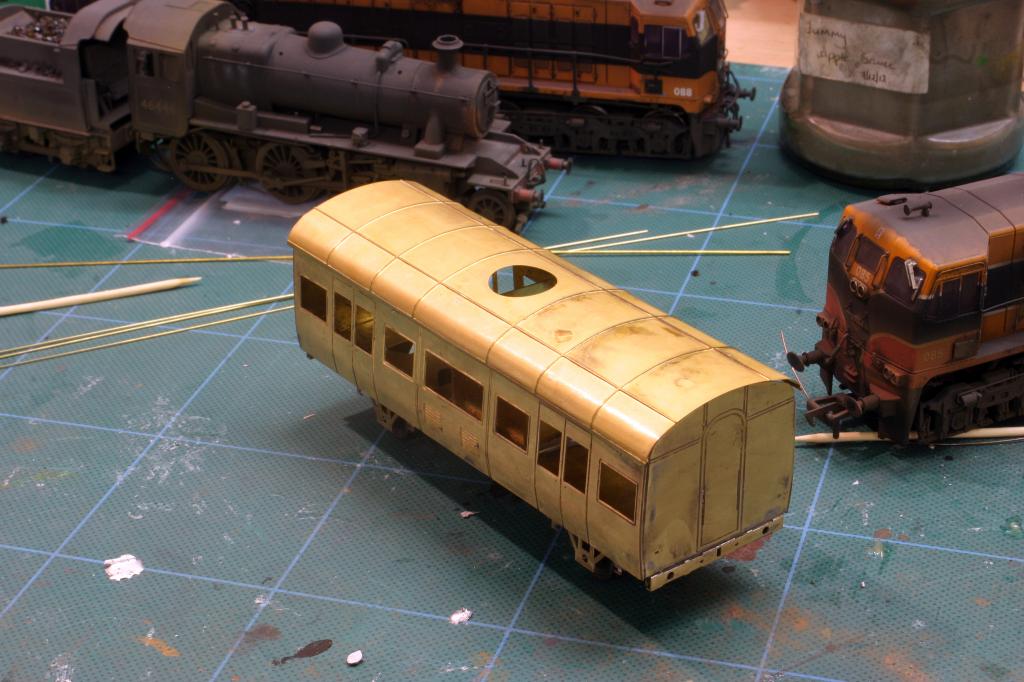
Heres the update on the Bulleid Van. Paint went on and the Mask Came off. Window are blank off with masking tape here so it looks a bit Strange. I may go for a Draker grey on the roof as it looks a bit out of place as it is too light, that was Phoenix Precision roof Dirt.

-
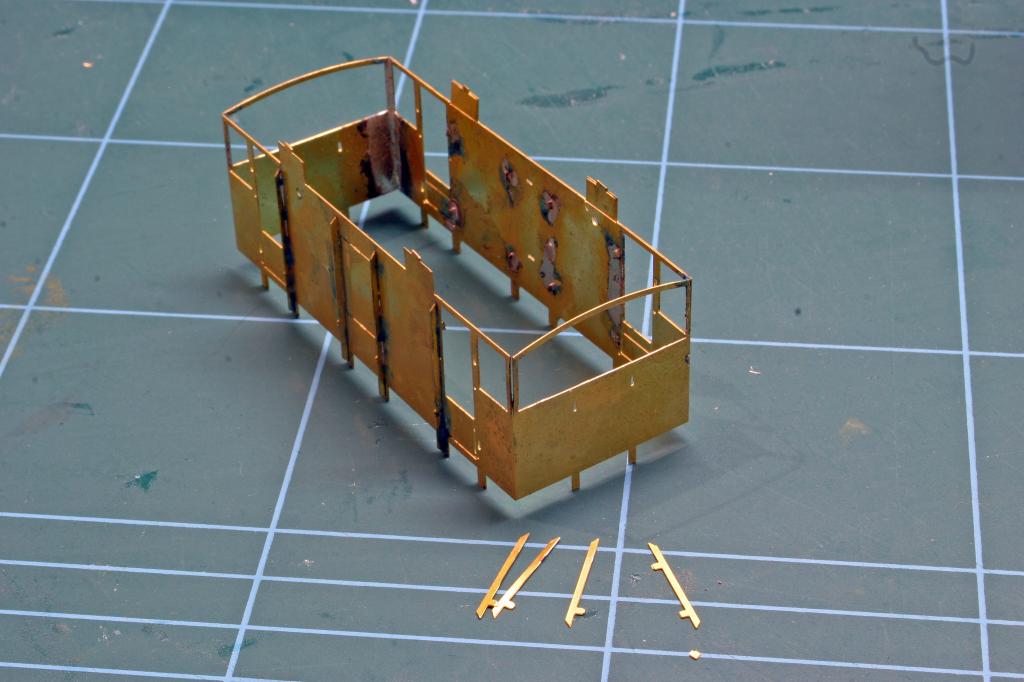
Heres the Latest on the Brakes, All the Side Strakes or T Section as Des Calls them are on,
The End ones were soldered on first,4 per van, A tab had to be cut off of one and as there was no hole in the End of the Veranda to sit it into. No big deal just some extra time taken.
The last of the Strakes in the Side of the Body were soldered on, There are four lengths that you have to cut to size yourself and this took a wee bit of time but all good fun!!
-
Wizard Whesty says plain ol Superglue would do. Maybe Medium Viscosity Perhaps..
-
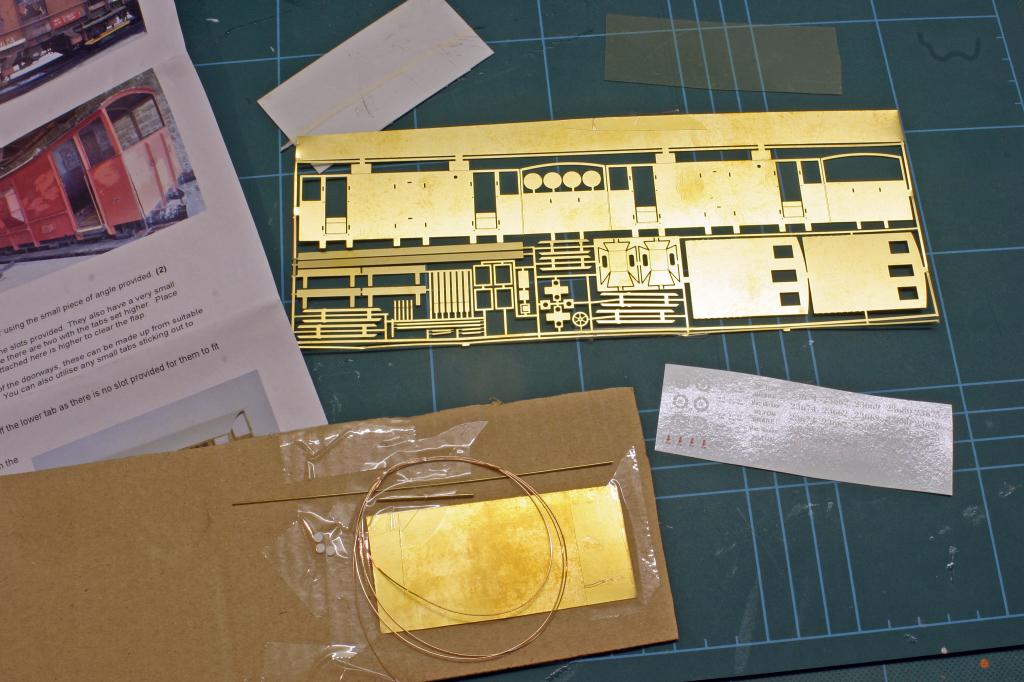
While the Orange is drying on the tin Van I started one of the SSM Kits, The 20tan Brake van. Again this is a nice kit and great thought has gone into the breakdown of the parts to make it a easy as possible. This one will be soldered as well but these can be glued with great results.
Here is what you get for you few bob, Brass Etch, Dapol Prestwin Kit. Clear Glazing, Brass roof and some wire for handrails, I prefer the straight brass wire myself to save time Straightening it out, Also Transfers and some masking tape.
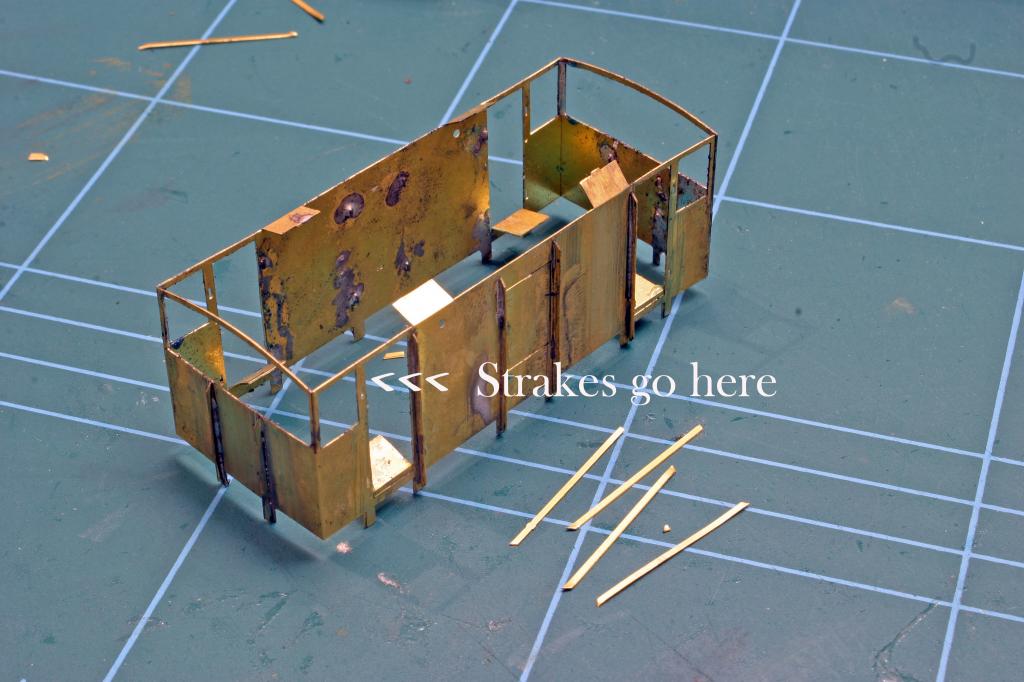
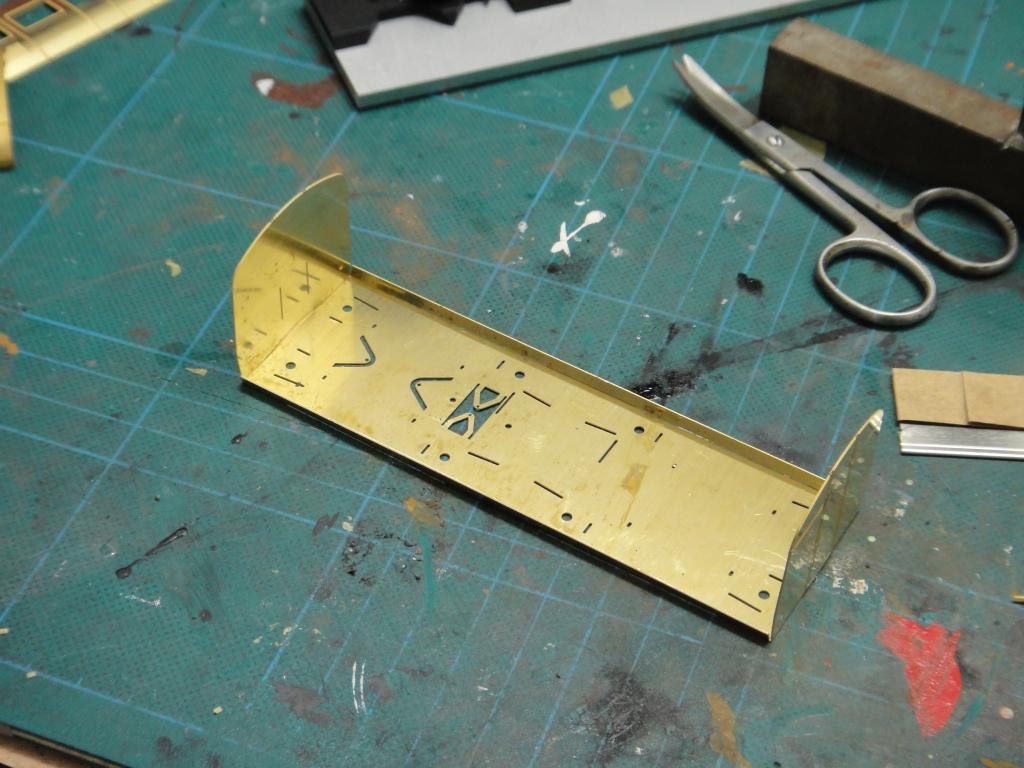
First thing to do was to cut out the Main body etch and fold up using a steel ruler. I then cut of the Side strakes. Note that one part has notches higher up due to where the Ashpan sits so look twice!!
A smear of solder paste and as cut off bit of solder and hot iron enabled to solder to run along the joint.
It was just a handy to add another two to the fire!!
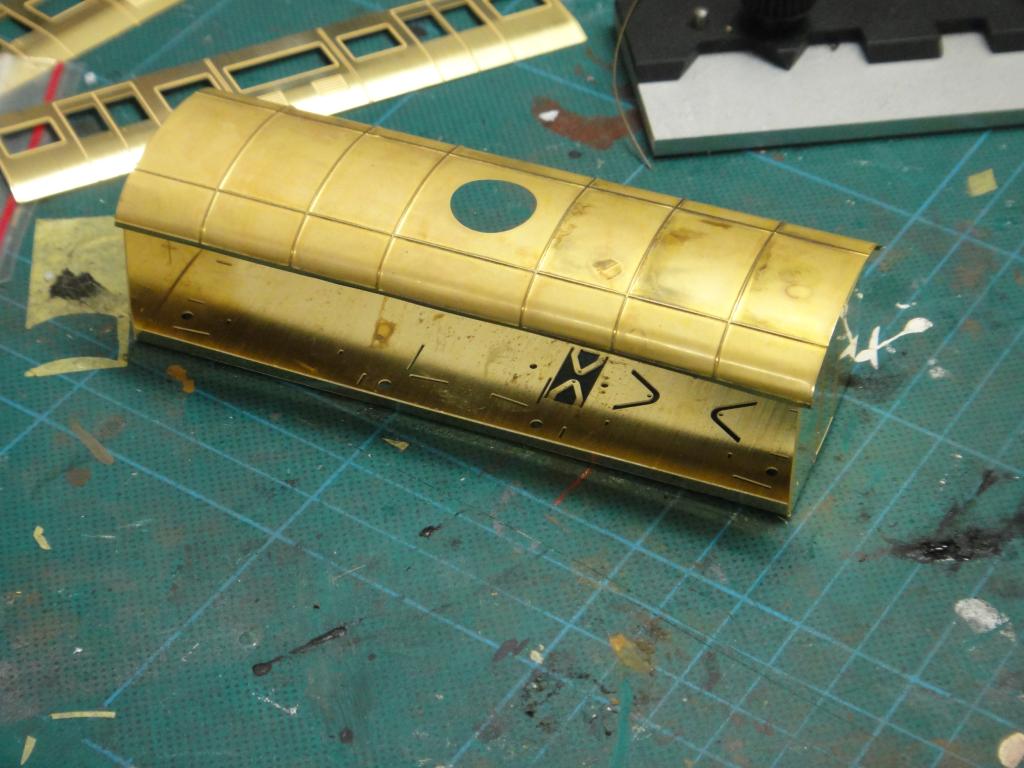
Here I Added the Strakes on and again used a smear of solder paste where the part was going to sit and soldered from the inside which let the solder flow out and along the parts fusing them together. small bit of tidying up need afterwards.
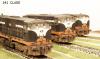
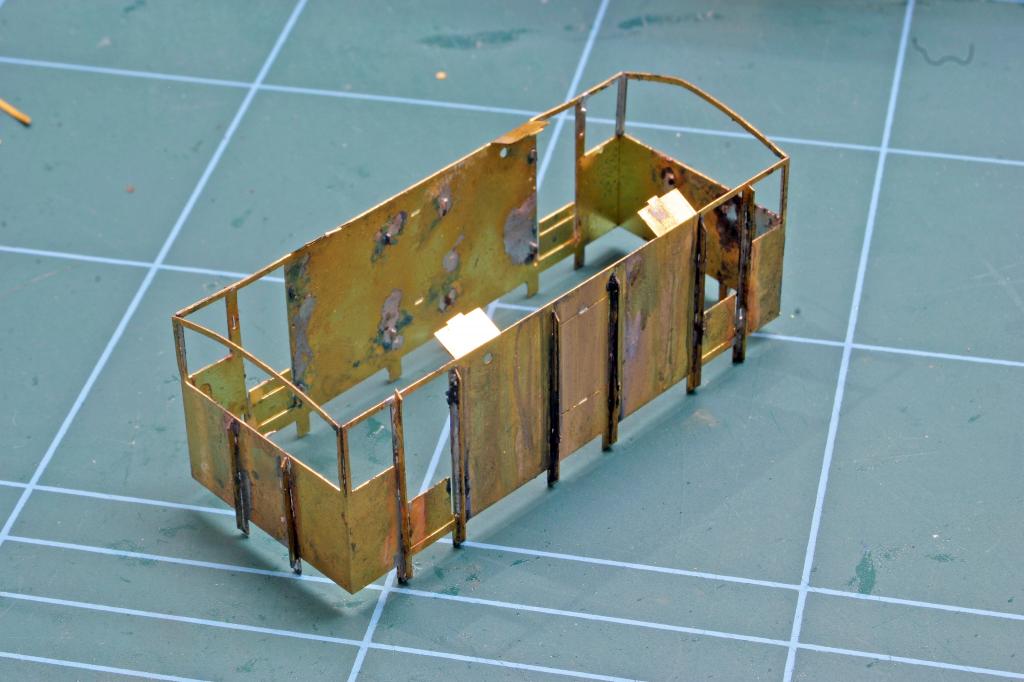
Here all three bodies have the side strakes done, need to do the Front strakes next. about 1.5 hours to get to this stage.
Now back to painting the black on the tin van!!
Thanks for looking
G
-
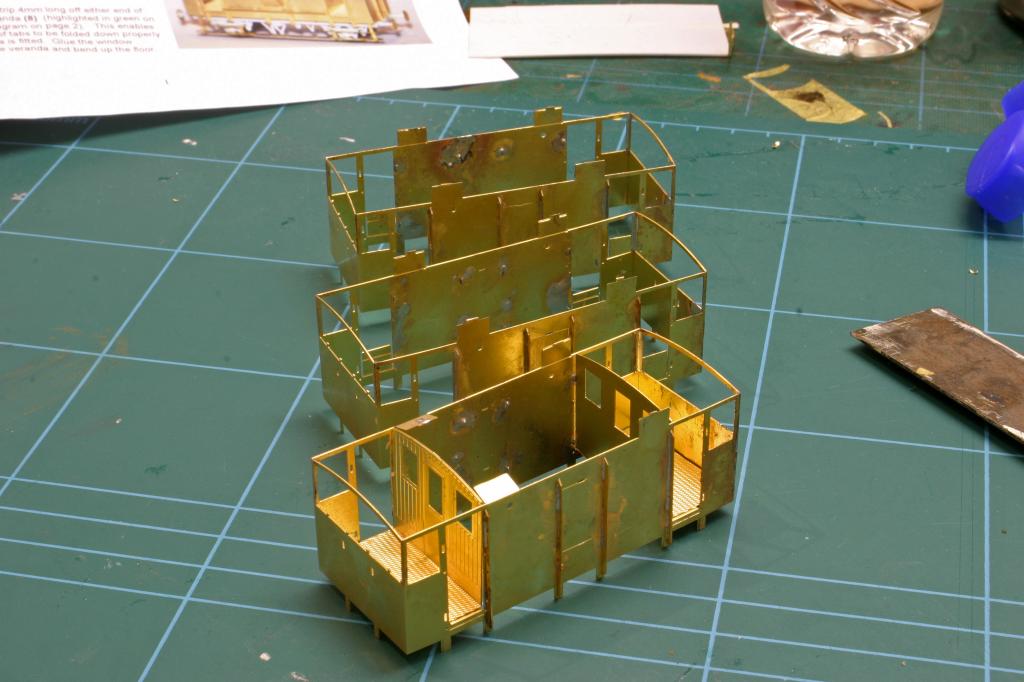
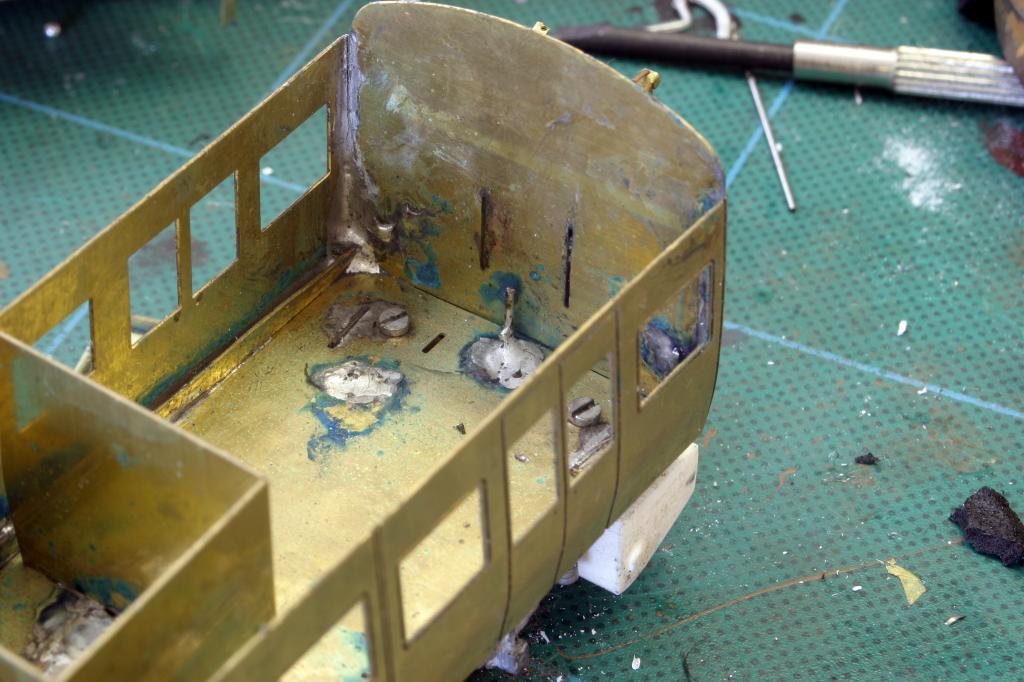
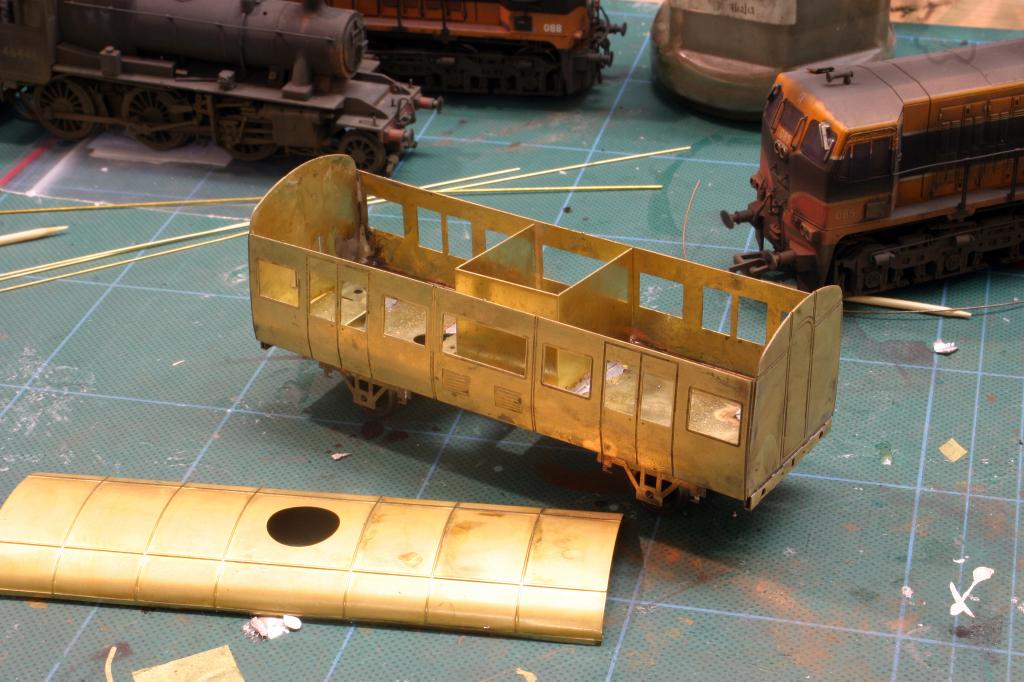
George, my recollection is that there weren’t any cages or partitions inside the vans to contain the luggage.
Thanks For that.
I will put a floor in though to finish it off.
Tks
George
-
Easons Cork have this book in the Cork Shop Reduced from E27.00 to E8.99, Not a bad little book
-
Thanks lads...As I have said before its down the the Design of the kit, It is pretty much Perfect.Clean Crisp and solid Etched parts. Hope the Roof fits nicely once the Glazing goes in!! Thats my main worry!!
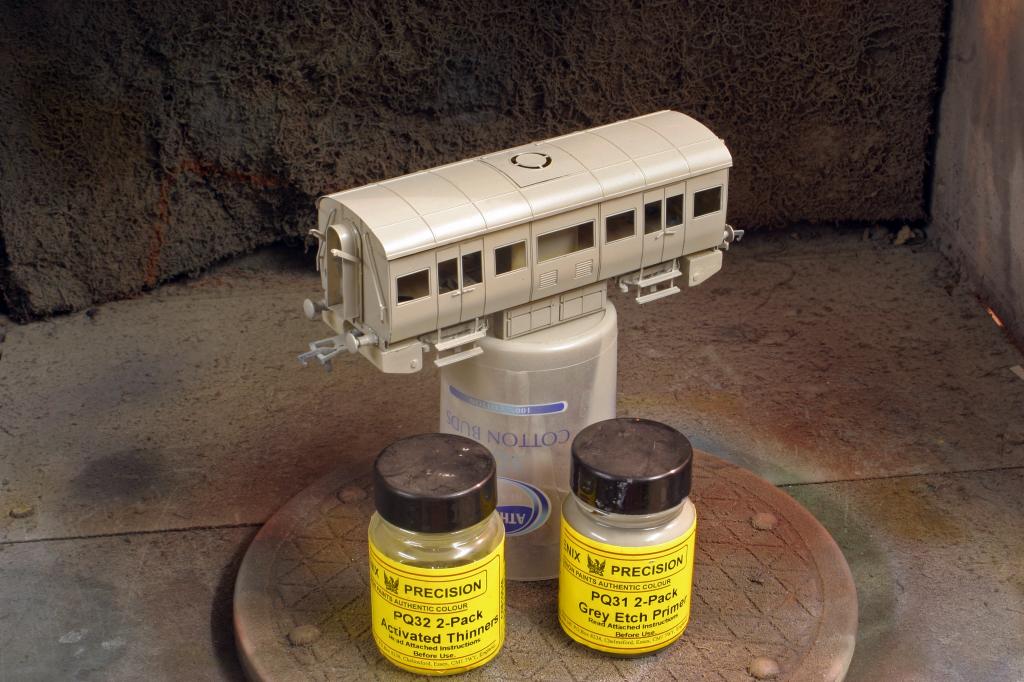
This is the 1st time I used this primer and it is Brilliant, I used Car spray stuff before but this is Phoenix Stuff is excellent, It has Activation Properties that make sure the Paint holds onto the brass. I found with aerosol primers they did not have the grip and ruined the finish when you pulled the Masking tape off the paint came away in small Sections and thats with Tamiya Tape!!
Looking forward to the Finish, Its gonna be Black and tan!!.
Thanks George
-
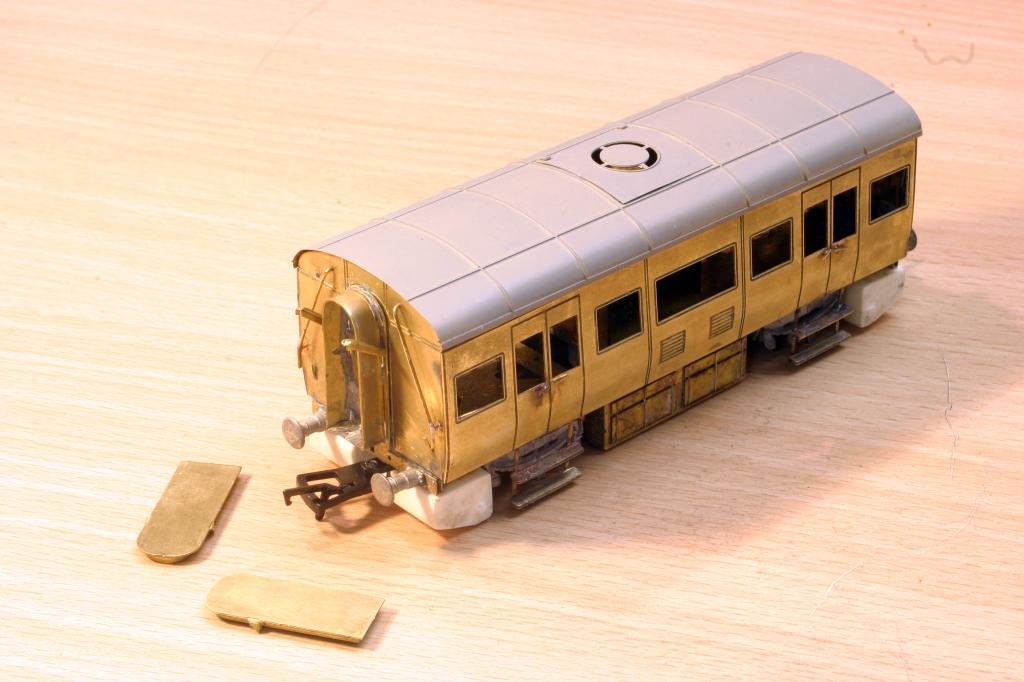
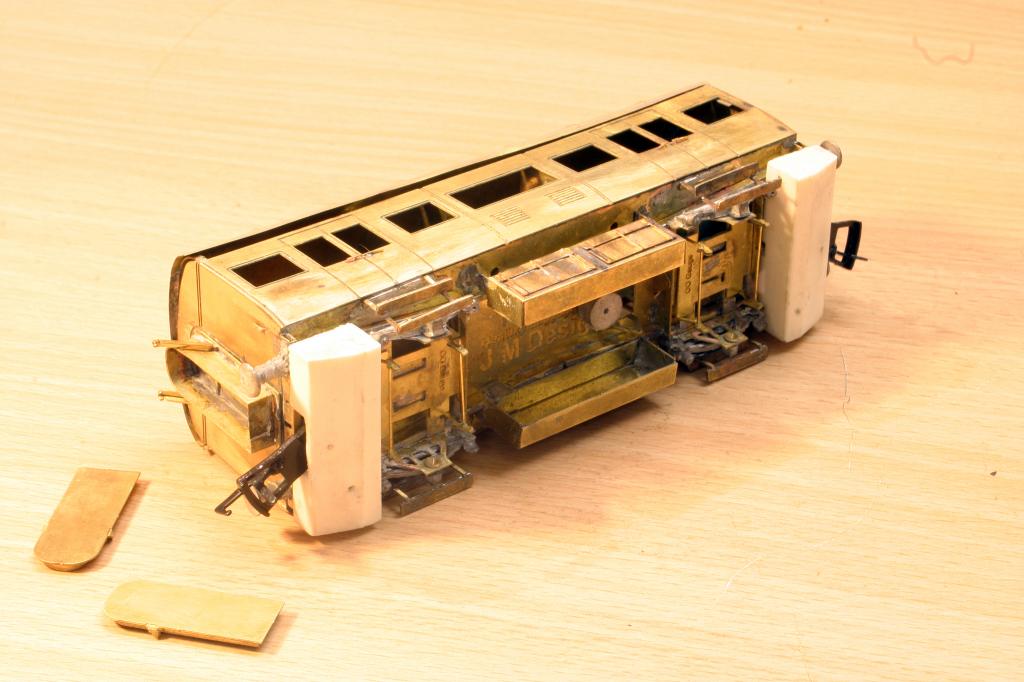
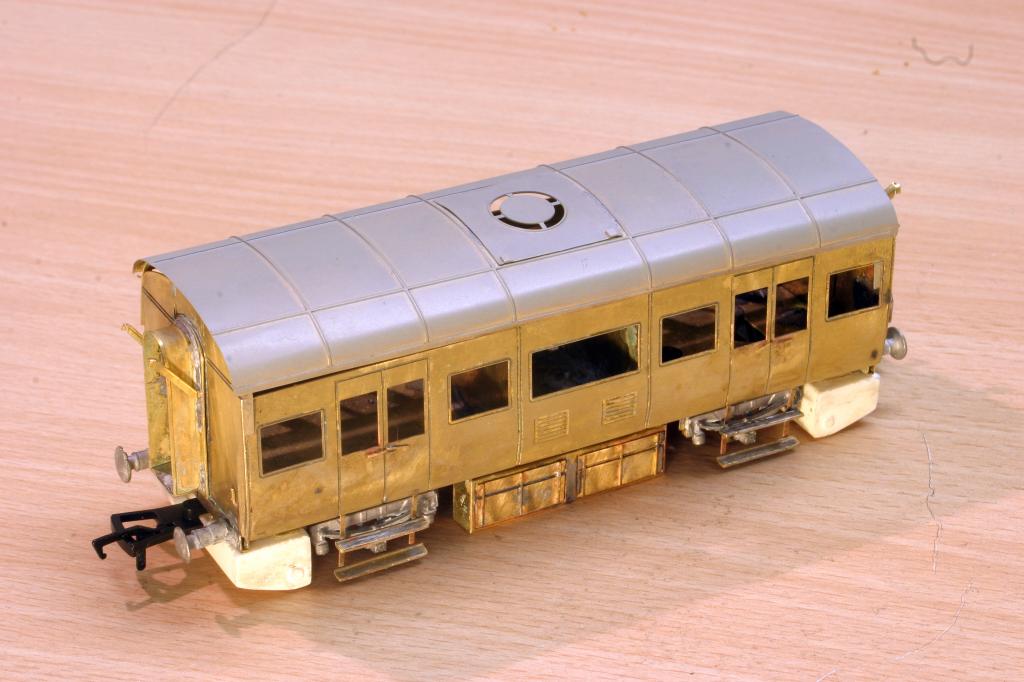
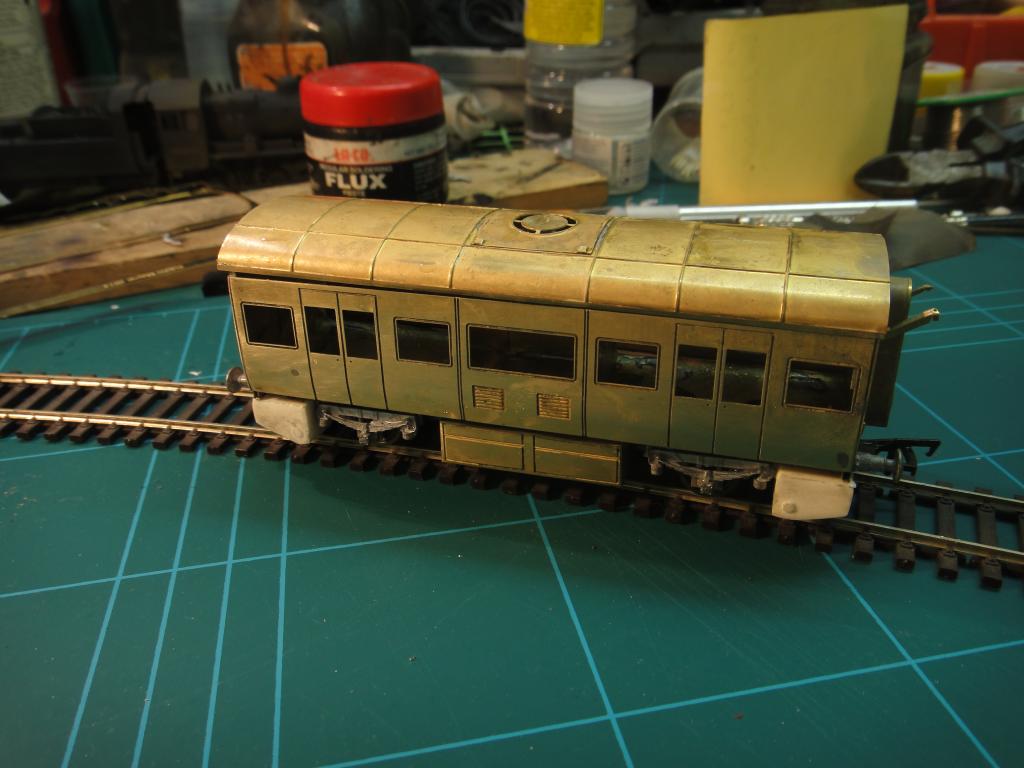
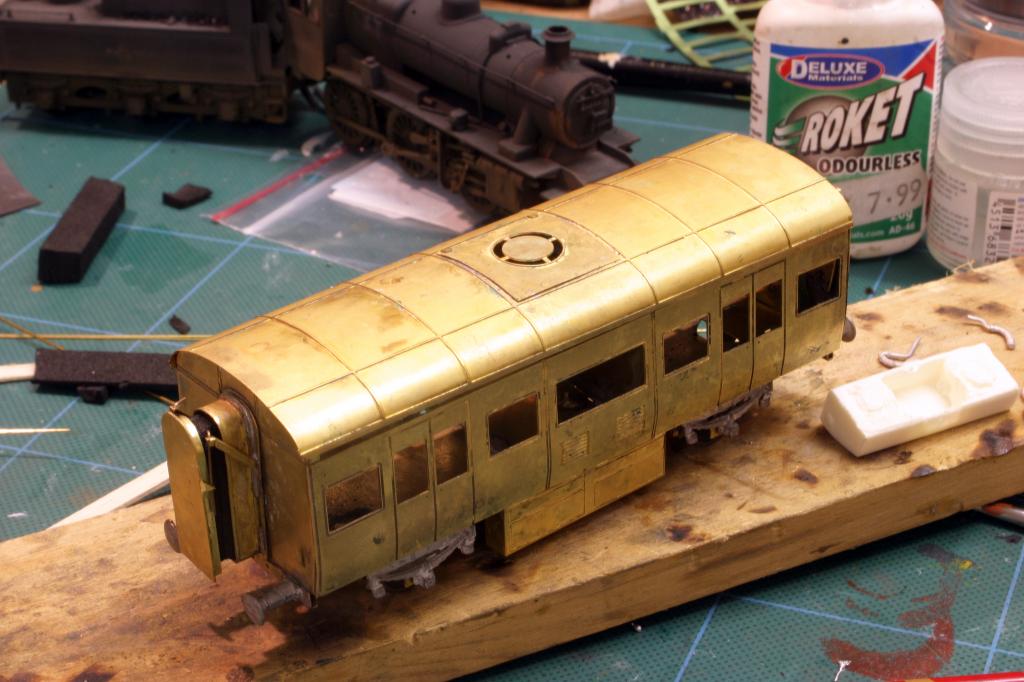
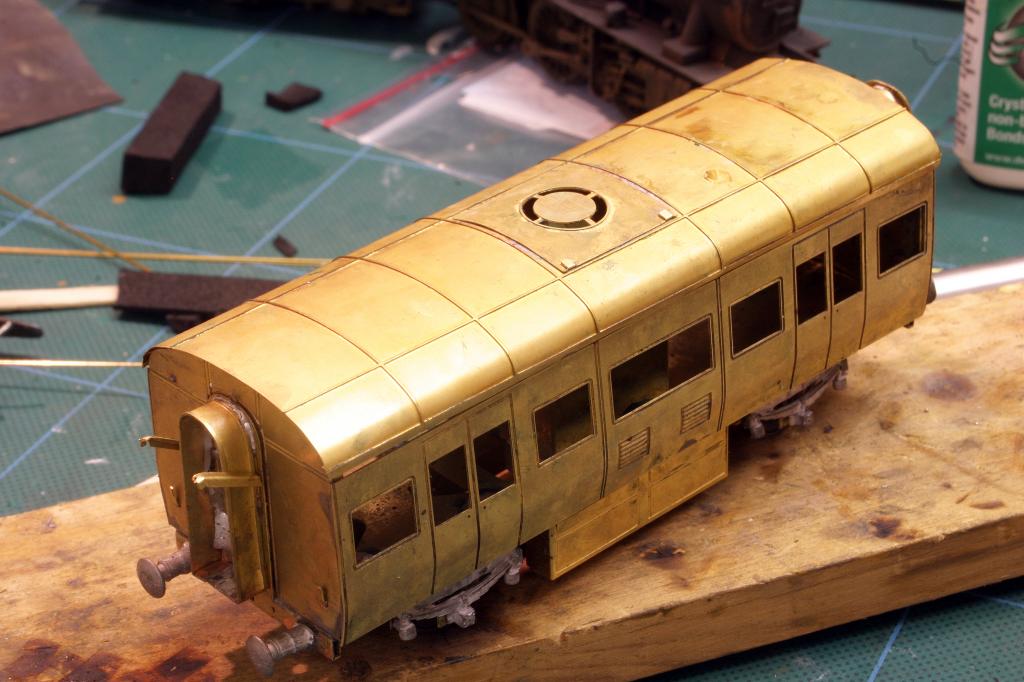
Heres is the Lastest Installment, As I mentioned I had to solder up the Footsteps which were a Simple fold and sweat together, The Door handles were then soldered using a thin piece of Brass as a gap between the body and the door handle, I then soldered on the Water Tank Filler pipe and now she has a coat of paint on her.I used Phoenix Precision Etch primer which is a two part mix and man alive does it stink, I needed to open all the windows and doors in the Shed for this one!!
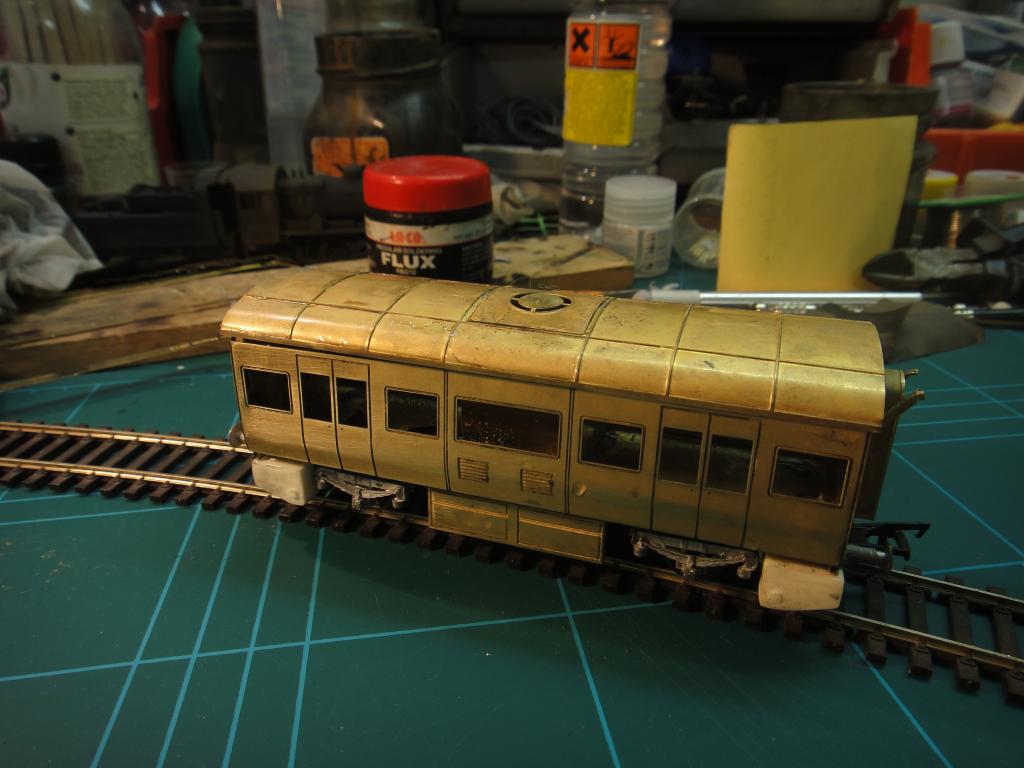
Here some shots of the Fully Assembled Van. I must say I have enjoyed this model, A real joy to build and an easy one to start off with I think If you wanted to try a brass kit, That and SSM Brake Van. Now 2 more Vans to do..
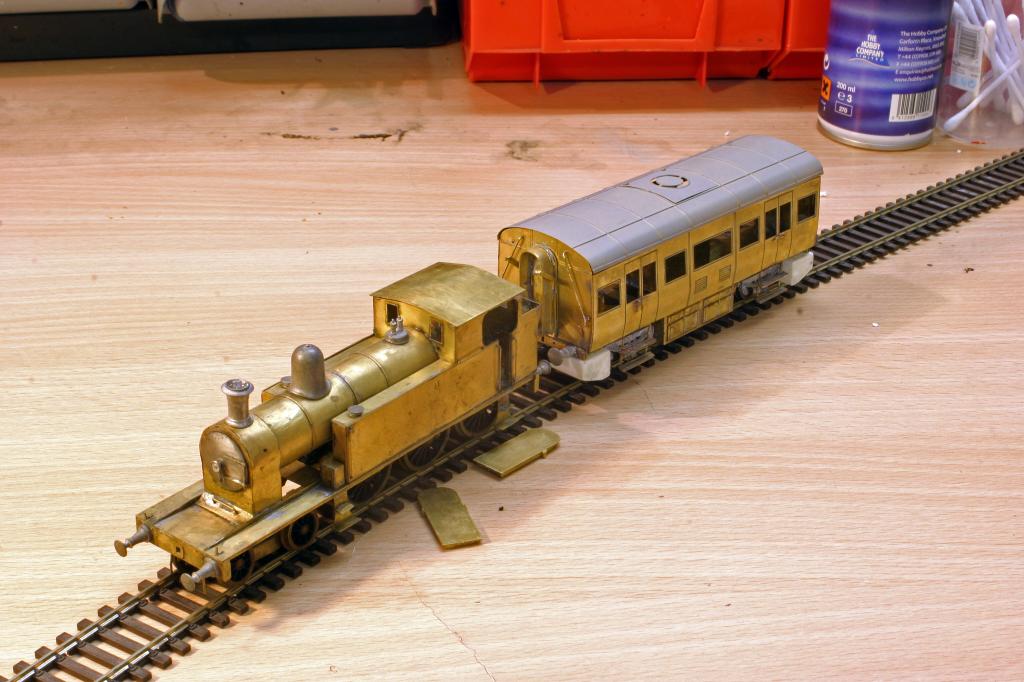
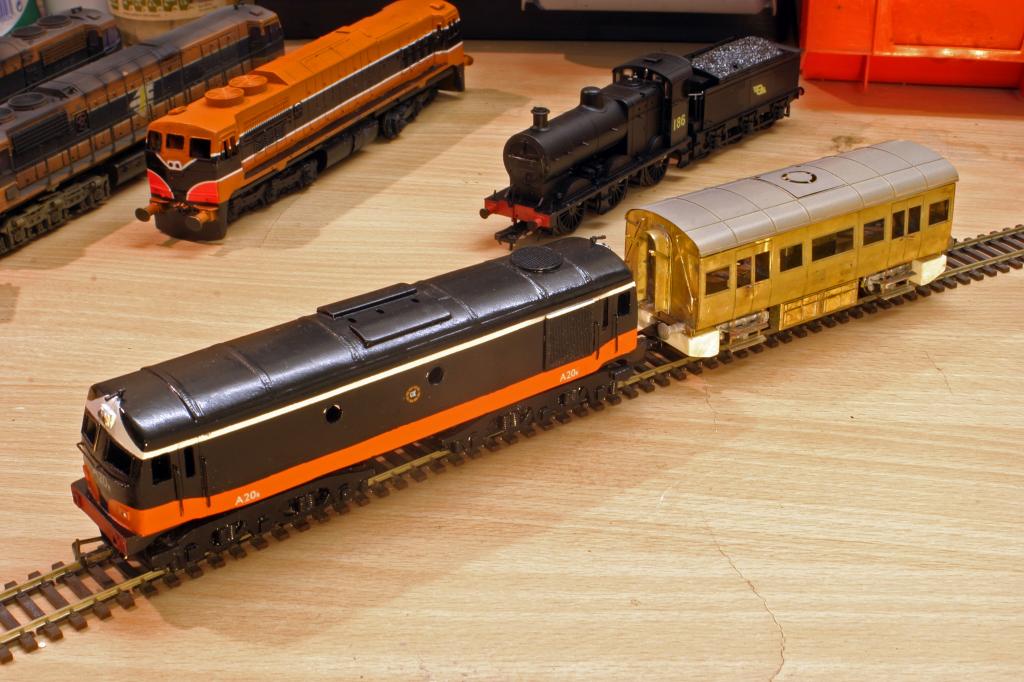
Heres she is in Good Company
Primer on:
Now the Fun Begins!! and the roof needs fixing just yet, I wait till I put the Glazing in obviously!!
-
Yep All Soldered, Jut spent the Last couple of hours soldering the Footsteps, Door Handles, Water Filler pipes. Pictures shortly....
-
Gave it a wash last night and it scrubbed up well so ready for Painting.
-
Could do with a Spring on the back of the coupler to keep it in check though but thats for another day.
-
Yep, Phoenix Precision etvh brass primer I use. The usual primers dont hold the paint on I find.
G
-
Horray, suggest you do a few extras den, A Lad down in Wexford wants some.
G
-
I wonder did these Van have Partitions in or Even cages for the Luggage?
-
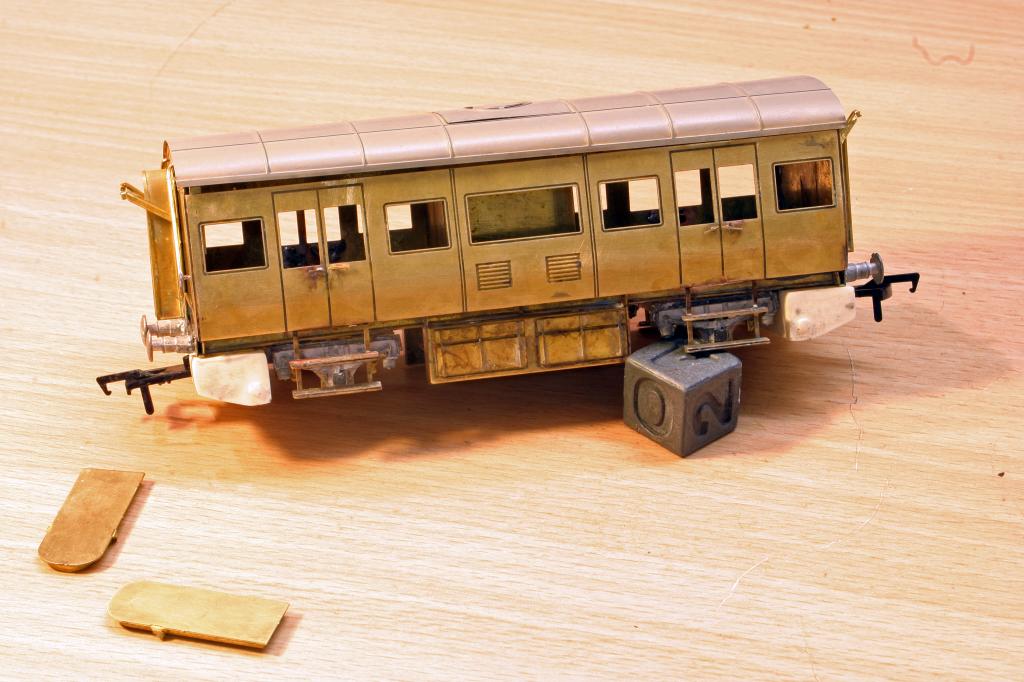
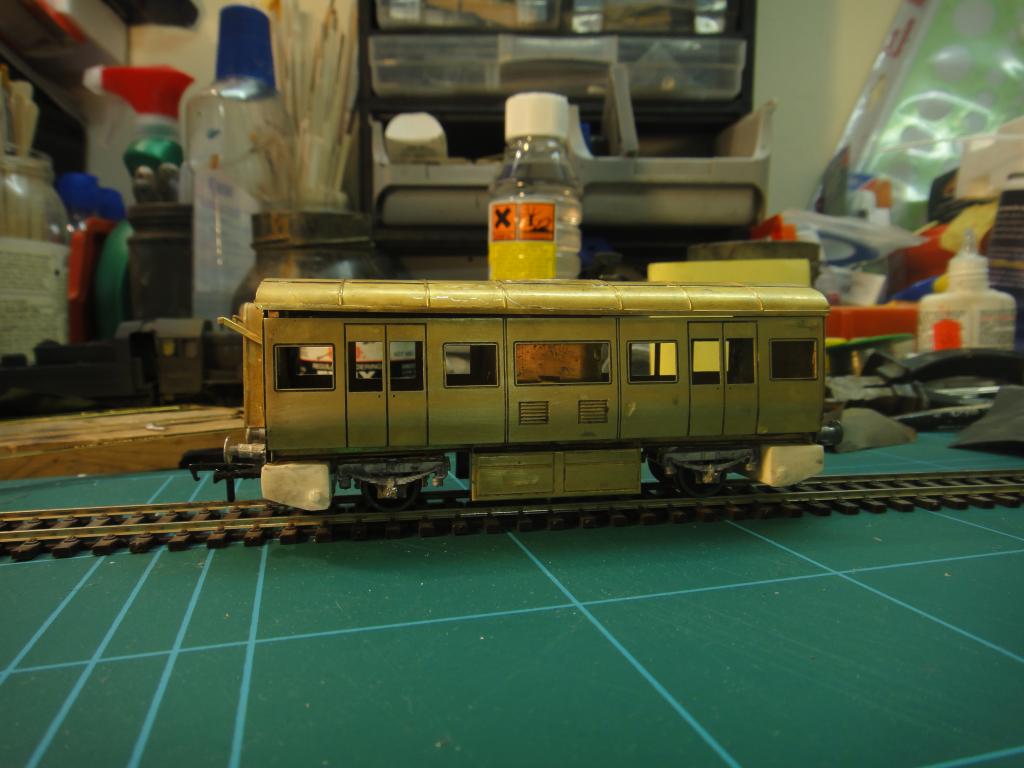
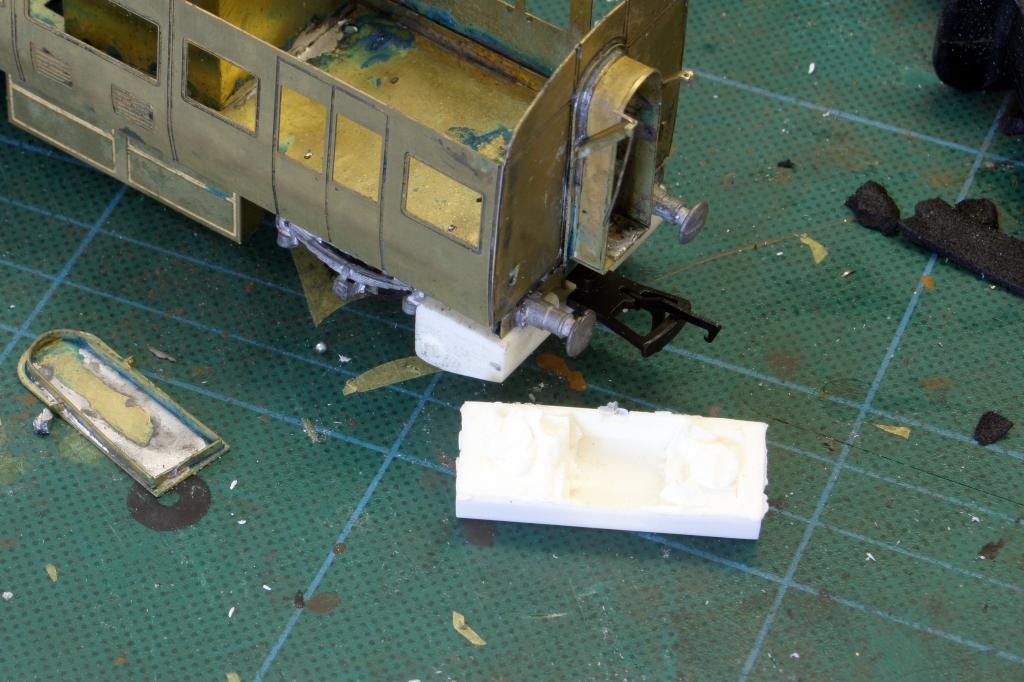
Heres the next bit of work done, I needed to fit Tension locks Couplers on the ends as the chap running it has those on his layout. I used a slimline one. I drilled a hole in the Chassis floor and the Tension lock coupler and and using a bit of brass wire threaded through the hole in the Chassis, Through the Tension lock to Articulate it and then through the Resin Fuel Tank. I Sanded off the Excess wire flush with the Resin tank. It works an all!!
Here you can see the Wire sticking up at the base of the End plate
Here you can see the fuel tank with the hollow part in the Resin for a Kaydee or coupling of your choice. Great Idea.
Here you see the Wire going from the above the Coupling and through the Coupling itself.
Here you see where I sanded off the Excess Wire protruding from the Resin
-
will pas it on, Tks G
-
Just wondering lads A Friend of mine is doing a rake as was wondering if there are Ready to stick Buffers that are like the Taras out there somewhere. I Know as few chaps Scratched their own but this route would save him a bitteen of time.
G
-
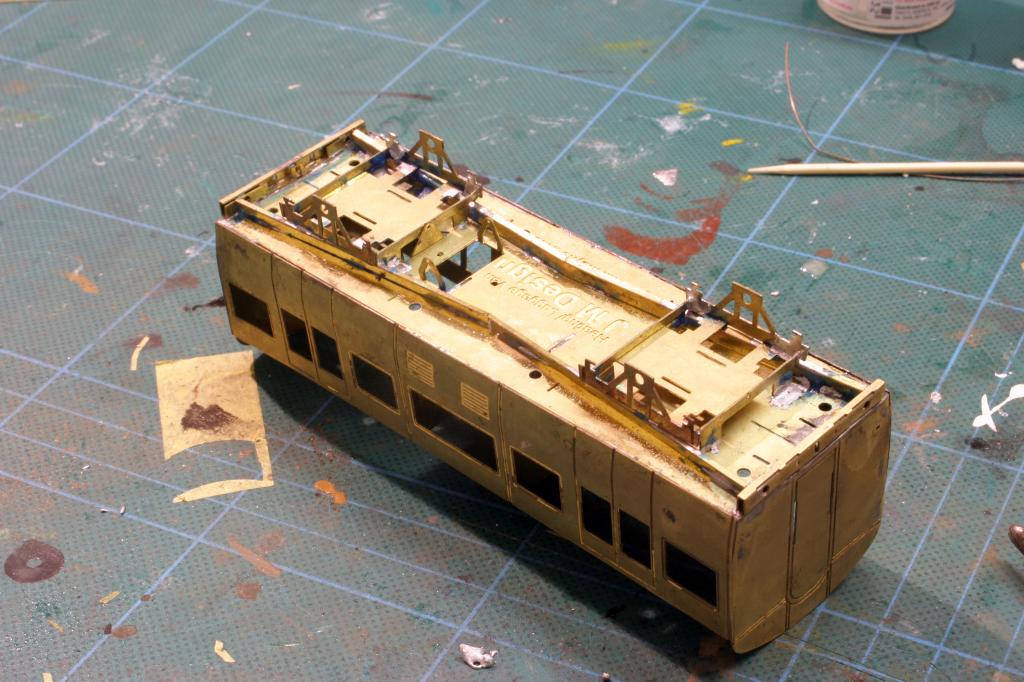
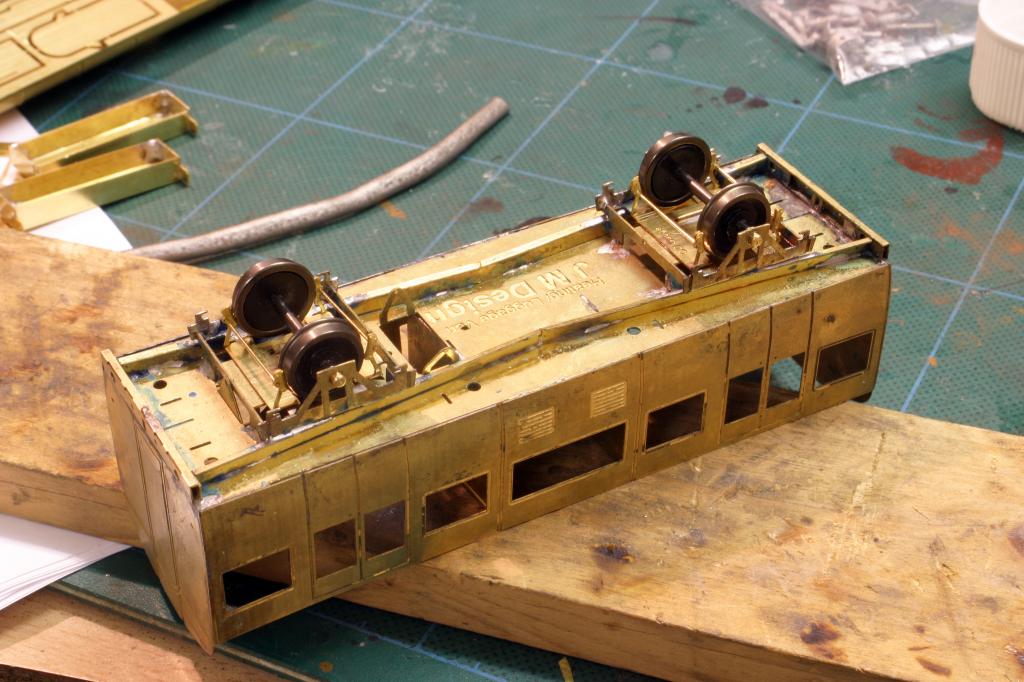
Done another bit tonight, Hate to see what the ESB bill will be after this yoke. Started at 1000 and went till 0100hrs. Heres the pics of the Progress so far, Nothing tricky to report. Everything seems to go very well except when you think you know better and skip reading the Instructions.
Wheel and bearings on
Battery Boxes Went together well.
White Metal fittings on. More to do.
Roof Vent on
Gangway Completed, Just need to Add the Crepe paper surround and the hanging bars:
Other end to do tomorrow
-
Busy Enough Rich, 3 more SSM 20ton brake vans came today!!. Maybe time to advertise on Job Bridge for someone to build a layout for me!! only joking of course.....
-
LOL, That jet wont be Oragne for sure, Thats was meant to be a quick build but is now in its 4 month.
anyhow 1.5 hours later we have reached this stage:
Everything went together pretty well except for the W irons where one set of tabs is fouled by the Solebars but 2 mins with a needle file and it was sorted. No problem.
The roof is just placed on at this stage.
Looking forward to the Next bit!!
-
Love the reverse Curve Kirlry.
-
Fantastic bit of kit, Thought out well too, I Like the ideas of the servos too as they are much kinder to the point and great possibilities with signals. Can see one of these being purchased in the future. Seems fairly Straight forward to work out how to do it also!! Thanks for throwing this up.
G
-
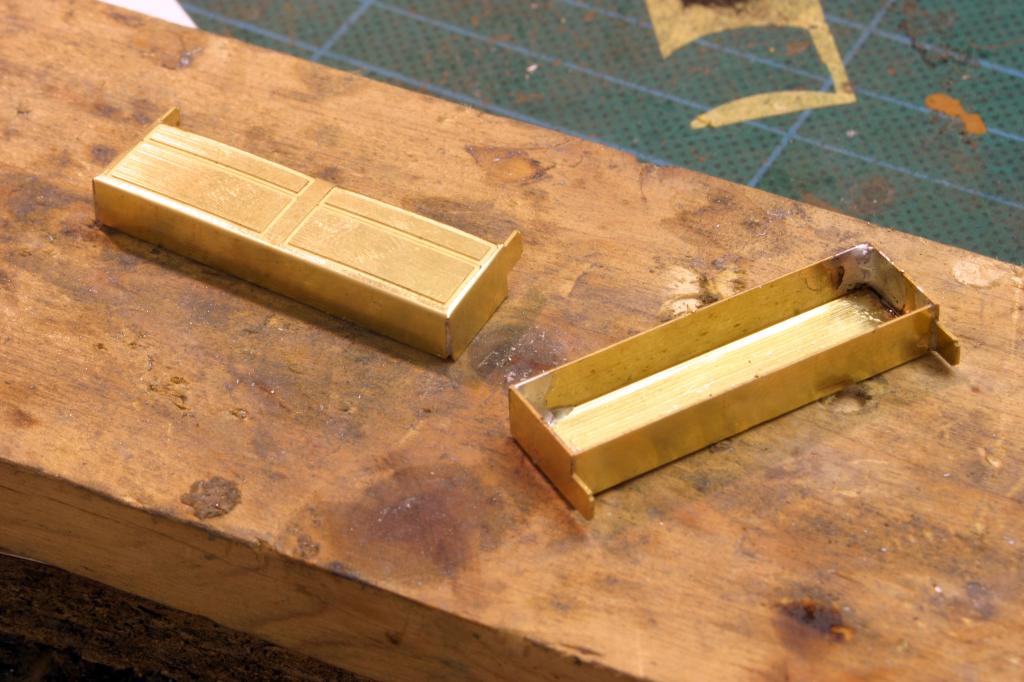
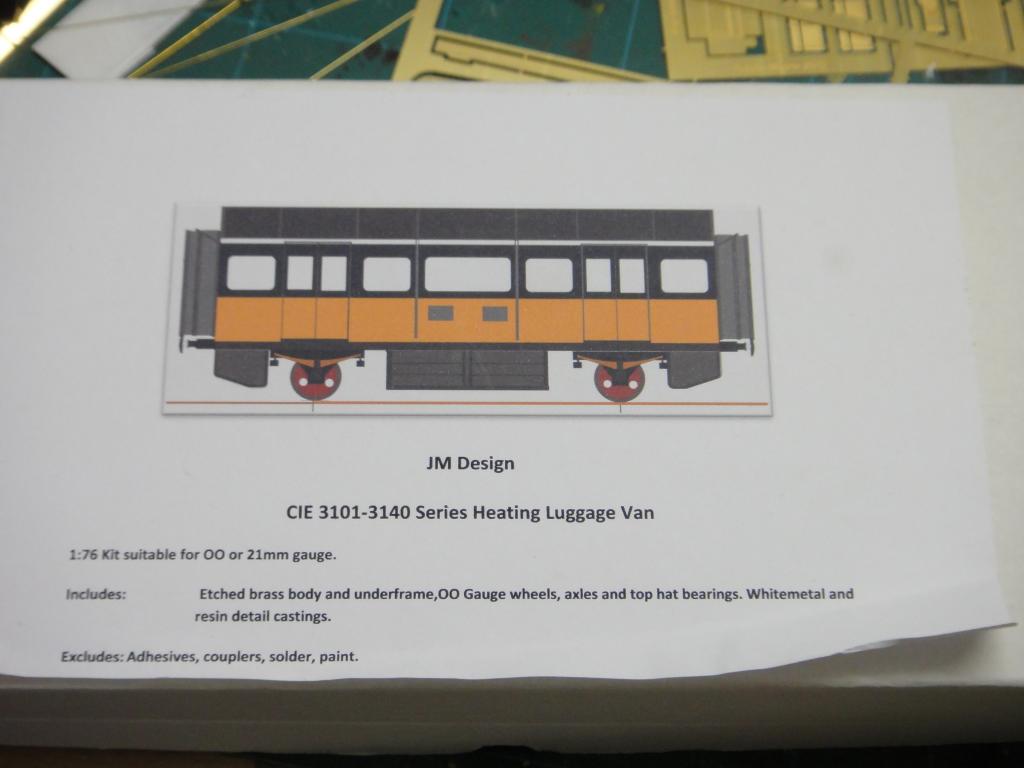
Well the Postie arrived yesterday with a Parcel from the southern Hemisphere and by god what a package.
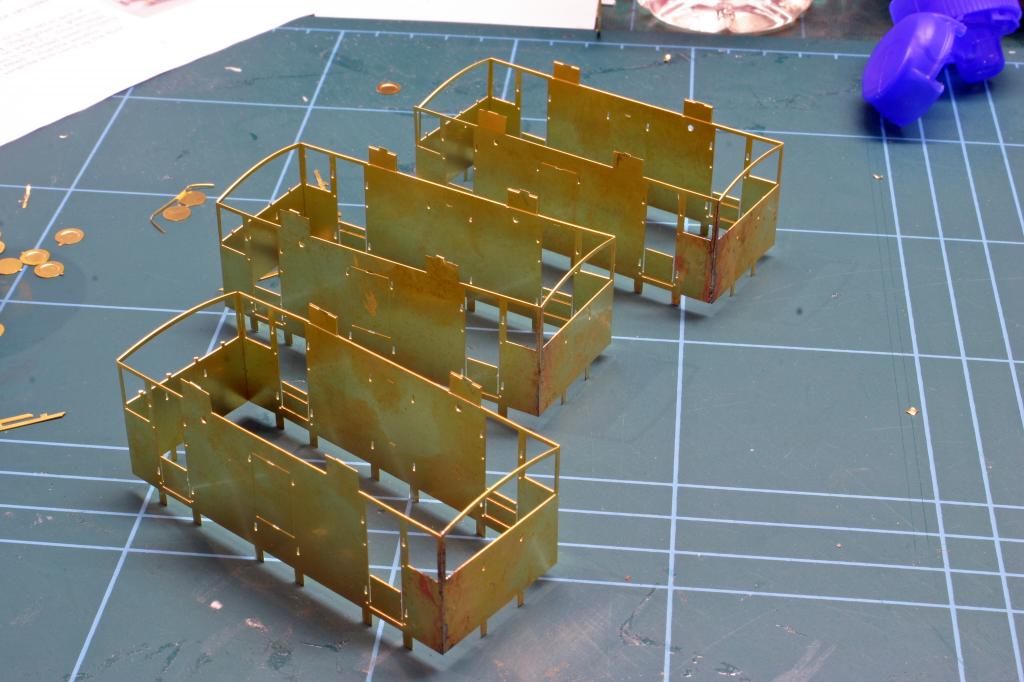
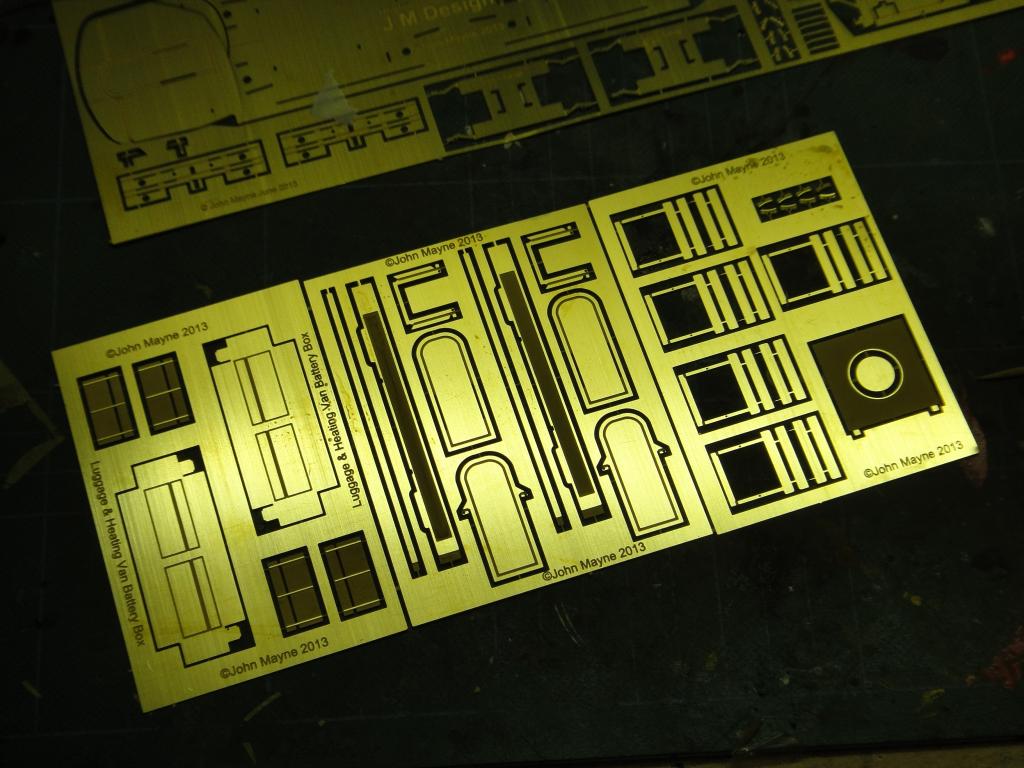
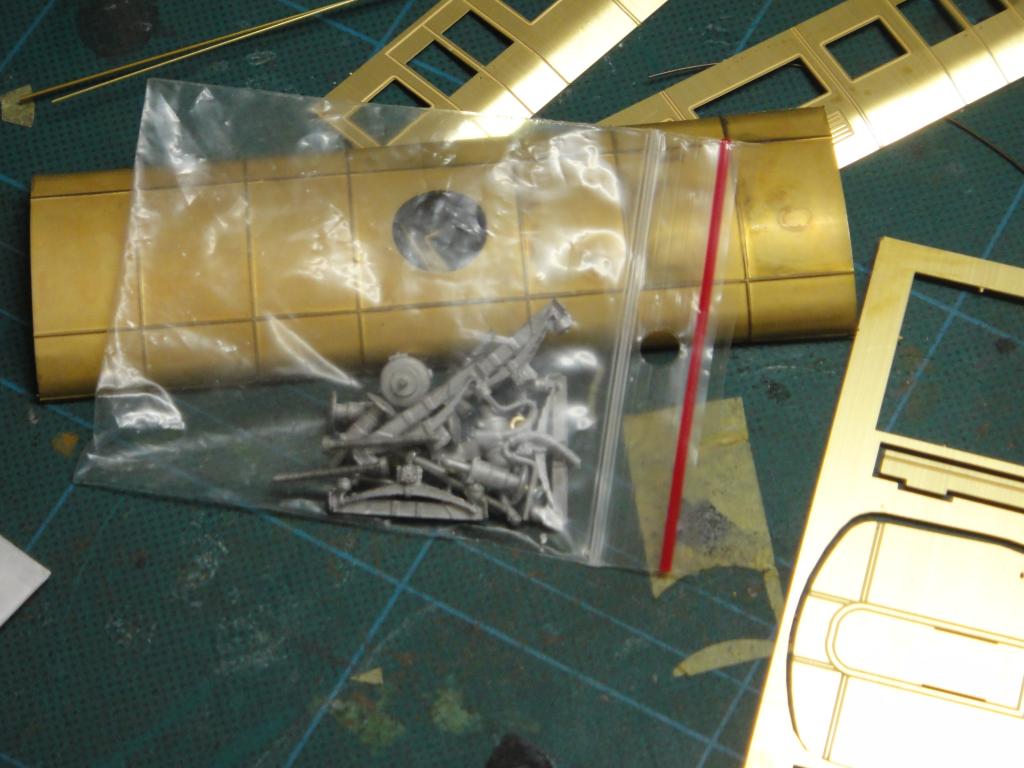
Upon opening the box you are greet with a fairly substantial instruction sheet as well as some illustrations and a bit of history of the van. The brass was each packaged in its own Tissue paper,Lovely white metal pieces in a separate bag, Clear Acetate for the windows, Pre rolled roof and pre rolled side. In fact Mr Mayner has not left much out in all fairness. The kit looks exquisite. I told myself to hold back but I started as small bit tonight. There are some Fiddly bits to do, The Gangways probably the most difficult part. Over all a well thought out kit with Clear and Concise instructions that don't Confuse a Nation!! 10 out of 10 form me so far!!
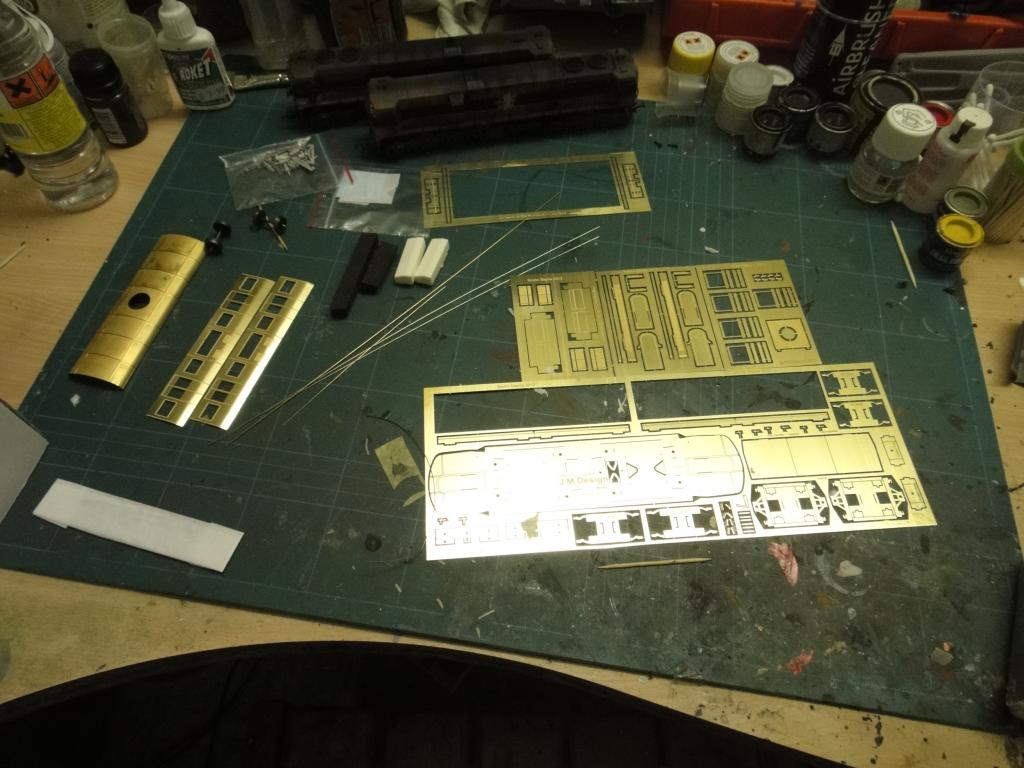
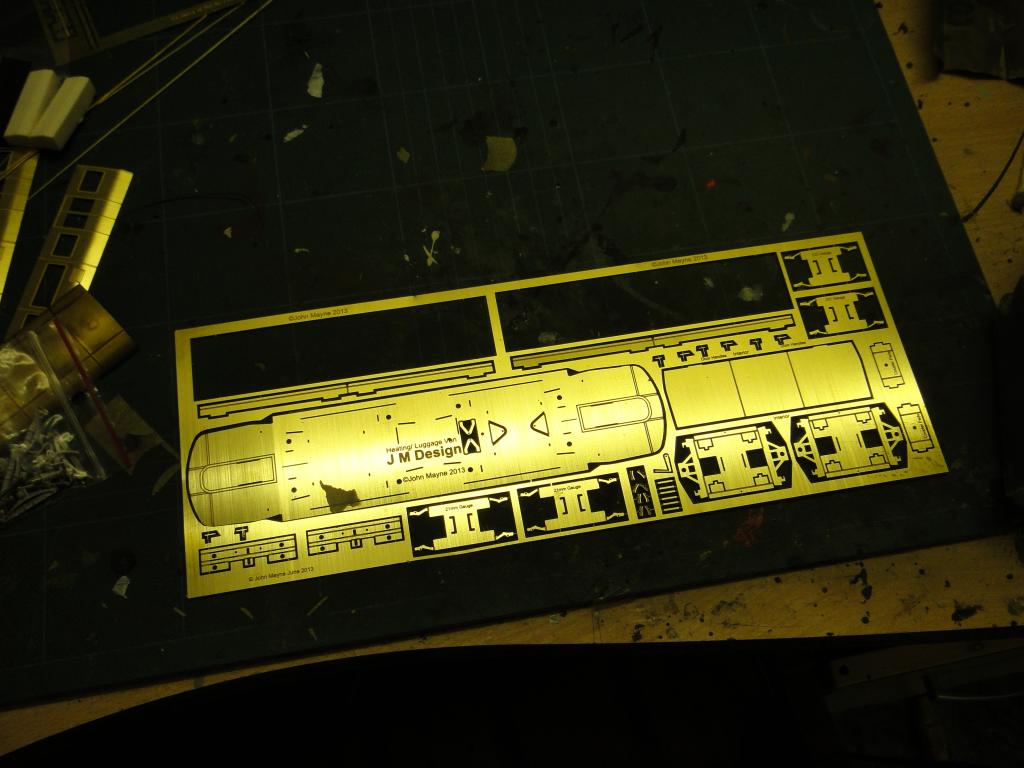
Heres some shots of the bits n bobs.
Thnak you John for the Excellently Pre rolled Sides and roof!!
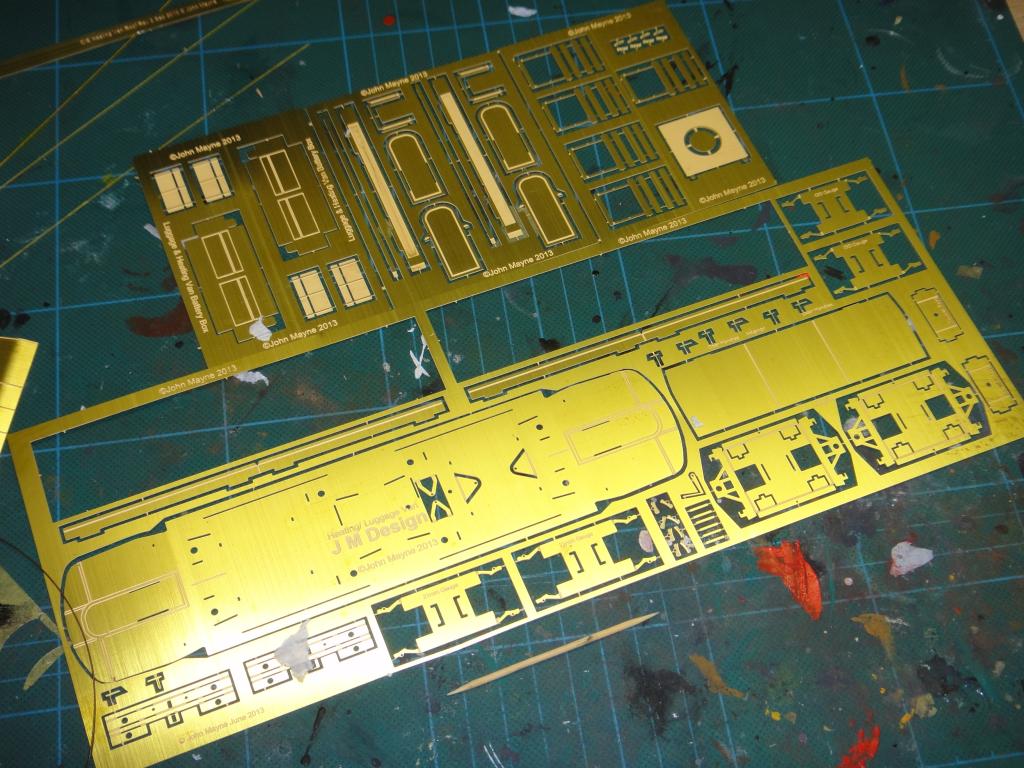
Heres the Start. Sides and Ends Folded.
Could not help Myself, Test fit of the Fantastic Roof
Cheers
G
-
Wow, They look Brilliant and almost could build themselves. Can wait to see them in the Flesh!


Georges Workbench
in Workbench
Posted
bit more of a update on the Brake Vans. Got the Lamp Irons Soldered one, Side lamps, Ash vent, Window Frames, and door ends. good bit of time on these spent, the vans look pretty bad at this stage but one I give em a little love and a wash they should come up nicely.
Heres the Lamp Irons on
The I tackled to Duckets, It would be great to have these cast in Resin so you can just glue em on!! Handy too for Scratch building. I et the solder flow out of the Joins so I can sand them flush and the join will be filled. Thats the plan anyhow!!
Next was the Door ends and to solder these in place and the window Frames, Pretty straighforward to do this.
Frames in place
Door ends in place
Ashpan flap soldered on, This is a 2 part piece
Here with have the little Side lamps soldered on.
Also on the go is an SSM MK.3 EGV. I have this a long way through the build and just spraying the Dayglo on the ends. Need to fix back on a step by the looks of it.
Finally not everything goes to plan, I had these mark 3s sprayed up and Decalled, 95% complete, just needed to glue on Etch Window surrounds and the Shawplan Windows and they were done however I used y own mix of orange which was a tad too light when matched up to another EGV I had so I soaked them in oven cleaner and fairy power spray and now have re-primed them again and will used the Phoenix precision CIE Orange which is back on sale in Marks, Big and Small tins. Big tins E9.99.