RedRich
-
Posts
2,680 -
Joined
-
Last visited
-
Days Won
8
Content Type
Profiles
Forums
Events
Gallery
Blogs
Everything posted by RedRich
-
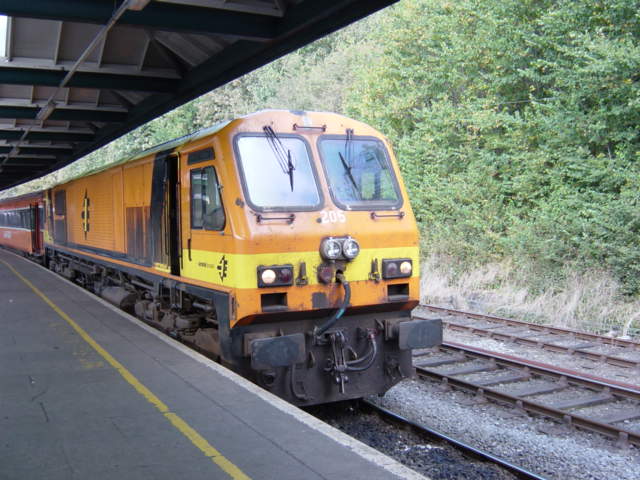
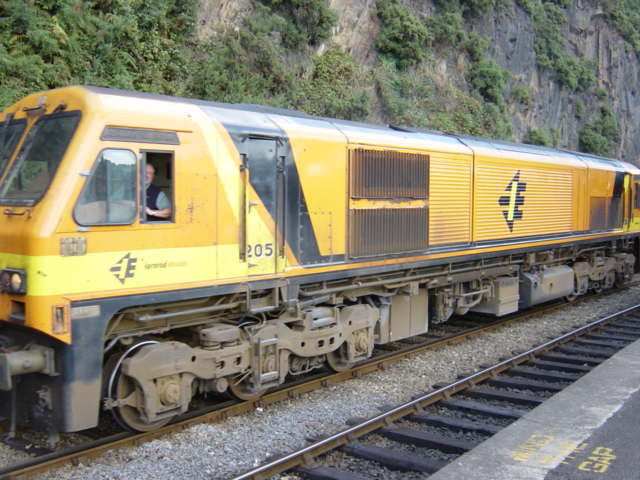
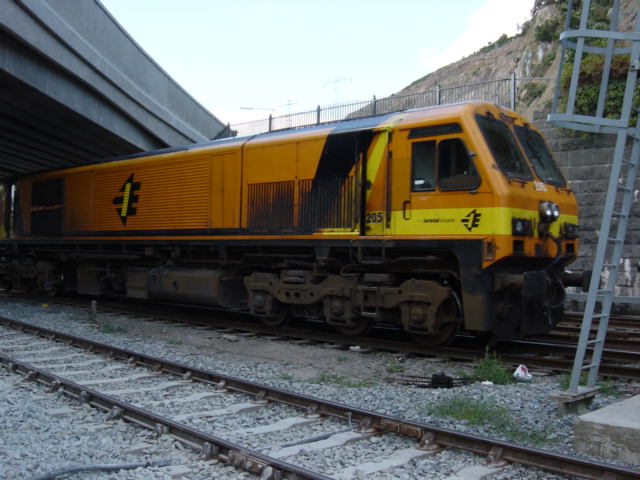
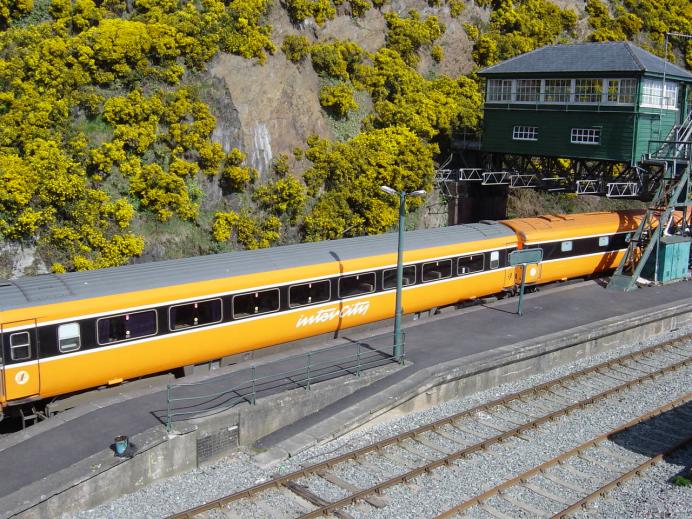
Some MK111 EGV pics taken at Waterford Plunkett. Rich,

-
Hopefully some of these will be of use to the weathering guys. Rich,
-
Miscellaneous Signs and details
RedRich replied to snapper's topic in Photos & Videos of the Prototype
That's great news Snapper I will wait for the next bunch in anticipation. There is already so much of the history of the railway lost to us, but we are preserving something of our own era that can be a resource for people in the future. If anyone has got any pics of mile posts viaducts and bridges get em up here please as it is important to have a record of these things to hand on to future generations of modellers and railway enthusuasts. Rich, -
Miscellaneous Signs and details
RedRich replied to snapper's topic in Photos & Videos of the Prototype
Richie it's just getting better with every photo that is being uploaded, keep em coming or I'll get withdrawal symptoms. Rich, -
That's amazing Kirley that you have achieved so much in so short a space of time. It's always great to have a pal within the hobby to help you and Anto has the experience of building his own layout to give you so it's a win win situation all round. Please keep us all up to date with your progress. I will be watching this with interest and most of all anticipation for every installment . Rich,
-
I know Eamonn and just think of the brownie points you could score with the missus. You could transport yourself and the layout around the country and have the first model railway exhibition on tour. Rich,
-
I couldn't agree more with that statement as it has surely made people aware of the growing repertoire of Irish prototype models available to people that wouldn't be aware of the phenomenal growth of the hobby here, let alone the standards of the work that the lads produce. That kind of work and access to what is available has surely inspired many a young kid to have a go and also find their way to this group as a consequence of watching these videos. Rich,
-
Miscellaneous Signs and details
RedRich replied to snapper's topic in Photos & Videos of the Prototype
Those pics are truly wonderful Snapper and why more people don't photograph this side of the railway is beyond me. I hope you get more up here soon, and thanks for sharing them . Rich, -
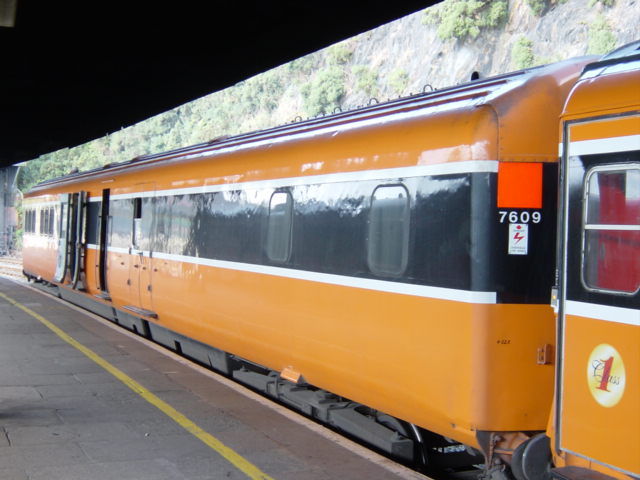
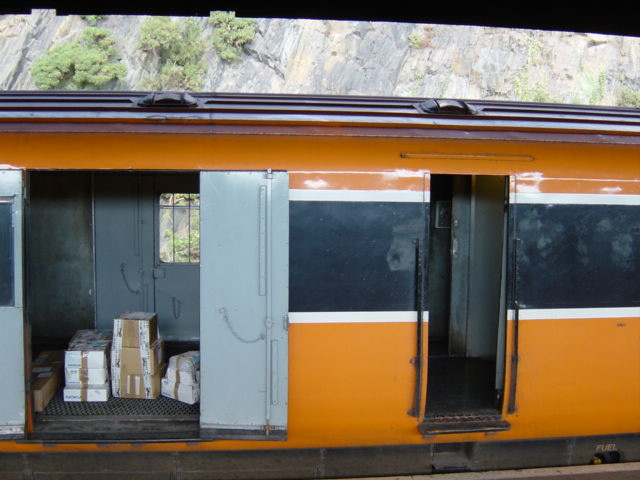
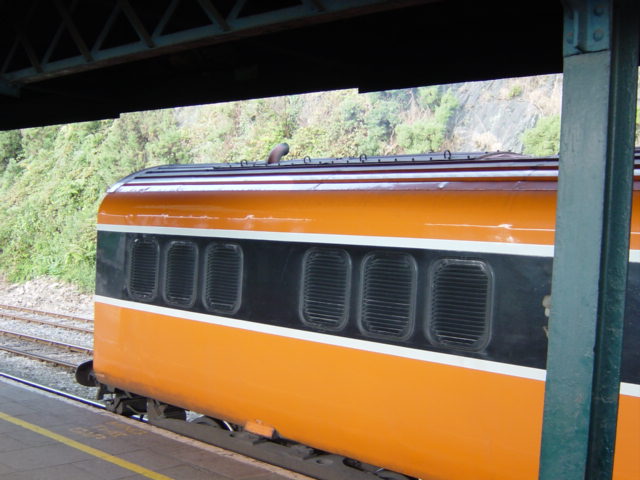
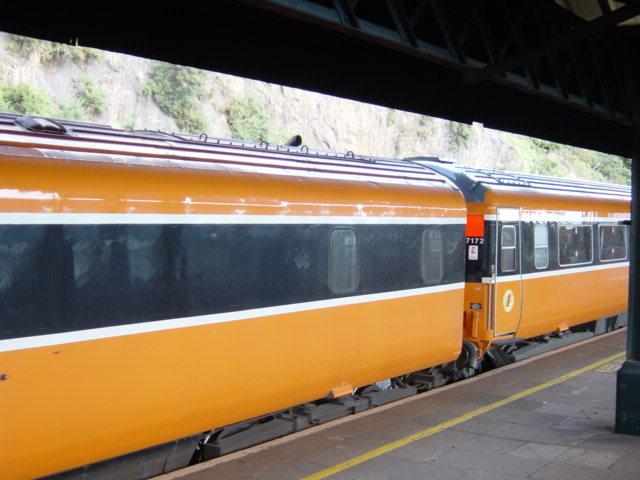
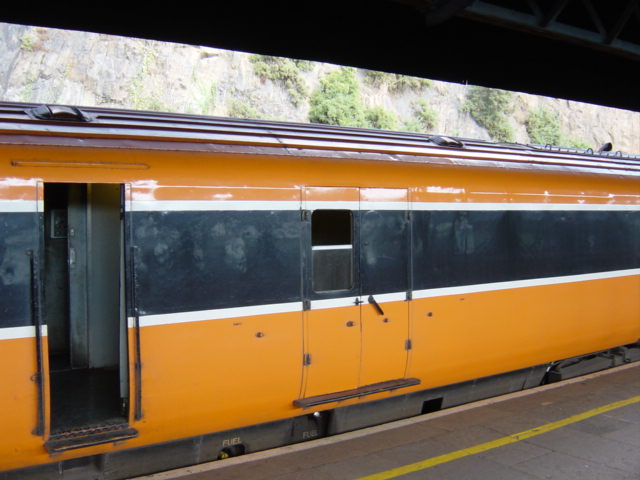
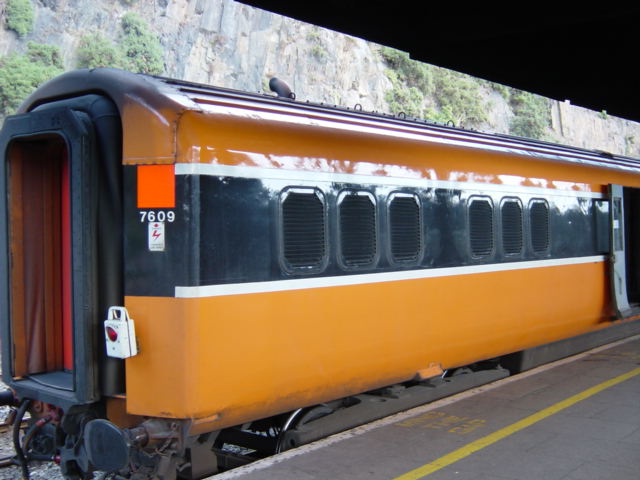
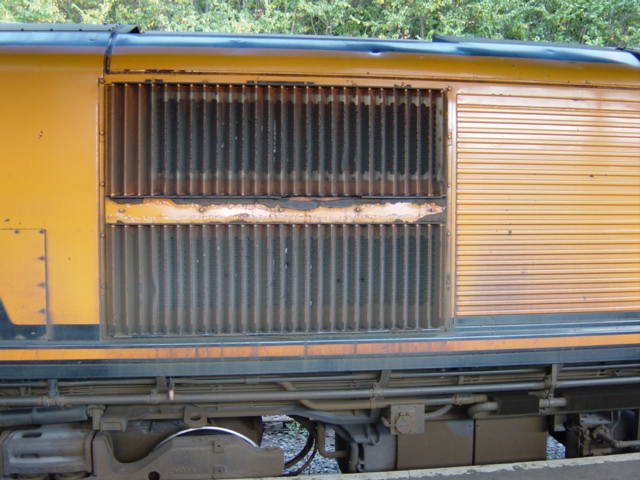
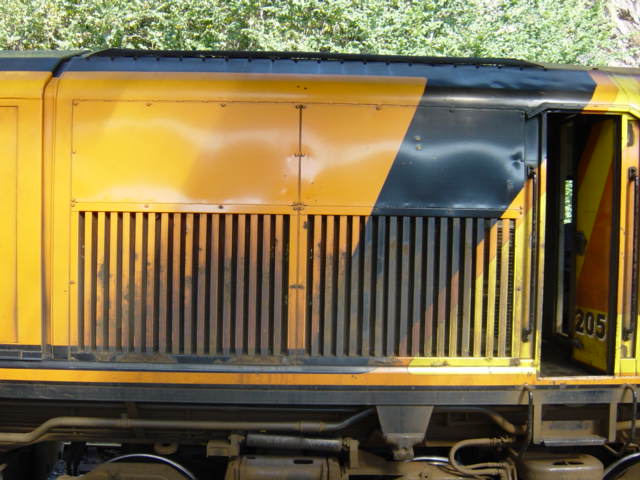
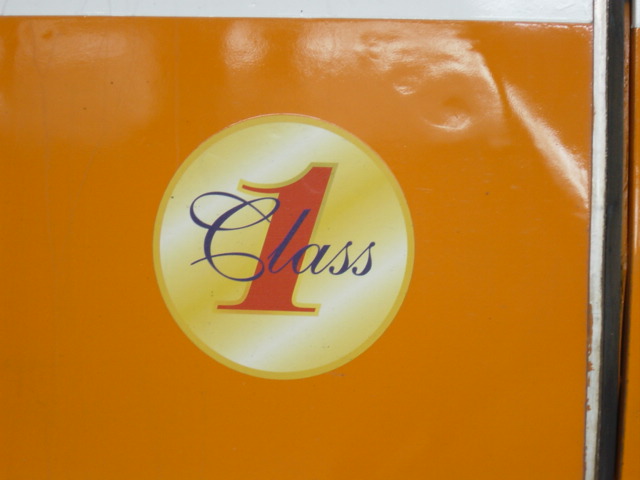
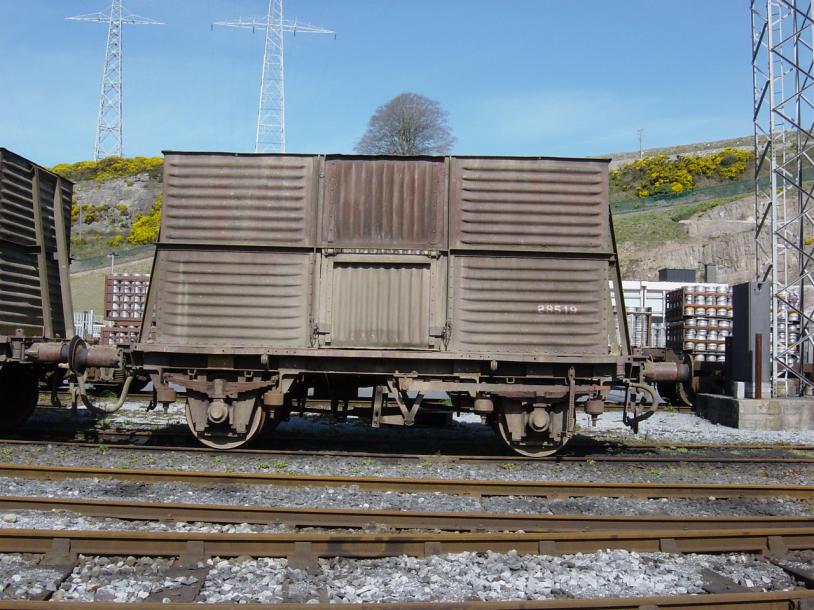
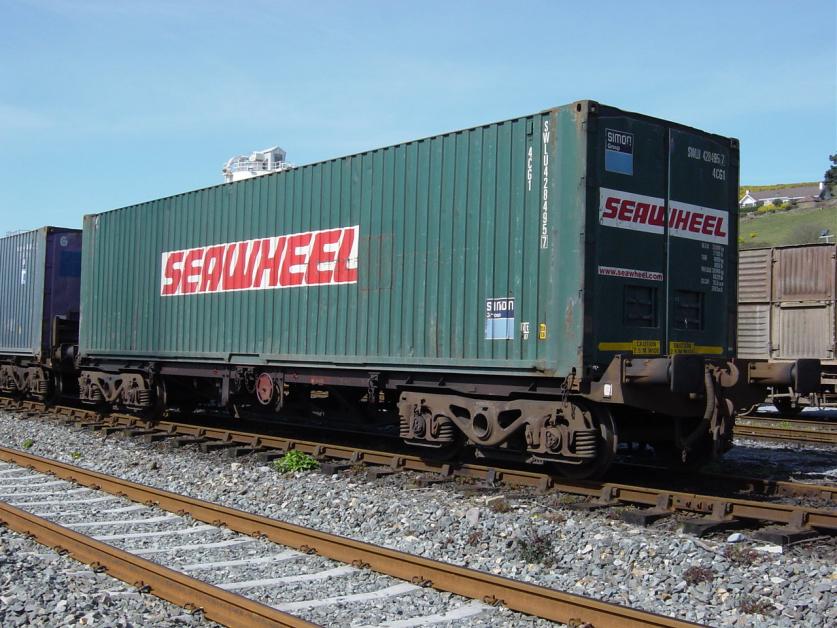
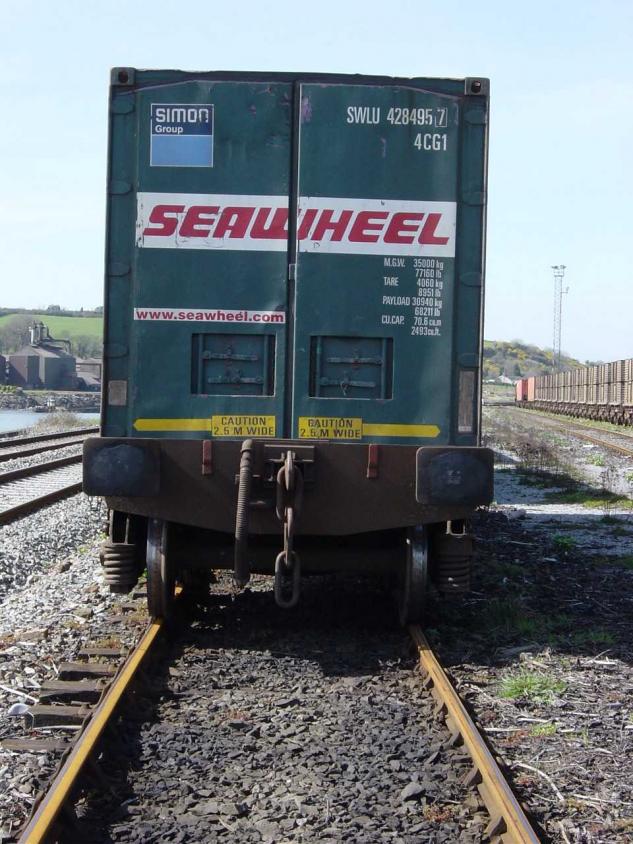
Here are some pics taken ten or eleven years ago at Waterford Plunkett. Permission was granted by IE to take the photos. First up a MK111 Standard roof for those that want to weather their models. Next up a MK111 First class coach with grey roof. A MK111 First Class emblem on the coach door. These would only be at the First class end of the coach. Last up a MK111 EGV Roof. Some have 2 exhaust pipes and some have four so be careful which prototype you choose to model. Rich,
-
Lovely work Eamonn I thought we were going to see a model of the tardis there for a minute. Rich,
-
I think the best way to gauge this sort of thing is to ask the retailers how many kids and teenagers frequent their shops and purchase model railway equipment. Look around at an exhibition and gauge the same thing there, how old are the visitors what percentage are kids and adults. I think that this is one hobby that has stood the test of time and there have been turbulent times for a lot of us of a certain age in our lifetimes with recessions and high unemployment. Kids today are very resourceful and they will try and earn a few bob to pay for their models as the young lads have stated above. Vincent even went without his sausages, and he will benefit from it by having a point and stopping his arteries clogging . Groups like this draw an awful lot of young blood into the hobby as they will get advice comradeship and a voice to air their opinions for free, there is no doubt that for the majority of the time the internet has started a revolution and I wonder as groups like this grow will it have an effect on the print media within the hobby, as I find myself buying the monthly Railway Modelling mags less often as I find all the entertainment and knowledge here that I need. For me they also bring an enthusism that takes me back to my youth. Rich,
-
There is eating and drinking in it Noel. Rich,
-
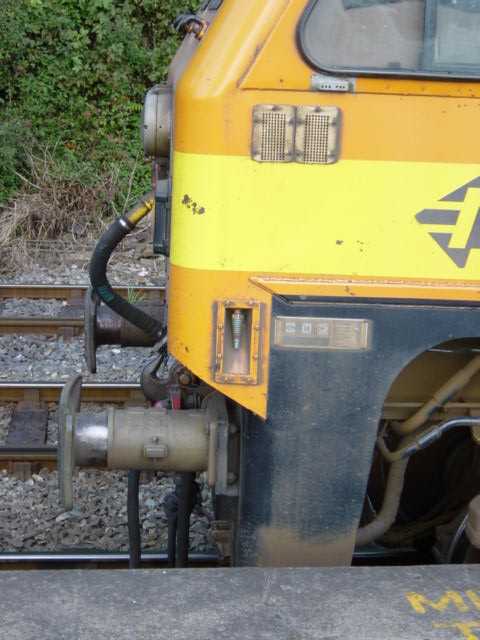
I do indeed. I promised Hidden Agenda some pics of the underframe a while back and when I sort the man out with them I will post some up here. Welcome to the group by the way. Rich,
-
Some fine bargains there Steven. The 141 in as preserved livery is a steal at that price. Thanks for the heads up. Rich,
-
Alan please feel free to download any of my pics as it's only right that we share what we have with each other. The amount of information that is available to the group from those members who give it freely is why this group is special. It is also a place of learning, and I have learned so much myself from information posted here by all our members. There is no showboating or boasting on here only sharing and giving, I love it. Rich,
-
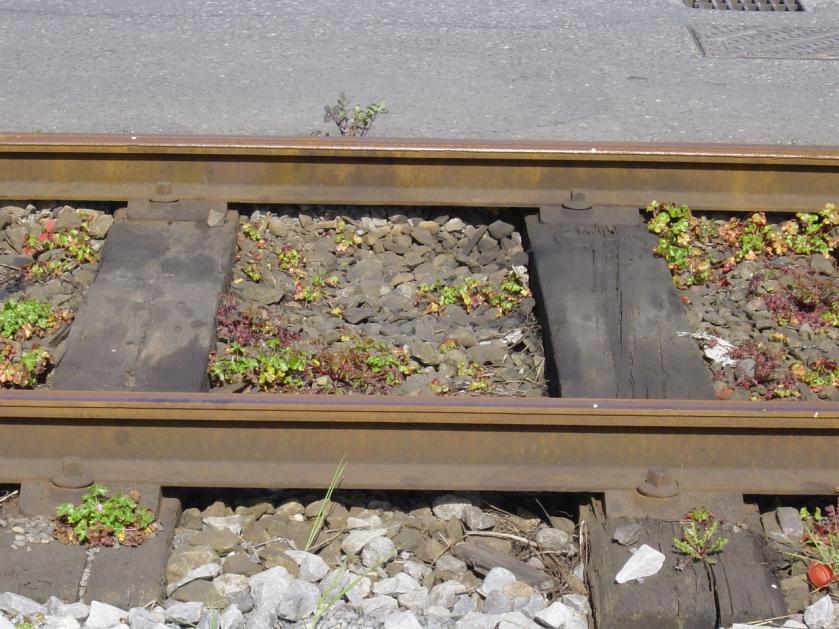
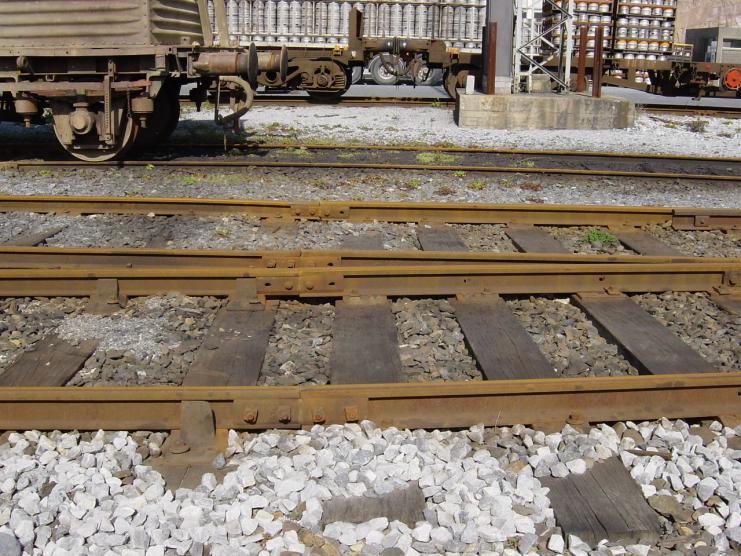
Some more pics of flat bottom and bullhead rail. This is some flat bottom on wooden sleepers attached to base plates by a single bolt at Waterford West. This is a stranges mix of flat bottom and bullhead rail on wooden sleepers on a point at Waterford West. This is some bullhead rail fixed to concrete sleepers at Waterford Plunkett. Rich,
-
Working in 21mm Rolling Stock Conversions.
RedRich commented on Mayner's blog entry in Mayner's Blog
Lovely work John, I will be following your blog with interest as I want to take in as much information as I can as I progress on my own journey into 21mm. I wouldn't say that the Hornby coach looks cheap and nasty. It's more of a sows ear turned into a silk purse. Rich, -
That's great work John. I shall be picking your brains as I progrees with my own work, well done=D. Rich,
-
They Would indeed Des. Next time I am up in Clonmel I will get a couple of pics of the mother and child signal on the Tipp side of the Road bridge. If you look at the signals in your range of SSM kits Des they are all in Clonmel as are the LC gates on the Tipp side of the station. You have saved me a lot of hard work in trying to source parts in the past or scratch building. Taking pride of place on the front of the station building when it gets built will be an SSM post box. Rich,
-
About time I got my finger out and did something Anto. Rich,
-
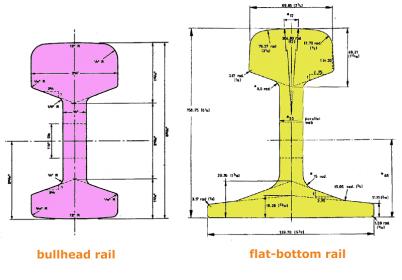
Glad to hear it. Here are dimensional detailed drawings of bullhead and flat bottom rail. It probably says more in a picture than it would in words. Rich,
-
I'll have a butchers through the collection Anto and stick one up. Did you get that email I sent. Rich,
-
Some Beet Wagon shots at Waterford West, Rich,
-
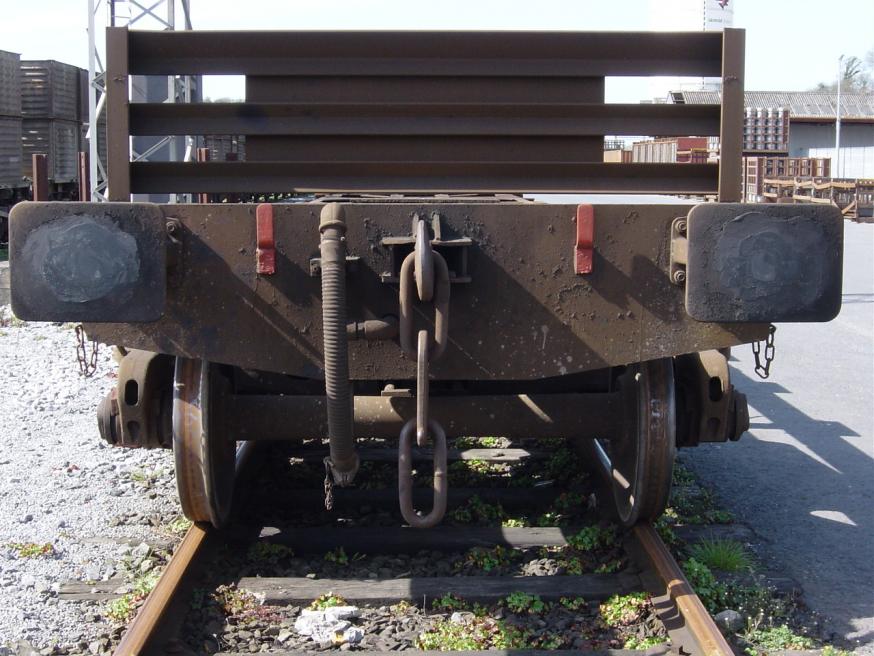
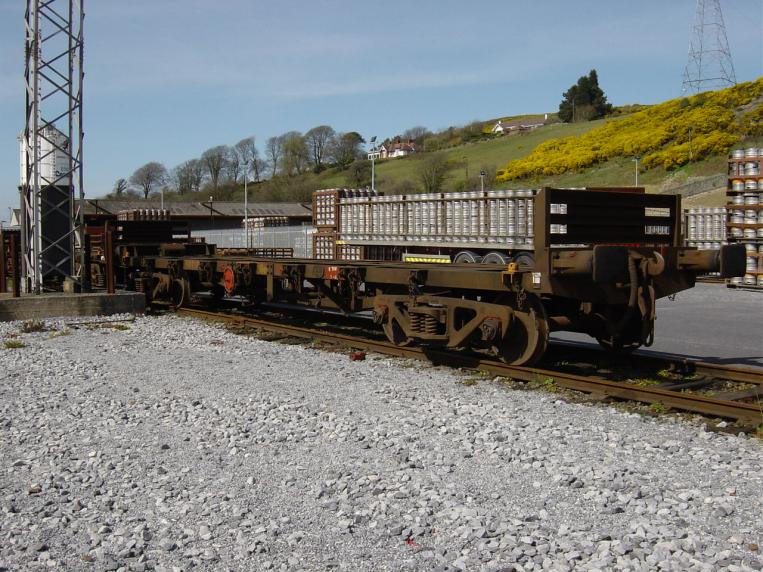
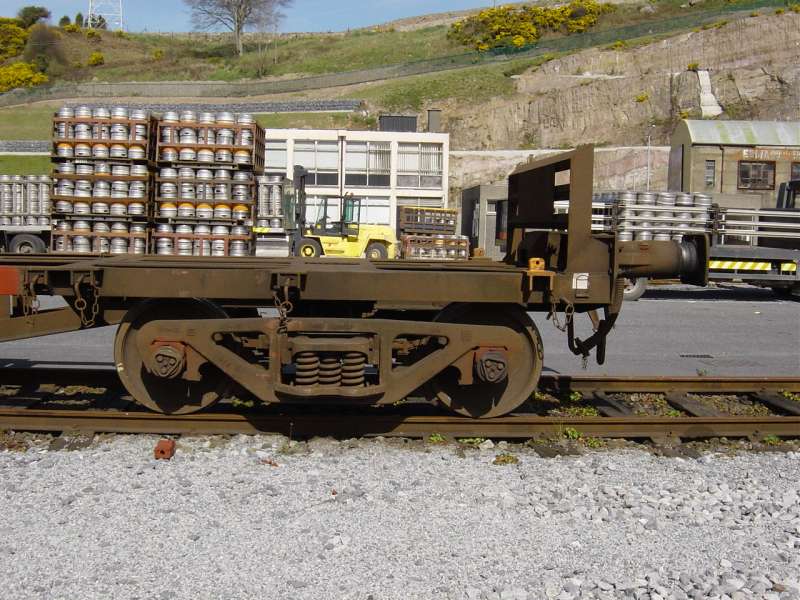
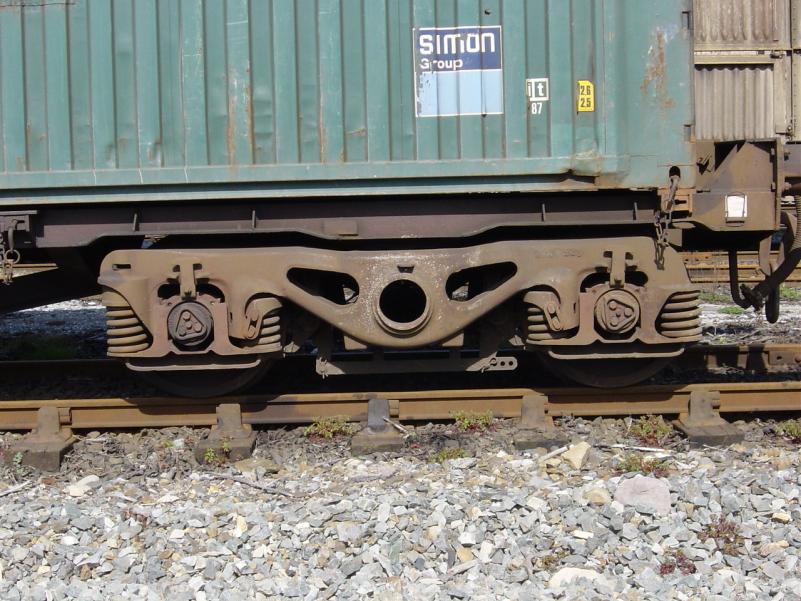
Some more bogie flat pics of a different variety. Rich,
-
Some bogie flat pics taken at Waterford West. Rich,