

irishthump
-
Posts
1,840 -
Joined
-
Last visited
-
Days Won
7
Content Type
Profiles
Forums
Resource Library
Events
Gallery
Blogs
Store
Community Map
Posts posted by irishthump
-
-
So these chips are seperate and noting to do with Model Shop Belfast?
-
Lovely paint job, Anto. Certainly looks the part!
-
Yeah, lovely piece of film.
And that's Dun Laoghaire/Mallin station before they wrecked it!
-
I hand paint all my built stock and while it is not a patch on any of the sprayed work seen on these pages,I find it much more rewarding and fulfilling doing it this way.
Have to agree. I would'nt dream of getting anybody else to build, paint or weather any of my stock. It would'nt be mine otherwise!
-
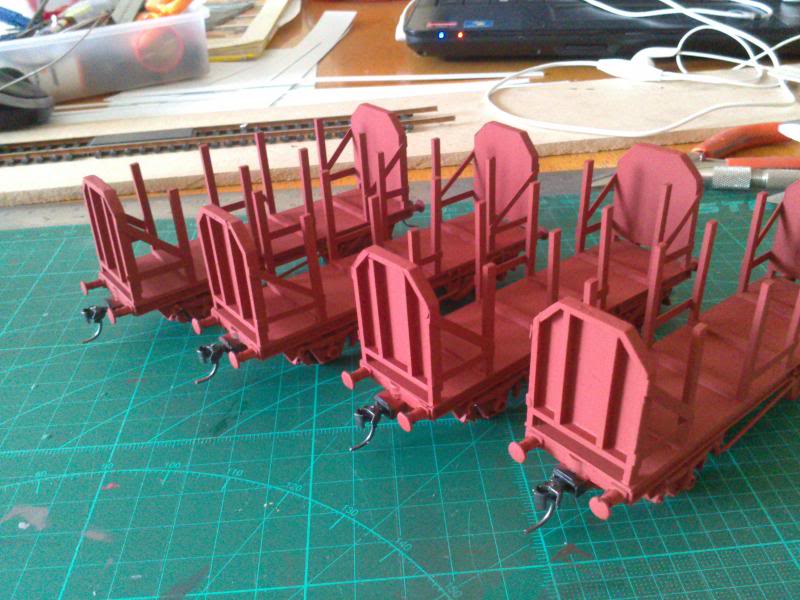
Well, finally got the flats and timber wagons weathered. Here are a few pics...
Weathering was done with washes and powders.

-
Nothing should delay the 121 model's production any further.
Is that a statement of opinion or a statement of fact?
-
In the American market which is vast compared to the irish one once the manufacturers moved to China and could make a ready to run wagon for about 5 dollars more, the Kits have virtually died a death.
I can understand that!
-
I think having the choice of both would be the best way to go as I the thought of assembling a kit can be terrifying to some modellers!
But I do agree that the kits can be just as costly as RTR when you factor everything in, price permitting I would be happy to go the RTR route.
-
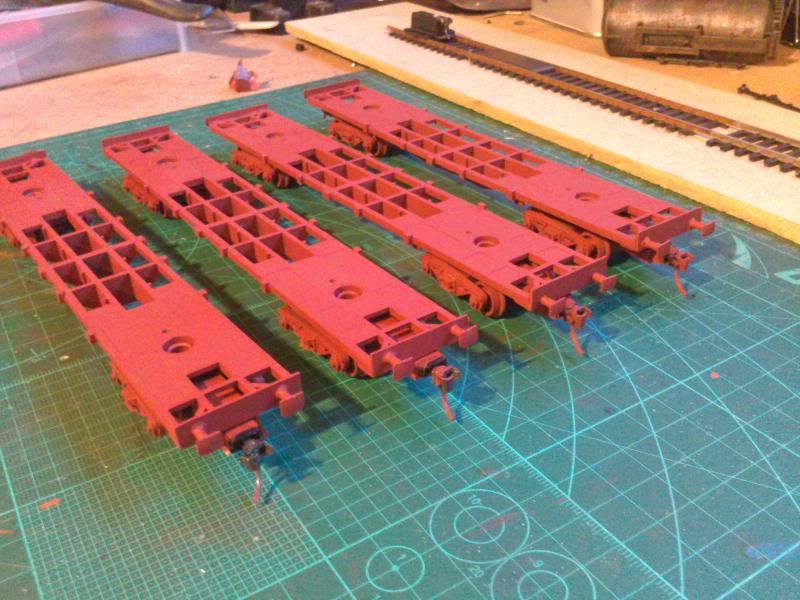
Well, close to 42'9" anyway!
I had a few Hornby Railroad flats which I decided to cut-and-shut.
Here's one glued up...
A couple after the glue had set (I used 5 min epoxy).
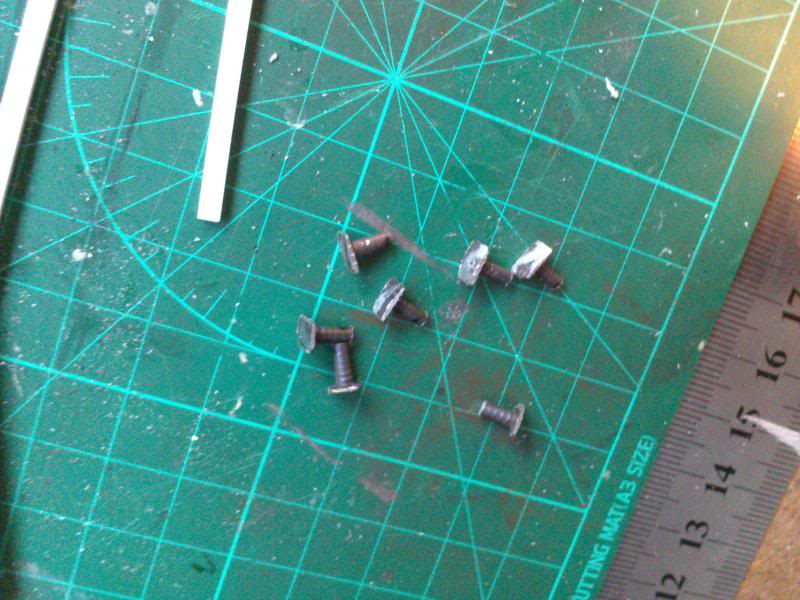
Some buffers made from filed-down tacks.
Added some styrene detailing and Kadee couplers.
All four finished and sprayed with red oxide.
-
My own little fleet:
B141, 161sa, and 182 all sound chipped, and B165.
-
Well said Tom,and credit to Stephen for the site,and the Mods
who do a great job.400 members in a year is pretty good.
I never knew it cost 2k to keep servers going in the year,I
have no idea on this aspect,so thanks again.
I don't think there is a need for feedback section,as any
requests are always looked at.Sorry for off topic again.
I also never considered the cost of keeping the site running. Well done to you, sir. The site is an invaluable resource for the Irish modelling community and I'm one of many who have benefitted from the advice and expertise of it's members.
-
Hello, Jamie and welcome to the site. Nice to have someone from so far afield!
Sounds you already have a nice collection of stock. With a small space a nice little shunting layout with a goods or container yard might be a good idea.
Or maybe even a diesel maintenance depot and refueling point.
Try this site for track plan ideas - http://www.freetrackplans.com/Home.php
-
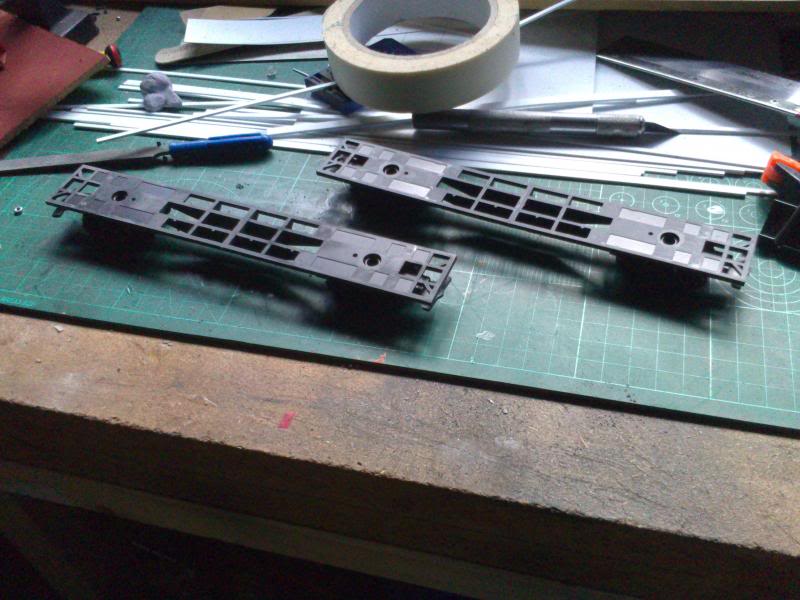
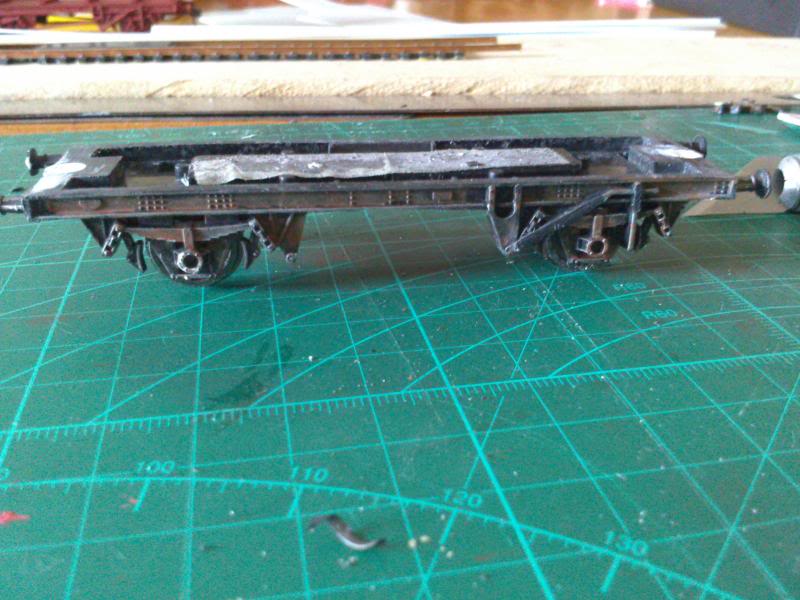
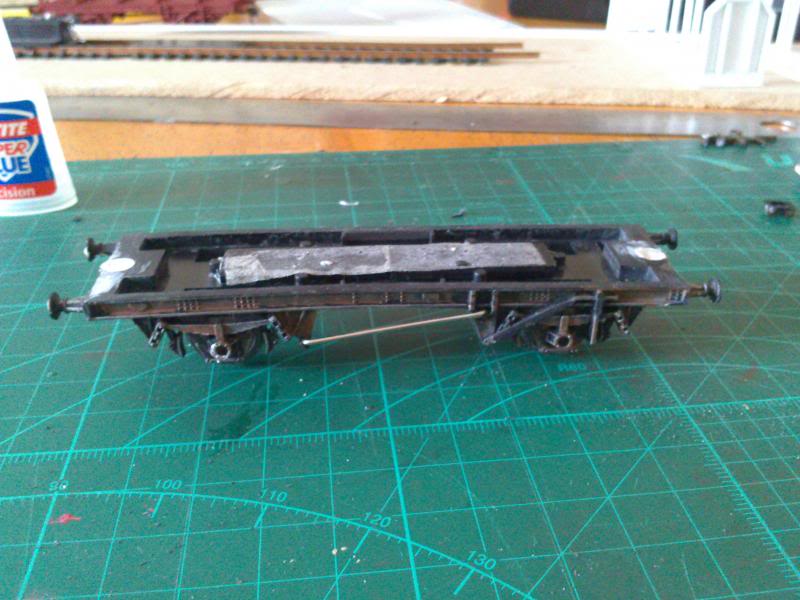
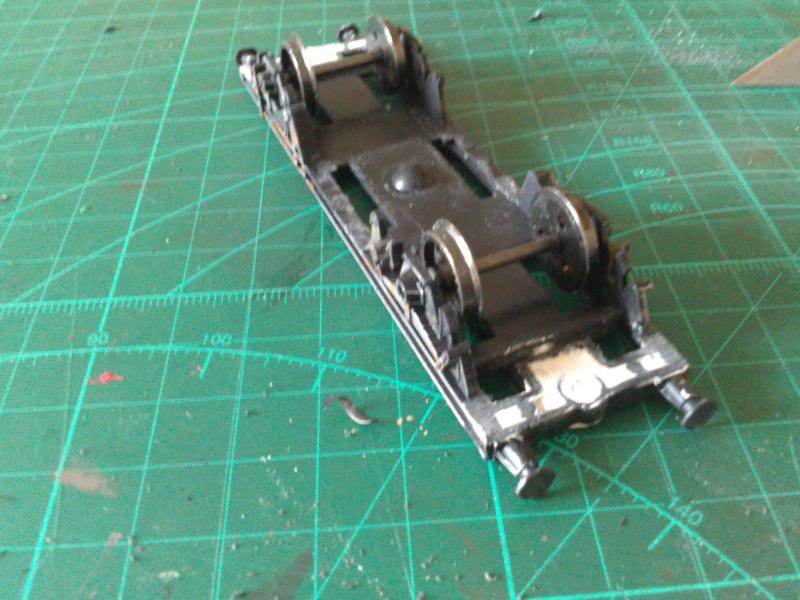
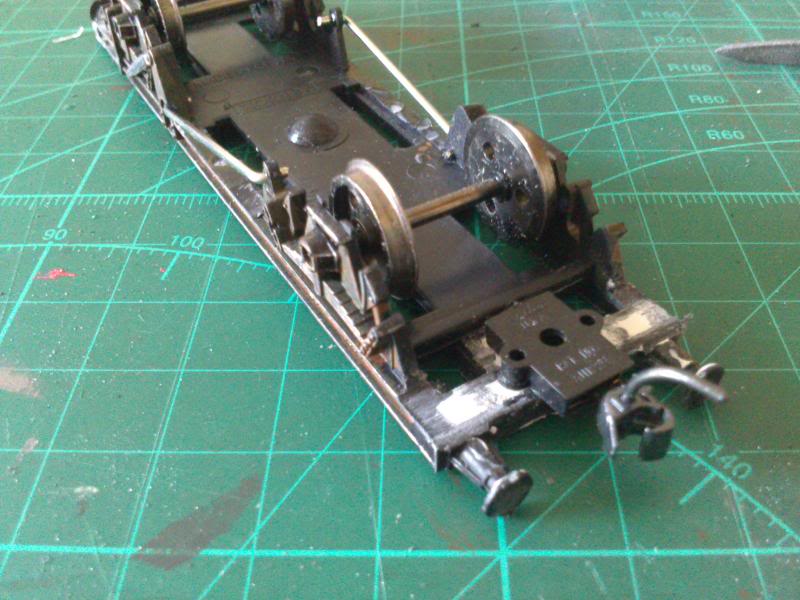
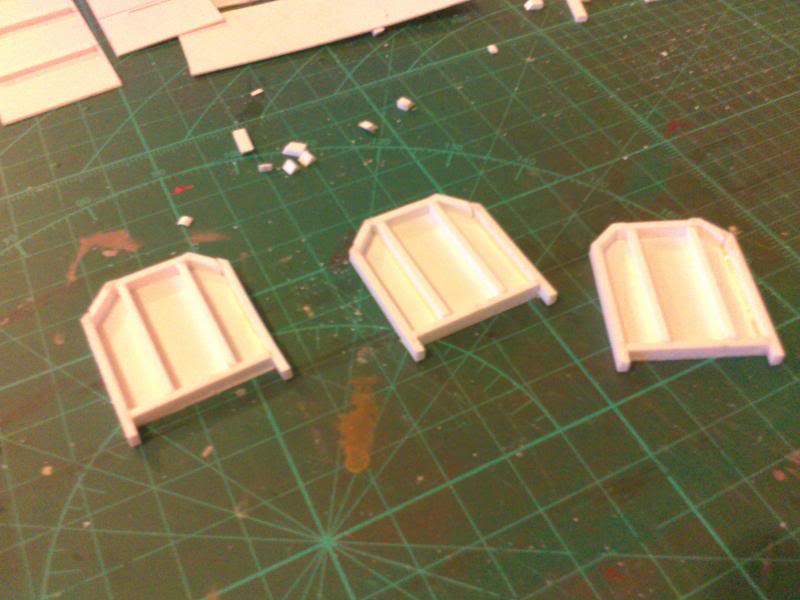
I had been planning to buy a few Hornby timber wagons but after seeing this thread http://irishrailwaymodeller.com/showthread.php/1212-Four-Wheeler-Timber-wagons I decided to go the scratchbuilt route.
I had a few of those horrible Hornby Railroad range tanker wagons so I decided to use the chassis as it looks roughly the right size.
I cut away most of the underframe detail.
An old paperclip makes some passable brake gear and makes the chassis look a little less bare!
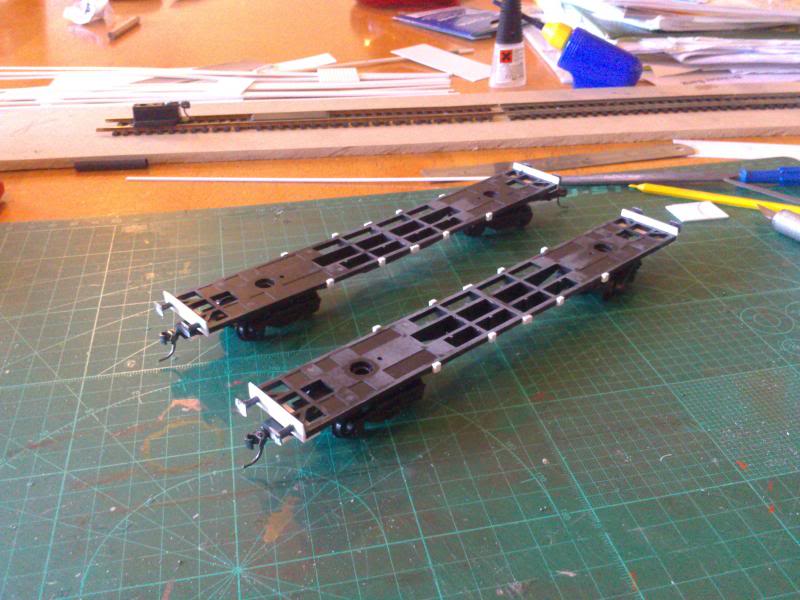
I removed the tension lock couplers and used filler to make a suitable mounting point for a Kadee No.5 coupler.
Coupler mounted...
The wagon bodies were built from styrene.
Fitted to the chassis and given a coat of oxide primer, weathering to follow...
Hardly prototypical but I think they'll look good on the layout!

-
Yeah Thump, you blob on a rice shaped bit, and use a wet brush to push it into the corners, really heavy and crude. When it dries in a few minutes, run the wet brush over it again and take the heavier stuff off. Keep repeating as much as you need, and if it goes wrong, wash the model and start again! R
Thanks, Glenderg.
I usually use Games Workshop washes which give the same effect, but they are getting bloody expensive so I was looking for a less expensive alternative!
-
Excellent work!
Is the wash made up from just gauche and water?
-
Man, that sounds impressive!
I have the sound chip for my 071 on order from Modelshopbelfast, can't wait for it to arrive.
-
Wonderful work, both vans look the business!
-
I fear that little street might end up an oul parody allright
Sheriff Street? Then don't be surprised when you find you're pliers gone and every window smashed on that double decker!
-
Lovely find, really enjoyed it!
-
Lads,
Lidl are selling 1 metre strips of leds complete with a small 12v transformer wired to it for €10
It's the same as this stuff - http://www.ebay.co.uk/itm/LED-Lighting-Strip-300mm-18-Warm-white-LEDs-per-Length-/270703748272?pt=UK_Trains_Railway_Models&hash=item3f073364b0#ht_1769wt_1255
Which can be cut into various lenghts and used for building or coach lighting. They had white as well as other colours.
-
I'd be surprised if anyone has ever bought any hornby stuff from Toymaster on Jervis Street to be honest.
That said, I got a couple of Hornby Railroad Container flats for €10 euro each.
-
Guys,
Was in Dublin yesterday picking up a few things in Mark's Models and I happened to pop across to Banba Toymaster on Jervis street (they have quite a large selection of Hornby stuff). While I was there I noticed they were selling the bog-standard Hornby decoder; R8429, for €25. Bit pricey thought I! Sure enough I went into Hamley's in Dundrum that afternoon and they are selling the same decoder for €15! You can even pick up the Sapphire from them for €30...
I know that some shops are a law unto themselves but I think a tenner in the difference is a bit rich!
-
Hi irihthump, I've been sitting here viewing all your work on your layout, & I have to say it look's just fantastic. your attention to detail is amazing, I know it takes time to do what you would like your layout to be, your doing a great job, you also have a really nice selection of rolling stock, and your 071 sure do's not look out of place, very well done,
Thanks for the kind words Burnthebox! As you say it takes time, and while I'm very happy with the way it's going, I already find myself thinking of what I would I would do differently on the next layout!
-
A few pics of my 071 in it's natural environment!
Outside the engine shed.


ESU LokSound V4 for MM Class 201 & 071
in Irish Models
Posted
Well actually all that's needed on the 141/181's is to solder the connections for the speaker, it's not a huge job. I found the hardest part was getting the bloody body off!