Dunluce Castle
-
Posts
1,048 -
Joined
-
Last visited
-
Days Won
2
Content Type
Profiles
Forums
Events
Gallery
Blogs
Everything posted by Dunluce Castle
-
I know, I'm the same, I've thought about using them for a Y class (Jinty repaint) as they should be the right size for that.
-
Railtec only sell NCC tender locomotive letters, they have coach transfers but they are over scale.
-
Thank you Murrayec for that, I will get a chance to read it properly very soon, it looks very interesting. Thank you Cg-Antrim, the transfers for the "LMS" were HMRS wagon transfers and for the "NCC" it was also HMRS but private owner lettering, but it's not worth it, I've already run out of "C"s as they only provide 4 "C"s in the sheet, the rest of the sheet is just the rest of the alphabet, so I may need to find someone who does custom transfers.
-
Thank you everyone for your kind words, much appreciated, thank you. Yes please murrayec, it would be interesting to see what's needed.
-
Glenderg posted my video there, but as you say it's not enough to work from, sorry.
-
It's coming along very nicely, I've got a video that shows roof detail, will that do?
-
Brilliant storage boxes David, all so neat and tidy, great idea.
-
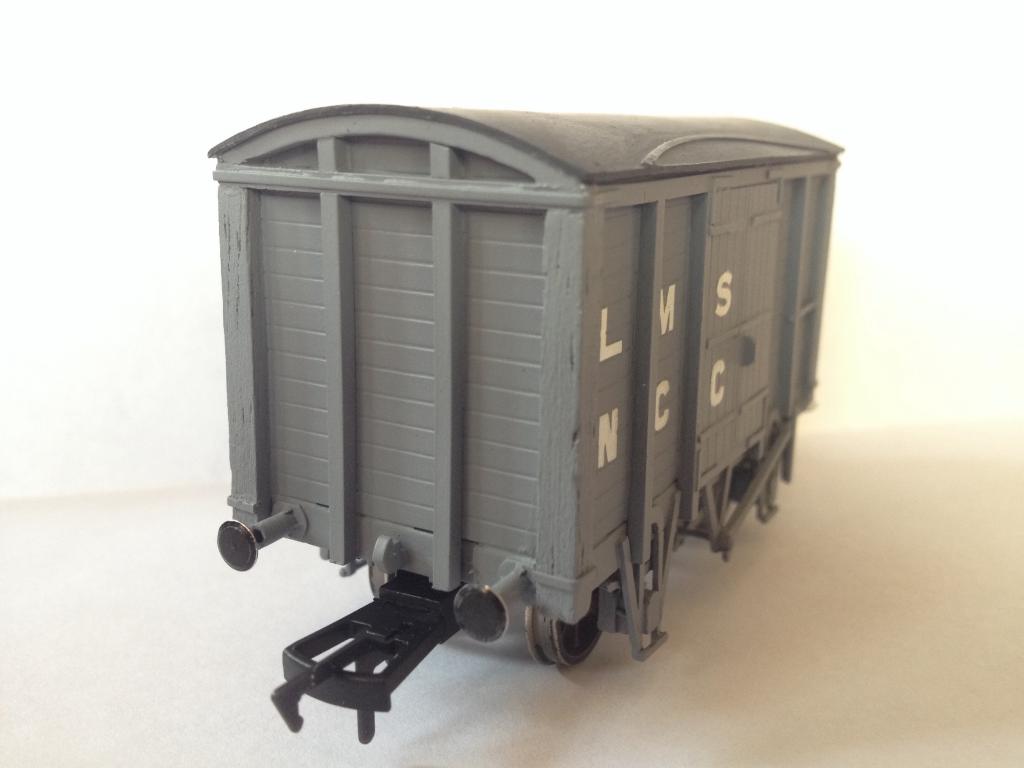
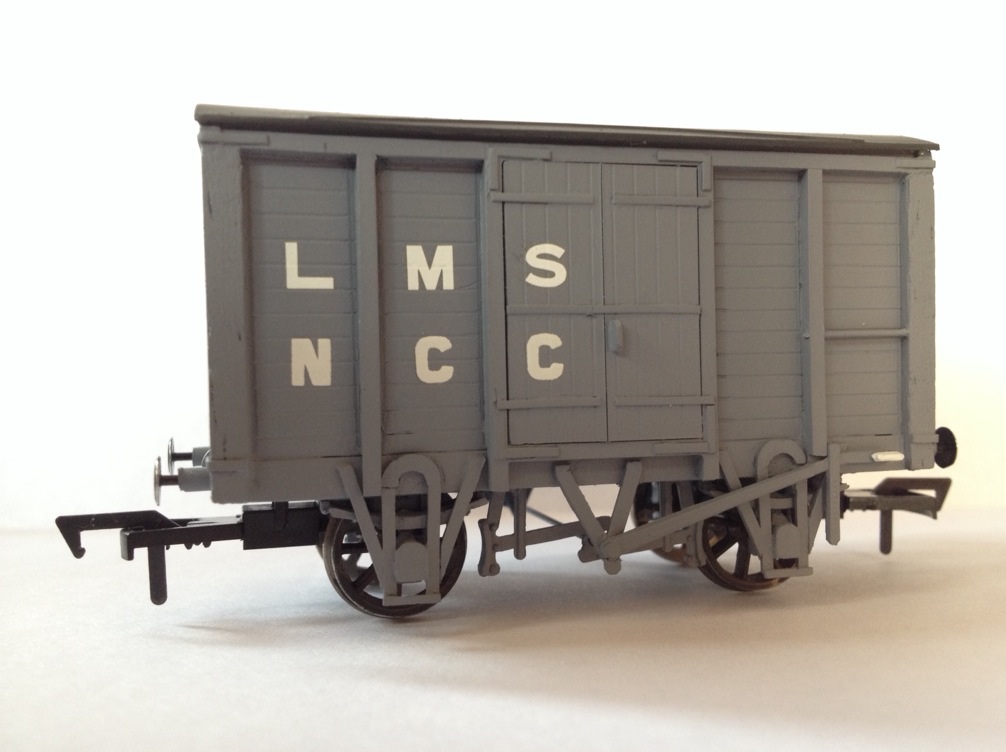
Hello everyone, Here she is completely finished, I've decided to keep her in ex works condition as I love the uniform look of the grey. Many thanks for all your support, Nelson

-
Thank you David for your comment and kind words, I must say I've never thought about making a resin casting, it's certainly a good idea and I must re-search into it, thank you. Thank you scahalane The van is so nearly complete, just final touches and transfers then she'll be finished.
-
Please don't feel like that Stevie, everyone can do it, just takes time.
-
Certainly cg-Antrim after I come home from the club
-
Thanks glenderg,
-
Thank you Hunslet I've decided in the end to have her as ex works, and not weather her, I love the grey that she's in.
-
Thank you murrayec, I'm thinking of building a few more seeing as these were common in NCC days, I'm now not sure to weather her or not?
-
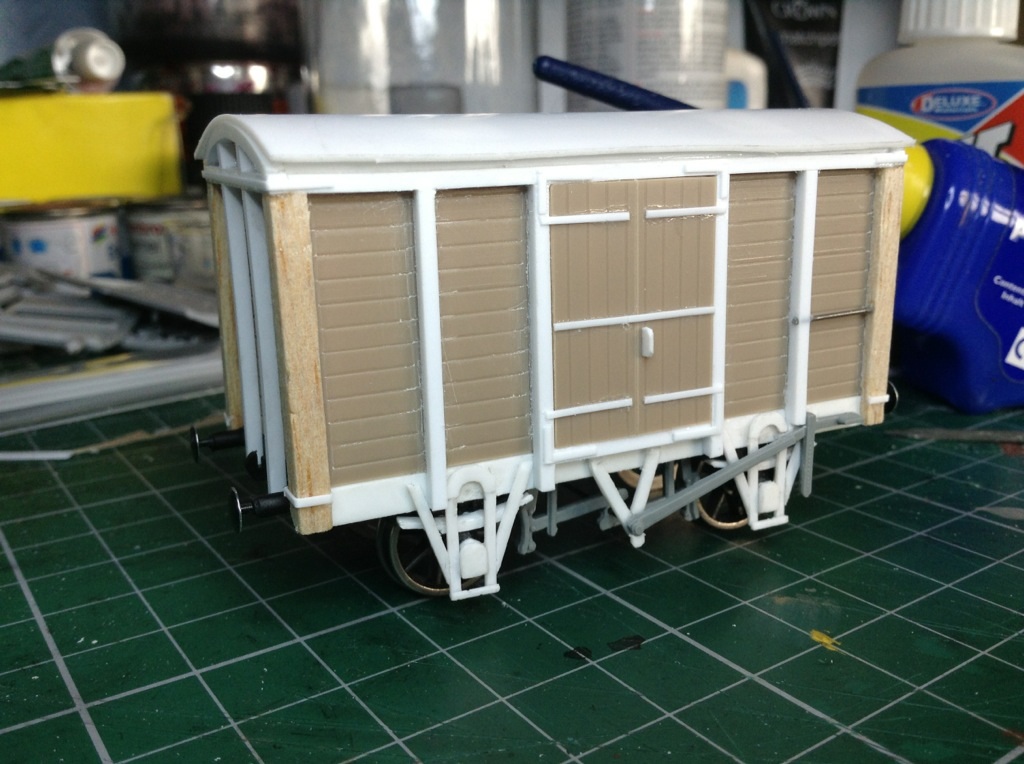
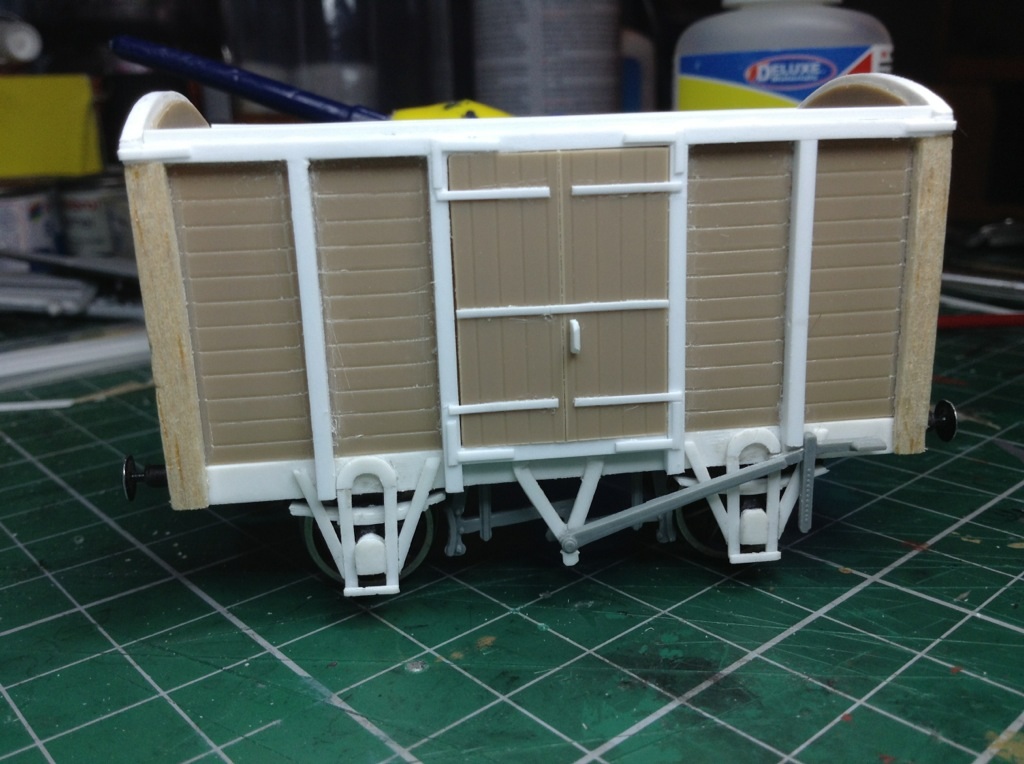
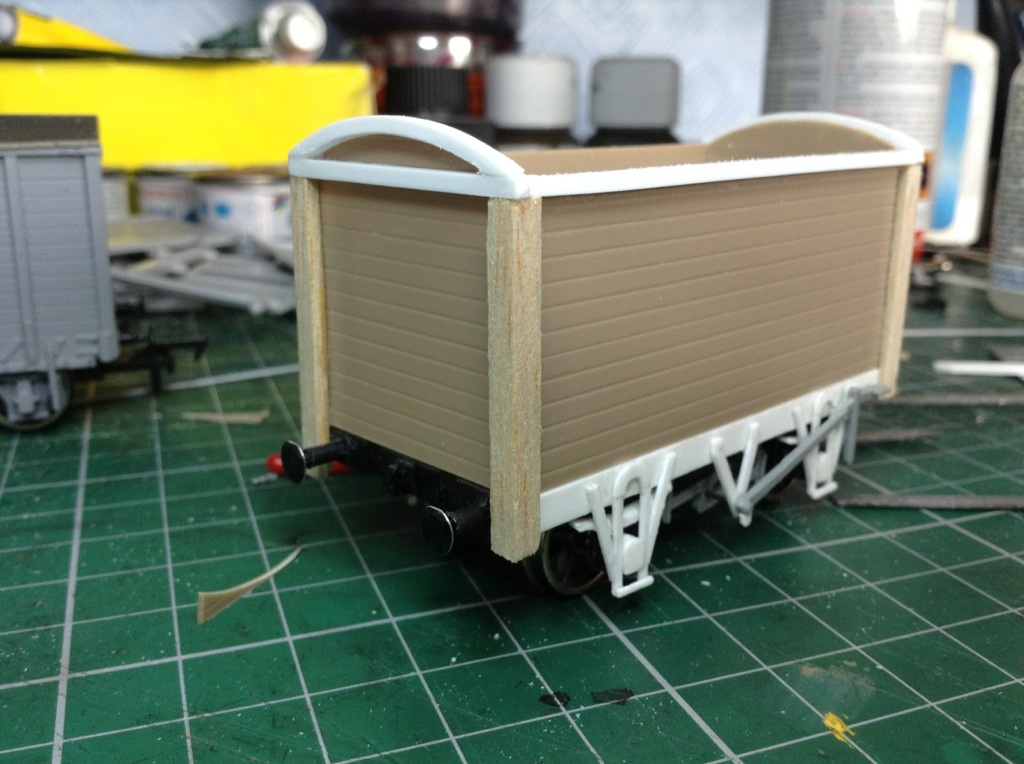
Complete and ready for painting, ignore the roof, it isn't stuck down yet, I'll do that after painting. Note the handrail on the right hand side, a nice small feature. Thanks Nelson
-
Thanks cg-Antrim And yes glenderg, the axeboxe covers from 30tho sheet cut out and filed, the outside W irons from individual strips cut out from a sheet of 20tho plasticard and the springs, 4 layers of 10tho plasticard. A very timly process but I hope you can agree that they look rather good, the hard bit was the half circle on the solebars, this was carefully cut out then filed to the correct shape x4. Nelson
-
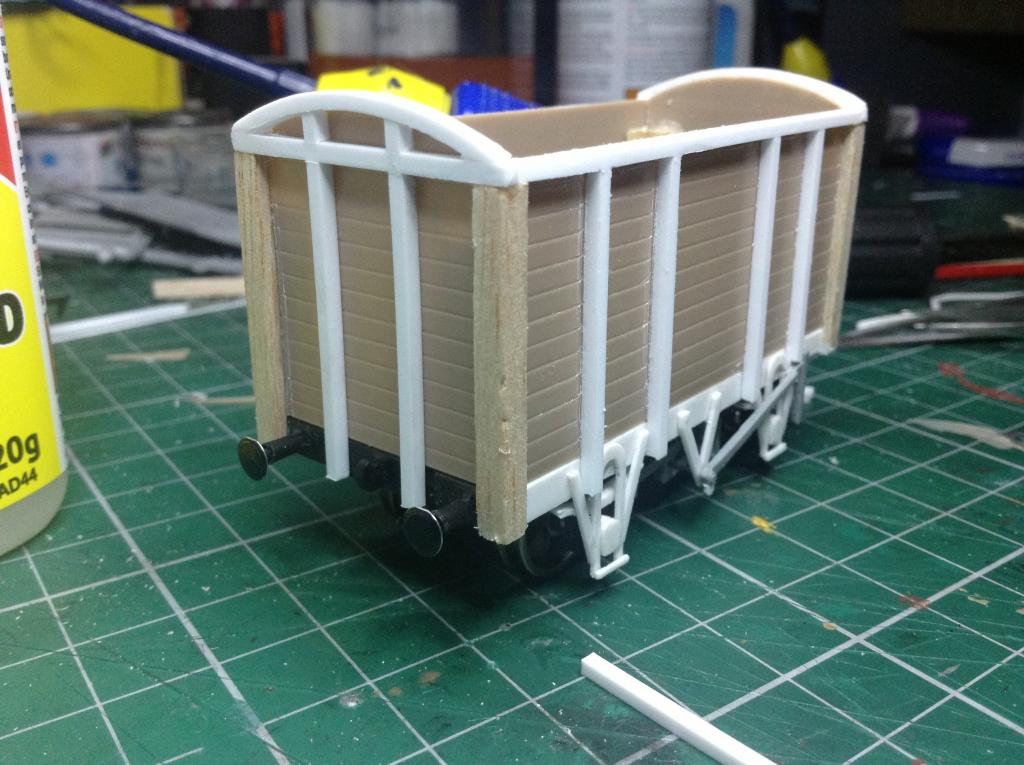
Hello everyone, Today saw the van getting its door and roof made, small details such as the door handles and straps were also put on the van. Sorry about the poor lighting in the pics, I'll tidy the van tomorrow and get it ready for the paint shop. Many thanks Nelson
-
That NCC carriage is beautiful, the rover damask red is a great colour, must get some for myself. A LMS crest in the middle would finish her off. best-laid schemes of mice and men ... Never always go to plan (I think, read the book last year lol)
-
Thank you Kirley
-
Further progress today, I'm a slow modeller... Nelson
-
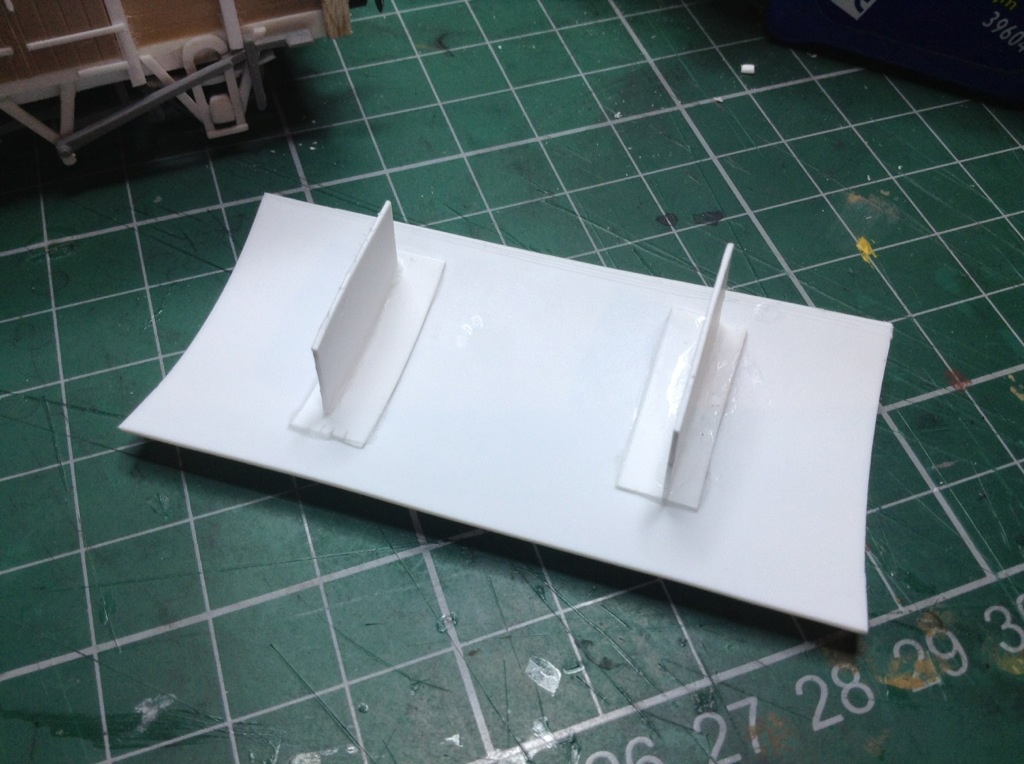
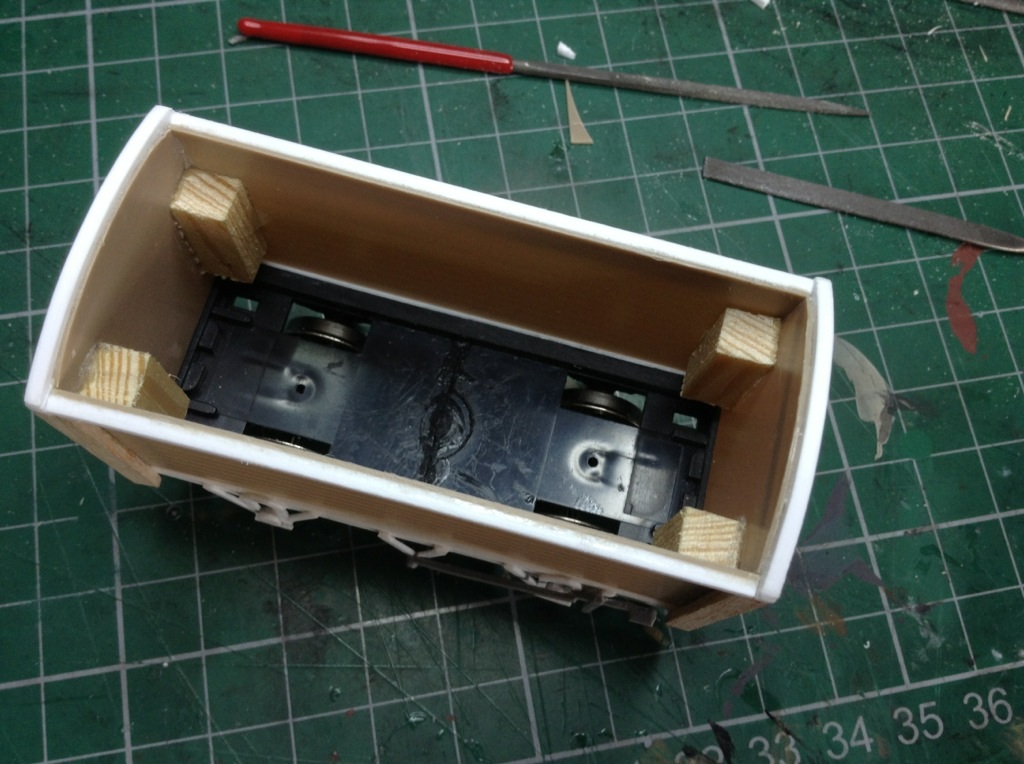
Hello everyone, Sorry I haven't made an update sooner, I've been very busy with the club and it's Easter running specials, but here we are, I've cut out the 4 sides, made the corner supports out of balsa wood, these have yet to be shortened down, and others you can see in the pics below, the body fits onto the chassis perfectly, next is to do the door on the side and more supports/frames on the ends and sides. Inside Many thanks Nelson
-
I ain't too keen on the finish that 3d printing gives, sometimes it can be very hard to make it look right.
-
It's the future of model railways, but I don't seem to keen on the idea.
-
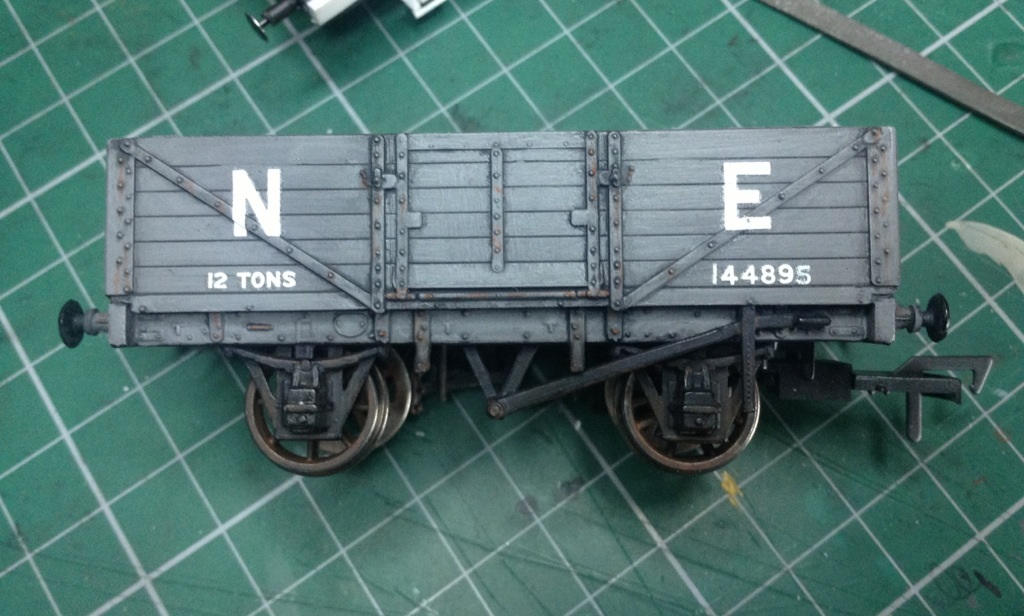
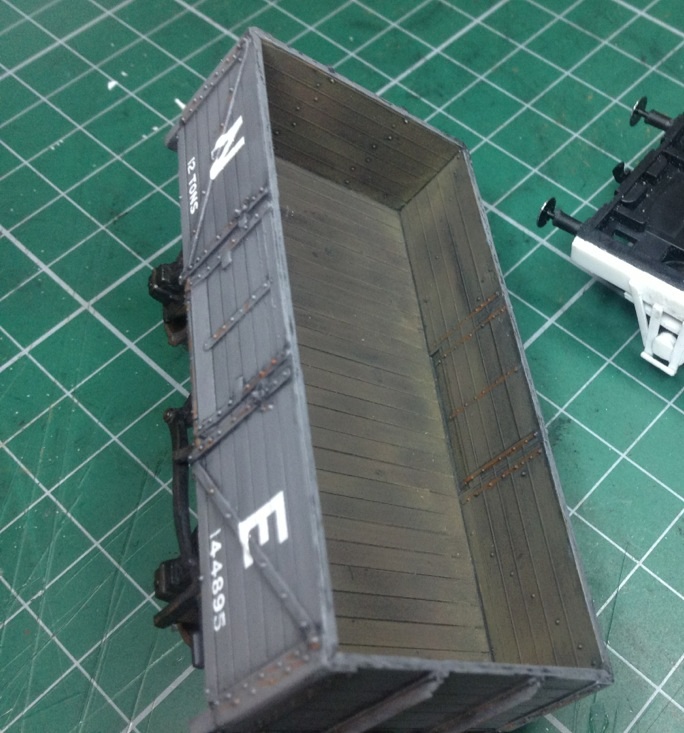
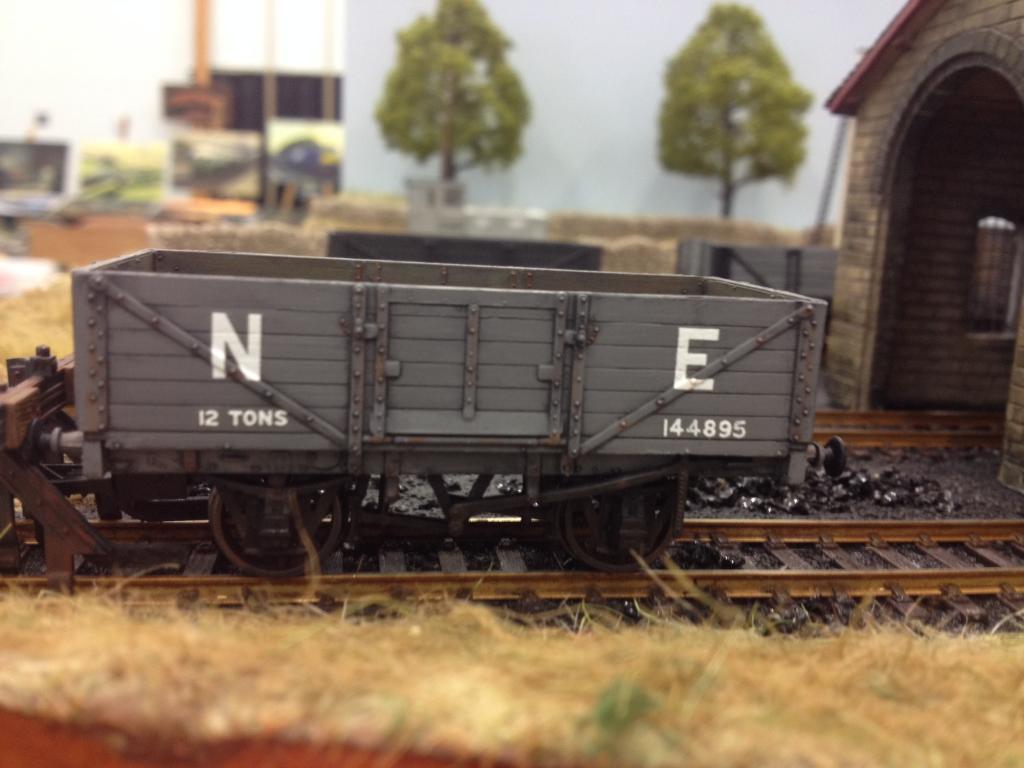
Hello folks, I've taken some pics of my LNER wagon, it was a very nice build and I'm quite proud of her. You may notice that one coupling is missing, reason for this is that it came off during an exhibition but I got it fixed now. Many thanks Nelson
-
Captures the look brilliantly, nice one.