gibbo675 Posted July 6, 2024 Posted July 6, 2024 Hi Folks, I have three other threads ongoing at the moment and I have decided that I should perhaps bring all things into one ongoing workbench thread. One of the reasons for this is that I do tend to chop and change with projects because the next one is always more interesting than the one that I'm working on and all the others that end up in the "nearly started box". I also tend to have several things on the go all at once. The three threads will be left as they are and will run until the projects are complete so that make it easier to search the source material. At the moment I am working on: NBL type 4 class 41 Ten Scalecraft Roadrailers NCC W class NCC WT class GNRI V class GNRI coach conversions Three unfinished cranes Seven Motorail flats to alter for I built them wrong because I can't count. A BR West Coast Main Line set around 1973 layout that is wired up and works with no scenery, (scenery isn't really my thing it like doing the garden in model form). A dock yard layout with some scenery but no dock as yet, (I haven't cut the hole in the board yet) Miscellaneous refurbishments, paintjobs and transfers to apply. I shall start the thread off with the work I did last evening in starting the GNRI coach conversion project. I was supplied a great set various drawings of Irish stock by @Hadren Railway of which there were drawings of GNRI coaches included. These coaches are similar in profile and window dimension to those built by the LMS and with alteration and quite some amount of cutting and shutting I should be able to build reasonable representations of the GNRI coaches. The first coach is a First-Third Composite, there is a little cheat with this coach as I decided that the cutting a shutting wasn't really worth it for the sake of what difference it made so the the window spacing between two windows isn't quite as it should be but only noticeable if you look closely. The GNRI coach is 58' over headstocks making it a two feet shorter than a comparative LMS coach that were 60' long. The Hornby Staniers are too short anyway and there is only so much you can do in life. The Airfix coaches may be a better bet if you wish for better accuracy and the scheme of the conversion will be applicable to those coaches with minor alterations. This is a really easy conversion in that all that is required is to disassemble the coach, cut two extra windows in the vestibules opposite the toilet to the same position dimensions as the toilet windows, and then file the corners of the windows square. The only thing that is required will be to alter the glazing as a bar is required across the top of the windows that have been cut in and also there are some part numbers moulded into the glazing in the area of one of the new windows. The next coach to be attempted is a Brake First for which I am using the first class section of am LMS composite spliced into an LMS brake third. The first job is to cut the ends from the sides using a razor saw, the next job is to carefully score along just under the gutter of the roof until the side comes away from the roof so that you are left with just the sides as a flat section. The sides cut from the coaches, top is the side form a composite and bottom left is the first class section form a composite and bottom right is a section from the brake third. The section that is at an angle is the off cut from the brake section. The composite side piece was used a s guide for the length of the new section. I glued the sections together making sure that they were of the correct length and when cured I then cut out the double doors replacing them with a piece of .040" plasticard cut to 25mm X 23.5mm. That was glued into the gap left to represent the inset doors of the van, I set the pieces up against a straight edge on a flat surface when gluing them together. When fixing the inset doors I used scrap bits of plasticard to shim underneath to make up for the thickness of inset doors and also a piece of .060" Plastruct square section to space the bottom of the inset doors so that they do not foul the frames when the coach is rebuilt. One thing that is slowing me down is that I only know what this side of the coach looks like with regard the arrangement of the doors and windows. Is any one able to let me know if the arrangement is mirrored or different ? Gibbo. 6 1
LNERW1 Posted July 6, 2024 Posted July 6, 2024 Looks brilliant, I also have a dock layout with no actual water yet, as I can’t find a way to incorporate it, but at the same time stopping the scenic break, a road bridge, from just running straight into the water. You seem to enjoy slicing up RTR British models and turning them into Irish ones, good luck with all your projects! 1
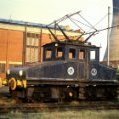
gibbo675 Posted July 6, 2024 Author Posted July 6, 2024 Hi Folks, The coach sides were filed straight and flat along the top edge as was the underside of the coach roof under the gutter. The sides were checked for fit and some .010" strips were glued to the coach ends to make up for the razor saw cut. So long as all is straight and flat gluing is not too difficult although I did use some elastic bands to hold the ends in place making sure that the bands were in line with the coach ends so that they did not collapse the sides in. Checking the roof. Checking the sides. The first of the sides glued in place with the second ready to fit. The second side ready for a dry run and the .010" make up strips glued onto the coach ends to make up for the saw cuts. Note the filled in door and toilet windows from when the side was an LMS brake third and the inset doors of the van. A Dublin to Belfast express headed by a GNRI V class compound leans into the curve on the 4' 1.5" gauge concrete sleepered track with is GNRI coaches in tow. It was all going to fast for the painters to catch it ! Gibbo. 8 2
gibbo675 Posted July 10, 2024 Author Posted July 10, 2024 Hi Folks, Here is my latest eBay haul that will be cut and shut into various GNRI, NCC and CIE coaches. Not bad for less that £8.00 each delivered. Gibbo. 7
gibbo675 Posted July 10, 2024 Author Posted July 10, 2024 Hi Folks, Four hours later: Cut down the ends of the coaches with a razor saw. Scribe several times under the gutter and carefully remove sides. I'm now ready to cut and shut sixteen coach sides into at least seven coaches, should things work out well a possible eight. One thing that has crossed my mind is that I've got some old Mk2's that are surplus and I've been looking at class 70 and class 80 railcars, lets see where this ends up. In other news I have been altering my cocked up Motorail wagons and I have done one side of all seven of them This shews a part altered wagon with every other stanchion removed and replaced with the extra two stanchions that i missed counting put into place hence the irregular pattern. This shews one that is half way complete in altered state, it now has fourteen stanchions on the side nearest, instead of the incorrect twelve, the side furthest which I had originally fitted because I can't count ! Gibbo. 2
gibbo675 Posted July 11, 2024 Author Posted July 11, 2024 Hi Folks, I have so far cut and shut a GNRI corridor first and a GSR corridor third. Top is the GNRI corridor firsts from the first class ends of the LMS composite with the left over brake van doors from the brake first built last week. The narrow toilet and corridor windows need to be cut into the left hand ends as seen above. Bottom is the GSR corridor third made from the third class ends of the LMS brake thirds. The corridor side is cut four windows to the left and three windows to the right with a piece cut from double van doors of the LMS brake coach and the compartment side is cut four and four windows with one blanked off with a piece of .060" plasticard so that the toilet windows may be cut in once the glue is cured. I shall have to get around to drawing diagrams for where and how the sections and cuts are to be placed. Gibbo. 4
gibbo675 Posted July 12, 2024 Author Posted July 12, 2024 Hi Folks, I can't be bothered with the Motorail flats at the moment so I'm carrying on with coaches, some micro-strip arrived in the post today so I shall be able to carry on with the locomotives on my other threads sometime soon also. The GNRI open third is coming on and to begin with I filled in every other window aperture with .060" plasticard, the doors were marked out by finding the centre of the infill piece of one door and laying a spare section with a door over it and drawing round the inside of it with a pencil. The door window was cut and filed out to size and then using this as a template I lined the large windows up with the opposite section for all of the doors. When that side was fully marked I used the first door window to repeat the templating on the original side. I repeated the templating process with the small windows either side of the doors in the same way. By doing this I only have to mark out from scratch one set of windows the rest are then templated. I shall use this set of coach sides to mark out for the open brake third as the passenger end is to the same pattern. The open third shewing all of the door windows and the first pairs of small windows. The GSW corridor third after incorrectly filing out the corners of the windows. I picked up the wrong coach side thinking it was one of the GMRI corridor firsts sides. The squared off corners had .060" square rod glued into them which were then filed off flush before having the radii replaced by filing. The only good thing is that I have the opportunity to display the repair technique. The finished GNRI open third and the GSR corridor third, shewing its completed repairs along side the GNRI open third brake. The GNRI open brake third will be templated from the open third which will save a lot of marking out. The white strip bottom left is because I filed too much out of the toilet window so I filed a little more and filleted a .040" make up piece. Gibbo. 2
gibbo675 Posted July 13, 2024 Author Posted July 13, 2024 Hi Folks, Here is what I've been up to today. I've finished the open third and the the open brake third as well as making up a UTA dining car number 87. As the two GNRI coaches and the UTA dining cars were 60' long I made them slightly longer by cutting the roof section and the frames and slicing some extra length to set them apart form the 58' coaches. As the 58' coaches are a slight short so are the 60' coaches so that they look in proportion to each other without making far too much work. The roof sections had the side glued into them before making up the gap that way they match the length of the side more accurately. Thr undersides of the gutters had any flashes scraped off and then they were filed flat. The top edges of the side were rubbed on some sand paper over a flat surface to make the top edge straight and flat. Sanding the top edge of one of the sides. The roof was reinforced by way of .040" strips cut about 15mm long and 2mm wide mostly made up from scraps. The roof will be made up later where the strips are currently seen. Shewing the strips from both the top and underside. The frames were cut about the centreline and joined with a piece of.060" plasticard 35mm X 18mm bridging the gap. While the glue was tacky I set the length to suit the sides and set them against a straight edge before fitting in another piece of .060" plasticard to fill in the gap with two 3mm tall pieces to make up the sole bars. Top shews the stretcher and bottom the infill pieces. The foot board were removed by scribing along them and shearing them off by carefully bending them with pliers. This is the state of play so far. GNRI L14 open brake third. GNRI K15 open third. GSR Bredin corridor third. GNRI F16 corridor composite. UTA dining car No. 87 GNRI C2 corridor first. GNRI D5 Corridor brake first. GNRI V class with seven on. Gibbo. 6 1
gibbo675 Posted July 13, 2024 Author Posted July 13, 2024 Hi Folks, I forgot to mention in the above post, does anyone have photographs or diagrams of either a GNRI B6 or B8 buffet cars ? I have only got photographs of one side of each so far and that is only the half of it ! Gibbo.
gibbo675 Posted July 15, 2024 Author Posted July 15, 2024 Yo Dudes, I've run out of Hornby coaches to cut and shut and its not the day for steam locomotives on the other threads so here is my latest project. Is anyone able to identify what it will be when is finished ? Gibbo. 1
StevieB Posted July 15, 2024 Posted July 15, 2024 (edited) AEC/ Park Royal railcar I believe. What are you going to use as the power unit, Hornby GWR railcar? Stephen Edited July 15, 2024 by StevieB 1
gibbo675 Posted July 16, 2024 Author Posted July 16, 2024 19 hours ago, StevieB said: AEC/ Park Royal railcar I believe. What are you going to use as the power unit, Hornby GWR railcar? Stephen Winner Winner Chicken Dinner ! I have some Lima class 73 chassis that I got lucky with on eBay and will use one of them with altered side frames to the bogies. The unpowered coach will utilise the frames and bogies of one of the left over Hornby coach frames and bogies from the above cut and shuts. All to be revealed in good time. Gibbo.
gibbo675 Posted July 16, 2024 Author Posted July 16, 2024 Hi Folks, I've been working on the AEC railcars today and I have built up two sides completely and mostly done the other two sides. I was called down from the loft for dinner and was also informed that Fiona is a "Loft Widow" so the important work of toy train building had to stop for the evening. After getting four coach sides cut and filed to shape as the above post, I set about making up the inner laminations that also form the underframes these are cut from .040" plasticard 37mm X 250mm with the reliefs with reliefs for the bogies. After the reliefs were cut I marked out a line 4mm above the base of the sole bar and laid the coach sides over the underframes I drew around the insides of the windows so that I could cut reliefs leaving just the window pillars. This shews the datum lines and the windows and how I cut just in from and under the windows by about 1mm, this will leave a landing to fit glazing. This shews how the window pillars line up with the coach sides. The next job was to file a tumblehome onto the lower section of the coach sides, I did this in pairs so that I ended up with two of each. the sides were lined up along the edge of my mitre box stood on its side and the tumblehome curve was filed onto the lower 5mm with the bottom edge almost feathered out to nothing. The coach side set up ready to both file the tumblehome and the corners of the windows. The sides were checked for fit and that each side was mirrored as pairs before gluing into place. I used Humbrol liquid poly for this by running a generous amount above the datum line before positioning and checking dimensions from the lower edge of the sole bar, this dimension is 4mm. The tumble home is just apparent on this photograph, the extra sticking out at the front end will be cut back as I build the cab although the full length will be required at the sole bar level as it projects in front of the coach work of the cabs. Its all going well so far and the cabs will be fun as there are complex curves and subtle angles to deal with. Gibbo. 5 2
gibbo675 Posted August 3, 2024 Author Posted August 3, 2024 Hi Folks, I'm back from my holidays, on with the toy trains. This post concerns the cabs and the roof details. The front end was fitted up with a .060" former placed at gutter height over the cab, this gave form to the profile of the front of the cab. Then four pieces of .040" plasticard cut and fitted in, as the cab front is angled in four axis each piece was slightly trapezoidal instead of what may be thought top be square, The pieces were cut slightly oversize and square and cut and filed to fit first doing the bottom pair one side at once and then fitting the opposite piece to it once the first piece was secure and squared up. The former over the cab roof with the four pieces that make up the cab front. Once this was done I glued strips of .040" to the underside of the roof to a position just behind where the radius of cab roof dome would run into the level of the roof line. I then scored the former over the cab roof before applying Milliput filler to the approximate shape of the cab roof dome. The next step was to cut some .030" strips 9mm X 38mm which were formed to shape and glued into place over the strips on the under side of the roof. Once these had cured I then cut some .020" strips 9mm X 40mm to make up the full thickness of the roof. I then made up the roof dome with Humbrol filler, I also applied some to the front of the cab under the windows to allow a rounded profile. Cab roof dome both before and after filler. The make up strips for the roof, this is because the units are longer than the Hornby Stanier coaches that I used for the roof sections. The extended side sheets had a .020" shim fitted ahead of the cab doors as I had cut the outer skin of the body flush with the edge of the cab doors. In hindsight I would have extended it as I did the inner lamination piece. Once cured the extended side sheets were cut back flush with the front of the cab fronts and then filed to a suitable radius. After the filler had hardened I filed the whole into shape making sure that the roof profile met the sides at gutter height squarely and then cut and filed out the windows. the next job was to fit the gutters. For the gutters I used .040" square rod as this is slightly larger than required and allows for the gutter to be filed to size and squared up if necessary. The gutters were attached with cyanacrylate glue as it was attached to the Milliput. Shewing one cab roof dome basically to shape and one as rough filler also the areas of filler to allow for a radiused instead of angular lower cab front. The near cab gutter is .040" as fitted the far one has been filed to shape and thickness. The roof vents were made from .040" plasticard cut into 2mm wide strips then further cut to 4mm long. I marked out the roof in pencil and fitted the ones at each end making sure that they were in line using a steel rule. Once cured it is a simple task to place a dab of glue into each position, fit the vents and then using the end two vents as datum aligning all the newly applied vents to the edge of the steel rule. Roof vent being lined up against the steel rule. Once all of the vent were cured I cut 30* angles off all four corners and then filed and sanded them to shape. The last job was to fit the maker lights and tail lamps form plastic rod. The shaping of the roof vents is not obvious in this shot however they are pretty much in line which is the main thing. I then scribed radiators into the underframe valances and fitted up .030" X .010" and .020" X .010" framings around the scribed areas but I omitted to photograph them so you will have to wait for that picture. The intermediate trailer car for this set is one of the K15 open thirds, complaints will be explained away by telling you that I have two of these so that is what it will be ! I fitted, roof vents, door handles and grab rails to this coach at the same time as to the units. All have so far been primed with Halfords white primer followed by two coats of Ford Ivory White, again from Halfords. I have some have some Skoda Pacific Blue to compliment it so we will see what that looks like once the ivory is hard enough to take masking tape in a few days. Gibbo. 3
gibbo675 Posted August 3, 2024 Author Posted August 3, 2024 Hi Folks, I'm still back form my holidays and still on with the toy trains. This post concerns the roofs of the coaches generally and the gap in the roofs of the coaches that were lengthened. The roofs of the Hornby Staniers have great thick beads on them so they have to be cut off also the roof vents are in the main of the wrong type and in the wrong positions. I use a Swann Morton No. 10 to cut off the beads and the vents almost flush and then I scrape off the paint which pretty much removes the residual of the beads and vents before filing locally and sanding generally. An awful job and rather boring when there ten roofs to do. Two in the back ground done, one with vents removed and one with vents and beads removed having the paint scraped off. Using the underside of the No.10 blade to scrape off the paint and high spots. The coaches that were lengthend had strips of .030" and .020" plasticard fitted over the joining strips in the roofs. These were 38mm for the bottom one and 40mm for the top one, the width was suited individually. They were curved into shape before fitting and once cured the ends were filed flush with the sides of the coach and filed to match the roof profile where proud. Where they are low they will be filled and sanded later. A .040" square rod is used to make up the gutter which is later filed to match the profile of the the original gutter. Shewing the make up pieces and gutter, a small amount of filler will be required for this one as it is slightly low in places. Gibbo. 2 1
gibbo675 Posted August 4, 2024 Author Posted August 4, 2024 Yo Dudes, Here are the photographs of the radiator details on the underframe valances that I didn't take yesterday. The photographs also shew the shade of the Ford Ivory White that I am using for the GNRI Blue and cream livery, we will get a better idea once the Skoda Pacific Blue is applied. Radiator details scribed into place and outlined with micro-strip framings. Something I forgot to mention was that the outlines of doors were scribed in at the same time. Progress so far with the K15 open third within the train. Gibbo. 4 1
gibbo675 Posted August 4, 2024 Author Posted August 4, 2024 Hi Folks, I've been looking the the above photograph of the front end and I've decided that the windows are too high and make the cab front look too tall. Despite the shiny new paint I have taken the decision to reduce the size of the windows by about .035" which ought to change the appearance of the cab front's aspect ratio from tall to wide. The one on the left has had fillets glued in place and the one on the right is as yet unaltered. Having built DMU cab fronts before I know that sizes and shapes are rather subtle and that very small changes make huge differences in the appearance of the finished article. A bit of filing and a squirt of paint should make all the difference in time. Gibbo. 2
gibbo675 Posted August 5, 2024 Author Posted August 5, 2024 Hi Folks, I've now altered the cab front windows and I'm much happier with how they now look. The model captures far better the look of the prototype. The windows have had fillets fitted into their tops and outside edges and when filed back .030"-.035" is left at the top and .045"-.050" is left at the sides. I may apply a little more filler as the cab fronts are not as smooth as I would like. Gibbo. 2 1
gibbo675 Posted August 9, 2024 Author Posted August 9, 2024 Hi Chaps, A spot of painting today, the colours I used were Ford Ivory White and Skoda Pacific Blue. The blue is perhaps a tad dark but it will have to do as first its all I had and second its done now ! Gibbo. 11
gibbo675 Posted August 19, 2024 Author Posted August 19, 2024 HI Folks, I'm back from my holidays and have already got right on with GNRI coaches. I received a couple more Hornby Stanier coaches, a brake and a composite one of which has just been converted into a B6 buffet car. Corridor side of B6 buffet car. Kitchen side of B6 buffet car. There are some windows to blank off and resize on the kitchen side along with filing the corners of the windows square and then I shall paint them to match the rest of the GNRI coaches. I have arrived home to some spray paints one of the colours was RAL 8023 orange brown which I decided was a god colour to use as the scumble teak of the GNRI coaching stock. Interestingly one of the Hornby Staniers was painted in the black and tan and the RAL 8023 was almost an exact match to the repainted Hornby coach. Was the scumble teak shade of brown the same as the black and tan orange ? GNRI coaches in scumble teak livery. Not the best photograph as it is a little over exposed for some reason, the colour is darker than it seems in this picture. Gibbo. 2
gibbo675 Posted August 22, 2024 Author Posted August 22, 2024 (edited) Yo Dudes, I've been applying transfers to the AEC railcar and the GNRI coaches. The AEC railcar has had its roof painted and been photographed but as yet the coaches are not finished as the roofs require second coat and the ends require to be painted black and as such not photographs as yet. The units require buffers glazing and cosmetic bogie side on the powered car as they are Lima class 73 bogies. The transfers are from Railtec, there were plenty of other numbers and GNR legends and crests which were used for the GNRI coaches. AEC railcar 601 with intermediate K15 trailer 186and out of shot 618 at the other end. Gibbo. Edited August 22, 2024 by gibbo675 Adding detail about the transfers 3
gibbo675 Posted August 24, 2024 Author Posted August 24, 2024 Hi Folks, Here is the first of the FGNRI coaches, it is the F16 corridor composite and it the first because it is the coach with the least amount of modification. F16 corridor composite number 89 in G~NRI scumble teak livery. Five more to come sometime soon. Gibbo. 2
LNERW1 Posted August 24, 2024 Posted August 24, 2024 (edited) Scumble has to be one of the greatest words of all time. Gibbo, you’re literally magic. That’s incredible. I am struggling to work out how that’s possible, wow. Edited August 24, 2024 by LNERW1 1
gibbo675 Posted August 24, 2024 Author Posted August 24, 2024 1 hour ago, LNERW1 said: Scumble has to be one of the greatest words of all time. Gibbo, you’re literally magic. That’s incredible. I am struggling to work out how that’s possible, wow. Hi @LNERW1, That's easy, although I don't like to brag because I'm really quite a scumble chap at heart. To be fair the title of the thread is how I do it, think about it and then have a go and see where it ends up. If the worst happens all that is to be done is that I have to alter it and do it again, its only bits of plastic toy trains. Gibbo. 3
gibbo675 Posted August 25, 2024 Author Posted August 25, 2024 Hi Folks, Here are the GNRI coaches all painted up, W class 91 heading the Enterparise, the Class V was still in the works. Open brake third L14, 175 Open third K15, 98 Corridor composite F16, 89 Buffet Car B6, 88 Corridor first C2, 217 Corridor brake first D5, 231 Gibbo. 5 1
Galteemore Posted August 26, 2024 Posted August 26, 2024 (edited) Gibbo - don’t want to disrupt @Patrick Davey thread so posting here:my six penny worth on GNR coaches. I have mine as a backdrop in my layout - just resin sides basically. But fully loaded with handrails etc to give the right illusion! Base coat of Matt brown. Light coat of orange. Top coat of streaky Phoenix paints mahogany….colour based on photos of the old stock used on the lNW lines west of Dundalk. Edited August 26, 2024 by Galteemore 9 1
gibbo675 Posted August 27, 2024 Author Posted August 27, 2024 20 hours ago, Galteemore said: Gibbo - don’t want to disrupt @Patrick Davey thread so posting here:my six penny worth on GNR coaches. I have mine as a backdrop in my layout - just resin sides basically. But fully loaded with handrails etc to give the right illusion! Base coat of Matt brown. Light coat of orange. Top coat of streaky Phoenix paints mahogany….colour based on photos of the old stock used on the lNW lines west of Dundalk. Hi There, I think that there may be a way to tone my coaches down a bit and make them appear a little more red and a little less orange by some sort of weathering process as you suggest. Cheers. Gibbo.
gibbo675 Posted September 3, 2024 Author Posted September 3, 2024 Hi Chaps, It's been sunny today so I've been applying spray paint to my LMS/BR postal coaches, all ten of them. I first use Halfords grey primer and then a coat of RAL 7038 agate grey which is good for BR Rail Grey, I use gloss so that the transfers don't silver which is always useful. For BR Rail Blue I use RAL 5020 ocean blue. Gibbo's outdoor spray booth with the postal coaches and the GNRI V class in undercoat. if you look closely there is a bit of overspray on the top of the wall which Fiona will moan about because it won't wash off in the rain, which is more usual in these parts than sunshine. I'm more bothered about the loose render but Fiona doesn't seem to have noticed that minor detail ! The question I require answered from you lot is, what shade of BLUE for the V class ? Gibbo. 3
Galteemore Posted September 3, 2024 Posted September 3, 2024 (edited) Ford Wedgwood Blue is cited by at least one source. Image courtesy Scooby’s Paints Edited September 3, 2024 by Galteemore 1 1
murrayec Posted September 3, 2024 Posted September 3, 2024 1 hour ago, gibbo675 said: ......The question I require answered from you lot is, what shade of BLUE for the V class ?..... Gibbo. Use Railmatch Caledonian blue for the original blue. Use Humbrol No 48 Mediterranean Blue, Humbrol No. 109 matt WW1 blue, or Ford Wedgewood blue, for the later repainted blue. Eoin 1 1 2
gibbo675 Posted September 4, 2024 Author Posted September 4, 2024 (edited) Hi Folks, Thanks for the information Eoin @murrayec, and @Galteemore I shall get on and paint the V class as soon as reasonable. Gibbo. Edited September 4, 2024 by gibbo675 adding a name
gibbo675 Posted September 6, 2024 Author Posted September 6, 2024 Hi Chaps, I've fitted glazing to the AEC railcar the power units have had 12mm by suitably long pieces fitted into the recesses created by the body structure. The lengths of the windows were measured as I was cutting them to ensure a snug fit with the large windows being 19mm long and the door windows bein approximately 9mm and the shorter windows about 12mm. Once I had cut and fitted windows for each side I used PVA glue to secure them into place as this is easy to do with a small fine paint brush and also that should any glue get onto the window it may be removed and wiped clean and the refitted. Any small amount of over application dries clear in any case and is difficult to see. The cab front windows were squares cut approximately 14mm X 14mm and held in with a good fillet of glue. Side windows fitted and glued into place. Cab front windows fitted and glued into place. This shows the AEC Railcar as far as I shall take it. Thomas will have to fit his own buffers as I don't have any suitable and I have run out of time to sort any out although I have drilled out pilot holes for them. The windows for the centre car were done in the same way as the GNRI coaches utilising the Hornby glazing that came with the original LMS coaches. Unfortunately I didn't have time to fit the top lights to the power cars, my plan was to use strips of Tamiya masking tape as the colour is very close to that of the cream colour. The bogies were similarly glued into position using PVA glue so that if Thomas wishes to fit seating the glue may be easily cracked off to remove them however it will give a strong enough hold to be handleably robust. Gibbo, 3
gibbo675 Posted September 16, 2024 Author Posted September 16, 2024 Hi Folks, With the exception of the GNRI V class all of the Irish stock is now in Sligo with its new owner. He took two of the coaches unpainted and he says that he thinks he will finish them in CIE green. I especially wished to finish the V class so I shall send that on by post another day. Today's work has been undercoat for the underframes of my mail coach set and the masking off and first coat of BR Rail Blue for the coach bodies. Above shews how I marked a line on the side of the coach bodies so that the masking would go on straight. The top of the blue is 9mm from the lower edge of the body side and so I cut a piece of scrap plasticard 8.5mm to use as a guide for a pencil line when the lower edge was set upon a datum surface, I used my mitre box as it allows the ends of the coaches to overhang suitably. The pencil is a .5mm lead and so when the tape is applied so that the pencil line is just visible then the edge of the tape is at 9mm, or near enough that makes no difference, and the edge is also very straight. Gibbo. 1
gibbo675 Posted September 27, 2024 Author Posted September 27, 2024 Yo Dudes, Here is the latest from the works. The Motorail flats have been finish painted and are awaiting transfers. Once the transfers arrive I can make the name boards to suit the transfers and fix them onto the sides of the flats. I would have had to make them this way in any case as painting behind them would have been tricky so no loss painting them as they are currently. The underframe trusses and the bogies are to be painted black as yet. End loading car flat Side loading car flat. The Postal coaches, all ten of them, have had the BR Blue applied, these are also awaiting transfers. There is a little bleed on parts of some of them where the masking was not quite pressed into the corners. I shall wait until the paint has hardened so that I might carefully scrape back the paint. The roofs, corridor ends, and the underframe trusses will be painted appropriately once the transfers and lacquer are applied. Three of the ten from left to right two POS sorting vans with net recesses and a POT stowage brake van. Gibbo. 3
gibbo675 Posted September 30, 2024 Author Posted September 30, 2024 Hi Folks, I have made, fitted and painted the Motorail logo and TOPS number boards to the car flats. These were made of .020" white plasticard so that the Motorail logos would be applied to white back grounds after the paint around the edges was scraped off and the surface sanded flat. The car flats are now ready for the transfers which have arrived from Railtec, sheet 6460. That job is ongoing and photographs to follow. The name and number boards fitted into position, the upper one is as painted and the lower has been scrped and sanded ready for the transfers to be applied. Gibbo.
Recommended Posts
Create an account or sign in to comment
You need to be a member in order to leave a comment
Create an account
Sign up for a new account in our community. It's easy!
Register a new accountSign in
Already have an account? Sign in here.
Sign In Now