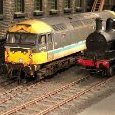
Si2020 Posted December 27, 2020 Posted December 27, 2020 (edited) Hi all, So another layout of mine that has been stalled for a good few years now and I though posting it up on here may give me the reason to get it back out and start work on it and the possible exhibition invite for October 2021. Please excuse the bad photo as its the only one i could find of it before I made a start on the track. The layout is 4ft 6 inch across and folds in two for transporting and stoage. It will be DCC with computer control to enable lunch time covers at shows and also to allow me to set it up at home and watch the trains go by. Edited September 2, 2021 by Si2020 Layout Name 2 Quote
Si2020 Posted December 29, 2020 Author Posted December 29, 2020 First task was to ake up the plain line work using the 2mmFS easi track track bases which as you may be able to make out is a sprue with two sections of base per sprue. I spent several mornaing and evenings threading the rail in to the bases after dressing he end of the rail. When you build things you find little short cuts to make things easier to do and again as you can see in the photos I first started to thread the bases on to the rail using the same side of the sprue. This reduced the amount you could thread on so I would have to keep cutting the bases off the sprue,slide the bases down and start again. One morning by accident I threaded the other side of the sprue on and found that you could put more bases on without cutting the sprue and get the bases in the correct postion. This improved the production rate and I managed to get all the track for the front made up in just over a week. 1 Quote
Si2020 Posted January 15, 2021 Author Posted January 15, 2021 Hi all, One of the issues with a round layout is you have to have curved track work which means handbuilt track work, well I didn't really have a choice as you have to build your own track work in 2mmFS. So after gluing down the templot plan I made a start gluing down the sleeper strip. Lost count how many there was to glue down. 3 1 Quote
Robert Shrives Posted January 15, 2021 Posted January 15, 2021 Lovely looking work and hours of fun to follow, thanks for update. viz sleeper strips keeping the sprue attached is key even with the jig and yes once rail tip slightly honed to give a fine end rail is easy to make. The point blades will be fun with the curve, good luck! Robert Quote
Si2020 Posted January 18, 2021 Author Posted January 18, 2021 On 15/1/2021 at 12:14 PM, Robert Shrives said: Lovely looking work and hours of fun to follow, thanks for update. viz sleeper strips keeping the sprue attached is key even with the jig and yes once rail tip slightly honed to give a fine end rail is easy to make. The point blades will be fun with the curve, good luck! Robert Thanks, I found it easy with or without the sprue attached. The key to it all is getting the end free of burrs so that the rail slides in nice and easly and dosnt slice the chairs in two. Curved point baldes are the easy bit in my eys but when my first go at point building was a 1:8 curved 2mmFs point then anything after that is easy.......isnt it?? 1 Quote
Robert Shrives Posted January 18, 2021 Posted January 18, 2021 Yes deburring rail and ensuring web is clear of debris/burr is key. I found the tiniest drop of lube oil worked wonders as well. Good to know your first point was "straight-forward." But it is a learning to swim - I had built some 3mm points and the next was a 2 foot gauge 3way stub point- ably helped by a school gang! Layout follows a tradition of cricular 2mmfs layouts. Mine is an N model of Powderham - but currently stored in Wales having wiring refurbished, but I am not in wales ! Happy track building . Robert Quote
Si2020 Posted January 21, 2021 Author Posted January 21, 2021 Next up has been crossing construction. Now just to add to the fun (they do say the hobby is fun......right ) I had to have the crossing V jigs custom made as i have 1:12, 1:13 and a 1:14 and the ones avaiable from the 2mmFS assocation stores only go up to 1:10. I will take a photo of the jigs when I next get the box out but this is the result of about an hours work Thanks 3 1 Quote
Si2020 Posted February 5, 2021 Author Posted February 5, 2021 Track laying was started with the inside point and the stock rail with a hour or so of threading chairs on to the rail. 1 Quote
Si2020 Posted June 8, 2021 Author Posted June 8, 2021 (edited) Some of the rails being added to the sleepering. I had also best pull my finger out and crack on with it as the layout now has its first exhibiton booking for next year...... Edited June 8, 2021 by Si2020 2 Quote
Si2020 Posted July 26, 2021 Author Posted July 26, 2021 A view down at track level which won't be possible once the scenics are done. 3 1 Quote
Si2020 Posted July 29, 2021 Author Posted July 29, 2021 On 26/7/2021 at 10:10 PM, Midland Man said: Looks great Track looks amazing Thanks Quote
Si2020 Posted August 23, 2021 Author Posted August 23, 2021 HI all, The track laying was progressing along. To try and get nice flowing curves it was case of pinning the rail in place and then gluing the chairs to the sleepers whilst keeping an eye of the curve. The photo shows the entry and exit points in the fiddle yard. 3 1 Quote
Robert Shrives Posted August 23, 2021 Posted August 23, 2021 Reminds me I ought to get on with my 2mmfs Scottish terminal micro mini affair. I have more rail and sleepers ex ebay to hand to help while away a few hours . I have a selection of unused points I was offered a while back - a big cheat but never look a gift horse etc ! Great work and flowing curves do look good. I have a packet of the brass cast sleeper units for base board and connections - hopefully solder rails to these and add a dropper soldered through a hole in outside of sleeper, have to saw in two of course but a neat casting. Robert Quote
Si2020 Posted August 24, 2021 Author Posted August 24, 2021 14 hours ago, Robert Shrives said: Reminds me I ought to get on with my 2mmfs Scottish terminal micro mini affair. I have more rail and sleepers ex ebay to hand to help while away a few hours . I have a selection of unused points I was offered a while back - a big cheat but never look a gift horse etc ! Great work and flowing curves do look good. I have a packet of the brass cast sleeper units for base board and connections - hopefully solder rails to these and add a dropper soldered through a hole in outside of sleeper, have to saw in two of course but a neat casting. Robert Im the same, boxes of random stuff that has been "gifted" to me over the years and one day I will hopefully get to use it all. When I started building this the brass chairs hadn't been thought of so I used the copper strip and will probably leave them at the board ends as I have put down small sections of rail of about 1 cm long to act as sacrafical bits incase they get knocked plus they will be covered by some of the scenery. At the end of the rail sections on the rest of the layout, I will be doing the same as you and using them as anchor points for the ends. I did contemplate about soldering them to the rail but want to have the rail to have the abilty to move with heat. After seeing a few layouts developing track buckles and witnessing the effect of heat on real rail it makes you think. I may be going slighty over the top but when you have seen fishplate bolts loosened and the 65-lb rail expand to fill a 1/2 inch gap quicker than you can blink its made you think about how it effects the model. 1 Quote
Robert Shrives Posted August 24, 2021 Posted August 24, 2021 Hi True, at the Derby model show in the assembly rooms I saw a TT layout have its fiddle yard wrecked - big picture windows and hot sun - the rails ripped out of the plastic sleepers and bent every which way- heart breaking I expect stock suffered as well. No idea what they did for Sunday other than nurse hangovers ! On the Ffestiniog railway where clearances are minimal fishplate mnt is key but the last heat wave saw track getting excited and several 5mph restrictions imposed and some late in the day ballast drops to increase shoulders. Best left to sort itself out , but have in past pulled rails uphill in autumn to open up gaps nearby, this and rail anchors help in hot weather. I think the practice of having almost real rail lengths with gaps in 2mmfs is not a bad one - I wonder what the lads did on Fencehouses with it long straight sections. happy modelling Robert 2 Quote
Si2020 Posted August 25, 2021 Author Posted August 25, 2021 12 hours ago, Robert Shrives said: Hi True, at the Derby model show in the assembly rooms I saw a TT layout have its fiddle yard wrecked - big picture windows and hot sun - the rails ripped out of the plastic sleepers and bent every which way- heart breaking I expect stock suffered as well. No idea what they did for Sunday other than nurse hangovers ! On the Ffestiniog railway where clearances are minimal fishplate mnt is key but the last heat wave saw track getting excited and several 5mph restrictions imposed and some late in the day ballast drops to increase shoulders. Best left to sort itself out , but have in past pulled rails uphill in autumn to open up gaps nearby, this and rail anchors help in hot weather. I think the practice of having almost real rail lengths with gaps in 2mmfs is not a bad one - I wonder what the lads did on Fencehouses with it long straight sections. happy modelling Robert MIne was seeing Bath Green Park at one of the Exeter shows which i was exhibiting at and their fiddle yard got a hump in it. At one of the Railex shows whilst helping on Mini M-S-W with Alan we had all but one loco shunt down with the heat in the hall. It can be a strange one with the effects. Totally agree with the clearances on the FR and as you say best to leave the track to settle on its own as it normally returns to its starting point with the occasional help need. I'm tempted to do a test peice and het it up to see what happens. 1 Quote
Si2020 Posted September 2, 2021 Author Posted September 2, 2021 Hi all, So not much has been happening on the layout recently as I've been busy with work and doing a couple of extra bits that I do. But you may have noticed that the layout now has a name, No Place. Now you are probably thinking he's lost the plot, (well I might have but thats a whole other story) but No Place is a small Village near Beamish in the north east corne of England. Just below the area seen on maps of dragons and other mithyical beasts!! Its ideal as I wanted to be able to swap the buildings on the layout to move the layout to different areas of the country to enable me to run different stock. 1 Quote
Si2020 Posted October 18, 2021 Author Posted October 18, 2021 The track work is progressing along. A couple of bits need tidying up and then on to the electrical testing. 4 Quote
Recommended Posts
Join the conversation
You can post now and register later. If you have an account, sign in now to post with your account.