Adrian
-
Posts
108 -
Joined
-
Last visited
-
Days Won
3
Content Type
Profiles
Forums
Resource Library
Events
Gallery
Blogs
Store
Community Map
Everything posted by Adrian
-

IKEA Shelf Diorama - First Ever Railway Modelling Experience
Adrian replied to Rush and Lusk's topic in Irish Model Layouts
Well done George, great debut! -
Depot #8 by Riverbank Railways (fictional 1980s / early 1990s depot)
Adrian replied to Adrian's topic in Irish Model Layouts
Cheers Jason! Thanks for that -
Depot #8 by Riverbank Railways (fictional 1980s / early 1990s depot)
Adrian replied to Adrian's topic in Irish Model Layouts
Thanks John, Appreciate your kind comments - with the scenic work complete, I'm gonna tackle those videos next week and get them online -
Depot #8 by Riverbank Railways (fictional 1980s / early 1990s depot)
Adrian replied to Adrian's topic in Irish Model Layouts
Thank you both very much :) -
Depot #8 by Riverbank Railways (fictional 1980s / early 1990s depot)
Adrian replied to Adrian's topic in Irish Model Layouts
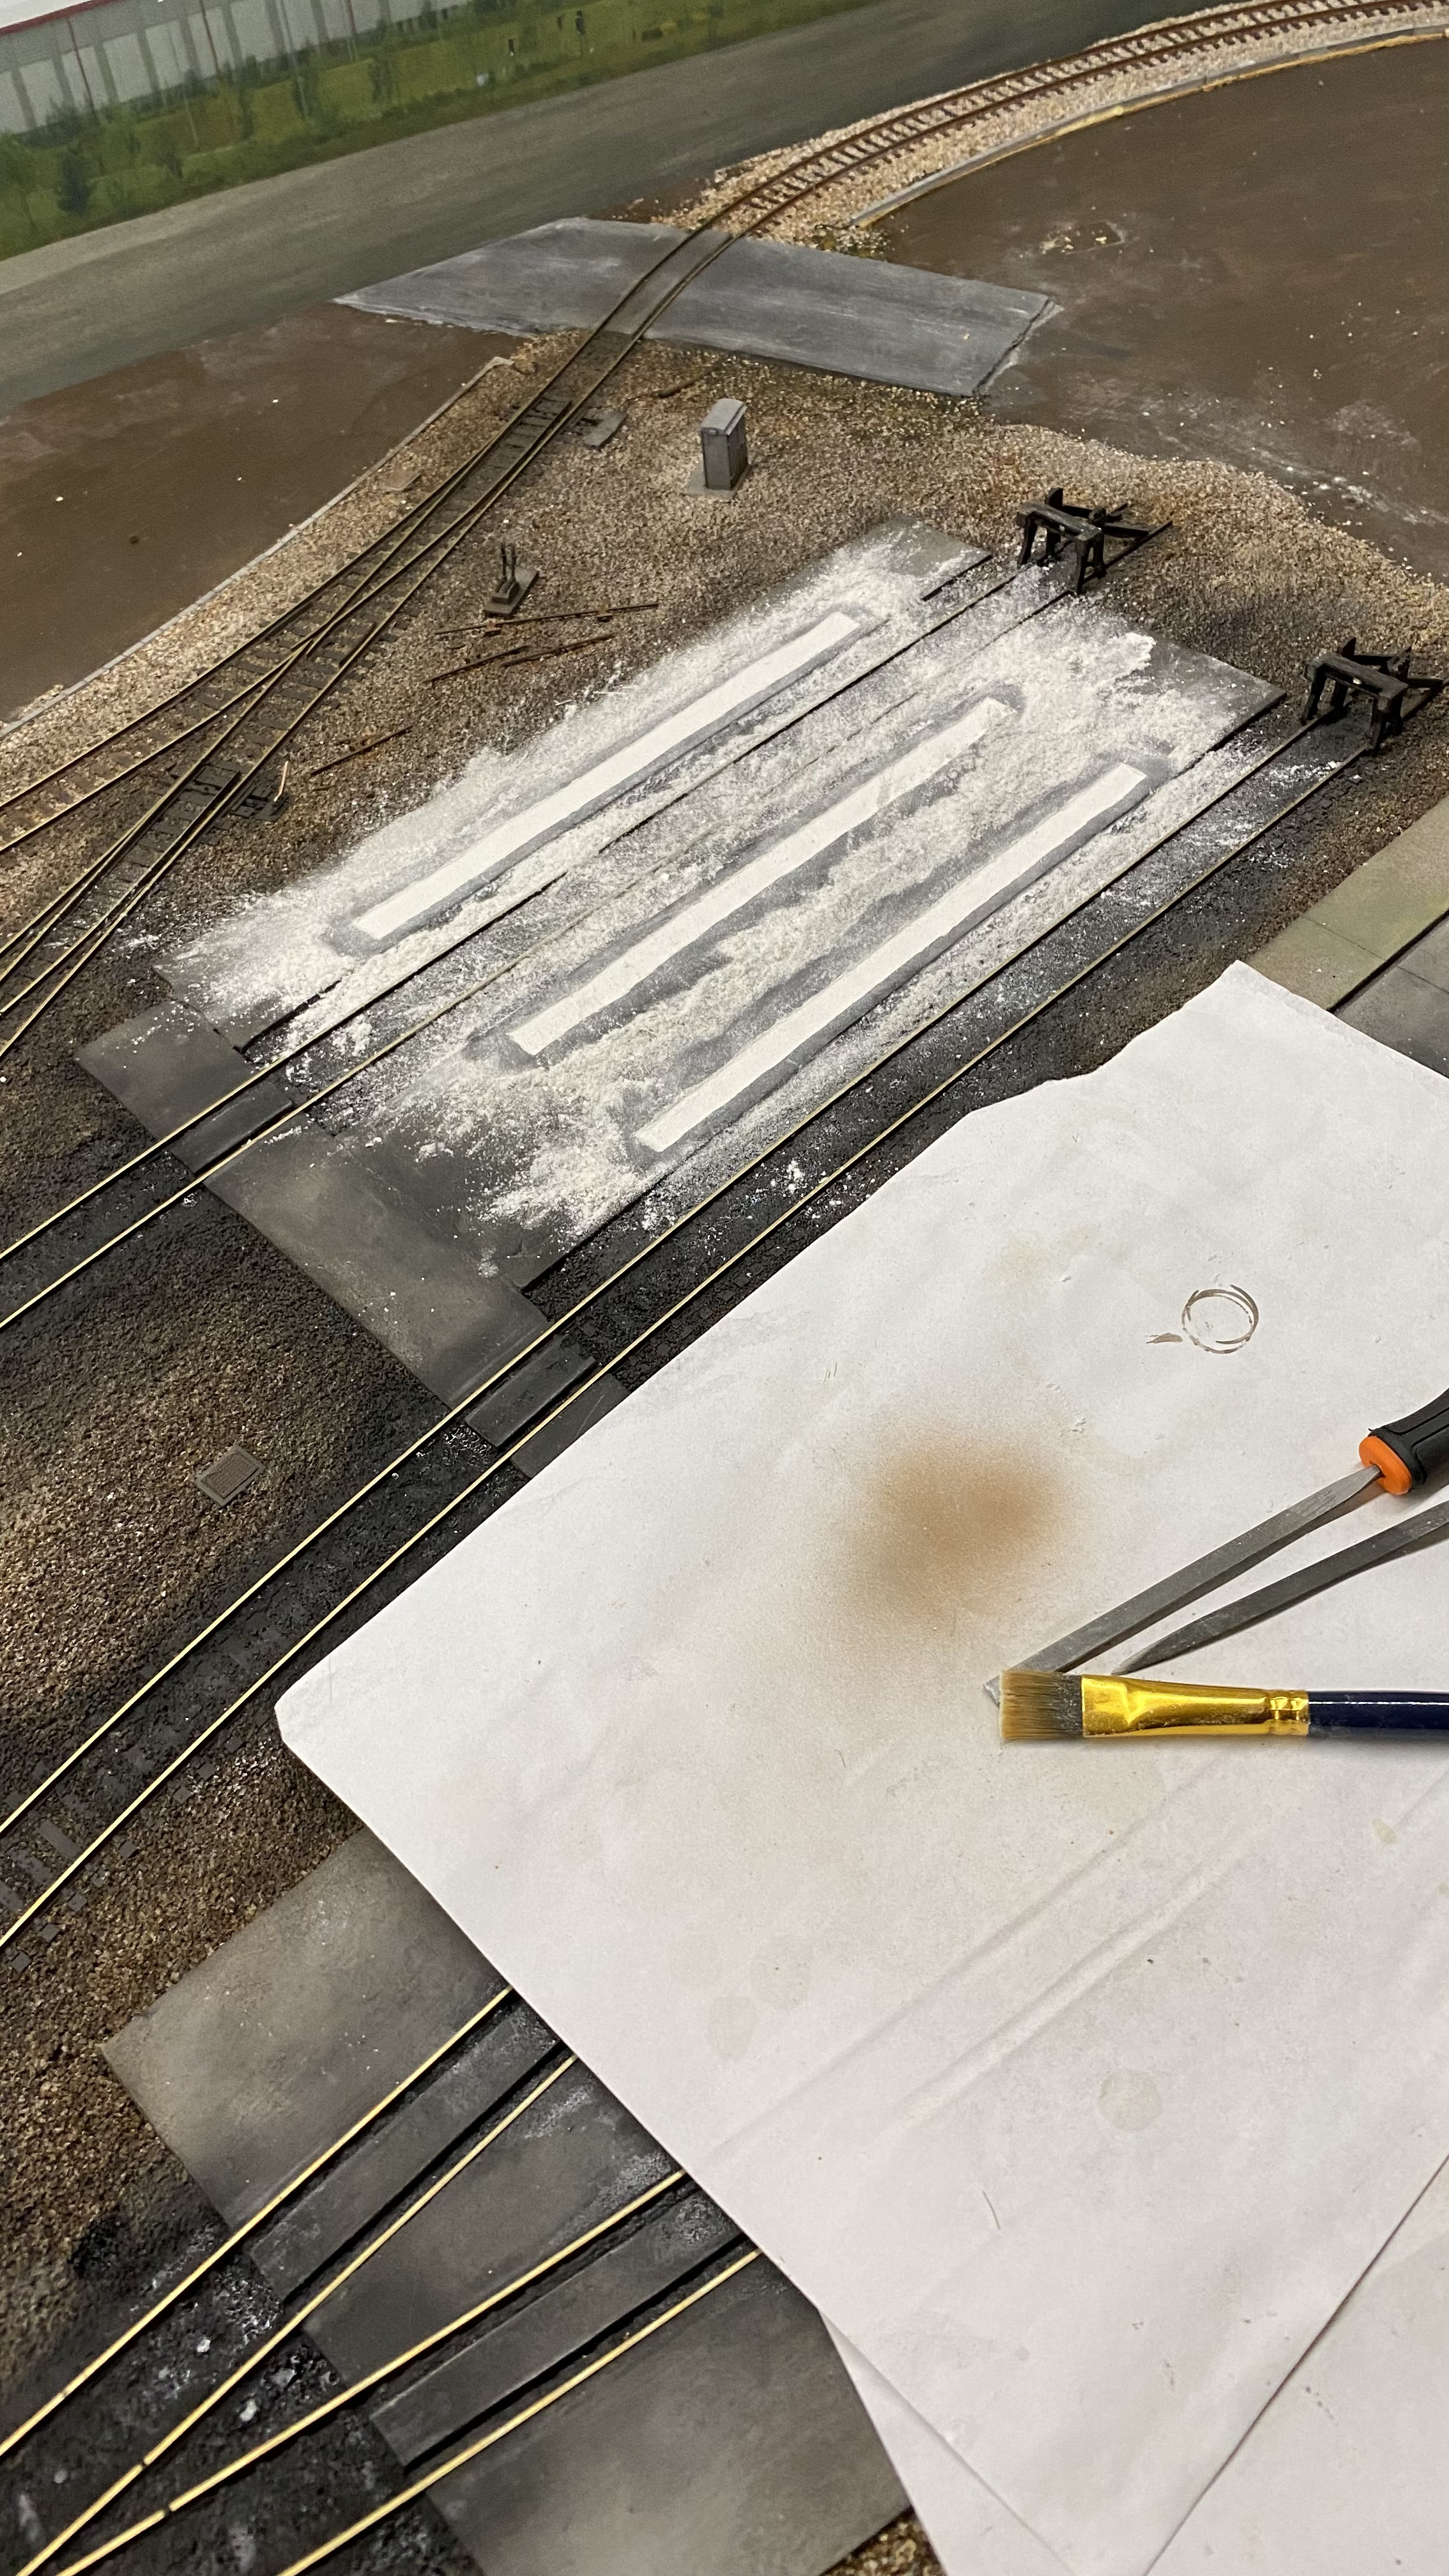
Thank you all for your comments, really appreciate them @scahalane The point rodding is the SS89 kit from Wills https://www.marksmodels.com/search/?s=rodding&x=0&y=0 Very, very finicky and I would definitely recommend doing it as the track is being laid and before the ballast is in - looks good when it's in though -
Sweet, thanks for sharing, will take a look!
-
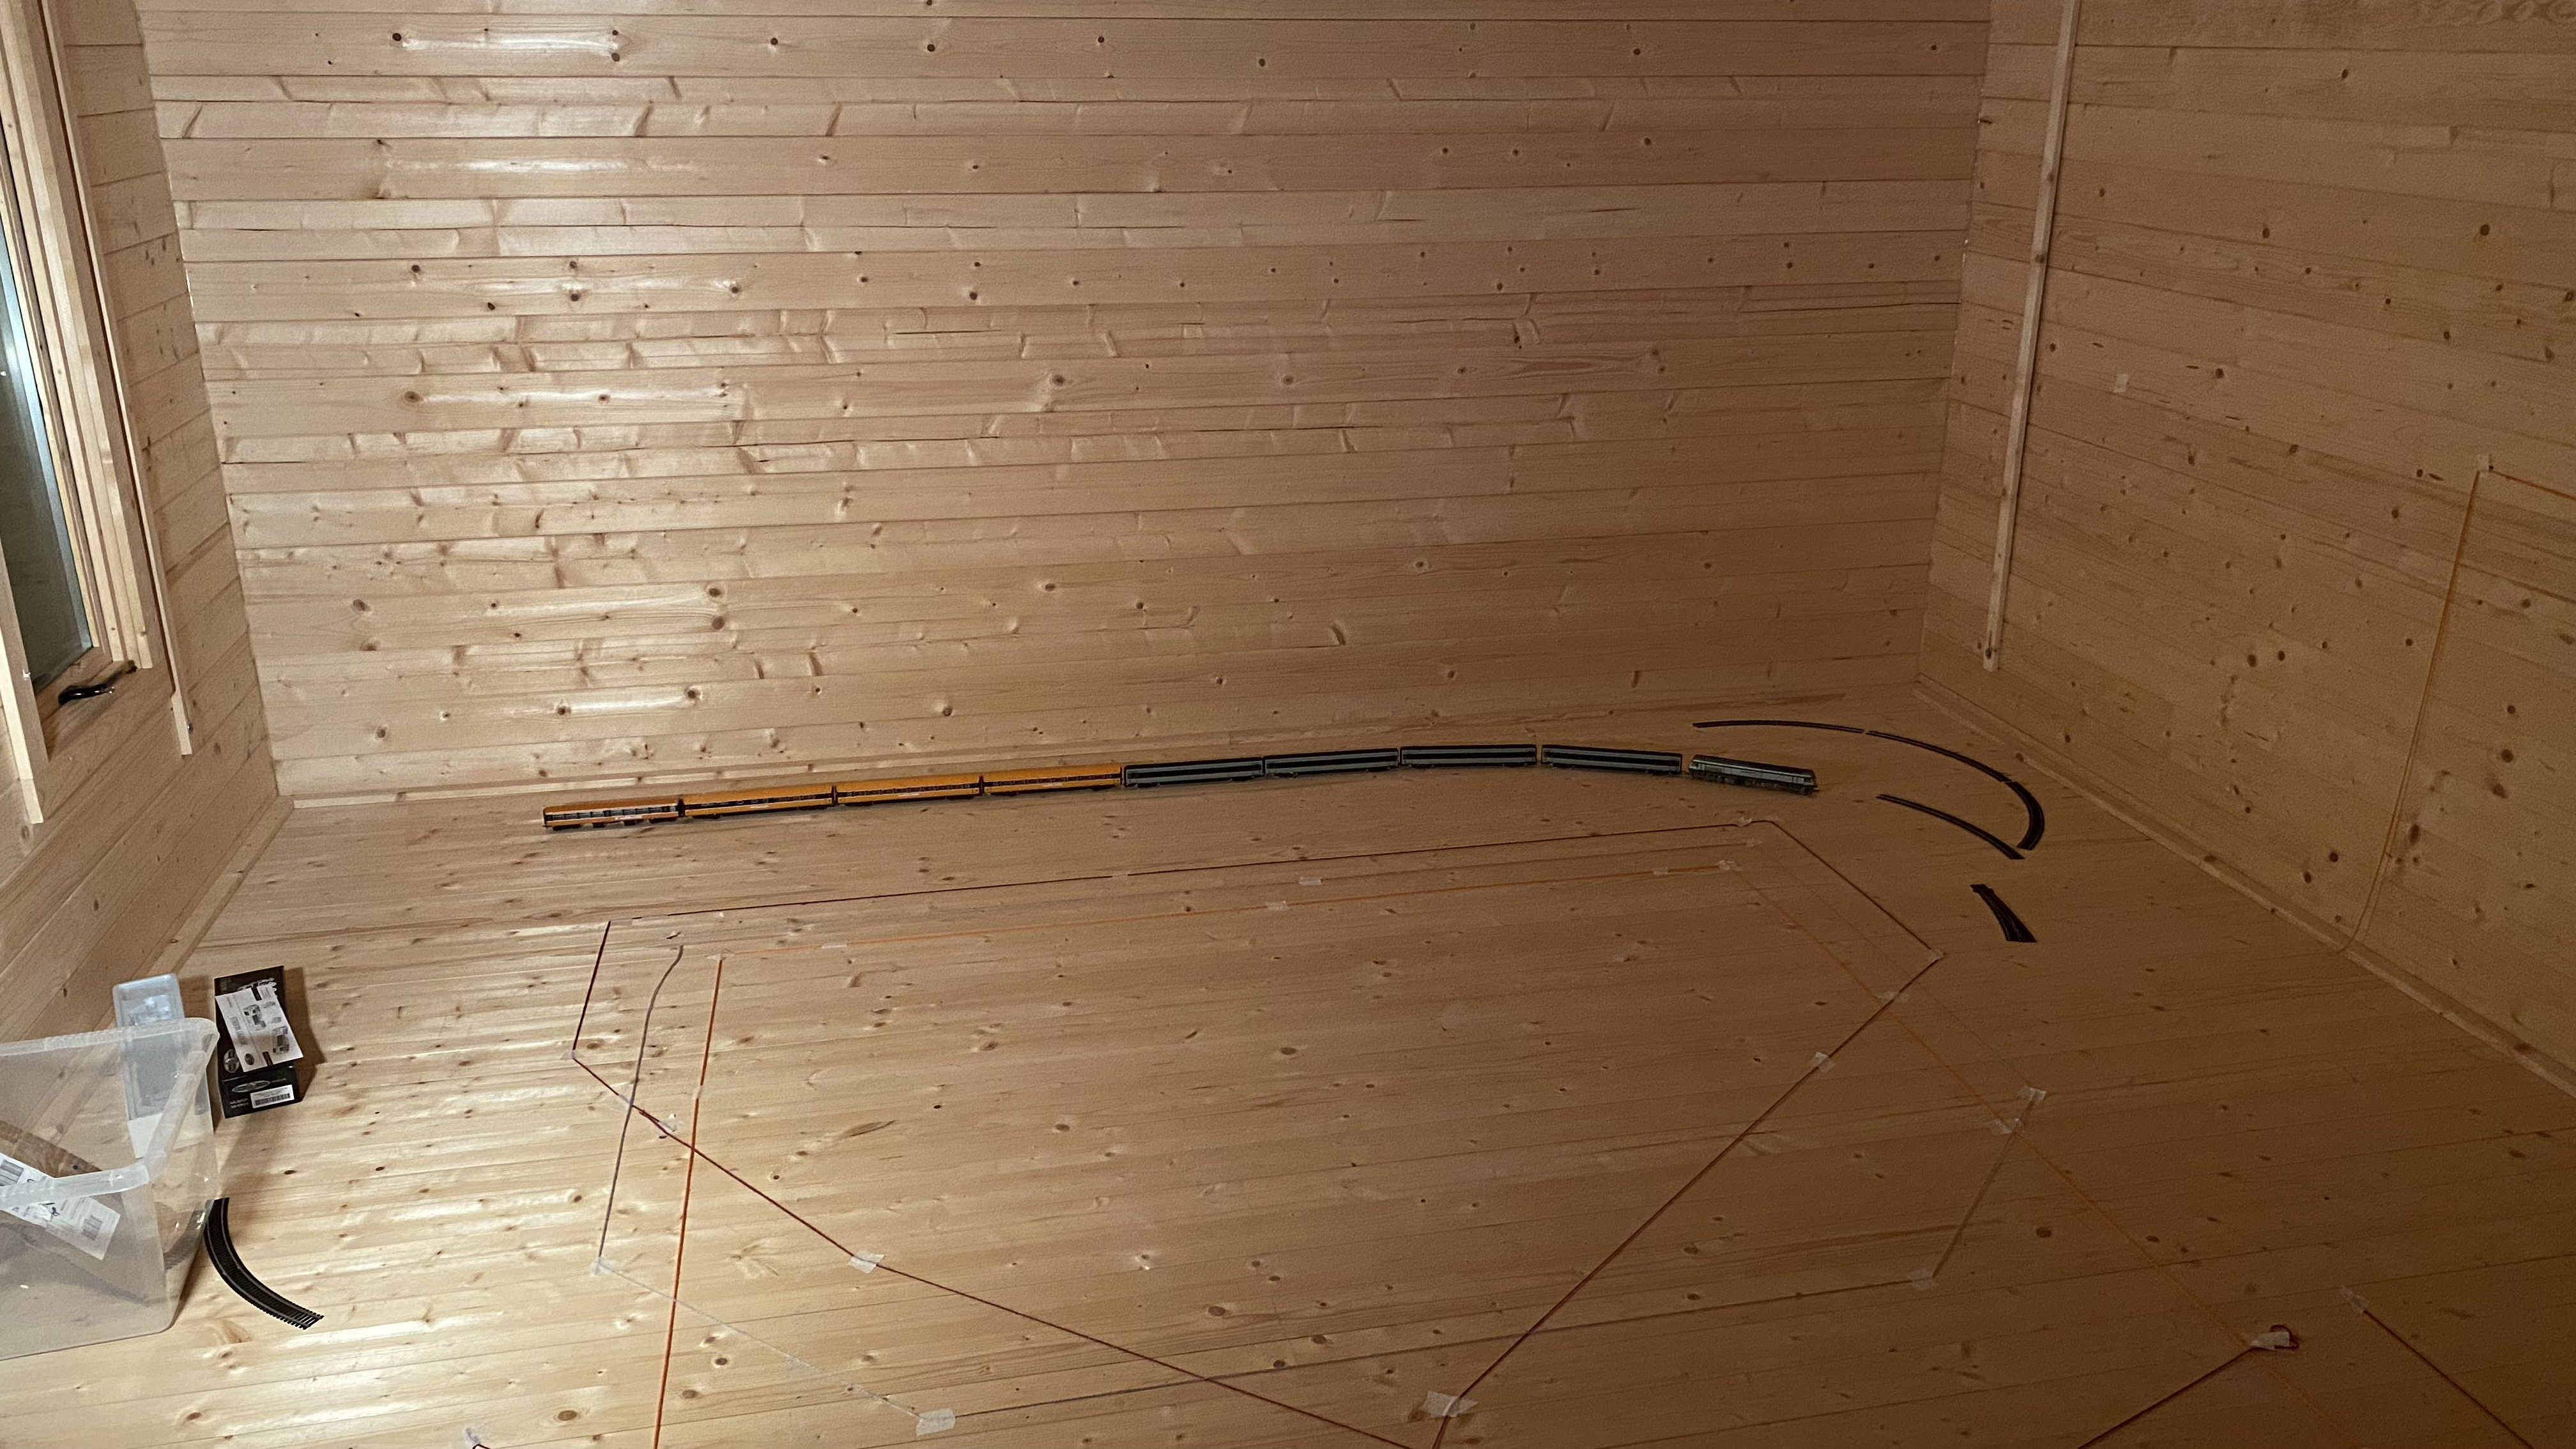
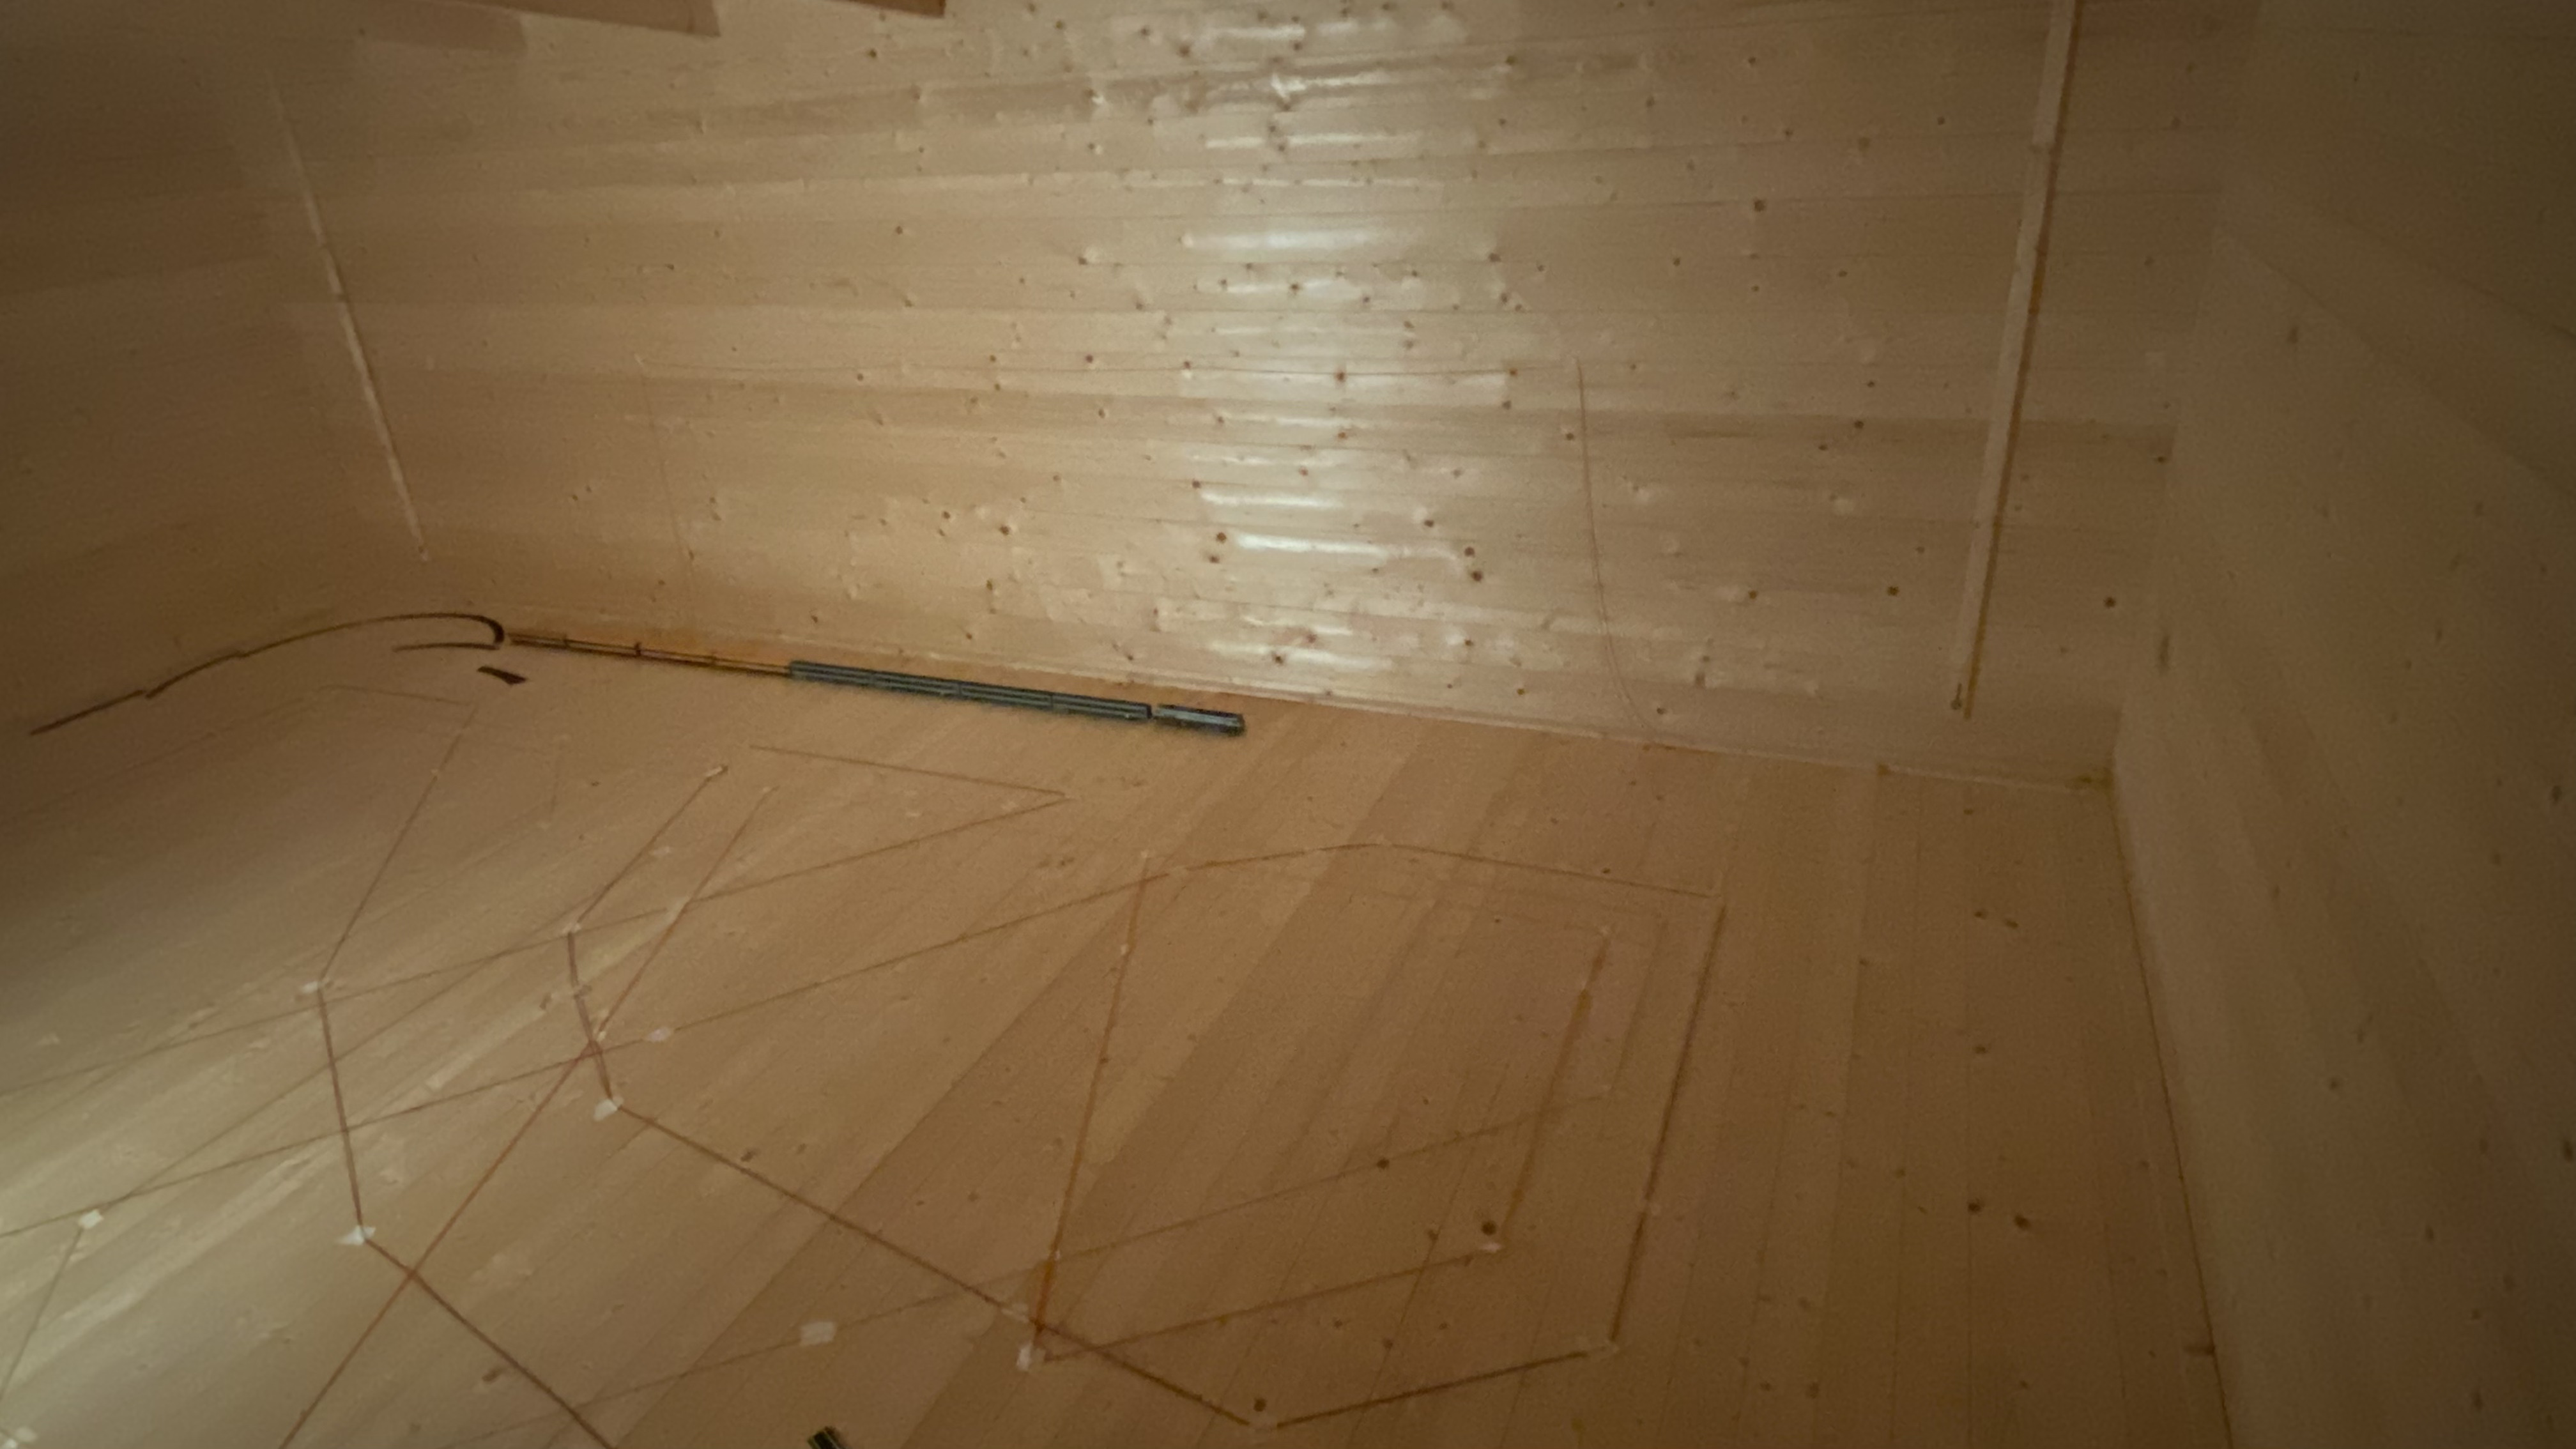
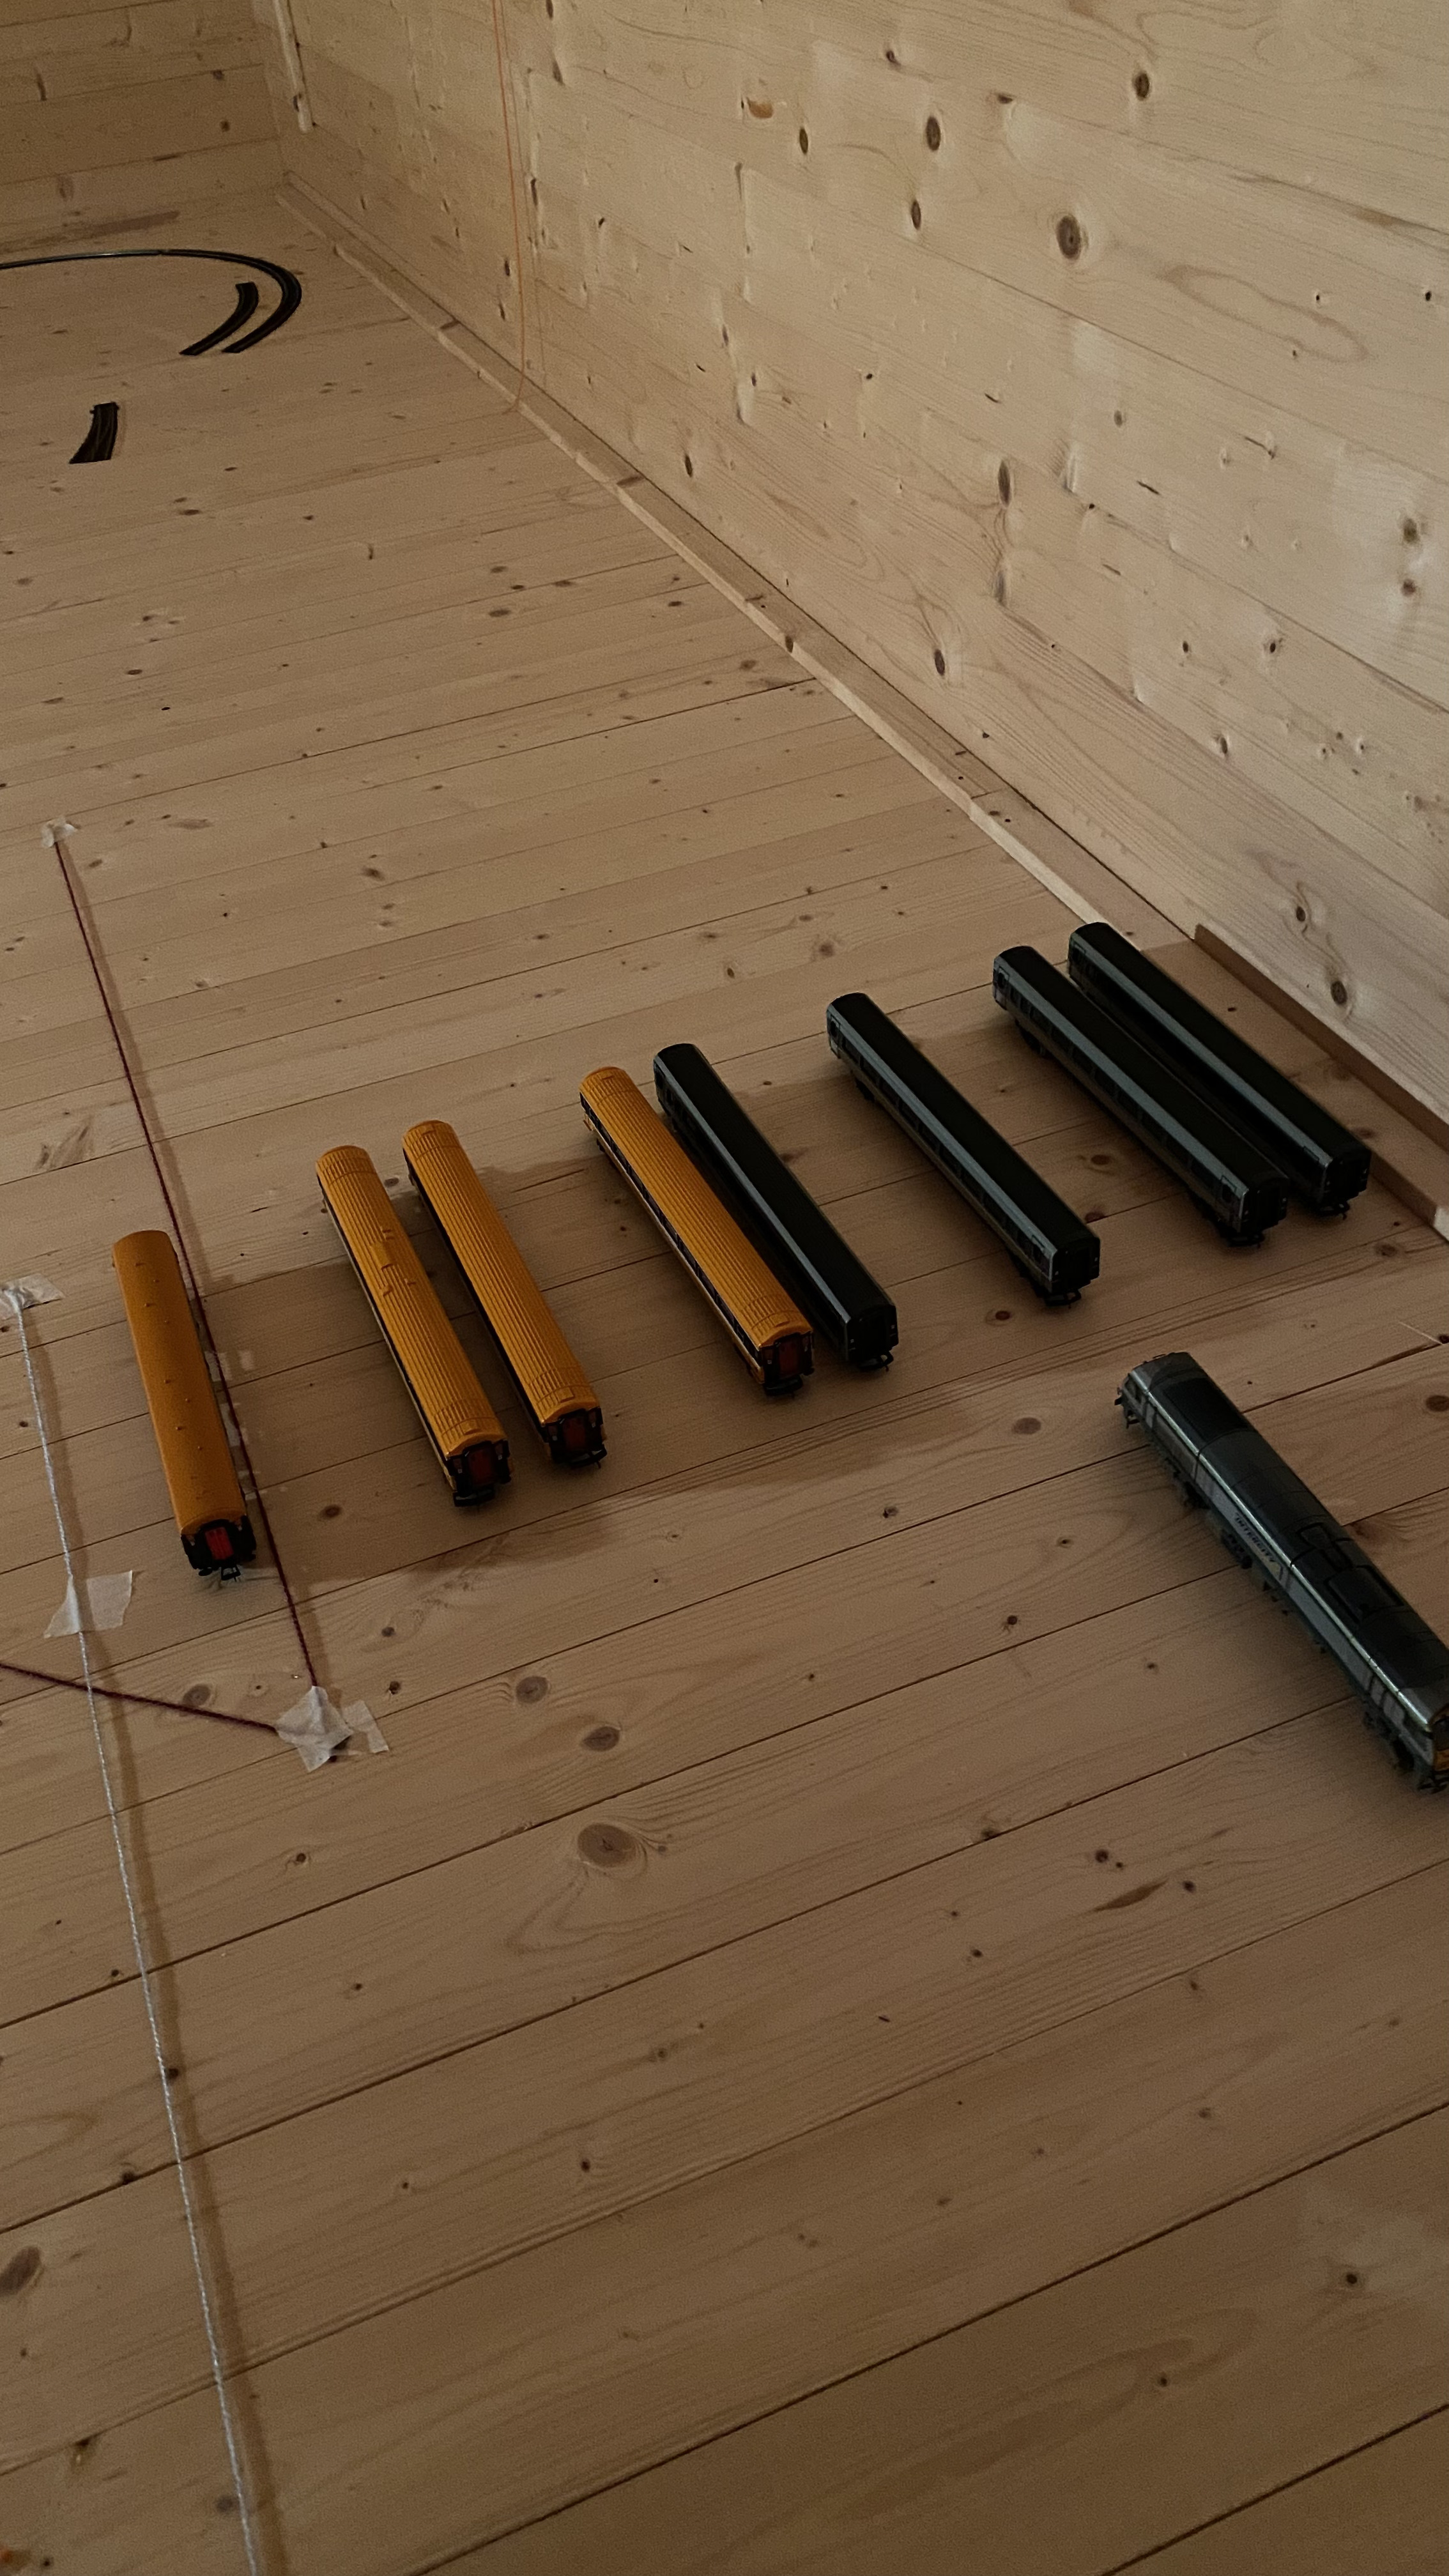
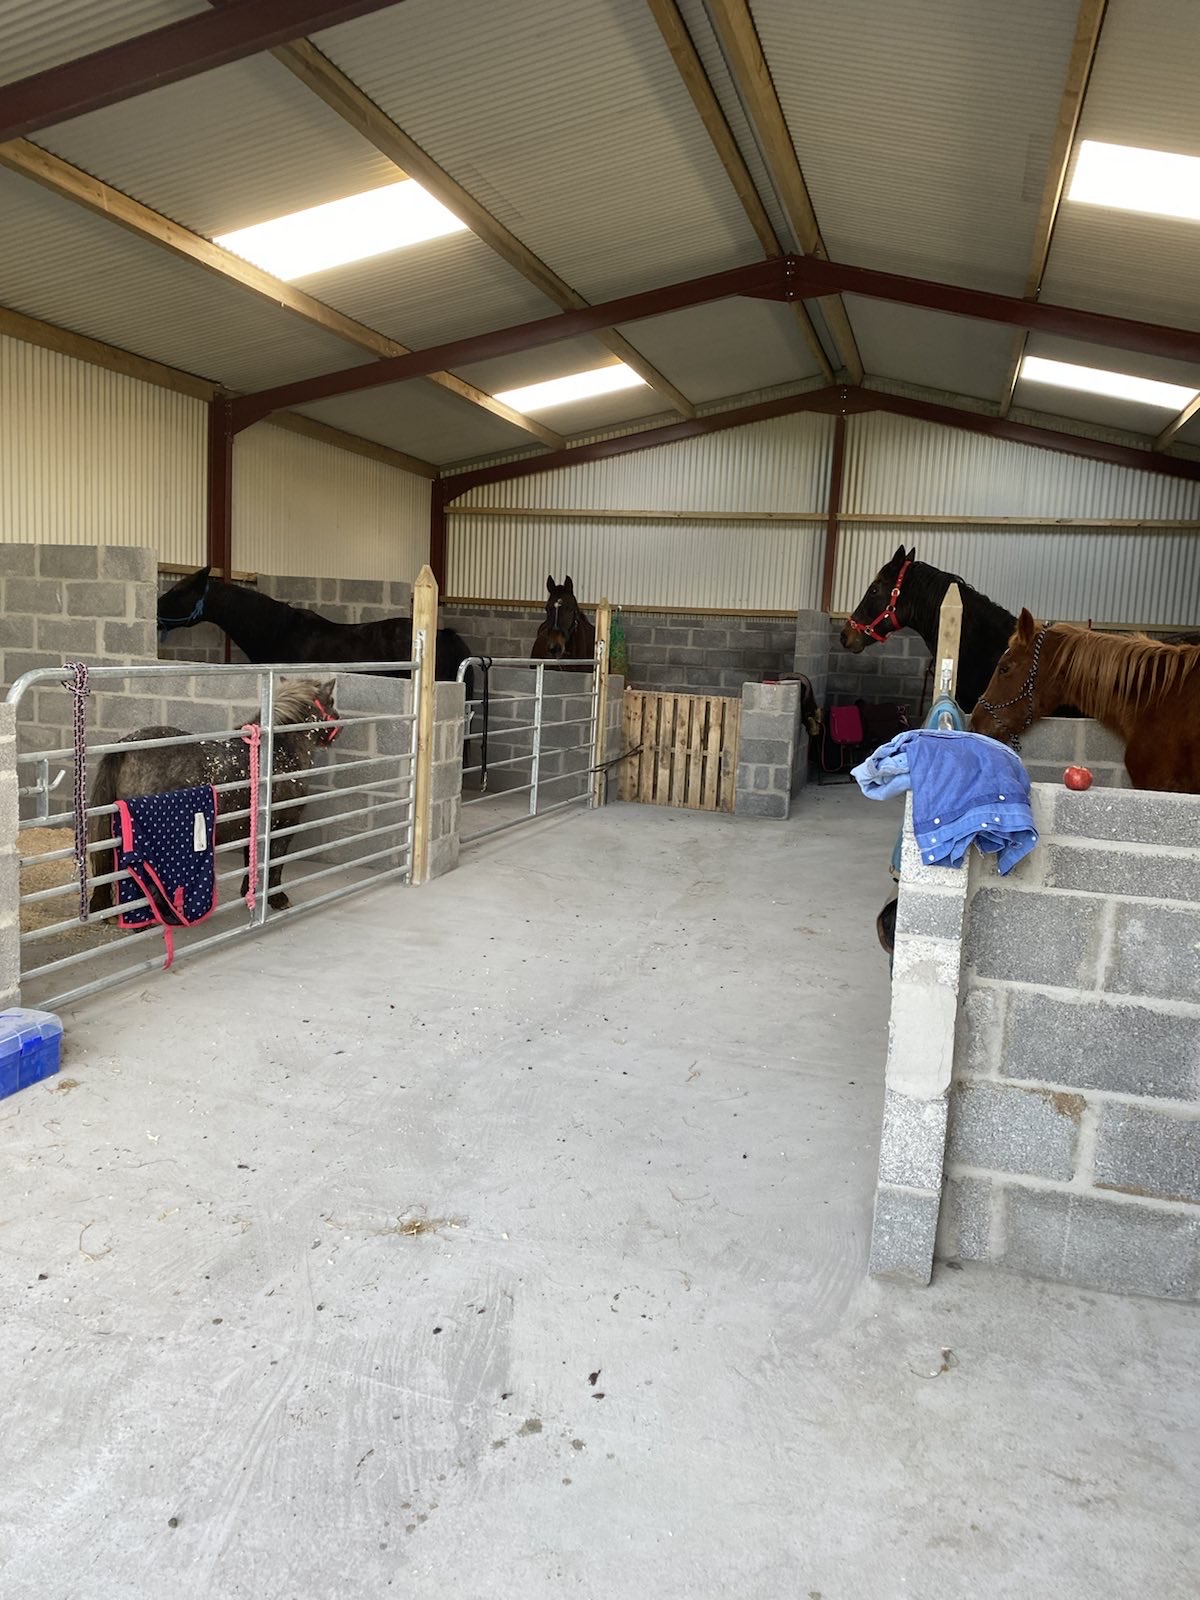
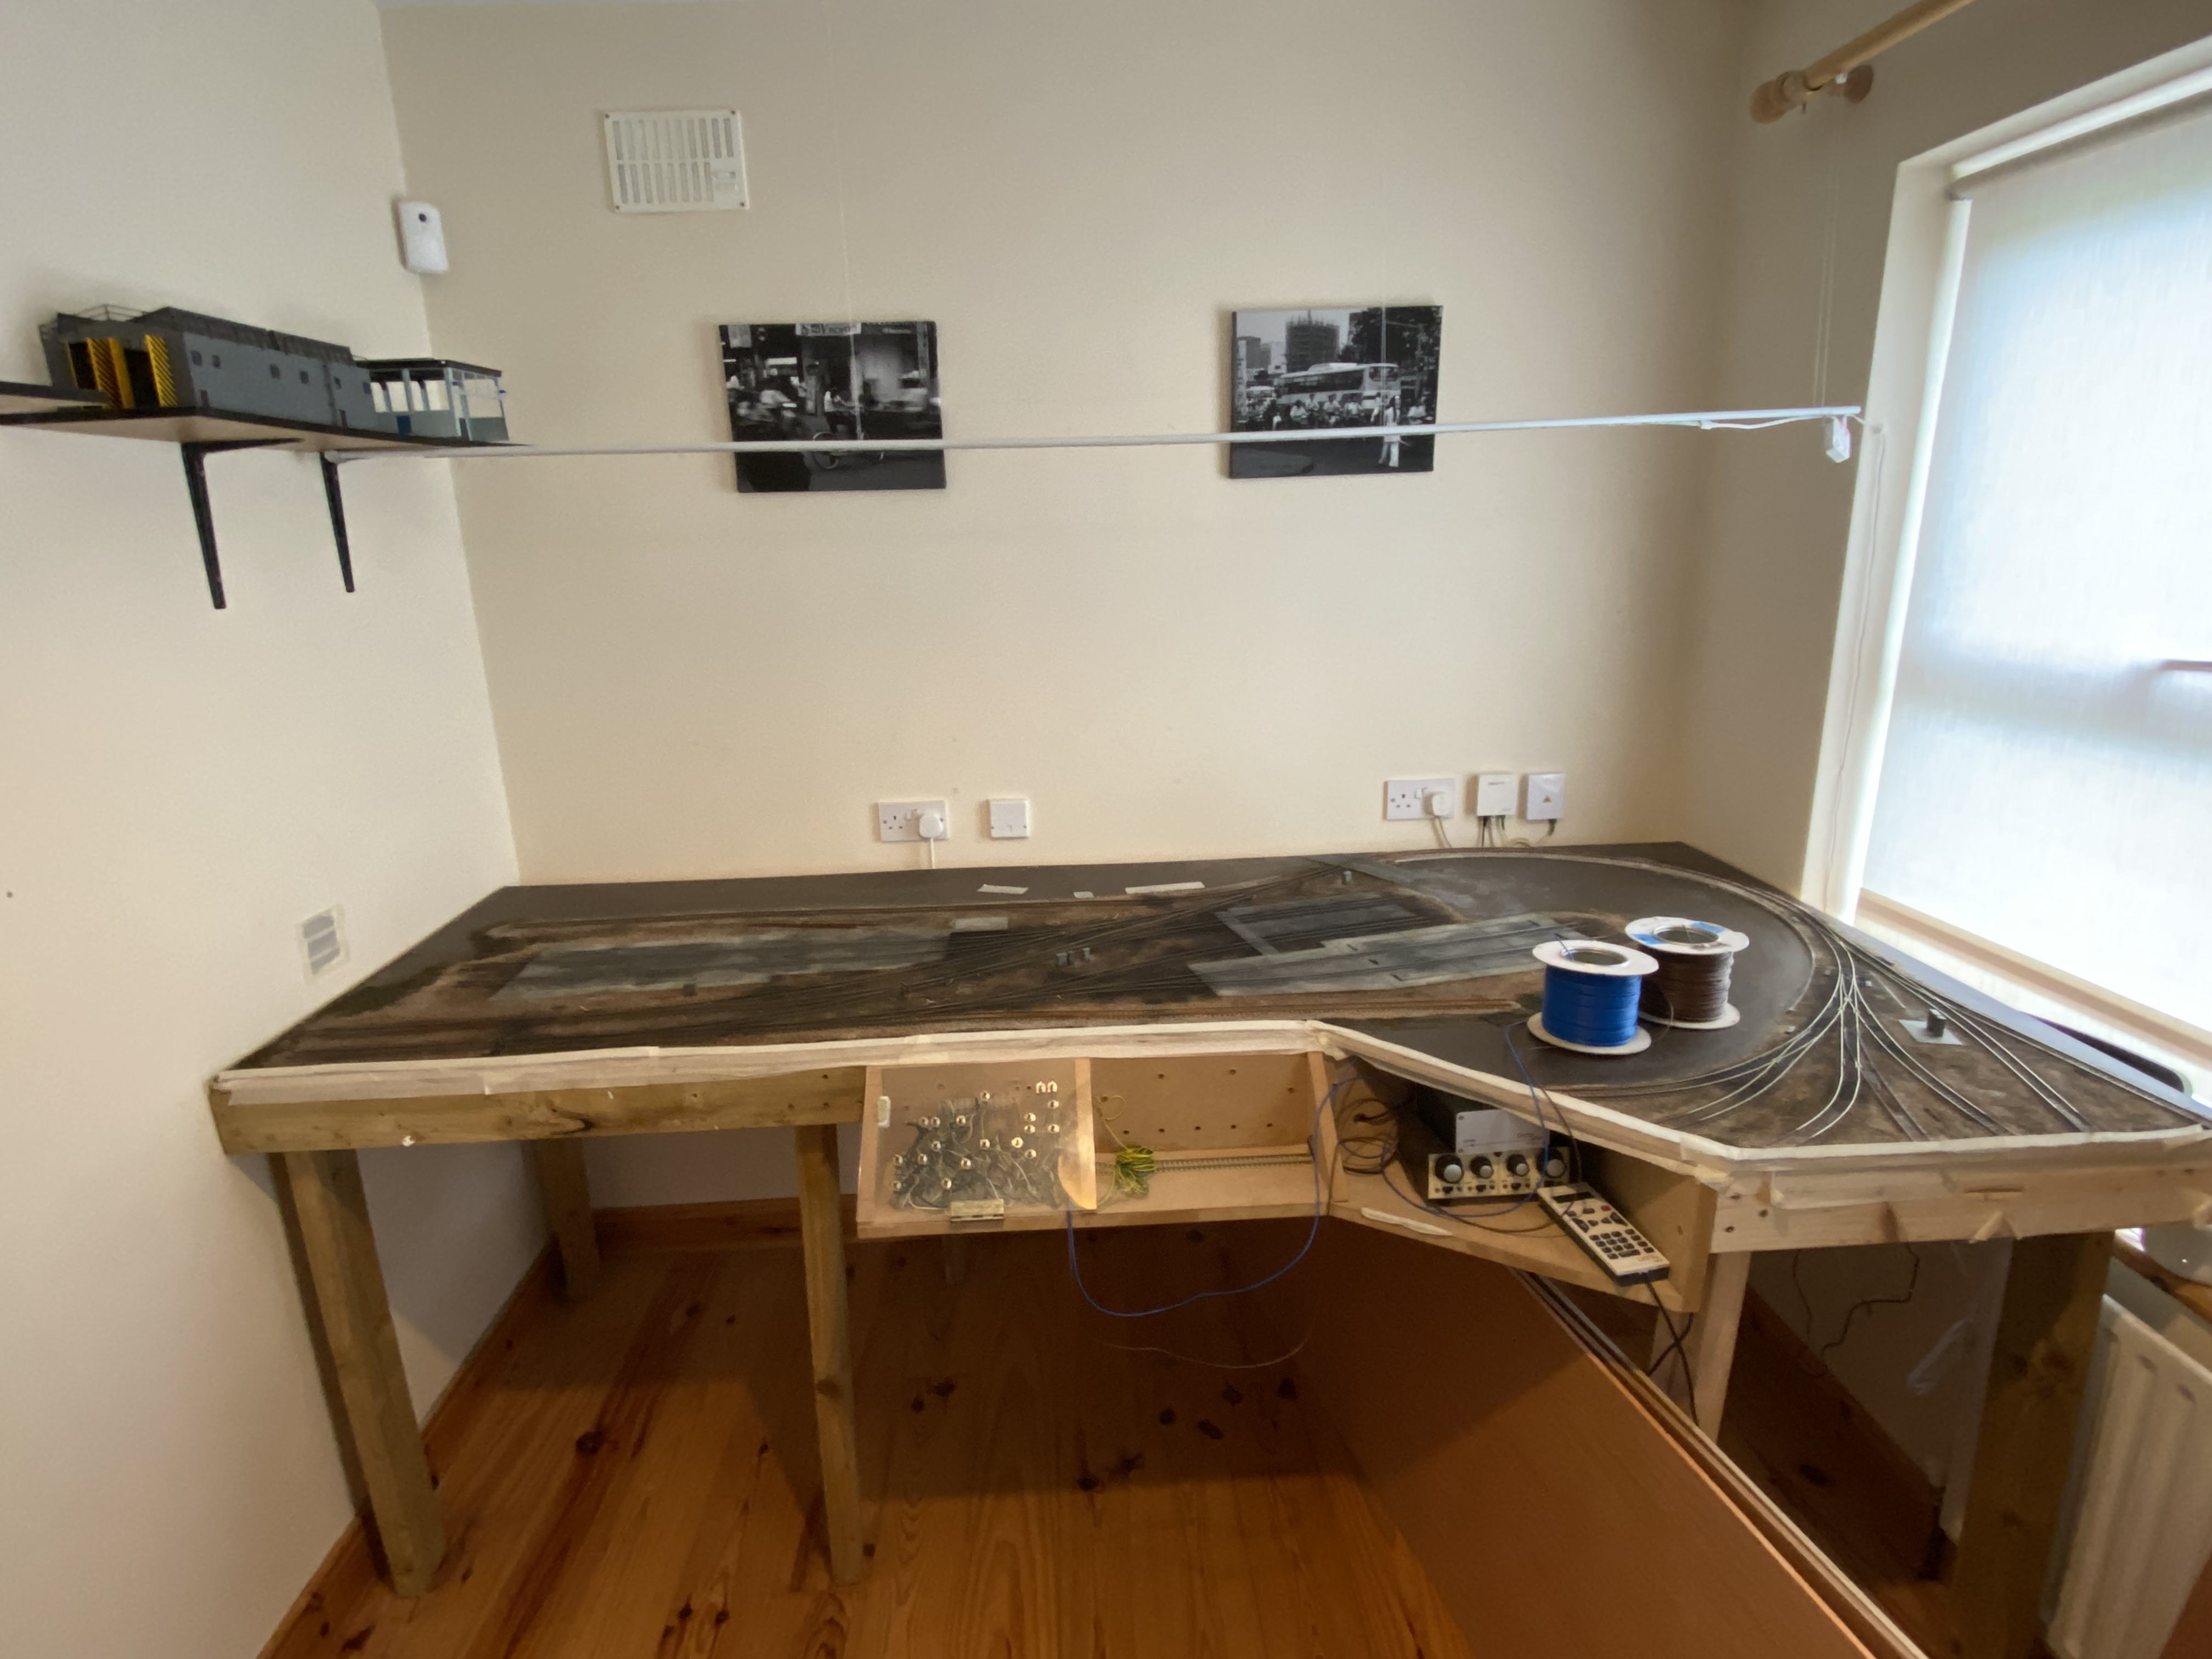
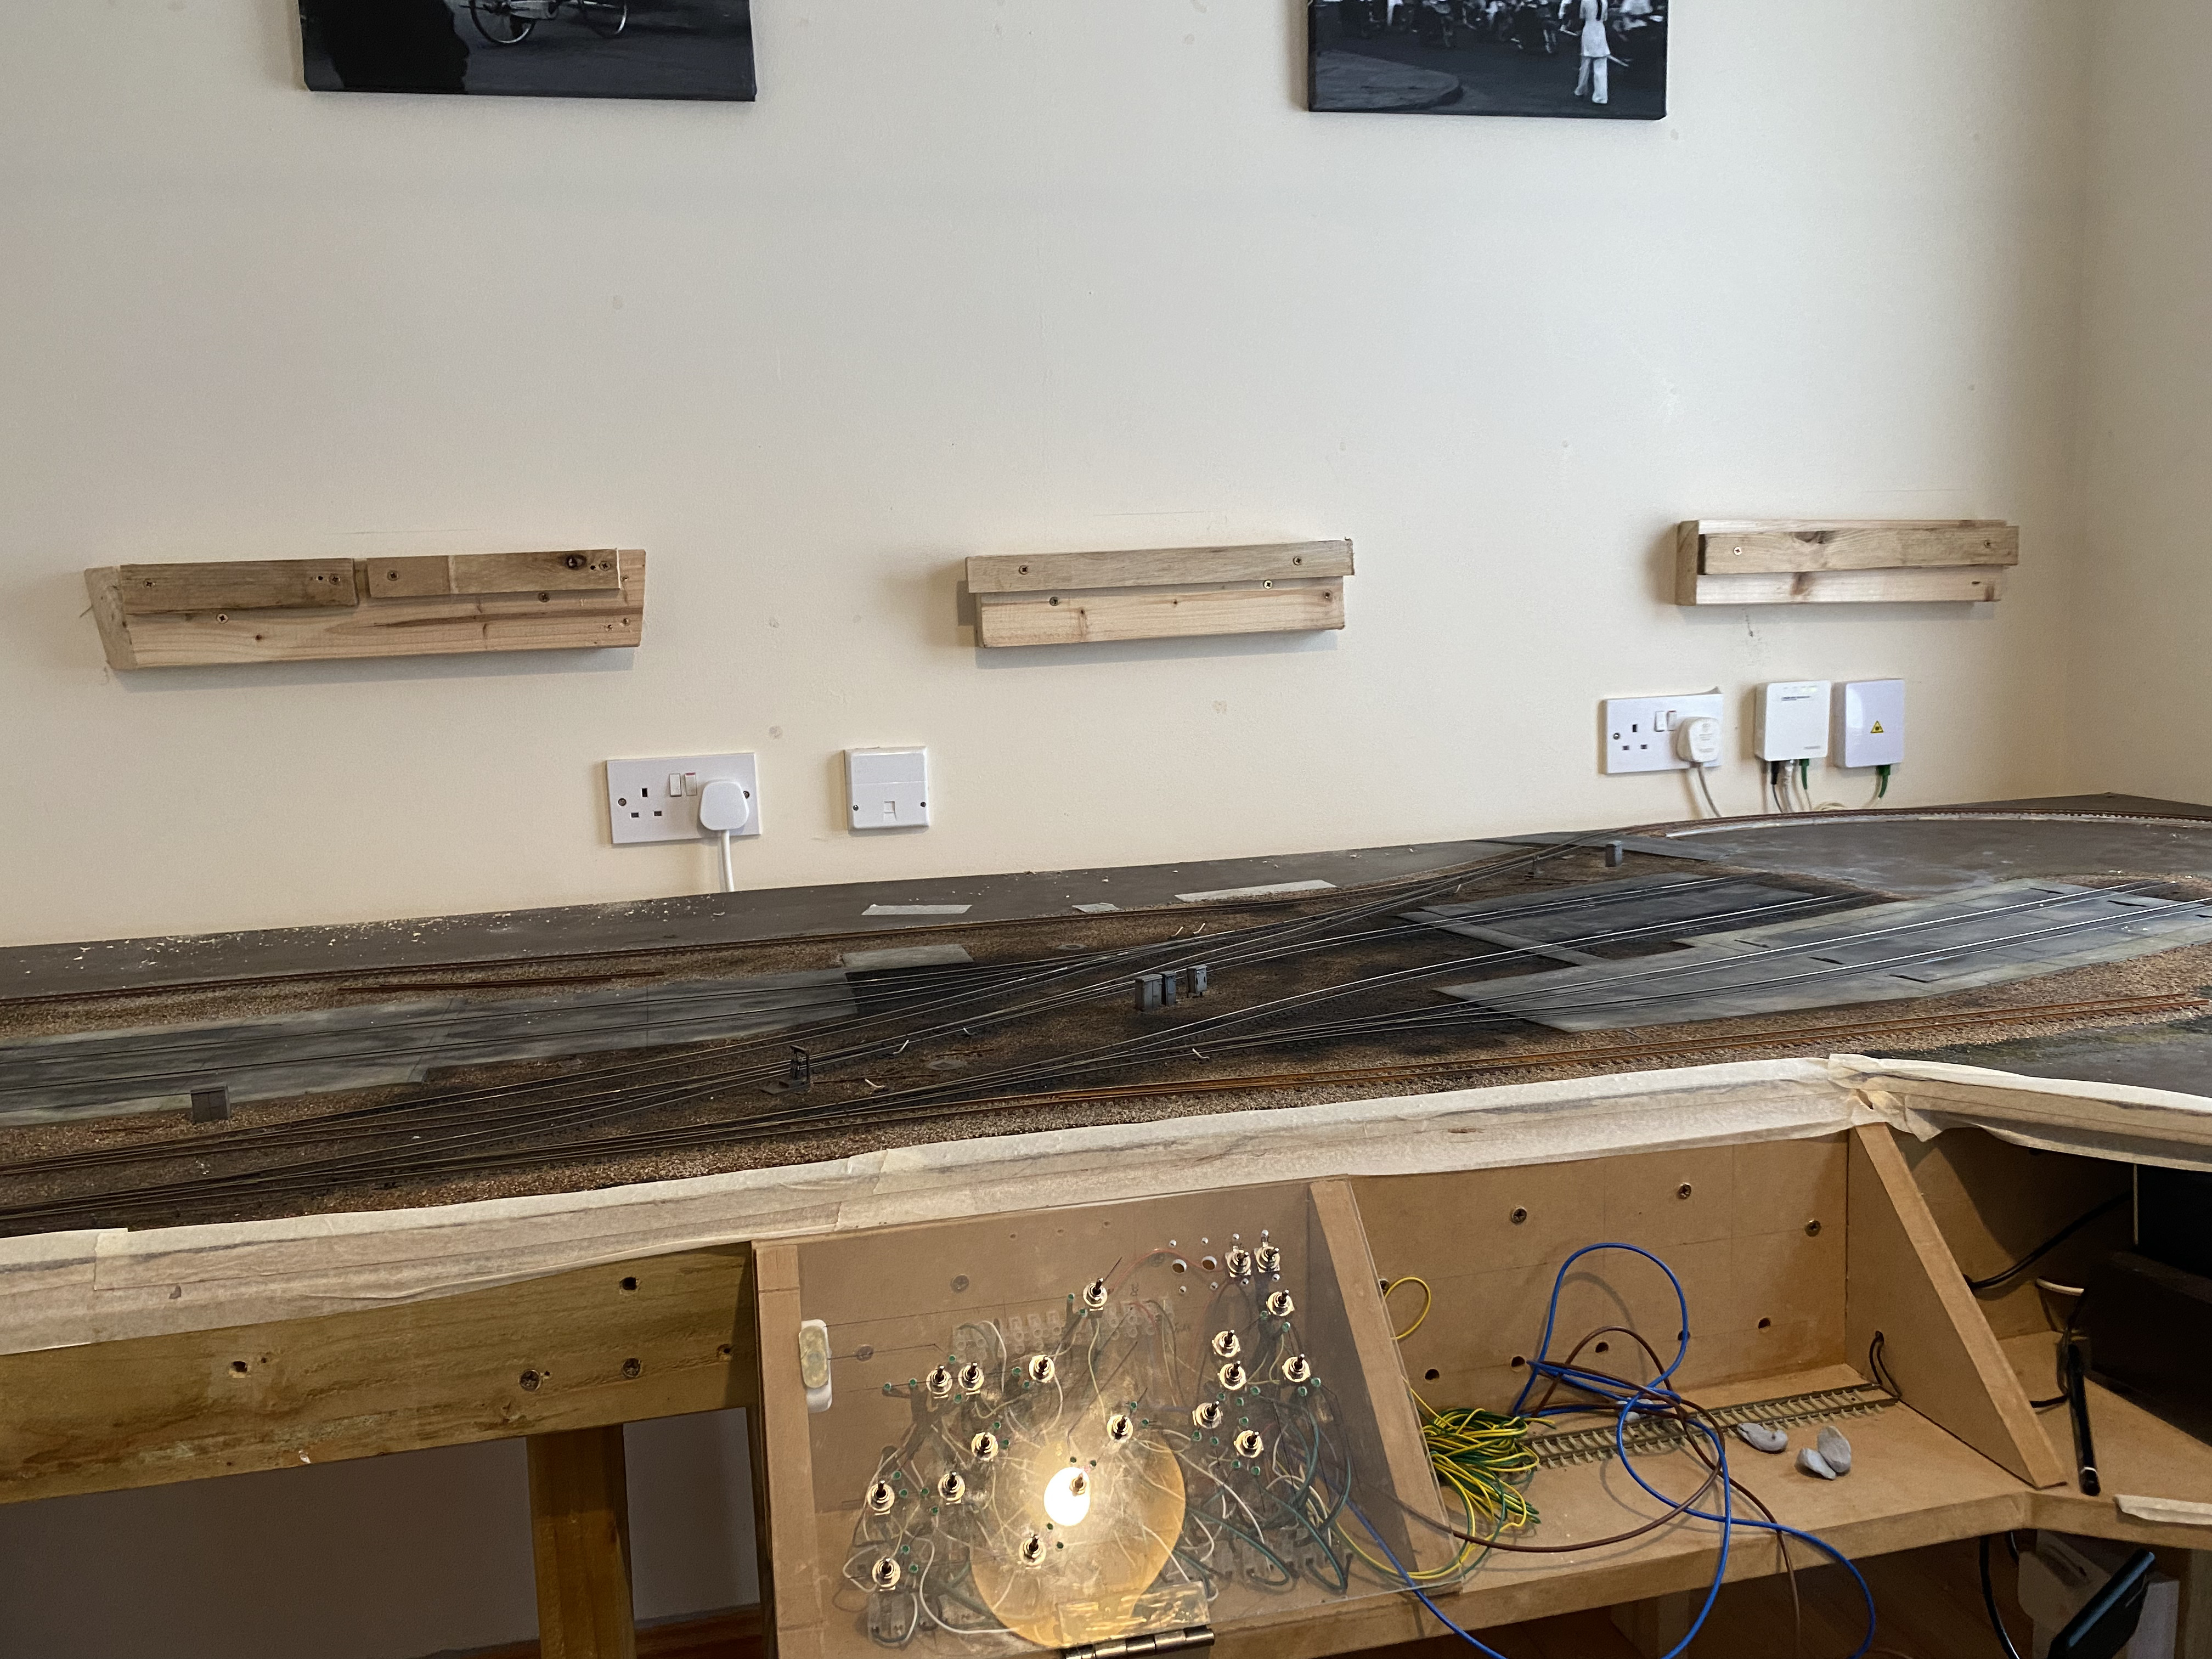
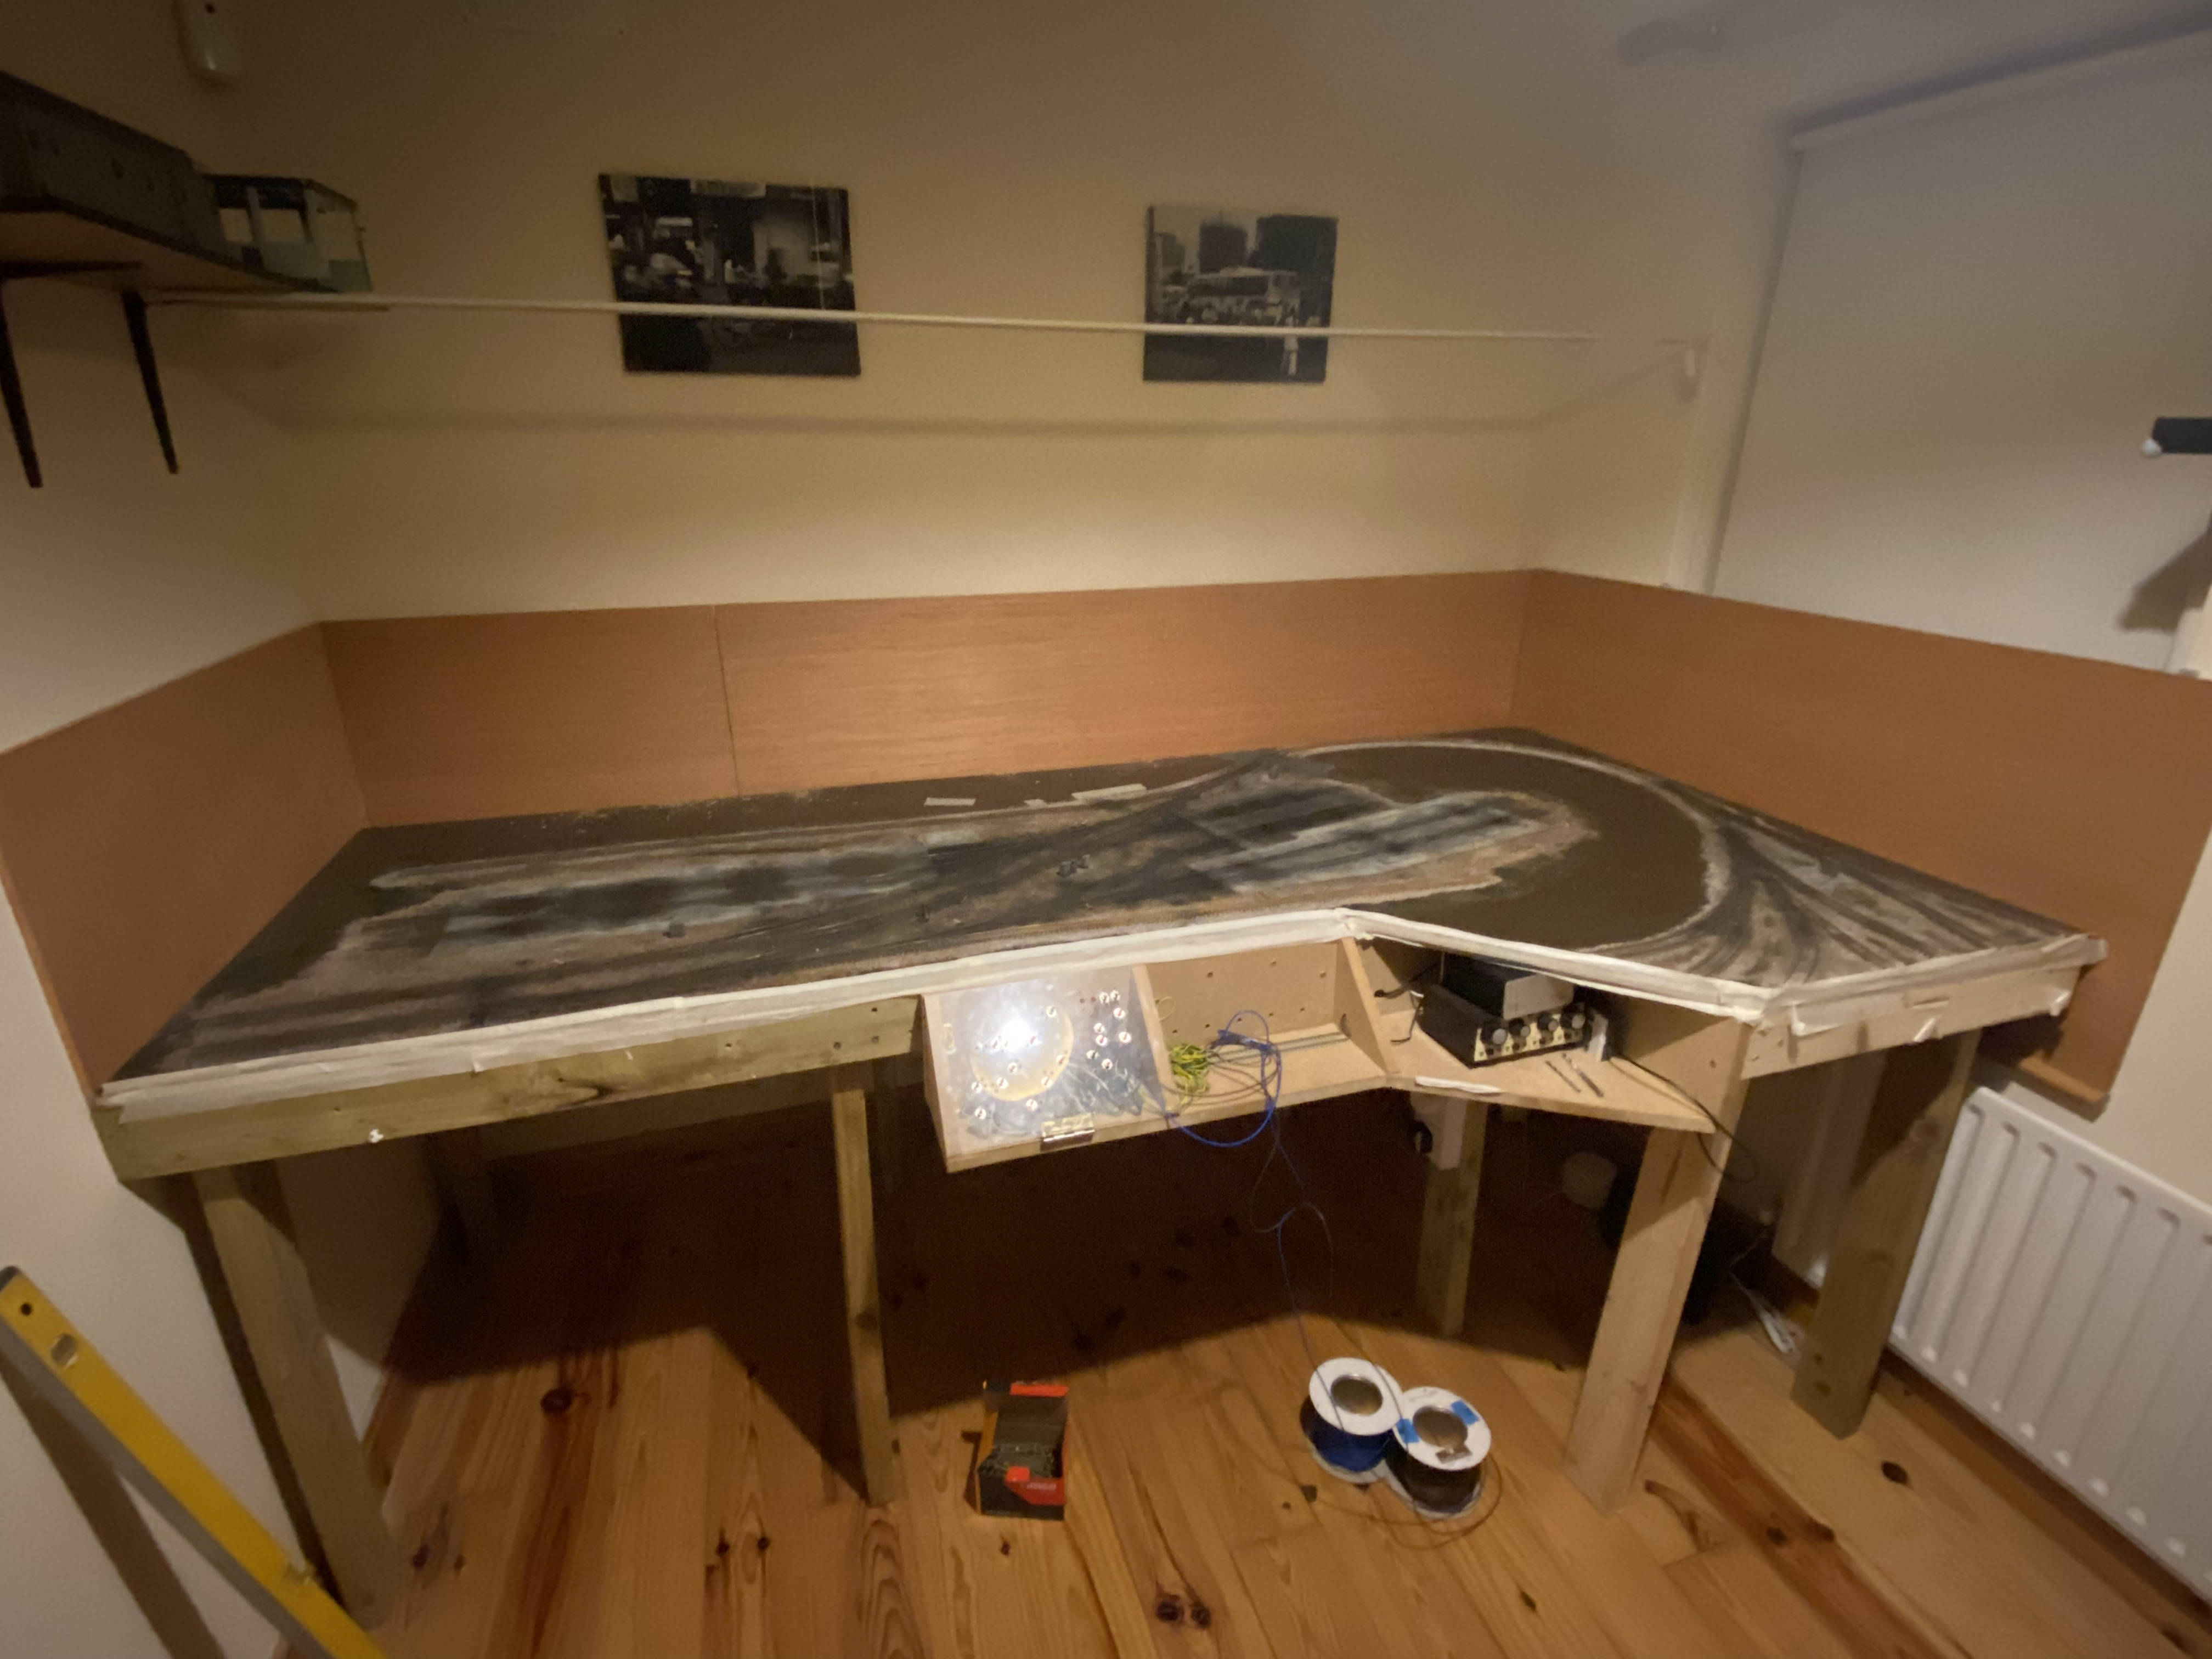
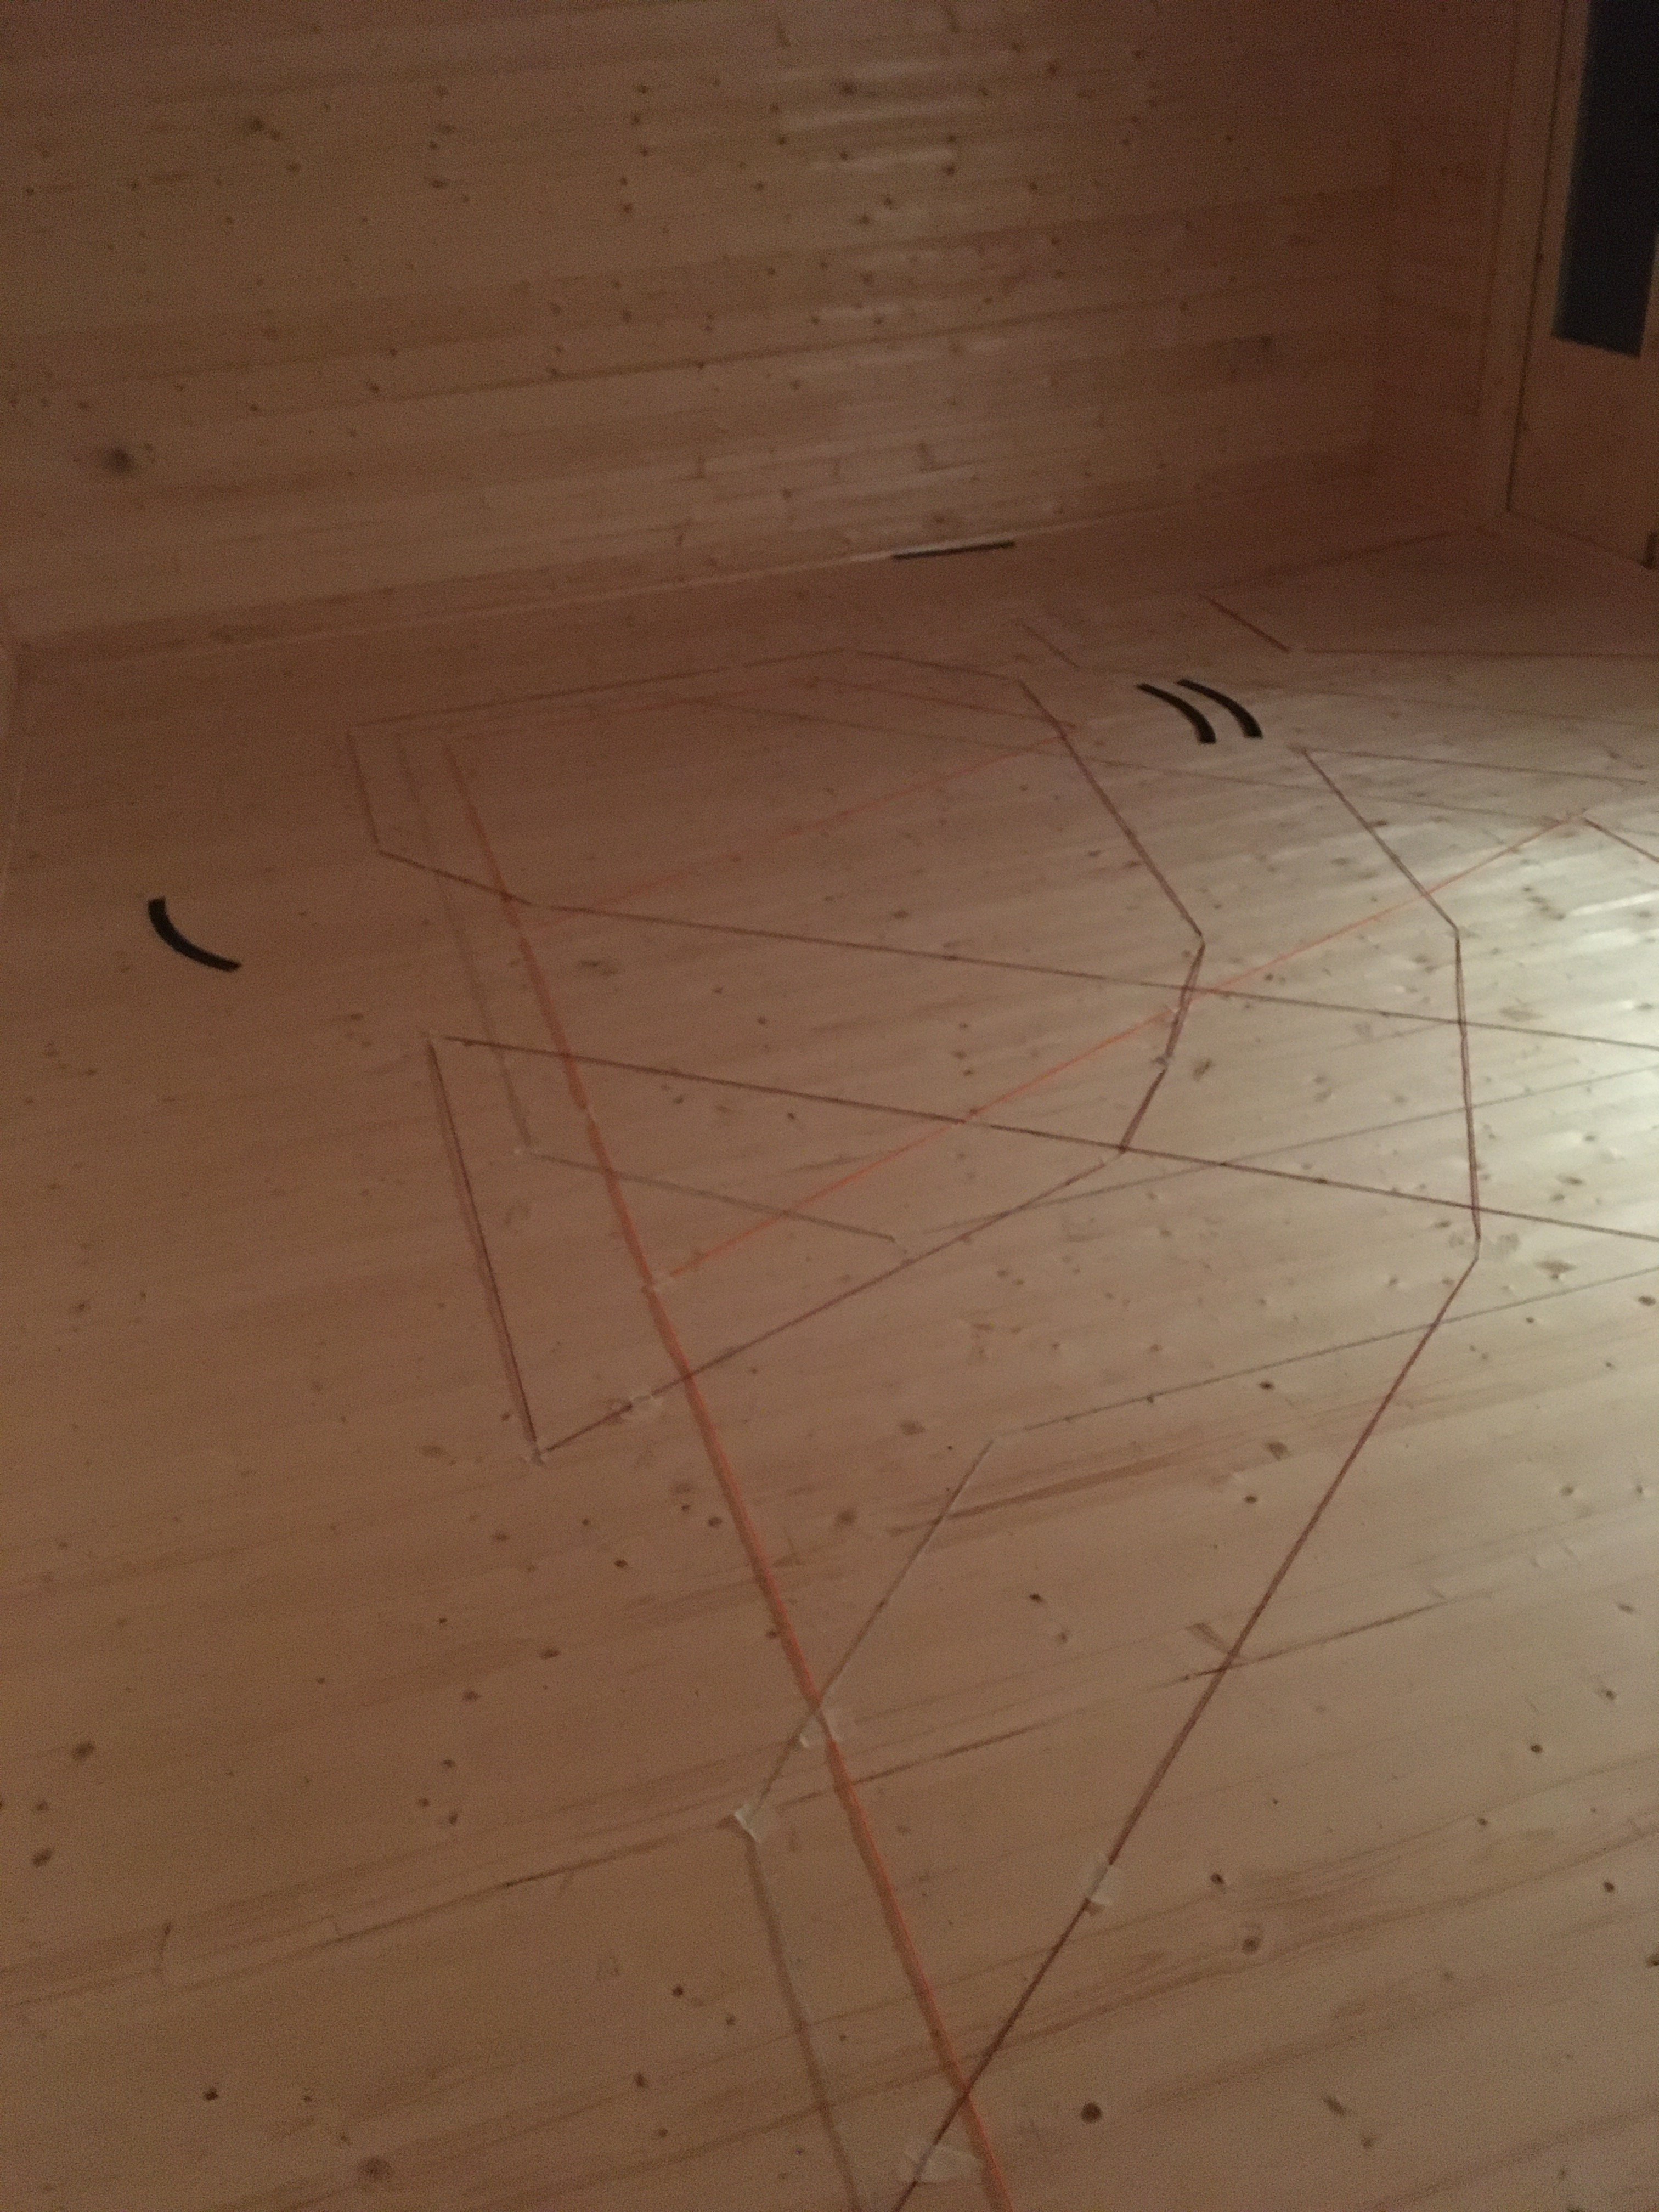
Quick update - nothing has happened on the Railway cabin since last March! Basically I need to run electricity out to the cabin in order to have lighting and heat. And for that I need my brother-in-law's help (he's an electrician). However we both have small kids, both were super busy during the year and had other priorities and it got put on the long finger. Also, since the cabin was bought, the stables then took priority (!) and they got built over the summer. Also had planned to do it at Christmas, but then we all got COVID in our house so that put the cibosh on that. Hopefully we will get it done on the upcoming bank holiday Monday and then we're off In the meantime I can share a few pics from when I was planning out the layout. The main feature will be a full length (loco plus 8 carriages - approx 2.8 metres) ) terminus station, something I've always wanted. As you can see below, technically it would fit at the end of the cabin (4 metres) but it would be a tight fit with station buildings / scenery etc and might look a little staged when the train is pulling out of the station and immediately into a curve (although I'm sure there's an example in real life - there usually is!). Nevertheless, looking at the next photo where the train is along the long edge of the cabin (6 metres) I think it looks much better and am gonna go with that. It gives the train room to straighten up before entering the station and a lot more space for pointwork and busy lineside detaling etc. which is something I love doing And with plans for an 80 cm wide baseboard, with two hidden tracks at the wall for the express line loops, it should give enough space for a 6 platform terminus station, which is plenty And sure while we're at it, here's the new stables that did all the delaying of the railway cabin...but far be it from me to complain

-
Depot #8 by Riverbank Railways (fictional 1980s / early 1990s depot)
Adrian replied to Adrian's topic in Irish Model Layouts
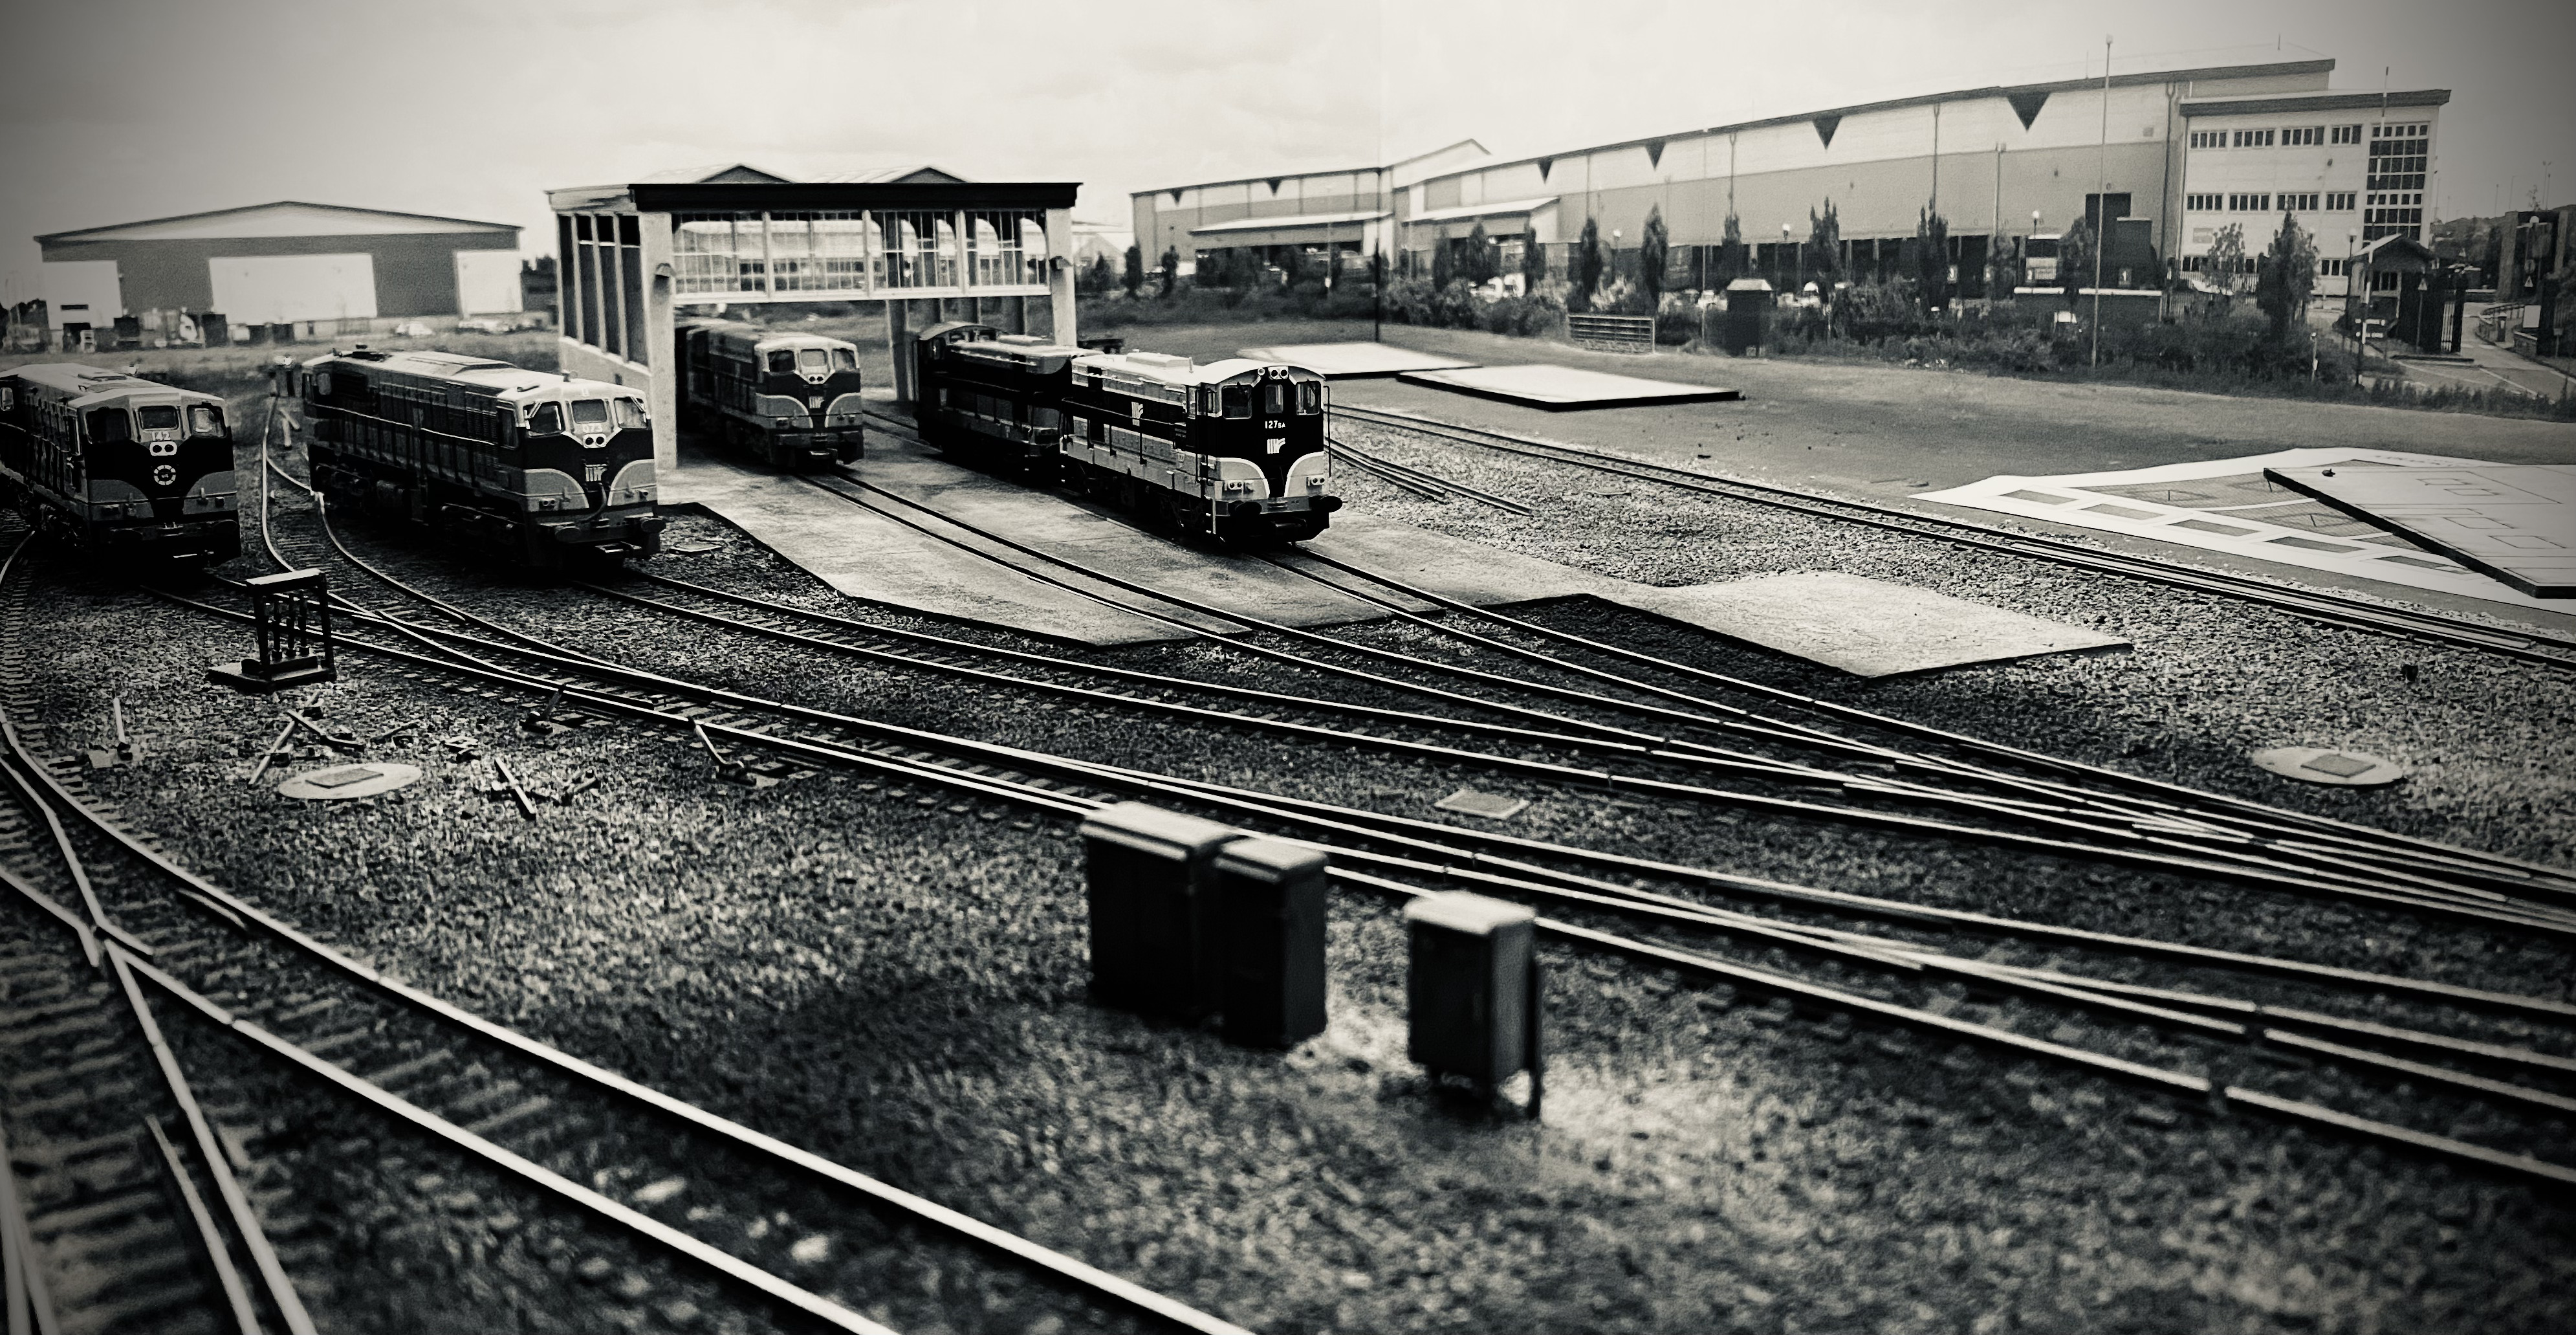
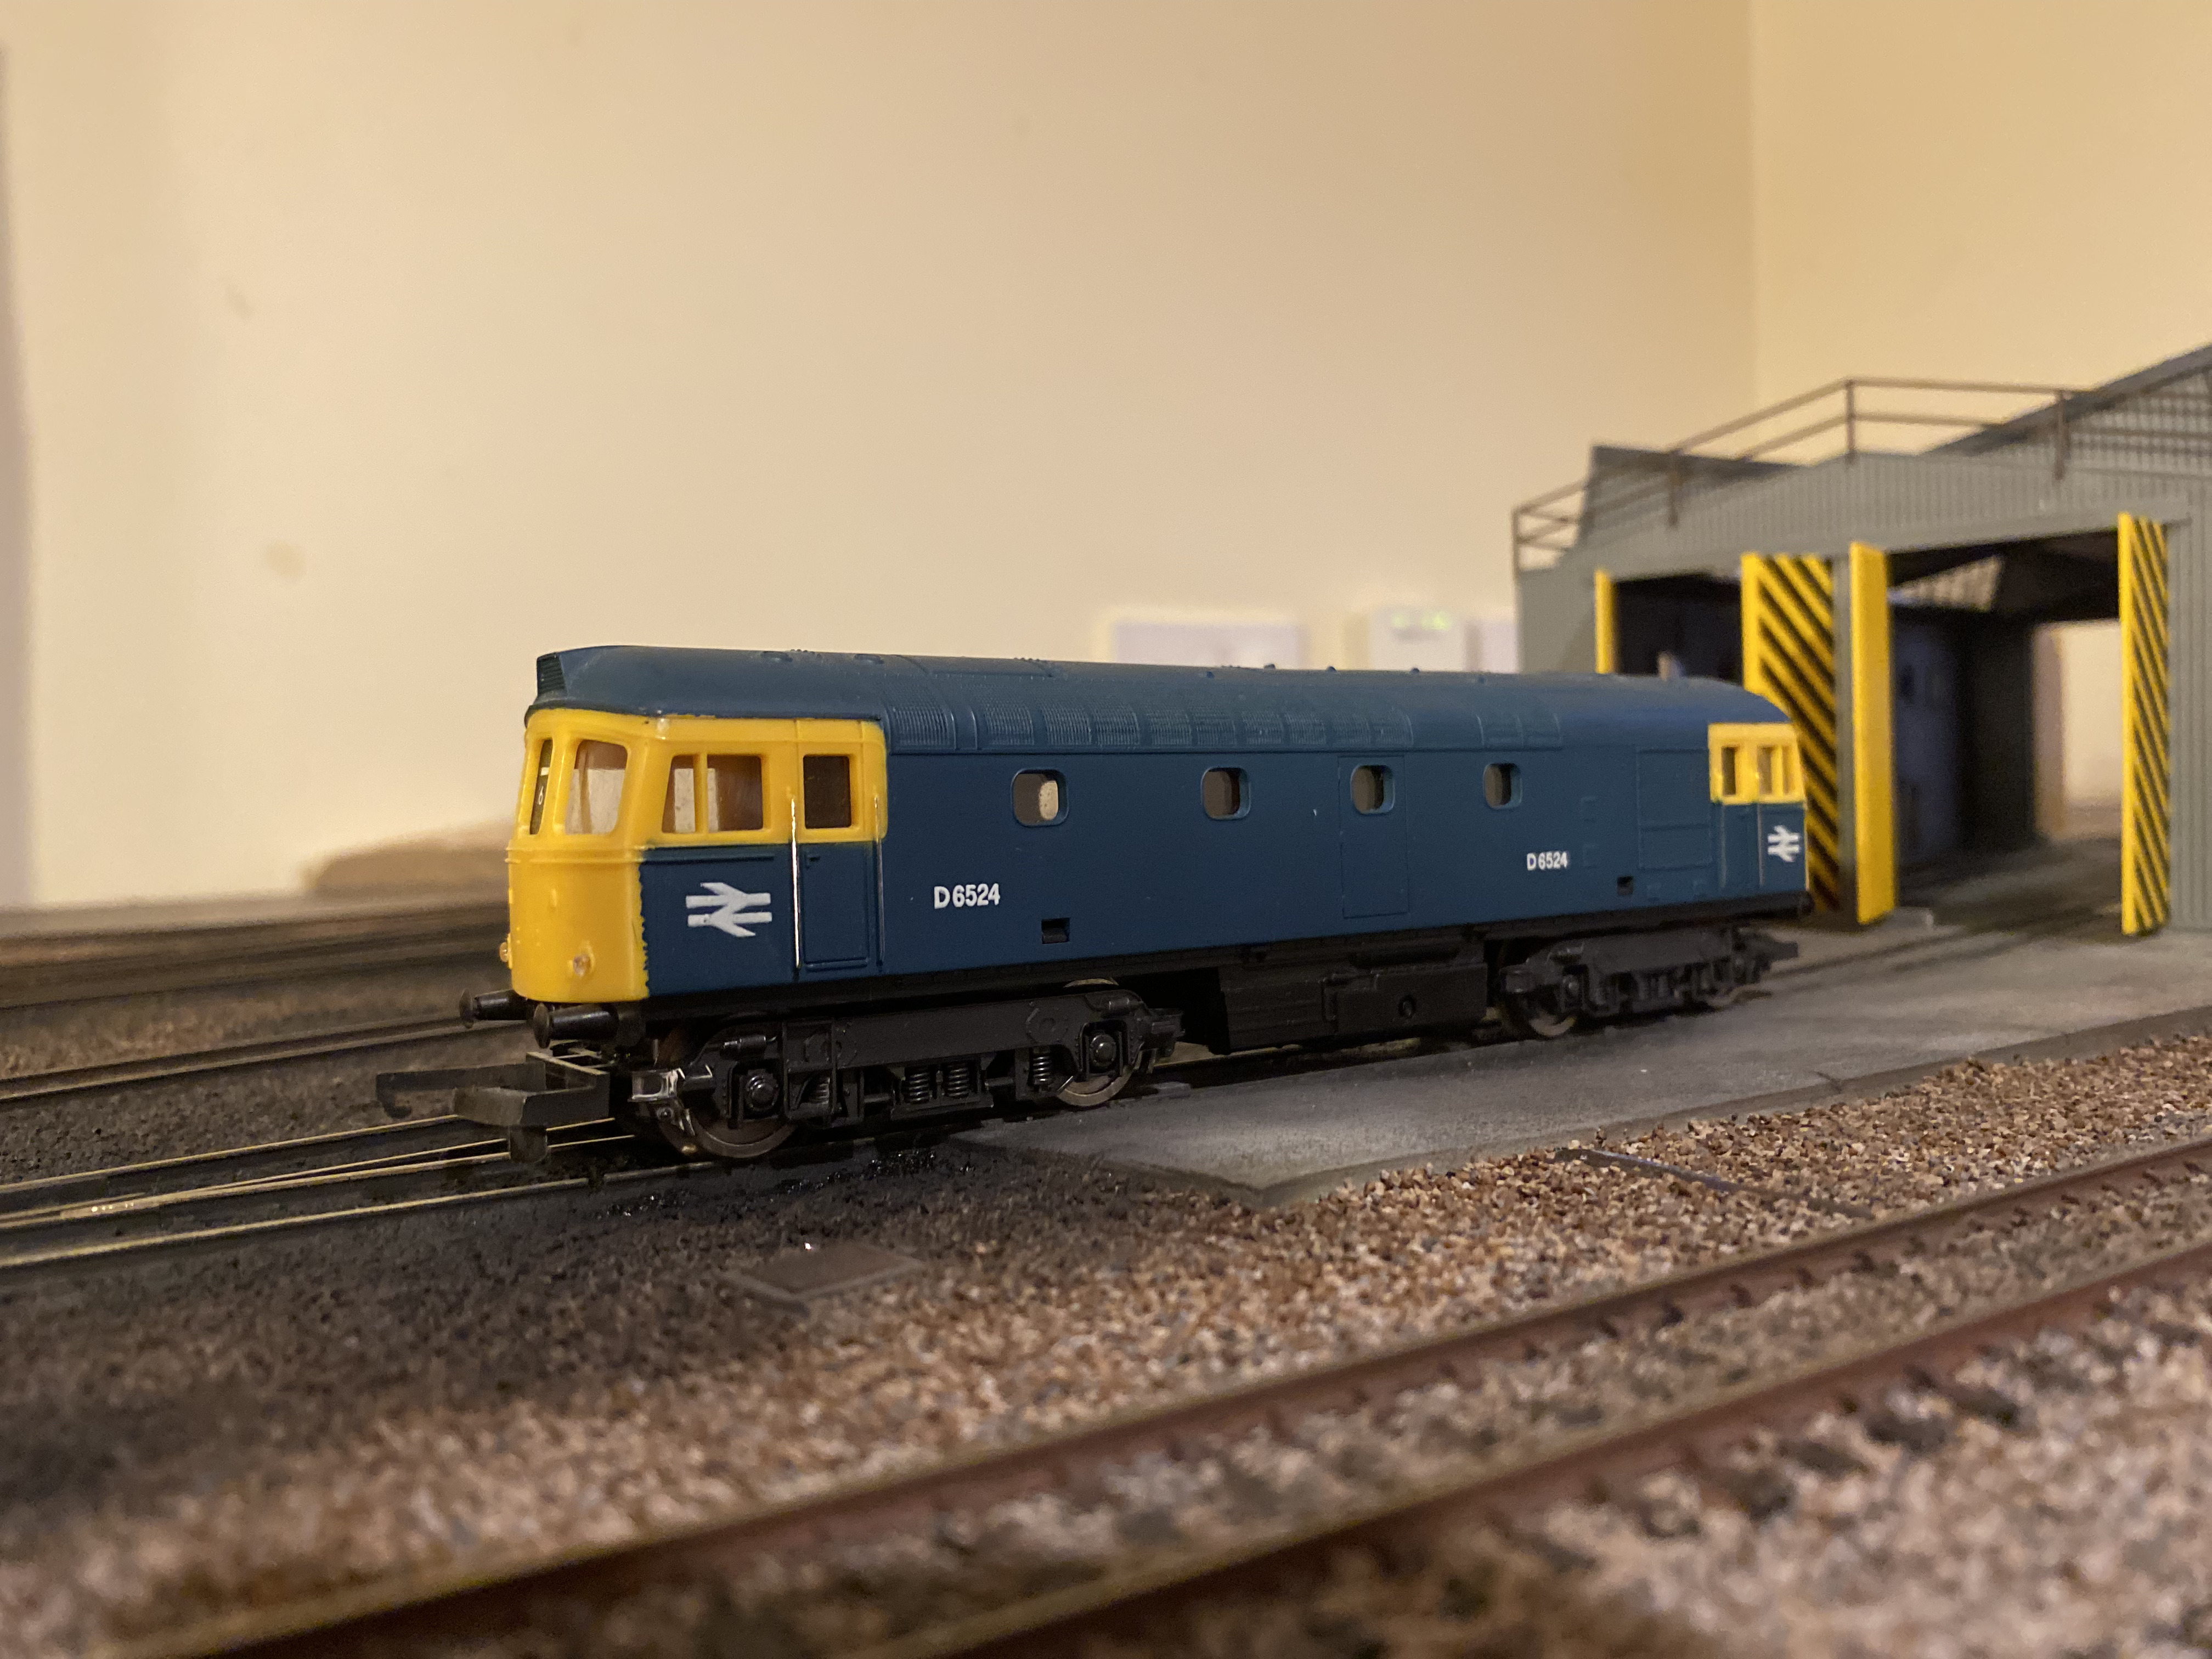
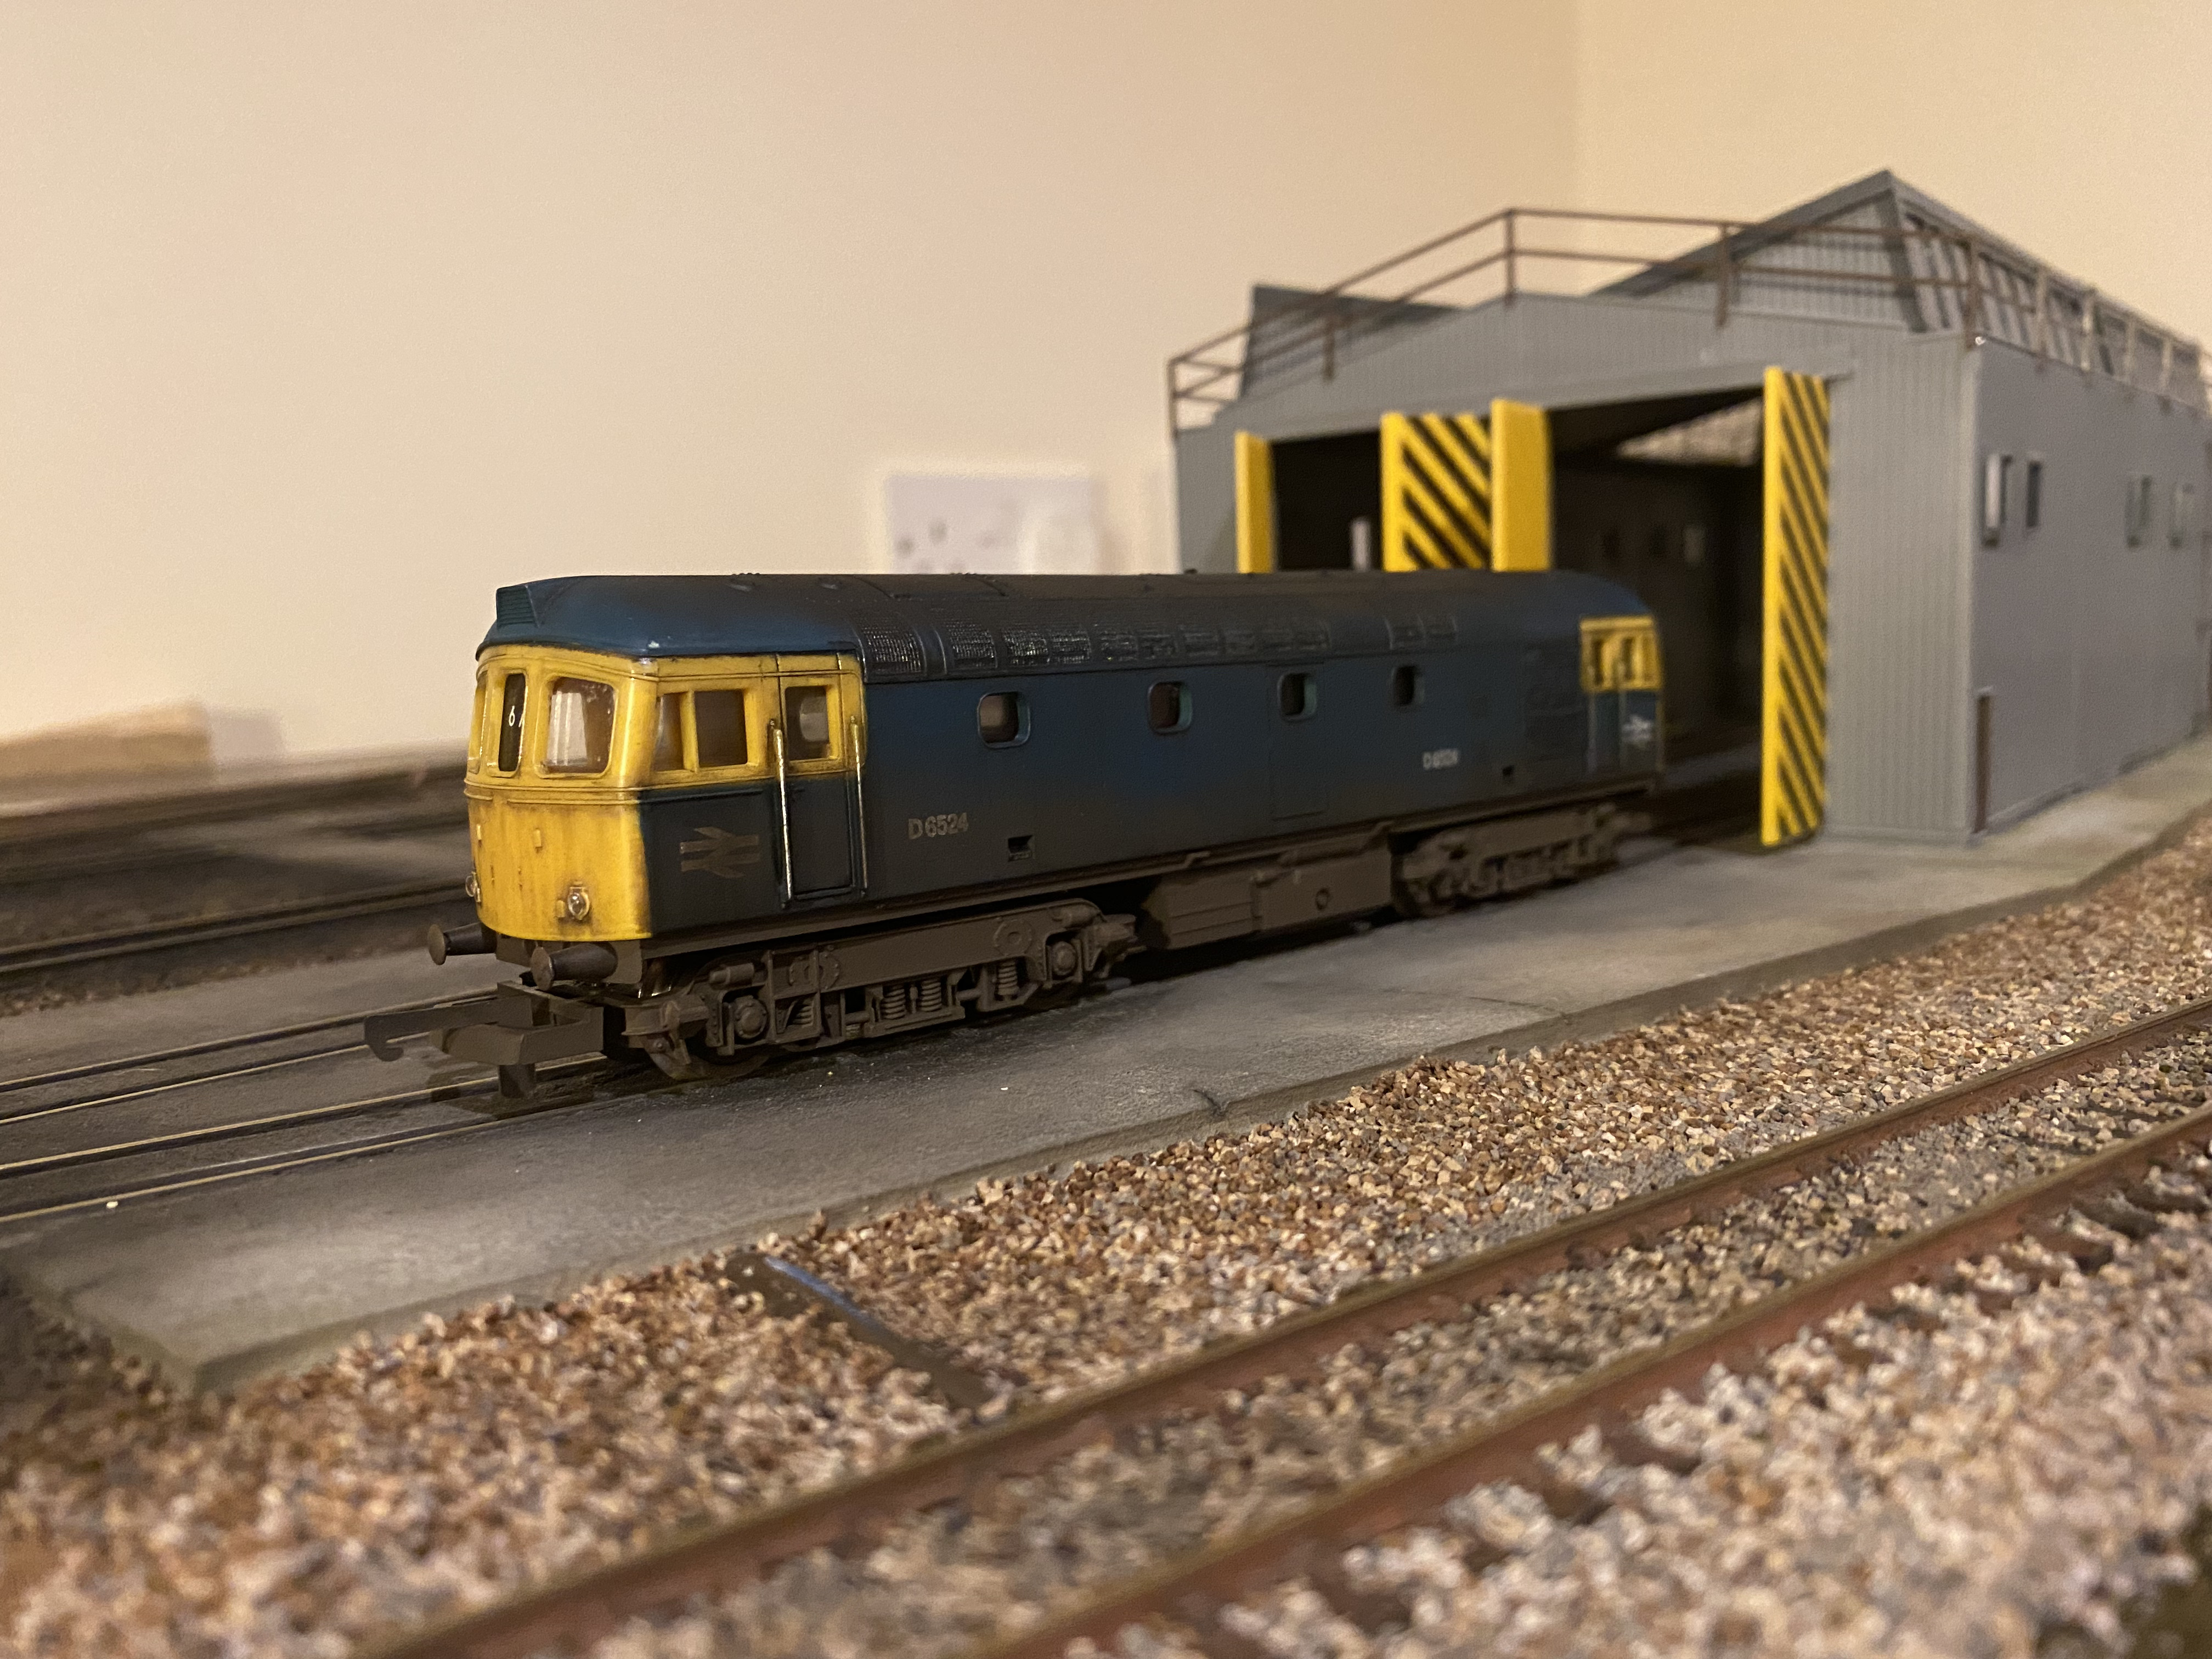
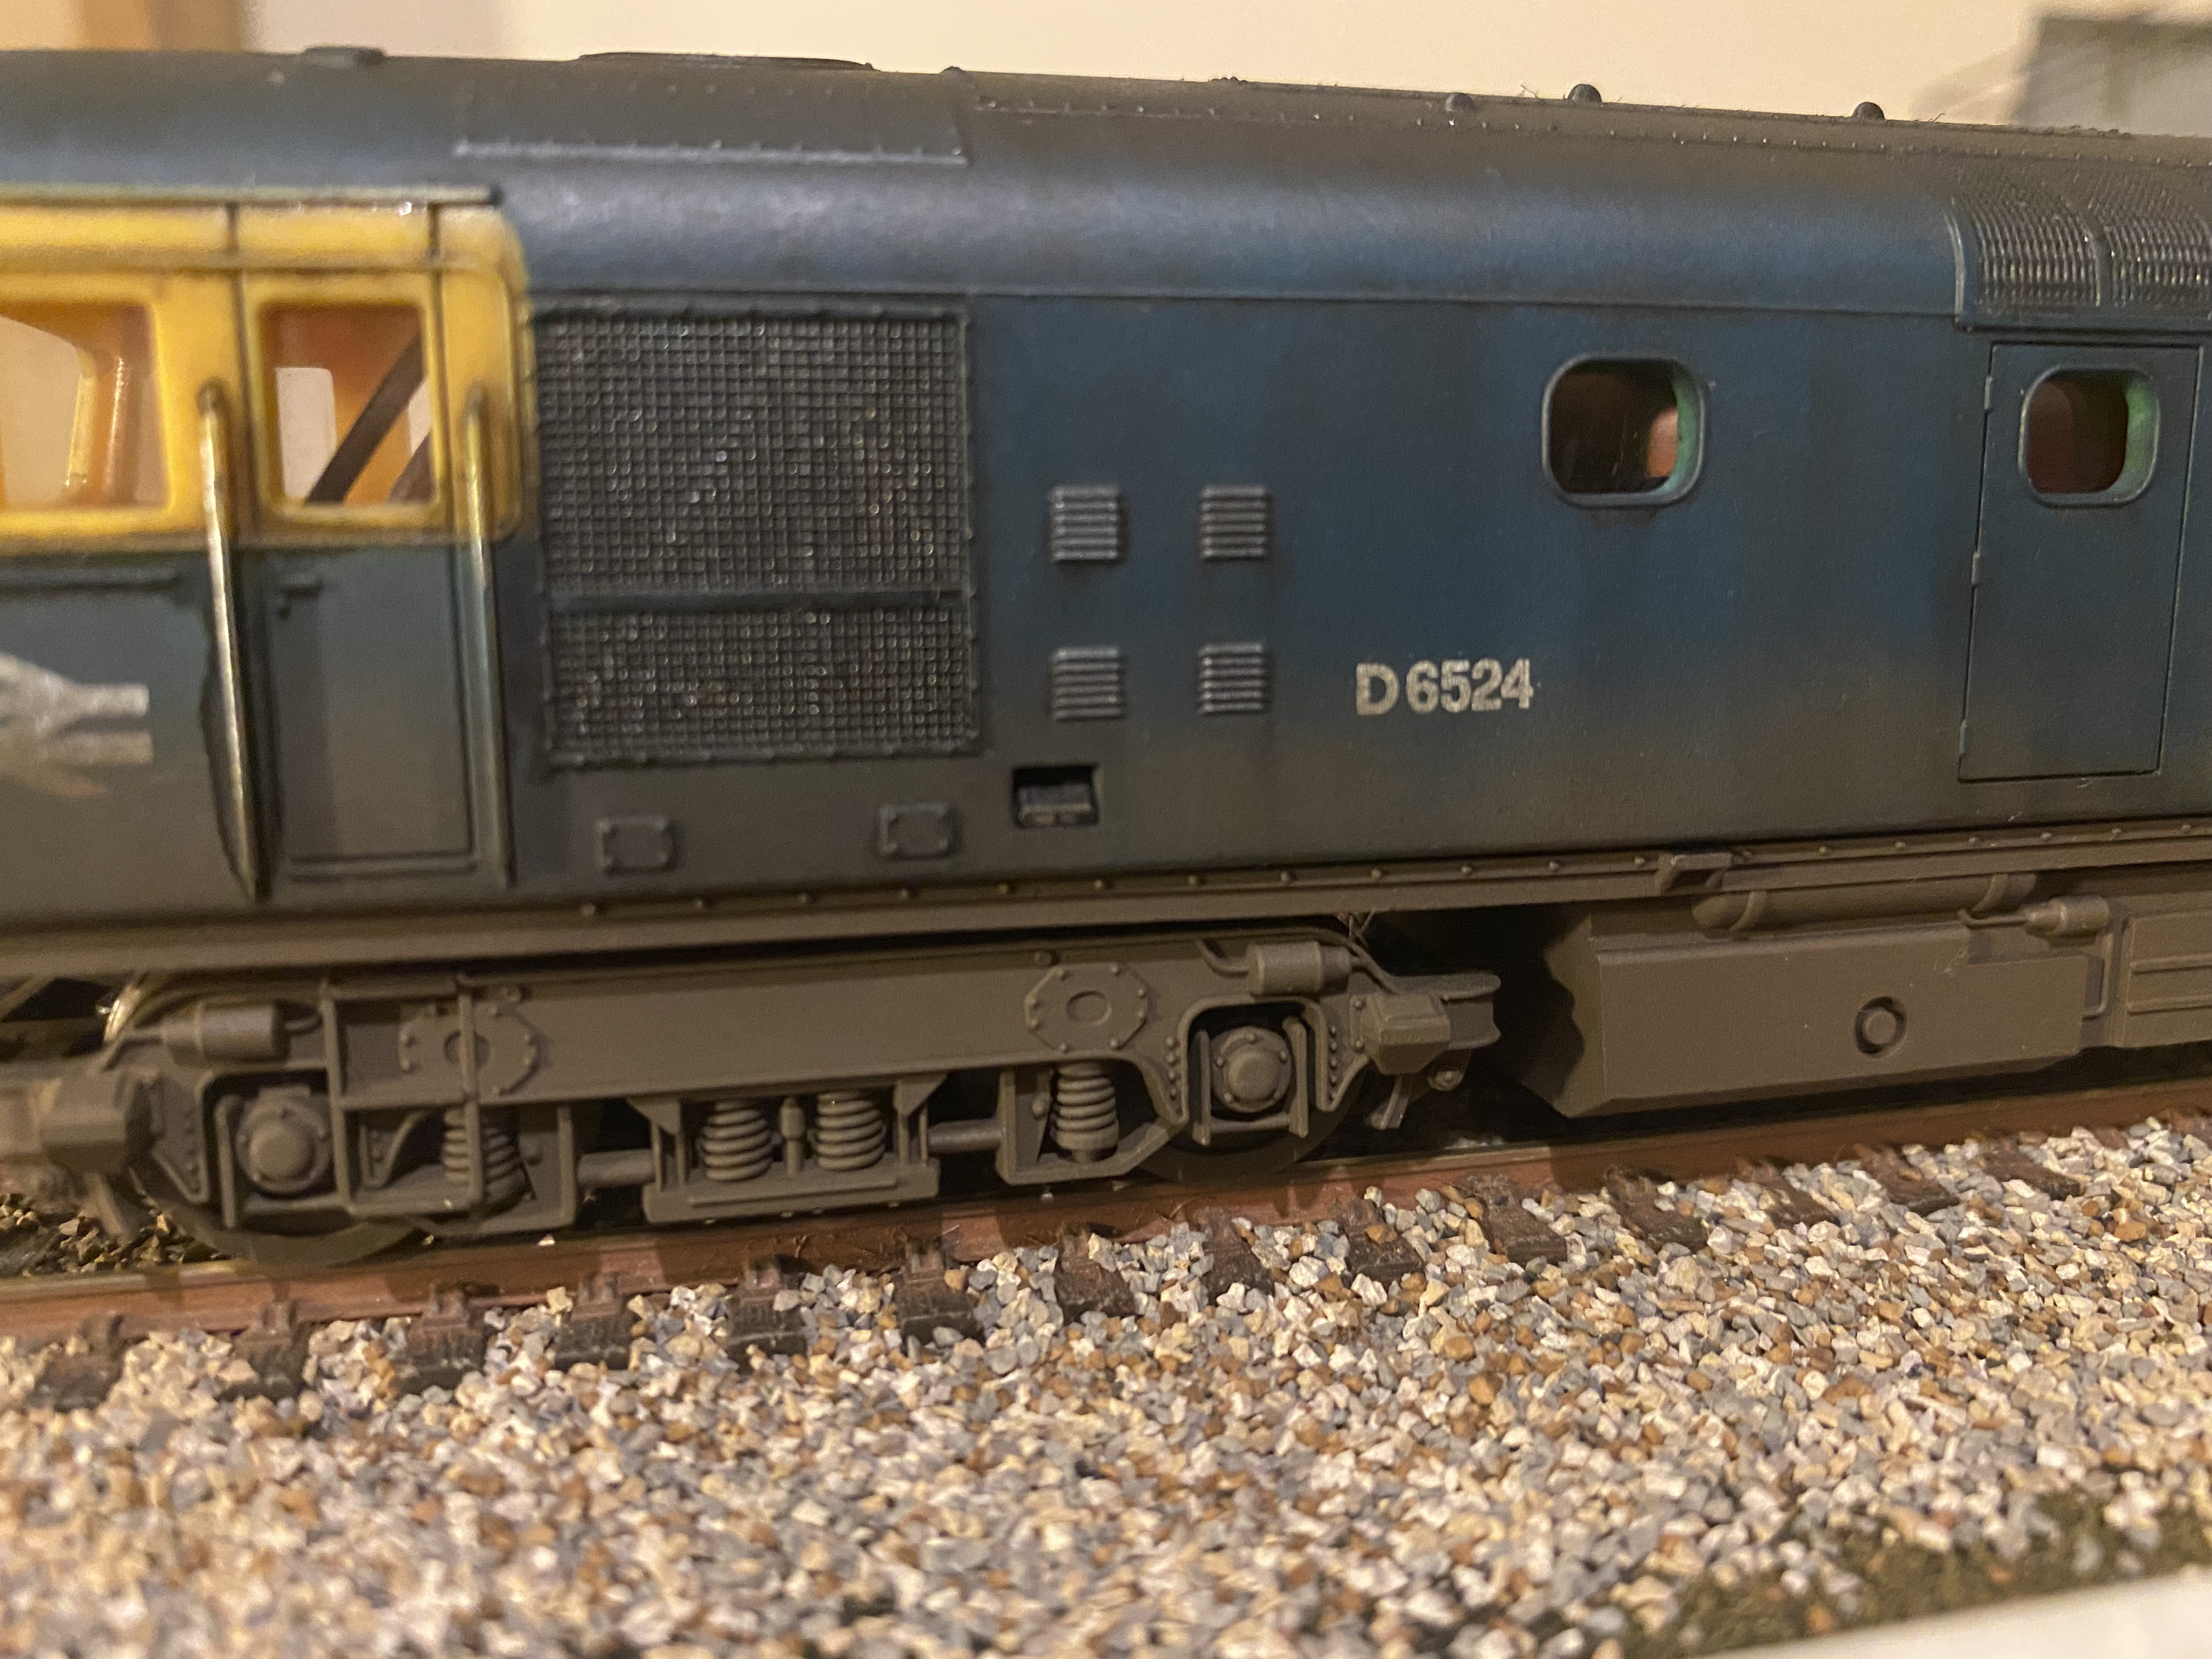
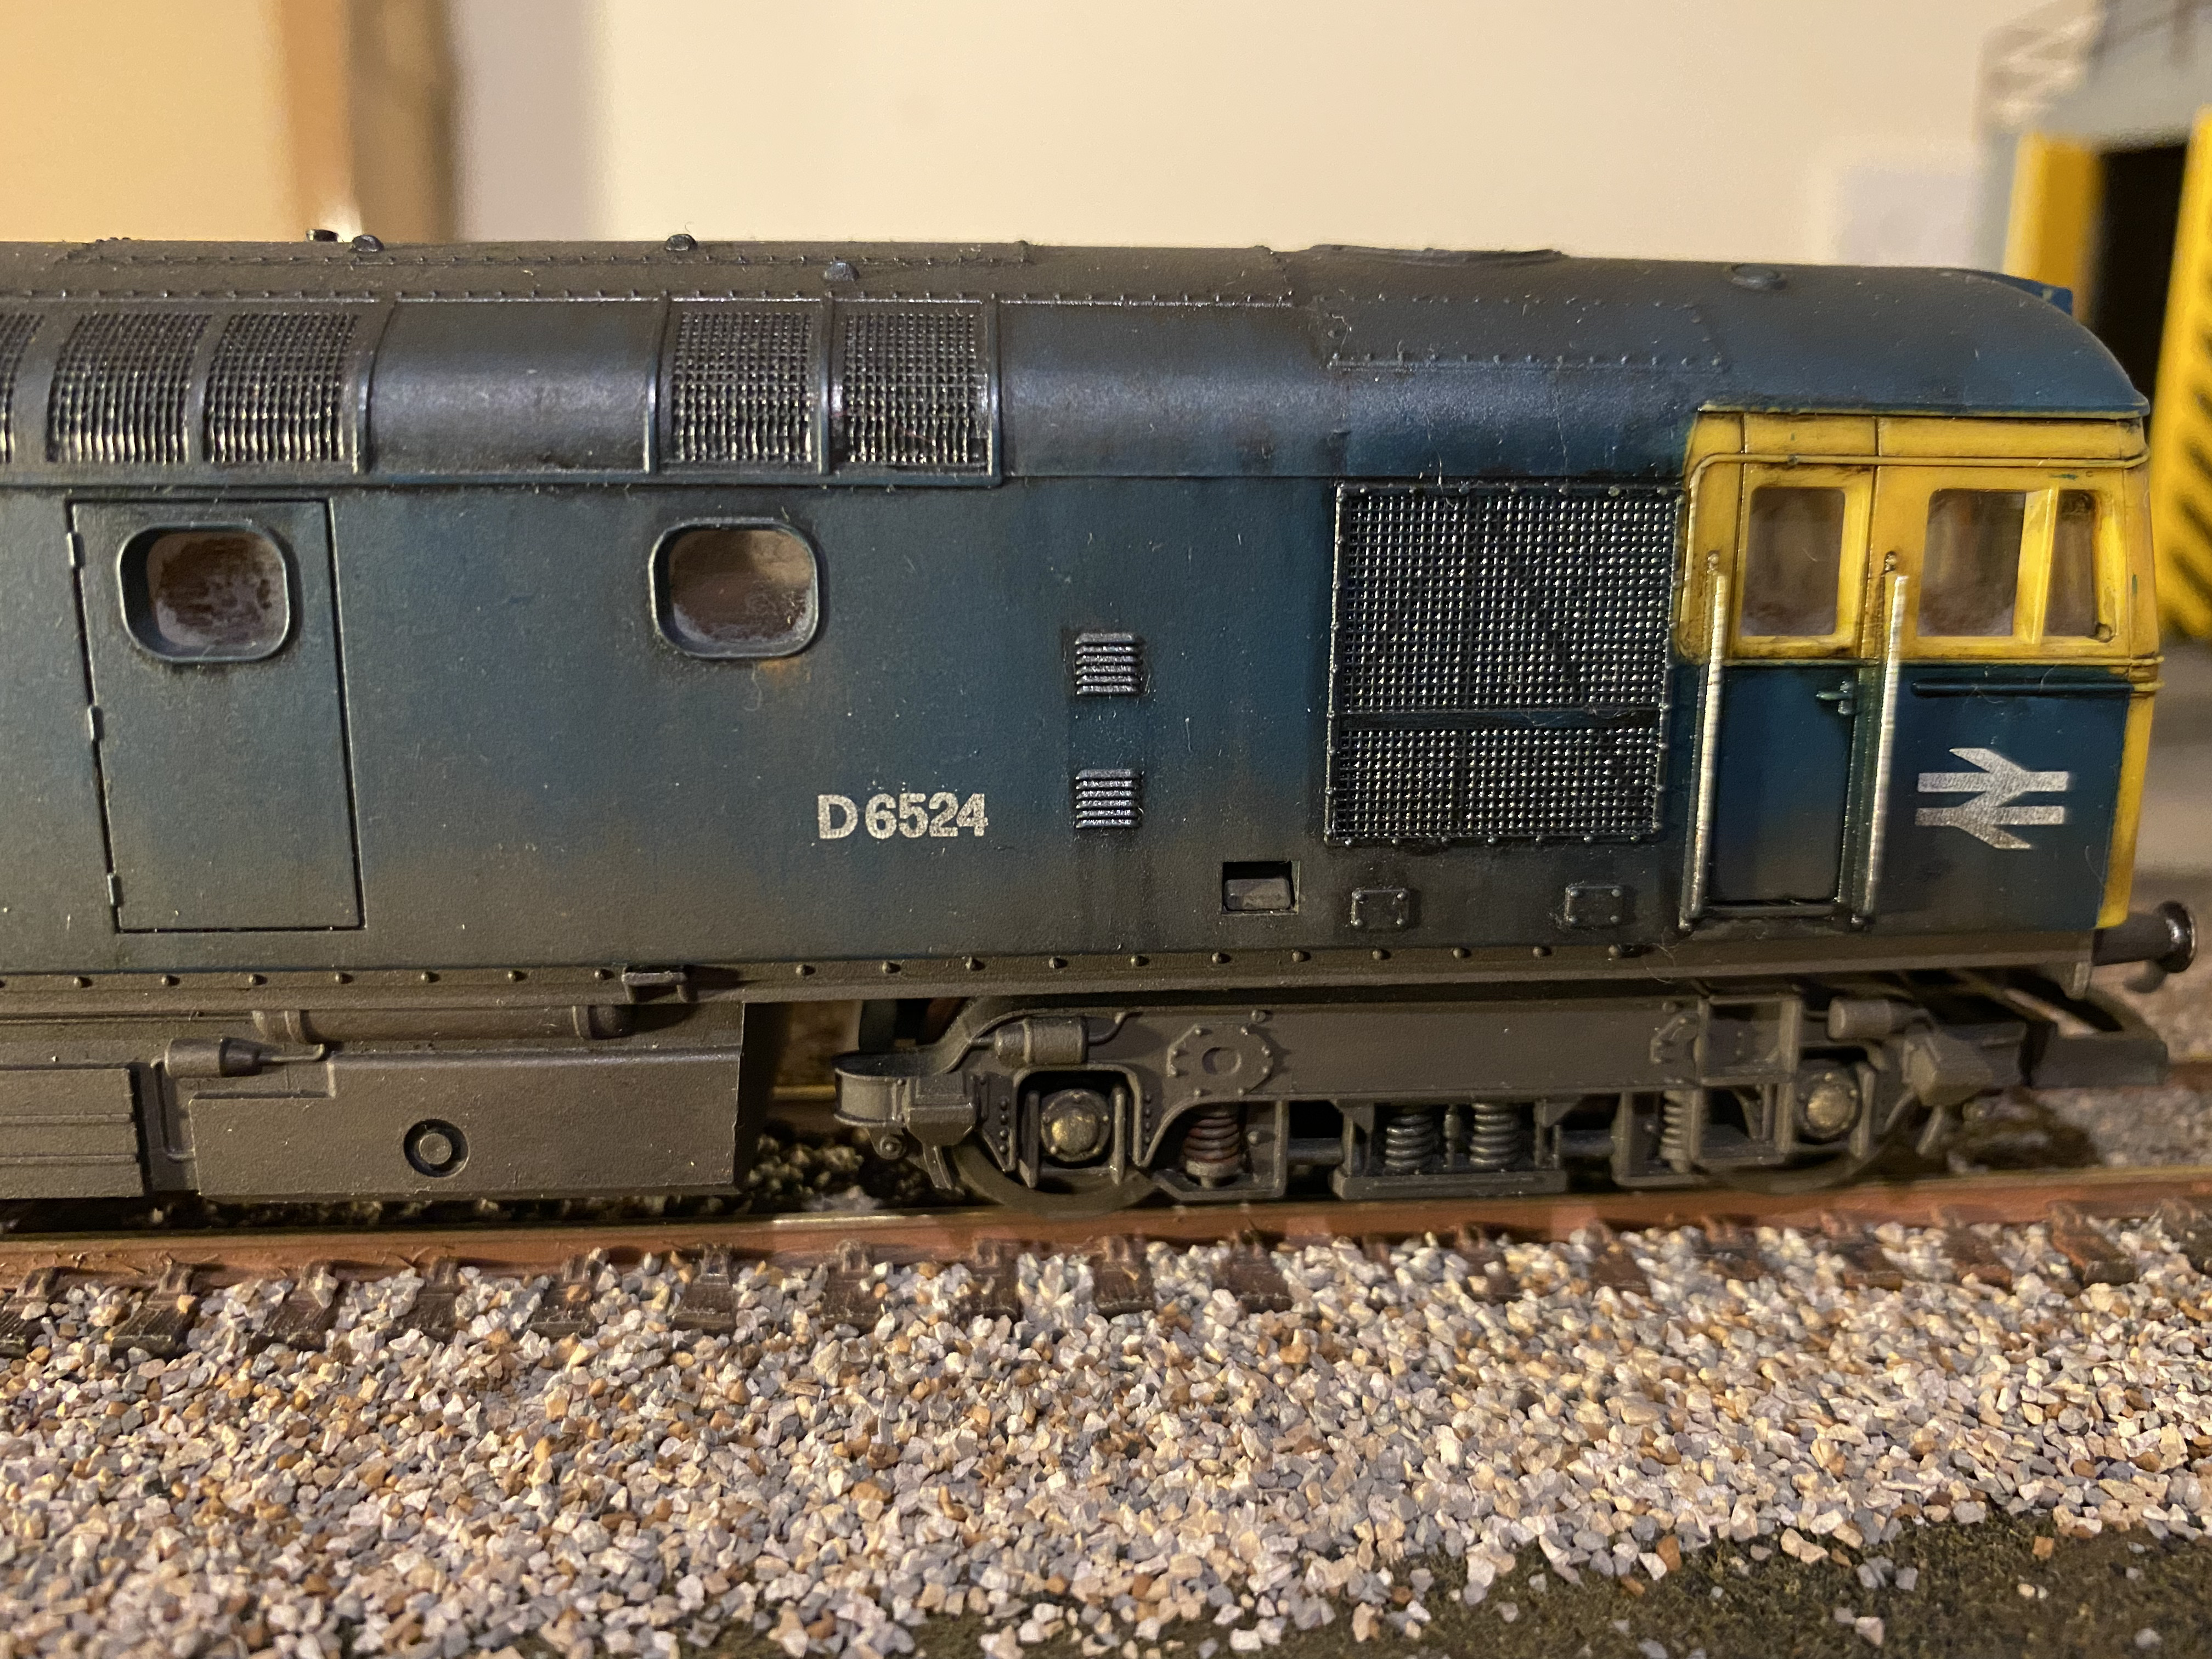
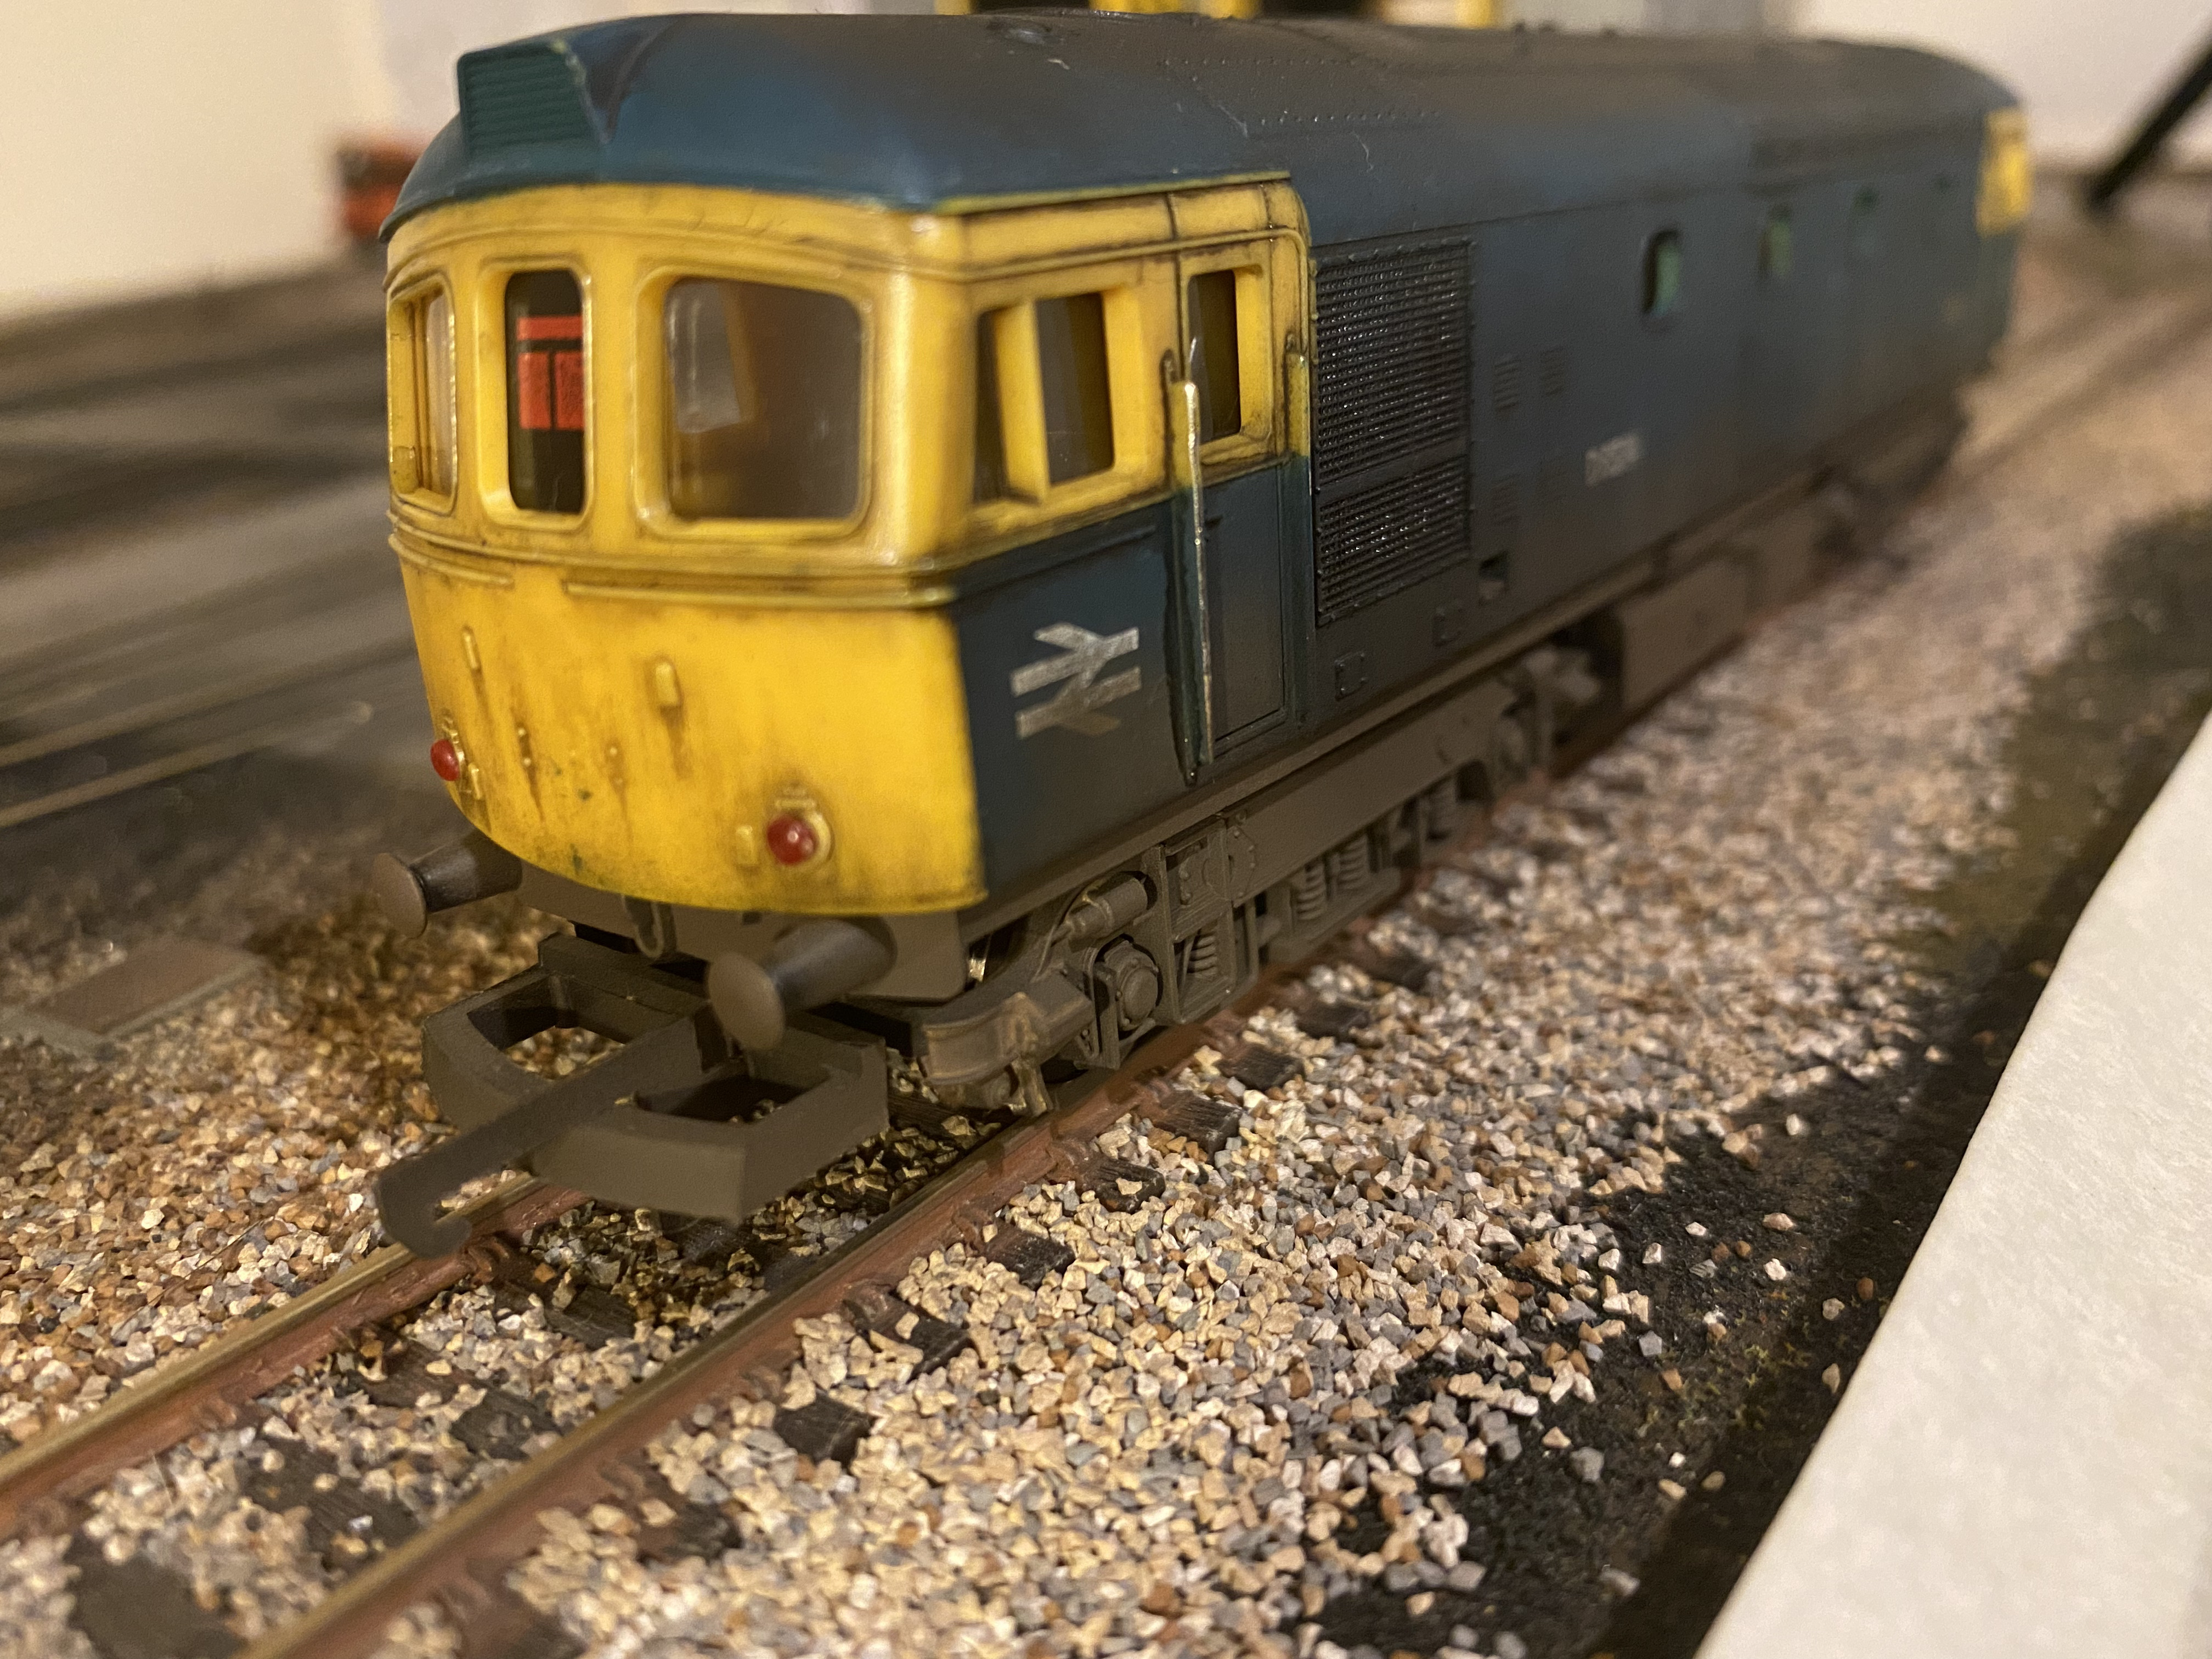
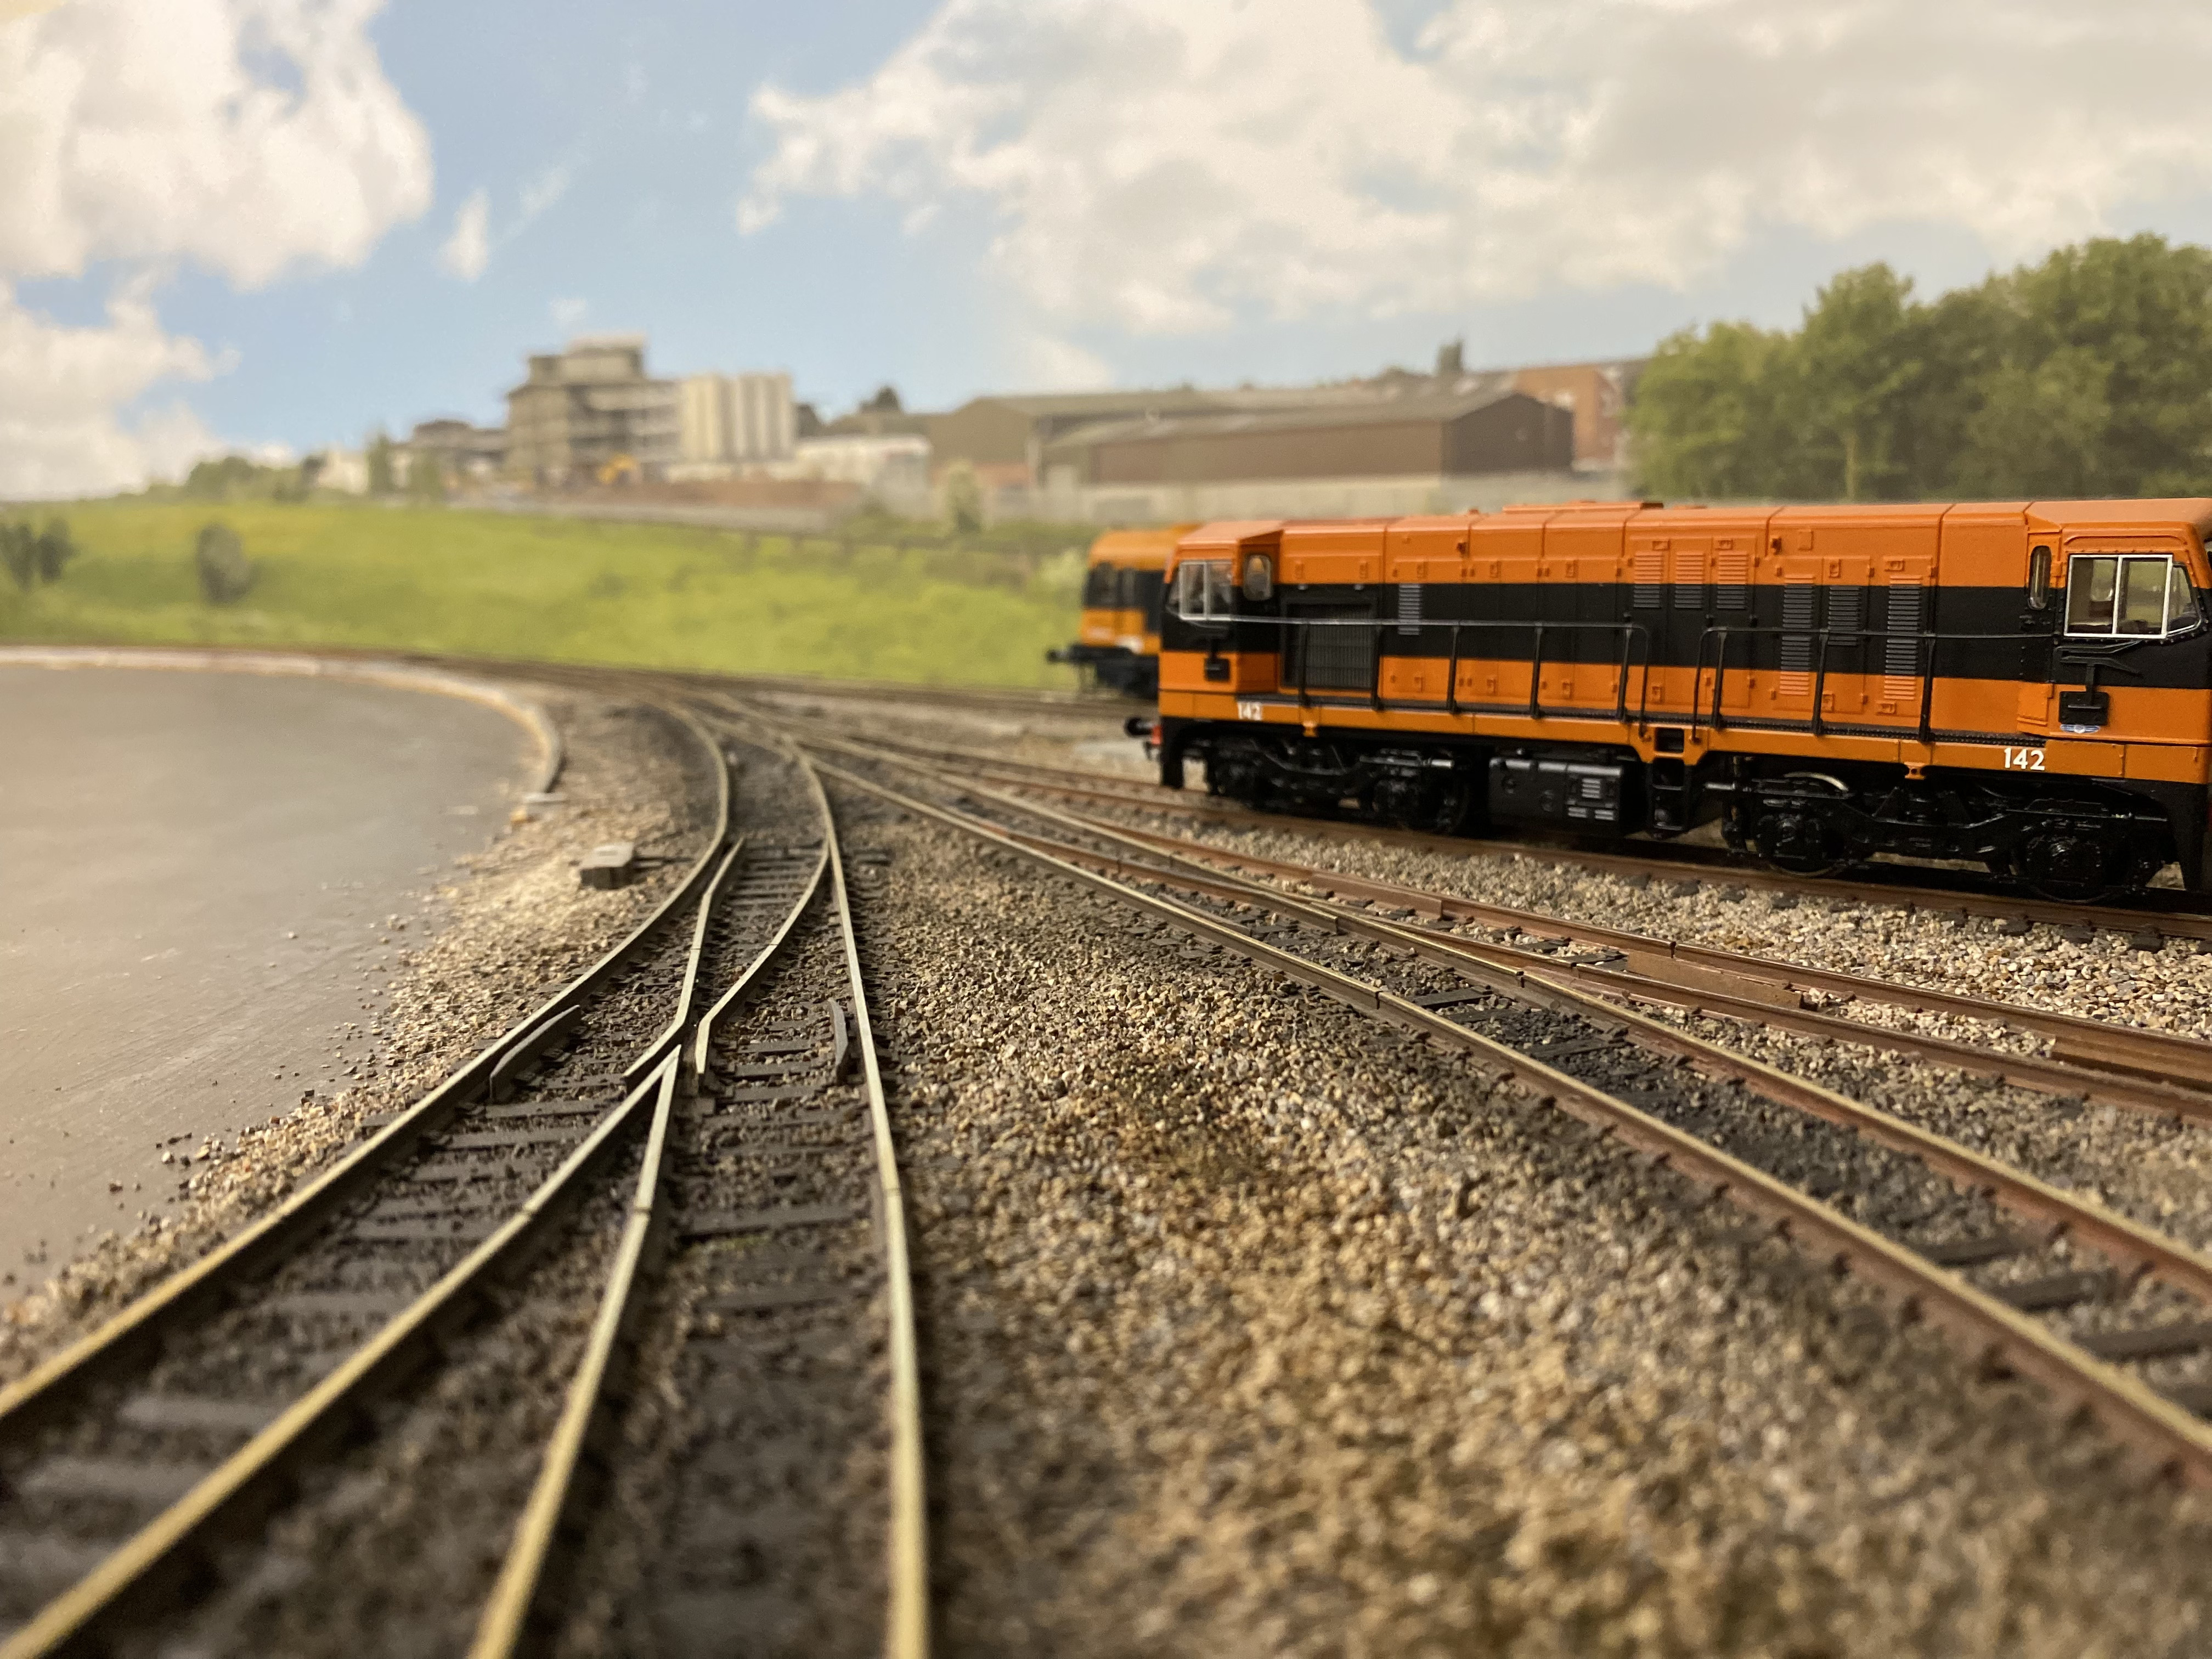
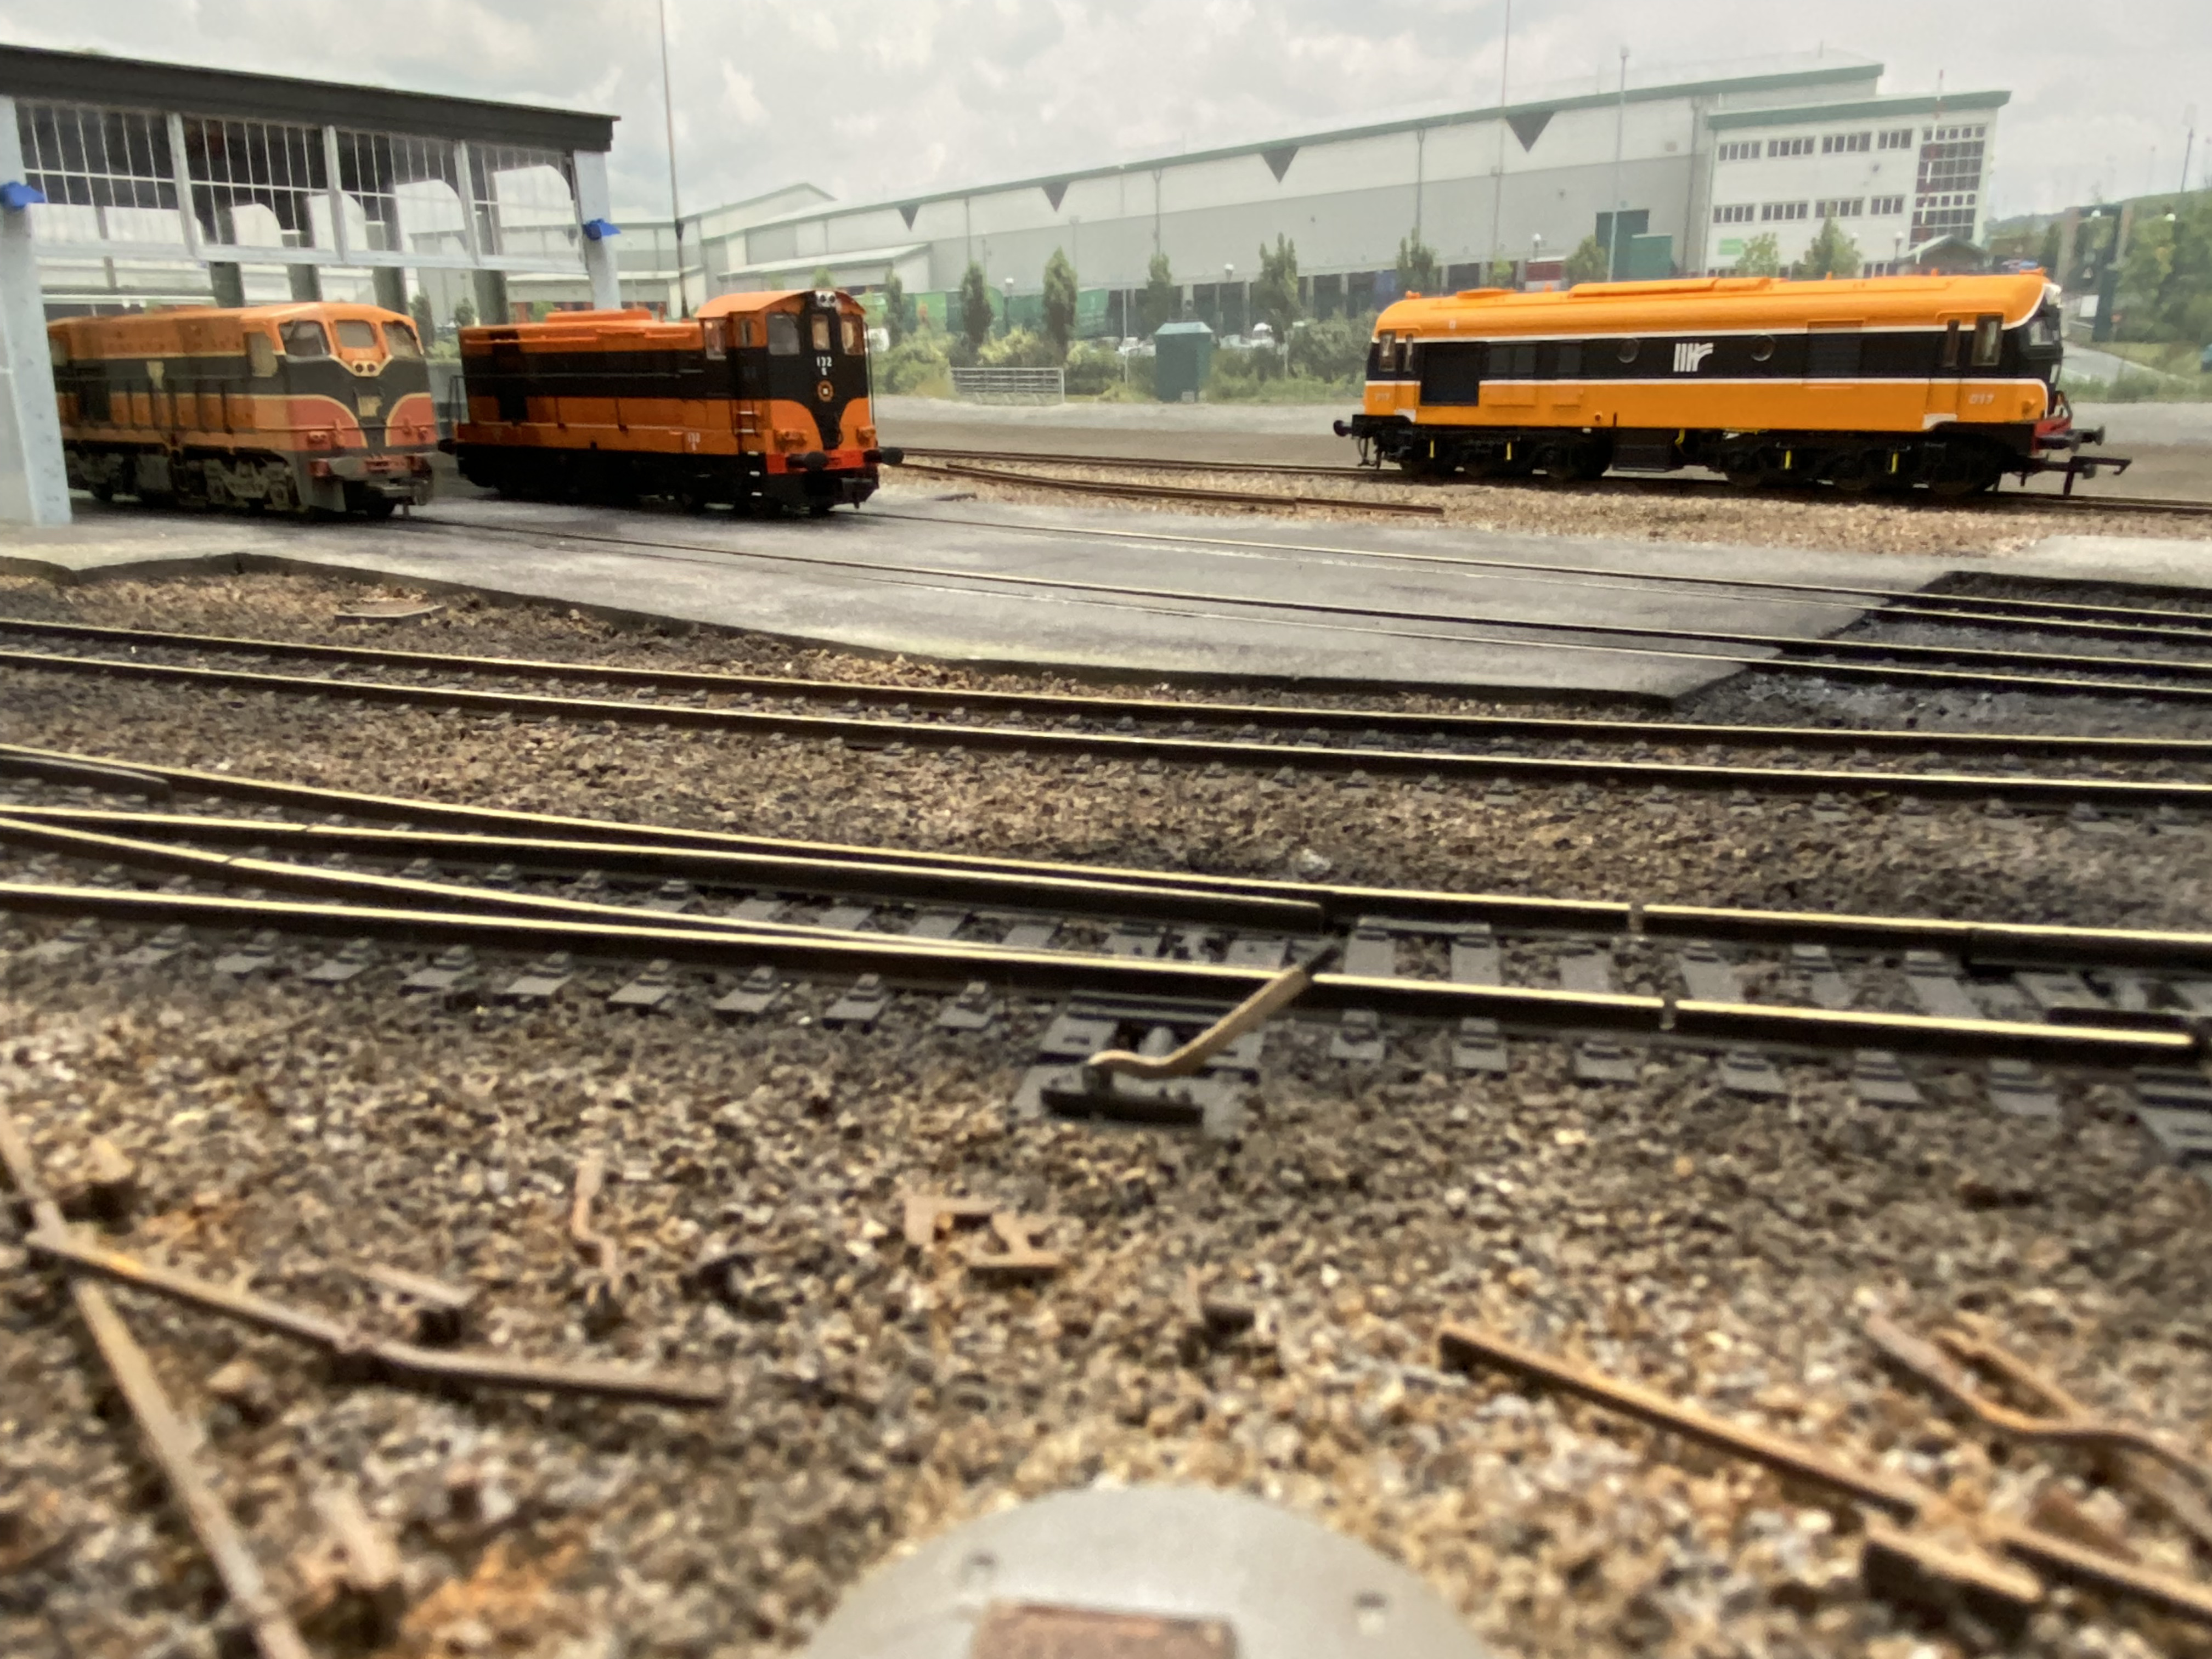
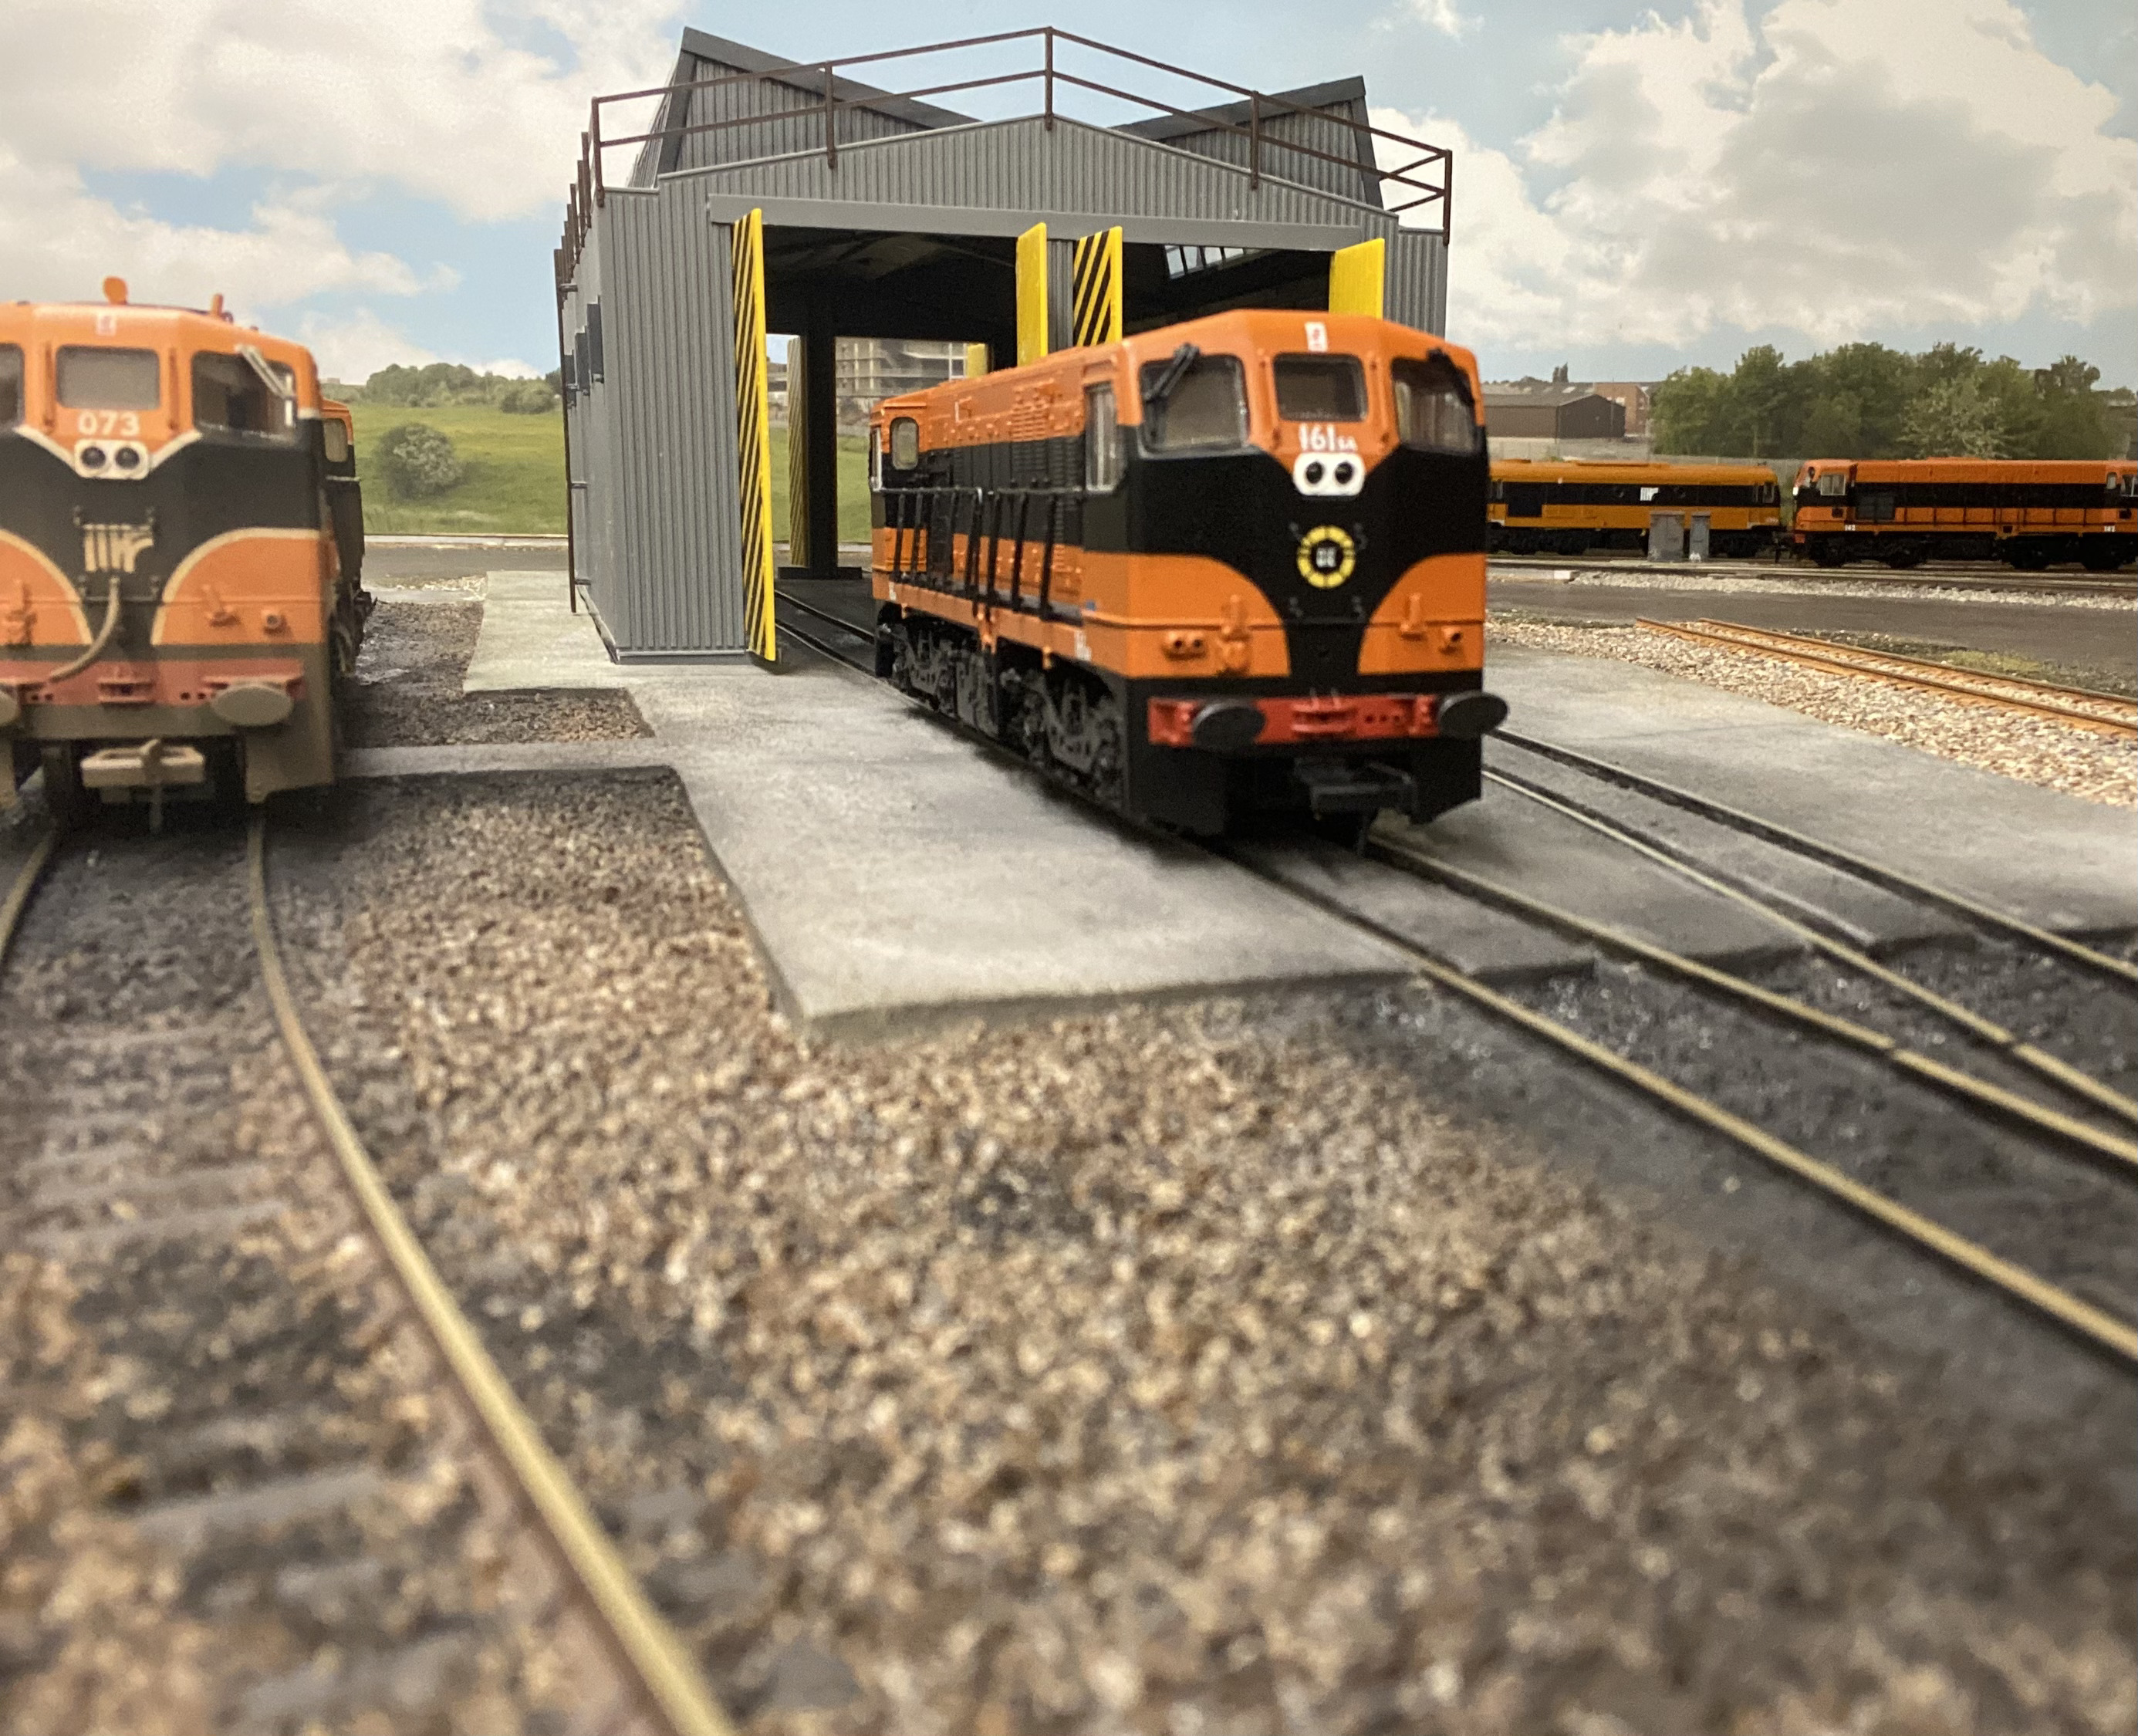
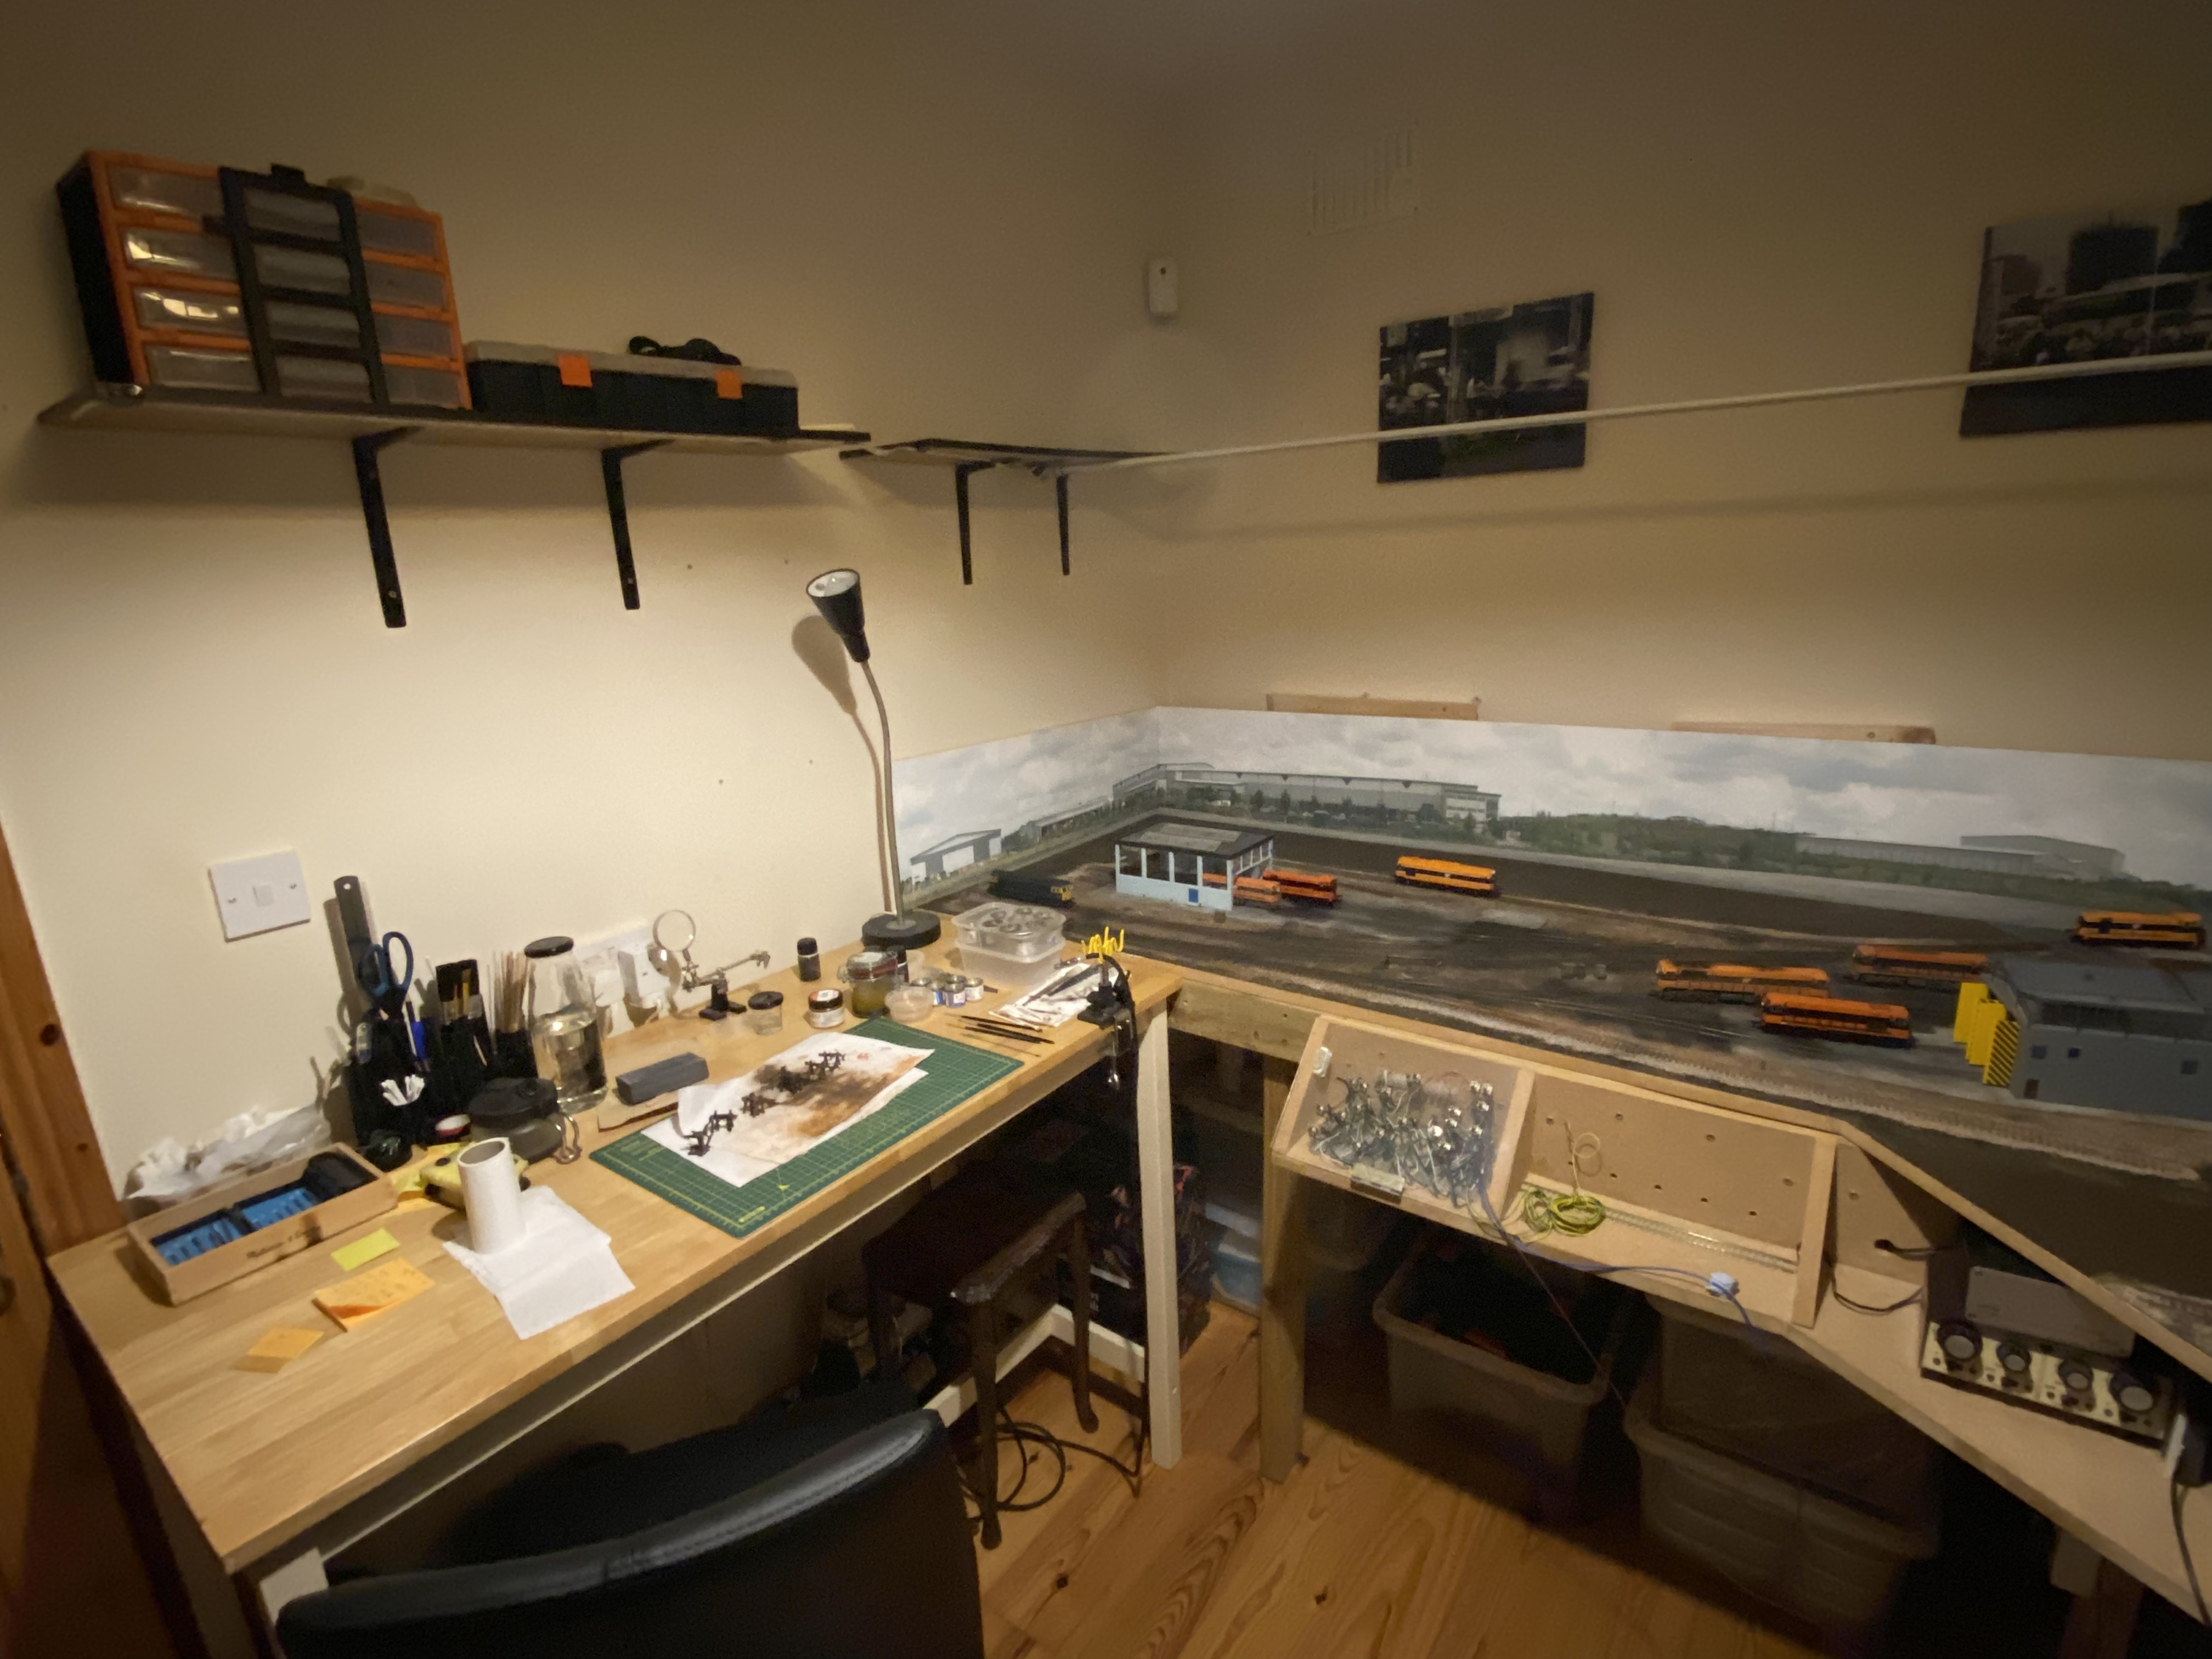
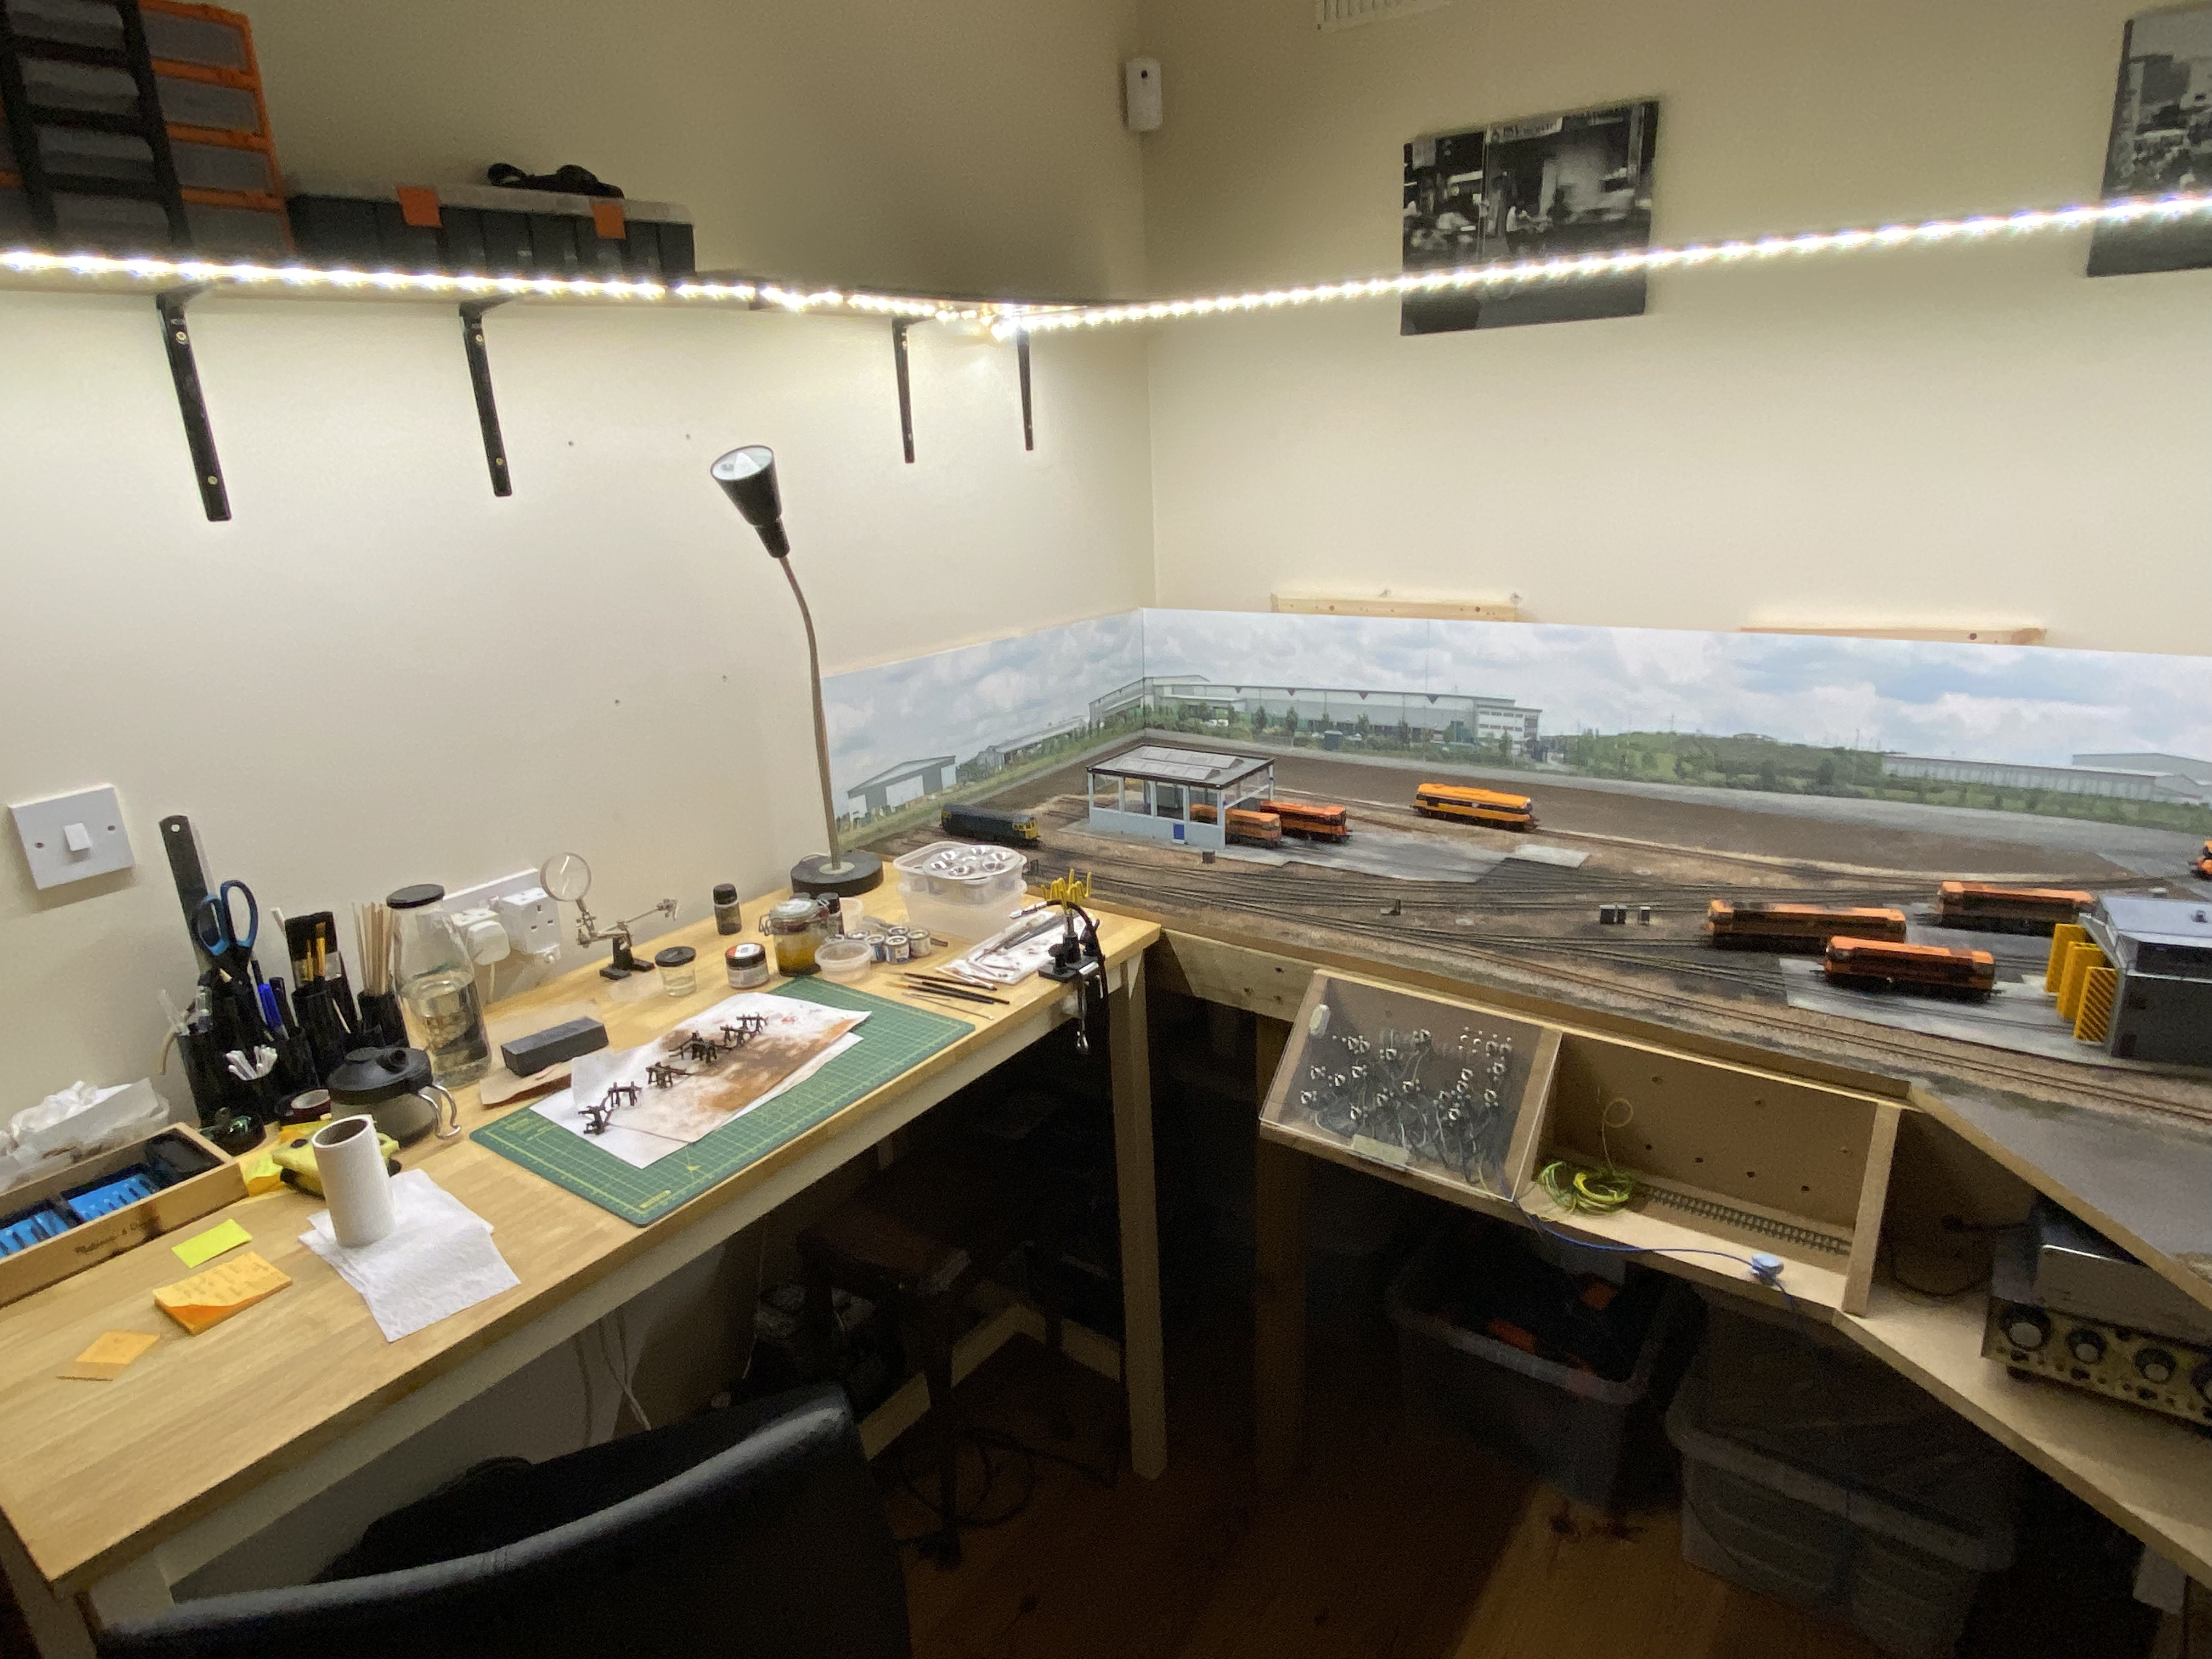
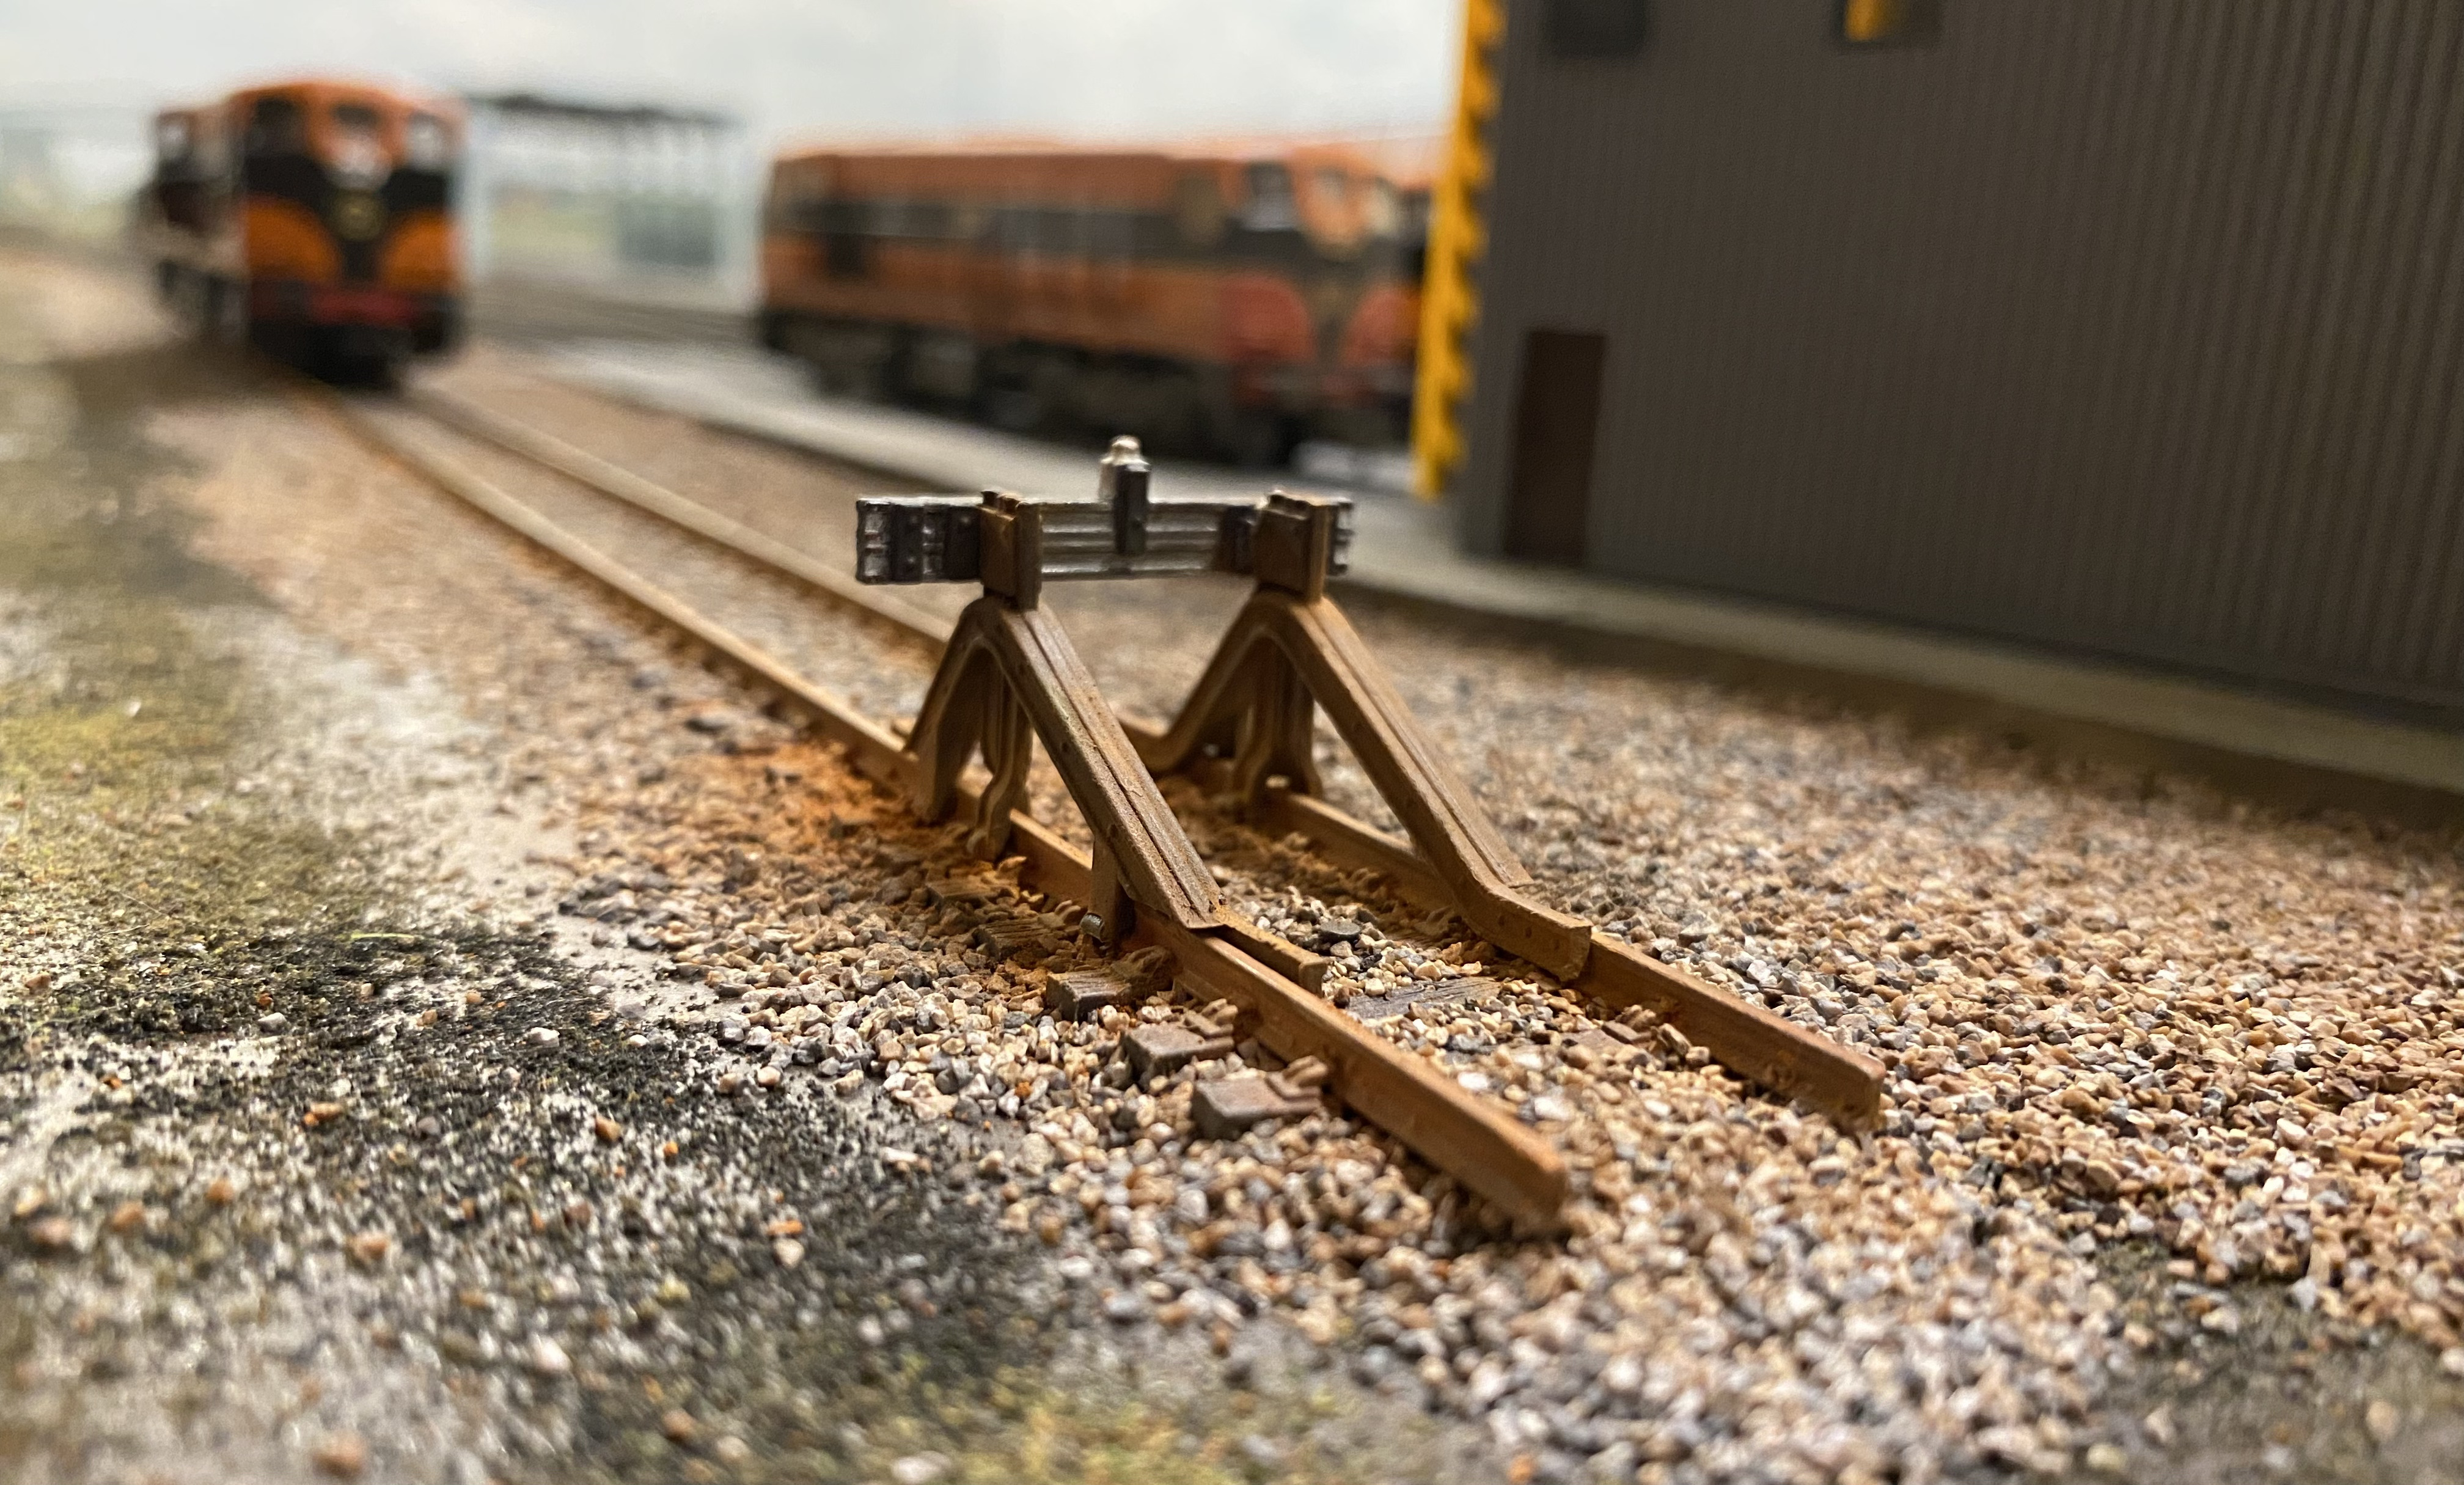
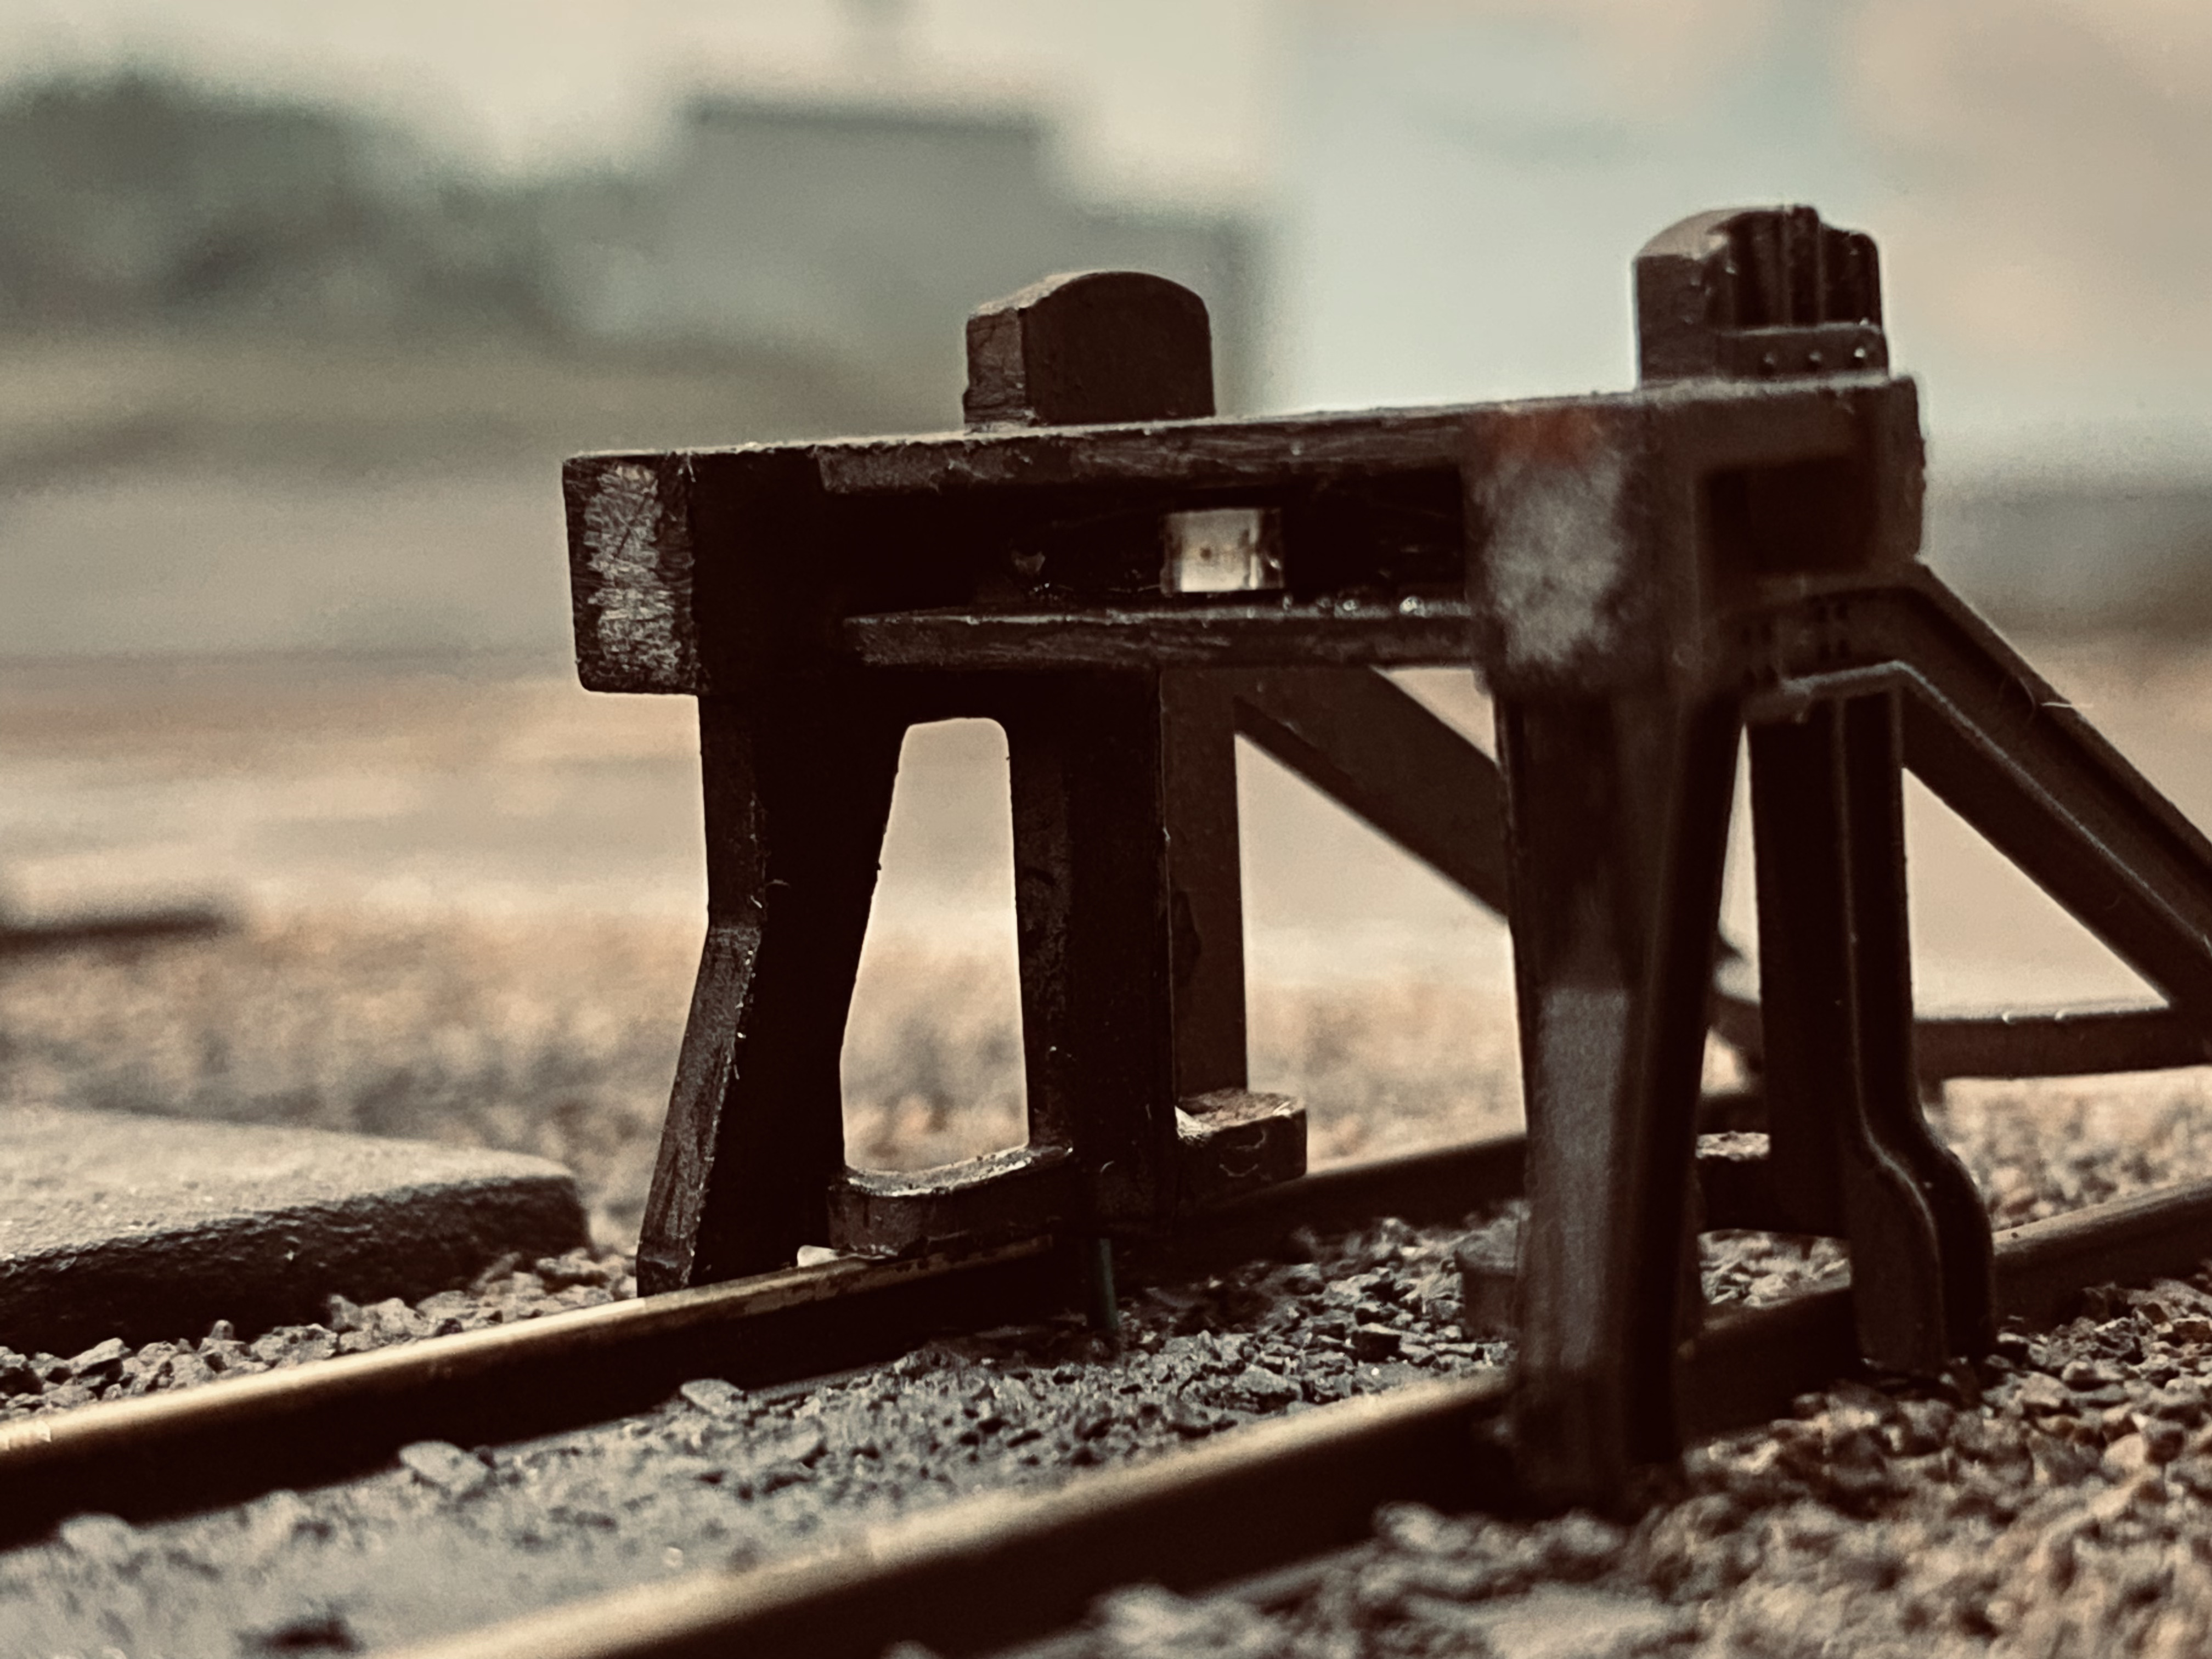
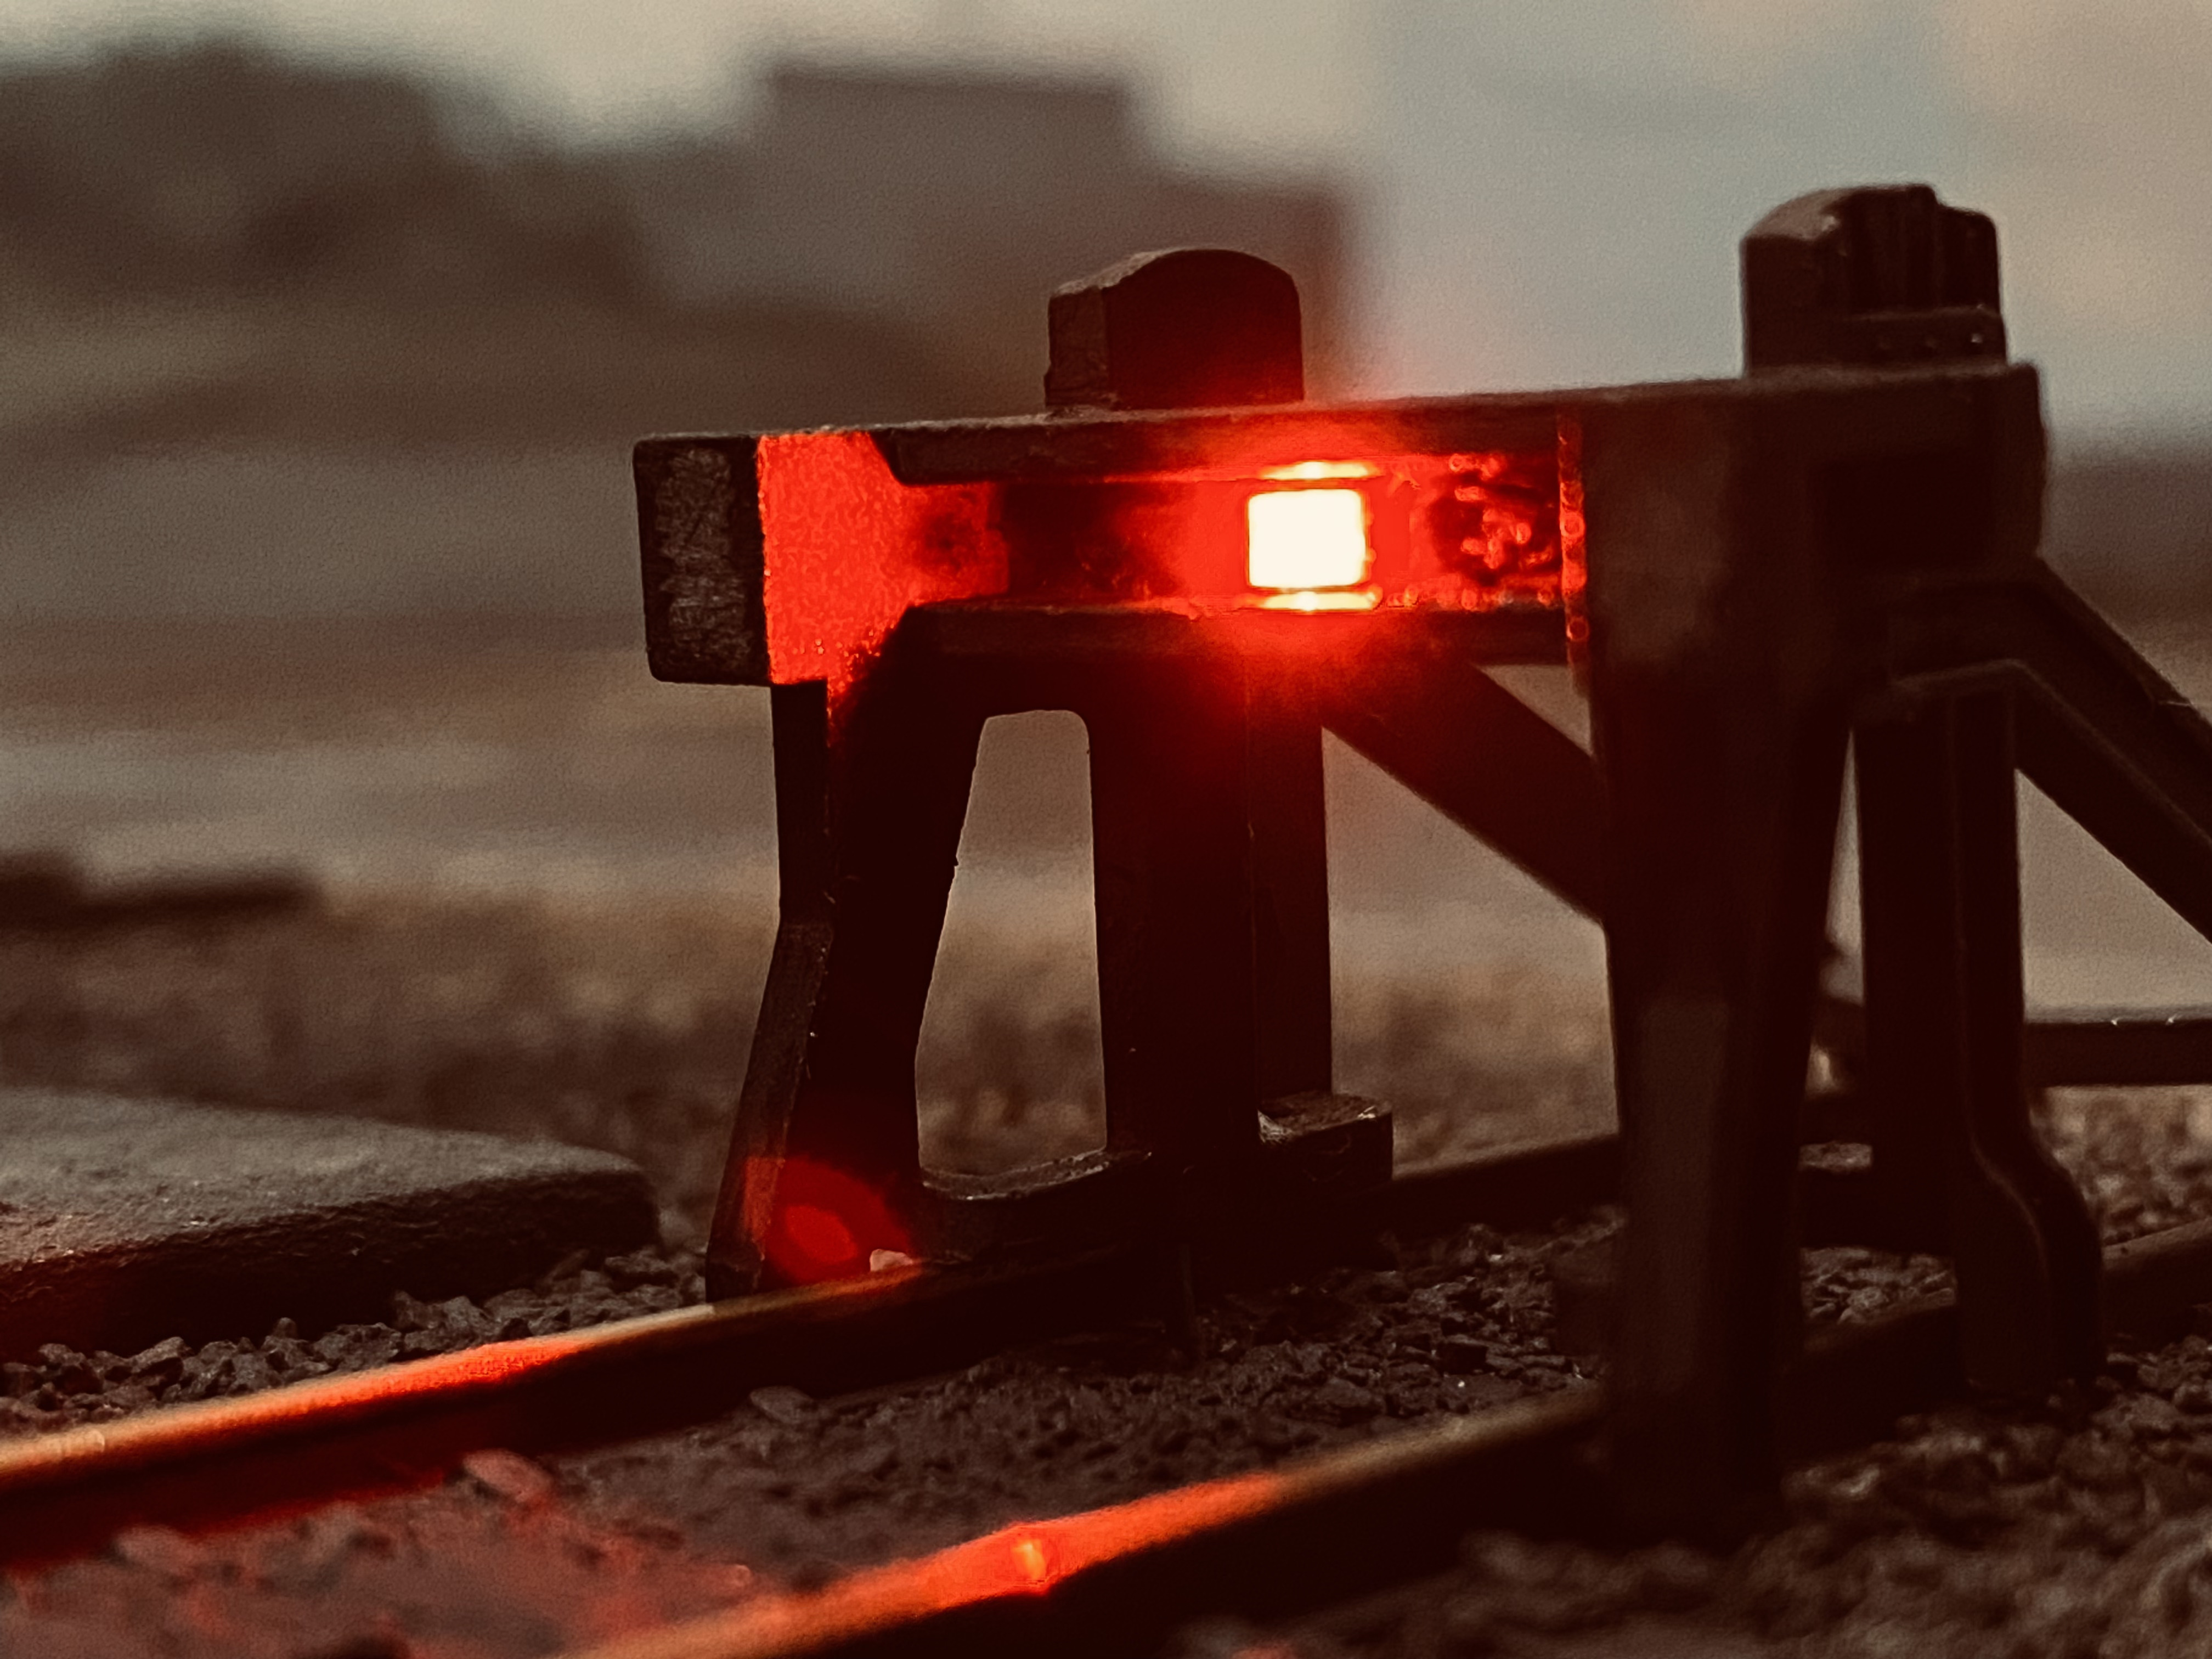
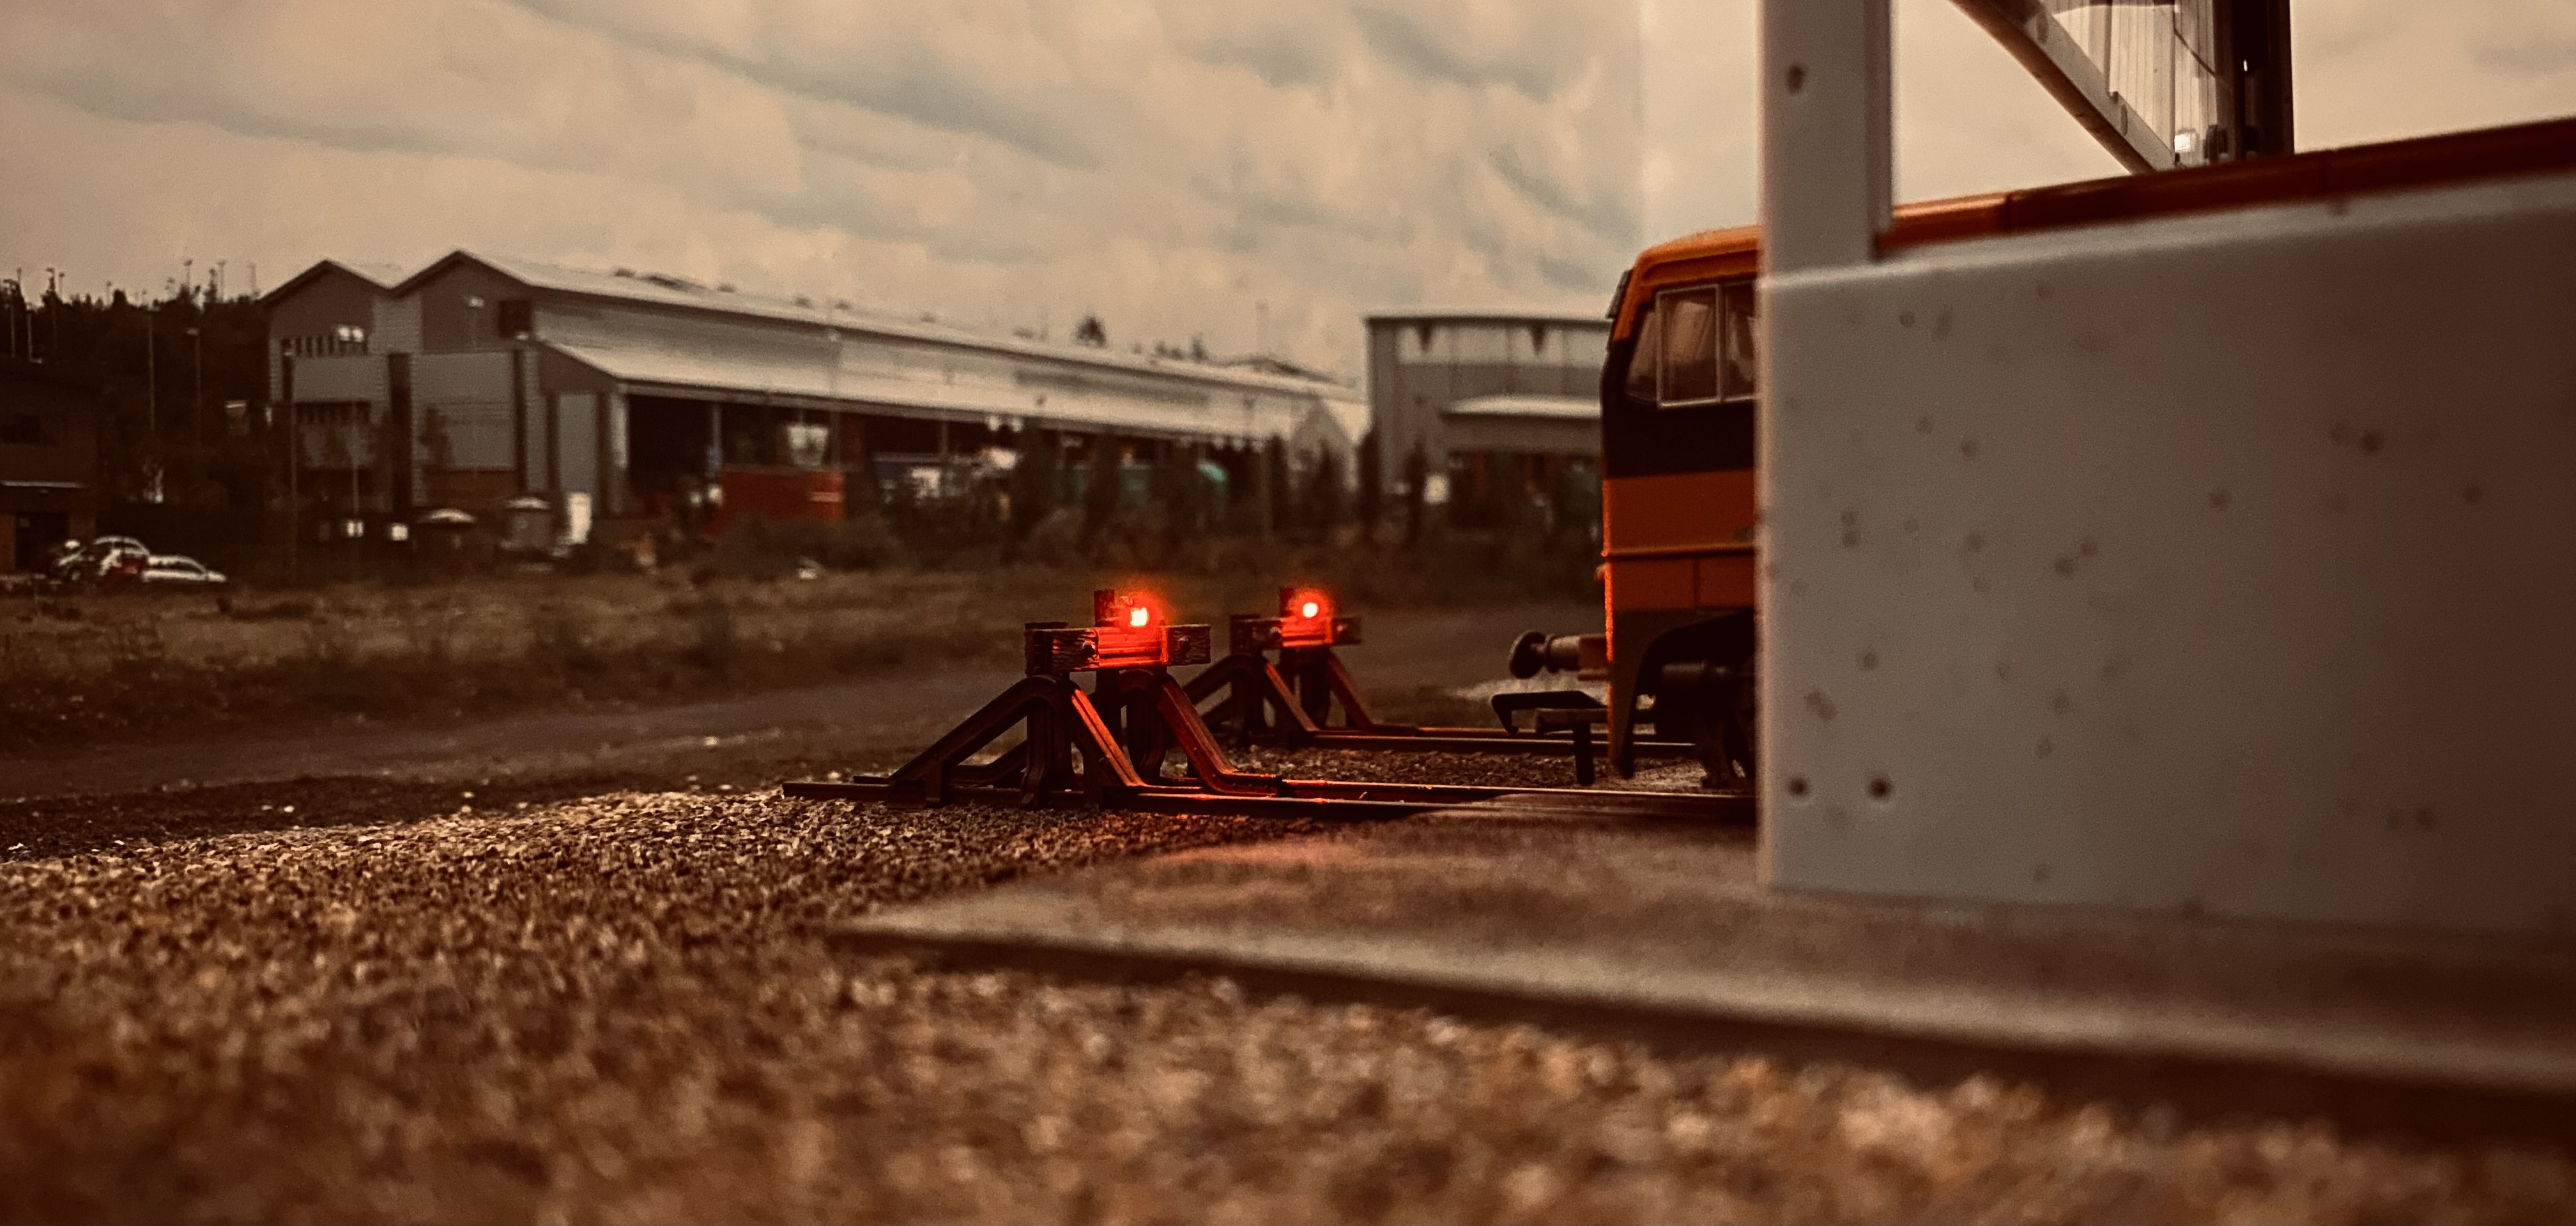
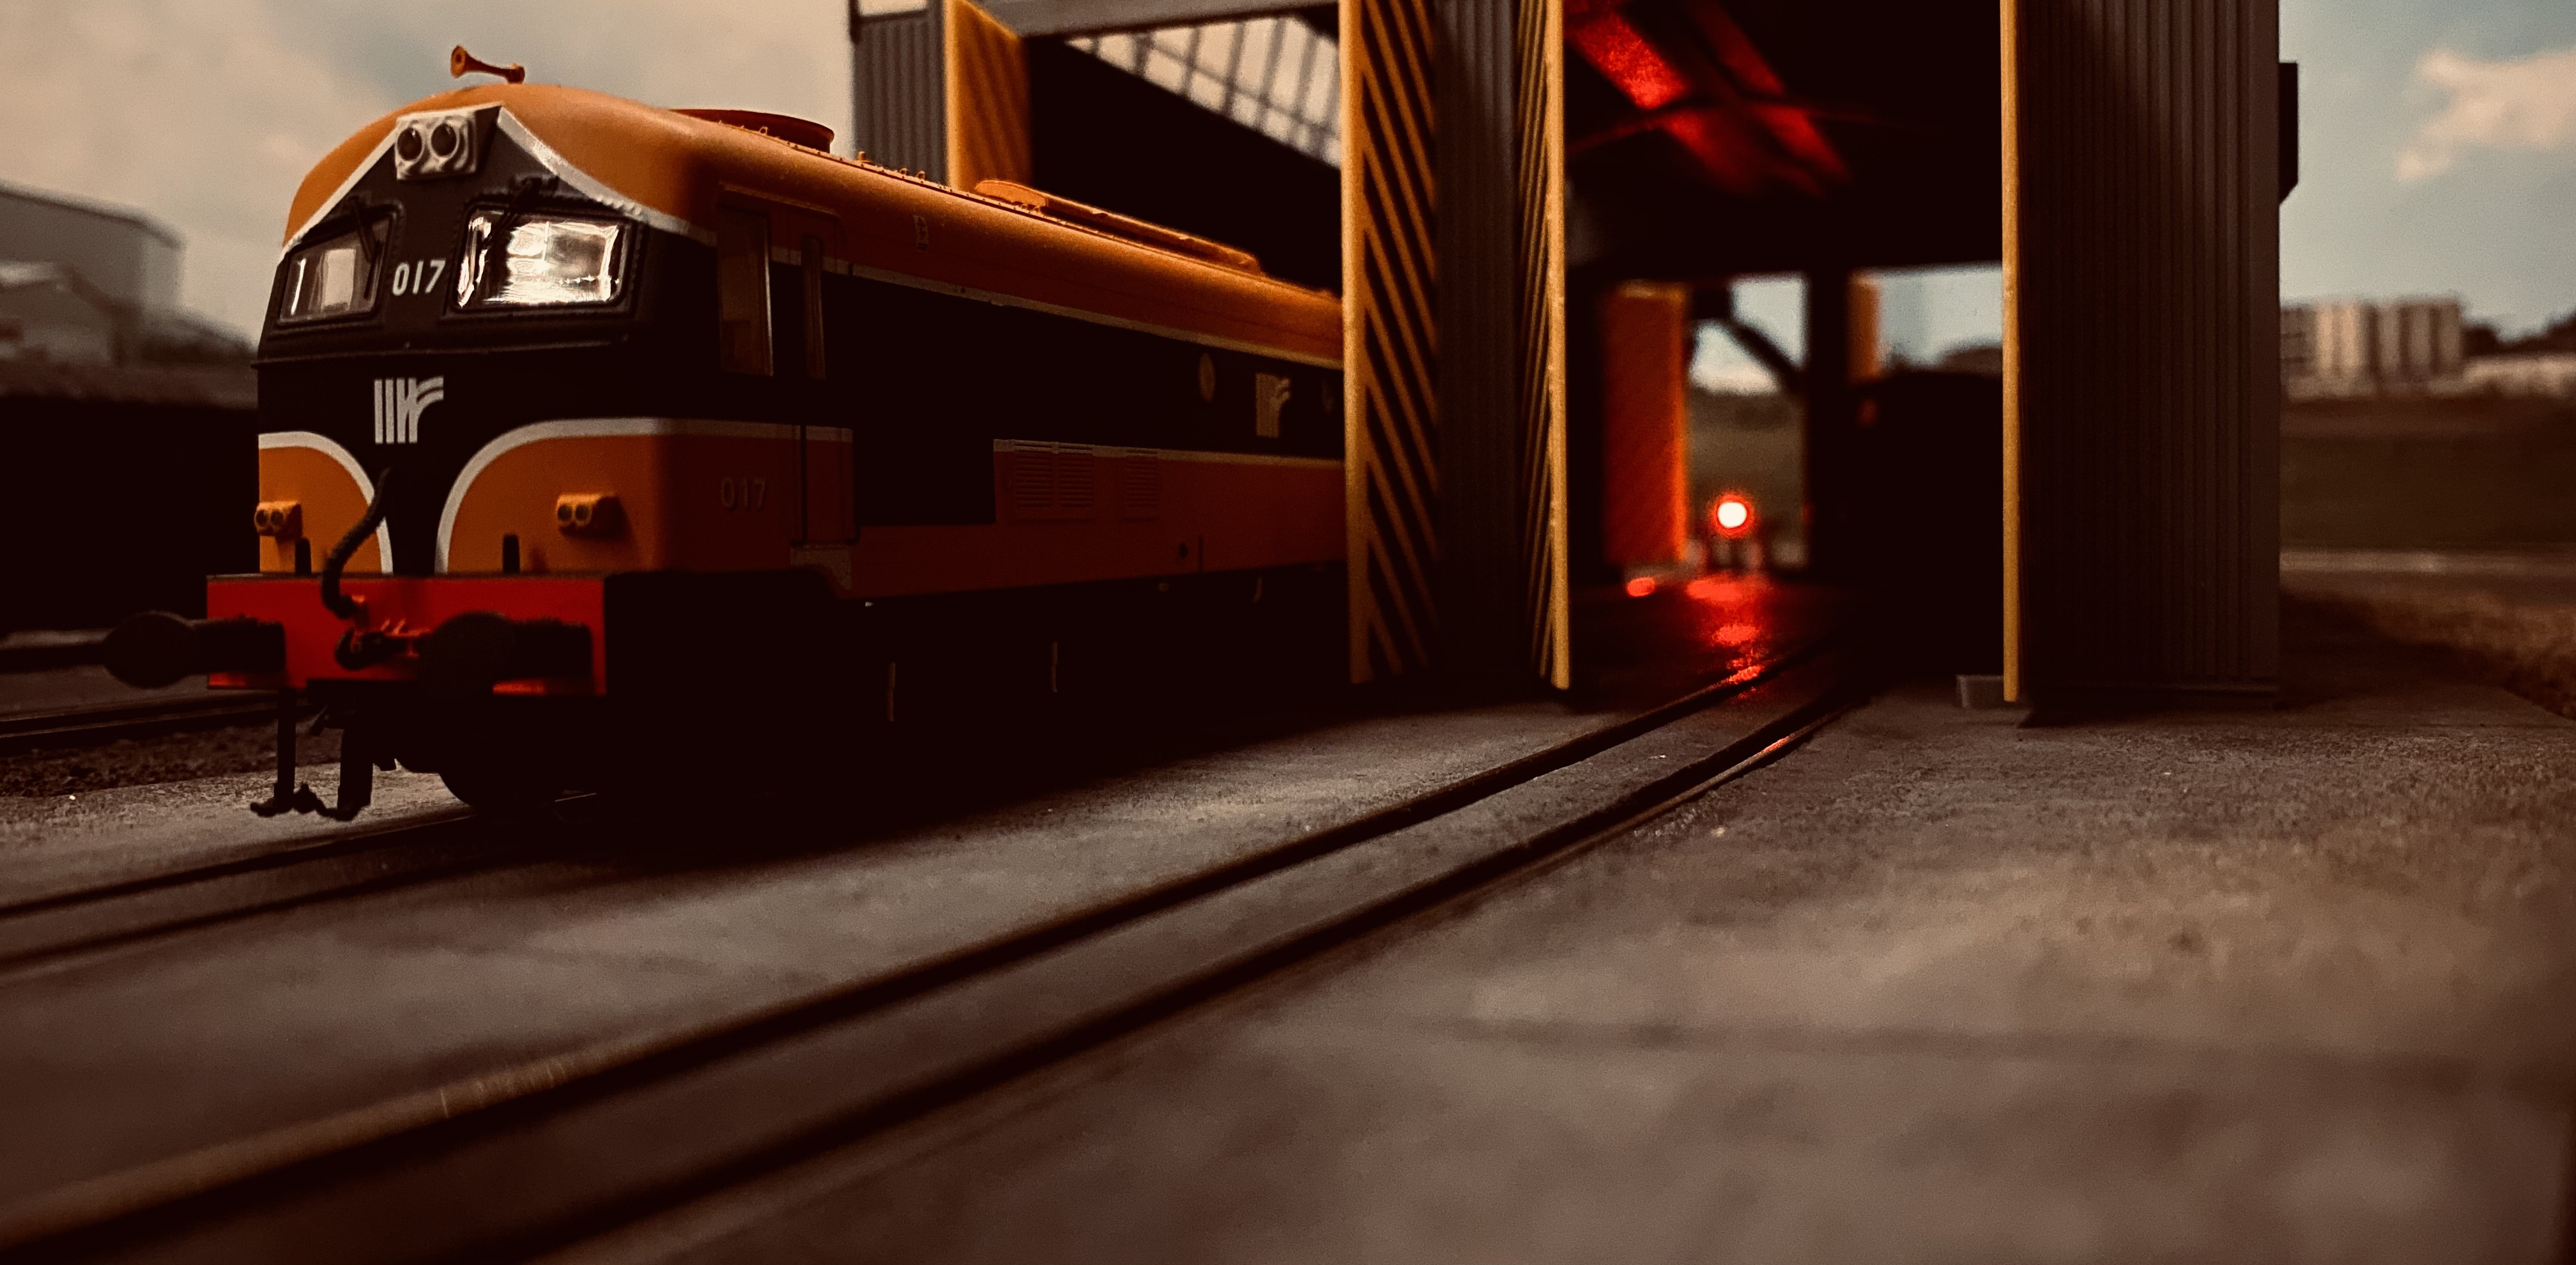
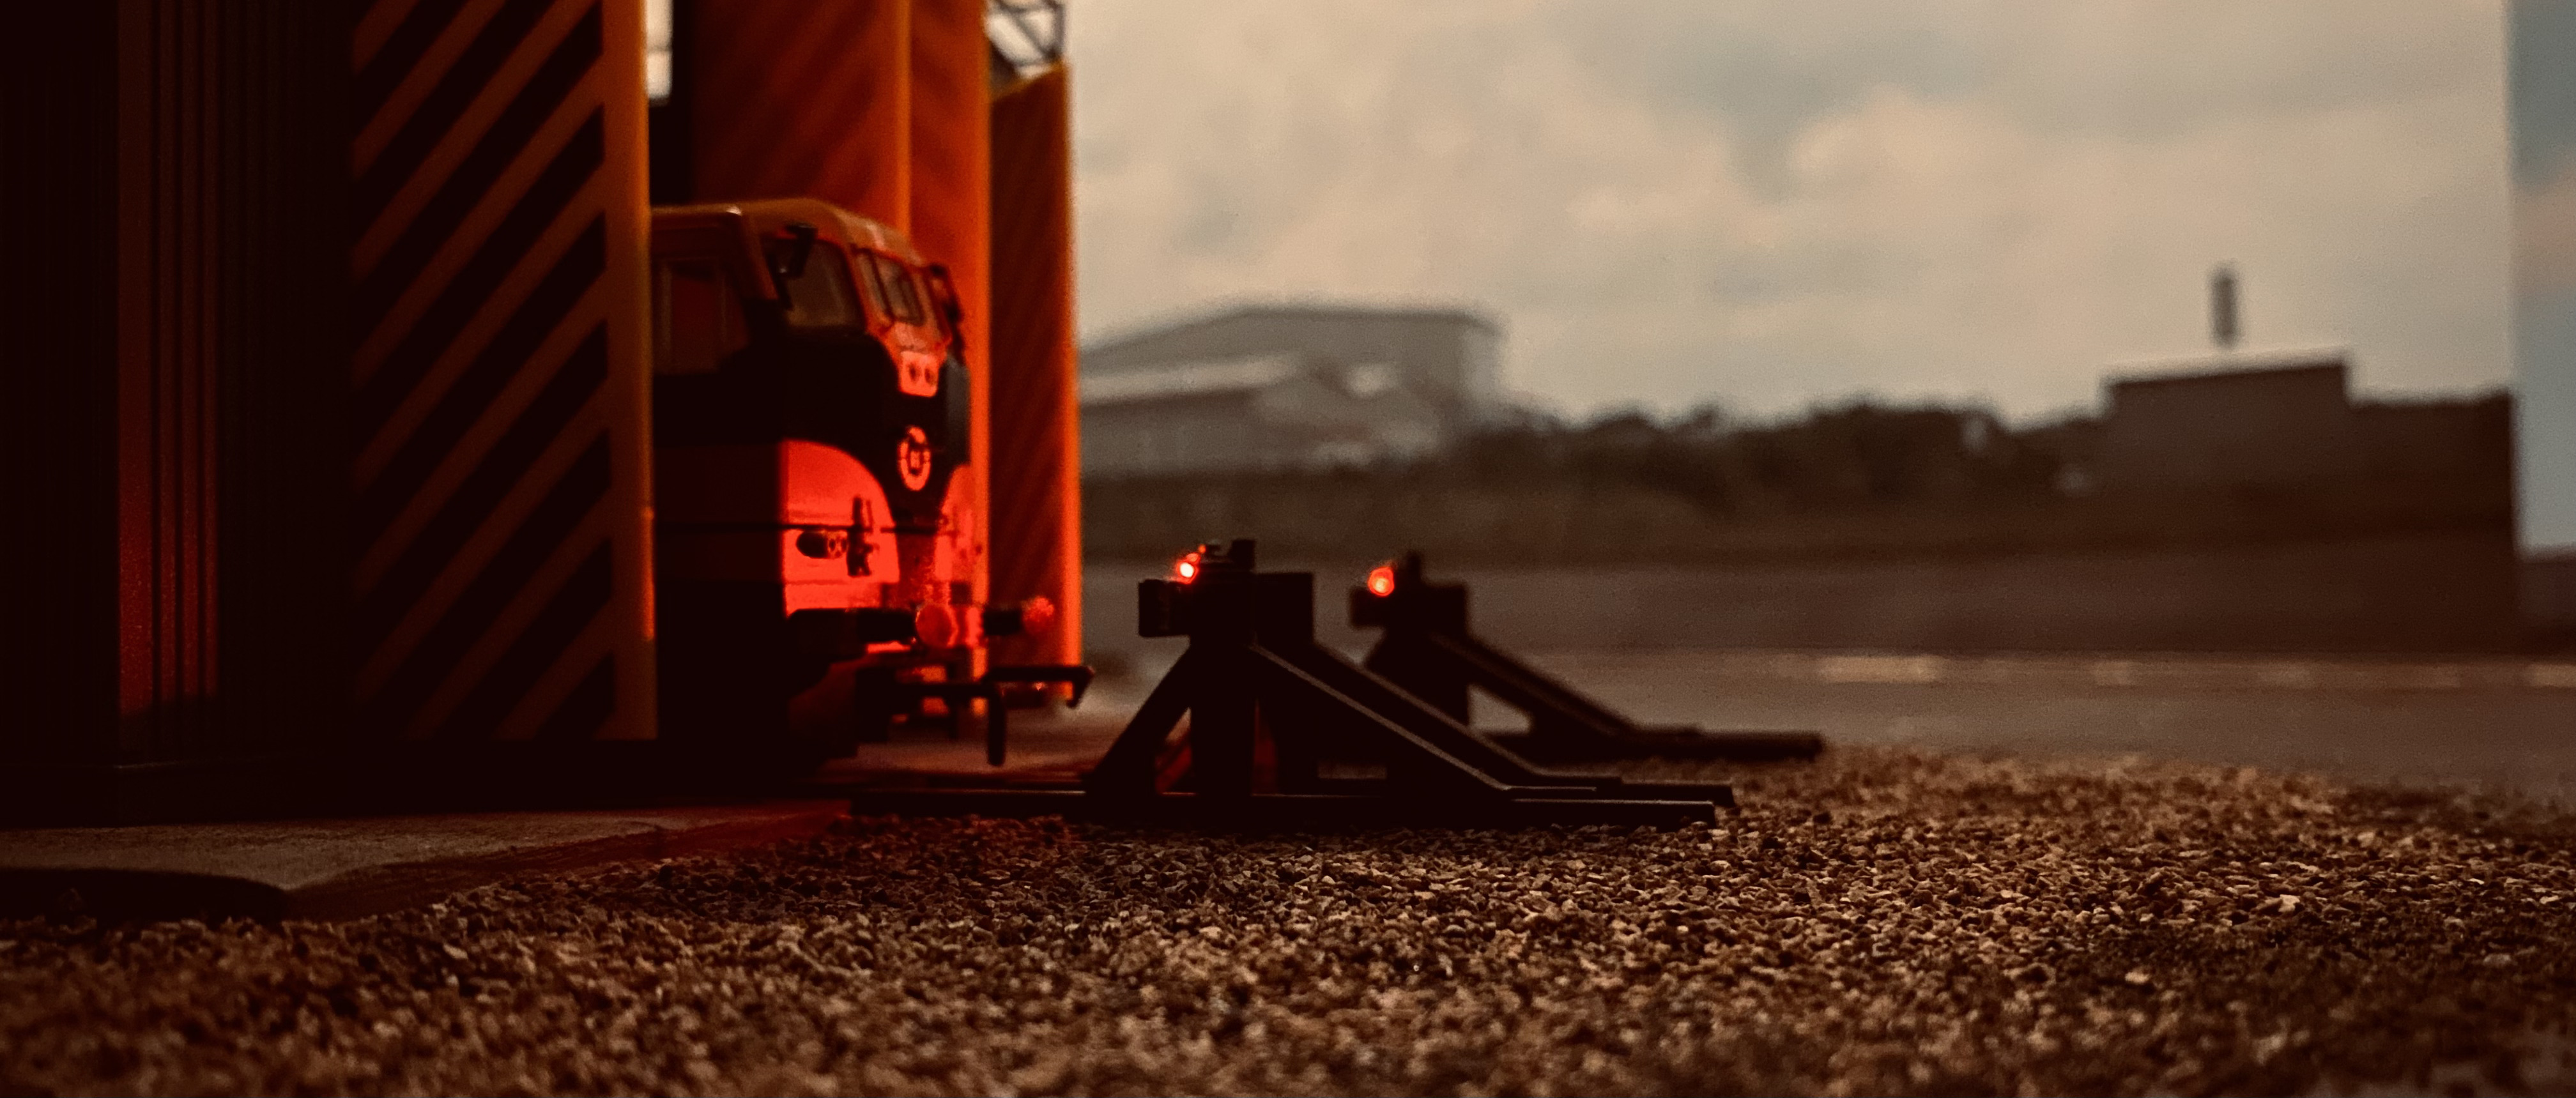
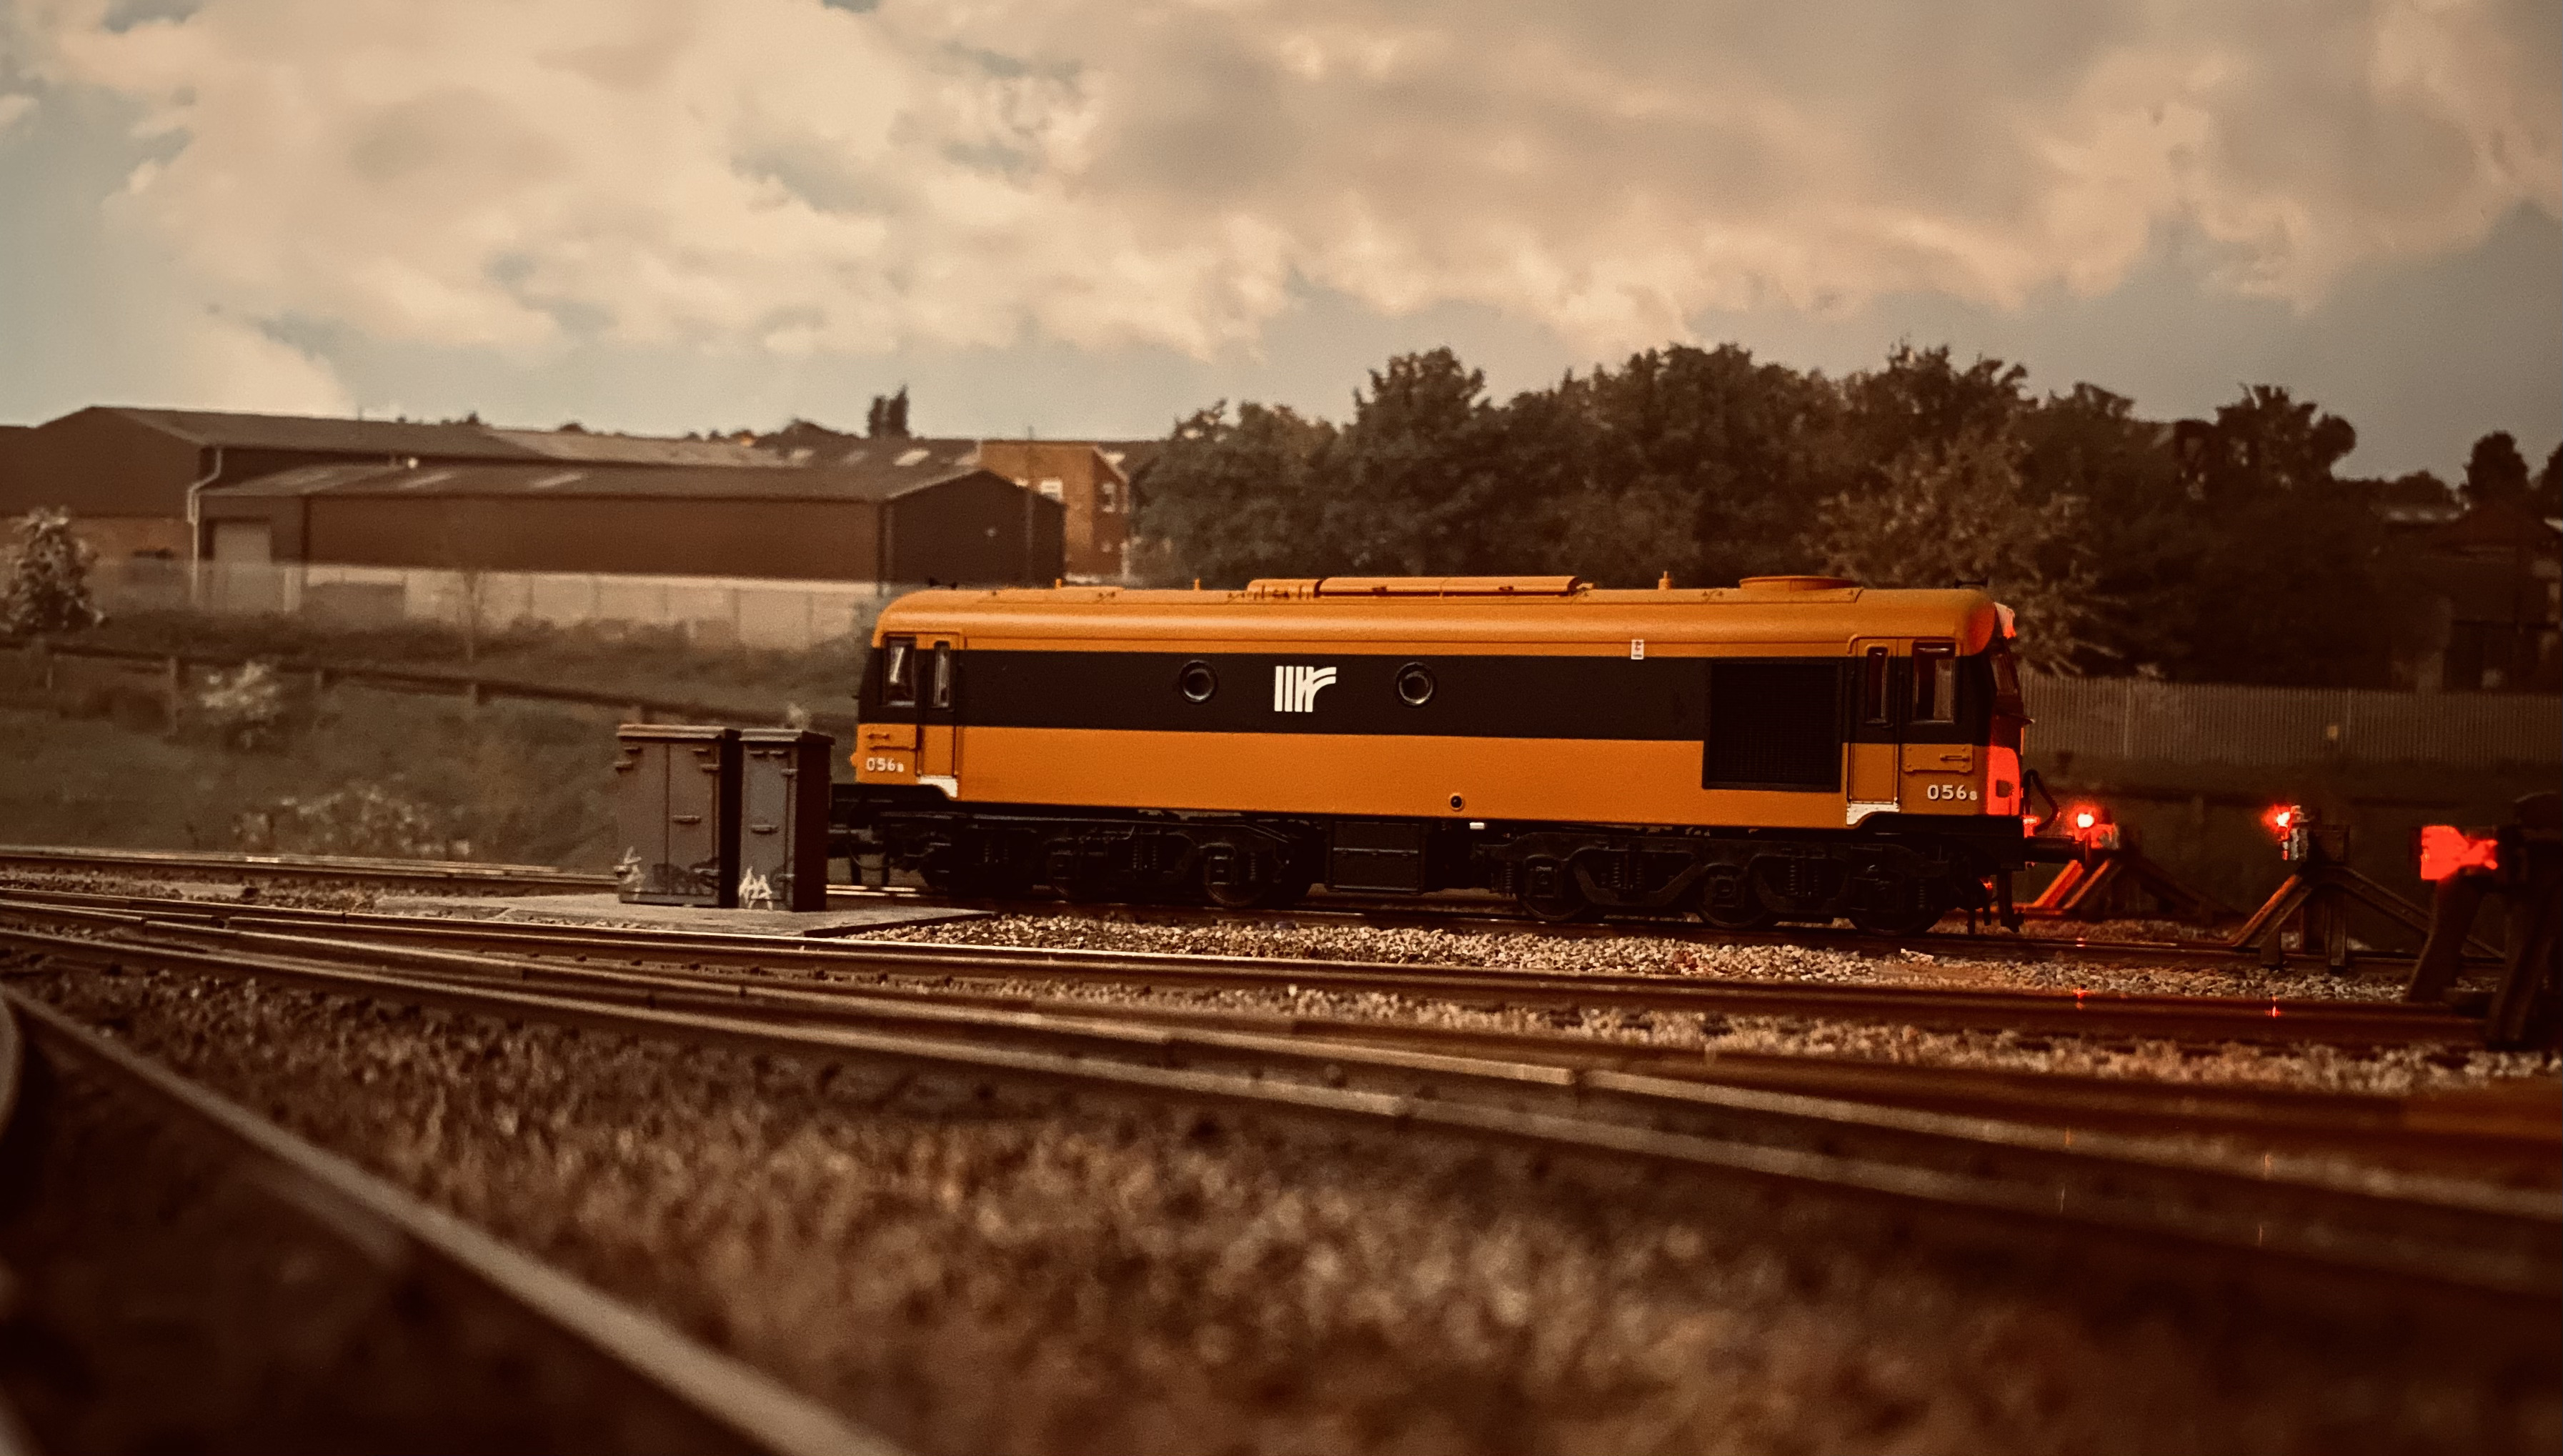
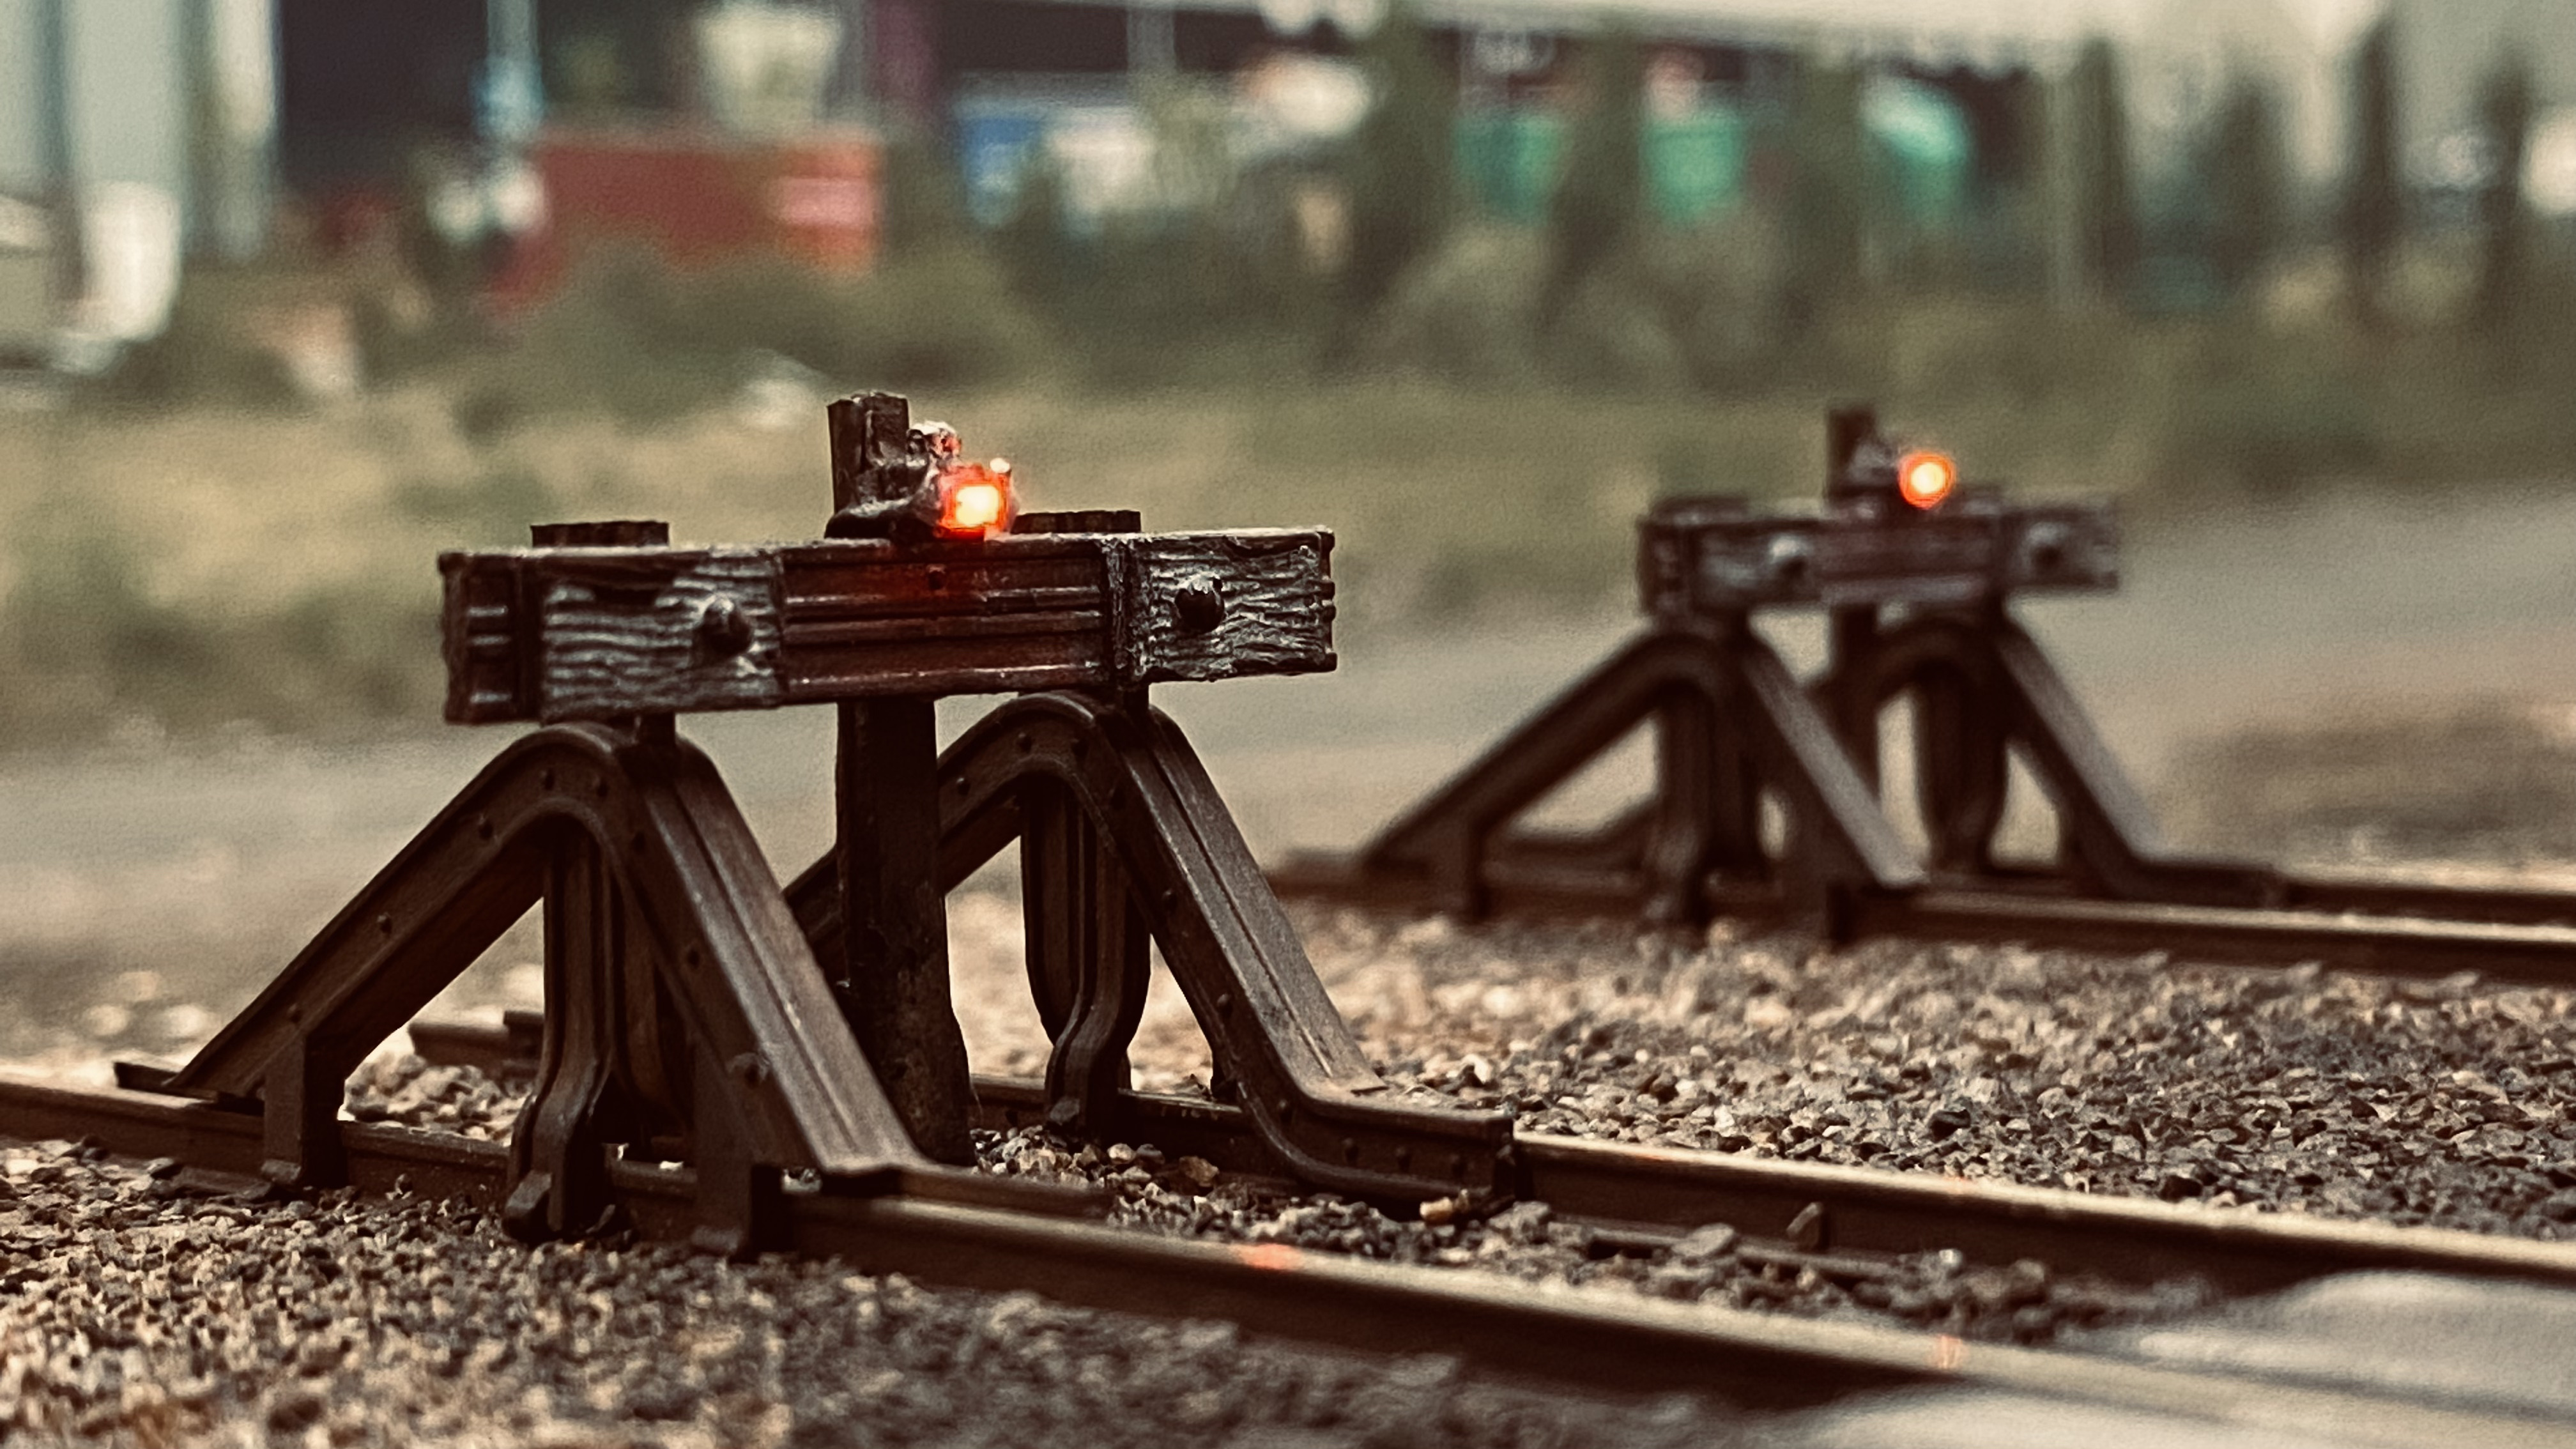
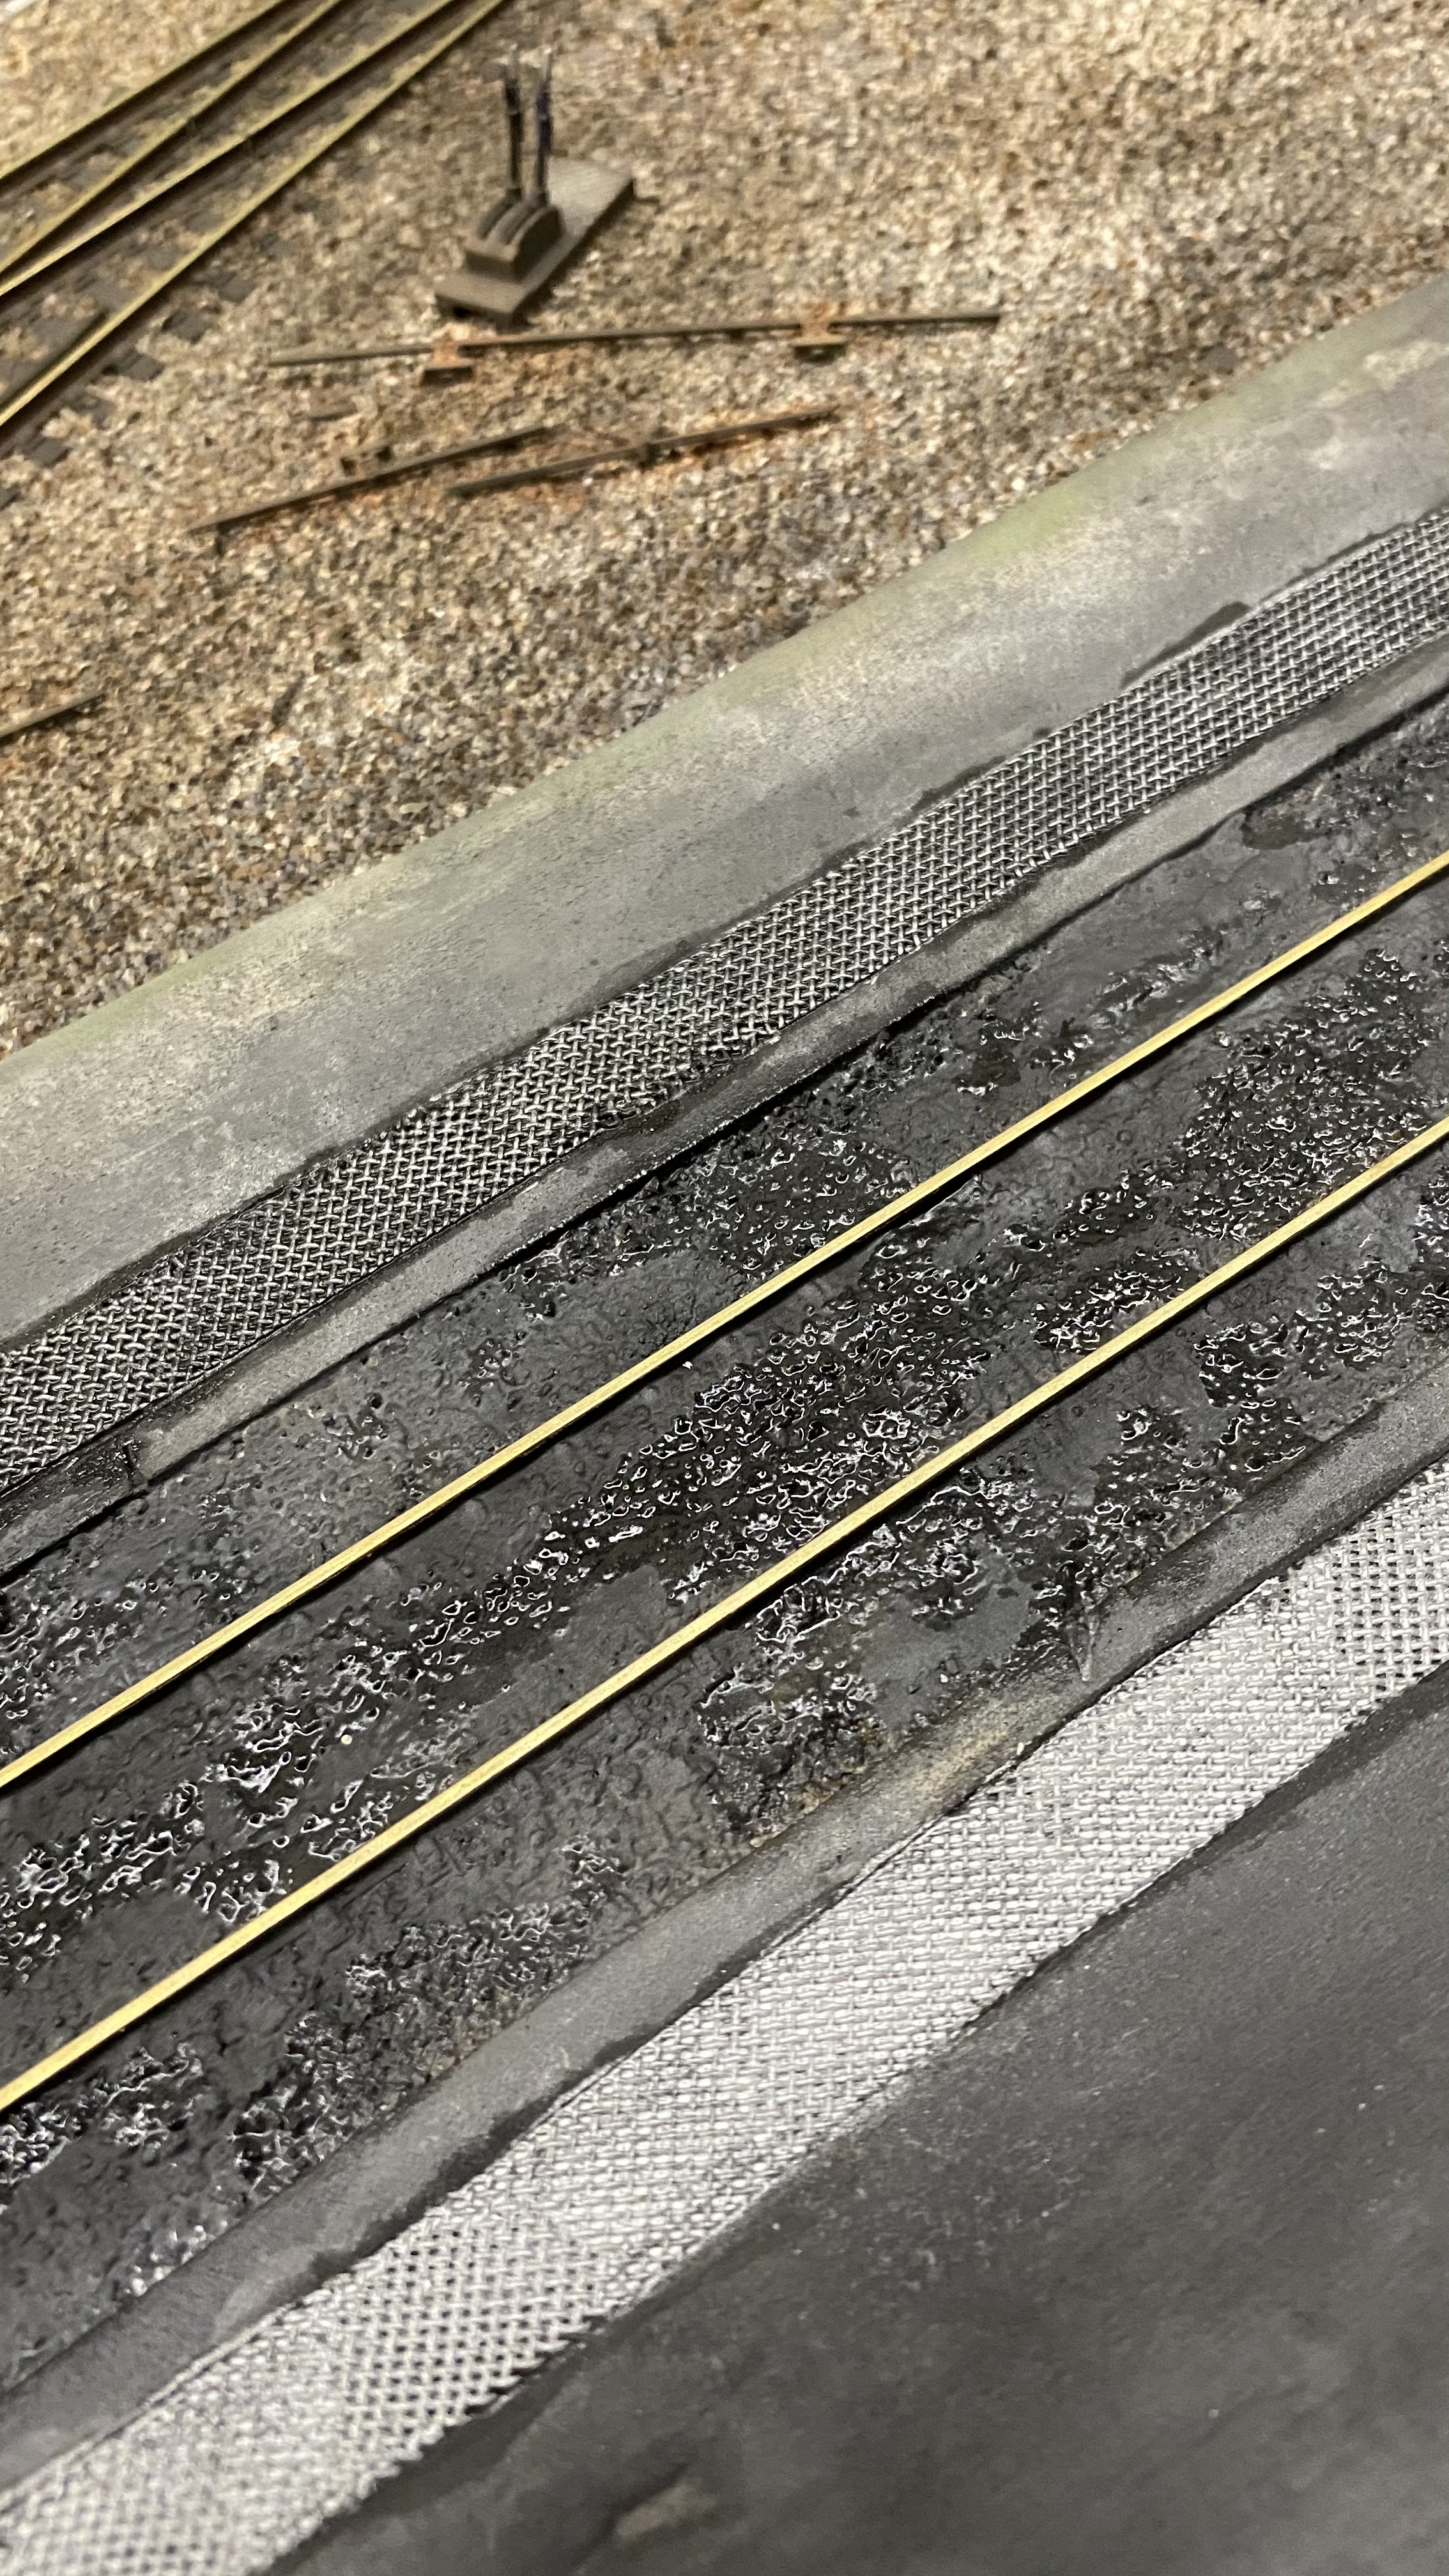
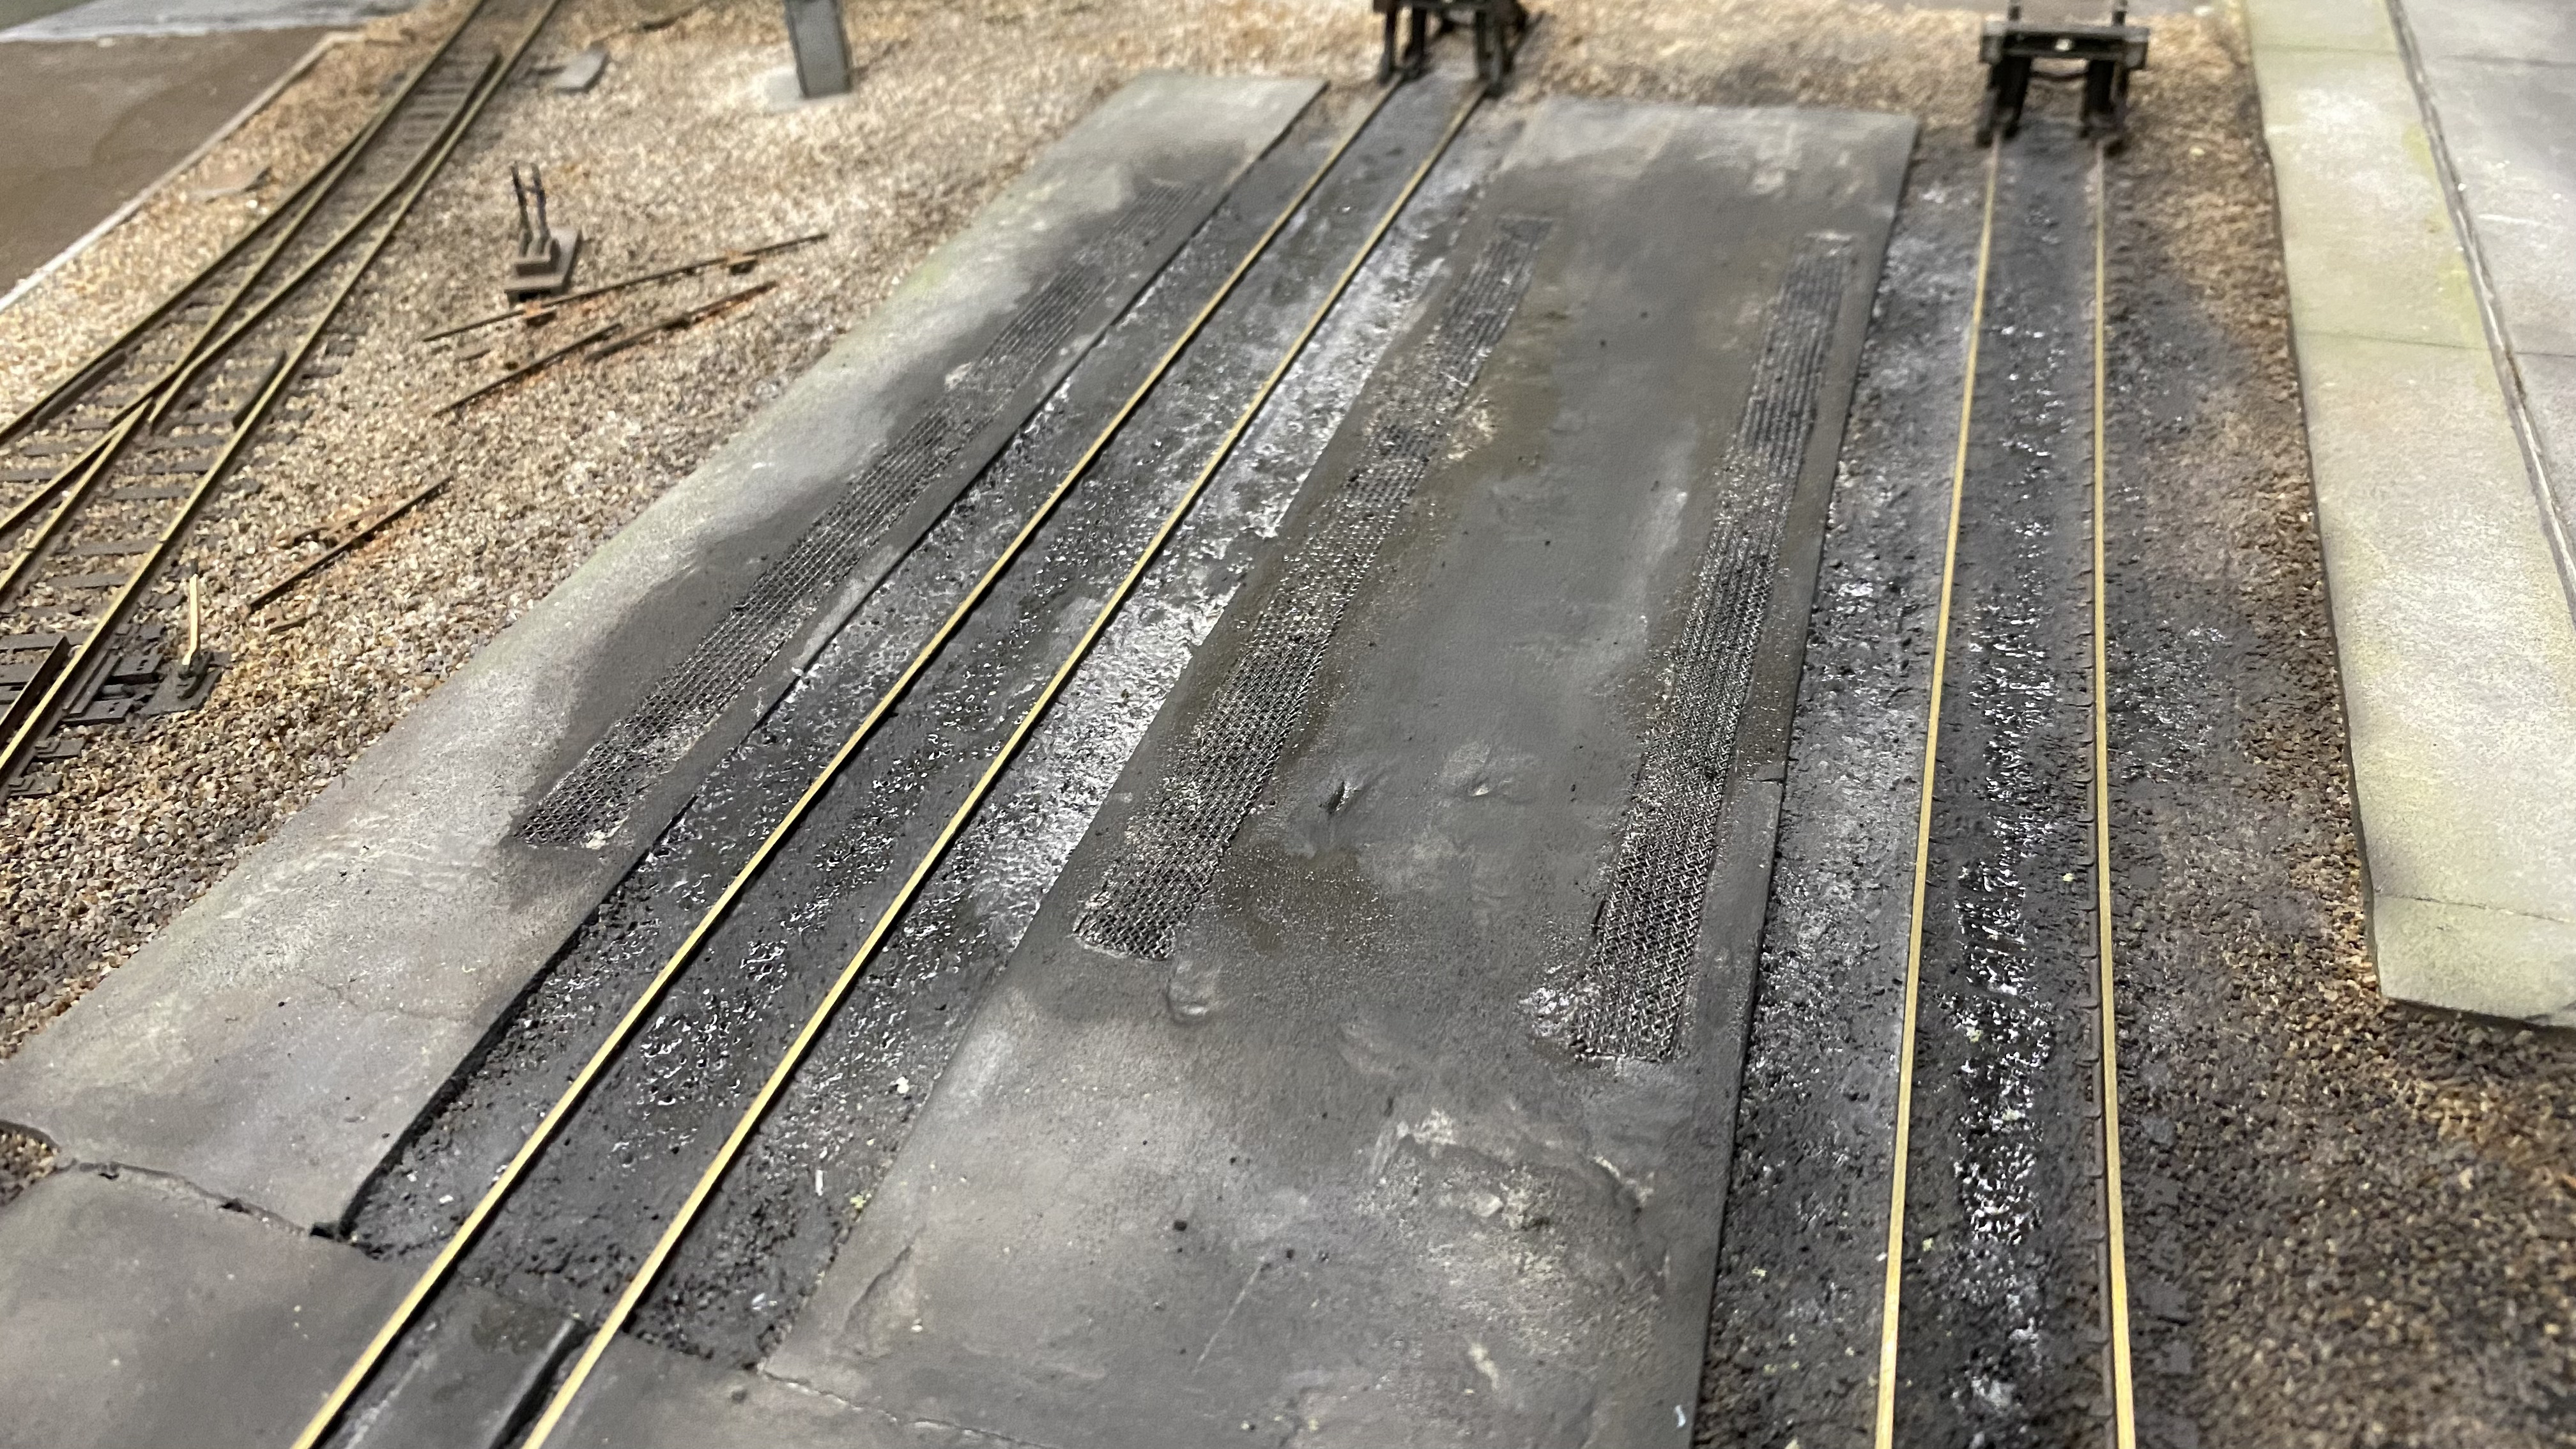
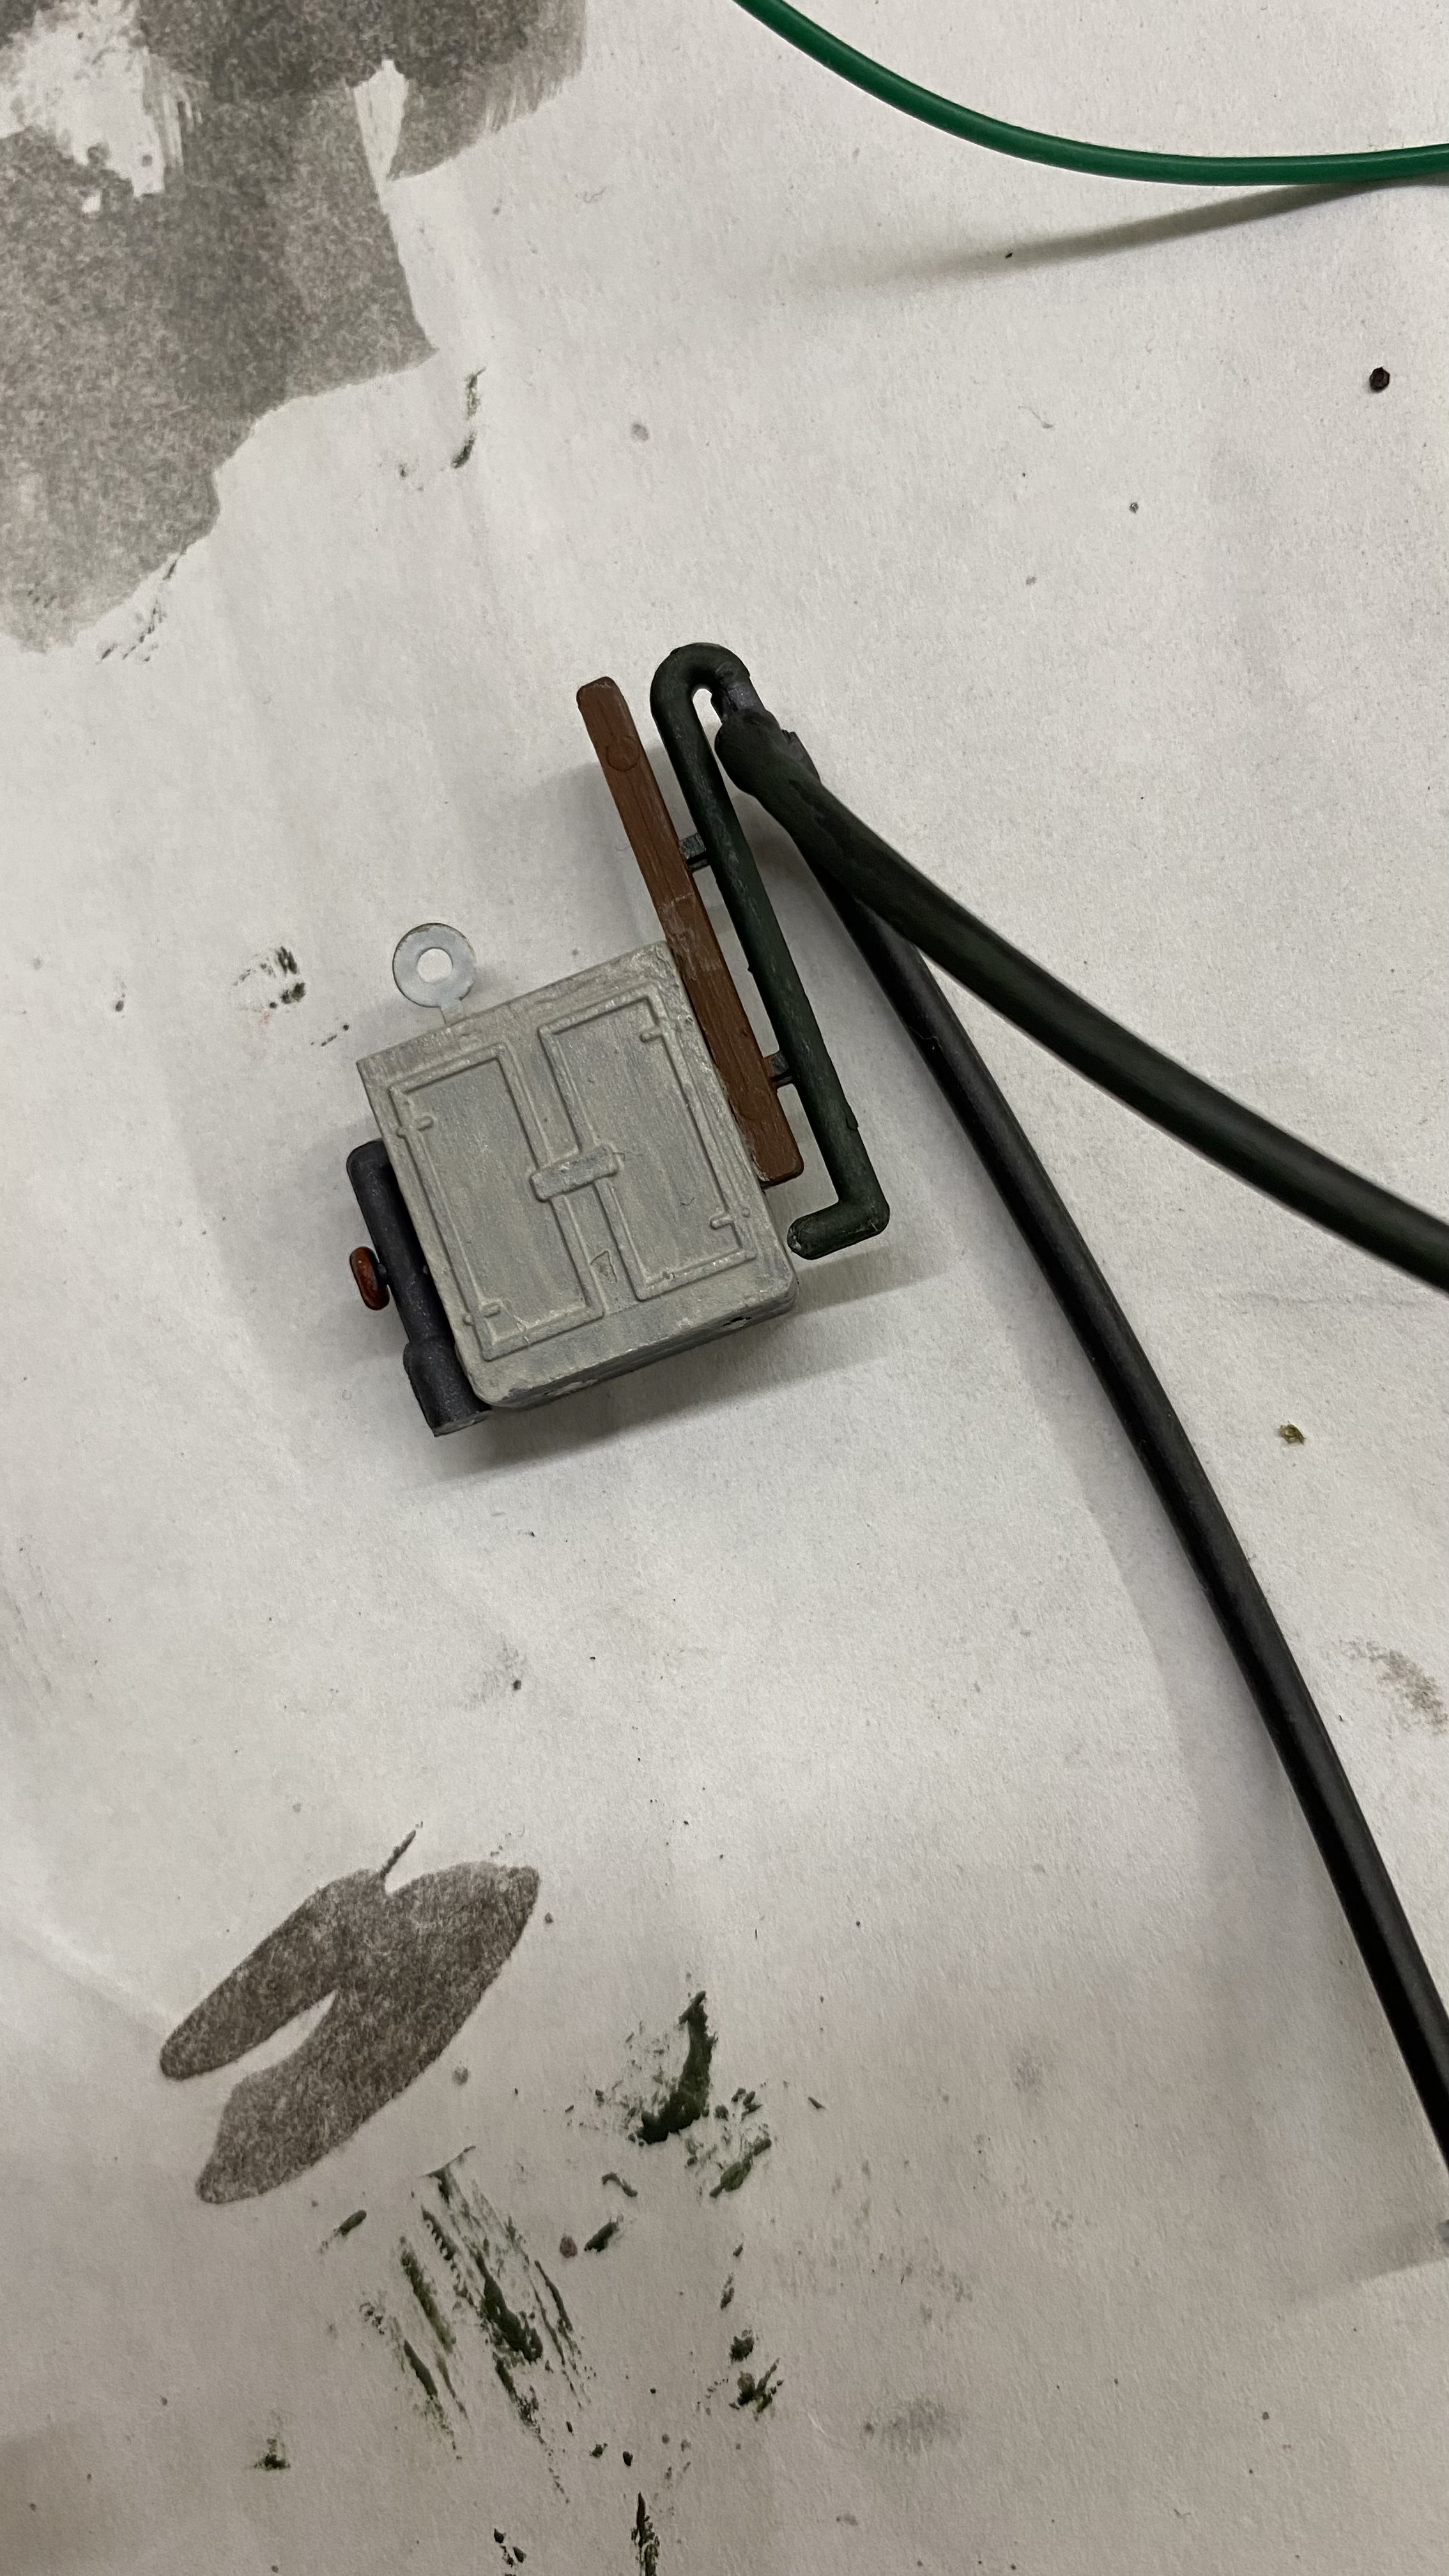
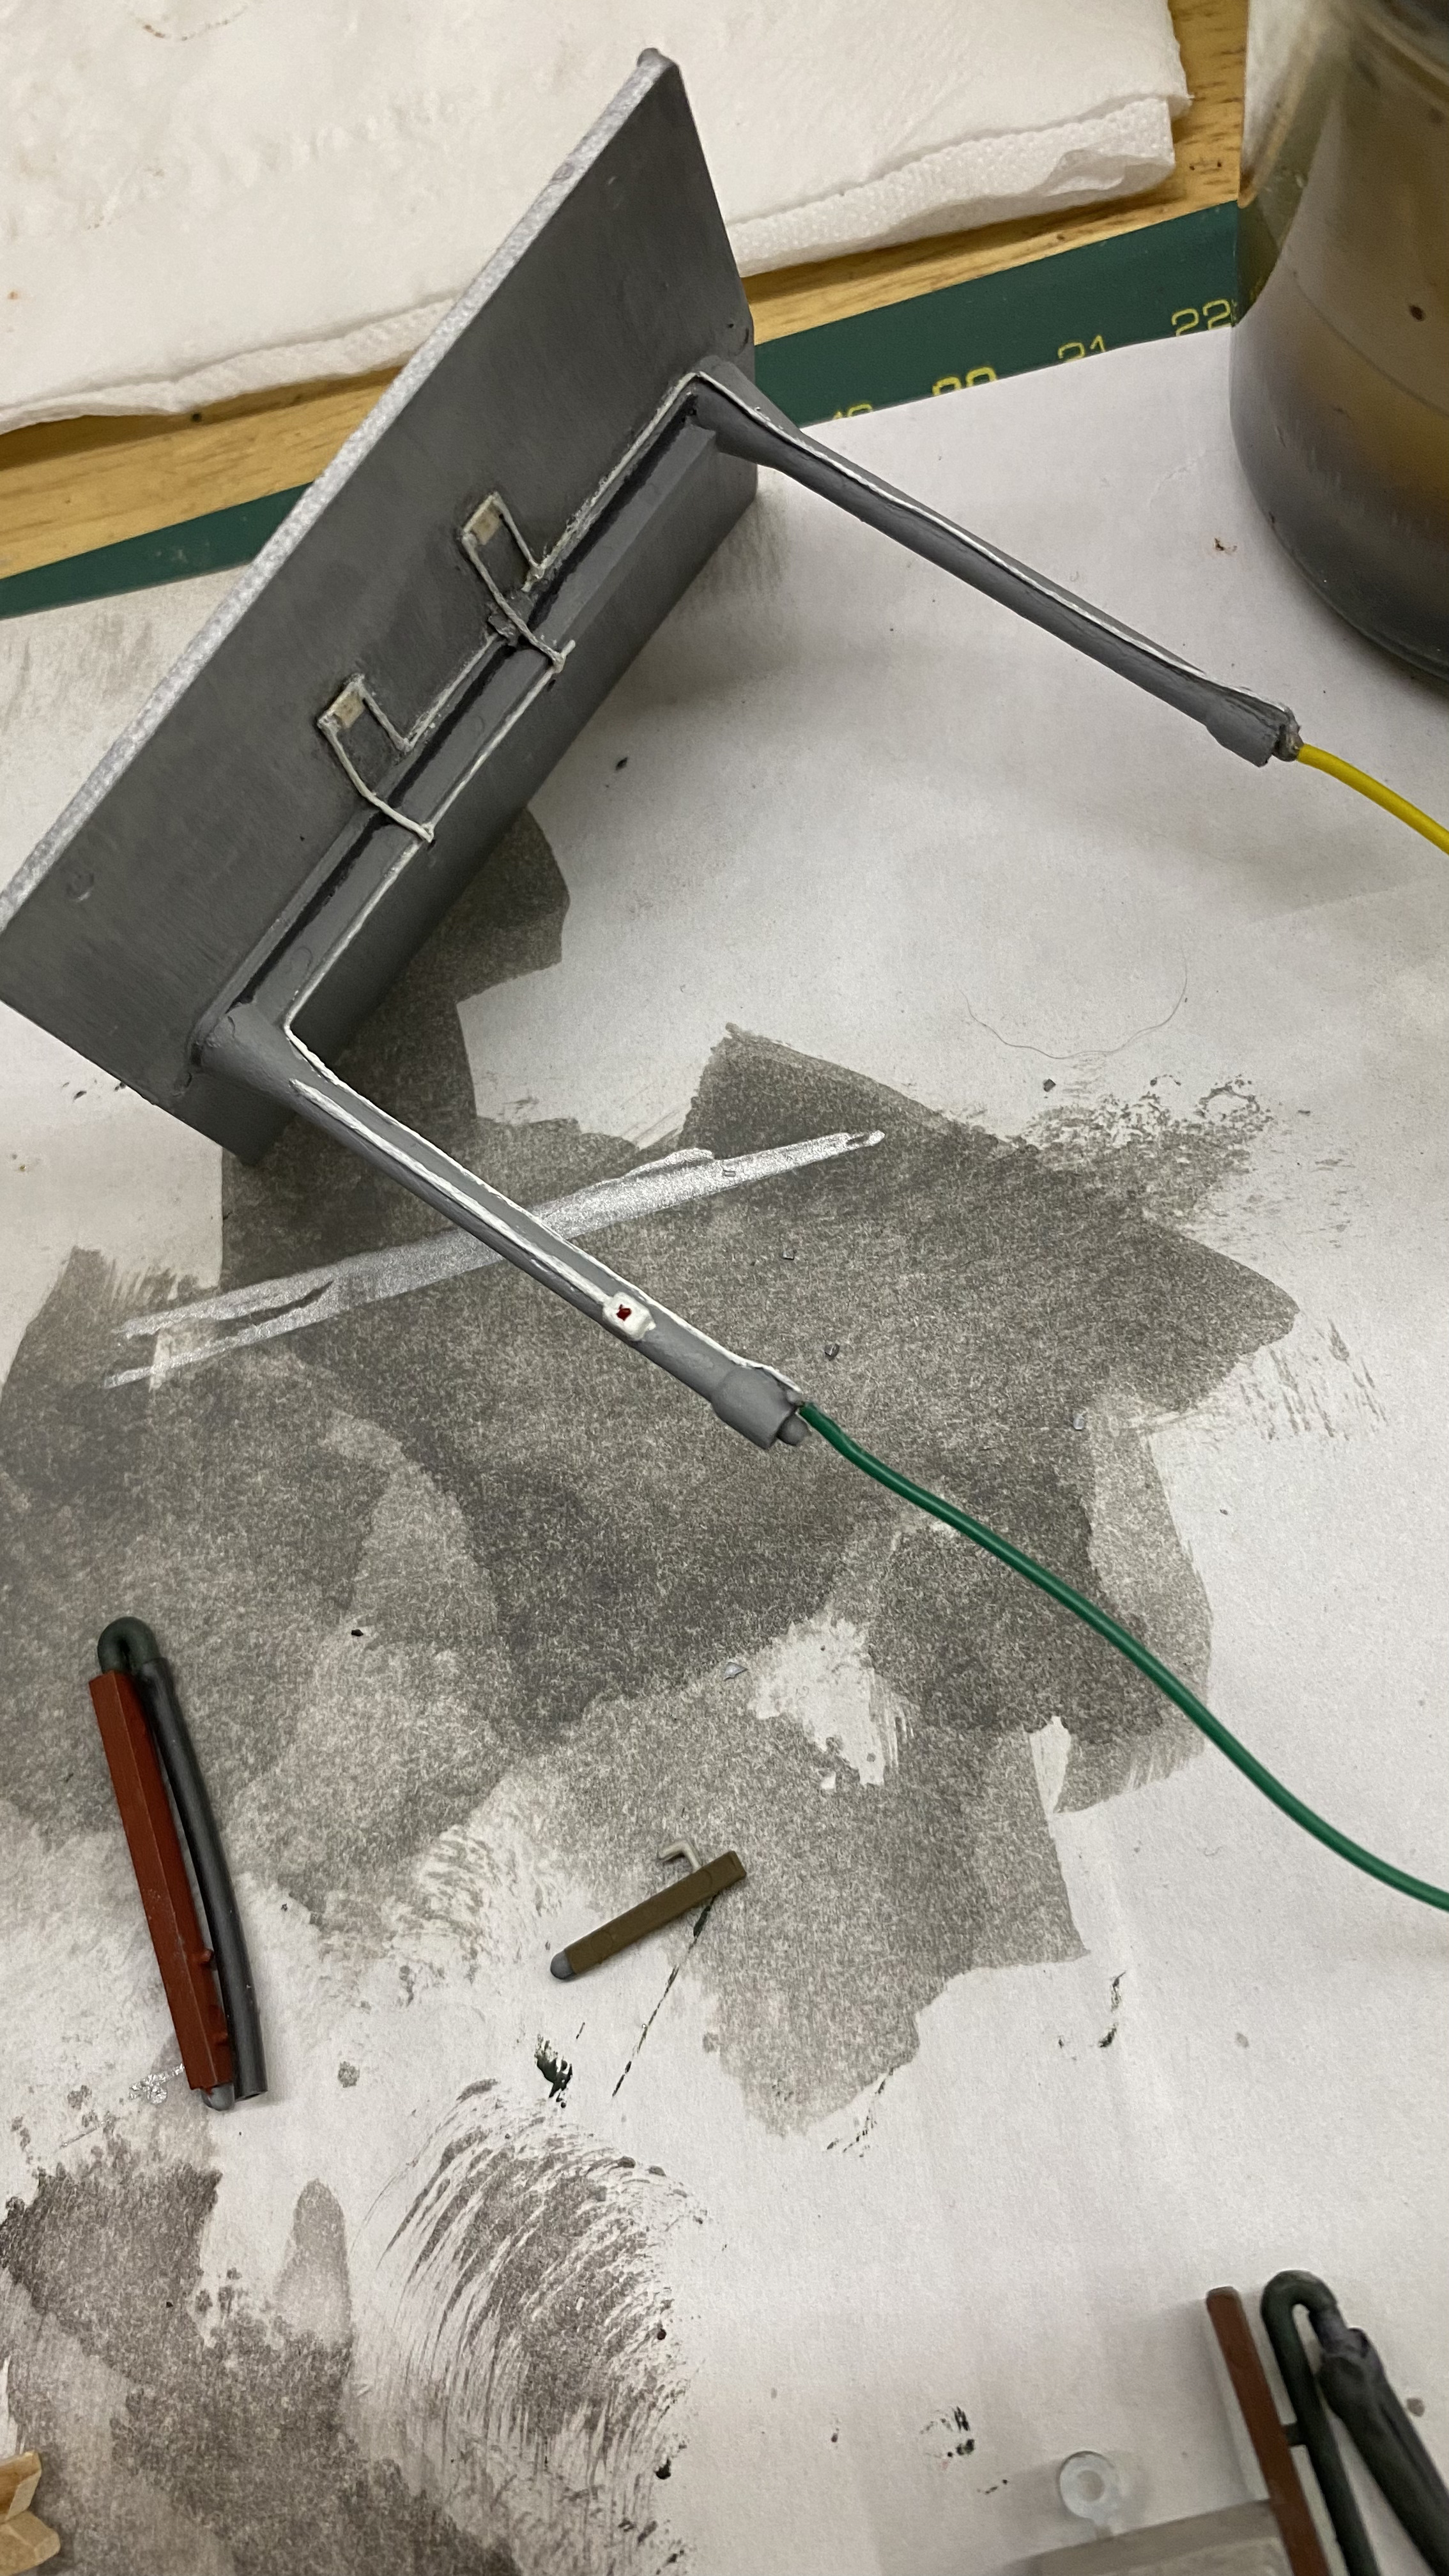
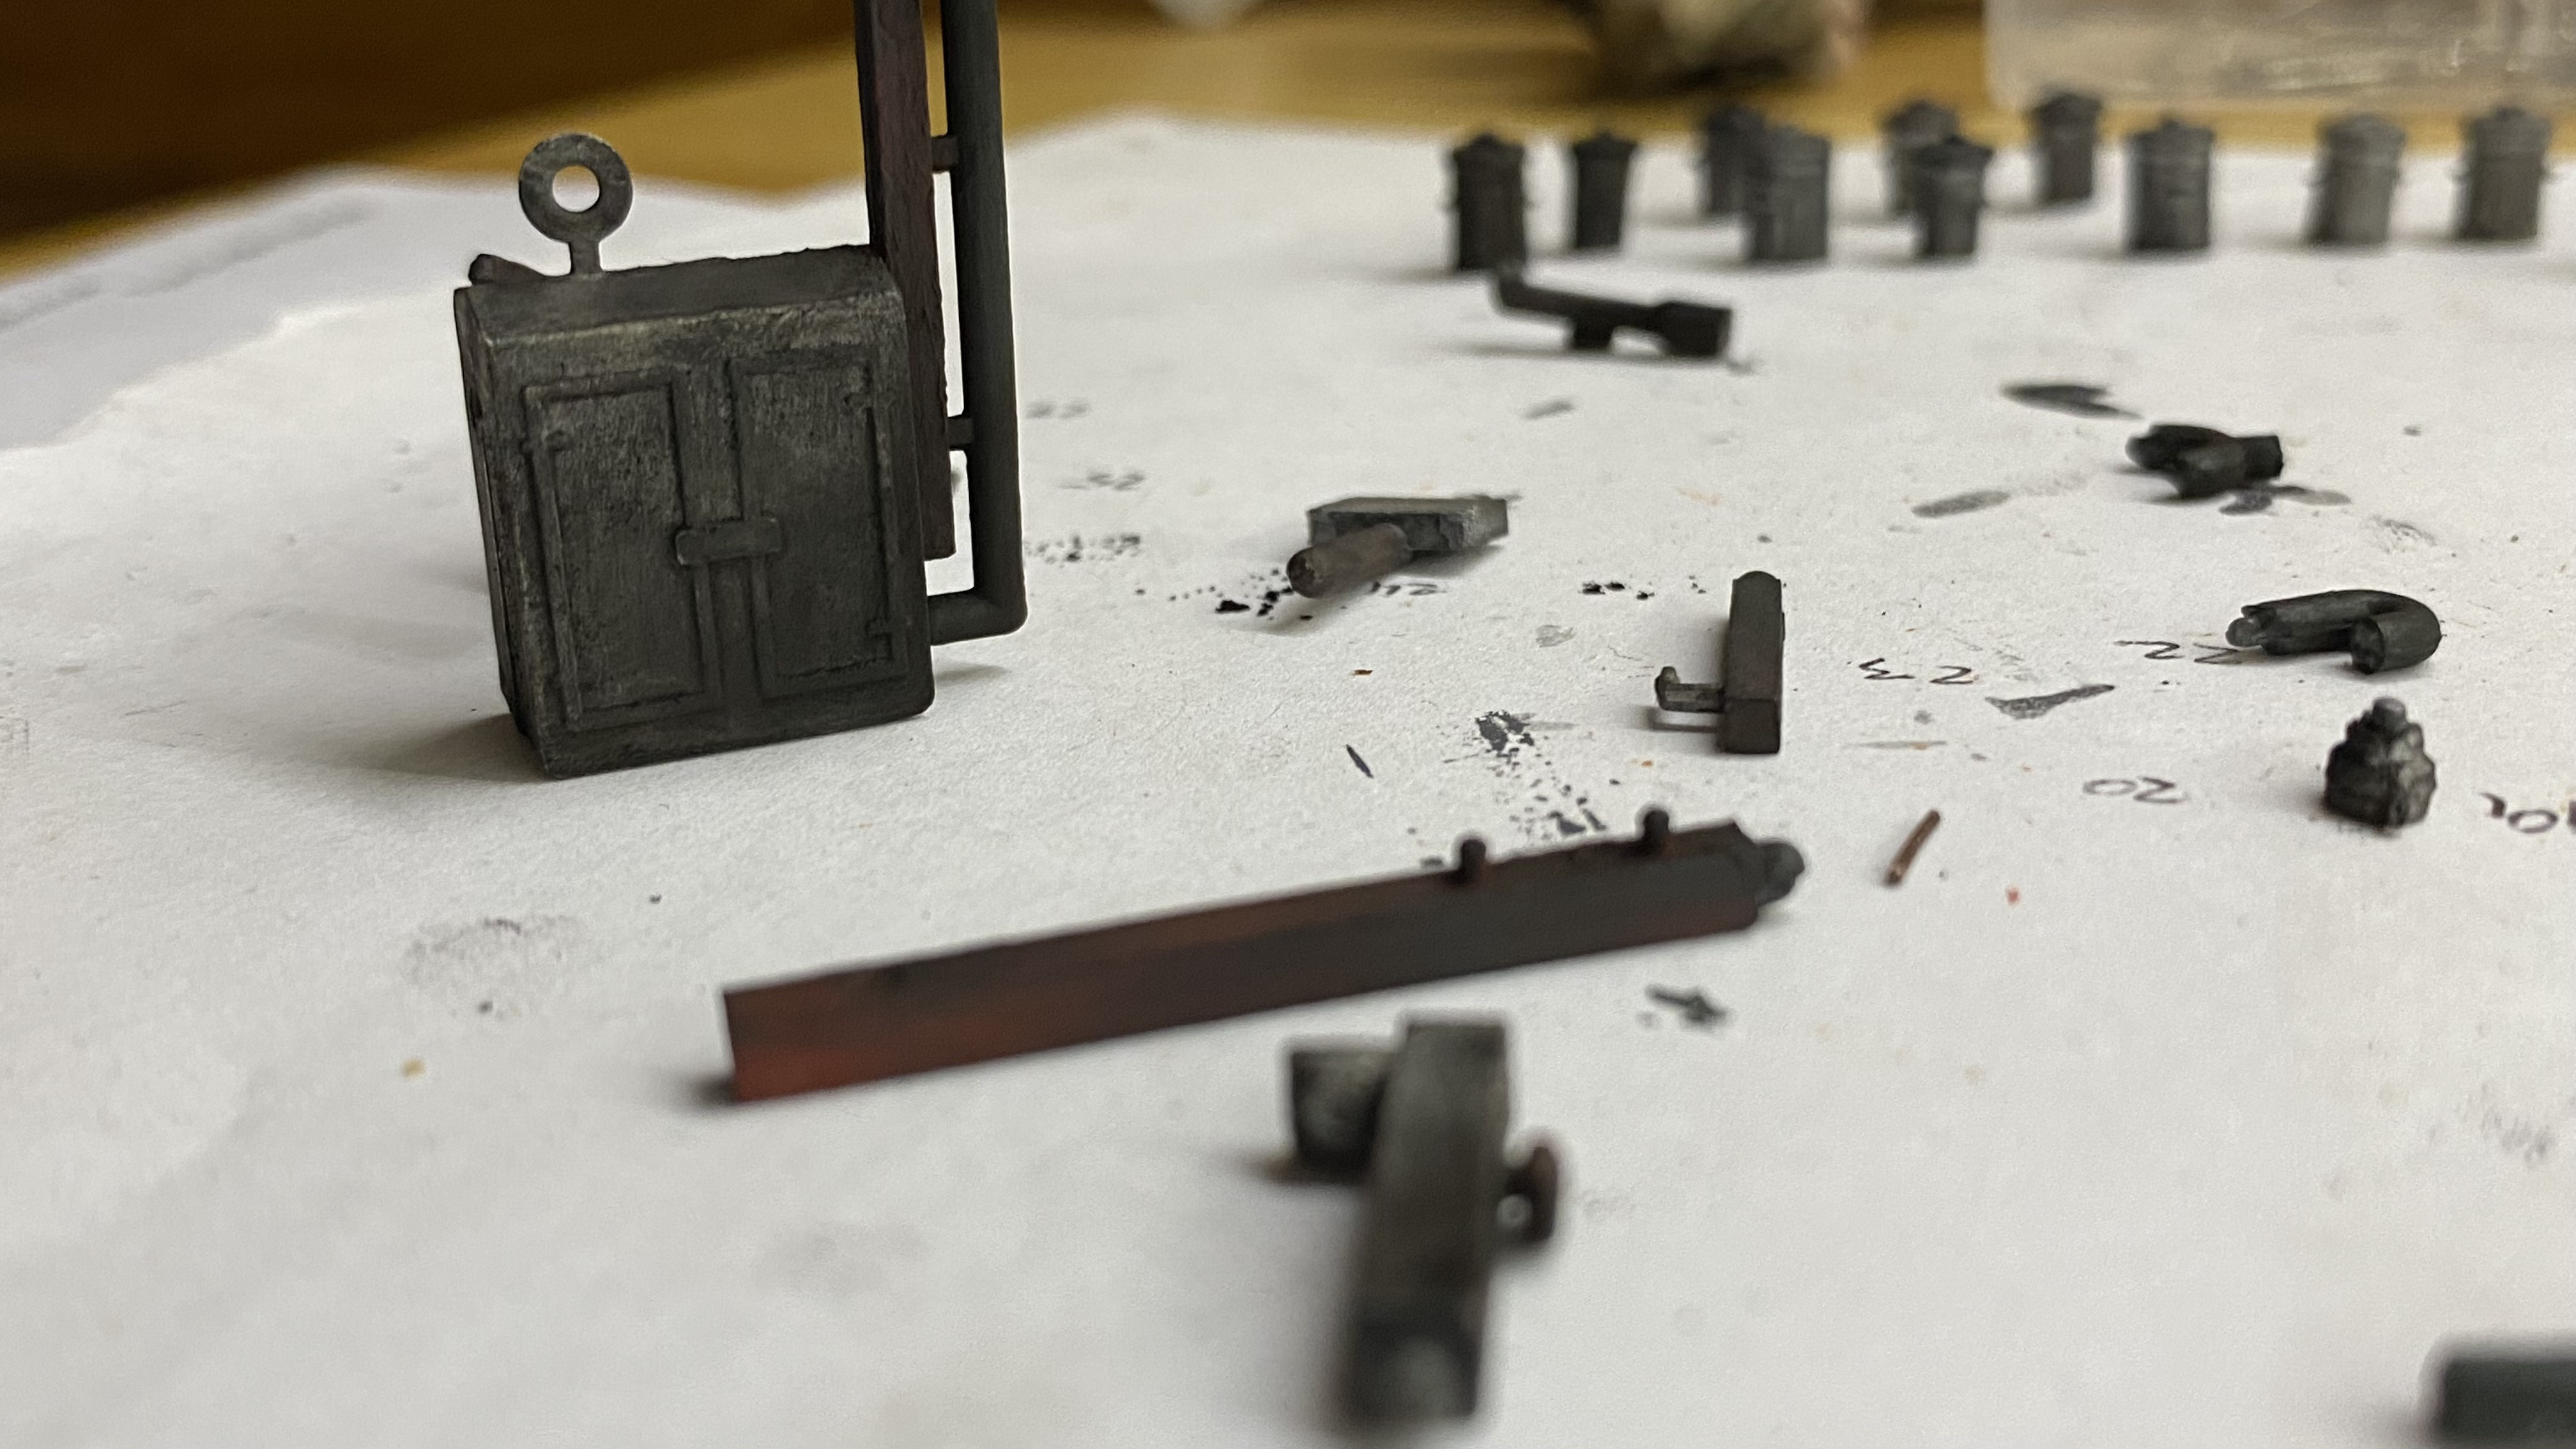
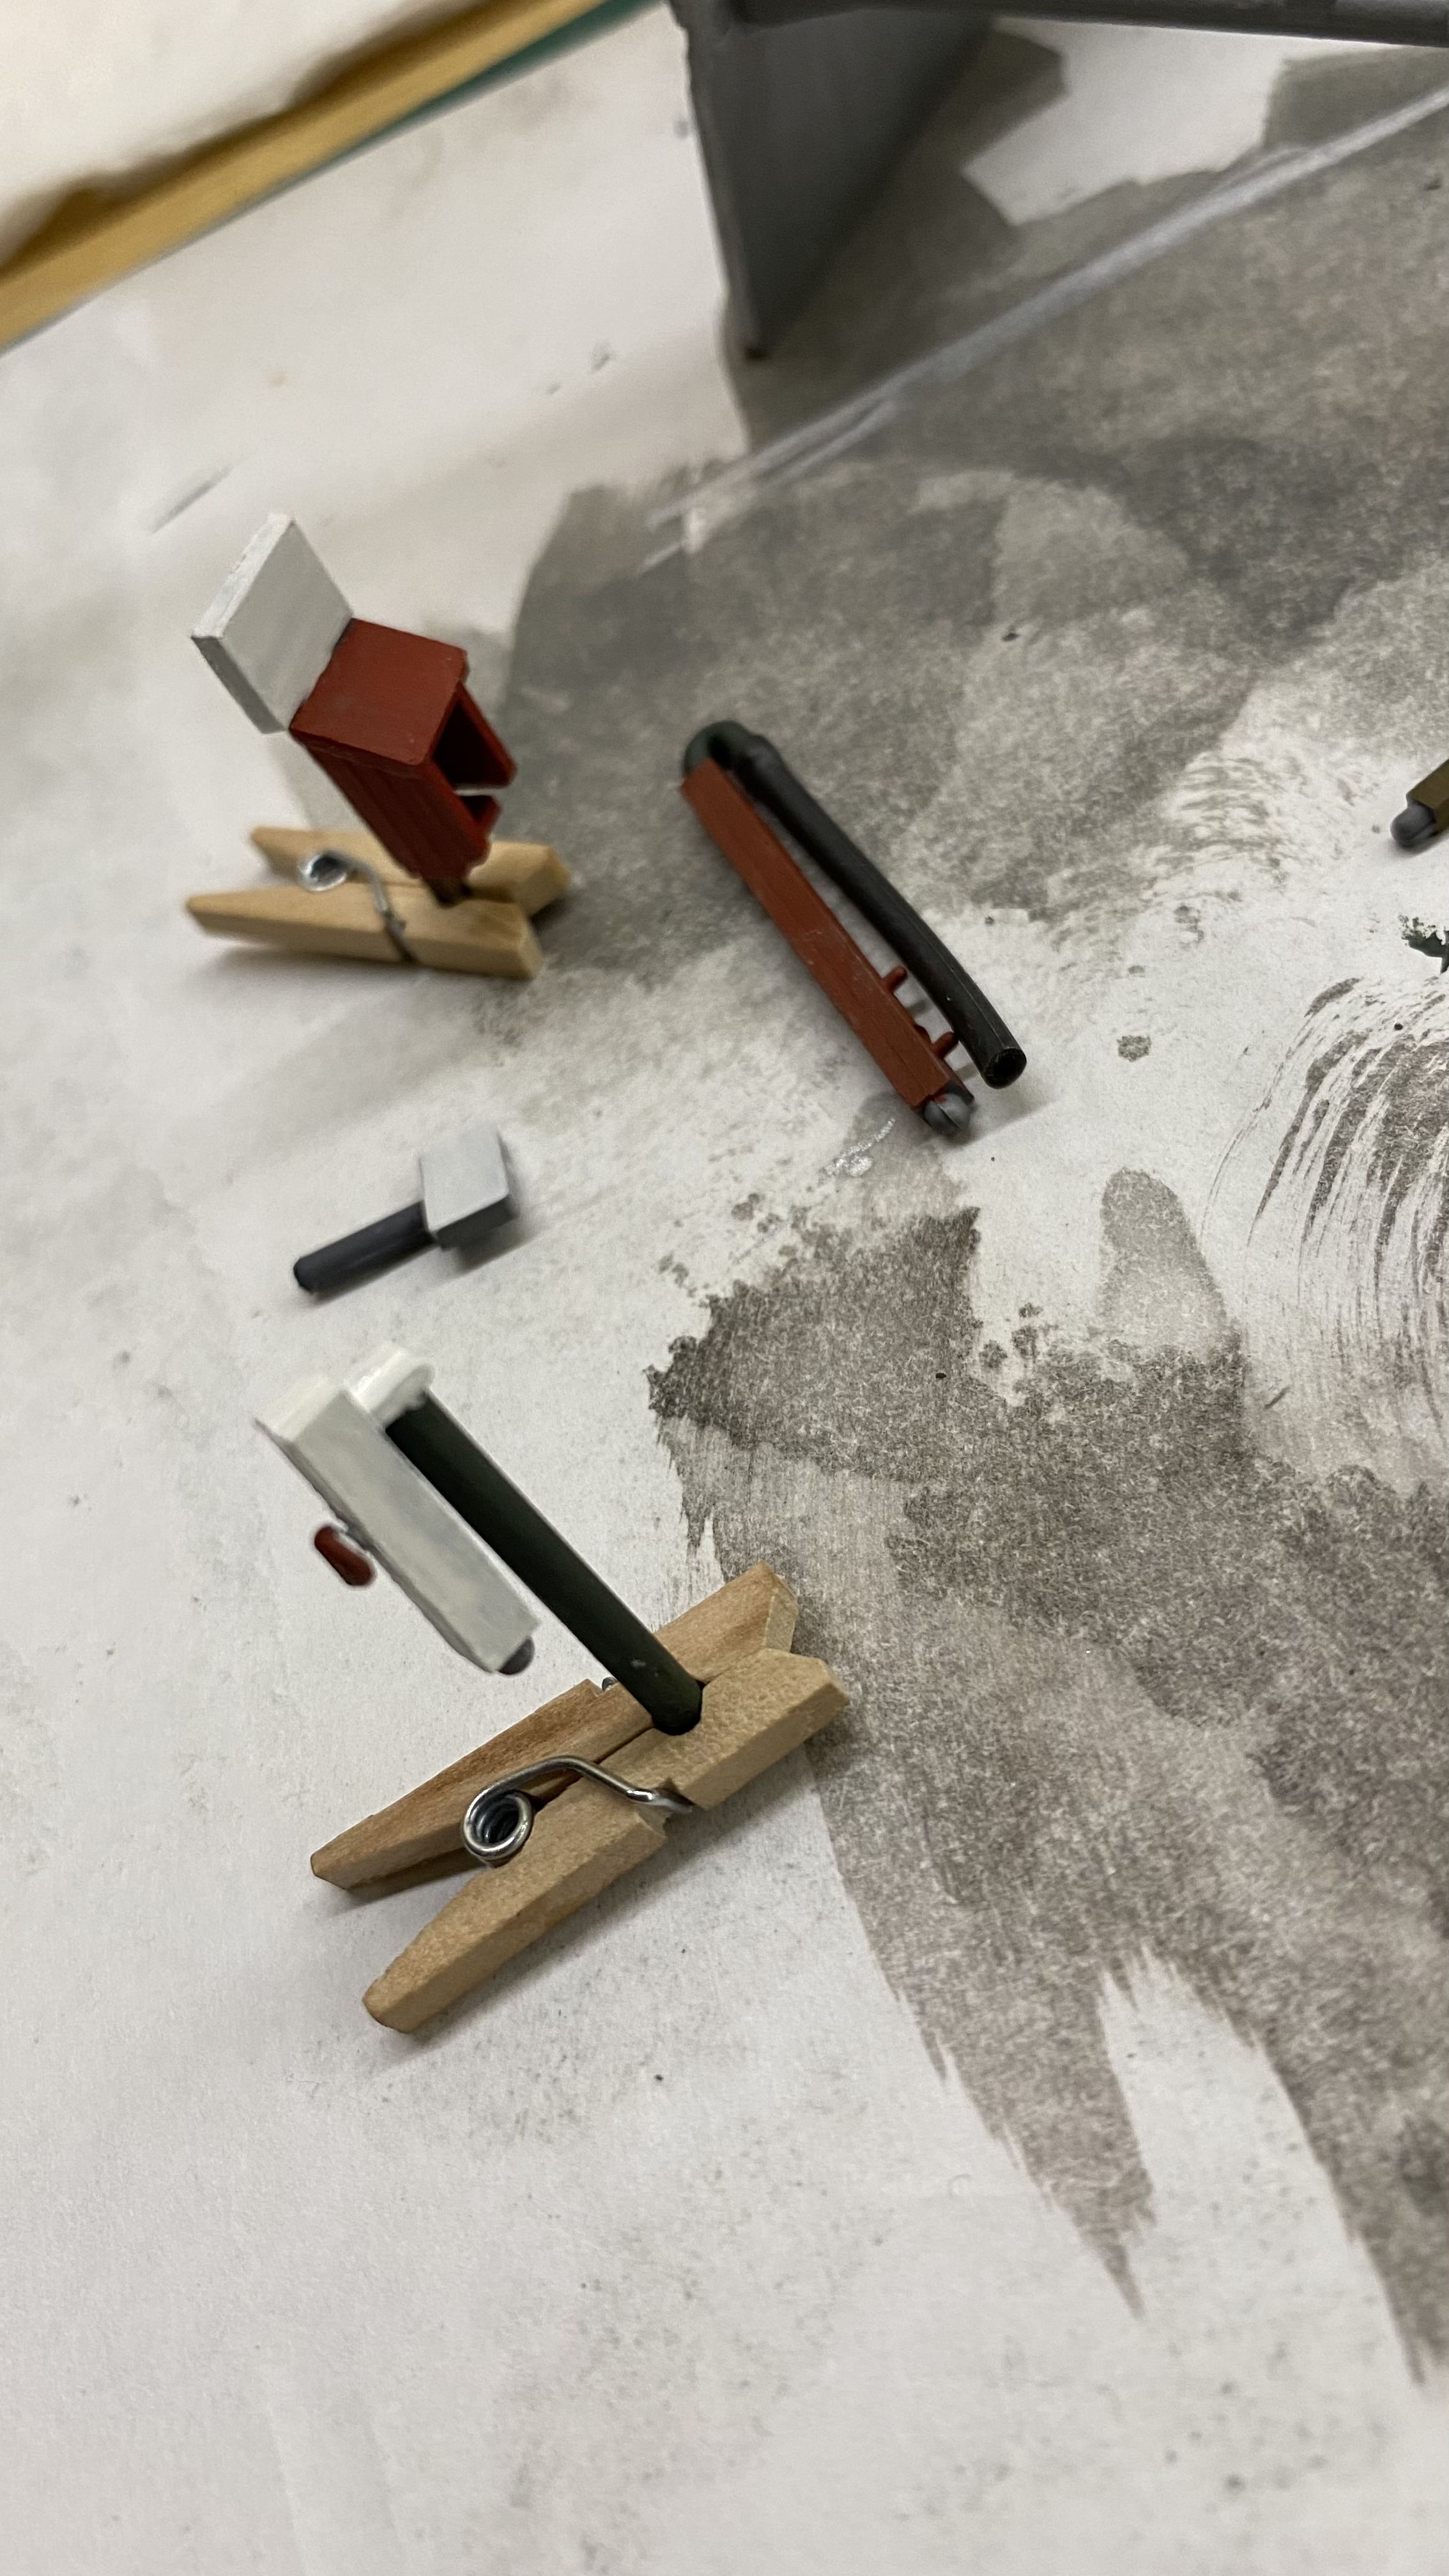
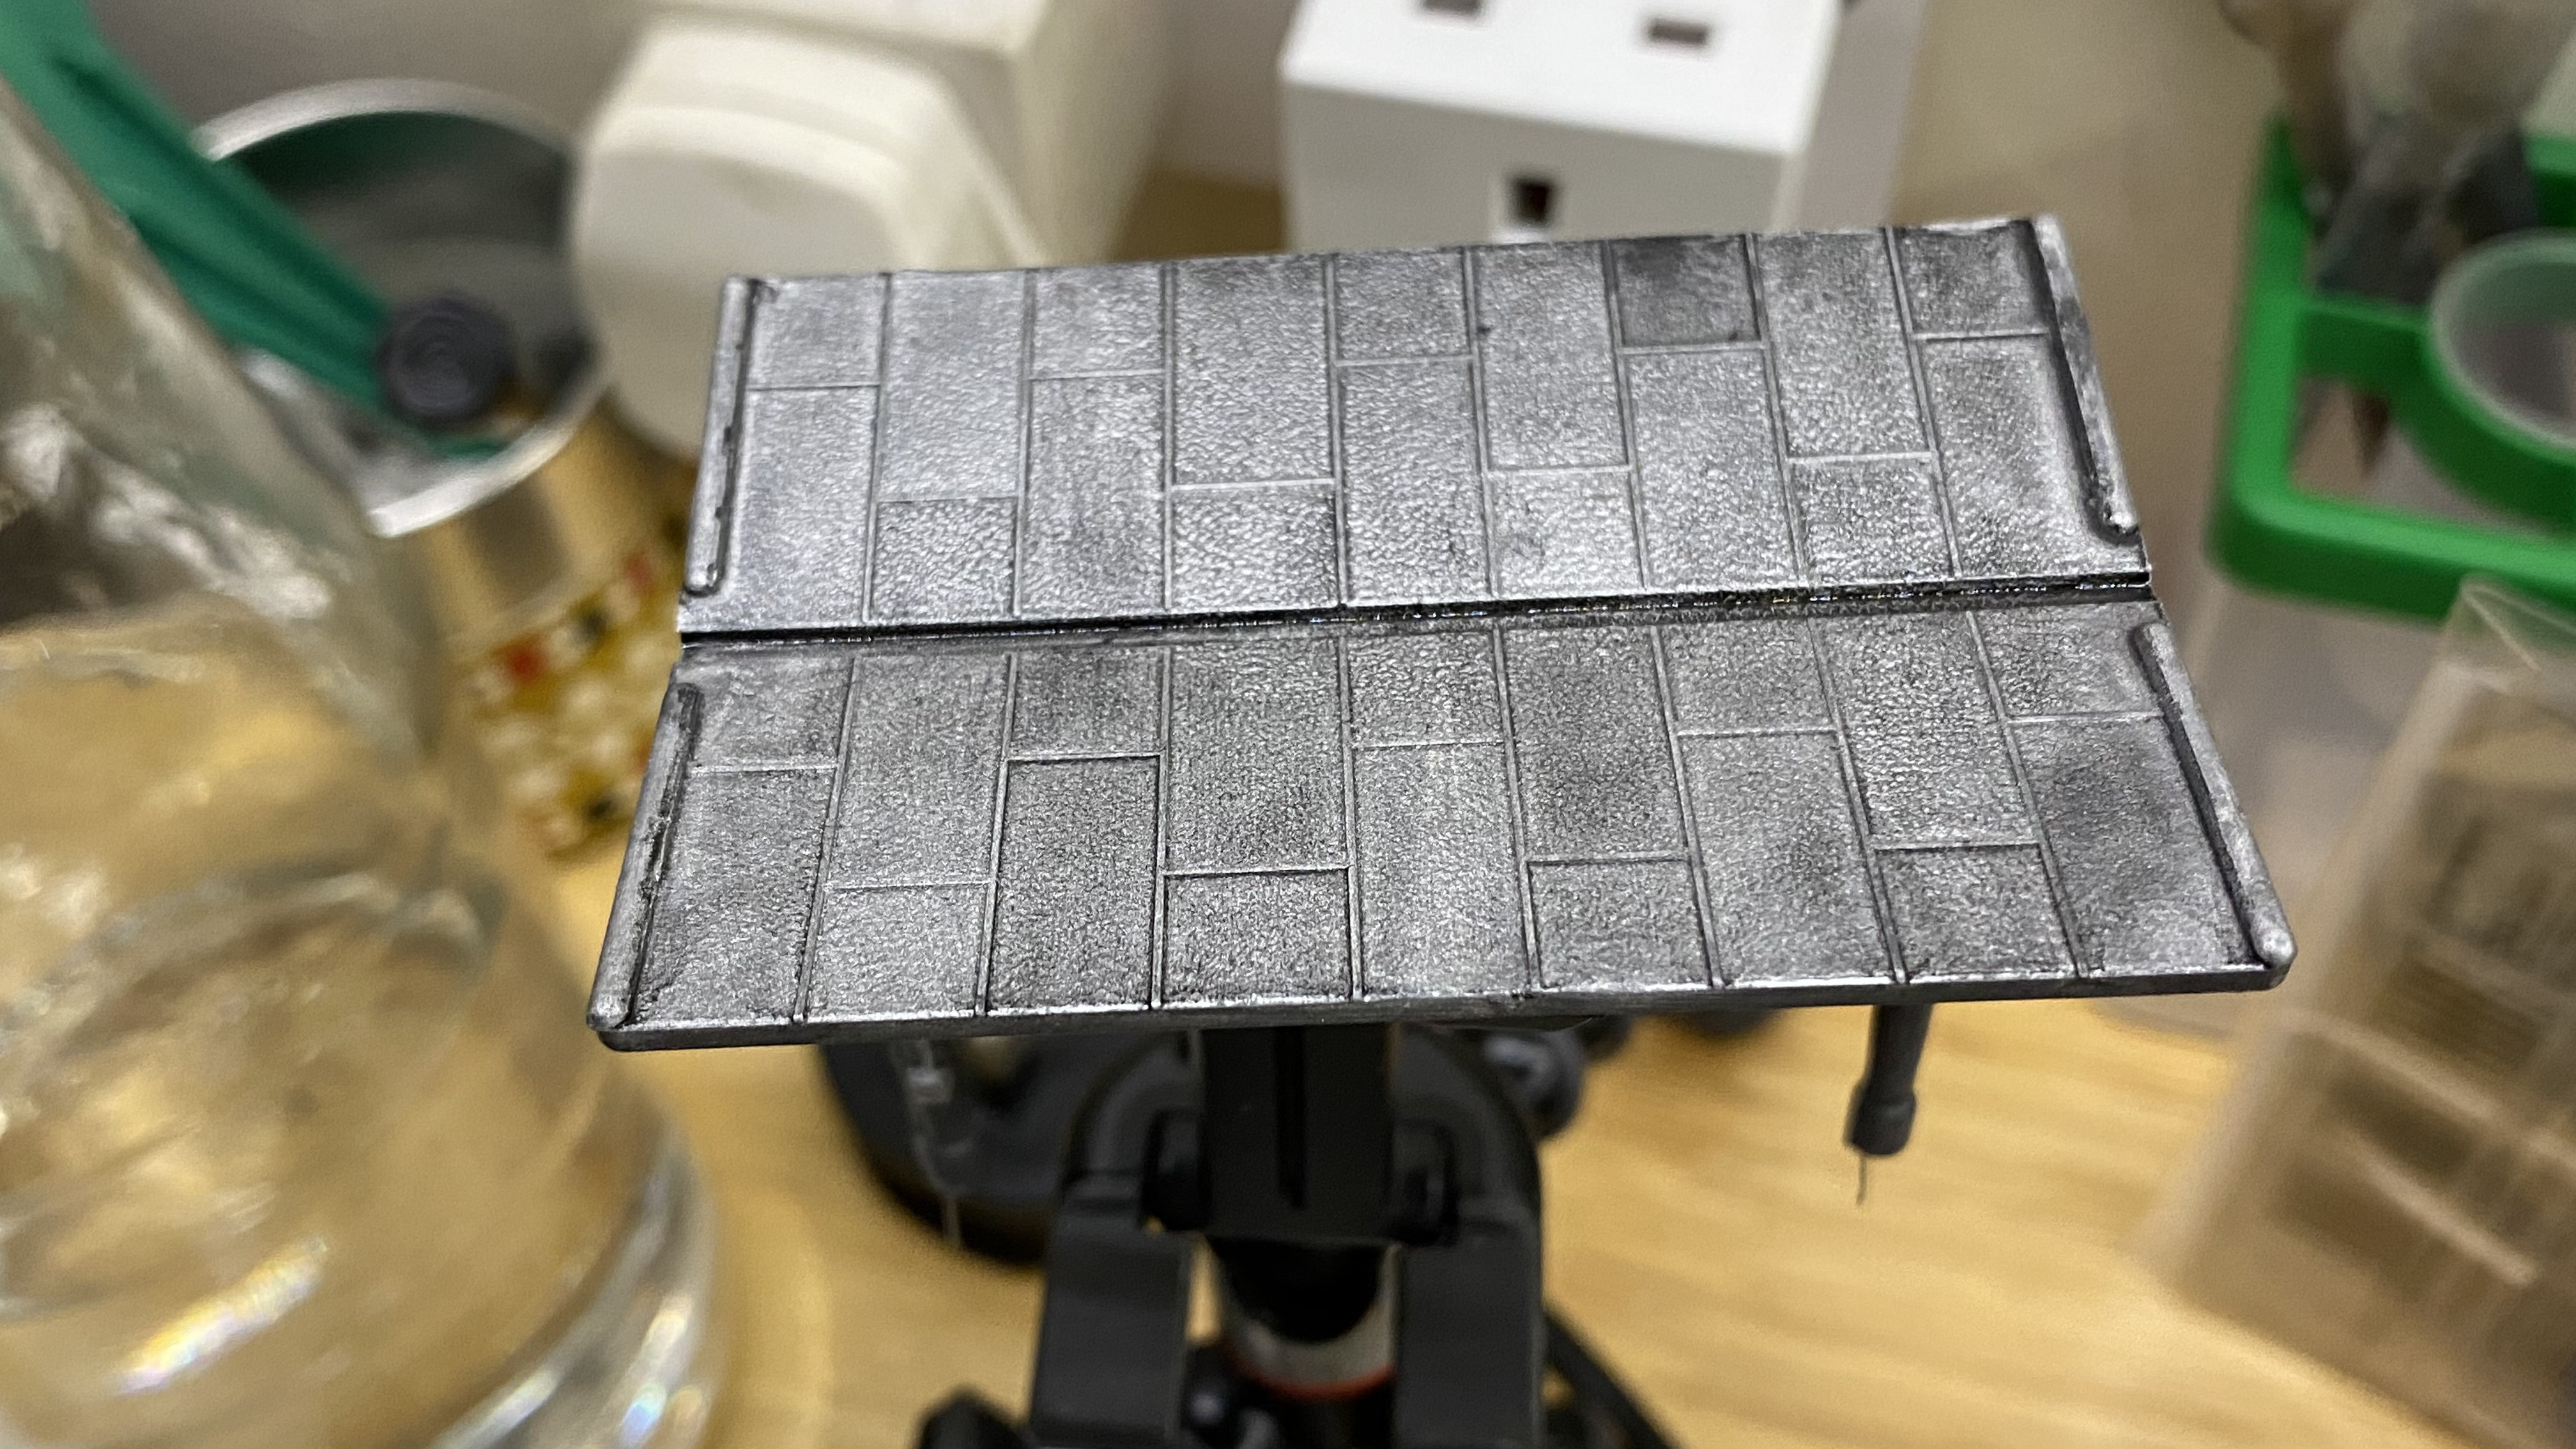
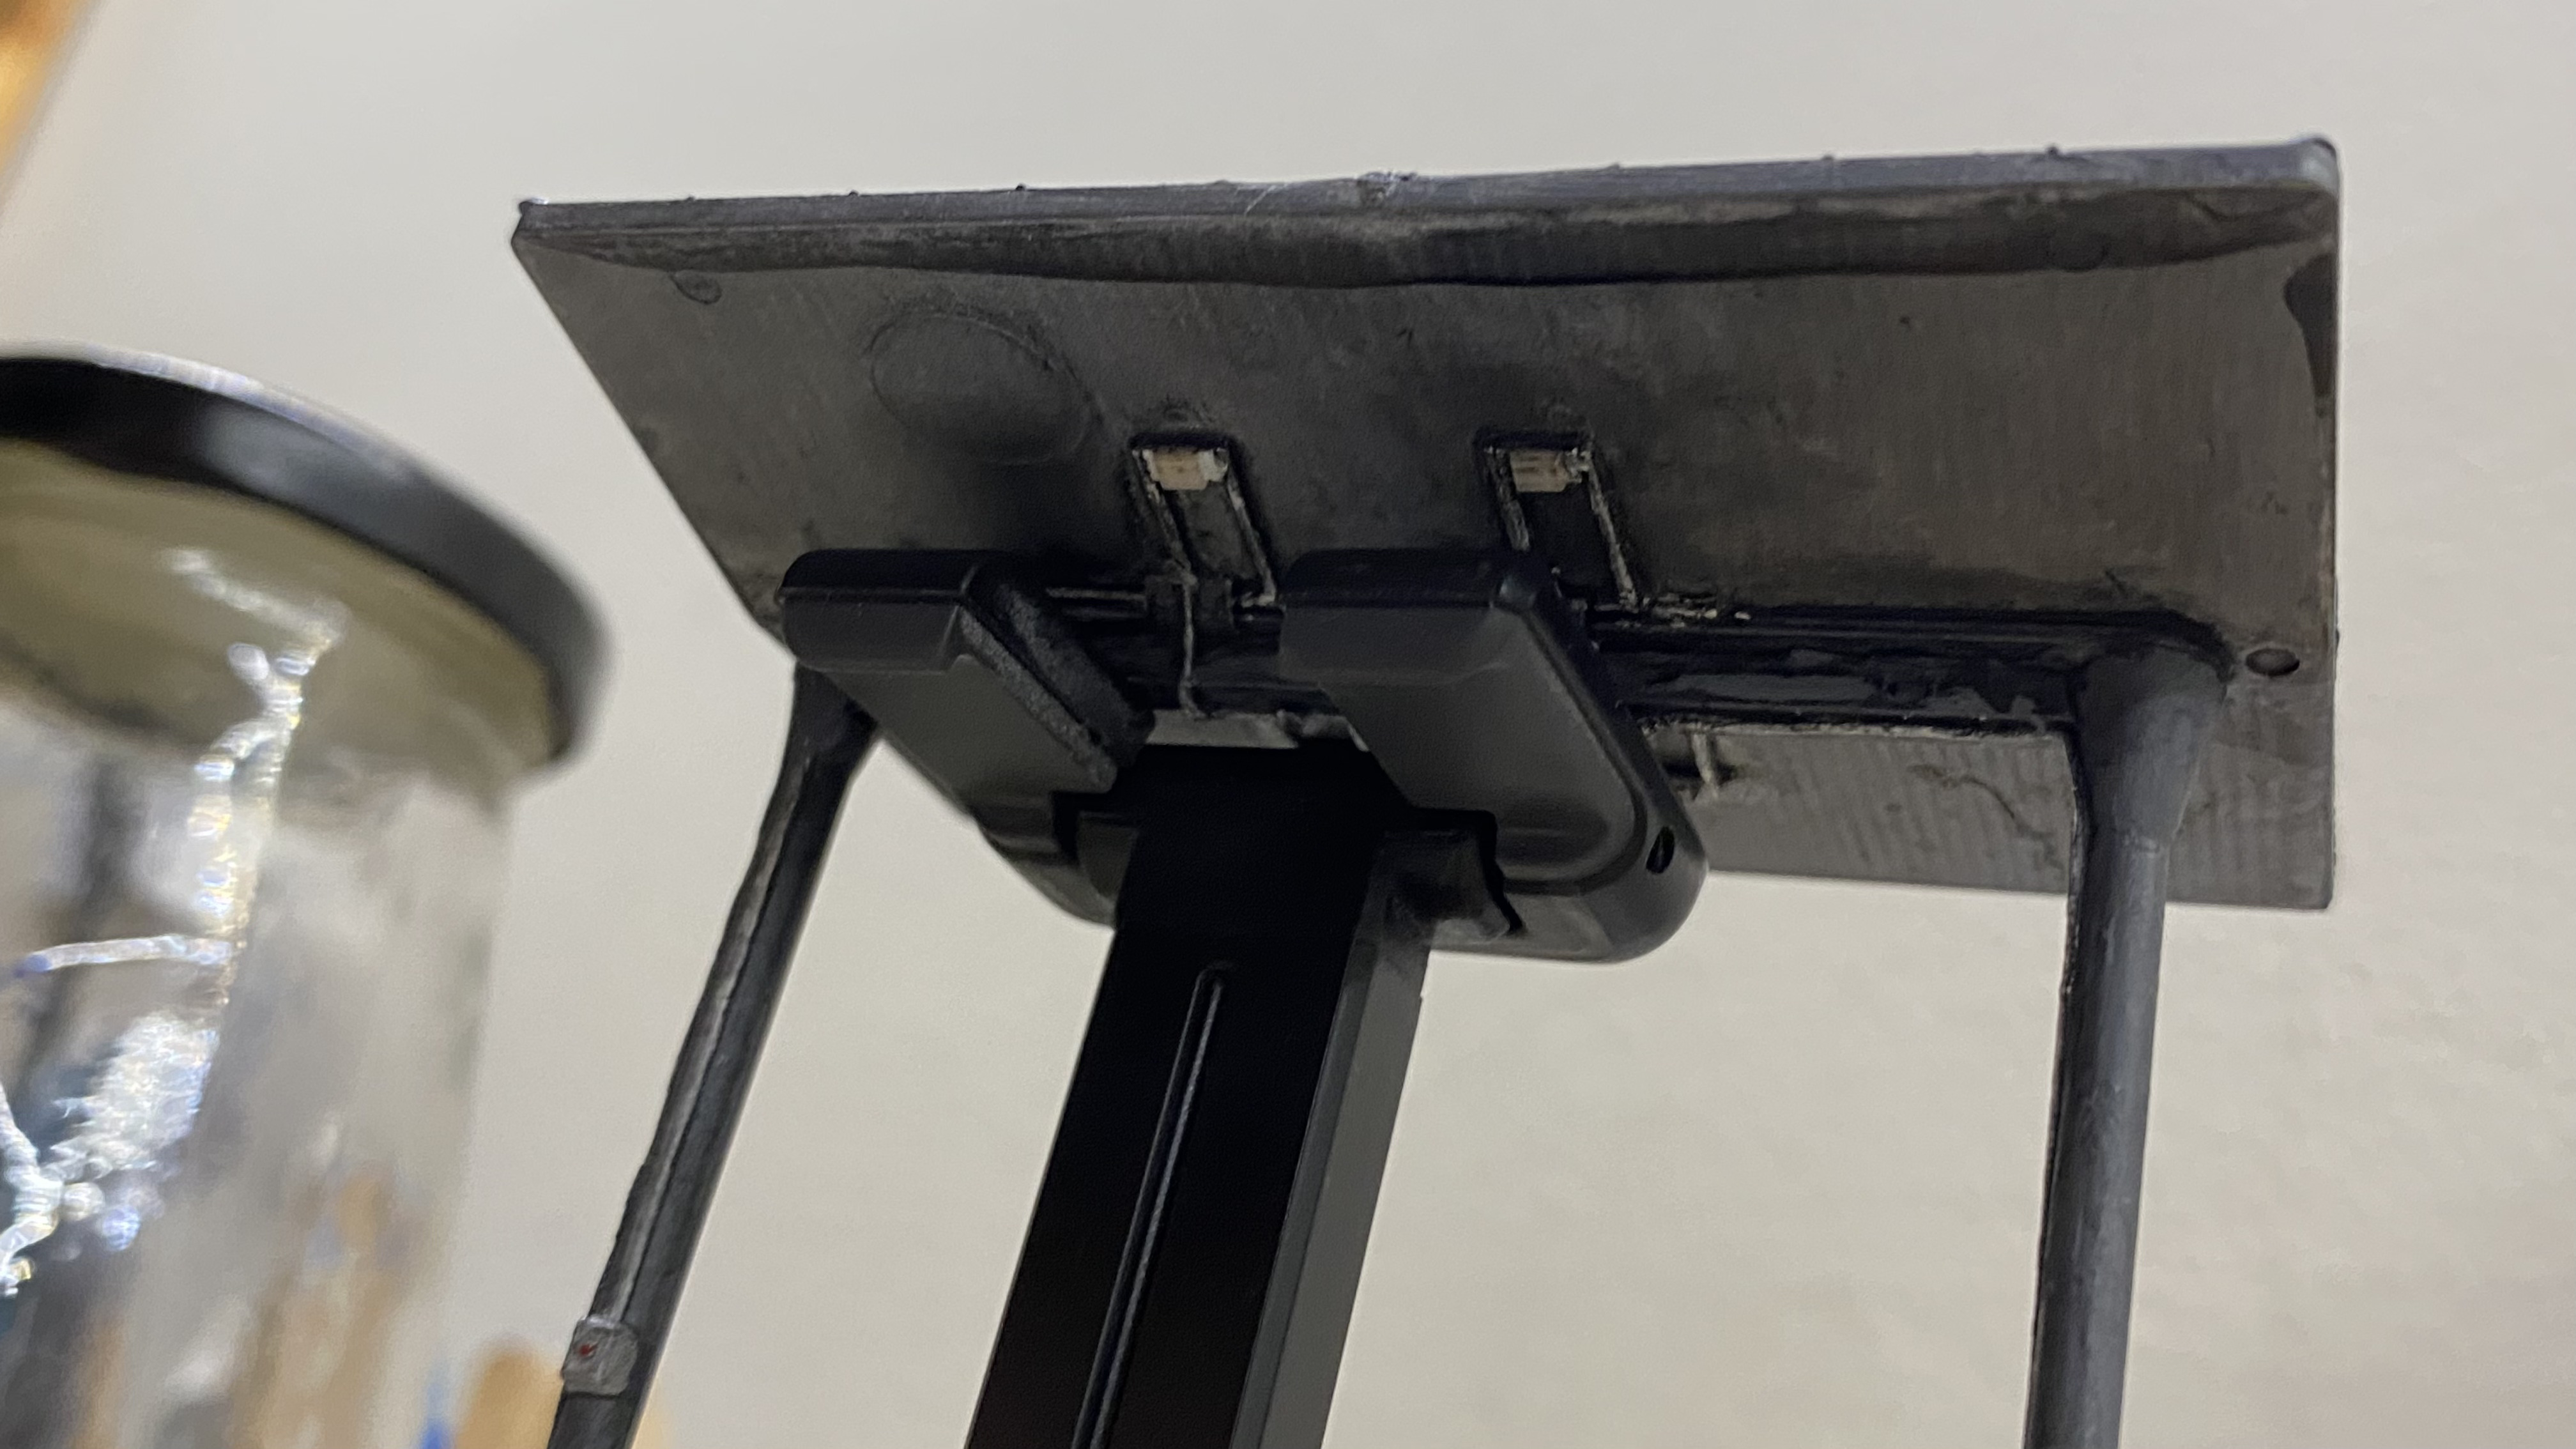
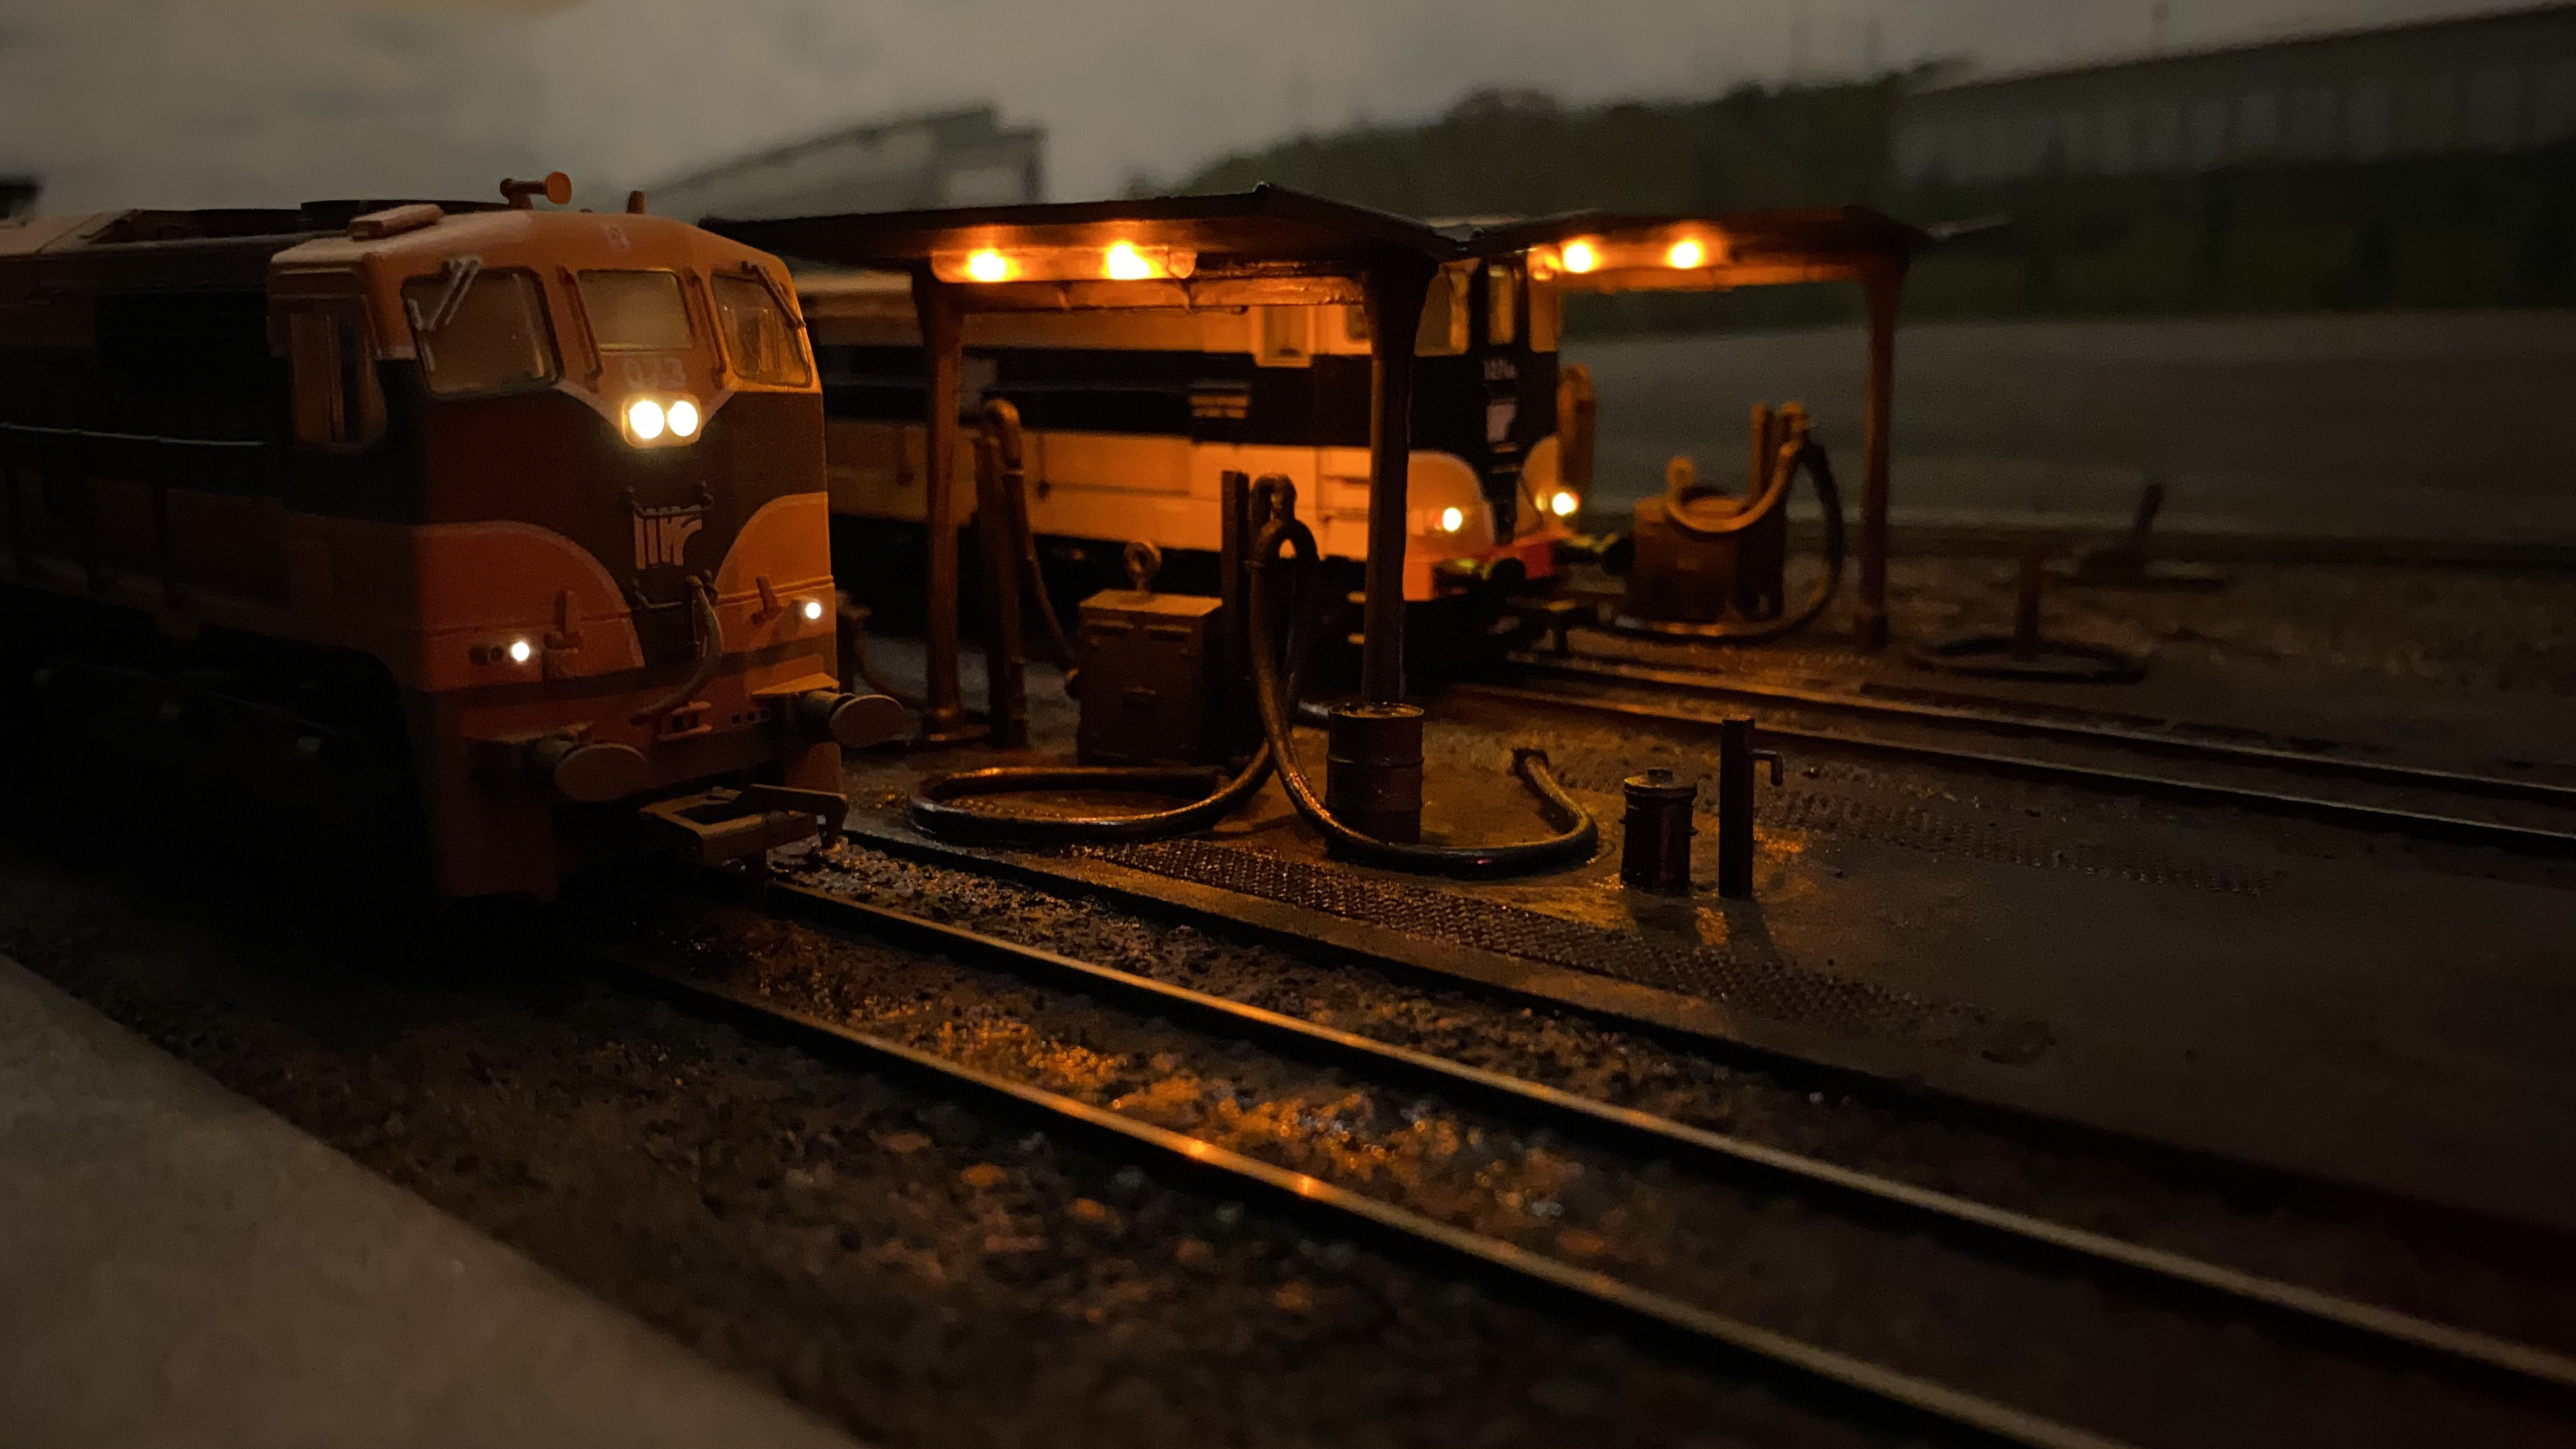
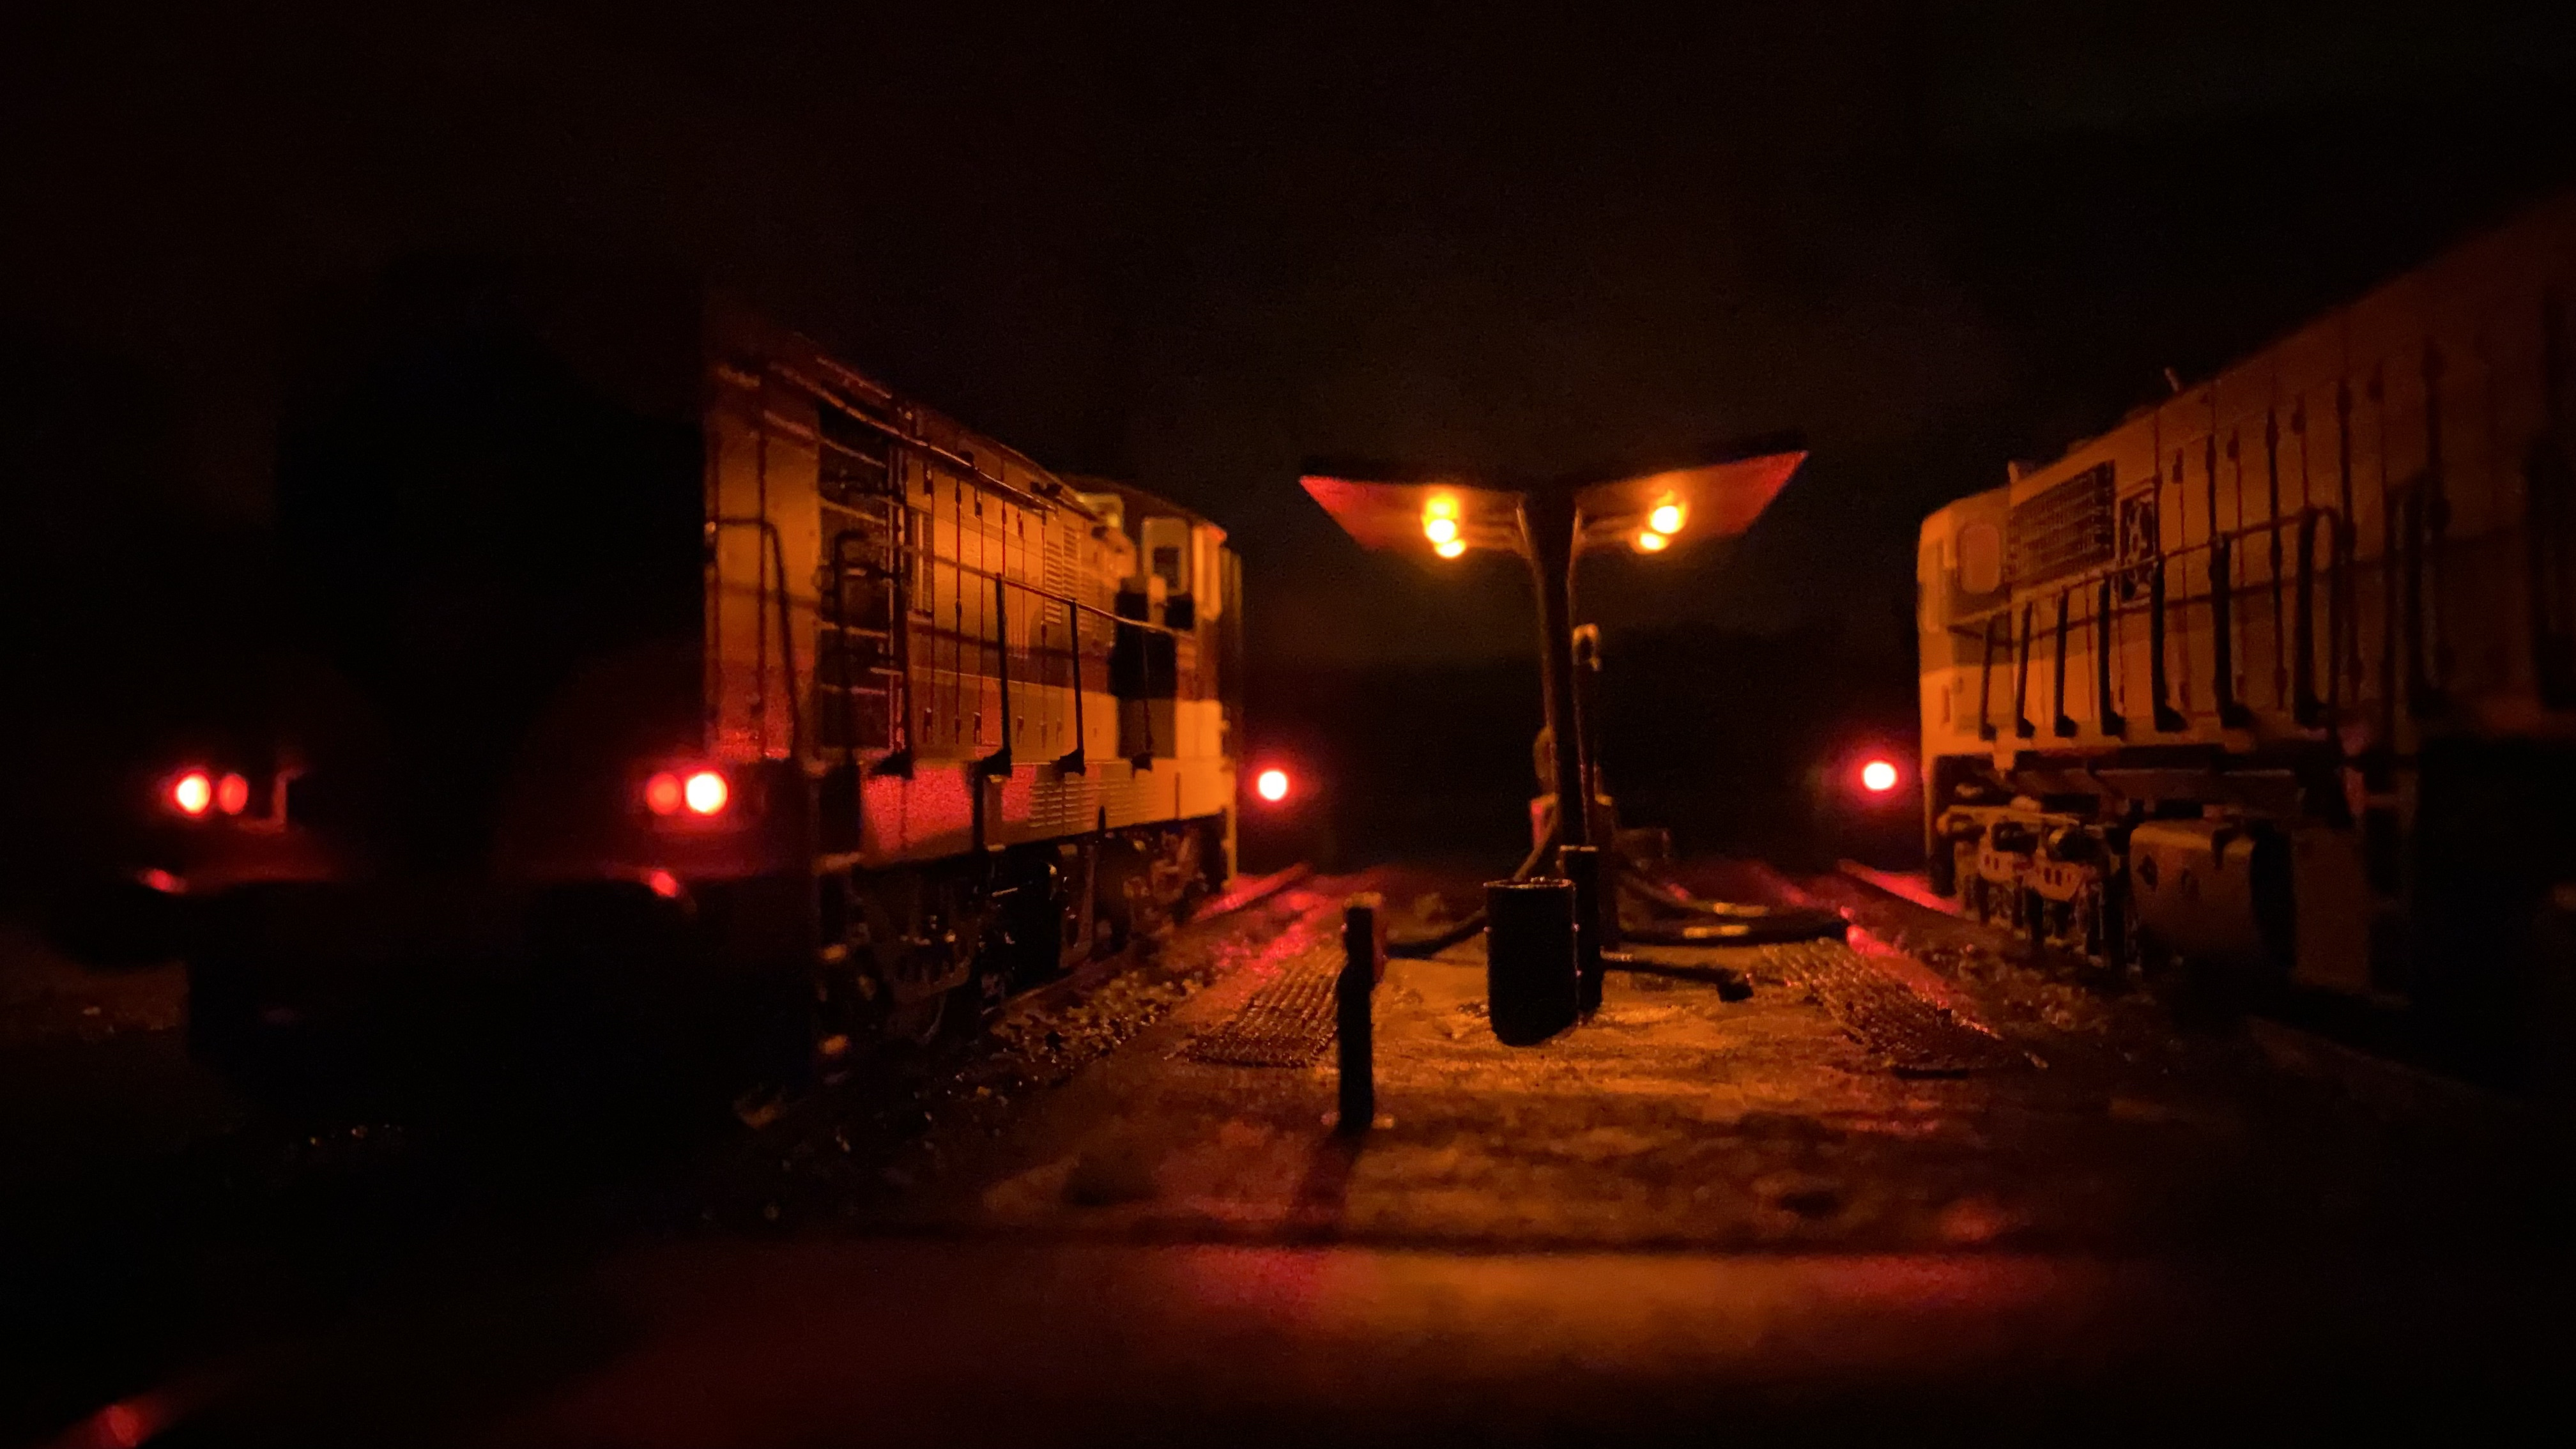
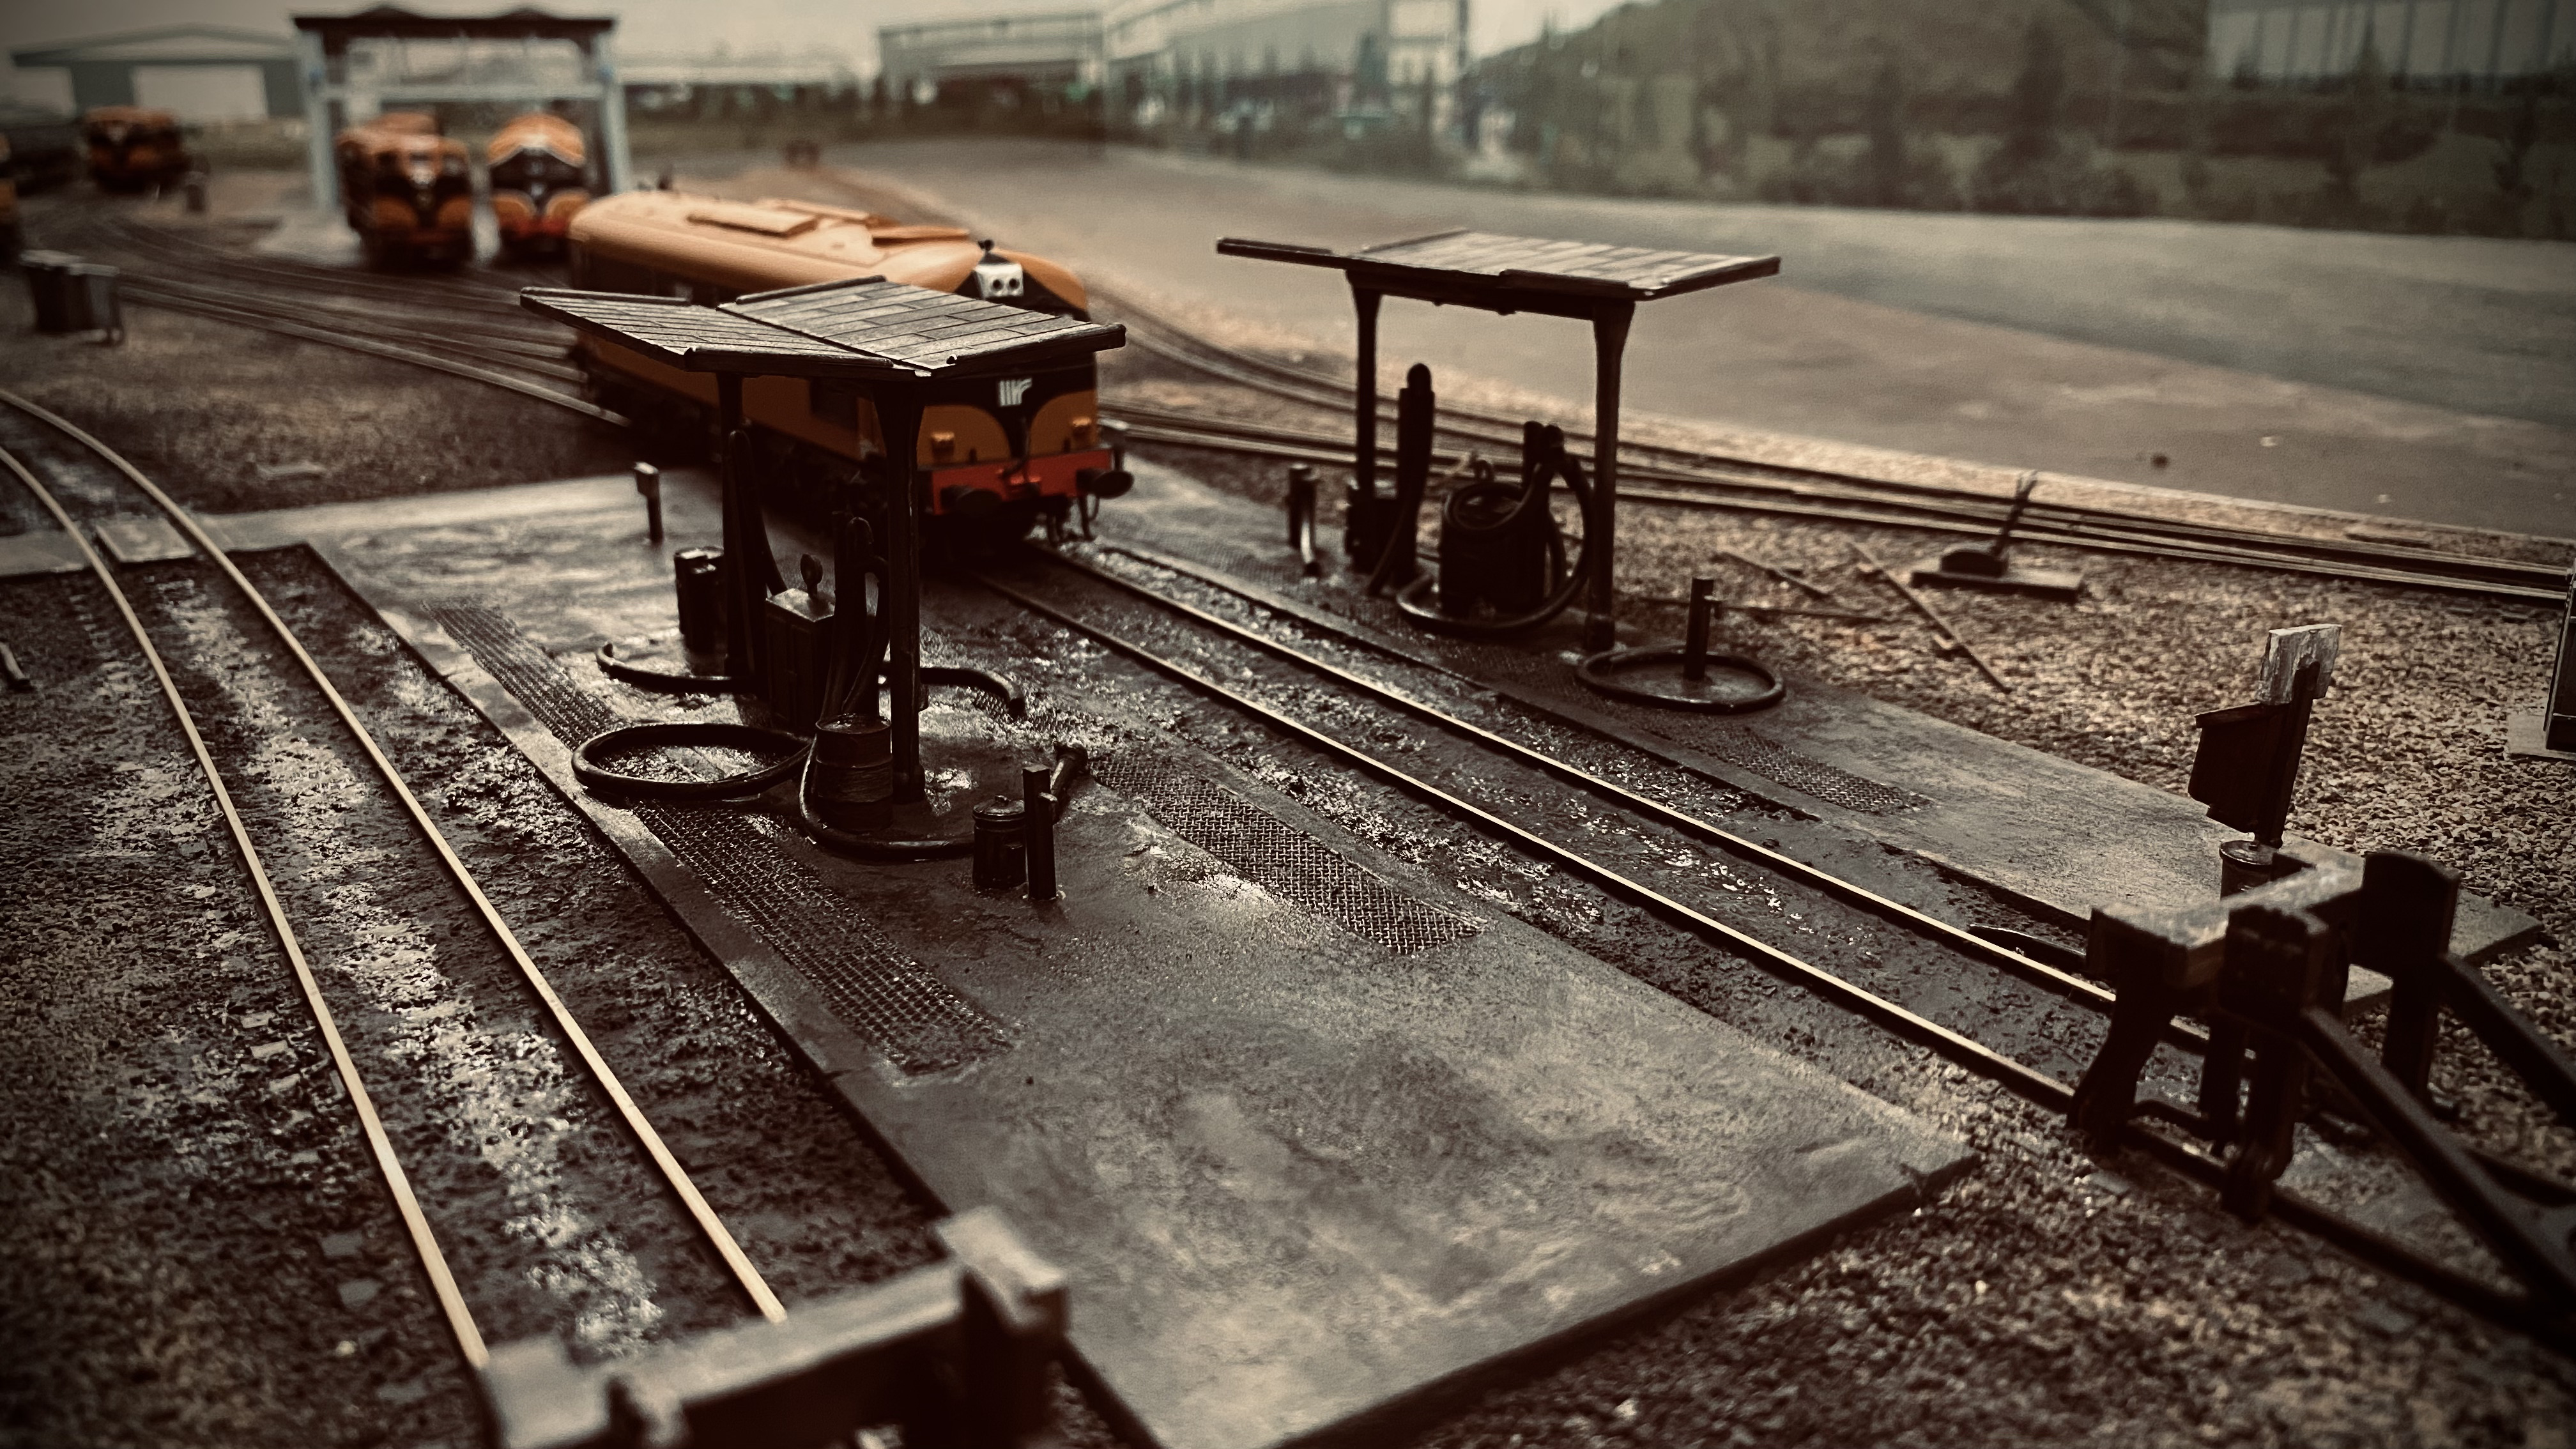
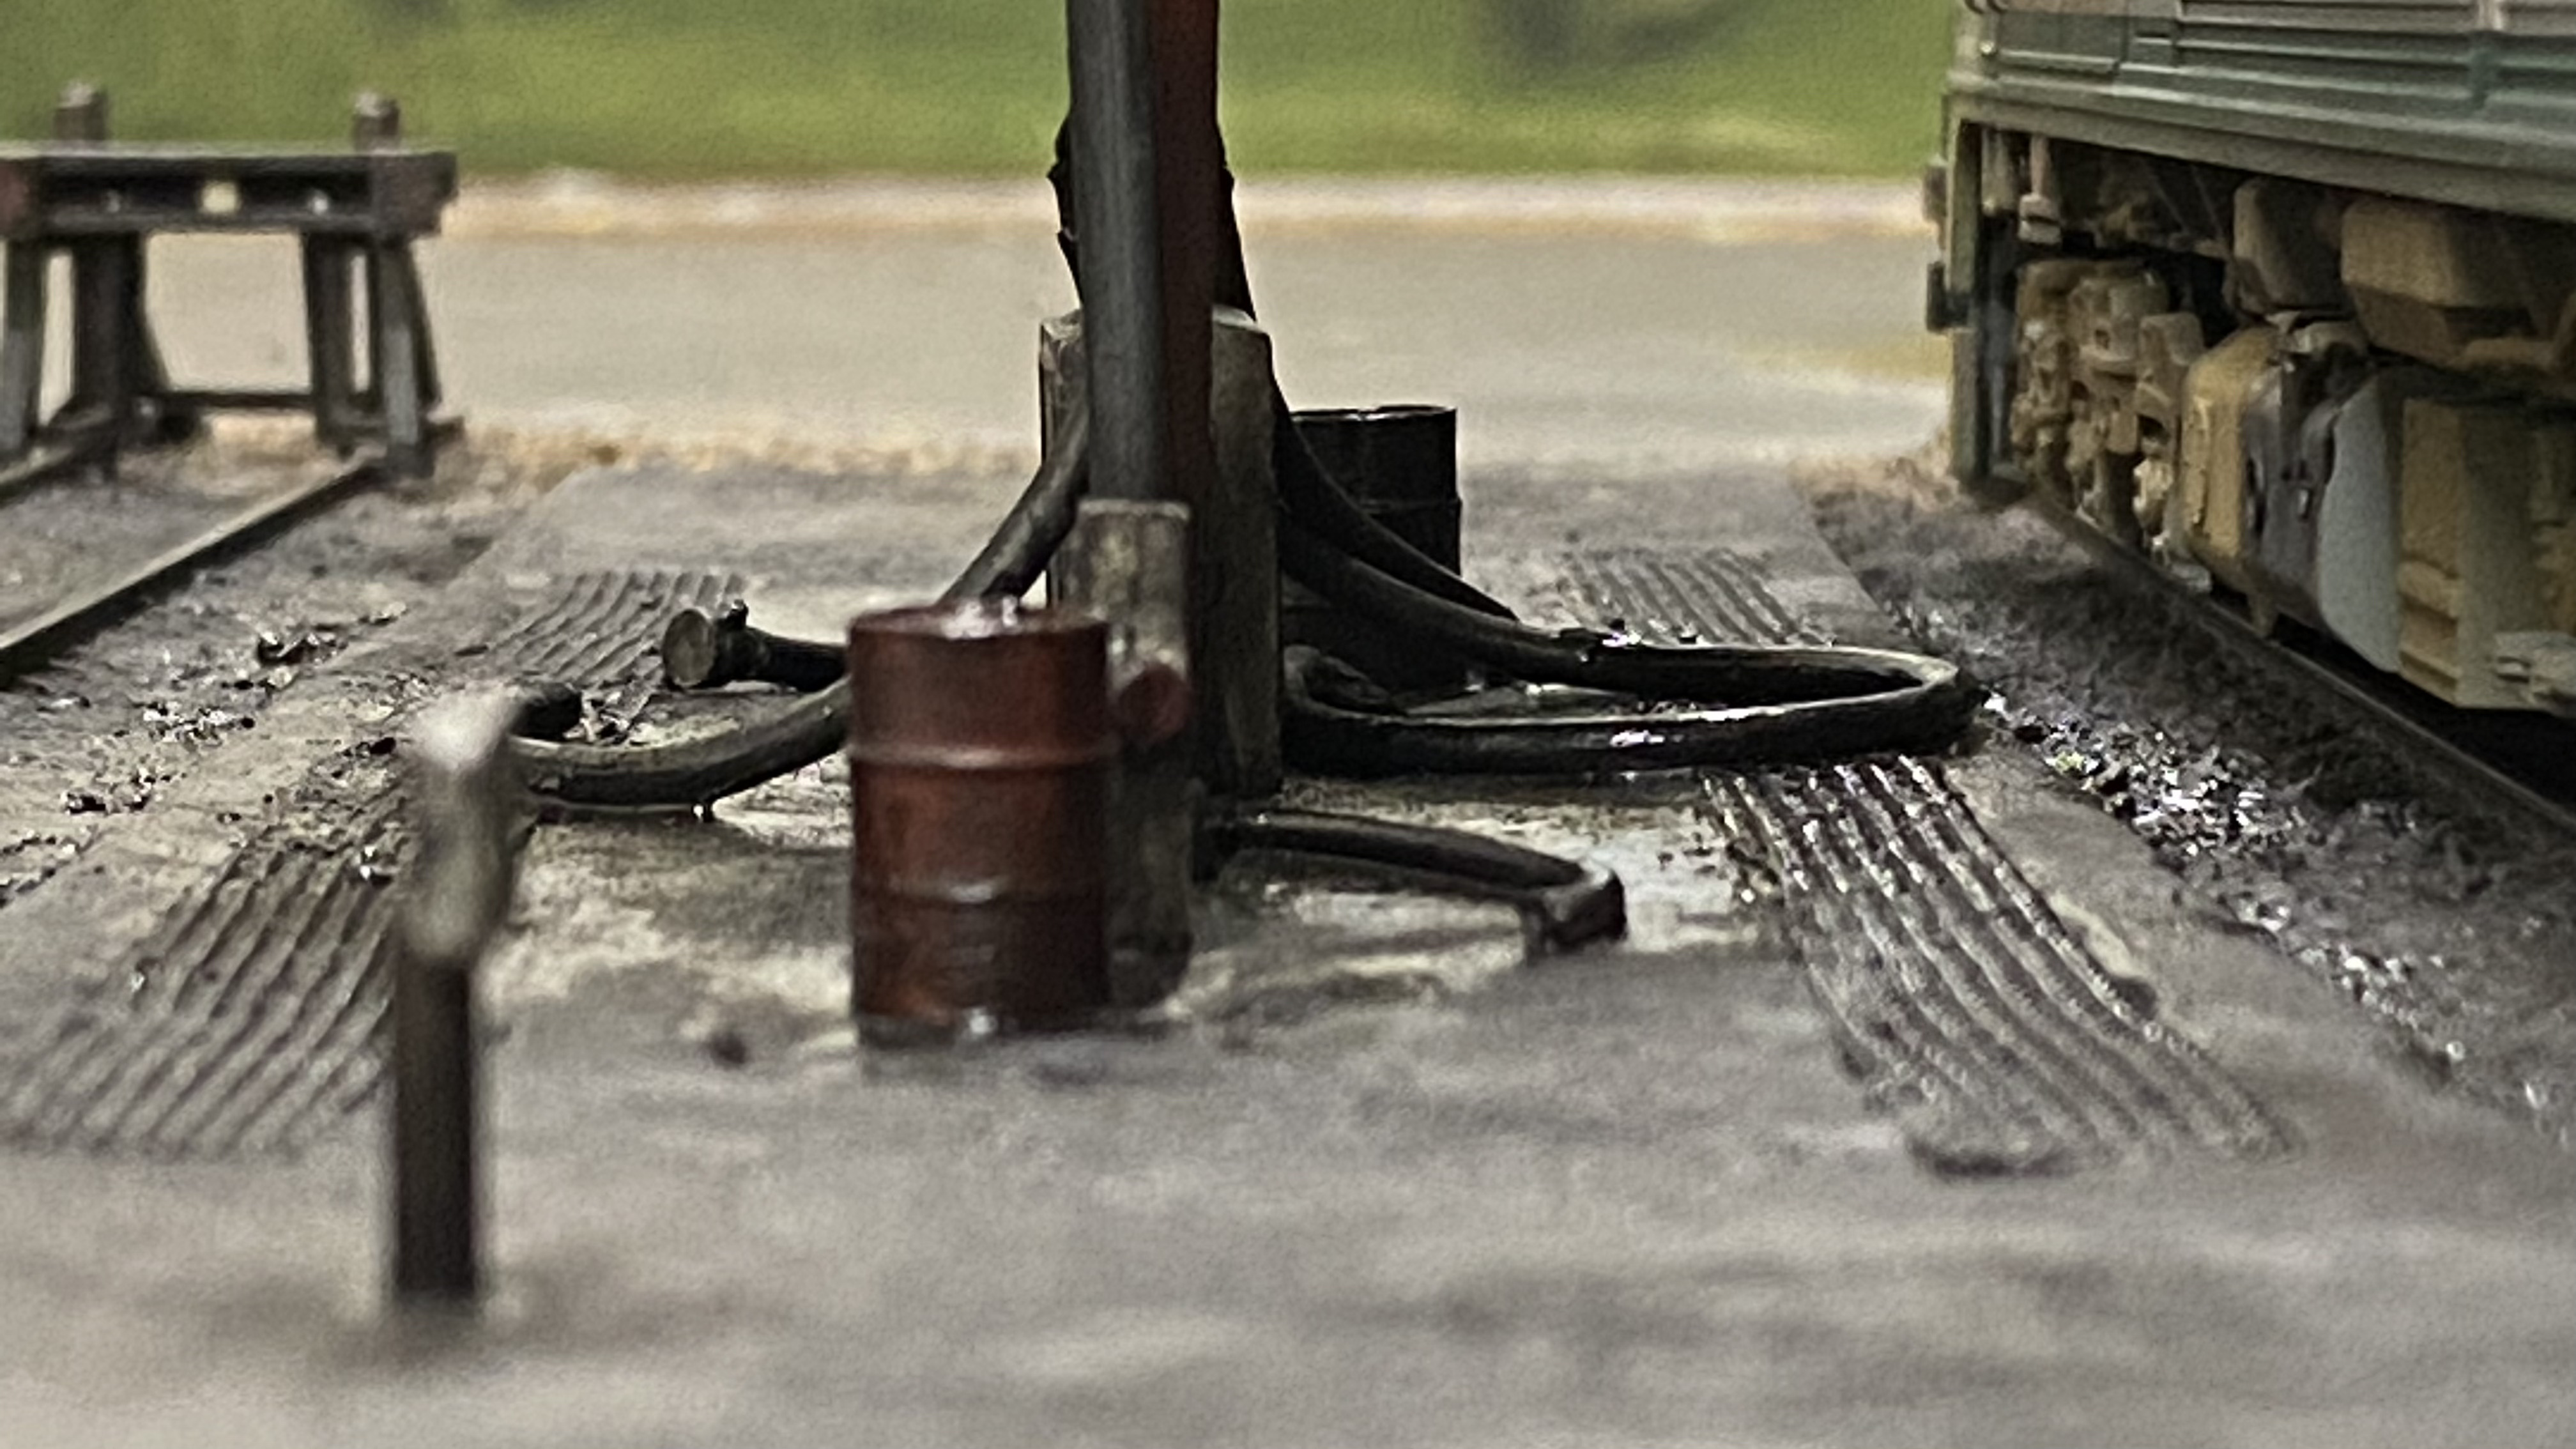
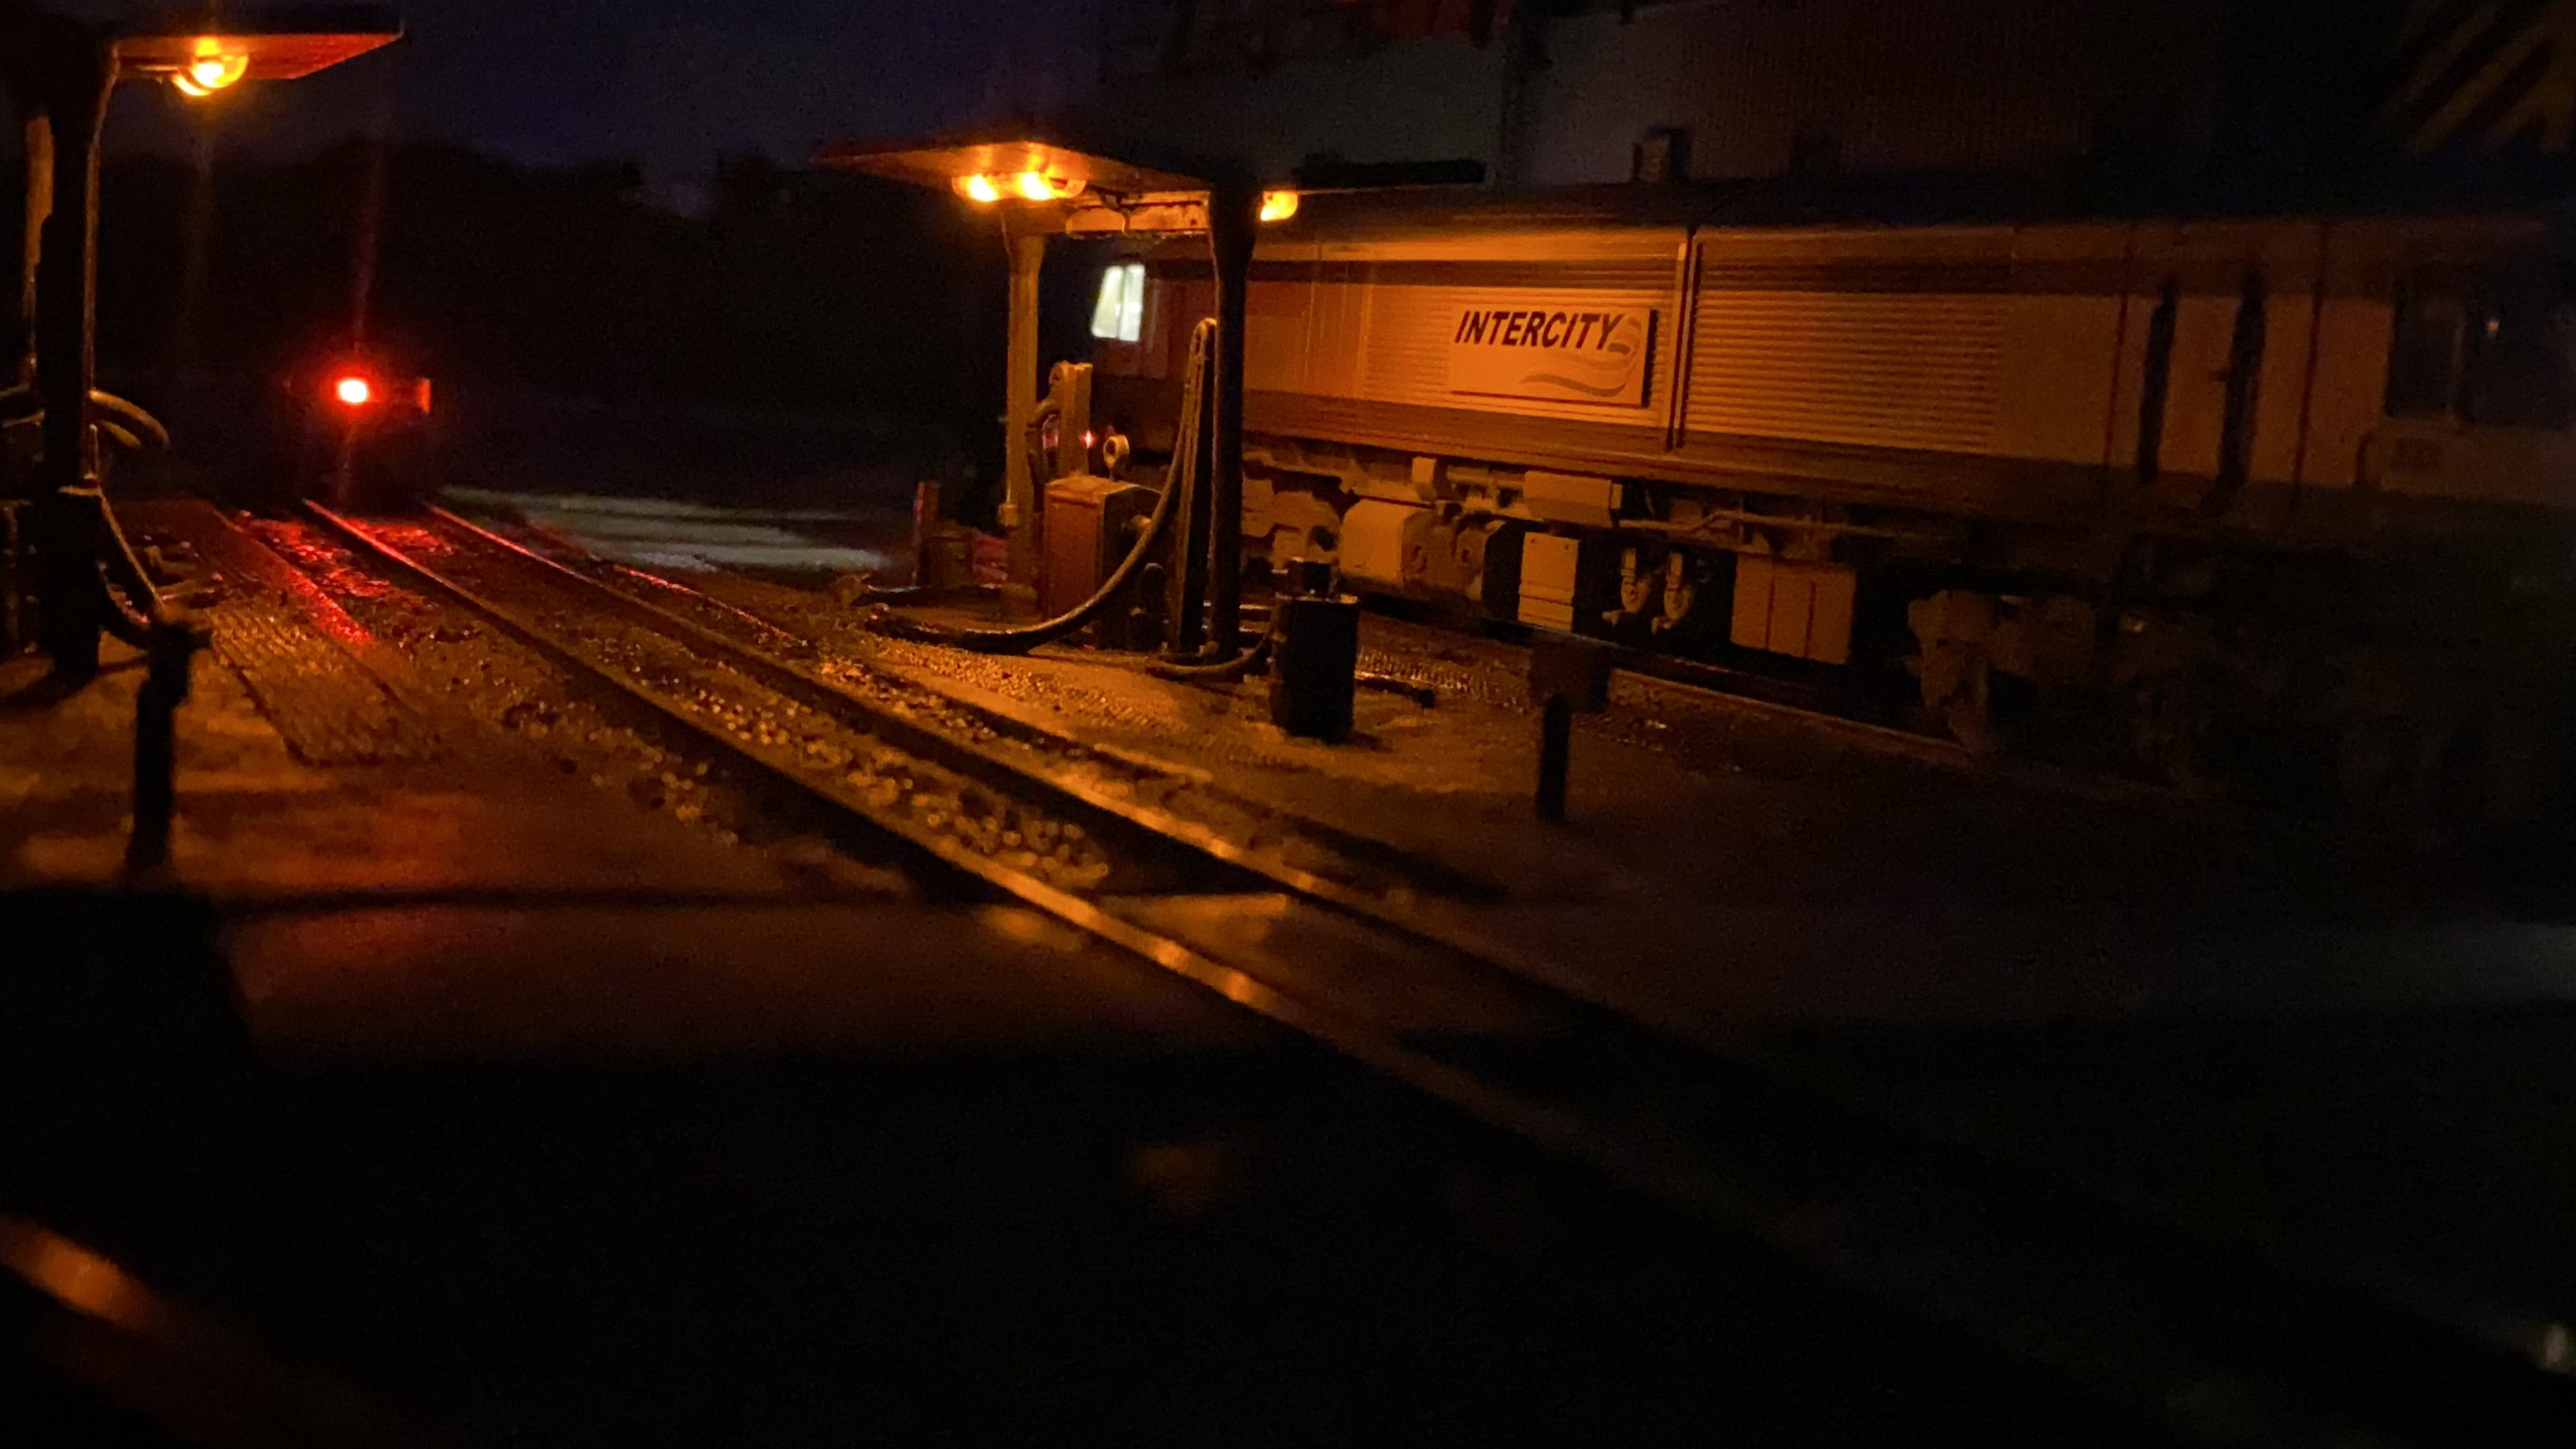
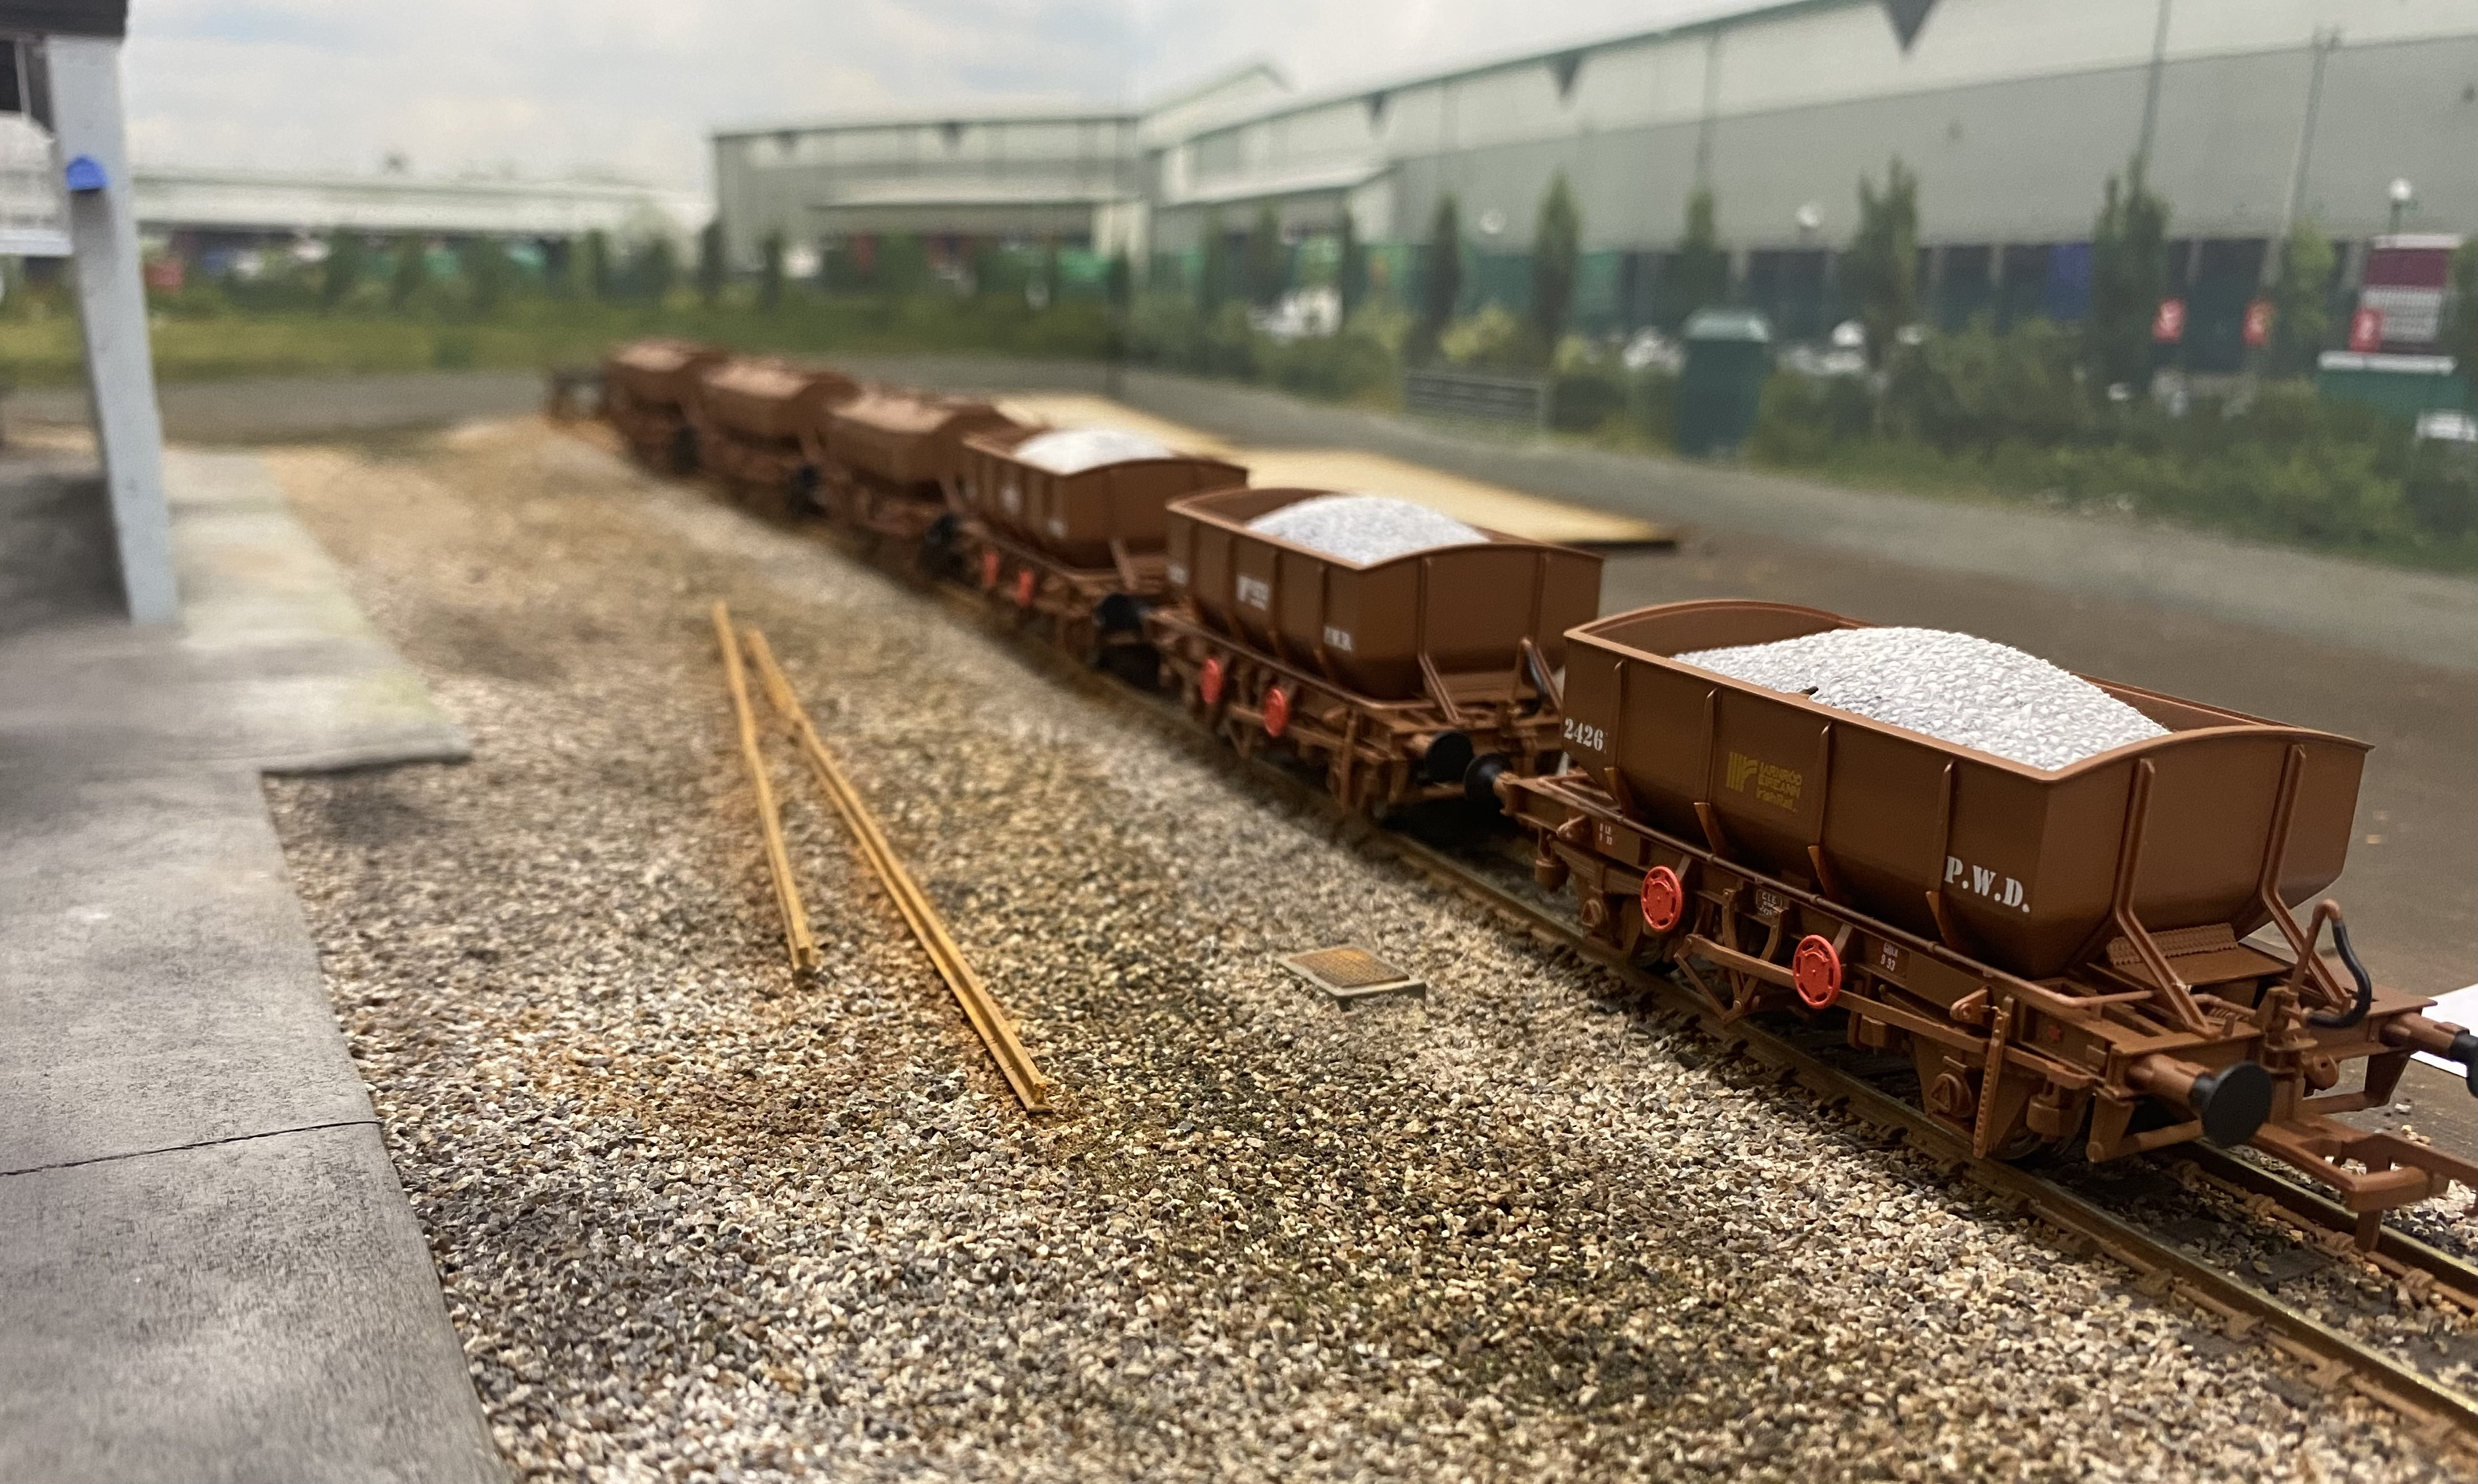
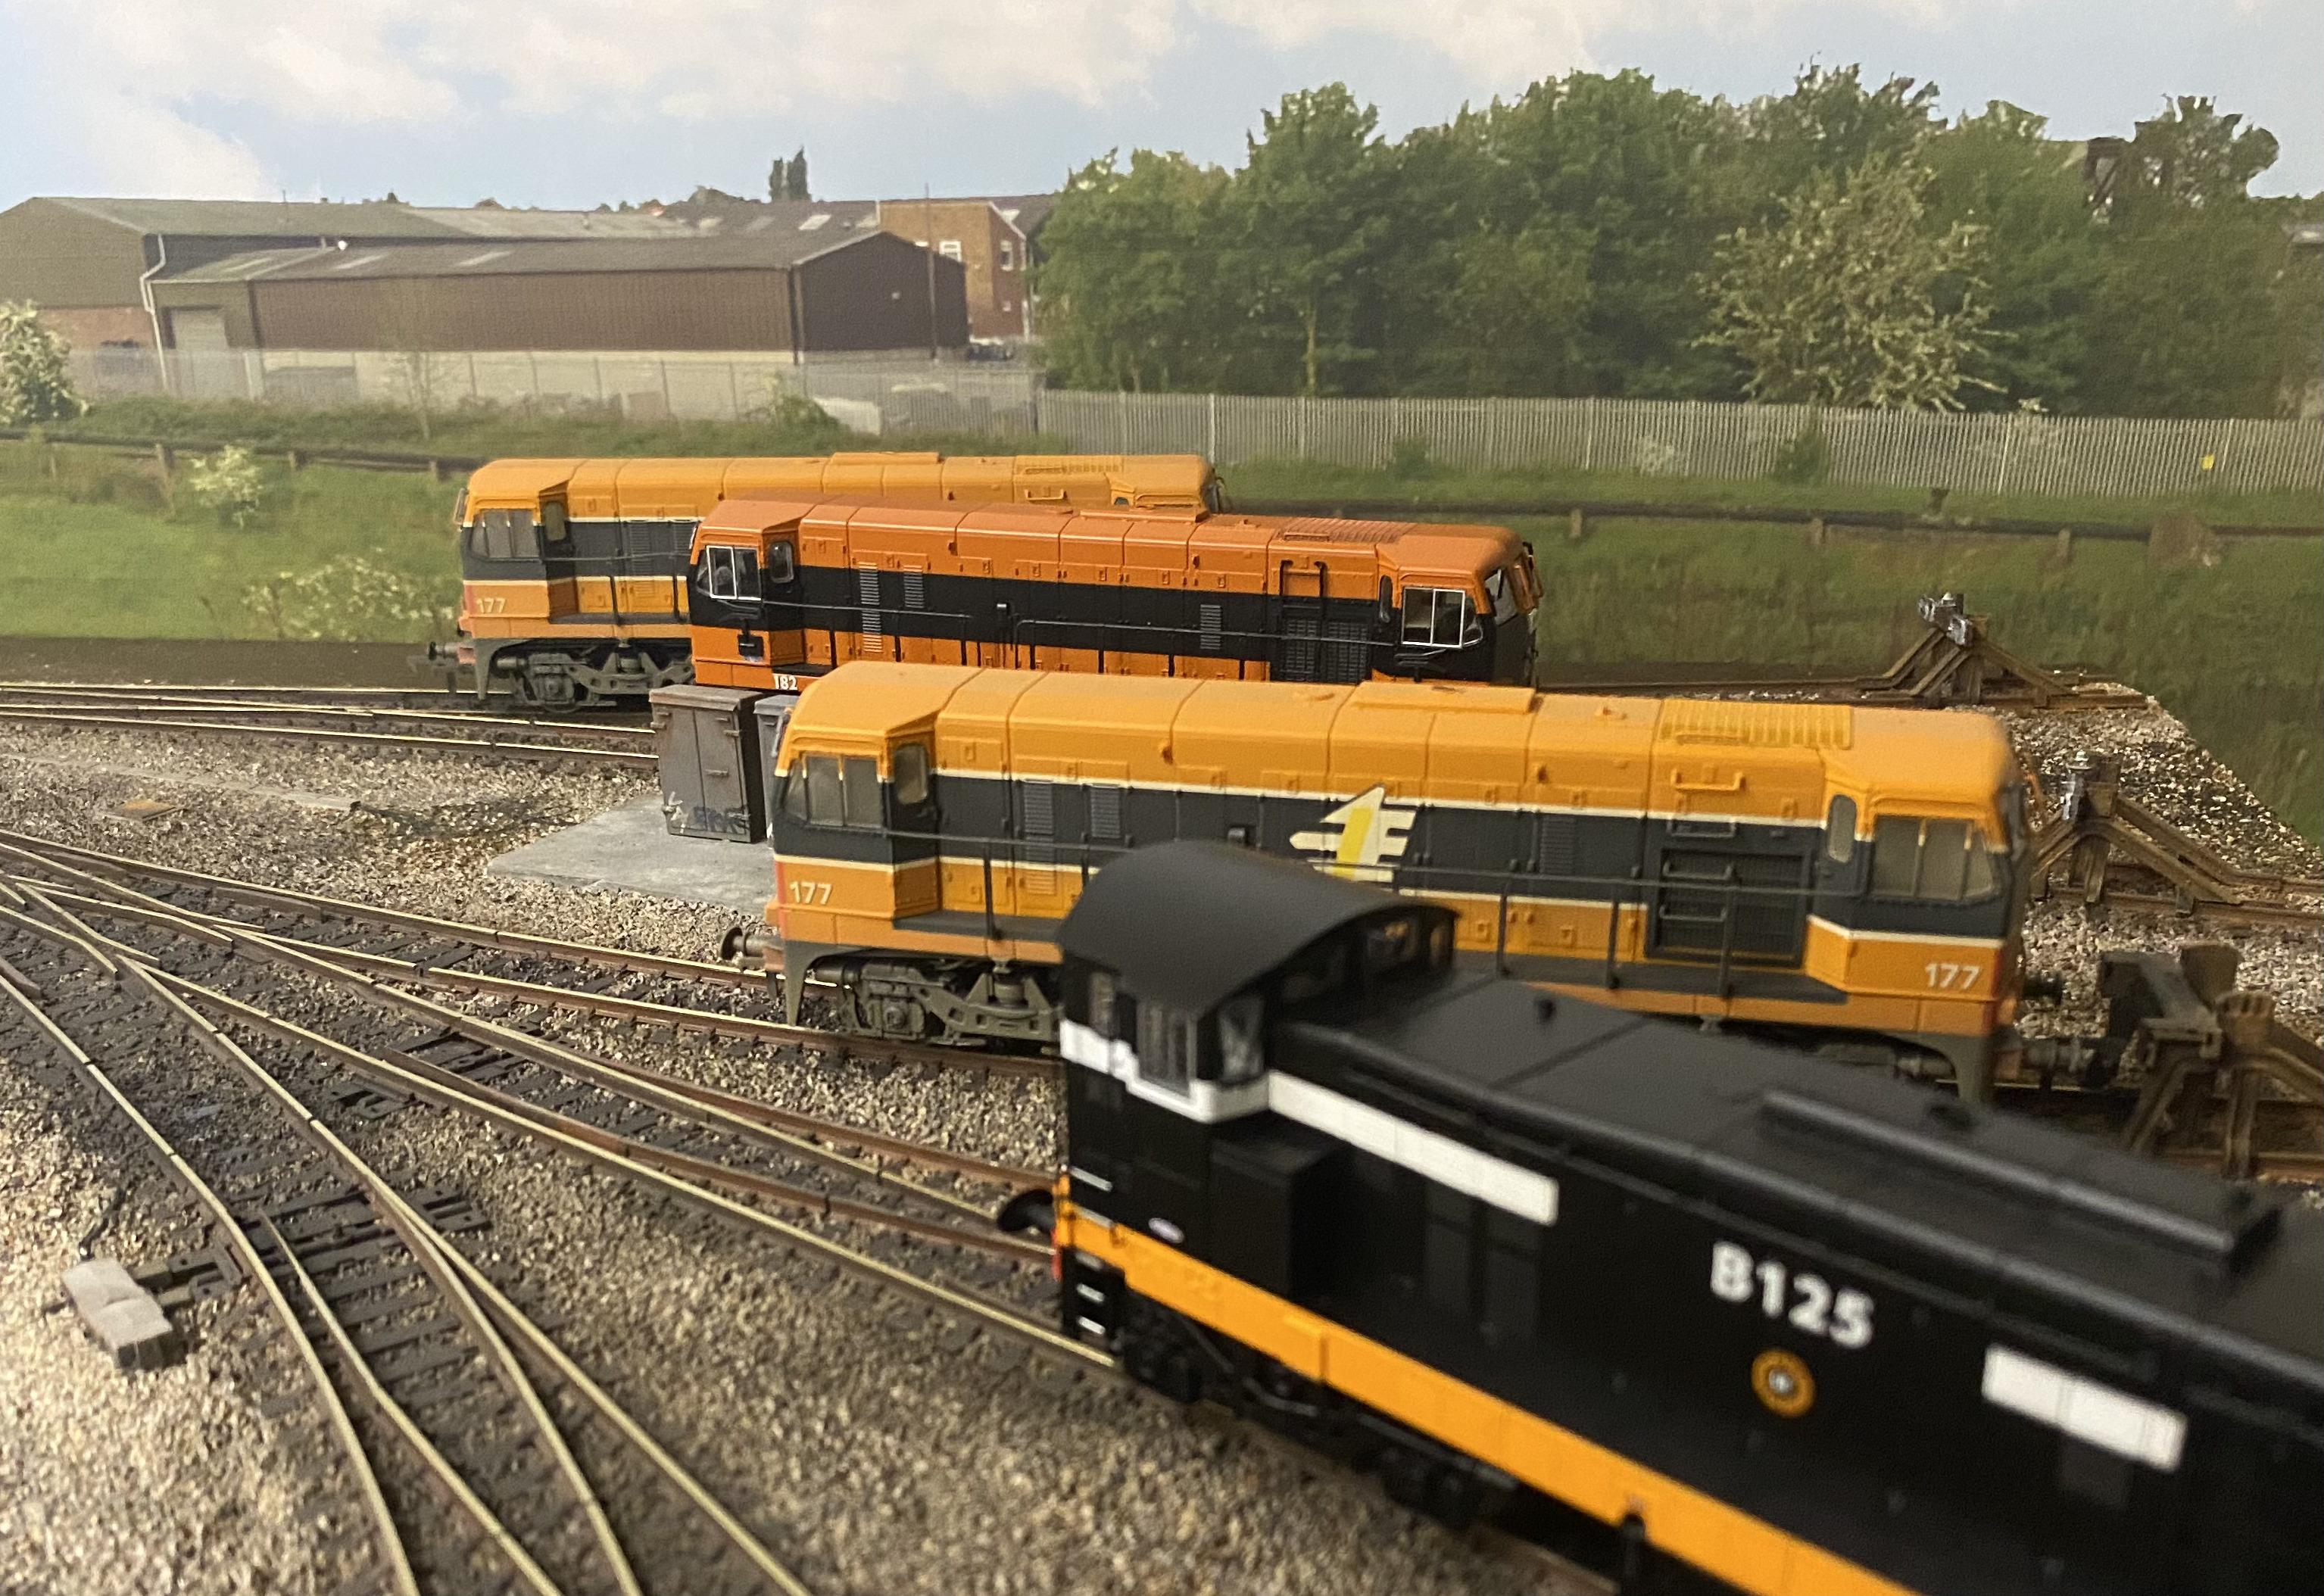
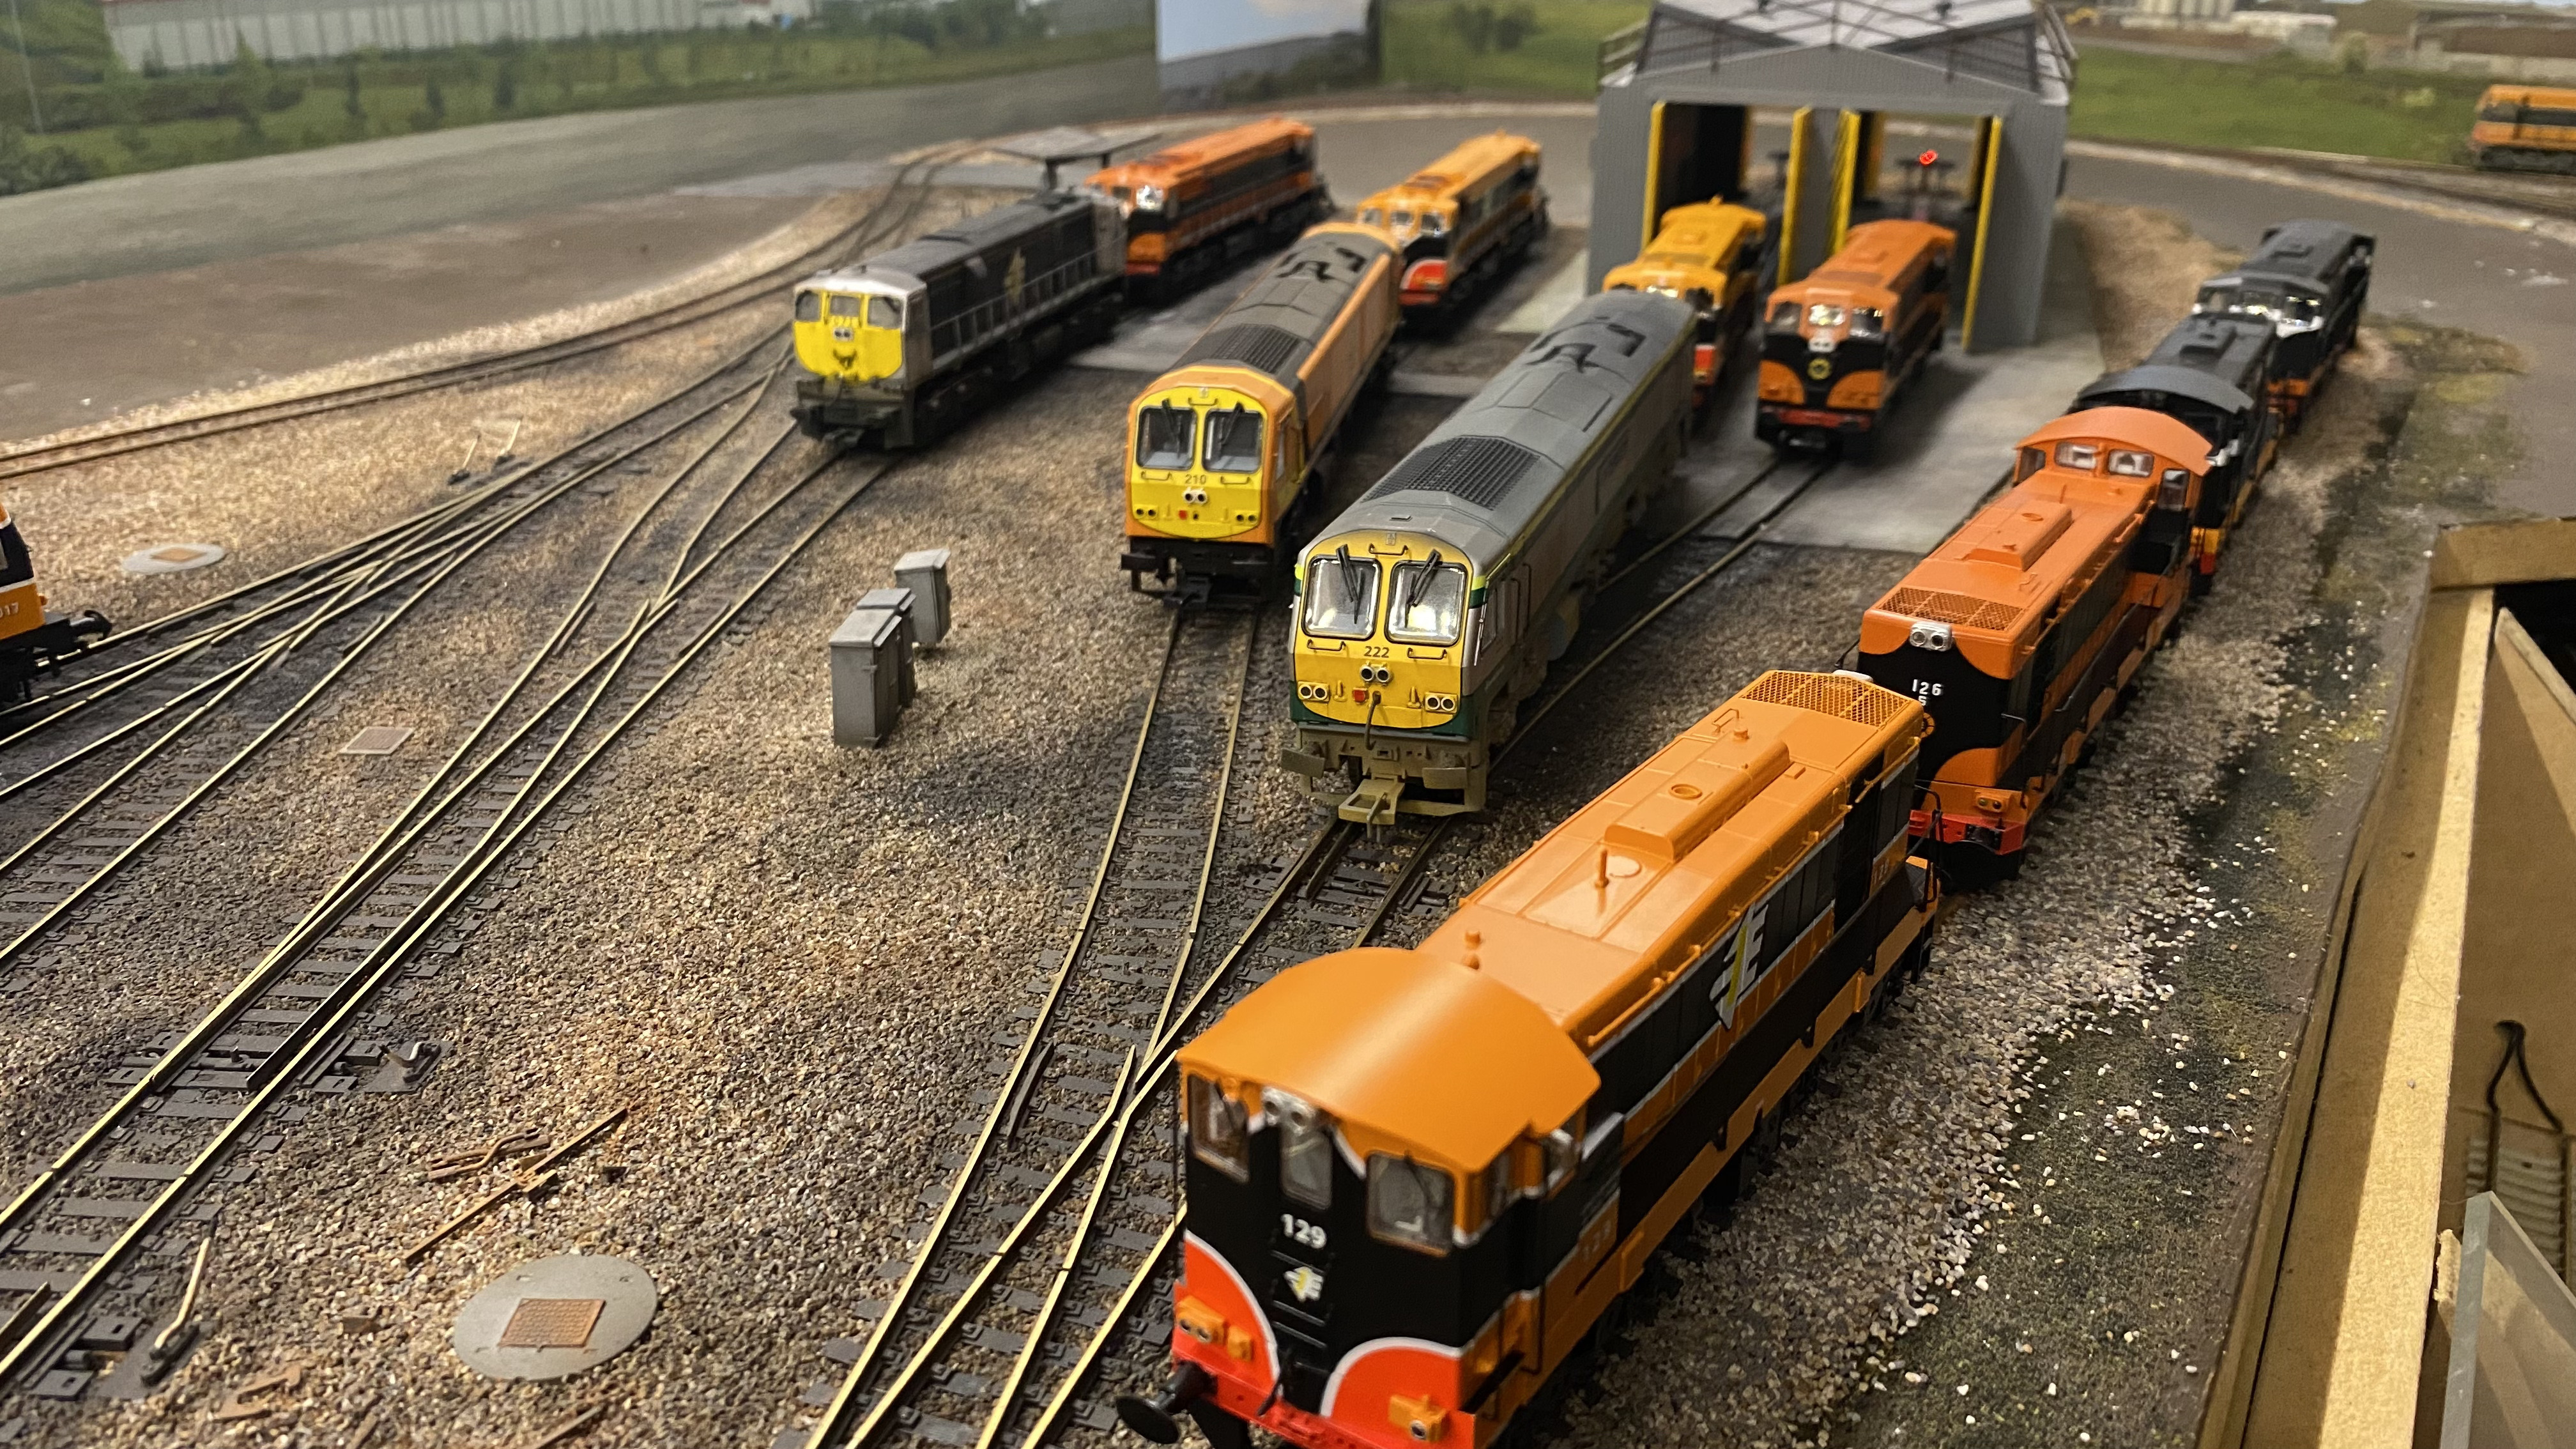
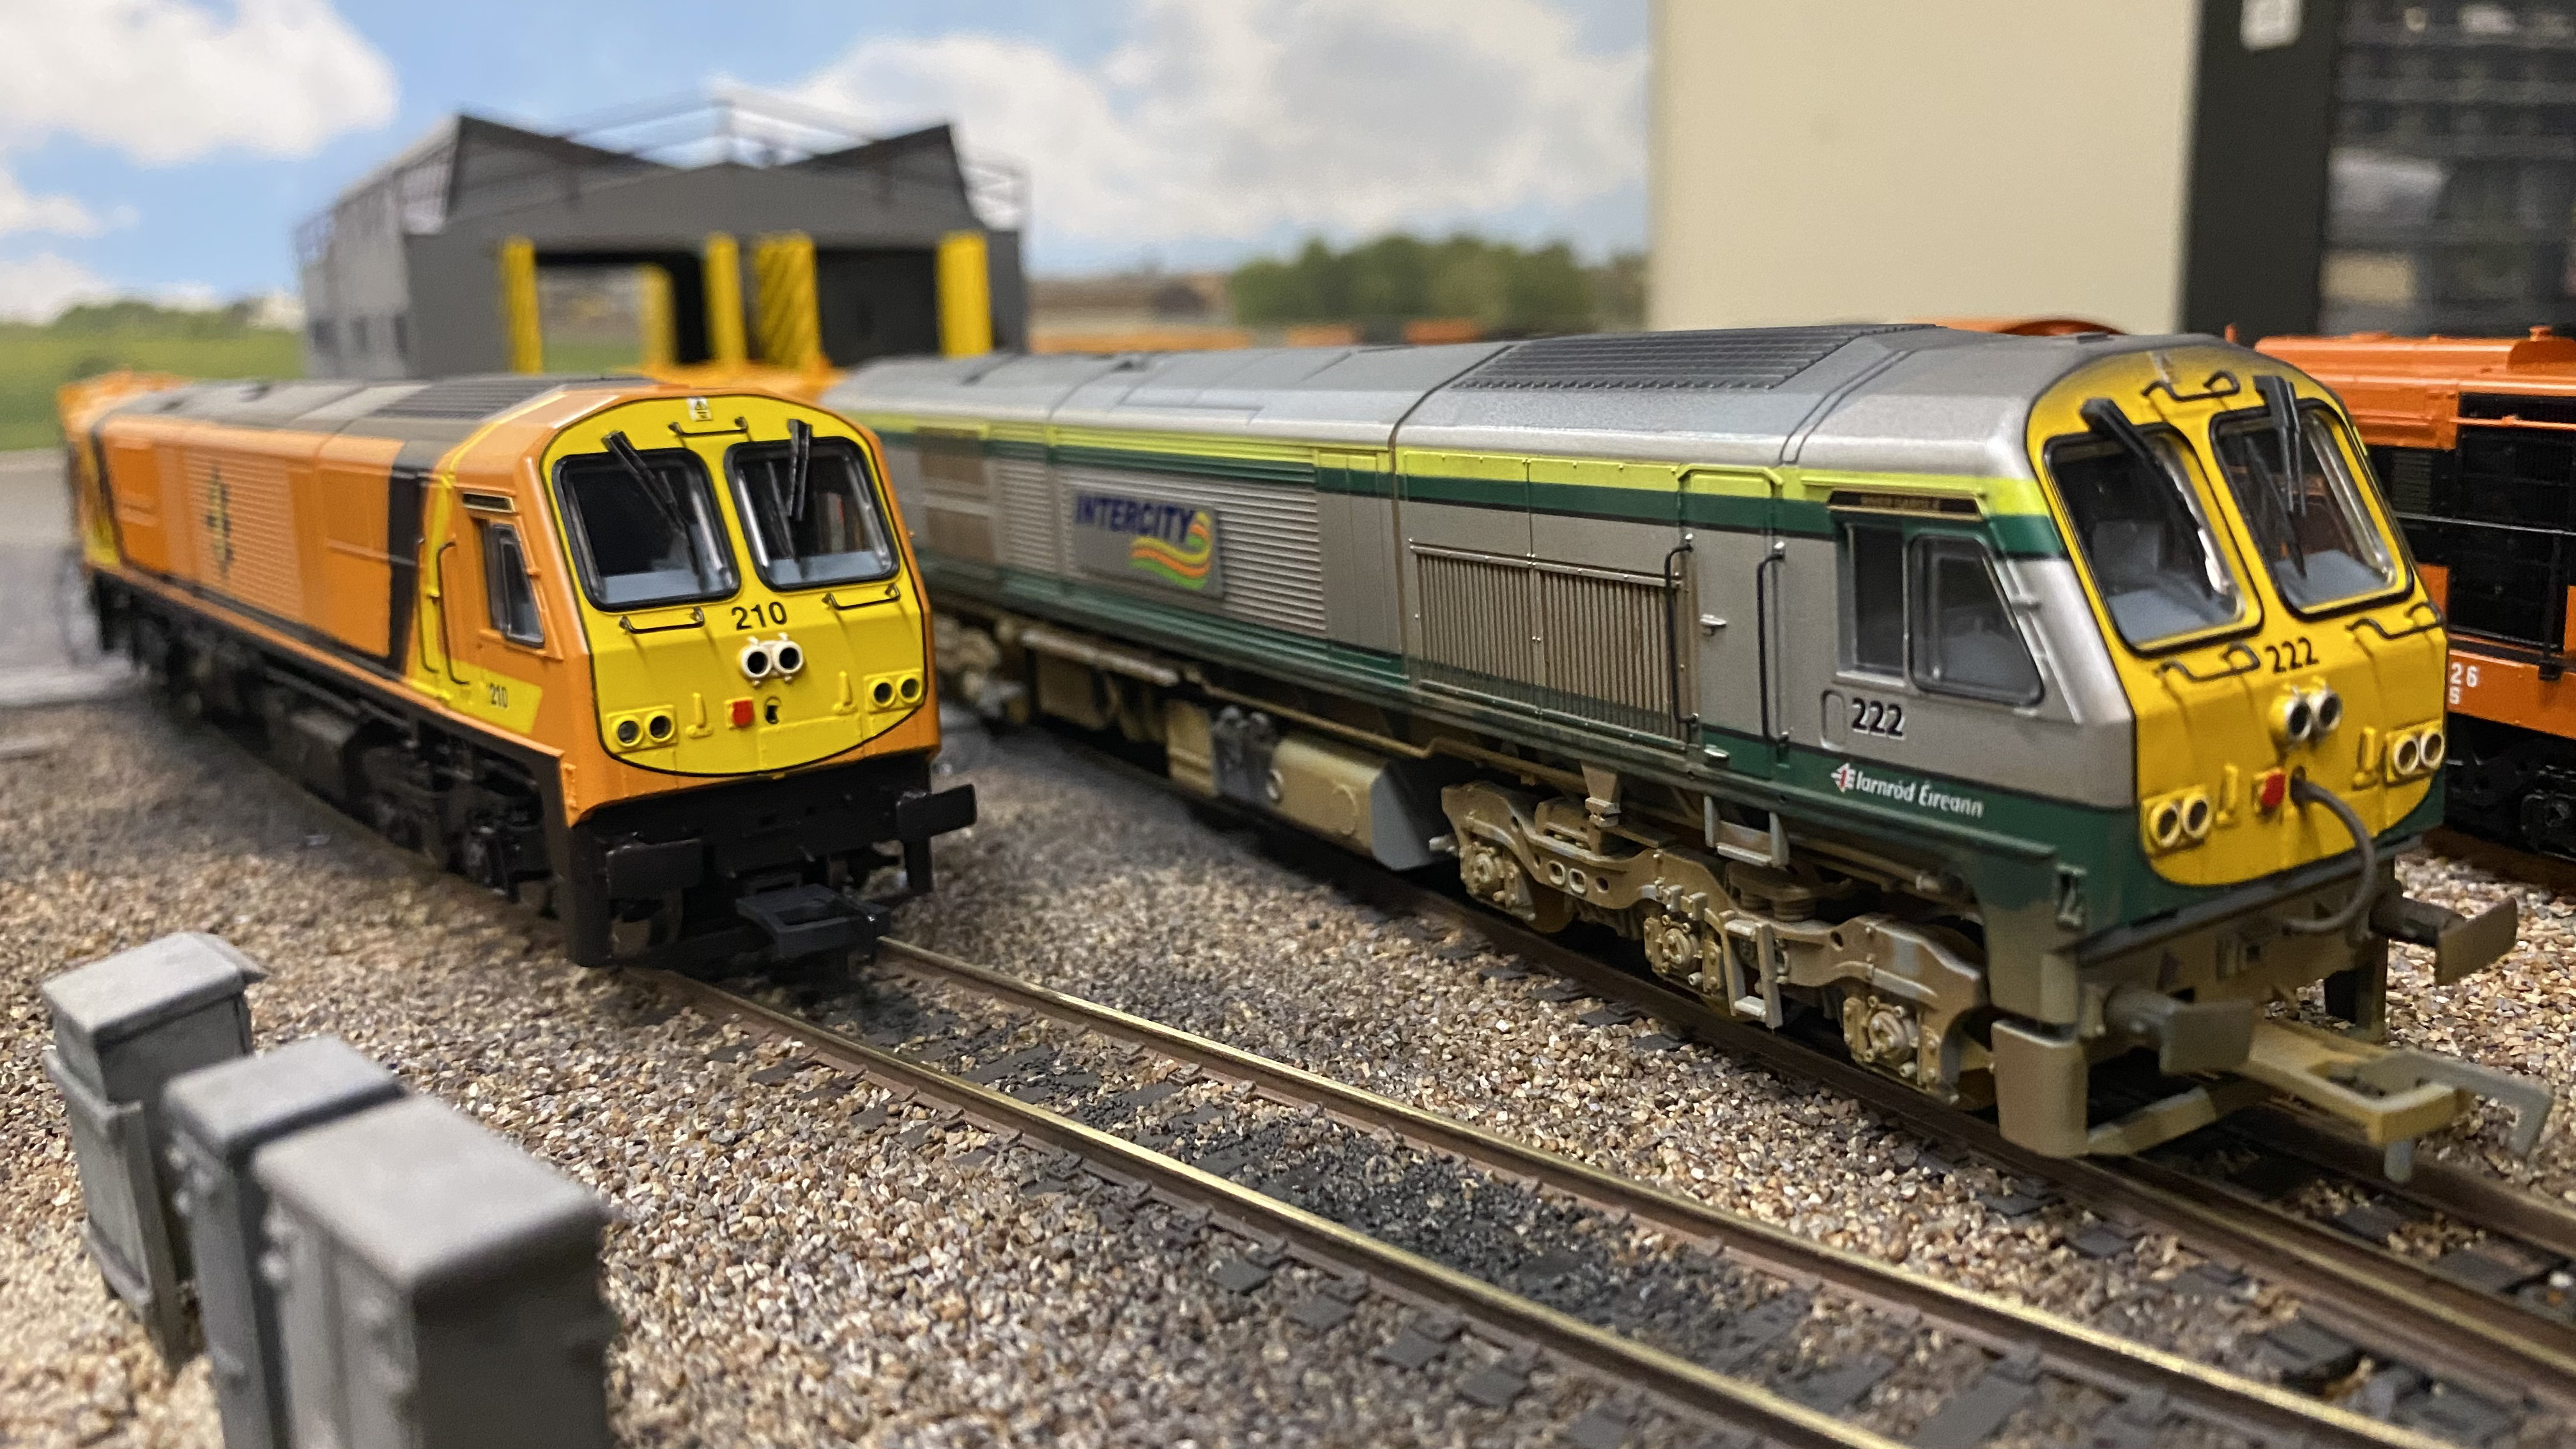
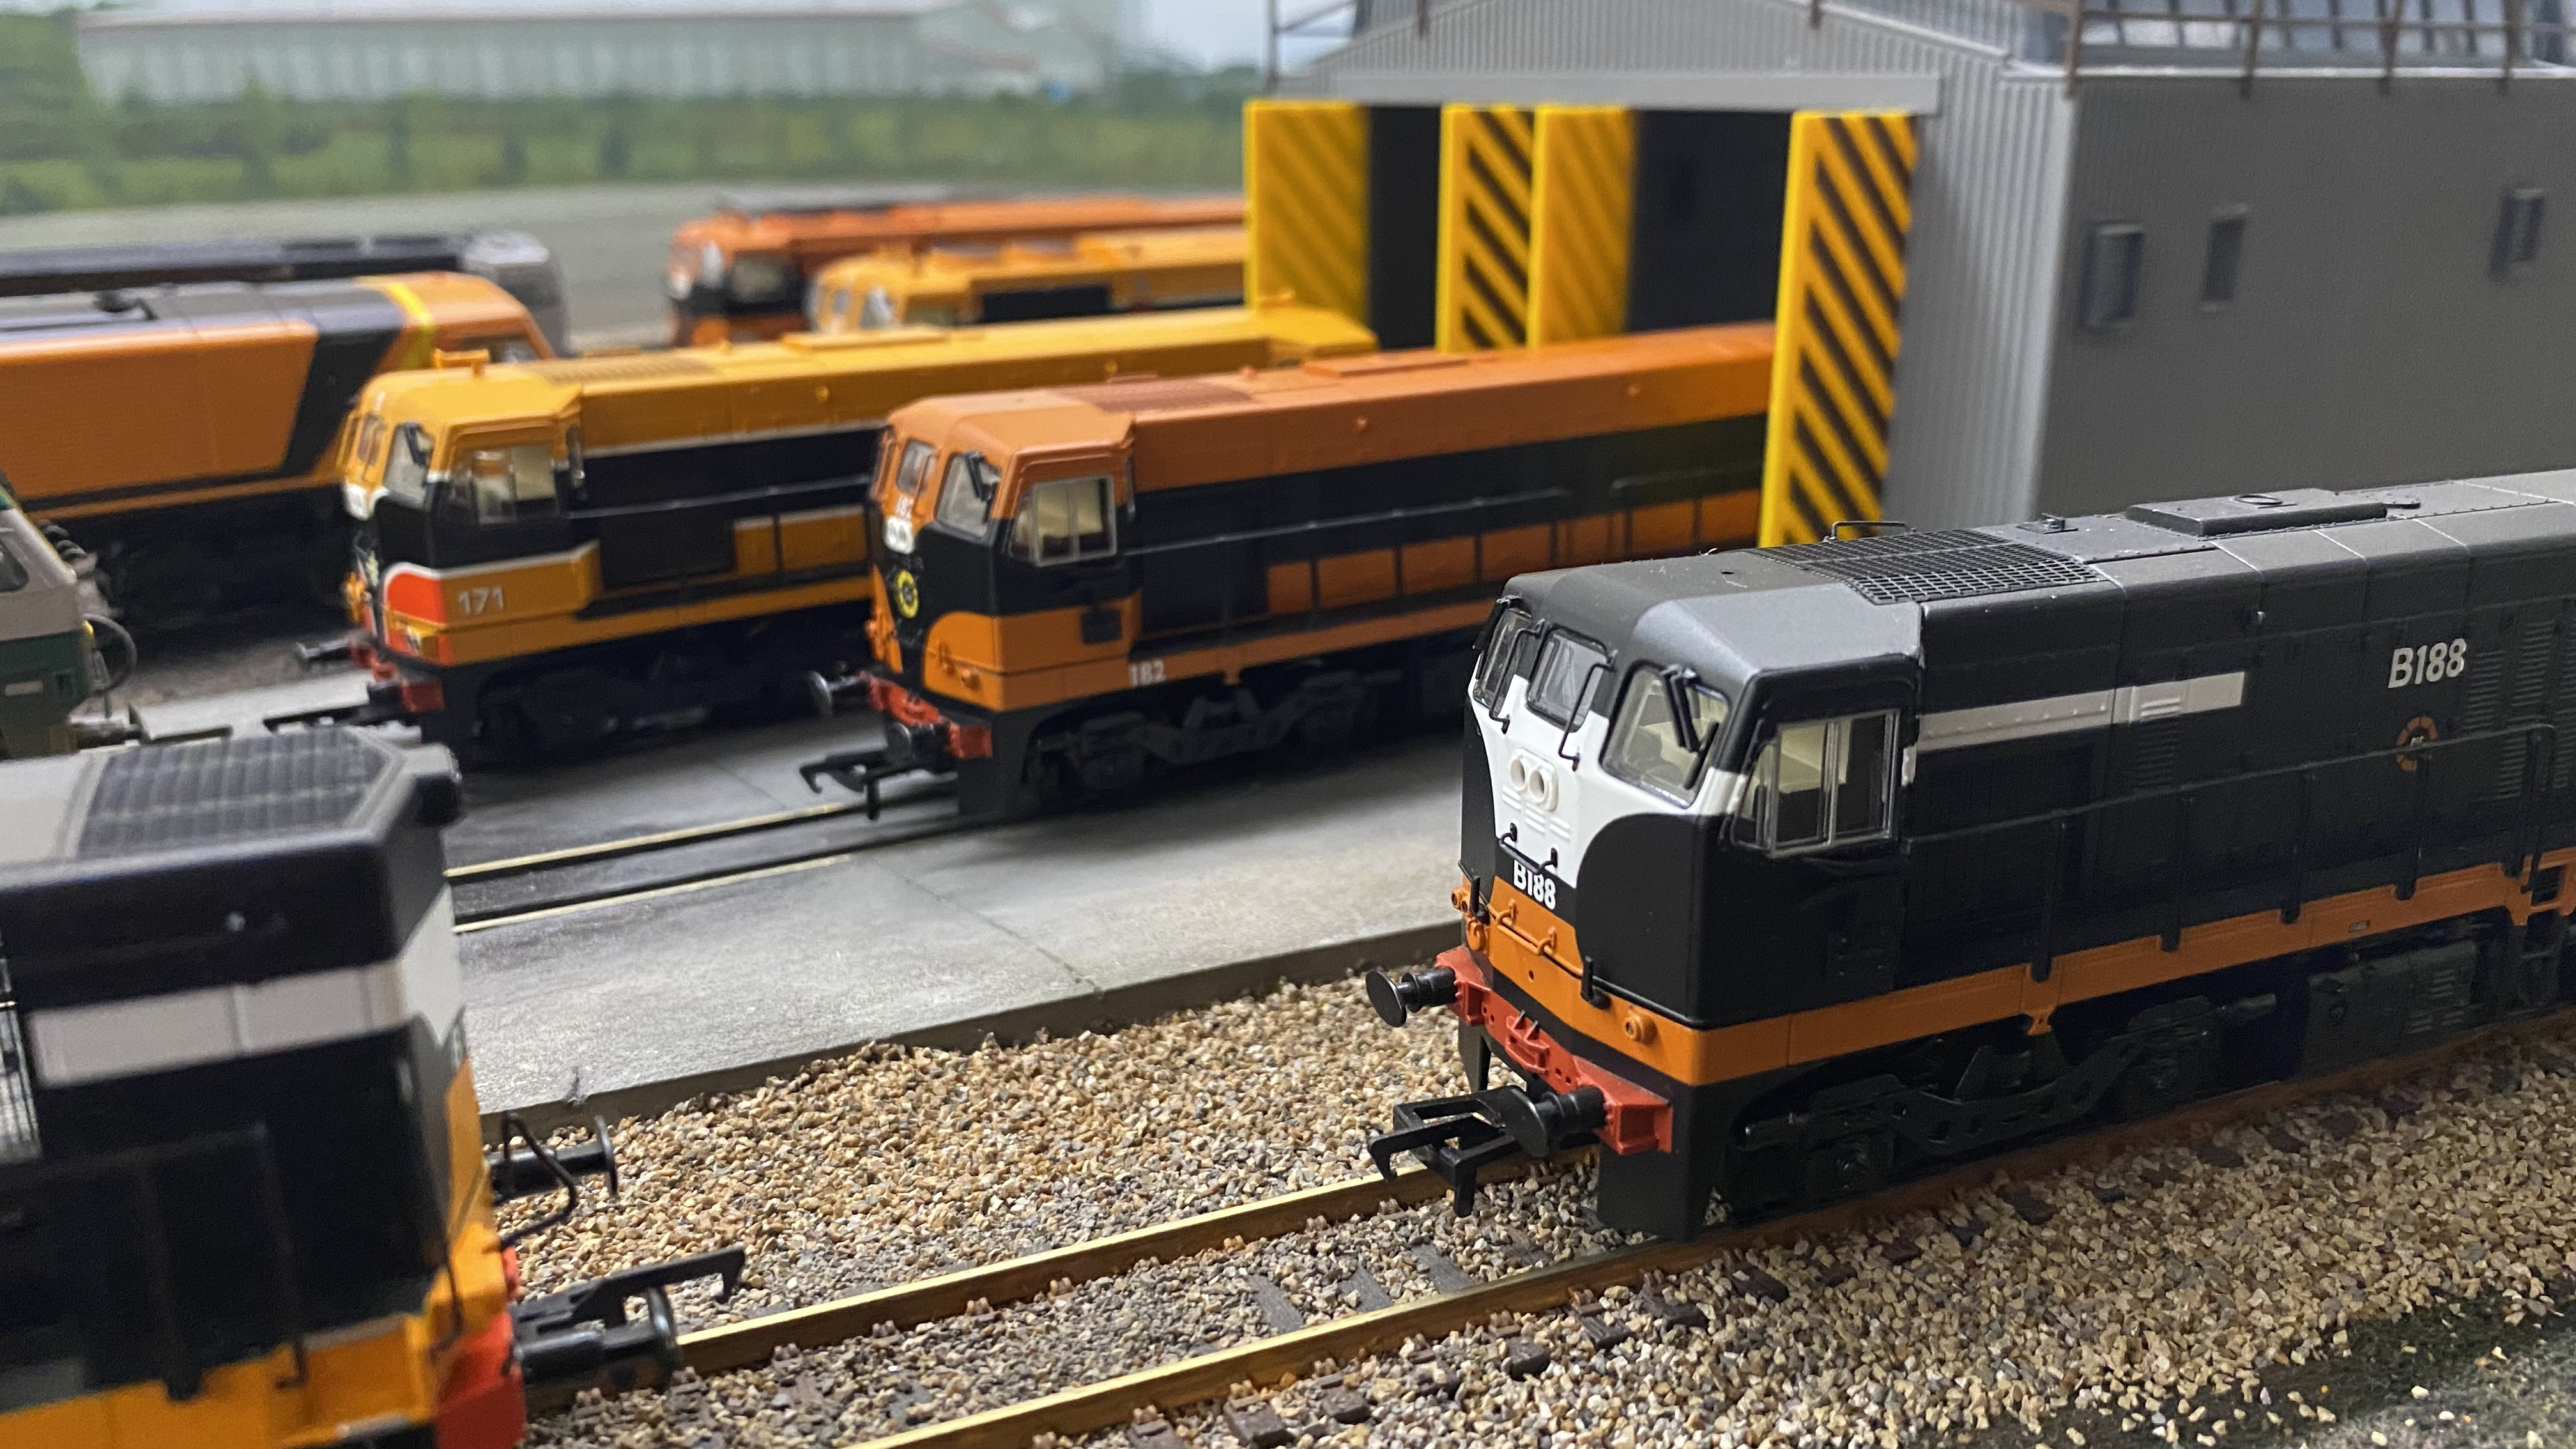
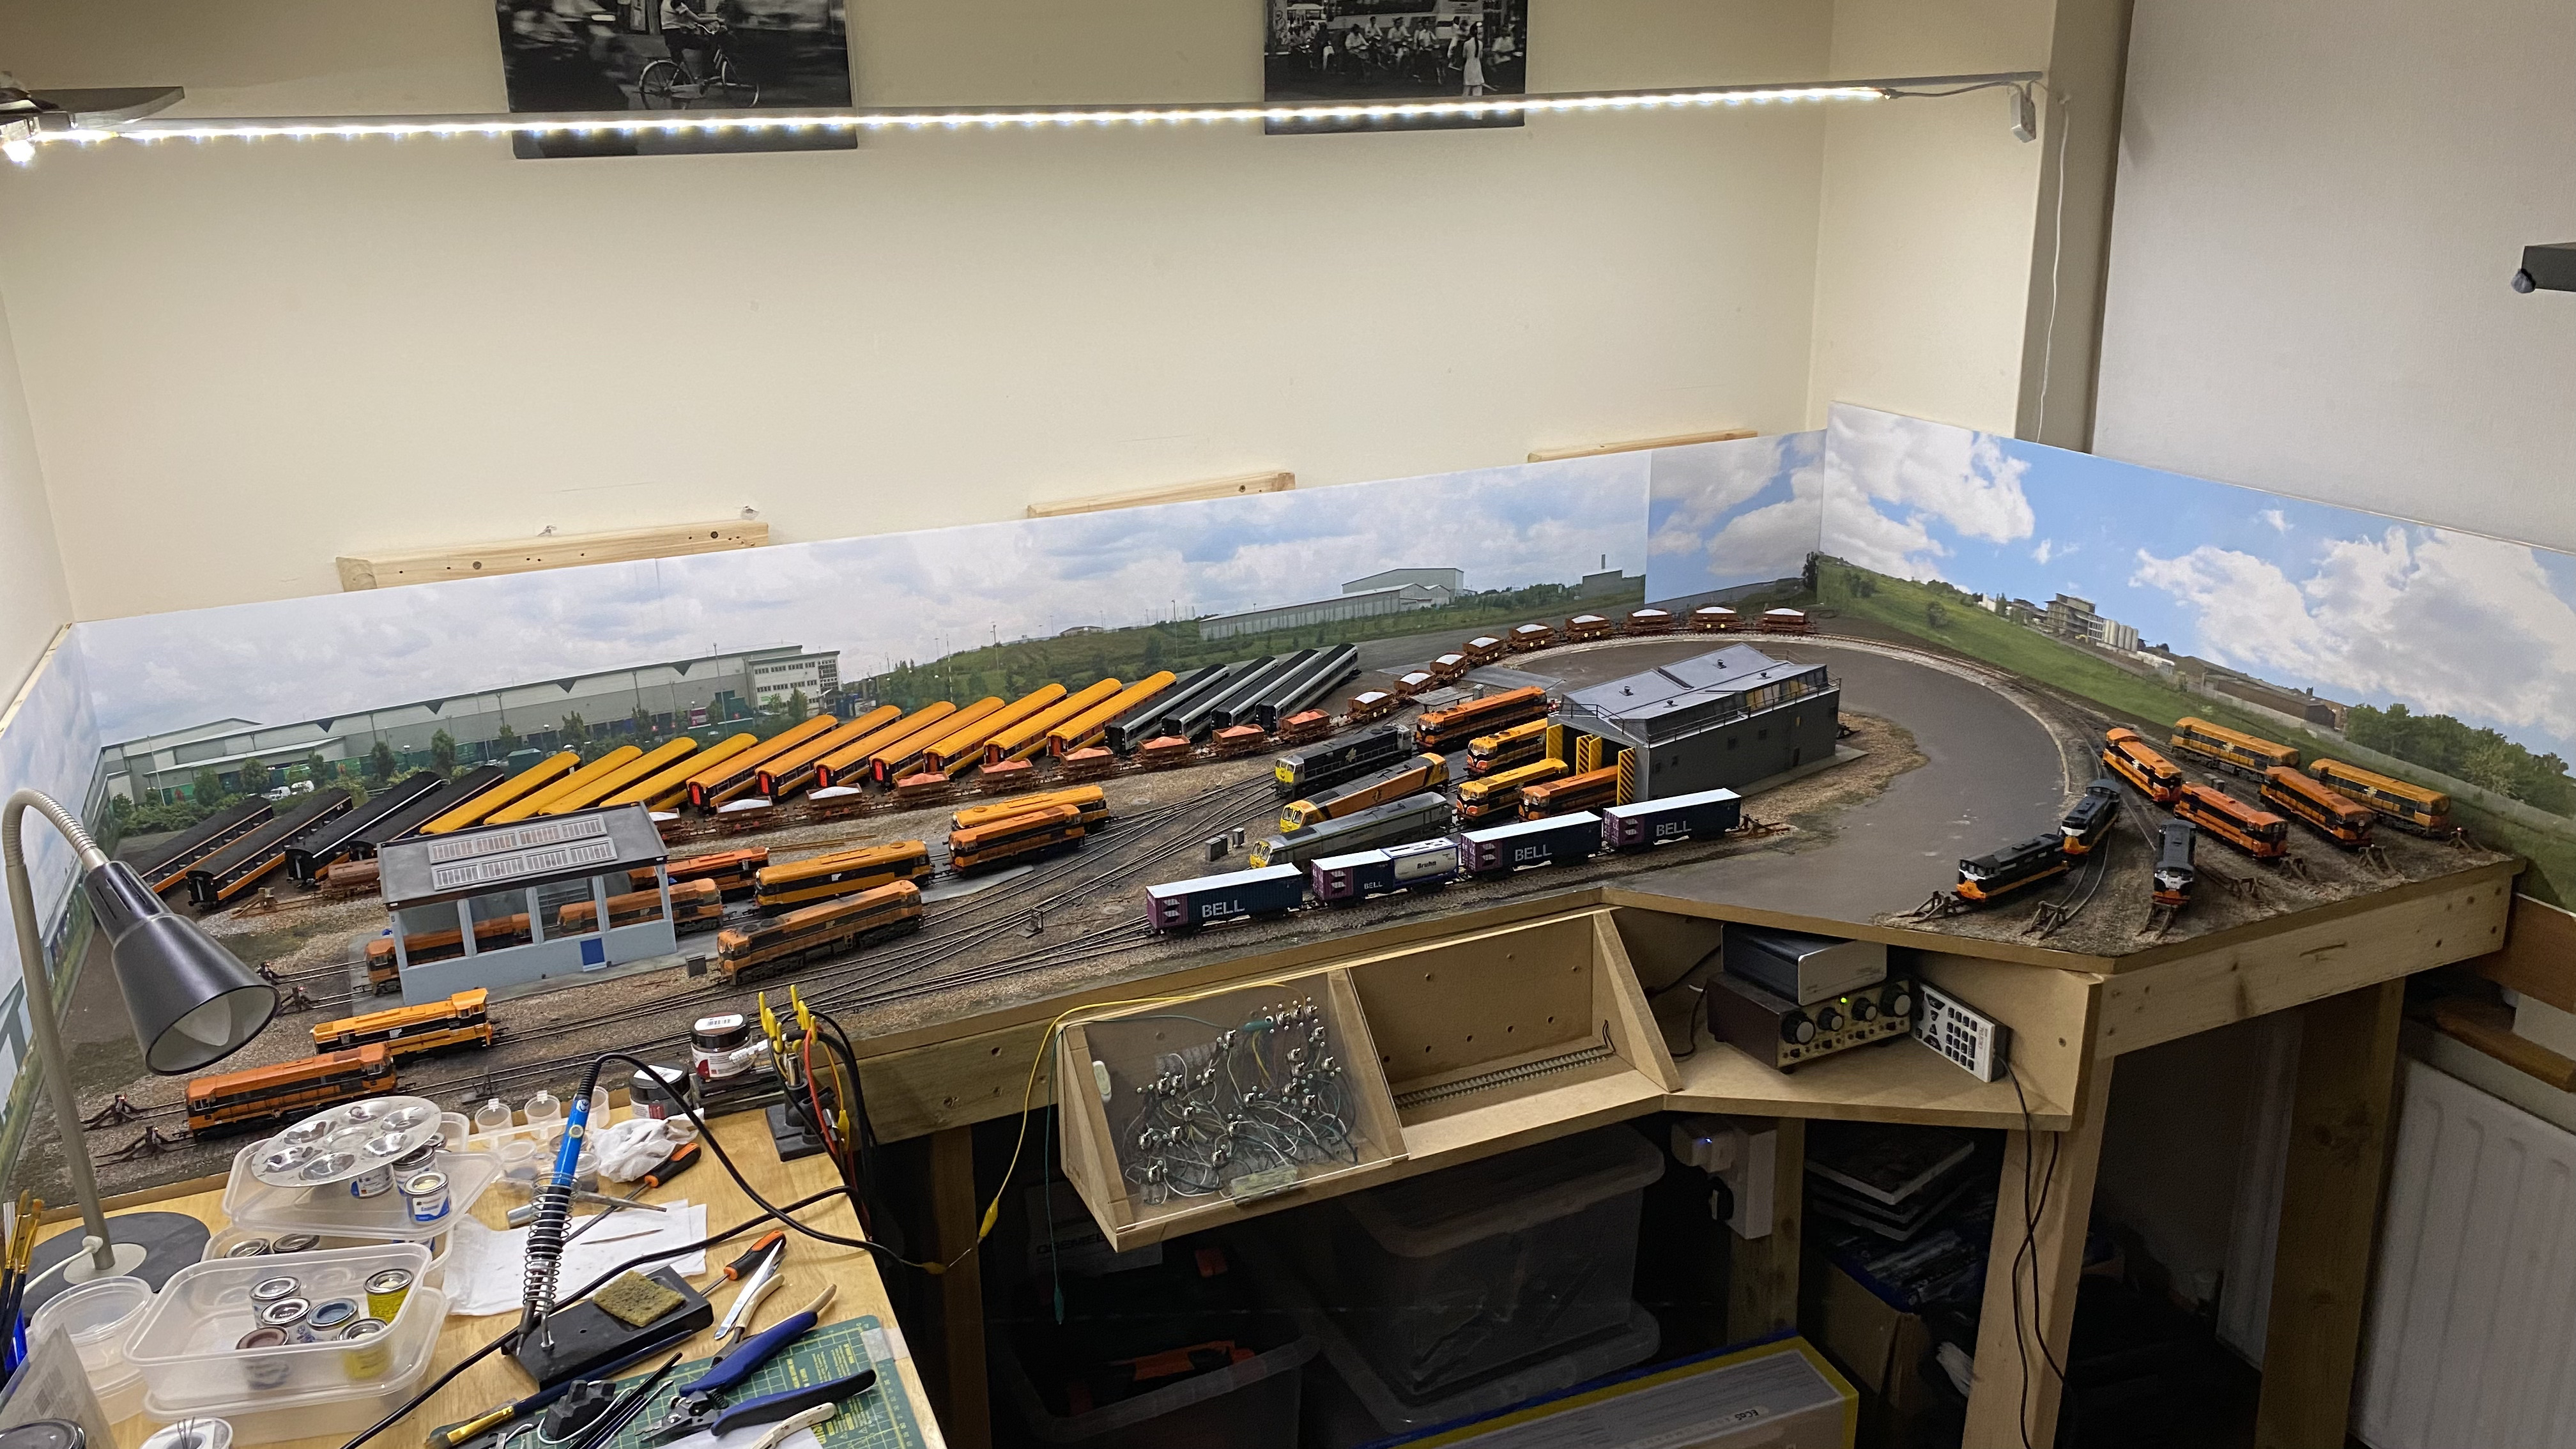
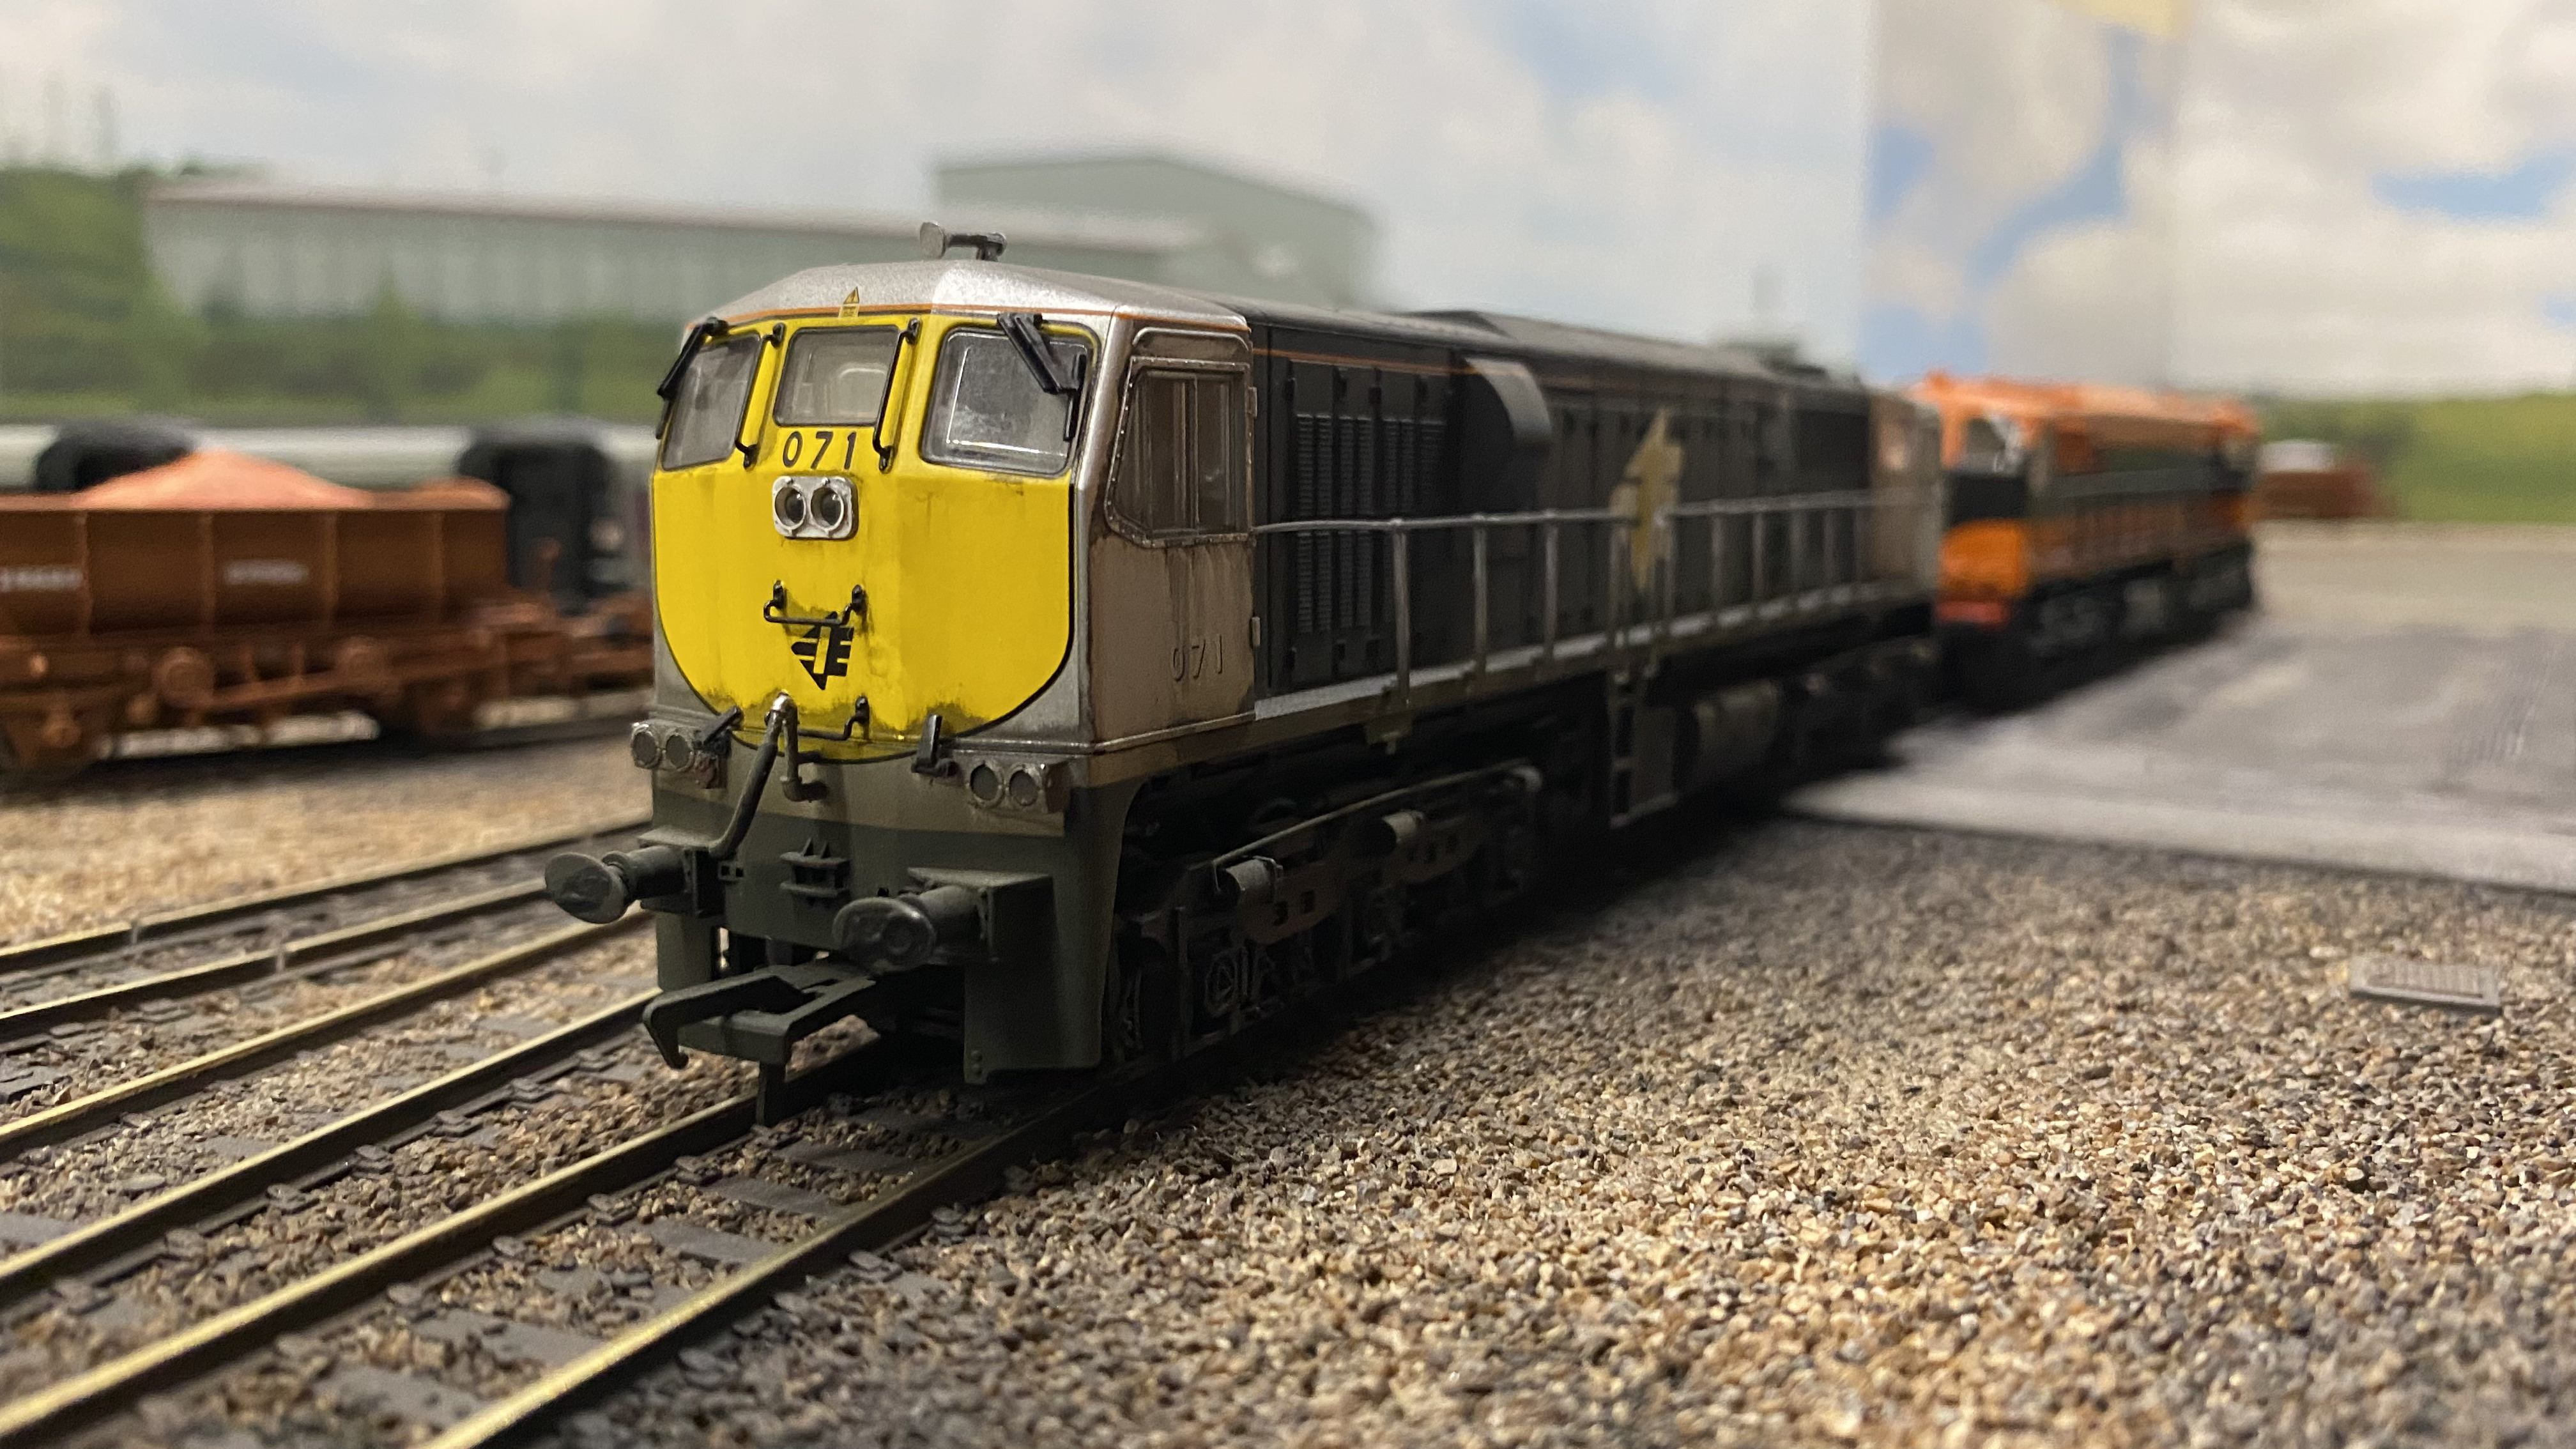
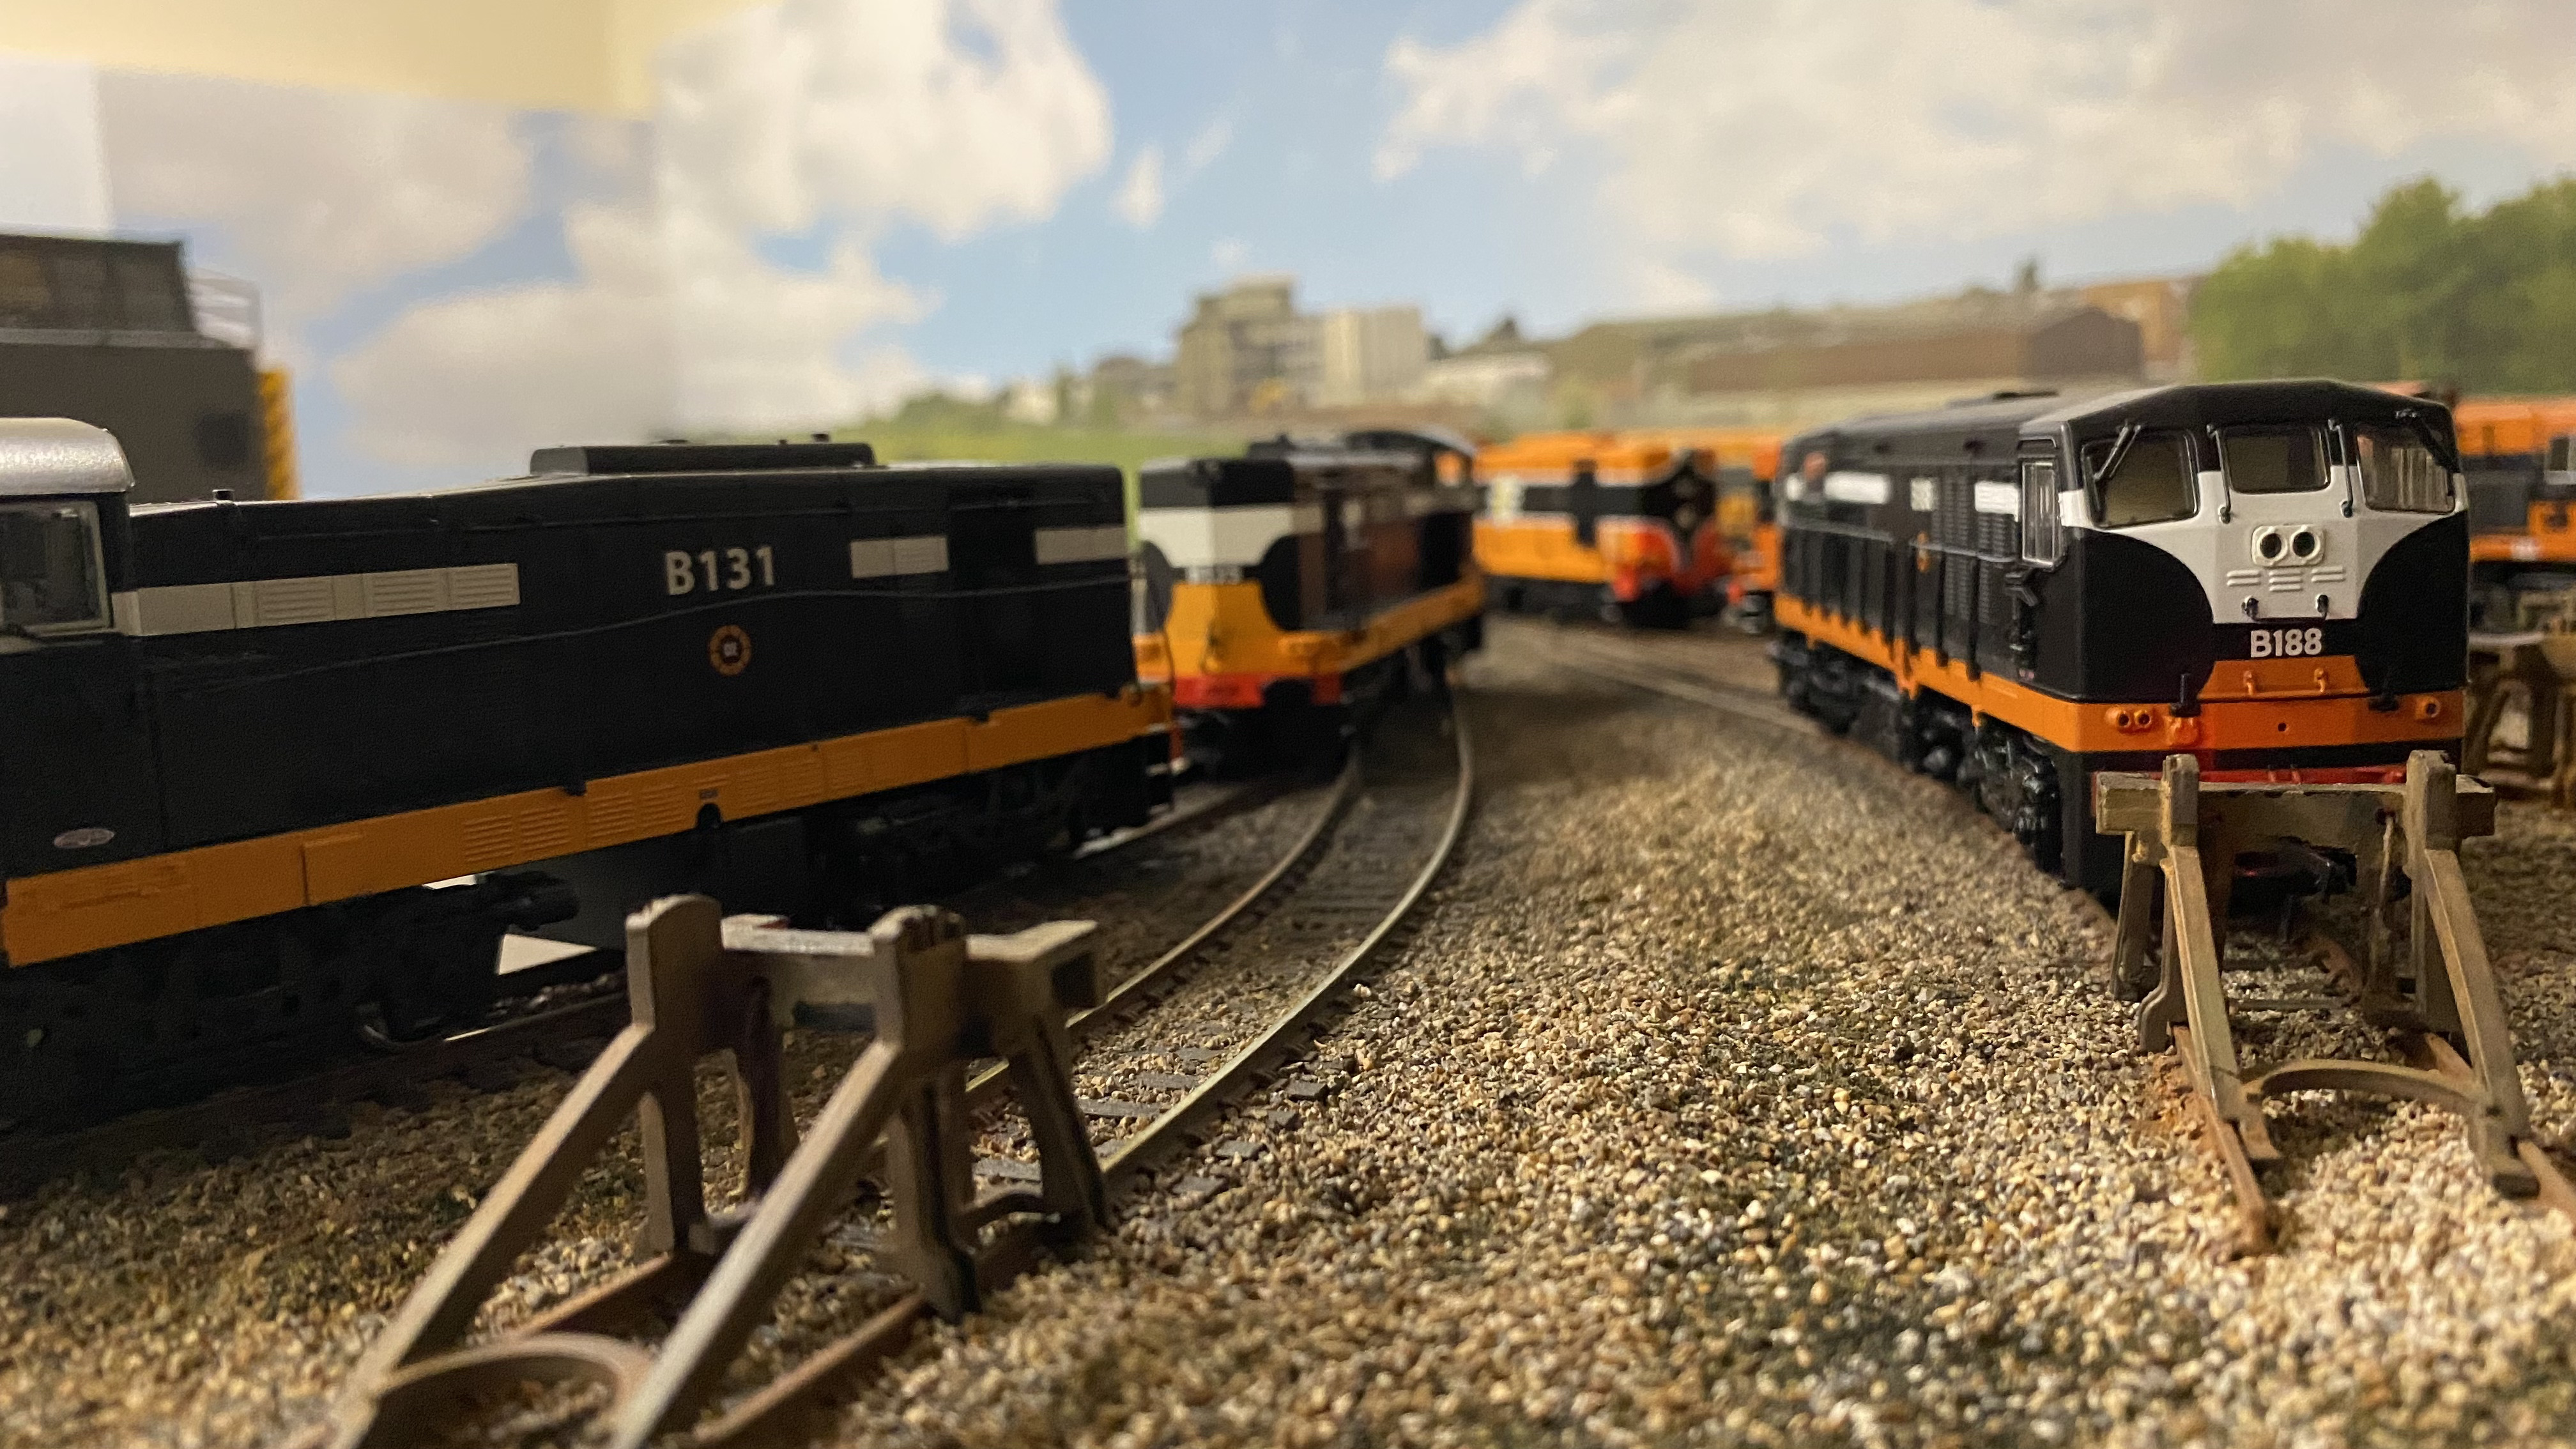
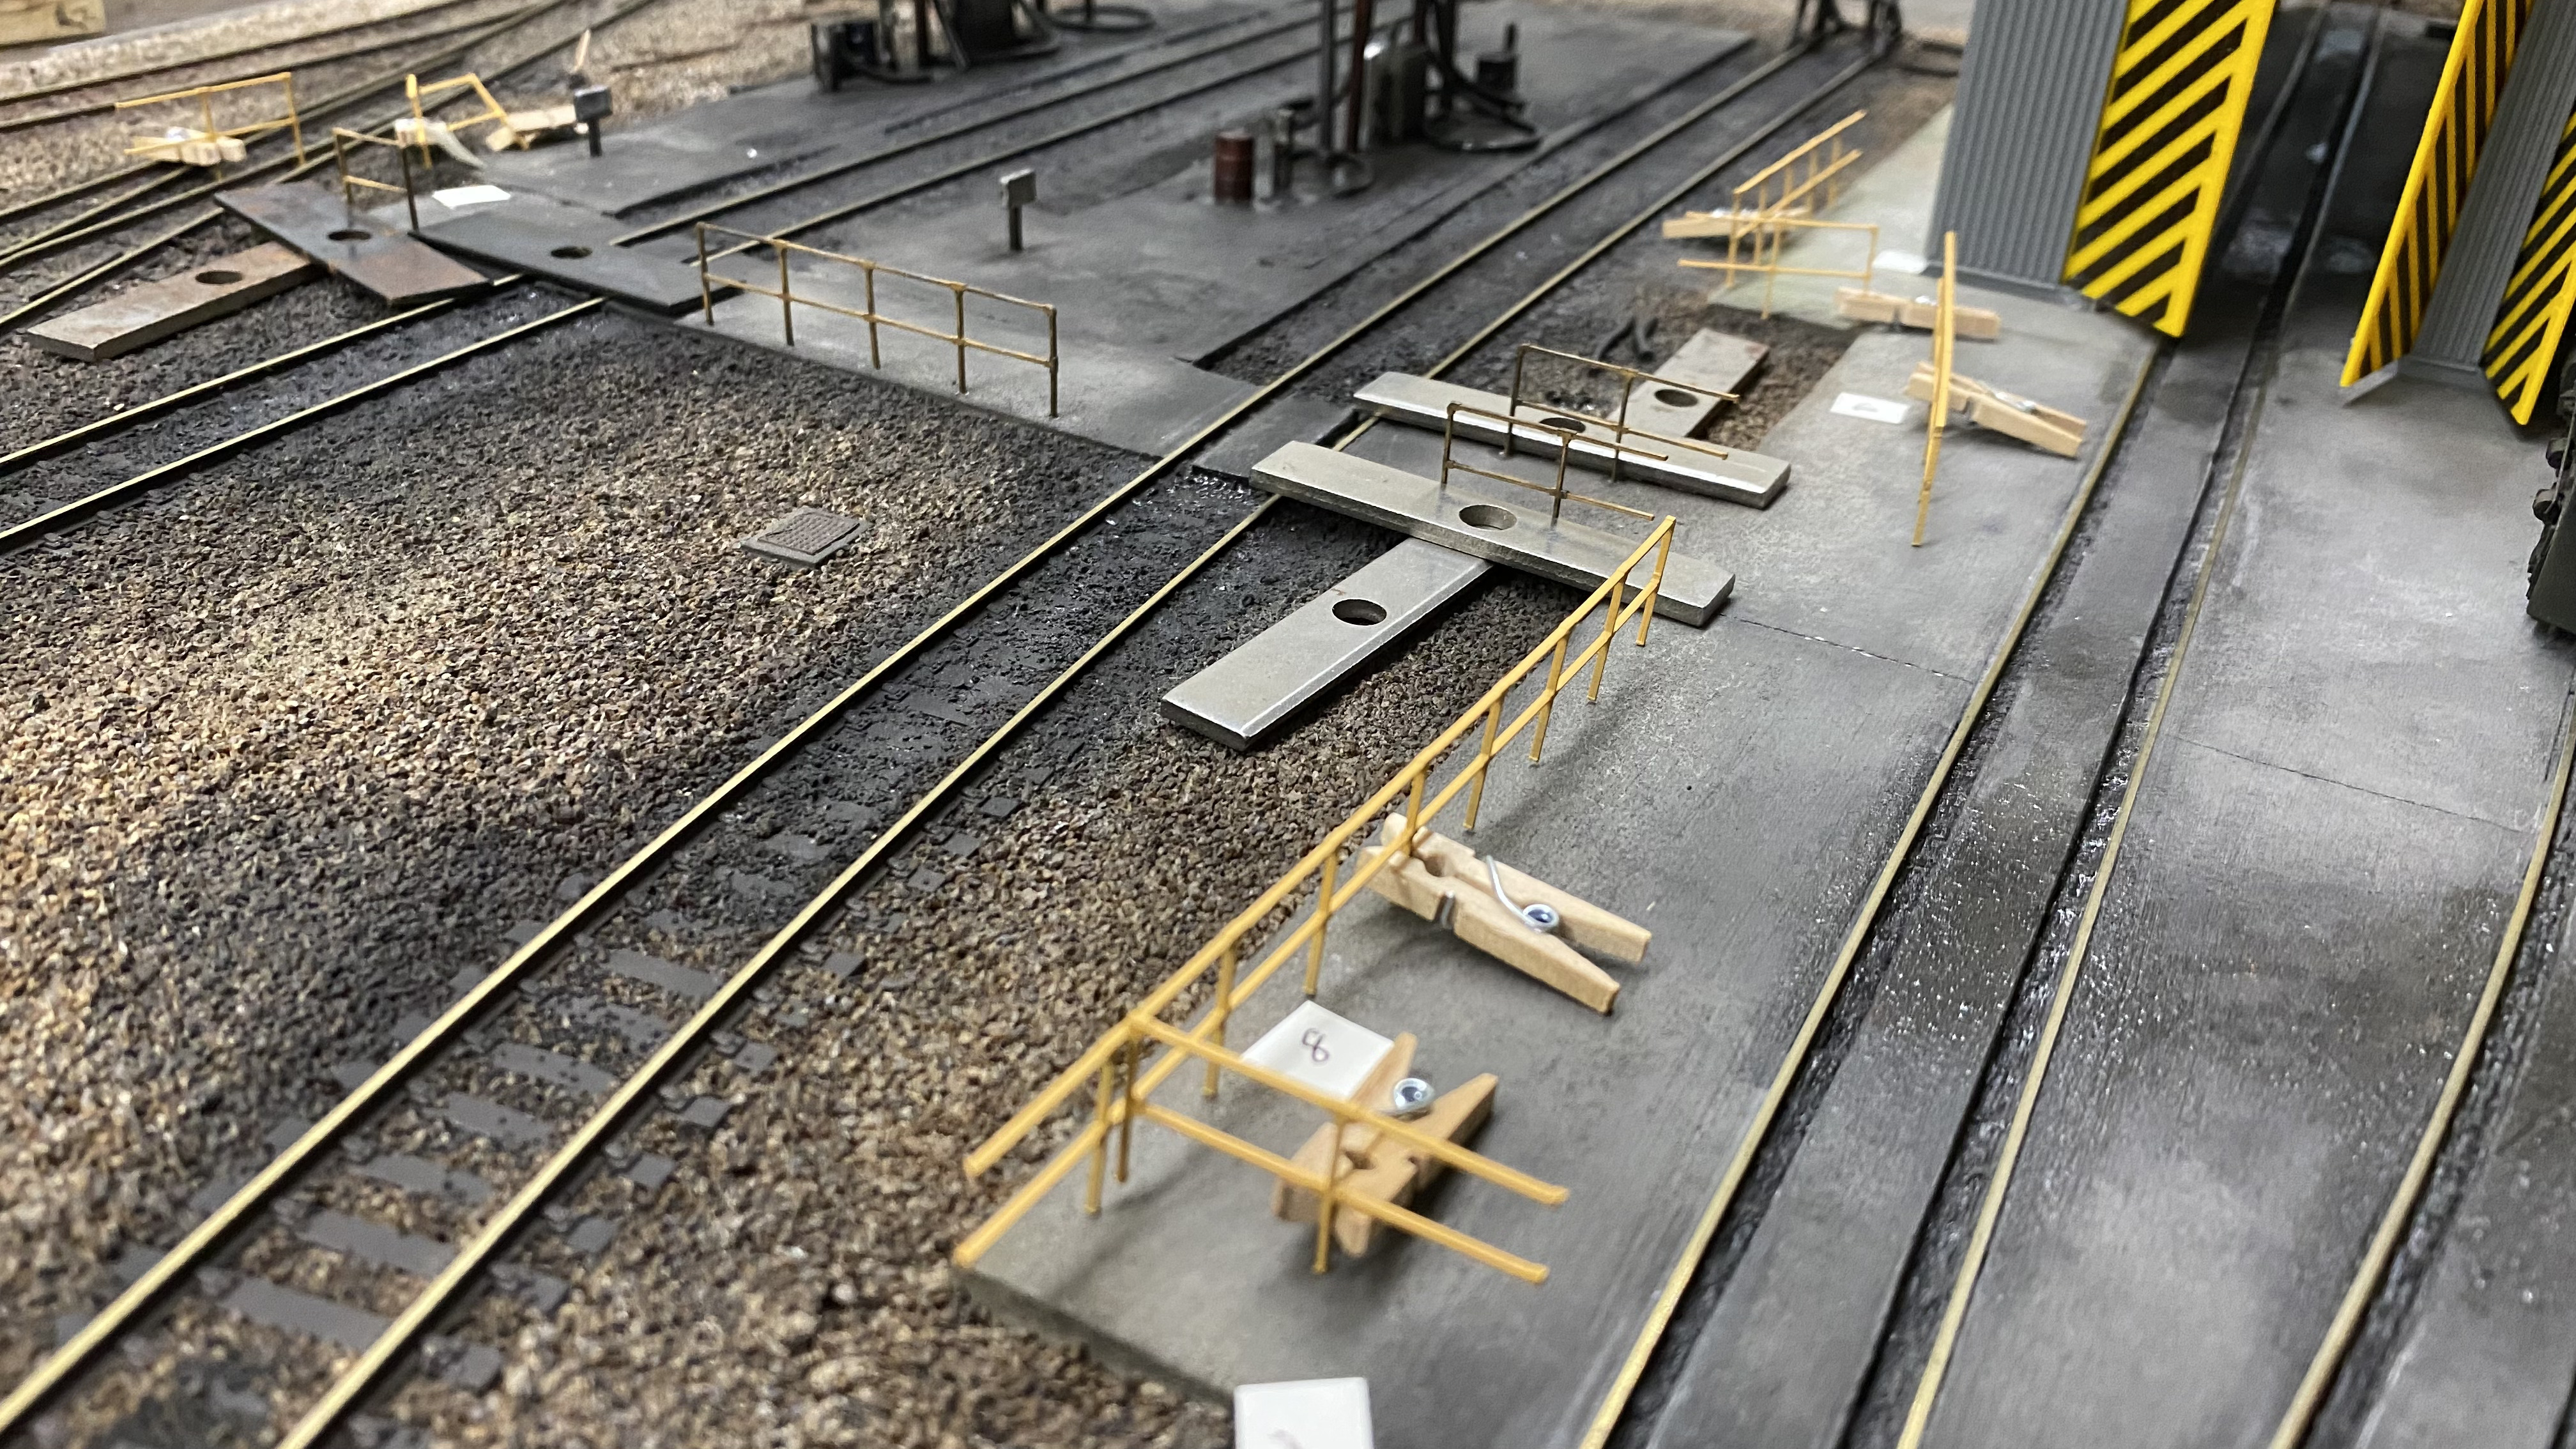
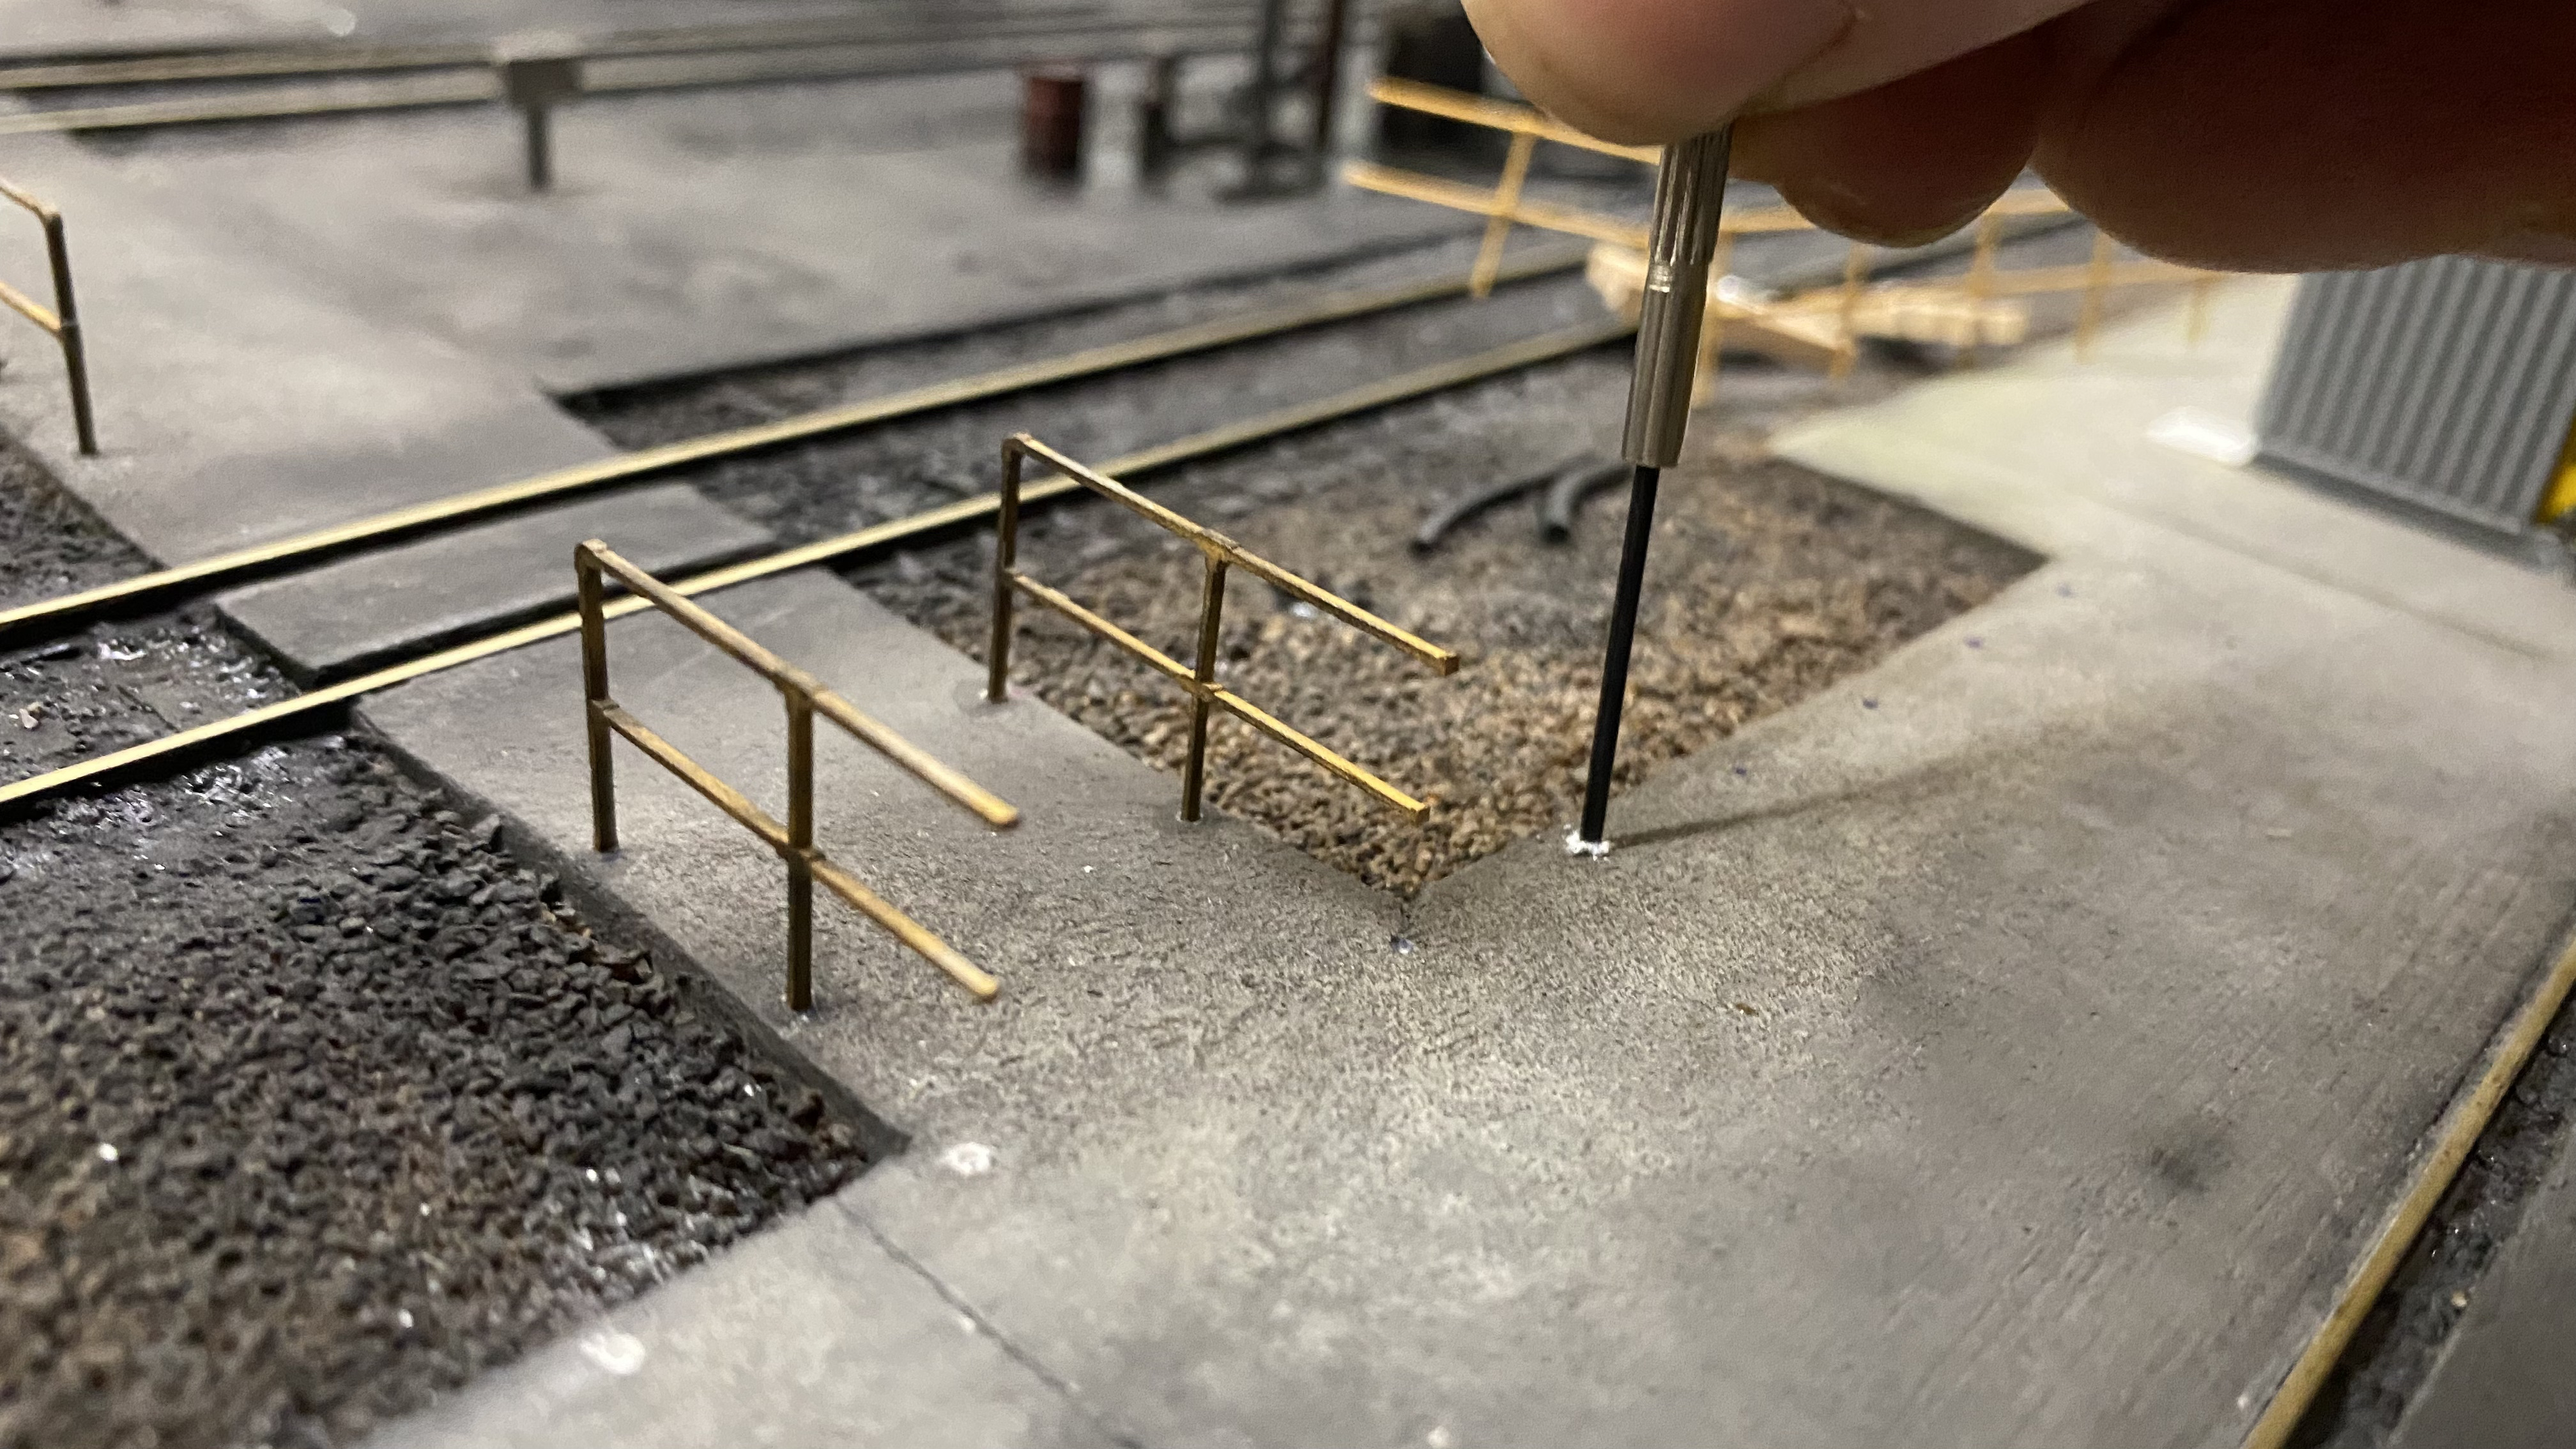
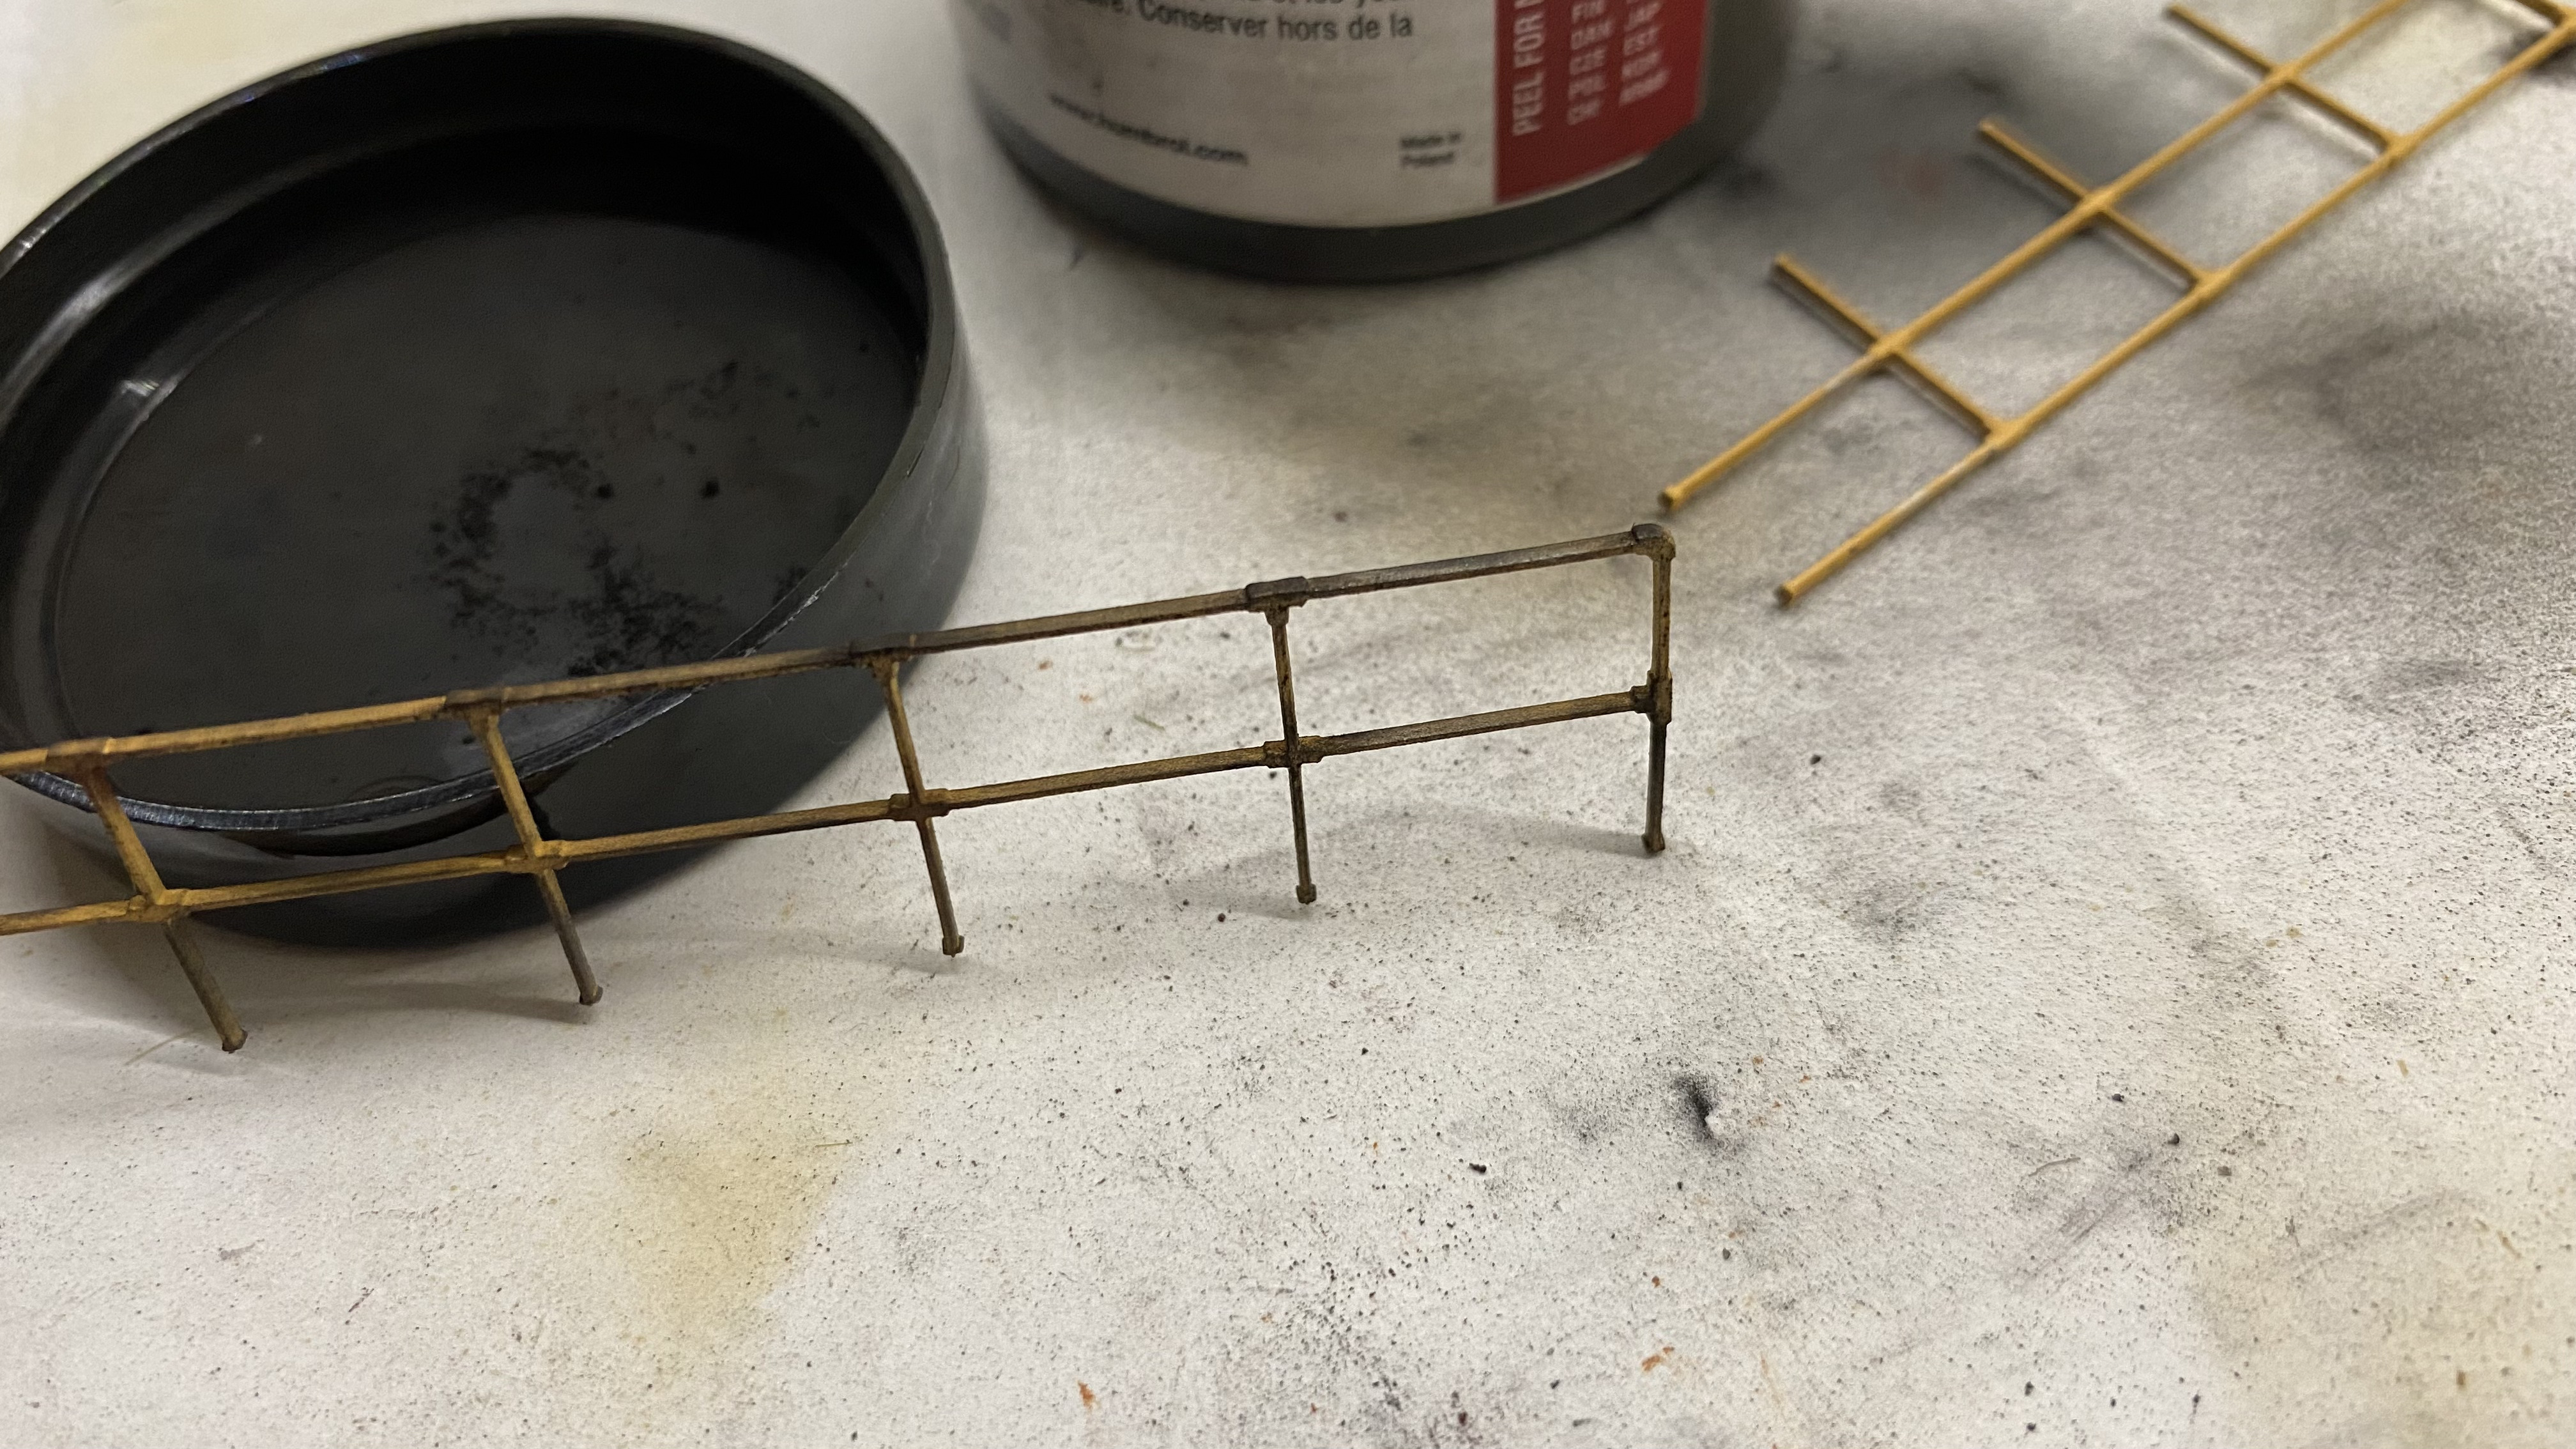
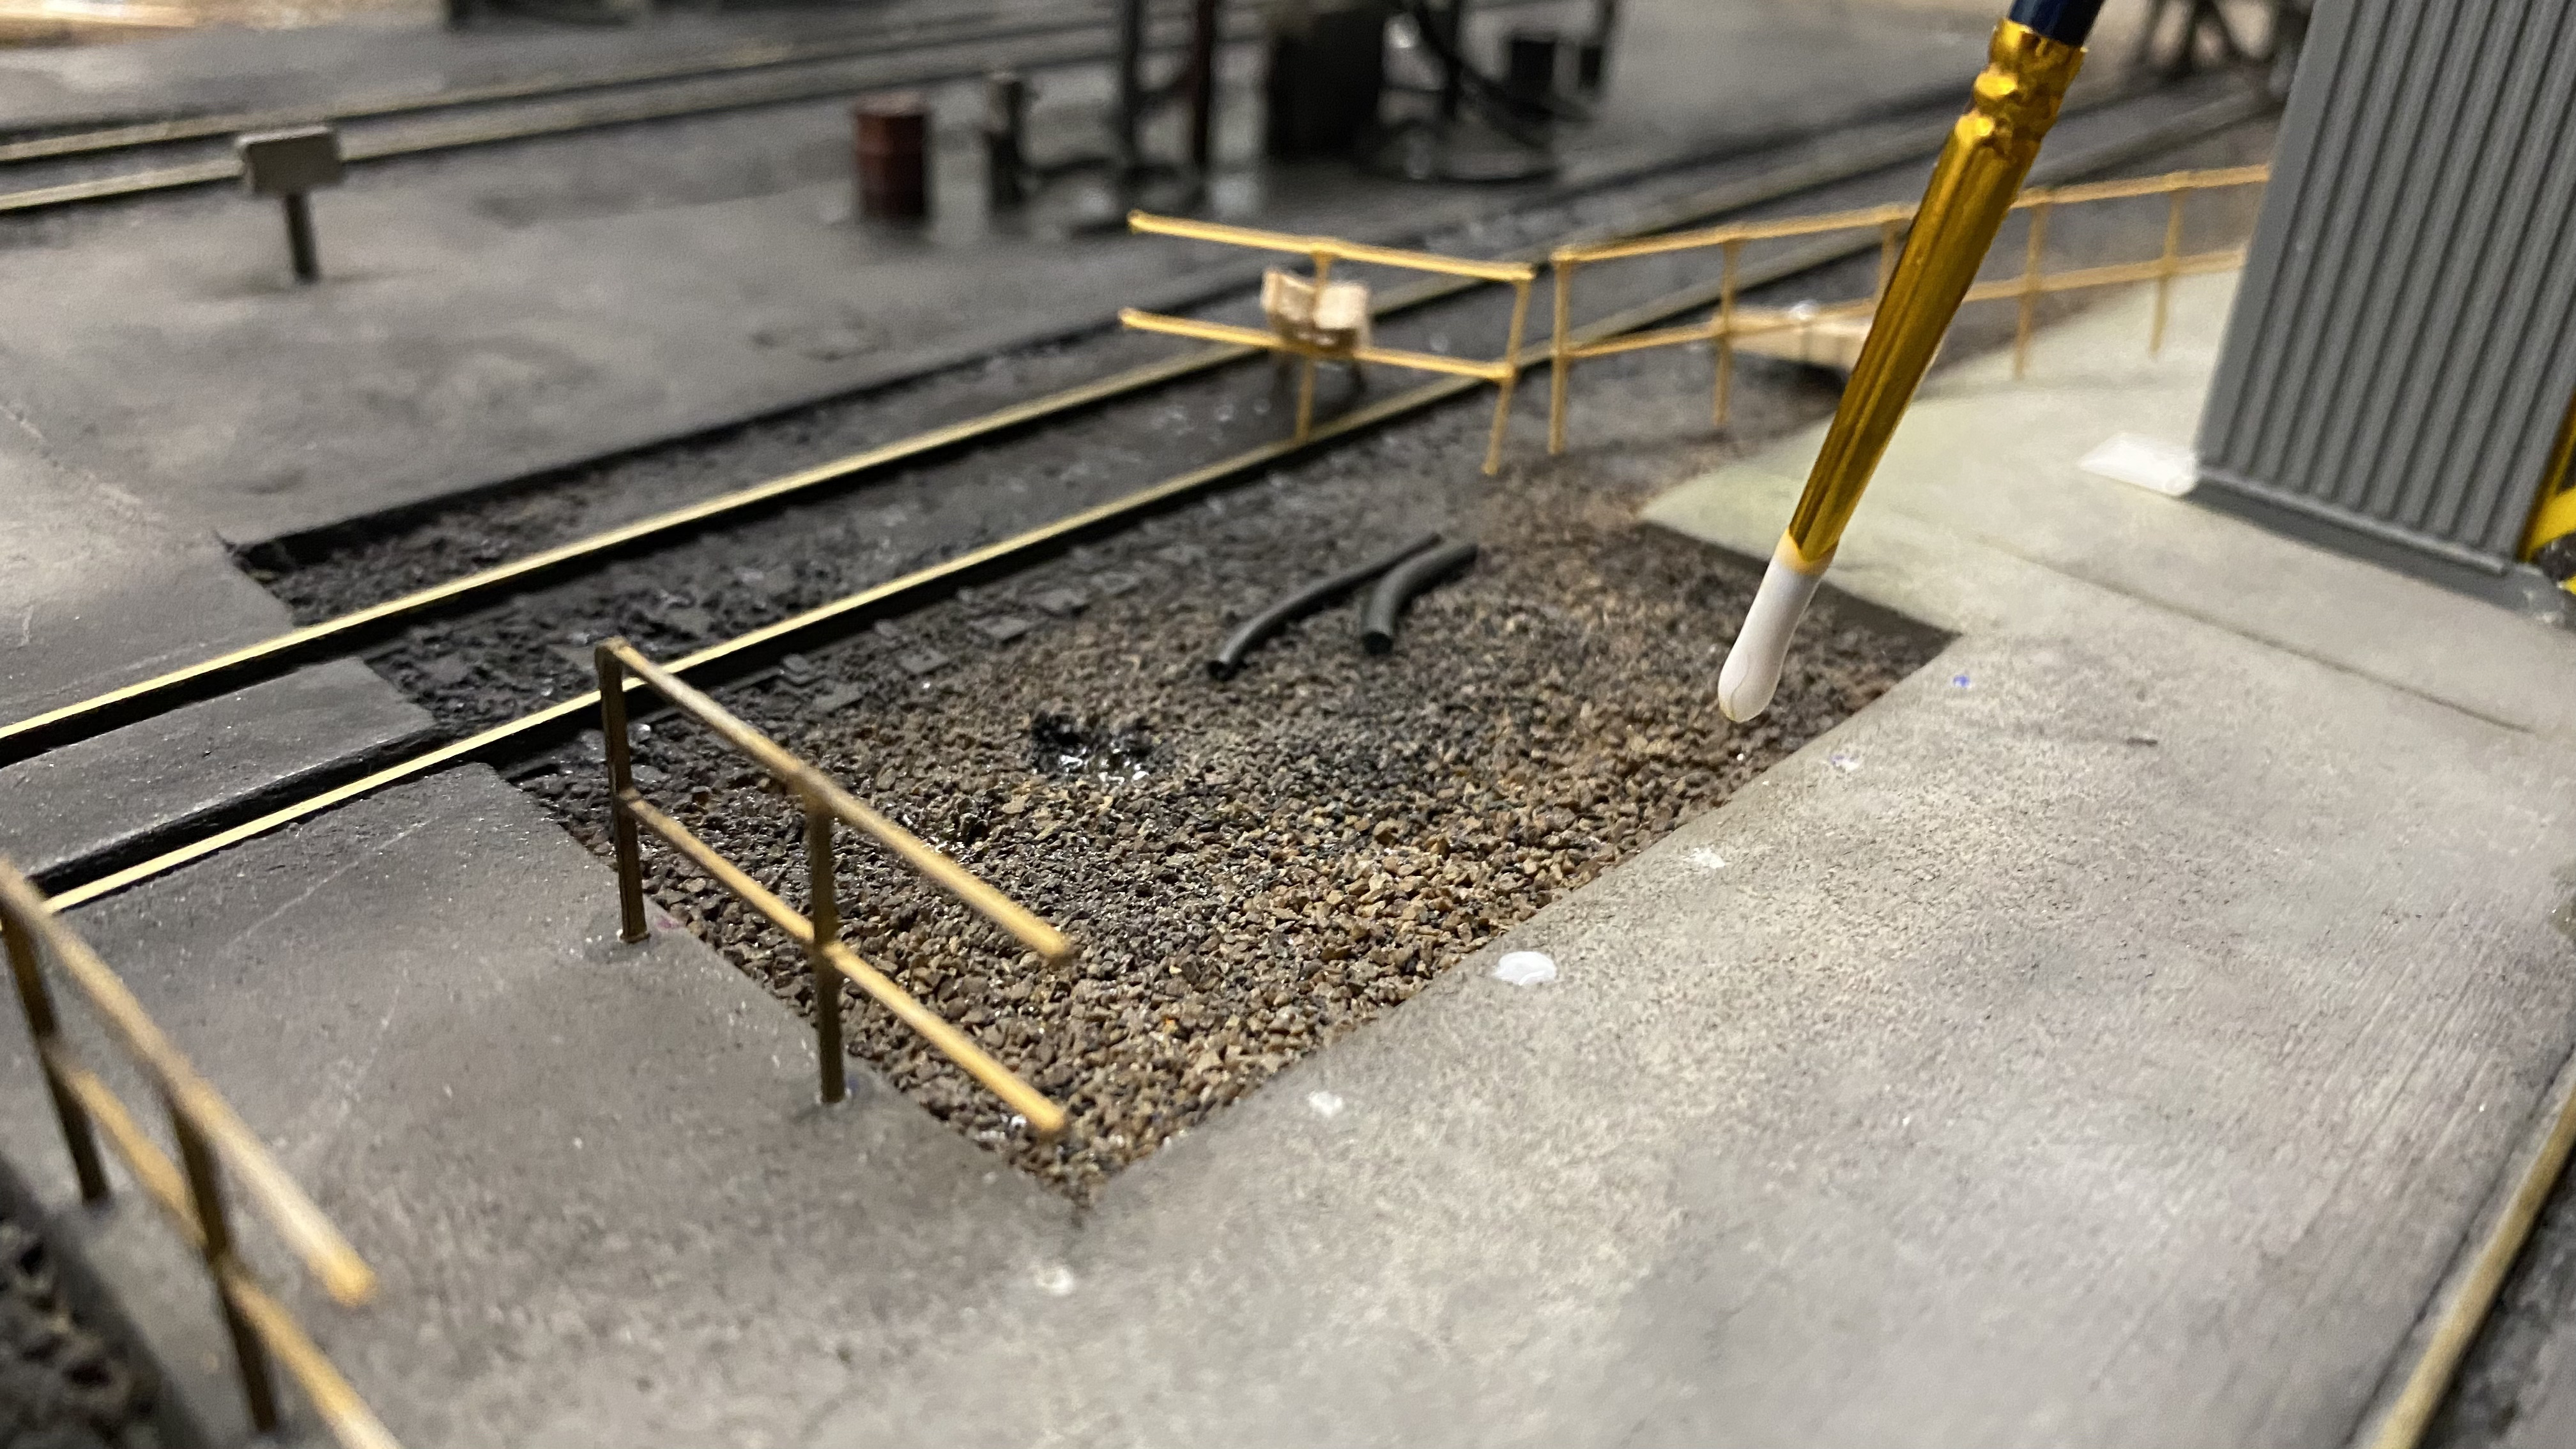
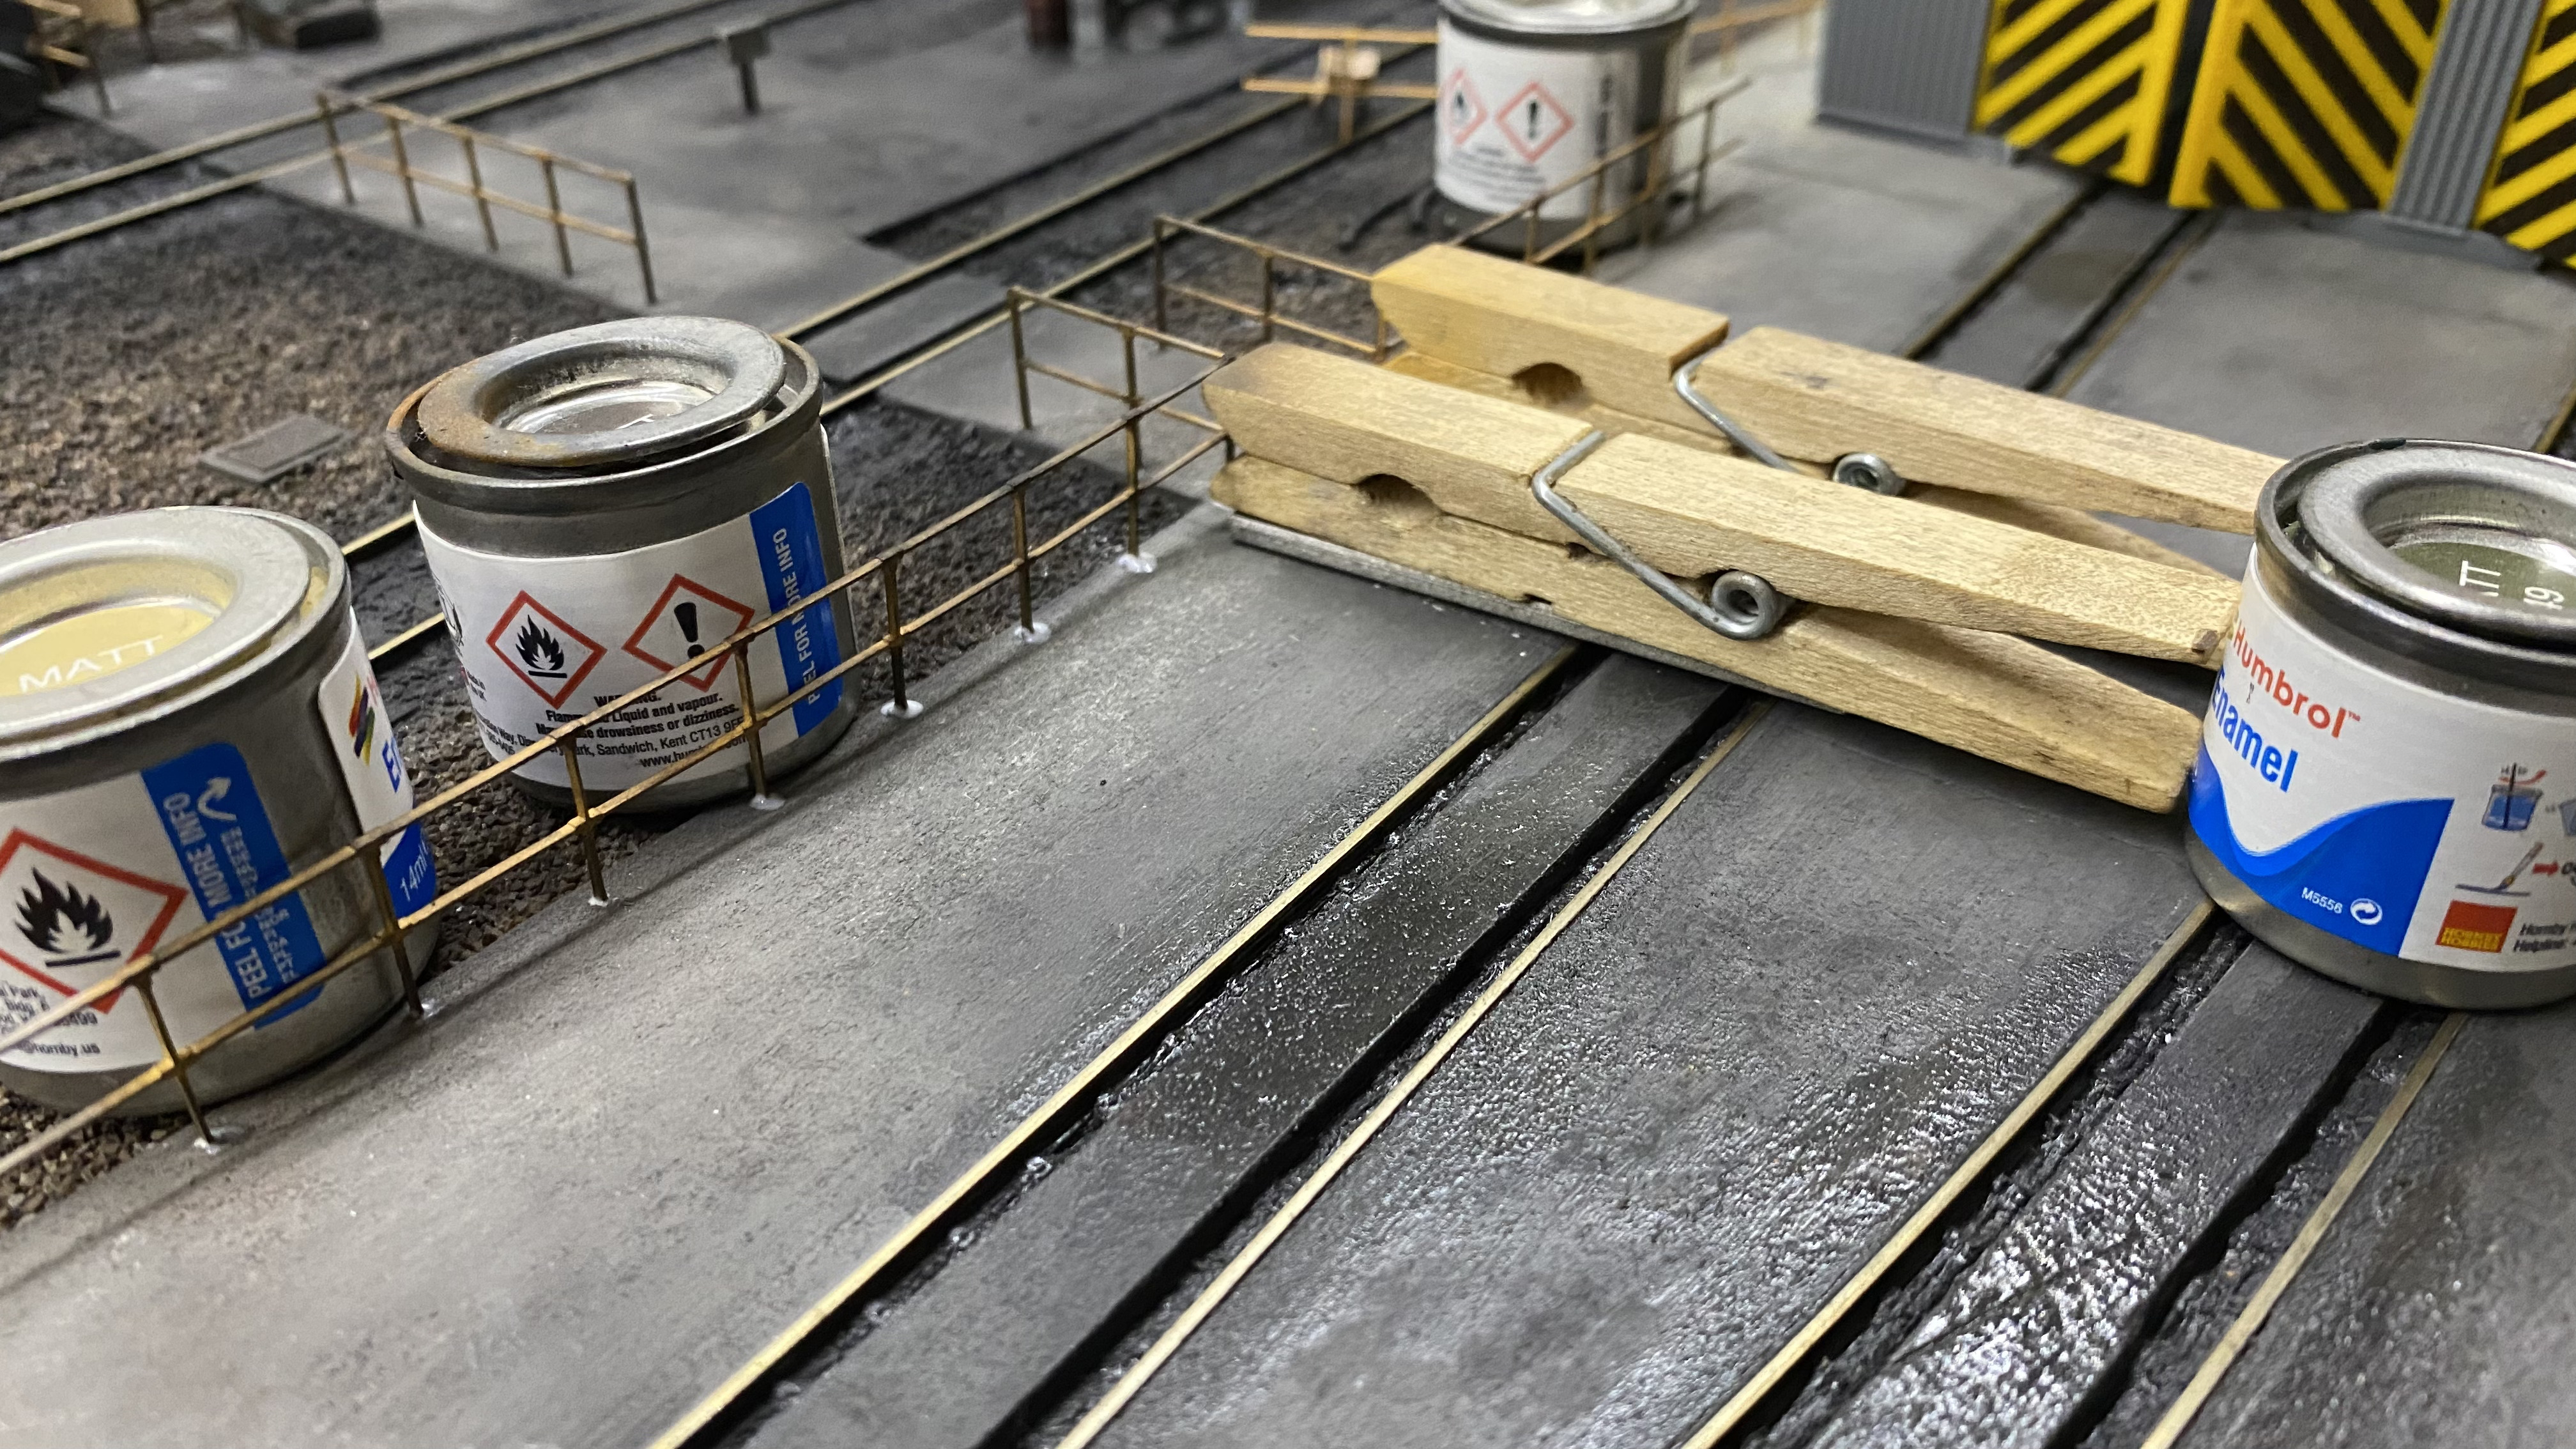
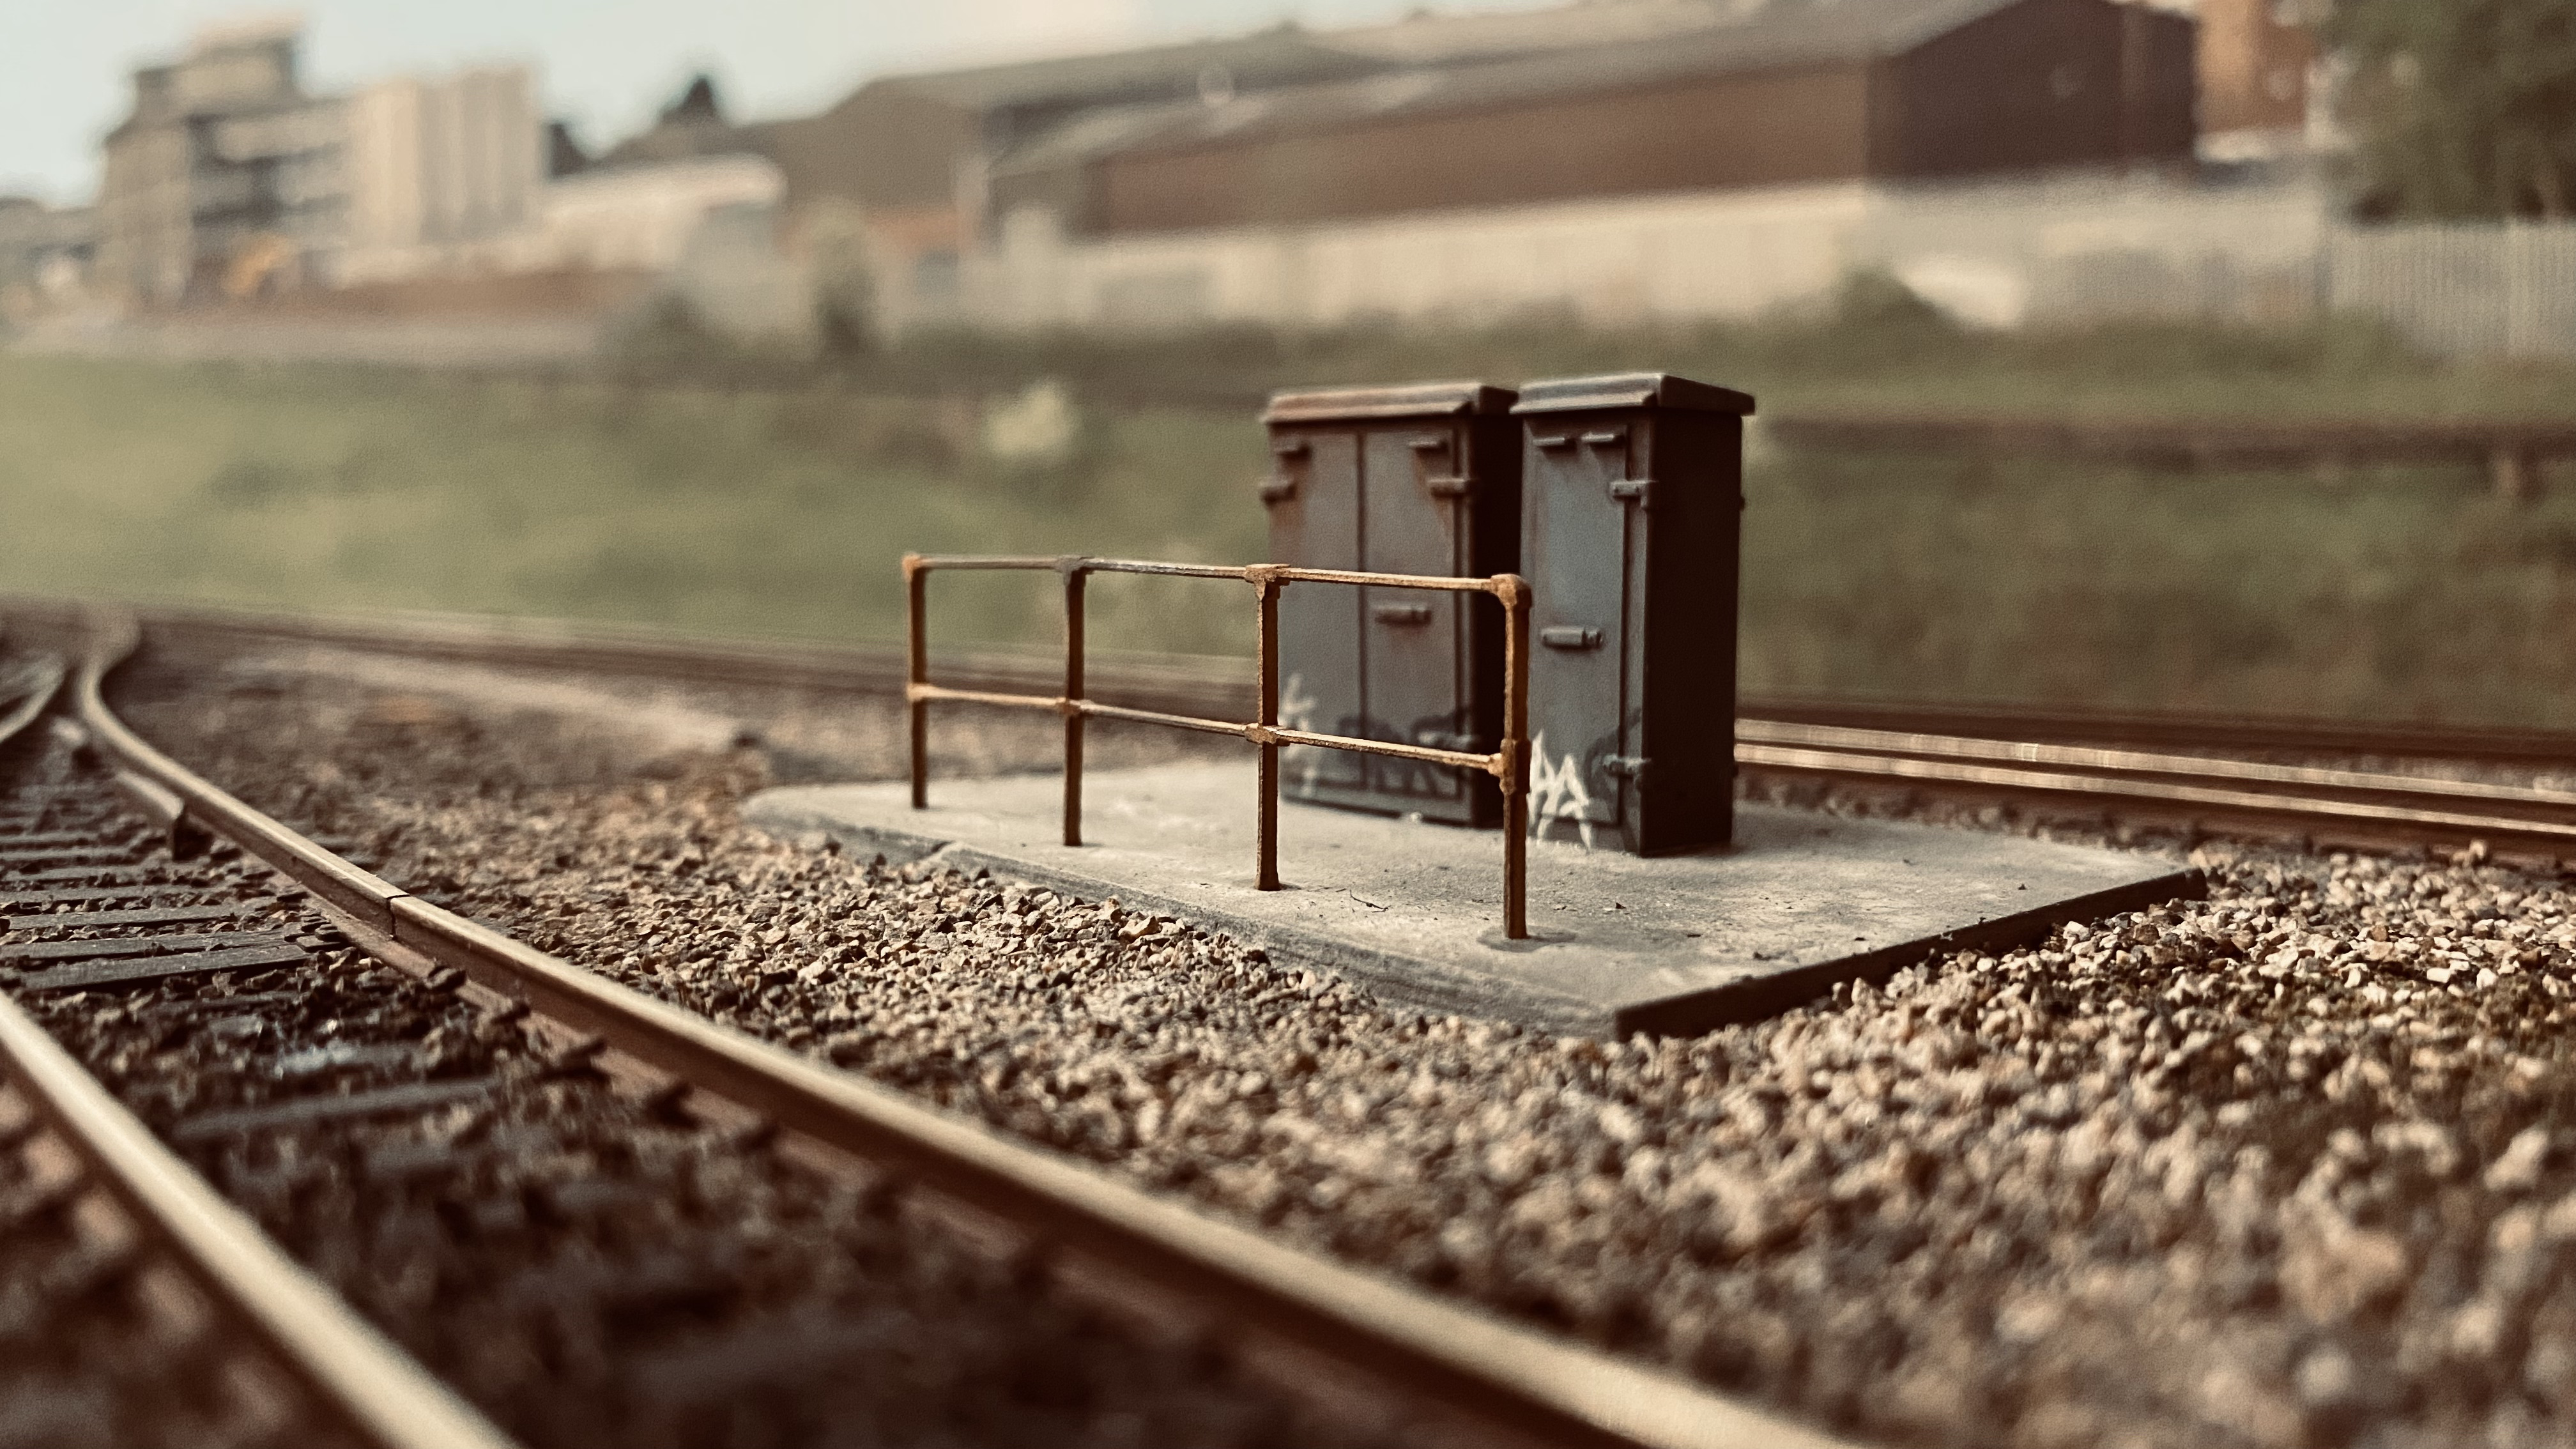
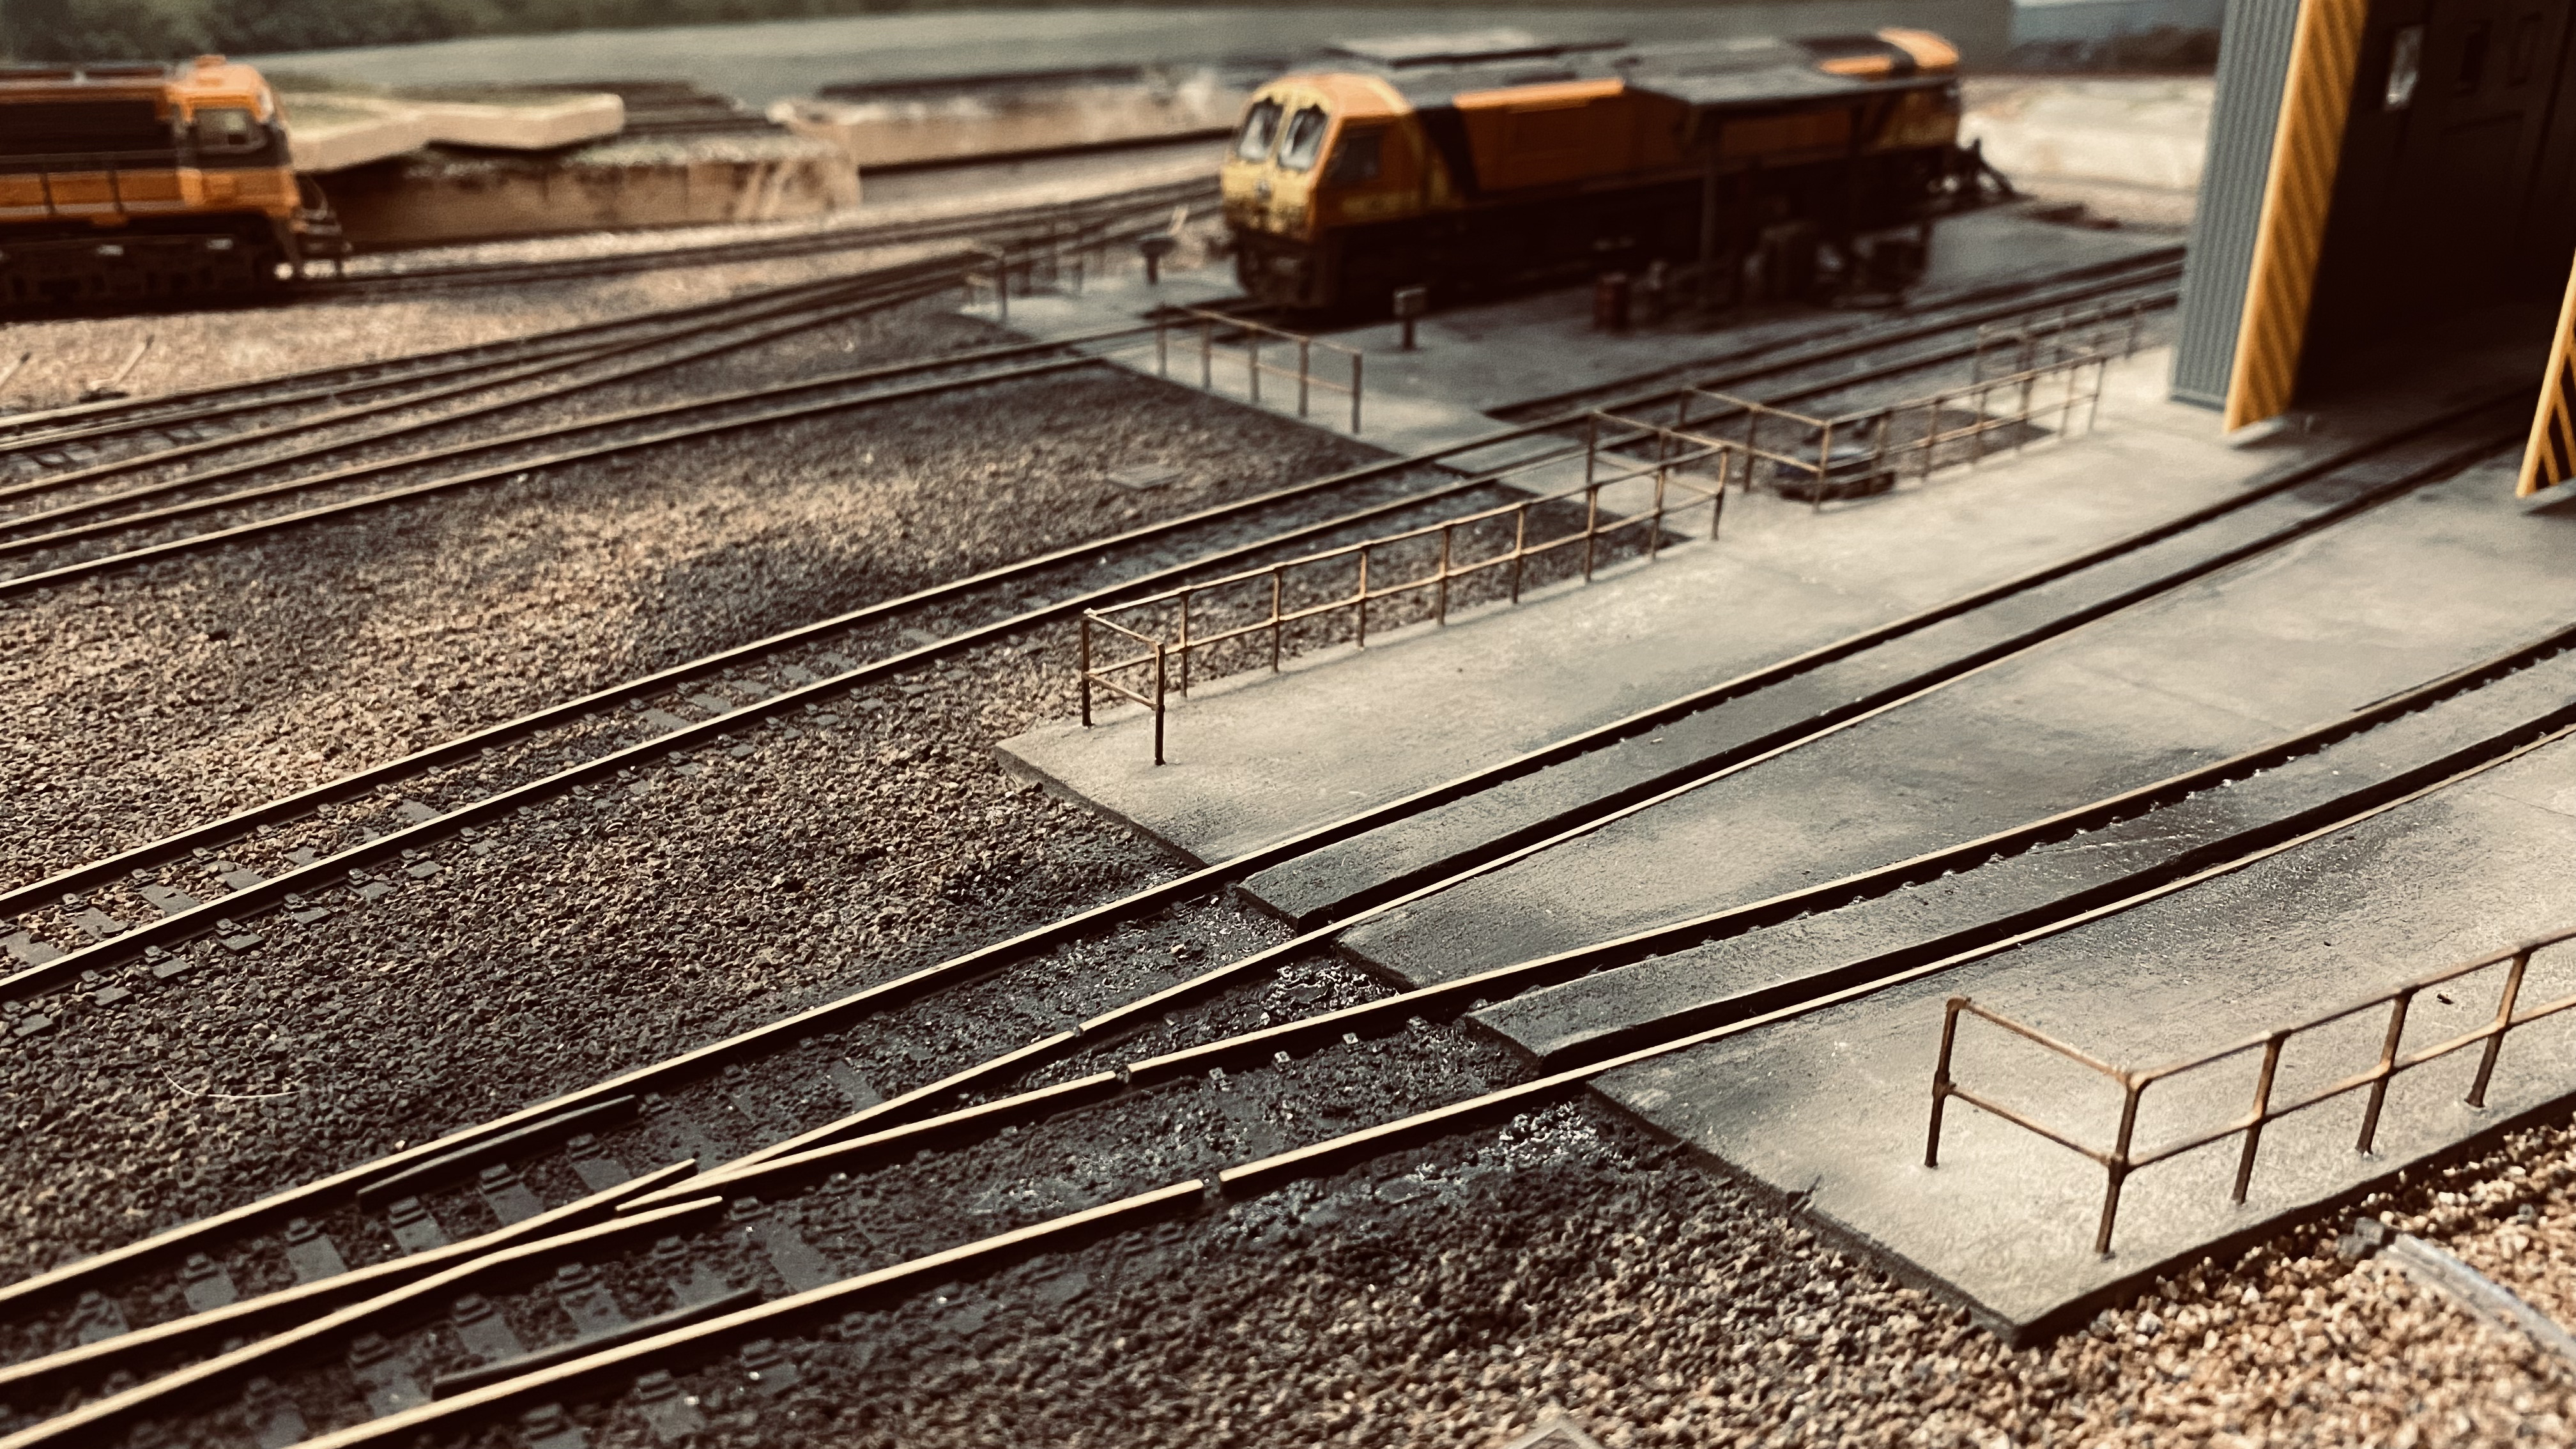
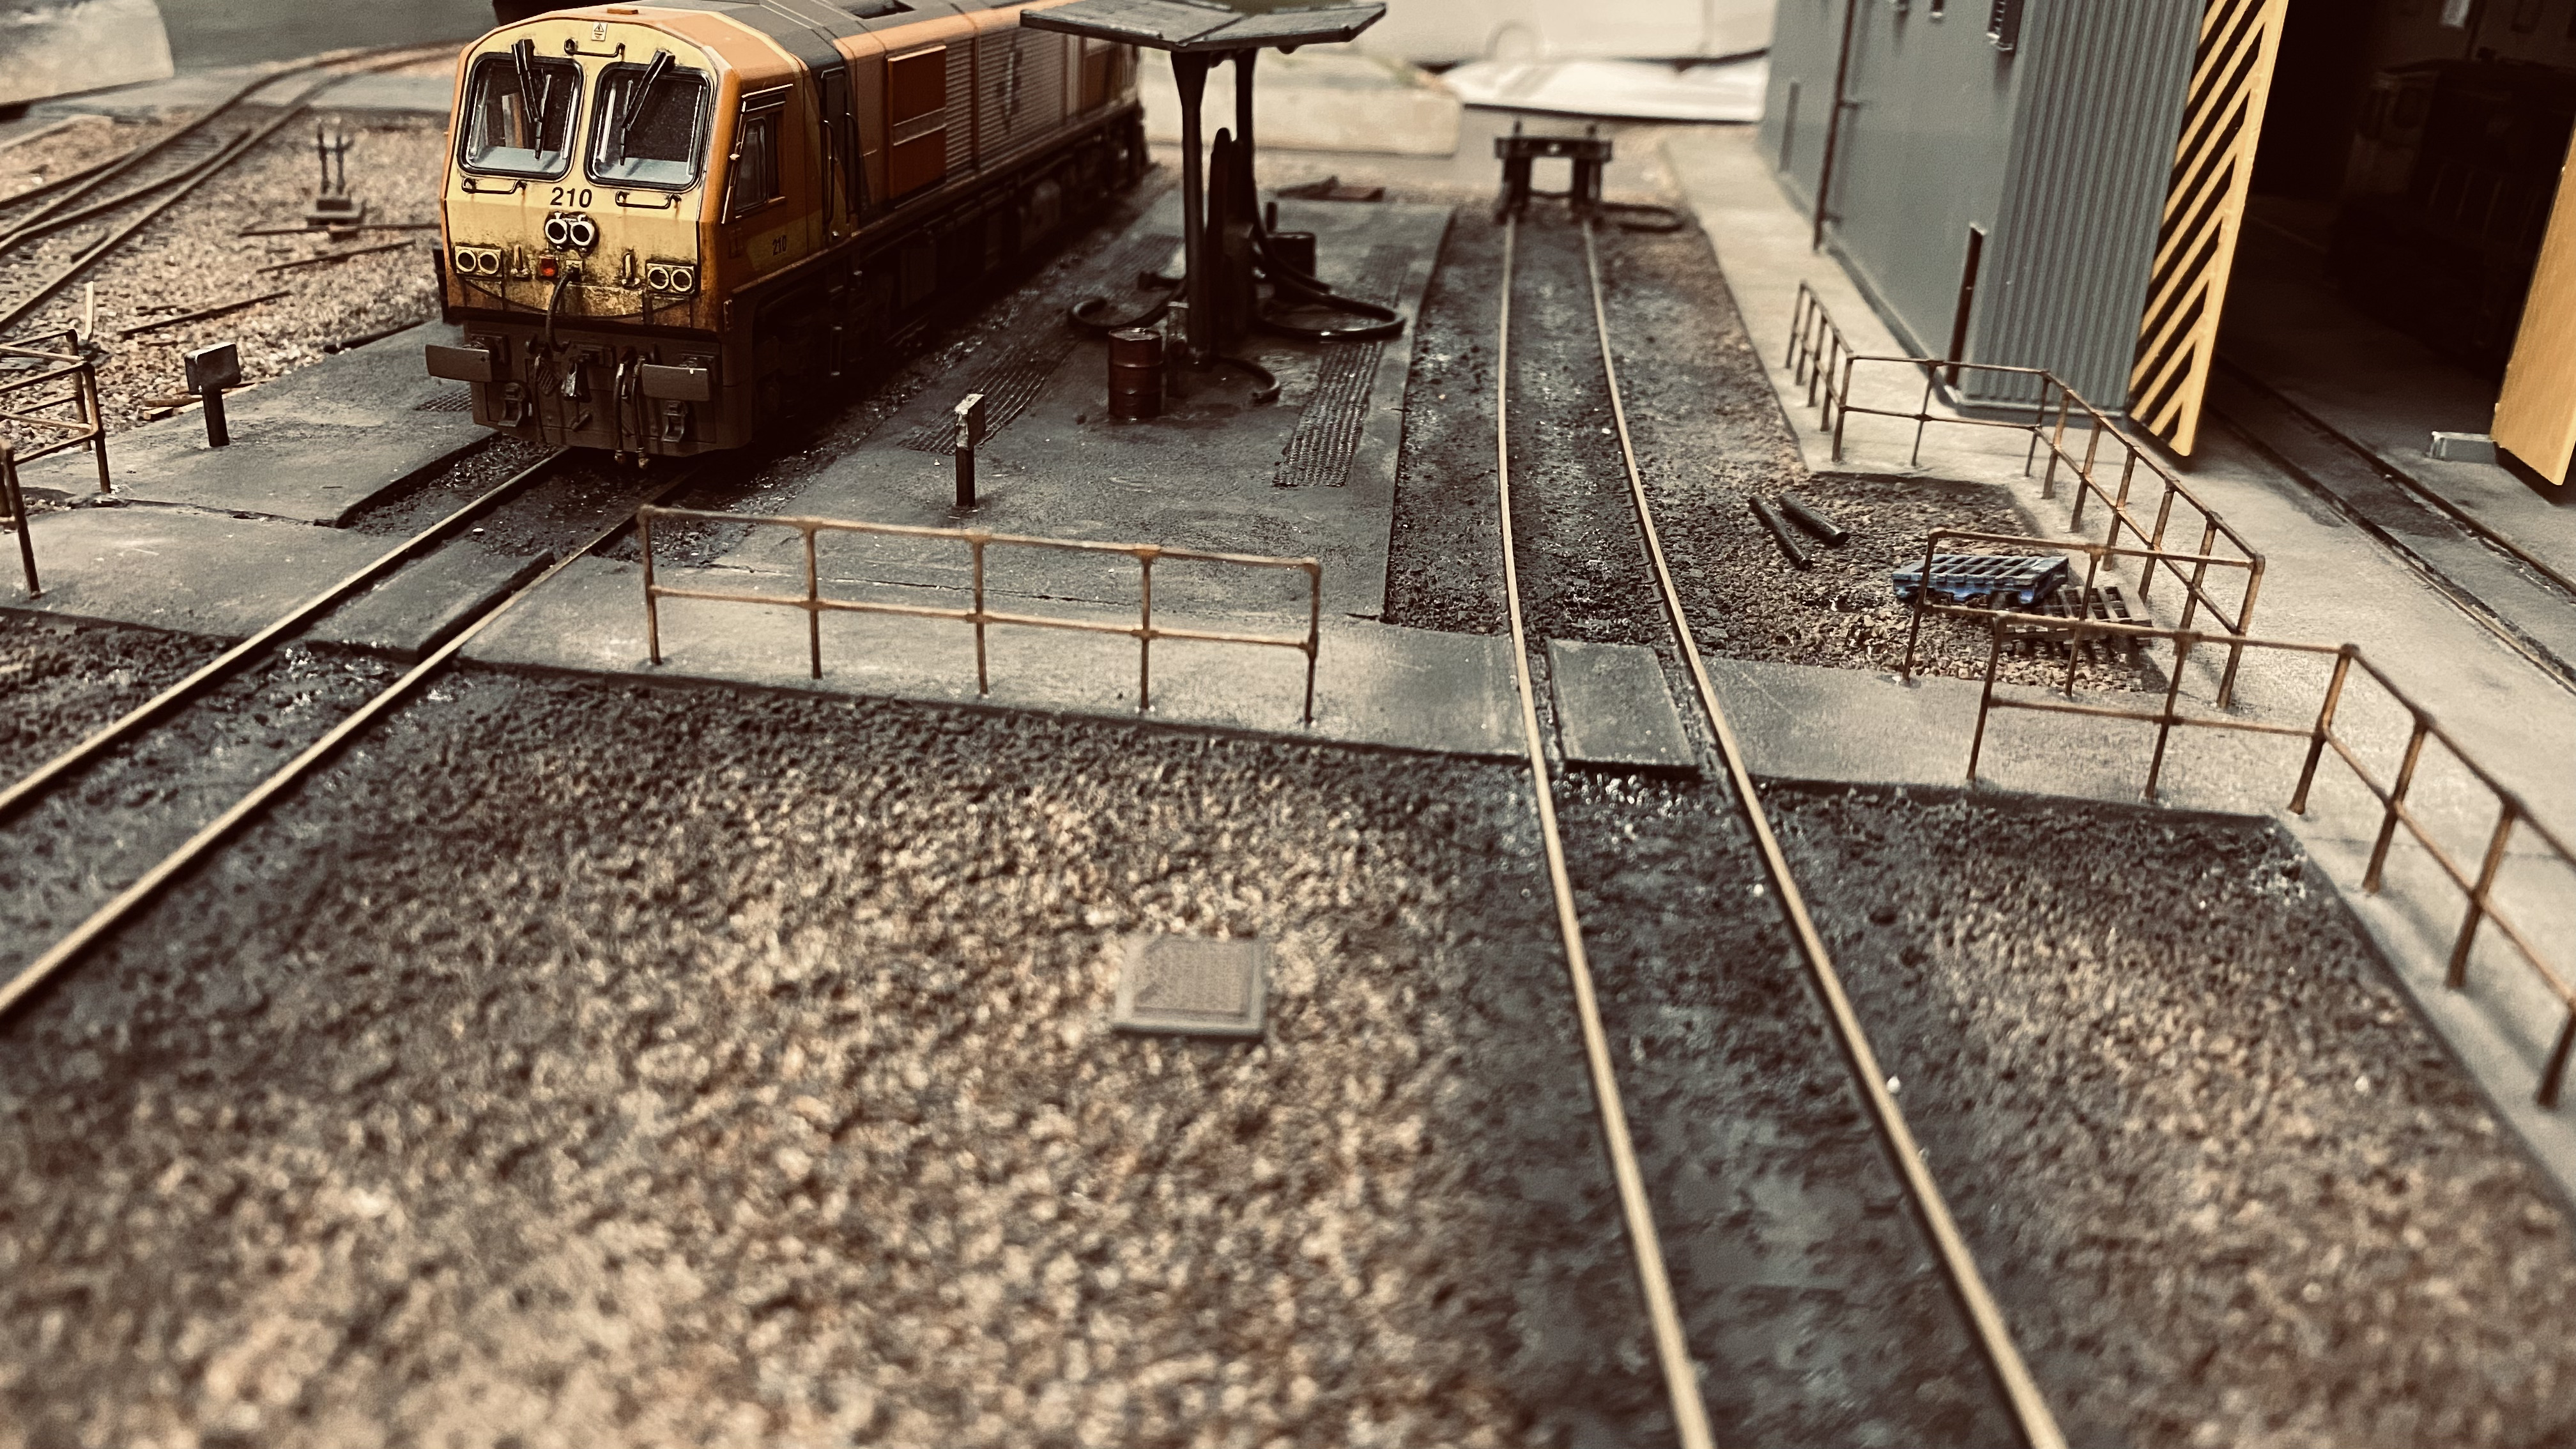
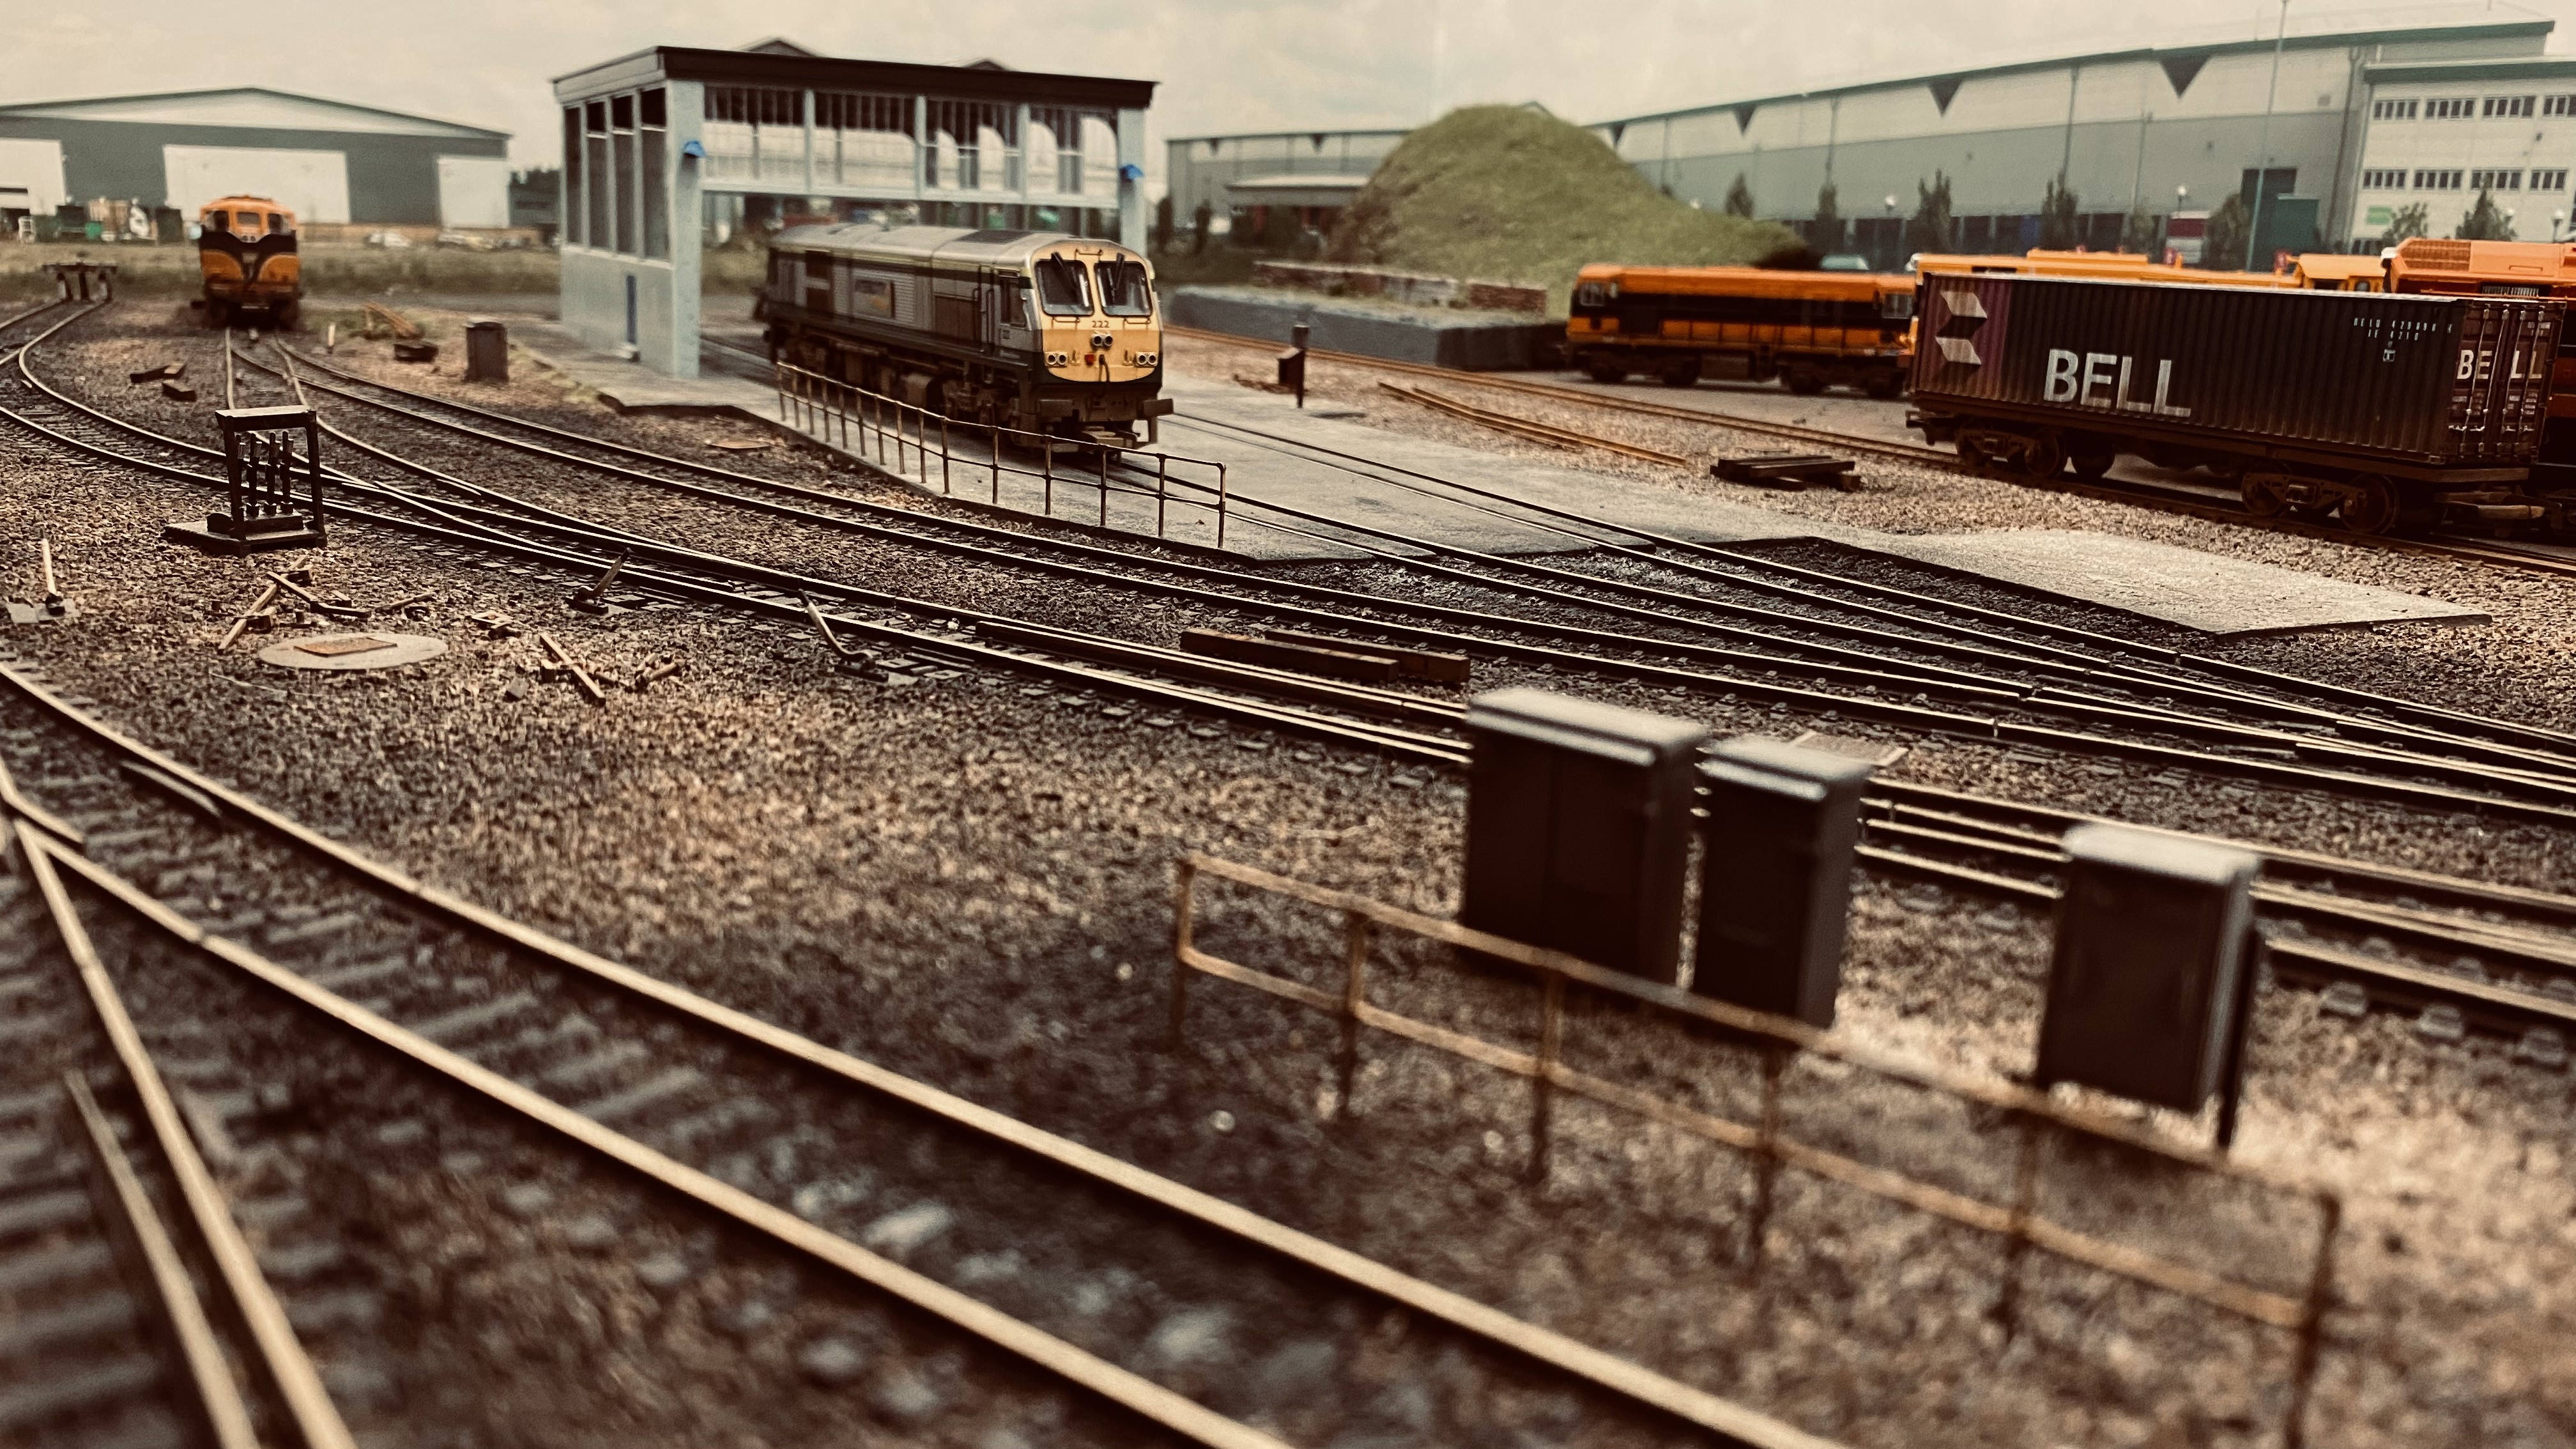
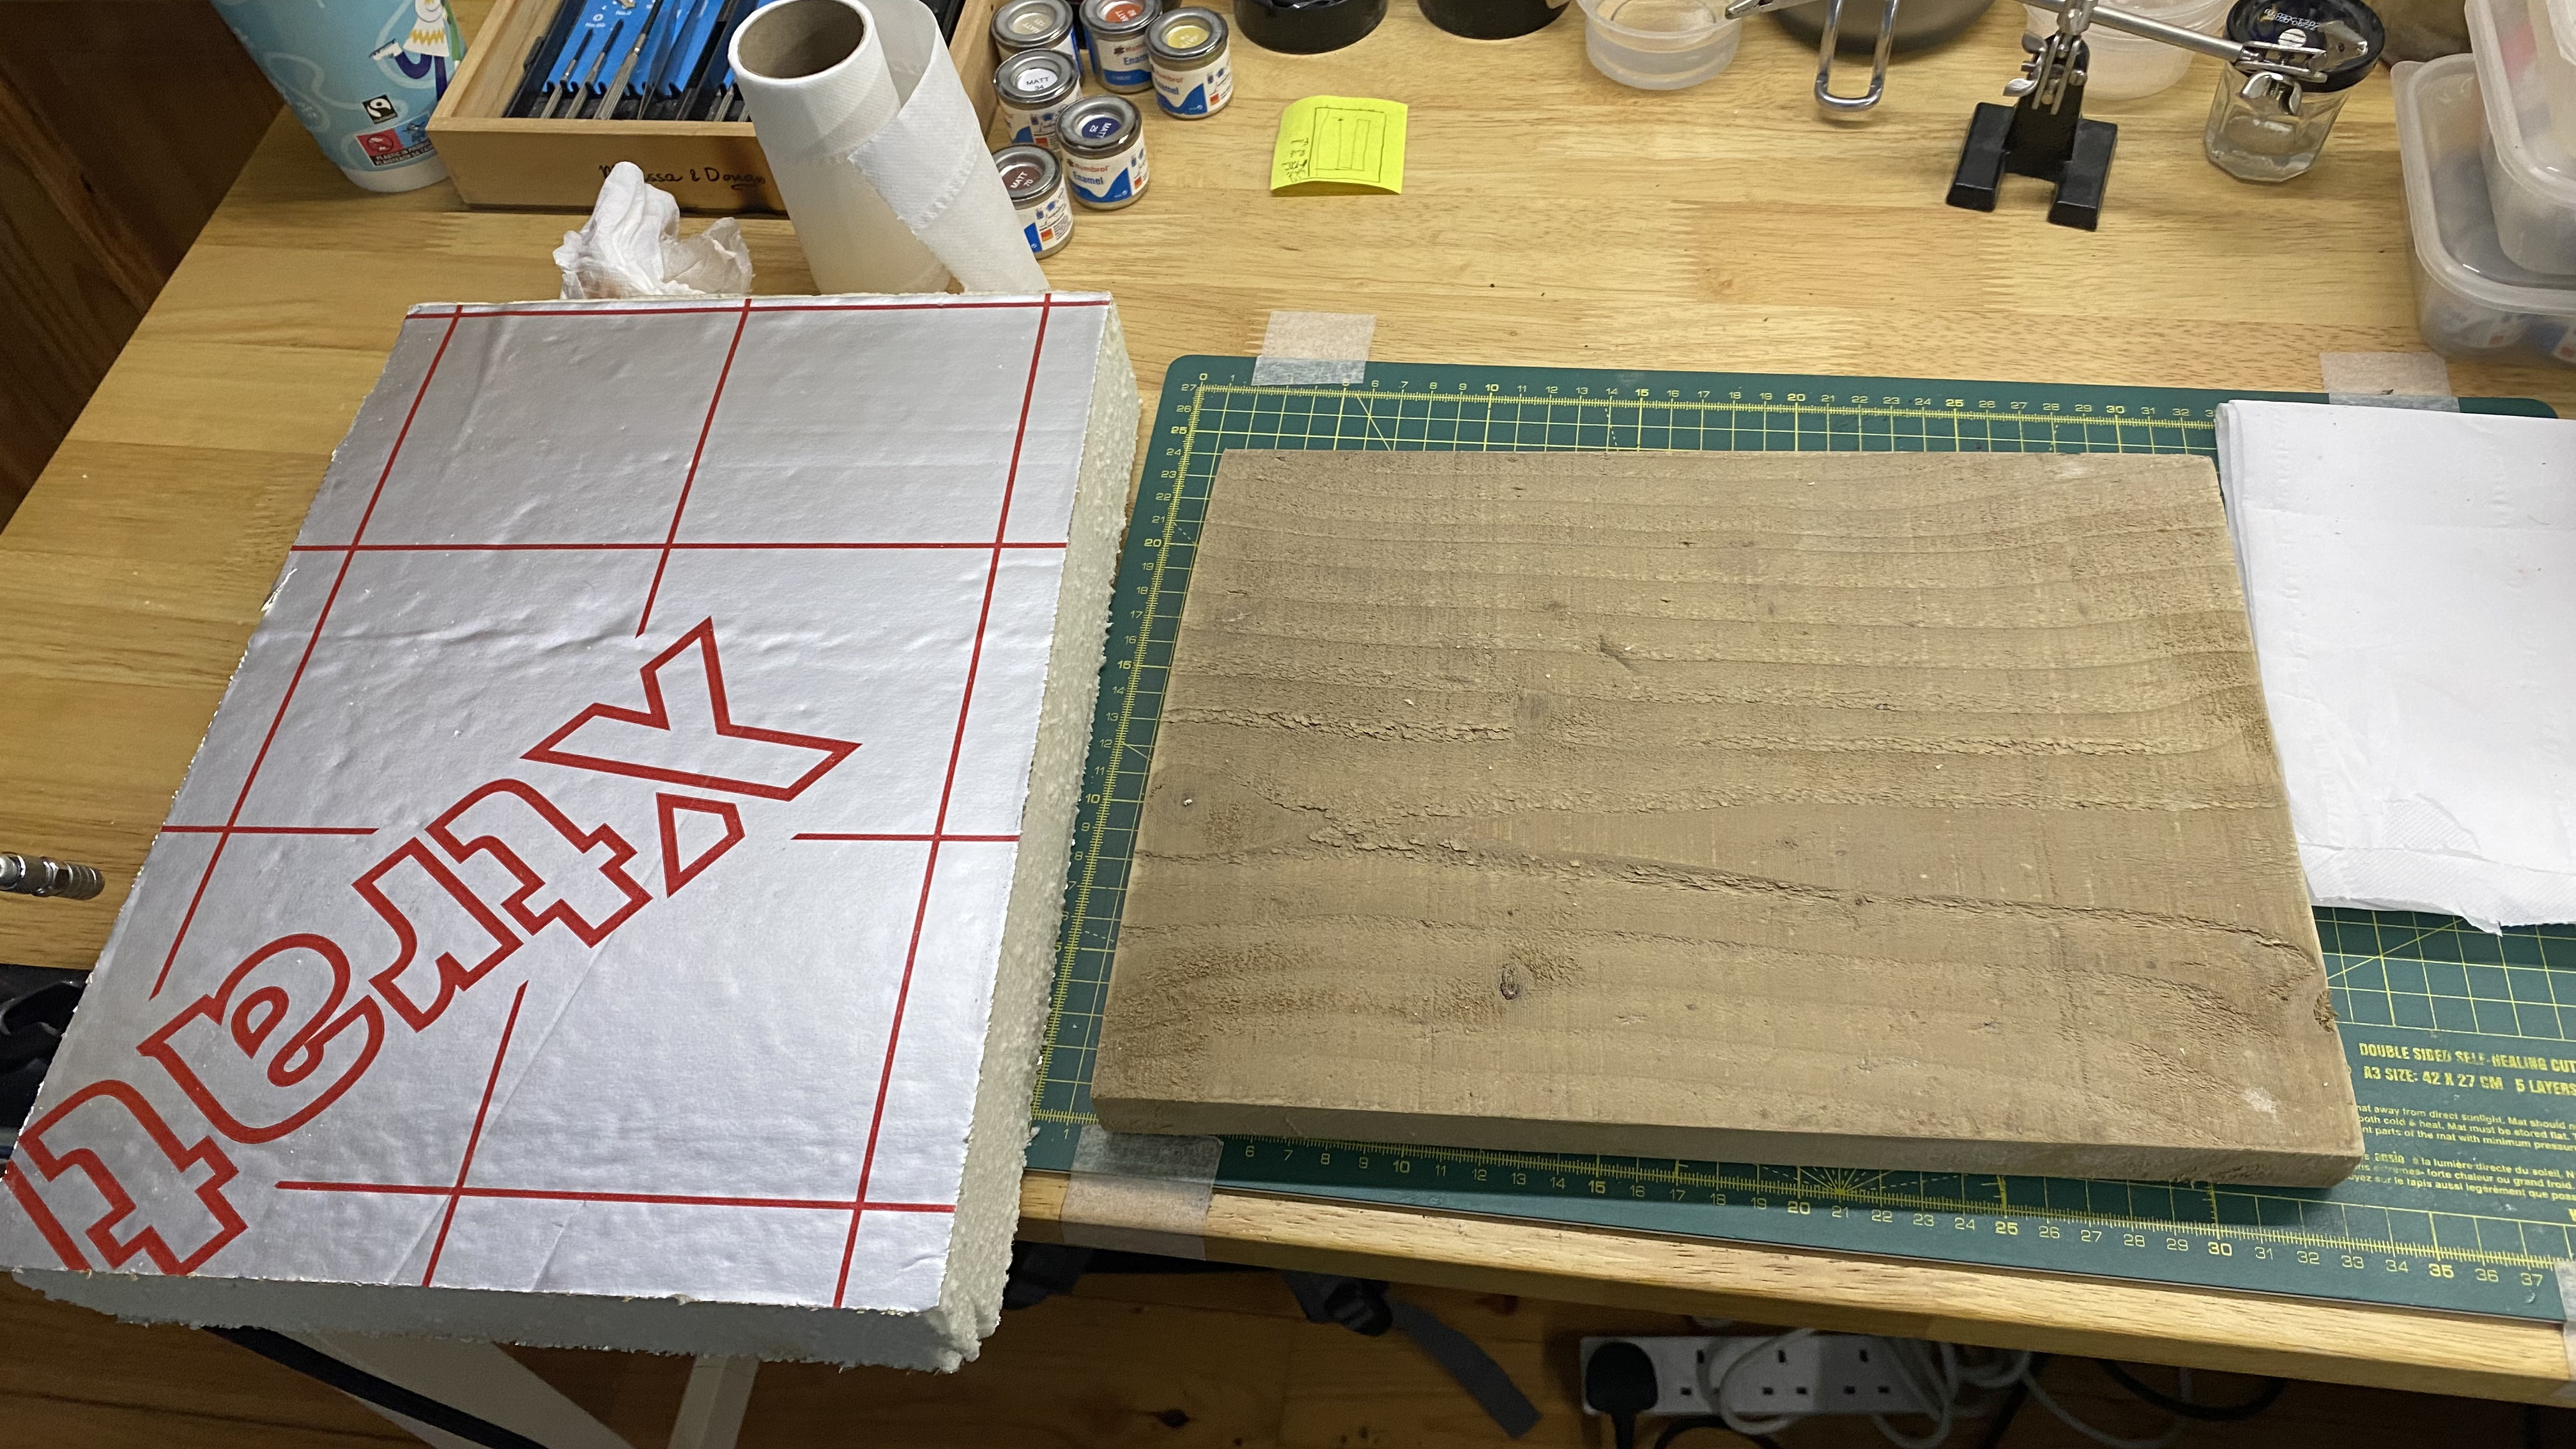
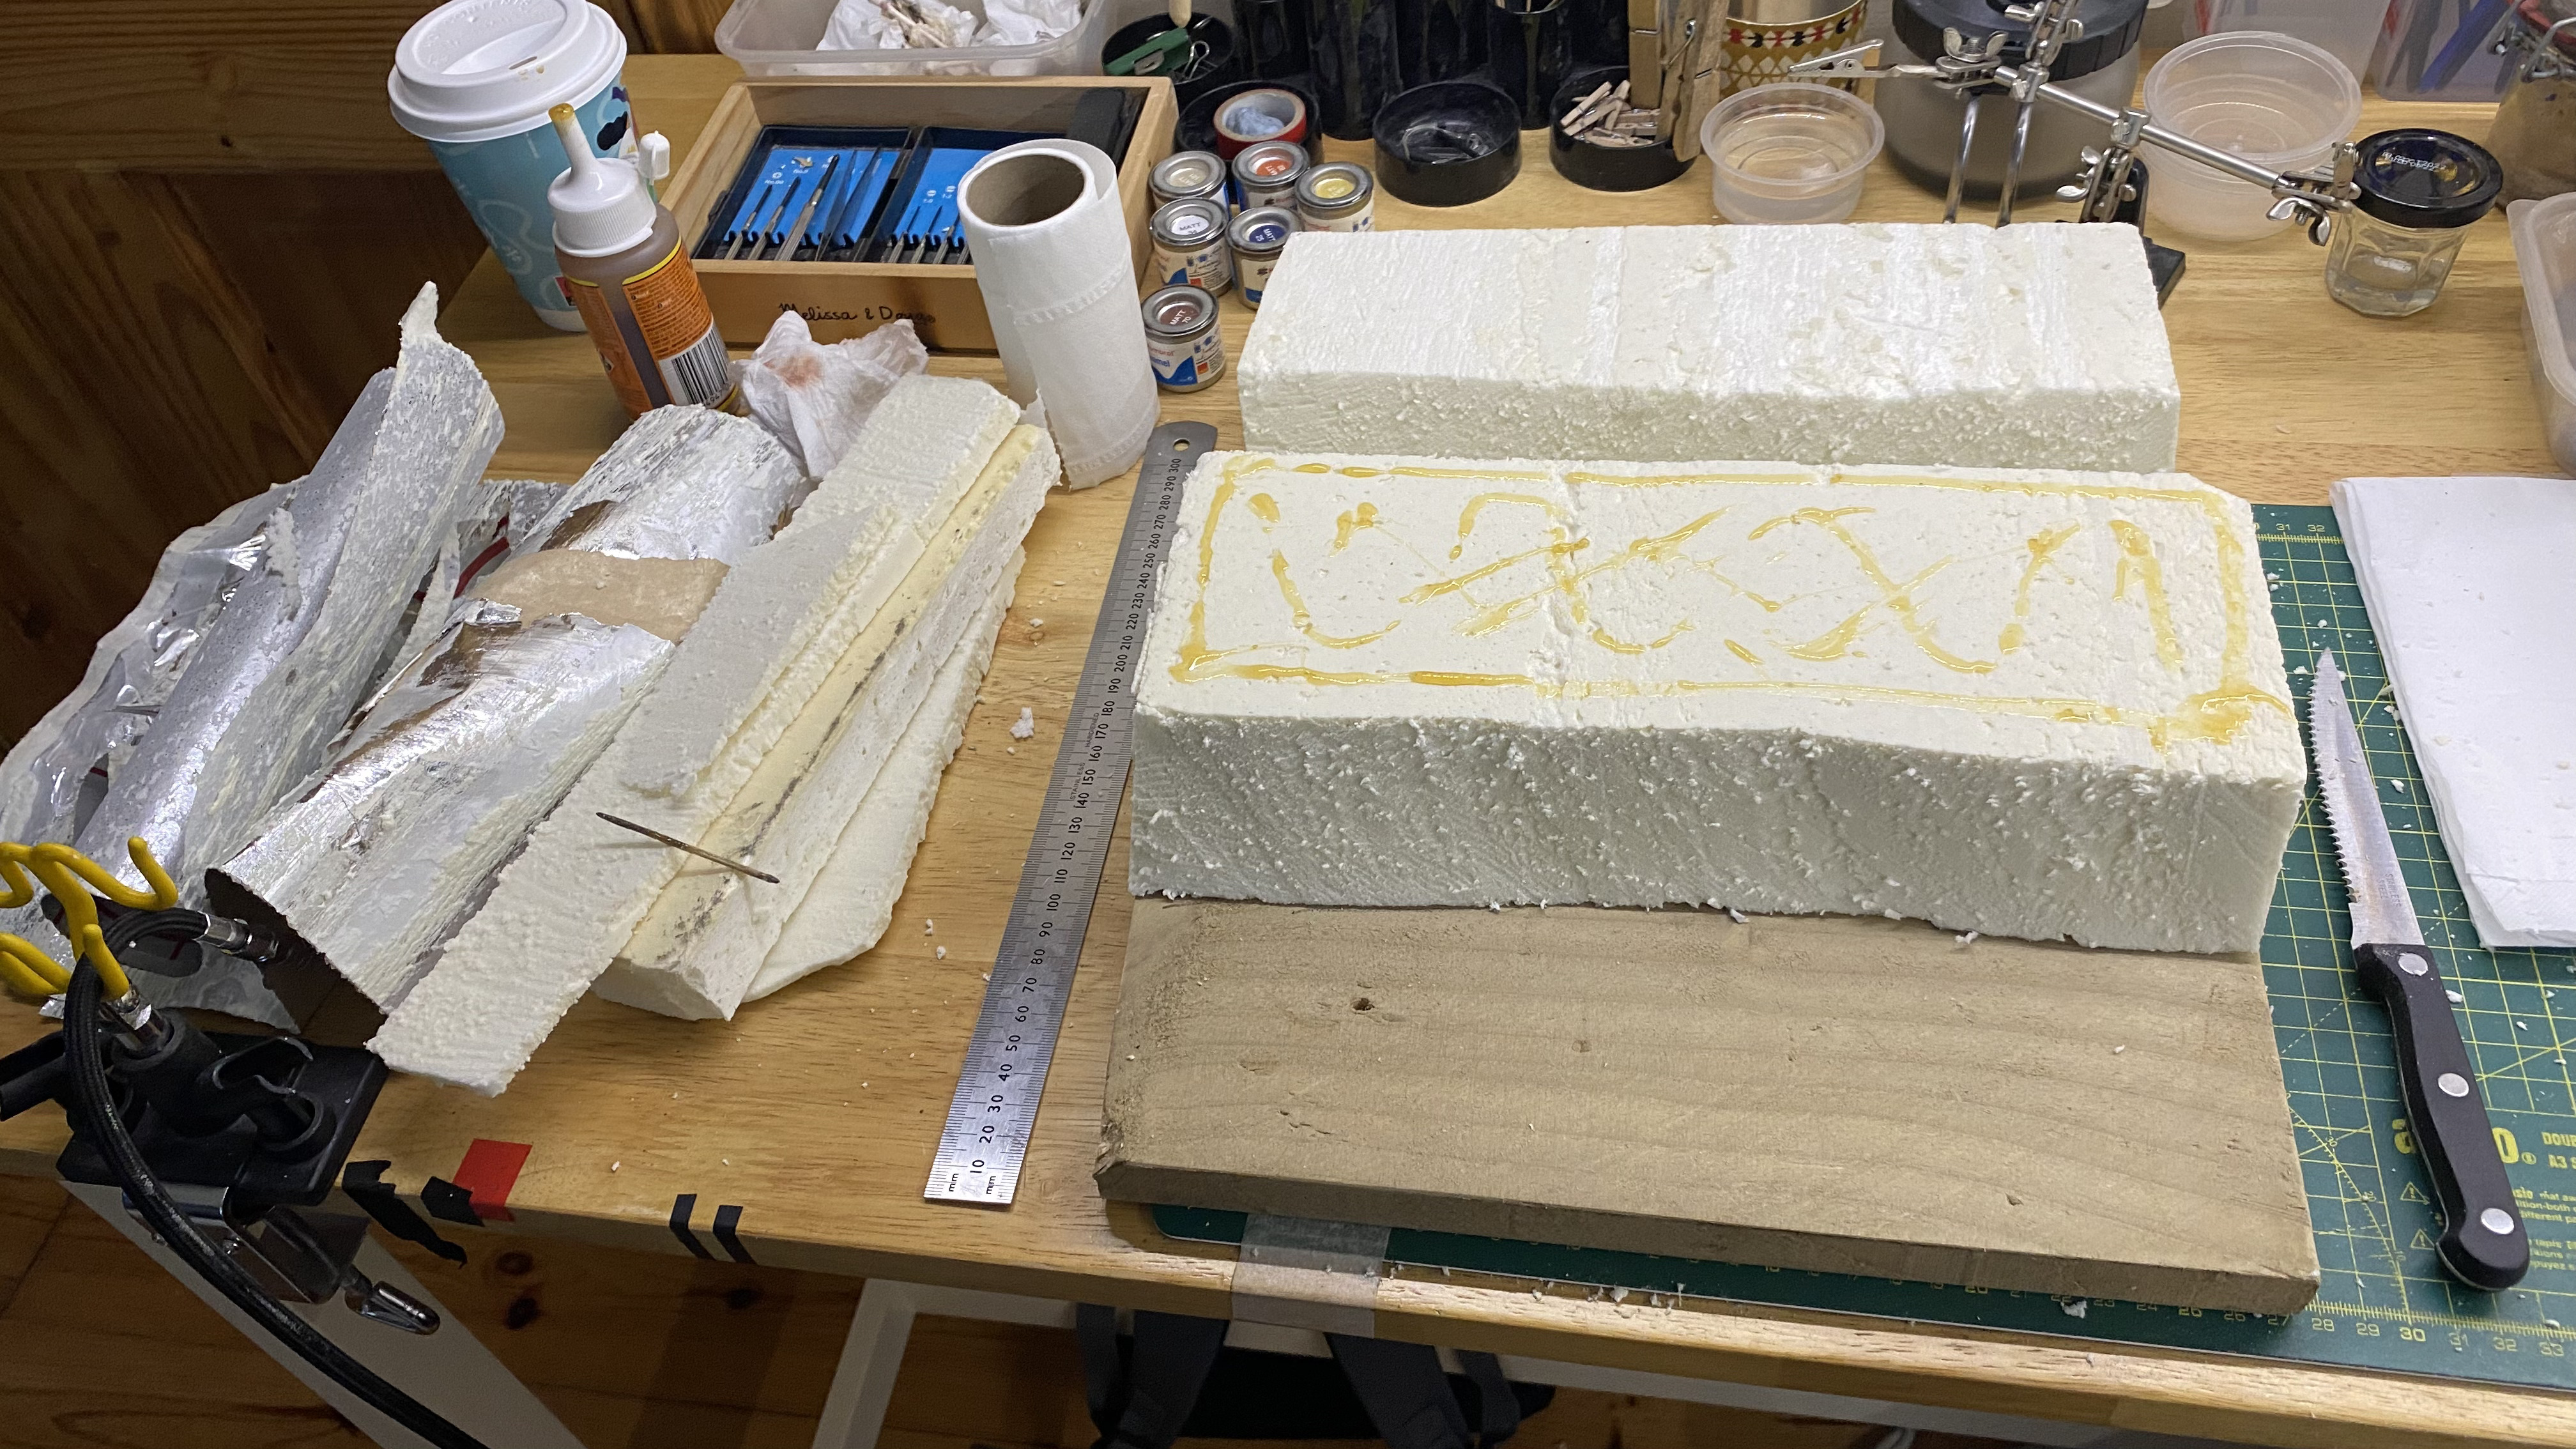
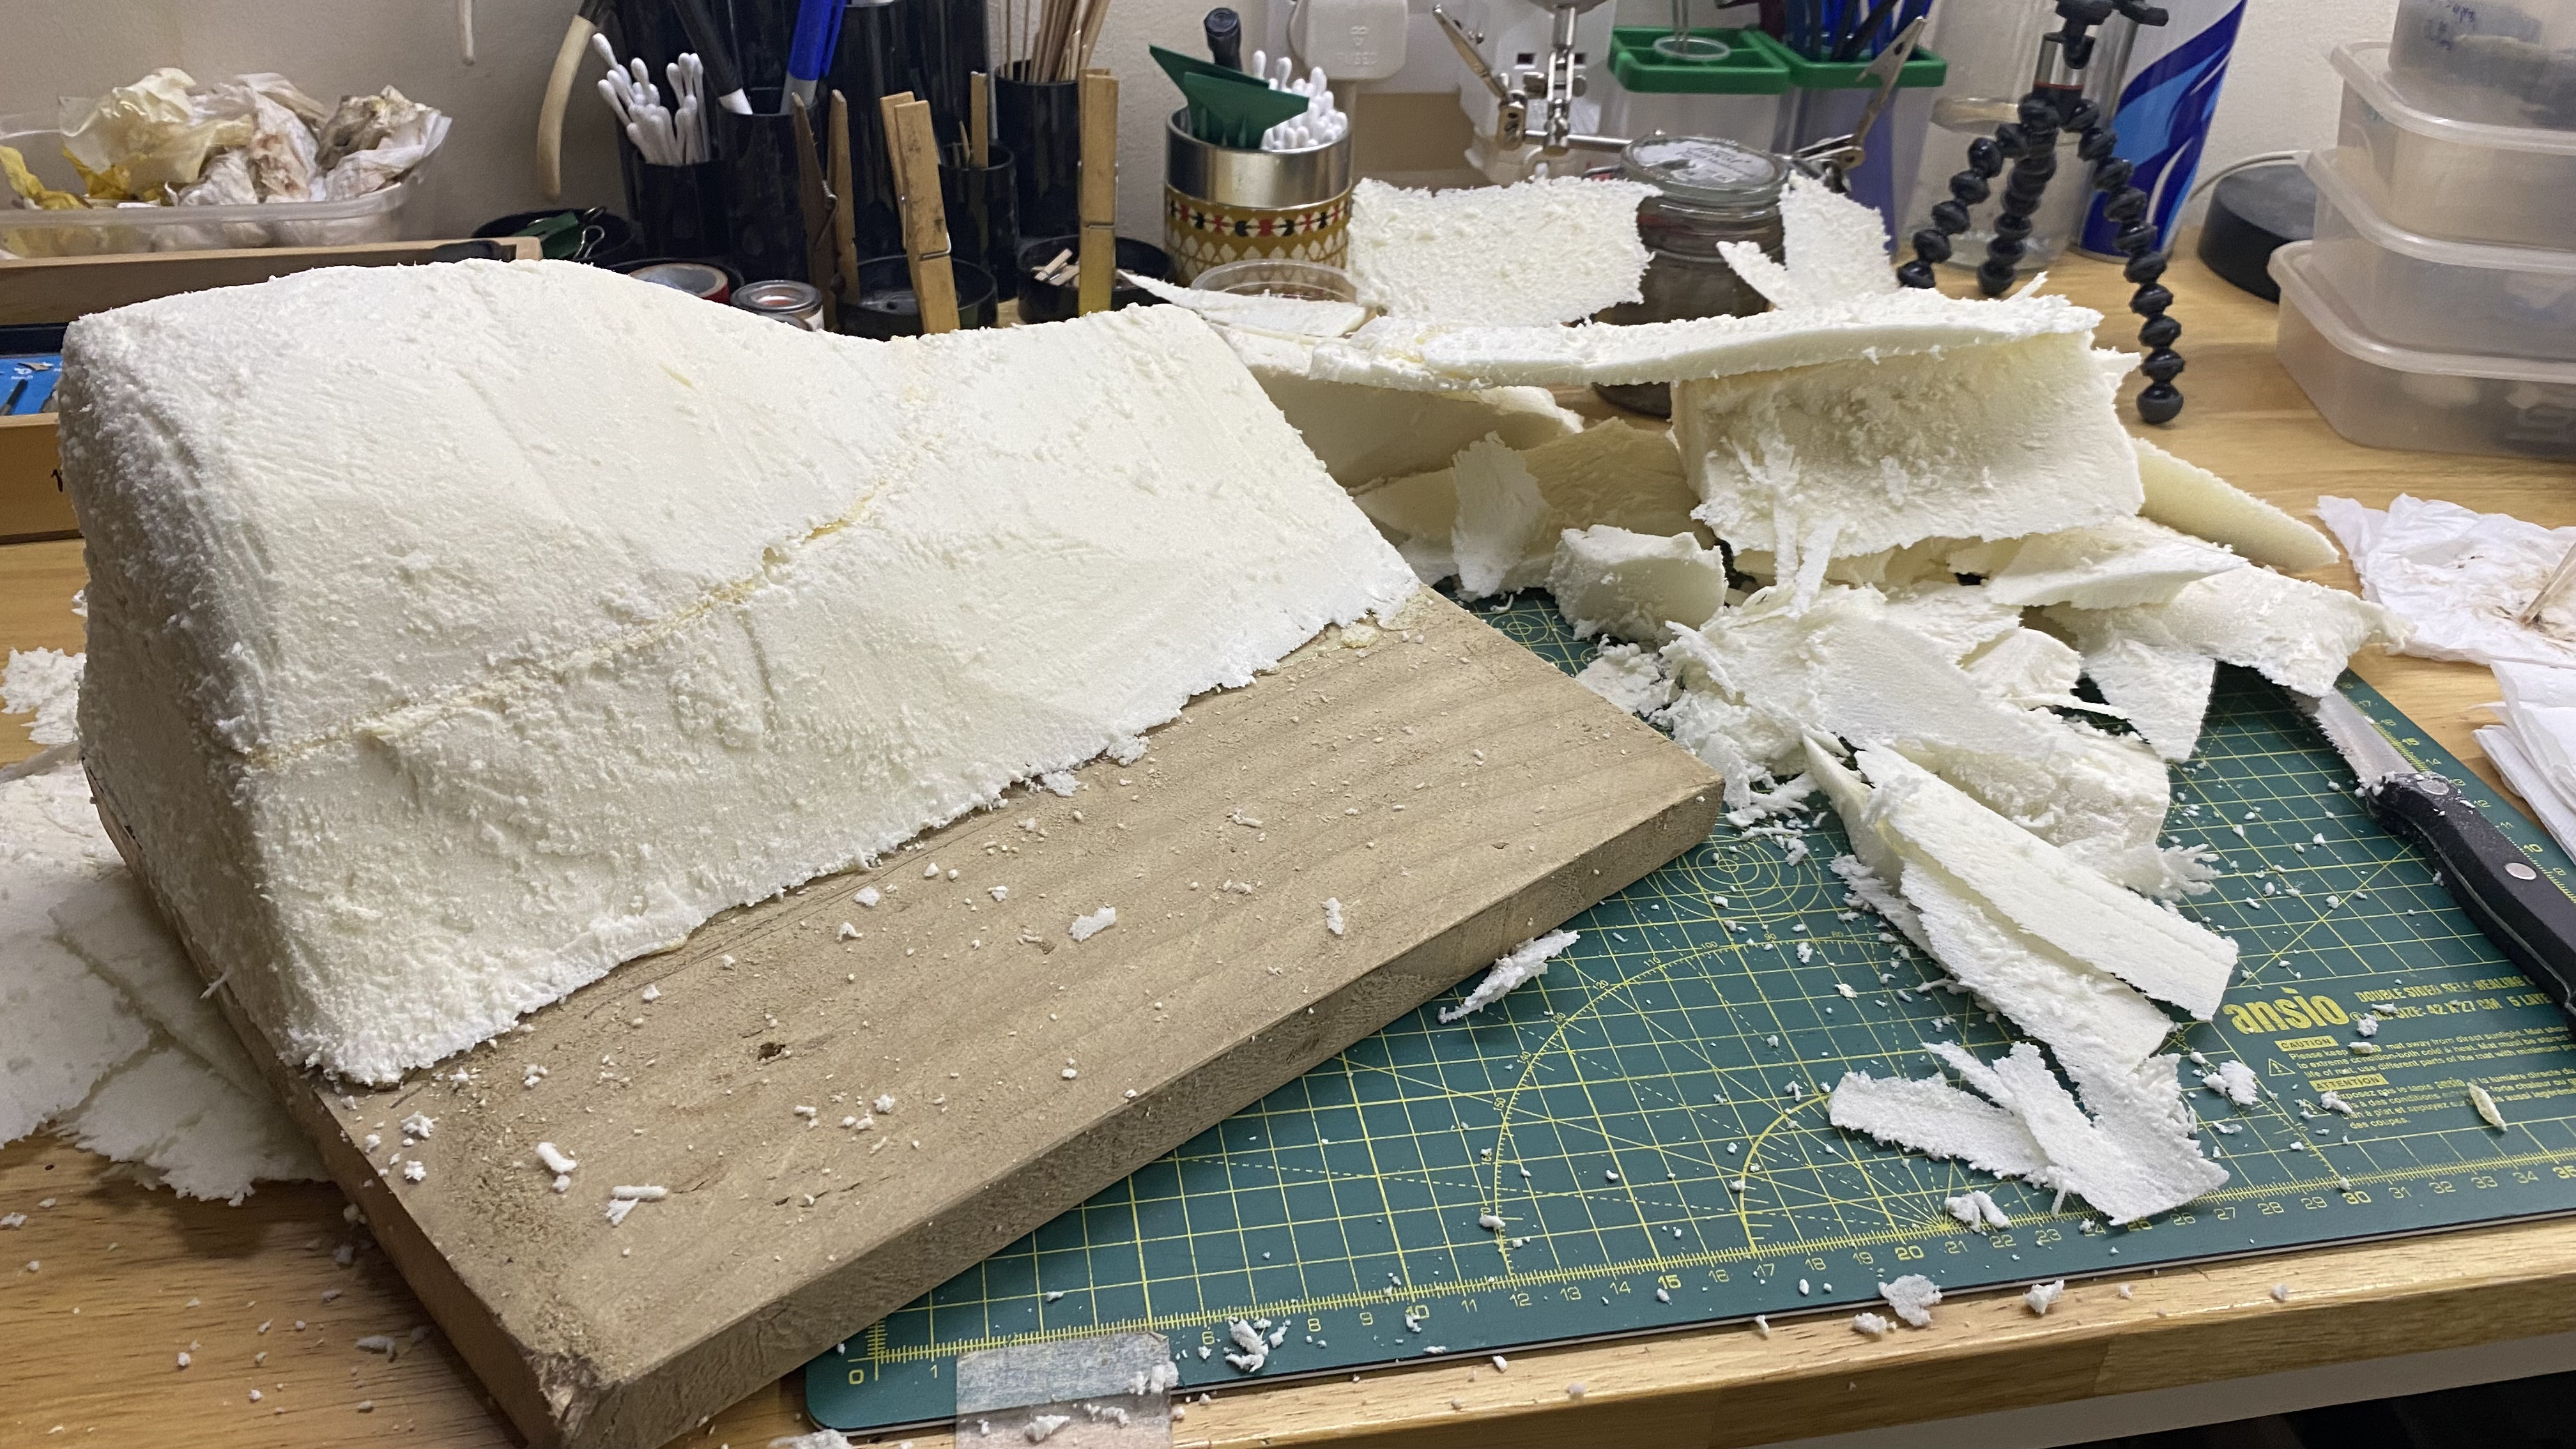
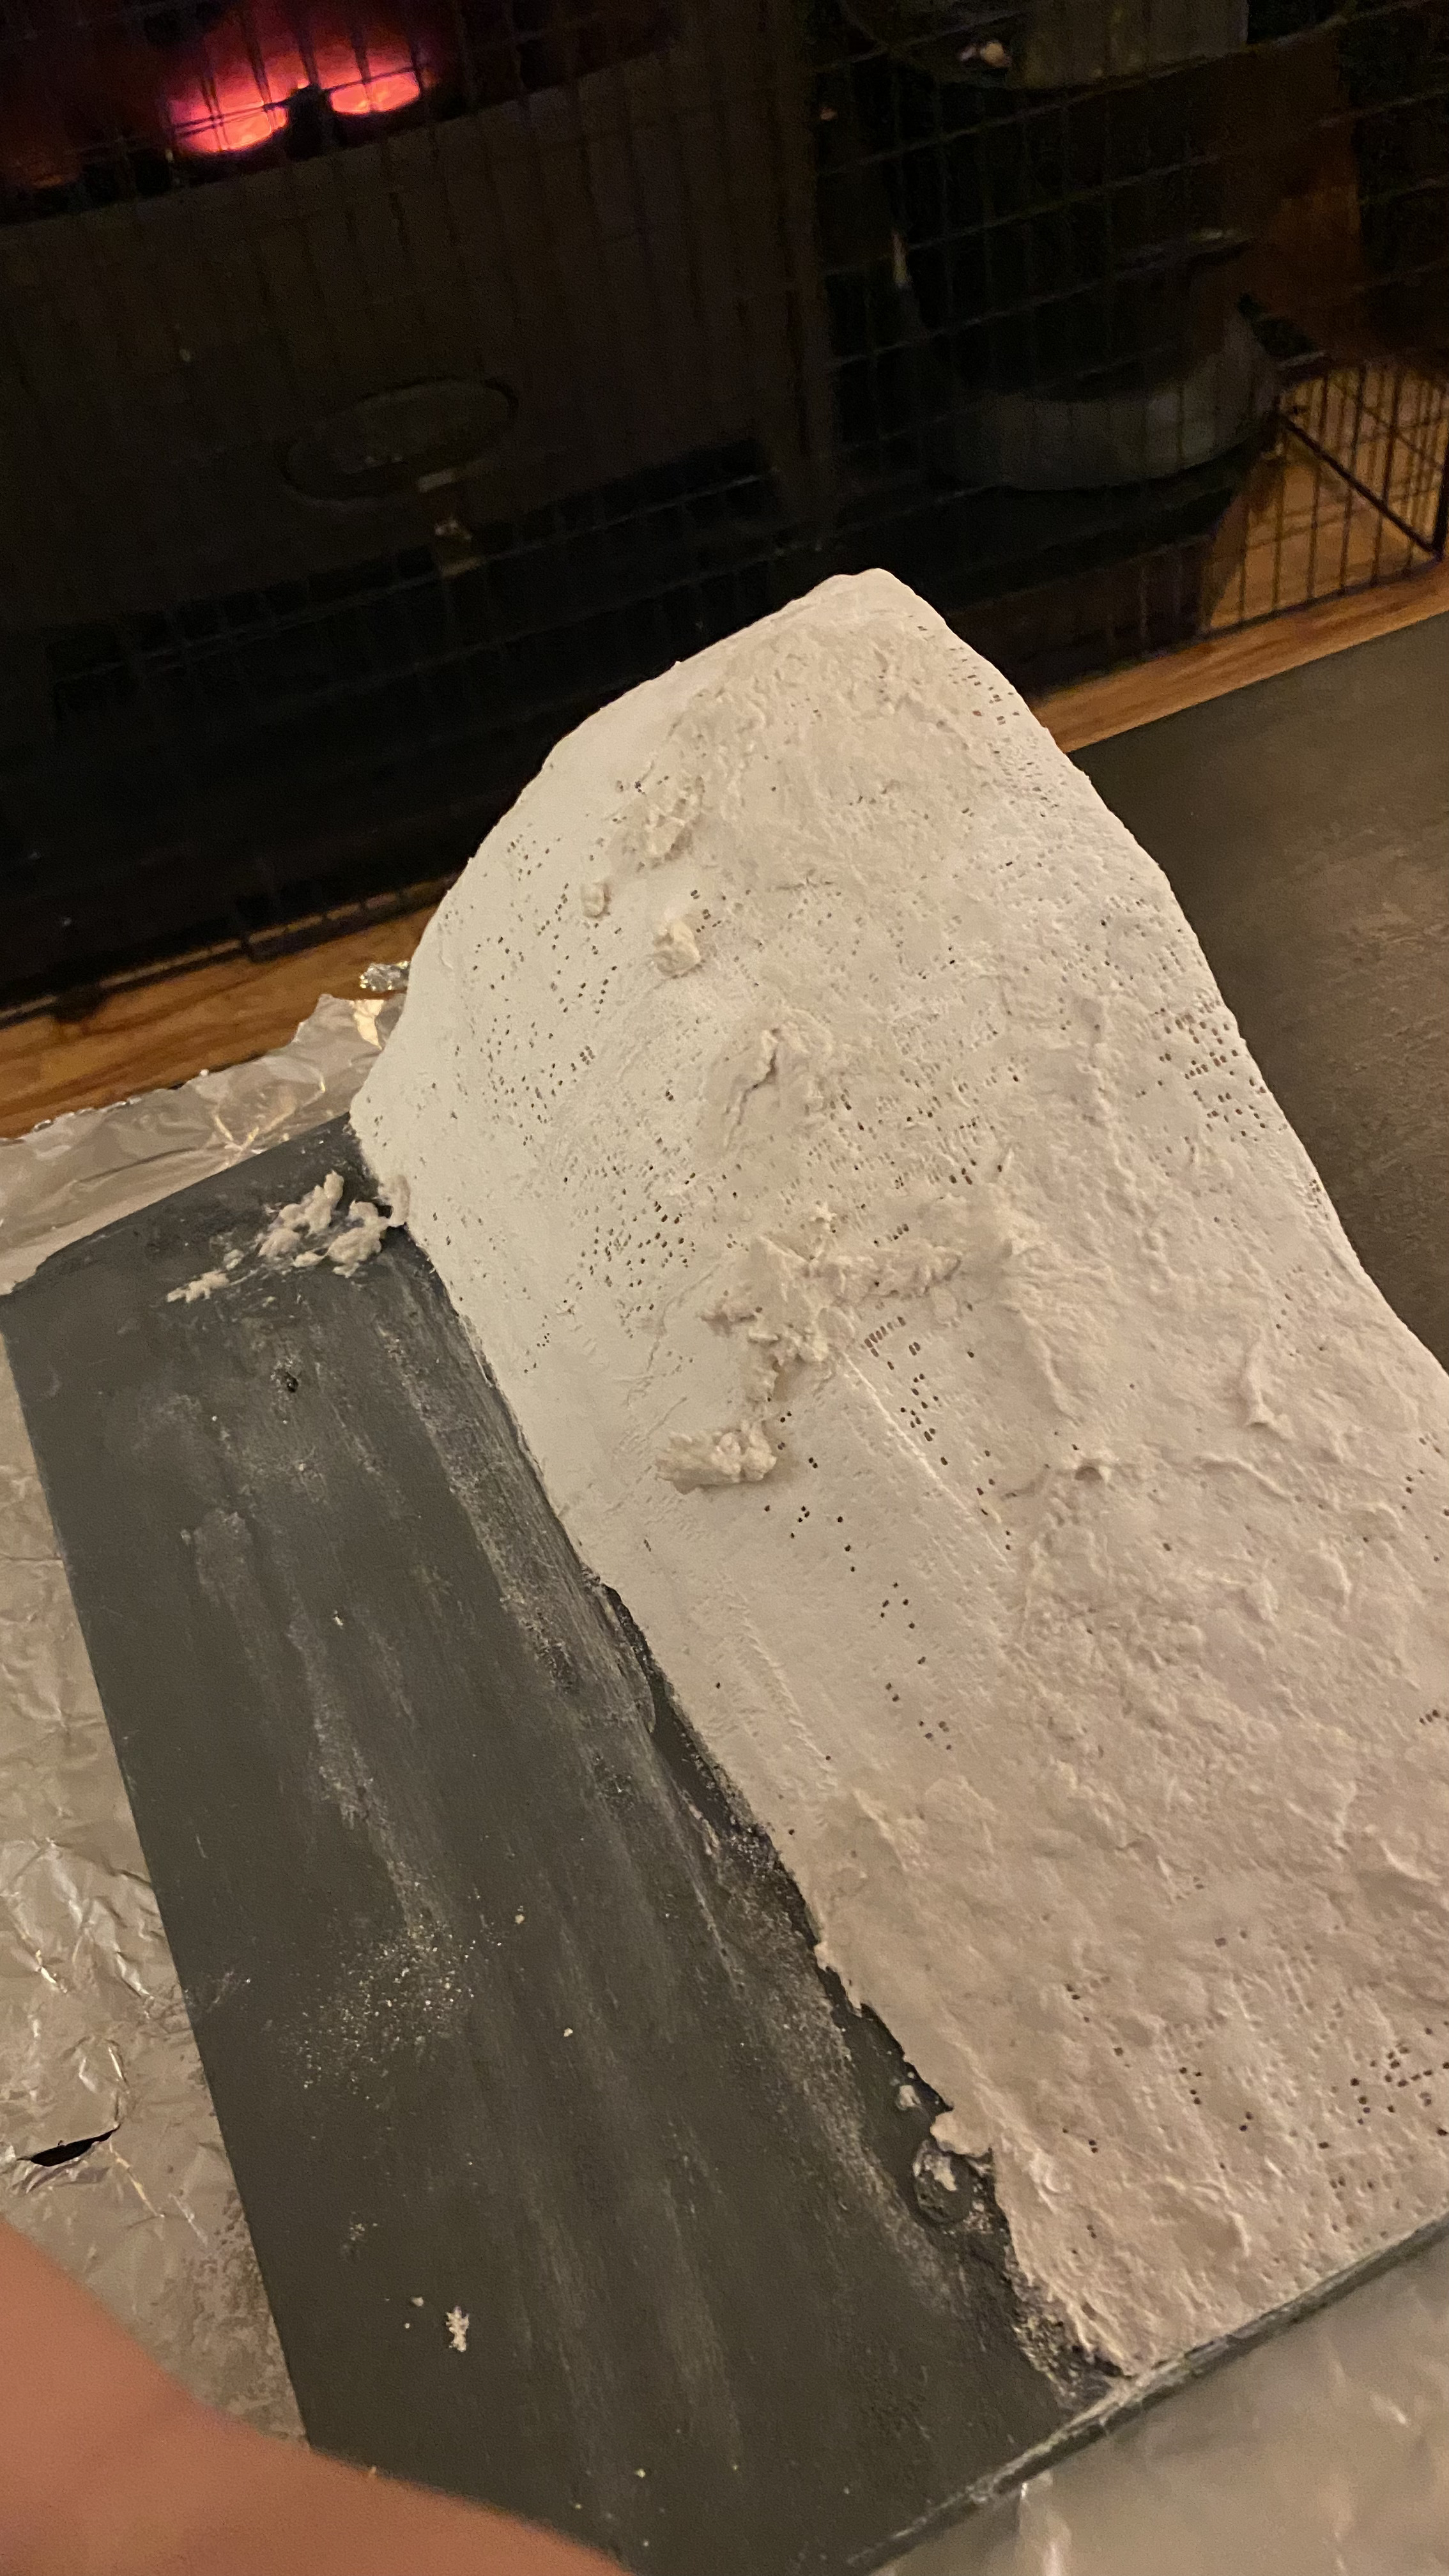
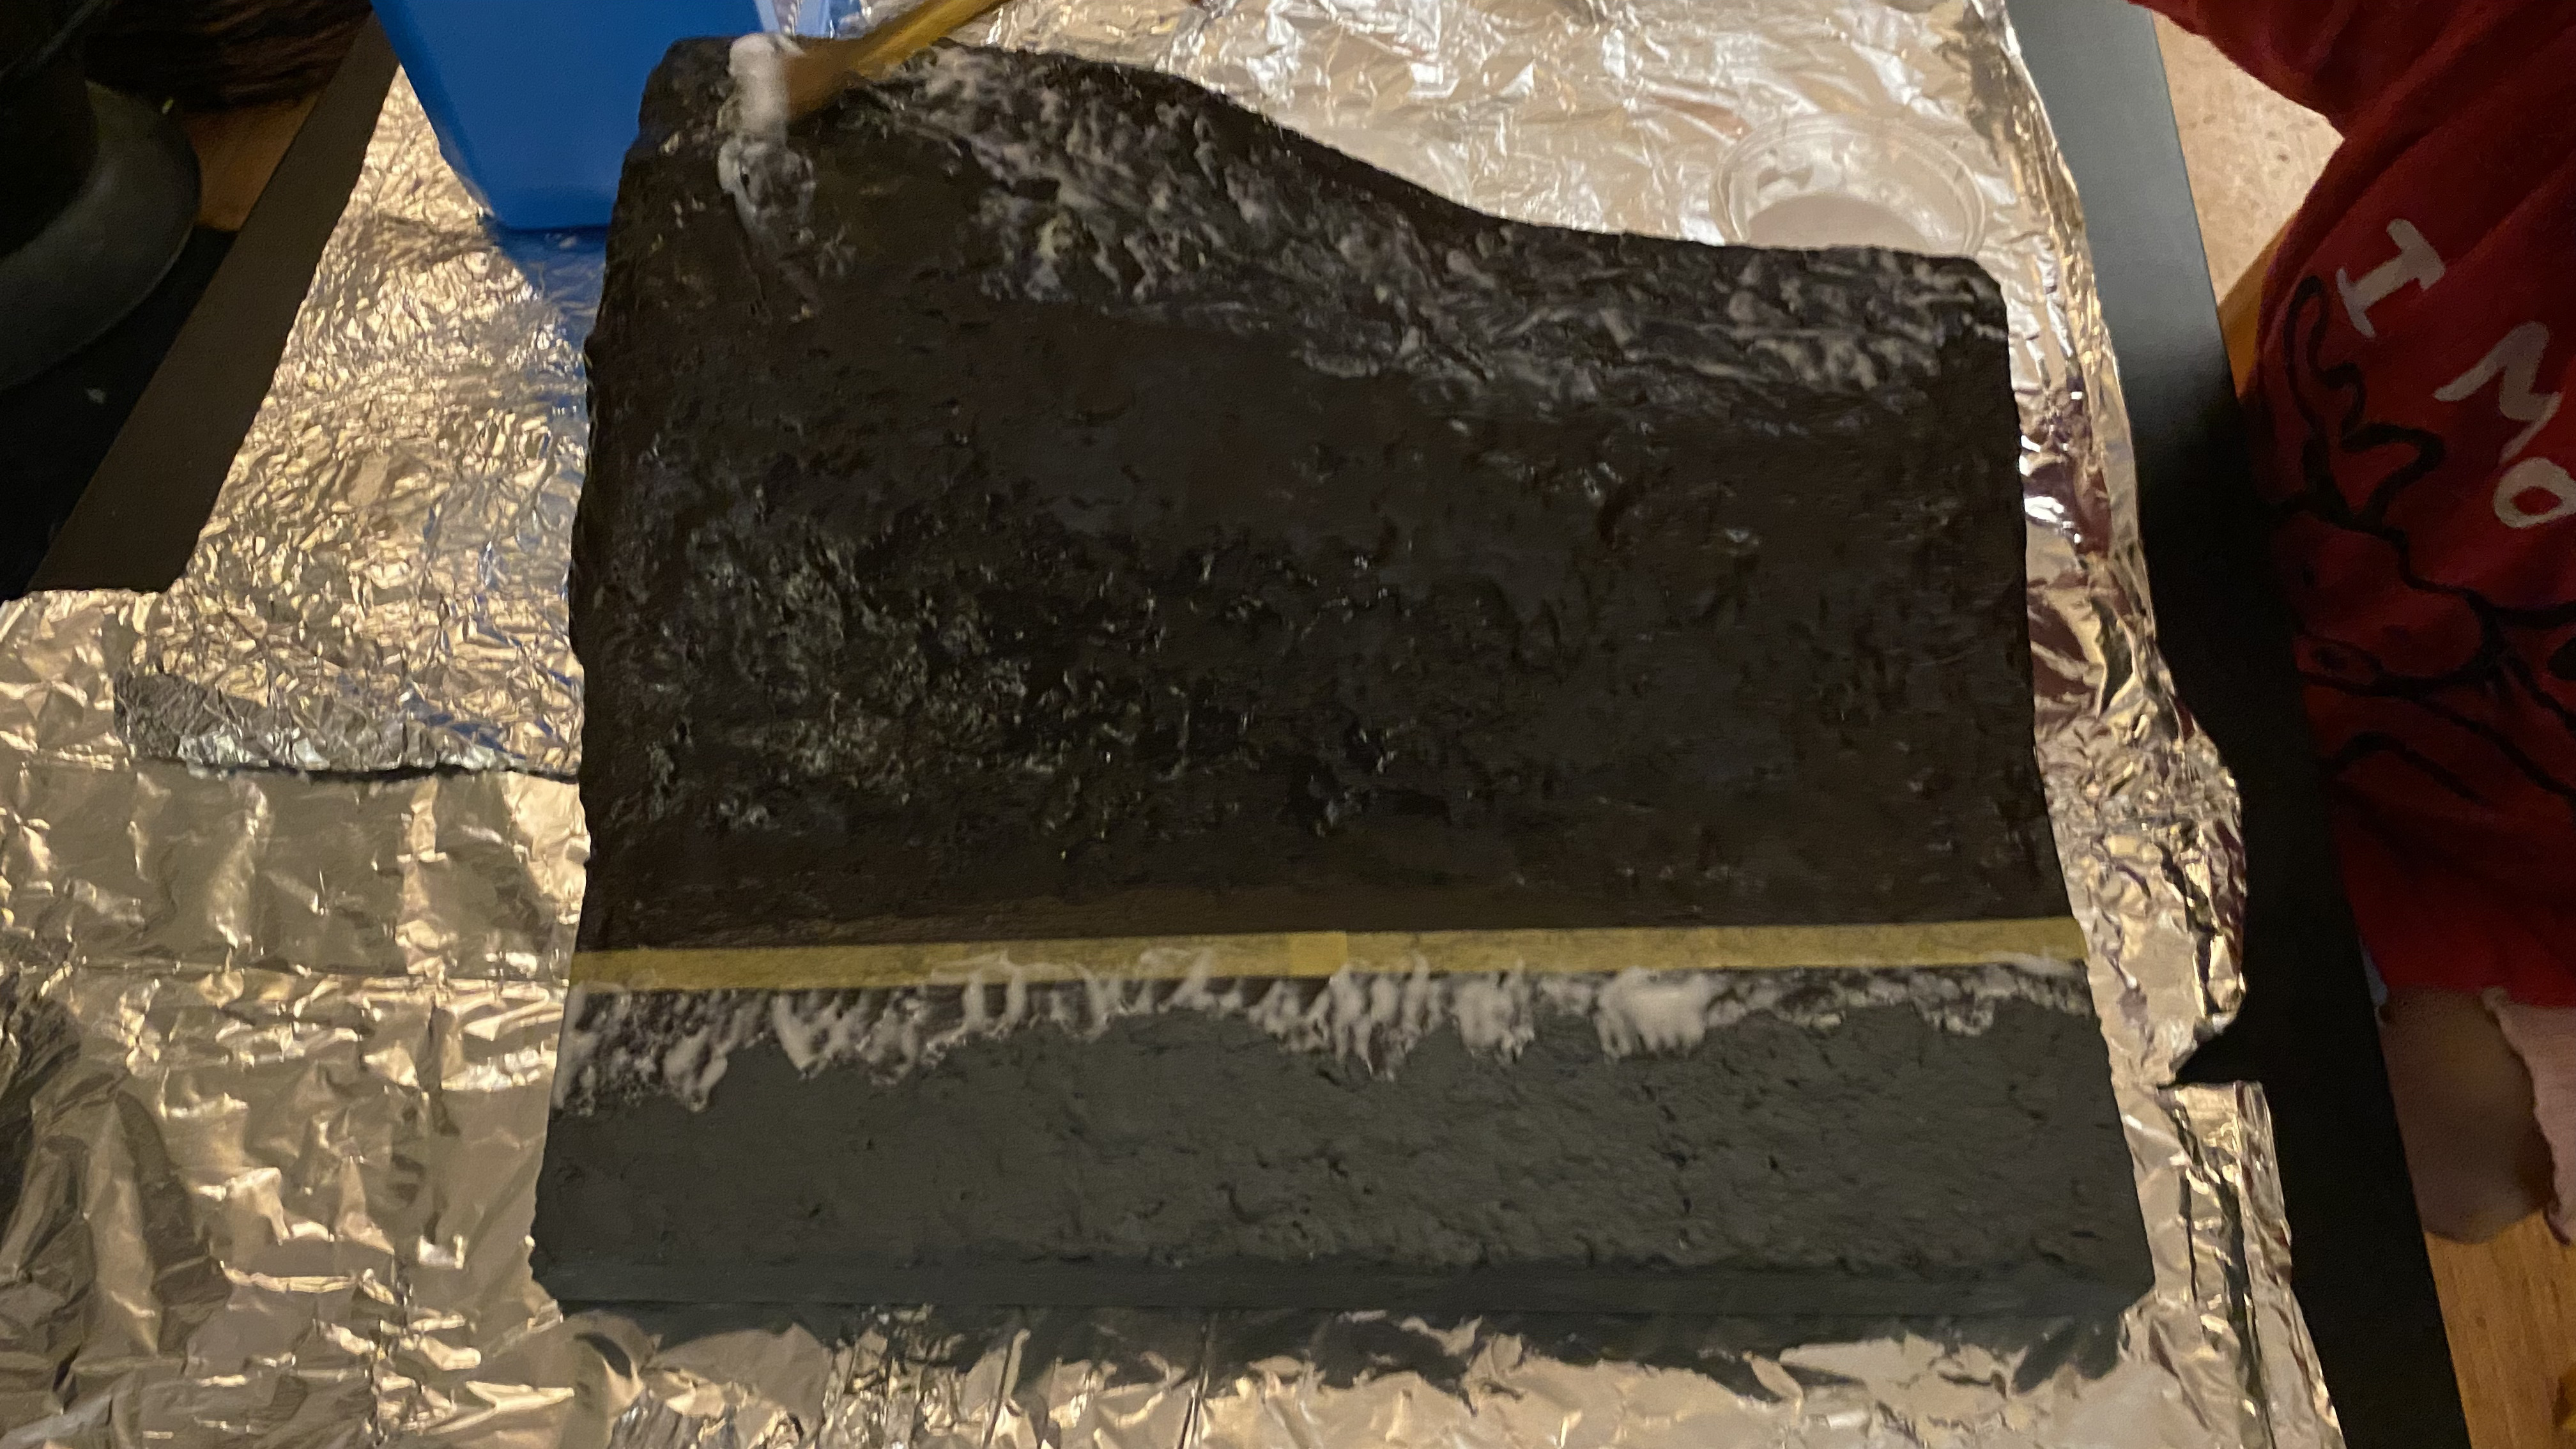
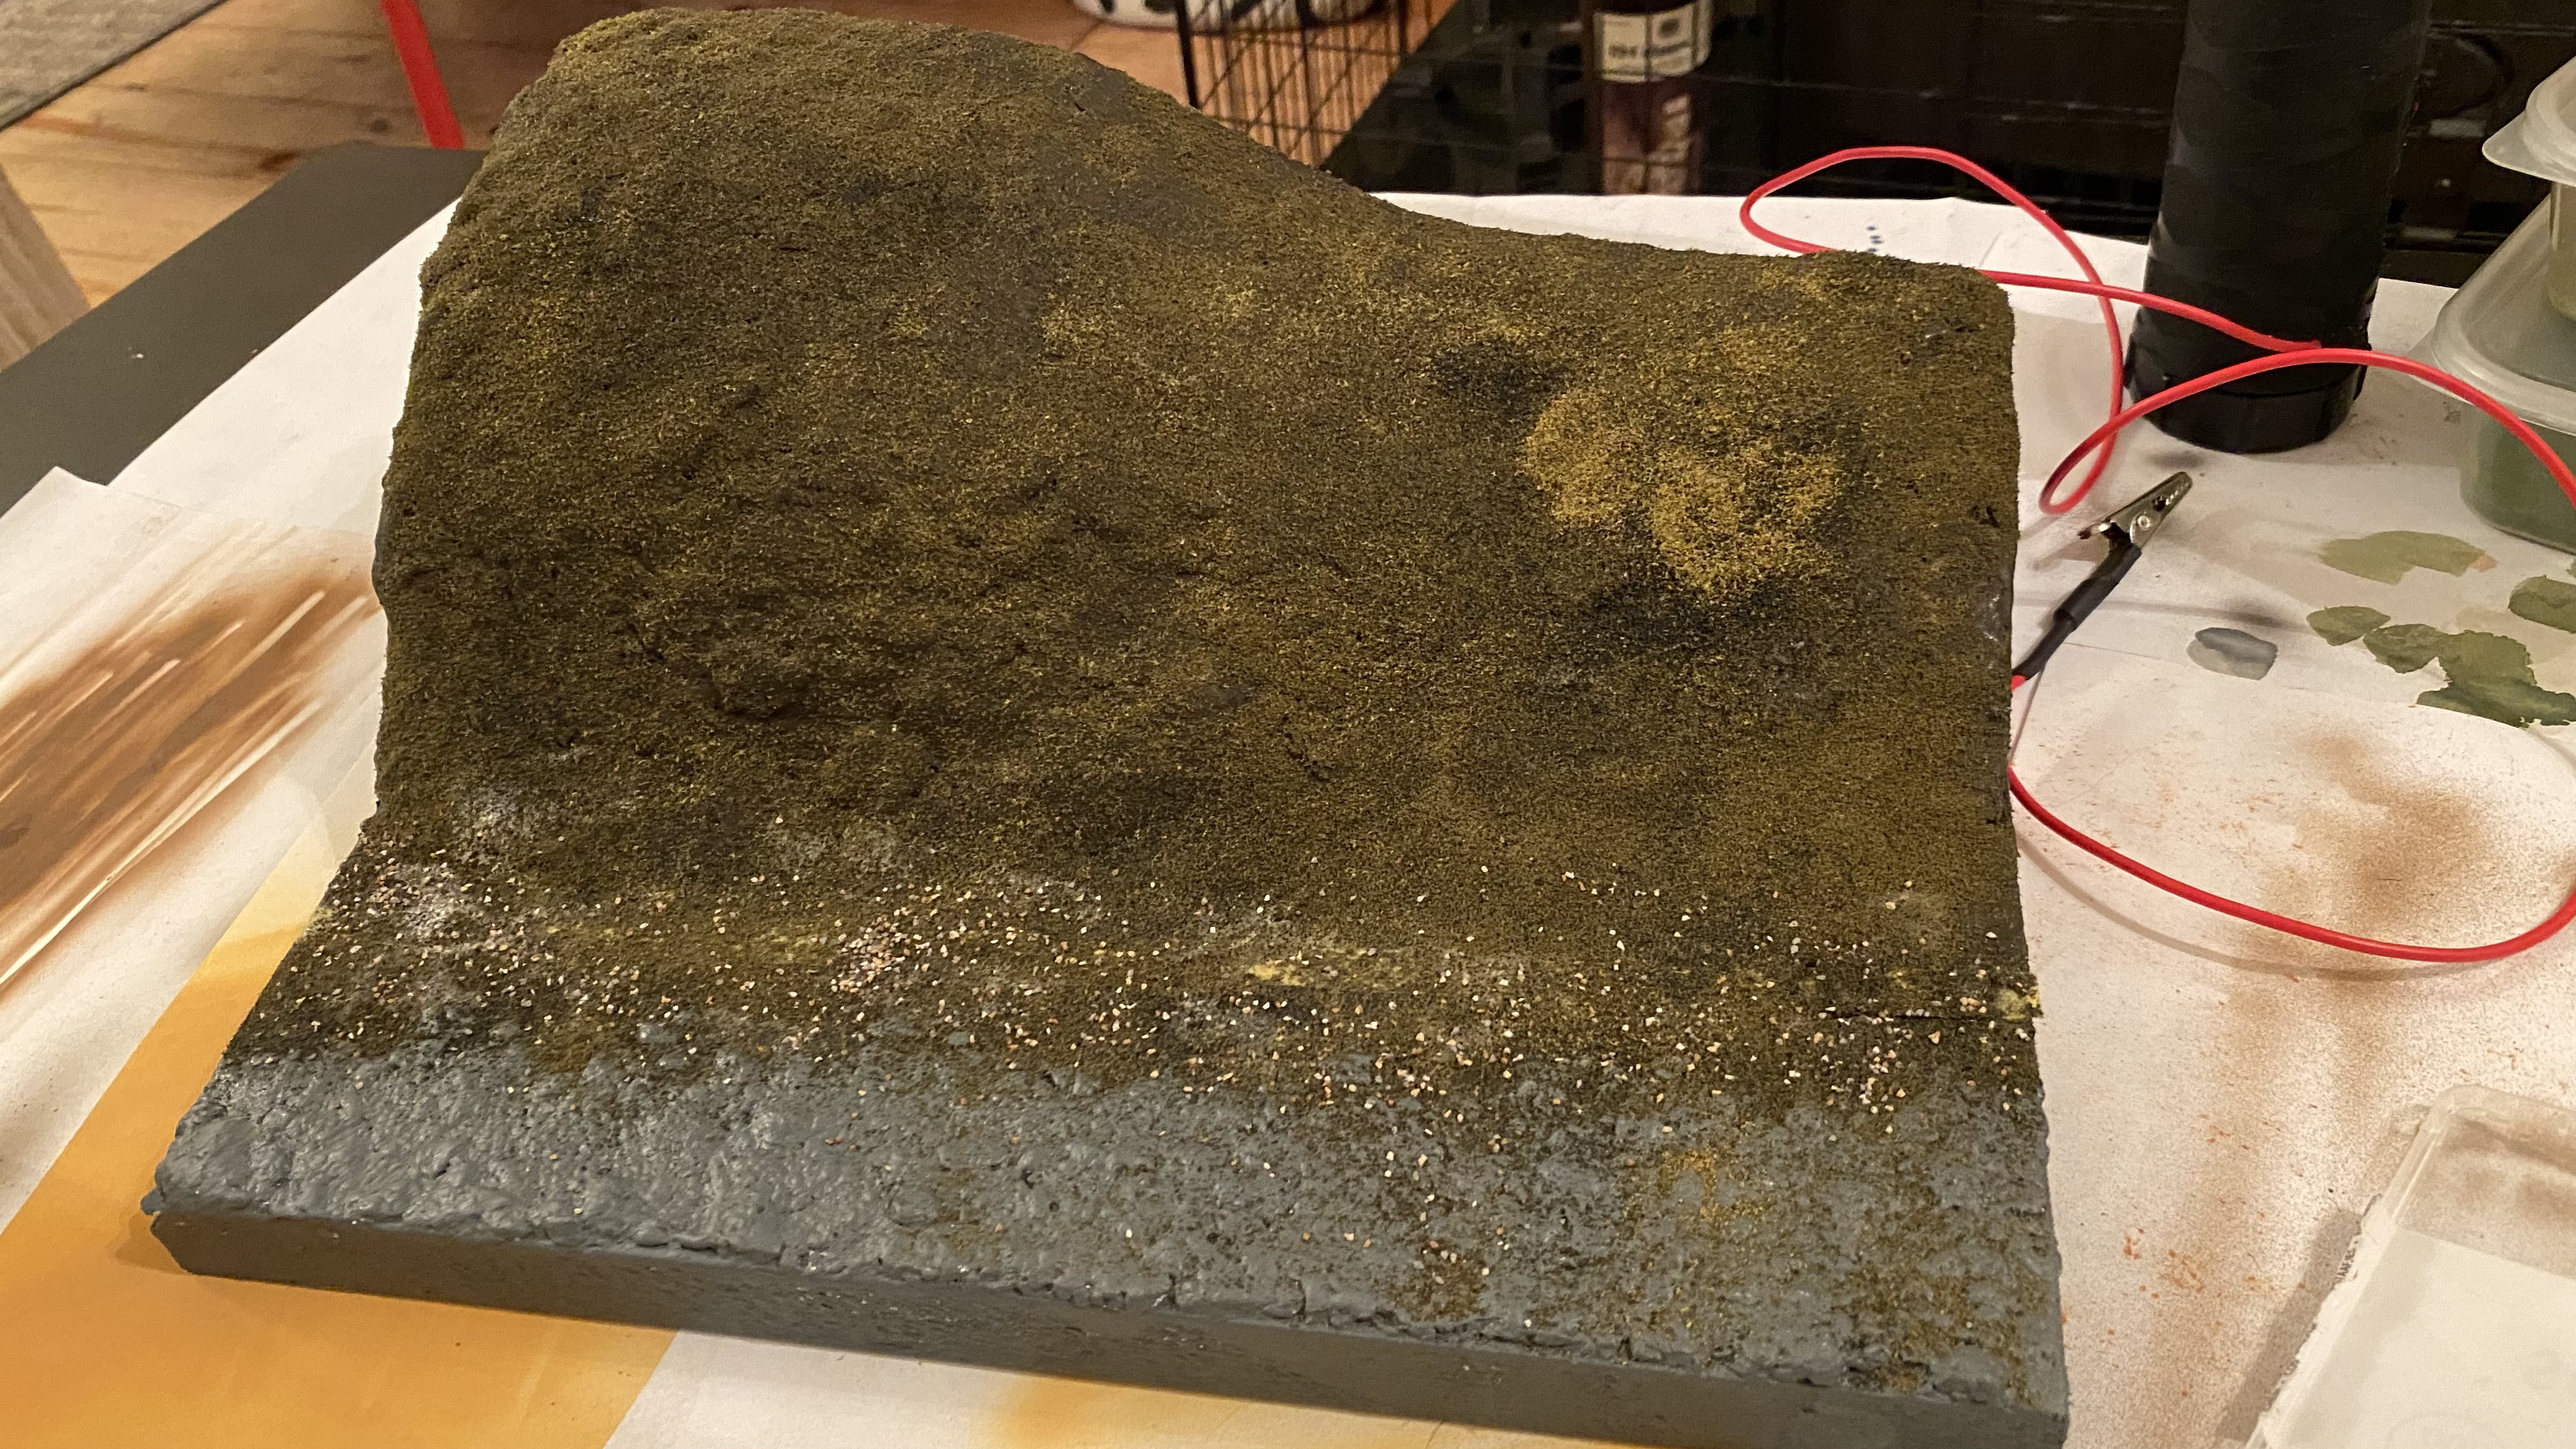
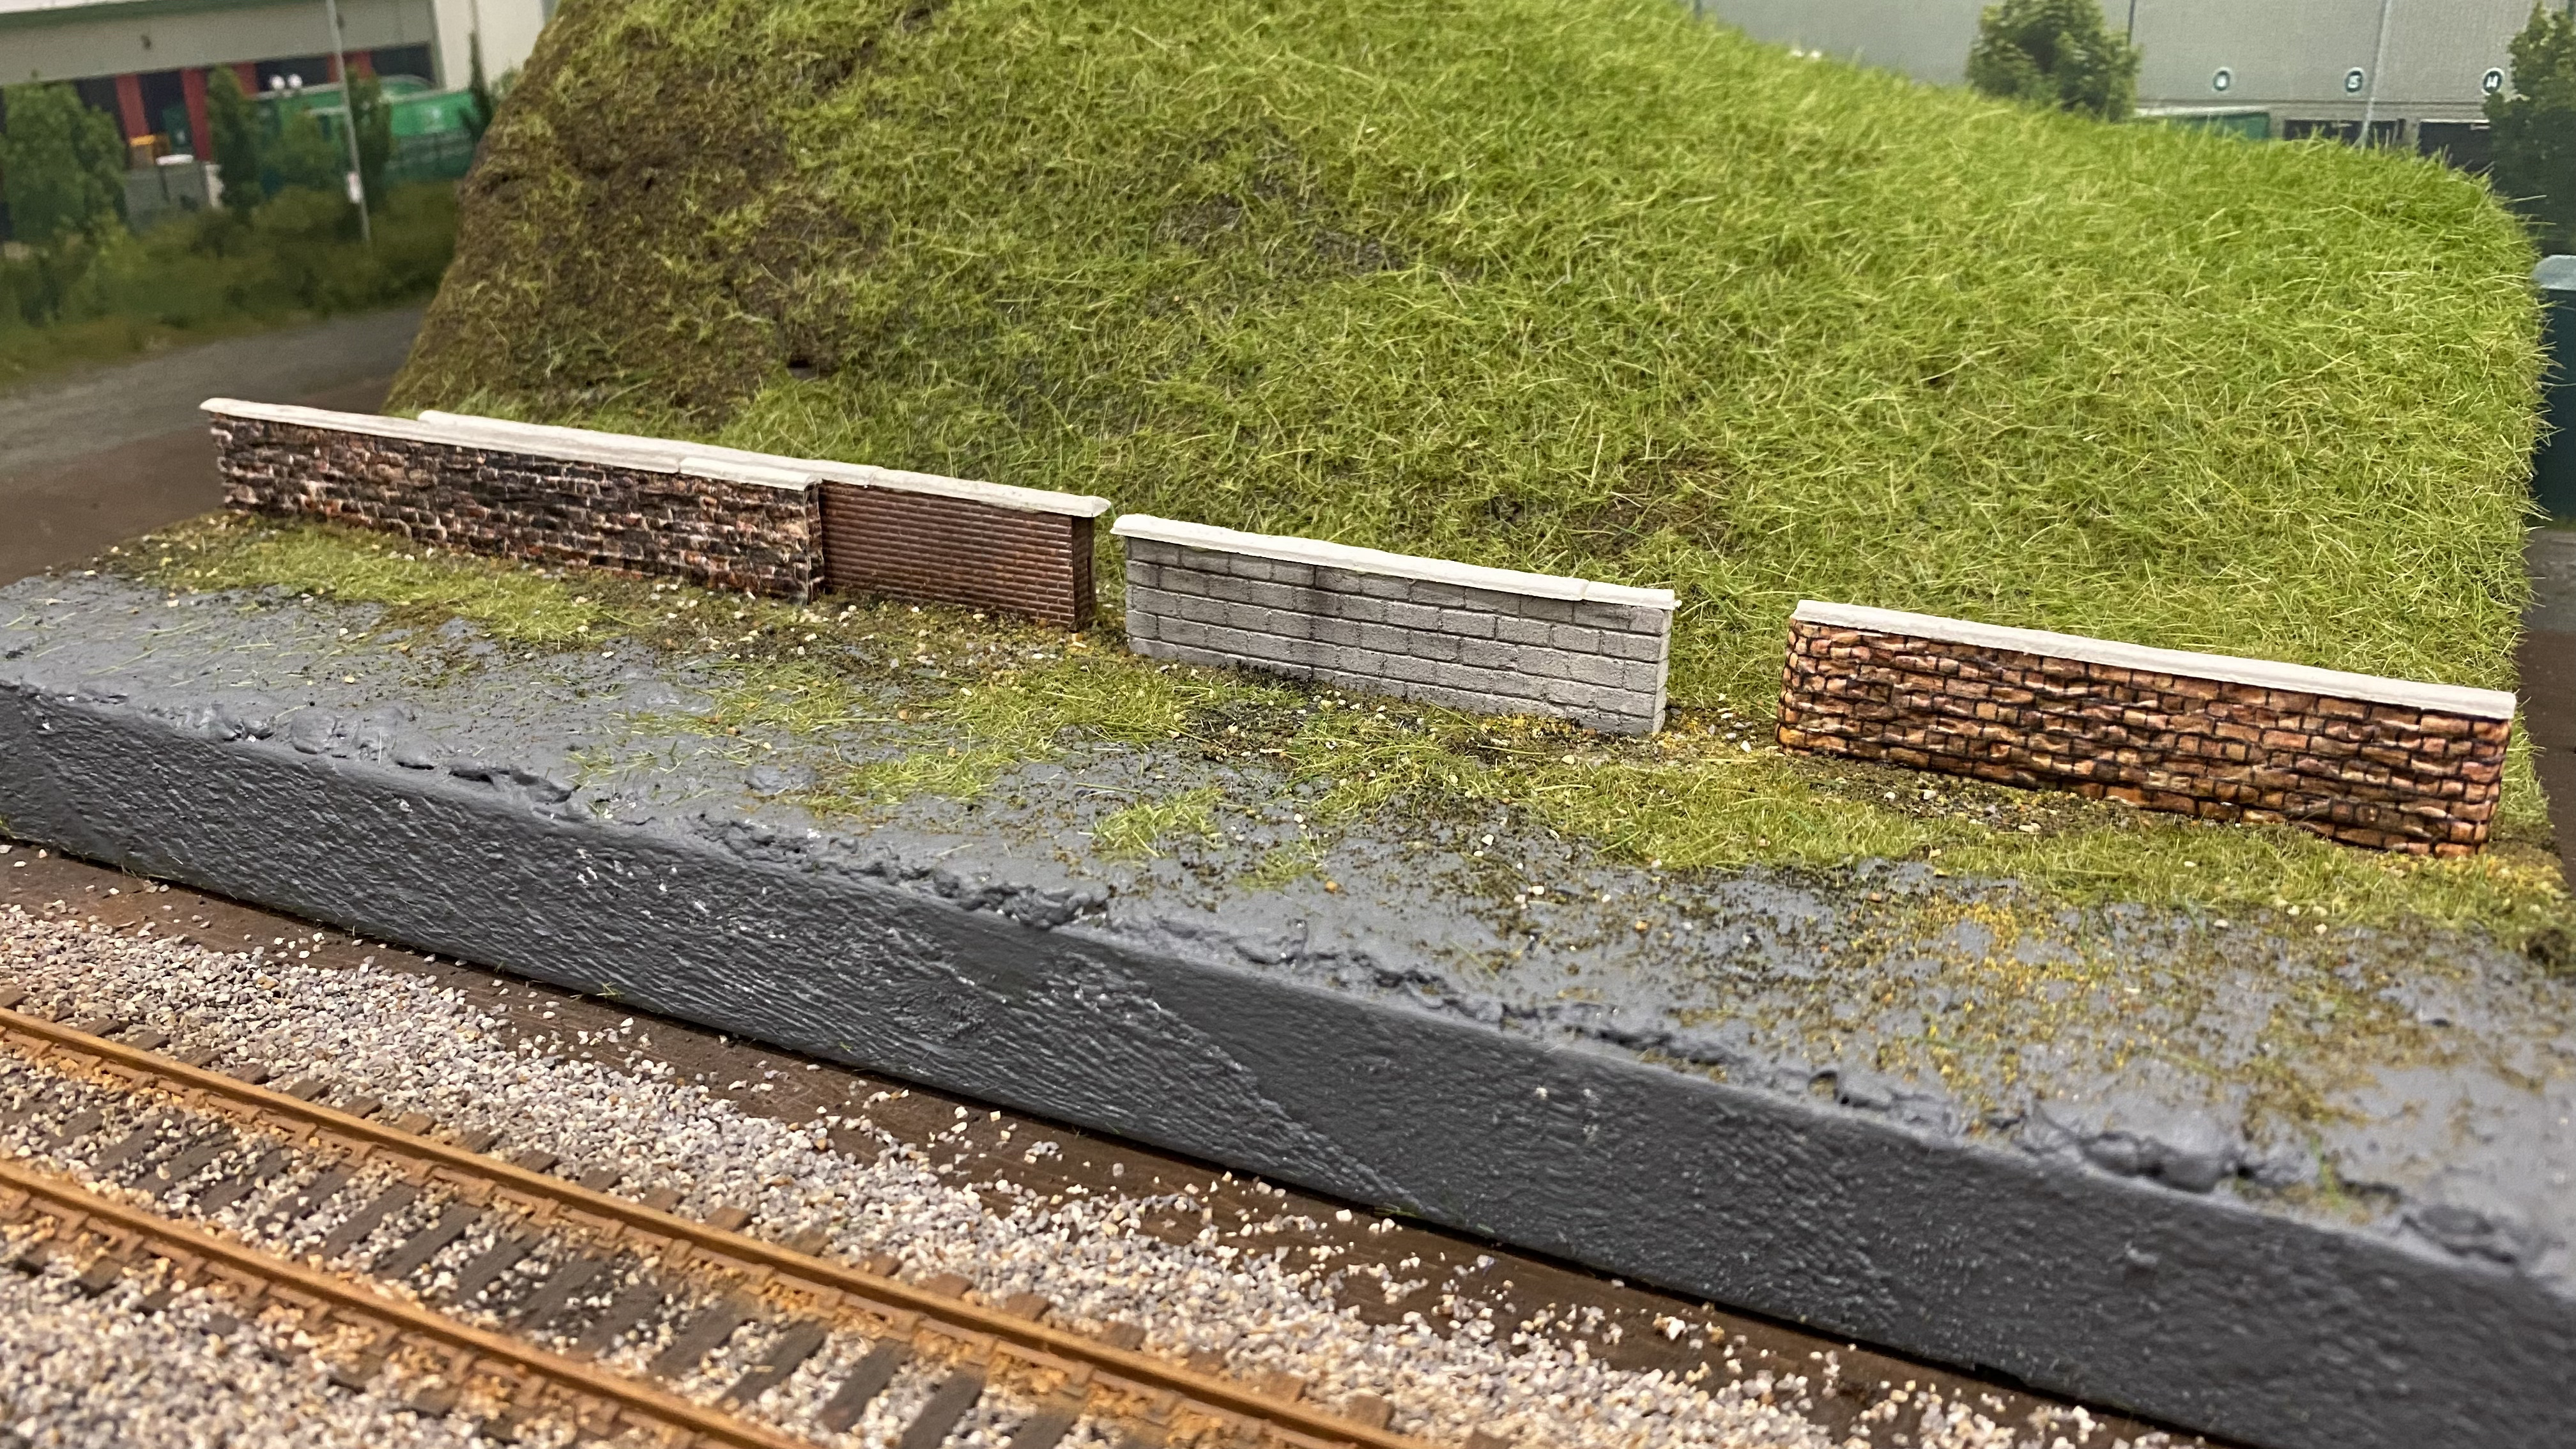
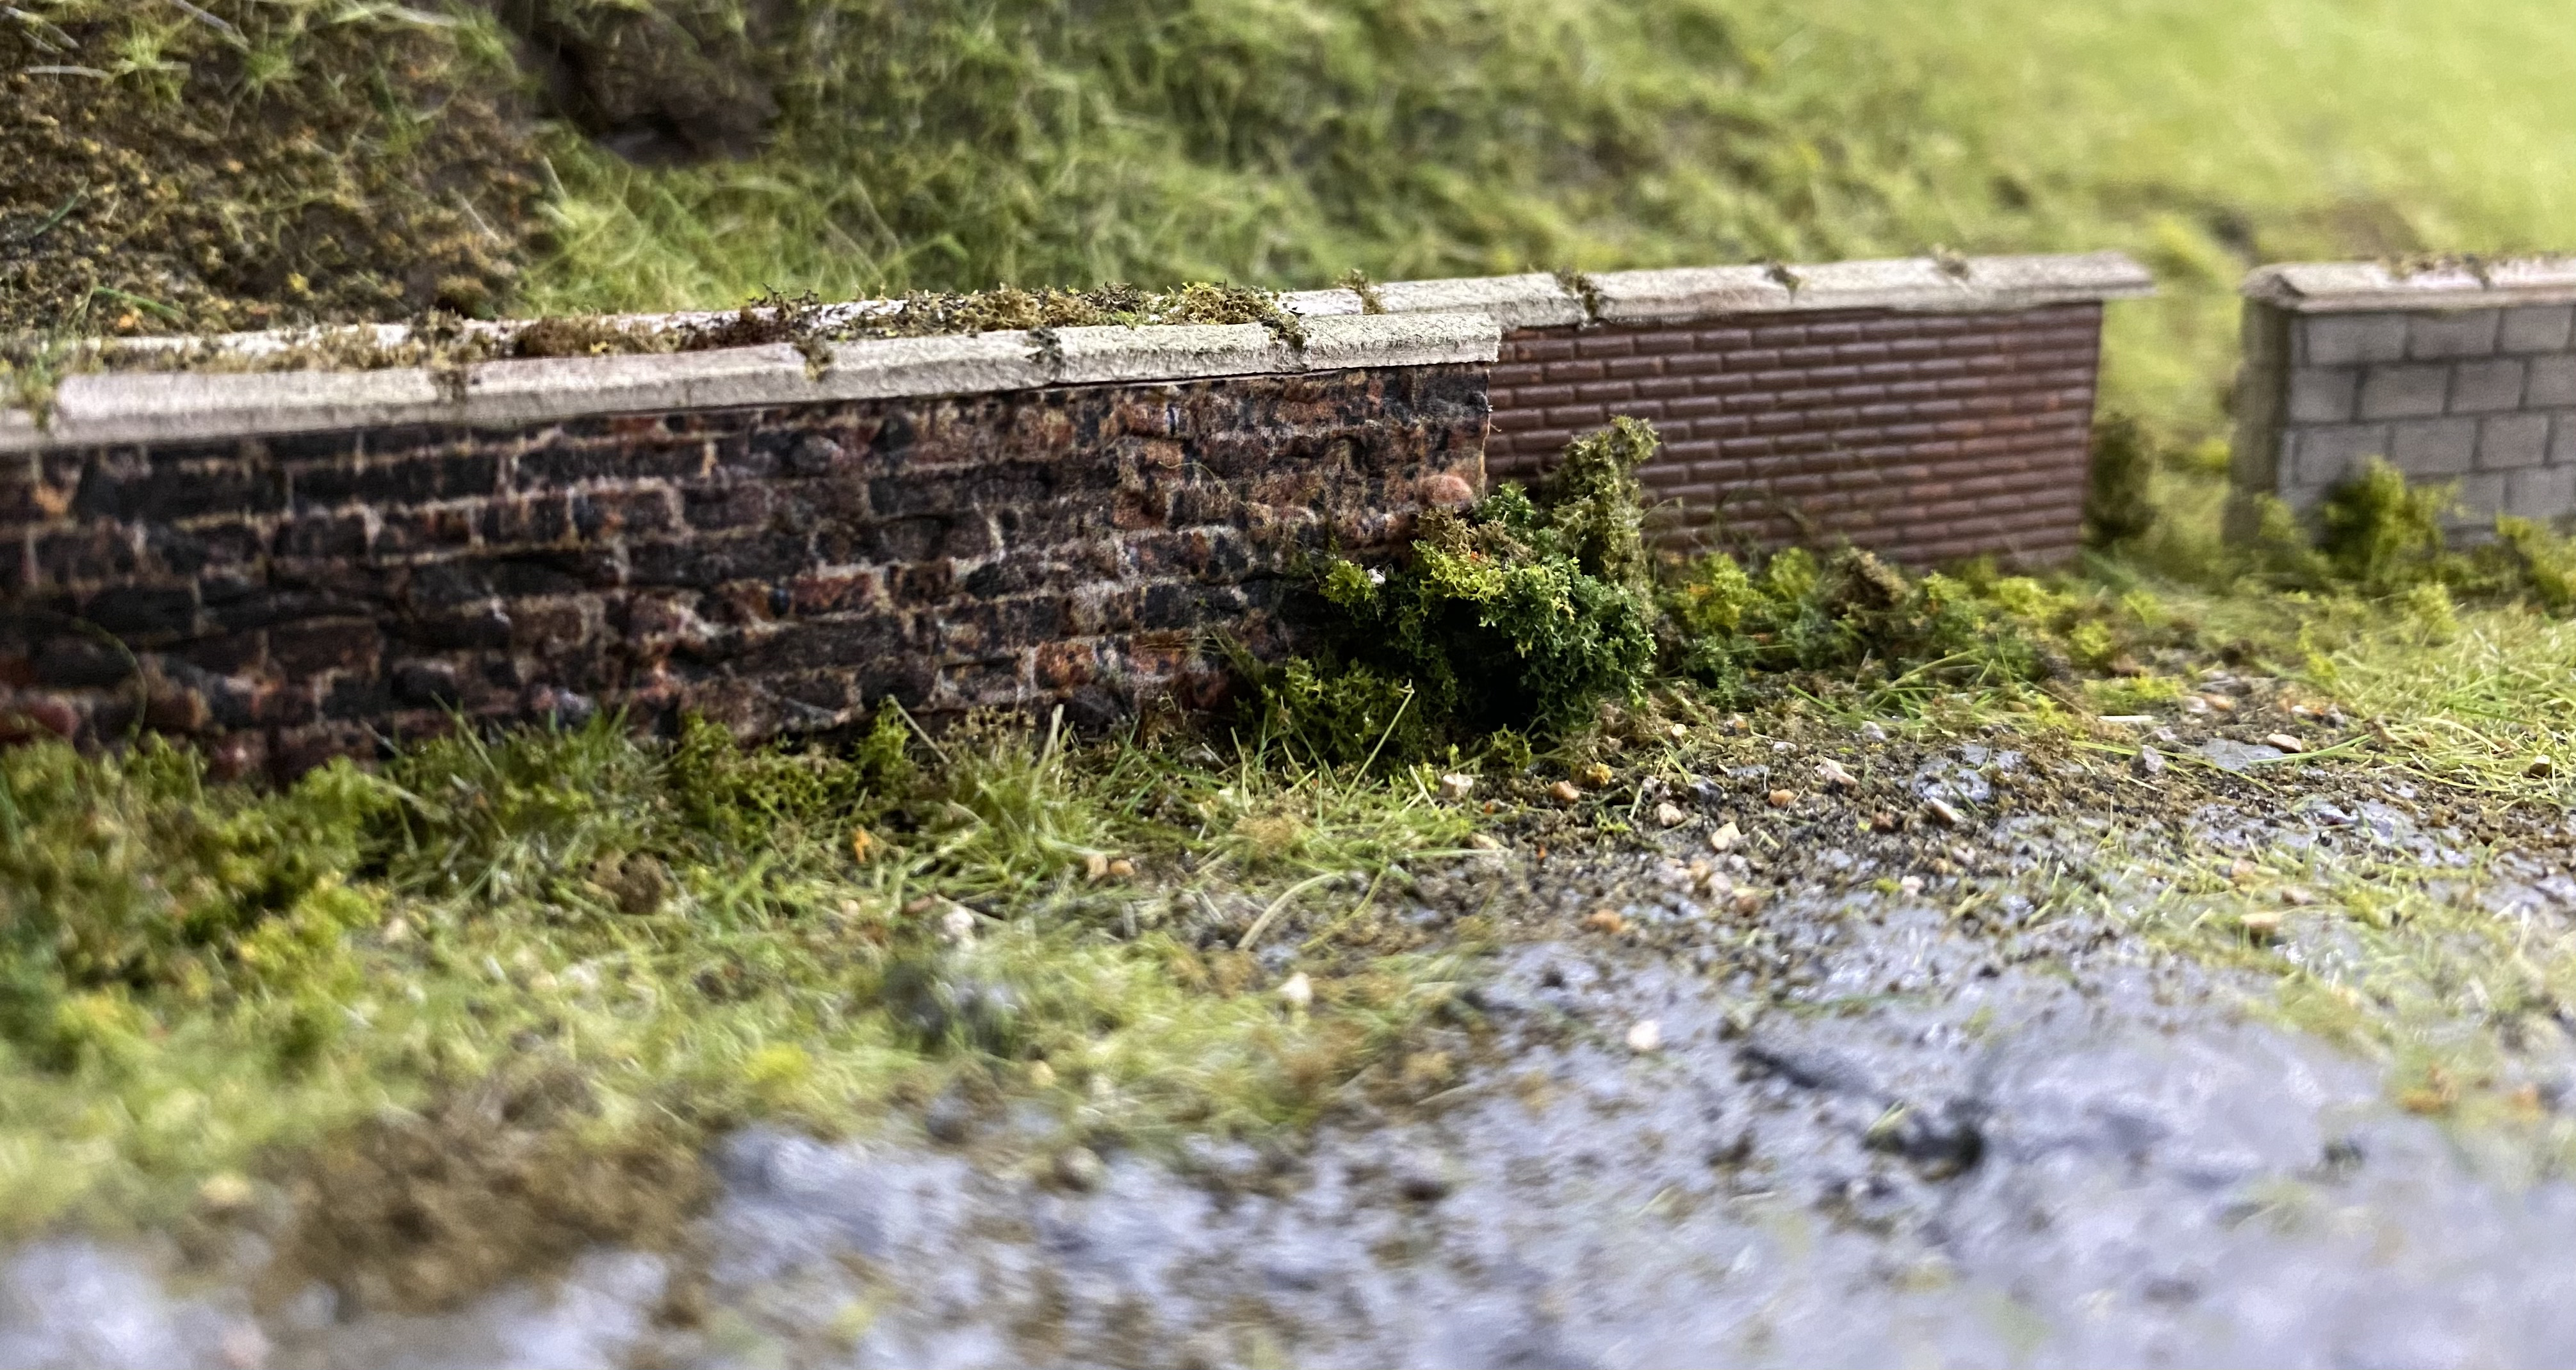
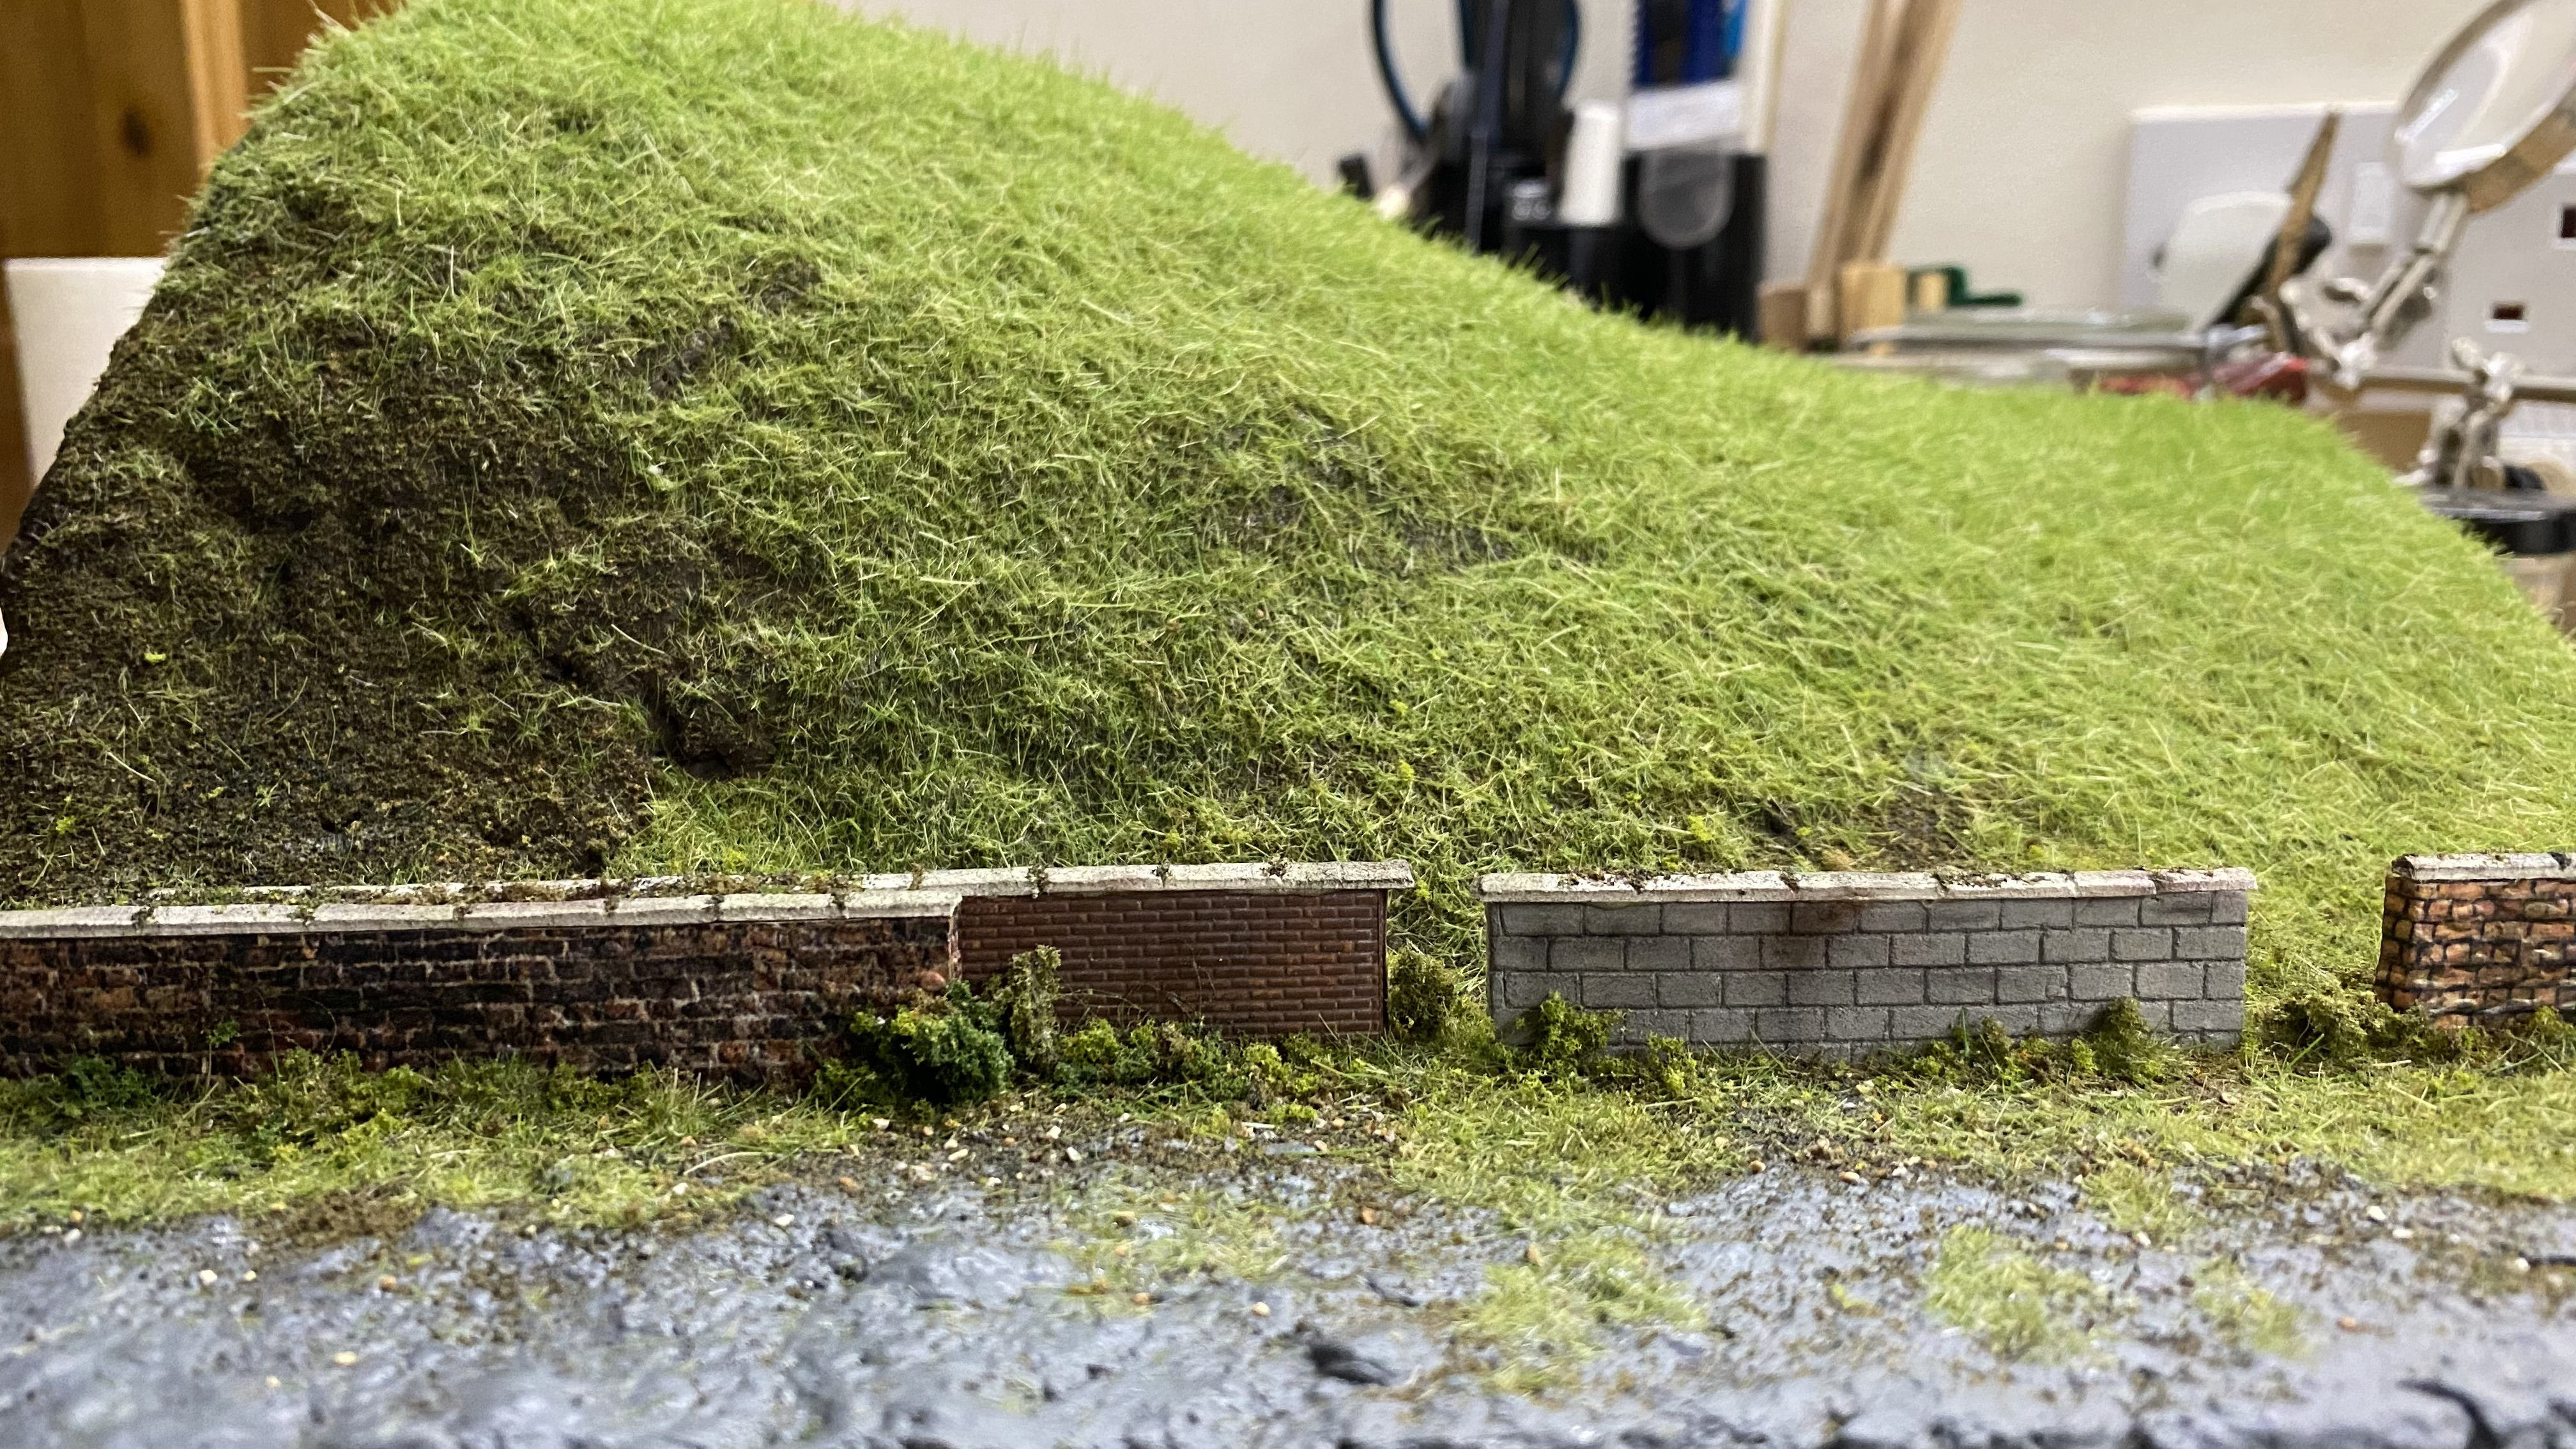
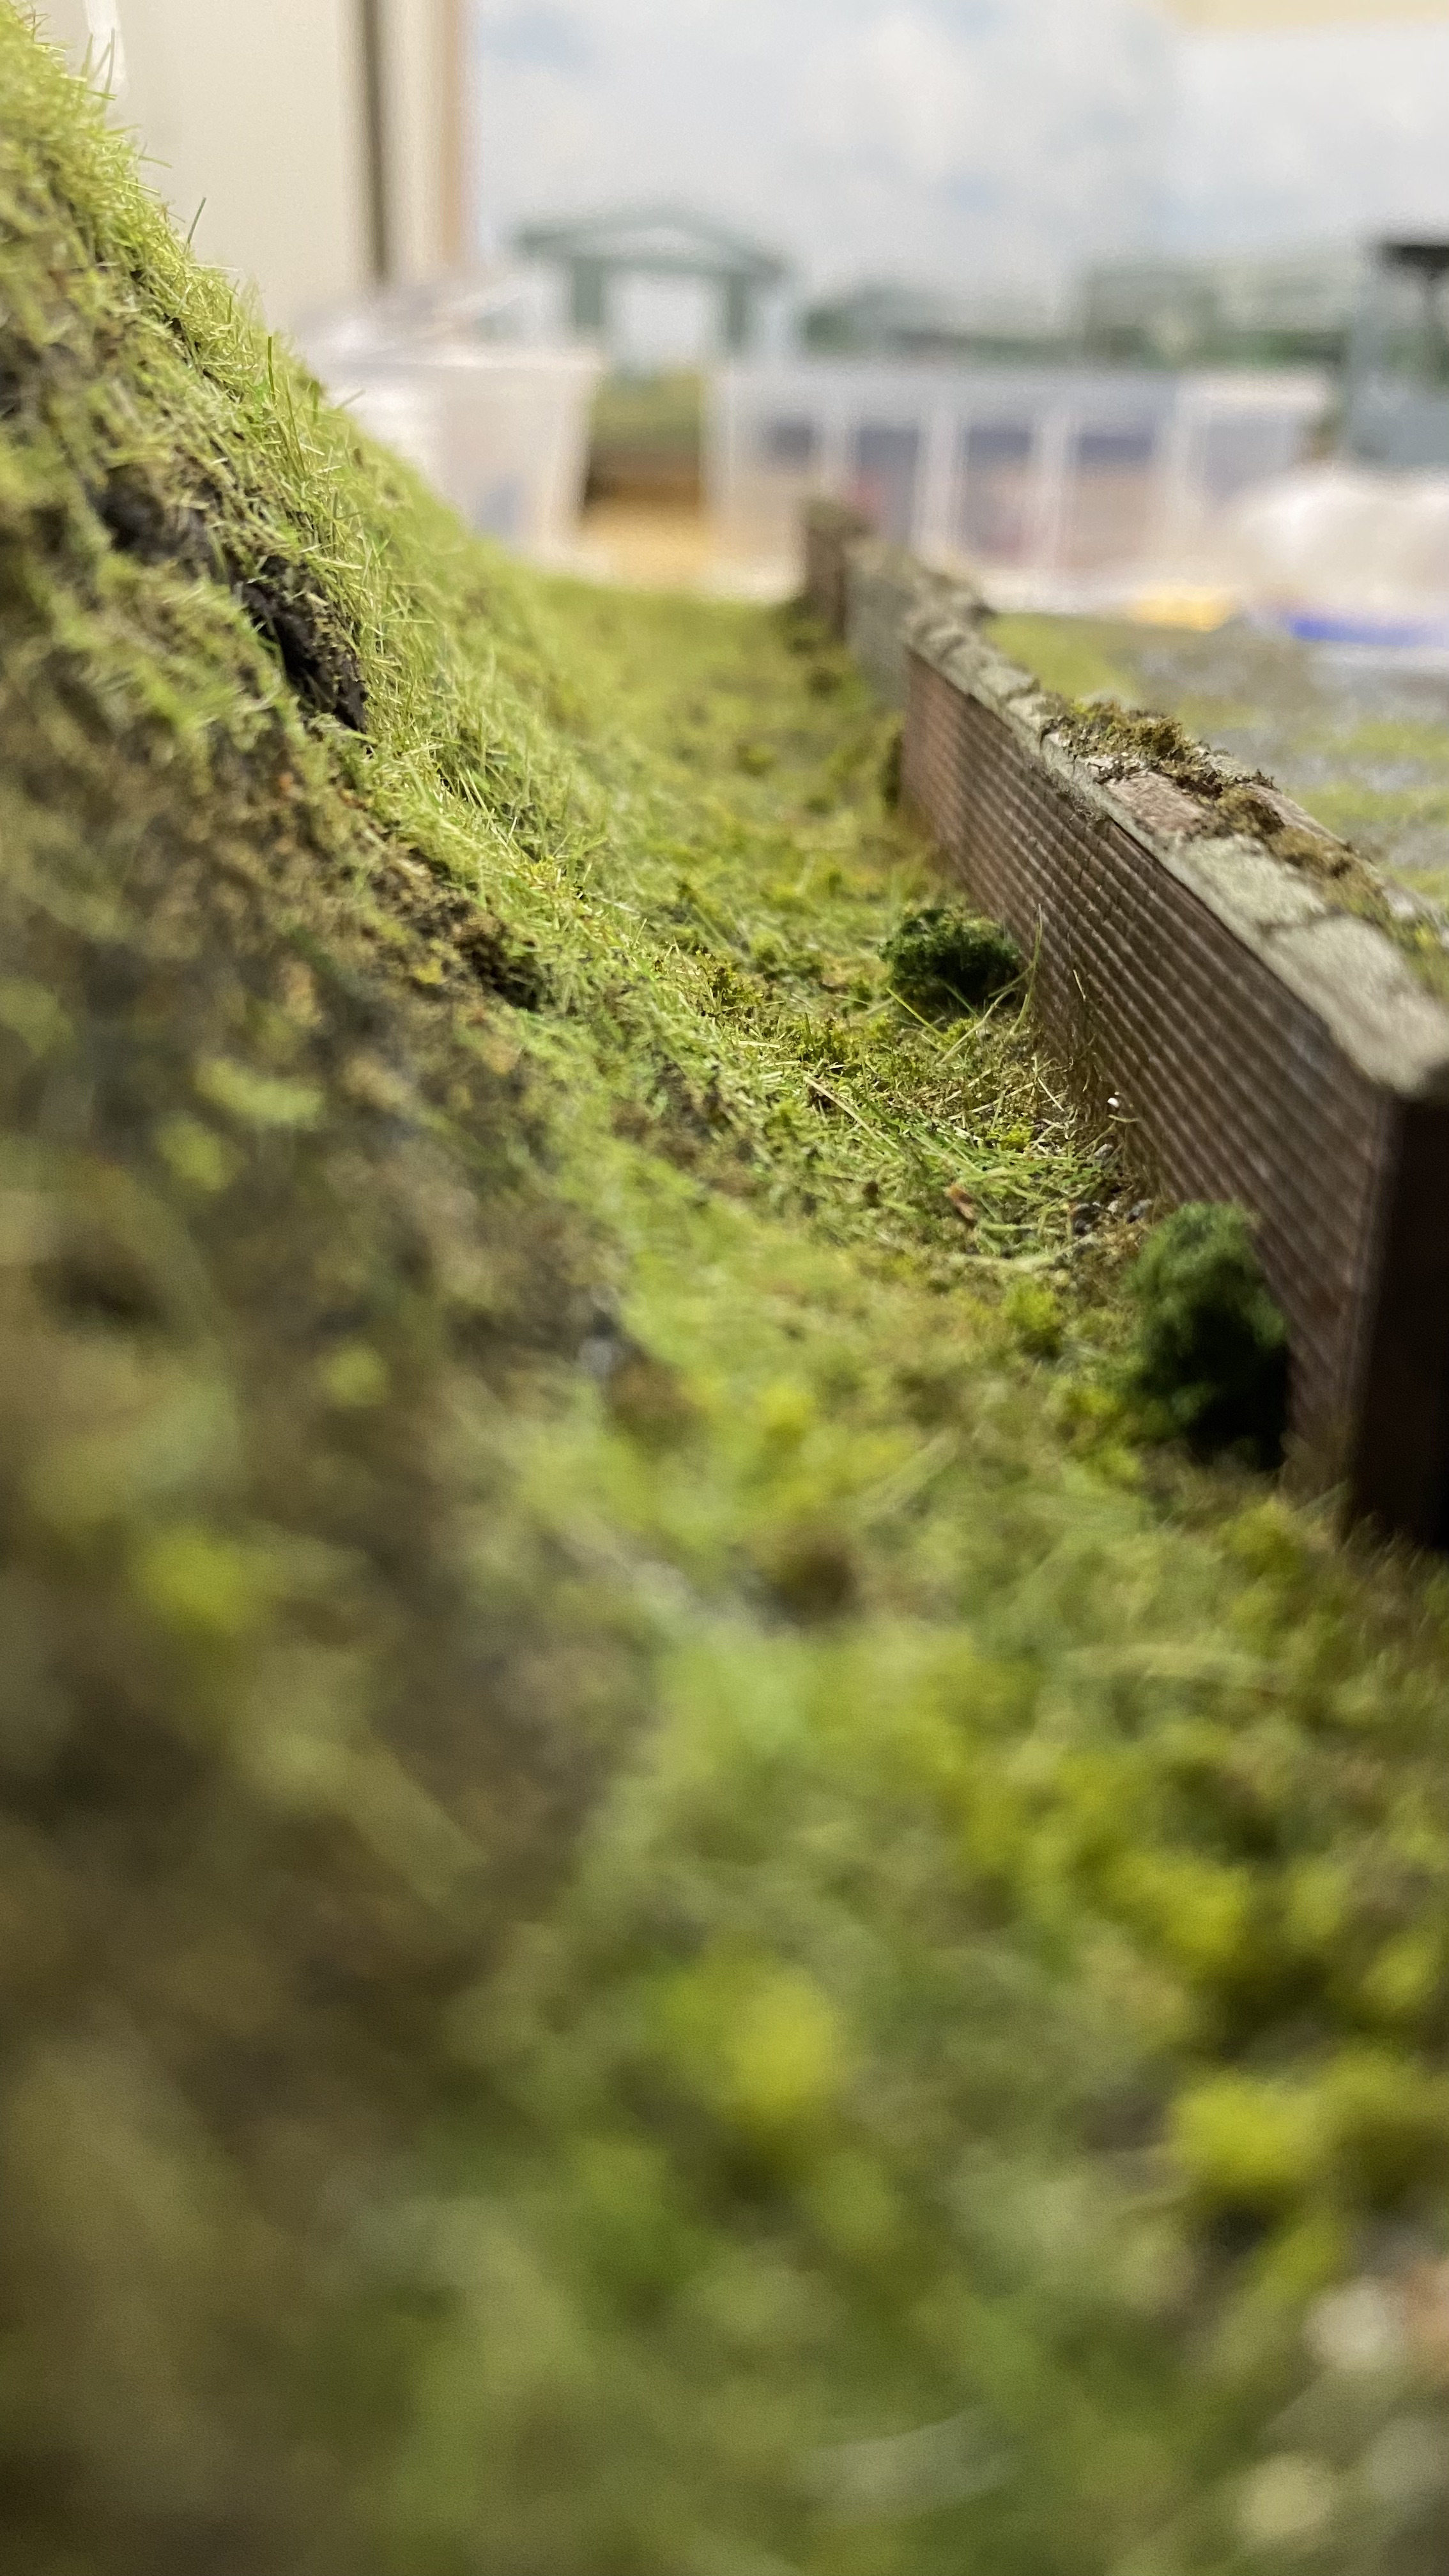
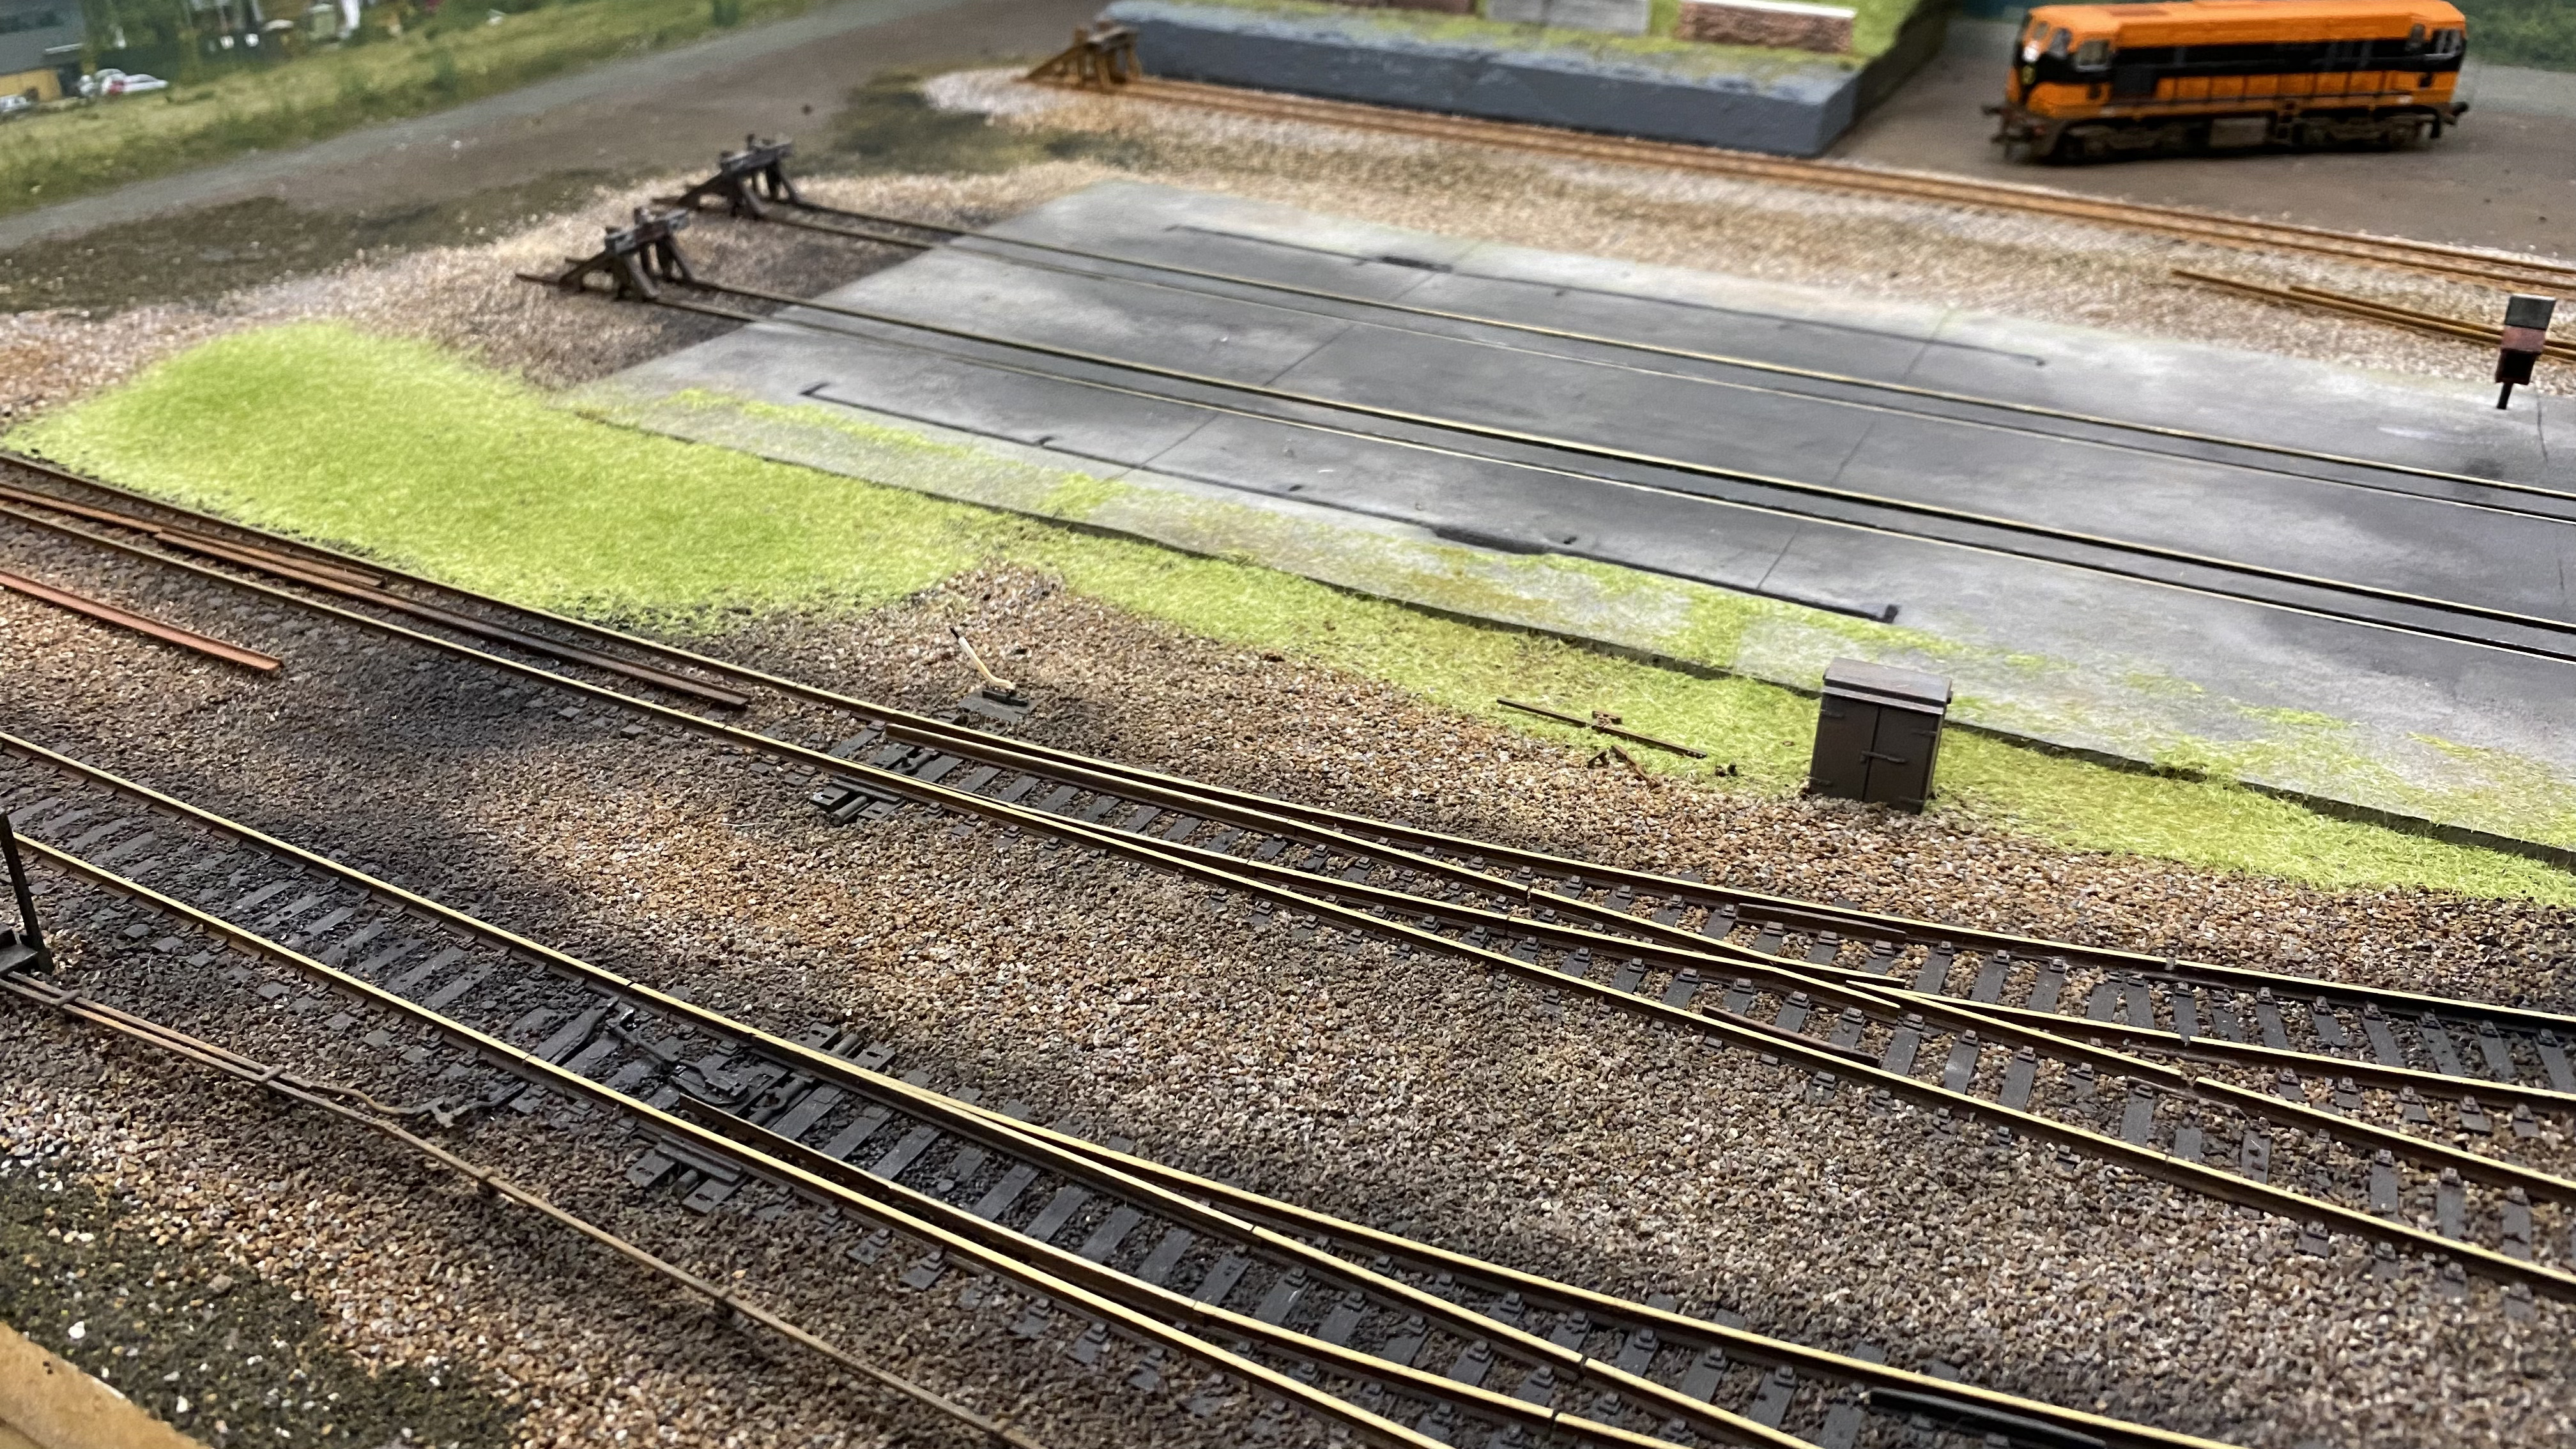
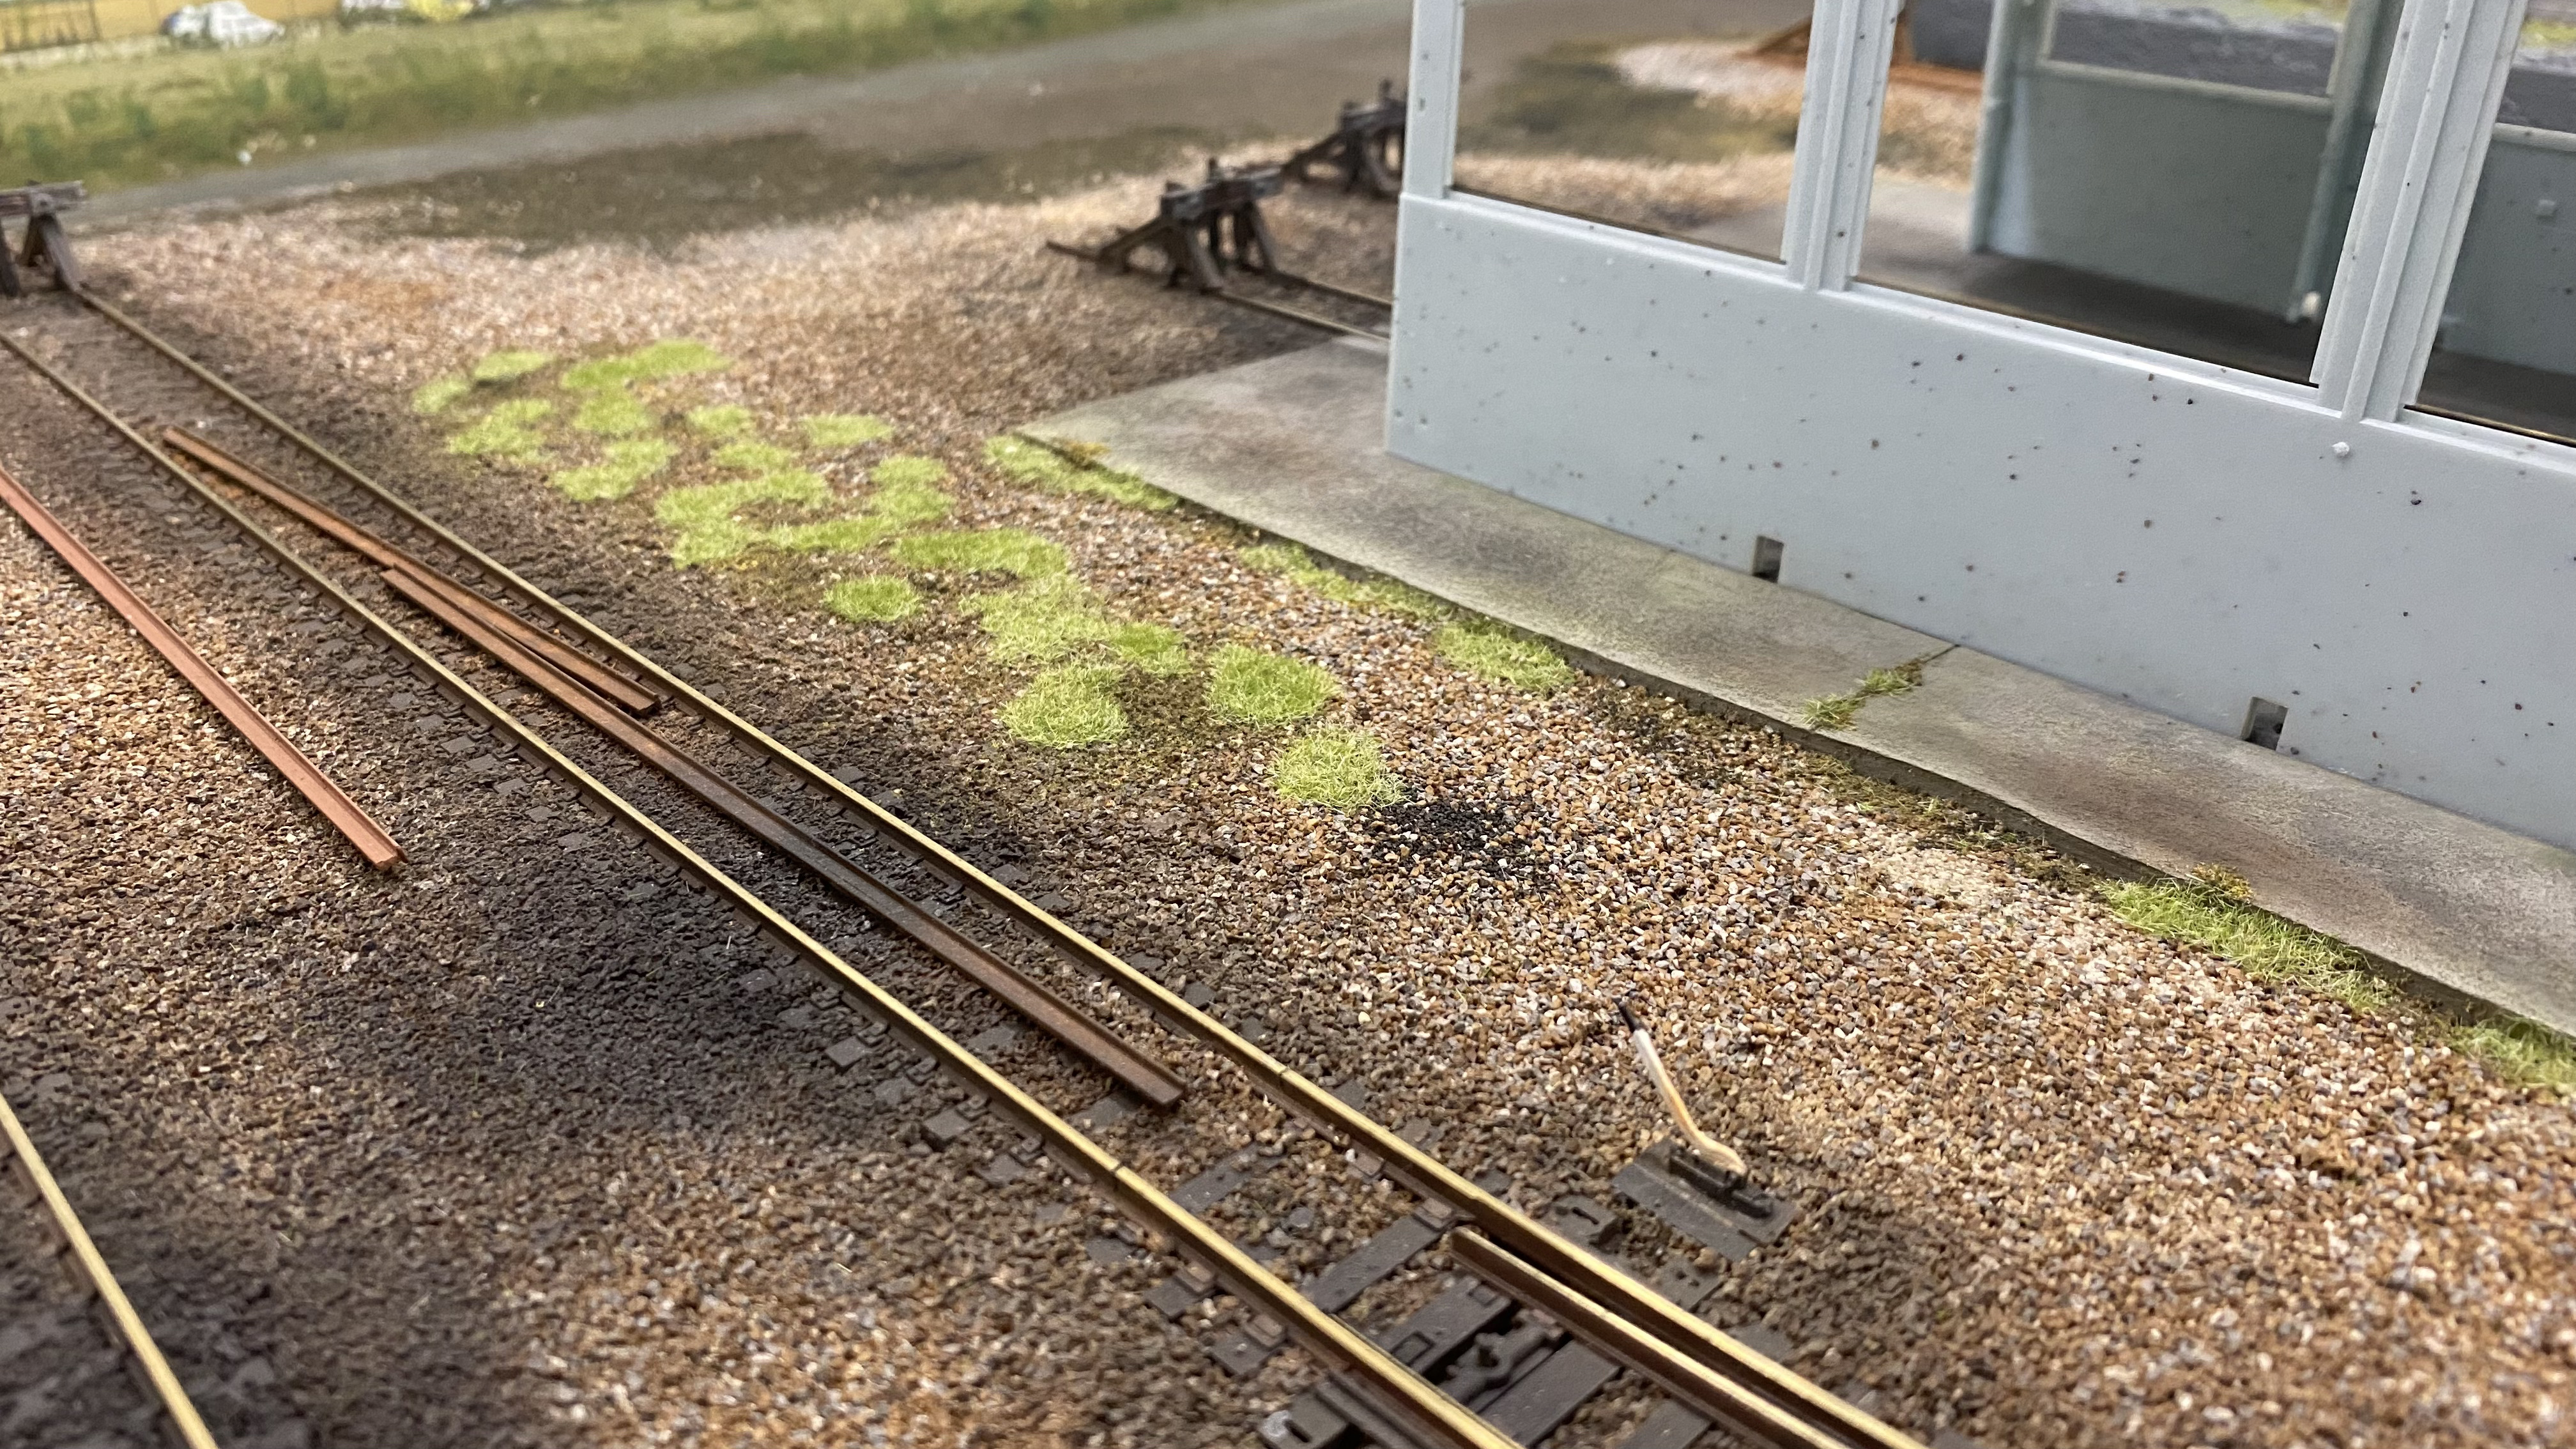
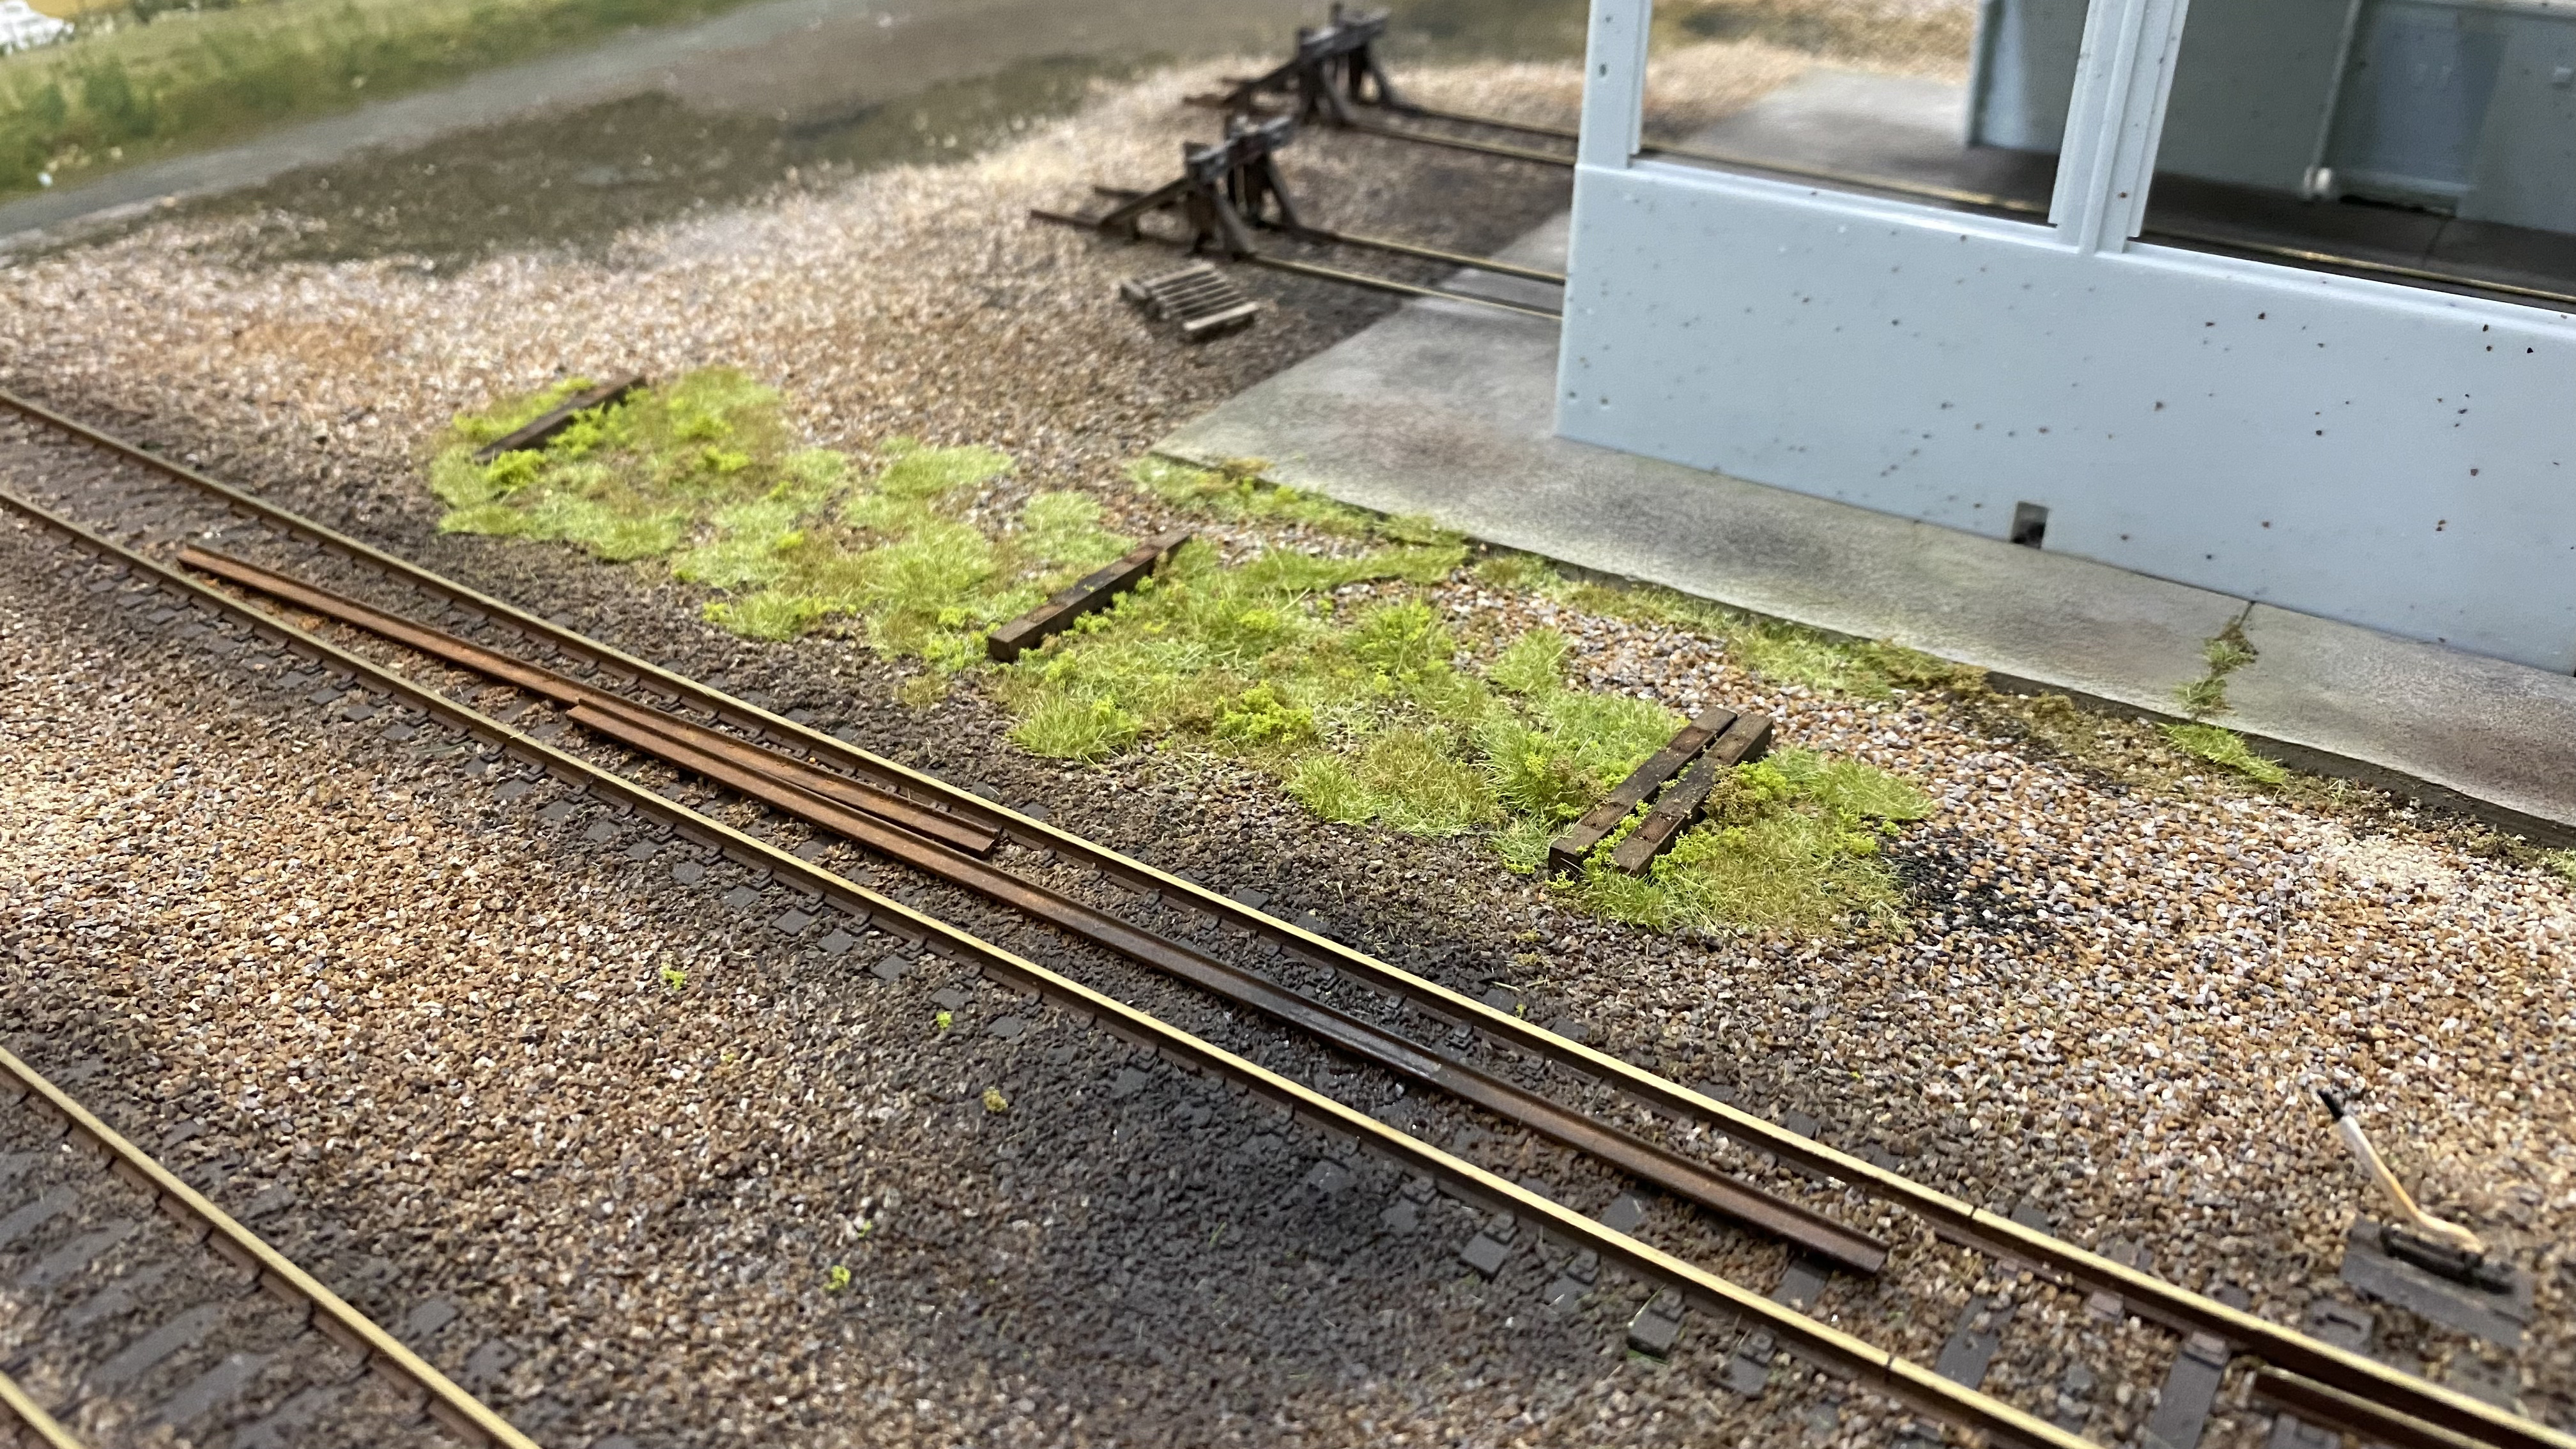
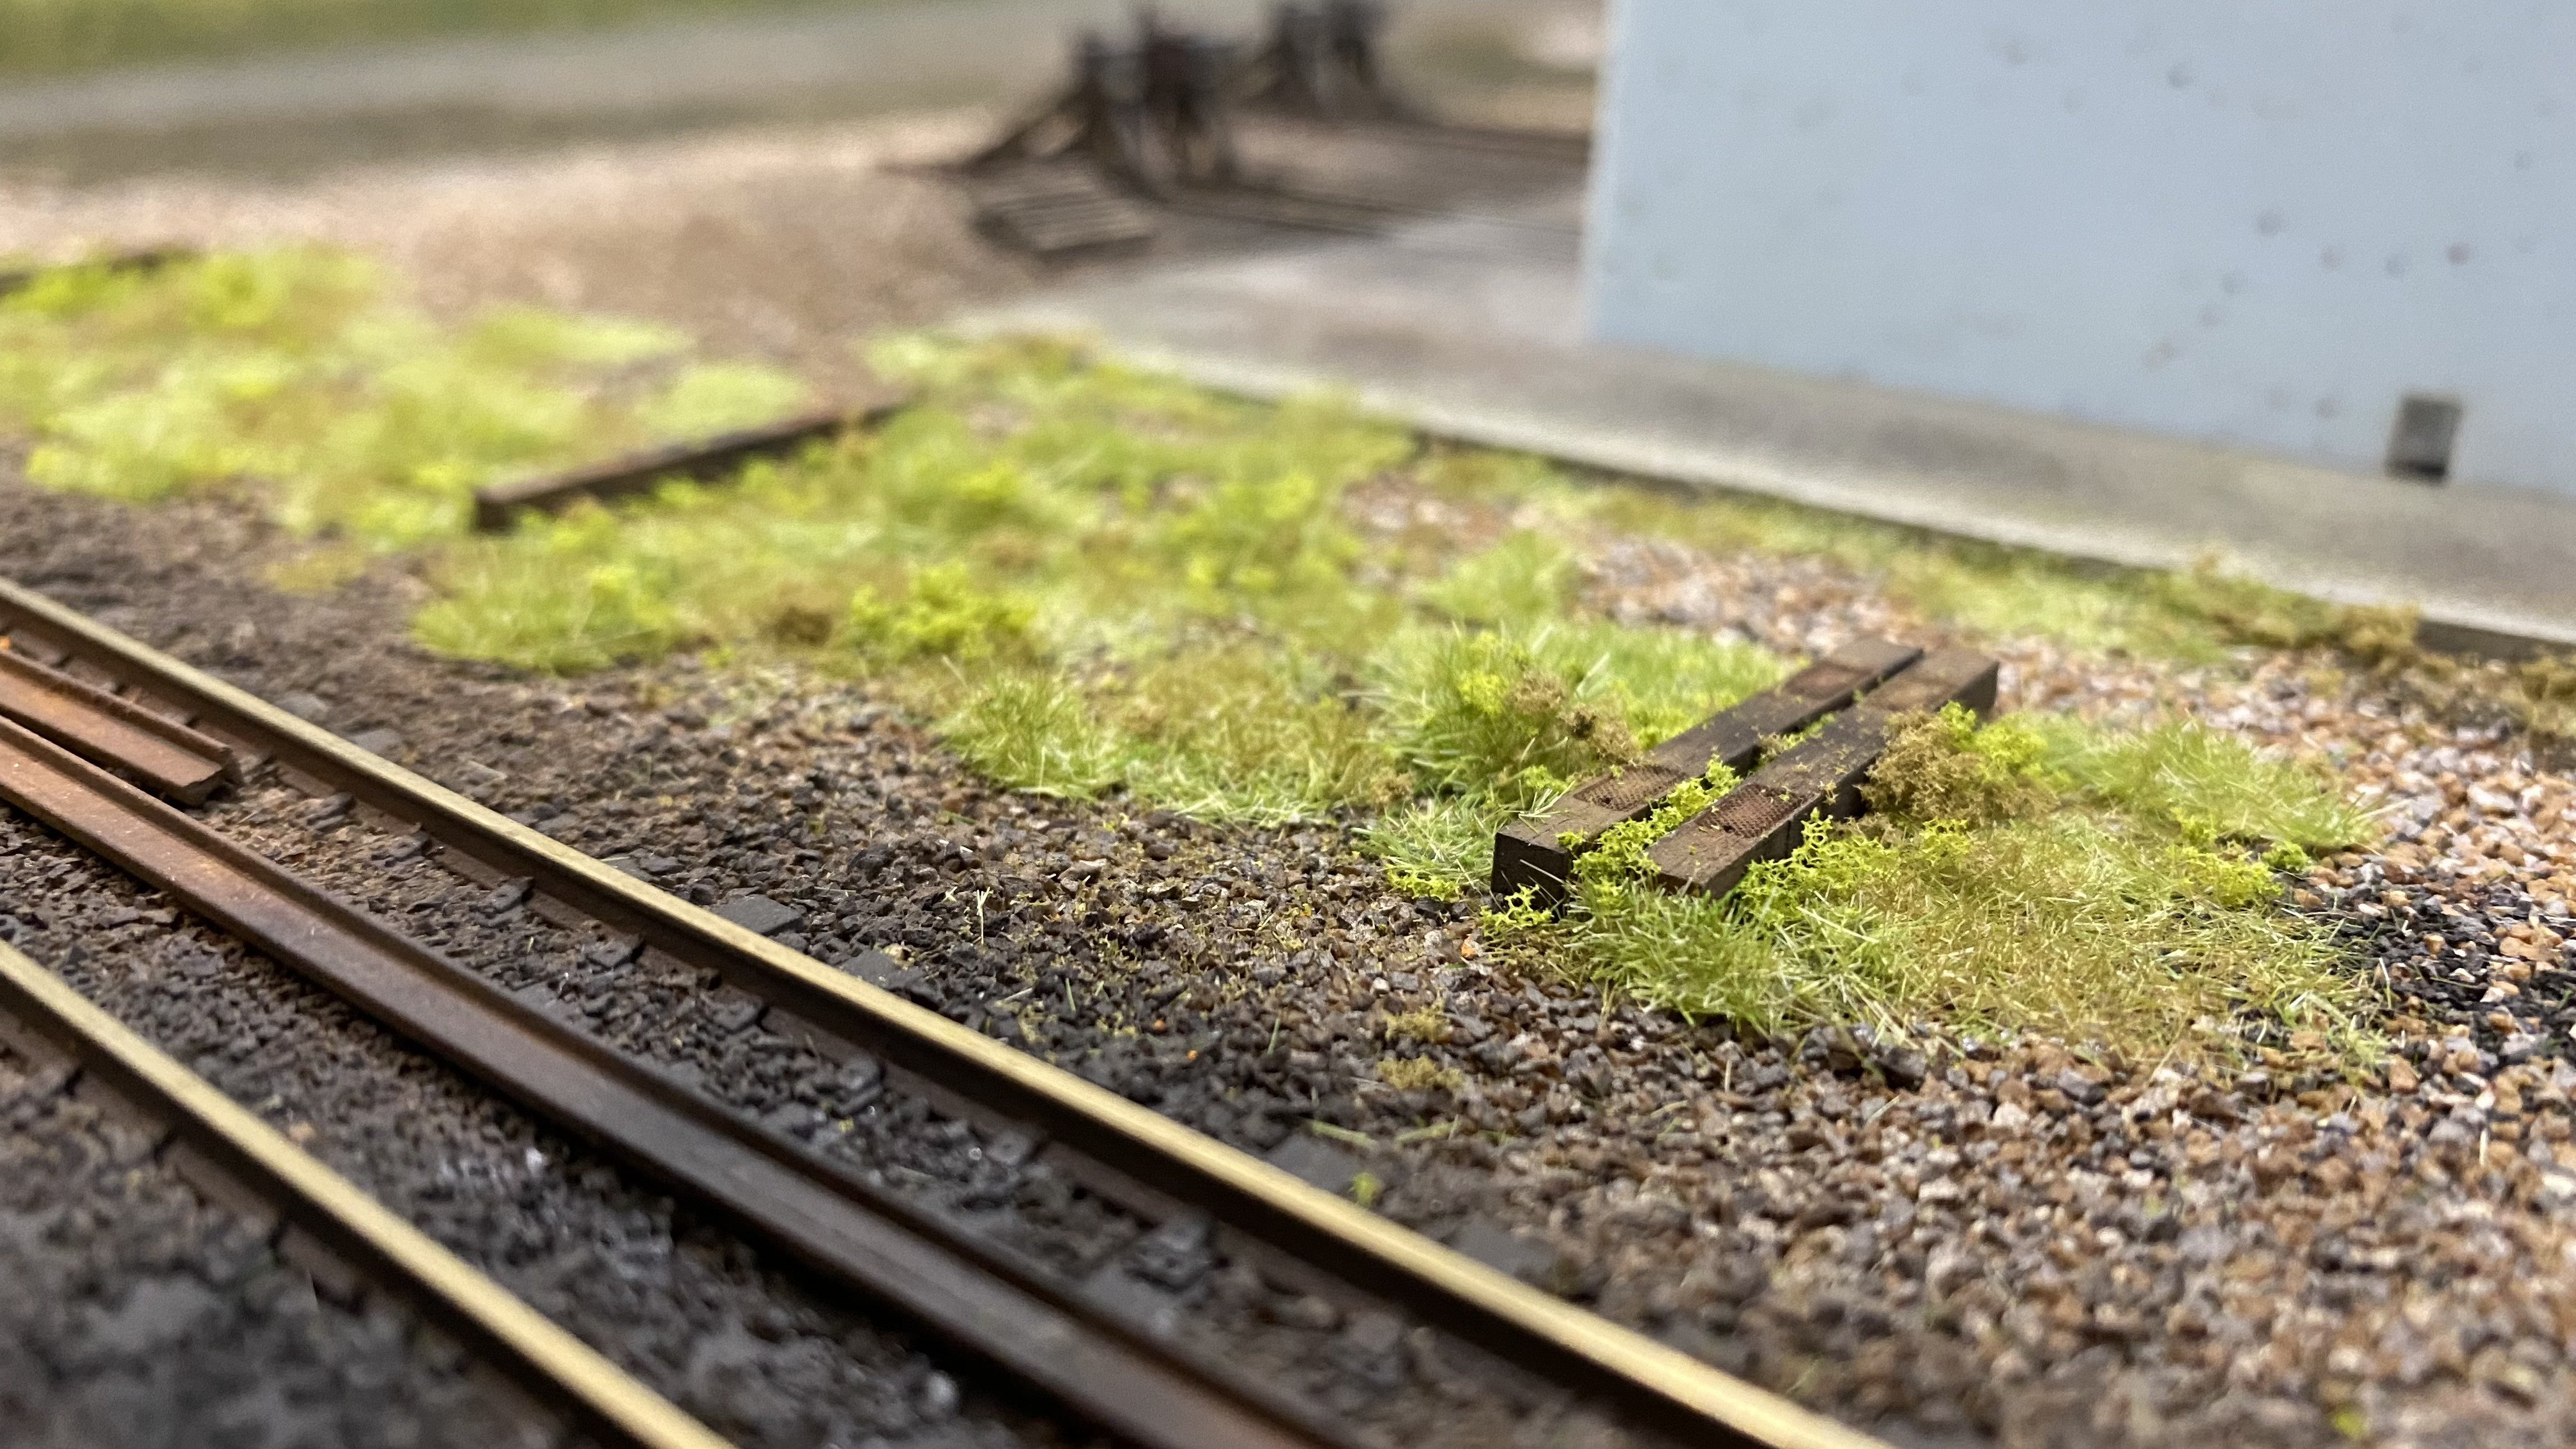
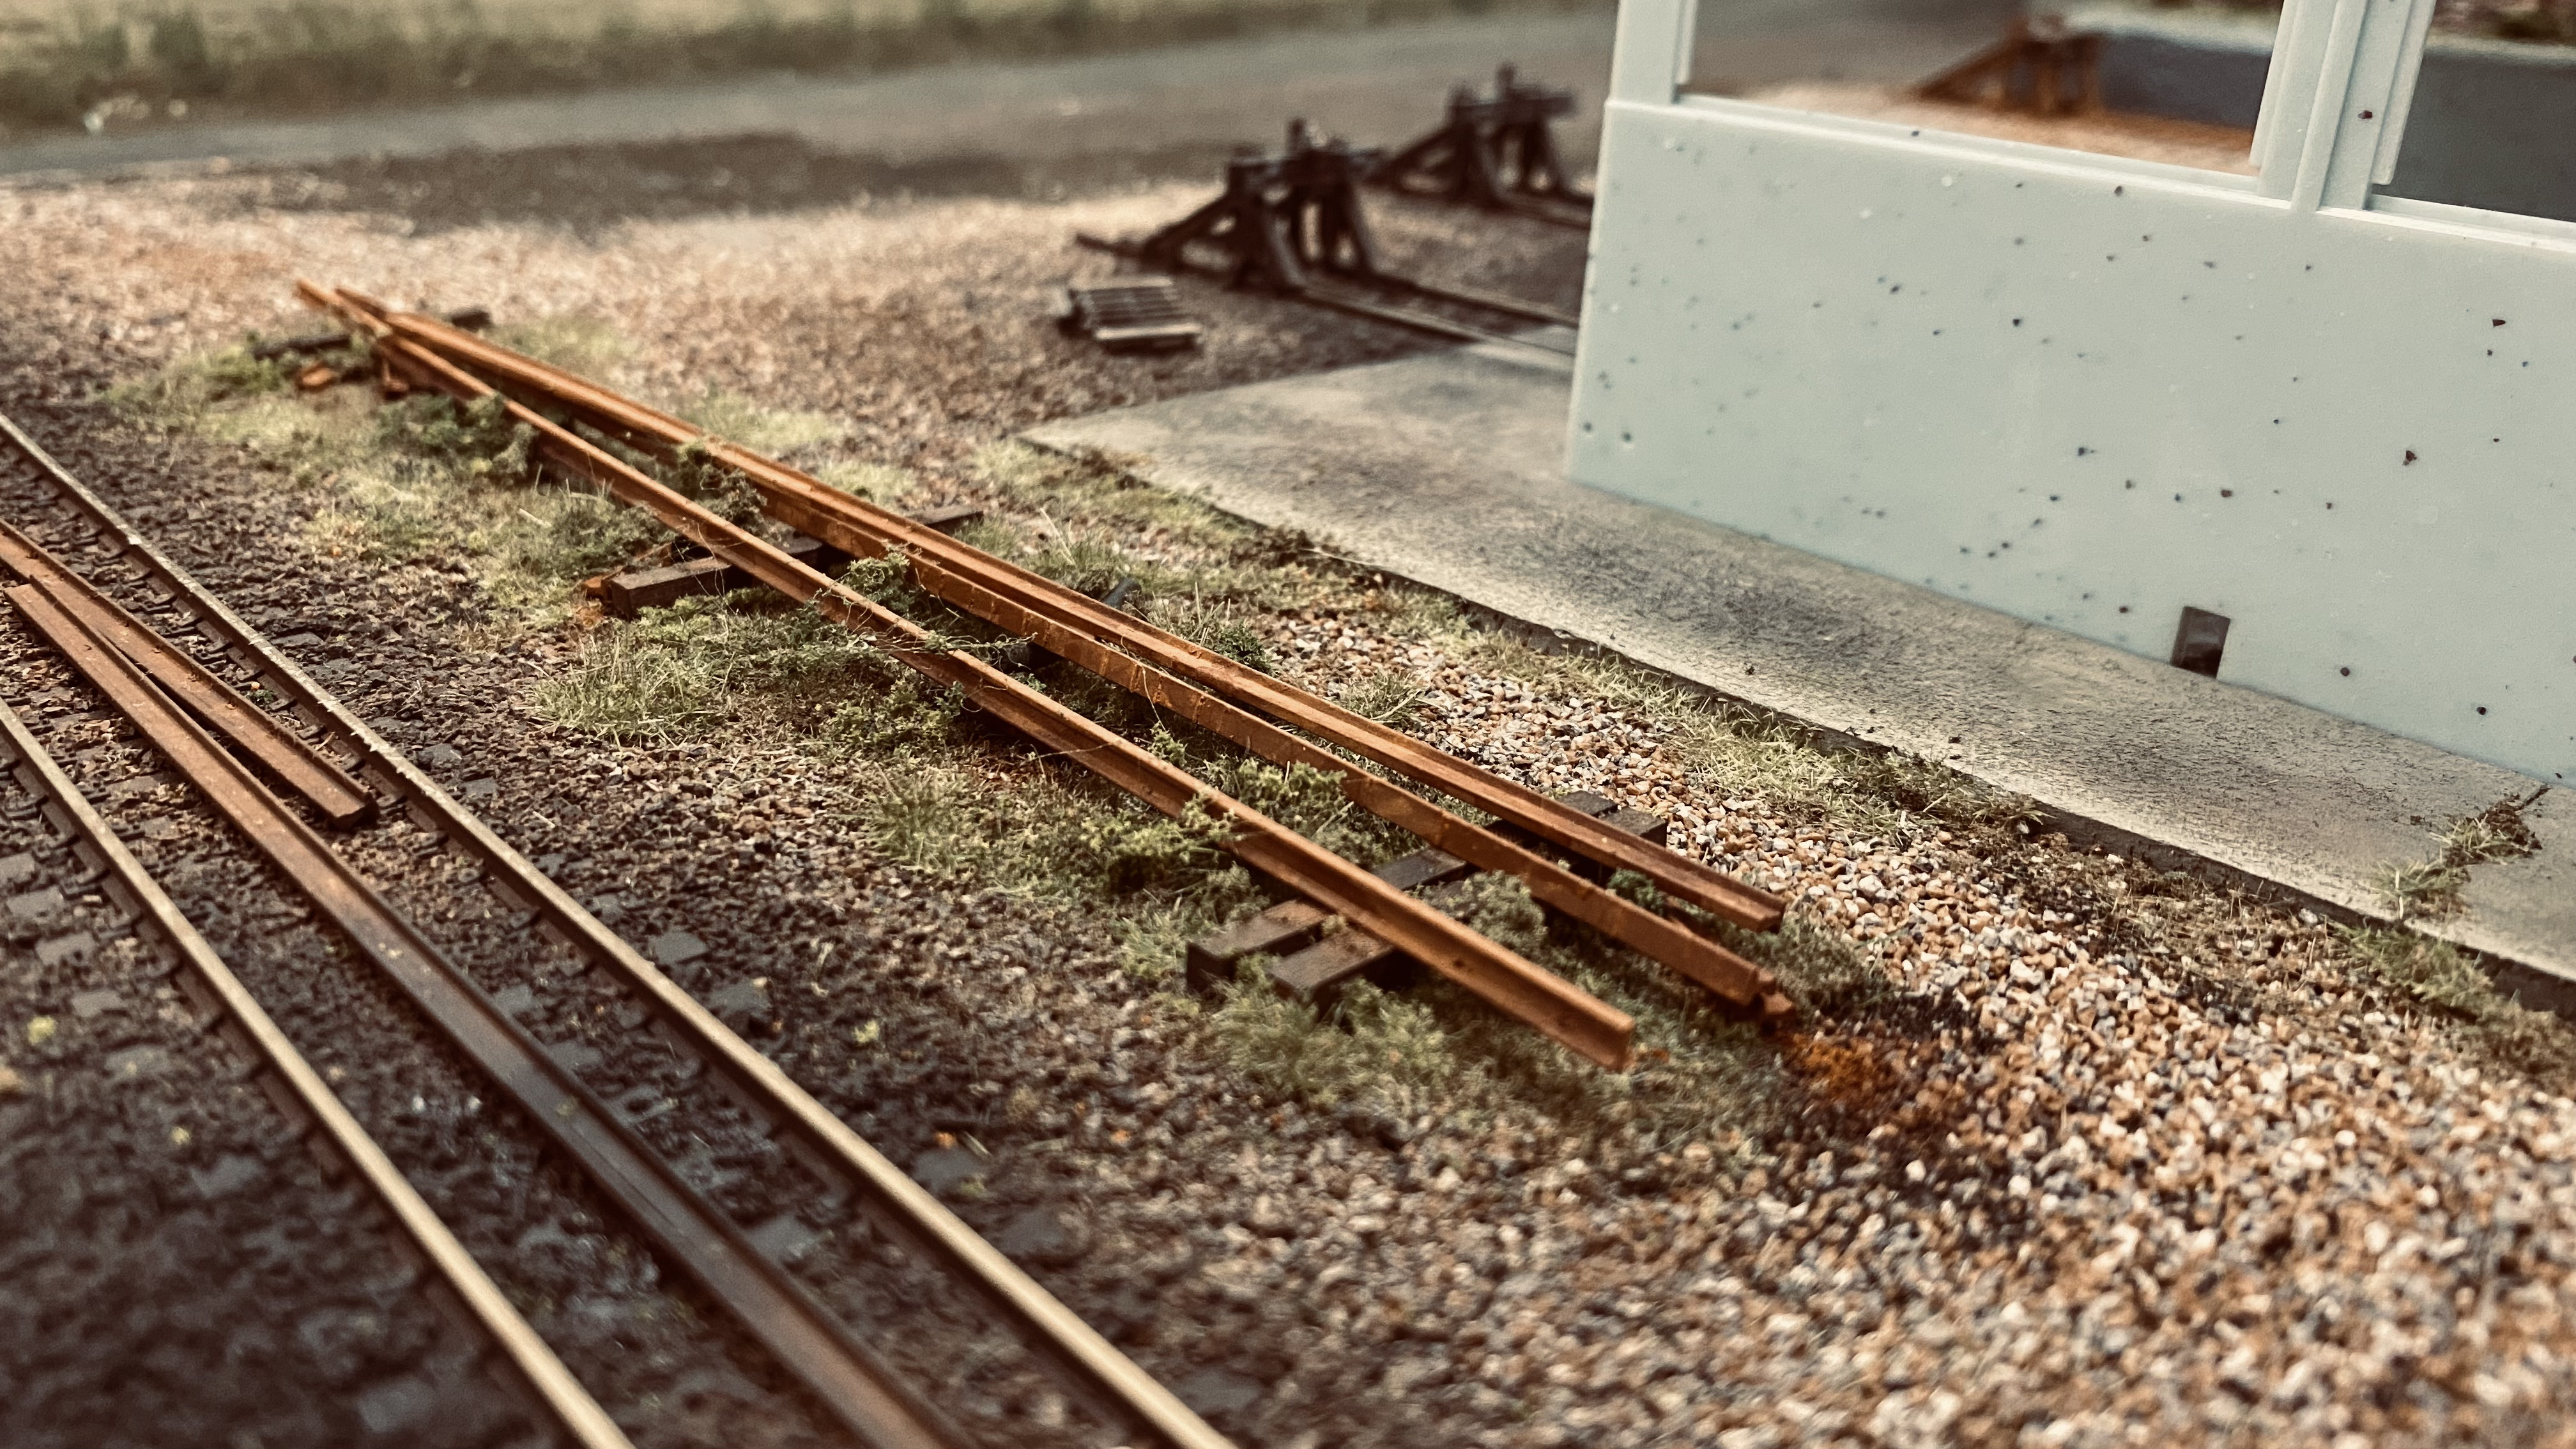
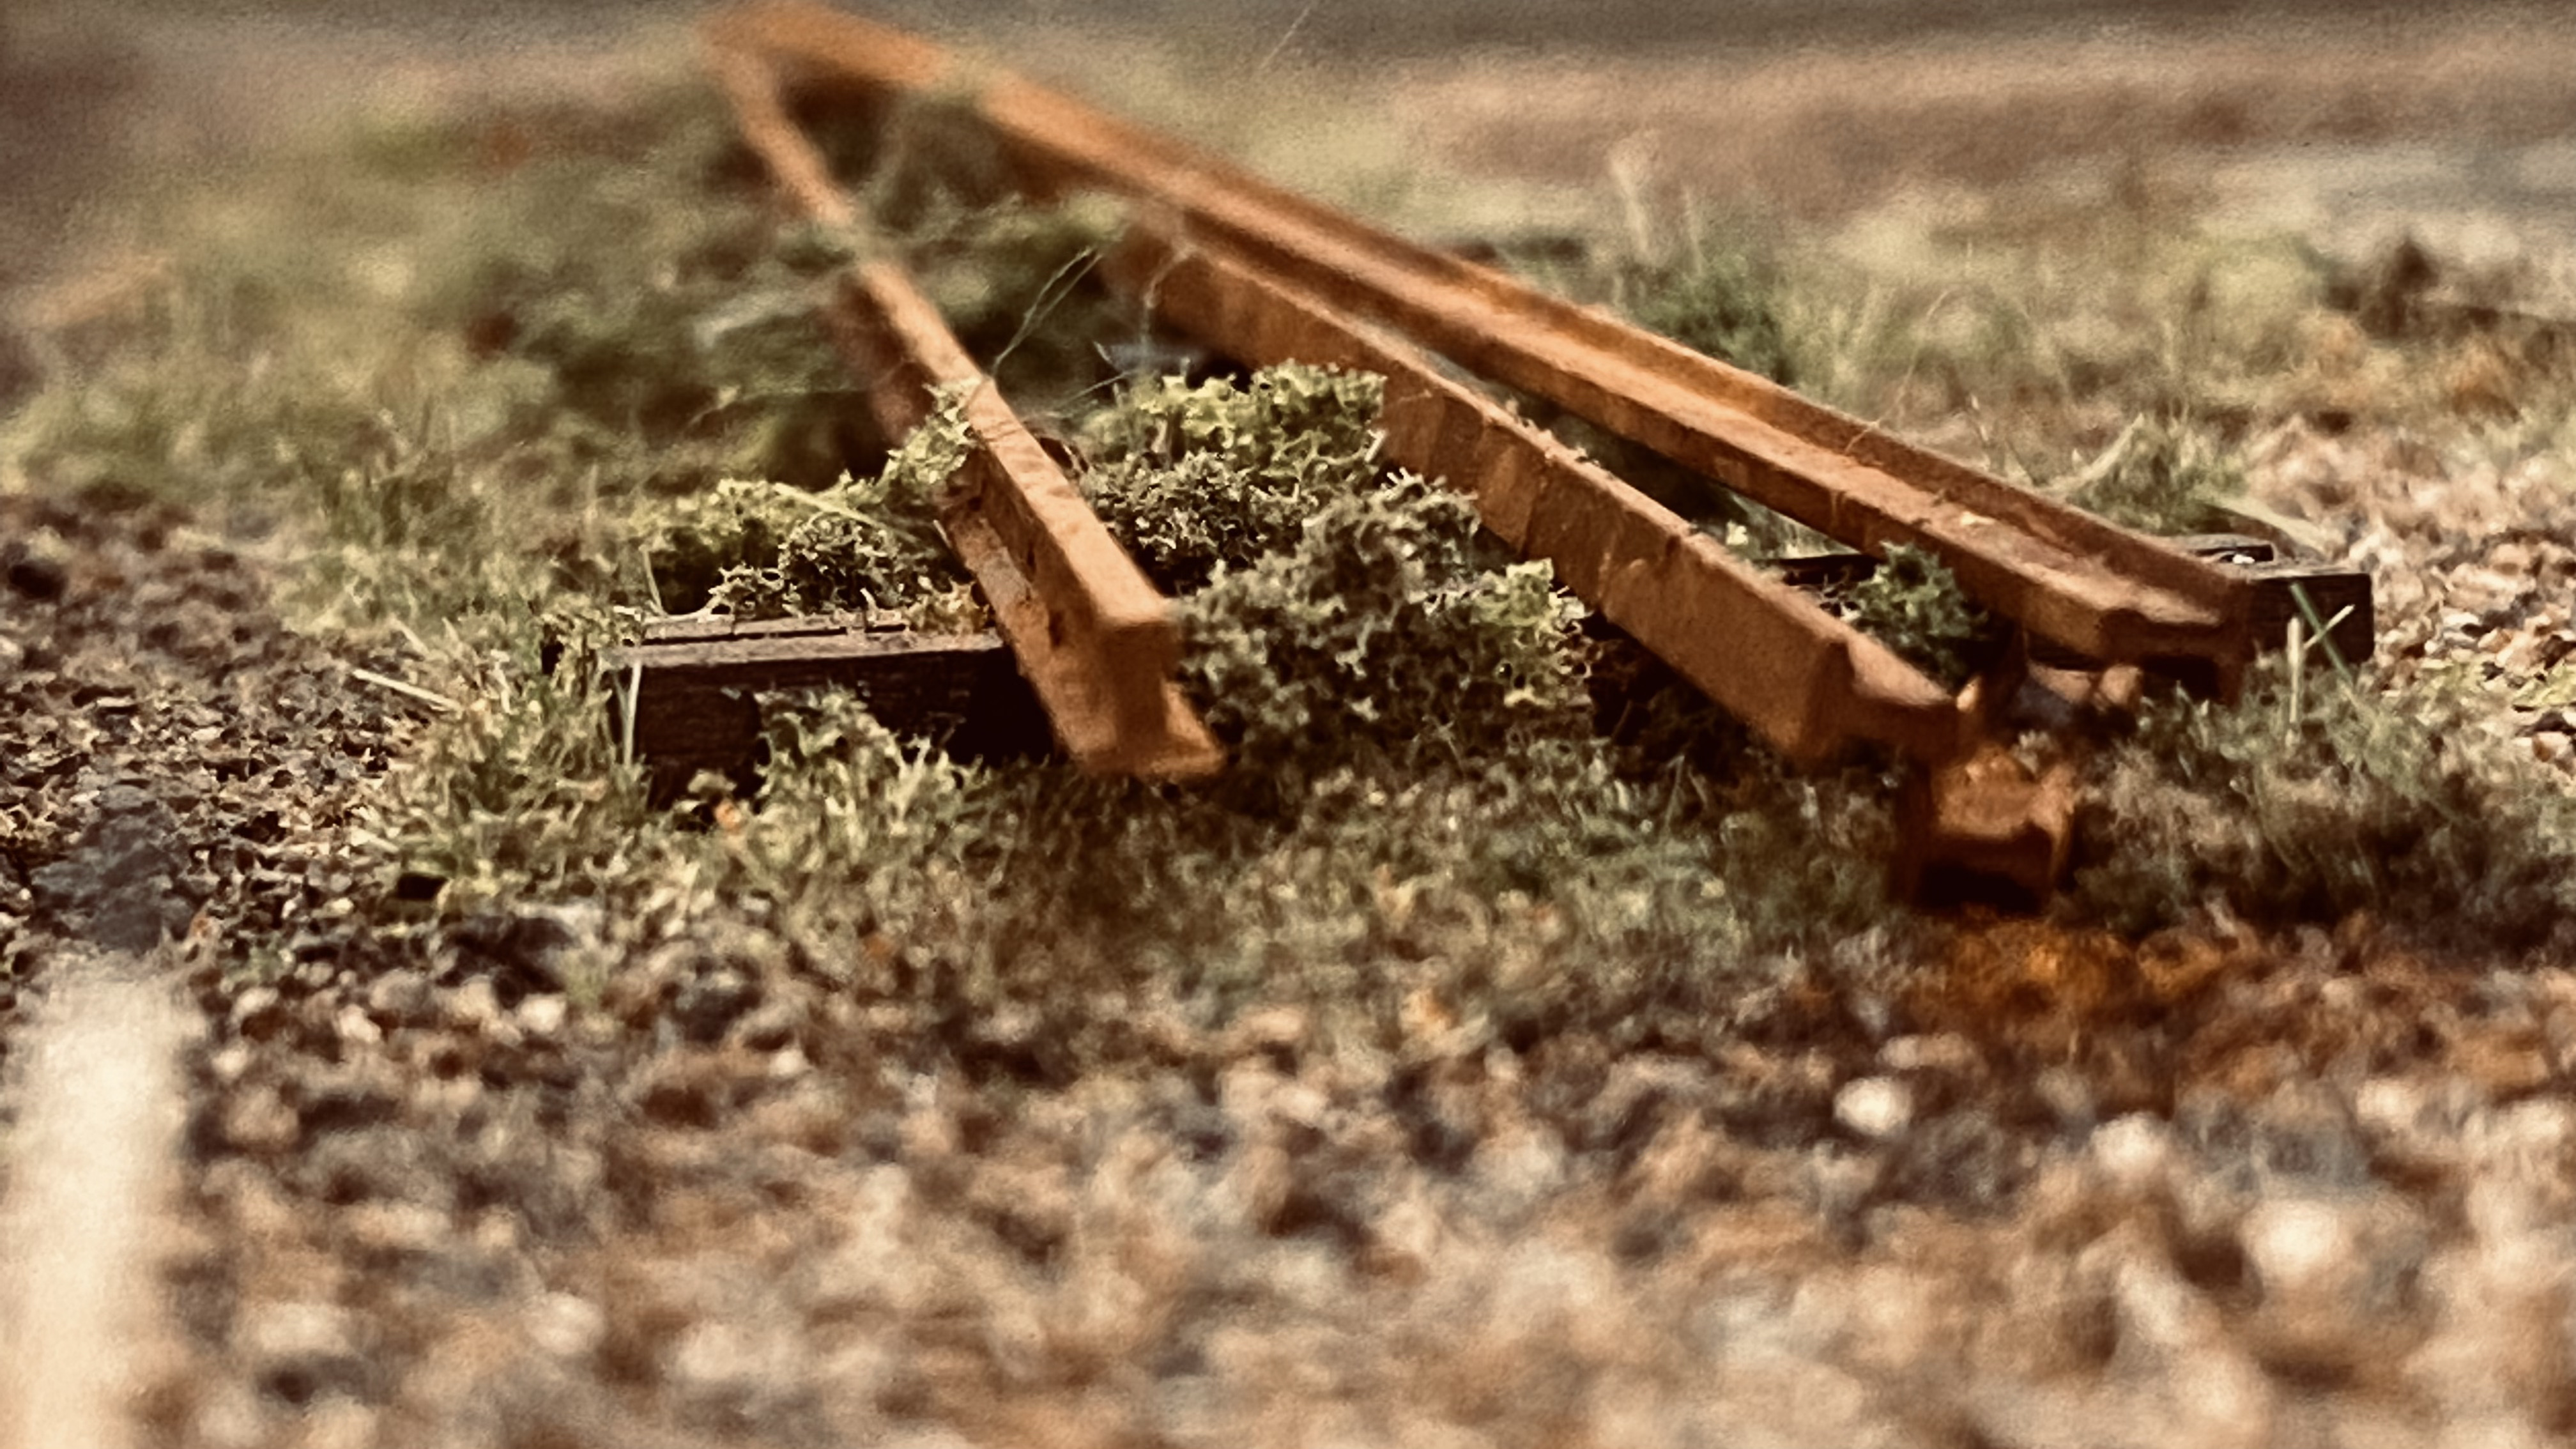
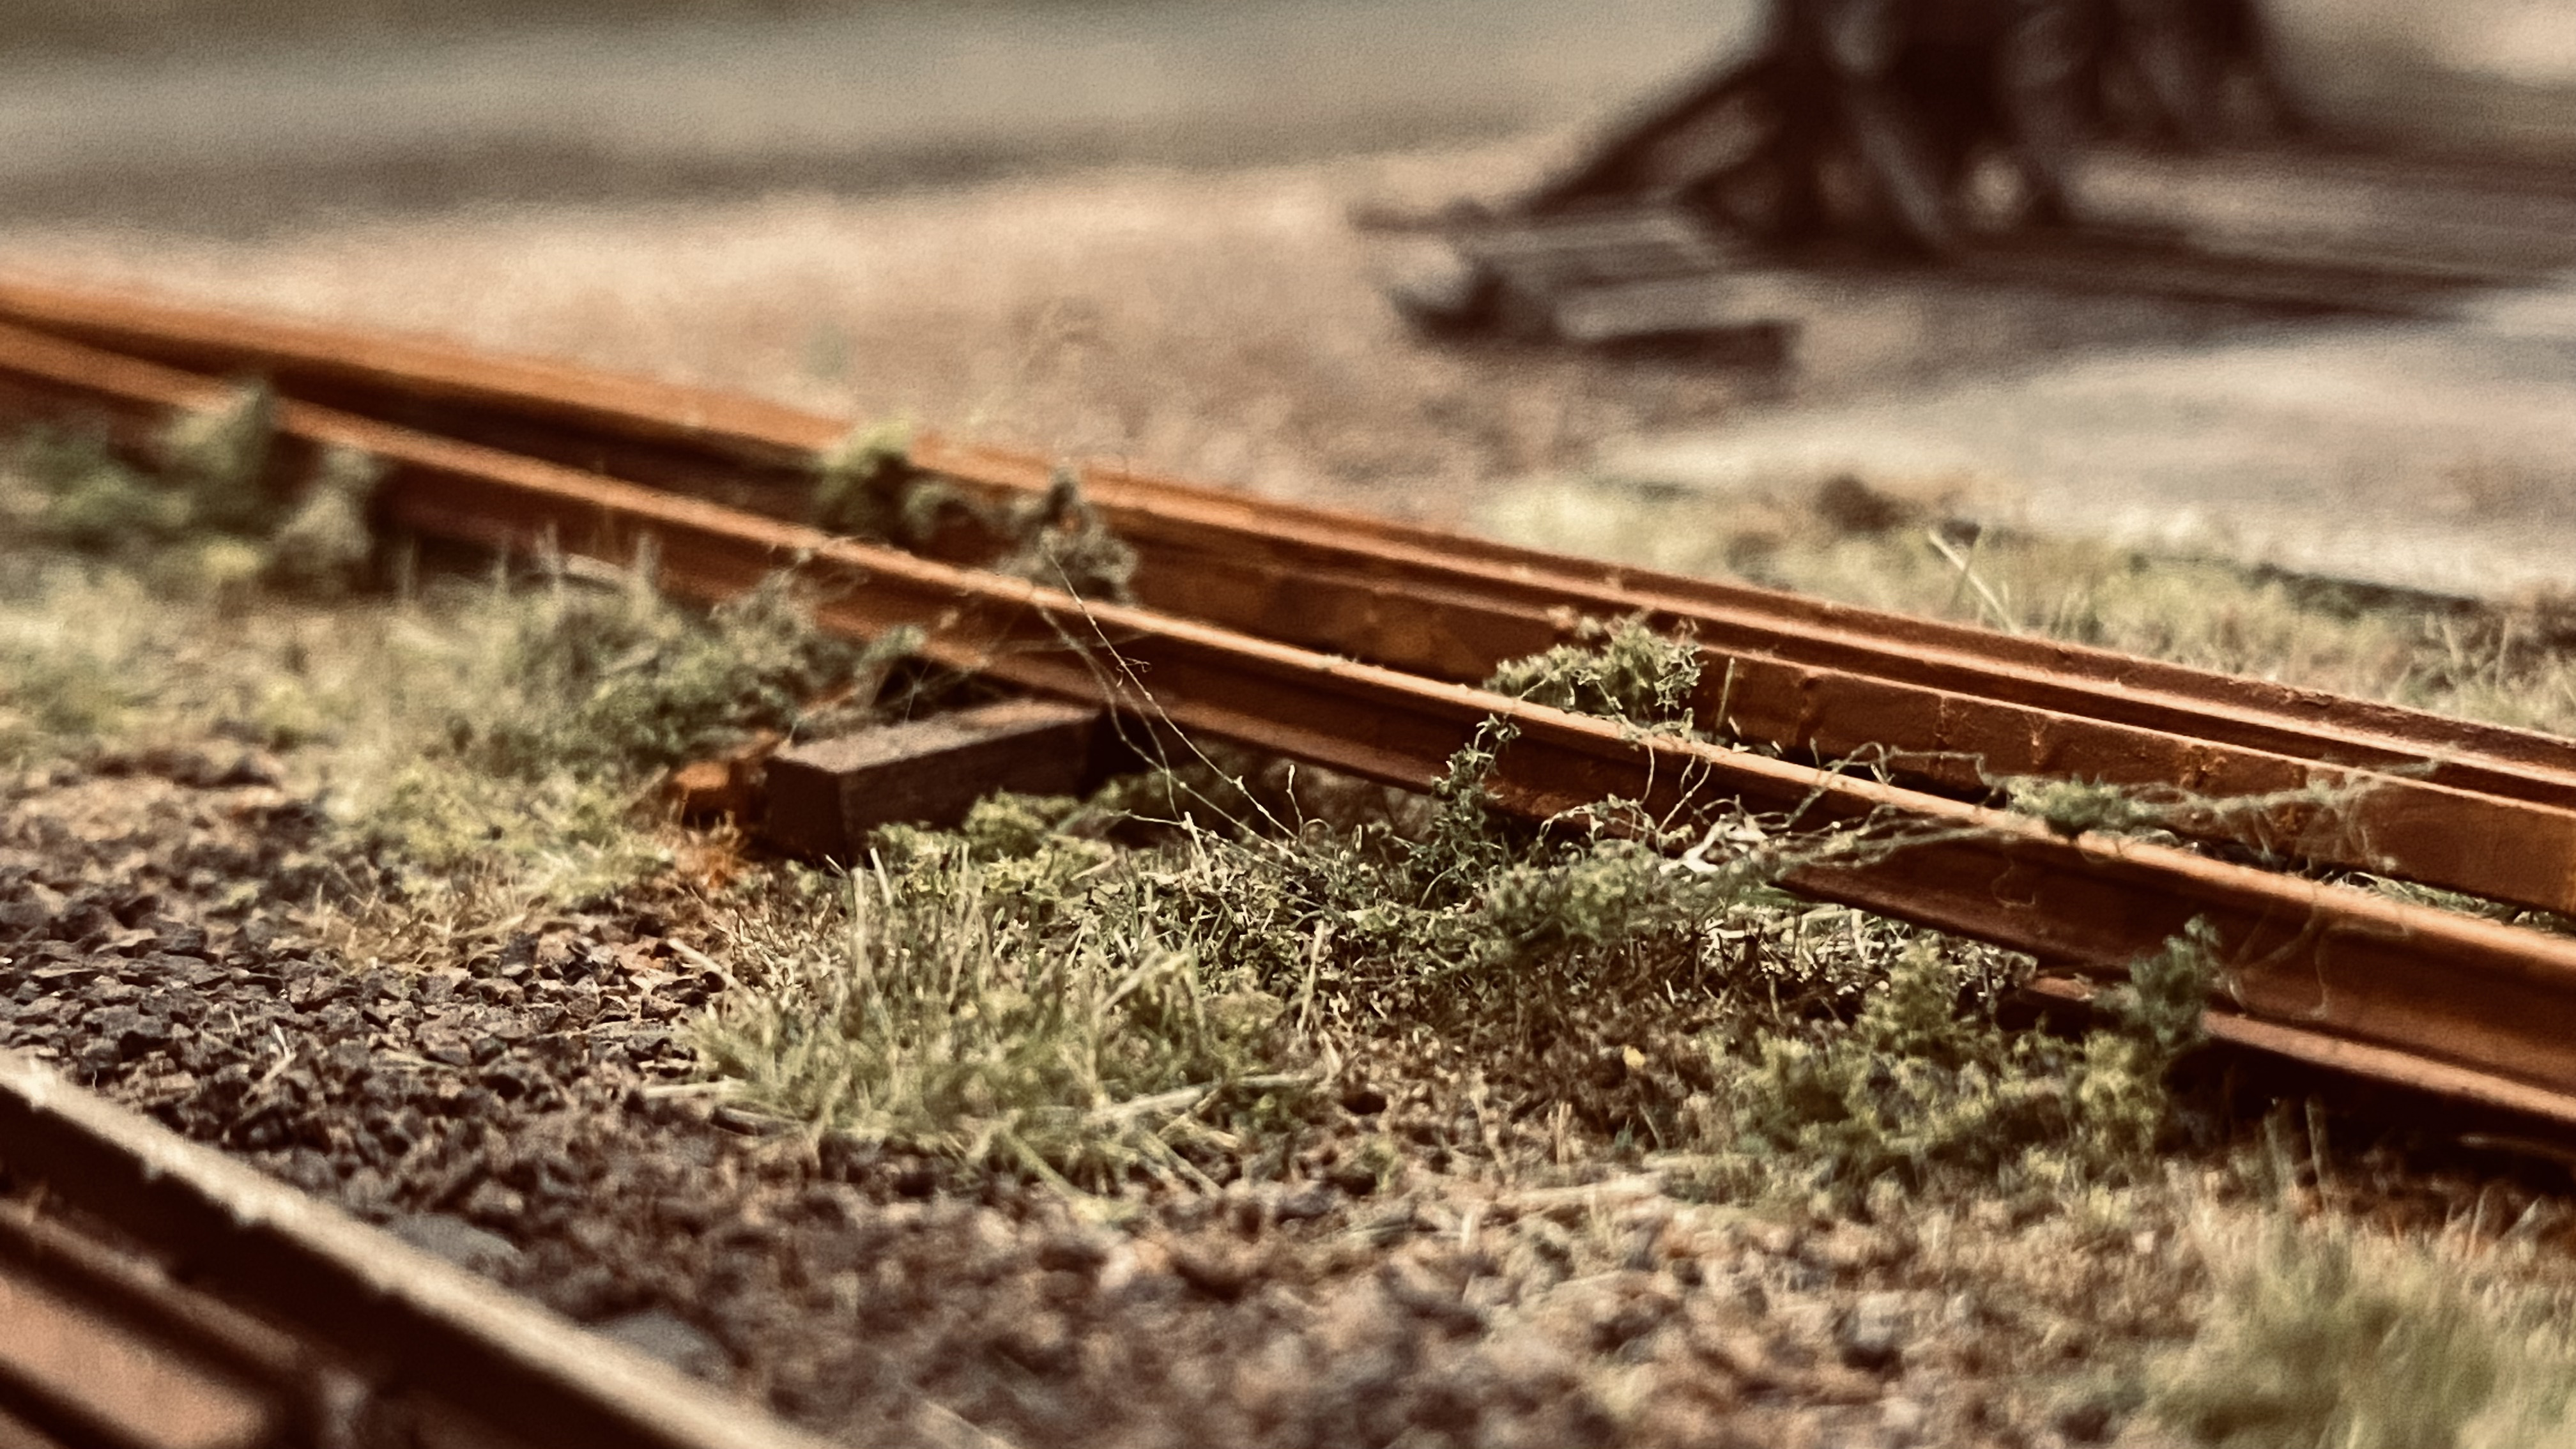
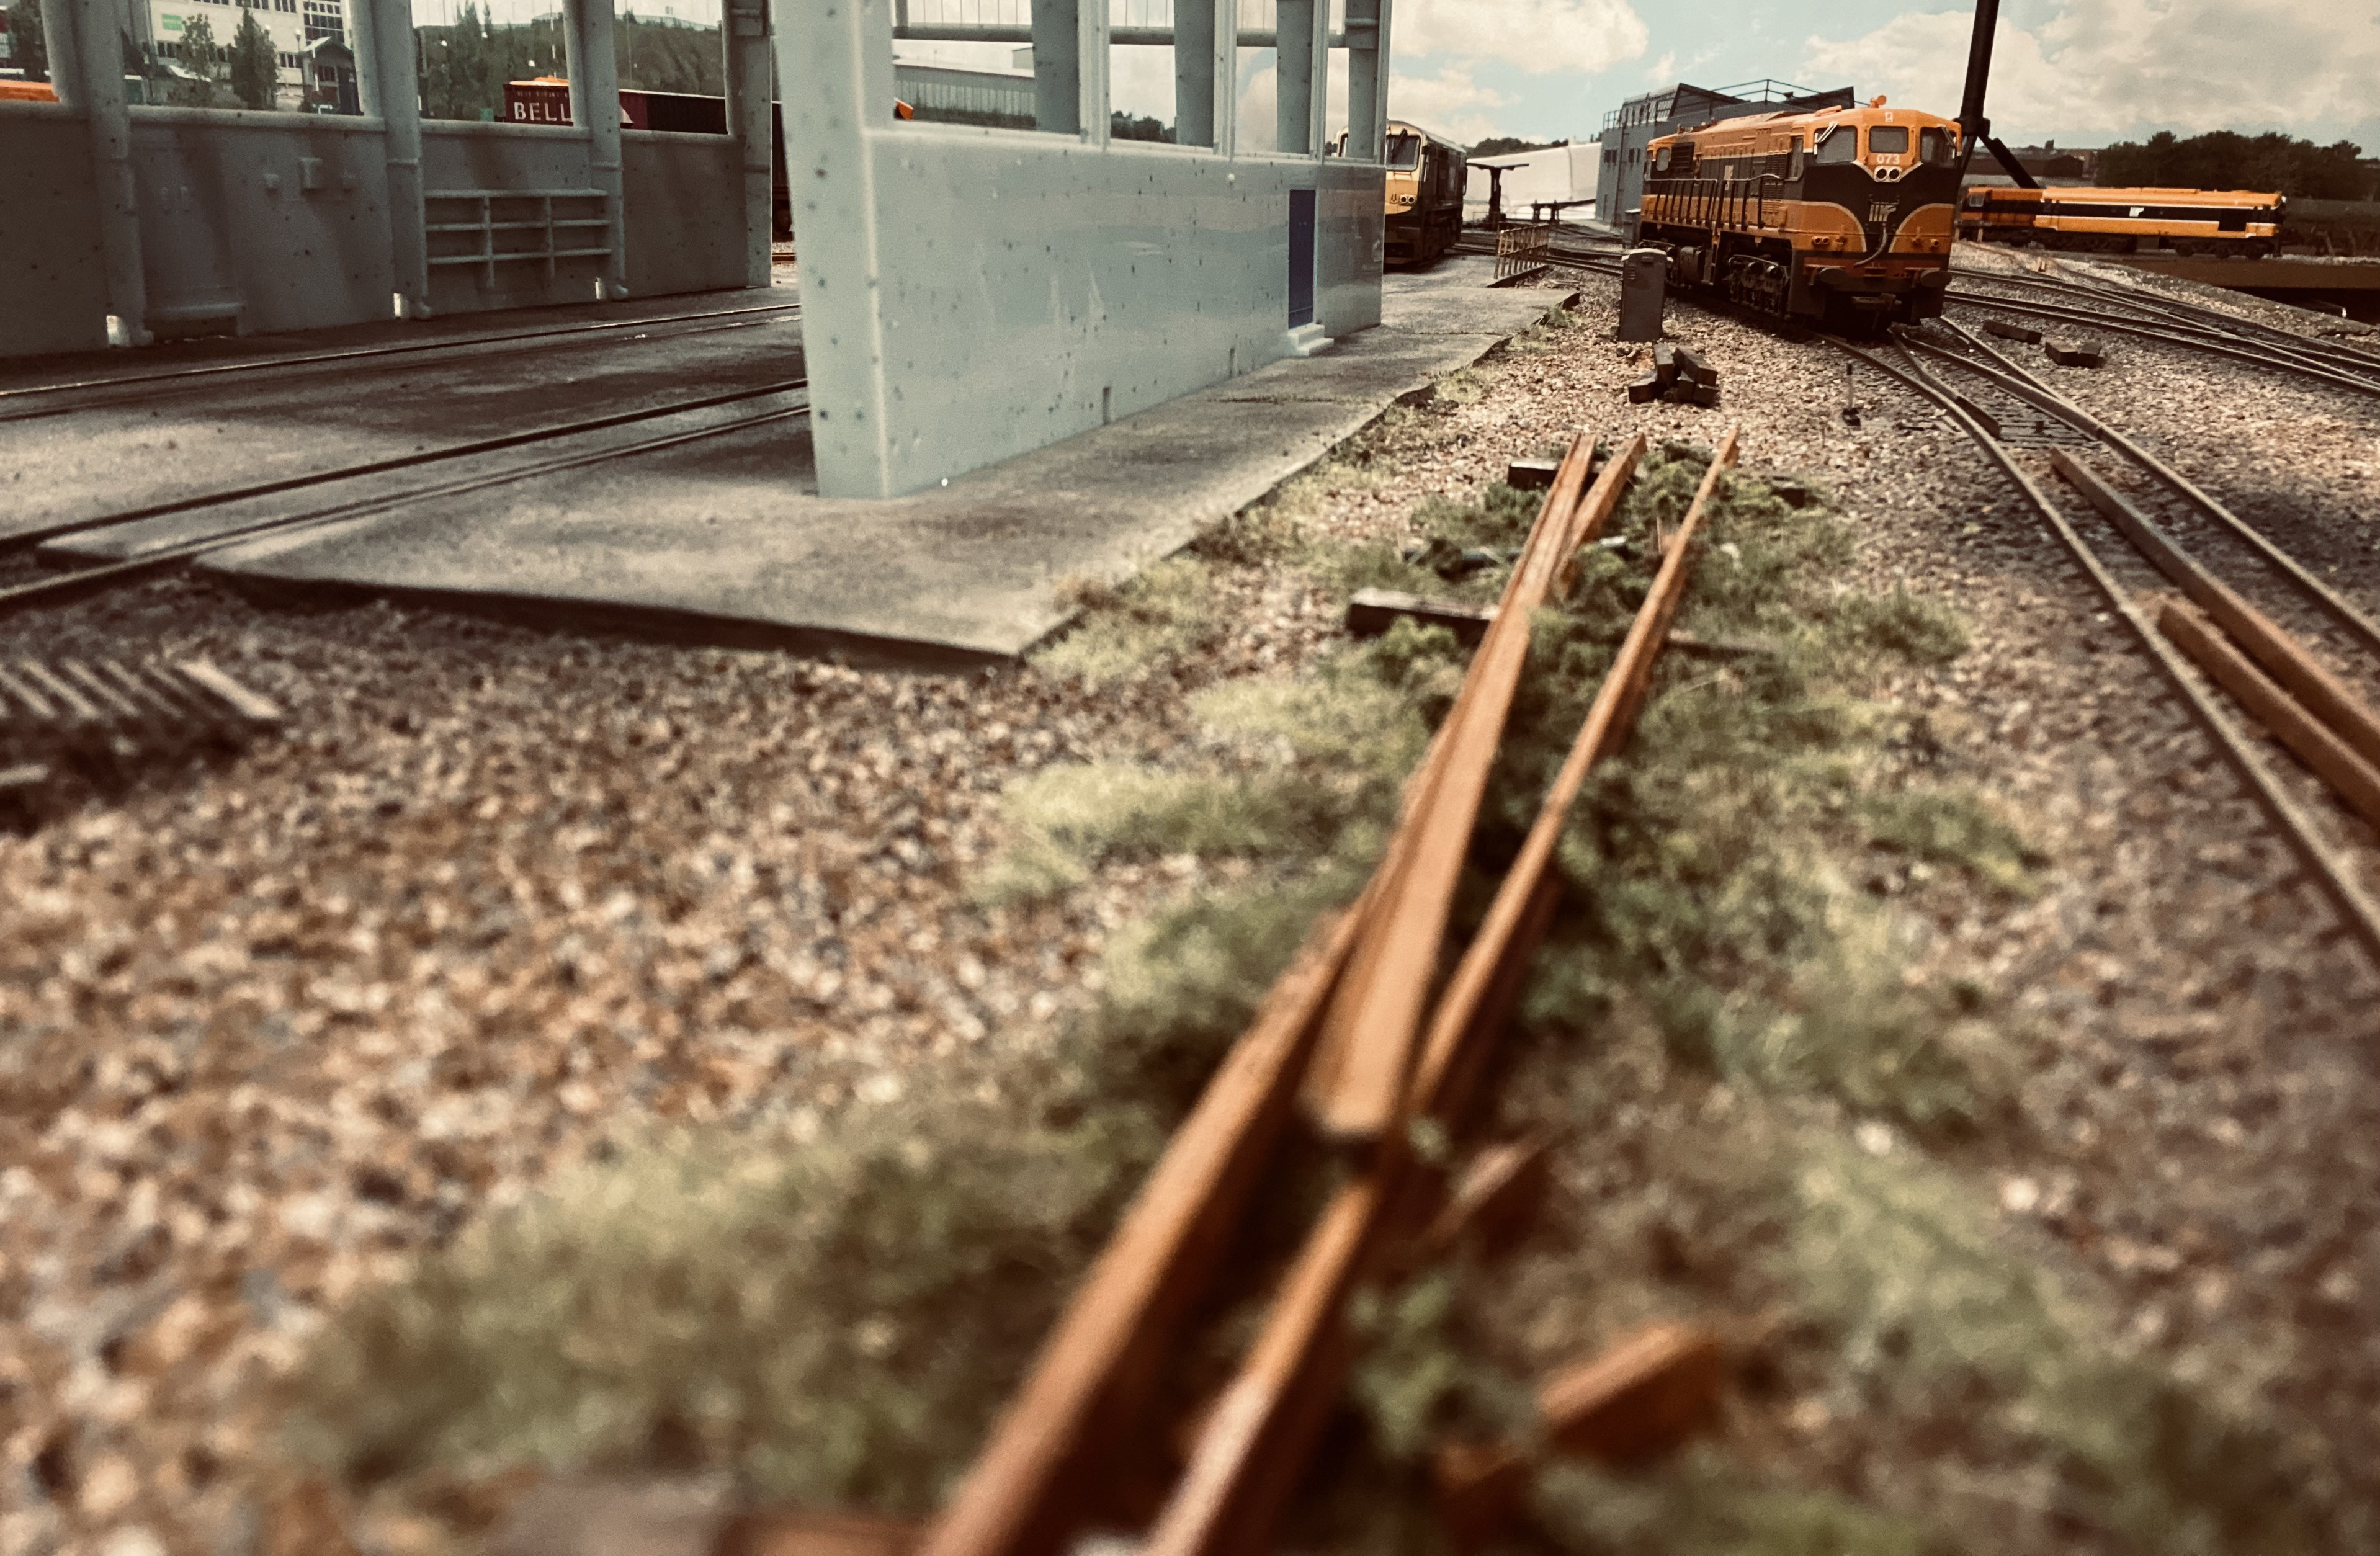
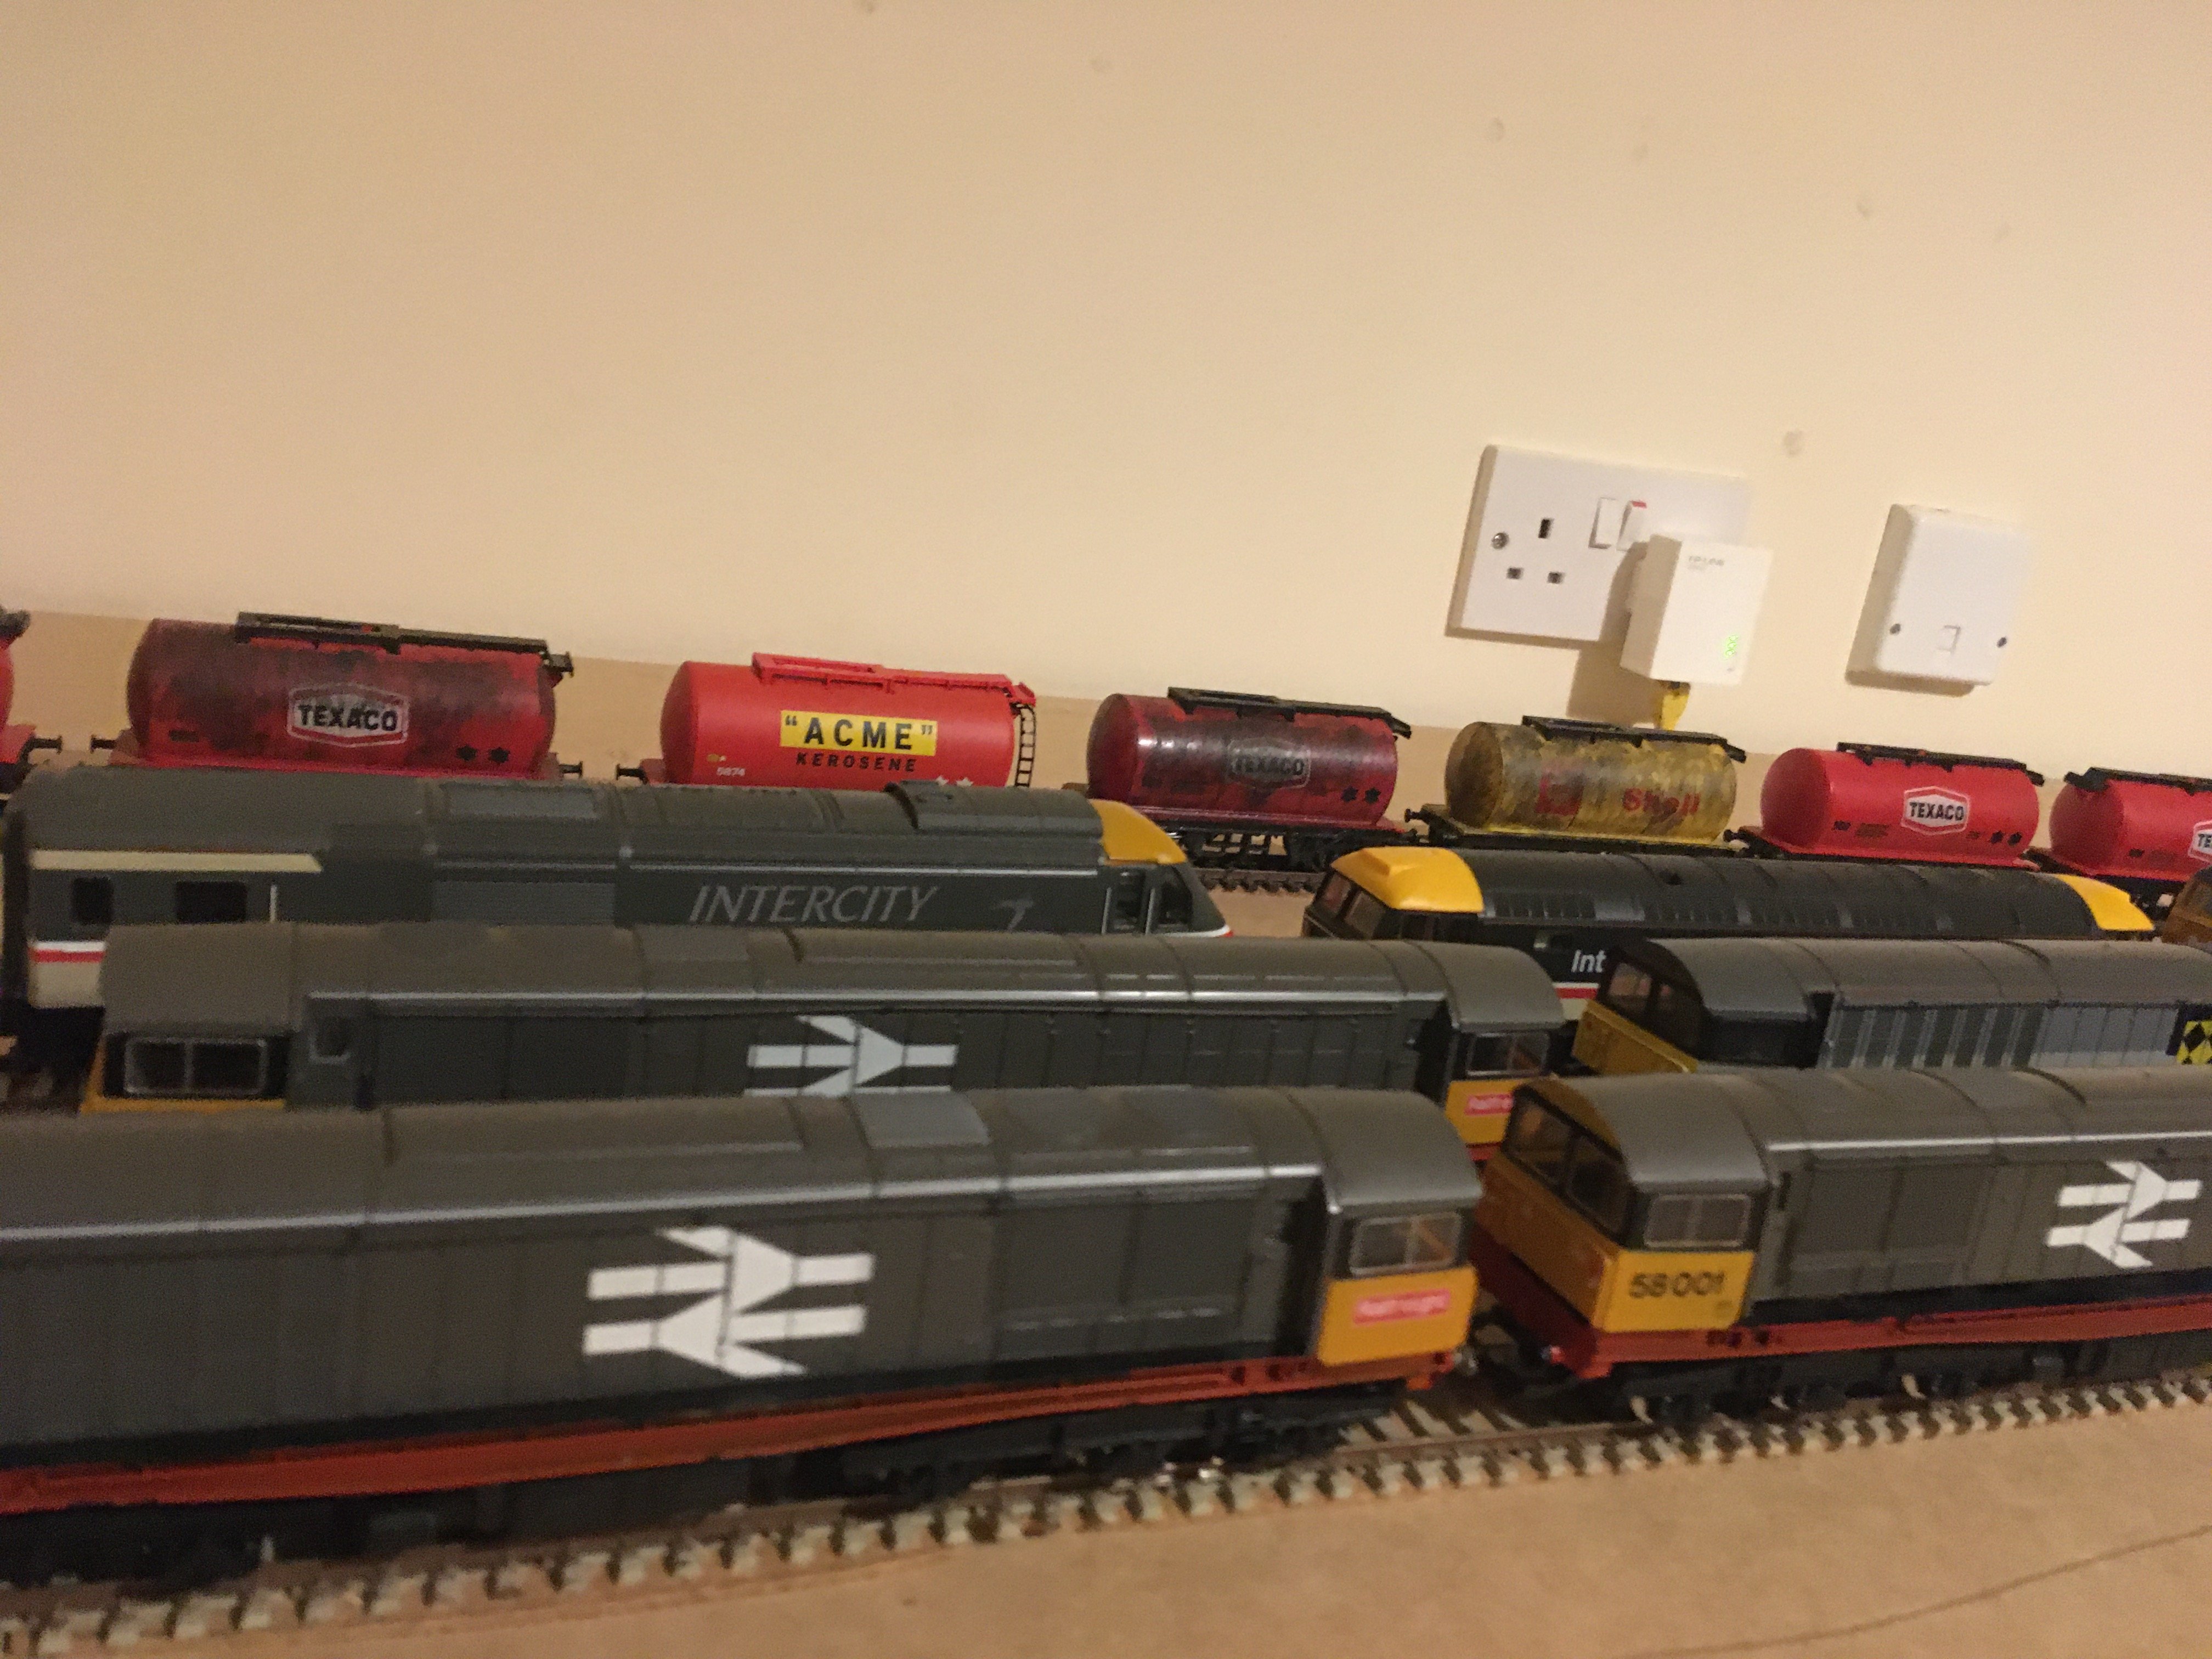
Big update below - I cant't believe it's been nearly a year since the last update! You think you're not getting a lot done, but when you look back and gather it all together, it can be surprising how much can been accomplished on a layout over a few months. So grab a cuppa (if that's your thing) and enjoy Loco weathering At the start of the summer I was excited to start weathering the locos. Not wanting to make my first attempt on our lovely beautiful (expensive) Murphy Models / IRM Irish locos, I took one of my older Lima class 33's and gave it a go, using some streaking techniques I had seen on Everard Junction on YouTube and also some weathering powders and paint effects. Quite pleased with the result and found it easy enough to do, mistakes could also be corrected so that put my mind at ease that I could handle Irish locos (they're working out well, more photos to come soon). Backscenes & Lighting Next up, I was getting sick of looking at the bare walls in every photo and took the plunge to create the backscenes and add better lighting. I put up a WIZ smart LED strip from Currys across the layout and workbench - made a massive difference to the quality of the lighting. The backscenes were particularly tricky to do since I had no access to the back of the baseboard (it being in a small office) and having to offset them from the wall due to plug sockets and the broadband connection terminals. So I mounted 2x4 blocks on the wall above and below the baseboard to carry the weight of the boards, cut the boards to size, and used double-sided picture hanging strips (from Homeware) to just hold the boards in place. I used ID Backscenes with the self adhesive backing, laid them on the board (very happy with how easy and smoothly they went on) and put them up. Voila, was delighted with the result...until about 4 days later. This was during the hot few weeks in the summer and I came in one morning to see the entire backscene was covered in bubbles Looking online, other people had similar problems with the self adhesive expanding in the heat and then contracting, destroying the backscene! I was not pleased, however I re-purchased the backscene and flipped the boards around, attaching it on with strips of double sided tape from a craft store. This seemed to do the trick and I purposefully left gaps in the strips to allow any trapped air to escape. It's worked a treat so far and made a huge difference to the layout and photos. Mounting the Backscenes Lighting Before and After End Result Buffers Insanely, I decided to add LEDs to all the buffers from scratch. This turned out to be really fiddly and sometimes frustrating, but ultimately enjoyable and rewarding. The result was great and I'll pop a series of how-to images in the tutorial topic at some point in the near future if anyone wants to see how it was done. The LEDs for the Hornby buffers were easier to manage as they were 1206's (0.12 inches by 0.06 inches (3.2 x 1.6 mm)). However I used 0603's on the lamp on the Peco Buffers and they were tiny (0.06 by 0.03 inches (1.6 by 0.8 mm)). I also left some buffers without LEDs and rusted on older sidings. Using an old adjustable Gaugemaster control unit as the power source also meant the intensity of the lights could easily be turned up or down, so that was handy Fuel Point Next up near the end of the summer was to complete the fuel point. The concrete hardstands had been sitting there for a few months and I'd been itching to get at them and do some grimy, oily weathering. I also wanted to use a kit and add some dim orange lighting, typical of the 80's and 90's when LED lighting wasn't as widespread. Very happy with the end result, it has the dirty and grimy feel, with shiny oil stains and dim sodium lighting, exactly what I was aiming for Adding metal grates to the concrete by digging strips out of the modelling clay, cutting out the plastic from a sieve, gluing in place, adding baby powder mixed with some coal dust to represent accumulated grime, more PVA, and then a series of black washes for colour. Putting together the kit parts, painting and weathering them to look nice and oily For the lighting, I used more of the small amber LEDs and wire saved from cutting off LED arms, and the frog wire from points. Supergluing this carefully (even using some heat shrink to insulate the wires where they cross on the structure), the long wires are then run down the two supports, where they can pass through holes in the baseboard. End Result! New locos October saw a career opportunity and change to work for Getty Images so I treated myself and expanded the fleet, picking up 4 locos at the Model Show in Dublin and a bunch more from the UK. This bring the Irish loco total to 24 which is the perfect size fleet for what I have in mind on the next, larger layout in the cabin (https://irishrailwaymodeller.com/topic/11229-charobyn-model-railway/) 3 x 141s and a Black and Tan 121 from the Irish Model show, plus the obligatory couple of packs of ore wagons from irish Railway Models Bought another 11 models and rolling stock from a UK modeller who just happened to be selling them when I was looking on ebay - have saved up for these for a while! (2 x 201, 3 x 071, 3 x 141 and 3 x 121) Railings Over Christmas, we all got struck down with Covid in the house (from the 23rd to the 2nd, just in time to go back to work ). However it did mean a lot of time for modelling, so I added some railings from Scale Model Scenery around the depot and fuel point area to protect workers from accidentally wandering into the path of locos! The railings were a breeze to use, painted with a yellow / orange mix, weathered using black and rusty weathering powders, as well as a spot of aluminium paint for areas frequently leaned on by workers. Then some hole punching and PVA to hold them in place, as well as tricky joining work on the corners using Roket Card glue and job done. Pretty happy with the result, I like that they are weathered and dirty and not bright yellow when surrounded everywhere by oil and grime End result Static Grass And last but not least, something I've been putting off for ages as I was terrified of screwing it up and making an irreversible mistake on the layout...scenery and static grass. So I took the opportunity to get my daughter (3 years 9 months) started in modelling over Christmas Covid lockdown and she helped me make a mock diorama to practice creating a hill and adding scenery. This worked out quite well, using insulation board from the local hardware, cut to shape with a steak knife and glued using gorilla glue. Then a coat of sculptamold, chocolate paint, ground cover and static grass. Also took the opportunity to practice making walls using 3mm mdf and covering one with textured brickwork wrap (made by a guy in Greece on Etsy ), one with brick plasticard and making one from scratch with DAS modelling clay and etching in the brickwork lines. All were weathered using paint washes and powders and turned out well. Adding Woodland scenics turf, bushes, underbrush, foliage and more scatter completed the scene - I felt a bit more confident about adding some scenery to the layout after this! End Result This "practice run" then gave me to confidence to try out a little scene with old rusty rails and weeds near the back of one of the depot buildings. I'll admit I was getting worried that it looked crap and artifical, but when I started adding bushes and extra details, it really came together and I was delighted End Result ---------------------------------------- So there we go, "lot's done, more to do" as the fella says I hope you enjoyed this update as much as I enjoyed putting it together. At the moment, I'm having great fun weathering the Irish locos. I think the next big project will be painting and properly weathering one of the engine sheds, but we'll see. I have also figured out how to upgrade the sound and fit twin double mega bass speakers into the 071s and the 201s so will share some videos on that soon. Also it was tricky but I even managed to fit another sugar cube tower speaker into the class 121 with amazing results. Will share that too as it was definitely not obvious, or easy to do! More updates soon...much sooner than last time anyway
- 80 replies
-
- 27
-

-

-
Thanks a lot John, Missed your comment so only replying now sorry! I have similar tutorials for adding speakers to the 071, 201 and even 121 classes, decent speakers jus make such a difference Just putting the content and images together - watch this space!
- 4 replies
-
- 2
-
-
- 141/181 class
- speakers
- (and 1 more)
-
They're out there alright - my best advice is to keep an eye on ebay (maybe setup an automated alert for the search) and be prepared to pay fast and pay high. You should be budgeting about £350 sterling cos that's what they're going for these days. Since this post I have been able to seriously expand my fleet using ebay and a layout update for Riverbank is well over due - watch this space over the next few days
-
Lol, the Boss and myself have a deal, I get this Railway Cabin and she gets stables built later this year, so she doesn’t really care about the loss of a clothes line
-
All done - 3 coats of stain on the #railwaycabin
-
Comparison of 7 different speaker combinations for class 141/181
Adrian replied to Adrian's question in DCC, Electrics and Electronics
That's really interesting ^^ thanks for sharing- 5 replies
-
- 1
-
-
- speakers
- 141/181 class
- (and 1 more)
-
Comparison of 7 different speaker combinations for class 141/181
Adrian replied to Adrian's question in DCC, Electrics and Electronics
That's very interesting information @Sean an @murphaph Thank you! That logic of having different speakers handle different parts of the sound totally makes sense but is beyond my capabilities for now And I agree with Phil, that I do like the sound fading over distance as well. To answer your question, the speaker do have their own enclosures and are simply mounted on the chassis using black tack - again as Phil said there's not enough space to do anything else in most OO locos, to say nothing of the narrow CIE bodies on these models!- 5 replies
-
- 1
-
-
- speakers
- 141/181 class
- (and 1 more)
-
Just posting this here in case it's useful for someone in the future - it's a set of comparisons of various different speaker types for the 141 including: * double iPhone * twin sugarcubes * slim sugarcube * bass enhanced * twin megabass * EM2 bass (knew it wouldn't fit but had to try it out ) * Direct comparison of double iPhone and combination sugarcube & megabass * The winner (IMHO): Combination of 1 x Sugarcube & 1 x Megabass Enjoy!
- 5 replies
-
- 4
-
-
-

-
- speakers
- 141/181 class
- (and 1 more)
-
Can anyone recommend a good speaker for Murphy Models Class 141/181
Adrian replied to mmie353's question in DCC, Electrics and Electronics
And last but not least, here's a full tutorial for the 141s if you are fitting your speakers and need to file down the chassis to make them fit - might be helpful! -
Just sharing this in case it's useful for anyone following or new to this thread - continuing the sound for class 141/181 themes, here's a full start to finish video of fitting both a sugarcube and megabass to the loco, with details on how to modify the chassis as well Hope someone finds it useful!
-
Depot #8 by Riverbank Railways (fictional 1980s / early 1990s depot)
Adrian replied to Adrian's topic in Irish Model Layouts
The depot is sounding great these days The last few weeks have concentrated on sound and getting it right. The LokSound decoders for 141/181 from Roads & Rails are great and come with a double iPhone speaker which is good...but I wasn't 100%, so decided to buy a load more speaker types and test them out. Also the iPhone speakers wouldn't quite fit without modifying / filing the chassis, which I didn't want to do without testing other speakers first, so the testing began. Speaker Testing Here's the full playlist with all speaker tests so you can see for yourselves if you like Speaker Installation I eventually settled on a combination of a sugarcube with as deep an enclosure as I could fit into the loco and a megabass speaker which just about fit, with some modification of the chassis. I found various posts on this topic (especially getting the body off) but no videos so created a full start to finish tutorial over in the tutorials section - hopefully it might help someone in the future The Winner And here's the final result! Double Heading And last thing I was doing this week was getting to grips with double heading and how to arrange CV values so as to be able to control loco functions while in the double header - got it running nicely and here's some 181 and 121 examples - enjoy! New Railway Last but not least, I am excited to launch Charobyn, a new large layout -
Over the last few months, I've bought four class 141/181s and as I love having sound, I wanted to fit DCC sound chips and speakers to each. I hadn't fit speakers before to anything so this was a new challenge, even just getting the body shell off the loco was something I had to look up. I also found two good posts on this topic on this forum https://irishrailwaymodeller.com/topic/8434-dcc-sound-for-locos-in-2020/ and https://irishrailwaymodeller.com/topic/4568-dcc-sound-speaker-comparison/ to get me started and give some idea of what needed to be done. After testing a bunch of different speaker types (watch the tests here if you like) I eventually settled on a combination of a sugarcube with as deep an enclosure as I could fit into the loco and a megabass speaker which just about fit, with some modification of the chassis. I never found a start to finish video tutorial on how to do this, so decided to create one and add it on here - hopefully it helps someone else in the future
- 4 replies
-
- 10
-
-
-

-

-
-
- 141/181 class
- speakers
- (and 1 more)
-
Wow! This is not something I need to do, or would ever attempt, but that's some serious machinery and equipment you have there and it's obvious you know how to use it. Thanks for sharing all that
- 26 replies
-
- 1
-
-
- lathe work
- machines
- (and 1 more)
-
Locks on everything and it's in the middle of nowhere Thanks a lot!
-
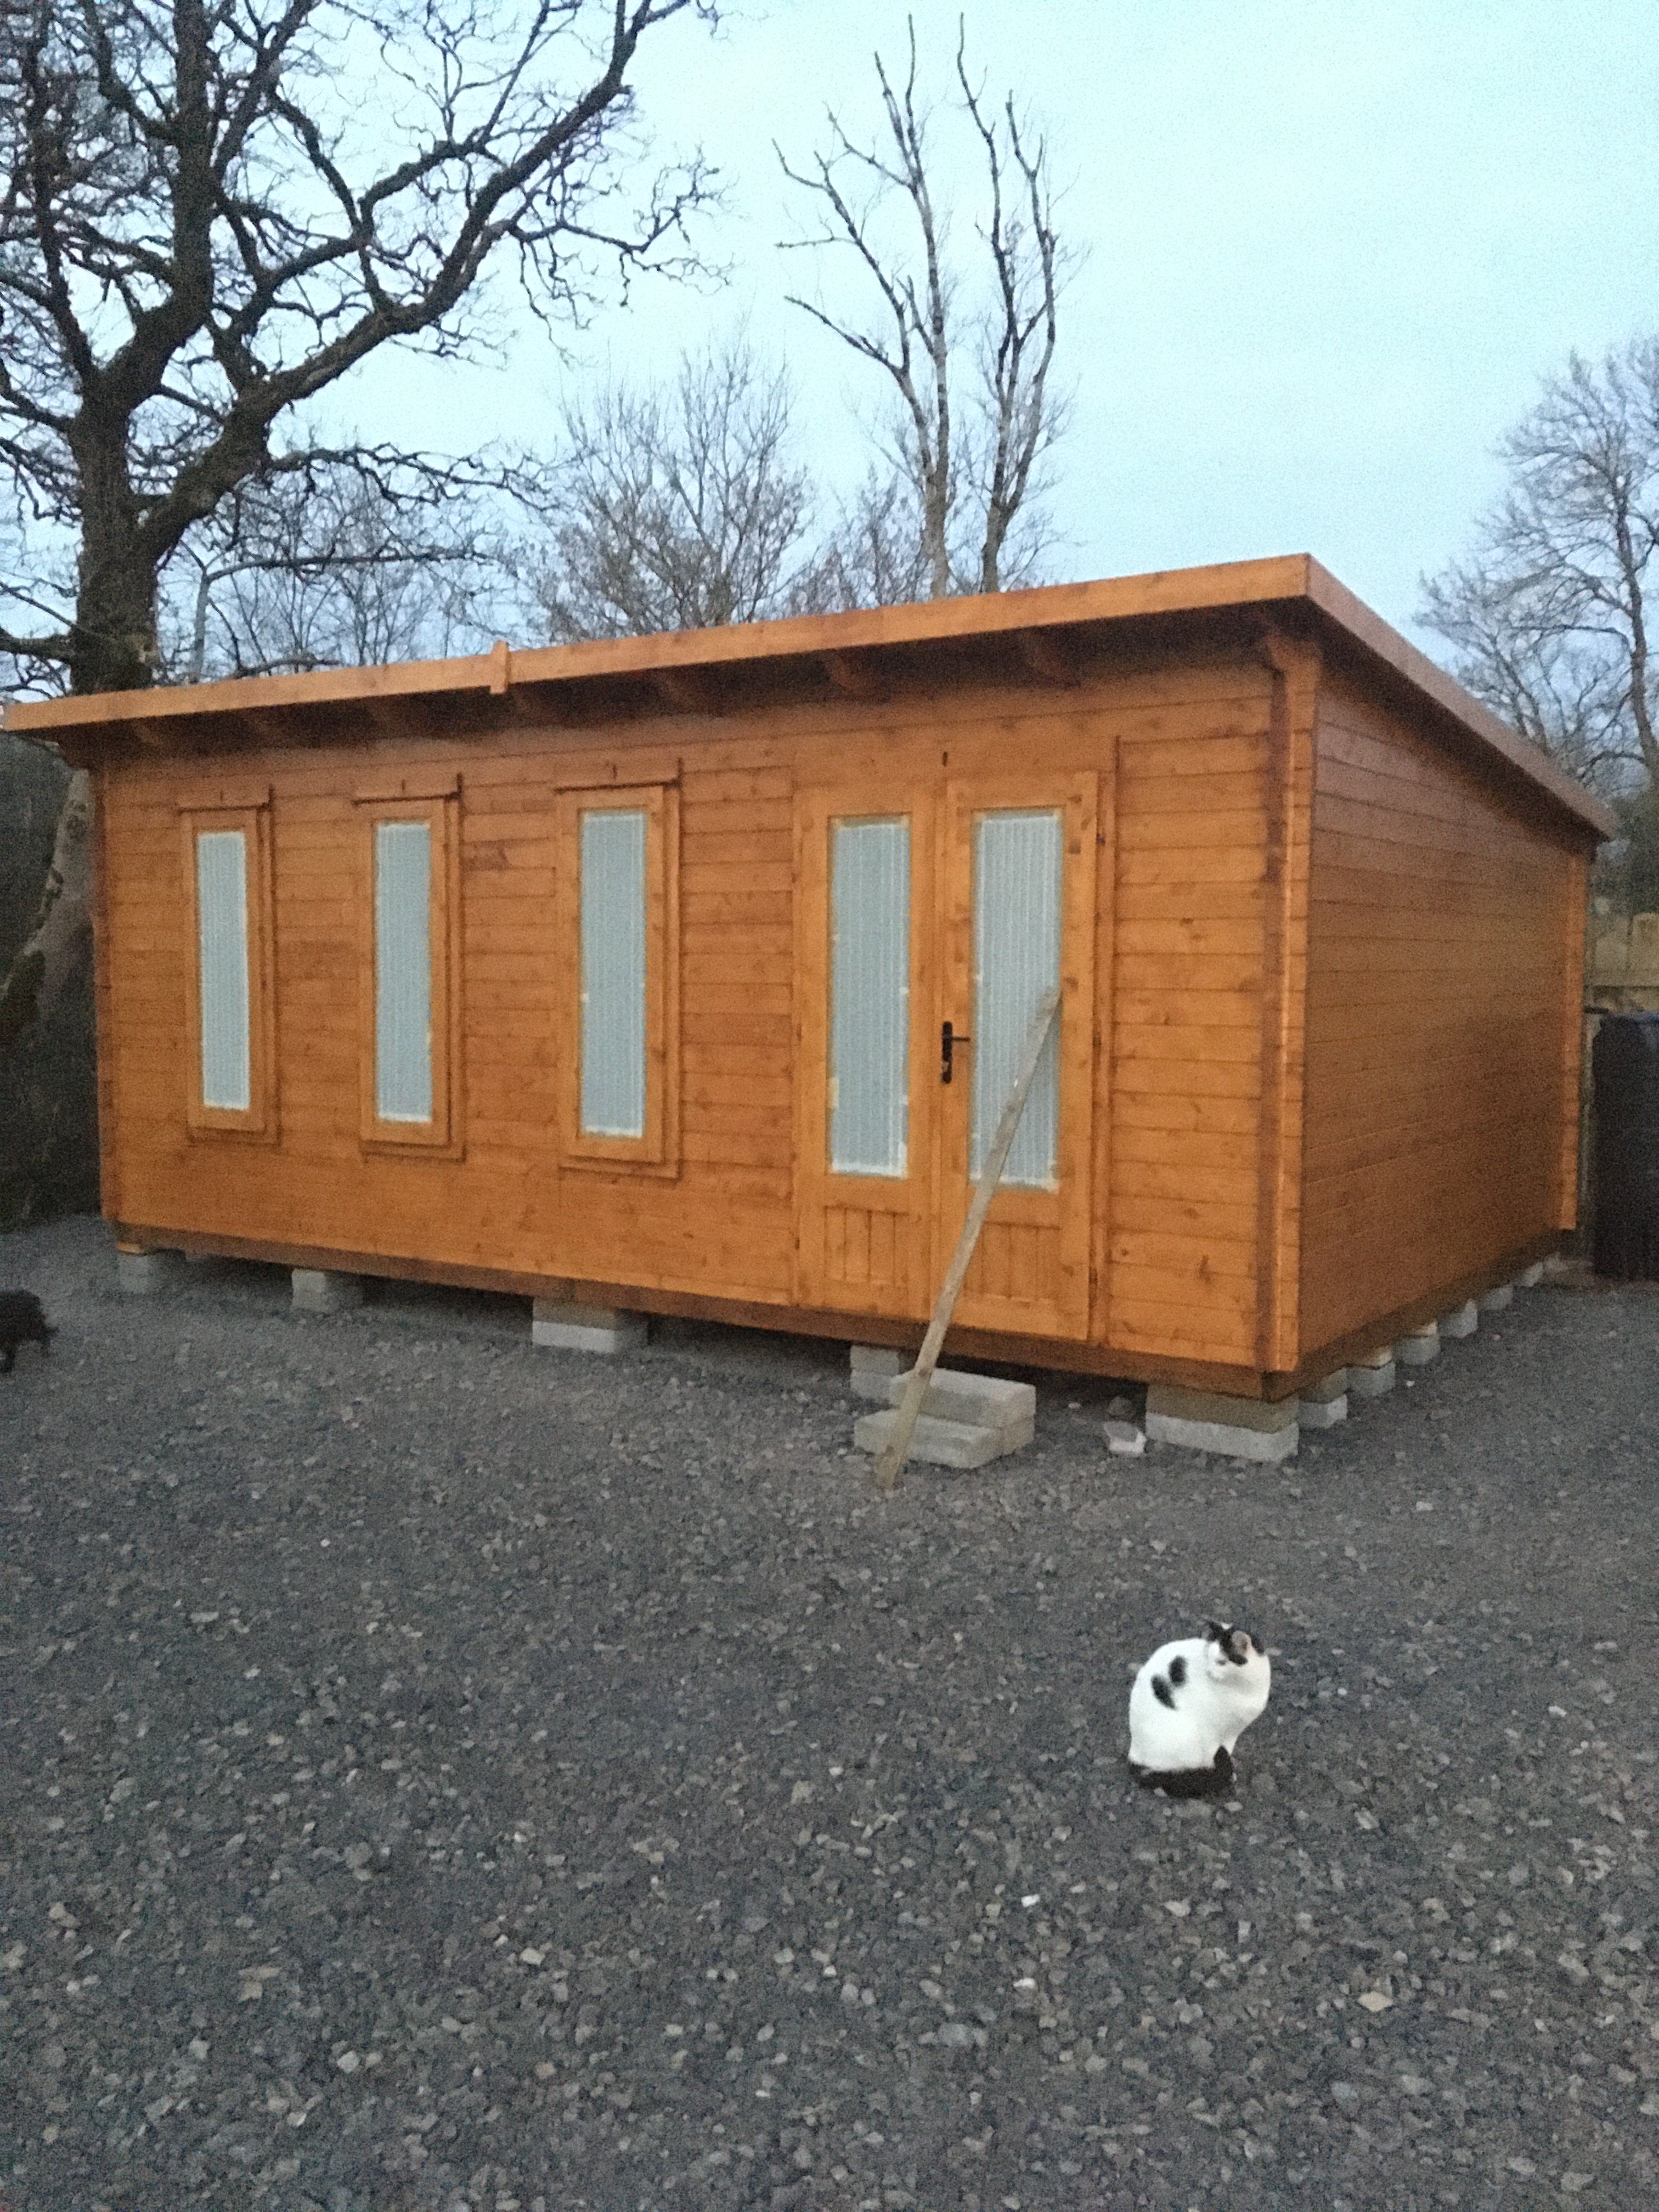
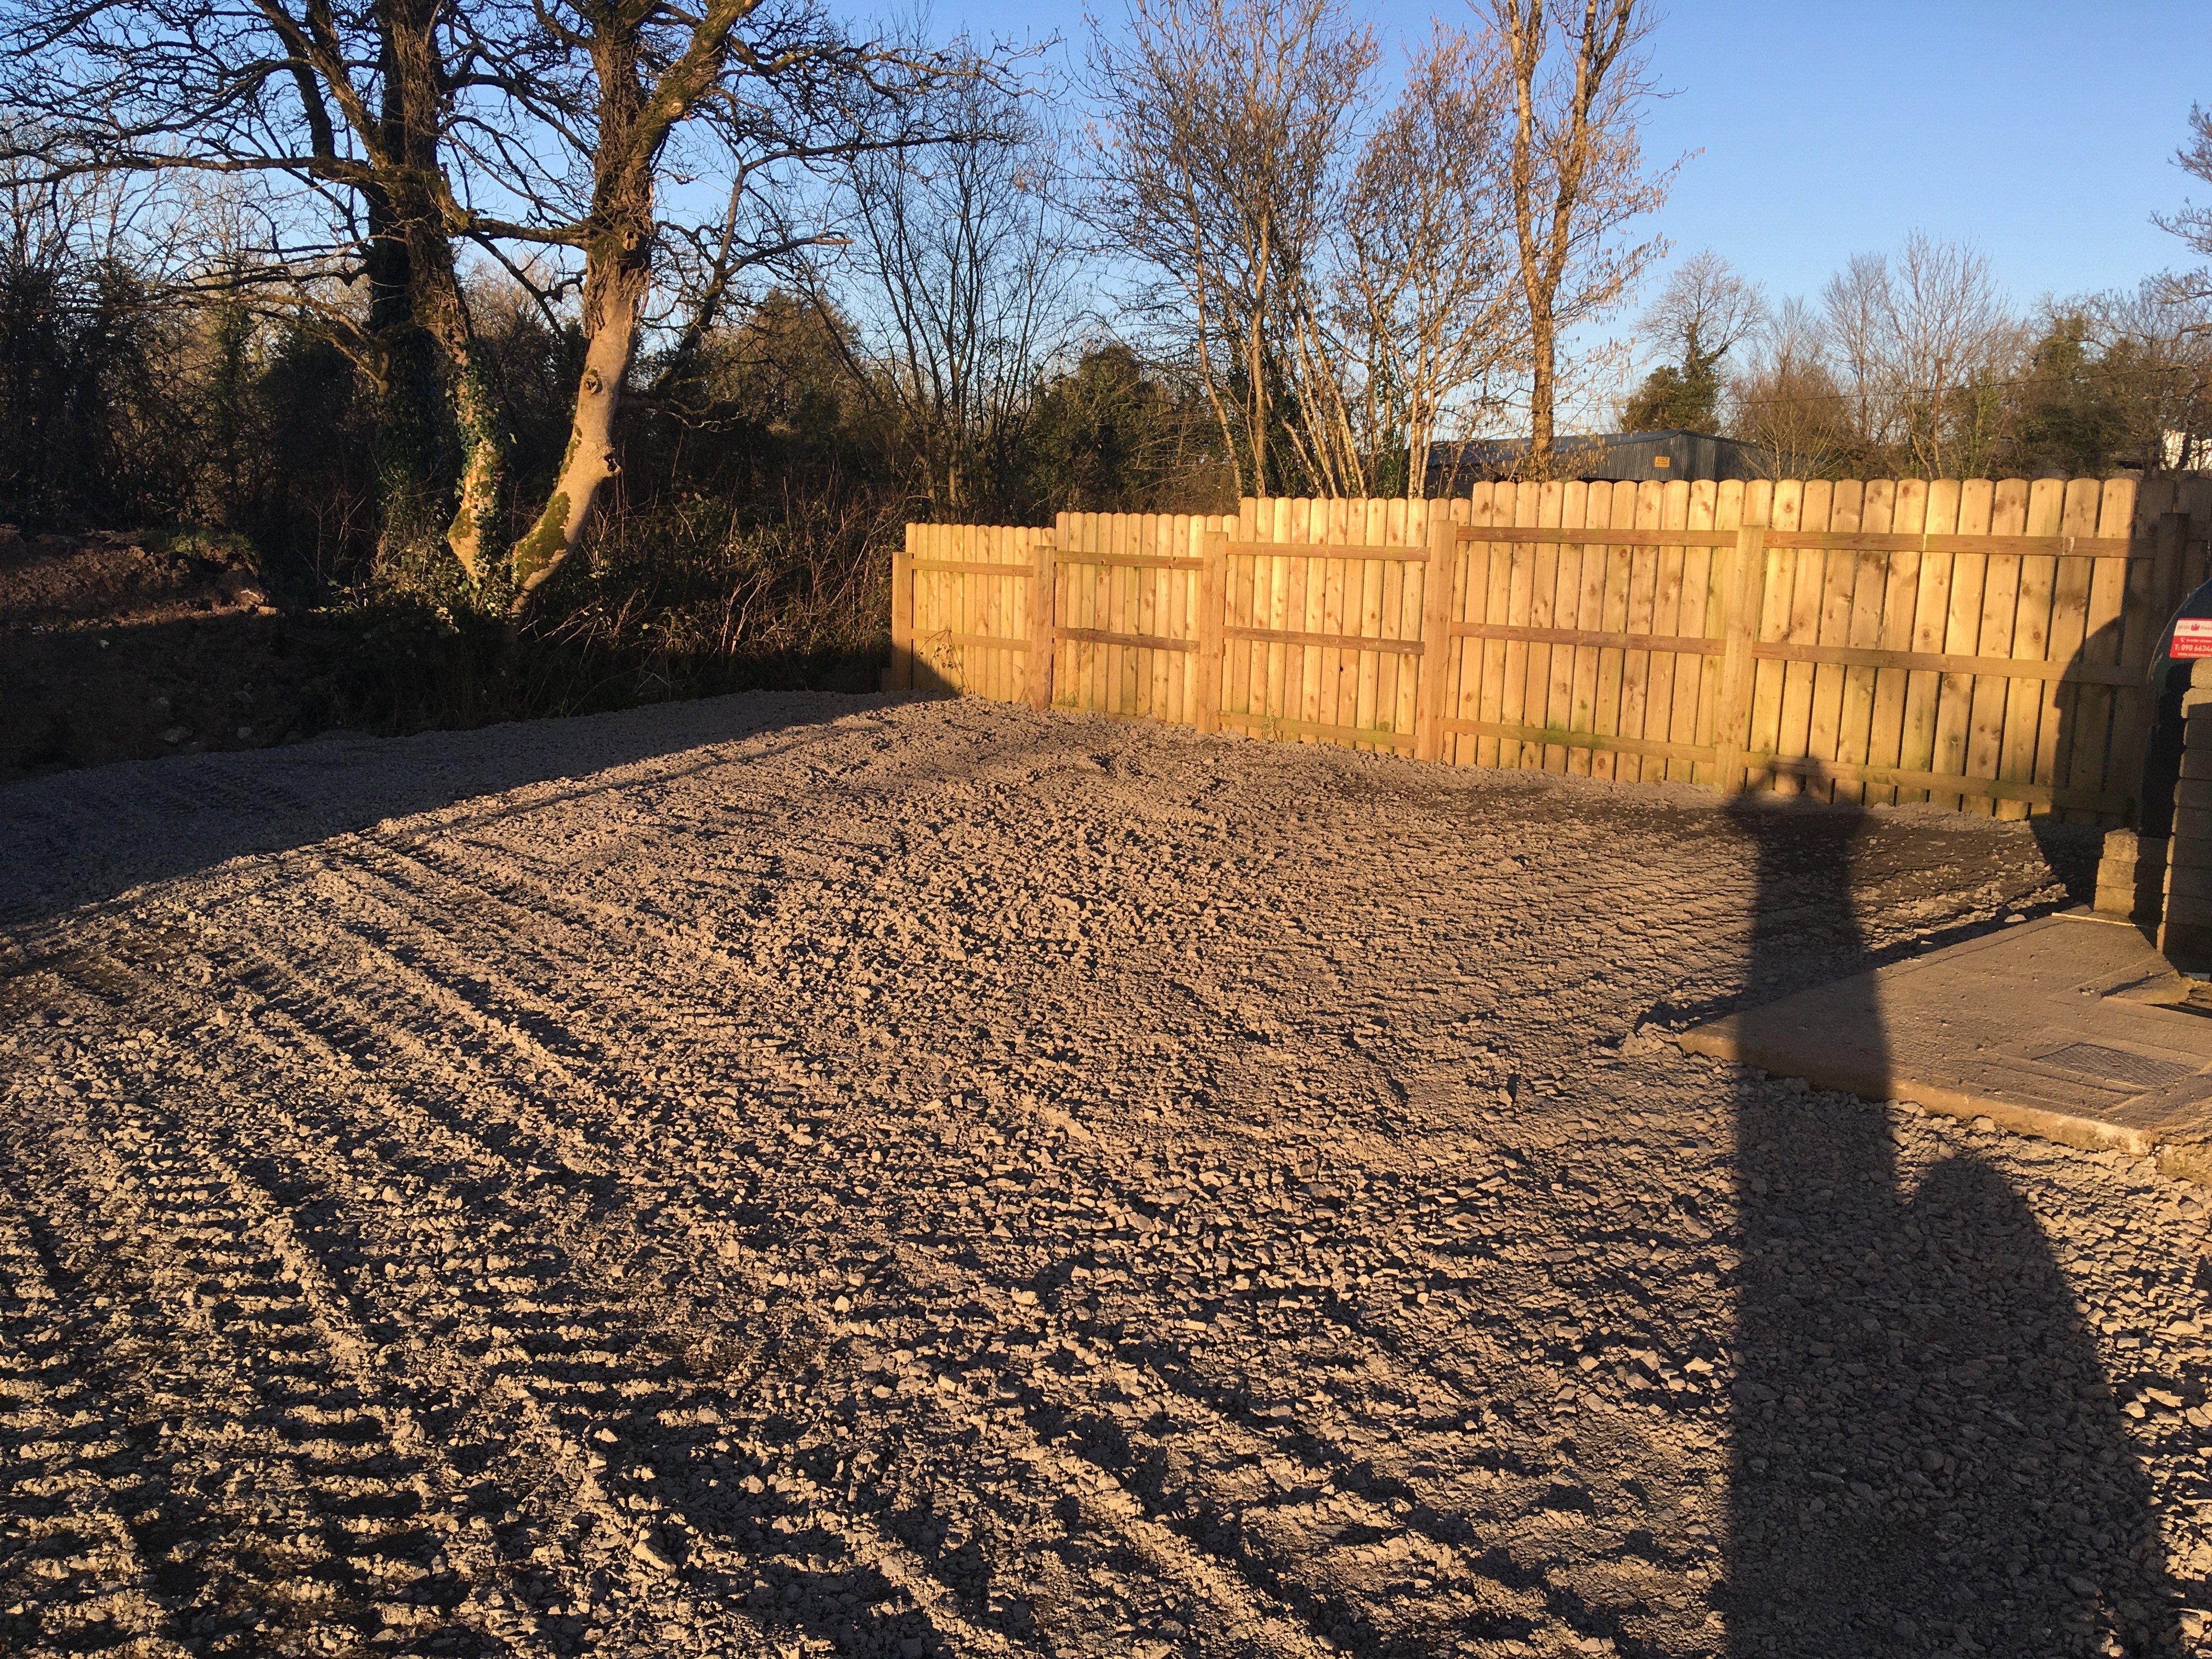
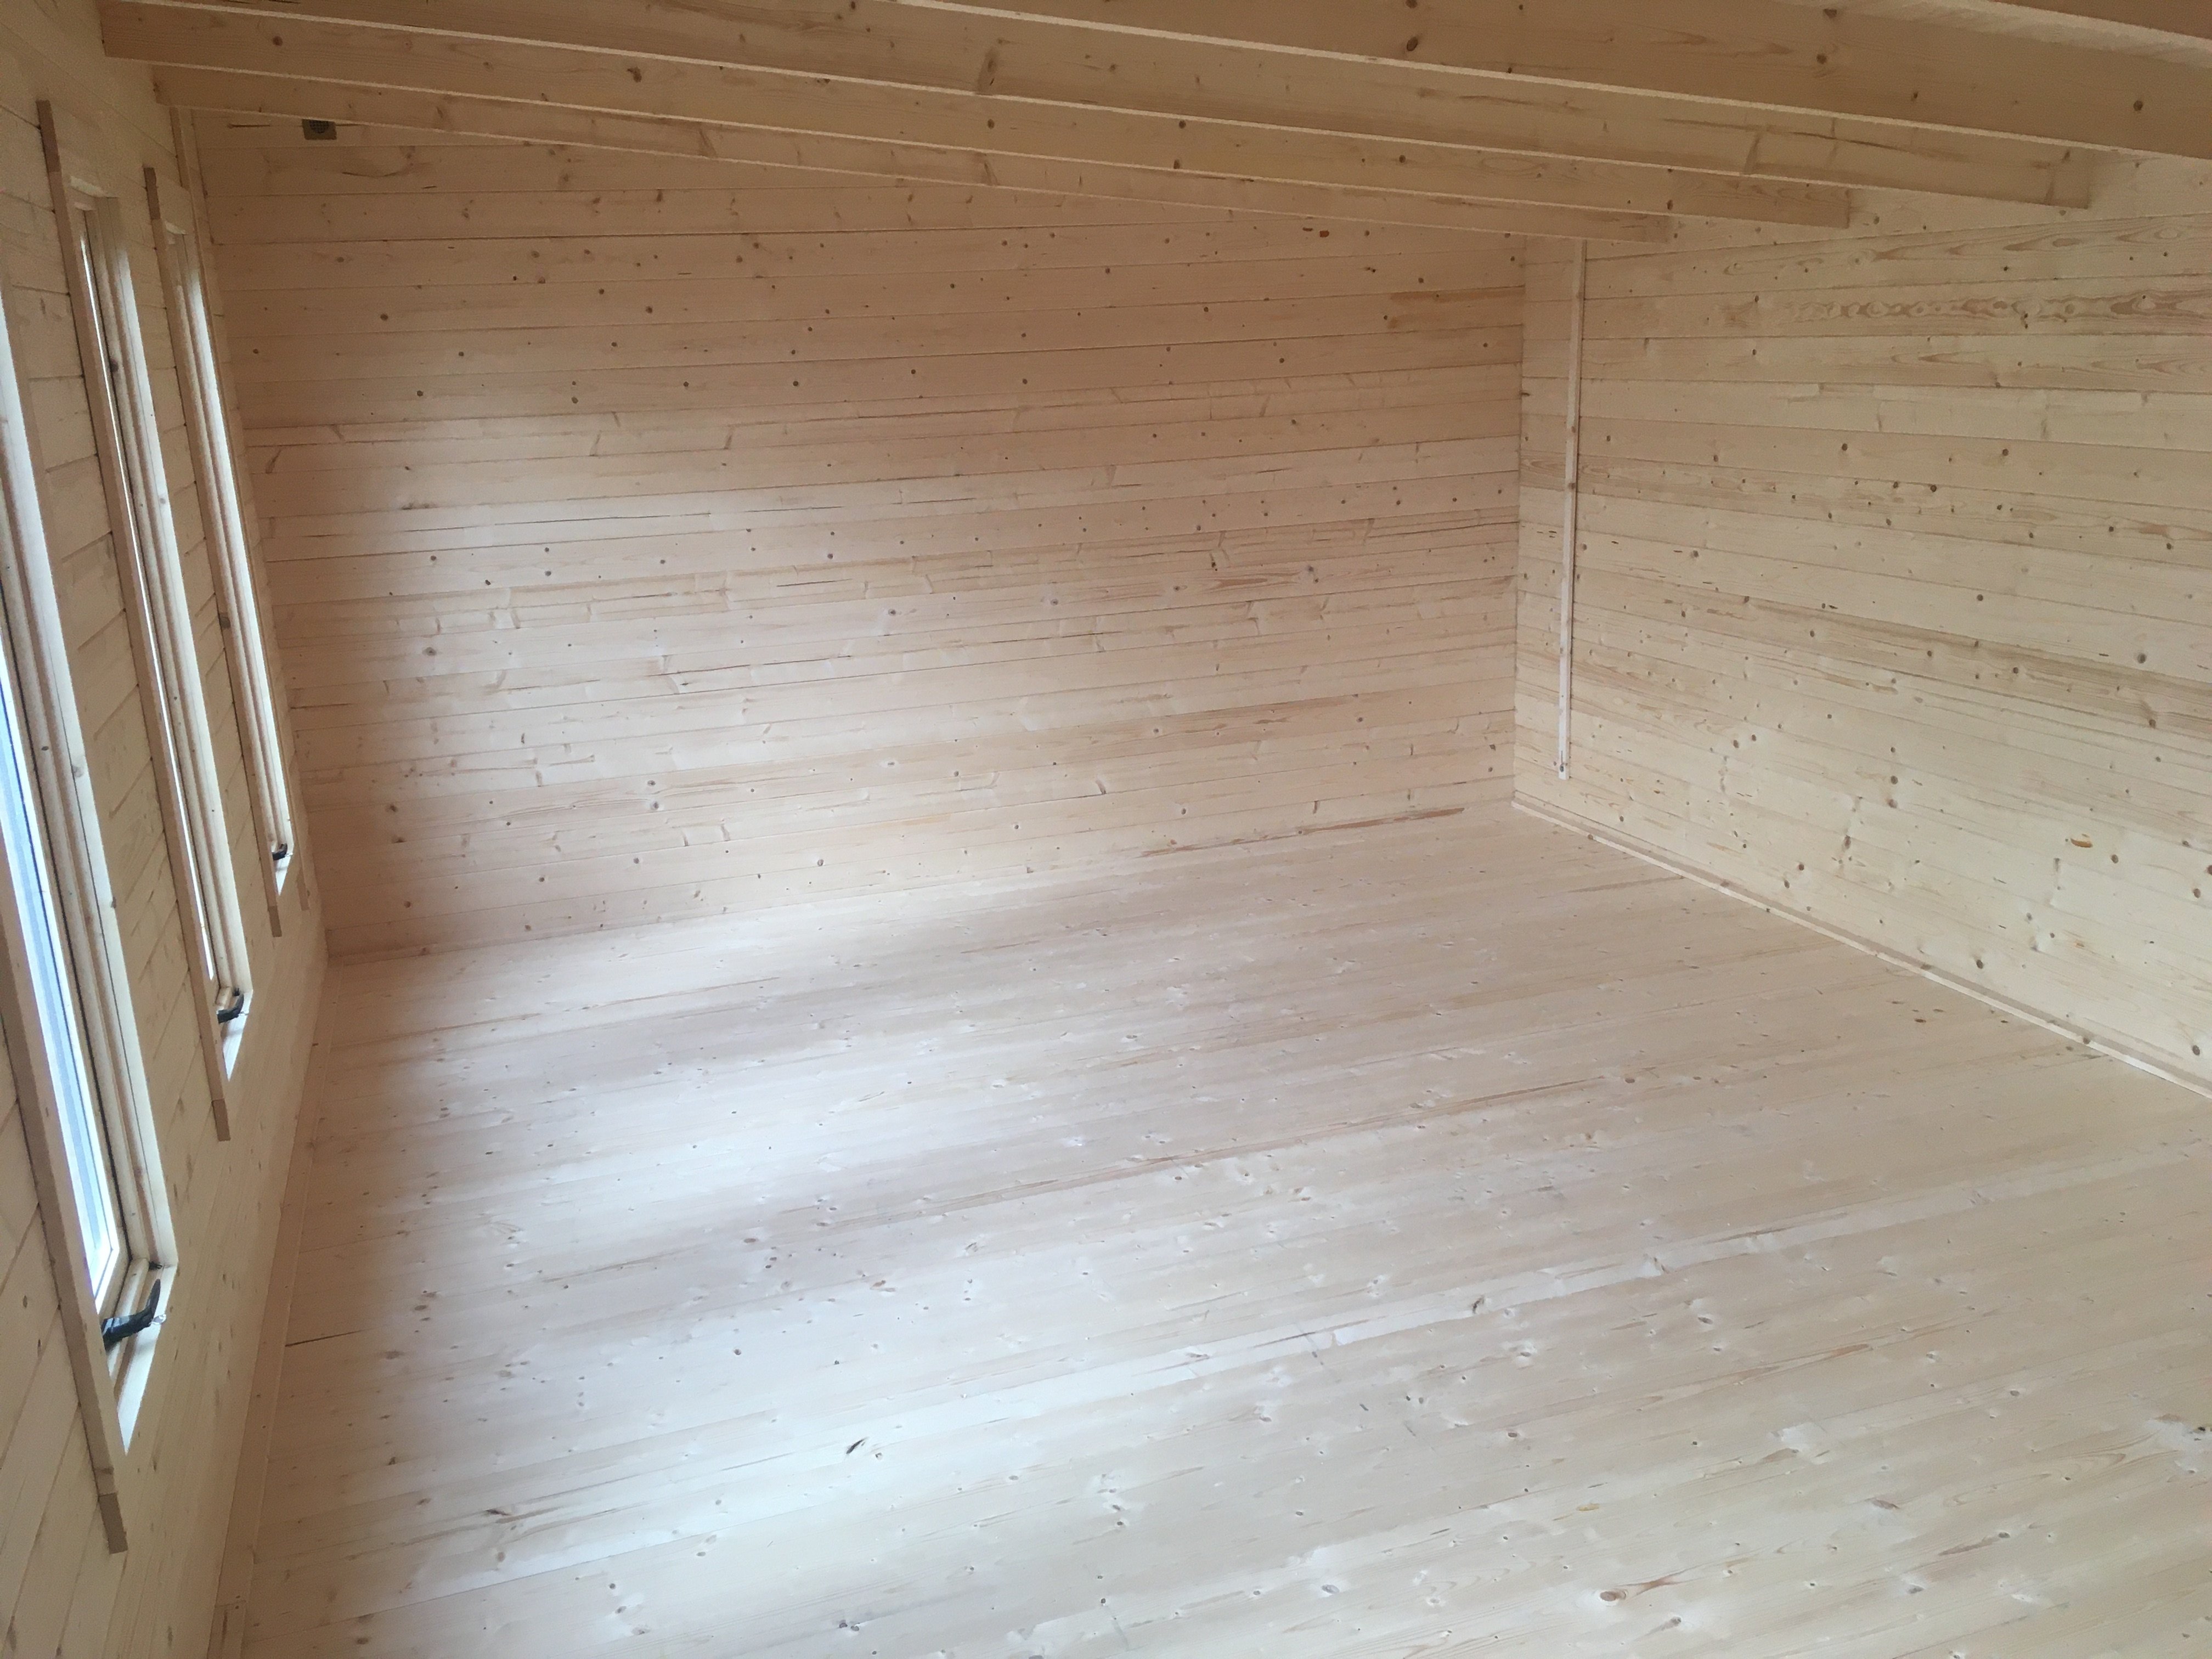
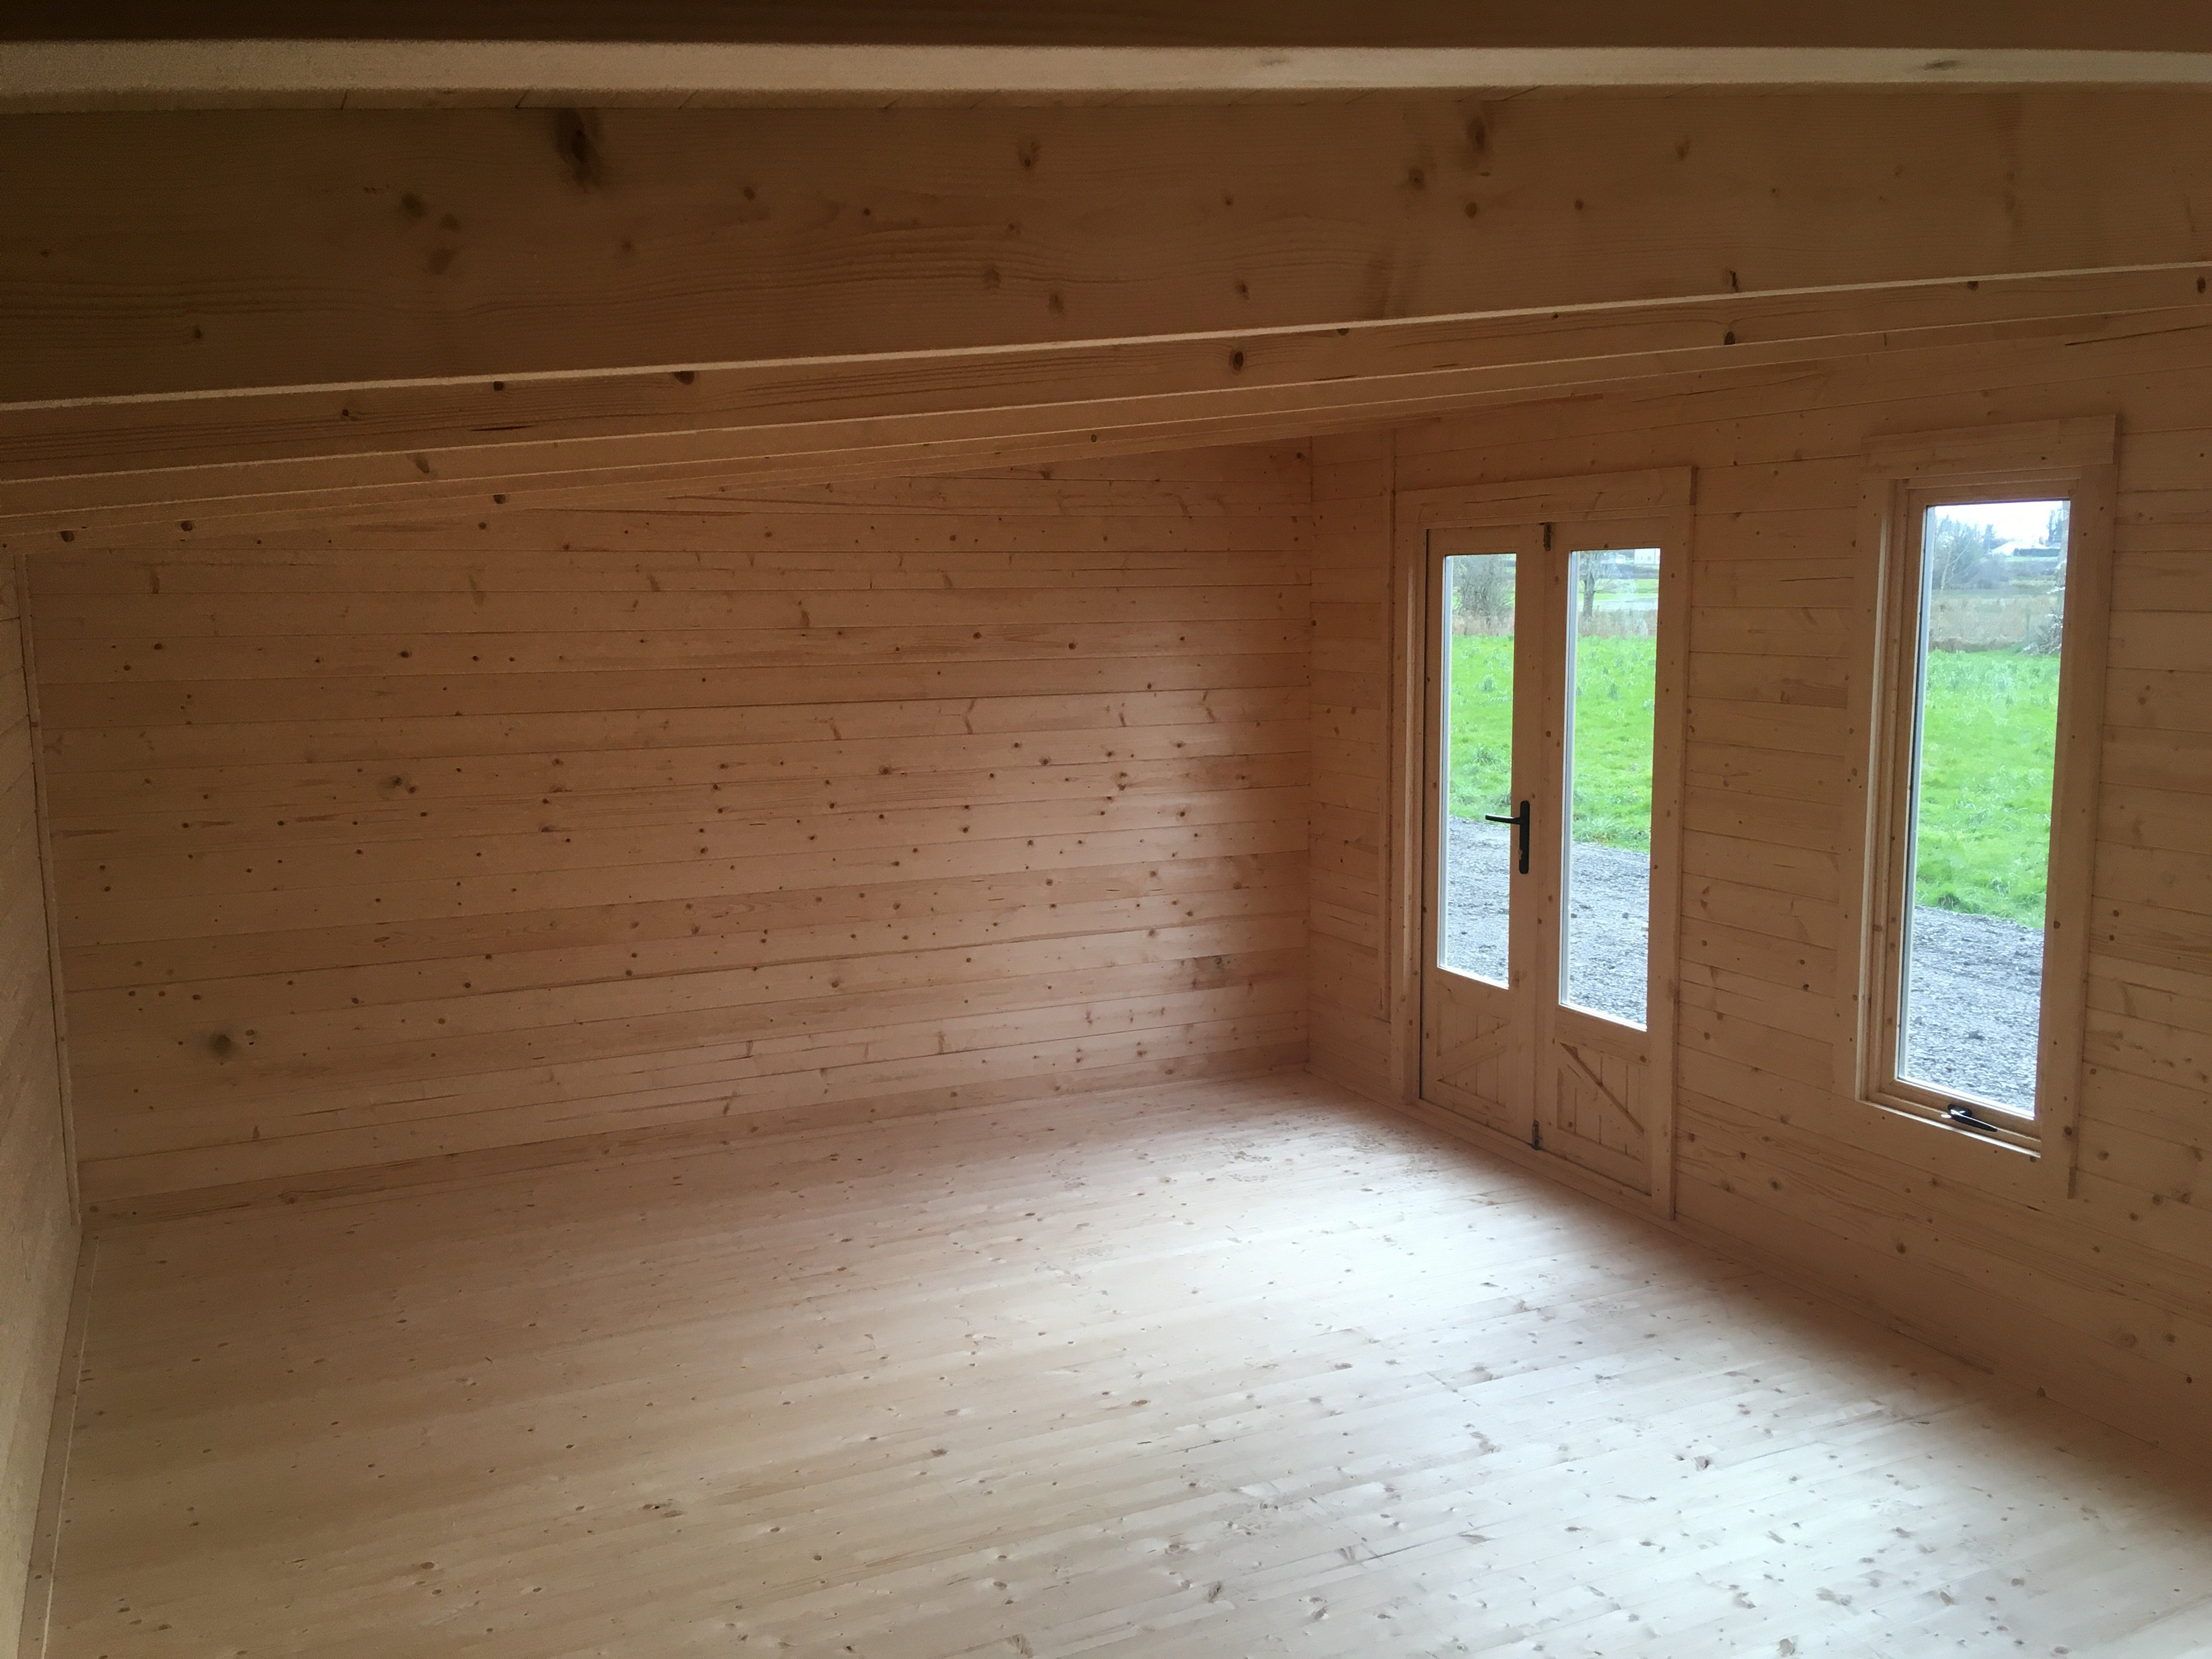
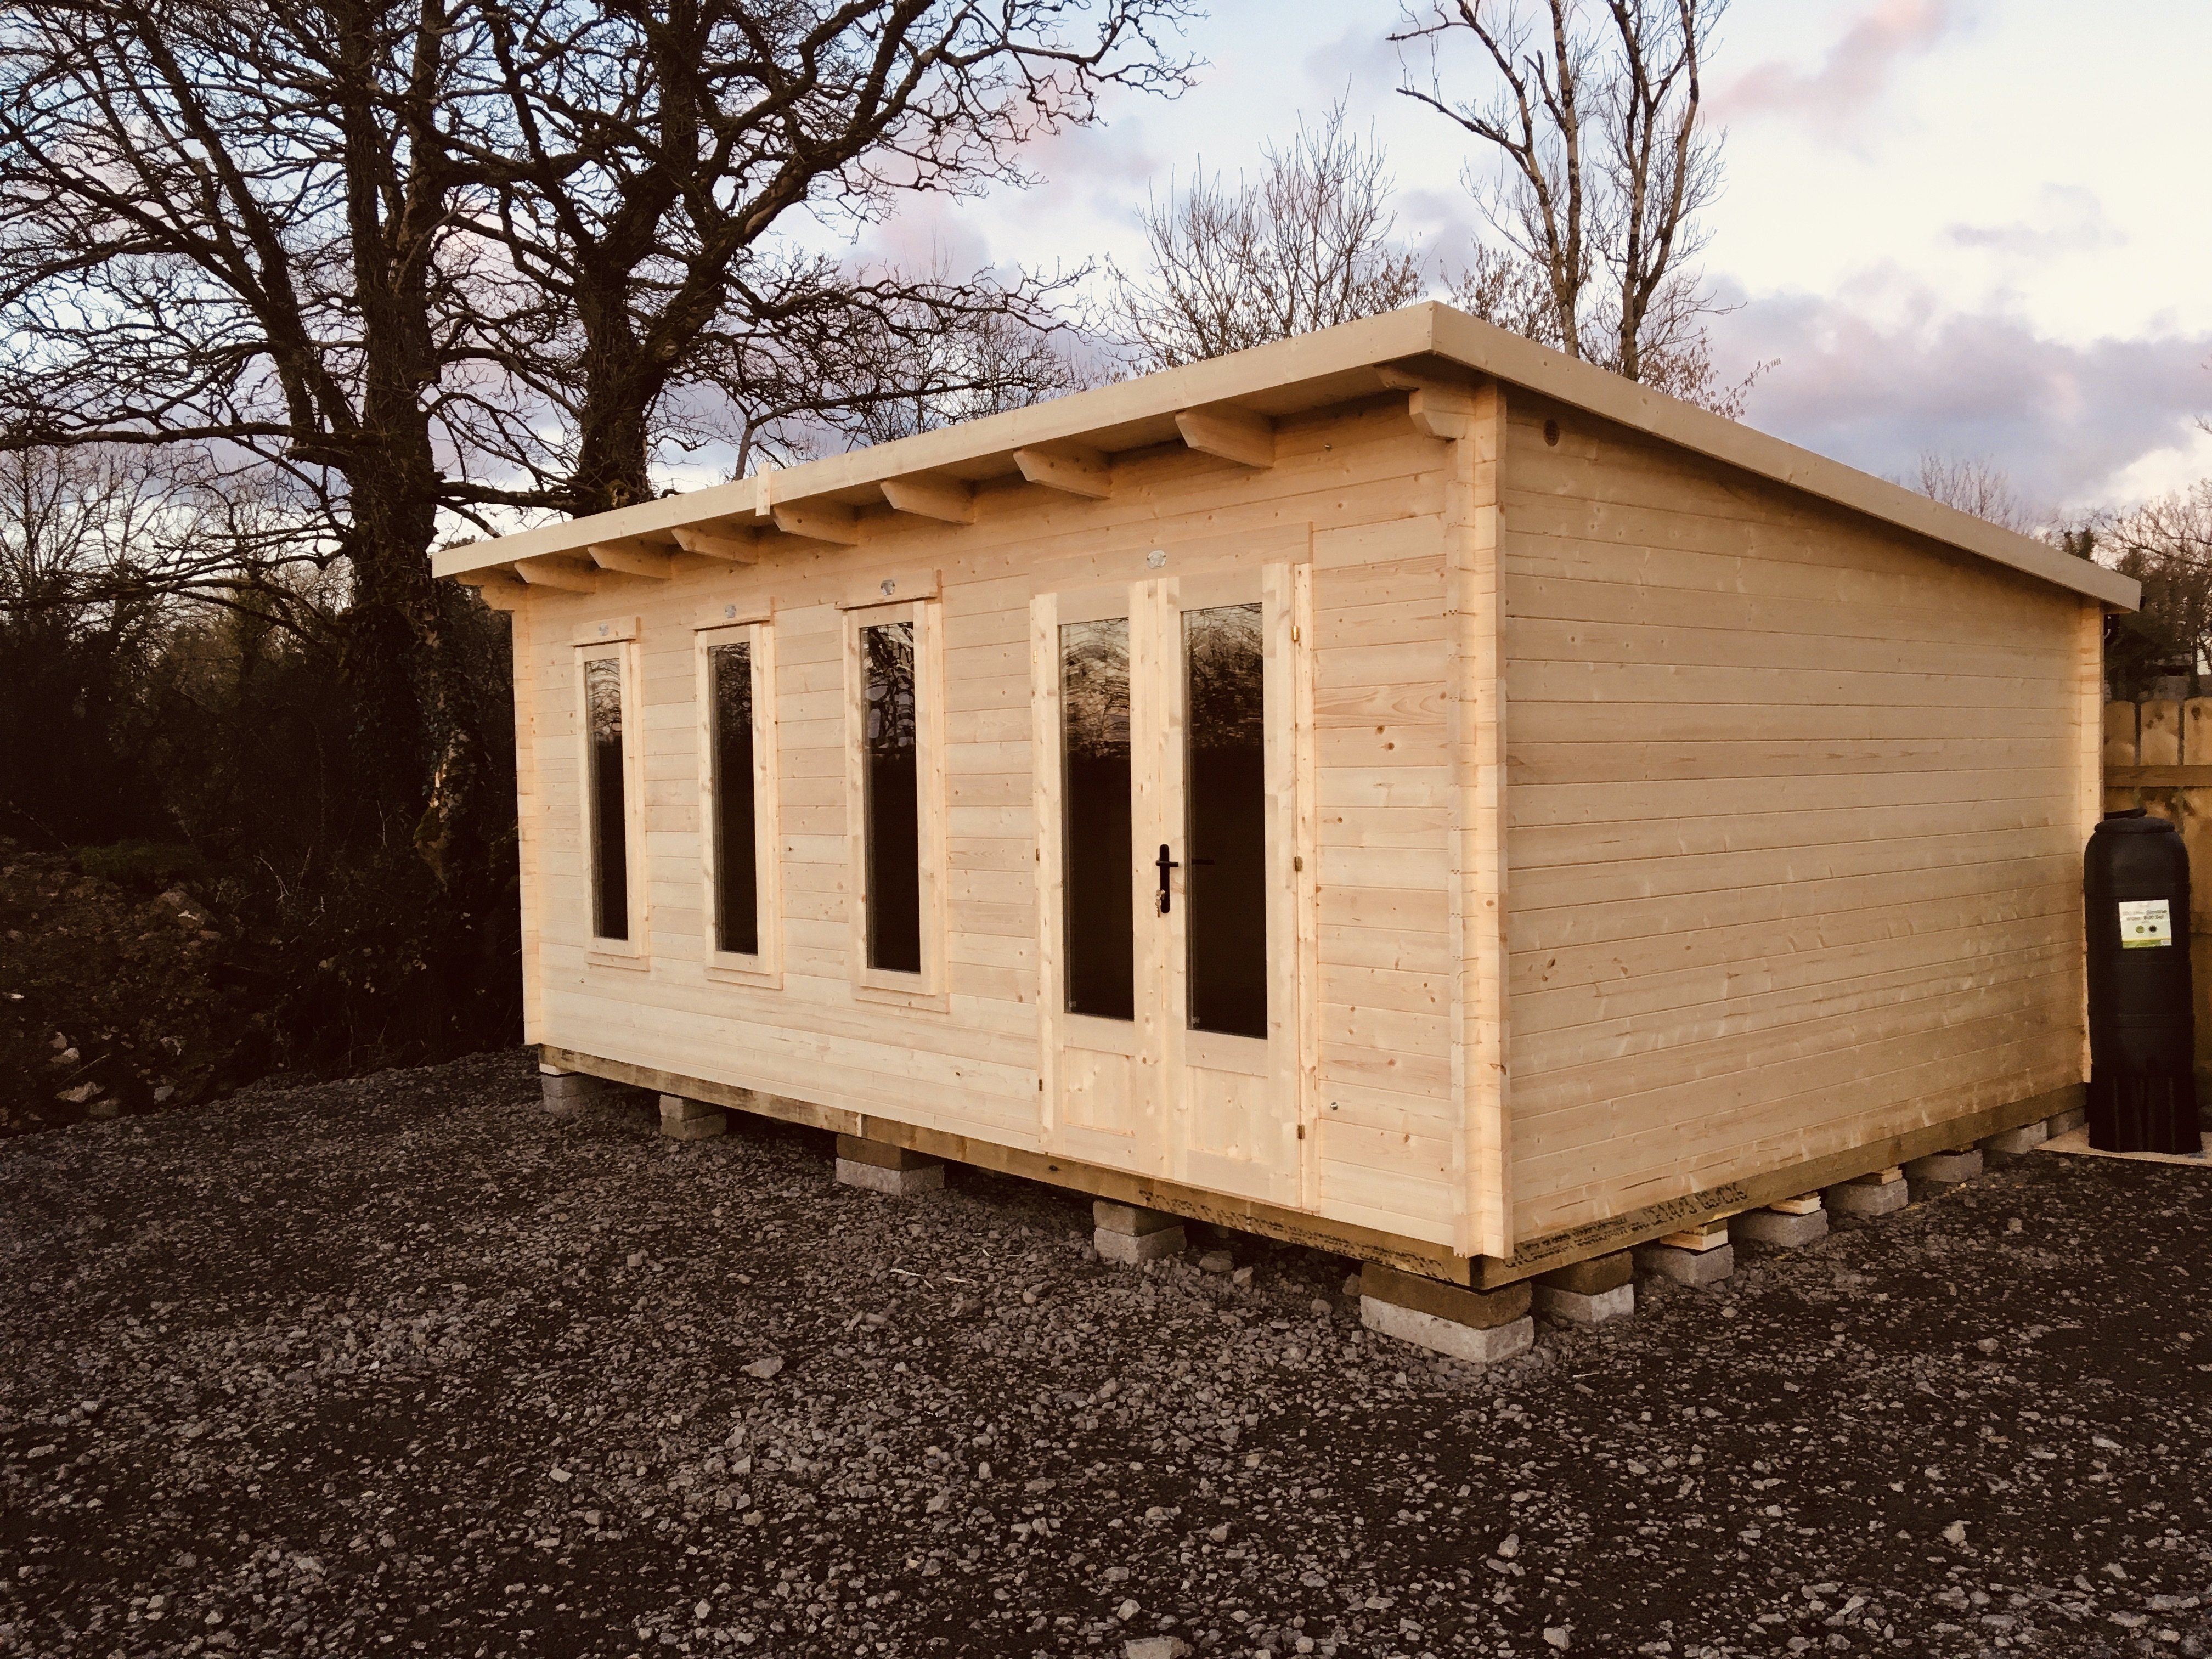
Hey all, This is it, the big one that'll do me to retirement! After modelling Depot #8 for the last 18 months to test feasibility, I took the plunge and bought an insulated outdoor cabin to house the new model railway. I'll still keep Depot #8 alive as the test bed for new skills and also to have something to run during the long construction phases of the new railway. The cabin is fully insulated top and bottom, double glazing and rubber seals, up off the ground with damp breaks between block and wood and is 6m x 4m, plenty of space First job is to stain and weather-protect it, hopefully this weekend if it's fine. Then run some electrics to it, with lighting and electric radiators to follow. Plenty to do - here's some pics: Gotta move the dog and cat sheds... Ready for stone Ground work and levelling complete Cabin built Interior shots Rough planning begins (with wool and masking tape ) I've so many ideas of what to do - obviously it will be 80s Ireland (that's a given), I've always wanted to do a terminus station, with long meandering country sections, a viaduct, two levels, a depot and a quarry. Probably include a variation on Carlow as a small station on the way since that's where I'm from originally. And it's named after my two daughters if you were curious Watch this space!
- 60 replies
-
- 11
-
-
-
One thing I found really useful is a videographer / YouTubers lightbox source. I got it free from work and almost got rid of it but then realised I could use it for modelling. Comes with a telescopic tripod which is really handy for lighting the whole layout or close in work, and also bend upwards so can be used when working under the baseboard Also the light tone can be made warmer or colder - super handy!
-
Can anyone recommend a good speaker for Murphy Models Class 141/181
Adrian replied to mmie353's question in DCC, Electrics and Electronics
No worries! All the speakers I bought are on Roads and Rails and have the same names as I used in the video titles Also if you are using a single speaker it’s needs to be a 4 or 8 ohm. If you are using two speakers they need to be 8 ohm. Using double 8 ohm speakers wires in parallel will give an impedance of 4 ohms which the chip can handle. If you use two 4 ohm speakers in parallel you get an impedance of 2 ohms which will let too much current through the chip and blow it! The speakers on Roads and Rails all display their ohm rating so it’s easy to buy what you need -
Unfortunately no, I knew it would never fit was just curious to hear it, it’s about 2/3 the size of the loco chassis and half again as wide so it just ain’t gonna happen