Adrian
-
Posts
108 -
Joined
-
Last visited
-
Days Won
3
Content Type
Profiles
Forums
Events
Gallery
Blogs
Community Map
Everything posted by Adrian
-
Very nice dude, looking forward to following this! I’ve just caught up on this thread and have a noob question: you mention brake fluid for stripping the coaches in the first few posts...do you mean actual car brake fluid and if so why do you use this? Presuming it’s something to do with not being too harsh? Thanks in advance
-

Depot #8 by Riverbank Railways (fictional 1980s / early 1990s depot)
Adrian replied to Adrian's topic in Irish Model Layouts
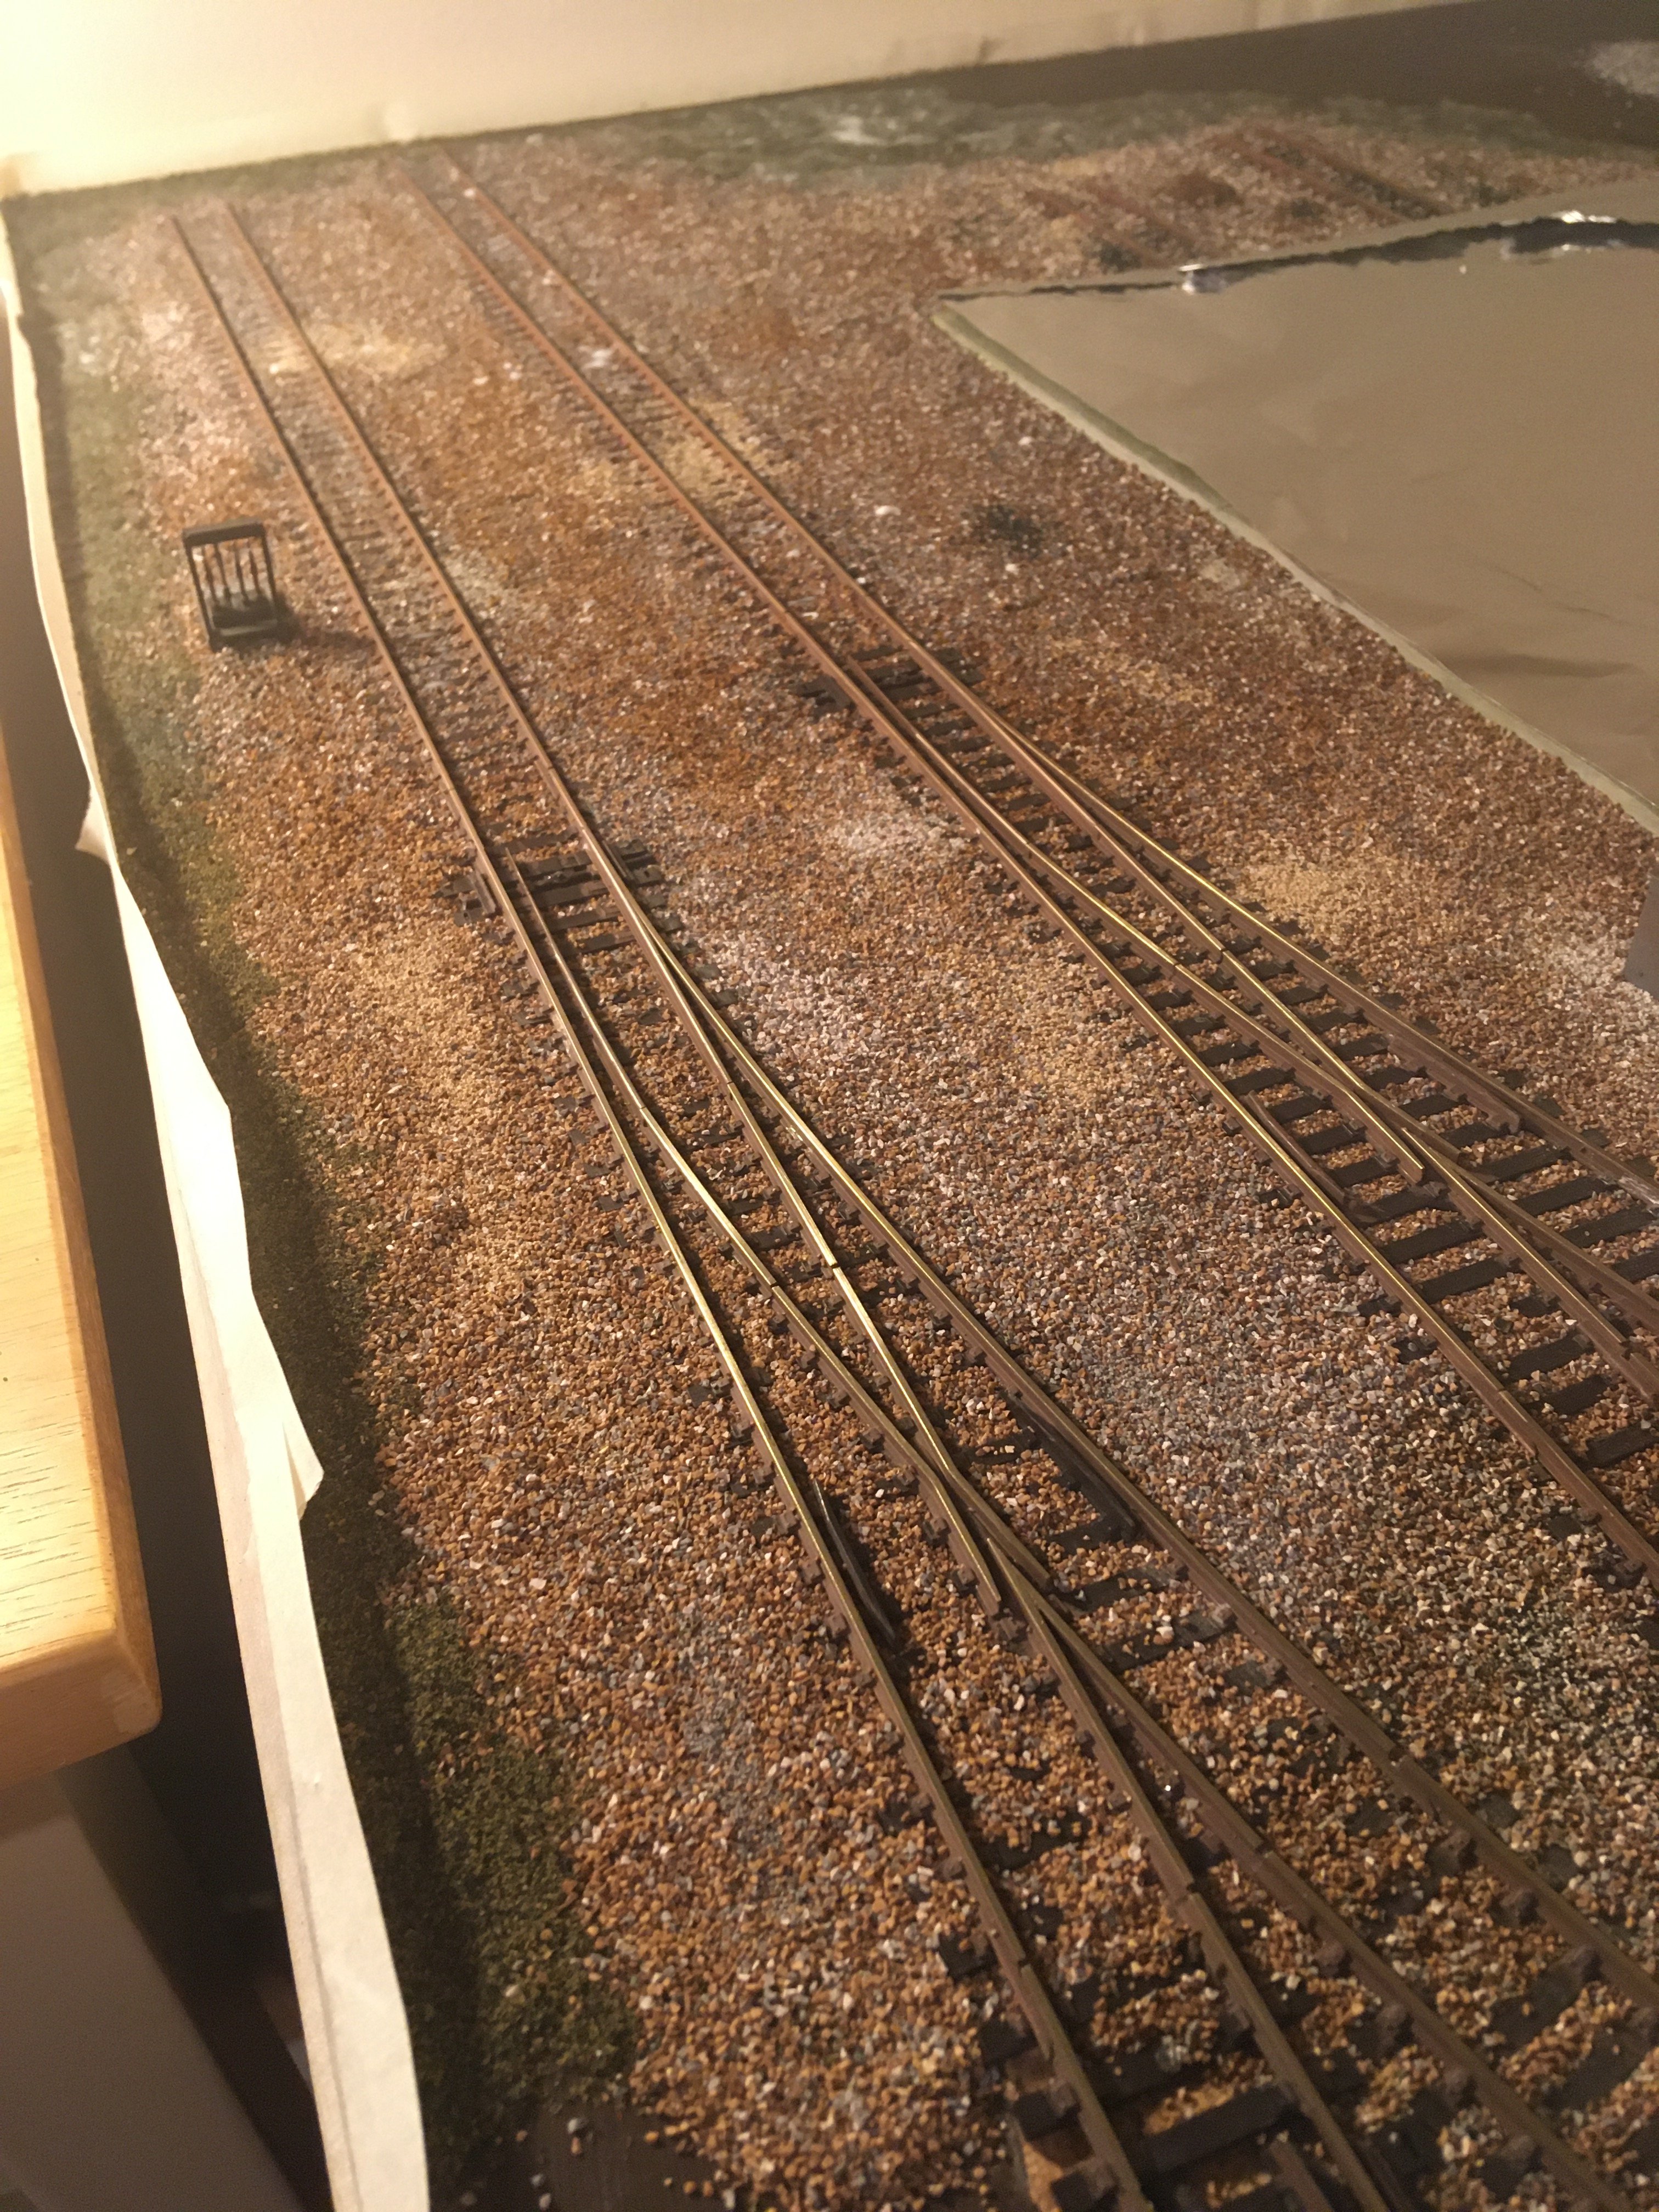
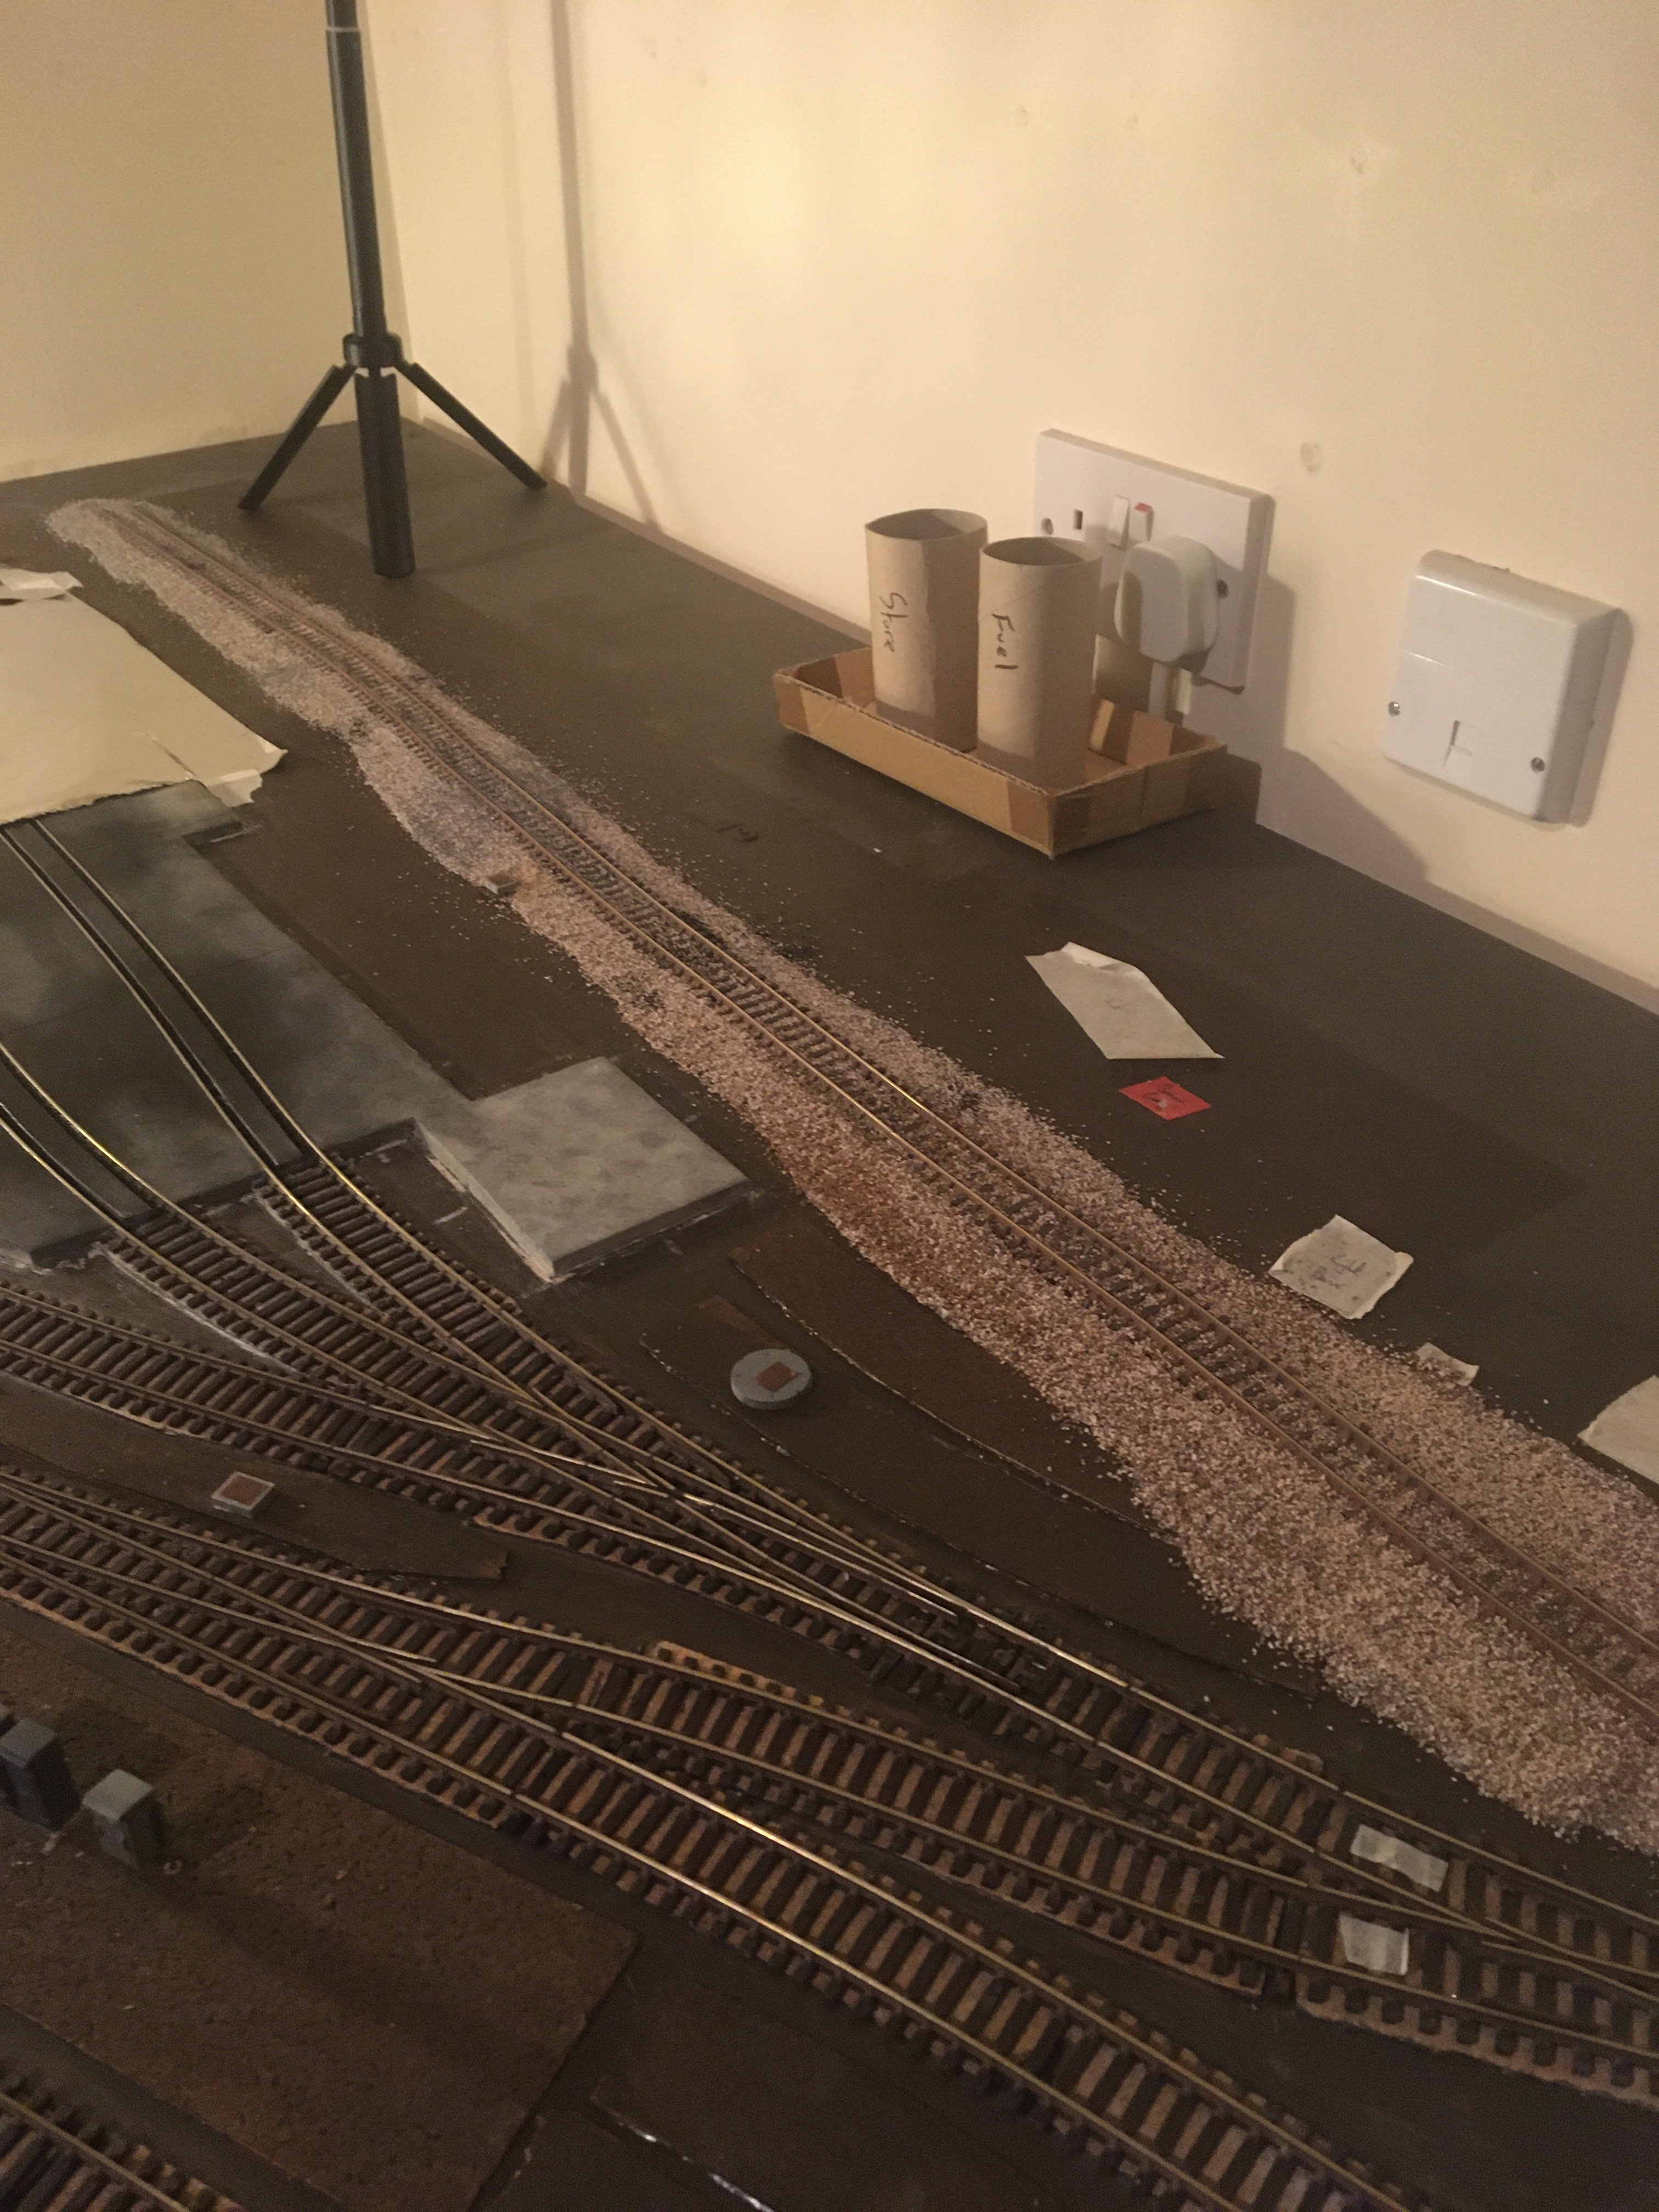
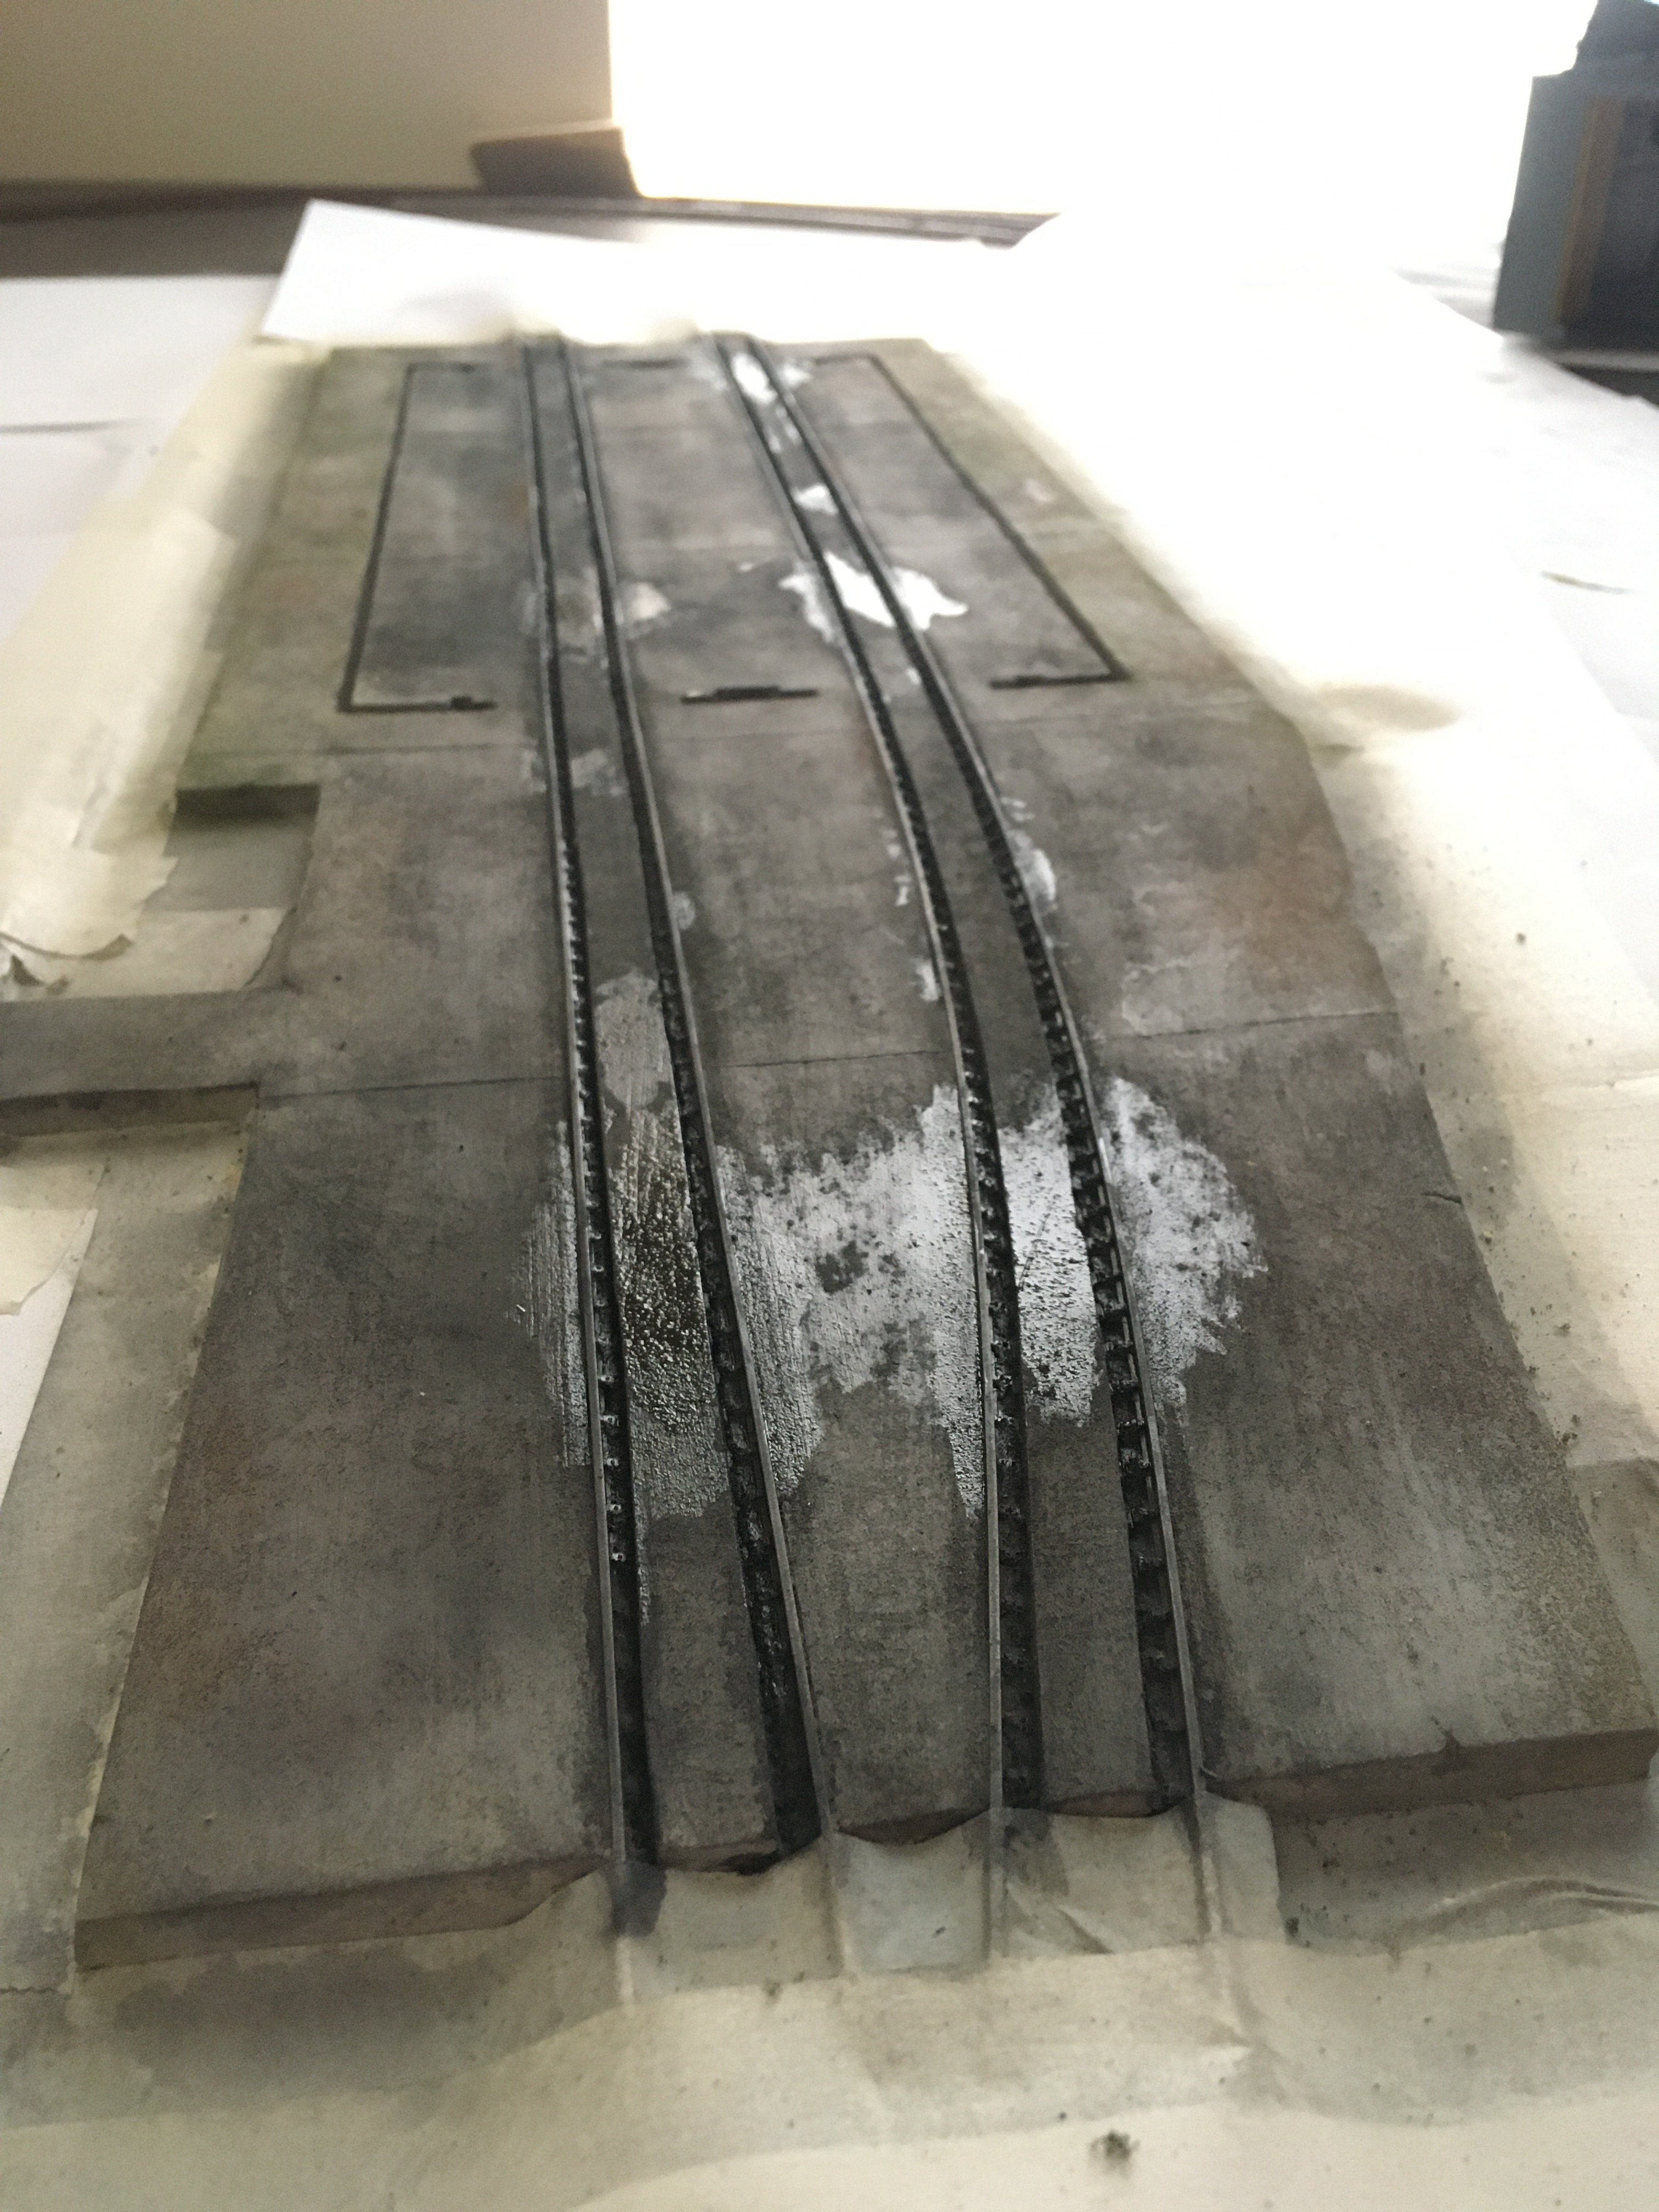
Having fun with ballasting, first section is gluing now. I love the creativity you can unleash Going for a brownish mix around the main areas of the depot with plenty of variation, second pic shows an oil tanker siding a bit away from the main track work, so different ballast mix
-
Depot #8 by Riverbank Railways (fictional 1980s / early 1990s depot)
Adrian replied to Adrian's topic in Irish Model Layouts
Yep, maybe so, the 071 just does it for me cos it’s the one I remember most from being a kid and getting the train in the 90s (born in 1980 in Carlow so didn’t see too many A classes) - for me that’s “the” train sound and gives me goosebumps -
Depot #8 by Riverbank Railways (fictional 1980s / early 1990s depot)
Adrian replied to Adrian's topic in Irish Model Layouts
Ballasting has commenced!
-
Depot #8 by Riverbank Railways (fictional 1980s / early 1990s depot)
Adrian replied to Adrian's topic in Irish Model Layouts
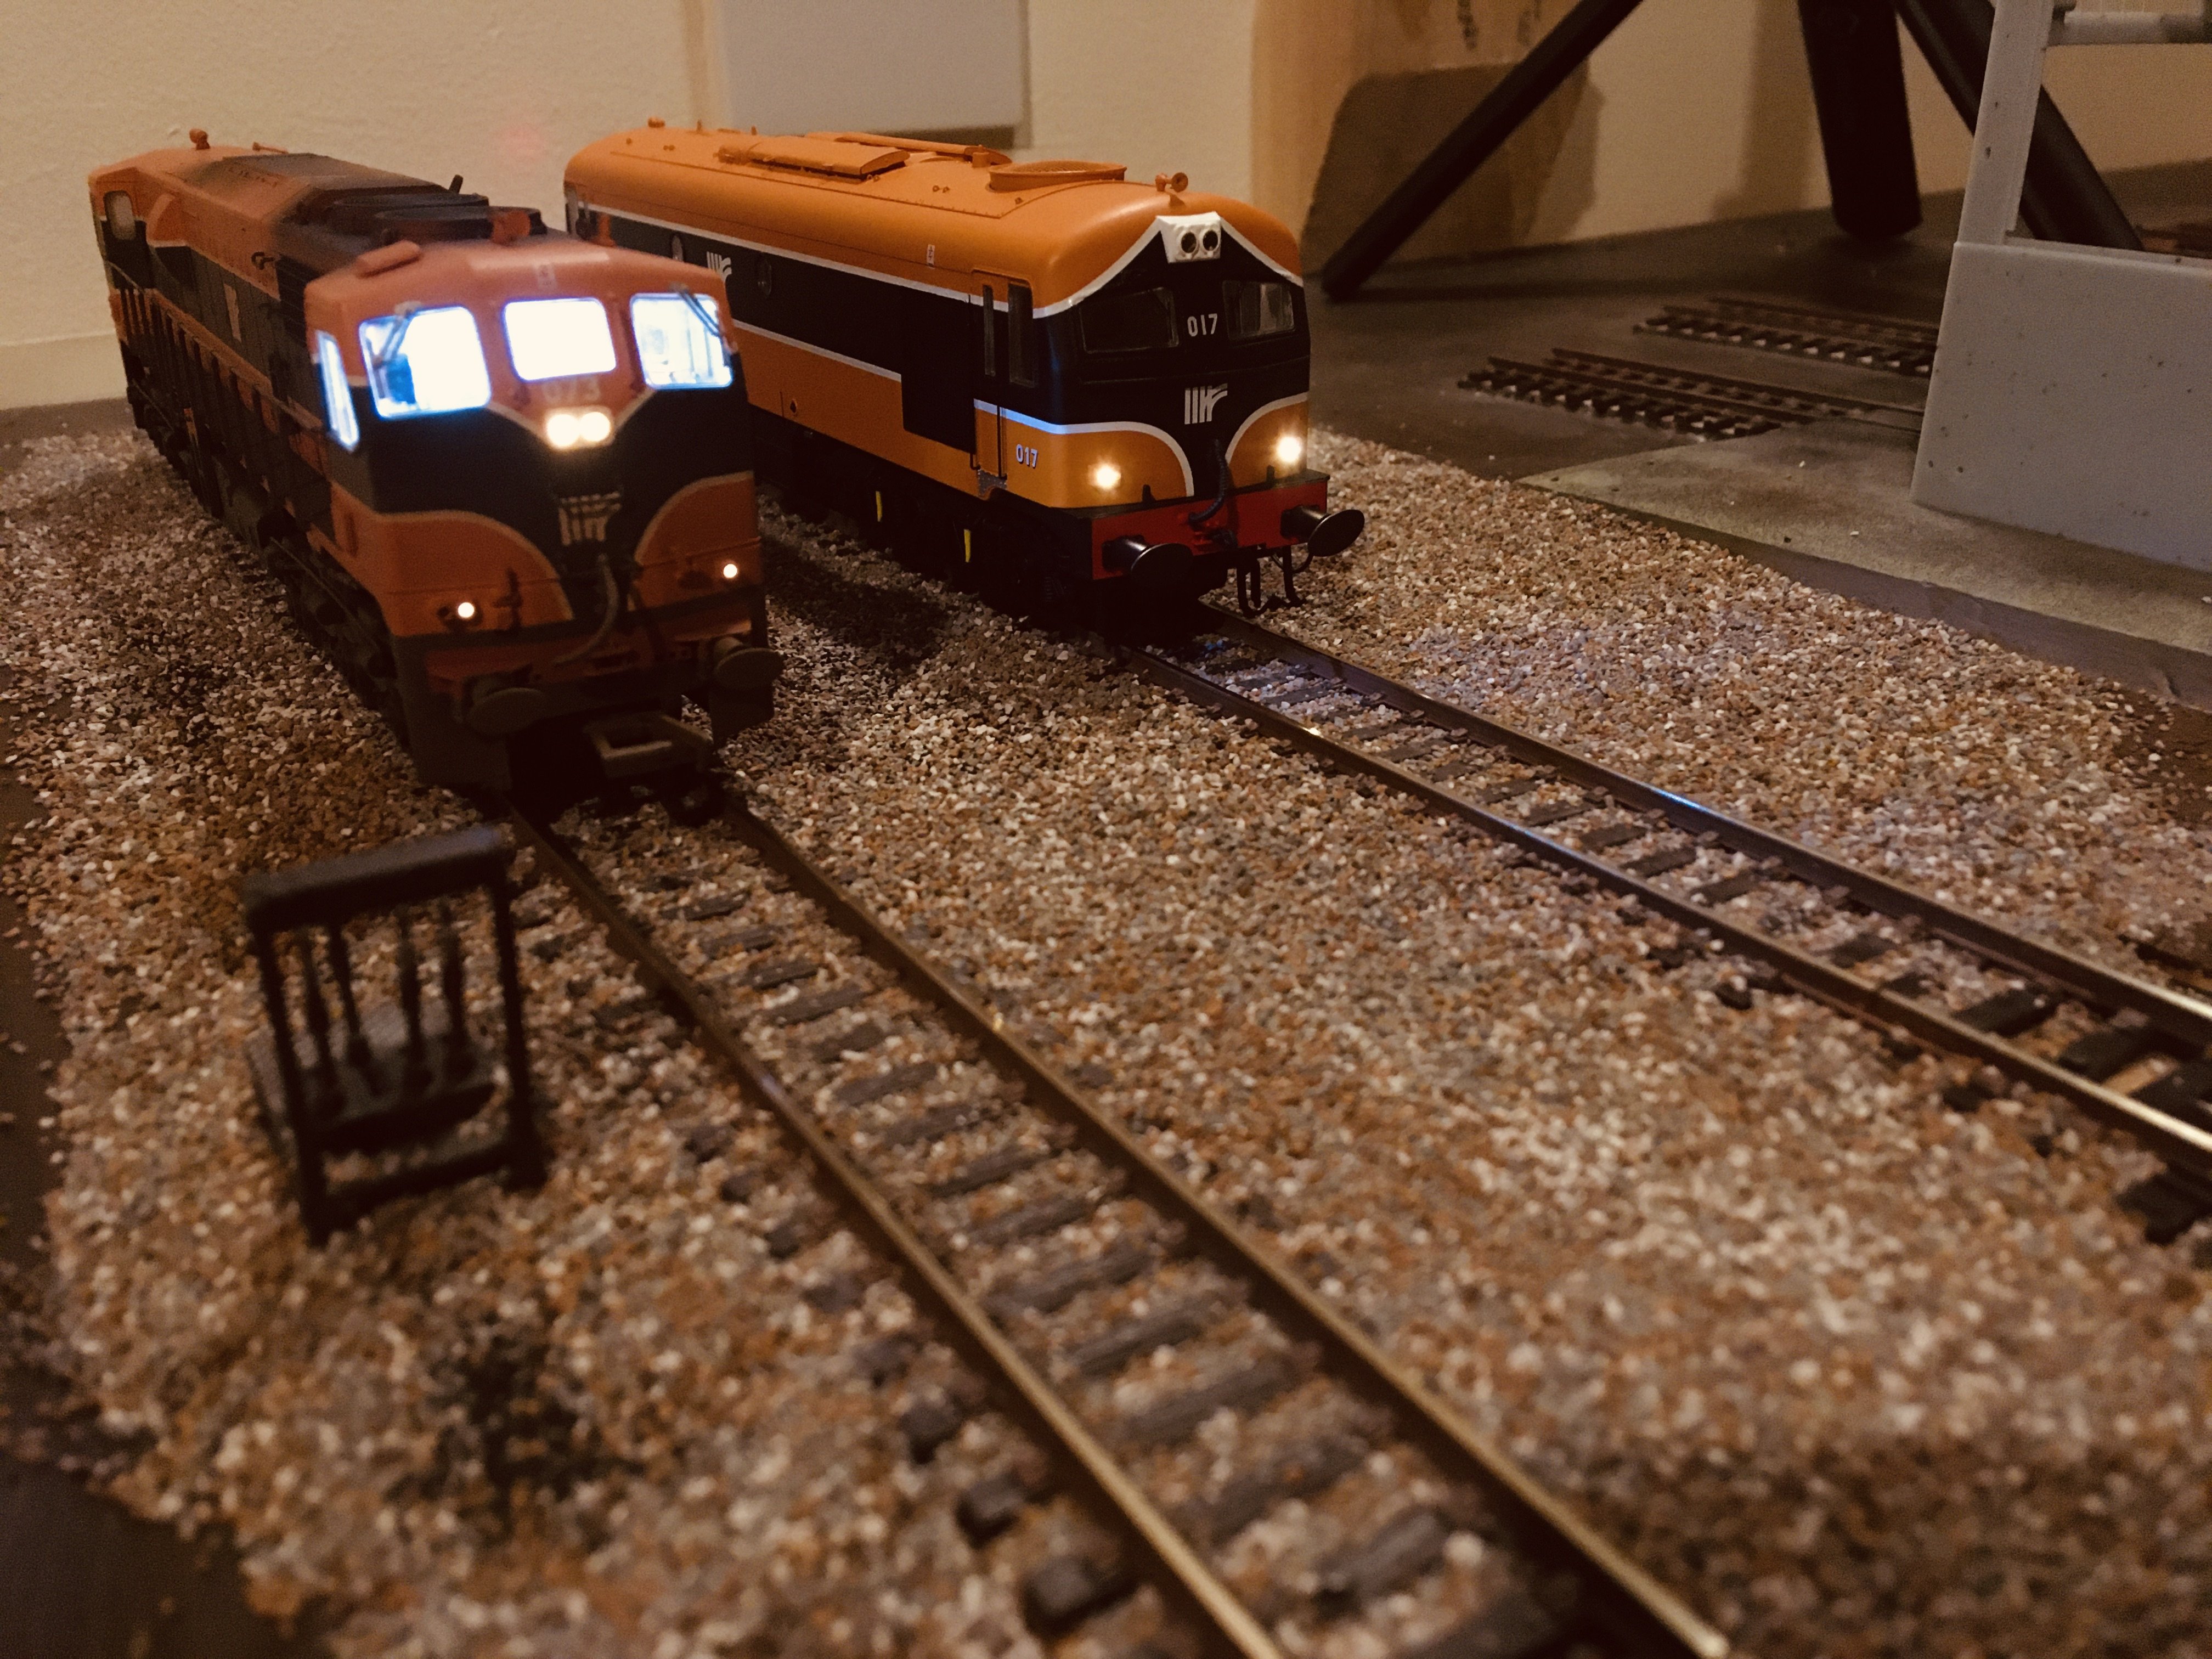
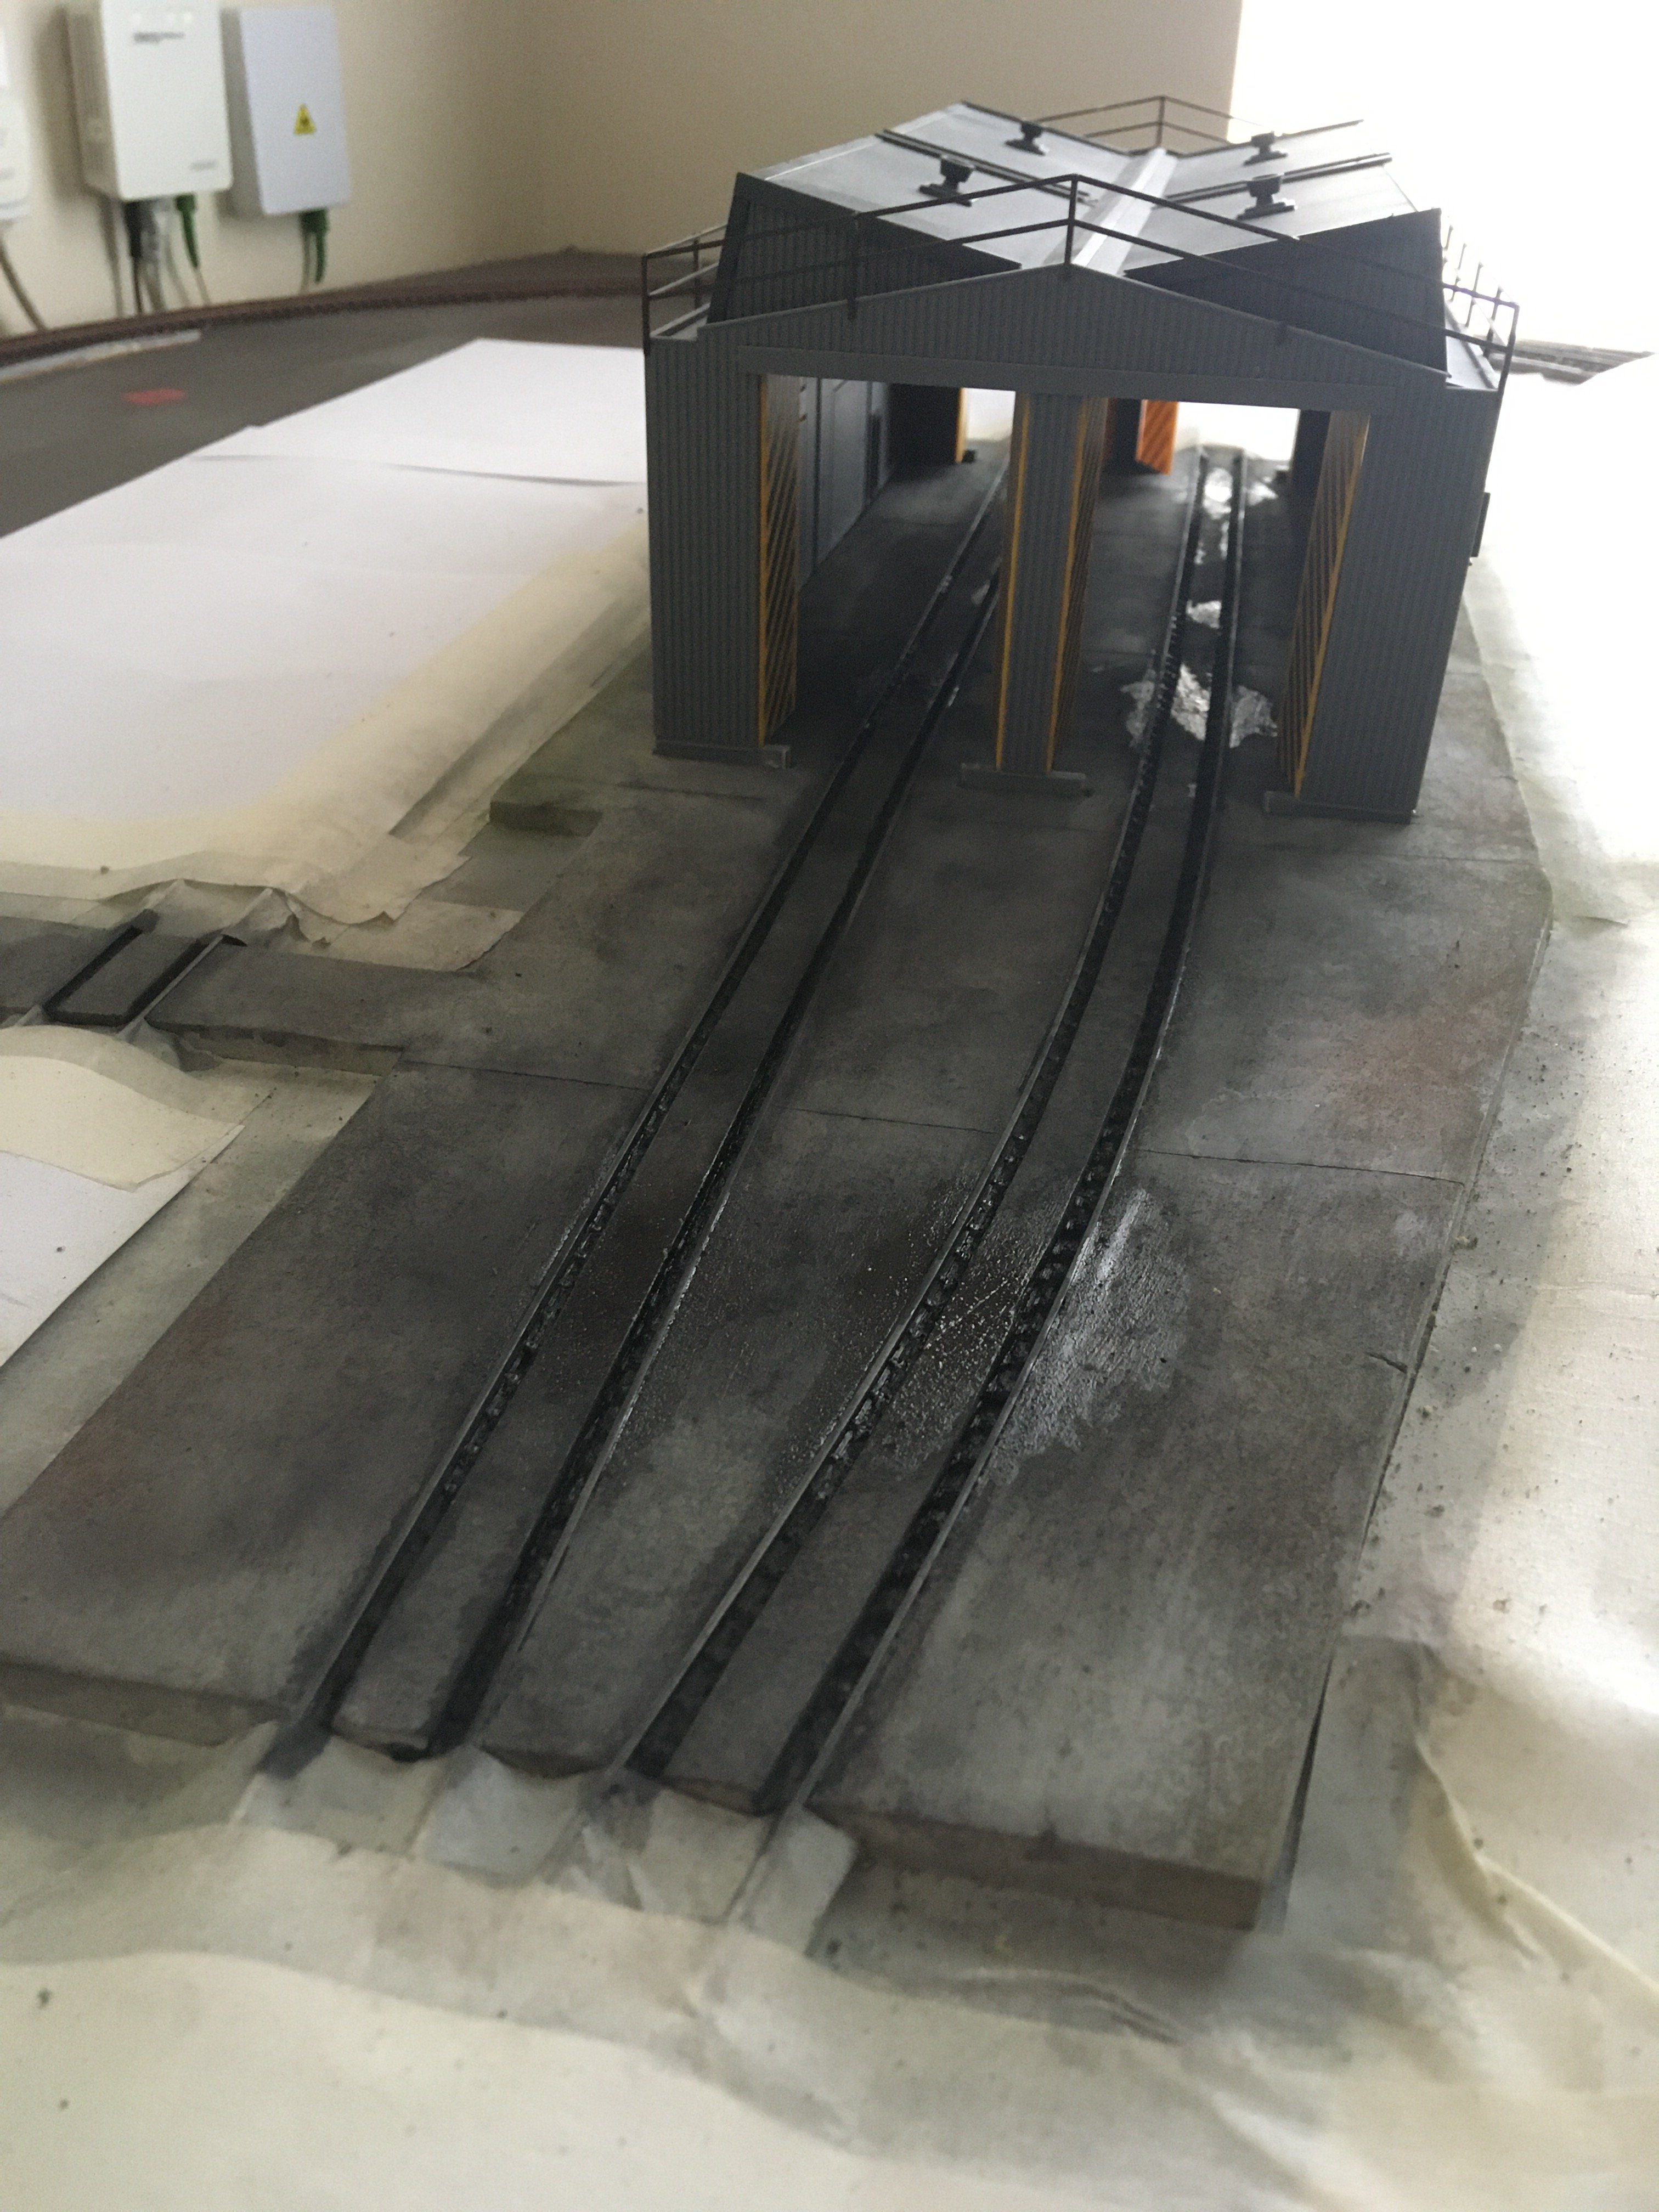
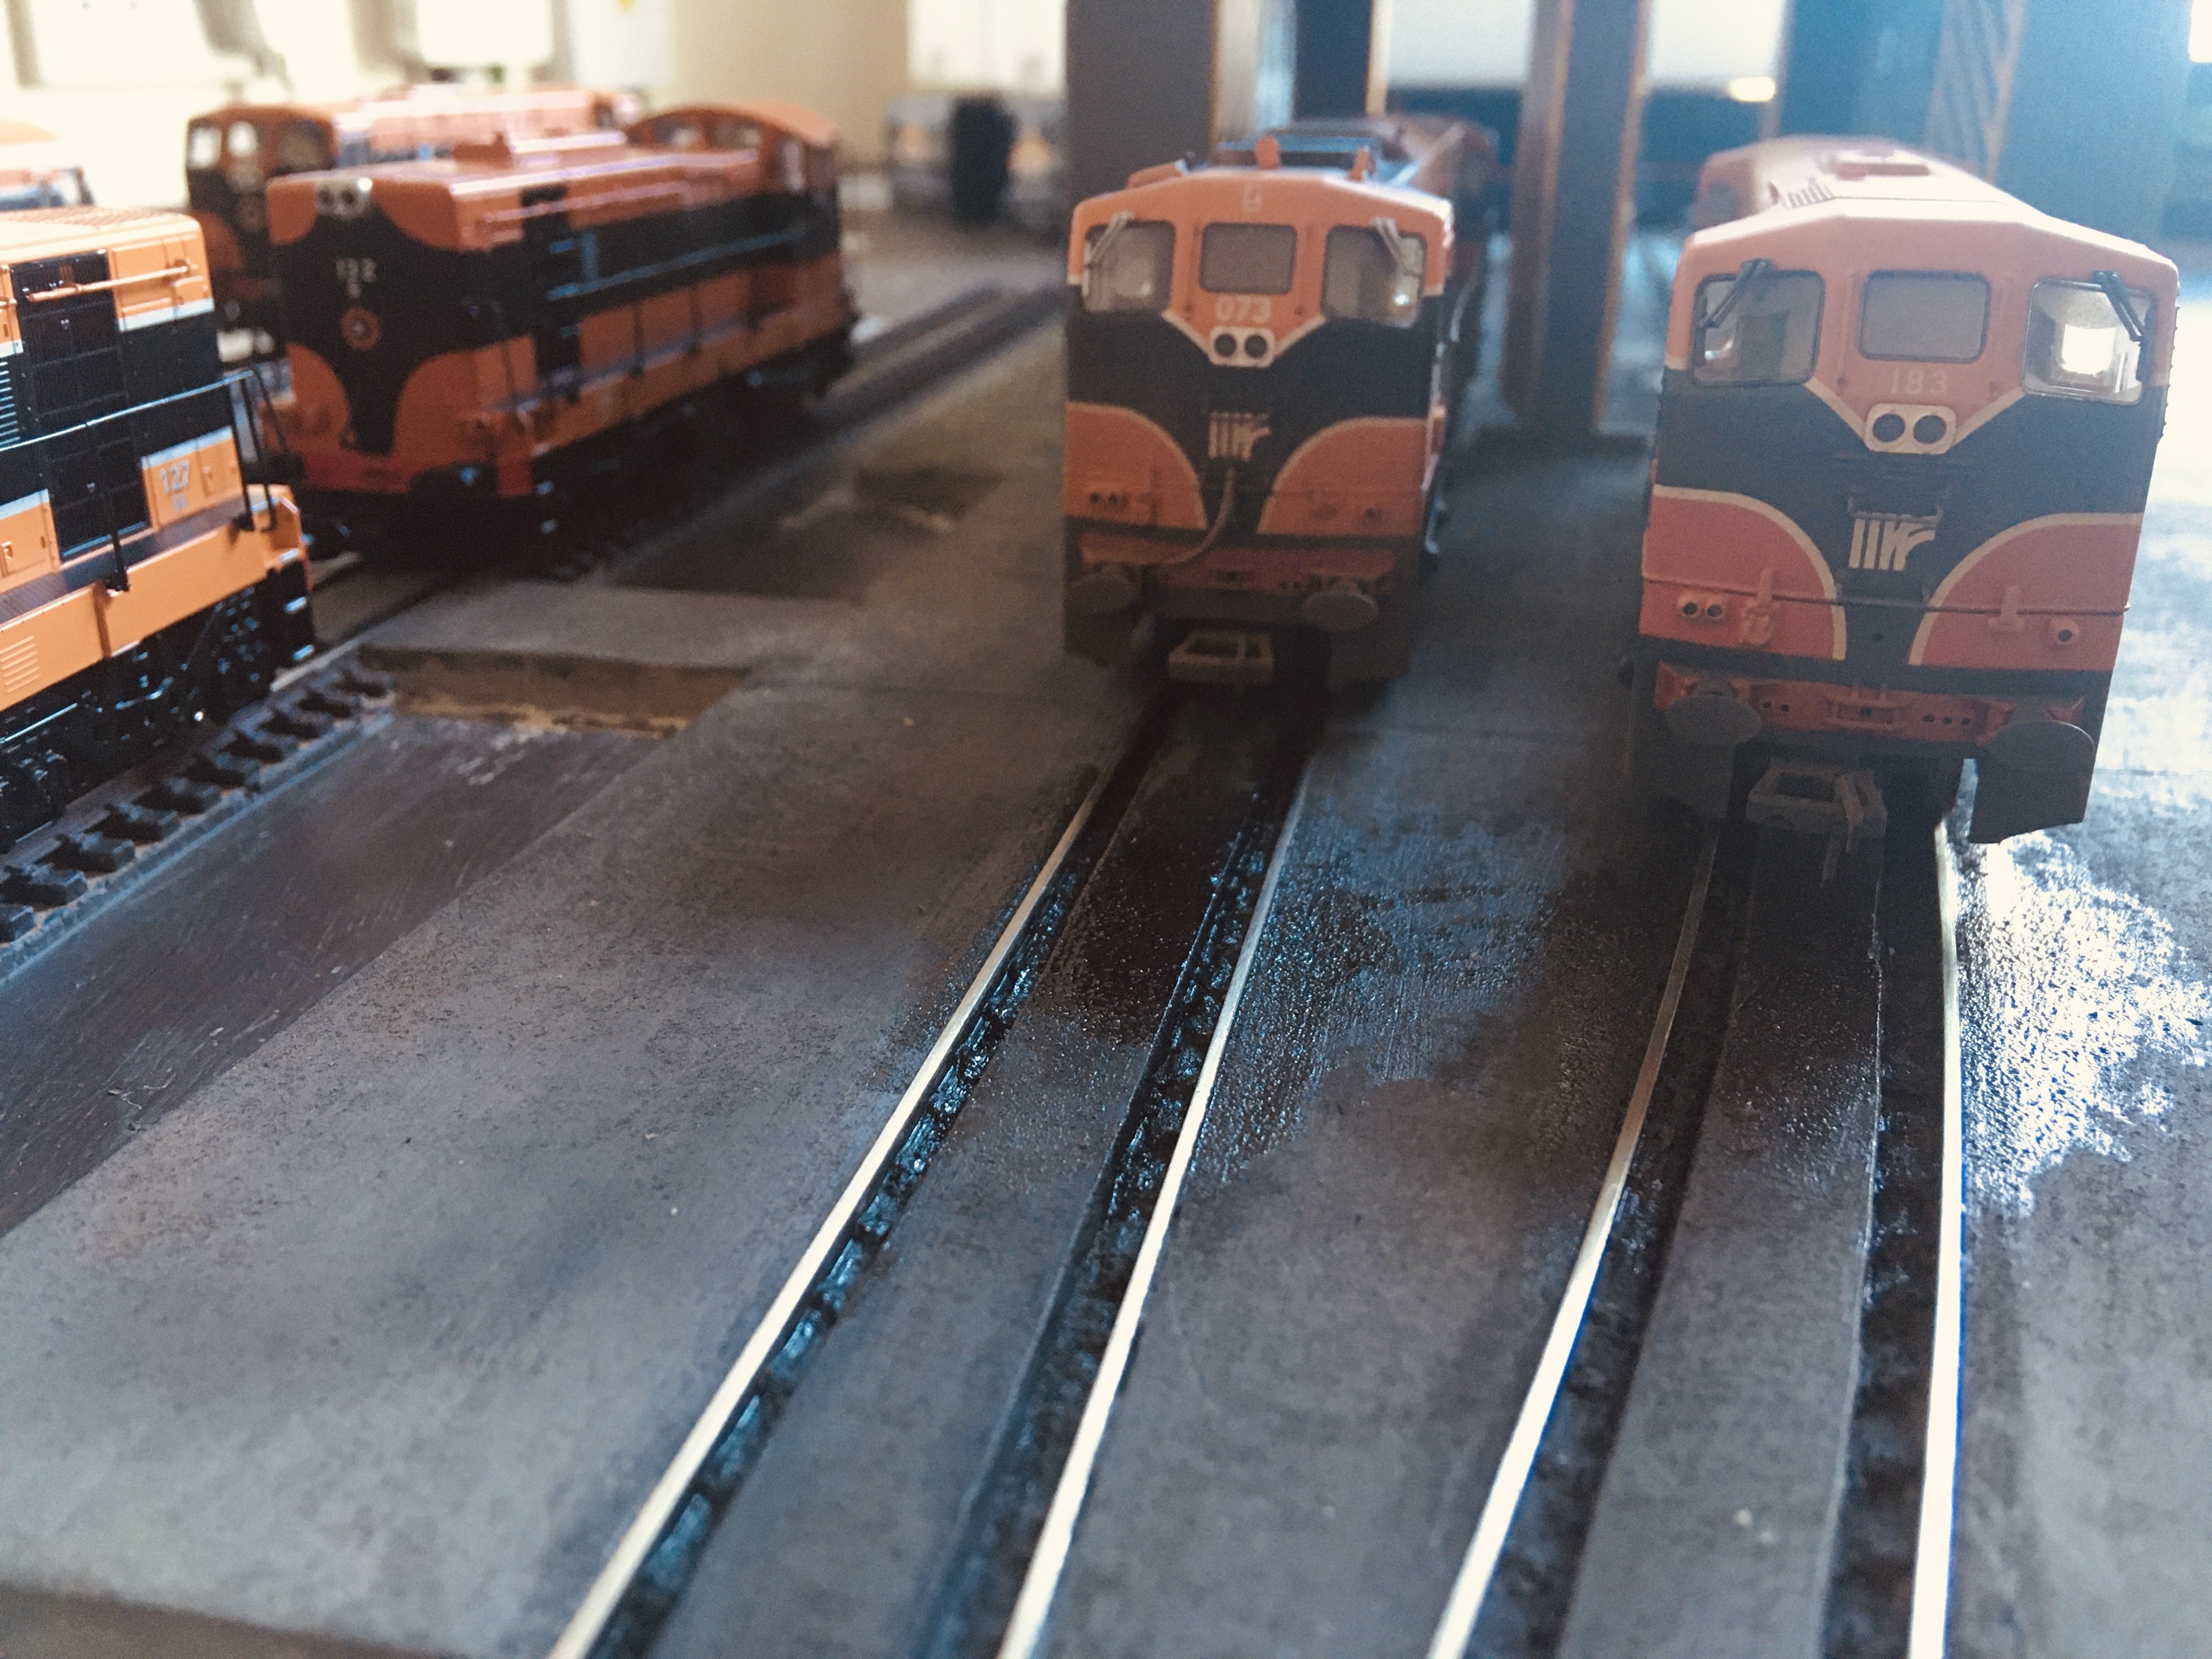
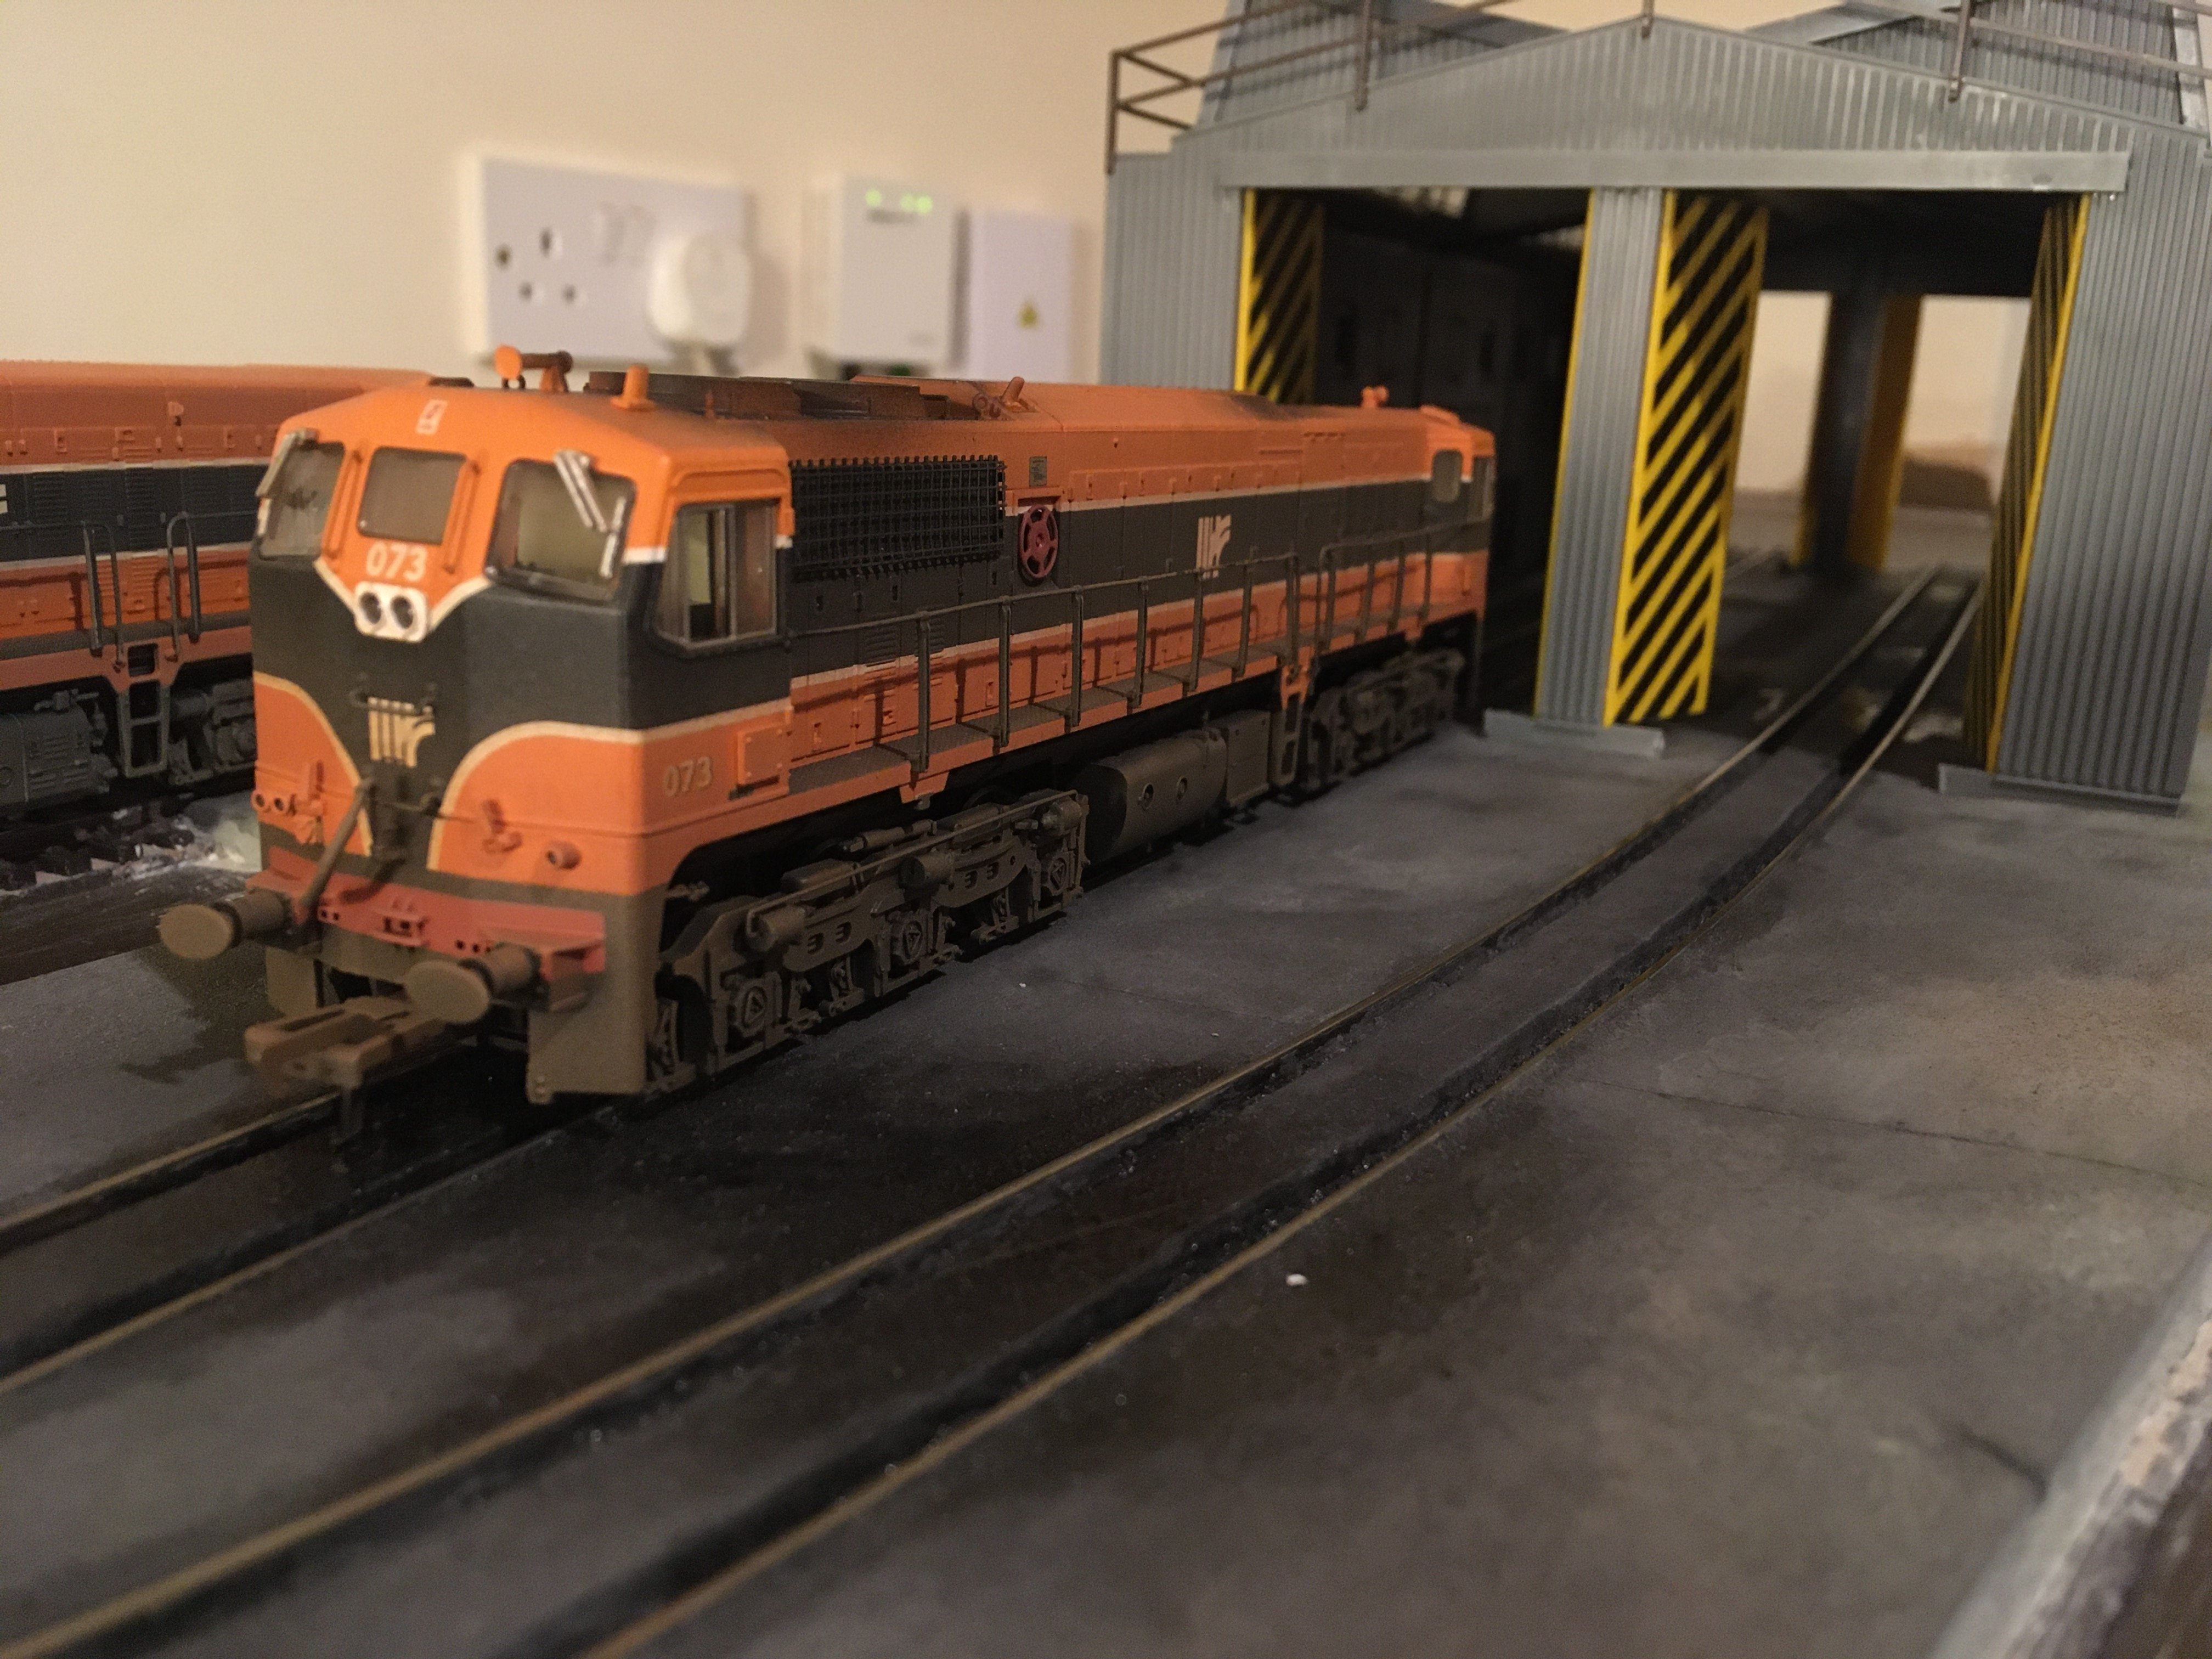
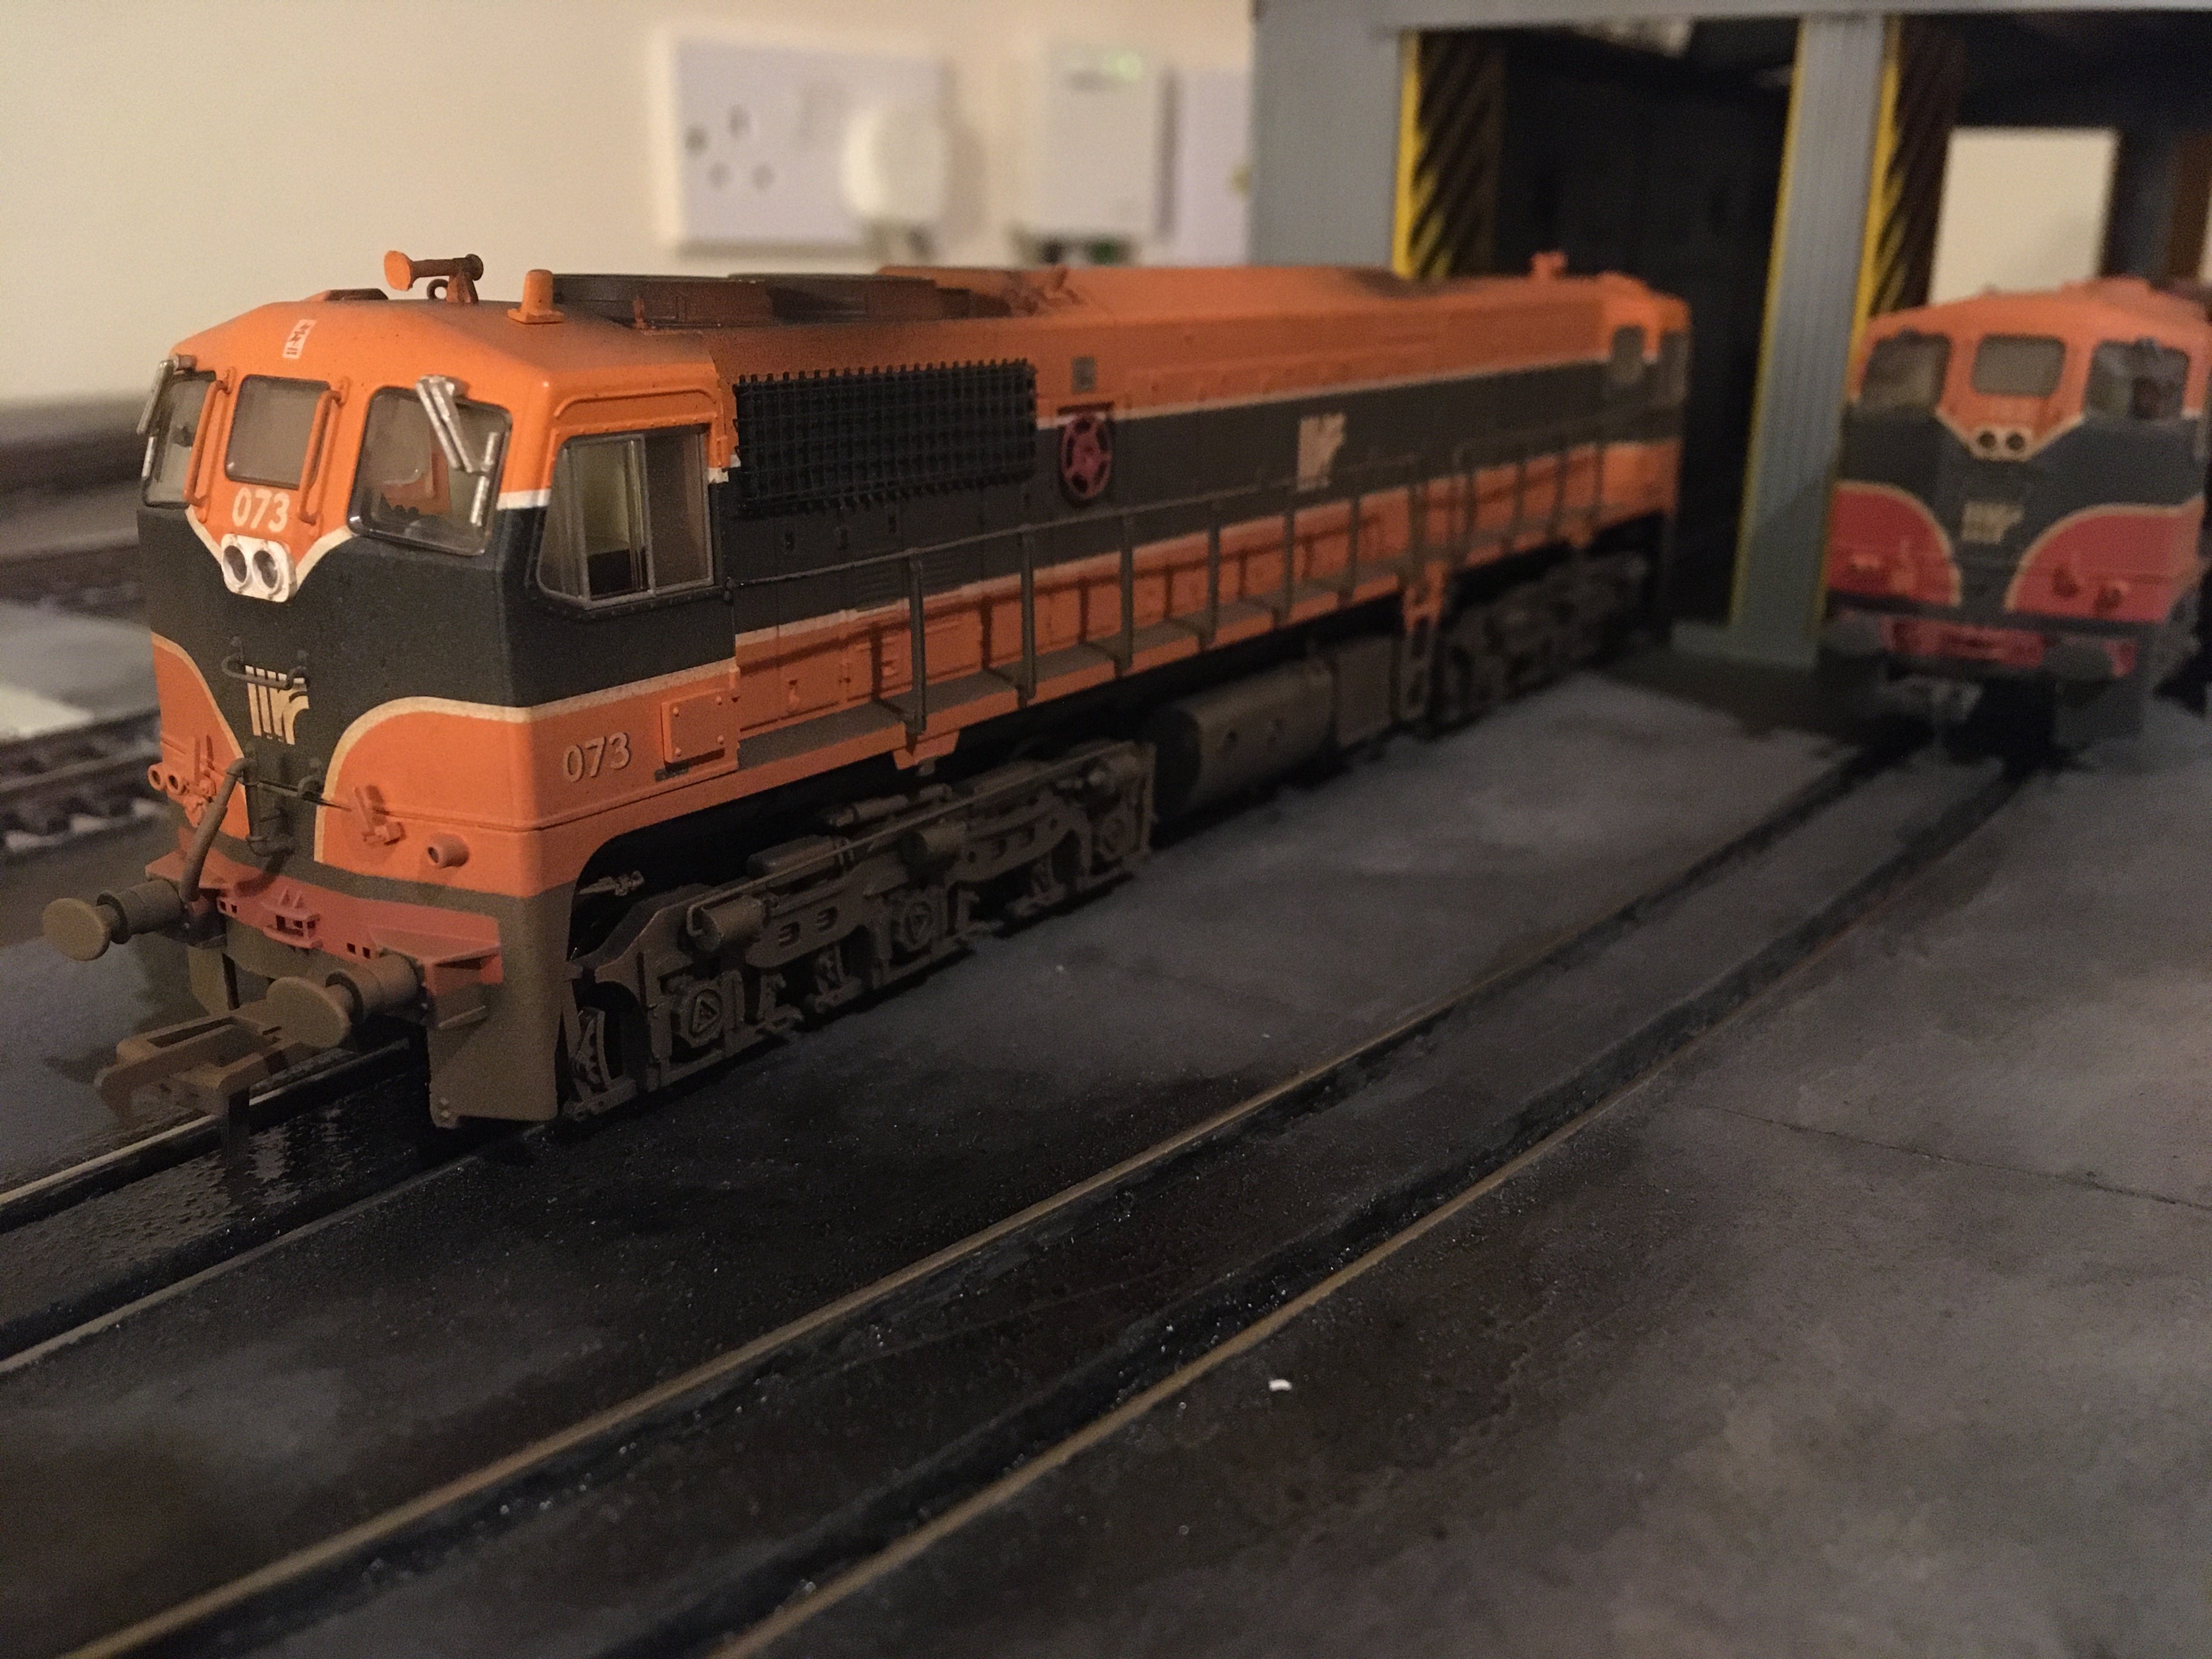
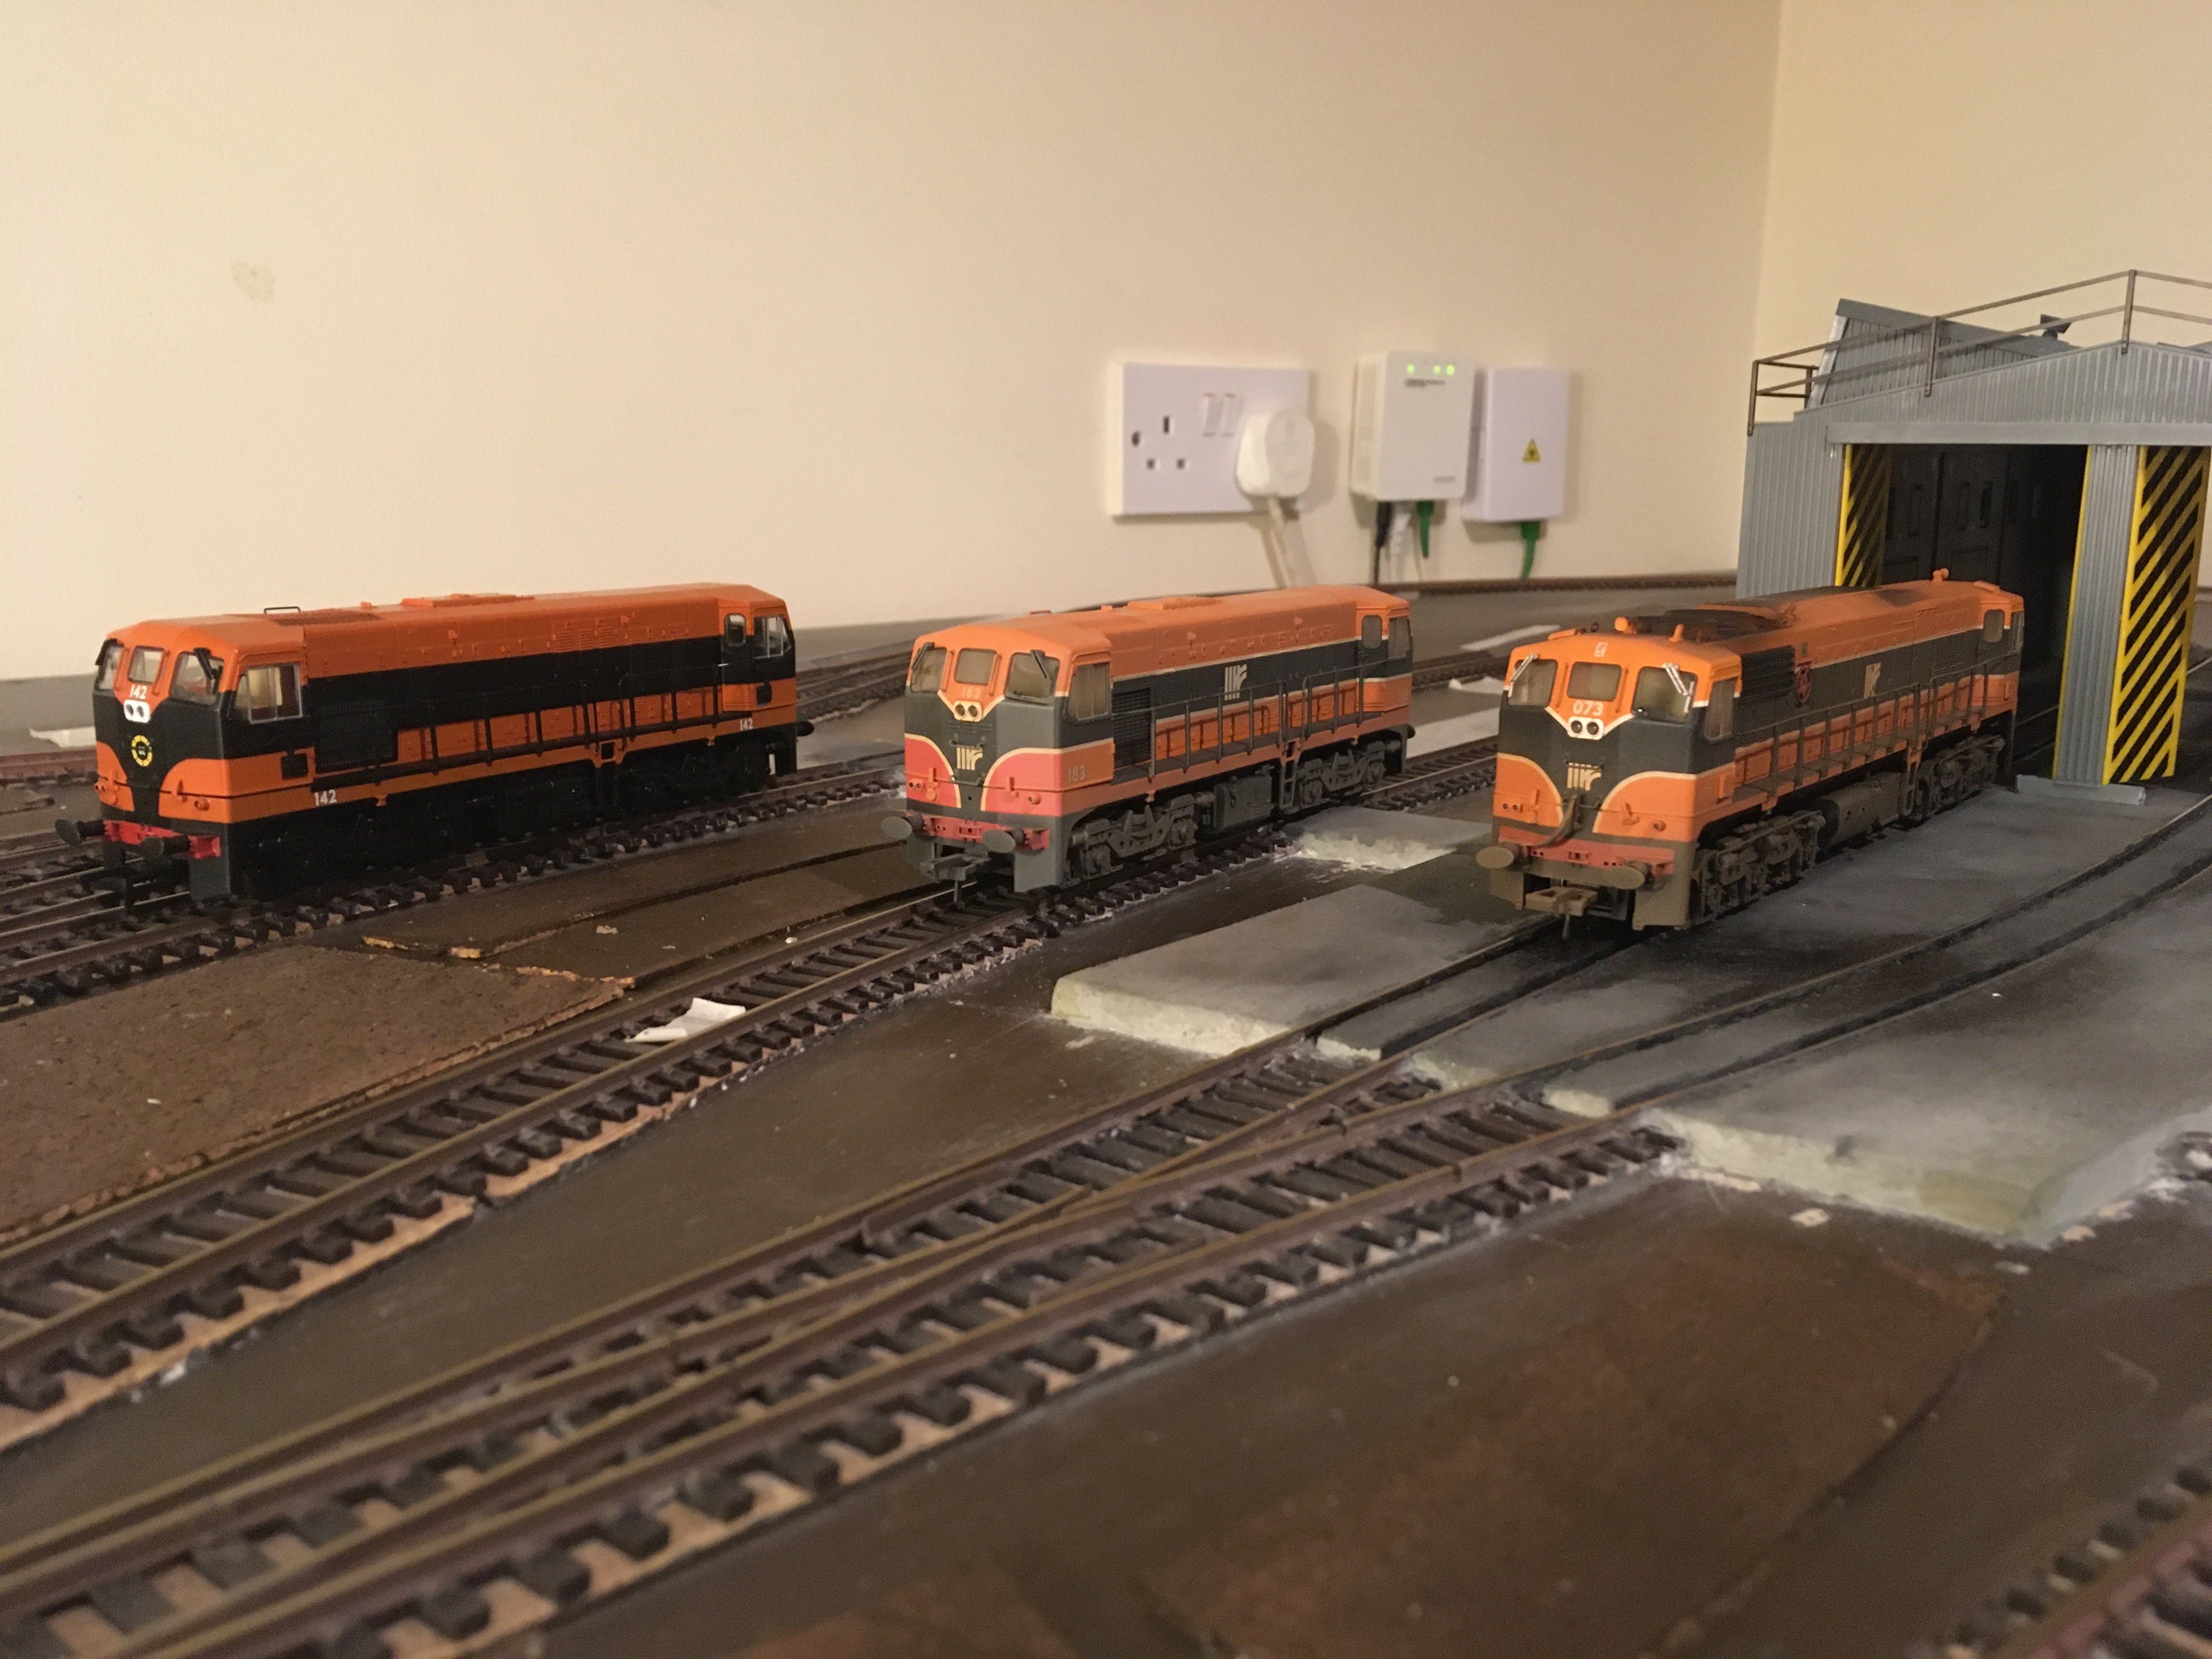
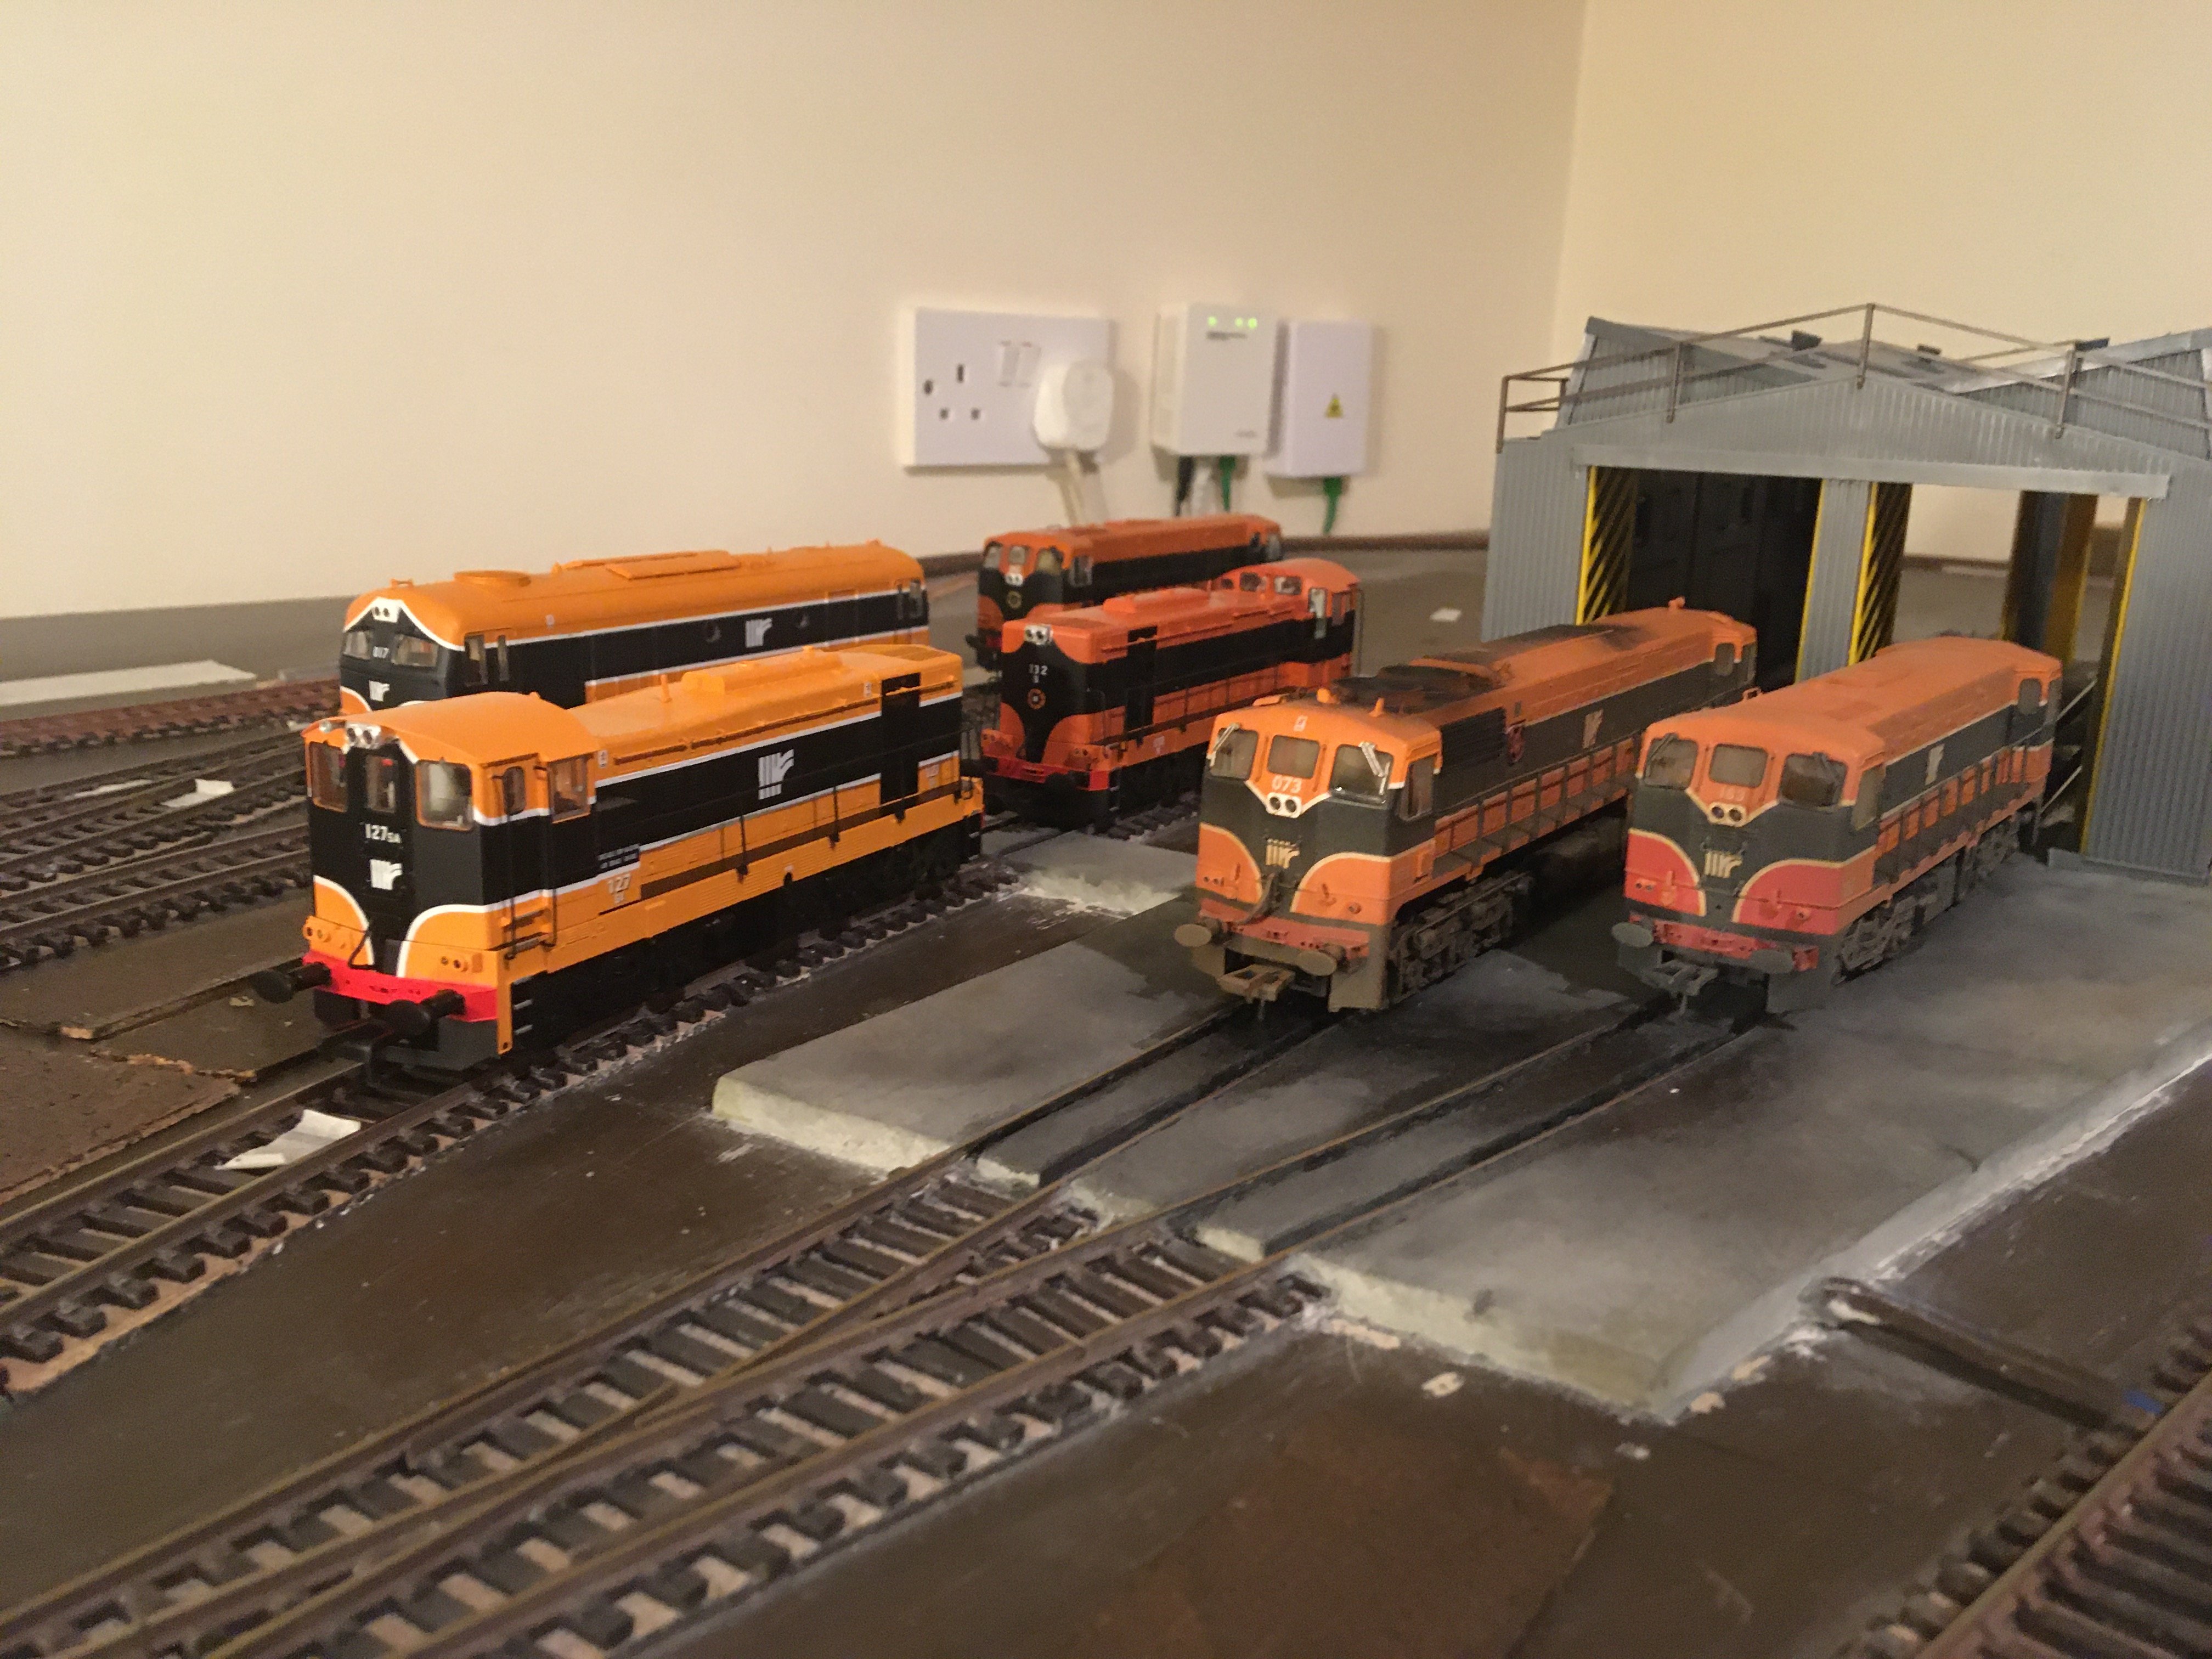
Oh I’m loving this! Evening time at the depot after fitting the MM 071 sound chip and the IRM A class EMD sound chip to my new MM 073 and IRM A class 017 - the sound quality is way better than I expected, full of bass and sounds even better in real life - the rail squeal effect is my favourite -
Very nice, love the weathering on the station building, very realistic
-
Very nice, just caught up. Liked your solution for fitting the point motors and then putting them through the whole from the top, I...didn’t do this and using Seep PM1s instead contorted myself trying to align them from underneath using a flashlight - never again! Looking forward to seeing more updates
-
Depot #8 by Riverbank Railways (fictional 1980s / early 1990s depot)
Adrian replied to Adrian's topic in Irish Model Layouts
Delighted to hear that -
Depot #8 by Riverbank Railways (fictional 1980s / early 1990s depot)
Adrian replied to Adrian's topic in Irish Model Layouts
Got the videos organised and have them in a playlist for easy watching - they're quick and to the point - 15 mins in total - have fun! Posted here: -
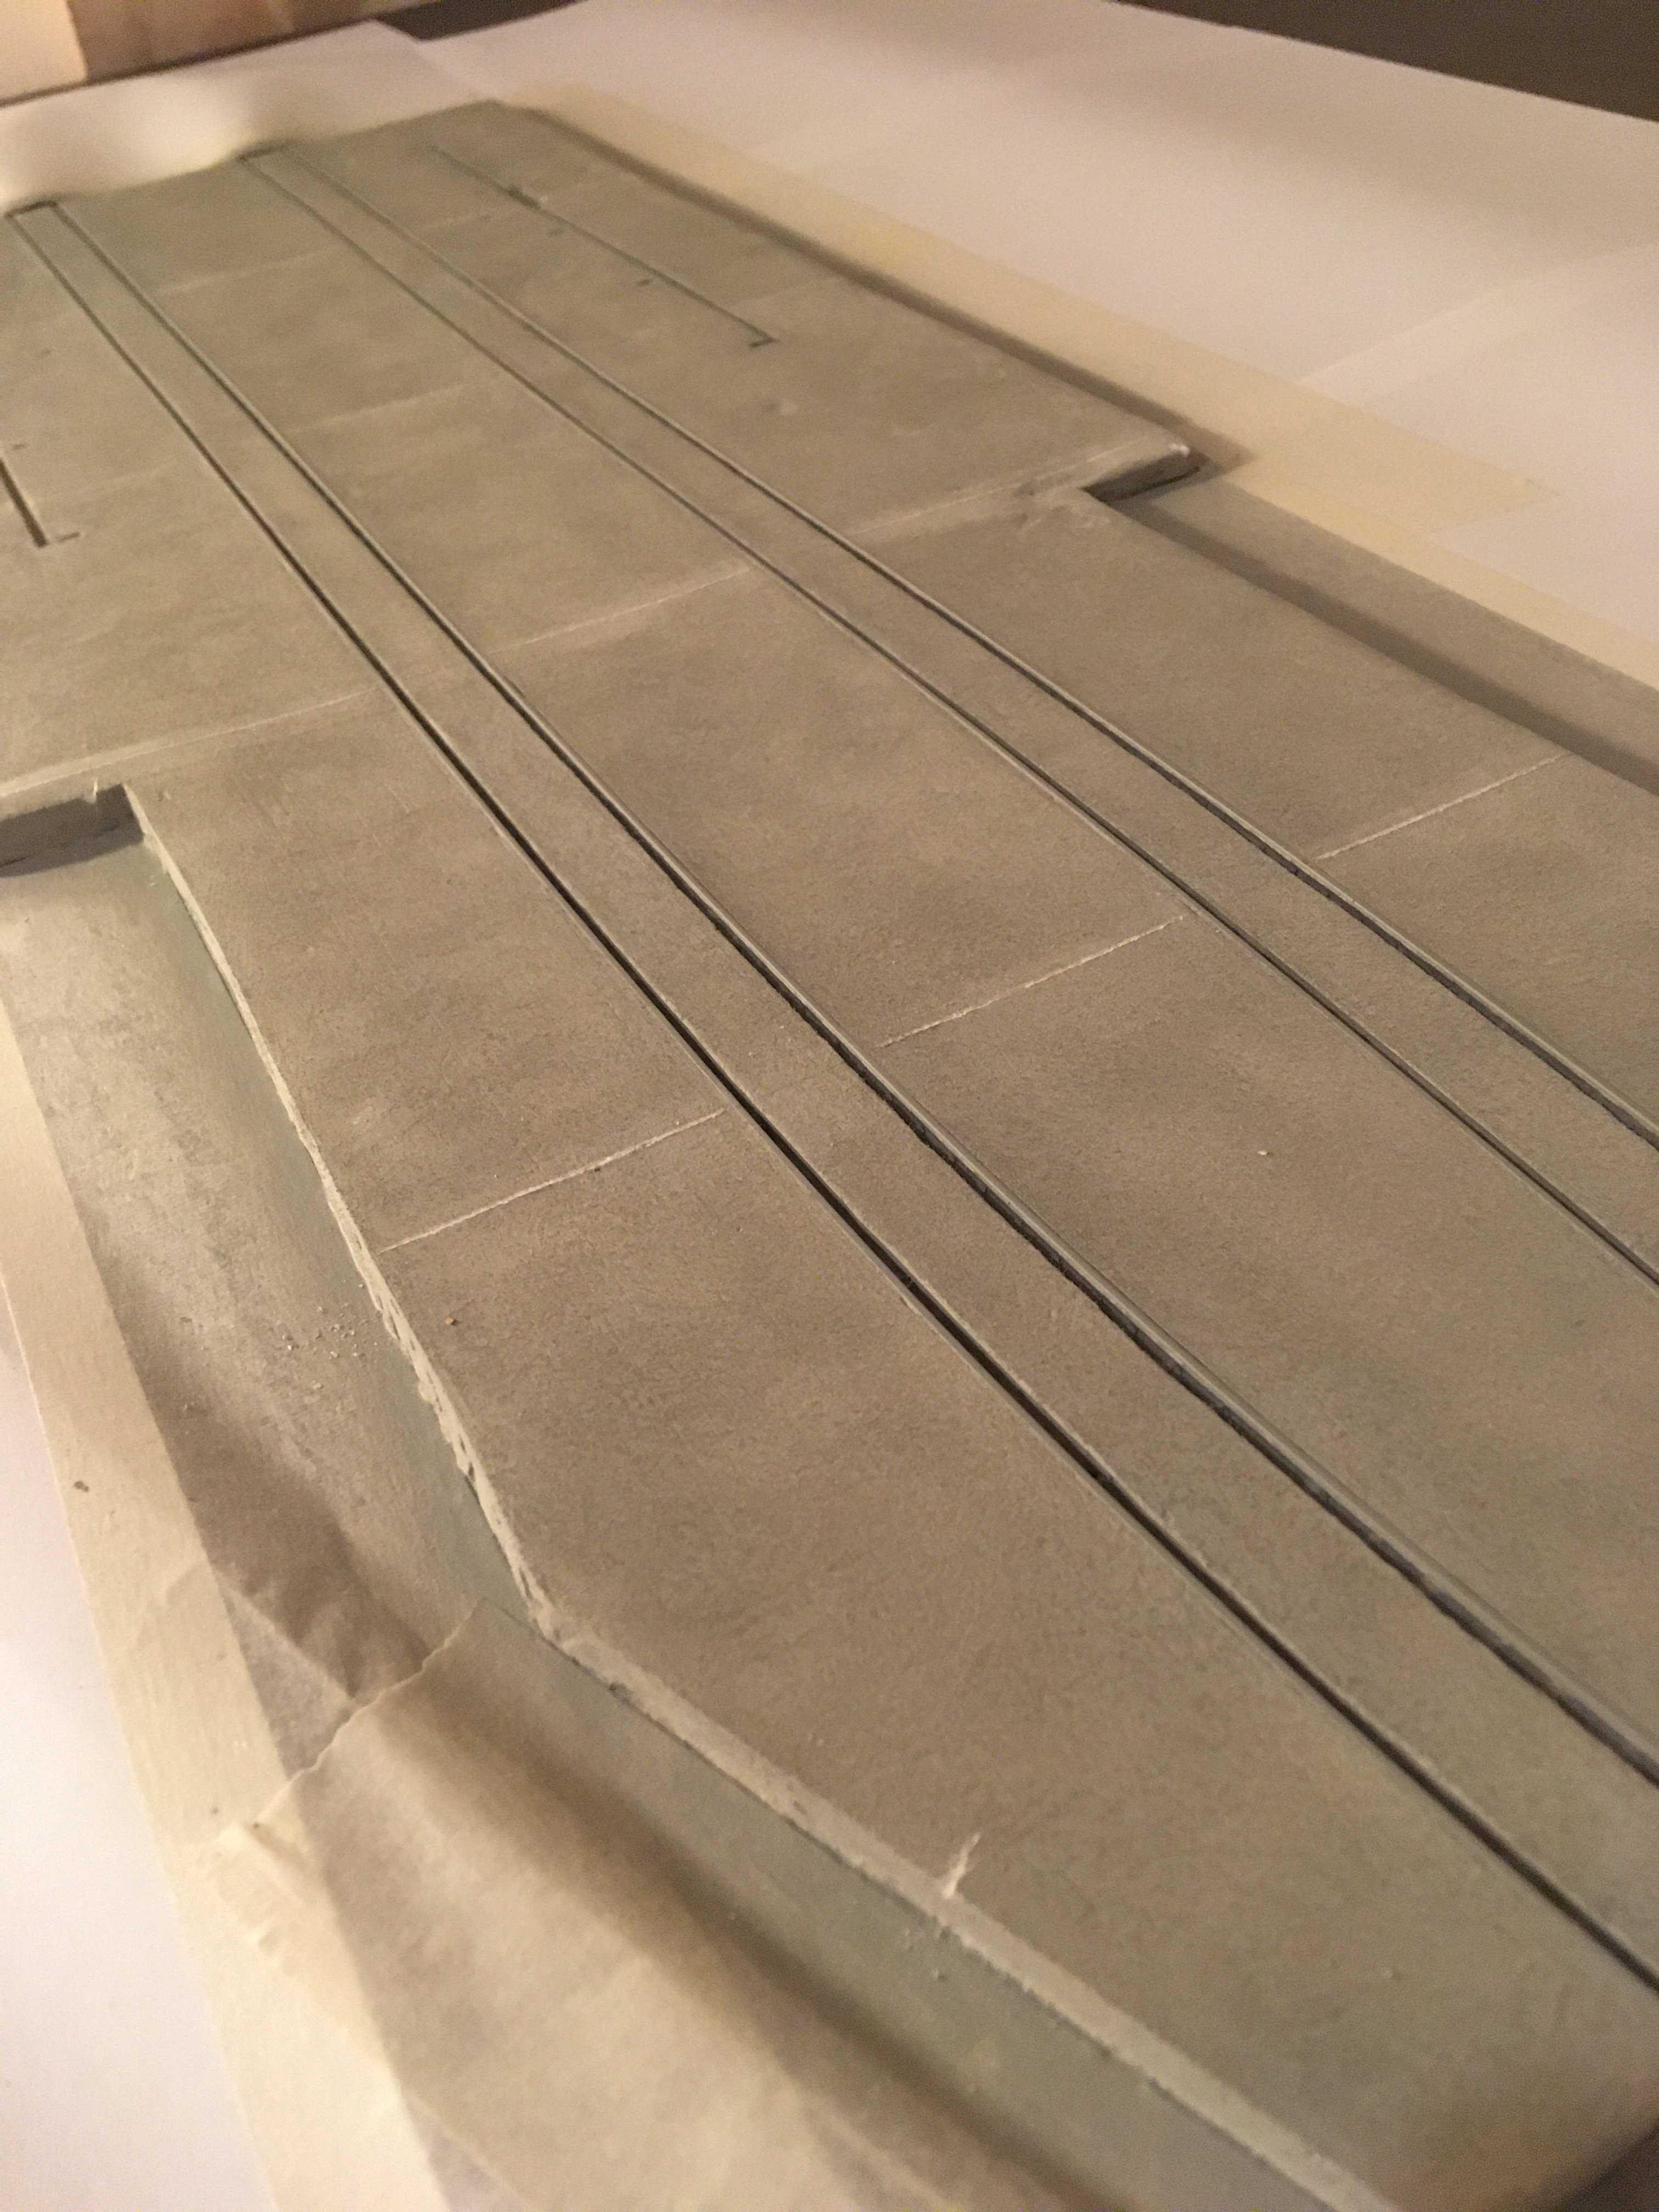
This is a start to finish series of videos on how to create weathered concrete for model railway depot hardstands using DAS weathering clay. Includes tips for modelling the clay, creating molds, painting, weathering and adding oily effects. The playlist has 15 x 1 min videos to keep things nice and to the point You can watch individual videos or the full playlist is below... * Step 1: Create the mold * Step 2: Mold the wet clay into shape * Step 3: Separate the mold and clay * Step 4: Cut off the mold * Step 5: Sanding time * Step 6: Cut out the wheel grooves * Step 7: Cut out shed base grooves * Step 8: Spray paint concrete base colour * Step 9: Add grime to the rail and shed grooves * Step 10: Sponge dab a grey pattern weathering wash * Step 11: Add base colour of grime and dirt * Step 12: Add dirt and algae areas * Step 13: Add oily patches * Step 14: Add subtle weathering powder effects & highlights * Step 15: Add shiny oil reflections Full Playlist Feel free to comment and share, I always appreciate any feedback
-
Depot #8 by Riverbank Railways (fictional 1980s / early 1990s depot)
Adrian replied to Adrian's topic in Irish Model Layouts
Thanks dude! I was the same, never soldered anything before this time last year, there's a bit of fear at the start, but as you say, if you start practicing on random bits of wire, getting a single LED working etc you'll be flying. That's what I did anyway - here's some of my earliest experiments... * https://photos.app.goo.gl/VfP7U8AKyb8oATDx9 * https://photos.app.goo.gl/NhUH1XjLJSMfHEwh8 Quick tip, when soldering flux makes everything easier --- @David HolmanHere's the vid for cutting out the grooves in the rails - one thing to note, they need to be 1.5 to 2 times wider than what you're seeing here - as I learned! -
No worries @Geeb I haven't used Digitrax myself but from what others say it sounds like a good choice Most of the decent controllers (€200-€300) should last you years. This is what I do, I am a software developer by day so prefer to keep as much analogue as possible on the layout (while also loving DCC ) You can see my control panel in the first post here - scroll down 4 or 5 photos:
-
Happened me with DPD last week (on something else). I got a notification that it had been delivered (I can see my postbox from my home office) and also that it was signed for!! Apparently the local driver just marks them all as delivered and signed for in the morning before he heads out onto DPD and di some persuading to get him to go back, pick it up and bring it to me - the eircode was literally printed on the box :shrug
-
Depot #8 by Riverbank Railways (fictional 1980s / early 1990s depot)
Adrian replied to Adrian's topic in Irish Model Layouts
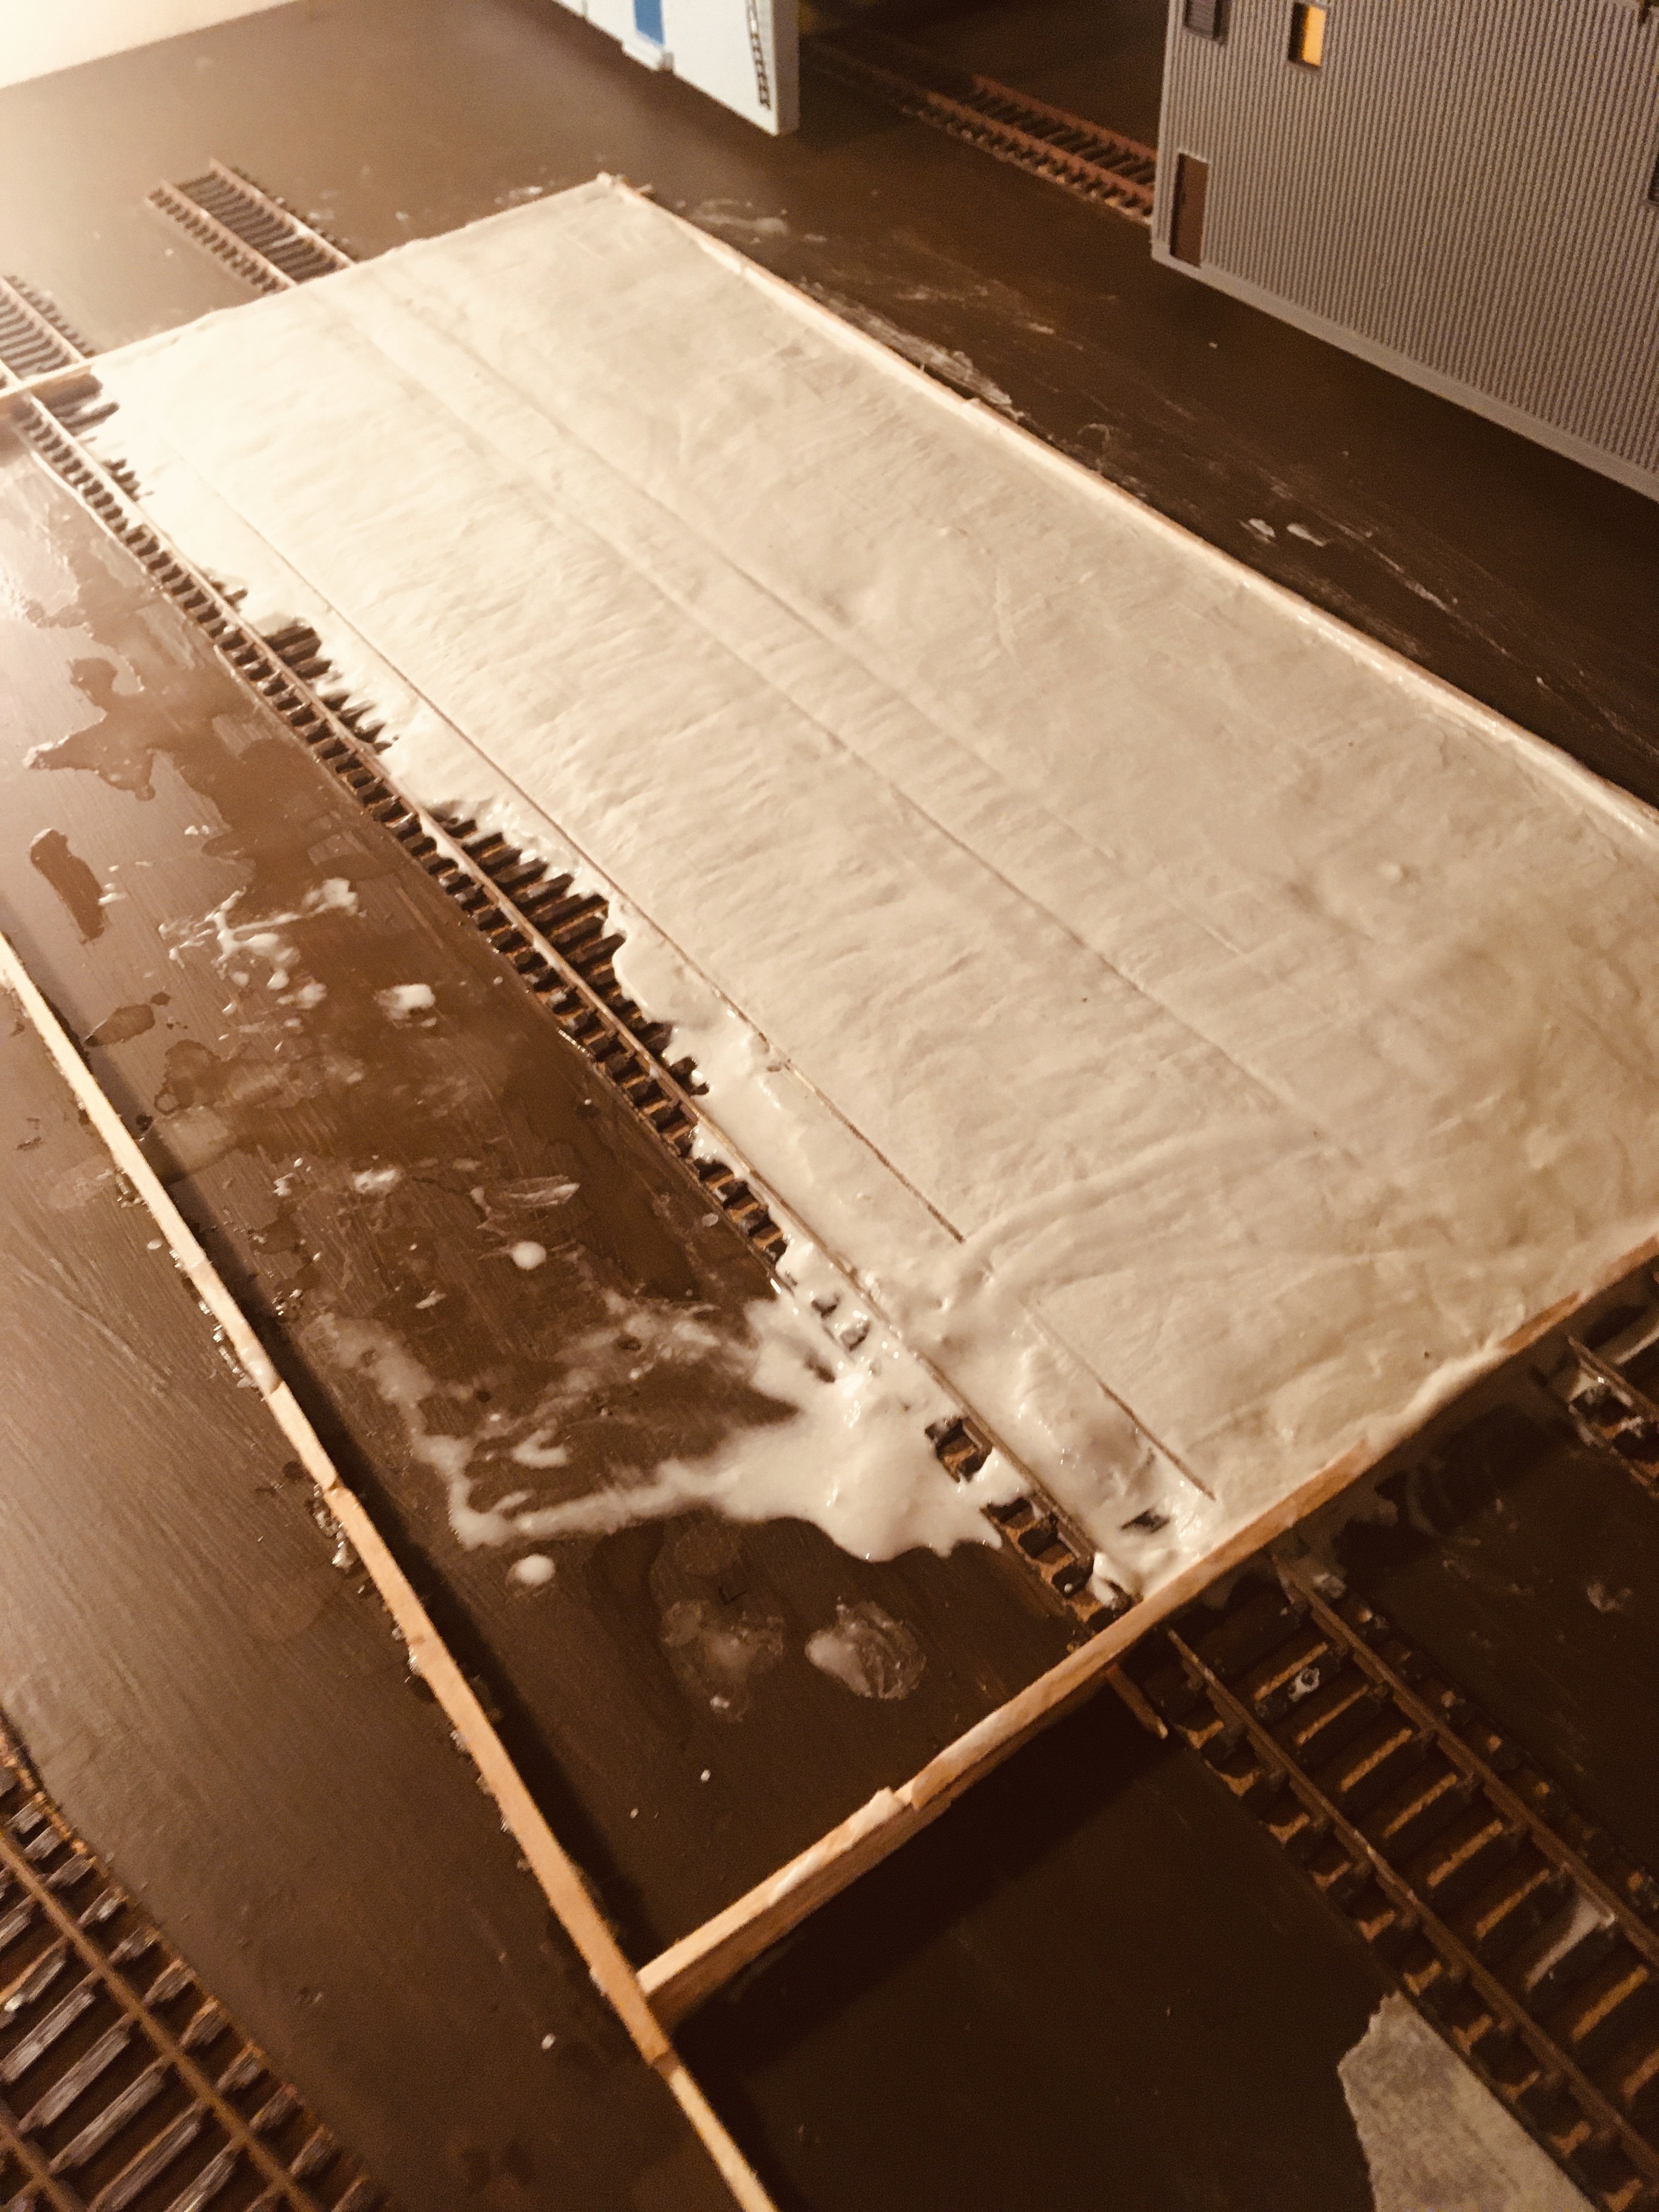
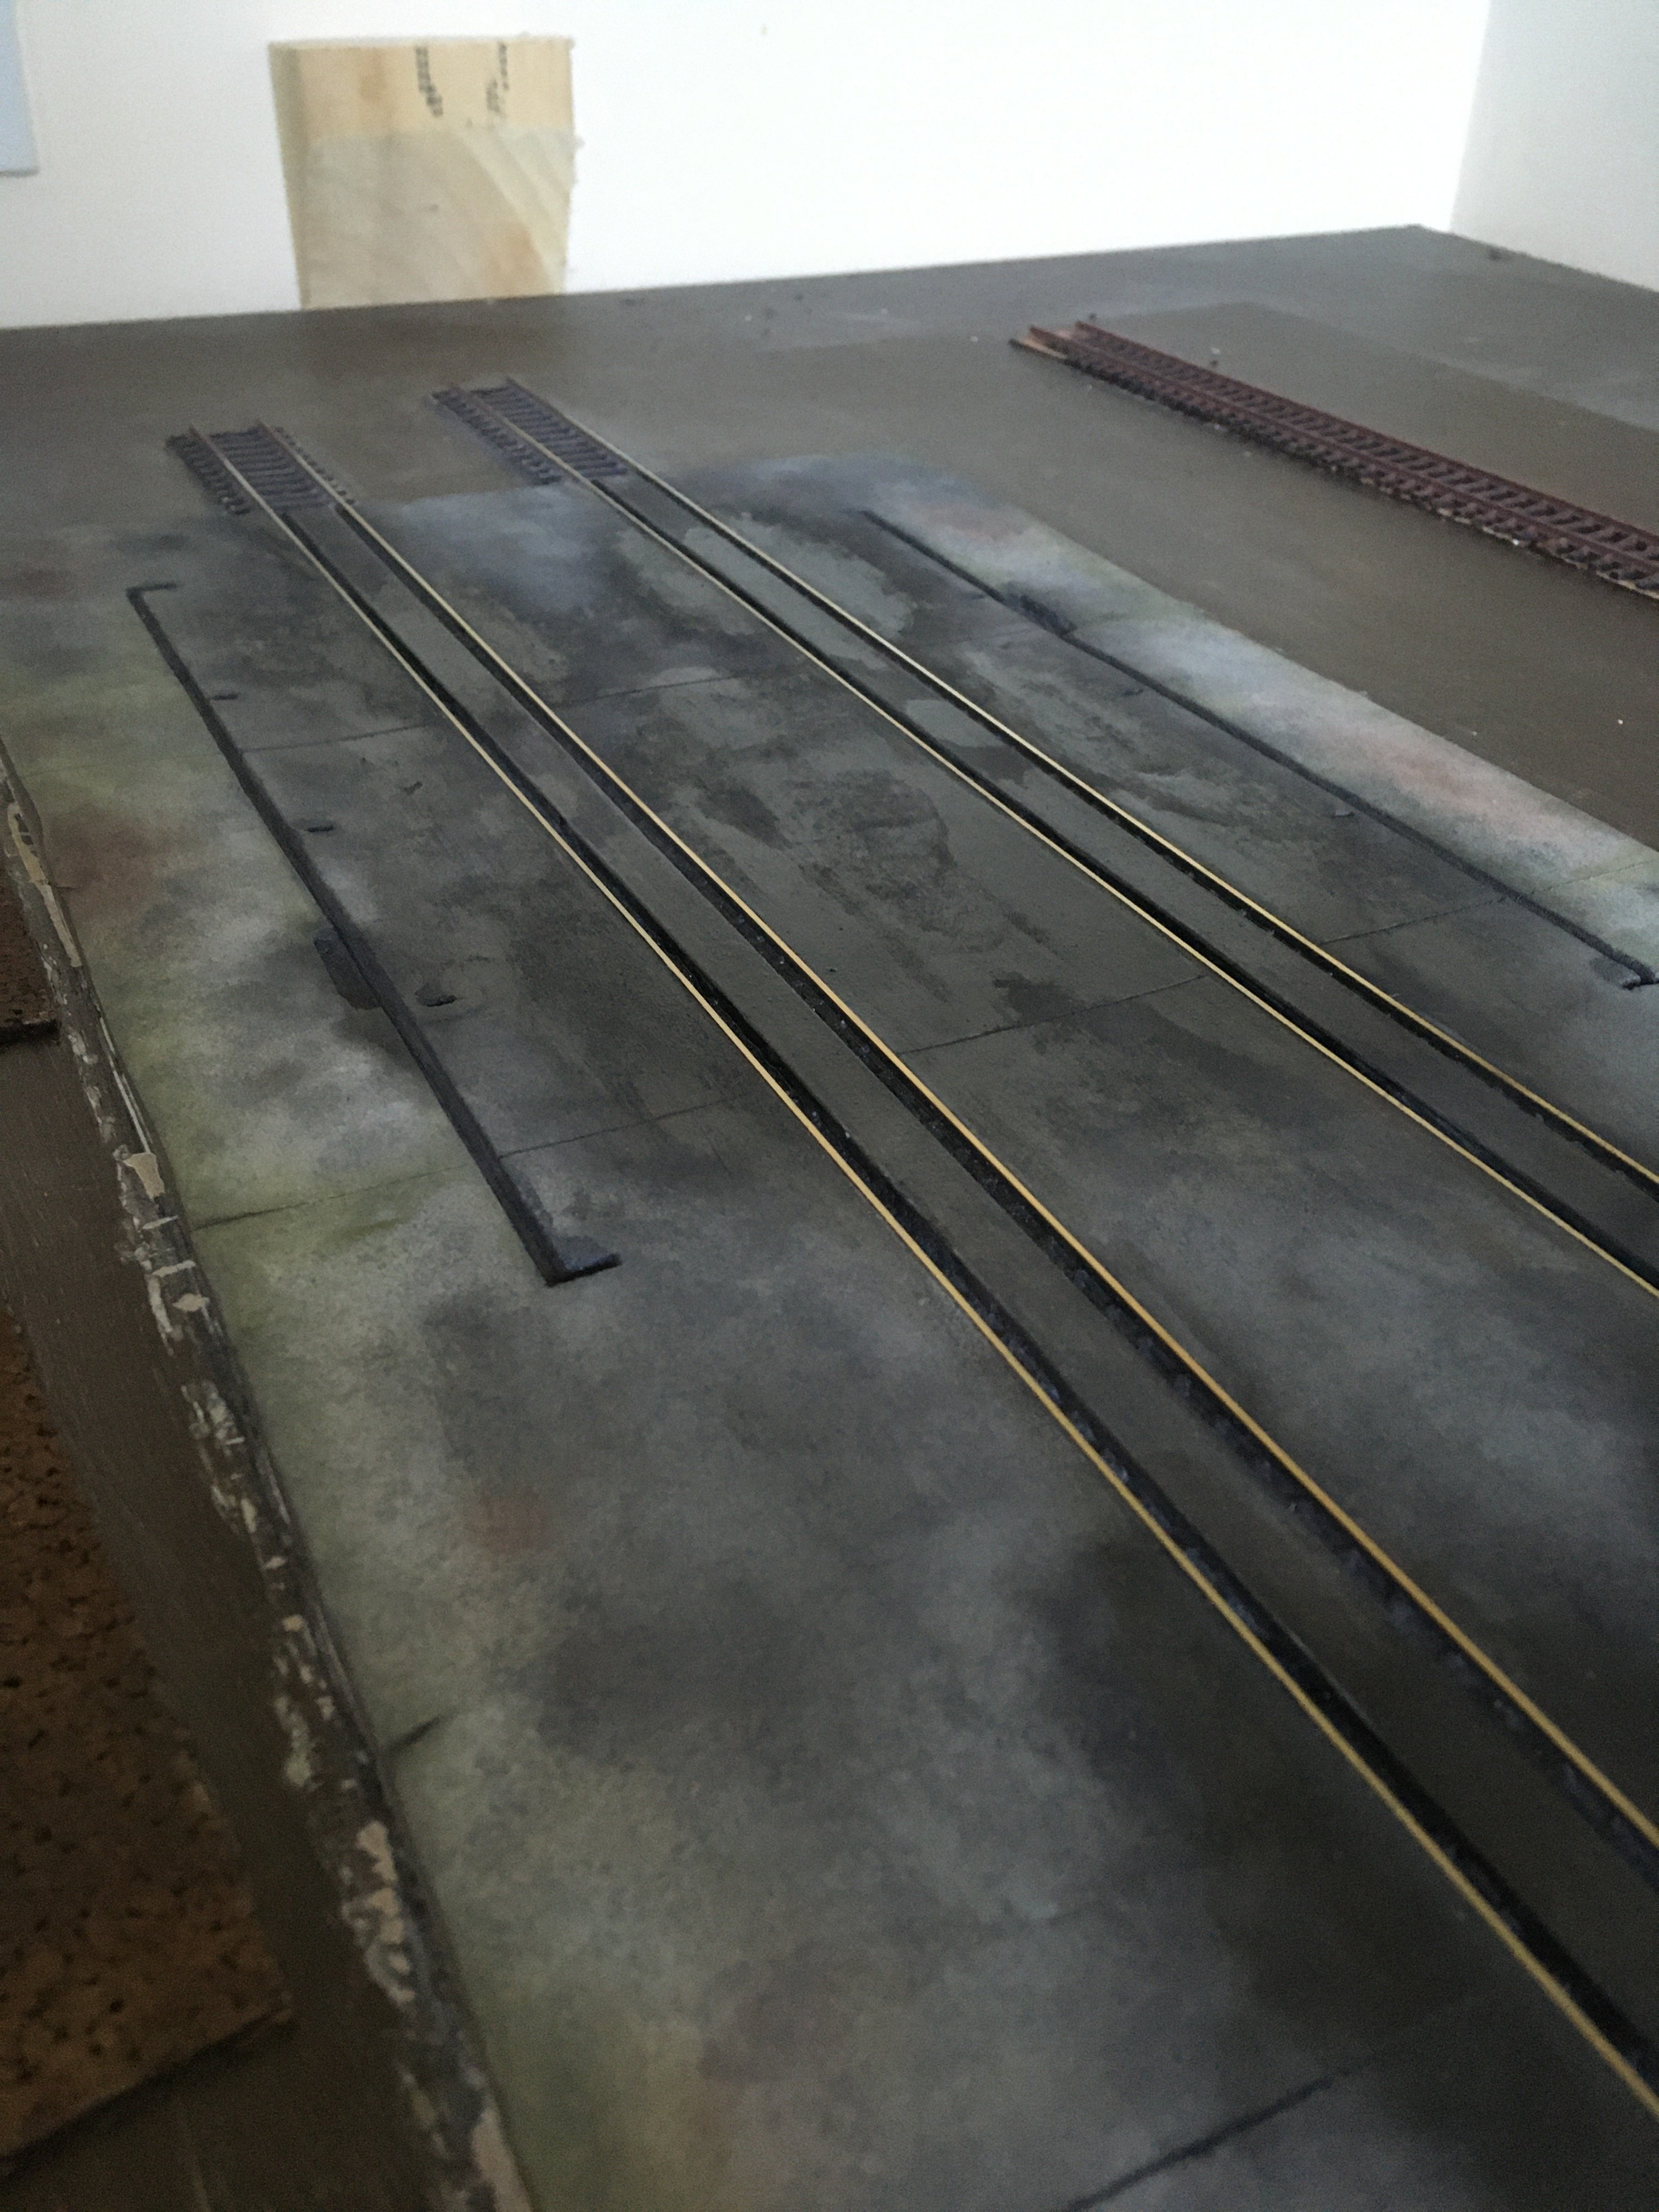
Oh wow, what a response! Thanks for all the comments and encouragement everyone Hey @David Holman, with lots of learning! I cut along the inside of the rails with a scalpel and then used a metal ruler to cut along the channel, then dug it out with the scalpel, then I learned that the channels were too narrow which caught the wheels and I had left the surrounding clay a little too high which bumped them up and broke the contact (this is after spraying ). It was fine for stay alive fitted locos but not good on older ones. I had to resand and make the channels wider and respray again (which actually worked out well as the concrete ended up with two different textures). Then after weathering I learned that you gotta clean the inside top of the rails as well, as the locos were depending on that for contact (especially older Lima wheels which are not flat but at an angle). Then I learned not to let the varnish pool too much or it would lift the wheel again as it passed over lol. So trial and error on the first attempt but once figured out, the second hardstand went much smoother. I'll have a video up soon which shows the technique so will plop a link down here for ya- 80 replies
-
- 10
-

-
Definitely be doing some weathering practicing on other locos next year and will give it some touch ups, but it's a great base to work on
-
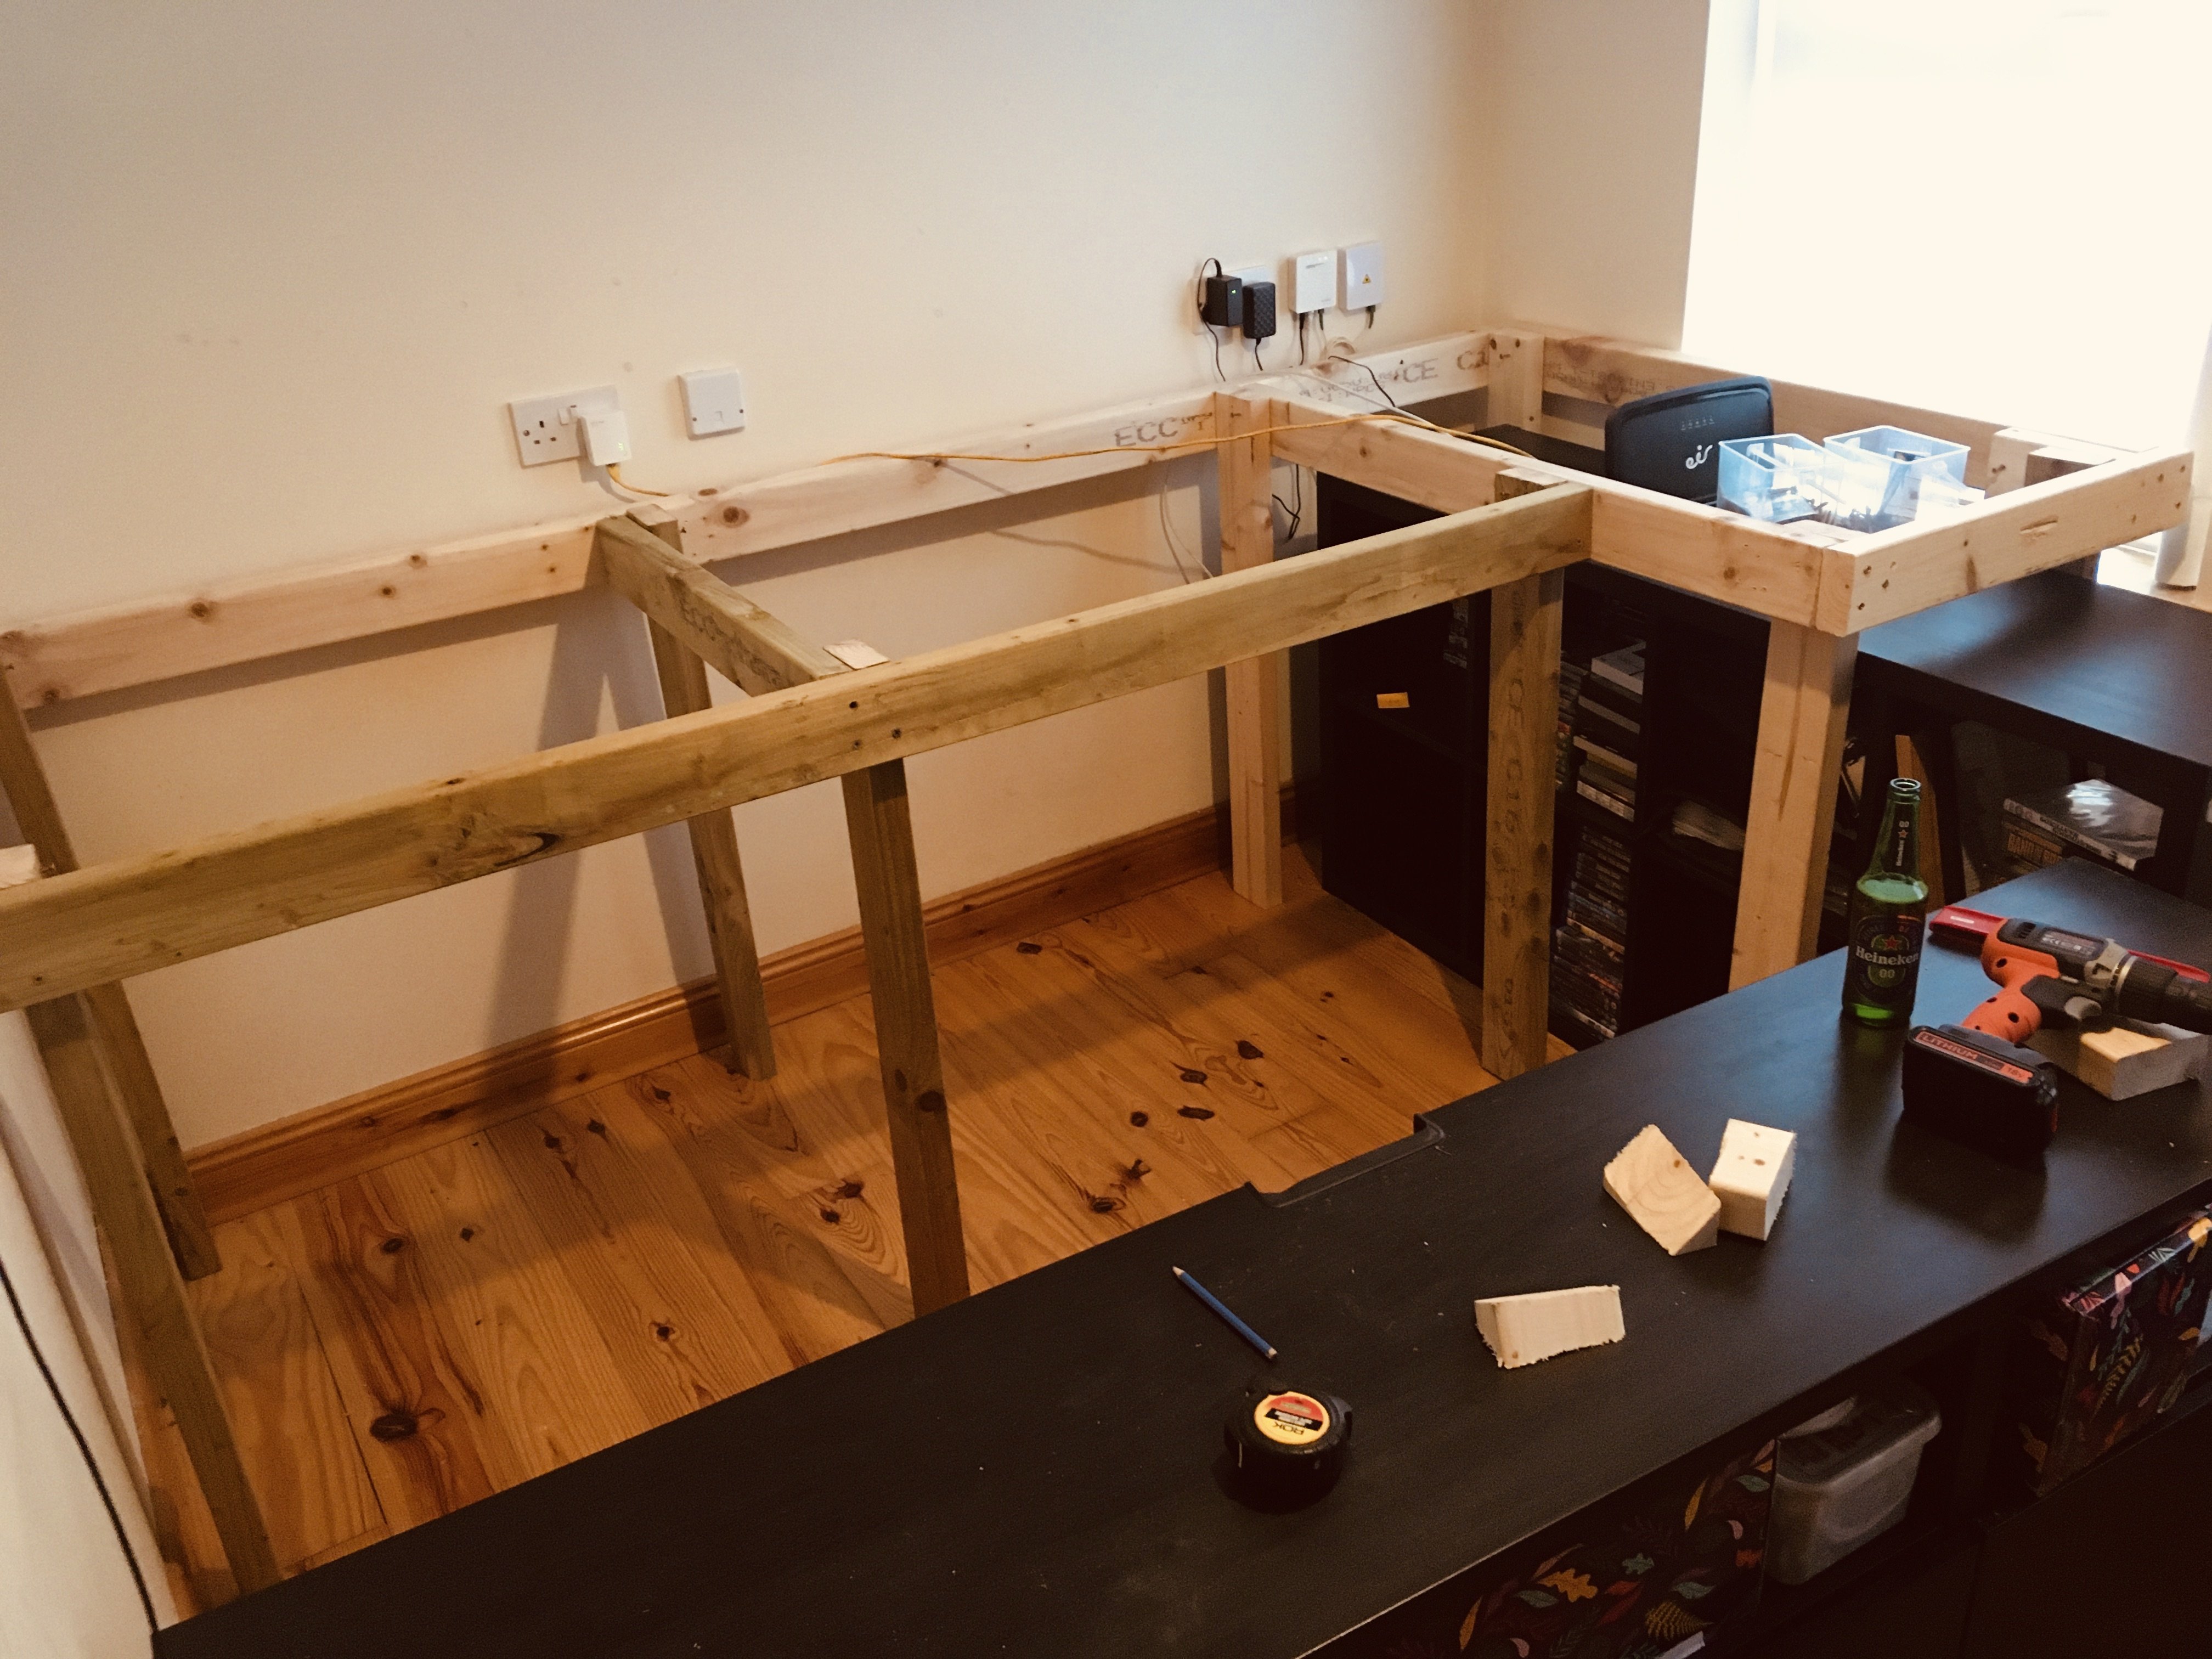
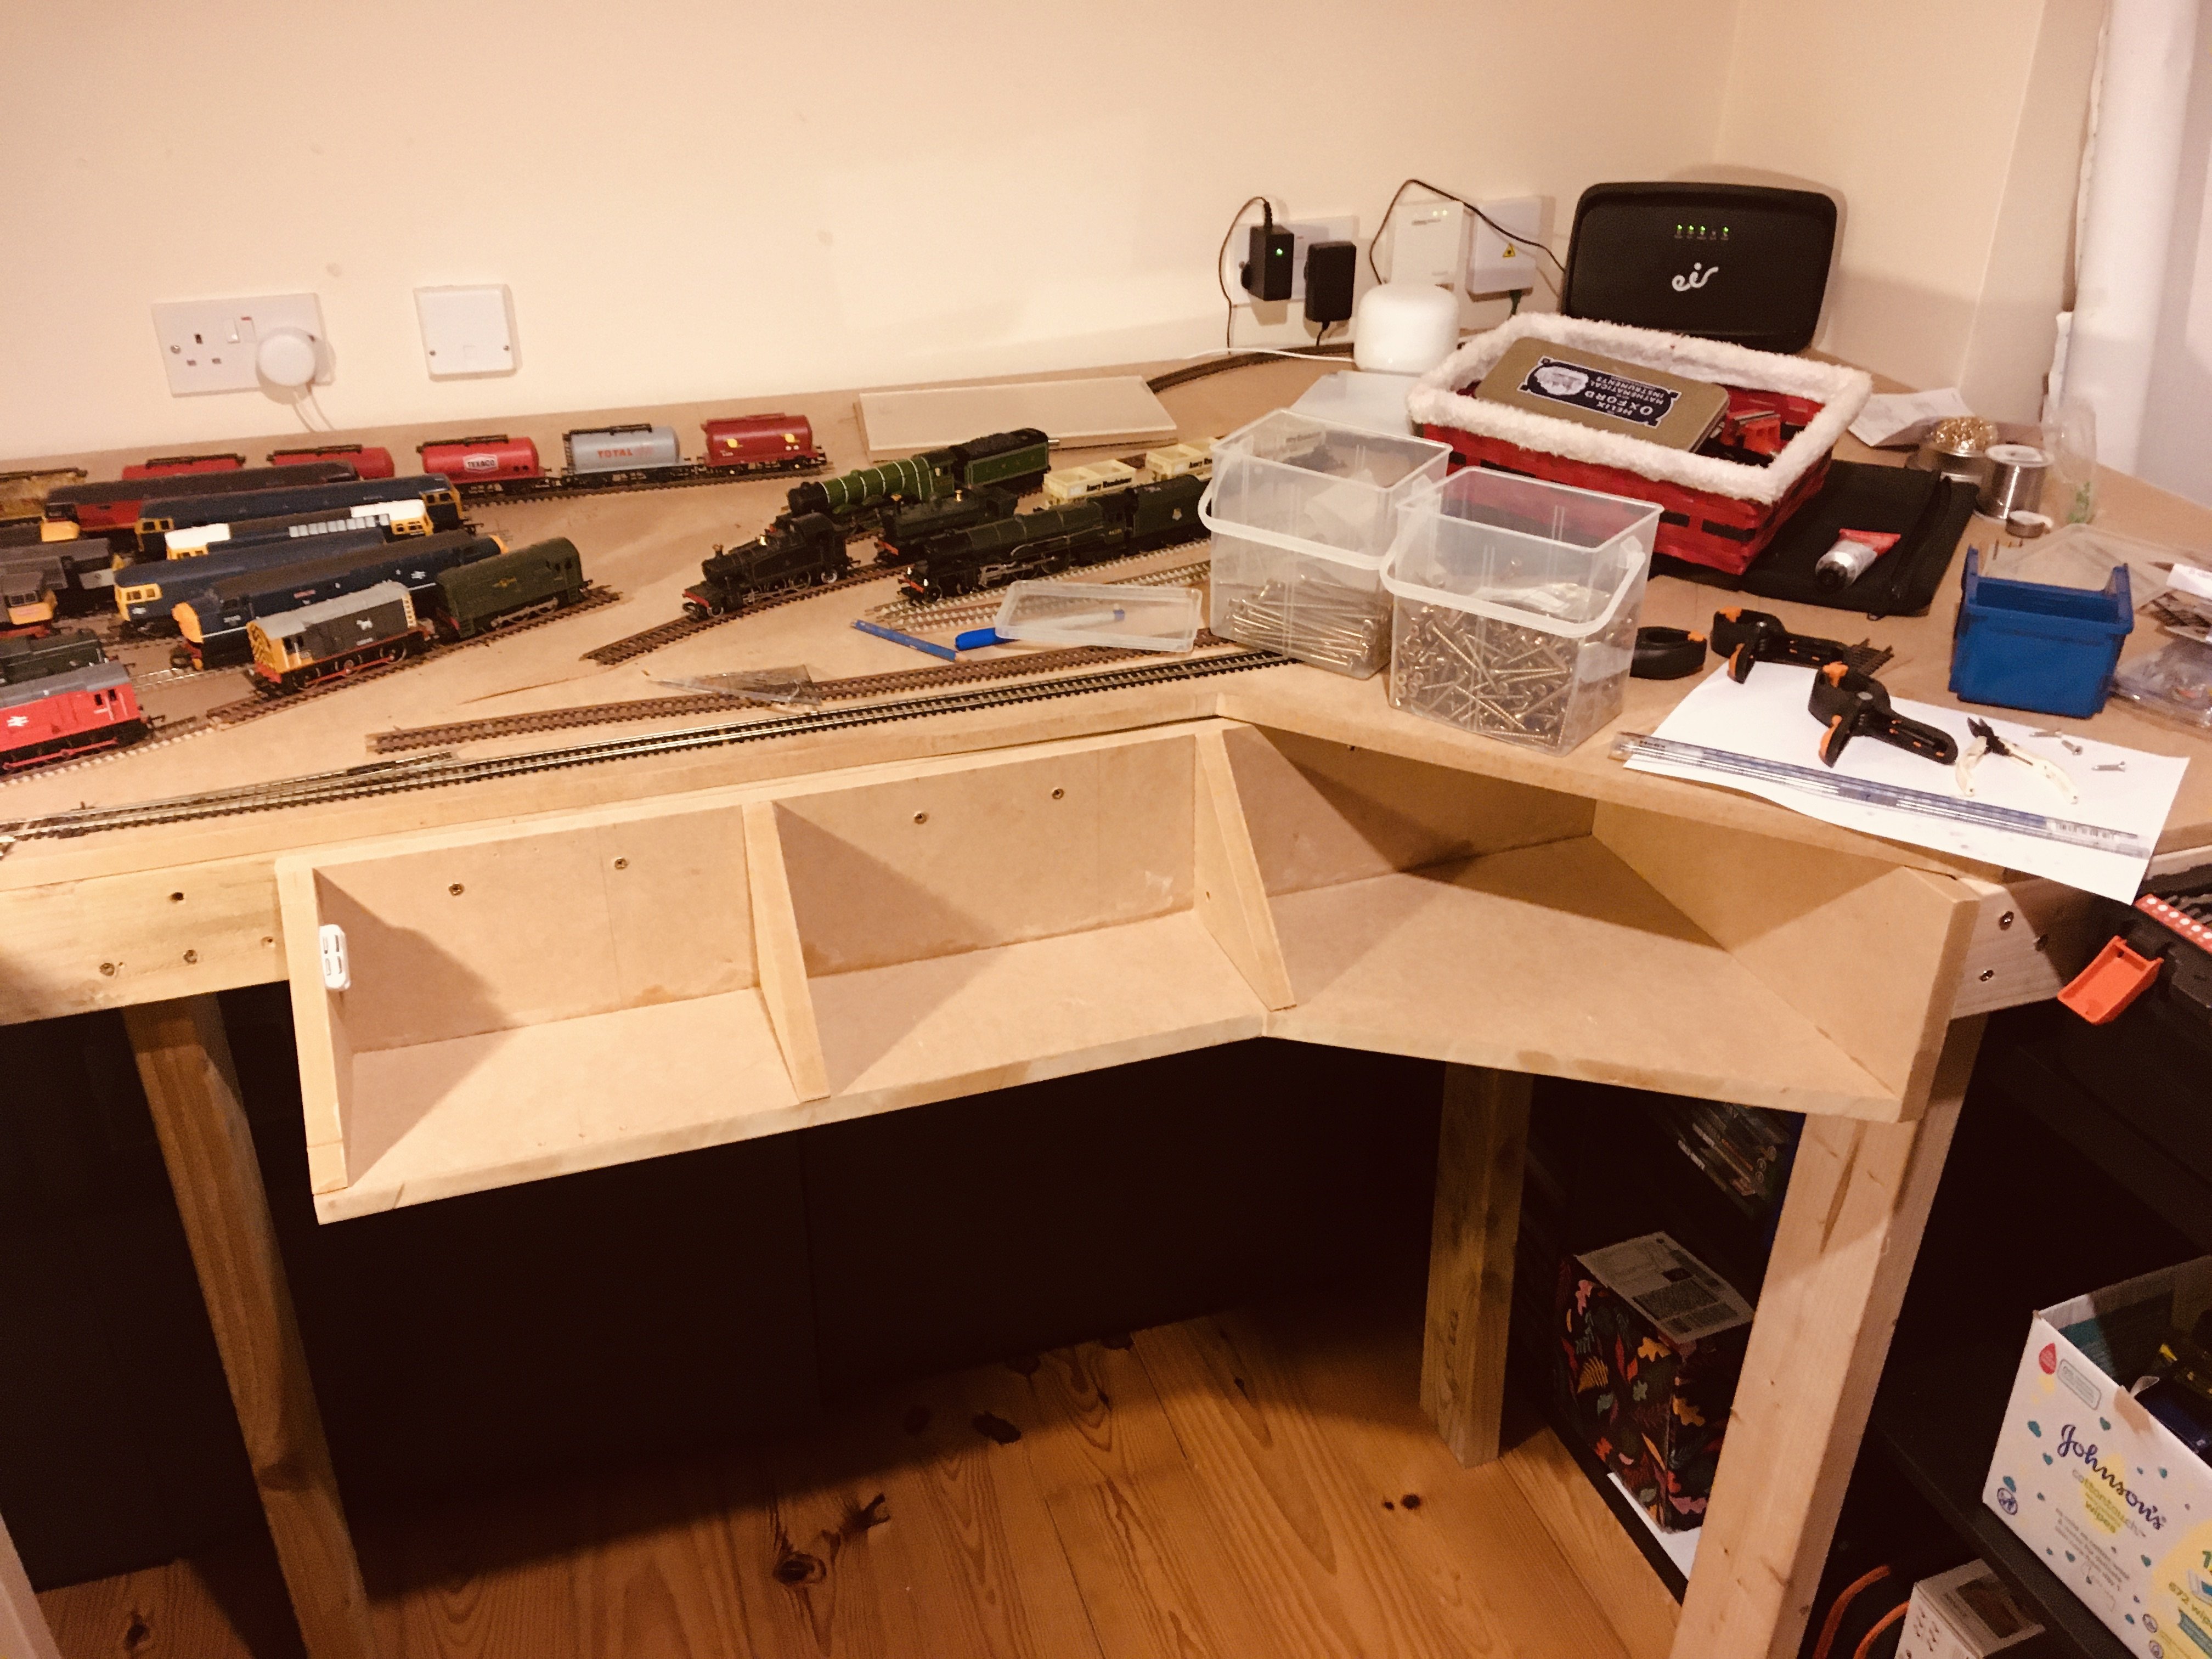
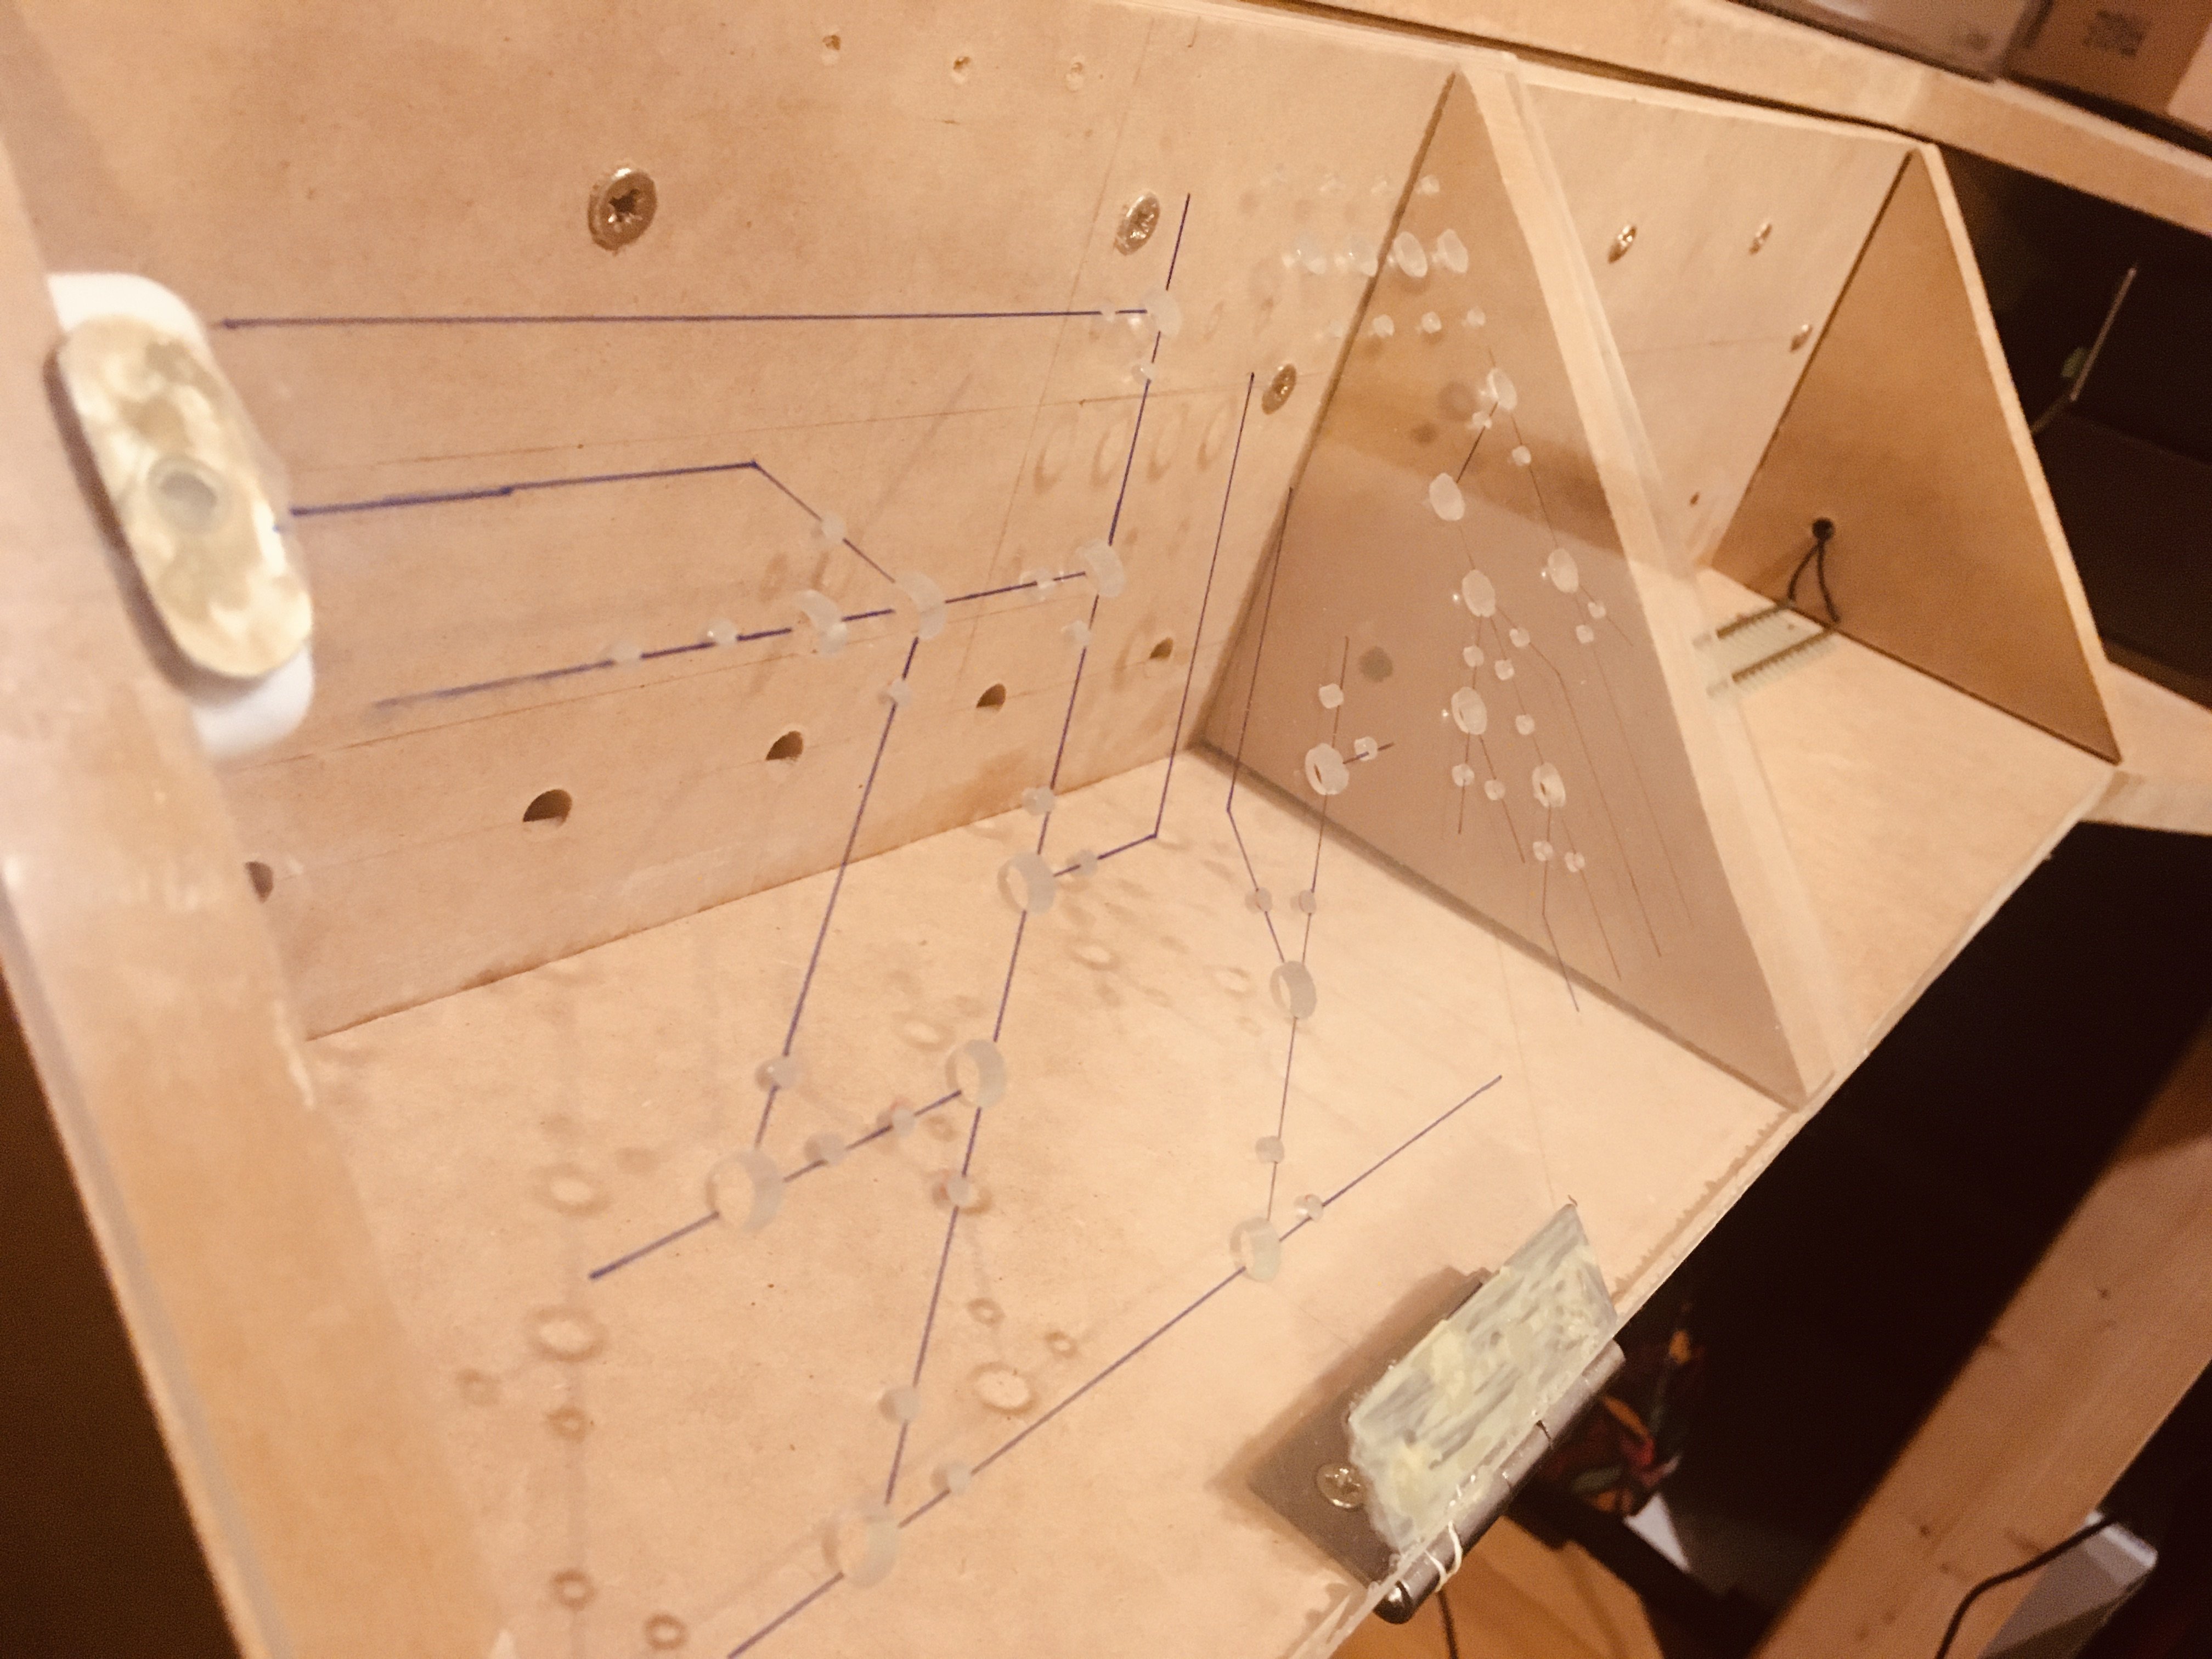
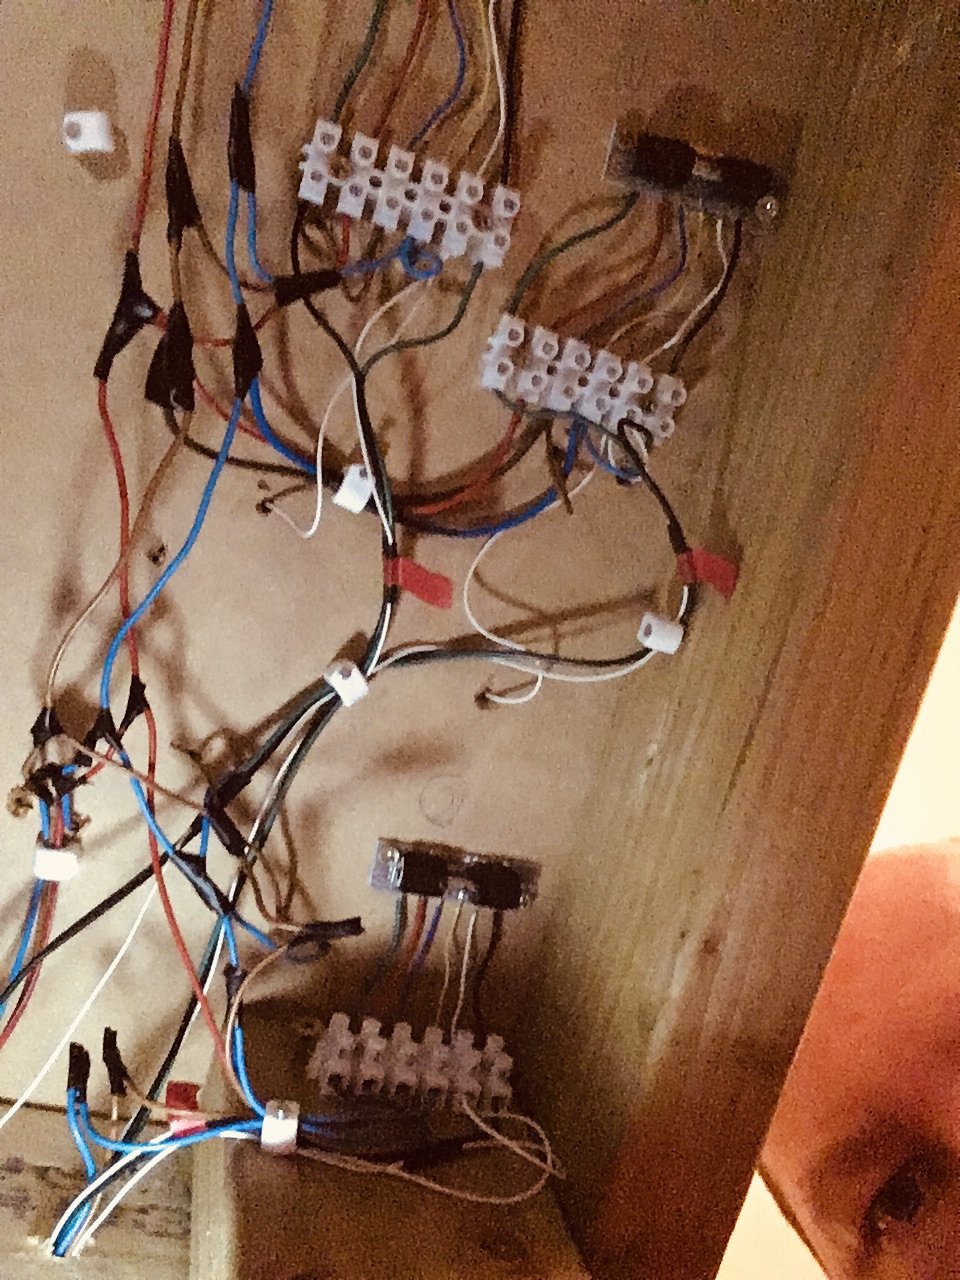
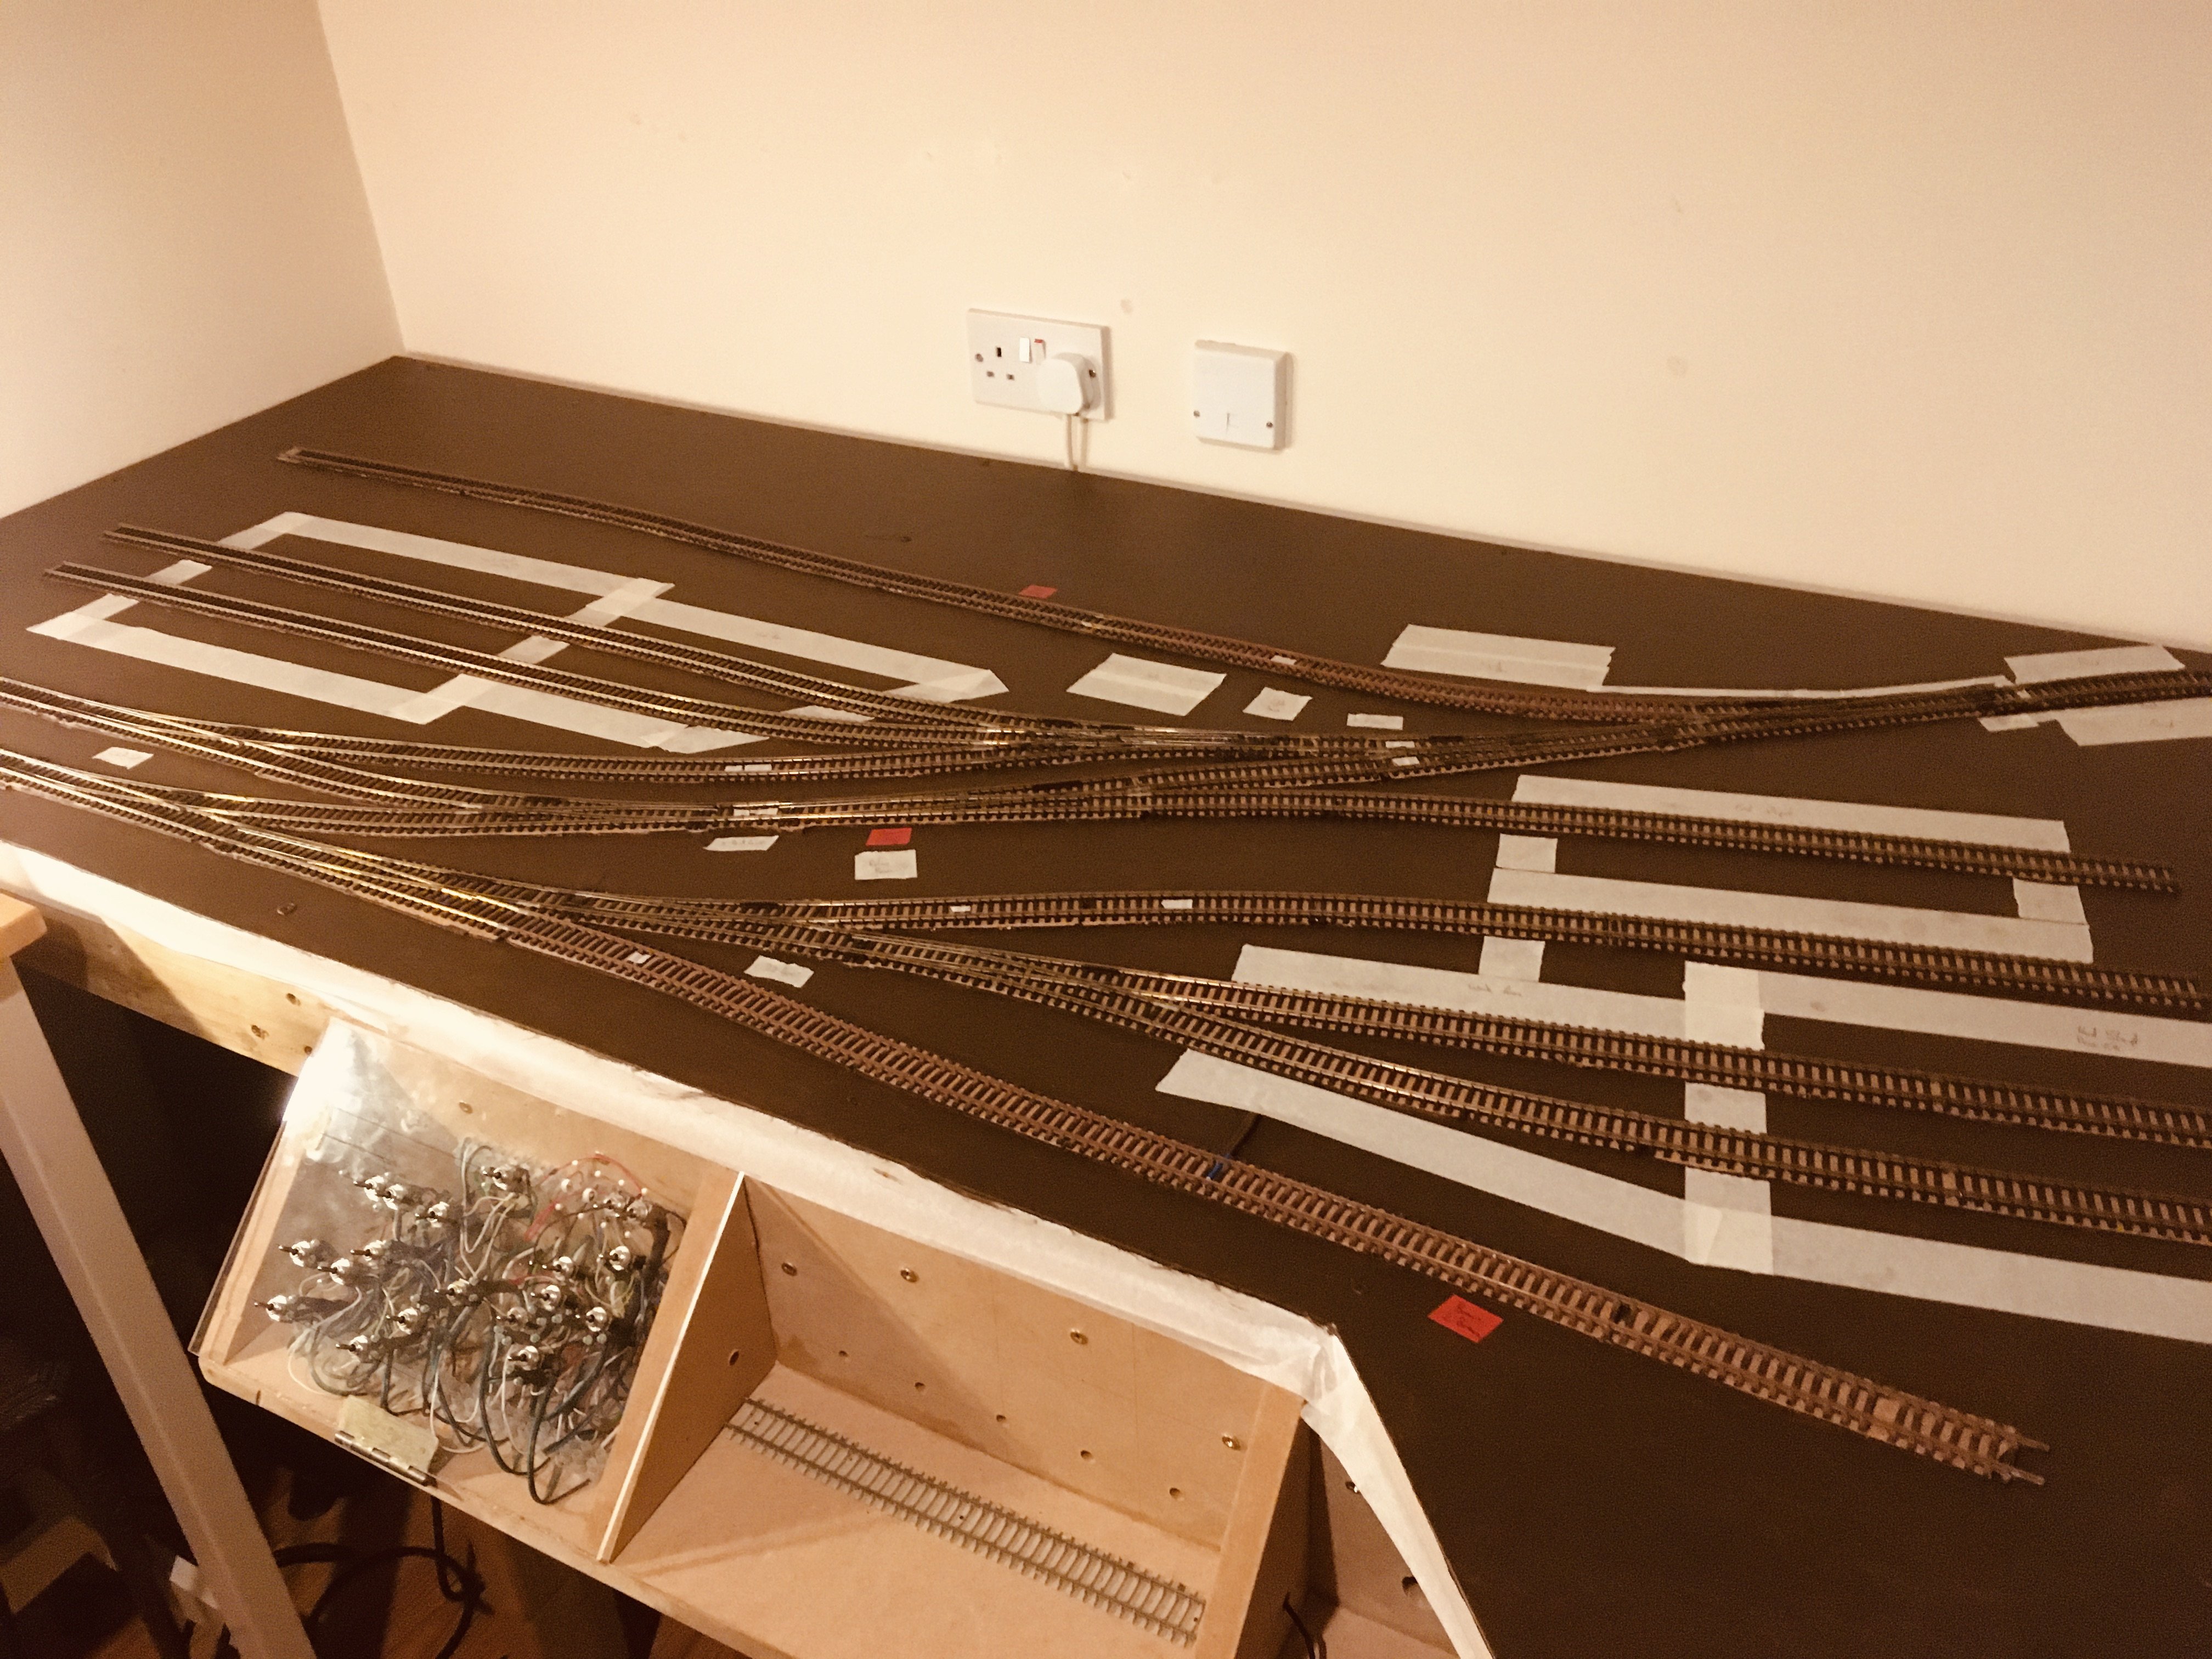
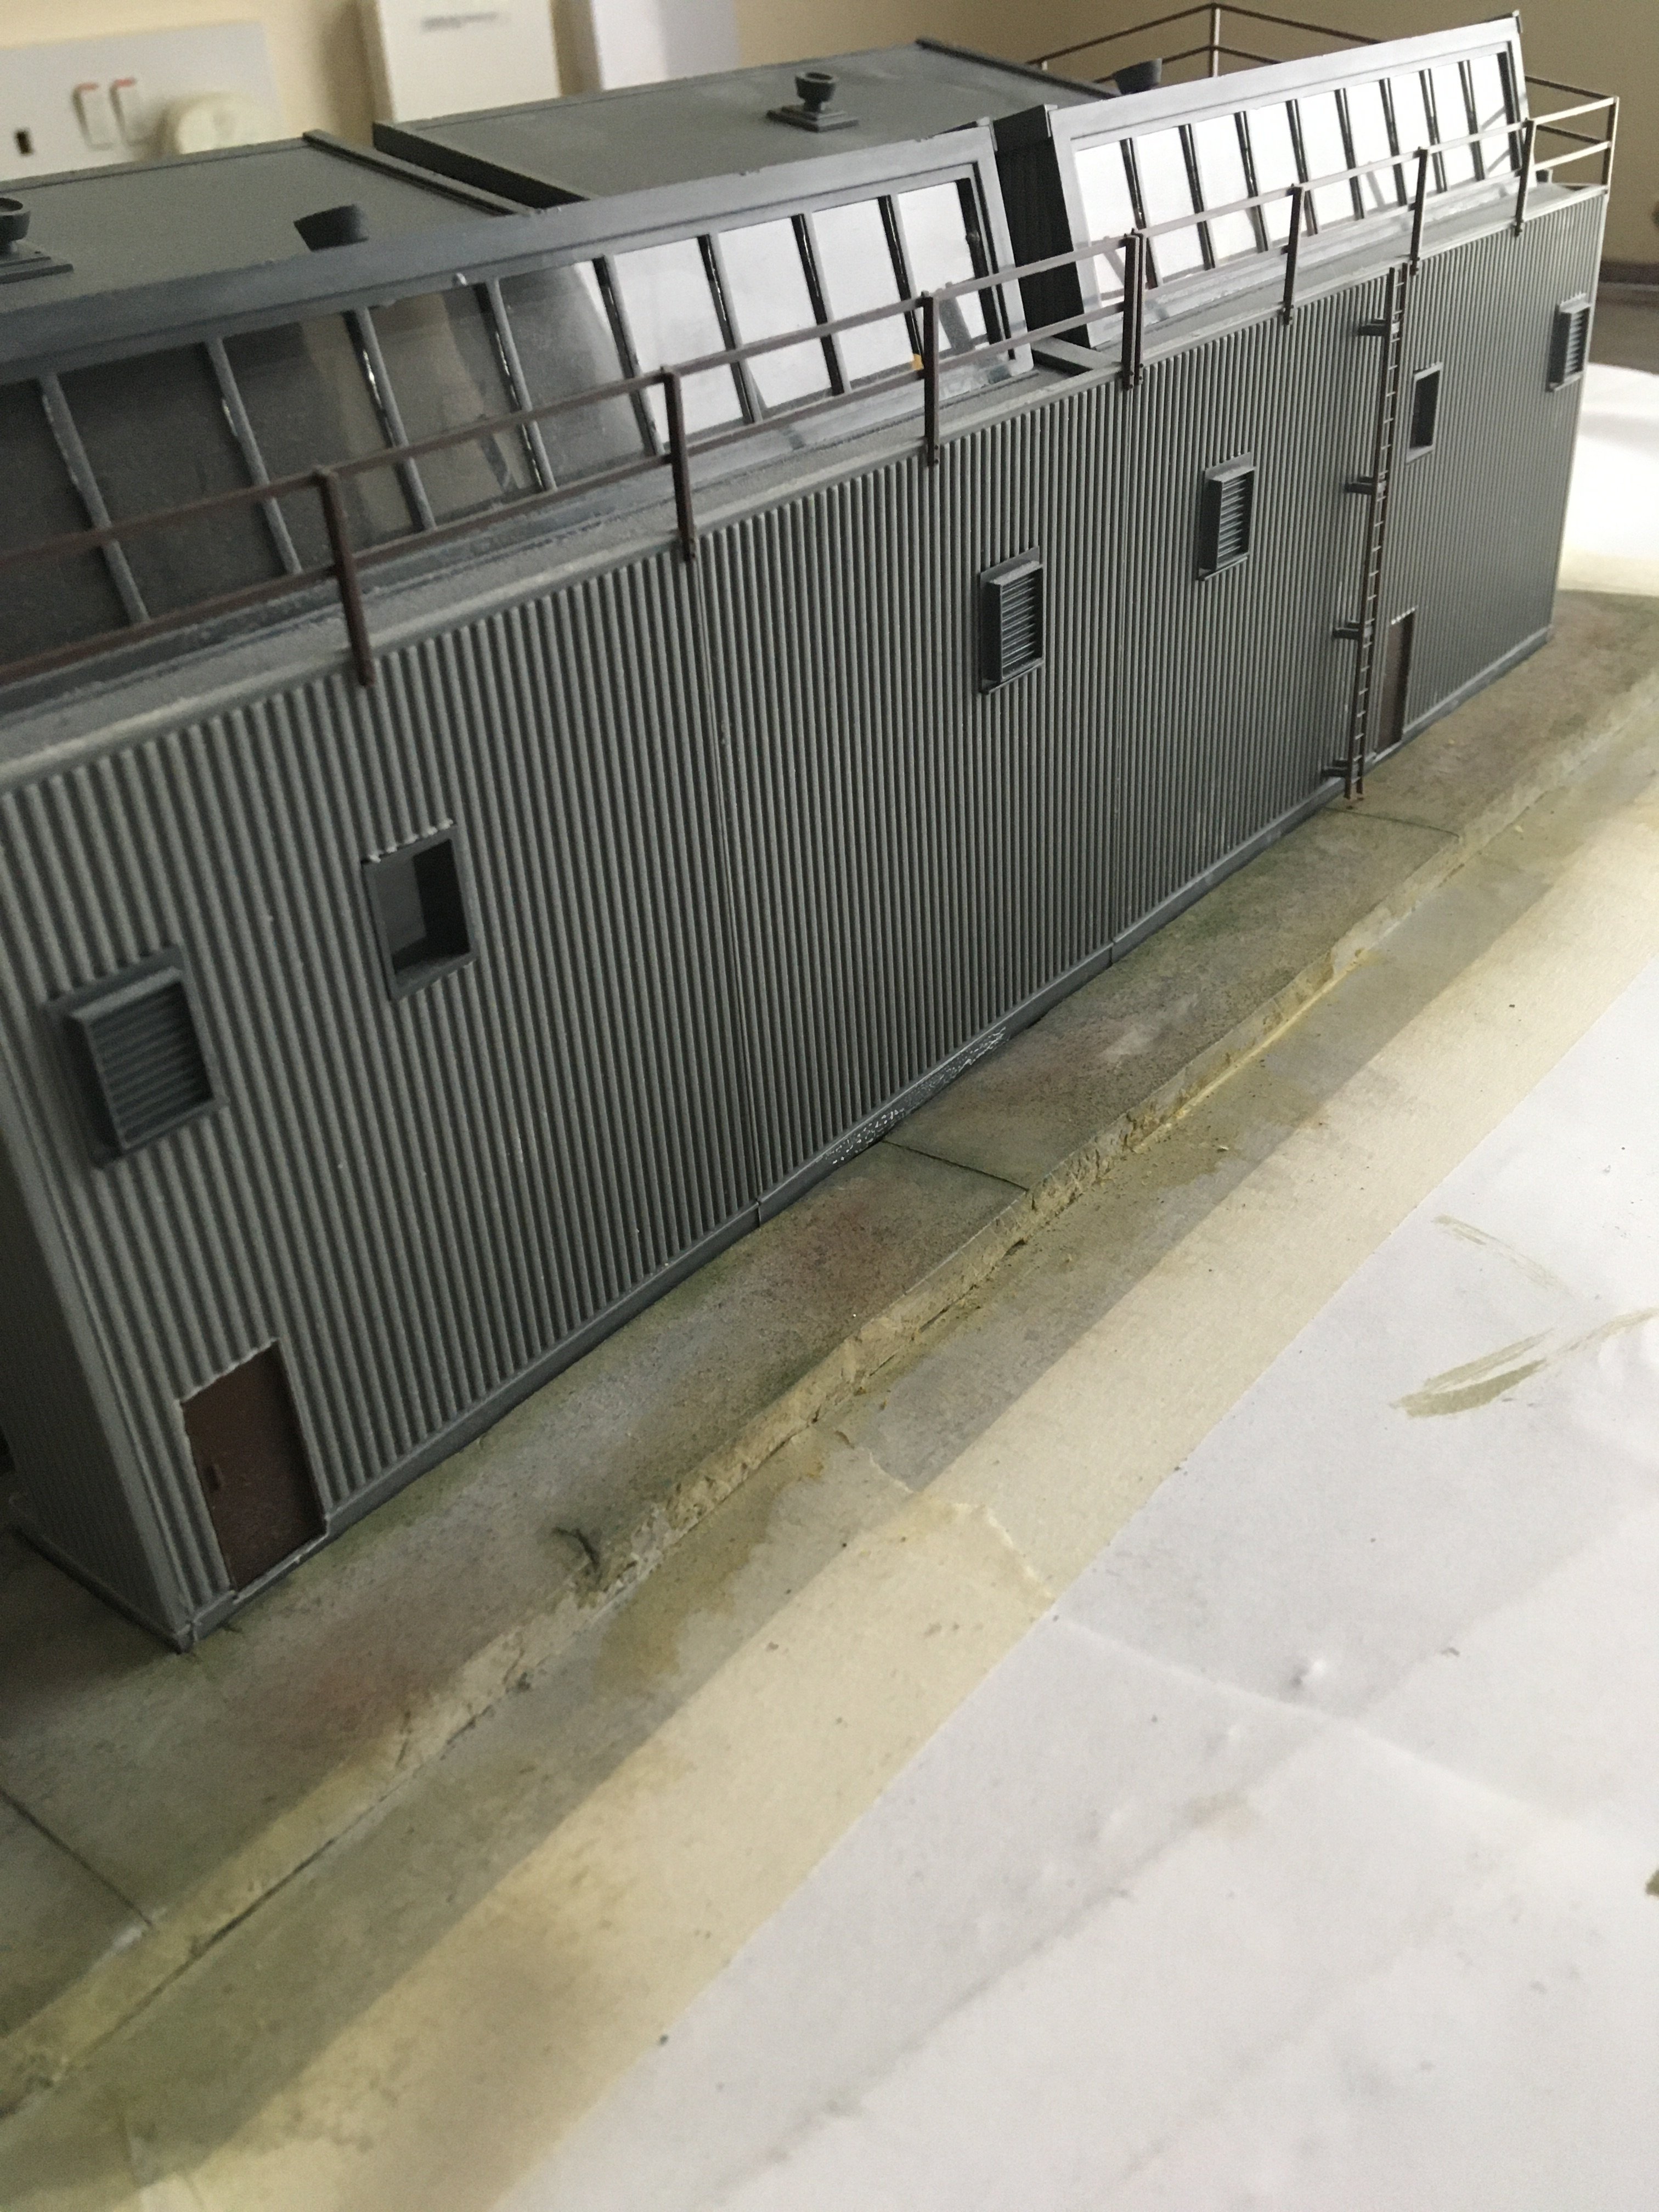
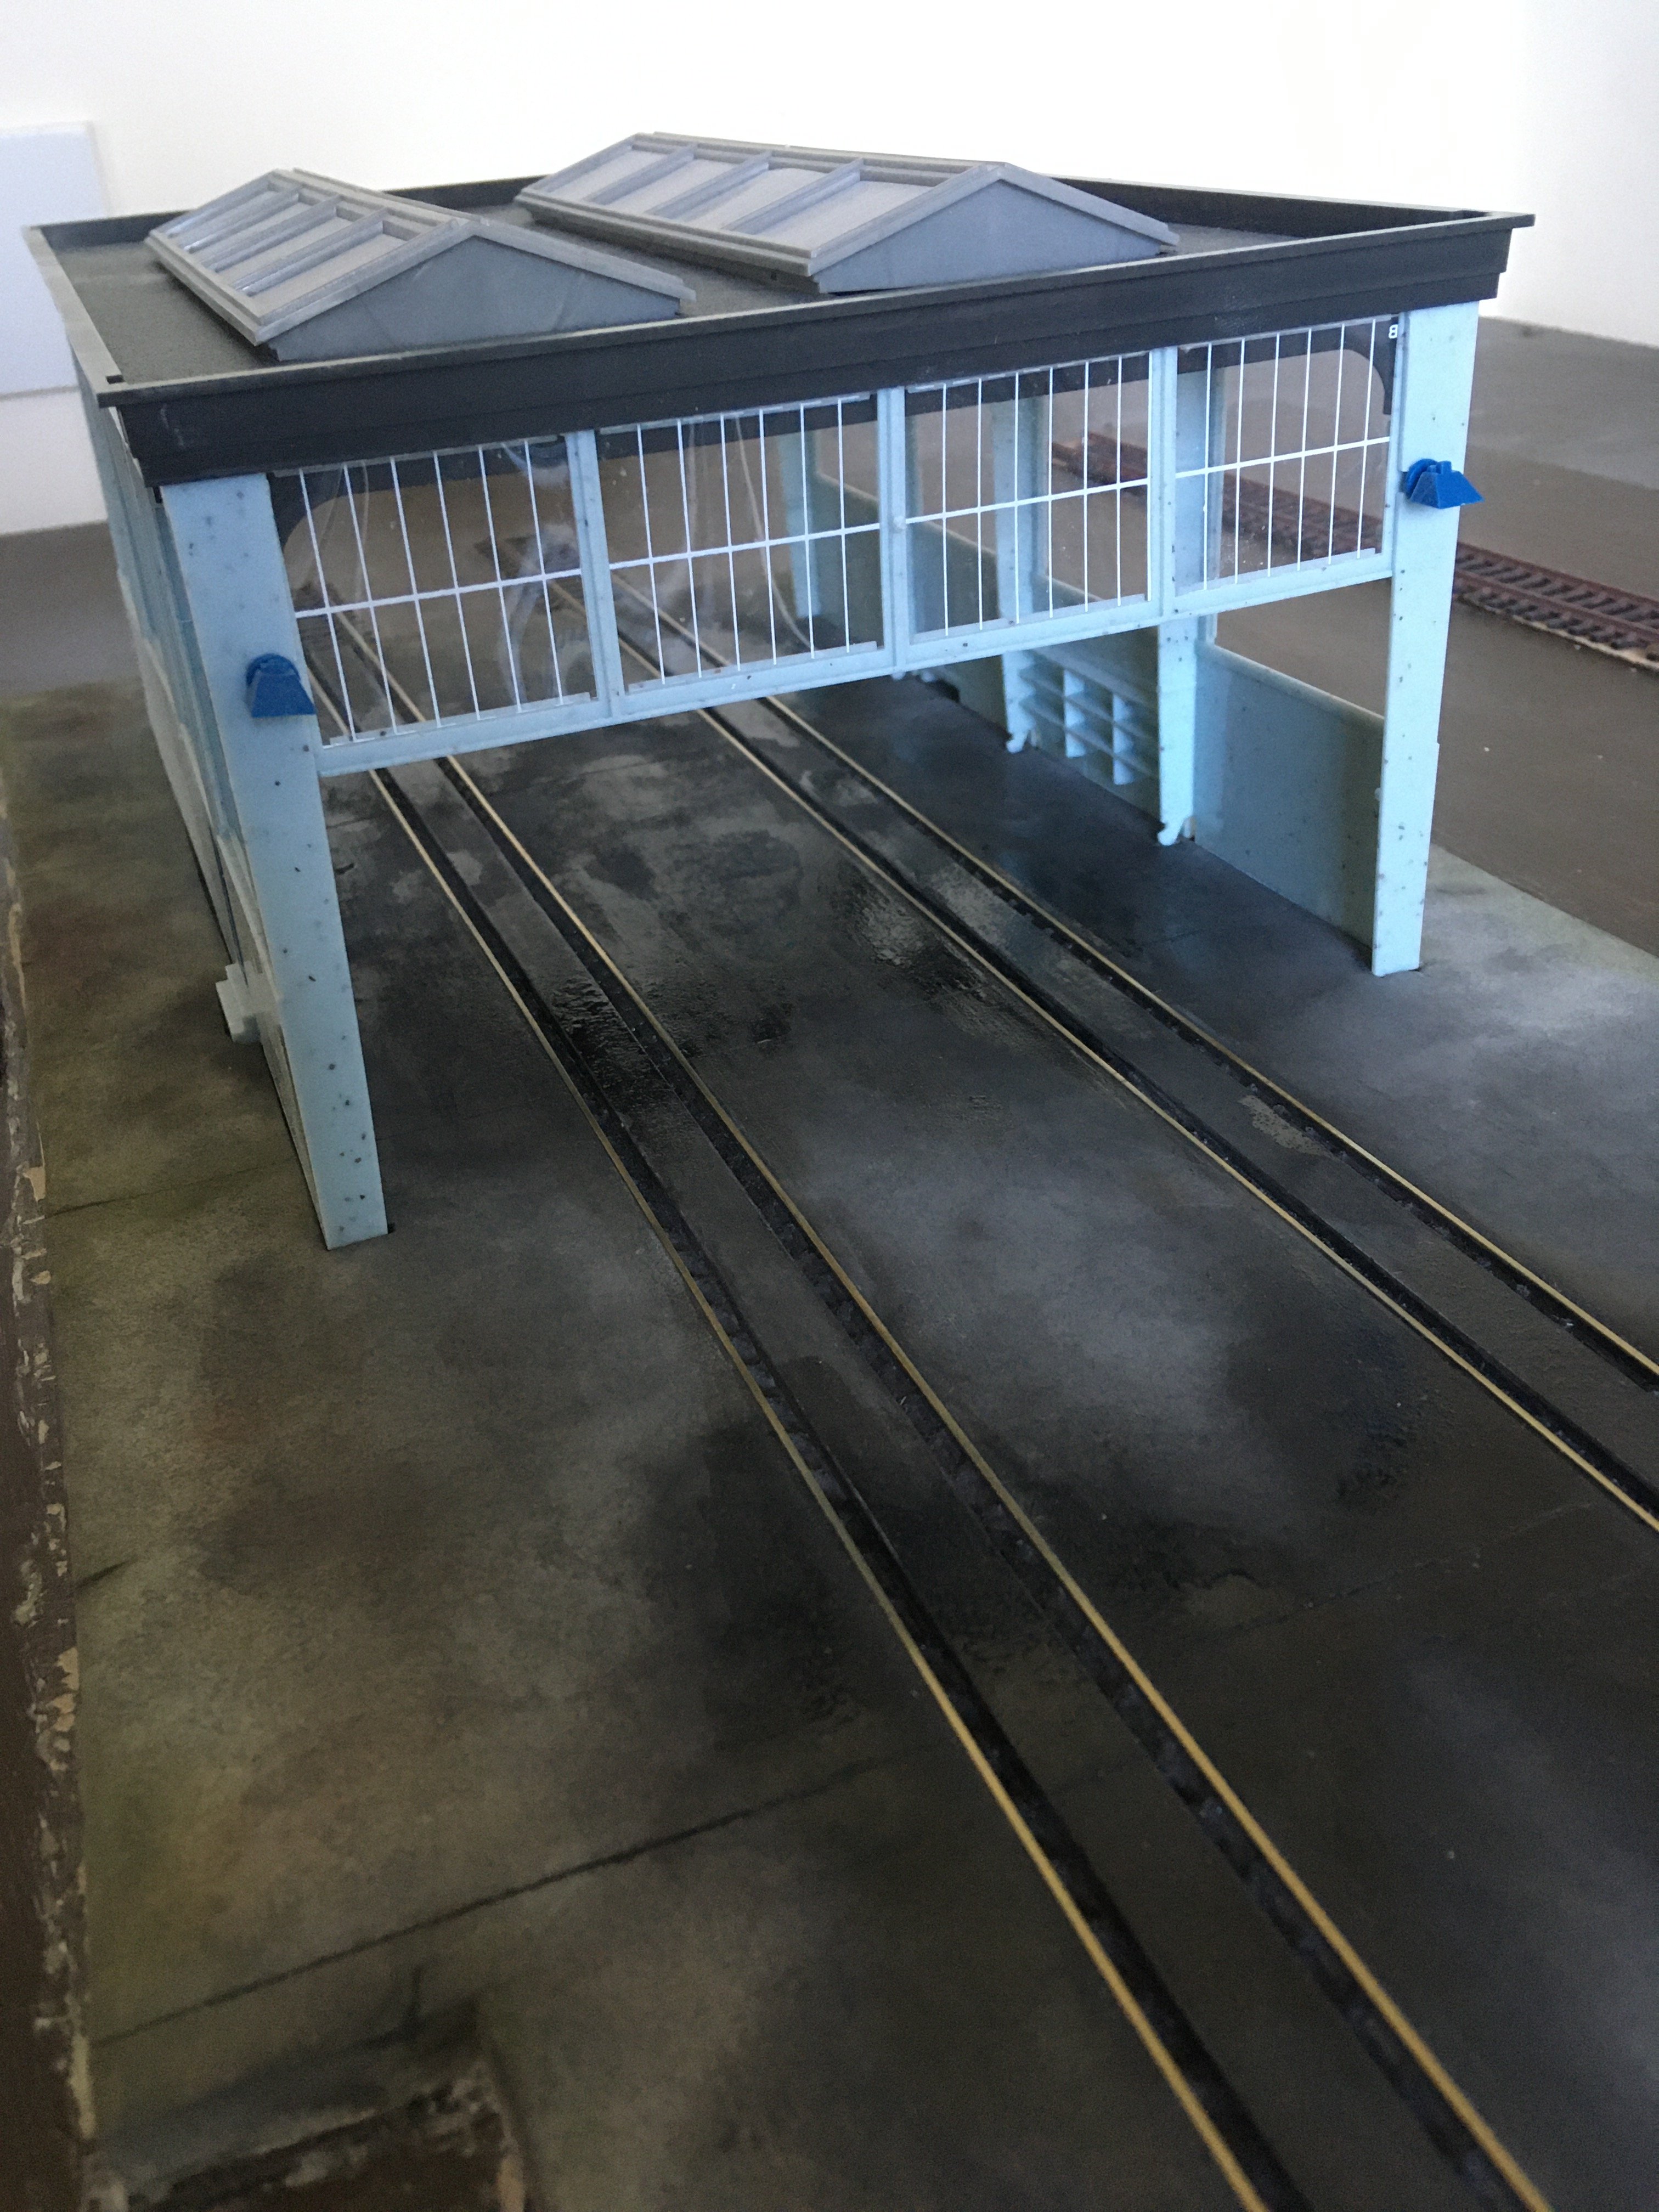
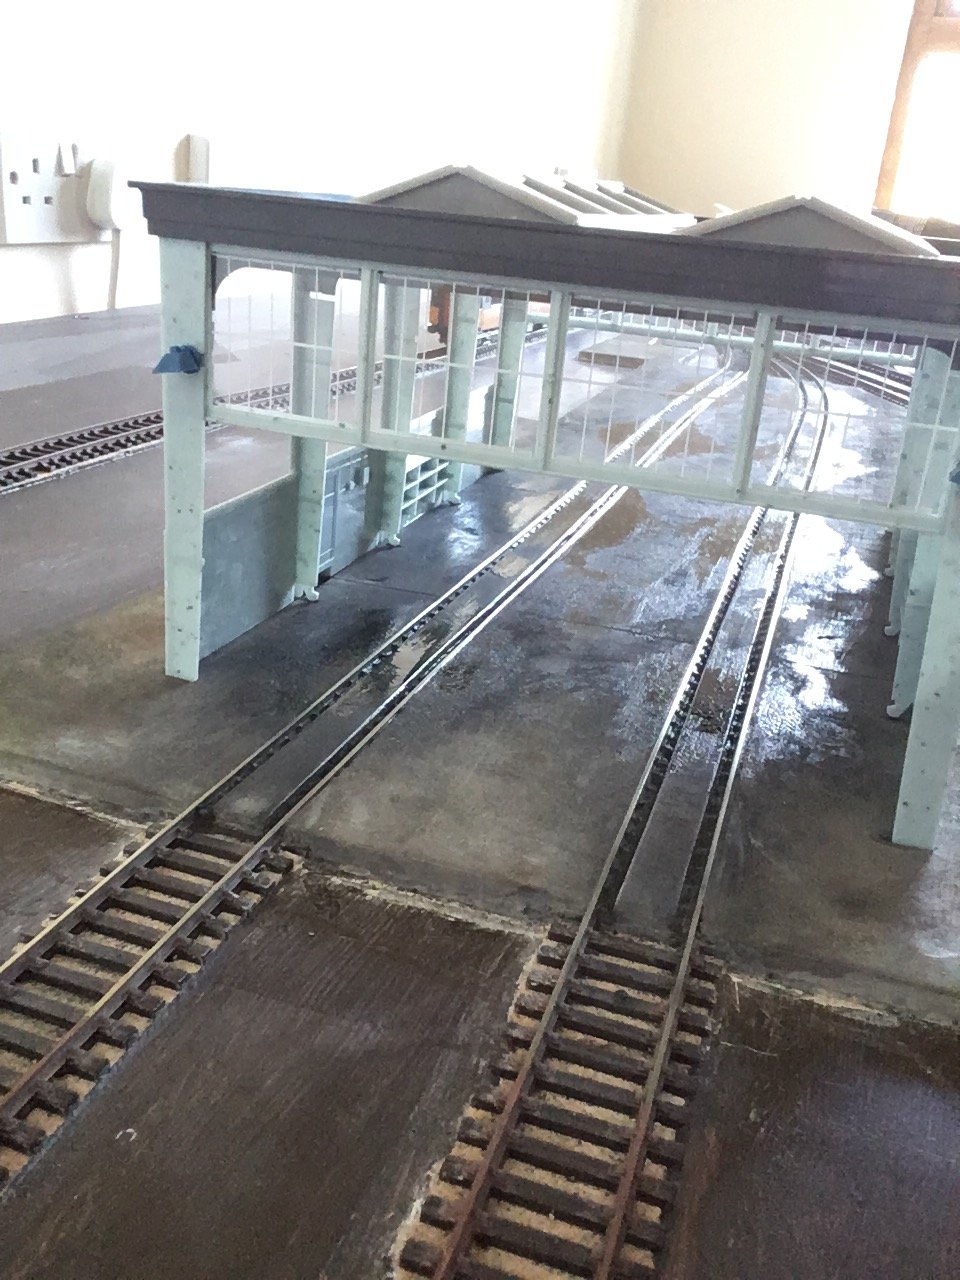
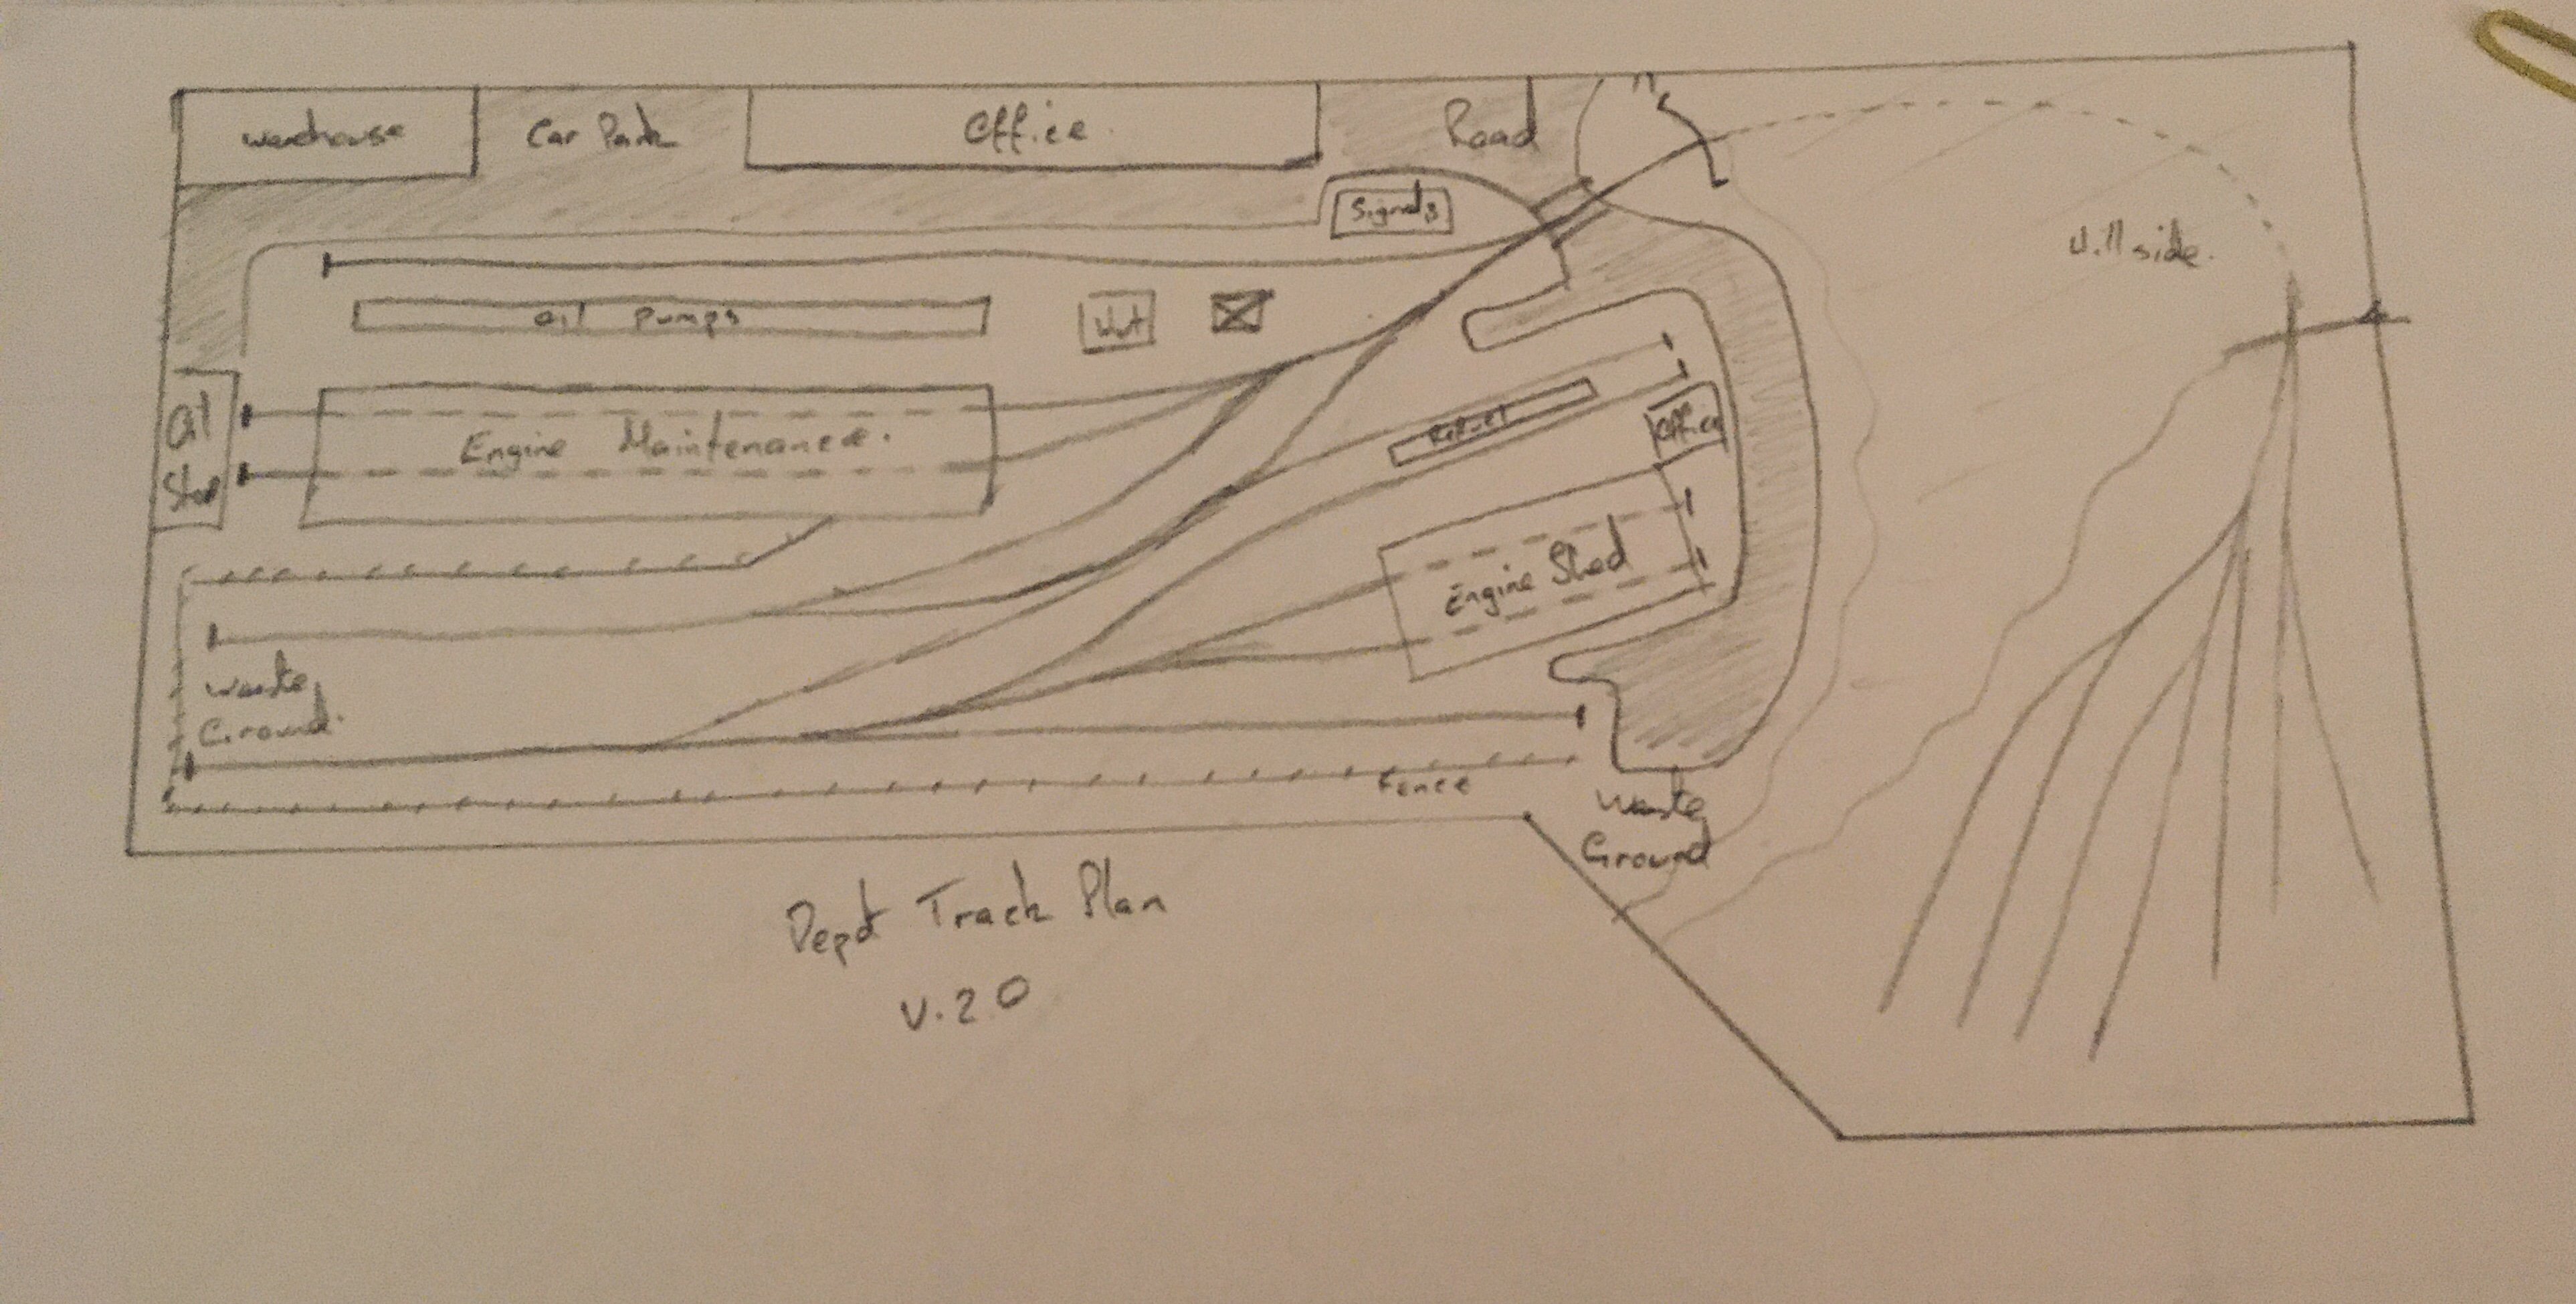
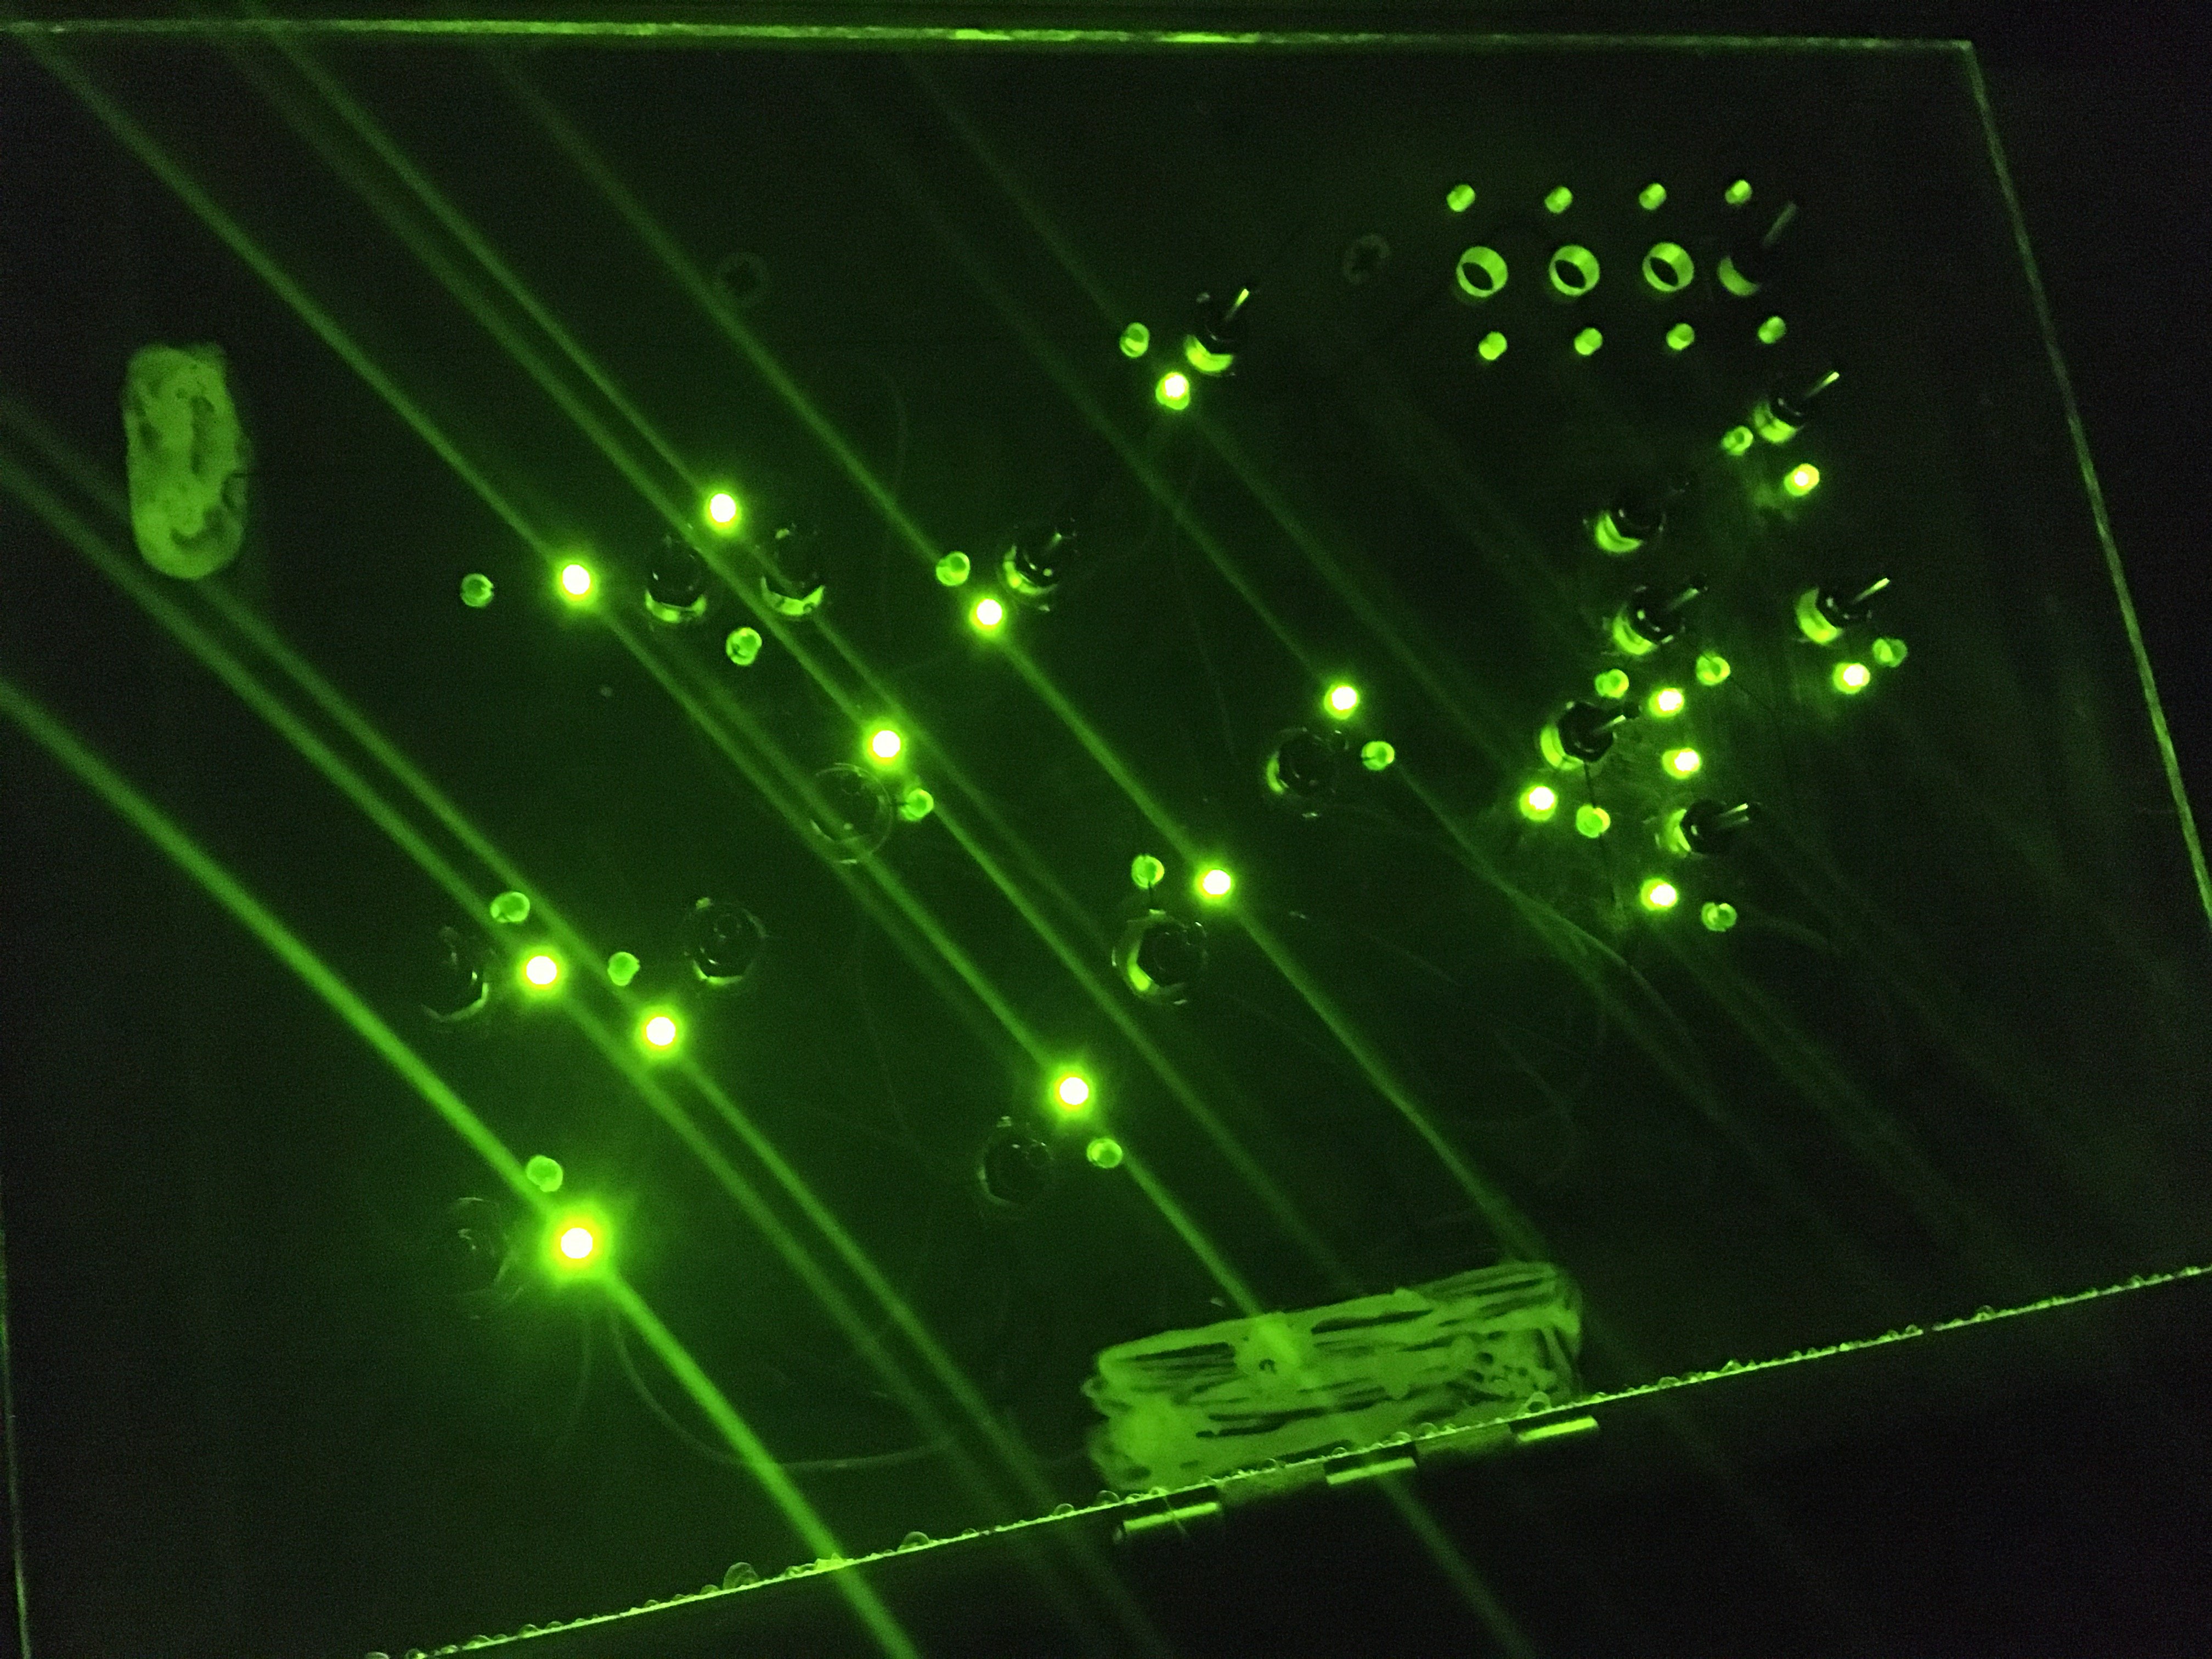
Hey all, new to the forum and thought I might show my layout progress here - it's my first so be gentle! Back in the hobby after 25 years so learning all the latest techniques and practicing my skills on a small depot before going for the bigger layout. I love the variety of skills you have to learn for a model railway, none of which were in my skillset when I started last year, specifically I am very much not a carpenter Progress is slow but steady, I like taking my time to delve in detail and do it right rather than rushing. Plus between work and a toddler I usually have only an hour or so in the evenings. I'll keep posting major updates here and pop a few how-to videos of techniques in the tips section The depot is totally fictional, set in the 80s era, will be completely filthy as per the custom of the time and will sometimes see UK loco visitors, as I am just now starting my Irish collection (a lifetime ambition of mine). I'd welcome any comments / feedback / tips you might have and will get you caught up with some of the highlights so far...Enjoy! Initial Plan Profesional wiring diagram Construction in my office Baseboard and control panel added Acrylic control panel - had a lot of fun drilling these holes with a black and decker! All connections underneath and to every section of track are soldered, I tried the blue clips but wasn't happy with their reliability The control panel worked out as I had hoped... ...and looks cool in the dark Made up some cardboard mockups to get an idea of the final layout and proportions Sealed and painted the mdf to prevent swelling when all the ballast glue goes down (maybe it's not needed but I wanted to play it safe). Also marked out the areas for the concrete hardstands, a well as point motors, relays etc Started on the concrete using DAS modelling clay which is very easy to work with Sanded and sprayed in a mixed concrete colour - I used enamel: Humbrol Matt 27:28:121:34 in the approx ratio 2:6:6:4 and thinned 1:1 Rest of the photos are the final result after weathering, powders and oil added. To be honest I was delighted with the result, my first attempt at something like this I'll fire this process in the tips section as well if it might help others - I did 15 x 1 min "short" videos for YouTube & Twitter which I'll stitch together. And it looks even better with the orange and blacks Cheers!
- 80 replies
-
- 31
-

-
-
I'd be interested Garfield, live near Strokestown in Roscommon, have never been in a club before though so let me know what commitment is usually involved activity / timewise
-
Hey Geeb, Welcome to the forum Sounds like you got to the root of the problem above (the Hornby controller). I got back into models last year and to test out DCC I got a combined freight Hornby train set to play with, it worked for that but anything serious needs a better controller (if you want to be able to change CV settings on the locos chip, you will also need something better as the standard horby controllers don't enable that). I would also advise going down the DCC route, it will save you a lot of hassle in the long run. If you are looking for recommendations: 1. I went with a Lenz Set 100 system with an LH100 handset - cost about £200 on ebay almost new - things to remember, usually you need a handset for control, a control unit which does all the computing and a transformer to provide power to the track 2. I initially bought some standard Hornby DCC chips for €20 to start off, but they're totally useless, especially if you have any older locos. My favourite non-sound chip is Zimo MX600R which is about €30 and works really well with older locos if you have them, after Zimo, Bachman and Lenz chips are solid (IMO) unless locos have specific chips / sound chips made for them, as most Murphy Models and IRM models do, in which case snap them up! 3. Lastly, if you (or others reading this) do have older locos with ringfield motors that you are attached to and want to run, I have found that with a bit of research, trial and error and practice, you should be able to completely convert them to a perfectly running DCC model for under €50. I usually replace the motor with a Strathpfeffer Junction CD motor conversion kit, (approx £10) add a Zimo MX600R DCC chip (€20) and a Lais Stay Alive chip (£10) - it's perfect for older Hornby and Lima locos, apart from the Hornby class 58 as it has a worm gear motor - but the chip and stay alive helps - if anyone wants more details on how I do this, just reply below and I'll do up a quick vid Welcome again!
-
Thanks to this gentleman @flange lubricator I am now the proud owner of my first 071, a lifelong ambition. It's a stunning loco and I am delighted, also picked up a 141 and 181 from him when we met for coffee. Proud to show it off next to the recently completed weathered concrete hardstands at my fledgling depot layout and my growing Irish collection That's the budget busted for now, but I'll be back looking for more in February...maybe March actually
-
Fab layout Raymond! Met you last week in the Railway Modeller app - just wanna say thank you so much for letting me know about this forum, I joined last week, posted and have already acquired an 071, 141 and 181 from a gentleman @flange lubricator on Friday. Will be posting pics later Thanks again and I’ll be following your layout with interest
-
New to the forum and catching up, this is amazing work, as said before I expected some of the photos to start moving. Inspiring stuff
-
Wow Fergal, class work there, am also a fan of DAS clay myself The scenery is beautiful and something to aspire to, love that you included Mt Leinster - I’m also learning as I go and chose a small depot to learn on instead of a country scene (layout topic being opened tomorrow). I’ll be following this one with great interest, I grew up in Carlow town in the 80s as well so the sugar beet is very familiar, all you need to work out now is how to get the “campaign” smell going
-
Gorgeous scene here! Love the river details and water effects - well done
-
New to the forum and catching up - love your layout and great work on the loco weathering!