gibbo675
-
Posts
205 -
Joined
-
Last visited
-
Days Won
7
Content Type
Profiles
Forums
Events
Gallery
Blogs
Store
Community Map
Everything posted by gibbo675
-
British locos and stock that can be disguised as Irish
gibbo675 replied to Westcorkrailway's topic in Irish Models
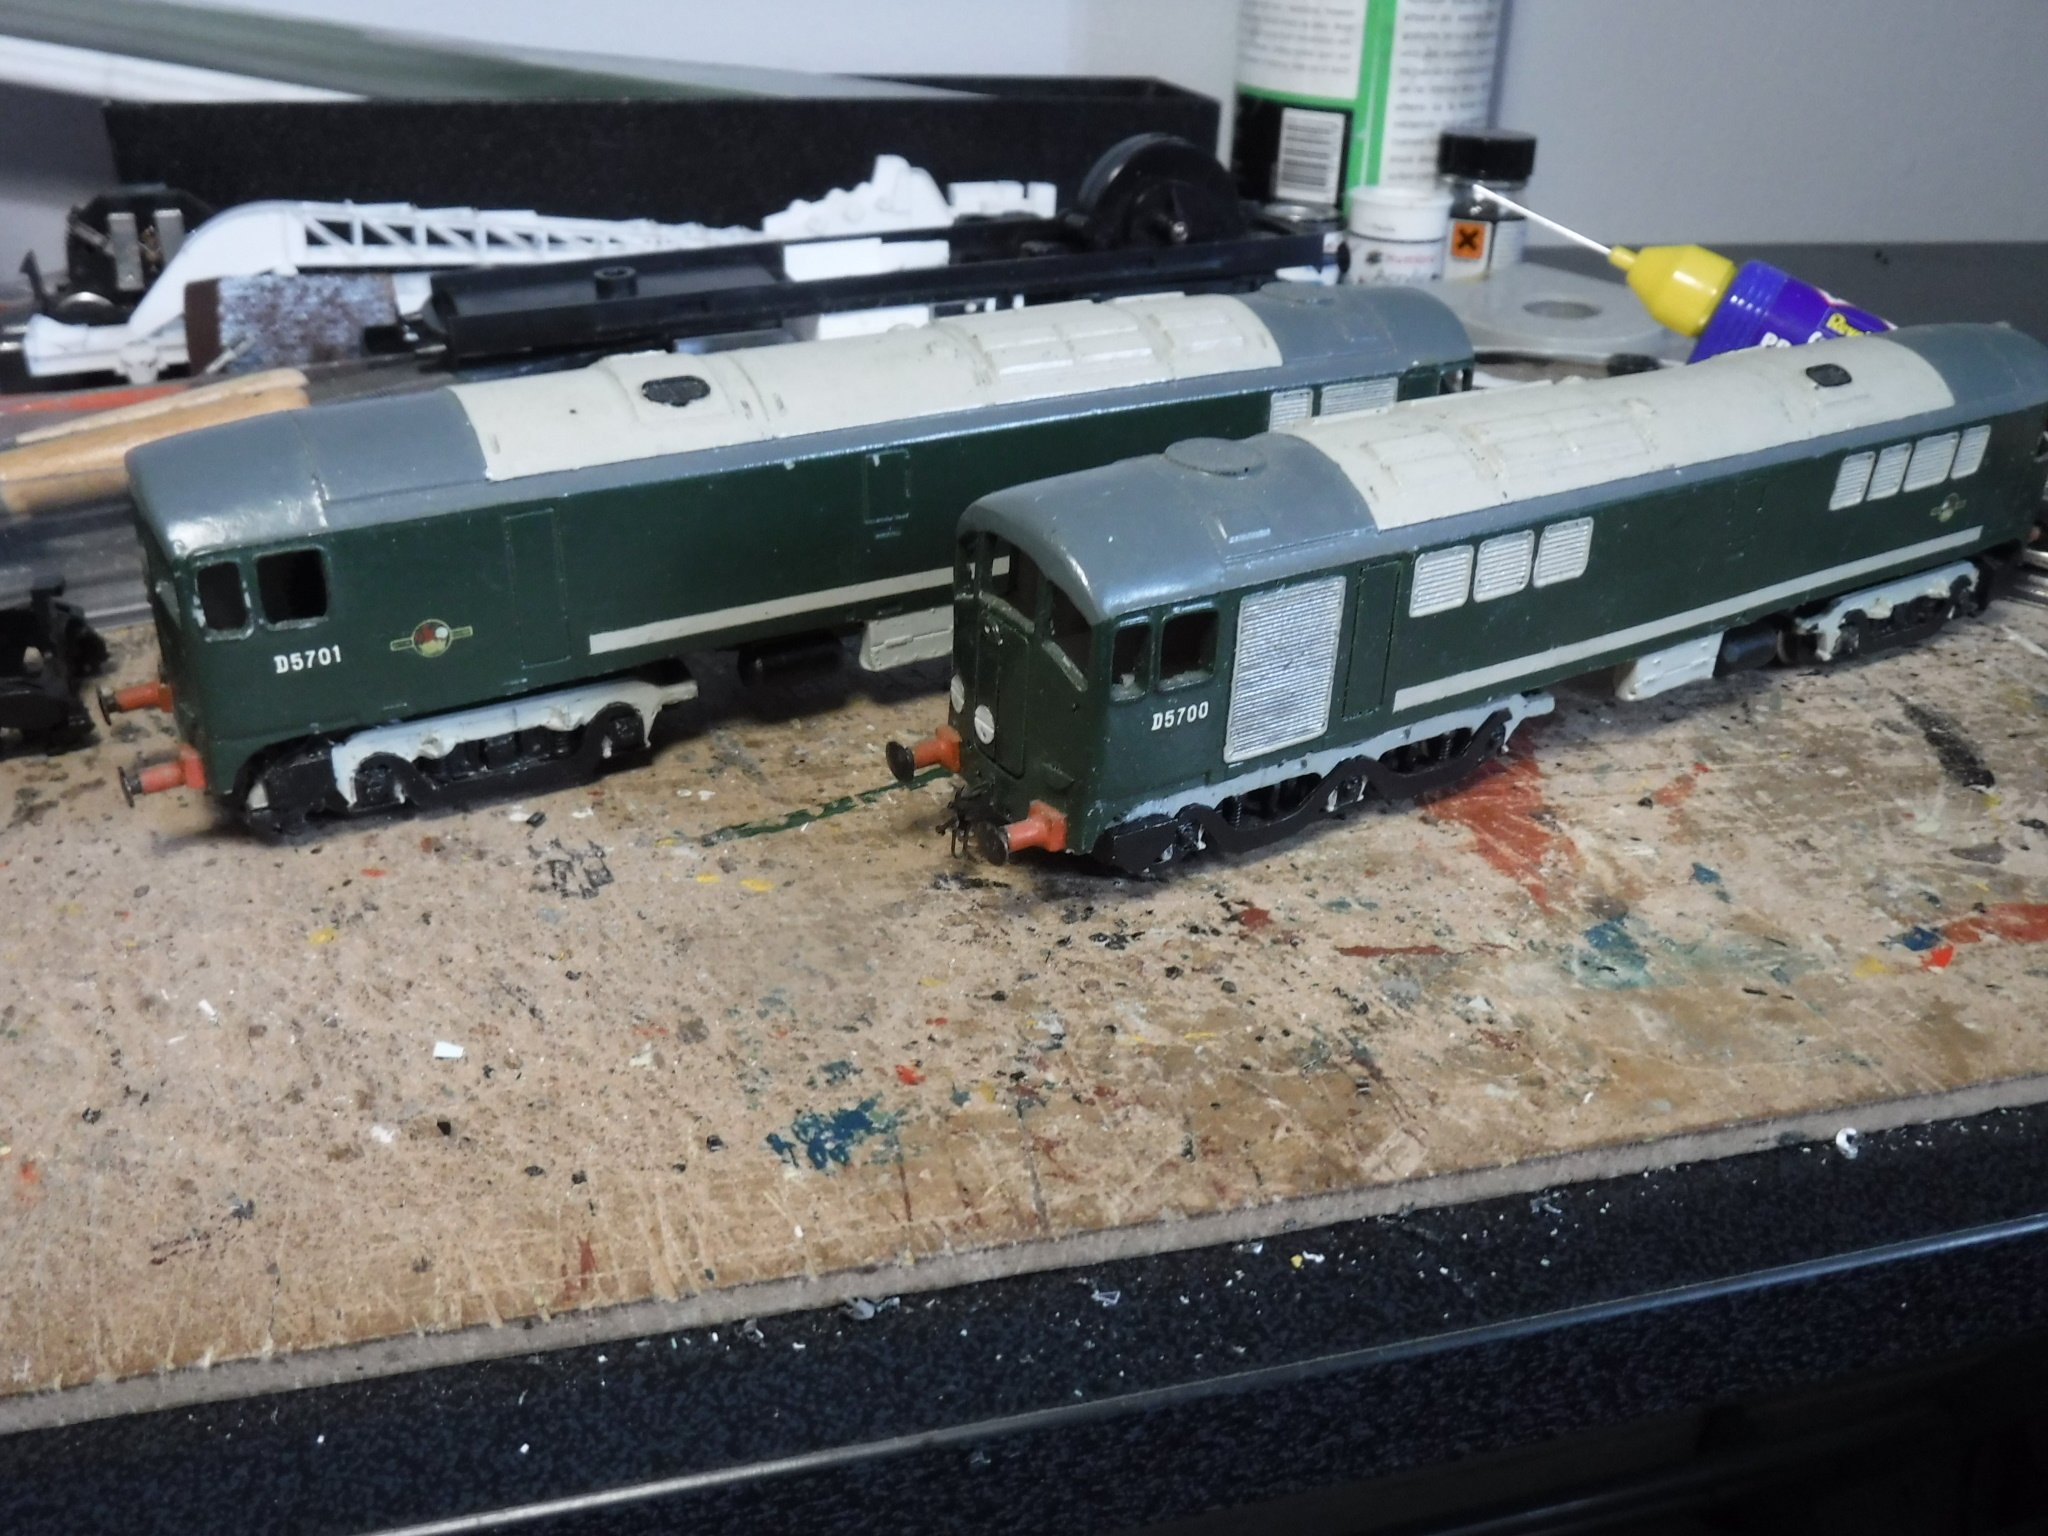
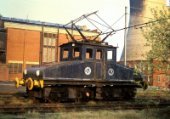
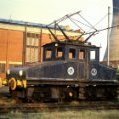
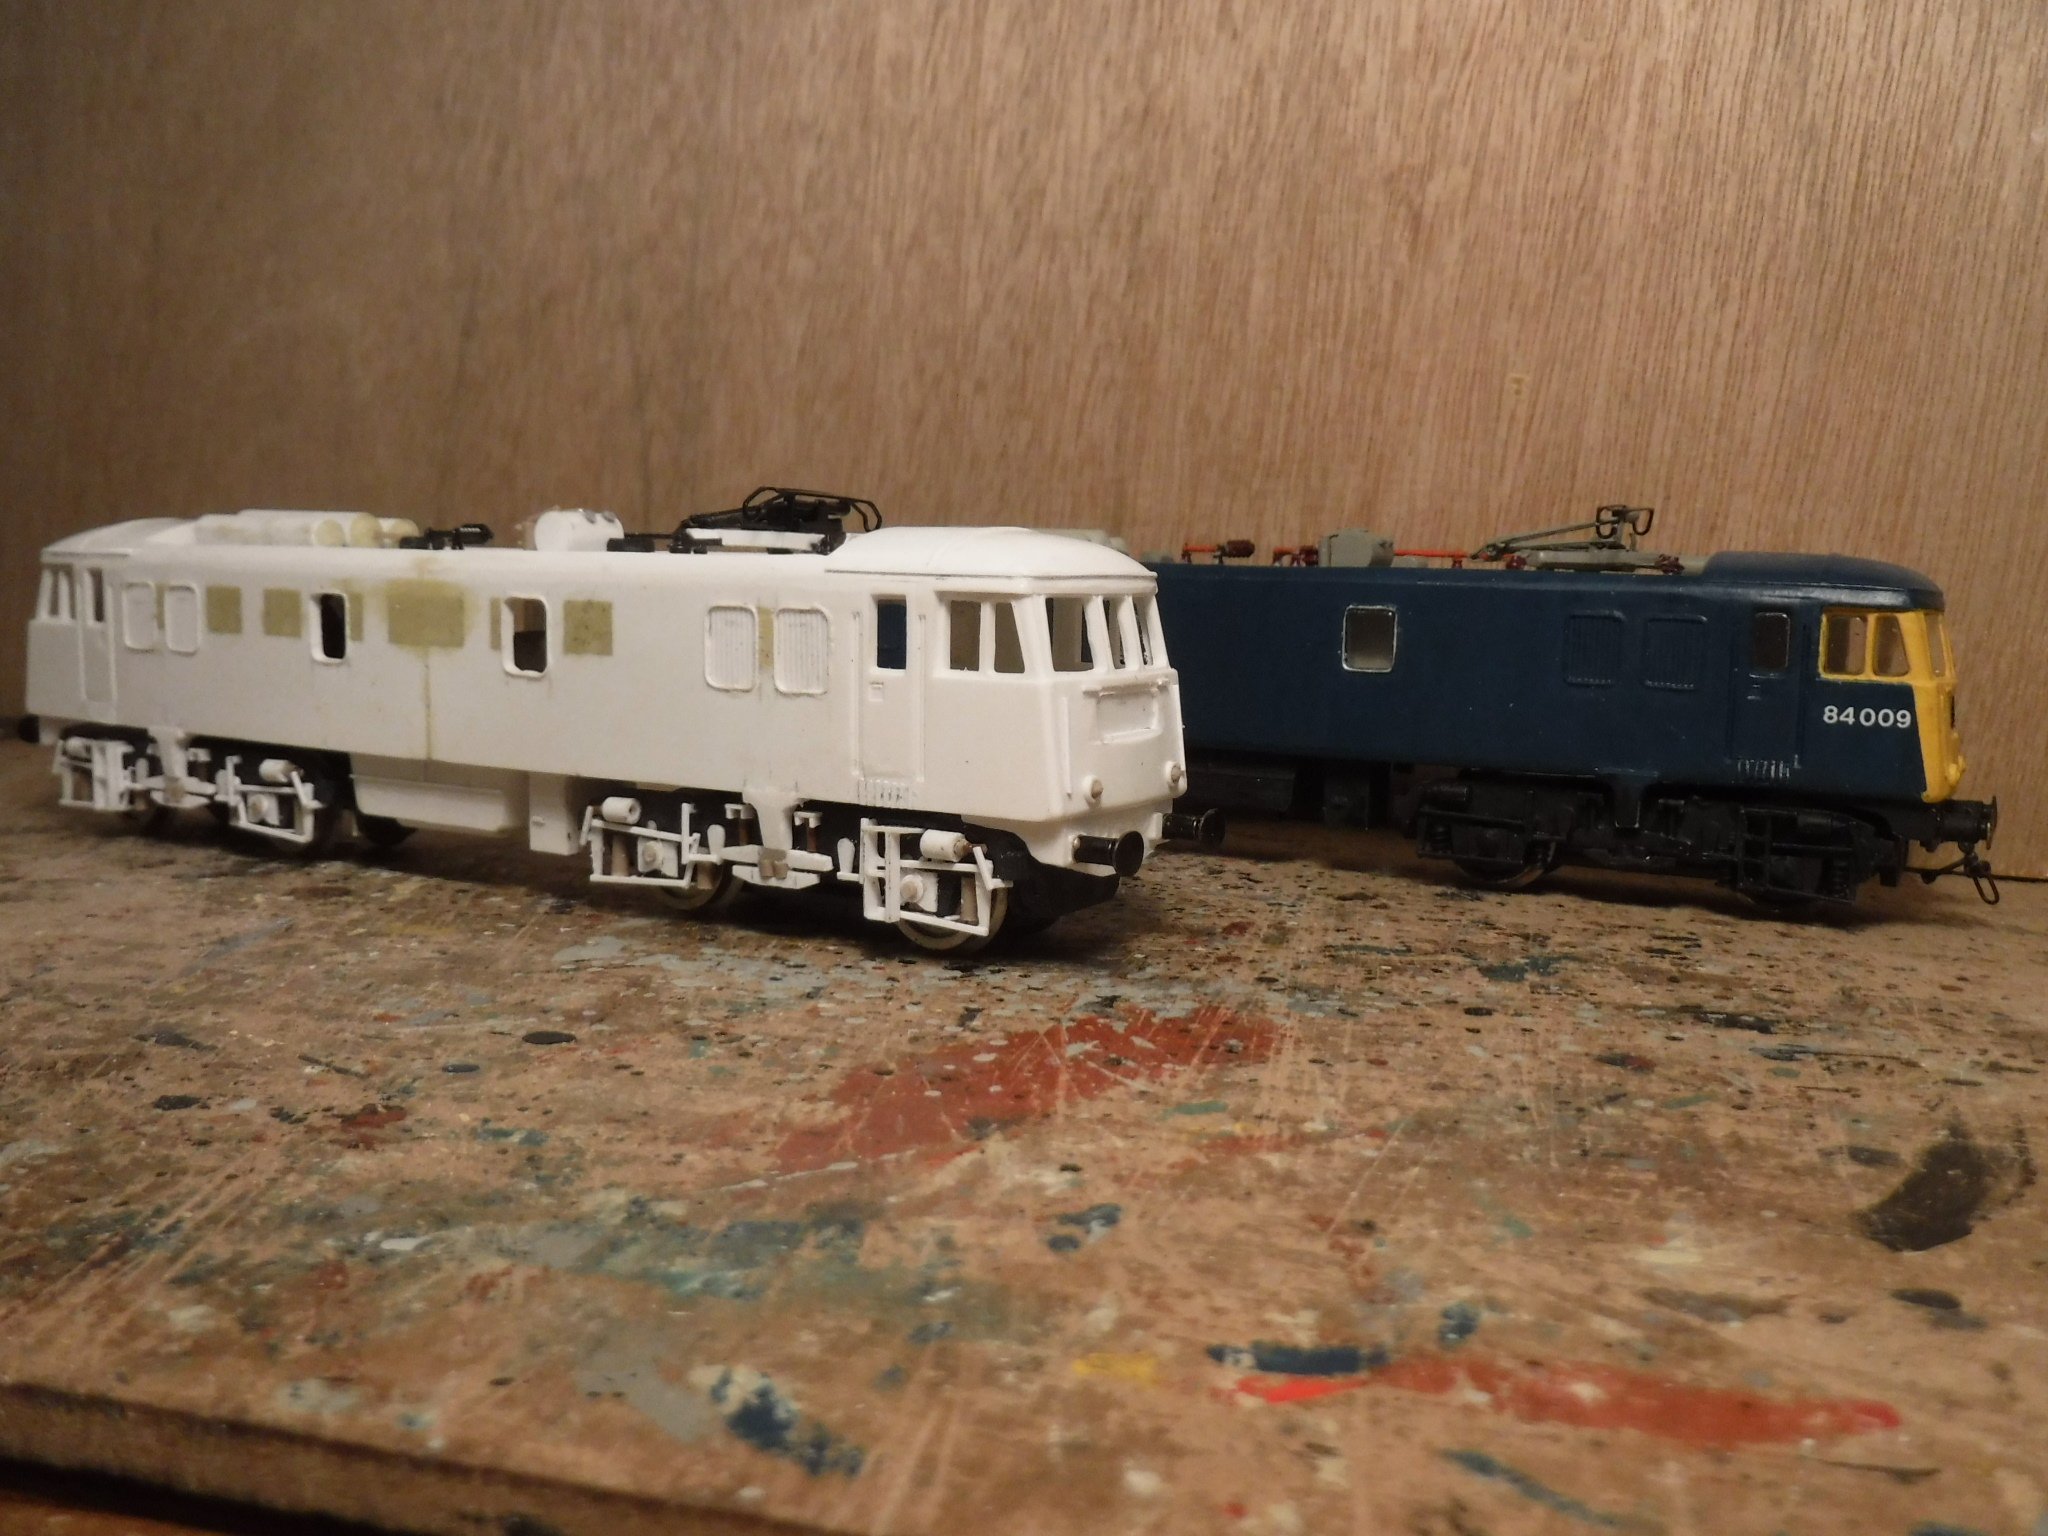
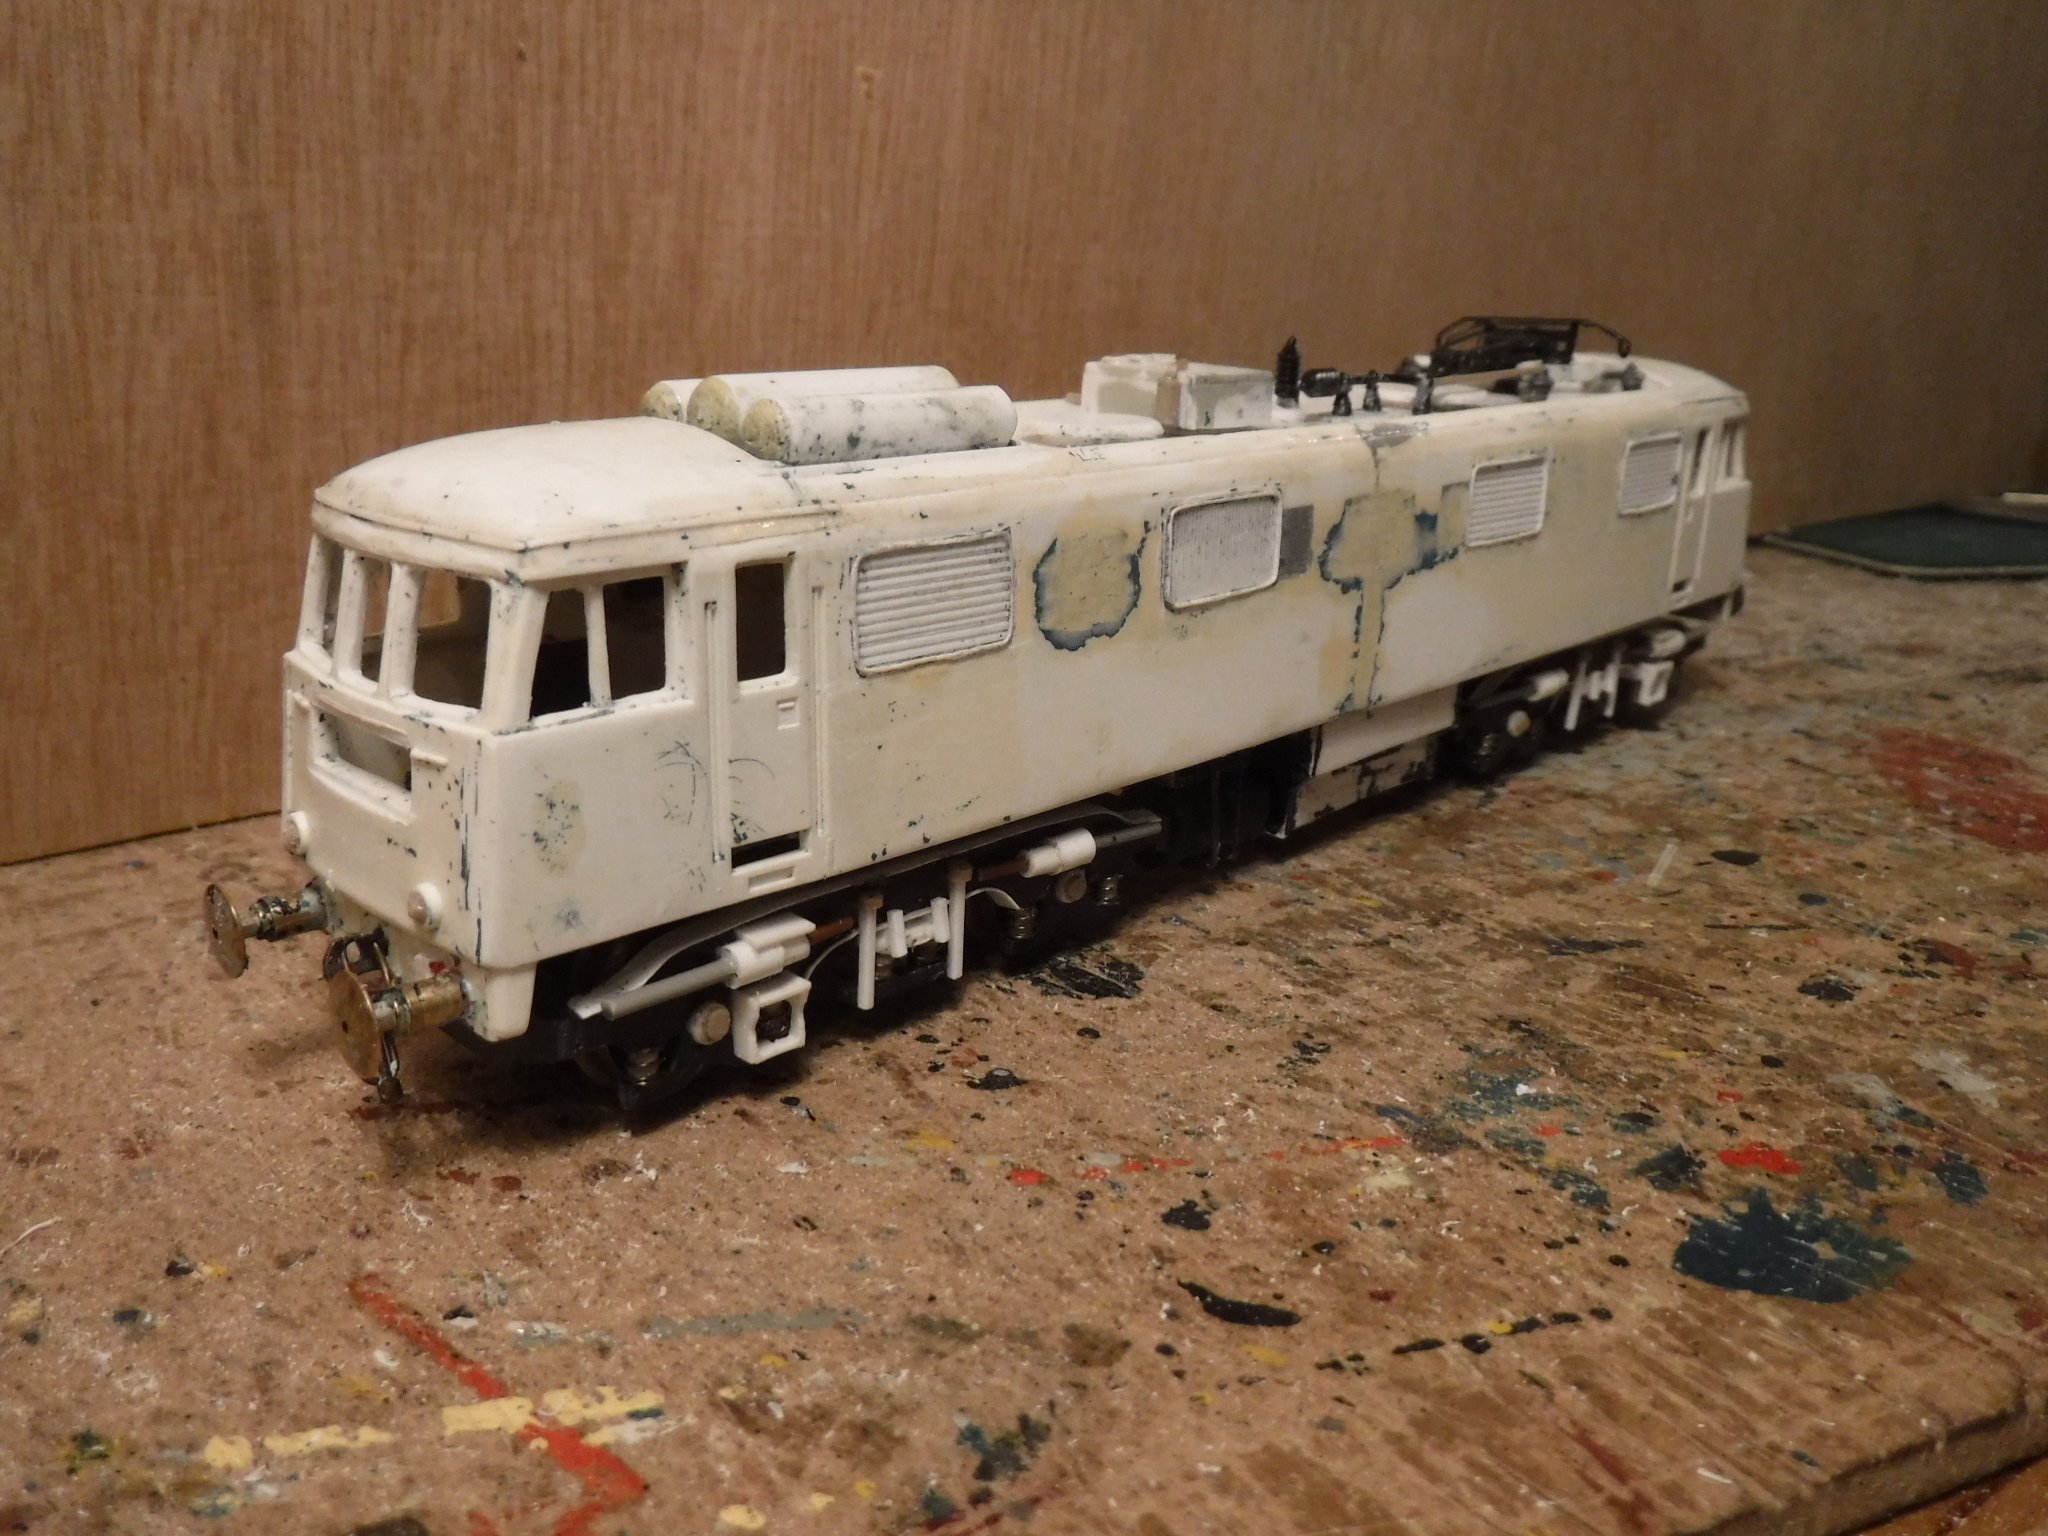
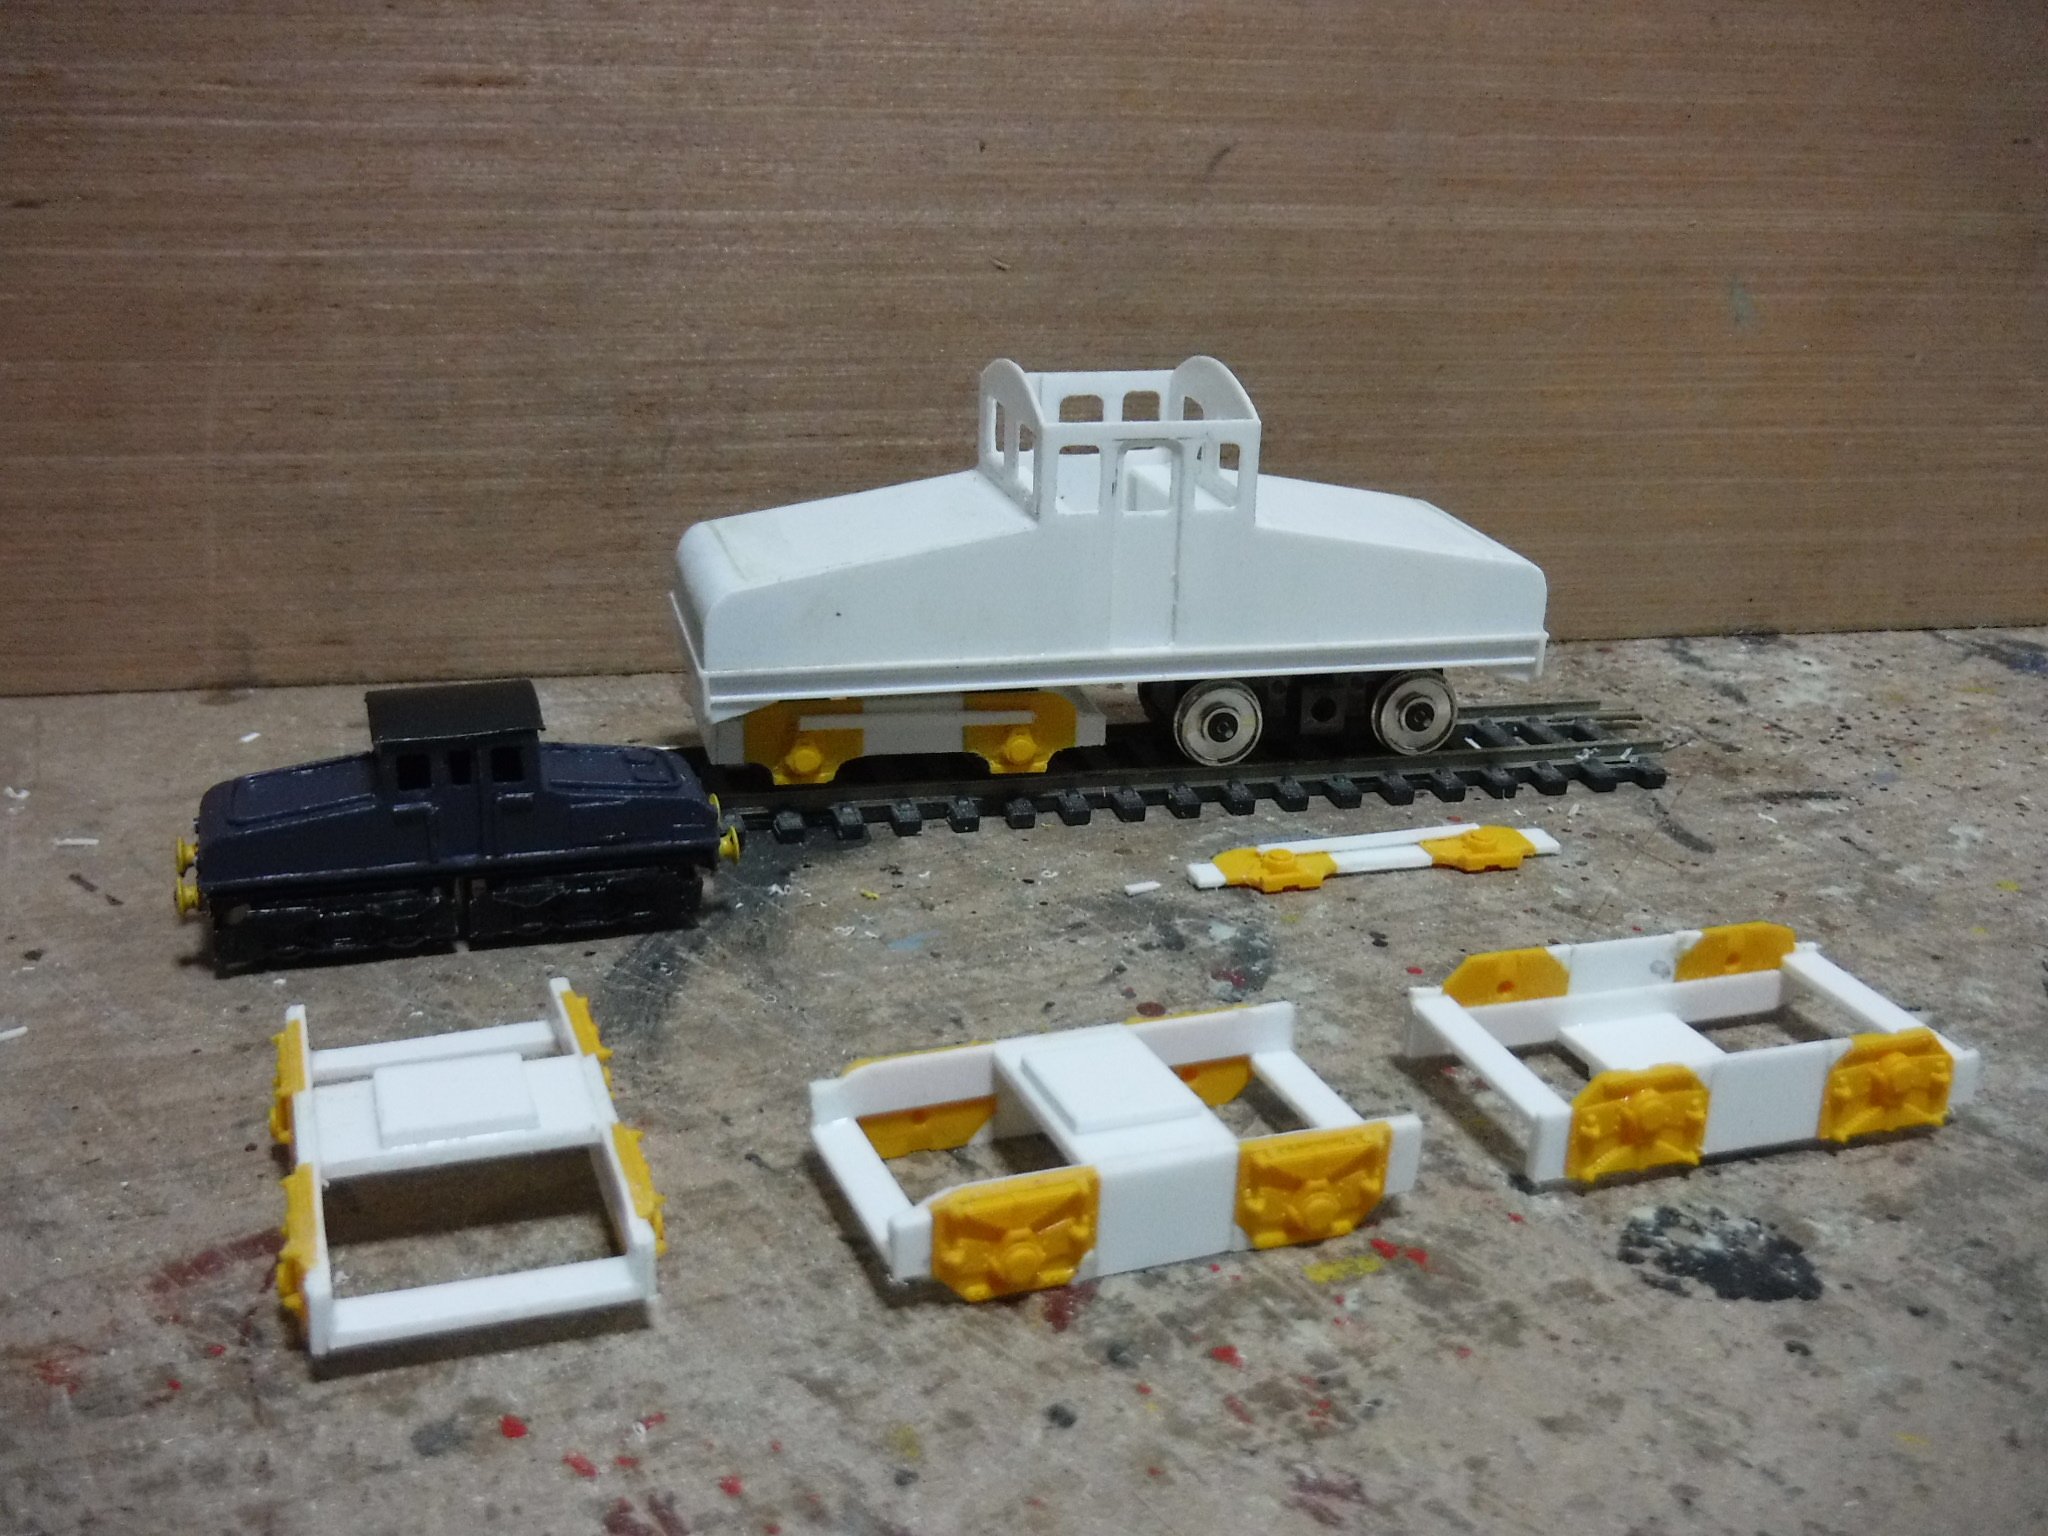
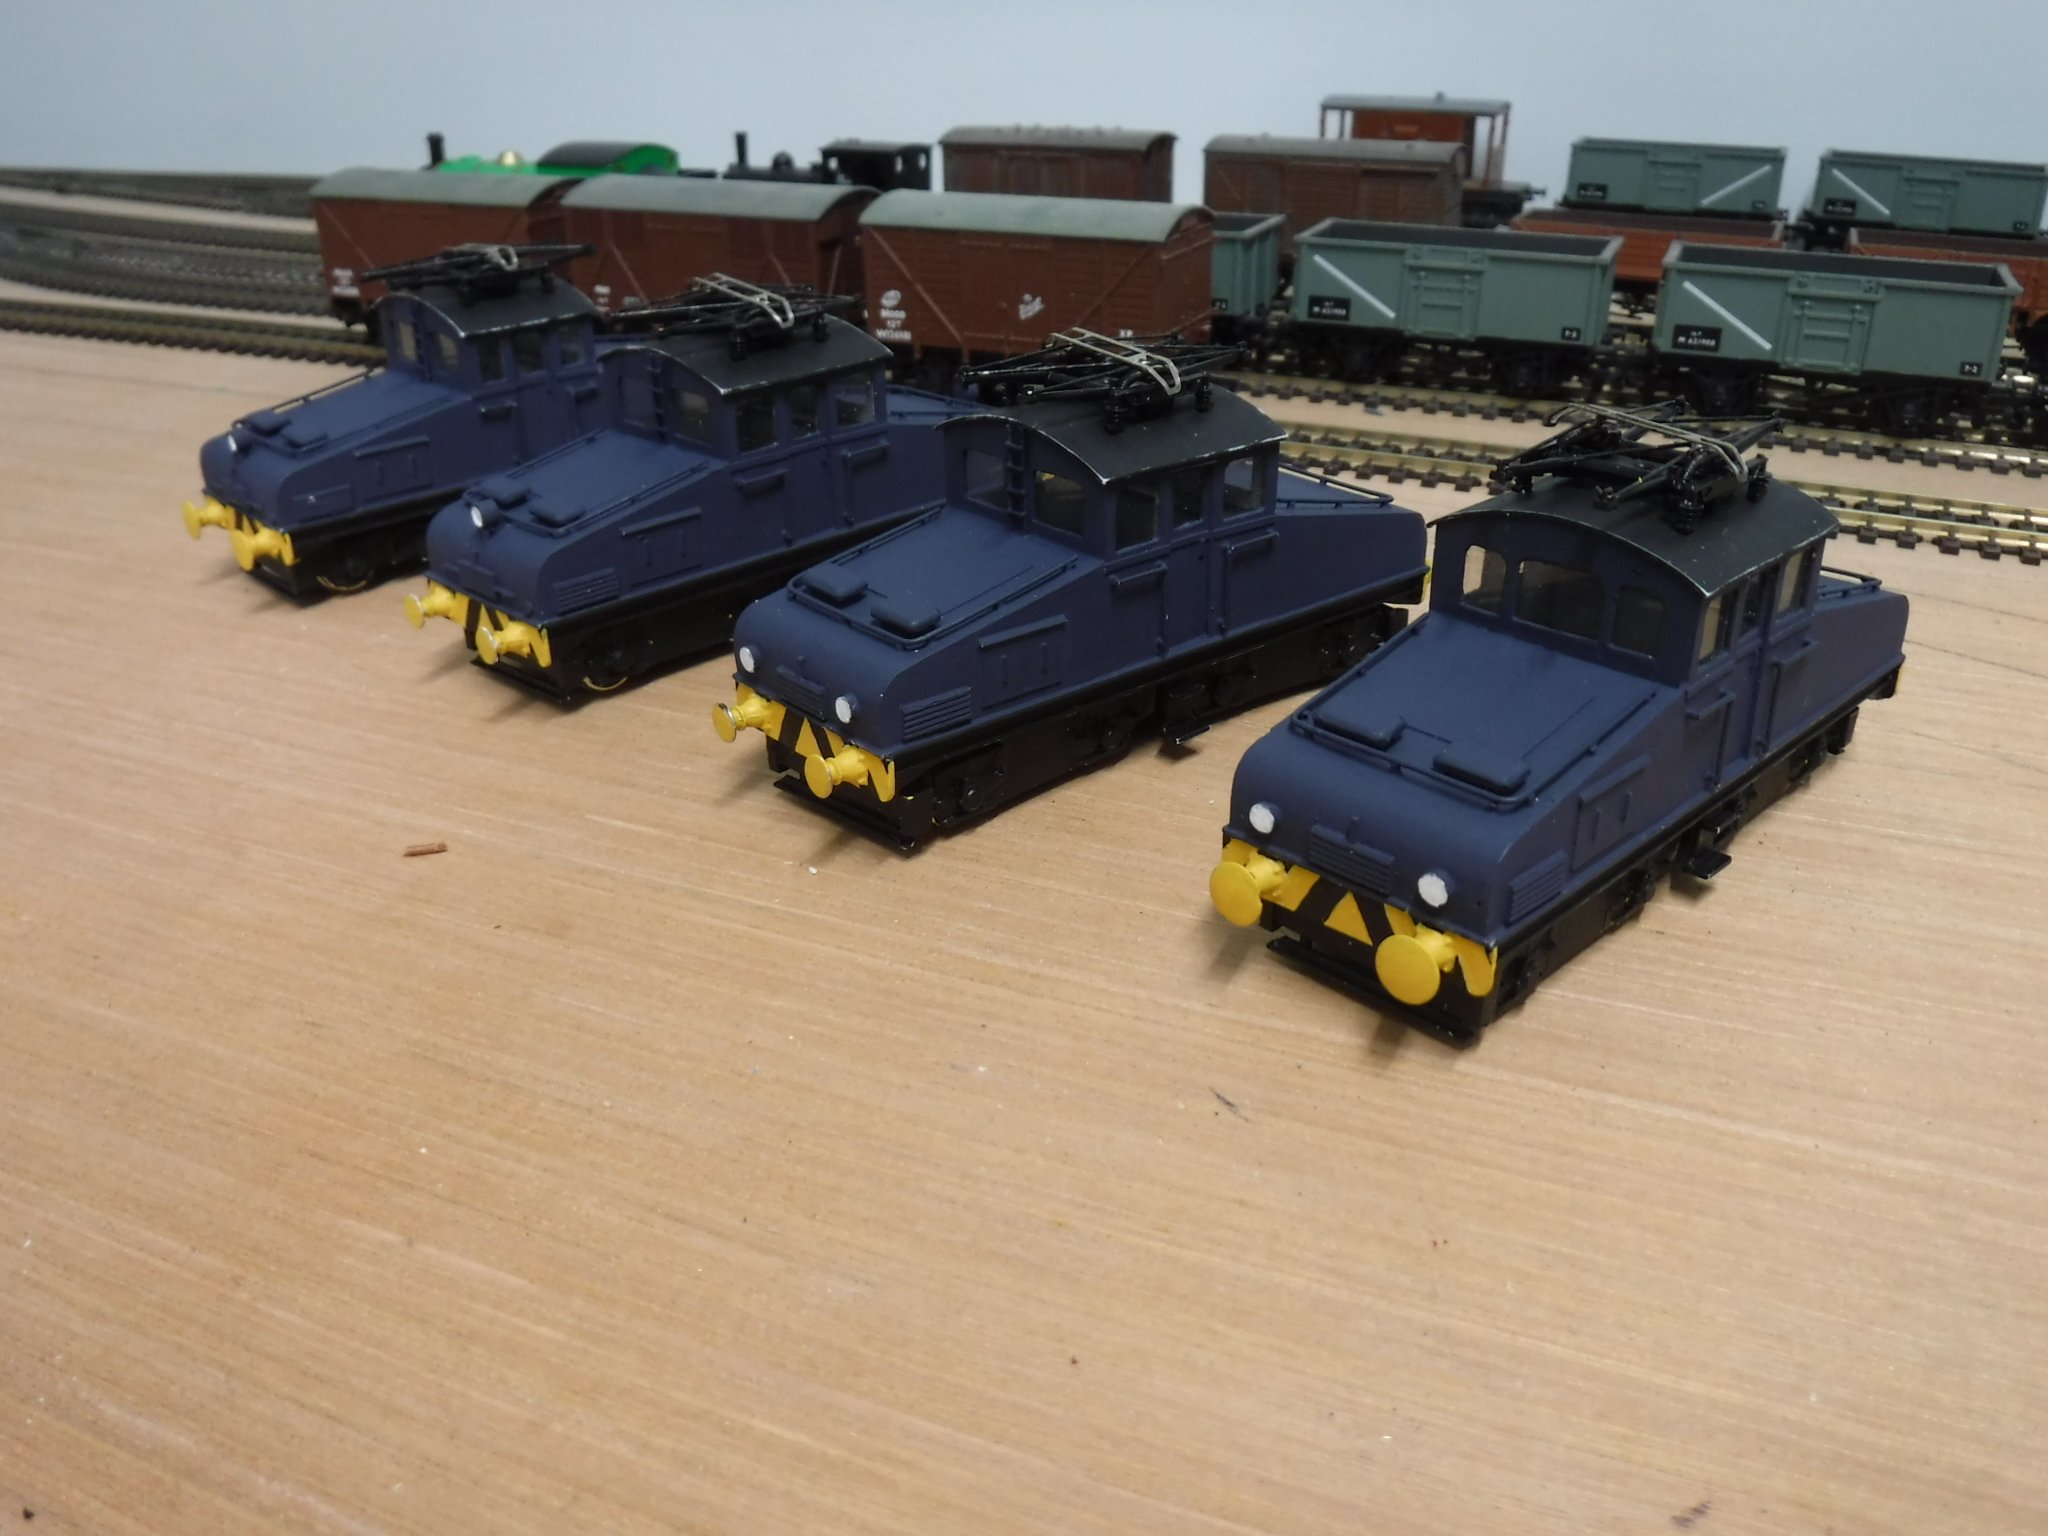
Hi Folks, Will these be of any use ? Scratch building bodies for diesels isn't anything like as difficult as you might think. Previously for OO gauge I've used .060" plasticard and around the cabs and roof lines layer up and reinforce corners and then file and sand back to shape. Radiator grilles can be made by scribing plasticard with variously, hack saw, junior hack saw or razor saw blades depending upon sizes required, different TPI's are suitable. If I were to build a 071 I think from having a quick look then a class 58 body shell is a good start and I would look to see if there was an American HO chassis to get as near to correct bogies as possible although you could make plasticard overlays and stick them on with cyanacrylate glue to the Hornby bogies. I have scratch built and kit bashed all sorts of unavailable British stuff for myself, in some cases built stuff that is available because its more fun. Here are some of my cut and shut specials, all British but the concept is the same. Scratch built bogies for NBL class 84. My second class 84 catching up the first one I built, the body shells are Trix class 81 mouldings. Part built RSH DC electric shunters built for Kearsley Power station near Manchester next to an N gauge built for a friend of mine. All four of Kearsley's fleet N gauge APT-E, once again for my lucky friend with a Leyland bus bodied coach made from Hornby class 142 body shells and a Mk1 undeframe. The N gauge APT-E on my friends layout next his own prototype HST. Imagination fellas, the single most powerful force you all posses. Gibbo. English electric class 83 Hi DJ, No, it is the LMS fowler class 4P 2-6-4 tank, LMS numbers series 2300-2424, (for BR add 40000). Gibbo.
-
British locos and stock that can be disguised as Irish
gibbo675 replied to Westcorkrailway's topic in Irish Models
Hi Folks, As LNERW1 has quoted me here some photographs of what I've been cutting and shutting so far, none of it finished let alone painted as yet. Full descriptions in my threads which can be found by looking up my content. GNRI V class with a GNRI brake first and a composite. The locomotive is a converted Hornby LMS compound with the boiler from a Hornby 5XP Patriot and an altered tender chassis with a scratch built tender tank. The coaches are Hornby LMS Stanier coaches, the composite is slightly modified and the brake is a cut and shut from a brake third and a composite. NCC W class from a Hornby Fowler class 4 tank with a Bachmann Fowler tender chassis and the tender tank from a Hornby LMS class 4 Compound. NCC WT class from a Hornby Fowler class 4 tank. Any questions ask away either here on the appropriate thread. Gibbo.
-
Hi Darius, That's Jonathon Creek's house ! Are you a secret admirer of Caroline Quentin ? It looks very much like Kings Mill Shipley as featured in the above. Gibbo.
-
Yo Dudes, It has been coaches today, they are described on my workbench thread called, "What is now on the bench was recently a figment of imagination"; A Dublin to Belfast express headed by a GNRI V class compound leans into the curve on the 4' 1.5" gauge concrete sleepered track with is GNRI coaches in tow. It was all going to fast for the painters to catch it ! Gibbo.
-
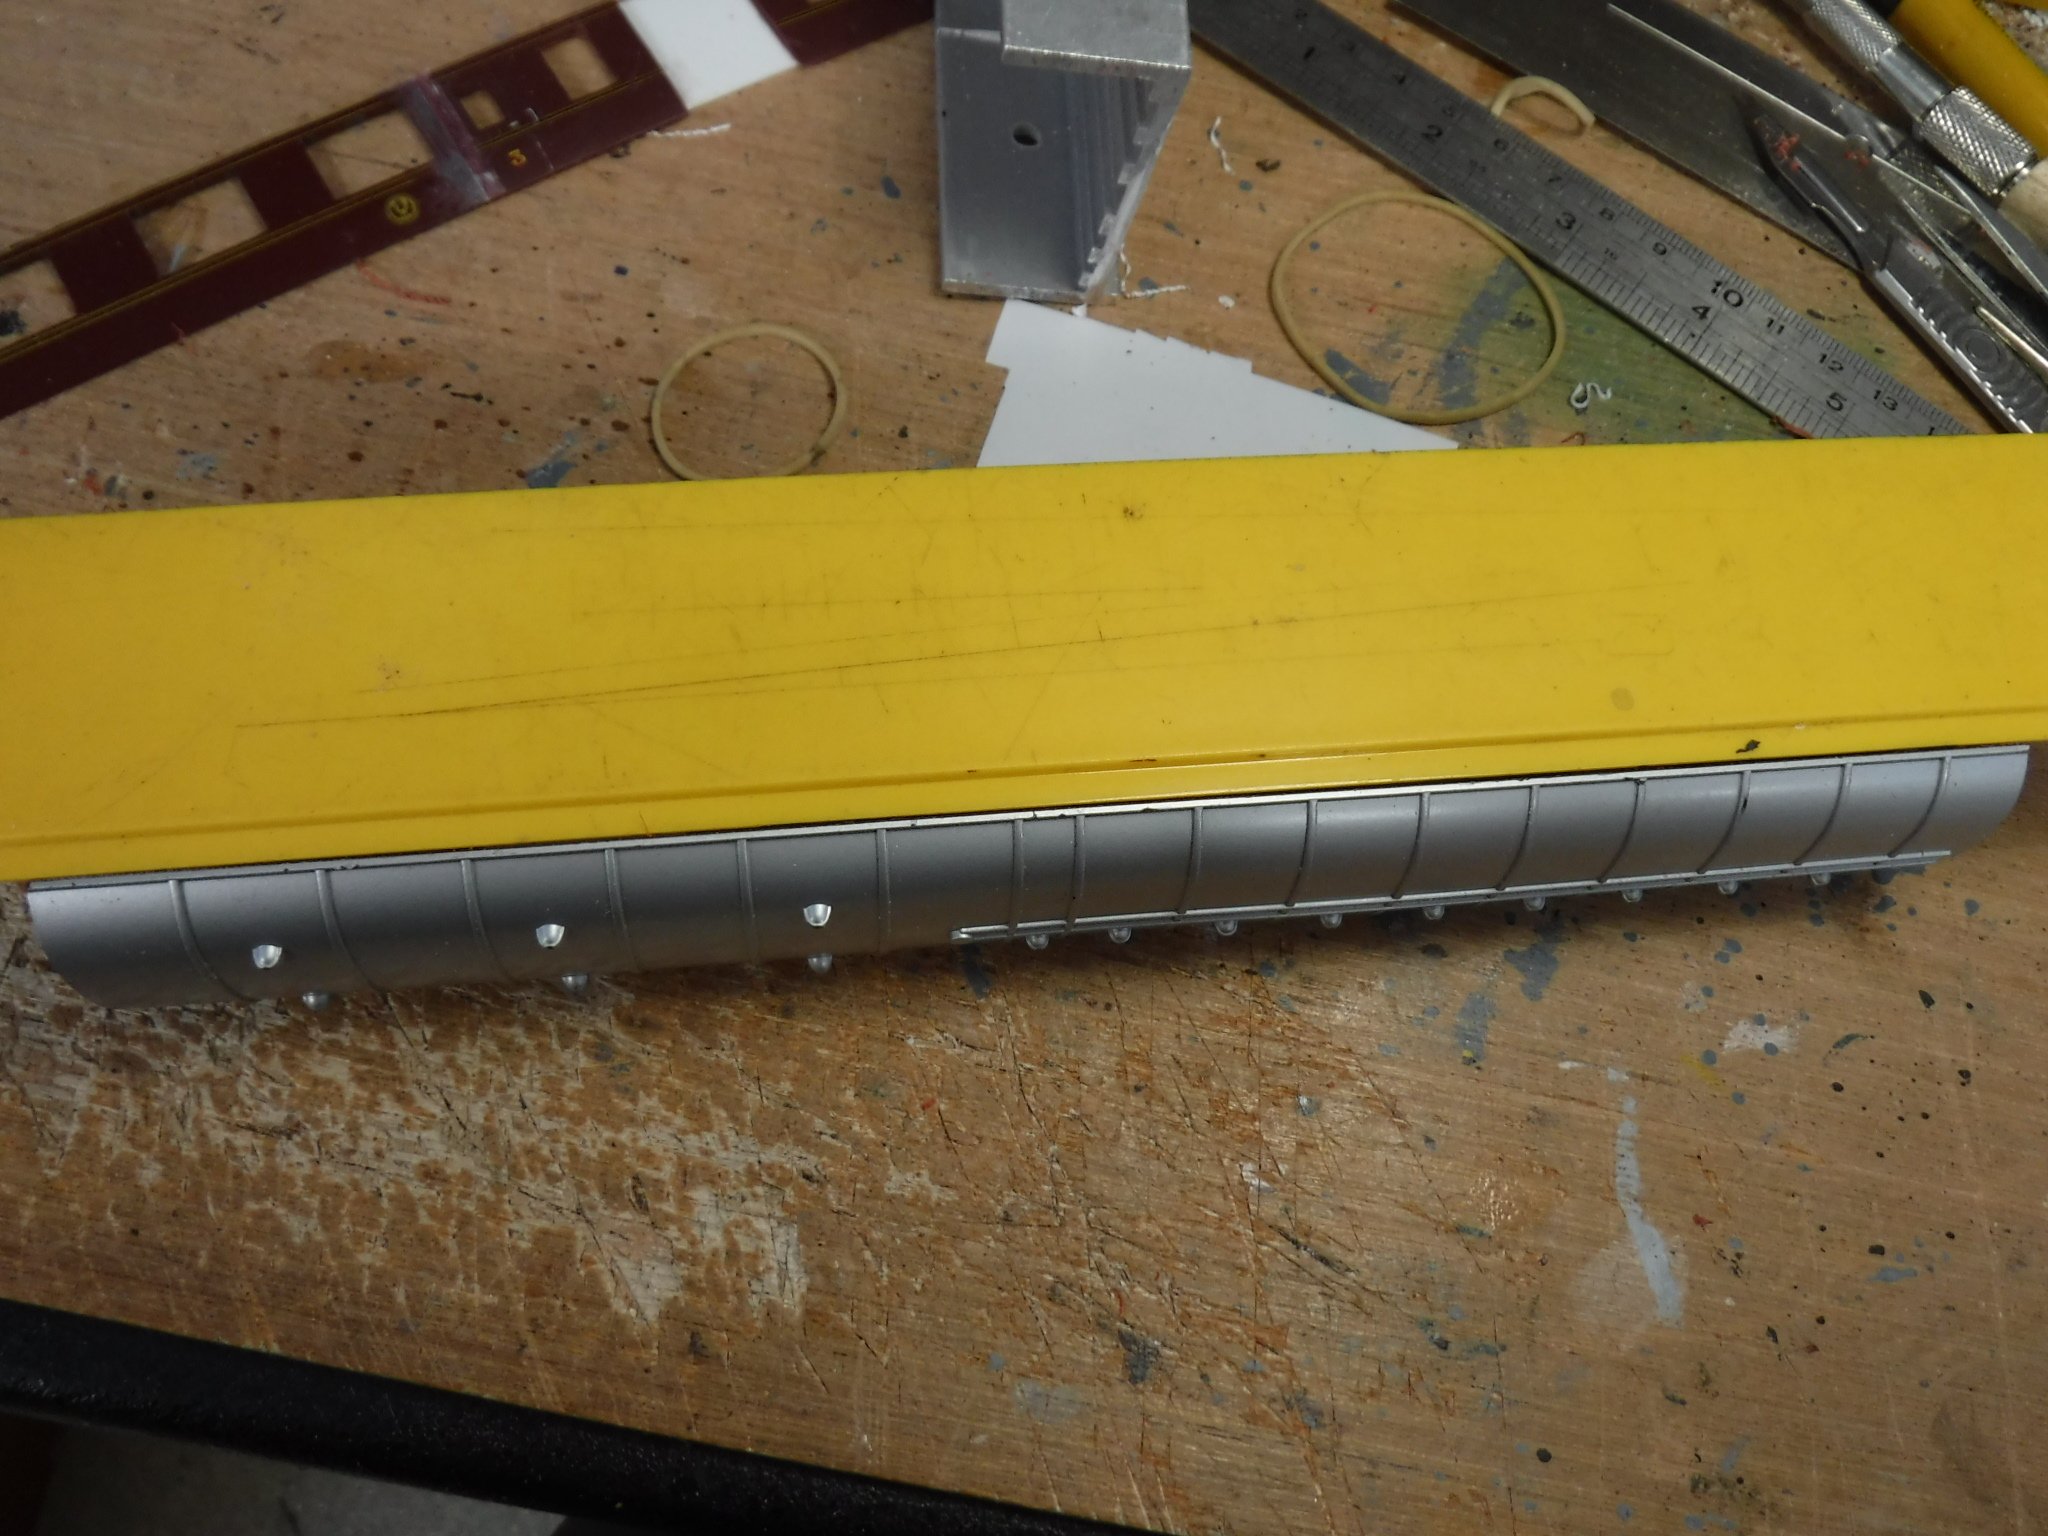
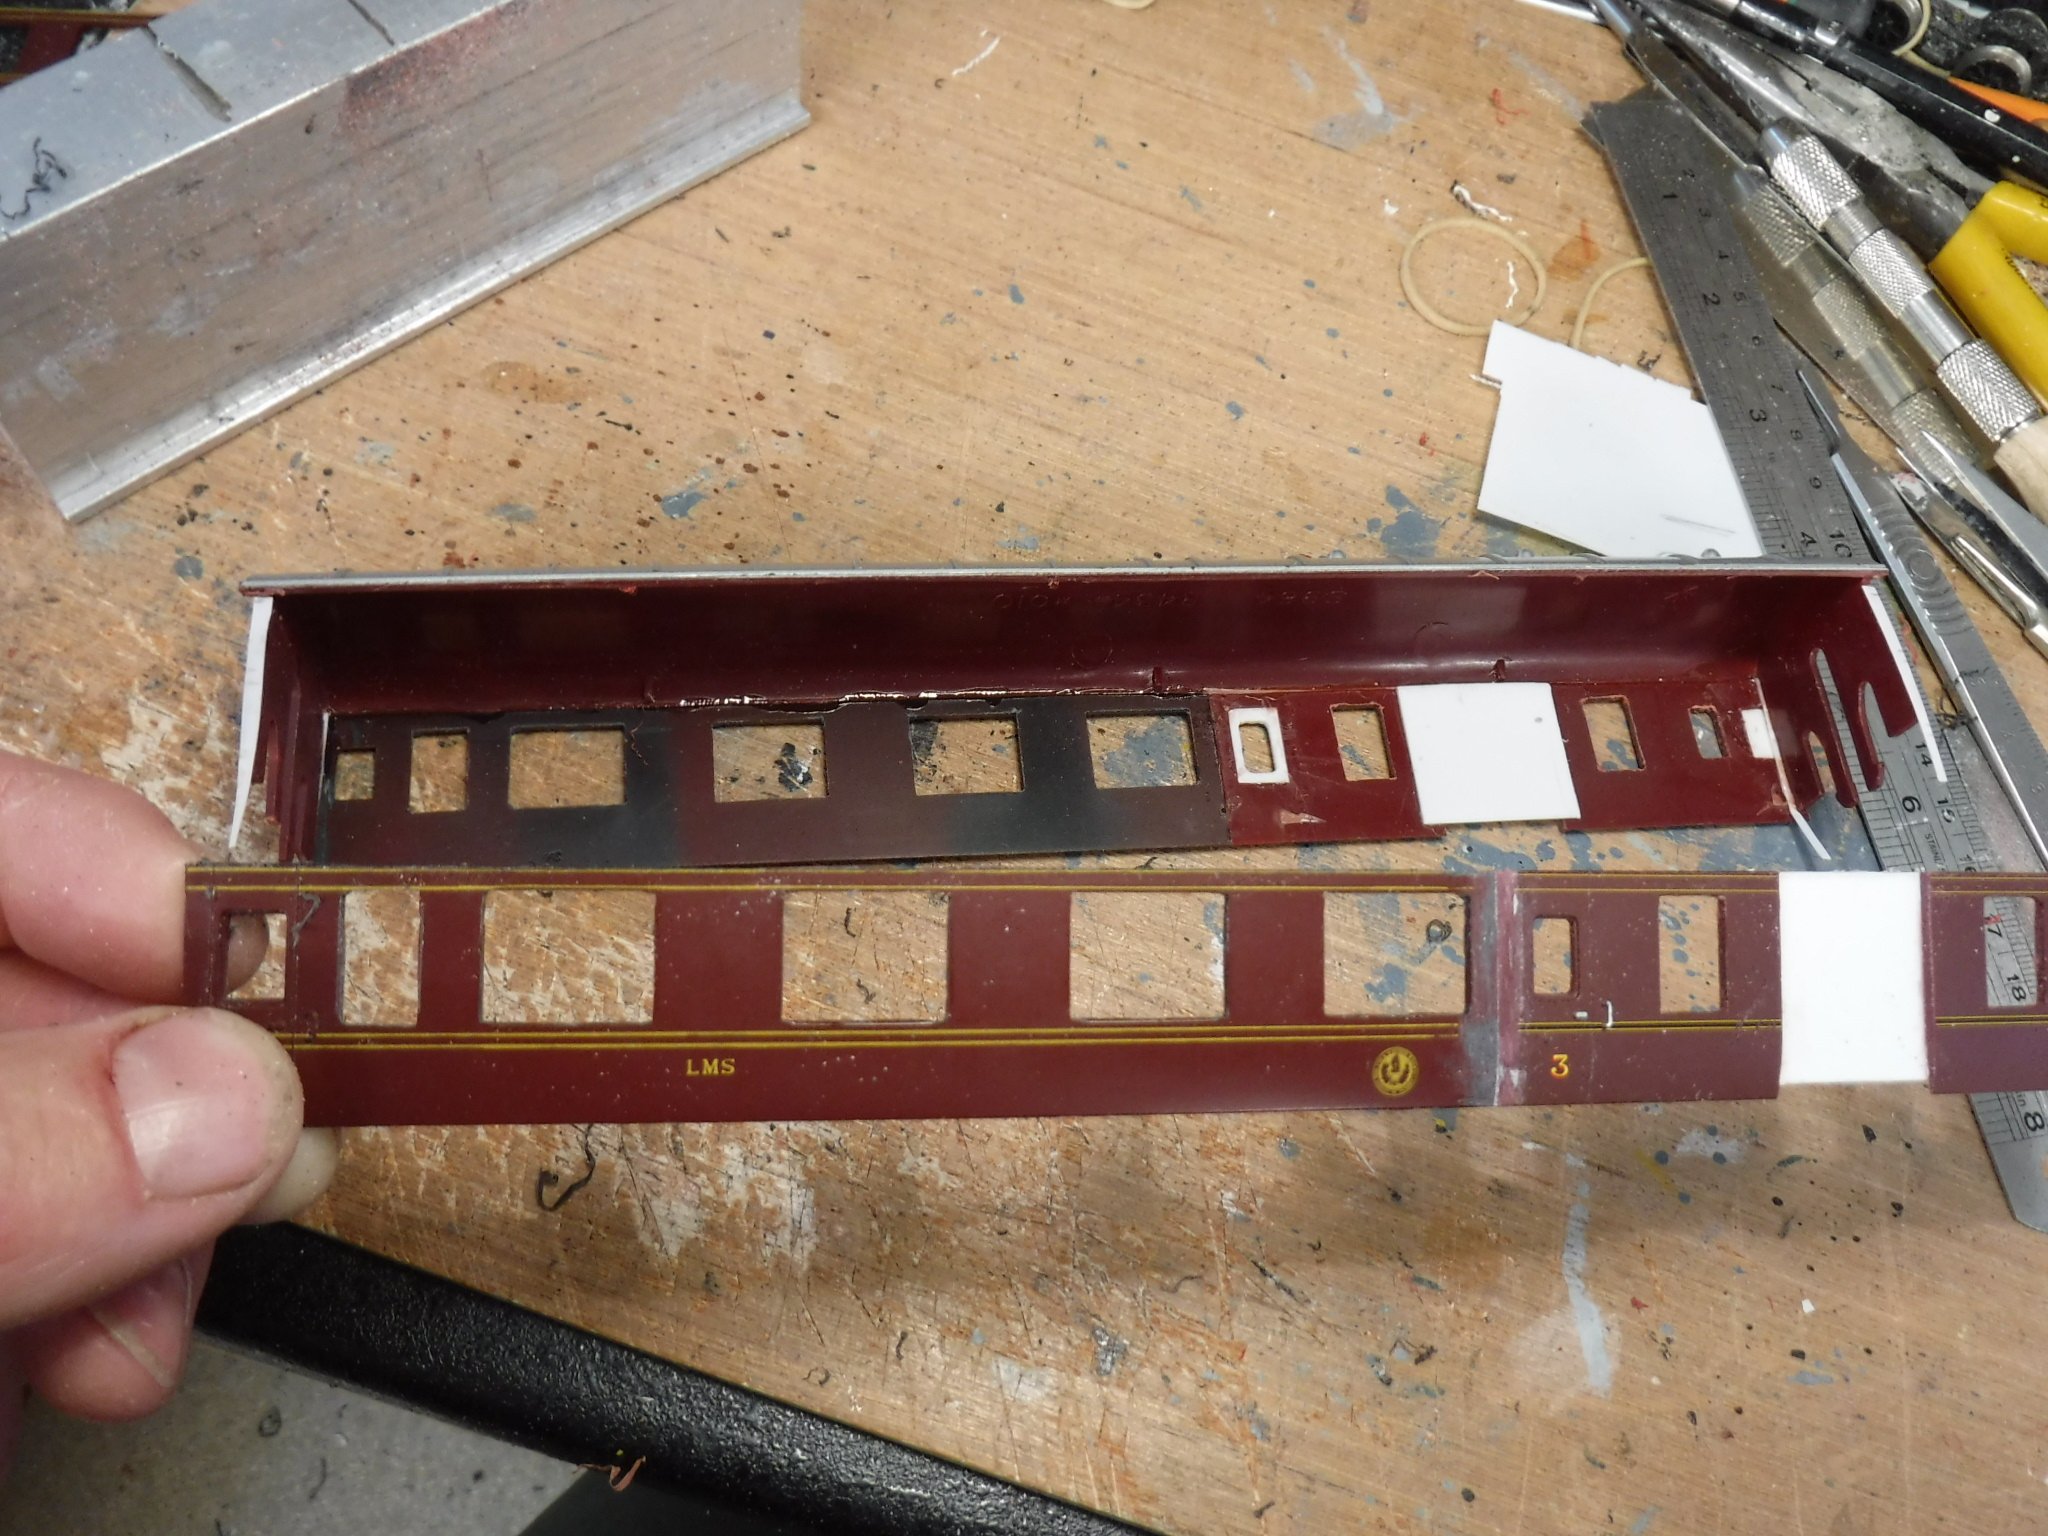
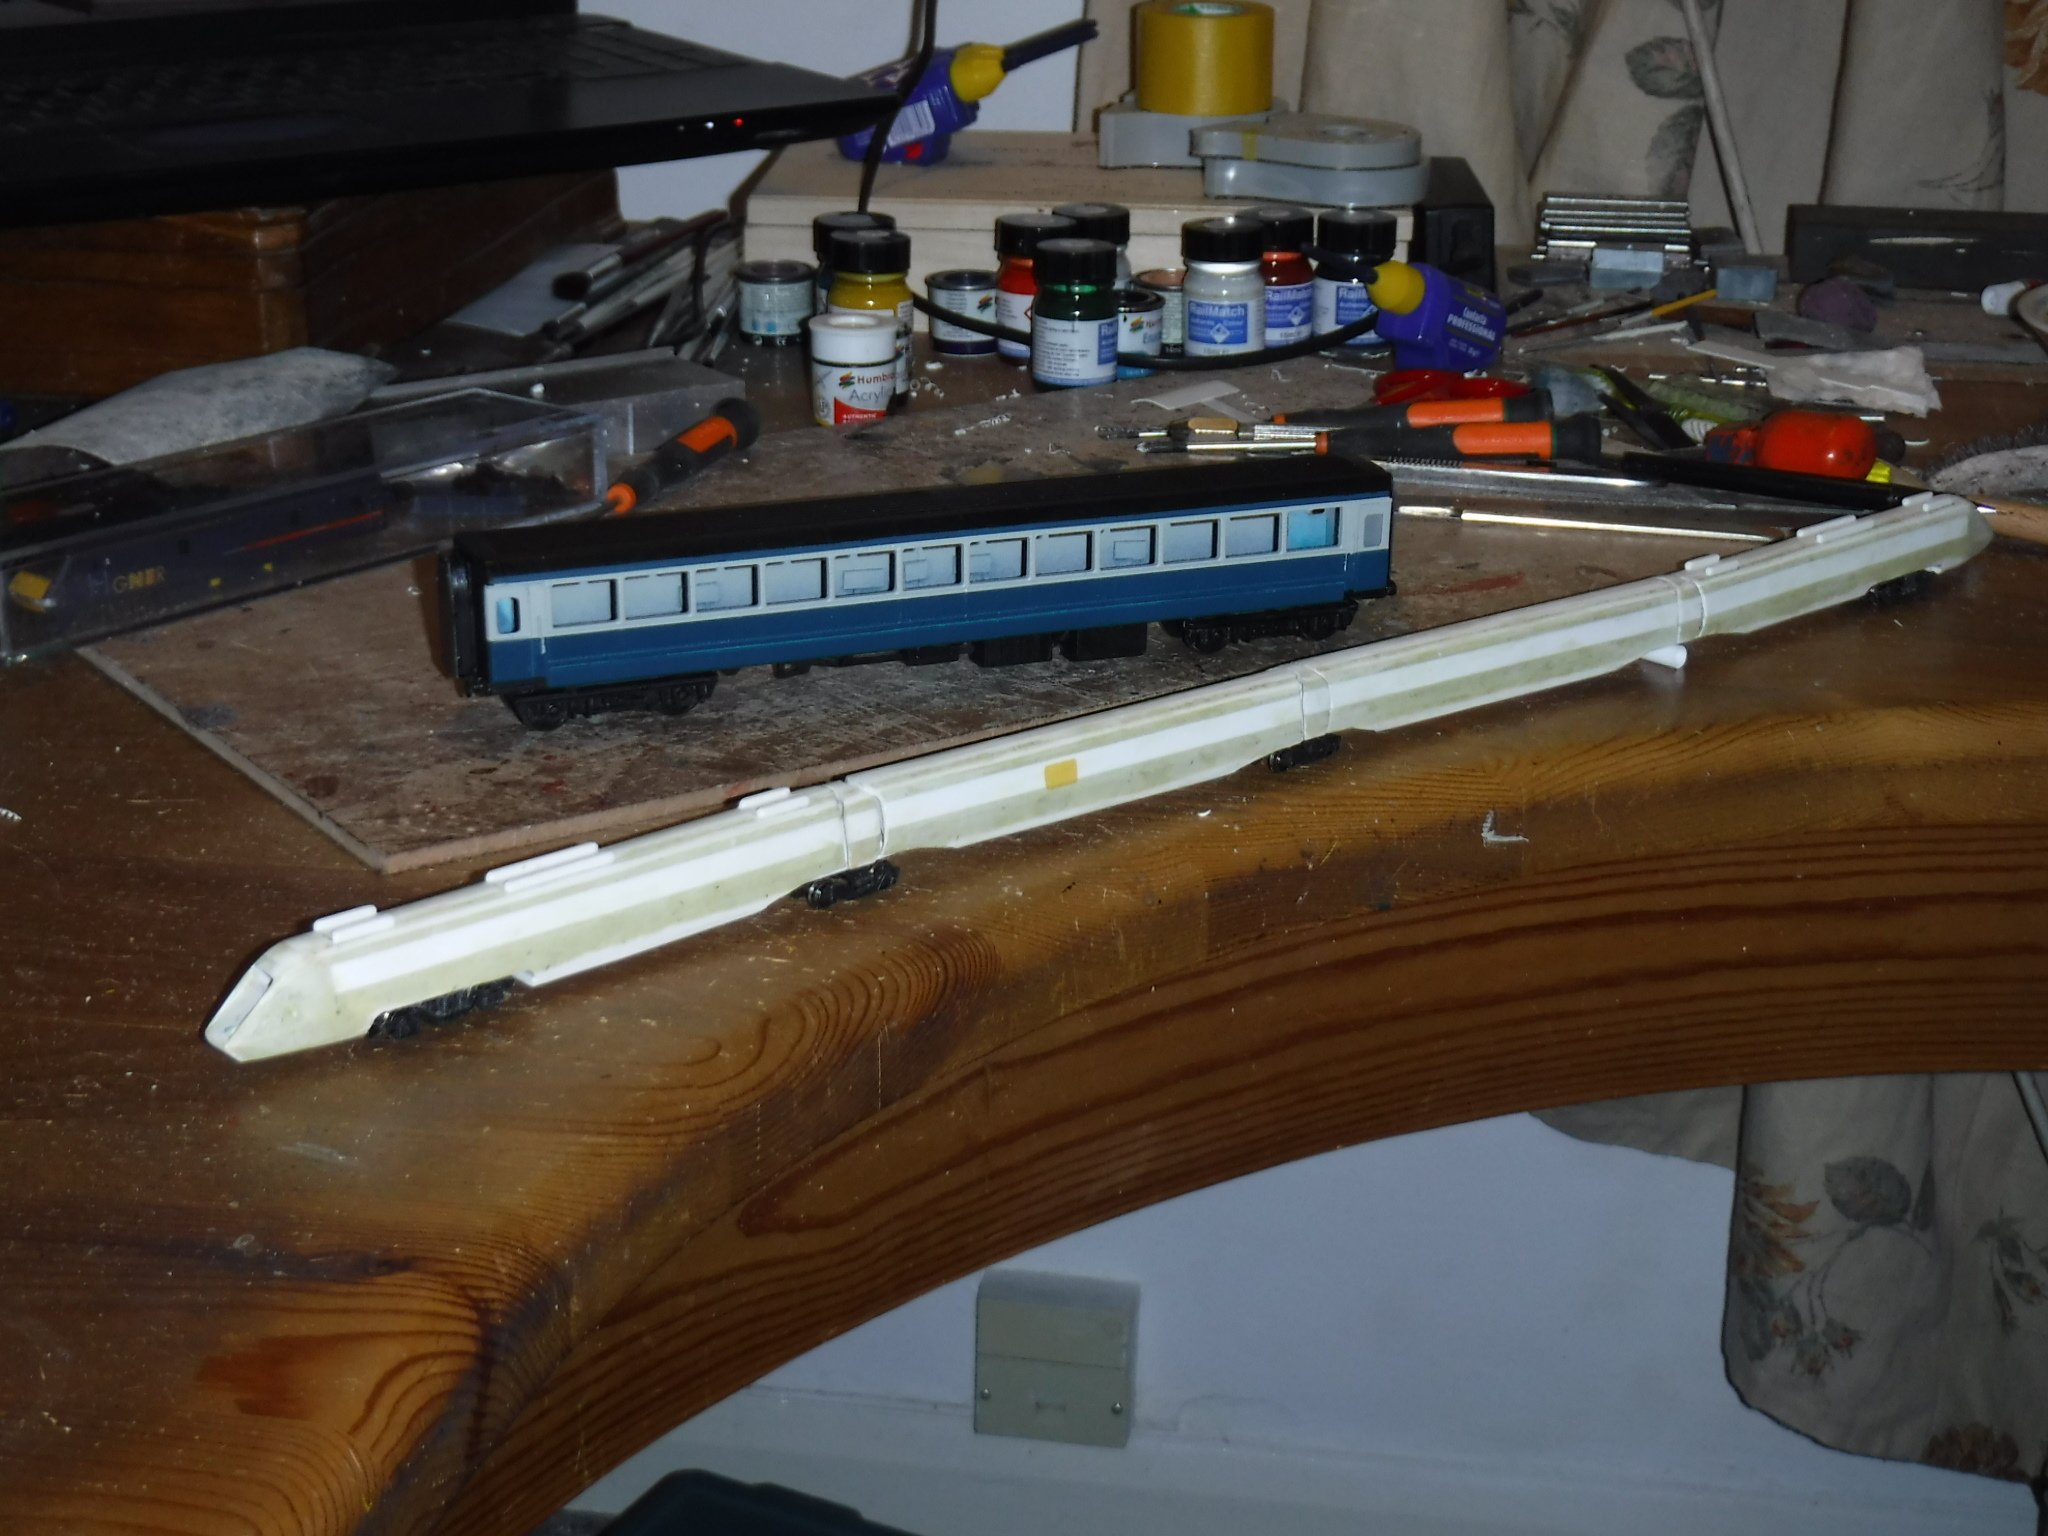
Hi Folks, The coach sides were filed straight and flat along the top edge as was the underside of the coach roof under the gutter. The sides were checked for fit and some .010" strips were glued to the coach ends to make up for the razor saw cut. So long as all is straight and flat gluing is not too difficult although I did use some elastic bands to hold the ends in place making sure that the bands were in line with the coach ends so that they did not collapse the sides in. Checking the roof. Checking the sides. The first of the sides glued in place with the second ready to fit. The second side ready for a dry run and the .010" make up strips glued onto the coach ends to make up for the saw cuts. Note the filled in door and toilet windows from when the side was an LMS brake third and the inset doors of the van. A Dublin to Belfast express headed by a GNRI V class compound leans into the curve on the 4' 1.5" gauge concrete sleepered track with is GNRI coaches in tow. It was all going to fast for the painters to catch it ! Gibbo.
- 86 replies
-
- 10
-

-

-
No good, its already a known verb !
-
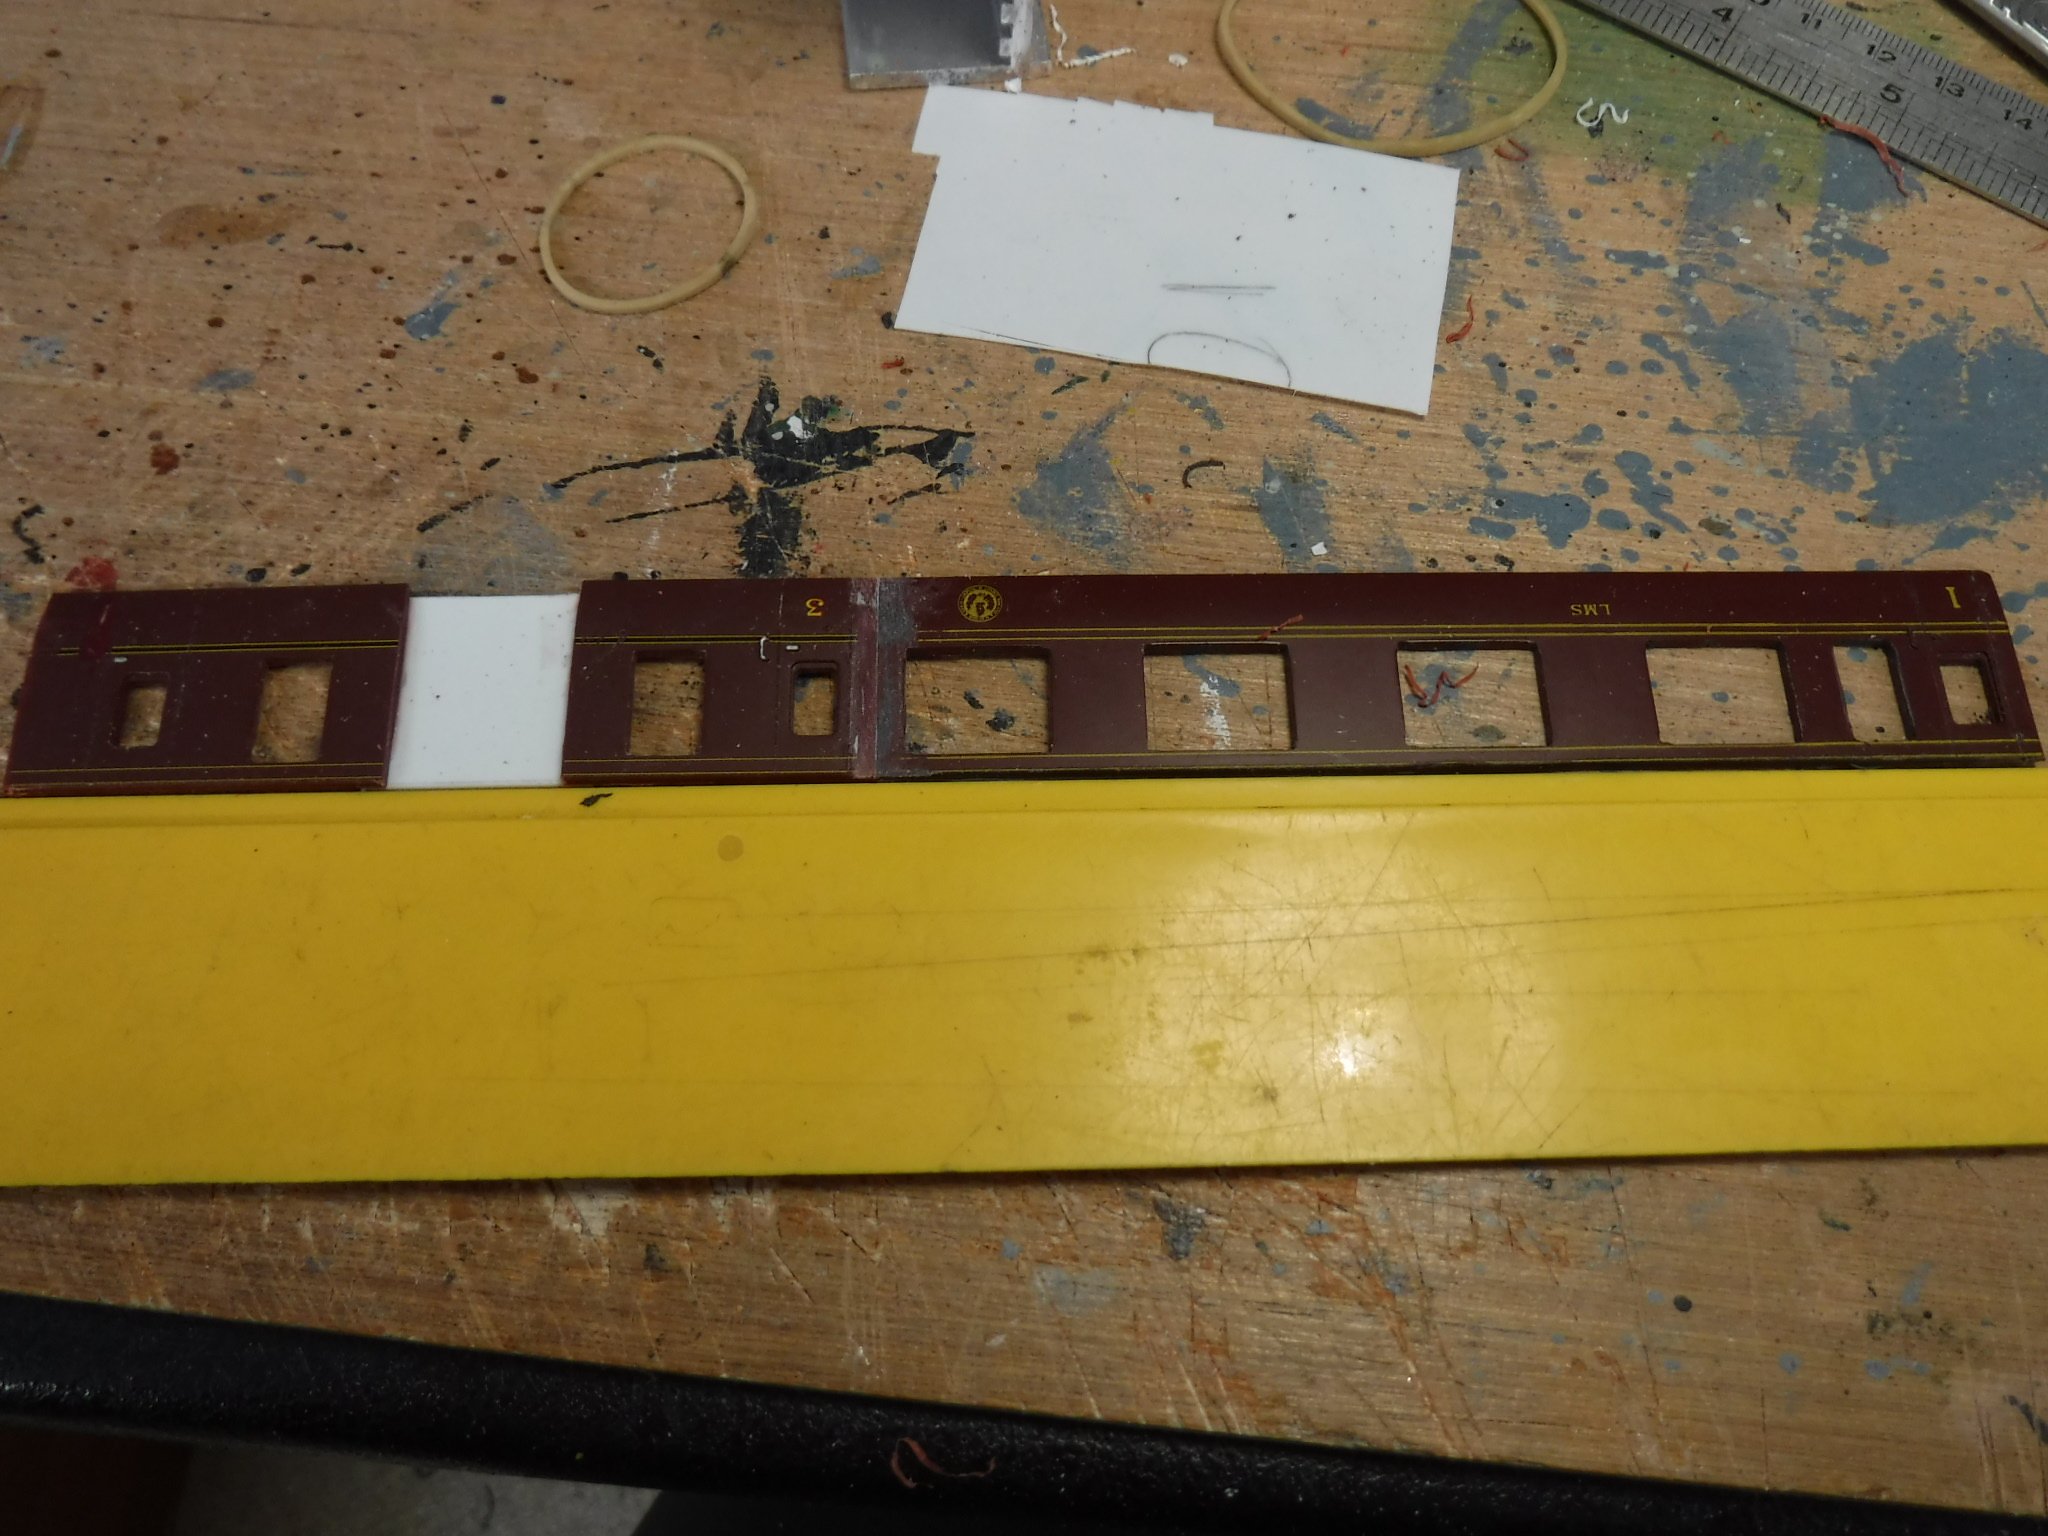
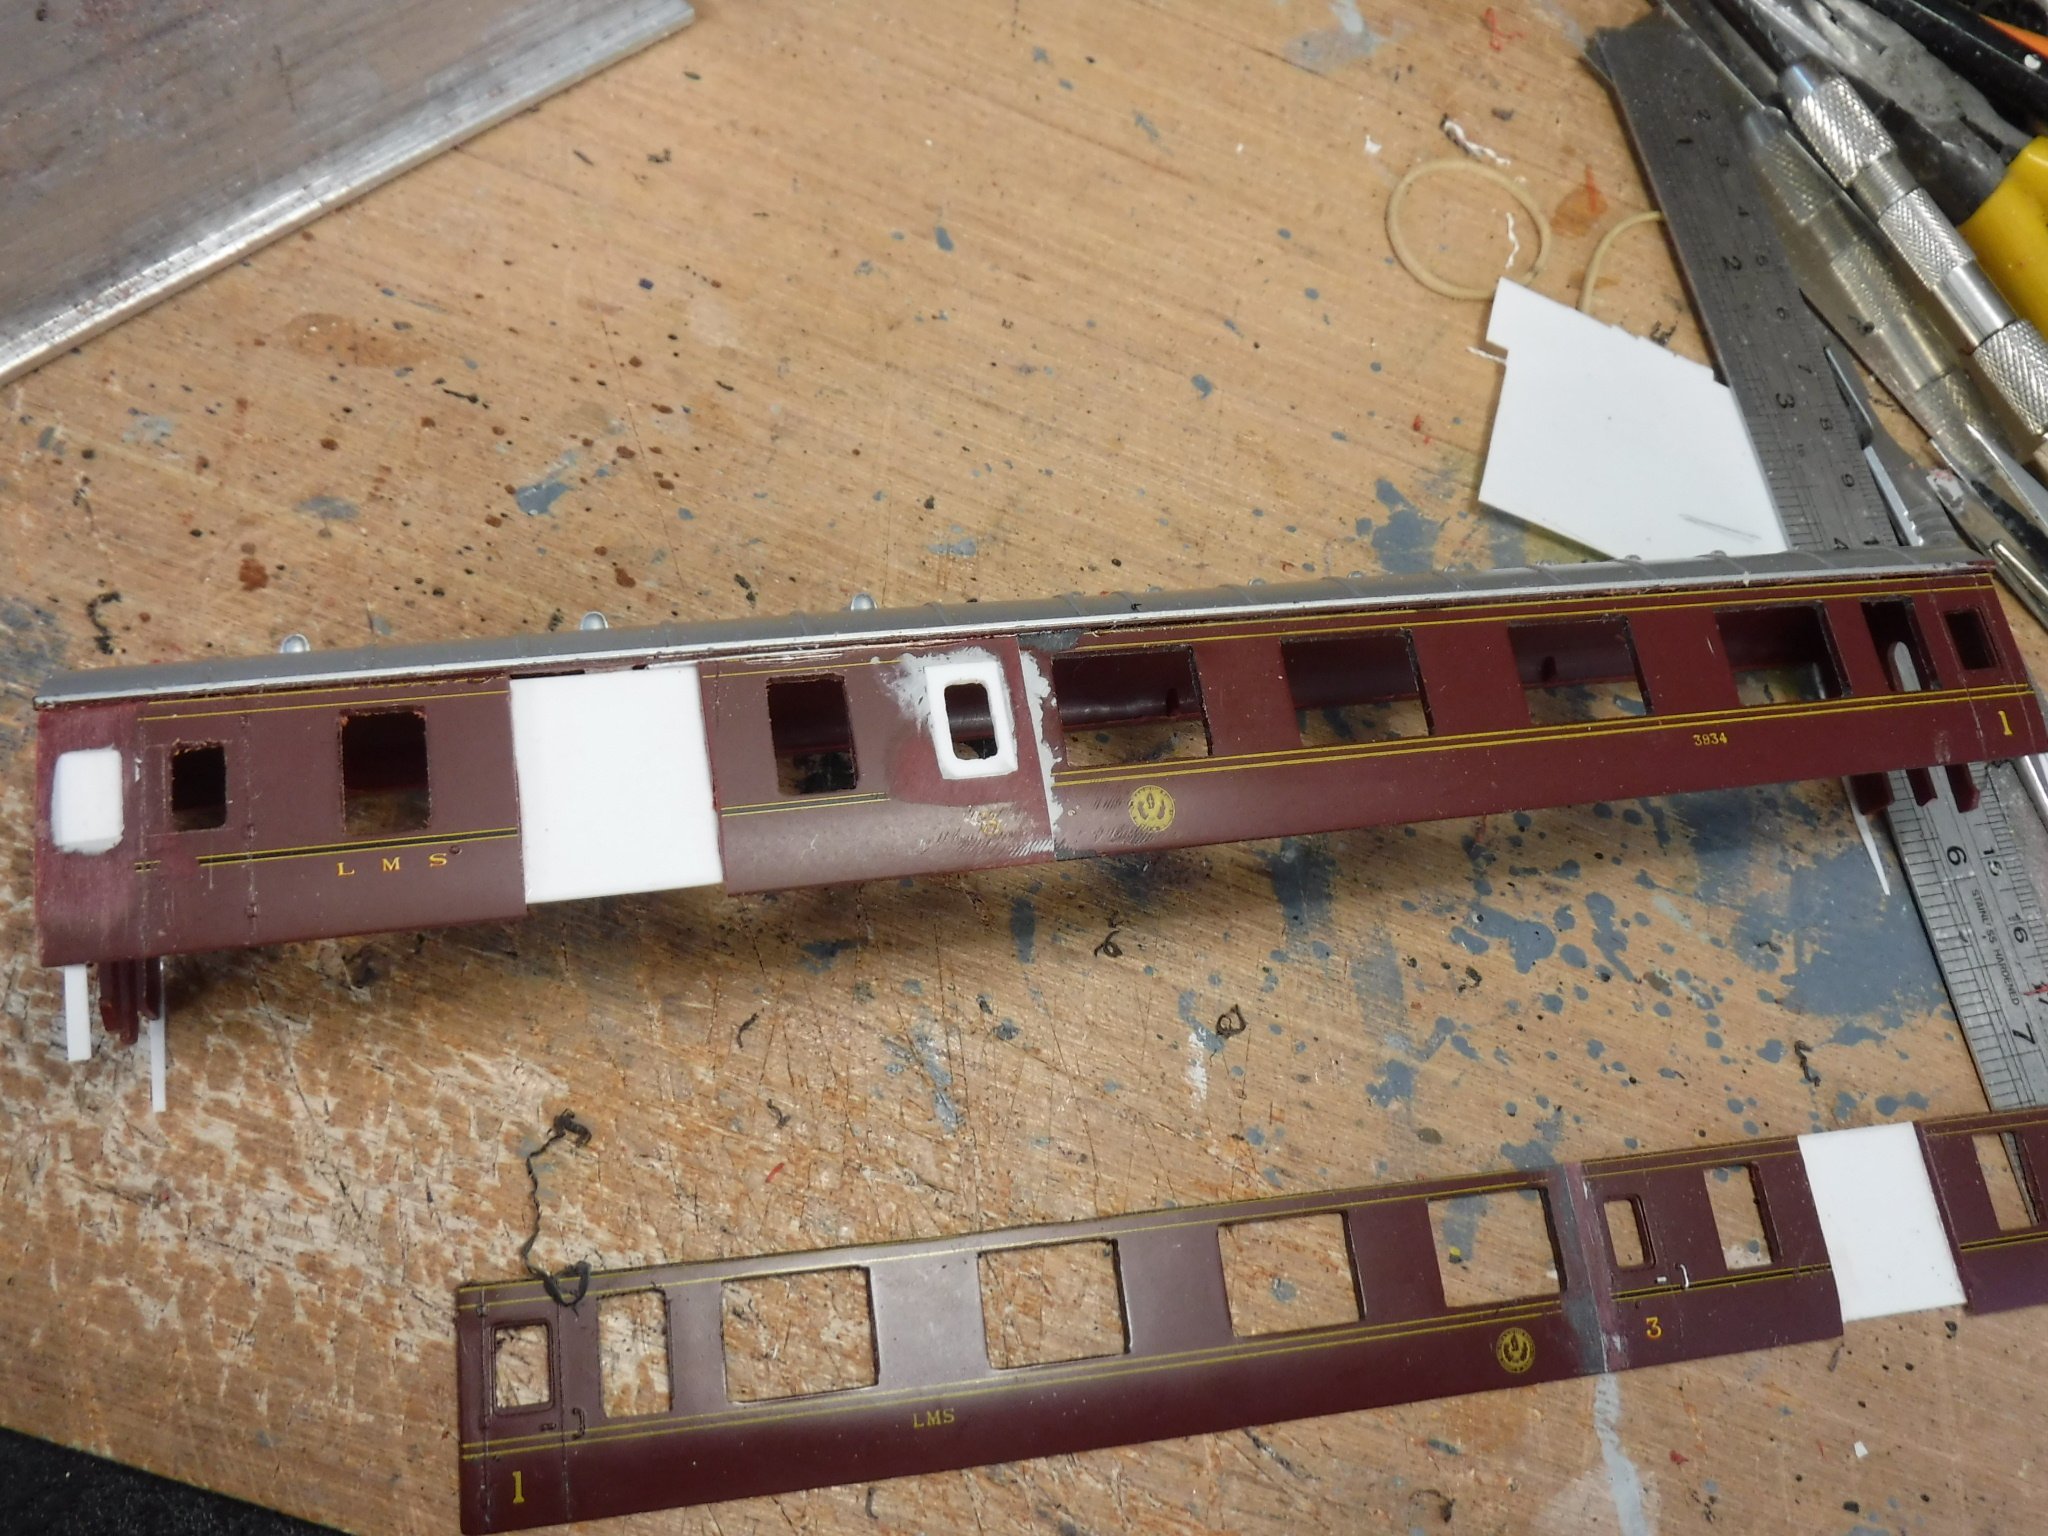
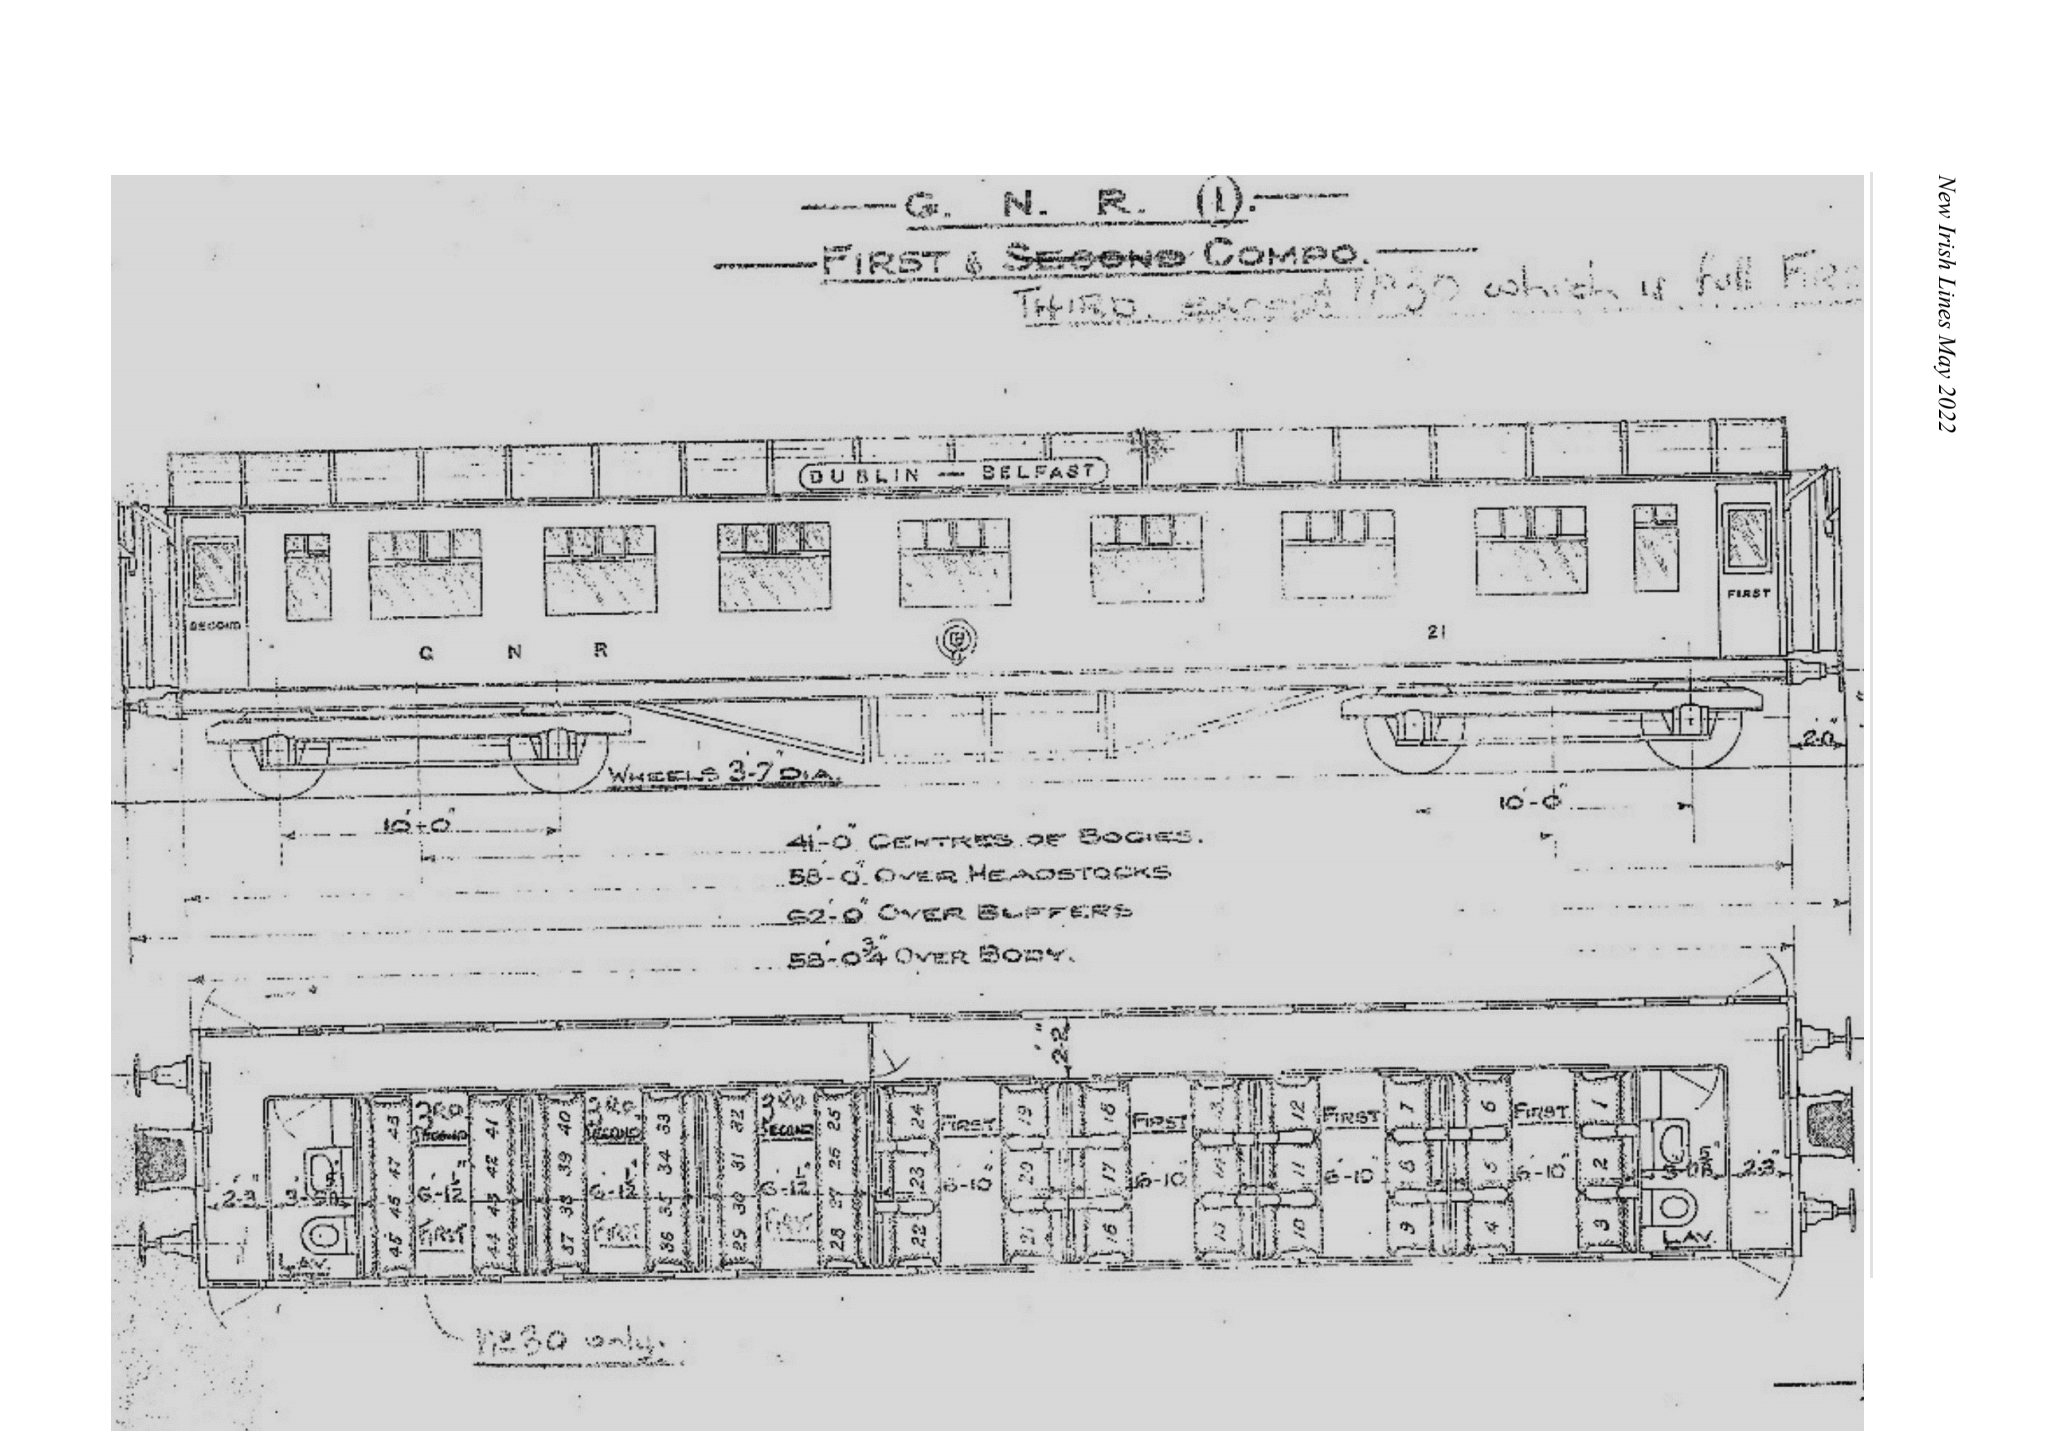
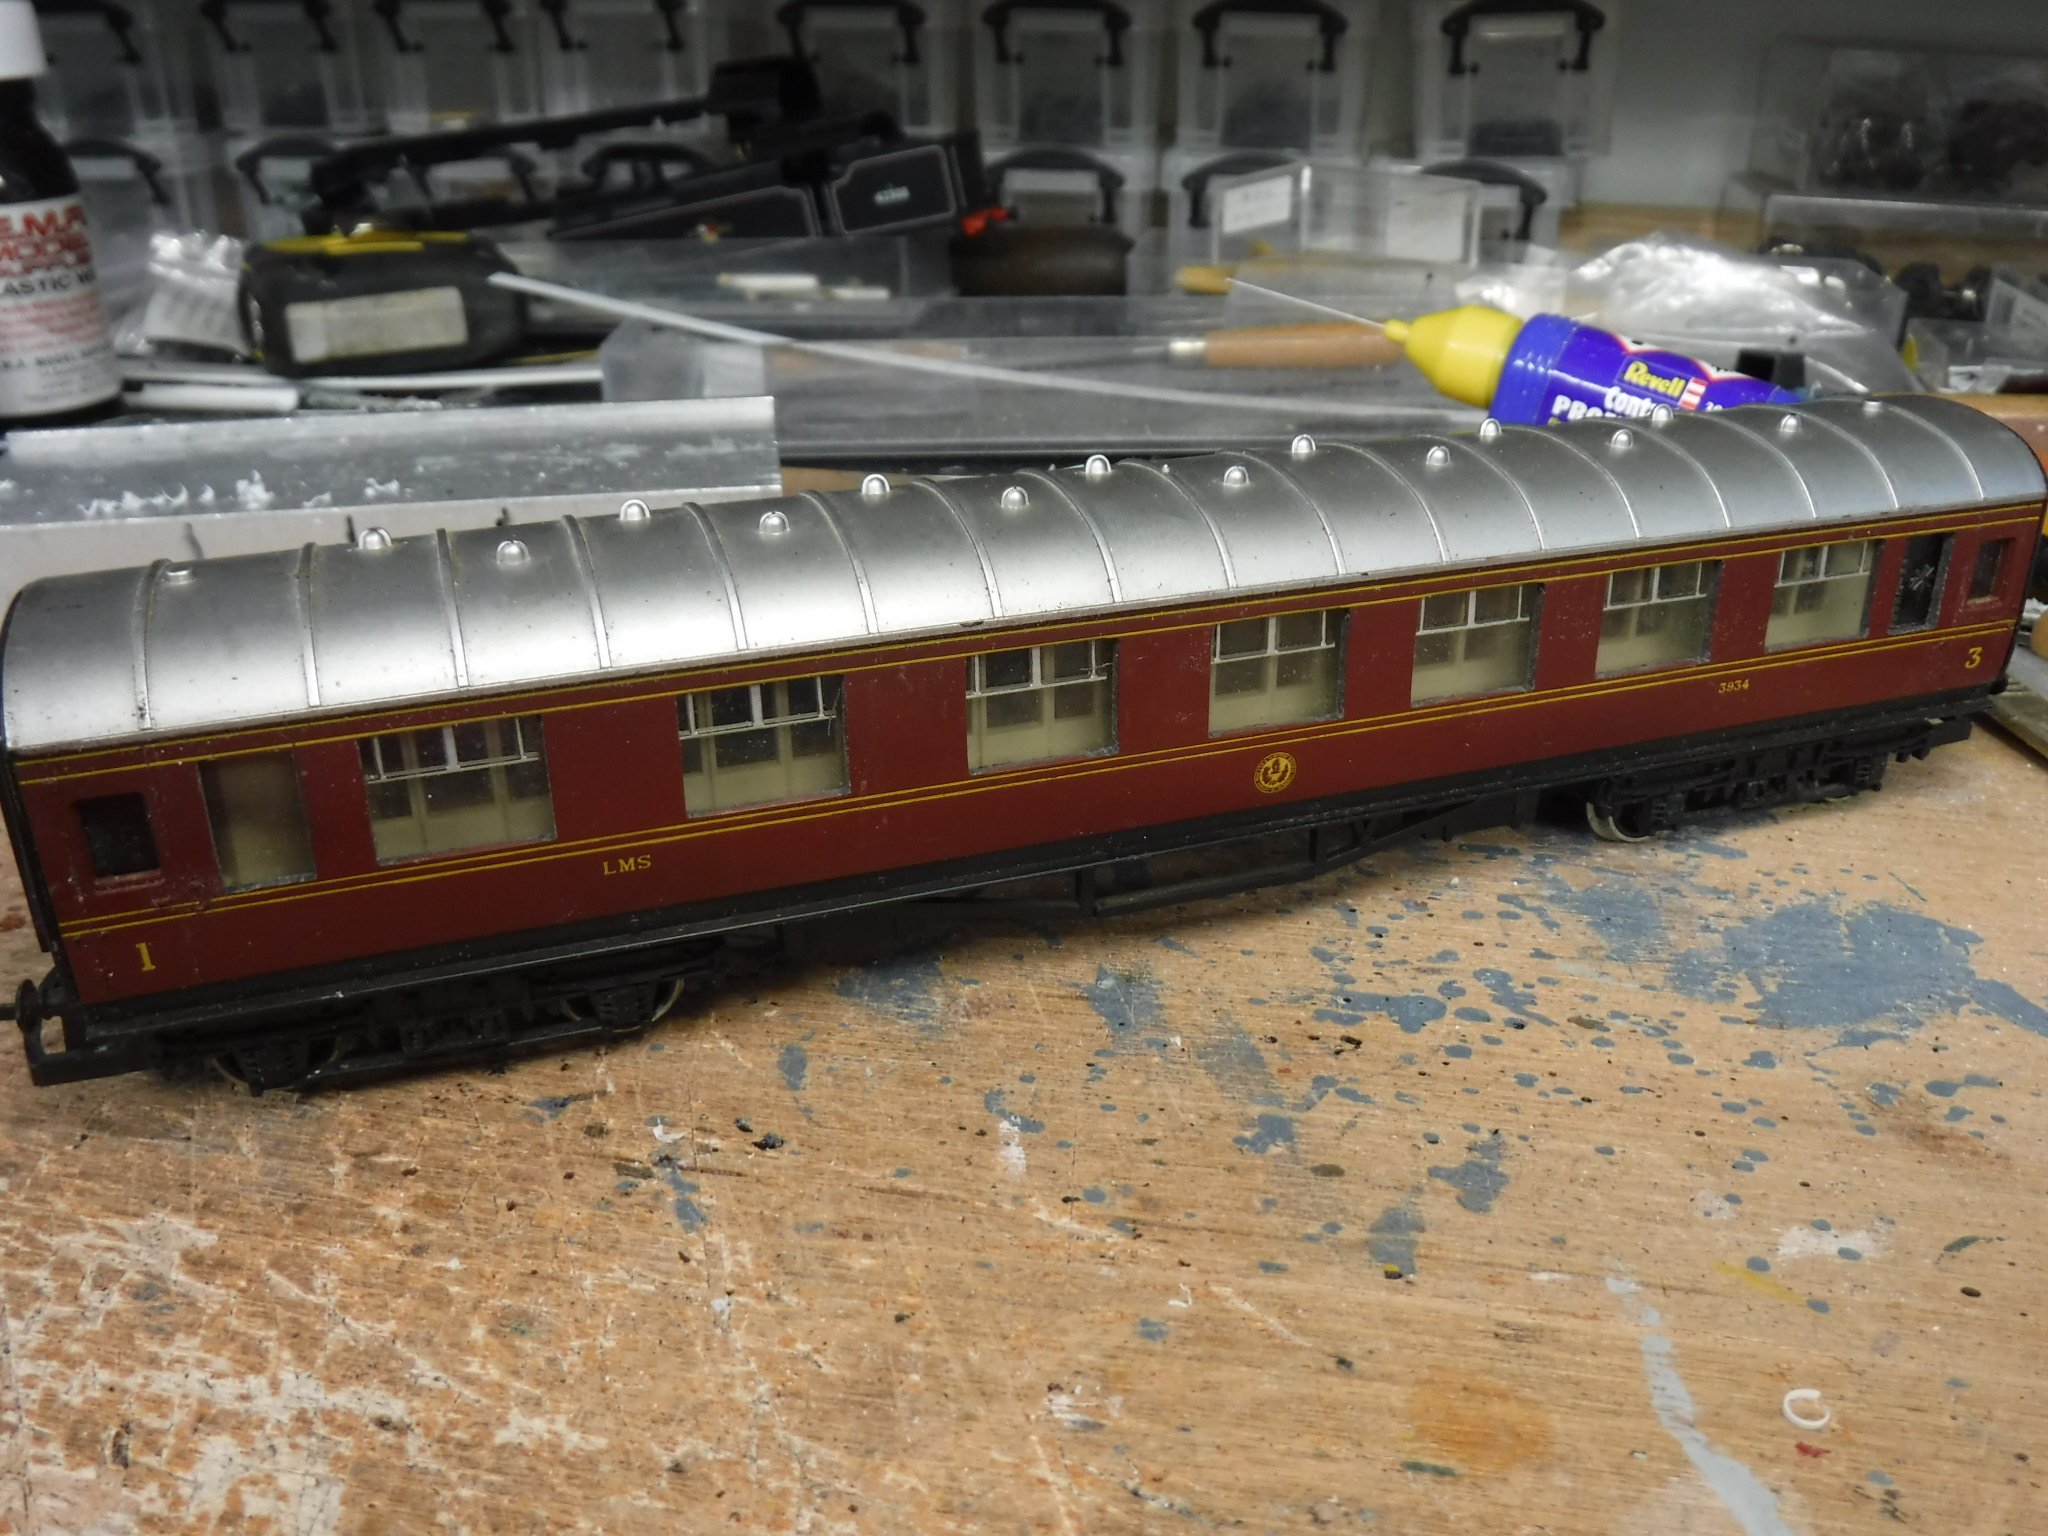
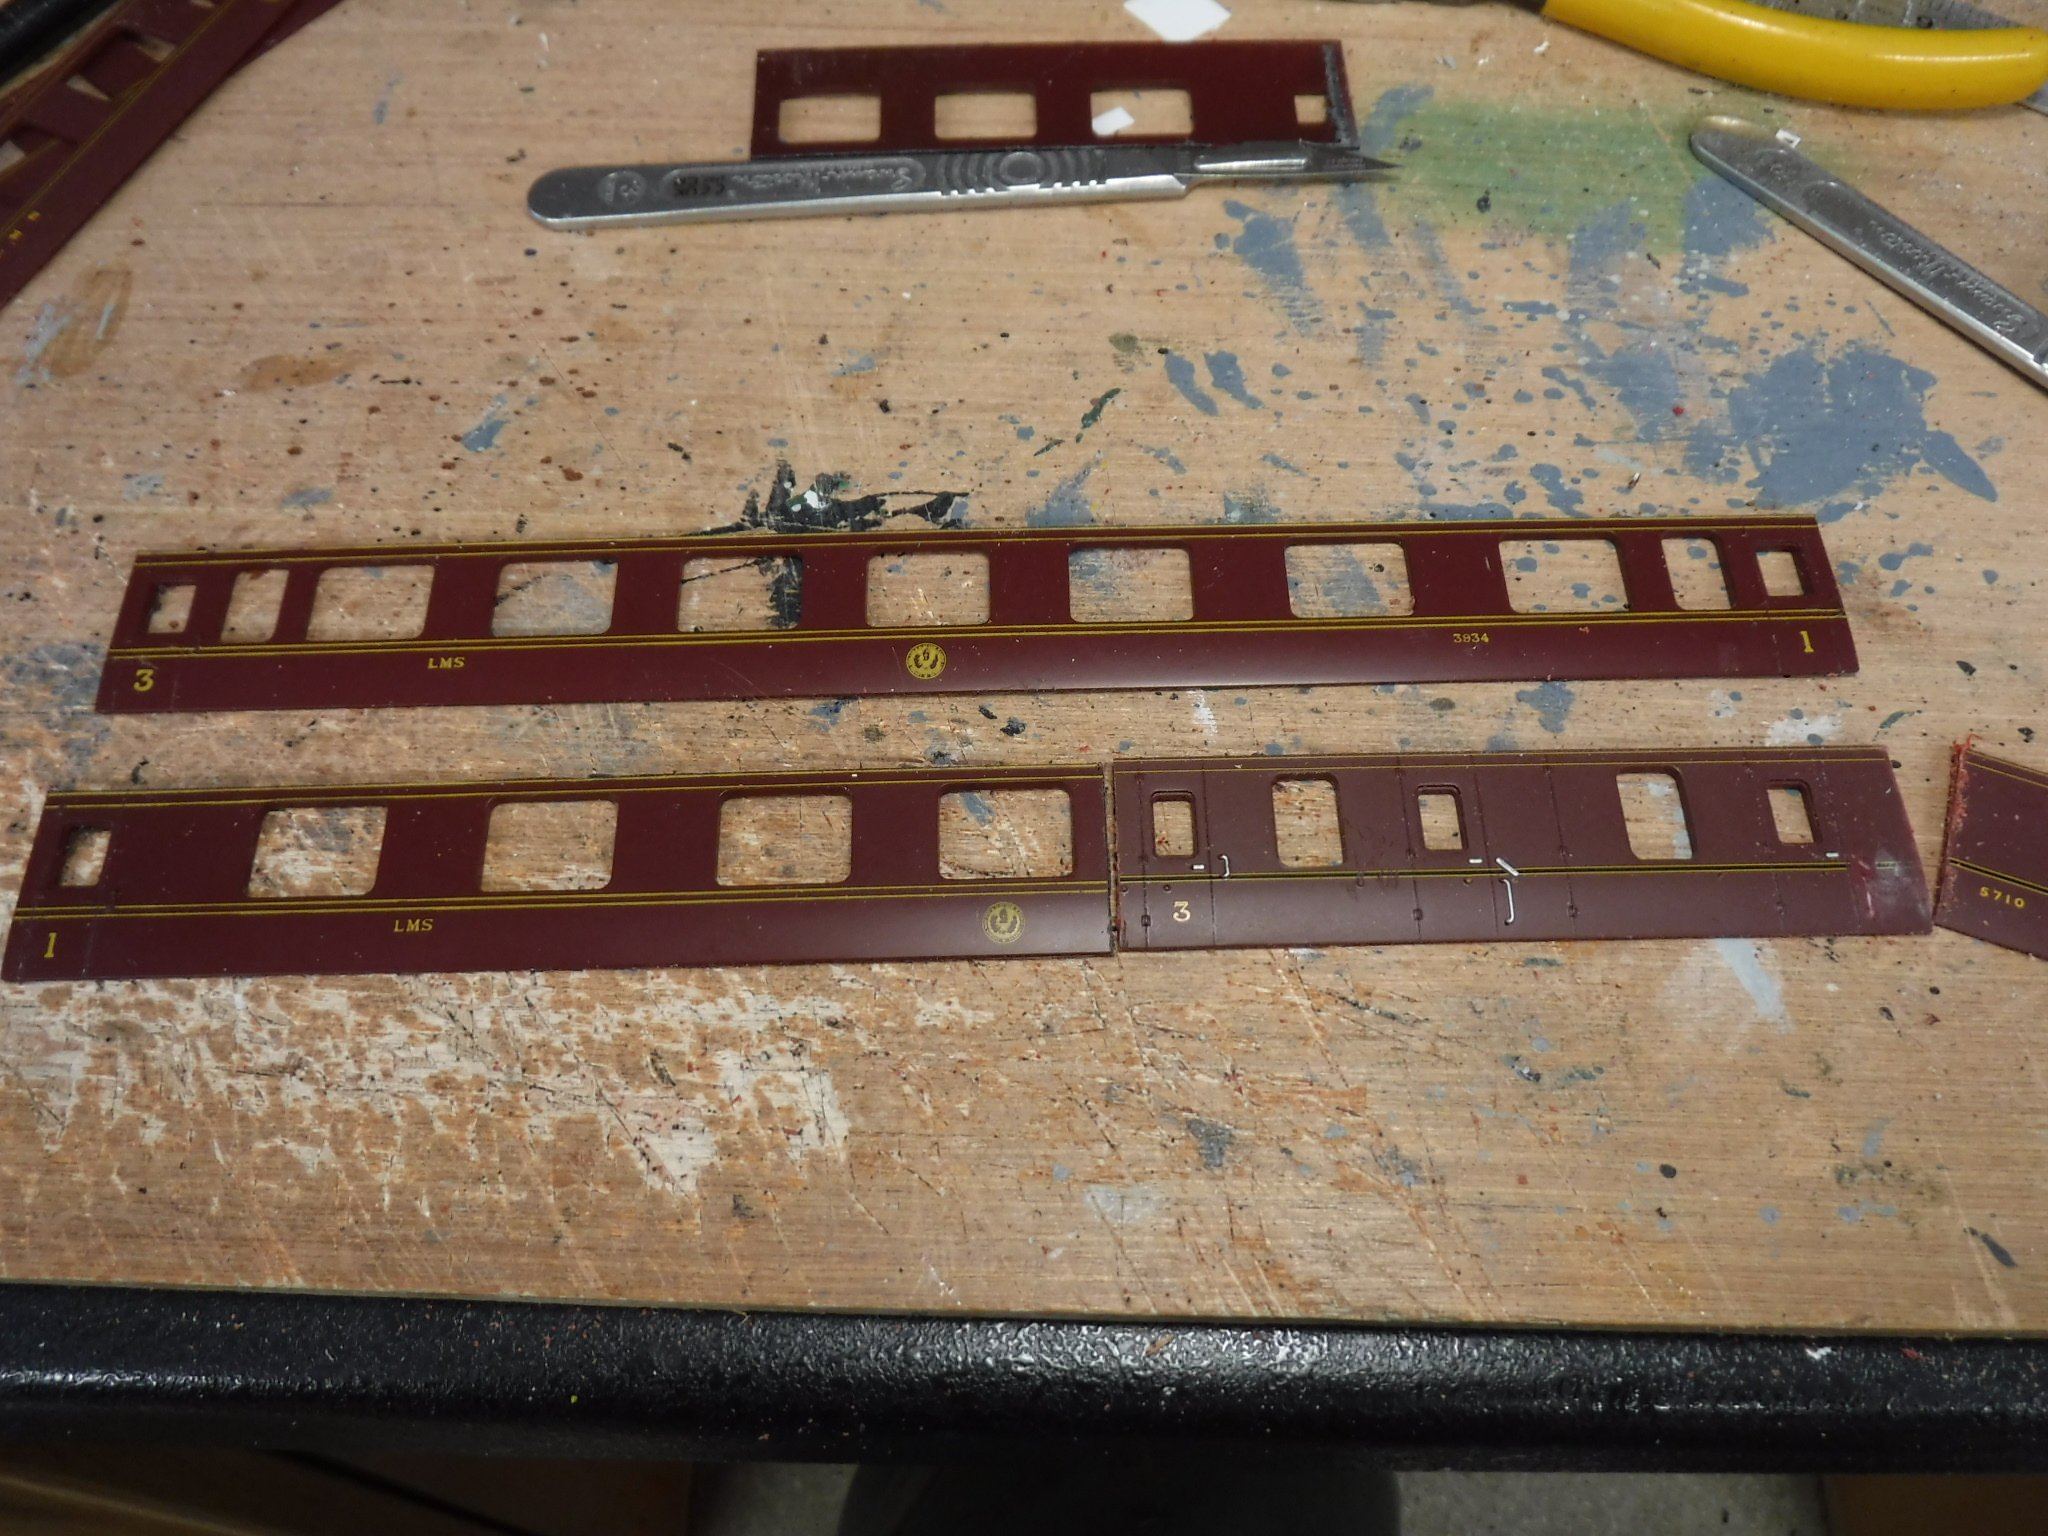
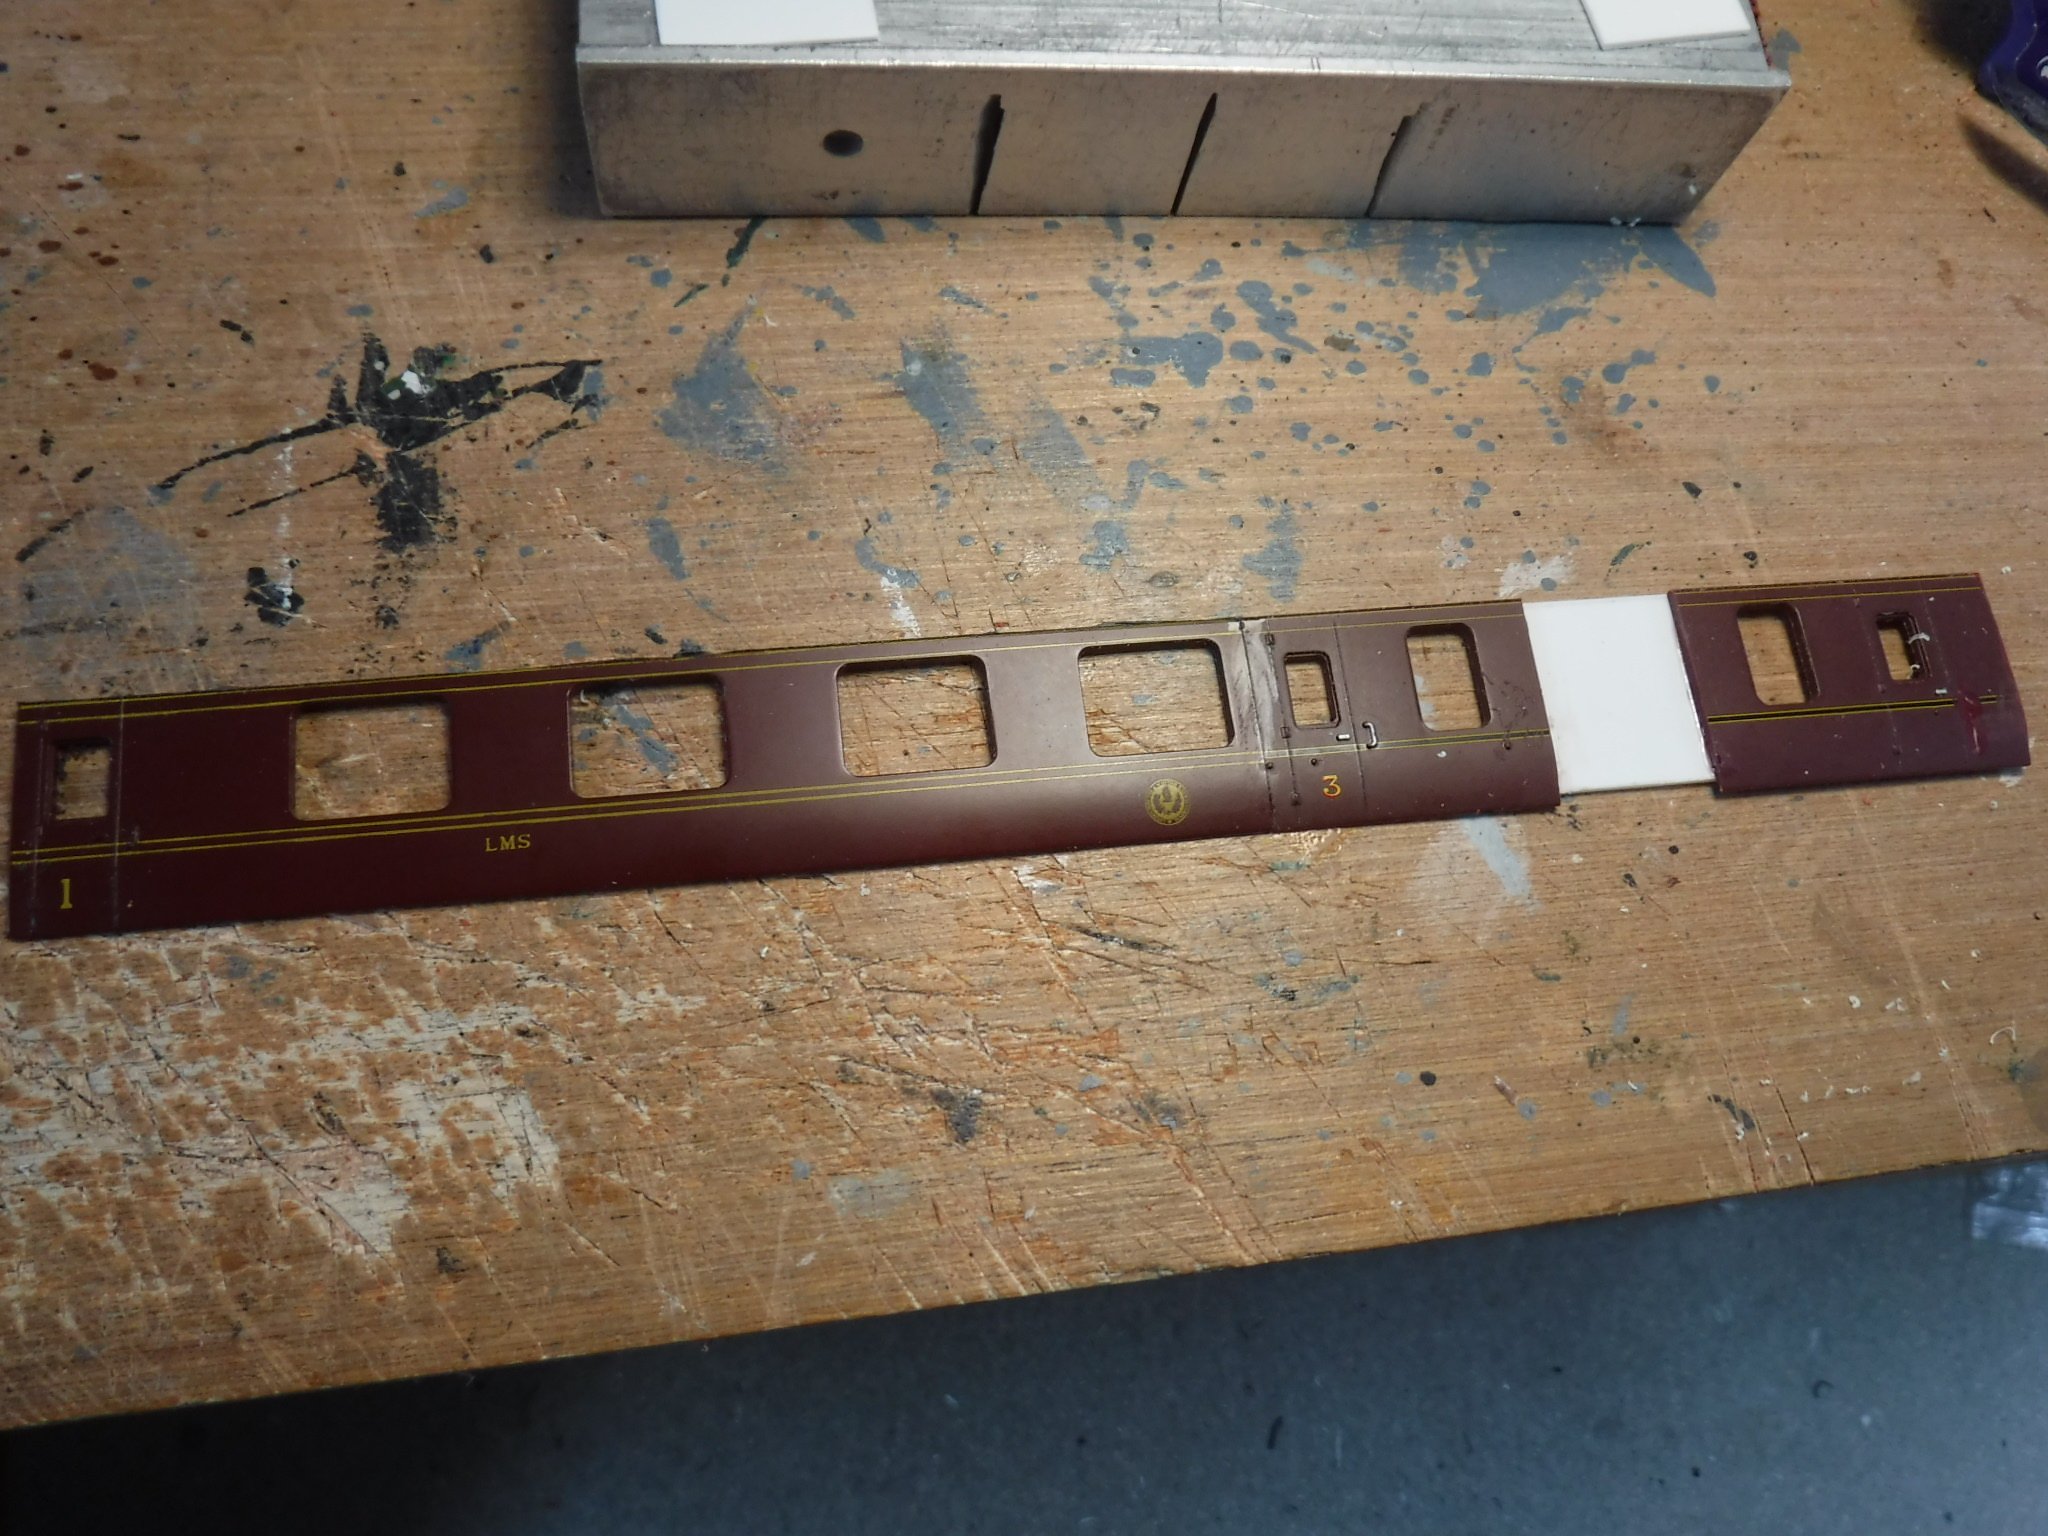
Hi Folks, I have three other threads ongoing at the moment and I have decided that I should perhaps bring all things into one ongoing workbench thread. One of the reasons for this is that I do tend to chop and change with projects because the next one is always more interesting than the one that I'm working on and all the others that end up in the "nearly started box". I also tend to have several things on the go all at once. The three threads will be left as they are and will run until the projects are complete so that make it easier to search the source material. At the moment I am working on: NBL type 4 class 41 Ten Scalecraft Roadrailers NCC W class NCC WT class GNRI V class GNRI coach conversions Three unfinished cranes Seven Motorail flats to alter for I built them wrong because I can't count. A BR West Coast Main Line set around 1973 layout that is wired up and works with no scenery, (scenery isn't really my thing it like doing the garden in model form). A dock yard layout with some scenery but no dock as yet, (I haven't cut the hole in the board yet) Miscellaneous refurbishments, paintjobs and transfers to apply. I shall start the thread off with the work I did last evening in starting the GNRI coach conversion project. I was supplied a great set various drawings of Irish stock by @Hadren Railway of which there were drawings of GNRI coaches included. These coaches are similar in profile and window dimension to those built by the LMS and with alteration and quite some amount of cutting and shutting I should be able to build reasonable representations of the GNRI coaches. The first coach is a First-Third Composite, there is a little cheat with this coach as I decided that the cutting a shutting wasn't really worth it for the sake of what difference it made so the the window spacing between two windows isn't quite as it should be but only noticeable if you look closely. The GNRI coach is 58' over headstocks making it a two feet shorter than a comparative LMS coach that were 60' long. The Hornby Staniers are too short anyway and there is only so much you can do in life. The Airfix coaches may be a better bet if you wish for better accuracy and the scheme of the conversion will be applicable to those coaches with minor alterations. This is a really easy conversion in that all that is required is to disassemble the coach, cut two extra windows in the vestibules opposite the toilet to the same position dimensions as the toilet windows, and then file the corners of the windows square. The only thing that is required will be to alter the glazing as a bar is required across the top of the windows that have been cut in and also there are some part numbers moulded into the glazing in the area of one of the new windows. The next coach to be attempted is a Brake First for which I am using the first class section of am LMS composite spliced into an LMS brake third. The first job is to cut the ends from the sides using a razor saw, the next job is to carefully score along just under the gutter of the roof until the side comes away from the roof so that you are left with just the sides as a flat section. The sides cut from the coaches, top is the side form a composite and bottom left is the first class section form a composite and bottom right is a section from the brake third. The section that is at an angle is the off cut from the brake section. The composite side piece was used a s guide for the length of the new section. I glued the sections together making sure that they were of the correct length and when cured I then cut out the double doors replacing them with a piece of .040" plasticard cut to 25mm X 23.5mm. That was glued into the gap left to represent the inset doors of the van, I set the pieces up against a straight edge on a flat surface when gluing them together. When fixing the inset doors I used scrap bits of plasticard to shim underneath to make up for the thickness of inset doors and also a piece of .060" Plastruct square section to space the bottom of the inset doors so that they do not foul the frames when the coach is rebuilt. One thing that is slowing me down is that I only know what this side of the coach looks like with regard the arrangement of the doors and windows. Is any one able to let me know if the arrangement is mirrored or different ? Gibbo.
-
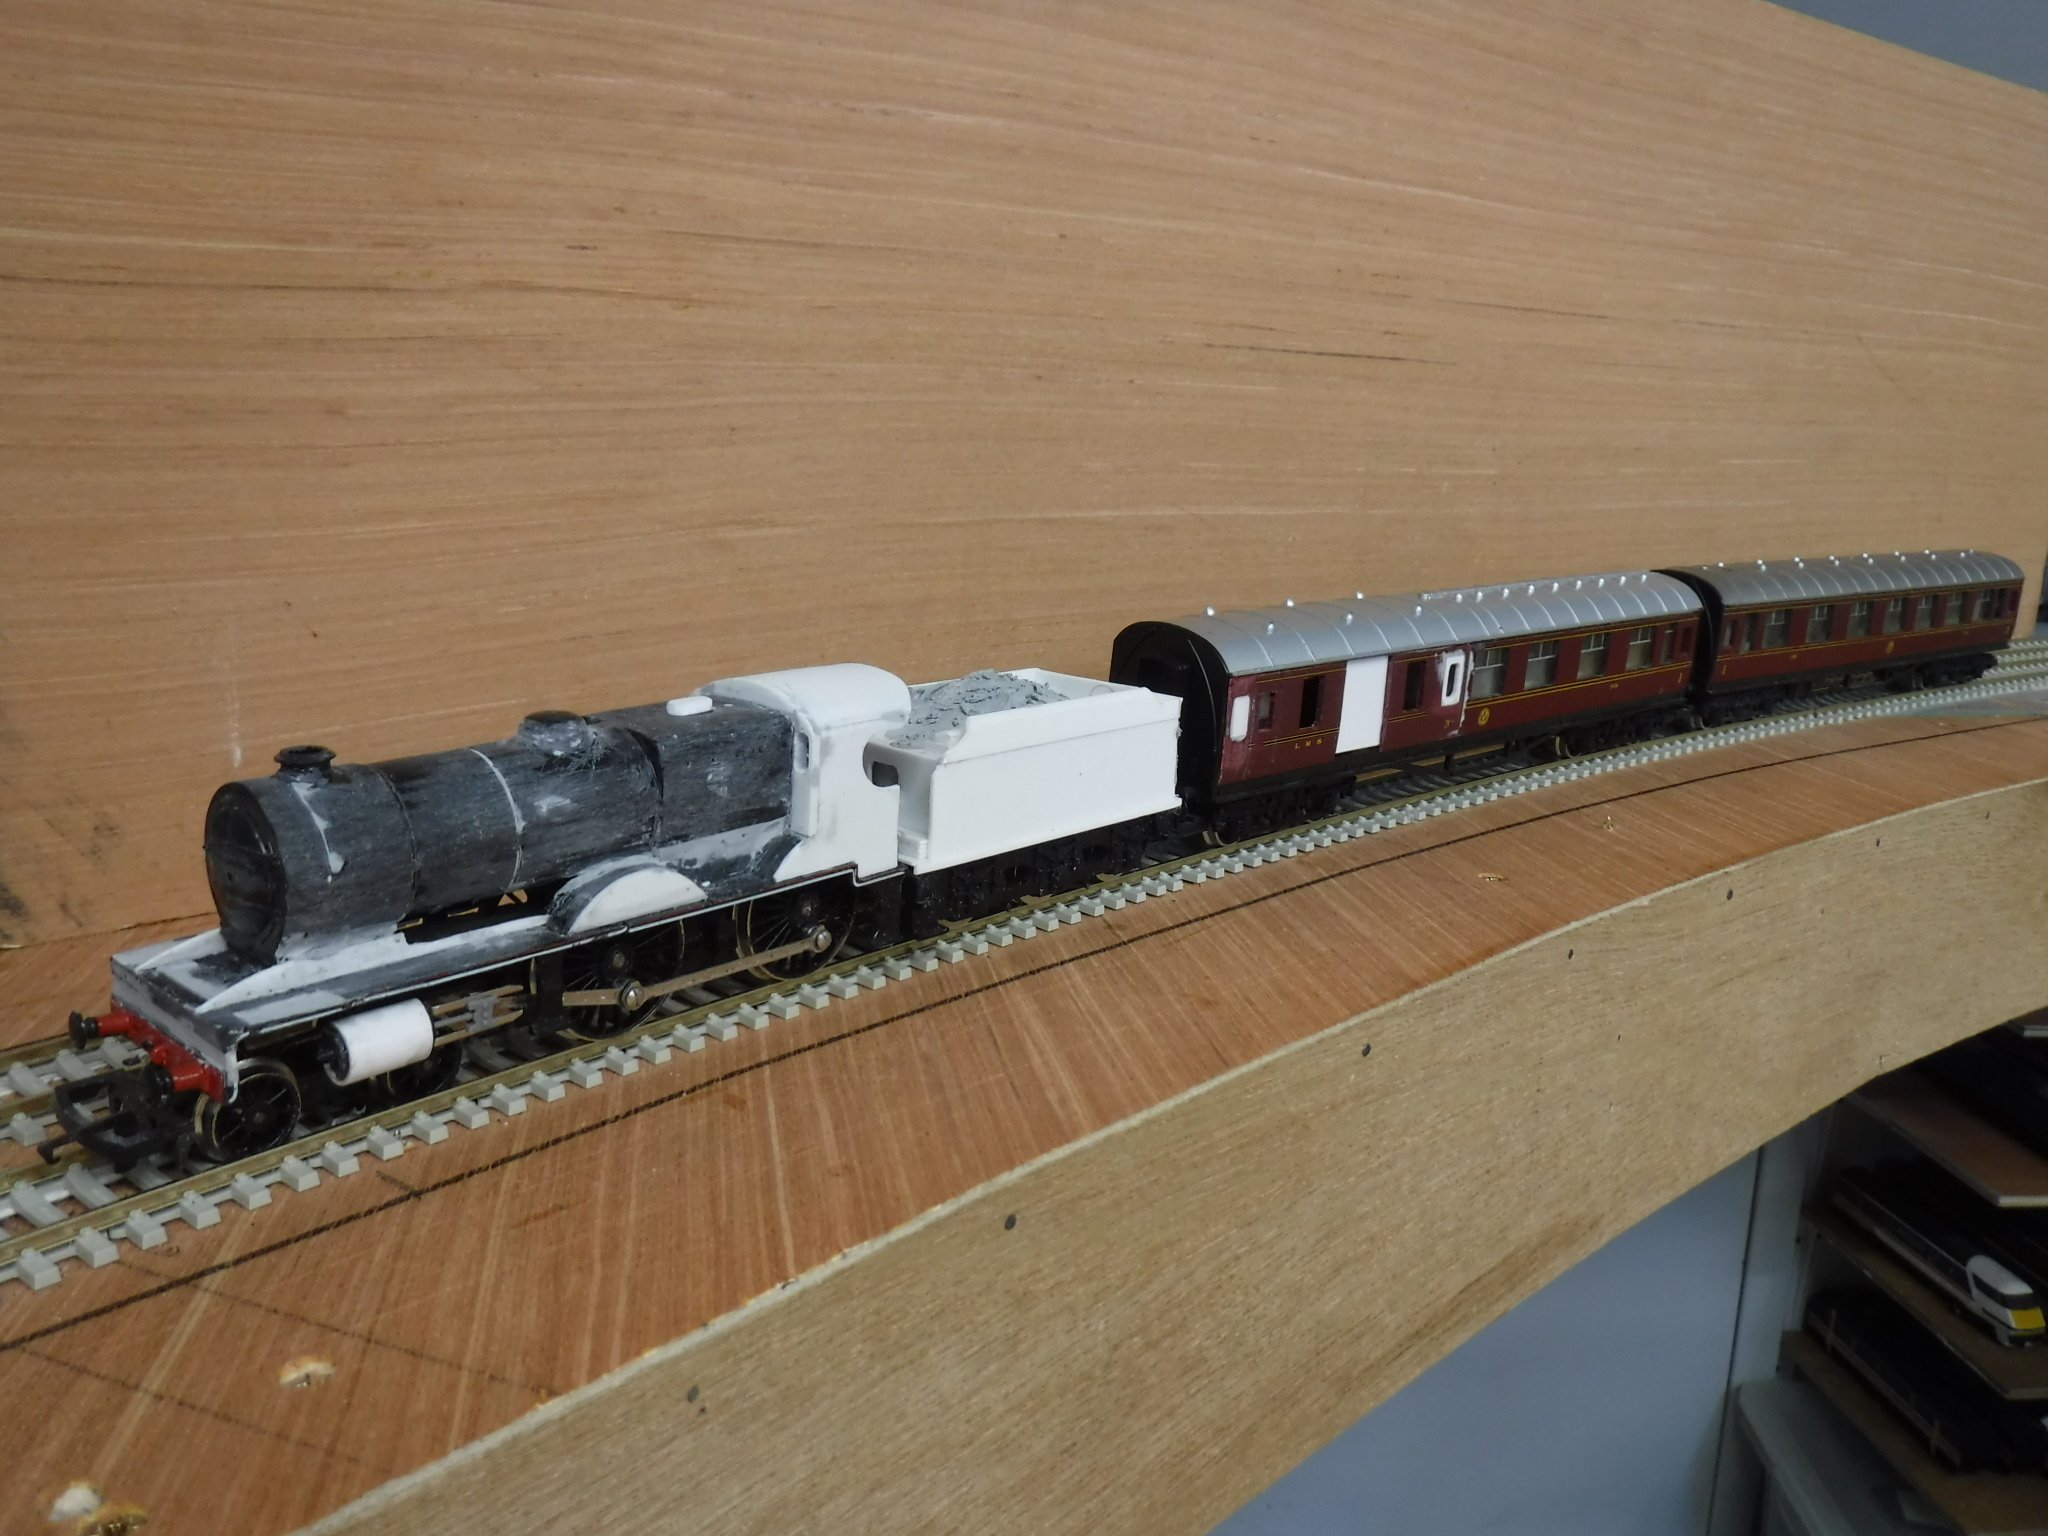
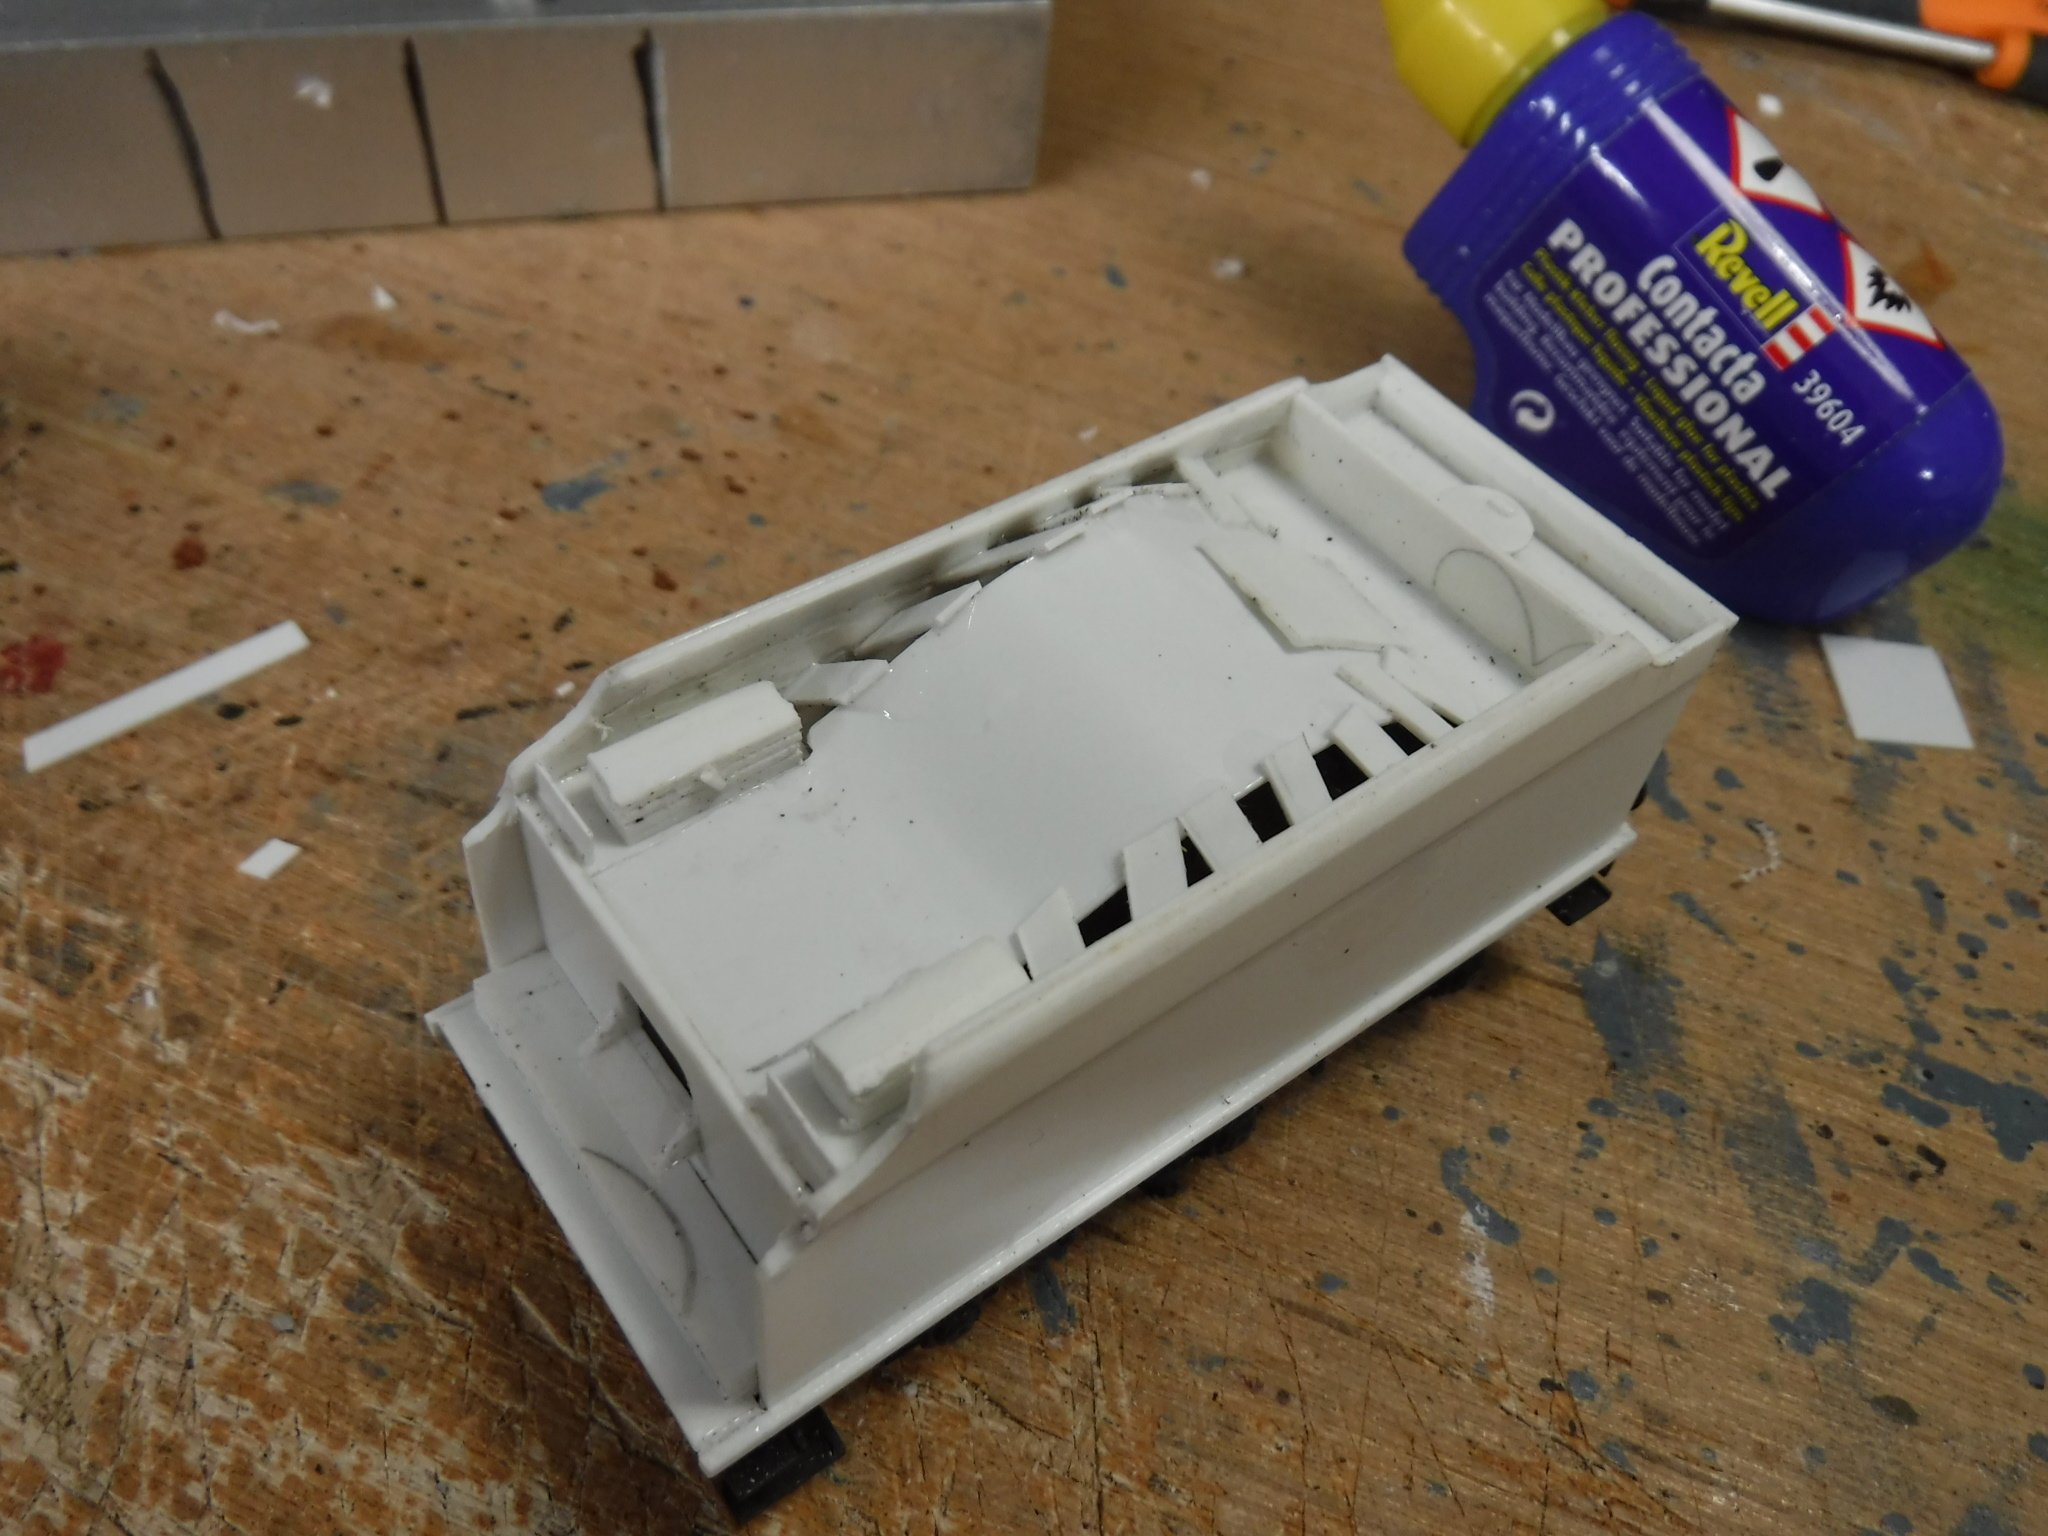
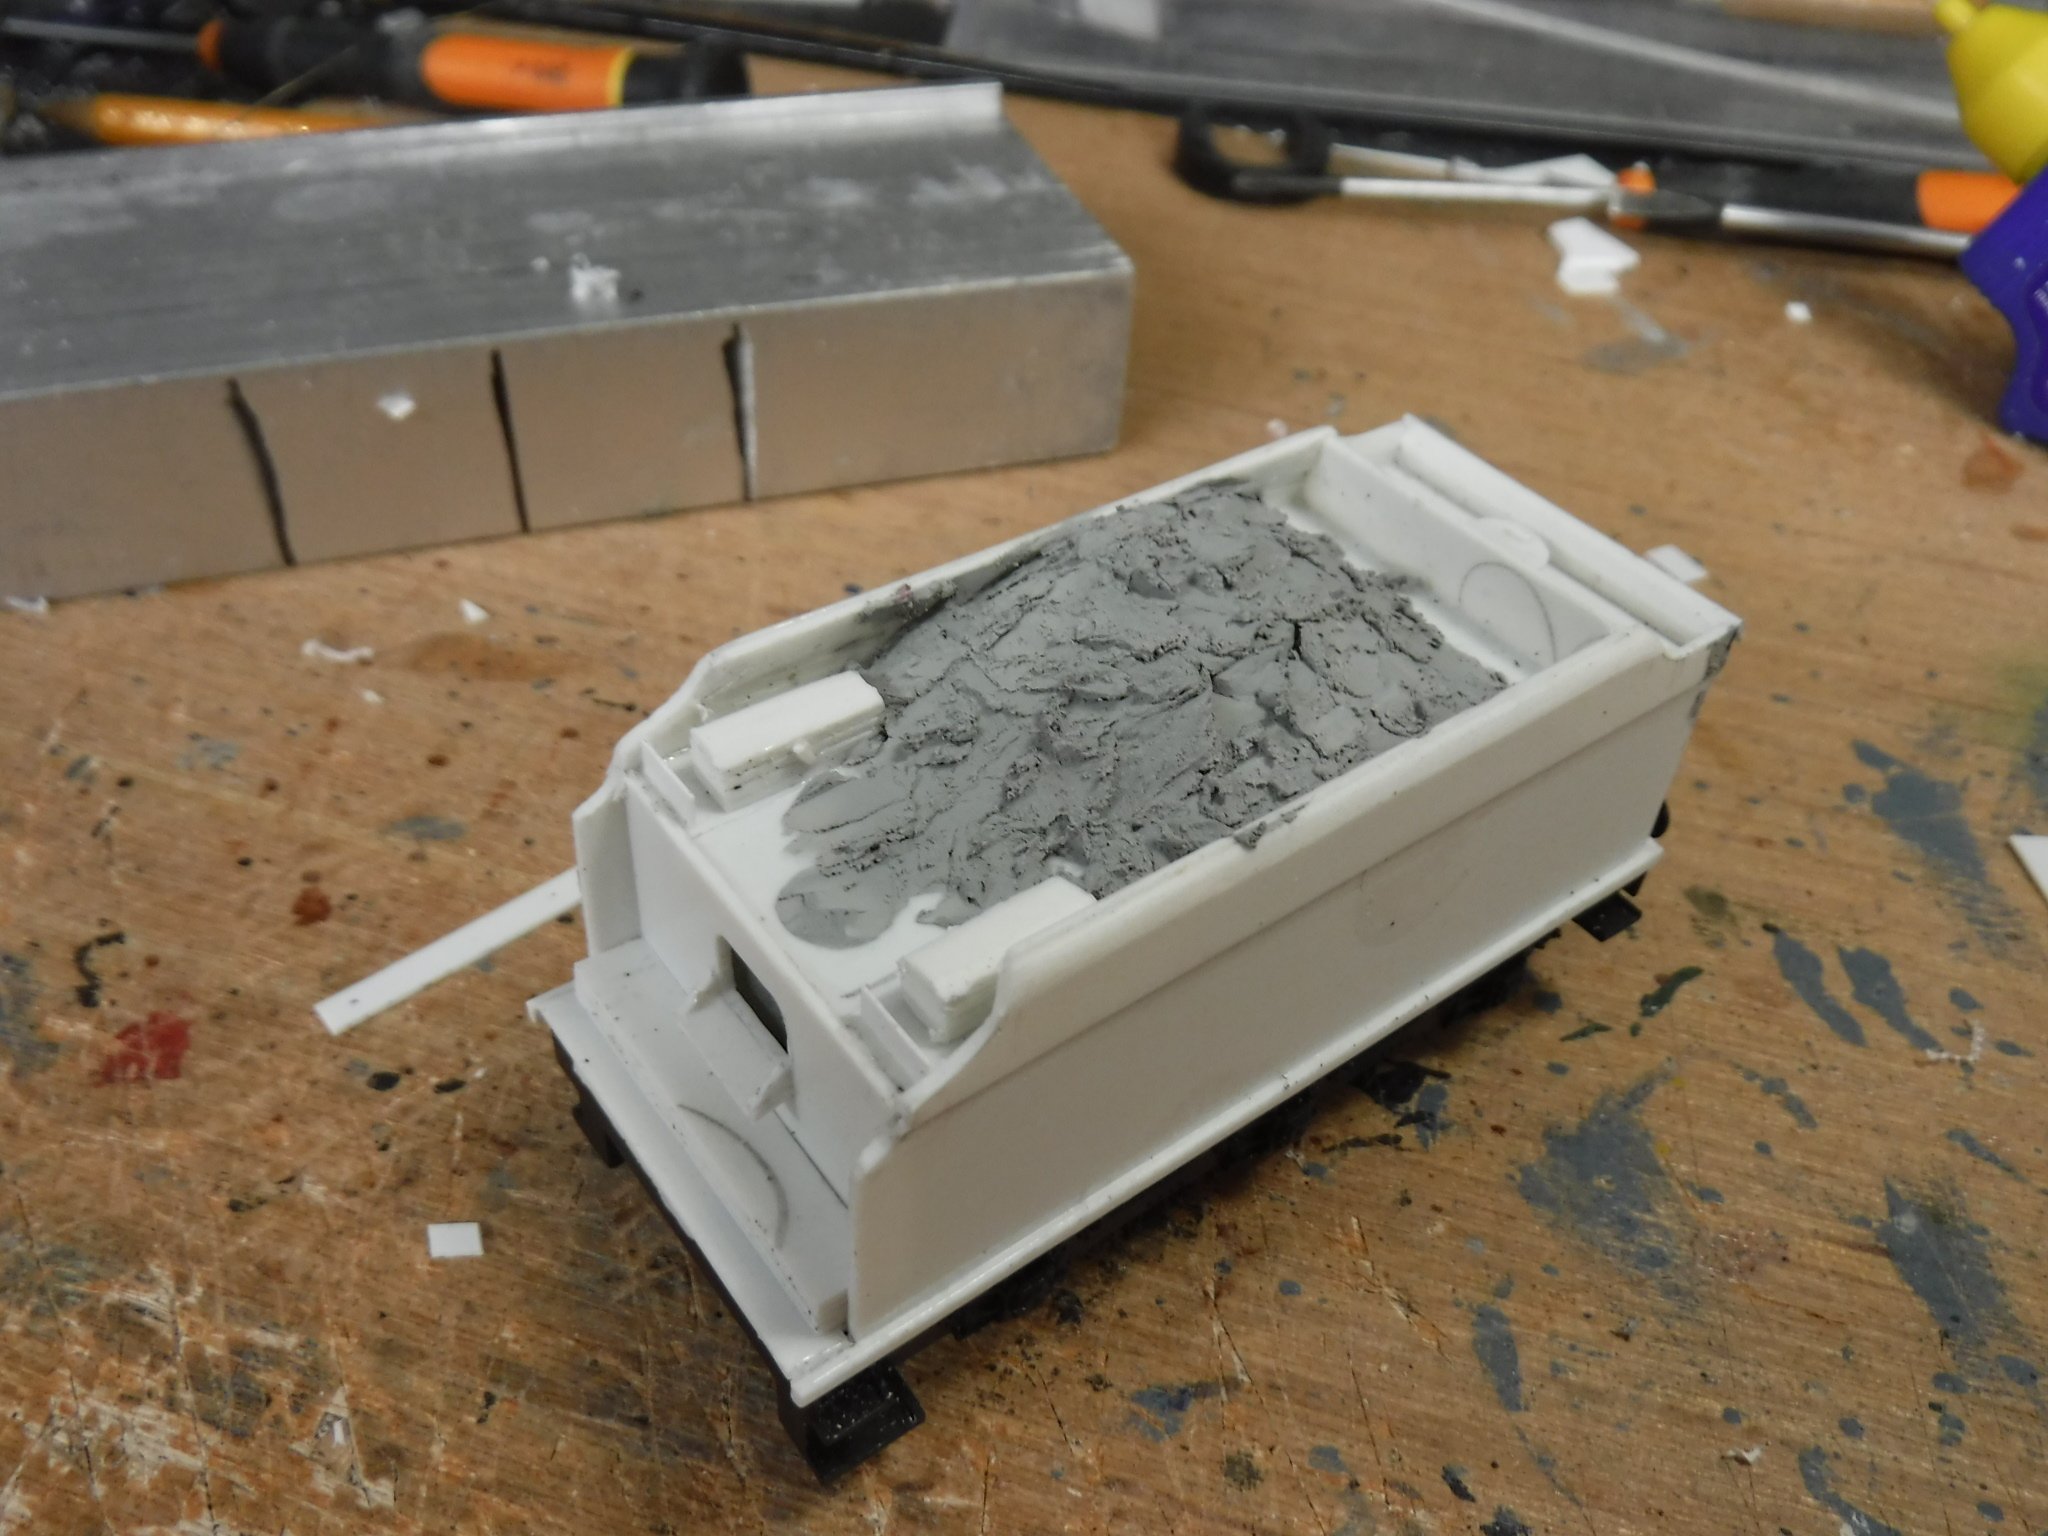
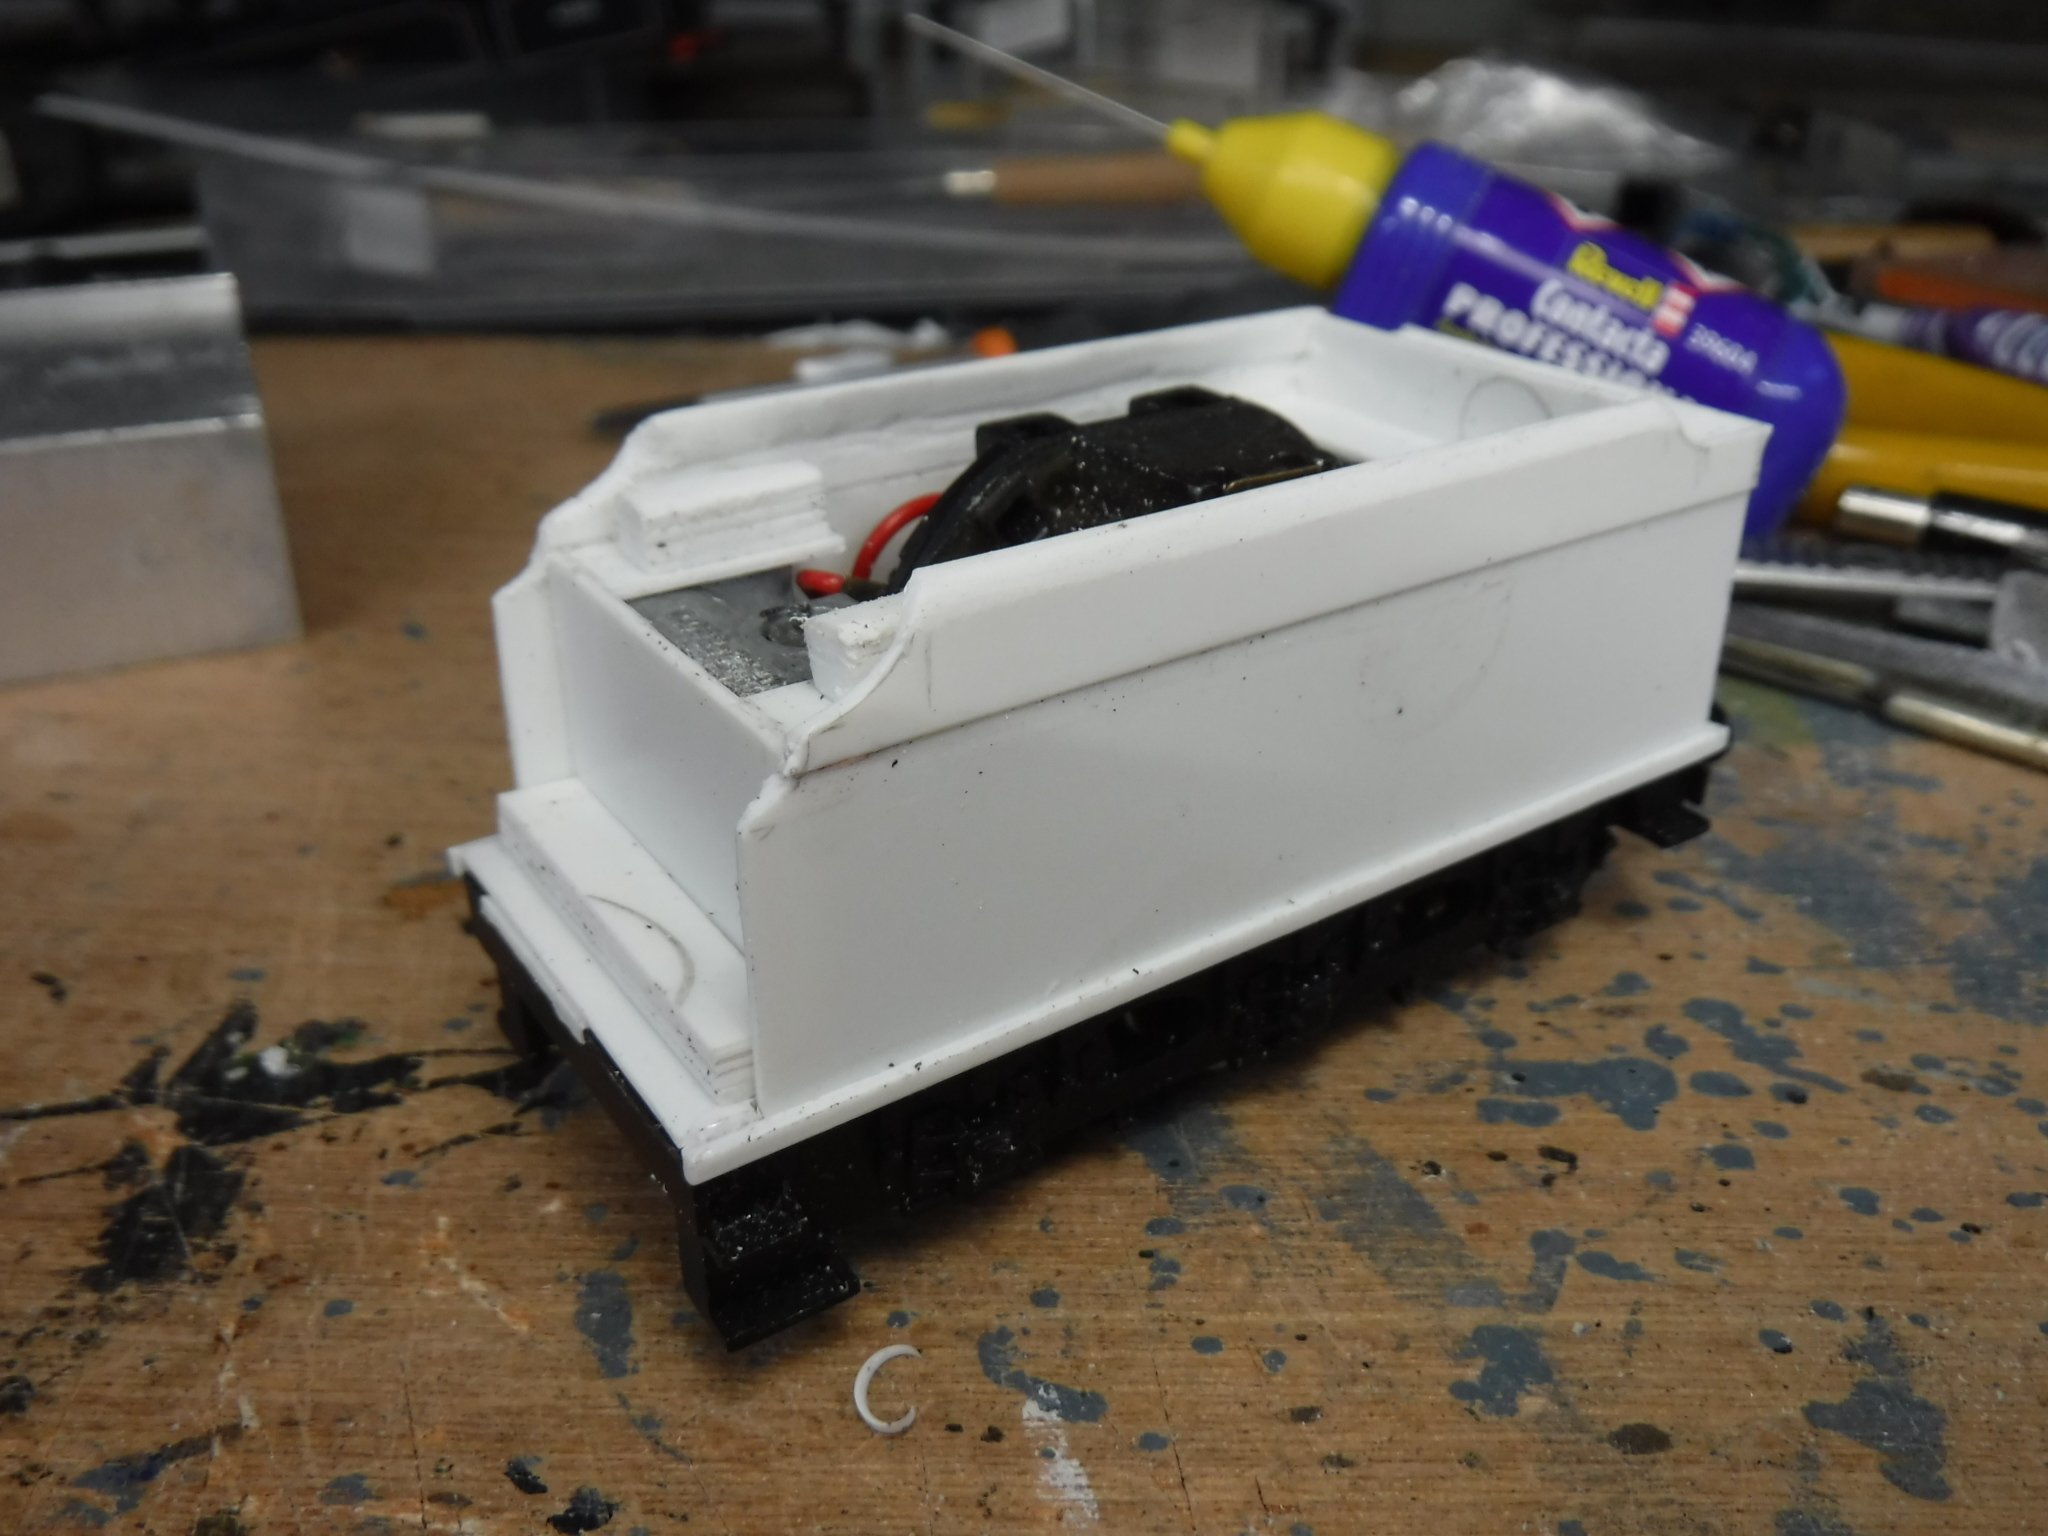
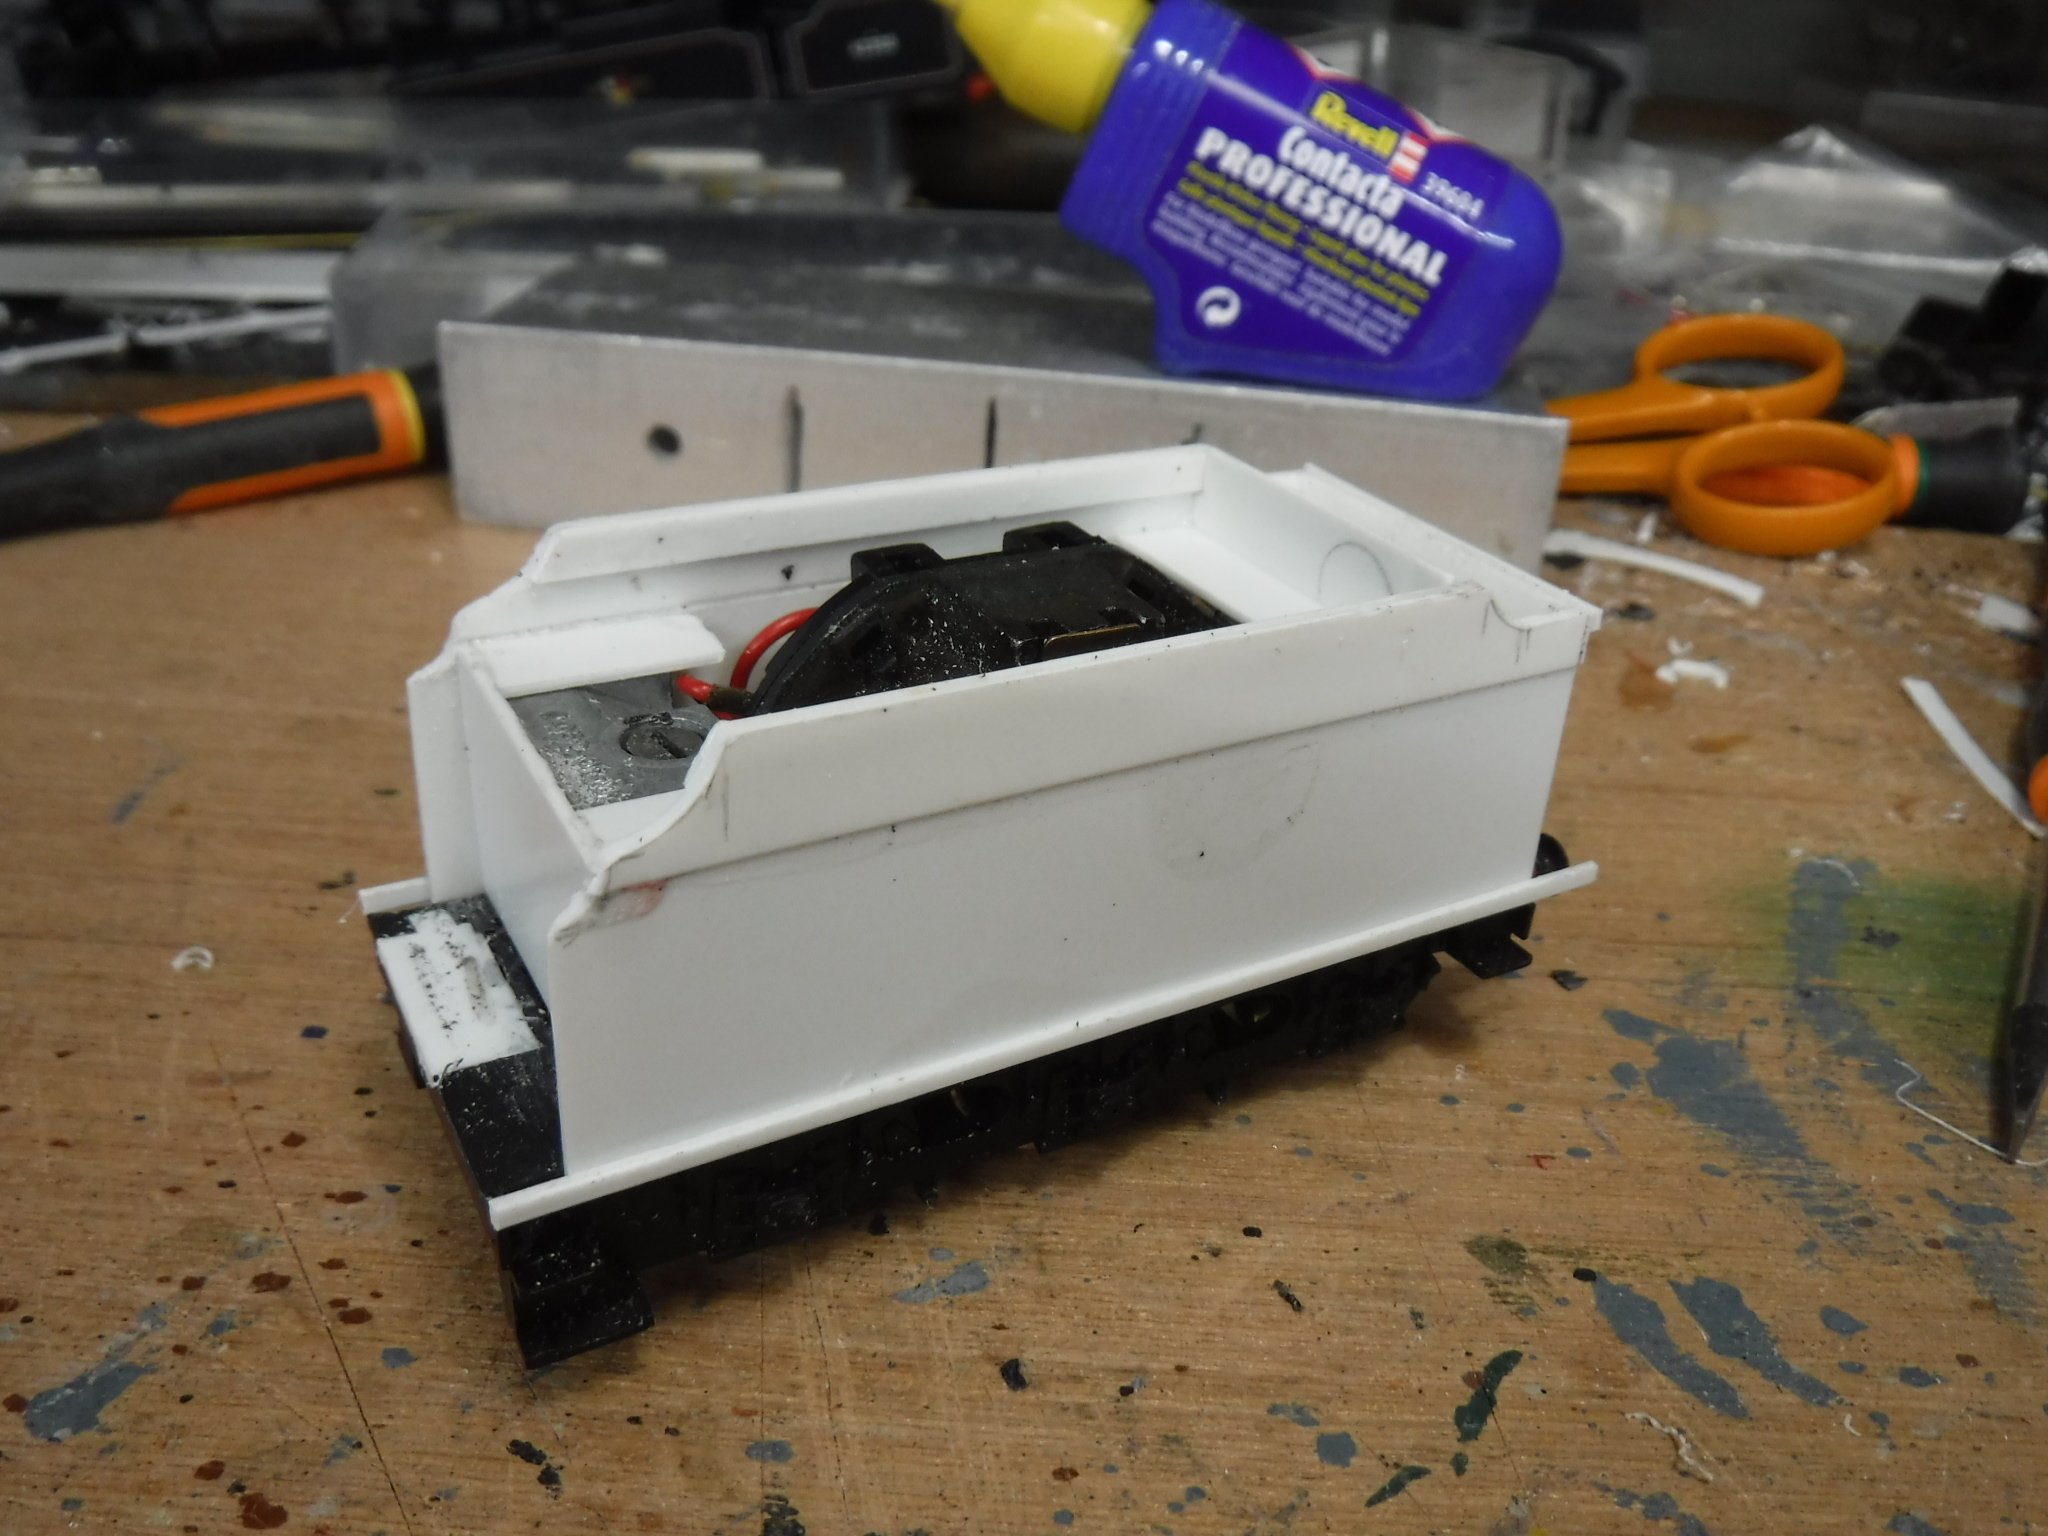
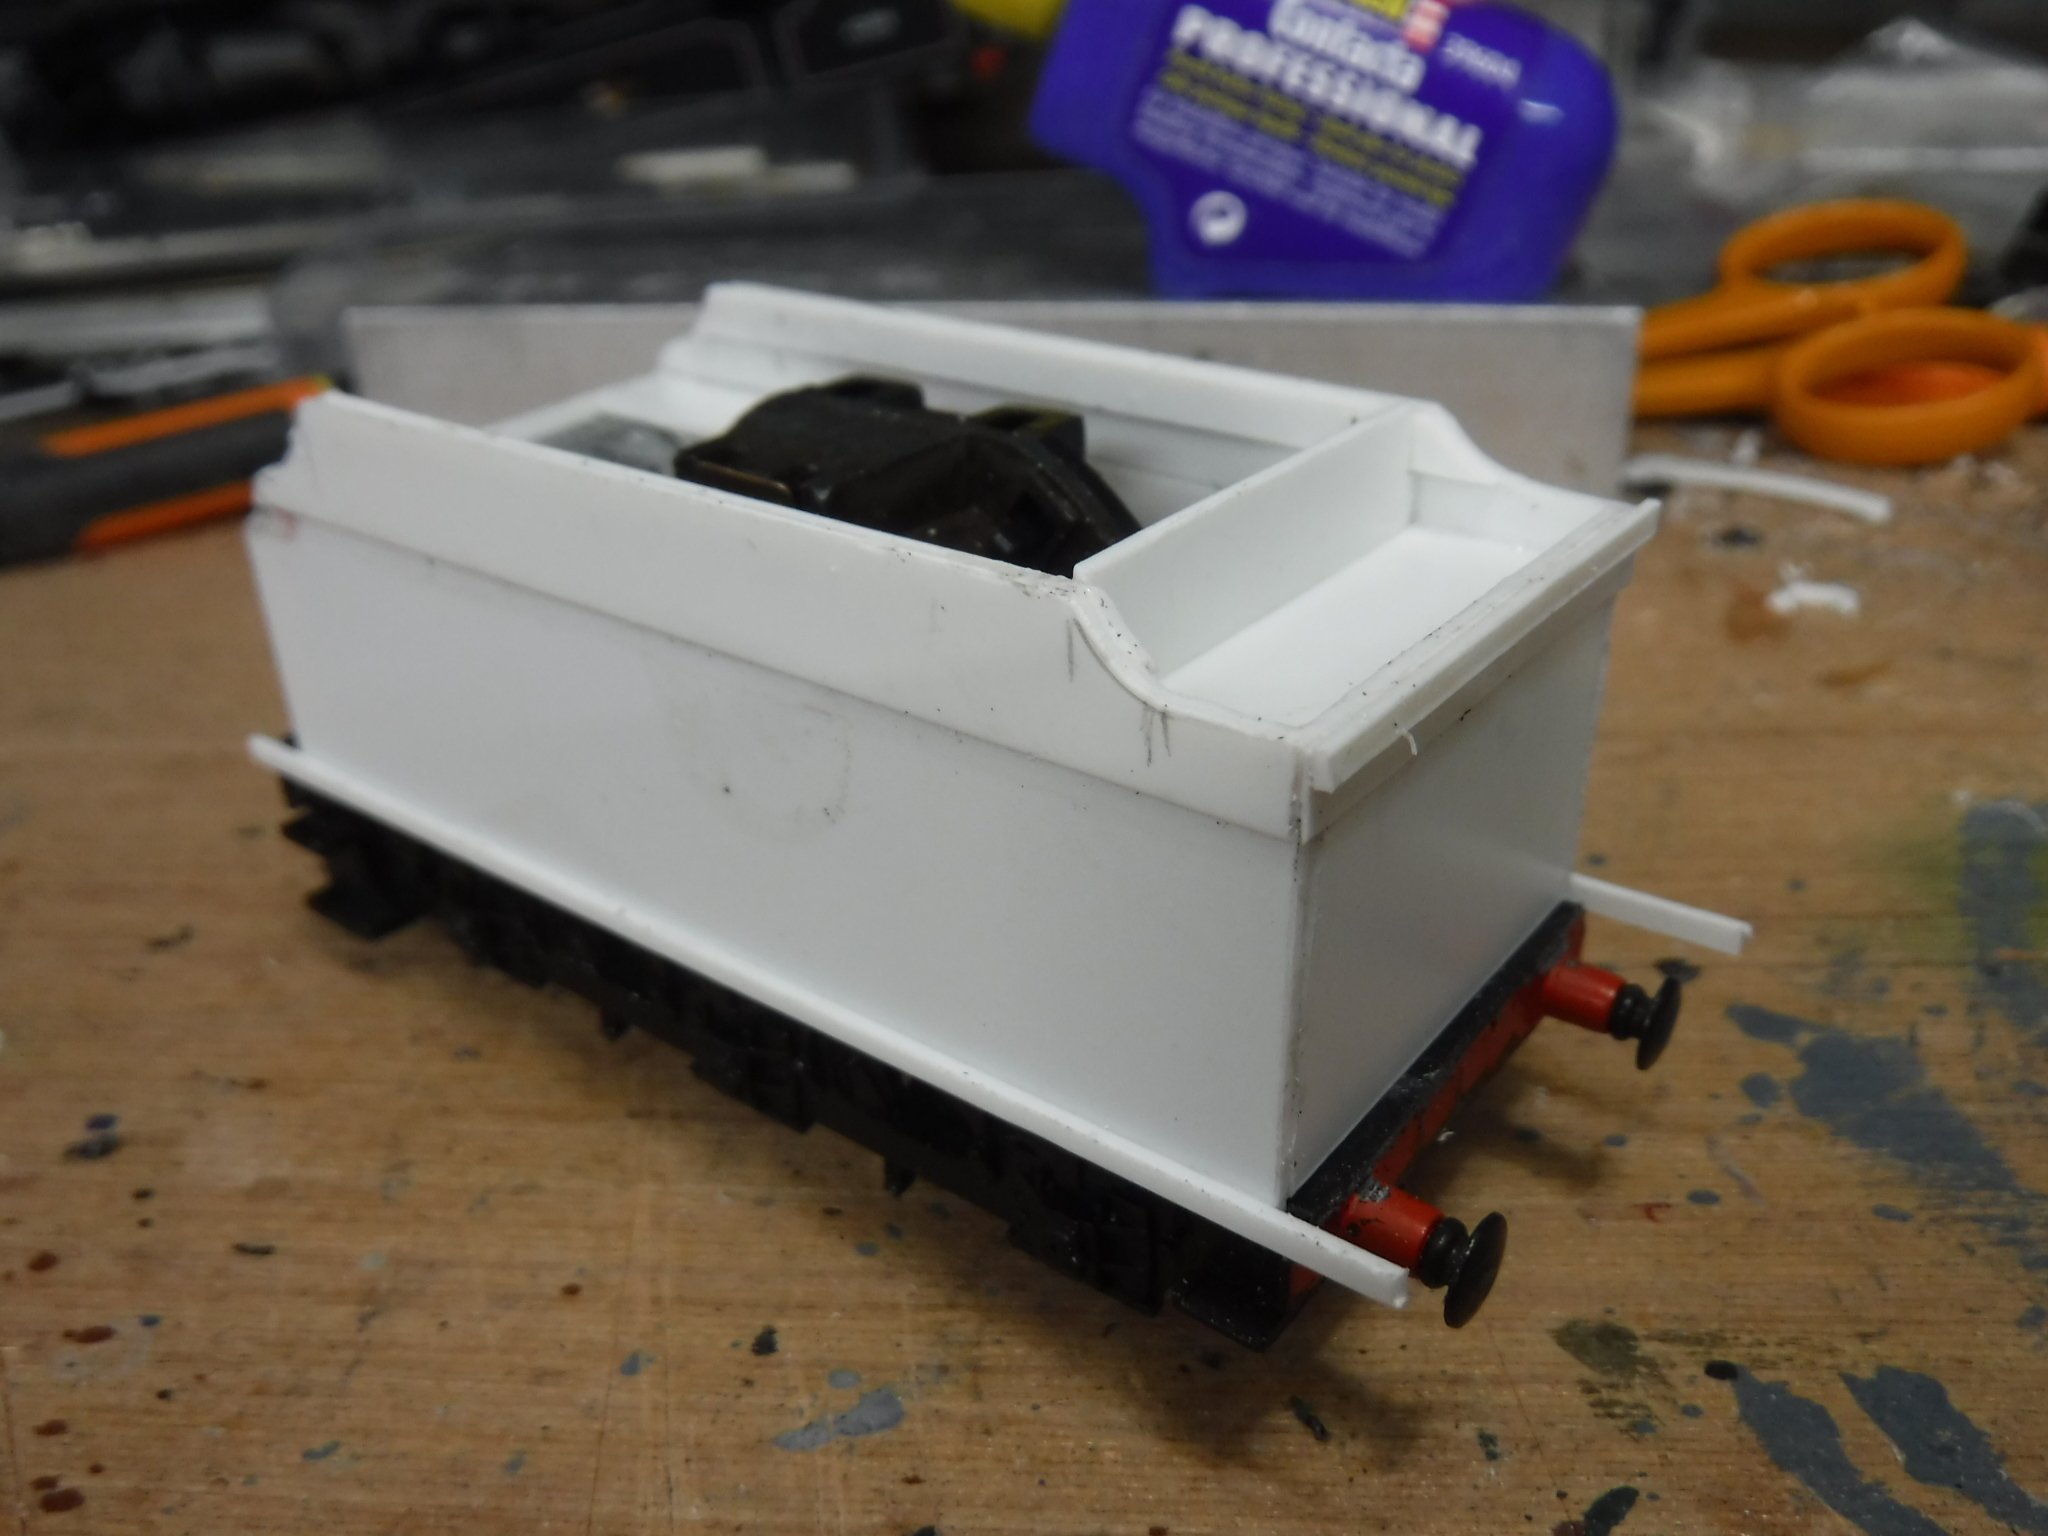
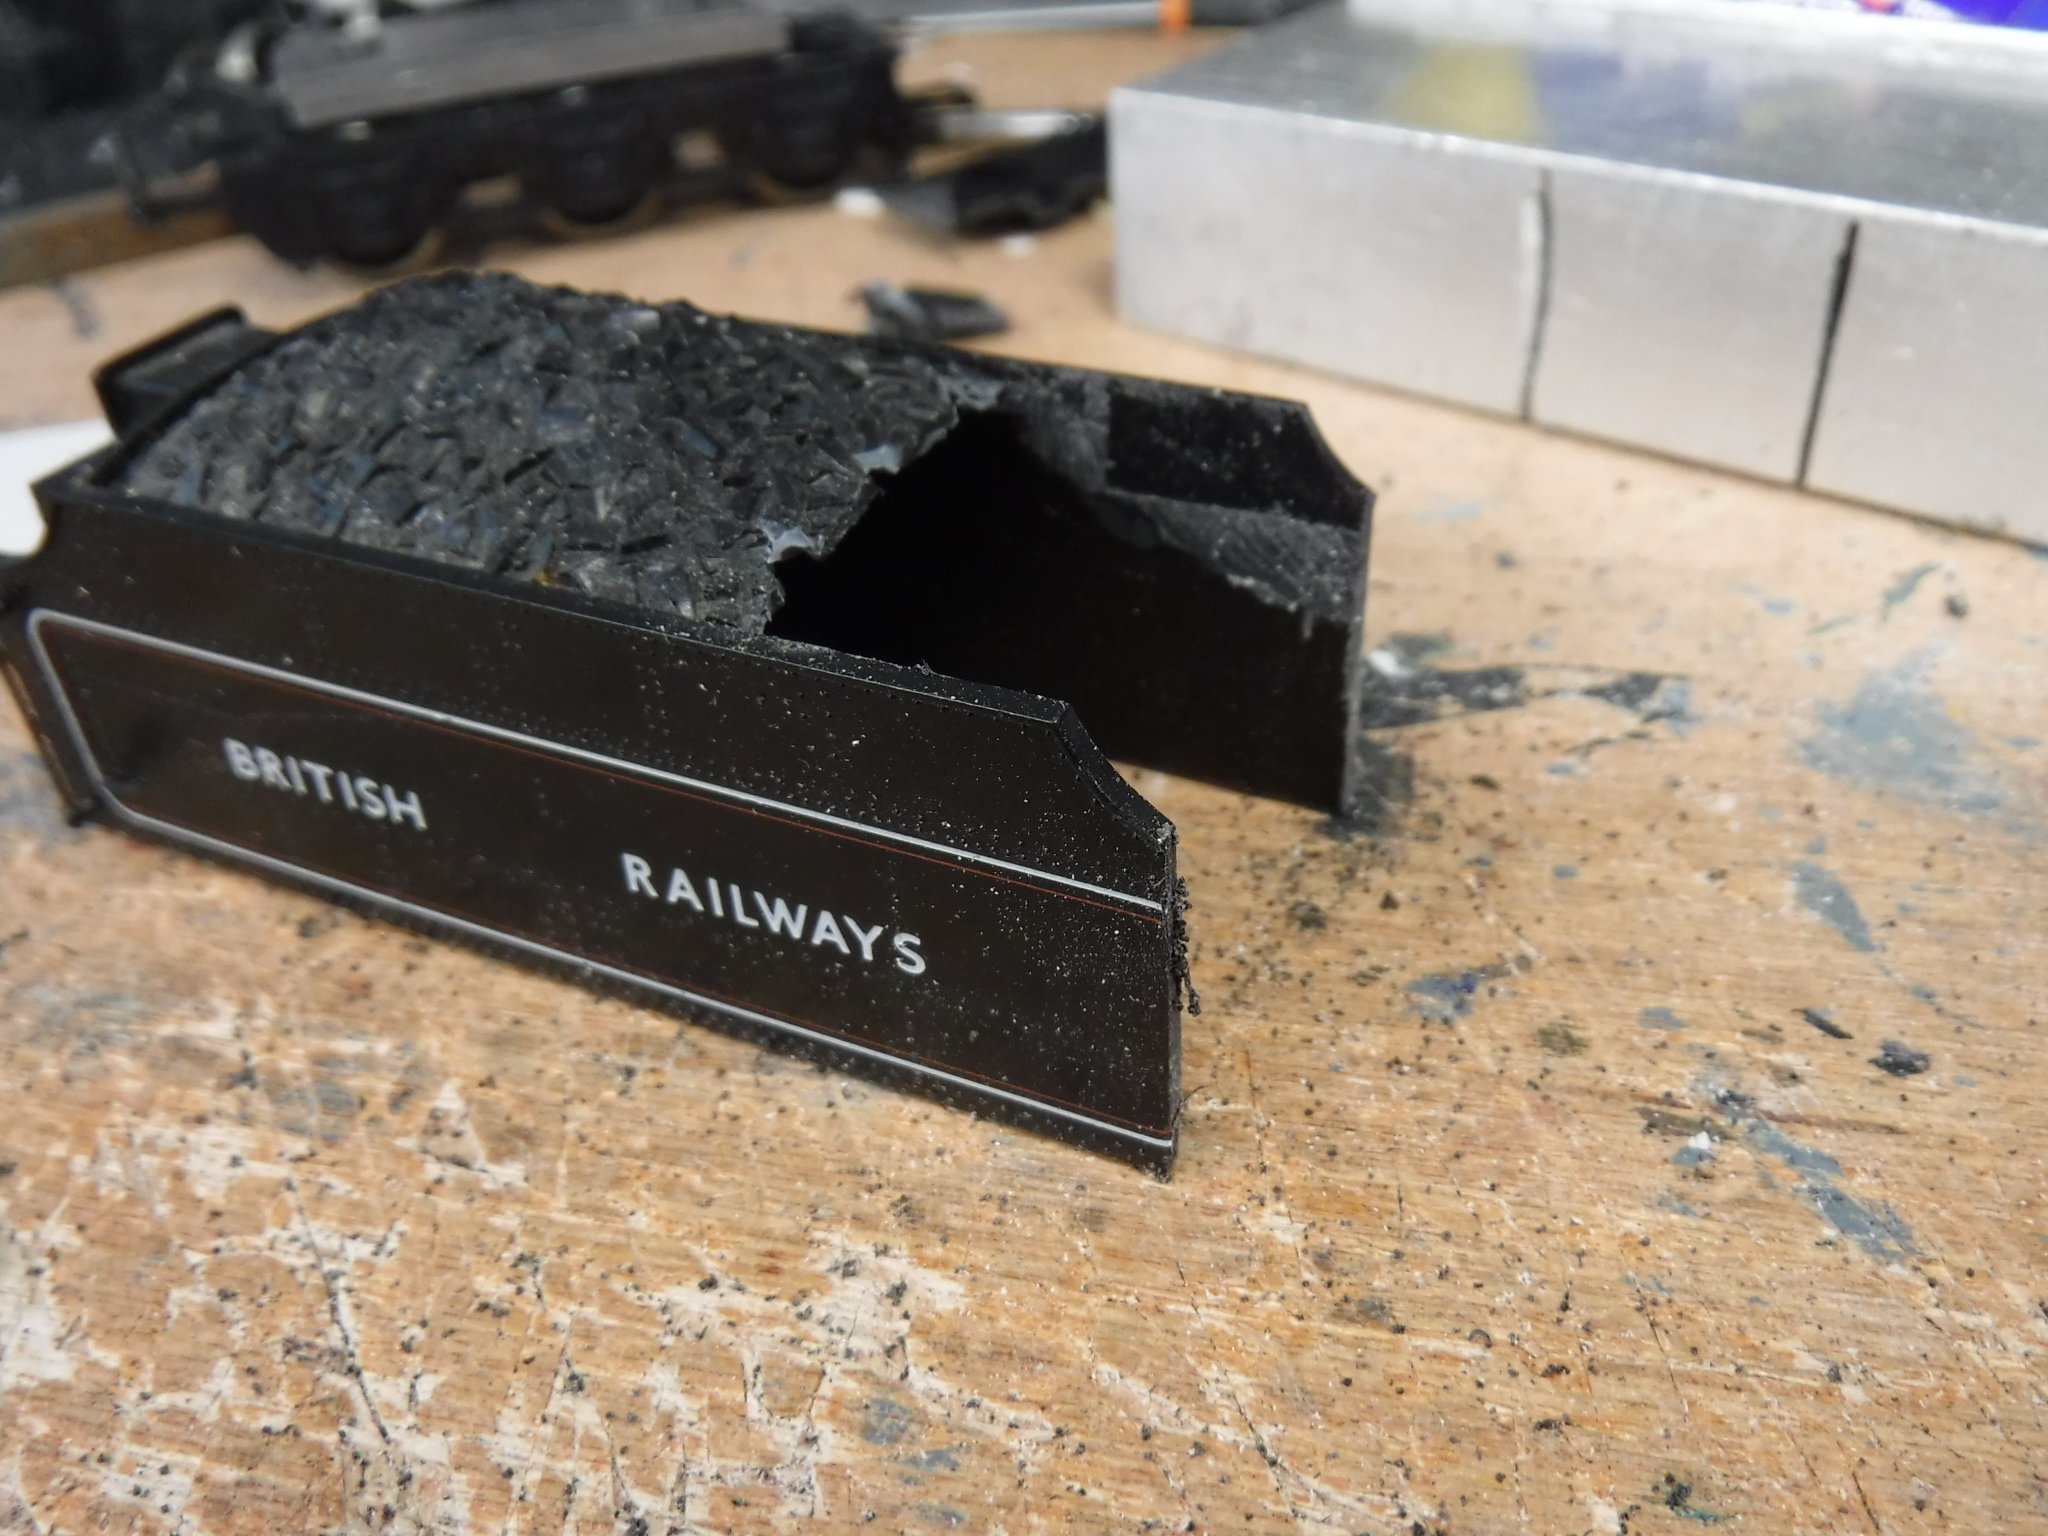
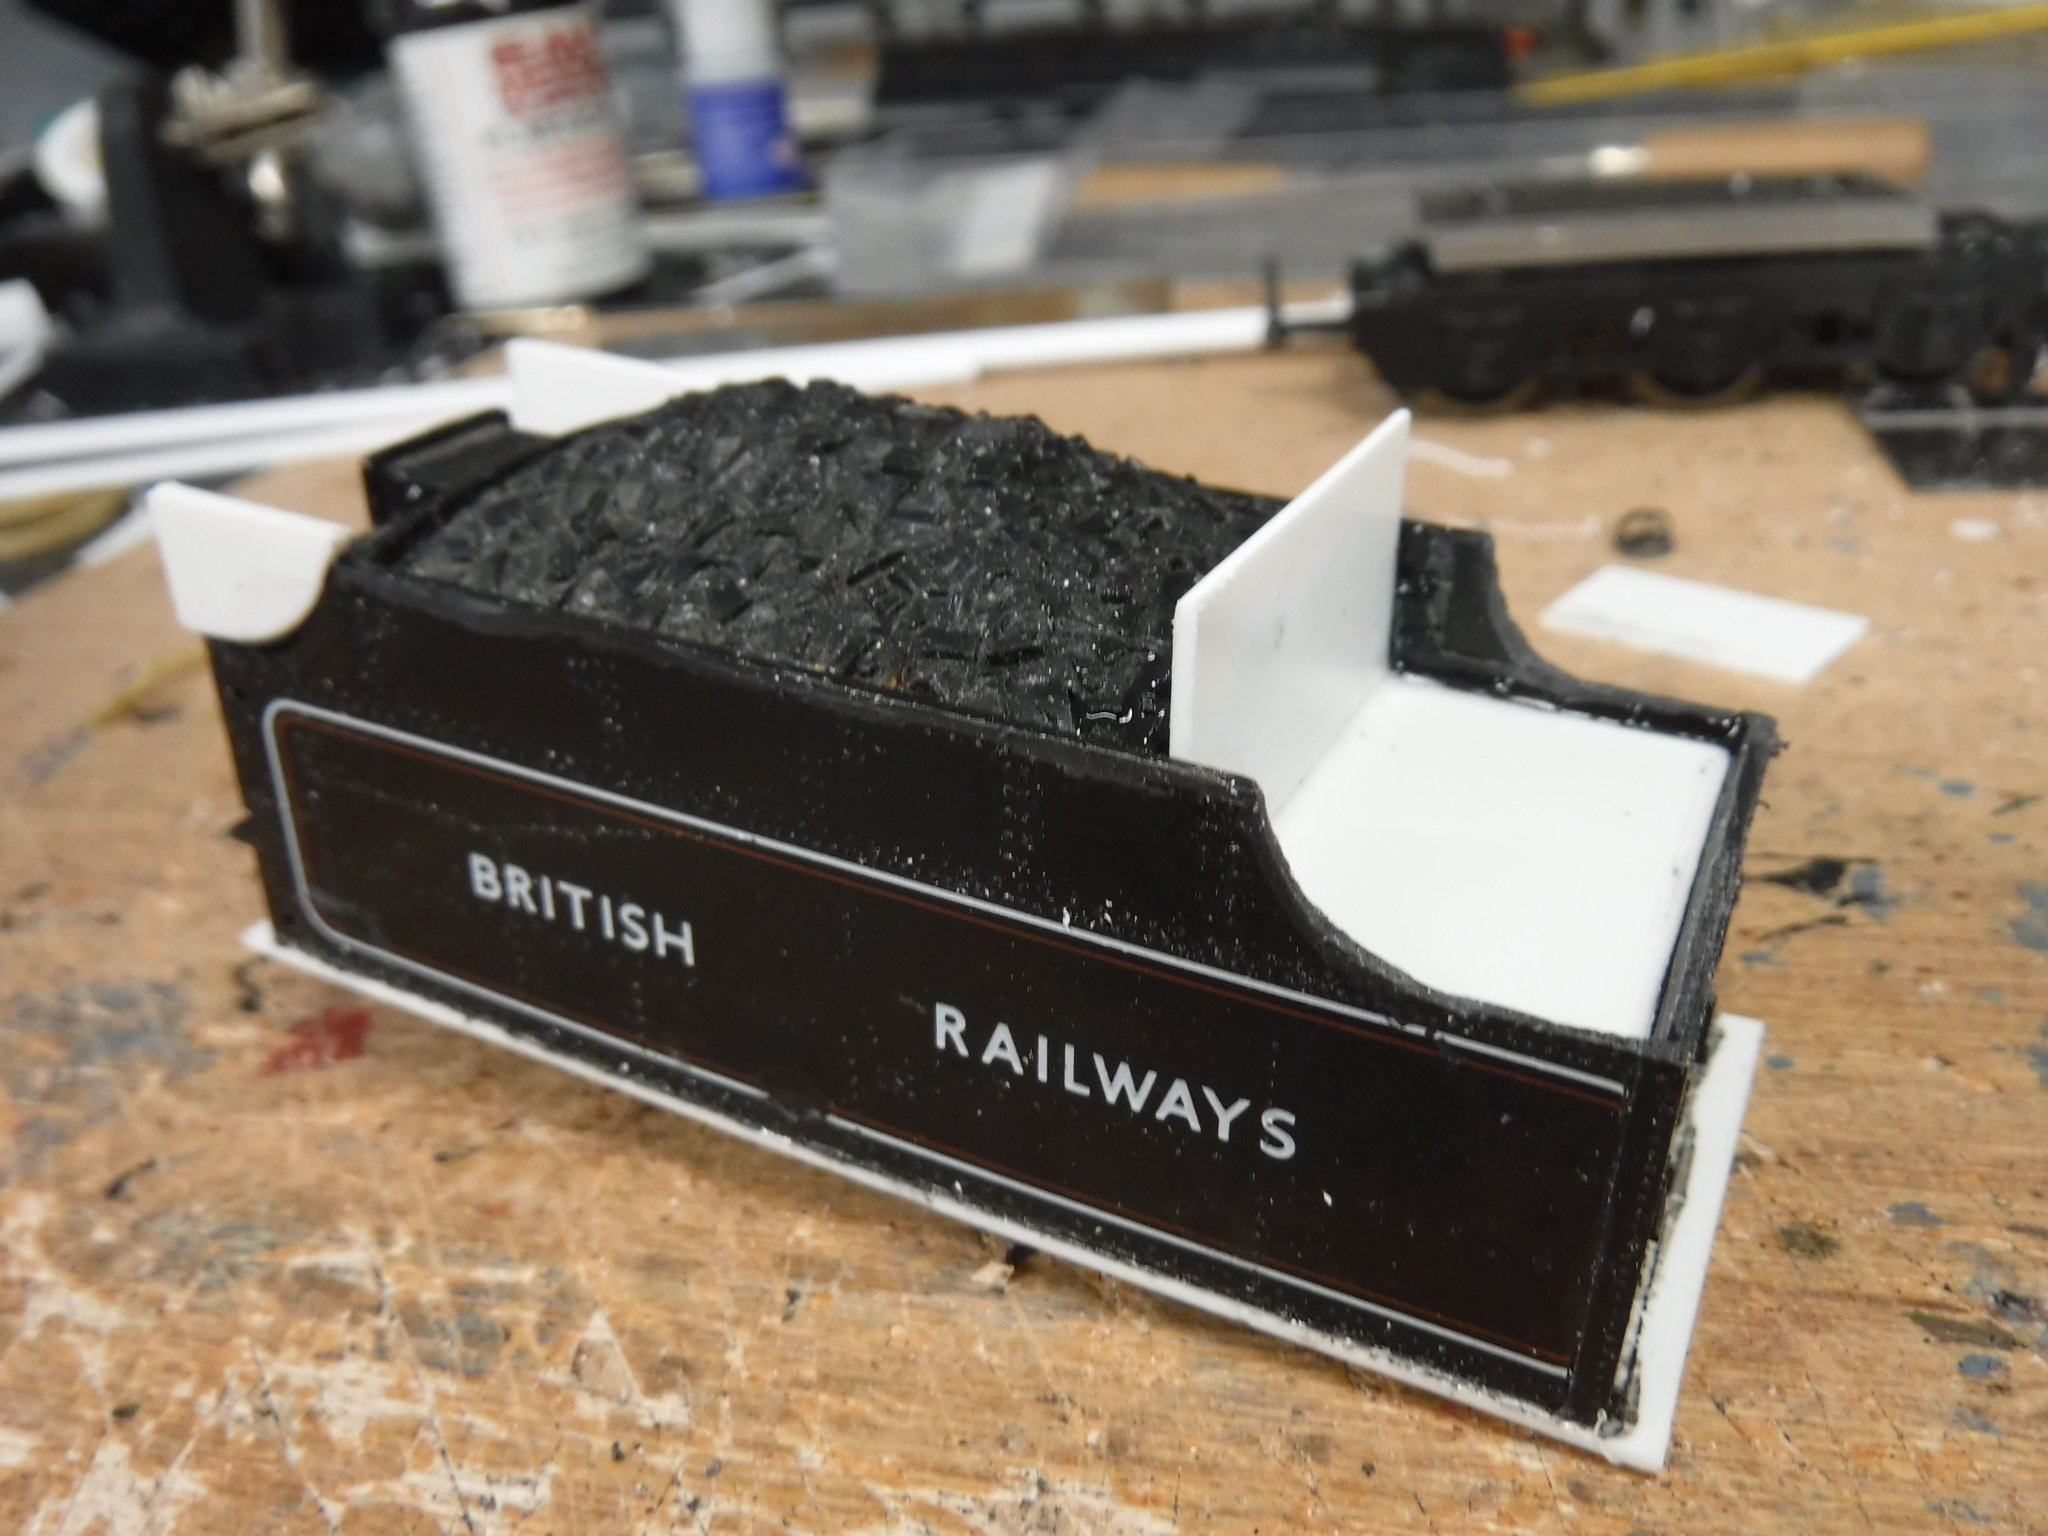
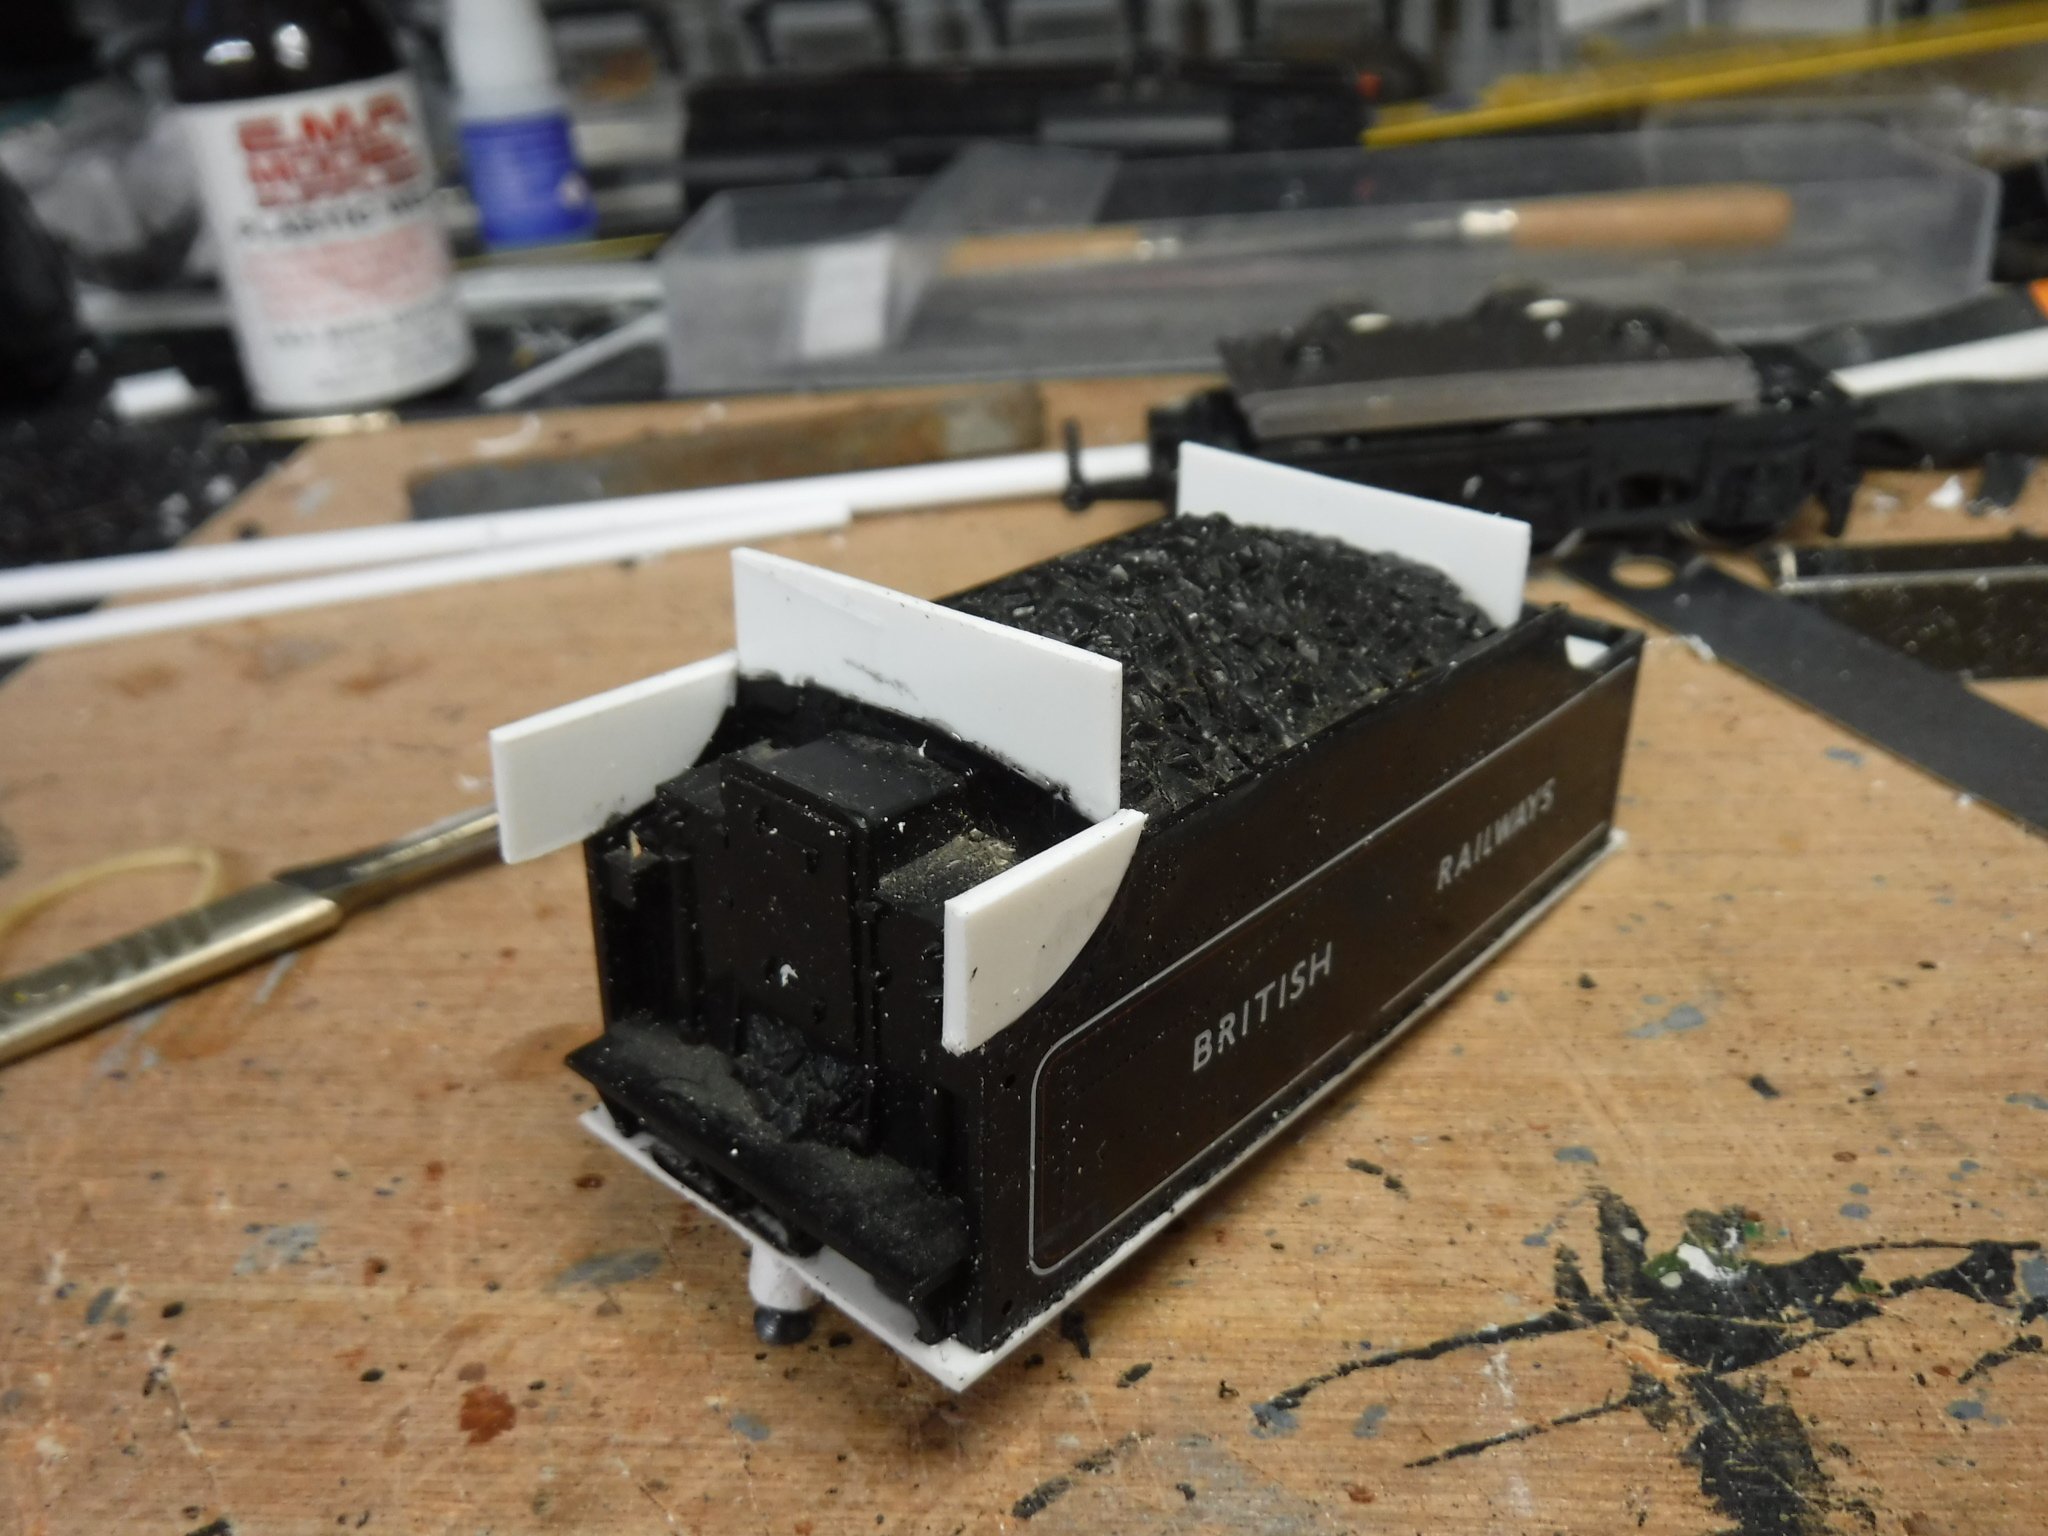
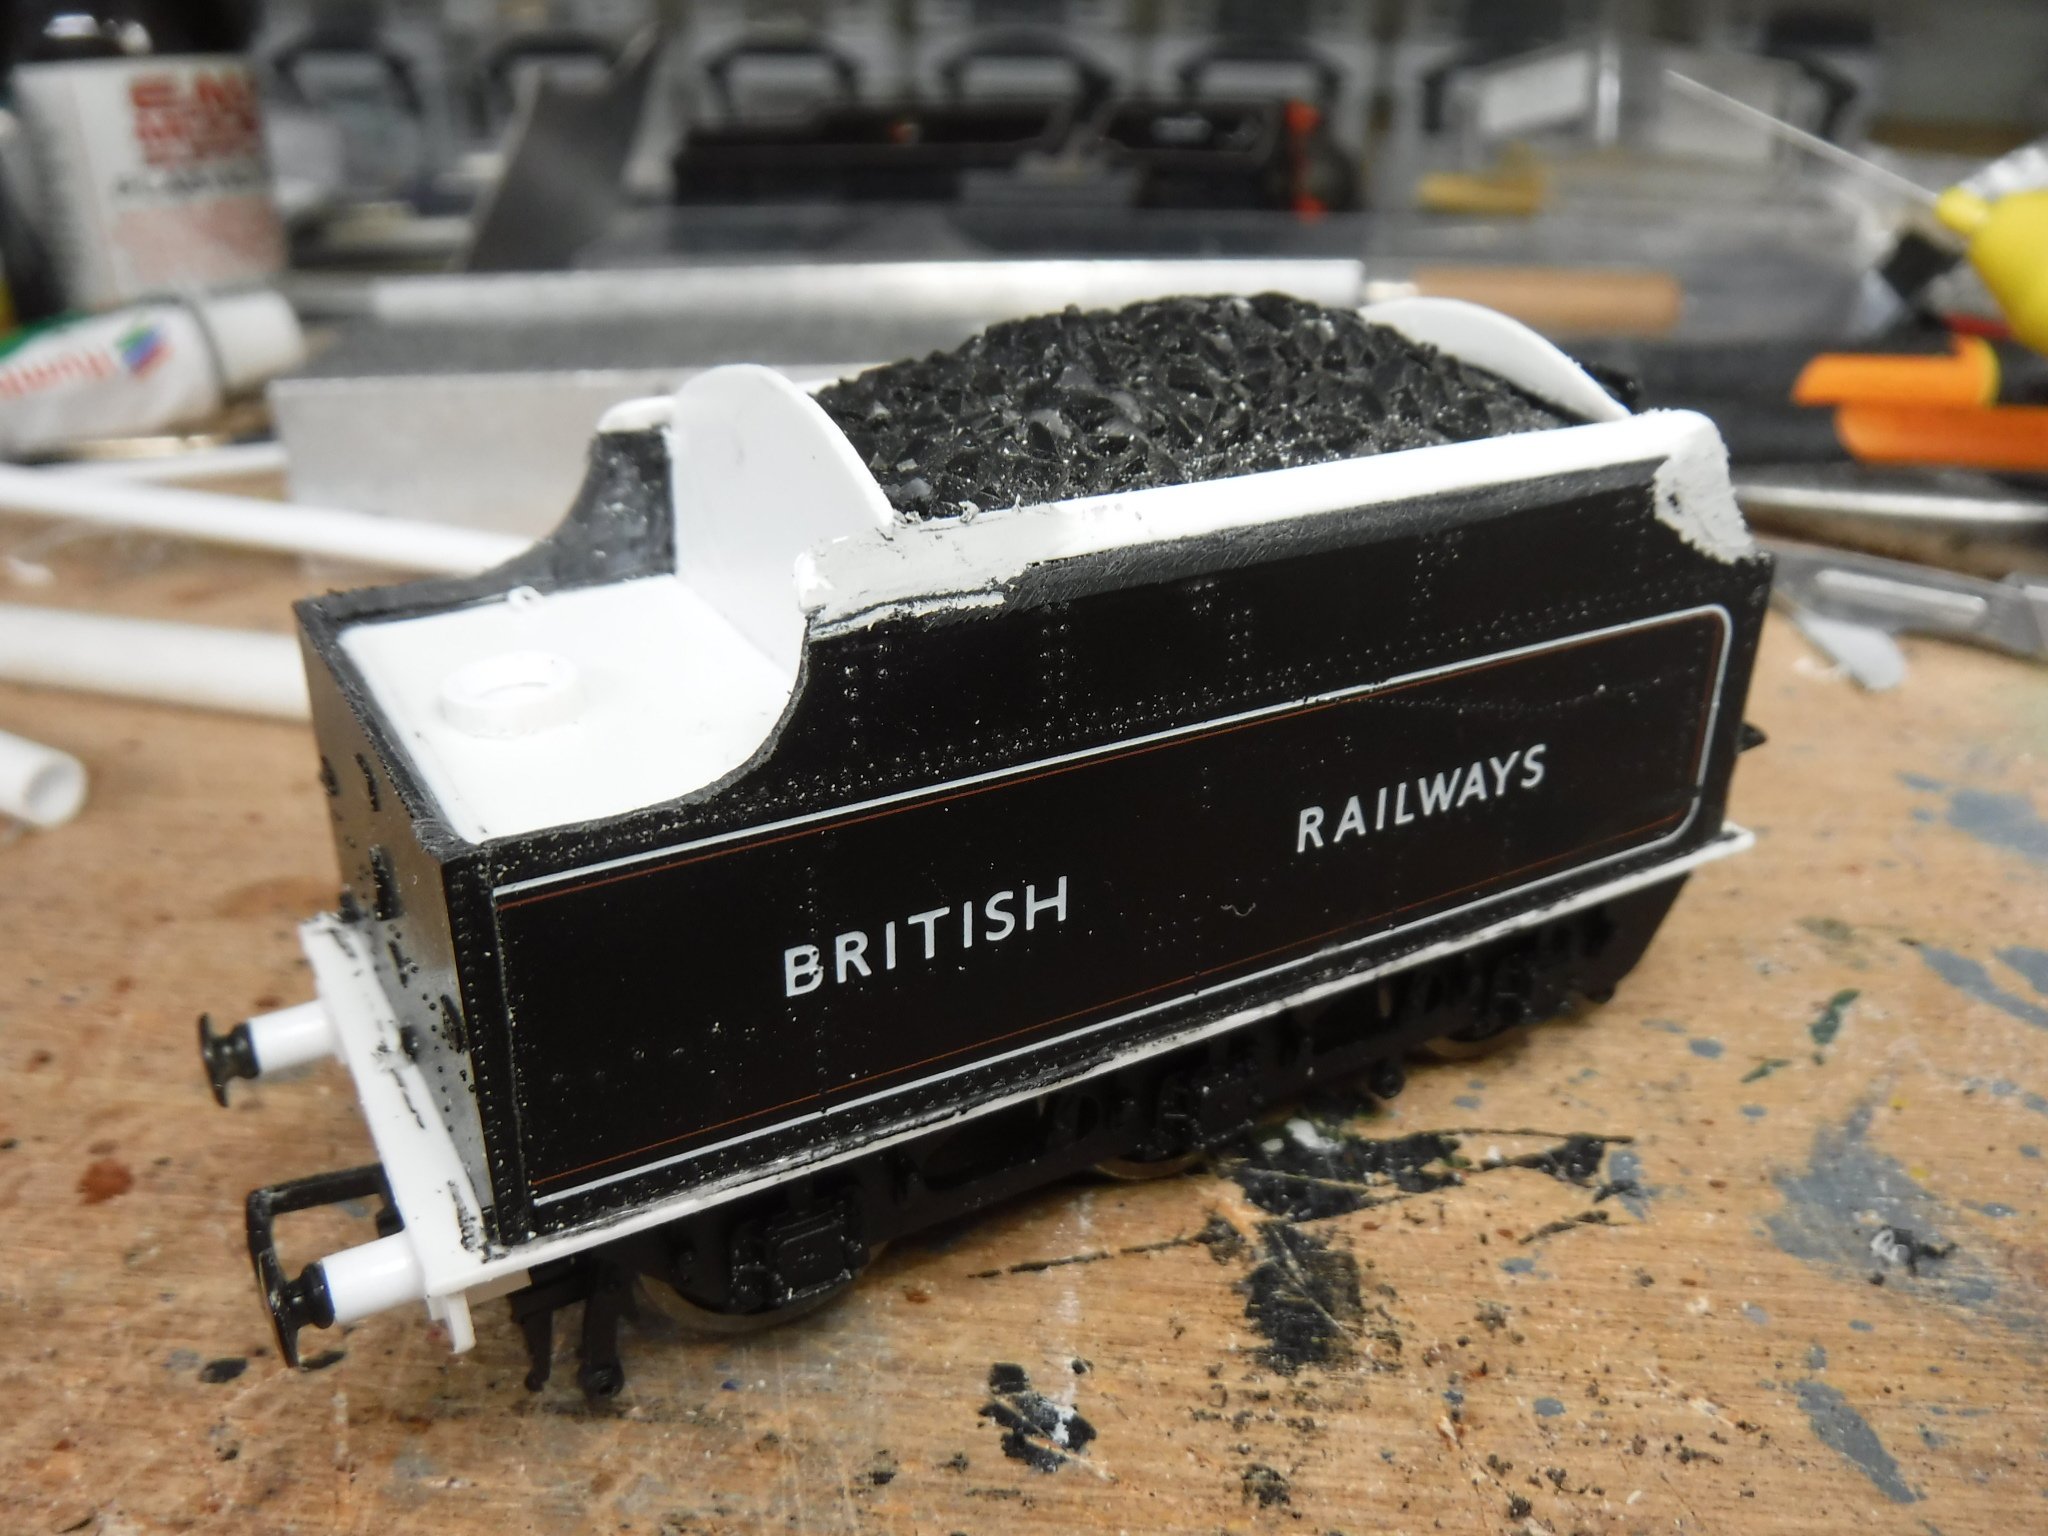
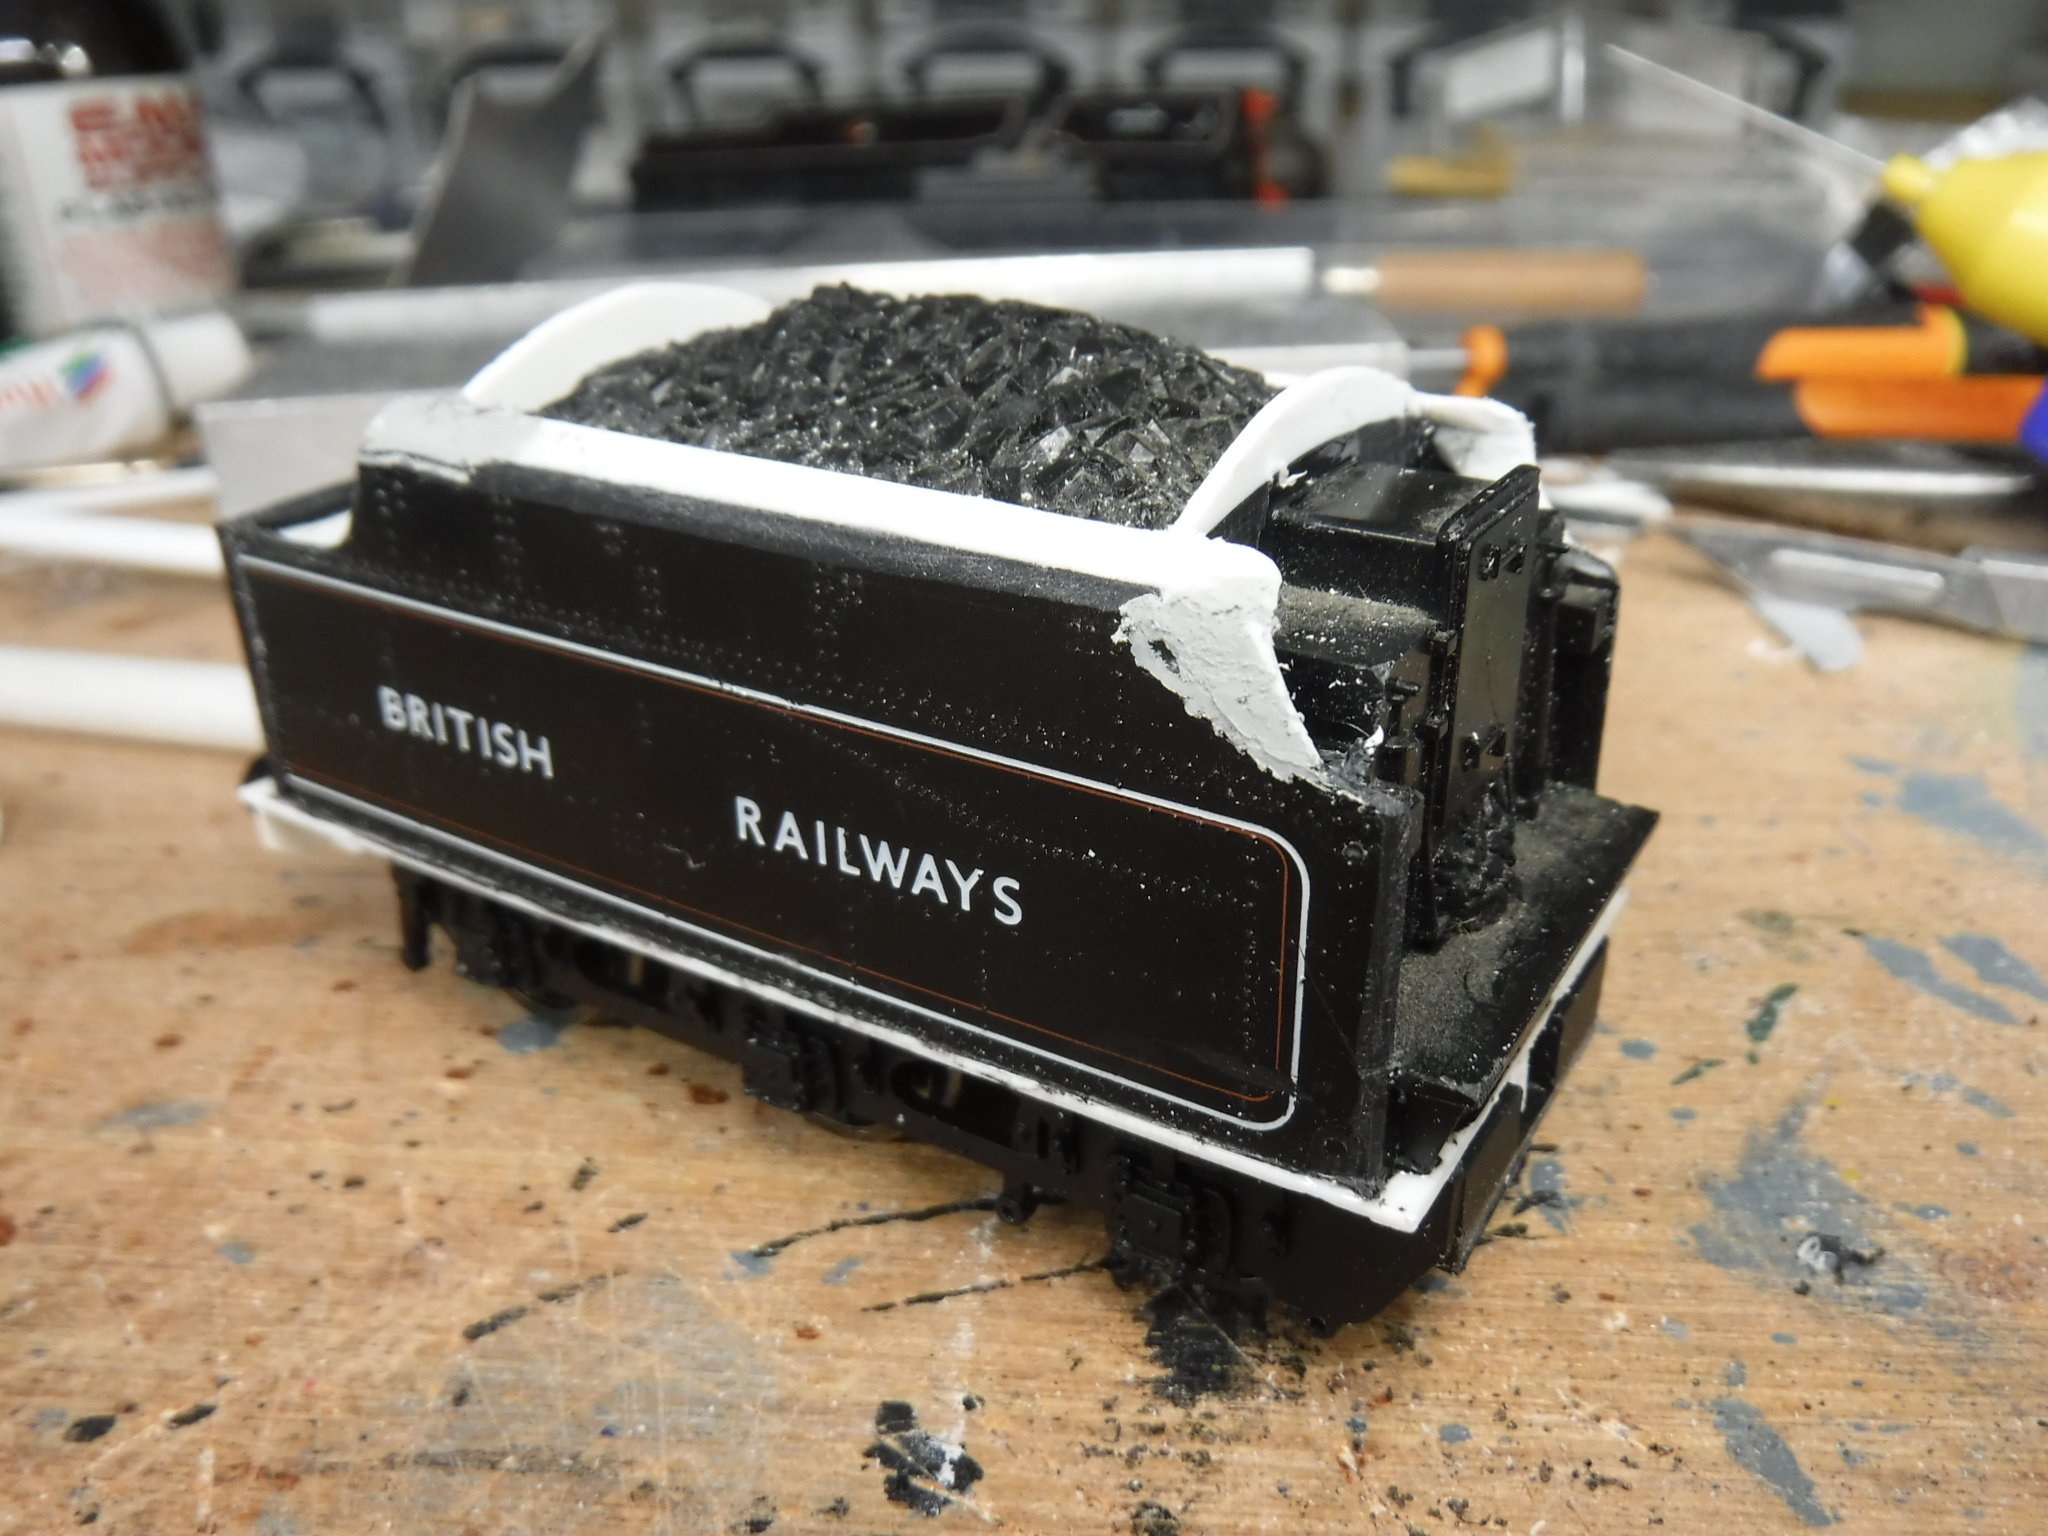
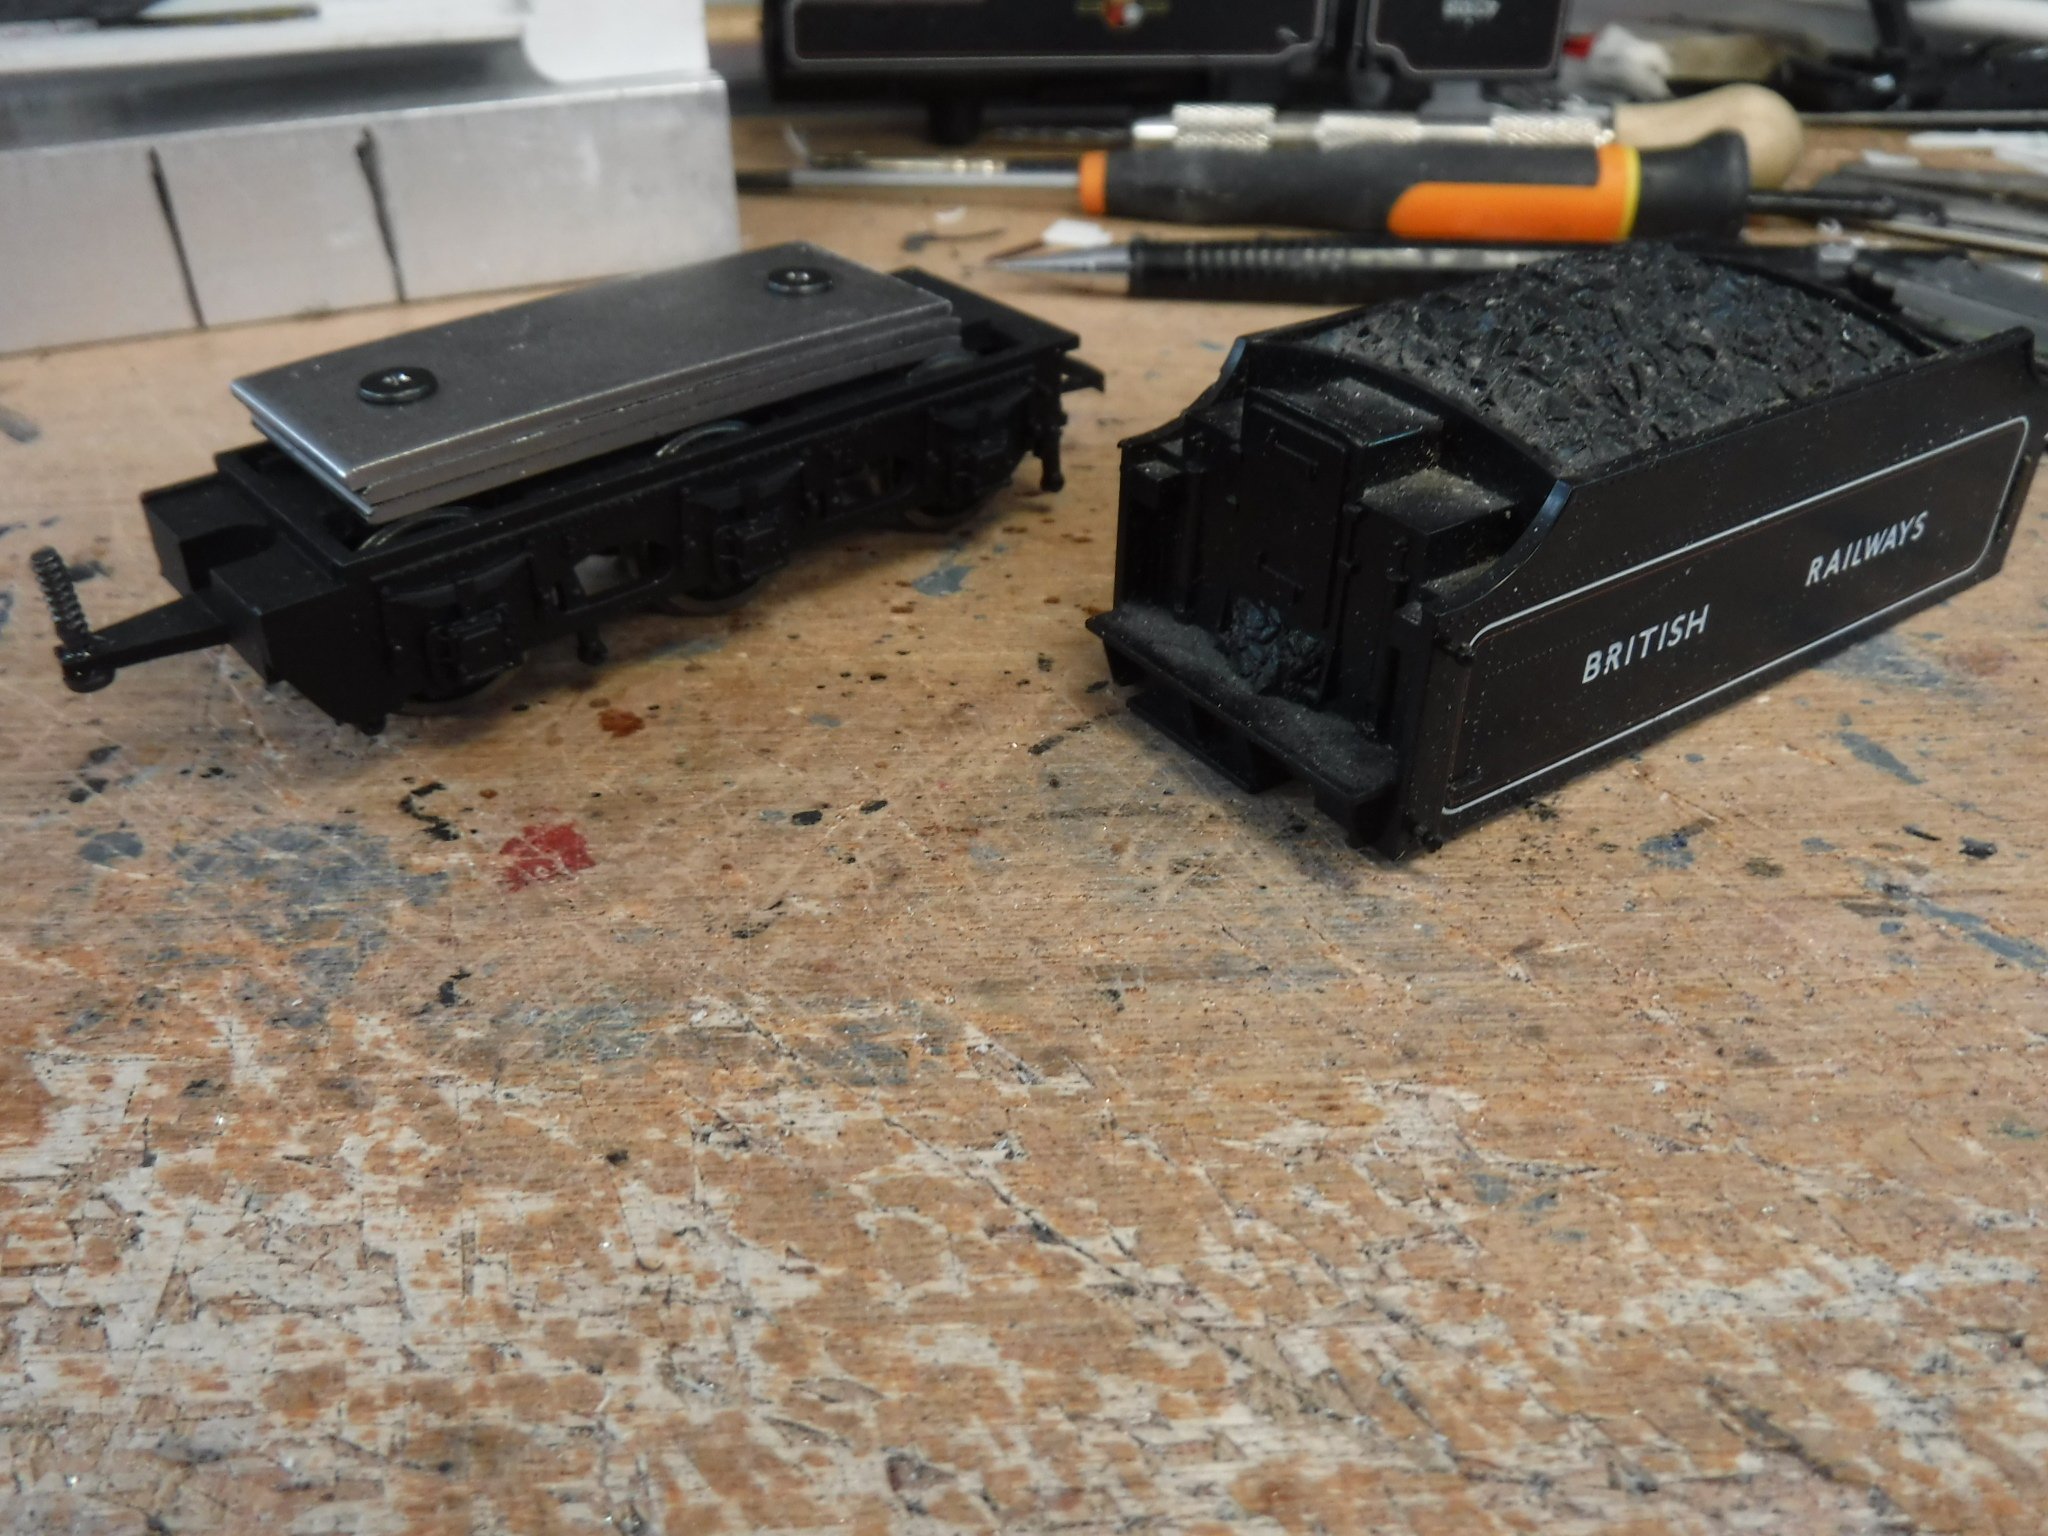
Hi Folks, I have covered up the motor in the tender with a plasticard frame covered with Humbrol filler. Easy application of filler as it didn't need smoothing out of sanding down afterwards. The broad strip down the middle is from .020" plasticard and the lattice strips are of the same, the gaps will assist the filler to adhere. Filler applied and left to harden, in time it will be painted black and have some coal glued to it. Gibbo.
-
Should there be any less than 280 parts per million of CO2 in the atmosphere then plants will not grow and you will starve. Think on !
-
Mr Metrovick, That's good to know and I'm pleased you feel that you could build something. What is your main interest and time period ? My next projects will be some GNRI coaches from Hornby Stanier coaches. I've made a start on the composite coach although it will be a bit of a cheat with three first and four thirds instead of four firsts and three third compartments. Lots of cutting and shutting action for the brake coaches and open thirds when I get around to them. though. Gibbo.
-
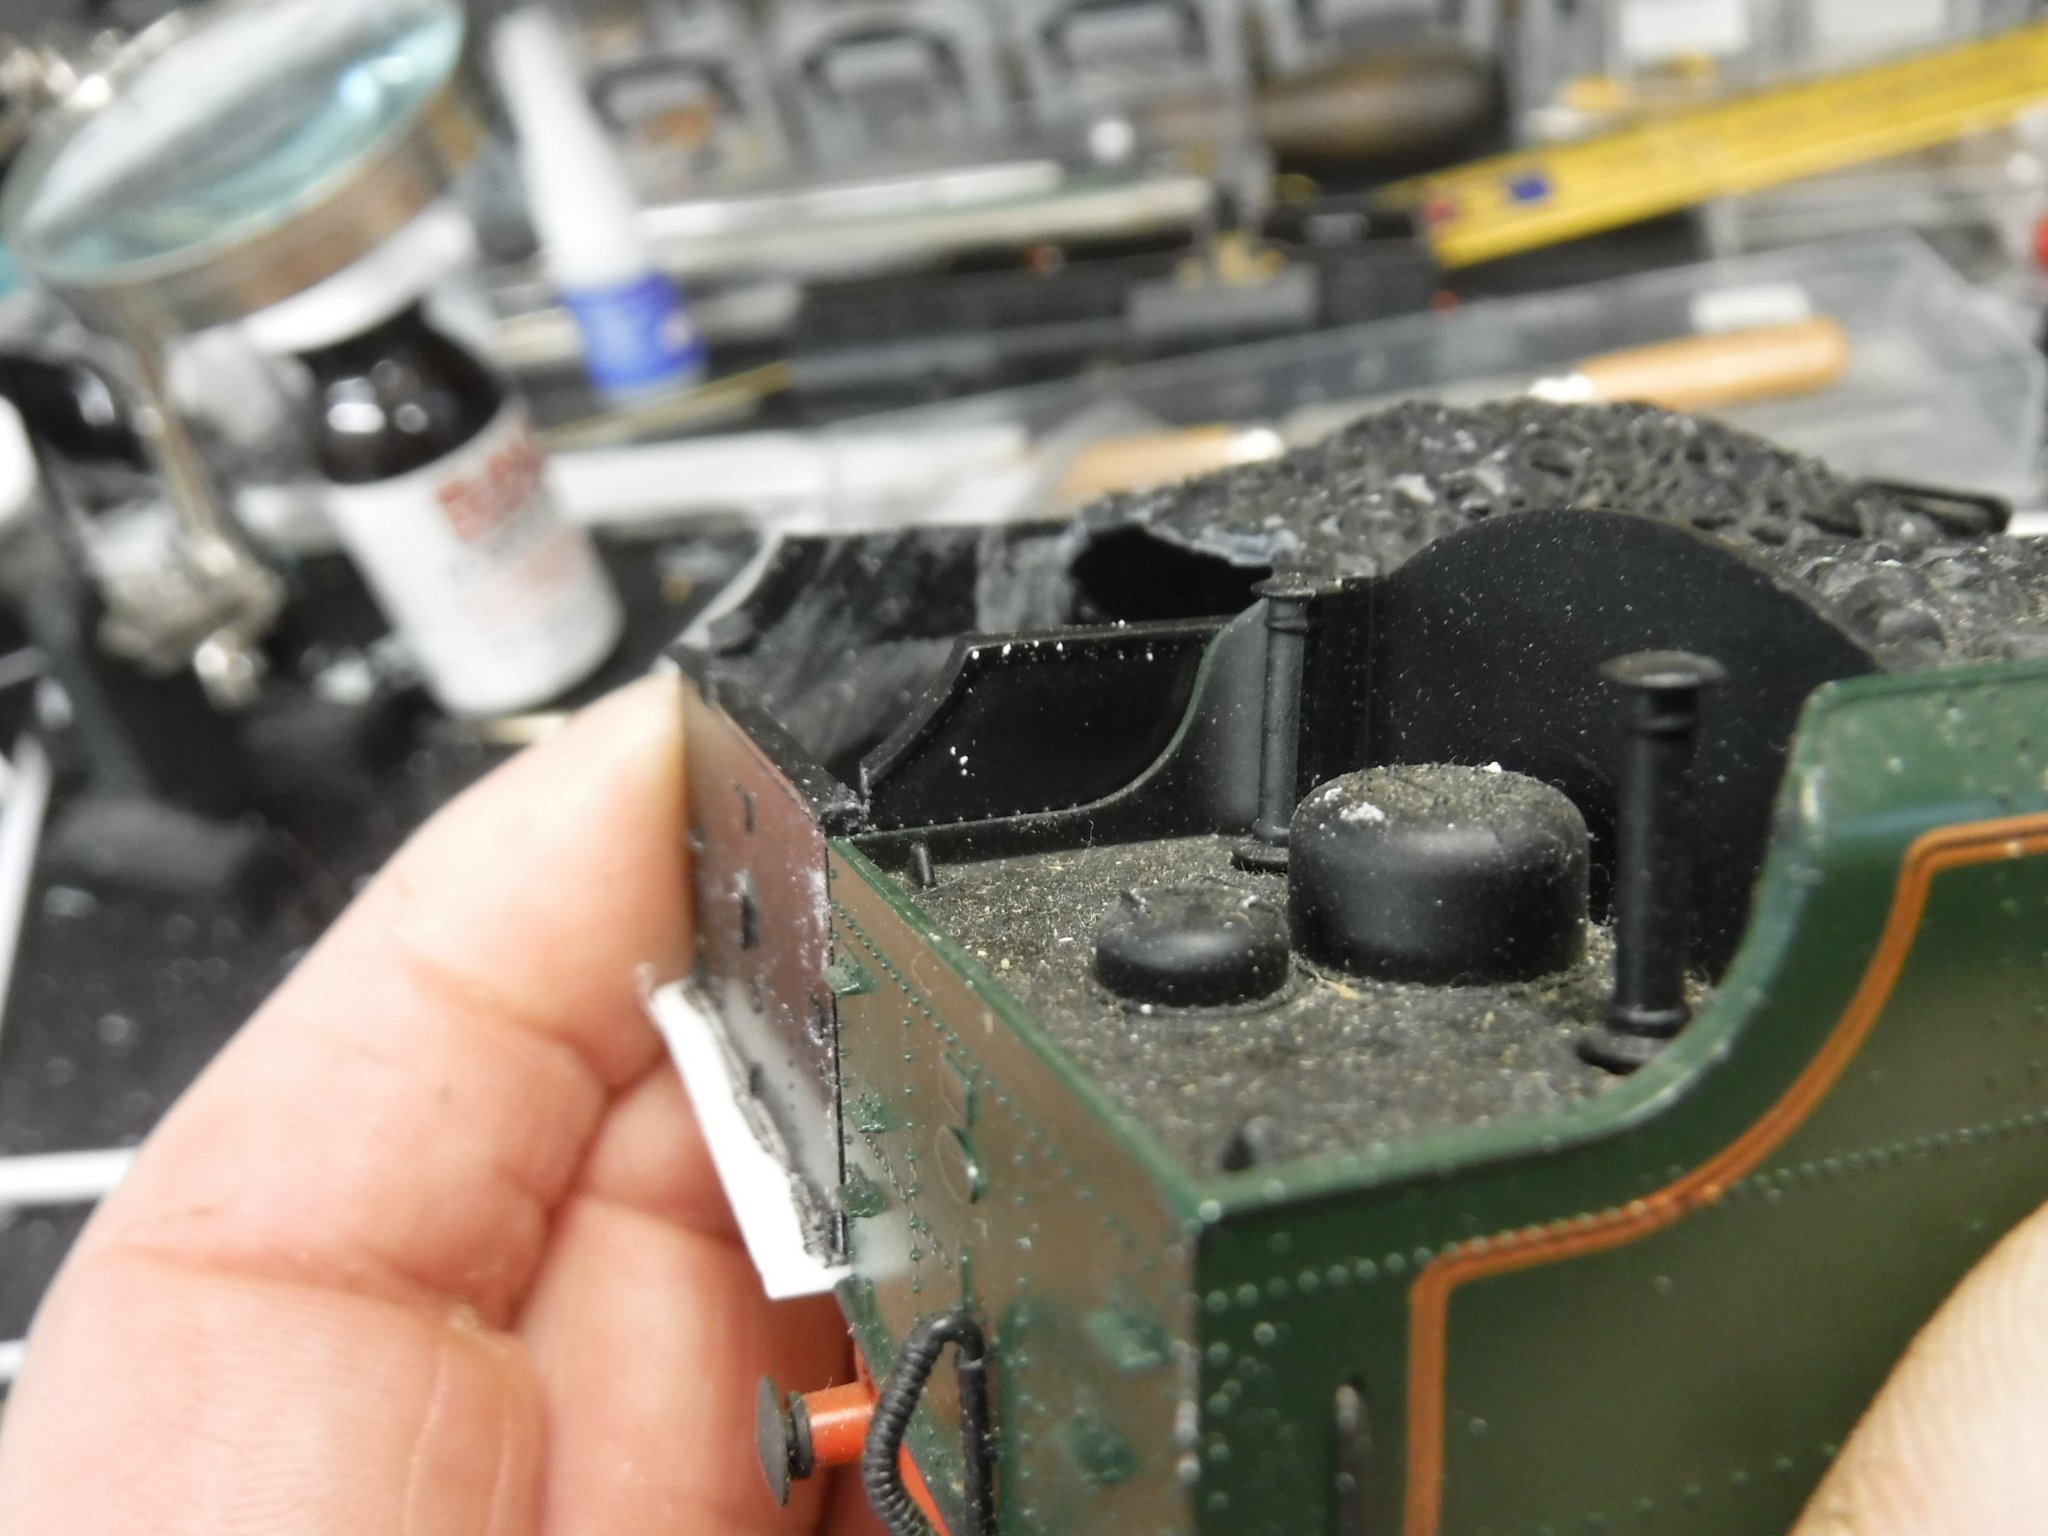
Hi Folks, More tenderage, is there such a verb ? Tender footstep and tools boxes, the footstep is made from four layers of .030" plasticard cut 5mm wide to fit between the sides of the tender and the lower part is .030" cut to 8mm wide to fit between the framing notched for the tender sides. The tools boxes are made from five 4mm wide strips cut to 12mm long with a radius filed on the top. This shews the flare on the back of the tender after carving scraping a filing the shape to it and also the curve to the top of the tender raves. The filler cap is made from a piece of .25" Plastruct tube 2mm long capped with a 7mm diameter piece of .020" plasticard. The lower framing has been joined by a piece of .030" strip that was cut back and filed to fit flush with the buffer beam. Gibbo.
-
Hi LNERW1, I have a thread for each locomotive pictured so that is where you need to look. As for the James and Daisy, they just happen to be there and the Mk2's are part of a Glasgow Birmingham with a class 85 at its head. Gibbo.
-
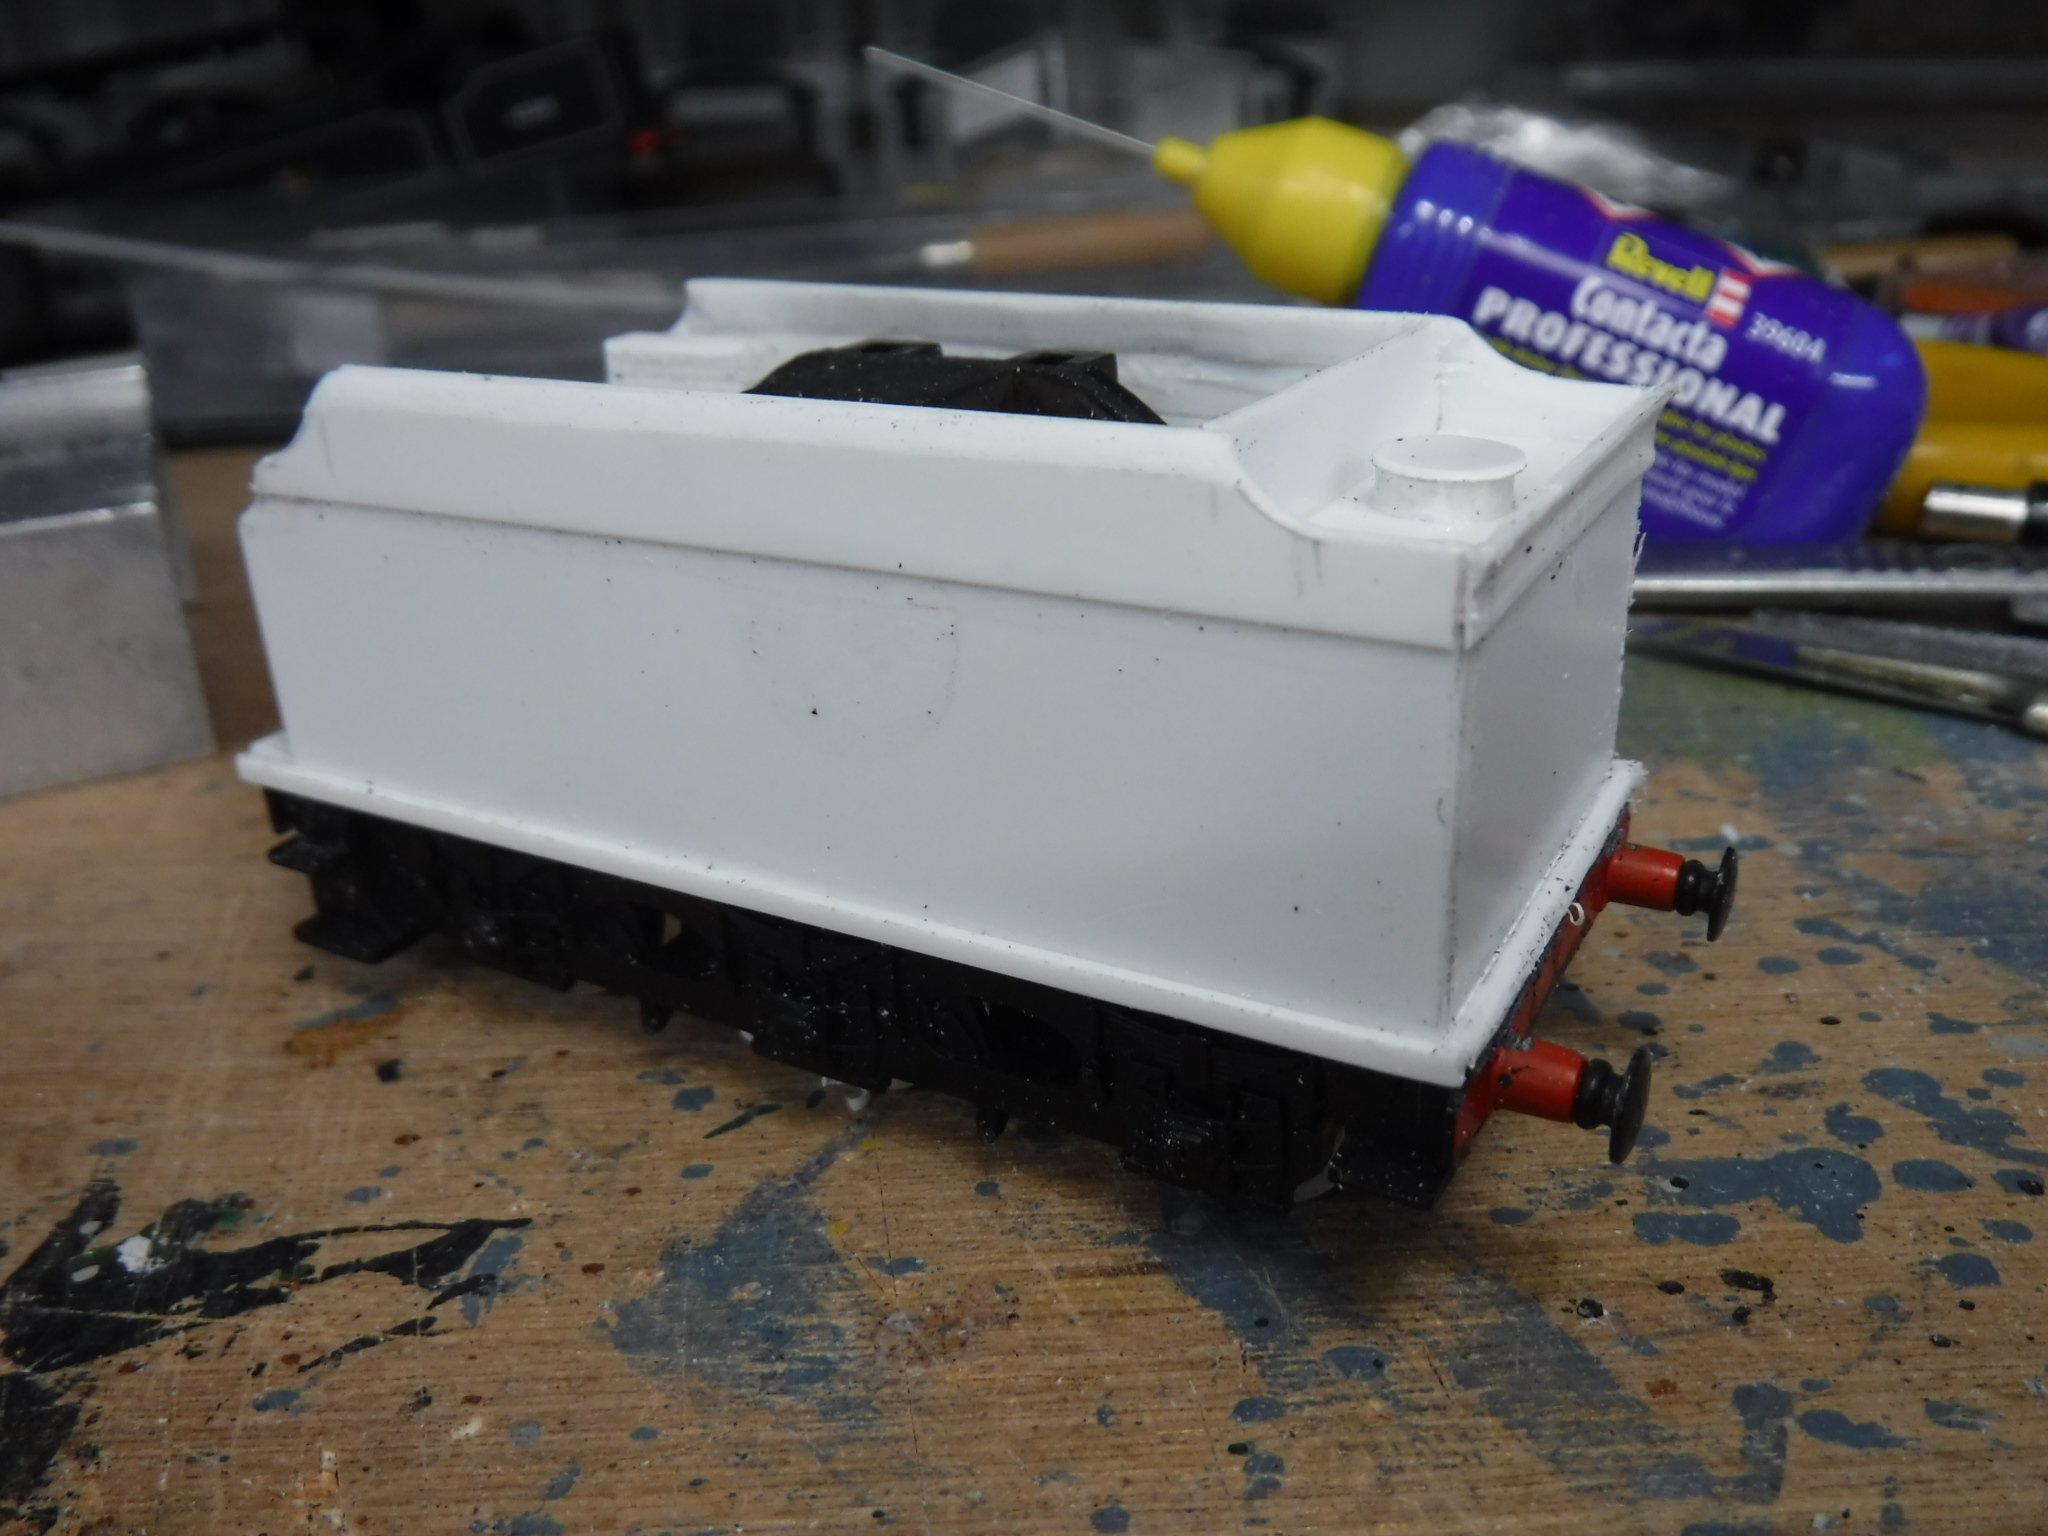
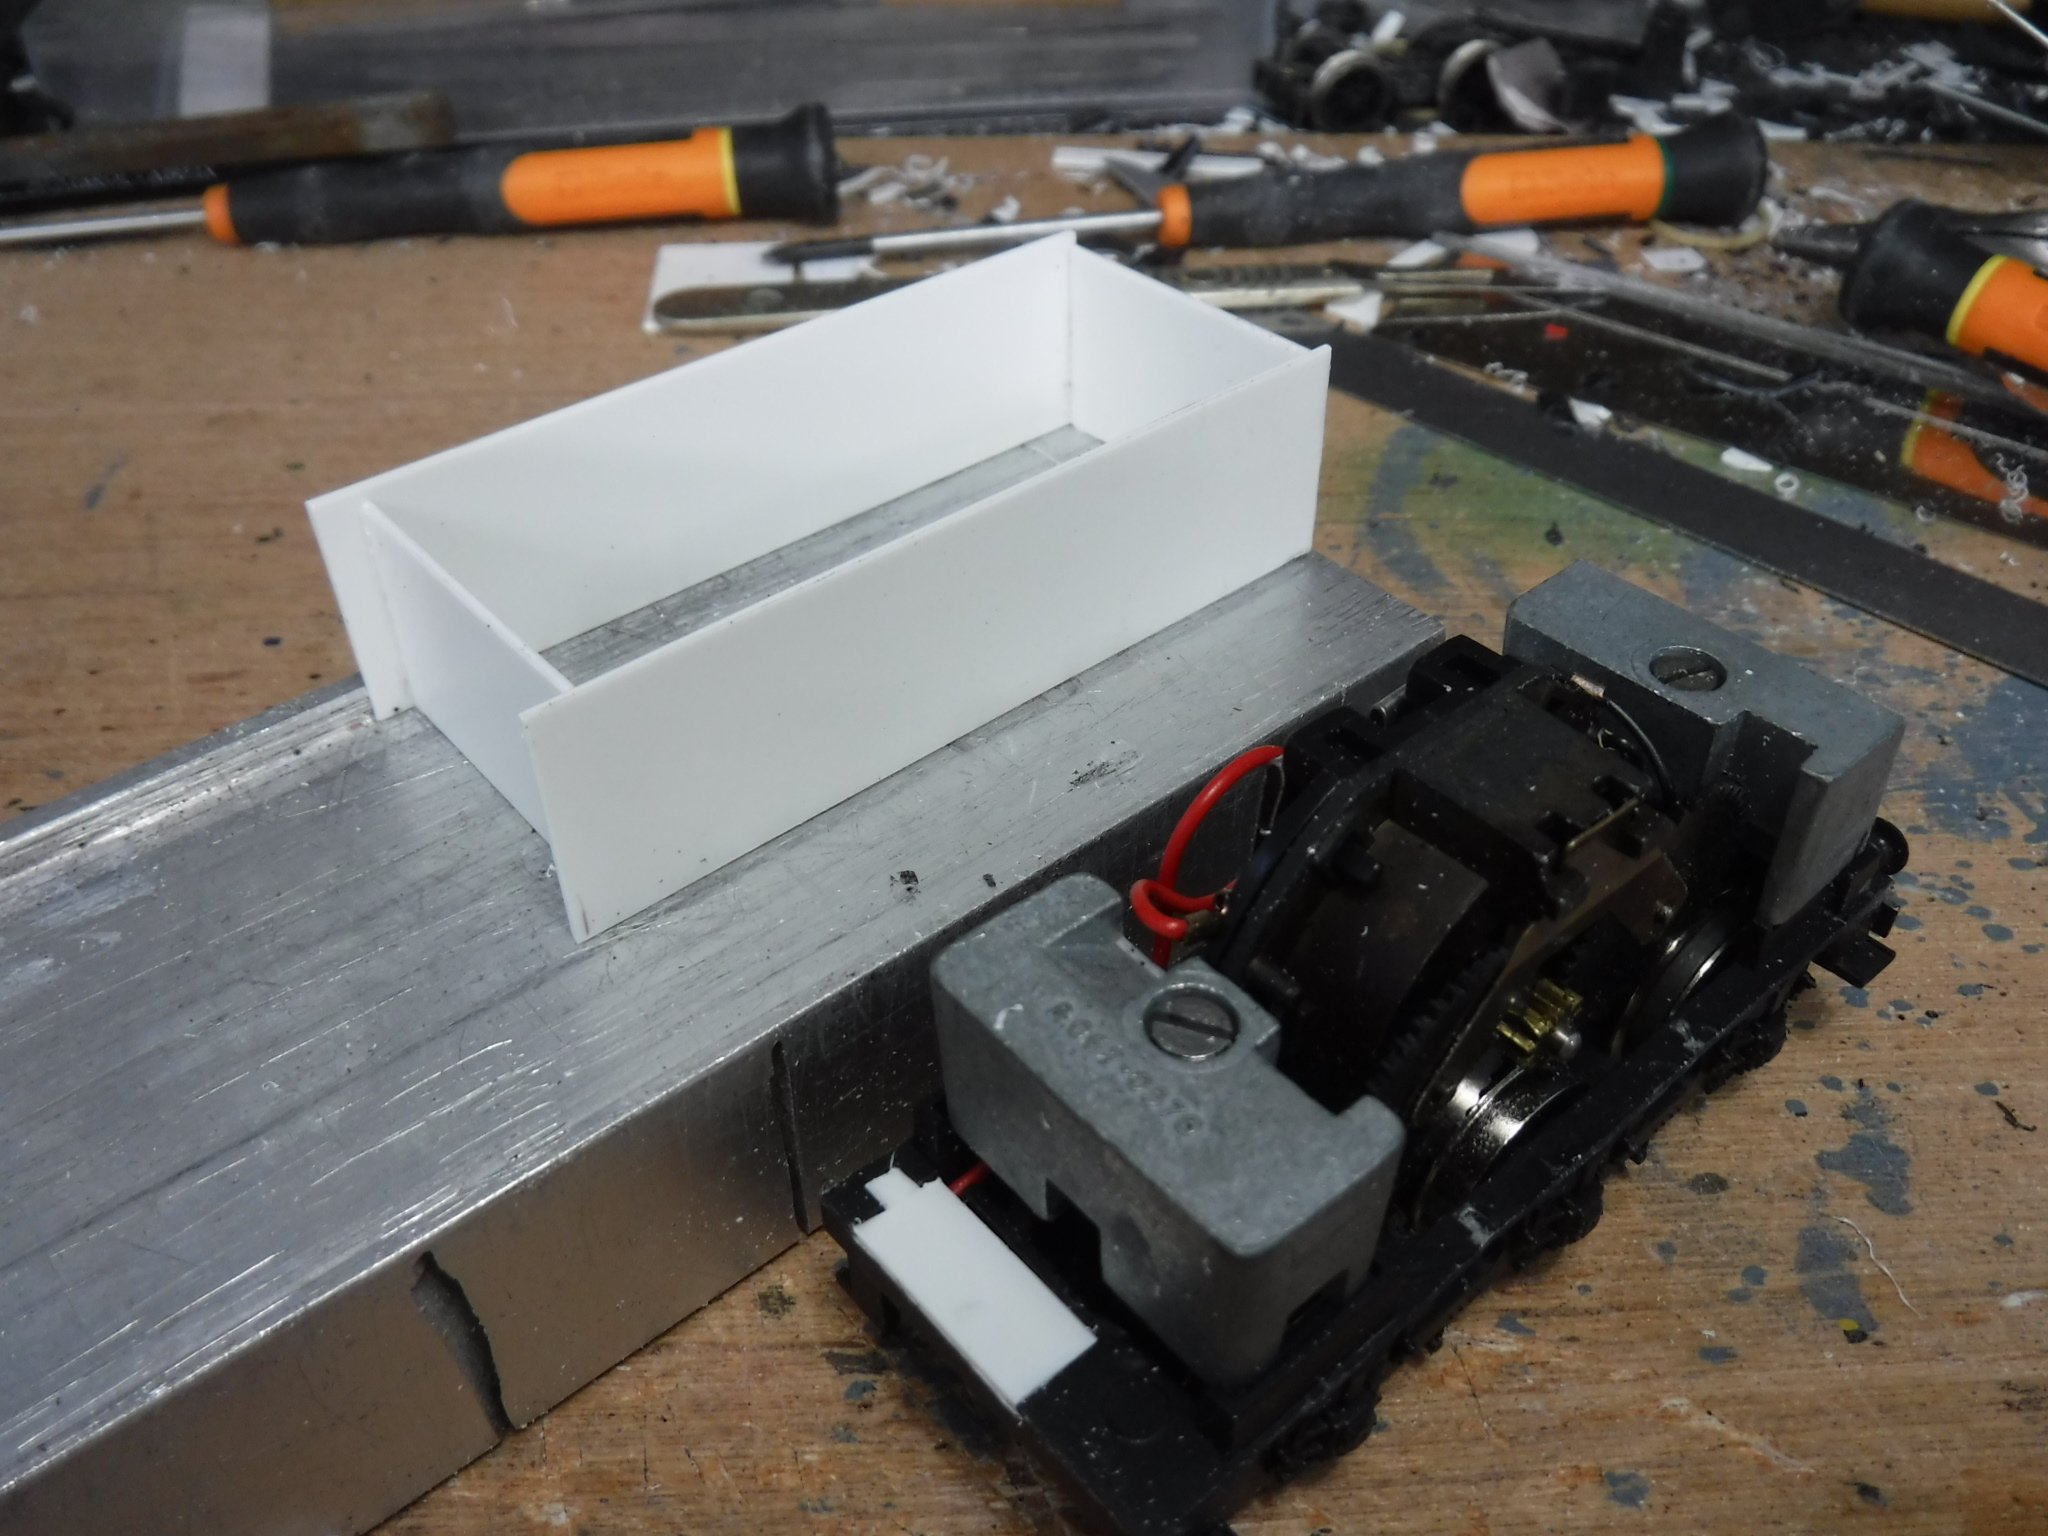
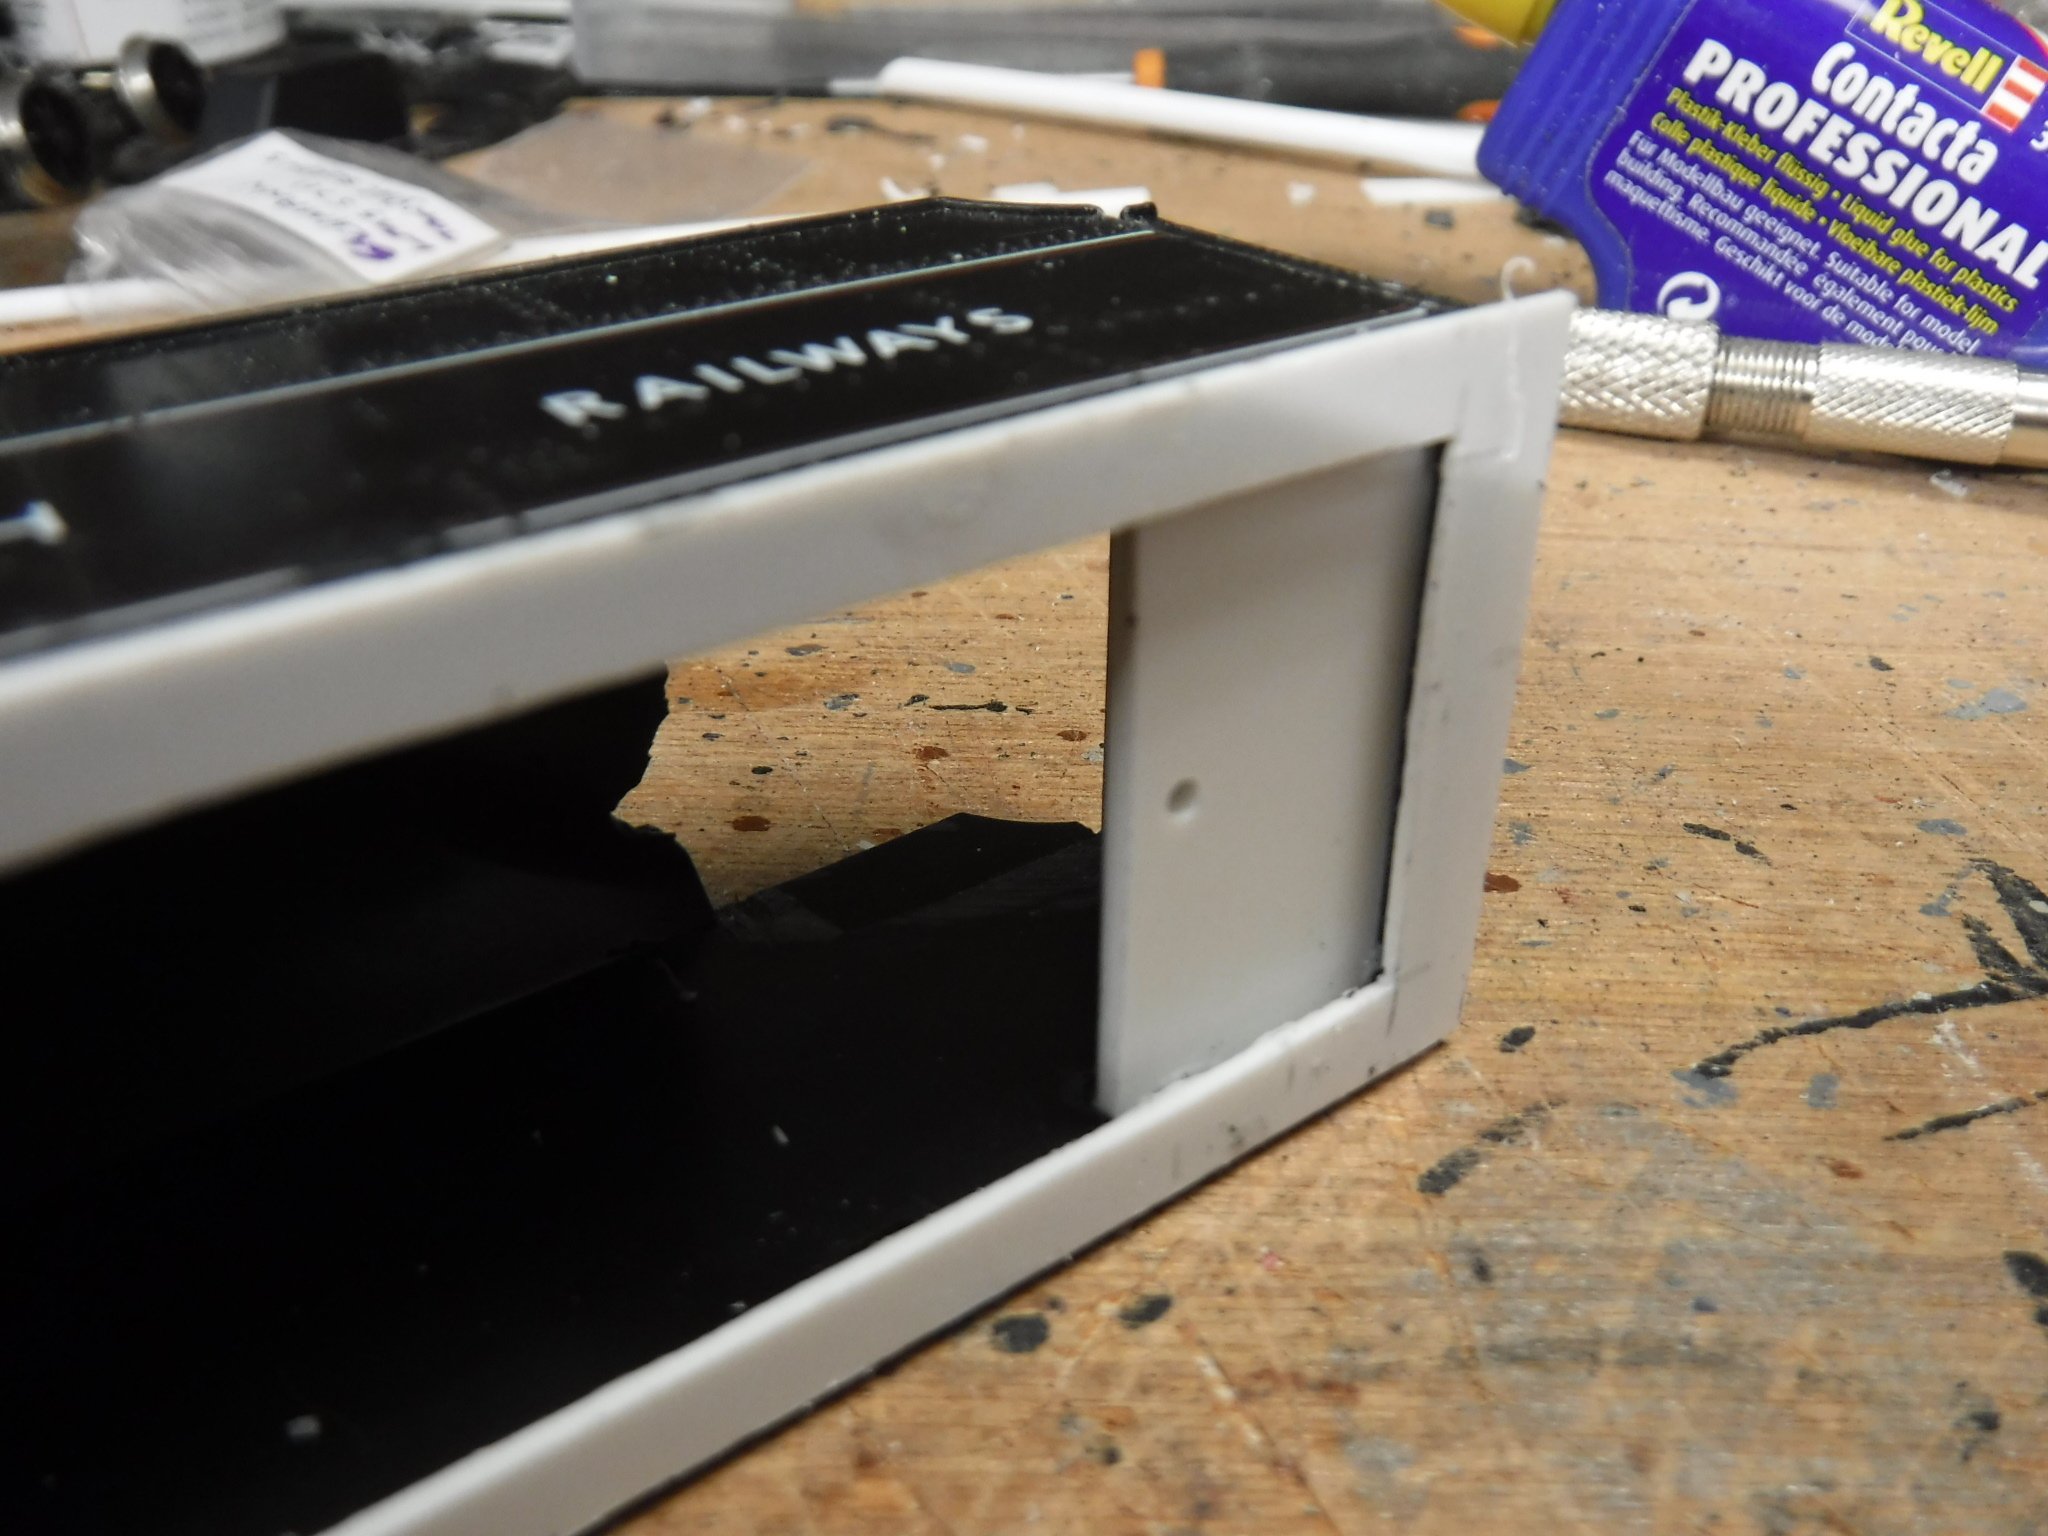
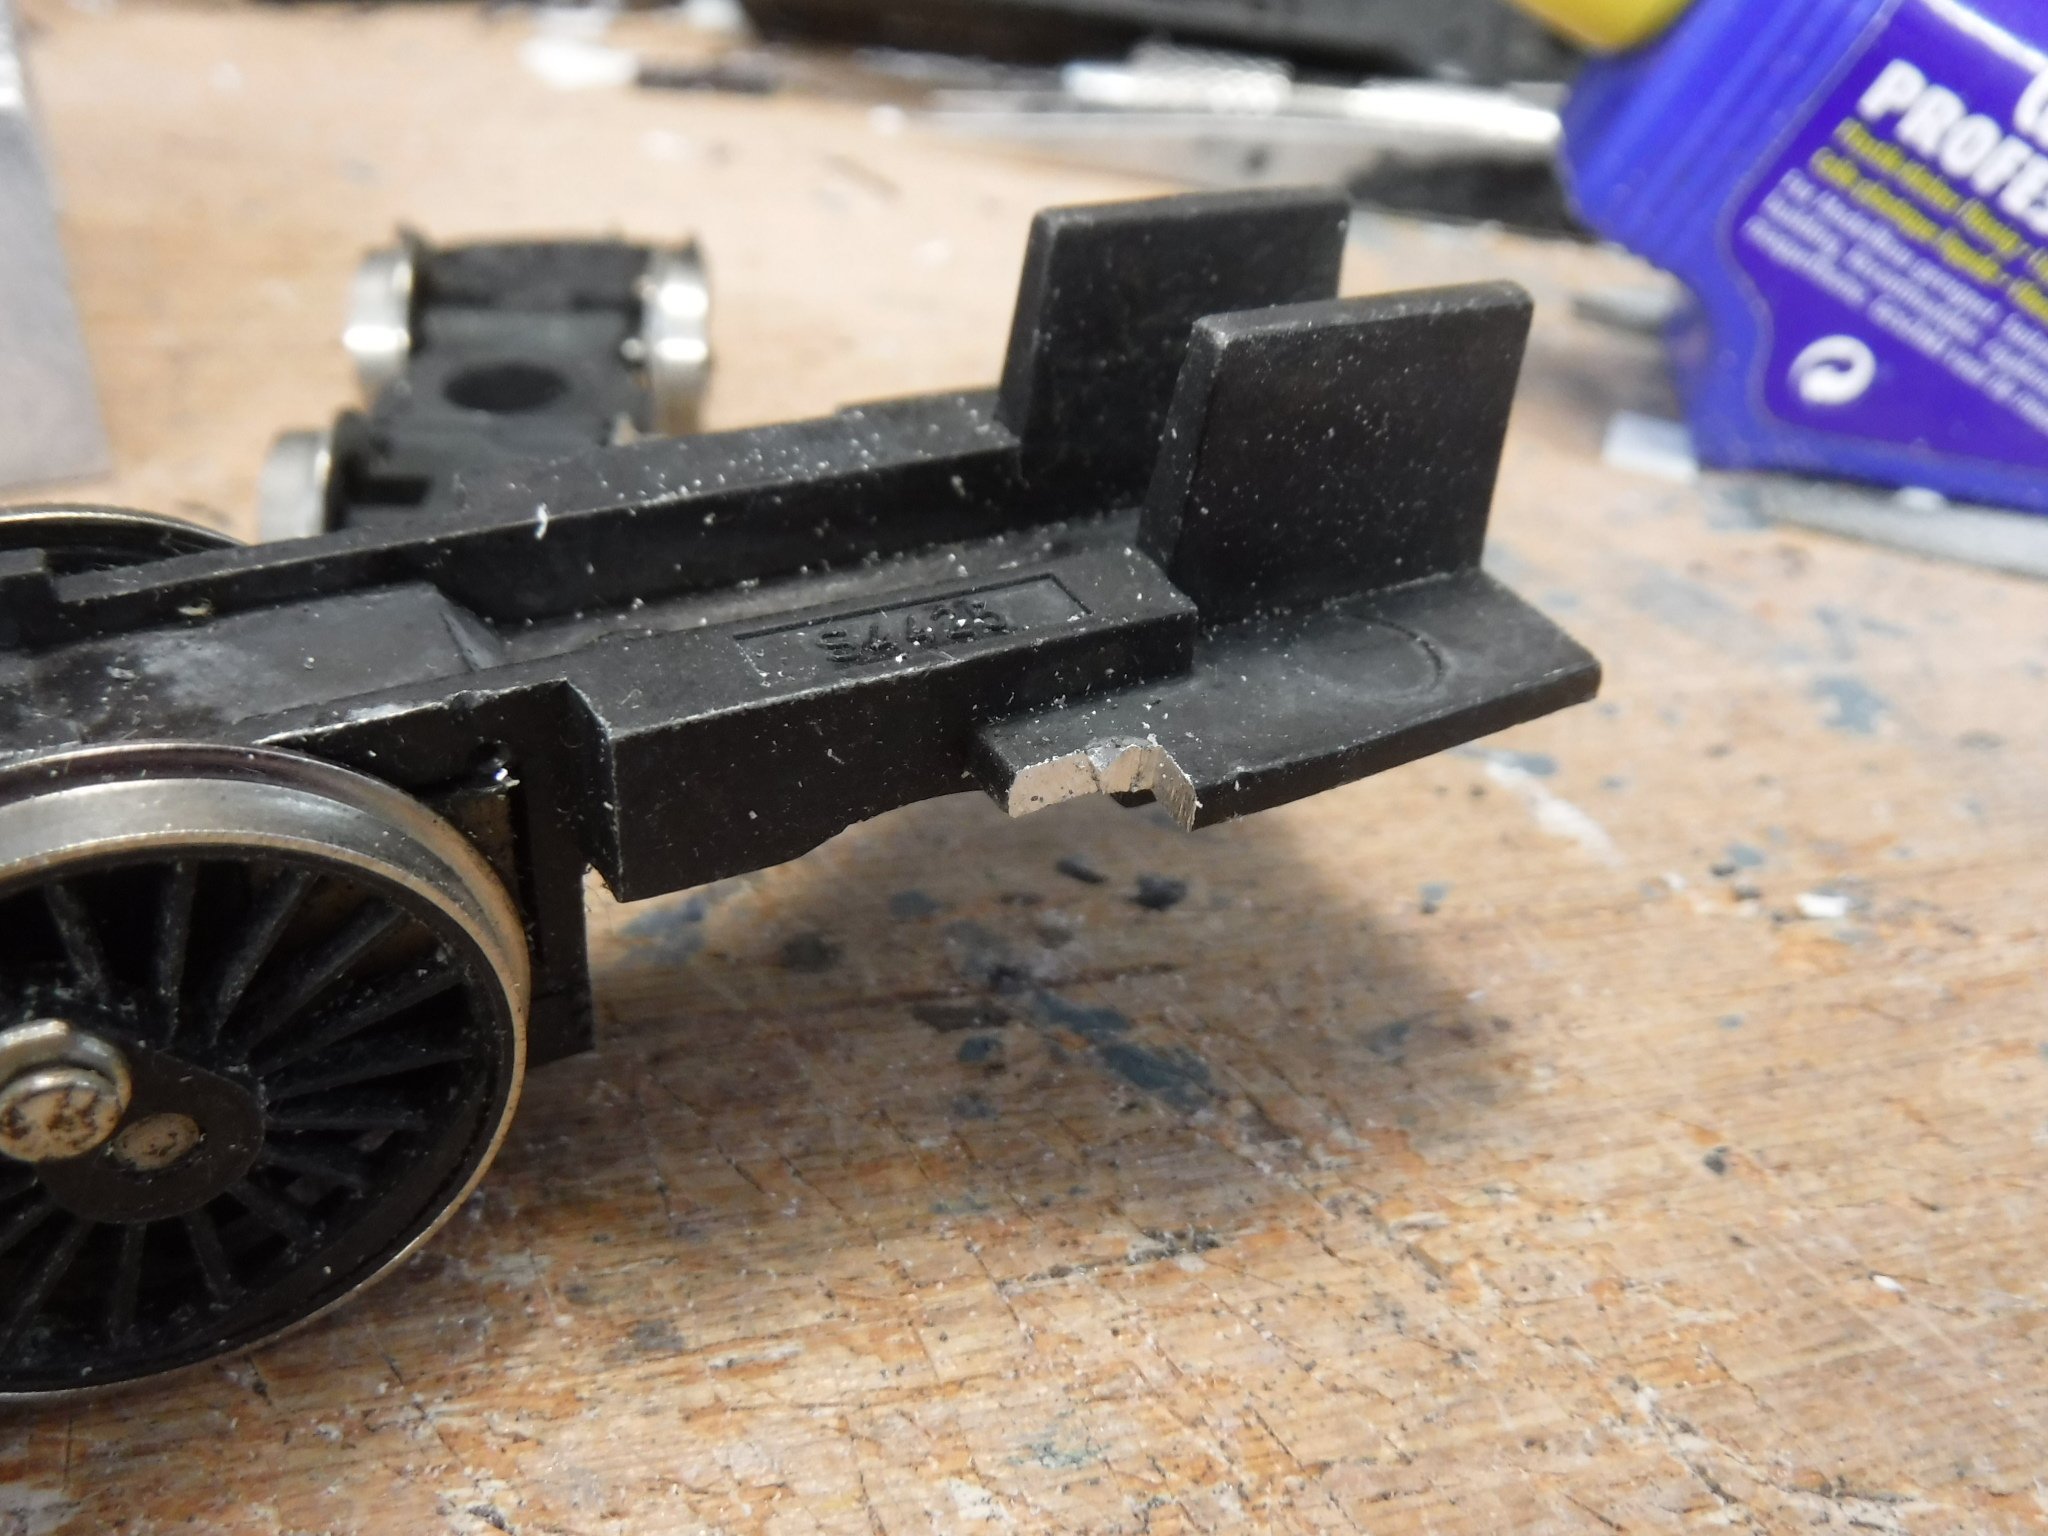
Hi Folks, I've been building tenders again, this time for the V class. The main body of the the tender is made up from .040" plasticard measuring 74mm X 20mm for the side and 31mm X 19mm for the ends. This was glued into a box with one end set in by 3.5mm. The tender chassis was altered slightly by cutting the width of the flange around the top of the frames down to 31mm. This was surprisingly simple as all that needs to be done is to set a steel rule against the lugs the locate the weights, scribe with a knife a few times and break it off carefully. Clean up with a file and nib the top edges of the buffer beams and it is about right. The hole above the coupling pin requires filling in and the weight requires 2mm removing from the front edge, this had not been done in this photograph. The top raves were then cut from two other pieces of .040" plasticard 74mm X 7mm and stuck on top of the box, with a piece 31mm X 4mm also .040" across the back. This was in some ways an oversight as I should have made the sides 27mm deep however as it worked out I think that it was easier to have to lower ends of the ends set in by 1mm from the bottom edge while getting the whole square. Once this was done I cut .010" overlays for the top part of the raves which covered the joint in any case so my slight oversight worked in my favour. On the inner edges of the tops of the raves I glued a piece of .040" 3mm X 60mm so as to form the slight radius that is required. two pieces of .040" were cut at 25mm X 7mm as plating for the tool boxes to be mounted upon. Very conveniently when the tender body is in position they sit atop the tender weight. Framing around the base of the tank was made from a .040" strip 1.5mm wide making sure that it projects 5mm from the front edge of the tender. A strip of the same was glued to the top of the rear of the tank to form the flare. The rear platform of the tank and bunker bulkhead were cut from .040" at 31mm X 18 and 31mm X 7mm respectively with the bulkhead being notched to fit around the 3mm strip at the top of the raves. The bulk head is positioned 12mm back from the outer edge of the tank. There will have to be a lot of coal in this tender to cover up the motor ! Gibbo.
-
Less hassle than doing the following: All good fun though ! Gibbo.
-
NCC W class from Hornby LMS Fowler class 4, 2-6-4 tank
gibbo675 replied to gibbo675's topic in Irish Models
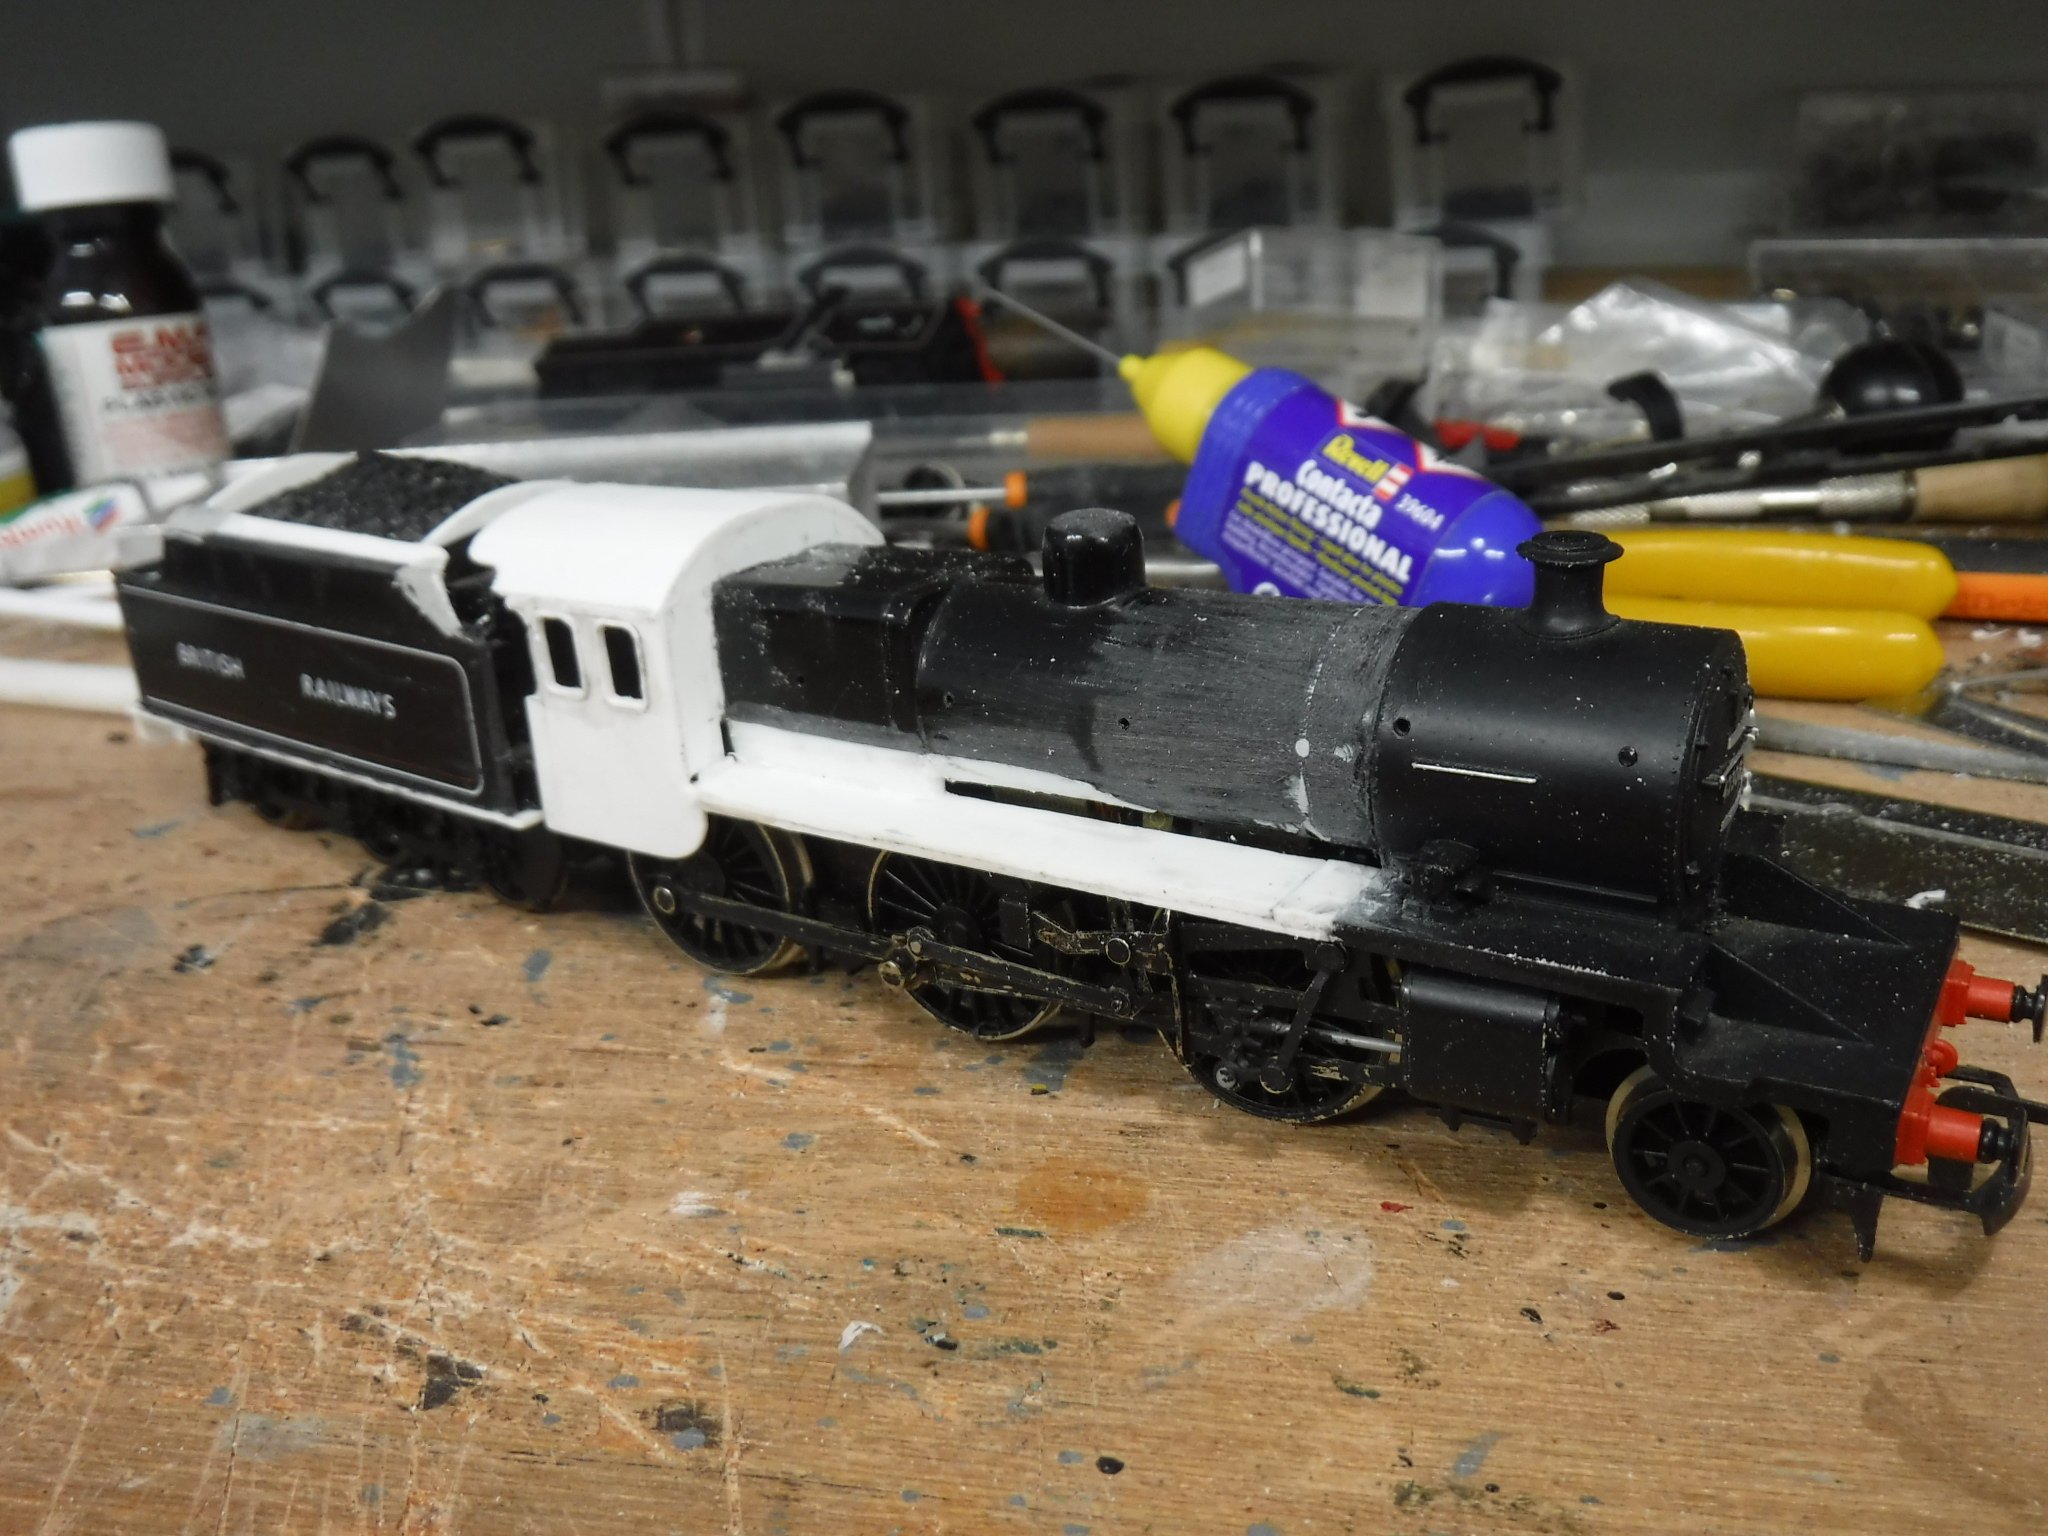
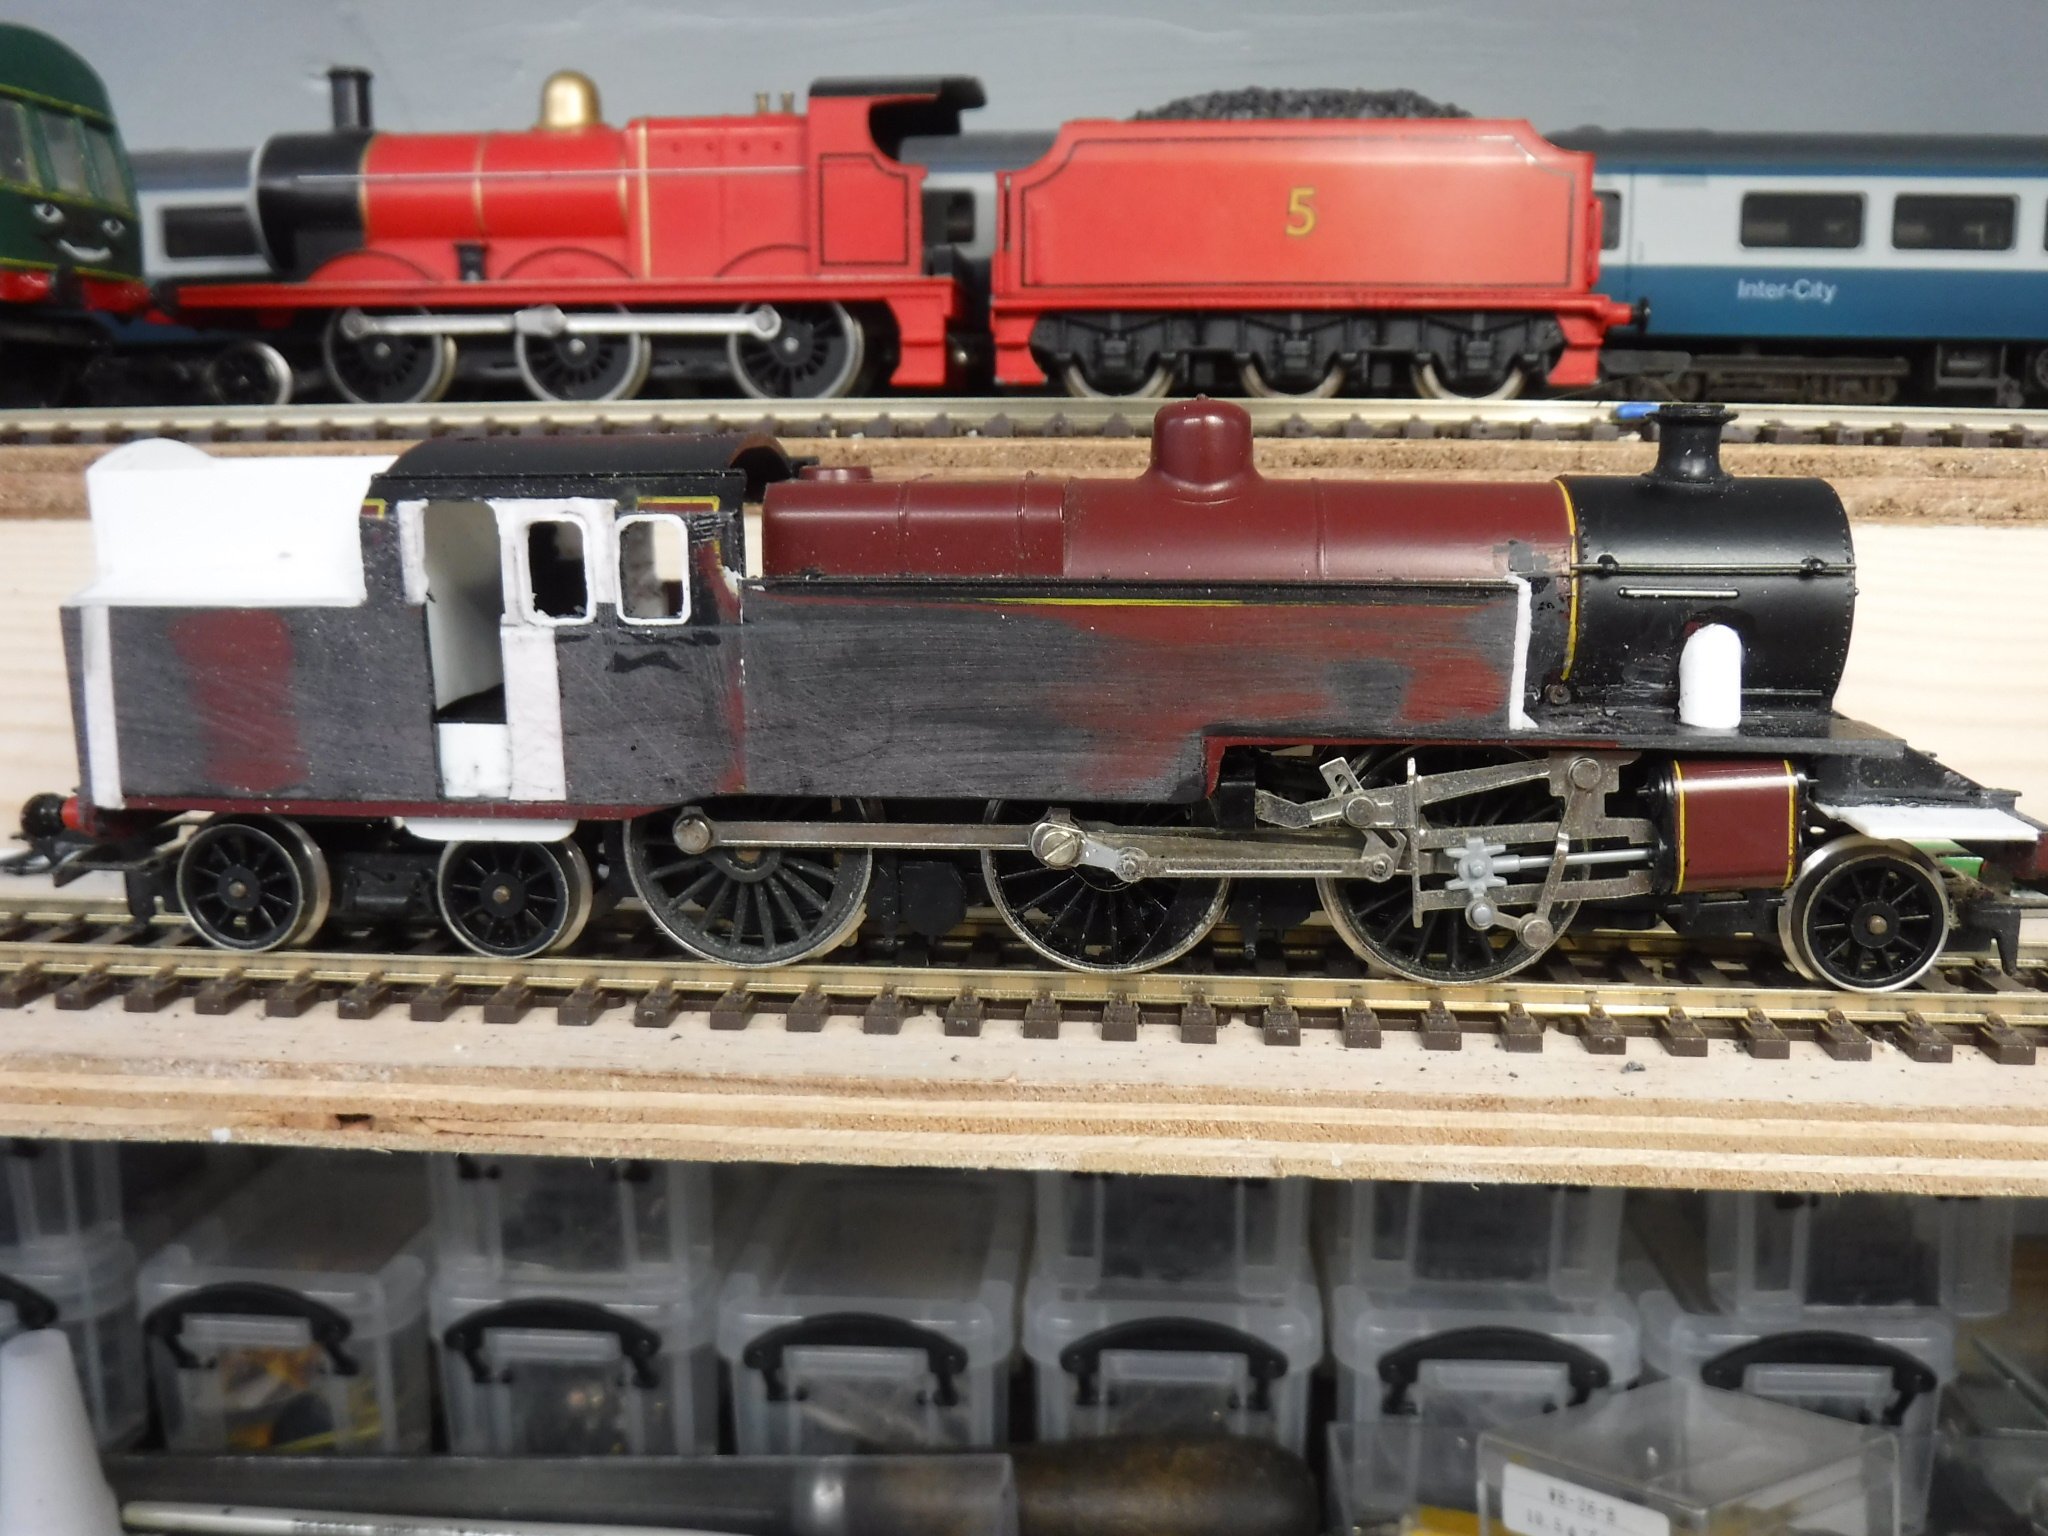
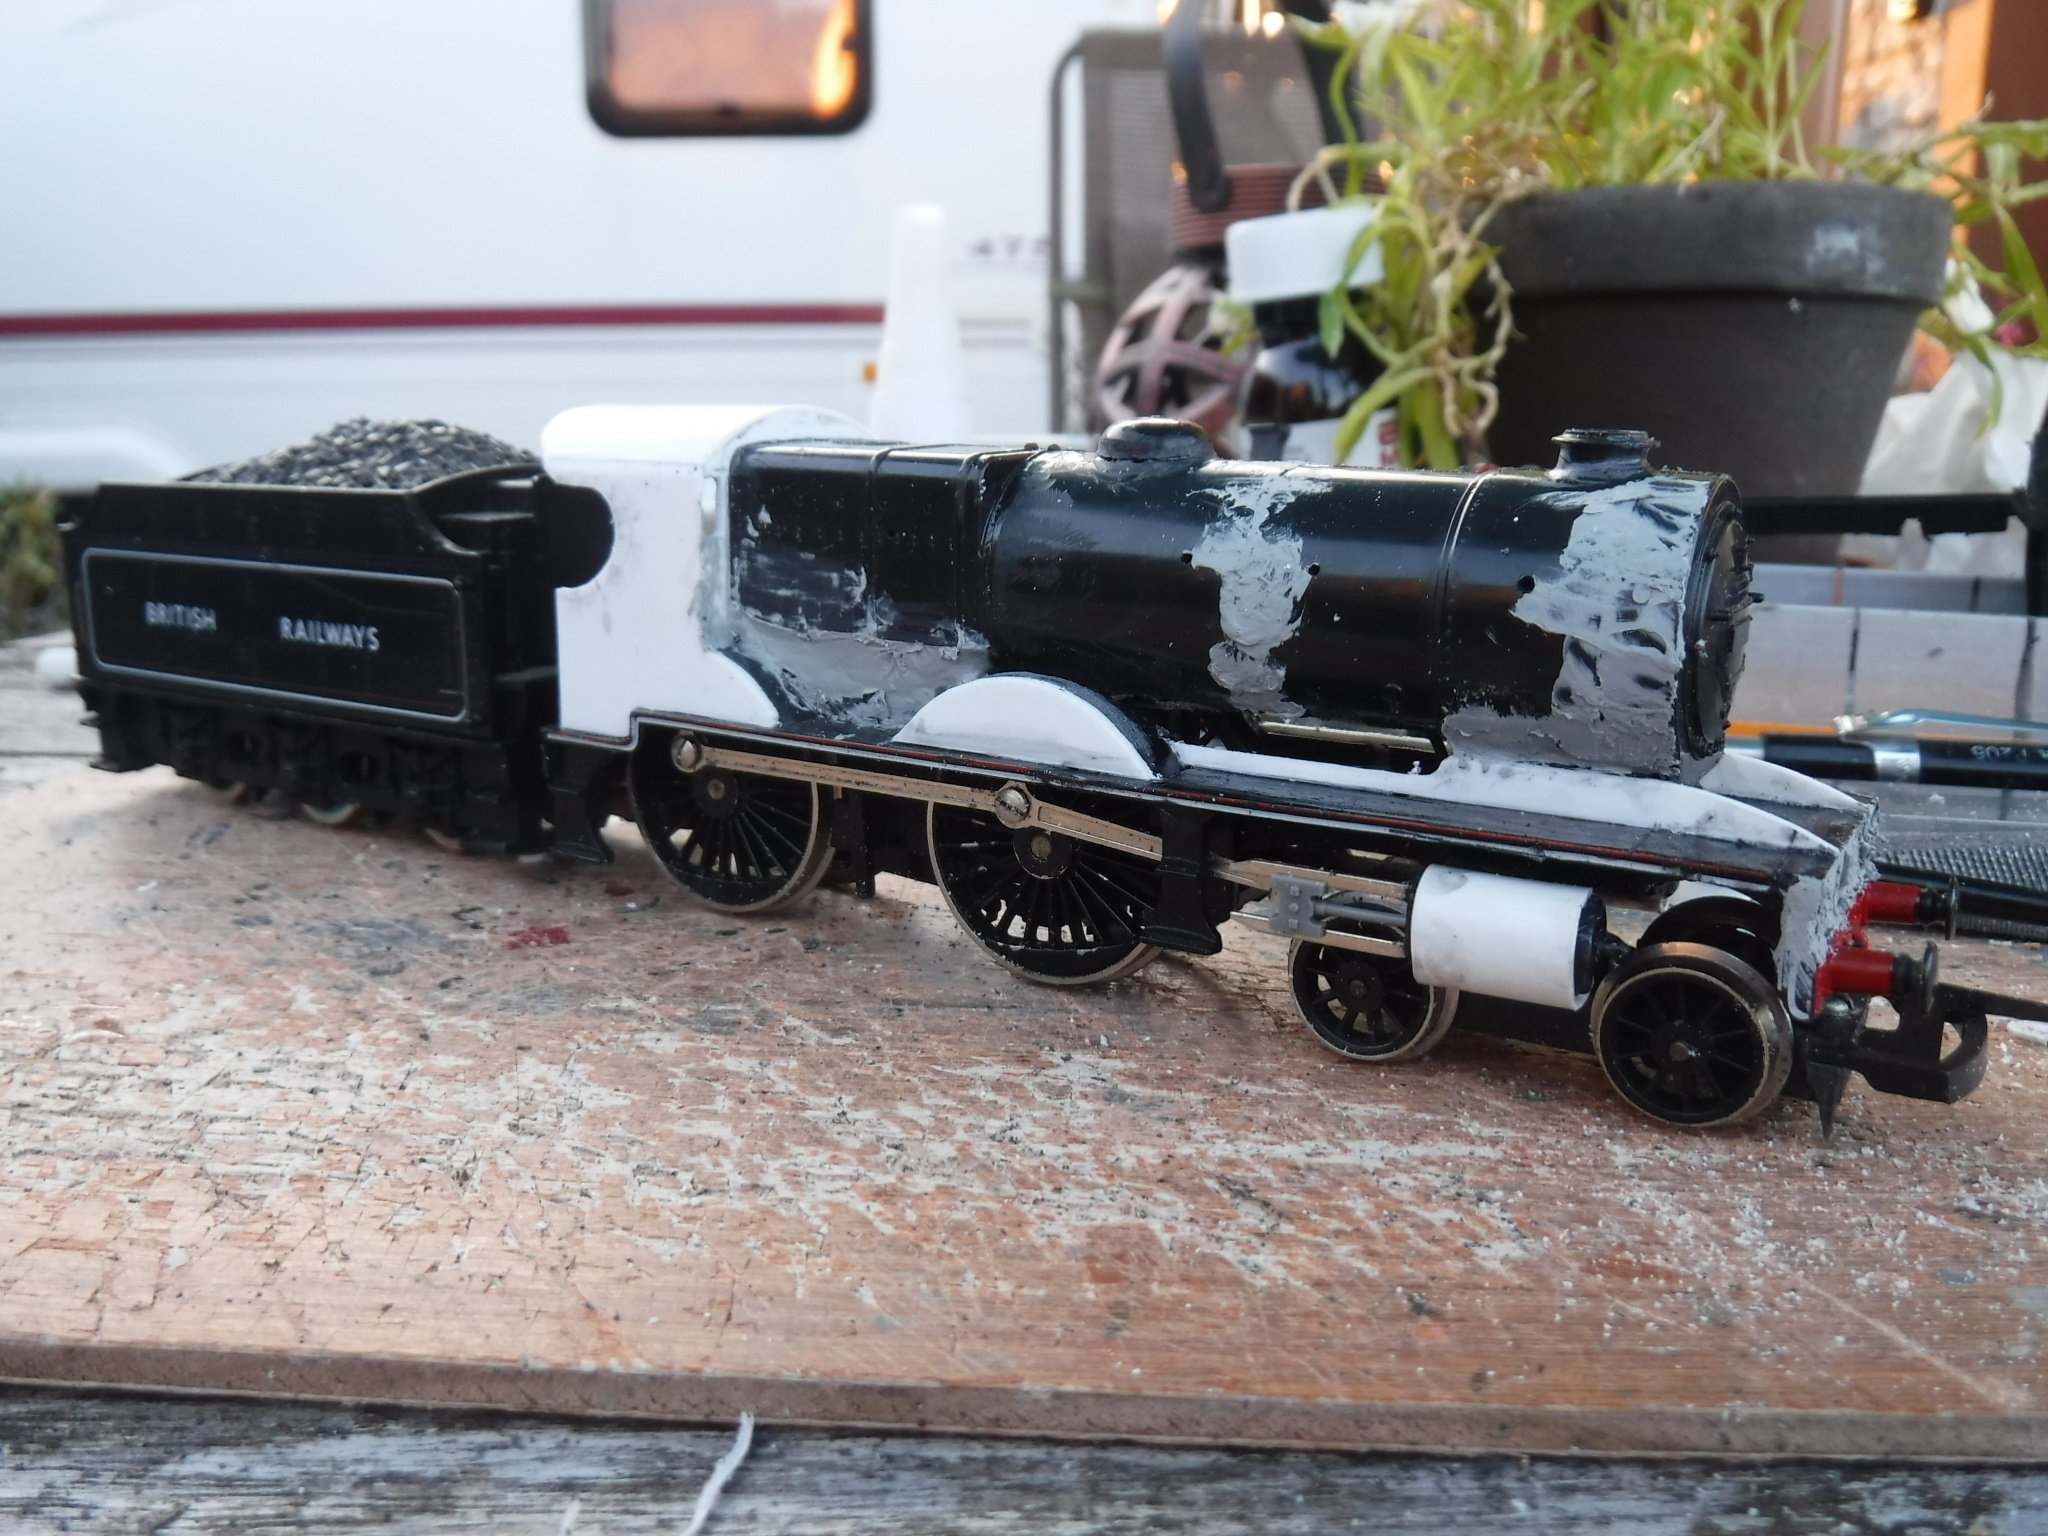
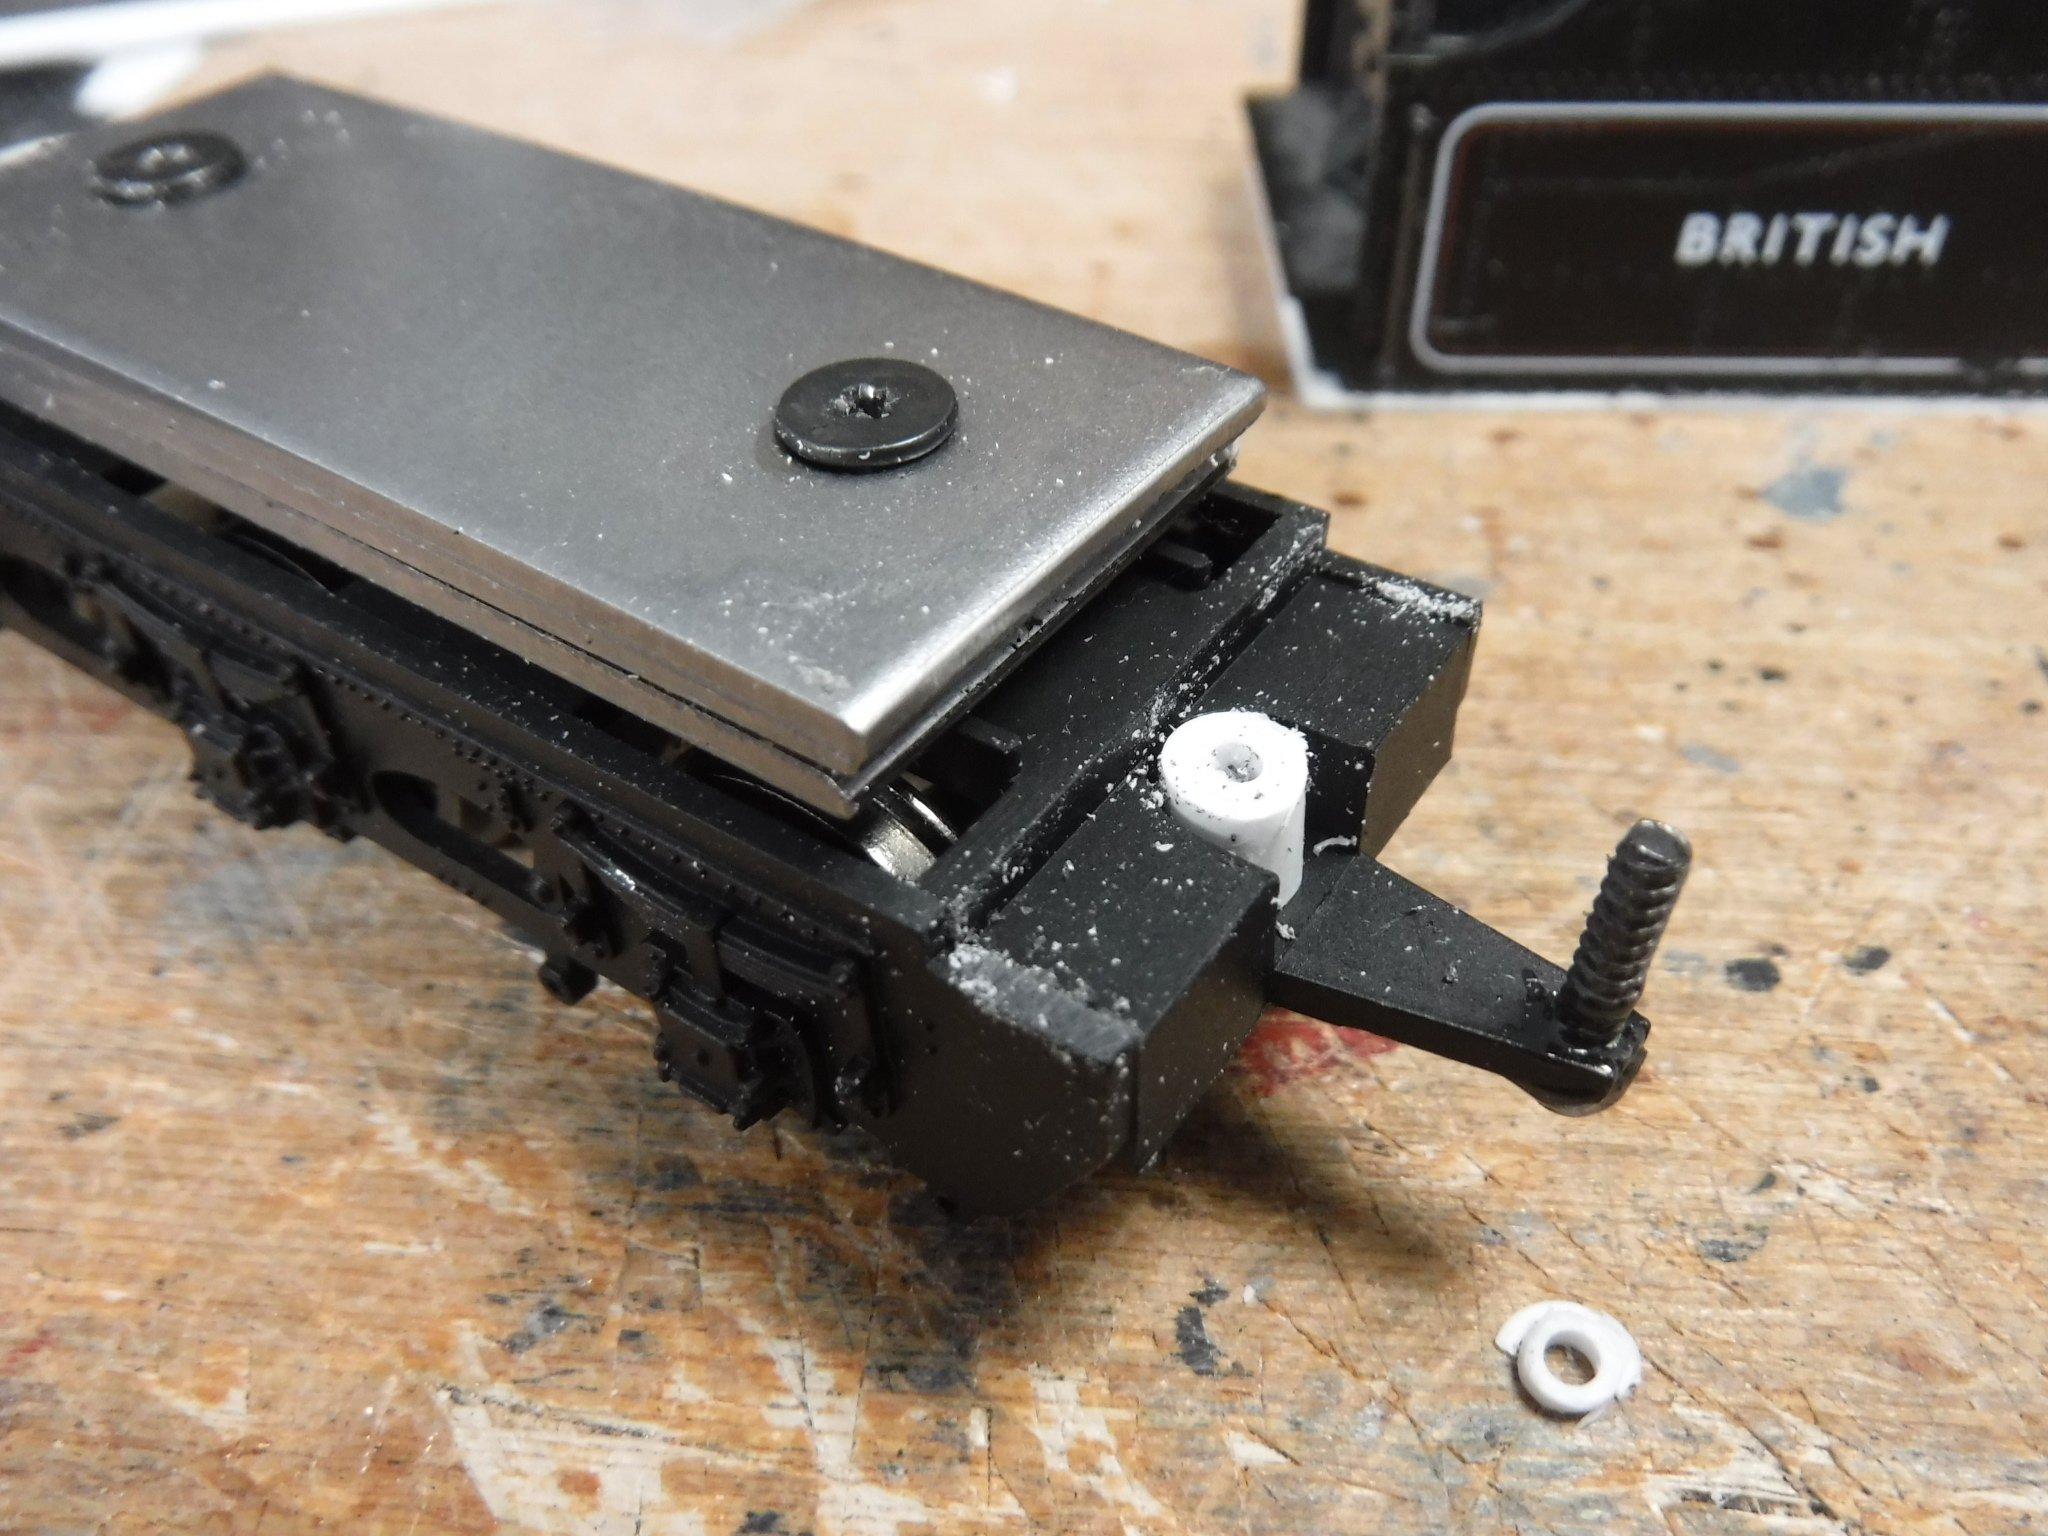
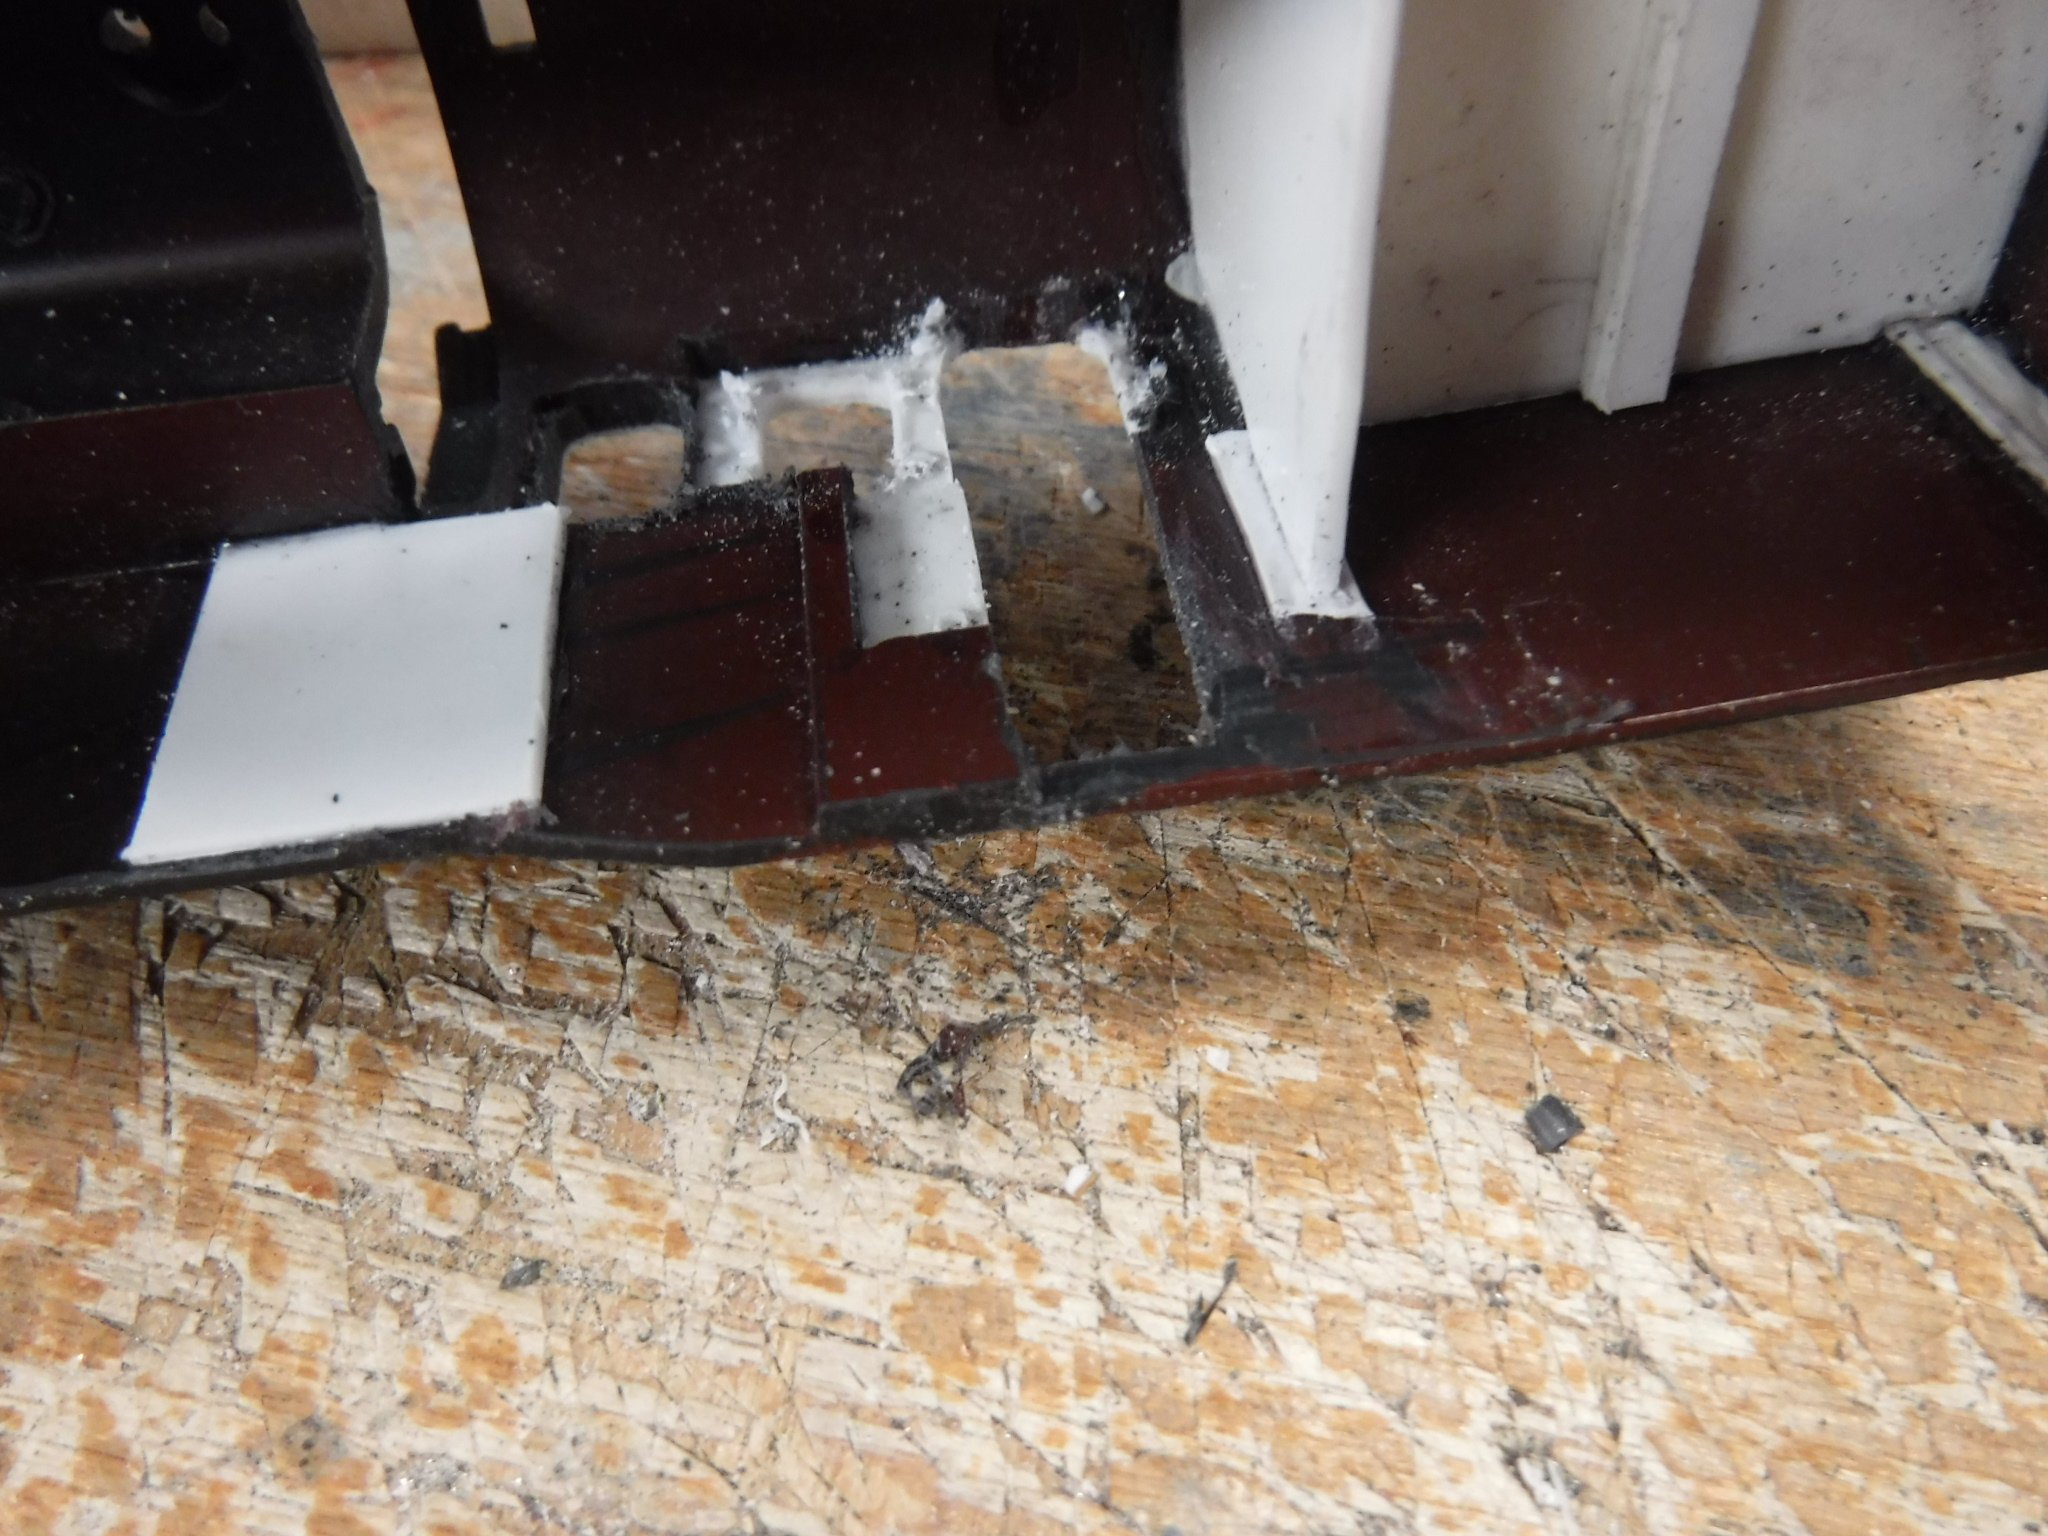
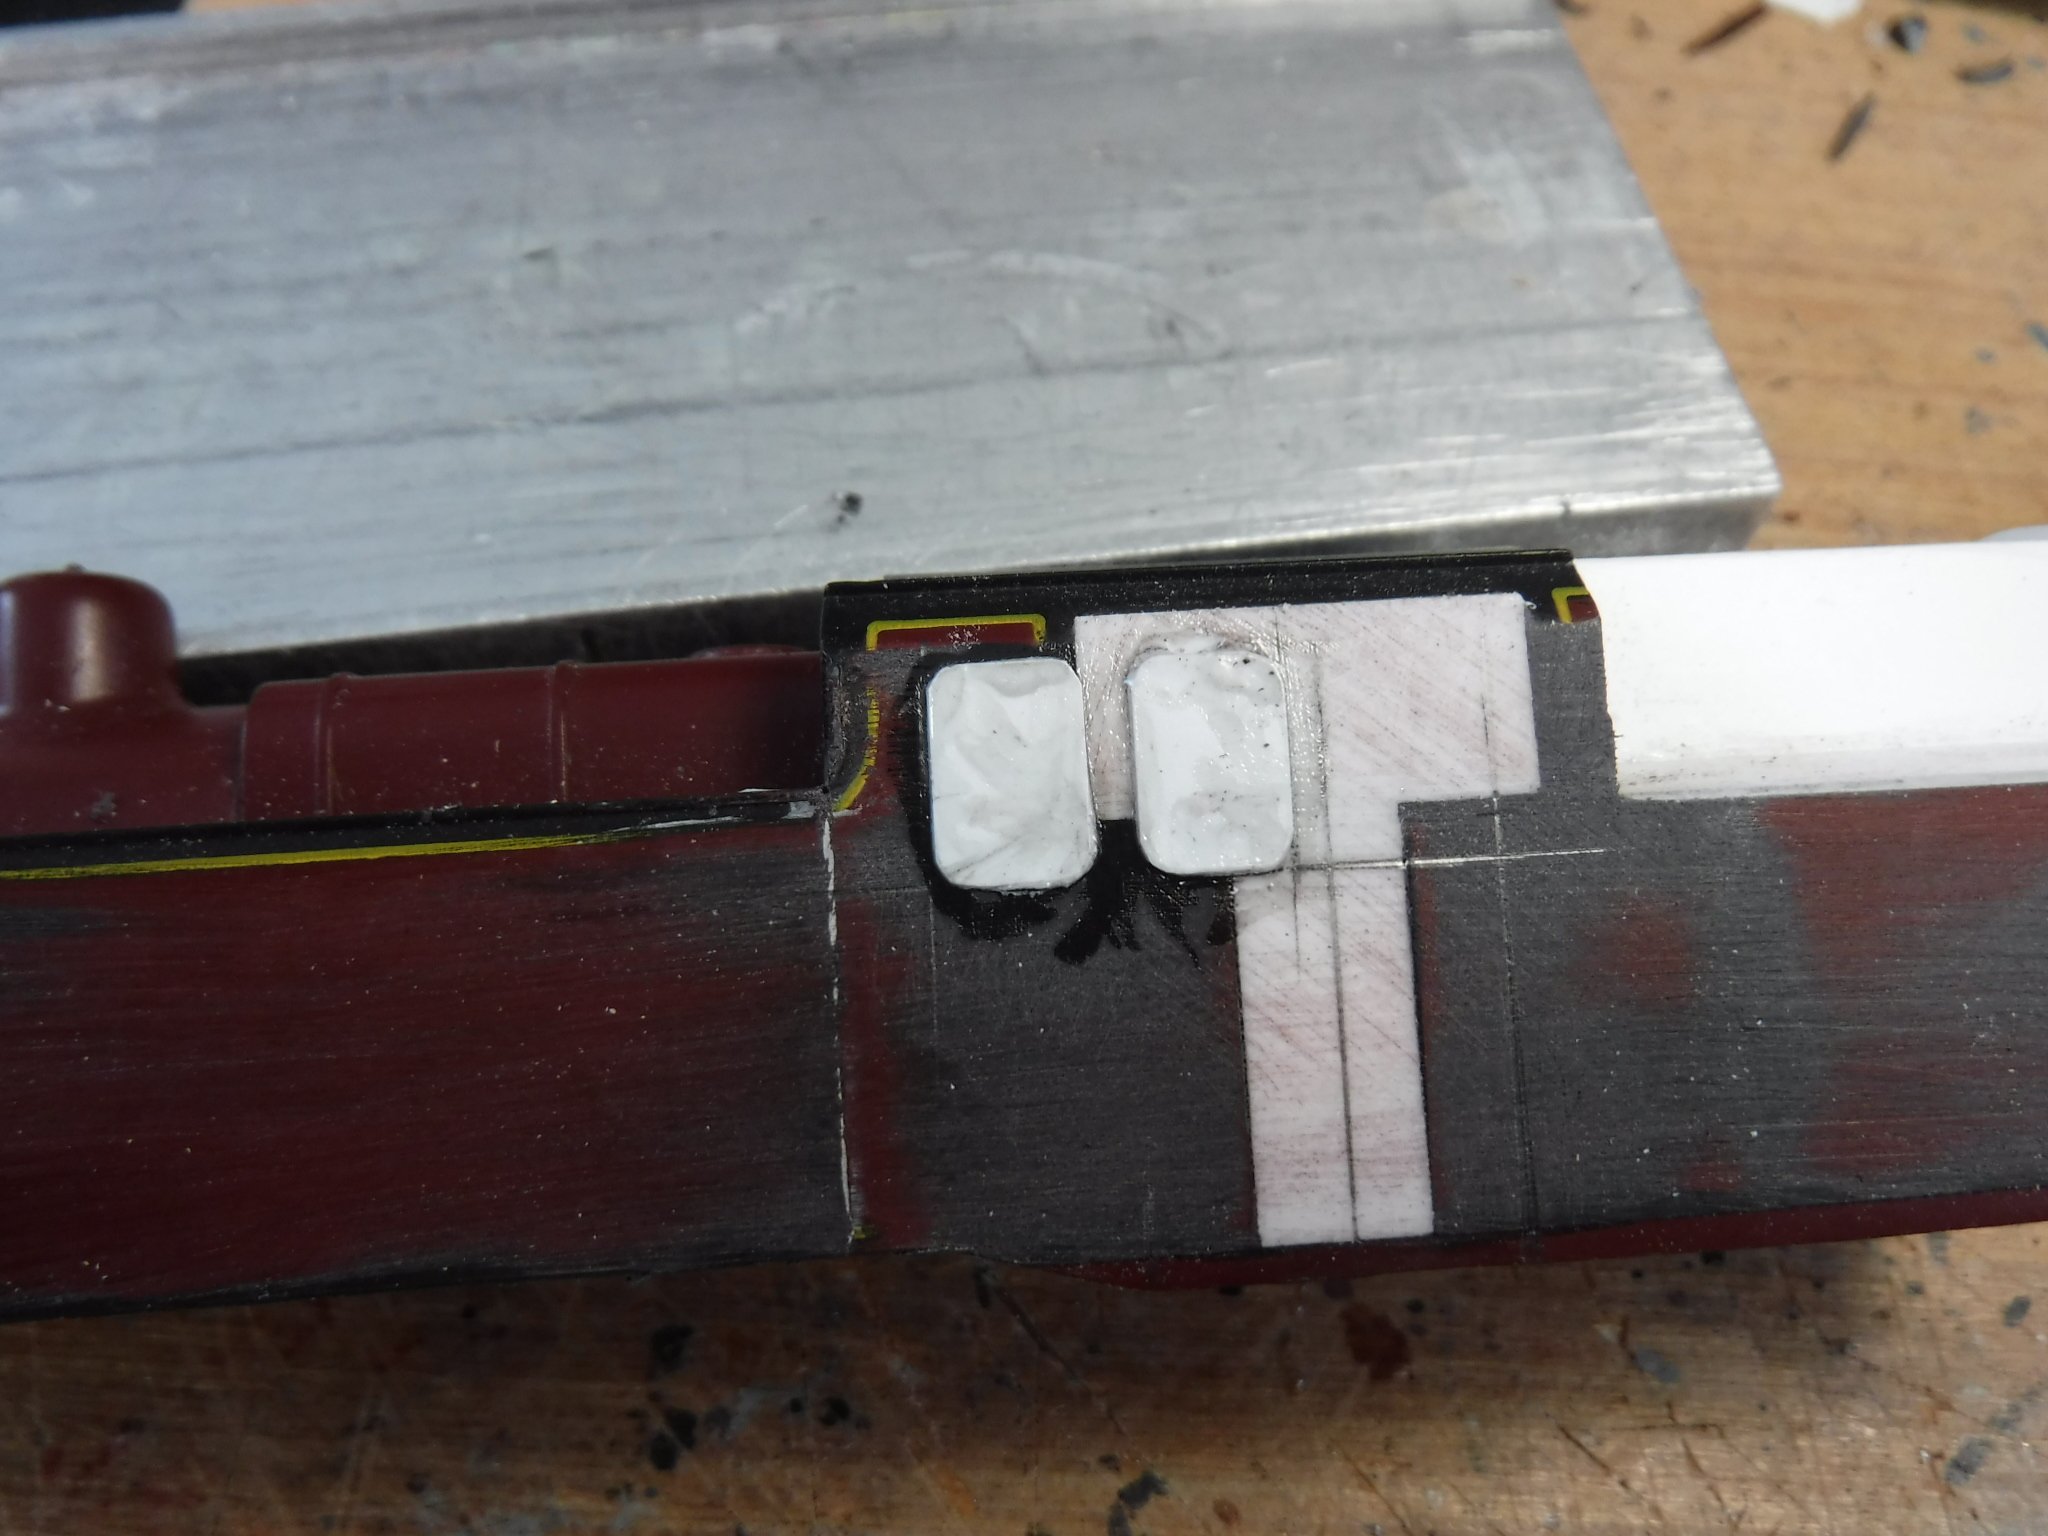
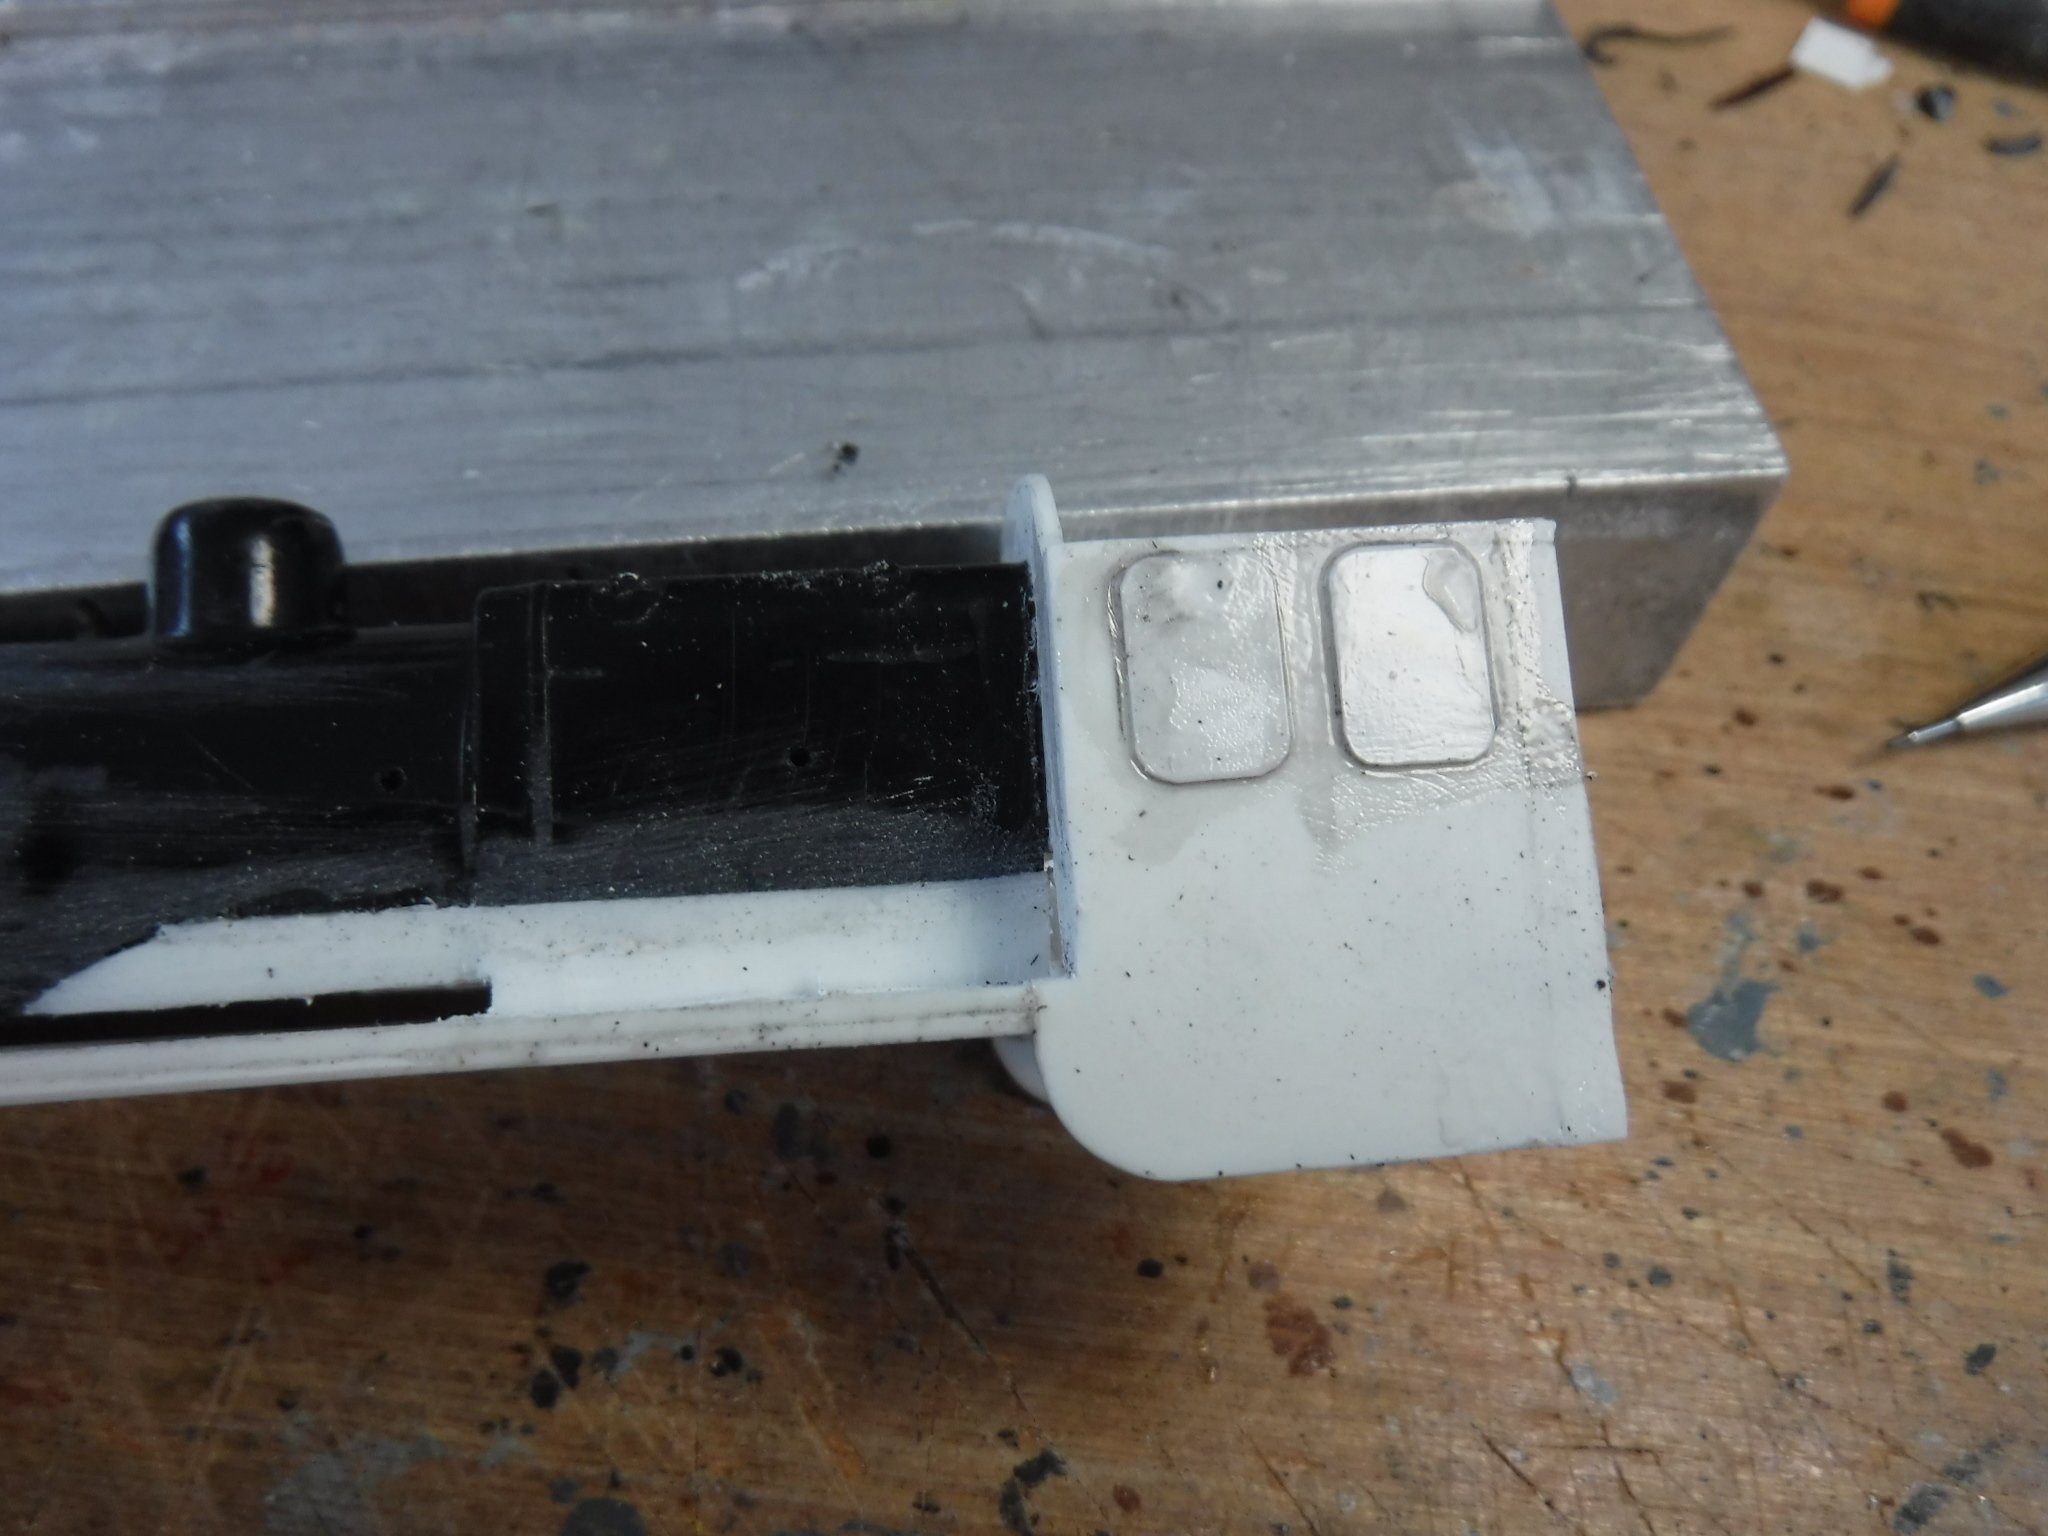
Hi Folks, I've been working on the tender and this is how far I've got with the job. The Hornby tender tank had 5mm cut from its length, I did this by measuring the thickness of the rear end which was 1.5mm and added the 5mm. Very conveniently the red line of the lining is in just the right spot to use as a cutting guide. The next job is to cut the excess from the rear of the tank and file it flush so that it fits squarely and that the tank body measures 79mm. The coal load also needs to be cut back to position the rear bulkhead, this measurement is 22mm from the rear of the tank once the rear is refitted. The cut back tank. The next job is to fit a floor to the tank, the floor has to have a rectangular hole to fit over the chassis. The floor measures 85mm X 35.5mm, the hole is 72.5mm X 25.5mm and was filed to fit snugly onto the chassis. The tighter the fit the better it will sit on the line of rivets above the leaf springs. The hole is set back 6mm from the front edge, and when glued in place there is a 3mm ledge at the rear. This shows the hole in the tank floor, There is a step under the front of the tank that requires cutting off and filing flush. To fix the tank onto the chassis I made up a lug that accepted one of the original fixing screws from 1/8" and 3/16" Plastruct tube a slight over 5mm long. It was held in place by the screw with glue applied to its end the tank was then positioned into place and once cured and attached to the tank it was filed down so that it would correctly locate. The fixing lug in place. The rear screw was fitted into a rectangle of plasticard 30mm X 14mm which was positioned into the rear of the tender, the tank put into position and then the plasticard piece was pressed into place and glue applied. Once cured I drilled a 1.5mm hole for the screw to locate. The plate with the screw hole drilled. The tank then needed alteration to change its styling from Fowler to Stanier pattern. I marked it out the easy way by using a Stanier Jubilee tender as a template and then cutting out to the pencil line drawn. The tank top and rear bulk head fitted, both made from .030" plasticard. The bulk head needs to be at least 16mm tall so that it may be cut to the correct shape. The plate extensions to the front of the tender made from .060" plasticard, also showing the front bulk head. All three pieces were scribed put using the tender tank as a template. The curved tops to the bunker sides were made up from .060" plasticard strips 2.5mm wide and about 60mm long. This is so that they may be cut back to shape afterwards. These had an angle scraped onto one edge which was at the angle that the plates are when fitted, the bunker bulkheads require the ends trimming to suit to make sure they sit correctly. This shews the extensions after trimming and filing, the filler is because I was a little over keen with the file. The radius of the curved sides starts 2mm down form the top of the original tank proper and blends into the extensions by about 1mm, this will give as near to the correct profile as possible. This shews the filler over the joint of the front extensions. The front extensions were scribed in the same way using the LMS Jubilee tender lined up appropriately. Progress so far. Gibbo.
- 12 replies
-
- 10
-
-
-
Drogheda MacBride Station And Platin Cement Factory
gibbo675 replied to Anders112's topic in Irish Model Layouts
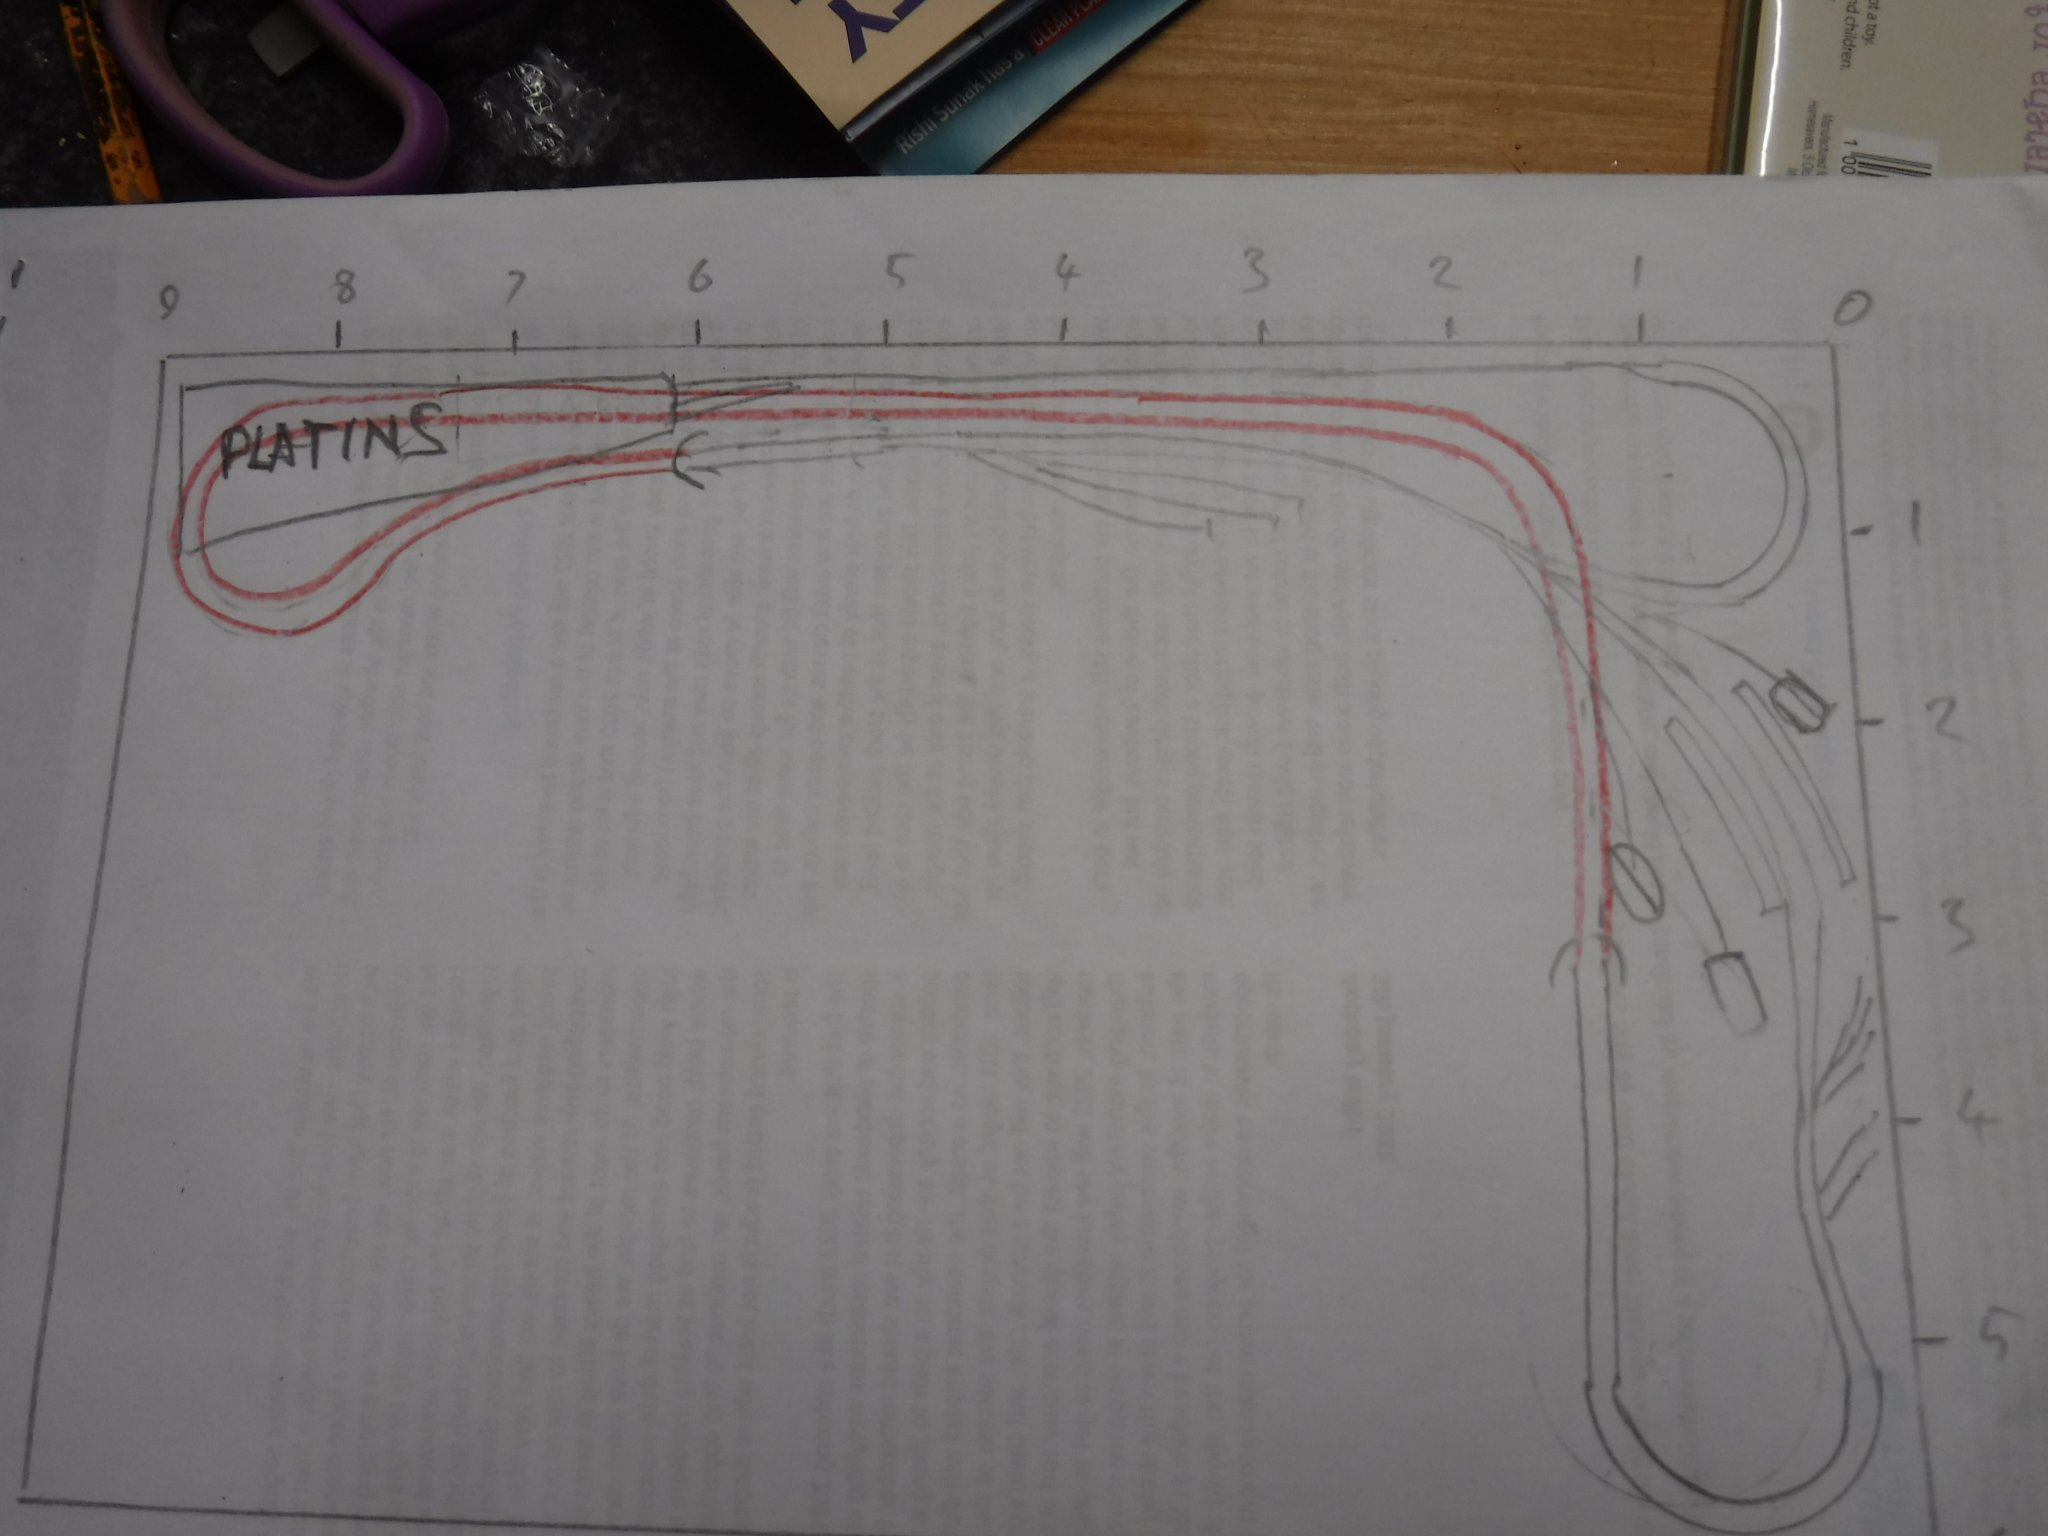
Hi Anders, You asked for tips and tricks a couple of posts previously. From what I see of your track plan could you not place the Drogheda part of the layout in the corner of the garage and have the Navan branch double back along the other wall behind a scenic break where Buckie's sidings would be placed and pop out in the far corner at Platin's. The return loop could run underneath where the tracks are shewn in red. The tight curves are approximately 3rd and 4th radius which are 505mm and 572 respectively you could save a little by using smaller radius curves. All the other curves could be done in flexi track to suit and the board might be just over 1m wide at the widest point. Having the layout on an "L" shaped shelf leaves you with about 7m X 4M of floor space left in the garage. It should give you roughly the same amount of track joined up by long thin bits on shelves around the edge. You could put loops in along the joining bits or underneath where the track is marked in red. Gibbo.
-
NCC WT class from Hornby LMS Fowler class 4, 2-6-4 tank
gibbo675 replied to gibbo675's topic in Irish Models
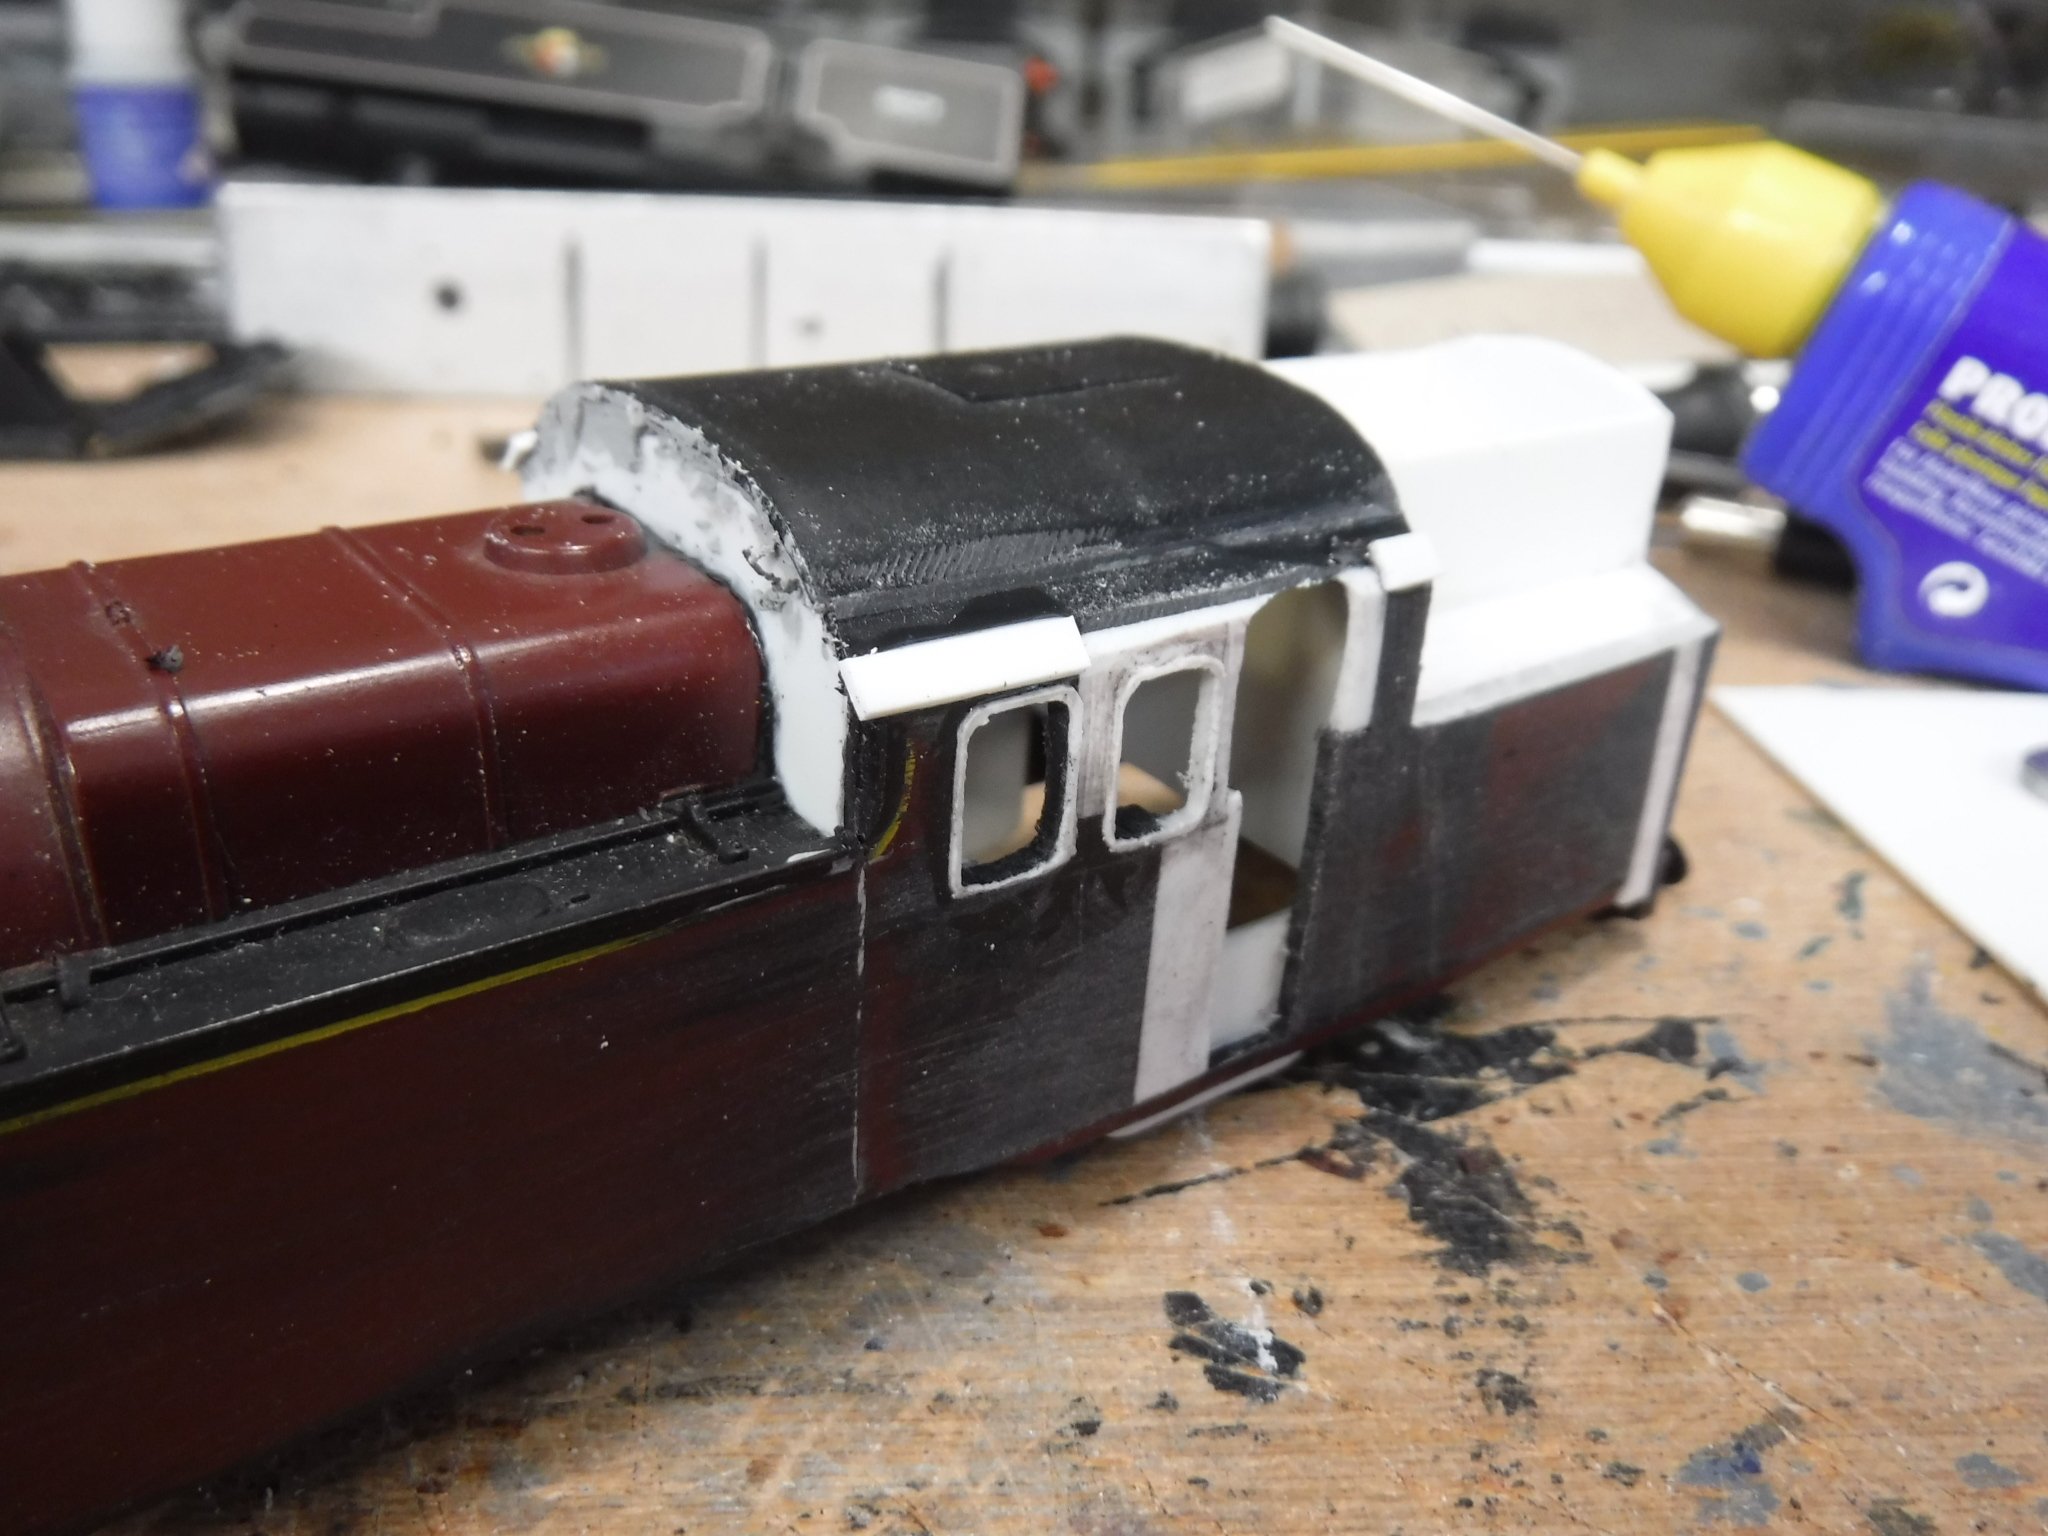
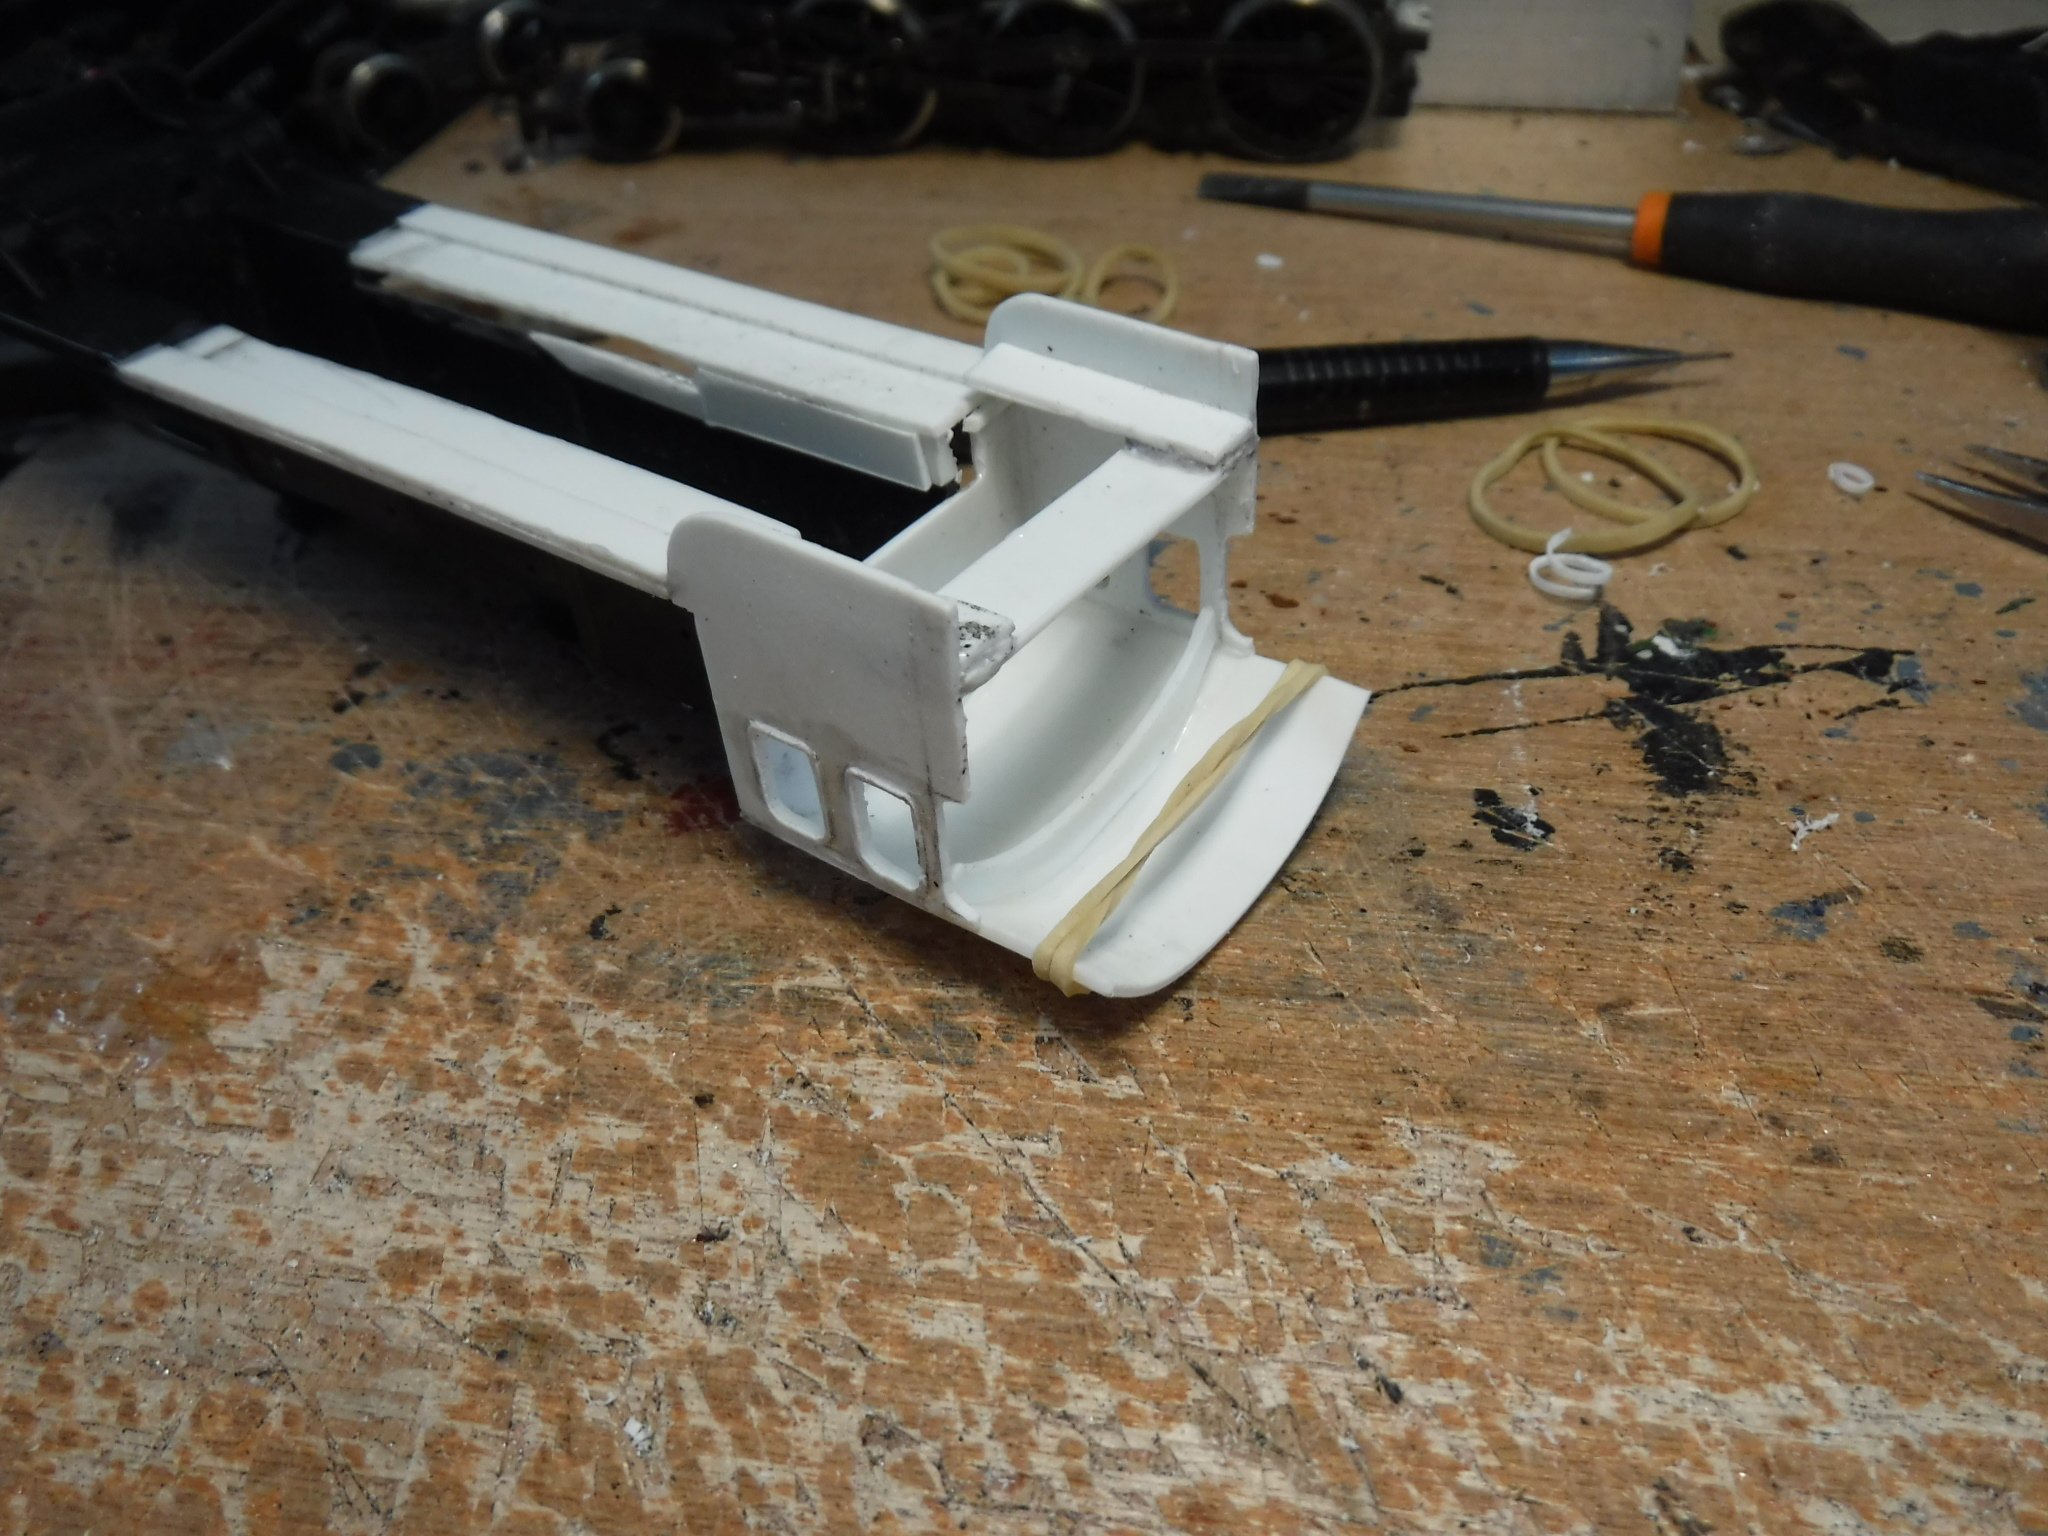
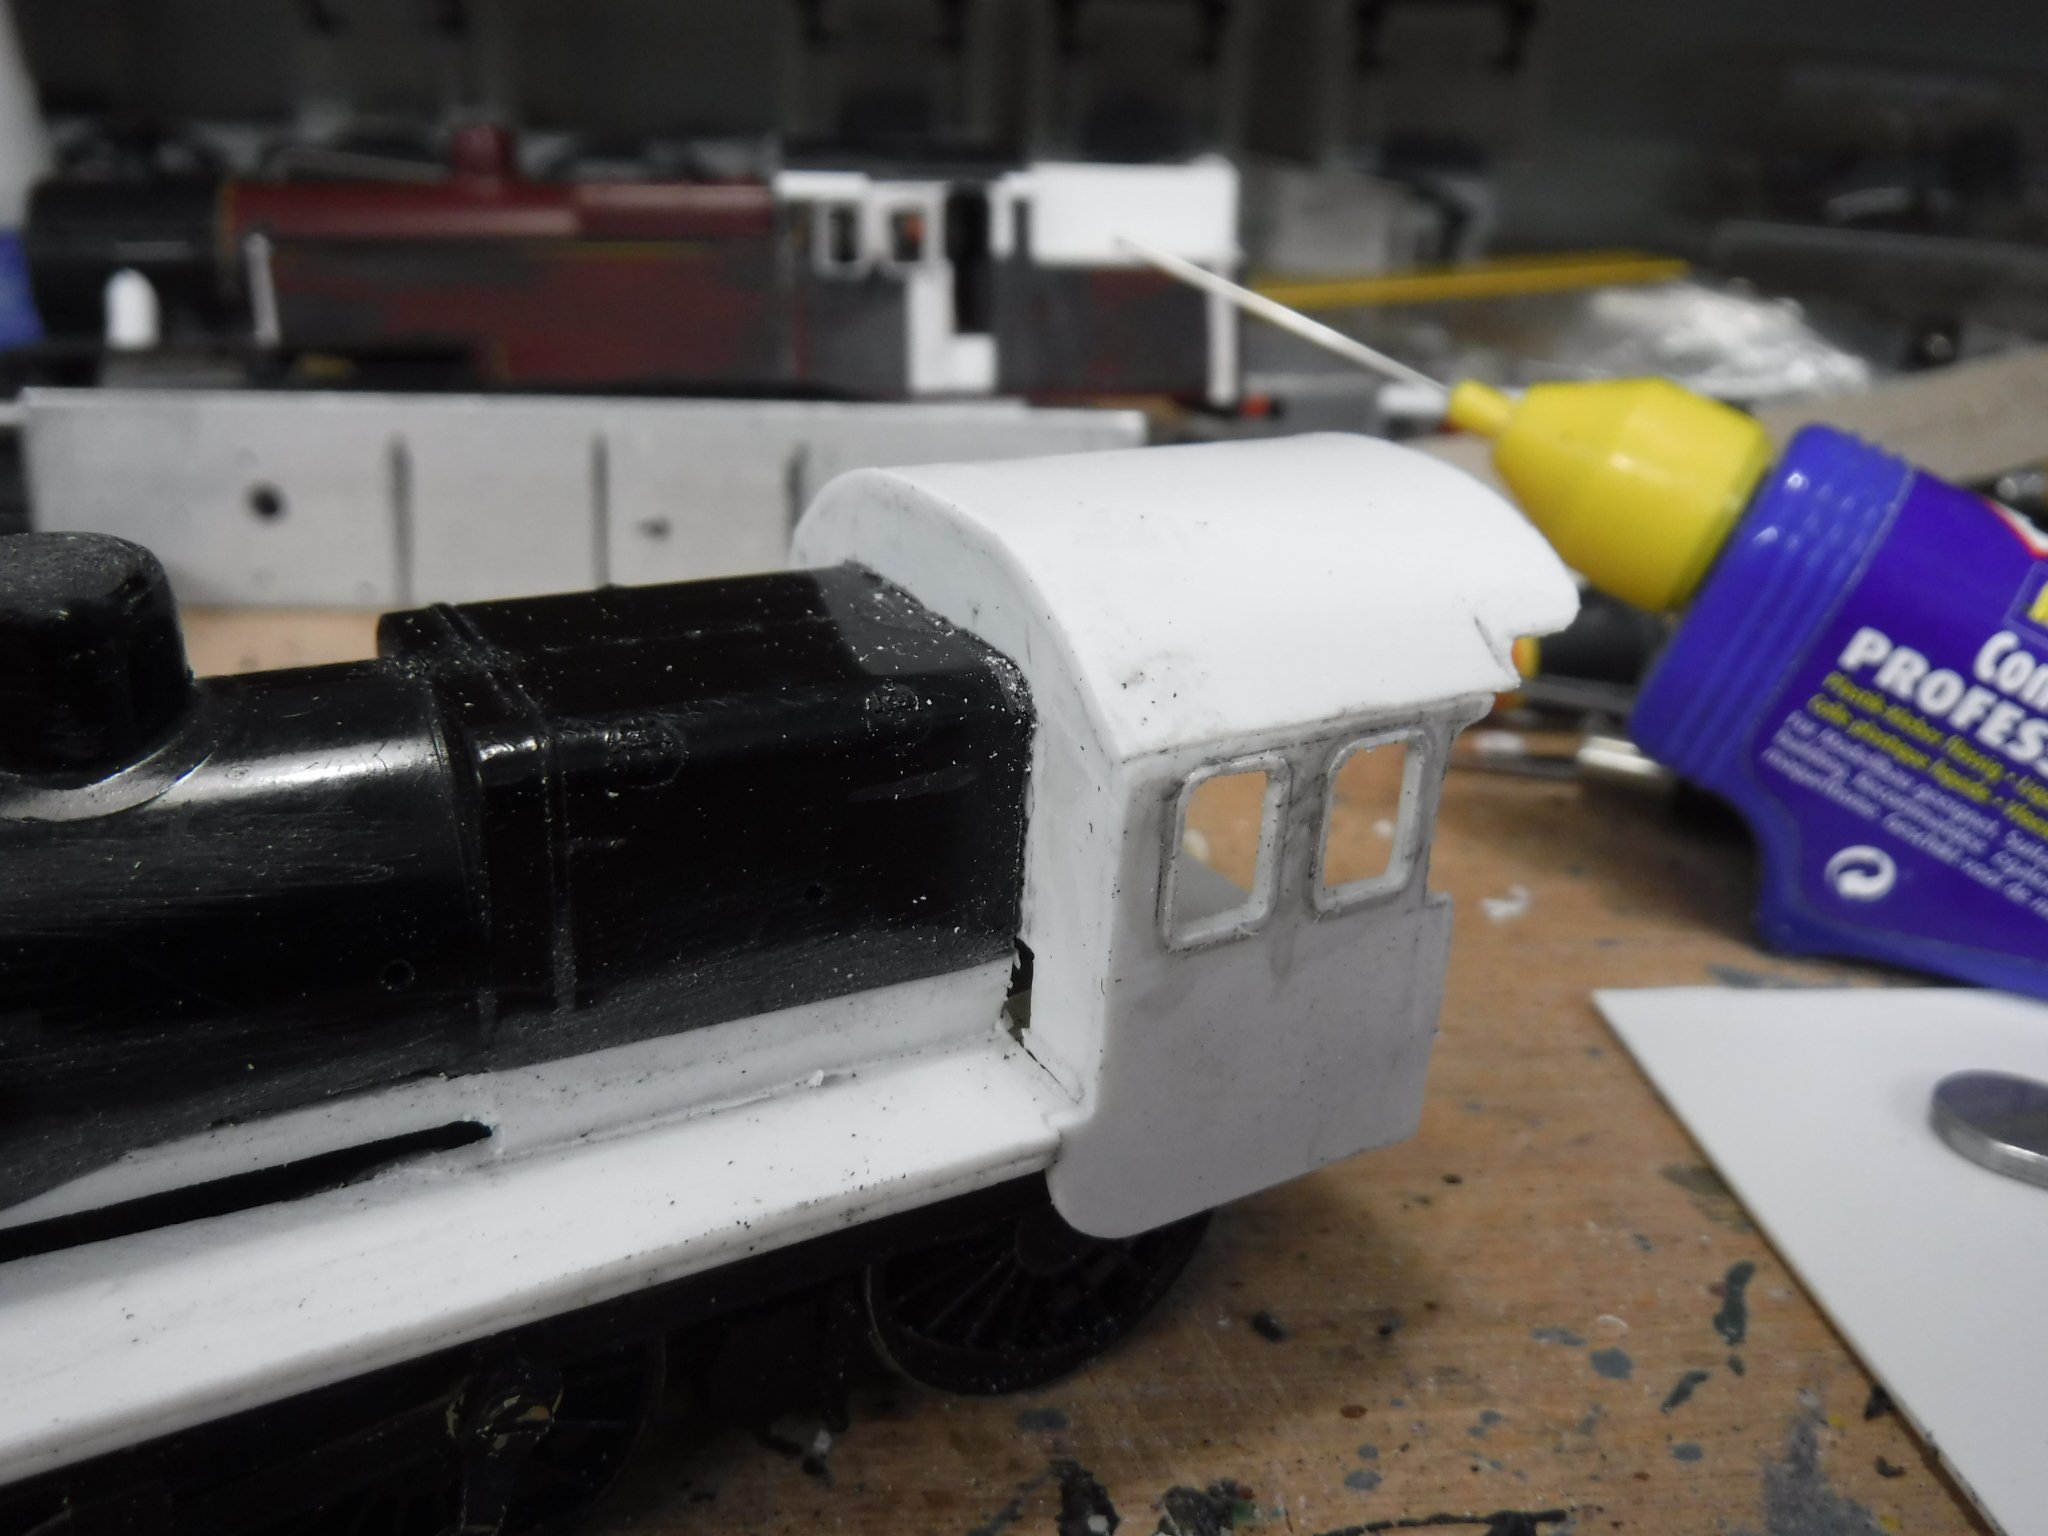
Hi Folks, The cab side s have been tidied up a slight and the spectacle plate fitted along with a trimmed back cab roof as the WT is shorter than the Fowler class 4. The original rain strip has been carved off and some .030" plasticard has been glued at the gutter edge of the cab roof to make up for the curved profile of the Fowler 4 shape. This will be carved back and filed to shape once cured with the spectacle plate windows being cut and filed to shape. A bit of shaping and filing will sort out the shape of the cab roof at the gutter edge, rain strips will also be added. Gibbo.
-
NCC W class from Hornby LMS Fowler class 4, 2-6-4 tank
gibbo675 replied to gibbo675's topic in Irish Models
Hi Folks, I have fitted the cab roof today formed form a piece of .040" plasticard, I also cut and filed the cab side windows to shape. The cab roof was cut a slight too long to allow for trimming back. The stiffening rib is to be seen with the elastic band to hold shape while the glue sets. Cab roof trimmed and filed to shape, the spectacle plate windows are next along with the little holes to patch up. The holes are from minor miscalculations fitting the cab over the chassis, nothing a dab of glue won't fix ! I shall also fit the rain strips and ventilator to the cab roof at the same time. Gibbo.
-
Hi There, I note you have folks that live in Southport, not far from Burscough where Universal Bulk Handling built these Bulk Haul reefer tanks. The factory was levelled about two years ago and the site is now brand new "toy town " housing development. Gibbo.
-
NCC W class from Hornby LMS Fowler class 4, 2-6-4 tank
gibbo675 replied to gibbo675's topic in Irish Models
Cheers for that, I shall make good use of it. The last drawing you sent on I placed in the library with credit to your self. Gibbo. -
NCC WT class from Hornby LMS Fowler class 4, 2-6-4 tank
gibbo675 replied to gibbo675's topic in Irish Models
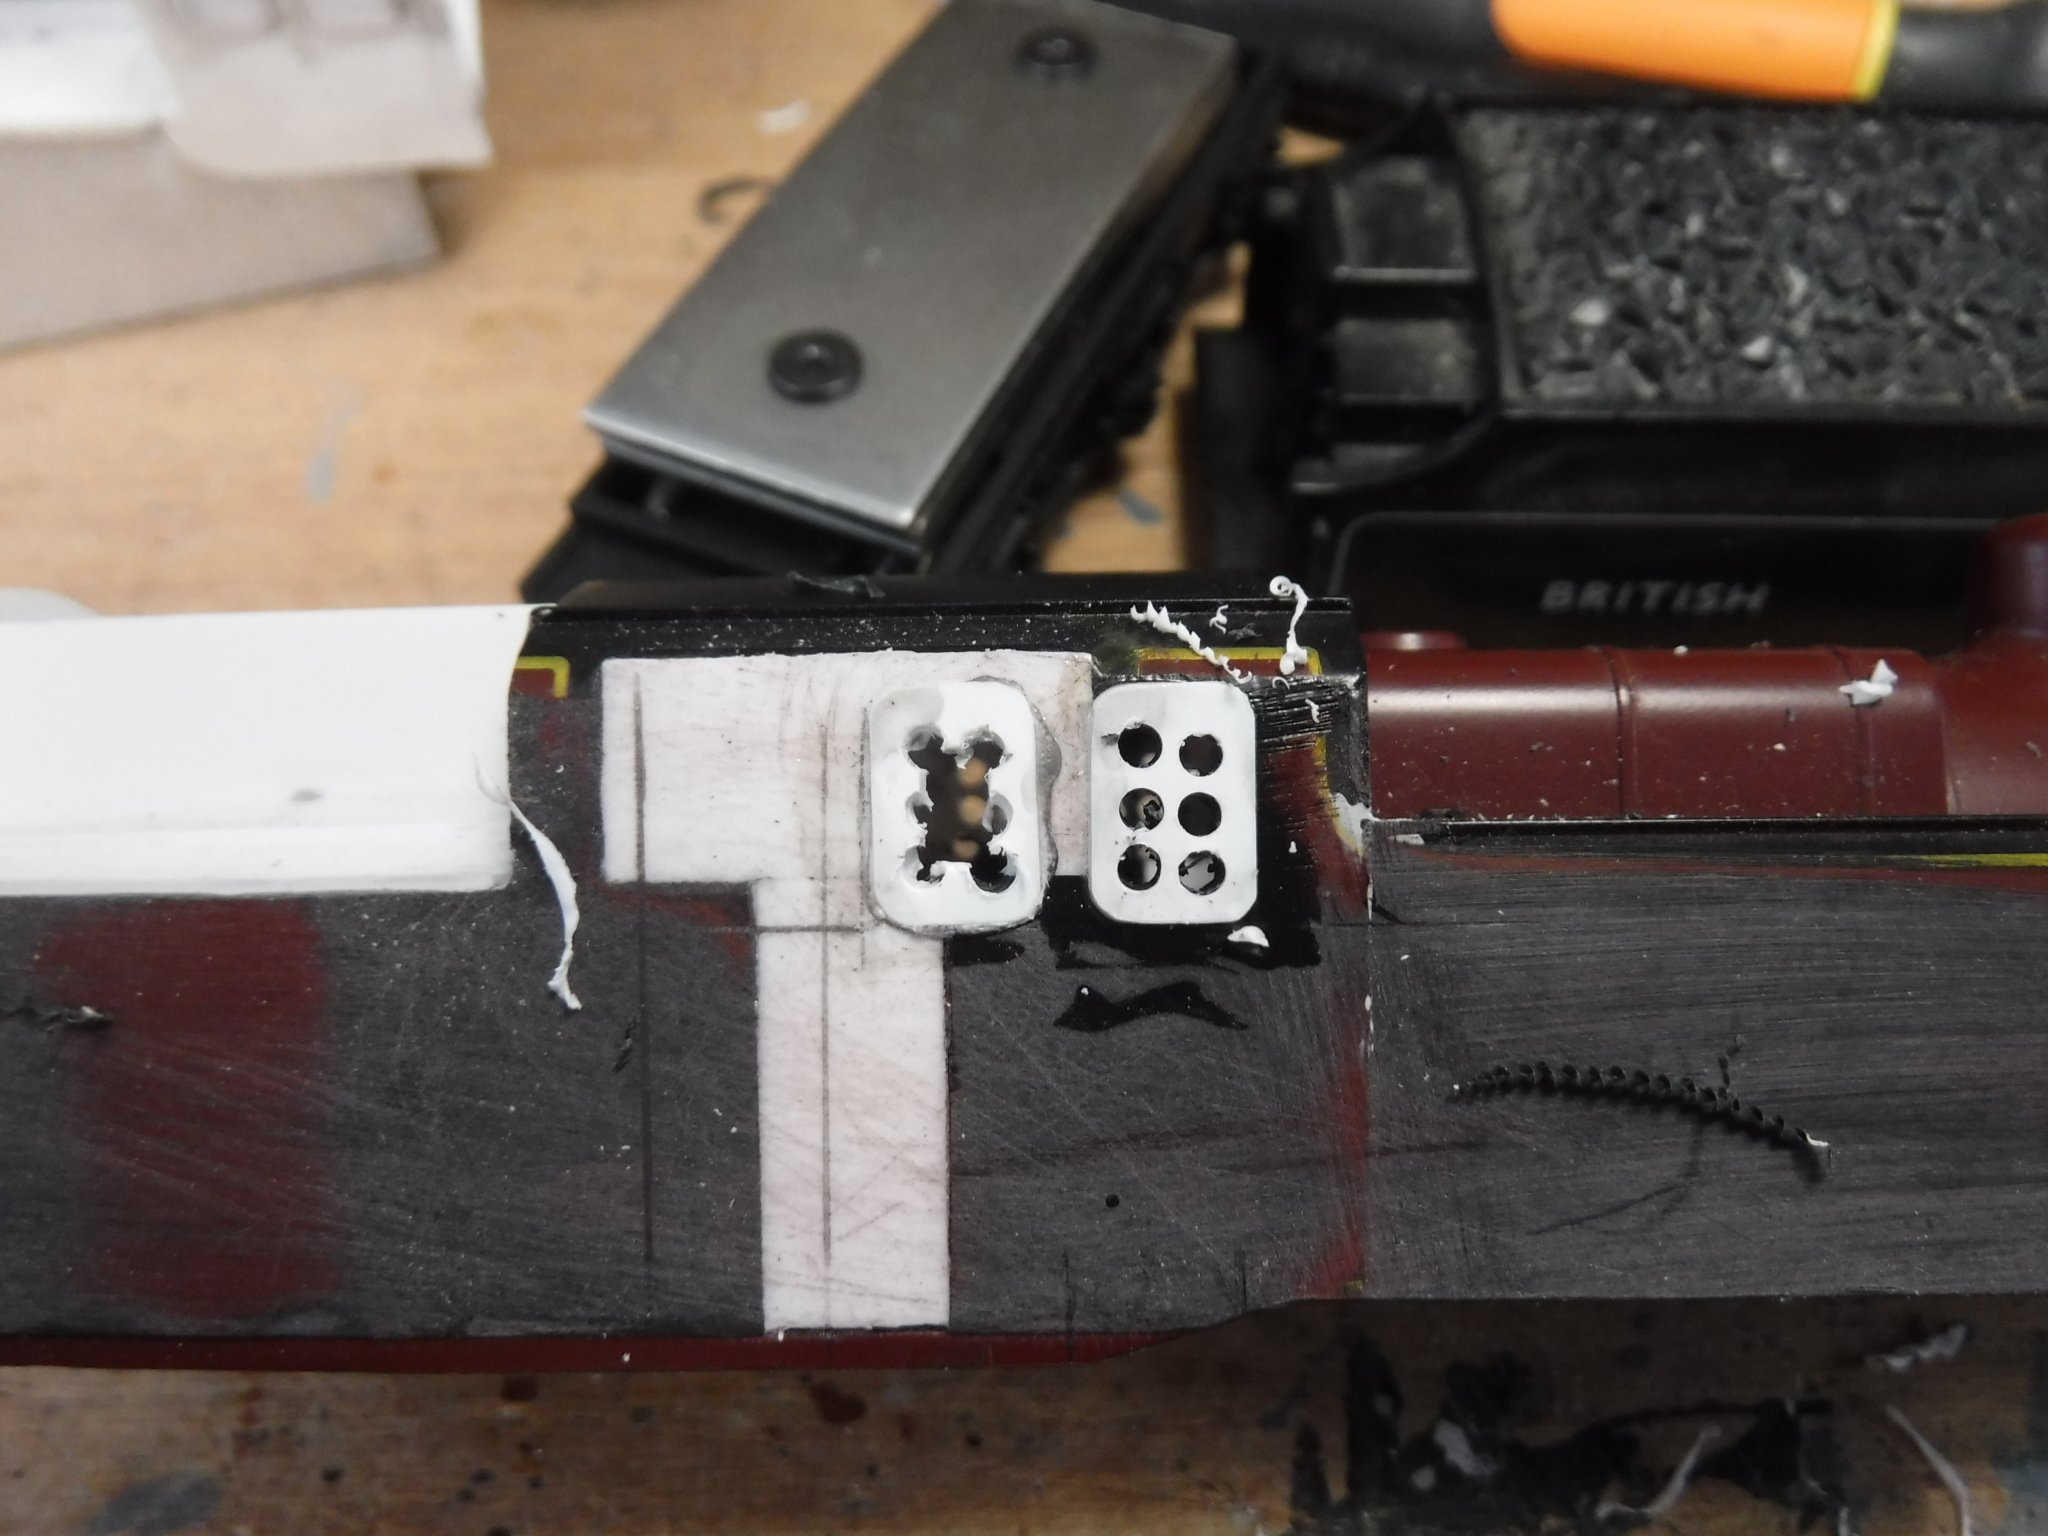
Hi Folks, I've done a bit more with the WT class cab sides, the cab side windows have been cut and filed to shape and also the doorways cut in and filed to shape and balance pipes added. This photograph shews one window pierced and one cut out ready for filing to shape. The window blanks were filed to within about .5mm of the edge with the top corners being filed with a round file and the bottom corners with a square file. A slight mistake with the window blanks was to put too large a radius on the outside of the bottom corners, such is life. After the doorways were cut in the balance pipe for the tanks under the bunker had to be made up along with the step block in the bottom of the cab doorway. First filed away the remnants of the cab doorway reveal and then I cut a piece of .040" plasticard 8mm X 10mm gluing it in place flush with the bottom of the tanks. The balance pipes were made from .060" plasticard 10mm X 16mm with 2.5mm radii filed on two of the corners. The bottom of the doorways were blanked off with the .040" and the door reveals filed down slightly to match the thickness and the .060" piece was then glued to that so that 2.5mm projected from under the tanks. The chassis then requires 3mm X 5mm relief to clear the balance pipes. This shews the reliefs to clear the balance pipes. How it all looks so far, no front spectacle plate and no cab roof proper as yet. I had wondered about using a James the Red Engine as a basis for a model of K2 class No. 461 and then discovered how much they are on eBay. Perhaps not. Gibbo.
-
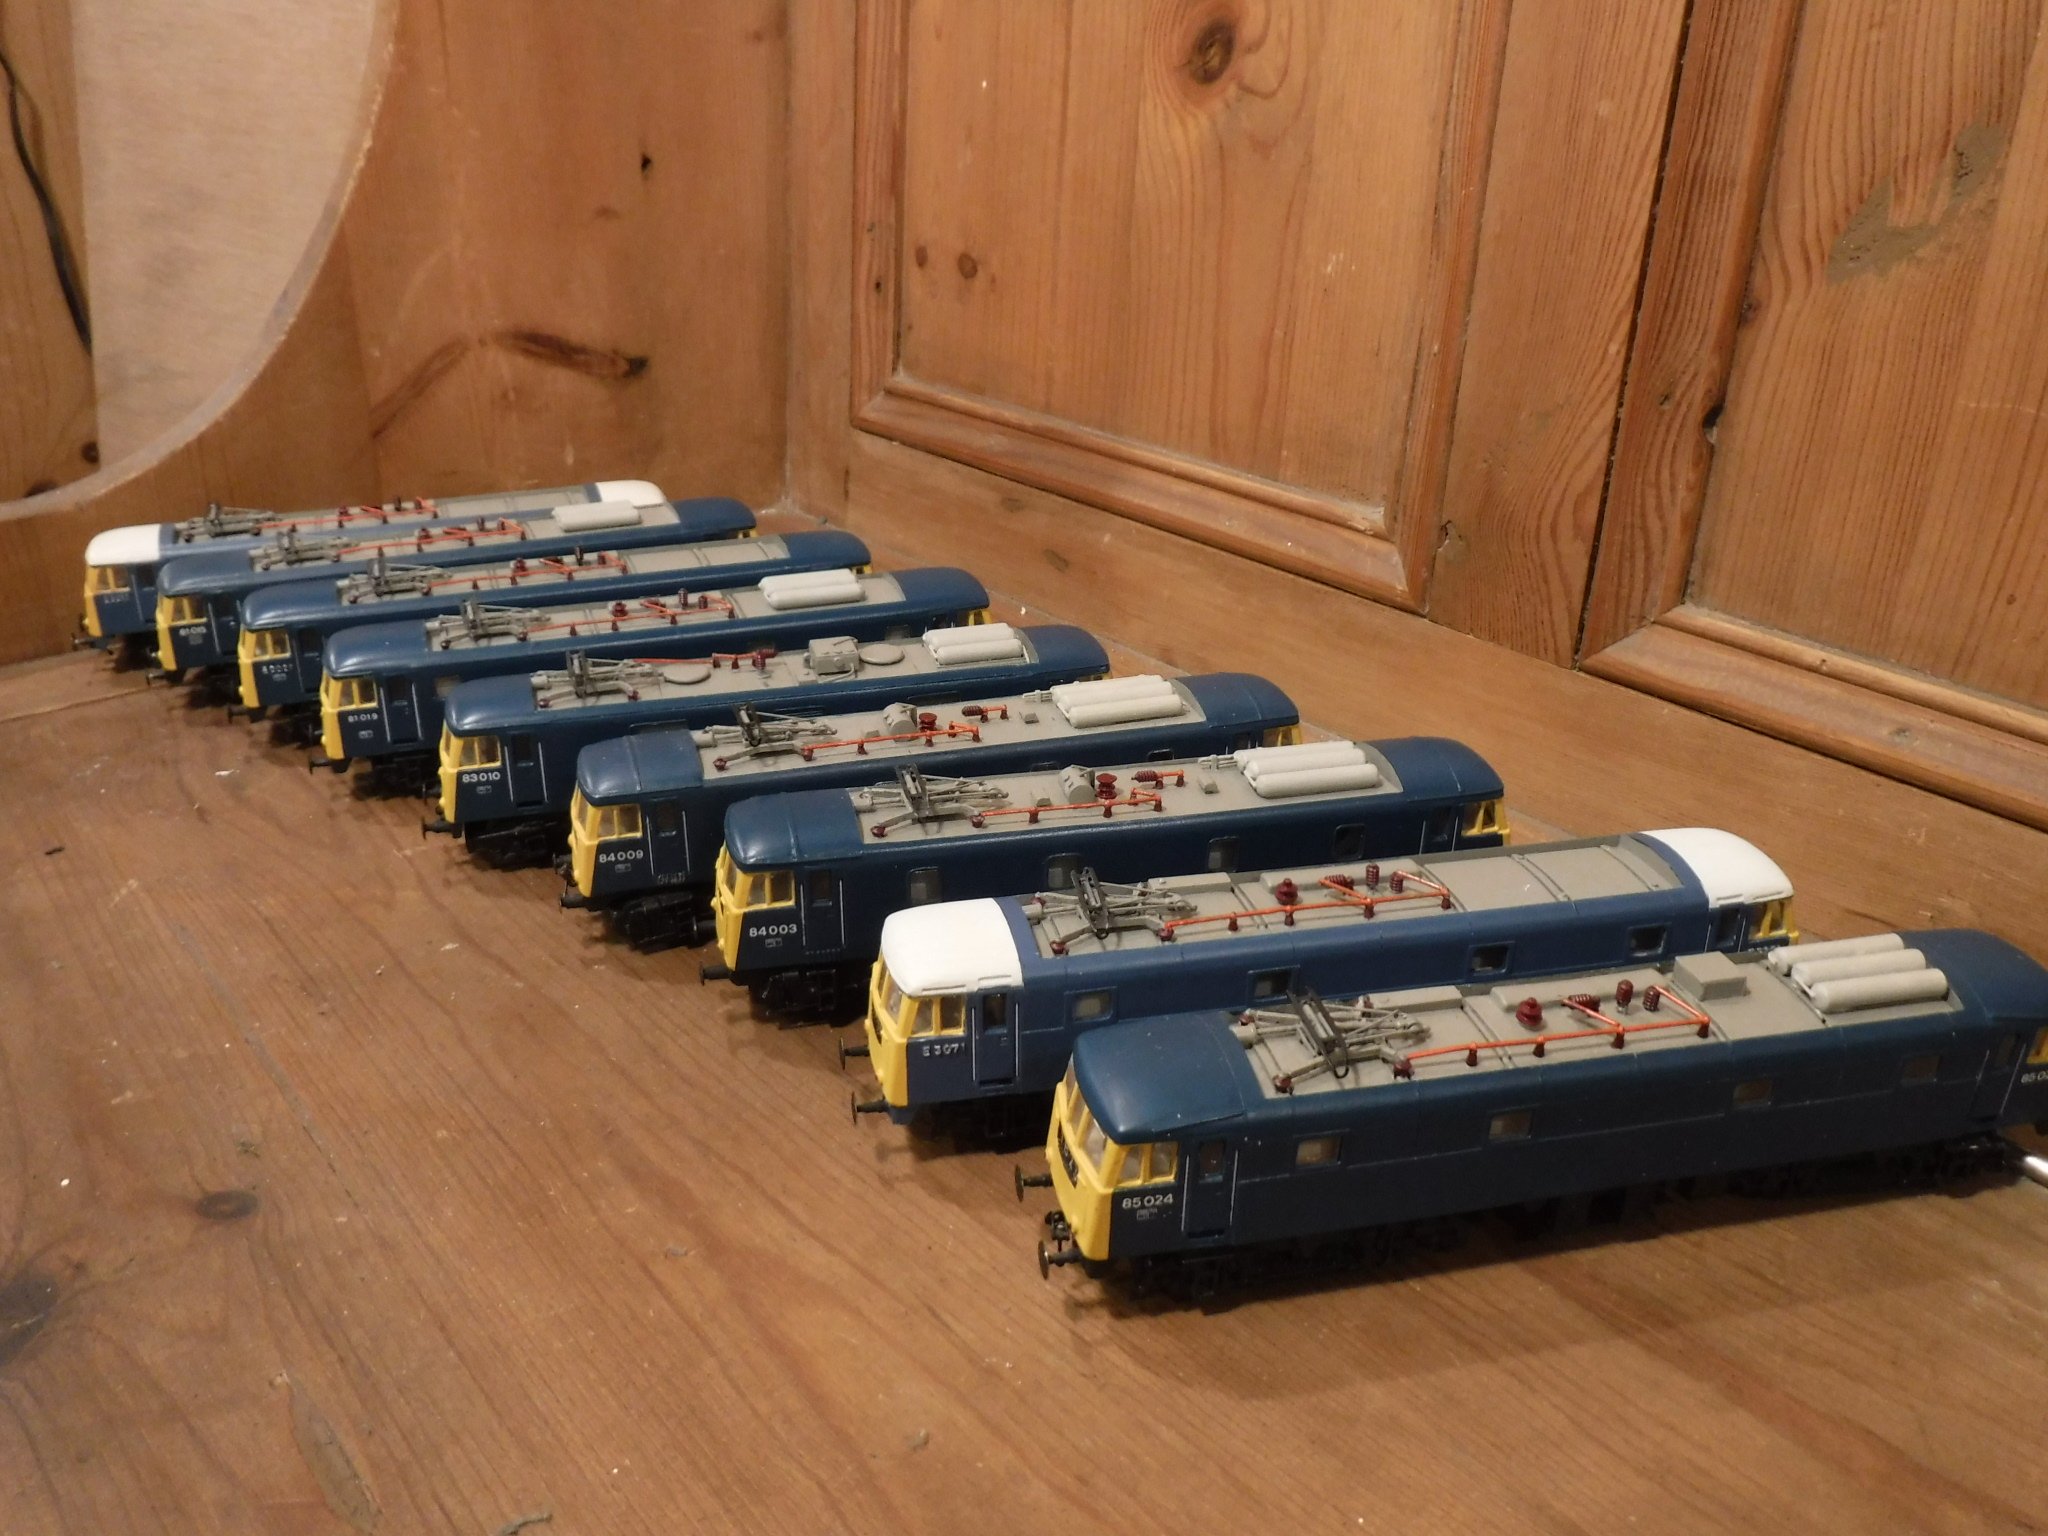
HI Darius, Here is my similar line up. From the back, four 81's, 83, two 84's and two 85's. The 82 was missing because the varnish coat had bloomed and it was undergoing a repaint, it has since been completed and is to a similar standard. Gibbo.
-
NCC WT class from Hornby LMS Fowler class 4, 2-6-4 tank
gibbo675 replied to gibbo675's topic in Irish Models
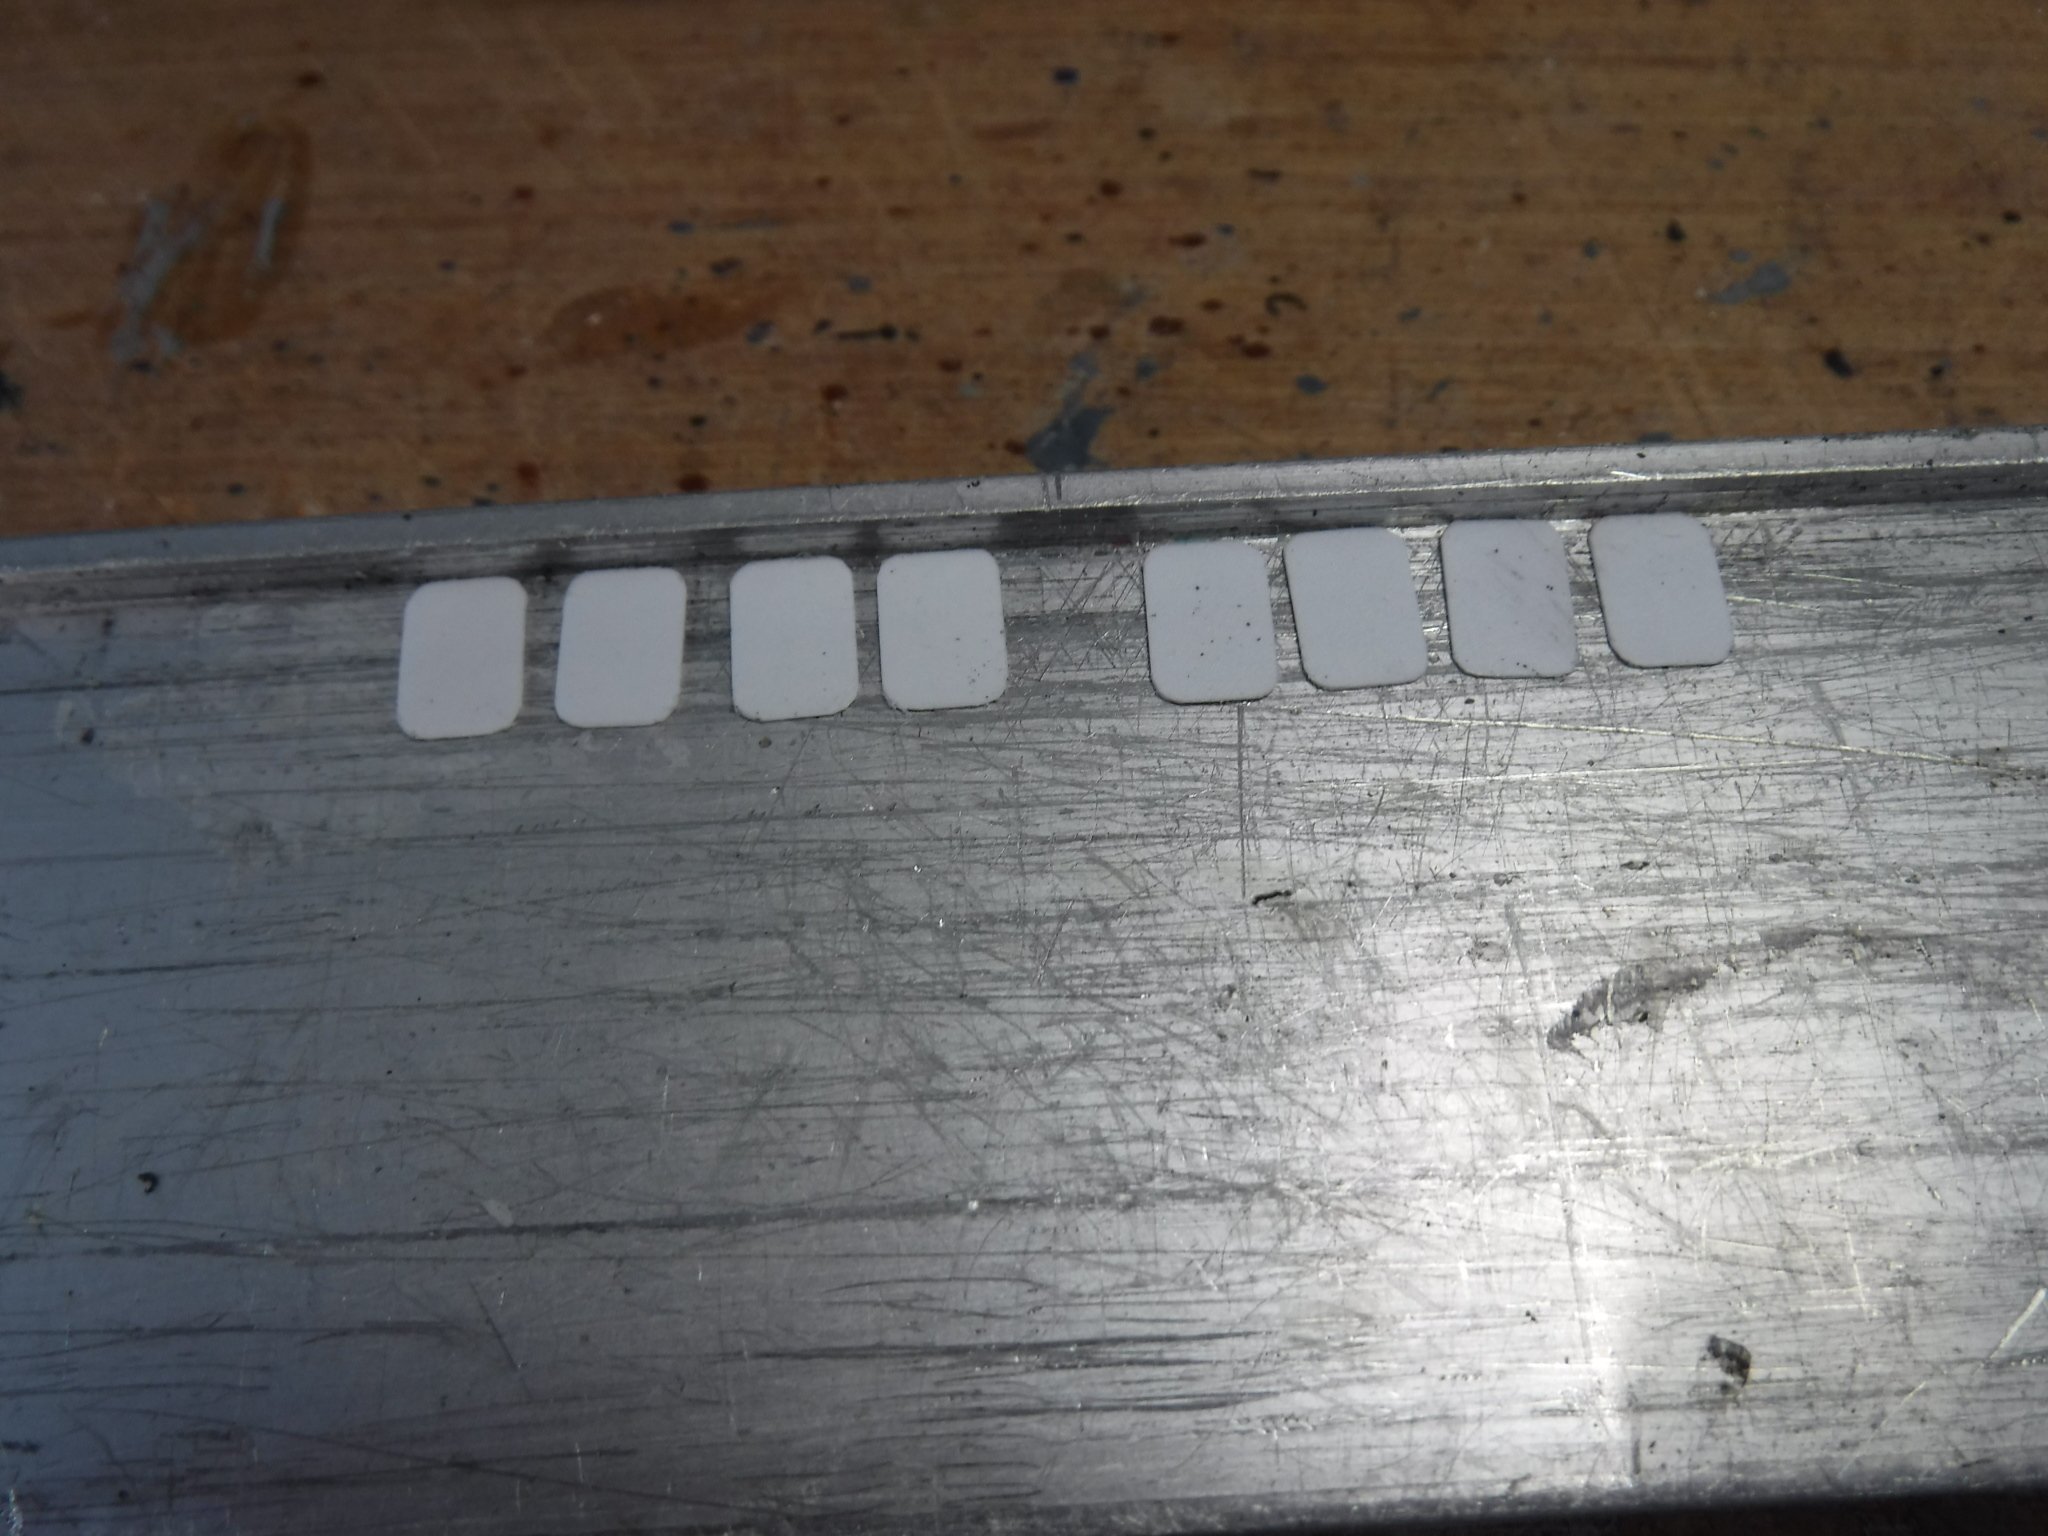
Hi Folks, I've been busy with the V class 4-4-0 this last week although things have started moving again with the WT class. The lower edge of the tanks have been altered to accord the drawing supplied by Hadren Railway (how do you tag user names ?) and I have filled and sanded flush the joints in the various cuts and infills on the tank sides. I also marked out the cab door way and the position of the cab side windows. The cab windows have beaded edges and my way of representing beaded window edges is to glue a bank onto the site of the window and when cured cut out and file out the window through the blank. When finished all that should be left is the beaded edge around the window aperture. Window blanks for both the WT and W class locomotives. The window blanks glued into place, the lower edge is 17mm from the bottom edge of the tank, the front edge of the front window is 4mm from the front spectacle plate, and the dimension over the outer edges of the windows is 15mm. The cab door way is 7mm wide and is 5.5mm from the rear spectacle plate. Gibbo.
-
NCC W class from Hornby LMS Fowler class 4, 2-6-4 tank
gibbo675 replied to gibbo675's topic in Irish Models
Hi Folks, I've been busy with the V class 4-4-0 this last week although things have started moving again with the W class. One thing is that I've sourced a decent enough drawing to work from, it doesn't however shew the whole of the tender but that isn't too much of a problem as I am familiar enough LMS Stanier tenders from which it is derived. Arrived today is the Bachmann LMS Fowler tender frame set which is of the correct dimensions regarding length and wheel base. The tender tank is the cast off from the V class project as it is too wide, too long and the wrong shape for the V class. Very usefully the tender tank is of the correct width and the front bulkhead is of the correct style for the tenders trailed by the W class locomotives and will be modified soon enough. What I have done is to file and sand down the filler on the body shell of the locomotive and also to position some window blanks for the cab side windows. The cab windows have beaded edges and my way of representing beaded window edges is to glue a bank onto the site of the window and when cured cut out and file out the window through the blank. When finished all that should be left is the beaded edge around the window aperture. Window blanks for both the W and WT class locomotives. The window blanks glued into place, the upper edge is 1mm from the top edge of the cab, the front edge of the front window is 3mm from the front spectacle plate, and the dimension over the outer edges of the windows is 15mm. The cutaway at the rear edge of the cab has been marked out , the glue has partly obliterated the marking out, and is 1mm form the top edge of the cab and 10mm X 2mm, the corners are radiused. Gibbo.
-
I have to say I've been playing trains since 1973 when I received my cousins cast off Hornby Dublo Caledonian set for my first proper model train set, 46245 City of London and two Stanier tin plates, still got them. I did have about 25 years out when I converted to 304.8mm to the foot scale when I rebuilt steam locomotives at Riley & Son's in Bury for a living Just for you though, recently photographed but built in about 1988 or 36 years ago if you prefer. In the background are a half built LMS 50ton Cravens Crane and the undergibbons (a Darius43 joke) of a BRCW class 27. Gibbo.


.JPG.38bf6d0bb93ab9391cf38a695aa673f9.JPG)