

irishthump
-
Posts
1,840 -
Joined
-
Last visited
-
Days Won
7
Content Type
Profiles
Forums
Resource Library
Events
Gallery
Blogs
Store
Community Map
Posts posted by irishthump
-
-
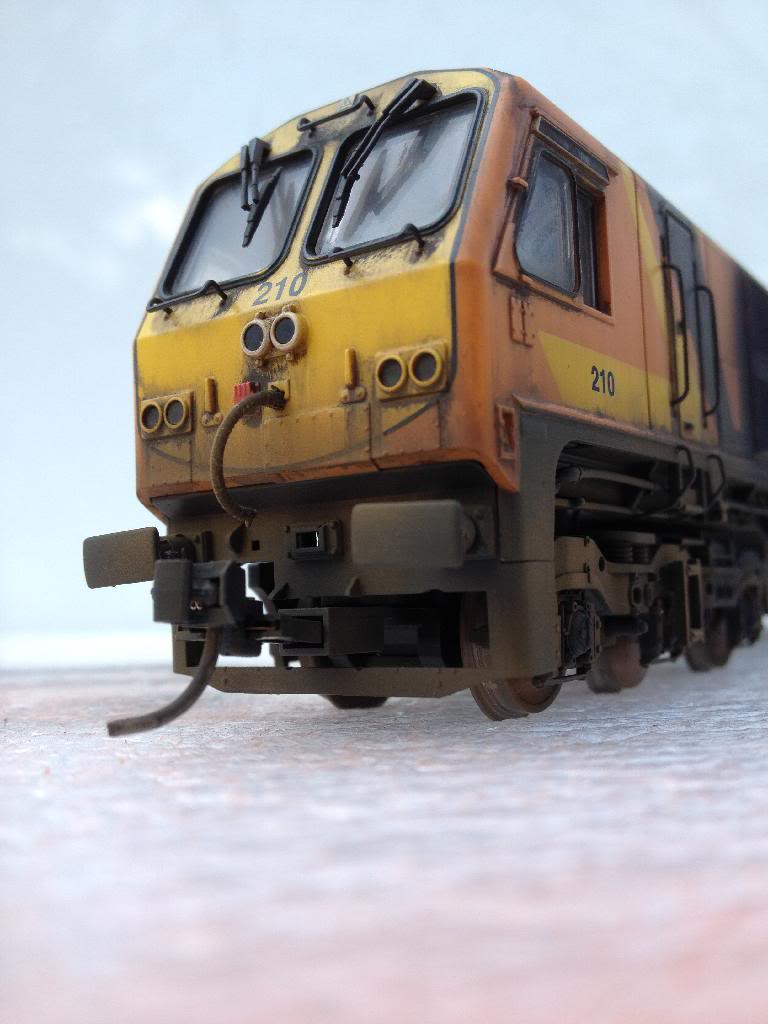
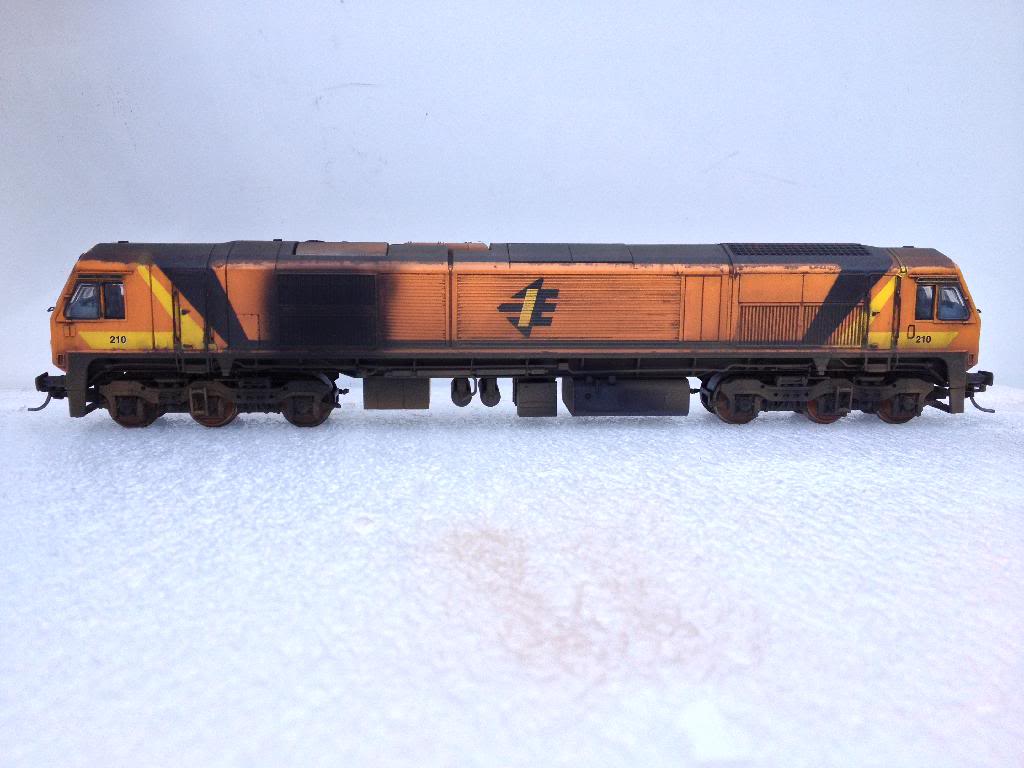
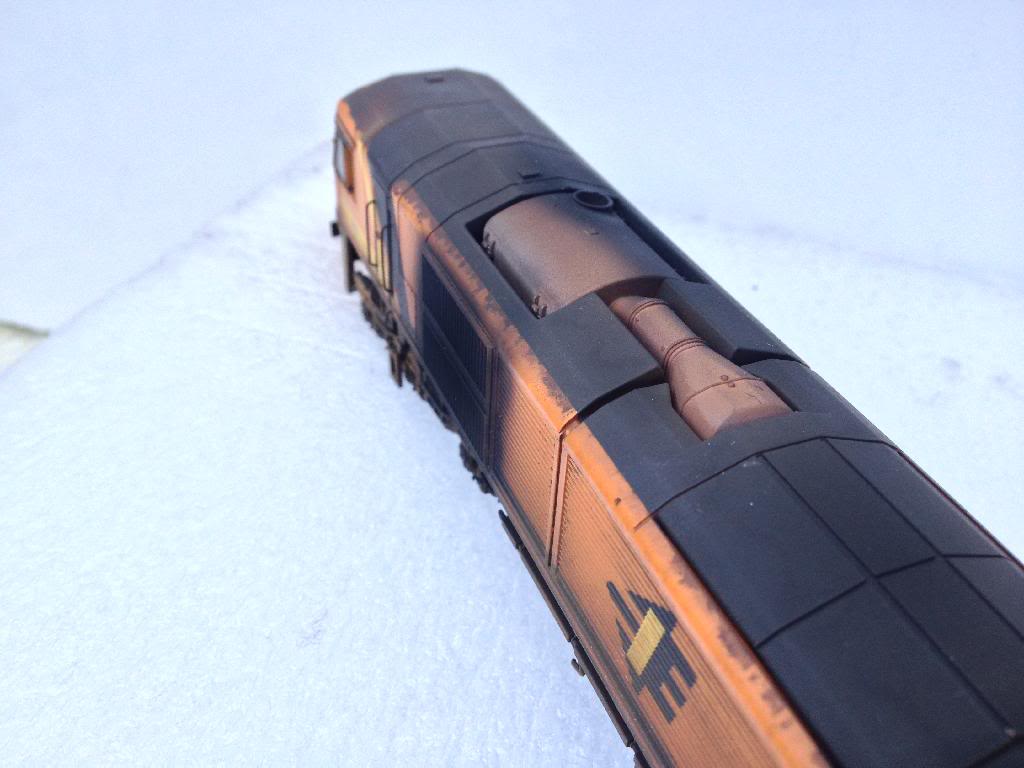
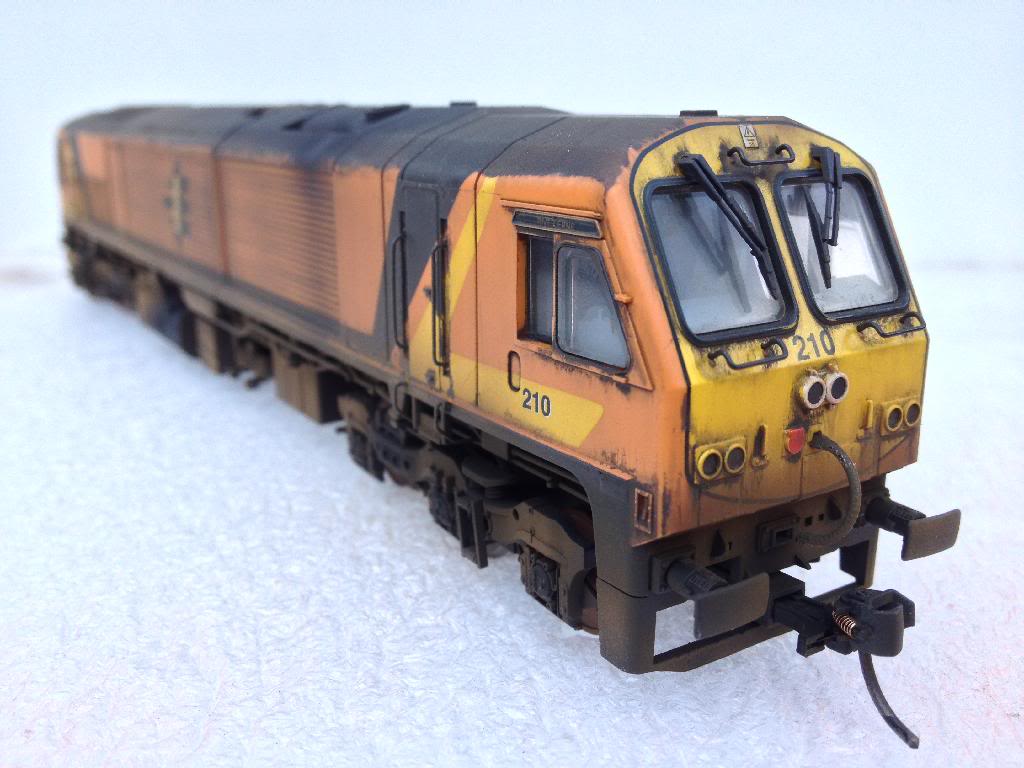
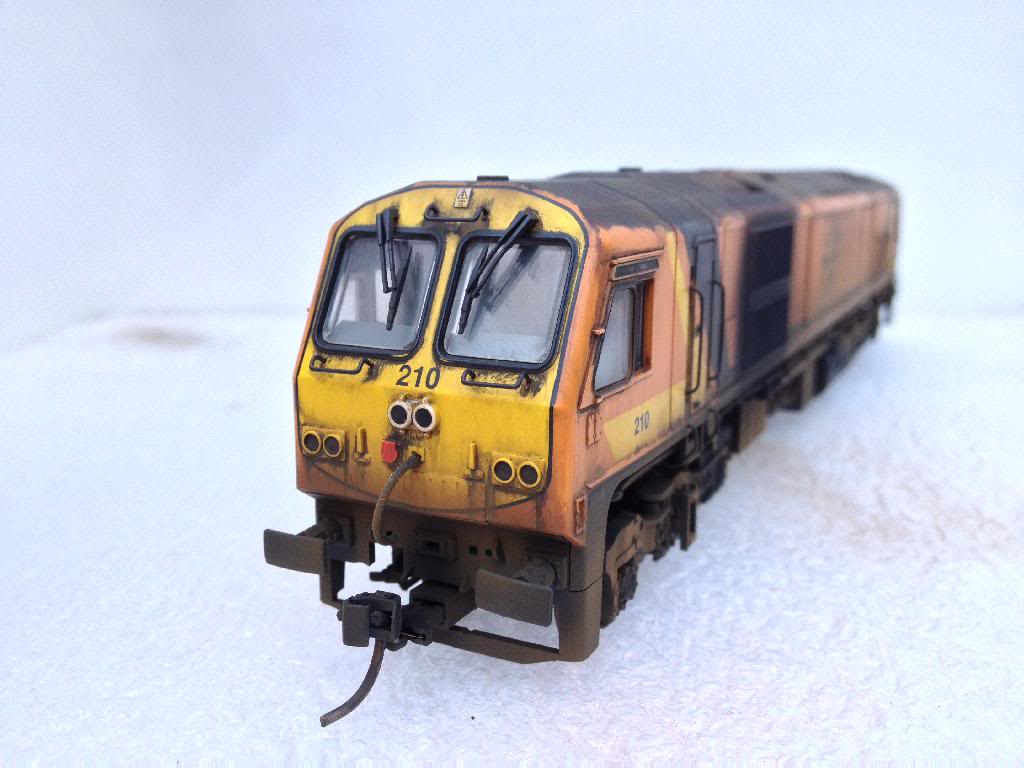
Thanks for all the comments, lads!
210 got some of the same treatment.....

-
Looking great Sean, nice neat job on the ballasting! You're really making some progress with your layout.
-
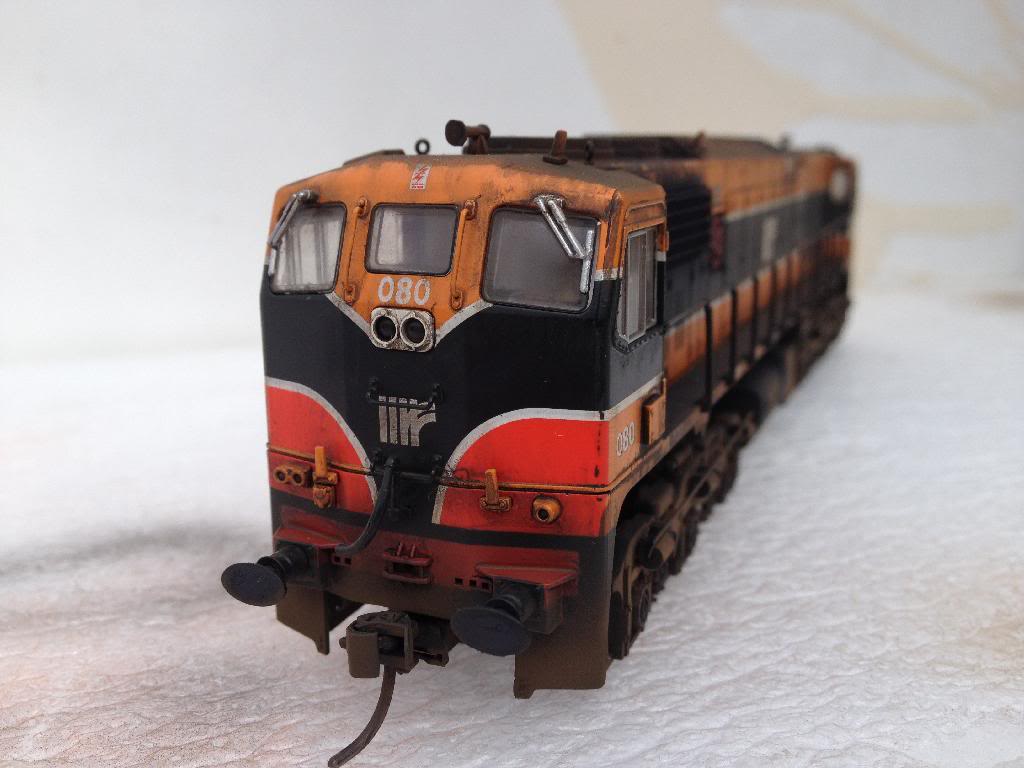
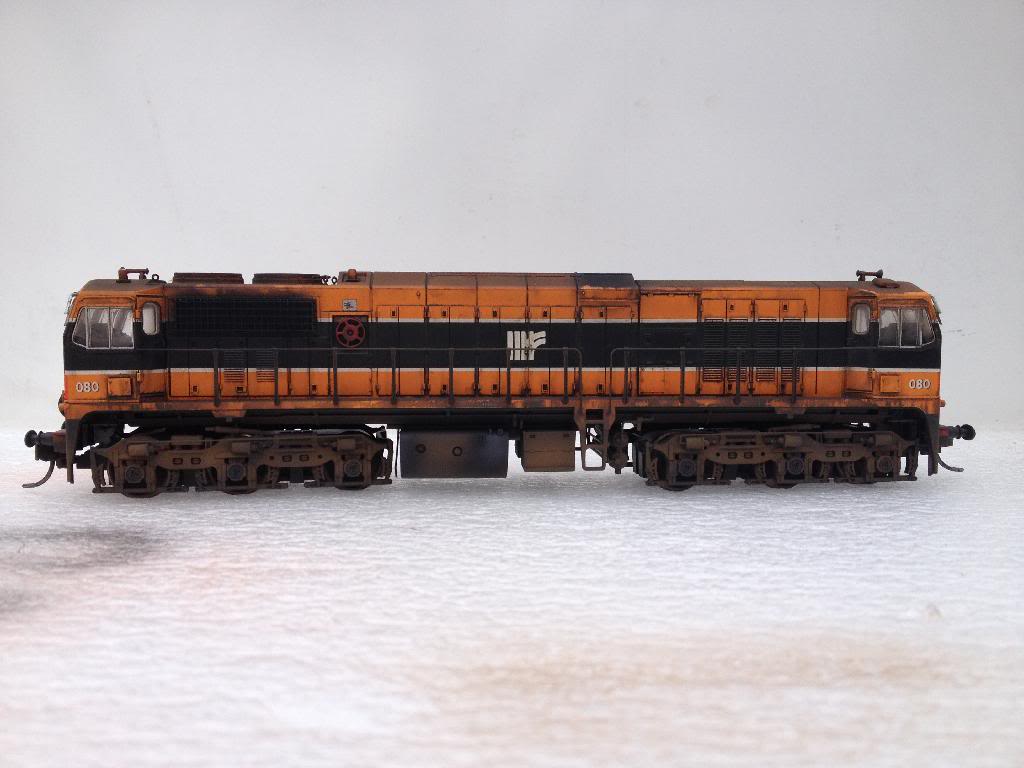
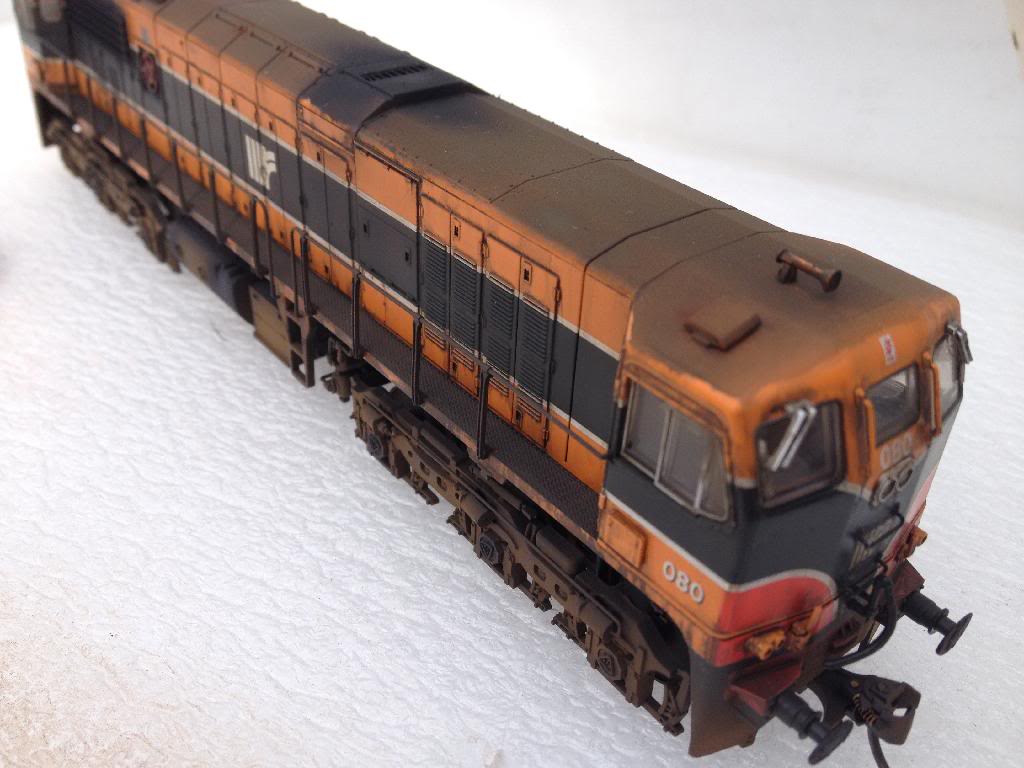
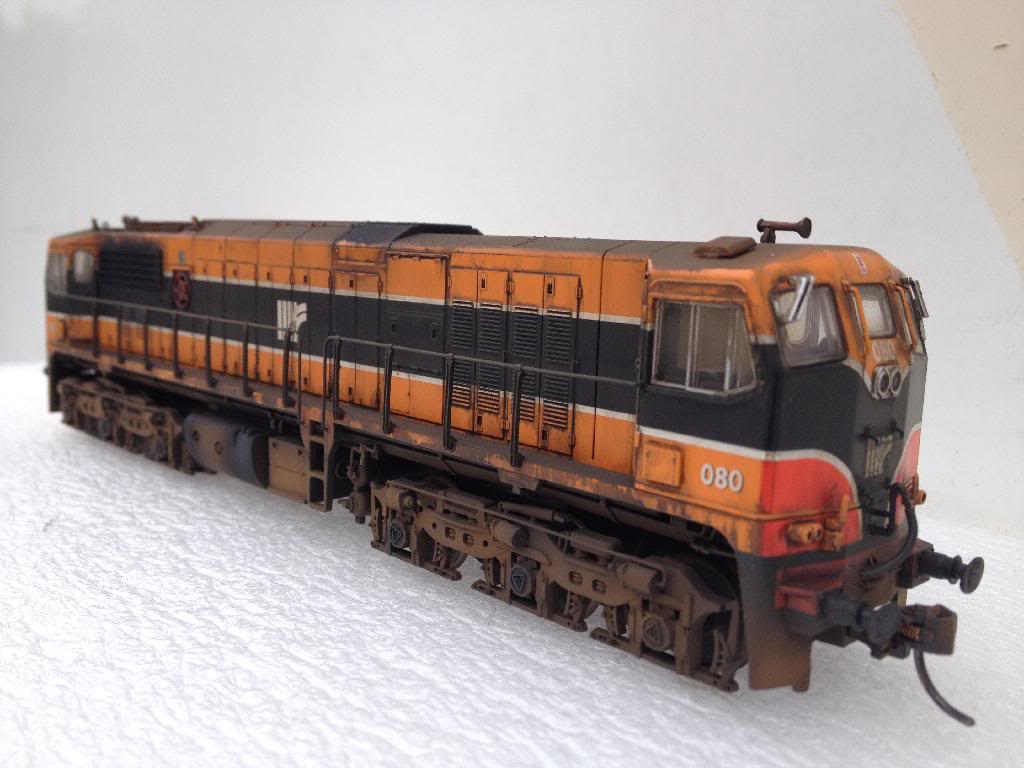
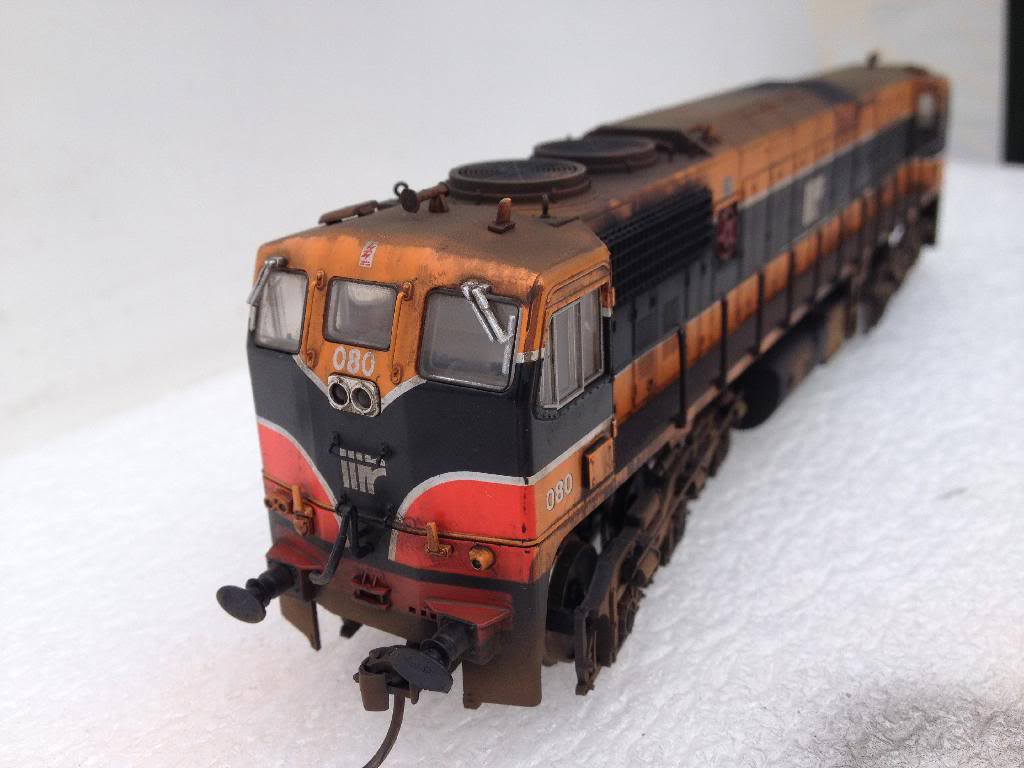
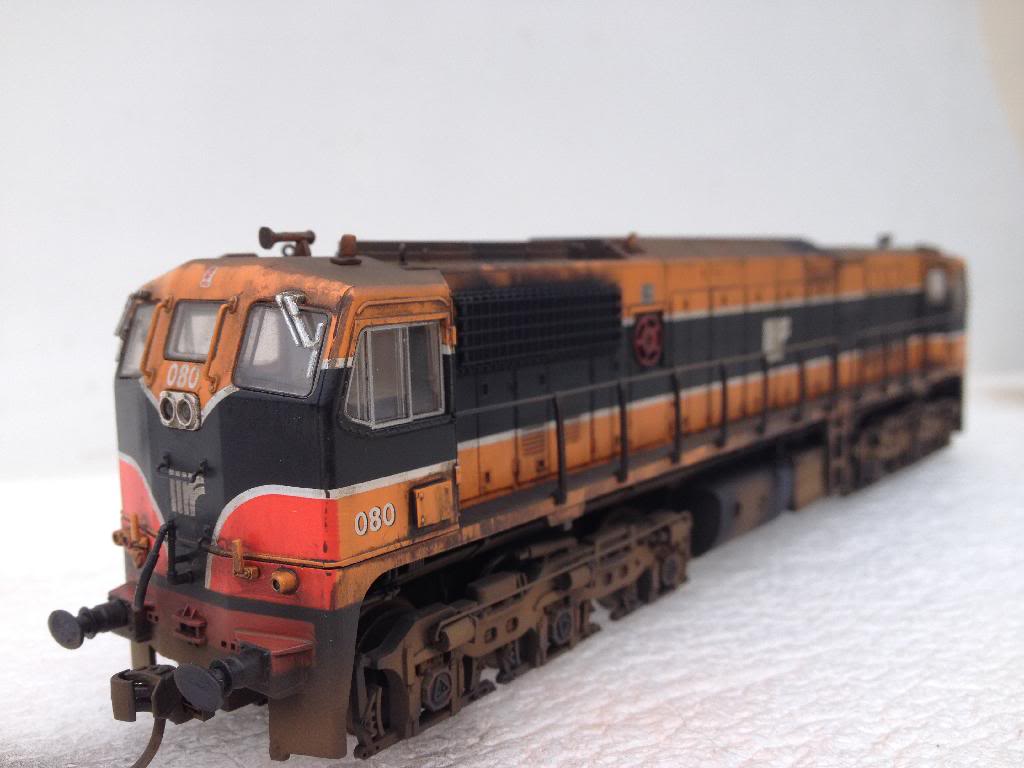
An Xmas present of some vouchers for Mark's Models resulted in me picking up 080 a couple of months ago and I finally got around to weathering her over the last few days. Have a look and see what you guys think....
-
Some good tips there David!
In regards to the issue of pastels and weathering powders darkening when sealed; I had the same problem not matter how fine a spray of varnish was used. (I switched from aerosol to airbrush but to no avail!) I found a good technique was to give the model a coat of matt varnish BEFORE apply the powders. This gives a much betters key for the powders to adhere to.
Sean, have a look at this thread: http://www.irishrailwaymodelling.net/showthread.php/1667-Weathering-Tips
It's a link to a PDF on weathering. It's mainly for US freight stock but the techniques are still worth trying.
-
Hope this won't stop you posting on your workbench!
I've always loved seeing your work....Best of luck for the future, George.
-
I'd also spray the area white and then mask off the line and go orange over it. Always go from light to dark colours...
As Warbonnet says spray the white first but after you've masked off the line spray ANOTHER layer of white over the masking. This will seal the edges and stop the paint from bleeding underneath the tape.
-
Very interesting little contraption, is it easy to switch out the couplers for either tension locks/kadees?
It looks like the couplers are fitted in NEM pockets so it's just a straight swap.
-
Not great at all but still worth €4.00. I bought it with the same idea as Dunluce Castle, something to goof with and if you make a mess it did not cost much!
murrayec
I suppose €4 is one thing but what are the later magazines going to be priced at?
-
I saw it in Eason's earlier in the week. No interest in steam so I didn't give it a second glance!
-
Not sure if this has been posted already....
Some good deals on 201's, especially if you can avail of the free UK postage.
-
Check out the DCC Concepts decoders - D2SAP -
To be honest I've heard varying reports on the DCC Concepts decoders, but if it can make a Lima run smoothly without cutting out it's doing well!
The TCS Keep Alive units seem the most effective, especially if you use insulfrog turnouts.
-
I don't have this now with the two motor bogies - anyone any suggestions about a remedy or do I just wait until I can pick up another Class 66 chassis?
What about a stay-alive capacitor?
-
That's a nice job!
-
thanks for all your advise, I have decided to use 1.5 T@E for droppers, (every 3 ft.) and 2.5 T@E for bus, (solder solder), with 10 zones, each not exceeding 15ft, in a star formation. I have 5 roads,all 40ft long by 10ft wide: up and down mainline, up and down suburban line and a branchline with a sub-branch, a quarry, 7 stations, creamery, 2 goods yards, 2 loco depots and a carriage depot with sidings: controlled by, yes a Hornby Select!!, yes I will need to update it, another day's work.
Wow! That's an ambitious project, looking forward to see it develop. Keep us updated!
When you say zones, are you talking about splitting the layout into power districts? That would be a good idea with a layout of this size. Also to be honest I wouldn't go with a star formation for the bus, it sounds like more hassle. I'd probably run a ring bus around the main loop.
-
Oh!! Will Take note on this bit of info. Had not heard of it before but thanks for the Gen.
On a footnote I added deluxe Liquid lead to a brake van about a year ago and no expansion has taken place. It is the Deluxe stuff that I am using and there is no reports if that Expanding.Maybe the Traditional lead shot causes that issue.
The acetic acid in the PVA reacts with lead to cause the expansion. It happens when a large amount of weight and glue are added, so it's more common in larger scales. Using it in an enclosed space such as a loco boiler is also a factor, so using it on the underside of a wagon shouldn't be a problem.
As far as I know the Deluxe Liquid Gravity is not pure lead so doesn't react the same way. Mind you they recommend using thin CA glue to fix it in place.
-
Looks the part!
I'd be interested to know the make of the wagon myself.... and what paint did you use?
-
I use the blade splicers on my own layout and they work fine. I've heard that they are not recommended for a layout that gets moved constantly but that's not an issue for me. Just make sure you use the correct diameter wire to ensure a proper connection.
If you decide to use them don't buy them from shops like Halfords or Maplins as they charge a fortune for them, I got them on eBay for around 10euro for 2 packs of 50 including postage.
-
Lovely work there, Eamonn.
I see you're converting to using Kadees, have you tried using no. 5 couplers rather than the plug in type? They're lot cheaper.
-
Something like this
Is what I'm using for overhead lights, and for the scenic lighting. It puts out 10A at 12V and is fully regulated (and has a voltage adjustment, so you can drop the output down a few volts (handy for LEDs and avoids messing with resistors to reduce brightness)
You can then run a DC 'bus' and take feeds off for each area with lighting (photo looks gorgeous btw! )
10A?!!! You could light a house with that!
-
Kirley,
It depends on a couple of things...
1) How many amps does the DC controller supply?
2) Are the lamps bulbs or leds?
Typically, leds will draw around 20ma each depending on their brightness while bulbs will draw closer to 100ma each. If your DC supply is say 1amp (1000ma) then you can power up to 50 leds from a 1amp supply, but only 10 bulbs.
Are you powering the lights from an old DC trainset controller?
-
Guys, here's a couple of questions for anyone who feels they can answer them!
Is this system basically wireless DCC complete with CV's which are adjustable for motor control, lighting effects and/or sound? Or is it simply a wireless method of motor control?
-
That's very impressive! I just might try one in one of my 141's...
-
Sounds fantastic! Do you have the MSB decoder as well?...and if you do, how does it compare? I have a 141 decoder on the way from MSB but now I hope it's not a mistake having heard the sample of the EMD 567 on the Loksound site. I discovered this clip only days after ordering from MSB...
MSB's 141 chips are excellent (I already have 3 of them!) and the sounds are top quality, probably better recordings than the ESU. Remember, MSB's chips are recorded from an actual 141 (which sounds like a 645 engine rather than the 567) while the ESU's are taken from an American loco. I just fancied having a bit of variety on my layout and got this chip made up as an experiment. Olivia's Trains have an excellent reputation but to be honest I wasn't sure how the chip would turn out!
One thing which the ESU chip does have over the MSB chip is the notch up/down feature. (Although I'm sure MSB could do this if it was requested.)
-
2.5 T&E is overkill, also DCC power shouldn't be sent through a solid core cable as you can get voltage drops. Always use multistrand cable.
I wouldn't call it overkill, going by the OP's description his layout will need a bus around 100 feet in length. I know solid core wire isn't recommended for portable layouts due to the risk of movement causing the wire to fail, but it shouldn't matter with a stationary layout.
The voltage drop caused by the "skin effect" of AC current shouldn't be an issue. The drop is roughly the same in multi-strand and solid wire of the same gauge.

 I've always loved seeing your work....
Graham's Workbench
in Workbench
Posted
No it's just a standard MK1, but I do have a MK1 brake converted to a steam genny van, I'll take a pic of it when I get the chance.