
JasonB
-
Posts
1,406 -
Joined
-
Last visited
-
Days Won
26
Content Type
Profiles
Forums
Resource Library
Events
Gallery
Blogs
Store
Community Map
Posts posted by JasonB
-
-
On 26/10/2017 at 8:47 AM, StevieB said:
I can understand where you are coming from in terms of height of the wagon side but, in so doing, you have changed the appearance of the side, as per this. It is always the problem when things are made too big, everything gets stretched, so when you cut down to get the size right, some of the detail goes.
Stephen
What I lost in detail is miniscule compared to what I gained in correcting their height.It's certainly nothing I'll be losing any sleep over, life is a little short for that.But that's just my opinion.
-
22 minutes ago, Noel said:
Hi Jason. I know 'Mr Pristine' wants to lightly weather these gorgeous Irish Cement wagons!

For my personal taste buds a light weathering should be sufficient as they are very attractive wagons with the blue Irish Cement logo.
Have to agree, they look that good it seems harsh to cover them in cement dust.I think I'd have to go all the way though
-
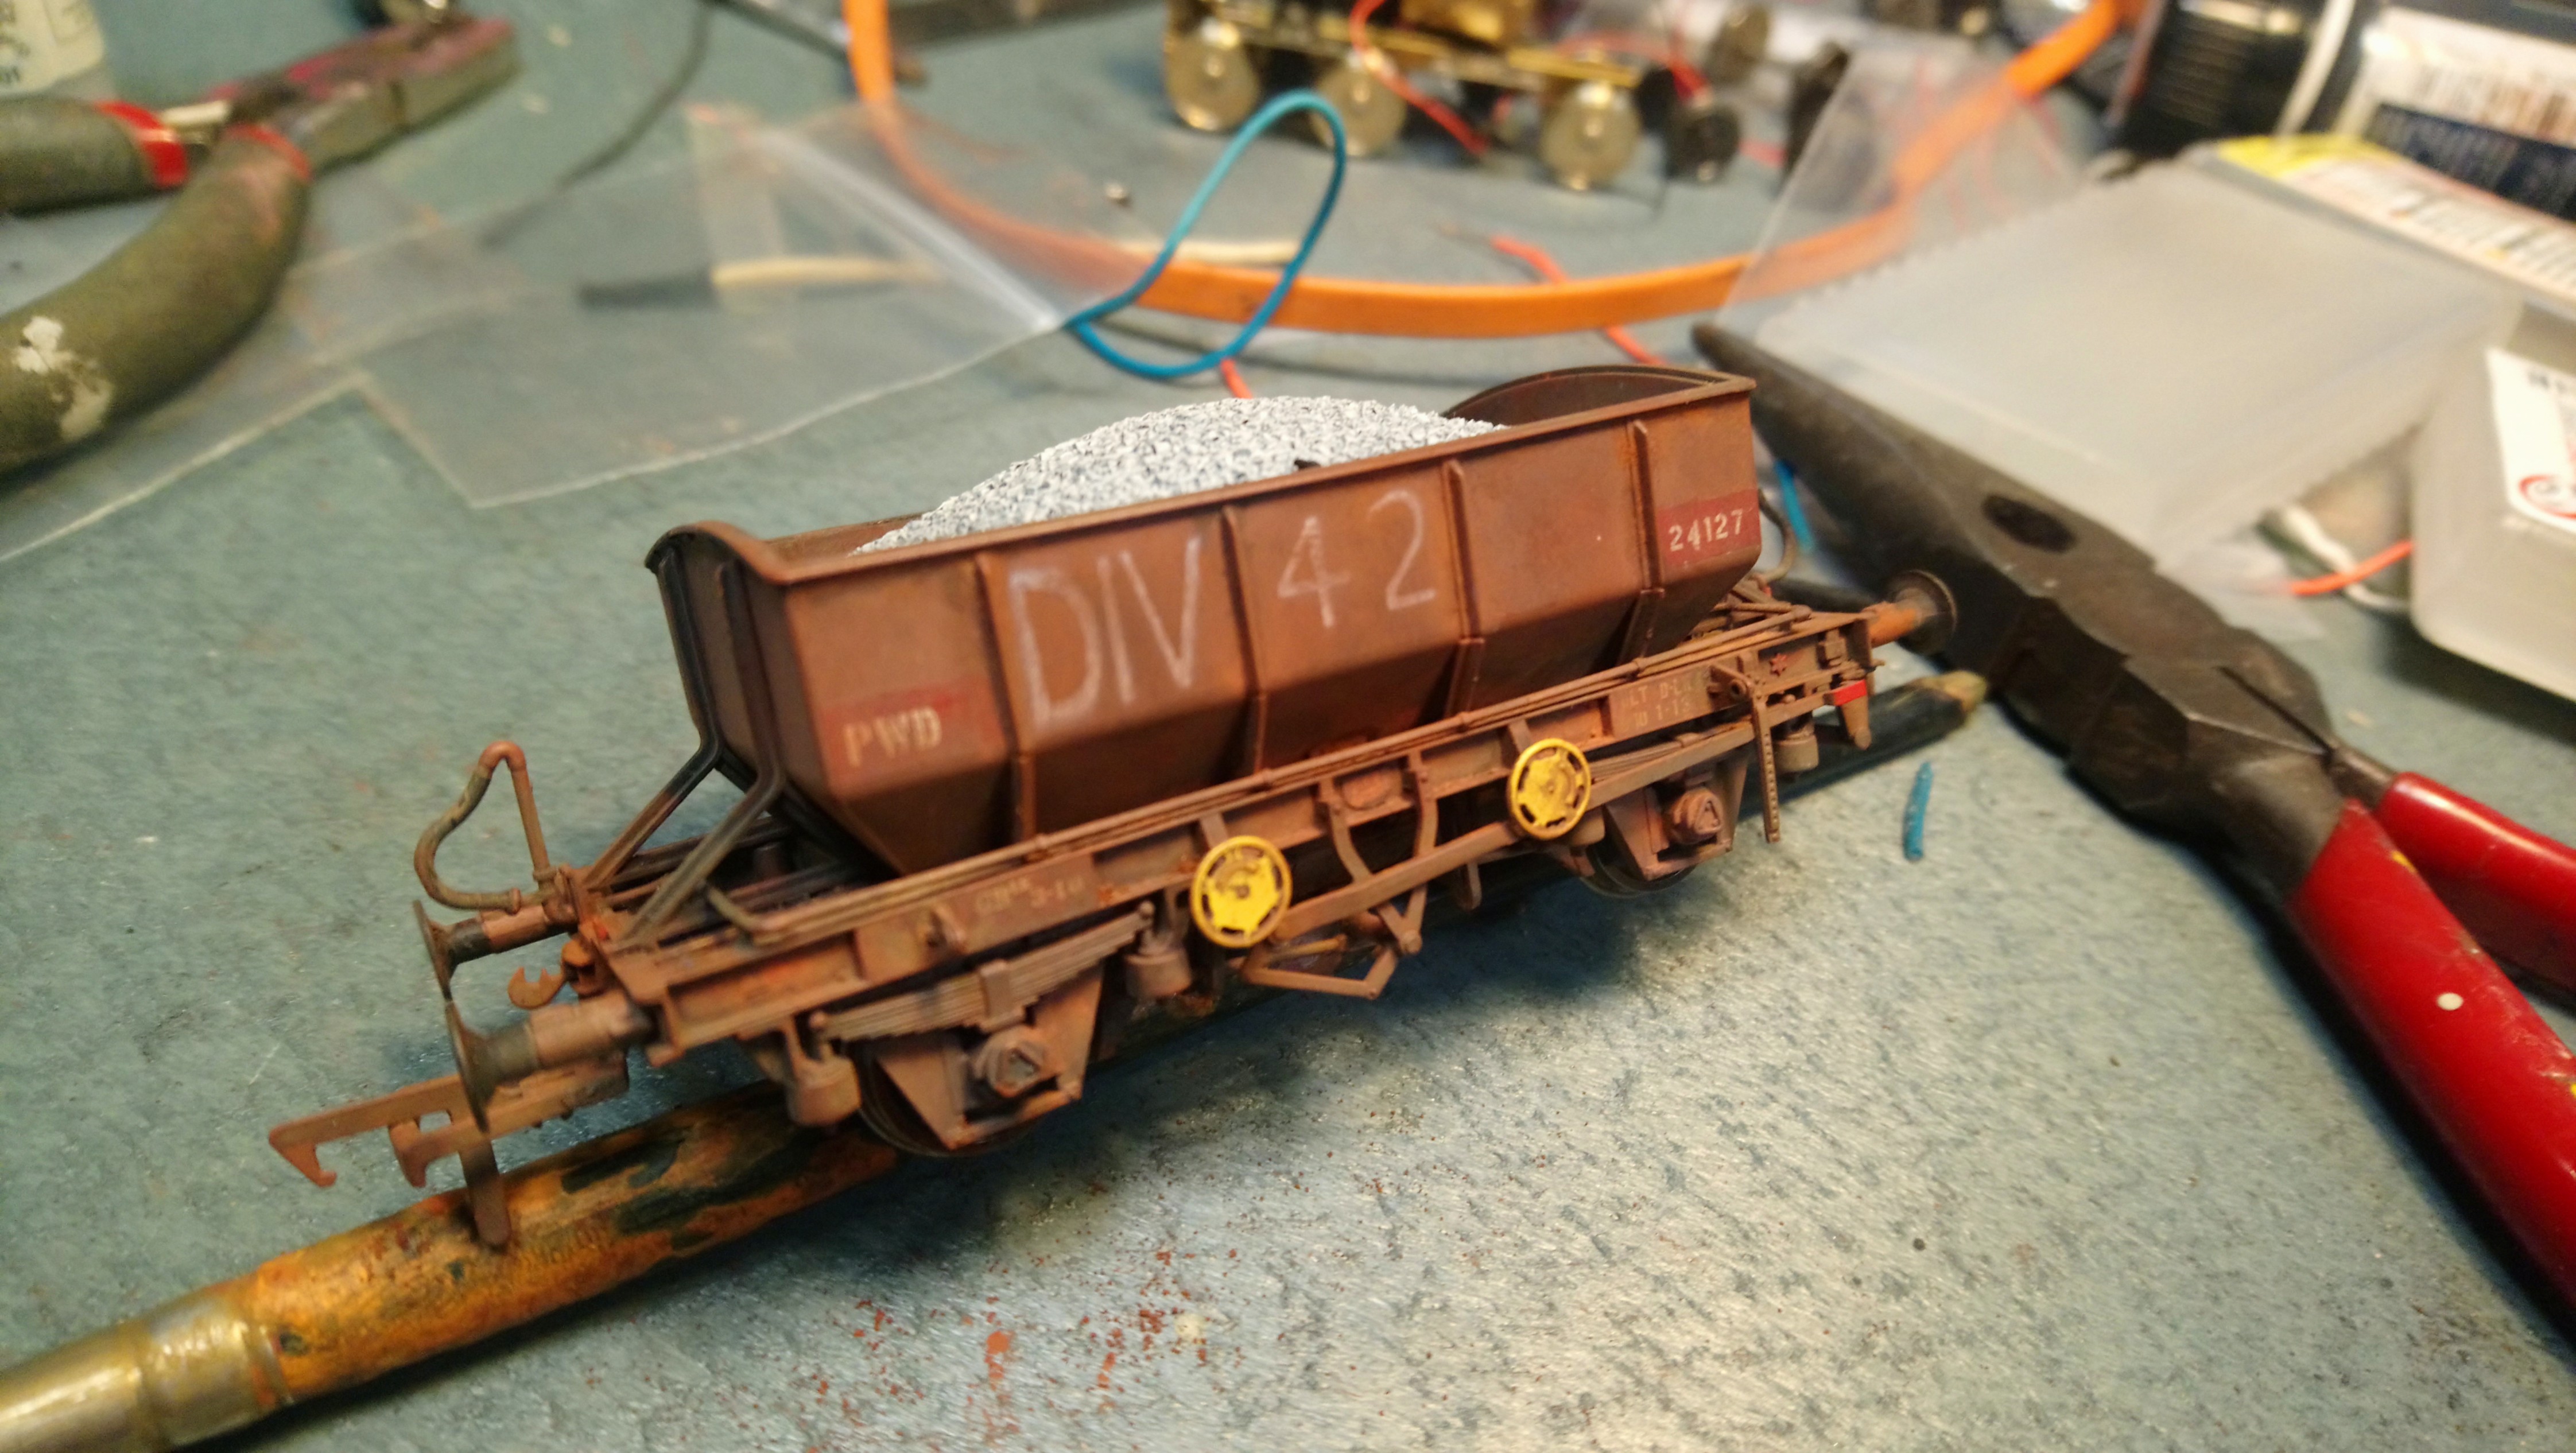
On 27/10/2017 at 9:48 PM, Glenderg said:
Just a quick snap of a weathered set of ballasts, chap wants DIV 42, despite being on a different running number. First project of the rebuilt and relocated "workbench"!
Weathering powders and hand applied highlights only.
R.
Beautiful Richie, fancy doing mine
-
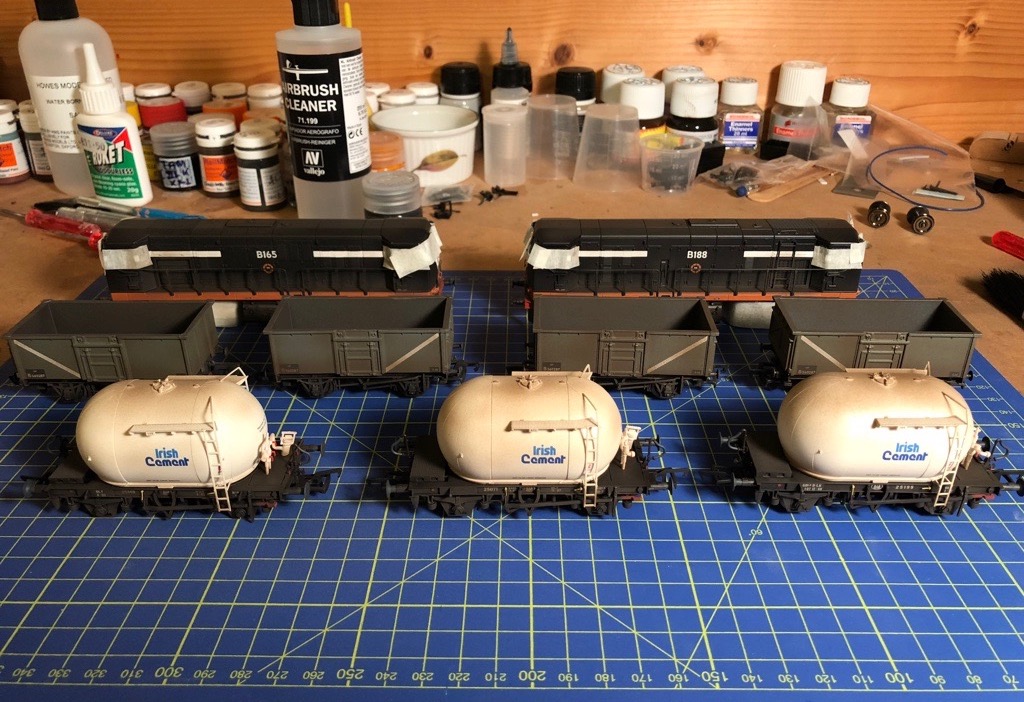
46 minutes ago, Noel said:
Got itchy this evening and took first steps towards very lightly weathering a pair of baby GMs, four mineral wagons and three cement bubbles. Will try some grey dust on the tops of the bubbles tomorrow after I get some more work done on the GSV.
Noel you've definitely come across to the dark side.Only have the bubbles since yesterday and your already weathering them
Have to say even though its only a light dusting you've given them its already highlighted the incredible detail these wagons have.
-
 1
1
-
-
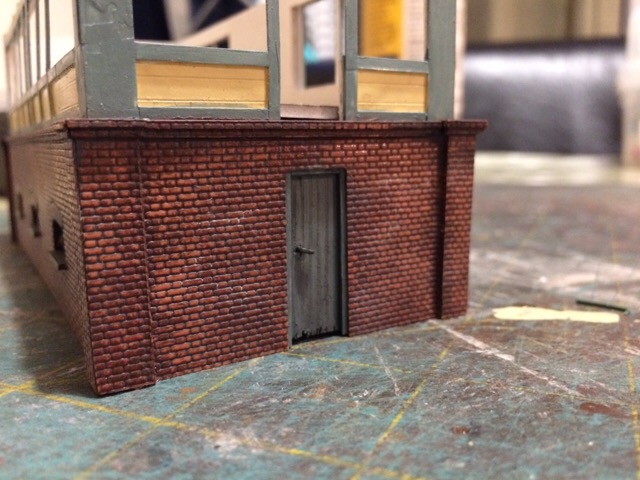
14 minutes ago, PaulC said:
Fiddly little jobs are on the cards at the minute. The frames for the arched windows are being made using 1mm plastruct. The space available to work in is so limiting making it very difficult to get accuracy in the cut and positioning. The curved sections are also difficult to create requiring a strip of plastruct to be put in place with glue and then leaving for 10 to 15 minutes while glue sets using a pair of self release tweezers to hold the piece in its curved position.
One side done and I've now run out of strip so more ordered.An easier job has been the ground level door. A piece of card with scribed plasticard followed by 1mm plastruct for the frame. The door handle is a 1mm piece of florists wire bent to shape.
Paul
Excellent build.Love the brickwork it looks very realistic
-
 1
1
-
-
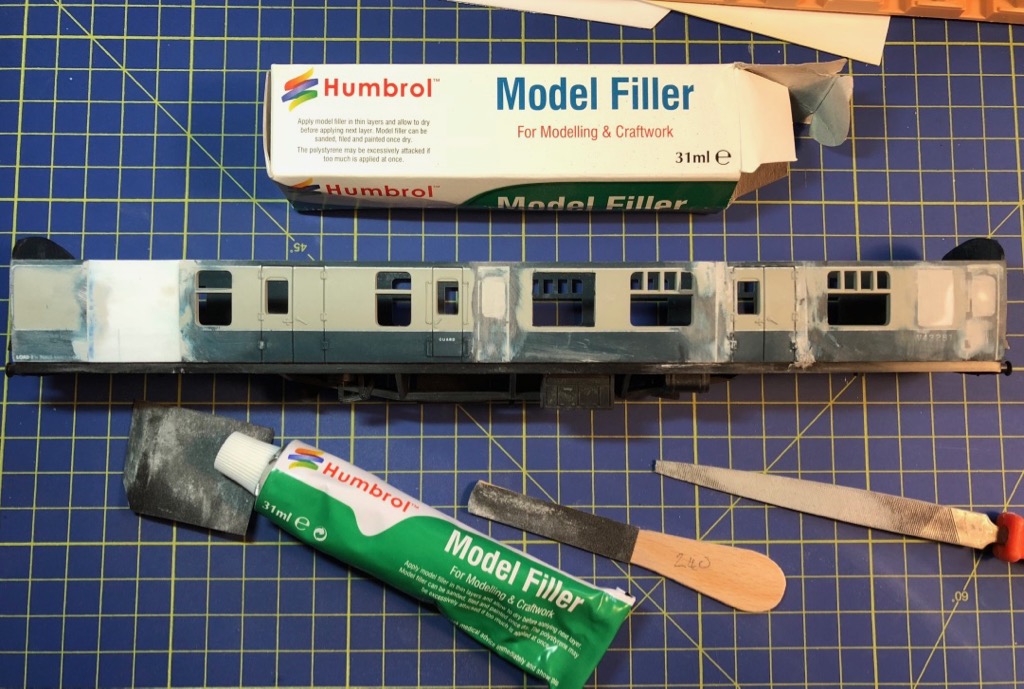
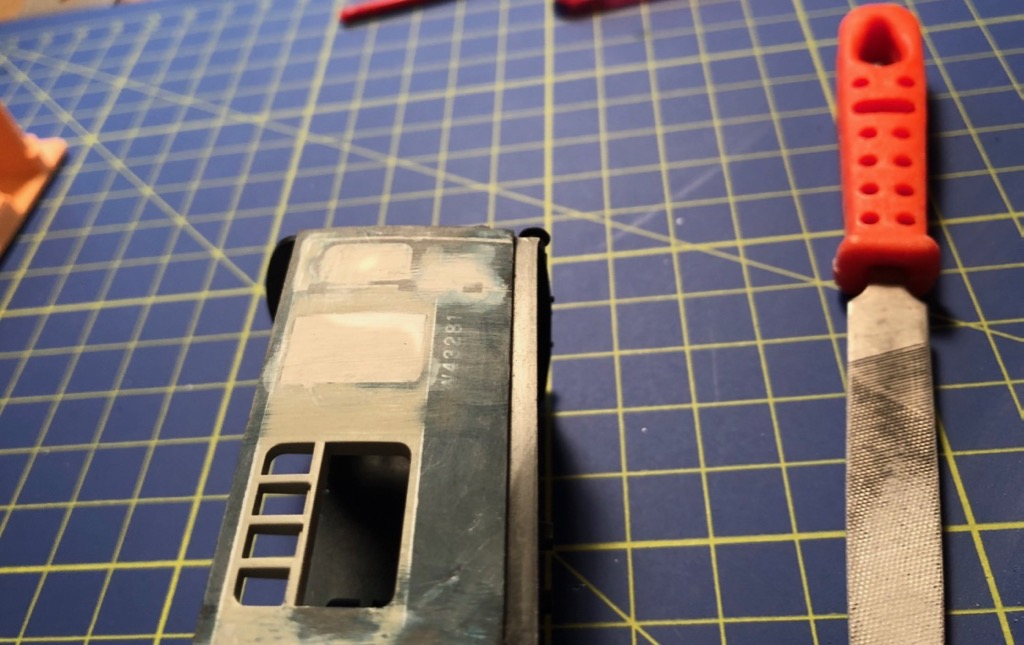
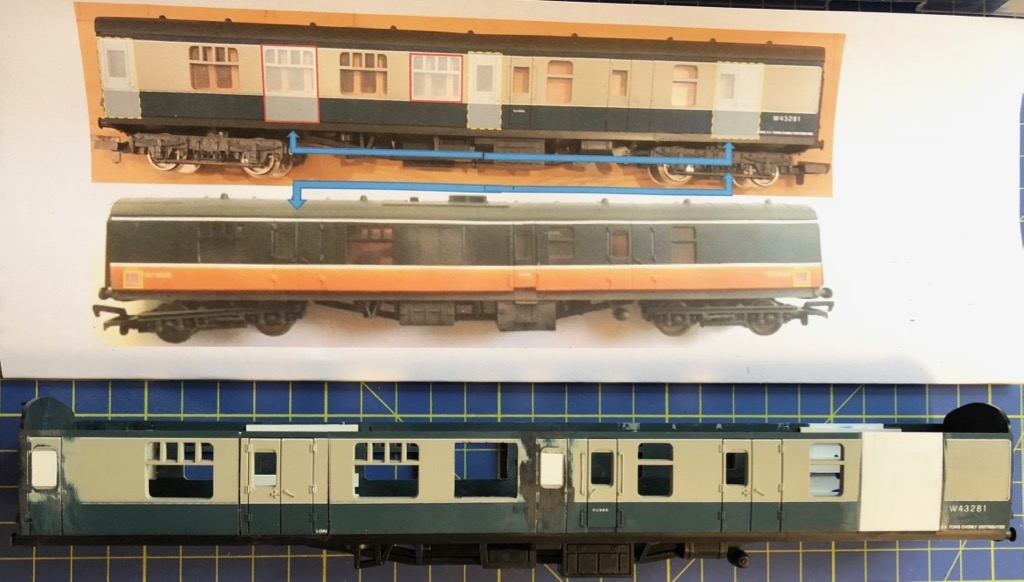
9 hours ago, Noel said:
Side one: Body modified, now filler and rub down, see blemishes, refill and run down again
Humbrol model filler seems to dry in a few hours and then files and sands very easily
Side two: Completed modifications to other side. Twin doors swapped with window, two single doors filed flat ready for filler. Vent window squared off. Plastic panel RHS inserted to replace double doors moved where LHS 2nd window used to be. Next step filler, file, sand and first prime to reveal any blemishes. As these Lima roofs are snap fit and pop on and off really easily will leave interior for another day, but will have to make mods to under frame and source B5 bogies. Haven't really worked much with plastic card before but enjoying trying to figure it out.
This is kind of fun.
Nice start Noel.Looking forward to watching this progress.
-
1
-
-
On 18/10/2017 at 10:51 AM, craven1508 said:
some job done there!
, just picture them with a well weathered 121 when they arrive!!!!!
Thanks Craven
On 18/10/2017 at 5:52 PM, ttc0169 said:Lovely work ,very realistic looking wagons, well done Jason.
Cheers Noel
-
Thanks for the comments lads:tumbsup:
-
Nice video Noel.Both locos looking and sounding great especially climbing the gradient out of Killarney.
-
1
-
-
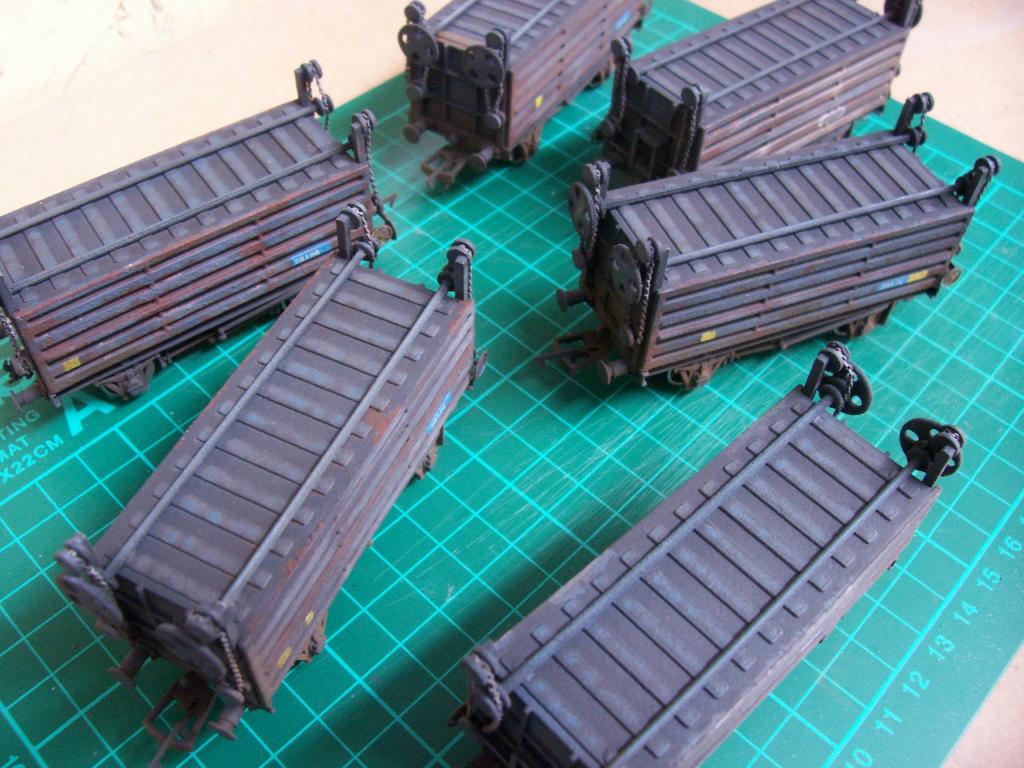
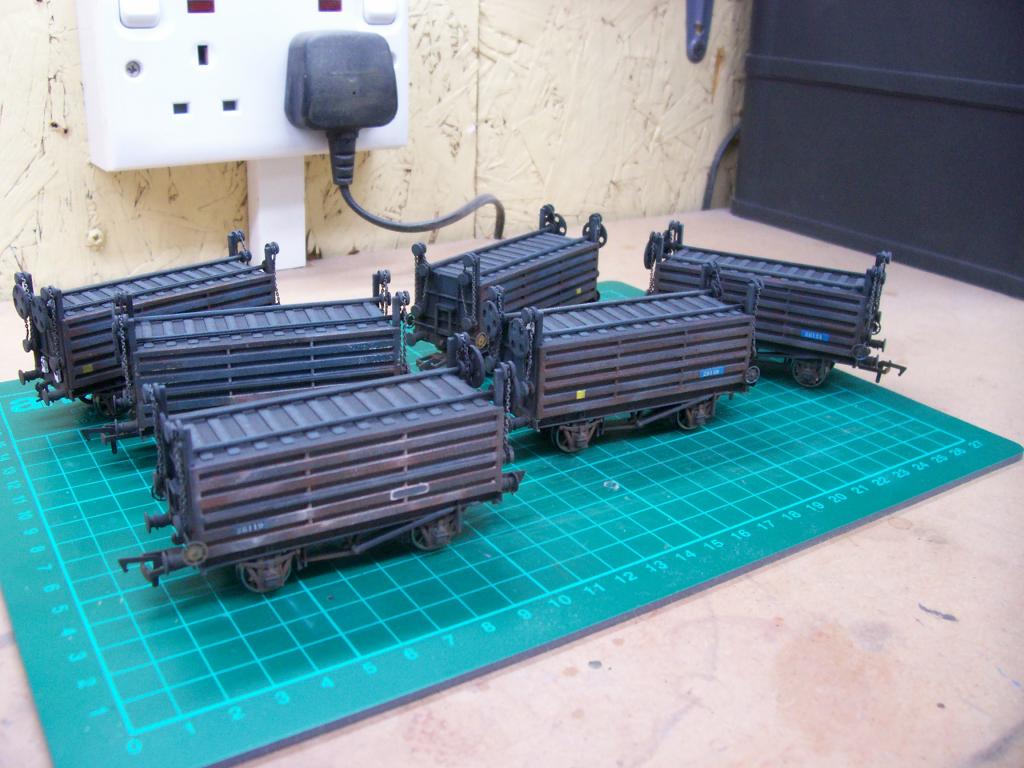
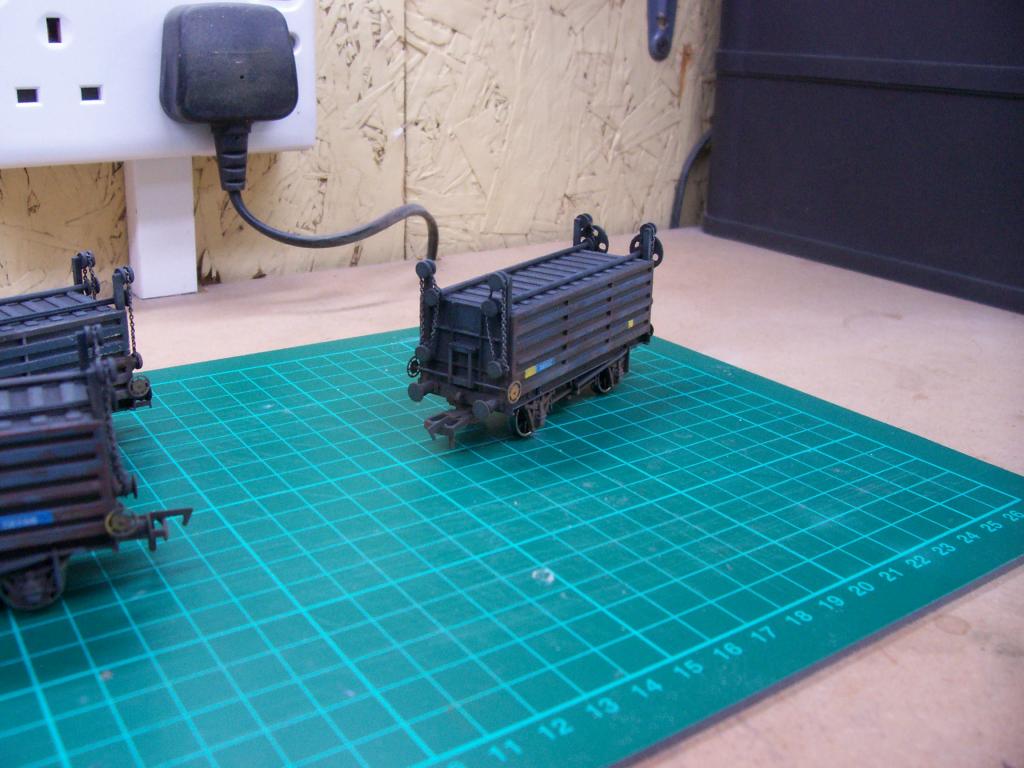
Not got much done of late so before starting anything new its back to a post from early January and to some work I had started on my bagged cement wagons from Irish Freight Models.At the time I had got as far as cutting the bodies down to sort a small issue I had with their height,taken off the plastic hand wheels which are located on one end of the wagon and had also removed the buffers and replaced them with the chunkier looking white metal type.Anyway I've recently got back around to finishing them off so here's a few pics of them now completed with some weathering and additional detail added which I've made up from plasticard and SSM break wheels/wire.
-
1
-
 1
1
-
-
Agree totally with Rich.You can use areas like door recesses to break up the decal.But even on long uninterrupted straights like on a Craven the decal can be cut into 2 or 3 pieces and even then you'd find it hard to see the joins if applied correctly.It's like most things in modelling,plenty of patience needed.
-
Tried double heading for the first time
Happy with the result
Now that's a proper ballast train
-
Nice video Fran love the close up shots.Class looking layout.
-
Very nice Noel.Like the Ammonias
-
Beautiful model.The detail is fantastic.
-
Popeye,it's been a while since I've seen something on here to get anywhere near this especially a scratch build.Top notch work,absolutely fantastic
-
Not my preferred era but another great video Noel.Love the Bell's in the last shot
-
1
-
-
Likes his hub caps.
-
Interestingly the ones on eBay have white/cream coloured roofs, whereas the marks models ones are dark grey roofs??? Same model numbers so did bachmann produce two variants?
Hmmm
price aside, I've yet to see a brass built one that is not warped or twisted in some way.Bit of a sweeping statement to make Noel.There's plenty of brass kits running on layouts that suffer from none of the above mentioned.I've also seen many brass kits on here which have been built to exceptionally high standards.
-
1
-
-
That's the one Richie
-
Are there any videos of the actual prototype ballast wagons laying and spreading ballast with ploughs? (I.e. As opposed to being in transit). Never seen a video that shows how they were operated.
Noel not sure how to post the link to the video but check out Eiretrains.com in the videos section.Nice footage of one working on there.
-
Seems to have clouded quite badly Noel.Strange to see that type of damage considering the distance involved.
-
Speaking of yellow things, where's the flying, thumping banana? Aka the Last of the Eighties, aka the NIR Sandite train? Seems to have disappeared from her siding at York Road Works. Indoors, being readied for her next/last Sandite season?
Withdrawn and scrapped around March or April this year I think.
-
Lovely video Noel nicely done.181 sounds fantastic


 , just picture them with a well weathered 121 when they arrive!!!!!


Kingsbridge - paint shop
in Workbench
Posted
Looks good Noel.The detail on the chassis is highlighted really well with some weathering applied.Are you still planning on keeping the logo visible or are you going to cover the bubble completely?