Leaderboard

Popular Content
Showing content with the highest reputation on 14/12/25 in Posts
-
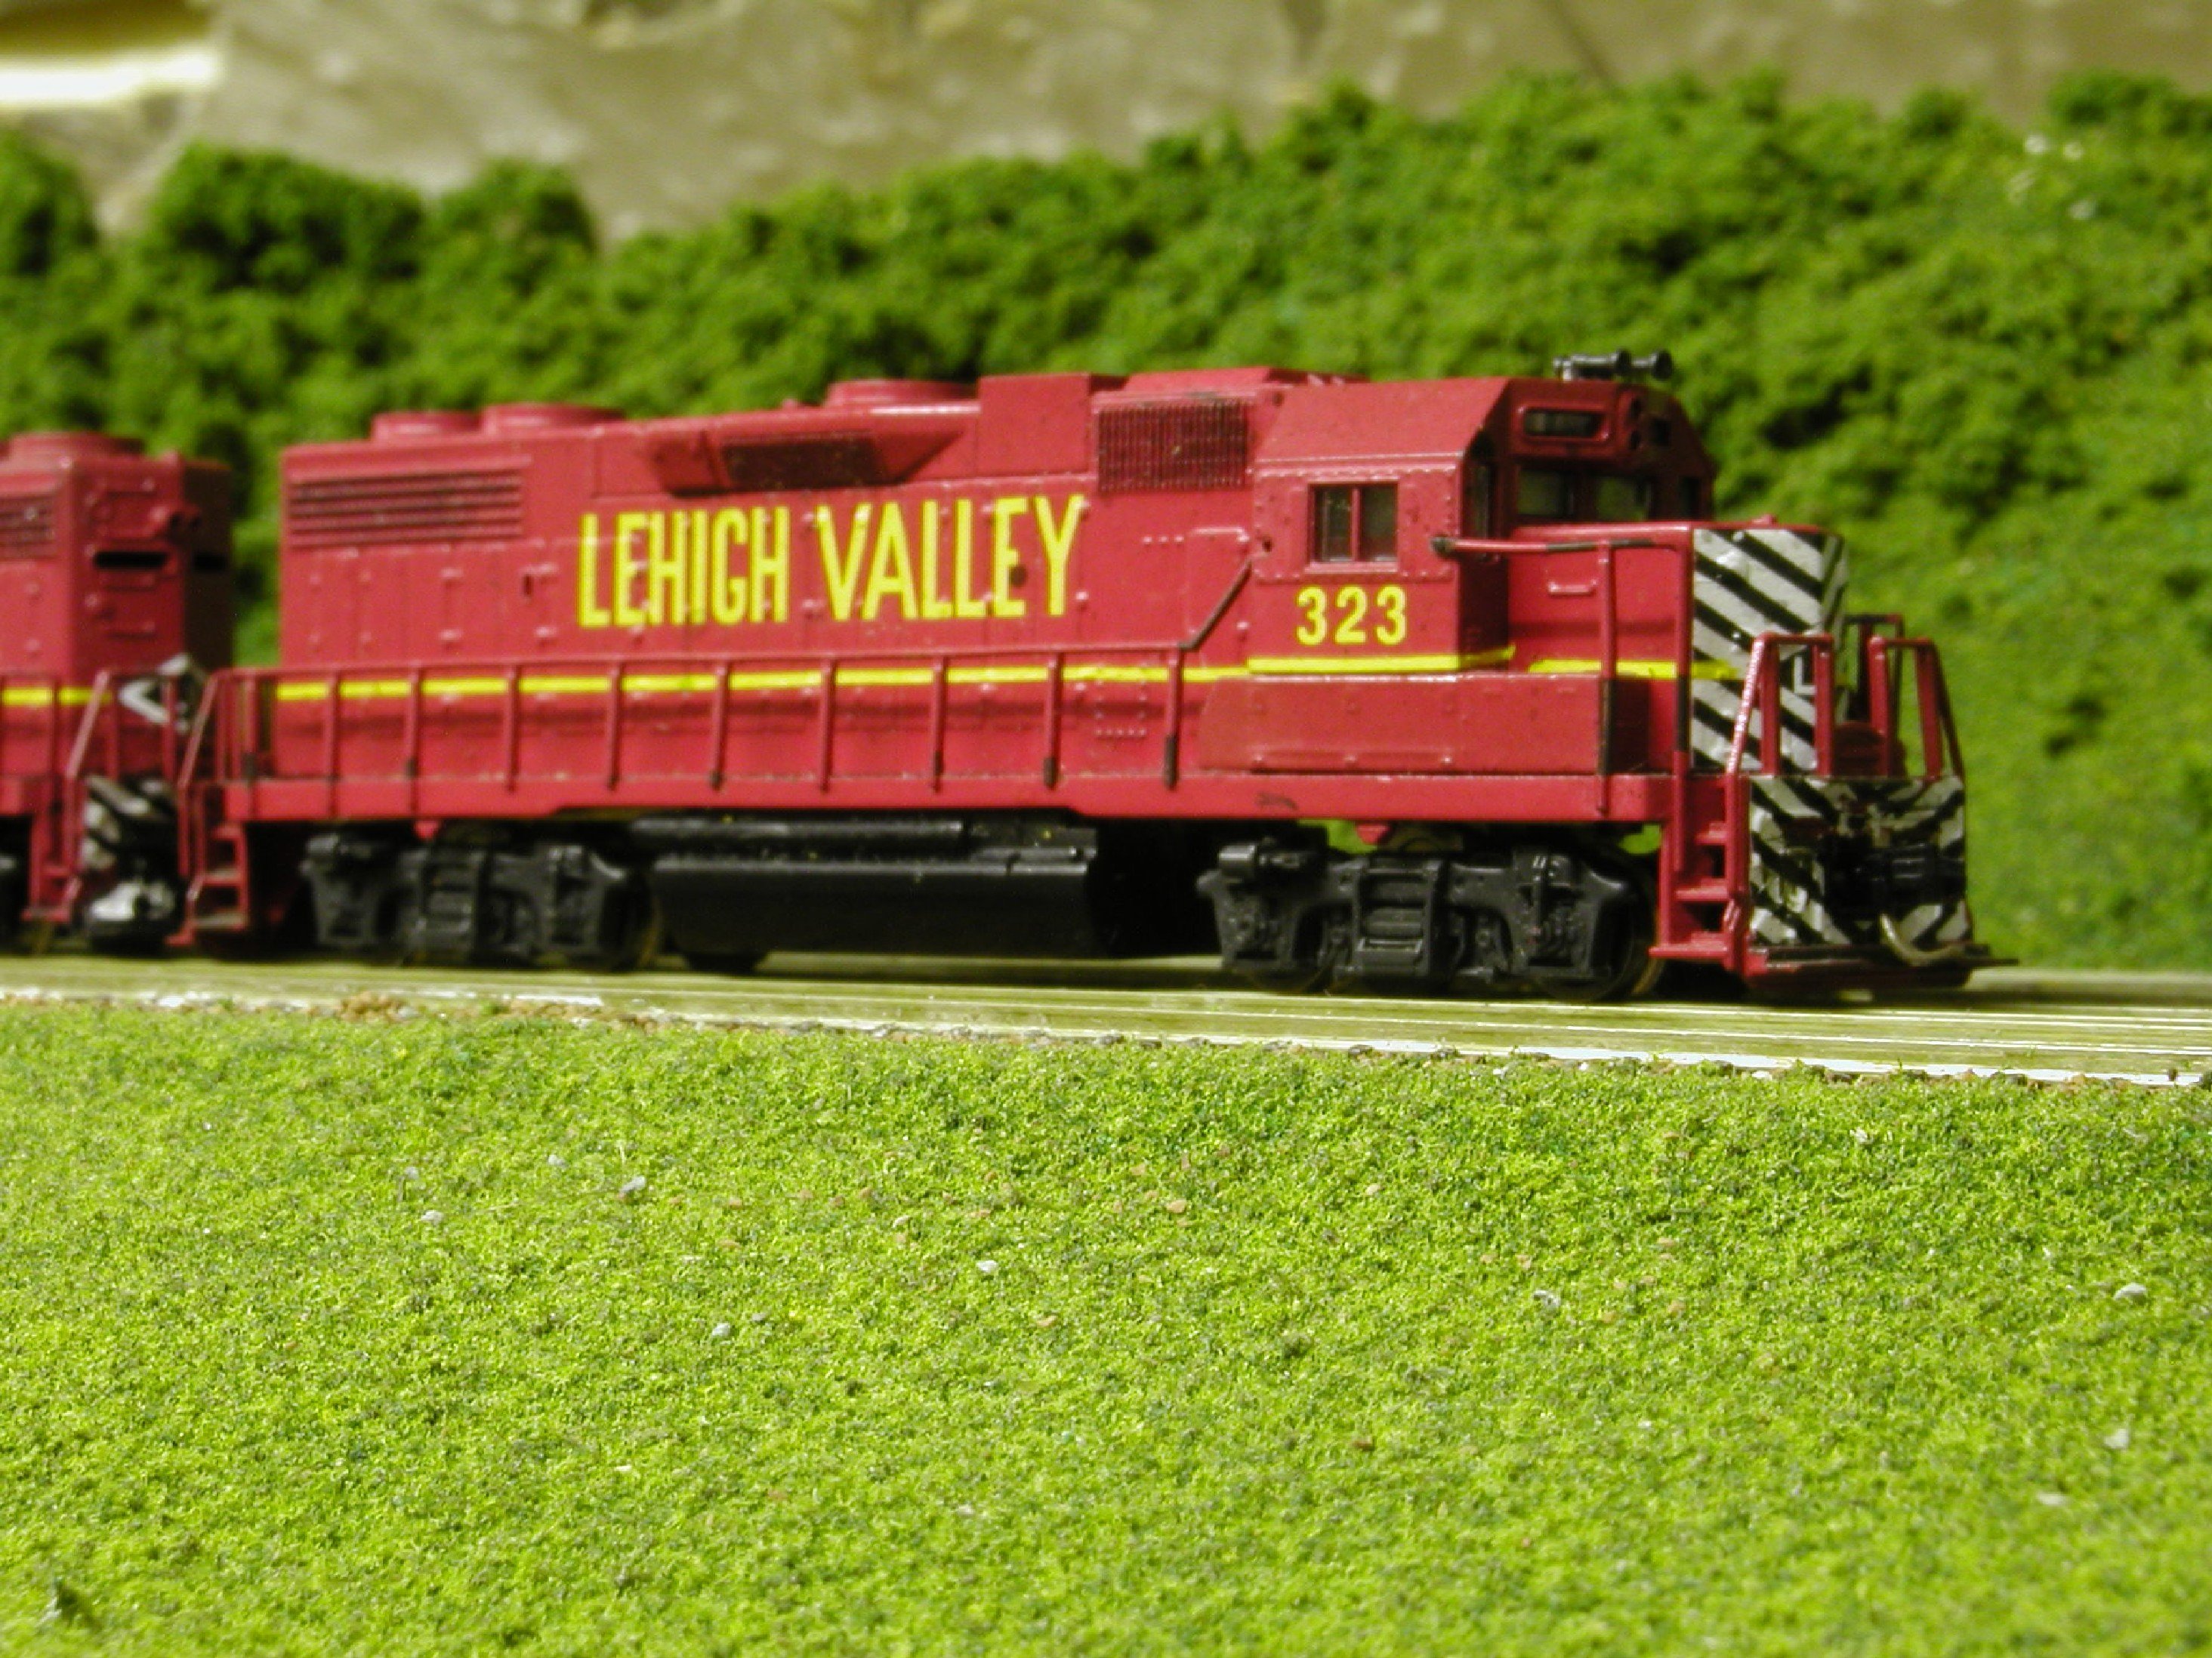
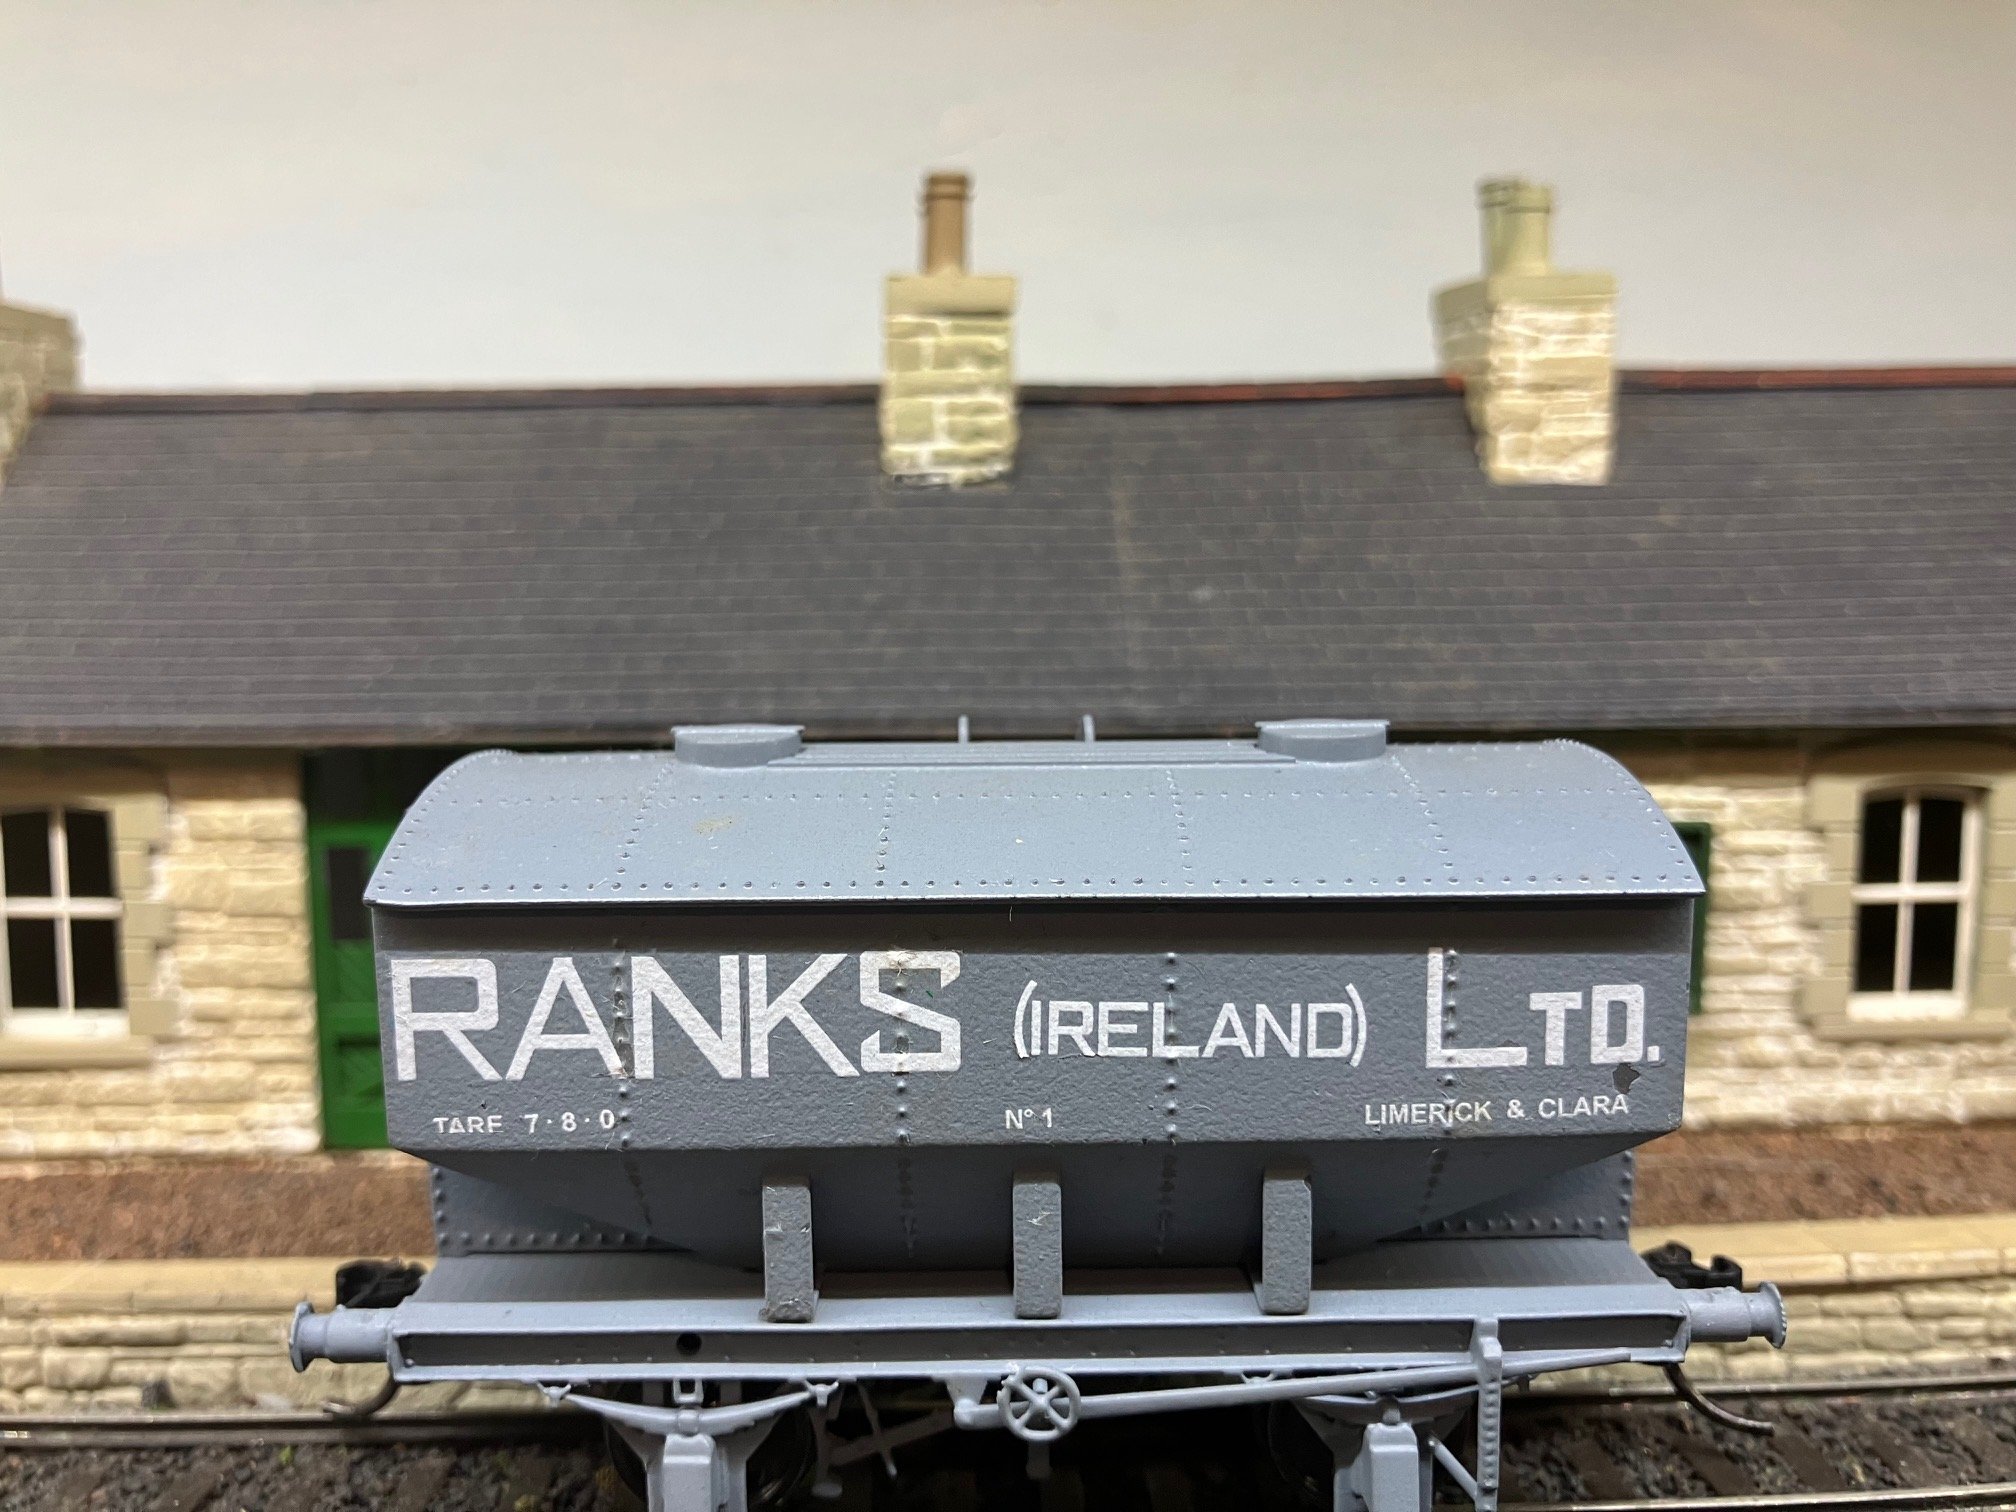
Applying waterslide transfers over rivets/raised detail is bascially a case practice and suitable preparation and selection of suitable transfers, wetting agents & varnish/sealant. N Scale Lehigh Valley Diesel. One my pride and joy, very much a hard worked 'layout loco' I finished the loco in LV livery about 25 years ago using Microscale waterslide decal set, incl black/white nose/pilot stripes s, Micro-Set (wetting setting agent) Micro-Sol (solvent/softner) around details/irregular surfaces. Loco painted in a gloss aerosol red then, then finished with a semi matt aerosol. Paint did not adhere too well to handrails which were molded in a black flexible plastic. 4mm Ranks Ireland wagon (Enlargement shows up the blemishes!) Decals comissioned from Railtec Transfers, Humbrol Decalfix (recommended by Railtec, Micro-Set Micro-Sol incompitaible). Main challenge was applying large RANKS (Ireland) Ltd element of decal due to its sheer size, applied RANKS (Ireland) Ltd as 3 separate decals! (Ireland) after applying the two larger decals! Again model first spray painted grey with a gloss finish and then sealed with a matt/semi-matt finish once decals had dried out I originally intended to have the decal pad printed comercially, but printer declined to print further wagons after pad printing the initial batch of 20T Brake Vans
 1 point
 -
Reminds me of what I posted earlier in the Dugort Harbour thread!
1 point
-
Yes - I had actually thought it was long gone by then.1 point
-
That's exactly what it is! And behind it is what by then was a VERY rare DSER survivor!1 point
-
Could that be 58M behind the A?1 point
-
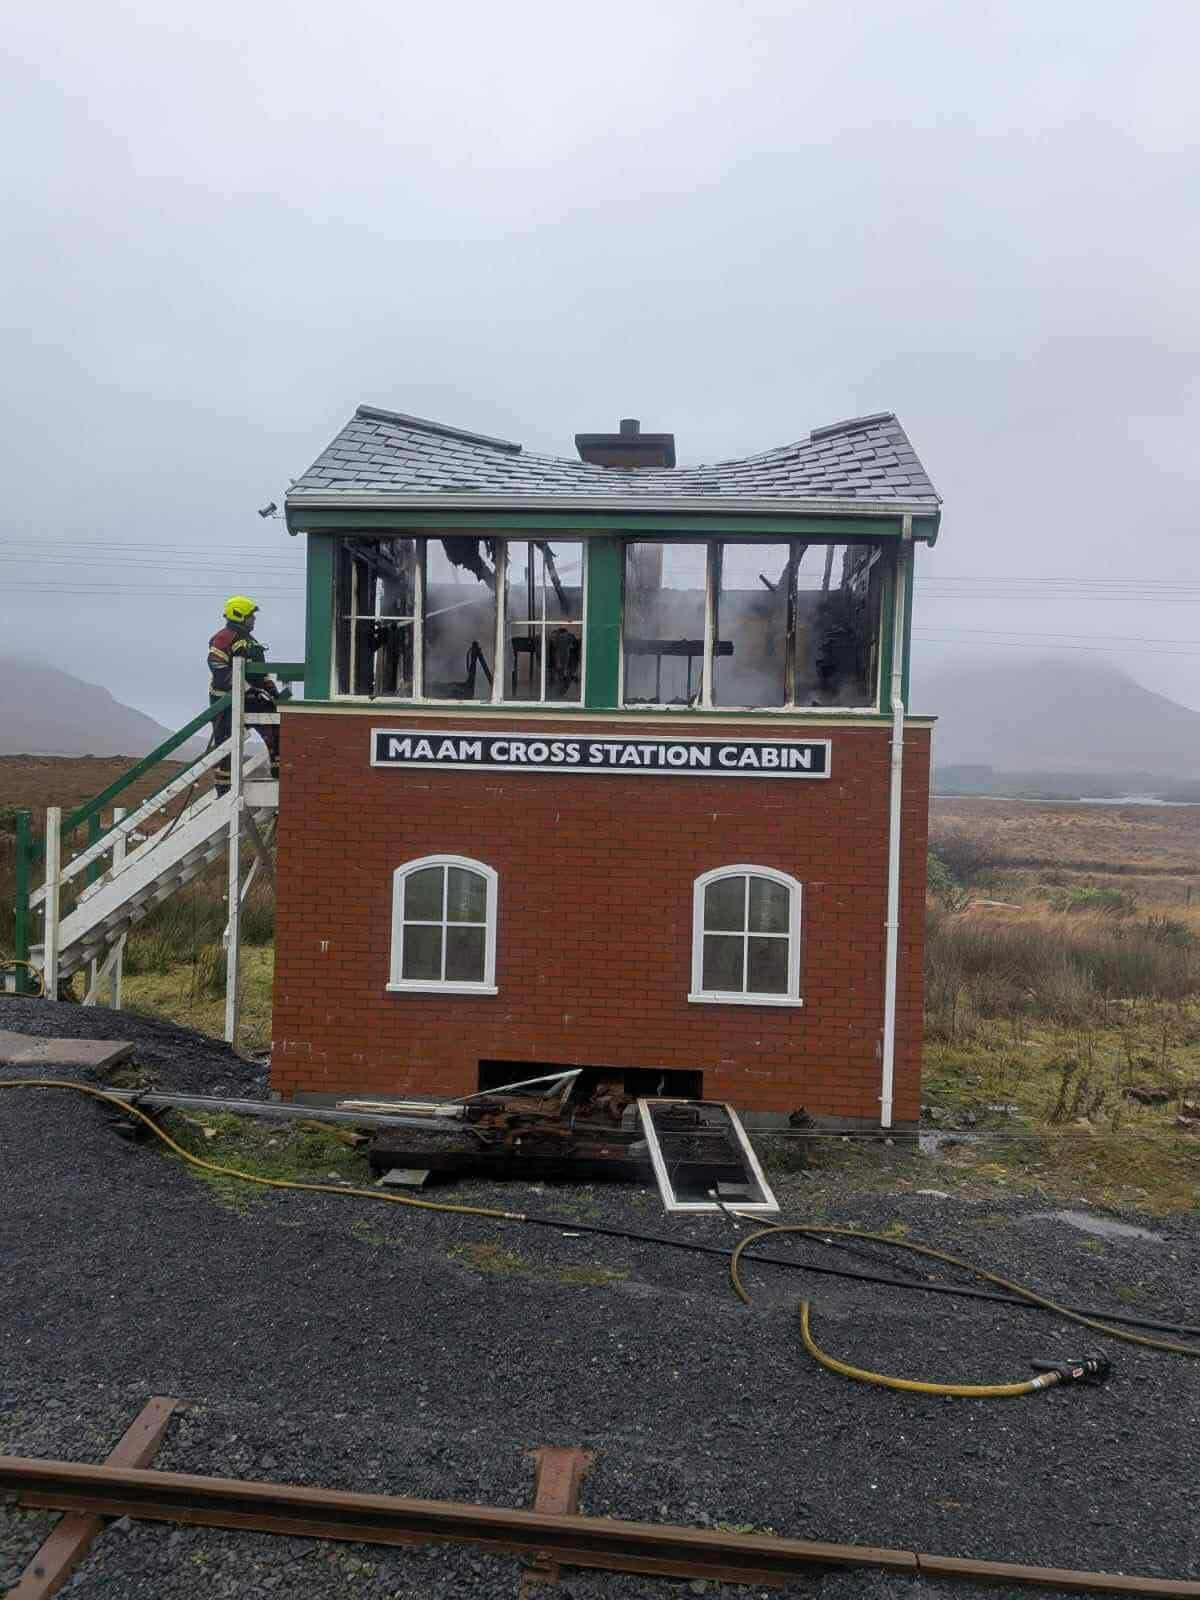
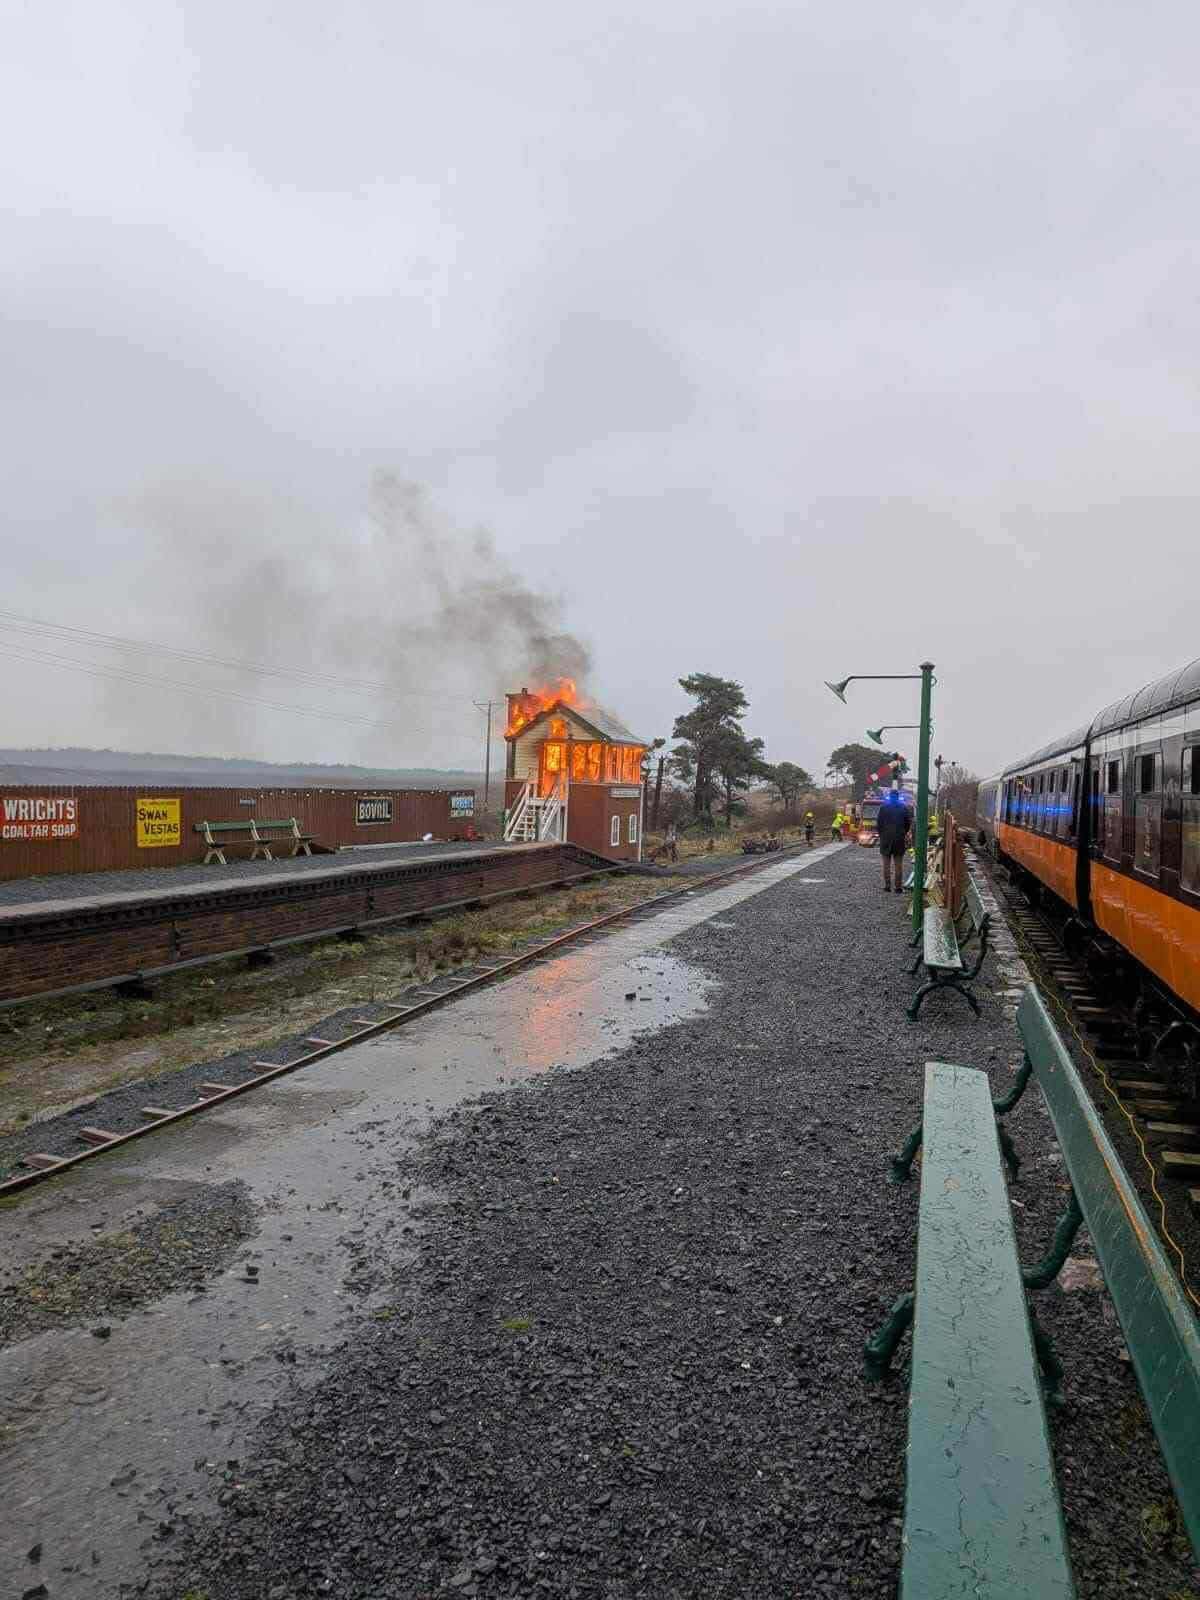
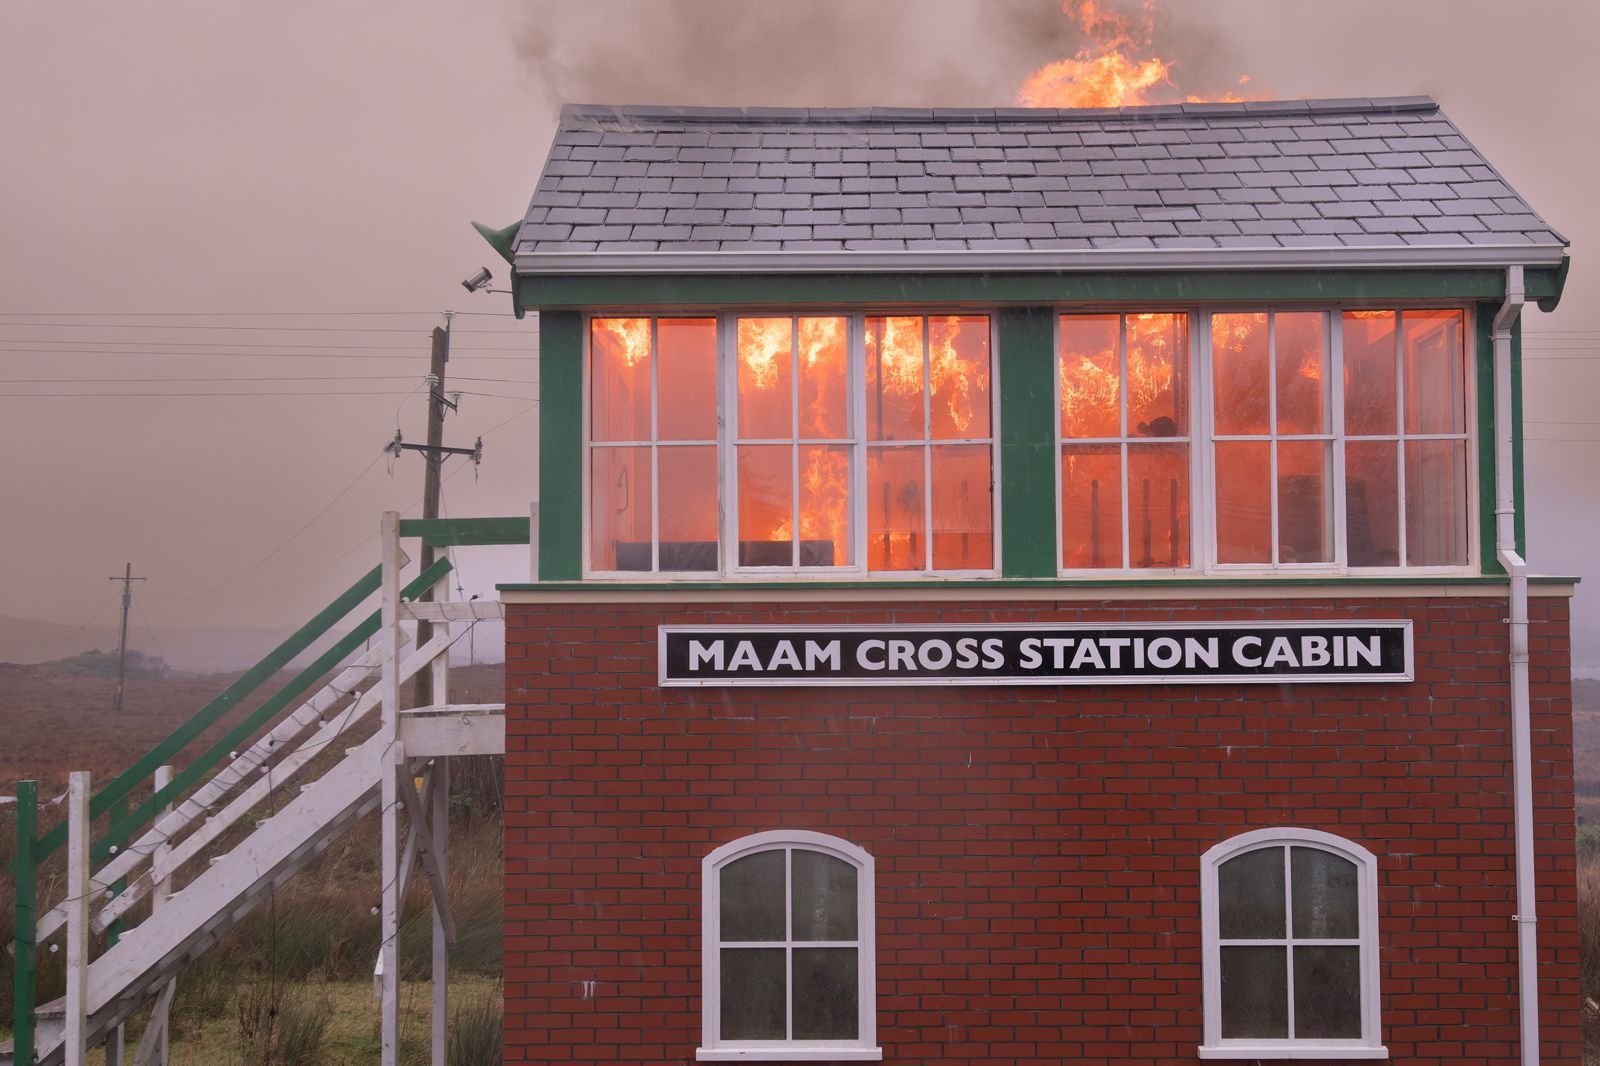
I saw these photos on the news/social media. Horrible to see the signal cabin go up in flames and sending best wishes to the great volunteers at Maam Cross. No doubt they will build back better, and a horrible day like today will be nothing more than a memory in the not-too-distant future. https://www.dailystar.co.uk/news/latest-news/breaking-horror-fire-engulfs-entire-36397136 You can donate on the Connemara Railway Project Gofundme page.
1 point
-
BCDR No.2 went wandering last week, passing through Coleraine before eventually arriving at Ardglass. The passengers were surprised. They thought they were going to Ballynahinch. With thanks to @colmflanagan for this opportunity to exercise No.2 on his excellent Ballycrochan Line. No 2.mov1 point

.jpeg.48e6a5d418c4a4188c2e619e165e86ba.jpeg)