

David Holman
-
Posts
4,161 -
Joined
-
Last visited
-
Days Won
114
Content Type
Profiles
Forums
Resource Library
Events
Gallery
Blogs
Store
Community Map
Posts posted by David Holman
-
-
Lovely model, Alan and well worth the effort.
-
 3
3
-
 1
1
-
-
Likewise. Hadn't realised there was such variation in Donegal wagon grey!
-
Gold dust. Maybe it is just me, but that ground signal would make a rather nice garden ornament.
-
1
-
-
4mm? I thought it was the 1:12 doll's house from those interiors!
-
1
-
 1
1
-
-
Great stuff and looks like good fun too. What scale have you used?
-
1
-
-
We were talking about colours down the Club last night, though in this case it was roof slates, where there are certainly a lot more than 50 shades of grey.
Ultimately, you can spend any amount of time trying to get something 'right'. However, this also means doing the same thing on everything else. Fine if it is a showcase model, weathered or pristine, but from a whole layout point of view, it starts to get difficult. In any case, a single 'perfect' wagon or coach is arguably unnecessary from a whole train point of view - especially if the train is moving. It is the overall impression that counts. Likewise buildings and scenery, where the eye registers the general scene. One stunning model among stuff of lower standards will stick out in the same way as a poor one.
So, consistency may be more important that total accuracy, perhaps?
-
 6
6
-
2
-
-
Apparently clean front ends is a bit of a health and safety thing, especially in BR days when the yellow ends were meant to be clean(er) to improve their visibility.
-
1
-
-
There are a couple of layouts recently that have done the monochrome thing and it can be quite effective. Have considered it myself, though the biggest problem is scenic scatter and fibre materials, which would need recolouring or painting as there appears to be no grey shades available.
-
A further point, which I have mentioned before, is that males of our species start to lose colour definition with age - a bit like the film. In this case it is appreciation of green that goes. Not good for the Irish scene! Read somewhere that we should check with the lady in our life as the female of the species does not suffer from colour matching issues as much - but am guessing most of us knew that anyway...
As Jim says, light is probably the most important thing. The light when the photo was taken and the light the model is painted and viewed under. JHB of this parish has done a lot of work on identifying the paint 'code numbers' of many of the livery colours, presumably based on analysis of the real thing, where available, so this gives a bit of a bench mark.
Equally, as soon as anything is painted, it quickly comes under the influence of weathering, in all its forms, from the accumulation of grime to fading from sunlight. Therefore, if our models are depicting a working scene (rather than intended for the show case), then weathering is key, which is why Martyn Walsh's book on the subject remains so important to me, though there are plenty of other options as well.
-
6
-
-
A beauty! The paint work looks just right to my eyes - subtle difference between smokebox and nicely polished boiler. Cab interior too.
-
1
-
-
Always interesting and made me wonder, can a 'stay alive' be fitted to a dc set up?
-
Me too!
-
1
-
-
Thanks folks. The air brushing took all of two minutes, though I did practice on bits of card beforehand to try and get the spray pattern right. Truth be known, it looks ok with the two foot rule, but close up, it could be better. Must make sure I request barriers when the layout goes out again!
Going back to Gordon's masterful work, have come to realise that time is never a factor in what he does. Apart from the obvious skill and experience, he simply works on stuff until it is right - and if it takes more than one go, so be it. Indeed, he will often practice extensively before making the actual model or component.
One example he told me last weekend was about Pempoul's track. The Reseau Breton was metre gauge, while the layout uses EM (18mm) track. Not quite correct, because the scale used is 1:50, but a reasonable compromise. The track itself utilised S scale components: code 98 bullhead rail and cast whitemetal chairs. Gordon assembled everything using aradite. Not the 5 minute stuff, but the full on 24 hour setting version. Immensely strong, but requiring numerous half track panels to be assembled one at a time, over many evenings!
I guess we all have certain things we are happy to spend more time on than others, but the very best modellers do it on everything - and there, I think, lies the difference. Add in skill, experience, knowledge, vision etc and you get the very best of the best.
-
6
-
-
It's been a busy couple weeks, including a short break in Paris sandwiched between two exhibitions. Northport Quay behaved reasonably well in the first, though there was still a list of things to look at afterwards. The second show, last weekend, was at Ashford, in support of the National Model Railway Centre. The latter is the brainchild of Cliff Parsons [of Gresley Beat fame] aimed at preserving some of our most iconic model railways. Gordon Gravett's Arun Quay was at the show, but so was Pempoul, his Reseau Breton masterpiece - and with Gordon busy on Pempoul, I had the delight and privilege of operating Pempoul.
Those who know the layout will appreciate it is a scenic masterpiece, but it is also a mechanical and electrical one too. It uses one of the ZTC DCC controllers, complete with semi automatic control because the five storage roads are well out of reach at the back of the oval. Choose a train and the route is set, then all you have to do is drive it, via a very nice regulator lever, round to the station. There was an 0-6-6-0 and 0-4-4-0 Mallet, plus three railcars to play with - all scratch built, as indeed is the whole layout. At least 13 years work in total...
Helping Gordon pack up Arun Quay after the show, I also saw how well engineered his layouts are. Arun Quay's structure is largely made from laminated foamboard and the two baseboard fit snugly in a beautifully built wheeled box. Baseboards sit on a purpose-built frame [which will also support his new Reseau Breton layout]. This folds up neatly for transport, with carefully made slots for various other pieces, while the fascias live in their own, purpose made gunny sack. Exquisite doesn't begin to describe it all.
Came away feeling I really should do better!
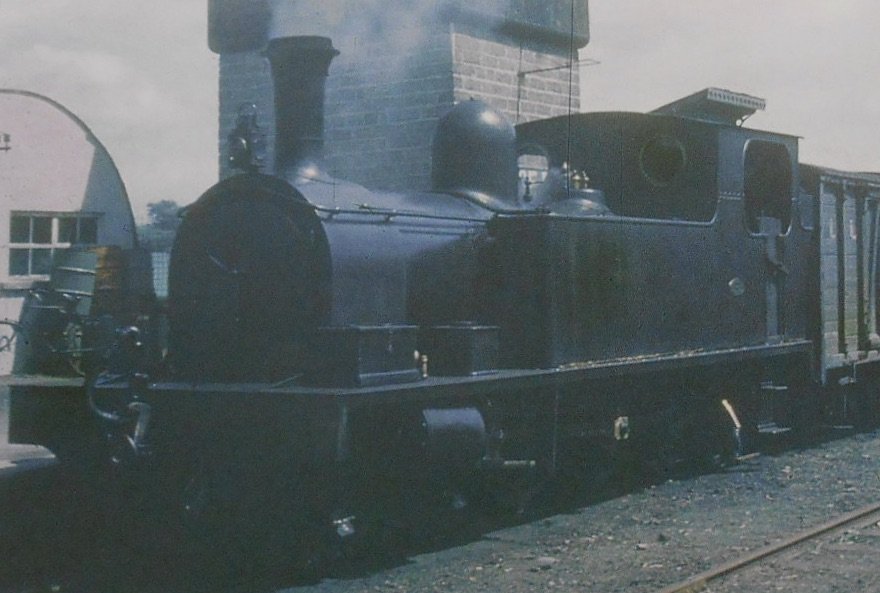
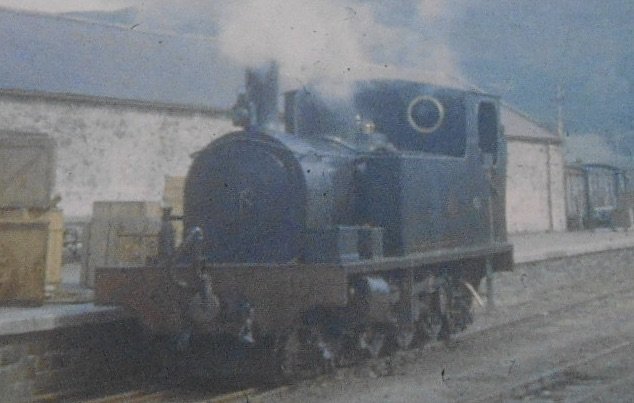
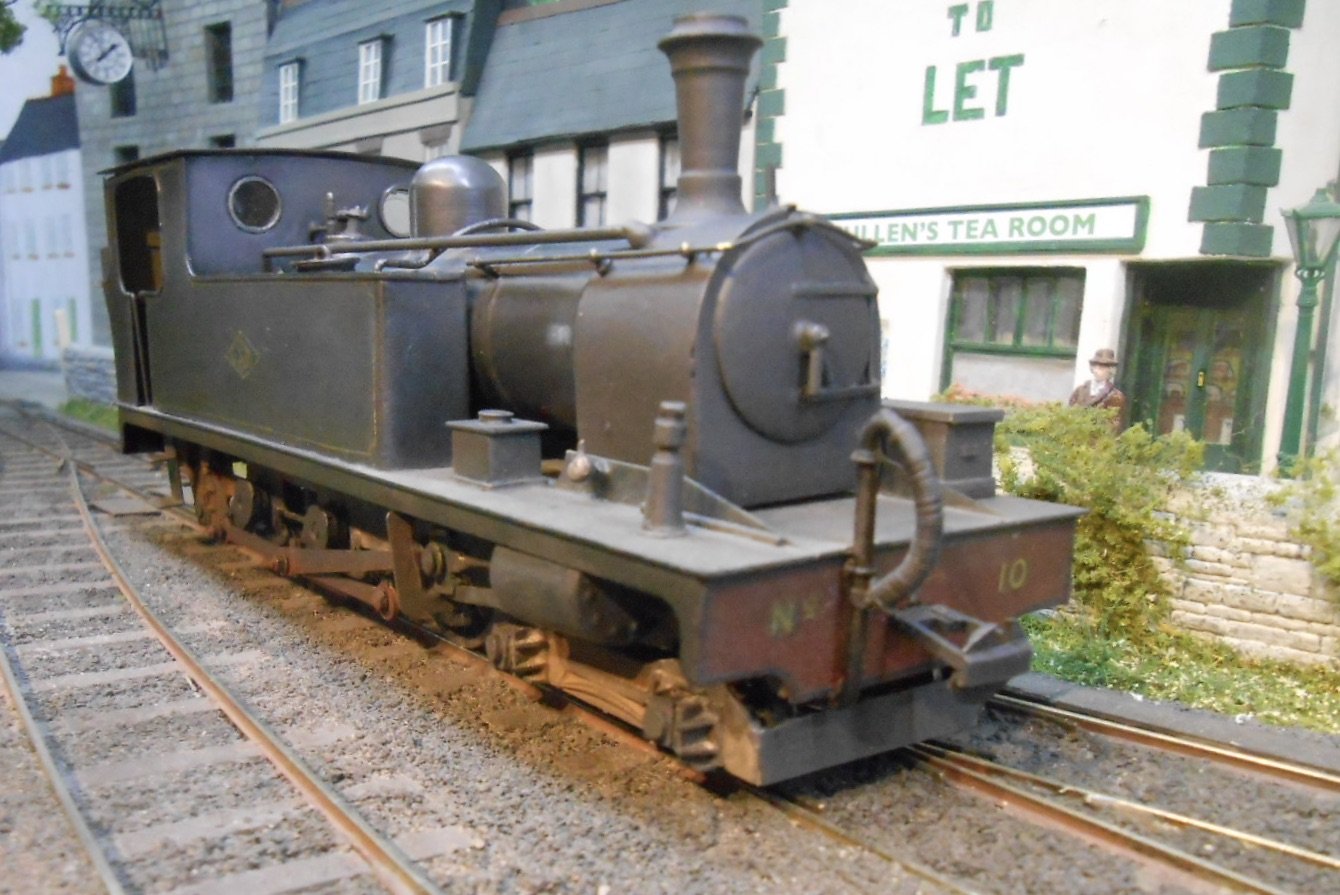
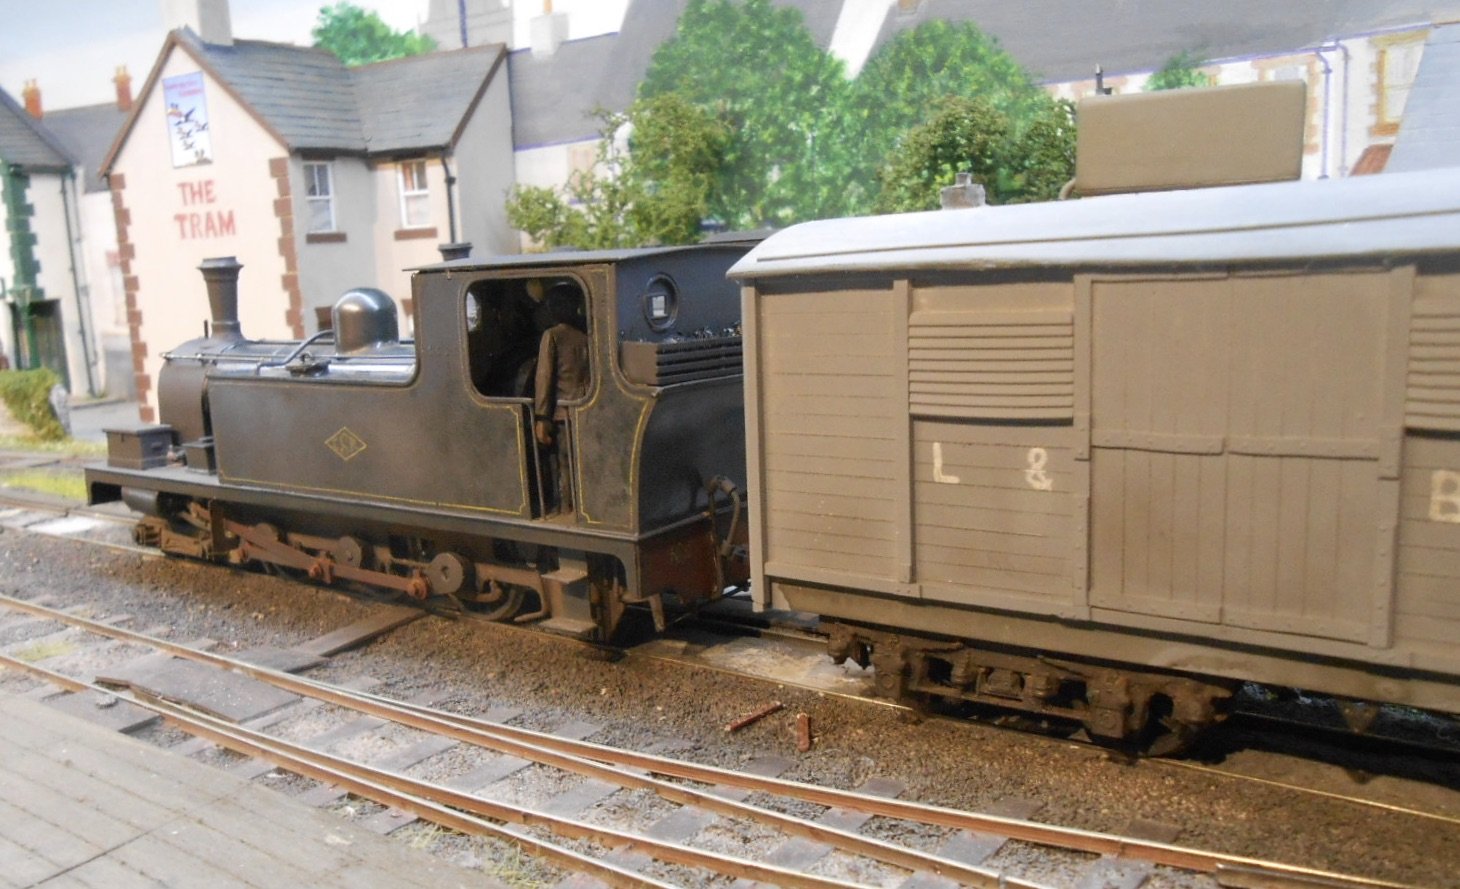
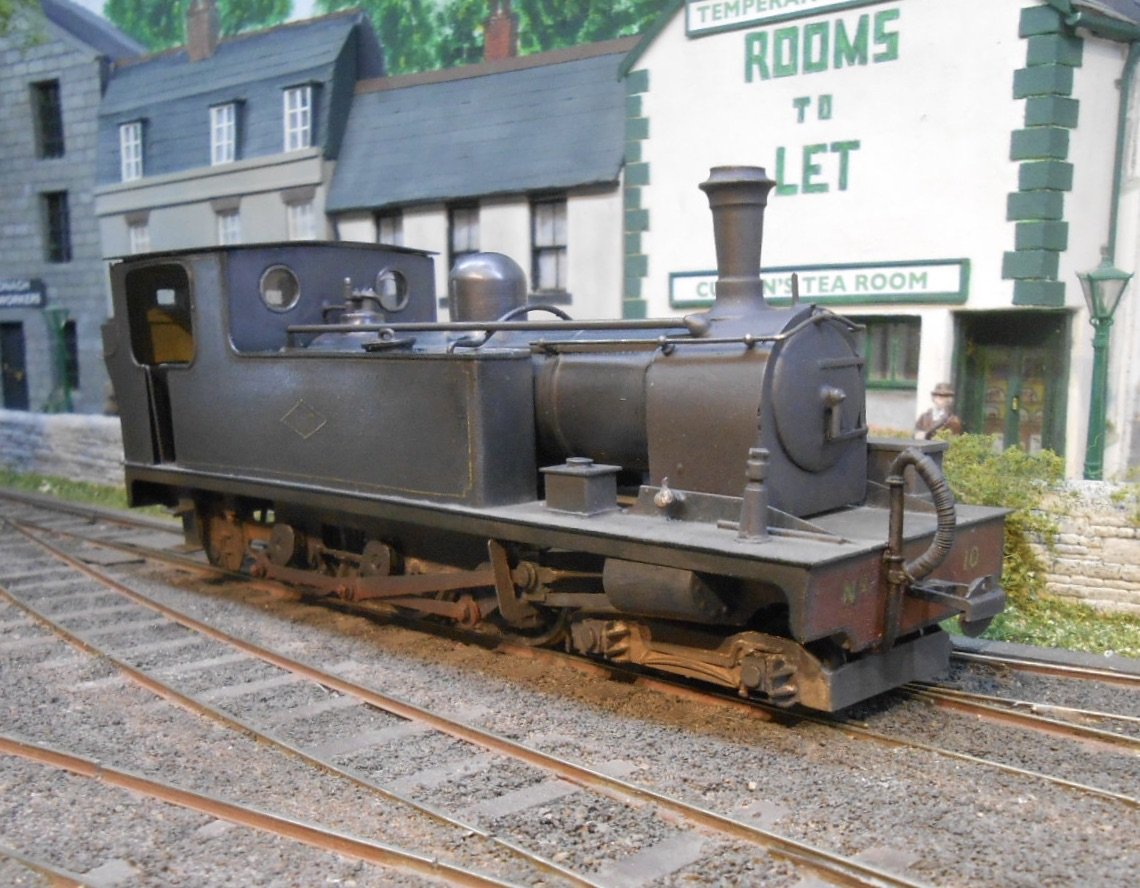
Anyway, this week, finally got back to the Swilly Pacific. While looking very smart in its lined green livery, for me it was a bit too bright and clean and I wanted the finish to be more like the photos in Norman Johnson's splendid 'Irish Narrow Gauge Railways in Colour'. The two pictures below, while not the best in terms of definition [They are early 1950s colour, after all], give a good idea of what I was after. Fairly clean, but with lining and lettering appearing only faintly behind a haze of everyday grime.

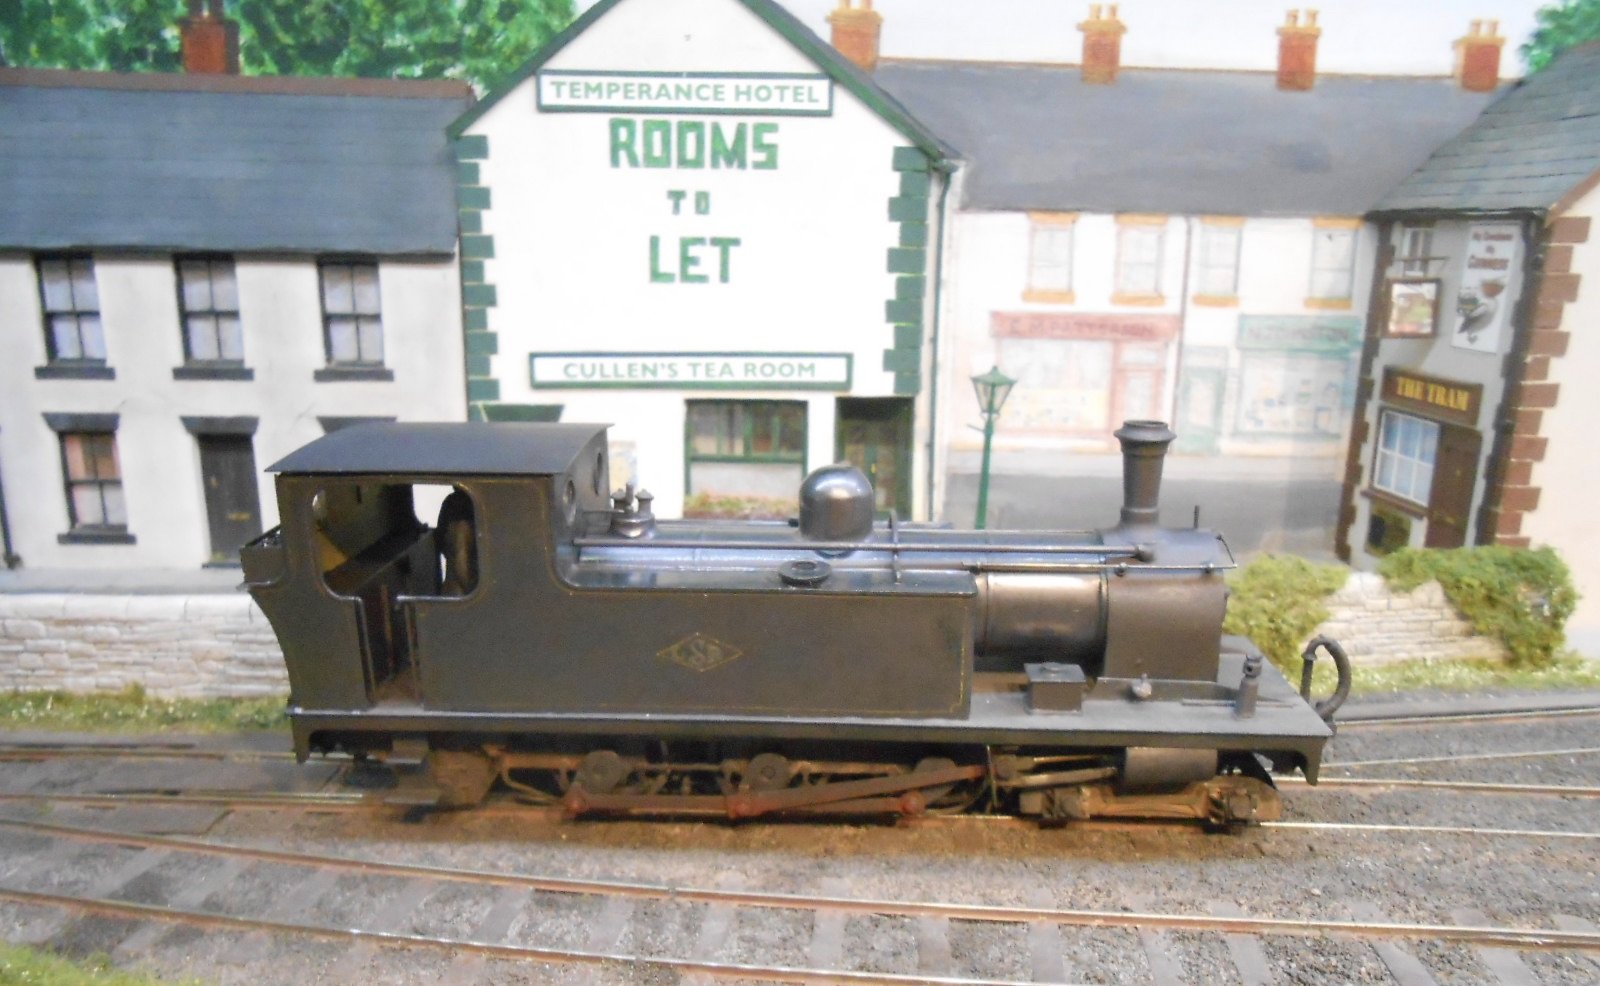
So, it was back to the bible that is Martyn Welch's The Art of Weathering. Produced nearly 30 years ago, it remains my 'go to' for such work, because it makes everything seem very achievable. However, I also had to gird up my loins and get out the airbrush - very much NOT my favourite implement, but needs must in this case.
The basic work is to spray a fine mist of Humbrol Metalcote gunmetal, mixed 2:1 with tarmac, though as the latter isn't available anymore, I used slate grey instead. The main concern was getting the right amount of misting & overall, it seems to have worked out ok.
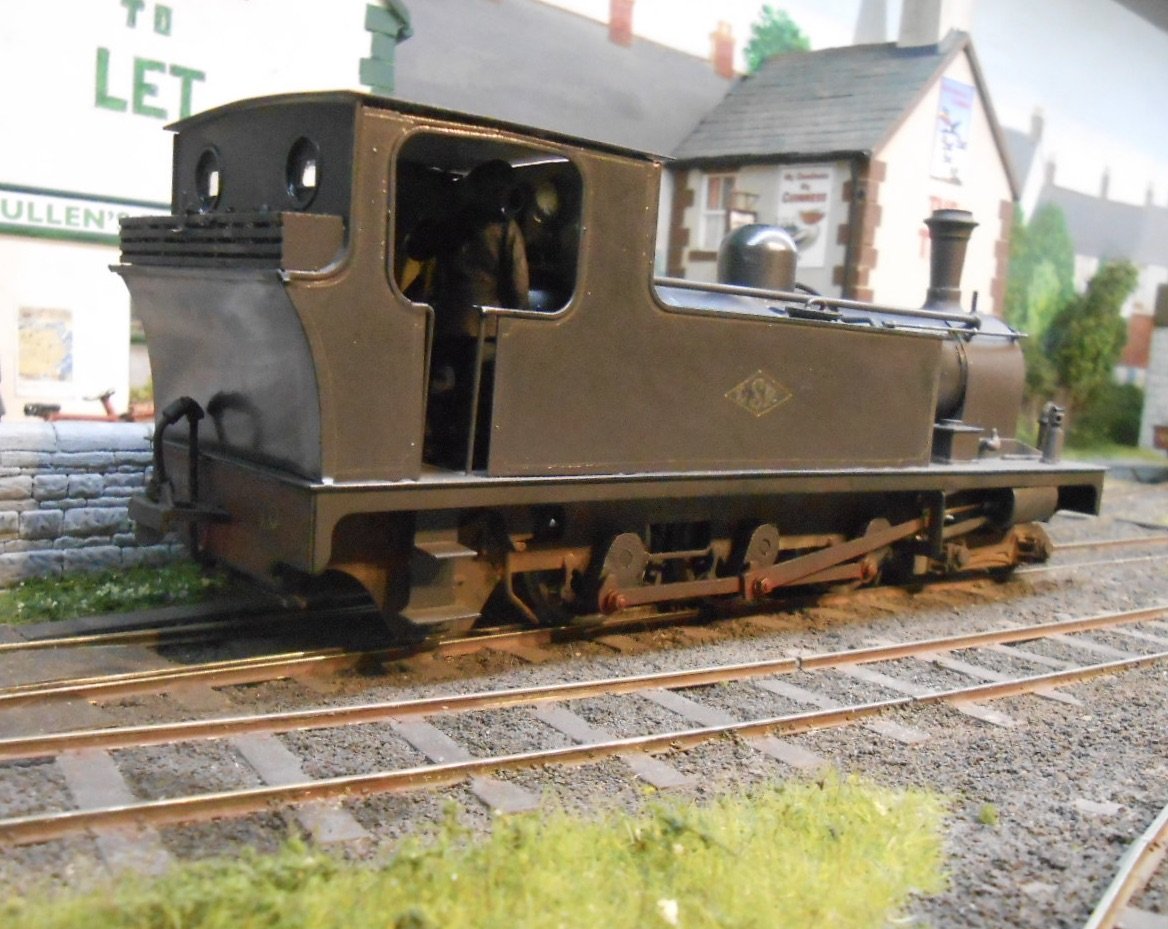
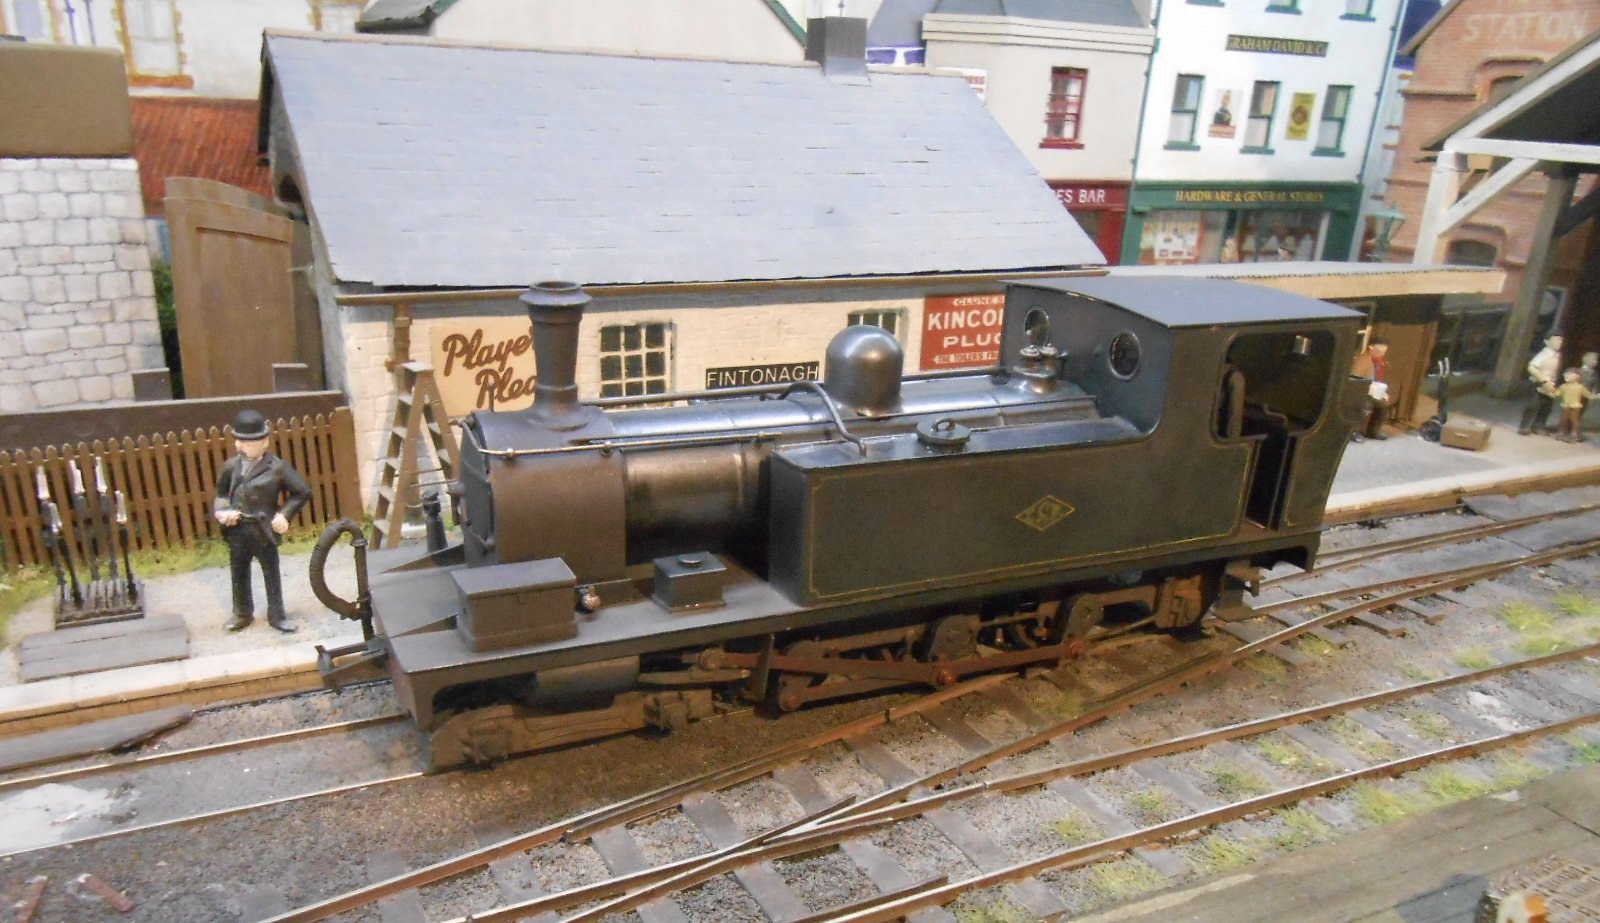
After leaving the paint to dry overnight, I then used cotton buds to polish the tanks, boiler and cab to give a more cared for look. Glazing was then added to the cab, the roof fixed in place and vacuum pipes fitted too.
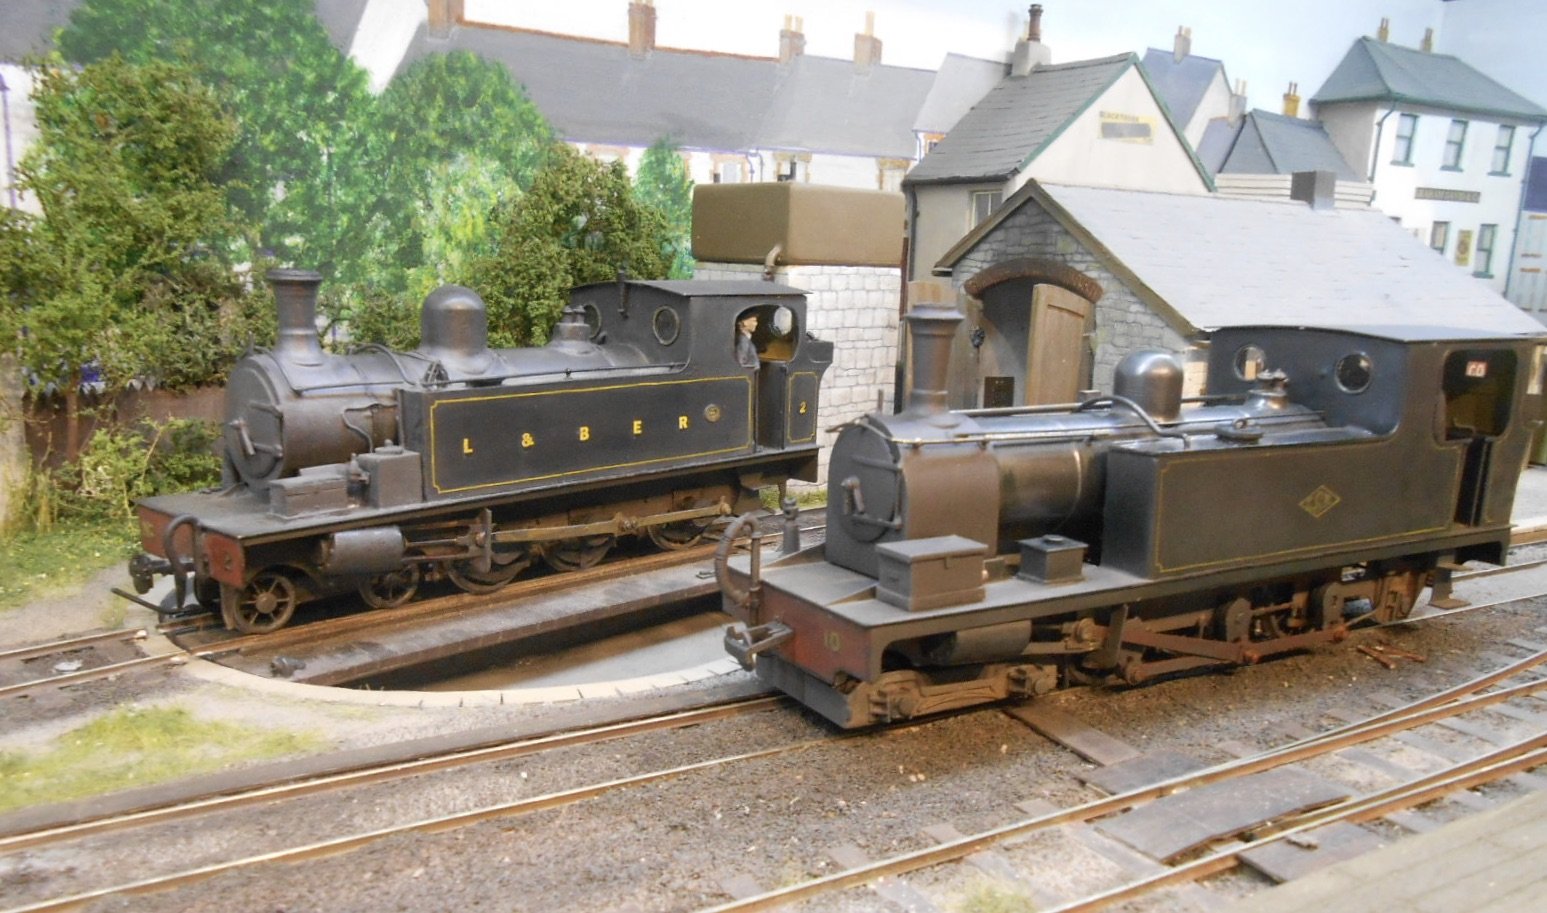
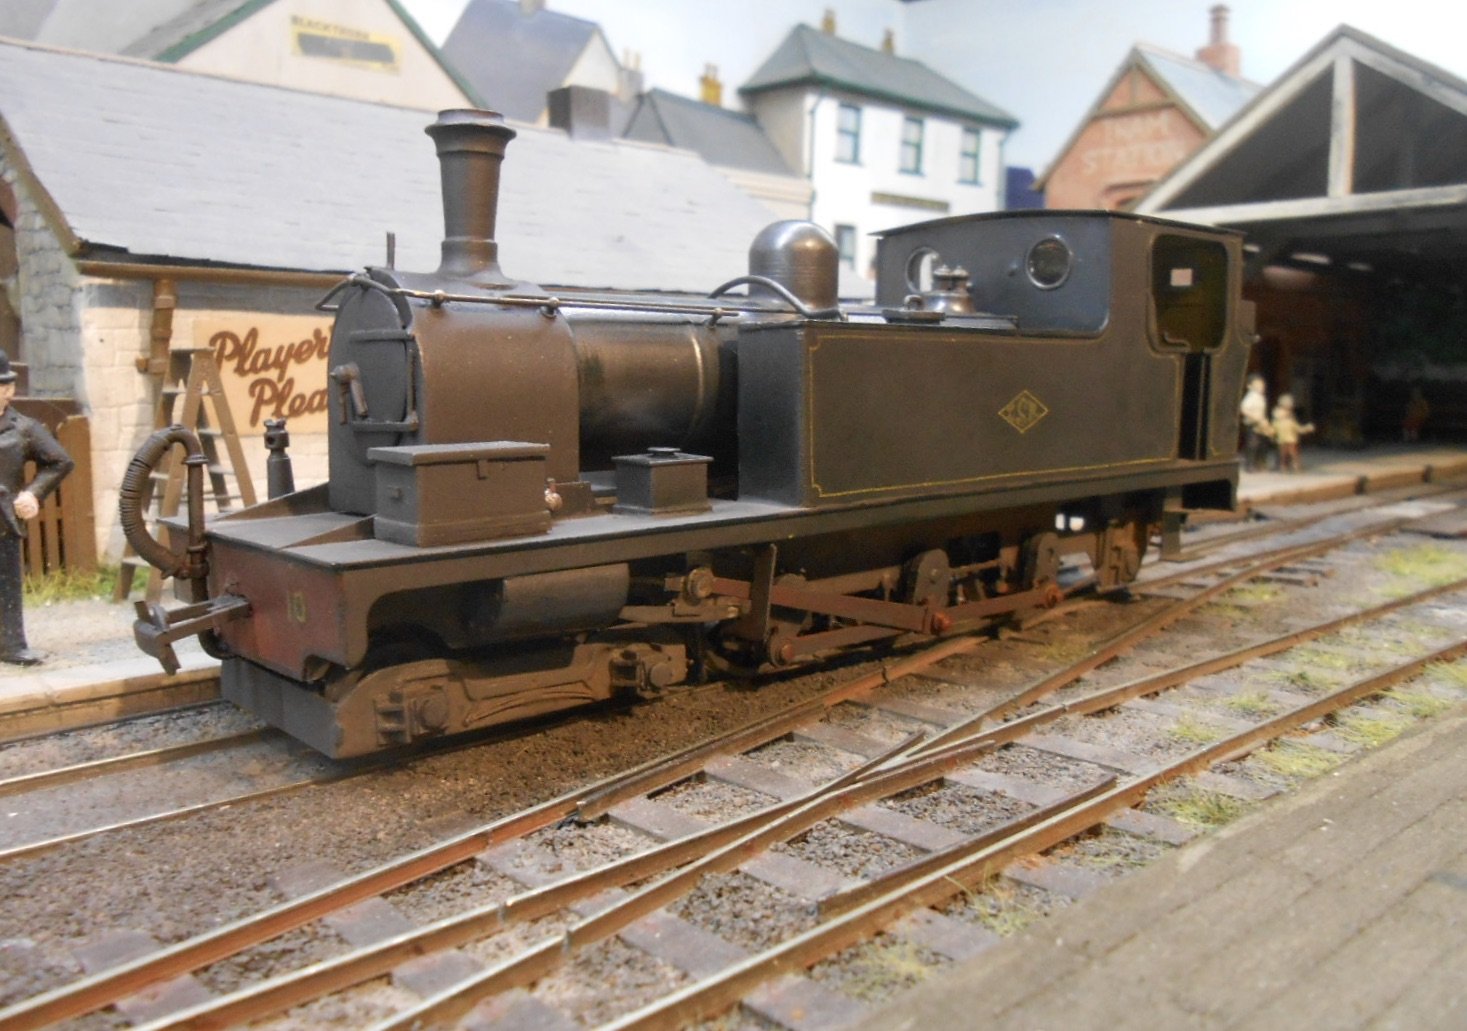
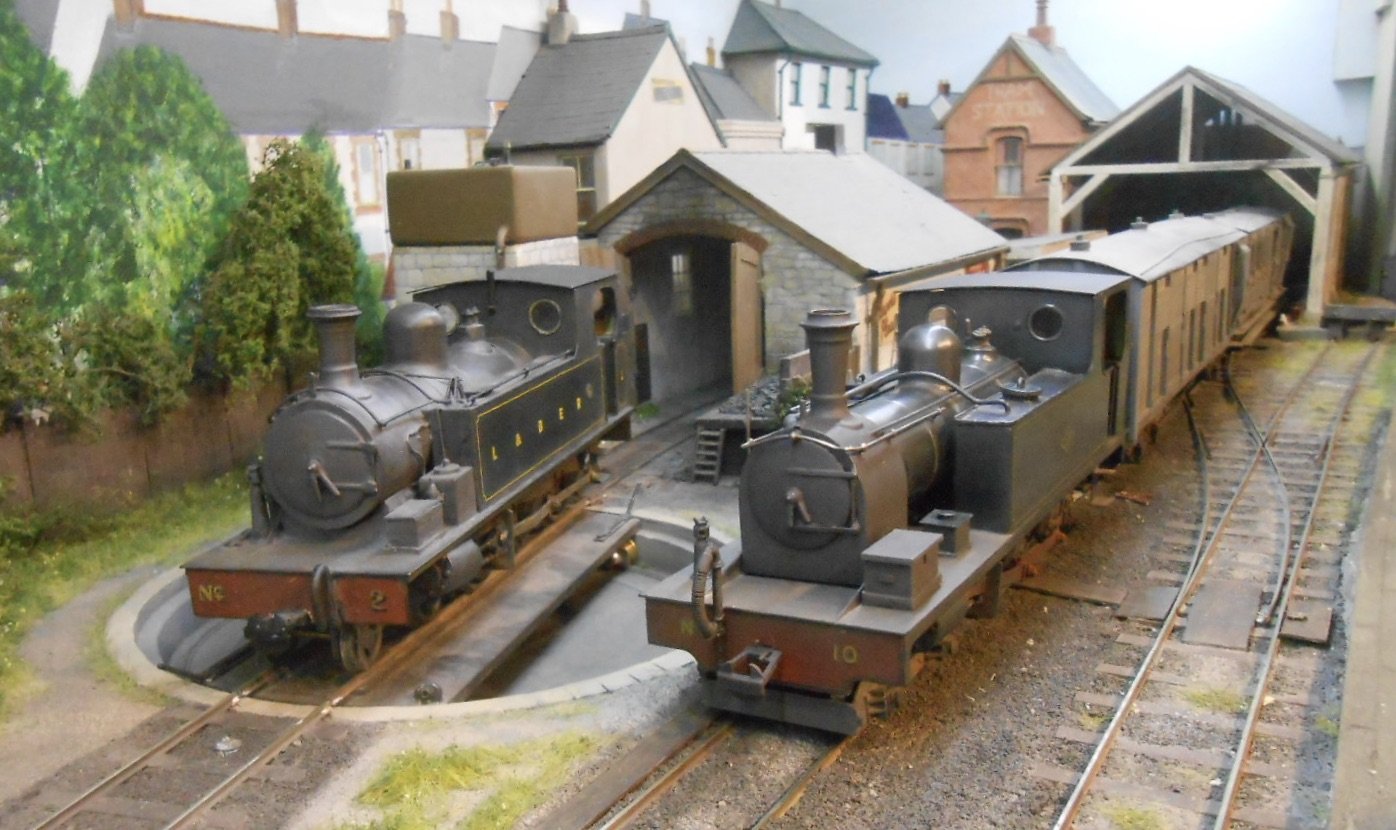
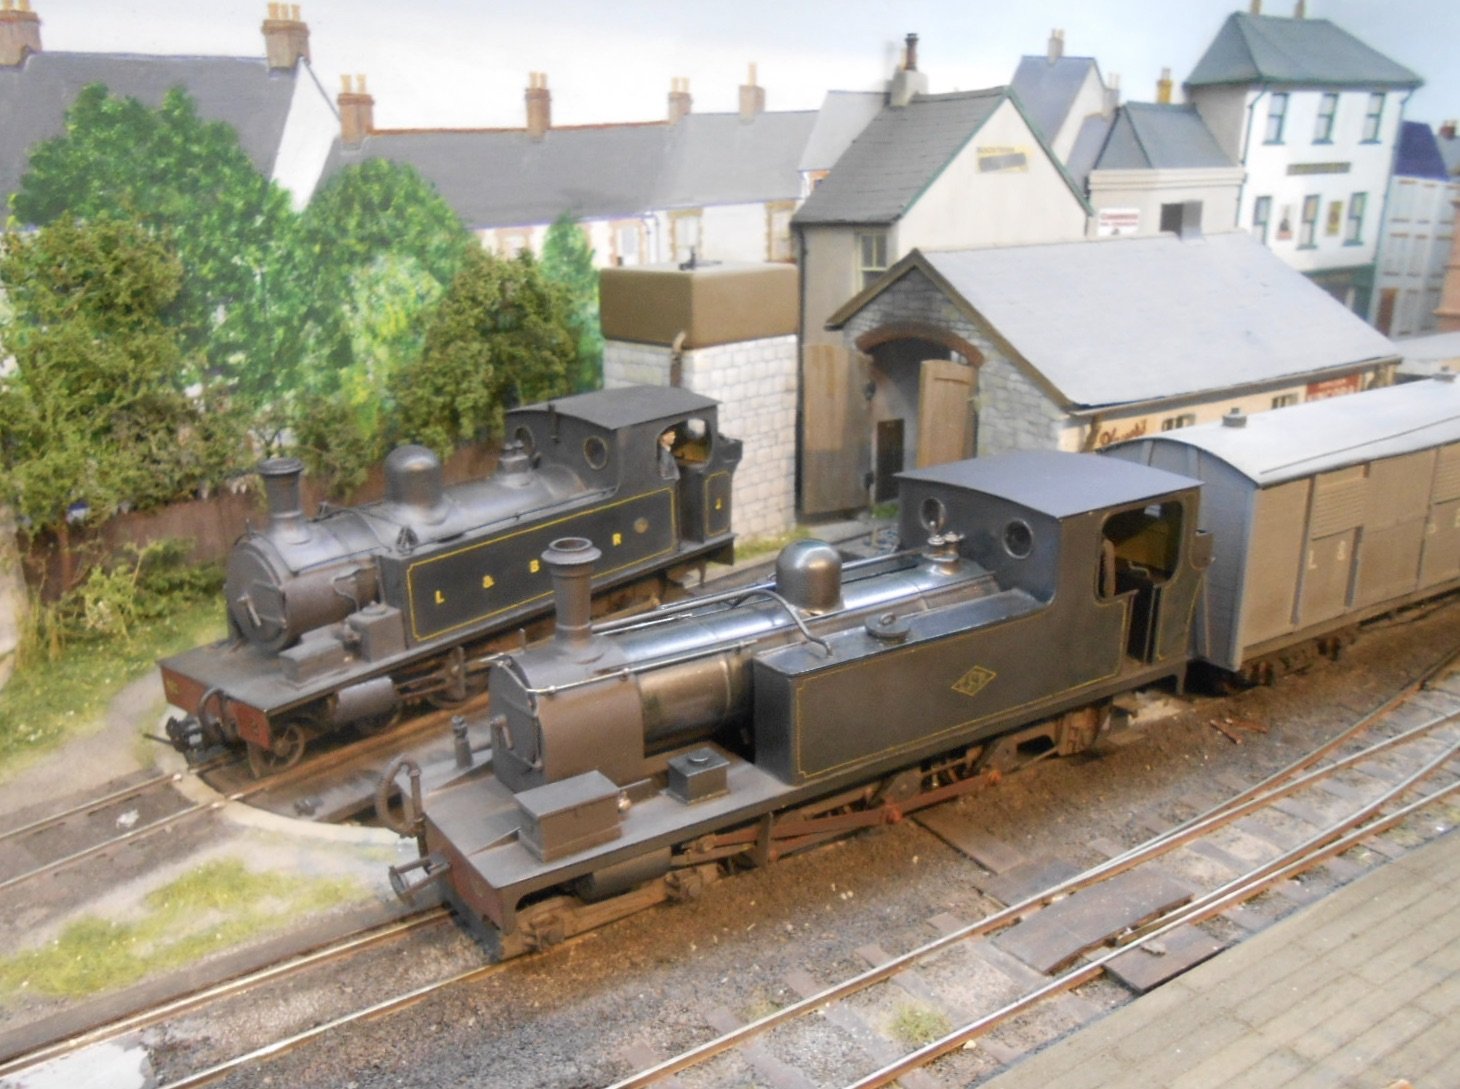
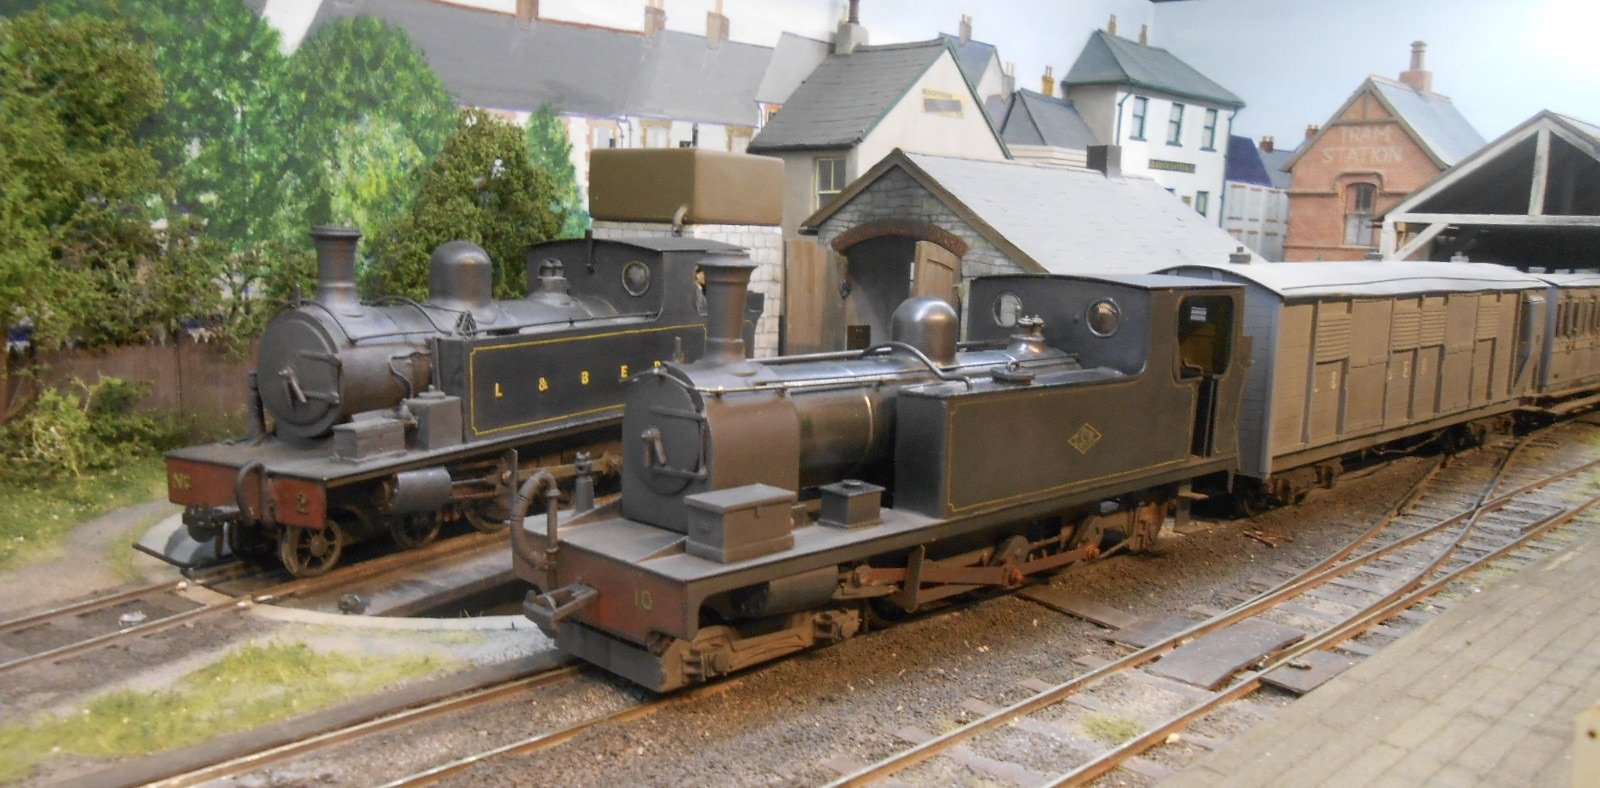
Judicious use of weathering powders finished the job. Still a bit of final fettling to do, but thought it would be nice to pose the loco on the layout, along with some of my other Swilly stock.

-
4
-
 10
10
-
-
I have an extensive catalogue of rude words, epithets (and sequences of such), which I find can be very helpful in such work.
However, Rule Number One, which is much more useful, is always to stop while you are winning. In my experience, the temptation to fit one more piece almost always comes back to bite you.
-
4
-
1
-
-
The simplest form of multi level layout is probably the folded figure of eight. This has been used countless times, but does involve gradients of course.
Iain Rice came up with a neat idea of three small layout units, mounted one above the other on a wall and using a cassette to move trains between each level. This was real minimum space stuff, but no reason why cassettes couldn't be used to move trains between levels on a larger layout.
Another Rice idea was to have two unconnected levels, with say a passenger line on one and freight on the other. Two independent railways serving the same town could do the same thing, likewise standard/narrow gauge or mainline and trams.
-
1
-
-
The American concept of a walk around layout has much to offer the solo operator who has a decent amount of space. You can still have all the trains you want, but the idea of working a single one at a time, stopping at intermediate stations to pick up/ set down traffic seems quite appealing. It also gives real purpose to operation.
This side of the pond, with less space on offer, it is the terminus-fiddle yard which gives most scope, though often with a (very) limited run. Continuous run layouts can be nice for watching the trains go by, but a basic oval can't offer much scope without a big set of storage sidings to feed a variety of train.
Americans seem happy with relatively short distances between stations and wayside sidings, so as long as there is a scenic break between each one and looks like you could fit in at least five, which could be fun. An alternative to the full-size fiddle yard might be to use cassettes, which only occupy a narrow linear space, but can be lifted in or out from storage racks above or below the layout.
-
A splendid line up, Alan
-
1
-
-
I think the RCH tank wagon, of Irish Shell and others was one of the very few types to make it across the water. I made one from the Slater's kit for Northport Quay, but it is a static model at the moment because clearances for 36.75mm gauge are too tight for its very prototypical chassis.
-
2
-
-
Finely crafted, from start to finish. Fantastic modelling.
-
2
-
1
-
-
Coming to life!
-
1
-
1
-
-
Back in the 1950s when BR was still a 'common carrier', there was a lady living somewhere in East Anglia who made high end posh hats for the toffs for Royal Ascot. BR had to put on a 'hat special' to transport her products and there is a picture in one of Dr Ian Allen's albums showing said train. A ninety ton loco, one 12 tom box can and a brake - all for a few pounds of posh hats!
Today, I believe we still have Eddie Stobart trains and Tesco ones too, but you have to wonder at the concept of lorries from Ireland to Europe taking the ferry to England, then driving to a Channel port instead of just sending goods direct by ship.
-
2
-
1
-
-
Do you have a model railway club nearby? If so, worth contacting them to see if they can help. Another thought is to visit a local model show. There will usually be a stand where you could ask for help and some even do a soldering clinic where you can learn the 'dark art'. It really isn't difficult.
If not, worth separating body from chassis (usually only a couple of screws) to see if anything has come adrift.
-
1
-
-
A very decent first step and one to be proud of. Everything else is an extension of this - including moving to 7mm scale/36.75mm gauge.

-
2
-
3
-
David's Workbench
in Workbench
Posted
Stuff!
A combination of Mayner's writings and a weekend with Gordon Gravett, has prompted a serious look at my exhibition stuff, in an effort to tidy things up and make life a bit better than 'it will do'. A big problem with going to shows is that [for me anyway], however good the intentions going out, coming home tends to be a bit hit and miss. I keep a record book to note everything that goes wrong, but this means I'm more reactive than proactive. All a bit C minus, must to better!
So, first up, did a bit of an audit with the aim of trying to be more preventative.
Something that has had me worried for a while is the sliding/rotating fiddle yard. It's a bit of a nervous breakdown every time the train table needs rotating and though I'm [fairly] sure everything is safe, decided a bit of belt and braces was needed - hence a couple of wooden blocks screwed to the frame so that long bolts can go through the beams for a bit of extra security.
Also decided a new, separate storage box was merited for all the electrics - instead of chucking them all in the 'sundries crate' at the end of a show.
As Mayner has already pointed out with his large scale garden railway stock, our models can lead a hard life and so it is with exhibitions - mainly down to getting things in and out of boxes all the time. Going through my stuff found a host of minor problems, plus several niggles like loose cab roofs and so on:
Above is the under frame of Railcar B, missing one of its struts. Below is one of the exMGWR 6 wheel coaches, lacking a cover to the guard's Duckett.
Discovered several wagons with missing bits of under frame, brake handles & so on, while even Wof Dog wasn't immune, having lost a step from its tender.
None of the remedial work took long to fix - though the repairs still need painting and there are a fair few other models that need a bit of touching up as well while I'm at it. As stuff goes back in the stock boxes, I'm also taking time to make sure each of the sections is secure, including the all important pieces which protect the Alex Jackson couplings.
Decided it might also be a good idea to have a spare Tortoise point motor - just in case. They rarely go wrong, but you can be sure if the do, it will be at a show! Fairly easy to fit a new one - though probably not from underneath the layout...
Finally, a neat little idea I learned from Gordon at the Ashford Show. It's his track cleaner, which uses a barbecue skewer with a hole drilled in it to take half a cotton bud. Soak the bud in meths/alcohol/lighter fluid and it becomes a very handy way to clean to the rail tops.