

David Holman
-
Posts
4,163 -
Joined
-
Last visited
-
Days Won
114
Content Type
Profiles
Forums
Resource Library
Events
Gallery
Blogs
Store
Community Map
Posts posted by David Holman
-
-
A very decent first step and one to be proud of. Everything else is an extension of this - including moving to 7mm scale/36.75mm gauge.

-
 2
2
-
 3
3
-
-
Yep - love it!
-
 1
1
-
-
Well done Leslie - quite a task. Do the slightly wavy canopy lines matter? Suspect this happens all the time on the real thing as it is all part of the aging process.
-
 3
3
-
1
-
-
Clever stuff and well outside my pay grade!
-
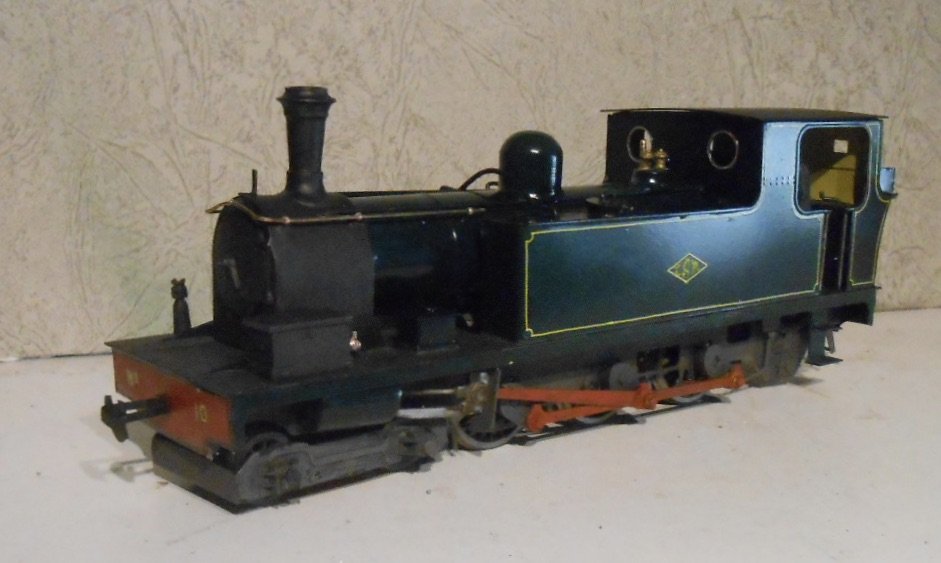
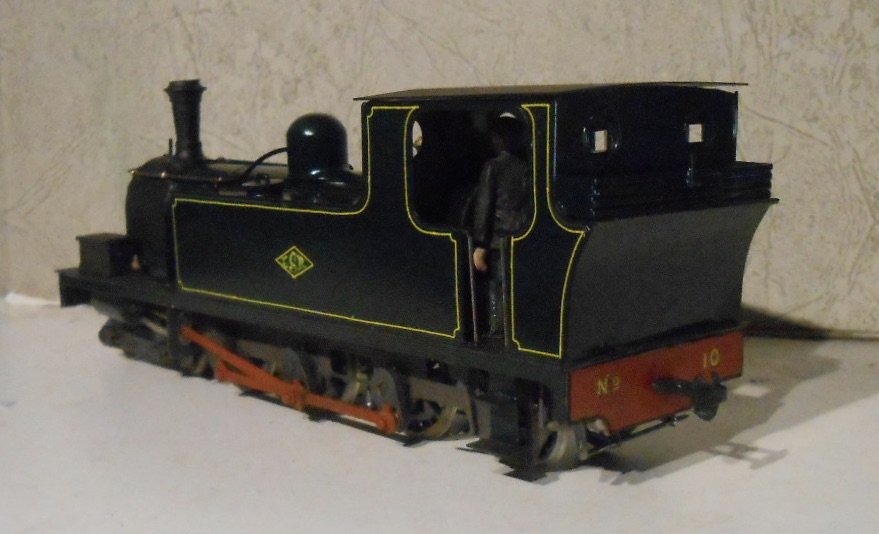
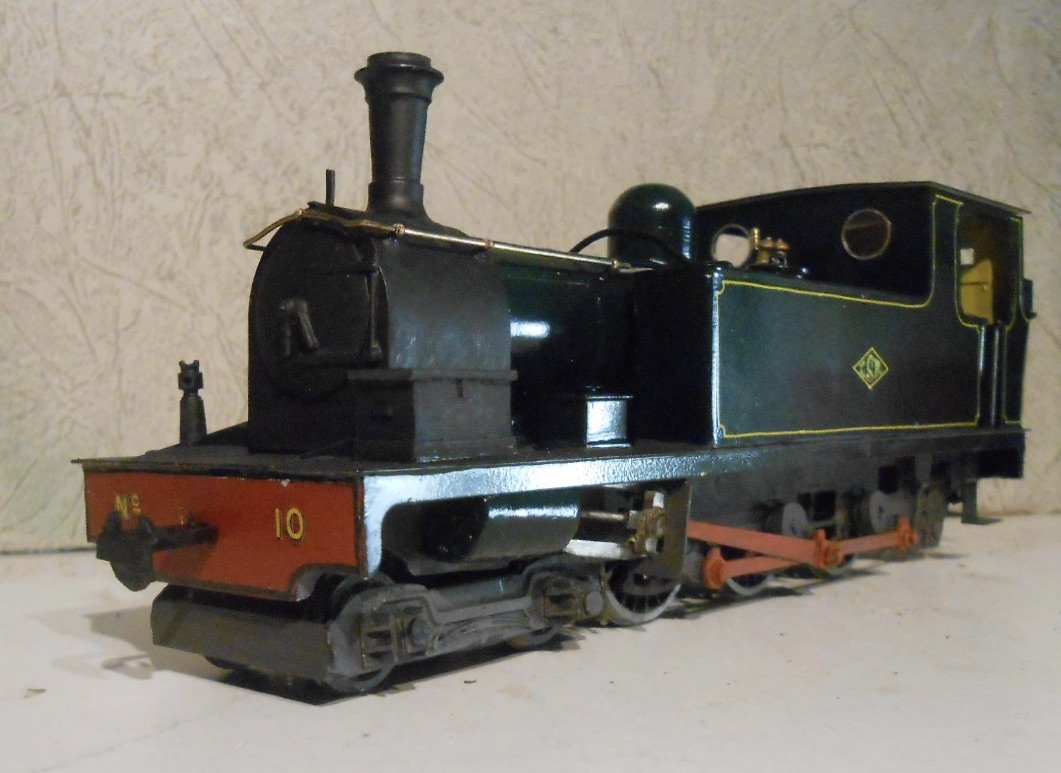
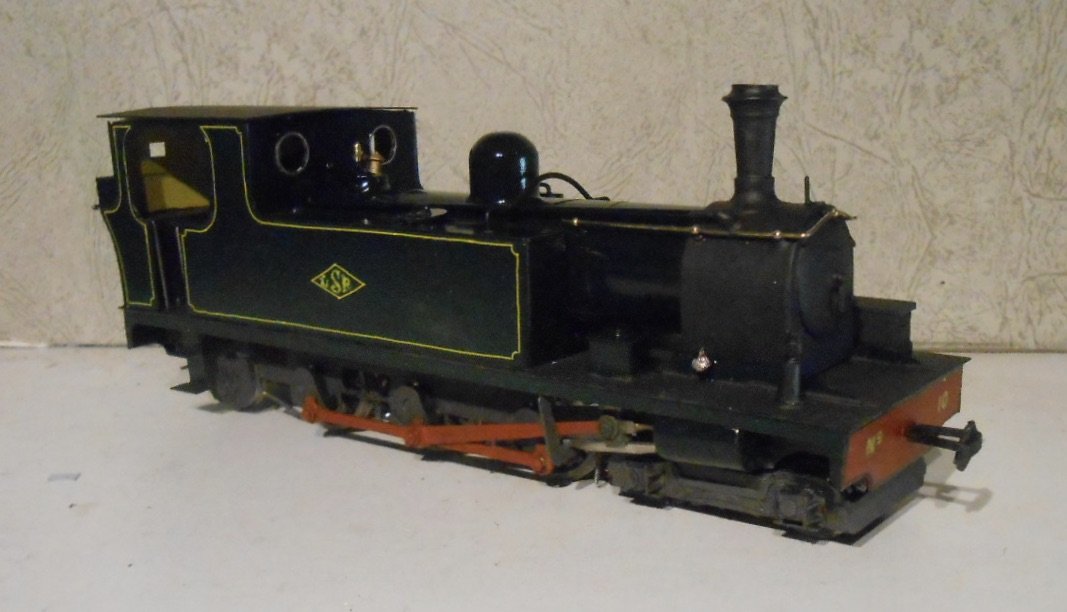
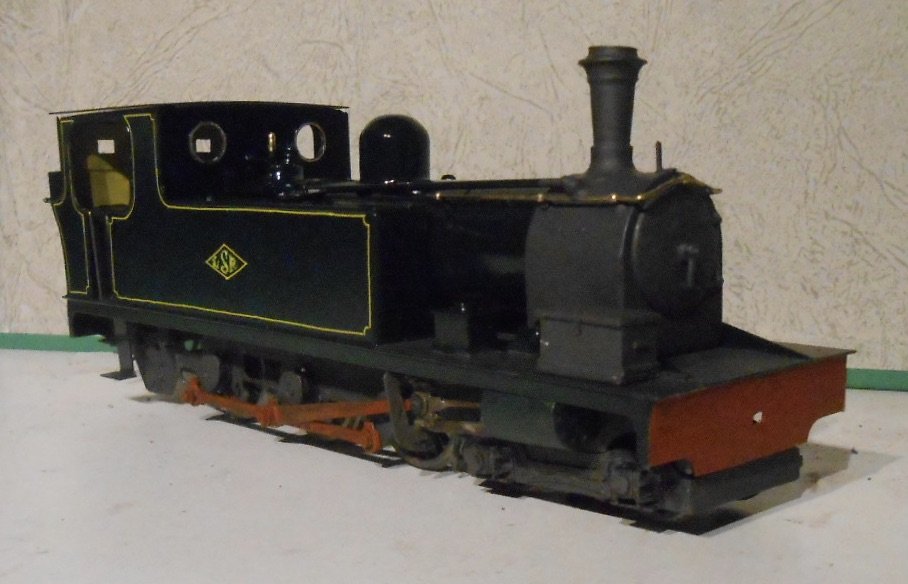
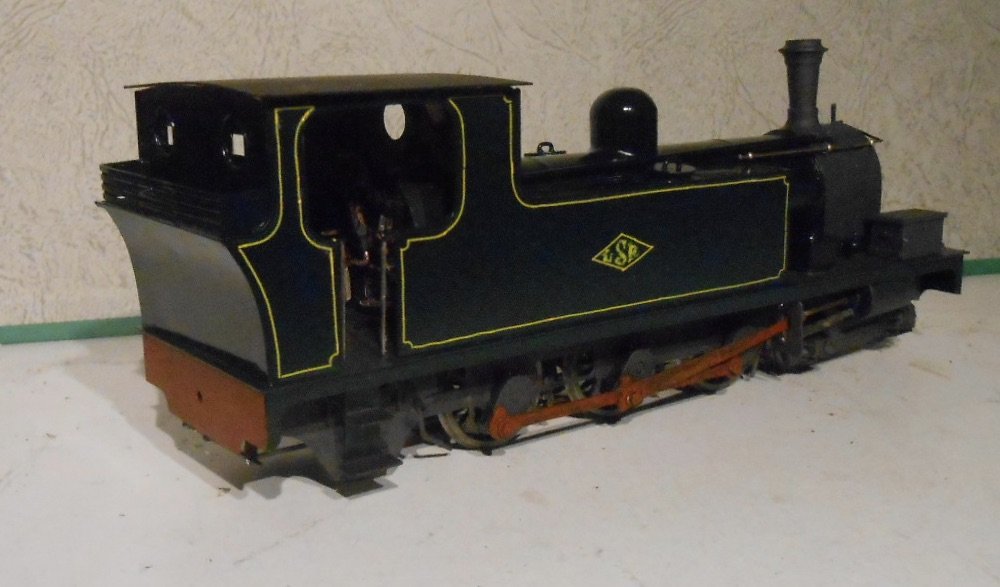
The Swilly tank engine is now approaching what might be described as the 'ex works' stage. The cab still needs glazing, while roof is still to be fixed, vacuum pipes added, plus coal for the bunker.

When adding the finishing touches to a model, I am always surprised at both how many of them there are and how long it can take. For example, buffer beam red is a colour that does not seem to cover well. Three coats in this case, each needing to dry overnight before the next. Even painting the rods as well, it is little more than a ten minute job, but ends up being spread over several days.
Painting the crew can be similarly fiddly, but at least acrylic paint dries quickly.
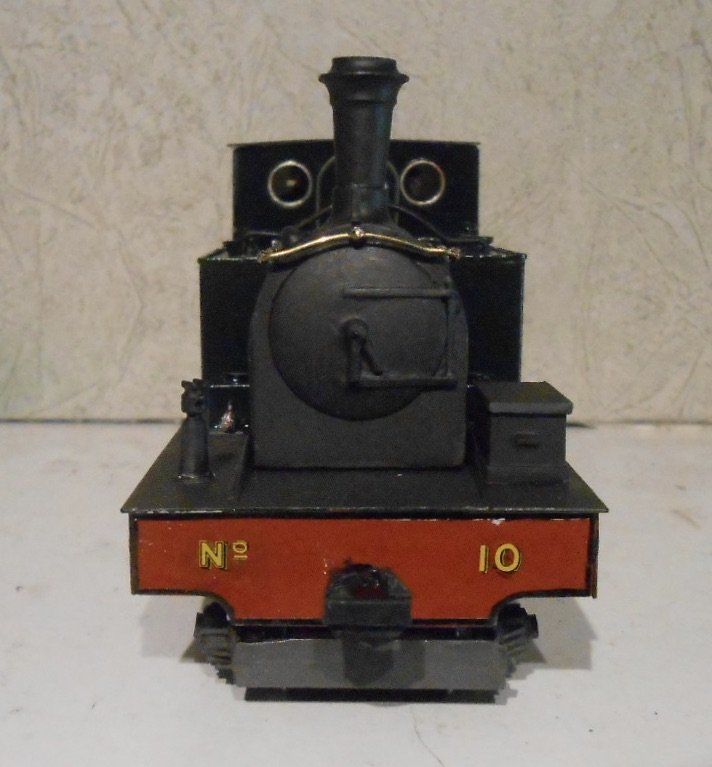
Buffer beam lettering is pressfix. I was going to use some Fox transfers black lining for the buffer beam surrounds, but it was easier to use a fine black marker pen.
Looking at colour photos of No 10, I felt I'd painted the smokebox too grey. This was easily remedied with a coat of Metalcote gunmetal [27004]. The footplate and cab floor were done with a mixture of ordinary gunmetal [53] and a dark rust [70]. Martyn Welch's Art of Weathering suggests bauxite [133] but this is no longer available. On the chassis, the same mix is used as for the footplate.
Actual weathering comes next, for which I need to gird up my loins and get out the airbrush. Martyn suggests a light spray with a mix of metalcote gunmetal and tarmac [or roof slate] in a ratio of 2:1, with leather [62] as an option. After all the efforts so far, I'm not about to risk this on the model without a bit of practice, so have sprayed a couple of bits of card with the dark green, so I can gauge the effects, so wish me luck!
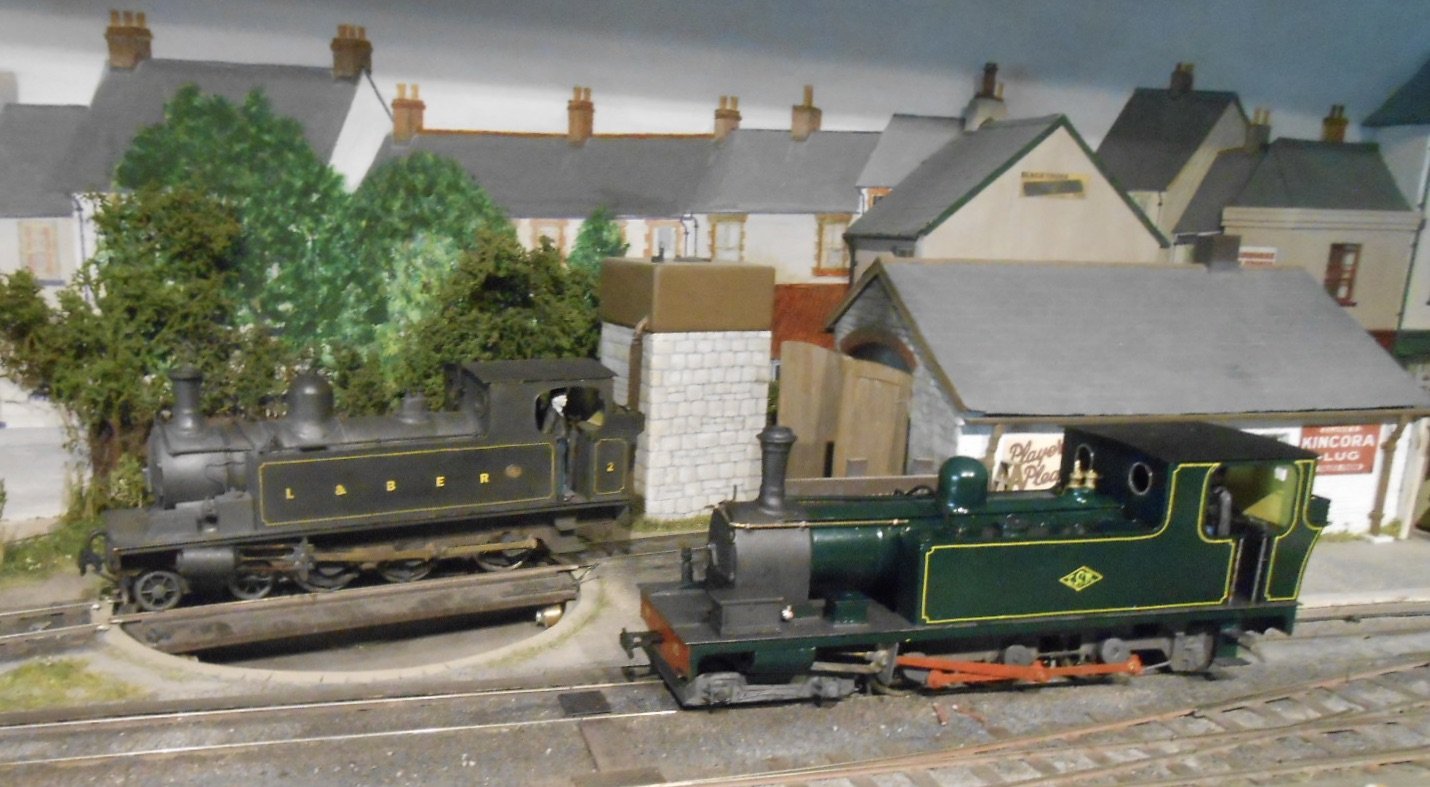
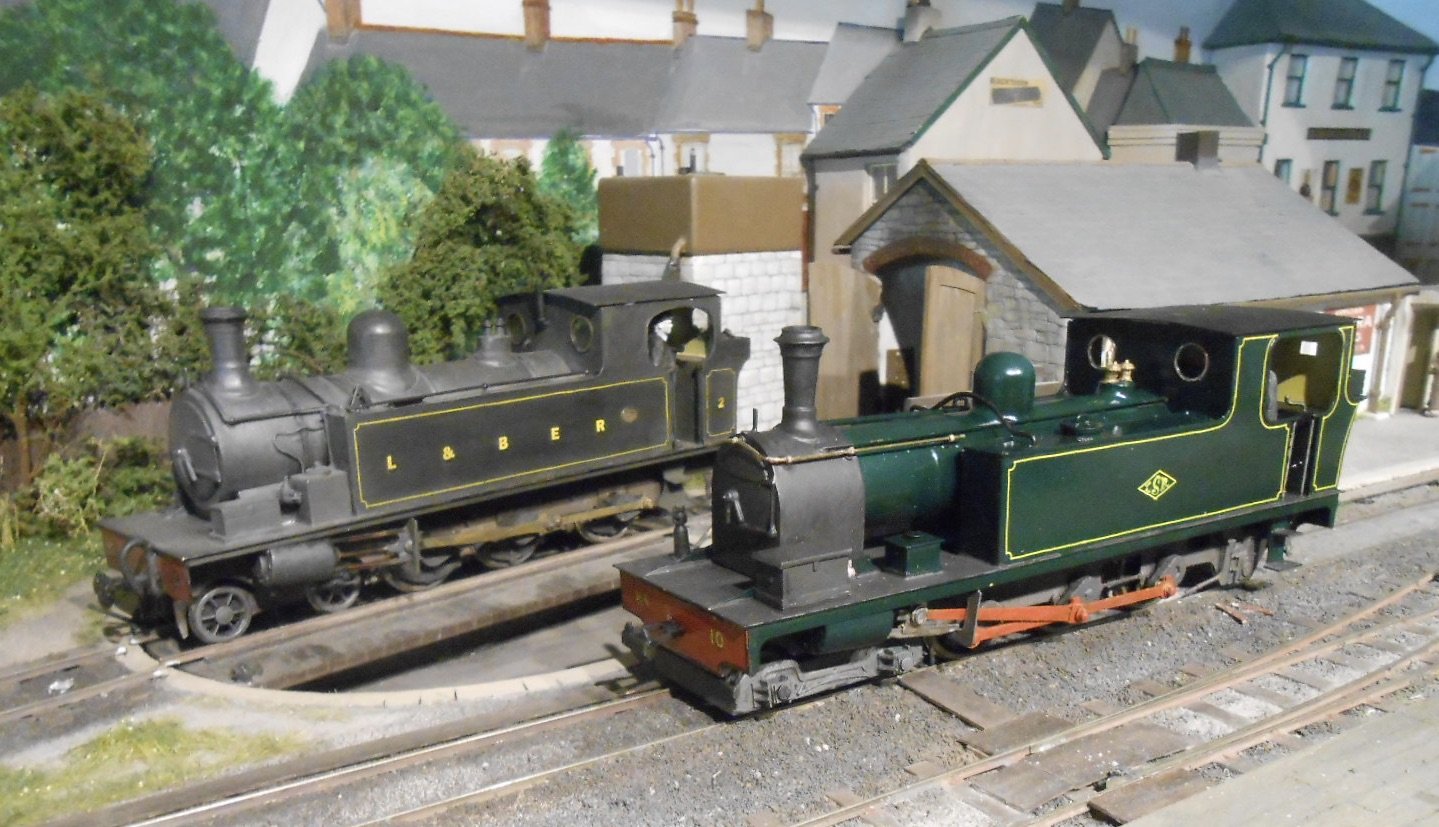
Finally, for now, a couple of pictures of the loco on the layout, with its Barclay sister. The Barclays, though well cared form, seemed to get a bit grubby in their daily lives, whereas the Kerr Stuart generally seemed well polished - albeit with the oily rag somewhat darkening things. Note again how the shade of green varies under different lighting.
-
6
-
 7
7
-
-
Well said.
Like it or not, pretty much everything in our hobby is about compromise - starting with track gauge and wheel profiles. The etched brass route for some items is a great idea.
Before CAD, there was little option other than scratchbuilding things like gates from microstrip - not always successful either, for the same reasons mentioned. Yes, you can buy ready made, but the right thing is not always available. For me, 3D printing is the ideal medium for such items if you have the CAD skills. From what little I know, the time needed to draw out (almost) 2D items is much less than more complex stuff - plus you are developing skills as you go along.
I think we are entering a new era of scratchbuilding, where CAD, laser cutting, 3D printing etc are much more accessible in terms of cost and availability of the key tools. Don't forget the "three foot" viewing rule (though should be 900mm these days!), nor the effect of a coat of paint. What you have shown us is great, can only get better and is very much the way forward in terms of opening up new opportunities for enhancing our layouts.
-
4
-
-
Thanks Patrick - there's some fine stuff here. Did make it all the way to Burtonport once myself. Must have been an amazing journey back in the day.
-
1
-
-
Sounds like a great project Dane - and if it essentially freelance, so what? Looks like it is more about the journey than the destination and what a fine way to have some fun & gain experience.
I did much the same thing in 0n16.5 a few years ago and it was really worthwhile in terms of how my skills developed.
-
That is very good to know. Thanks JB, and indeed everyone.
-
1
-
-
They are all nominally 6ft, Paul. However, being hand built (by me) wouldn't like to say for sure. Plus they have been rebuilt a couple of times to address tight spots.
The two points on the quay side are both Ys. Based on earlier custom made ones by Marcway, for Arigna Town, they are only 12 inches long from toe to clearance and are a good six inches shorter than a standard left or right, so great space savers.
-
1
-
-
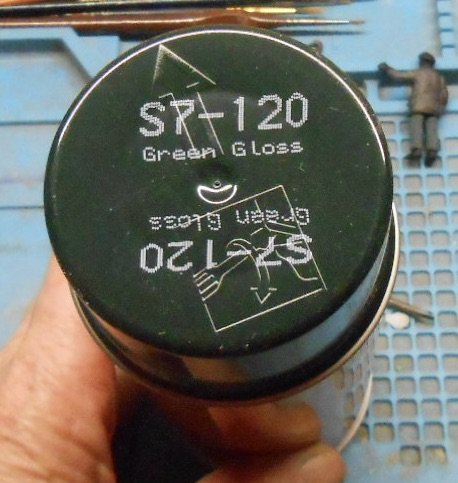
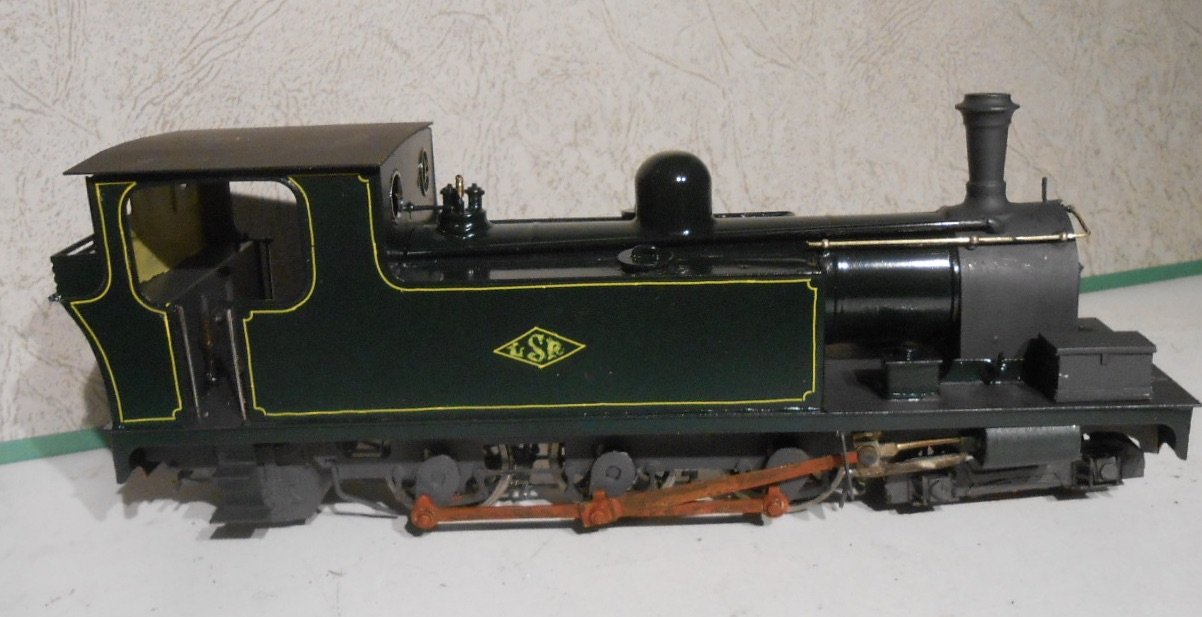
Well, the shiny nickel silver and brass has gone, replaced with Halfords rattle cans, starting with self etch primer [pale yellow], then red oxide primer and finally dark green gloss, as shown below.
As so often with these things, the colour is a bit of a wing and a prayer, but was the darkest I could find. In some lights, it looks almost black, but the green comes through quite a bit more in others. No matter - I'm intending to make the final finish worn but well cleaned with some careful weathering.
So what we have above is the primary phase of the gloss green, with lining, plus a first coat of red on the buffer beams and rods, and dark grey on the smokebox, footplate etc.
The lining is from Fox Transfers [0.35mm yellow], while the Swilly lozenge uses the same for its outline with hand drawn logo using a fine dipping pen and acrylic paint. Lining and lettering took about 5 hours over two days and rates well down my list of favourite things to do.
Very little is fixed in place yet, while the photos [for me at least], show why a model looks far too stark without at least some degree of weathering. It all needs toning down if it is to look realistic. Some of the lining still needs looking at too, but note how the shade of green varies between pictures
Anyway, it's a start though it might be a while before the model is finished as attention now turns to Northport Quay, which is going to the Orpington Show in two weeks time. Always a nice occasion, but not the biggest. At the end of May, NPQ is going to Railex at Aylesbury as a late replacement for a layout which had to drop out. Galteemore David is going to join me on the Sunday, so there should be a fair variety of broad gauge stock on show, maybe some GNRI too.
-
11
-
7
-
-
Have usually found that being creative is the antidote to the stresses of life Eoin. Worked particularly for me when I was doing 80-100 hour weeks as a primary headteacher. Yes, had the holidays in between, but found a few hours creativity in a busy week helped keep me sane.
Always enjoy reading about your stuff, in particular the technical and practical approaches that I would just never think of.
-
1
-
-
What are you building these days Eoin?
-
Looks great to me, but then so did the previous picture... and to think I spent a whole day in the company of the real loco!
-
1
-
2
-
-
Love it, though am ashamed to say my own solution to cutting rectangular holes in things involves a slotting disc in as Dremel. Crude, but effective.
-
2
-
1
-
-
Witchcraft! Necromancy!
Or just magic...
-
3
-
-
Always so satisfying to get to that stage!
-
1
-
1
-
-
Yep. Very best wishes John and hope things settle down for you all now.
-
1
-
-
Absolutely. In this age of seemingly almost everything available ready to run, it is great to hear of someone keen to expand their skills in making stuff.
-
3
-
-
The last two posts show the difference between what I would call a modelling approach and an engineering one. Clever stuff that we can all learn from.
I think there is also the element of how often you are building locos. I probably average at most one of two a year and daft though it may seem, lose the mind set in the six months or so between finishing one project and starting the next. Anything cosmetic (bodywork, buildings, scenery etc) is less of a problem because it doesn't have to work, so am endlessly grateful to the likes of Eoin and John for all their practical advice.
-
3
-
1
-
-
As a long time 7mm scale modeller, have more recently had to turn to Gibson wheels for some of my 3' narrow gauge locos as the Slater's range didn't cover my needs. Have found Gibson's to be ok and their service is decent. However, the lack of automatic quartering is a pain, while the wheels are not happy if you have to take them on and off the axles more than a couple of times. I have also found that tyres can come loose from their rims. Both can be fixed with a touch of cyano, but overall they are not as robust as Slaters. Or maybe I am just too heavy handed?
-
 1
1
-
-
5 minute epoxy for me on whitemetal.
-
1
-
2
-
-
Spoiling us again, Ernie!
-
3
-
-
Thanks folks!
From what I've read, there was not much in the way of a standard paint scheme on the Swilly apart from the early days. Even within the same class, there were variations. For example, the Barclay 4-6-0Ts were black, but lining and lettering seemed to be different on each one.
There were only two Kerr Stuart's and No9 didn't last that long, so mine will be No10. This was reported to be unlined dark green by my chosen period of the late 1940s, with red coupling rods and buffer beams. The green is VERY dark in the few colour pictures available - almost black after multiple goings over with the proverbial oily rag. However, looking at other pictures, I could be persuaded that there was yellow lining on the tanks, while the LLLS lozenge could be there too.
I've got a dark green rattle can, which may be ok with some weathering on top, but any thoughts are welcome.
-
1
-


Anybody doing repairs?
in Questions & Answers
Posted · Edited by David Holman
Do you have a model railway club nearby? If so, worth contacting them to see if they can help. Another thought is to visit a local model show. There will usually be a stand where you could ask for help and some even do a soldering clinic where you can learn the 'dark art'. It really isn't difficult.
If not, worth separating body from chassis (usually only a couple of screws) to see if anything has come adrift.