gph2000 Posted February 22, 2022 Posted February 22, 2022 I'm about to convert my mogul (K Class) to DCC. The first thing I did was removed all the base screws. Bad Idea. The centre one should stay in place. The outcome of this is that before I do any conversion, I've got the valve gear binding! I need tips on how I can get them running freely again.
Joe Keegan Posted February 22, 2022 Posted February 22, 2022 A picture of both sides would paint a thousand words 1
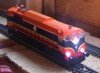
gph2000 Posted February 23, 2022 Author Posted February 23, 2022 I'll get painting when I get back to the shed. I thought I had one on the phone, but nothing that was of any use when I downloaded them. Here they are but I need at least one side on to be of any value.
Georgeconna Posted February 23, 2022 Posted February 23, 2022 Sides the man said, Not underneath. I would undo the plate again disengage the gear wheel and rotate the wheels left or right until the connecting rods look spot on. The Quatering is already set so it should be ok. 1 1
gph2000 Posted February 24, 2022 Author Posted February 24, 2022 I got lucky George, I did exactly that and all was good. Some pieces of advice for anyone else who needs to remove a K class body shell, DO NOT UNDO THE CENTRE SCREW UNLESS YOU HAVE TO. If your base plate becomes disturbed and needs re fitting, fit it from the motor end forward, otherwise the motor end will not fit back properly While you have the body shell off secure the base plate at the motor end with a nut and bolt as seen here to prevent it becoming disturbed during the work - I am converting to DCC so there will be some handling 1
Georgeconna Posted February 24, 2022 Posted February 24, 2022 nice one done it many times myself!! thats are hard wire jobbie now for ya!
mmie353 Posted February 25, 2022 Posted February 25, 2022 So how bad is it to convert one of these to DCC? I have a lot of decoders to get for locos to get but I am not even thinking of this loco yet.
gph2000 Posted February 25, 2022 Author Posted February 25, 2022 I'm not finished yet, but if it has the circuit board, its one of the easier ones. I'm following here Bachmann N-class - How I did it. - DCC Fitting Guides - RMweb and here Bachmann N Class - non-DCC ready - DCC Fitting Guides - RMweb 1
Georgeconna Posted February 25, 2022 Posted February 25, 2022 I removed the Circuit board and used the space there for the decoder. Soldered the red and black tot he pick up wires and the orange and grey to the mortar. couple of mins, Make sure your decoder will fit in there though!
gph2000 Posted February 25, 2022 Author Posted February 25, 2022 I'm sticking with the decoder in the tender and keeping the PCB - so that if I have to replace the decoder in future I don't have to reopen the engine.
Georgeconna Posted February 25, 2022 Posted February 25, 2022 cool I did that for a Baccy Standard 5 but used wires with a tiny plug so I could detach the Tender and Loco when needed.
gph2000 Posted February 25, 2022 Author Posted February 25, 2022 6 hours ago, Georgeconna said: cool I did that for a Baccy Standard 5 but used wires with a tiny plug so I could detach the Tender and Loco when needed. Thats a thought. That's something I might do when I address the issue of the tender coupling.
gph2000 Posted February 28, 2022 Author Posted February 28, 2022 Almost done. A couple of lessons learned, it would be easier to abandon the PCB as George advised, but if like me you insist on keeping it, then un solder it from the motor as part of the disassembly. I didn't - it made the work much more awkward, and detached itself anyway! Early testing was a success, the only glitch is that forward and reverse are excusing the word, reversed! I need to fix that and test again. 1
Georgeconna Posted March 1, 2022 Posted March 1, 2022 (edited) You can change that using the CV29 to 1 I think. You could of just kept the PCB in the box and re soldered it back if you wanted to flog it on. Edited March 1, 2022 by Georgeconna
Old Blarney Posted March 1, 2022 Posted March 1, 2022 (edited) Change of Locomotive's Direction. CV29 is the correct CV to call-up for altering the Direction of Travel. Be careful. There are a significant number of of options offered. You will need to select the correct one for your Locomotive. Georgeconna is correct - HOWEVER - CV29 = 001 is used for a Speed Table of (14) Analogue Mode (OFF) Reverse Direction of Travel (RDOT) CV29 = 002 is used for Speed Table of (28/128) Analogue Mode (OFF)Reverse Direction of Travel (RDOT) Two Digit Address - This is 0 to 127. Four Digit Addresses start at 128 and upwards. Example. Decimal Value (CV29) - HEX (x06) Speed Step (28/128) Analogue Mode (ON) Normal Direction of Travel (Forward) 2or 4 Digit Address (2) To reverse this Direction of Travel Change the Decimal Value of CV29 address to 07 or alternatively HEX (x07). The Woolwich Locomotives (Class K1) were allocated the numbers 372 to 391. The final six Locomotives (Class K1A) were numbered 392 to 396. (6ft Driving Wheels.) If you were numbering your locomotive using this series then- Use a Four Digit address. Four Digit Address CV29 = 34 for the above settings Reverse Direction CV29=35 I hope this information resolves your situation. Edited March 1, 2022 by Old Blarney 1
Recommended Posts
Create an account or sign in to comment
You need to be a member in order to leave a comment
Create an account
Sign up for a new account in our community. It's easy!
Register a new accountSign in
Already have an account? Sign in here.
Sign In Now