
2996 Victor
-
Posts
348 -
Joined
-
Last visited
-
Days Won
2
Content Type
Profiles
Forums
Resource Library
Events
Gallery
Blogs
Store
Community Map
Posts posted by 2996 Victor
-
-
2 hours ago, Northroader said:
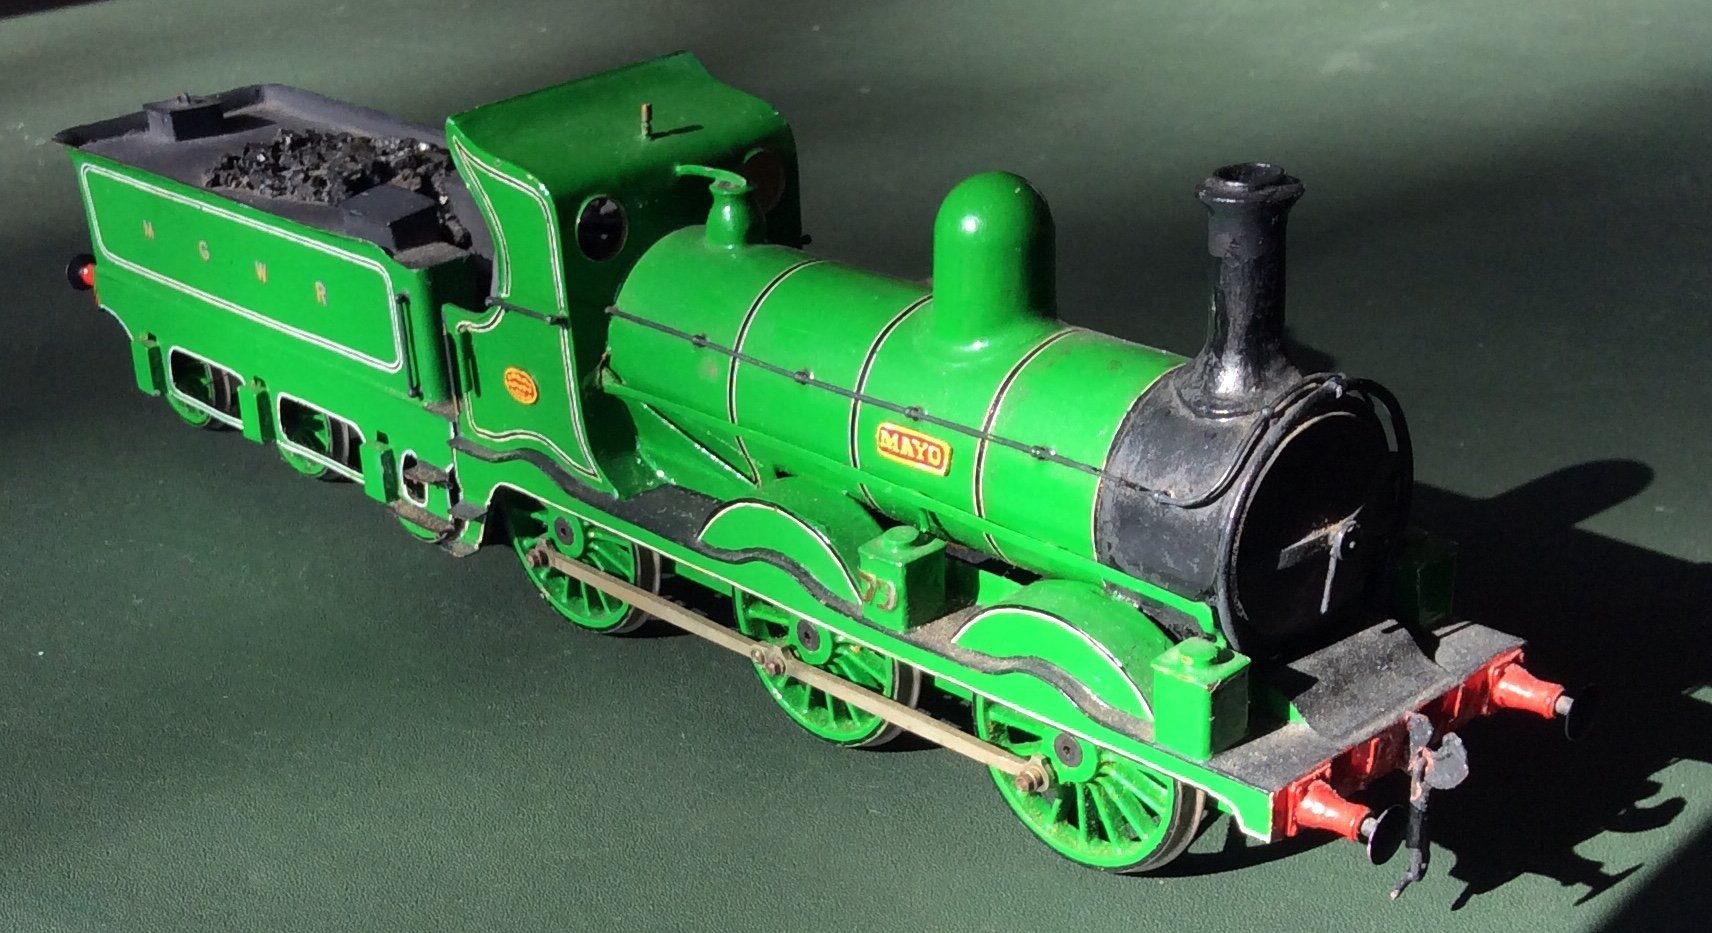
The second loco I fancied was the MGWR “L” 0-6-0 standard goods, which does have a varied history, with alphabetical suffixes for variations, and becoming two classes in GSR days. I hadn’t built up enough competency to build it entirely by myself, I needed a machined chassis, and as luck would have it, the wheel sizes and wheelbase are very close to a GWR 2251 class, just the Swindon loco has more overhang at the back end. At the time, there was a long established firm, CCW, doing kits for chassis and bodies of quite a wide range of popular prototypes. The chassis were very similar to the Leinster Models kits, with 1/16” frame plates and spacers, axle bushes, and the coupling rods were very nice milled to profile in nickel silver. They were reasonably priced, so I sent for it, and some Slaters wheels, buffers, pickups, and a motor/gearbox from Premier.

Then it was just trim a foot or so of the back end and reposition the rear spacer holes, and mark and drill for the pickups. Everything fitted very nicely, and I became a CCW fan. They had a great catalogue, with an extensive range of products, a good stand at the Gauge 0 Guild meetings, and I started to pick out what I fancied next. Then they stopped trading! Just like that, there one minute, gone the next.
On to the body, I did this myself from .018” brass sheet, tinsnips, hacksaw and filing. Anybody remember Micromodels? They were neat little printed card sheets in a pack, very small scale, and I used to cut them out and stick them together when I was a kid, and they did have the virtue of showing how you could form the shape of a loco from a flat sheet, so useful training. You can still pick them up on eBay, and there are folks still producing the same idea as downloads. Here’s a sample if you haven’t come across them.
http://worldofmicromodels.nl/wp-content/uploads/2019/10/Set-NS-V-Justin-Olson.pdf
Using this principle, plus some commercial castings for a dome, the superstructure was formed.
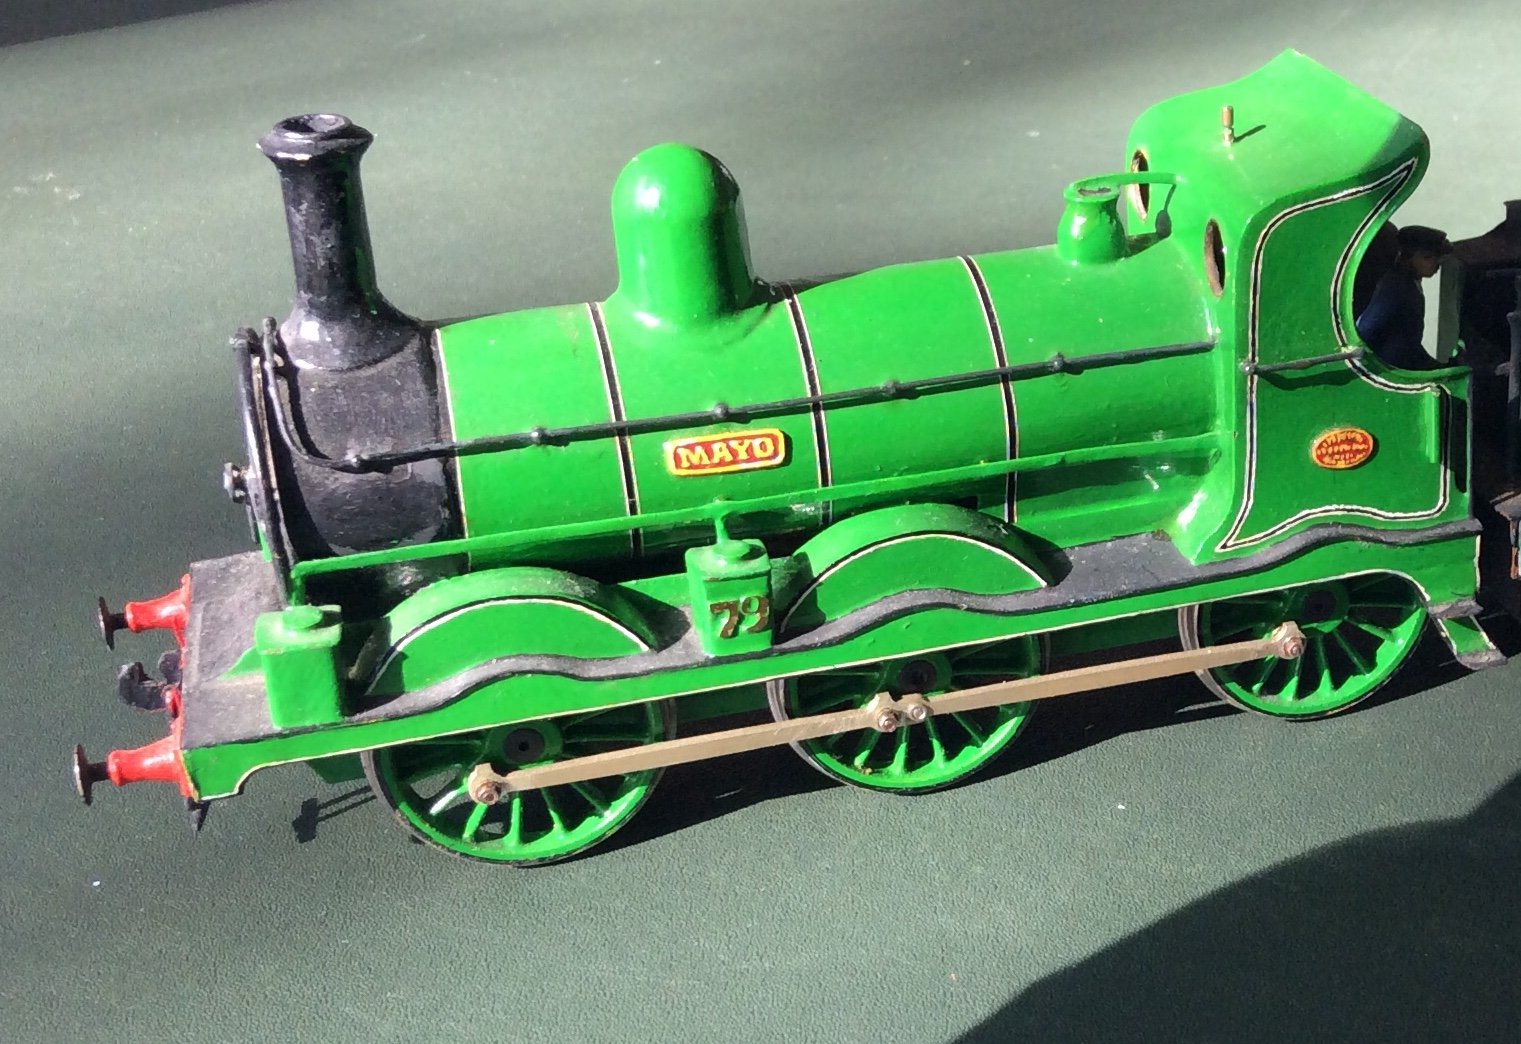
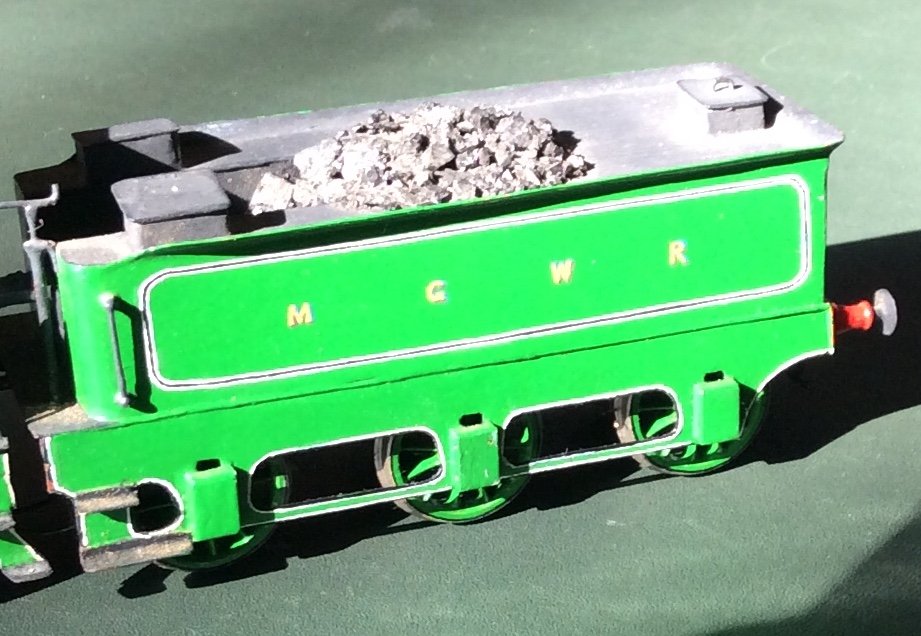
The tender is made with the outside frames as dummies hanging down from the body, and the wheelsets run in a detachable inside frame. You’ll see it has a PCB fixed on carrying phosphor bronze whiskers (wire from Slaters) acting on the wheel flanges for pickups
Then the body gets done from brass sheet in a similar manner to the loco.
And there you have it, I really did fancy the unique look for the MGWR “flyaway”cab.
What a beauty! Absolutely gorgeous and looking resplendent in her green livery.
Cheers,
Mark
-
 1
1
-
-
1 hour ago, Galteemore said:
Rough guideline is lower the speed you want, the higher the ratio. Over 100 ideal for a small shunting layout.
Hmmmmm.....not sure if 80 or 108, then! Have to think about that
")
-
2 hours ago, Mayner said:
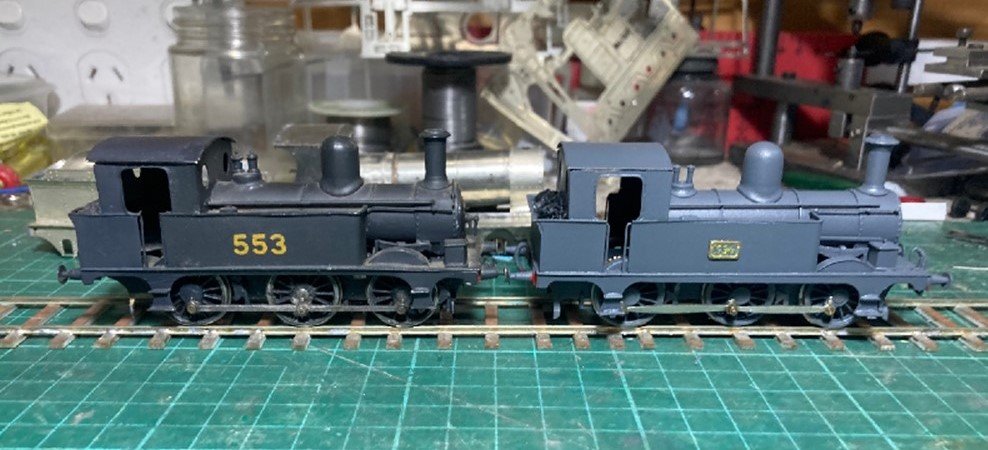
I have assembled the TMD/SSM MGWR E Class kit with both the original brass and more recent nickel silver chassis both locos run reasonably well. I assembled the first kit (my first etched kit) in 1984/5 rebuilt the loco into GSR form about 10 years later and recently completed the second kit.
The kit was originally supplied with with an etched brass chassis in the same thickness of material as the body, the kit was later supplied with a etched nickel silver chassis a material which is less flexible than brass. The main drawback with the brass chassis was that it was difficult to achieve reliable running when assembled as a rigid chassis as the chassis tended to twist when both ends of the chassis were bolted to the body and the break gear/pull rods was very fine challenging to assemble, the nickel silver chassis largely over came these problems.
The SSM/TMD is a good starting point for assembling etched kits or scratchbuilding, being a very simple kit closer to pressed metal kits such as the Leinster Models O gauge E class than more complex etched kit design.
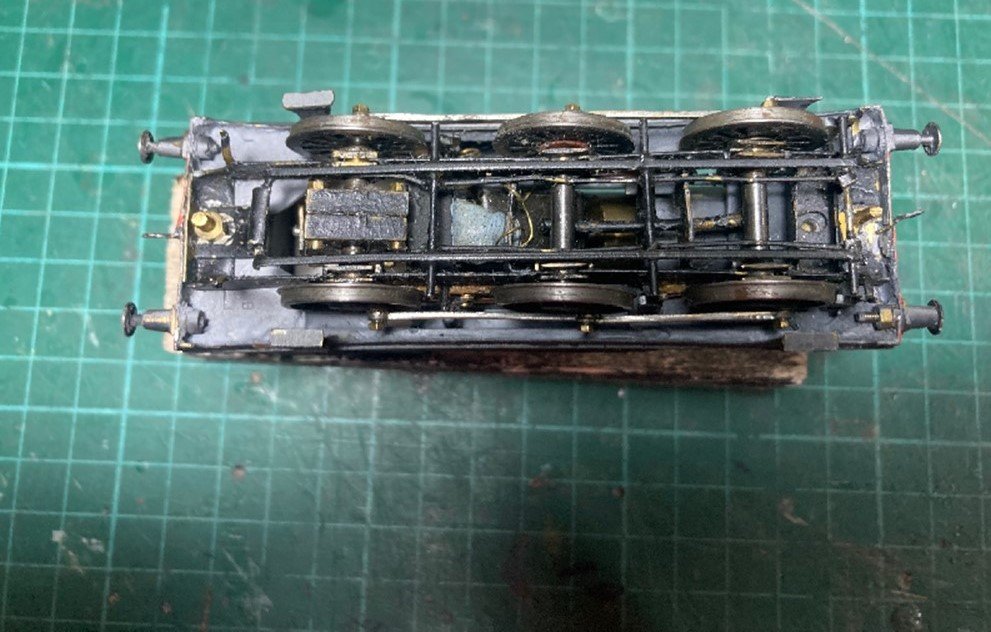
Underside of 553 with brass chassis, showing limited clearance between crank pins and valence in 21mm gauge.
I will update my Workbench thread with a post on the pros and cons of assembling both types of chassis.
Applying a bit of lateral thinking Andy's suggestion of using a J72 chassis makes sense especially with the High Level Chassis kit https://www.highlevelkits.co.uk/product-page/lner-j72, the two classes are very close dimensionally including overall length, wheelbase, wheel and boiler diameter, a High Level 2 stage gearbox with one of the new coreless motors would result in a very quiet smooth running loco.
Hi John,
many thanks for this: your thoughts on the TMD/SSM kit are very welcome! I'd noticed the High Level Chassis Kit and that they do a package with a gearbox and motor - next question is what's the best gearing....??? Almost unanswerable, I know, but I suspect of the three available, 60:1, 80:1, 108:1, that 60:1 or 80:1 would be the most useful. And which motor?
Cheers,
Mark -
@KMCE, @Galteemore, @Andy Cundick - chaps, I'm convinced - I'm going to give it a go!
-
 1
1
-
 2
2
-
 2
2
-
-
Fabulous, and inspirational!
Cheers,
Mark
-
1
-
-
11 minutes ago, KMCE said:
Both have merits and depending on your preferences, either way, you will find great advice.
Good to know
I expect a combination of the two will be good for a six-coupled tank locomotive!
13 minutes ago, KMCE said:What I learned is that despite how complex these locos look (including mine) they are built up of small parts, each being quite straightforward to build. No loco just appears on your workbench fully finished, but does come together as each part is built - a very satisfying process
I think this is what has put me off for so many years, making the transition from raw materials to finished object. It's difficult for someone with no experience to visually break down, even compartmentalise, the various parts of a locomotive and approach them as discreet entities. I had never thought in those terms literally until I read your post!
18 minutes ago, KMCE said:I will warn you though, once you go down this route, Pandora's box is opened and anything is possible!!!
Lol!
 Yes, I can imagine that.....
Thank you for your encouragement, Ken, I'm feeling quite excited to give it a go!
Cheers,
Mark
-
2
-
-
7 minutes ago, KMCE said:
Whereas, I went for the second one as I have a soft spot for tank locomotives. My post on 458 class build
was based on Boltons second book with strong influence from Flexichas by Sharman.
Depends if you want tank or tender locomotives, but as @Galteemore noted, both are excellent.
Ken
Thanks, Ken, that's good to know! I'll probably want both tender and tank locomotives, long term. So, both it is!!!
Cheers,
Mark
-
1
-
-
1 minute ago, Galteemore said:
Both are good. If you have to pick one, I’d go for the first one. He basically builds a GER J15 in it and guides you along the way. It’s probably not a million miles off what your J26 would require - a guide to building a simple six coupled loco.
Brilliant, thanks! I'll start with that one
I'll probably end up with them both..... 
Cheers,
Mark -
1 hour ago, Galteemore said:
I’d also recommend Simon Bolton’s books on scratch building - very accessible and user friendly.
So I'm finding two books: Scratch-building Model Railway Locomotives and Scratch-building Model Railway Tank Locomotives. Are they complimentary or does one repeat what's said in the other? Do I need both???
Thanks for any advice!!!
Cheers,
Mark-
2
-
-
1 hour ago, Galteemore said:
Post your progress here Mark.
I will!
1 hour ago, Galteemore said:We have all had to learn this stuff. I’d also recommend Simon Bolton’s books on scratch building - very accessible and user friendly.
I haven't heard of these - quick Google search needed! Thanks for the pointer
1 hour ago, Galteemore said:Eileen’s is great for many things but can also be pricey. Try watch suppliers like Cousins. Metalsmith is a great place to buy your sheet metal from.
Again, thank you! I'll check out Metalsmith as well!
Cheers,
Mark -
12 minutes ago, Andy Cundick said:
The thing with using the Mainly trains chassis is that you have all the bits and instructions which if its your first chassis will simplify things.Alan Gibson did do the frames even though they are not in there current list however bear in mind that what you get is just that a pair of frames with cutouts for hornblocks,Two tools i would suggest you acquire is an 1/8th reamer and the GW Models wheel quartering jig (makes quartering simple).Andy.
Hi Andy,
Many thanks for this - it makes perfect sense and given that the difference in wheelbase is a scale 5" it's really not going to be noticeable. I'll have a look for the Mainly Trains chassis kit and get one ordered.
Thanks for the tool suggestions, as well, I imagine Eileen's would be a good place for the reamer. I've also sent an order to Poppy's WoodTech for one of their chassis building box thingies - I'll need all the help I can muster
Many thanks once again,
Mark
-
2
-
-
Just now, Westcorkrailway said:
I’m tempted myself to do an SSM J26 kit, would J72 chassis really fit underneath the kit build?The E Class wheelbase is 6'3"+7'0", while the J72 is 6'8"+7'0", which is 1.66mm in 4mm scale. I'd guess you might have to fudge the front splasher slightly?
Gibson does custom milled frames, so I've just sent them a message asking what the likely costs might be, and giving them the wheelbase dimensions. Not sure if they'll need any other info before providing an estimate, but I'll post it here when they get back to me.
Cheers,
Mark -
43 minutes ago, Andy Cundick said:
My E Class (thats the MGW one no the NER one),was built from the TMD kit now done by SSM,i don't know how much it has changed but the (about 35 yrs ago) it came with 2 chassis neither of which i was very impressed with,the fact that Gibson does the frames indicates i wasn't the only one.If you are thinking of doing a 21mm gauge one,i would suggest the best plan would be to use the Mainly trains J72 chassis with longer axles and spacing washers.For the chassis and then have go at building your own body,its a nice simple one to do,brass tube for the boiler and next size up for the smokebox.There are drawings for the loco in Model Railways Oct 1976.For cabsides/tanks the trick is to sweat two bits of brass together then using PVA glue stick the plan onto the brass and cutout round out round it once done unsolder the two sheets and there you are both sides done at once.The trick with scratchbuilding is not to focus on the whole thing but just on the bit you're doing ie footplate that way its less daunting.Why brass and soldering? because i when you cock it up a touch of the iron and you can have another go,try that with plastic.If you do go down that route i've got the original pattern smokebox and chimney you can have which came with the kit as did 552 in the 30s so they're surplus to requirements.Andy.
Hi Andy,
many thanks for your reply, that's extremely helpful and very encouraging, thank you! You've convinced me to have a go at scratch-building in brass
as you say, its a fairly straight-forward loco, shape-wise, and appears to be flush-rivetted, too. I've been having a look at the current Gibson catalogue and there's a nice selection of parts available.
I've had a quick look for Model Railways October 1976, it seems a bit shy but hopefully I can find one.
Thank you very much indeed also for your kind offer of the original-pattern chimney and smokebox, which I'd very much like to take you up on, please. I'll drop you a PM.
Kind regards,
Mark -
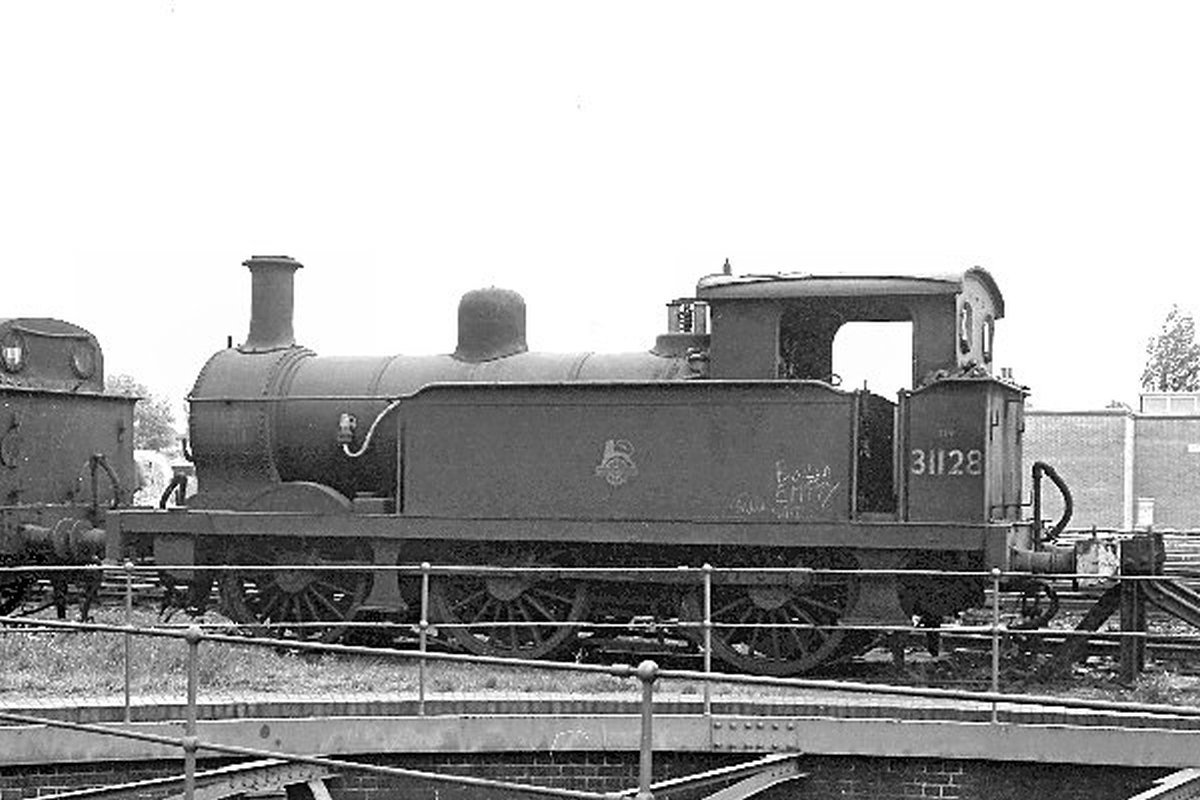
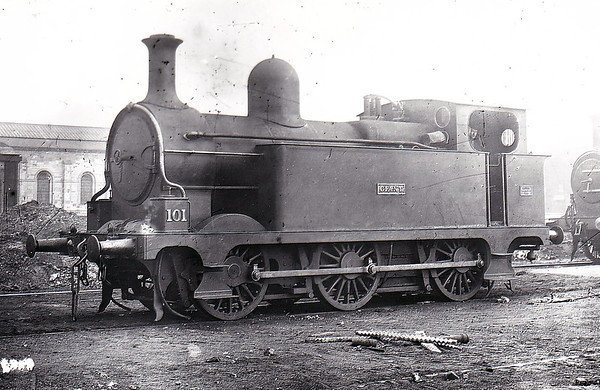
4 hours ago, David Holman said:
This is probably going off at a slight tangent, but does the old Wrenn/Hornby South Eastern R1 translate into anything vaguely Irish? Converted one to EM without any problems and the motor/gears were good for the day. Mind you, that was nearly 40 years ago, when I returned to model railways following the usual sojourn of pushing up the value of brewery shares and chasing girls.
At the time, I knew almost nothing of modelling and the tool kit was vestigial, so an R1 might be a starting point perhaps and there must be a few out there second hand.
3 hours ago, Galteemore said:Not a bad idea at that, David! Can’t check dimensions right now but an MGW P is close-ish….images from Mike Morant
For some reason I can't quite now remember, I was looking for a Wrenn R1 a couple of years ago and they were still quite easily find-able on fleabay. There were also brand-new body mouldings, too.
I have a strong hankering for a P Class, they have real "presence" and with names like "Giant", "Giantess", "Hercules" what's not to like? One would be completely out of place on a minor branch-line in Galway, of course, so I'll have to invoke Rule 1
Cheers,
Mark3 hours ago, KMCE said:Gotta promote the auld DSER
And why not, Ken? Speaking of which, I'm hoping this weekend to be able to make a start on those wagons you sent me
Cheers,
Mark-
1
-
-
17 hours ago, Andy Cundick said:
Bear in mind Wizard does the Mainly Trains replacement chassis kit for the J72,my one went together easily as did the conversion bits to a J71. My own Class E uses the frames from Alan Gibson as i didn't fancy either of the chassis that came with the kit.Andy
Hi Andy,
may I ask which E Class kit you've built? I'm wondering whether there is any real merit in chopping up the J72, particularly as I'm going 21mm gauge and it'll need a new chassis, or whether to bite the bullet and either scratch-build or attempt a kit. The latter option is a bit fraught as my previous experiences with etched brass have resulted a heavy defeat and a hasty withdrawal on my part
Thanks,
Mark-
1
-
-
5 hours ago, Galteemore said:
Lovely little thing - had 3 of them back in the day. But the chassis was very hit and miss. Anyway, she’s lost a few bits already so it’s not like she’s mint….but it’s always hard to carve up something nice!
Very true, apart from the handrail the tank vent and filler cap are missing on the other side, and I know the chassis has, shall we say, a "reputation"!!! Not certain yet how I'm going to address that, but it could be my first essay into chassis building..... Eeeeek!
-
2
-
-
Look who arrived this morning! Poor little unsuspecting J72, it has no idea what's in store for it.....
To be fair, although its the Mainline offering rather than the new Bachmann release, its a nice little model and its almost a shame to hack it up
Onward!
Mark
-
6
-
-
1 hour ago, Patrick Davey said:
Thanks all

Grey board indeed it is, obtained from Scale Model Scenery.
Mark the brick detail and quoins are from York Modelmaking, they add a lot to the build I think!
They certainly do - excellent details that would otherwise be difficult to reproduce.
I've heard of York Modelmaking, but never tried out their products. I think a little browsing of their website is in order!
Cheers,
Mark
-
1
-
-
Many thanks for this info, John, it's hugely appreciated - I've got some of the Broadstone drawings and I'm trying to get hold of the IRRS wagon compendium, so some scratch building is on the horizon.
Did I read somewhere that your MGWR wagon etches are still available, or did I dream that?
Cheers,
Mark
-
5 minutes ago, David Holman said:
Lots of nice 'gingerbread' in the details, especially that penultimate photo.
Definitely! @Patrick Daveyhow did you achieve the fancy brickwork detail above the top window?
Cheers,
Mark
-
7 hours ago, jhb171achill said:
The cattle wagons of short wheelbase of Leslie’s SLNCR / GNR design aren’t strictly within period, but like the new JM Design goods van isn’t too far after. However, despite Board Of Trade rules, in 1905 many - if not most - cattle trucks remained roofless. The Provincial ones could be made up like that, at a pinch.
Thanks, Jonathan, that's great!
Cheers,
Mark
-
1
-
-
1 hour ago, David Holman said:
So, what could the Ice Age do for your layout...?
-
3
-
-
2 hours ago, Galteemore said:
The lovely -and frustrating - thing about modelling a location is that it gives you a discipline to follow. Throws up all sorts of challenges as you work out how to replicate a particular chimney or lamp bracket…. Just be careful in your choice of prototype or you will end up replicating the short comings of the real thing…Newtownards, Manorhamilton etc etc…..;)
It also helps inasmuch as you don't have the problem of deciding what your infrastructure should look like.
That's one aspect of creating a fictional location that I'm having difficulty with for my MGWR Mount Bellew project: the architectural style of the railway infrastructure. The L&B had very distinctive station buildings but, being a quayside layout, Yeoman's Wharf won't have anything like them to say where it's located.
Cheers,
Mark
3 hours ago, Andy Cundick said:The thing to note regarding coaches is that the Southern filled in the door toplights which is how PECO depicted them, The thing that slows me up is the early livery which is to put it politely fiddly.Though saying that i've just finished three North British locos in pre great war livery ready for Expo EM in a week now that is over the top.As to the modelling an actual location lets just say it works for me.Andy.
Ah - interesting! Can't say I fancy fretting out the toplights on the PECO coaches
so if I ever get around to Simonsbath I'll going the Worsley Works route!
I'd be interested to see those NBR locos!
Cheers,
Mark
-
2 hours ago, Andy Cundick said:
Though i admit a broad gauge (7'0") threeway point is causing a certain amount of a challenge.
I'd like to see that! I presume it's baulk road? Sheer trackwork elegance
Building my own track is something I want to do, but just not yet! Although having said that, I really mean "pointwork" as I'll be building plain track for Yeoman's Wharf.
Cheers,
Mark


Mount Bellew, MGWR
in Irish Model Layouts
Posted
Thanks, Ken, that's extremely helpful!
Not ever having tried this before, it's truly bewildering - obviously, the lower the gear ratio the slower the speed for a given rpm, but having reference to motor speeds is essential.
Greatly appreciated as always!
Mark