GNRi1959
-
Posts
1,476 -
Joined
-
Last visited
-
Days Won
27
Content Type
Profiles
Forums
Events
Gallery
Blogs
Everything posted by GNRi1959
-
Some very realistic, atmospheric shots there full of realism, well done JB.
-
Trust my luck. My daughter bought a house in Bangor, just 5mins from the Venue but alas i am basking in the sun in Adelaide and sorry that i’ll miss out this time. Have fun, everyone.
-
Perfection, my biggest stumbling block!
-
David, indeed a shame but a great learning experience. I hate to say I do have an idea and I'm won't disclose the details until the pain of this experience is in the past.
-
Points salvaged and in storage, Fintona has gone to the railway graveyard. Next Stop - destress !
-
Hi all, on a learning curve, from my experience I’ve learned a few things. These are personal views, so I’m not preaching fact..... Short shunting layouts are more demanding on ‘power flow’ than continuous layouts and are more prone to contact problems short shunting layout with a lot of points and insulated rail joints present challenges for locomotives pva and other liquids in and around pointwork is to be used with great care foam ballast underlay may not be the worst choice
-
The points are fine
-
There is a lot to be learned from mistakes and I just seem to make new ones each time. It isn’t the first layout that went to the railway graveyard!
-
Yes, I have a CDU fitted and everything has been fine up to the point where I introduce PVA mix for ballast. To be honest, I have put my wagons and loco's back in their boxes and they are now in a bedroom cupboard, I've walked away. I just lost heart in it!
-
I stayed with the layout for some time the morning after and switched them for a while, ensuring they were all moving. They were fine. Now one is working and all others not. If I reach under, the motor is still moving, maybe there is an electrical problem somewhere. The are gauge master
-
Yesterday I laid ballast and dampened it lightly with a spray of water. I covered by points with strips of duck tape and then sprayed the ballast with a mix of water, fairy liquid and pea. After all was complete I started cleaning up, removing any excess glue, ballast and removed the duck tape. I checked all my posts from the switches and all points were working correctly. This morning, none of them are operating so I guess some glue had made its way, through the bore hole in the ply and possibly glued my motors? I cannot think of any other reason. The points are all moving manually but motors not. Am I doomed?
-
At the moment the GNRi locos are on ‘start/stop’ mode
-
I reckon I need to buy a decent locomotive to run thorough tests in my layout. These OOworks UG and U locos are so unreliable as they are very temperamental due to wheel balance.
-
I know that this is probably and old question but I’m not keen on searching...... 1. OO Works UG Goods seems to need weight added to the tender, what’s the best material others have used. 2. wagons seem to derail a lot, I think they are just too light - is this a proper assumption? when shunting at slow speeds and coupling/uncoupling a bit of weight is required.
-
Yes, the electrics do work very well. The only problem I encountered was devising a sensible plan to bring seven point motors back to a switching system I knew nothing about. In the end it took two attempts to wire it.
-
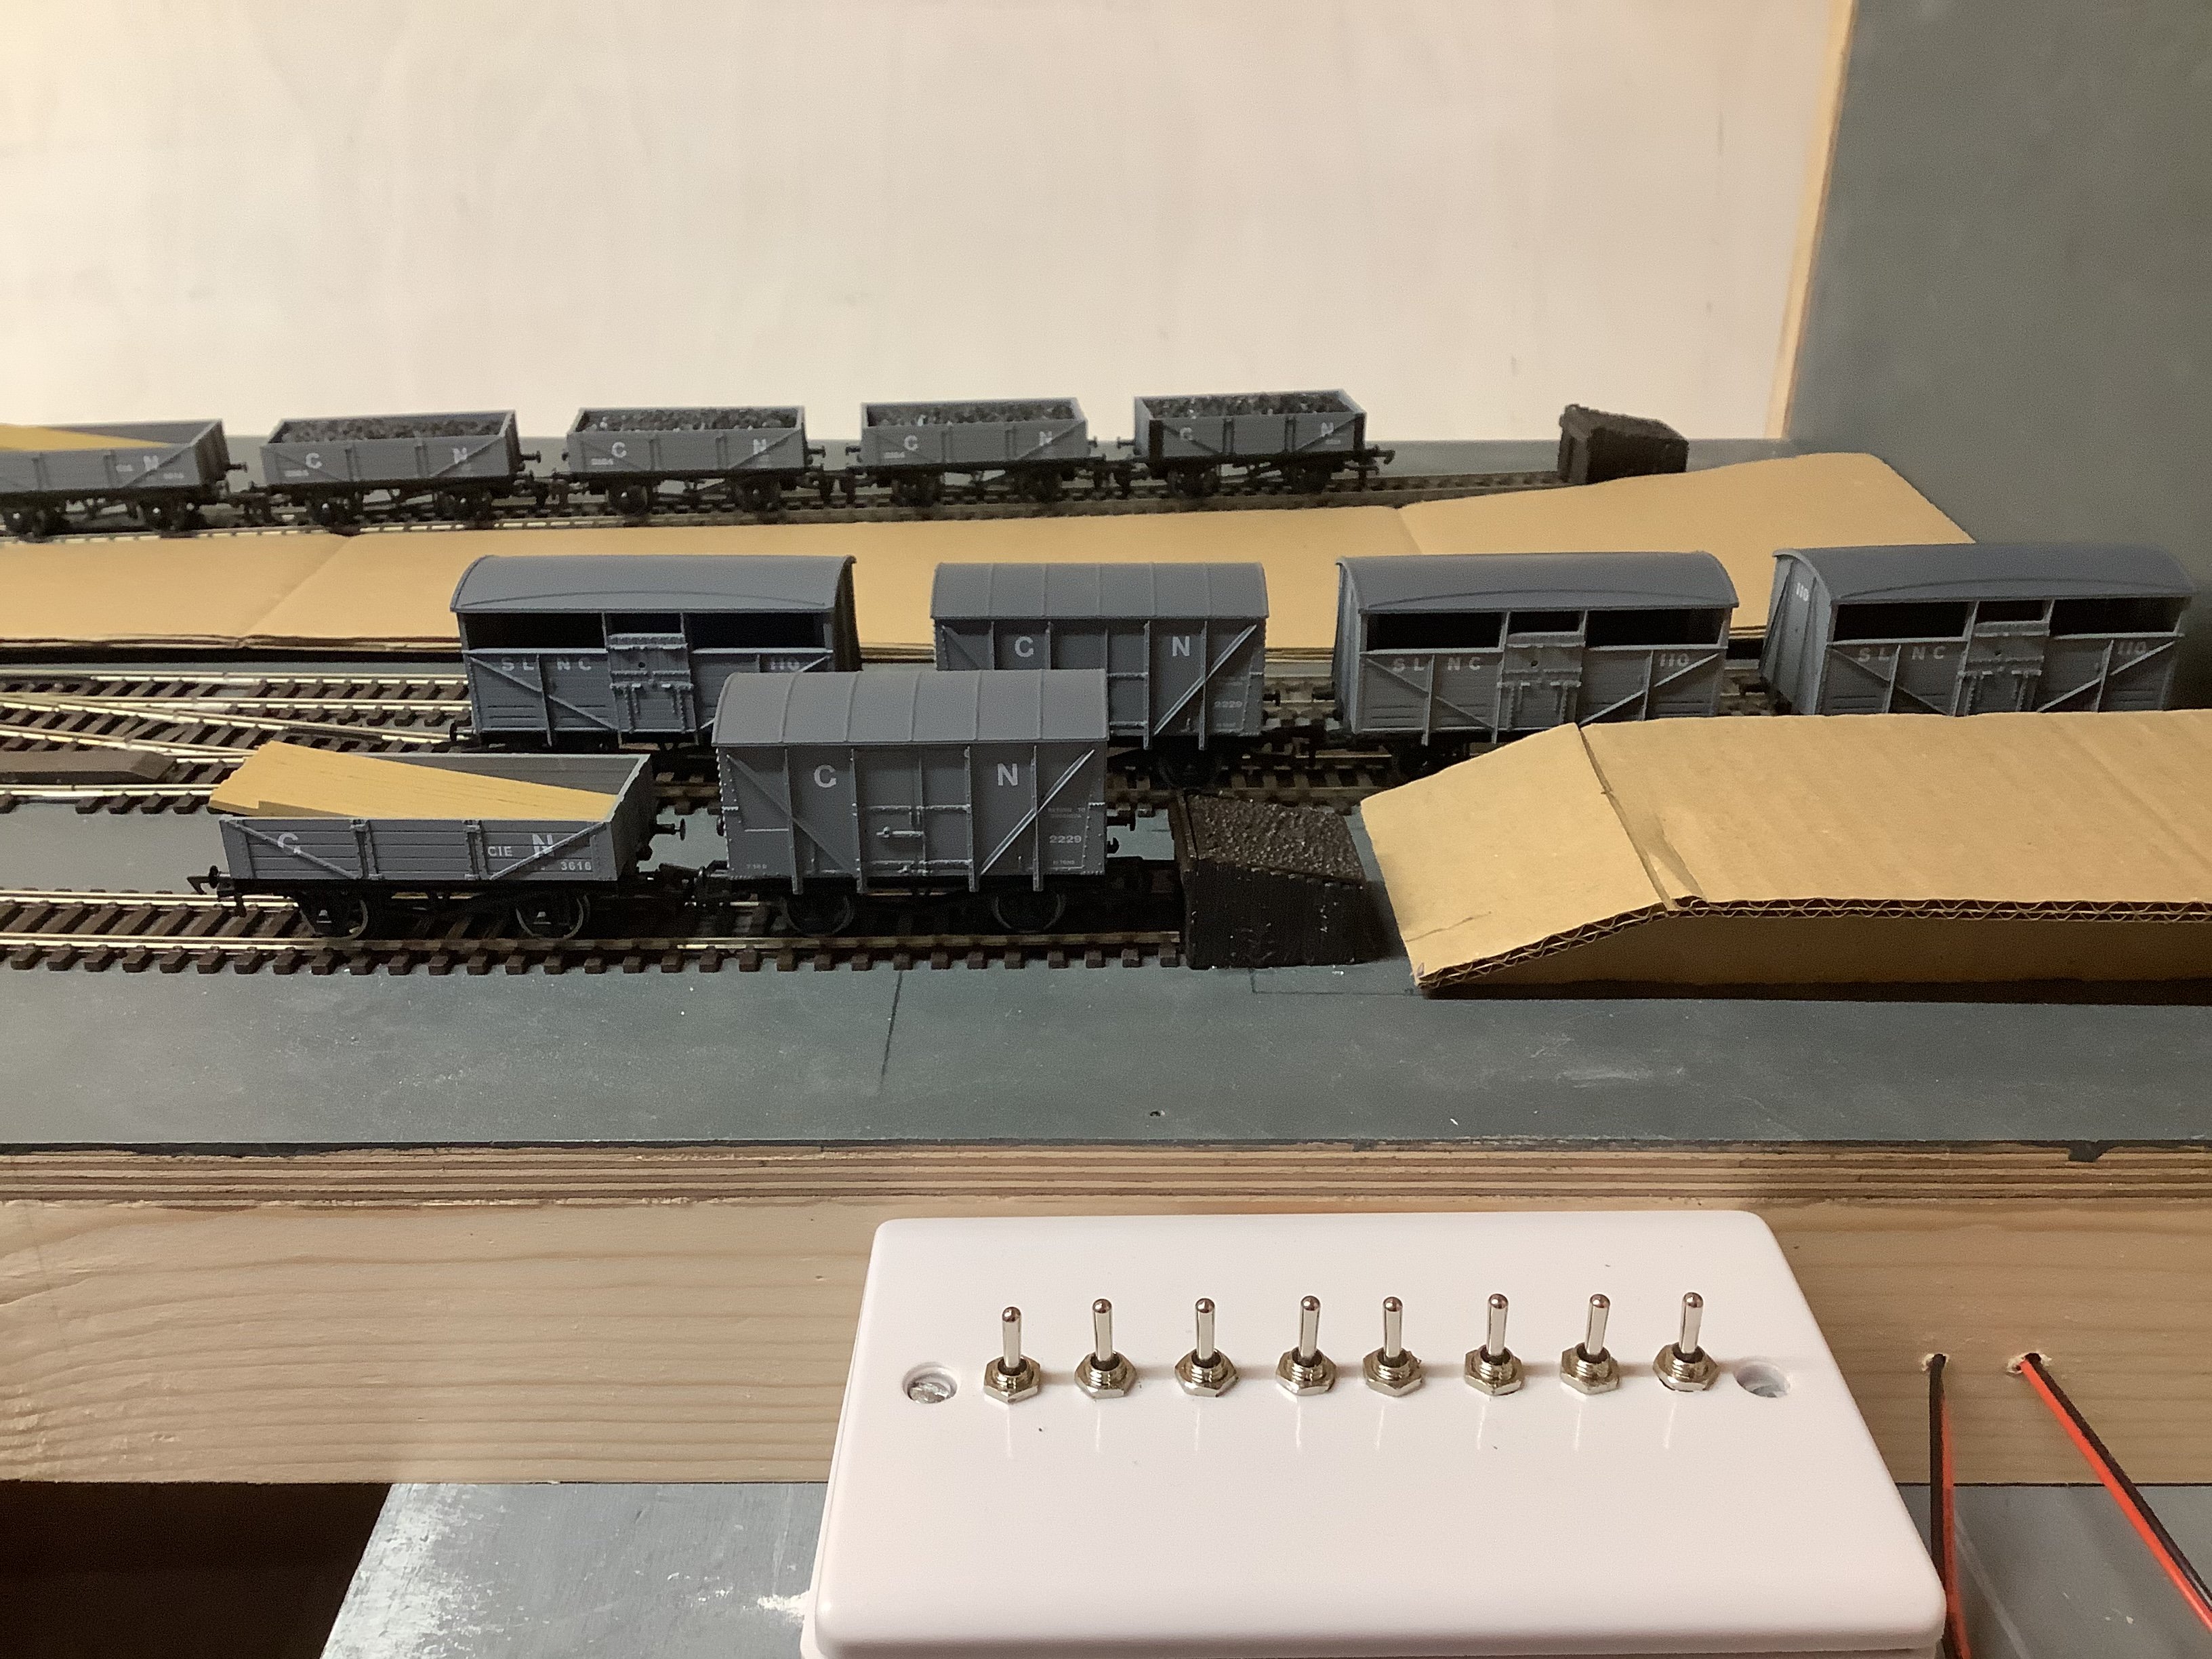
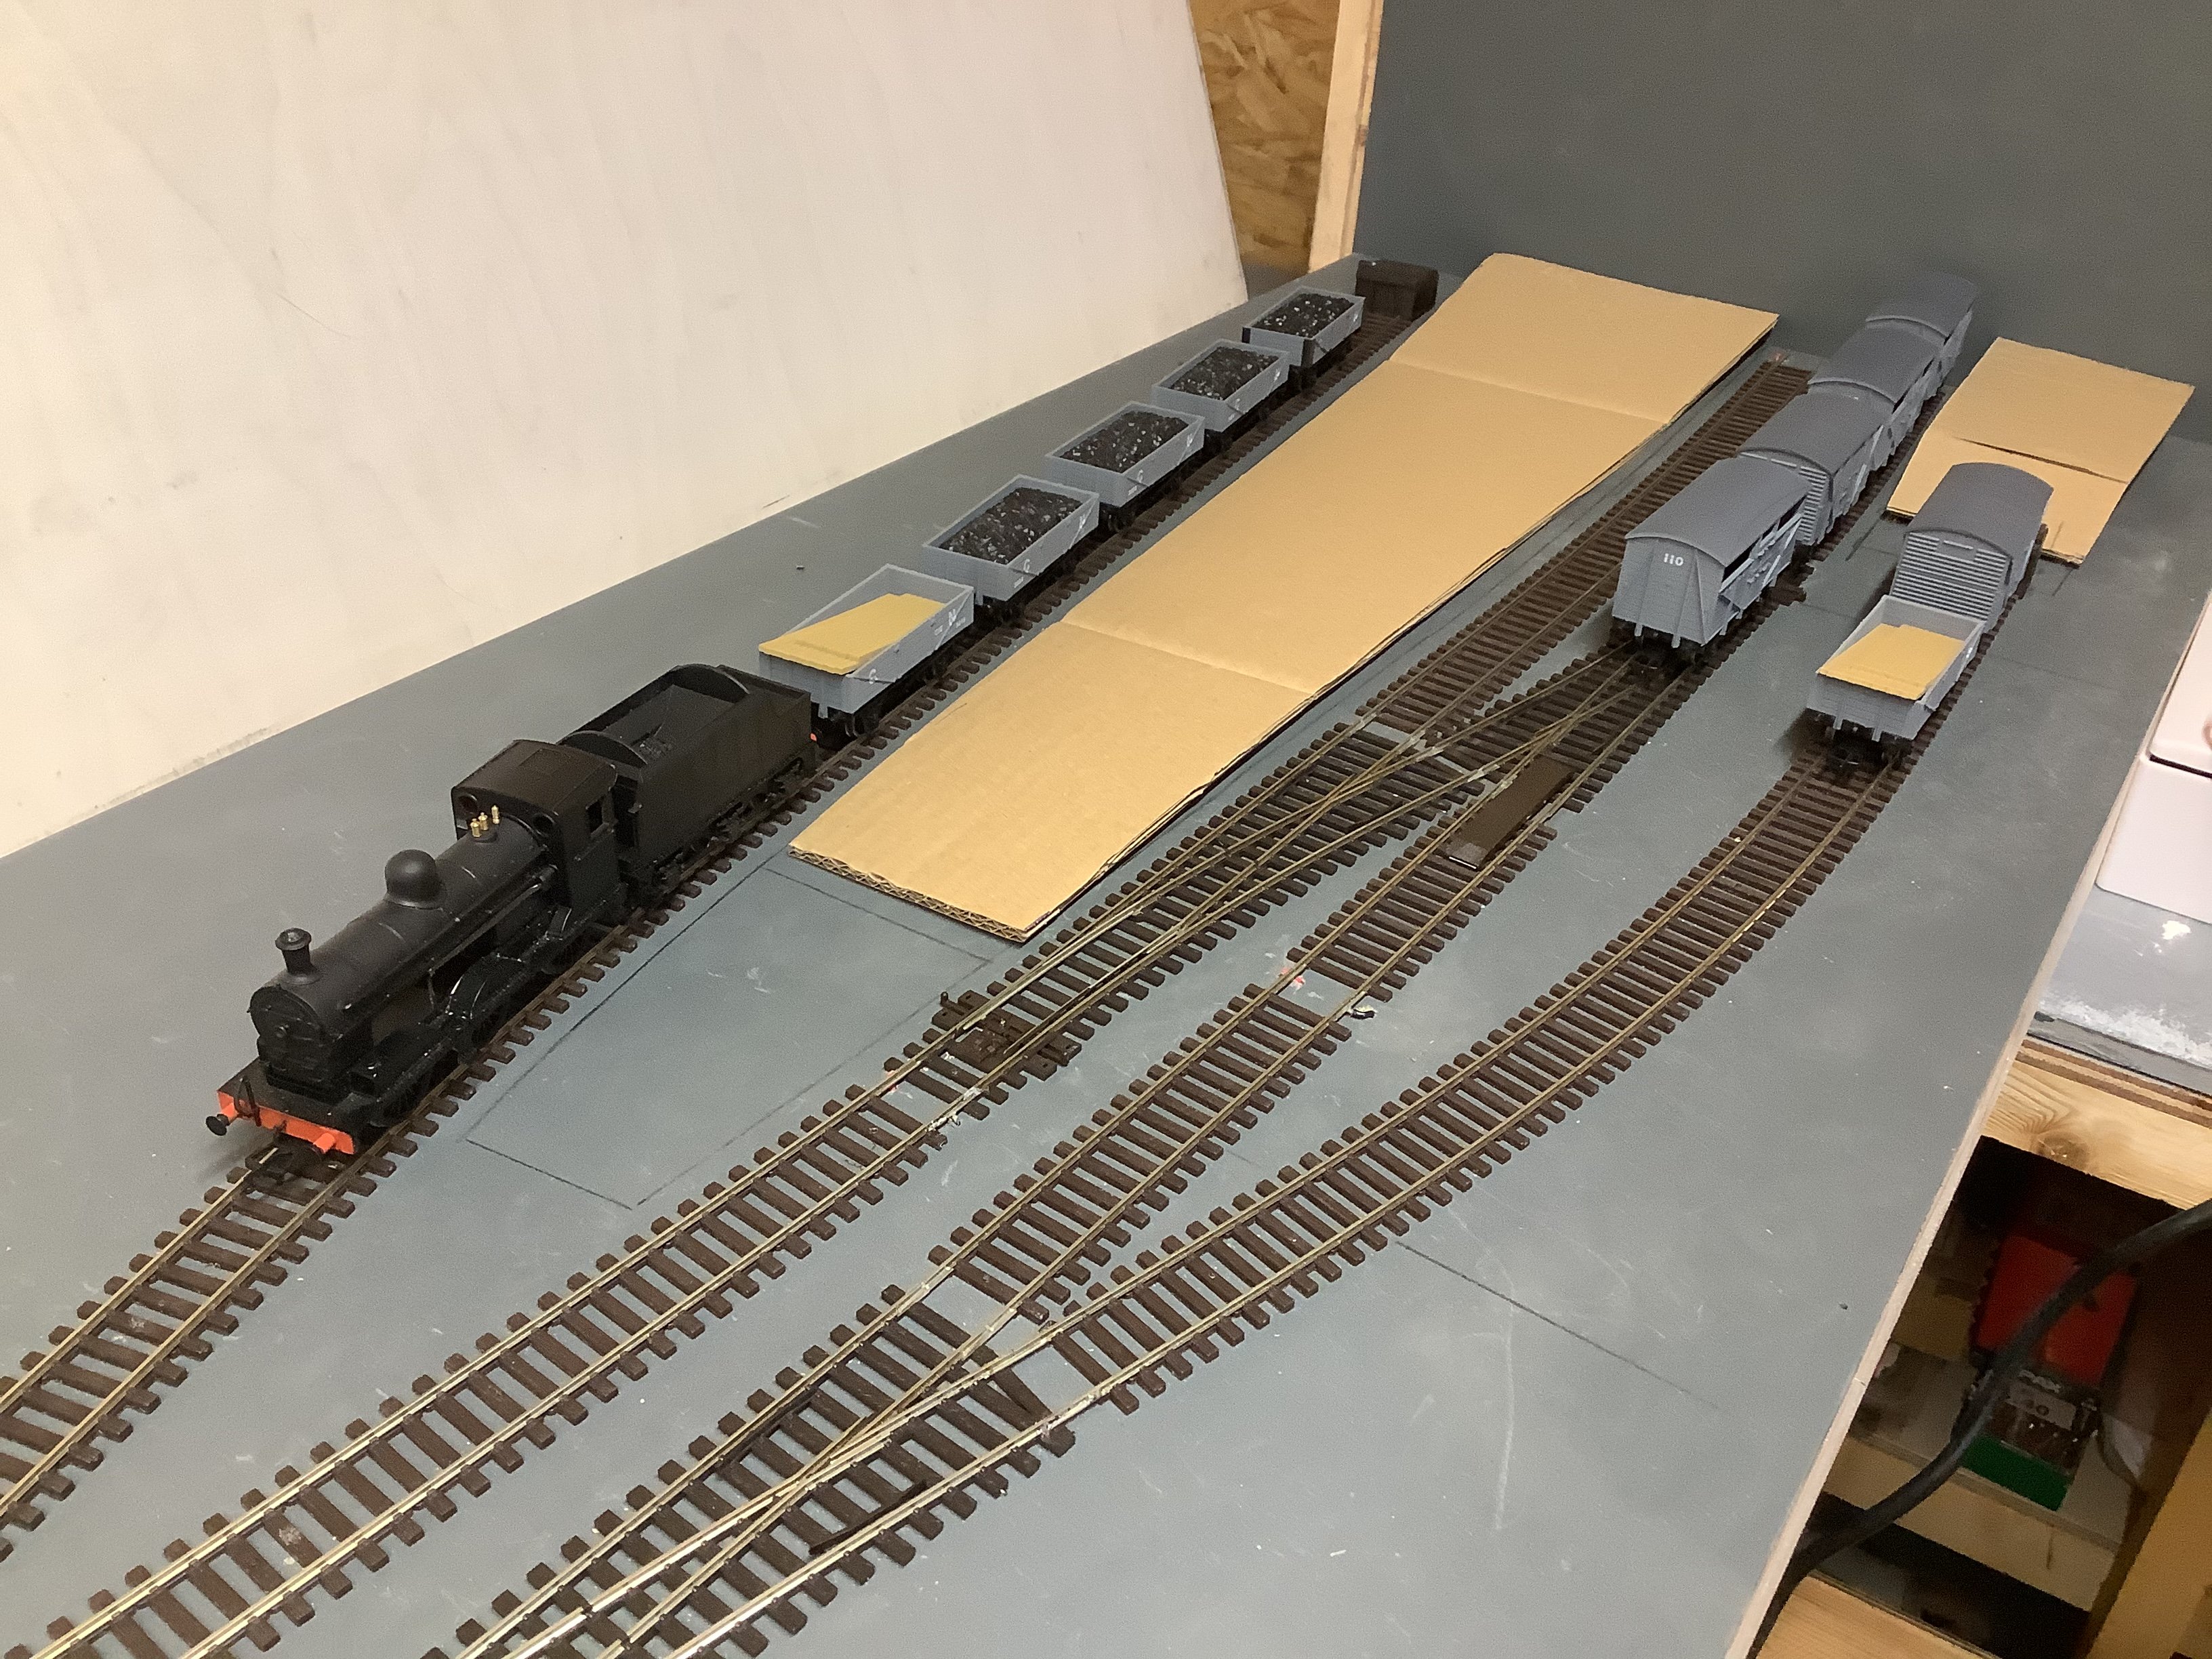
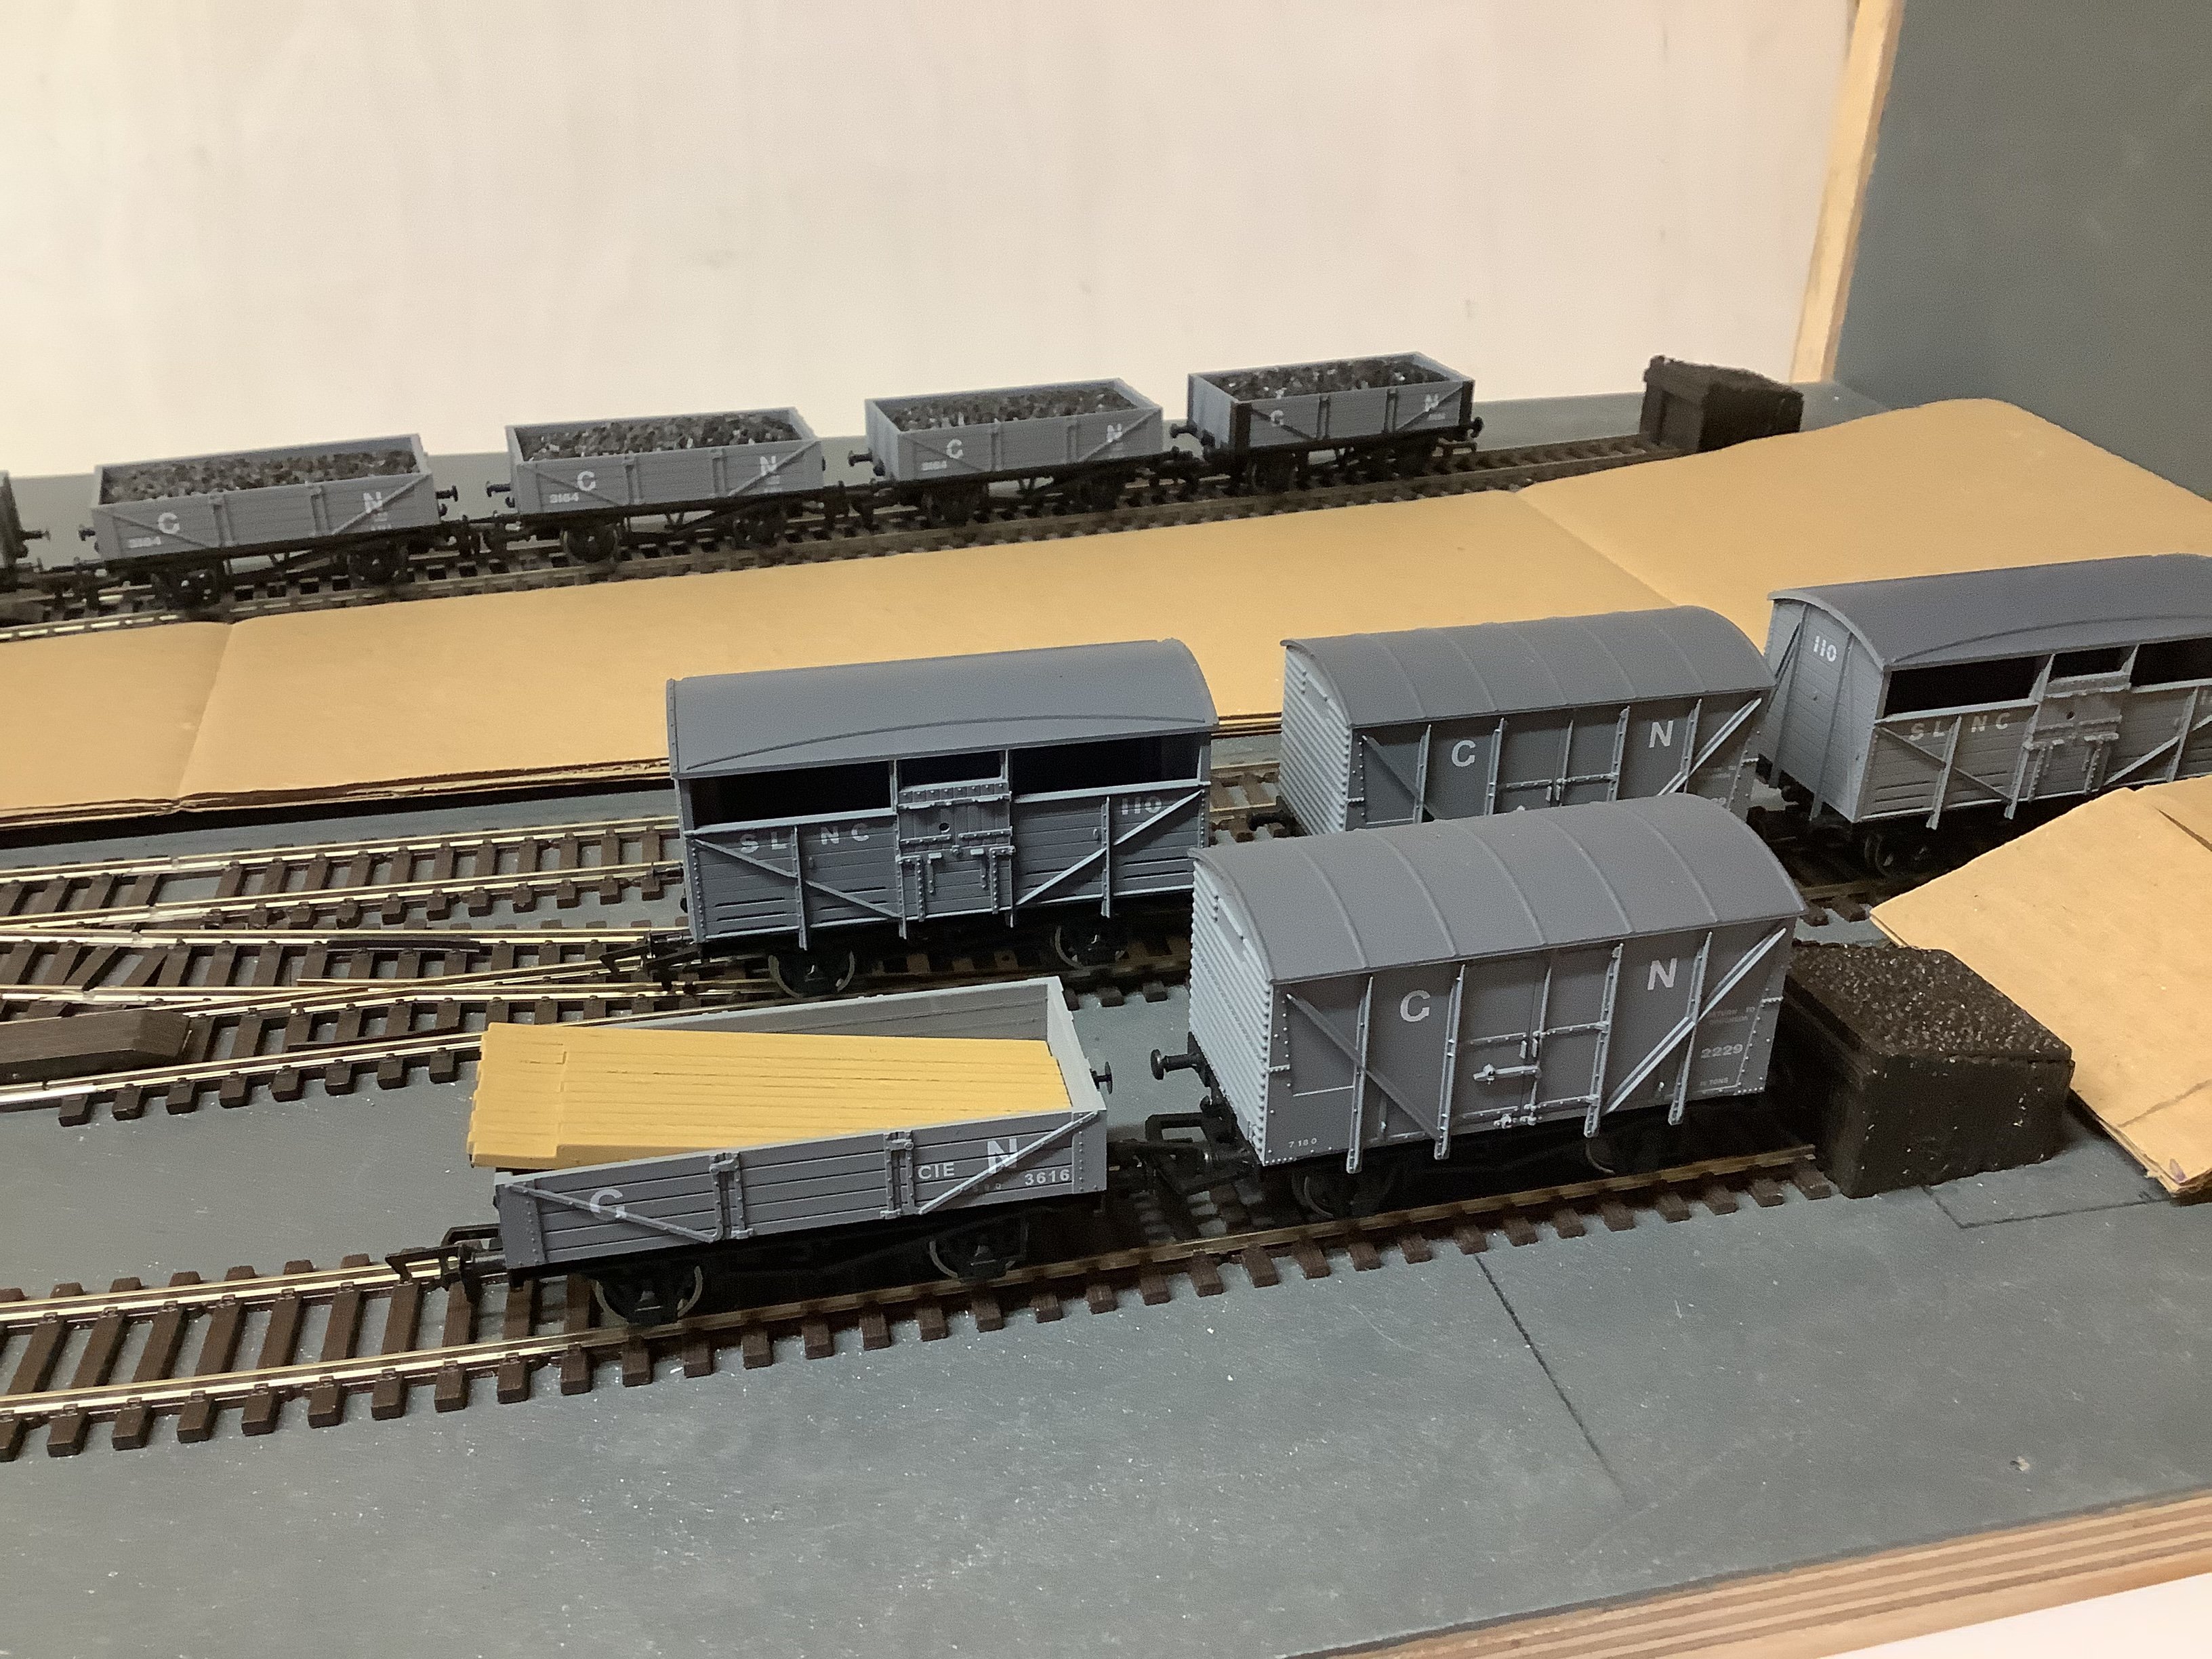
Having spent several weeks underneath the layout, wiring point motors and bringing everything back to my switch module, I started laying uncoupling ramps and mock up cardboard platforms. The mock up platforms give me an idea of what works best before I build them. I’m awaiting ballast, which is due shortly. Although the layout is called Fintona Station, it may in time become a small Irish shunting layout with no name.

-
JB, glad I visited this layout, lots of great ideas to learn from.
-
They look great. I went back to Page 2 and found some nice close up pics of the platforms. Very authentic. I normally use Peco but yours have given me the idea that I should be modelling mine from scratch.
-
What are your platforms made from JB?
-
Fantastic collection of stock, looking so authentic. Lovely layout.
-
Even though I am currently working on a small shunting layout, my next modelling project will undoubtedly by circular. I plan on building a sectional structure, which will need some pre-thought. The timber work is the easy part aways for me as I am a carpenter, the challenge will be securing the curved rail joints. I plan to have a simple twin track layout with one cross over and hope that I can convince a local toy and model shop that it would be a nice addition to his window display next Christmas. Forward planning .......
-
- 3
-

-
Some terrific scenes there JB. I'm hoping I get to this level in time
-
Would anyone hazard a guess of ballast type to purchase?
-
Update.... all wiring is now complete and a switch module operates all gaugemaster points. The track is pinned down in selective areas and will remain like this until I’m happy that trains run well. (The only minor problem I see is the Coupling on the rear side of the tender of my UG tends to be a little low and fouls when reversing over the point work, this can be fixed quite easily - sorted) My next task is to start painting the track prior to ballasting, but I guess ballasting will be a few weeks away yet.
-
I’m not really bothered about the admin of this, it’s how FB works that does. I changed every password I use only yesterday after I was notified of another Messenger hack from a FB friend.