Tullygrainey
-
Posts
1,084 -
Joined
-
Last visited
-
Days Won
59
Content Type
Profiles
Forums
Events
Gallery
Blogs
Community Map
Everything posted by Tullygrainey
-

Clogherhead - A GNR(I) Seaside Terminus
Tullygrainey replied to Patrick Davey's topic in Irish Model Layouts
It was the micro-organisms in that Clogherhead sand you collected Patrick. They were elbowing their way out to escape the glue. -
Clogherhead - A GNR(I) Seaside Terminus
Tullygrainey replied to Patrick Davey's topic in Irish Model Layouts
Commiserations Patrick. That's a great shame, and a bit of a puzzle. Hope you can salvage something from the wreck. At least the other wagon survived. Hang in there! -
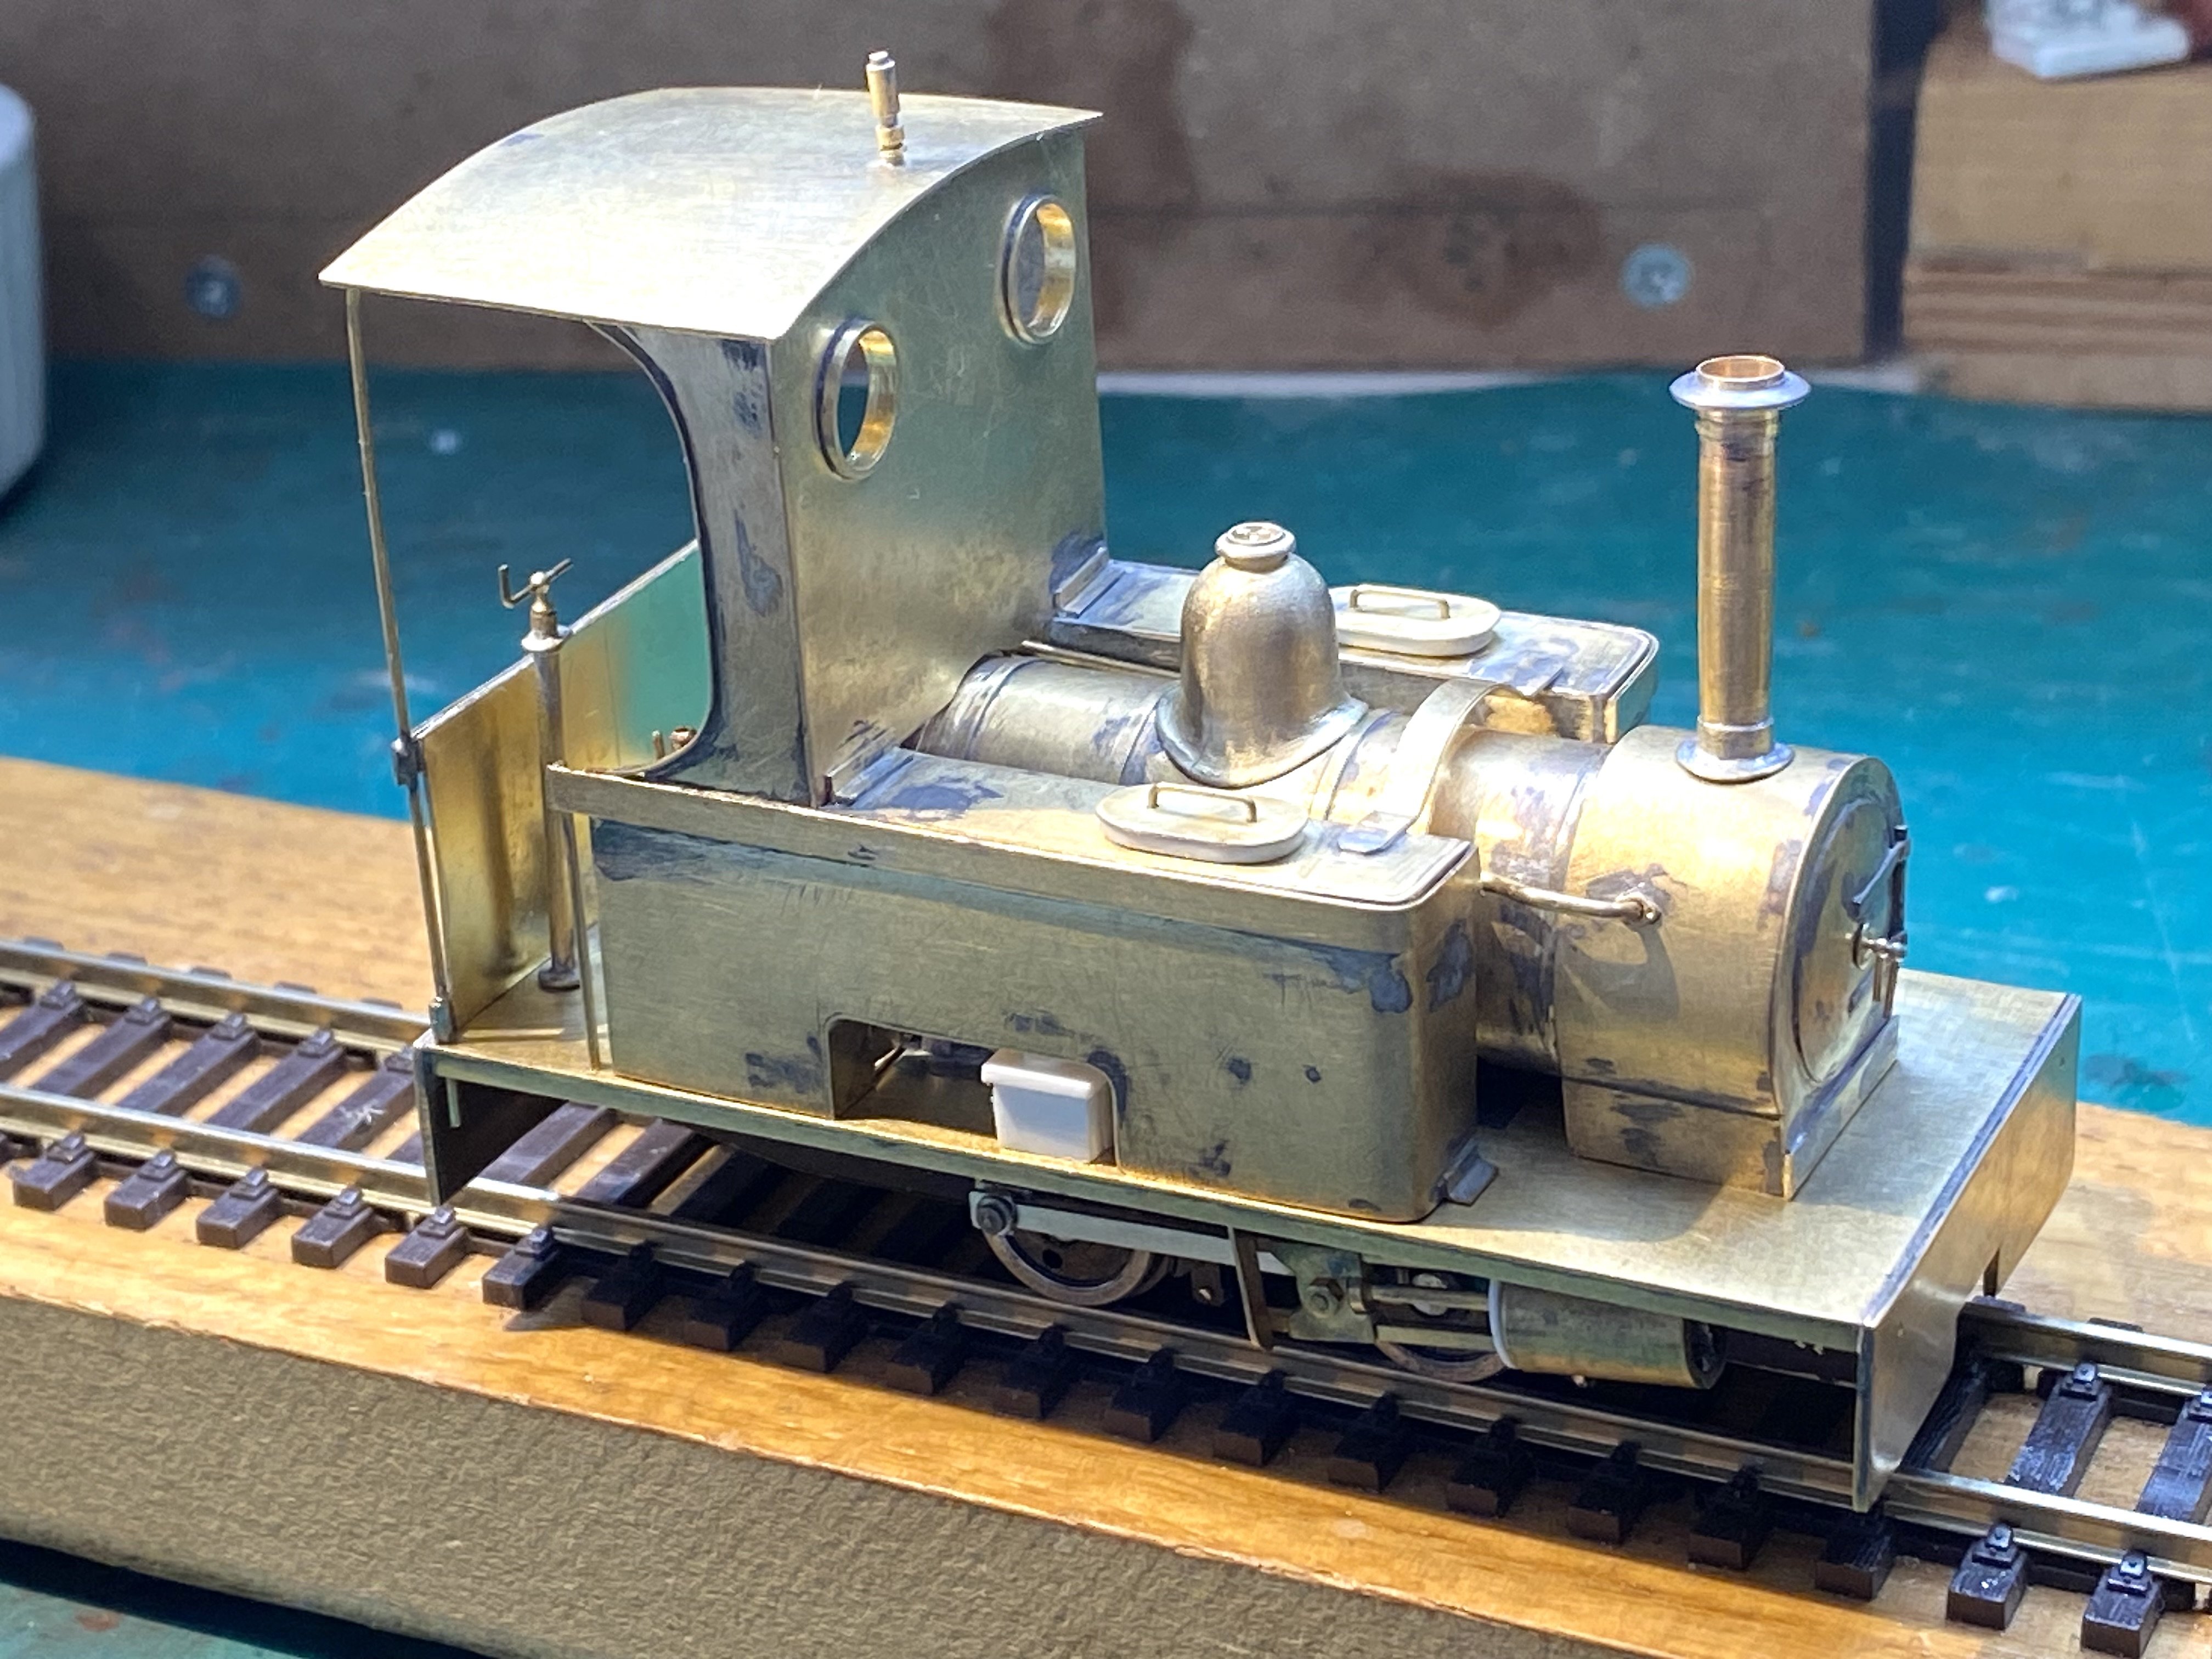
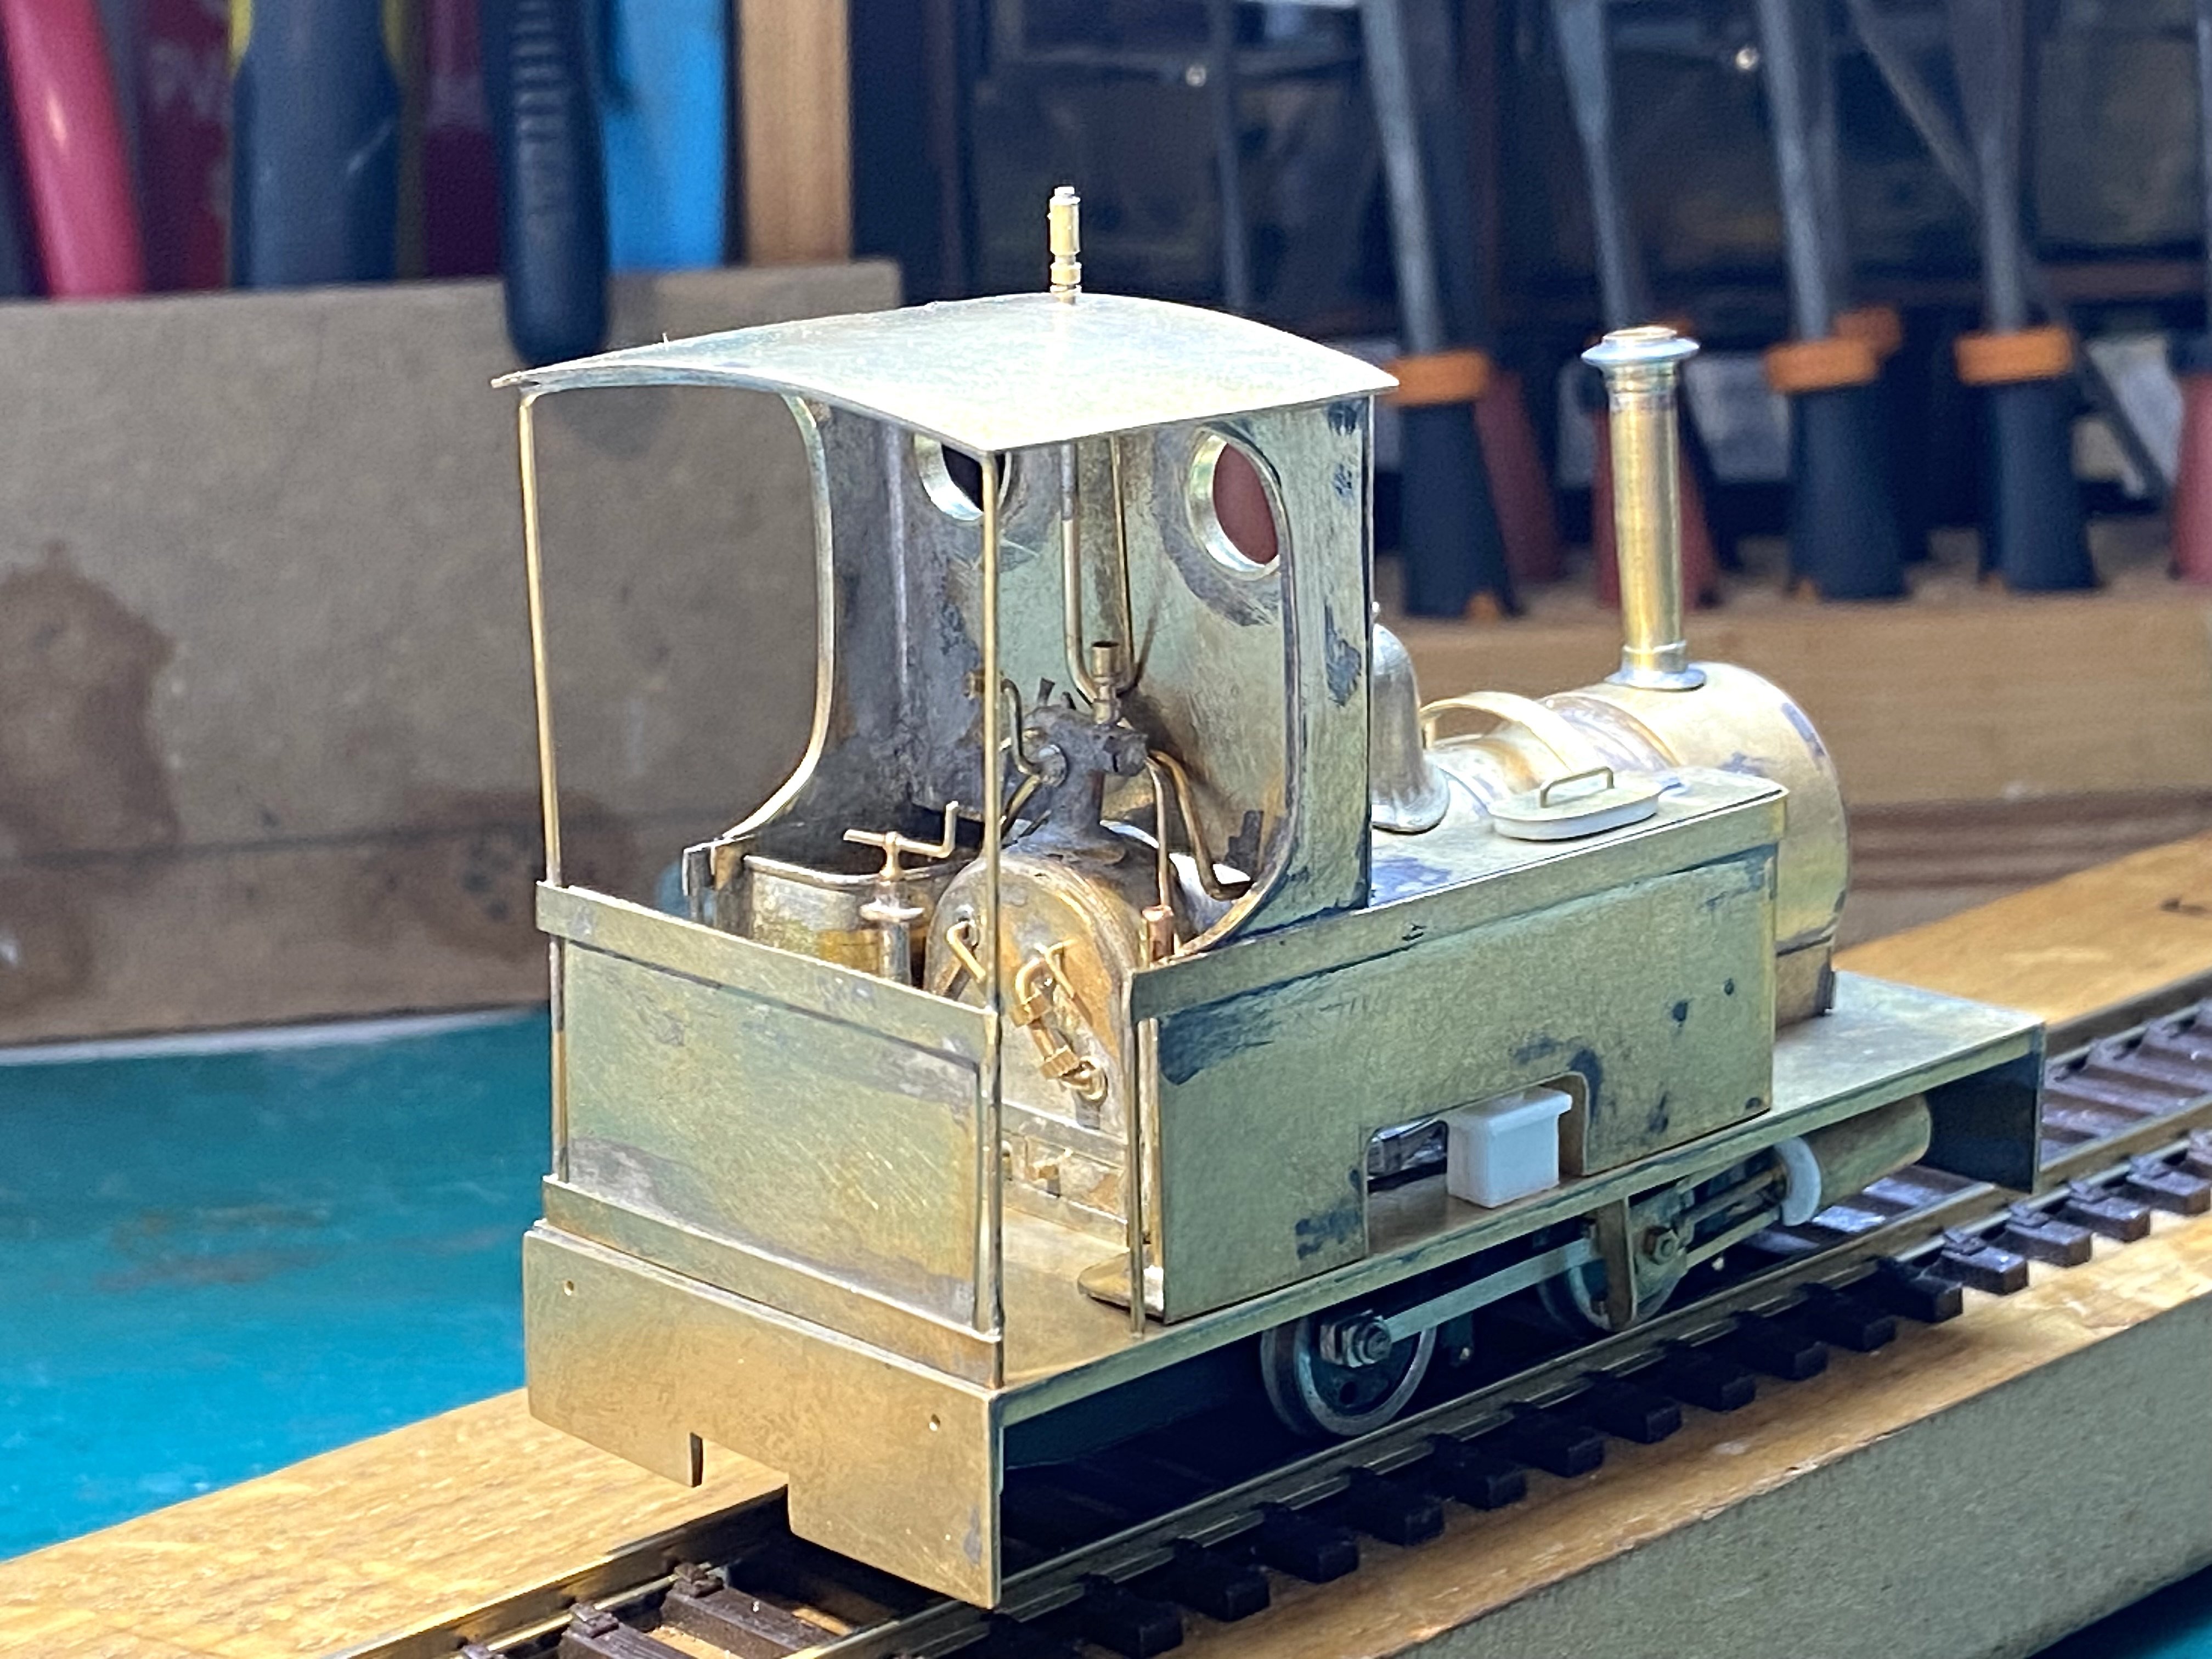
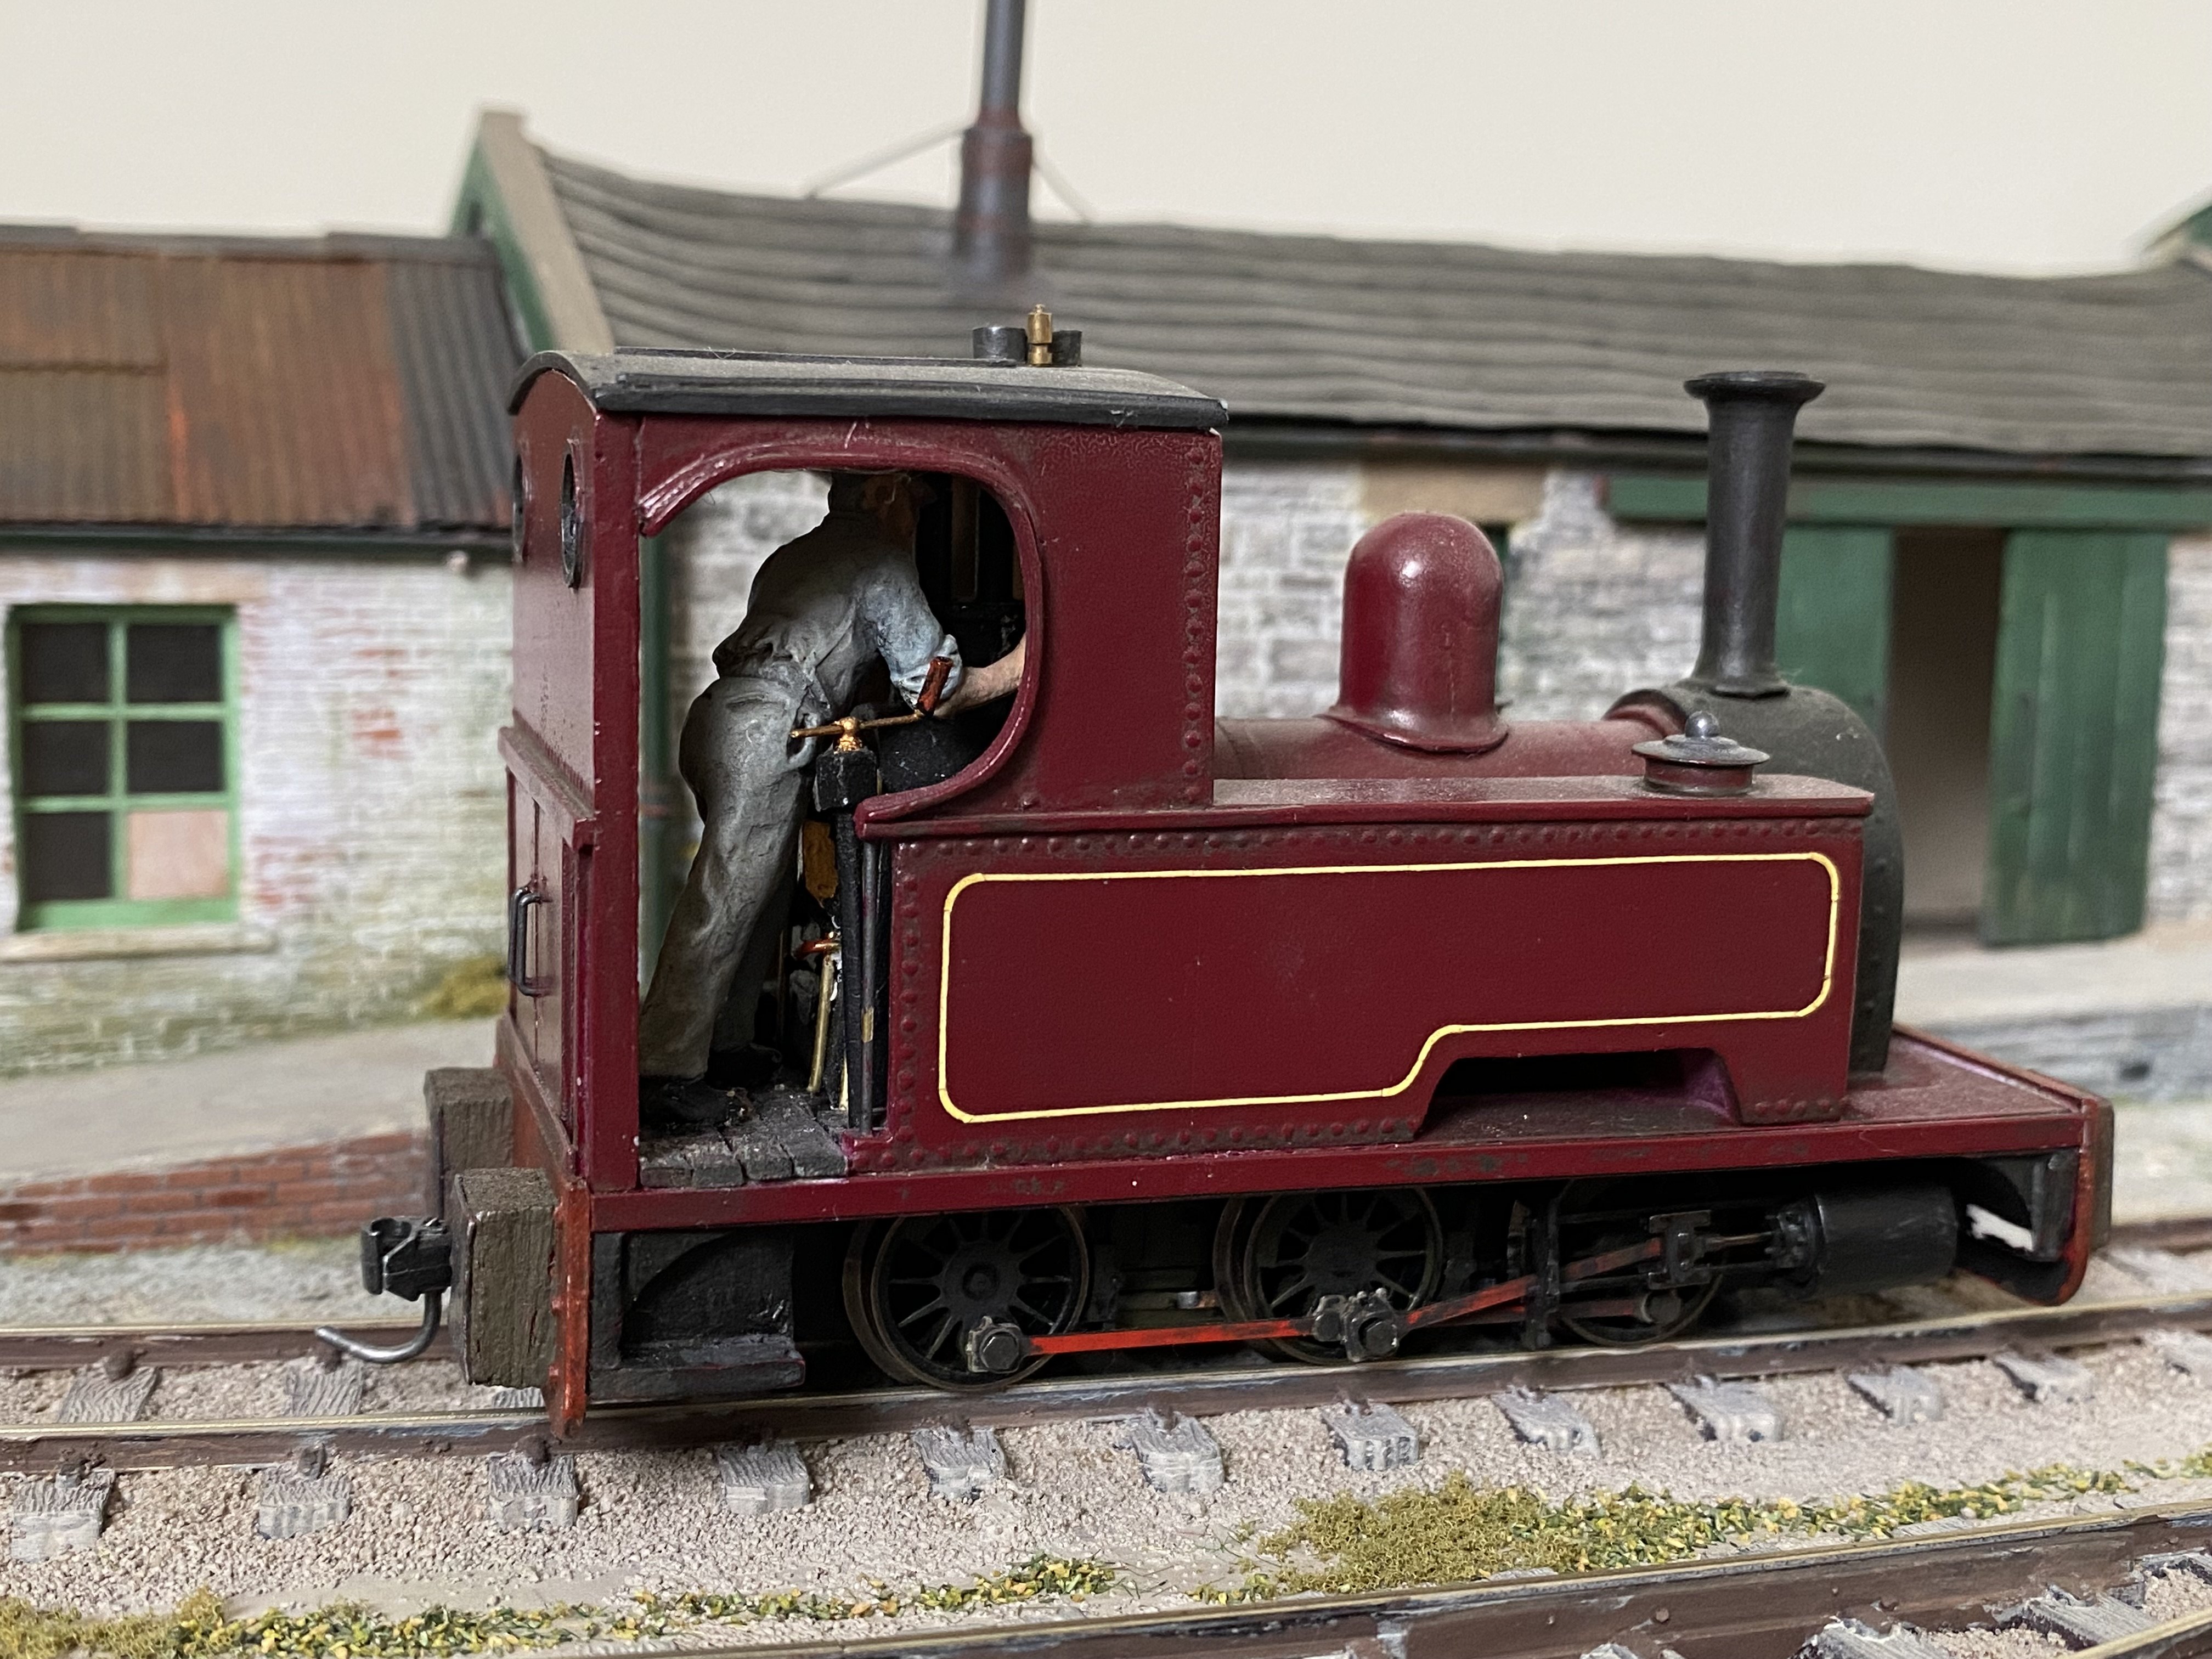
A dusting of etch primer and a nasty outbreak of pimples? For such a small loco, Peckett has an awful lot of rivets. 3D transfers by Micromark, courtesy the 7mm Narrow Gauge Association.

- 779 replies
-
- 12
-

-
Clogherhead - A GNR(I) Seaside Terminus
Tullygrainey replied to Patrick Davey's topic in Irish Model Layouts
Looking suitably three-dimensional Patrick. Good stuff! -
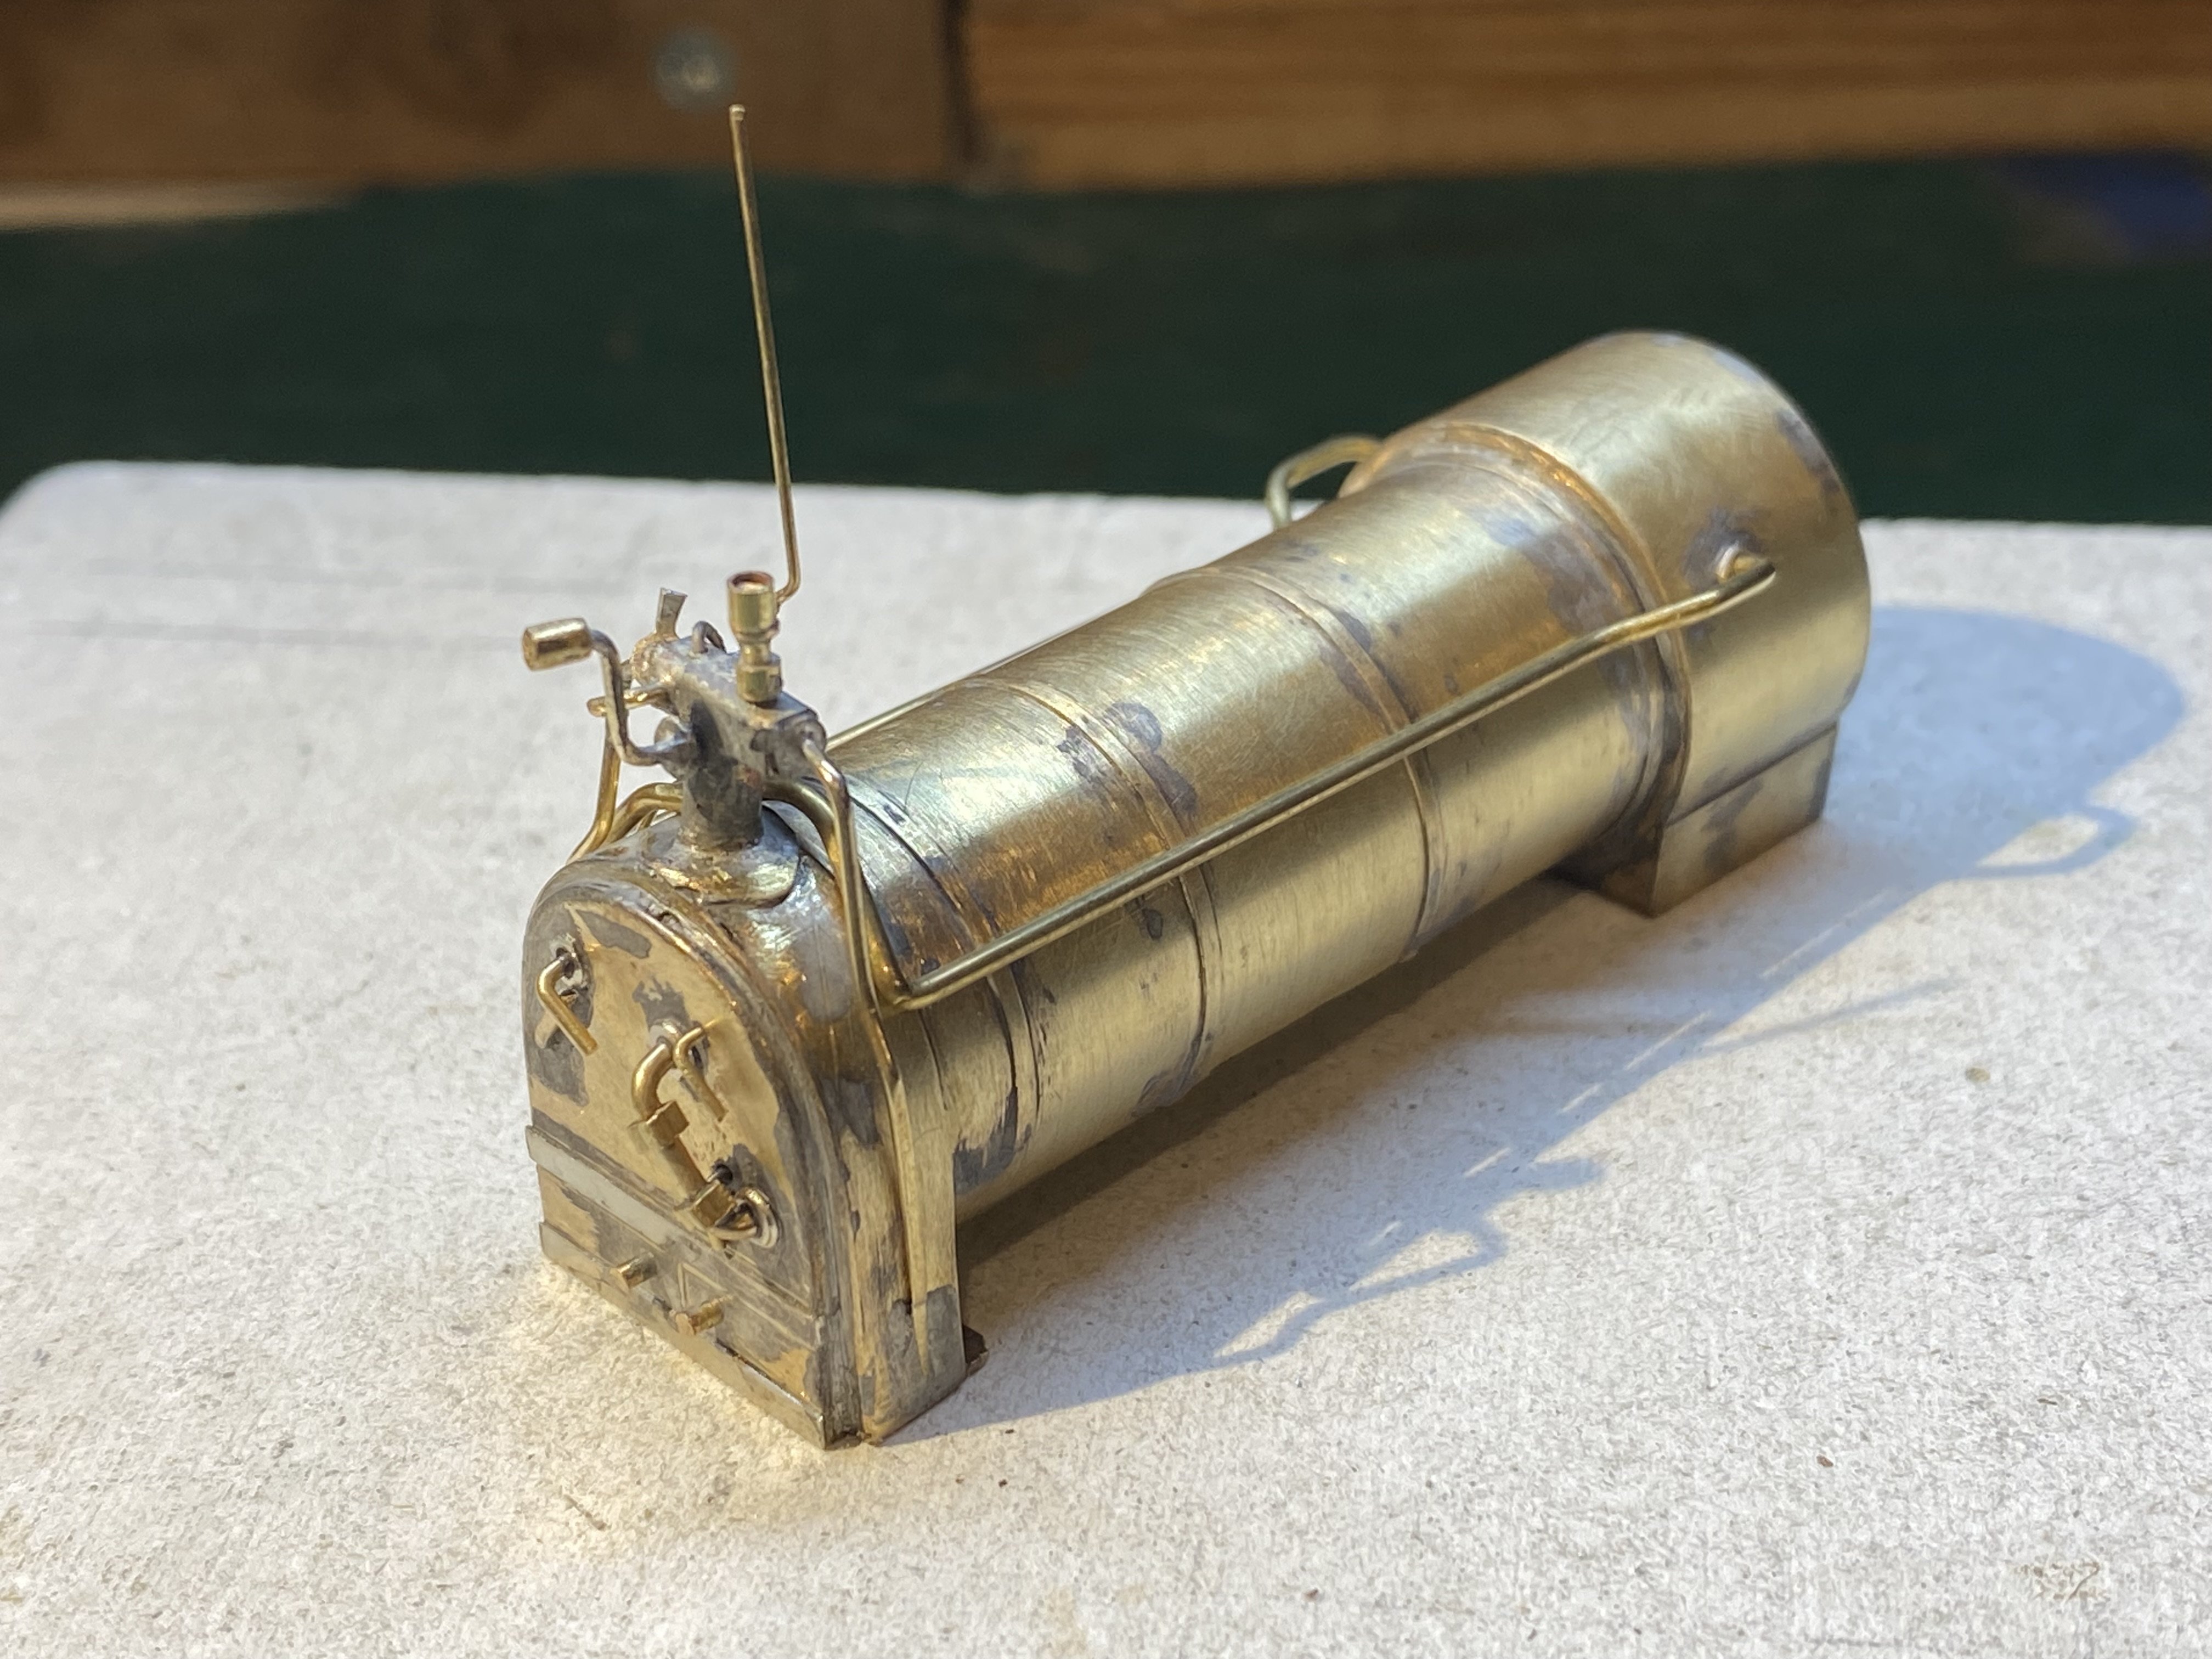
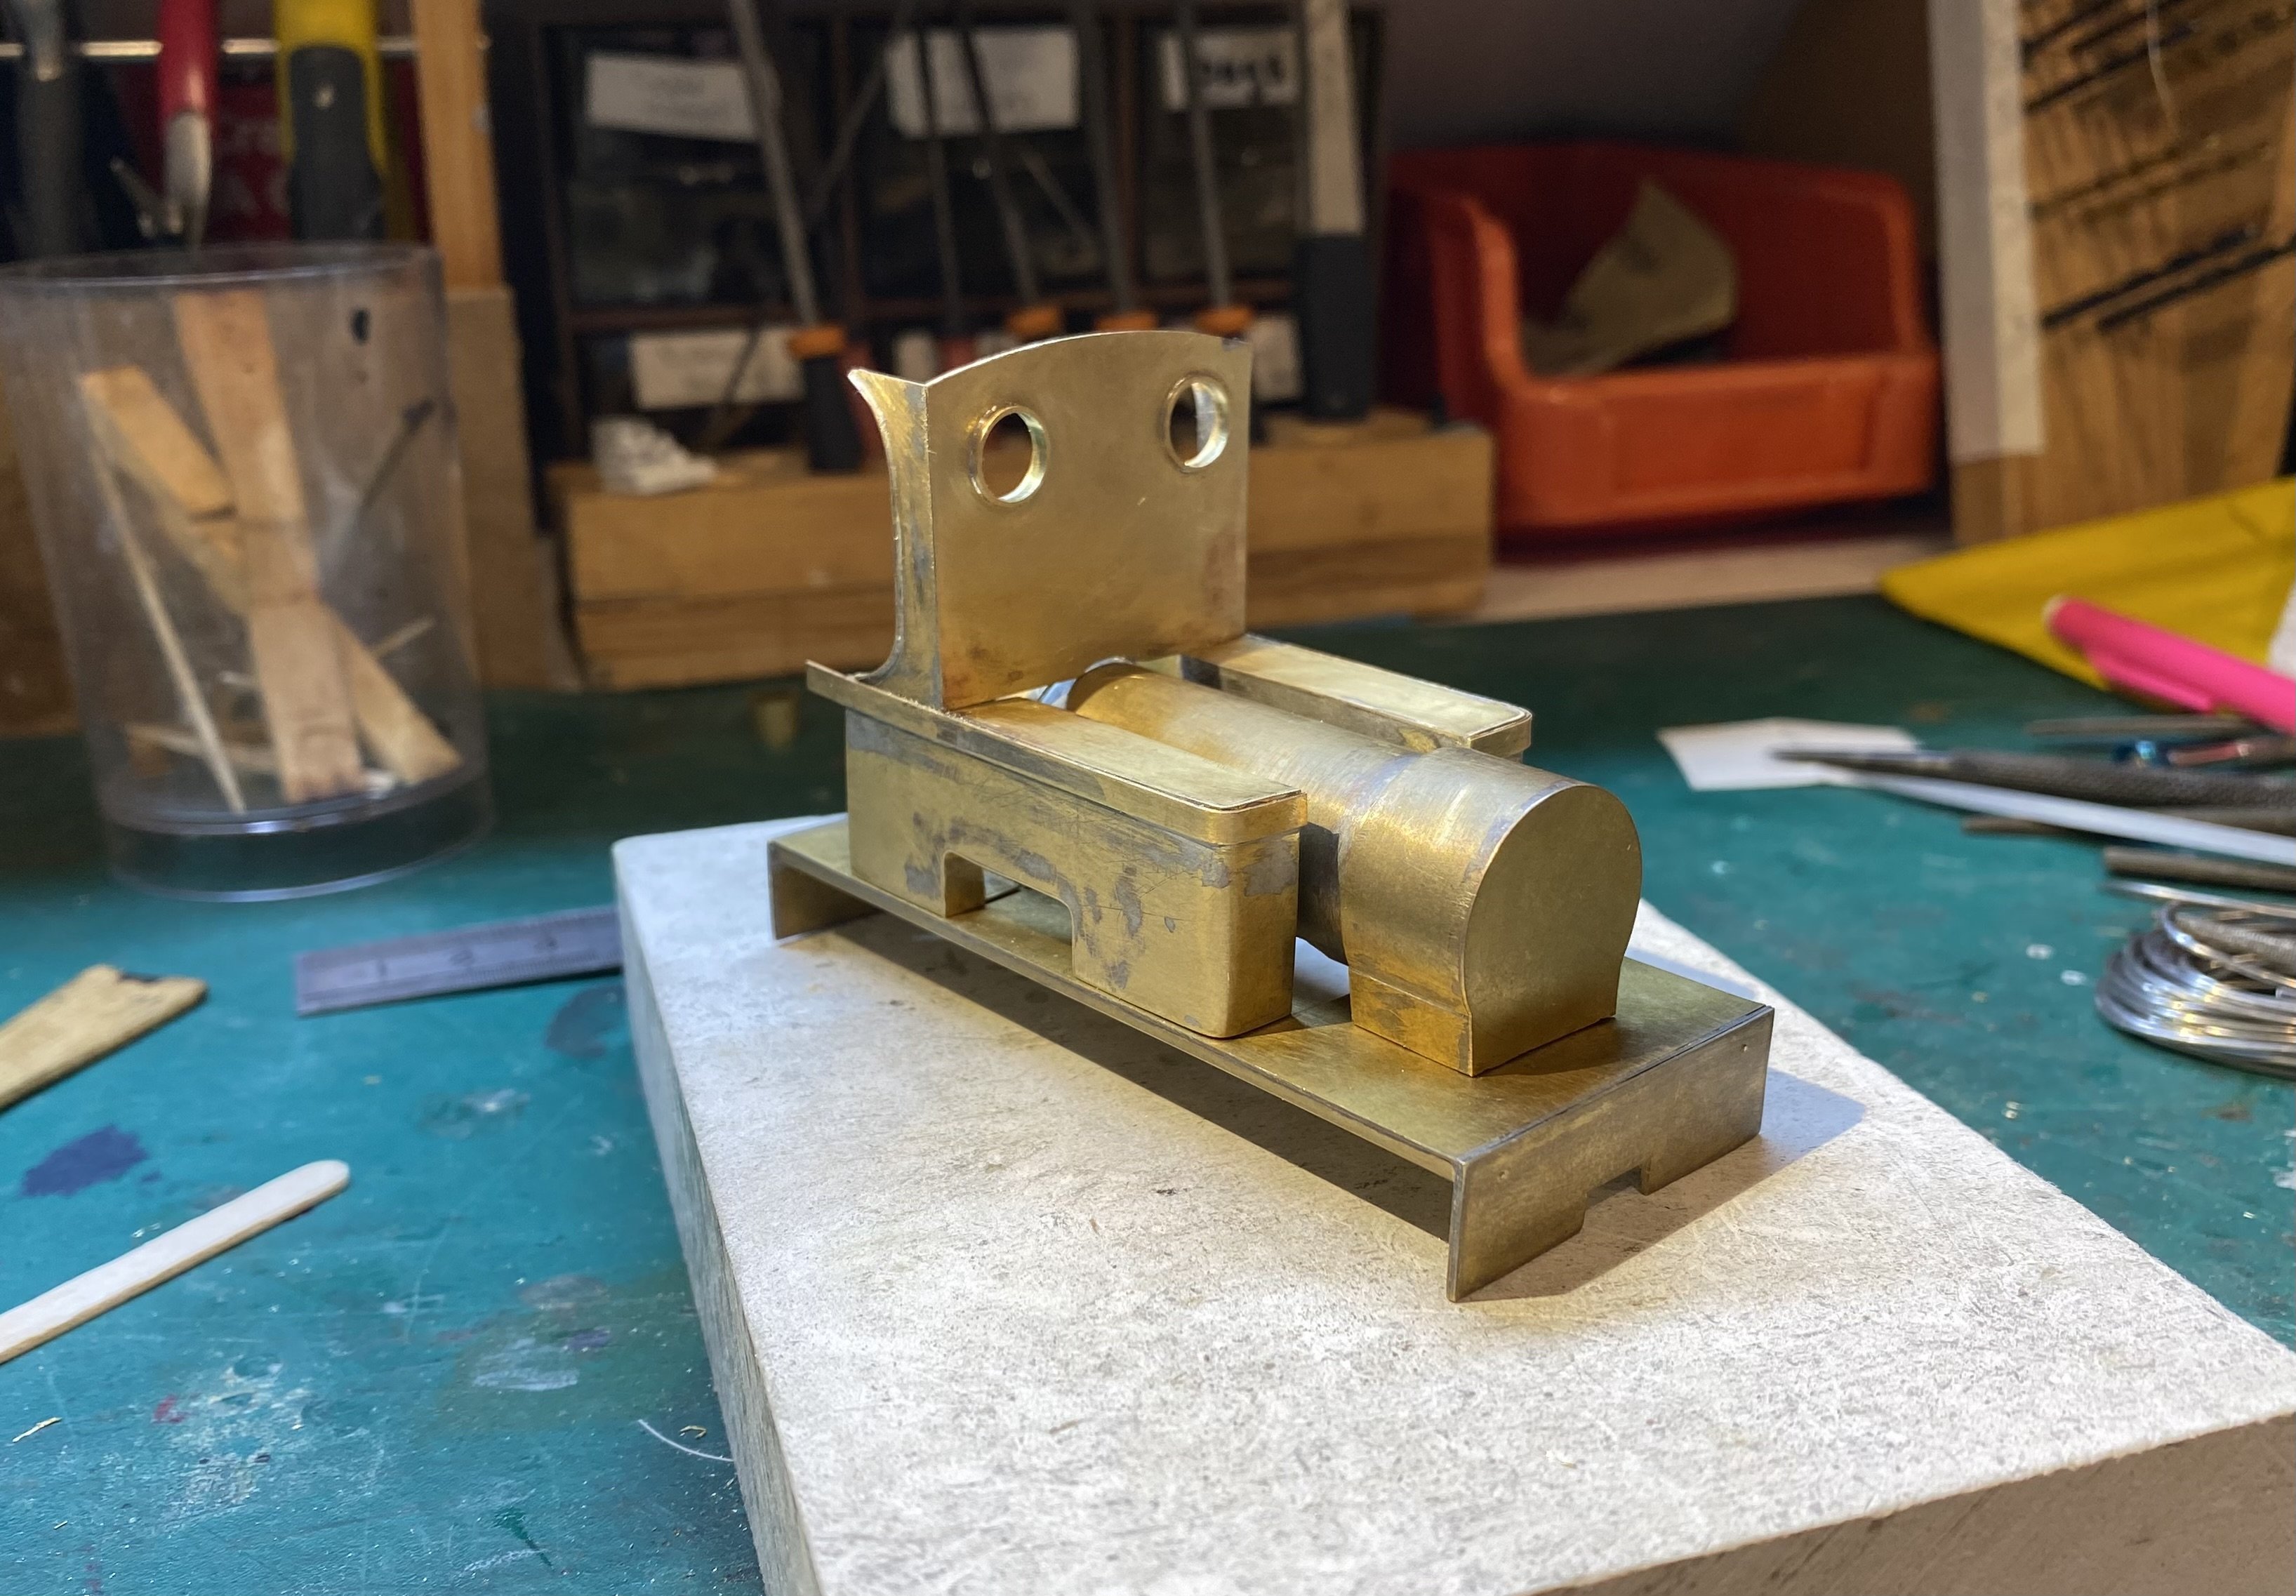
A trial fitting together of the various Peckettbits, prior to me making a meal of trying to paint the thing (it's traditional). The dome is an Alan Gibson 4mm casting (4M616 Midland Railway) with some cosmetic surgery. The ex-brass wood screw chimney isn't attached since it's still Plan B.
- 779 replies
-
- 13
-
-

-
Thanks for this Leslie
-
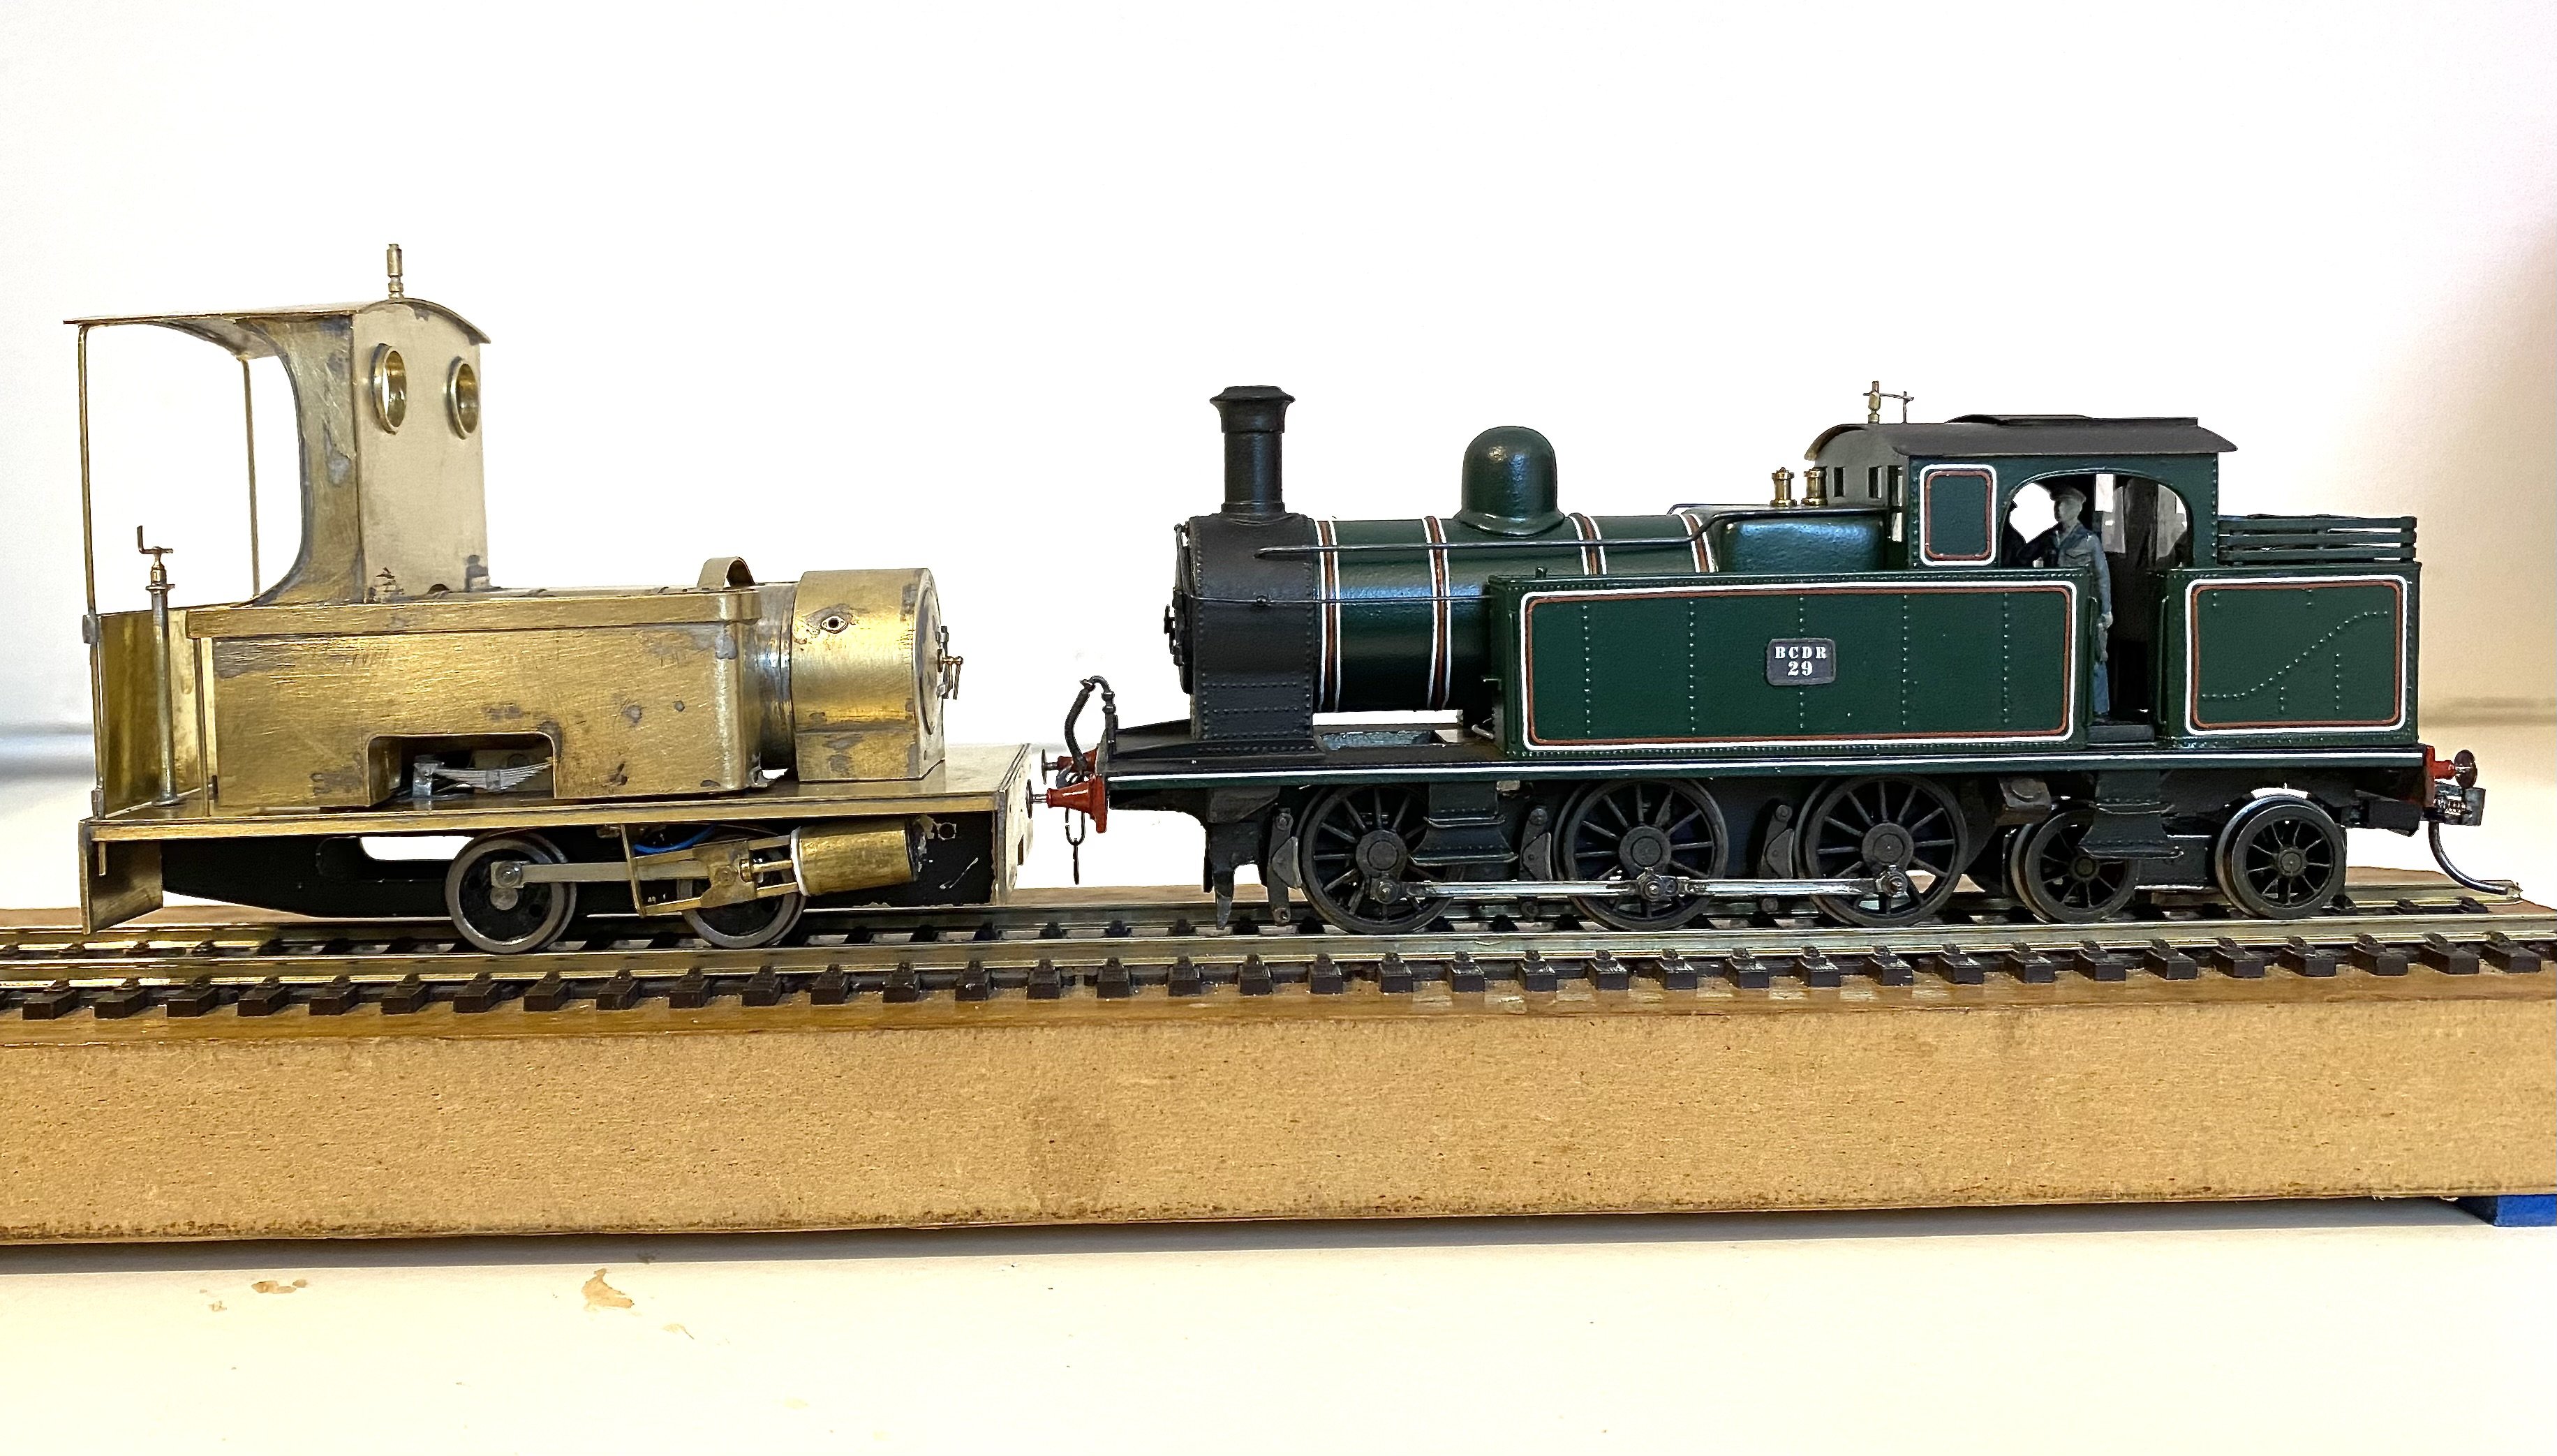
Escaping Loughan Quay for the day, No.2 runs into Donaghadee with a trainload of Comber spuds for onward transit to GB. With thanks to the Ulster Model Railway Club for a great show, Belfast 19-20 August 2023, and with special thanks to Gordon Hunt for the great pleasure and privilege of running BCDR Nos 2 and 29 on his exceptional model of Donaghadee Station. Alan IMG_8189.MOV
-
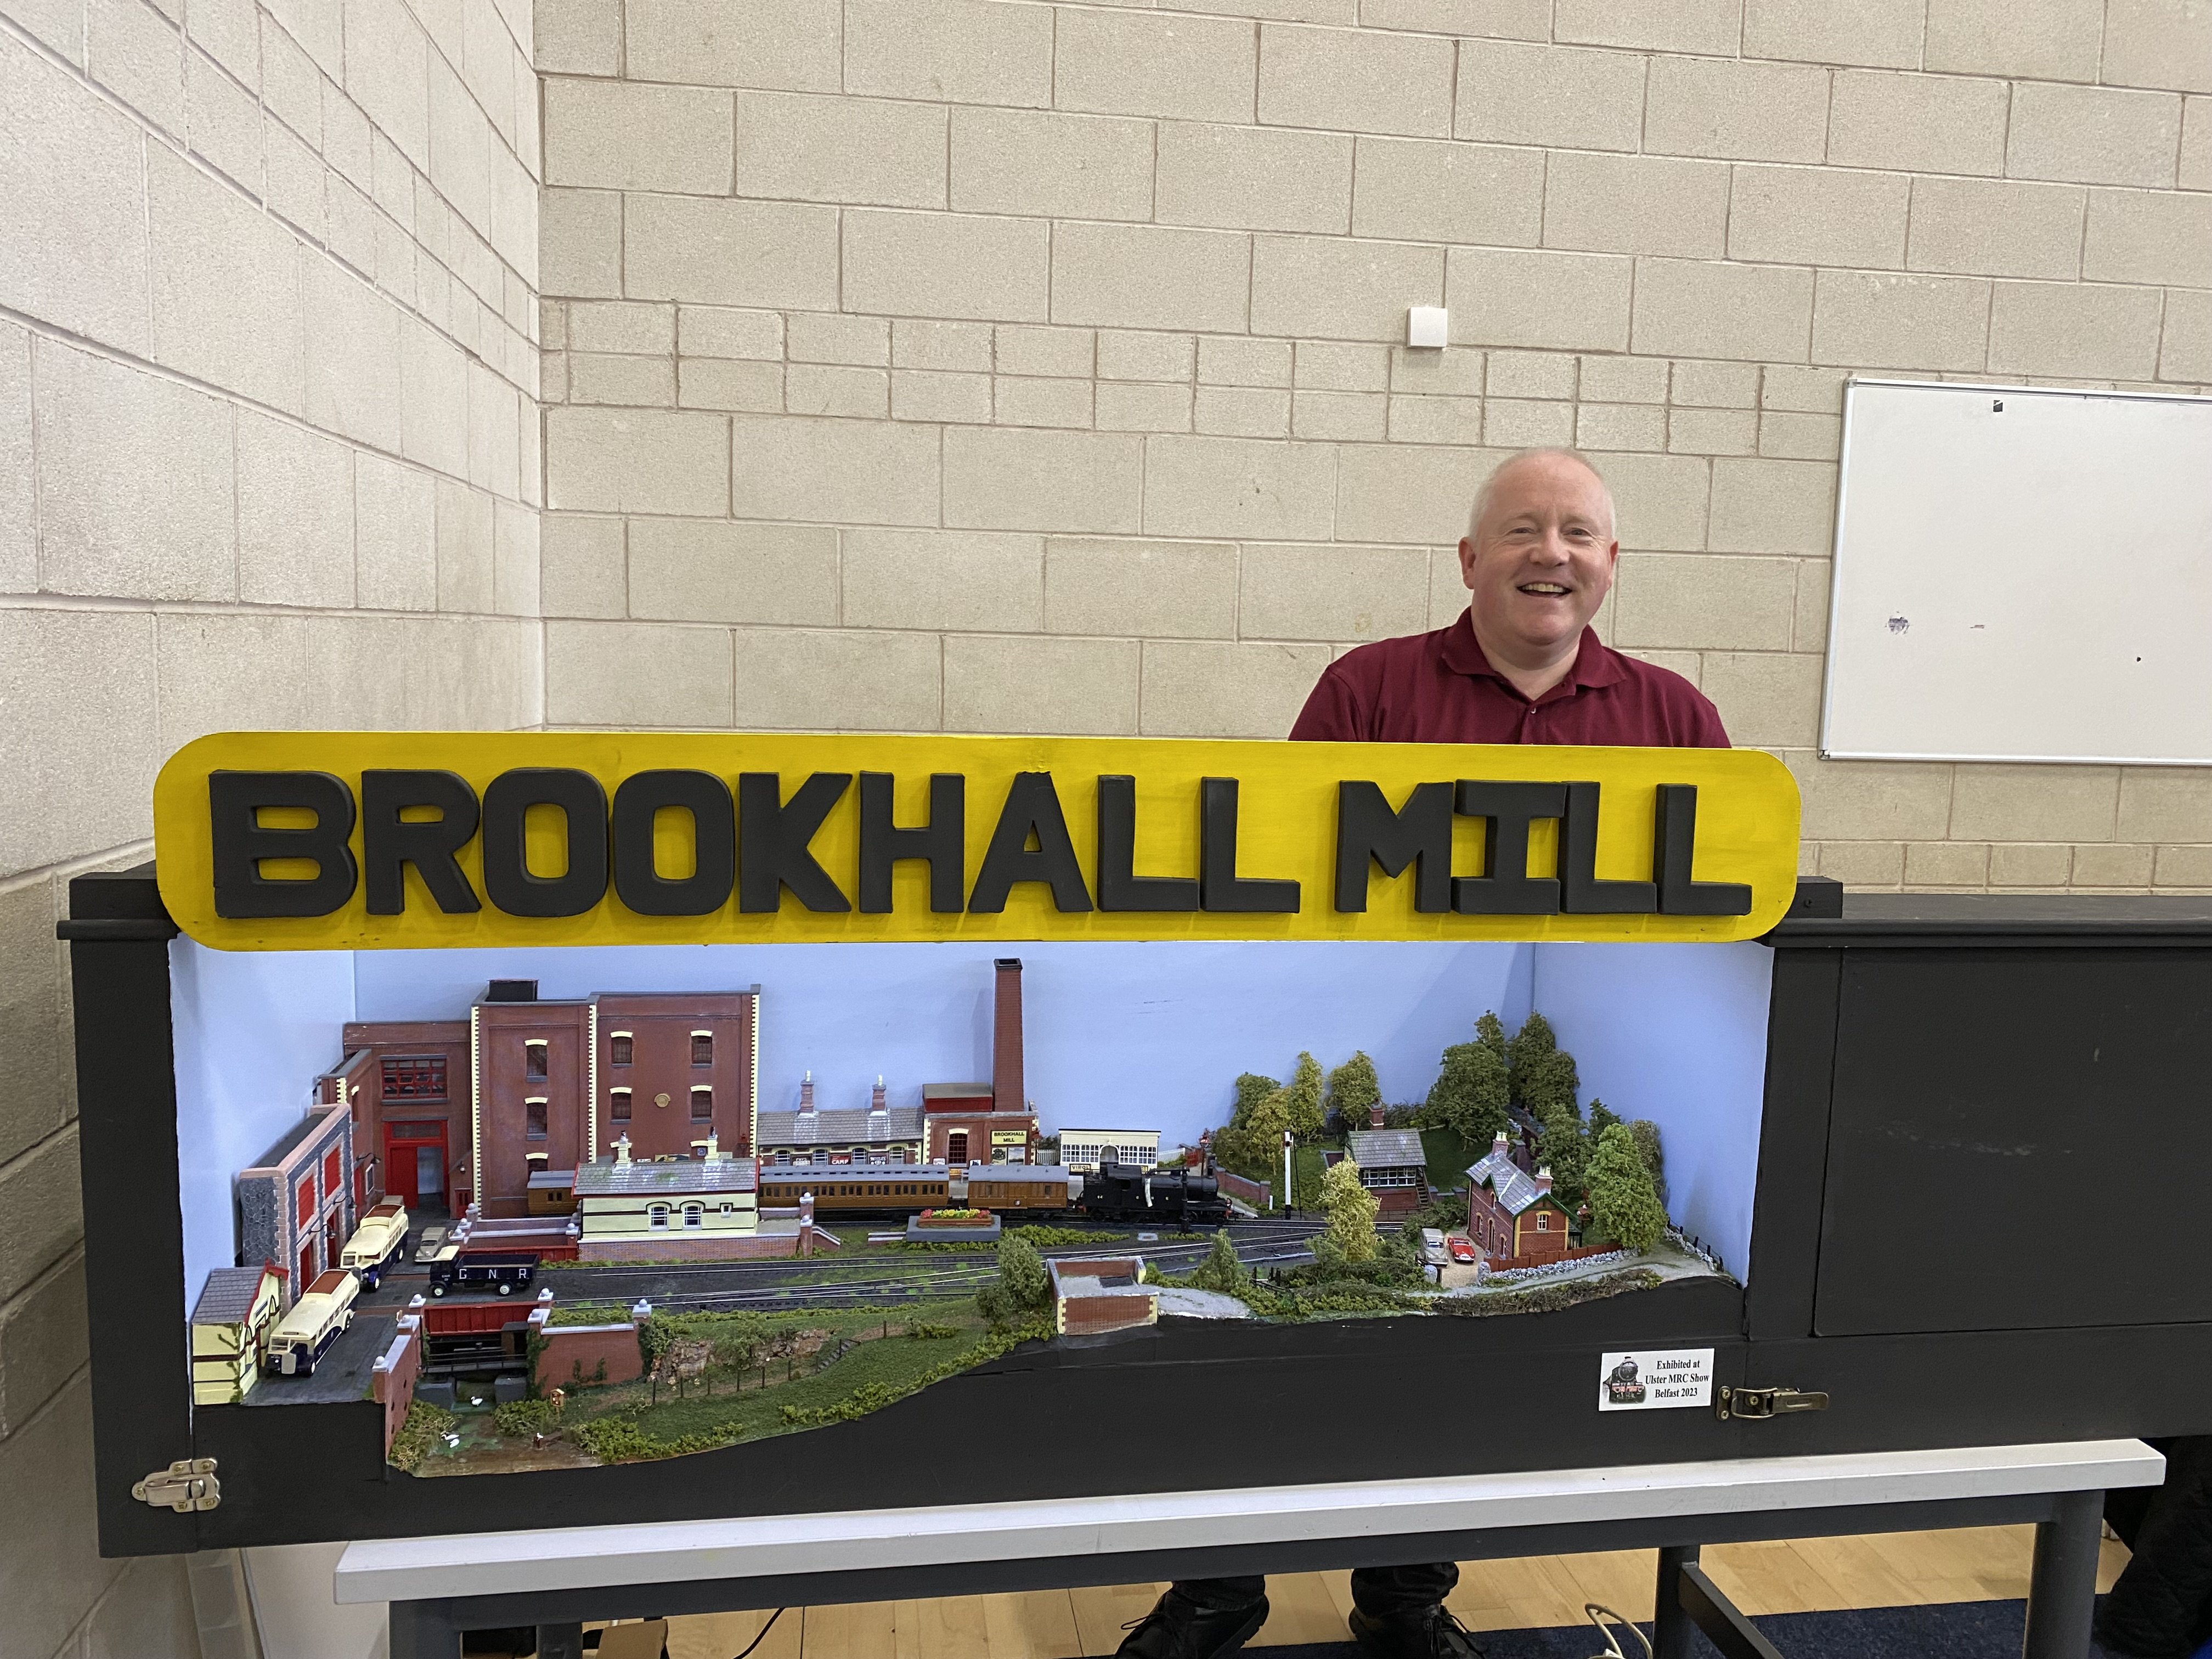
Brookhall Mill - A GNR(I) Micro Layout
Tullygrainey replied to Patrick Davey's topic in Irish Model Layouts
Thanks for the opportunity to be part of Brookhall Mill's debut Patrick. Really enjoyed my day. Here's to more appearances in the future (Mr Weaver permitting, of course. Why was he hiding in the signal box all day?) Alan
-
For my next trick... The statue of David holding an NCE PowerCab, from a chair leg. Thanks everyone
-
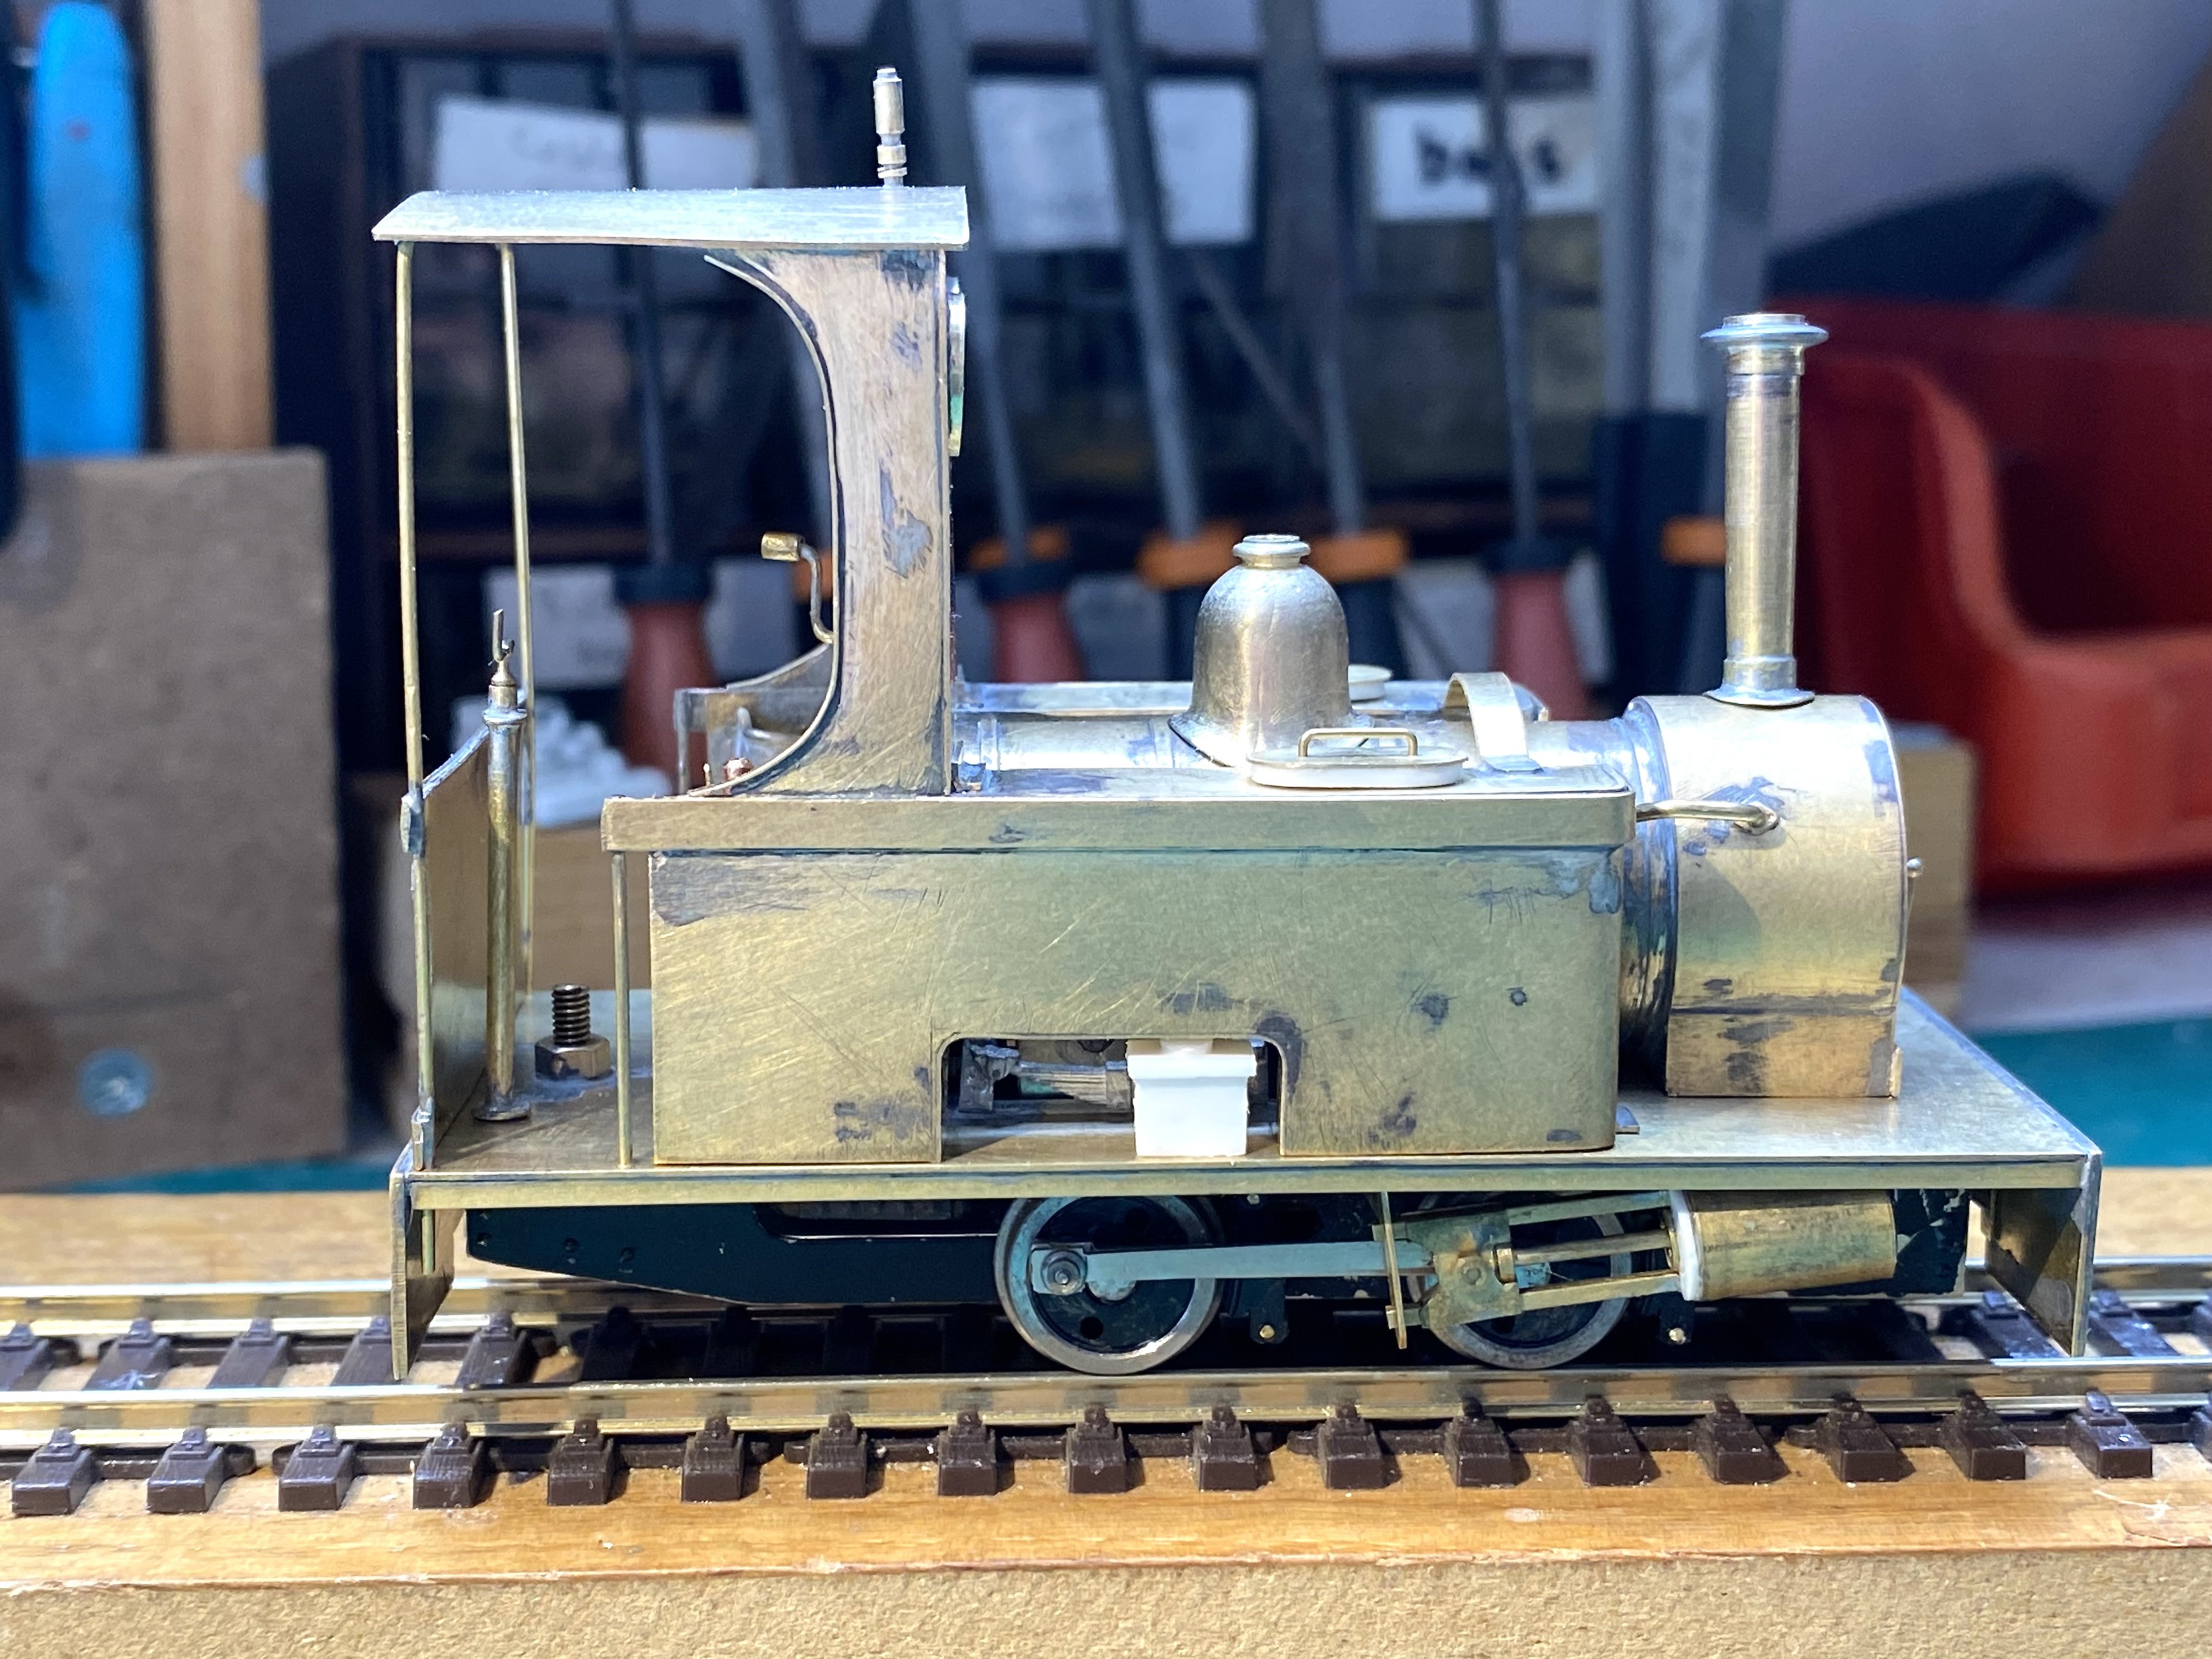
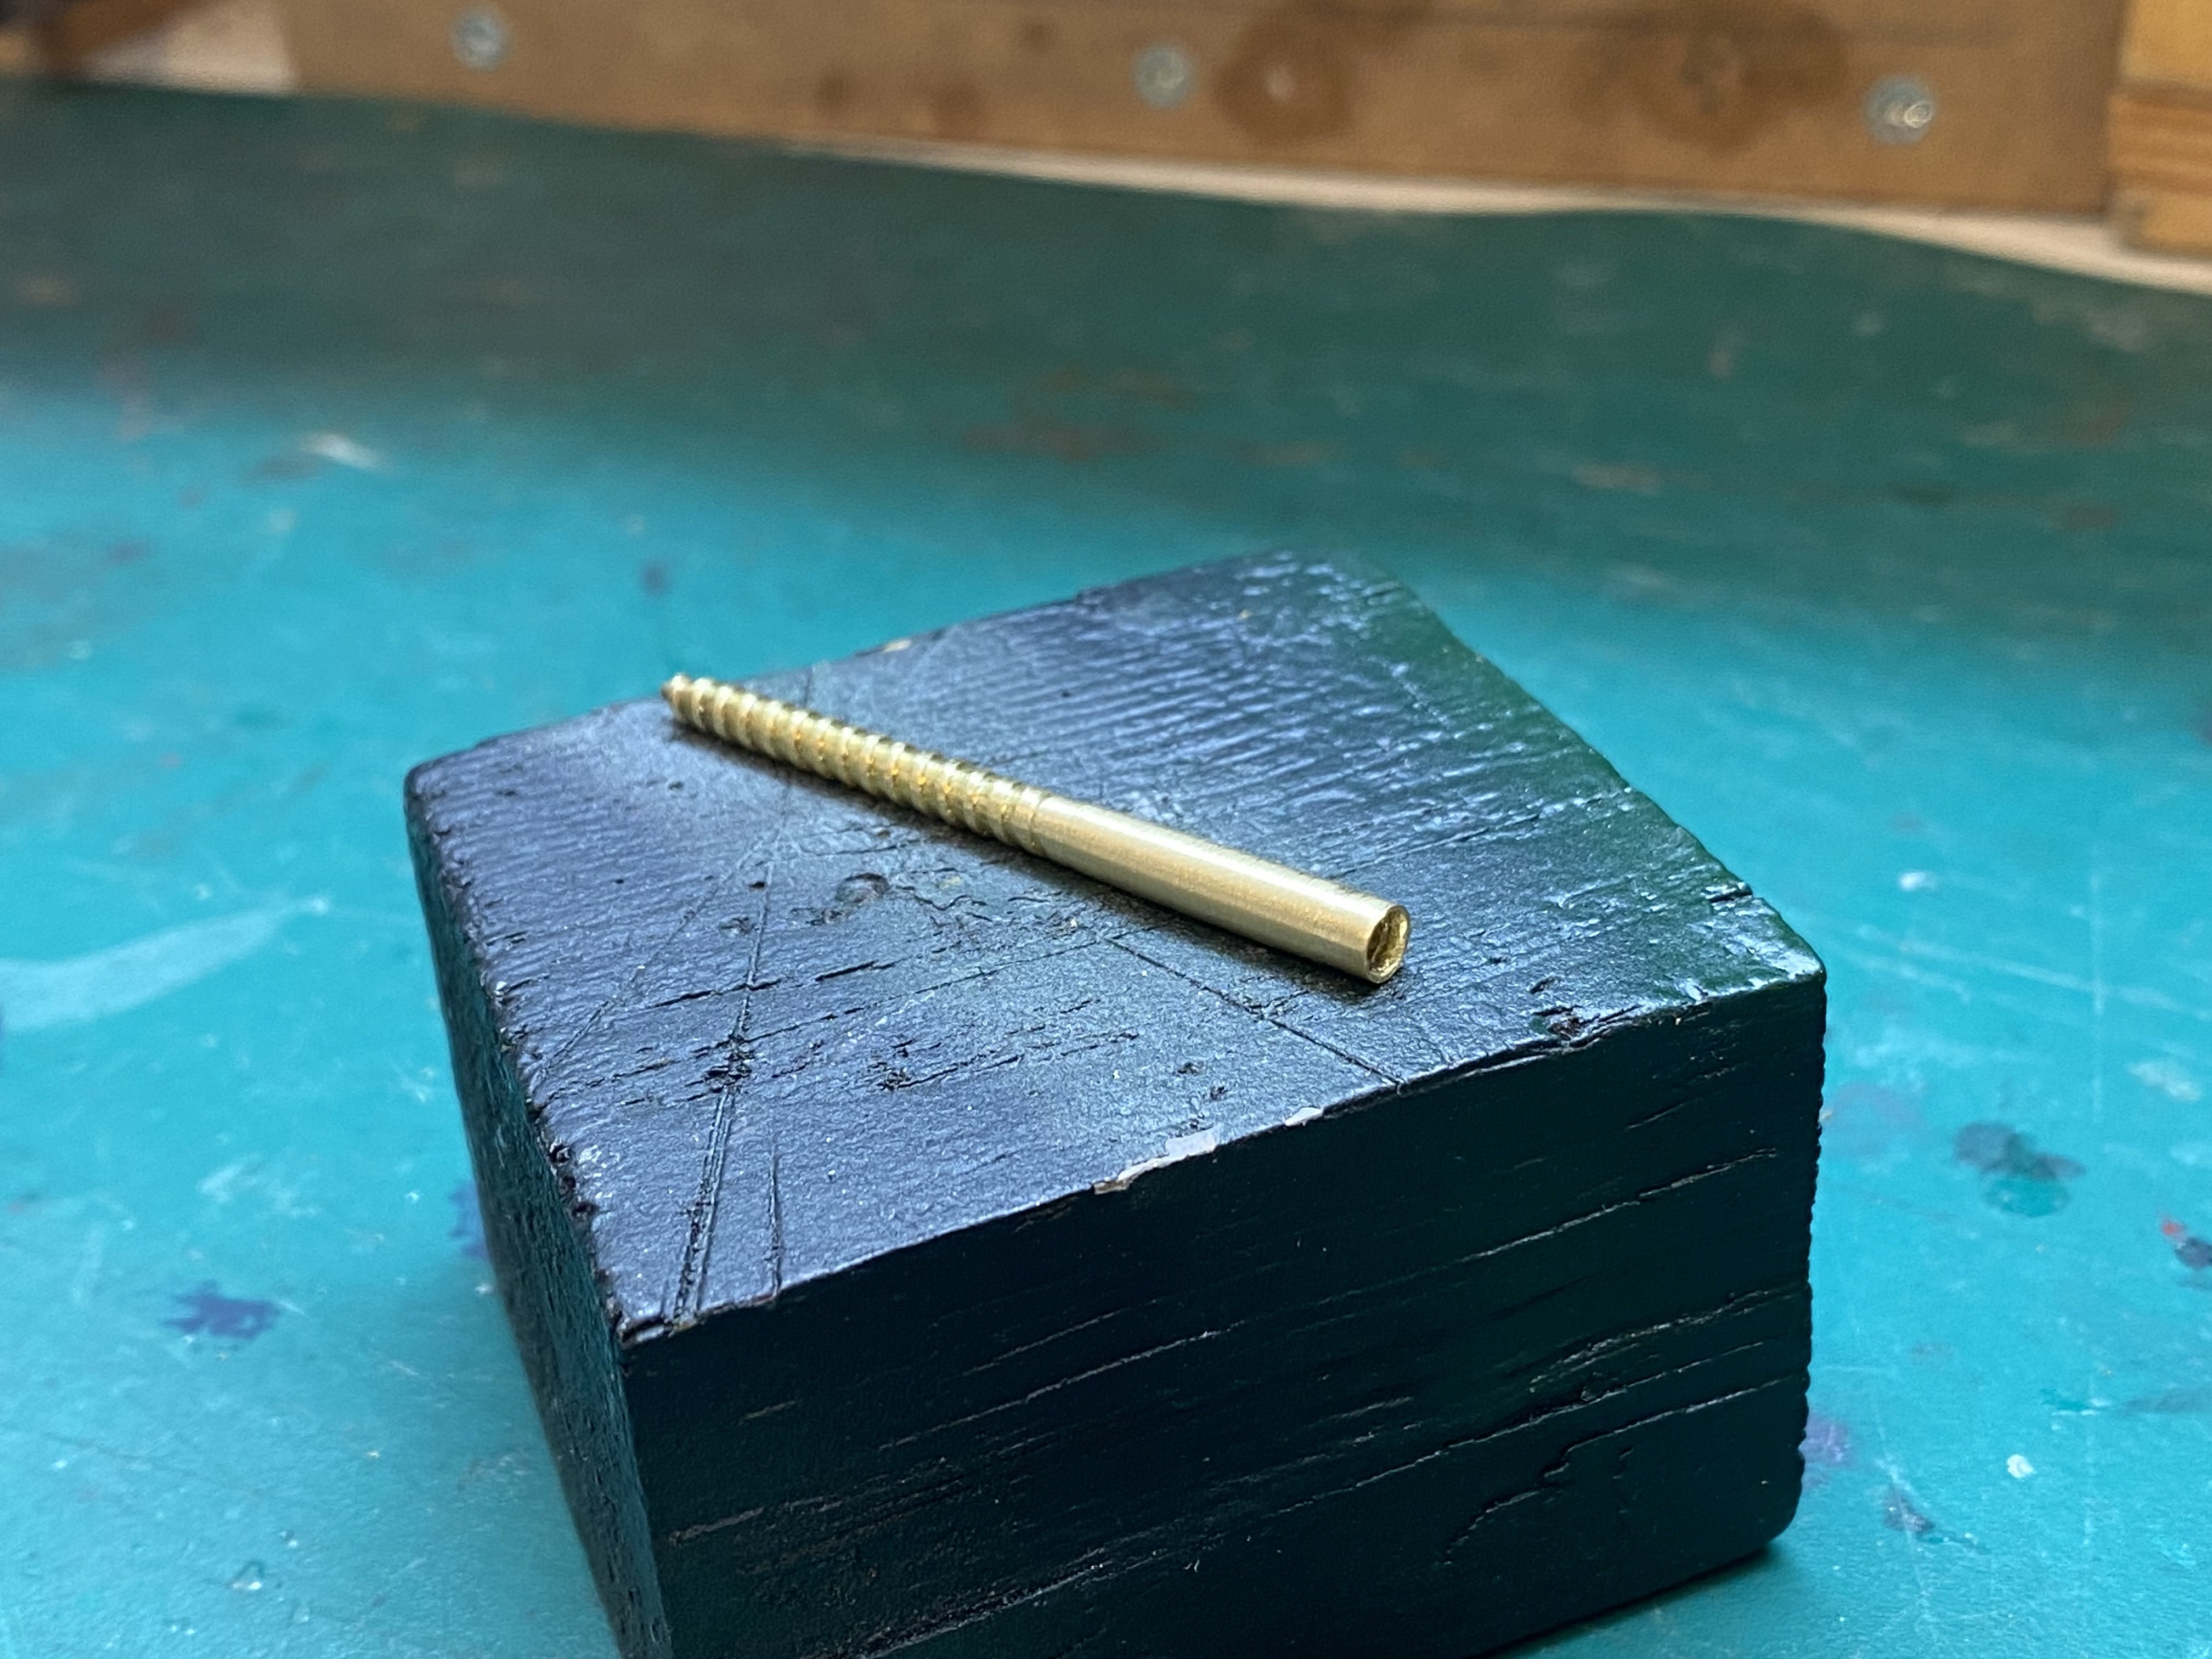
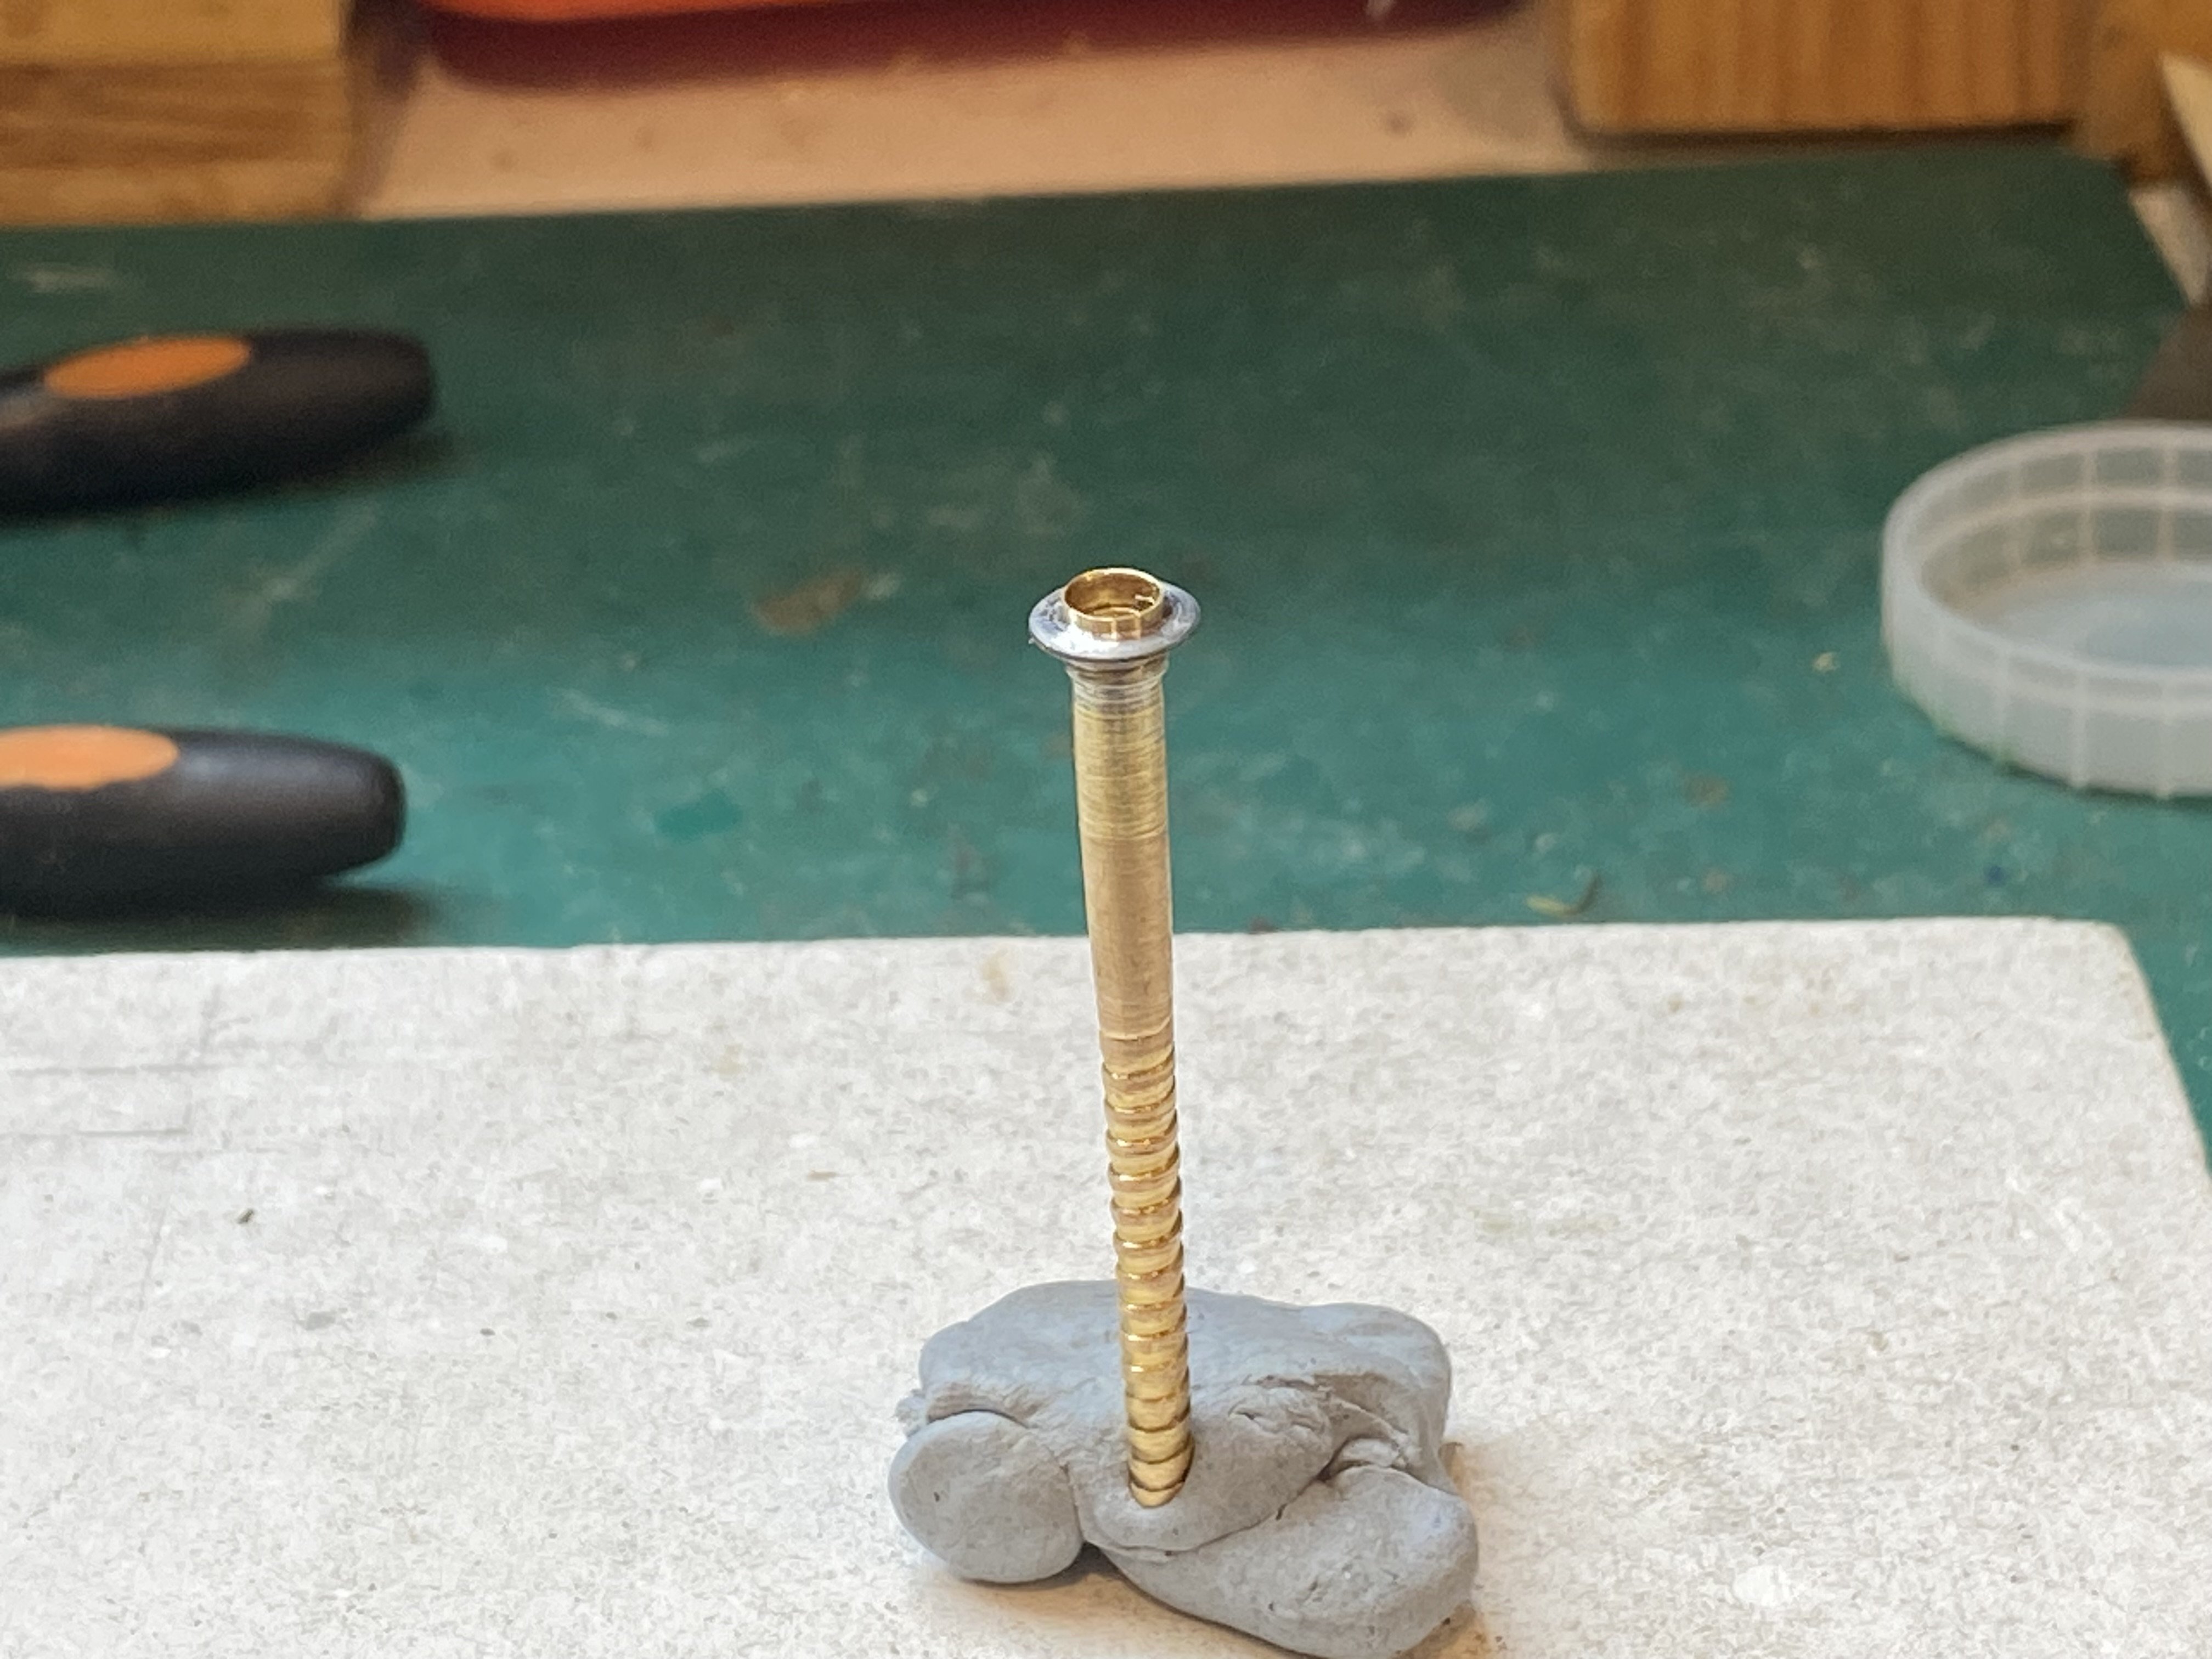
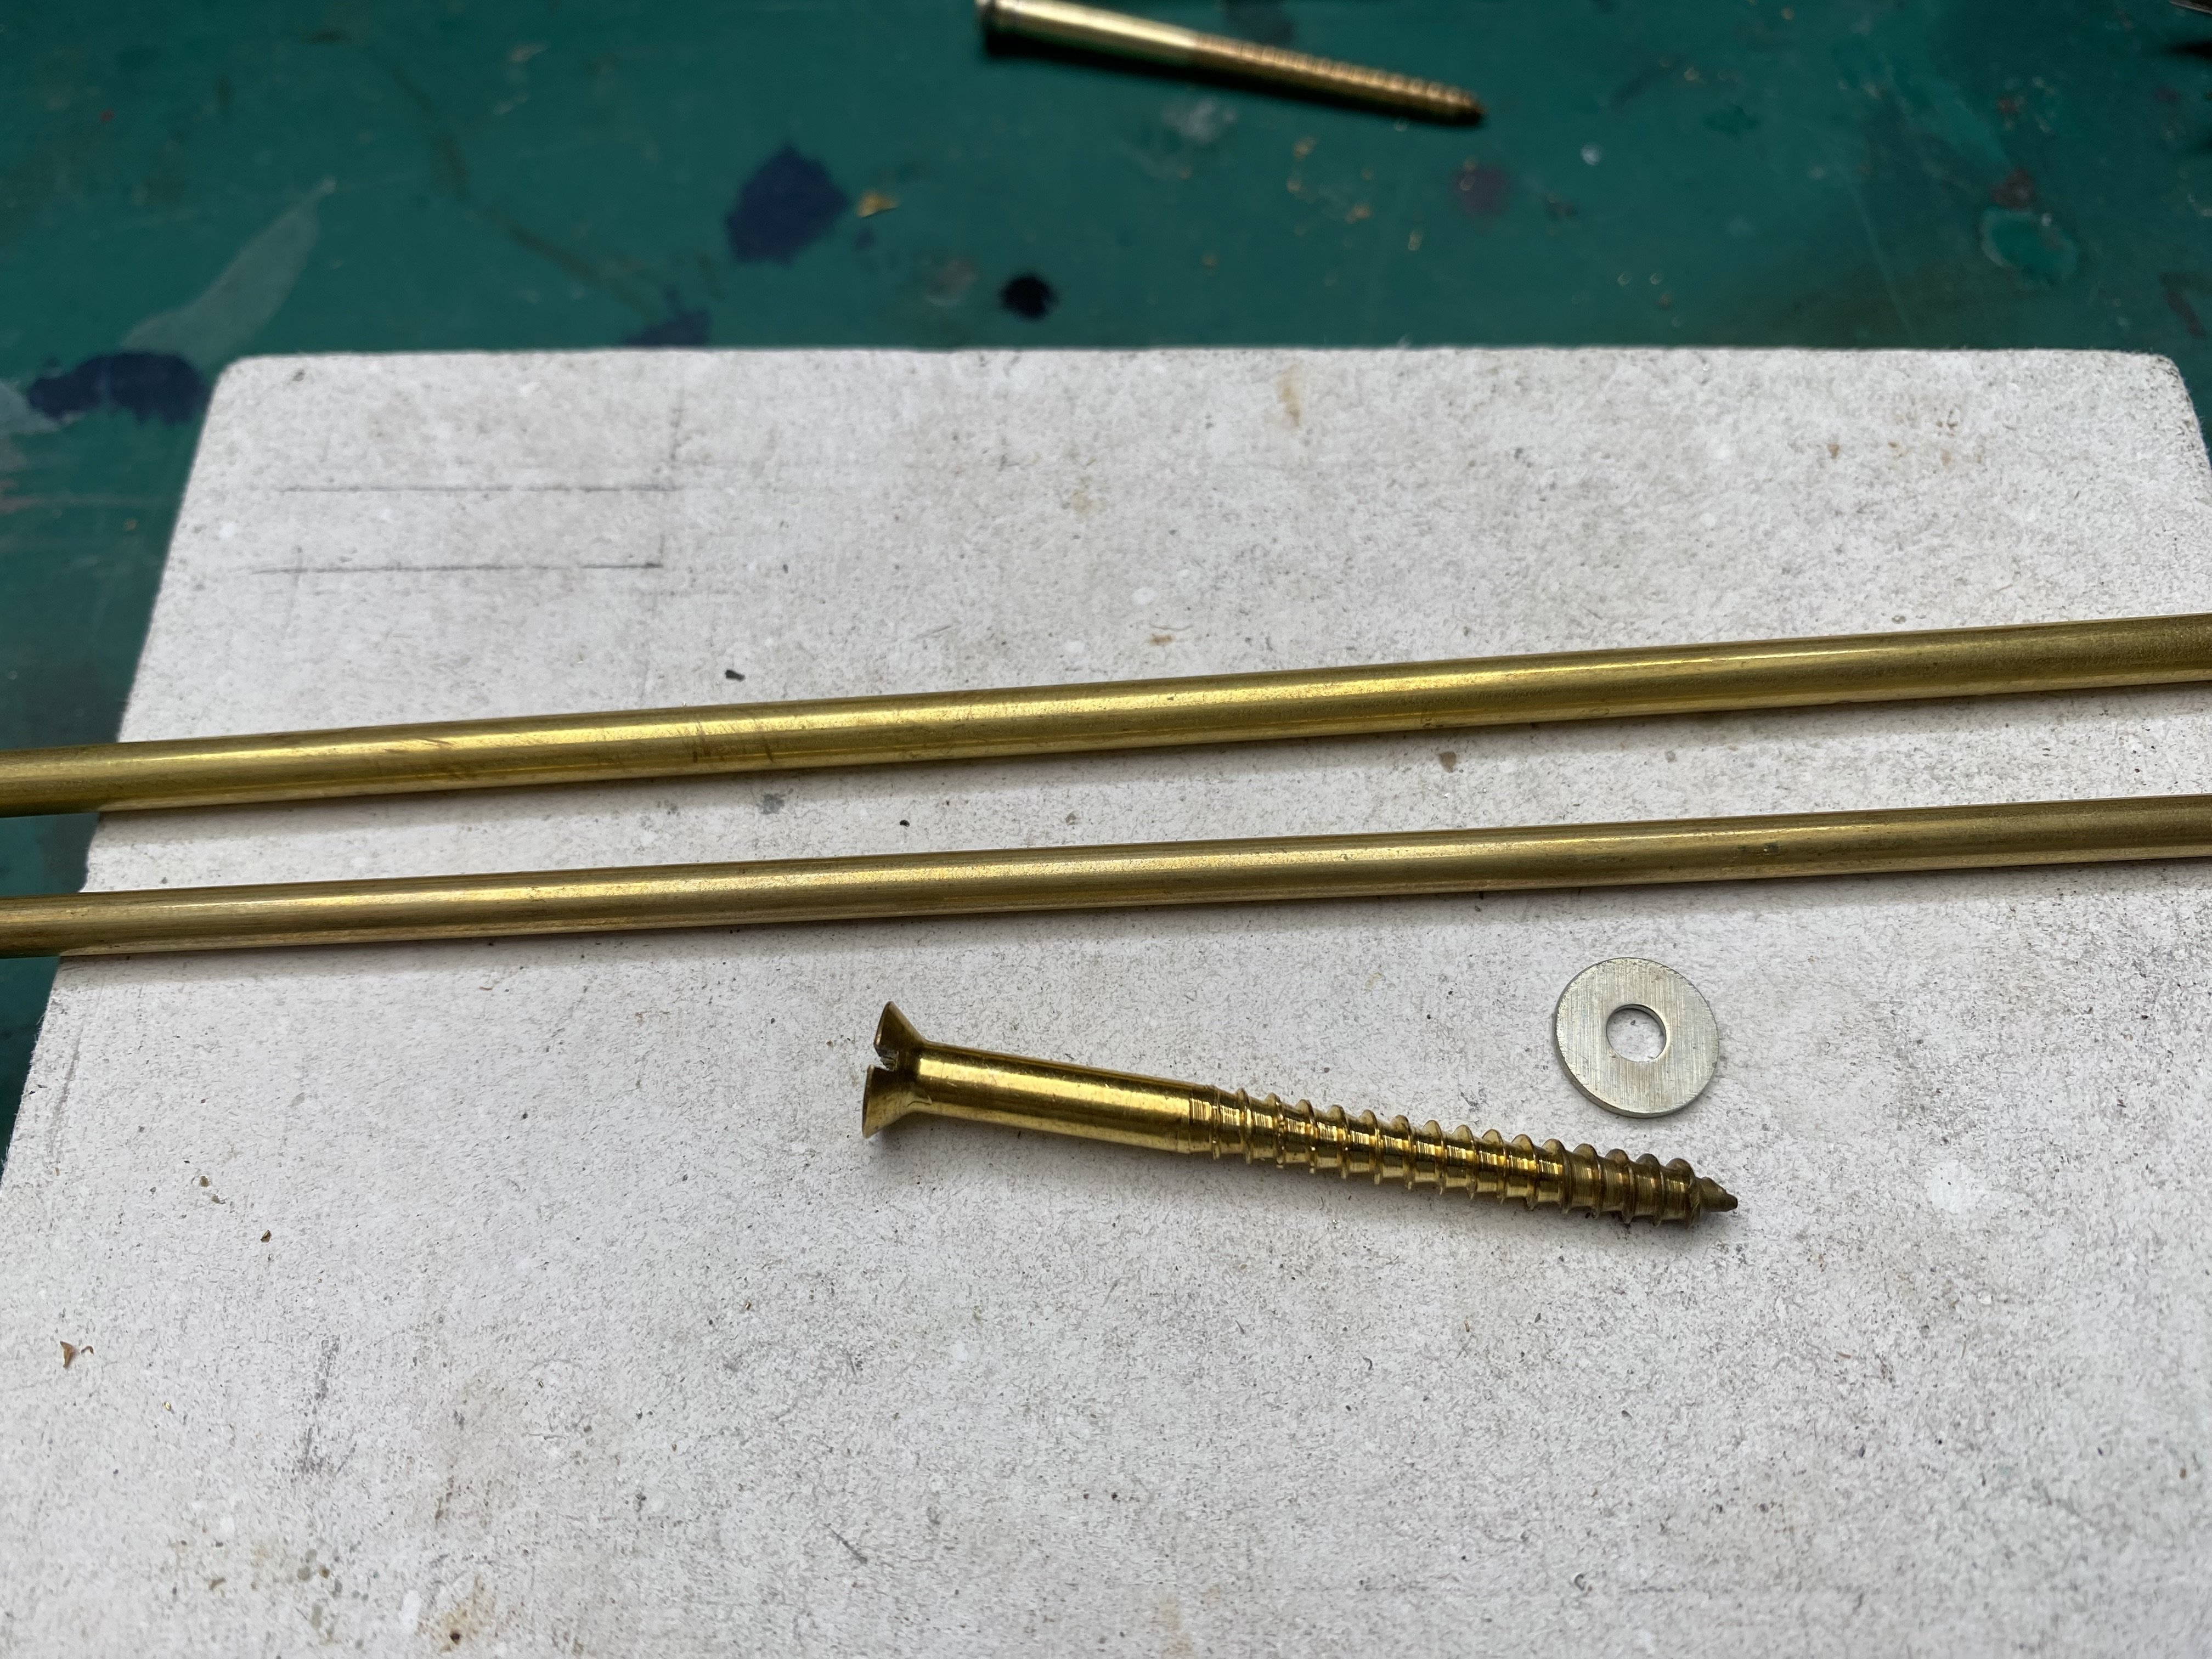
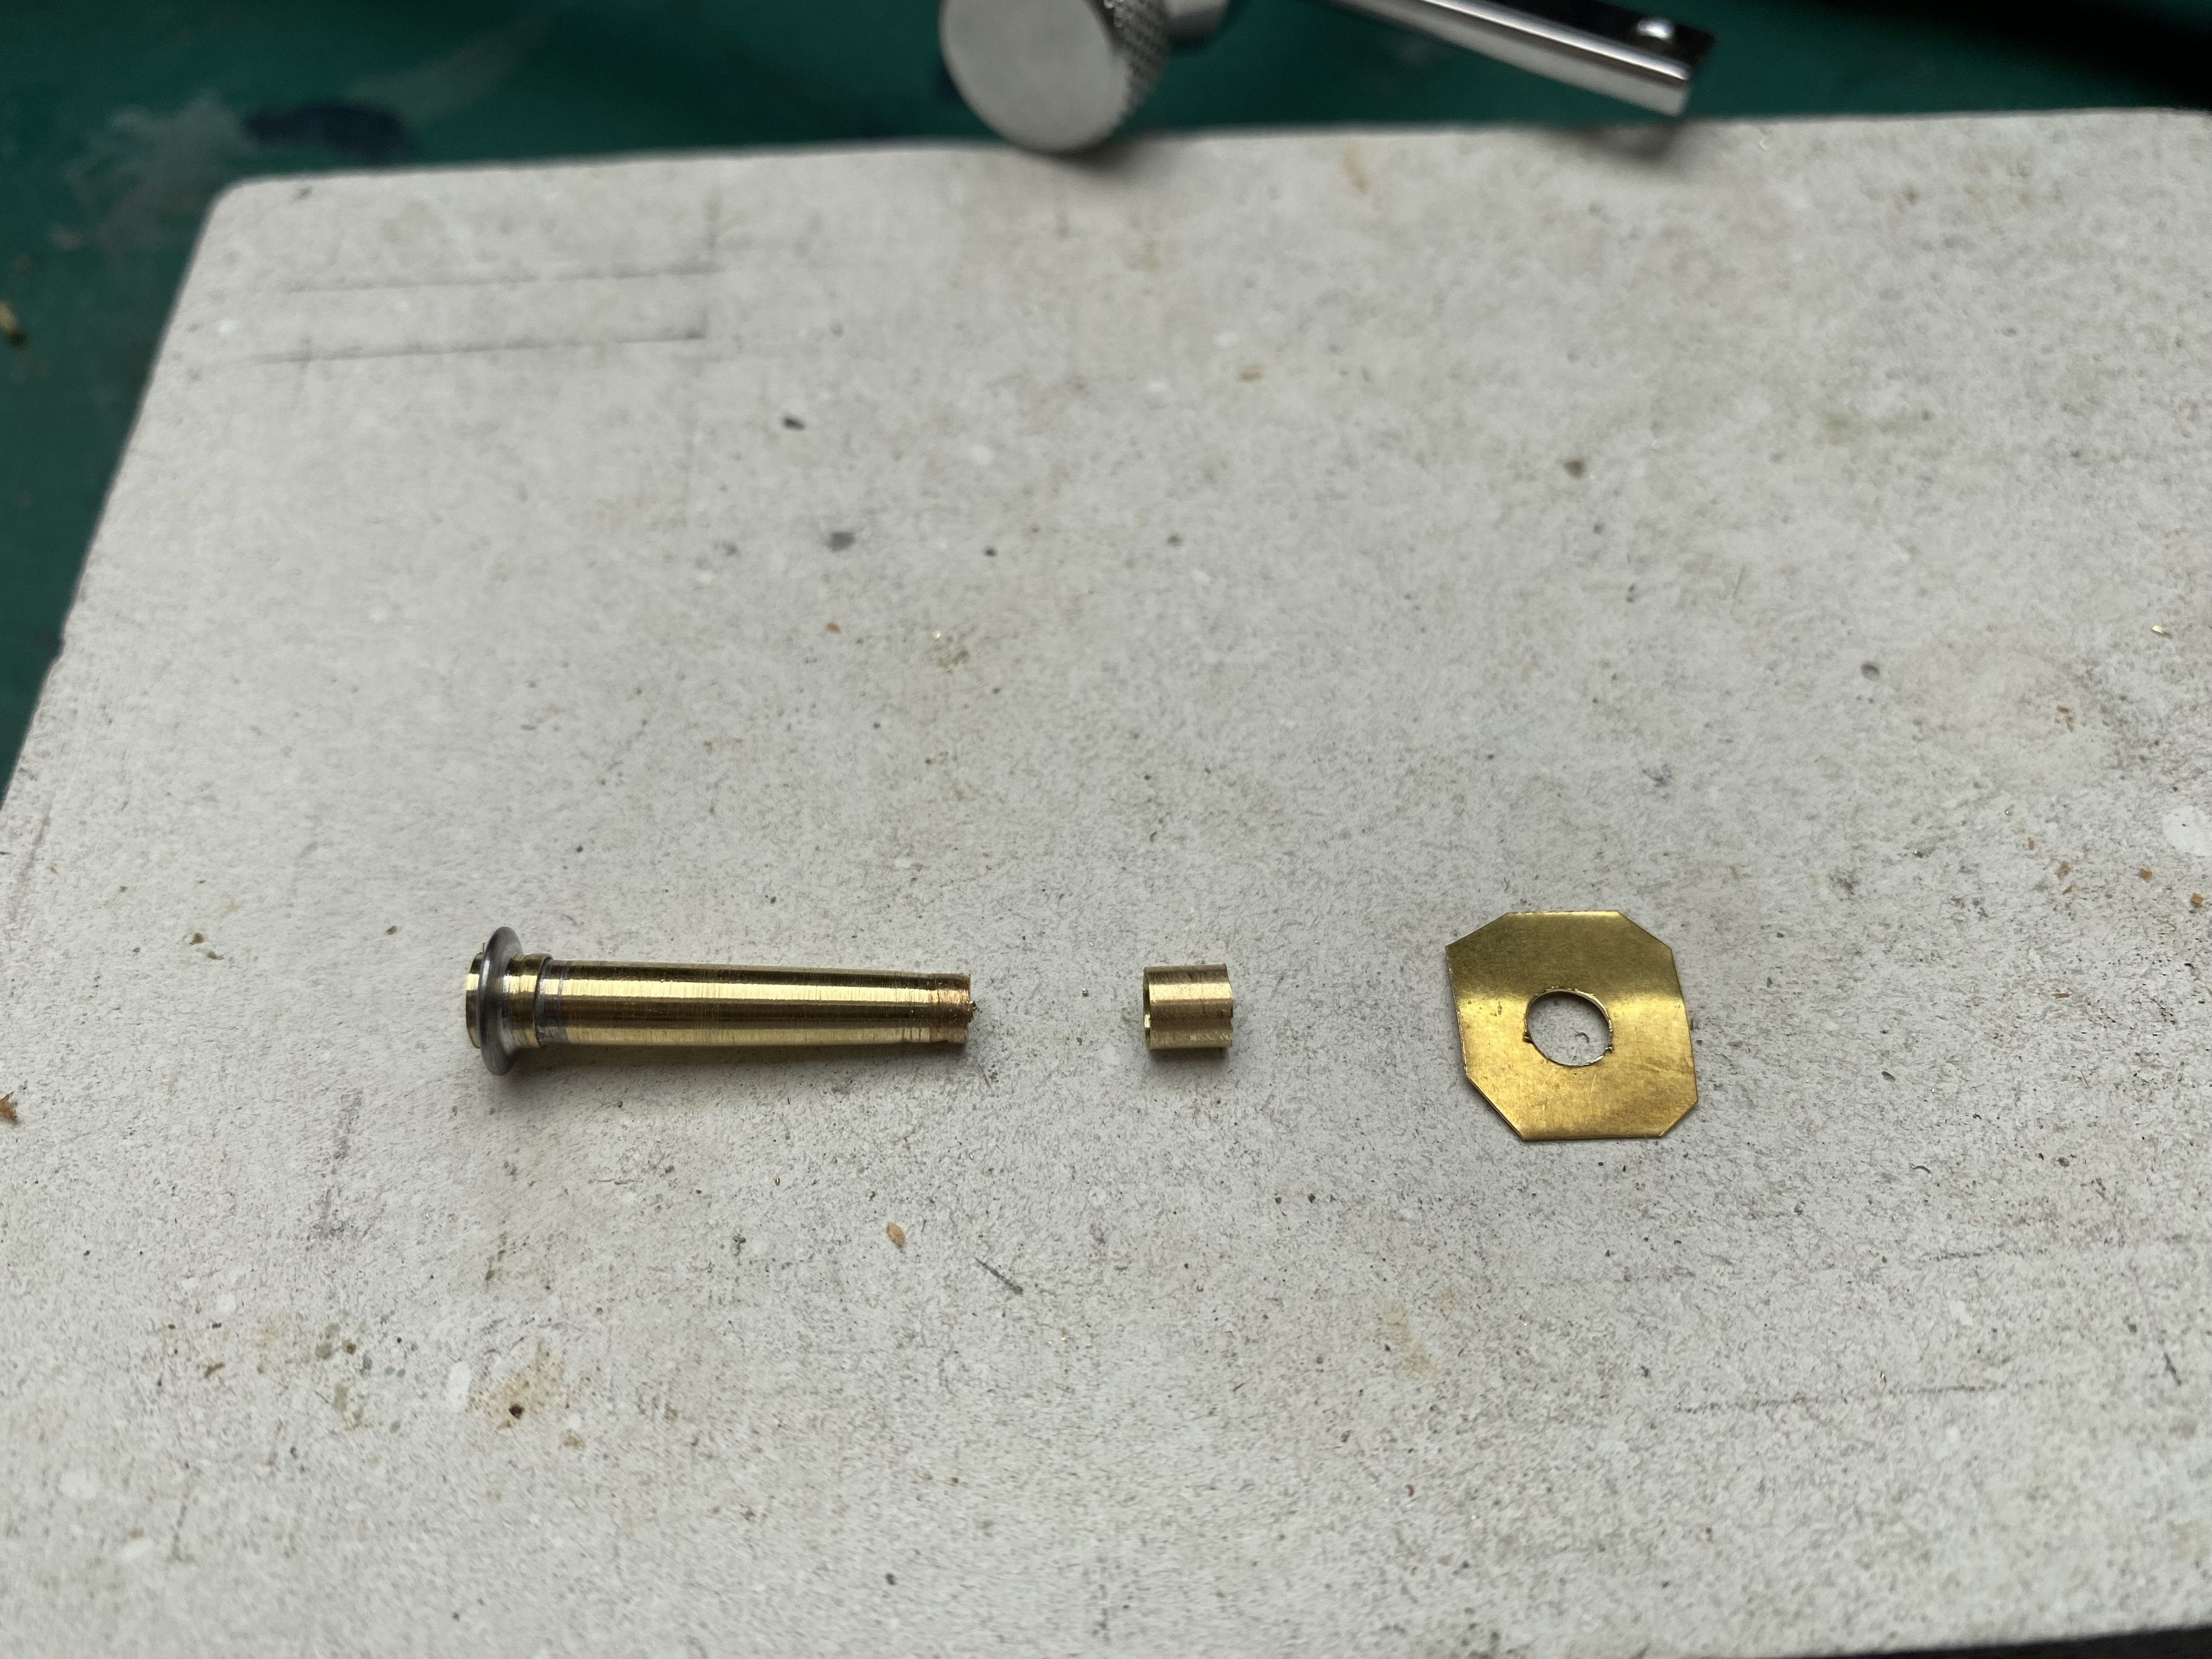
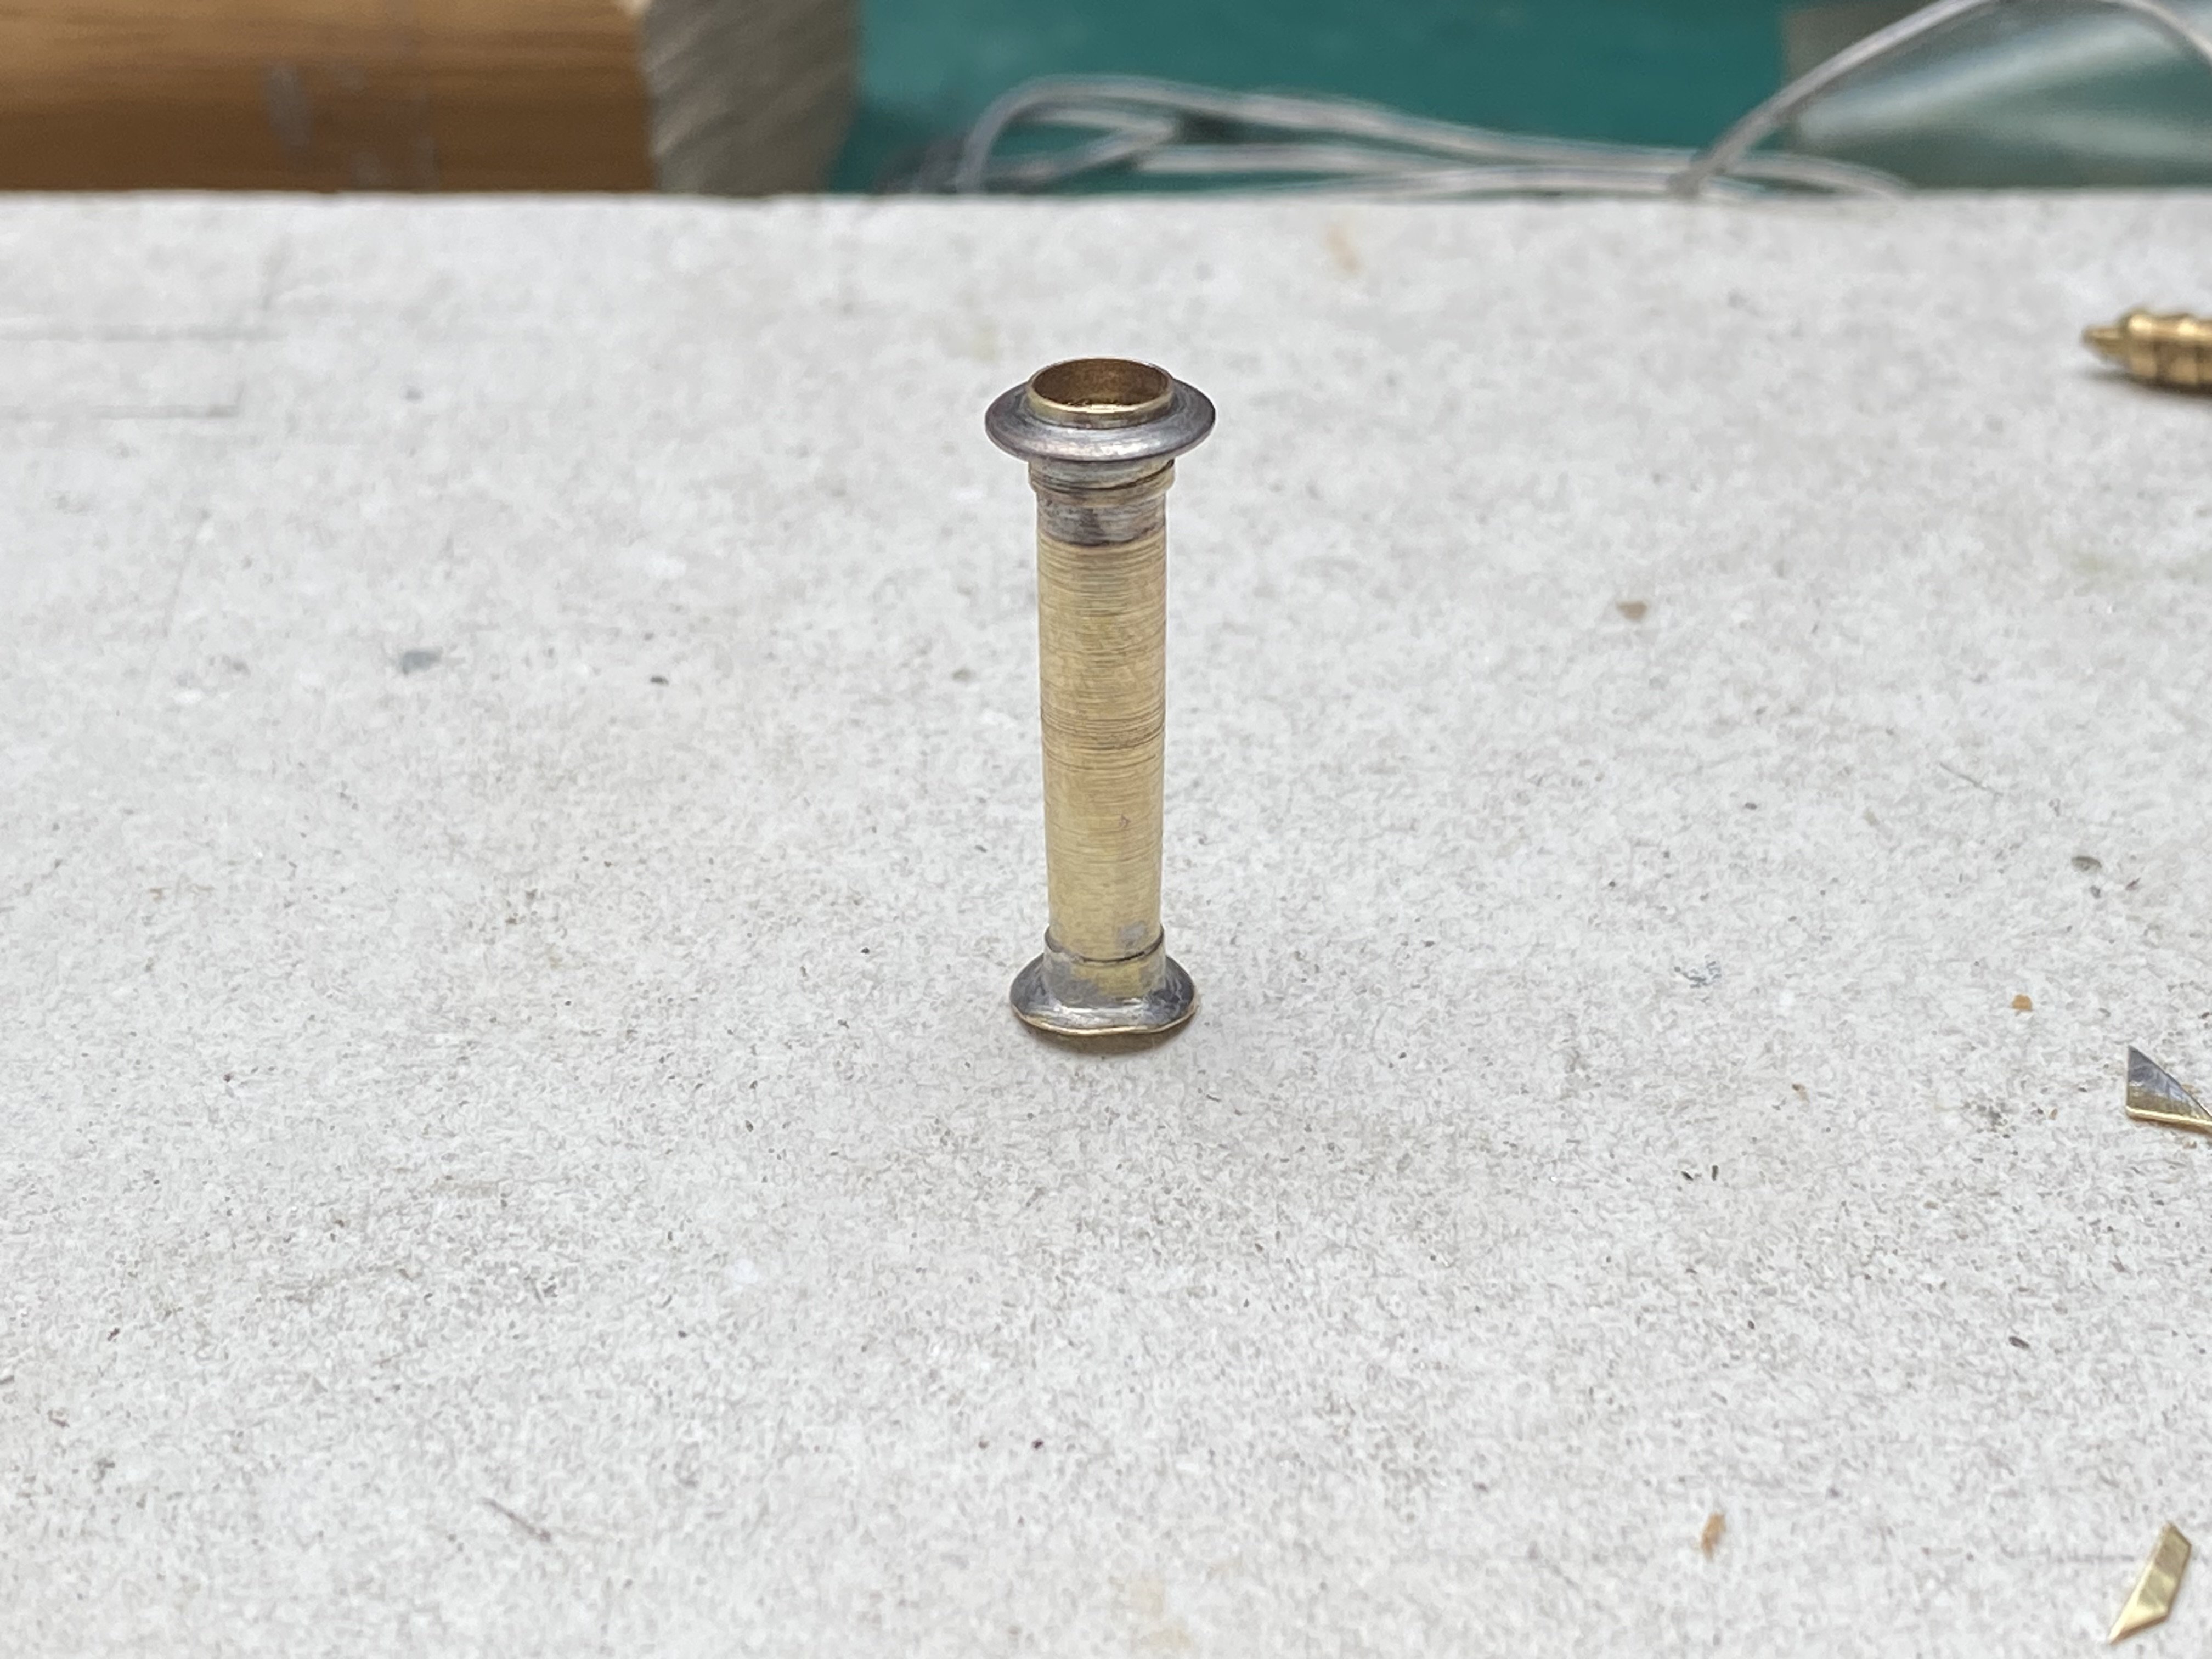
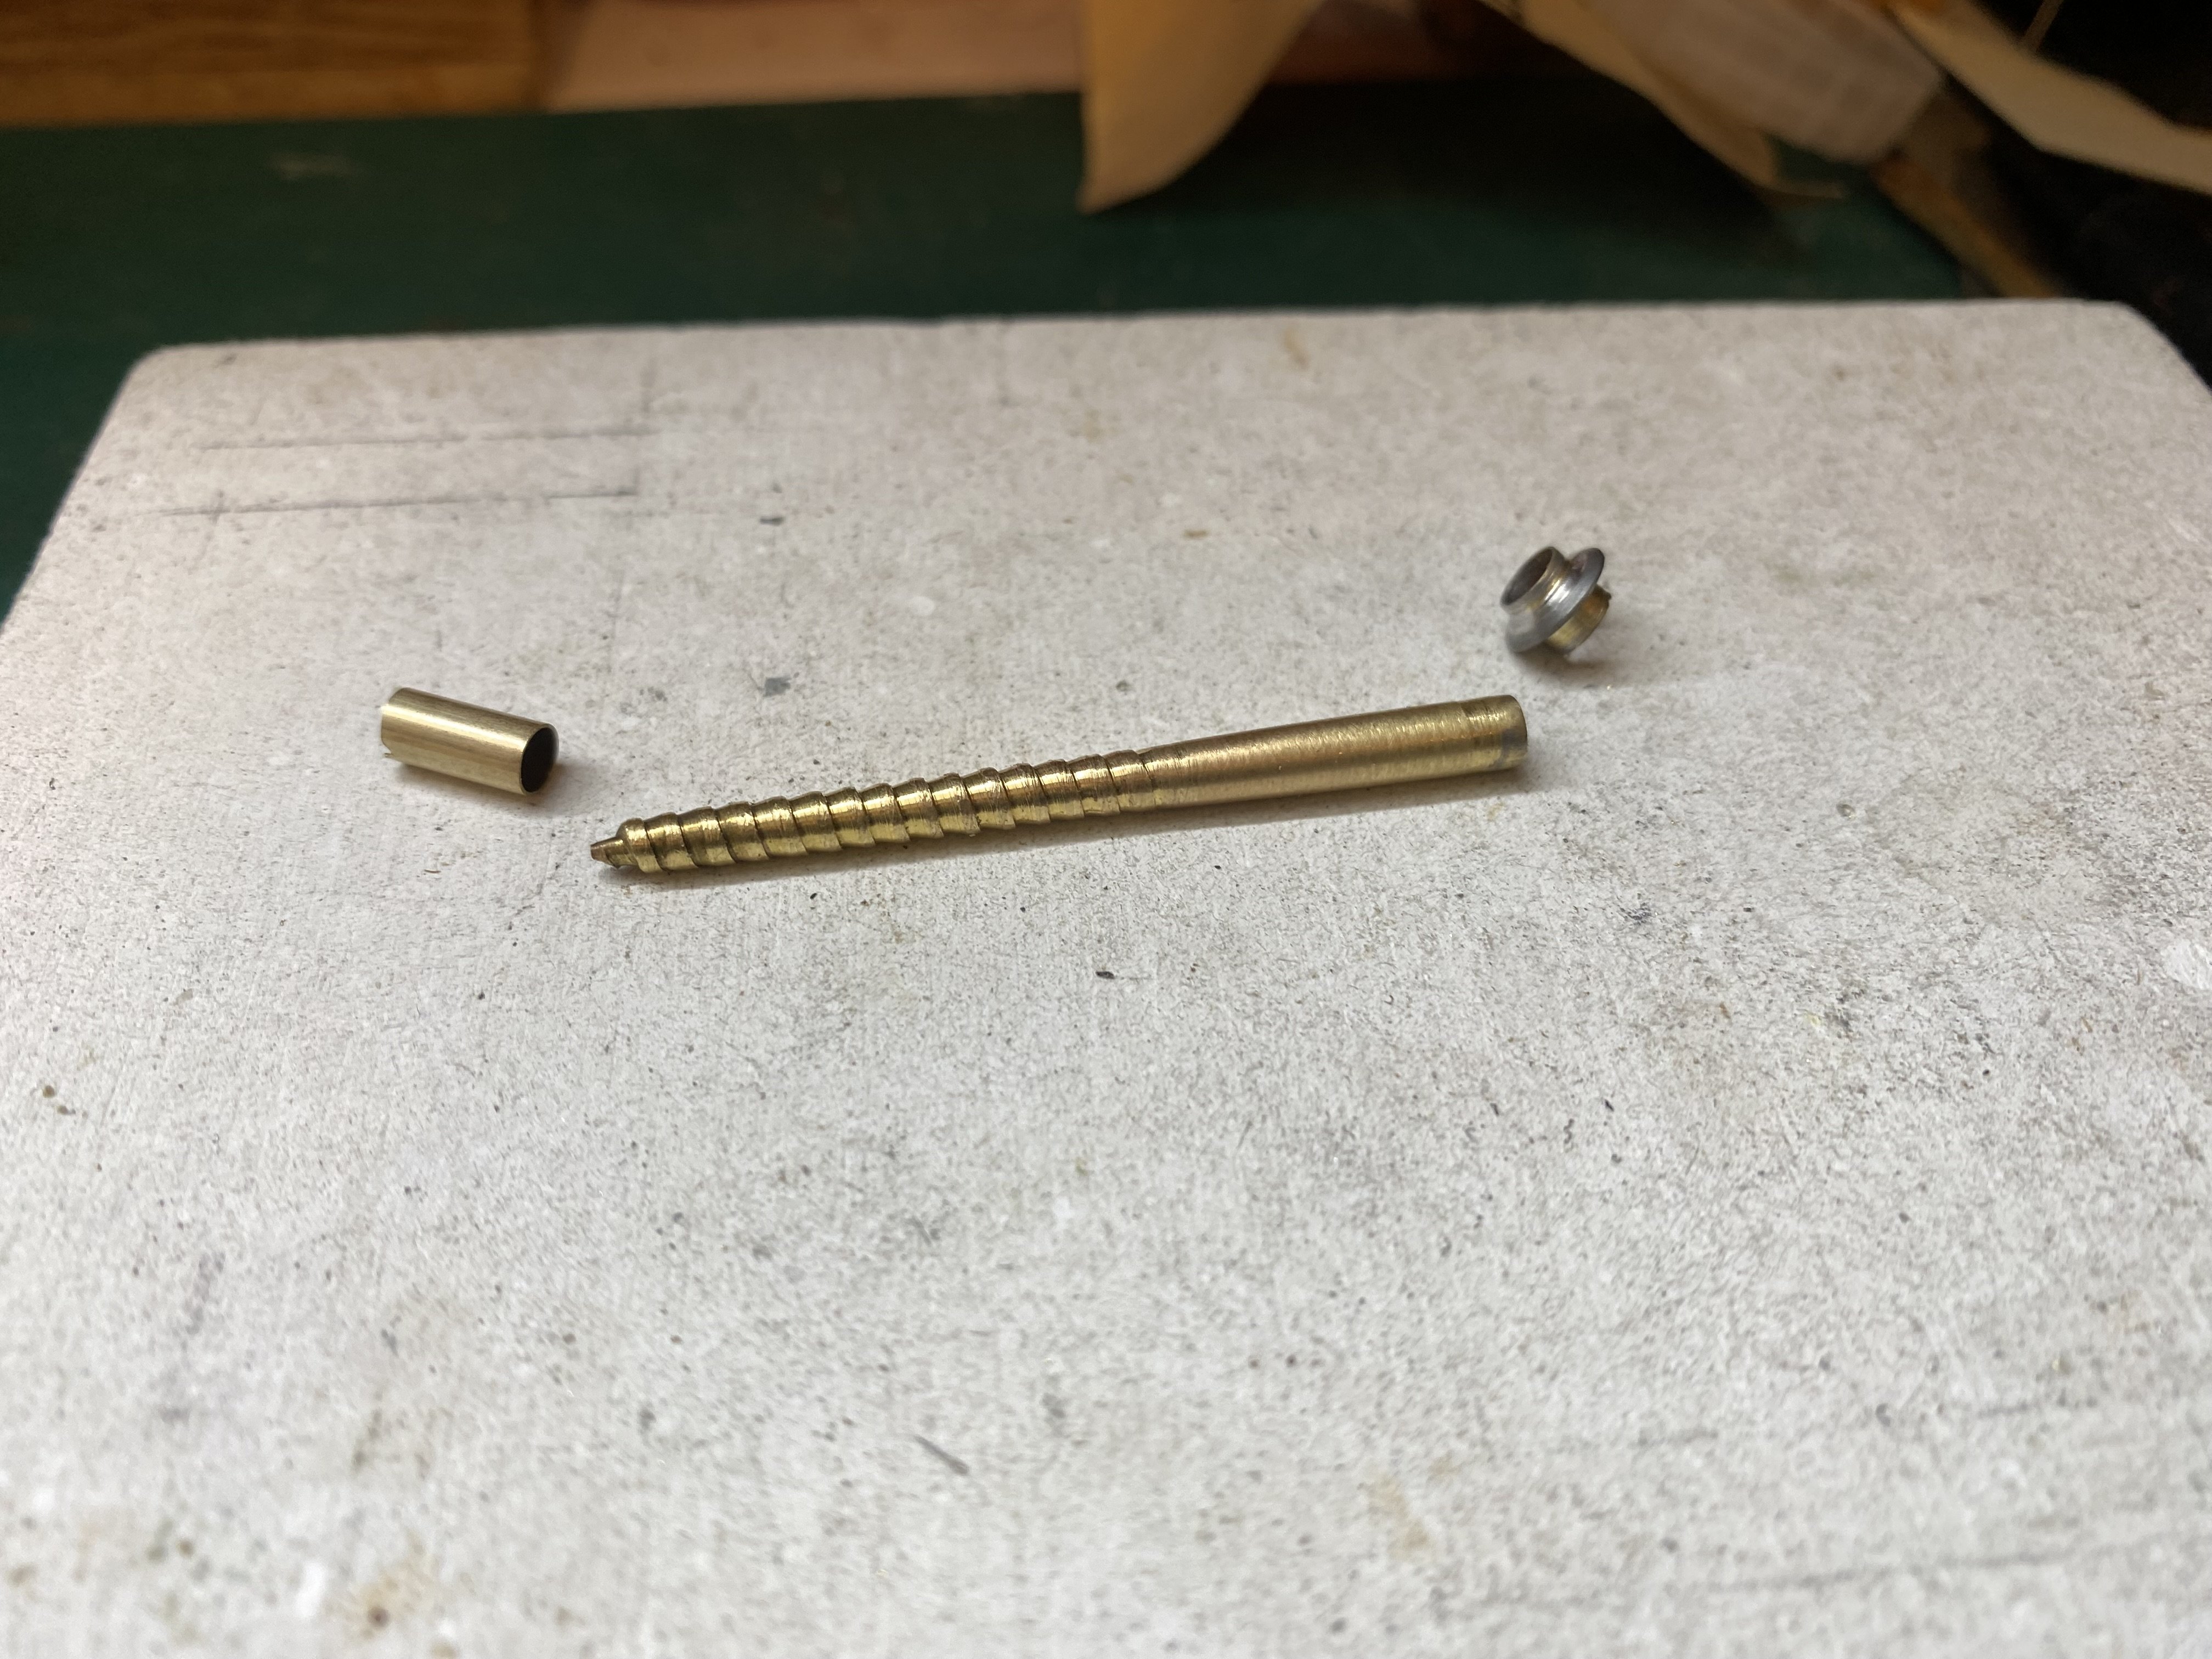
Impatience got the better of me (again) and I had another go at a chimney for Peckett using a big brass wood screw, two sizes of brass tube and a suitable washer. It took a fair bit of grinding in the trusty Black & Decker but I've managed to get a bit of a taper on it and I now have something useable if nothing better turns up. Knee deep in brass filings, Alan
- 779 replies
-
- 15
-
-
-
To clarify what I posted on 13.08, Smallbrook Studio does indeed sell individual parts from its ranges of kits. An email specifying your needs is all that's required to initiate an order. Alan
-
Beautiful! The shot of 170 on the bridge with her reflection in the water is just perfect.
-
You're certainly having a torrid time with that crane one way and another David. You seem to have been very unlucky with the shuttle unit. Very frustrating. It's a great model and deserves to be seen moving so I hope you can get it sorted before too much longer. Hang in there!
-
What a wonderful machine! And a beautiful model too.
-
Thanks David. I'd completely forgotten about Smallbrook, despite having this sitting at my elbow every time I use this computer That chimney looks pretty close to what I need. I've had a look at the Smallbrook website and it seems they may have discontinued selling single bits from their kits. I'll try an email anyway and see what transpires. Some of the Laurie Griffin chimneys come close but the problem is likely to be size as much as shape. Peckett is a 7mm/foot model but its dimensions are closer to a 4mm model. The original really is tiny. I'm not familiar with ScaleFactor and couldn't find anything on-line. Do you have a weblink for them? Regards Alan
-
Thanks J-Mo. That’s probably the best solution but I don’t have the tools or skills to do that yet
-
Thank you very much. It’s a bit of a fudge but I think it will look ok once it’s in place
-
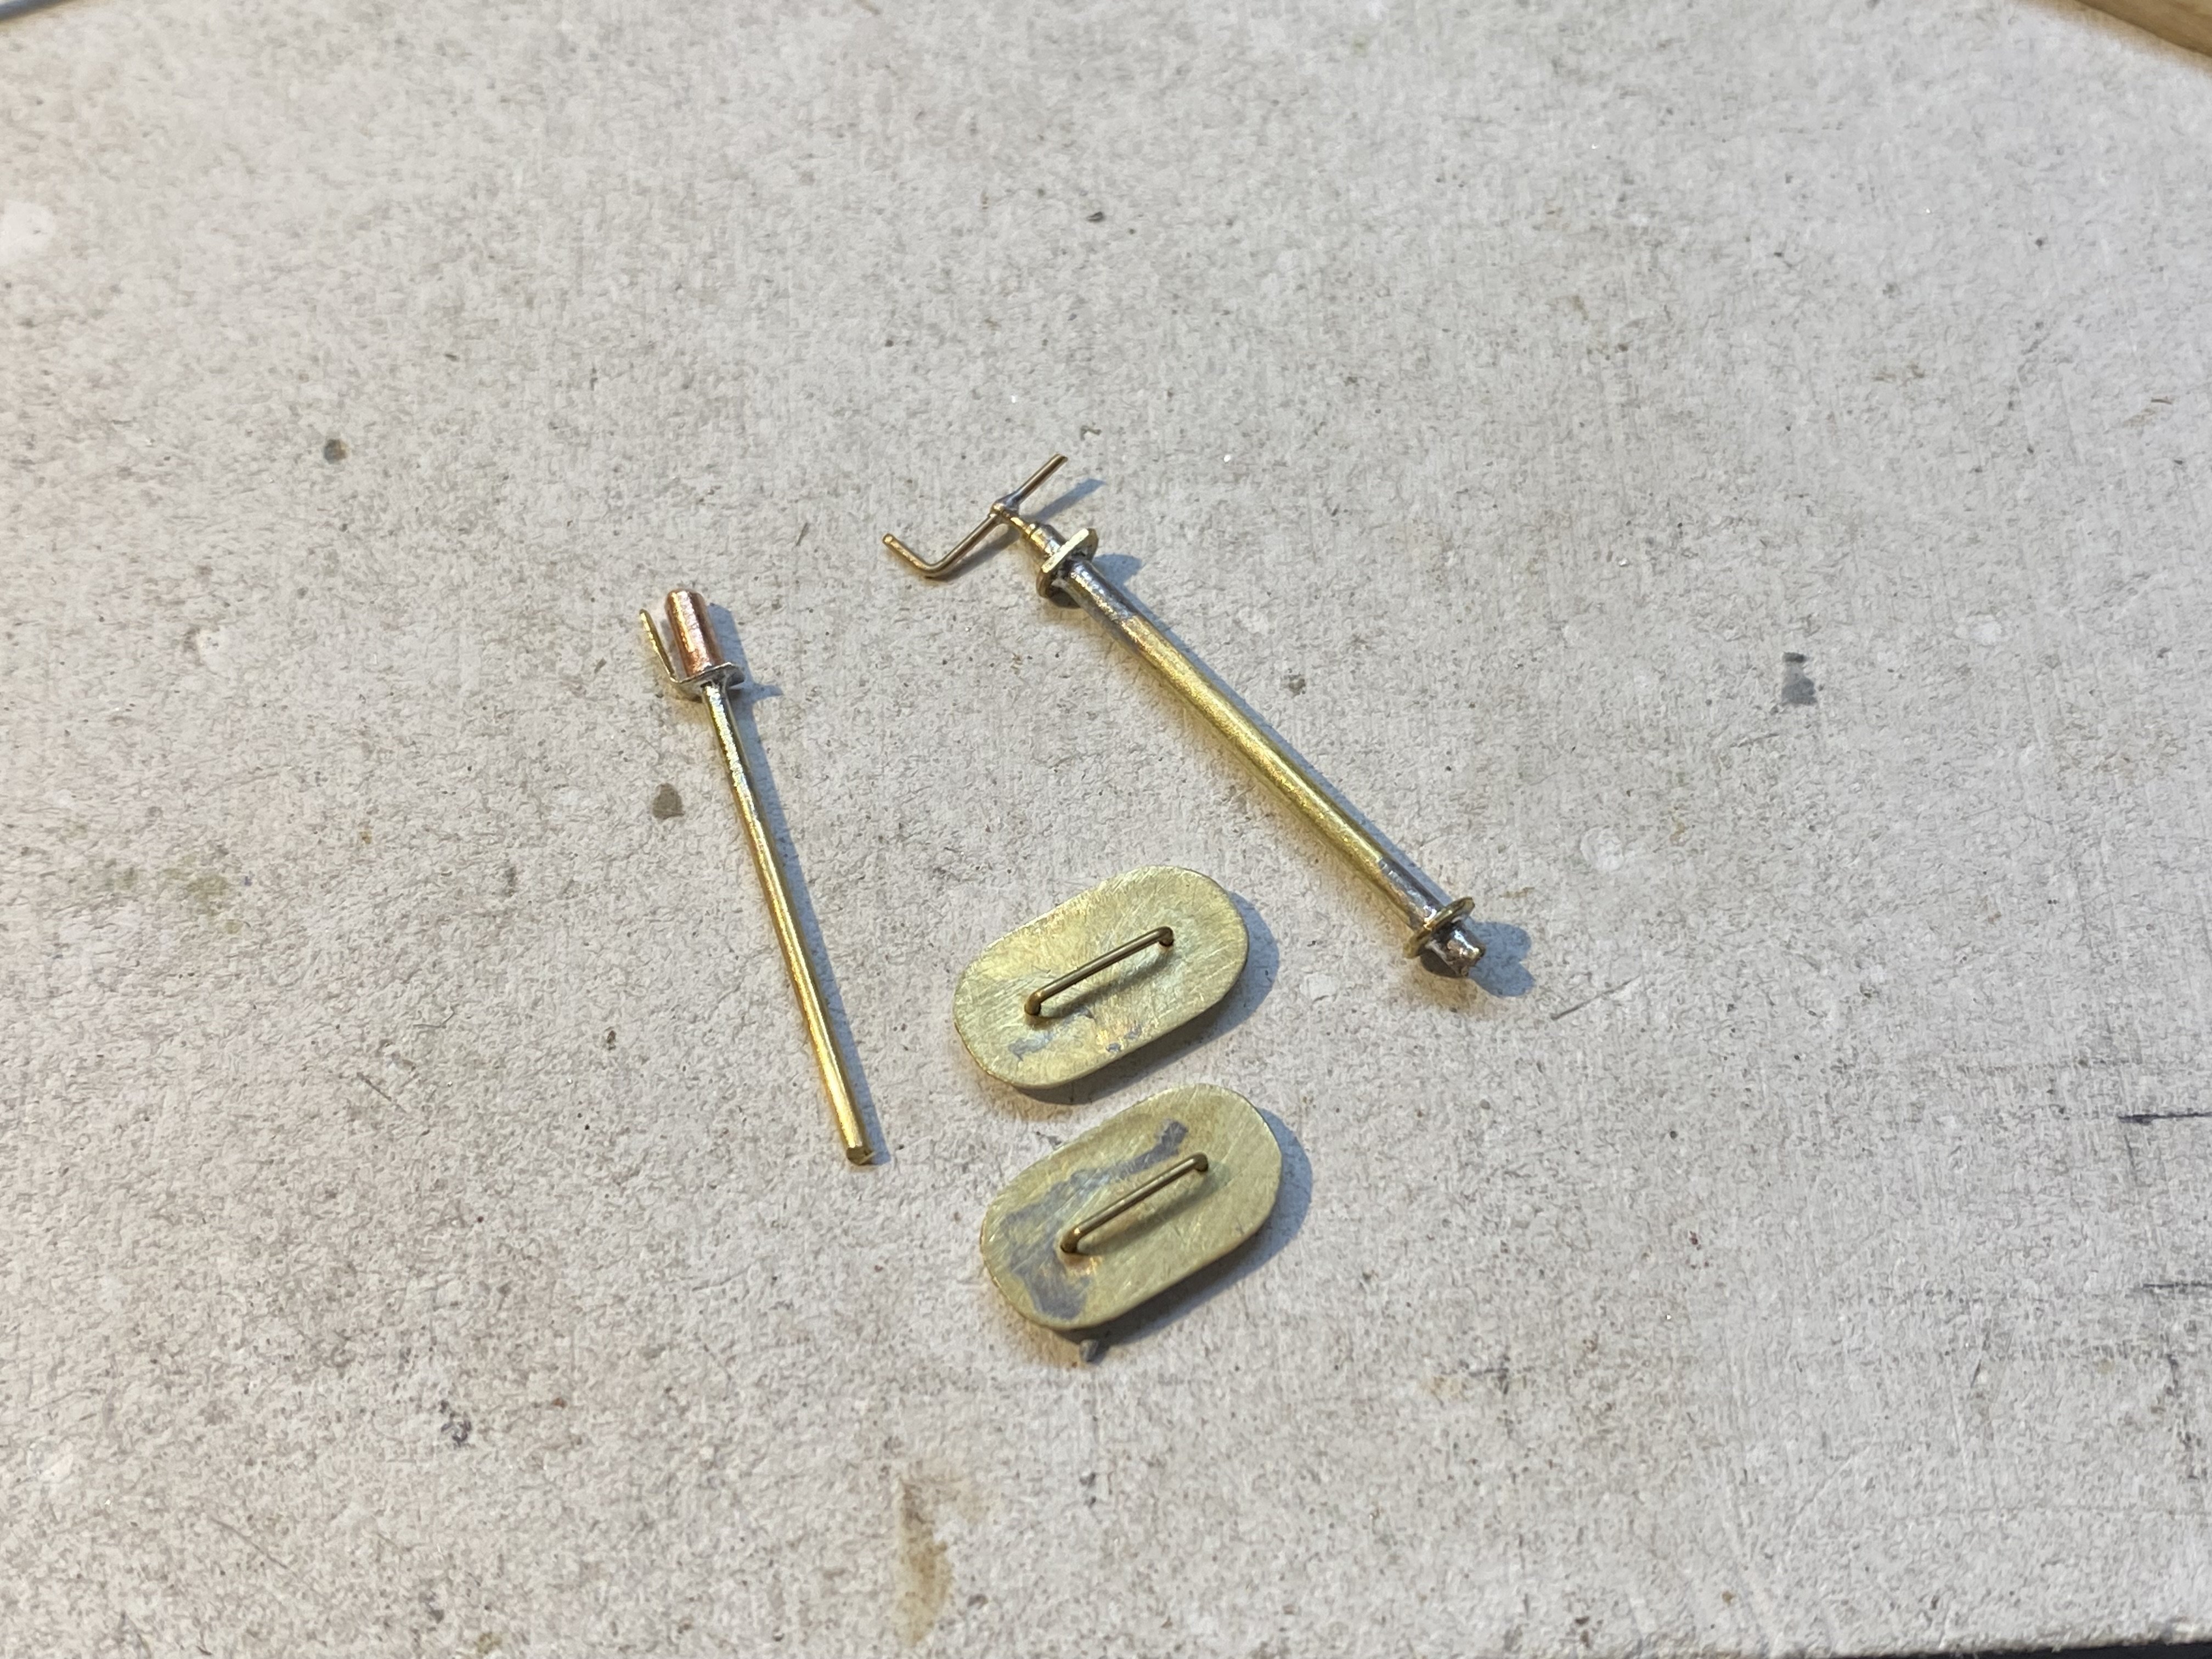
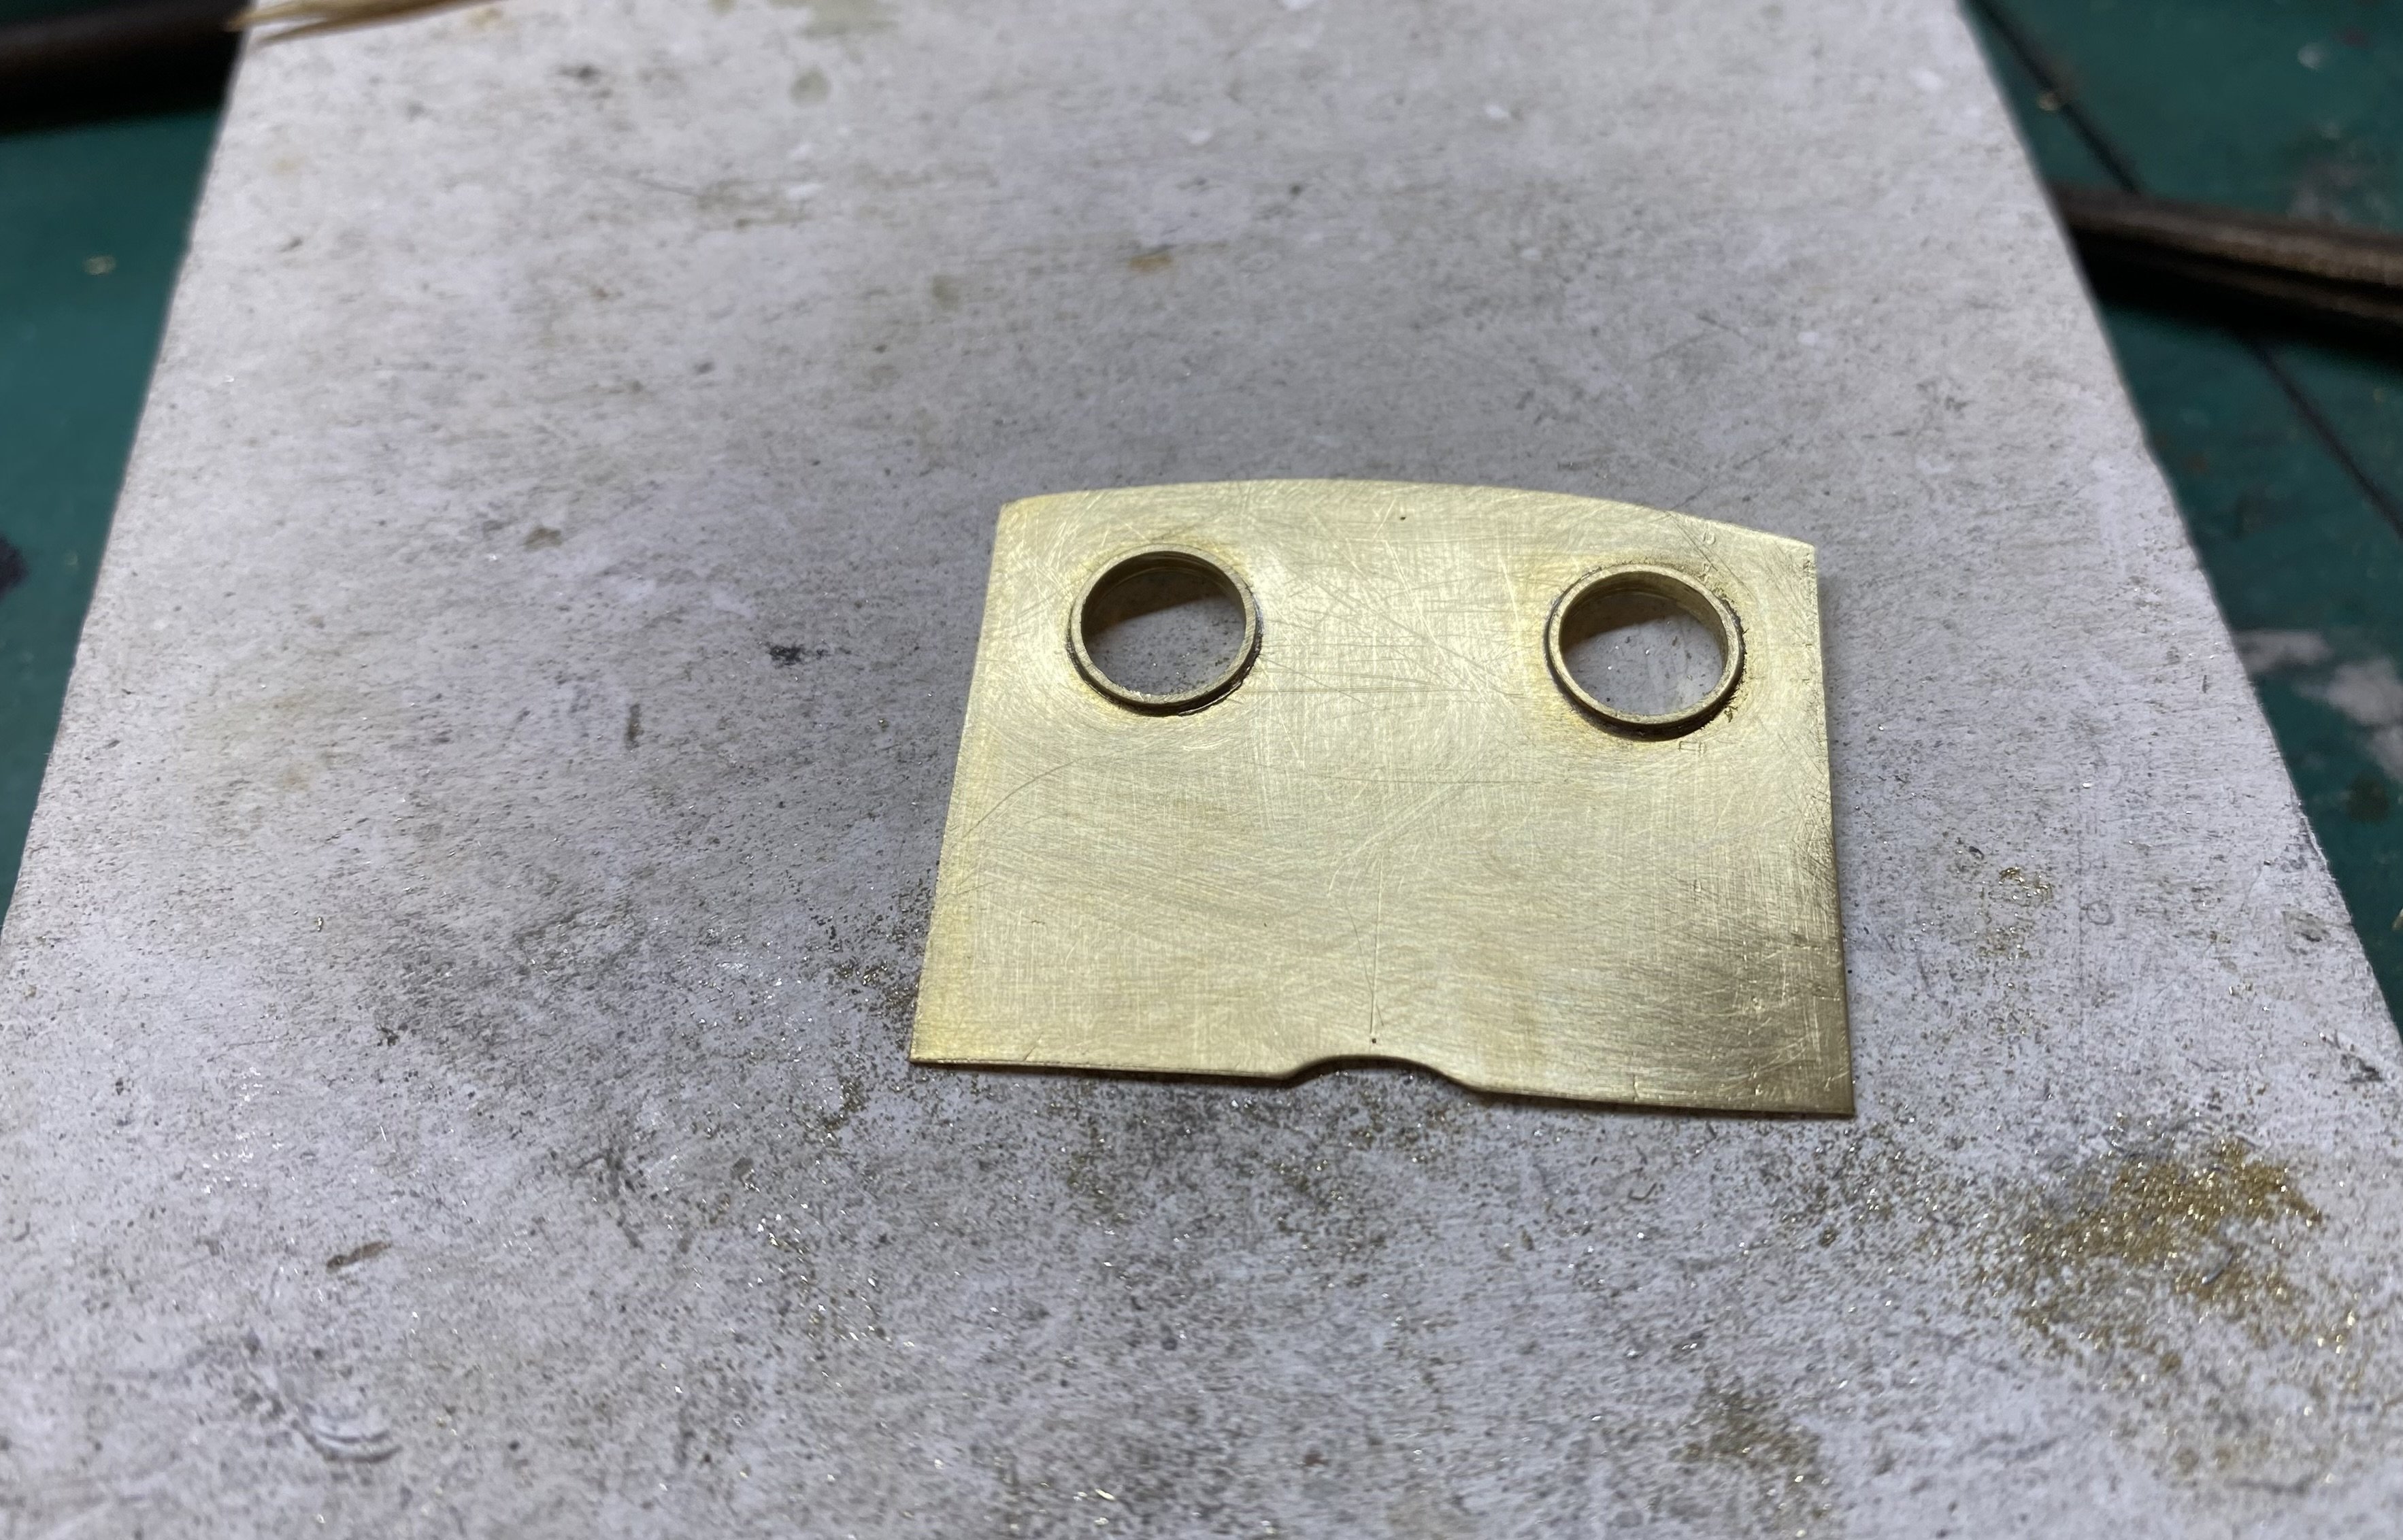
Some small Peckettbits - cab controls and a pair of tank fillers. The boiler also gained a few fittings this week. Don't look too closely at all that plumbing. It doesn't really make a lot of sense but I was aiming for something that looks reasonably steam-enginey. By the time it's buried inside the cab and the driver gets in there with his shovel, flask, lunch tin and paper, it may be hard to see anyway. With a bit of luck. The chimney has so far defied me. It's tall and slim and some nested brass tube would have done the job except that it tapers from top to bottom. Mine may well not do that. Alan
- 779 replies
-
- 14
-
-
-
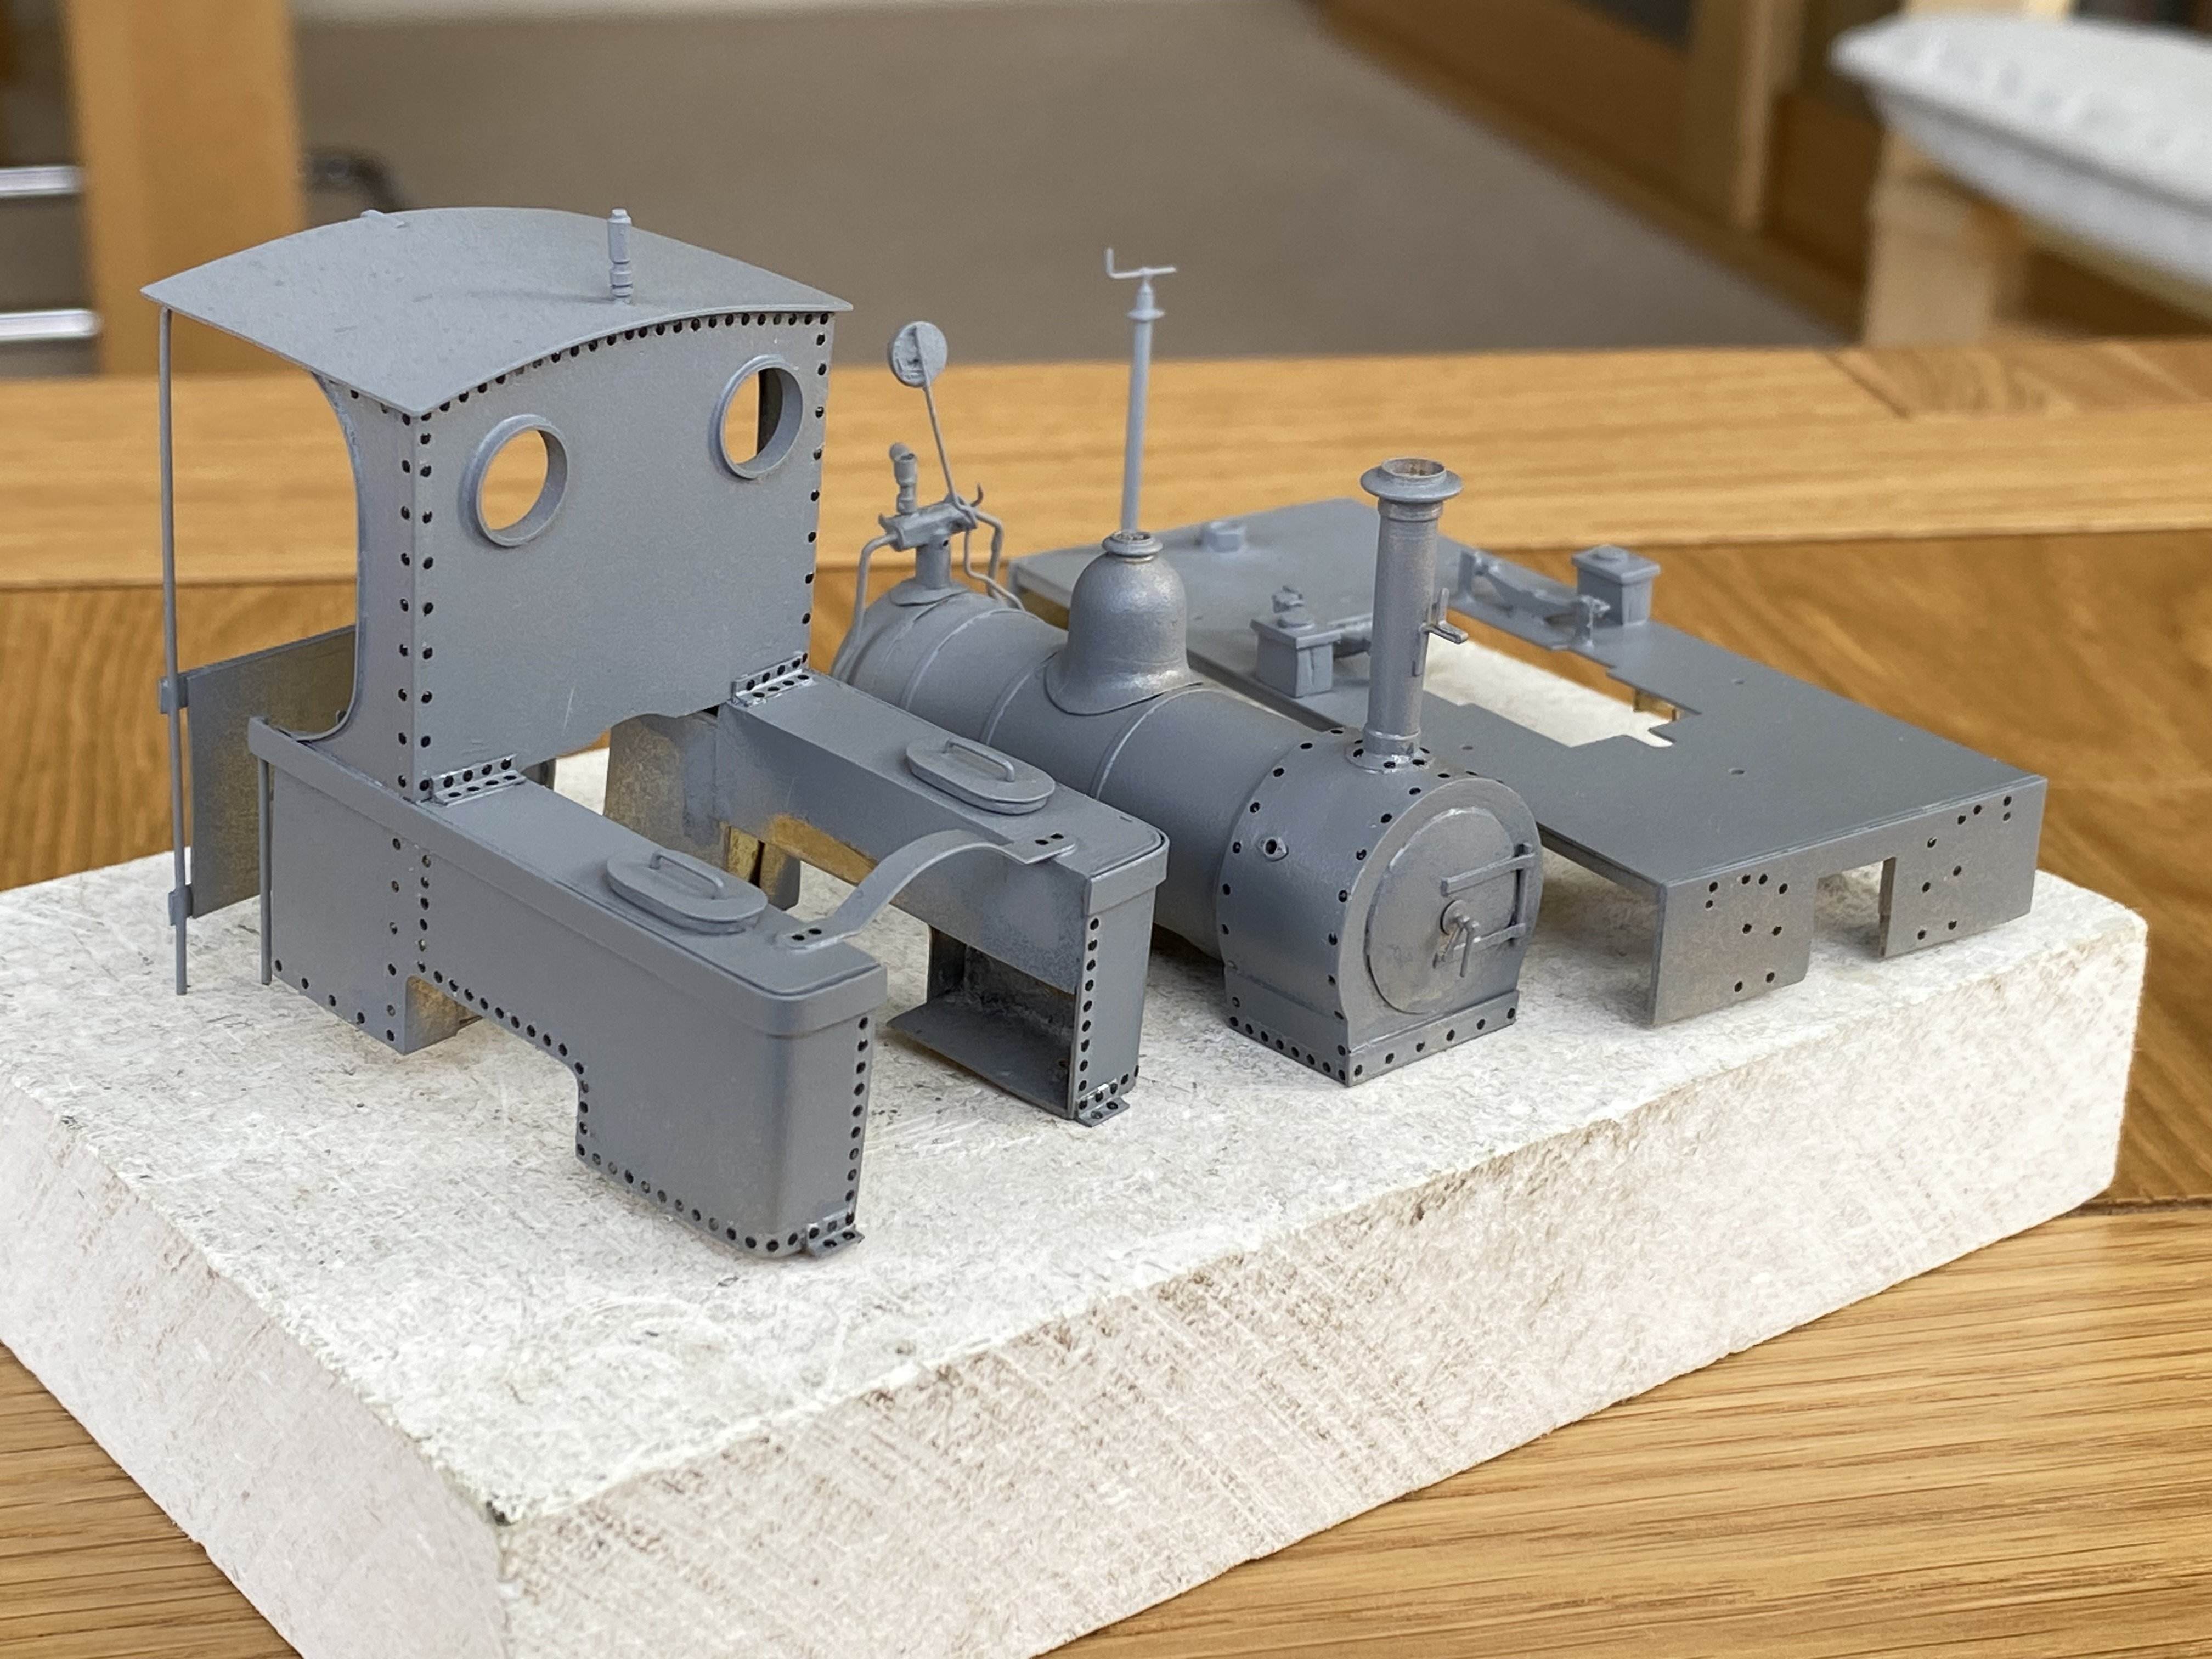
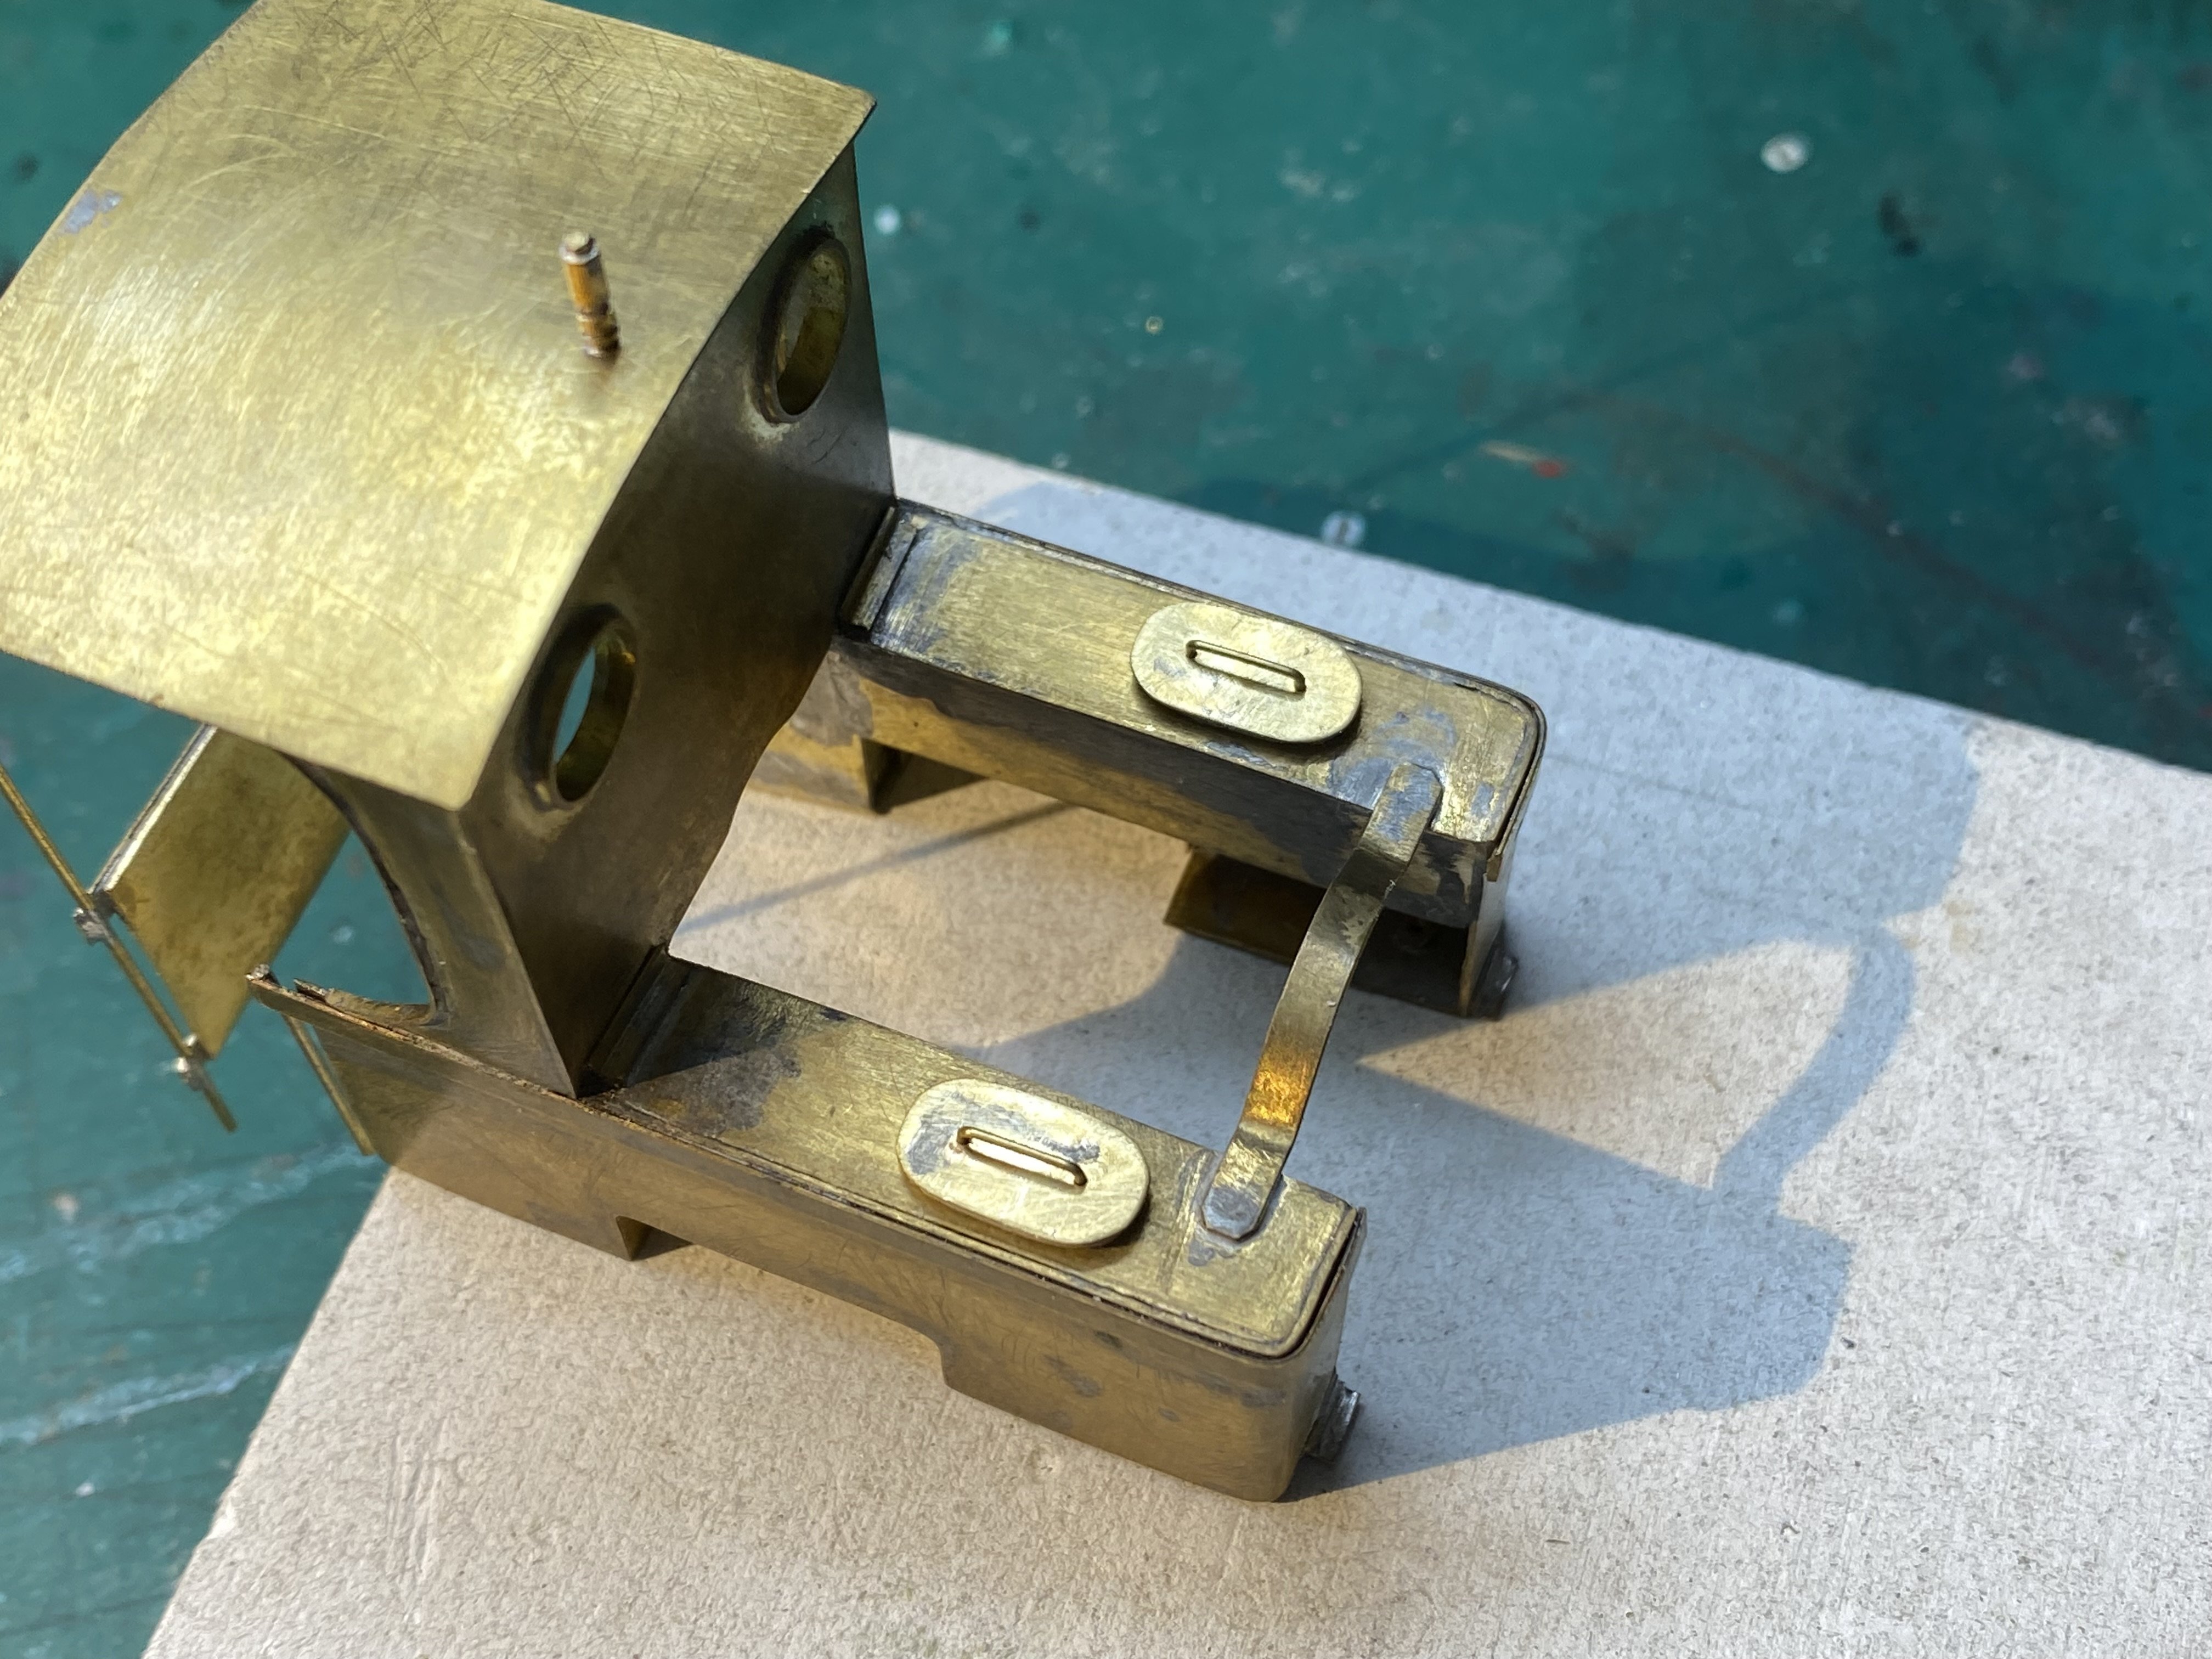
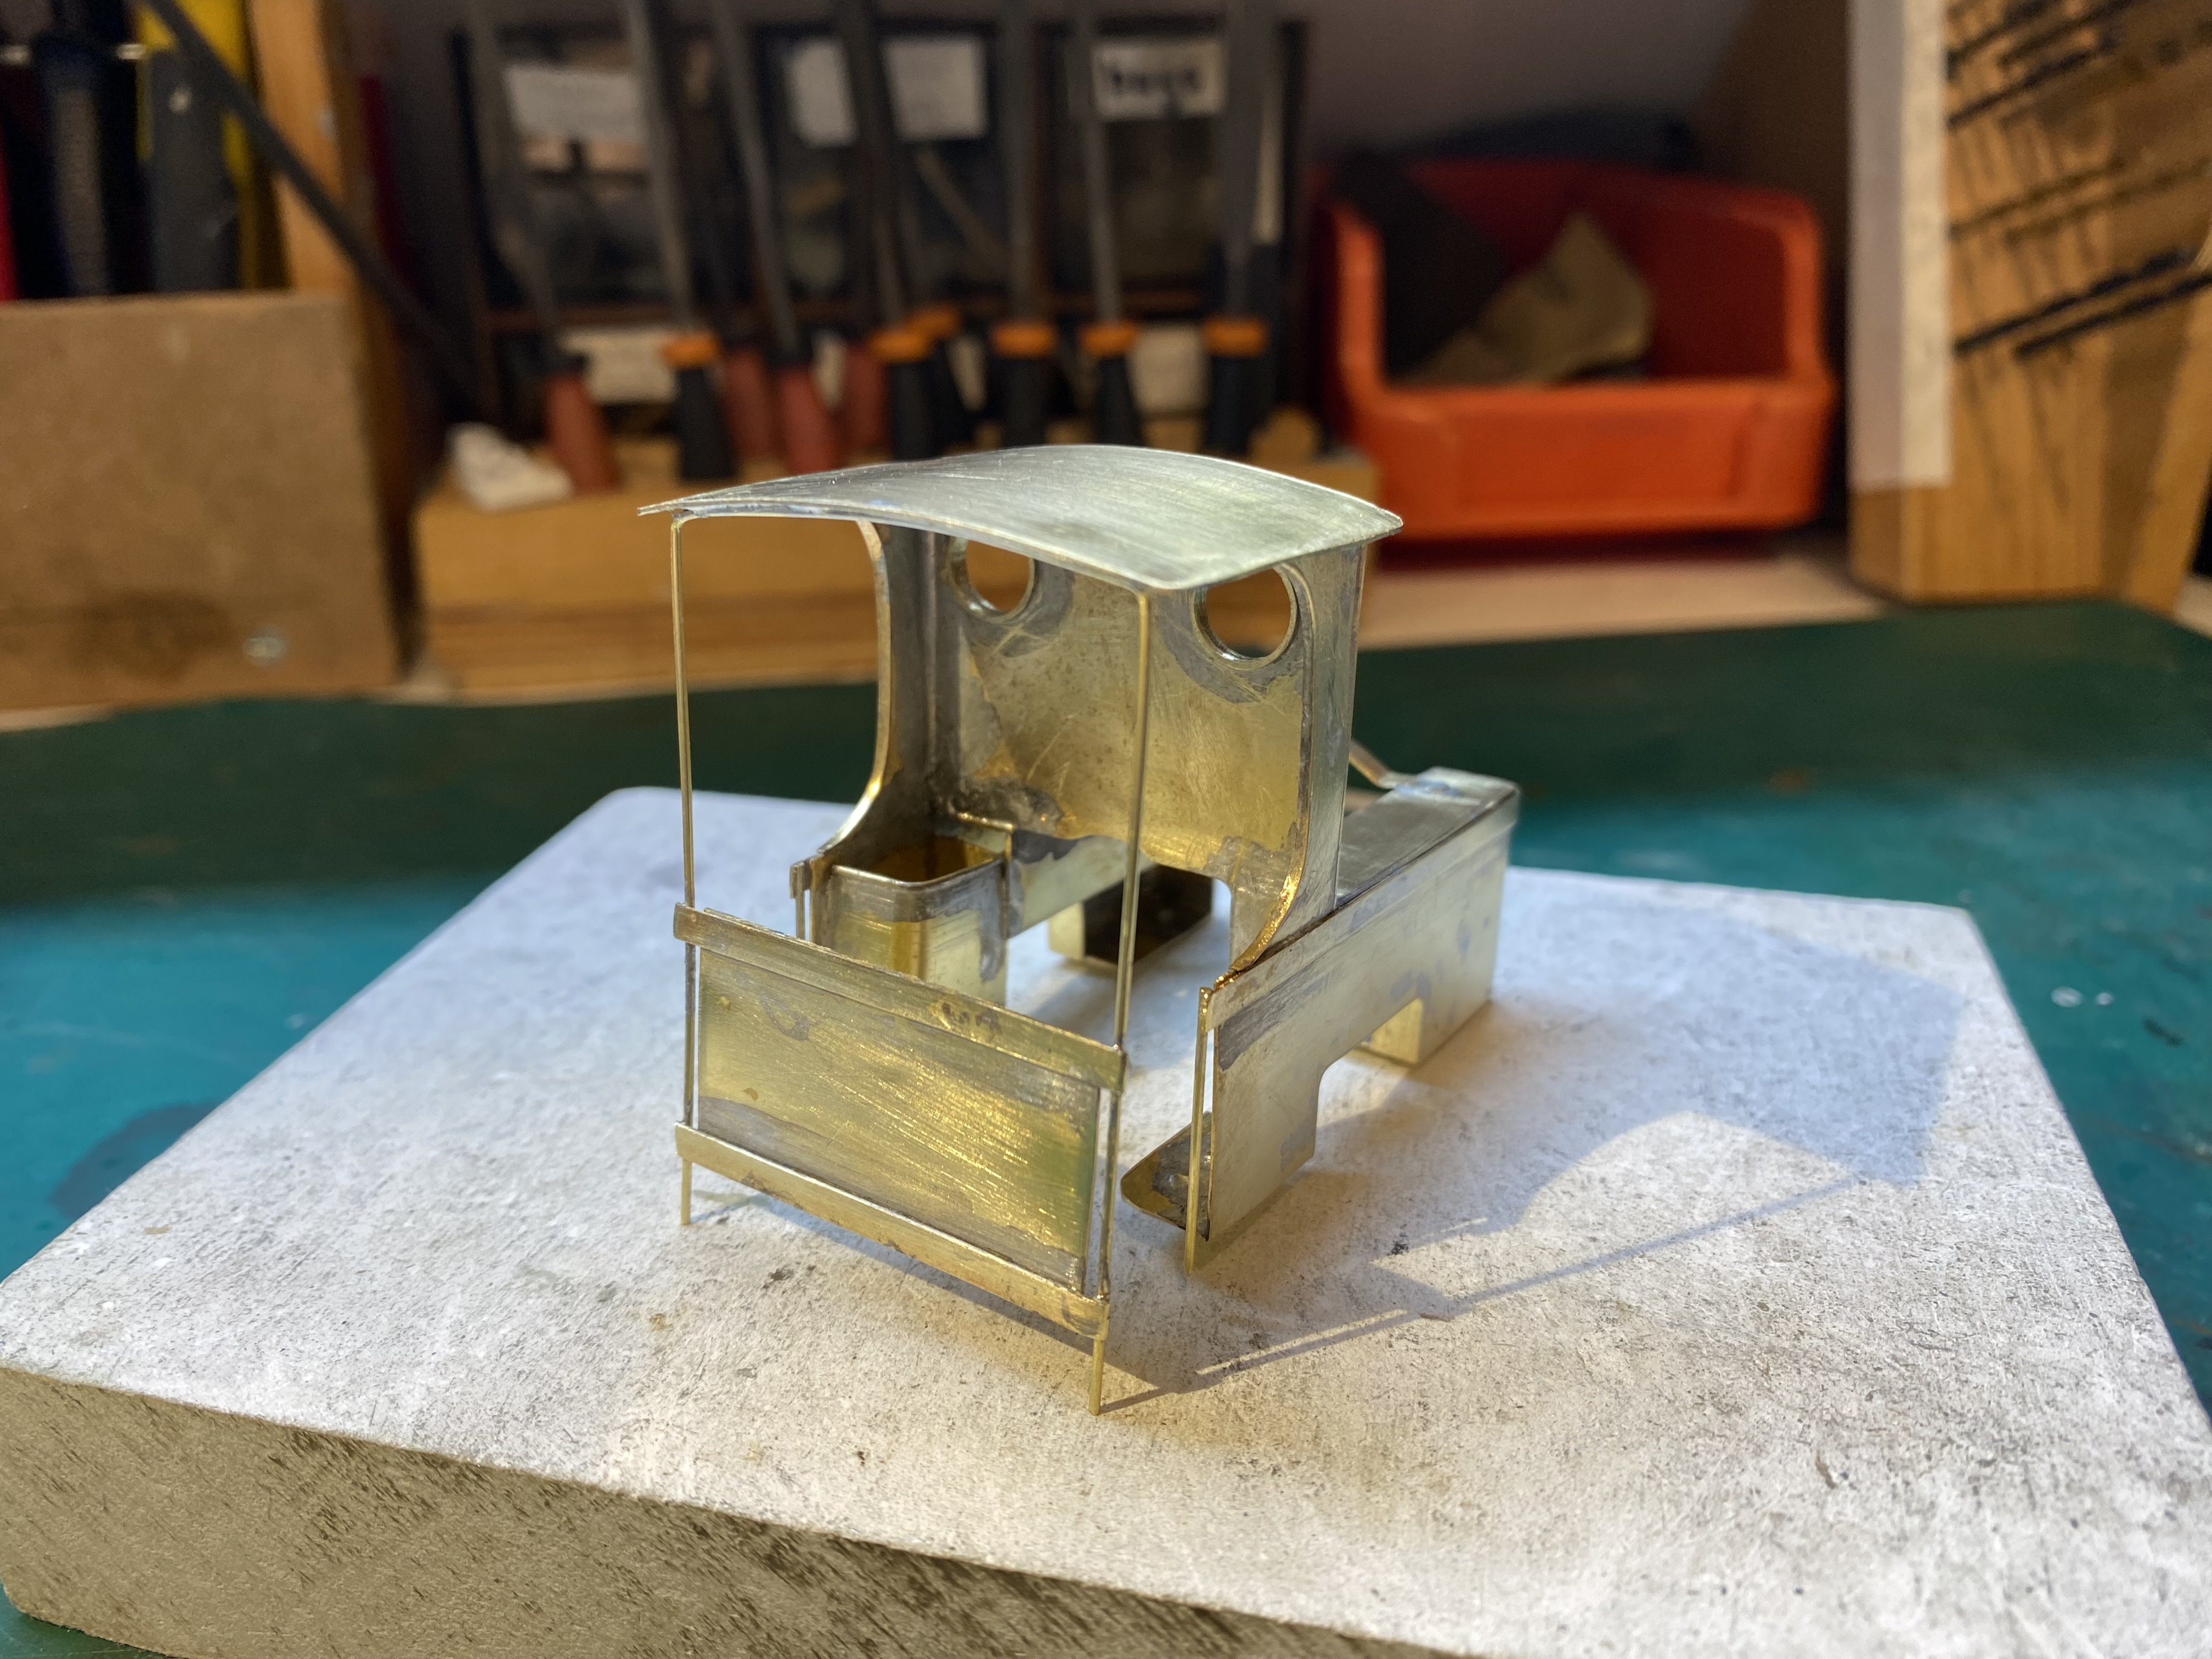
Wet Sunday so more indoor activity down the Peckett Works. The cab is no longer defying gravity at the back. The job was quite tricky - it felt as if I was soldering fresh air to fresh air a lot of the time. The various handrails slot into holes drilled in the running plate and it's quite strong once it's bolted down. Peckett now has a bunker too though it hardly qualifies as one. More coal scuttle than coal bunker. The coal it can hold might have got a BCDR Baltic as far as the end of the platform at Queen's Quay. Need to think about cobbling together a backhead for this one. No hiding place in such an open cab Alan
-
Fascinating stuff John. So much skill and ingenuity. Reading Derek Naylor's account of making coupling rods from Dinky hair curlers, chassis frames from curtain rail and bodywork from Oxo tins, I'm reminded how fortunate we are now in terms of available materials and components. Alan
-
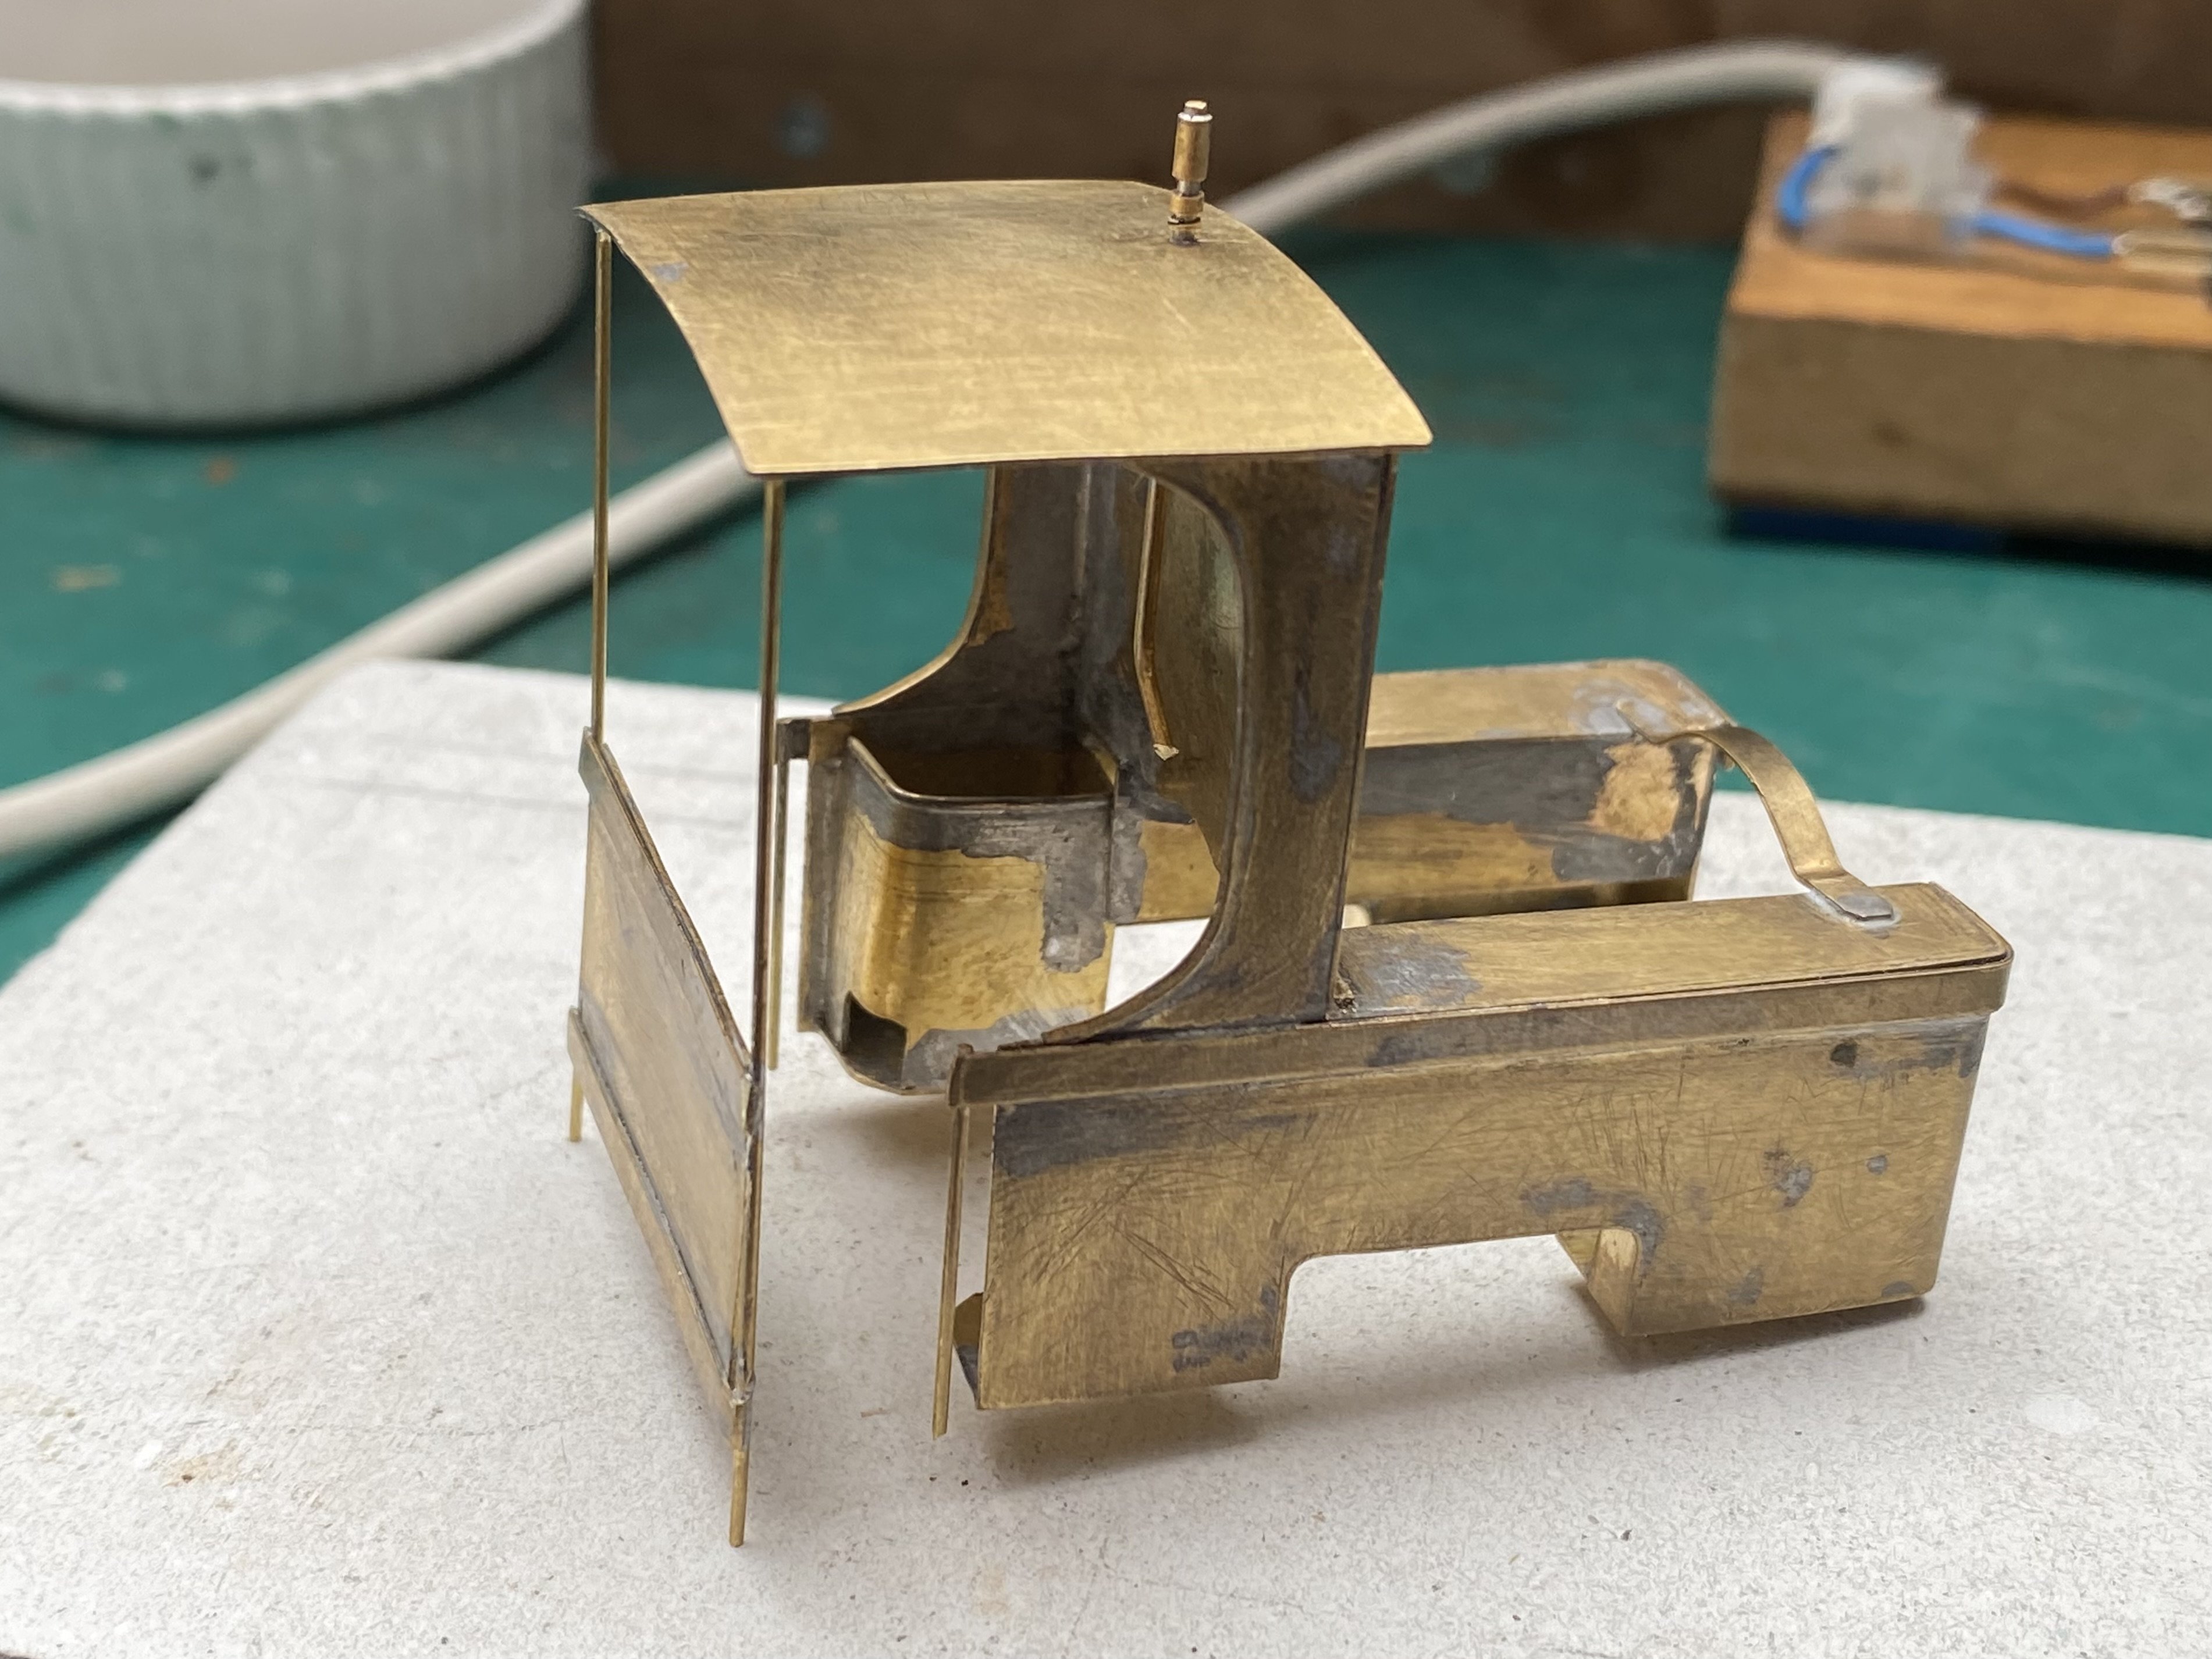
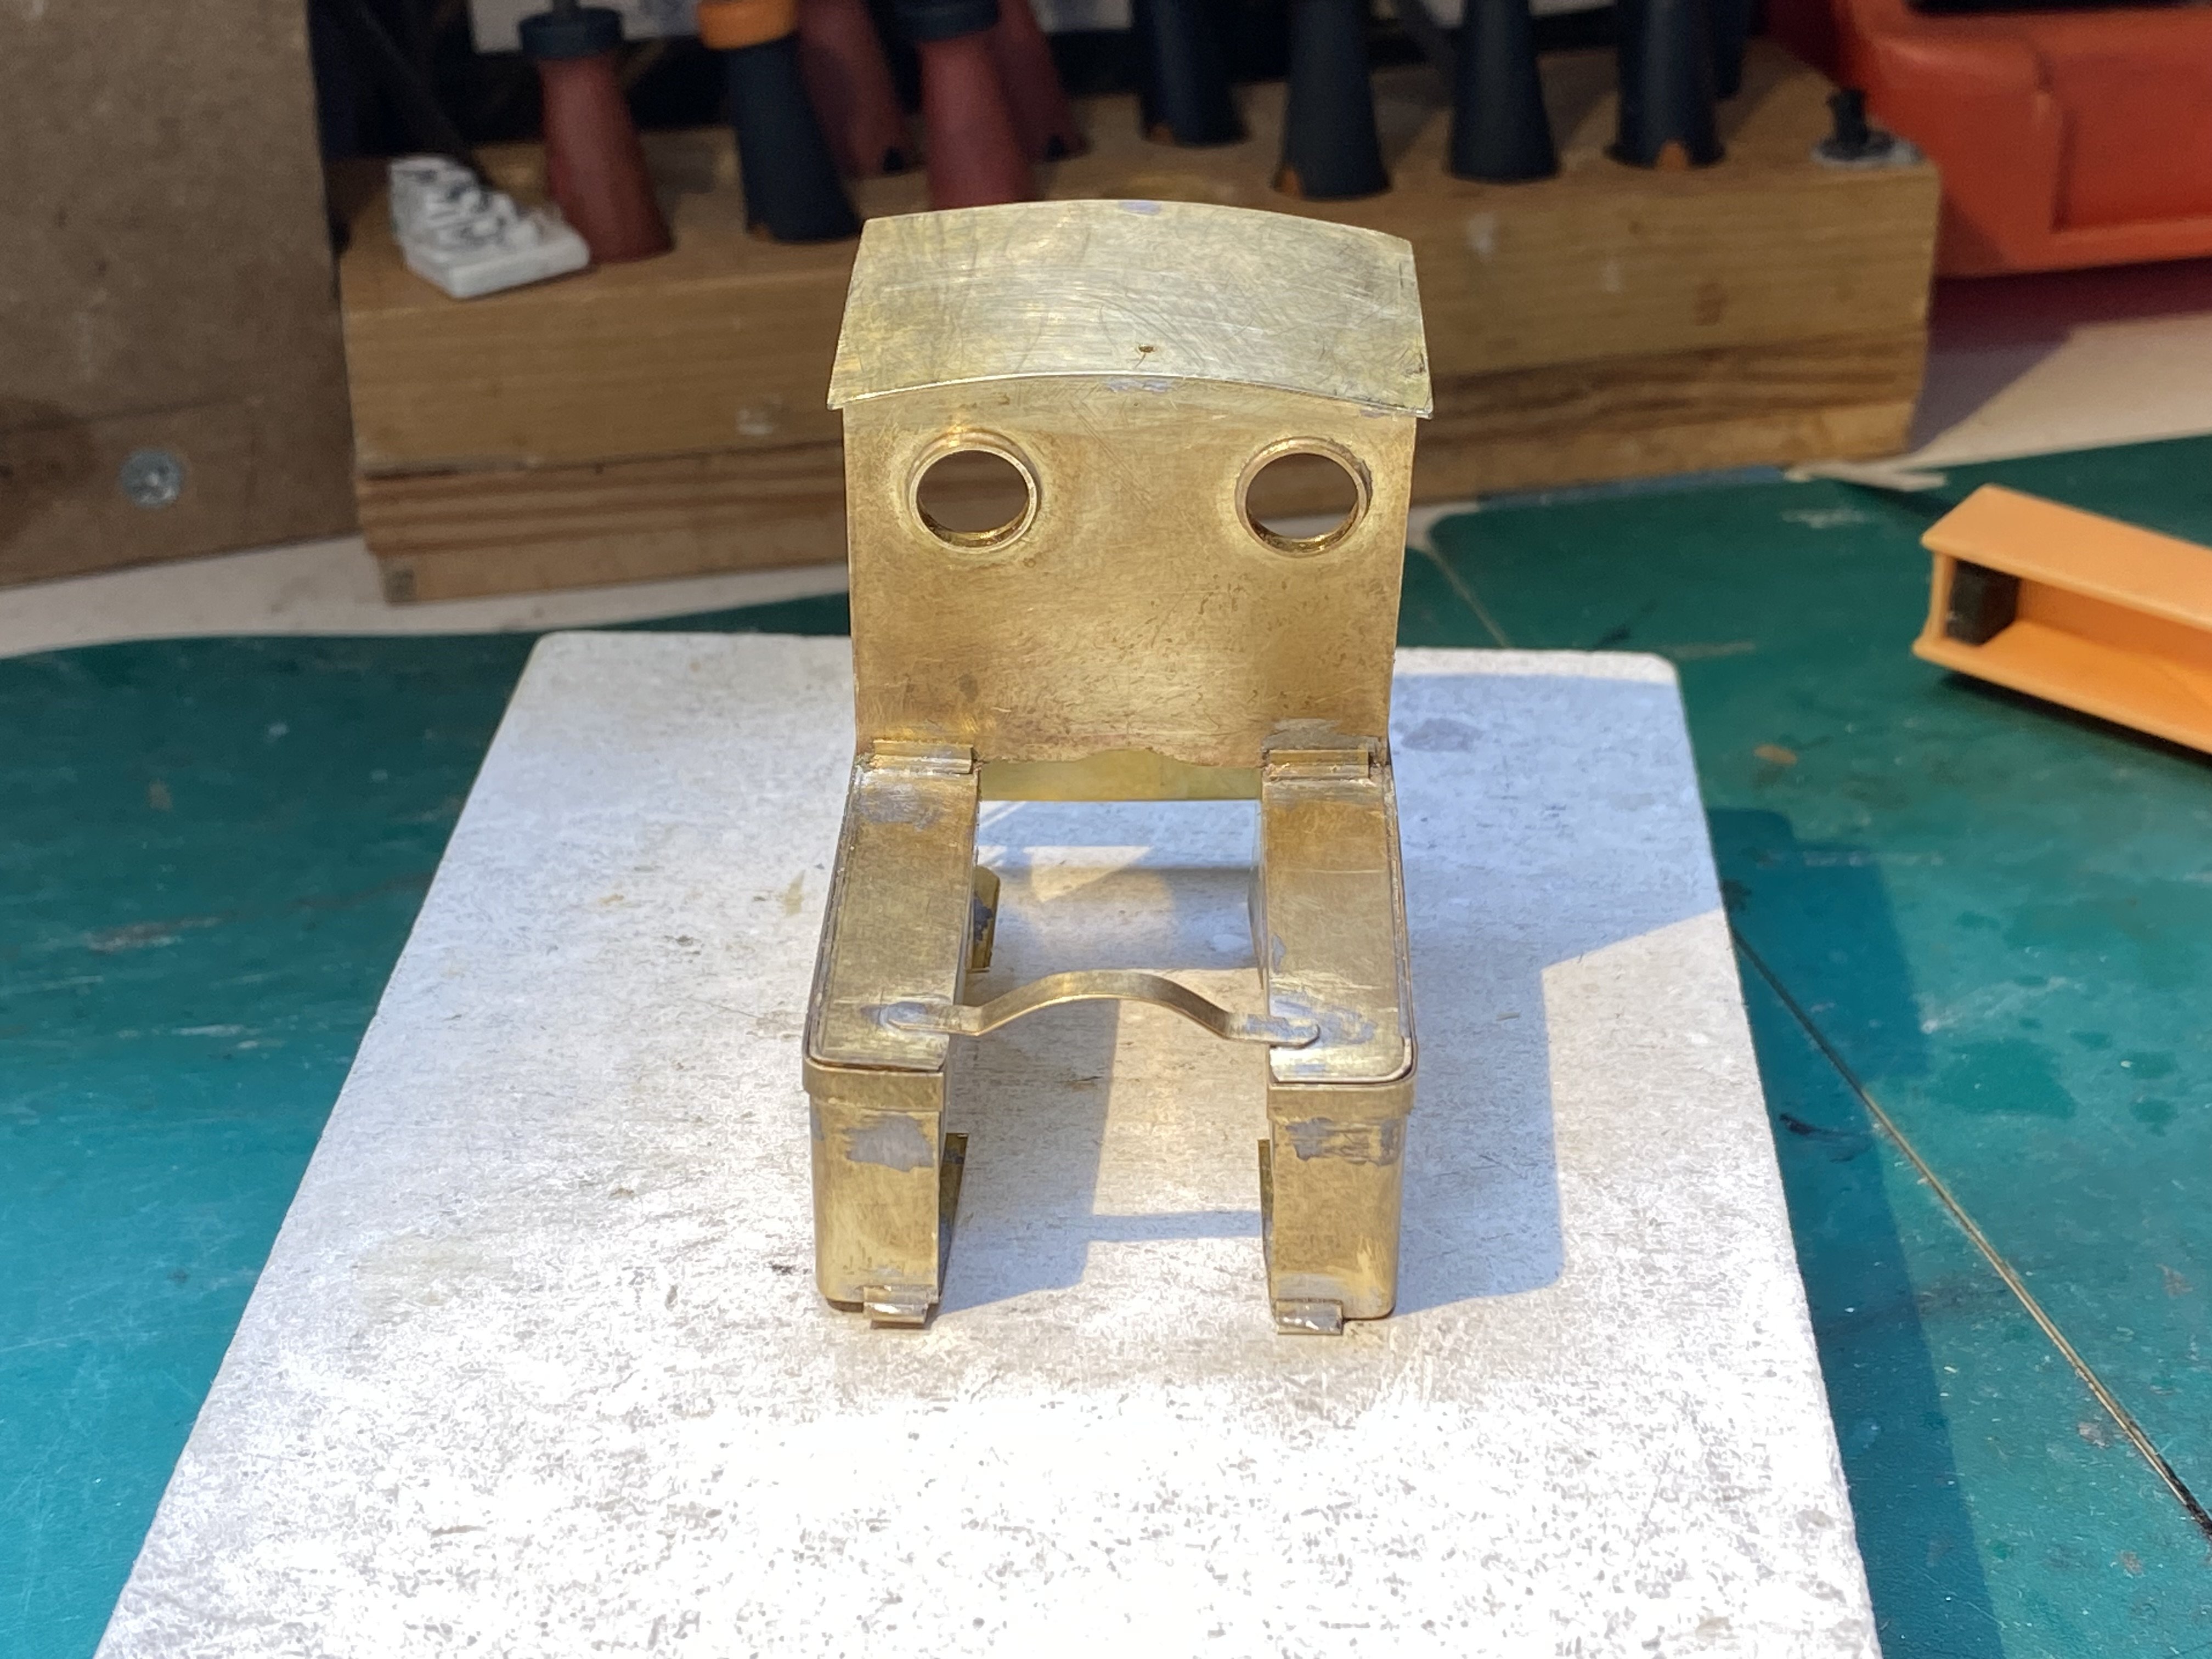
A nice simple shape for the Peckett's cab front with window frames made using slices of brass tube from a bag of assorted offcuts I bought at the Bangor show a while ago. With the boiler and tanks bolted to the running plate, the cab front could be soldered in and trimmed to size. A brace across the tanks and the roof on. It's beginning to have a bit of structural strength at last. It'a an odd little beast but the further I get with it the more I like it Pecketting away merrily Alan
- 779 replies
-
- 14
-
-
-
A shame about your rogue shuttle unit David. That’s v frustrating but all being well the replacement will do the job. All looking good on NPQ. That’s a nice compact little control panel.
-
Clogherhead - A GNR(I) Seaside Terminus
Tullygrainey replied to Patrick Davey's topic in Irish Model Layouts
STOP! I’m developing an allergic reaction to puns -
Clogherhead - A GNR(I) Seaside Terminus
Tullygrainey replied to Patrick Davey's topic in Irish Model Layouts
Ok truce! I’m sorry I asked about the gulls -
Clogherhead - A GNR(I) Seaside Terminus
Tullygrainey replied to Patrick Davey's topic in Irish Model Layouts
And hens again- those chooks you mentioned (I’ll see myself out)