Northroader
-
Posts
356 -
Joined
-
Last visited
-
Days Won
2
Content Type
Profiles
Forums
Events
Gallery
Blogs
Community Map
Everything posted by Northroader
-
I hadn’t commented on @seagoebox’s Antrim picture, which looks around the 1920/30s timeframe. There’s no oil lamp chimneys, so electric lights are fitted, and all the lower footboards are removed, including the brake van. We’ve got two six compartment thirds, followed by a four compartment coach, probably a composite? There’s a ventilator centrally placed, but no door handles, so most likely a pair of toilets for the two inner compartments. At the back end there’s a standard brake van, with side lookout duckets.
-
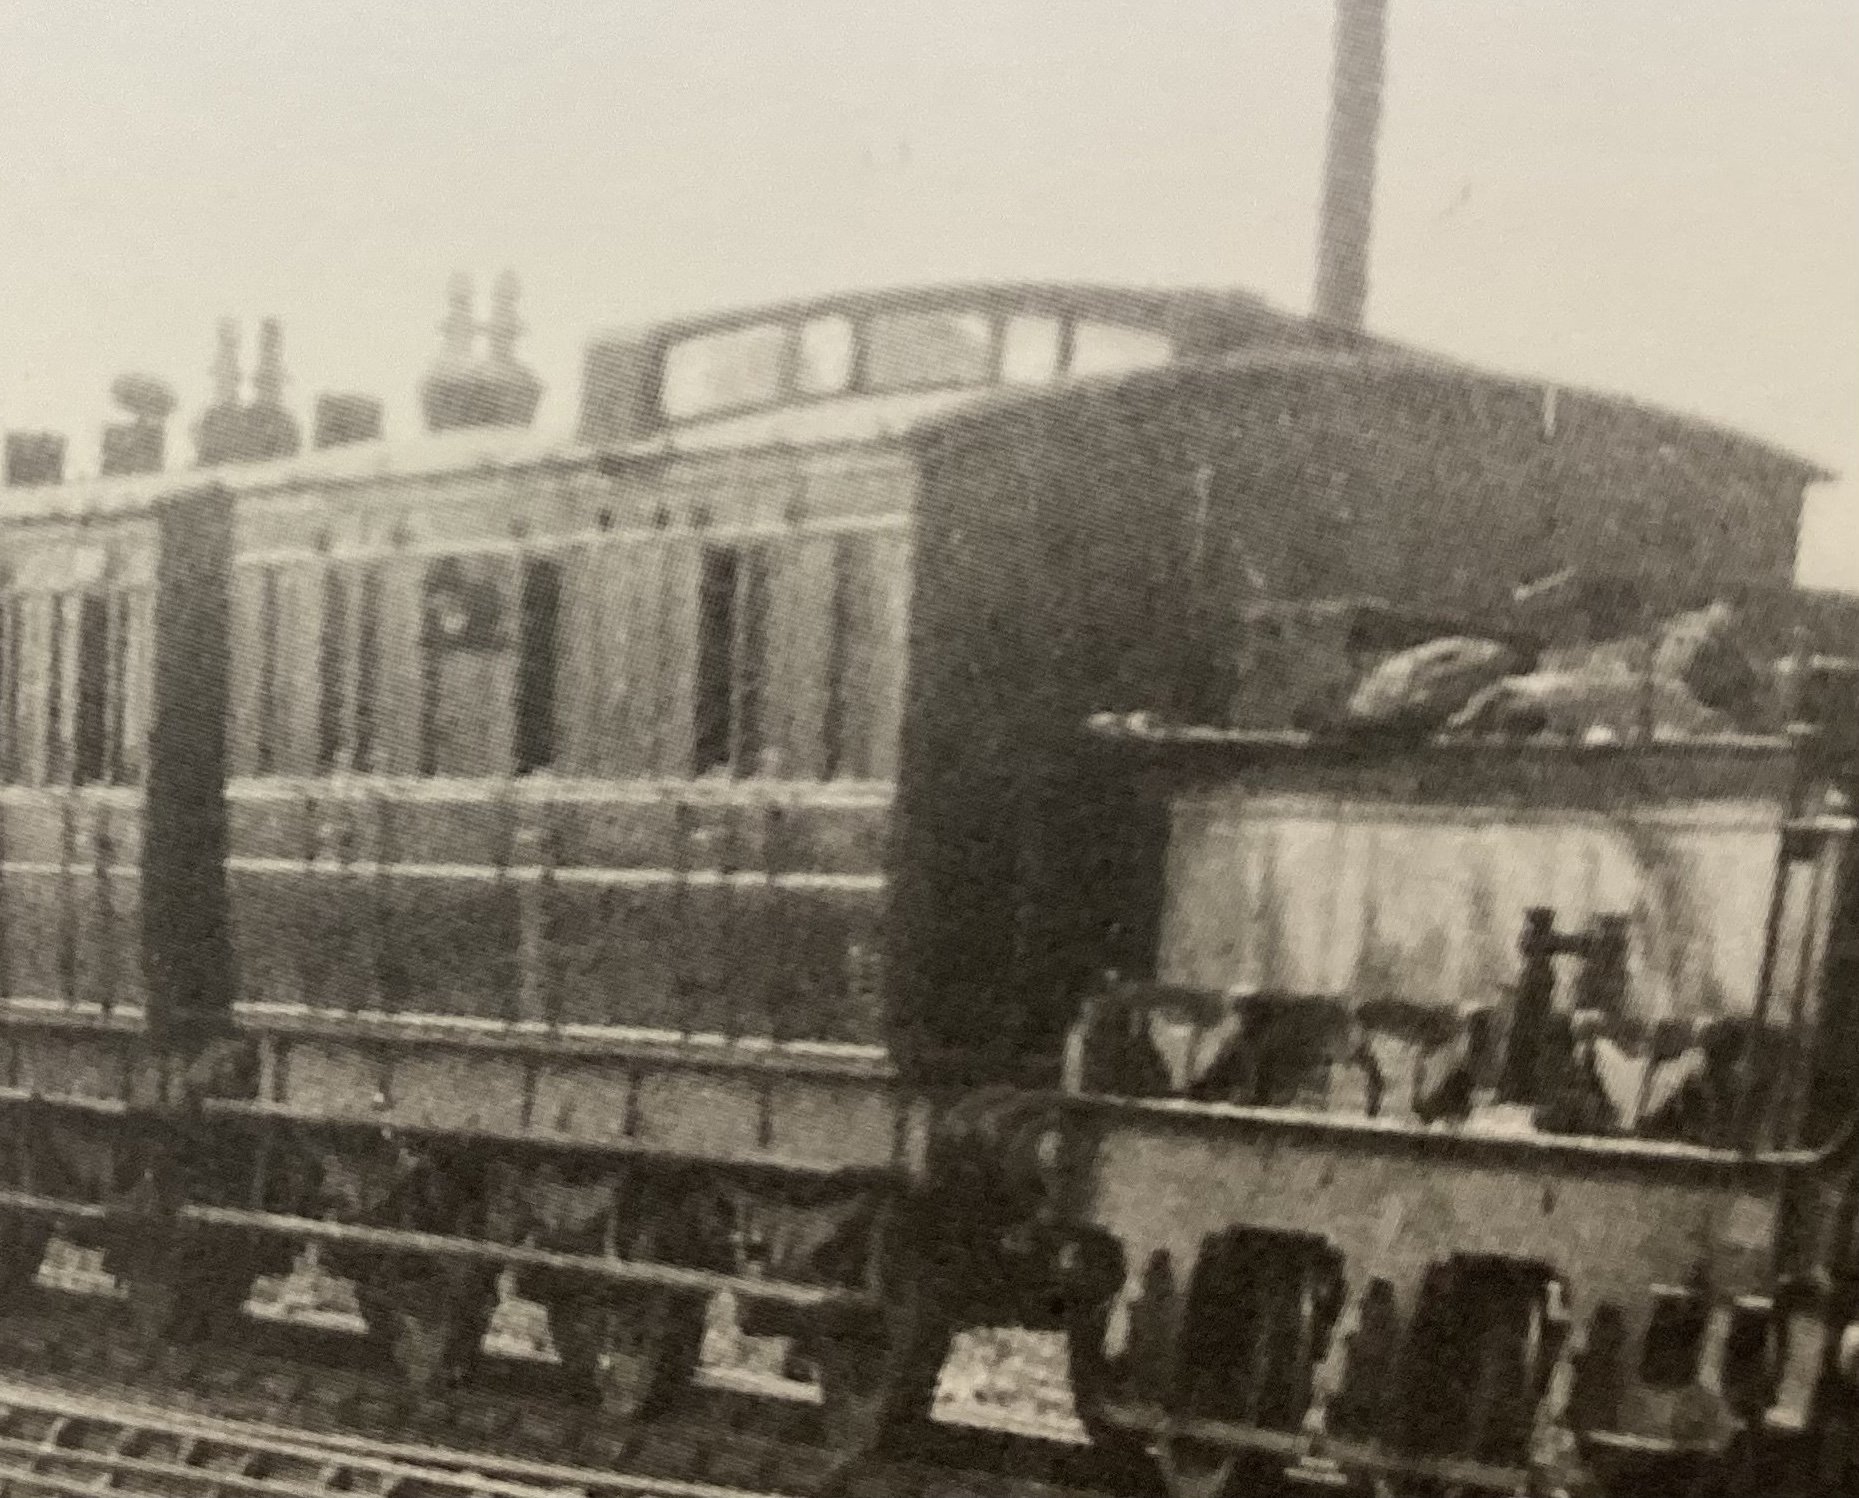
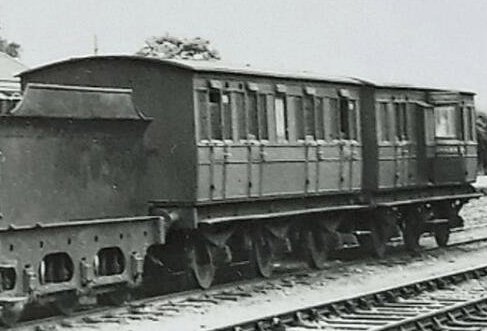
There’s a real treasure appeared on @Irishswissernie Photo collection today, an old GNR brake van converted for service use. It’s got the window and door spaces matching what might be termed the later standard vans, but then you’ll see: Axle-guards on the front face of the sole bar and the springs behind, Louvre ventilators over all the door windows, simplified mouldings over the panelling. So just like the composite that appeared in the smug mug photo a few posts ago. Presumably built some time around the GNR amalgamation before Park standardised the “Doncaster” appearance, or possibly from a constituent company? Wonder if it started life with a “birdcage” lookout on the roof? Compare it with the later vans, they have extra panels under the lookout, so would this be a 30’ body, and later ones are 32’? Either way, it’s crying out to be modelled.

-
Ernies Massive Irish 1930's to 2005 Photo Archive
Northroader replied to Glenderg's topic in Photos & Videos of the Prototype
Now, that middle picture sparked my interest, sure enough, it’s still got “GNR” on it. An old six wheel brake van. Ernie, could I post a copy on my GN coaches thread on here, please? It’s the clearest picture I’ve seen of one of these. -
Clogherhead - A GNR(I) Seaside Terminus
Northroader replied to Patrick Davey's topic in Irish Model Layouts
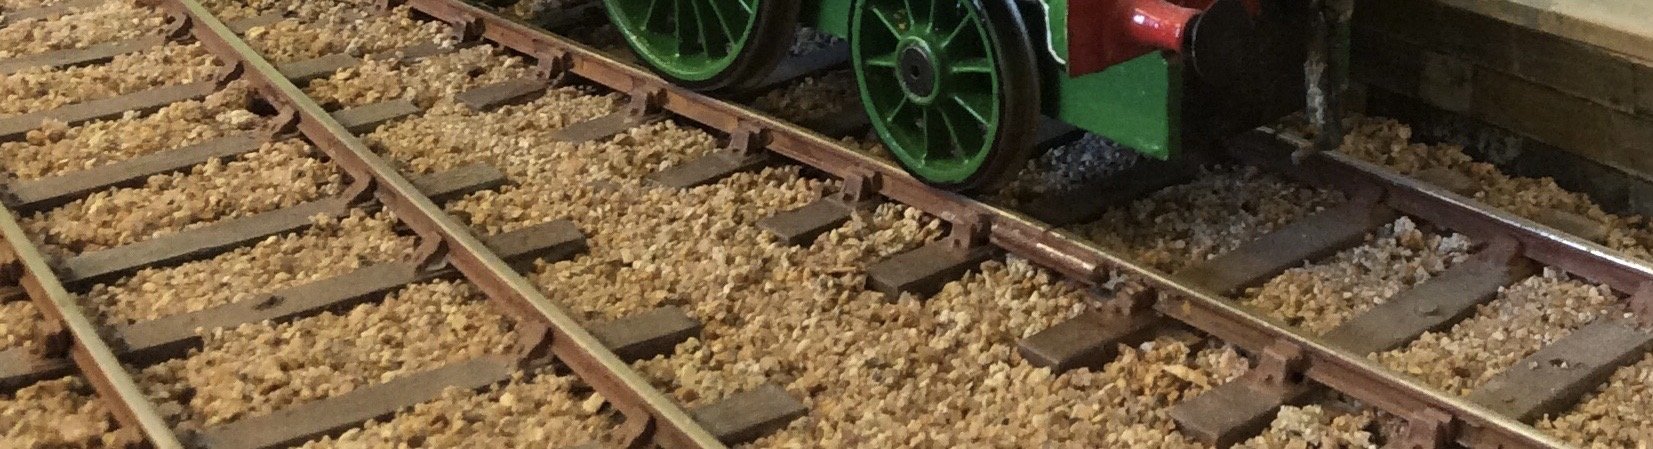
To me, TBH, it looks too pale grey. In the past I’ve used some sand my wife gets from a garden centre for her potting, rather than sea sand or builders sand. (in the picture, it’s mixed with some ballast from finer scales than 7mm.)
-
No, six wheels. Over this side of the channel quite a lot of railways went in for taking the middle axle out of six wheelers in later years, but it doesn’t seem to have been such a common practice over in Ireland?
-
I like to aim at pre 1900, there was a bit more colour in the paint schemes, and single drivers were still around….
-
Paul has just shown me a diagram for a GNR 6wheeler four compartment all first coach with a 30’ body. There must have been very roomy compartments, and the vertical dividing strips between each set of windows are quite wide. Still, a full first class coach on a limited space layout for a country branch line wouldn’t be a good idea.
-
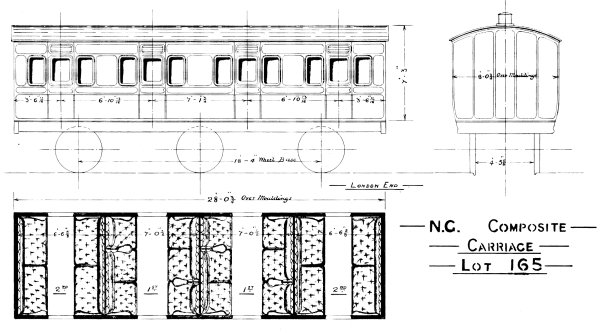
On picking a body length, I was guided by a sample of GWR coaches from the Penrhos site: http://www.gwrcoaches.org.uk particularly the U9 diagram six wheeler composite: This has a 28’ body, but the width of the vertical panels between the windows looks a bit more generous than the coach in the Smug Mug picture, so I knocked a foot off. Looking at the Irish 30’ body six wheeler composites, they all fitted something like a luggage locker or a pair of toilets at the centre tween the pairs of compartments, and there is a GNR version of this in that very dark photo of Amiens St a few posts back. So, if the GNR didn’t have any below 30’, this must have come from one of the constituent companies pre 1878 amalgamation, although it sounds from Johnson’s book as if everyone went on doing their own thing for a few years after. This makes it all the more interesting, and would account for the other non standard items like axleguard placing and quarter light ventilators.
-
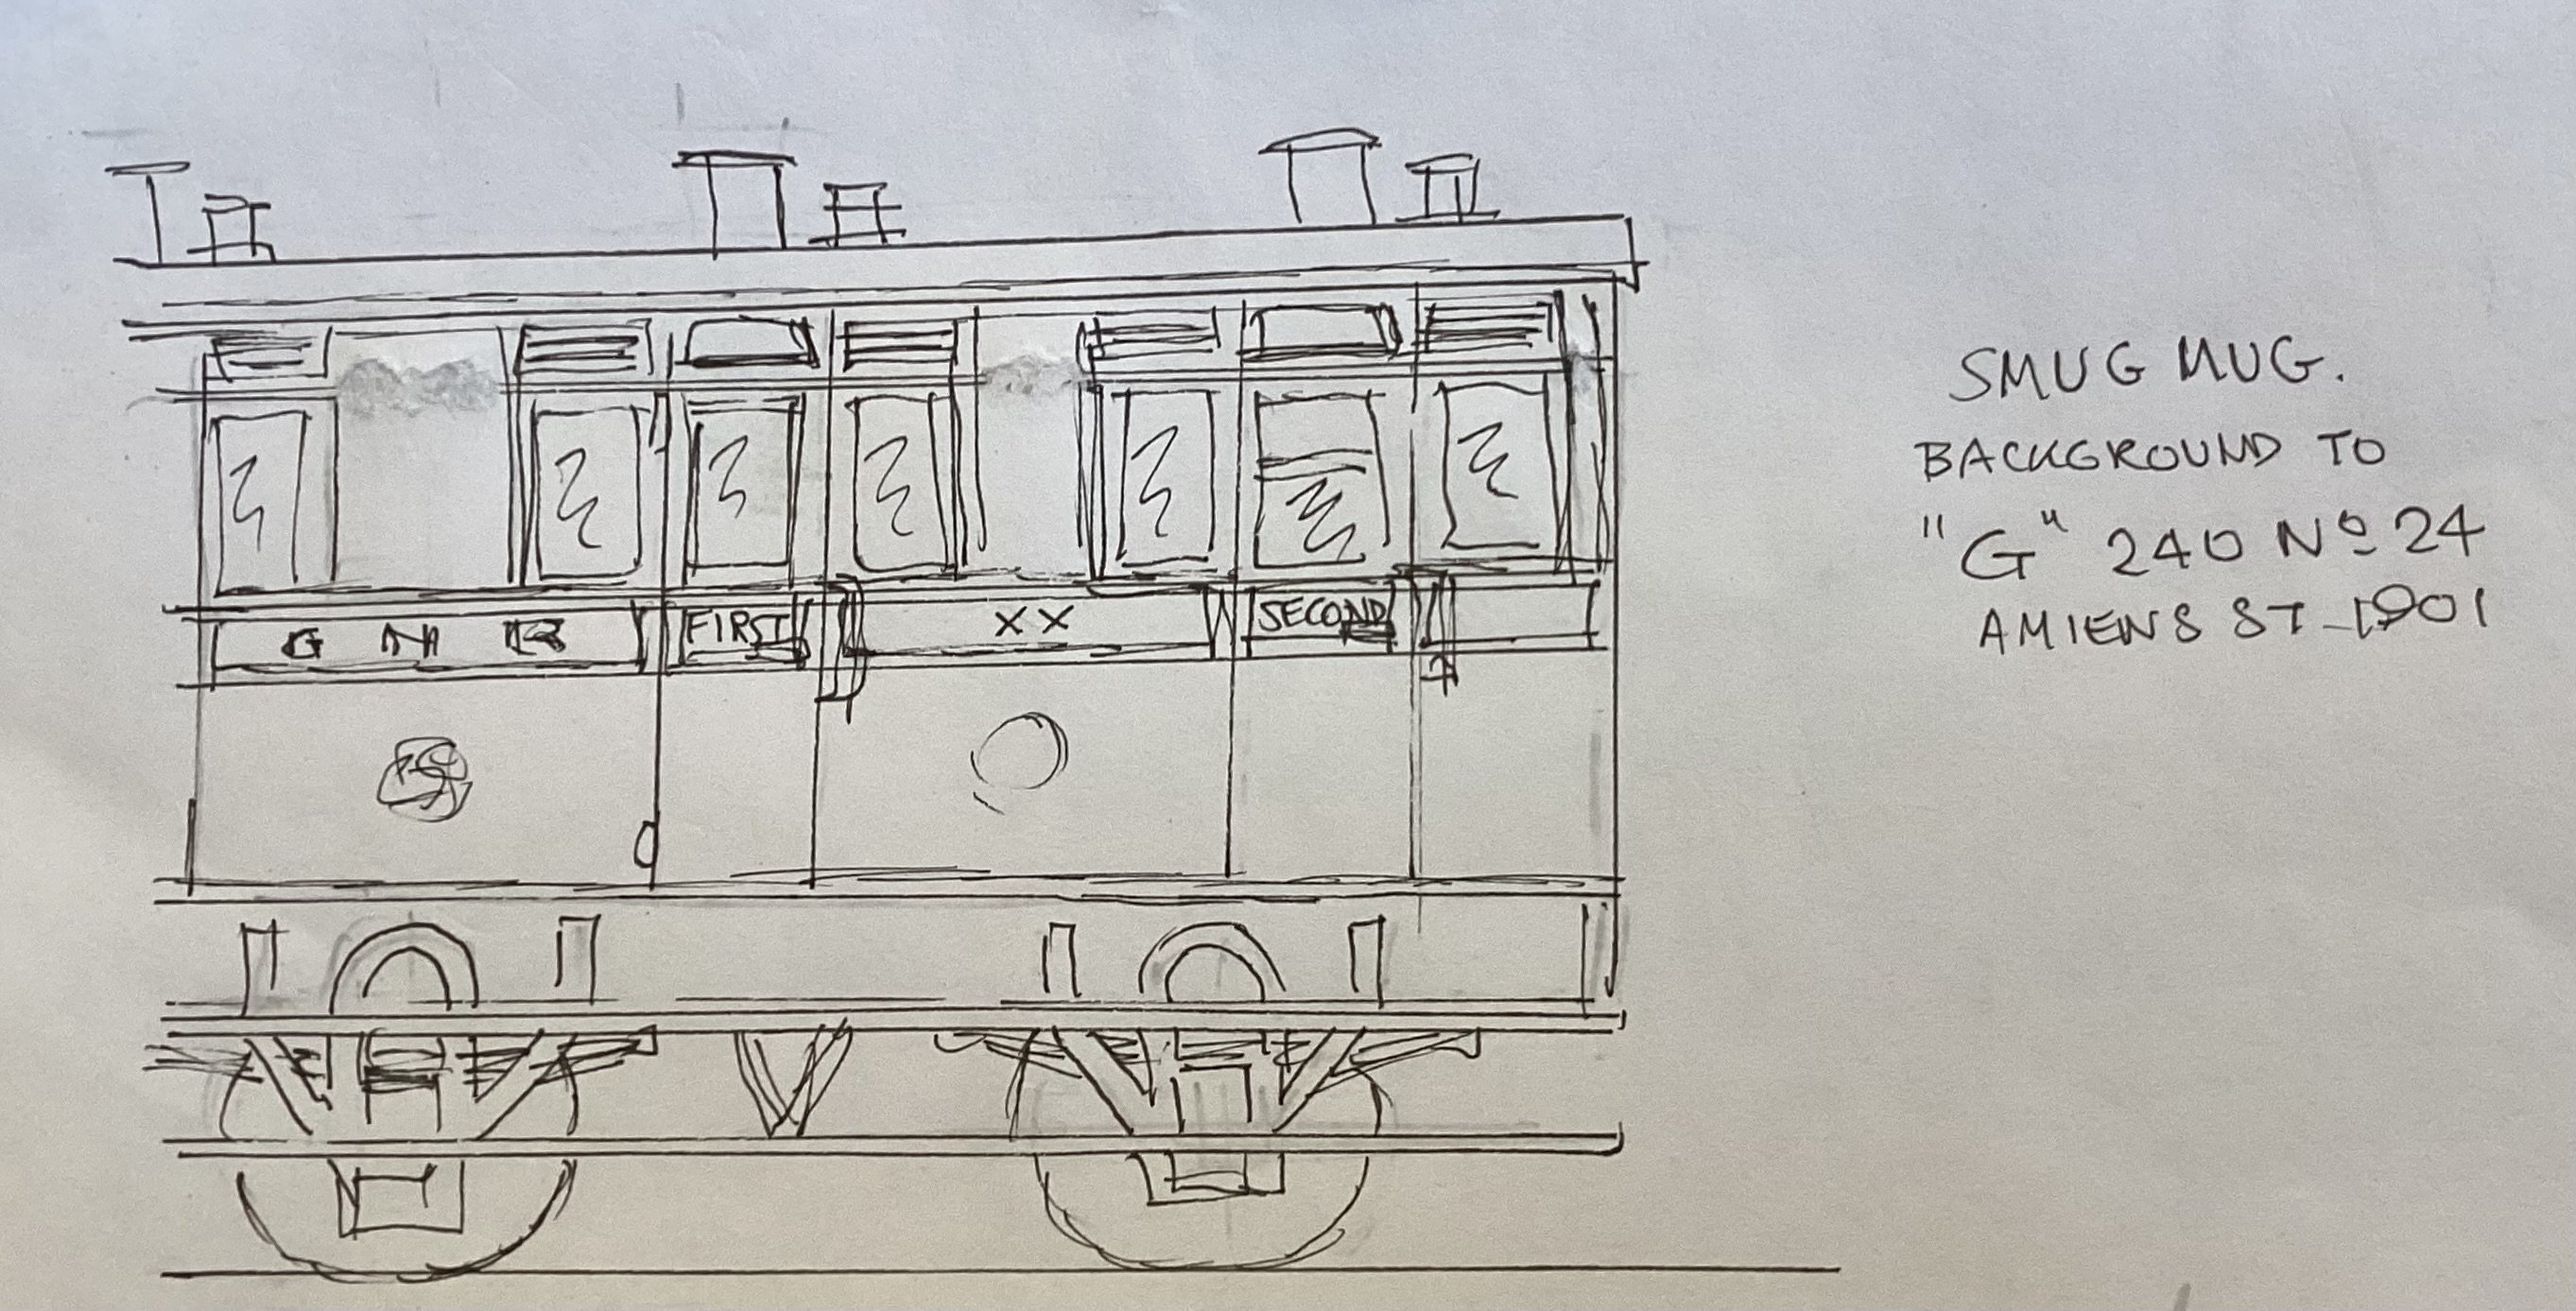
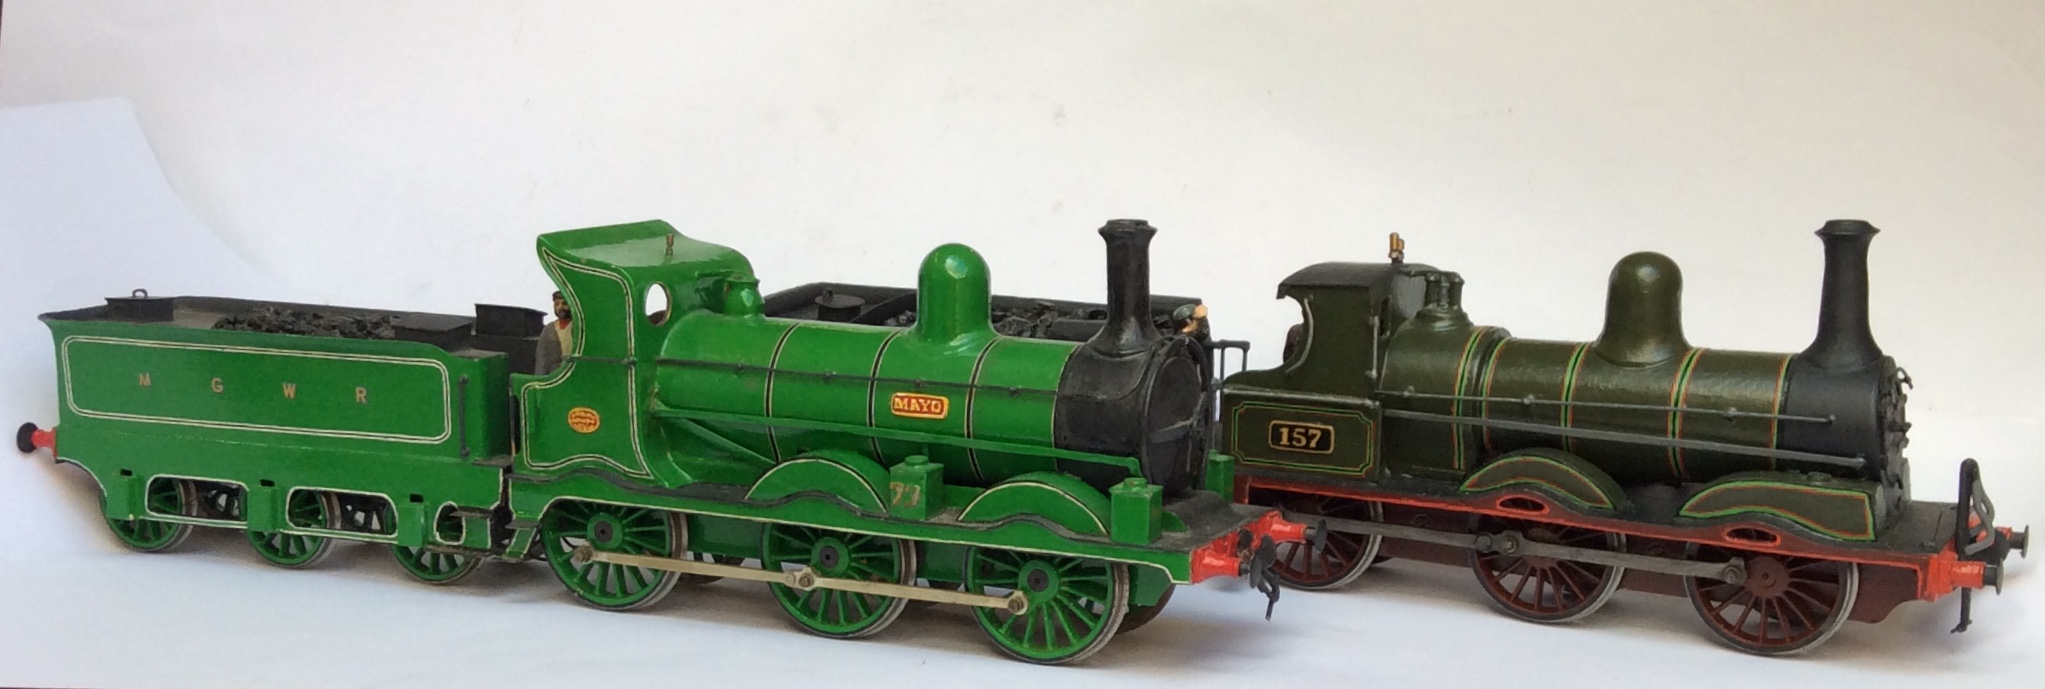
Dredging round for old coaches, and I found an interesting one in the background of one of the “Smug Mug” loco collection. (Edit: here’s a link: it’s a six wheel first and second composite, but there’s some variations which suggest it’s one built early to the general standardised appearance of these coaches. Things which are different to me are the axleguards are placed in front of the solebars, with the springs behind them, and the louvre ventilators above the quarter lights. The body panels look as if there’s the step in levels between the lower and upper panels, but the moulding strips are simpler, just round the windows and on the waist strip. I’m guessing at a body length of around 27’. It’s very like the third vehicle in this train:
-
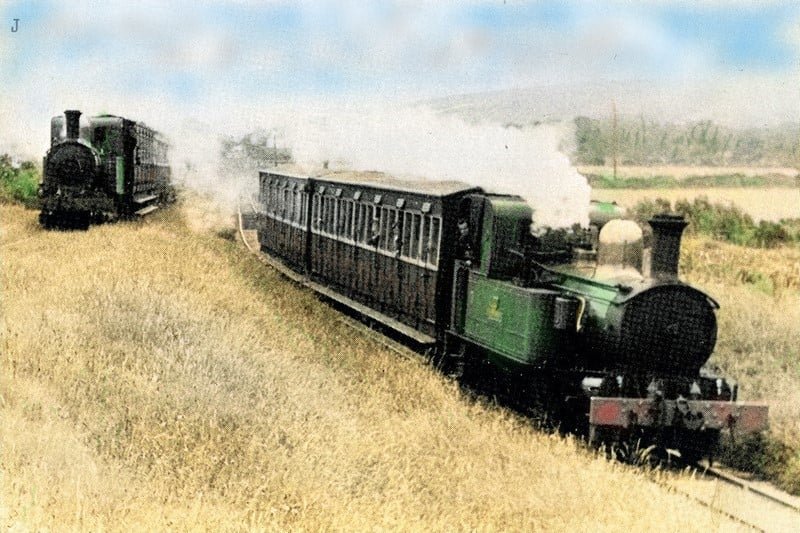
I don’t think “Sylph” likes towing that bogie coach anywhere, the weight of it, Plenty of wheel slip happening! But it keeps going.
-
Hangs my head in shame, yes, I do tend to skate over below the footplate detail, such as brakes and lifeguards. My first kit was a Leinster Models job, and I caught the habit from that, though I expect the McGowans did it to keep costs down. These days when you open a box of etchings with 500 bits to make up the brake work, it gets a bit frightening.
-
Looking at the drawing, Ken, and there’s no dimension for corridor width. Typically, they could be as narrow as two feet, but you think of the doors in your house as 2’6”, so somewhere in that block hole. Getting off the boat at Waterford as a kid, and getting into a 5’3” coach, I thought the corridors seemed a bit more generous than a British coach because of the wider bodies, but that could be just me, and having the internal doors hinged rather than sliding. As Jonathan says, a lot of six wheelers with lav’s just placed them centrally in the coach, and only the first compartment on each side could access them. In these cases the partition between the two slanted diagonally, so the entrance doors were both placed centrally in the compartment. The fact that the bogs on your coach are placed between the two classes implies everyone could have access, not just the firsts, with a similar passageway arrangement to the GNR. The one thing about your coach is that you’d need lighting and ventilation in them, so with two side by side loos the gas lights and shell vents would be offset from the centre, the more so with the water tank sticking up in the middle, and this might be worth checking. Presumably such a vehicle would appear on through journeys to Waterford, and not show up on the Bray services, where was less chance of getting taken short., well, not til you’re 85 anyway!
-
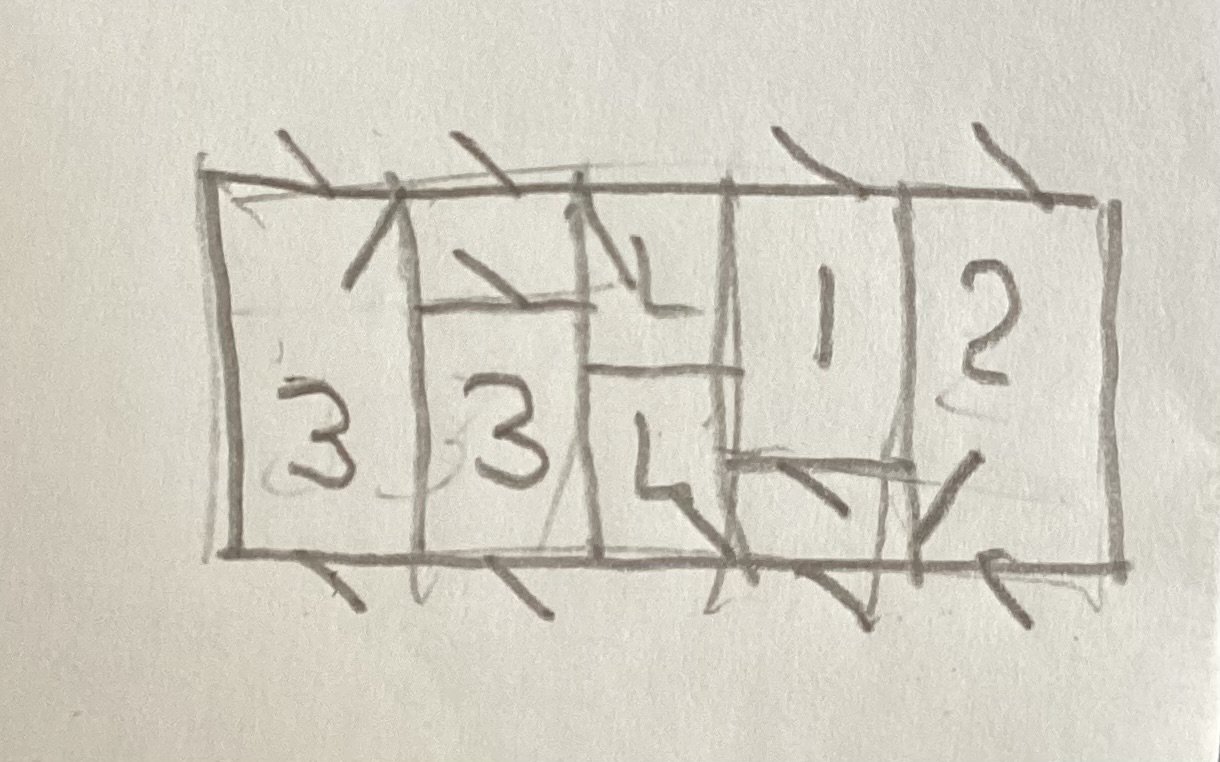
Just looking at the leading coach of the Cootehill train, I must acknowledge Leslie McA’s help with a drawing, which shows it as a R2 tricomposite. The body is 30’ long and 8’9” wide, with a 10’1.5”+10’1.5” wheelbase. Near end there’s two third compartments, with a more generous spacing of 5’9.75” between partitions. Then there’s two side by side lavatories, with a spacing of 3’5.5”, followed by a first class compartment, and then a second class, both compartments having 6’10.75” space between partitions. The lav’s are reached by short passageways, that for the thirds being the far side of the coach. I just show a sketch of the arrangement, as it’s nearly a corridor, but not quite. As to the carriage lighting, I’ve read that the GNR was a pioneer in introducing electric lights, which accounts for the bare roofs in some pictures. I think I’ll stick to the oil lamp chimneys for my model, giving it a pre 1900 look. You'll appreciate as it caters for all three classes, it just needs a brake van, and you’ve got a full train, so it’s just what’s wanted for a very short branch line terminus, and will be down on my must do modelling list.
-
ask, and ye shall receive… (our local butchers, and we’re moving!)
-
True, it was the only picture I could find, red/brown would have been better.
-
The one that sticks in my mind is leaving St.Johns on a Peel train, with the Ramsey line running parallel for quite a way out of the station. The Peel and Ramsey trains departed simultaneously, side by side over the level crossing, and you could look across and damn near touch the coaches of the Ramsey train. The engines would be pounding away, and after a few hundred yards the lines would split, the Peel line dropping down to the side of the river, the Ramsey line rising on an embankment to an over bridge over the main road. You could then enjoy seeing the Beyer Peacock 2-4-0T in full flight. Magic!
-
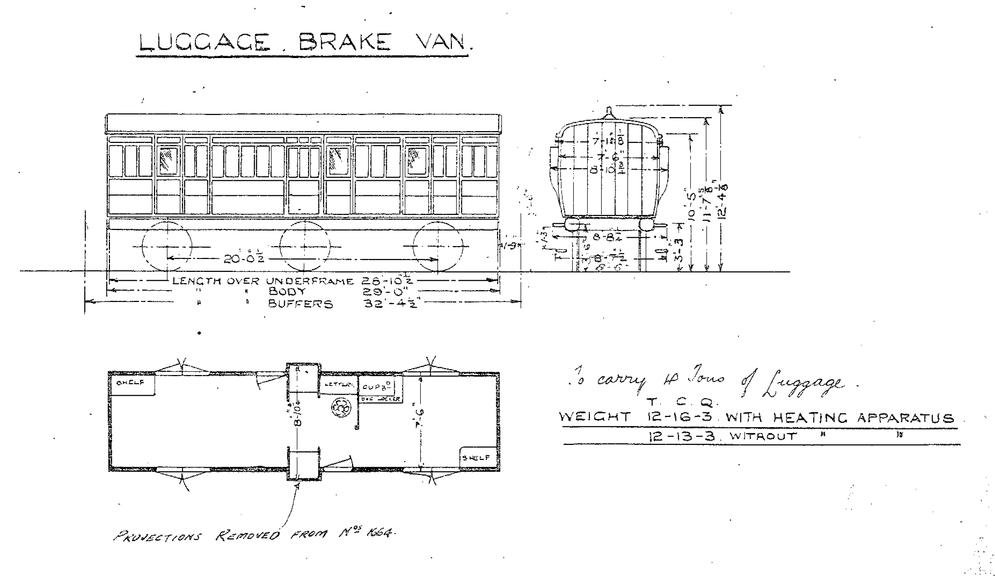
I’m starting to wonder about the initial idea of cannibalising English GNR coaches. The drawing I placed for the 29’ luggage van is probably the best chance, given a new roof. The main difference for six wheel thirds is the English GNR used five compartments, Dundalk went for six, as per the one at Downpatrick. The drawing for a U2 diagram coach shows a body 30’ long and 8’9” wide, so six compartments allows less than 5’ per compartment between partitions, with two wooden benches facing each other, very restricted legroom, and five a side seating to manage sixty people in the coach. Not ideal travelling conditions! The construction requires square cut windows, and the mouldings covering the panels can be strips meeting at right angles, no rounded corners, which is a very handy way of going on, but there’s still very many cuts to make, so a full third loses its attraction. Composites and brake thirds sound more enticing. The drawing shows three oil lamps per carriage, symmetrically placed above pairs of compartments, whereas the Amiens Street picture shows six oil pots on the roof, one per compartment.
-
The battens on the floor are fairly common on cattle wagons, and I would think the purpose is as you say. Not having your commercial knowhow, Leslie, about what sells and what doesn’t, but I would think a “convertible” wagon with the centre open roof section would be popular, as having a distinctively Irish look, although a rarity by the time diesels appeared..
-
Well, John, moving to a much smaller house showed me I had to offload many finished models, and scrap what was lying around in unfinished layouts, and this has worked very well. I’ve met a lot of new faces, who I now regard as friends, and I feel my models have all gone to good homes. The items that are going with me all need finishing. One thing that has emerged is that everyone says go on with what you’re doing, so whilst there should be a clean slate, in effect I’ll need to have a micro layout, which is ‘common user’, like a small theatre with frequent scene shifting, even if the track will look odd in some applications. There’s some lovely models appearing in 4mm scale, but I’m afraid 7mm has become ingrained, and I’ll stick with it. I think I need to follow the example of the two Daves on here, and go for the proper gauge for this projected GNR idea, meaning two micro layouts rather than one. (Problems with the boss here, I think!) Good luck with the 4mm East Anglian idea, the one that caught my interest recently is “Lockdown Fen”. https://www.rmweb.co.uk/topic/159751-lockdown-fen-4mm-wuish/
-
Moral of this is: join the I.R.R.S ! Thanks, Leslie and Richard McLachlan, just wish I could produce the models as fast as the drawings came!
-
Just picked up a drawing of the equivalent Doncaster built van, which can’t be far away from the ones in the pictures, and should give a basis: Thank you, Leslie, you’ve got me imagining someone at the side of a lake with this marvellous view, sipping a glass of sparkling wine as his lunch goes down, when the phone goes…
-
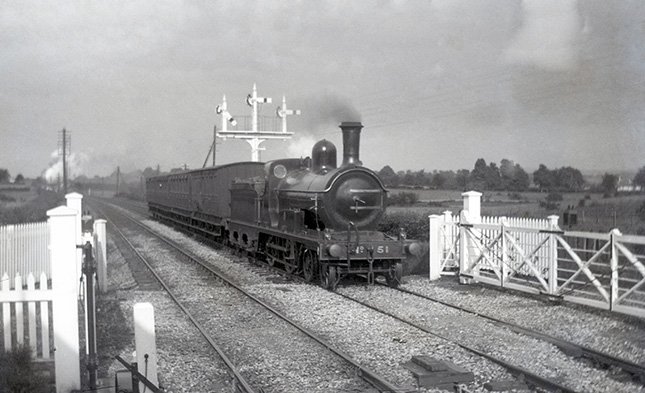
But when you look at the Knockmore and Amiens Street pictures, 1890-1910 era, there are lower footboards visible back then. There must have been a purge some time later.
-
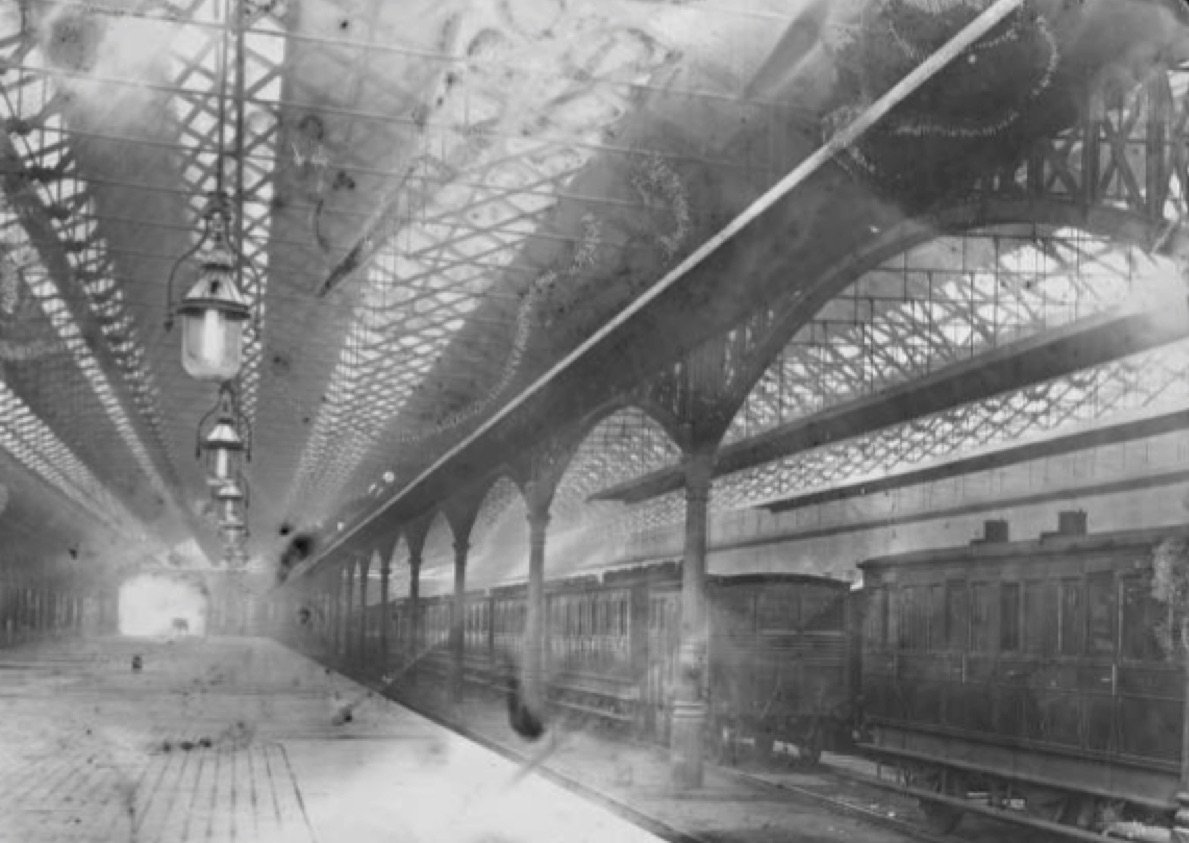
It’s fun when you start digging, isn’t it? Here’s the carriage sidings in the middle of Amiens Street in 1890, rather a cloudy image but given it's under a mucky old roof.. Definately oil lamps in use back then. The nearest coach is four compartments with a central luggage locker, composite or first? Then a ventilated van, which must be vac fitted for perishable traffic, then a six compartment third.
-
Thanks for your reply, Jonathan, I picked up on your mention of Cootehill, did an enquiry, and lo and behold! Six wheelers on the GNR in 1939! A composite lav., plus a full brake with an open door. Just the sort of train that’s needed:
-
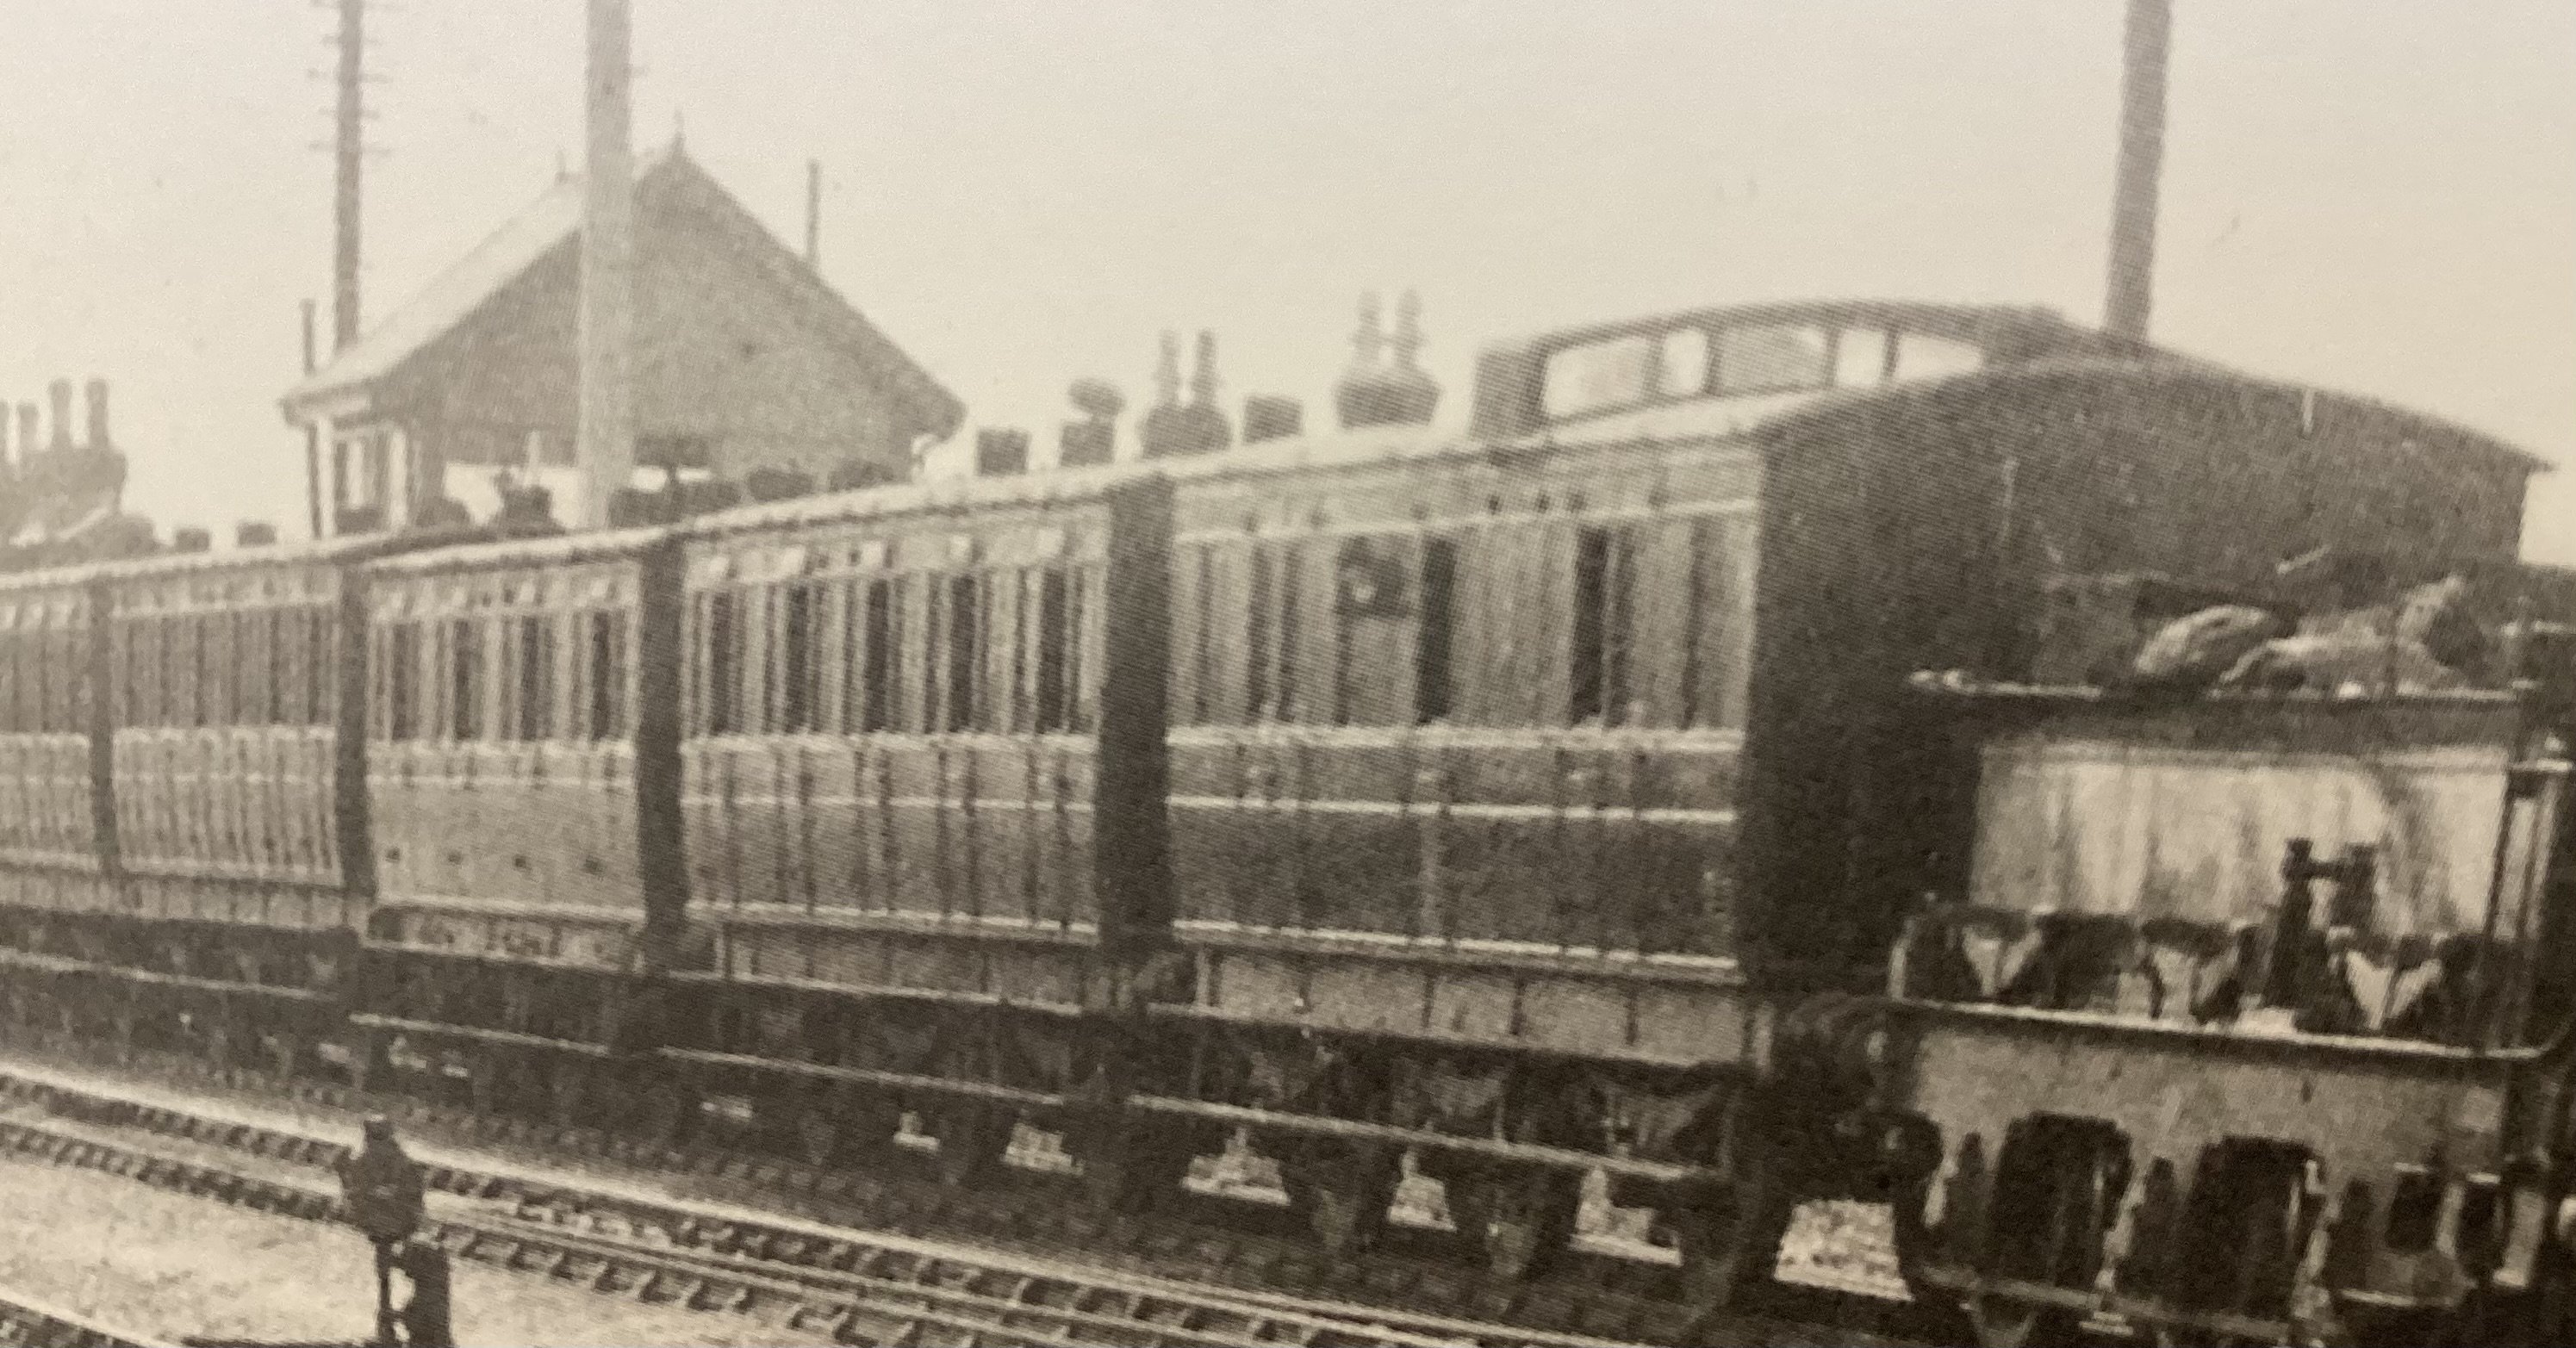
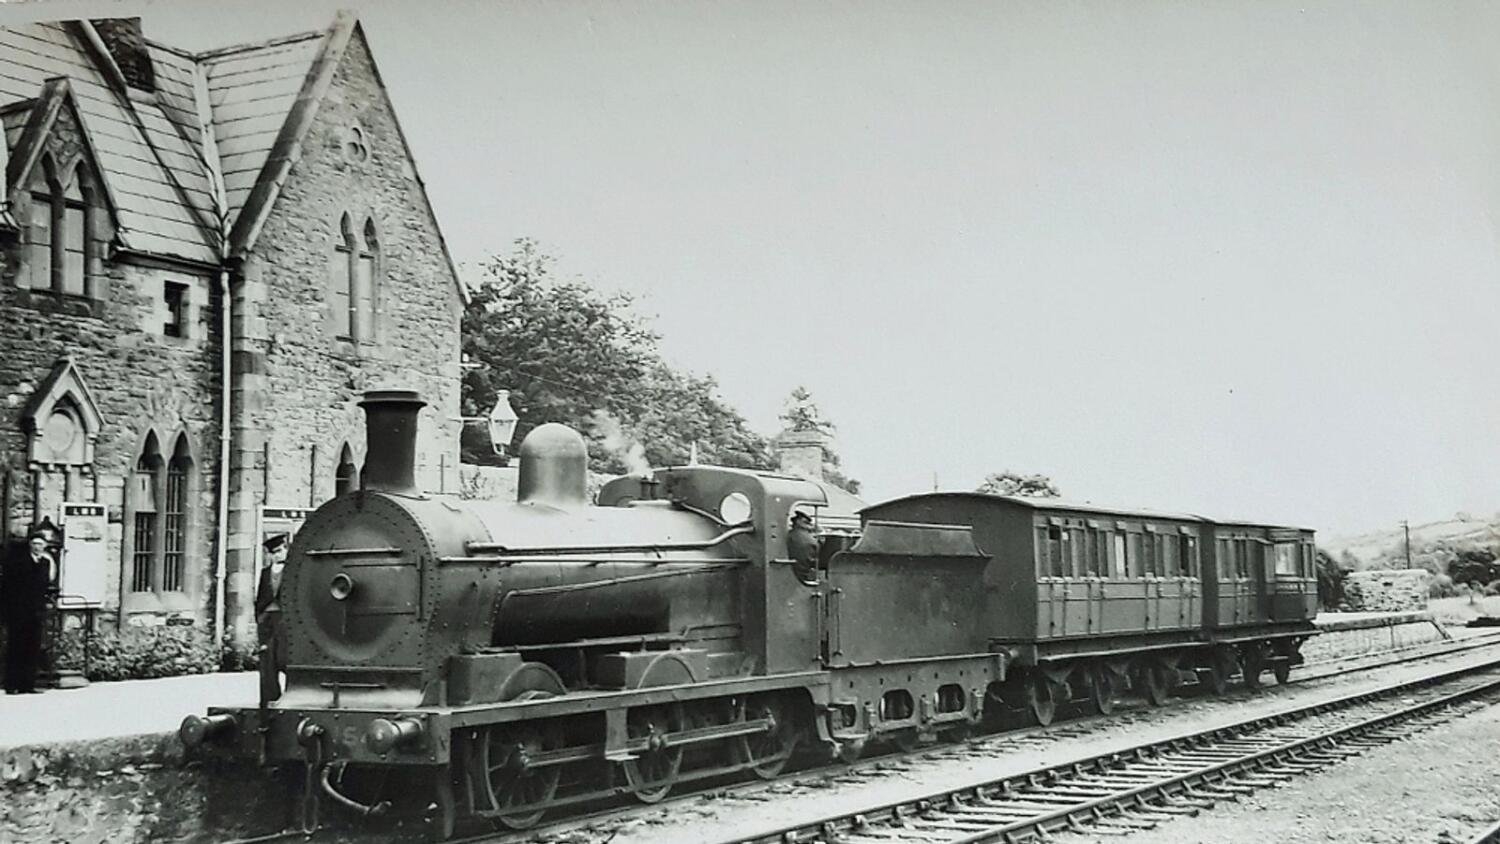
I was looking at a shot of Knockmore Junction, and trying to work out the composition: they look like six wheelers, and there’s a full brake, and a six compartment third, (thanks, Niles, just like the one you’ve picked out) then two others. No oil lamp chimneys visible, was the GNR using gas or electric lights by then?