islandbridgejct
-
Posts
212 -
Joined
-
Last visited
Content Type
Profiles
Forums
Events
Gallery
Blogs
Everything posted by islandbridgejct
-
Liveries of Great Southern Railway
islandbridgejct replied to kenbac's question in Questions & Answers
For what it's worth, my theory on the low level of new locos is that a new loco has to be paid for out of capital, whereas you can rebuild an existing loco out of income. To have capital, you may need to declare a dividend and pay corporation tax on your profits. A nice rebuilt J15 could be had, with new frames, new boiler, even new cylinders, and maybe keep the cab just so you can say it's a rebuild, for a lot less money. That's just a theory - I've no evidence for it whatsoever. Alan -
Nicely executed and I think that livery's going to suit it. I hope you don't have the realism police after you. Alan
-
Very nice. Completely convincing. 9 more to go? Alan
-
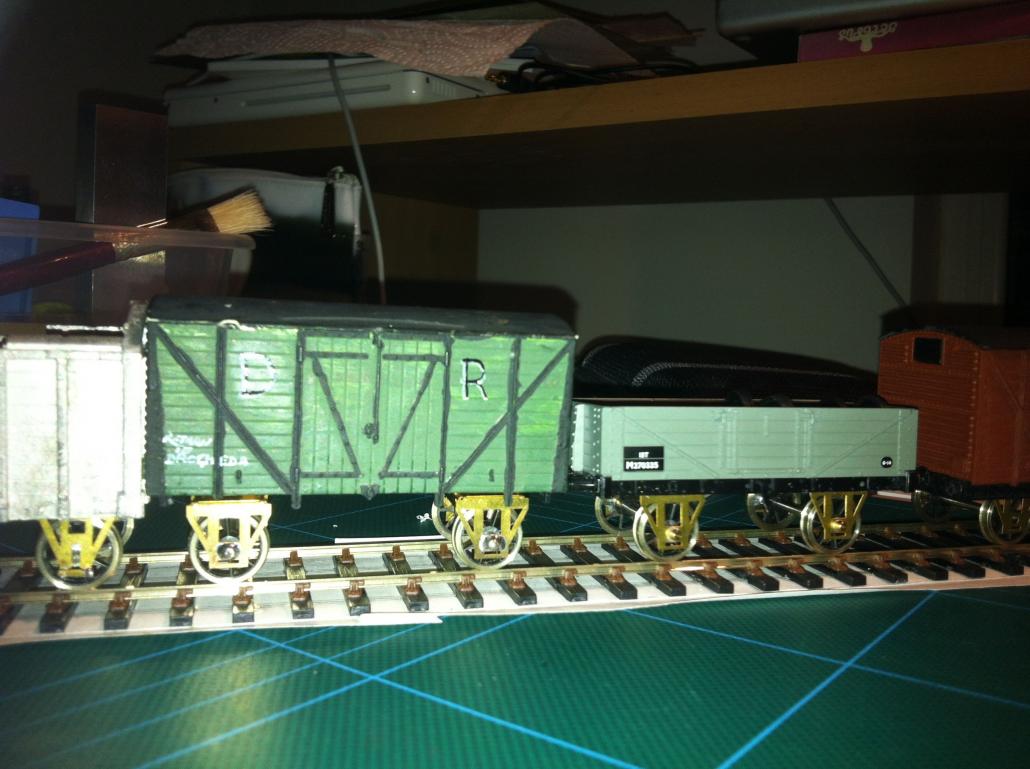
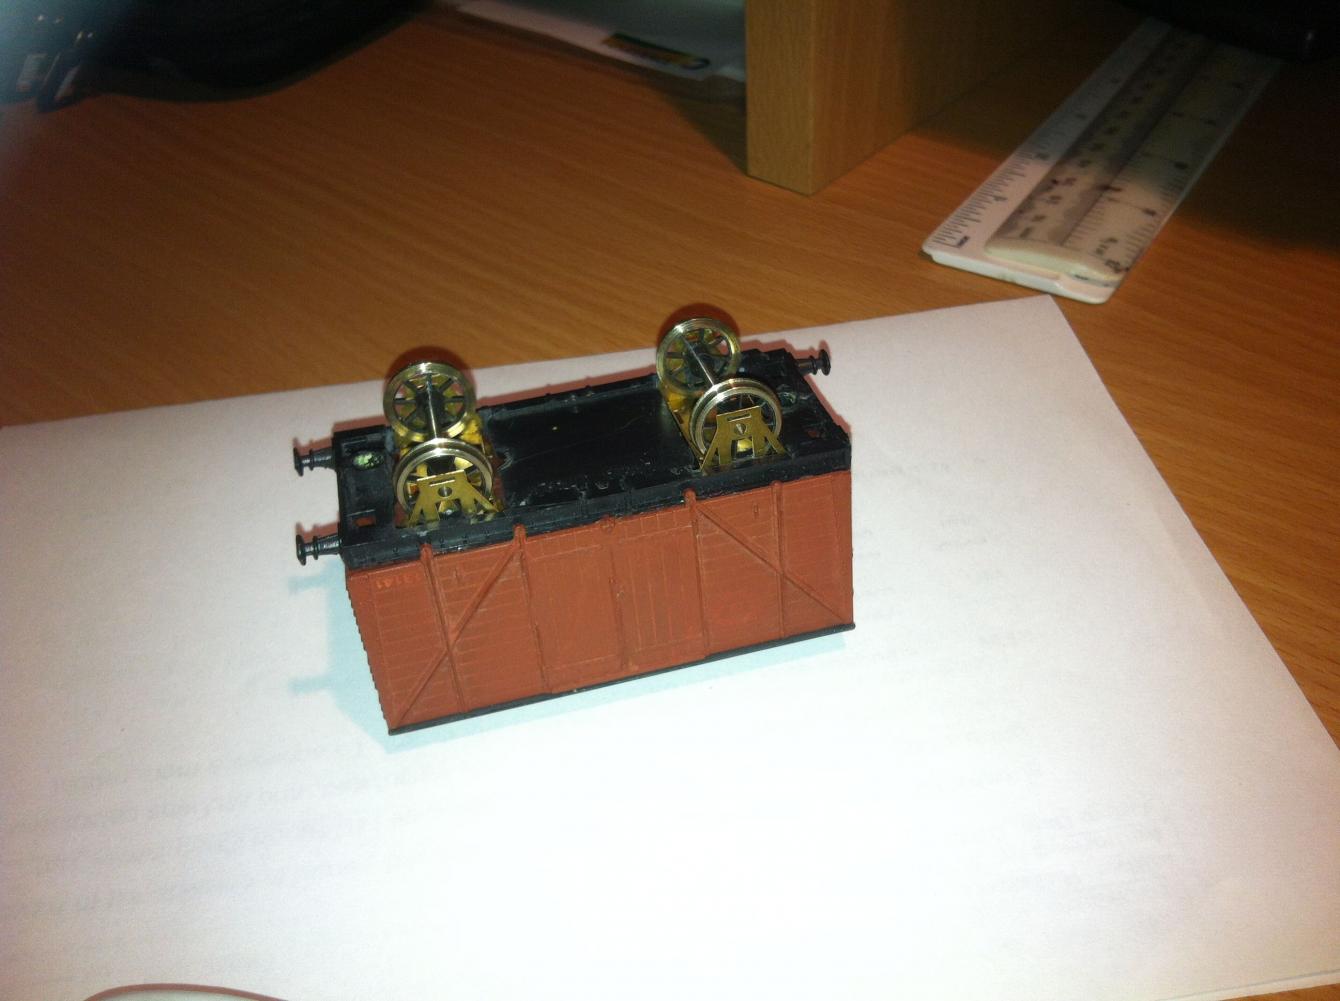
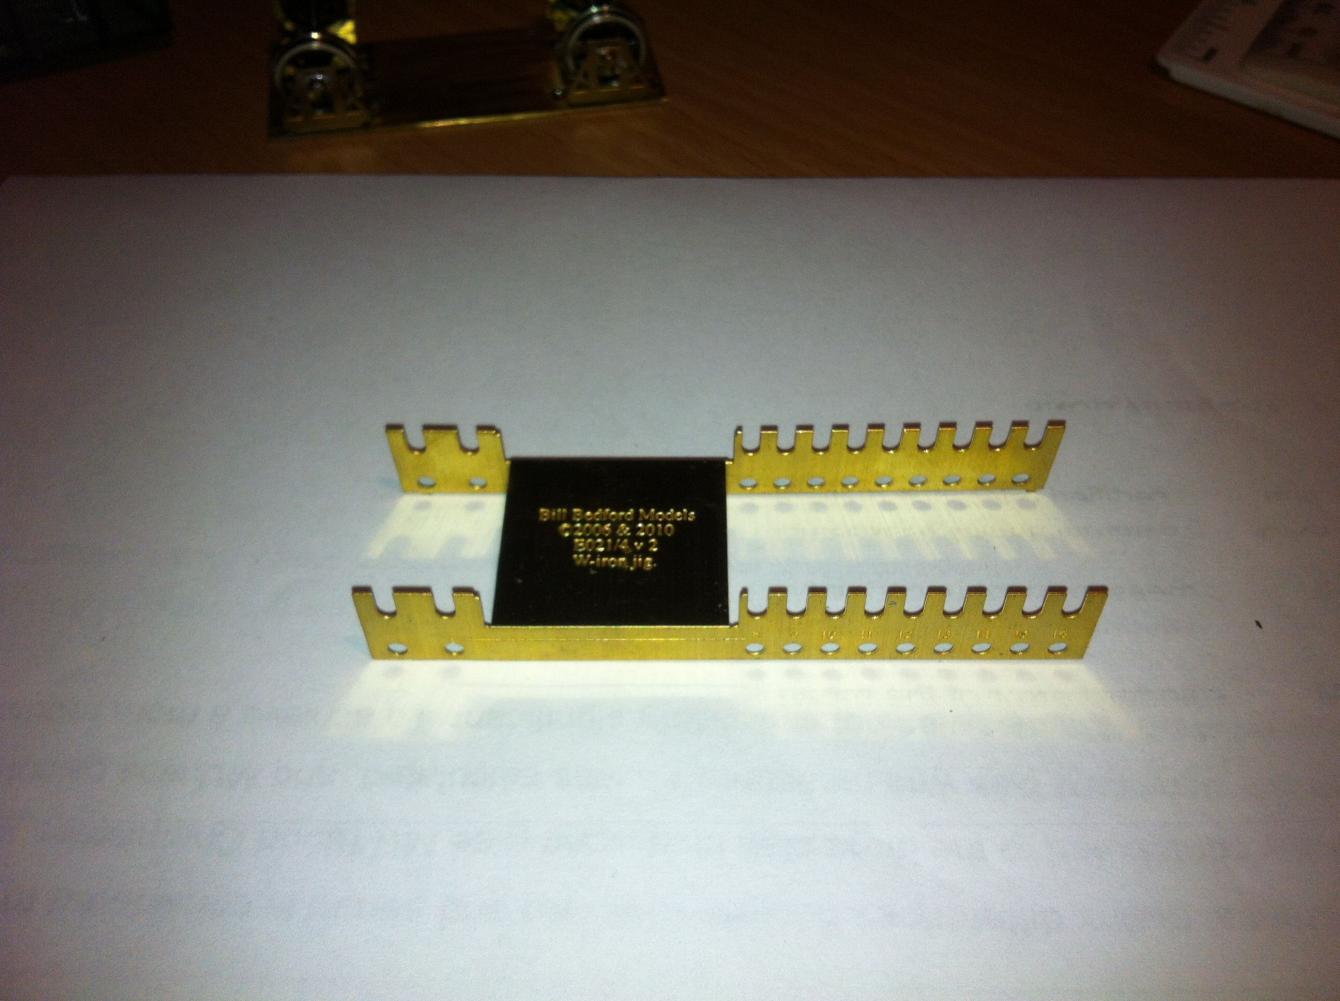
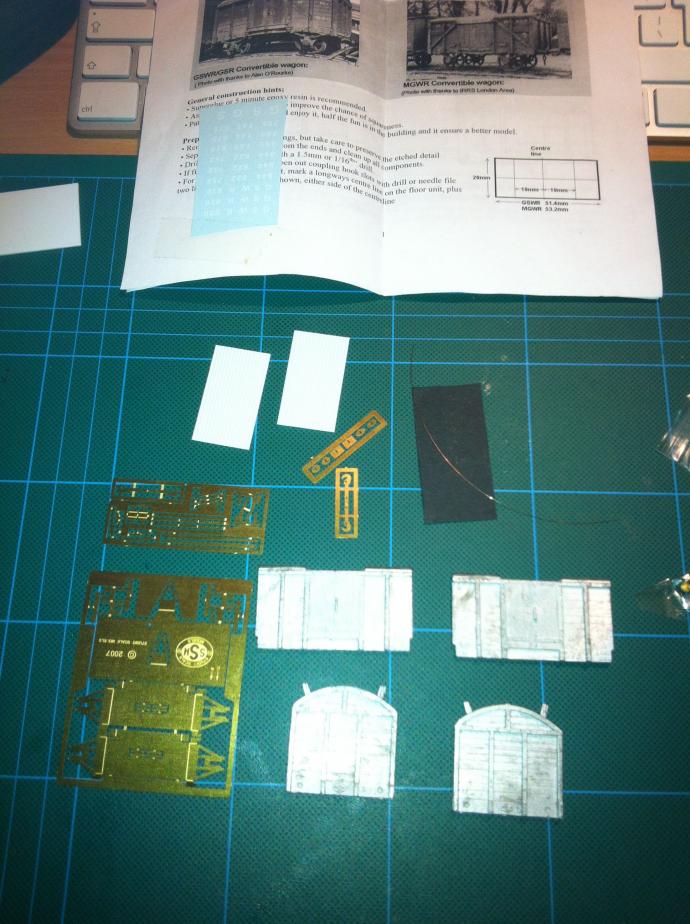
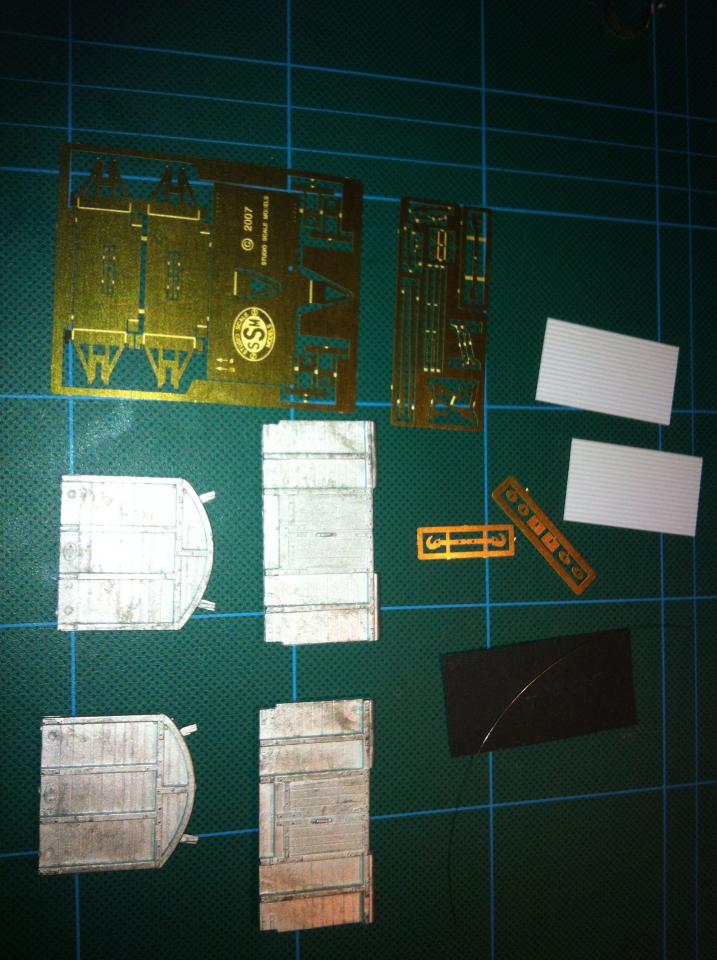
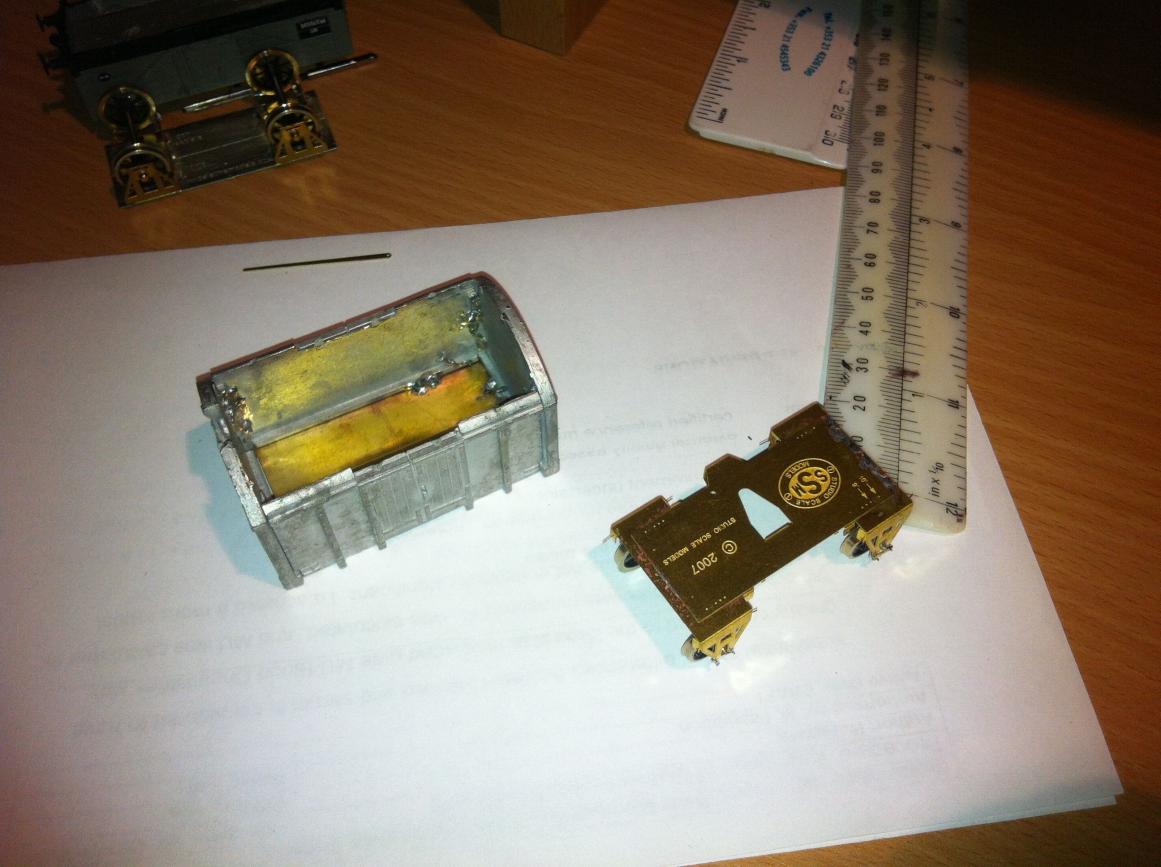
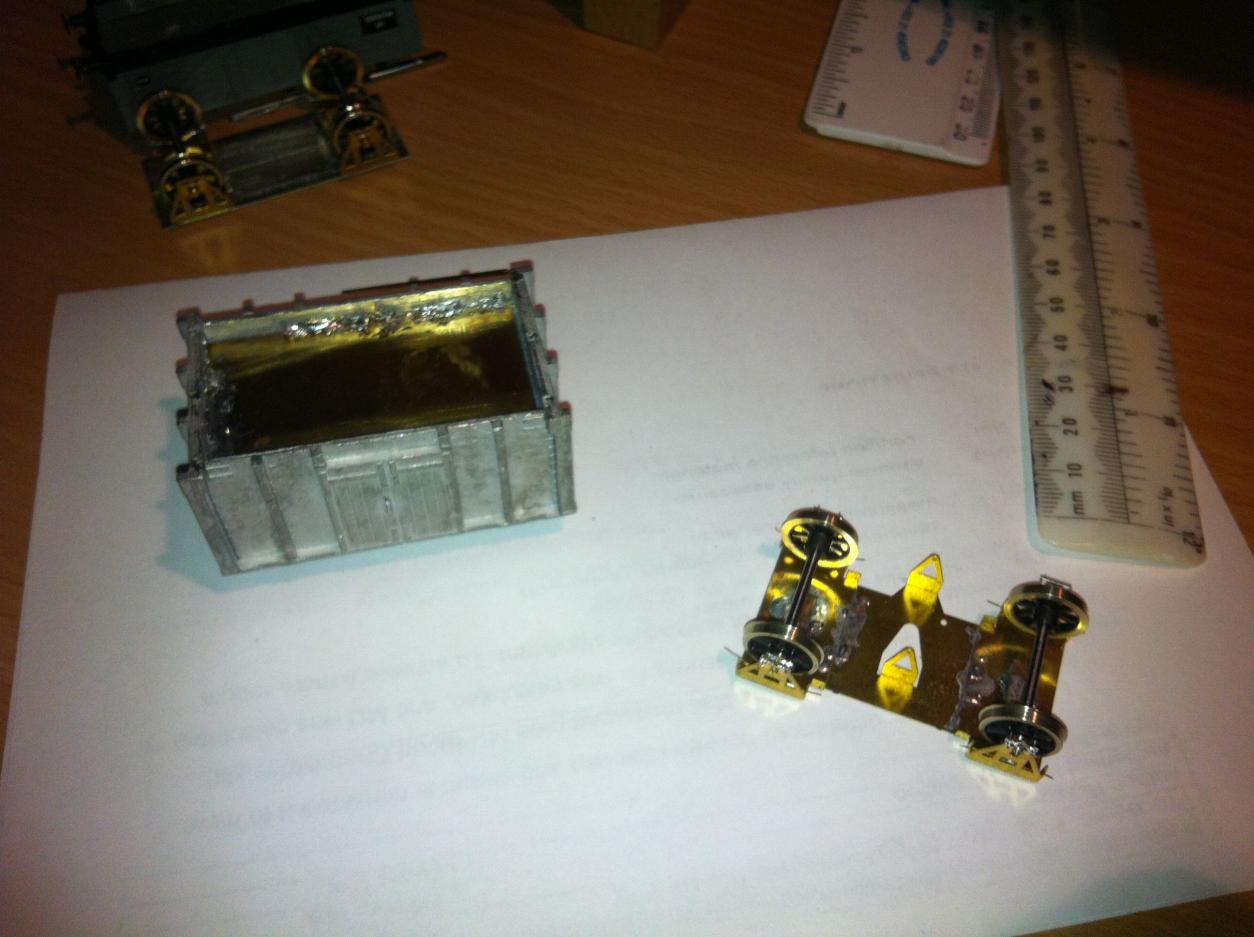
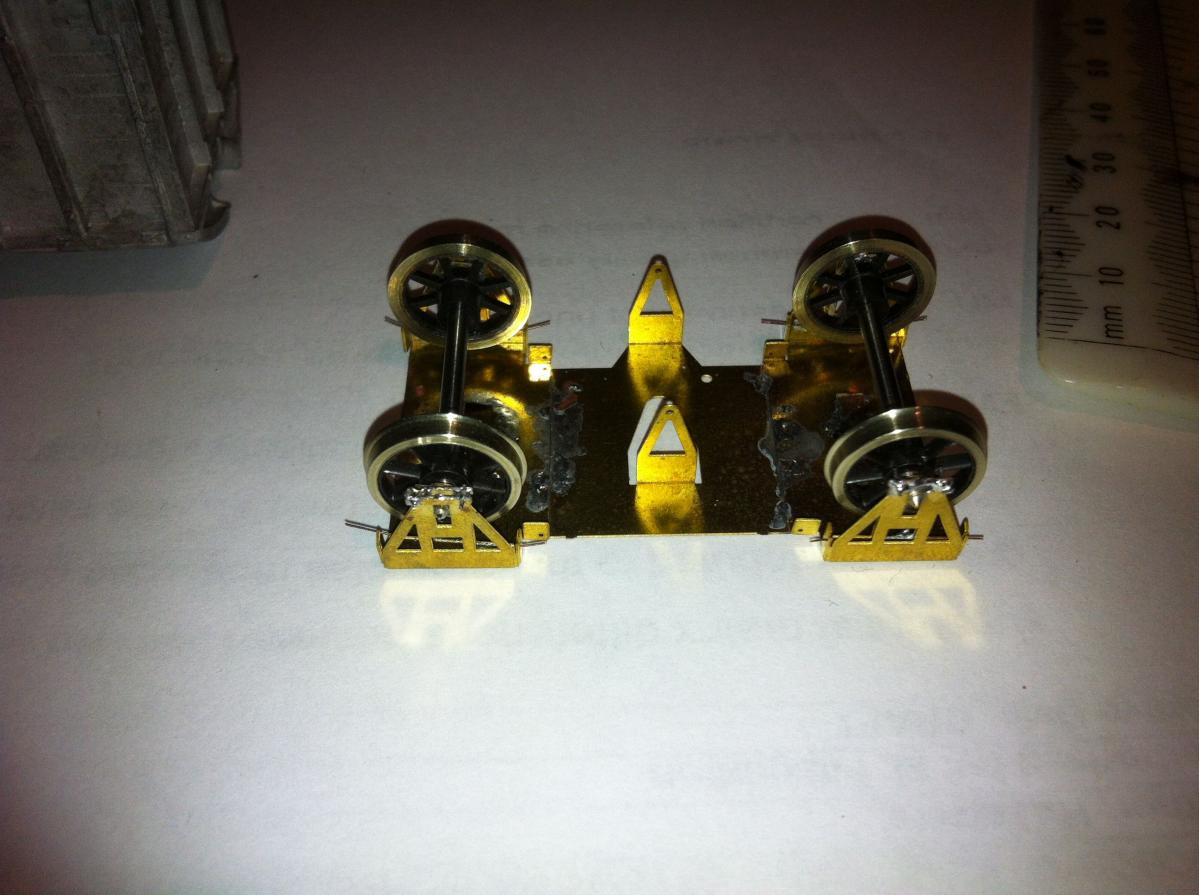
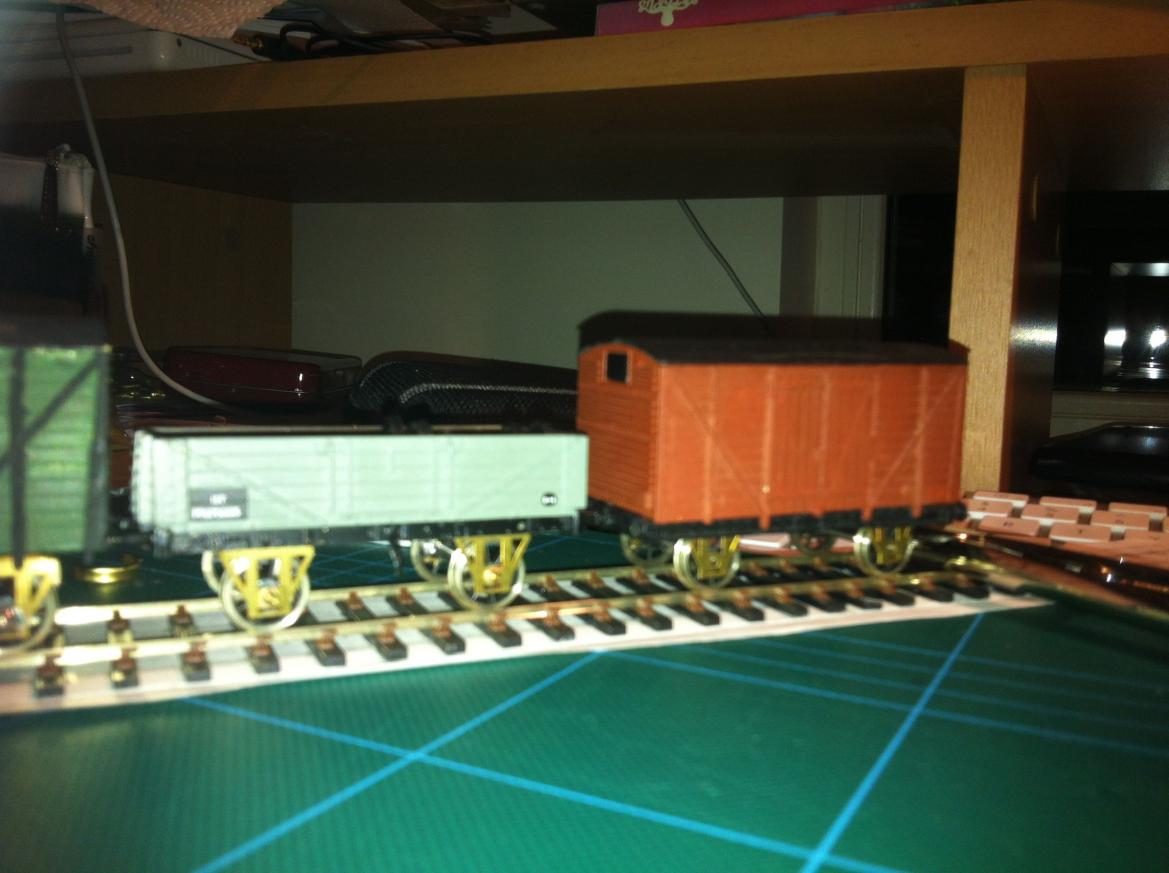
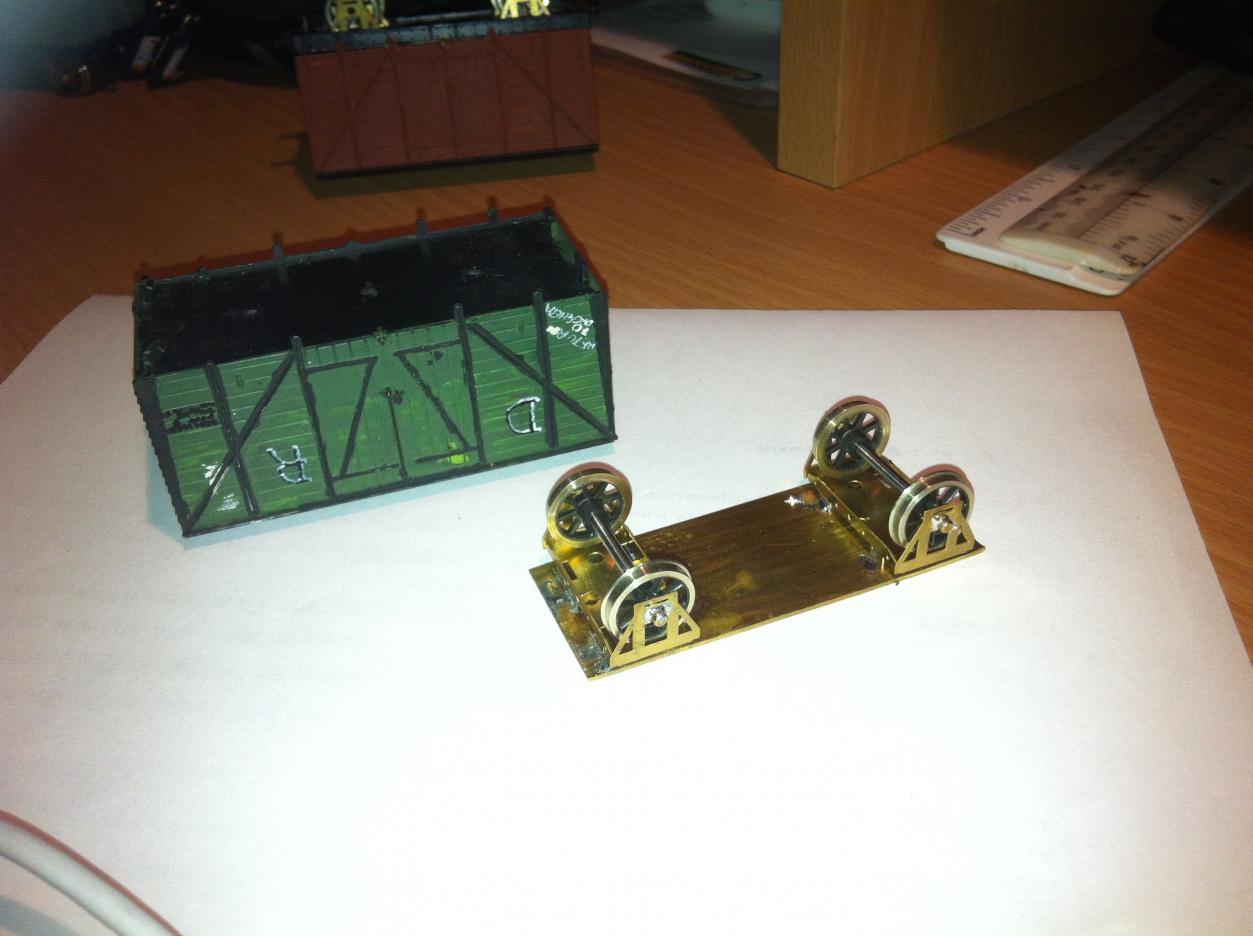
A bit stuck here for the past few weeks. I'm ready to start laying track on my test track but I need to brace the board I'm building it on, and I can't get time during the day to drill a series of holes. Modelling time is late at night, and I can't use the electric drill for fear of waking up the family and the neighbours. (In fact, a lot of the time, modelling time is becoming work time. I never used to be a workoholic. Oh well - best not to complain - finally off on my Summer hols on Saturday - no more work or modelling for 2 weeks.) So I've been working on converting some wagons to 21mm gauge. Here's the line up: Working from the right: #1 is an old Lima box van with 21mm W-irons fitted and 12mm 8 spoke wheels painted in Humbrol red oxide. Useful as a first attempt but the irons were either too high or too low. Now they're set too deep so the buffers are too low. I'll redo the underframe in due course the same way as #3, and fit buffers and couplings. #2 is a new Bachmann 5 plank BR open, of similar design to any open. It is mounted on a Palatine Models nickel silver base plate. I had to do a fierce amount of scraping with a craft knife to open the solebar out enough to fit the W irons inside. The Palatine base plate is from P4 stores and very nice: a completely flat base to build an underframe on. I need to fit couplings and build brake gear to finish. #3 is another old Lima box van which I was practising painting and lining on years ago - hence the odd livery. It is sitting on an underframe built on a thick brass plate. Took quite a bit of work to get the plate flat after cutting it with the tin snips and filing to shape, but the end result is quite good. I need to glue the 2 parts together, build couplers and brake gear, add buffers, and repaint to a more prototypical livery. #4 is a modern Bachmann GWR cattle wagon. This was easy to convert, as the bits came apart fairly easily. Then I cut the solebars off the frames, cut the w irons off the solebars, fitted the 21mm w irons and stuck the plastic ones on outside. I'll need to repaint it before use. It's obviously not a GSWR prototype, but it will do to be practising on. Buffers required and perhaps some painting. #5 is the real McCoy, one of Weshty's GSWR convertibles (Mustang and T-bird drivers eat your hearts out!) I'm stuck on this because I realised that white metal is 60% lead (or is it only 40%?) Anyway, it's not to be used around the house because I don't want a 2 year old ingesting the stuff, so completion will have to wait until I have time to work outside and cut off the flash, file off the excess, and use the fibreglass brush to remove the oxidation layer. I soldered it together and it's very nearly square. The soldering was a bit difficult, since I've no temperature control on the iron, so actually it's more like I welded it together. Welding a white metal kit is dodgy, but very strong. I fitted a brass floor plate instead of the plastic one supplied, so the idea is to solder the sides to the floor plate. Disaster struck when the wagon swung around while being melted together: I kept control of the tip of the iron fine, but didn't realise that the end of the wagon was resting against the element of the iron. A bit of a repair job to do there. The best part of this wagon is the underframe, which is sprung. Not too hard to build, but it took a long time to figure out because there were no instructions: apparently most people just build the wagon by attaching the supplied white metal w-irons to the floor plate for a OO model, but I wouldn't fancy my chances of getting those square, and there are some very nice locating holes built into the etch (0.35mm drill bit required). I've told Des I'll do a step by step on the next one, but it'll be a month or more before I get to it, otherwise I'd say 'watch this space.' I'm held up finishing too because this wagon needs 14.2 mm spoked wheels on 28 mm axles and P4 stores are out and Gibsons won't be providing a new set for a few months. However, northyard in New Zealand say they can supply them so I've an order to put in there. (Thanks to John Mayne for that tip.) I'll put Gibson wheels on them. Then I can build up the brake gear: there's all sorts of brake gear bits supplied and I can't figure out which ones to use until I get the correct wheels in. Everything is too interrelated, but I think it'll be a good model when it's finished (apart from the patch on the end.) Then there's proper buffers to be bought and I have to figure out if I can make Alex Jackson couplings. I have some of the jigs for this but the things just look too fine to be practical. Time will tell. Some extra pics of the convertible: A closer shot of the unfinished convertible and the GWR cattle truck: Bachmann open and Lima box van: Bachmann open and bauxite Lima box van - the latter down at one end because I couldn't figure out how to get the fixed and floating w irons at the same height: The bauxite box van upside down showing the underframe cut away to accommodate the w irons, which are screwed to the floor of the upper part of the van: Lima box van with brass plate chassis, underframe to be rebuilt to complete (hopefully Weshty's bits will suit), and chassis to be attached: A Bill Bedford jig for making square wagon underframes. Make up 2 w irons, place 28mm axles in them. Clean and flux the w iron and base plate. Put the w irons down on the base plate. Put the jig on top to make sure the wheels are square to one another. I got this from P4 stores. He trades out of mousa.biz as well - some classic arguments in the blog on the website. And finally, the Bachmann open, with underframe on a Palatine Models base plate. Great, easy to solder, possibly a bit expensive when you can just use a piece of brass instead: Anyway, that's the current state of progress, such as it is. I wrote this seeing as I was making no progress on the actual models last night. I recall a great Iain Rice article that started, "Prawgress. Uz don' get much prawgress roun' 'ere, most wise." Alan

-
Nice livery job, Richie, though the 22s look better in green. Prettiest thing on the network these days, they are (071s in black and silver being better looking but certainly not 'pretty'). The 22s are how I learned to love railcars and stop longing for Cravens. Here's the 89 in Supertrain livery, which is great - http://www.fictitiousliveries.co.uk/photo.php?89011_ob.jpg. Try the 47 in black and tan - that orange doesn't suit it at all. The 67 is good. Someone did a 58 on here (or the old site) in orange and black a way back which looked superb. Alan
-
Murphy's CIE Mk IId coaches - What's What
islandbridgejct replied to FrankS's question in Questions & Answers
That's right. The CIE supertrain livery was orange and black, with no white stripe and an orange roof, and has not been released yet. It was used on the Mk IIs until Irish Rail painted white stripes, black ends, and - later - black roofs on these carriages. (Subject to correction about when the black ends came in, but originally the orange and black stripe continued up to the gangway, like on a Mk III. I'm always a bit puzzled when people talk about the 'Galway' livery. I presume it is the orange with black band around the windows, not extending as far as the doors which remained orange and some yellow lining. It's a late IE livery and needn't concern you. Most of the Irish retailers will correctly list their carriages as IE, IR or CIE, depending on era, so you should be able to rely on their description. You're looking for CIE. You'll need to either wait for the CIE version to be released or else paint out the white stripe. As far as I recall, the white stripe was added over an area that was originally orange - the black stripe remained the same width after repainting. Again, someone else on this site may correct me if I'm wrong. Alan -
Fantastic. Not sure which I prefer, the hair, the uniforms or the peaked caps. Ní bheidh a leithéad arís ann - buíochas le Dia. Great continuity too - 084 on shed (but was it in the diesel shops rather than the running shed?), 083 backs onto the train, and 076 takes it away. Thanks for posting, Ciaran, Alan
-
Frank, Martin Bott Books, http://www.bottbooks.com/onlinebookshop/page.asp?tmplt=sys&wbpg=home, has an Irish Transport section and used to have a load of IRRS journals. He sells mail order and the service was good when I used it. Hope that helps. Alan
-
I love the way the brickwork seems to glow from under all the smoke and dirt. I don't think I've seen better modelling anywhere. Alan
-
Those vans were generator / steam vans (GSVs). They had a generator for electric lighting and a steam boiler for steam heating. The Cravens coaches had 'train line' lighting and a 'TL' suffix on their numbers in the late 80s, which meant they needed a light source because they didn't have a dynamo fitted beneath the coach. Some other coaches also had the TL suffix, but I can't remember which. The advantage was that, when your engine broke down, you weren't left sitting in the dark. I think the Park Royals and laminates had the dynamo, and worked with a heating / luggage van (HLV), but I wouldn't be sure on that. There were some coaches that had storage heaters for working the Ballina branch without a van. Oliver Doyle and Stephen Hirsch's first edition of Locomotives and Rolling Stock of CIE and NIR had all the details. Alan
-
Beautiful work as usual. Funny to think that when the convertibles were withdrawn they weren't much older than the Tara wagons. Alan
-
That's gorgeous modelling, Padmack. I've just spent an hour poring over the SSM underframe for the convertible. Is that the sprung version you're using, and if so, have you any advice on how to put it together? I'm feeling a bit out of my depth at the moment. Lovely weathering on the horsebox. There's a picture in Des Coakham's "Irish Broad Gauge Carriages", but in black and white. Great ideas on how to weight down models. I've been wondering how to do it in order to avoid using lead. (You'll probably want to seal the batteries, otherwise they'll leak acid in a few months / years and ruin your models. There was correspondence in MRJ a few years back about using lead shot and pvc for weights: apparently the pvc reacts with the lead and the resultant compound is bulky and can cause models to swell and buckle. I haven't tried it myself, so that's just 2nd hand info.) Thanks John for posting the address for 28 mm axles. Scalefour are out of stock and I've just about used up my supply. Alan
-
That's beautiful modelling. Thanks for posting it. Alan
-
John, Those are beautiful and just as I remember them. Light years ahead of the old MIR ones. Alan
-
About the colour, I think this is down to them being painted by GM before shipping. The paint pigments must have been slightly different to what the paint shop in Inchicore was using at the time. I remember noticing the different colour - browner, more 'tan' than the shade of orange used in the 1970s / 80s, with a white roundel rather than the standard orange with white 'CIE' in the centre. When they were repainted, Inchicore turned them out the same way as the 141s. I wasn't aware of the headlight detail - interesting. Alan
-
Improving the looks for MM 141/181
islandbridgejct replied to Flying Scotsman 4472's topic in Tips & Tricks
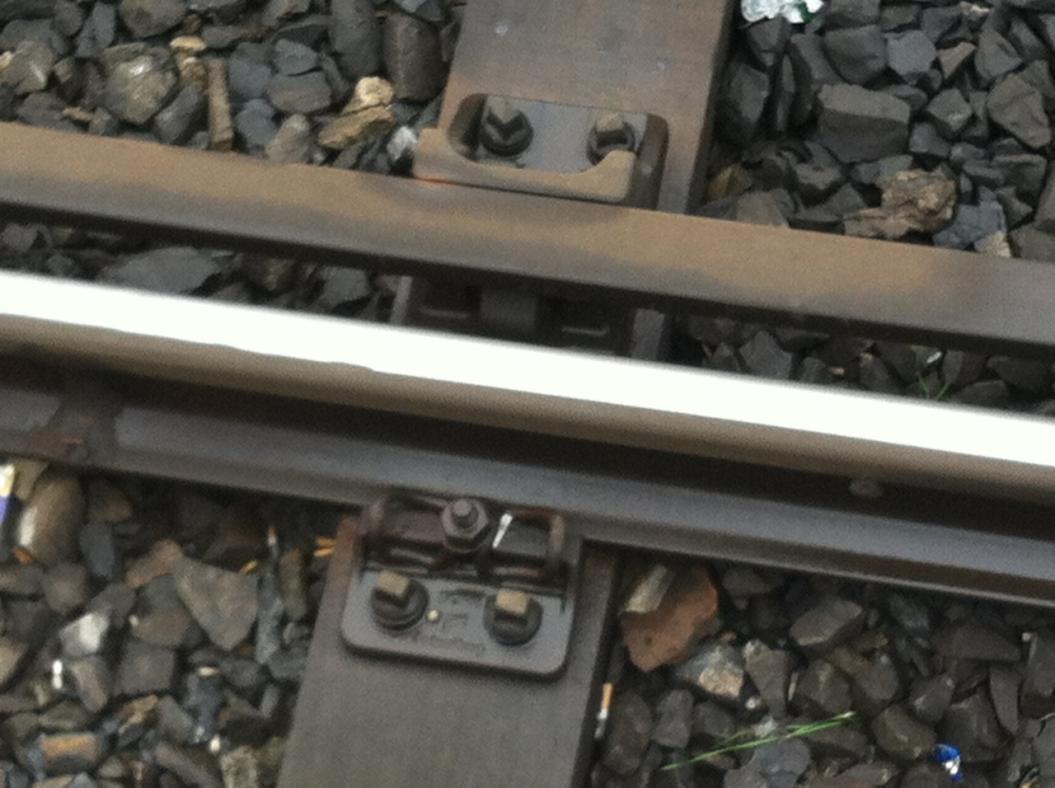
The one's I remember were all ordinary bullhead as well. I was a bit surprised when I realised these are square and not very deep. The chairs holding them are pretty massive. Alan -
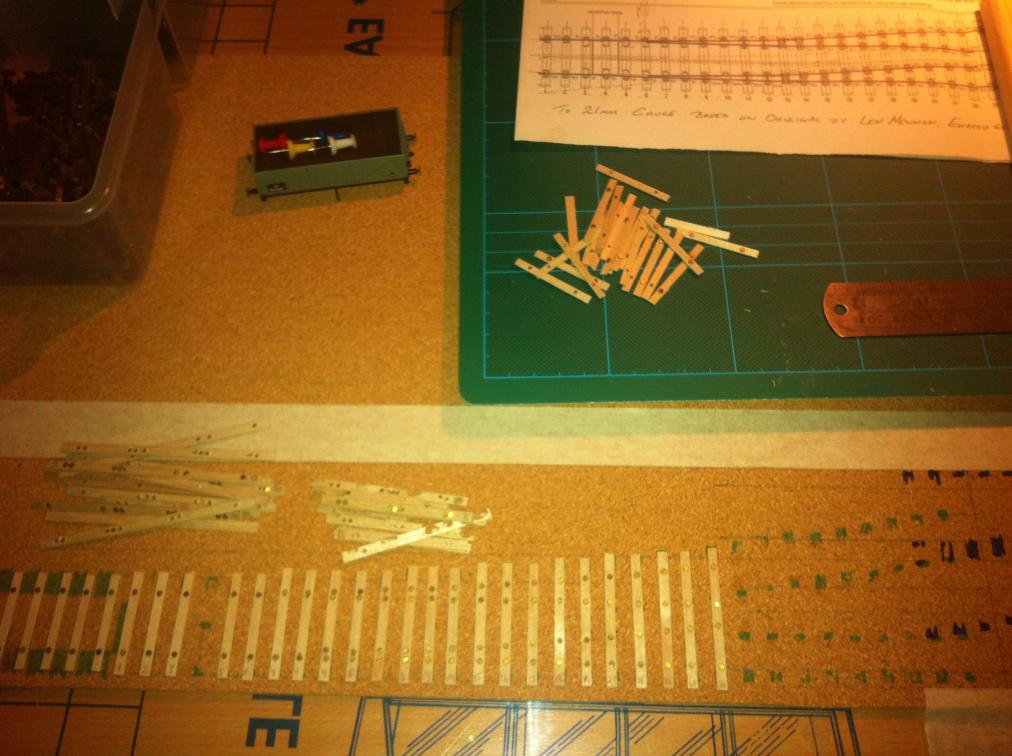
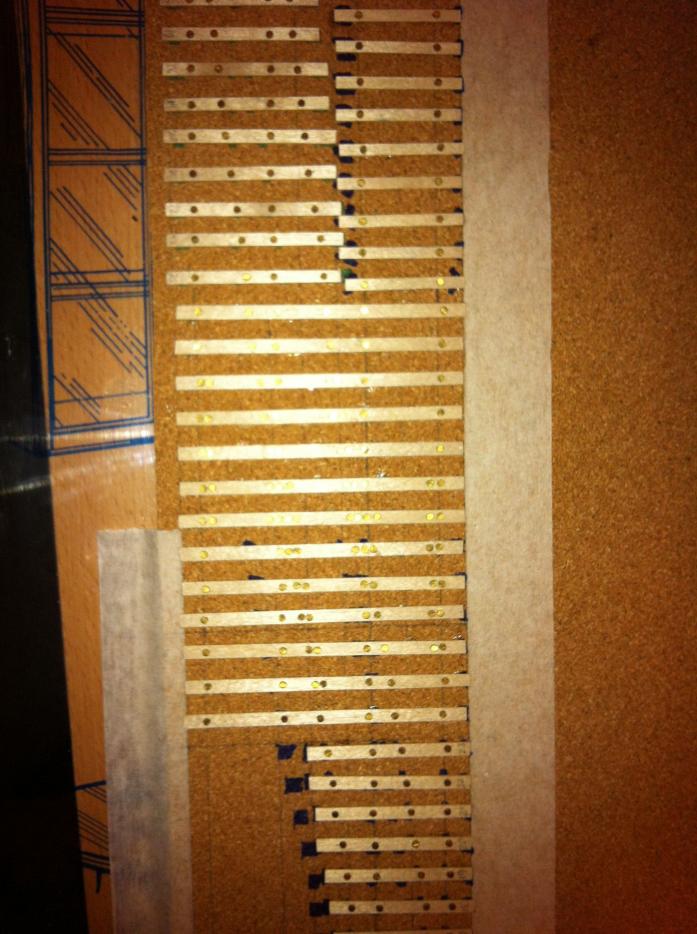
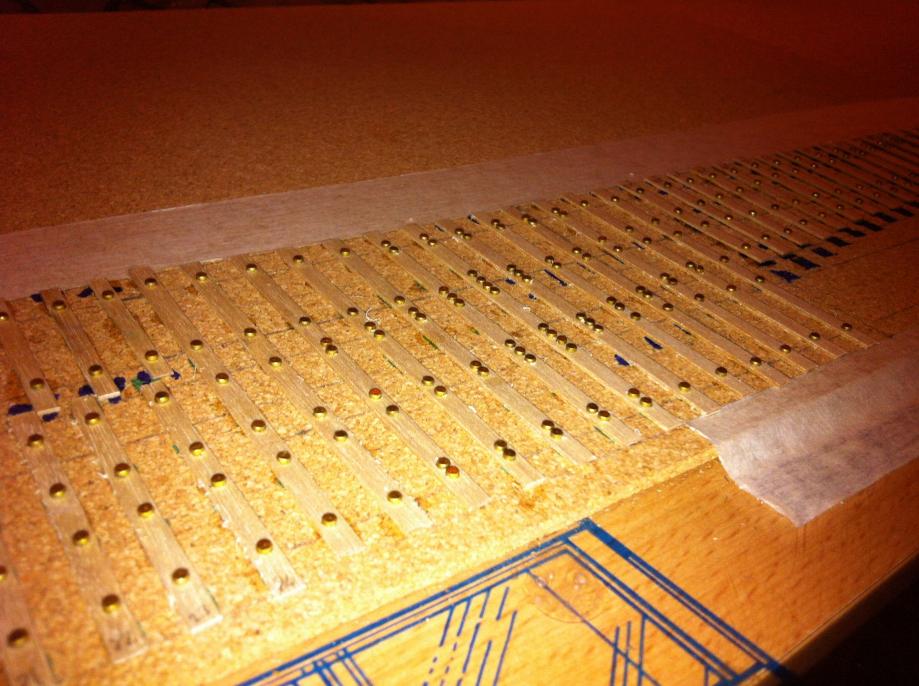
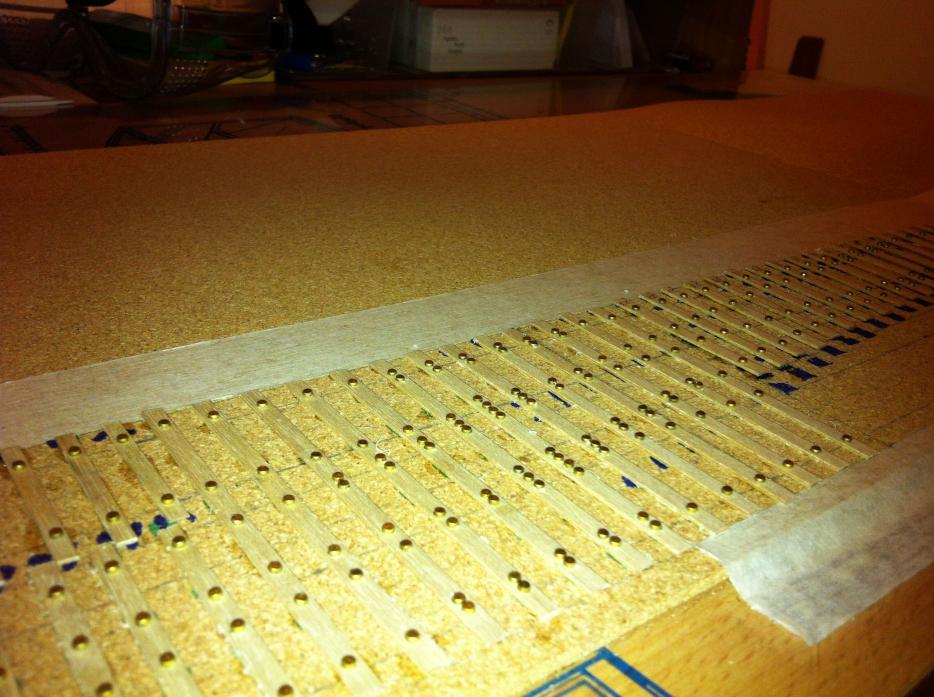
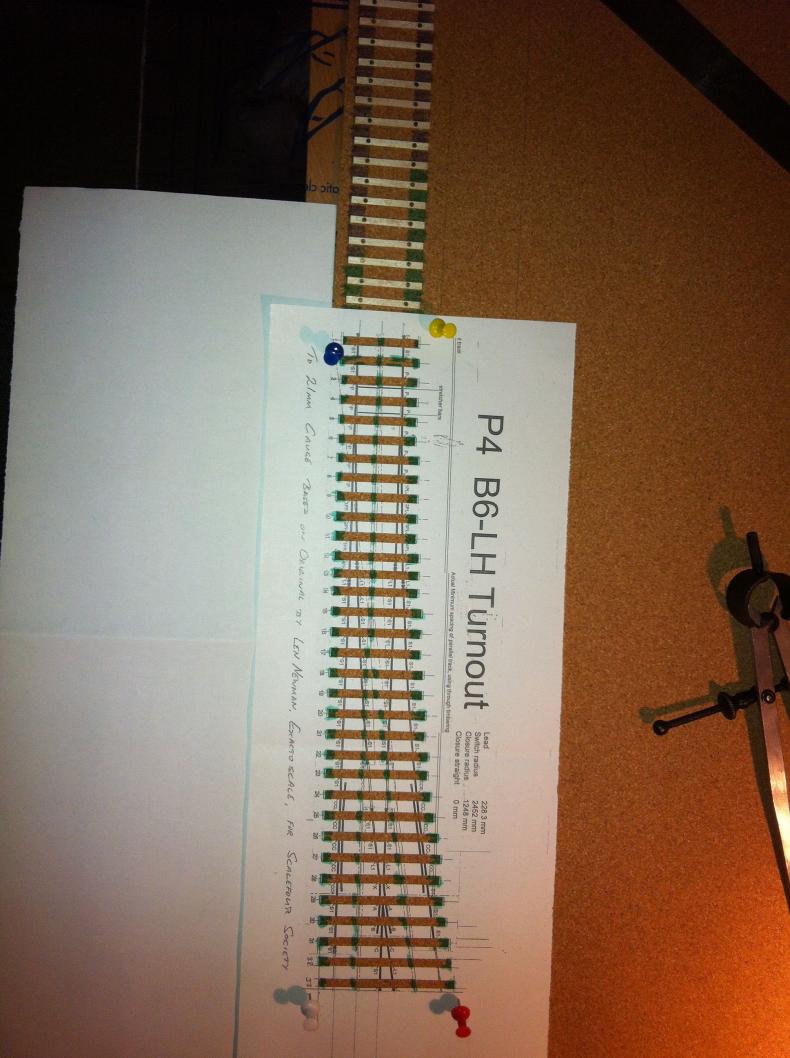
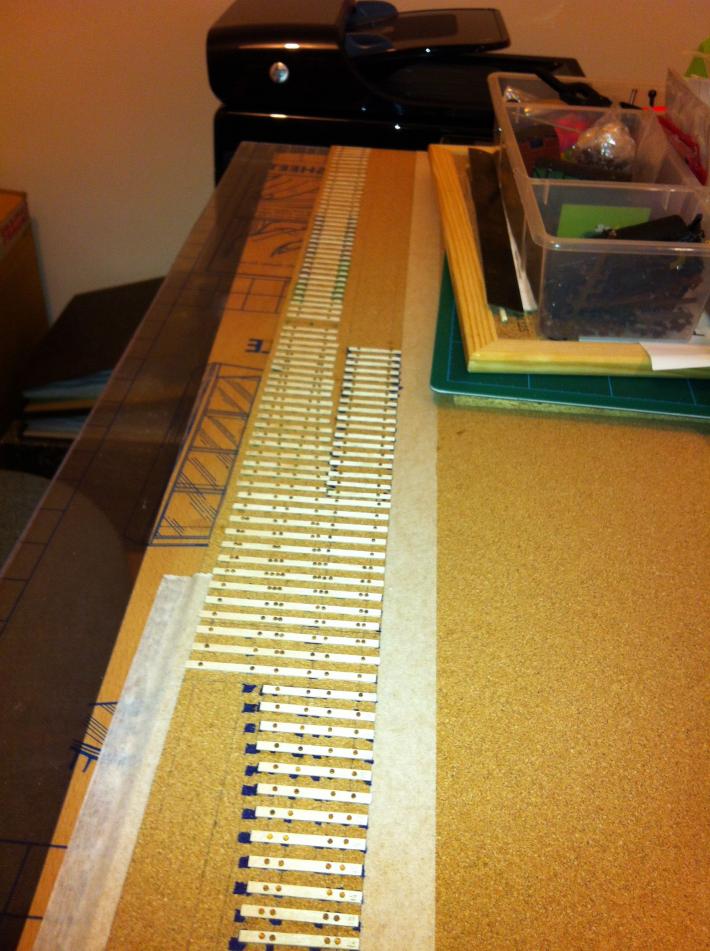
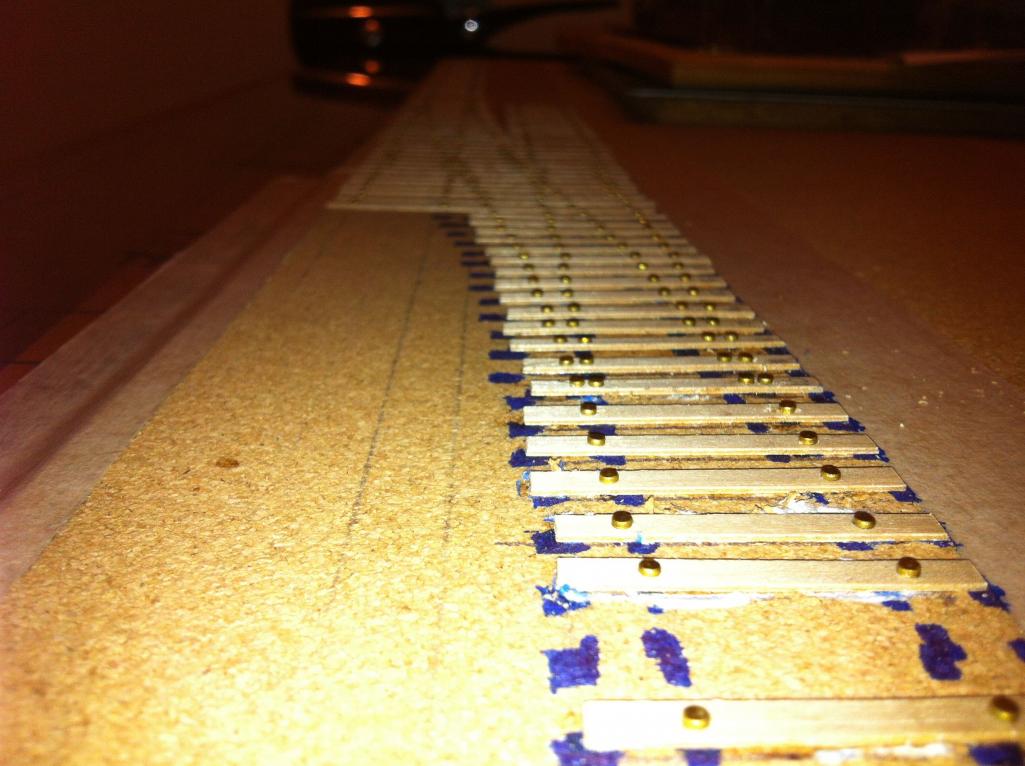
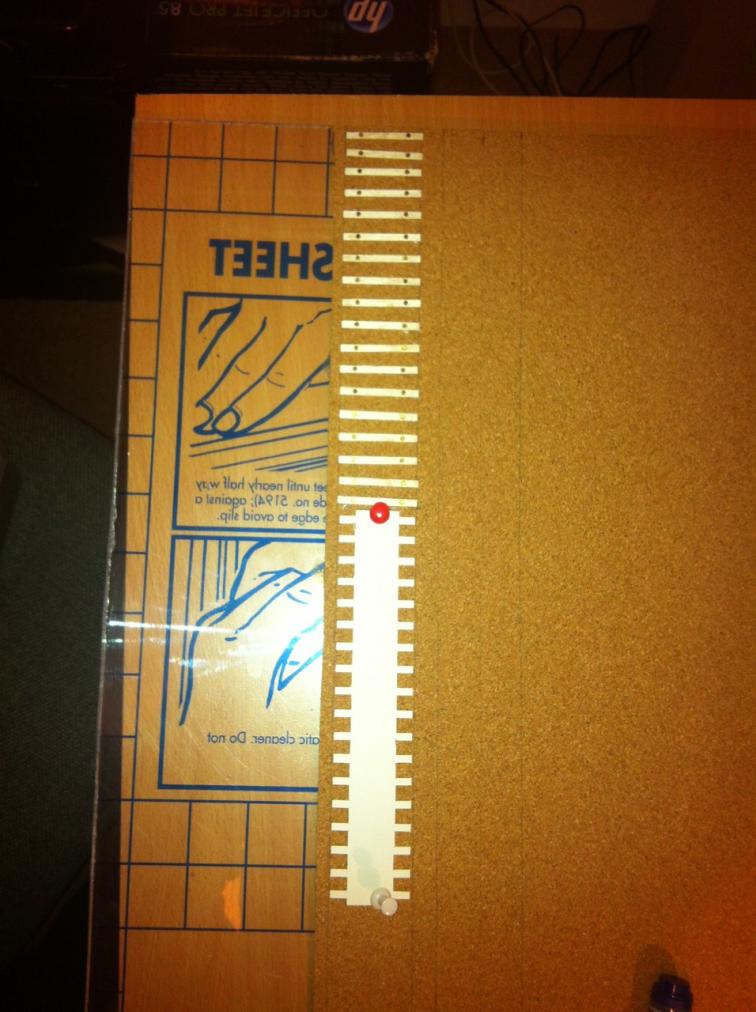
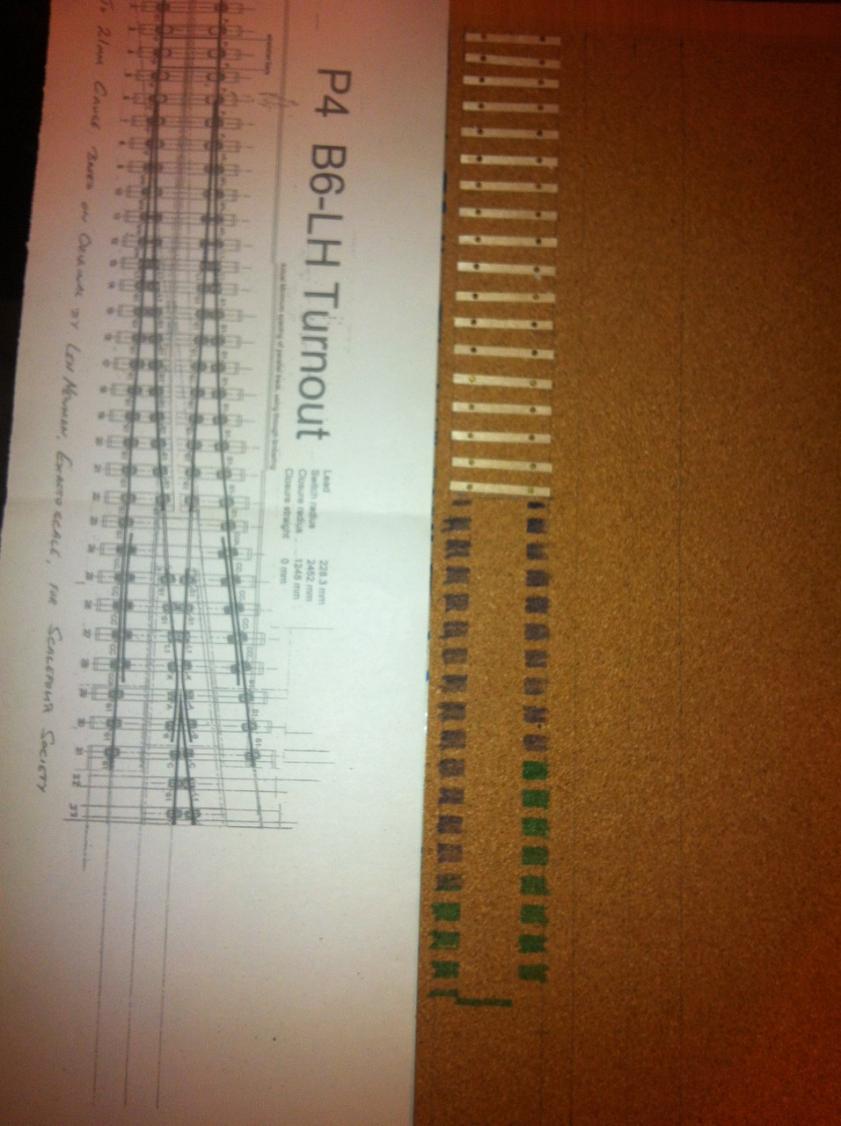
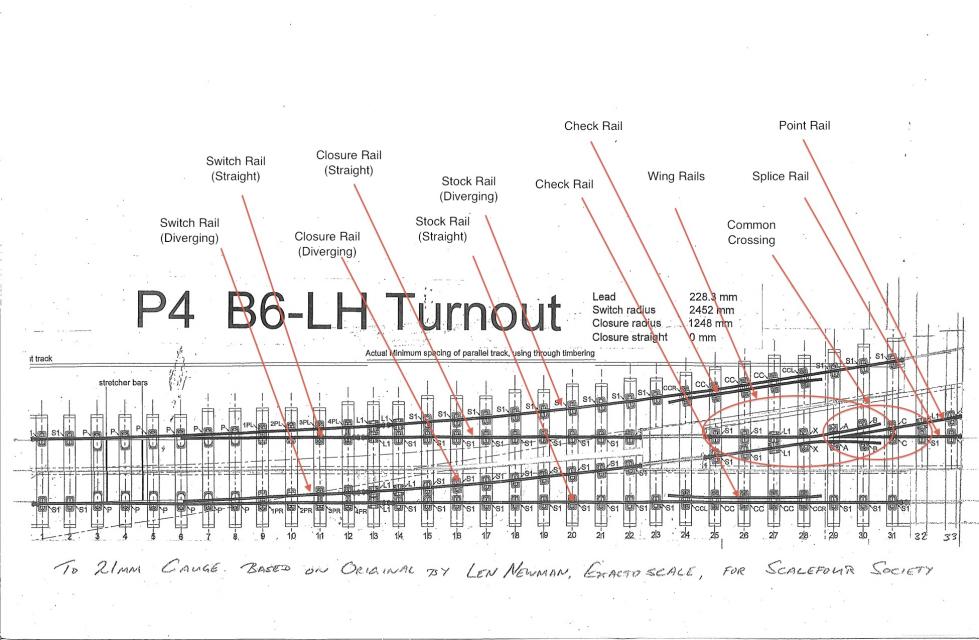
19 July A few more pictures of work on the test track. Marking out for the turnout. I cut out the sleepers, placed the template in position, then marked where each sleeper was to go. (Don't try to stick the sleepers down with the template in place and then lift the template – the glue under the sleepers will leak out and stick the two together.) img296 Sticking the sleepers to the cork. (Why do I always want to put a capital C on Cork?) I'd got to this stage and a little bit beyond when I realised I had a problem. img 314 You can just see the problem in the right of the picture: in order to get the correct 6 foot way, you can't simply lay 2 turnouts end to end. You have to cut a bit off the diverging stock rail of each, and try to match up where the sleepers lie. You also have to lay a thing I had never heard of: through timbers. These are long timbers spanning both running lines, and the common crossings are laid on them. But how many through timbers should you have, and when should they start. I checked through all my books for a good picture. None. I checked rm-web and the Scalefour website. Nothing. I thought about posting a question, but one of the questions I had read through said, go out and see for yourself, so I thought I'd better try that first. There followed several weeks of peering over bridges and out of moving DARTs, trying to see the through timbers, but they're all hidden in the narrow angles between the diverging and straight rails. Finally, a trip from Grand Canal Dock left a few minutes before a train was due, and I could see a crossover at the north end. A quick jaunt down the southbound platform brought me close, but not quite close enough. I could see, though, that the northbound platform ended on the crossing. Still 6 minutes until the train was due, I hoofed it back down the platform to the footbridge, over and up the northbound, looked at the arrangement, and hared back to catch my train. Long things, platforms. The answer to my question is that the through timbers begin at the point where the timbers of the diverging line meet the timbers of the straight line, and continue to the same point on the other side of the crossover. (Worth highlighting, in case anyone else is wondering.) At Grand Canal Dock the situation is complicated by the fact that there are two crossovers in line. Rather than find timbers to span all 3 lines, Irish Rail just have some of the timbers bolted together, though they're laid out as through timbers. img 315 shows the gap left for sleeper number 4, which will be used as the turnout operating lever. I'll fit cosmetic bars later. Note the numbering of the sleepers, to prevent getting confused as to which is which. I hope that will come off with the rubber. Later, I just relied on positioning and length to avoid having to do this. Next up, the laying of the through timbers. They're a bit shorter than sleepers 1 to 24, because I realised that, when I widened the template for the Irish gauge, I didn't shorten the 'outboard' end of the sleepers. I ended up laying this section twice because I made a mess of the rivet location first time out. (Yet another reason to use P4 Track Co parts.) img340 - img342 And finally for now, a picture taken from line level showing the timbering for the full crossover – and cruelly showing up the drunken location of the rivets. This is mainly down to the drill bit sliding on the grain of the plywood as I drill the hole. (It's either that or whiskey, and I LIKE whiskey.) A check with a piece of thread revealed that each rivet should be capable of connecting to the track, so I decided against replacing any of the timbers. Now I just pray I'm right. Alan
-
New 4mm kit released. Great Southern Railways Class 800 "Maedhbh"
islandbridgejct replied to Weshty's topic in News
Gorgeous model. Excuse me while I prop up my jaw and try to stop drooling. Alan -
Irish Traction in Colour Book | Derek Huntriss
islandbridgejct replied to snapper's topic in General Chat
I looked through it in Easons and there's a nice collection of pictures. The usual range of topics, but not anything I had seen before. I'll probably buy it in due course. I always thought 'traction' meant diesel or electric locos. I guess that would be 'modern traction'. You live and learn. Alan -
Improving the looks for MM 141/181
islandbridgejct replied to Flying Scotsman 4472's topic in Tips & Tricks
Sorry, Anthony, I'm a bit slow with these. I kept arriving just before my train was due, so this morning I got devious and took them after I got off. Alan [ATTACH=CONFIG]1751[/ATTACH]
-
Nice track work, John. Personally, I think I'd skip straight to the sausages. * At the moment, I'm working on a 1.2 metre test track with a B6 crossing. I'm laying it on cork underlay, loosely attached to a baseboard. The idea is to create a floating track to allow some flexibility, so that it shouldn't be too noisy. I'll experiment with how firmly it needs to be attached. I decided I didn't want a layer of paper between the track and the cork, as this would lose some of the qualities I have the cork for in the first place. Apart from that deviation, the principles are pretty much as set out in Iain Rice's Approach to Building Finescale Track (published by Wild Swan and available here: http://britishrailwaybooks.co.uk/books/wildswanmodelling.php) which is pretty much invaluable and worth every penny. I had to figure out how to get the sleeper spacings from the template to the cork, and this is version 1: cut out around the outside of the sleepers, leave the area between the tracks intact, pin the template down, and mark the edges using an old indelible marker. It works quite well. (If you don't transfer the template to the cork, either the sleeper spacings go wrong, or the alignment.) The board iteslf is perspex and will be braced with aluminium angle, but that's another story. Alan
-
They're very nicely built. I didn't know the bull ants used a rubber drive. Any idea what happens when it perishes? Alan
-
Improving the looks for MM 141/181
islandbridgejct replied to Flying Scotsman 4472's topic in Tips & Tricks
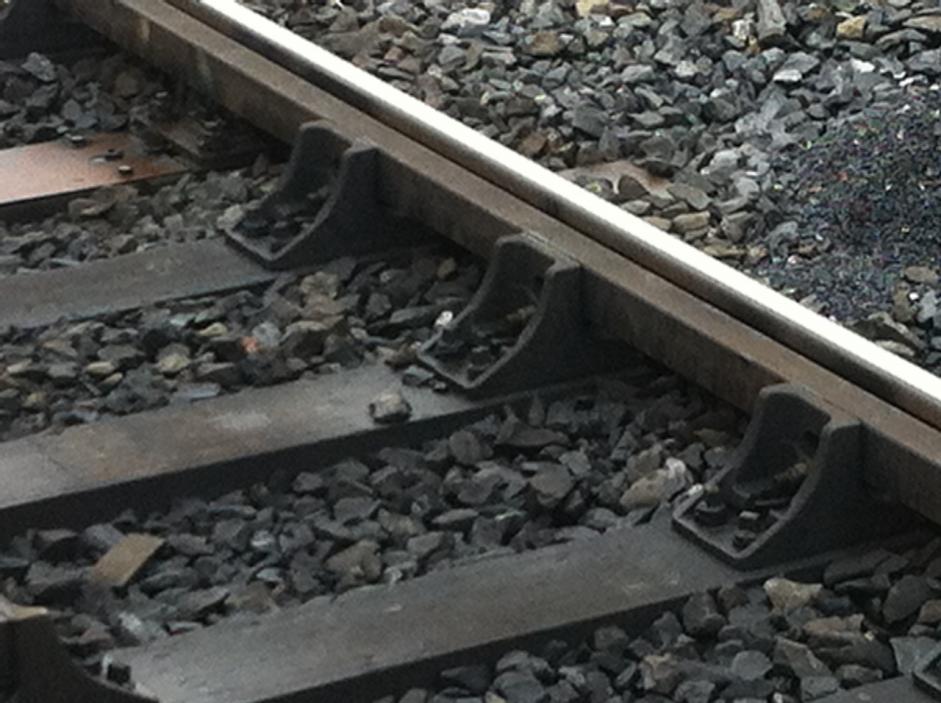
Nice conversion there. I've a couple of 141s to convert to get me going on the broad gauge before I start time travelling, so it'll be useful to me. Tara Street has check rails. The rails themselves are square, slightly wider and than the head of the rail and as deep as they are high. They're held in fairly massive special chairs, which hold the rail and the check rail, and the chairs are held down with pandrol clips. Ciaran Cooney has some reasonable shots on Eiretrains. If I can get some close ups over the next few days, I'll post them here. Alan -
John, Thanks for all that. It's fascinating, particularly the thought that you do it the same way for real narrow gauge rail. I missed that on first reading. I have Mills' book open and it's great information. He has a table on the advantages of bullhead over flat bottom rail – better load distribution through the chairs, less wear on sleepers, rail can be changed without disturbing the chairs, easier to bend – yet by the 1950s flat bottom had won out, even without the flexibility of the Pandrol clip. I had thought that the GNR used inside keyed bullhead, but when I looked at my photos it was all outside keyed, so thanks for clearing that up. I really must make it down to the IRRS to see what information they have. Hopefully in September. I also must see if I can look at the Lawrence collection photos – I have a book of them collected as “Transport in Ireland, 1880-1910” published by Transport Research Associates in 1967, and they really do contain a wealth of detail. I'm interested that the GSWR could still have been using bridge rail in sidings in the early 20th century. Most of the sidings I've seen pictures of have light flat bottom rail, and I'm planning to use Code 55 flat bottom rail It's curious that the Midland and GNR could build large 4-4-0s and 0-6-0s while the GSWR couldn't. I must see what I can find out about that. I had a look at New Ross on Ciaran Cooney's eiretrains.com to see if I could find some DSER bullhead (because the track is still in place northwards to the Barrow Bridge) and sure enough he has a picture of a 1923 DSER bullhead chair and rail. I can't remember when the DWWR got through to Waterford, and changed its name, but I know it was before 1906 when the GSWR made it to Rosslare, so either the New Ross line was relaid about 1923 or it got cascaded DSER rail later. It's interesting though that it was laying bullhead before 1906 near Shankill but by the late 30s parts of the main line in Wexford were still laid with flatbottom rail. (Or else I'm just misremembering photos again.) Thanks again for all the info. Alan
-
Richie, I think part of the confusion may be because I'm talking about this rail and that rail without providing a clear indication of what bit is what. Here's one now, and I hope it helps (but be careful, because I've mixed up the names of the point rail and the splice rail on the common crossing and can't alter the jpeg without starting again - should be the other way around - duh): b6a Mind you, it may not. I find exactly the same problem when I read stuff someone else has written: they're talking about this bit or that bit and the names go straight over my head and just keep going. That's partly why I started building stuff. I had read all I could get my hands on, and I often found my eyes just glazing over and I'd come to the end of the passage and wonder what it all meant. It makes more sense when you've tried it yourself. There's no substitute for actually doing the stuff. I find now that, when I go back and read things I've read before, I'm left thinking, “oh, so that's what he meant.” And, by way of confession, I only figured out properly which rail is which when I wrote the passage above. Now I just hope I can remember them. Talking about trying it yourself, I'm really just posting progress on this workbench so people can see a bit of what it's like to figure it out as you go along. John has maybe 20 years' experience and it really shows in his construction. It's neat and tidy and it looks well. I have burnt sleepers and rivets that are up to 1mm out of line. I have solder joints that fail because I didn't clean them properly or flux them enough. I leave bits out and find I can't put them in later. But I've only 6 months' experience. I'm hoping some people will look at what I'm writing and say to themselves, “I could try that.” And you should. Alan