islandbridgejct
-
Posts
212 -
Joined
-
Last visited
Content Type
Profiles
Forums
Events
Gallery
Blogs
Everything posted by islandbridgejct
-
No signs of fettling on that chassis. Looks like a standard to aspire to. As to the black, black is never really black anyway - unless you're in space, and then no-one can hear you fettle. Alan
-
And after half an hour's soldering - well, 5 minutes with the iron and 25 trying to get pieces cleaned, fluxed and into position, I'm reasonably happy with this: True, one side is a bit bendy, but that's the side I filed the door bottom off on anyway. And the underframe doesn't quite fit - needs to be about 1mm smaller all round, so I'll have to fabricate another one. Anyway, so far I'm at middling. The next one will be better.

-
You've done a nice job with the shape of the front end there - that's probably the most difficult and most distinctive part of the old 201s. Alan
-
Superb workmanship. What did you have to do to fold up the splasher / footplate to clear the coupling rod? Alan
-
The doctor said he needed something a bit more concrete.
-
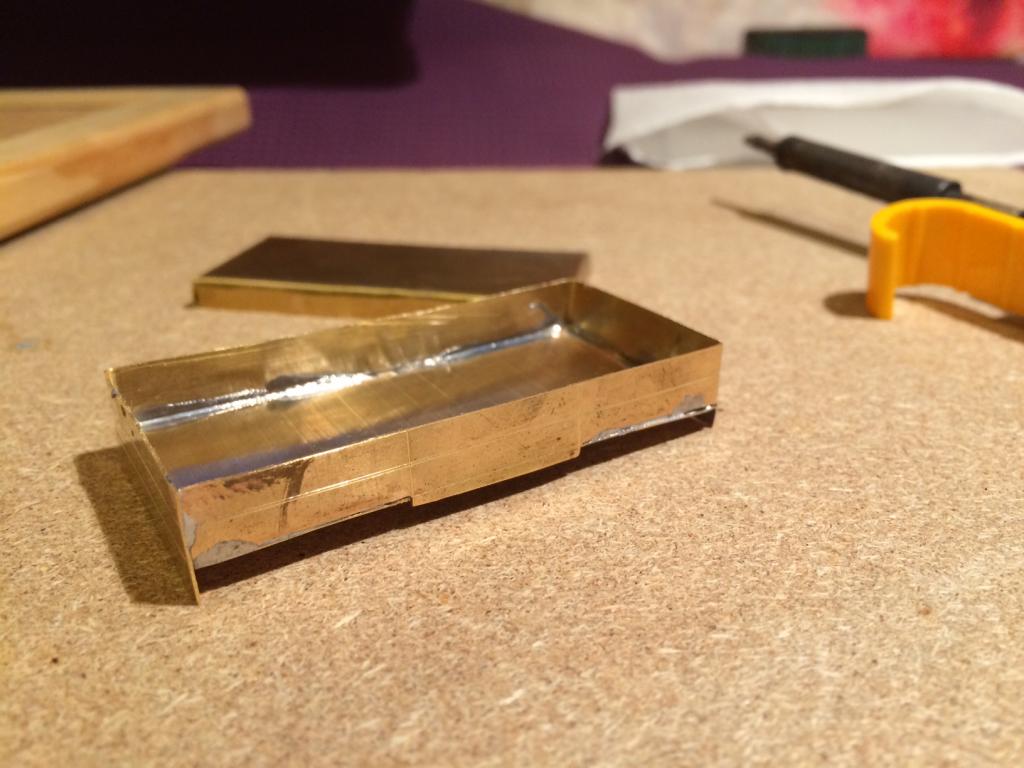
Tonight's progress - trial build of a brass open wagon. Underframe, floor and wraparound sides. Some errors already - in particular, I removed the bottom of the door on one side, oops - but I'll try assembling it anyway to see if it works out. Wraparound approach probably still not a good idea, though it does save having to solder the sides back together, and there should be a frame at the corners anyway. Floor filing is a bit rough, but I may be able to smooth it out. Overall, 0.2mm seems too narrow, so maybe I should go for a double thickness, or buy thicker brass sheet. Next night, soldering. Alan
-
That's a great plan. If you check IRRS journals for the 1980s they reported on what sections of track were upgraded to CWR since the previous journal. Keep us posted on your progress. Alan
-
god, you can't turn your back for 6 months but someone goes and posts a p4 layout and you miss it. Only just found this. Lovely work. I used a DD Wheelwrights rolling gauge to space the check rails from the stock rails (which I gather is NOT recommended) and a Bond (?) gauge to check clearances. I think I got them all from the P4 stores. (But don't look at me, I've only built a crossover and 1.2m of track so far.) If you're looking for 21mm gauge bogies, Bill Bedford is producing his to suit the GSR and B4 designs. Good luck with the build. I'll keep an eye on this now that I know it's here. It's nice to see an increase in the number of people interested in modelling to 21mm gauge. Alan
-
You've two lovely builds going on there with the coaches and 2-4-0, David. I look forward to seeing Belmullet - I was out there last year and it's a good deal bleaker and more wind-swept than Cavan. Alan
-
Nice work. Will be interesting to see more.
-
Hi John, Just found this: very nice work. I've reservations about Iain Rice's backing paper idea, because I think the paper is a perfect sound board, particularly if impregnated with glue. How do you find it? (I'm off now to try to find the Limerick Junction thread) Alan
-
Definitely making a silk purse of those two.
-
Thanks Kirley and Hunslet. I don't find the process too time consuming. The main problem I've had before has been in accurate marking out. Using CAD and a printout eliminates all of that, and gives me a template I can cut straight from. My plan for a brass open wagon is to do a printout on thin paper and stick it to the brass with Pritt stick or similar, and score through from that. The reason for going for brass opens is to try to get a bit more weight into them. I'll see how it goes. Alan
-
Thanks John. I've nothing against styrene. In fact I started to build using it - but just thought I'd try something a bit different, and that I could print more easily. In fact the printing doesn't work perfectly, because the toner tends to come off the board when I cut and scribe it. I've been thinking of alternatives. I'm keen to make some wagons in brass too, and may do some more in styrene. I'll try and get on with these ones first. Alan
-
Thanks jhb, I'd love to see pictures of the Inchicore model, if possible taken outside from a slight distance (he said, getting picky.) Colours tend to look darker under artificial light. So far, all I've got to go on are Richard Chown's model's from Castle Rackrent http://highlandmiscellany.com/tag/richard-chown/, and a photo in Michael Baker's Railways of the Republic of Ireland, 1925-1975 showing two ancient wagons at Achill about 1934, still in GSWR livery, and looking very faded and quite light grey (plus your own comments on this site.) What really strikes me about wagons of the GSWR, MGWR and DSER is the prevalence of outside, wooden frames, and the single brake shoe. These set them apart from mainstream English models, which mostly suit the period 1930-1960. I've seen pre-grouping English vans that are similar to the Irish ones. The other big difference of course is the large number of convertible or semi-covered wagons, which I'm trying to model here. A thing I've been wondering about is whether these wagons doubled up as cattle wagons. Captions to pictures are a bit ambivalent. Looking at photos, there seem to be vans with removable upper planking, and I'm not sure if these are the ones that are converted to cattle use, or if it's the semi-covered with tarpaulin above the doors. Do you happen to know? Thanks for the comments. Alan
-
Very nice. Would that be a Ford 040-T by any chance? Alan
-
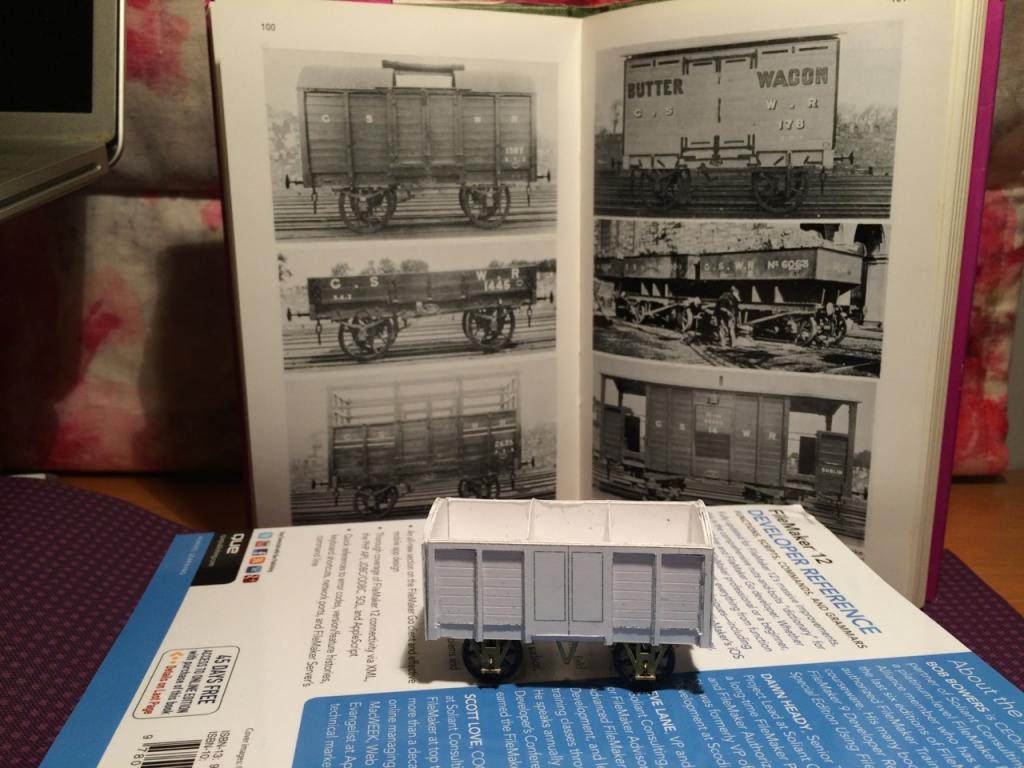
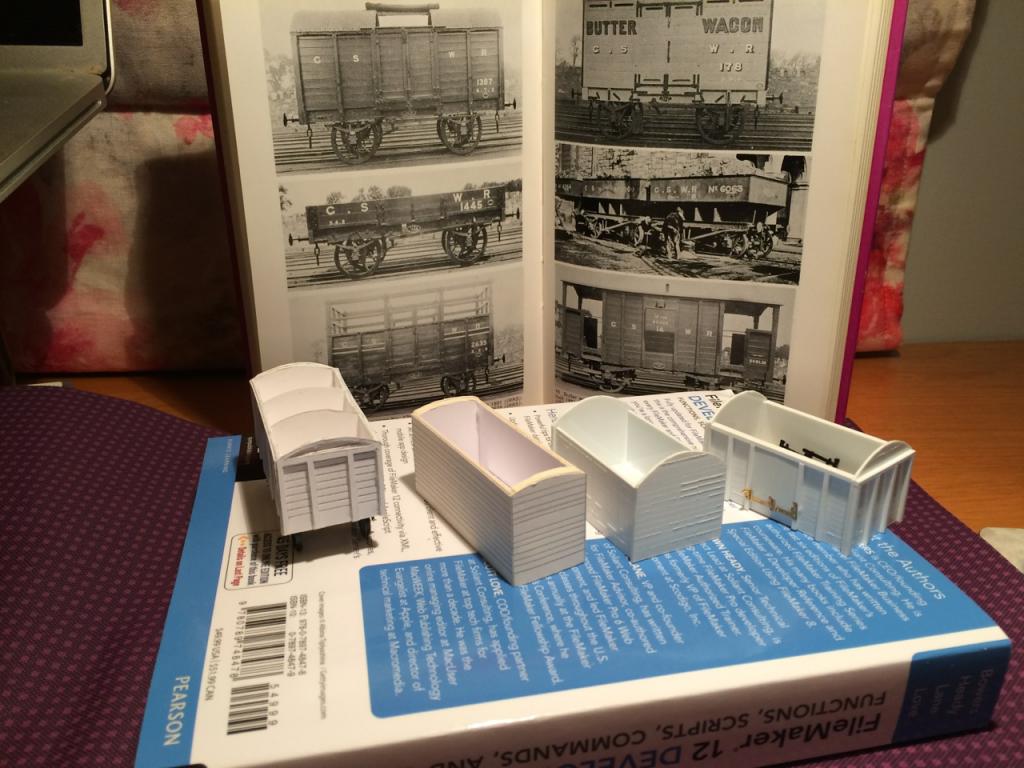
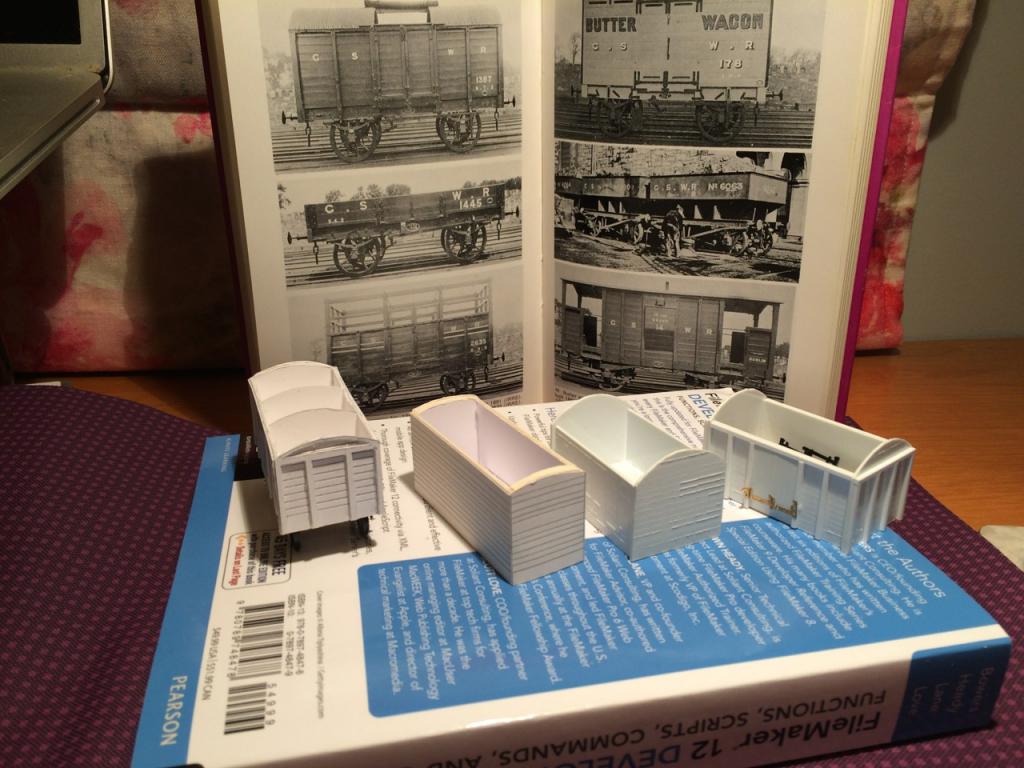
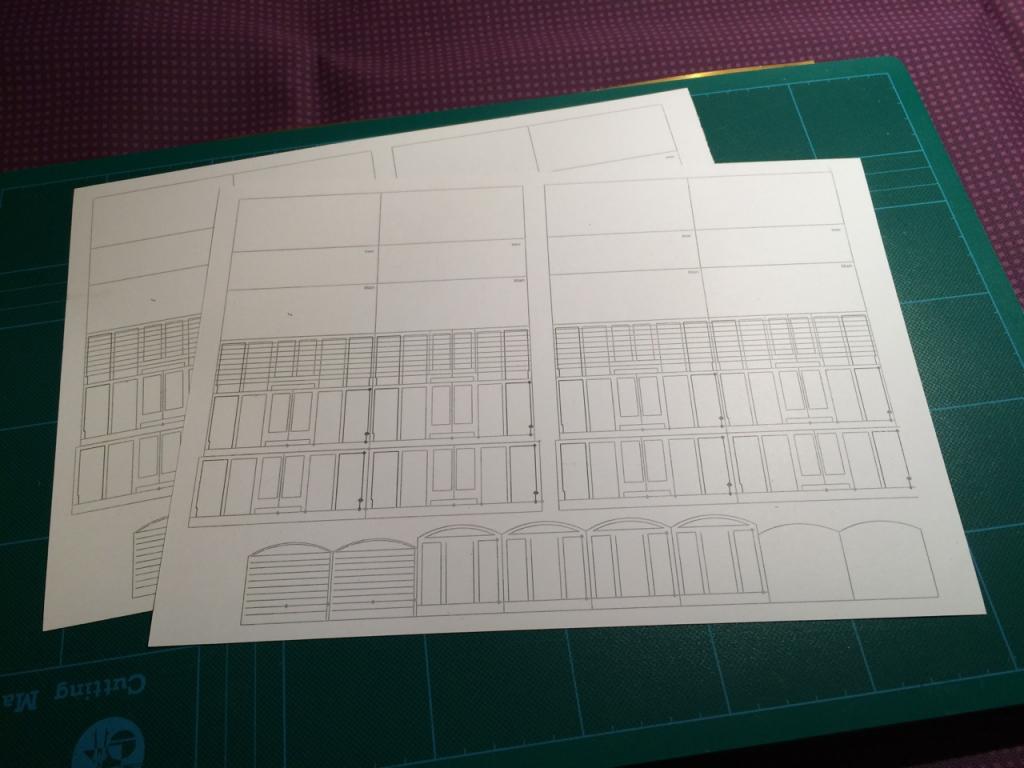
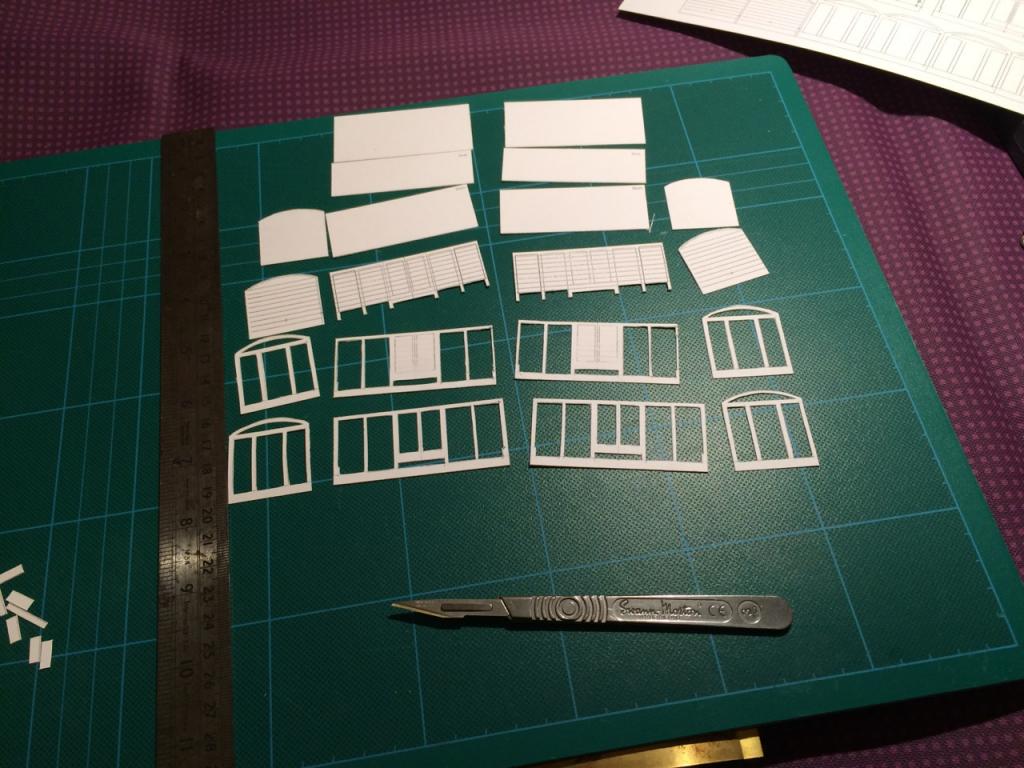
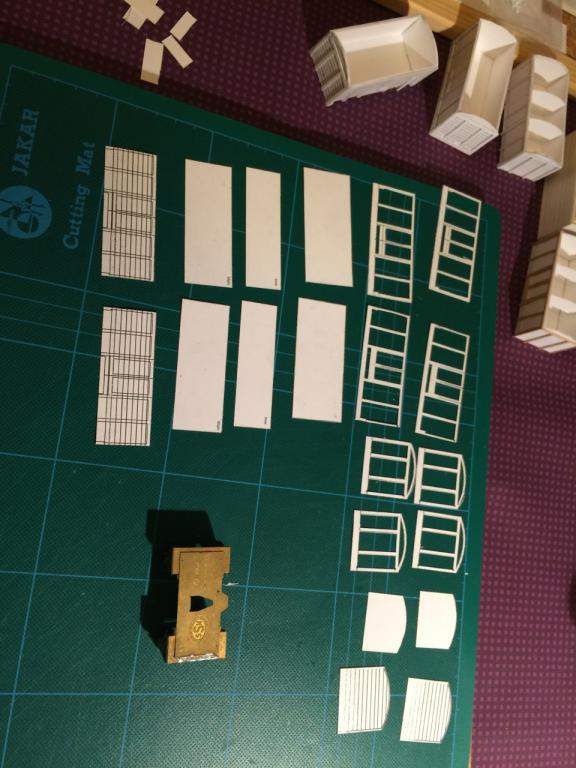
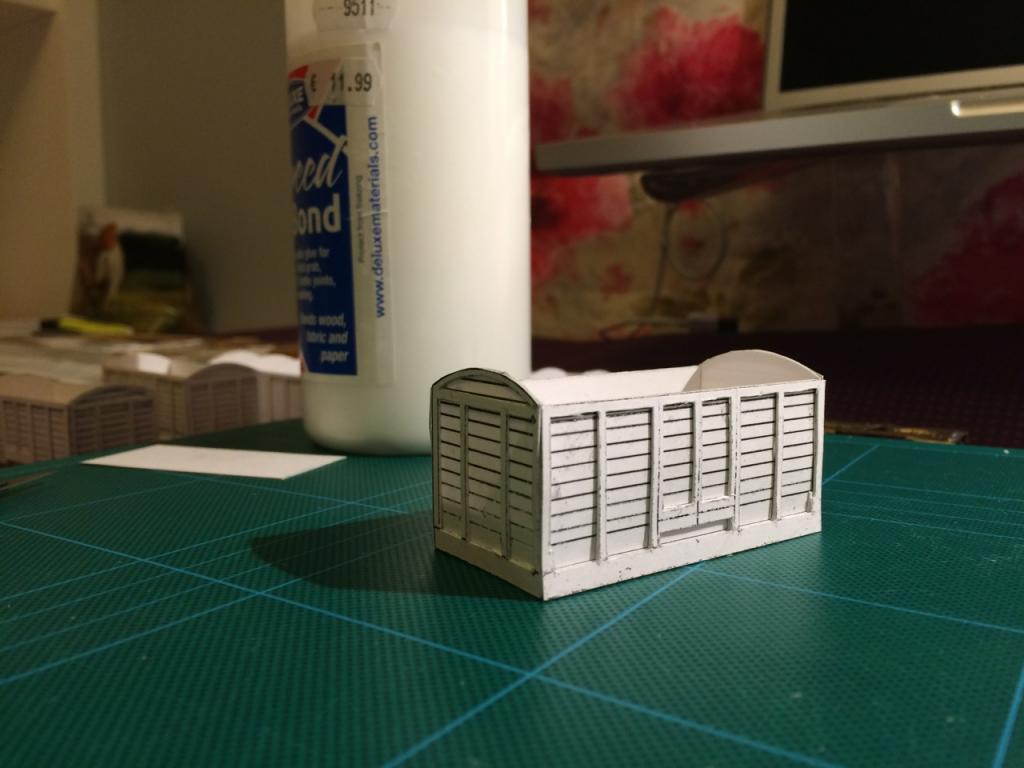
Well, this is what I’ve been up to – card models of GSWR convertible wagons. Following a self imposed ban on white metal, because I don’t want lead filings around the house, particularly at a desk where I take coffee and biccies late at night, it was back to the drawing board for construction techniques. Prime suspect number 1 was styrene, but I wanted to draw the outline on TurboCad, and wasn’t too sure about putting styrene through the printer at work, and it won’t go through the printer at home. A chance reference on rmweb to poor durability of styrene, and potential for the old fashioned approach of using Bristol board and shellac made me wonder what shellac was, and whether it was still available. Google said shellac was made of beatle shells. OK, sez I, that sounds pretty environmentally sound and non-hazardous, let’s see can I get any of that. MRCB on Cornmarket in Dublin were happy to oblige. KM Evans at Mary’s Abbey were selling Bristol board and scalpels. Marks sold me some glue, so I was set. Next up, a plan. Consulting Murray and McNeill’s history of the GSWR, there are several side on photos of wagons. Scan them, draw over them, and then work out the scale – 14mm from railhead to buffer centerline. Rescale the drawing, and Bob is looking suspiciously like your uncle. Next, see how many bits of wagons you can fit on a sheet of board. 2 false starts in styrene. Next up: Iteration 1. Use mounting board as a backing. Not so good. I’d got the scale wrong. The wagon was too narrow. The mounting board blunted the scalpel in seconds, and the whole was too coarse. Iteration 2. Use Bristol board throughout. Better, but as John and Richie suggested, wraparound design wasn’t good. Iteration 3. Individual sides and ends, built up in several layers. Getting better, but the fit was poor. I hadn’t calculated how much the width and length would increase over several layers. (Photo shows Iteration 3, bulging a bit on the ends.) (Next, from right to left, 2 in styrene - too wide; 1 in HO - too narrow and too high; and on the left, Iteration 3 in card - sides and ends not quite meeting up. Bah.) Iteration 4. Adjust the lengths. Sides are 3 layers – planking layer, backing, and two for the outside frames. Ends are the same. Make the outermost side frames slightly longer so that they sit outside the ends. Make the inner backing layer slightly less high, to let the underframe sit inside the cosmetic wagon frame – 4mm should do it. Leave a straight panel on the bottom of the outer frame for strength – you can cut it off later. Stick it together. Now, that’s beginning to look a bit better. Iteration 5. Wouldn’t it be better if I used sleeper timbering for the frames? It’s only 1.3mm thick. Answer – No. Back to iteration 4. (Photo is Iteration 5 with its precursors in the background, and yes, the door really is crooked.) Next, copy your bits onto a sheet and printout for bulk production. Cut, cut, cut. Glue, glue, glue. It’s therapeutic work late at night, and working from a printout really improves the accuracy. Everything is marked out accurately and square before you even have to think, and all you have to do is cut and glue carefully. Next, the underframe. Des at SSM does a lovely little sprung etched brass undercarriage which he said he’d be able to provide separately. A few emails show Des is under pressure. You want how many? 42? 3 or 4 maybe. I’ll see what I can do. Last seen riding off into the sunset…. Never mind, I have the technology, I can build it myself. Spend Christmas doing drawings for etchings and underframe. Might as well do a bogie while I’m at it. Get them both etched together. Bogie is based on Bill Bedford’s designs – inspired by, not copied from. Better ask him if that’s OK. He’ll never mind – nobody else is stupid enough to be modeling 21mm gauge in P4, so there’ll be no demand. Bill comes back and says he can adjust his bogies for my gauge and will be happy to sell them. Should have guessed that anyone who will produce Highland Railway carriages isn’t exactly in the mass market anyway. So this is where it all sits down, waiting for a w-iron / solebar. Money has changed hands. Deliveries are awaited. They’re promised for mid-February. So at present I have 11 built and parts for 2 more. 10 was the plan but I seem to have got carried away somewhat. Roofs can’t go on until I figure out how to join the uppers to the unders, and then add some weight. Painting can’t be done until everything is together. And then there are those AJ couplings to figure out. Those boys have me running scared. And lettering. All good fun and games. (Pics of the baker's dozen tomorrow, or in 3 months time maybe, who knows?) Alan
-
Very nice indeed. The redbrick building in particular is fantastic.
-
CIE - Laminates coaching stock
islandbridgejct replied to Junctionmad's question in Questions & Answers
Das right - it's called interoperability. There's a lot to be said for it. Some further identification notes: Cravens had B4 bogies and big picture windows. Everything else had squarer windows. Laminates came in 2 main types - toilet both ends with 7 windows, and toilets one end with 8 windows, commonwealth bogies. Bredin / early CIE had a similar body profile to the laminates, with toilets in the middle and often a centre door. GSR bogies until about 1953, but they were rebuilt as vans and various things with a mix of GSR and commonwealth bogies. Catering vehicles were numbered in the 2000s, had Bredin profile and B4 bogies for use on express trains, pre-AC coaches (=Mk 2d) Park Royals you know about. Dang, I've just got distracted again. Alan -
That's a beautiful job, and looks very lifelike. Would you be prepared to pose it beside a MM version just to show how far things have come? I've a MIR whitemetal 141 that I never got running, and shudder when I see it beside the Murphy version. Alan
-
IE Mark III Restaurant Coach Roof Details
islandbridgejct replied to Irishrailwayman's question in Questions & Answers
That's interesting about Patrick Scott's involvement. I had been wondering if the CIE engineers went to LaGrange when they were ordering the first GM diesels, and simply borrowed the colour scheme from the Illinois Central: http://www.railpictures.net/viewphoto.php?id=167571 Is the resemblance too close to be a coincidence? Alan
-
I managed to miss this thread until now. More excellent information. Thanks. Alan
-
With kits like that, who wouldn't want to model CIE / IR freight? Really superb. Alan
-
Thanks jhb. That's very useful. Do you know was the GSR scheme a post-independence thing or one taken over from the GSWR like the loco livery? Alan
-
I did a test build, as you suggested, and discovered I was building in HO. Oops, scaling error. Making some changes now.