GNRi1959
-
Posts
1,476 -
Joined
-
Last visited
-
Days Won
27
Content Type
Profiles
Forums
Events
Gallery
Blogs
Everything posted by GNRi1959
-
Got a bit more done this evening. Connected all power feed joiners to main wiring under baseboard and installed wires and diodes to connect to Gaugemaster shuttle controller. Managed to wire my first DPDT switch to shuttle controller and I'm listening to the sound of my first loco on the track. Tomorrow afternoon, all being well I can connect the rest of the circuit!
-
Thank you all for your help and guidance on this topic. I tried for three days and was making a real mess so I opted for the Peco powered joiners and fitted all of them tonight, hassle free. All I need to do now is wire underneath to my DPDT switches and we're hopefully ready to test all lines and sidings!
-
I just don't have the knack for this, I spent many hours trying. I have ordered Peco powered rail joiners this morning. I have only a dozen connections to make and I don't want to make a complete mess of this. Once wired, thats me done!
-
I have every intention of supporting any RTR stock and producers of such kits but I would also like to build a few bits myself.
-
If I were to scratch build some Irish rolling stock is it possible to buy metal strapping with proper bolt heads showing in 00 gauge?
-
I'll keep practicing......
-
I am so disappointed by my soldering. Its really terrible!
-
Heres my first efforts at soldering the underside of the rails......

-
I looked at them but I really need to be able to solder. I have a shuttle controller going into the layout and this will involve soldering diodes into the layout too. Plenty of practice and good quality solder! Thanks anyway.
-
This is an excellent method, I have been trying to solder my cable to the side of the rails and it has been so hard! Thanks
-
I've been trying most of the afternoon to solder droppers to my Peco track with no success really, very messy with hit and miss results. Never was able to do it, any tips?
-
Any advice on where to place three DPDT switches on this layout. Baseboard top or edge?
-
Before actually buying any of the components, does anyone know if commercial cranks are actually scaled for 4mm. I have pre-bored under all points so if I have to go under the baseboard everything is in place for that. I am also routing all cabling away from point work.
-
Silly question, when wiring a layout do I bore holes for 'droppers' and feed the cable from under?
-
I've returned to this thread because I cannot walk away from trying the rod and crank system without giving up on it.
-
Good point, to be honest the Gaugemaster Twin is a bit of a beast of a controller. I bought it new for £50 which was a real bargain, otherwise I would have shopped around for something more compact. Anyway, I'm planning on doing the wiring this weekend hopefully and will look at that too, thanks
-
Here is my plan, hopefully someone can tell me if I am correct in doing this. I intend wiring my layout below surface next week. The plan is to soldier the cables to the track and drop them through the baseboard where they were go via block connectors to three separate DPDT switches. I intend recessing the DPDT switches into an panel of black perspex and mounting this on the top of my baseboard in a place where I hope to operate the layout from.My gauge master twin controller will sit below the baseboard tables in a small shelf.
-
My baseboard measures 2metres x 500mm and sits nicely on a trestle style table of similar size. During the construction phase I didn't really think about where I would place my controls. I have a Gaugemaster Dual Control, a super controller and three DPDT switches to consider. Should I mount them on a hanging bracket and shelf under the table, otherwise it will look out of place on the baseboard.
-
Are Peco PL-80 Powered Joiners a waste of money?
-
To be honest, possibly once a year for the local Modellers Show and nothing more. The ideas you mentioned will be simple and effective. Ta
-
Thank you, that will help. Is there a male/female connector that I can use to carry the power from one board to the next?
-
I'm buying Peco branded wiring cable (PL-38) at the moment on-line but would like to buy an equivalent in the local electrical stores where its convenient and I don't need to wait for it by mail order. Whats the standard cable to buy for 00 gauge.layouts.
-
Meanwhile, back at Omagh North, I have started the wiring of the layout. I am wiring and testing the entire layout on the surface, using masking tape to fix cables between and under tracks. When everything is wired, test and running well I will have to come up with a plan of getting it all wired permanently under the baseboard top and out of sight≥
-
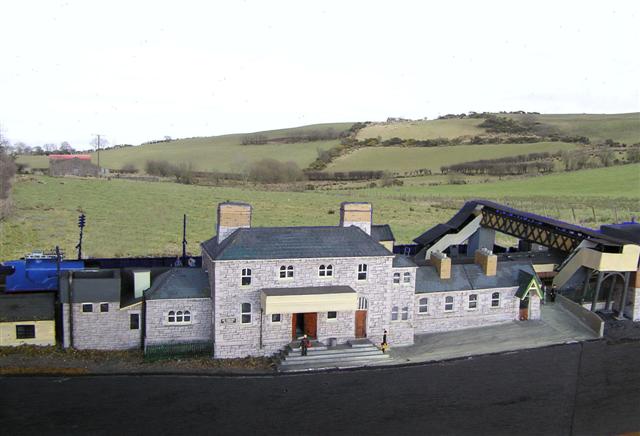
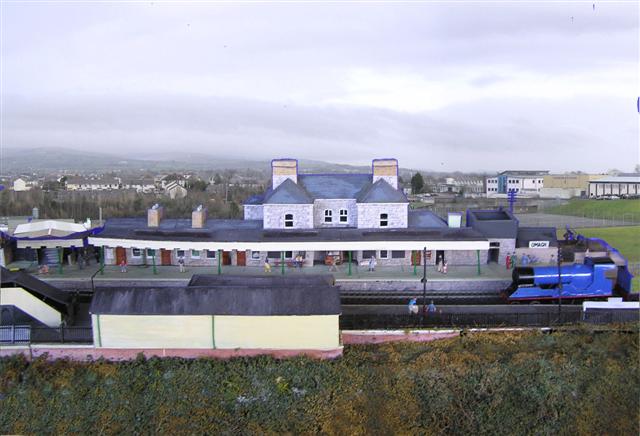
Just out of curiousity, here are two pictures I found of Omagh General Station that I built in the 1990s. The completed model was purchased by the local library when they opened their new headquarters in town. It has since been moved to Omagh Station Centre which is a youth club built on the site of the old goods yard. The photographer used photoshop to blend in a recent background picture of Omagh town.
-
Broithe, can I ask what paint you used to achieve this rust effect on the rail?