David Holman
-
Posts
4,359 -
Joined
-
Last visited
-
Days Won
117
Content Type
Profiles
Forums
Events
Gallery
Blogs
Everything posted by David Holman
-
Lovely combination, Leslie.
-
Clogherhead - A GNR(I) Seaside Terminus
David Holman replied to Patrick Davey's topic in Irish Model Layouts
Splendid. -
No problem, Derek. After all, I only copied something else! There is something quite therapeutic about working with DAS and certainly more interesting than ballasting. Both definitely worth it in the end and just things we have to grin/grimace and get through.
-
Very subtle, but it just looks right with at heavy load on.
-
Fine models, neat weathering and do I detect a lovely prototypical slight sag in the middle of the bogie? Certainly works for me.
-
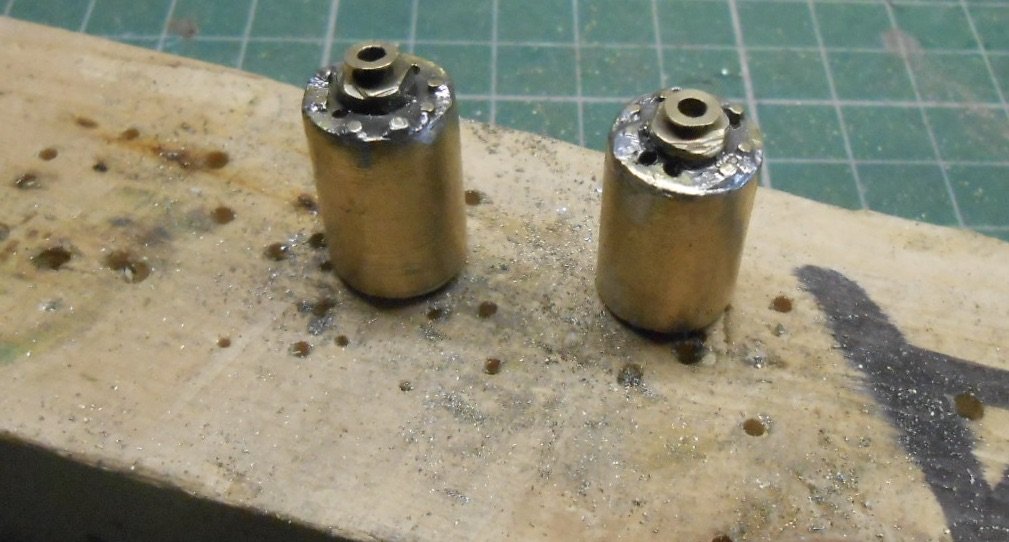
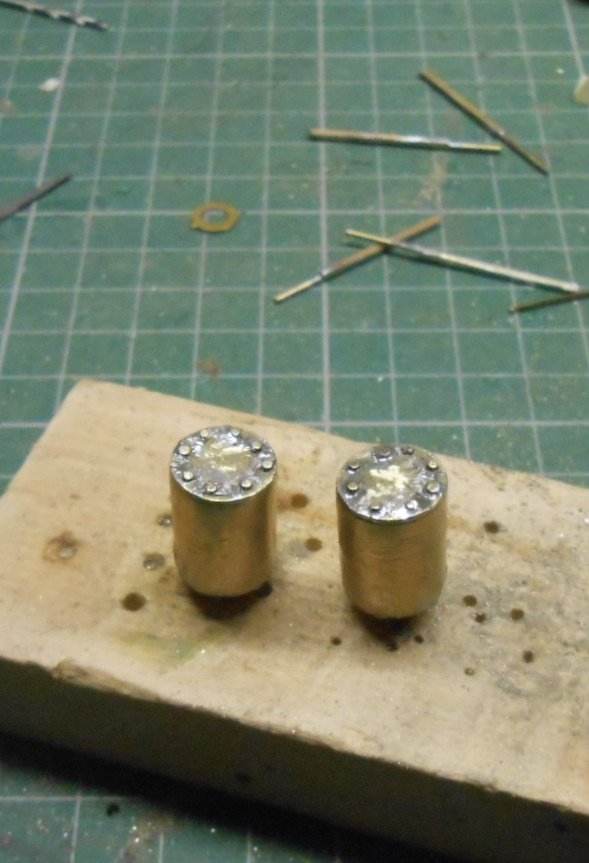
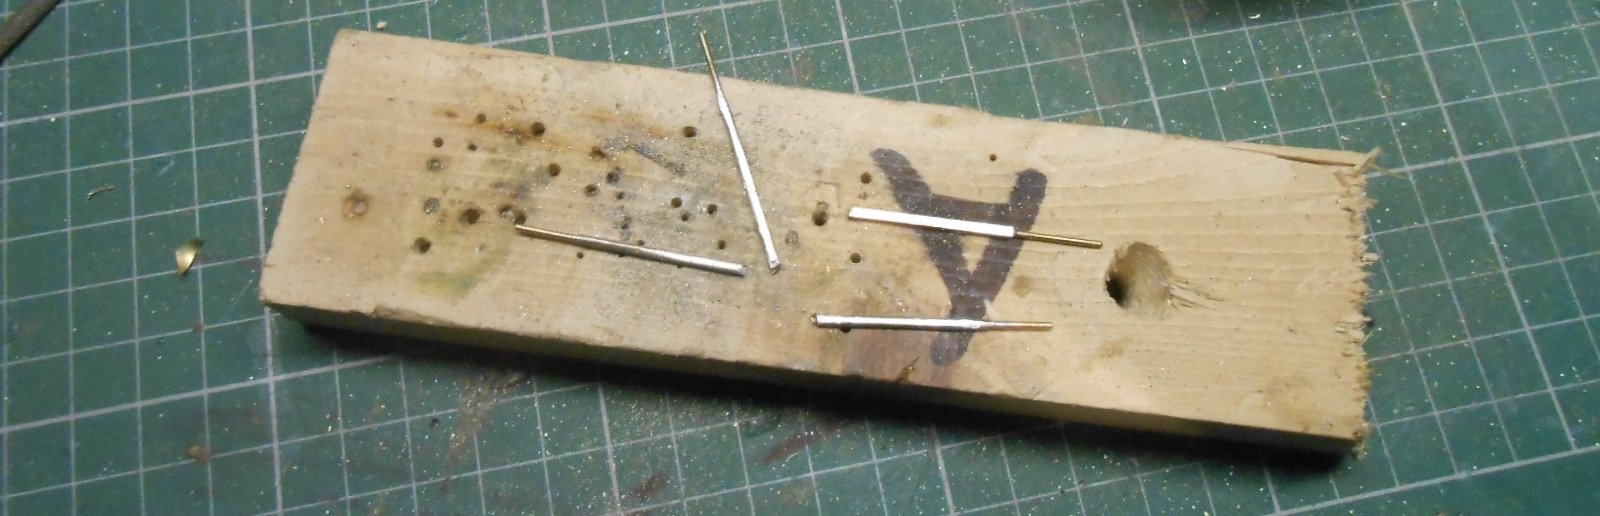
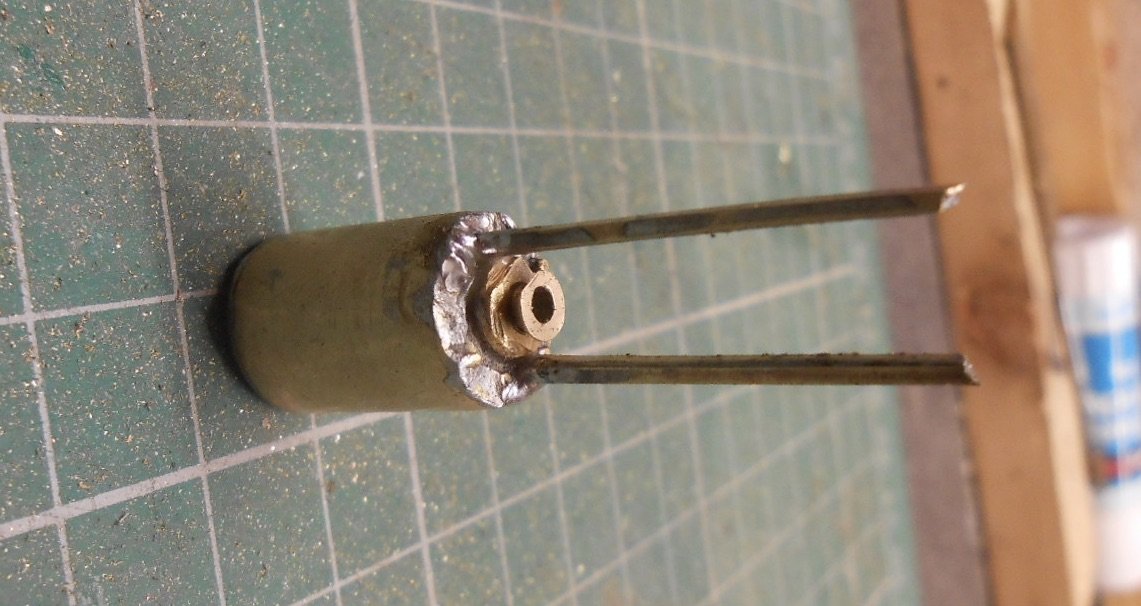
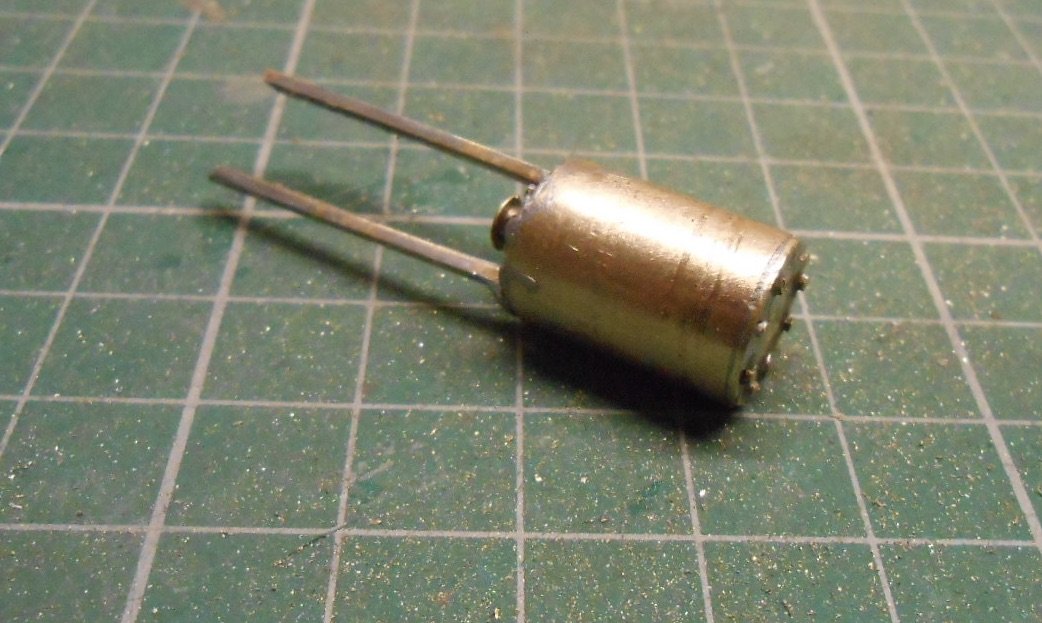
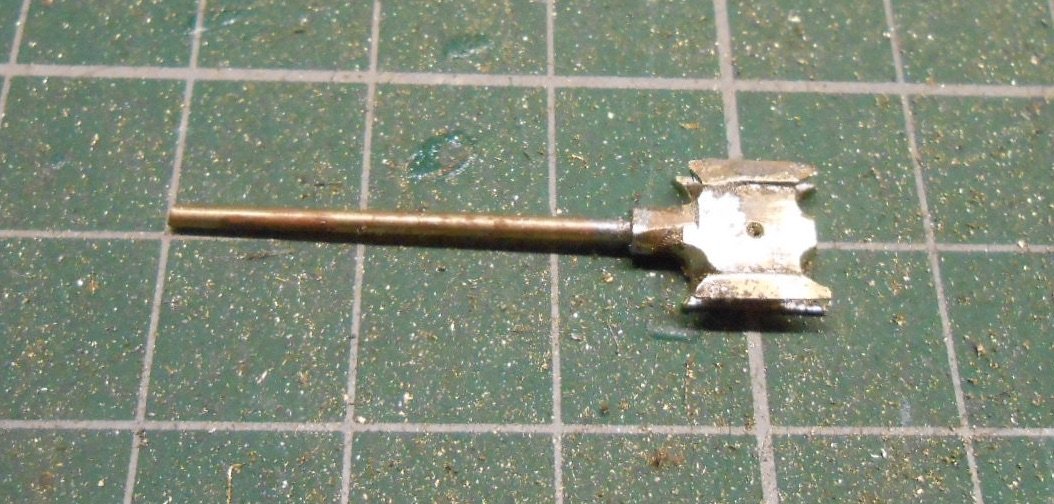
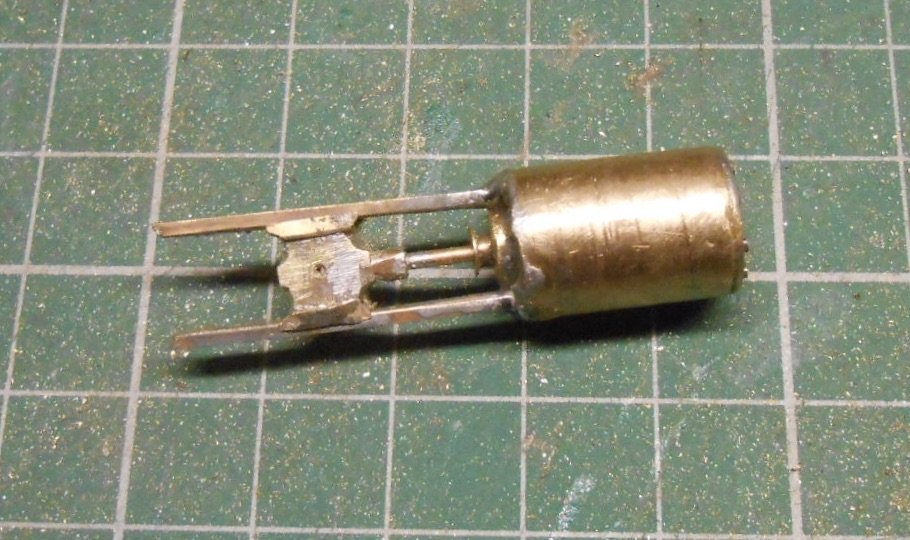
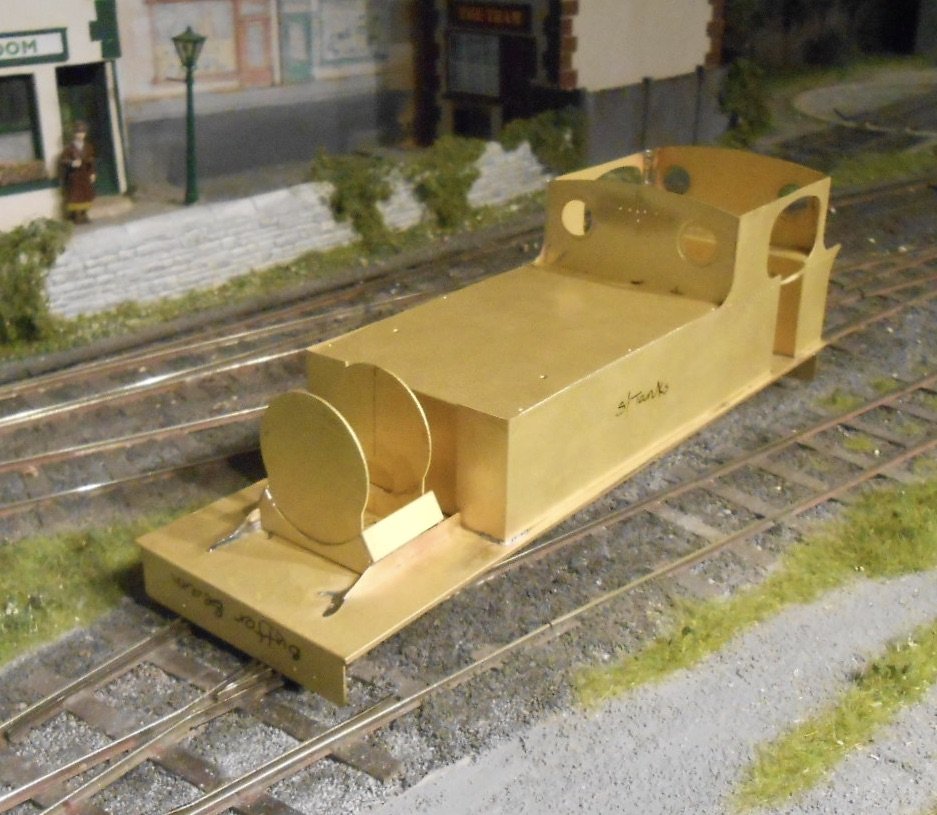
While waiting for a new gearbox to arrive, have been working on other aspects of the chassis. First up was to fit dummy hornblocks to the outside frames. Two rectangles of 10 thou brass sheet, cut out with strong scissors, soldered together, then soldered to the frames. After, made cut outs for the extended axles with a slitting disc in the Dremel. Nice and easy, for once. A bigger job, especially with the number of parts required, was the outside cylinders and motion. Remembering the Horlicks I made earlier as a result of diving in without enough thought, I read up a bit first. There are several options, including making the ends & then adding a wrapper, but decided to get out my mini lathe and turn down a piece of brass rod to the right diameter, drill out the centre & then add the various details Started with the ends, which are simply pieces of 18thou brass sheet, soldering in place then filed to shape. Thinking ahead [for a change], I used 240 degree solder for this, so I could use 145 for adding later pieces. The cylinder ends are bolted to the casing and a quick experiment showed that my rivet press would not make large enough indentations, so instead I drilled 32 one millimetre holes [eight bolts each end] and then soldered 1mm brass wire into these for the bolts. Inspiration for the next bits came from Tullygrainy's Workbench thread & I started looking through various boxes of bits for stuff to make the gland where the piston rod goes into the cylinder, plus the slide bars and crossheads. The piston rod gland is made of three washers, soldered together, with a 7mm scale wagon bearing, drilled out for the rod to go through. More tidying up still needed, but the results are shown below: Ideally, the slide bars should have been brass strip, but nobody seems to sell the stuff other than online & it is expensive enough as it is, without adding the postage. Looking through the rack in my local model shop [any amount of tube, wire and rod, but no fine strip], realised that 1 x 1.5mm U section channel might do the job. It worked out quite well, because I soldered pieces of 1mm brass wire into the channel & then used the latter to fit into holes drilled into the cylinder ends. Used 145 solder again and had the cylinder clamped into the bench vice to act as a heat sink and stop my hard work coming undone. Making the crossheads was similarly fiddly. At the core is two rectangles of 28thou brass soldered together & drilled through for the connecting rod. The piston rod is a piece of 1.2mm brass wire soldered into a crankpin bearing, which was in turn soldered the brass rectangles. 240 solder to begin with, then 145 again after that. Each crosshead then needed 4 small pieces of brass strip soldered top and bottom to make the flanges which run in the slide bars. Happily, nothing fell apart while I was doing this and, following a bit of tidying up, the crossheads are a nice easy fit in the slidebars. The last two pictures show the dummy frames and the cylinder units held in place with Blutak. So, progress at last - for now, anyway!

-
Sorry Angus, 90 is fine, 45 not quite. Must be the way I tell it! Fingers crossed, sorted now, though am sure there are other things yet to bite me...
-
Few things are more tedious than ballasting!
-
Many thanks, Ken, much appreciated. Have ordered a basic Roadrunner as a replacement - the first one was a Roadrunner+, with the extension cradle and 60:1 gears, so have gone for 45:1 this time, to keep things simpler. However, fear you are right, as I did indeed file those pips off before I read the instructions! Lesson learned!I There is no doubting the quality of HL stuff, though to me fixing the worm to the motor with cyano seems odd. In 7mm scale it is always a grub screw. Speaking of which, the self same to fix the final drive gear to the axle is definitely an accident waiting to happen. Thought I'd lost mine, but fortunately it had attached itself to the motor.
-
That sounds familiar, Alan. I wondered if I'd got a bit of superglue in the gears, but couldn't find anything. The HL gear boxes seem very good, but from years of 7mm working, where you usually get stuff ready assembled, boy are they fiddly, to me anyway. Very much making it all up as I go along and as I mentioned in the Questions thread, don't have a definitive guide to follow, so will create one for future reference. Hopefully there will be a Swilly 4-6-2 and Donegal 4-6-0 to follow. Jointed rods being worked on at the moment and coupling rods to follow, then cylinders, crossheads, slidebars and dummy axles boxes, before the front bogie unit. I've built an entire loco in less time that this chassis!
-
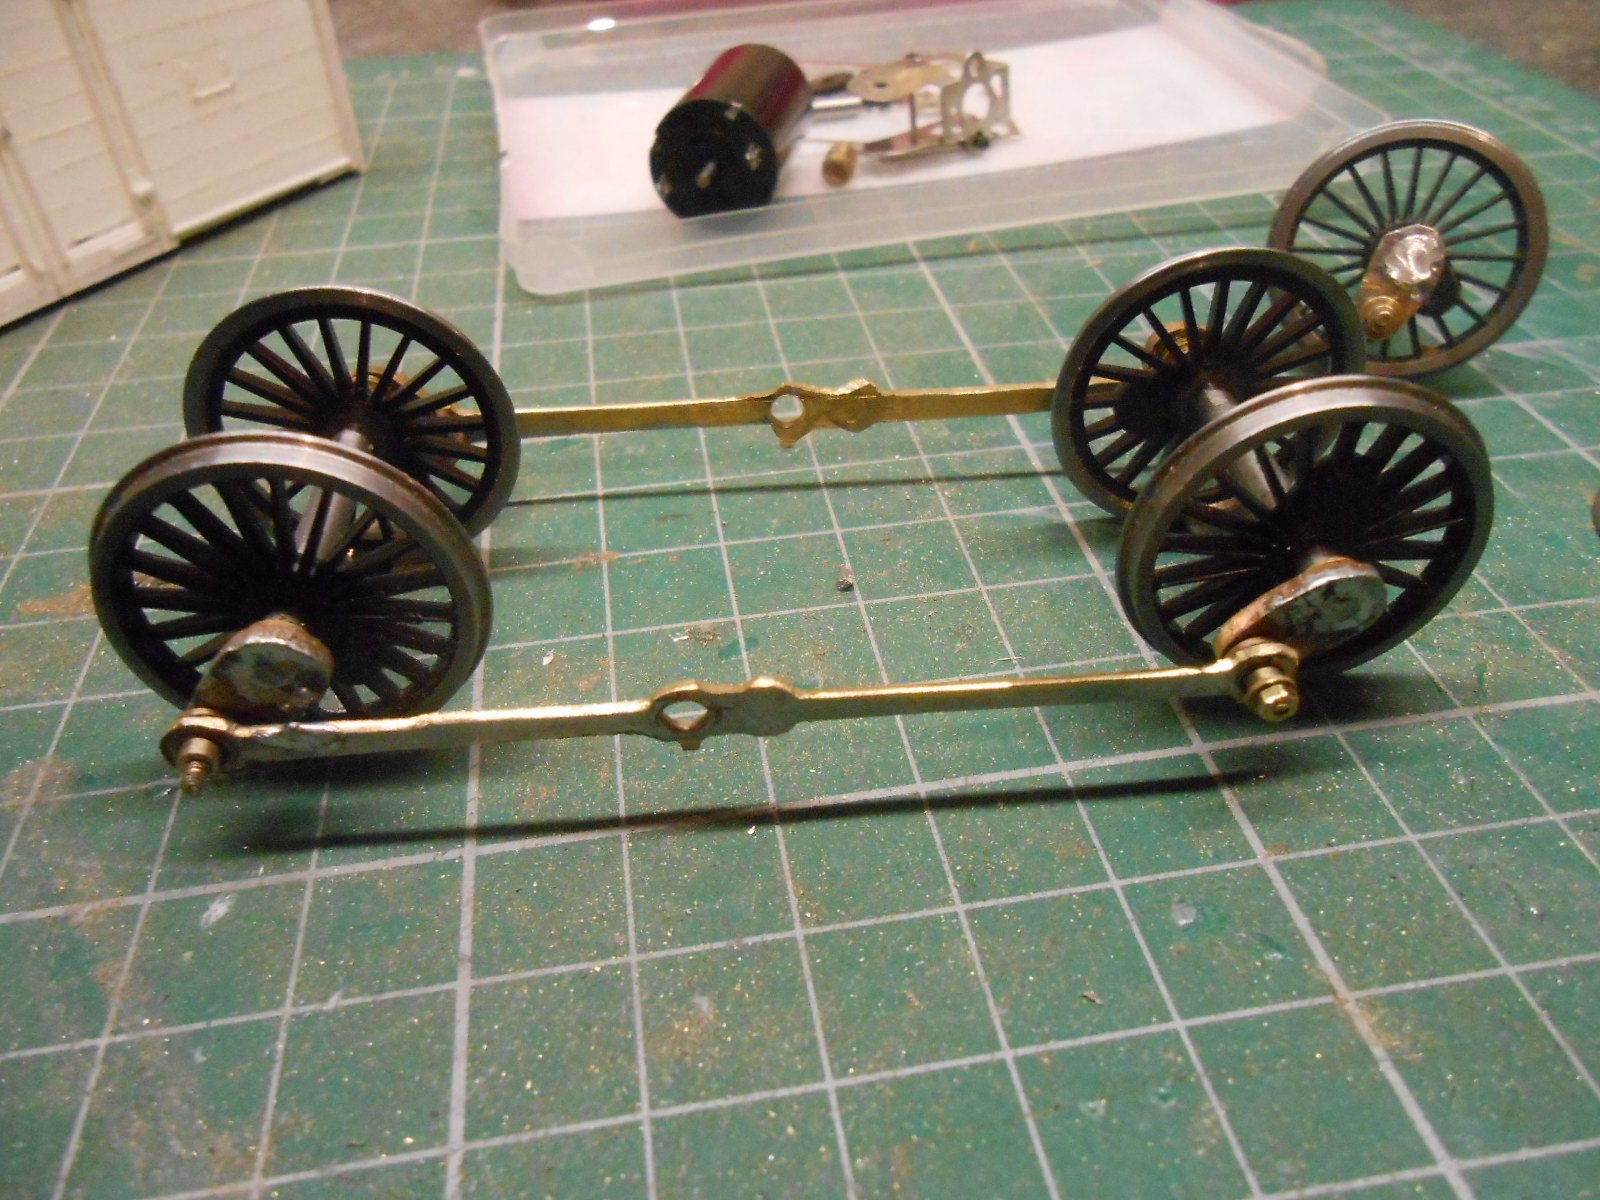
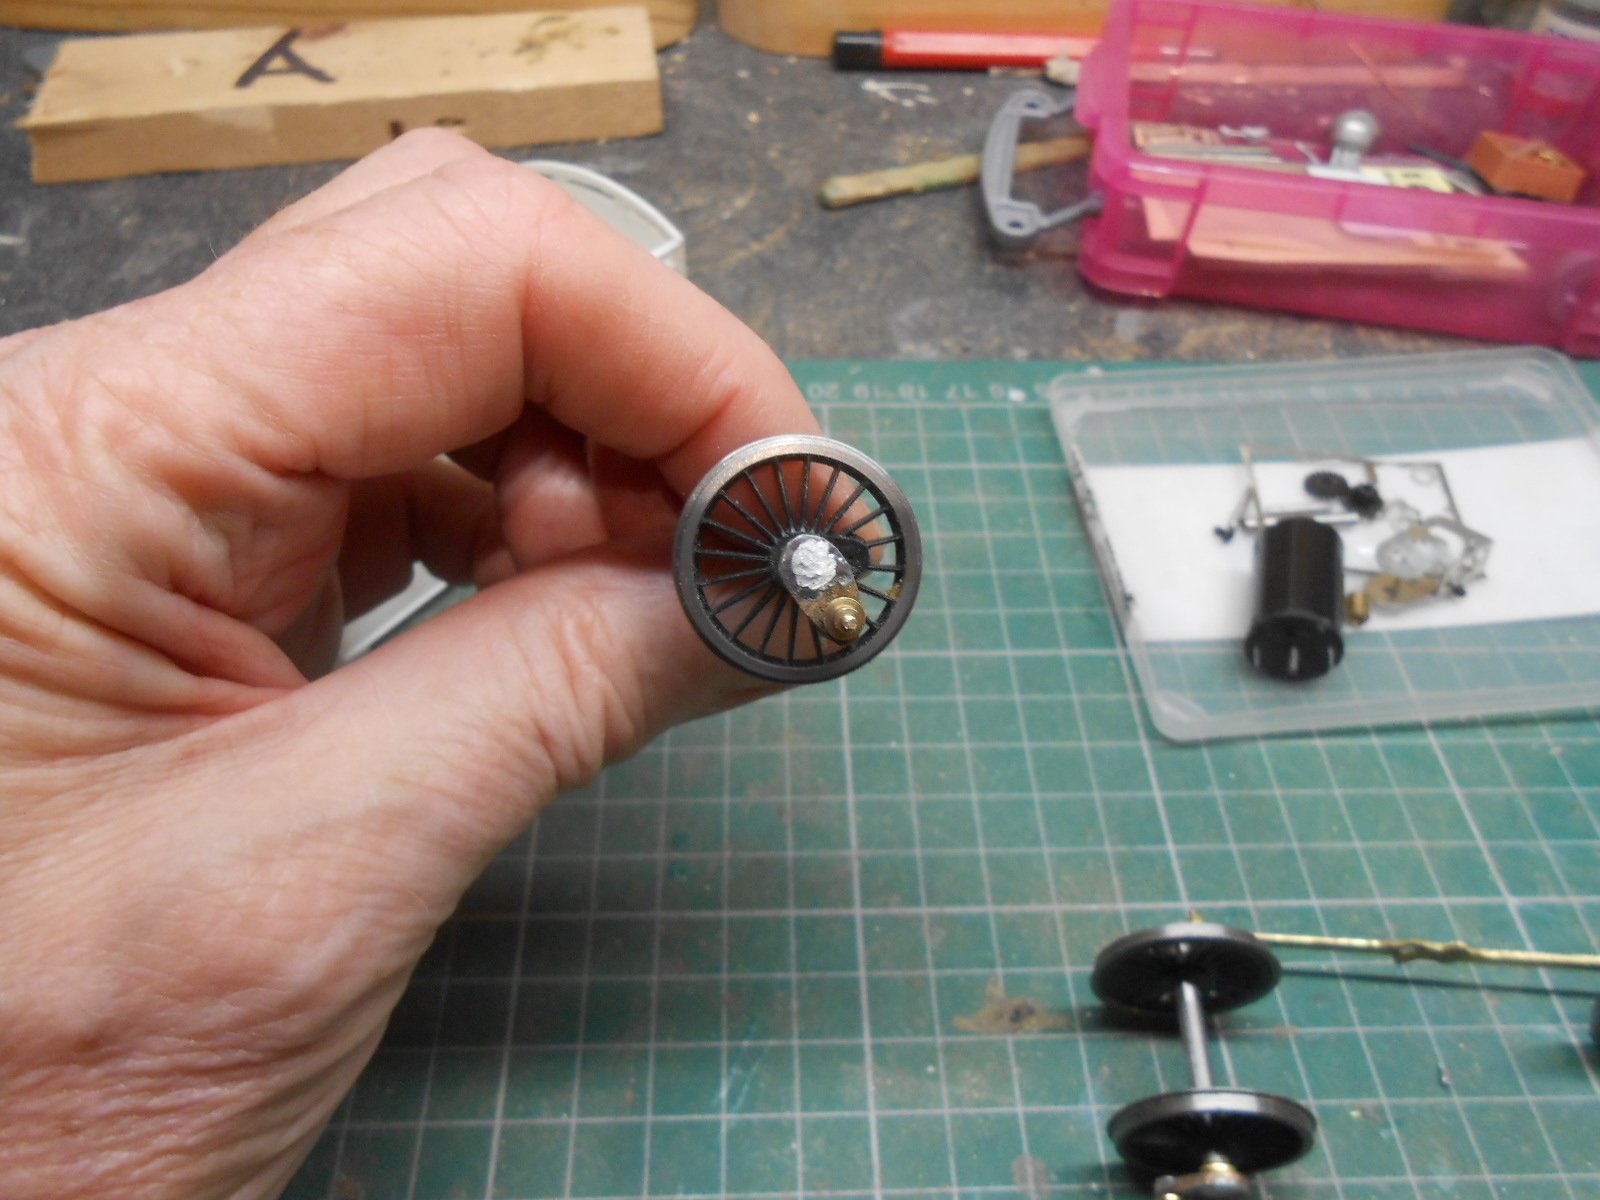
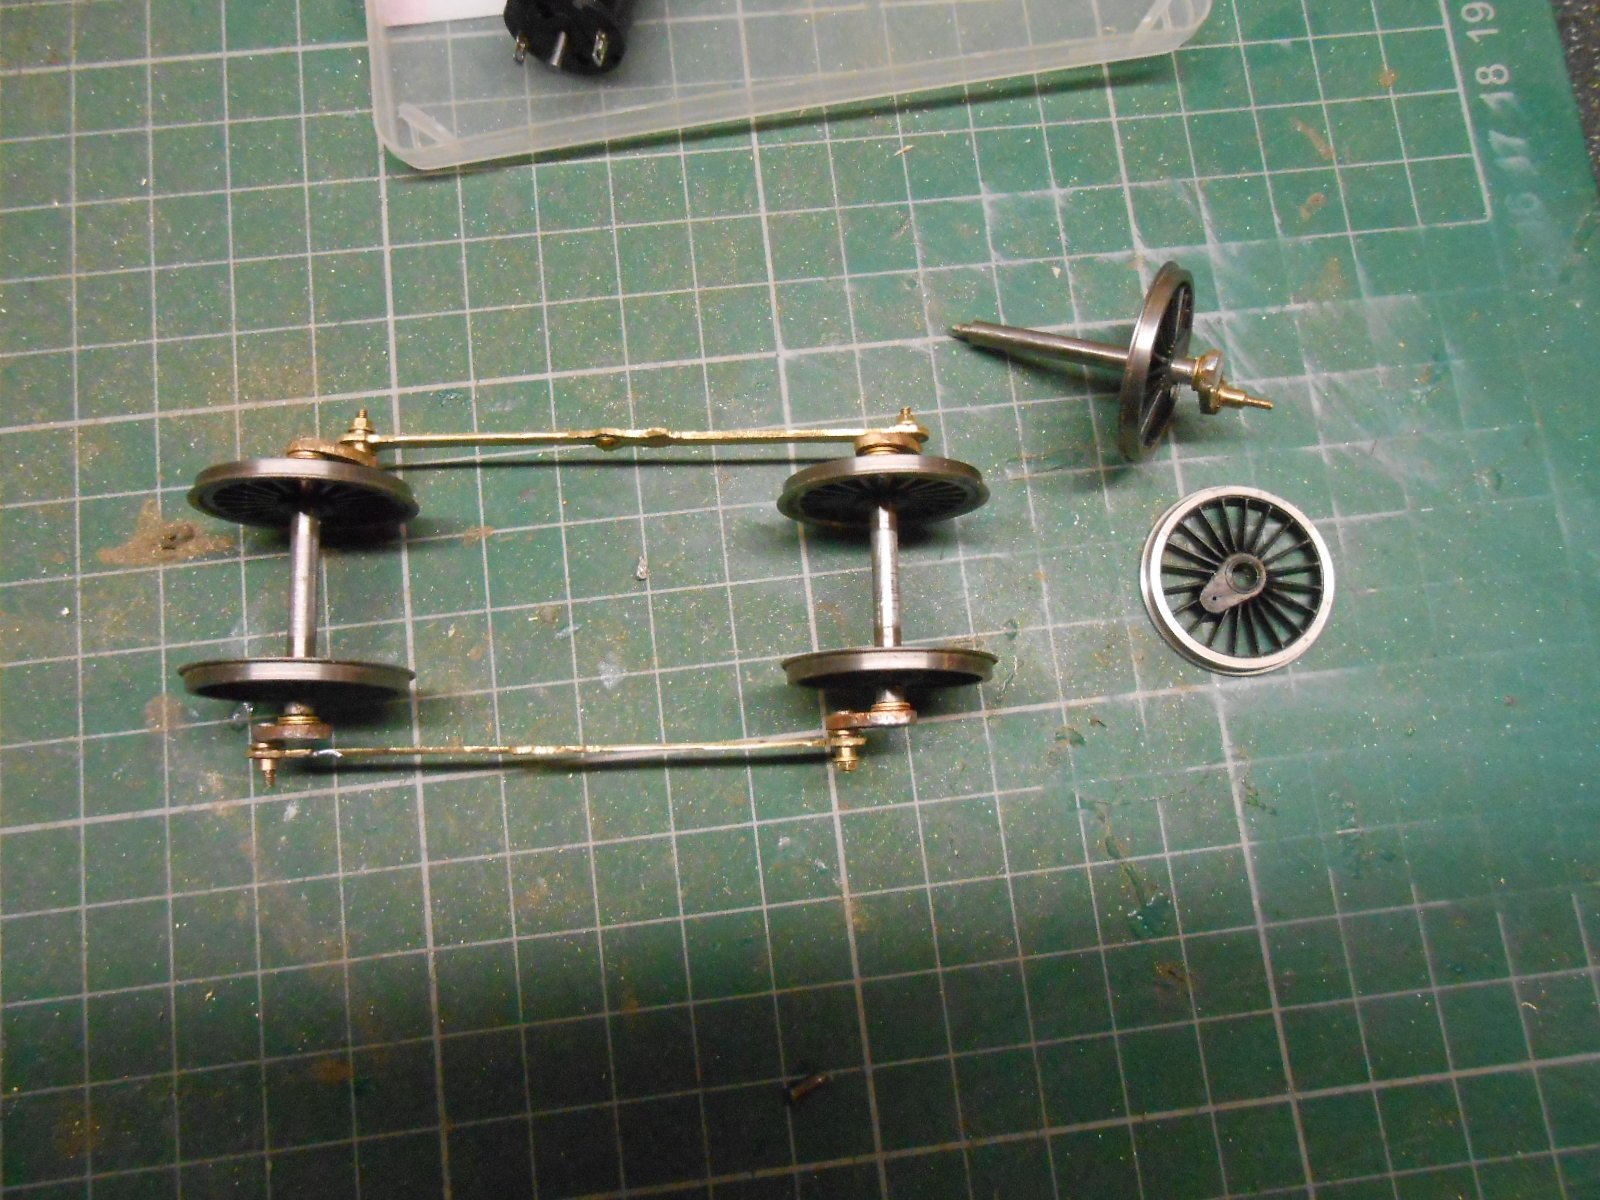
Two steps forward, but one back at the moment - plus sore fingers too. Many thanks to those who helped with ideas re quartering the cranks. I used the old John Ahern book to make a simple jig so the six crank pins all have the same throw, then it was a case of filing and grinding the initial 2mm brass rectangles to shape. One hole is 1.7mm diameter, to go over the end of the Slater's wagon axles, the other is 1.2mm to take a 12BA bolt, fitted from the rear, soldered and then the head filed flat. Slater's crank pin bearing then go through the coupling rods and are held in place with 12BA nuts and washers. So far, so good. The arrival of a High Level motor-gearbox meant that, once this was assembled, I then had to take one of the centre drivers off its axle, so the gearbox could go between the frames. Those who read my post in the question section will know I had managed to quarter the cranks successfully enough, but more at 45 degrees than 90, so on refitting the cranks I quickly fixed problem and was ready to test the motor in the chassis. Unfortunately, here was where the problems started. Again. The motor gearbox seemed to work well enough on the bench, but fitted to the chassis it was decidedly clunky. At first I thought it was the quartering that was out [though the chassis rolled nicely on its own], but eventually it became clear that something in the box wasn't right. Indeed, it looked like the top gear, working from the worm was trying hard to strip its nylon teeth against the brass. Whatever, I now need to order a new 'box, because in dismantling it for further examination, said gear pinged off into the far, darkest reaches of the workshop & has run away to join the circus. So, while waiting for a new box to arrive, have started making parts to create jointed coupling rods in the hope that I will eventually be able to add a degree of springing to the chassis. One day. Eventually.
-
Excellent stuff John and some very useful tips too.
-
Don't need one for 7mm scale HT, as Slater's axles and wheels have square ends which takes care of the problem. Not sure a jig would help with outside cranks, so used the old school method of simply setting the first pair as the datum, then added the second pair, with the rods, quartered these as an 0-4-0, before adding the third pair of cranks and doing the same. Had got it all running nicely when I noticed one crank wasn't pushed in far enough and in correcting that bollixed the whole thing up, breaking a golden rule of stopping for a break beforehand. The cranks are soldered to the axles, by the way. The cranks are home made from 2mm brass strip, drilled in a jig for the axle ends and crank pins. Have used the Slater's set up for the latter, with 12BA bolts soldered in for the pin and top hat bearings on the coupling rods so pins can be fixed with nuts and washers. By leaving the bearings off, there is enough slop to quarter the wheels in pairs. However, my High Level motor gear box has now arrived, so I"m going to need to remove the centre axle to fit it, so might as well move it all to 90 degrees anyway. Am also thinking that that, with the keeper plate giving me a small amount of vertical movement, I might as well make the coupling rods jointed and fit a bit of springing to the outer axles. One of the problems of scratchbuilding is the lack of instructions and because I haven't built a loco for a couple of years, it is all to easy to forget some of the conventions. With at least two more outside framed locos to build, I must write myself an aide memoir for future reference, once I've got this one working properly! Hopefully a report and pictures soon.
-
A technical question for those with an engineering background: Have managed, after much messing about, to get the outside cranks on my Swilly 4-6-0T, sort of, quartered. However, having got the drivers to go smoothly, I then discovered they are not at 90 degrees, but more like 45. Is this going to be a problem? Seem to remember that there were examples of drivers set at 135 degrees, but would be interested to know what the technically minded of you think.
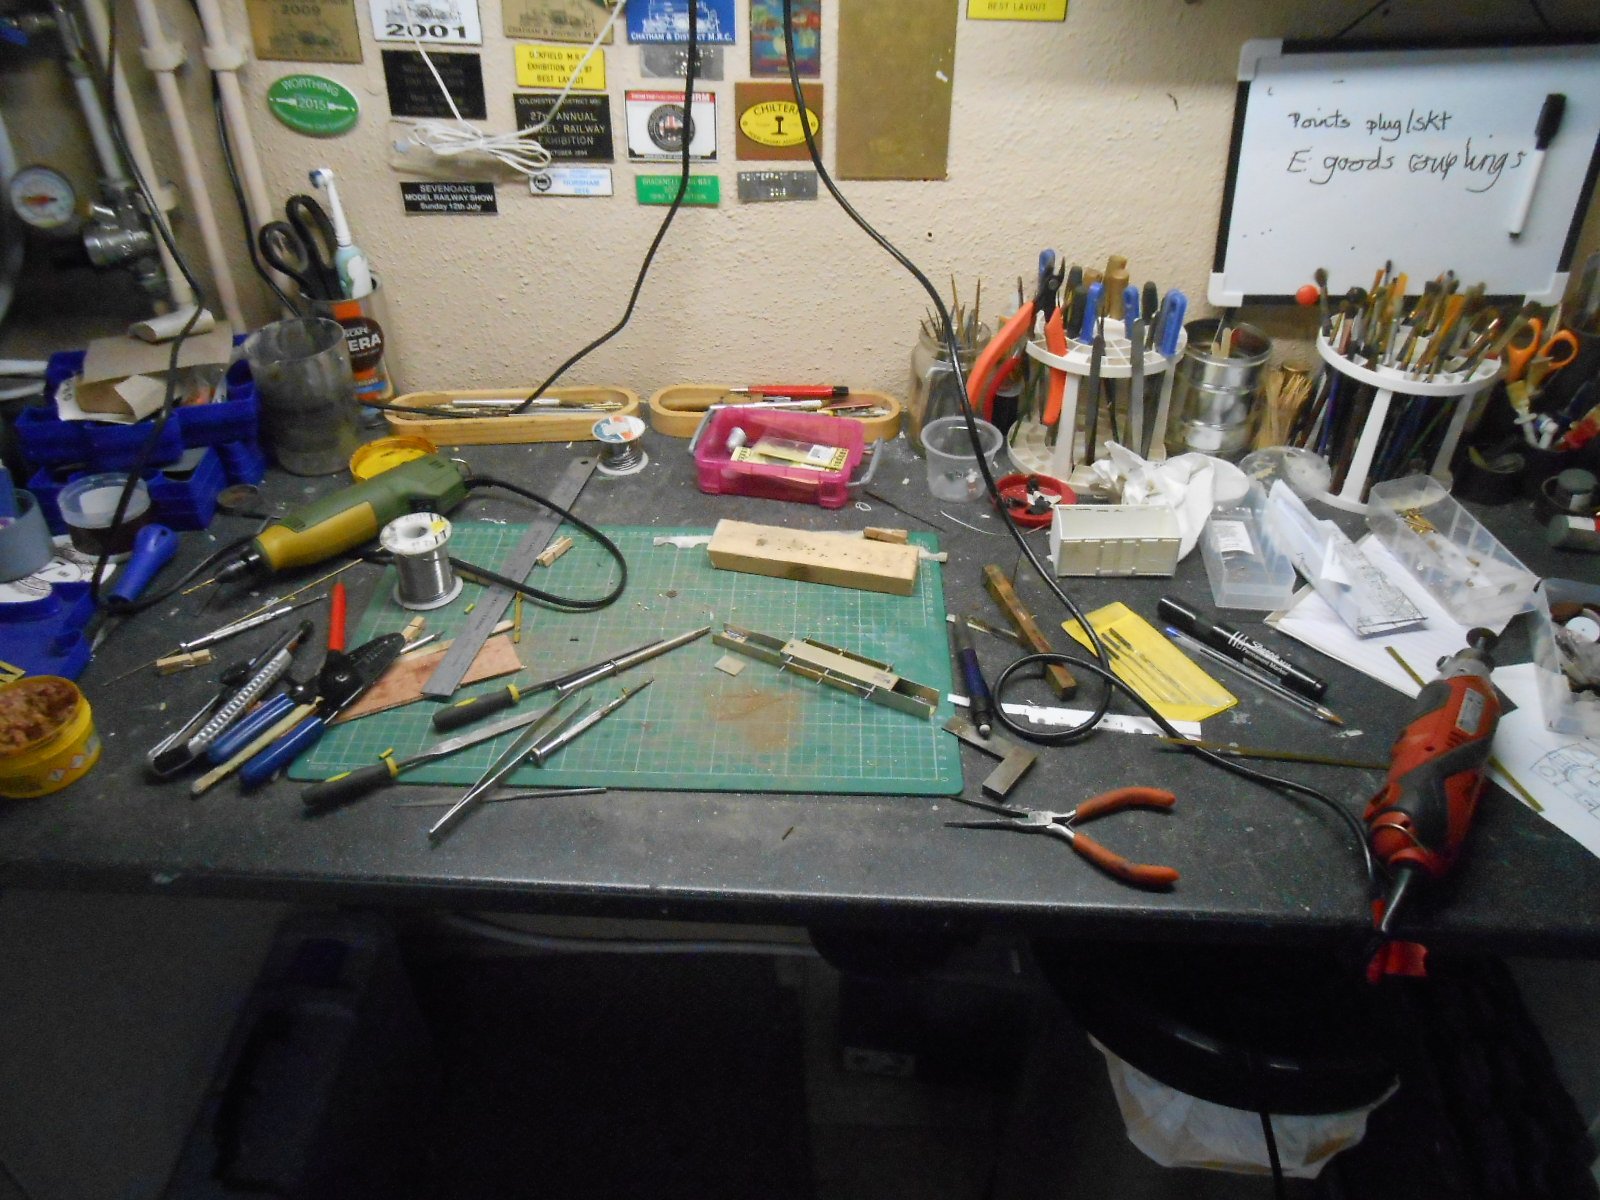
-
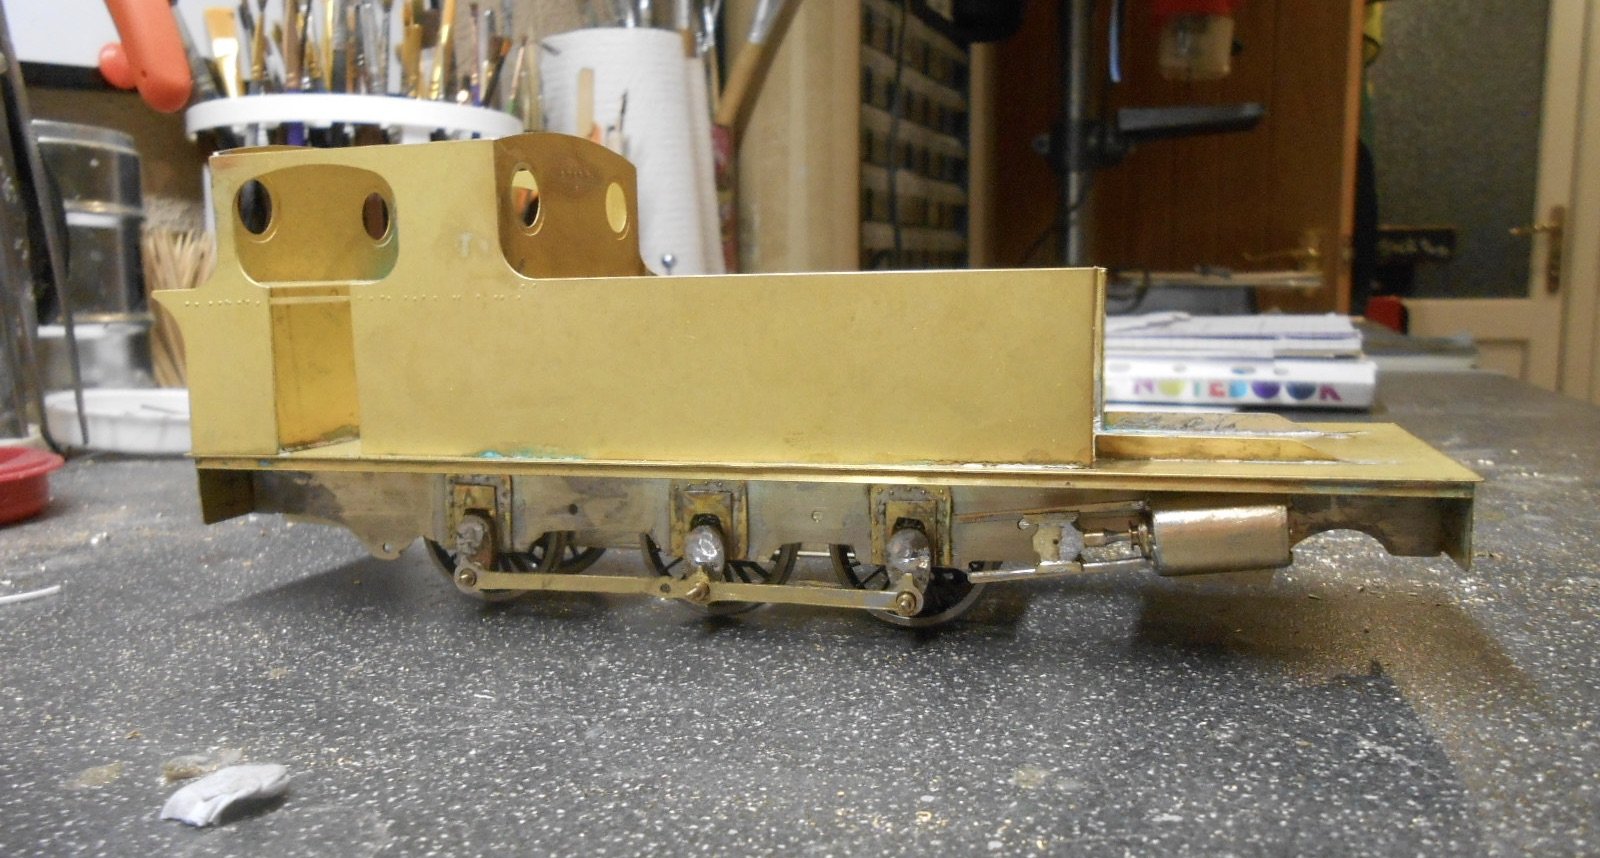
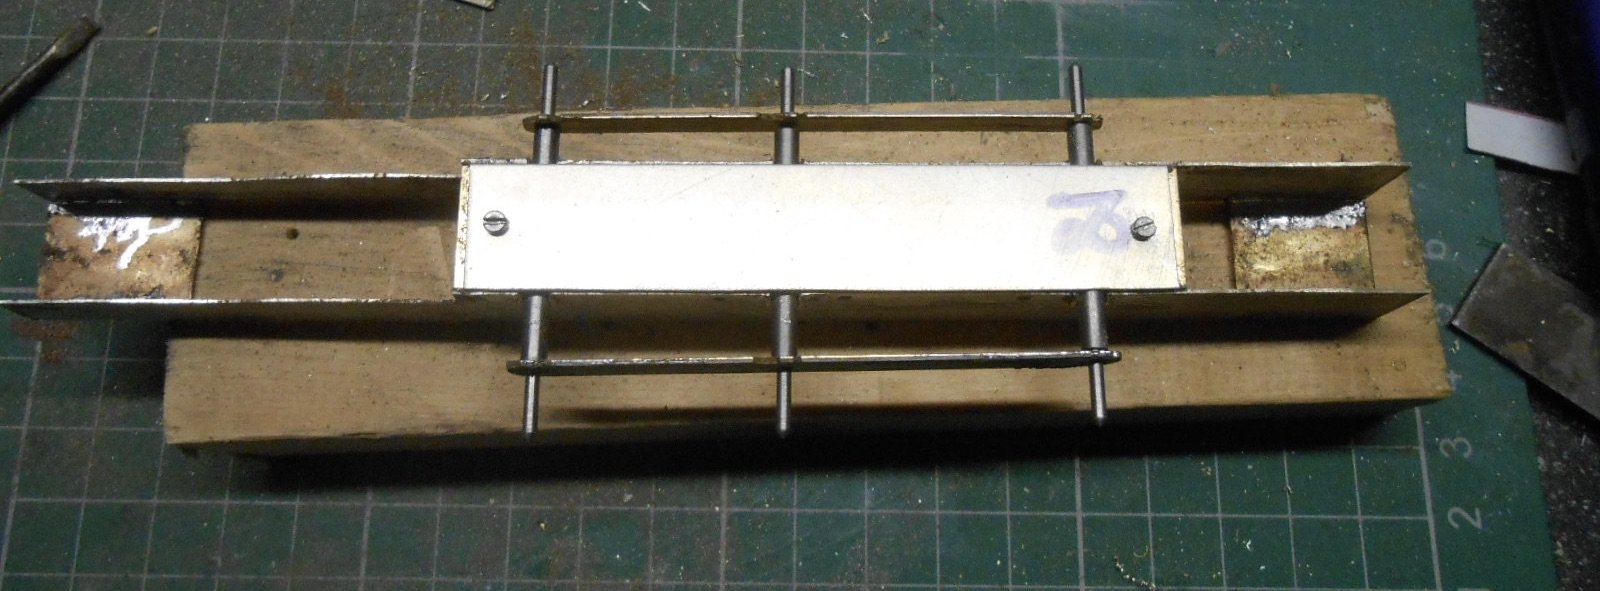
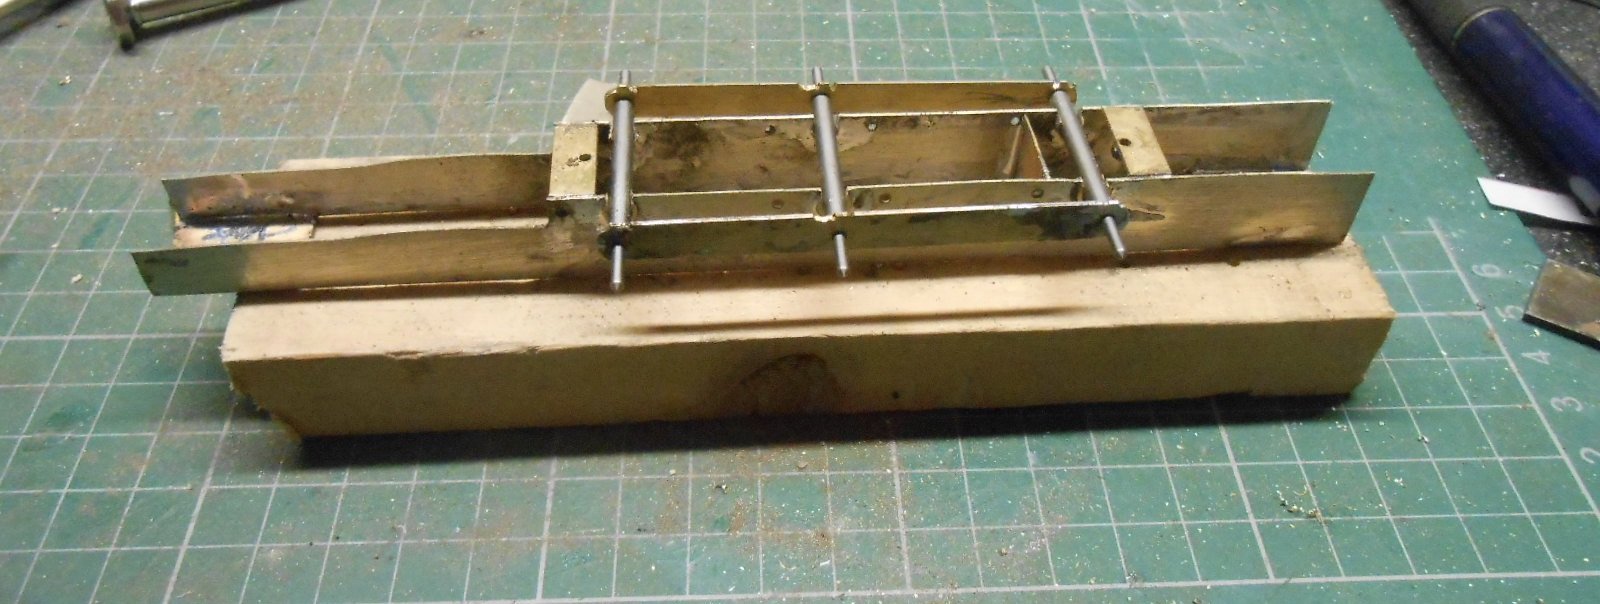
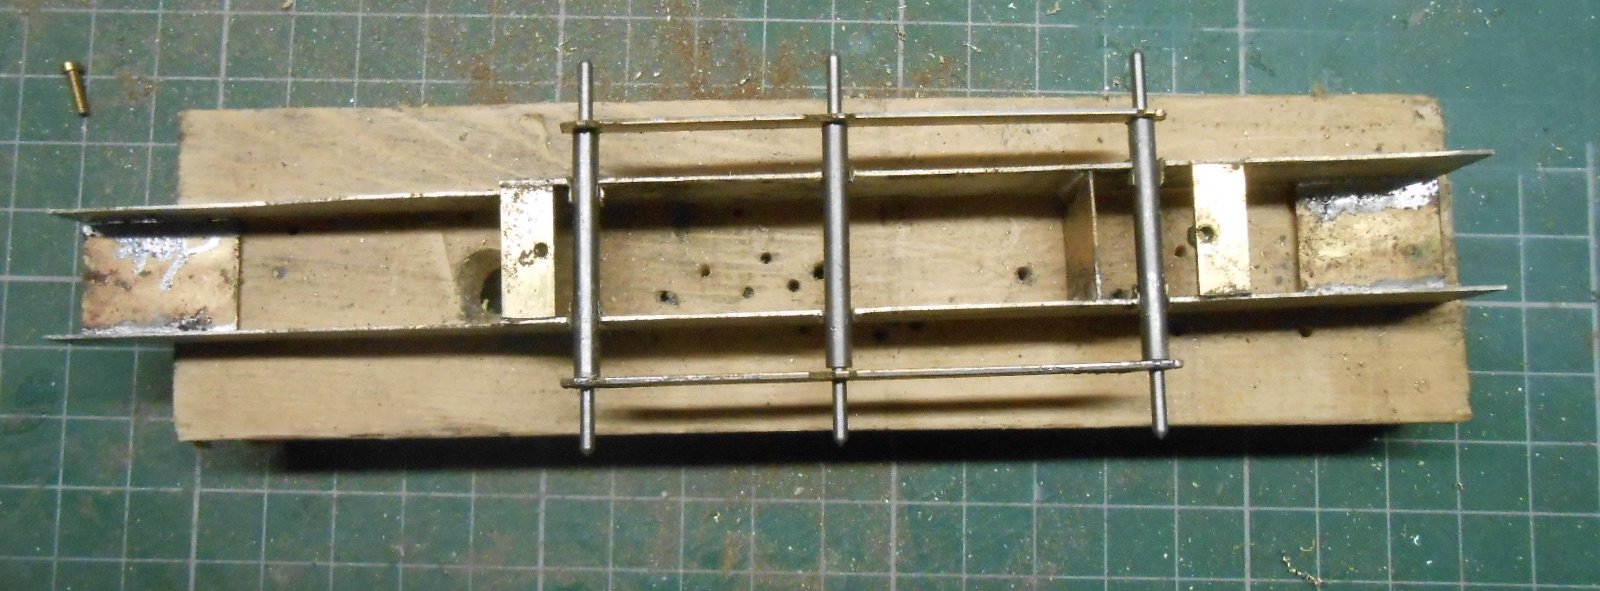
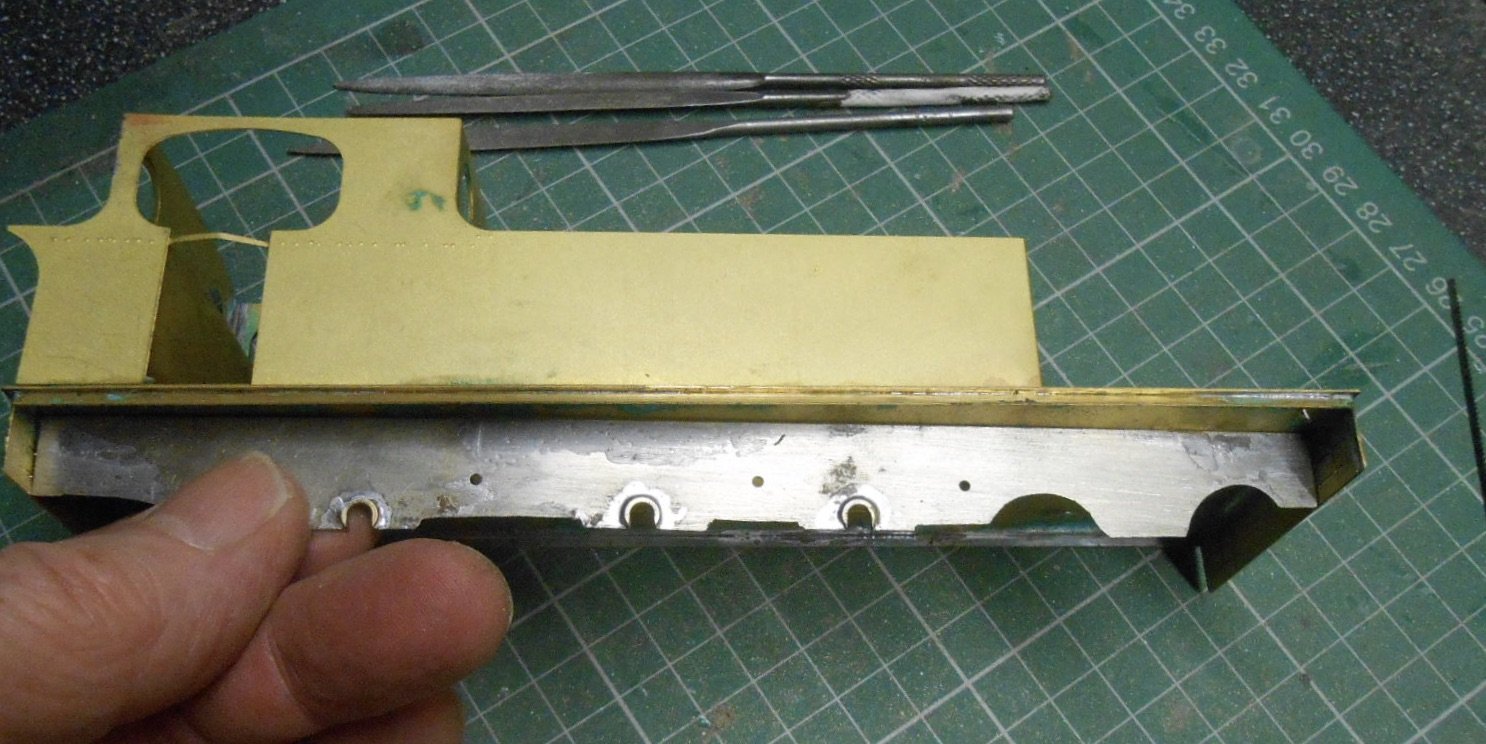
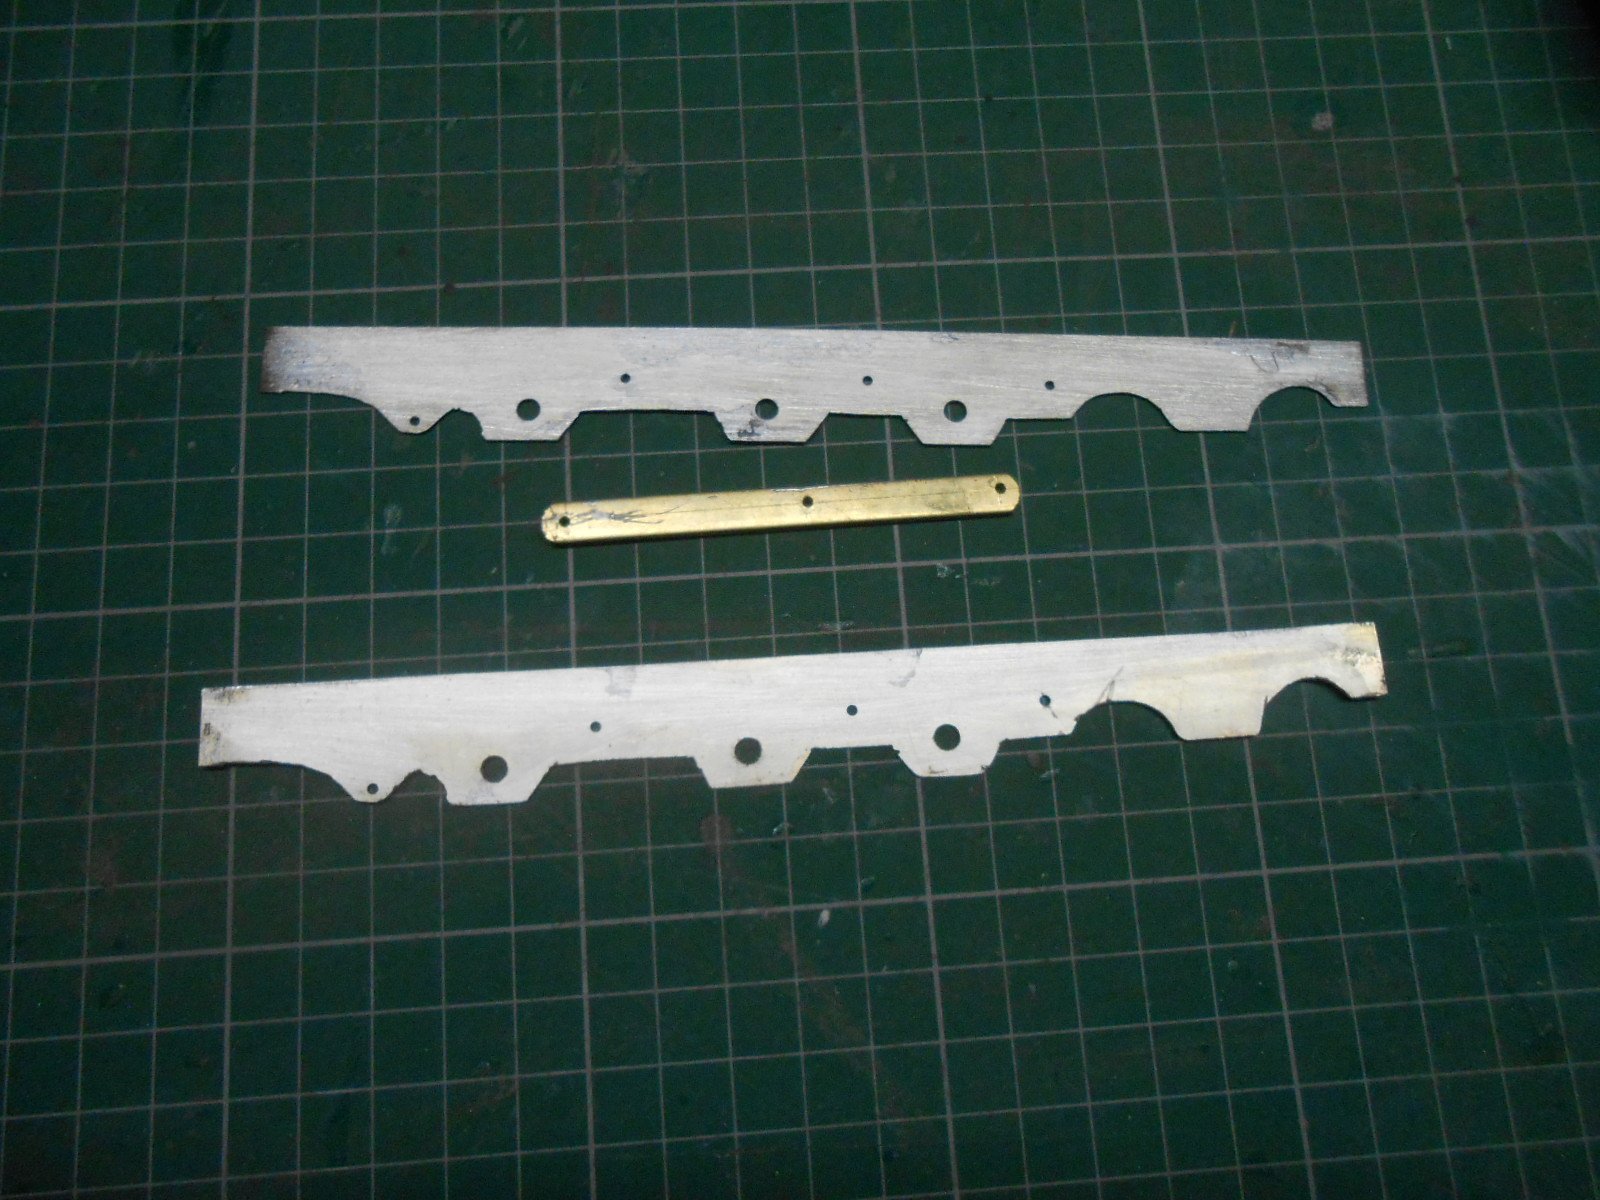
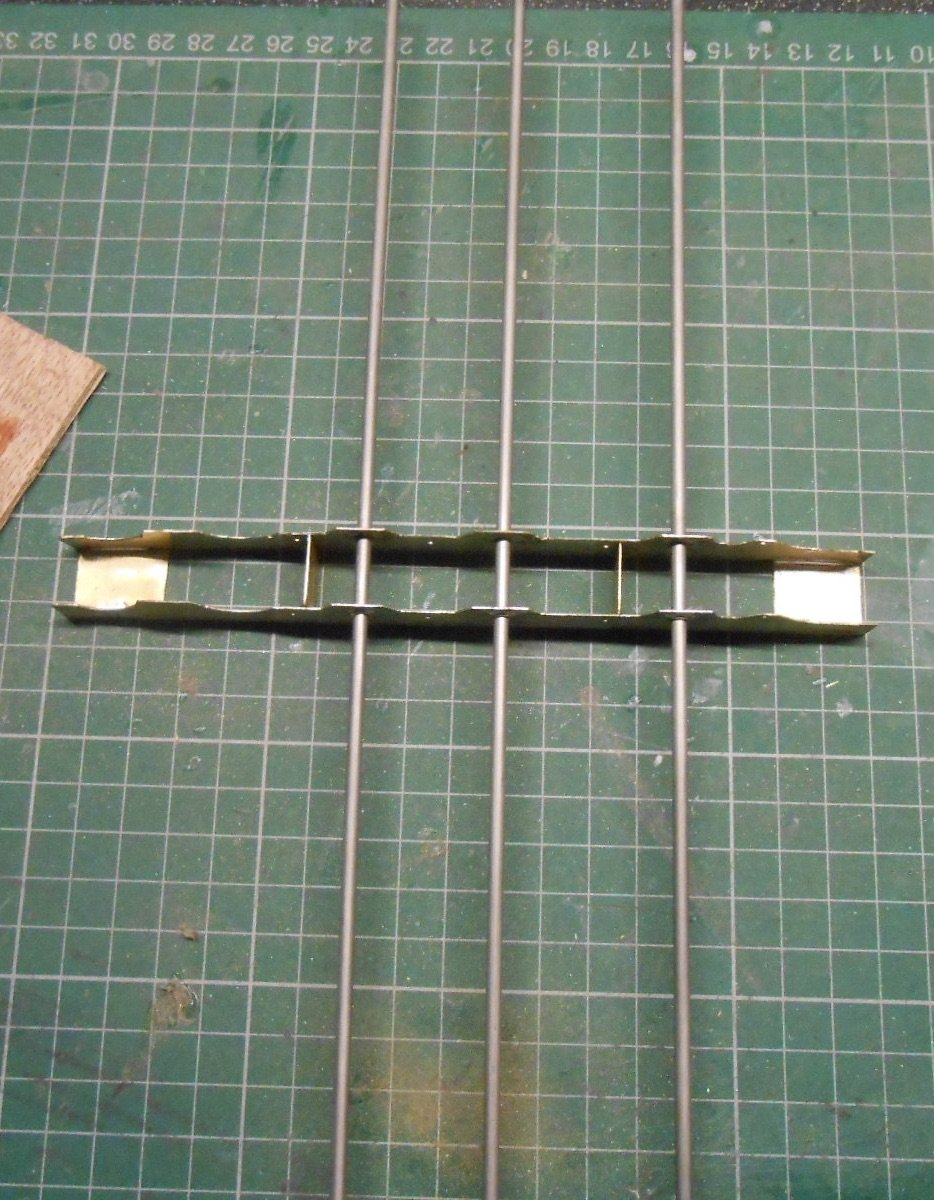
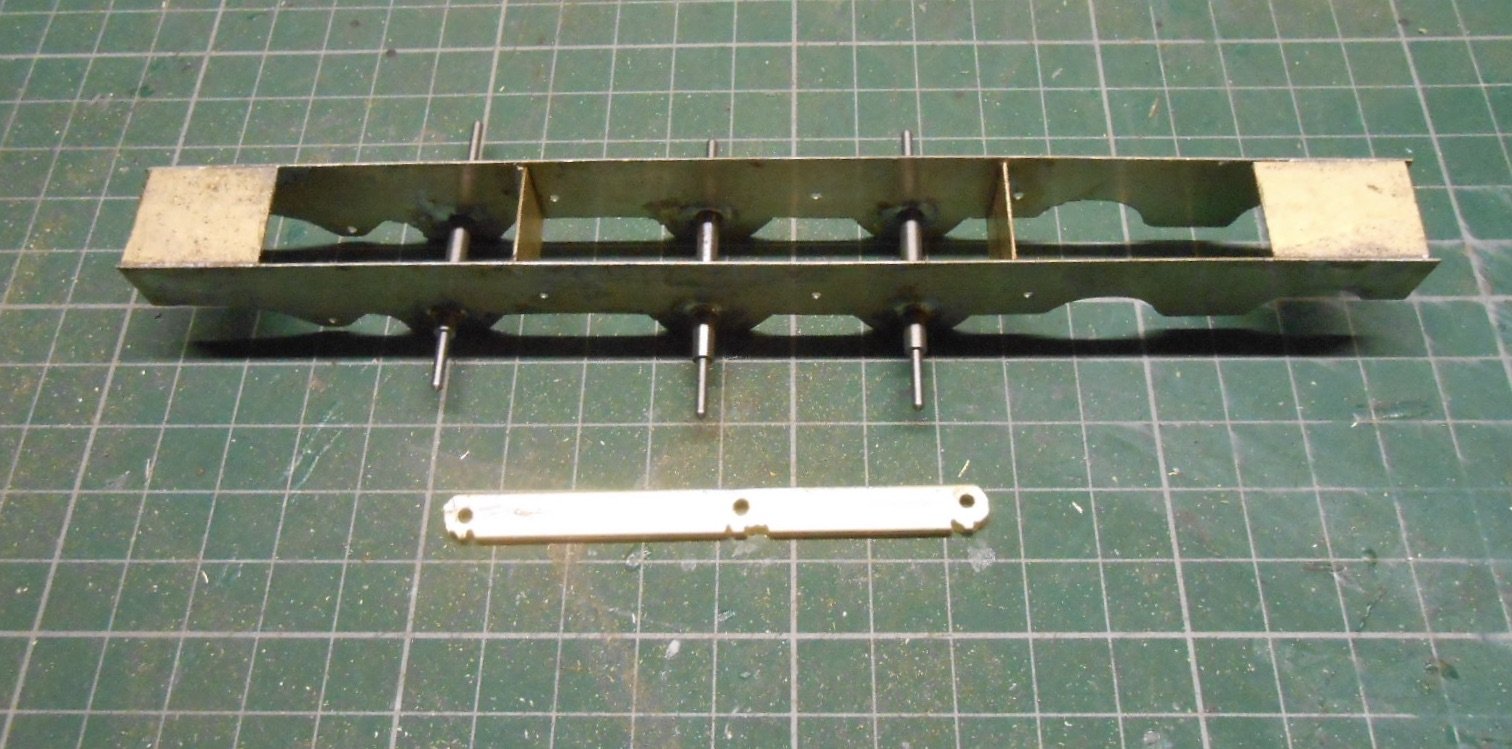
Much pondering this week on the chassis & am grateful to Alan [tullygrainy] for his advice on Gibson wheels and [going way back] to John Ahern's book on loco construction. My concerns centred around the Gibson wheels, which as a long time 7mm Scale modeller seem a bit less robust than Slater's. At this stage of building a model, wheels need to come on and off many times: quartering not an issue until the cranks go on, but when they do, I don't want to have to mess about after that. Here's where the Ahern book comes in. First published in 1949, obviously a lot of the ideas are very old school now, but still worth looking at and it was a section on using keeper plates which caught my attention. A keeper plate means that all three axles/six wheels can be dropped out in a single unit, complete with the motor gear box. However, before this, a problem arose in that though the axles in the chassis aligned well enough, when I tried to add the coupling rod blanks, the rear section was out by getting on for a millimetre... Deep sigh, various profanities etc, so what to do? In an effort to cut my losses, decided I could probably still use the original inner frames as the outer ones, but there was little alternative than to cut some new inner ones and set the coupling rod blanks more accurately this time. Kept these new frames very simple, because they won't be seen, so it didn't take too long, but the photo below of my workbench shows the amount of tools I ended up using. Before the frames were assembled, I marked a line across the base of the bearings and then removed the metal level with this, followed by cutting out a section of each bearing to create slot for the axles to drop into. I then fitted two pieces of thicker brass between the frames and cut a larger rectangle for the keeper plate. Holes at each end were then drilled to take 10ba bolts, which fit into captive nuts in the two new spacers. The final picture shows how the previous inner frames might yet be used as the outer ones. Dummy hornblocks and springs will hopefully hide their origins.
-
Mmmm.... Clever, very clever! Looks great too.
-
For those interested 1039 Models trade on Ebay:1039models.com
-
It was indeed very cold. Felt sorry for the traders. The rest of the sport centre was fine but this hall was more the ice rink next door.
-
An 0 Gauge Trade Show is always interesting, because you get to see traders who rarely come out for other events and the range of stuff available ranges from a couple quid to several thousand pounds. Thus it was today at Guildford. Top class kit makers like Connoisseur and Finny rubbed shoulders with custom loco builders like Lee Marsh, where a mainline loco will set you back over £3000. With the demise of Eileen's Emporium, Squires have taken on the role of tool and material suppliers, while it is always nice to see the likes of Roxey, CPL and Slaters. Like as not many of these names won't mean much to some, but they are bastions of 7mm scale modelling. A new name to me was 1039 Models, but very welcome as they stock a wide range of whitemetal castings - vital stuff for me like wagon underframe parts, buffers and so on. Turns out they are trying to pick up the pieces of JPL Models, who ceased trading last year following the death of the proprietor. Seems a lot of stuff could well be lost forever, so it is welcome that at least some is being saved. Email 1039models@gmail.com A blast from the past is John Day Models, where the old ABS range has been purchased from the late Adrian Swain's estate. It was a vast range of stuff, which is being slowly reintroduced and upgraded. See www.johndaymodels.co.uk for the website.
-
Yep, I seem to be dribbling... Don't how the lining goes, but did it on my MGW coaches by using a gold gel pen on the raised beading. Alternatively, leave well alone - they really are splendid.
-
Fine model of a lovely locomotive.
-
Fine models - coaches really are a trial of endurance!
-
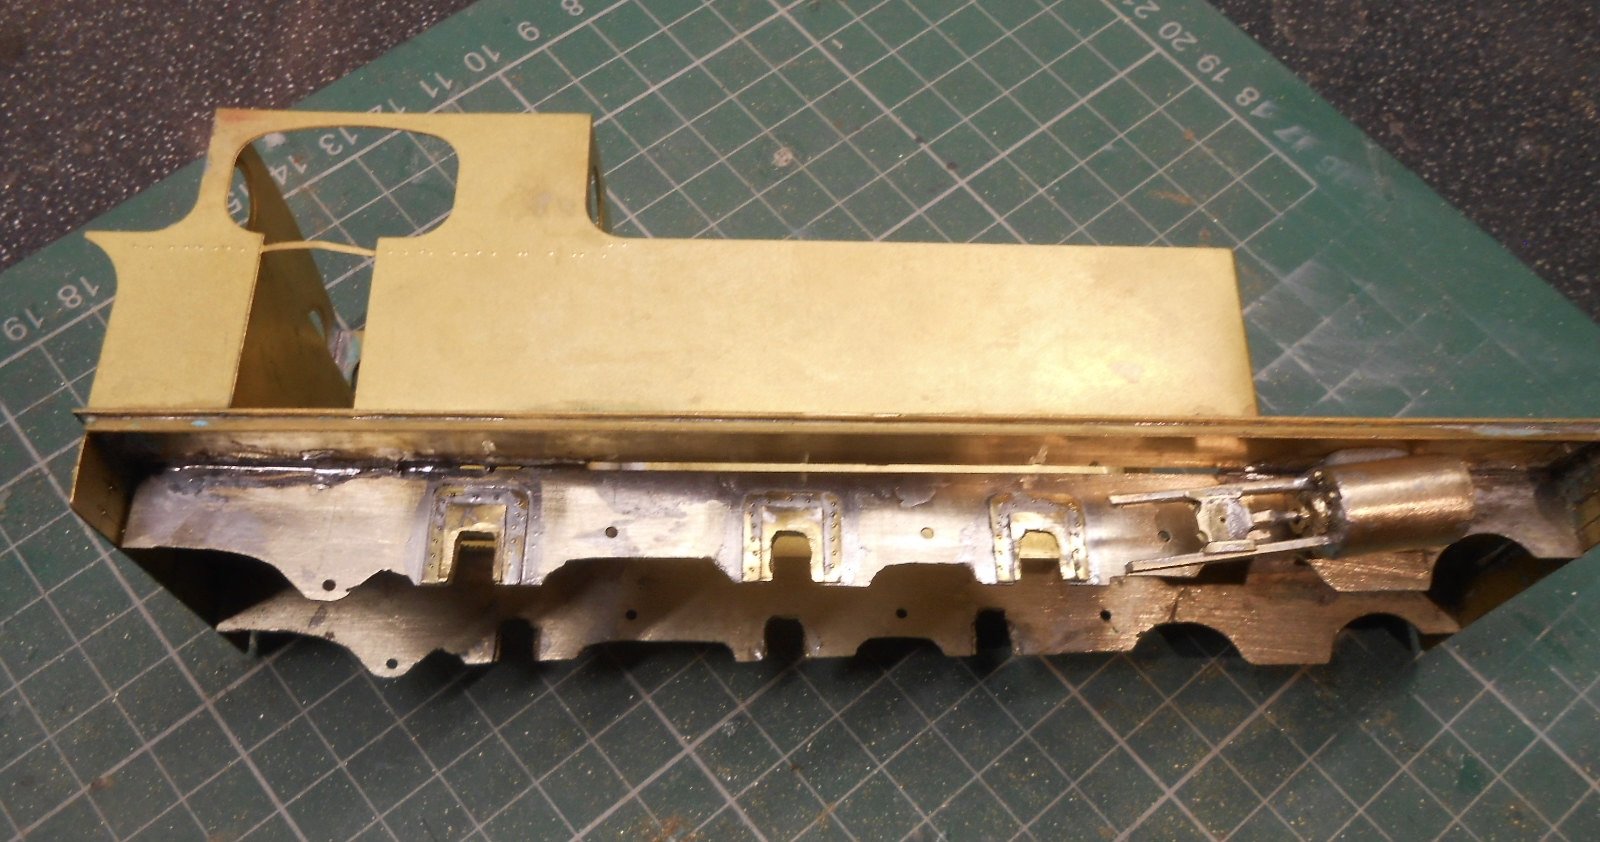
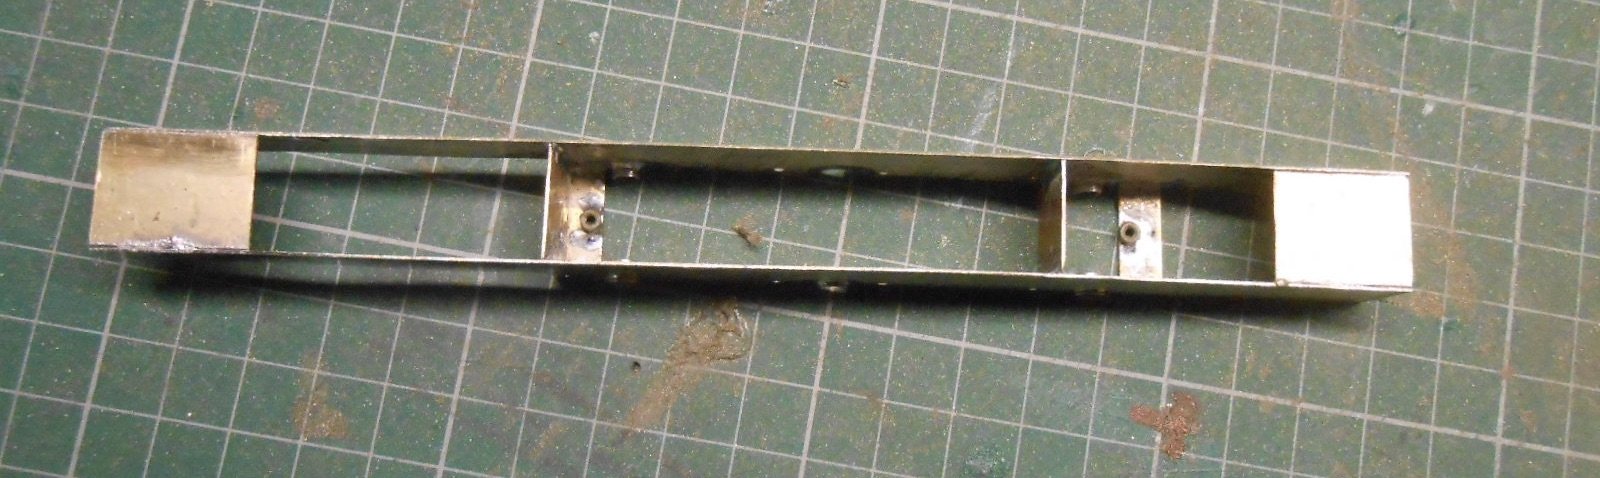
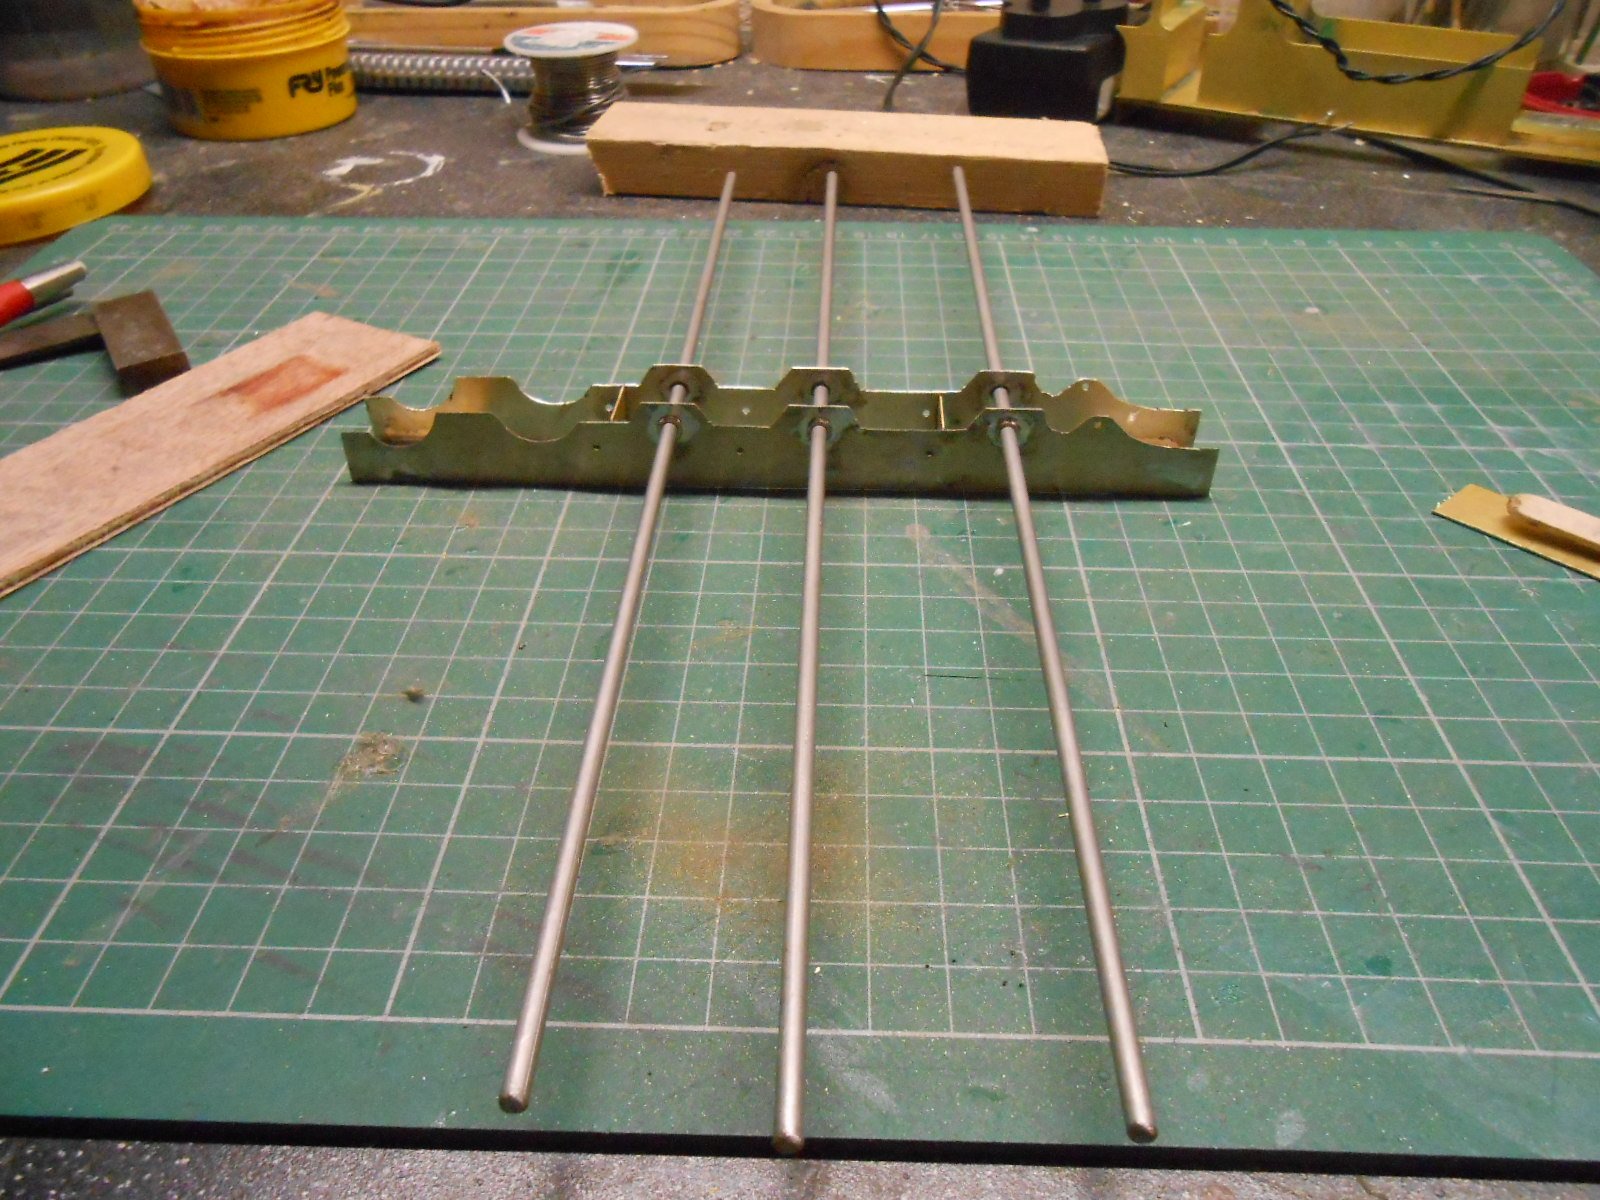
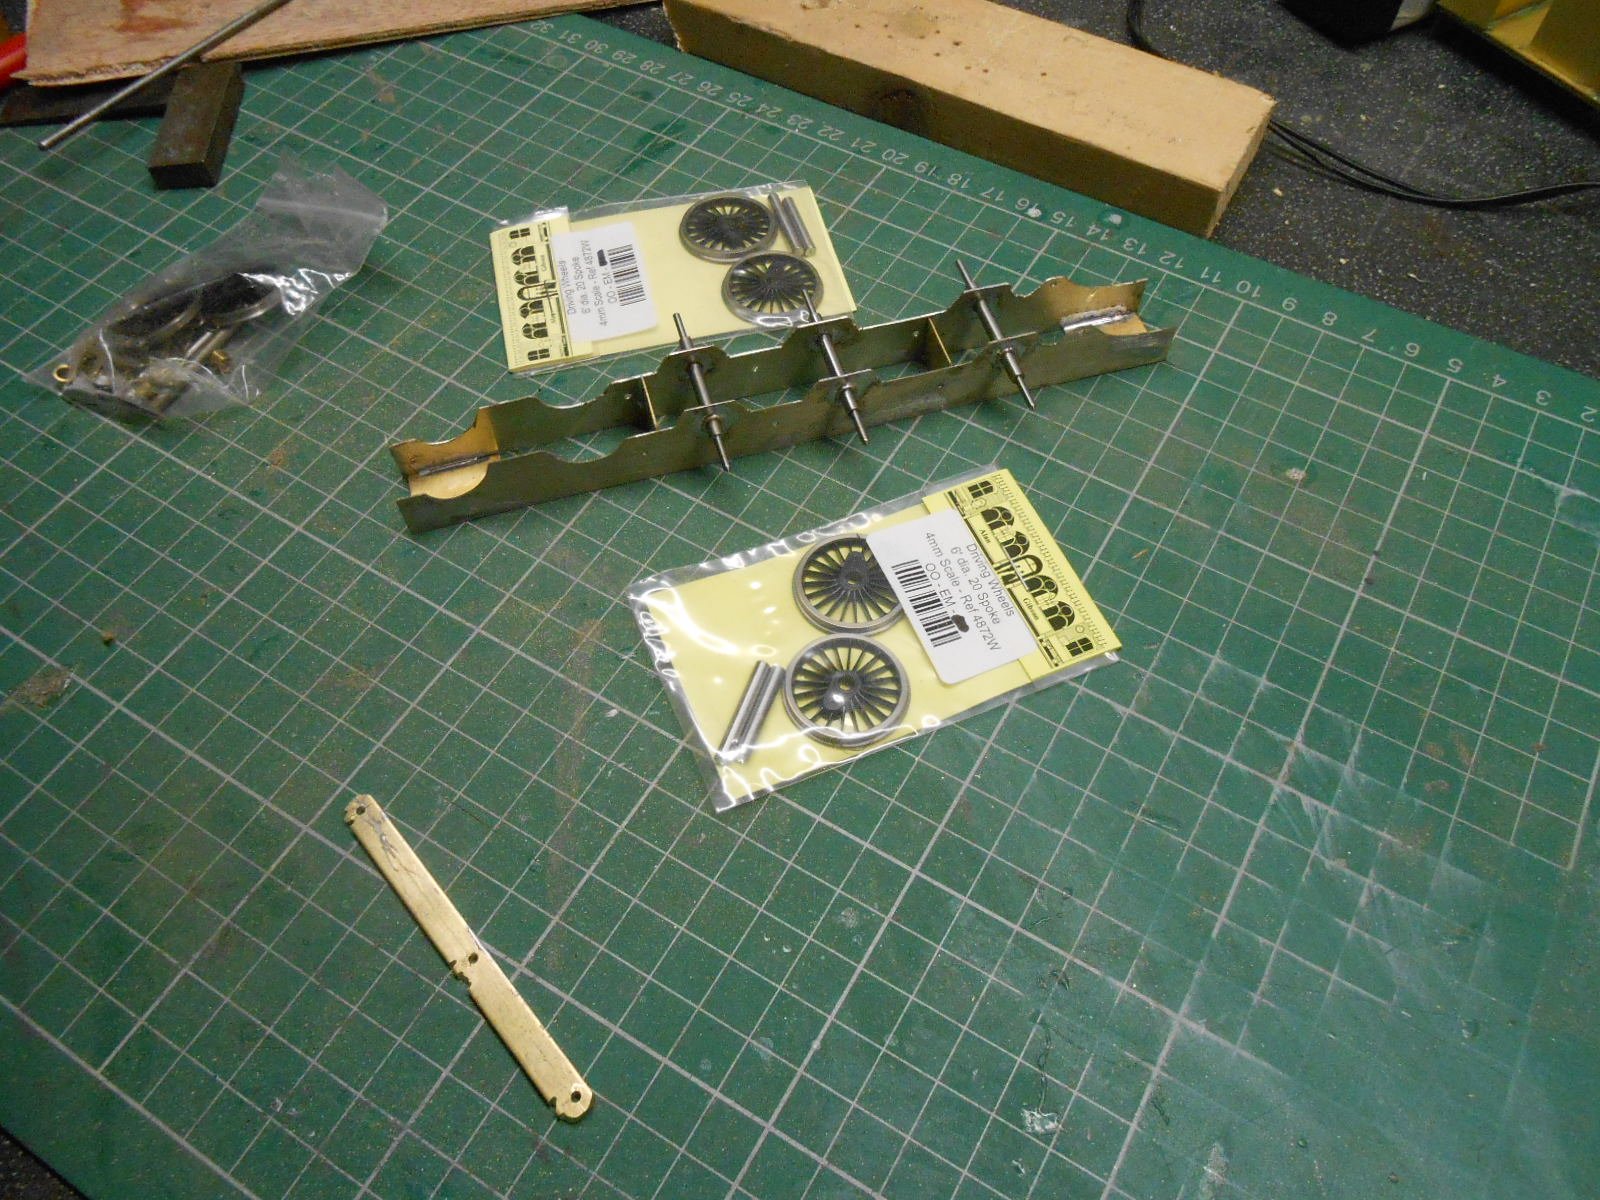
First of all, many thanks to Paul, Galteemore and Airfixfan for their advice and help with the Barclay tanks, which did indeed follow the usual conventions. The next stage for me was to start on the chassis, now that I have a basic body structure. I always like to get the working parts of a model done as soon as possible, because once that is assured, the rest is cosmetic. So far, the approach has been very conventional, starting with the coupling rod blanks. These are two strips of brass, soldered together, then marked out and drilled for the crank pin holes. They will be filed to shape later. Next, two more strips of nickel silver sheet were soldered together, then the relevant part of the chassis plan was cut out and stuck to the sheets with Pritt Stick. The frame sides were then cut out to this profile, using a slitting disc in the Dremel. Crude, but effective, not least because these inner frames will be hidden from sight and don't need any detailing. The coupling rod blanks were then clamped to the frames and drilled through for the axle holes., opening the frame holes out to just over 1/8th inch. The frames were then separated and the axle holes opened a bit more to take the axle bearings, which could then be soldered in place. Previous 3' gauge locos' frame spacers are 15.5mm wide, so some more brass strip was cut and filed to shape to make four of these. The two vertical spacers were now soldered to one of the frames and then, using three, 300mm pieces of stainless steel rod to align both frames, the other side was soldered to the first two spacers and then two more horizontal spacers added after than. So, a decent start on the chassis, but the tricky bits, namely the bogie and [especially] the outside cranks are still to come, while an order has been sent off for a High Level motor gearbox. The final pictures shows the Slater's wagon axles in place. The Alan Gibson wheels will go on the 1/8th inch part of these and the outside cranks [when I have made them]will eventually go on the 1.8mm diameter outer ends.
-
Lough Swilly Barclay 4-6-0T details
David Holman replied to David Holman's question in Questions & Answers
Many thanks chaps! -
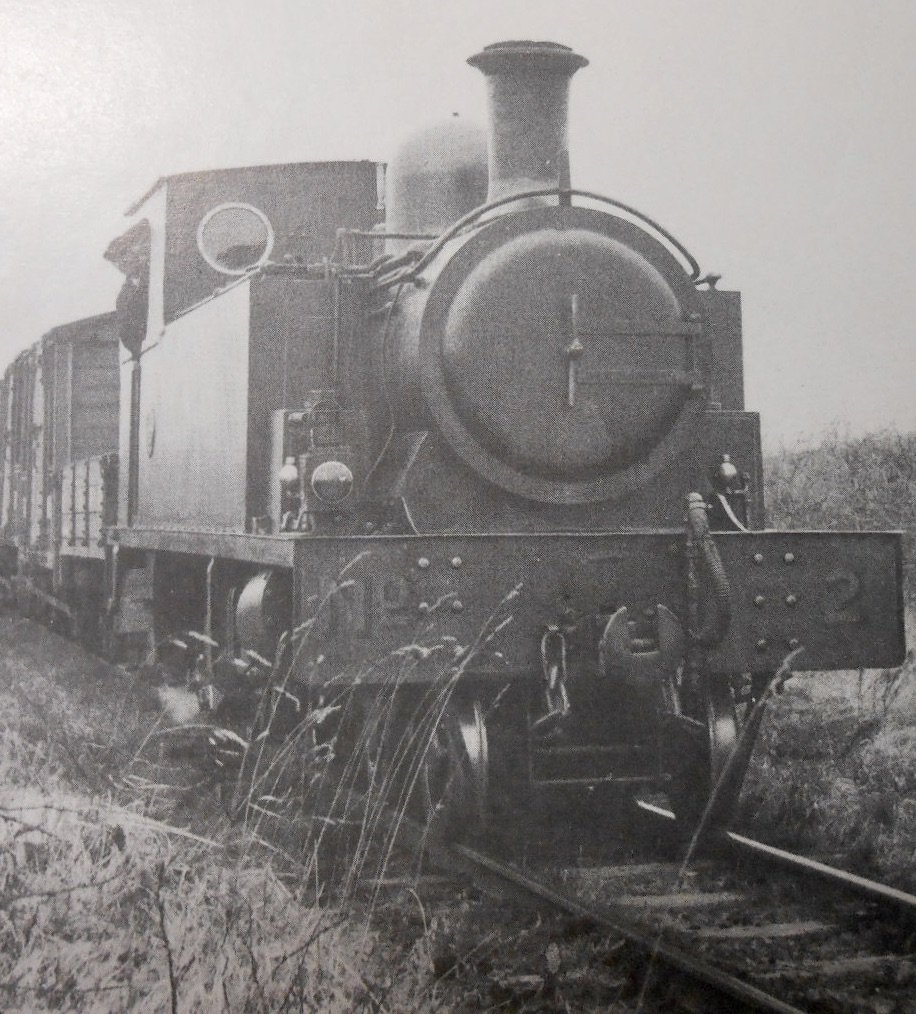
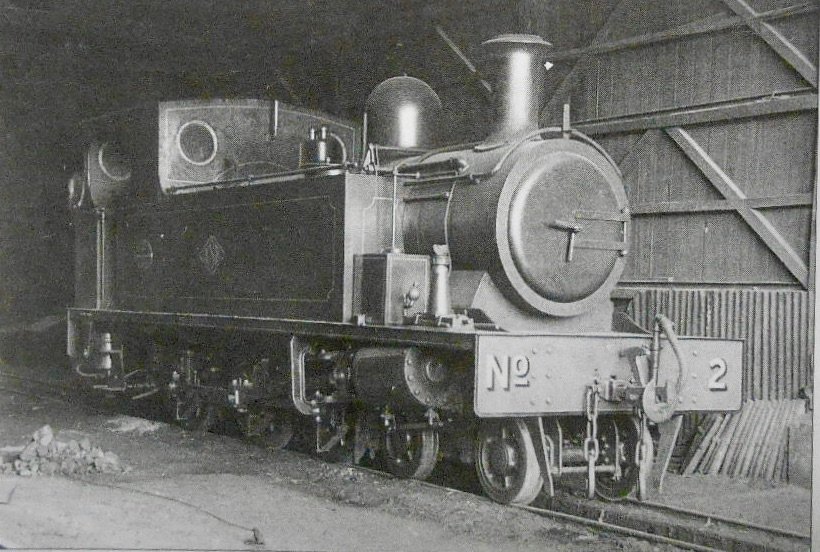
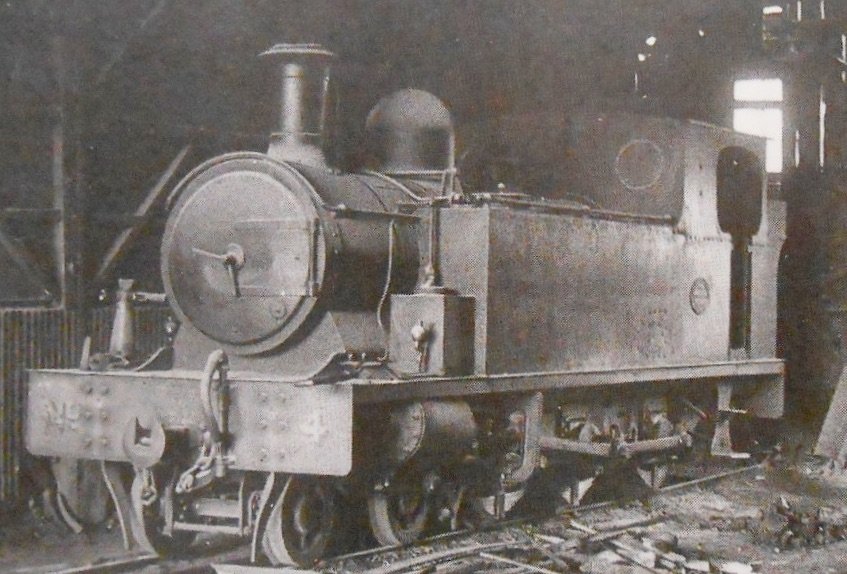
Bit of a wing and a prayer for this one... My workshop thread is now focussed on building one of these Swilly tanks. I have most of the books and have been browsing Ernie's Archive Swilly album, but a few questions remain: Any details of the interior of the cab would be welcome, though am guessing it will be standard Barclay stuff, so can probably look this up on the web The tops of the tanks do not seem to appear in any of the available photos, & anyone looking at my Workbench thread will have seen that I've cast doubts on the Worsley etchings for this: For the life of me, I just can't see how the above arrangement would work, though if you look at the photos below, the front of the tanks are definitely profiled to match the curve of the boiler. What I need to know is whether the top of the tanks were indeed a single sheet [a bit like a GWR Pannier] with a flat arc of the boiler poking above, or if it is just the front plating of the tanks that is flush with the boiler and the inner tanks sides are conventionally vertical behind that. Note that there are no etchings on the Worsley sheets for either boiler, smokebox or cab interior. Any thoughts will be most welcome and pictures especially so! Many thanks.