David Holman
-
Posts
4,359 -
Joined
-
Last visited
-
Days Won
117
Content Type
Profiles
Forums
Events
Gallery
Blogs
Everything posted by David Holman
-
Anybody here got any experience of making your own waterside transfers and therefore advice on the process? Seems to me the main issue is that if you want to print your own, via a computer, how do you get white? So many Irish wagons have white lettering, but your average inkjet printer doesn't do that, instead relying on paper being white - not much good for a clear transfer sheet. Have been looking around for years for various Irish prototype sheets in 7mm scale, but always end up either hand lettering or picking bits from other transfer sheets. The latter now running low. Would very much like Swilly and Donegal logos, but all I've found so far is 009 stuff, which is too small, so will be interested to hear of alternatives, please.
-
Me neither, but do know the model runs well, is cheaper than many 00 locos and could form the basis of a nice shunting layout. Correct 're class nomenclature.
-
And I thought Cultra was a long way for a one day show! Looks fantastic!
-
Checkout the latest edition of Continental Modeller, which has something similar - and very nice it is too.
-
The Green Bible says they were standard Sentinel products - makers numbers 6846/7. Built in 1927. Allocated to Cork and Tralee, one was tried out on the Castleisland branch, but by 1931 both were at Tralee before moving to Limerick in 1932. Here they worked the Market siding until this closed in 1940. Apparantly, they then lay out of use until withdrawn in 1948. They were numbered 280 and 281. Have often wondered about a 7mm version as there are at least two rtr models. Moving the wheels out to 36.75mm gauge has been tried in the Chatham Club's SMR version, which has run trials on Northport Quay, but it doesn't fit either of my timescales.
-
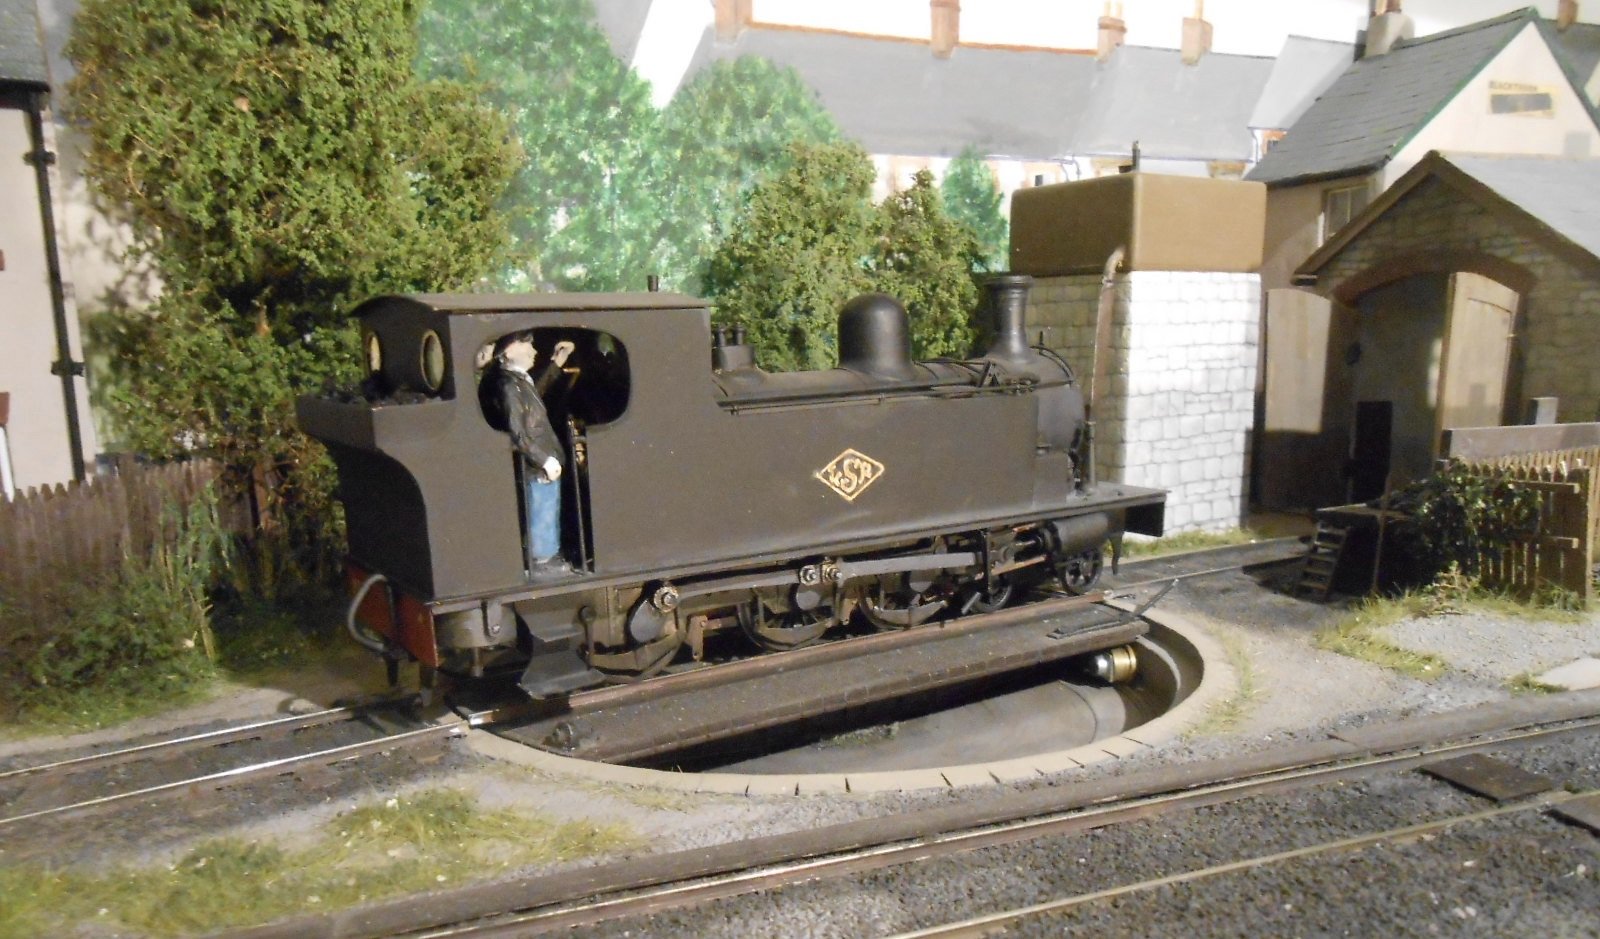
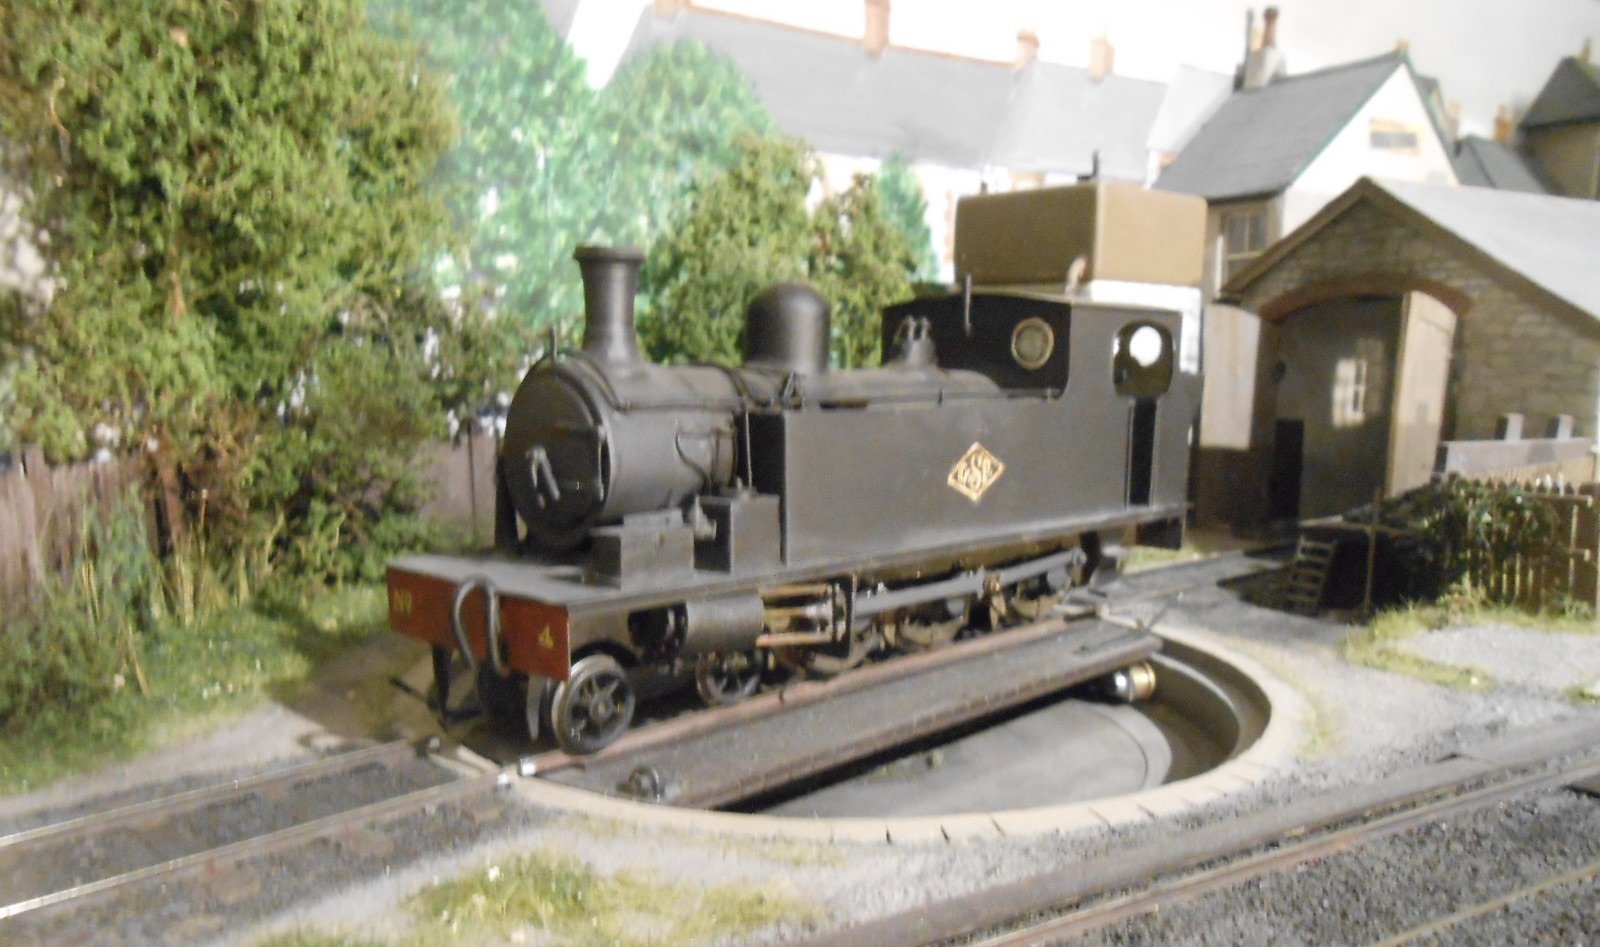
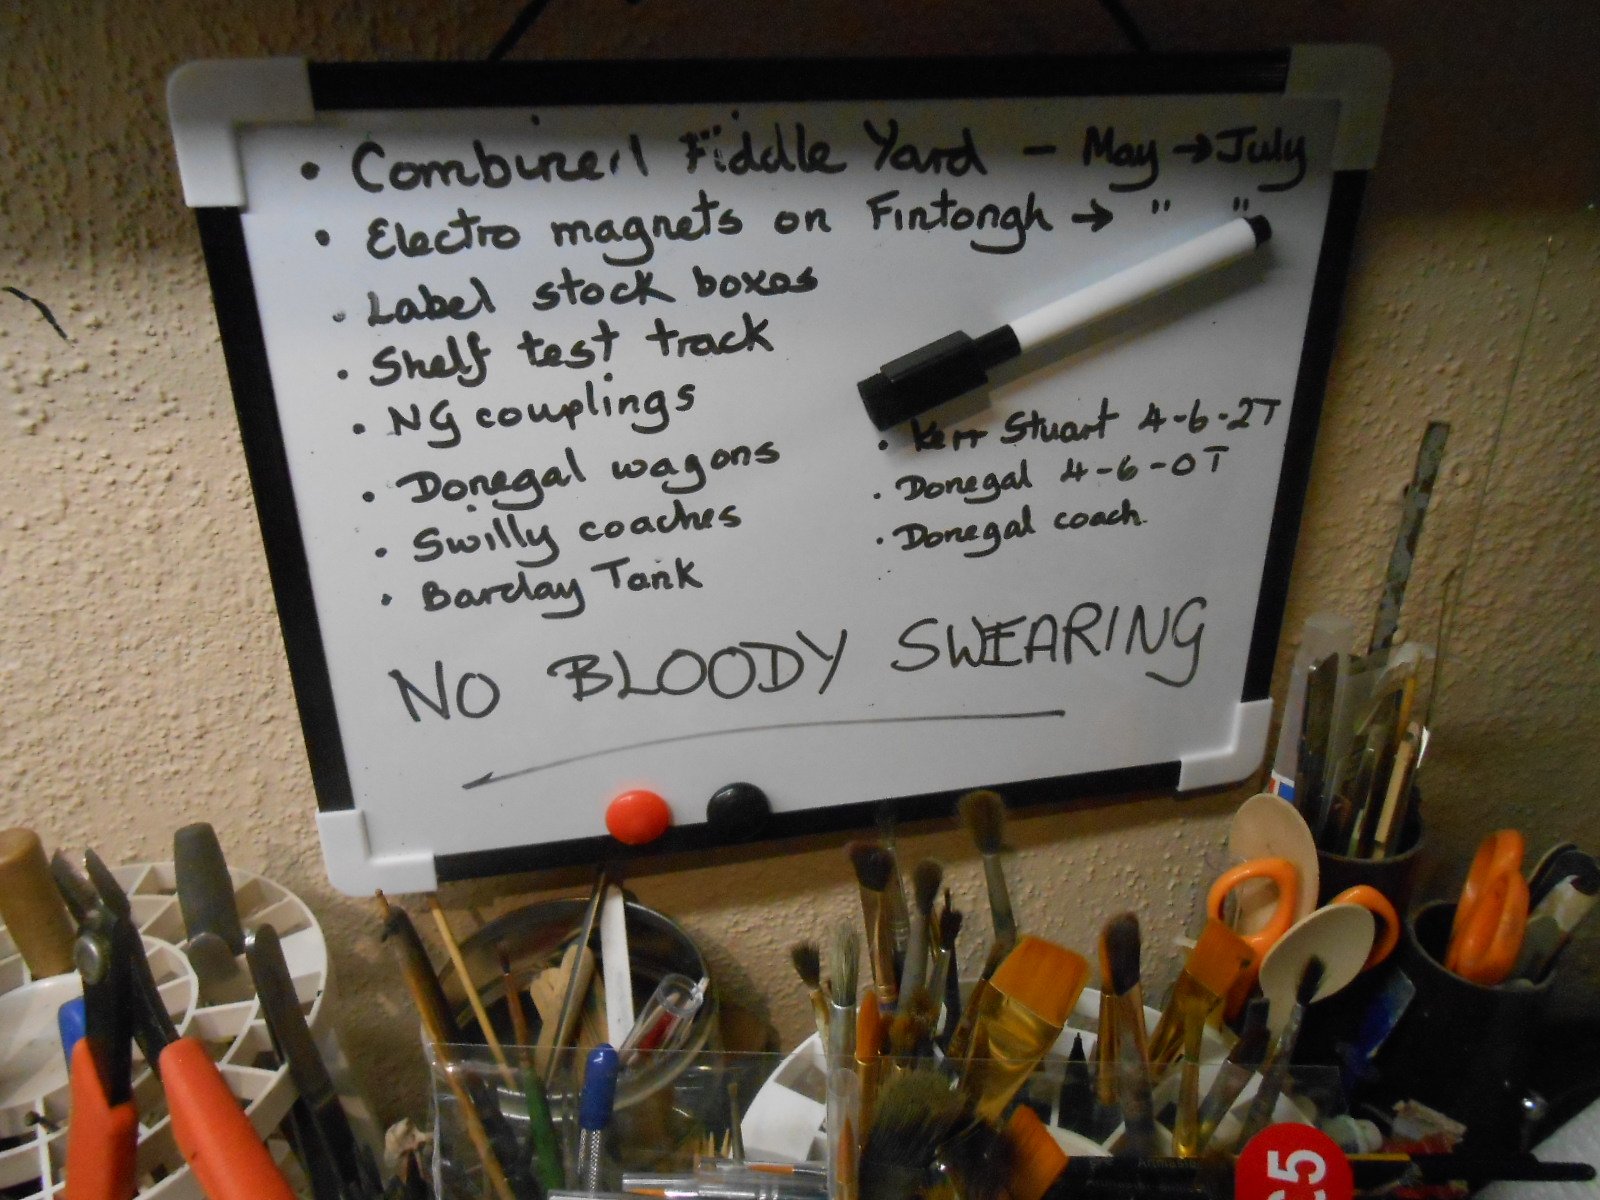
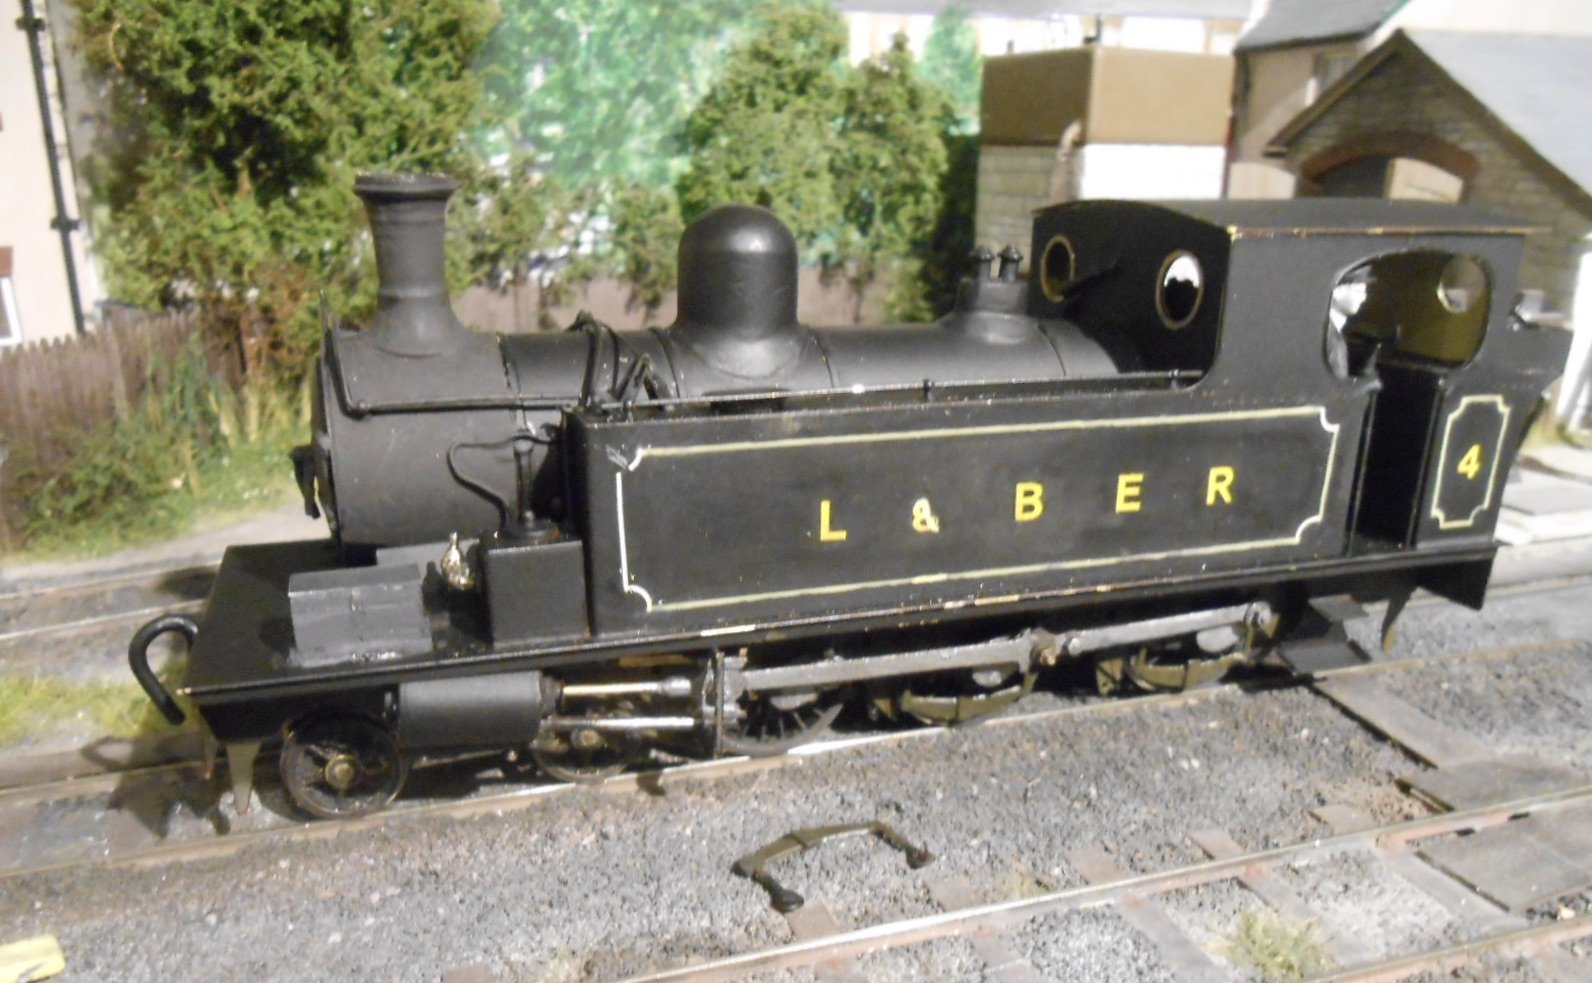
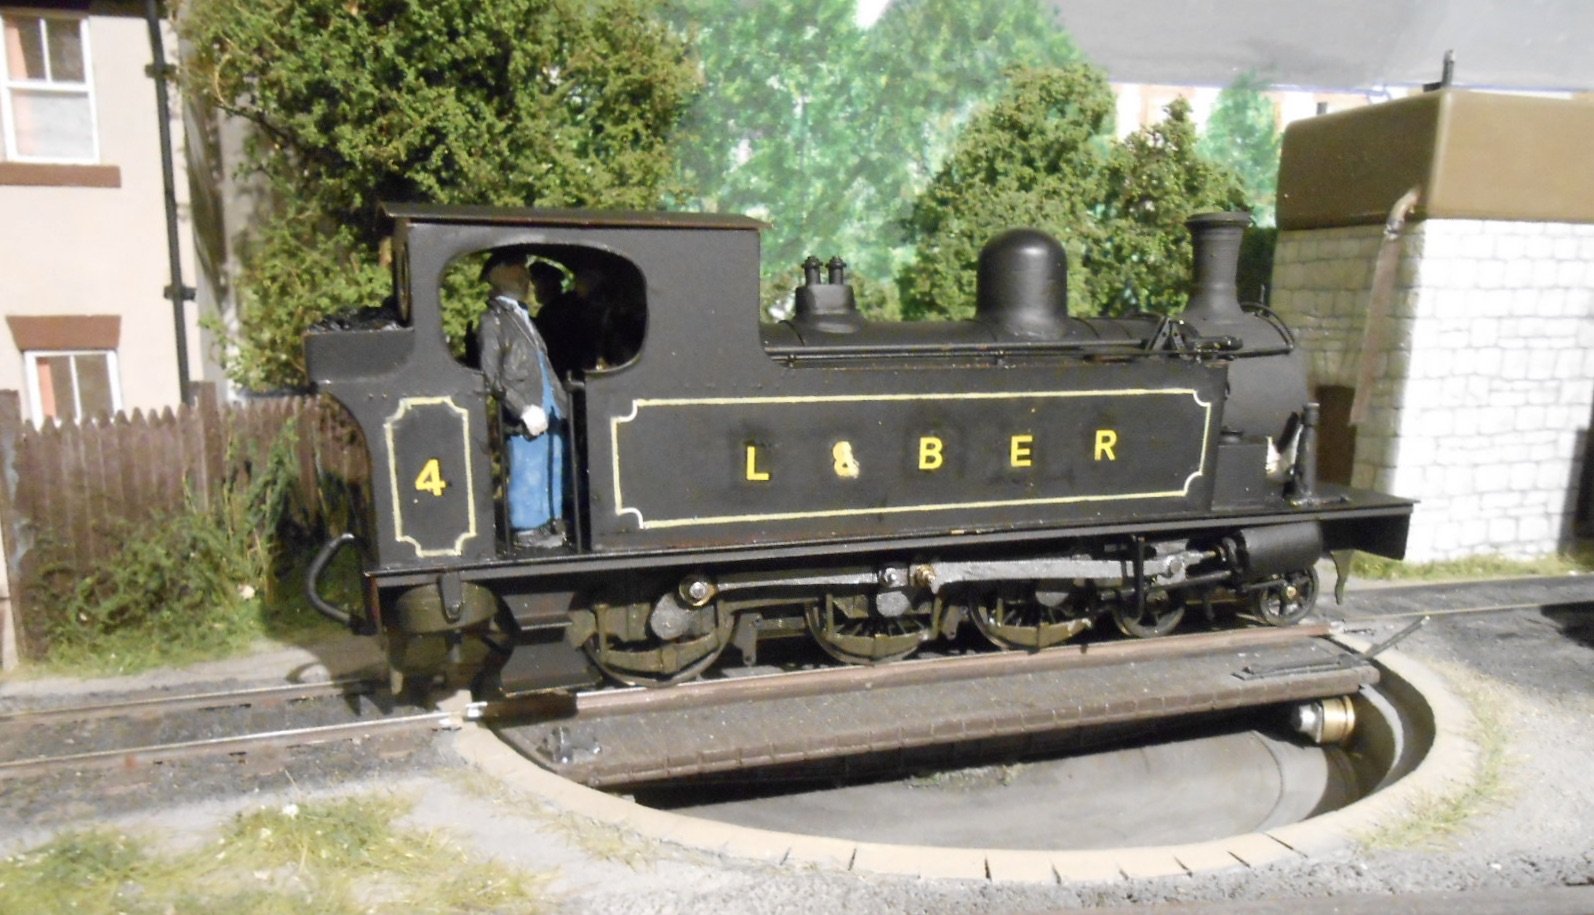
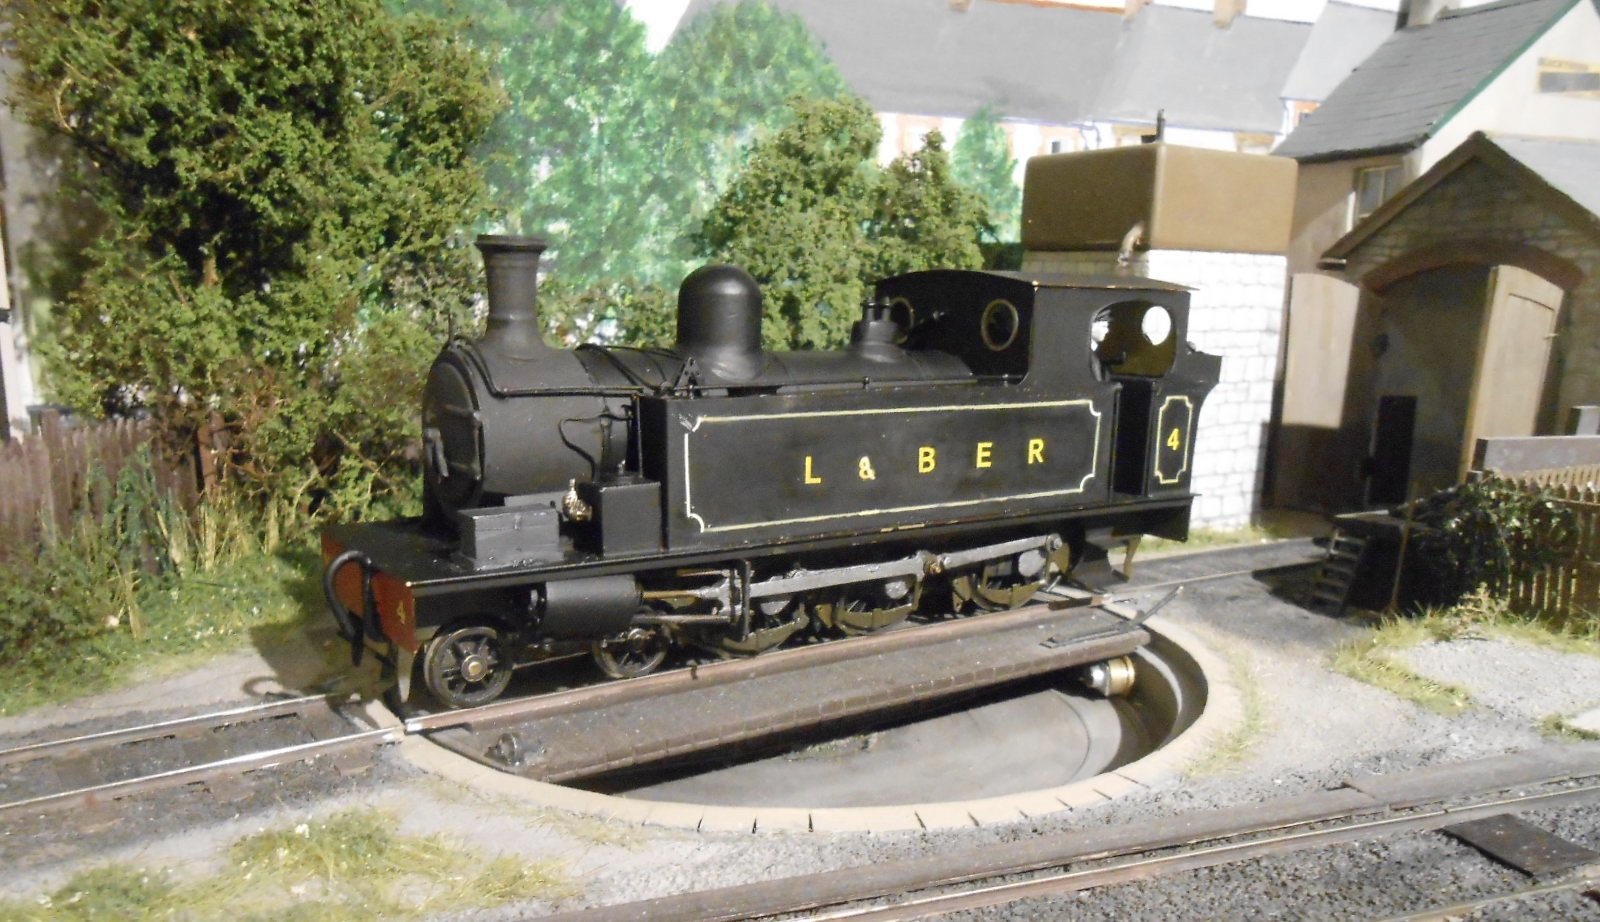
My much abused Barclay tank is on yet another incarnation, having stripped/sanded the tank and bunker sides back to brass, then reprimed and resprayed to get rid of the Horlicks I'd made of the lettering and lining. It may have looked ok in the photos [though bet you didn't enlarge them], but the reality was a mess I couldn't live with. The crew are fixed in place, as is the cab roof and glazing, while the bogie has been weighted with lead. Rather than redo the lettering, with my transfers showing way too much backing film, decided to go with a Swilly 'lozenge' instead. Made a diamond from a piece of plasticard, then held this to the tank side with a small piece of Blutak, before drawing round it with white gel pen. Used the same pen to do the LSR lettering [nowhere near as fancy as the prototype], then, once dry, went over this with orange felt pen. Final [?] tidying up was done with a fine brush dipped in thinners to remove the worst of the blemishes. Still not sure about this, as from some angles, the lozenge looks too big, but Swilly engines varied greatly in their livery, ranging from lining & lettering, to nothing at all - the latter has not been ruled out either... Judicious used of weathering powders has followed. Pictures show that Swilly engines were well looked after, right to the end. No 4 awaits its builders plates and couplings, but hopefully the pictures show an improvement from before - plus at least it now runs well enough. Meanwhile, for those interested in such things, a picture of my main 'to do' list, though this changes according to mood. There are many others too!

-
Chris Pendleton is at a different level to many of us mortals, having worked in P4 for many years. He also did an eight page article in MRJ on Alex Jackson couplings, in which he improved their reliability to 95%. Doesn't matter how many times I try to read it, my eyes glaze over less than halfway through. Respect, yes, but well beyond my abilities! That said, anything that keeps wheels on the track, especially drivers, has to be important, along with as many pickups as possible.
-
Another stunner. Interesting to read about back to back standards. I used 19.3 on Fintonagh for wagon and coach wheels (Branchlines), with Code 83 rail and 1mm flangeways. The wheels have fairly fine treads and anything more than 0.3mm out can cause problems. Could be my track laying though!
-
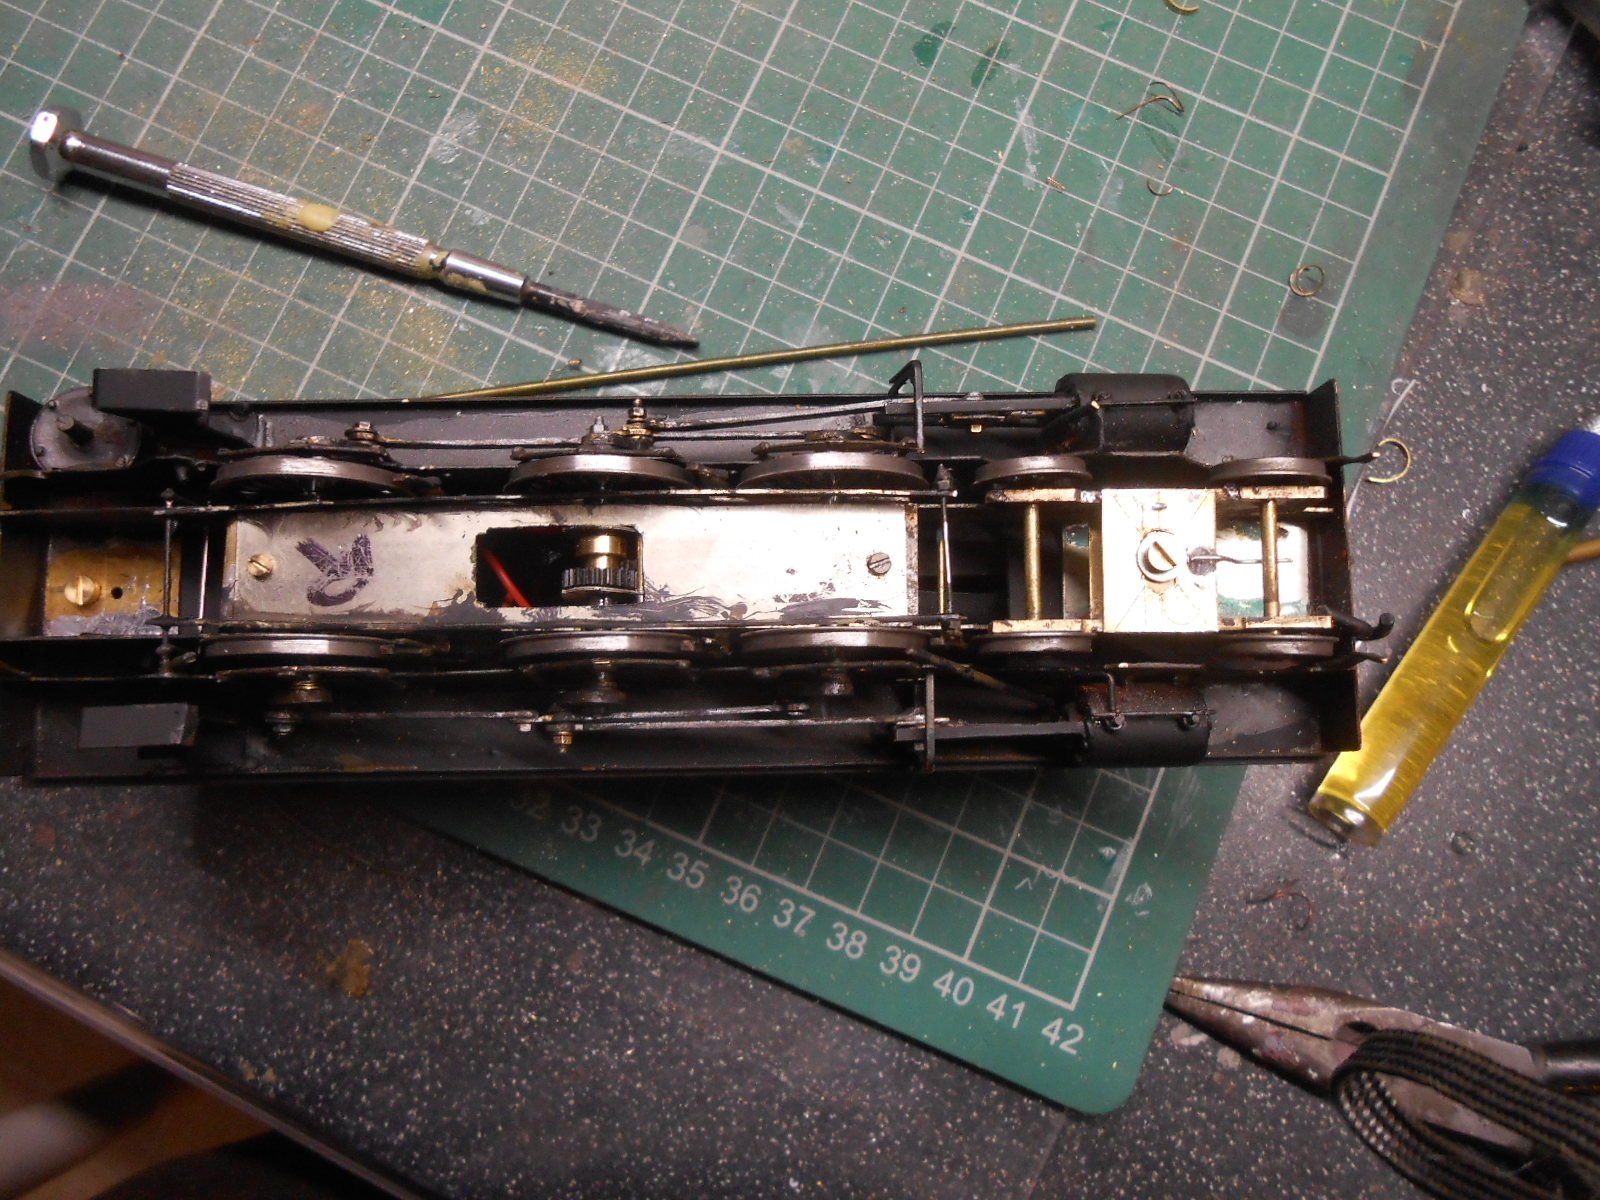
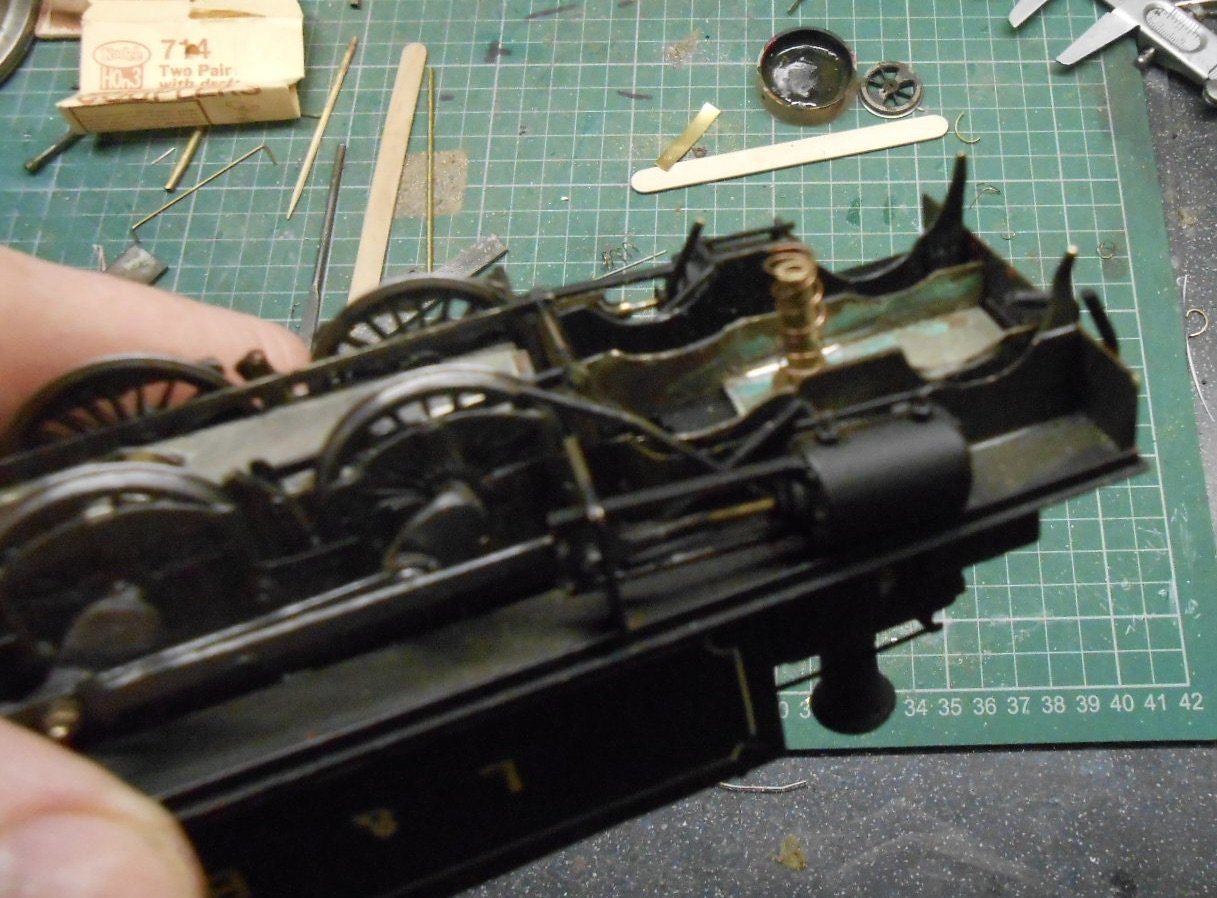
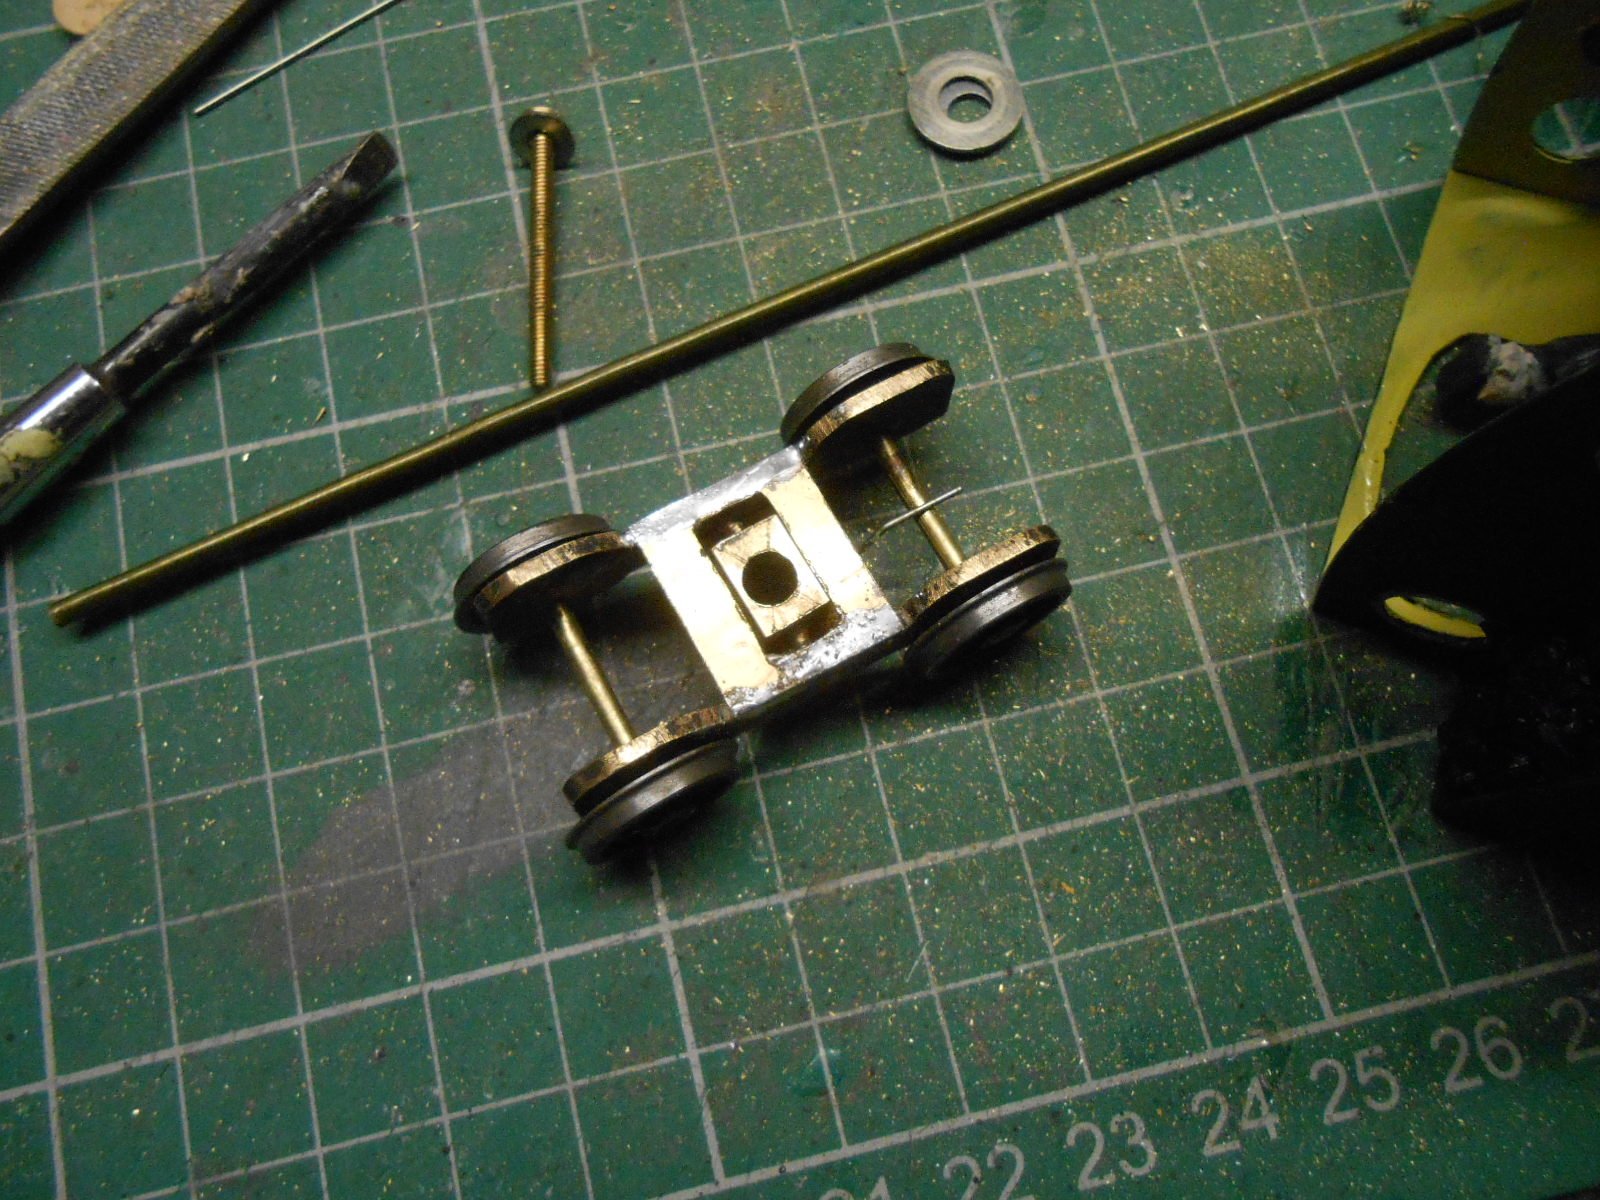
Thanks folks, after considering all options, in the end decided the old way was probably the best, but when you look at the car crash of my workbench this evening, you can see it was not without much cussing and swearing. Putting stuff away, I counted over 50 different tools and materials - though some of the former were because I couldn't find the original ones in the mess... Retained the central pillar and used some 2mm brass to make the pivot, with the added advantage of a bit of extra weight. However, getting it to sit properly was a case of much trial and [even more] error, before finally getting it to sit properly. The loco managed to traverse the whole layout this evening, though some lead weight will be added to the bogie for extra security, as per Alan's suggestions. At least the pivot point has been able to use the same nut/bolt as the front of the keeper plate. Number 4 has suffered considerably through all this and is going to need a repaint. One of the dummy springs has come off too. However, I've never been really happy with the lining and lettering, so maybe it is all for the best in the long run. All good fun, allegedly.
-
Feel sure somebody used to do a working model of a gantry crane, though it wasn't cheap.
-
0n16.5 is a lovely scale to work in, because there is so much that can be used from 00 doner parts like coach and wagon chassis, as well as locos. The gauge is a bit narrow for representing 3', so (having previously thought about 5.5mm scale) it might be worth considering 1:50. Two options here. First, stick with 00 track, because with 1:50 (or 6mm/ft), the correct gauge is actually 18mm, which is only 1.5mm out and much better than 4.5mm in 7mm scale on 00. Not sure how that affects wheel sizes, but worth checking, because with a fair bit of adapting and scratchbuilding needed, being able to use commercial chassis should ease much of the pain. There are plenty of commercial figures available in 1:50 (also close to American 0 gauge, which is actually 1:48), while road vehicles likewise not a problem, for the same reason AND Corgi Classic and Dinky, among others were often 1:50 - in particular those lovely bus models. Buildings clearly not a problem for a man of your skills! The second option is as above, but go the whole hog and use EM track, which is the correct gauge. RTR points are now available from the EM gauge Society.
-
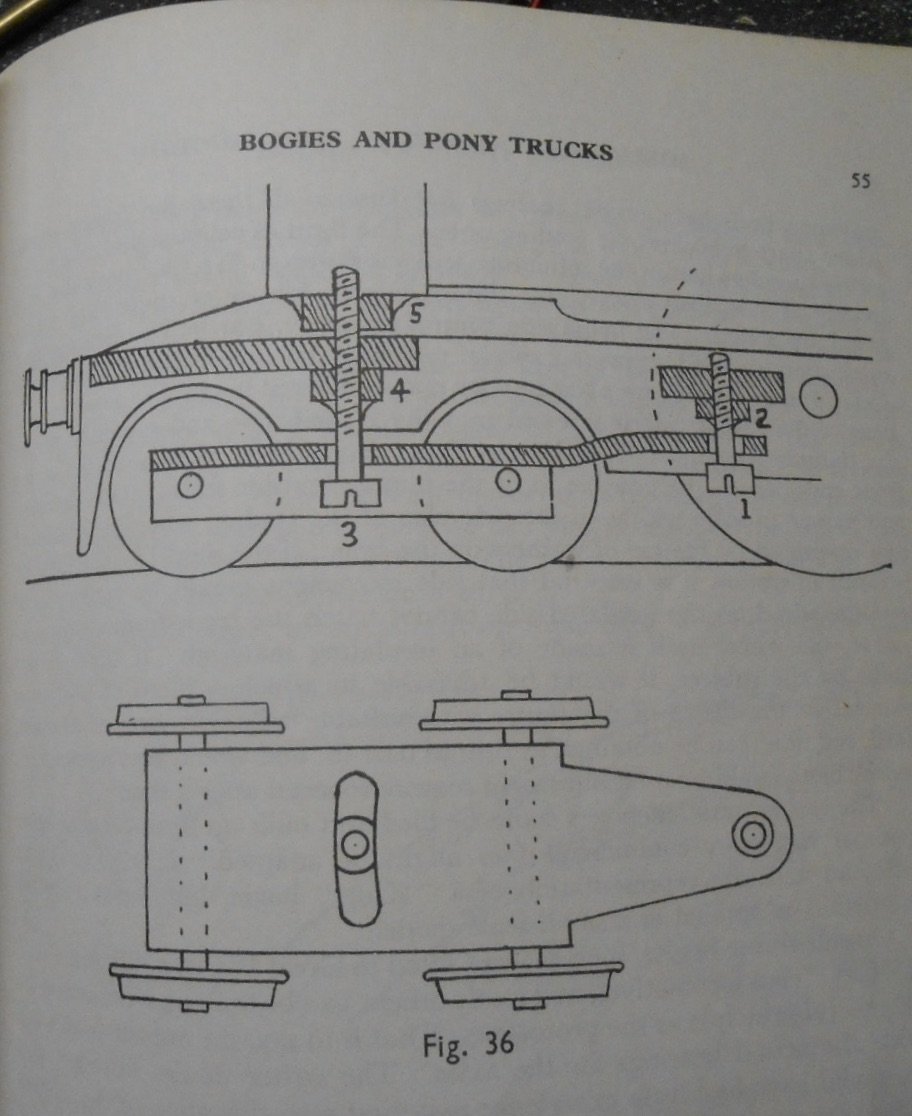
Thanks Alan - that is what I was thinking of. The side control springs are the Kadee knuckler ones, so very light, but with the rear of the bogie so close to the drivers, methinks it needs some better geometry to help it. Plan C will be to remove the central block and add a pivot, from fairly thick brass, as per the Ahern drawing, with that curved slot. Just need to decide how far back to put the pivot point.
-
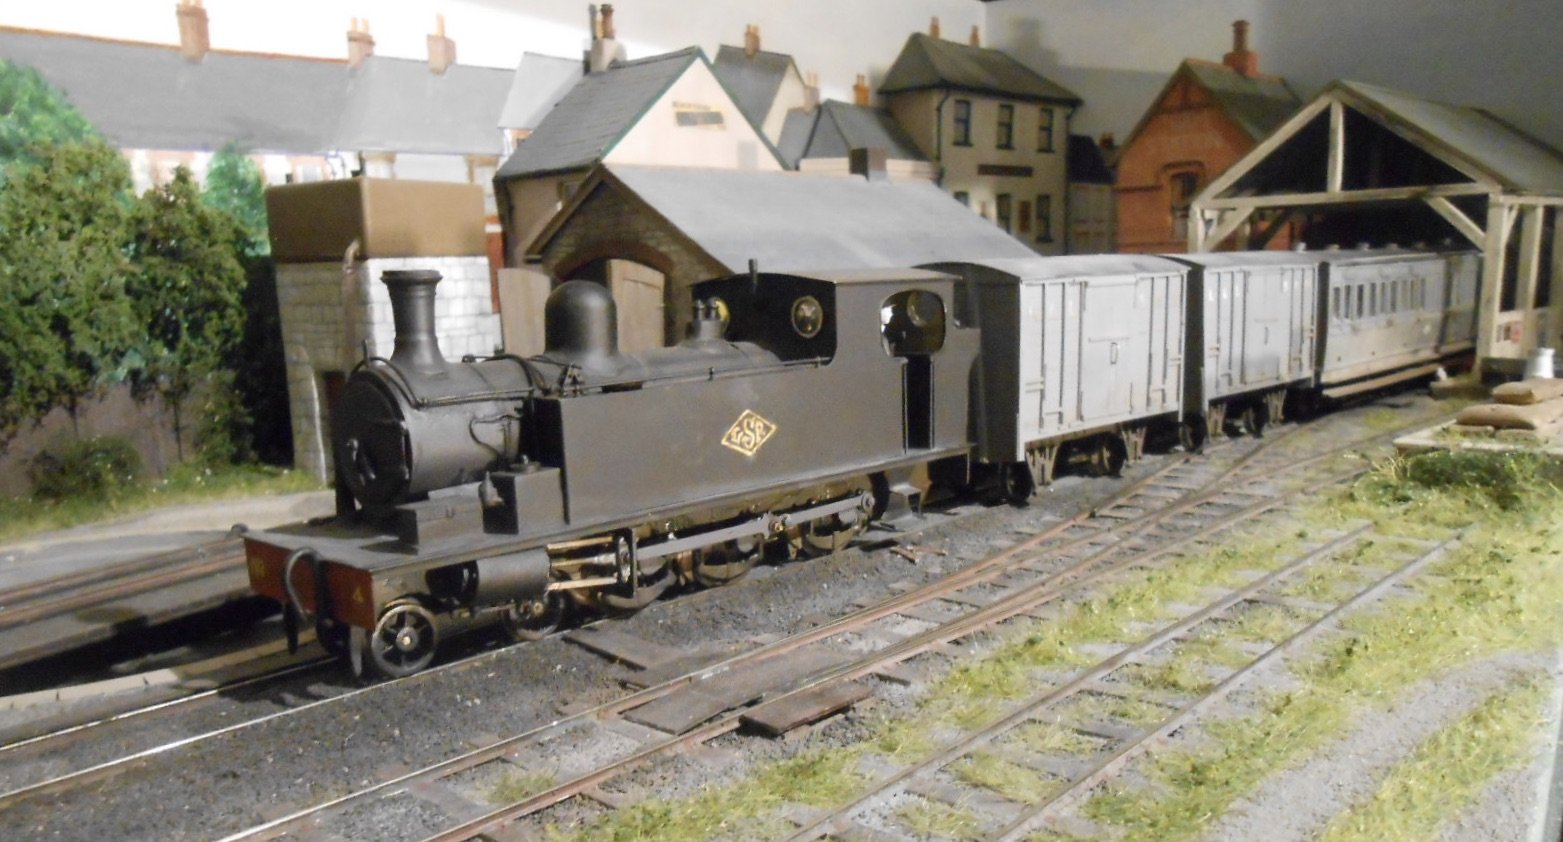
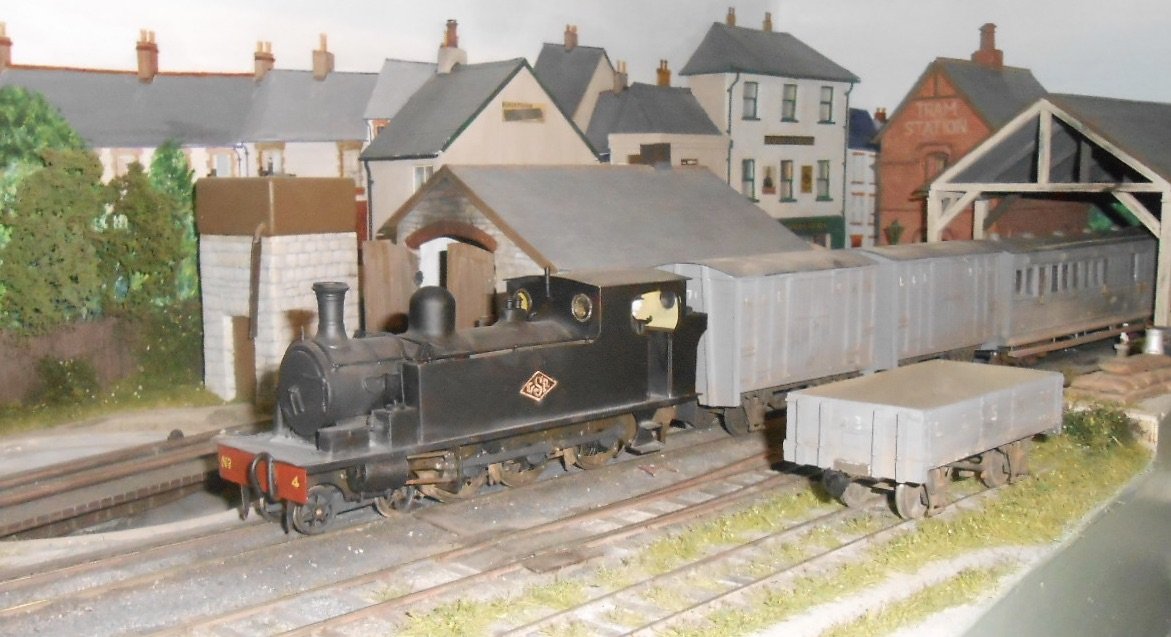
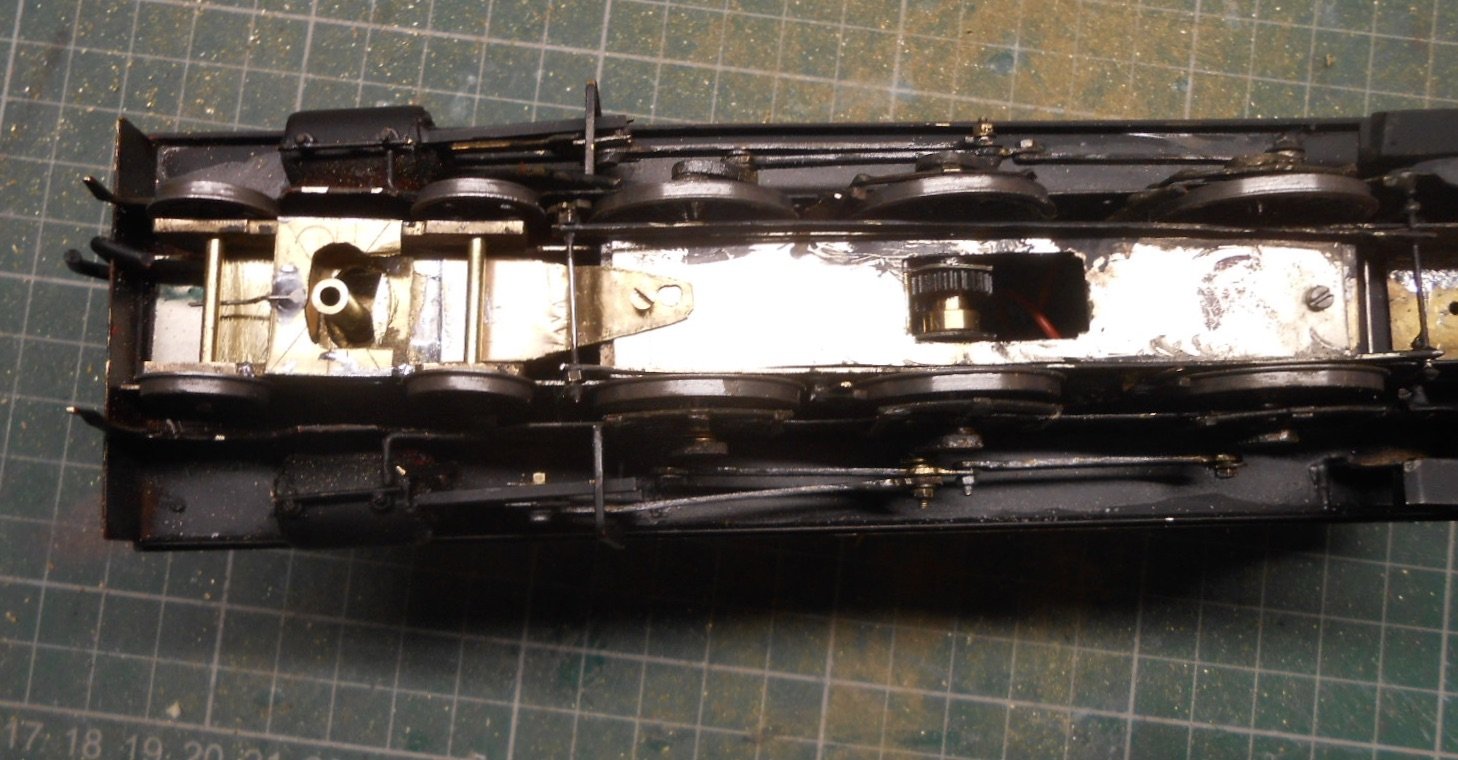
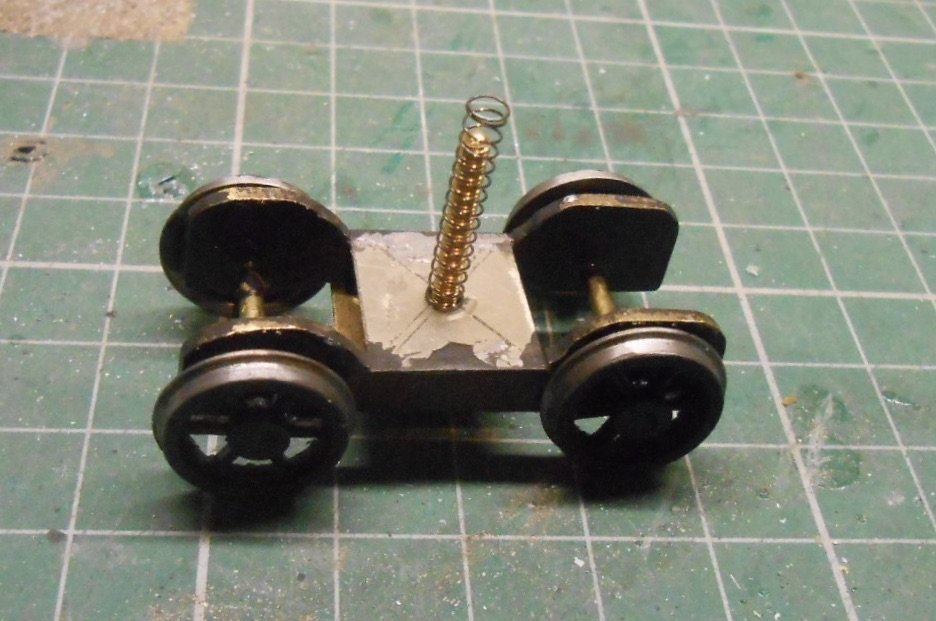
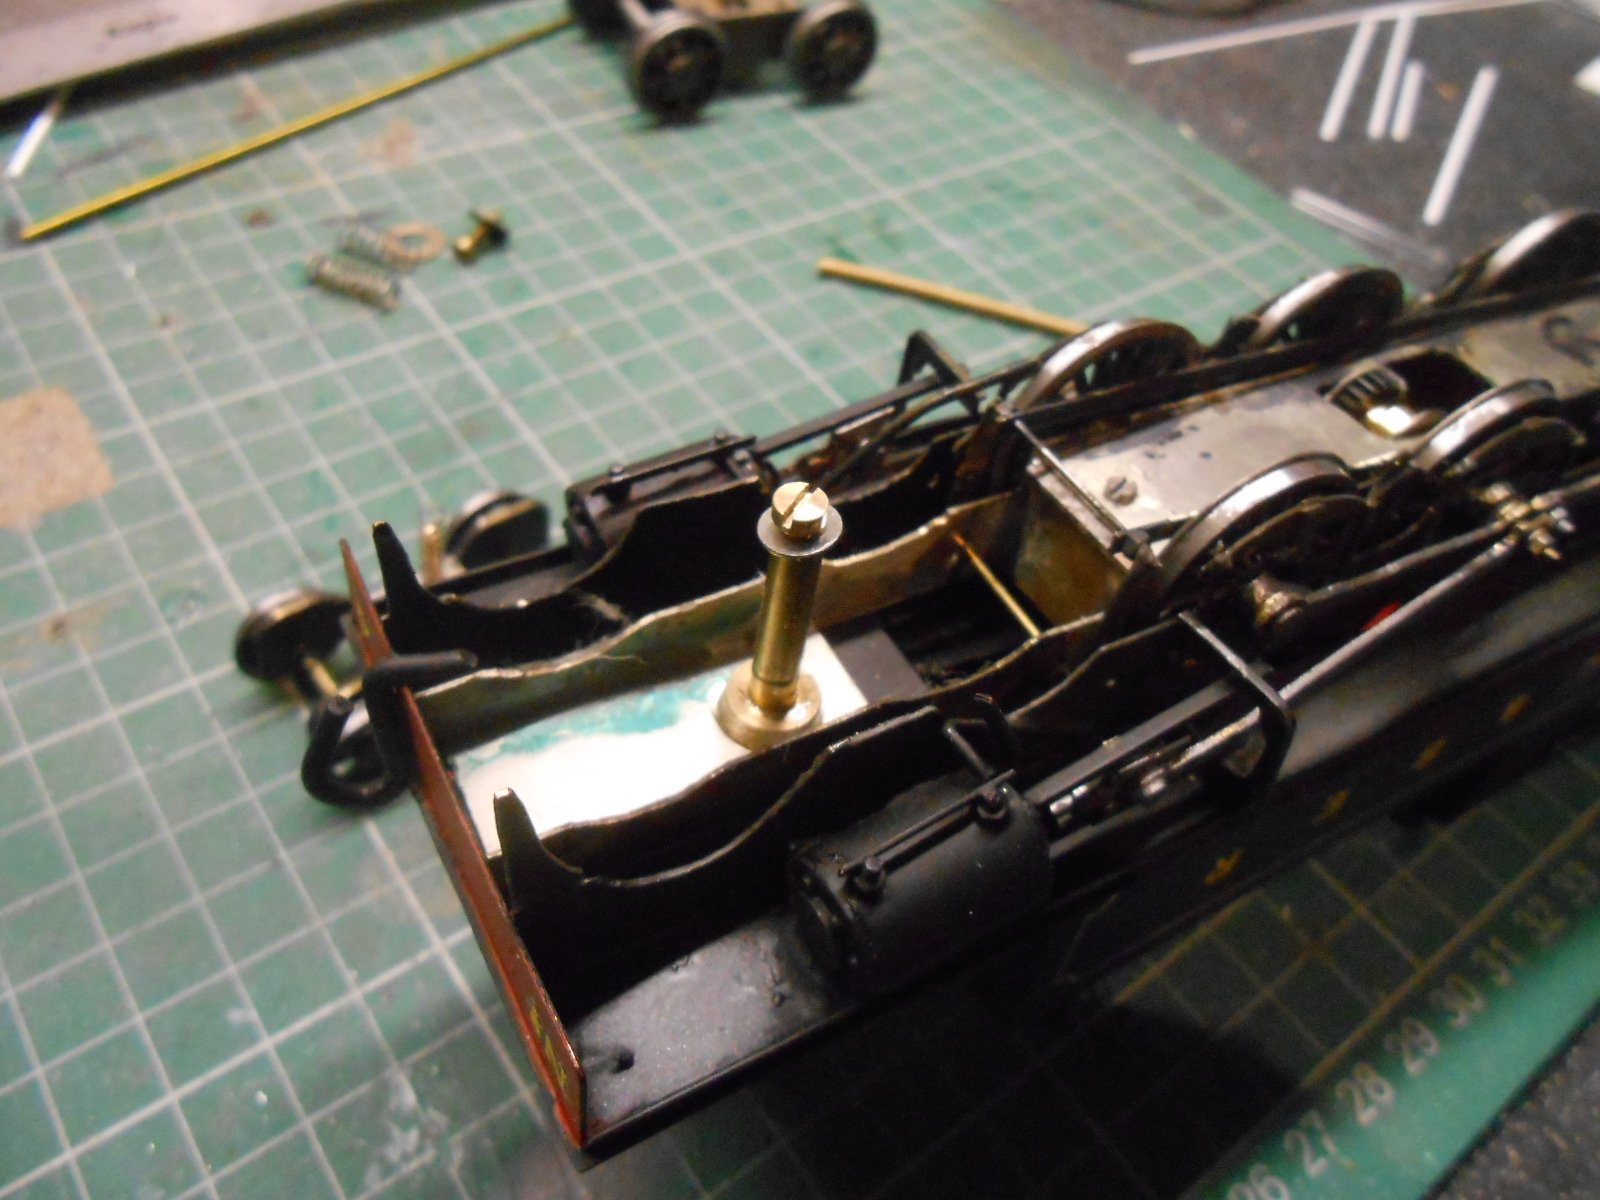
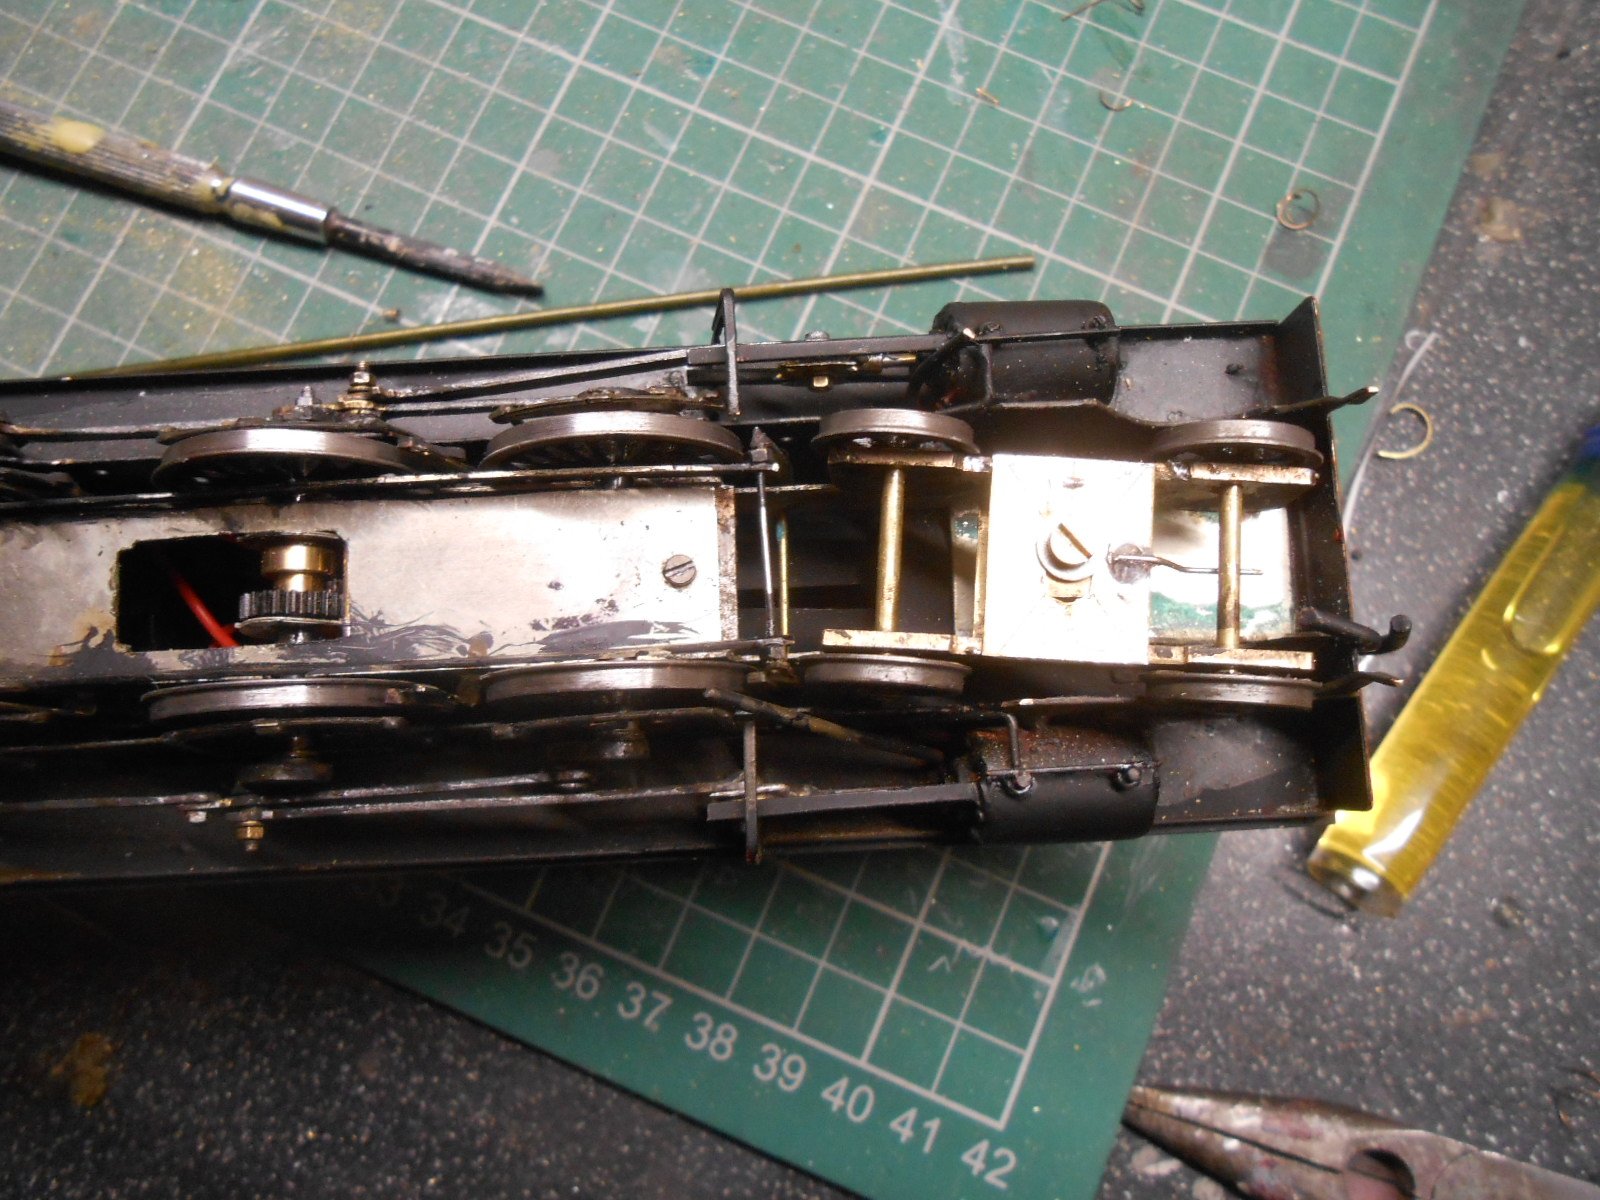
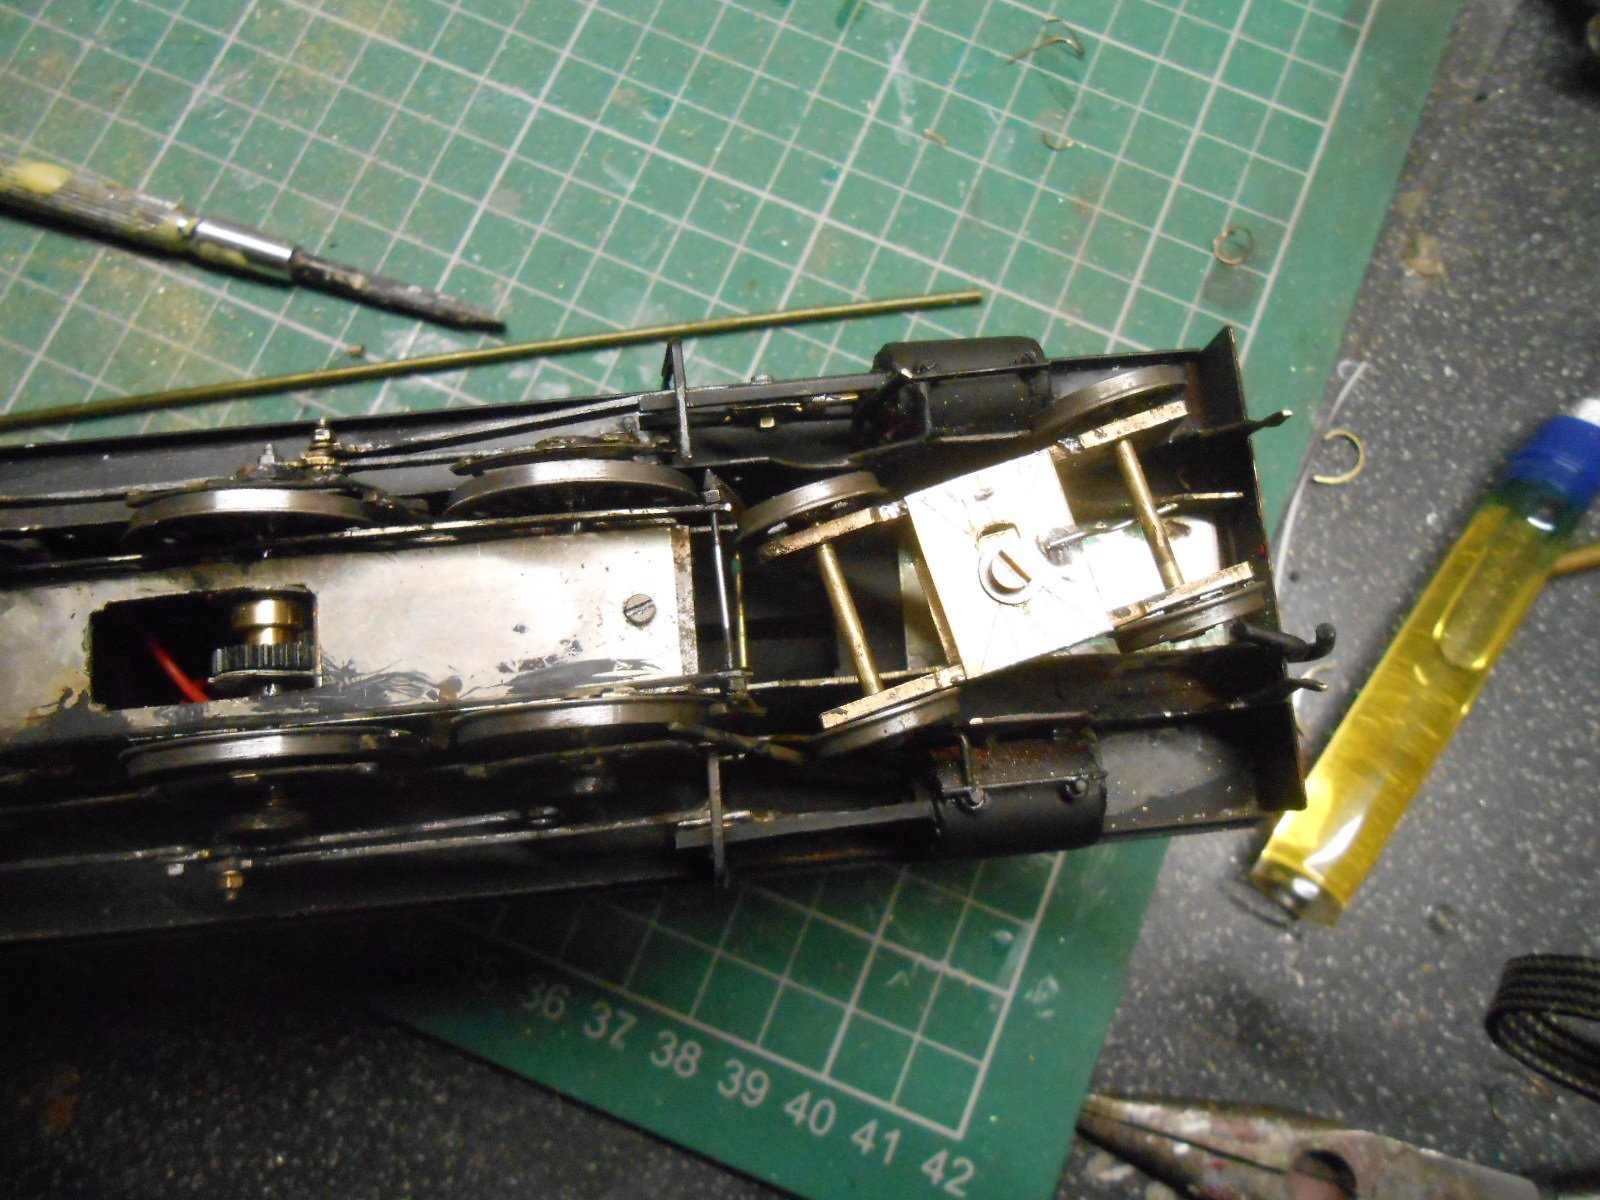
Speaking of locomotives, after getting a driver and fireman at Tonbridge last weekend, decided to have another look at the Barclay - though as will be revealed, it continues to bite me. All went well enough to begin with - the crew got painted and were installed & then I fitted the outside frame springs, applied a bit of weathering and had a go at cleaning up the side tanks, the latter not exactly successful. Spurred on by all this, I decided it was time for a proper test run on Fintonagh, only for things to start unravelling. All was well in a straight line - though the High Level motor certainly does NOT like my Gaugemaster hand held controller, which created rampant cogging. I have a more basic W unit, without feedback & the motor is ok with this. However, as soon as I tried running round the loop, stalling and derailment of the front bogie occurred. Was sort of expecting this, as the set up was pretty basic, with just a spring on the 8BA fixing bolt. Plan B was to use the same system as on my Sligo Leitrim 0-6-4Ts. This uses a solid pillar, fixed to the chassis & then the bogie has a brass block, which slides on to the pillar. A spring [hopefully] keeps the bogie pressing down on the track and side springs on the block allow a degree of lateral movement too. Unfortunately, the bogie is still derailing - most likely because of what the pictures below show, because as it swivels, it creates a sharp angle with the front drivers. Points on Fintonagh are 3' radius and I hadn't envisaged any problems. Indeed, with the bogie removed, the loco travers all bar one of the points well enough, apart from a tight spot in the point to the turntable, which a bit of easing ought to solve. Any ideas as to what to do about the bogie are welcome. One option might be the old fashioned one outlined by John Ahern 70 years ago. Another thought is to make it a 2-2-6-0 tank, fixing the inner pair of wheels on the bogie [but giving them plenty of side play] and making the front wheels into a pony truck. Either way, I really don't want to have to build a new chassis.
-
One in 7mm would be nice. 3D printed body, plus bogie side frames?
-
Guess every large city has its less pleasant areas. On our first trip to Ireland, we'd stayed in a wonderful castle/hotel for our last night, but then had to find our way over the Wicklow Mountains to the ferry at Dun Laoghaire. Well before the days of sat nav or mobile phones and we first got lost in the mist going through the mountains only to them find ourselves in the sort of council estates it was best not to stop to ask the way. We'd spent all our Punts and I was convinced we were going to miss the ferry. Finally got to the port and were waved on with some urgency as the last car and had barely time to switch off the engine before the ramp was up and the ship was away. The next ferry wasn't until the following morning... It was only a five day trip, but we saw a bit of everything from mountains to bog lands, sunshine and soft days, Mrs O'Leary's guest house and that fantastic castle hotel. Lovely people and (I've since discovered) wonderful railways too. Just needs a classic bit of preserved railway - preferably a good narrow gauge run as well, plus a tramway, etc. Not much to ask!
-
Whoever built all these certainly knew what they were doing. Single maker or more than one/separate painter?
-
With only a few feet of track to do, ballasting must become (almost) enjoyable! Seriously worthwhile here as it really looks the business.
-
My first thought was Warners. The Allypally show is run by The Model Railway Club (capital letters because it is the original/first one), but all the funding and legal side of things comes from the publishing company - including professional stewarding, the latter on the anal side of pedantic at times. I would imagine the costs of hiring the NEC will be similar to that of Allypally = eyewatering. I asked Nick Freezer (son of Cyril and one of the Club organisers) about this once and his comment was "Don't know and daren't ask!" Back in the day, the Chatham Show needed to take in £20 000, just to break even. About half of that came from trader's fees and the rest from ticket sales. Our fees for traders were around a quarter of what they were charged at Allypally. Therefore easy to see why the Warley Club wanted out in the end. I wonder if Warners are doing the new show on their own, or getting help from volunteers? They certainly have plenty of experience of running big shows and it may well be that this is the future of such events, so long may they prosper.
-
Thanks folks, have filed that idea under B. Quite how Gordon did all his Reseau Breton stock on Pempoul like this is beyond me, but that's a master craftsman for you.
-
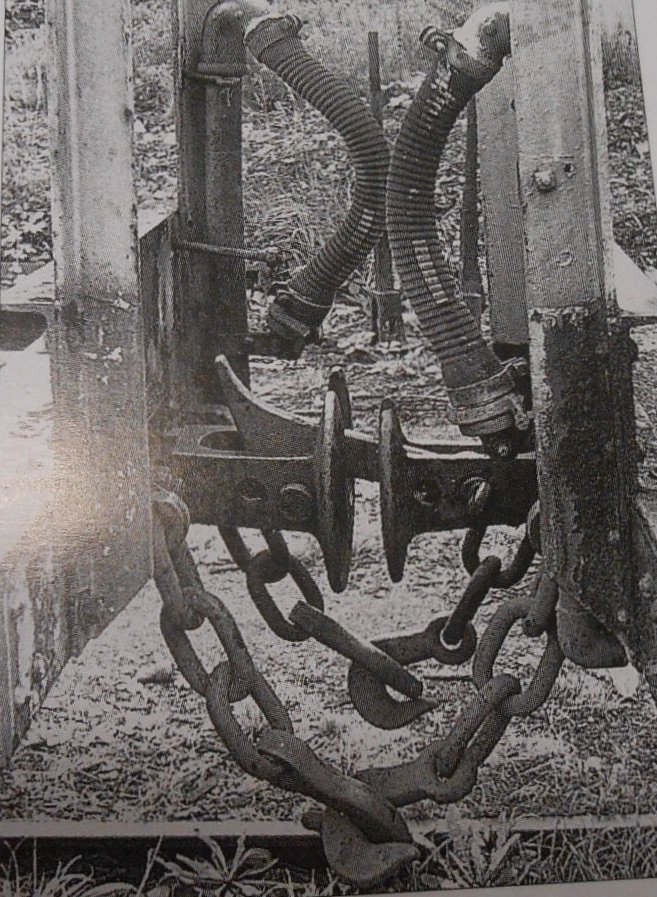
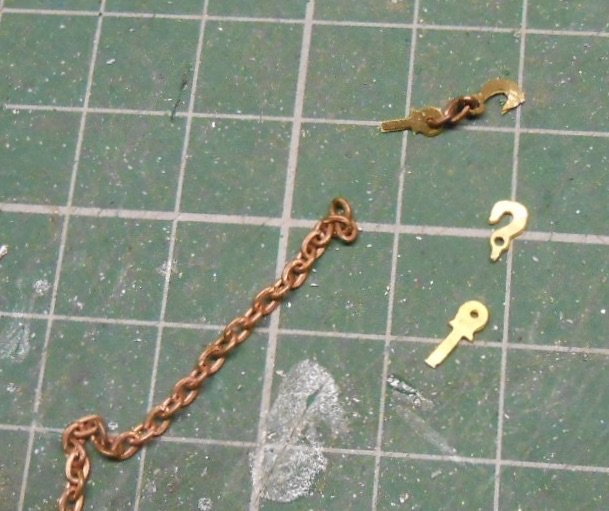
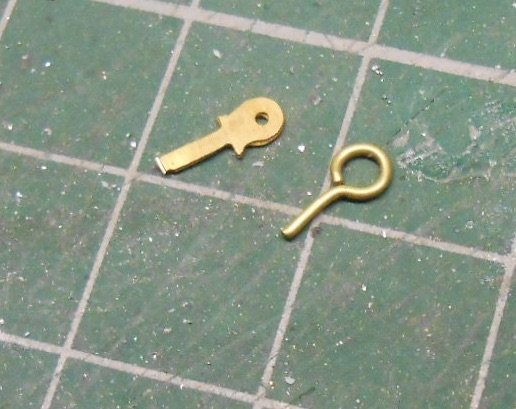
Side chains - the Spawn of Satan Seems ok from the picture below? A piece of three link chain, with a hook on one end and a fixing loop in the buffer beam on the other? Well, not for me it ain't and while normally I wouldn't waste space on items like this, I've simply felt the need to share the pain... For starters, every vehicle needs four of the poxy things. This involves separating three links from a longer piece of chain, then opening the link at each end to fit a hook and loop. Both the latter come on various etches lurking in the scrap box and which are destined to lurk some more too. One possible option might be to use the 'eye' below, but to be honest, beyond maybe fitting them to my locos, I really can't think of a reason to do it - and remember, I work in 7mm scale. On top of that, the chains are not going to be connected on the layout, so am caused to wonder why bother? I did [mostly] finish a Donegal open the other day and managed to get most of the materials I wanted at Tonbridge yesterday, so have every reason to put the side chains back in the drawer marked 'Do Not Open' for a while - and maybe forever!
-
Don't know if I'm in a minority on this, but I much prefer to watch preserved trains go by than ride on one. As Mayner says, much depends on the experience too. For example, the Bluebell Railway is good because it passes pleasant scenery and has at least one summit in the middle. Likewise, the North York Moors. The Kent and Easy Sussex is pleasant and certainly does a fine job of recreating the days of Colonel Stephens. However, the only real gradient (a steep one admittedly) is from Rolvenden to Tenterden and this is the only time you see and hear trains working hard. Going out from Tenterden is very low key. The Ffestiniog and for that matter the Durango and Silverton have the same 'problem', albeit with dramatic scenery to compensate. Enjoyed my trip to Silverton, but less so on the way back, but my favourite memory was waiting at the crossing just outside Durango, with the morning train whistling its way out of town before attacking the start of the gradient in very fine style. I think, with so many preserved railways to choose from this side of the water, some sort of theme is essential to bring non enthusiasts along. If you don't have the scenery, you might need to get creative, as per the Nene Valley with its continental stock. At least Ireland has its mainline steam tours, but the lack of much in the way of tourist railways is a shame, especially with so many failed ventures to look back on. If it had survived longer, the Hill of Howth tram would probably make money as a preserved line today, but it is hard to think of other options that might make a living. Over here, you actually expect there to be a tourist railway every few miles down the road - and indeed they often are! It seems general folk in Ireland are far less interested and breaking that chain will always be difficult nowadays.
-
Phoenix forays on the Donegal
David Holman replied to David Holman's question in Questions & Answers
Thought as much. Have also wondered if the CVR Unit had actually been used by the Donegal, whether one of two of the former's brake vans would have gone with it, to make lightweight goods possible. -
It is a sombre fact that when state pension from the age of 65 was first introduced, the life expectancy of the average working man was just 48... Now 'they' complain that we are living too long and the older generation are a burden on society! An answer to that is in the wonderful book 'This Thing of Darkness' - the story of Captain Robert Fitzroy's voyage with Darwin on the Beagle. When they reached the tip of South America, they noticed that there were no older folk among the local tribes people. When asked if they moved North to avoid the cold winters, the reply was they weren't there because they ate them!
-
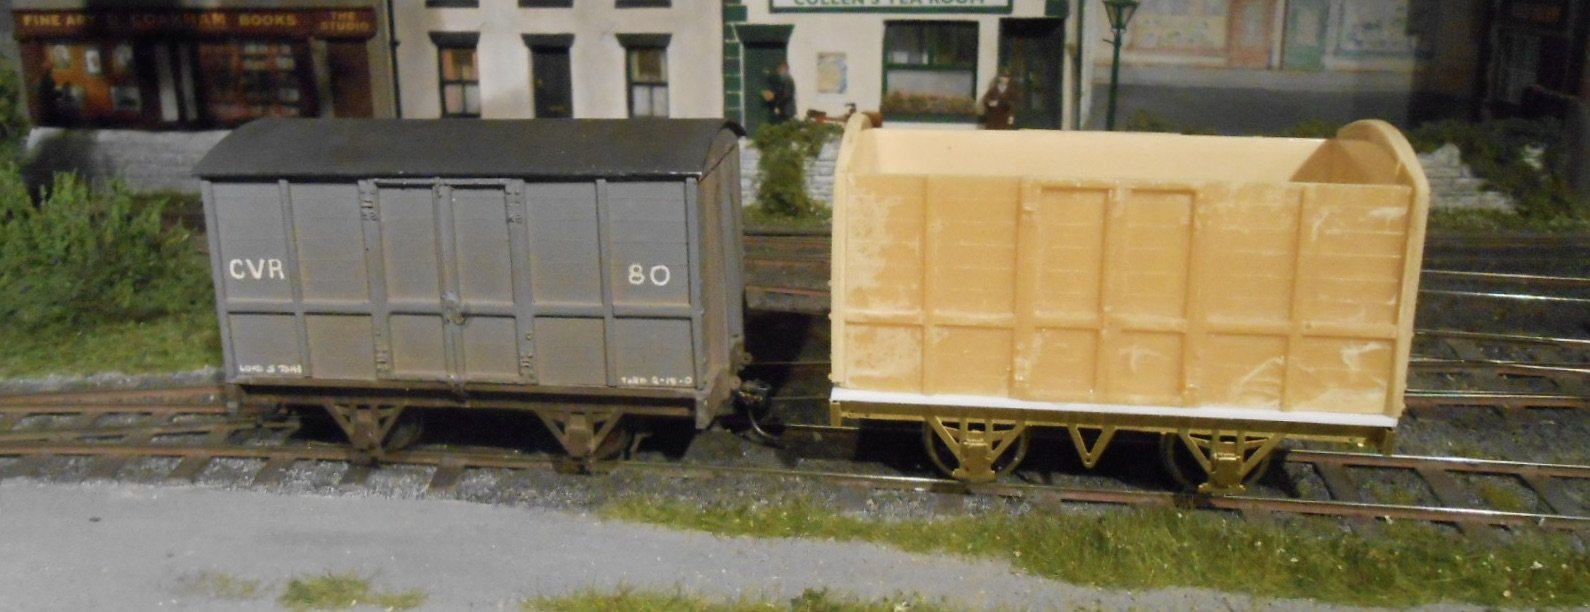
Bodies are all plasticard, apart my resin cast one. The chassis for this is a Branchlines etched brass kit, correct for CVR wagons. Still available, even though, like the two CVR coachex, they date from the late 1980s. Swilly and Donegal wagons are on Alphagraphix whitemetal chassis kits. These are discontinued, but if you email Roger (see the website), it is possible he may still have a few. The ones I got are all nine foot wheelbase, but it is a simple matter to cut them down, or even extend. I use Slater's wheels in these and Branchlines 14mm in the others. The latter use 2mm brass rod for the axles to suit both 21mm gauge and magnetic uncouplers. Not (yet) got round to building CVR 4, Jim. Maybe one day...
-
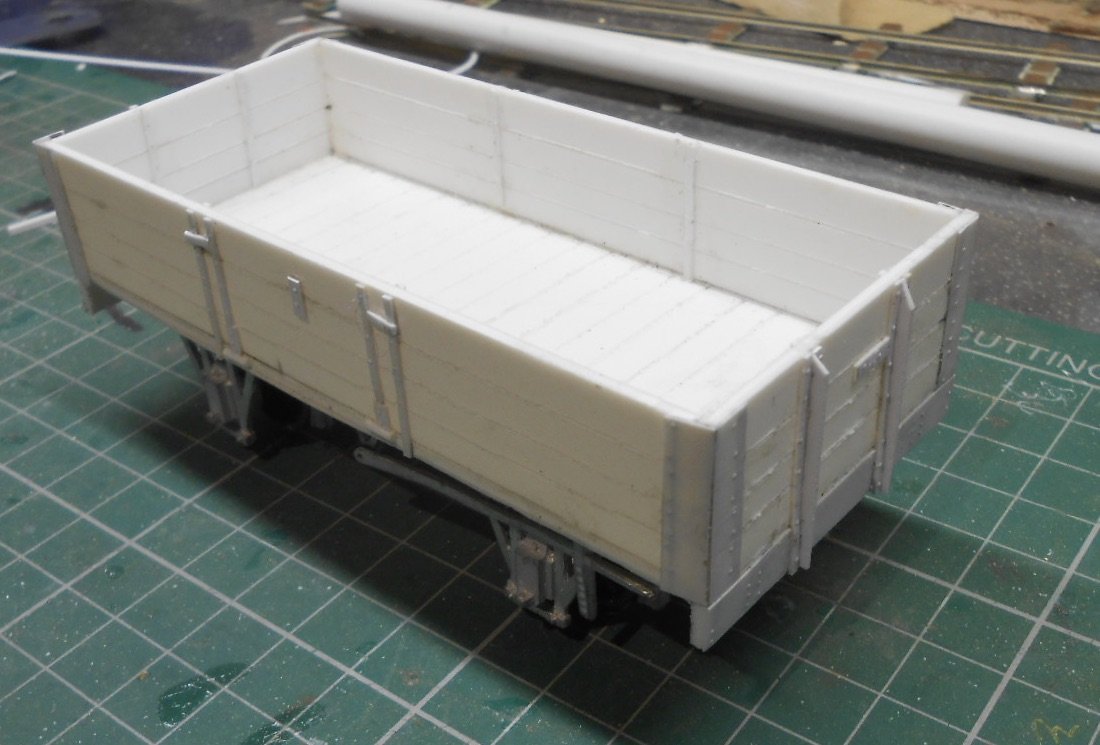
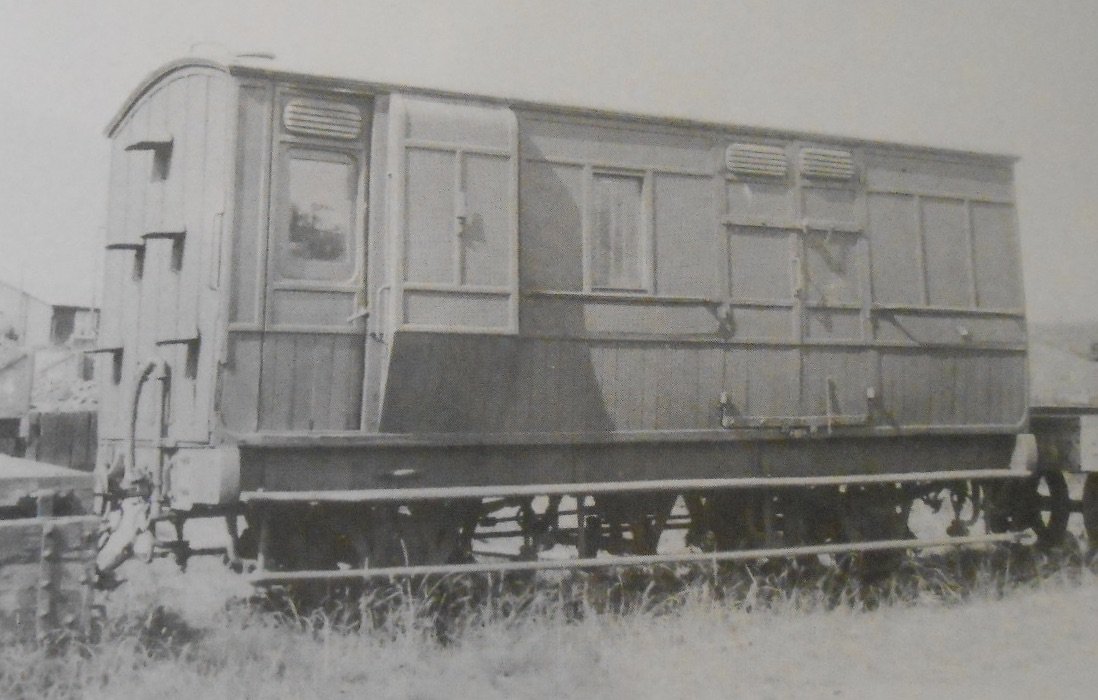
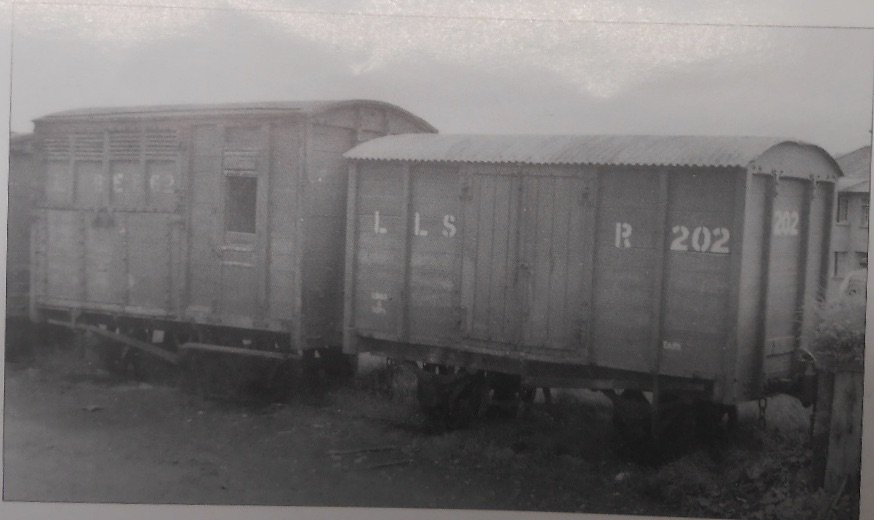
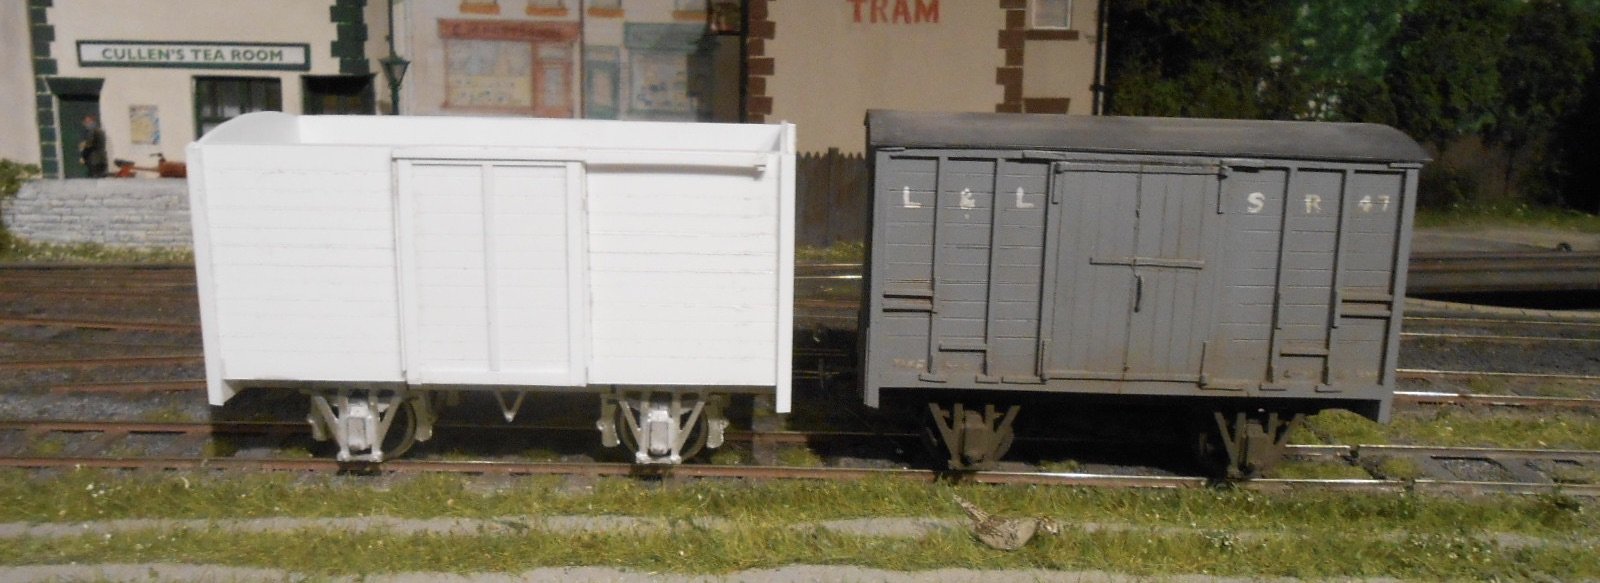
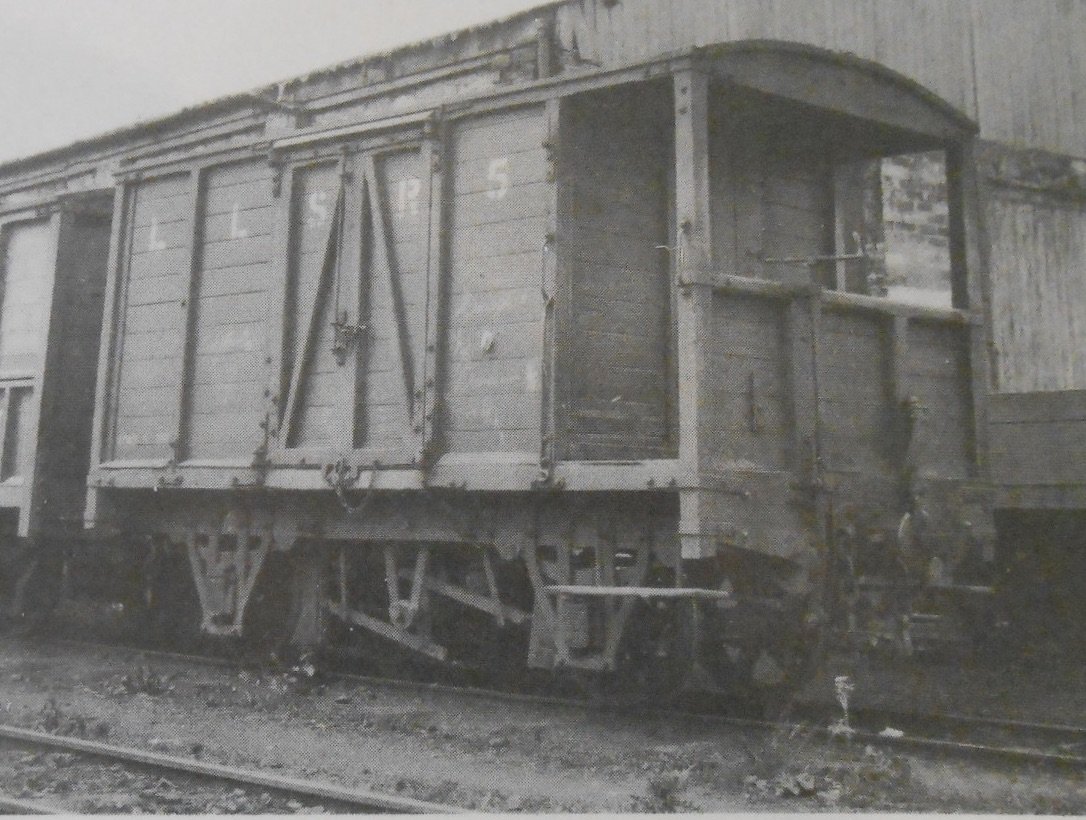
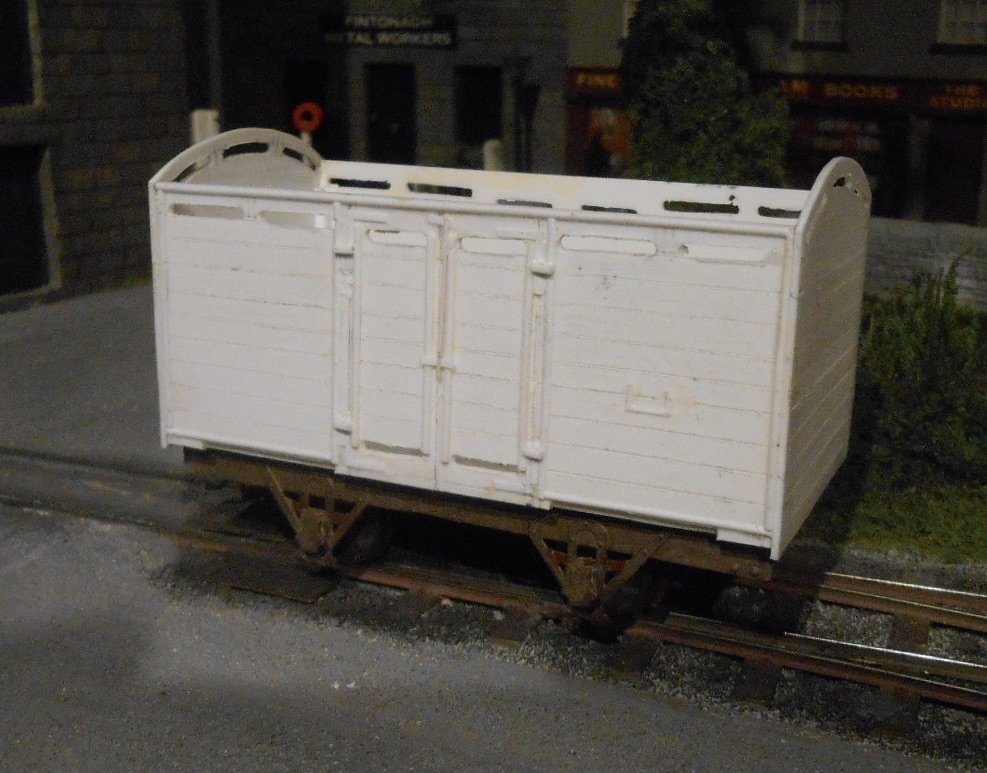
I seem to have been flitting around various wagons over the last week or so, starting several, but not able to complete anything due to shortages of micro strip. Hopefully, I can put that right at the Tonbridge show on Saturday. Another problem has been trying to decide which Donegal wagons I want to build. The background to this is that the makeover I want to do on Fintonagh sees both Swilly and Donegal trains share the tracks - either as separate sequences or combined. Swilly is fairly easy - a passenger train and either a mixed or a freight. The mixed had been favourite, but finding a pictures and plans of 4 wheel brakes is leaning me towards the latter now. I have three Swilly wagons, but going through various books, I realised I had the means for several others, in the form of my Clogher Valley stock. Two or three of these won't need much work, other than a bit of new lettering. They even seem to have kept the original 2' diameter wheels when they went to the Swilly and, I'll argue, could have been ideal for my bit of fiction - as will an unfinished scratch build of a CVR butter van. CVR stock went to the Donegal as well, of course [Cavan and Leitrim too], who saw the vans and opens as ideal for working with their railcars. However, compared to the CVR's 10-15mph speeds, on the Donegal they were expected to run at up to 40mph, which their small wheels, with narrow treads, soon caused problems, so most got rebuilt with 2'7 wheels and vacuum brakes, becoming the well known 'red vans'. At least one open wagon seemed to retain its original chassis, so one of my opens is due for a repaint. For the red vans, I have several unmade Branchlines CVR chassis etches, which, with a small amount of fettling, will take 2'7 wheels. I also have two sets of my own resin castings which can make a couple of vans - though Slater's corrugated plastic is very much on Saturday's shopping list for me to make their roofs. Progress on the above is shown below: the one on the left will become a Swilly van, while the one on the right uses the resin castings and 2'7 wheels. The final pictures show a Donegal sliding door van - one of two that need micro strip I don't have - plus alongside it a not dissimilar Swilly van. Deciding on motive power for my Donegal trains has also caused much head scratching. CVR railcar 1 will be repainted to become Donegal 10, while the Atkinson Walker tractor will be rebuilt and repainted as Phoenix. The 'Unit' also went to the Donegal, but only got used for spares, it seems. However, in my version of events, it will find use hauling goods - probably with one of the CVR brake vans and a mixture of stock. I have been thinking about building a Class 2 4-6-0T for this work, but they had all gone by 1937. However, I hope to build another railcar, either 6 or 7, which can also haul a couple of wagons if required, with Phoenix acting as shunter. As I'm already on Plan D [at least!] for all this, no doubt things will still change, but it feels good to be able to repurpose so much of my CVR stock. Might the Sharp Stewart tanks also have found a home on my Donegal-Swilly Joint line? Who knows - though they were pretty worn out by the CVR's closure.